Loading ...
Loading ...
Loading ...
4
This manual covers several models. Your model may have some or all of the items listed. Refer to this manual or the Frequently
Asked Questions (FAQs) section of our website at www.jennair.com for more detailed instructions. In Canada, refer to the
Customer Service Section at www.jennair.ca.
A
B
C
D, E
F
G
H
I
J
K
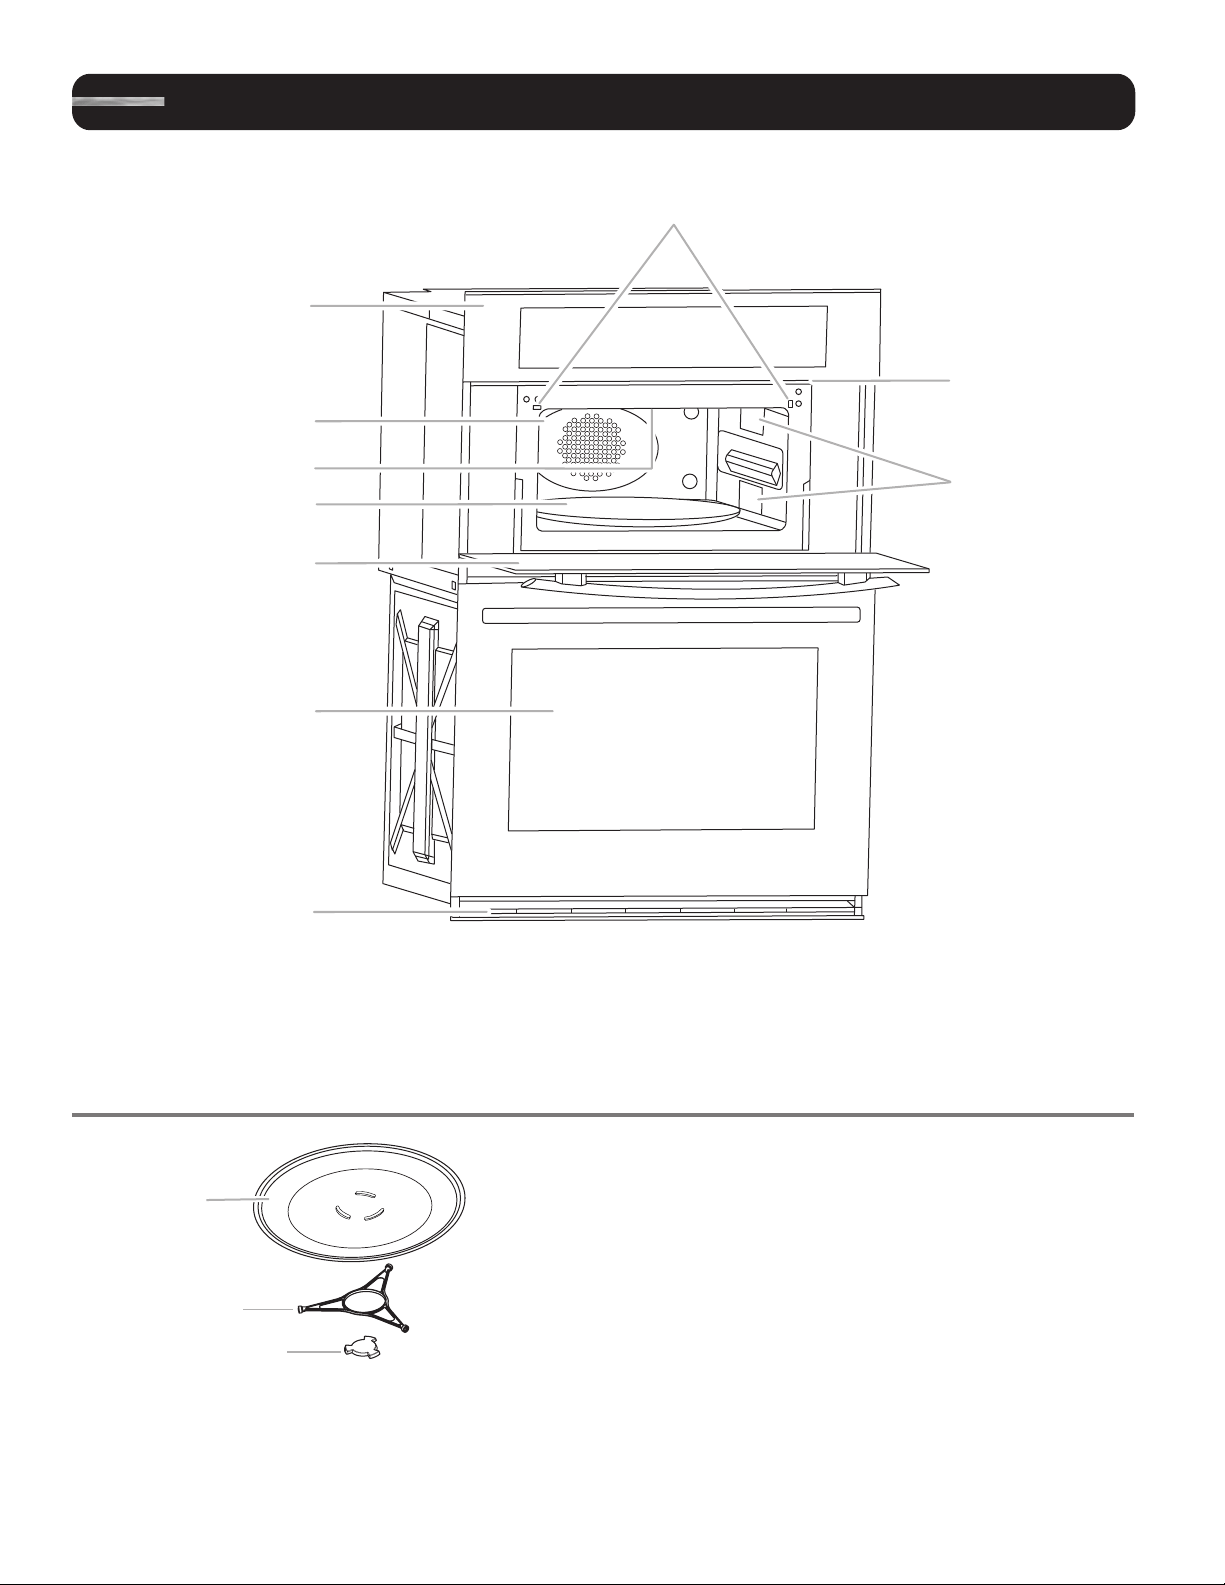
A. Electronic oven control
B. Model and serial number plate
(on center vent under control panel.
NOTE: On single microwave oven
models, on the right side trim.)
C. Convection element and fan
(hidden behind back panel)
D. Light
E. Broil element
F. Turntable
G. Metal shielded window
H. Lower oven (on combination models.
See separate Use and Care Guide.)
I. Bottom vent
J. Door switch
K. Dual microwave emission
Parts and Features not shown
Convection grid
Grilling grid
Crisper pan and handle
Parts and Features
Turntable
A
B
C
A. Turntable
B. Support and rollers
C. Hub
The turntable rotates in both directions to help cook food more
evenly. Do not operate the microwave oven without having the
turntable in place. See “Assistance or Service” to reorder any of
the parts.
The raised, curved lines in the center of the turntable bottom fit
between the 3 spokes of the hub. The hub turns the turntable
during microwave oven use. The rollers on the support should
fit inside the turntable bottom ridge.
NOTE: The microwave-cooling fan may continue to run for
several minutes after the cooking cycle has been completed.
The microwave cooking does not continue beyond the end
of cooking cycle.
To Turn On/Off:
For best microwave performance, it is recommended to always
leave the turntable on. If necessary, the turntable can be turned
Off (except during an auto function).
This is helpful when cooking with a dish that is larger than
the turntable.
Loading ...
Loading ...
Loading ...