The oven comes with different accessories that help you prepare different types of food.
NOTE Availability of accessories with an asterisk (*) depends on the oven model.
Before you start
Initial settings
When you power on the oven for the first time, the default time of “12:00” appears on the display where the hour element (“12”) blinks. Follow the steps below to set the current time.
Use the buttons to set the hour, and then press . The minute element blinks
Use the buttons to set the minute, and then press
To change the current time after this initial setting, hold down the button for 3 seconds and follow the above steps.
New oven smell
Before using the oven for the first time, clean inside the oven to remove the new oven smell.
Remove all accessories from inside the oven.
Run the oven with Convection 200 °C or Conventional 200 °C for an hour. This will burn any remaining production substances in the oven.
When complete, turn off the oven.
Accessories
For first time use, clean the accessories thoroughly with warm water, detergent and a soft clean cloth.
Level 1
Level 2
Level 3
Level 4
Level 5
Insert the accessory to the correct position inside of the oven.
Allow at least a 1 cm space from the accessory and the bottom of the oven, and from any other accessory.
Take caution in removing cookware and/or accessories out of the oven. Hot meals or accessories can cause burns.
The accessories may be deformed while they are gaining heat. Once they have cooled down, they will recover their original appearance and performance.
Basic use
For better cooking experience, familiarise yourself with how to use each accessory
Wire rack
The wire rack is designed for grilling and roasting. Insert the wire rack into position with the protruding parts (stoppers on both sides) towards the front.
Wire rack insert *
The wire rack insert is used with the tray, and prevents liquid from dropping onto the bottom of the oven.
Baking tray *
The baking tray (depth: 20 mm) is used to bake cakes, cookies, and other pastries. Put the slanted side to the front.
Universal tray *
The universal tray (depth : 30 mm) is used for cooking and roasting. Use the wire-tray insert to prevent liquid from dropping onto the bottom of the oven.
Put the slanted side to the front.
Extra-deep tray *
The extra-deep tray (depth: 50 mm) is used for roasting with or without the wire-tray insert. Put the slanted side to the front.
Telescopic rails *
Use the telescopic rail plate to insert the tray as follows:
1. Stretch the rail plate out from the oven.
2. Put the tray on the rail plate and slide the rail plate into the oven.
3. Close the oven door.
NOTE Availability of accessories with an asterisk (*) depends on the oven model.
Operations
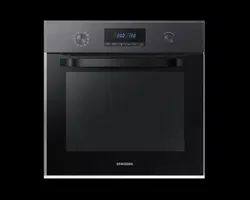
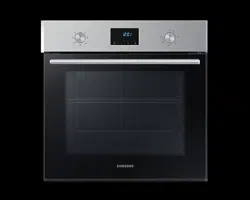
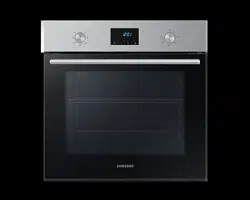
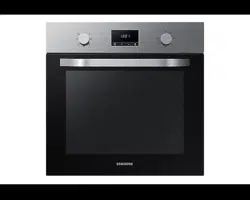
Control panel
The front panel comes in a wide range of materials and colours. For improved quality, the actual appearance of the oven is subject to change without notice.
01 Mode selector
Turn to select a cooking mode or function.
02 Display
Shows time information or a brief description of the selected mode.
03 Cooking Time/ Clock
Press to set the cooking time.
Press and hold for 3 seconds to set the current time.
04 Up / Down
Use to adjust the setting value for clock or timer settings.
05 Timer
Timer helps you check the time or operating duration while cooking.
06 Value dial
Use the value dial to set the temperature or power level for grilling.
NOTE Tapping on the display while wearing plastic or oven gloves may not operate properly.
Mode selector
01 Off
02 Fast preheat
03 Cooking modes
04 Oven light
Value dial
01 Power level for grilling
02 Termperature range
Fast preheat
Optionally, you can fast preheat the oven. This will significantly shorten your waiting time until the preheating is done. To do this, follow the steps below.
1. Turn the mode selector to select
2. Turn the value dial to set a desired temperature within the temperature range.
The oven starts preheating until the internal temperature reaches the target temperature.
When complete, make sure to switch back to the selected mode.
NOTE Preheating is not necessary for Grill mode.
Cooking time
1. Press
2. Use the buttons to set the cooking time, and then press. You can set the time to a max of 23 hours and 59 minutes.
NOTE If you want to clear the cooking time, press and then set the time to 0:00.
Cooking modes
It is recommended to insert food in the oven after preheating is complete. This will help obtain best result.
1. Turn the mode selector to choose a cooking mode.
2. Turn the value dial to set a desired temperature within the temperature range. For Grill mode, select a power level instead.
01 Grill mode
02 Cooking modes except for Grill
NOTE
If you select the Grill function and set the temperature between 50 °C and 250 °C, or if you select Normal Cooking mode and set the temperature between Grill 1 and 3, you are asked to reset the temperature with message(as shown on the left) and a beep. The exact temperature inside the oven can be measured with authorized thermometer and method defined by an authorized institution. Using other thermometers may cause a measuring error.
Mode
Suggested
temperature (°C)
Instructions
Convection
170
The rear heating element generates heat, which is evenly distributed by the convection fan. Use this mode for baking and roasting on different levels at the same time.
Conventional
200
The heat is generated from the top and bottom heating elements. This function should be used for standard baking and roasting for most types of dishes.
Top heat + convection
190
The top heating element generates heat, which is evenly distributed by the convection fan. Use this mode for roasting that requires a crispy top (for example, meat or lasagne).
Bottom heat + convection
190
The bottom heating element
generates heat, which is evenly distributed by the convection fan. Use this mode for pizza, bread, or cake.
Large grill
Level 2
The large-area grill emits heat. Use this mode for browning the tops of food (for example, meat, lasagne, or gratin).
To stop cooking
While cooking is in process, turn the mode selector to select
NOTE
If inside the oven is hot:
Even after turning off the oven, the cooling fan automatically runs and the oven light stays on until the oven cools down.
Convenience
Oven light
The oven light turns on automatically when the oven starts operation.
To turn on the oven light without activating oven operations, simple turn the mode selector to .
NOTE The cooling fan automatically runs when you select the oven light.
Child lock
To prevent accidents, Child lock disables all controls. Child lock is available only in Off or Oven light mode.
Hold down the and buttons simultaneously for 3 seconds to activate, or hold down for 3 seconds again to deactivate the lock on the control panel.
NOTE When Child lock is activated, “L” apears on the display.
Timer
Timer helps you check the time or operating duration while cooking.
Press .
Use the buttons to set the time, and then press .
You can set the time to a max of 23 hours and 59 minutes.
NOTE If you want to cancel the timer operation, press , and then set the time to 0:00.
Cooking smart
Manual cooking
WARNING on acrylamide
Acrylamide produced while baking starch-contained food such as potato chips, French fries, and bread may cause health problems. It is recommended to cook these foods at low temperatures and avoid overcooking, heavy crisping, or burning.
NOTE
Pre-heating is recommended for all cooking modes unless otherwise specified in the cooking guide.
When using Eco Grill, put food in the centre of the accessory tray.
Accessory tips
Your oven comes with a different number or kind of accessories. You may find that some accessories are missing from the table below. However, even if you are not provided with the exact accessories specified in this cooking guide, you can follow along with what you already have, and achieve the same results.
The Baking tray and the Universal tray are interchangeable.
When cooking oily foods, it is recommended to put a tray under the Wire rack to collect oil residue. If you are provided with the Wire rack insert, you can use it together with the tray.
If you are provided with the Universal tray or Extra deep tray, or both, it is better to use whichever is deeper for cooking oily foods.
Baking
We recommend to preheat the oven for best results
Roasting
* Turnover after half of time.
Grilling
Preheat the empty oven for 5 minutes using large grill function
Frozen ready-meal
Maintenance
Cleaning
WARNING
Make sure the oven and accessories are cool before cleaning.
Do not use abrasive cleaning agents, hard brushes, scouring pads or cloths, steel wool, knives or any other abrasive materials.
Oven interior
For cleaning the interior of the oven, use a clean cloth and a mild cleaning agent or warm soapy water.
Do not hand-clean the door seal.
To avoid damaging the enamelled oven surfaces, only use standard oven cleaners.
To remove stubborn soils, use a special oven cleaner.
Oven exterior
For cleaning the exterior of the oven such as the oven door, handle, and display, use a clean cloth and a mild cleaning detergent or warm soapy water, and dry with a kitchen roll or dry towel.
Grease and dirt can remain, especially around the handle because of the hot air coming from inside. It is recommended to clean the handle after each use.
Accessories
Wash the accessories after every use, and dry it with a tea towel. To remove stubborn impurities, soak the used accessories in warm soapy water for about 30 minutes before washing.
Catalytic enamel surface (applicable models only)
The removable parts are coated with dark grey catalytic enamel. They can be soiled with oil and fat spattered by the circulating air during convection heating.
However, these impurities burn off at oven temperatures of 200 °C or above.
Remove all accessories from the oven.
Clean the interior of the oven.
Select Convection mode with max temperature, and run the cycle for an hour.
Door removal
For normal use, the oven door must not be removed but if removal is necessary, for example, for cleaning purposes, follow these instructions.
CAUTION
The oven door is heavy.
Open the door and flip open the clips at both hinges completely.
Close the door by approximately 70 °. With both hands, grasp the sides of the oven door at its middle and pull-lift until the hinges can be taken out.
After cleaning, for attaching the door repeat the 1 and 2 steps in revers order. The clip on the hinge should be closed on both side.
Door Glass Removal
The oven door is equipped with three sheets of glass placed against each other.
These sheets can be removed for cleaning.
Press the both buttons on the left and right sides of the door.
Detach the covering and remove glass 1 and 2 from the door.
After cleaning the door glasses, for assembly repeat 1, 2 steps in revers order. Check the right locations of glass 1 and 2 with picture.
NOTE When assembly the inner glass 1, put printing to direction below.
Water collector
The water collector collects not only excess moisture from cooking but also food residue. Regularly empty and clean the water collector.
WARNING If you encounter a water leak from the water collector, contact us at a local Samsung service center.
Cleaning the ceiling (depending on model)
You can let down the grill heater and it is helpful for cleaning the ceiling of the oven. Remove the nut circular by turning it anticlockwise while holding the grill heater.
The front of the grill heater inclines downwards and the grill heater can not be removed out of the oven. Do not press the grill heater down, the grill heater can be deformed.
When cleaning has been done, lift the grill heater back to its original level and turn the nut circular clockwise
Detaching the side runners (depending on model)
Press central part of the side runner top portion.
Rotate the side runner by approximately 45 º.
Pull and remove the side runner from bottom two holes
Replacement
Bulbs
Remove the glass cap by turning anticlockwise.
Replace the oven light.
Clean the glass cap.
When done, follow step 1 above in the reverse order to reinsert the glass cap.
WARNING
Before replacing a bulb, turn off the oven and unplug the power cord.
Use only 25-40 W / 220-240 V, 300 °C heat-resistant bulbs. You can purchase approved bulbs at a local Samsung service center.
Always use a dry cloth when handling a halogen bulb. This is to prevent the bulb from being tampered with fingerprints or sweat, resulting in a shortened lifecycle.
Troubleshooting
Checkpoints
If you encounter a problem with the oven, first check the table below and try the suggestions. If the problem continues, contact a local Samsung service centre.
Problem
Cause
Action
The buttons cannot be pressed properly.
If there is foreign matter caught between the buttons.
Touch model: if there is moisture on the exterior.
If the lock function is set.
Remove the foreign matter and try again.
Remove the moisture and try again.
Check whether the lock function is set.
The time is not displayed.
If there is no power supplied.
Check whether there is power supplied.
The oven does not work.
If there is no power supplied.
Check whether there is power supplied.
The oven stops while in operation.
If it is unplugged from the power socket.
Reconnect the power.
The power turns off during operation.
If continuous cooking takes a long time.
If the cooling fan does not work.
If the oven is installed in a place without good ventilation.
When using several power plugs in the same socket.
After cooking for a long time, let the oven cool.
Listen for the sound of the cooling fan.
Keep the gaps specified in the product installation guide.
Use a single plug.
There is no power to the oven.
If there is no power supplied.
Check whether there is power supplied.
The oven exterior is too hot during operation.
If the oven is installed in a place without good ventilation.
Keep the gaps specified in the product installation guide.
The door cannot be opened properly.
If there is food
residue stuck between the door and product interior.
Clean the oven well and then open the door again.
The interior light is dim or does not turn on.
If the lamp turns on and then off.
If the lamp is covered by foreign matter during cooking.
The lamp automatically turns off after a certain amount of time to save power. You can turn it on again by pressing the oven light button.
Clean the inside of the oven and then check.
Electric shock occurs on the oven.
If the power is not properly grounded.
If you are using a socket without grounding.
Check whether the power supply is properly grounded.
There is water dripping.
There may be water or steam in some cases depending on the food. This is not a product malfunction.
Cool the oven and then wipe with a dry dish towel.
There is steam through a crack in the door.
There is water remaining in the oven.
The brightness inside the oven varies.
The brightness changes depending on power output changes.
Power output changes during cooking are not malfunctions, so there is no need to worry.
Cooking is finished, but the cooling fan is still running.
The fan automatically runs for a certain amount of time to ventilate inside the oven.
This is not a product malfunction, so there is no need to worry.
The oven does not heat.
If the door is open.
If oven controls are not correctly set.
If the household fuse has been blown or the circuit breaker has been tripped.
Close the door and restart.
Refer to the chapter on oven operation and reset the oven.
Replace the fuse or reset the circuit. If it happens repeatedly, call an electrician.
Smoke comes out during operation.
During initial operation.
If there is food on the heater.
Smoke may come from the heater when you first use the oven. This is not a malfunction, and if you run the oven 2-3 times, it should stop happening.
Let the oven cool sufficiently and remove the food from the heater.
There is a burning or plastic smell when using the oven.
If using plastic or other containers that are not heat-resistant.
Use glass containers suitable for hot temperatures.
The oven does not cook properly.
If the door is often opened during cooking.
Do not frequently open the door unless you are cooking things that need to be turned. If you frequently open the door, the interior temperature will be lower and this may affect the results of your cooking.
Information codes
If the oven fails to operate, you may see an information code on the display. Check the table below and try the suggestions.
Code
Meaning
Action
C-20
Sensor malfunctions.
Turn off the oven and then restart. If the problem continues, turn off all power for 30 seconds or more and then reconnect. If the problem is not fixed, please contact a service centre.
C-21
C-22
C-d0
Button problem
Occurs when a button is pressed and held for a period of time.
Clean the buttons and make sure there is no water on/ around them. Turn off the oven and try again. If the problem continues, contact a local Samsung service centre.
S-01
Safety shutoff
Oven has continued operating at a set temperature for an extended time.
Under 105 °C - 16 hours
From 105 °C to 240 °C - 8 hours
From 245 °C to Max - 4 hours
This is not system failure. Turn off the oven and remove food. Thenm try again normally.


 buttons to set the hour, and then press
  . The minute element blinks


 buttons to set the cooking time, and then press


 .
.
 and
and buttons simultaneously for 3 seconds to activate,
 buttons to set the time, and then press