Loading ...
Loading ...
Loading ...
16
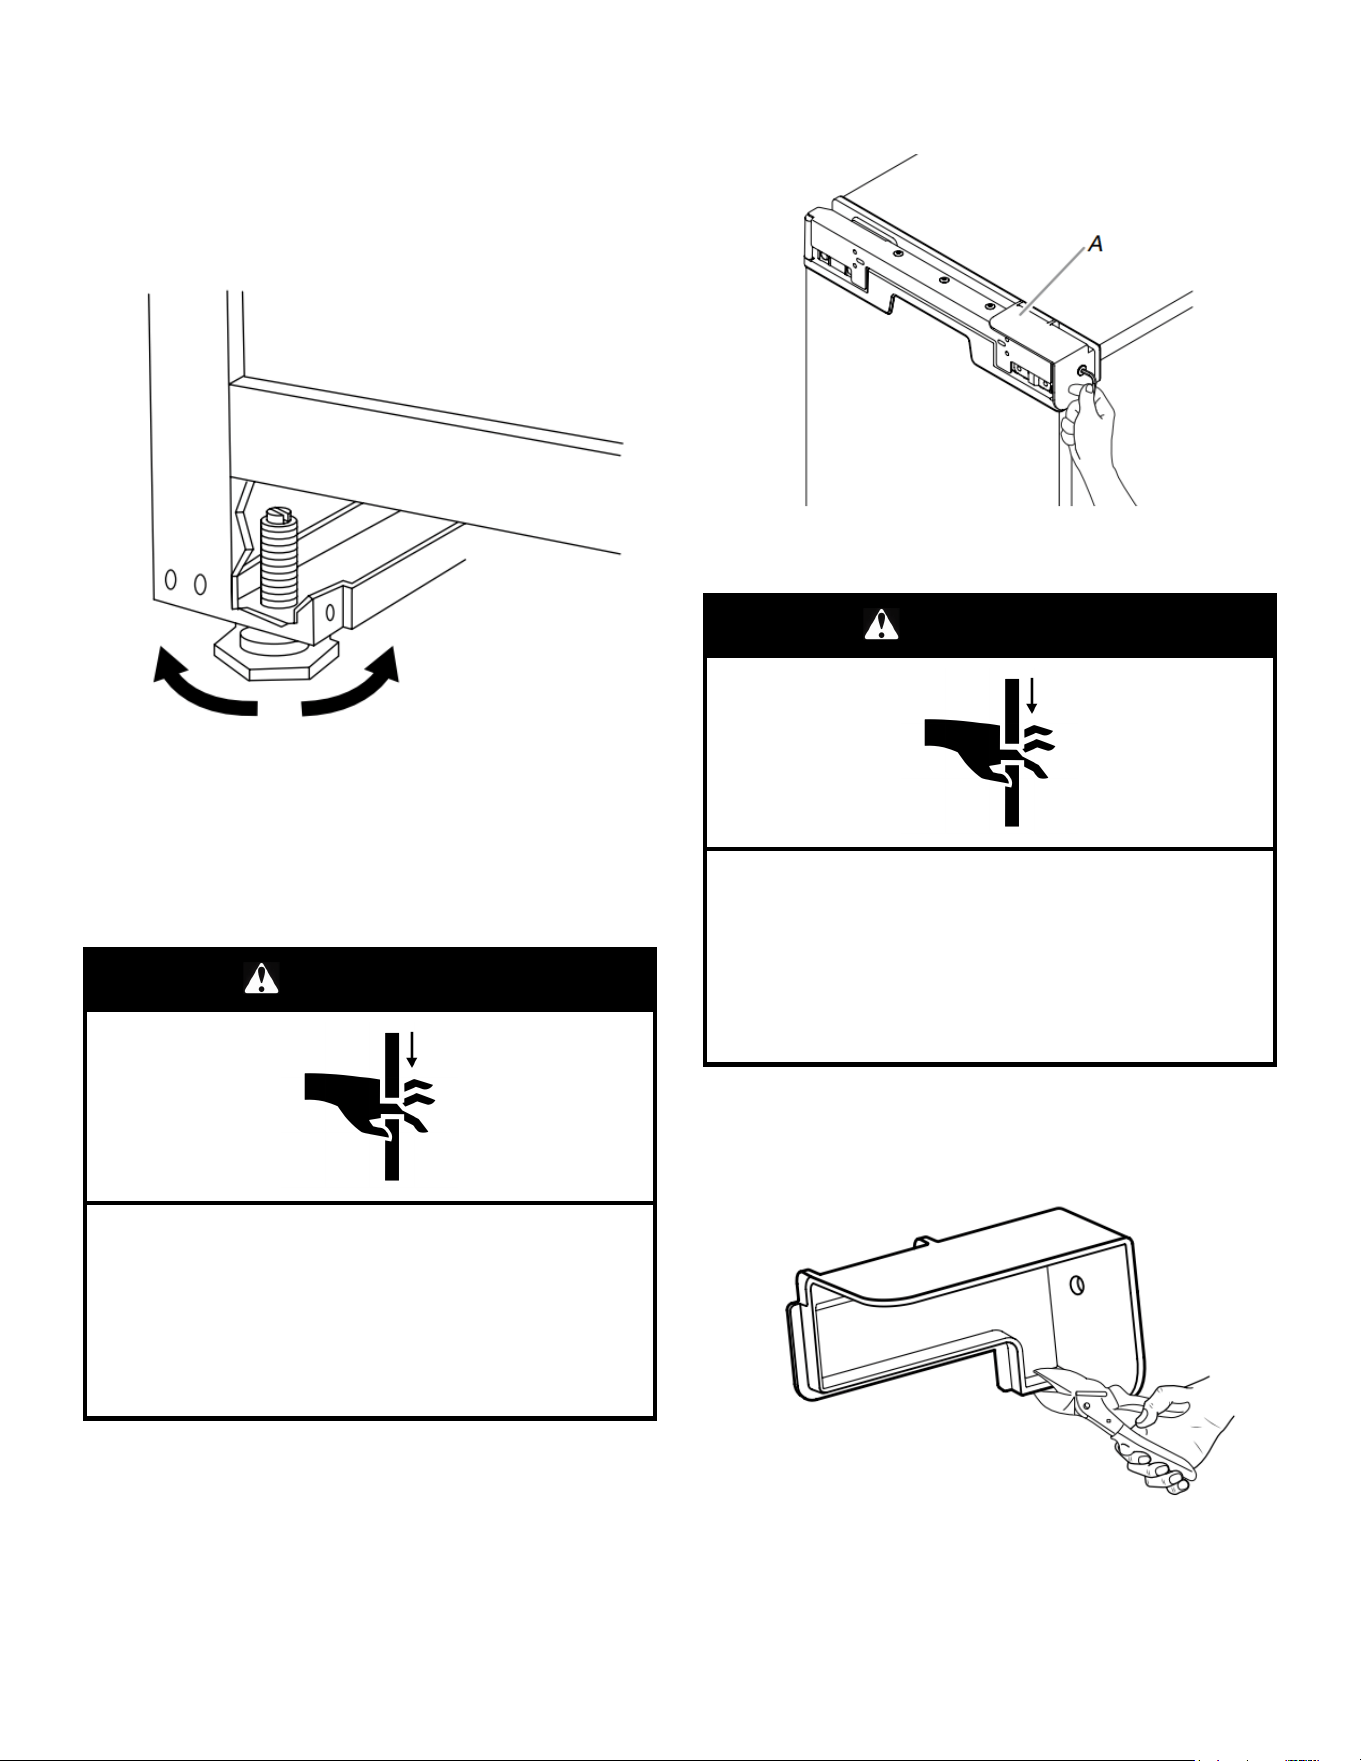
4. Using an adjustable wrench, change the height of the legs as
follows:
� Turn the leveling leg to the right to lower that side of the ice
maker.
� Turn the leveling leg to the left to raise that side of the ice
maker.
NOTE: The ice maker should not wobble. Use shims to add
stability when needed.
5. Push up on the top rear of the ice maker and locate the
leveling legs that are on the bottom rear of the ice maker.
6. Follow the instructions in step 4 to change the height of the
legs.
7. Use the level to recheck the ice maker to see that it is even
from front to back and side to side. If the ice maker is not level,
repeat steps 2 to 5. If the ice maker is level, go to the
“Connect Water Supply” section.
For cabinet models:
WARNING
Crush Hazard
Articulated hinges are self closing and many pinch
points exist prior to cabinet installation.
Do not remove hinge covers until product is ready to be
installed.
Failure to follow these instructions can result in crush,
cut, or pinch injuries.
8. Remove the screws attaching top and bottom hinge covers
using an 3/16ʺ hex driver.
A. Hinge cover
WARNING
Crush Hazard
Articulated hinges are self closing and many pinch
points exist prior to cabinet installation.
Do not operate or close the hinges while they are
removed from the ice maker.
Failure to follow these instructions can result in crush,
cut, or pinch injuries.
9. Using pliers, remove the hinge covers from the top and bottom
hinges.
NOTE: Save the hinge coves for future use. Reinstall the
hinge covers if ice maker is removed from cabinet installation.
10. For custom panel installation, install the door panel according
to the instructions in the “Custom Wood Panel” section.
Loading ...
Loading ...
Loading ...