Loading ...
Loading ...
Loading ...
14
3. Insert the short end of the hex key into the left-hand hole and
slightly rotate the hex key until it is engaged in the setscrew.
4. Using a left-to-right motion, tighten the setscrew a quarterturn
at a time just until it begins to contact the shoulder screw. Do
not fully tighten.
5. Repeat steps 3 and 4 to fasten the right-hand setscrew to the
shoulder screw.
6. Once both setscrews have been partially tightened as
instructed in the previous steps, fully tighten both setscrews.
IMPORTANT: When the screws feel tight, tighten them an
additional quarter-turn. The handle is not properly installed
without this extra tightening.
7. Save the hex key and all instructions.
Remove the Handles
1. While holding the handle, insert the short end of the hex key
into a setscrew hole, and slightly rotate the hex key until it is
engaged in the setscrew.
2. Using a right-to-left motion, loosen the setscrew a quarter-
turn at a time.
3. Repeat steps 1 and 2 for the other setscrew. Slowly pull the
handle away from the door or drawer.
4. If necessary, use a Phillips screwdriver to remove the shoulder
screws from the door.
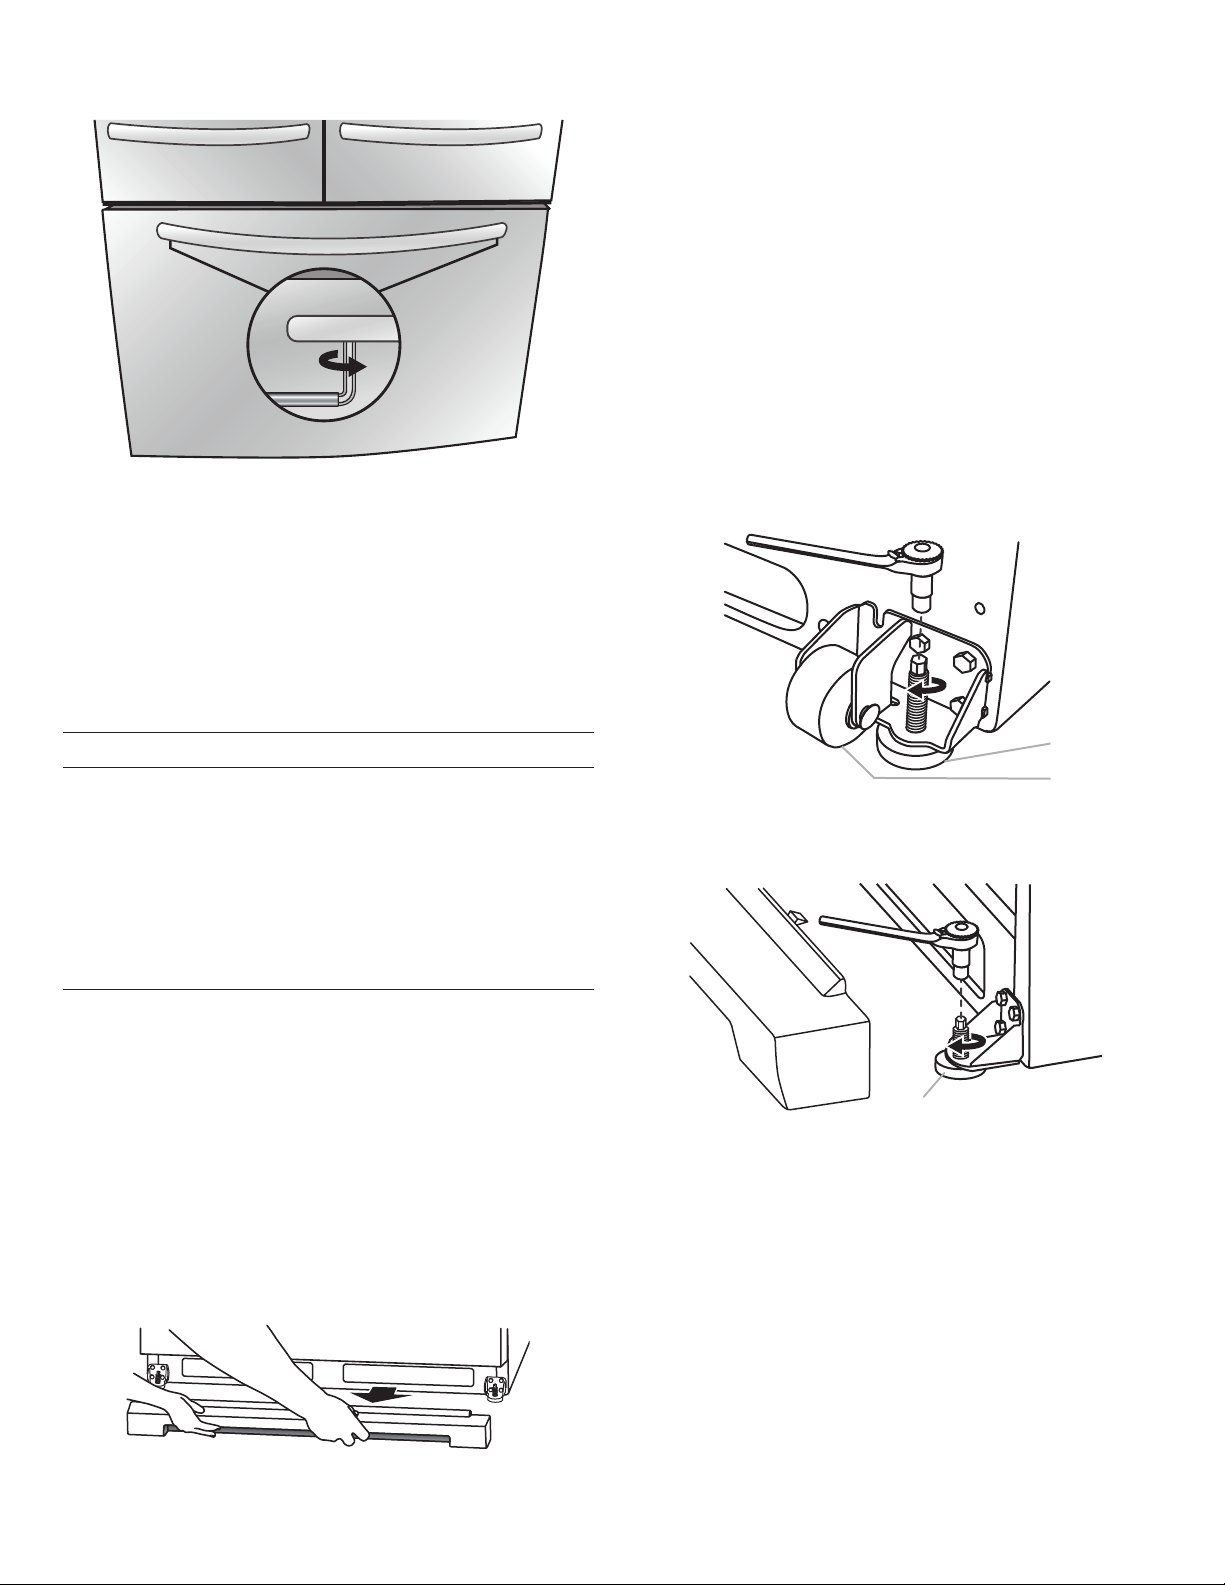
Refrigerator Leveling and Door Closing
The base grille covers the adjustable brake feet and roller
assemblies located at the bottom of the refrigerator below the
freezer drawer. Before making any adjustments, remove the base
grille and move the refrigerator to its nal location.
Tools Needed: 1/4" hex driver
Tools Provided: 1/8" hex key
1. Remove the base grille. Using both hands, grasp the grille
rmly and pull it toward you. Open the freezer drawer to
access the brake feet.
NOTE: To allow the refrigerator to roll easier, raise the brake
feet by turning them counterclockwise. The front rollers will be
touching the oor.
2. Move the refrigerator to its nal location.
3. Using the 1/4" hex driver, lower the brake feet. Turn them
clockwise until the rollers are off the oor and both brake feet
are snug against the oor. This keeps the refrigerator from
rolling forward when opening the refrigerator doors or freezer
drawer.
IMPORTANT: If you need to make further adjustments
involving the brake feet, you must turn both brake feet the
same amount to keep the refrigerator level.
4. Make sure the doors close easily. If you are satised with the
door opening and closing, skip the next section and go to
Step 5. If, however, the doors do not close easily or the doors
pop open, adjust the tilt.
To Adjust the Cabinet Tilt:
■ Open the freezer drawer. Use a 1/4" hex nut driver to turn
both brake feet clockwise the same amount. This will raise
the front of the refrigerator. It may take several turns to
allow the doors to close easier.
NOTE: Having someone push against the top of the
refrigerator takes some weight off the brake feet. This
makes it easier to turn them.
Style 1
Style 2
5. Make sure the refrigerator is steady. If the refrigerator seems
unsteady or rolls forward when a door or drawer is pulled
open, adjust the brake feet.
To Steady the Refrigerator:
■ Open the freezer drawer. Using a 1/4" hex driver, turn both
brake feet clockwise the same amount until the brake feet
are snug against the oor. Check again. If not satised,
continue to adjust the brake feet by half turns of the screw
until the refrigerator does not roll forward when the drawer
is opened.
NOTE: Having someone push against the top of the
refrigerator takes some weight off the brake feet. This
makes it easier to turn the screws.
6. Replace the base grille by aligning the ends of the grille with
the leveling assemblies on each side and snapping the grille
into place.
A
B
A. Brake foot
B. Front roller
A
A. Brake foot
1/4"
1/4"
Loading ...
Loading ...
Loading ...