|
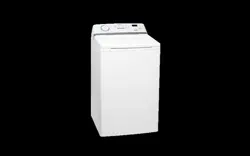
1. STARTING YOUR WASHING MACHINE
- Connect the mains plug to the mains socket.
- Turn the water tap on
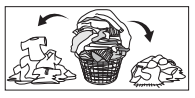
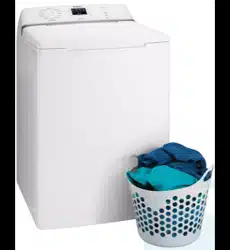
2. LOAD THE WASHING MACHINE
When loading the clothes into your washing machine, there are four things to remember:
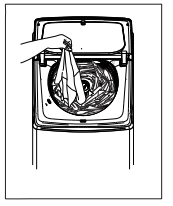
1. Clothes must be loaded evenly around the agitator.
For best result load small items first, followed by large items.
For example, a typical load should be loaded using the following sequence : handkerchiefs, wash cloths, undershorts, pillow cases, T-shirts, business shirts, tablecloths, sheets, bath towels
2. Clothes must not be wrapped around the agitator.
3. The washing machine must not be overloaded. Clothes must be able to move during wash.
4. The load should contain only three or four large items, for example sheets. The rest of the load should be small items. A mixed load of large and small items will wash cleaner than a load of all large items.
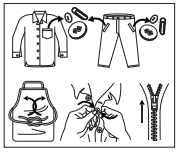
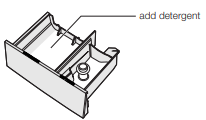
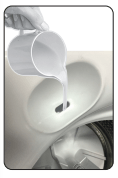
3. ADD THE DETERGENT
When using the washing machine for the first time,check that the dispenser is set for the type of detergent you will use. To do this, proceed as follows:
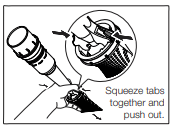
1. Pull the dispenser drawer forward until it stops.
2. Lift the front of the drawer up and forward to remove it from the runners.

3. Check the position of the flap at the rear of the detergent compartment in the dispenser drawer.
(Factory setting is flap up for powder.)
4. Clip the flap down if you intend to use liquid detergent.

5. Refit the dispenser back into its runners.
Remember: If you change the type of detergent you use, the position of the flap will need changing. See picture.
6. You are now ready to add detergent. Measure the amount required and pour it into the detergent compartment of the dispenser drawer
When using liquid detergent, some may leadk out of the dispenser into the wash load earlier than expected through small openings in the back of the dispenser. The openings are to help flushing out of detergent.
7. If you want to use fabric softener, see “Add fabric softener”.
8. Close the drawer by pushing it backwards into the top panel of the washing machine when you have finished adding detergent.
Don’t do these things:
- Using too little detergent will give you a poor wash result.
- Using excessive detergent will create too much suds and may cause overloading of the motor during the spin stage of the wash cycle.
To avoid excessive suds, reduce the amount of detergent you use. It is best to use detergent labelled low susing. Good quality, front load detergent will perforn will in this machine.
- Use soap based products in your washing machine.
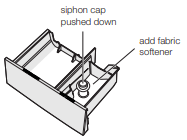
4. ADD FABRIC SOFTENER
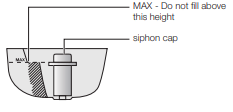
Before adding softener to the dispenser, make sure the siphon cap is pushed firmly down onto the spigot in the drawer.
The softener will not siphon out if the cap is incorrectly fitted, is missing or blocked with residue. You are now ready to add fabric softener.
Measure the correct amount as recommended on the softener package into a cup and then pour it into the softener compartment of the dispenser drawer.
Caution: Do not overfill the fabric softener dispenser.
Overfilling and then siphoning out too early can cause softener and detergent to mix resulting in staining problems.
The softener dispenser holds 90ml when filled up to the MAX marker. Any level lower than MAX will function correctly.
Caution: Only use the detergent compartment for detergent and the fabric softener compartment for fabric softener.
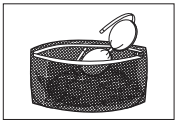
5.ADDING BLEACH
|
|
Bleaching of clothes can help to remove stains, heavy soiling and to kill bacteria.
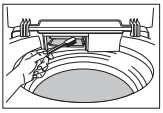
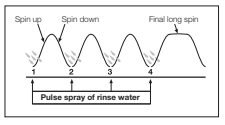
Oxygen type - This is generally a powder type bleach. Mix the required quantity with water and pour down the hole in the top panel during the fill when there is some water in the wash bowl.
|
Refer to the instructions on the bleach container.
Chlorine type - This type of bleach should NOT be mixed with detergent. Mix the bleach with water as per the instructions on the container.
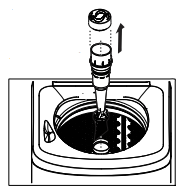
Turn Program Selector to a Regular Wash position. - Press the Start/Pasue To Pause touchpad to commence water fill.
Pour the bleach solution down the hole in the top panel during fill when there is some water in the wash bowl.
Allow the machine to agitate for a few minutes, then let it stand for the required time by pressing and holding the Star/Hold To Pause touchpad for 1.2 seconds to pause machine.
Turn Program Select to Drain & Spin position and press the Star/Hold To Pause touchpad to empty the wash bowl.
|
|
NOTE
You can now wash the clothes load using detergent and your selected wash program.
Bleach should NOT be used on silk, wool, rayon or drip dry clothes.
Lid Soft Landing Feature (Except SWT8063E) When the lid is fully opened, to close just pull down initially the lid then the lid will close down slowly by itself.

Lid soft landing device will not be working if opened less than 80 degree (Please keep your hand away, lid will close rapidly and hurt your hand).
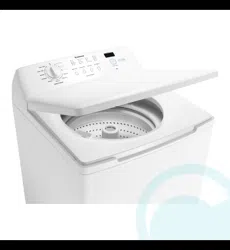
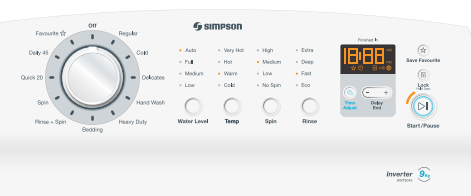
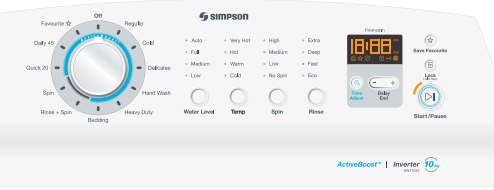
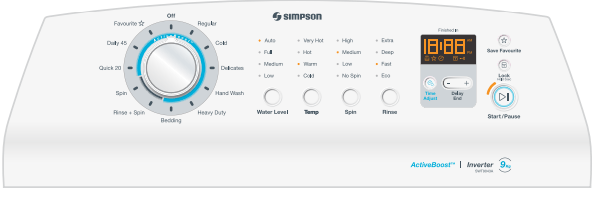
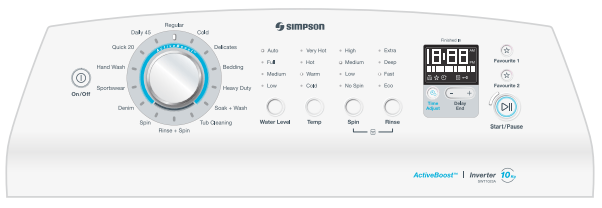
6. SETTING A PROGRAM
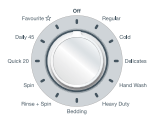
1. Turn the program selector to the required program.
- Your washing machine is now in STAND-BY-MODE and ready to wash your clothes.
- Press the ON/OFF button (SWT1023A)
- The relevant light will light up.
- The buzzer will sound.
- The selector dial can be turned either clockwise or anticlockwise.
- Once you selected a program, the program selected will stay at that position for the whole of the cycle
- The display shows the program duration.
If the settings shown on the control panel are what you want to use, press the Start/Pause button to start your wash.
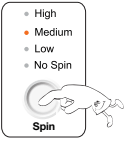
2. If you want your laundry to be washed with functions different from the one proposed by the machine, press Temperature, Water Level, Spin Time and Rinse Option buttons.
NOTE:
Different functions can be combined which is dependent on the program selected.
When these buttons are pressed, the corresponding pilot lights come on.
3. If you want to define the end of the washing program, press the “Delay End” button repeatedly to choose your machine end time.
7. STARTING A PROGRAM
To start a program, press the Start/Pause button, a default program duration will be displayed on the screen.
NOTE:
When you select the Drain+Spin program, there will be a delay of at least 2 minutes before the washing machine starts to spin. This delay is a pump out (Drain) period to ensure the bowl is empty of water, which is necessary before spin commences. Even though you may have only put wet clothes into an empty bowl, the delay before spin will still occur to be safe and to protect your washing machine
.
8. INTERRUPTION OF A PROGRAM
If you have started your wash and you wish to stop it for some reason, press the Start/Pause button to enter PAUSE mode. The time remaining is shown then “ PAUSE ”.
Press the Start/Pause again. The program will continue.
9. CHANGING A PROGRAM
You can turn the Program Selector Knob to a new program position at any time. If you do move the Program Selector Knob the effect will be different depending on the status of the machine at the time you do this, as follows:
- When the machine is in PAUSE mode, moving the Knob to a new position 3 short beeps to remind you that cannot change the program in pause mode.
- When the machine is running, moving the Knob to a new position will result in the machine continuing the wash and 3 beeps to remind you that this option is not allowed.
10.CHANGING THE OPTIONS
It is possible to change only before start the program.
11. AT THE END OF THE AUTO OFF PROGRAM
- The appliance stops automatically.
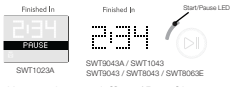
- The display will show
- SWT1023A : “ FINISHED ”
- SWT1043 / SWT9043 / SWT8043 / SWT8063E / SWT9043A : “ END ” and with End sound every 15 second in 2 minutes.
- Turn the Program Selector knob to the position “ Off ” or Press the ON/OFF button (SWT1023A)
- Remove the laundry from the appliance. Make sure that the washing tub is empty.
- Keep the lid ajar, to prevent the mildew and odours.
- Turn off the water tap.
12. AUTO OFF
After 5 min without any user interaction with the appliance, during the machine is in stand by or after the end of the cycle, the appliance receives no further instructions, it will automatically turned Off
(for energy savings in conformity with the standards on energy consumption).
All the settings are stored so that when the appliance is turned back on, the program is ready or if the auto-off mode was triggered after the end of the cycle, the user can see that the cycle ended normally, and can restart it.
|


 ” and you will hear rapid short beep continuously to remind you about this problem.
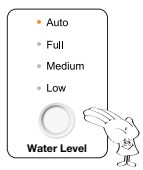


 will light up when the feature activate (Except SWT8043, SWT8063E)
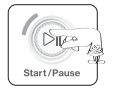
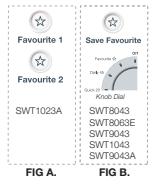
 will light up when this feature is activated.
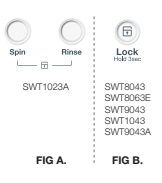
 will light up when this feature is activated.
 will disappear when this feature is deactivated.

 will light up and the clock will begin counting down until it reaches the set time.
 appears and blinks after appropriate number of wash cycles are finished, this is to remind user to clean the lint filters. See page 24.