Electric Leaf Blower
User Manual
Model No: AL001

01
Video Tutorials
Scan the QR code to watch the AL001 tutorial
videos, which demonstrate how to use the AL001 safely
It is recommended to watch tutorial videos and notices beforeusing
for the first time.
WARNING
To reduce the risk of injury, the user must read and understand
the Operator’s Manual before using this product. Save these
instructions for future reference.
Support Email: [email protected]
READ BEFORE USE
EXCEPT AS EXPRESSLY PROVIDED IN AFTER-SALES SERVICE
POLIES AVAILABLE AT([email protected]), THE PRODUCT AND
ALL MATERIALS AND CONTENT AVAILABLE THROUGH THE
PRODUCT ARE PROVIDED AS IS " AND ON AS AVAILABLE BASIS"
WITHOUT WARRANTY OR CONDITION OF ANY KIND.
02
Anykit is a trendy and practical tool brand. We focuse on simplicity
and ease of use, providing people with convenience in their everyday
lives. Our products including otoscopes, endoscopes, and a variety of
household tools to enable DIY enthusiasts to embrace creativity and
convenience.
Dear Customer:
Thank you for purchasing the ANYKIT Leaf Blower. Please read the
Safety Warning and Instructions carefully before use. The set
includes ANYKIT leaf blower, a blower tube, an extend nozzle, a
strap, 2x2.0Ah batteries and a charger. Please make sure all parts
included when coming and check if they are in good condition. Do
not discard the box until all accessories have been checked.
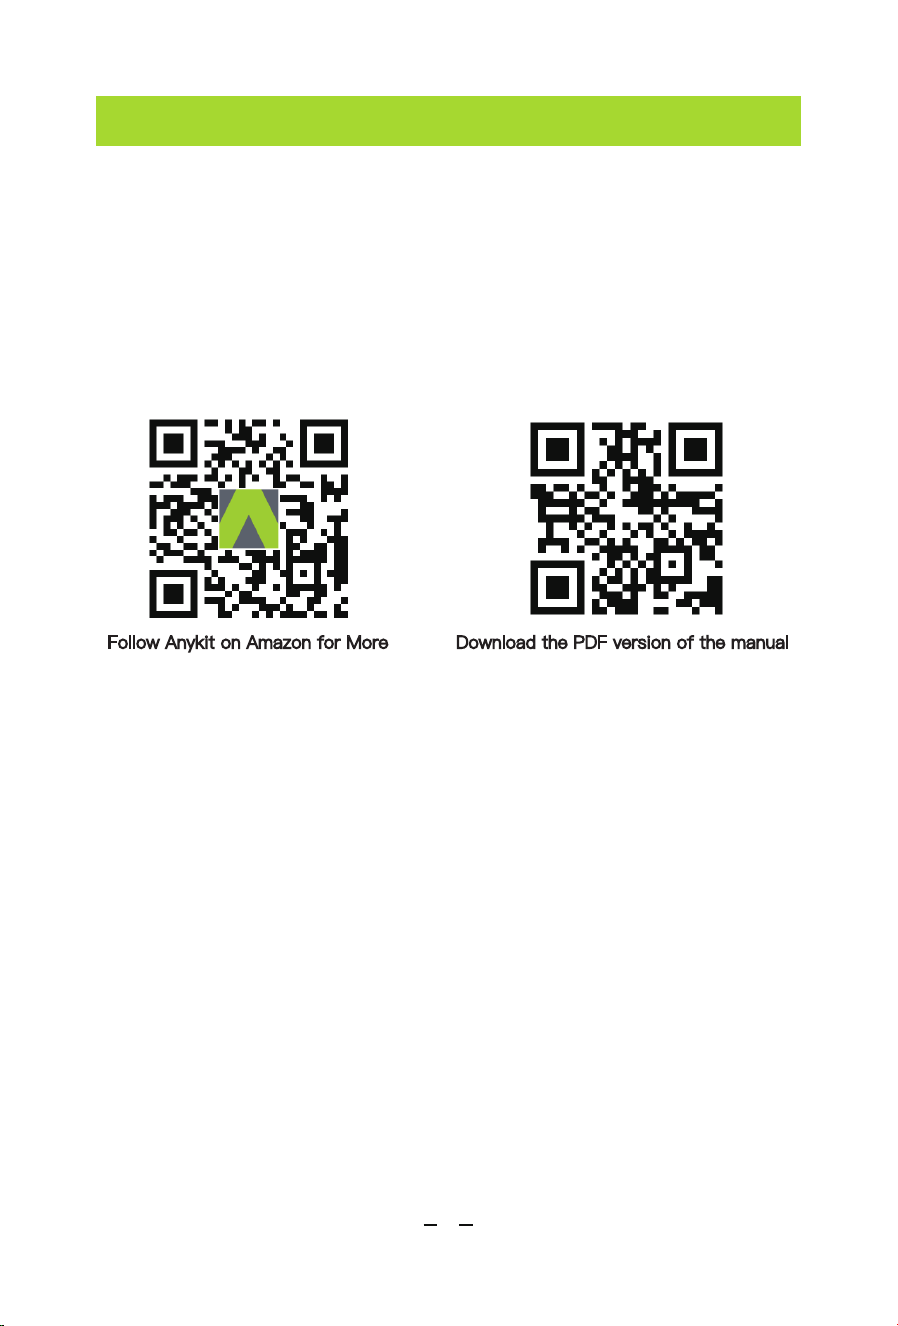
Download the PDF version of the manual
About Anykit
Follow Anykit on Amazon for More
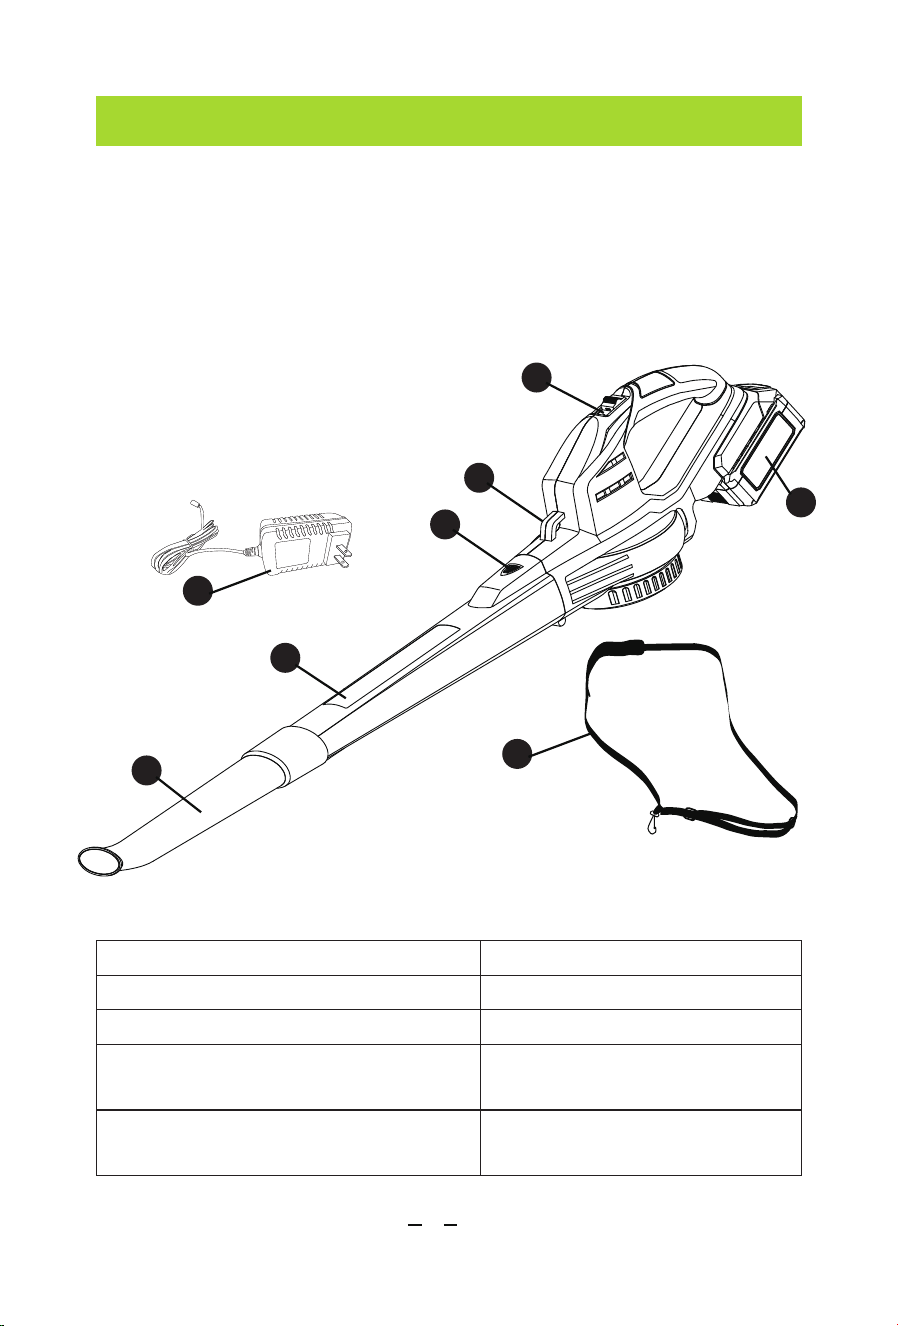
03
1. Battery Pack
2. On/Off/Adjustment Switch
3. Tube Release Button
4. Blower Tube
5. Extend Nozzle
6. Shoulder Strap Connecting Ring
7. Shoulder Strap
8. Charger
Specif ications
1
2
3
4
5
6
7
8
No Load Speed:
Voltage:
Chagring Electric Current:
Recommended Operating
Temperature:
Battery Pack Recommended
Storage Temperature:
32℉-104℉(0℃-40℃)
80℉-176℉(0℃-80℃)
1A Charger (US Standard)
20V
12000-18000r/min
Product Introduction
04
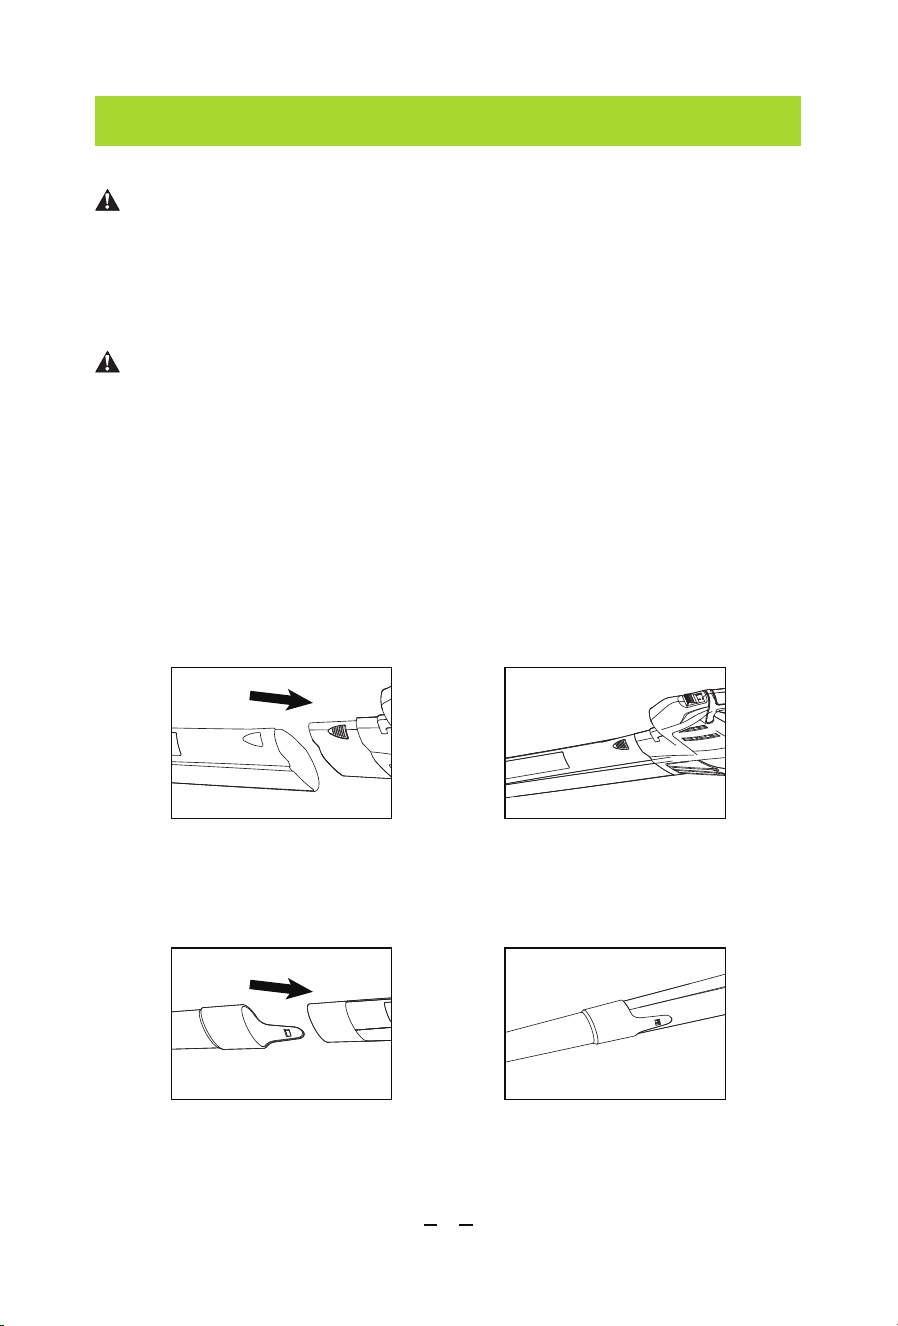
Unit Assembly and Disassembly
Assemble the Blower Tube and Extend Nozzle
WARNING:
If any parts are damaged or missing, do not operate this product
until the parts are replaced. Use of this product with damaged or
missing parts could result in serious personal injury.
WARNING:
Always remove the battery pack from the product when you are
assembling parts, making adjustments, cleaning, or when the product
is not in use.
1. Push the blower tube onto the blower housing until the latch snaps
into place.
2. Push the extend nozzle onto the blower tube until the latch snaps
into place.
05
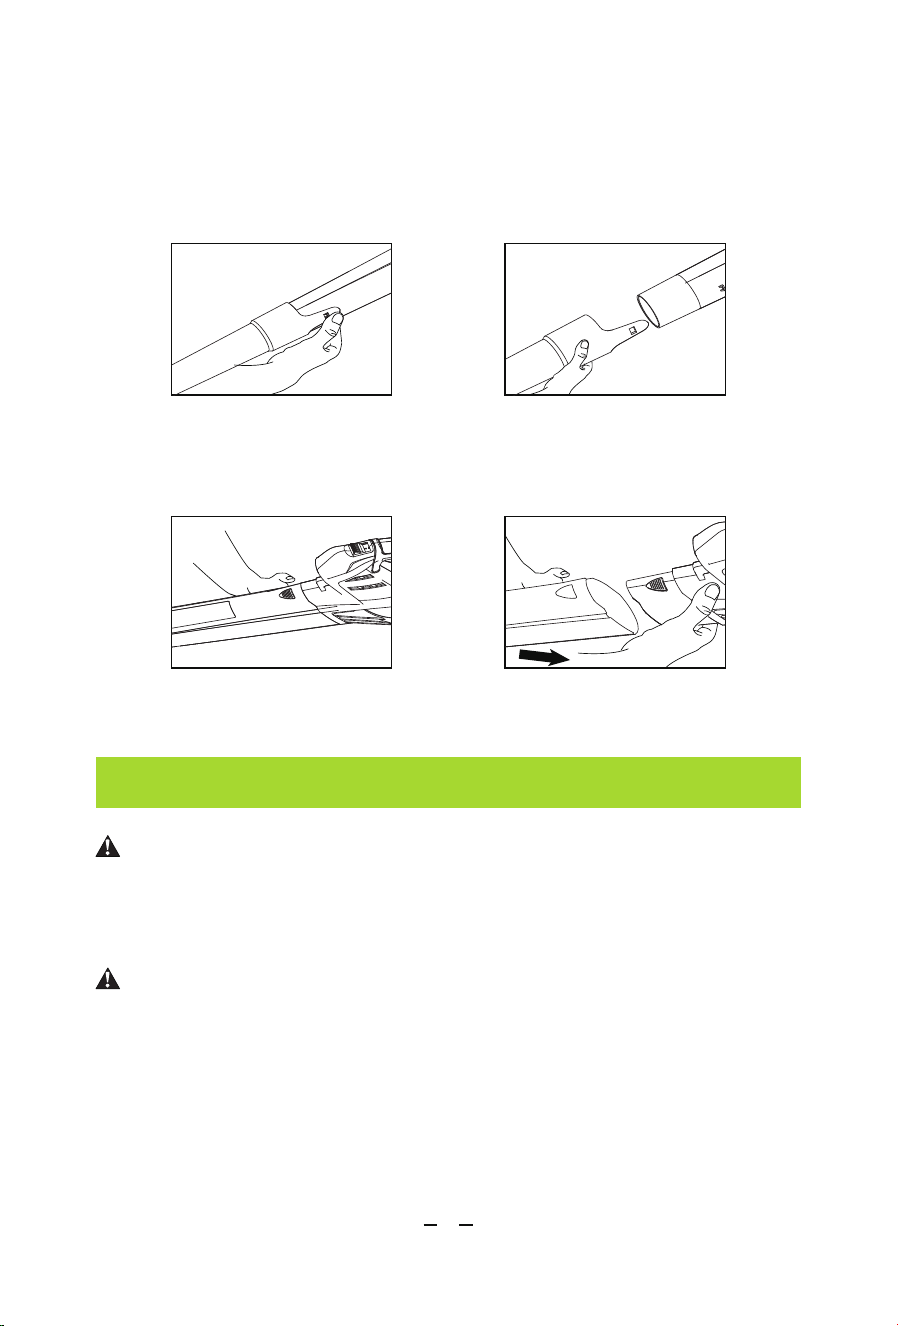
Disassemble the Blower Tube and Extend Nozzle
1. Release the latch snaps and pull the extend nozzle out in the
meantime.
Battery Pack Assembly and Disassembly
2. Press the tube release button and pull the blower tube out in the
meantime.
CAUTION:
Always switch off the blower before installing and removing of the
battery cartridge.
CAUTION:
Hold the blower and the battery cartridge firmly when installing or
removing battery cartridge. Failure to hold the blower and the battery
firmly may cause them to slip off your hands and result in damage to
the blower ant battery cartridge and a personal injury.
Assemble the Battery Pack
Align the tongue on the battery cartridge with the groove in the
housing and slip it into place. Insert it all the way until it locks in
place with a little "click".
Disassemble the Battery Pack
Press the battery release button and slide the battery cartridge
from the housing.
06
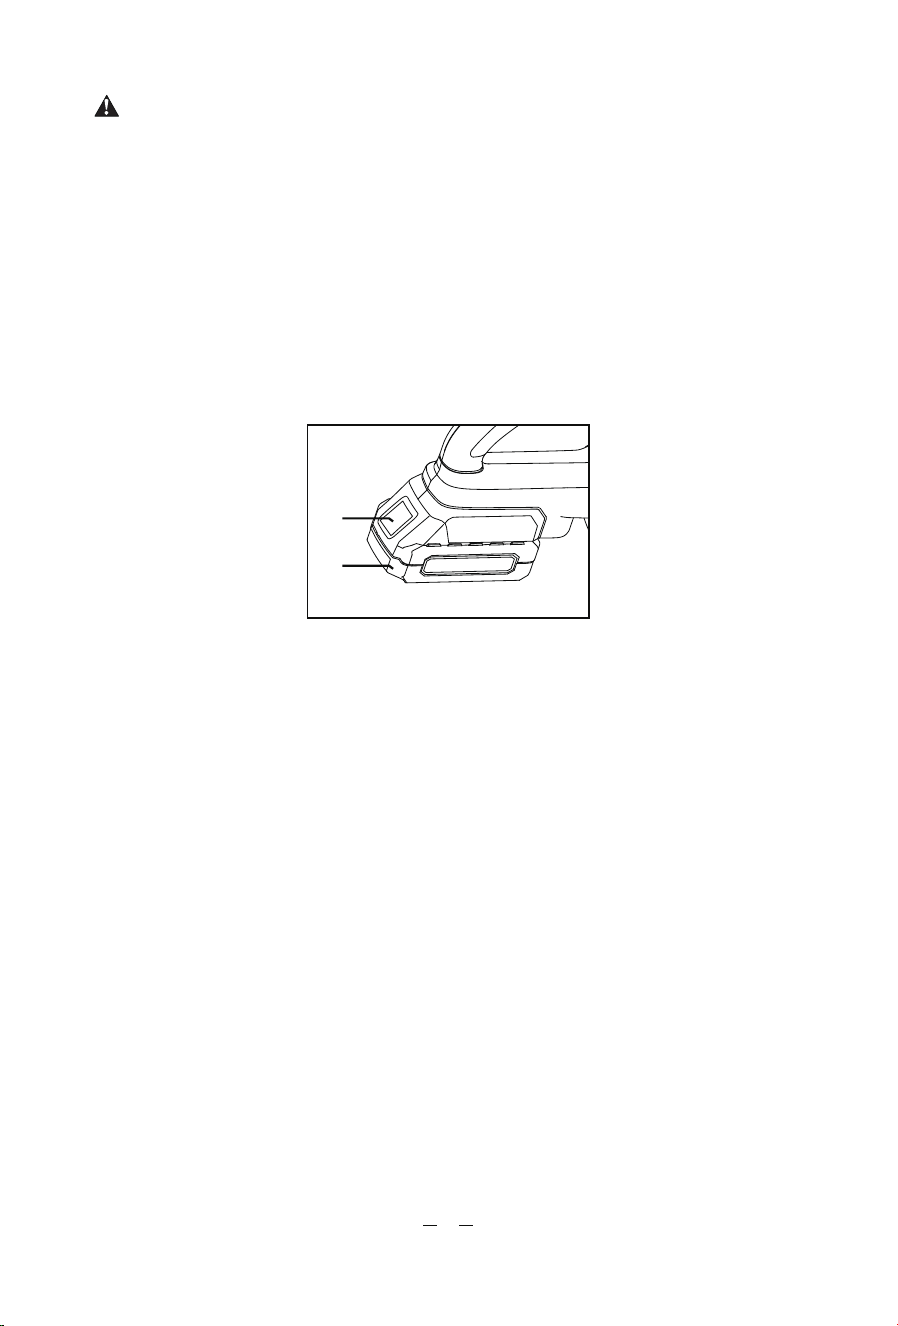
Battery Pack
1. Battery Release Button
2. Battery Cartridge
CAUTION:
Always install the battery cartridge fully until the click lock cannot be
seen. If not, it may accidentally fall out of the tool, causing injury to
you or someone around you.
1
2
07
Operation
1. Your battery pack is uncharged, please charge it before use.
2. Move the On/Off switch to the“1”position to reach speed 1
3. Move the On/Off switch to the“2”position to reach speed 2
4. Move the On/Off switch to the“0”position to turn off the
blower after use.
CAUTION:
Always wear safety glasses. Wear a filter mask if the operation is dusty.
Use of gloves, long pants and substantial footwear is recommended.
Keep long hair and loose clothing away from openings and moving
parts. THIS BLOWER IS FOR HOUSEHOLD USE ONLY.
CAUTION:
Before each use, inspect the entire product for damaged, missing, or
loose parts, such as screws, nuts, bolts, caps,etc. Tighten securely
all fasteners and caps and do not operate this product until all
missing or damaged parts are replaced.
1
2
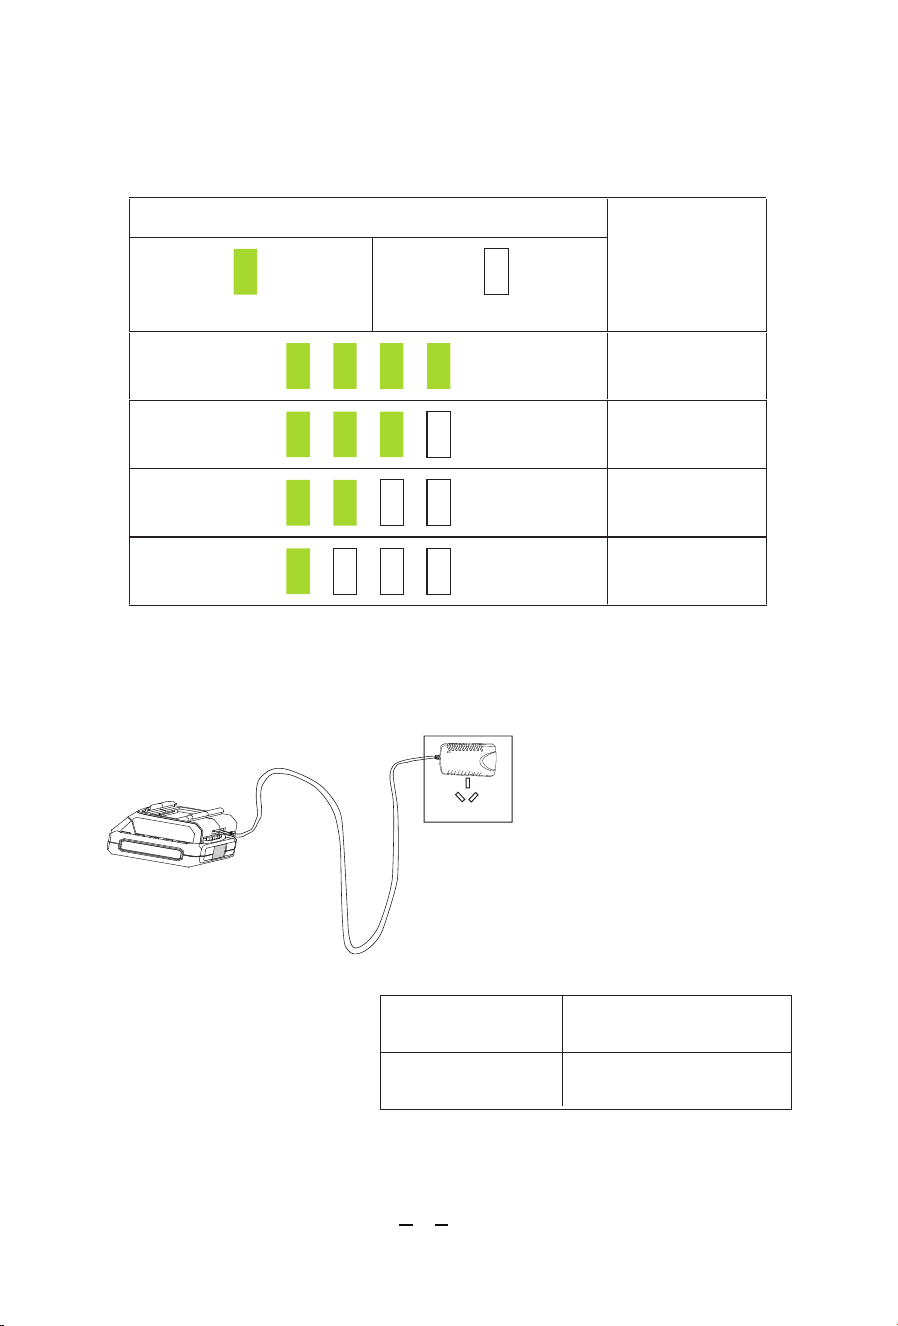
Charge the Battery Pack
Indicating the remaning battery (On battery pack)
When the blower automatic stopped frequent, please check the
remaining battery and charge the battery pack.
08
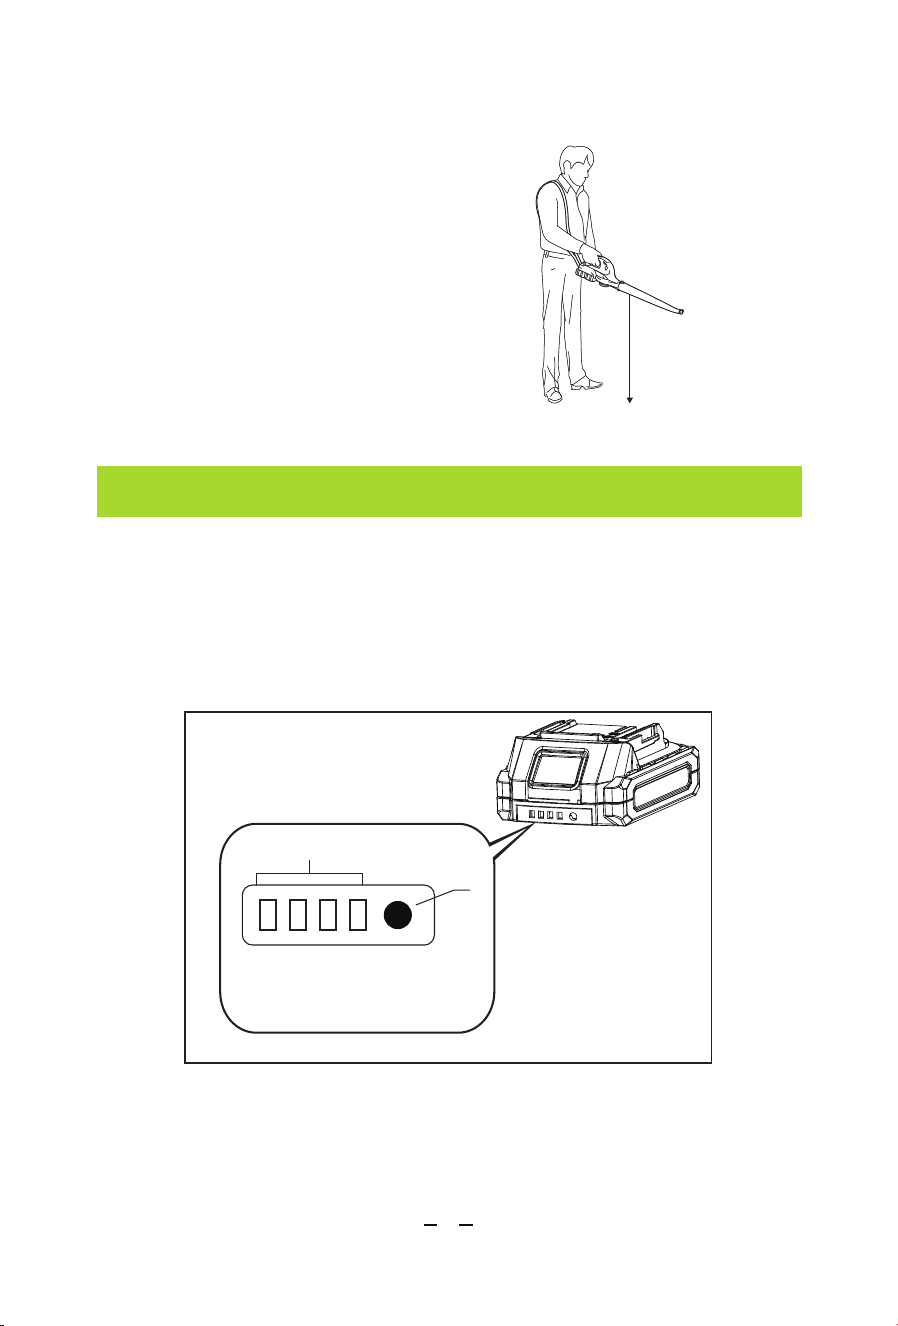
USER TIPS:
Hold the blow tube approx 7”above the
ground when operating the blower. Use
a sweeping motion from side to side.
Advance slowly keping the accumulat-
ed debris/leaves in front of you.
After blowing the debris/leaves into a
pile, it is easy to dispose of the pile.
Approx 7"
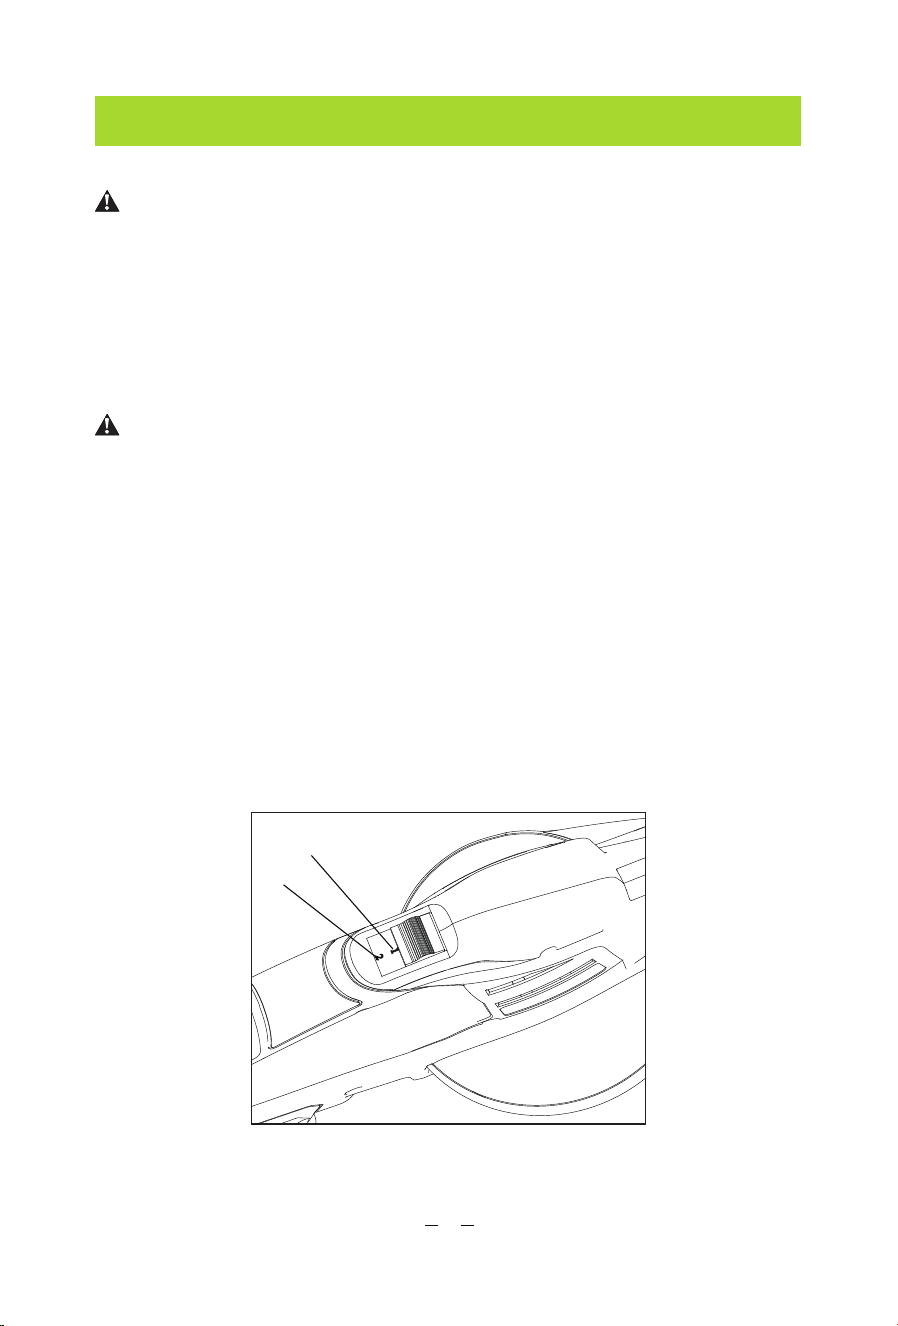
1
2
1. Indicator Lamps 2. Check Button
►
Press the check button on the battery cartridge to indicate the
remaining battery. The indicator lamps light up for few seconds.
When battery is low, charge the battery pack by the coming charger.
Indicator lamps
Remaining
capacity
Lighted Off
75% to 100%
50% to 75%
25% to 50%
0% to 25%
Red Light
Green Light Fully Charged
Charging
09
Warranty
10
Please use only mild soap and a
damp cloth to clean the blower.
Maintenance
Cleaning
Storage
Store the blower under certain
tenperature and humidity as we
recommend.
Store the blower indoors in a
place that is inaccessible to
children. Do not store the tool on
or adjacent to fertilizers or
chemicals. Such storage can
causer apid corrosion of the
metal parts.
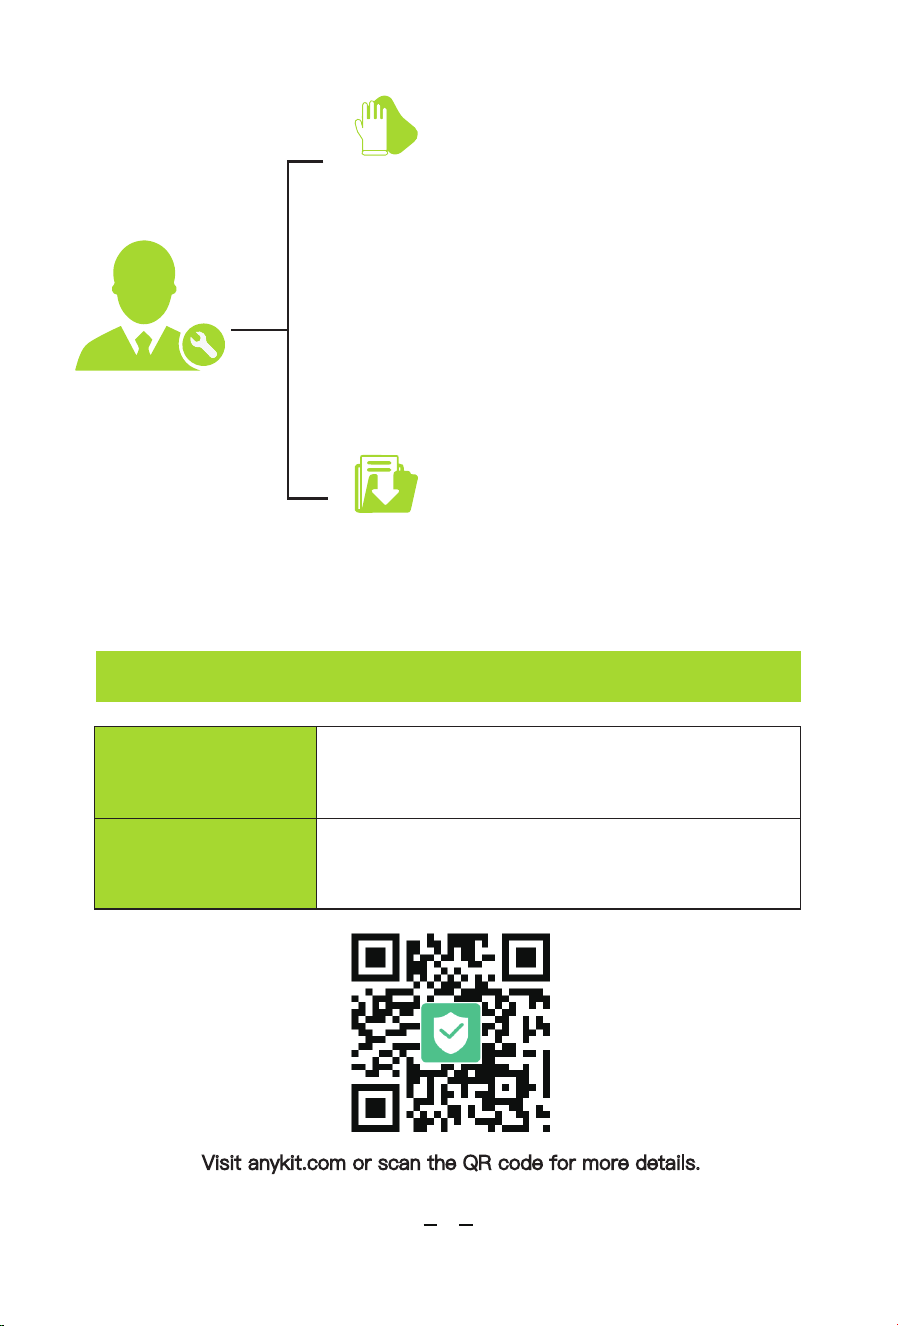
30-Day Guarantee
One-Year Warranty
We will give you a full refund if you are not
satisfied with the product.
We offer a limited warranty that commences
from the date of purchase of the product.
Visit anykit.com or scan the QR code for more details.

3.06.16.001200
ANYKIT AL001 C1012 V1.0
Designed by Anykit in California
Made in China
CUSTOMER SUPPORT
If you have any questions or concerns about your product,
please contact our Customer Support Team
Facebook Messenger
1-877-888-7979
Mon.-Fri. 8:00-5:00 PST(US)
www.anykit.com
@anykit
@anykit
