Car Tire Inflator
Model : D55


READ BEFORE USE
By using this product, you signify that you have read, understand, and
accept the terms and conditions here.
It is recommended to watch all tutorial videos on the official Anykit
website and read the safety guidelines before using.
Prepare for your first use by reviewing the quick start guide and refer to
this user manual for more information.
Scan the QR code to watch
the D55 tire inflator tutorial
videos, which demonstrates
how to use the D55 tire
inflator safely.
Video Tutorials
Scan this QR code to get the
manual in PDF, which can be
enlarged and viewed on your
mobile device.
ONLINE MANUAL
Read the following documents before using.
(1)Safety Guidelines
(2)Quick Start Guide
(3)User Manual

•
WARNING!
• The car tire inflator is only suitable for 12V vehicles and car tires with
width below 12.4’’(315mm).
• To prolong the lifespan of the inflator, it is recommended not to
exceed 15 minutes of continuous inflation to prevent excessive wear
on the components.
• Do not use this product when the car carries a load that exceeds its
capacity. This car tire inflator is not suitable for inflating truck or RV
tires.
• This product is not a toy and is recommended for ages 16 and up.
• Keep a safe distance between children and the inflator while inflating.
• There is a built-in lithium battery inside the product. Don’t place the
product in a fire.
• Overheating, damage, or water may increase the risk of fire or
explosion. It’s best to keep the product away from heat sources, and
not leave it for prolonged periods in a hot car. If the inflator becomes
very hot, there is a chance it could explode.
• Please store the product at a temperature ranging from -22~140°F.
Extremely hot or cold environments may damage the battery and
shorten the lifetime of the inflator.
• Long-term storage of the product may decrease the effectiveness of
the battery. Charge the inflator at least once every three months to
maintain its performance.
• The product has a built-in DC motor which may generate sparks
during operation. Do not use it in an environment with dust or gas that
is liable to explode.
SAFETY INSTRUCTIONS

• If there is an unusual noise or the temperature becomes very high
during inflating, please turn off the inflator immediately.
• Before setting the inflation pressure value, make sure the pressure
unit is correctly selected. Mixing up psi and bar could lead to
dangerous overinflation.
• Unit conversion: 1bar = 14.5psi, 1bar = 100kPa.
• Do not leave the inflator unattended while it is in operation.
• Please use the product in a dry and clean environment. The intrusion
of sand and dust may cause damage to the product. Don’t wash the
product with water.
• Please use a certified 5V/3A adapter and the included charging cable
to charge this product. Malfunction caused by actions not in
accordance with the above requirements is not covered by the
warranty.
• After running for a long time, the temperature of the junction between
the air tube and the main body can become very high. To avoid burns,
avoid touching it.
• This inflator is equipped with short-circuit protection. Do not connect
its USB-A port with its USB-C port.
• Caution: To reduce the risk of electric shock, do not expose to rain.
Store it indoors.
SAFETY INSTRUCTIONS

ABOUT ANYKIT-------------------------------
KNOW YOUR PRODUCT-------------------------
SPECIFICATIONS------------------------------
BATTERY LEVEL INDICATOR & CHARGING------------
HOSE CONNECTION---------------------------
12V DC POWER------------------------------
STARTUP SHUTDOWN--------------------------
MODE SWITCHING----------------------------
UNIT SWITCHING-----------------------------
DEFAULT VALUES FOR VARIOUS TIRE PRESSURE MODES-
AUTOMATIC SHUT OFF-------------------------
LED LIGHT------------------------------
THE CONNECTION METHOD & USAGE OF NOZZLES-----
HOW TO CHANGE THE FUSE---------------------
MAINTENANCE------------------------------
TROUBLESHOOTING------------------------
WARRANTY--------------------------------
CUSTOMER SUPPORT-------------------------
1
2
3
4
5
6
7
8
8
9
9
10-11
12
12
13
14-15
16
17
TABLE OF CONTENTS

- 1 -
ABOUT ANYKIT
Anykit is a contemporary and user-friendly tool brand with a strong
commitment to simplicity and convenience. Our portable tire inflators,
inspection cameras, and an array of automobile maintenance tools enable
DIY enthusiasts, to offer both creativity and practicality in various aspects
of life, whether you are at home or on the road.
Follow Anykit on Amazon for More
- 2 -
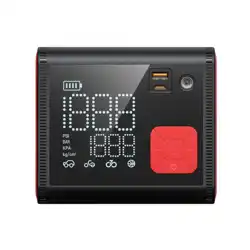
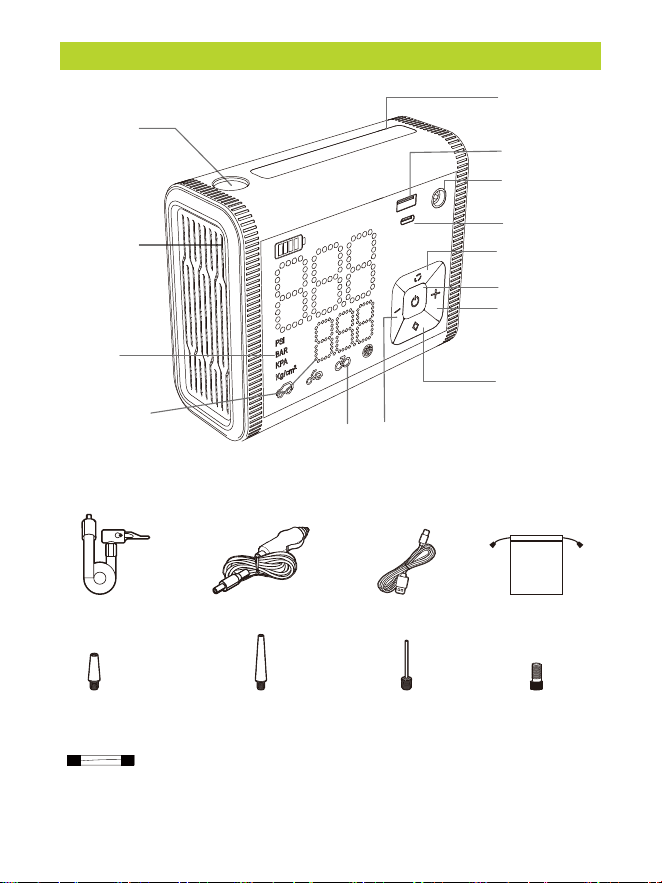
KNOW YOUR PRODUCT
LED/SOS Light
USB-A Port
Working Mode
Preset Plus
Preset Minus
Mode
Preset
Pressure Value
Unit
Inf lation hose Car charging cable
Short adapter Long adapter Ball needle
USB Type-C cable
Cigarette lighter fuse
Presta adapter
Unit Switching
Power On/Off
Inflation On/Off
USB Type-C Port
DC Port
Hose Connector
Air Release Valve
Storage bag

- 3 -
SPECIFICATIONS
Model
Working Voltage
No Load Flow
Maximum Working Pressure
Display Units
Battery Capacity
Charging Time
Continuous Working Time
Working Noise
Input
Output
D55
DC 12V
44 L/Min
150 PSI
PSI, BAR,KPA,KG/CM2
12000mAh
3.5H(5V/3A)-5H(5V/2A)
15 Mins
Lower than 80dB within 1 meter
5V/3A
5V/2A
USB Type-C
USB-A
10A
120W
5.75x4.65x2.38 inches
10.83 ft (3.3m)
23.6-inch(60 cm)
± 0.15 PSI/ 0.1 Bar
Input Port
Output Port
Sensor Accuracy
Max. amps
Max. power
Dimensions
AC cable length
Air tube length
- 4 -
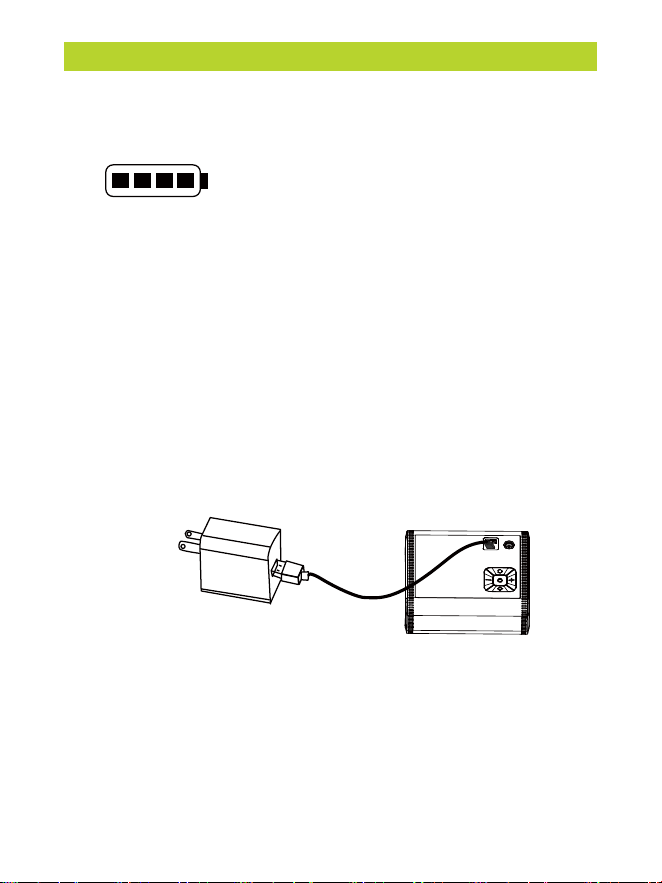
BATTERY LEVEL INDICATOR & CHARGING
1 bar = under 25%
2 bars = between 25% and 50%
3 bars = between 50% and 75%
4 bars = between 75% and 100%
Battery Level Indicator
The battery level is shown by four bars, with each bar representing 25%.
Note:The battery indicator will flash when the battery level is below 20%.
Charging
Fully charge the inflator before using it for the first time. To charge,
connect it to a certified 5.0V/2A USB charger with the charging cable.
While charging:
1 bar flashing = under 25%
1 bar solid, 2nd bar flashing = between 25% and 50%
2 bars solid, 3rd bar flashing = between 50% and 75%
3 bars solid, 4th bar flashing = 75% and 100%
All 4 bars solid = fully charged
The inflator will automatically switch off if left inactive for 5 minutes
after being fully charged.
Note:
• Do not use the device while it’s charging via USB.
• The USB charger is recommended to use 5V / 3A. Use the
type-C charging cable to connect the air pump and power
adapter (NOT INCLUDED) for charging
• Charging status: battery indicator flashes
• Full state: the battery indicator light remains steadily lit without blinking.
• DC12V can only be used as a plug-and-play device and cannot be used
to charge the battery of an air pump.
- 5 -
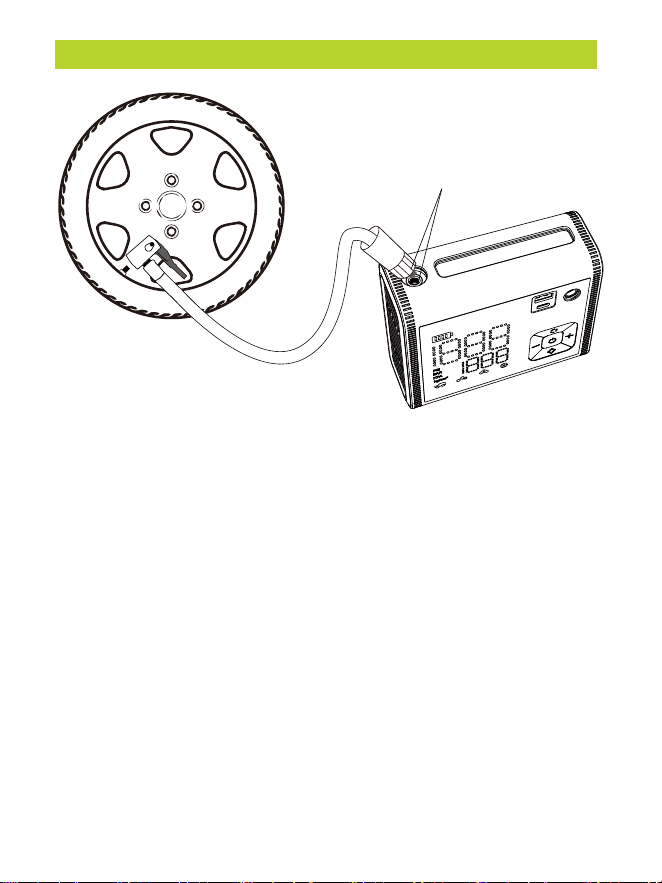
HOSE CONNECTION
If the tire inflator's battery is running low, you can also use a
car's 12V DC cigarette lighter to power your device.
When inflating larger tires like those on pickup trucks, it is advisable to use
a cigarette lighter DC 12V power supply as it will provide faster inflation
speed.
Note:
Do not use this product when the car carries a load that exceeds its
capacity. This car tire inflator is unsuitable for inflating large trucks and RV
tires.
High temperature zone
American standard nozzle
- 6 -
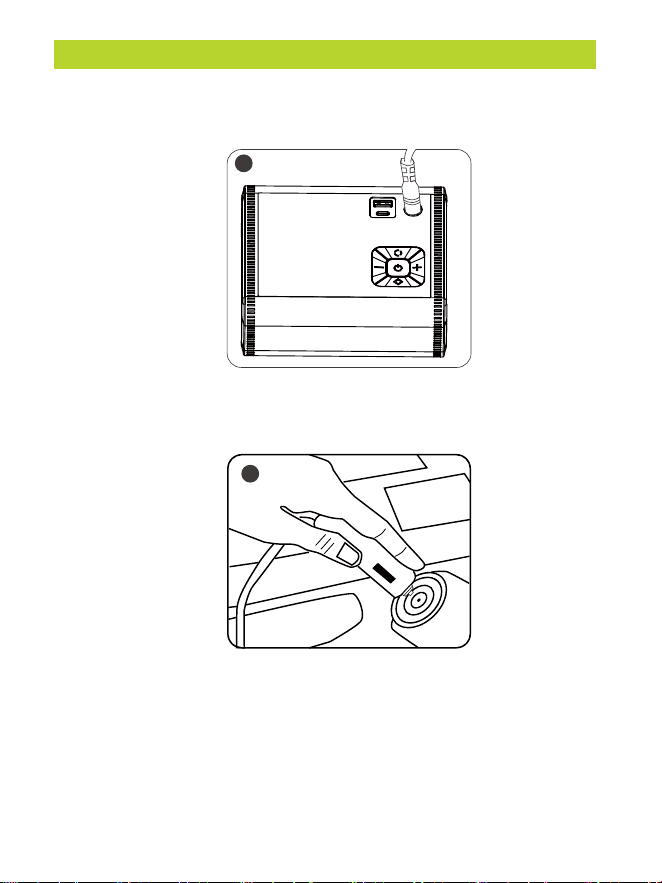
12V DC POWER
2. Locate the 12V DC cigarette lighter in your vehicle and insert the
plug of the air pump's power cord into it.
3. Turn on the vehicle's ignition to supply power to the cigarette
lighter.
2
1. Locate the charging port on the air pump, plug one end of the
charging cable into the charging port.
1
- 7 -
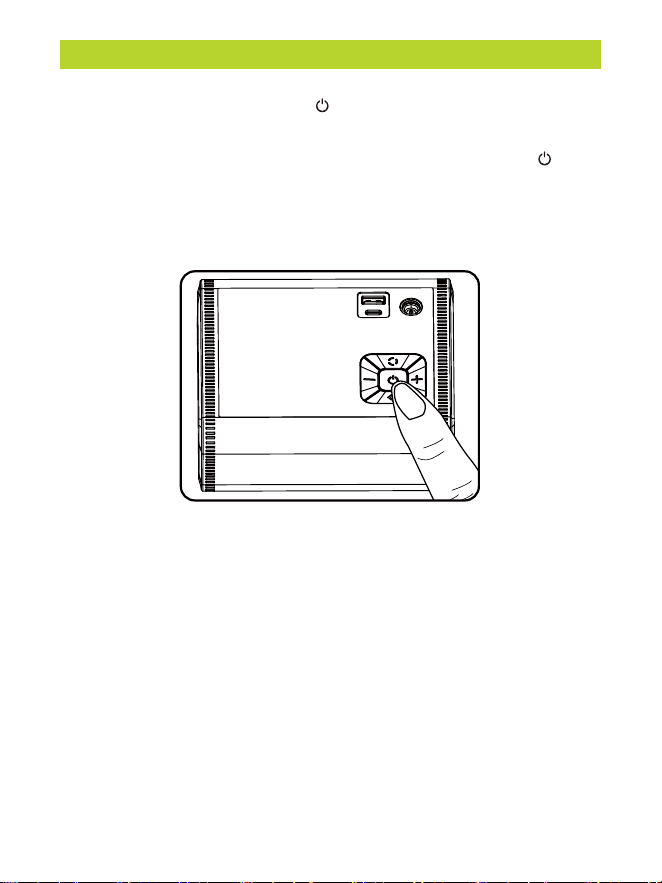
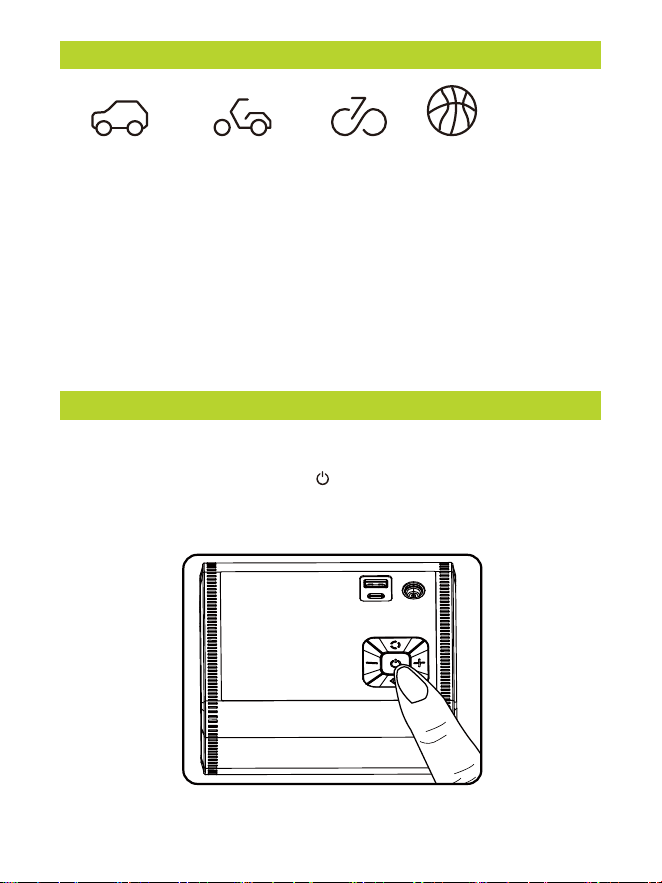
STARTUP SHUTDOWN
Press and hold the power button for three seconds to turn on the
device. The screen will light up.
While the device is turned on, press and hold the power button for
three seconds to turn off the device. The screen will go completely
dark.
NOTE:
If the device remains idle in the turned-on state for 120 seconds, it will
automatically enter a power-saving sleep mode. To wake up the
device, simply press the power button briefly.
- 8 -
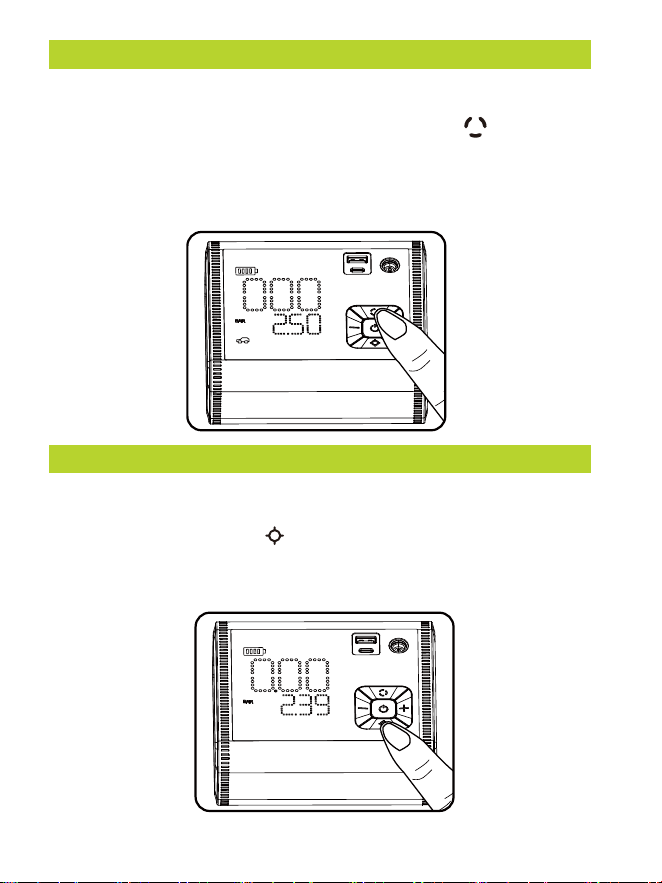
MODE SWITCHING
UNIT SWITCHING
It's convenient for you to switch between the five modes - car, motorcycle,
bicycle, ball, and custom. You can use the mode button to switch and
select the desired mode, and the default air pressure value will automatically
synchronize with the selected mode.
Note: The custom mode does not display a mode icon.
You can switch between these four units PSI, BAR, KPA, Kg/cm2 as
needed. Press the unit button to switch and select the desired unit,
and the preset pressure values will automatically convert and change
according to the selected unit.
- 9 -
DEFAULT VALUES FOR VARIOUS TIRE PRESSURE MODES
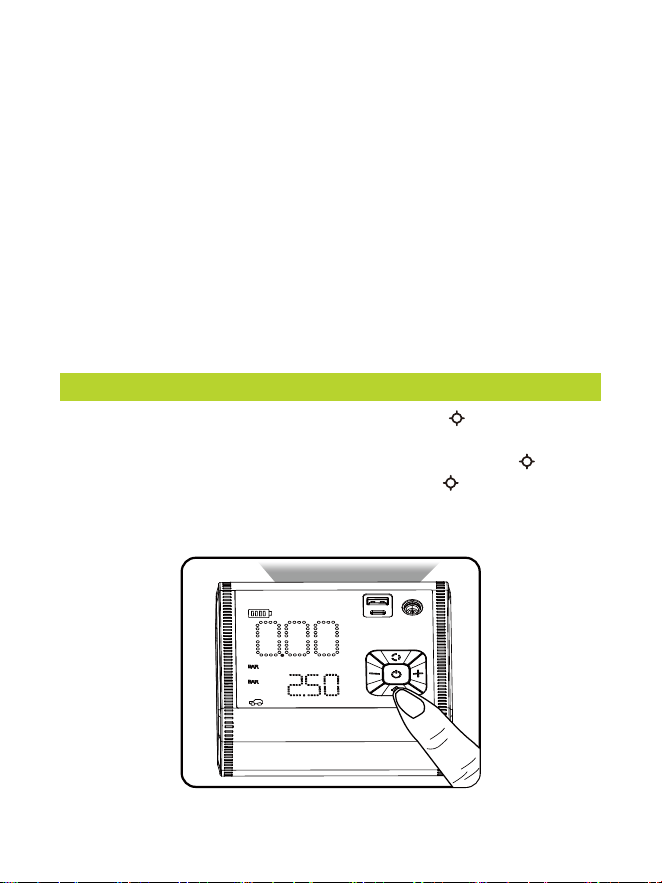
AUTOMATIC SHUT OFF
PRESET PRESSURE VALUE
Short press +/- button: adjust the preset value +/- 0.1 PSI
Long press +/- button: can quickly adjust the preset value
NOTE:
The default unit upon startup is PSI. If you wish to remember the last set
of tire pressure values, please select the custom mode. The car mode,
bicycle mode, motorcycle mode, and sports ball mode do not have a tire
pressure memory function.
After selecting the desired inflation mode and preset tire pressure value.
Once you press the power button , the inflation process begins. When
the tire pressure reaches the preset value, the air pump automatically
stops inflating
Custom mode
Car mode
36 PSI
(4-65.2 PSI)
Motorcycle mode
34 PSI
(26-44 PSI)
Bicycle mode
30 PSI
(4-150 PSI)
Ball mode
8 PSI
(4-16 PSI)
(4-150 PSI)
- 10 -
LED LIGHT
NOTE:
It's important to note that there is a delay of approximately 10 seconds
before the inflation process stops after the pressure is displayed as
reaching the preset value on the screen.
Why doesn’t the inflation process stop immediately when the preset tire
pressure is reached?
Our tire inflator is designed to ensure accurate and stable tire pressure.
During the inflation process, there may be slight variations and factors
that can affect the precision, such as the tightness of the air nozzle or
the accuracy of the pressure gauge. To compensate for these potential
errors and guarantee that the tire pressure reaches the desired level, our
tire inflator has a built-in delay mechanism.
First, turn on the power. Then, press and hold the button for 3 seconds to
activate the LED light.
If you want to enter the white light flashing mode, press the button once. To
enter the red-blue light flashing mode, press the button again. If you want to
cycle through the modes, simply press the light button briefly. Finally, to turn off
the LED light, press and hold the light button.

- 11 -
This power bank is capable of providing a 5V/2A output power to charge
products with low battery levels.
NOTE:
It's important to note that you should not connect a USB cable to the
USB-A port of the tire inflator and the other end to the USB-C port of the
tire inflator, as this may cause a short circuit.
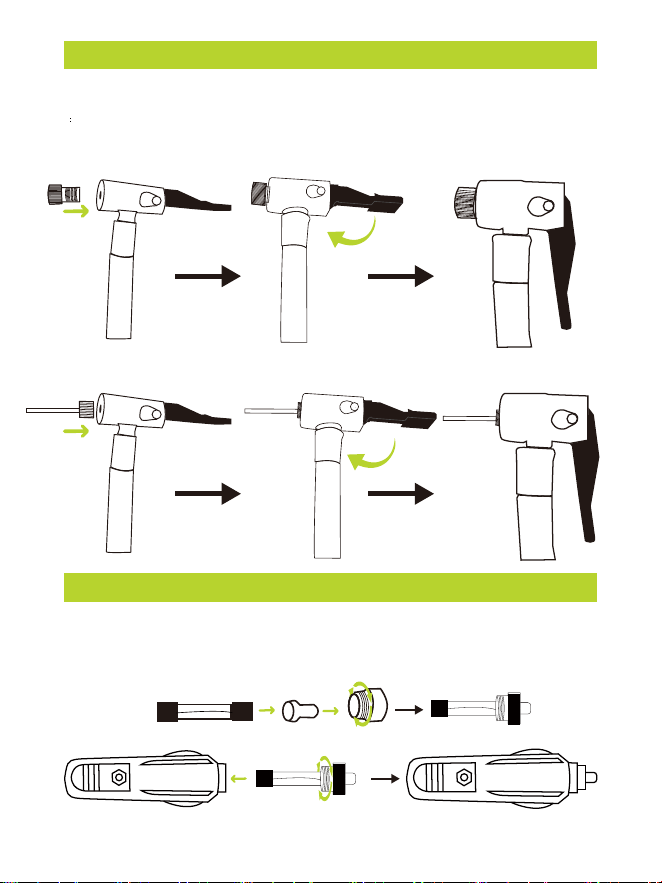
If you suspect the fuse in the plug adaper, may have blown, unscrew the tip
of the plug adapter, remove the fuse, and inspect (The packaging includes
replacement fuses).
- 12 -
THE CONNECTION METHOD & USAGE OF NOZZLES
HOW TO CHANGE THE FUSE
How to install the adapter nozzle onto the air pump's nozzle.
Push the adapter nozzle firmly into the air pump's nozzle until it fits securely.
Presta standard nozzle - for high-pressure road style and some mountain
bicycles.
Ball needle nozzle - for sport balls

- 13 -
MAINTENANCE
Chemical Contact:
Avoid any contact between plastic parts of the tool and substances like brake fluids,
gasoline, petroleum-based products, penetrating oils, or any other chemicals. These
chemicals can potentially damage, weaken, or even destroy plastic components, posing
a serious risk of personal injury.
Cleaning:
Keep the tool clean to ensure its longevity and optimal performance. Use a soft damp
cloth to wipe the tool's surfaces. Ensure that the cloth is damp, but not wet, to prevent
water from entering the tool's internal components.
Solvents and Plastics:
Plastic parts are susceptible to damage when exposed to various commercial solvents.
Avoid using solvents when cleaning plastic components to prevent any potential harm.
Instead, use a clean, dry cloth to remove dirt, dust, oil, grease, and other contaminants.
Battery Maintenance:
To maintain the rechargeable battery's performance and lifespan, take the following
precautions:
Protect the battery from overheating, both during charging and storage. Avoid exposing
it to extreme temperatures.
Recharge the air pump every three months when not in use. This helps prevent the
battery from deep discharging, which can be detrimental to its health.
Regular Inspection:
Periodically inspect the tool for signs of wear, loose components, or damage. If you
notice any issues, discontinue use and address them promptly to ensure safety and
maintain optimal functionality.
Storage:
When storing the tool, keep it in a clean, dry environment. If possible, store it in a
protective case or bag to shield it from dust and debris.

- 14 -
TROUBLESHOOTING
Problem Possible Reasons and Solutions
The unit will not start.
The inflator does
not work.
The inflation is slow.
Inflation failure.
• Check to see if the pre-programmed INFLATE RIGHT
digital gauge is set to a lower PSI than your tire currently
is reading (i.e., the digital gauge is set to 15psi but your
tire is at 20psi; in this scenario, the inflator will not turn
on) Refer to the digital gauge operating instructions and
set the PSI to the correct tire pressure.
• Push the power plug firmly into the receptacle and twist
it back and forth.
• Check receptacles and plug terminals for dirt, particularly
tobacco. (Use a non-conductive probe, not fingers or
metal)
• Check the vehicle power outlet fuse, it should be 15
amps minimum.
• The fuse, located in the plug adaptor, may have blown.
Unscrew the tip of the plug adaptor, remove the fuse,
and inspect(If the fuse has blown, please replace it with
a new one.)
• Check if the preset pressure is lower than the
current pressure.
• Check if the power cord is connected tightly.
• Check if the car engine has been started.
• Check if the glass fuse is damaged.
• Check if the air hose and the inflatable are connected
tightly.
• Check if the air hose leaks.
• Check if the device is low on battery, charge it fully,
and try again.
• Check if the actual pressure is higher than the preset
value, switch the inflator to the appropriate mode.

TROUBLESHOOTING
Problem Possible Reasons and Solutions
There is air leakage.
Unchangeable preset
pressure value.
Accessories are
missing or damaged.
For any additional problems, please contact us.
The appliance works
normally, but the
current pressure
shows 0.
The battery level
indicator doesn't light
up during charging.
• Check if the inflatable leaks
• Check if all connecting parts are connected
tightly and ensure the nozzle is screwed tightly.
Check if the adapter or cable is incorrect;
please use the original charging cable for
charging.
Check if the pressure has reached the limit for this
mode, change the inflation mode, and try again.
Please contact our customer service team.
• Check if the hose is damaged.
• Check if the pressure of the object being inflated is
below the detection range.
• Low-pressure inflatables like balloons are not
measurable by this appliance.
• When the tire is flat, it takes a little time for the tire
pressure to be measurable.
- 15 -

- 16 -
WARRANTY
30-Day Guarantee
We will give you a full refund if you are not
satisfied with the product.
We offer a limited warranty that commences
from the date of purchase of the product.
One-Year Warranty
Visit anykit.com or scan the QR code for more details.

CUSTOMER SUPPORT
If you have any questions or concerns about your product,
please contact our Customer Support Team
Facebook Messenger
1-877-888-7979
Mon.-Fri. 8:00-5:00 PST(US)
www.anykit.com
@anykit
@anykit
- 17 -

ANYKIT D55 C1209 V1.0
3.06.06.002000
