AI Digital Frame
User Manual
Model: ADF1001
NOTE: 1. Please read this manual carefully before using the product.
2. Images and illustrations in this manual are for reference only
and may differ from the actual product.
15.6-inch

Contents
Product Overview
Packaging List
Device Connection and Power-On
Wi-Fi Setup and Device Binding
Main Feature Description
AI Voice Interaction
Calendar Functions
Tasks
Other Features
Quick Reference for Common Operations
Usage Recommendations
Safety Precautions
Specifications
FCC Statement
01
01
01
02
07
08
10
12
13
14
14
15
15
16
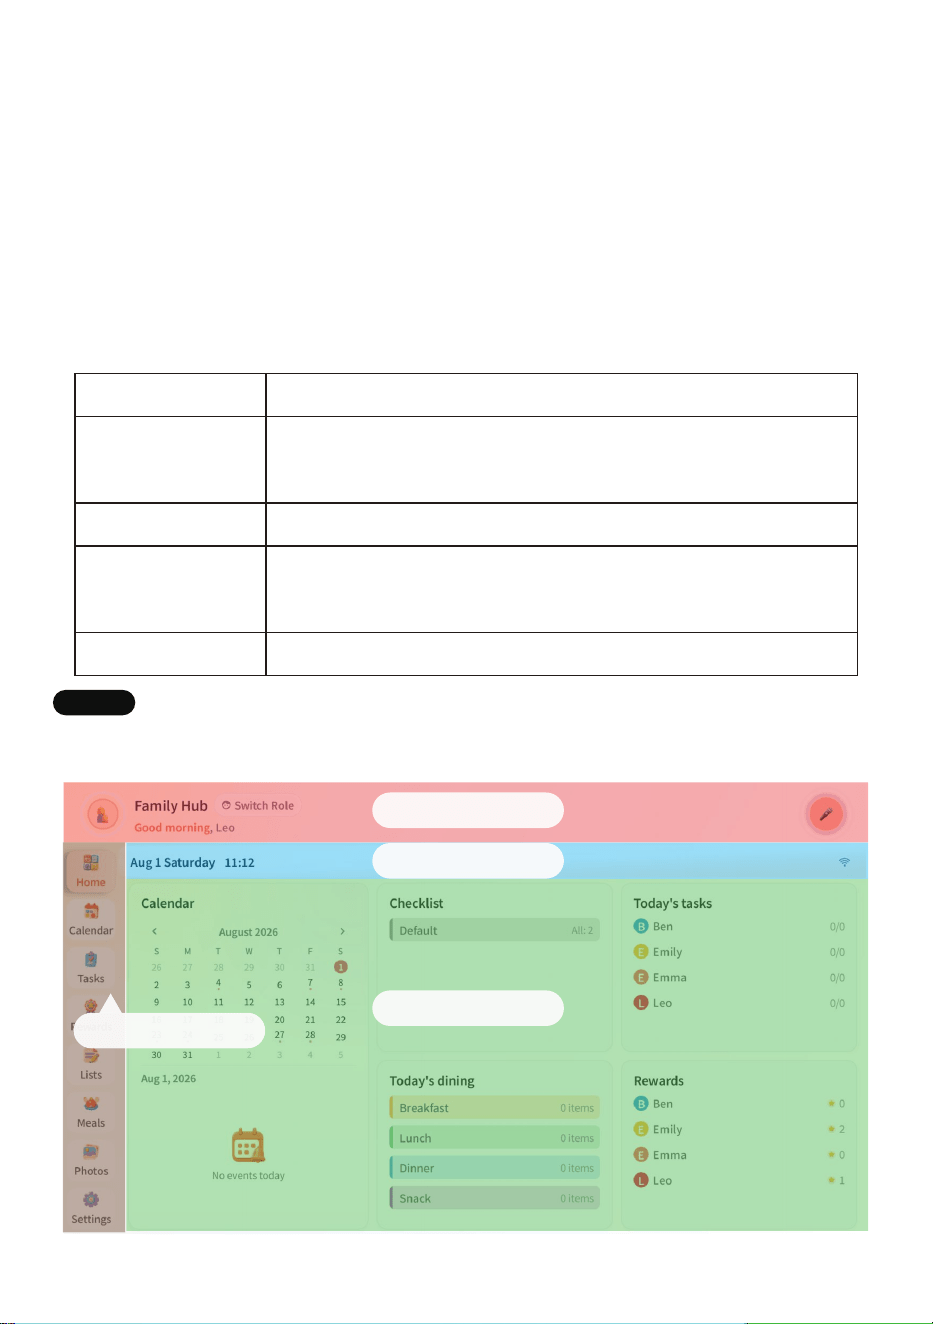
I. Product Overview
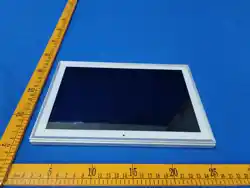
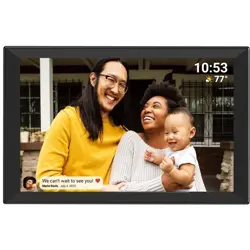
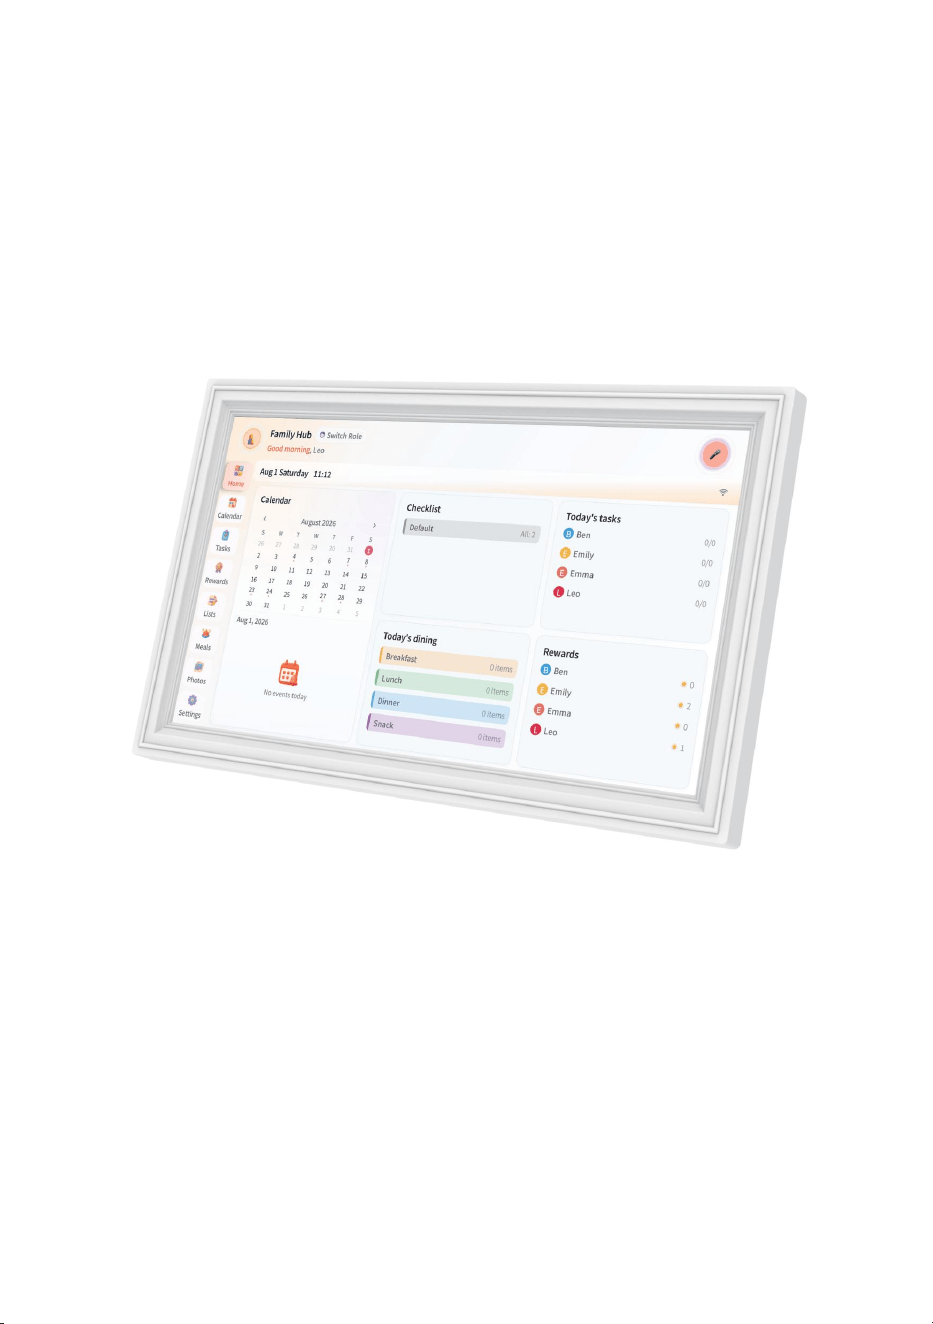
The 15.6-inch AI Digital Frame is built for family calendar and schedule management. It
supports viewing family calendars, task planning, voice interaction with the AI assistant,
and managing rewards, lists, meals, and photo albums. The user interface consists of a
top AI Assistant bar, a left navigation bar, and a center content area. Use the left icons to
change pages, or tap the top microphone to talk to the AI.
II. Packaging List
III. Device Connection and Power-On
1. Connect the power adapter to the power port on the smart calendar.
2. Plug the adapter into a power outlet.
3. Wait for the device to power on automatically and enter the initialization page.
4. When using the device for the first time, follow the on-screen instructions to complete
Wi-Fi setup and account binding.
5. Download the VTimes Smart app
Scan the QR code in this manual to download the VTimes Smart app. You can also
download it from the App Store or major Android app stores.
No. Item Quantity
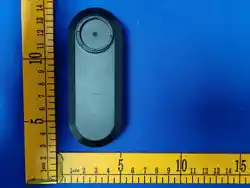
1 15.6-inch AI Digital Frame 1
2 Power Adapter
3 User Manual
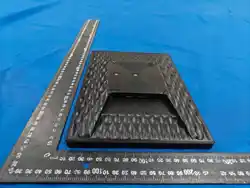
4 Desktop Stand
5
1
1
1
1Wall Mount Bracket
— 1 —
VTimes Smart App Scan the QR code to
download the APP
Note: App Store is a service mark of Apple Inc.
Google Play and the Google Play logo are
trademarks of Google LLC.
IV. Wi-Fi Setup and Device Binding
When using the device for the first time you need to set up the Wi-Fi connection and bind
the device to your account via the VTimes Smart app.
1. First-use
● The smart calendar is powered on and stays on the initialization page.
● Your home Wi-Fi is working properly, and you have the Wi-Fi password ready.
● The VTimes Smart app is installed on your phone, and you have logged in with your
account.
● Camera permission is enabled on your phone so you can scan the QR code on the
device.
● Keep your phone and the device close to the router to avoid weak network signals.
2. Device Initialization
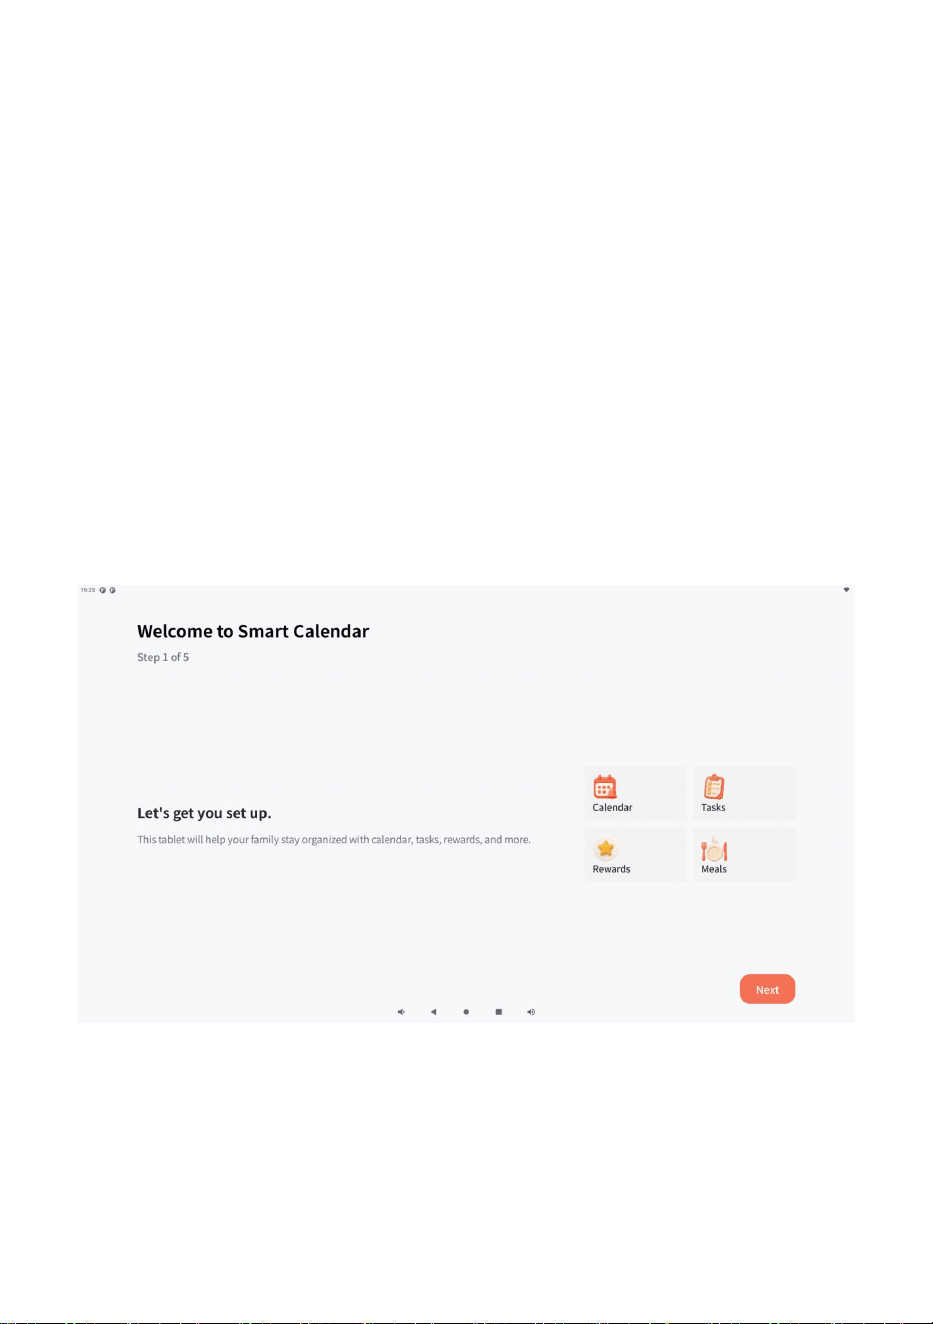
Step 1: Enter the Initialization Wizard
Once the device powers on, the “Welcome” screen appears. When the device enters the
initialization process, tap Next in the bottom-right corner to continue.
— 2 —
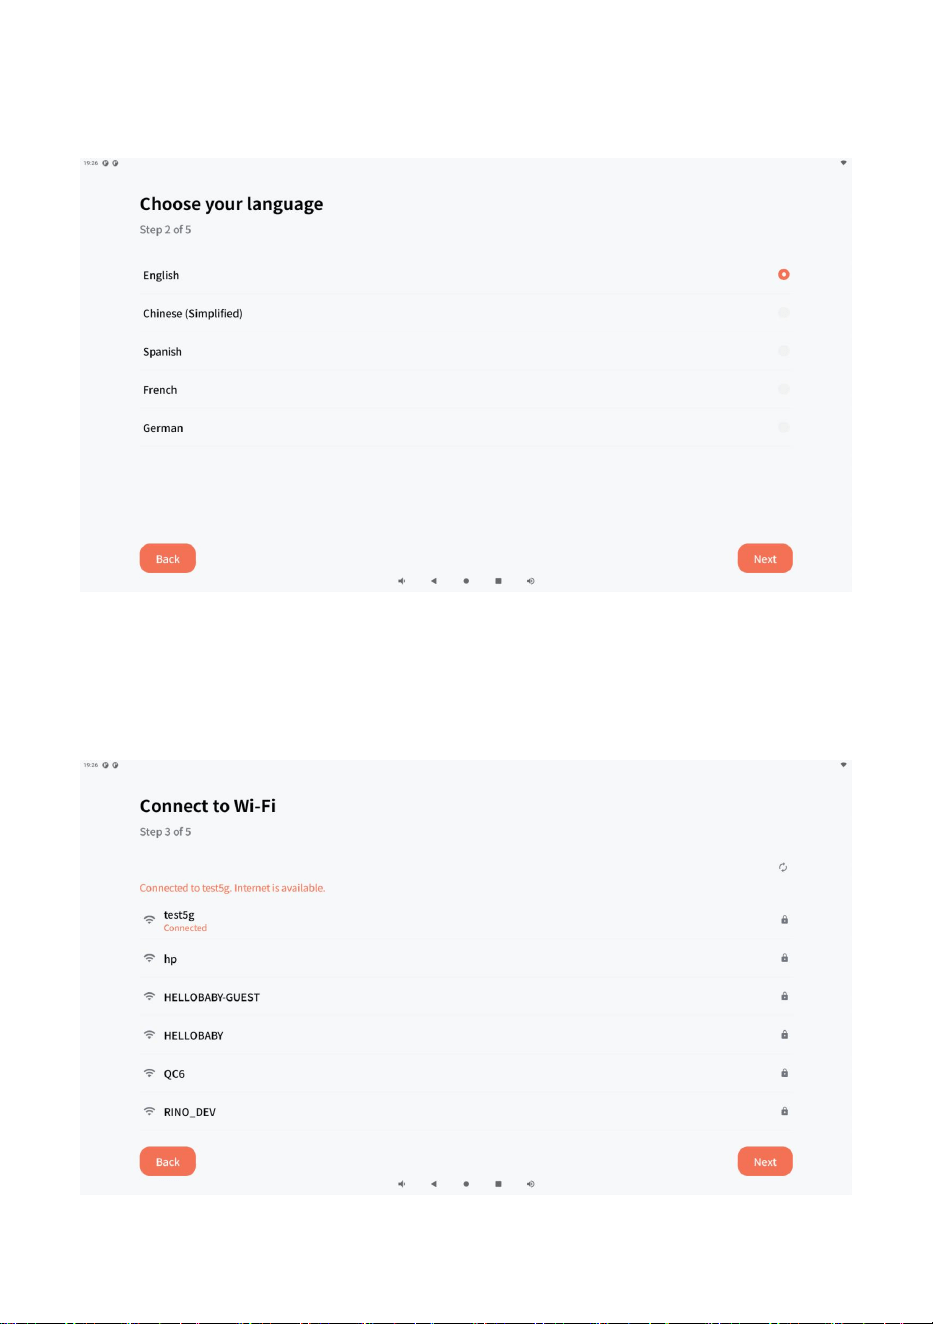
Step 2: Set Your Language
Select your preferred language from the list, then tap Next in the bottom-right corner to
proceed.
Step 3: Connect to Wi-Fi
Choose your home network, enter the password, and wait for the connection. The network
name will show once connected. Confirm it's working and tap Next. To adjust system
settings, tap "Open System Wi-Fi Settings."
— 3 —
— 4 —
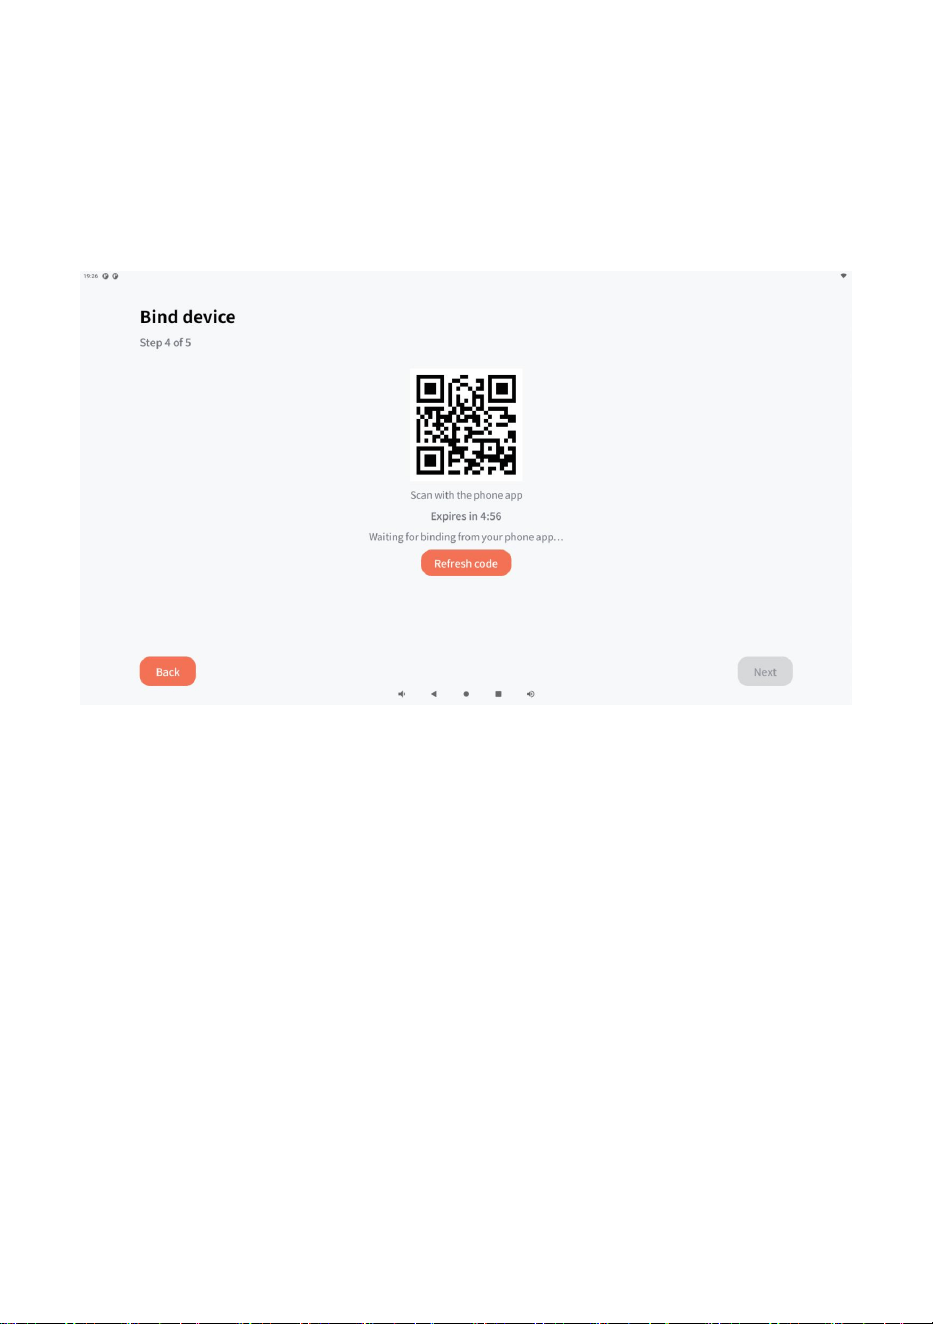
Step 4: Bind Your Device
The device will now display a Bind Device screen with a QR code and a pairing code.
Keep this screen visible, then open the "VTimes Smart app" on your phone and scan the
QR code to complete the binding.
If the QR code or pairing code expires before you finish, tap Refresh Code to generate a
new one.
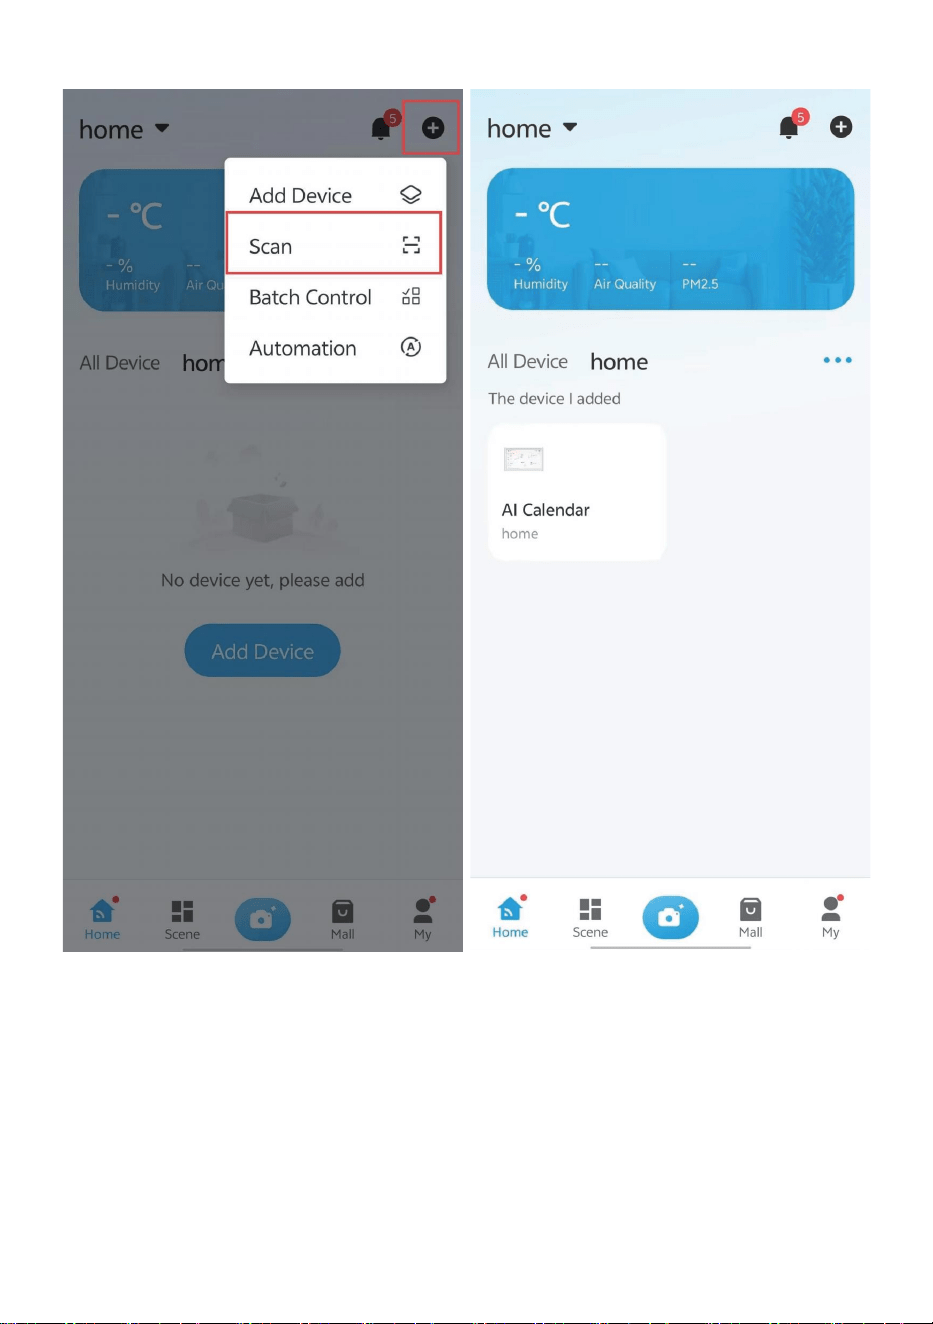
Step 5: Bind Device with App QR Scan
● Open the VTimes Smart app and sign in to your account.
● On the app home page, tap Add (upper-right corner), then choose Scan.
● Scan the QR code displayed on the device.
● Upon successful scan, the device will appear on your app home page.
— 5 —
3. Confirm on the Device
After the Wi-Fi setup is complete, the device will normally enter the home screen
automatically. If it doesn't, wait a few seconds or tap Complete / Enter Device on the
screen.
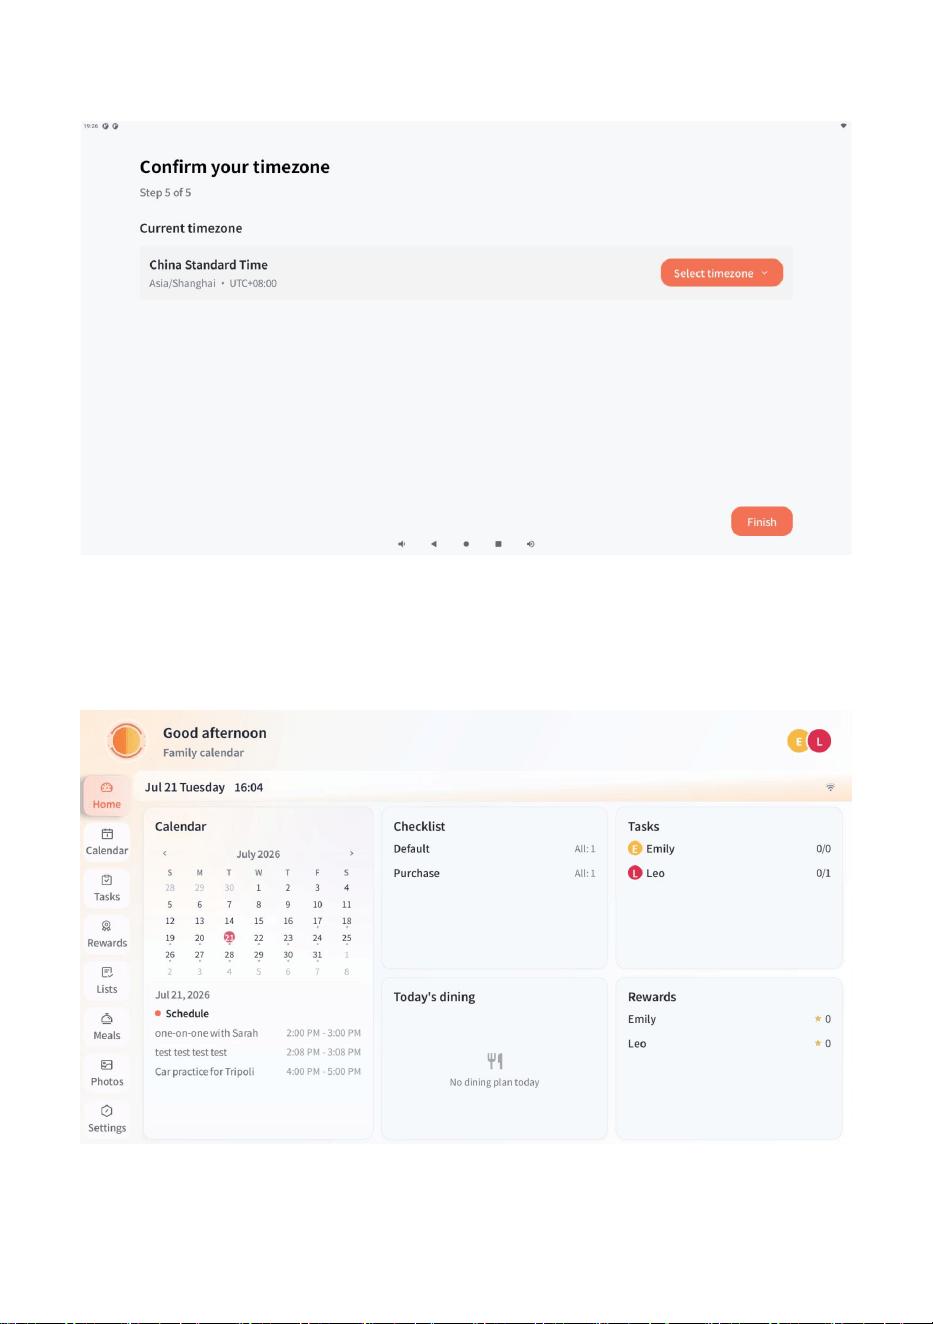
Once you have bound the device in the app, return to the device to continue. On the
Confirm your timezone screen, check that the displayed time zone is correct. To change it,
tap Select timezone and choose your region, then tap Finish in the bottom-right corner.
— 6 —
After the settings are completed, the device will enter the main interface. You can then
start using functions such as the calendar, tasks, and conversations with the AI.
4. Trouble with Wi-Fi Setup
If the connection fails, go through this checklist:
● Double-check that you've entered the right Wi-Fi password.
● Move your phone and the device closer to your router.
● Make sure your router is online and working.
● Go back and restart the "Add Device" flow in the VTimes Smart app.
● If this device was used with a different account before, you'll need to remove it from that
account, or tap the reset option on the device to clear the old network settings.
V. Main Feature Description
Area Description
AI Assistant Bar
Role switching, pick the assistant mode, display the current
AI character and the current prompt, and provide voice
interaction functionality.
Switches between Overview, Calendar, Tasks, Rewards,
Lists, Meals, Photo and Settings.
Date Status Bar Shows the current date, time, and network status.
Navigation bar
Content Area Shows the content of the currently selected feature page.
— 7 —
Al Assistant Bar
Content Area
Navigation Bar
Date Status Bar
NOTE:
To use the AI assistant function, you must subscribe this function through the
VTimes Smart APP.
VI. AI Voice Interaction
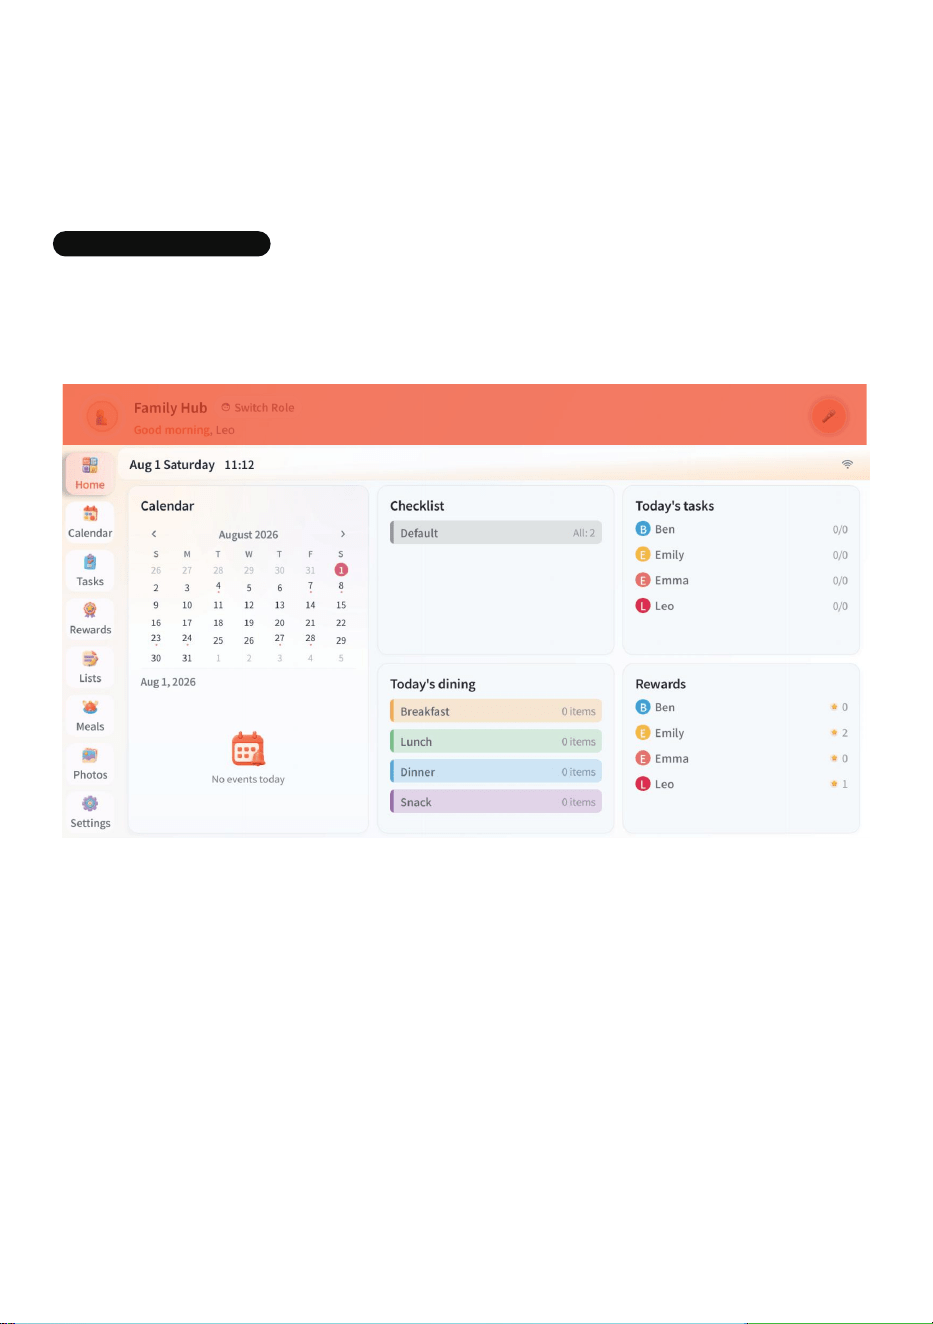
AI voice interaction is one of the core features of the device's smart calendar experience.
You can set reminders, schedule tasks, and check family plans by talking to the AI
assistant. You can also switch the functions corresponding to different roles for a more
personalized experience.
1. Start an AI conversation
● Tap the microphone button in the upper-right corner of any page.
● When you hear a prompt tone or see the conversation status, speak what you want to
ask or schedule.
● The AI assistant will respond based on your family calendar, tasks, and other information.
● Tap the microphone button again to end or exit the conversation.
Example of possible conversation:
● What is my schedule today?
● Remind me to pick up the package this afternoon.
● Ask the child to complete the task of packing their schoolbag.
● What important activities are planned for this week?
— 8 —
NOTE: AI Responses:
The AI assistant generates responses using automated models. While designed to assist
with family schedules and reminders, answers provided by the AI may occasionally be
inaccurate, incomplete, or incorrect. Please verify critical schedule information, dates, or
task details manually.
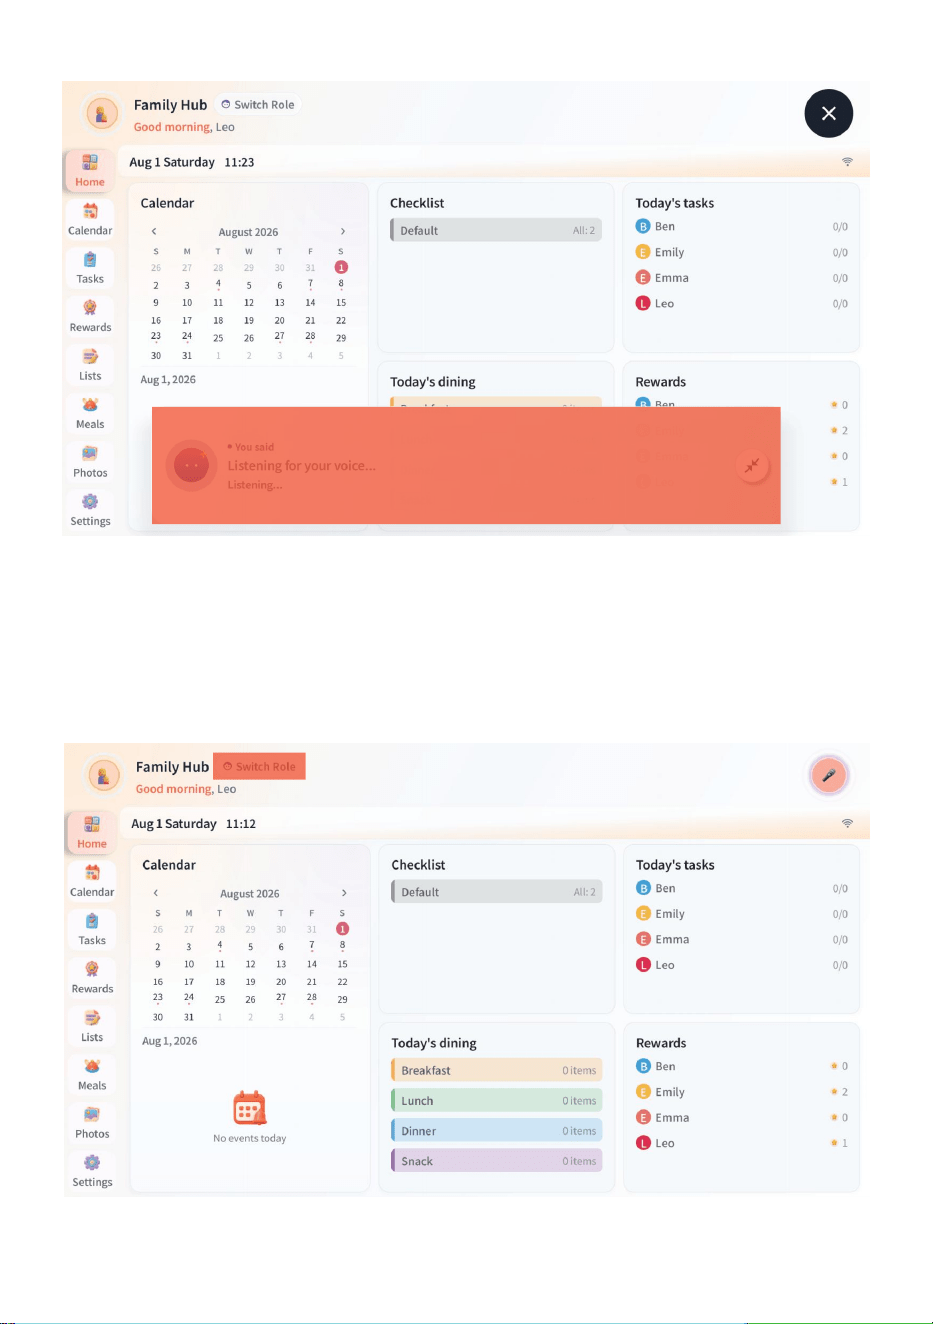
2. Switch AI Role
● In the AI assistant bar, tap "Switch Voice".
● The role selection page will open.
● Tap the AI role you want to use.
● After returning to the main interface, the selected role, voice style,and theme color will
be automatically updated.
— 9 —
VII. Calendar Functions
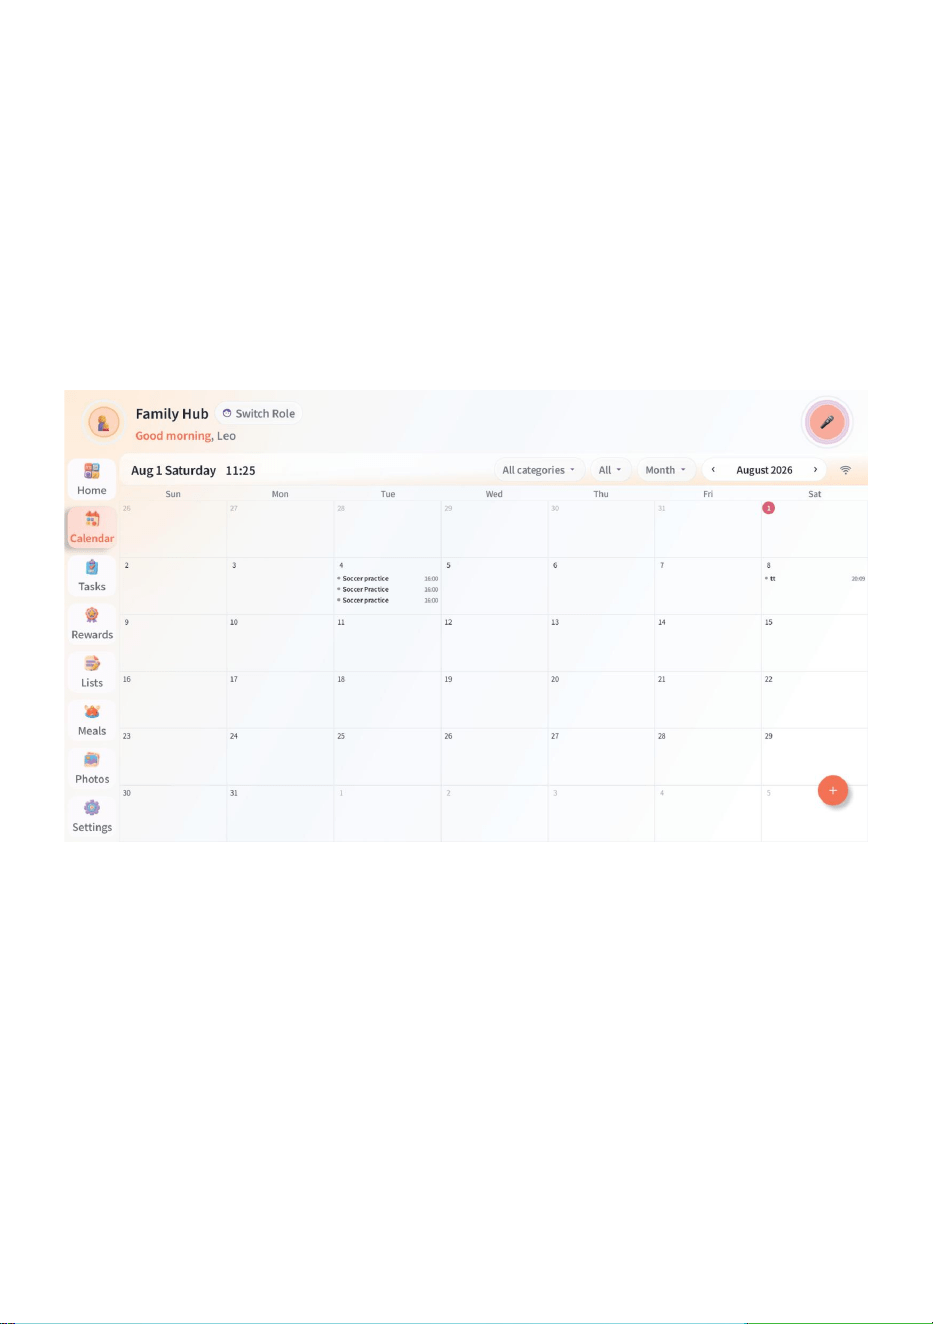
The calendar is one of the core features of the smart calendar, allowing you to view and
manage important schedules for family members in one place.
1. View Calendar
● Tap the Calendar icon in the left navigation bar.
● The monthly view opens.
● The current date, selected dates, and existing events will be displayed in the calendar.
● Tap a date to view its events.
2. Add an Event
● Tap the "+" icon in the bottom-right corner of the calendar page.
● Enter the event title, date, time, assigned family members, and category.
● Once Saved, the event will appear on the selected date.
— 10 —
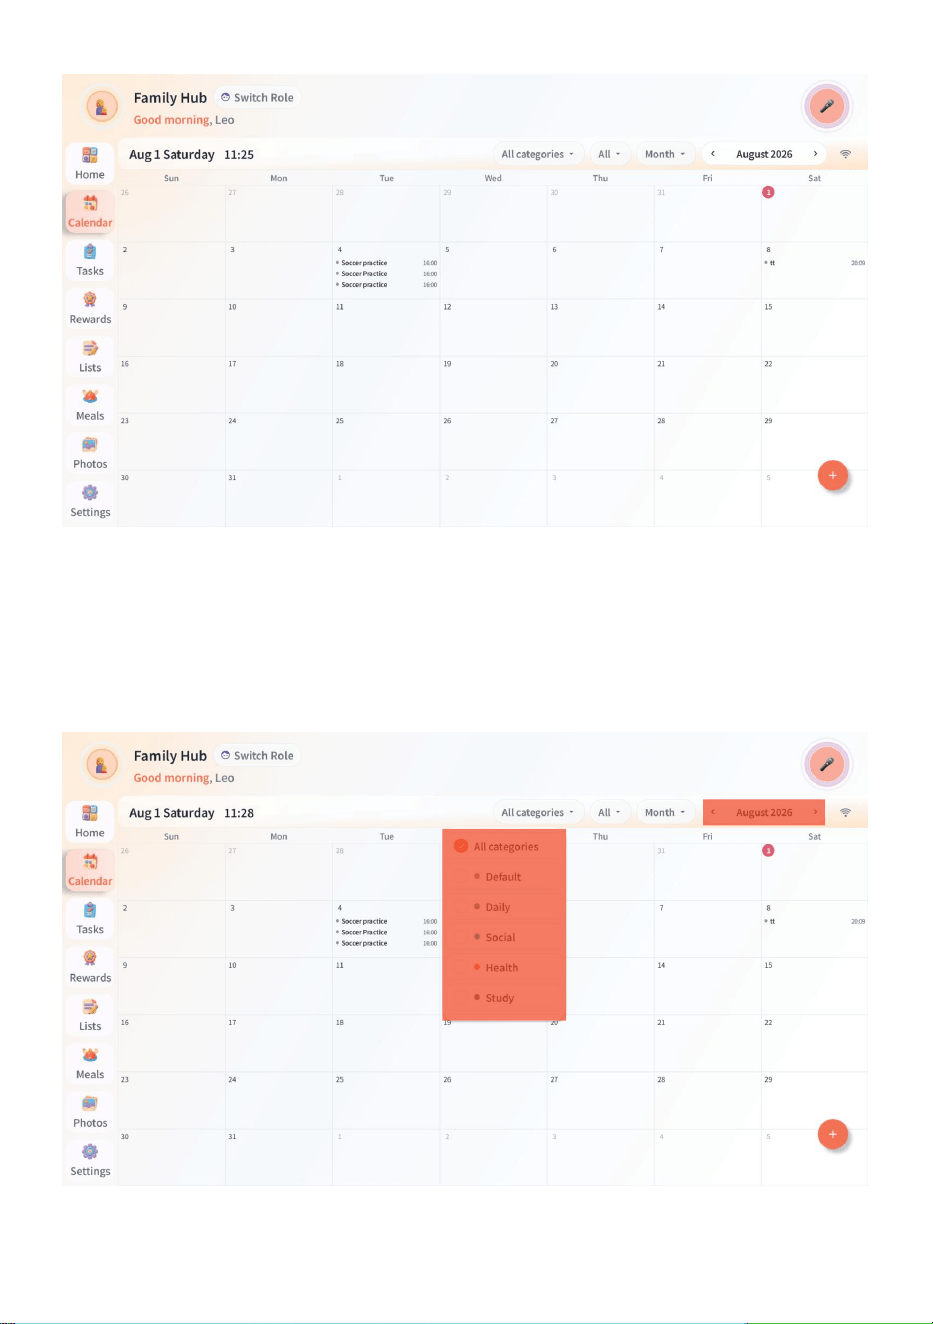
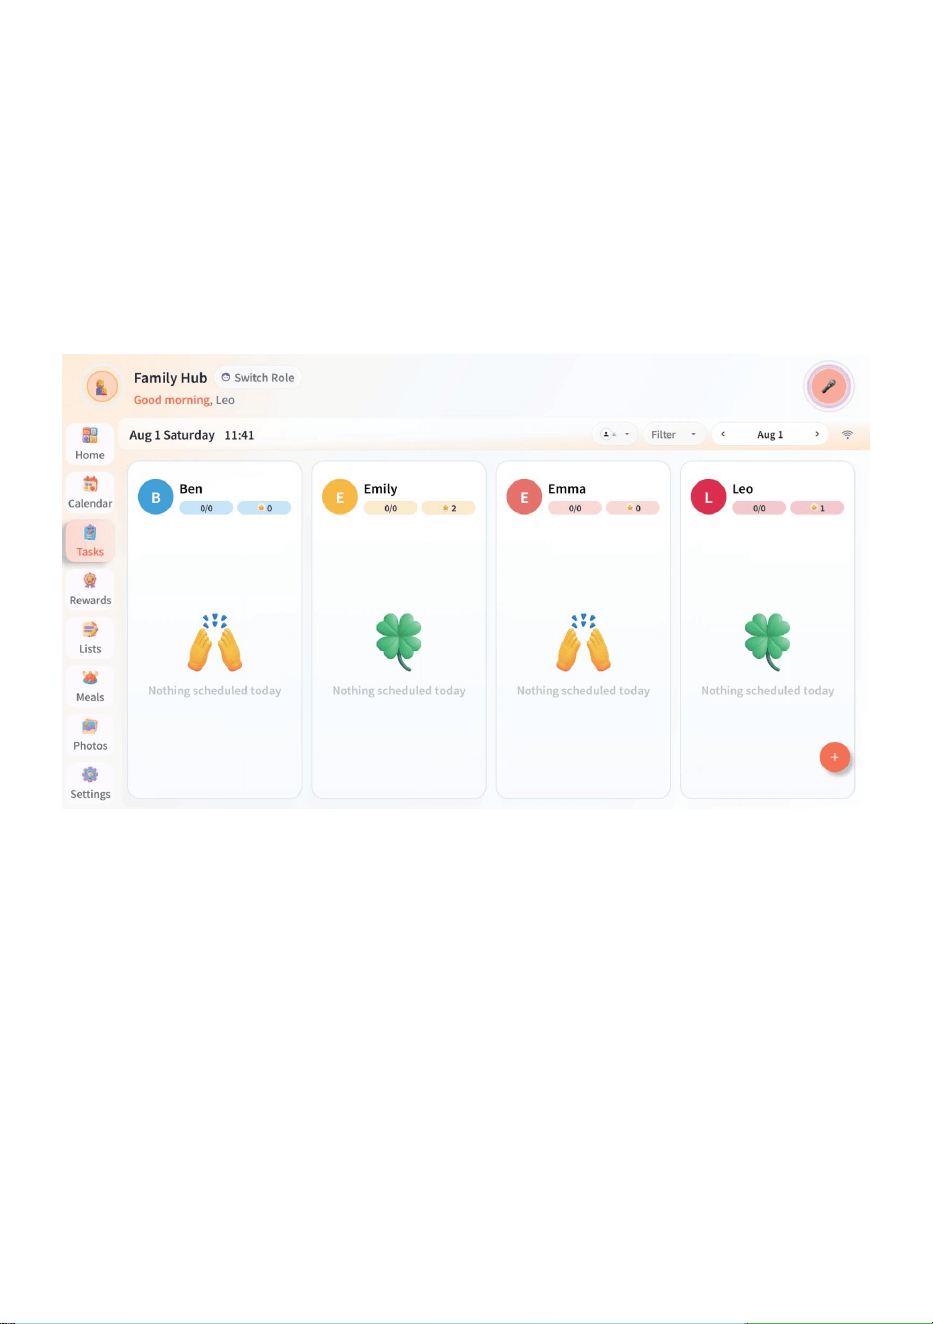
3. Browse by Month or Category
Use the month selector at the top of the Calendar screen to move between months.
Filter events by category or family member to view the plans you need.
— 11 —
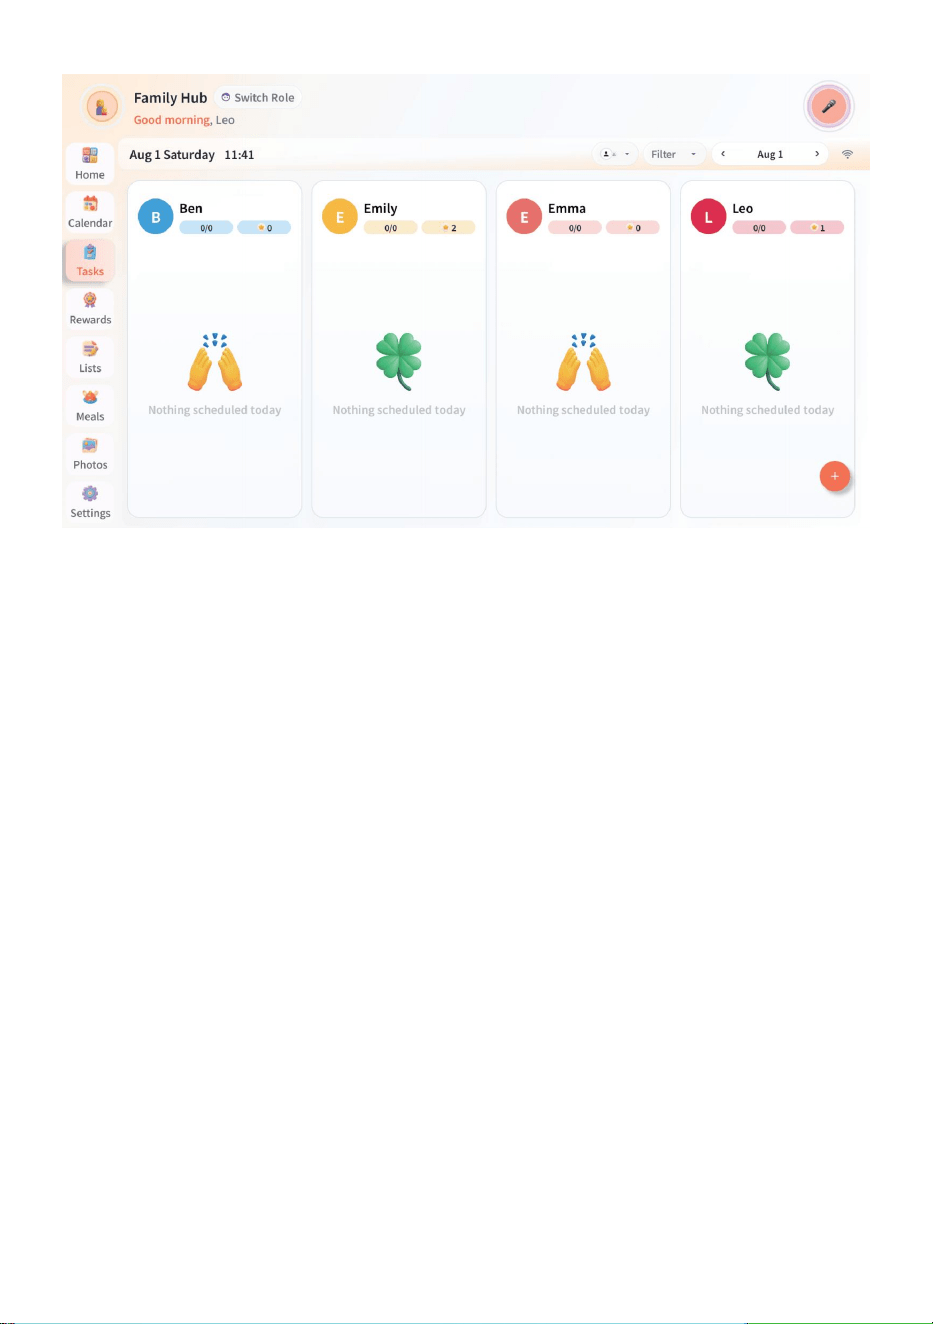
VIII. Tasks
Tasks help family members build daily routines and reward habits. Parents can assign
tasks to family members, and members can earn stars after completing them.
1. View Tasks
● Tap the Tasks icon in the left navigation bar.
● Task cards are grouped by family member.
● Each member area displays the number of completed tasks, stars, and pending
tasks.
2. Complete a Task
● Find the task for the corresponding member.
● Tap the circular complete button on the right side of the task.
● Once you update a task’s status, the task progress and star count will update automatically.
3. Add Task
● Click the "+" icon in the bottom-right corner of the task page.
● Enter the task name.
● Select the family member responsible for the task, date, number of stars, or repeat rule.
● Click Add to display the task in the corresponding member's task list.
— 12 —
IX. Other Features
1. Home
The Home page gives you a quick look at your family's day, including calendar, tasks,
lists, meals, and rewards. Use it as your daily home screen.
2. Rewards
The Rewards page shows available rewards and the number of stars required to redeem
them. Family members can redeem corresponding rewards on this page after completing
tasks and earning stars.
3. Lists
The List page allows you to manage household lists such as shopping lists, purchase lists,
and to-dos. Users can view different list contents by category.
4. Meals
The dining page allows you to plan breakfast, lunch, dinner, and snacks weekly, helping
families plan meals for the week in advance.
5. Photos
The album page serves as an entry point for displaying family photos, activity records, or
memorable content.
— 13 —
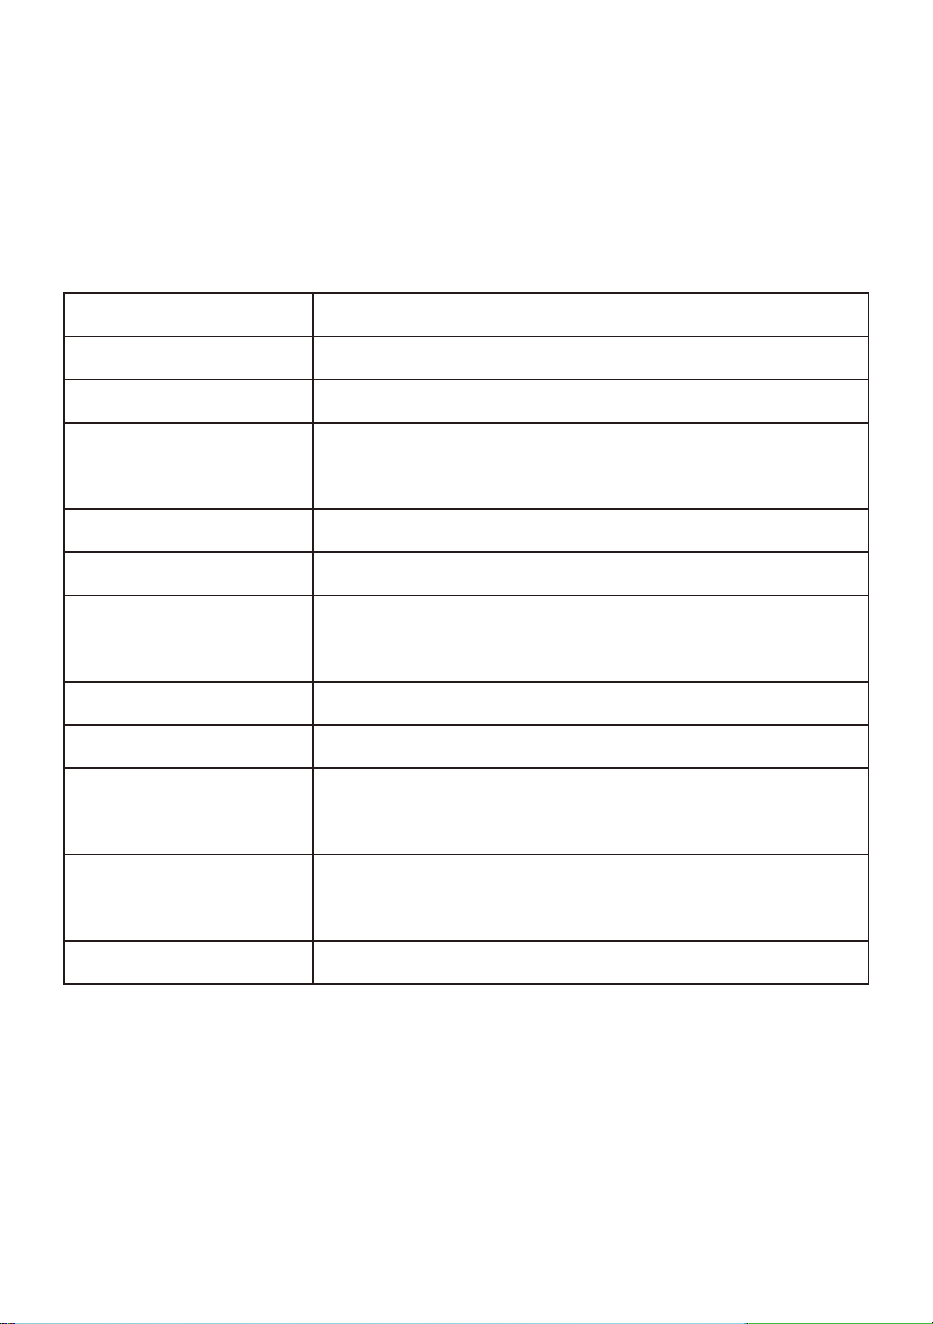
6. Settings
The Settings page manages basic device information, including general settings, calendar
settings, themes, sleep mode, sidebar and navigation, family members, Wi-Fi, and more.
You can change the device name, time zone, language, date and time, and other settings
here.
X. Quick Reference for Common Operations
XI. Usage Recommendations
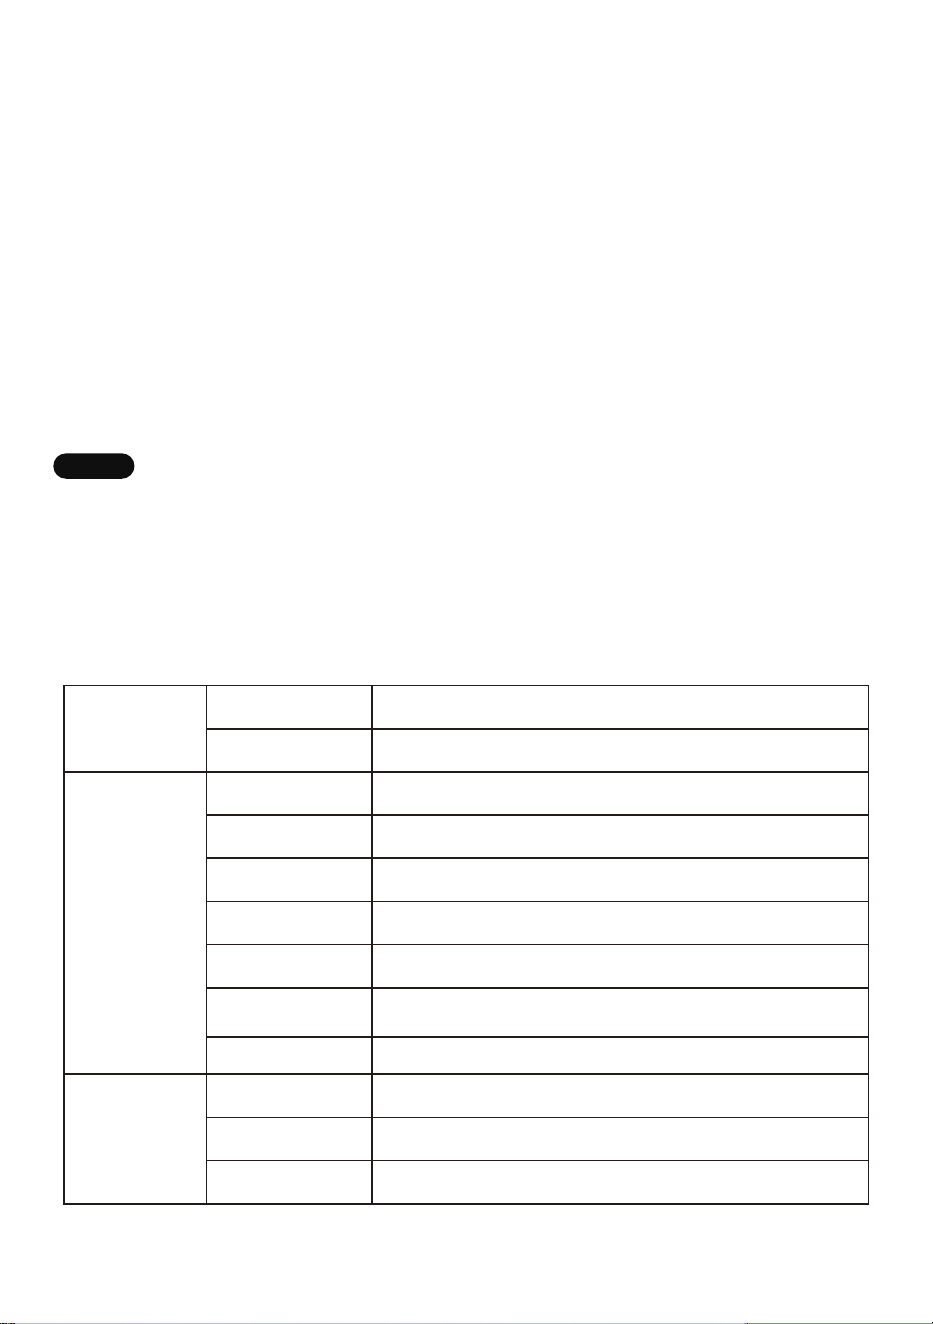
● Each morning, start by viewing the Home to quickly see your daily household tasks.
● Add important family events to the Calendar for all members to view synchronously.
● Use Tasks and Rewards together to help children build good habits.
● Switch AI characters based on family members' preferences to make interactions feel
more natural.
Operation Method
Switch Pages
Tap an icon on the left navigation bar.
Start AI Voice Interaction Tap the microphone button in the top-right corner
End AI Voice Interaction
Click the microphone button again or follow the
on-screen prompts to exit
Switch AI Role / Character Tap Switch Role at the top
View Events Go to the Calendar and Tap a date
Add an Event
Go to the Calendar and Tap the "+" icon in the bottom
right corner
View Tasks Go to the Tasks to view member task cards
Complete a Task Tap the circular button on the right side of the task
Add Task
Go to Tasks and Tap the + icon in the bottom
right corner
Redeem a Reward
Go to Rewards and tap Exchange on the reward
item
Manage Device Go to Settings and select the desired setting
— 14 —
● You can plan meals in advance each week to reduce the costs associated with
last-minute arrangements.
XII. Safety Precautions
● Use only the original power adapter or a compatible one that meets the device
specifications.
● Do not operate in humid, hot, or strongly magnetic environments.
● Always disconnect the power before cleaning the screen.
● Do not disassemble, modify, or attempt to repair the device yourself.
● If the device does not respond for an extended period, disconnect and reconnect the
power to restart it.
● Software features are subject to change with version updates; please refer to the actual
device interface for the most current information.
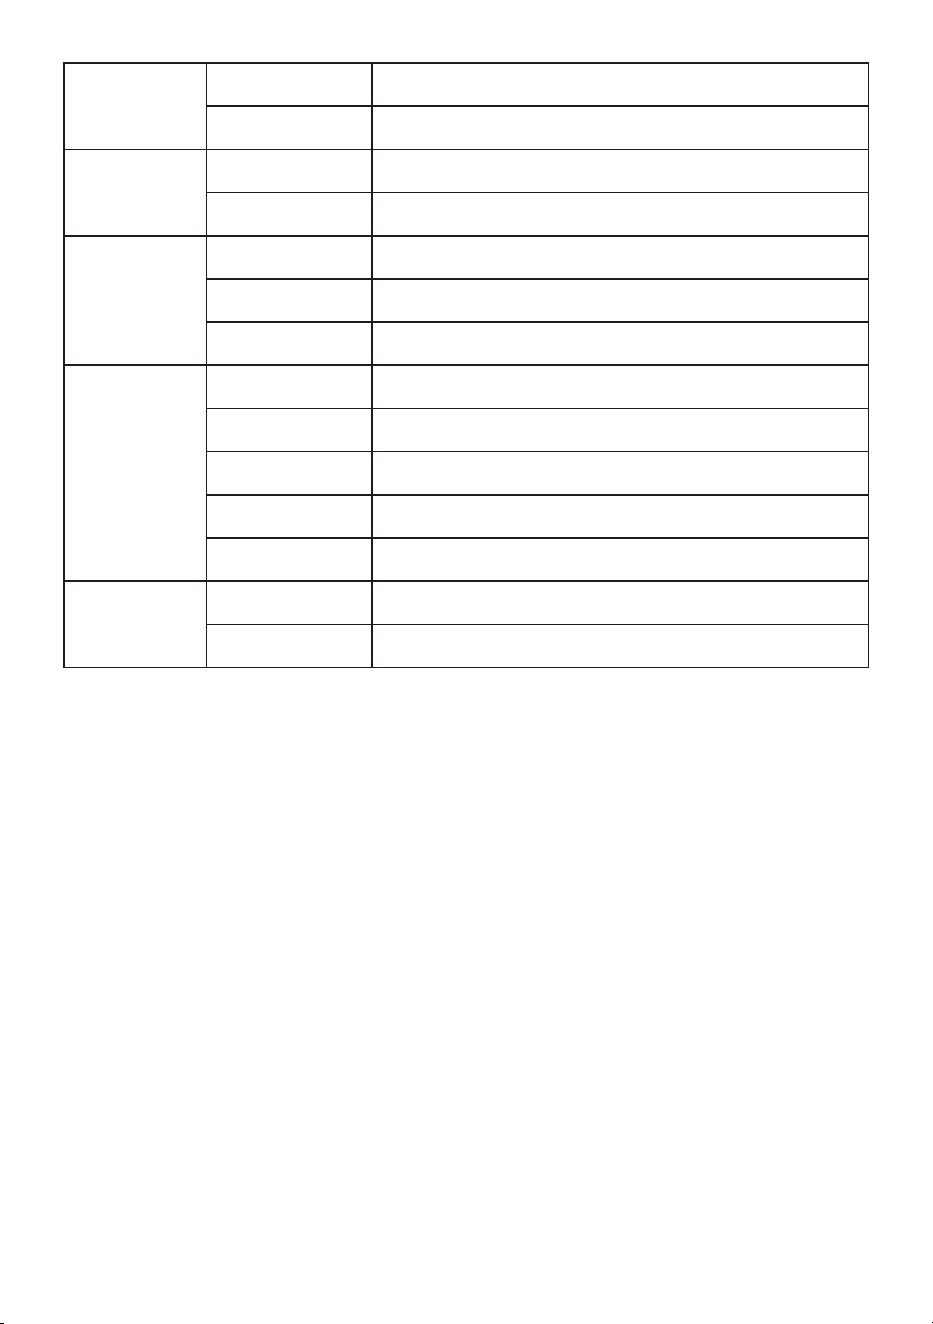
Specifications
Size
394.49 mm (length) × 243.89 mm (height) × 28.40 mm (thickness)
15.6-inch Full HD LCD display
External Dimensions
Screen
Resolution ratio 1920*1080
Luminance 700:1
Contrast ratio 16:9
Display Ratio 250cd/m²
Display Mode IPS display
View Angle 85/85/85/85 (Top/Bottom/Left/Right)
Memory 32GB
Touch screen 10-point capacitive touch
System Android 11
344.16(H)×193.59mm(V)Display Area
Display screen
System
— 15 —
NOTE:
AI Information Accuracy: Information, answers, or schedule recommendations provided by
the AI Voice Assistant are generated automatically and are intended for general reference
only. The AI may occasionally produce inaccurate or incorrect responses. Do not rely solely
on the AI assistant for critical health, safety, financial, or time-sensitive matters.
FCC Statement
This equipment has been tested and found to comply with the limits for a Class B digital
device, pursuant to part 15 of the FCC Rules. These limits are designed to provide
reasonable protection against harmful interference in a residential installation. This
equipment generates, uses and can radiate radio frequency energy and, if not installed
and used in accordance with the instructions, may cause harmful interference to radio
communications. However, there is no guarantee that interference will not occur in a
particular installation. If this equipment does cause harmful interference to radio or
television reception, which can be determined by turning the equipment off and on, the
user is encouraged to try to correct the interference by one or more of the following
measures:
● Increase the separation between the equipment and receiver.
● Connect the equipment into an outlet on a circuit different from that to which the receiver
is connected.
● Consult the dealer or an experienced radio/TV technician for help. This device complies
with part 15 of the FCC Rules. Operation is subject to the following two conditions:
(1) This device may not cause harmful interference.
(2) This device must accept any interference received, including interference that may
cause undesired operation. Any changes or modifications not expressly approved by
— 16 —
Interface
1 × 12V DC power socket
MPEG-1, MPEG-2, MPEG-4, H.263, H.264, VC1, RV, etc.,
supporting resolutions up to 1920x1080p
Source
Video frequency
Audio frequency MP3/WMA/AAC etc.
Picture JPEG
Lampshade 2*2W
Wall mounting hole Standard 100x100 wall-mounted VESA mount
RTC/ Startup &
Shutdown
Support
OSD language
Multi-language OSD operation support, including Chinese and
English
Working temperature 0℃ — 40℃
Operating instruction Standard configuration
Adapter DC 12V/3A Power Adapter
Type-C*1 (Data transmission)Type-C
Multi-media
Appendix
Configure
WiFi WiFi 2.4GHz&5GHz
PDA Bluetooth 5.2
Network

Made in China/Ver1.1
the party responsible for compliance could void the user’s authority to operate the
equipment.
Note: The manufacturer is not responsible for any radio or TV interference caused by
unauthorized modifications to this equipment. Such modifications could void the user's
authority to operate the equipment.
FCC RF Radiation Exposure Statement
This equipment complies with FCC RF radiation exposure limits set forth for an uncontrolled
environment. This device and its antenna must not be co-located or operating in conjunction
with any other antenna or transmitter. “To comply with FCC RF exposure compliance
requirements, this grant is applicable to only Mobile Configurations. The antennas used for
this transmitter must be installed to provide a separation distance of at least 20 cm from all
persons and must not be co-located or operating in conjunction with any other antenna or
transmitter.”
Manufacturer: Shenzhen Vtimes Intelligent Technology Co., Ltd.
Address: Room 2104, Building 11, Tianan Yungu Phase II, Gangtou Community,
Bantian Street, Longgang District, Shenzhen, Guangdong, China.
— 17 —