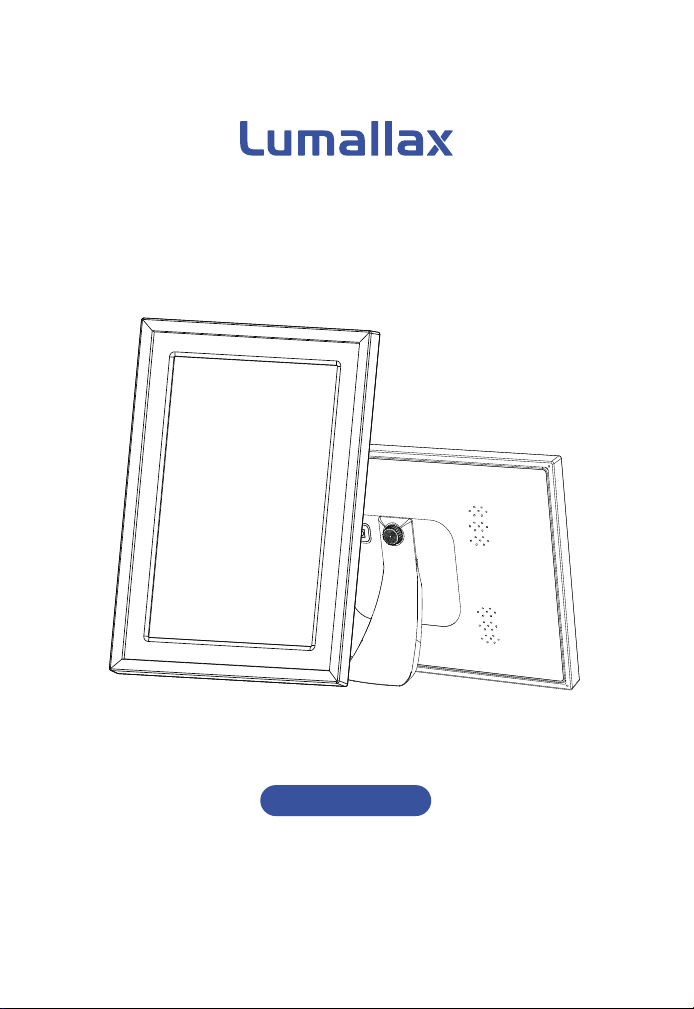
X10 3D Digital Photo Frame · AI Family Photo Frame
Manufacturer: Shenzhen Shijing Technology Co., Ltd.
This manual is for reference only. The actual product shall prevail.
All rights of interpretation belong to Shenzhen Shijing Technology Co., Ltd.
QMD-X10

Table of Contents
1. Product Introduction
2. Packing List
3. Product Appearance, Buttons & Interfaces
4. FirstTime PowerOn & Quick Setup
5. Lumallax App Download, Login & Binding (FiveStep Procedure)
6. Daily Use of the App & Photo Frame
7. Common Settings & Family Management
8. Works & Playlist Management
9. Safety Precautions
10. Product Technical Specifications
11. FAQ & Troubleshooting
12. Warranty & AfterSales Service
1-2
3
4-6
7-8
9-14
15-20
21-25
26-27
28
29
30
31
-1--1-
The Lumallax X10 is a smart digital photo frame featuring a 10.1inch IPS
glassesfree 3D touchscreen, 5point capacitive touch, dual stereo
speakers, WiFi connectivity, and support for the Lumallax mobile app.
Once family members and friends join the family space, they can
remotely manage photos, AIgenerated works, playlists, and frame
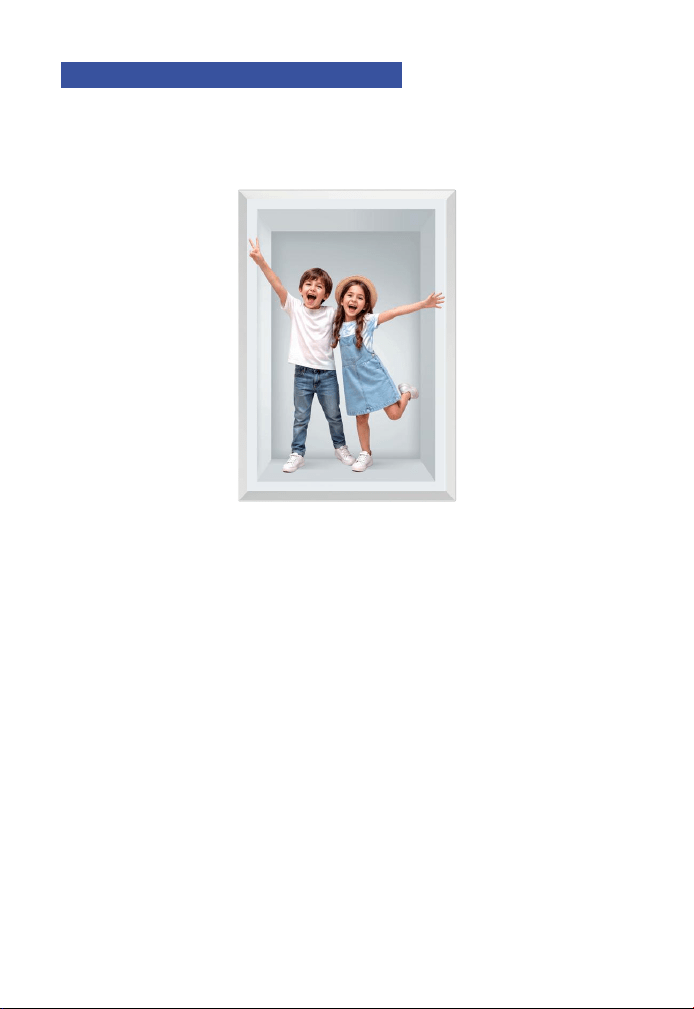
settings. Clear 2D photos can also be transformed into AIgenerated
dynamic works, allowing family memories to be displayed as still images
or looping short videos
1 Product Introduction

-2-
• HighDefinition Display: 10.1inch IPS screen with 800 x 1280 resolution
and 300 cd/m² brightness for clear, detailed visuals.
• Remote Sharing: The owner can invite family members through the
Lumallax app. Invited relatives and friends can upload works and manage
playlists in the same family space without using the same local network
asthe frame.
• Touch Controls: 5point capacitive touch. Tap the playback screen to
view progress or change the display orientation. Press and hold for about
1.5 seconds to open local settings.
• AI Dynamic Works: Convert existing 2D photos into looping short videos.
The system automatically performs foreground detection, background
composition, and model selection. Standard generation costs 100 credits
per submission. Benefits and pricing are subject to the information
displayed in the app.
• Format Support: JPG, JPEG, PNG, and WEBP images, plus mainstream
video formats.
• Smart Features: Family sharing, playlists, background music, sleep
scheduling, cloud synchronization, and switching between multiple rames
Product Features
-3-
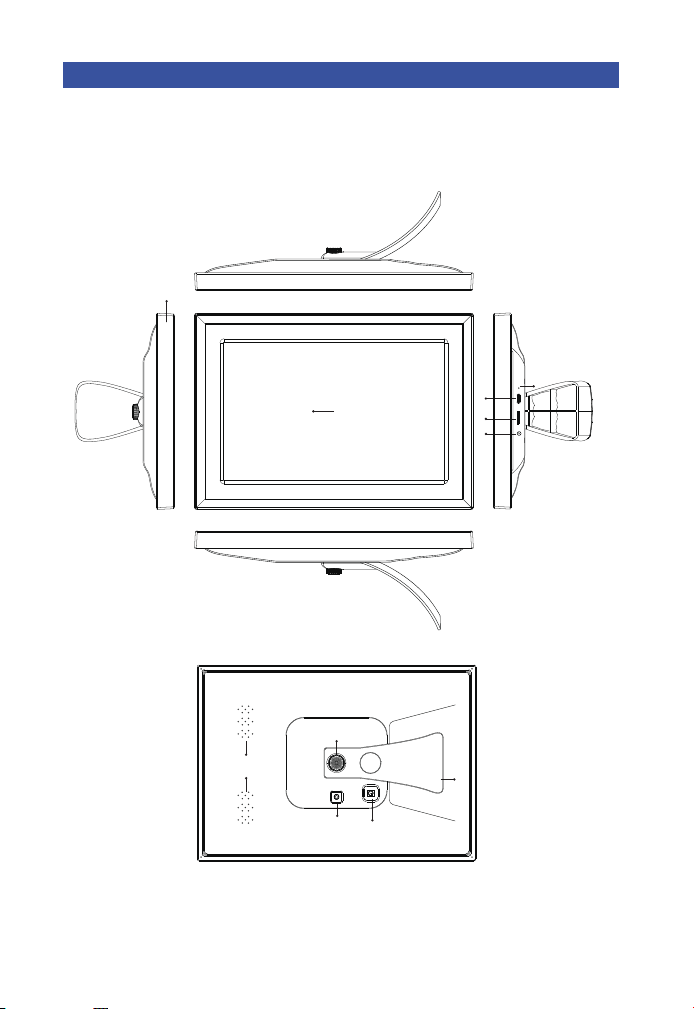
Please check package contents upon opening. Contact your dealer
promptly if any item is missing.
1 Lumallax X10 3D Digital Photo Frame 1 Unit
1 Piece
1 Sheet
1 Copy
1 Set
1 Set
DC Power Adapter
Photo Frame APP Quick Guide Card
Product Manual
Stand + Screws
Gift Box Packaging
2
3
4
5
6
2 Packing List
No. Item Quantity
-4-
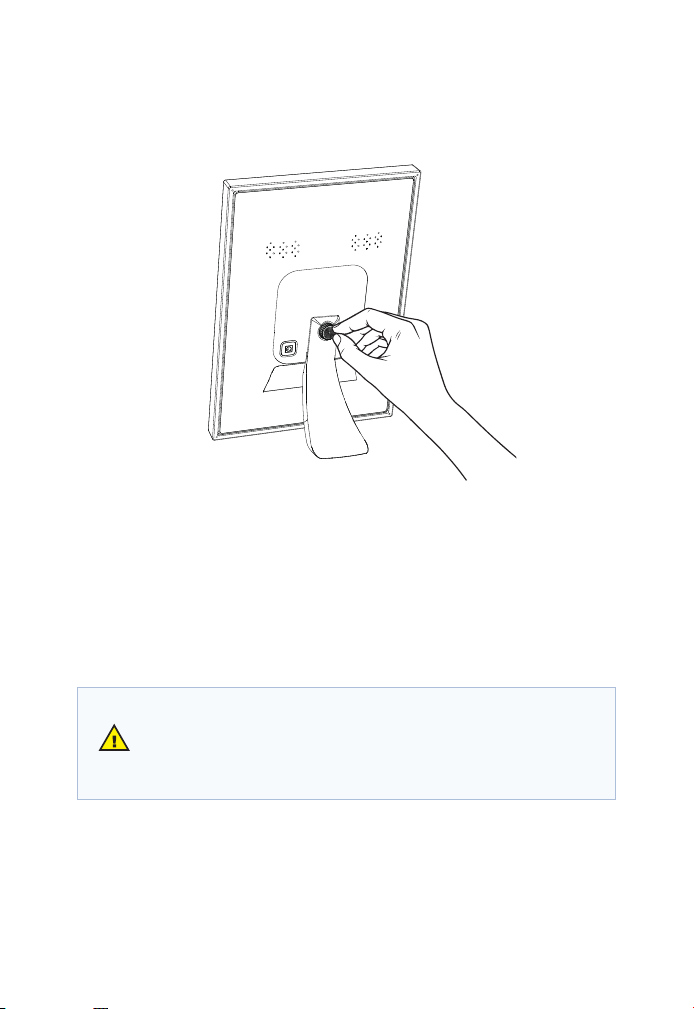
3.1 Component Layout
a
b
h
i
j
k
c
f
d
e
g
3 Product Appearance, Buttons & Interfaces

-5-
10.1-inch Display
Touchscreen for photo browsing and
menu navigation
Frame Body
Optional finishes: Stripe Black, Stripe
White, orWhite with Black Frame
Speakers
Two 8 Ω / 2 W speakers for video audio
and system prompts
Screw Hole Mounting point for the stand
Screw Secures the stand
Power Button
Press and hold to power the frame
on or off
Stand
Supports portrait or landscape
placement
DC Power Port DC 5 V / 2 A power input
TF Card Slot
MicroSD card slot for storage expansion
(subject to software version)
USB TypeC Port
USB data transfer and power input
(subject tosoftware version)
Reset Hole
Use a pin to reset the device if it
becomes unresponsive
a
b
c
d
e
f
g
h
i
j
k
No. Name Description
-6-
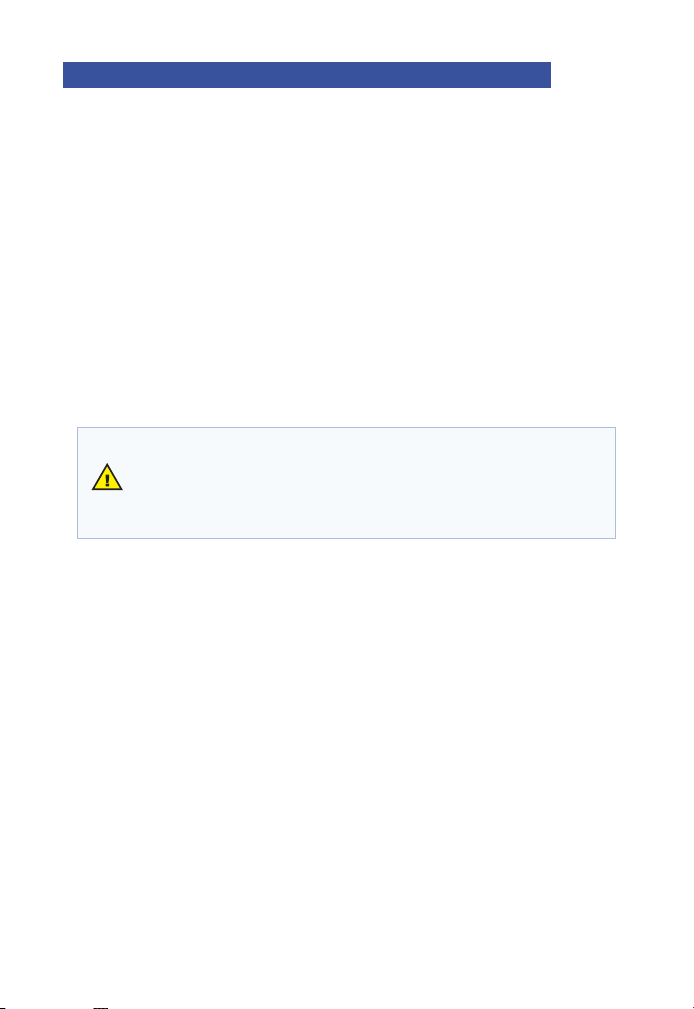
1. Align the stand with the screw holes on the back of the frame.
2. Fasten the stand securely using the supplied screws.
3. Place the frame upright on a stable, flat surface.
Do not set the frame upright until the stand is securely
fastened. An unsecured frame may tip over and cause
damage or injury
3.2 Stand Installation
-7-
1. Connect the supplied DC 5 V / 2 A adapter to the DC power port on
the back of the frame. The frame powers on automatically when power is
connected.
2. When the screen turns on, follow the onscreen instructions to
complete initial setup.
On first startup, complete the following steps as prompted:
1. Select Language: Choose the display language.
2. Connect to WiFi: Select a WiFi network with internet access.
3. Device Initialization: After the network connection is established, the
frame automatically completes security registration. Do not power off the
frame or disconnect it from the network during this process.
4.1 Power Connection & Startup
4.2 OnFrame Quick Setup
4FirstTimePowerOn&QuickSetup
Always use the supplied DC 5 V / 2 A adapter. An
incompatible power supply may cause malfunction or
hardware damage.

-8-
4. Display Binding QR Code: After initialization, a binding QR code
appears for scanning with the mobile app.
The QR code remains valid until the frame is bound and becomes invalid
immediately afterward. Set the frame name in the app during binding; no
entry is required on the frame.

-9-
The Lumallax mobile app is required to send photos, manage playlists,
invite family members, and create AI dynamic works. Follow the steps
below to sign in and bind your first photo frame.
1. Scan the app download QR code printed on the packaging or
provided through an official sales channel.
2. On iOS, search for "Lumallax" in the Apple App Store.
3. Overseas Android users can search for "Lumallax" on Google Play.
For other distribution channels, refer to official release information.
5LumallaxAppDownload,Login&Binding
(FiveStepProcedure)
5.1 Download the App
Search for “Lumallax” app
-10-
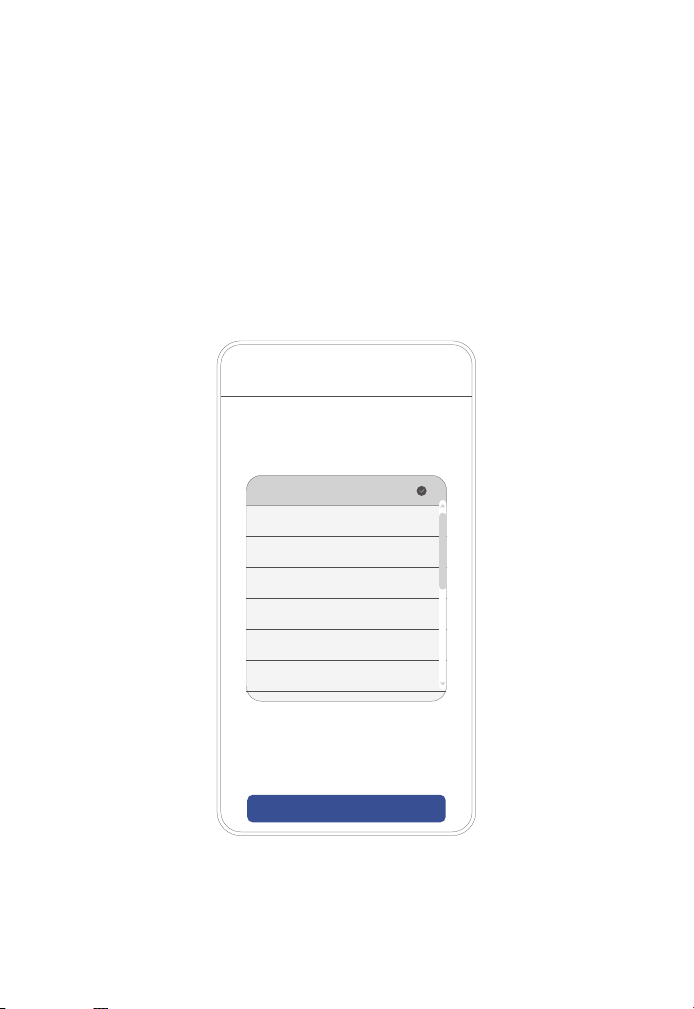
1. Open the "AI Home Photo Frame" app and select a language. Choose
English to follow this manual.
2. Tap "Get Started".
5.2 Step 1: Select Language
AI Home Photo Frame
Welcome
Choose alanguage
简体中文
繁體中文
English
Español
Français
日本語
한국어
Get Started
-11-
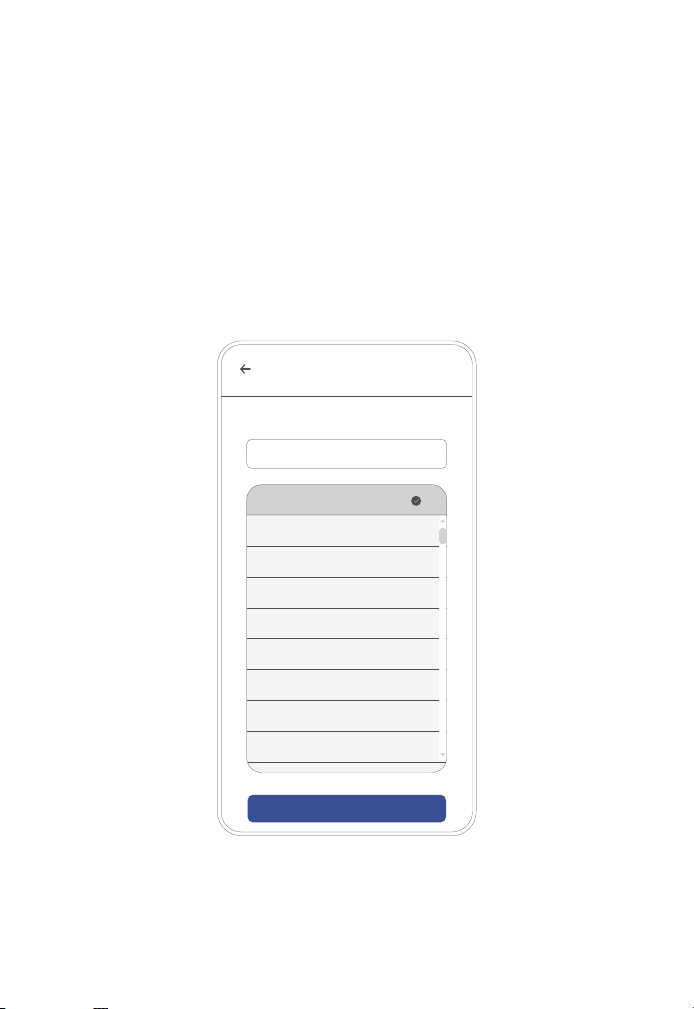
1. Select your country or service region from the list (for example, United
States, United Kingdom, or Canada).
2. Use the search box to find a region quickly.
3. Tap "Next".
5.3 Step 2: Select Country or Region
AI Home Photo Frame
Choose a region
United States
Canada
Australia
Singapore
Afghanistan
Aland Islands
Albania
New Zealand
Ireland
Next
Search Region
-12-
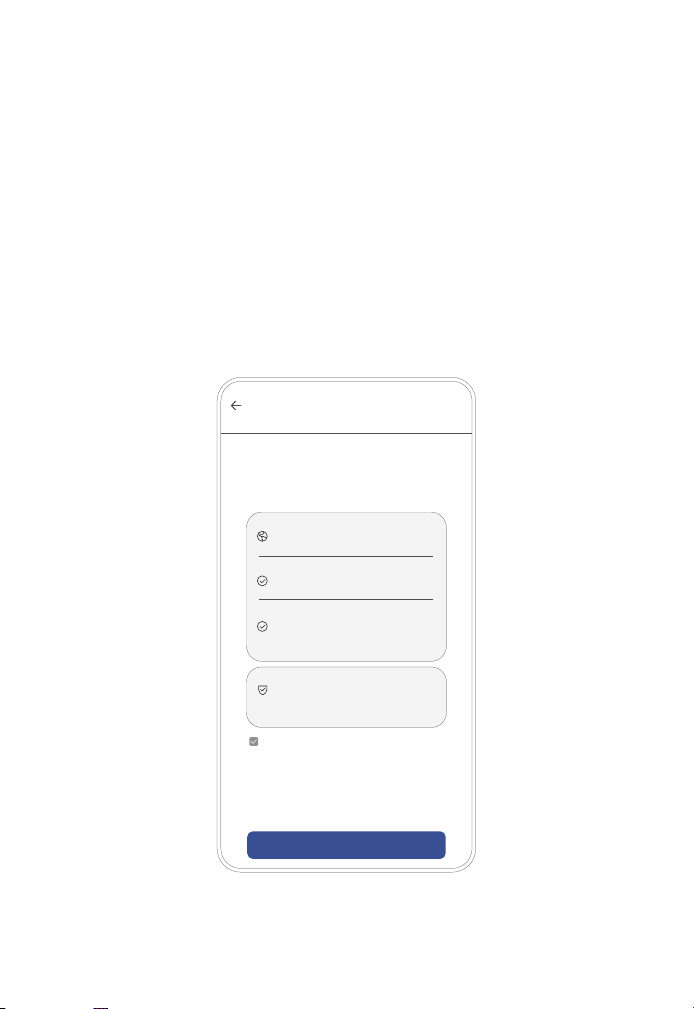
1. Confirm the selected region (for example, United States).
2. Review the verification method and data region. Accounts, media, and AI
tasks are processed in the overseas region.
3. Select "I have read and agree to the User Agreement, Privacy Policy and
Regional Data Rules."
4. Tap "Agree and Continue".
5.4 Step 3: Confirm Region & Agreements
Confirm to use the overseas region
Agree and Continue
Region & Agreements
Region
United States
Verification Code Mode
Email Address and Email
Verification Code
Data Region
Region Isolation
Accounts, media and AI tasks
will be stored and processed
in the overseas region.
I have read and agree to the User
Agreement, Privacy Policy and Regional
Data Rules.
After account creation, the service
region cannot be directly migrated.
If you need to modify it, please go
back and re-select the region.
AI Home Photo Frame
-13-
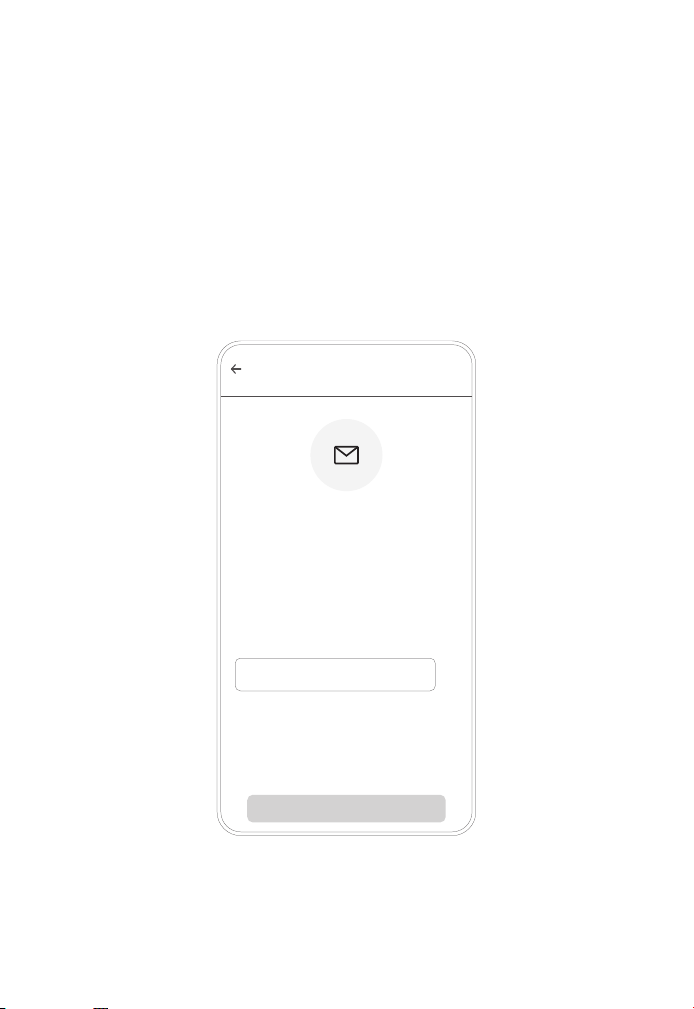
1. Enter your email address.
2. To change the language or region, tap the corresponding option.
3. Tap "Get Verification Code", then enter the code sent to your email
address to sign in.
5.5 Step 4: Email Verification Login
AI Family Photo Frame
Get Verification Code
Password-free login with real
verification code
&NBJM"EESFTT
$IBOHF-BOHVBHFPS3FHJPO
After successful verification, an unregistered
account will be automatically created, and
an existing account will log in directly.
Enter email address
GBNJMZ!FYBNQMFDPN
-14-
1. Make sure the photo frame is powered on, connected to WiFi, and
displaying the binding QR code.
2. Confirm that the frame is connected to the internet. Your phone does not
need to use the same network.
3. Tap "Start Scanning to Bind" and scan the QR code displayed on the
frame.
4. After binding, select "Switch Account" or "Start Creating Family Space".
5.6 Step 5: Bind the First Photo Frame
Add the First Photo Frame
Start Creating Family Space
Please complete Wi-Fi setup on the photo
frame screen first, and proceed after the
binding QR code appears.
Bind Your First Photo Frame
Start Scanning to Bind
4XJUDI"DDPVOU
The photo frame is
powered on
Keep the device on the
binding QR code page
Photo frame connected
to network
Phone and photo frame do
not need the same network

-15-
The app manages works, playlists, family members, and AI generation
tasks. The photo frame synchronizes and plays published content from the
app.
• The Overview tab shows the content currently active on the selected
frame.While a new playback configuration is synchronizing, the current
content continues to play.
• The bottom navigation includes Overview, Works, Play, and Settings for
task status, worklibrary and playlist management, and family settings.
• When multiple frames are bound, tap the frame name in the top bar to
switch frames. Works, members, credits, and playback settings are
managed separately for each frame.
6.1 App Overview & Frame Switching
11. Select the photos to upload.
2. Adjust the framing for portrait (5:8) or landscape (8:5) display.
3. Tap Submit. You may leave the page while validation and processing
continue in the background.
4. Processed photos are added to the Works library. A work plays on the
frame only after it has been added to a playlist and published
Note: The server stores original images at full resolution. Cropping
records only normalized display coordinates and does not alter the original
file. Work details and thumbnails in the app use these coordinates. Each
family space supports up to 1,000 uploaded photos, with a maximum of
200 photos per batch.
6.2 Add Photo Works
6 Daily Use of APP & Photo Frame

-16-
6.3 Power Button Operation
Power Off
Press and hold the power button, then select
Power Off to shut down the frame.
Reboot
Press and hold the power button, then select
Reboot to restart the frame.
Standby Mode
Press the power button briefly to turn off the
screen.The frame remains online and can
continue receiving remote content
Function Description
Do not disconnect the power while the frame is
operating.Use the power button to shut down or
restart the device.

-17-
The frame automatically plays synchronized content published from the
app. On the playback screen, you can view progress, change the display
orientation, and press and hold to open local settings.
6.4 Frame Playback & Local Controls
Official Playback
Content
After a published configuration has
synchronized, images and videos play
in playlist order
Built-in Demo
Content
When no published content is available, the
waiting page appears. Tap the screen to loop
the builtin demo videos
Playback
Progress
When a playlist contains multiple items, tap
the screen to display the current item number
Open Local
Settings
Press and hold the playback screen for
about 1.5 seconds. Settings open after the
progress indicator completes
Adjust Display
Orientation
Tap the orientation button to switch between
portrait and landscape, or select Auto, Portrait,
or Landscape in Settings.
Function Description

-18-
In Settings, the owner can create family invitations. Relatives and friends
can join the family space by scanning an invitation QR code or entering
invitation credentials after signing in to Lumallax. The owner can view or
remove members and control whether members may use shared credits
for content generation.
6.5 Family Sharing
AI Dynamic Works convert clear 2D photos into looping short videos.
Foreground detection, background selection, motion settings, and
generation are completed in the Lumallax app.
6.6 AI Dynamic Works (3D Box)
1. Open the target frame and select "Create Dynamic Work".
2. Select one main photo from the Works library. Optionally add up to
two 2D reference photos for motion guidance.
3. Wait for automatic foreground detection. You may leave the page while
processing continues. Resume the task from the task center on the
Overview or Works page.
4. Select a serverprovided background. Choose a recommended motion
or enter a custom motion prompt.
5. Review the available credits and generation cost, then submit the
task. The server automatically selects the appropriate model; manual
model selection is not available.
6. You may close the app or switch pages during generation. Task
status, failurereasons, and the selected motion remain available in the
task center.
7. After generation succeeds, the work is saved to the Works library.
6.6.1 Operation Steps

-19-
Add it to a playlist and publish it. The dynamic work will play after
synchronization.
Motion Settings: The server provides localized recommended motions
based on the photo subject and marks a default option.
• Recommended Motions: Select one of the serverrecommended motions.
Changing the app language changes only the displayed text, not the
generated result.
• Custom Motion (Optional): Describe the desired subject movement in
natural language. A custom prompt takes priority over recommended
motions.
Background Selection: Available backgrounds and names are
updated through the app. The server marks a default option.
Model Selection: The server automatically selects a model based on the
subject. Manual model selection is not supported.
Credits & Confirmation: Standard generation costs 100 credits per
submission.Credits are reserved when the task is submitted and
deducted only after successful generation. If the balance is insufficient,
purchase additional credits. Pricing and payment methods are subject to
the information shown in the app or app store.
Generation Tasks: Foreground analysis and video rendering run on the
server in the background.
6.6.2 Generation Configuration Details

-20-
Tasks can be resumed from the task list after the app is restarted.
Publish & Play: A successful generation is saved only to the Works
library. Itdoes not automatically replace the content currently playing on
the frame.
Background Library: The system background catalog is updated remotely.
This manual does not provide a fixed number or list of backgrounds.
Background Replacement: Generating the dynamic work again with a
newbackground consumes credits. Changing the background of a static
photo is free.
• You may leave the generation page while the serverside task continues.
Do not submit duplicate requests for the same content.
• Reserved credits are refunded according to system rules if generation
fails,content moderation rejects the request, or a valid cancellation is
made.
• For better foreground detection and generation quality, use photos with
a clear main subject, minimal obstruction, and a simple background.
• AIgenerated results may vary. Do not upload images or prompts that
are unauthorized, illegal, or inappropriate.
6.6.3 Important Notes
-21-
Frame settings can be changed remotely in the app or locally on the
frame. To open local settings, press and hold the playback screen for
approximately 1.5 seconds.
7.1 Frame Settings in the App
Frame Name
Rename the frame for easier identification
when managing multiple frames.
Screen
Brightness
Adjust the frame brightness remotely.
Music Volume
Adjust the backgroundmusic volume for the
current frame's playlists.
Display
Orientation
Select Auto, Portrait, or Landscape.
Sleep Schedule
Enable or disable the schedule, then set the
start time,end time, and time zone.
Sync &
Diagnostics
View target and active configuration versions,
downloaded media count, and device online
status.
Network &
Unbind
Start network reconfiguration or securely
unbind the frame. Only the owner can unbind.
Setting Item Description
7 Common Settings & Family Management

-22-
7.2 Local Settings on Photo Frame
Preview and save the screen brightness.
Adjust the playlist backgroundmusic volume.
Change the frame interface language.
Select Auto, Portrait, or Landscape.
Set the sleep start and end times.
Set the time zone used by the sleep schedule.
Check for and download the latest playback
configuration.
Open network setup to connect to a different
WiFi network.
View local cache usage and clear downloaded
content.Cloudstored works are not deleted.
Hint: The sleep schedule turns off only the screen. The frame remains
online and continues synchronizing.
Brightness
Music Volume
Interface
Language
Display
Orientation
Auto Sleep
Device
Time Zone
Sync Now
Reconfigure
Network
Cache
Management
Setting Item
Description

-23-
7.3 Playback & Background Music
After content published from the app has
synchronized,it takes priority over builtin
demo videos.
Images cycle according to the playlist settings.
Videos play as configured, including singlevideo
looping.
Choose system background music and adjust
or mute the volume.
When no published content is available, start
demo playback manually.
Images & Videos
Priority of
Official Content
Background
Music
Built-in Demo
Videos
Setting Item
Description

-24-
7.4 Network & Synchronization
Shows the connected WiFi name and
online/offline status.
Connects to the server to retrieve the latest
playback content, settings, and notifications.
Opens the network setup wizard when
changing the router or WiFi environment.
Sync Now
Network Status
Re-configure
Network
Setting Item
Description

-25-
7.5 Notifications, Cache & Device Information
View system notifications sent by the server;
tap to mark them as read.
If a download or validation fails, the existing
content continues playing and an error
message is displayed.
Delete locally cached media without removing
works stored in the app or cloud.
Sync Errors
Device
Notifications
Clear Cache
View the model, serial number, firmware
version, and sync status. Factory reset
behavior depends on thecurrent binding status.
Device Info &
Factory Reset
Setting Item
Description

-26-
Open the Works tab in the app to view regular photos, fixed photos, and AI
dynamic works in the family space. Filter the list by All, Generating,
Completed, or Failed.
When deleting multiple works, the app checks whether they are used by
anactive playlist or published configuration. Remove those references
andrepublish before deleting the works.
Regularphoto thumbnails are reducedresolution previews. The app
displays the crop area using coordinates supplied by the server.
Changing the crop does not change the original image file.
1. Open the Play tab, create a playlist, and enter a name.
2. Select works and arrange the playback order.
3. Choose system background music, adjust the volume, or disable
background music.
4. Publish the playlist. Wait for the frame to download and validate the
content, then switch to the new configuration.
8.1 Works Library
8.2 Playlist
Deleting a playlist does not delete the works it
contains.
"Published" means the server has accepted the
request.Only an "Active" status in the app confirms
that the frame has applied the new configuration.
Works&PlaylistManagement

-27-
1. The owner can unbind the frame in the app's frame settings. After the
online cleanup is complete, the frame displays a new binding QR code.
2. Before closing an account in a multimember family, ownership must be
transferred.
3. After account deletion is requested, all sessions end immediately and
a 7day recovery period begins. During this period, sign in with a
verification code to cancel the deletion.
4. After the recovery period, userowned works and profile data are
deleted or anonymized. Transaction and security logs required by law
are retained.
8.3 Account & Frame Data Management

• Place the device on a stable, flat surface to prevent it from falling or
tipping.
• Do not block the speaker grilles or ventilation openings.
• Children should use the product only under adult supervision to reduce
the risk of injury from collisions or tipping
9.4 Placement
-28-
Read and follow these safety instructions before using the product to
prevent injury or damage.
9 Safety Precautions
• Do not use or store the device in hightemperature, highhumidity, dusty,
or strong magneticfield environments.
• Operating temperature: 0 °C to 40 °C; operating humidity: 10% to 90% RH.
• Keep the device away from heaters and other heatgenerating appliances.
9.1 Operating Environment
• Always use the supplied DC 5 V / 2 A power adapter.
• Do not disassemble or modify the device or power adapter.
9.2 Power Supply
This product is not waterresistant. Keep it away from water, rain, and
highhumidity environments such as bathrooms.
Clean the surface only with a dry, soft cloth. Do not spray liquid directly
onto the screen or frame
9.3 Water Resistance
-29-
X10
Dual 8 Ω / 2 W speakers
Dualband WiFi, 2.4 GHz / 5 GHz
Onboard storage; microSD (TF) expansion
up to 32 GB(FAT32)
DC power port, USB TypeC port, TF card slot,
reset hole
DC 5 V / 2 A
0 °C to 40 °C
JPG, JPEG, PNG, WEBP
MP4 and other mainstream video formats
110.1inch IPS glassesfree 3D touchscreen;
800 x 1280 resolution; 5point capacitive touch;
300 cd/m² brightness
Model
Screen
Speakers
Network
Storage
Interfaces
Power Input
Operating
Temperature
Image Formats
Video Formats
Item Specification
10 Product Technical Specifications

-30-
Q1: The photo frame does not power on
A: Confirm that the supplied 5 V / 2 A adapter is connected securely.
Press and hold the power button for 8 seconds to force a restart. If
necessary, use a pin to press the reset hole.
Q2: The app cannot scan the frame's binding QR code
A: Confirm that the frame is connected to WiFi and displaying the
binding QR code, and that the account region matches the device
region. A QR code becomes invalid after use. Unbind or factoryreset
the frame to generate a new code. Restart the frame and app, then try
again.
Q3: The frame does not play newly published content
A: In the app, compare the Target and Active configuration versions
under Sync & Device Status. The frame continues playing the current
content until the new configuration has been downloaded and validated.
If downloads fail, correct the network problem and retry synchronization.
Q4: Updated cropping is not reflected in thumbnails or on the frame
A: Cropping changes only the display coordinates; it does not change
the image file URL. Refresh the work list in the app to update thumbnails.
The frame applies the new crop after a new playback configuration
becomes Active.
If the problem persists, contact your dealer or the manufacturer's support
team.
11 FAQ&Troubleshooting

-31-
1. This product includes a oneyear limited warranty for the complete unit,
covering hardware defects not caused by the user.
2. Warranty coverage does not apply to damage caused by drops, water
ingress, unauthorized disassembly or modification, or use of nonstandard
power adapters.
3. Proof of purchase is required for warranty service. Do not disassemble
the device; unauthorized disassembly voids the warranty.
4. For aftersales support, contact the dealer from whom the product was
purchased.
Notice: Photos and personal data stored on the device belong to the user.
Back up all data before service. The manufacturer is not responsible for
data loss during repair.
NOTE: This equipment has been tested and found to comply with the limits for a Class B digital device, pursuant to
Part 15 of the FCC Rules. These limits are designed to provide reasonable protection against harmful interference
in a residential installation. This equipment generates, uses and can radiate radio frequency energy and, if not
installed and used in accordance with the instructions, may cause harmful interference to radio communications.
However, there is no guarantee that interference will not occur in a particular installation. If this equipment does
cause harmful interference to radio or television reception, which can be determined by turning the equipment off
and on, the user is encouraged to try to correct the interference by one or more of the following measures:
- Reorient or relocate the receiving antenna.
- Increase the separation between the equipment and receiver.
- Connect the equipment into an outlet on a circuit different from that to which the receiver is connected.
- Consult the dealer or an experienced radio/TV technician for help.
This device complies with Part 15 of the FCC Rules. Operation is subject to the following two conditions:
(1) This device may not cause harmful interference, and
(2) this device must accept any interference received, including interference that may cause undesired operation.
Changes or modifications not expressly approved by the responsible party could void the user’s authority to operate
this equipment.
12Warranty&AfterSalesService
1

The final interpretation right of the product belongs to
Shenzhen Shijing Technology Co., Ltd.

FCC Statement
This device complies with Part 15 of the FCC Rules. Operation is subject to the following two conditions :
(1) this device may not cause harmful interference, and (2) this device must accept any interference
received, including interference that may cause undesired operation.
Warning: Changes or modifications to this unit not expressly approved by the party responsible for
compliance could void the user’s authority to operate the equipment.
NOTE: This equipment has been tested and found to comply with the limits for a Class B digital device,
pursuant to Part 15 of the FCC Rules. These limits are designed to provide reasonable protection against
harmful interference in a residential installation. This equipment generates, uses and can radiate radio
frequency energy and, if not installed and used in accordance with the instructions, may cause harmful
interference to radio communications.
However, there is no guarantee that interference will not occur in a particular installation. If this
equipment does cause harmful interference to radio or television reception, which can be determined by
turning the equipment off and on, the user is encouraged to try to correct the interference by one or more
of the following measures:
Reorient or relocate the receiving antenna.
Increase the separation between the equipment and receiver.
Connect the equipment into an outlet on a circuit different from that to which the receiver is
connected.
Consult the dealer or an experienced radio/TV technician for help
The device must not be co-located or operating in conjunction with any other antenna or transmitter.
FCC RF Radiation Exposure Statement Caution:
To comply with FCC RF exposure compliance requirements, this grant is applicable to only mobile
configurations. The antennas used for this transmitter must be installed to provide a separation distance
of at least 20 cm from all persons.