Product Instructions
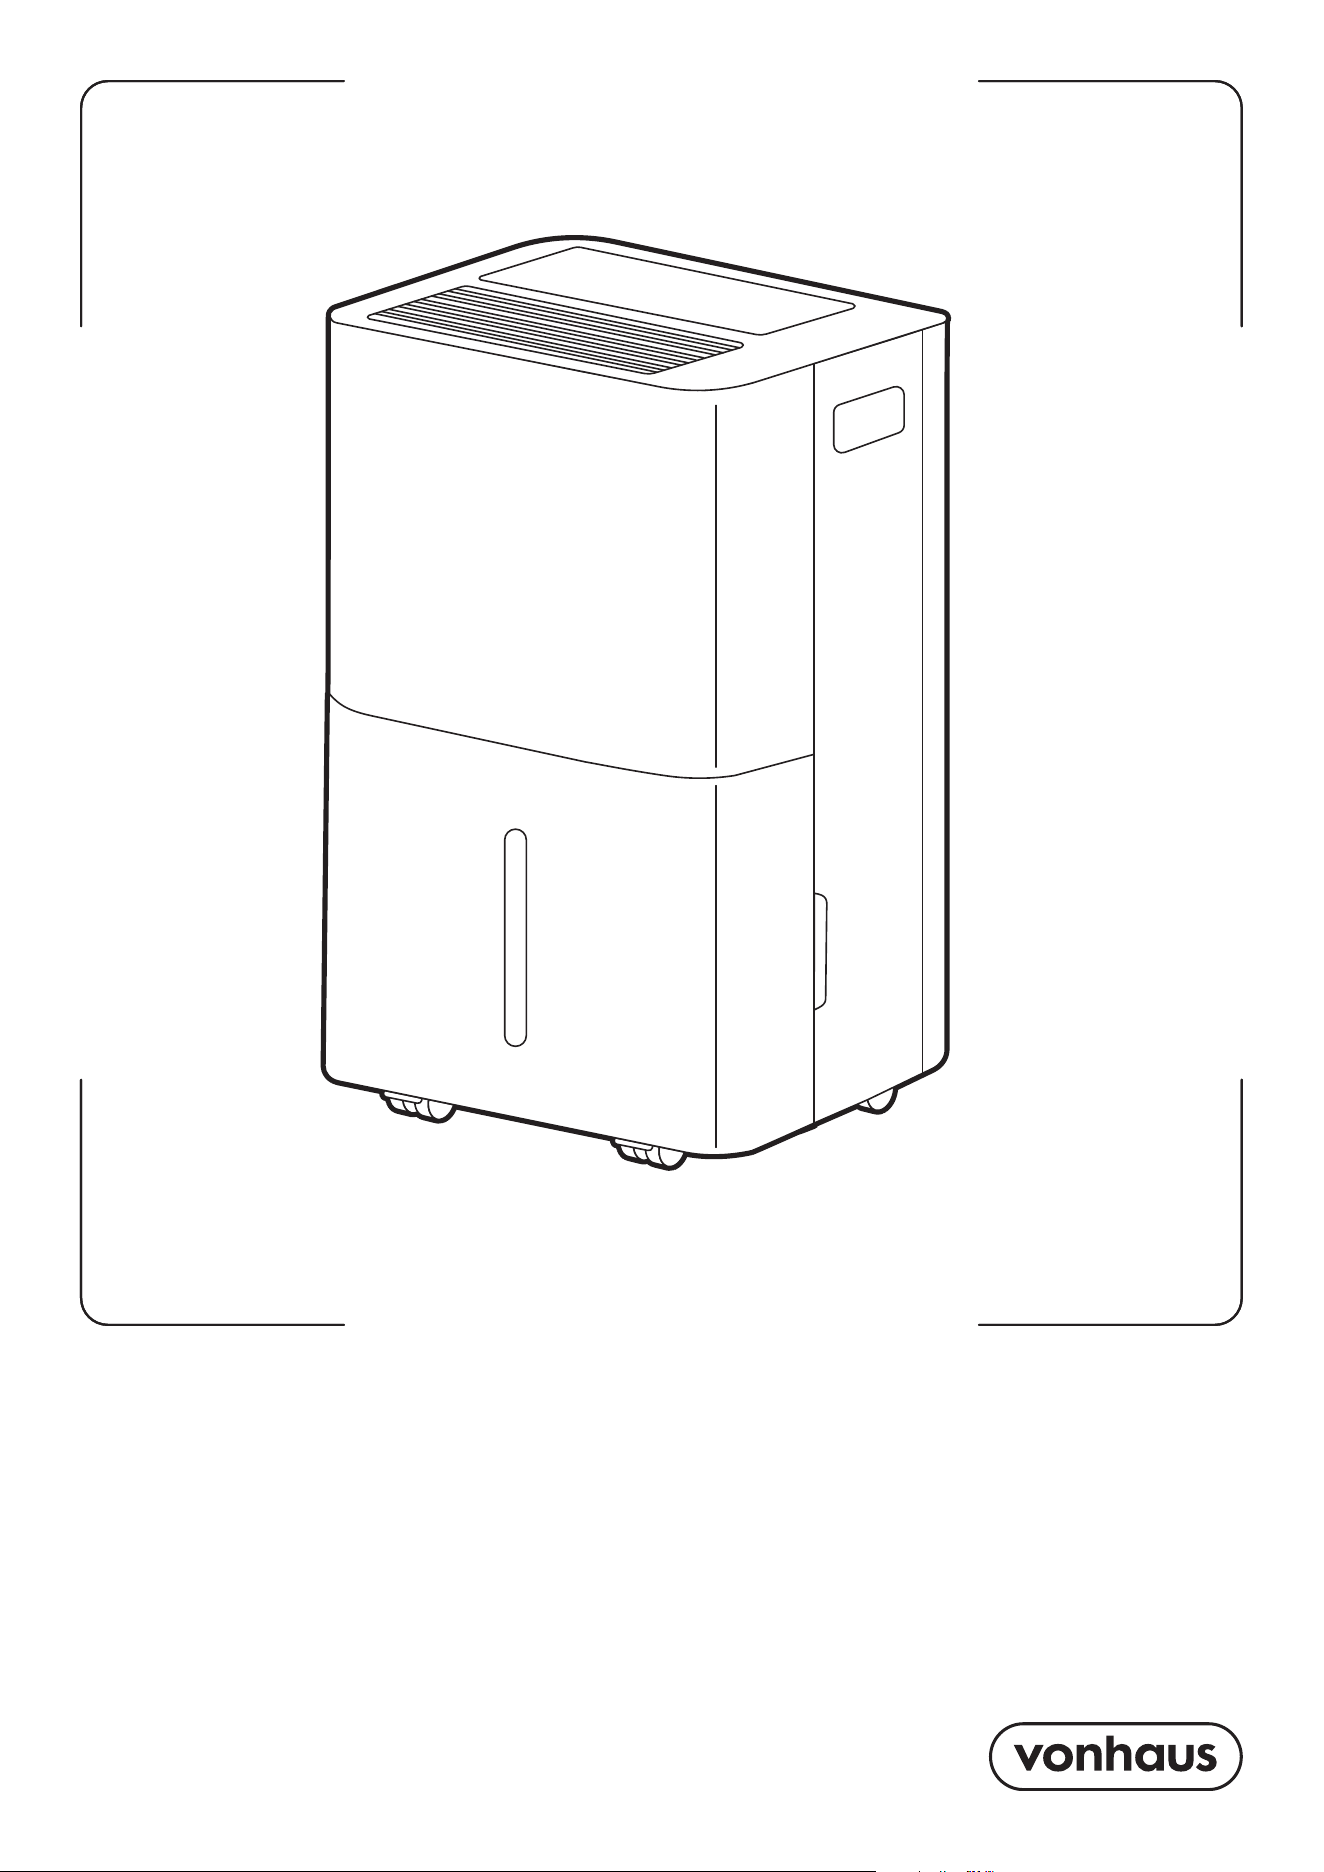
Product No. 2000342
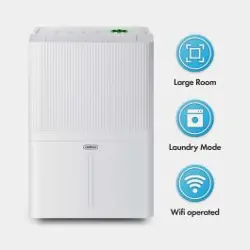
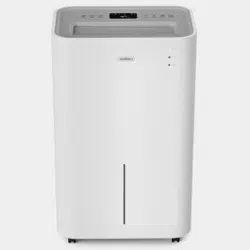
30L DEHUMIDIFIER
WITH WIFI
2 3
Need further help?
suppor[email protected]
See our full range at
www.vonhaus.com
Let’s get started!
Visit our product hub for
useful tips and tricks on
getting the most out of
your new product.
SCAN ME
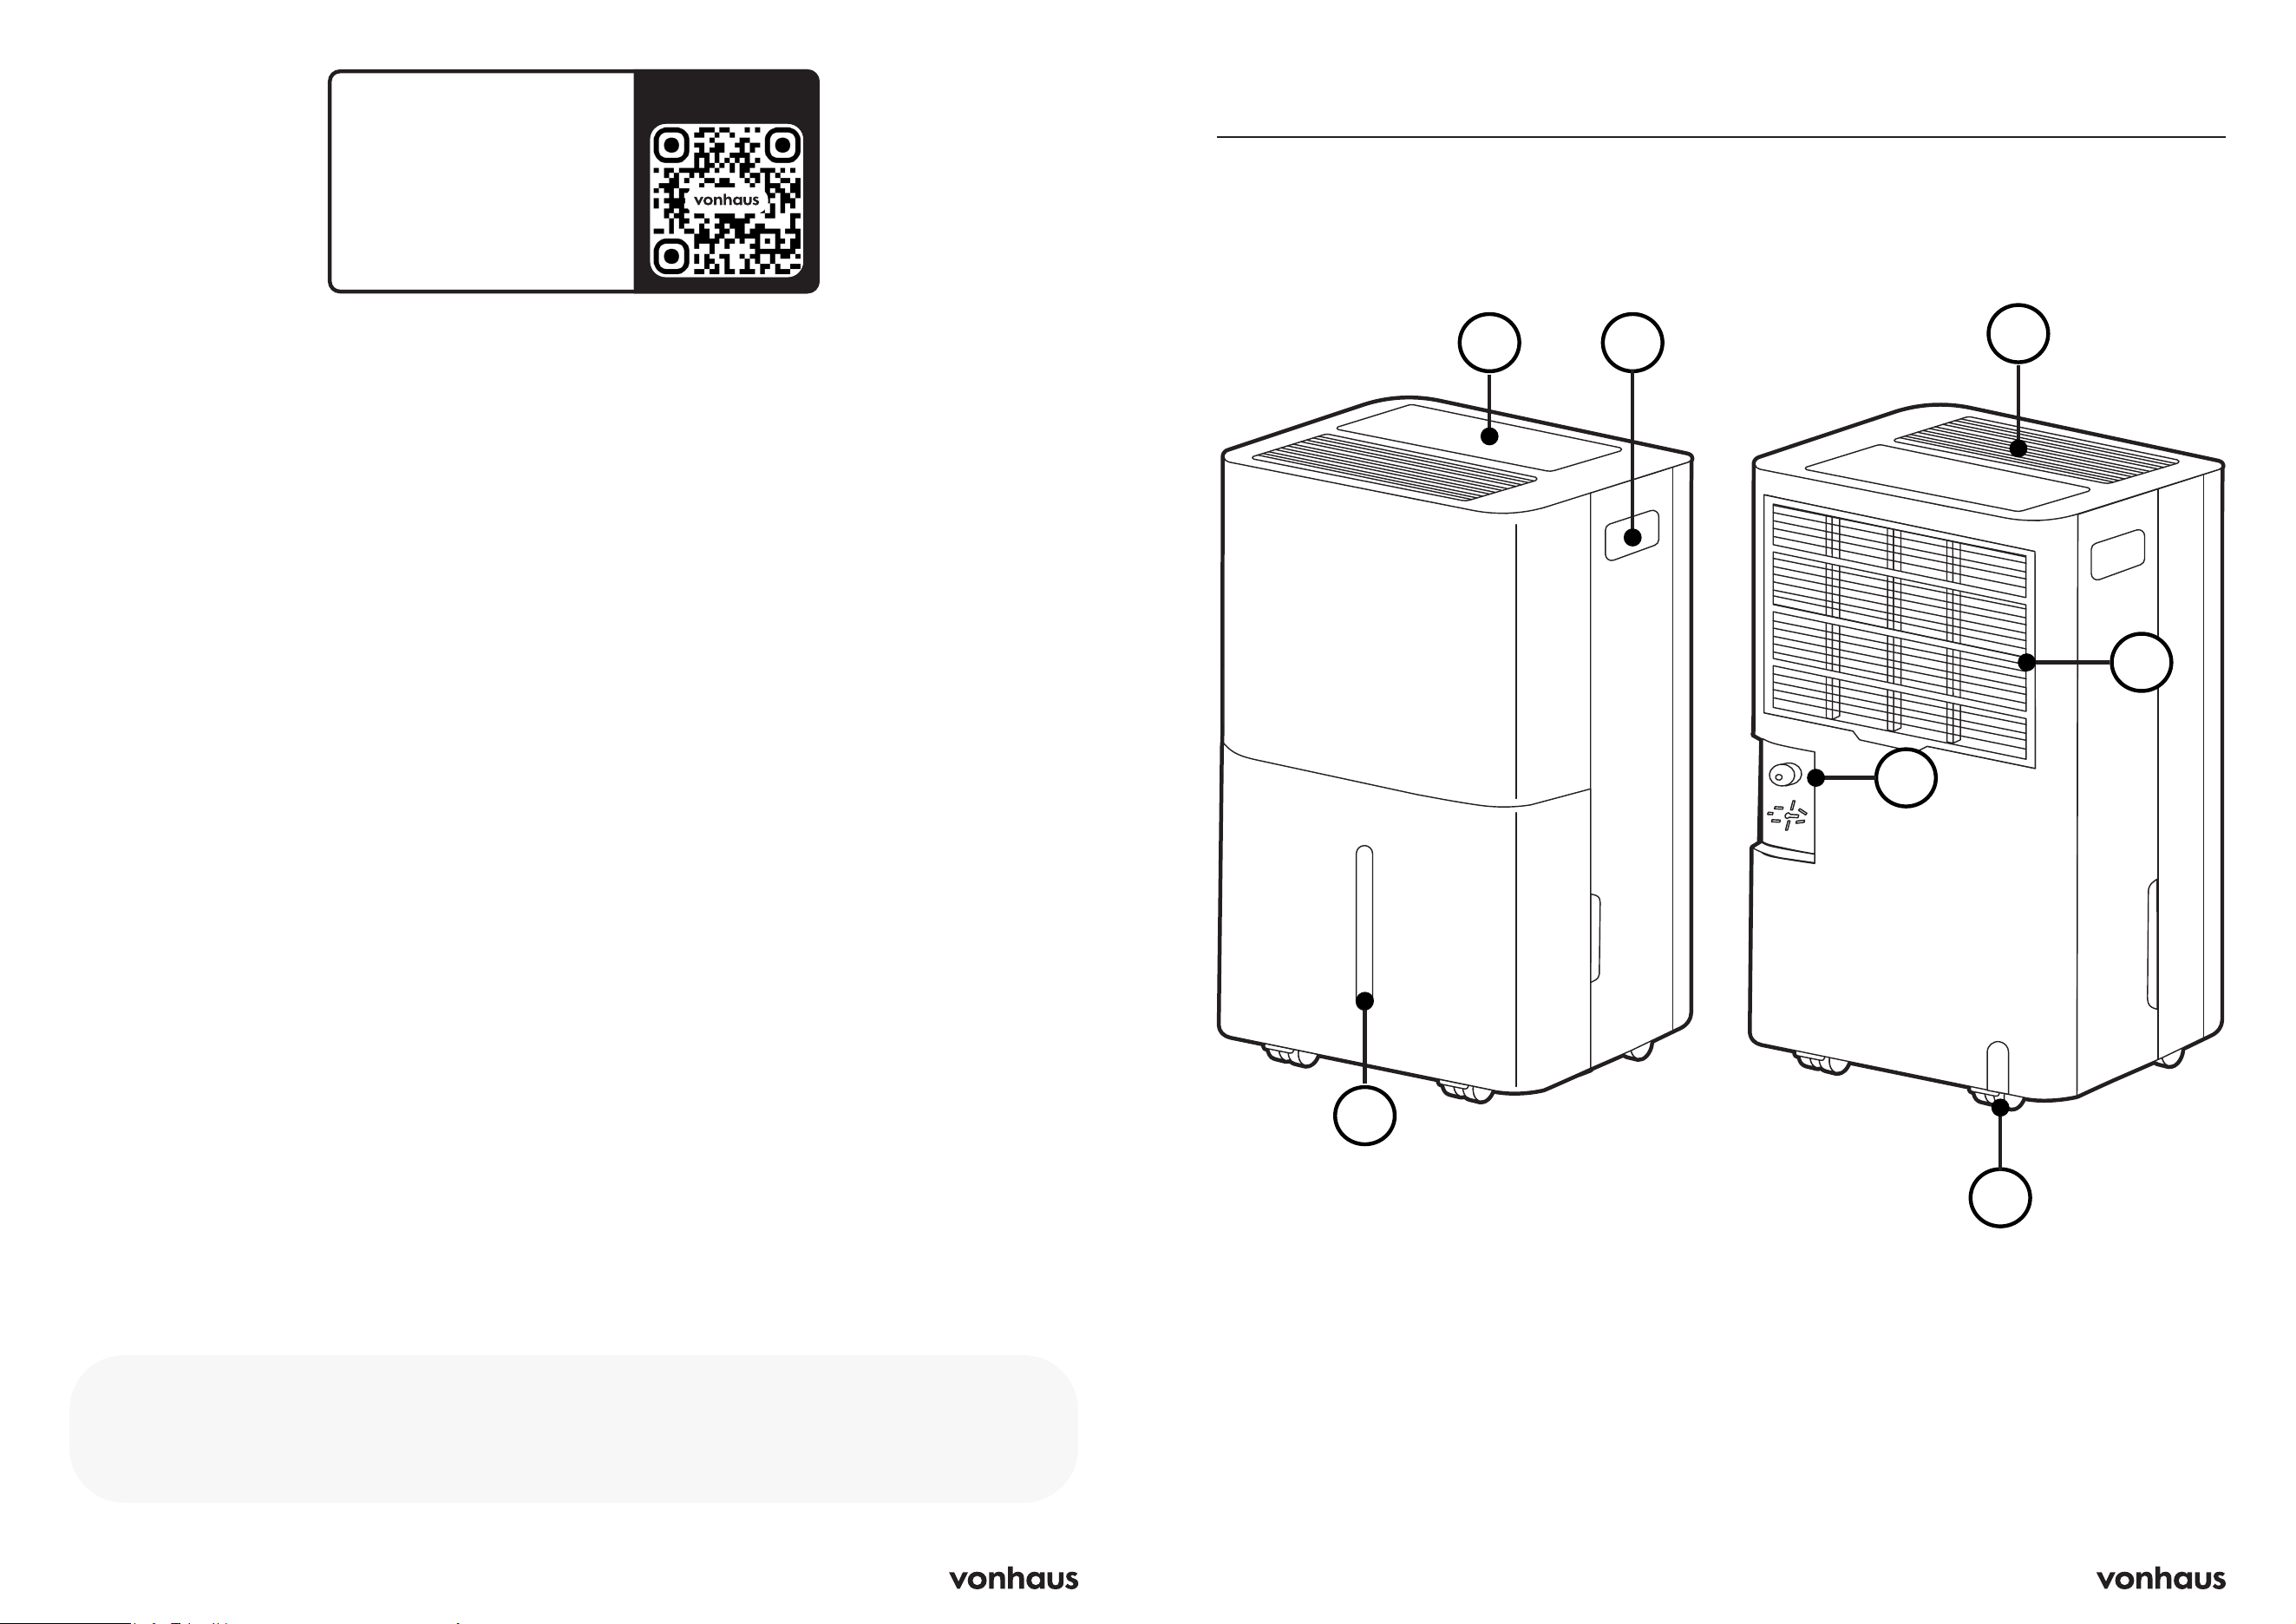
Product Diagram
A. Control Panel
B. Handle
C. Water Tank
D. Air Exhaust
E. Filter
F. Continuous Drainage Hole
G. Wheels
A
D
C
B
E
G
F
4 5
Placement
30cm
30cm
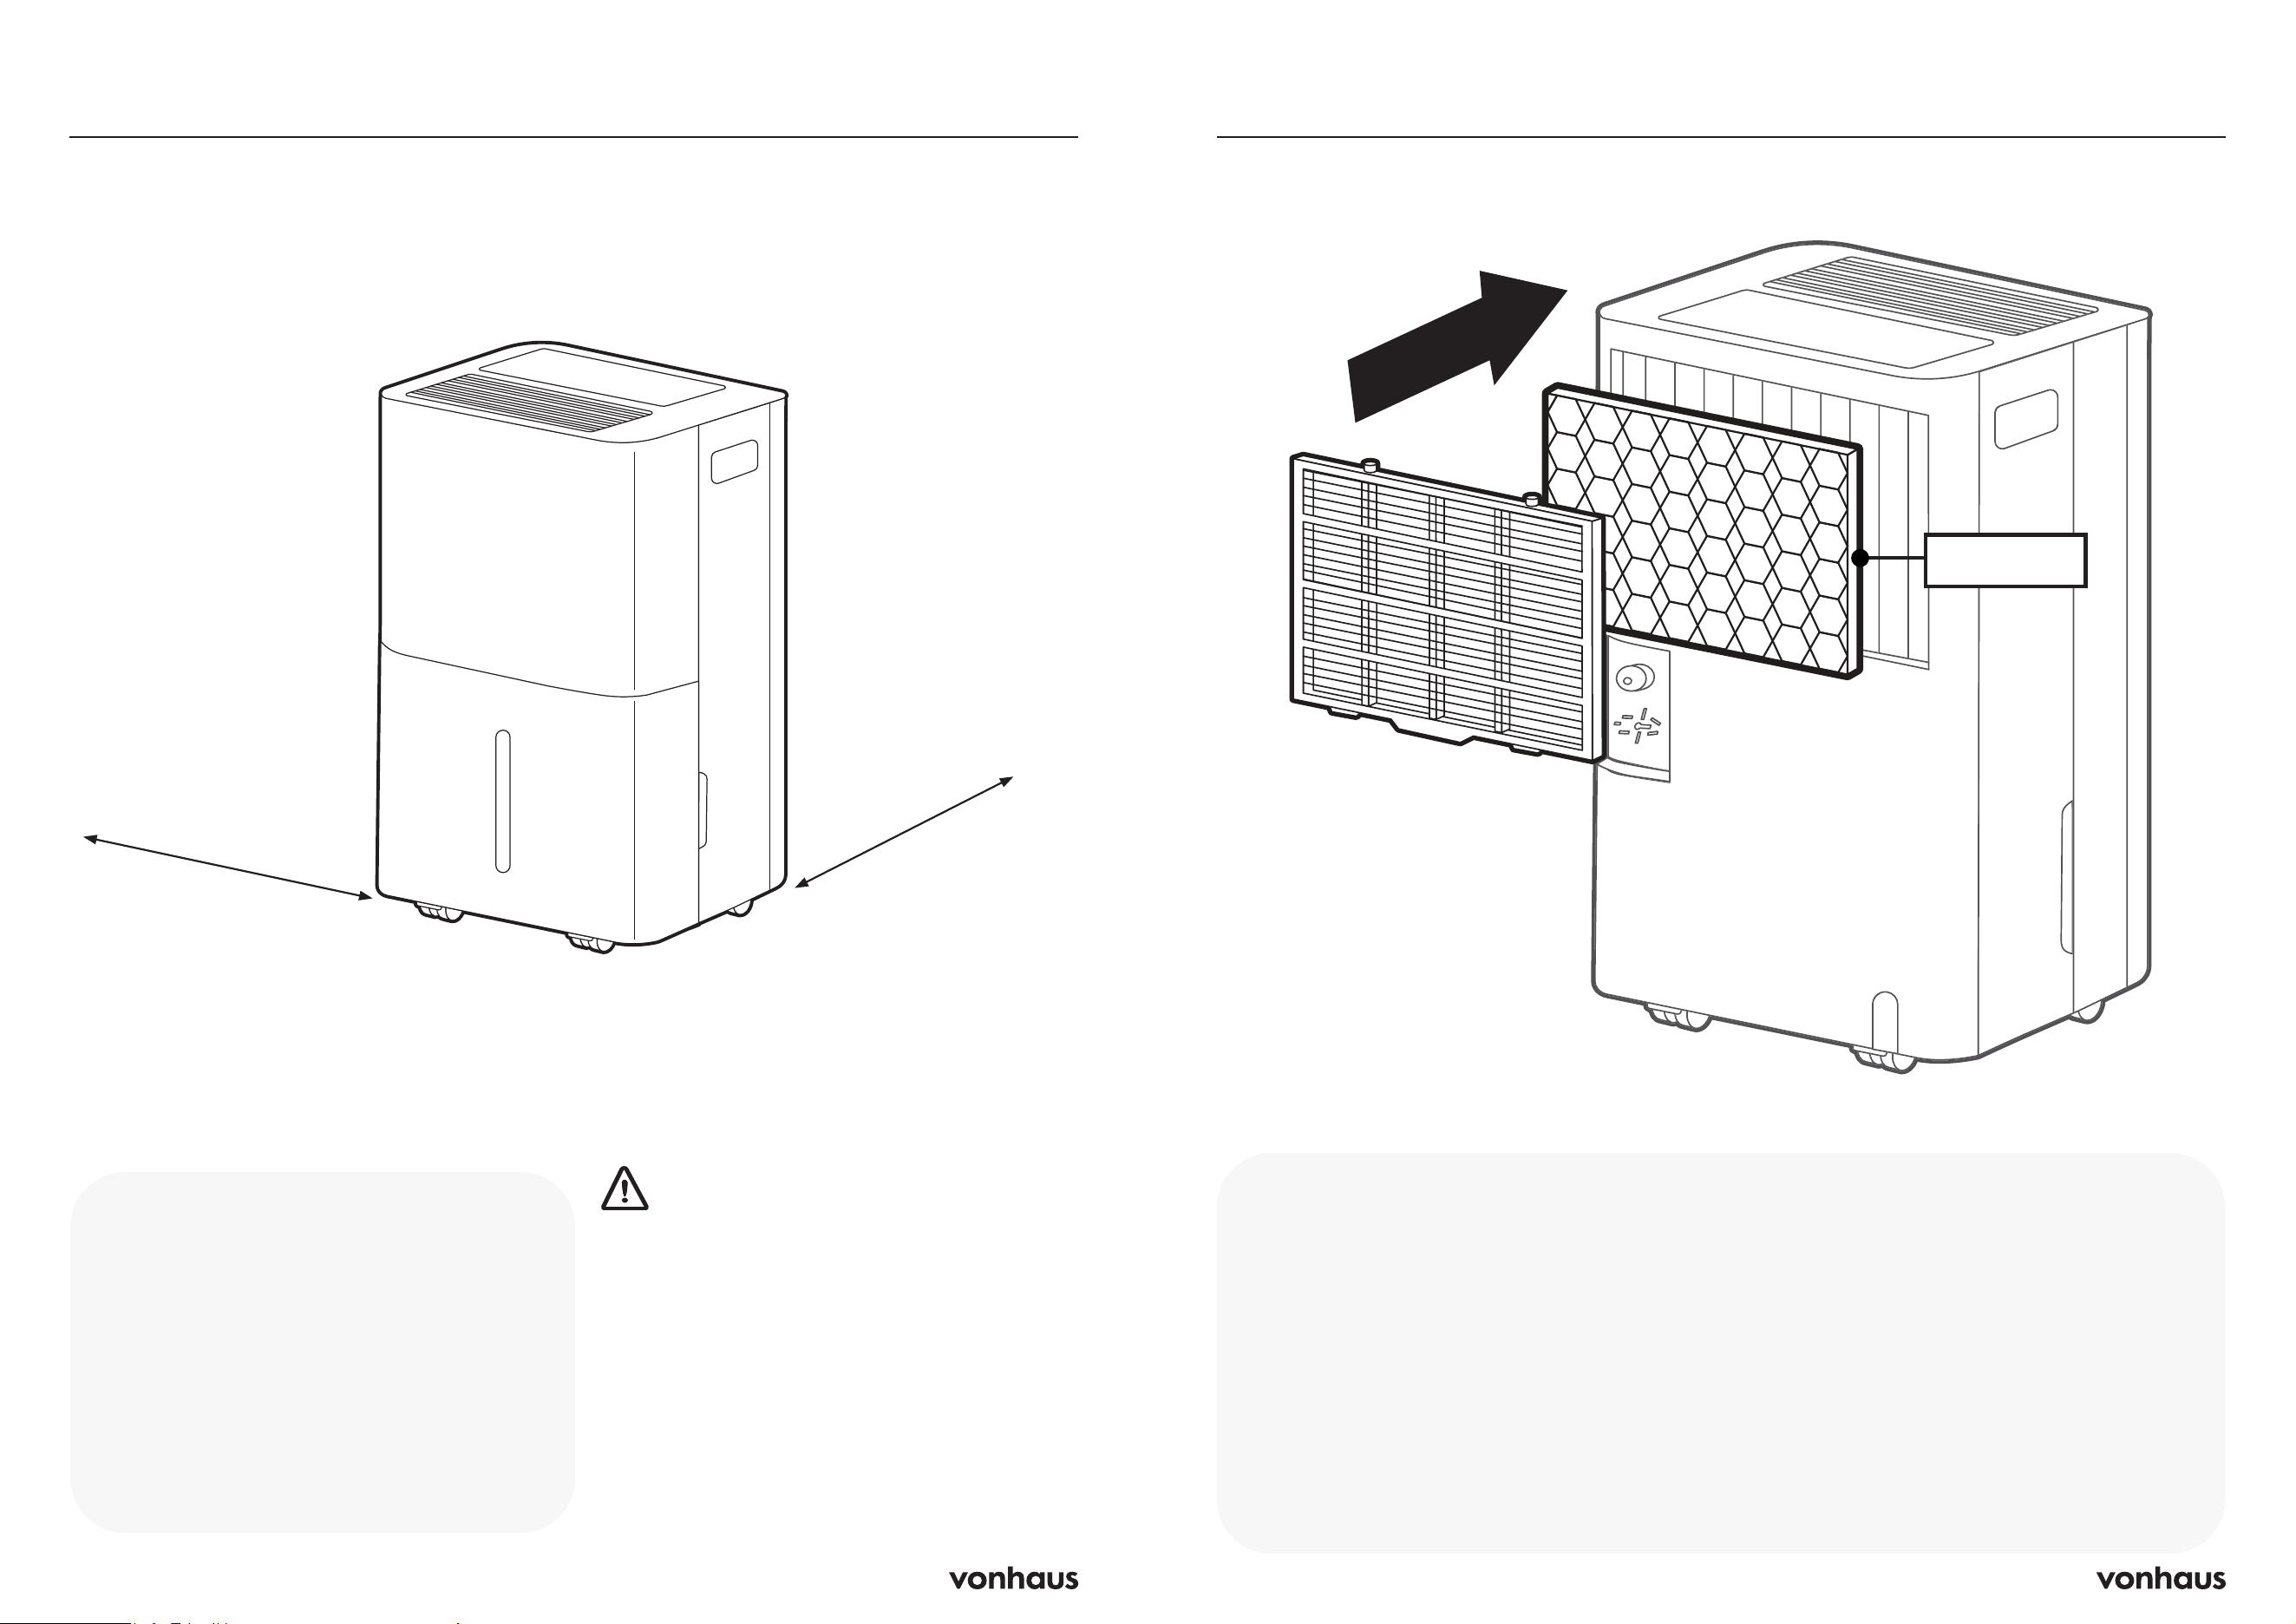
Unit Placement
Place on a firm, level surface with at least
30cm of open space around the unit for
air circulation.
Install the unit in rooms larger than 4 m².
WARNING: Avoid these locations
• Near heat sources
• Where oil or water may splash
• Direct sunlight
• Vibration or shock
• Excessive dust
• Poor ventilation (e.g., inside cabinets)
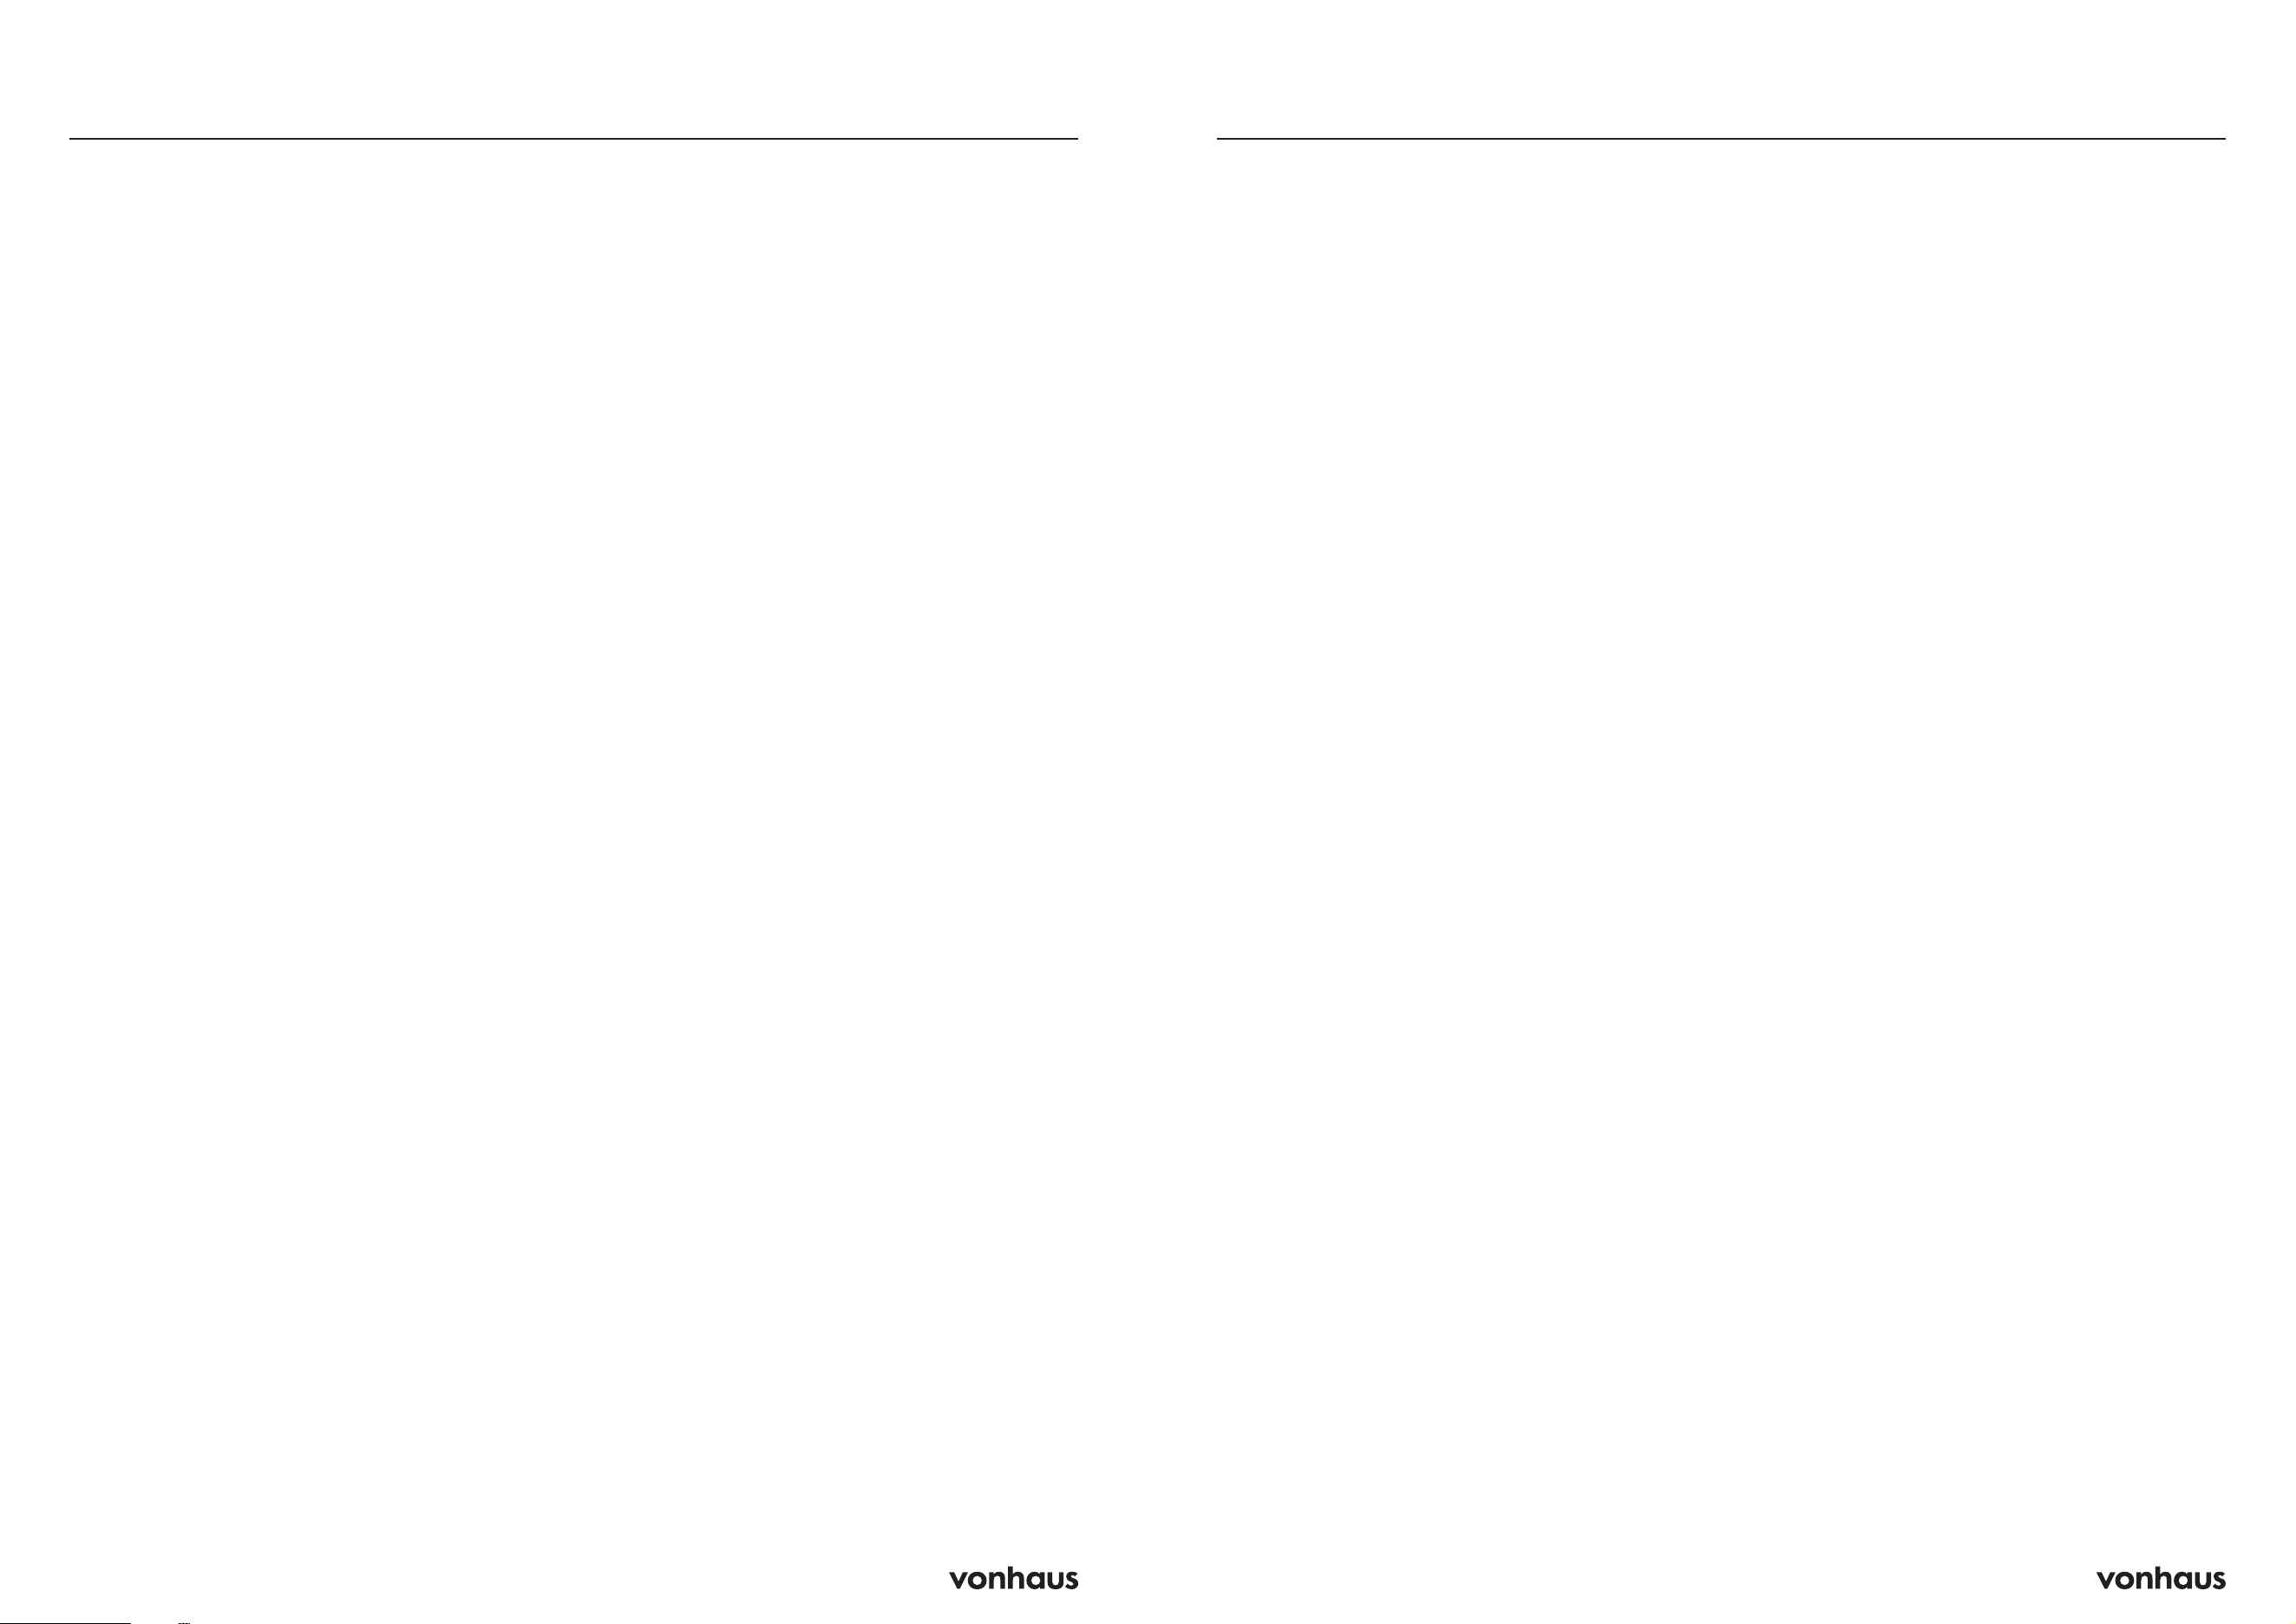
HEPA Filter Installation
Instructions
1. Remove the pre-filter from the back of
the dehumidifier
2. Remove the HEPA filter from the
packaging and install into the back of
the dehumidifier
3. Place the pre-filter back on and
ensure it is securely installed
Note: It is recommended to clean the
pre-filter every 2 weeks and replace the
HEPA filter after every 6 months.
You may need to adjust your cleaning
and replacement schedule depending on
usage and environmental conditions.
HEPA Filter
6 7
Control Panel
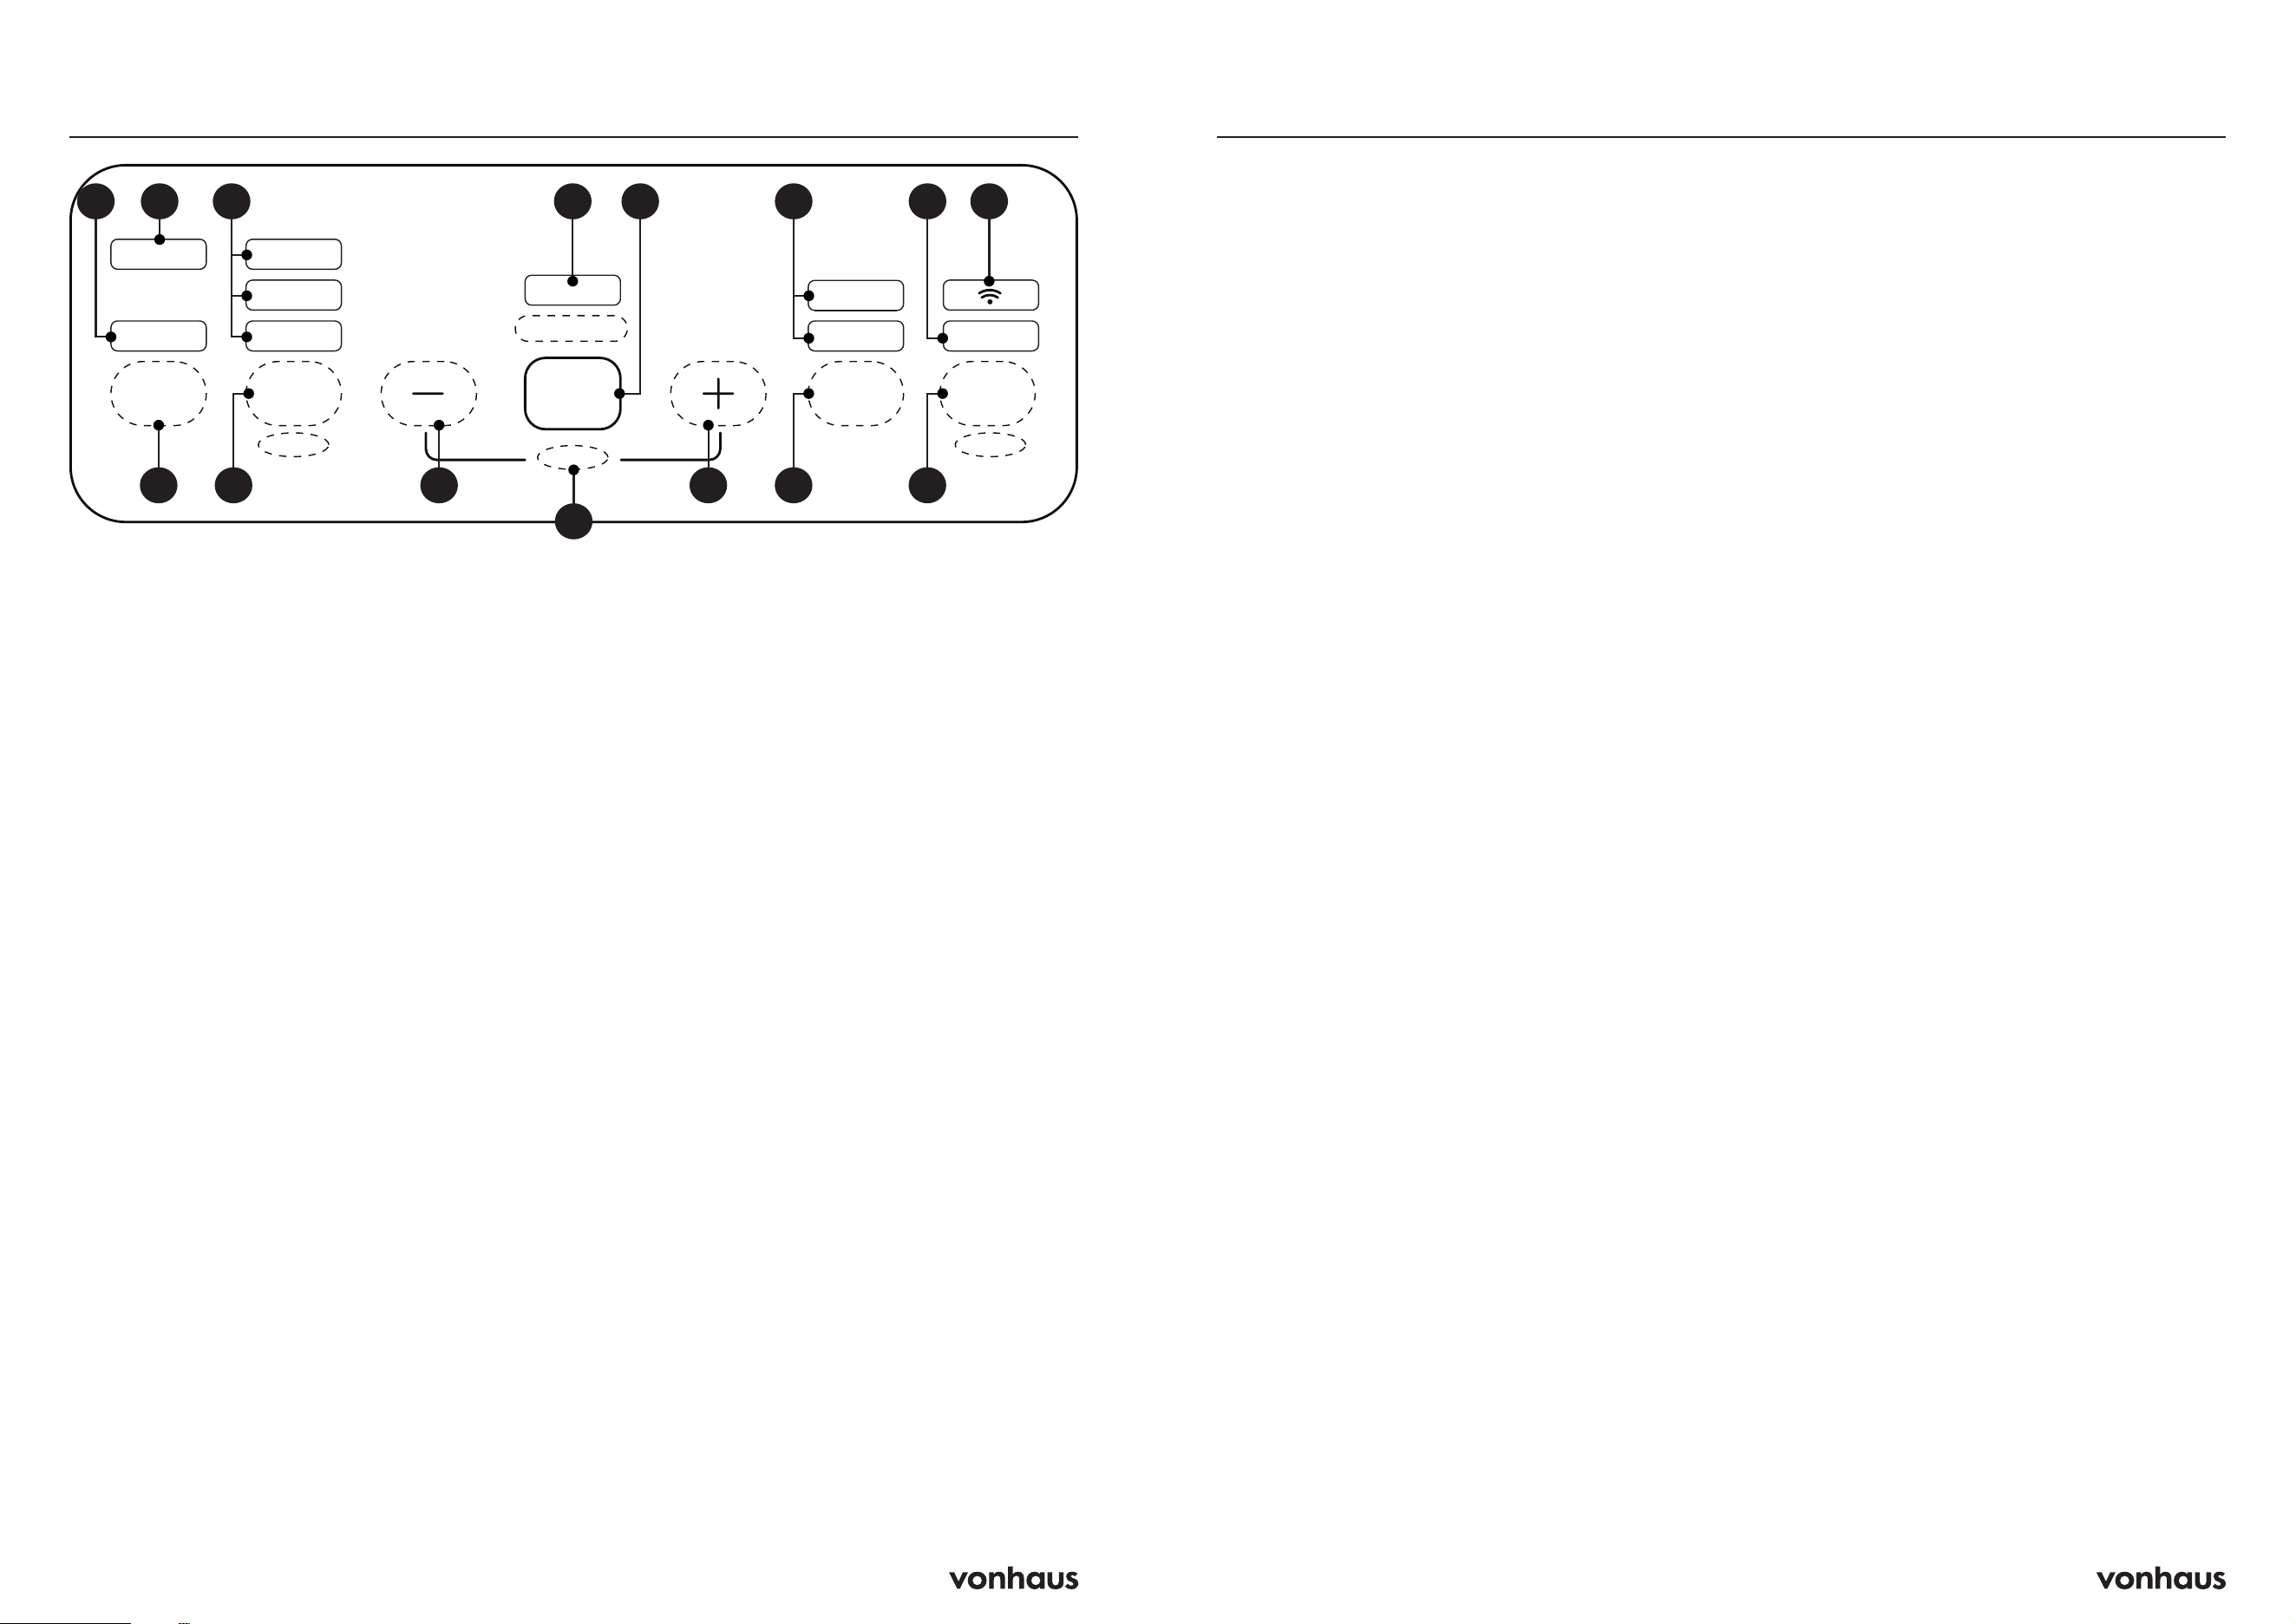
Button Functions
1. Power: Press to switch the unit on or off.
2. Fan Speed/Sleep Mode:
Fan Speed
• Press to toggle between Low and High fan
speed. The corresponding indicator light
will display.
Sleep Mode
• Press and hold this button for 3 seconds to
activate sleep mode
• Fault codes will not be displayed. When
the water tank is full, the appliance will not
beep, but it will stop collecting water. The
Empty light will display once you exit this
mode
• Press and hold this button again for 3
seconds to deactivate Sleep Mode
3. Decrease (-)
• Press to decrease the target humidity level
and timer
• Press once to reduce the target humidity
level by 5%. Set the target humidity level
to 35%, then press once more to activate
Continuous Laundry Mode
• When Continuous Laundry Mode is
selected, the appliance will continue to run
regardless of the humidity level, but the fan
speed can be adjusted
• When the timer is set, press once to reduce
the timer by 1 hour
4. Child Lock: Press + and – simultaneously
to activate child lock. To disable,
simultaneously press + and - again
5. Increase (+)
• Press to increase the target humidity level
and timer
• Press once to increase the target humidity
level by 5%
• When the timer is set, press once to increase
the timer by 1 hour
6. Timer
Timer Shut-Off
• When the unit is on and running, press the
Timer button to set a scheduled shut-off
time between 1-24 hours
• Press the Timer button again to cancel
• Once the time set has expired, the unit will
automatically turn off
Timer On
• When the unit is in standby and you haven’t
yet selected a mode, press the Timer button
to set a scheduled switch on time between
1-24 hours
Empty Sleep
High
LowOn
PowerPower
Fan
Speeds
3s-Sleep
Lock
Laundry
Humidity %
Timer Purified
3s-Wifi
Air CleanOff
OnOn
321
4
5 76
9 8
10
11121315 14
Control Panel
• Press and hold the button to cycle through
faster
• Press the Timer button again to cancel
• Once the set time has expired, the unit will
automatically turn on
7. Purify/ WIFI Connection
Purify
• The fan will continuously run to circulate
and filter the air in the room
• The fan speed can be adjusted but the
humidity level cannot
• The air will pass through the HEPA filter to
remove particles, dust, pet dander, pollen,
and odours
WIFI Connection
• Press and hold this button for 3 seconds
to connect or disconnect to WIFI. See
‘Connect to WIFI’ section for further details
Indicator Lights & Display
8. WIFI
• The indicator light will flash to begin pairing
mode. See ‘Connect to WIFI’ section for
further details
• The indicator light will be a steady light
once the appliance has connected to WIFI
9. Air Purify: Indicator light will display when
Purify mode has been activated
10. Timer: Relevant indicator light will
display depending on if Timer Switch On
or Timer Switch Off has been selected
11 . Display Screen: Shows ambient humidity
(current humidity levels of the room), target
humidity level or timer setting
12. Continuous Laundry Mode: When this
mode is selected, the indicator light will
display
13. Fan Speed/ Sleep Mode
• When Low or High fan speed is selected,
the corresponding indicator light will
display
• When Sleep Mode is selected, the sleep
indicator light will display
14. Full Water Tank: When the water tank
is full, the appliance will stop collecting
water. It will beep and the Empty indicator
light will display to remind you to empty the
water tank
15. On: Indicates that the appliance is turned
on
8 9
Connect to WIFI
Instructions
1. When the water tank is full, the unit
will beep and the Empty indicator
light will light up on the display screen
2. Turn the product off. Carefully slide
out the water tank from the front of the
water tank
3. Empty the water and gently slide the
water tank back into the main unit
IMPORTANT: If the Empty indicator light
still displays, ensure the water tank has
securely been placed back into the unit
and the float in the water tank is correctly
in place.
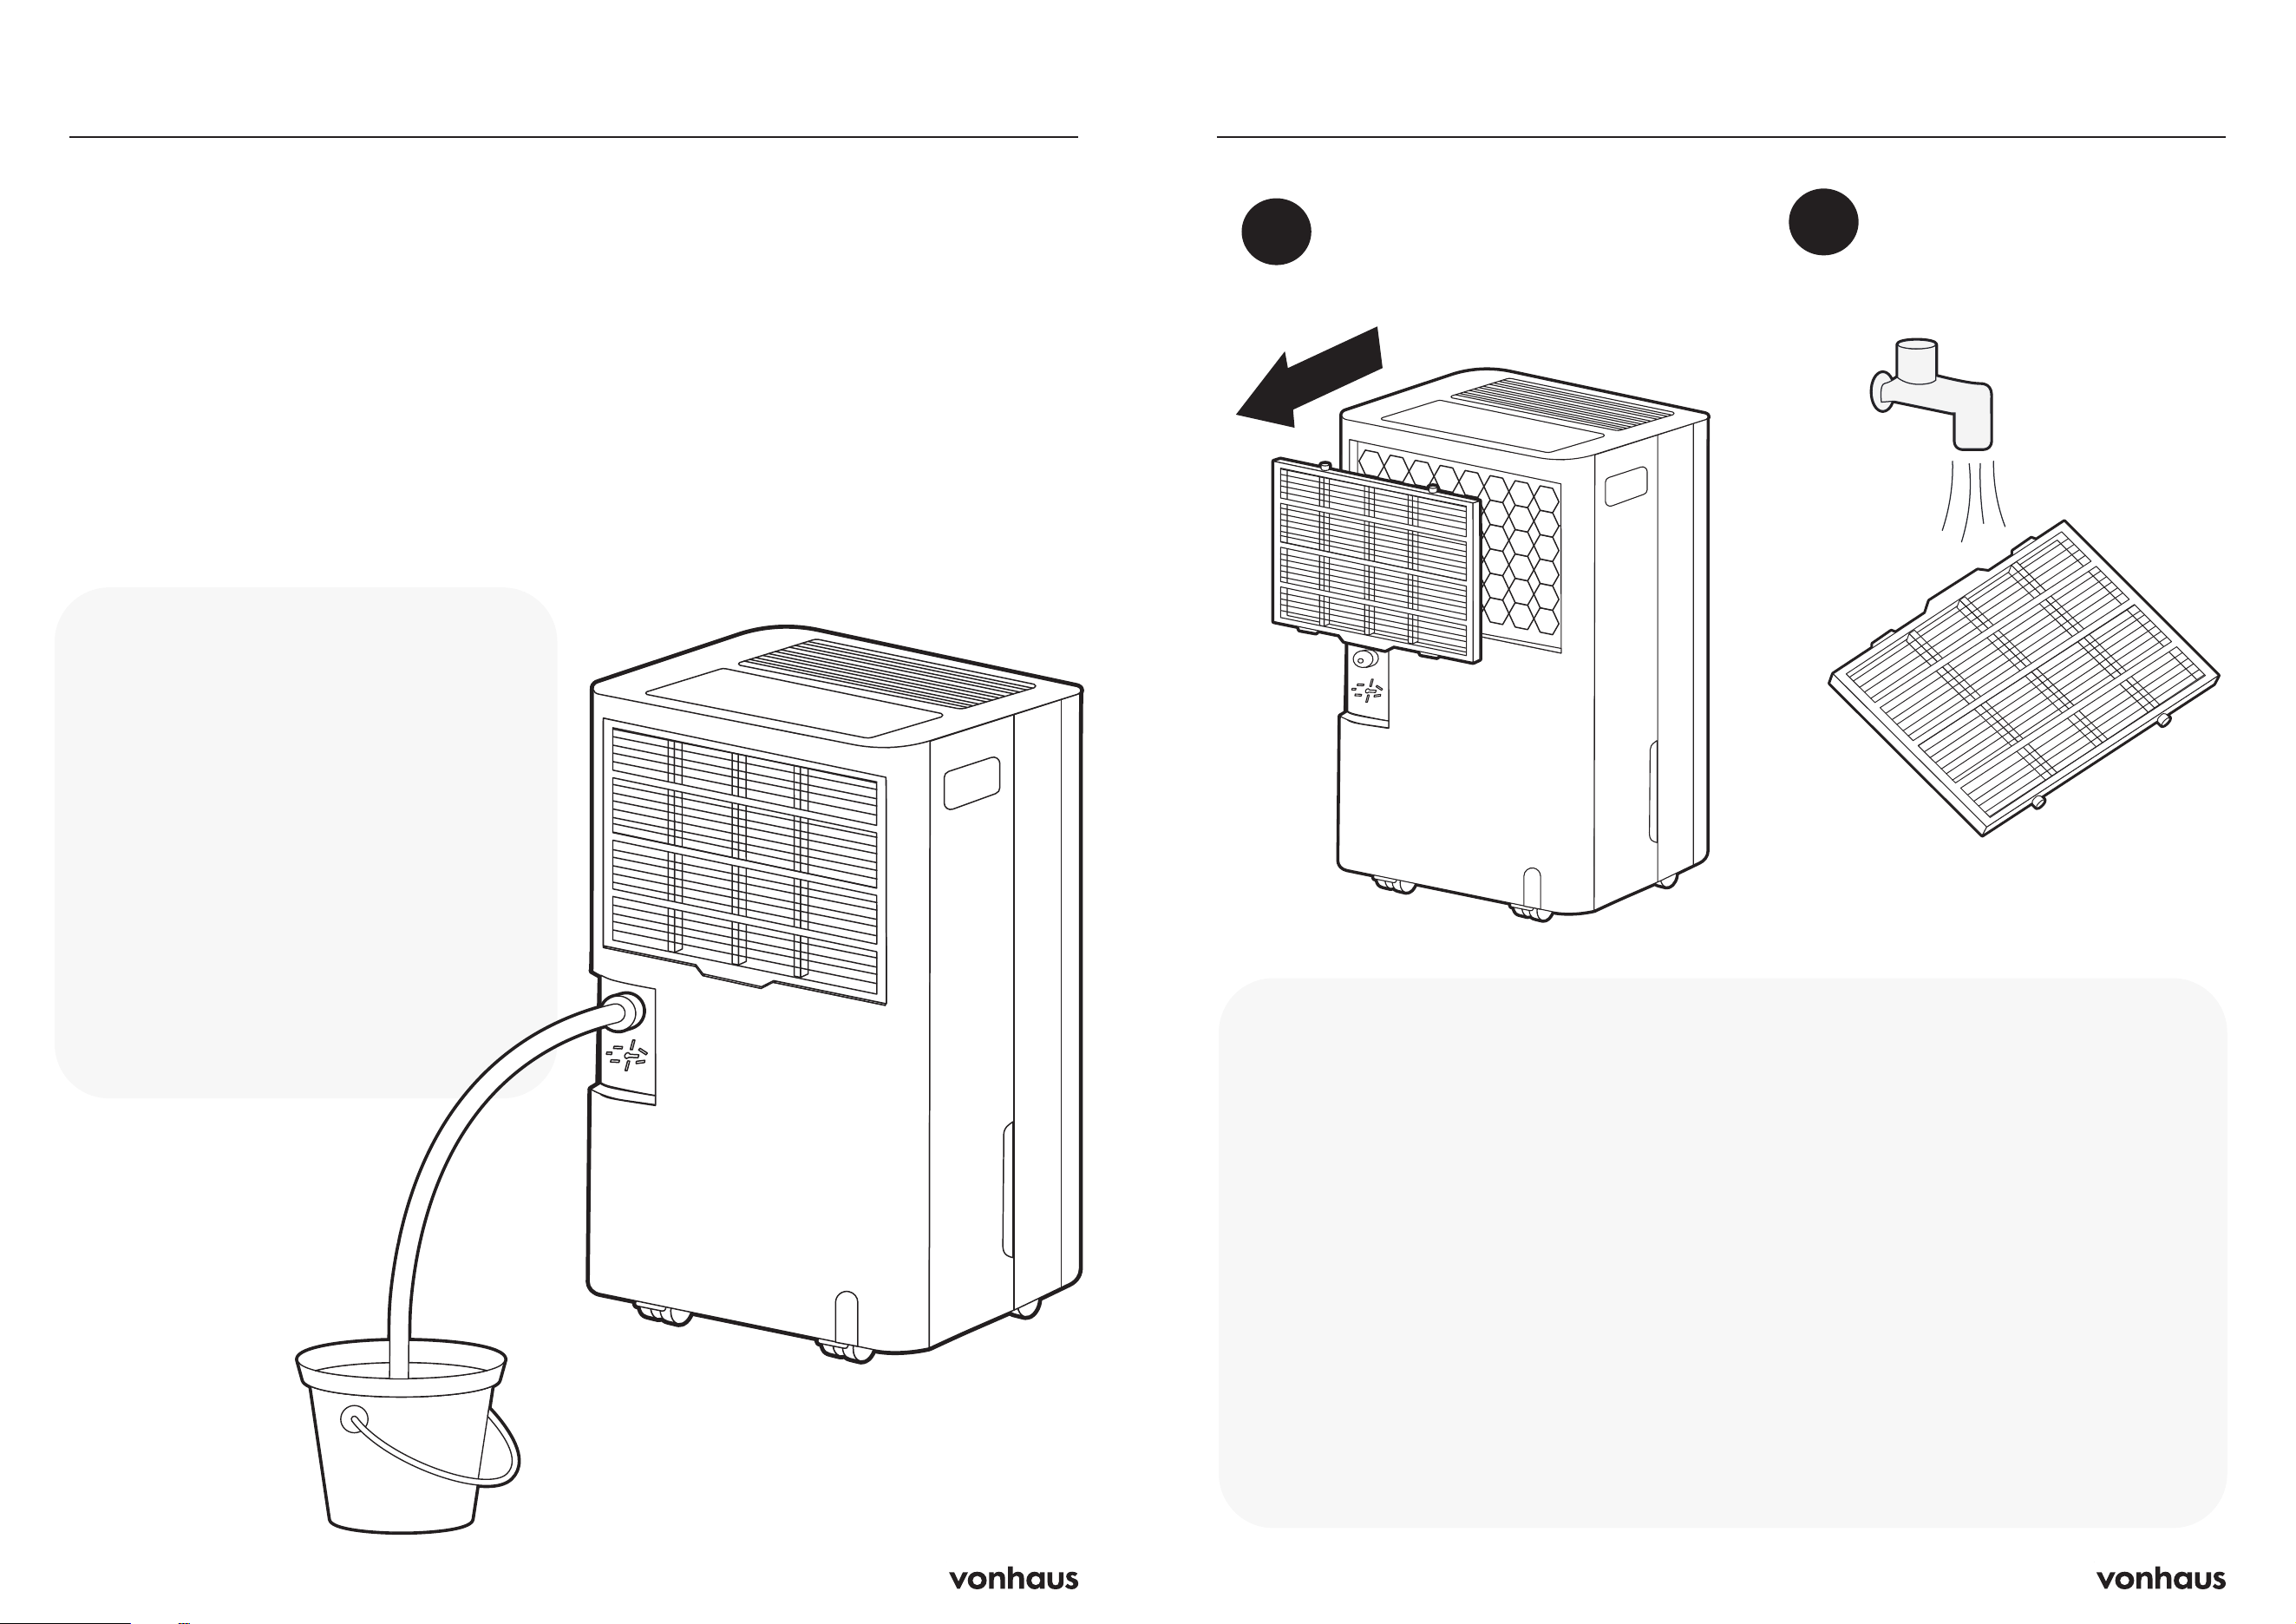
Draining the Tank
1
2
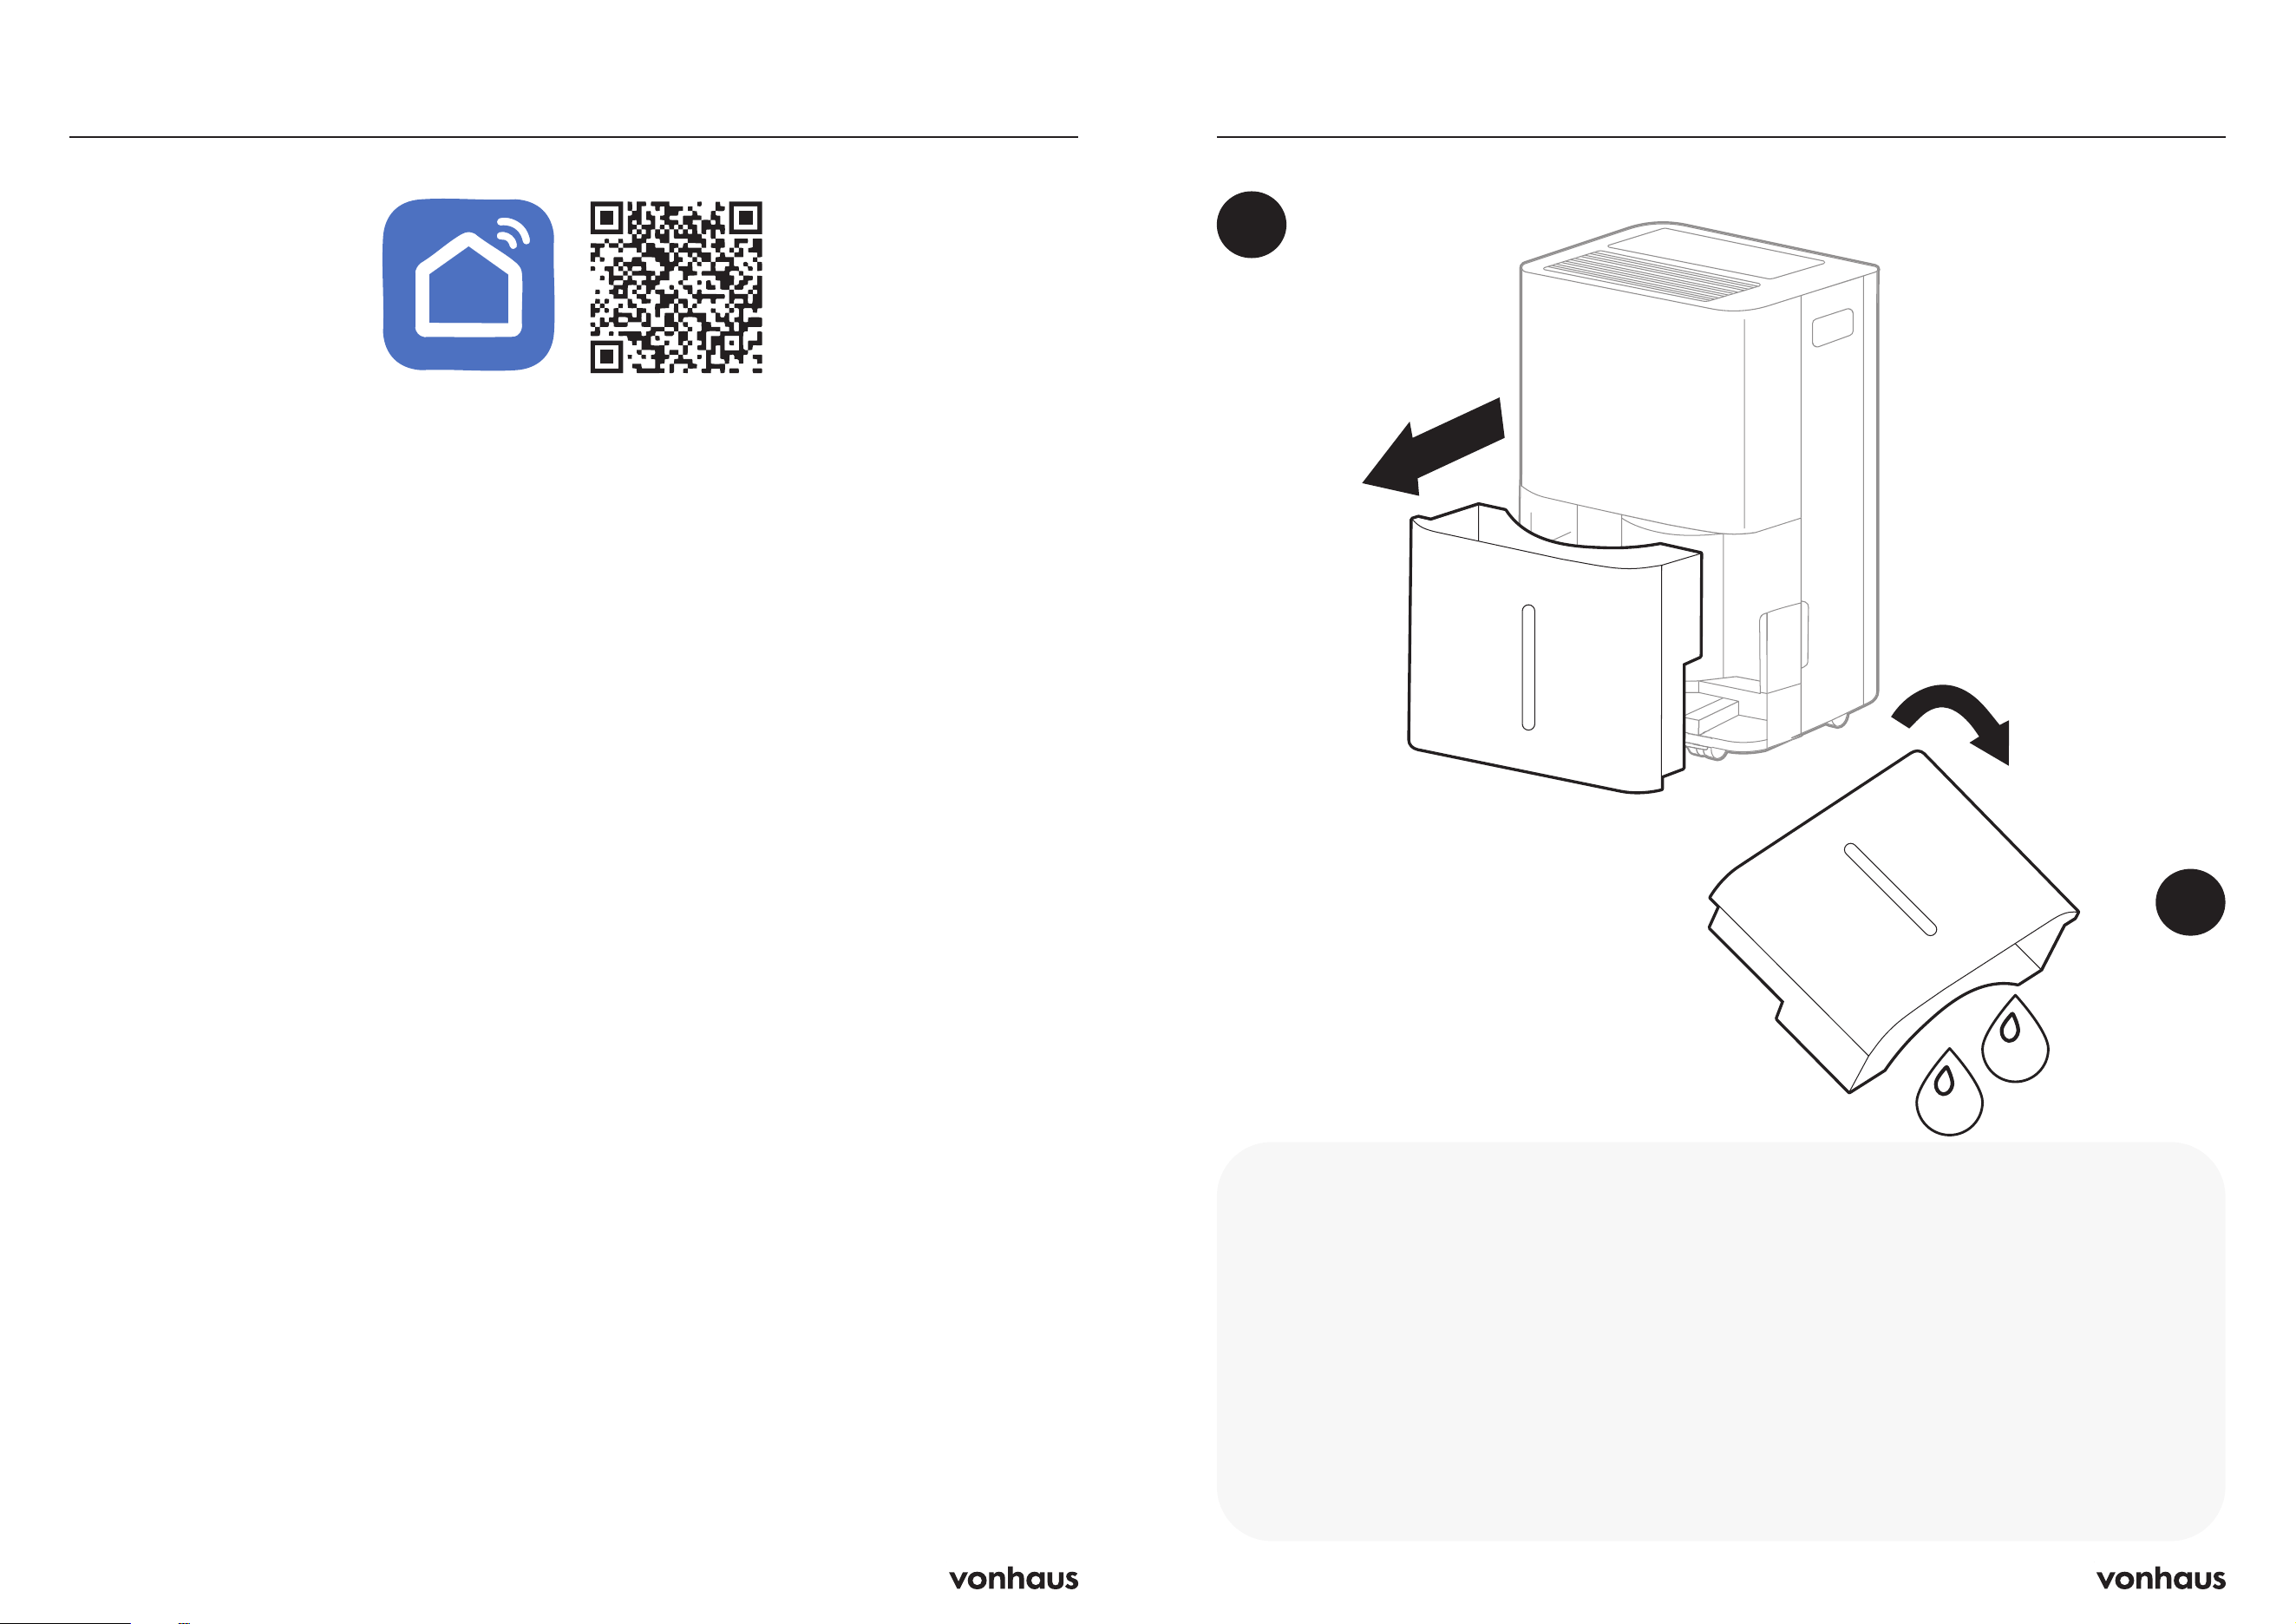
Download the Smart Life App
The “Smart Life” app works on Android and
iPhone. Scan the QR code to download it
directly.
Step 1: Get Ready
• Install the “Smart Life” app
• Create an account
• Make sure your phone has WiFi and
Bluetooth turned on
Step 2: Prepare Your Appliance
• Place the dehumidifier within 5 metres of
your WIFI router
• To turn the WIFI on the dehumidifier, press
and hold the ‘Purify’ button for 3 second
until the WIFI indicator light starts flashing
Important: If you don’t connect to WIFI within
3 minutes, the indicator light will turn off and
you will need to restart the process again by
holding down the Purify button.
Step 3: Connect Your Appliance to WiFi
Now choose one of these two methods:
Method 1: Easy Bluetooth Connection
1. Make sure Bluetooth is on
2. Open the “Smart Life” app whilst the WiFi
light is flashing
3. The app will connect your appliance to
WiFi automatically
Method 2: Manual Connection
1. Open the “Smart Life” app whilst the WiFi
light is flashing
2. Select “Add Device” > “Small Home
Appliances” > “Dehumidifier”
3. Follow the on-screen instructions
4. Watch your WiFi light:
• Slow flashing: Tap “Go to Connect,”
join the “SmartLife-XXXX” network, then
return to the app
Success!
The WiFi light stays on solid (no flashing)
You can now control your appliance through
the app
To Disconnect
If you need to cancel the WIFI connection,
then you should press and hold the “purify”
button for 5 seconds. The WIFI light will flash
to indicate that it is waiting for a re-connection.
If there is no operation for re-connection, then
the WIFI light will go out.
10 11
Continuous Drainage
Important Notes
Ensure hose is:
• Securely connected
• Not kinked
• Unobstructed
• Angled downward (>20°)
Don’t submerge the end of the hose
(prevents air lock)
WARNING: The drainage hose must
not be very long (recommended 1m).
Continuous drainage is suitable for humid
environments as the water tank does not need
to be emptied.
1. Unscrew the water cap on the continuous
drainage hole
2. Connect one end of the hose in the
drainage hole and place the other in to
your drainage area e.g bucket
3. Make sure to keep the hose straight and
below the drainage hole level
4. Double check the connection is secure and
that nothing blocks the drainage path
1
2
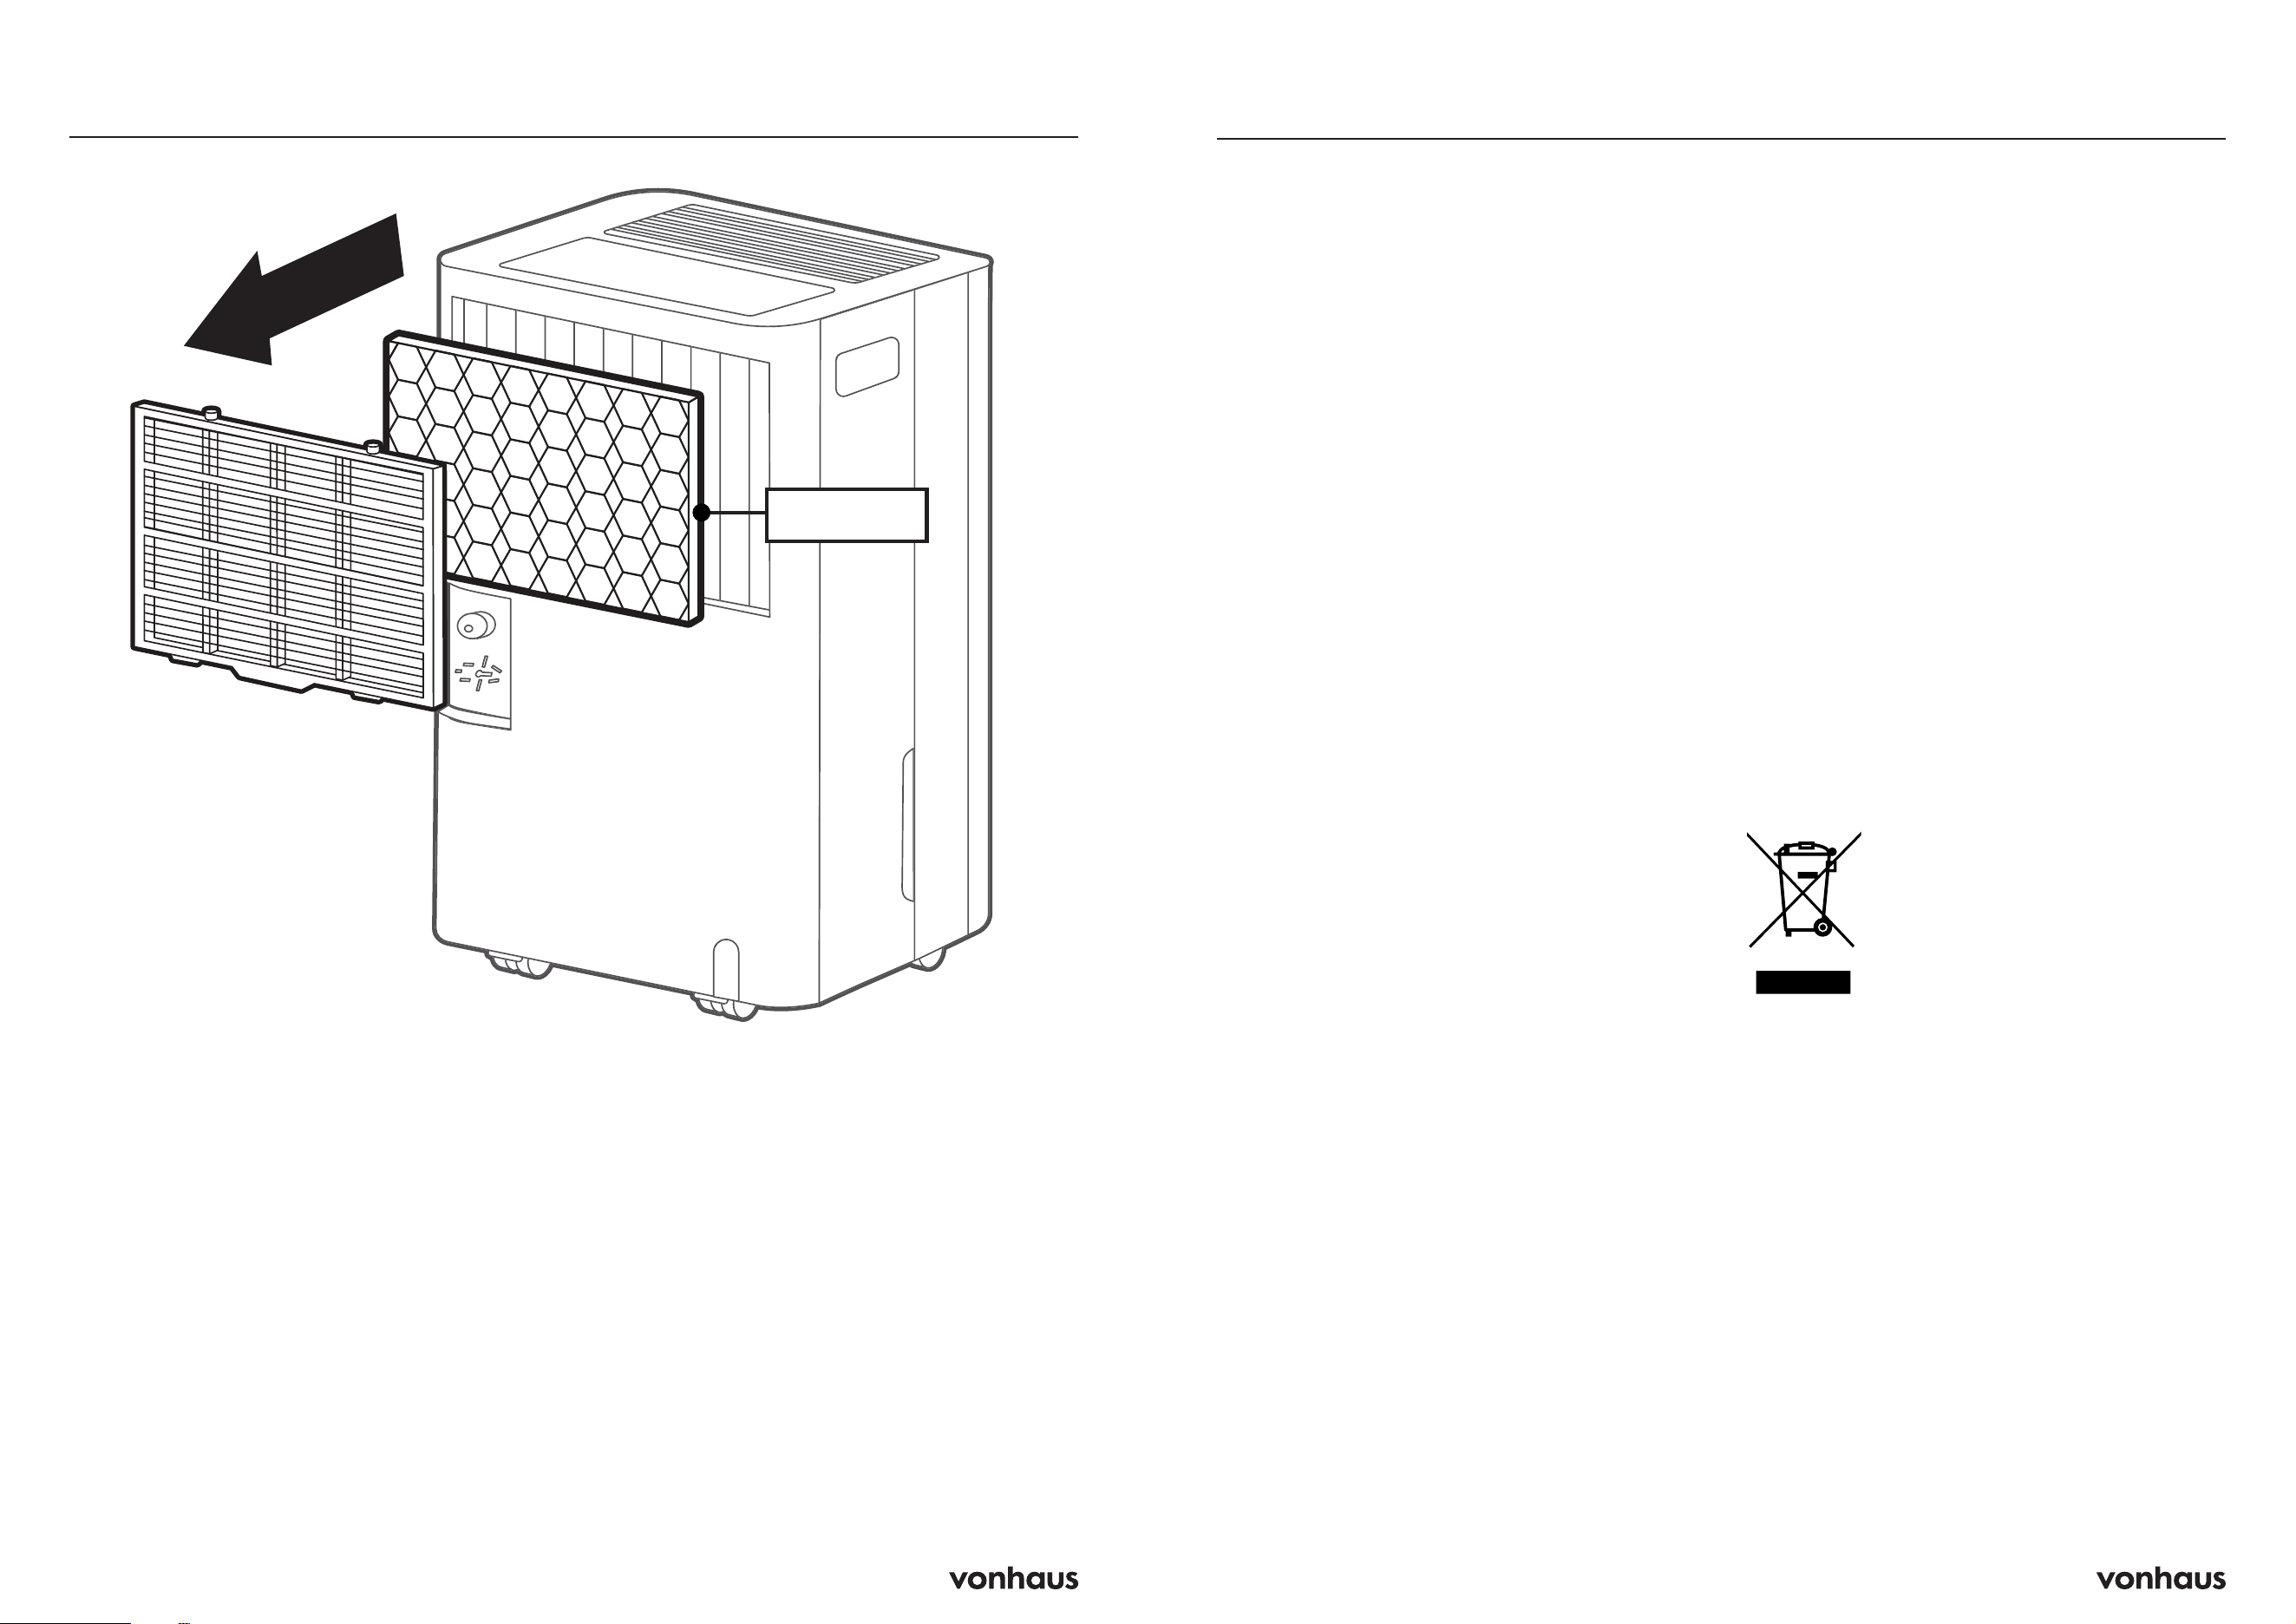
Cleaning the Air Filter
Instructions
IMPORTANT: Always turn off and
unplug the unit before cleaning.
1. Remove the air filter.
2. Gently vacuum any dust from the filter
surface
3. For heavily soiled filters, wash with
mild soap and water, then leave to air
dry completely
4. Reinstall the filter
Why This Matters
• Dust buildup restricts airflow
• Poor airflow reduces efficiency
• Blocked filters can damage the unit
• Never run the unit without a filter, as
this can contaminate the evaporator
Additional Tips
• Clean the filter regularly (every two
weeks)
• The filter is designed to be removable
for easy cleaning
• Ensure filter is completely dry before
reinstalling
12 13
HEPA Filter Replacement
To maintain optimal air purification
performance, the HEPA filter should be
replaced every 6 months, but this might
be adjusted due usage and environmental
conditions
Factors affecting filter life:
• Frequency of use
• Air quality in the room
• Presence of pets, smoke, dust, or allergens
• Whether the unit also uses a pre-filter that is
cleaned regularly
Signs the HEPA filter needs replacing:
• Reduced airflow from the unit
• Persistent odors despite using Purify mode
• Increased dust accumulation in the room.
• Filter discoloration or visible dirt build-up
Instructions:
• Remove the pre-filter from the back of the
dehumidifier
• Remove the HEPA filter from the packaging
and install into the back of the dehumidifier
• Place the pre-filter back on and ensure it is
securely installed
Electrical Safety
• Use only grounded power outlets
• Never pull power cord to unplug
• Avoid extension cords and adapters
Operation Safety
• Keep away from fire and flammable objects
• Don’t insert objects into air outlets
• Don’t touch inlet or aluminum fins
• Stop using if unit shows damage
• Avoid chemical cleaning
• Keep ventilation areas unobstructed
Installation Requirements
• Follow national wiring regulations
• Maintain minimum 4m² space for
installation
• Ensure proper ventilation
• Protect connecting pipes from damage
• Install away from heat sources
R-290 Refrigerant
This product contains R-290 (propane)
refrigerant and requires specific safety
precautions:
• Only qualified technicians can service the
sealed refrigerant system
• Never release refrigerant into air
• Keep away from flames, cigarettes, and
ignition sources
• Use only identical parts for repairs
WARNING: R-290 is flammable, heavier
than air, and odorless. Failure to follow safety
guidelines could result in explosion and serious
injury.
Electrical Safety
• Use only grounded power outlets
• Never pull power cord to unplug
• Avoid extension cords and adapters
Operation Safety
• Keep away from fire and flammable objects
• Don’t insert objects into air outlets
• Don’t touch inlet or aluminum fins
• Stop using if unit shows damage
• Avoid chemical cleaning
• Keep ventilation areas unobstructed
Installation Requirements
• Follow national wiring regulations
• Maintain minimum 4m² space for
installation
• Ensure proper ventilation
• Protect connecting pipes from damage
• Install away from heat sources
WARNING: Improper use may risk fire,
electric shock, or injury.
Safety Information
Disposal Information
WARNING: Releasing refrigerant into
atmosphere is strictly forbidden!
Do not dispose of electrical appliances as
unsorted municipal waste, use separate
collection facilities.
Contact your local government for information
regarding the collection systems available.
If electrical appliances are disposed of in
landfills or dumps, hazardous substances can
leak into the groundwater and get into the food
chain, damaging your health and well-being.
HEPA Filter
14 15
Q: Why does warm air come out of the air
outlet?
This unit draws in room air, cools it through the
dehumidification unit below the dew point so
that moisture condenses into water droplets
that fall into the water tank. The dehumidified
air is then reheated by the reheat unit before
being discharged. This process reduces energy
consumption and increases dehumidification
speed. Warm air output is therefore normal
and does not indicate a fault.
Q: Why does the dehumidifier fail to
operate or stop suddenly?
The water tank may be full or not properly
installed. Empty the tank and/or reinsert it
correctly.
The unit may be in “Dehumidification
Mode’”but the ambient temperature is too low
or too high. Dehumidification may not function
below 5°C or above 32°C.
Operating temperature range: 5–32°C,
relative humidity 30%–80%. Optimal
operating temperature: 16–32°C.
Q: Why is there little water in the tank
during winter?
In winter, temperatures are lower and air
is drier. Dehumidification capacity drops
significantly compared to summer. This is not
a fault.
Q: Why are there small water drops on
the floor beneath the unit?
When operated for extended periods in hot
and humid environments, condensation may
form on the water tank and outer casing. A
small amount of this water may drip onto the
floor. This is normal.
Information
Troubleshooting
If the dehumidifier experiences any of the
following issues, try the solutions listed below.
Unit does not operate
• Power plug disconnected — Insert the plug
into the socket.
• Water tank full or incorrectly positioned —
Empty the tank and/or reinsert it correctly.
• Ambient temperature out of range — Use
the unit at 5–32°C.
Dehumidification not effective
• Room temperature or humidity too low —
Dehumidification capacity is reduced in
dry seasons.
• Air inlet or outlet blocked — Clear any
obstructions from the inlet and outlet.
No airflow
• Air filter blocked — Clean the filter as
described in the Maintenance section.
Unusual noise
• Unit tilted or unstable — Place the unit on a
stable, level surface.
• Air filter blocked — Clean the filter as
described in the Maintenance section.
Hissing sound
• Refrigerant flowing — Normal — not a
fault.
Water leaking
• Drain hose connection loose — Reconnect
the drain hose securely.
• Drainage system blocked — Clear the
blockage and straighten the hose.
Frost forming
• Low temperature; defrost cycle — Normal
— unit has automatic defrost function.
Error Code Reference
• FL: Water tank full alarm
• E1: Coil sensor fault
• E2: Room temperature sensor fault
• EF: Motor feedback fault (DC motor
models only)
• Eb: Refrigerant deficiency fault
• HI: Room temperature too high
• LO: Room temperature too low
• P1: Unit undergoing defrost cycle —
normal
• LC: Child lock active
Information
16 17
Customer Service
If you are having difficulty using this product
and require support, please contact
suppor[email protected]
Warranty
To register your product and find out if you
qualify for a free extended warranty please
go to www.vonhaus.com/warranty
Please retain a proof of purchase receipt or
statement as proof of the purchase date.
The warranty only applies if the product is used
solely in the manner indicated in the warnings
page of this manual, and all other instructions
have been followed accurately.
Any abuse of the product or the manner in
which it is used will invalidate the warranty.
Returns
Returned goods will not be accepted unless
re-packaged in its original packaging and
accompanied by a relevant and completed
returns form. This does not affect your statutory
rights.
No rights are given under this warranty to a
person acquiring the appliance second-hand
or for commercial or communal use.
Copyright
All material in this instruction manual are
copyrighted by DOMU Brands.
Any unauthorised use may violate worldwide
copyright, trademark, and other laws.
Thank You
Thank you for purchasing your product/
appliance.
Should you require assistance with your
purchase, please contact us at
suppor[email protected]
Vonhaus is a registered trademark of DOMU
Brands Ltd.
Made in China for DOMU Brands Ltd.
Unit 30, Stakehill Industrial Estate
Middleton, Manchester, M24 2RW
EU Authorised Representative
Authorised Representative Service
77 Camden Street Lower
Dublin, D02 XE80
Ireland
Information
Product No.2000342
Let’s get started!
Visit our product hub for
useful tips and tricks on
getting the most out of
your new product.
SCAN ME