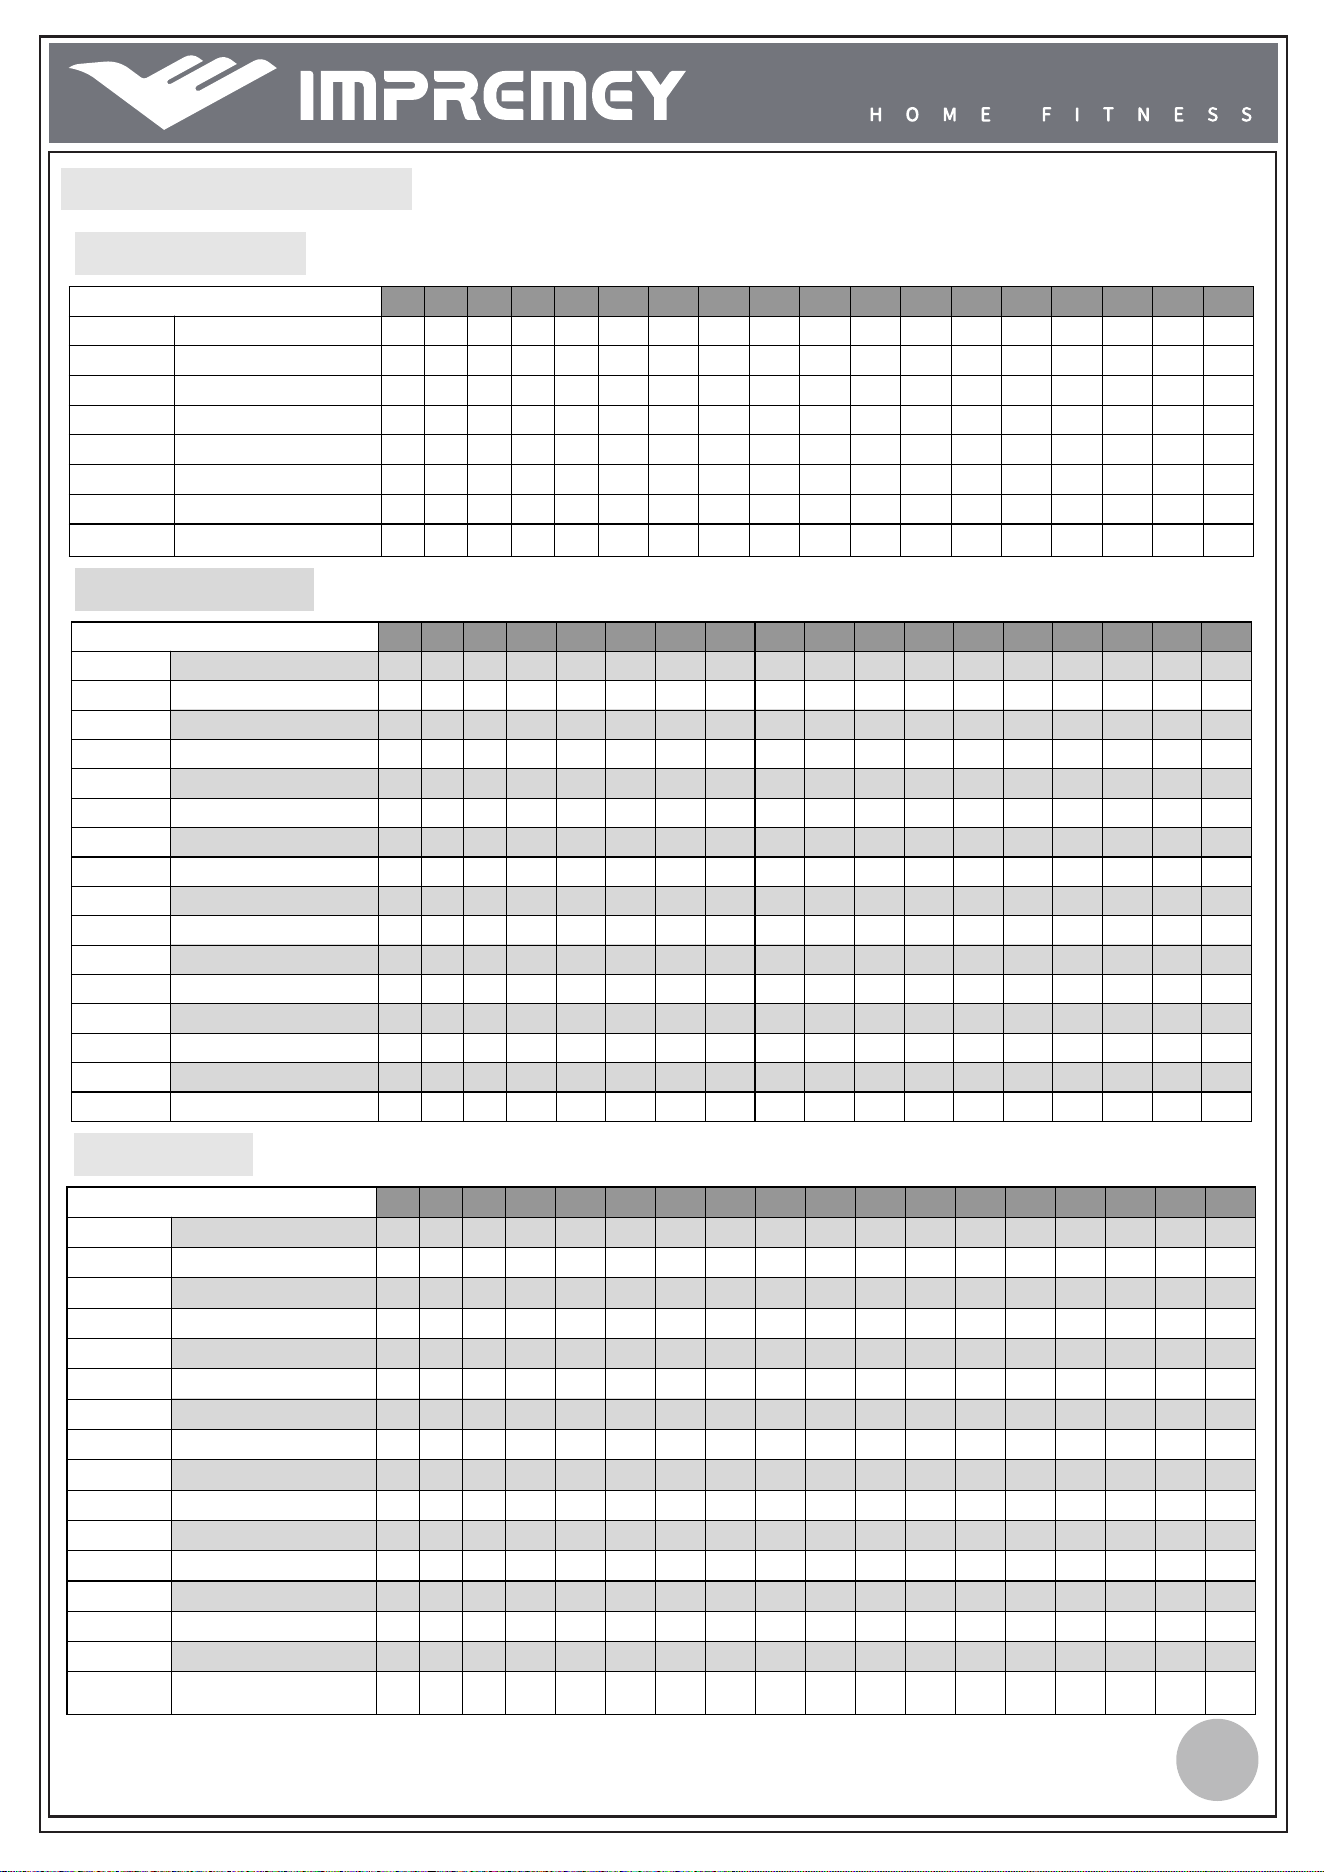
PRESET PROGRAM CHART
P1. WEIGHT LOSS
SPEED CHANGES 1 2 3 4 5 6 7 8 9 10 11 12 13 14 15 16 17 18
Level 1 SPEED(KM/H) 1 2 2 3 3 3 4 5 6 6 7 6 5 4 4 3 2 2
Level 2 SPEED(KM/H) 1 2 2 3 4 4 5 6 8 8 10 8 8 5 5 3 2 2
Level 3 SPEED(KM/H) 1 2 3 4 5 5 6 8 9 10 12 10 8 7 6 4 3 2
Level 4 SPEED(KM/H) 1 2 3 4 6 7 8 10 11 12 13 11 10 8 7 5 4 2
Level 5 SPEED(KM/H) 2 3 4 5 7 7 8 10 12 14 14 13 12 10 9 6 4 2
Level 6 SPEED(KM/H) 2 3 4 5 7 9 10 12 13 14 14 13 12 10 9 6 5 3
Level 7 SPEED(KM/H) 2 3 5 6 8 9 10 12 13 14 15 13 12 10 9 6 6 3
Level 8 SPEED(KM/H) 2 3 5 6 8 10 12 14 14 15 15 14 13 11 9 7 6 3
P2. CARDIO TRAIN
SPEED & INCLINE CHANGES 1 2 3 4 5 6 7 8 9 10 11 12 13 14 15 16 17 18
Level 1
ELEVATION 1 1 2 3 4 5 6 7 7 8 8 7 7 5 4 2 1 1
SPEED(KM/H) 1 1 2 2 3 4 5 6 6 7 7 6 6 4 3 2 1 1
Level 2
ELEVATION 1 2 3 4 5 6 7 8 8 9 9 8 8 6 5 3 2 1
SPEED(KM/H) 1 2 2 3 4 5 6 7 7 8 8 7 7 5 4 2 2 1
Level 3
ELEVATION 1 2 4 5 6 7 8 9 9 10 10 9 9 7 6 4 2 1
SPEED(KM/H) 1 2 3 4 5 6 7 8 8 9 9 8 8 6 5 3 2 1
Level 4
ELEVATION 2 3 5 6 7 8 9 10 10 11 11 10 10 8 7 5 3 2
SPEED(KM/H) 2 2 4 5 6 7 8 9 9 10 10 9 9 7 6 4 2 2
Level 5 ELEVATION 2 4 6 7 8 9 10 11 11 12 12 11 11 9 8 6 4 2
SPEED(KM/H) 2 3 5 6 7 8 9 10 10 11 11 10 10 8 7 5 3 2
Level 6 ELEVATION 3 5 7 8 9 10 11 12 12 13 13 12 12 10 9 7 5 3
SPEED(KM/H) 2 4 6 7 8 9 10 11 11 12 12 11 11 9 8 6 4 2
Level 7 ELEVATION 4 6 8 9 10 11 12 13 13 14 14 13 13 11 10 8 6 4
SPEED(KM/H) 3 5 7 8 9 10 11 12 12 13 13 12 12 10 9 7 5 3
Level 8 ELEVATION 5 7 9 10 11 12 13 14 14 15 15 14 14 12 11 9 7 5
SPEED(KM/H) 4 6 8 9 10 11 12 13 13 14 14 13 13 11 10 8 6 4
P3. FAT BURN
SPEED & INCLINE CHANGES 1 2 3 4 5 6 7 8 9 10 11 12 13 14 15 16 17 18
Level 1
ELEVATION 1 1 2 2 3 3 4 5 5 5 5 4 4 3 2 2 1 1
SPEED(KM/H) 1 2 3 3 5 6 7 8 8 8 8 7 7 5 4 3 2 1
Level 2
ELEVATION 1 1 2 2 3 4 5 6 6 6 6 5 5 4 3 2 1 1
SPEED(KM/H) 1 2 3 4 6 7 8 9 9 9 9 8 8 6 5 3 2 1
Level 3 ELEVATION 1 1 2 3 4 5 6 7 7 7 7 6 6 4 3 2 1 1
SPEED(KM/H) 1 2 4 5 7 8 9 10 10 10 10 9 9 7 6 4 2 1
Level 4
ELEVATION 1 2 3 4 5 6 7 8 8 8 8 7 7 5 4 3 2 1
SPEED(KM/H) 2 3 5 6 8 9 10 11 11 11 11 10 10 8 7 5 3 2
Level 5
ELEVATION 1 2 3 4 6 7 8 9 9 9 9 8 8 6 5 3 2 1
SPEED(KM/H) 2 4 6 7 9 10 11 12 12 12 12 11 11 9 8 6 4 2
Level 6 ELEVATION 2 3 4 5 7 8 9 10 10 10 10 9 9 7 6 4 3 2
SPEED(KM/H) 3 5 7 8 10 11 12 13 13 13 13 12 12 10 9 7 5 3
Level 7 ELEVATION 2 3 5 6 8 9 10 11 11 11 11 10 10 8 7 5 3 2
SPEED(KM/H) 4 6 8 9 11 12 13 14 14 14 14 13 13 11 10 8 6 4
Level 8 ELEVATION 2 4 6 7 9 10 11 12 12 12 12 11 11 9 8 6 4 2
SPEED(KM/H) 4 7 9 10 12 13 14 15 15 15 15 14 14 12 11 9 7 4
18
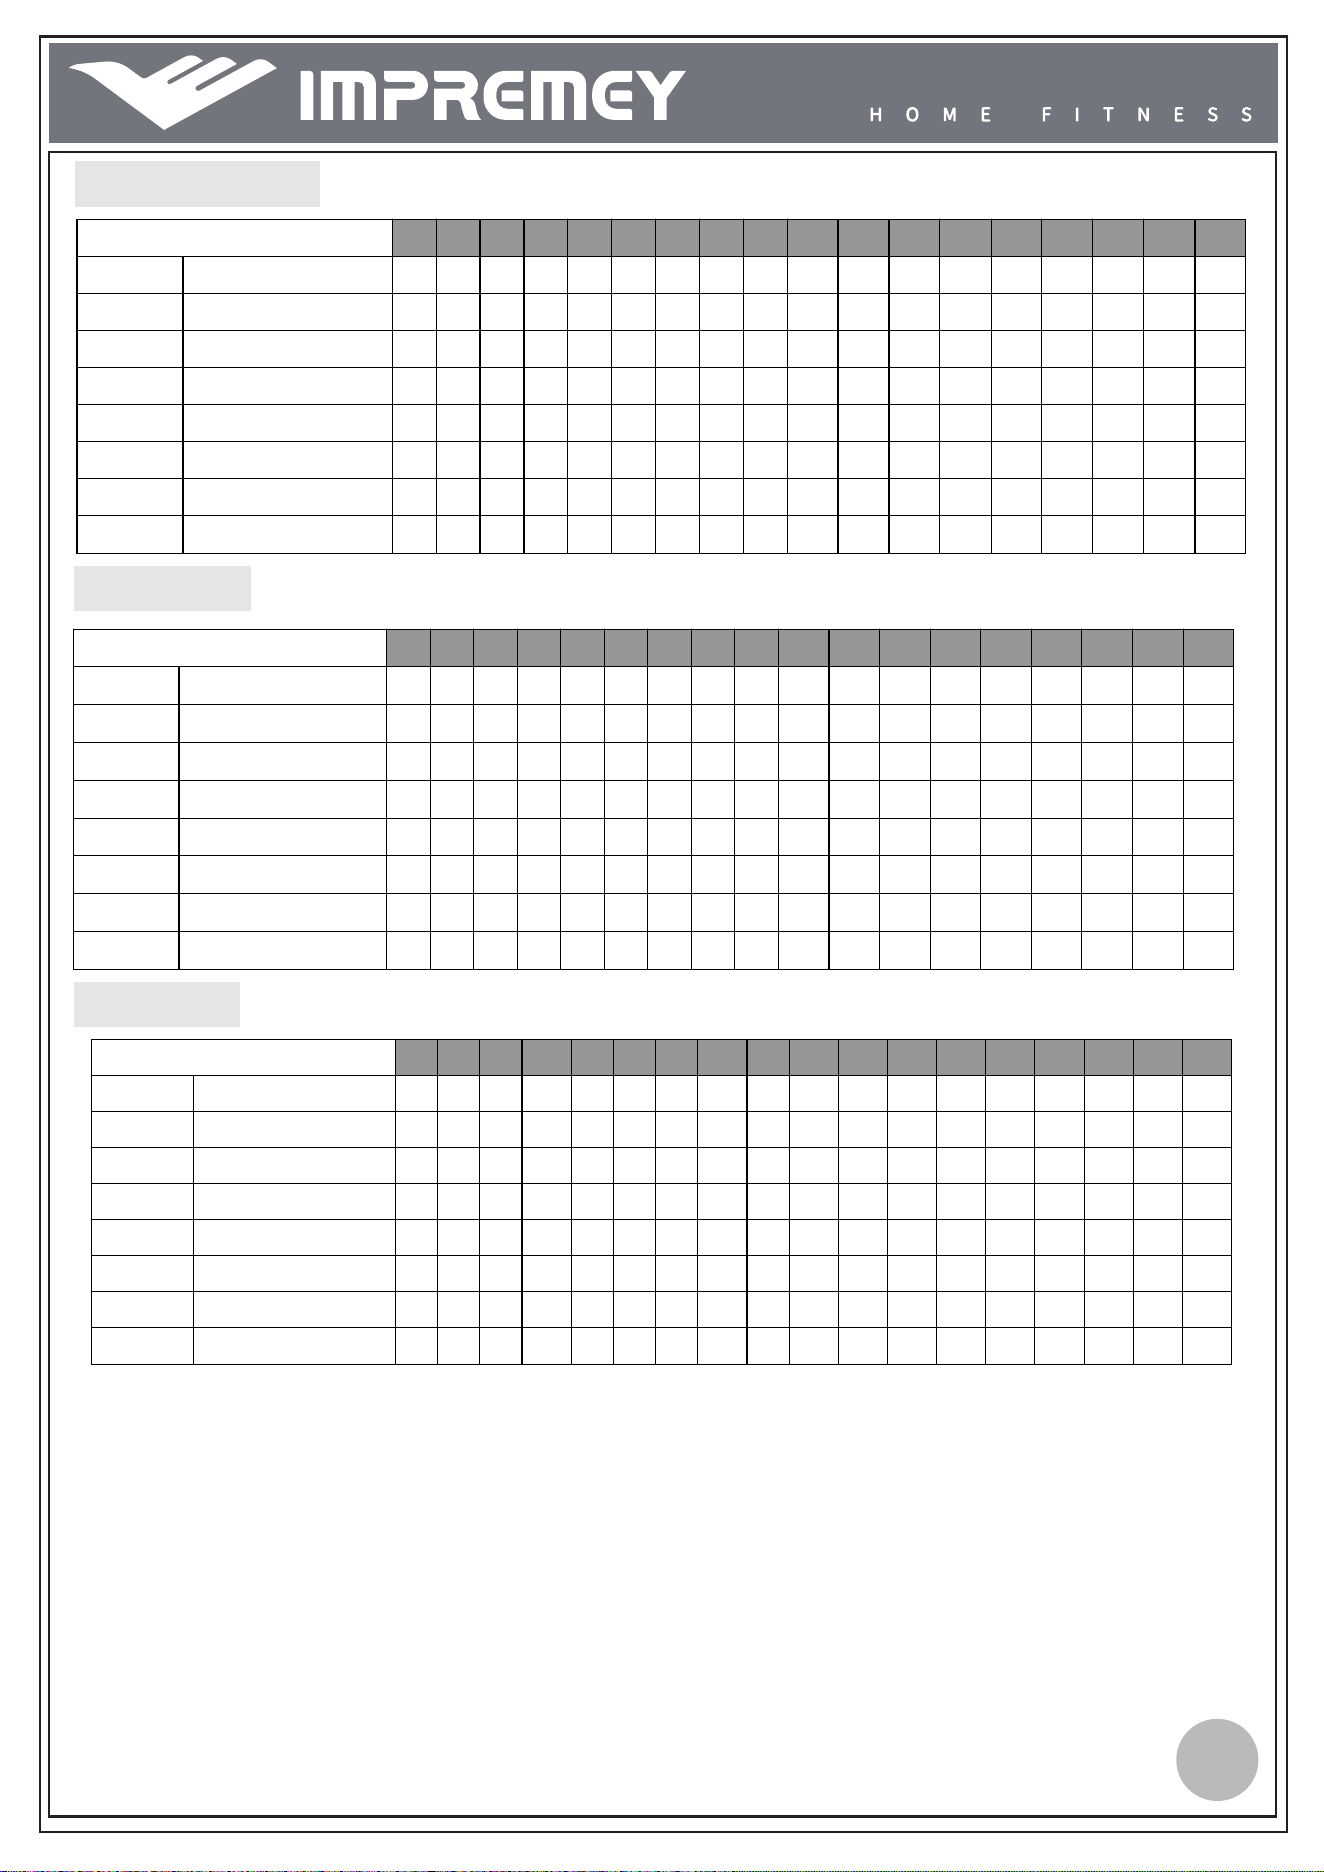
P4. POWER WALK
SPEED CHANGES 1 2 3 4 5 6 7 8 9 10 11 12 13 14 15 16 17 18
Level 1 SPEED(KM/H) 1 1 2 2 3 3 4 4 4 4 4 4 3 2 2 2 1 1
Level 2 SPEED(KM/H) 1 2 2 2 3 3 4 4 5 4 4 4 3 3 2 2 1 1
Level 3 SPEED(KM/H) 1 2 2 3 3 4 4 5 5 5 4 4 4 3 3 2 1 1
Level 4 SPEED(KM/H) 1 2 3 3 3 4 4 5 6 6 5 4 4 4 3 2 2 1
Level 5 SPEED(KM/H) 1 2 3 4 4 5 5 5 6 6 6 5 4 4 4 3 2 1
Level 6 SPEED(KM/H) 1 2 3 4 5 5 6 6 6 6 6 5 5 4 4 3 2 1
Level 7 SPEED(KM/H) 1 2 3 4 5 6 6 7 7 6 6 6 5 5 4 3 2 1
Level 8 SPEED(KM/H) 1 2 3 4 5 6 7 7 7 7 6 6 6 5 5 4 2 1
P5. INTERVAL
P6. ROLLING
SPEED CHANGES 1 2 3 4 5 6 7 8 9 10 11 12 13 14 15 16 17 18
Level 1 SPEED(KM/H) 1 2 3 2 1 2 3 2 1 2 3 2 1 2 3 2 1 1
Level 2 SPEED(KM/H) 2 3 4 3 2 3 4 3 2 3 4 3 2 3 4 3 2 2
Level 3 SPEED(KM/H) 2 3 4 5 4 3 4 5 4 3 4 5 4 3 4 5 4 3
Level 4 SPEED(KM/H) 2 4 5 6 5 4 5 6 5 4 5 6 5 4 5 6 5 3
Level 5 SPEED(KM/H) 2 5 6 7 6 5 6 7 6 5 6 7 5 6 7 6 5 3
Level 6 SPEED(KM/H) 3 6 7 8 7 6 7 8 7 6 7 8 7 6 7 8 7 4
Level 7 SPEED(KM/H) 3 7 8 9 8 7 8 9 8 7 8 9 8 7 8 9 8 4
Level 8 SPEED(KM/H) 3 8 9 10 9 8 9 10 9 8 9 10 9 8 9 10 8 4
SPEED CHANGES 1 2 3 4 5 6 7 8 9 10 11 12 13 14 15 16 17 18
Level 1 SPEED(KM/H) 1 2 4 2 4 2 4 2 4 2 4 2 4 2 4 2 4 2
Level 2 SPEED(KM/H) 1 2 5 2 5 2 5 2 5 2 5 2 5 2 5 2 5 2
Level 3 SPEED(KM/H) 1 2 6 2 6 2 6 2 6 2 6 2 6 2 6 2 6 2
Level 4 SPEED(KM/H) 1 3 6 3 6 3 6 3 6 3 6 3 6 3 6 3 6 3
Level 5 SPEED(KM/H) 1 3 7 3 7 3 7 3 7 3 7 3 7 3 7 3 7 3
Level 6 SPEED(KM/H) 2 4 7 4 7 4 7 4 7 4 7 4 7 4 7 4 7 4
Level 7 SPEED(KM/H) 2 4 8 4 8 4 8 4 8 4 8 4 8 4 8 4 8 4
Level 8 SPEED(KM/H) 2 5 8 5 8 5 8 5 8 5 8 5 8 5 8 5 8 5
19
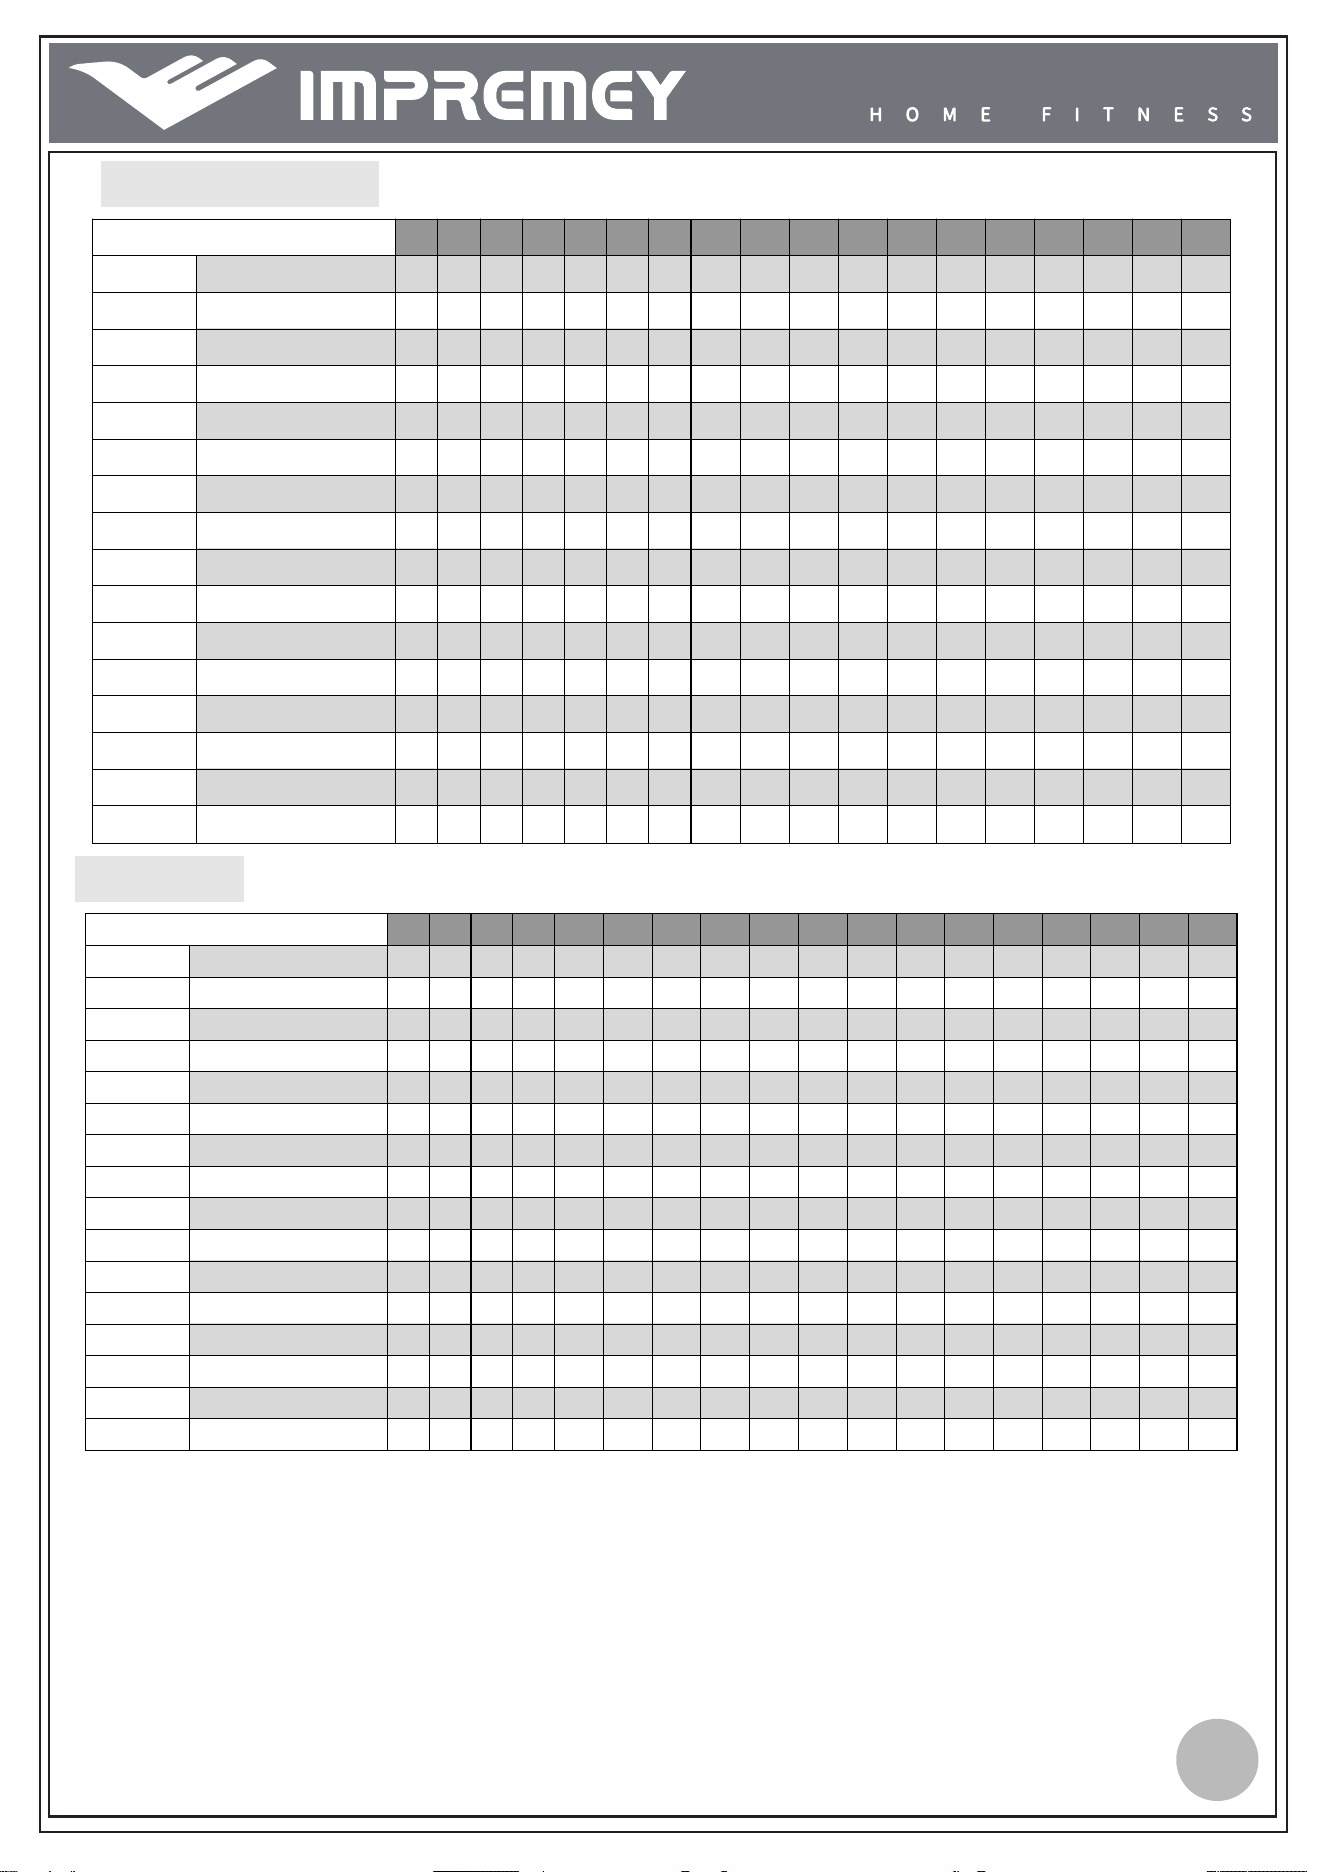
P7. MOUNTAIN CLIMB
SPEED & INCLINE CHANGES 1 2 3 4 5 6 7 8 9 10 11 12 13 14 15 16 17 18
Level 1 ELEVATION 0 1 1 2 2 3 3 4 4 5 6 7 8 7 6 4 2 0
SPEED(KM/H) 1 1 2 2 3 3 3 4 4 4 3 3 3 2 2 2 1 1
Level 2 ELEVATION 0 1 2 2 3 3 4 4 5 6 7 8 9 8 6 4 2 0
SPEED(KM/H) 1 1 2 2 3 3 3 4 4 4 3 3 3 2 2 2 1 1
Level 3 ELEVATION 1 1 2 3 3 4 4 5 6 7 8 9 10 9 8 6 4 2
SPEED(KM/H) 1 1 2 2 3 3 3 4 4 4 3 3 3 2 2 2 1 1
Level 4 ELEVATION 1 2 2 3 3 4 5 6 7 8 9 10 11 10 8 7 5 3
SPEED(KM/H) 2 2 3 3 4 4 4 5 5 4 4 4 3 3 3 2 2 2
Level 5 ELEVATION 1 2 3 4 5 6 7 8 9 9 10 11 12 11 10 8 6 4
SPEED(KM/H) 2 2 3 3 4 4 4 5 5 4 4 4 3 3 3 2 2 2
Level 6 ELEVATION 2 2 3 4 5 6 7 8 9 10 11 12 13 12 10 8 6 4
SPEED(KM/H) 2 2 3 3 4 4 4 5 5 4 4 4 3 3 3 2 2 2
Level 7 ELEVATION 2 3 4 5 6 7 8 9 10 11 12 13 14 13 10 8 6 4
SPEED(KM/H) 2 2 4 4 5 5 5 6 6 6 5 5 4 4 4 2 2 2
Level 8
ELEVATION 3 4 5 6 7 8 9 10 11 12 13 14 15 13 10 8 6 4
SPEED(KM/H) 2 2 4 4 5 5 5 6 6 6 5 5 4 4 4 2 2 2
P8. HILL RUN
SPEED & INCLINE CHANGES 1 2 3 4 5 6 7 8 9 10 11 12 13 14 15 16 17 18
Level 1 ELEVATION 0 0 1 1 2 2 2 3 3 3 4 4 5 5 4 3 2 1
SPEED(KM/H) 2 2 2 3 3 3 5 5 7 7 9 9 10 8 8 6 4 2
Level 2 ELEVATION 0 0 1 1 2 2 2 3 3 3 4 4 5 6 5 3 2 1
SPEED(KM/H) 2 2 2 4 4 4 6 6 6 8 8 10 10 8 8 6 4 2
Level 3 ELEVATION 0 0 1 1 2 2 3 3 3 4 4 5 5 6 5 3 2 1
SPEED(KM/H) 2 2 4 4 4 6 6 6 8 8 10 10 12 10 8 6 4 2
Level 4 ELEVATION 0 1 1 2 2 3 3 4 4 4 5 5 6 7 6 5 3 2
SPEED(KM/H) 2 2 4 4 6 6 8 8 8 10 10 10 12 12 10 7 5 3
Level 5
ELEVATION 1 1 2 2 3 3 4 4 5 5 6 6 7 8 7 6 3 2
SPEED(KM/H) 2 4 6 6 6 6 8 8 8 10 10 12 13 12 10 7 5 3
Level 6 ELEVATION 1 2 3 4 4 4 5 5 6 6 7 8 8 8 7 6 3 2
SPEED(KM/H) 2 4 6 6 6 6 8 8 10 10 12 13 13 12 10 7 5 3
Level 7
ELEVATION 1 2 3 4 5 6 6 7 7 8 8 9 10 10 9 6 3 2
SPEED(KM/H) 2 4 6 6 8 8 10 10 12 13 13 14 13 12 10 7 5 3
Level 8 ELEVATION 1 2 3 4 6 6 7 7 8 8 9 9 10 12 9 6 3 2
SPEED(KM/H) 2 4 6 8 10 10 12 12 13 13 14 14 13 12 10 7 5 3
20
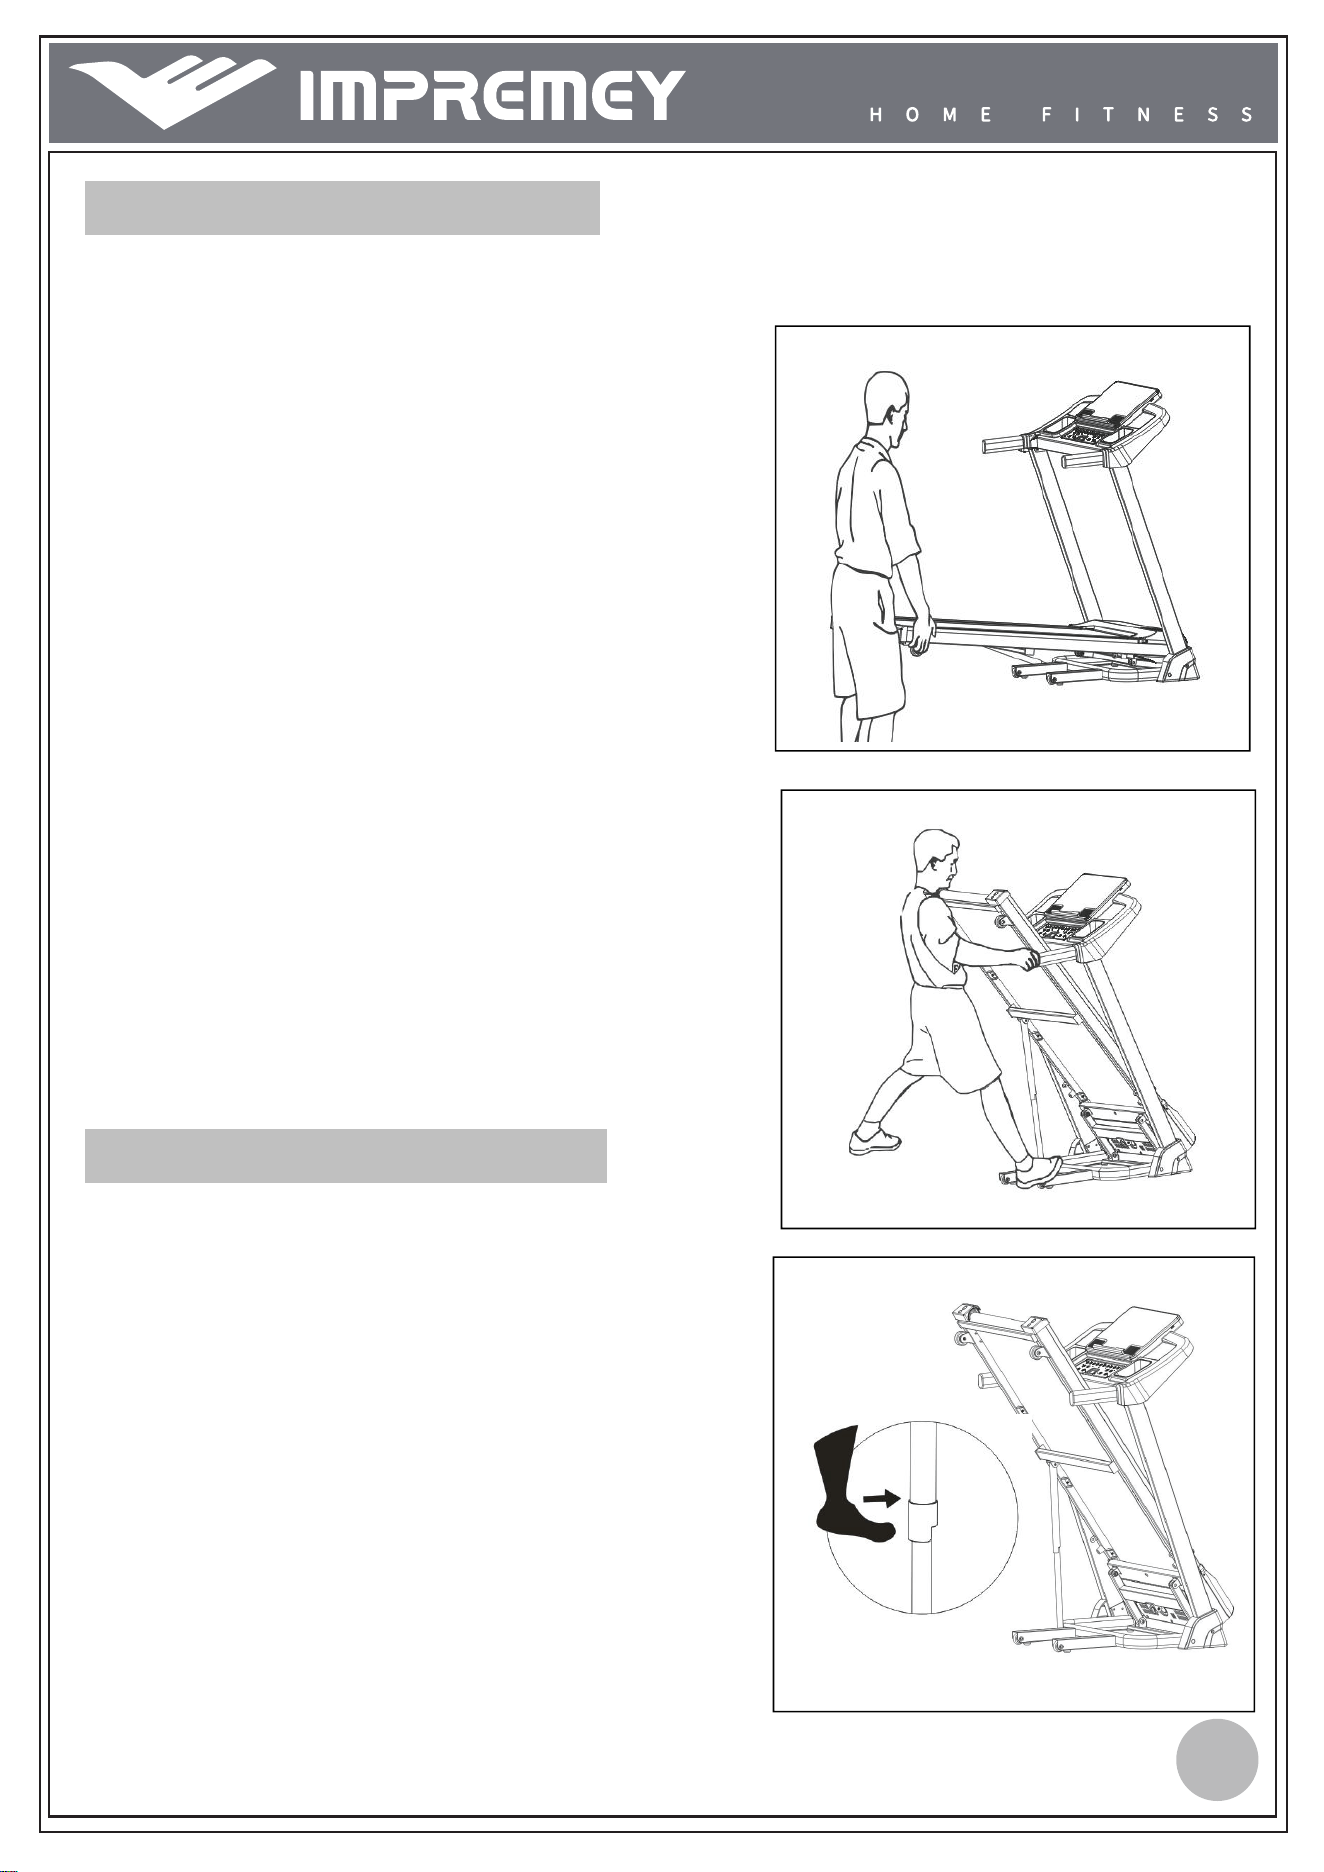
HOW TO FOLD THE TREADMILL
Before folding the treadmill, unplug the power cord.
CAUTION: You must be able to safely lift 45
pounds (20kg) in order to raise, lower, or move
the treadmill.
1. Hold the treadmill with your hands in the locations
Shown at the right. CAUTION: To decrease the
possibility of injury, bend your legs and keep your
back straight. As you raise the treadmill, make sure
to lift with your legs rather than your back. Raise
the treadmill until the running deck is firmly held by the
folding pole as the right figure shows.
2. If you want to put the treadmill to the work position,
Firstly pull the folding knob outward as figure shows,
And then lay down the running deck light onto floor.
HOW TO MOVE THE TREADMILL
1. Hold the handrails as shown and place one foot
against a wheel.
2. Tilt the treadmill back until it rolls freely on the
wheels.Carefully move the treadmill to the desired
location.
Never move the treadmill without tipping it back.
To reduce the risk of injury, use extreme caution
While moving the treadmill. Do not attempt to
move the treadmill over an uneven surface.
3. Place one foot on a wheel, and carefully lower the
Treadmill until it is resting in the storage position.
21
SUGGESTED STRETCHES
A successful exercise program consists of a warm-up, aerobic exercise, and a
cool-down. Do the entire program at least two and preferably three times a week,
resting for a day between workouts. After several months, you can increase your
workouts to four or five times per week.
Warming up is an important part of your workout, and should begin every session.
It prepares your body for more strenuous exercise by heating up and stretching
out your muscles, increasing your circulation and pulse rate, and delivering more
oxygen to your muscles. At the end of your workout, repeat these exercises to
reduce sore muscle problems. We suggest the following warm-up and cool-down
exercises:
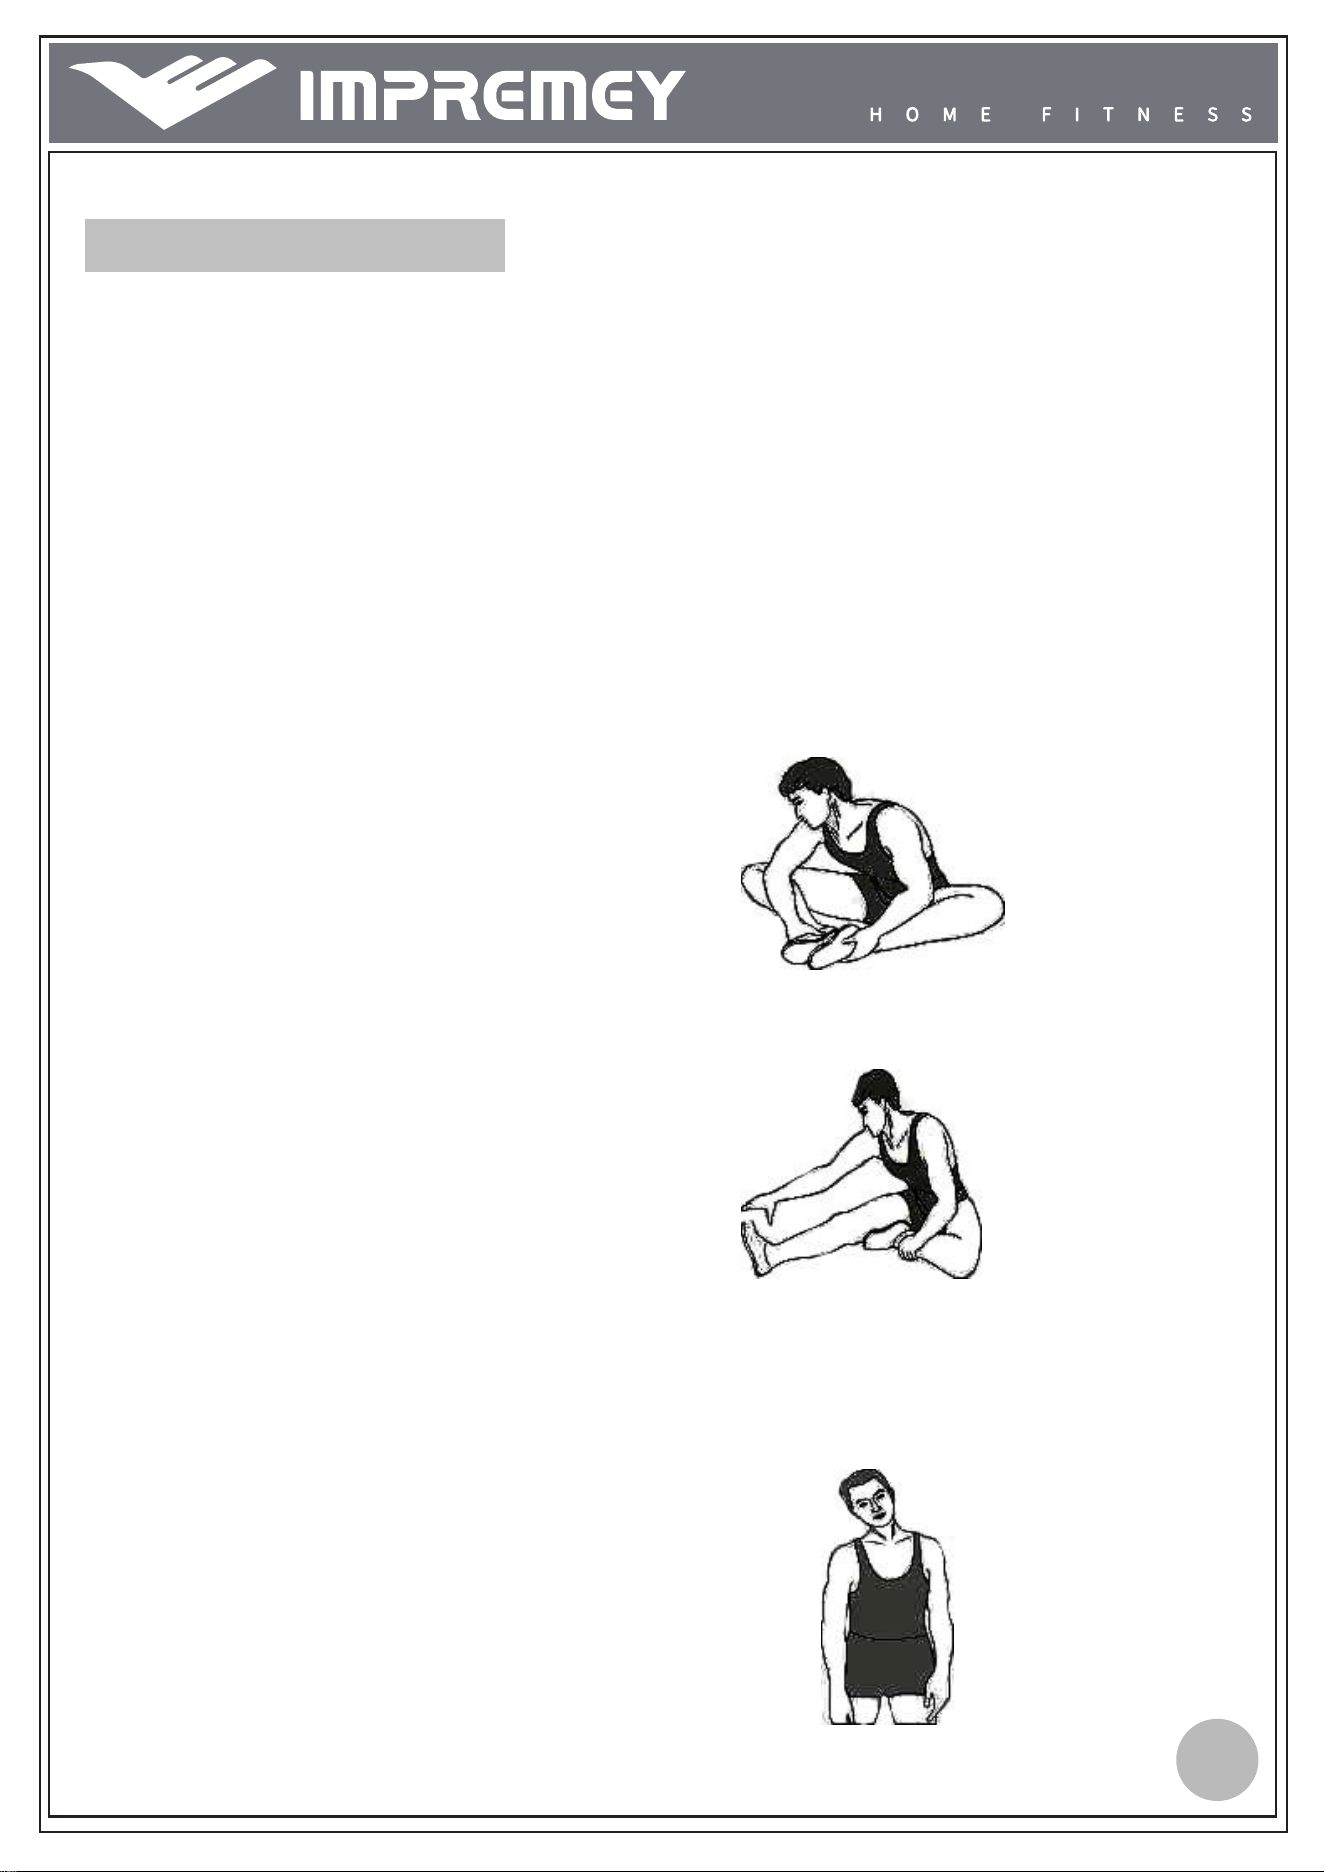
1. Inner Thigh Stretch
Sit with the soles of your feet together with your
knees pointing outward. Pull your feet as close
into your groin as possible. Gently push your
knees towards the floor. Hold for 15 counts.
2. Hamstring Stretch
Sit with your right leg extended. Rest the sole
of your left foot against your right inner thigh.
Stretch toward your toe as far as possible.
Hold for 15 counts. Relax and then repeat with
left leg extended.
3. Head Roll
Rotate your head to the right for one count, feeling
the stretch up the left side of your neck.
Next, rotate your head back for one count, stretching
your chin to the ceiling and letting your mouth open.
Rotate your head to the left for one count, and finally,
drop your head to your chest for one count.
22
SUGGESTED STRETCHES
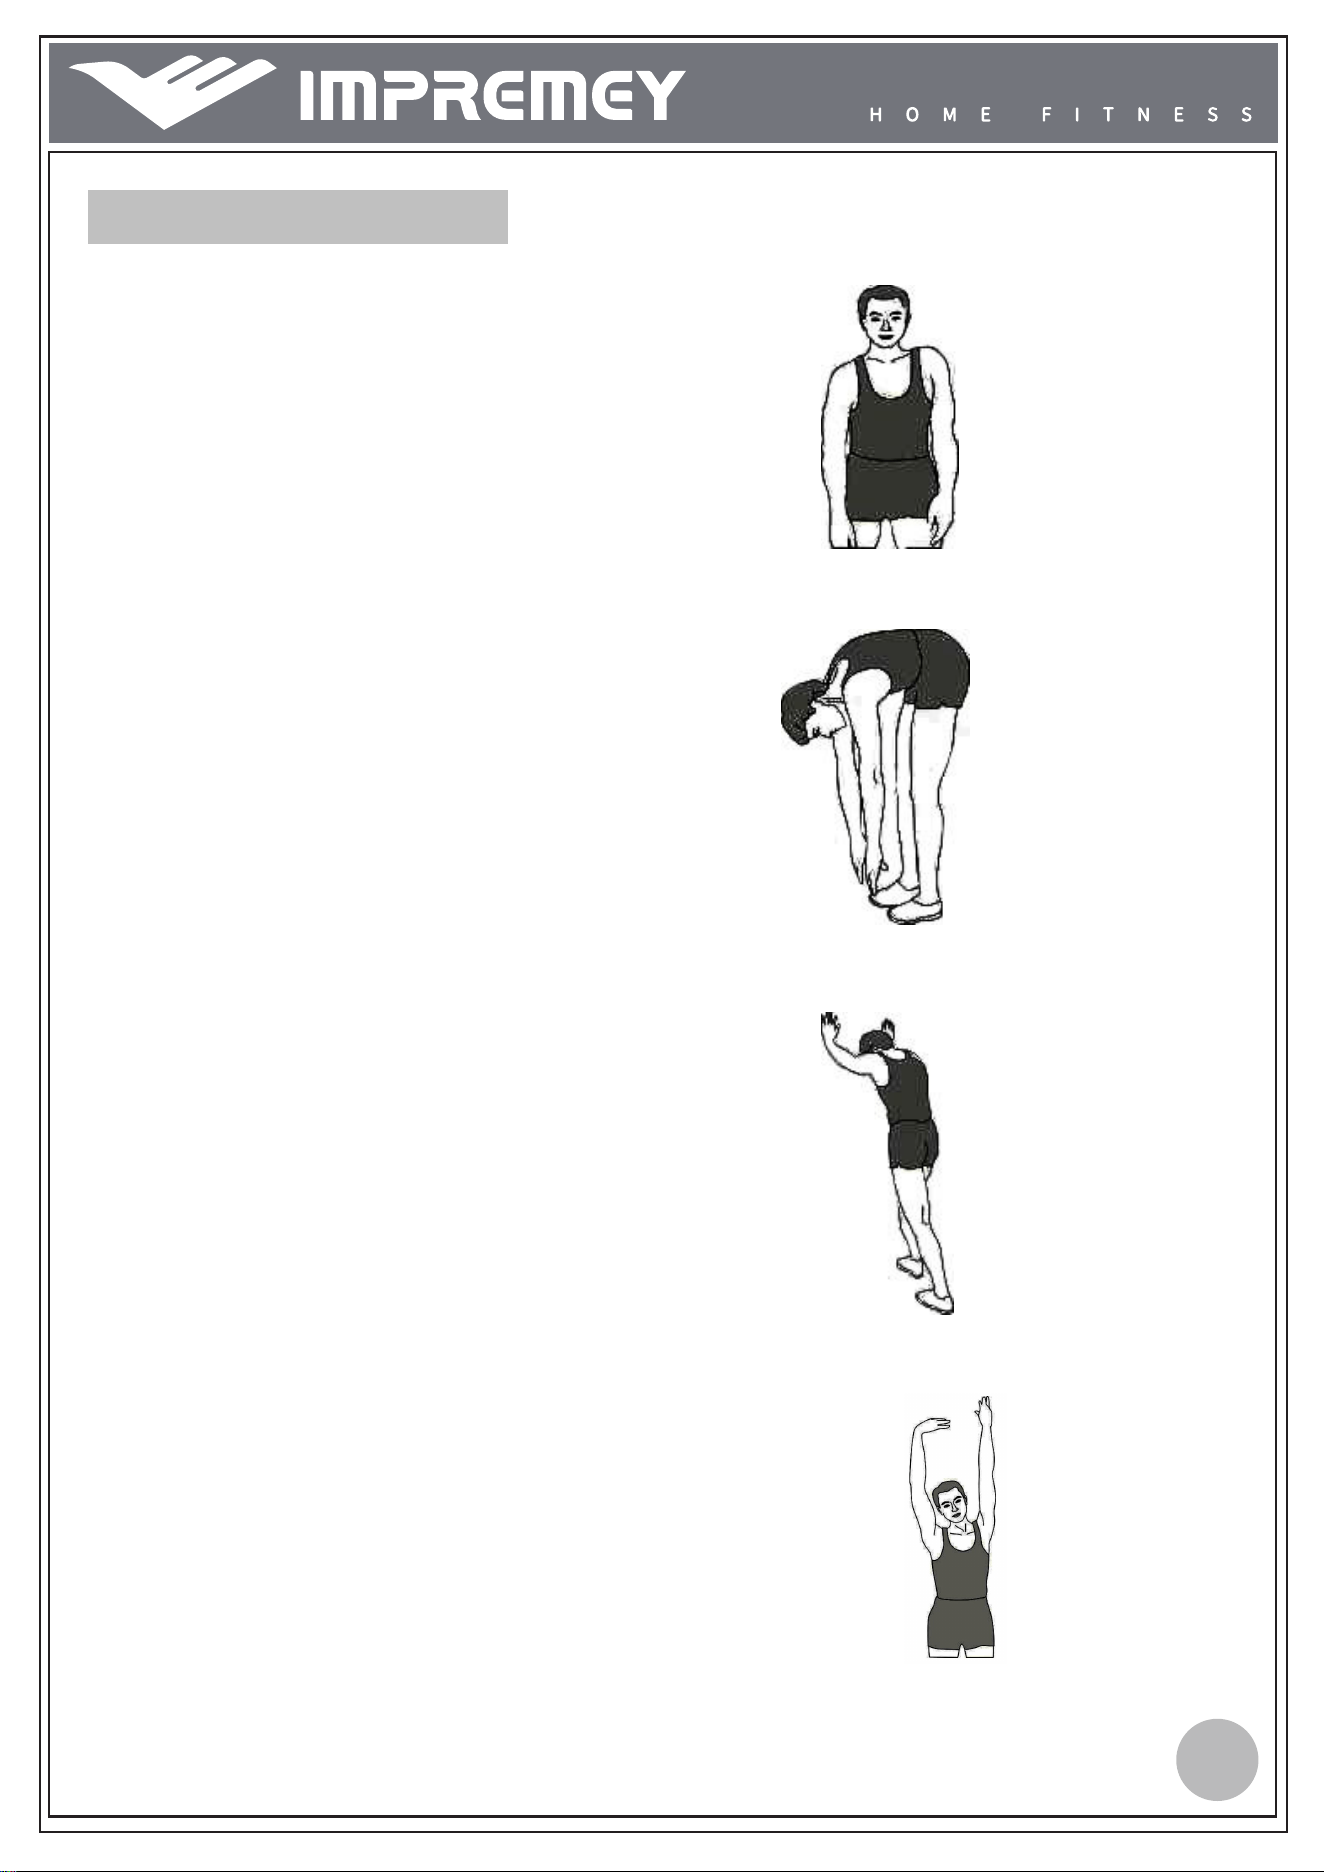
4. Shoulder Lift
Lift your right shoulder up toward your ear for one
count. Then lift your left shoulder up for one count as
you lower your right shoulder.
5. Toe Touch
Slowly bend forward from your waist, letting your
back and Shoulders relax as you stretch toward
your toes.
Reach down as far as you can and hold for 15
counts.
6. Calf-Achilles Stretch
Lean against a wall with your left leg in front of the
right and your arms forward. Keep your right leg
straight and the left foot on the floor; then bend the
left leg and lean forward by moving your hips toward
the wall. Hold, and then repeat on the other side for
15 counts.
7. Side Stretch
Open your arms to the side and continue lifting
them until they are over your head.
Reach your right arm as far upward toward.
The ceiling as you can for one count.
Feel the stretch up your right side.
Repeat this action with your left arm.
23
MAINTENANCE
WARNING! Before performing any maintenance to your treadmill, always unplug
the power cord from the surge protector.
CLEANING: Routine cleaning of your TREADMILL will extend the life of your
treadmill.
WARNING! To prevent electrical shock, be sure the power to the treadmill is
OFF and the unit is unplugged from the wall electrical outlet before attempting any
cleaning or maintenance.
AFTER EACH WORKOUT: Wipe off the console and other treadmill surfaces
with a clean, water dampened soft cloth to remove excess perspiration. USE NO
CHEMICALS.
WEEKLY: Use of a treadmill mat is recommended for ease of cleaning. Dirt from
your shoes contacts the belt and eventually ends up underneath the treadmill.
Vacuum underneath the treadmill once a week.
TREADMILL LUBRICATION:
IMPREMEY recommends lubricating every 30-50 hours for in-home use.
The walking belt has been pre-lubricated at the factory. However, it is
recommended that the walking board be checked periodically for lubrication to
ensure optimal treadmill performance. Every 10 days or 10 hours of operation,
lift the sides of the walking belt and feel the top surface of the walking board as
far under as you can reach. If you feel signs of silicone, no further lubrication is
required. If it feels dry to the touch, lubrication is needed. Ask your retailer or call
Service line for the type of silicone.
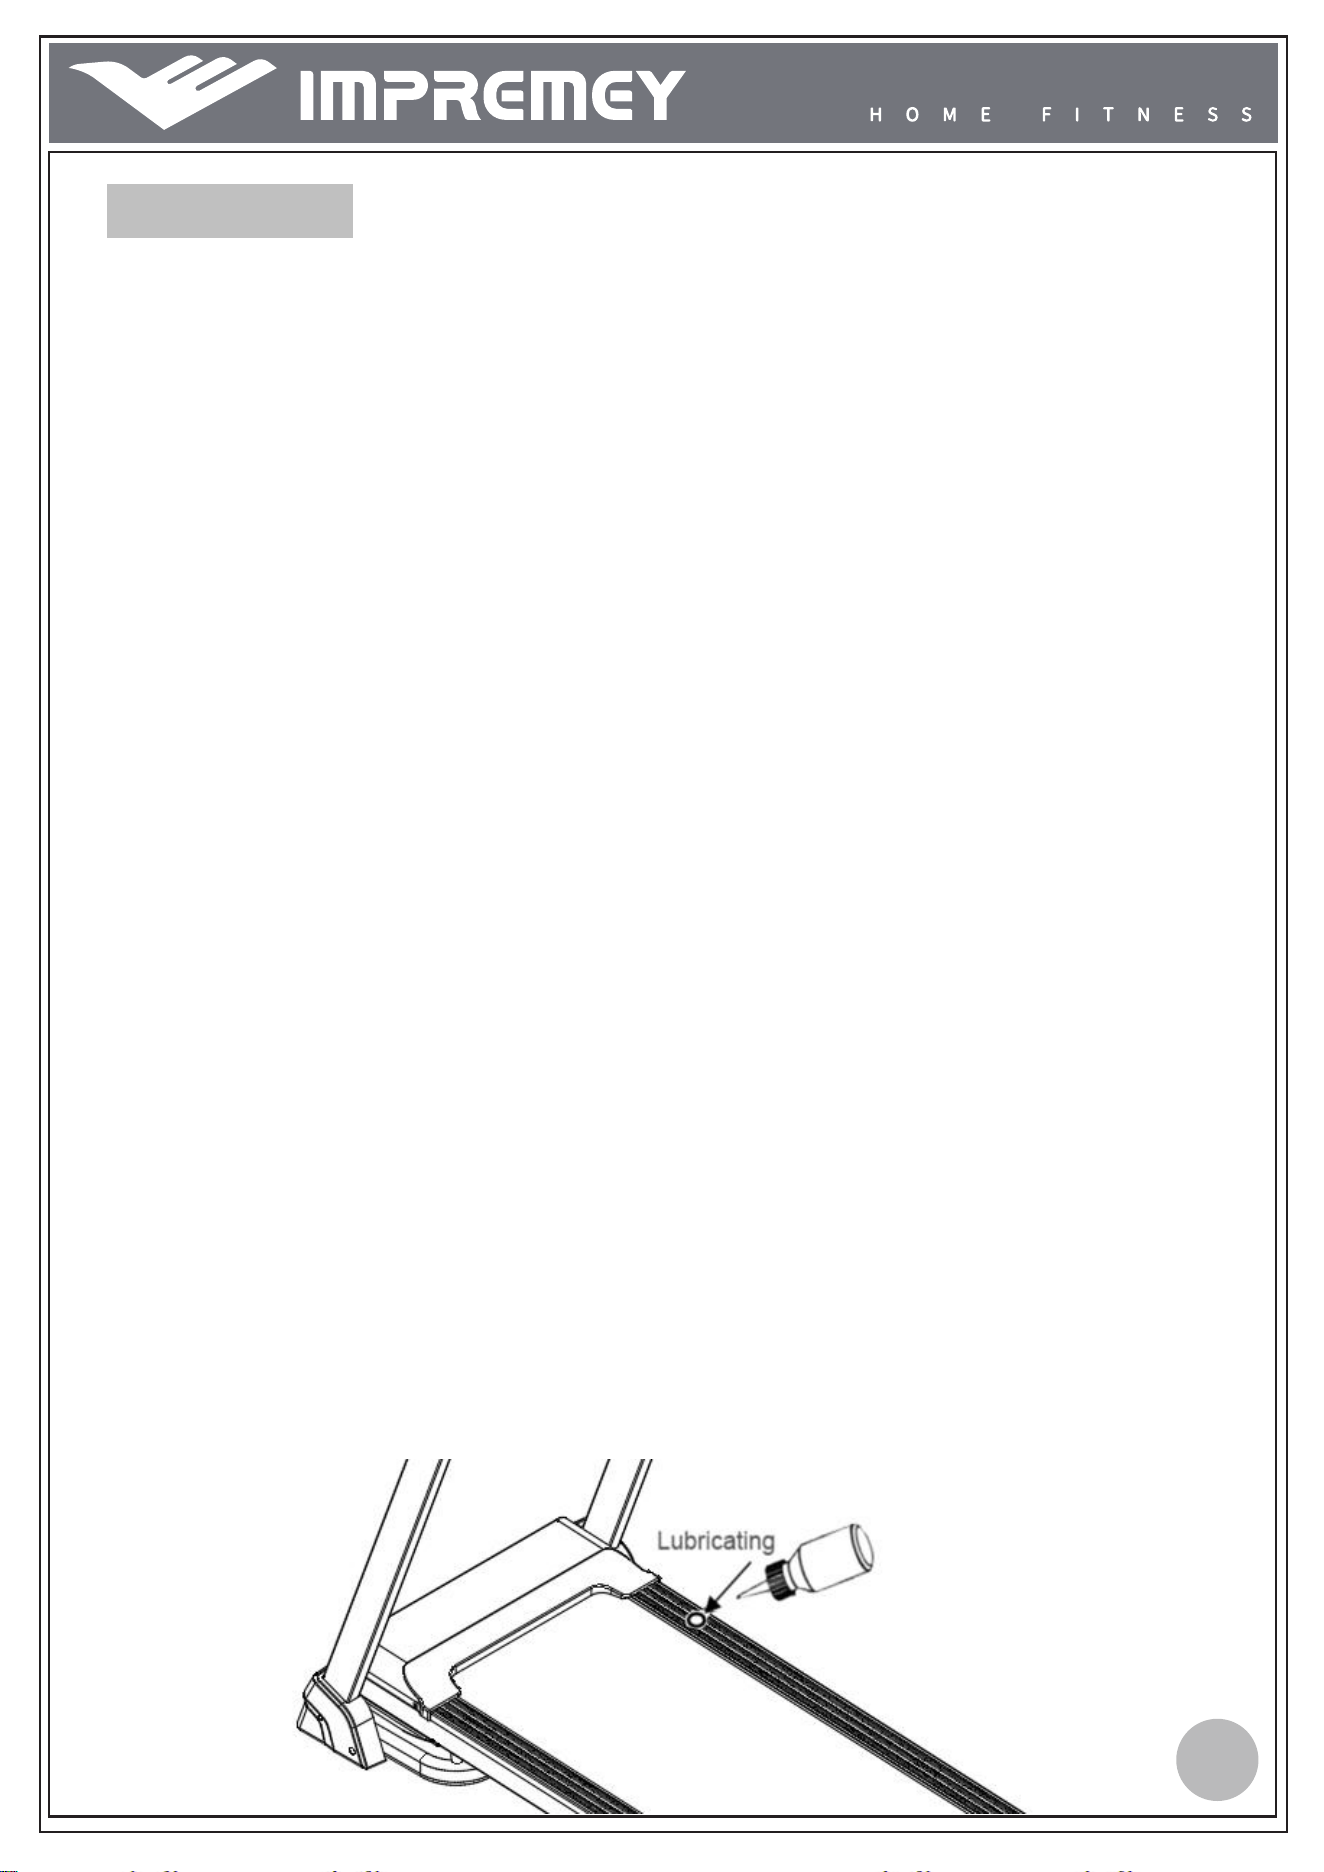
There is a lubricating hole in the right side rail.
Walk on the treadmill at 2MPH for about 60 seconds to spread the lubricant evenly
through the belt and deck.
WARNING: Do not over-lubricate the walking board. Excess lubricant should be
wiped off with a clean towel
24
MAINTENANCE
Running belt tension adjustment
The treadmill has been adjusted and passed QC inspection before leaving the
factory. If there is phenomenon of bias running of the belt, the possible reasons
might be:
A. The frame is not stably laid
B. The user is not running on the center of the running belt;
C. The user’s two feet are not using even strength.
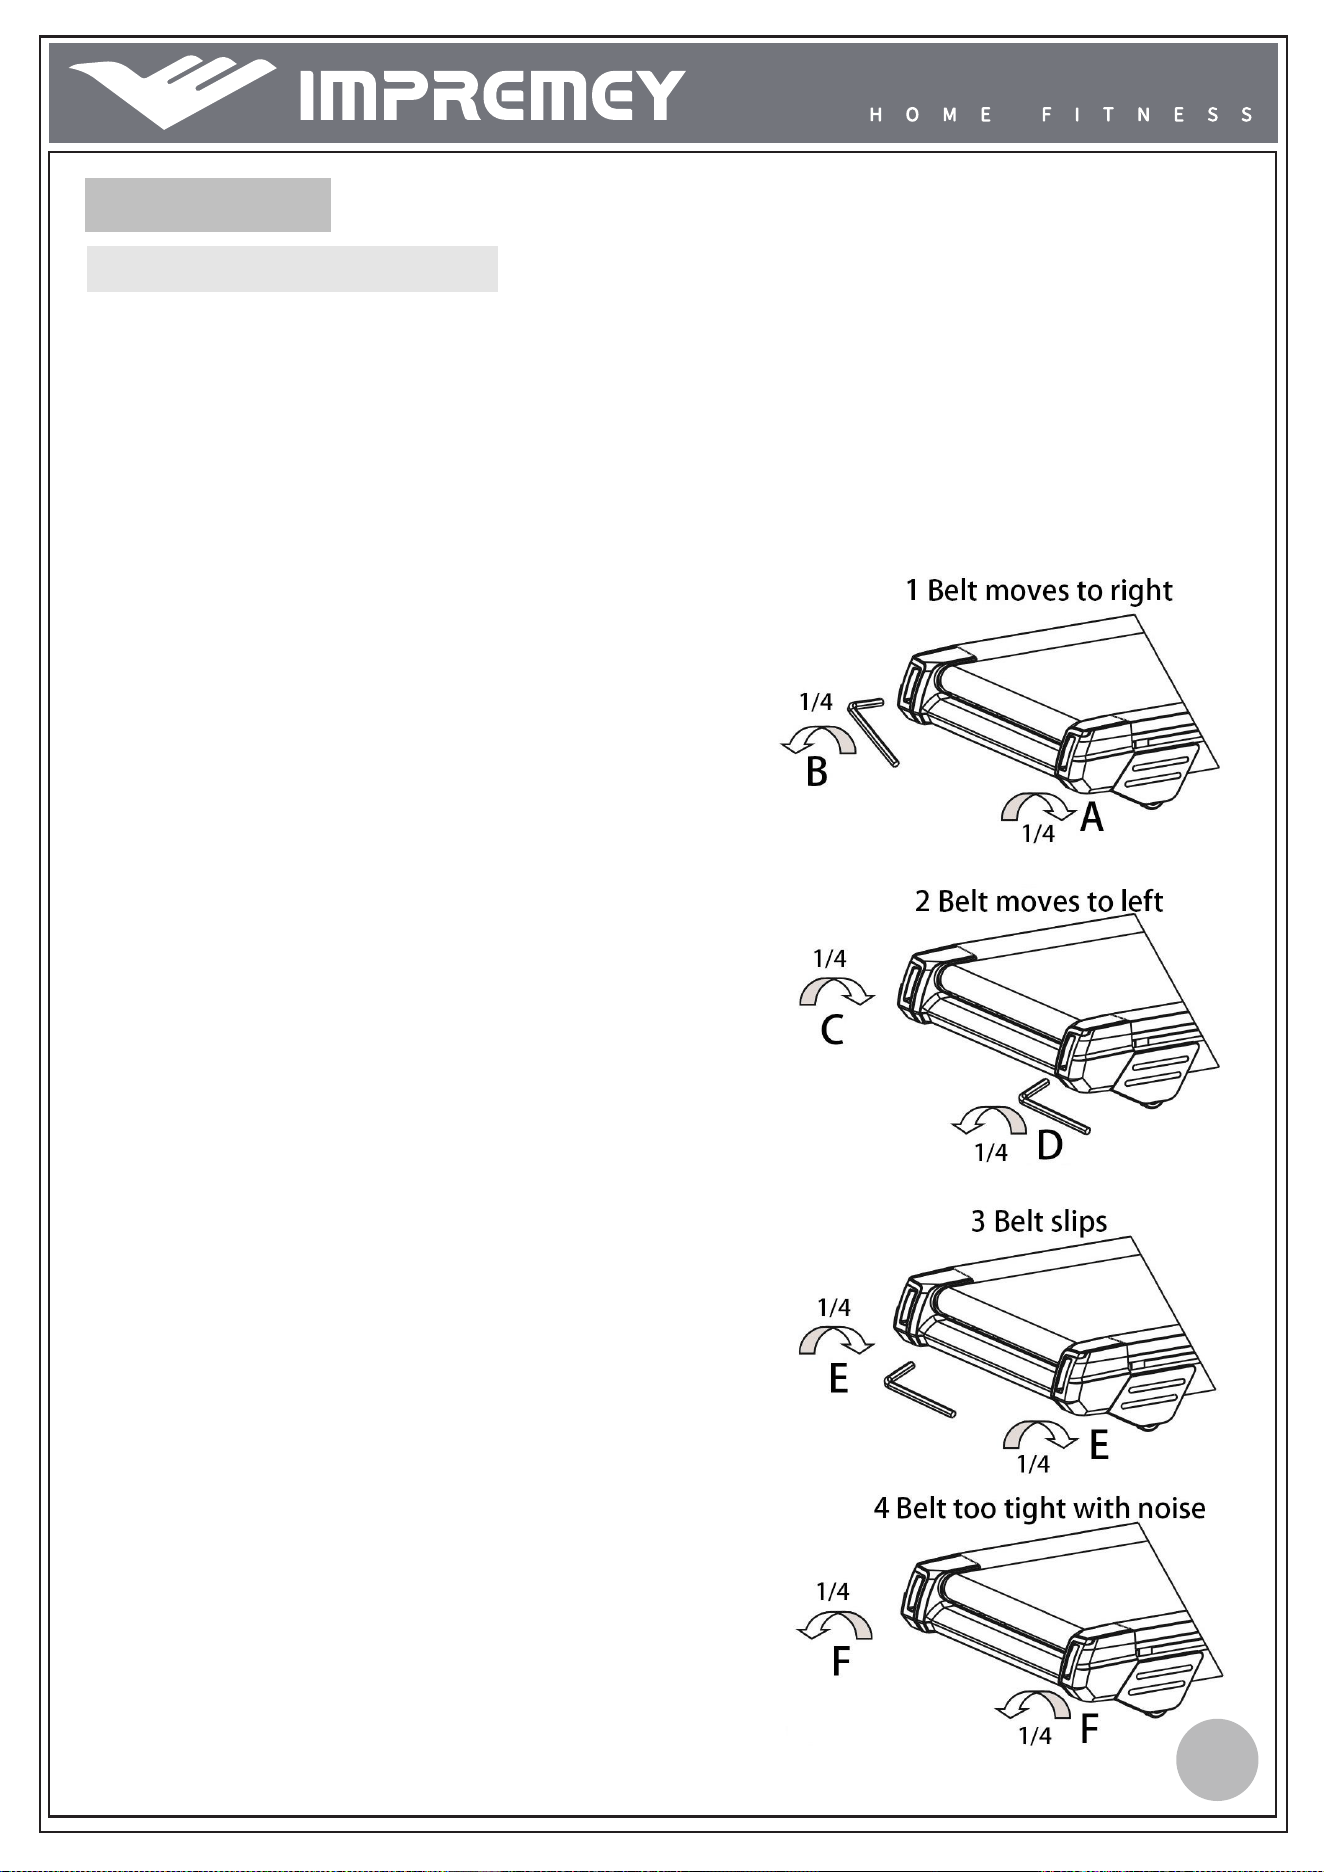
For bias which cannot be fixed automatically, try the following methods to fix the
belt, as picture shown
25
If the belt tends to move to the right, you should set
the running speed on 2-3 mph, then you should
turn the belt adjustment screw on the right in
clockwise direction Picture A. We recommend you
turn 1/4 turn each time and check how it works. If
the belt remains slanting to the right ,then turn the
belt adjustment screw on the left in
counterclockwise direction 1/4,as shown in the
picture B
If the belt tends to move to the left, you should set
the running speed on 2-3 mph,then turn the belt
adjustment screw on the left in clockwise direction
for 1/4 turn Picture C. If the belt remains slanting to
the left ,then turn the belt adjustment screw on the
right in counterclockwise direction for 1/4 turn, as
shown in the picture D
After having been used for a period, the belt might be
slightly elongated, and slipping and halting might
appear when a person is running on it. When these
phenomena appear, you should set the running
speed on 2-3 mph, then secure the screws on both
sides for 1/4 turn Picture E. If the belt is too tight,
just loosen the screw on both sides for 1/4 turn, as
shown in picture F.
TROUBLE SHOOTING GUIDES
E01 Software Overcurrent Power on and start again, mainly caused by excessive load
E02 Hardware overcurrent The power input voltage is too low, or the lower controller is damaged
E03 IPM module overheating Shutdown for 30 minutes and then start again
E04 Under voltage protection The power input voltage is too low, or the lower controller is damaged
E05 Overvoltage protection The power input voltage is too high, or the lower controller is damaged
E06
Motor phase loss
protection
Replace lower controller or motor
E07 Motor jam protection Power on and start again
E08 Motor stopped 1. Add lubrication oil. 2. Replace the motor
E09
Motor overcurrent
protection
1. Add lubrication oil. 2. Replace motor. 3. Replace the lower controller
E10 Overload protection 1. Replace lower controller 2. Replace console PCB 3. Replace cable
E12 Communication issues 1. Replace lower controller 2. Replace console PCB 3. Replace cable
PROBLEM POSSIBLE CAUSES CORRECTION
Console has no
display
1. Power cord not plugged
well.
2. Defection on whole set
cable or not plug well.
3. Overload protection.
1. Check power cord connection.
2. Plug every connector well.
3. Reset overload protector.
Treadmill belt
slipping
1. Running belt too loose.
2. Motor belt too loose.
1. Tighten running belt.
2. Tighten motor belt.
Running belt not
smooth
1. Lack lubrication oil
2. Running belt too tight.
1. Add lubrication oil to belt and
deck.
2. Loose running belt.
Motor not work
1. Safety key not attached
correctly.
2. Motor cable not connect
well.
3. Whole set cable not plug
well.
4. Controller damaged.
5. Motor damaged.
1. Insert safety key.
2. Check motor cable connection.
3. Plug whole set cable again.
4. Replace controller.
5. Replace motor.
26

FCC Statement:
This device complies with part 15 of the FCC Rules. Operation is subject to the
following two conditions:
(1) This device may not cause harmful interference, and
(2) this device must accept any interference received, including interference that
may cause undesired
operation.
This equipment has been tested and found to comply with the limits for a Class B
digital device, pursuant
to part 15 of the FCC Rules. These limits are designed to provide reasonable
protection against harmful
interference in a residential installation. This equipment generates, uses and can
radiate radio frequency
energy and, if not installed and used in accordance with the instructions, may
cause harmful interference to
radio communications. However, there is no guarant ee that interference will not
occur in a particular
installation. If this equipment does cause harmful interference to radio or
television
reception, which can
be determined by turning the equipment off and on, the user is encouraged to try
to correct the
interference by one or more of the following measures:
—Reorient or relocate the receiving antenna.
—Increase the separation between the equipment and receiver.
—Connect the equipment into an outlet on a circuit different from that to which
the
receiver is connected.
—Consult the dealer or an experienced radio/TV technician for help.
Caution: Any changes or modifications not expressly approved by the party
responsible for compliance
could void the user's authority to operate the equipment.
This equipment complies with FCC radiation exposure limits set forth for an
uncontrolled environm ent.
This transmitter must not be co‐
located or operating in conjunction with any
other
antenna or transmitter..

Acknowledgements
Dear customer,
Thank you for choosing IMPERMEY. We commit to provide
thebest products and services to every customer.
If you have any inquiries or require further assistance,
please contact IMPERMEY customer support by
Your suggestions are always important and valuable to us.
Kindest regards,
Company Founder
Email:[email protected]