USER MANUAL
PM5
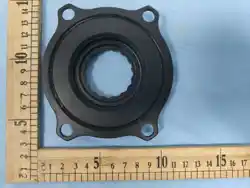
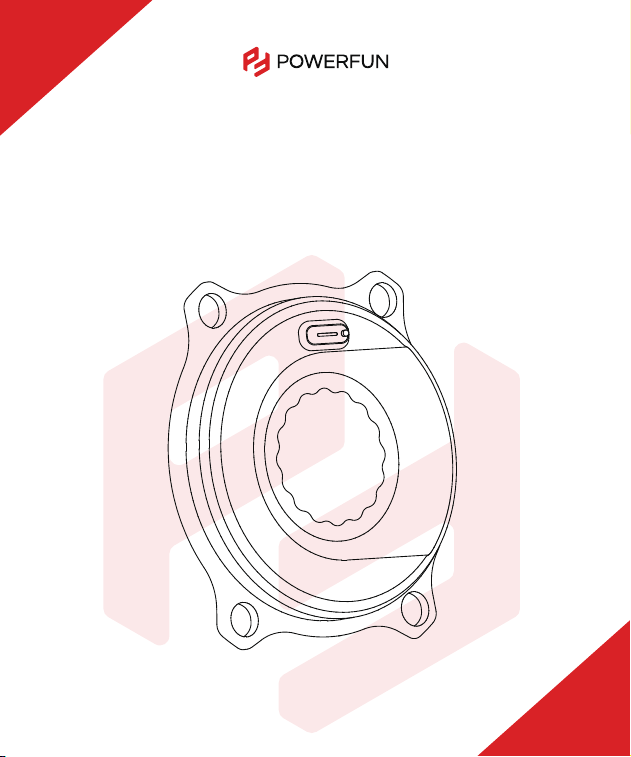
POWER METER SPIDER
This product is specifically designed for road cycling training. Equipped with a high-
precision strain gauge and temperature compensation function, it provides stable
and accurate real-time power data during daily rides, helping you monitor your riding
status, facilitate scientific riding, and optimize training results.
The product supports dual protocol wireless transmission (ANT+ and Bluetooth) and
is widely compatible with mainstream bike computers and training applications.
*Thank you for choosing this product. To ensure proper use, please carefully read
this manual before use and keep it properly for future reference.
1.Product Introduction
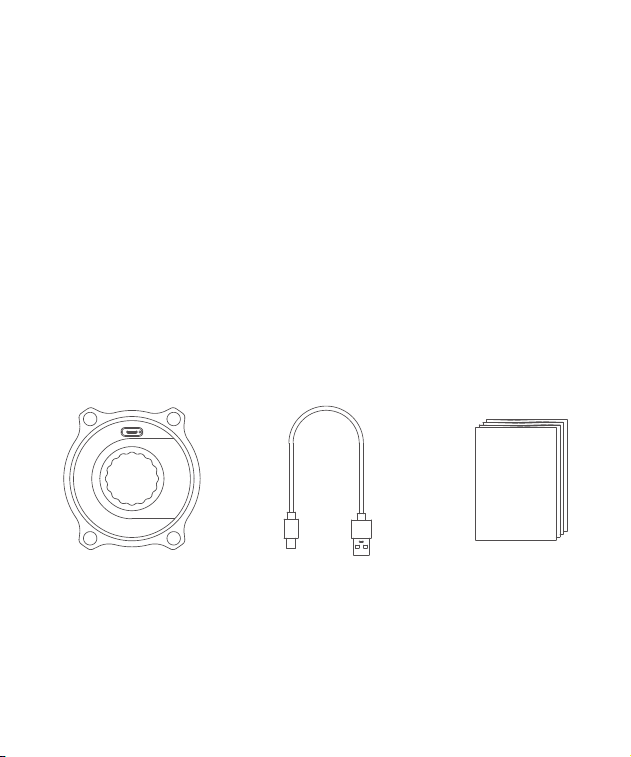
2.Package Contents
Type-C charging cable x 1Spider power meter x 1 User Manual x 1
01
User Manual

It is recommended that the installation be performed by personnel with
experience in installing bicycle drive systems or installation by professional
technicians. For the proper operation of the power meter and riding safety,
please pay attention to the following matters during installation.
3.Installation Requirements
02
Before installation, please refer to the crankset's installation instructions to
understand its installation method and specified locking torque, and strictly
follow the specifications.
3.1 Refer to Crank Specifications
During installation, please carefully check that the power meter does not rub or
bump against the frame, crank, chain, freewheel, or other surrounding components,
and that it operates smoothly.
3.2 Check for Interference
After installation, it is recommended to perform a short test ride to check the power
meter's operation. If any abnormal noises, readings, or data discrepancies are found,
please stop immediately and re-check the installation .
3.3 Installation complete and testing.

This product supports both ANT+ and Bluetooth dual-protocol wireless
transmission.
4.Connection pairing
03
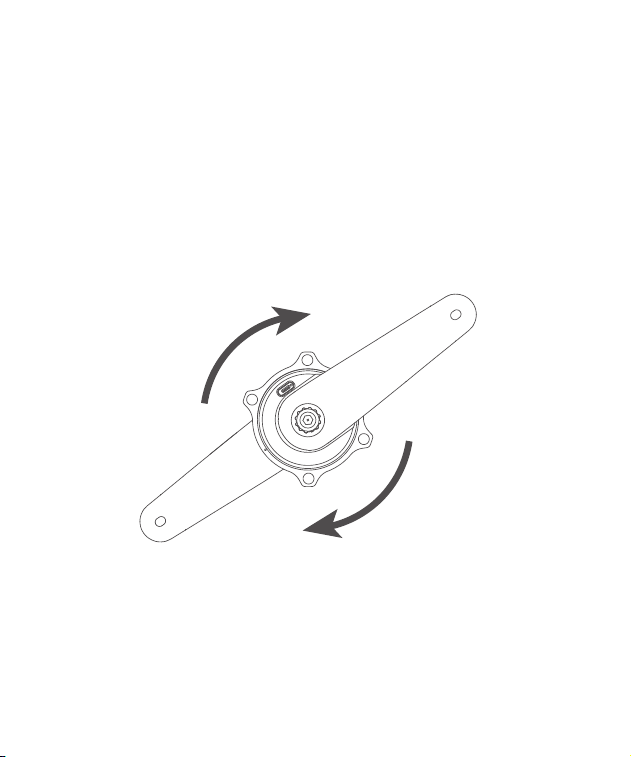
(1)Wake up the device: Turn the crank to ensure the power meter has exited sleep
mode; the indicator light will flash.
(2)Enable the wireless function of the receiving device: On your bike computer or
mobile phone, enable ANT+ or Bluetooth search function.
(3)Maintain distance: Please perform pairing operations within 3 meters of the
power meter.
(4)To avoid interference: If other power meters or sensors are already connected,
it is recommended to disconnect them temporarily to avoid signal interference.
4.1 Preparation before Pairing
(1)Open the bike computer and enter the system menu.
(2)Click "Sensors" and select "Add Sensor".
(3)Turn the crank to activate the power meter.
(4)Find the power meter ID for pairing.
(5)After successful connection, rotate the crank a few times, and the cadence data
will appear on the speedometer.
4.2 Bike Computer Pairing
(1)Turn on your phone's Bluetooth and open the cycling or training app you are using.
(2)Access the "Device Management," "Add Sensor," or similar function interface
within the application.
(3)Turn the crank to activate the power meter.
(4)In the list of available devices, select the power meter ID to connect.
(5)After a successful connection, the indicator light on the power meter will flash
blue once.
4.3 Connecting applications
*Usage Tips: No manual operation of the switch is required during daily riding; the
device will automatically manage the power based on your riding status
This power meter features intelligent power management and can automatically
enter a low-power state when not in use. It monitors power consumption and
quickly resumes operation when you start riding to optimize battery life.
5.Sleep and Wake-up Mechanism
04
When the crank starts to turn (usually after 1 to 2 revolutions), the power meter
will immediately wake up and establish a connection. During the wake-up process,
the indicator light will flash briefly, and its color represents the current battery level
(see section "8. Indicator Light Description" for details) .
5.1 Wake
If the power meter does not detect any movement for 5 consecutive minutes, it will
automatically enter sleep mode. During sleep mode, the pairing information between
the device and the bike computer or app will be retained and will not be lost.
5.2 Hibernation

·Charging Safety
It is recommended to charge the device within an ambient temperature range of
-10°C to +45°C. Do not charge the device near open flames, high-temperature heat
sources, or in extremely cold or hot environments.
·Strictly Prohibited Modifications
Any form of disassembly, modification, or crushing of this product is strictly
prohibited to avoid damaging the battery and circuitry, which could lead to safety
hazards. If the battery accidentally comes into contact with water or is submerged,
immediately stop using it and dispose of it properly.
·User Safety
Keep this product out of reach of children to prevent accidental damage to the
device or personal injury.
*Usage Tips: The Type-C interface can be used with a standard 5V slow charger
or various fast chargers, but it will automatically use the slow charger protocol.
If using a power bank or a high-power fast charger, the charging may be
automatically disconnected when the battery is almost fully charged and enters
trickle charging mode due to low current. In this case, the red light will turn off
and the green light will not illuminate.
To read the current power meter charge, you can connect the device to the
"POWERFUN Settings" app and read the charge level. However, there may be a
delay in reading the charge level while charging.
Remove the waterproof silicone cover and charge using a Type-C charging cable.
After charging is complete, be sure to replace the cover and check that it is tightly
closed to avoid affecting the waterproof performance of the power meter.
During charging, the indicator light will be solid red; once fully charged, the
indicator light will be solid green.
6.Charge
05
【Safety Warning】

*Usage Tips: Please keep the device stable during calibration. If calibration
fails, please check for connection interruptions and ensure the bicycle is
stationary before trying again.
To maintain the accuracy of power measurement data, manual zero-point
calibration is recommended under certain circumstances.
7.Equipment Calibration
06
(1)After installation: After the first installation or after disassembling and reinstalling
the power meter (in this case, you need to step on it several times to release the
assembly stress before performing the calibration operation).
(2)When there is a significant temperature change: when the usage environment
changes significantly, such as when moving from indoors to outdoors .
(3)Important pre-ride: Before formal training or the start of a race.
7.1 Recommended Calibration Conditions
Please follow these steps in sequence using the connected "POWERFUN Settings" app
or cycling computer:
(1)Enter device connection status and locate the "Sensor Settings", "Power Meter
Settings" or similar function interface.
(2)Make sure the bicycle is stationary and that no external force is applied to the
pedals or cranks .
(3)Click the "Start Calibration" button.
(4)Wait for the "Calibration successful" message to appear, indicating that the
calibration is complete.
7.2 Manual Calibration Steps
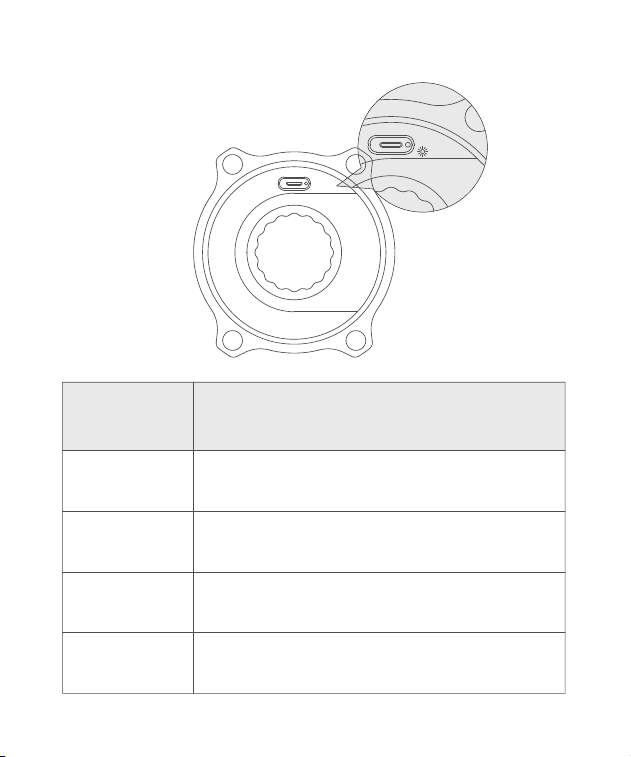
8.Indicator Light Description
07
Operate Indicator light status
Bluetooth Pairing
When Bluetooth is successfully connected, the blue
light flashes once; when Bluetooth is disconnected,
the red light flashes once.
After waking up the power meter, if the battery level
is above 20%,The green light flashes three times; if the
battery level is below 20%, the red light flashes five times.
The red light stays on while charging; the green light
stays on when the battery is fully charged.
(Charging in progress, other status lights are not working )
Wake-up
Charging
Firmware Upgrade
During the upgrade process, the blue light will
remain on. It will automatically turn off and
restart after the upgrade is complete.

9.Specifications
08
Power Accuracy
Weight
Battery Life
Battery
Radio Protocol
Waterproof
Operating Temperature
Storage Temperature
Power Range
Cadence Range
Measurement Data
±1%
108g
300h
Rechargeable lithium battery
ANT+, Bluetooth
IPX7
-20℃-60℃
-30℃-60℃
0-2800W
20-240RPM
Power, cadence, left-right balance,
pedaling smoothness

10.Cleaning and Maintenance
09
• Wipe the surface of the device with a soft, microfiber cloth to remove dust, dirt,
or sweat.
• The equipment is designed to withstand everyday rain, but do not immerse it in
water during cleaning, and avoid using a high-pressure water gun to rinse it directly.
10.1 Daily Cleaning
• Avoid subjecting the power meter and crank assembly to strong impacts or
vibrations to prevent damage to internal sensing elements.
• Regularly check whether the screws securing the power meter to the crank and
chainring are loose. It is recommended to check once a month or after every 500
kilometers of riding.
10.2 Protective Inspection
• To maintain data accuracy, it is recommended to perform a zero-point calibration
once a week or before each long-distance ride (see “7. Equipment Calibration”
section for details).
• Regularly check for firmware updates via the "POWERFUN Settings" app and upgrade
promptly to achieve feature optimizations and performance improvements.
10.3 Performance Maintenance
• Store in a dry, cool environment.
• Charge the battery every 6 months to maintain battery health.
10.4 Long-term Storage
• It is strictly forbidden to disassemble, modify or attempt to repair this product yourself.
• Avoid contact with corrosive chemical solvents.
10.5 Prohibited Items
The official POWERFUN app "POWERFUN Settings":
10
https://www.powerfun.com/DownloadView1
1.Download from the official website:
2.Scan the QR code to download:

Nantong POWERFUN Technology Co., Ltd.
Building 13, Sino-Singapore Intelligent Manufacturing Industrial Park, No. 6 Haibao Road,
Suxitong Science and Technology Industrial Park, Nantong City, Jiangsu Province
www.powerfun.com

FCC Statement
This device complies with part 15 of the FCC Rules. Operation is subject to the following two
conditions: (1) This device may not cause harmful interference, and (2) this device must accept any
interference received, including interference that may cause undesired operation. This equipment has
been tested and found to comply with the limits for a Class B digital device, pursuant to part 15 of the
FCC Rules. These limits are designed to provide reasonable protection against harmful interference in a
residential installation. This equipment generates, uses and can radiate radio frequency energy and, if
not installed and used in accordance with the instructions, may cause harmful interference to radio
communications. However, there is no guarantee that interference will not occur in a particular
installation. If this equipment does cause harmful interference to radio or television reception, which can
be determined by turning the equipment off and on, the user is encouraged to try to correct the
interference by one or more of the following measures:
•Reorient or relocate the receiving antenna.
•Increase the separation between the equipment and receiver.
•Connect the equipment into an outlet on a circuit different from that to which the receiver is connected.
•Consult the dealer or an experienced radio/TV technician for help.
Caution: Any changes or modifications to this device not explicitly approved by manufacturer could void
your authority to operate this equipment.
RF Exposure Information
The device has been evaluated to meet general RF exposure requirement. The device can be used in
portable exposure condition without restriction.