•
•
•
•
•
•
•
•
•
MODEL/MODELO #Z-RMCL12
ITEM/ARTÍCULO #5704541
Using a wet or dry soft cloth, clean the fixture, never spray any liquid cleaner or water directly onto the light or LED.
Con un paño suave húmedo o seco, limpie la lámpara, nunca rocíe ningún limpiador líquido o agua directamente sobre la luz o el LED.
Printed in China
Impreso en China
Thank you for purchasing this UTILITECH product. We’ve created these easy-to-follow instructions to ensure you spend your time enjoying the product instead of
putting it together. But, if you need more information than what is provided here, please visit Lowes.com, search the item number and refer to the Guides &
Documents tab on the product’s page.
Estimated Assembly Time: 10 minutes
Tiempo estimado de ensamblaje: 10 minutos
1. Fixture does not turn on.
1. Recharge the light.
2. Slide the switch to ON position.
1. Check batteries.
2. The switch on the light is in
OFF position.
Gracias por comprar este producto UTILITECH. Hemos creado estas instrucciones fáciles de seguir para garantizar que pase su tiempo disfrutando el producto
en lugar de armándolo. No obstante, si necesita más información que la entregada aquí, visite Lowes.com, busque el número de artículo y consulte la pestaña
Guides & Documents (Guías y documentos) en la página del producto.
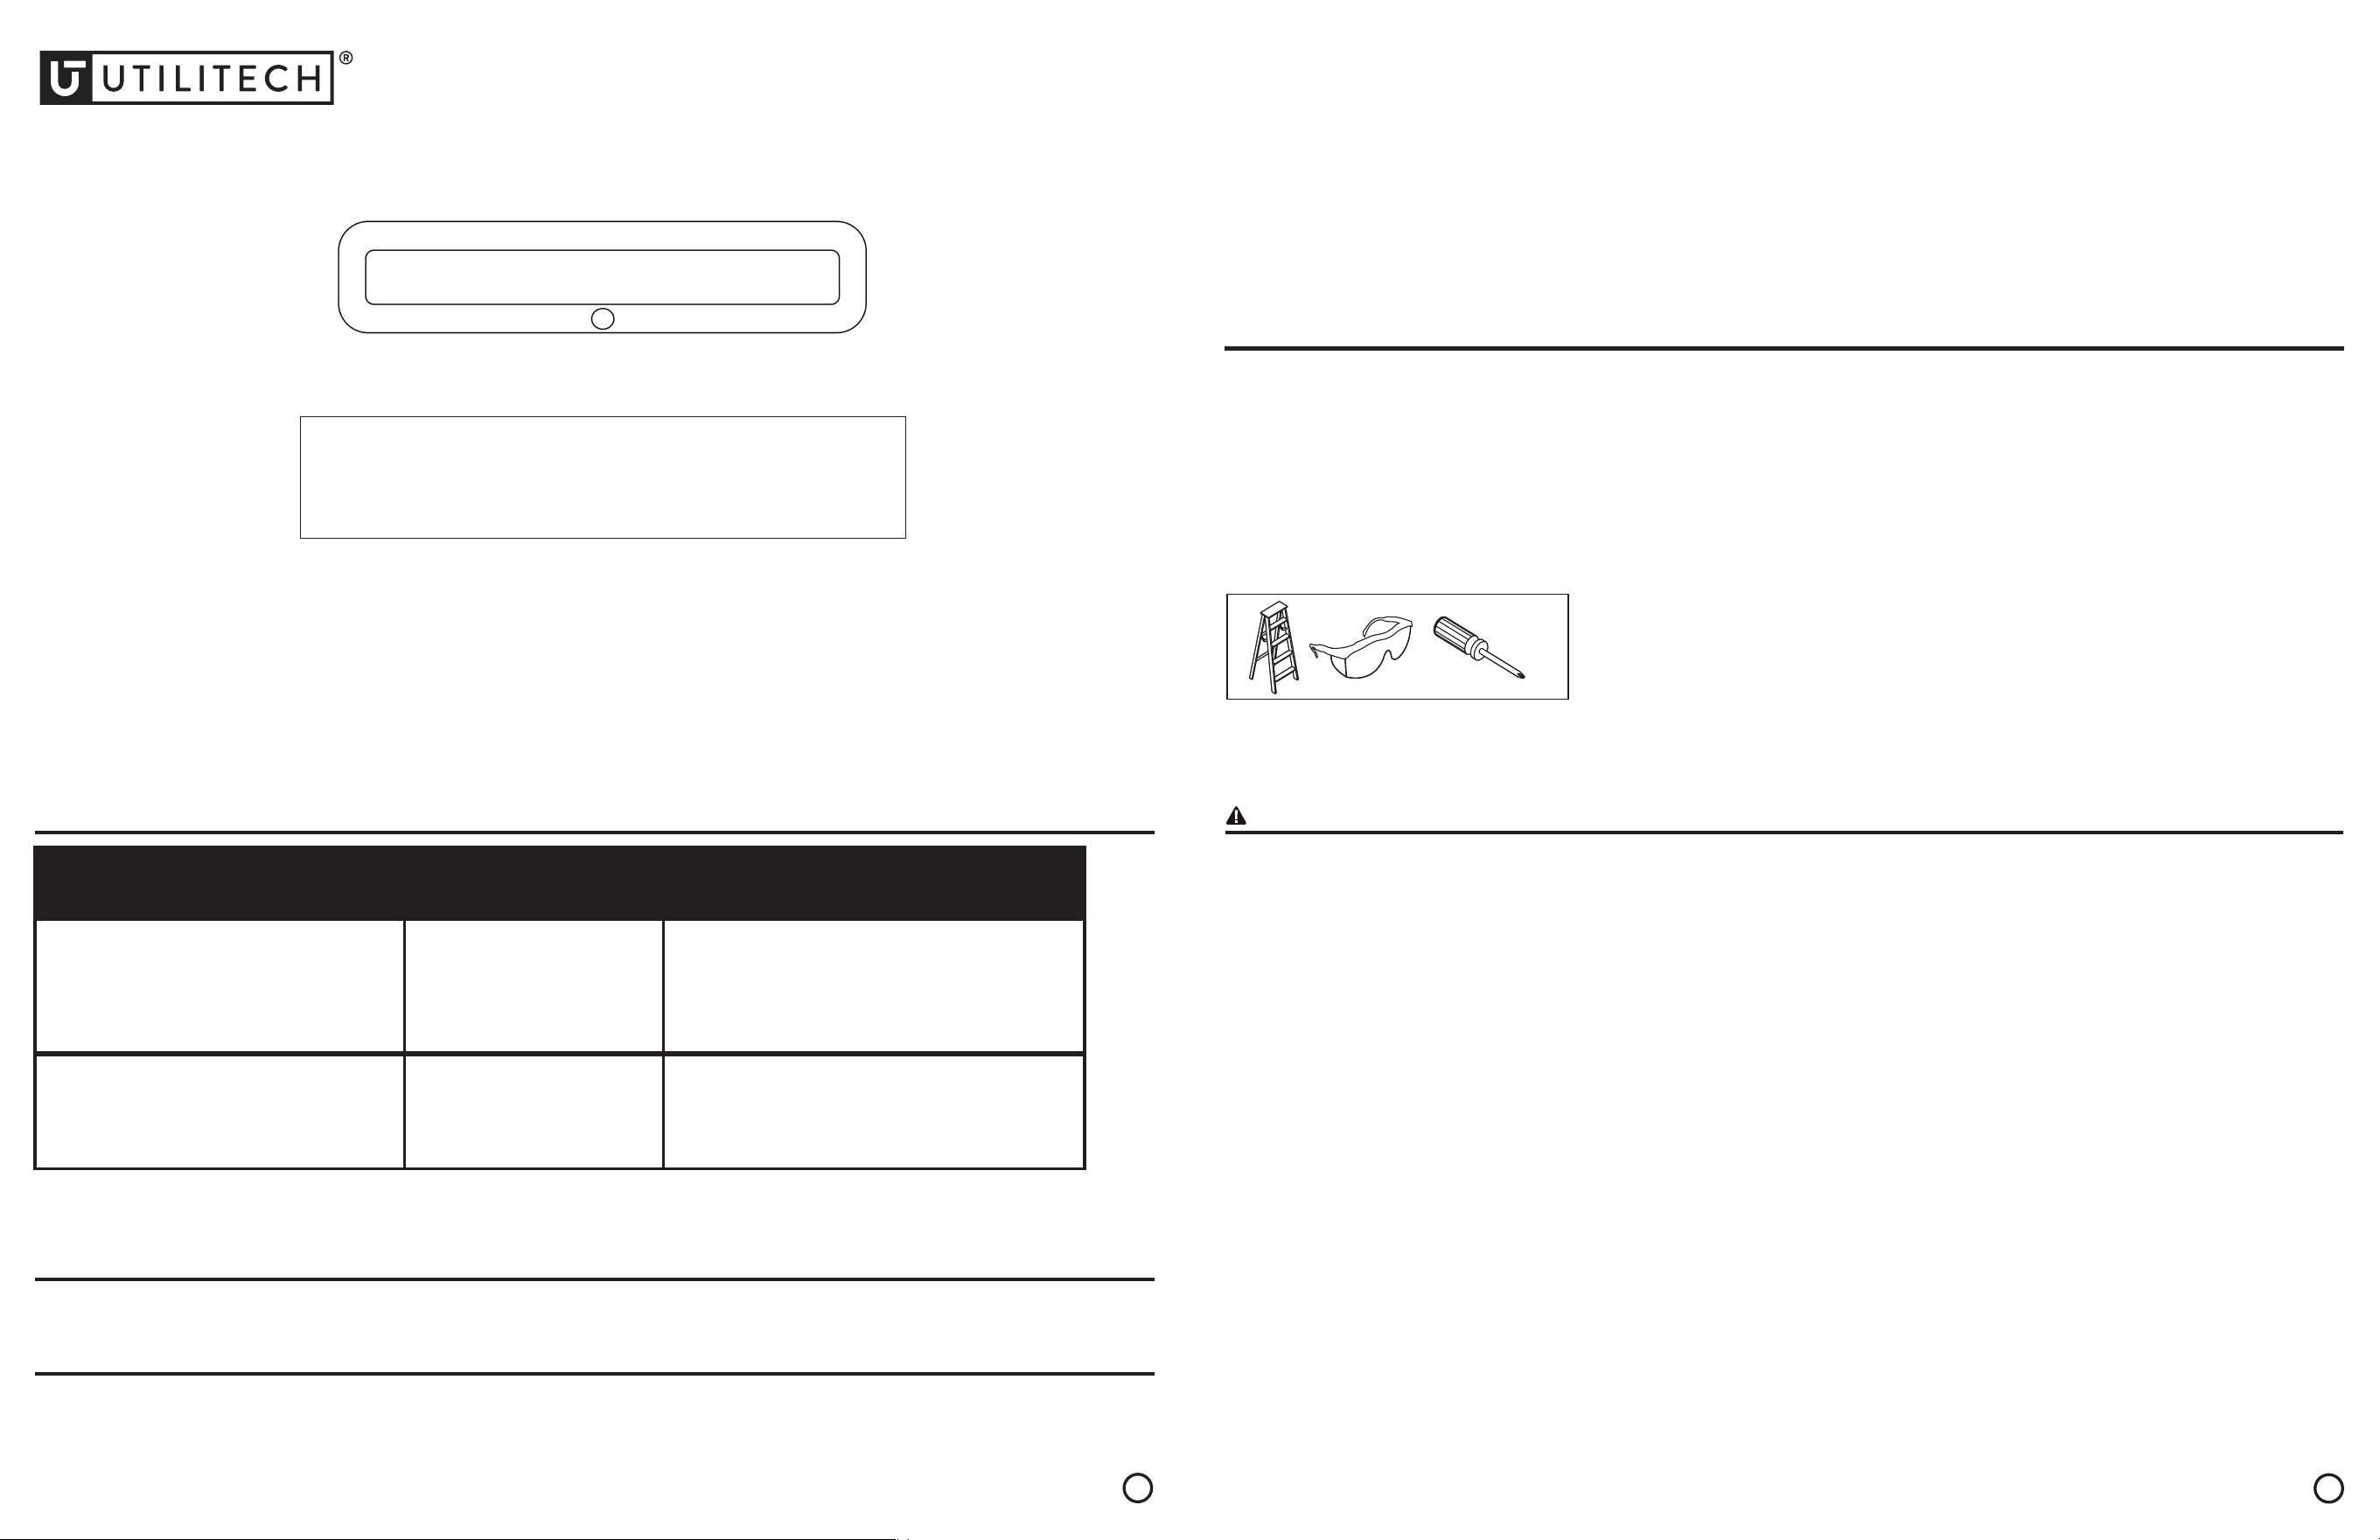
PREPARATION/PREPARACIÓN
Before beginning assembly of product, make sure all parts are present. Compare parts with package contents list and hardware contents list. If
any part is missing or damaged, do not attempt to assemble the product.
Antes de comenzar a ensamblar el producto, asegúrese de tener todas las piezas. Compare las piezas con la lista del contenido del paquete y
la lista de aditamentos. No intente ensamblar el producto si falta alguna pieza o si alguna está dañada.
TOOLS REQUIRED (NOT INCLUDED)/HERRAMIENTAS NECESARIAS (NO SE INCLUYEN)
TROUBLESHOOTING/SOLUCIÓN DE PROBLEMAS
PROBLEM
PROBLEMA
POSSIBLE CAUSE
CAUSA POSIBLE
CORRECTIVE ACTION
ACCIÓN CORRECTIVA
CARE AND MAINTENANCE/CUIDADO Y MANTENIMIENTO
WARRANTY/GARANTÍA
This product is quaranteed against failure due to factory defects in materials or workmanship for two (2) years from the date of purchase. This warranty is
non-transferable and applies only to the original owner. Proof of purcase is required for repair or replacement. This warranty does not cover normal ware of
parts or damage resulting from any misuse of the product. Misuse of the product includes, but is not limited to: washing the product, using in extreme weather
conditions, opening the product, trying to remodel the product or using in wrong voltage. Important: this warranty is only valid if the product has been
purchased through an authorized reseller.
SAFETY INFORMATION/INFORMACIÓN DE SEGURIDAD
WARNING/ADVERTENCIA
Don't install the lighting near flammable liquids or gas./No instale la luz cerca de líquidos inflamables o gas.
Turn power off before installation or removing the led light./Desconecte la alimentación antes de la instalación o de retirar la luz LED.
Please check the voltage before installing the bulb to make sure the voltage is correct./Verifique el voltaje antes de instalar la bombilla para asegurarse
de que el voltaje sea el correcto.
Please do not disassemble or modify the led light for any-purpose./No desmonte ni modifique la luz LED para ningún propósito.
Do not use the LED light with dimmers./No use la luz LED con atenuadores.
Discontinue use if damaged./Suspenda el uso si está dañado.
Suitable for use in damp locations (can be used in covered locations, not exposed to water)./Adecuado para uso en lugares húmedos (se puede usar en
lugares cubiertos, no expuestos al agua).
To prevent permanent eye damage, do not look directly at the LED lights./Para evitar daños oculares permanentes, no mire directamente a las luces LED.
This device is not intended for use with emergency exits or not for emergency lighting./Este dispositivo no es apto para usarse con lámparas o luces de
salidas de emergencia.
UTILITECH
and logo design are trademarks or registered
trademarks of LF, LLC. All rights reserved.
UTILITECH
y el diseño del logotipo son marcas
comerciales o marcas registradas de LF, LLC. Todos
los derechos reservados.
Este producto está garantizado contra defectos en los materiales o en la fabricación durante dos (2) años a partir de la fecha de compra. La garantía no es
transferible y corresponde únicamente al comprador original. Para realizar reparaciones o reemplazos, se requiere un comprobante de compra. Esta garantía
no cubre el desgaste normal de las piezas ni los daños debido al mal uso del producto. El mal uso del producto incluye, entre otros: lavar el producto, usarlo
en condiciones climáticas extremas, abrir el producto, intentar remodelar el producto o usarlo con el voltaje incorrecto. Importante: esta garantía solo es válida
si el producto se compró a través de un revendedor autorizado.
12-IN BATTERY-POWERED RECHARGEABLE
LED UNDERCABINET LIGHT
LUZ DE LED RECARGABLE PARA DEBAJO DE GABINETES CON
FUNCI
Ó
N A BATER
Í
A DE 30.48 CM
1. Revise las baterías.
2. El interruptor de la luz está en
la posición de APAGADO.
1. Recargue la luz.
2. Deslice el interruptor a la posición de ENCENDIDO.
1. The motion sensor does not work.
1. El detector de movimiento no funciona.
1. The light is located in a lighted
area.
1. Move light to a non-lighted location.
1. La luz está ubicada en una
zona iluminada.
1. Mueva la luz a un lugar sin iluminación.
1. La lámpara no se enciende.
SG24509
Questions, problems or missing parts?
Before returning, contact us on:
866-994-4148
,8 a.m. - 8 p.m., EST, Monday - Sunday or [email protected].
¿Tiene preguntas, problemas o piezas faltantes?
Antes de volver a la tienda, póngase en contacto al:866-994-4148, de lunes
a domingo, de 8 a.m. a 8 p.m., hora estándar del Este, o escriba a [email protected].
Please read and understand this entire manual before attempting to assemble, operate or install the product.
Lea y comprenda completamente este manual antes de intentar ensamblar, usar o instalar el producto.
Do not alter or disassemble any parts of the fixture. It is completely enclosed and does not contain replaceable or serviceable parts./
No modifique ni desarme ninguna pieza de la lámpara. Está completamente cerrada y no contiene piezas reparables por el usuario.
•
1
2
A
B
1
* Designed for safety to shut off the power to the light before it can cause the light to overheat or catch fire.
* Diseñado por seguridad para cortar la alimentación de la luz antes de que pueda hacer que la luz se sobrecaliente o se incendie.
x1
HARDWARE CONTENTS/ADITAMENTOS
Note: Hardware not shown actual size.
Nota: los aditamentos no se muestran en tamaño real.
4
3
QUICK REFERENCE GUIDE/GUÍA DE REFERENCIA RÁPIDA
QUICK REFERENCE GUIDE/GUÍA DE REFERENCIA RÁPIDA
PACKAGE CONTENTS/CONTENIDO DEL PAQUETE
INSTALLATION OVERVIEW/DESCRIPCIÓN GENERAL DE LA INSTALACIÓN
INSTALLATION OVERVIEW/DESCRIPCIÓN GENERAL DE LA INSTALACIÓN
INSTALLATION OVERVIEW/DESCRIPCIÓN GENERAL DE LA INSTALACIÓN
x1 x1x2
Screw
Tornillo
USB Charging Cord
Cable de carga USB
Remote Control
Control remoto
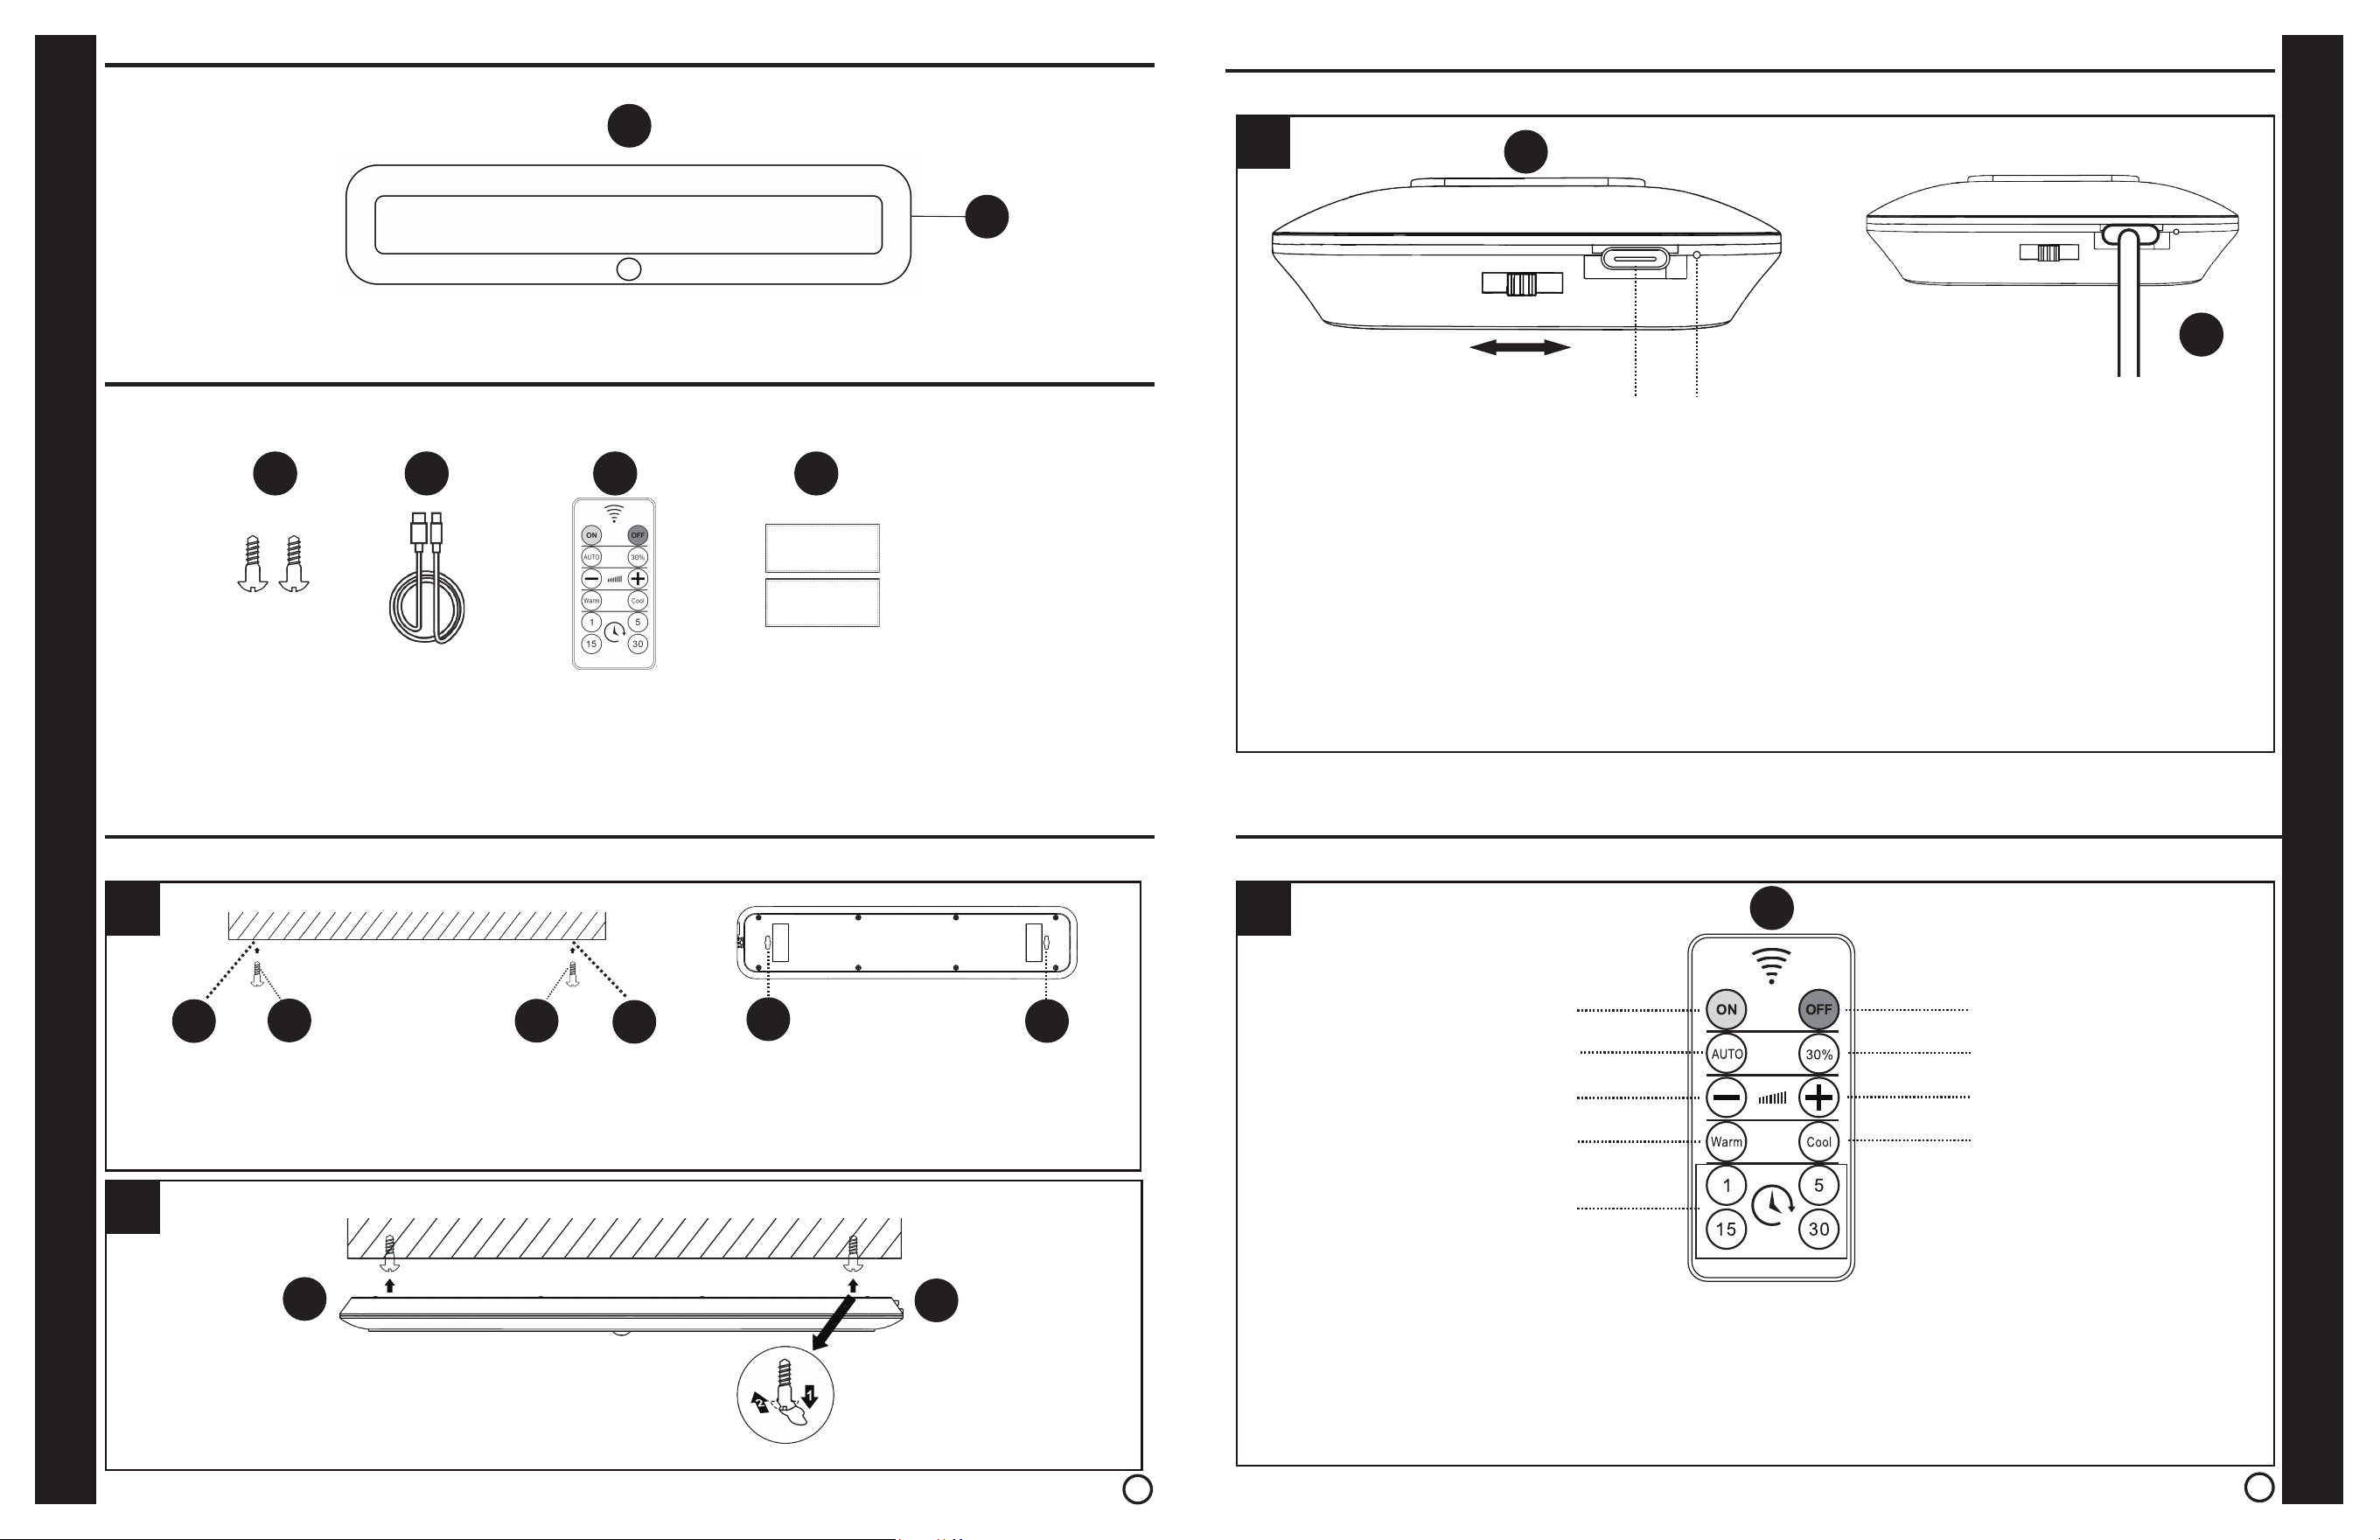
Slide
Input
Entrada
Power indicator light
Luz indicadora de encendido
Deslizador
Always on mode
Modo siempre encendido
Decrease brightness
Disminuir brillo
Light turns off
La luz se apaga
Motion sensor mode
30% brightness
30% de brillo
Increase CCT
Aumentar CCT
Modo de detector de movimiento
Decrease CCT
Disminuir CCT
Timer 1/5/15/30 minutes
Temporizador 1/5/15/30 minutos
Increase brightness
Aumentar brillo
2
A2
A1
A1
A2
Slide Switch
Interruptor deslizante
1. Before using the remote control pull out the plastic tab from the bottom of the remote control.
2.
You can choose a single light color(2700K-3000K-4000K-5000K-6500K)brightness.You can also choose 1 Min/5Min
/15Min/30Min timer and ON/OFF/AUTO.
3. Default brightness when turning on the light is at 100 % brightness.
1. Antes de usar el control remoto, extraiga la pestaña de plástico de la parte inferior del control remoto.
2. Puede elegir un solo color de luz (2700K-3000K-4000K-5000K-6500K) de brillo. También puede elegir el temporizador de
1 min/5 min/15 min/30 min y ENCENDIDO/APAGADO/AUTO.
3. El brillo predeterminado al encender la luz es del 100% de brillo.
1. Deslice el interruptor a ON (encendido) para encender la luz; el color de luz predeterminado es Luz del día.
2. Deslice el interruptor a AUTO (automático) para operar el modo de detector de movimiento. La luz funciona solo en áreas oscuras o con poca
iluminación. La luz se activa automáticamente cuando se detecta movimiento. La luz se apagará automáticamente en aproximadamente
30 segundos o cuando no se detecte movimiento. El alcance del sensor es de 2.5 m a 5 m.
3. Deslice el interruptor a OFF (apagado) para apagar la luz y ahorrar energía de la batería.
4. La luz indicadora de carga se volverá ROJA cuando se esté cargando. La luz cambiará a VERDE cuando esté completamente cargada.
1. Slide the switch to ON to turn on the light, default light color is Daylight.
2. Slide switch to AUTO, to operate the motion sensor mode. Light will work only in dark or low-lighten areas. The light will turn on
automatcally when motion is detected. The light will turn off automatically in approximately 30 seconds, or when no motion is detected.The sensor
range of 2.5 m - 5 m.
3. Slide the switch to OFF to turn off the light and save battery power.
4. The charge indicator light will turn RED when being charged.The light will change to GREEN when light is fully charged.
Position the light over the pre-installed screw heads and push the light onto the
mounted screw heads. Then slide the light into a secured position.
Coloque la luz sobre las cabezas de los tornillos preinstalados y empújela sobre
las cabezas de los tornillos montados. Luego deslice la luz a una posición segura.
For surface mounting, mark the position (A1, A2) of the light on the mounting surface with a marking device or sharpe object.
Once the mounting position has been marked, screw-in the mounting screws into place.
Para el montaje en una superficie, marque la posición (A1, A2) de la luz en la superficie de montaje con un dispositivo de marcado
u objeto puntiagudo. Una vez marcada la posición de montaje, atornille los tornillos de montaje en su lugar.
x2
Sticker Mounting Pad
Almohadilla de montaje con calcomanía
DD
AUTO OFF ON
5V
AUTO OFF ON
5V
A1
3
4
CC
BB
AA
A2AA AA
BB
B
CC