
UTILITECH and logo design are
trademarks or registered trademarks
of LF
,
LLC. All rights reserved.
Serial Number _____ _
Purchase Date _____ _
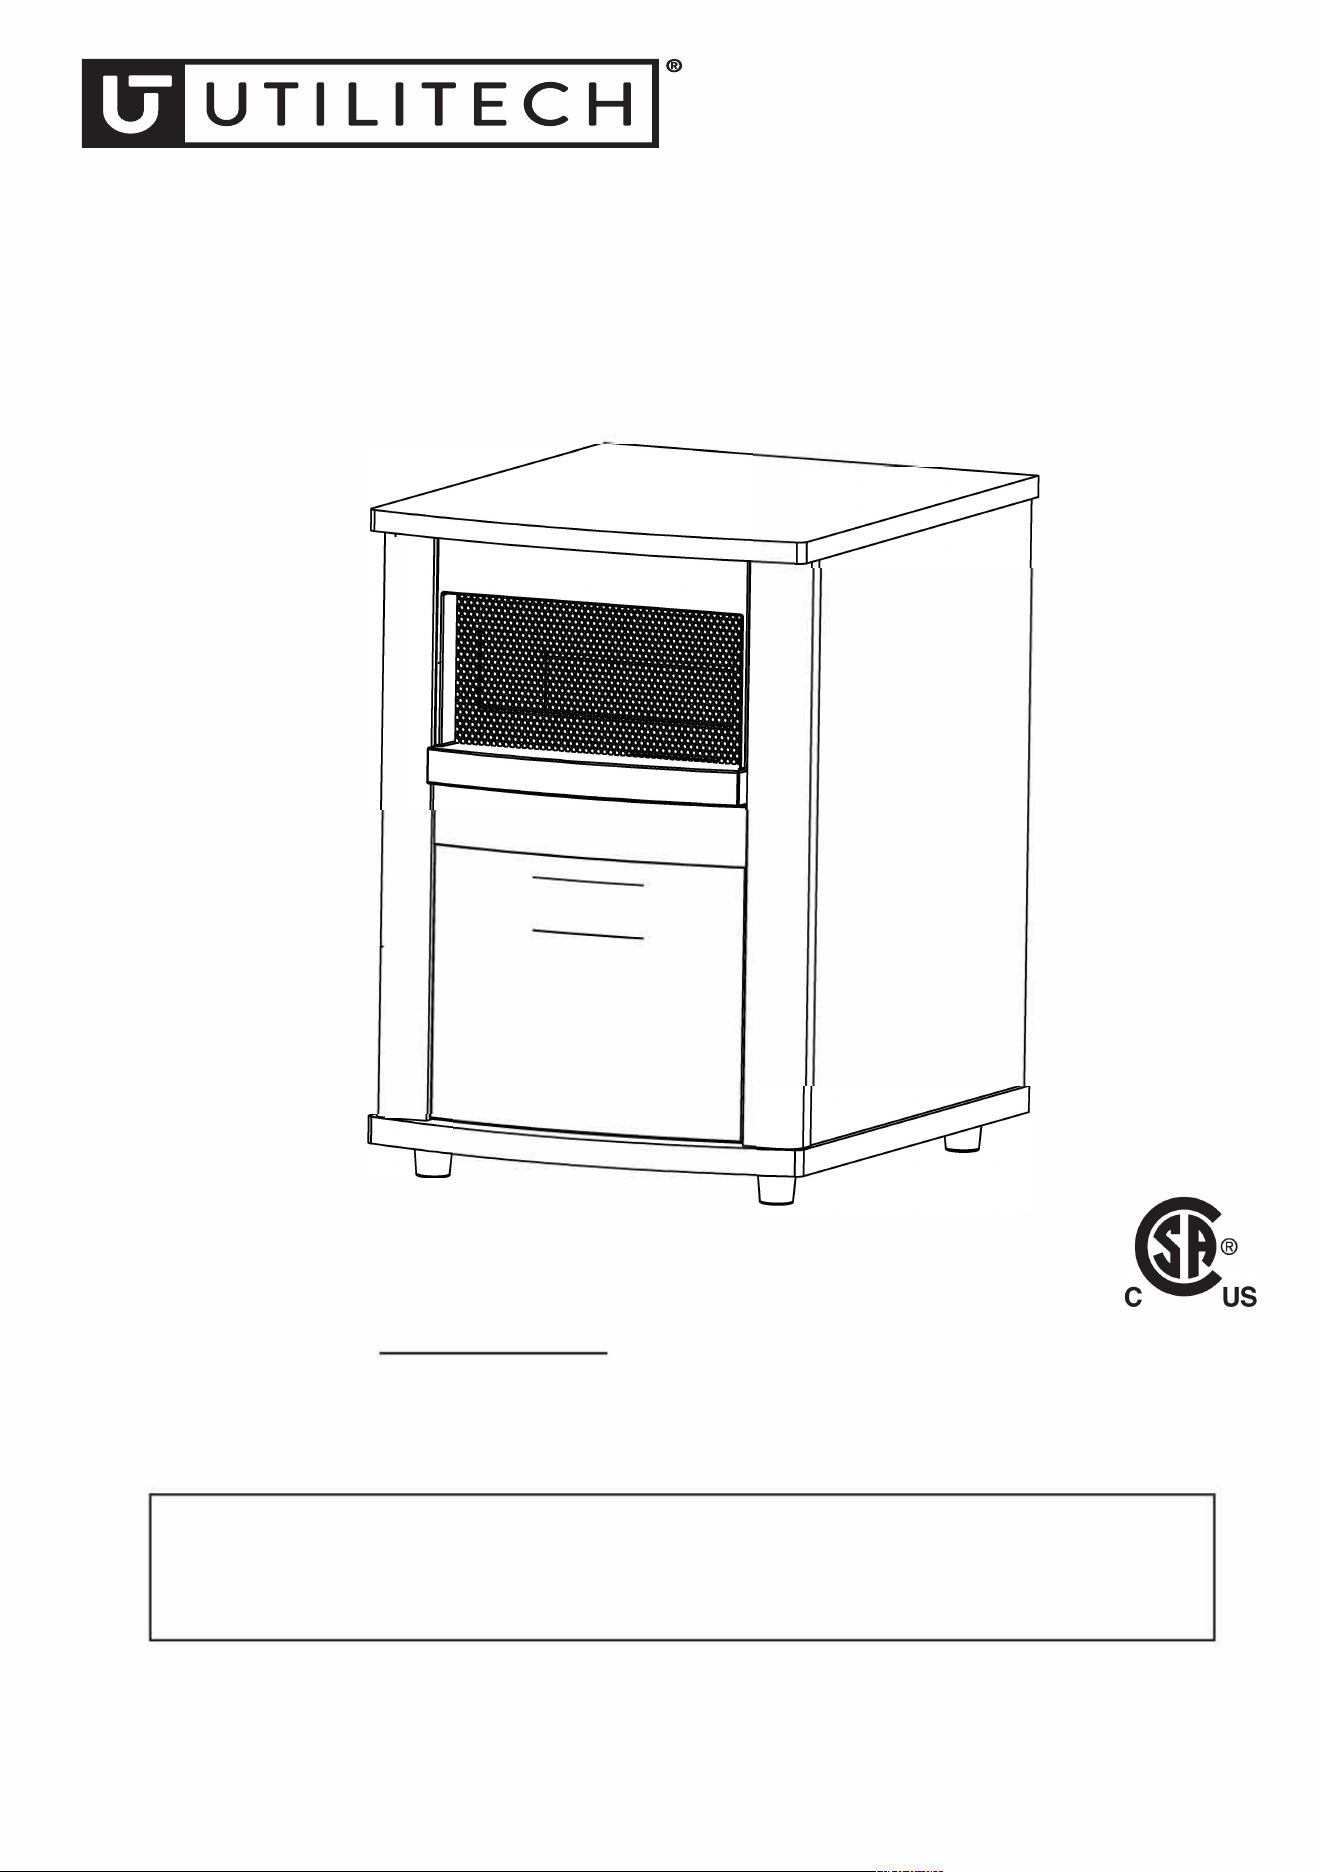
Thank you r purchasing this UTILITECH product.
Questions, problems or missing parts?
Bere returning, contact us on:
ITEM #
60
2332
0
MODEL #11
7
5I
R
H
-
CO
N-
5
0
3
I
N
F
R
A
R
ED
Q
UA
R
T
Z
CA
B
I
N
ET
ELECT
R
IC
SP
ACE HEATE
R
Es
p
anol
p
.13
866-994-4148, 8 a.m. - 8 p.m., EST, Monday - Sunday or [email protected].
1
SG25433
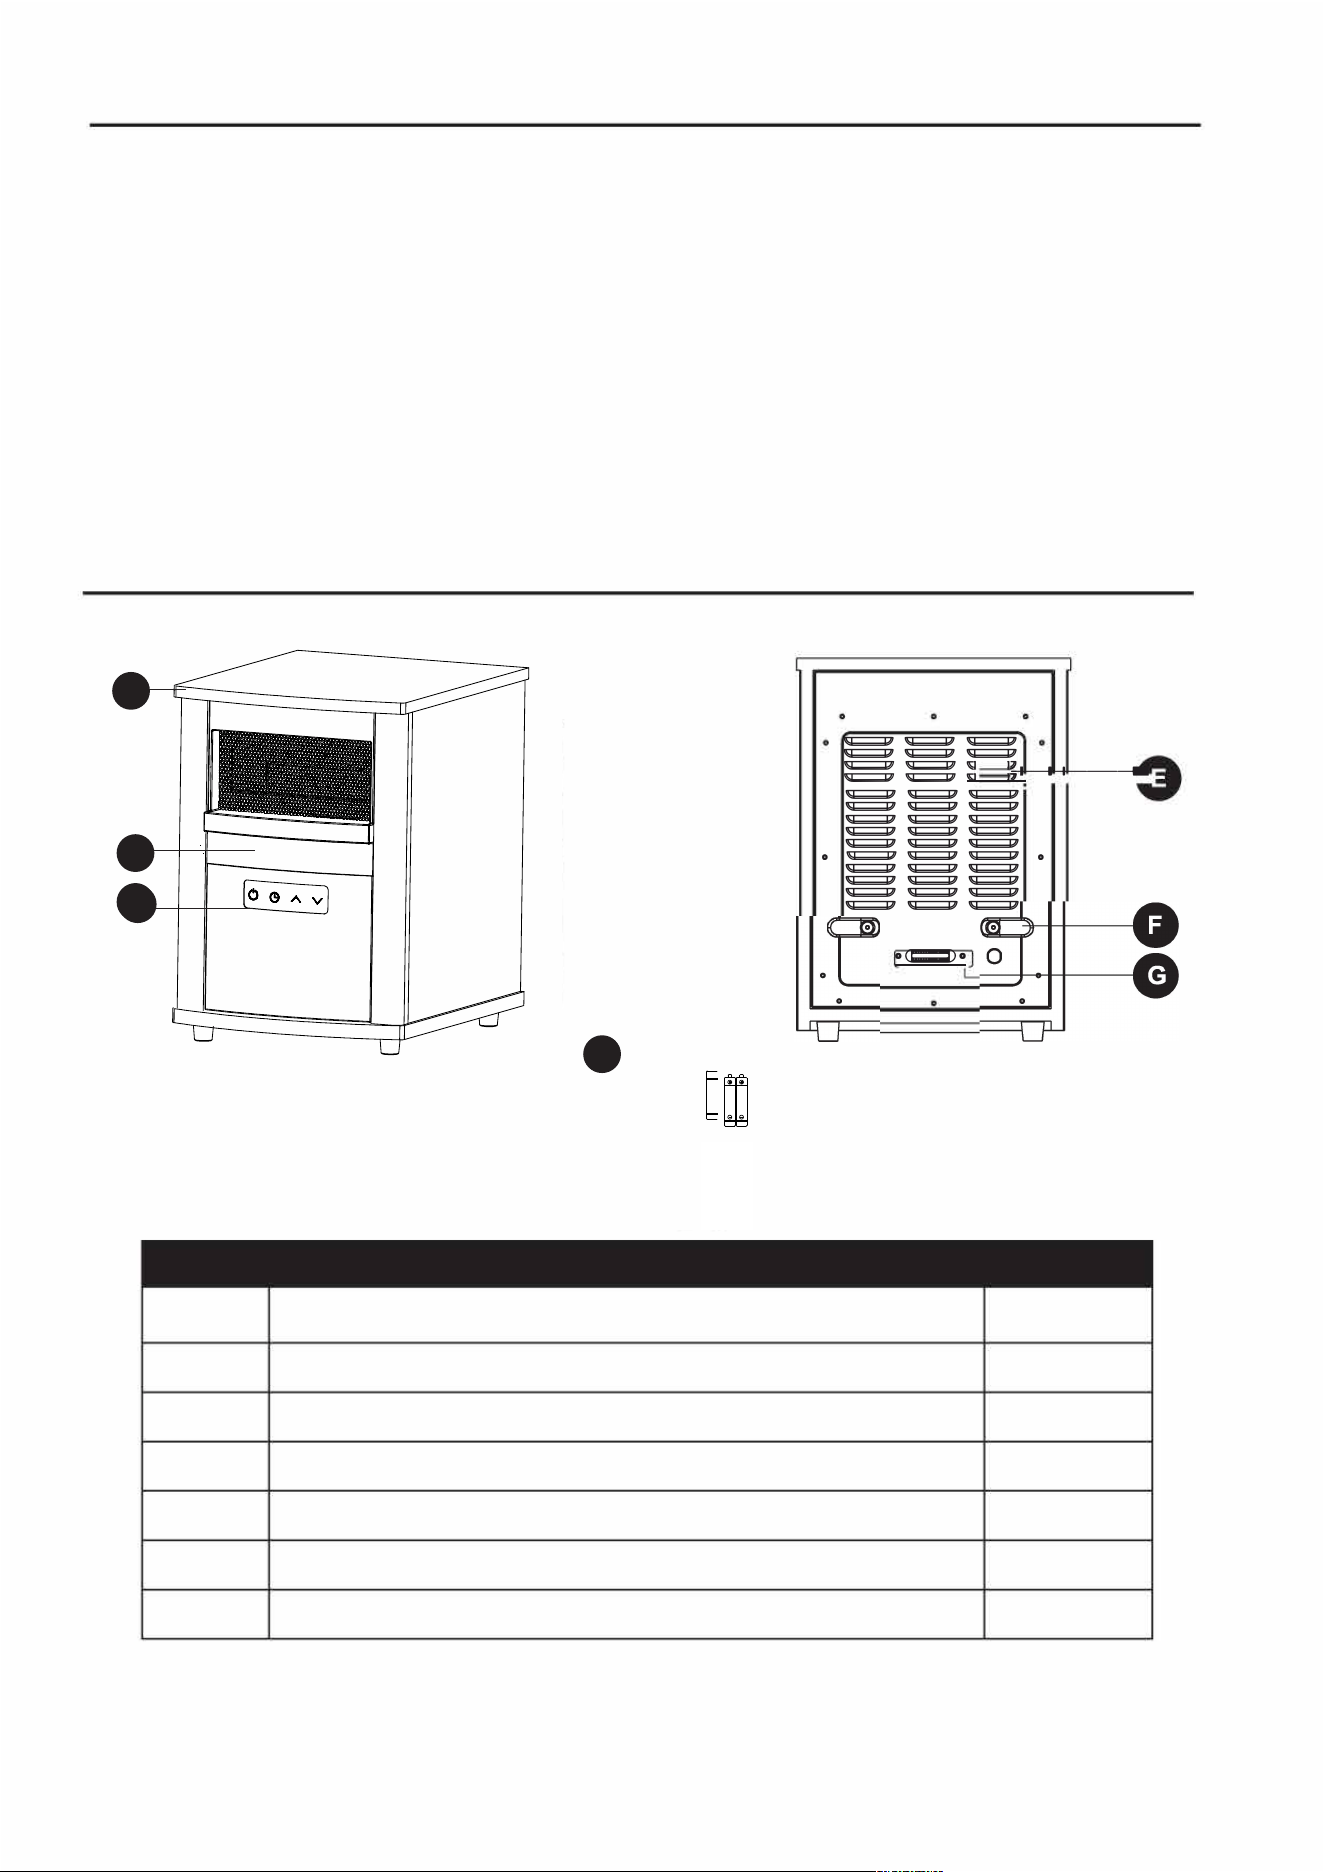
TABLE OF CONTENTS
Package Contents .............................................................................................................................. 2
Safety Information .............................................................................................................................. 3
Frequently Asked Questions .............................................................................................................. 5
Preparation ......................................................................................................................................... 6
Control Panel. ..................................................................................................................................... 7
Remote Control .................................................................................................................................. 8
Operating Instructions ........................................................................................................................ 9
Care and Maintenance ...................................................................................................................... 1 O
Troubleshooting ................................................................................................................................ 11
One-Year Limited Warranty .............................................................................................................. 12
Replacement Parts List. .................................................................................................................... 12
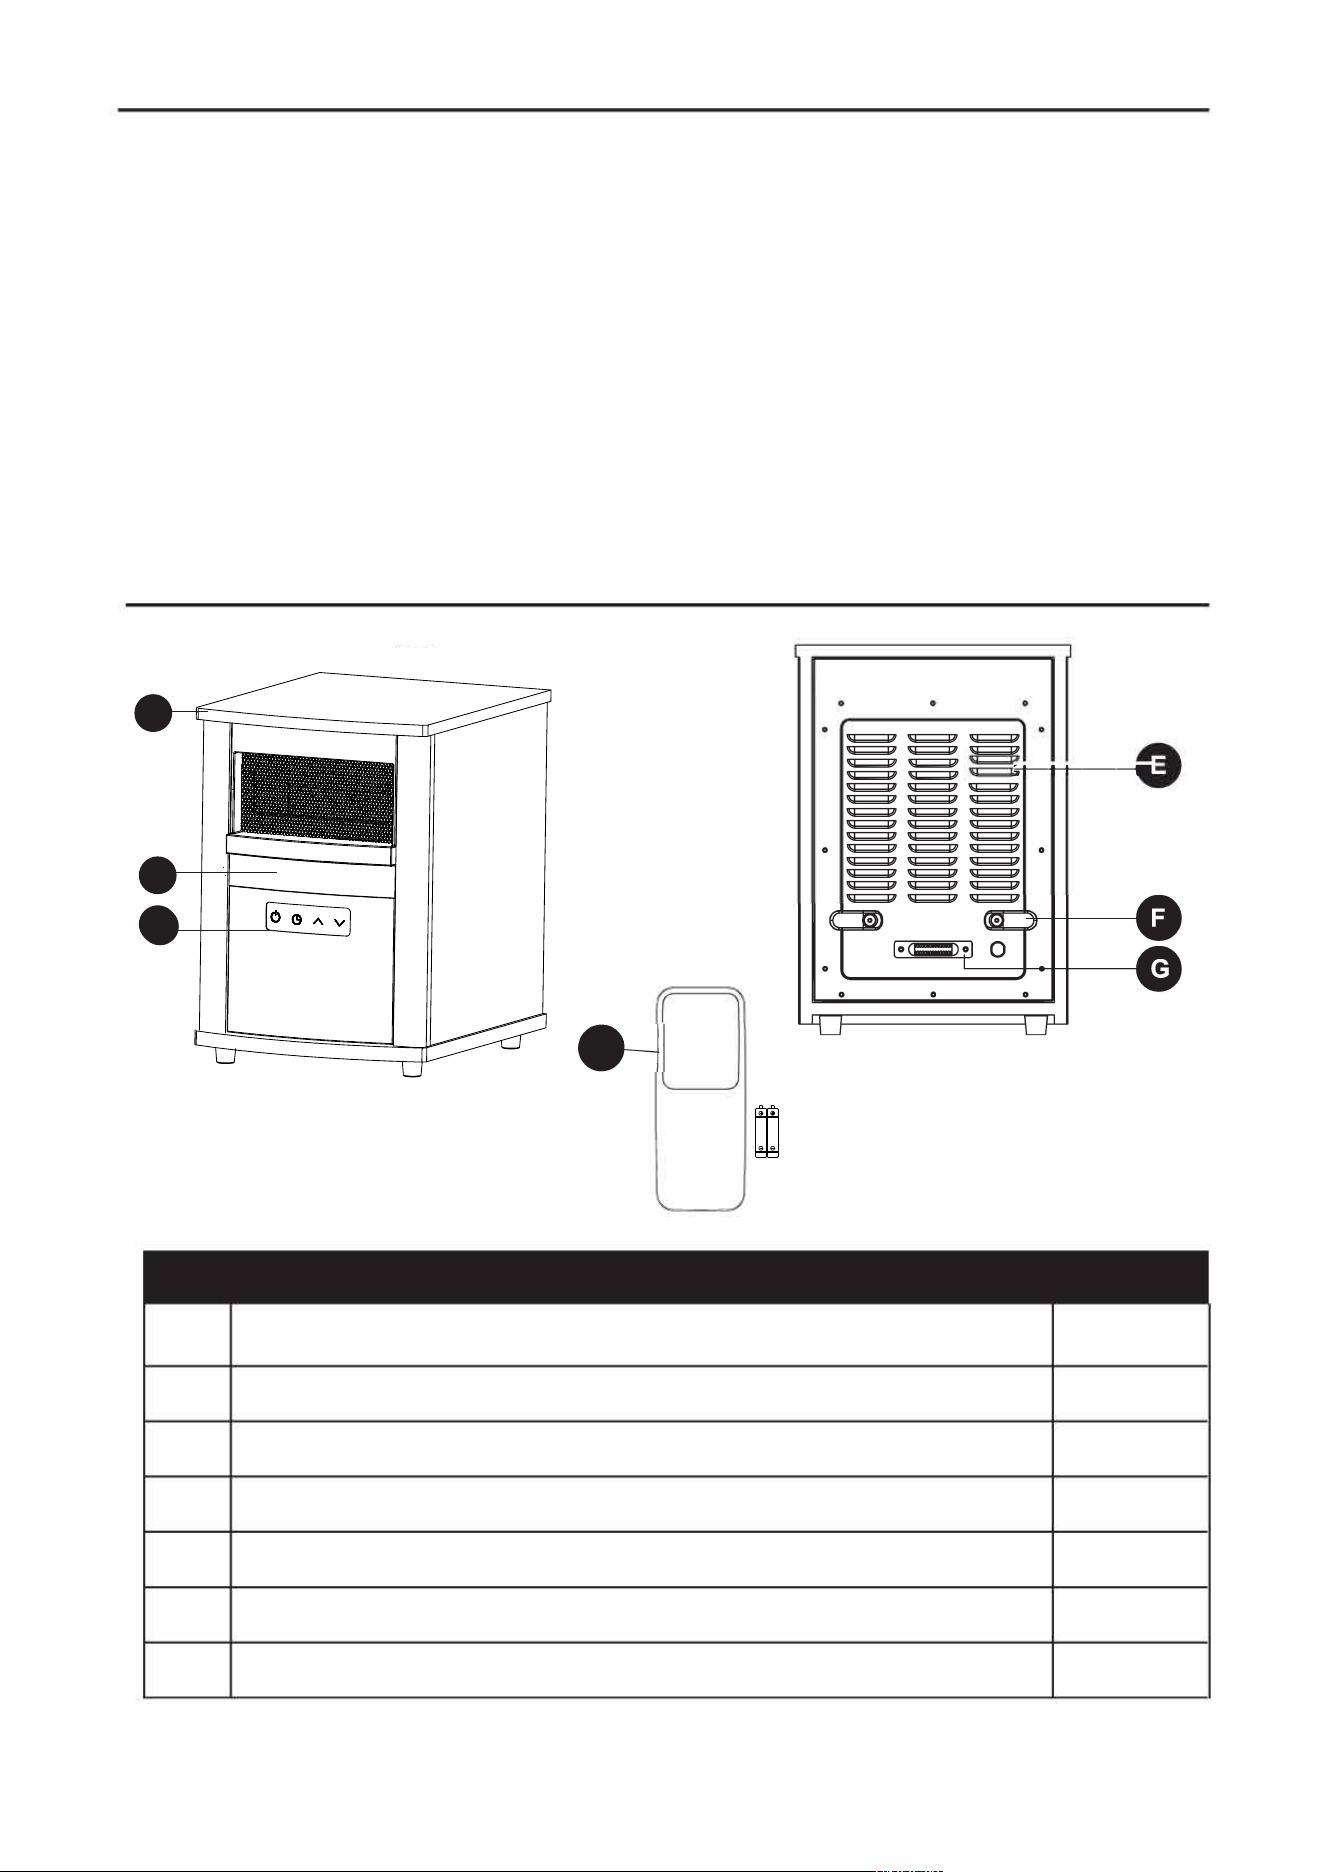
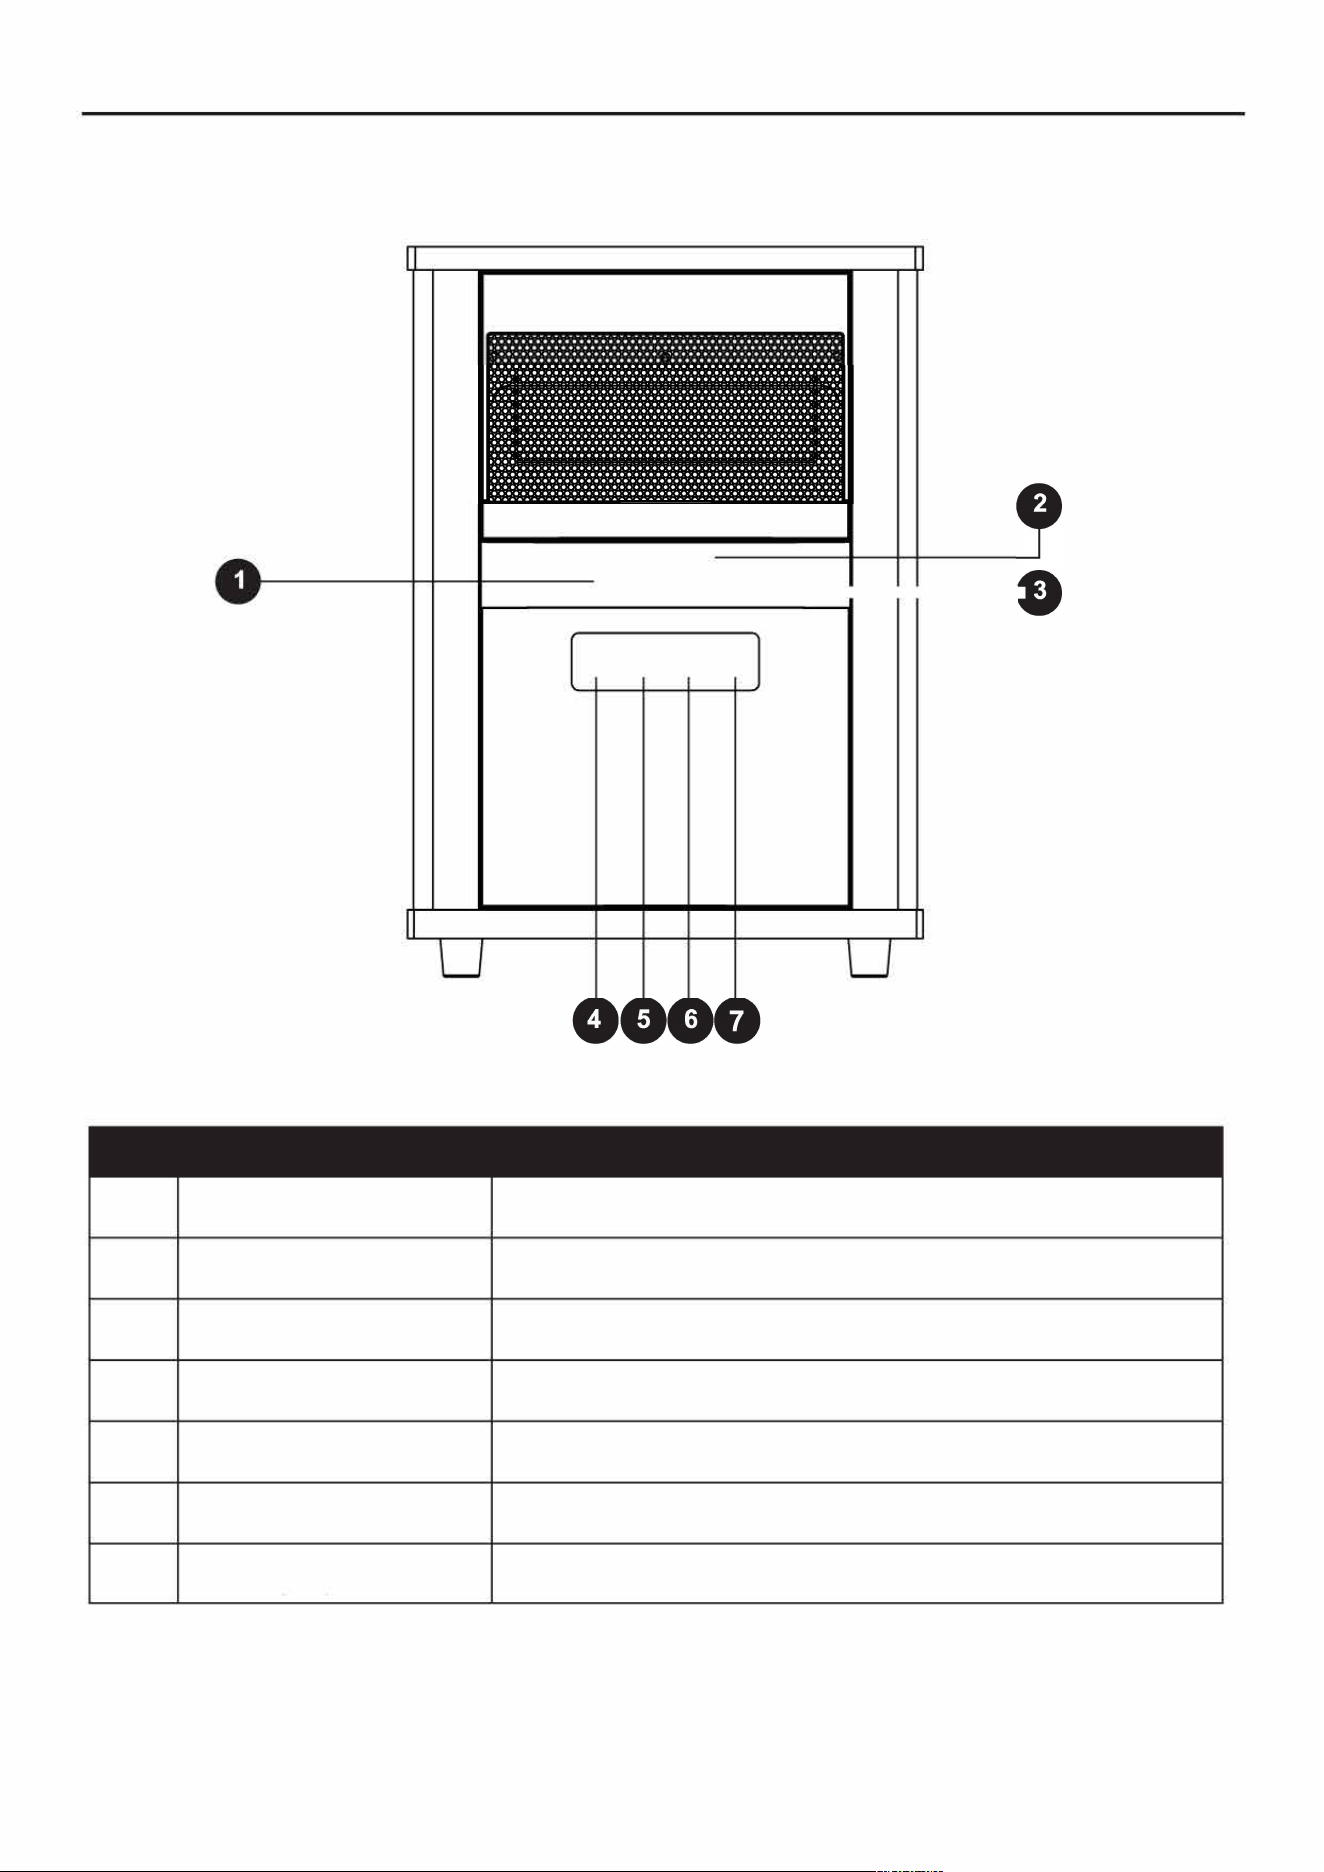
PACKAGE CONTENTS
PART
A
O
C
D
E
F
G
===
===
� � :: :: -
= = =
===
===
===
===
o���o
===
===
===
===
oo
DESCRIPTION
QUANTITY
1
1
1
1
1
1
2
O
A
C
D
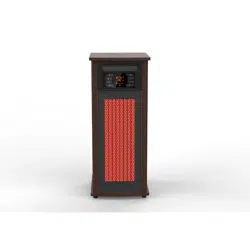
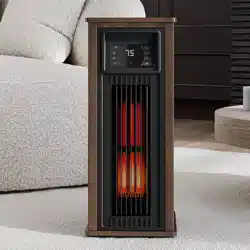
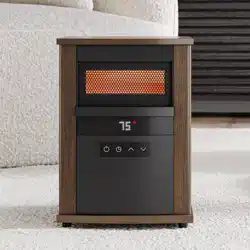
Infrared Heater
Remote Control (Battery)
Digital Display (preassembled to Infrared Heater (A))
Control Panel (preassembled to Infrared Heater (A))
Air Intake Vent (preassembled to Infrared Heater (A)) Cord
Rack (preassembled to Infrared Heater (A)) Temperature
Sensor (preassembled to Infrared Heater (A))
1

A SAFETY INFORMATION
Please read and understand this entire manual before attempting to assemble, operate, or install the
product.
IMPORTANT SAFETY INSTRUCTIONS
ARNING: POTENTIAL ELECTRICAL HARD IF NOT ADHERED TO. When using electrical
appliances, basic precautions should always be llowed to reduce the risk of fire, electric shock, and
injury to persons, including the llowing:
• This heater must be plugged into a 120 V, 15 amp (or more) circuit of its own. Do not plug anything else
into the same circuit, If unsure if your home meets this specification, consult a ceified electrician prior to
use. Risk of fire, overheating, malfunction, propey damage, inju, or even death may result if
not adhered to!
• Connect to a proper outlet only. Do not connect the heater to extension cords, surge protectors, timers,
direct breakers, or an outlet with other appliances connected to the same outlet. Risk of fire, overheat
ing, malfunction, propey damage, injury, or even death may result if not adhered to!
• This heater is hot when in use. To avoid burns, do not let bare skin touch hot surfaces. Use handles
(ceain models) or wheels to move this heater.
• Keep combustible materials, such as furniture, pillows, bedding, papers, clothes, and cuains at least3 .
(0.9 m) from the front of the heater and keep them away from the sides and rear of the heater.
• Extreme caution is necessa when any heater is used by or near children, invalids, pets, or when the
heater is le operating unattended.
• Always unplug the heater when not in use.
• Do not operate any heater with a damaged cord or plug or afte r the heater malfunctions, has been
dropped, or damaged in any manner, Contact the manufacturer r resolution options.
• Do not use outdoors. Exposure to outdoor elements such as rain, snow, sun, wind, or extreme tempera
tures may cause the heater to become a safety hazard.
• This heater is not intended for use in bathrooms, laund areas, and similar indoor locations, nor any
locations that use GFCI outlets.
• Never place the heater where it may fall into a bathtub or other water receptacles.
•
Do not run the cord under carpet. Do not cover the cord with thr
o
w rugs, runners, or similar coverings.
Arrange the cord away from traic areas and where it will not be tripped over.
• The heater must be plugged into a wall outlet that is a dedicated circuit with a minimum 15 amp rating on
that individual circuit.
• To disconne the heater, first turn the power butto n to the OFF position and then remove the plug from
the wall outlet.
• Do not allow reign objes to enter or block any ventilation or exhaust opening as this may cause
electric shock, fire or damage the heater.
• Allow at least 3 ft. of unobstructed space on all sides of the heater, including the front, rear, left, and right, to
ensure maximum heat, air circulation, and ventilation flow.
• A heater has hot and arcing or sparking pas inside. Do not use it in areas whe gasoline, paint, or
flammable liquids are used or stored, nor use flammable solvents to clean the heater. Keep the heater
dry at all times.
• Use this heater only as described in this manual. Any other use not recommended by the manufacturer
may cause fire, electric shock, or inju to persons.
• Do not use abrasive solvents to clean the heater as it may cause damage to the finish or casing.
• To prevent a possible fire, do not block air intakes or exhaust in any manner, Do not use on so suaces,
like a bed, where opening may become blocked .
• Always plug heaters directly into a wall outlereceptacle, Never use with an extension cord or relocatable
power tap (outlet/power strip).
• Hyperthermia can result in death. Symptoms of hypehermia include high body temperature, headache,
nausea, vomiting, tiredness, dizziness, fainting, and rapid pulse. If you begin to experience symptoms
related to hypehermia, turn o the heater and seek medical attention.
3

FREQUENY ASKED QUESTIONS
Q. Can I use more than one heater at a time? Can I use the heater and another appliance at the same
time?
A. Yes, but make sure they are not plugged into the same circuit. Each heater requires its own
minimum 15-amp circuit with no other items plugged into that circuit or outlet. This is because heaters
are considered appliances and draw out high amperage. If you are unsure your circuit meets these
requirements, veri with a certified electrician.
A WARNING: Risk of fire, damage to property, or injury may result if requirements are not met.
Q. Why does my heater's fan continue to run aer the set temperature is reached or the power is
turned o?
A. This is normal. The heater's fan will continue to run even aer the heater automatically cycles down.
The fan continues to run so that every last bit of heat is blown out of the heat chamber while allowing
the unit to continue filtering your air. Once the internal box/components cool completely, the fan should
then shut off on its own. In this case, allow a few minutes aer the heat cycles o (with power on). The
fan will shut o faster when the power is turned o.
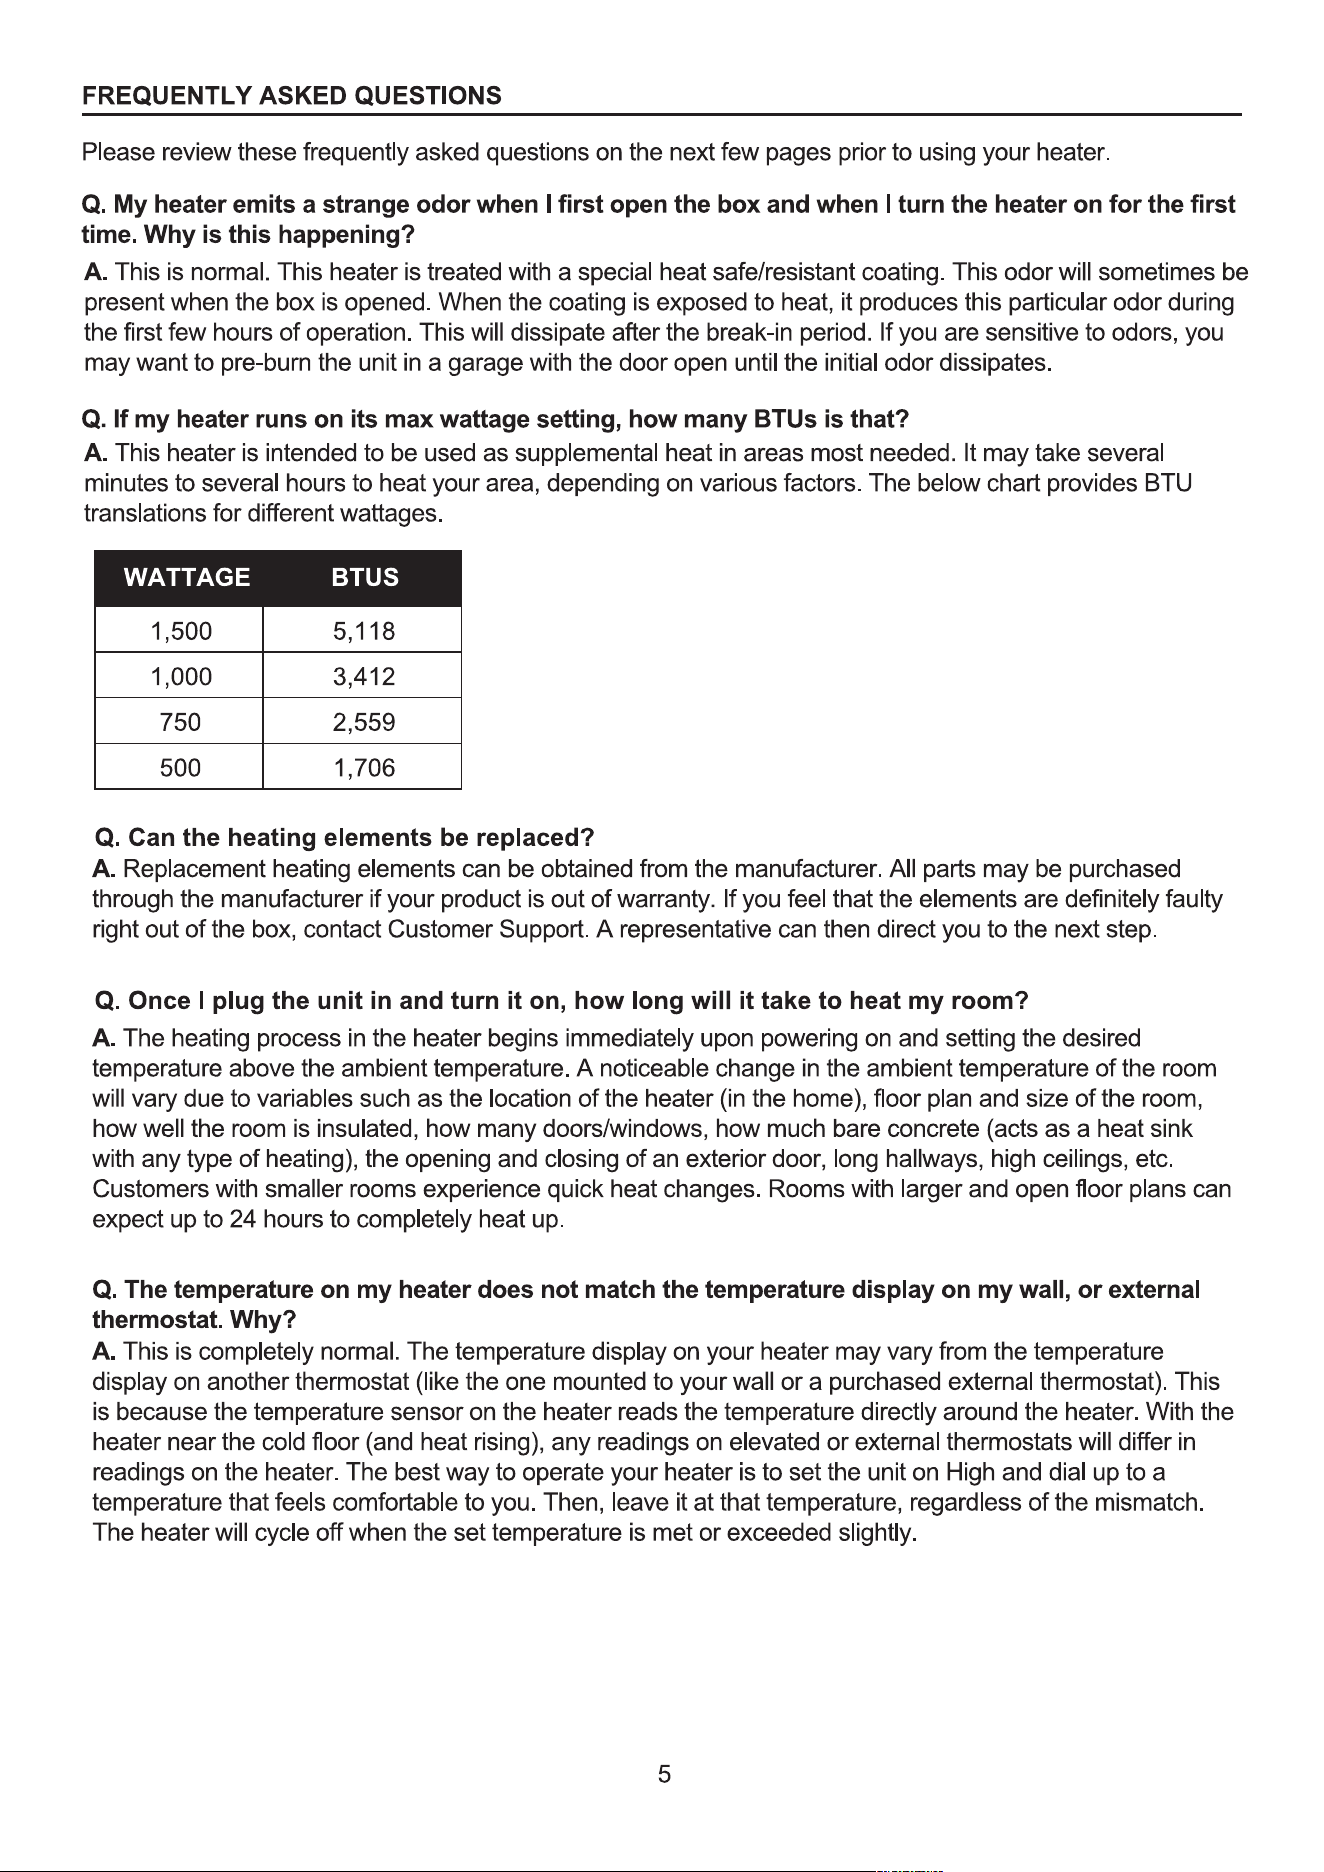
Q. My heater's display shows my ambient temperature to be in the 20s when I know it is warmer than
that. Why?
A. The heater's display is defaulted to read the temperature as Fahrenheit. If your heater is definitely
heating but shows it is in the 20s you probably have the setting to read your temperature in Celsius
rather than Fahrenheit.
Q. My heater's power cord gets warm. My cord is showing signs of heat or melting at the outlet.
Is this normal?
A. A warm power cord is normal. These power cords are rated safe for up to 105
°
C/ 221
°
F by the UL,
CSA, or TUV. The exception is, if you detect heat, smoke, or signs of melting at the contact point of the
wall outlet, it may be due to loose or worn wall contacts (or arcing). Please stop using the heater
immediately, contact warranty support for a replacement power cord, and have a certified electrician
replace the wall outlet as soon as possible.
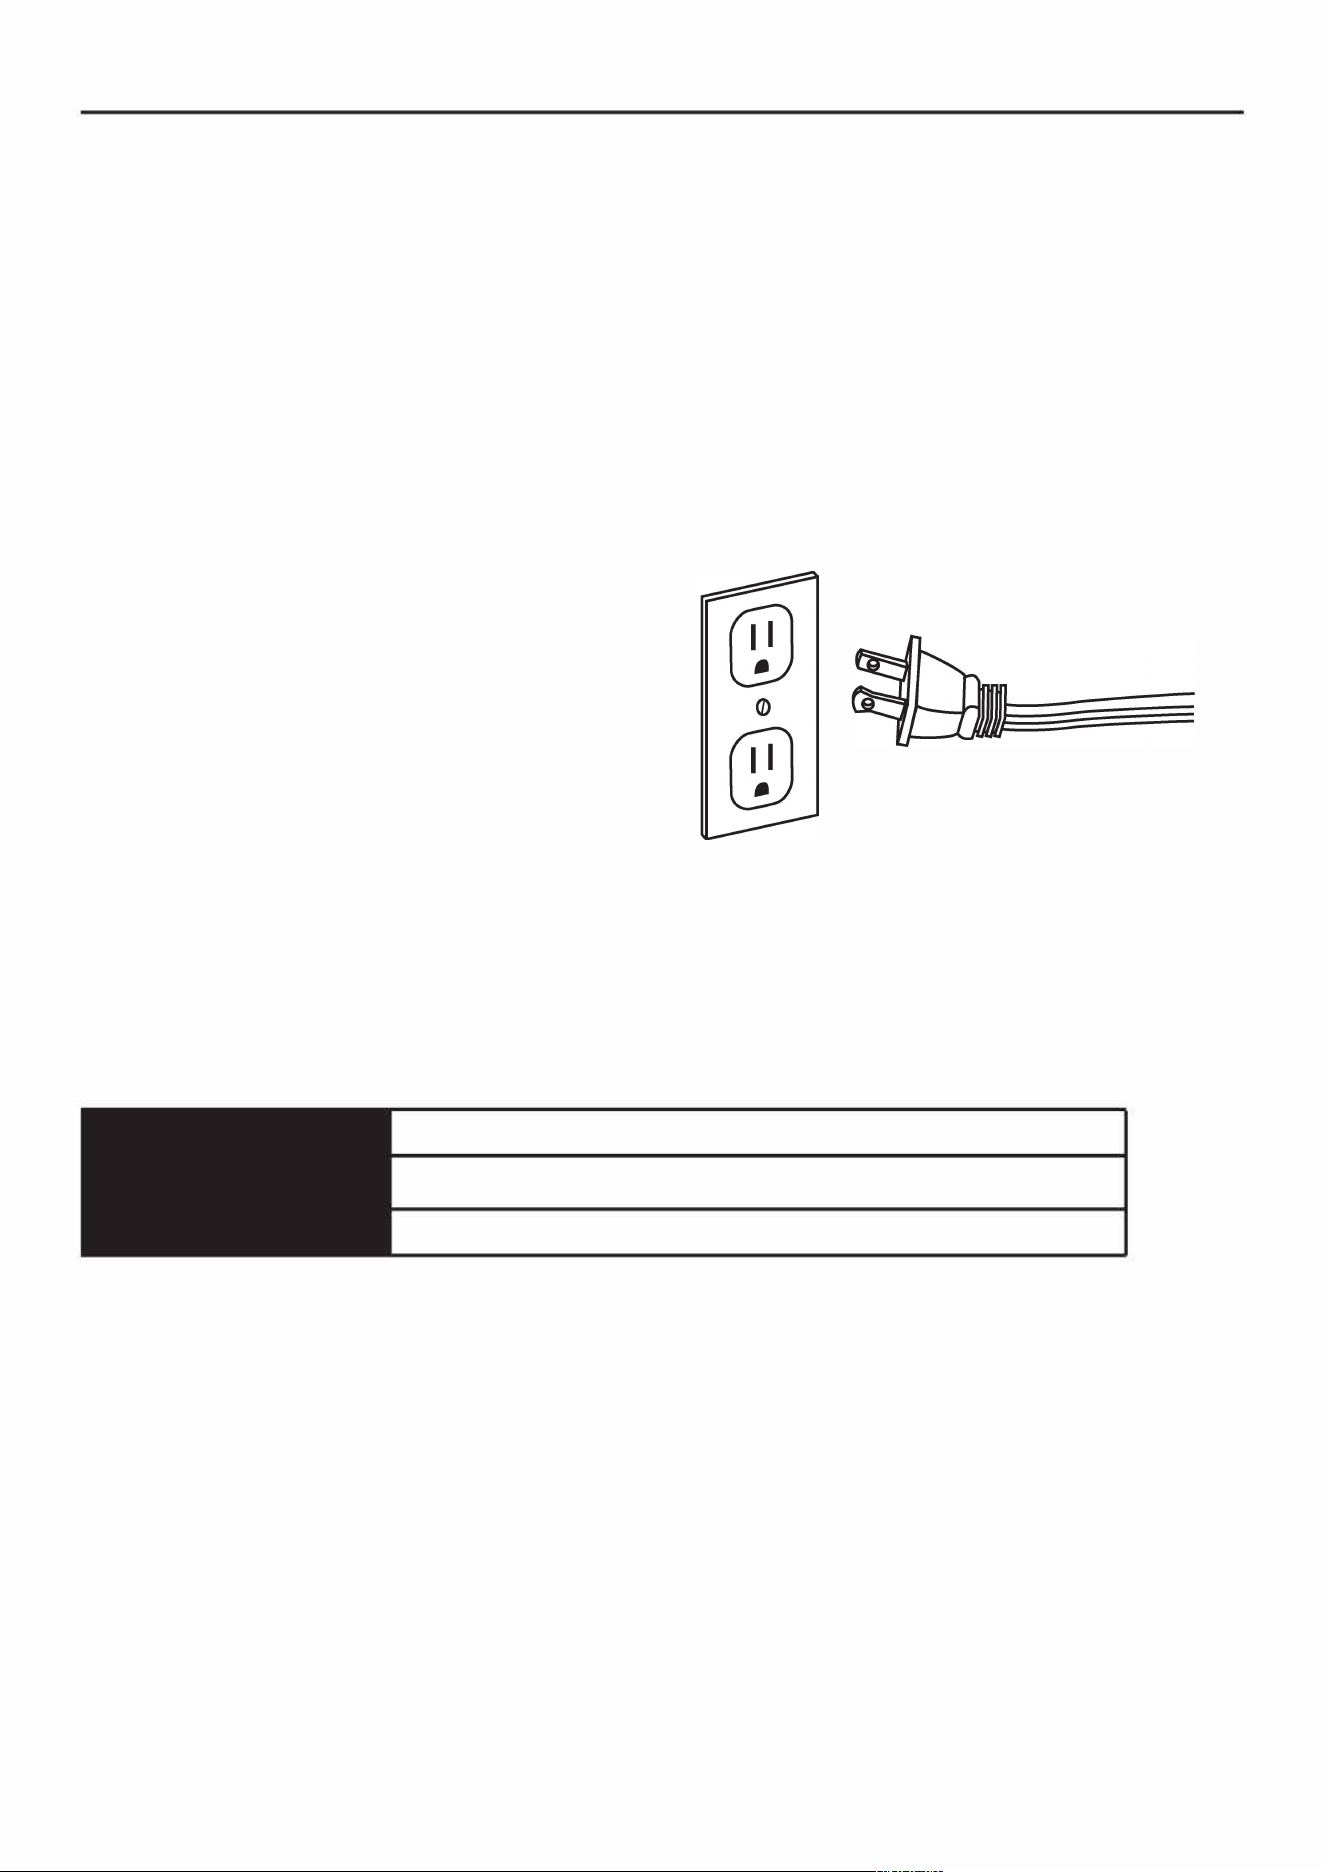
PREPARATION
Place the heater on a firm, level surface and plug into a grounded 120 V, 60 Hz power outlet. Only
operate heater in upright position.
Insert two batteries into the remote control before using (batteries not included). *(Not all products
will include a remote control.)
Please note that infrared heaters do not heat like a traditional space heater. You should not expect
infrared heaters to blow hot air like a traditional space heater. Infrared heaters heat objects not air.
Infrared heaters are intended to supplement an already heated, insulated room. Square otage
specifications assume a single enclosed room not an entire home. Infrared heaters do not heat through
walls, floors, and are not intended to replace a main heat source. Infrared heat can take at least 24 hours
to warm a room but operate much more eiciently to maintain the desired temperature. Infrared heaters
will not work well in uninsulated unheated spaces like screened in porches, RV's, garages, unheated
basements, etc.
6
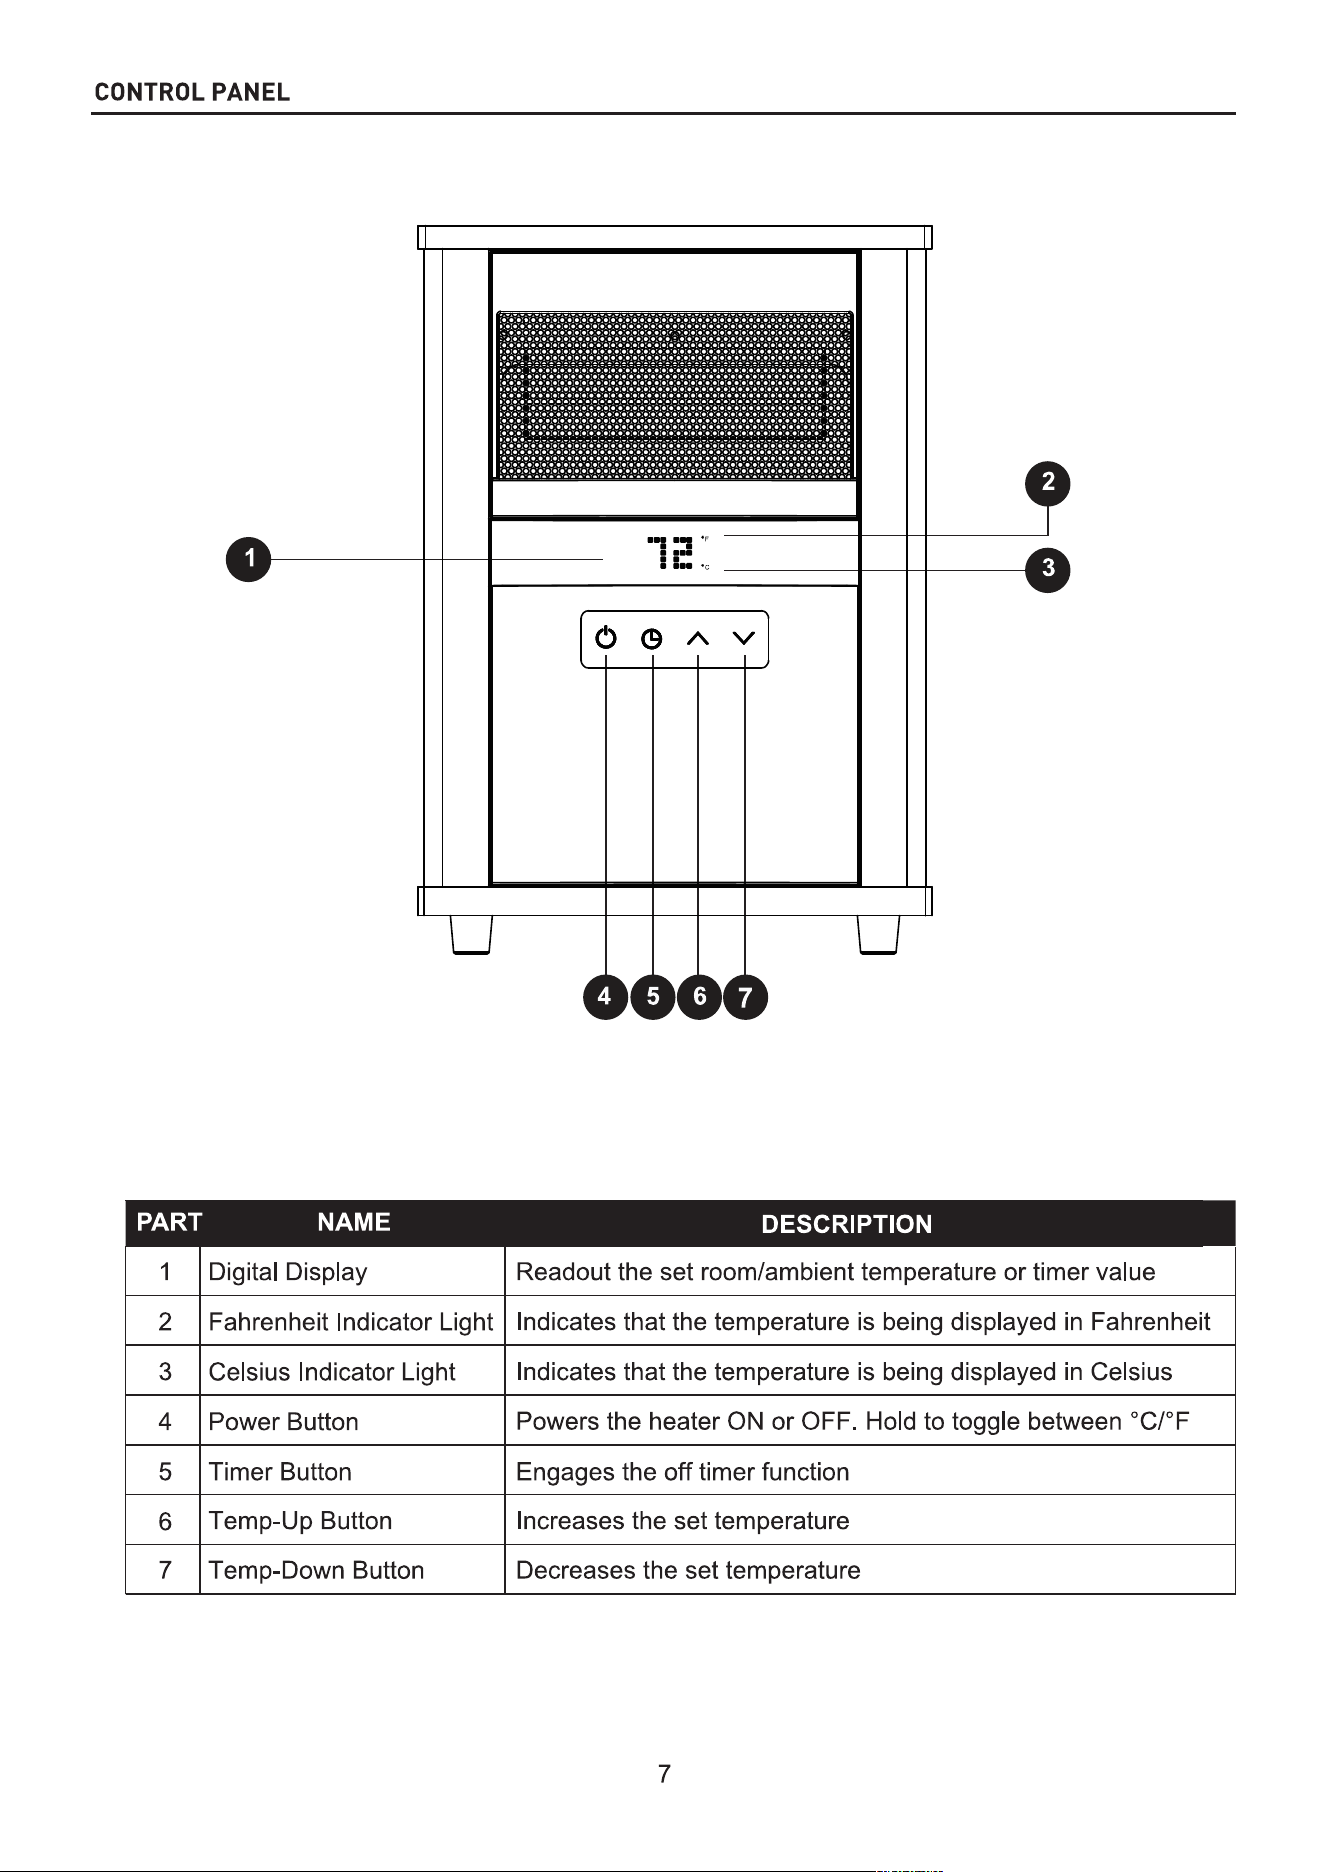
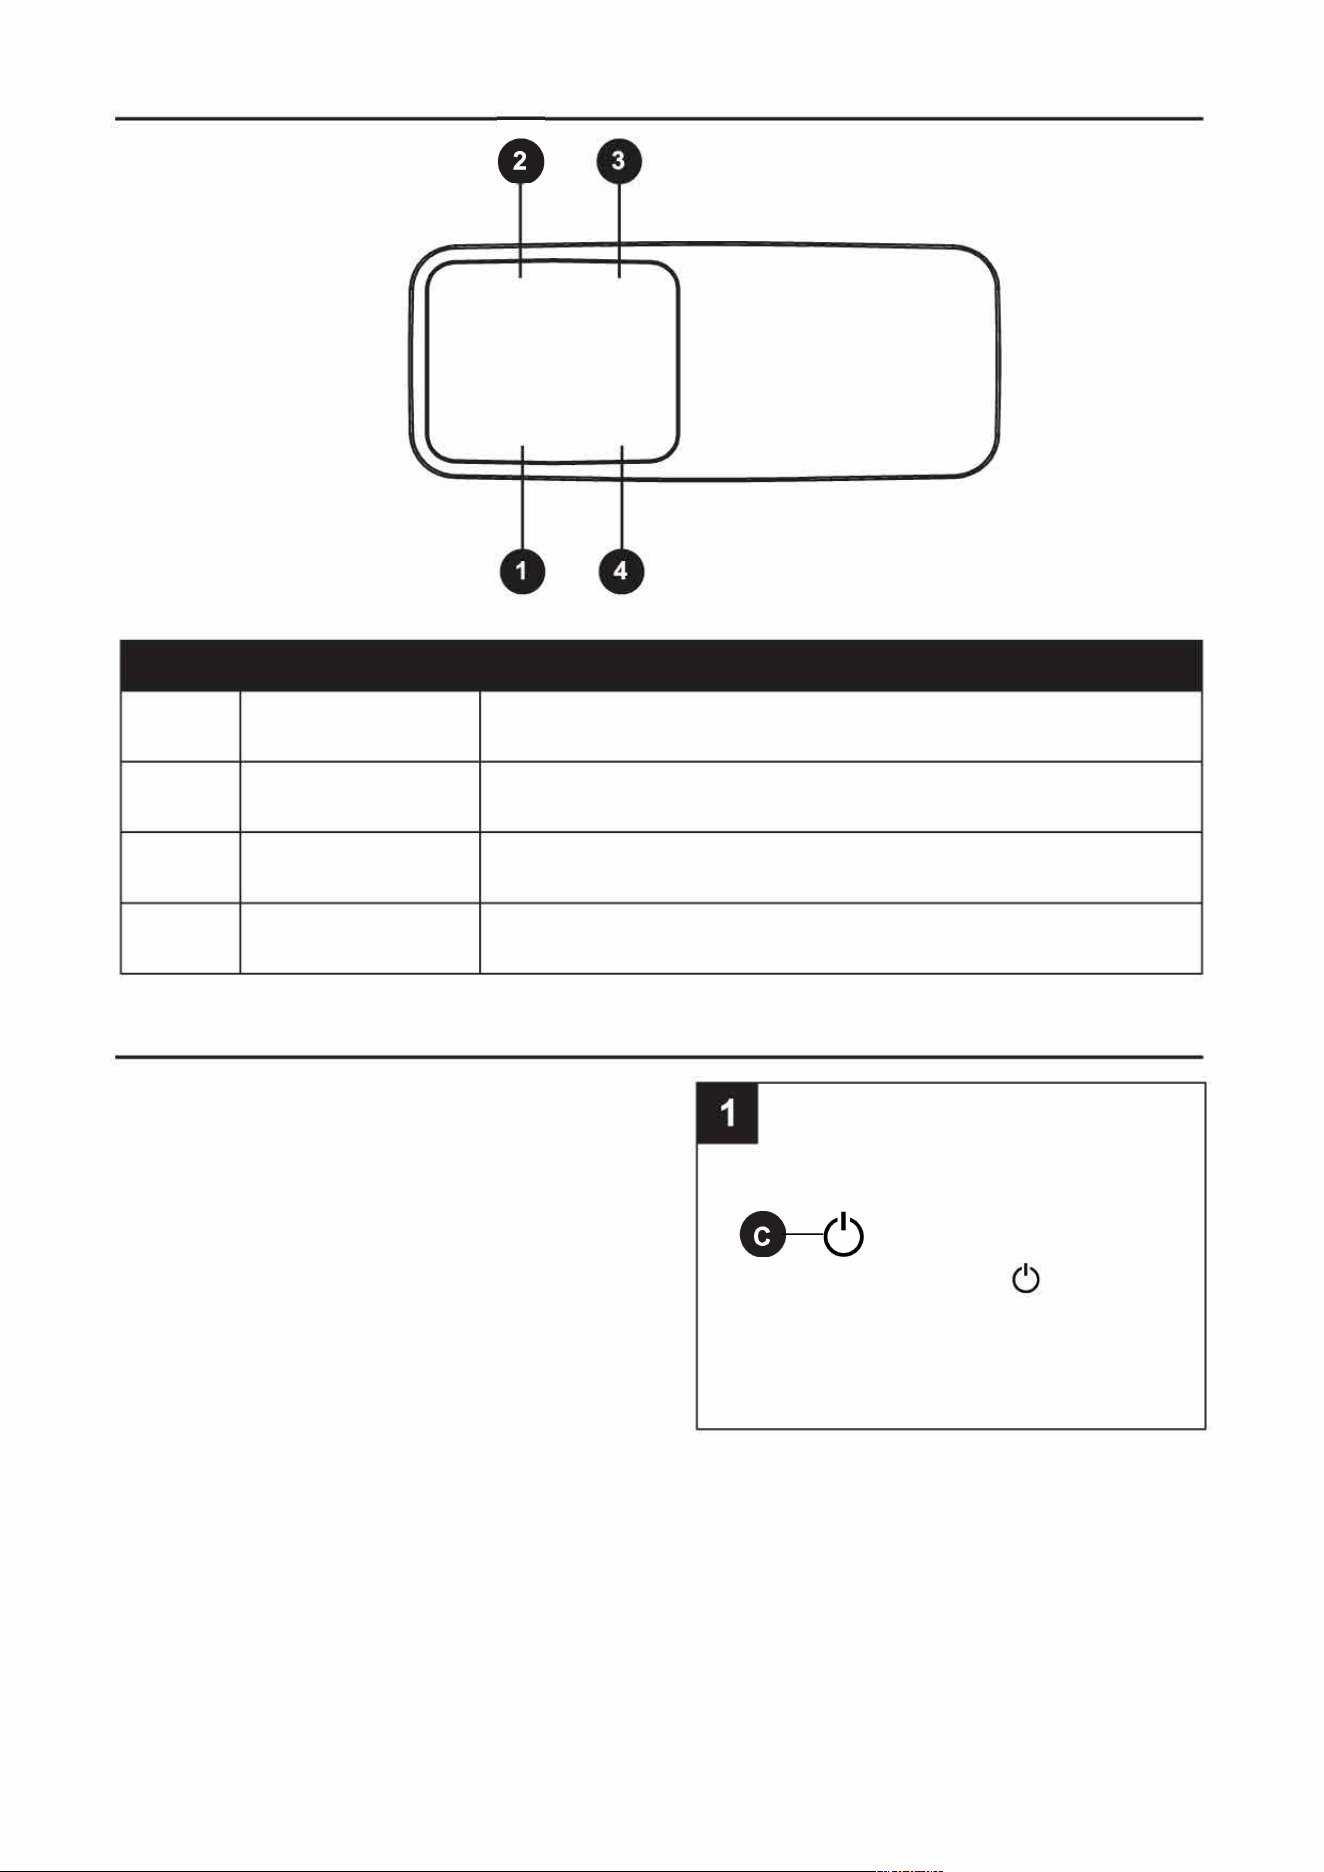
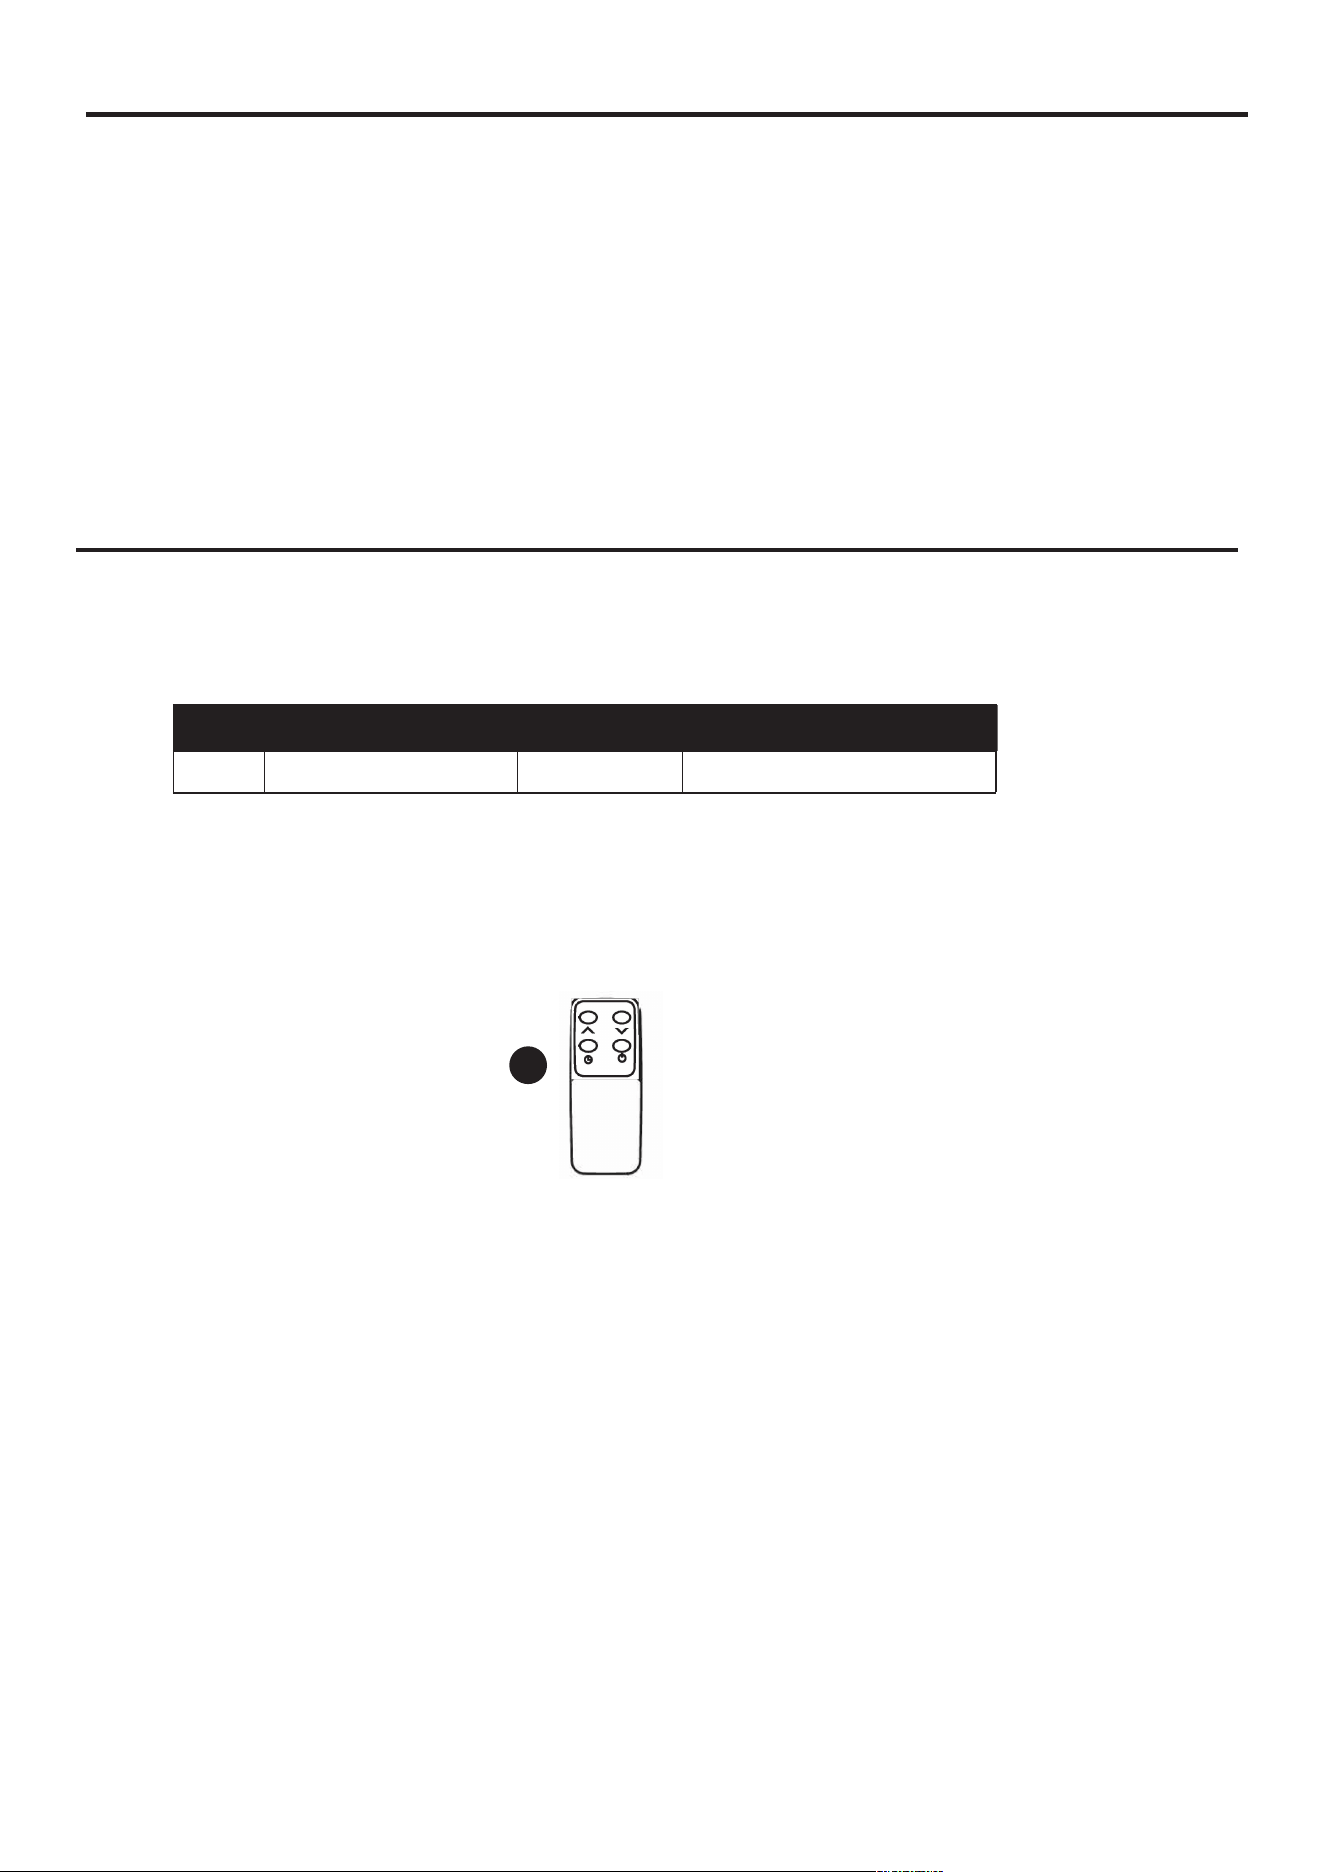
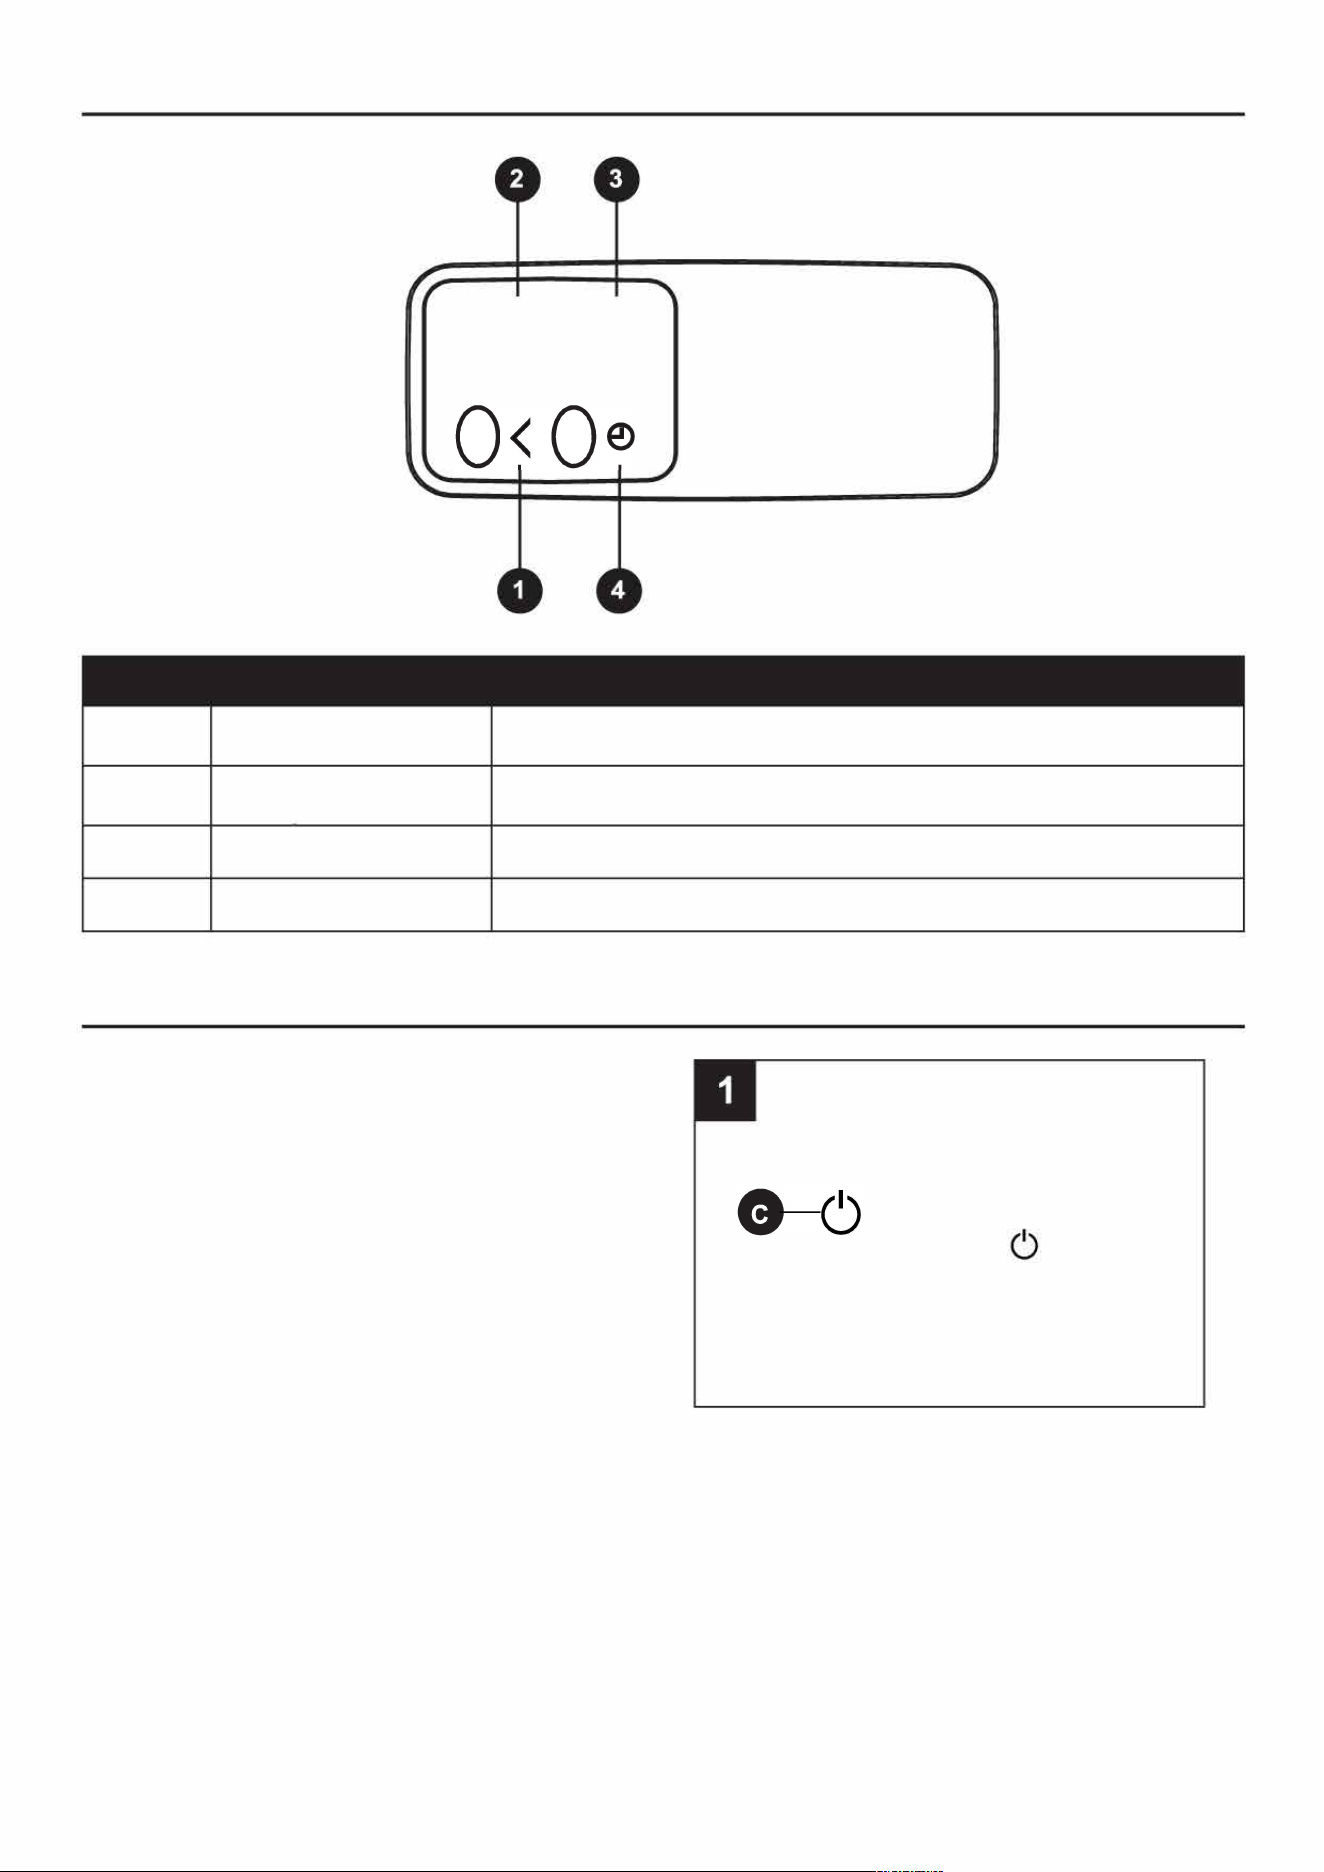
REMOTE CONTROL
0>0°
O
<
Q
PART NAME
DESCRIPTION
1
Temp-Up Button
Increases the set temperature value
2
Temp-Down Button
Decreases the set temperature value
3
Power Button
Powers the heater on or o
4
Timer Button
Engages the o timer
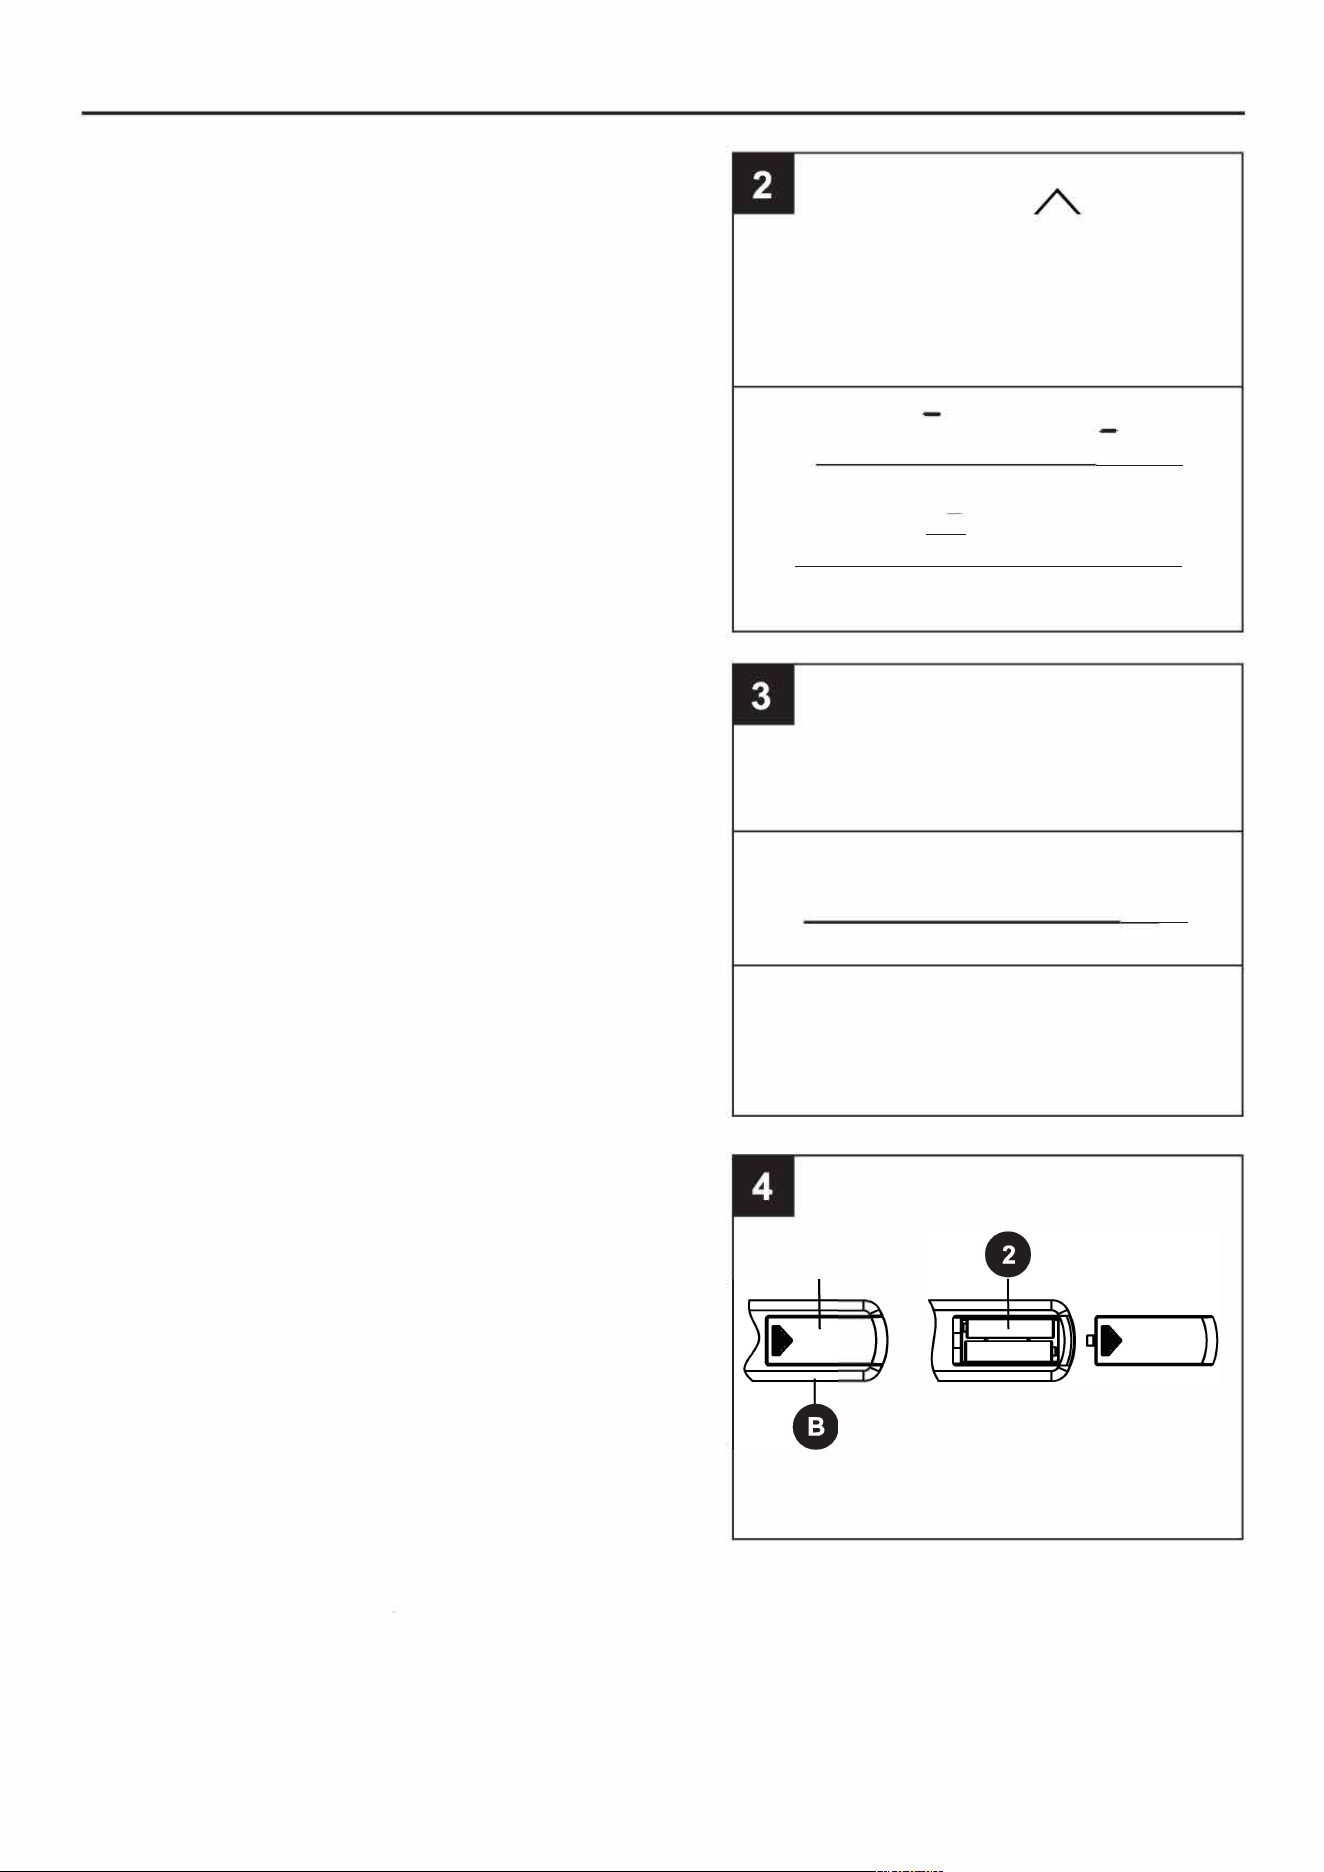
OPERATING INSTRUCTIONS
1.
Turn the heater on or o by pressing the
Power button on the control panel (C) or by
pressing the ON/OFF button on the remote
control (B).
Once the power is o, heating elements wil
lstop working first. The fan will continue
working for up to 60 seconds to dispense
residual heat inside the heater. This is a
normal function.
N
ote: This heater has only one heating power:
1500W. When the heater is turned on or
the temperature is adjusted, the display
shows the set temperature, and then
switches to the ambient temperature aer
4 flashes.
8
0
TROUBLESHOOTING
PROBLEM
The heater does
not turn on.
The heater shut
o unexpectedly.
The heater displays
an error code "E2".
POSSIBLE CAUSE
1.
The power cord is not plugged in.
2.
The electricity at the main fuse
box is not working.
3.
The battery in the remote control
is dead.
4.
The thermostat on the heater is
set lower than the room
temperature.
1. The heater has overheated.
2.
Insuicient power to the unit.
3.
The air vent is clogged.
4.
Insuicient air flow to the heater.
1.
Temperature sensor not
functioning properly.
11
CORRECTIVE ACTION
1.
Plug the power cord into an
electrical outlet.
2. Check the electricity at the main fuse
box.
3.
Replace the batteries in the remote
control.
4.
Increase the thermostat temperature
on the heater for a higher heat
setting.
1. Unplug the heater from the wall,
wait a few seconds then plug the
power cord back in.
2. Make sure the unit is plugged into a
dedicated outlet, without extension
cords or surge protectors.
3. Clean the air intake located on the
bottom of the unit.
4. Move the unit at least 3 from the
wall.
1.
Please contact technical support.
ONE-YEAR LIMITED WARRANTY
You should first read all instructions bere attempting to use this product.
This unit is guaranteed to the original retail purchaser against defects in quality or workmanship for a
period of one year from the date of original purchase. If this unit fails because of a manufacturing defect,
contact the customers service for technical support, or return it to the place of purchase for repair or
replacement. This warranty does not cover damage caused by misuse, abuse alteration. Repairs made
by anyone other than manufacturer are not covered in this warranty. Stores will not be held liable for any
losses due to neglectful operation.
Please retain your proof of purchase as well as the BOX to validate the guarantee.
You will need to provide the unit's model number, serial number (located on the heater), date of
purchase, a daytime phone number or email, and a copy of your receipt.
REPLACEMENT PARTS LIST
For replacement parts, call our customer service department at 866-994-4148, 8 a.m.- 8 p.m., EST,
Monday - Sunday. You could also contact us at [email protected].
Printed in
V
ietnam
12
P
ART
DESCRIPTION P
ART #
O
Remo
te Control
O
RC4-02
COVERED UNDER WARRANTY
Yes
UTILITECH y el diseno del logotipo son
marcas comerciales o marcas registradas
de LF, LLC. Todos las derechos reservados.
@ A v]
Numero de serie
Fecha de com
p
ra _____ _
ARTICULO #
60
2
33
2
0
MODELO #1
175IRH-CON-503
CALENTADOR DE
E
SP
ACIO EL
É
CTRICO
CON GABINETE DE
C
U
AR
Z
O INFRARROJO
13
Gracias por comprar este producto UTILITECH.
¿
Tiene preguntas, problemas o piezas faltantes?
Antes de
v
ol
v
er a la tienda, p
ó
ngase en contacto al:
866-994-4148, de lunes a domingo de 8 am. a 8 pm., hora estándar del Este, o escriba a
SG25433
iNDICE
Contenido del paquete ................................................................................................................... 14
lnformaci6n de seguridad .............................................................................................................. 15
Preguntas frecuentes .................................................................................................................... 17
Preparaci6n ................................................................................................................................... 18
Panel de control. ............................................................................................................................ 19
Control remoto ............................................................................................................................... 20
lnstrucciones de funcionamiento ................................................................................................... 21
Cui dado y mantenimiento .............................................................................................................. 22
Soluci6n de problemas .................................................................................................................. 23
Garant
í
a limitada de un a
ñ
o.......................................................................................................... 24
Lista de piezas de repuesto ........................................................................................................... 24
CONTENIDO DEL PAQUETE
PIEZA
A
0
C
D
E
F
G
===
===
� �
-
00
A
V
00
DESCRIPCION
= = =
===
===
===
===
0
��
0
===
===
===
===
14
CANTIDAD
1
1
1
1
1
1
1
A
C
D
O
Calentador infrarrojo
Control remoto
(
b
ater
í
a
)
Panta
lla digital (preensamblada en el calentador infrarrojo (A))
Panel de control (preensamblado al calentador infrarrojo (A))
Conducto de
v
entilaci
ó
n (preensamblada al calentador infrarrojo (A))
Ranura del cable (preensamblado al calentador infrarrojo (A)) Sensor de
temperatura (preensamblado al calentador infrarrojo (A))

A INFORMACl6N DE SEGURIDAD
Lea y comprenda completamente este manual antes de intentar ensamblar, usar o instalar el producto.
INSTRUCCIONES IMPORTANTES DE SEGURIDAD
ADVERTENCIA: POSIBILIDAD DE RIESGO ELECTRICO SI NO SE CUMPLEN LAS ADVERTENCIAS.
Cuando utilice electrodomesticos, siempre tome medidas de precauci6n basicas para reducir el
riesgo de incendios, descargas electricas y lesiones personales, incluidas las siguientes:
•
Este calentador debe enchufarse a un circuito propio de 120 voltios y 15 amperios (o más). No conecte nada
más al mismo circuito. Si no está seguro de si su hogar cumple con esta especificación, consulte con un
electricista certificado antes de usarlo. Si esto no se cumple, podrían producirse riesgos de incendio,
sobrecalentamiento, daños materiales, lesiones o incluso la muerte.
• Conectelo solo a un tomacorriente con la debida puesta a tier. No conecte el calentador a extensiones
elericas, protectores contra sobrecarga, temporizadores, interruptores de circuito o en un tomacorriente
donde haya tambien ots electrodomesticos conectados. Si esto no se cumple, podrian producirse
riesgos de incendio, sobrecalentamiento, daos materiales, lesiones o incluso la muerte .
• Este calentador se calienta cuando esta en funcionamiento. Para evitar quemaduras, no toque superficies
calientes con la piel desnuda. Utilice las manijas (algunos modelos) o las ruedas para mover el calentador.
• Mantenga los materiales inflamables, como muebles, almohadas, ropa de cama, papeles, ropa y cortinas a
0.91 m (3 pies) del frente del calentador como m
í
nimo y alejados de los costados y la parte posterior del
calentador.
• Se debe tener erema precauci6n cuando nios, personas discapacitadas y mascotas usen un calentador,
cuando este se use cerca de ellos o cuando se deje funcionando sin supeision.
• Siempre desenchu el calentador cuando no lo use.
• No opere ning(m calentador que tenga el cable o el enchufe danados o despues de que el calentador haya
fallado, se haya cafdo o danado de cualquier manera. P6ngase en contacto con el fabricante para conocer
las opciones de resoluci6n.
• No lo use en exteriores. La exposici6n a las condiciones climaticas exteriores, coma la lluvia, la nieve, el sol,
el viento o las temperaturas extremas, podrfa causar que el calentador se conviea en un riesgo de
seguridad.
• Este calentador no esta diseado para usarse en baos, cuartos de lavado ni en espacios interiores
similares, ni en ning(m area donde se utilicen tomacorrientes con interruptor de circuito de falla de puesta a
tierra (GFCI, par sus siglas en ingles).
• Nunca coloque el calentador donde se pueda caer dent de una baera u ots contenedores de agua.
• No pase el cable par debajo de almbras. No cubra el cable con almbras, tapetes o cubiertas similares.
• Coloque el cord
ó
n lejos de zonas de tr
á
nsito en donde nadie pueda tropezarse y caer.
• El calentador debe enchufarse en un tomacorriente de pared con un circuito exclusivo con una clasificaci6n
mf nima de 15 amperios en dicho circuito individual.
• Para desconectar el calentador, primero gire el bot6n de encendido a la posici6n "OFF" (apagado) y luego
retire el enchufe del tomaconiente de pared.
• No permita que objetos extraos ingresen o bloqueen las abeuras de ventilaci6n o escape, ya que esto
podrf a provocar descargas electricas, incendios o danos en el calentador.
• Deje un espacio sin obstrucciones de al menos 0.91 m en todos los lados del calentador (incluidos el frente,
la parte posterior, la izquierda y la derecha) para garantizar el m
á
ximo flujo de calor, circulaci
ó
n de aire y
ventilaci
ó
n.
Un calentador contiene piezas calientes y piezas que rman areas electricos o que echan chispas. No
• lo utilice en areas donde se almacene o utilice gasolina, pintura o If quidos inflamables, ni utilice solventes
inamables para limpiar el calentador. Mantenga el calentador seco en todo momenta.
• Utilice este calentador solo coma se describe en este manual. Cualquier otro uso no recomendado par
el fabricante puede causar incendios, descargas electricas o lesiones personales. No use solventes
abrasivos para limpiar el calentador, ya que podrf a daar el acabado o la carcasa.
• Para evitar un posible incendio, no bloquee las entradas de aire ni el escape de ninguna manera. No use la
unidad en superficies blandas, como una cama, donde las aberturas se pueden bloquear.
• Siempre enchufe el calentador directamente en un tomacorriente
/
recept
á
culo de la pared
;
nunca lo use con
extensiones el
é
ctricas ni tomacorrientes de alimentaci
ó
n reubicables (tomacorrientes m
ú
ltiples o regletas).
• La hipertermia puede provocar la muerte. Los sintomas de la hipertermia incluyen temperatura corporal alta,
dolor de cabeza, nauseas, v6mitos, cansancio, mareos, desmayos y pulso acelerado. Si comienza a
experimentar sintomas relacionados con la hipertermia, apague el calentador y busque atenci6n medica.
15
A INFORMACl6N DE SEGURIDAD
• Para evitar temperaturas ambiente excesivas que pueden causar hipertermia: NO deje el producto
funcionando sin supervisi
ó
n en un espacio confinado alrededor de beb
é
s o personas con capacidades
f
í
sicas, sensoriales o mentales reducidas.
Caracteristica de seguridad de sobrecalentamiento
Este calentador esta equipado con una caracteristica de seguridad de sobrecalentamiento. Cuando las
componentes internos del calentador alcanzan una temperatura que pueda causar el sobrecalentamiento o
un posible incendio, el calentador se apaga automaticamente. Si la unidad se ha sobrecalentado, deber
á
desenchufarla de la pared y volver a enchufarla para usar el calentador nuevamente.
AADVERTENCIA: PARA EVITAR DESCARGAS
ELECTRICAS, HAGA COINCIDIR LA CLAVIJA
ANCHA DEL ENCHUFE CON LA RANURA
ANCHA DEL TOMACORRIENTE E INSERTELA
COMPLETAMENTE.
AADVERTENCIA: es normal que el cable de alimentaci6n se sienta caliente al tacto. Sin
embargo,si el enchufe esta flojo en el tomacorriente, es posible que el enchufe se sobrecaliente. Si
esto ocurre, intente insertar el enchufe en un tomacorriente diferente. P6ngase en contacto con un
electricista calificado para que revise si el tomacorriente original presenta danos.
Especificaciones
Clasificaci6n de voltaje
Consumo de energia
Tamao de la unidad
120 V ( 60Hz)
1500 IOS
26.92 cm (ancho) x 33.27 cm (pfundidad) x 37.
84
cm (alto)
16
GUARDE ESTAS INSTRUCCIONES
PREGUNTASFRECUENTES
Consulte las preguntas frecuentes en las pr6ximas paginas antes de usar el calentador.
P. El calentador emite un olor extrao al abrir la caja y al encenderlo por primera vez. lPor que
ocurre esto?
R. Esto es normal. Este calentador esta tratado con un recubrimiento especial resistente al calor. Este olor a
veces puede sentie al abrir la caja. Cuando el recubrimiento se expone al calor, produce este olor
particular durante las primeras horas de funcionamiento. Este se disipara pasado el periodo de asentamien
to. Si usted es sensible a los olores, deberia encender la unidad en un garaje con la puerta abierta hasta
que el olor inicial se disipe.
P. Si el calentador funciona con la configuraci6n de vataje maximo, la cuantas BTU equivale?
R. Este calentador esta disenado para usarse como calefacci
ó
n complementaria en las
á
reas m
á
s
necesarias. Podr
í
a tardar de varios minutos a varias horas calentar el
á
rea, dependiendo de varios factores.
En la siguiente tabla, se proporcionan traducciones de unidades t
é
rmicas brit
á
nicas (BTU, por sus siglas en
ingl
é
s) para diferentes vatajes.
VATAJE
BTU
1,500
5,118
1,000
3,412
750 2,559
500
1,706
P. lSe pueden reemplazar los elementos de calefacci6n?
R. Los elementos de calefacci6n de repuesto pueden obtenerse del fabricante. T odas las piezas deben
comprse a traves del fabricante si la garantia del producto ha caducado. Si siente que los elementos
presentan fallas desde recien sacados de la caja, p6ngase en contacto con Seicio al Cliente. Un
representante lo guiara en los pasos a seguir.
P. Desde que enchufo y enciendo la unidad, lCUanto tardara en calentar la habitaci6n?
R. El proceso de calecci6n del calentador comienza inmediatamente despues de encenderlo y configurar
una temperatura deseada por sabre la temperatura de la habitaci6n. El cambio notorio en la temperatura
ambiente de la habitaci6n fluctua debido a variables como la ubicaci6n del calentador (en el hogar), la
distribuci6n y el tamano de la habitaci6n, la calidad del aislamiento de la habitaci
ó
n, la cantidad de puertas/
ventanas, la cantidad de concreto desnudo (act
ú
a como disipador t
é
rmico con cualquier tipo de
calefacci
ó
n), la apertura y el cierre de la puerta para exteriores, los pasillos largos, los techos altos, etc. Los
clientes con habitaciones m
á
s peque
ñ
as experimentan cambios de temperatura r
á
pidos. Las habitaciones
con una distribuci
ó
n m
á
s grande y abierta pueden tardar hasta 24horas en calentarse por completo.
P. La temperatura en el calentador no coincide con la tempetura que se muestra en el termostato
de pared o externo. lPor que?
R. Esto es completamente normal. La temperatura que se muestra en su calentador puede ser distinta de
aquella que aparece en ot termostato (por ejemplo, uno montado en la pared o uno externo ). Esto
sucede porque el sensor de temperatura en el calentador lee la tempetura de su entorno directo. Si el
calentador esta cerca del piso frio (y el calor esta ascendiendo ), cualquier lectura en termostatos elevados o
externos sera distinta de la lectura del calentador. La mejor manera de operar el calentador es configurar la
unidad en High (alto) y establecer una temperatura con la que usted se sienta c6modo. Luego, dejelo a esa
temperatura, sin impoar que las lecturas no coincidan. El calentador terminara el ciclo cuando se alcance
o se supere la temperatura configurada.
17

PREGUNTASFRECUENTES
P. lPuedo usar mas de un calentador a la vez? lPuedo usar el calentador y otro electrodomestico al
mismo tiempo?
R. Sf, pero asegurese de que no esten enchufados en el mismo circuito. Cada calentador requiere su
propio circuito de 15 amperios como mfnimo, sin ots artfculos enchufados en ese mismo circuito o
tomacorriente. Esto se debe a que los calentadores se consideran electrodomesticos y generan alto
ampere. Si tiene dudas sobre si su circuito cumple con estos requisitos, verifique con un electricista
certificado.
AADVERTENCIA: no cumplir con los requisitos podrfa resultar en riesgo de incendio, daos materiales o
lesiones.
P. lPor que el ventilador de mi calentador continua funcionando despues de que se alcanza la
temperatura configurada o se apaga la alimentaci6n?
R. Esto es normal. El ventilador del calentador continuara funcionando incluso despues de que el calenta
dor termine el ciclo automaticamente. El ventilador continua funcionando a fin de expulsar todo el calor de la
cama de calor, al mismo tiempo que permite que la unidad siga filtrando el aire. Una vez que la caja o los
componentes internos se enfrfen por completo, el ventilador deberfa apagarse automaticamente. En este
caso, espere unos minutos despues de que finalice el ciclo del calentador (con el calentador encendido). El
ventilador se apagara mas rapido cuando se apague la alimentaci6n.
P. La pantalla de mi calentador muestra que la temperatura ambiente esta alrededor de los 20
grados, pero se que esta mas caluroso que eso. lPor que?
R. La pantalla del calentador esta predeterminada para leer la temperatura en Fahrenheit. Si el calentador
esta calentando, pero muestra que hay alrededor de 20 grados, probablemente lo configur6 para que lea la
temperatura en Celsius en vez de Fahrenheit.
P. El cable de alimentaci6n de mi calentador se calienta. El cable muestra signos de calentamiento
o se esta derritiendo en el tomacorriente. lEs normal?
R. Un cable de alimentaci6n tibio es normal. Estos cables de alimentaci6n estan clasificados como seguros
pa usarse con hasta 105
°
C (221
°
F) por UL, CSA o TUV. La excepci6n es, si detecta calor, humo o
signos de derretimiento en el punto de contacto del tomacorriente de pared, podrfa deberse a contactos
sueltos o desgastados (o arqueados). Deje de usar el calentador inmediatamente, p6ngase en contacto con
el servicio de garantf a para obtener un cable de alimentaci6n de repuesto y pida a un electricista calificado
que reemplace el tomacorriente lo mas pronto posible.
PREPARACION
Coloque el calector en una supeicie firme y nivelada y coneelo a un tomacorriente de 120 V, 60 Hz con
conexi6n a tierra. Utilice el calentador Cmicamente en posici6n vertical.
lnsee dos baterfas en el control remoto antes de usarlo (no se incluyen las baterfas). *(No todos las
productos incluiran un control remoto ).
Tenga en cuenta que las calentadores infrarrojos no calientan como un calentador de espacio tdicional.
No debe esperar que los calentadores infrarrojos soplen aire caliente como un calentador de espacio
tradicional. Los calentadores inarrojos calientan los objetos, no el aire. Los calentadores infrarrojos deben
usae para complementar una habitaci6n aislada que ya tiene calefacci6n. Las especificaciones de
metros cuadrados dan por sentado una sola habitaci6n cerrada, no una casa completa. Los calentadores
infrarrojos no calientan a traves de las paredes o los pisos y no estan diseados para reemplazar una
fuente de calor principal. El calor infrarro puede tardar al menos 24 horas en calentar una habitaci6n,
pero funciona de manera mucho mas eficiente para mantener la temperatura deseada. Los calentadores
infrarrojos no funcionaran bien en espacios no aislados sin calecci6n, como porches con mosquiteros,
casas rodantes, garajes, s6tanos sin calefacci6n, etc.
18
PANEL DE CONTROL
·1 :I .,
1:. •c ------
0 A V
PIE
Z
A
NOMBRE
1
2
3
4
5
6
7
DESCRIPCION
Lecturas de la temperatura configurada de la habitaci6n o
ambiental, o del valor del temporizador
lndica que la temperatura se muestra en Fahrenheit
lndica que la temperatura se muestra en Celsius
Enciende o apaga el calentador. Mantenga presionado para
alternar entre °C y °F
Apaga la funci
ó
n de temporizador
Aumenta la temperatura configurada
Disminuye la temperatura configurada
Pantalla digital
Luz indicadora de grados
Fahrenheit
Luz indicadora de
grados Celsius
Bot6n de encendido
Bot6n del temporizador
Bot
ó
n
para subir la
temperatura
Bot
ó
n
para bajar la
temperatura
19
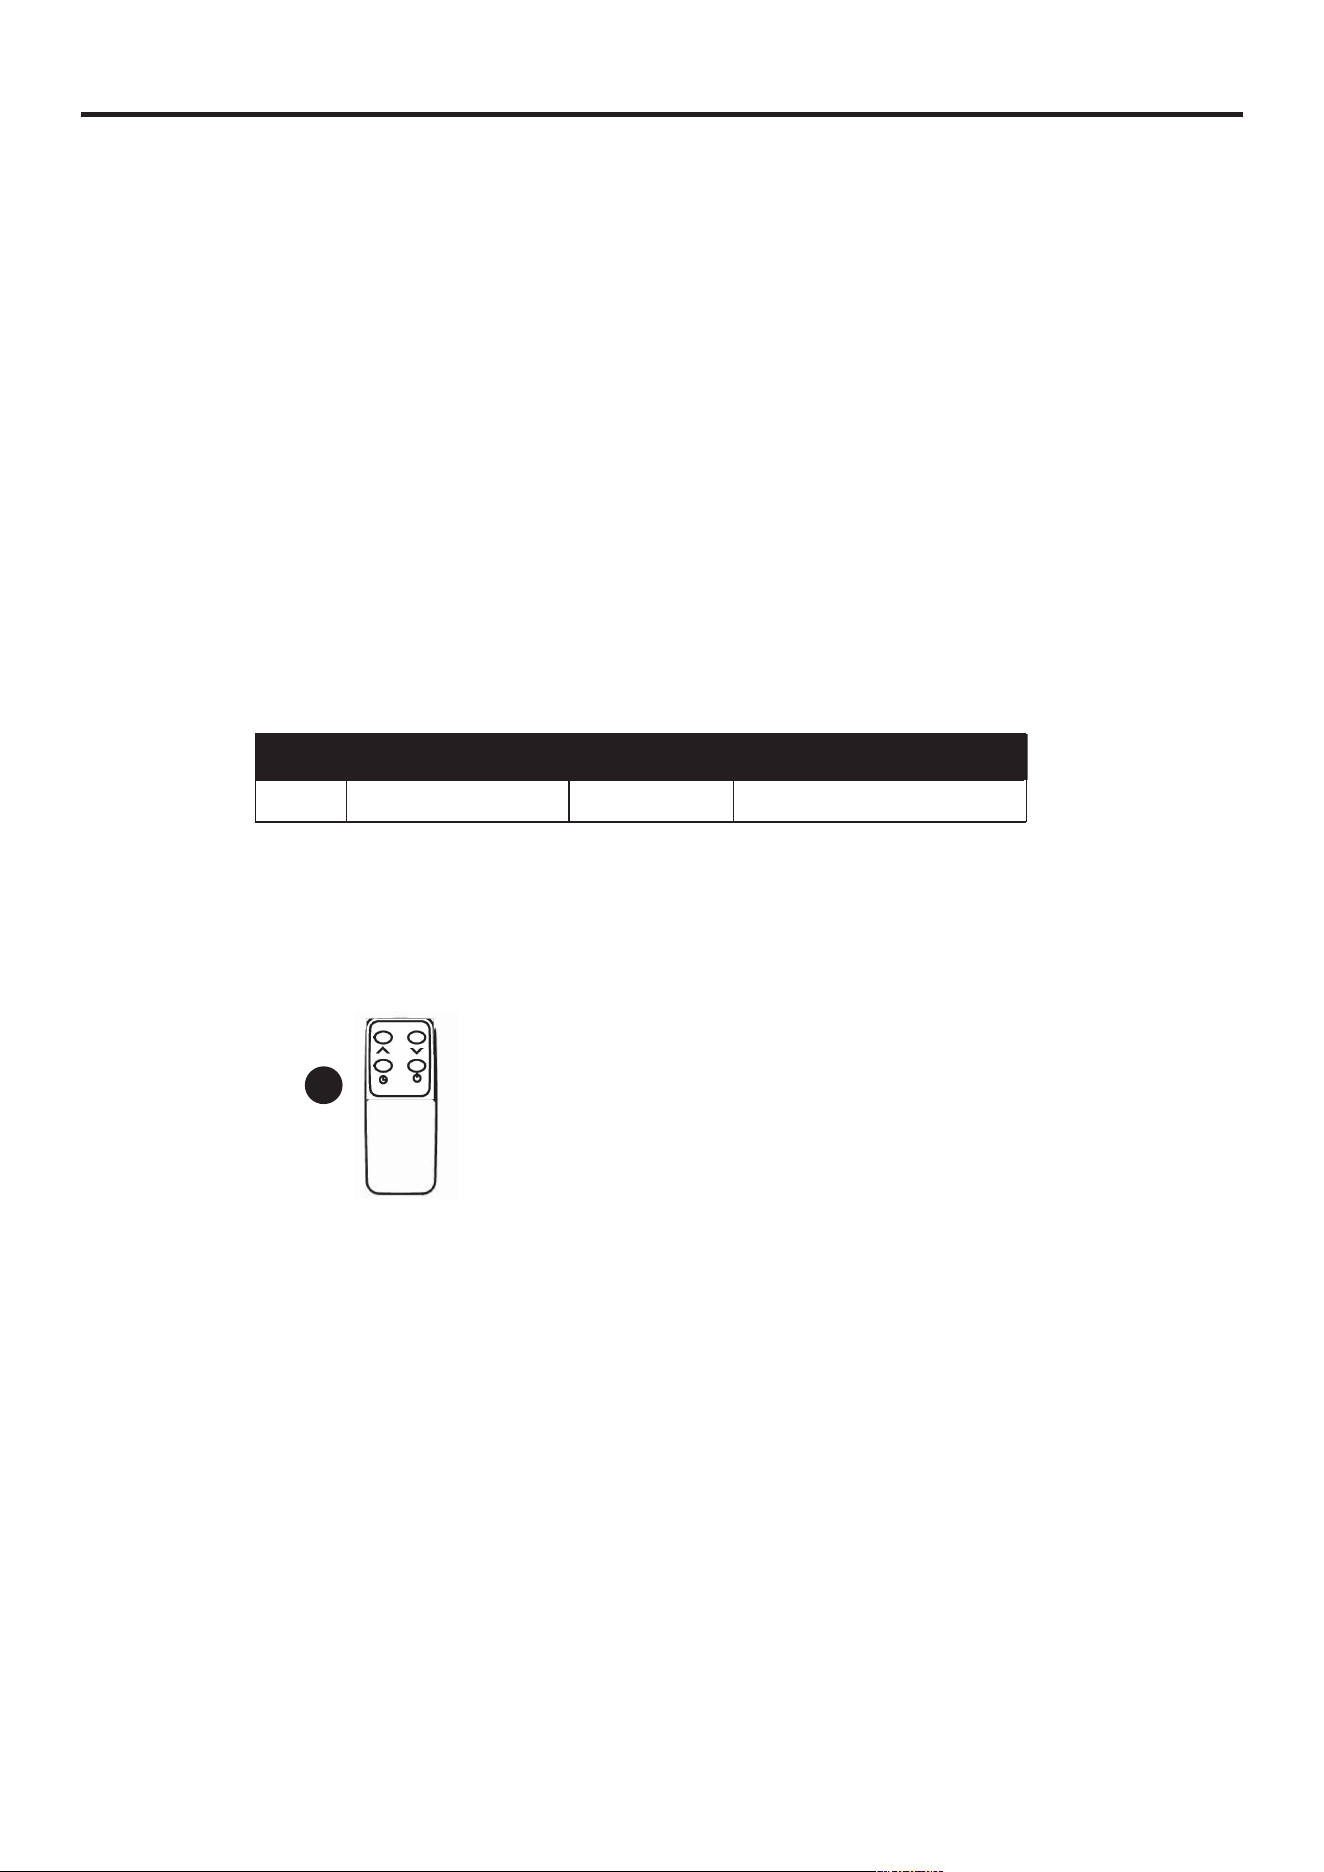
CONTROL REMOTO
0>0°
PIEZA
DESCRIPCIQN
1
Aumenta el valor de la temperatura configurada
2
Disminuye el valor de la temperatura configurada
3
NOMBRE
Bot
ó
n para subir la
temperatura
Bot
ó
n para bajar la
temperatura
Bot
ó
n de encendido
Enciende o apaga el calentador
4 Bot6n del temporizador Apaga el temporizador
INSTRUCCIONES DE FUNCIONAMIENTO
1. Encienda o apague el calentador presionando
0
20
N
ota
:
este calentador tiene una sola potencia de
calefacci
ó
n
:
1
5
00
W
. Cuando
se enciende la
calefacci
ó
n o se ajusta la temperatura, la
pantalla muestra la temperatura establecida y, a
continuaci
ó
n, cambia a la temperatura ambiente
despu
é
s de 4 parpadeos.
el
bot
ó
n de encendido en el panel de control (C)
o presionando el bot
ó
n
de encendido
en el
control remoto (B).
Una vez apagado, los elementos de calefacci
ó
n
dejar
á
n de funcionar primero. El ventilador
continuar
á
funcionando por hasta 60 segundos
para dispersar el calor residual dentro del
calentador. Esta es una funci
ó
n normal.
INSTRUCCIONES DE FUNCIONAMIENTO
2.
Configure la temperatura al presionar las
flechas en el panel de control (C) o en el
control remote (B).
Puede configurar la temperatura en el calentador
en cualquier lugar entre 10
°
c y 36
°
C (50
°
F y 97
°
F). Una vez que haya elegido la temperatura
deseada, el calentador permanecera encendido
hasta que la temperatura de la habitaci6n
aumente a la temperatura en la pantalla digital. El
calentador alternara entre encendido y apagado
para mantener la temperatura de la habitaci6n
deseada.
Nota:
mantenga presionado el bot6n de encendido
en el panel de control (C) durante 5 segundos
para cambiar el indicador de pantalla digital en
el calentador entre Fahrenheit y Celsius.
3. Para establecer que el temporizador apague el
calentador, encienda la un
idad y presione el
bot
ó
n de temporizador en el panel de control (C)
o en el control remoto (B).
Nota: la funci6n de apagado con temporizador
solo puede configurarse cuando el calentador
esta encendido.
La pantalla digital en el panel de control (C)
cambia de la lectu de la temperatura
configurada al valor de hara del temporizdor.
Presione el bot6n de temporizador
repetidamente para cambiar el valor del
numero entre un rango de O a 9 horas (O, 30
min, 1 h, 2 h, ... , 9 h).
La luz del temporizador se apaga cuando se
configura el temporizador.
4. Pa reemplazar las baterfas, retire la cubierta
para baterfas (1) del control remote (B),
aplicando presi6n en la cubiea para baterfas
(1) y deslizandola del control remote (B). lnserte
dos baterfas (no se incluyen) (2) y vuelva a
colocar la cubiea para baterfas (1) en el control
remote (B).
Nota: no mezcle baterfas antiguas con nuevas.
No mezcle bater
í
as alcalinas con bater
í
as
est
á
ndar (carbono-cinc) o bater
í
as recargables
(NiCad, Ni-
M
h, etc.). No deben recargarse las
bater
í
as que no est
é
n creadas para tal fin. Las
bater
í
as se deben introducir en la polaridad
correcta. Las bater
í
as agotadas se deben
retirar del producto.
Alcance del control remoto: 12.2 metros.
21
v
0 0
A
V
[
C i-1 �-·-•
• • • ,-11-1
]
_I
LI L• LI
_I
I
O
1
1-1
1
C
-11-
[
ILi
11_,
···=
1
c
1
1
0
[
,-1 1 1 • • •
c,1 J
_ LI 1 I
_
TEM
PO
RI
ZADO
R
•
S0LUCl6N DE PROBLEMAS
PROBLEMA
CAUSA POSIBLE
ACCION CORRECTIVA
El calentador no
1 . El cable de alimentaci
ó
n no est
á
1.
Enchufe el cable de alimentaci6n en un
enciende.
enchufado. tomacorriente.
2. No hay electricidad en la caja de
2.
Verifique que haya electricidad en la
fusibles principal.
caja de fusibles principal.
3. Se agot6 la baterfa del control
3.
Reemplace las baterf as del contl
remoto. remoto.
4. El termostato del calentador esta
4.
Aumente la temperatura del
configurado a una temperatura
termostato en el calentador para que
mas baja que la de la habitaci6n.
produzca mas calor.
El calentador se
1 . El calentador se sobrecalent6.
1.
Desenchu el calentador de la pared,
apaga
espere unos segundos y, luego, vuelva
inesperadamente.
a enchufar el cable de alimentaci6n.
2. No hay suficiente alimentaci
ó
n 2.
Asegurese de que la unidad este
en la unidad. enchufada a un tomacorriente
exclusivo, sin eensiones electricas ni
protectores contra sobrecargas.
3. El conducto de ventilaci
ó
n de
aire esta obstruido.
4. No hay suficiente flujo de aire en
el calentador.
3. Limpie la entrada de aire ubicada en la
parte inferior de la unidad.
4. Mueva la unidad a una distancia de
0.91 m coma mfnimo de la pared.
El calentador
1. El sensor de temperatura no
1. P6ngase en contacto con el servicio
muestra un c6digo
funciona correctamente.
tecnico.
de error "E2".
23
UN ANO DE GARANTiA LIMITADA
Debe leer todas las instrucciones antes de usar este producto.
Esta unidad est
á
garantizada para el comprador original contra defectos en la calidad o la mano de obra
por un per
í
odo de un a
ñ
o a partir de la fecha de compra original. Si esta unidad falla debido a un defecto
de fabricaci
ó
n, p
ó
ngase en contacto con el Departamento de Servicio al Cliente para obtener asistencia
t
é
cnica o devu
é
lvala al lugar de compra para su reparaci
ó
n o reemplazo. Esta garant
í
a no cubre los
da
ñ
os causados por mal uso, abuso o alteraci
ó
n. Las reparaciones realizadas por personas que no
sean el fabricante no est
á
n cubiertas por esta garant
í
a. Las tiendas no se hacen responsables de las
p
é
rdidas debidas a una operaci
ó
n negligente.
Conserve el comprobante de compra y la CA
J
A para validar la garant
í
a. Deber
á
proporcionar el n
ú
mero
de modelo de la unidad, el n
ú
mero de serie (ubicado en el calentador), la fecha de compra, un n
ú
mero
de tel
é
fono o correo electr
ó
nico para contacto diurno y una copia de su recibo.
LISTA DE PIEZAS DE REPUESTO
Para obtener piezas de repuesto, llame a nuestro Departamento de Servicio al Cliente al 866-994-4148,
de lunes a domingo, de 8a.m. a 8p.m., hora estándar del Est e. También puede ponerse en contacto con
nosotros a través de [email protected].
lmpreso en
V
ietnam
24
PIEZA
DESCRIPCIÓN
PIEZA #
O
Control remoto
O
RC4-02
CUBIERTO POR LA GARANTÍA
Sí