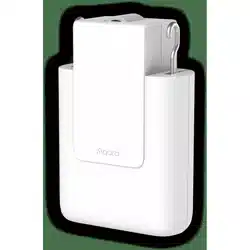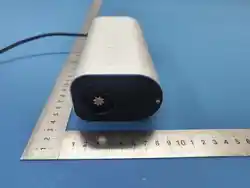

INS-101-C145
A-03 June 2026
WK80C/WK80T Series
Instruction

SAFETY NOTE
1. This appliance can be used by children aged from 8 years and
above and persons with reduced physical, sensory or mental capa-
bilities or lack of experience and knowledge if they have been
given supervision or instruction concerning use of the appliance in
a safe way and understand the hazards involved.
2. Children shall not play with the appliance.
3. Cleaning and user maintenance shall not be made by children with-
out supervision.
4. If the supply cord is damaged, it must be replaced by the manufac-
turer, its service agent or similarly qualified persons in order to
avoid a hazard.
5. WARNING: the drive shall be disconnected from its power source
during cleaning, maintenance and when replacing parts.
6. The instructions shall state that the A-weighted emis sion sound
pressure level of the drive is equal to or less than 70 dB(A), e.g. by
writing LpA ≤ 70 dB(A).
7. The mass and the dimension of the driven part shall be compatible
with the rated torque and rated operating time.
8. The type of driven part the drive is intended for.
9. WARNING: Important safety instructions. It is important for the
safety of persons to follow these instructions. Save these instruc-
tions.
10. Do not allow children to play with fixed controls. Keep remote con-
trols away from children.
11. Frequently examine the installation for imbalance and signs of
wear or damage to cables and springs. Do not use if repair or ad-
justment is necessary.
12. Watch the moving shutter and keep people away until the shutter
is completely closed.
13. WARNING: Important safety instructions. Follow all instructions,
since incorrect installation can lead to severe injury.
14. Before installing the drive, remove any unnecessary cords and dis-
able any equipment not needed for powered operation.
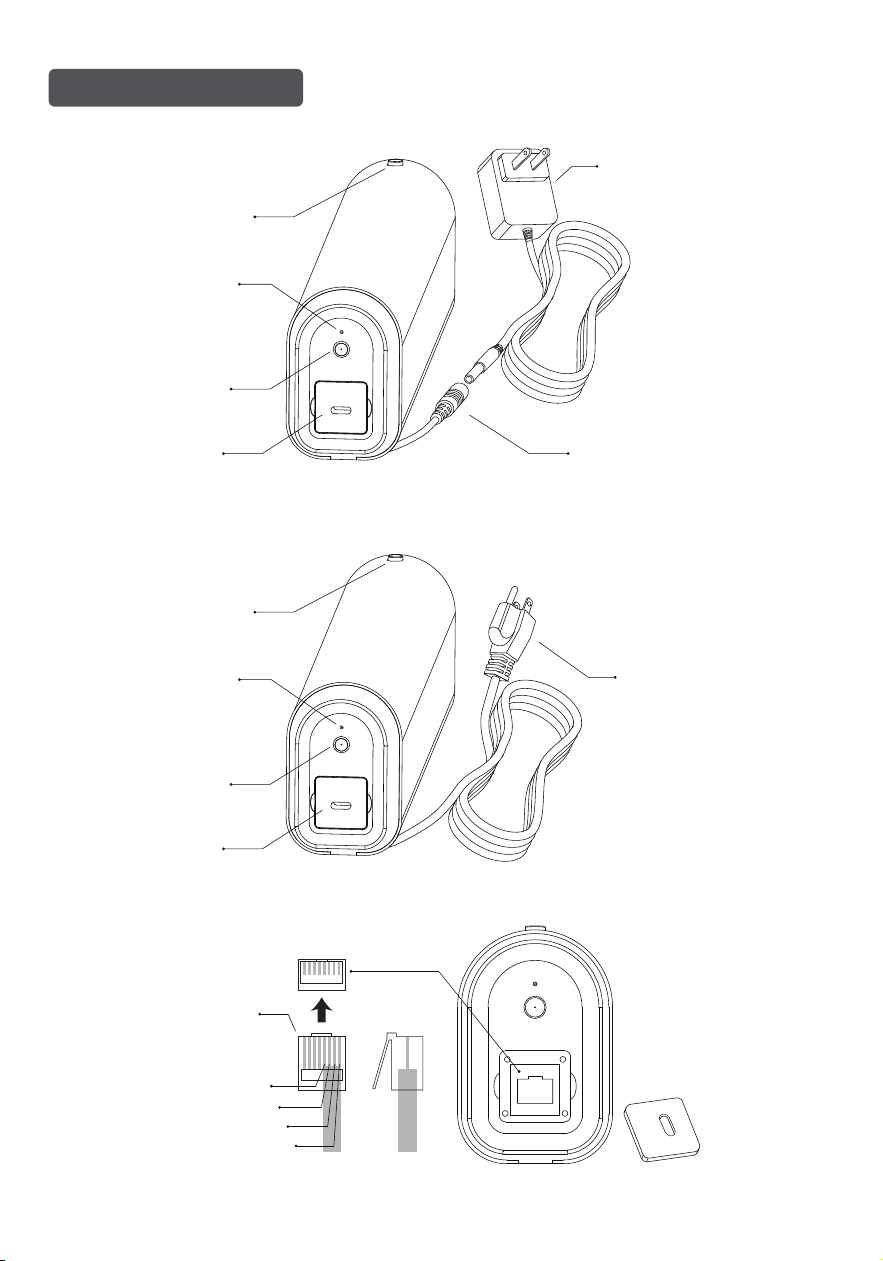
Product Introduction
1
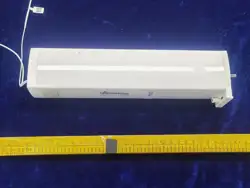
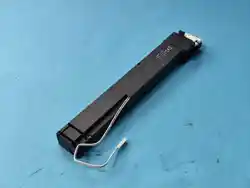
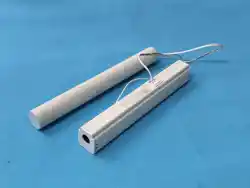
WK80C
WK80T
(Optional)
Black=COM
Green=OPEN
Red=STOP
Yellow=CLOSE
RJ45-8P4C
Cover
Button (P1)
Indicator Light
Lock
DC Power Adapter
Power Input Port
AC Power Cord
Cover
Button (P1)
Indicator Light
Lock
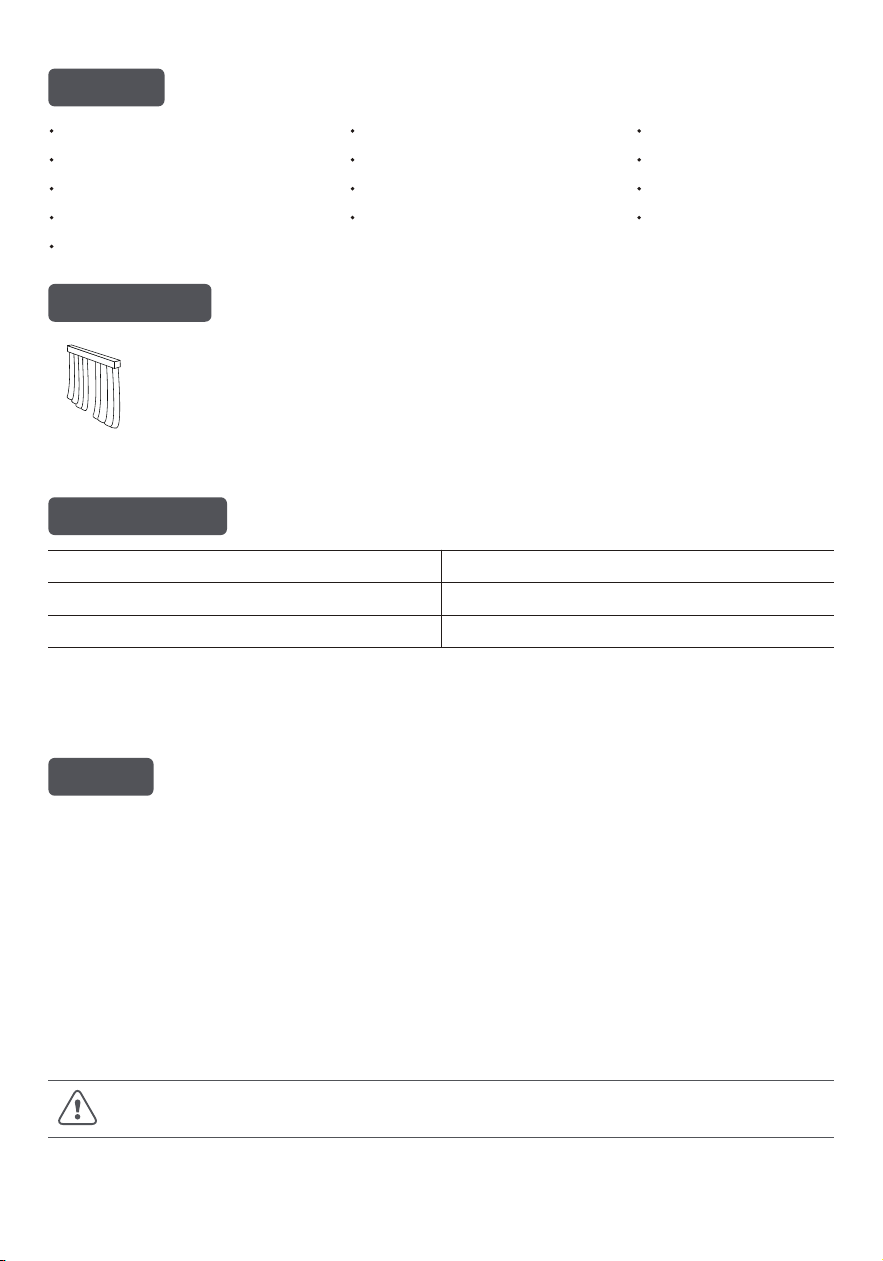
Built-in Receiver
Automatic Limit Setting
Pull-to-Start / Stop Control
App Control
Adjustable Speed
Direction Reversal
Stall Protection
Programming Button (P1)
Factory Reset
Electronic Limits
Favorite Position
Wall Switch Control
Manual Override
Features
Applications
This motor is designed for use with motorized curtains.
Specifications
Caution
2
* For additional motor models and torque specifications, please refer to the
product nameplate.
1. Do not expose the motor to moisture or extreme temperatures.
2. Do not cut the antenna. Keep it away from metal objects.
3. Do not allow children to play with this device.
4. Do not use the product if the power cable or connector is damaged.
5. Ensure the power cable and antenna are kept clear of and protected from moving parts.
6. Cables routed through walls must be properly insulated.
7. Before installation, remove any unnecessary cords and disable any equipment not
required for powered operation.
8. Installation and programming must be performed by a qualified professional. Use or
modification outside the scope of these instructions may void the warranty.
Read all safety instructions before use.
Operating Temperature: -10°C~+55°C
Rated Voltage (DC Motor): 12 V
Radio Frequency: 433.92 MHz
Maximum Running Time: 4 minutes
Rated Voltage (AC Motor): 100–240 V
Rated Power: 24 W
Setting Notice
Button Instructions
1. Operation:
① The valid interval for pressing buttons is within 10 seconds. If no operation occurs
within 10 seconds, the remote will exit the current setting mode.
② The motor will flash its LED and emit a beep as a prompt. Perform operations only
after the LED flashes and the beep sounds.
Please read the following instructions carefully before setup.
2. Limits setting:
① After installing the curtain motor, set the limit switches before first use.
② Once the limit switches are set, the motor memorizes the settings. After a power
cycle, open and close the curtain once to restore the limits.
③ After replacing the track or curtains, cancel the previous limit settings and set them
again.
3. Remote Replacement
① If a remote is lost, replace it with a new one.
① Each motor can store up to 10 channels. Once full, pairing a new channel will
overwrite the oldest stored channel in a circular manner.
4. Channel Storage
3
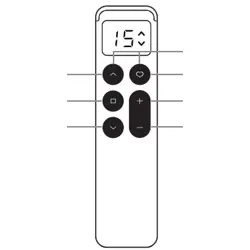
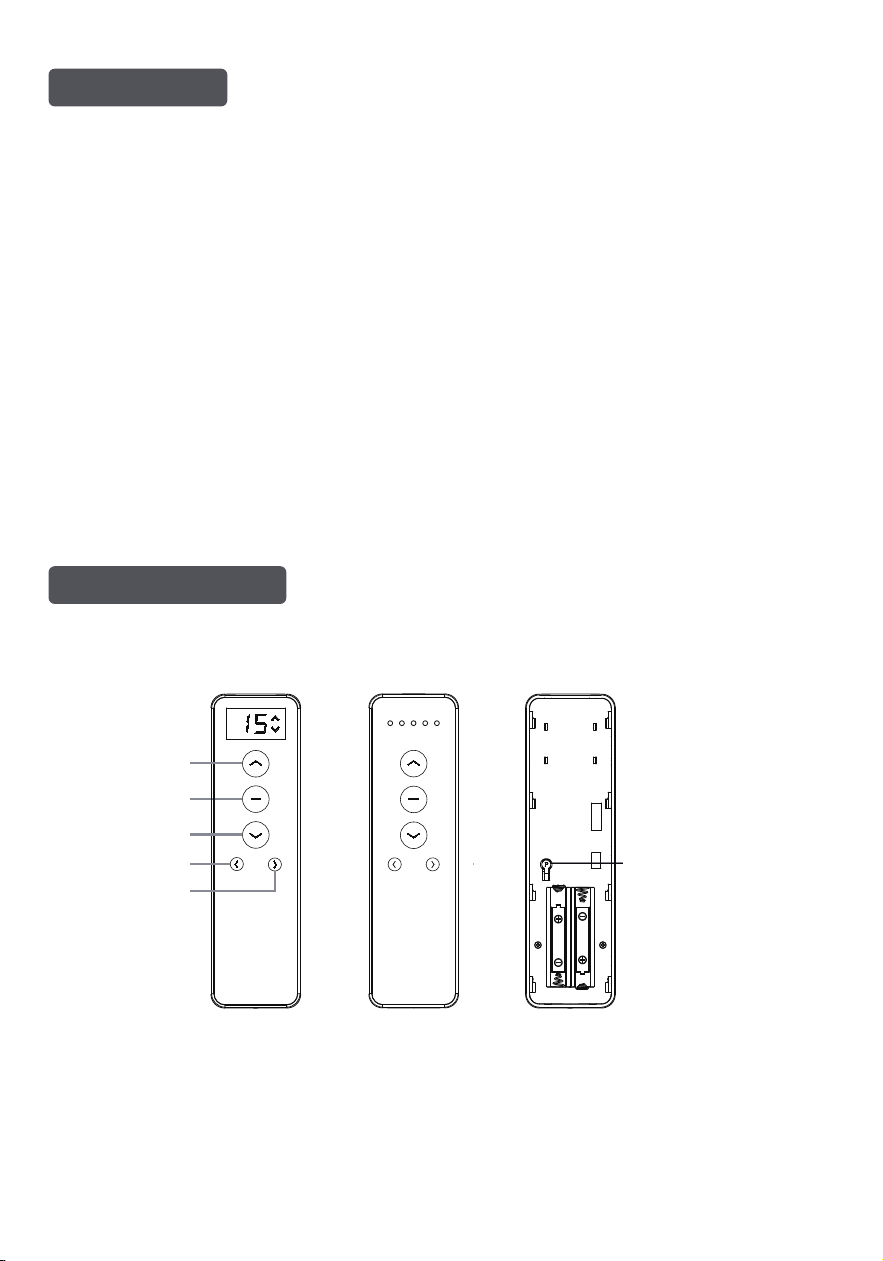
15CH FRONT
STOP
SETTING (P2)
CHANNEL DOWN
CHANNEL UP
5CH FRONT BACK
OPEN
CLOSE
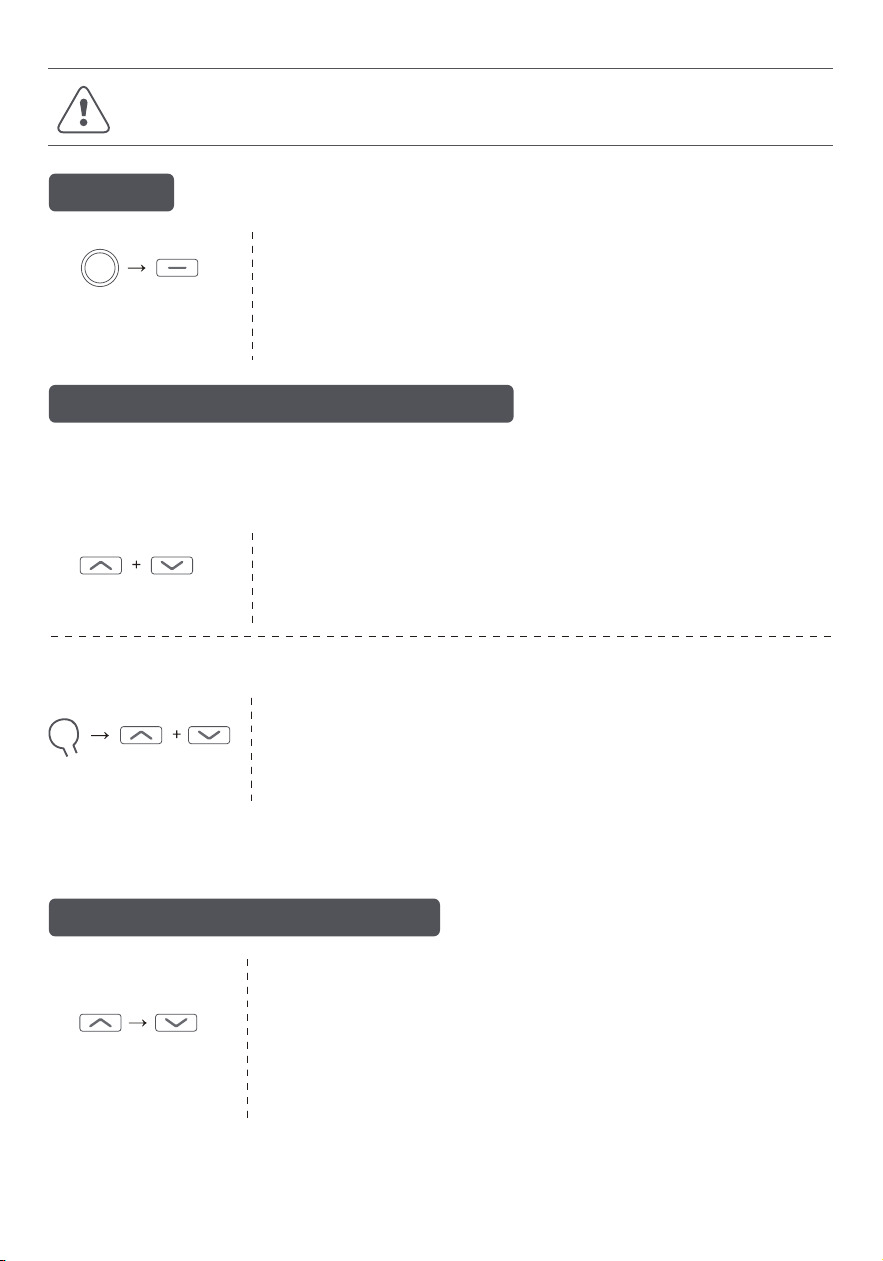
1 Pairing
2 Switch Rotating Direction (Optional)
3 Setting Open and Close Limits
4
Essential Settings
Steps 1–3 must be completed to ensure proper operation.
P1
P1 STOP
Press and hold OPEN and CLOSE buttons simultaneously for
2 seconds. The green LED will flash 5 times and the buzzer
will beep 3 times to indicate the direction has been switched
successfully.
If the drapery closes when pressing OPEN, you can switch the motor direction using one of
the following methods:
Method 1 (No-Limit State):
CLOSEOPEN
② Within 10 seconds, press the pairing button on the remote.
The buzzer will beep 3 times and the green LED will flash 5
times to confirm successful pairing.
OPEN CLOSE
Method 2 (After Limit Setting):
*Note: Switching the motor direction will cancel the current limit switch settings.
Please reset the limit switches
① On a paired remote, press P2 once (the buzzer beeps once),
then release.
② Press OPEN and CLOSE simultaneously once.The green LED
will flash 5 times and the buzzer will beep 3 times, indicating
the motor direction has been reversed successfully.
P2
P2
CLOSEOPEN
The limit setting is completed successfully.
① Press OPEN once. The green LED will flash 2 times and the
buzzer will beep 2 times. The drapery will open until it
stops at the end position.
② Press CLOSE once. The green LED will flash 2 times and the
buzzer will beep 2 times. The drapery will close until it stops
at the end position.
① Press and hold the programming button on the motor
head until the green indicator light flashes once. Release
the button, and a single beep will be heard.
4 Set a Favorite Position
5 Adjust Limits
The new open limit is now set.
1 Adjust the Open Limit
CLOSEOPEN OPEN
or
STOP OPEN STOP
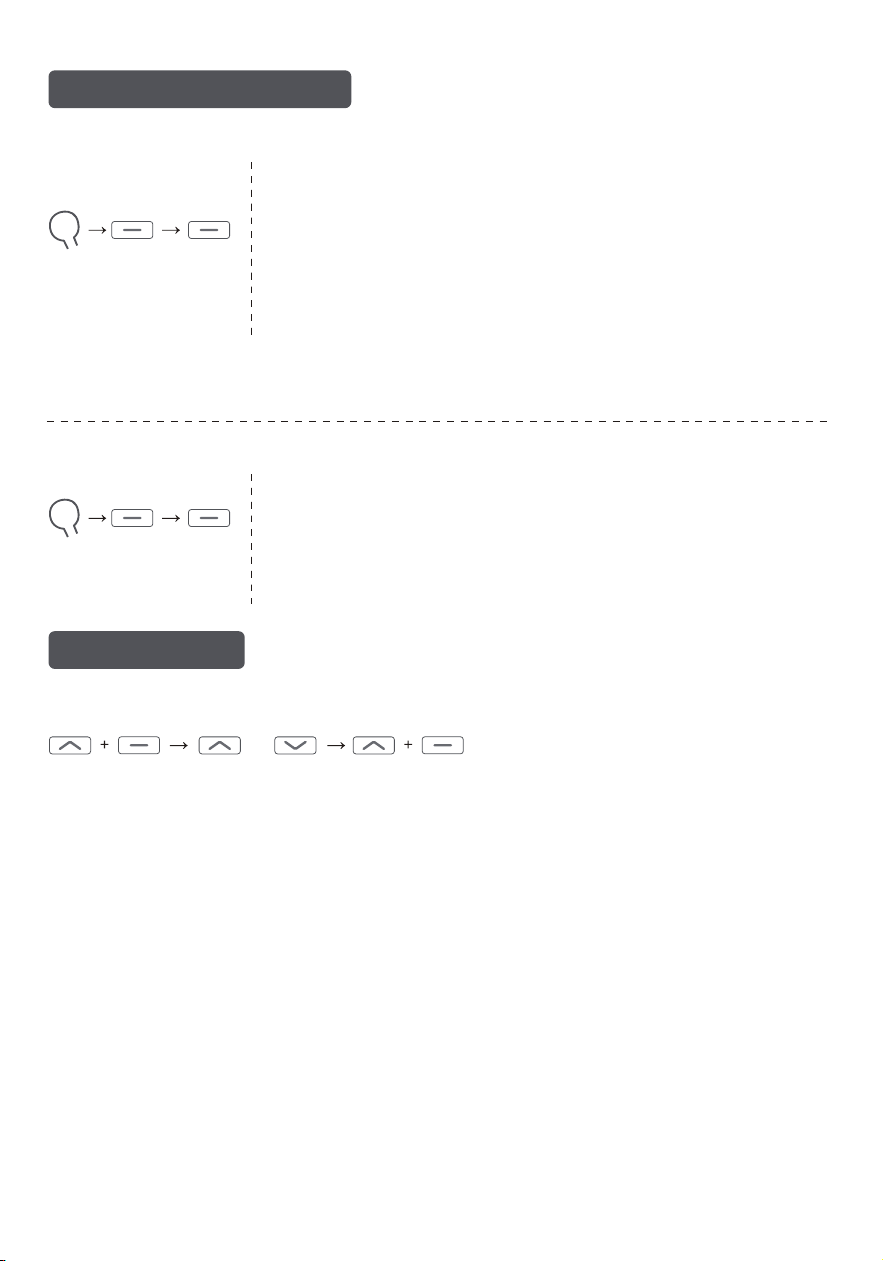
① Press and hold OPEN and STOP simultaneously for 5 seconds(the LED flashes slowly once
and the buzzer emits one long beep).
② Press OPEN or CLOSE, or gently pull the drapery by hand to adjust to the desired open
position.
③ Press and hold OPEN and STOP simultaneously for 2 seconds(the LED flashes 5 times and
the buzzer beeps 3 times).
5
Ensure both the open and close limits are set. Use the remote
to move the drapery to your desired position.
① Press P2 (the LED flashes once and the buzzer beeps once).
② Press STOP (the LED flashes once and the buzzer beeps once).
③ Press STOP again (the LED flashes 5 times and the buzzer beeps
3 times).
The favorite position is now set successfully.
① Press P2 (the LED flashes once and the buzzer beeps once).
② Press STOP (the LED flashes once and the buzzer beeps once).
③ Press STOP again (the LED flashes slowly 1 times and the
buzzer emits one long beep).
The favorite position is now deleted.
1 Set a Favorite Position
* Press and hold STOP for 2 seconds to move the drapery to the favorite position
automatically.
P2
P2
STOP STOP
2 Delete the Favorite Position
P2
P2
STOP STOP
6 Pair / Unpair an Additional Remote
7 Delete All Limits
* If no new limit is confirmed within 2 minutes, or if P1 or P2 is pressed, the motor
will exit limit adjustment mode automatically. The previous limit settings will
remain unchanged.
2 Adjust the Close Limit
or
CLOSECLOSE OPENSTOP CLOSE STOP
The new close limit is now set.
① Press and hold CLOSE and STOP simultaneously for 5 seconds(the LED flashes slowly once
and the buzzer emits one long beep).
② Press OPEN or CLOSE, or gently pull the drapery by hand to adjust to the desired close
position.
③ Press and hold CLOSE and STOP simultaneously for 2 seconds(the LED flashes 5 times and
the buzzer beeps 3 times).
P2 P2
P2
P2(a) P2(a)
P2(b)
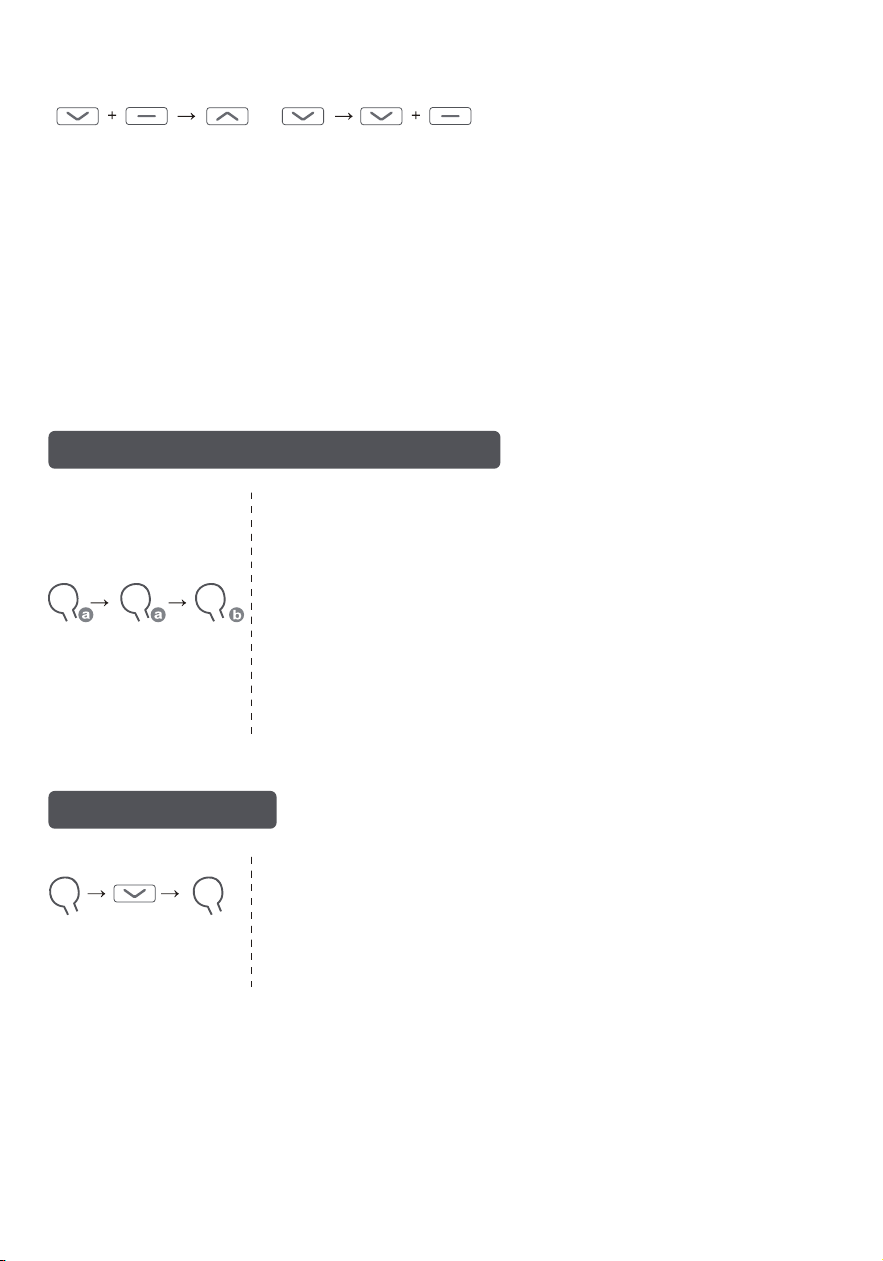
Pair an Additional Remote
Unpair a Remote
The new remote is now paired with the motor.
Repeat the same procedure using the remote you want to remove.
The remote will be unpaired from the motor.
*(a) as existing remote, (b) as new remote to pair/unpair.
① On an existing paired remote, press P2 twice(the LED flashes
once and the buzzer beeps once each time).
② On the new remote, press P2 once.
③ The LED will flash 5 times and the buzzer will beep 3 times,
confirming successful pairing.
All limit settings have been cleared.
P2
P2
P2
P2
CLOSE
① Press P2(the LED flashes once and the buzzer beeps once).
② Press CLOSE(the LED flashes once and the buzzer beeps once).
③ Press P2 again(the LED flashes 5 times and the buzzer beeps
3 times).
6
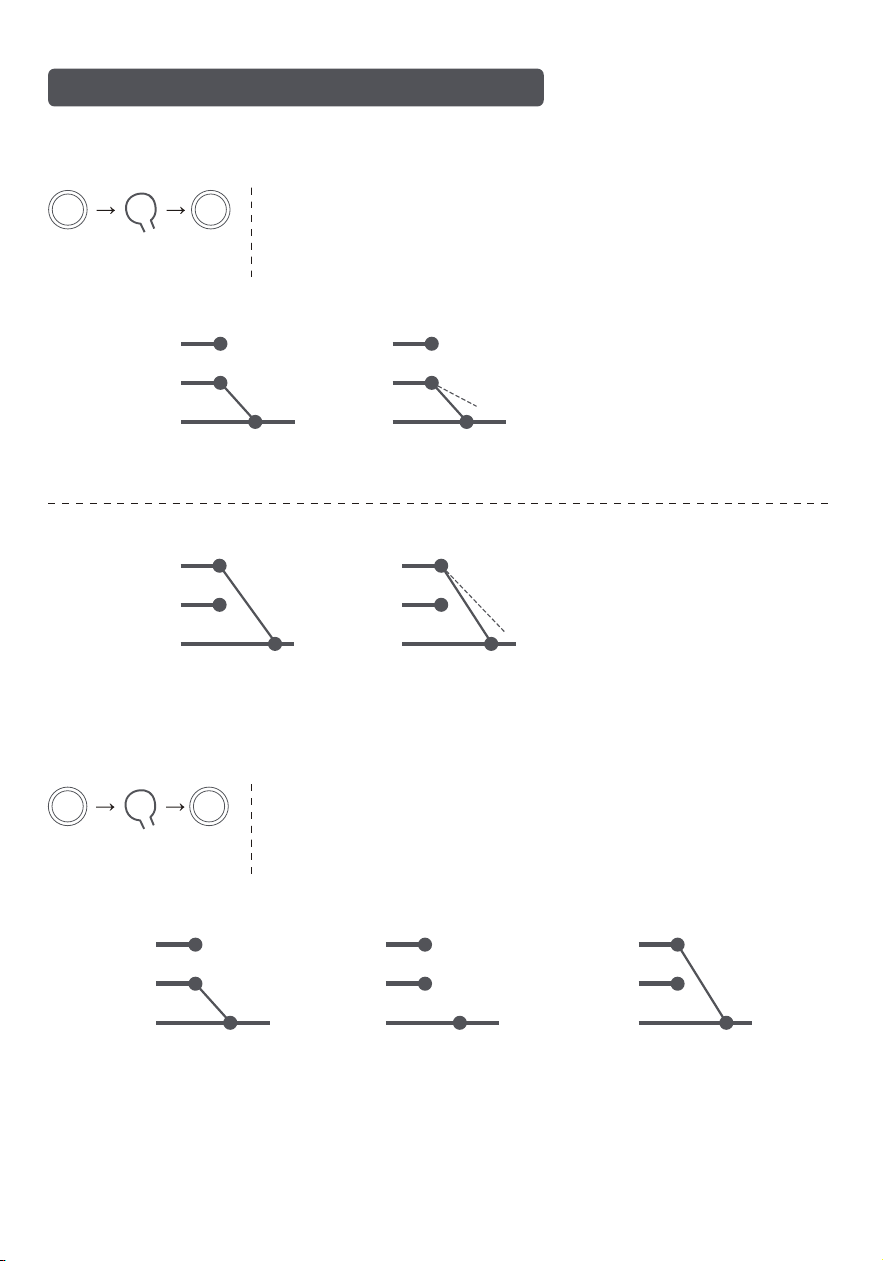
8 Weak-current Switch Modes (Optional)
7
Press and hold P1 button for 10S (3 flashes), release button
and beeps 3 times, press P2 twice (2 flashes and 2 beeps),
then press P1 button for 2S (5 flashes and 3 beeps), the mode
has been successfully switched.
Motor Open
COM
CLOSE
OPEN
COM
CLOSE
OPEN
COM
CLOSE
OPEN
Motor Stop Motor Close
2 Mechanical switch mode
P1
P2
P2 P1
Com line connects
OPEN line
OPEN line and CLOSE line
are not connected
Com line connects
CLOSE line
P1 P1
Press and hold P1 button for 10S (3 flashes), release button
and beeps 3 times, press P2 once (1 flash and 1 beep), then
press P1 button for 2S (5 flashes and 3 beeps), the mode has
been successfully switched.
1 Double button pushbutton switch mode (Factory default)
P1
P2
P2 P1
Com line connects
OPEN line
Com line connects
CLOSE line
Motor Open
COM
CLOSE
OPEN
COM
CLOSE
OPEN
COM
CLOSE
OPEN
COM
CLOSE
OPEN
Loosen the Com line and OPEN
line, and then connect
Loosen the Com line and CLOSE
line, and then connect
Motor Stop
Motor Close Motor Stop
P1 P1
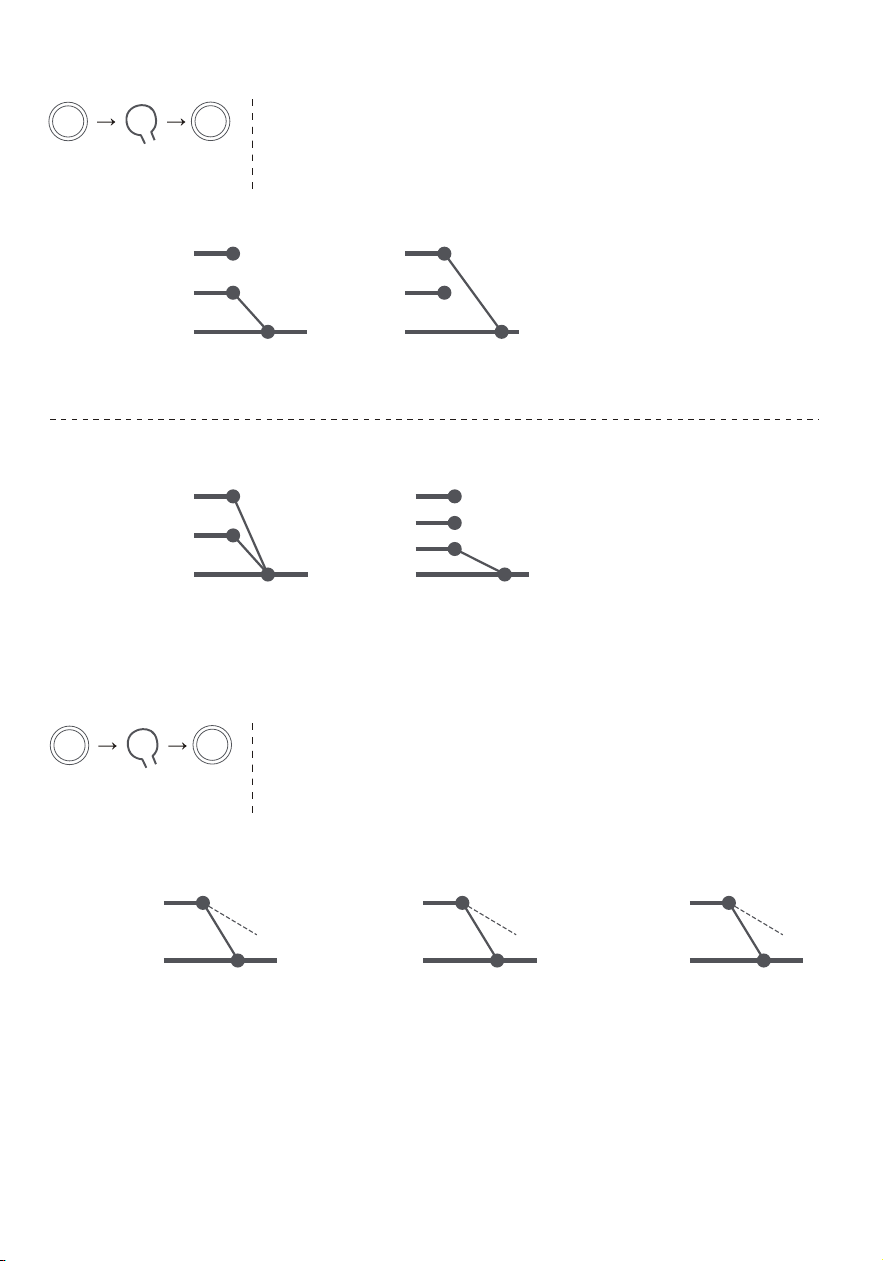
8
Press and hold P1 button for 10S (3 flashes), release button
and beeps 3 times, press P2 for 4 times (4 flashes and 4
beeps), then press P1 button for 2S (5 flashes and 3 beeps),
the mode has been successfully switched.
Press and hold P1 button for 10S (3 flashes), release button and
beeps 3 times, press P2 for 3 times (3 flashes and 3 beeps),
then press P1 button for 2S (5 flashes and 3 beeps), the mode
has been successfully switched.
COM
CLOSE
OPEN
COM
CLOSE
OPEN
Motor Open
COM
CLOSE
OPEN
Motor Stop
COM
CLOSE
OPEN
STOP
Motor Stop
Motor Close
3 Electronic switch mode
P1
P2
P2 P1
Com line connects
OPEN line
Com line connects
CLOSE line
Com line connected to the
OPEN line and CLOSE line
Com line connects
CLOSE line
4 Single channel pushbutton switch mode
P1
P2
P2 P1
Com line connects to OPEN
or CLOSE lines first time
Motor Open
COM
OPEN/CLOSE
COM
OPEN/CLOSE
COM
OPEN/CLOSE
Com line connects to OPEN
or CLOSE line second time
Motor Stop
Com line connects to OPEN
or CLOSE line third time
Motor Close
P1
P1
P1
P1
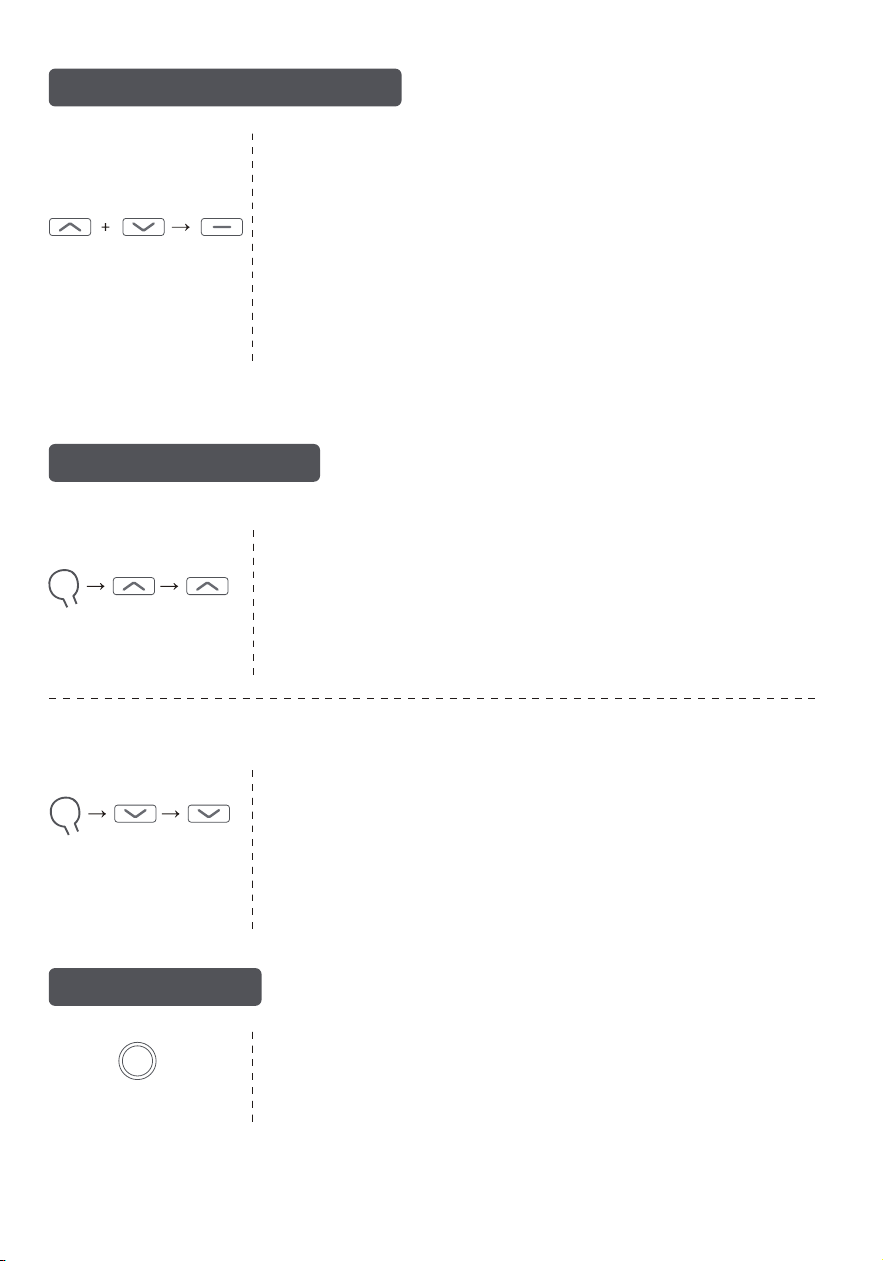
9 Run/Stop by Pulling Fabric
10 Speed Adjustment
11 Factory Reset
Note: This function is enabled by default.
OPEN CLOSE
STOP
Disable the Function
Enable the Function
The pull-to-start / stop function is now disabled.
Repeat the same steps above. The buzzer will beep 3 times and
the green LED will flash 5 times, indicating the function has been
enabled.
① Press and hold OPEN and CLOSE simultaneously for 5 seconds
(the green LED flashes once and the buzzer beeps once).
② Press the STOP button once(the green LED flashes 1 times and
the buzzer emits one long beep).
P1
P1
9
Hold the P1 button on the motor head for 14 seconds (8 flashes,
4 beeps) to reset the motor to factory settings.
P2
P2
OPEN OPEN
1 Increase Speed
P2
P2
CLOSE CLOSE
2 Decrease Speed
Press P2 (1 flash and 1 beep), then press OPEN (1 flash and 1 beep),
then press OPEN again.
- 5 flashes and 1 long beep = 1st speed gear
- 5 flashes and 2 long beeps = 2nd speed gear
- 5 flashes and 3 long beeps = 3rd speed gear
The motor running speed is accelerated.
Press P2 (1 flash and 1 beep), then press CLOSE (1 flash and 1
beep), then press CLOSE again:
- 5 flashes and 1 long beep = 1st speed gear
- 5 flashes and 2 long beeps = 2nd speed gear
- 5 flashes and 3 long beeps = 3rd speed gear
The motor running speed is decelerated.
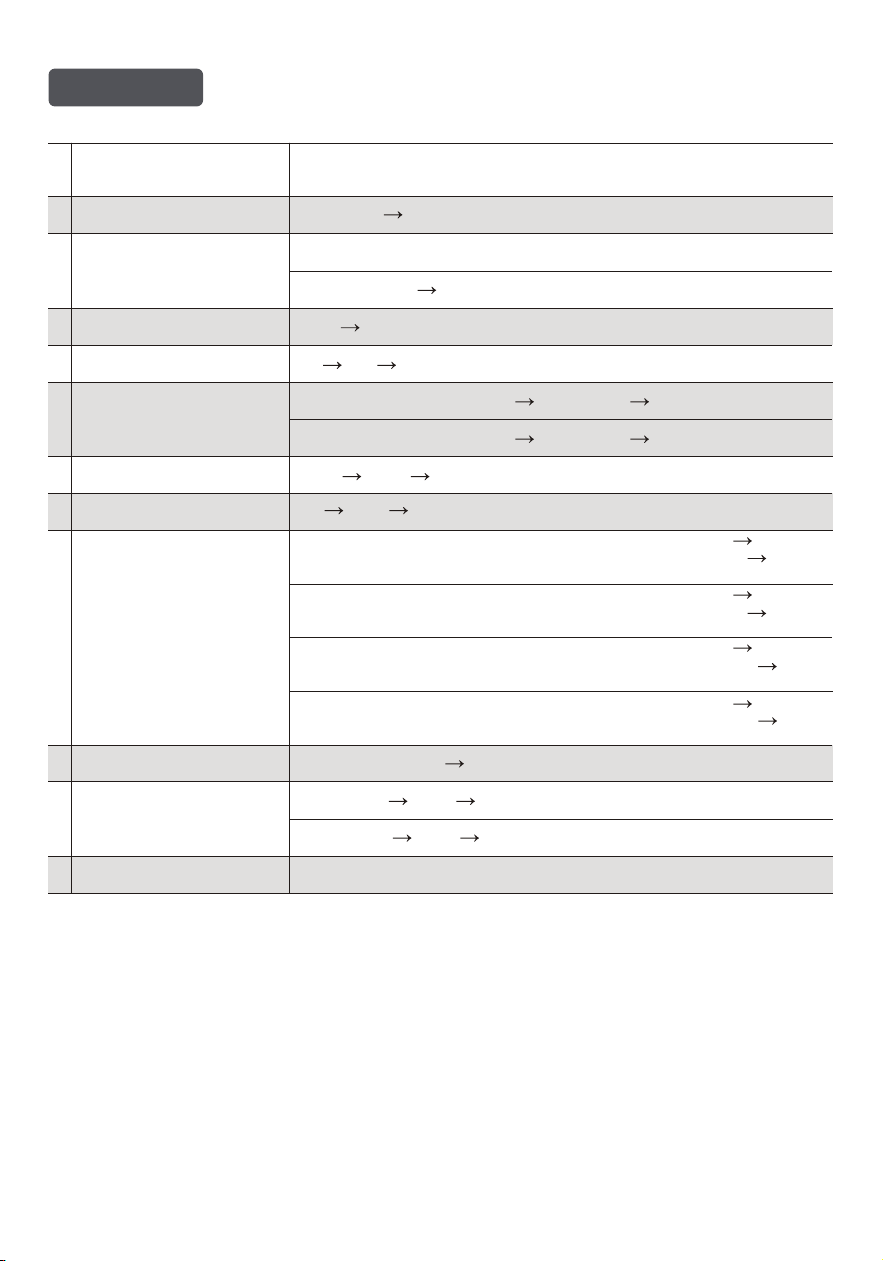
Quick Index
10
Increase: P2 Open Open
Decrease:
P2 Close Close
Pair / Unpair Additional Remote
6
Factory Reset
Speed Adjustment
P1 (hold 14 s)
11
Pull-to-Start / Stop Control
P2
P2 P2
P2(a) P2(a) P2(b)
9
10
Settings Steps
Pairing
Switch Direction
Set Open & Close Limits
Adjust Limits
Stop(hold 2S)P1 (hold 2S)
No limits set: OPEN + CLOSE (hold 2 s)
5
Set / Delete Favorite Position
4
3
2
1
Deleting All Limits
Weak-current Switch Modes
Close
7
8
Open Close
Stop Stop
Dual button pushbutton switch mode
Dual button interlock switch mode
Triple button pushbutton switch mode(DC246)
Single button pushbutton switch mode
P1 (hold 2S)
P1 (hold 10S)
P2 (press once)
P2 (press twice)
P2 (press 4 times)
P2 (press 3 times)
P1 (hold 10S)
P1 (hold 10S)
P1 (hold 10S)
P1 (hold 2S)
P1 (hold 2S)
P1 (hold 2S)
Open limit: Open + Stop (hold 5 s) Open or Close Open + Stop (hold 2 s)
Close limit: Close + Stop (hold 5 s) Open or Close Close + Stop (hold 2 s)
With limits set: P2 Open + Close
Open + Close (hold 5S) Stop
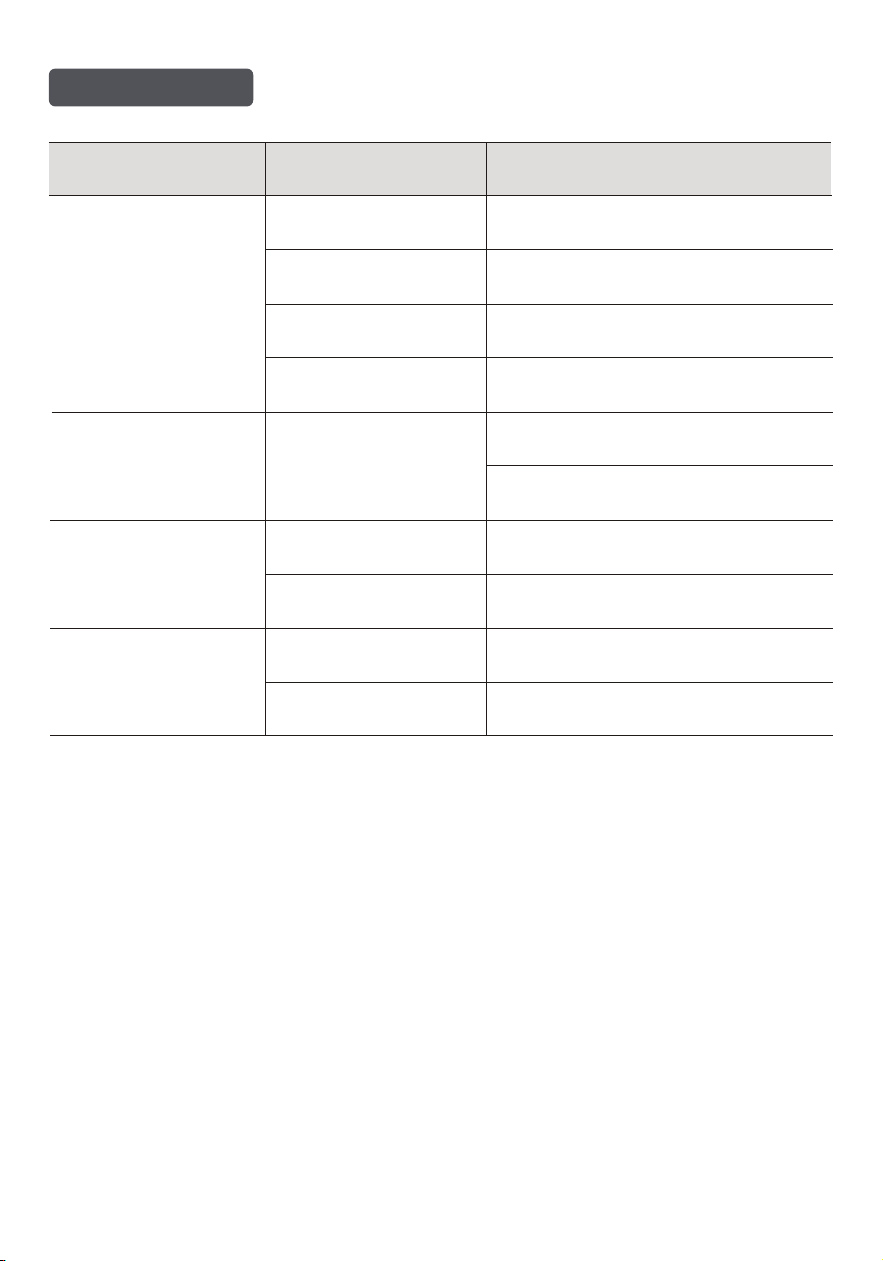
Troubleshooting
Issue Possible Cause Solution
The motor does not respond
Power failure or incorrect
connection
Remote battery is low Replace the battery.
Radio interference or signal
blockage
Out of control range Move closer to the motor and try again.
The remote cannot control a
single motor
Multiple motors are paired to
the same channel
Ensure each motor is paired to an individual channel.
Use a multi-channel remote for multi-motor setups,
and assign one motor per channel
The motor does not run, runs
slowly, or makes unusual noise
The motor stops during opening
or closing
* For further assistance, please contact customer support.
Connections are incorrect. Check and correct the connections.
Incorrect installation or overload
The motor has reached the open
or close limit
Continuous operation exceeds
4 minutes
Adjust the open or close limit settings.
Before limit settings are configured, the maximum
run time in one direction is 4 minutes.Restart the
operation if needed.
Check the installation and ensure the load is within
the rated capacity.
Ensure the motor antenna is intact and exposed.
Check for possible sources of interference.
Double-check the power supply and cable
connections. Follow the wiring instructions.
11

FCC
12
Any changes or modifications not expressly approved by the party
responsible for compliance could void the user’ s authority to
operate the equipment.
This device complies with Part 15 of the FCC Rules.
Operation is subject to the following two conditions:
(1) This device may not cause harmful interference, and
(2) This device must accept any interference received, including
interference that may cause undesired operation.
Note: This equipment has been tested and found to comply with
the limits for a Class B digital device, pursuant to Part 15 of the FCC
Rules. These limits are designed to provide reasonable protection
against harmful interference in a residential installation. This
equipment generates, uses and can radiate radio frequency energy
and, if not installed and used in accordance with the instructions,
may cause harmful interference to radio communications. However,
there is no guarantee that interference will not occur in a particular
installation. If this equipment does cause harmful interference to
radio or television reception, which can be determined by turning
the equipment off and on, the user is encouraged to try to correct
the interference by one or more of the following measures:
— Reorient or relocate the receiving antenna.
— Increase the separation between the equipment and receiver.
— Connect the equipment into an outlet on a circuit different from
that to which the receiver is connected.
— Consult the dealer or an experienced radio/TV technician for help.
FCC Radiation Exposure Statement:
Motor:
This equipment complies with FCC RF radiation exposure limits set forth for an
uncontrolled environment. This transmitter must not be co-located or operating in
conjunction with any other antenna or transmitter.This equipment should be
installed and operated with a minimum distance of 20cm between the radiator
&your body.
Remote:
This equipment complies with FCC radiation exposure limits set
forth for an uncontrolled environment.