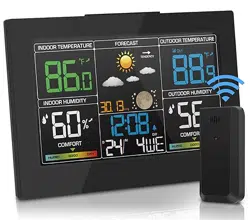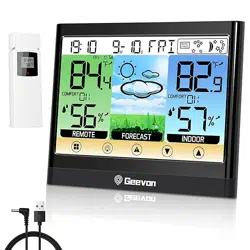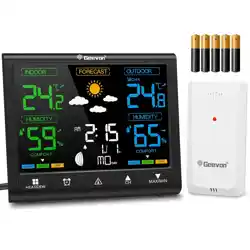
Smart Color Weather Station Item
No.246250 User Manual
Thank you for purchasing 246250 Smart Color Weather Station.
Please take a moment to read this guide and store it for future reference.
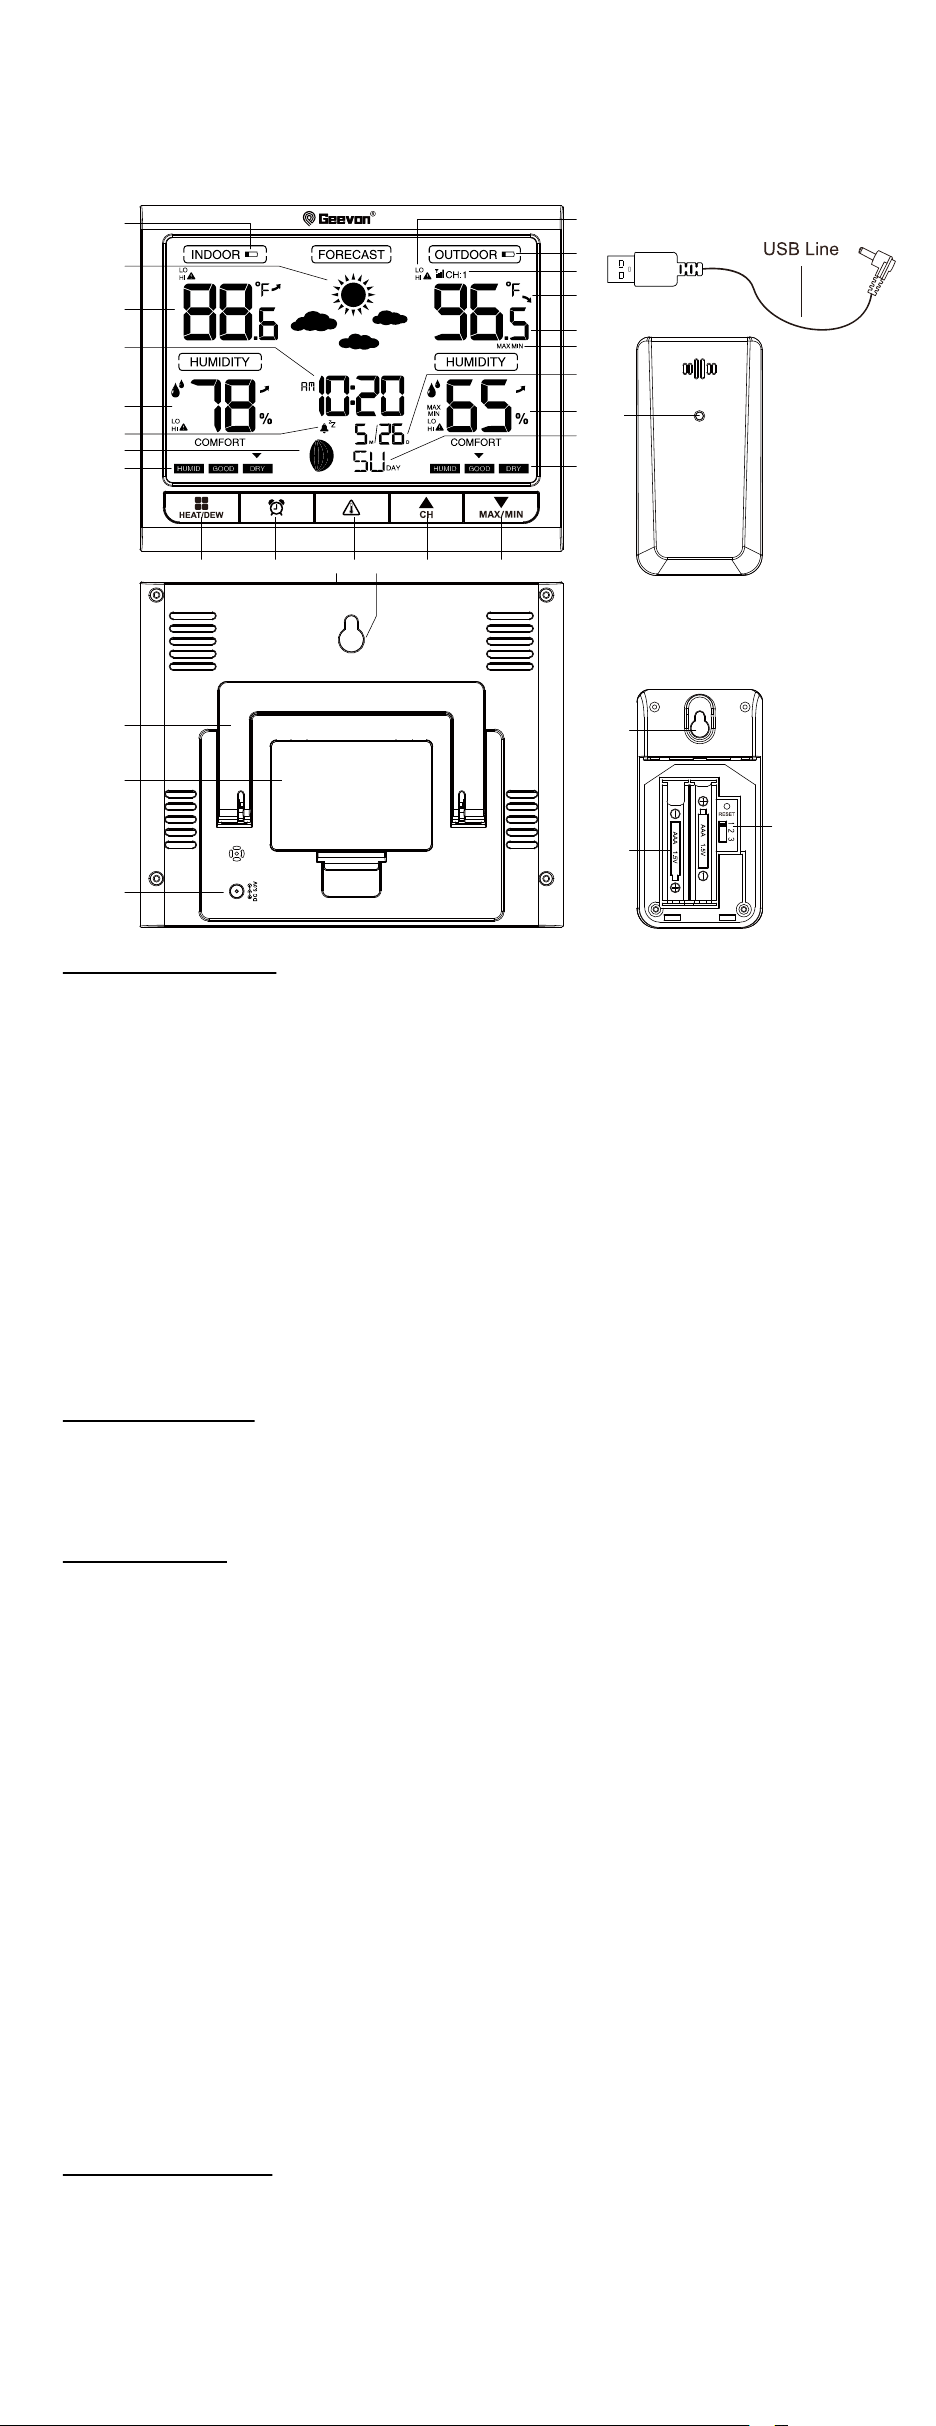
1. Controls and Displays:
1. Display low battery indicator
2. Icons of weather forecast
3. Indoor temperature
4. Time display
5. Indoor humidity
6. Alarm / Snooze display
7. Moon phase
8. Indoor comfortable index
9. Outdoor temperature alert
10. Sensor low battery indicator
11. Channel external sensor
12. Tendency of outdoor temperature
13. Outdoor temperature
14. Outdoor temperature max/min record
15. Calendar
16. Outdoor humidity
17. Weekday
2. Package Contents:
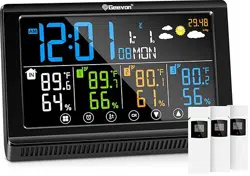
1. Color weather station display unit
2. Outdoor Sensor
3. Power supply unit
4. Instructions Manual
3. Getting started:
3.1 Inserting the batteries/connecting the power supply
• Connect the power supply unit to the power supply unit socket on the back of the color weather station.
• Place 3xAAA batteries into the color weather station.
• Place 2xAAA batteries into the wireless weather sensor.
• Place or hang the sensor outdoors.
3.2. Replacing Batteries:
• The range is 200 ft. (60m) unobstructed. The wireless range may be reduced by trees, walls, windows, etc.
• Do not place sensor in direct sunlight as this will give you an inaccurate temperature reading.
• We recommend using high quality batteries for the best product performance.
• Heavy duty or rechargeable batteries are not recommended.
• The outdoor sensor requires lithium batteries in low temperature conditions. Cold temperatures can cause
alkaline batteries to function improperly.
• Do not mix old and new batteries. Do not mix alkaline, standard, and/or rechargeable batteries.
3.3. Low Battery Indicator:
If the low battery indicator is displayed on the LCD for either the outdoor sensor or the display unit,
immediately change the batteries to prevent disruptions in communications of the devices.
3.4. Default settings
1. Default time: AM12:00
2. Default date: 01/01 (Year: 2024,date form: M/D)
3. Default week: MO
4. Weather forecast: Partly Sunny
5. Default temperature: °F
6. Default alarm: AM 7:00, default snooze time: 5min. The LCD display fully for 3 seconds when changing
new battery or resetting, then with a sound BI into the normal state.
4. Display / Keys Details:
There are totally 7 keys for this color weather station including MODE, UP, DOWN, SNZ/LIGHT, ALERT,
CH, ALARM.
1. MODE button
a. Hold for 3 seconds during the normal mode to enter setting mode.
b. Press button during the normal mode to check Temperature → Heat → Dew.
2. ALARM button
a. Check the alarm time.
b. Set the alarm
3. ALERT button
Enter the alert mode, use UP or DOWN to open or close alert function.
4. UP/CH button
a. Increase the current setting value.
b. Press this button to select the channel.
c. In normal display mode, press and hold to search RF.
5. DOWN/MEM button
a. Decrease the current setting value.
b. Press this button to display max/min temperature/humidity.
c. Press and hold the button for 2 seconds to clear the record of MAX/MIN
6. SNZ/LIGHT button
a. Press this button to open backlight for 10 seconds (without adapter).
b. Press to activate the snooze function when alarming.
c. Press this button to adjust the backlight : HI-LO-OFF (with adapter).
d. Press and hold the button for 3 seconds to set the snooze time value.
5. Manually Setting the Time, Date & Units:
Press and hold down the MODE button for 3 seconds until the display begins to flash.
• Set the following information in the order listed:
• 12/24 hour format.
• Hours
• Minutes
• Year
• Month/Day or Day/Month format
• Month
• Day
• Day of the week language
• Temperature unit
• To select individual values, press UP/CH button or the DOWN/MEM button and confirm each selection by
pressing the MODE button.
Note:
You will automatically exit settings mode if no buttons are pressed for 10 seconds.
6. Alarm Clock:
Setting the alarm
• Hold the ALARM button for about 3 seconds to set the alarm time. The display begins to flash. Set the
following information in the order listed: Hours →Minutes → Exit.
• To select individual values, press UP/CH button or the DOWN/MEM button and confirm each selection by
pressing the ALARM button.
• If you do not make an entry for 10 seconds, setting mode is exited automatically.
Activating/deactivating the alarm
To turn the alarm ON or OFF, press the ALARM button to enter alarm mode, press the ALARM button again
to ON or OFF the alarm. The symbol should show next to the clock display when alarm is set to ON.
Press the ALARM button again to turn off the alarm, when the alarm is set to OFF, the symbol should
not display.
Setting the snooze
• Hold the SNZ/LIGHT button for about 3 seconds to set the snooze time value. The display begins
to flash.The default snooze time is 5 minutes, and the snooze time value can be set to a minimum of 3
minutes and a maximum of 20 minutes.
• To select individual values, press UP/CH button or the DOWN/MEM button and confirm each
selection by pressing the SNZ/LIGHT button.
• If you do not make an entry for 10 seconds, setting mode is exited automatically.
Stopping the alarm/snooze function
• When the alarm is triggered, the alarm symbol begins to flash and an alarm sounds.
• By pressing any button (except the SNZ/LIGHT button) to stop the alarm. Otherwise, it will stop
automatically after 2 minutes.
Note:
While the alarm signal is sounding, press the SNZ/LIGHT button to activate the snooze function. The alarm
will sound after 5 minutes.
7.Temperature and humidity
7.1 Temperature
• Indoor temperature: 32°F ~ 122°F(0°C ~ 50°C)
• Outdoor temperature: -40°F ~ 158°F (-40°C ~ 70°C)
• Temperature resolution: 0.1°C
7.2 Humidity
• Indoor humidity range: 10%-99%
• Outdoor humidity range: 10%-99%
• Humidity resolution: 1 %RH
• When alarm ringing, temperature and humidity test will be stopped.
Note:
Accuracy
• Temperature accuracy:
-40°F~-4°F: ±7.2°F (-40°C ~ -20°C: ± 4°C )
-4°F~32°F: ±3.6°F (-20°C ~ 0°C: ± 2°C)
0°F~122°F: ±1.8°F (0°C ~ +50°C: ±1°C )
When the temperature in 122°F ~ 158°F(50°C ~ 70°C) range, the temperature is only for reference.
• Humidity accuracy:
±5% from 35% to 75% and ±10% from 20% to 35% & 75% to 99%.
7.3 Setting the Temperature Units:
To switch the temperature measurement between Celsius and Fahrenheit, press and hold the MODE button
8 times the “°F” starts flash, you can press UP/CH or DOWN/MEM to switch between Celsius and
Fahrenheit.
7.4 Checking the MAX/MIN temperature and humidity
• Press the DOWN/MEM button to check MAX/MIN temperature and humidity.
• In checking mode, hold the DOWN/MEM button to clear the record of MAX/MIN temperature and humidity.
7.5 Temperature Alert
• In standard mode, press ALERT to enter alert mode, use UP/CH or DOWN/MEM to turn on or off
temperature alert function.
• In standard mode, hold ALERT to set temperature alert value function.
• Setting order:
• outdoor temperature upper limit
• outdoor temperature lower limit
• indoor temperature upper limit
• indoor temperature lower limit
18. Outdoor comfortable index
19. MODE button
20. ALARM button
21. ALERT button
22. UP/CH button
23. DOWN/MEM button
24. SNZ/LIGHT button
25. Integrated hang hole
26. Stand bracket
27. Battery Compartment 3xAAA (batteries not included)
28. External power supply socket
29. Wireless signal indicator(Flashes when data is being
sent to the display unit)
30. Integrated hang hole
31. TX channel selector, select external sensor channel
(Maximum 3 channels available)
32. Compartment 2xAAA batteries (batteries not included)
29
1
9
10
11
12
13
14
15
16
17
18
3
2
4
5
6
7
8
19
26
27
28
20
24
21
25
22 23
32
31
30

Smart Color Weather Station Item
No.246250 User Manual
Thank you for purchasing 246250 Smart Color Weather Station.
Please take a moment to read this guide and store it for future reference.
1. Controls and Displays:
1. Display low battery indicator
2. Icons of weather forecast
3. Indoor temperature
4. Time display
5. Indoor humidity
6. Alarm / Snooze display
7. Moon phase
8. Indoor comfortable index
9. Outdoor temperature alert
10. Sensor low battery indicator
11. Channel external sensor
12. Tendency of outdoor temperature
13. Outdoor temperature
14. Outdoor temperature max/min record
15. Calendar
16. Outdoor humidity
17. Weekday
2. Package Contents:
1. Color weather station display unit
2. Outdoor Sensor
3. Power supply unit
4. Instructions Manual
3. Getting started:
3.1 Inserting the batteries/connecting the power supply
• Connect the power supply unit to the power supply unit socket on the back of the color weather station.
• Place 3xAAA batteries into the color weather station.
• Place 2xAAA batteries into the wireless weather sensor.
• Place or hang the sensor outdoors.
3.2. Replacing Batteries:
• The range is 200 ft. (60m) unobstructed. The wireless range may be reduced by trees, walls, windows, etc.
• Do not place sensor in direct sunlight as this will give you an inaccurate temperature reading.
• We recommend using high quality batteries for the best product performance.
• Heavy duty or rechargeable batteries are not recommended.
• The outdoor sensor requires lithium batteries in low temperature conditions. Cold temperatures can cause
alkaline batteries to function improperly.
• Do not mix old and new batteries. Do not mix alkaline, standard, and/or rechargeable batteries.
3.3. Low Battery Indicator:
If the low battery indicator is displayed on the LCD for either the outdoor sensor or the display unit,
immediately change the batteries to prevent disruptions in communications of the devices.
3.4. Default settings
1. Default time: AM12:00
2. Default date: 01/01 (Year: 2024,date form: M/D)
3. Default week: MO
4. Weather forecast: Partly Sunny
5. Default temperature: °F
6. Default alarm: AM 7:00, default snooze time: 5min. The LCD display fully for 3 seconds when changing
new battery or resetting, then with a sound BI into the normal state.
4. Display / Keys Details:
There are totally 7 keys for this color weather station including MODE, UP, DOWN, SNZ/LIGHT, ALERT,
CH, ALARM.
1. MODE button
a. Hold for 3 seconds during the normal mode to enter setting mode.
b. Press button during the normal mode to check Temperature → Heat → Dew.
2. ALARM button
a. Check the alarm time.
b. Set the alarm
3. ALERT button
Enter the alert mode, use UP or DOWN to open or close alert function.
4. UP/CH button
a. Increase the current setting value.
b. Press this button to select the channel.
c. In normal display mode, press and hold to search RF.
5. DOWN/MEM button
a. Decrease the current setting value.
b. Press this button to display max/min temperature/humidity.
c. Press and hold the button for 2 seconds to clear the record of MAX/MIN
6. SNZ/LIGHT button
a. Press this button to open backlight for 10 seconds (without adapter).
b. Press to activate the snooze function when alarming.
c. Press this button to adjust the backlight : HI-LO-OFF (with adapter).
d. Press and hold the button for 3 seconds to set the snooze time value.
5. Manually Setting the Time, Date & Units:
Press and hold down the MODE button for 3 seconds until the display begins to flash.
• Set the following information in the order listed:
• 12/24 hour format.
• Hours
• Minutes
• Year
• Month/Day or Day/Month format
• Month
• Day
• Day of the week language
• Temperature unit
• To select individual values, press UP/CH button or the DOWN/MEM button and confirm each selection by
pressing the MODE button.
Note:
You will automatically exit settings mode if no buttons are pressed for 10 seconds.
6. Alarm Clock:
Setting the alarm
• Hold the ALARM button for about 3 seconds to set the alarm time. The display begins to flash. Set the
following information in the order listed: Hours →Minutes → Exit.
• To select individual values, press UP/CH button or the DOWN/MEM button and confirm each selection by
pressing the ALARM button.
• If you do not make an entry for 10 seconds, setting mode is exited automatically.
Activating/deactivating the alarm
To turn the alarm ON or OFF, press the ALARM button to enter alarm mode, press the ALARM button again
to ON or OFF the alarm. The symbol should show next to the clock display when alarm is set to ON.
Press the ALARM button again to turn off the alarm, when the alarm is set to OFF, the symbol should
not display.
Setting the snooze
• Hold the SNZ/LIGHT button for about 3 seconds to set the snooze time value. The display begins
to flash.The default snooze time is 5 minutes, and the snooze time value can be set to a minimum of 3
minutes and a maximum of 20 minutes.
• To select individual values, press UP/CH button or the DOWN/MEM button and confirm each
selection by pressing the SNZ/LIGHT button.
• If you do not make an entry for 10 seconds, setting mode is exited automatically.
Stopping the alarm/snooze function
• When the alarm is triggered, the alarm symbol begins to flash and an alarm sounds.
• By pressing any button (except the SNZ/LIGHT button) to stop the alarm. Otherwise, it will stop
automatically after 2 minutes.
Note:
While the alarm signal is sounding, press the SNZ/LIGHT button to activate the snooze function. The alarm
will sound after 5 minutes.
7.Temperature and humidity
7.1 Temperature
• Indoor temperature: 32°F ~ 122°F(0°C ~ 50°C)
• Outdoor temperature: -40°F ~ 158°F (-40°C ~ 70°C)
• Temperature resolution: 0.1°C
7.2 Humidity
• Indoor humidity range: 10%-99%
• Outdoor humidity range: 10%-99%
• Humidity resolution: 1 %RH
• When alarm ringing, temperature and humidity test will be stopped.
Note:
Accuracy
• Temperature accuracy:
-40°F~-4°F: ±7.2°F (-40°C ~ -20°C: ± 4°C )
-4°F~32°F: ±3.6°F (-20°C ~ 0°C: ± 2°C)
0°F~122°F: ±1.8°F (0°C ~ +50°C: ±1°C )
When the temperature in 122°F ~ 158°F(50°C ~ 70°C) range, the temperature is only for reference.
• Humidity accuracy:
±5% from 35% to 75% and ±10% from 20% to 35% & 75% to 99%.
7.3 Setting the Temperature Units:
To switch the temperature measurement between Celsius and Fahrenheit, press and hold the MODE button
8 times the “°F” starts flash, you can press UP/CH or DOWN/MEM to switch between Celsius and
Fahrenheit.
7.4 Checking the MAX/MIN temperature and humidity
• Press the DOWN/MEM button to check MAX/MIN temperature and humidity.
• In checking mode, hold the DOWN/MEM button to clear the record of MAX/MIN temperature and humidity.
7.5 Temperature Alert
• In standard mode, press ALERT to enter alert mode, use UP/CH or DOWN/MEM to turn on or off
temperature alert function.
• In standard mode, hold ALERT to set temperature alert value function.
• Setting order:
• outdoor temperature upper limit
• outdoor temperature lower limit
• indoor temperature upper limit
• indoor temperature lower limit
18. Outdoor comfortable index
19. MODE button
20. ALARM button
21. ALERT button
22. UP/CH button
23. DOWN/MEM button
24. SNZ/LIGHT button
25. Integrated hang hole
26. Stand bracket
27. Battery Compartment 3xAAA (batteries not included)
28. External power supply socket
29. Wireless signal indicator(Flashes when data is being
sent to the display unit)
30. Integrated hang hole
31. TX channel selector, select external sensor channel
(Maximum 3 channels available)
32. Compartment 2xAAA batteries (batteries not included)
29
1
9
10
11
12
13
14
15
16
17
18
3
2
4
5
6
7
8
19
26
27
28
20
24
21
25
22 23
32
31
30
• To select individual values, press UP/CH button or the DOWN/MEM button and confirm each selection
by pressing the ALERT button.
• If you do not make an entry for 10 seconds, setting mode is exited automatically.
Note:
• In temperature alert status, alert temperature icon will flash and temperature will always display.
• Temperature alarm sounds for every minute, and it will not stop until:
• Press any button to stop alarm but temperature and alert icon will continuously flash.
• When temperature out of the alert range.
7.6 Ice alert
When the outdoor temperature in the range of -1°C ~ +3°C (+30.2°F ~ +37.4°F), the ice icon will flash, when
the temperature out of the range, the icon will disappear.
Note:
The ice alert not needs setting, as long as the temperature in the alert range, the icon will be displayed.
7.7 Temperature and humidity trend
• The device checks the temperature for trends every 30 minutes, comparing the current temperature with
the temperature from 3 hours ago.
• If the temperature rises 1 °C / 2 °F, the temperature arrow will be upward.
• If the temperature drops 1 °C / 2 °F, the temperature arrow will be downward.
• If the temperature stays within 1 °C / 2 °F, the temperature arrow will be horizontal.
7.8 Comfort indication
When the indoor/outdoor humidity is 10% to 40%, the indoor/outdoor comfort index indicates DRY.
When the indoor/outdoor humidity is 40% to 75%, the indoor/outdoor comfort index indicates GOOD.
When the indoor/outdoor humidity is 75% to 99%, the indoor/outdoor comfort index indicates HUMID.
8. Backlight:
• Sustained backlight is only possible by power supply unit.
• Press the SNZ/LIGHT button to switch the brightness from HI→LOW→OFF.
• When powered by battery only, the backlight will be off (to conserve power). Press the SNZ/LIGHT button
to active the backlight for 10 seconds.
9. Weather forecast:
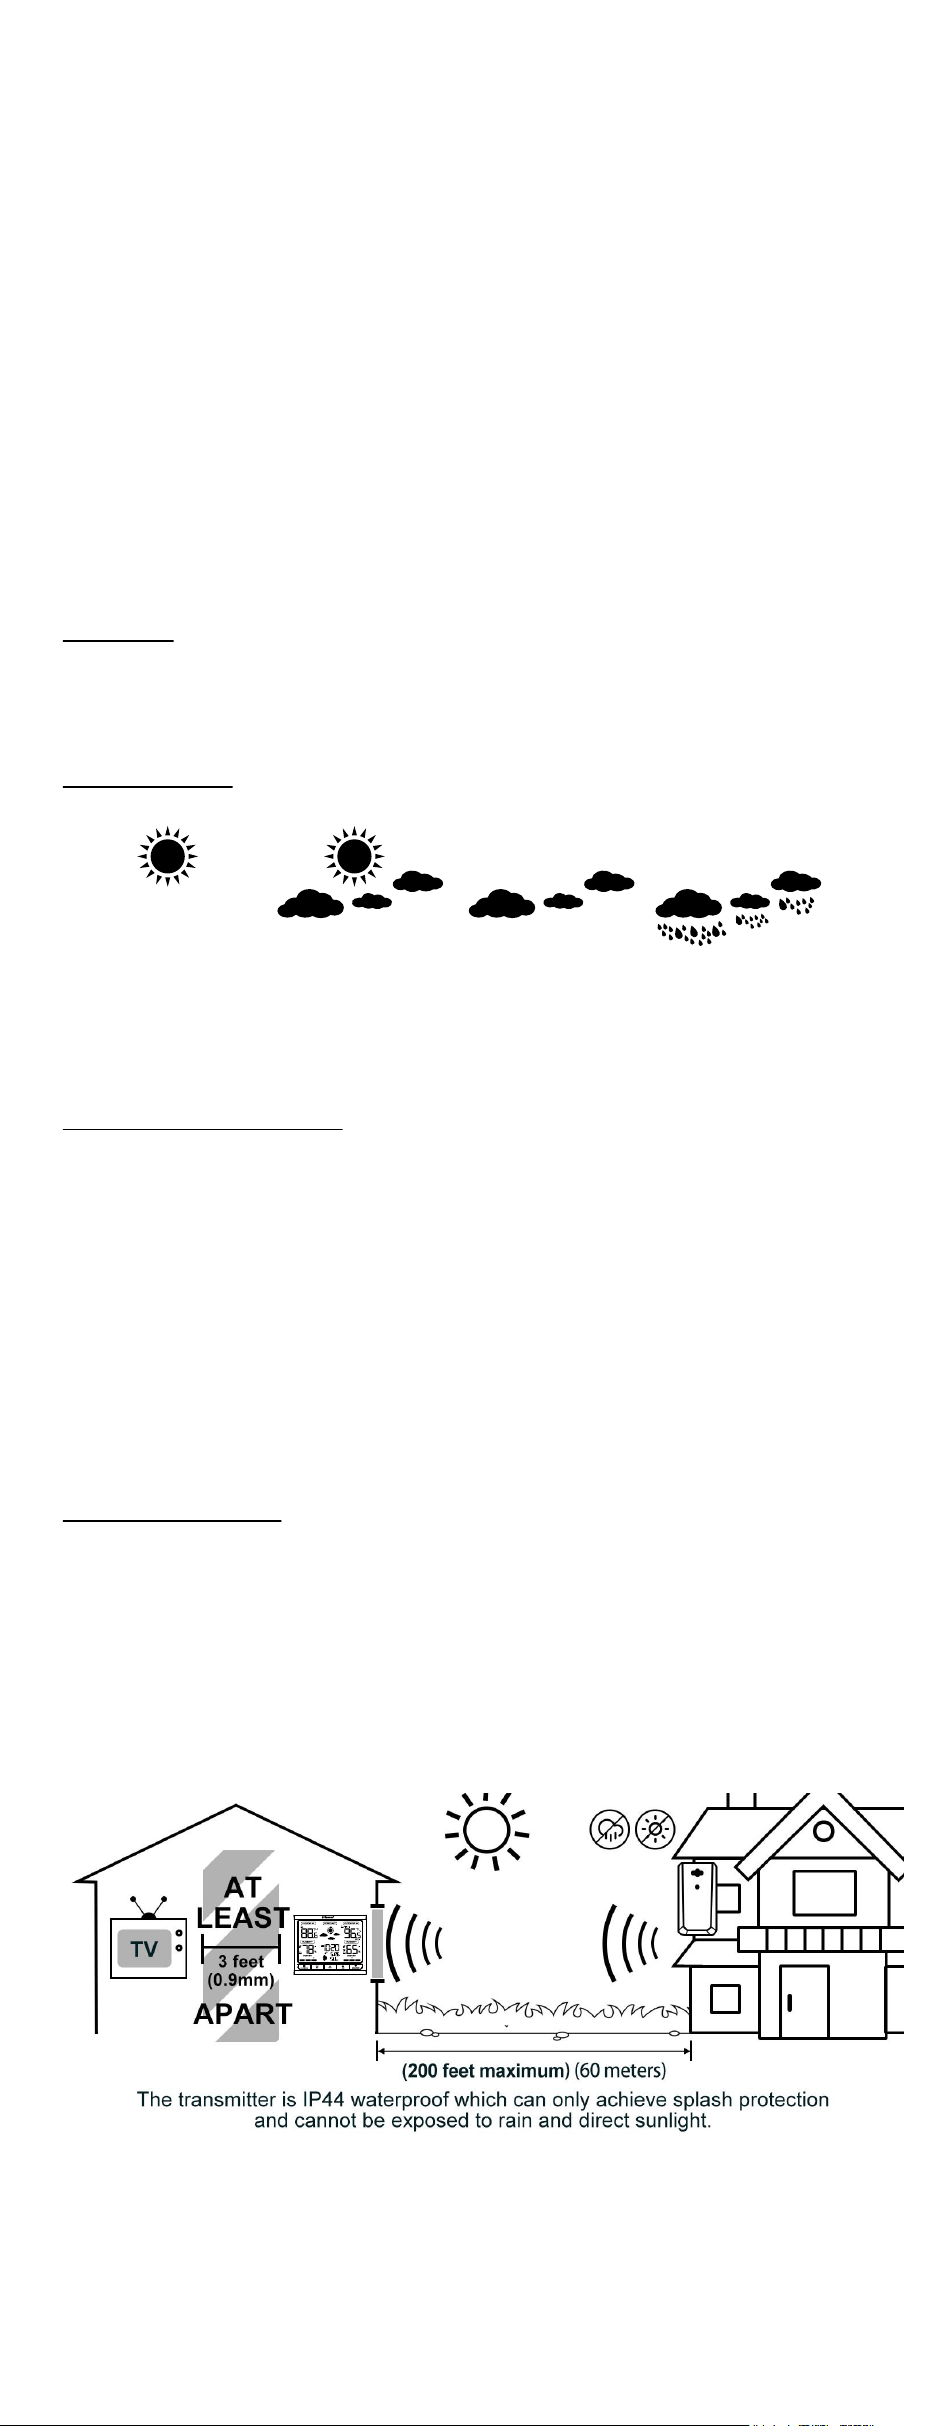
The following are icons that will show:
Note:
After setting up, weather forecast readings should be disregarded for the next 24 hours. This will allow
sufficient time for the weather station to collect data and therefore result in a more accurate forecast.
Common to weather forecasting, absolute accuracy cannot be guaranteed.
10. Remote sensor transmission:
This weather station is arranged to communicate with three external sensors. One of these comes with
the unit, the remaining two are optional.
• Power the weather station as described in Getting started.
• Insert the batteries in the external sensor, set the selector to the desired transmission channel (1, 2 or 3).
Automatic weather station data will be transmitted.
• Press the CH button more times to select the channel set on the external sensor. Sequentially selects the
channel 1, channel 2, channel 3 or sequential display of 3 channels (icon flashing channel).
Note:
• Place the weather station away from equipment that generates magnetic fields such as mobile phones,
televisions etc.
• In case of non receipt of the display, signal it is shown the character -. Press and hold the CH button to
receive RF signal.
• Always make sure the channel chosen on the display unit matches the channel option chosen on the
outdoor sensor.
11. Care and maintenance
Placement of the Device:
Proper placement of both the display unit and the outdoor sensor are critical to the accuracy and
performance of this product.
Display unit placement
Place the display unit in a dry area free of dirt and dust. Display unit right for tabletop/countertop use.
Important Placement Guideline
• To ensure accurate temperature measurement, place units out of direct sunlight and away from any heat
sources or vents.
• Display unit and outdoor sensor must be within 200 ft. (60m) of each other.
• To maximize wireless range, place units away from large metallic items, thick walls,metal surfaces, or
other objects that may limit wireless communication.
• To prevent wireless interference, place both units at least 3ft(1 m) away from electronic devices (TV,
computer, microwave,radio, etc)
Sunny Partly sunny Cloudy Rainy
Outdoor
Reading
Is Flashing or
Showing
Dashes
Problem
Possible Solution
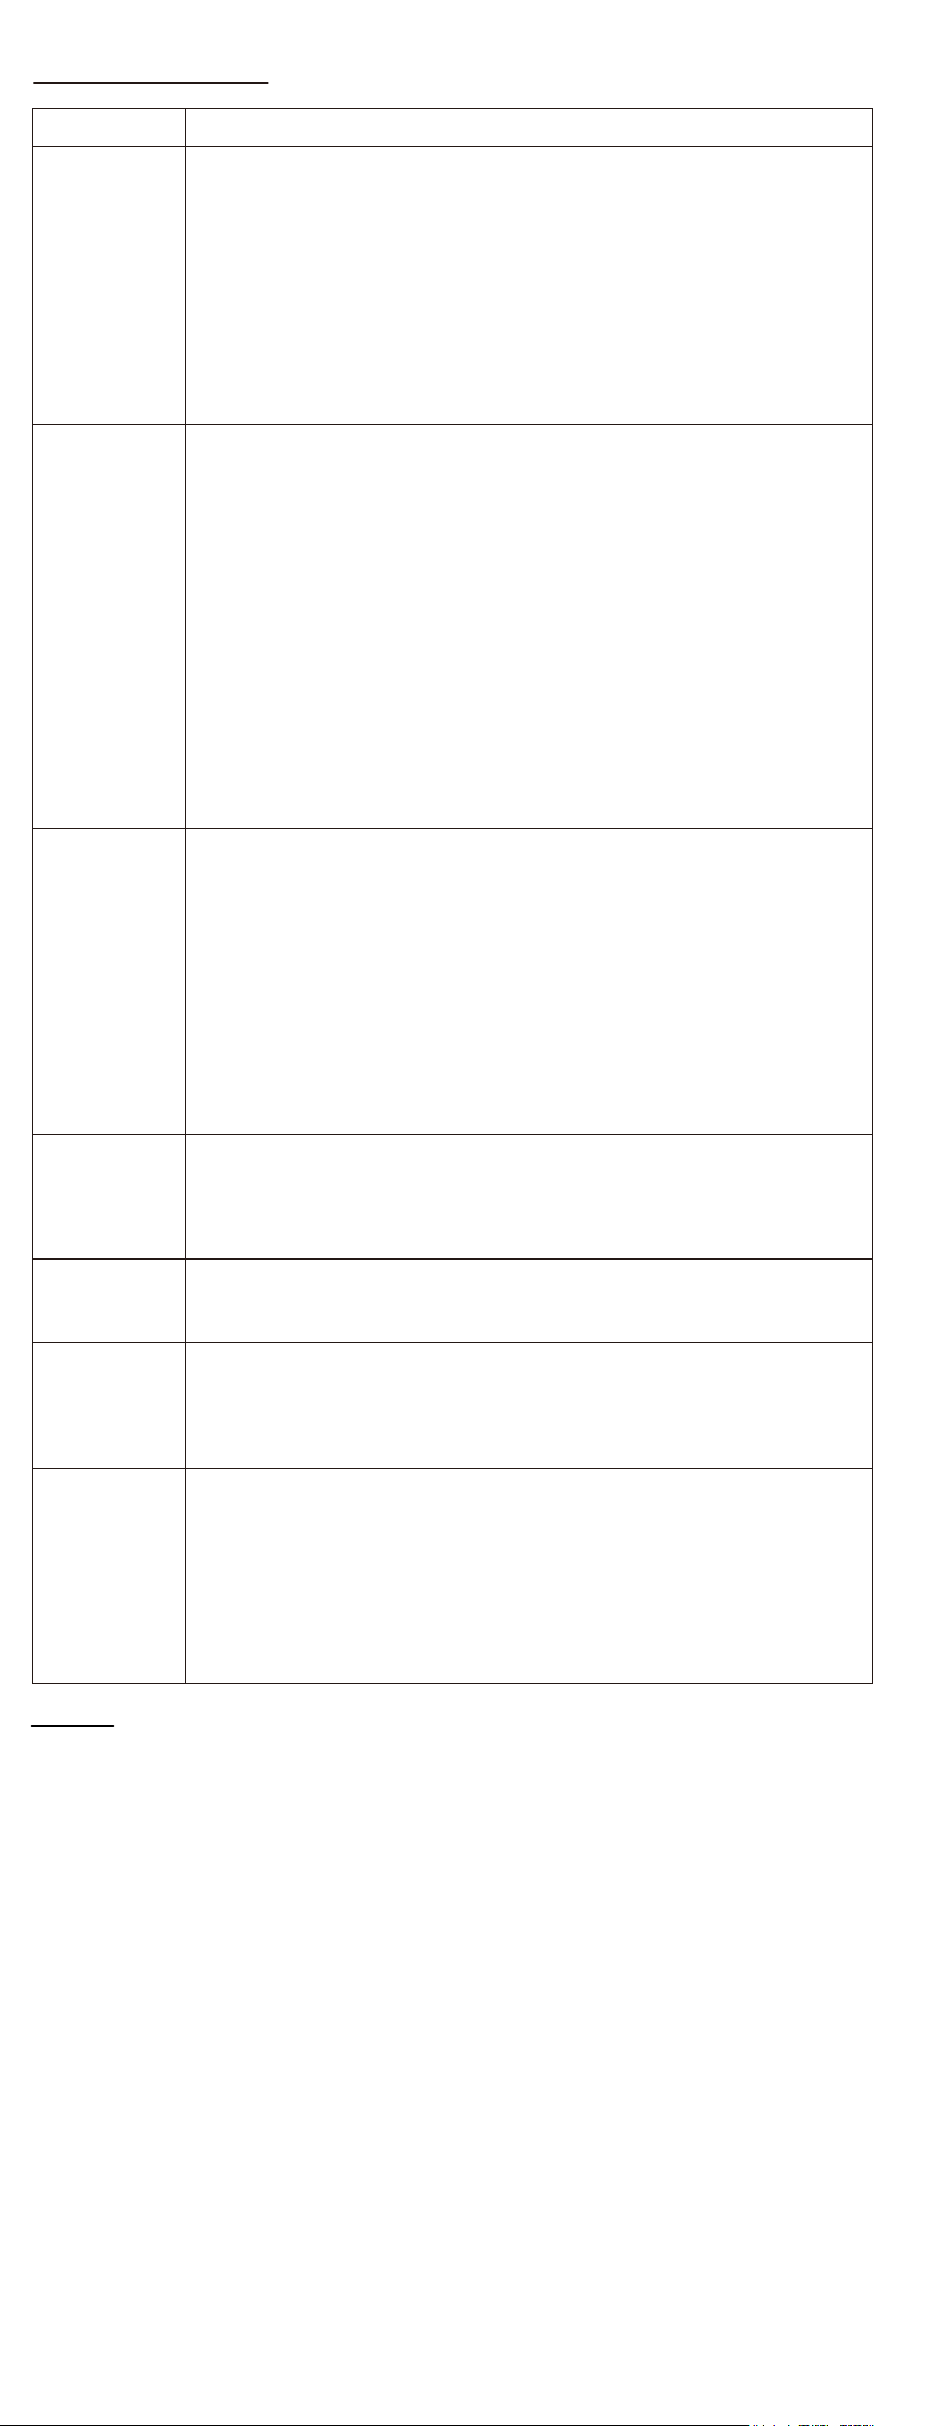
TROUBLESHOOTING:
Flashing of the outdoor reading is generally an indication of wireless interference:
1. Relocate both of main unit and outdoor sensor. Power the weather station as
described in Getting started. (Please refer to the SENSOR SETUP section.)
2. Display unit and outdoor sensor must be within 200ft (60m) of each other.
3. Press and hold the "CH" button to receive RF signal.
4. Place units out of direct sunlight and AWAY FROM any heat/moisture sources or
vents.
5. Place units away from large metallic items, thick walls, metal surfaces, or other
objects that may limit wireless communication.
6. Place both units at least 3ft(1 m) away from electronic devices (TV, computer,
microwave,radio, etc.)
No outdoor
sensor
reception
Inaccurate
temperature
/humidity
Inaccurate
Weather
Forecast
1. Relocate both of main unit and outdoor sensor. Power the weather station and
outdoor sensor again as described in Getting started. (Please refer to the SENSOR
SETUP section.)
2. Display unit and outdoor sensor must be within 200ft (60m) of each other.
3. Press and hold the CH button to receive RF signal.
4. Press the "CH" button more times to select the channel set on the external sensor.
Sequentially selects the channel 1, channel 2, channel 3 or sequential display of 3
channels (icon flashing channel).
5. Always make sure the channel chosen on the display unit MATCHES the channel
option chosen on the outdoor sensor.
6. Do not use heavy duty or rechargeable batteries. The outdoor sensor requires
alkaline batteries in low temperature conditions.
7. Do not mix old and new batteries.
8. Place the weather station away from equipment that generates magnetic fields
such as mobile phones, televisions etc.
1. When it is first stalled,it takes at least 1 Hour to have accurate temperature and
humidity data.
2. Make sure both the main unit and sensor are placed out of direct sunlight and
AWAY FROM any heat sources, vents or moisture sources.
3. Do not tamper with the internal components.
Temperature Accuracy: -40°C ~ -20°C: ± 4°C
-20°C ~ 0°C: ± 2°C
0°C ~ +50°C: ±1°C
Note: when the temperature in 50°C ~ 70°C range, the temperature is only for
reference.
Humidity Accuracy:
±5% from 35% to 75% and ±10% from 10% to 35%& 75% to 99%.
1. Weather forecast readings should be disregarded for the next 24 hours. This will
allow sufficient time for the weather station to collect data andtherefore result in a
more accurate forecast.
2. Common to weather forecasting, absolute accuracy cannot be guaranteed.
Backlight
doesn't stay
on
"HH/LL"
display in
indoor and/or
outdoor
temperature
Care and
maintenance
The backlight turns off after 10s to save energy when powered by batteries. If you
want the weather station always lights on, please plug in with power adaptor.
If the temperature is higher than the detection range, HH.H will display on screen for
indication;If lower than the detection range, LL.L will display on screen for indication.
1. Place the display unit in a dry area free of dirt and dust.
2. The remote sensor is totally wireless but has to avoid direct sunlight and rain.
3. Please immediately change the batteries if the low battery indicator is displayed
on the LCD screen of main unit.
4. Never immerse the product in water. This will damage the product.
5. Do not subject the product to extreme force, shock, or fluctuations in temperature.
6. Do not clean any part of the product with benzene,thinner or other solvent
chemicals. When necessary, clean it with a soft cloth.
Cautions:
Place the sensor vertically on a North-facing wallor well-shaded location to avoid sunlight andrain.Direct
sunlight will cause temperatures to readhigh. Recommend placing the sensor 6 inchesunder the eaves or
the deck rail is preferred. Thetransmission range to the base station is200ft/60m in open air, not including
walls or floors.
FCCID:2AM88-TX19
This device complies with part 15 of the FCCRules.
Operation is subject to the following twoconditions:
(1)This device may not cause harmfulinterference.(2)This device must accept anyinterference received,
includinginterference that may causeundesired operation.
• To select individual values, press UP/CH button or the DOWN/MEM button and confirm each selection
by pressing the ALERT button.
• If you do not make an entry for 10 seconds, setting mode is exited automatically.
Note:
• In temperature alert status, alert temperature icon will flash and temperature will always display.
• Temperature alarm sounds for every minute, and it will not stop until:
• Press any button to stop alarm but temperature and alert icon will continuously flash.
• When temperature out of the alert range.
7.6 Ice alert
When the outdoor temperature in the range of -1°C ~ +3°C (+30.2°F ~ +37.4°F), the ice icon will flash, when
the temperature out of the range, the icon will disappear.
Note:
The ice alert not needs setting, as long as the temperature in the alert range, the icon will be displayed.
7.7 Temperature and humidity trend
• The device checks the temperature for trends every 30 minutes, comparing the current temperature with
the temperature from 3 hours ago.
• If the temperature rises 1 °C / 2 °F, the temperature arrow will be upward.
• If the temperature drops 1 °C / 2 °F, the temperature arrow will be downward.
• If the temperature stays within 1 °C / 2 °F, the temperature arrow will be horizontal.
7.8 Comfort indication
When the indoor/outdoor humidity is 10% to 40%, the indoor/outdoor comfort index indicates DRY.
When the indoor/outdoor humidity is 40% to 75%, the indoor/outdoor comfort index indicates GOOD.
When the indoor/outdoor humidity is 75% to 99%, the indoor/outdoor comfort index indicates HUMID.
8. Backlight:
• Sustained backlight is only possible by power supply unit.
• Press the SNZ/LIGHT button to switch the brightness from HI→LOW→OFF.
• When powered by battery only, the backlight will be off (to conserve power). Press the SNZ/LIGHT button
to active the backlight for 10 seconds.
9. Weather forecast:
The following are icons that will show:
Note:
After setting up, weather forecast readings should be disregarded for the next 24 hours. This will allow
sufficient time for the weather station to collect data and therefore result in a more accurate forecast.
Common to weather forecasting, absolute accuracy cannot be guaranteed.
10. Remote sensor transmission:
This weather station is arranged to communicate with three external sensors. One of these comes with
the unit, the remaining two are optional.
• Power the weather station as described in Getting started.
• Insert the batteries in the external sensor, set the selector to the desired transmission channel (1, 2 or 3).
Automatic weather station data will be transmitted.
• Press the CH button more times to select the channel set on the external sensor. Sequentially selects the
channel 1, channel 2, channel 3 or sequential display of 3 channels (icon flashing channel).
Note:
• Place the weather station away from equipment that generates magnetic fields such as mobile phones,
televisions etc.
• In case of non receipt of the display, signal it is shown the character -. Press and hold the CH button to
receive RF signal.
• Always make sure the channel chosen on the display unit matches the channel option chosen on the
outdoor sensor.
11. Care and maintenance
Placement of the Device:
Proper placement of both the display unit and the outdoor sensor are critical to the accuracy and
performance of this product.
Display unit placement
Place the display unit in a dry area free of dirt and dust. Display unit right for tabletop/countertop use.
Important Placement Guideline
• To ensure accurate temperature measurement, place units out of direct sunlight and away from any heat
sources or vents.
• Display unit and outdoor sensor must be within 200 ft. (60m) of each other.
• To maximize wireless range, place units away from large metallic items, thick walls,metal surfaces, or
other objects that may limit wireless communication.
• To prevent wireless interference, place both units at least 3ft(1 m) away from electronic devices (TV,
computer, microwave,radio, etc)
Sunny Partly sunny Cloudy Rainy
Outdoor
Reading
Is Flashing or
Showing
Dashes
Problem
Possible Solution
TROUBLESHOOTING:
Flashing of the outdoor reading is generally an indication of wireless interference:
1. Relocate both of main unit and outdoor sensor. Power the weather station as
described in Getting started. (Please refer to the SENSOR SETUP section.)
2. Display unit and outdoor sensor must be within 200ft (60m) of each other.
3. Press and hold the "CH" button to receive RF signal.
4. Place units out of direct sunlight and AWAY FROM any heat/moisture sources or
vents.
5. Place units away from large metallic items, thick walls, metal surfaces, or other
objects that may limit wireless communication.
6. Place both units at least 3ft(1 m) away from electronic devices (TV, computer,
microwave,radio, etc.)
No outdoor
sensor
reception
Inaccurate
temperature
/humidity
Inaccurate
Weather
Forecast
1. Relocate both of main unit and outdoor sensor. Power the weather station and
outdoor sensor again as described in Getting started. (Please refer to the SENSOR
SETUP section.)
2. Display unit and outdoor sensor must be within 200ft (60m) of each other.
3. Press and hold the CH button to receive RF signal.
4. Press the "CH" button more times to select the channel set on the external sensor.
Sequentially selects the channel 1, channel 2, channel 3 or sequential display of 3
channels (icon flashing channel).
5. Always make sure the channel chosen on the display unit MATCHES the channel
option chosen on the outdoor sensor.
6. Do not use heavy duty or rechargeable batteries. The outdoor sensor requires
alkaline batteries in low temperature conditions.
7. Do not mix old and new batteries.
8. Place the weather station away from equipment that generates magnetic fields
such as mobile phones, televisions etc.
1. When it is first stalled,it takes at least 1 Hour to have accurate temperature and
humidity data.
2. Make sure both the main unit and sensor are placed out of direct sunlight and
AWAY FROM any heat sources, vents or moisture sources.
3. Do not tamper with the internal components.
Temperature Accuracy: -40°C ~ -20°C: ± 4°C
-20°C ~ 0°C: ± 2°C
0°C ~ +50°C: ±1°C
Note: when the temperature in 50°C ~ 70°C range, the temperature is only for
reference.
Humidity Accuracy:
±5% from 35% to 75% and ±10% from 10% to 35%& 75% to 99%.
1. Weather forecast readings should be disregarded for the next 24 hours. This will
allow sufficient time for the weather station to collect data andtherefore result in a
more accurate forecast.
2. Common to weather forecasting, absolute accuracy cannot be guaranteed.
Backlight
doesn't stay
on
"HH/LL"
display in
indoor and/or
outdoor
temperature
Care and
maintenance
The backlight turns off after 10s to save energy when powered by batteries. If you
want the weather station always lights on, please plug in with power adaptor.
If the temperature is higher than the detection range, HH.H will display on screen for
indication;If lower than the detection range, LL.L will display on screen for indication.
1. Place the display unit in a dry area free of dirt and dust.
2. The remote sensor is totally wireless but has to avoid direct sunlight and rain.
3. Please immediately change the batteries if the low battery indicator is displayed
on the LCD screen of main unit.
4. Never immerse the product in water. This will damage the product.
5. Do not subject the product to extreme force, shock, or fluctuations in temperature.
6. Do not clean any part of the product with benzene,thinner or other solvent
chemicals. When necessary, clean it with a soft cloth.
Cautions:
Place the sensor vertically on a North-facing wallor well-shaded location to avoid sunlight andrain.Direct
sunlight will cause temperatures to readhigh. Recommend placing the sensor 6 inchesunder the eaves or
the deck rail is preferred. Thetransmission range to the base station is200ft/60m in open air, not including
walls or floors.
FCCID:2AM88-TX19
This device complies with part 15 of the FCCRules.
Operation is subject to the following twoconditions:
(1)This device may not cause harmfulinterference.(2)This device must accept anyinterference received,
includinginterference that may causeundesired operation.