Model: 281A TN with Batteries (Color HD VA Display)
1. Overview
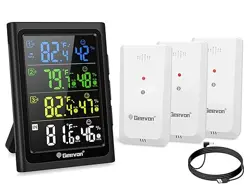
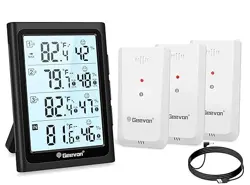
The Geevon Weather Station is a wireless indoor/outdoor thermometer and hygrometer. It consists of a main display unit and three remote sensors, allowing you to monitor temperature and humidity in four different locations simultaneously.
The system uses a 433 MHz wireless frequency to transmit data from the sensors to the display unit, with a maximum transmission range of 200 feet (60 meters).
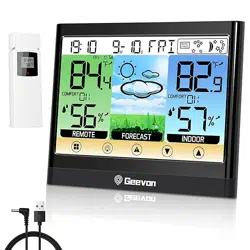
2. What's in the Box
1 x Main Display Unit (Weather Thermometer)
3 x Remote Outdoor Sensors
1 x USB Cable
User Instructions
Note: Batteries are not included. The main unit requires 2 AA batteries (or can be powered via USB). Each remote sensor requires 3 AAA batteries.
3. Specifications
Physical Specifications
Display Unit Dimensions: 0.6"D x 3.9"W x 5.3"H
Item Weight: 350 Grams
Material: Acrylonitrile Butadiene Styrene (ABS)
Finish: Polished
Technical Specifications
Power Source: Battery Powered & AC/DC Powered (via USB)
Display Unit Batteries: 2 x AA (not included)
Sensor Batteries: 3 x AAA per sensor (not included)
Connectivity Technology: 433 MHz Wireless
Transmission Range: Up to 200 ft / 60 m
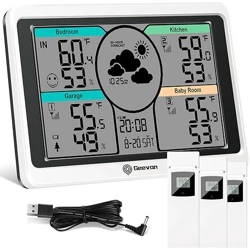
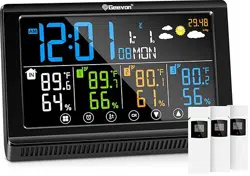
Display Type: 5-inch Color HD VA LCD
Measurement Specifications
Indoor Temperature Range: 50°F to 140°F (-10°C to 60°C)
Outdoor Temperature Range: -58°F to 158°F (-50°C to 70°C)
Temperature Accuracy: ± 1.8°F / 1°C
Humidity Range: 20% to 95% RH
Humidity Accuracy: ± 5%
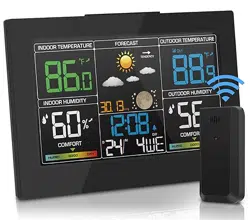
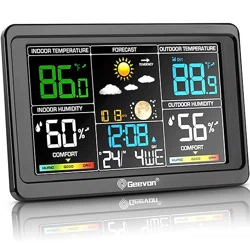
4. Display Unit Overview
Screen Layout
The display shows information for four channels:
Channel 1-3: Data from the three remote wireless sensors.
Channel 4 (IN): Data from the built-in sensor in the display unit.
For each channel, the screen displays:
Current Temperature (in °F or °C)
Current Humidity (as a percentage)
Trend Arrows (indicating if temperature/humidity is rising or falling)
Comfort Indicator Icon (a smiley face for comfortable conditions, a neutral face for normal, or a frowning face for uncomfortable conditions based on humidity and temperature).
Channel Number
Additional Screen Elements
MAX/MIN Records: The display shows the maximum and minimum temperature and humidity values recorded in the past 24 hours for each channel.
Backlight: An 8-second backlight activates for easier reading in low light.
Physical Features
Mounting Options: The unit has a tabletop stand, a keyhole slot for wall mounting, and magnets on the back for mounting on a metal surface like a refrigerator.
USB Port: A USB port on the side can be used to power the display unit or to charge external devices like phones or tablets.
Control Buttons: Buttons on the top or side (symbols may be stamped into the plastic) are used for setting alarms, switching units, and activating the backlight.
5. Remote Sensors
Sensor Setup
Ensure the channel switch inside the battery compartment of each sensor is set to a unique number (typically 1, 2, or 3 as printed on the front).
Insert 3 AAA batteries into each sensor.
Place the sensors in desired locations (indoors or outdoors). For accurate outdoor temperature readings, place sensors out of direct sunlight and precipitation.
The display unit should automatically search for and connect to the sensors within 1-2 minutes.
Sensor Placement Guidelines
Range: For best results, place sensors within 200 feet of the display unit. Walls, metal, and other obstructions can reduce this range.
Outdoor Placement: Mount under an eave or in a shaded, ventilated area for accurate ambient temperature readings.
Indoor Placement: Can be used to monitor different rooms, basements, garages, attics, or greenhouses.
6. Initial Setup and Installation
Power the Display Unit: Insert 2 AA batteries or connect the provided USB cable to a power source (e.g., wall adapter or computer). The unit can operate on batteries alone, but the screen may turn off to conserve power, requiring a button press to wake it. For an always-on display, use USB power.
Set Up Sensors: Follow the steps in Section 5 to install batteries in and position your three remote sensors.
Synchronization: The display will automatically search for sensors. Ensure each sensor is powered on and within range. The corresponding channel number will appear on the display once a connection is established.
Mount the Display: Choose your preferred mounting method (stand, wall, or magnetic).
7. Features and Use Guide
7.1 Reading the Display
Interpret the data shown for each of the four channels: temperature, humidity, trend, and comfort level.
7.2 Comfort Indicator
The icon changes based on humidity and temperature readings:
WET/Uncomfortable (Frowning Face): Humidity > 70%
COMFORTABLE (Smiling Face): Humidity between 40% and 70% AND Temperature between 68°F and 82°F (20°C and 28°C)
DRY (Neutral/Frowning Face): Humidity < 40%
7.3 MAX/MIN Memory
The device records the highest and lowest temperature and humidity readings for each channel over a rolling 24-hour period. This data resets every 24 hours.
7.4 Temperature and Humidity Alert (Alarm Function)
You can set audible alarms for when temperature or humidity exceeds or falls below your preset values.
To Set Alarms: (Refer to the included paper manual for specific button sequences, as symbols are stamped on the device). Typically, you enter a setting mode using a dedicated button, select the channel and parameter (temp/humidity), and use up/down buttons to set the high and low limits.
7.5 Using the USB Charging Port
The USB port on the side can output power. You can use it to charge a mobile phone or other USB device by connecting your own USB cable. This does not affect the operation of the weather station.
8. Troubleshooting
No Reading from a Sensor:
Check that the batteries in the sensor are fresh and correctly installed.
Verify the sensor is within 200 ft range of the display, with minimal obstructions.
Ensure the channel number on the sensor matches the channel you are checking on the display.
Wait 1-2 minutes for the display to automatically resync.
Display Screen is Off:
If running on batteries only, press the light/function button to wake the display.
For an always-on display, connect the USB power cable.
Check/replace the display unit's AA batteries.
Inaccurate Readings:
For outdoor sensors, ensure they are not in direct sunlight, which causes falsely high temperature readings.
Place sensors in a well-ventilated area, not inside a sealed box or behind furniture.
Alarm Not Sounding:
Confirm the alarm function is enabled and the limits are set correctly.
Check that the audible alarm is not muted in the settings (if applicable).
9. Care and Maintenance
Clean the display and sensors with a soft, dry cloth. Do not use chemicals or abrasives.
For outdoor sensors, check battery compartments periodically for moisture and ensure seals are intact.
Replace all batteries proactively to maintain consistent operation. Consider the battery life based on usage (months).
Store in a dry place if not in use for extended periods.
10. Compliance and Warranty
Warranty: This product comes with a one-year warranty from the date of purchase. The warranty covers defects in materials and workmanship.
Support: For warranty service or product support, contact the seller or manufacturer (Geevon) through the Amazon store page where the product was purchased.