
Meimeng Smart
Smart Sleep Temperature-Controlled Mattress Pad
User Manual
Smart Temperature Control Precise Adjustment Safe & Reliable Easy Operation
Please read this manual carefully before use and keep it properly.
Table of Contents
1.Product Overview……………………………….…02
2.Product Models………………………………….…04
3.Installation Instructions………………………...…04
4.Smart Main Unit Operation Steps………………...06
5.APP Operation Guide………………………………06
6.Safety Precautions…………………………………13
7.Warranty Information………………………………14
8.Contact Information………………………………..15
I.Product Overview
The smart sleep temperature control system is desi
g
ned for hi
g
h-
q
uality sleep
,
with precision temperature control and personali
z
ed
e
x
perience at its core.
1、
Pac
k
ing
L
ist
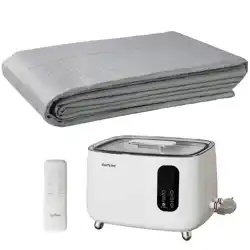
Smart Mattress Cover Smart Main Unit
H
eart
R
ate Monitorin
g
B
and
(
Standard with AI
V
ersion
)
Power Adapter
Safety
N
otice
:
Please use only the dedicated adapter included with this product.
D
o
not use any other adapters.
02
2、
Main Unit Control Panel Operation Instructions
W
ate
r
I
n
j
e
c
tion
P
o
r
t
(F
ill
u
p
to t
h
e
m
a
x
i
mum
w
ate
r
le
v
el
line onl
y)
Ma
x
W
ater
L
e
v
el
Mini
W
ater
L
e
v
el
T
h
e
s
a
m
e a
pp
lie
s
to
b
ot
h
le
f
t an
d
r
ig
h
t
s
i
d
e
s
o
f
t
h
e
b
e
d
.
1.P
o
w
e
r
O
n
: After connecting power, press the central
power button to turn on the display.
2
.
S
ele
c
t Zone
:
T
he
L
(L
eft
)
and
R
(R
ight
)
z
ones operate
independently and can be set separately.
3
.
S
w
it
ch
M
o
d
e
:
P
ress the
C
ool
/H
eat button for the
corresponding
z
one to acti
v
ate the desired
m
ode.
C
oo
l
in
g
H
e
a
tin
g
4
.
Ad
j
us
t
T
e
m
p
e
r
at
ur
e
:
Press the Temperature
+/- buttons to set the target temperature.
Cont
r
ol
P
anel
5
.
S
et
R
u
nti
m
e
:
P
r
e
ss
t
h
e
R
u
nti
m
e
+
/
-
bu
tton
s
to
s
et
t
h
e o
p
e
r
ating ti
m
e
r
.
(Maximum runtime: 12 hours)
6
.P
o
w
e
r
O
:
Press the Power button to shut down
the entire unit.
7
.
N
ote
:
When the device is turned o via the Mini
Program / App, it will delay shutdown for 2–3 minutes
to protect the device.
W
ate
r
I
n
j
e
c
tion
P
o
r
t
COO
L
T
E
MP
TIM
E
H
E
AT COO
L
T
E
MP
TIM
E
H
E
AT
M
a
x
W
ate
r
L
e
v
el
N
ote
:
I
t i
s
re
c
o
mm
ended to add
w
ater to
t
h
e
m
ar
k
ed
s
c
ale to a
v
oid o
v
er
lling
.
M
ini
W
ate
r
L
e
v
el
N
ote
:
I
f
t
h
e
w
ater le
v
el i
s
b
elo
w
t
h
e
m
ini
mum
s
c
ale
,
plea
s
e add
w
ater in ti
m
e
.
03
II.Product Models
WH01
Model
(
Smart
V
ersion
)
WH02
Model
-
Upgraded AI
V
ersion
(
wit
h
Sleep Monitoring Pads
)
Cooling/Heating Zone
Cooling/Heating Zone
Sleep Monitoring Pad
III.Installation Instructions
R
i
g
ht Mattress Water
Pipe Port
1
H
eart
R
ate Monitor
(
AI
V
ersion Only
)
3
5
Water
F
illin
g
Port
Temperature Control Main Unit Interface
D
ia
g
ram
Step
1
2
4
L
eft Mattress Water
Pipe Port
D
C Power Port
1
.
D
evice
W
ater Pipe Installation
Insert the plu
g
s of the smart mattress cover into the
correspondin
g
ports on the temperature control main unit.
04
Step
2
2
.
W
ater Pipe Removal
To remove the water hose
:
Press the release
button on the device bottom
(
push backward
)
to
pop the hose out automatically. If stuck
,
hold the
button and pull the smart mattress cover hose
outward.
3
.Install t
h
e Power Adapter
The adapter plu
g
features a twist-lock desi
g
n
:
insert
the plu
g
with the trian
g
ular arrow facin
g
upward
,
then
turn it
9
0
°
clockwise to lock it in place. To unlock
,
turn
it
9
0
°
counterclockwise. This ensures a secure
connection and safe removal.
4
.
W
ater
F
illing Cap Operation
To unscrew the cap:
Grip the water
llin
g
cap and rotate it
counterclockwise to remove it.
To ll water:
After unscrewin
g
the cap
,
pour distilled water or
puri
ed water into the water tank.
To re
i
nsta
ll
the cap:
After
llin
g,
ali
g
n the cap with the water
llin
g
port and rotate it clockwise to ti
g
hten it securely
,
ensurin
g
a waterti
g
ht seal.
05
I
V
. Smart Main Unit Operation Steps
Step 1:
Power on the device
rst.
Step 2:
Place the main unit at a position no lower than the
mattress. Connect the main unit to the smart mattress cover
,
then
ll the device with water up to the MA
X
water level
(
appro
x
. 1.25
L)
.
D
o
N
OT close the cap yet.
Step 3:
After connectin
g
the device water pipes
,
power on the
device and start the operation mode.
Step 4:
When the water level drops to the MI
N
water level
,
re
ll
water up to the MA
X
water level a
g
ain.
Step 5:
Screw the cap back on. The device is now ready for normal
operation.
V
. APP Operation Process
1.Andriod APP:https://www.pgyer.com/Jsv814EQ
2.Emailregister
0
6
1
.
D
evice
B
inding
After enterin
g
the homepa
g
e
,
tap
「
Go to Connect
」
to access the device connection
interface. Tap
「
R
efresh
」
to search for
B
luetooth devices. Select the correspondin
g
device
’
s
B
luetooth serial number from the nearby device list
,
then tap the device name
to complete the connection. A
"✓"
mark will appear once the connection is successful.
Ho
m
e
B
l
u
etoot
h
My
device
MM-IB-000000
N
ea
rbv
D
e
v
i
c
e
s
MM-I
B
-000000
MM-I
B
-000114
MM-I
B
-000116
MM-I
B
-000256
D
e
v
i
c
e
U
n
c
onne
c
ted
MM-I
B
-000000
MM-I
B
-000114
MM-I
B
-000116
MM-I
B
-000256
2.Tap the
B
luetooth icon on the home pa
g
e to start pairin
g
.
E
nter
your password
,
and you
’
re connected when the pairin
g
succeeds.
Distribution
Netwrorks Distribution
Netwrorks
Distribution
Netwrorks
Plea
s
e enter t
h
e
W
l
F
l pa
ssw
ord
Define
C
an
c
el
0
7
3
.
H
omepage
-
Control Interface
On the homepa
g
e
,
you can use all device functions and con
g
ure correspondin
g
settin
g
s.
W
it
h
H
eart Rate Monitor
F
unction
(
Couple Mode
) W
it
h
out
H
eart Rate Monitor
F
unction
(
Couple Mode
)
Sleep Time
Sleep Time
睡眠时间
Sl
ee
p
Mode
Ad
j
usts the bed temperature to the optimal level based on ambient
temperature
,
followin
g
a default 8-hour sleep cycle
(
2
H
fallin
g
asleep
,
2
H
li
g
ht
sleep
,
2
H
deep sleep
,
2
H
wakefulness
)
. User survey feedback can re
ne
temperature settin
g
s.
(WH
1
0
B
a
sic
version
)
A
I
Mode
Fa
st
Mode
Ma
x
imi
z
es device performance and fan speed. The device
q
uickly reaches the set
temperature and maintains it.
R
eal-time ad
j
usts sleep temperature based on individual pro
le
,
preferences and
sleep
q
uality. Continuously optimi
z
es temperature parameters with user feedback
and 2-week sleep learnin
g
data.
(WH
0
2
Al
version
)
Mite Removal Mode:The blanket heats up to 55°C at full speed for 4 hours, then
enters standby mode.
0
8
3
.
1H
ome Page
-
Mite Removal &
D
e
h
umidi
cation
Turn the
F
unction On
/
O
Tap the
「
D
ehumidi
cation
&
D
ust Mite
R
emoval
」
button to enable or disable this
function. Once enabled
,
it will run for 4 hours by default
,
and other modes will be
temporarily unavailable durin
g
operation. To end it early
,
simply tap the button a
g
ain to
turn o
the function.
Set a Scheduled Appointmen
Tap the
「
Schedule
」
option. In the pop-up settin
g
s window
,
slide the wheel up
/
down to
select your desired start time. Scheduled appointments can only be set within a 24-hour
window. After settin
g,
tap
「
Con
rm
」
to save.
V
iew
H
istory
R
ecord
In the
「
H
istory
」
section
,
you can view the date
,
runtime
,
and status of past
dehumidi
cation
&
dust mite removal tasks
(
e.
g
.
,
"
In Pro
g
ress
"
,
"
Completed
"
)
to keep
track of your device usa
g
e.
Schedule Time
S
c
h
ed
u
ling i
s
onl
y
a
v
aila
b
le
f
or ti
m
e
s
w
it
h
in t
h
e
ne
x
t
24
h
o
u
r
s.
Define
0
9
3.2
H
omepa
g
e - Sleep Schedule
1.
E
nable Scheduled Time
To
gg
le the
「
Timer Switch
」
to enable the schedulin
g
function.
2.Set Schedulin
g
Tar
g
et
&
Mod
「
Switch
L
eft
/
R
i
g
ht
」
:
Select which side of the bed
(L
eft
/
R
i
g
ht
)
the schedule will apply
to
「
Cool
/
H
eat Mode
」
:
Set the operatin
g
mode
(
Coolin
g
/
H
eatin
g)
for the scheduled
period.
Set Tim
Slide the wheel up
/
down to set the
「
Start Time
」
and
「E
nd Time
」
Go to the
「
R
epeat
」
option to set the repetition cycle for the schedule.
Preset Tar
g
et Temperatur
Tap
「
Temperature Preset
」
to set the tar
g
et temperature for the scheduled period. The settin
g
will take e
ect after savin
g
.
Sleep Time
R
e
p
e
a
t
a
b
l
e
A
ll
Monda
y
T
u
e
s
da
y
W
edne
s
da
y
T
hu
r
s
da
y
F
rida
y
Sat
u
rda
y
S
u
nda
y
Define
C
an
c
el
Temperature Preset
Define
C
an
c
el
10
4. Sleep
R
eport
(
AI
V
ersion Only
)
The report module includes daily
,
weekly
,
and monthly reports
,
allowin
g
users to
understand their sleep status from di
erent time dimensions.
Tap the survey icon to submit product feedback. We will continue to optimi
z
e the
product e
x
perience based on your input.
11
5
.My Account Interface
1.The
「
My Account
」
interface allows users to perform operations such as account lo
g
in
,
lo
g
out
,
and device permission mana
g
ement.
2.My Account - About
F
irmware
V
ersion
N
umber
:
Check the version of the device
'
s built-in
rmware
,
makin
g
it
easy to determine whether
rmware up
g
rade is needed.
About
F
ir
mw
are
V
er
s
ion
U
s
er
A
gree
m
ent
12
3.My Account -
D
evice
B
indin
g
When usin
g
the device for the
rst time
,
please connect it via
B
luetooth and complete the
network con
g
uration.
V
I. Precautions
Error Codes
1.
Panel display errors
:
E
1
:
Water shorta
g
e.
E
2
:
L
ow-temperature protection
E
3
:
H
i
g
h-temperature protection.
E
4
:
D
evice tilt detected.
2.
B
luetooth multi-connection
:
Supports up to 4 concurrent user connections.
3.
L
on
g
-term use of tap water will cause limescale buildup
,
which may
impair device function.
D
istilled or puri
ed water is recommended.
4.To ensure full functionality and stable performance
,
please update the
device
rmware to the latest version before use.
5.Always power on the device before addin
g
water
,
under any circumstances.
6.It is recommended to place the main unit above the bed level durin
g
use.
Troubles
h
ooting
:
1.
V
erify the device is powered on
,
usin
g
the ori
g
inal dedicated adapter
,
and
that the power supply is stable.
2.Check that the main unit is placed hori
z
ontally
,
at a position no lower than
the bed level
,
with no tiltin
g
or leanin
g
.
13
3.
E
nsure the water tank is
lled to the ma
x
imum level line. Use distilled or
puri
ed water to prevent limescale buildup.
4.Check that the water hoses between the main unit and mattress are
securely connected
,
with no kinks or leaks.
5.If the temperature control system is not workin
g
properly
:
Unscrew the
device cover to release air
,
wait appro
x
imately 20 minutes
,
then reti
g
hten the
cover.
V
II.
W
arranty Information
Product
W
arranty Statement
Thank you for choosin
g
our product. To protect your le
g
al ri
g
hts
,
please read
the followin
g
warranty terms carefully.
W
arranty Period
This product is covered by a 1-year free warranty from the date of purchase.
The warranty period is based on the date shown on your purchase receipt
(
invoice or electronic order
)
.
W
arranty Coverage
Under normal use
,
performance failures caused by defects in the product
’
s
materials or workmanship are eli
g
ible for free repair or replacement. This
speci
cally includes
:
Main unit core function failures
(
e.
g
.
,
unresponsive control panel
)
;
N
on-human-caused dama
g
e to ori
g
inal accessories
(
e.
g
.
,
water hoses
,
adapters
)
;
F
unctional abnormalities due to desi
g
n
aws in the software system
(
rmware
up
g
rade support is available
)
.
Important Reminders
Please keep your purchase receipt safe.
L
ost receipts will void your warranty service
;
Parts replaced durin
g
the warranty period will inherit the remainin
g
warranty period of
the ori
g
inal product
;
This warranty policy applies only to products purchased and used in Mainland China
(
e
x
cludin
g
H
on
g
K
on
g,
Macao
,
and Taiwan
)
. The company reserves the ri
g
ht of
nal
interpretation.
14
V
III. Contact Information
Company
:
Hengli Home Furnishing (Guangzhou) Co., Ltd.
Website
:
www.hlfurnish.com
E
mail
:
eason@hlfurnish.com
Address
:
No. 666, Building 2, Greenland Airport International Center,
Huadu District, Guangzhou City, Guangdong Province
Tel
:
+86 13879376177
15
FCC Warning:
Note: This equipment has been tested and found to comply with the limits for a Class B digital
device, pursuant to part 15 of the FCC Rules. These limits are designed to provide reasonable
protection against harmful interference in a residential installation. This equipment generates,
uses and can radiate radio frequency energy and, if not installed and used in accordance with
the instructions, may cause harmful interference to radio communications. However, there is no
guarantee that interference will not occur in a particular installation. If this equipment does
cause harmful interference to radio or television reception, which can be determined by turning
the equipment off and on, the user is encouraged to try to correct the interference by one or
more of the following measures:
• Reorient or relocate the receiving antenna.
• Increase the separation between the equipment and receiver.
• Connect the equipment into an outlet on a circuit different from that to which the receiver is
connected.
• Consult the dealer or an experienced radio/TV technician for help.
Caution: Any changes or modifications to this device not explicitly approved by manufacturer
could void your authority to operate this equipment.
This device complies with part 15 of the FCC Rules. Operation is subject to the following two
conditions:
(1)This device may not cause harmful interference, and (2) this device must accept any
interference received, including interference that may cause undesired operation.
This equipment complies with FCC radiation exposure limits set forth for an uncontrolled
environment. This equipment should be installed and operated with minimum distance 20cm
between the radiator and your body.