< Pulsar JINGGG-X MOUSE >
< Interface >
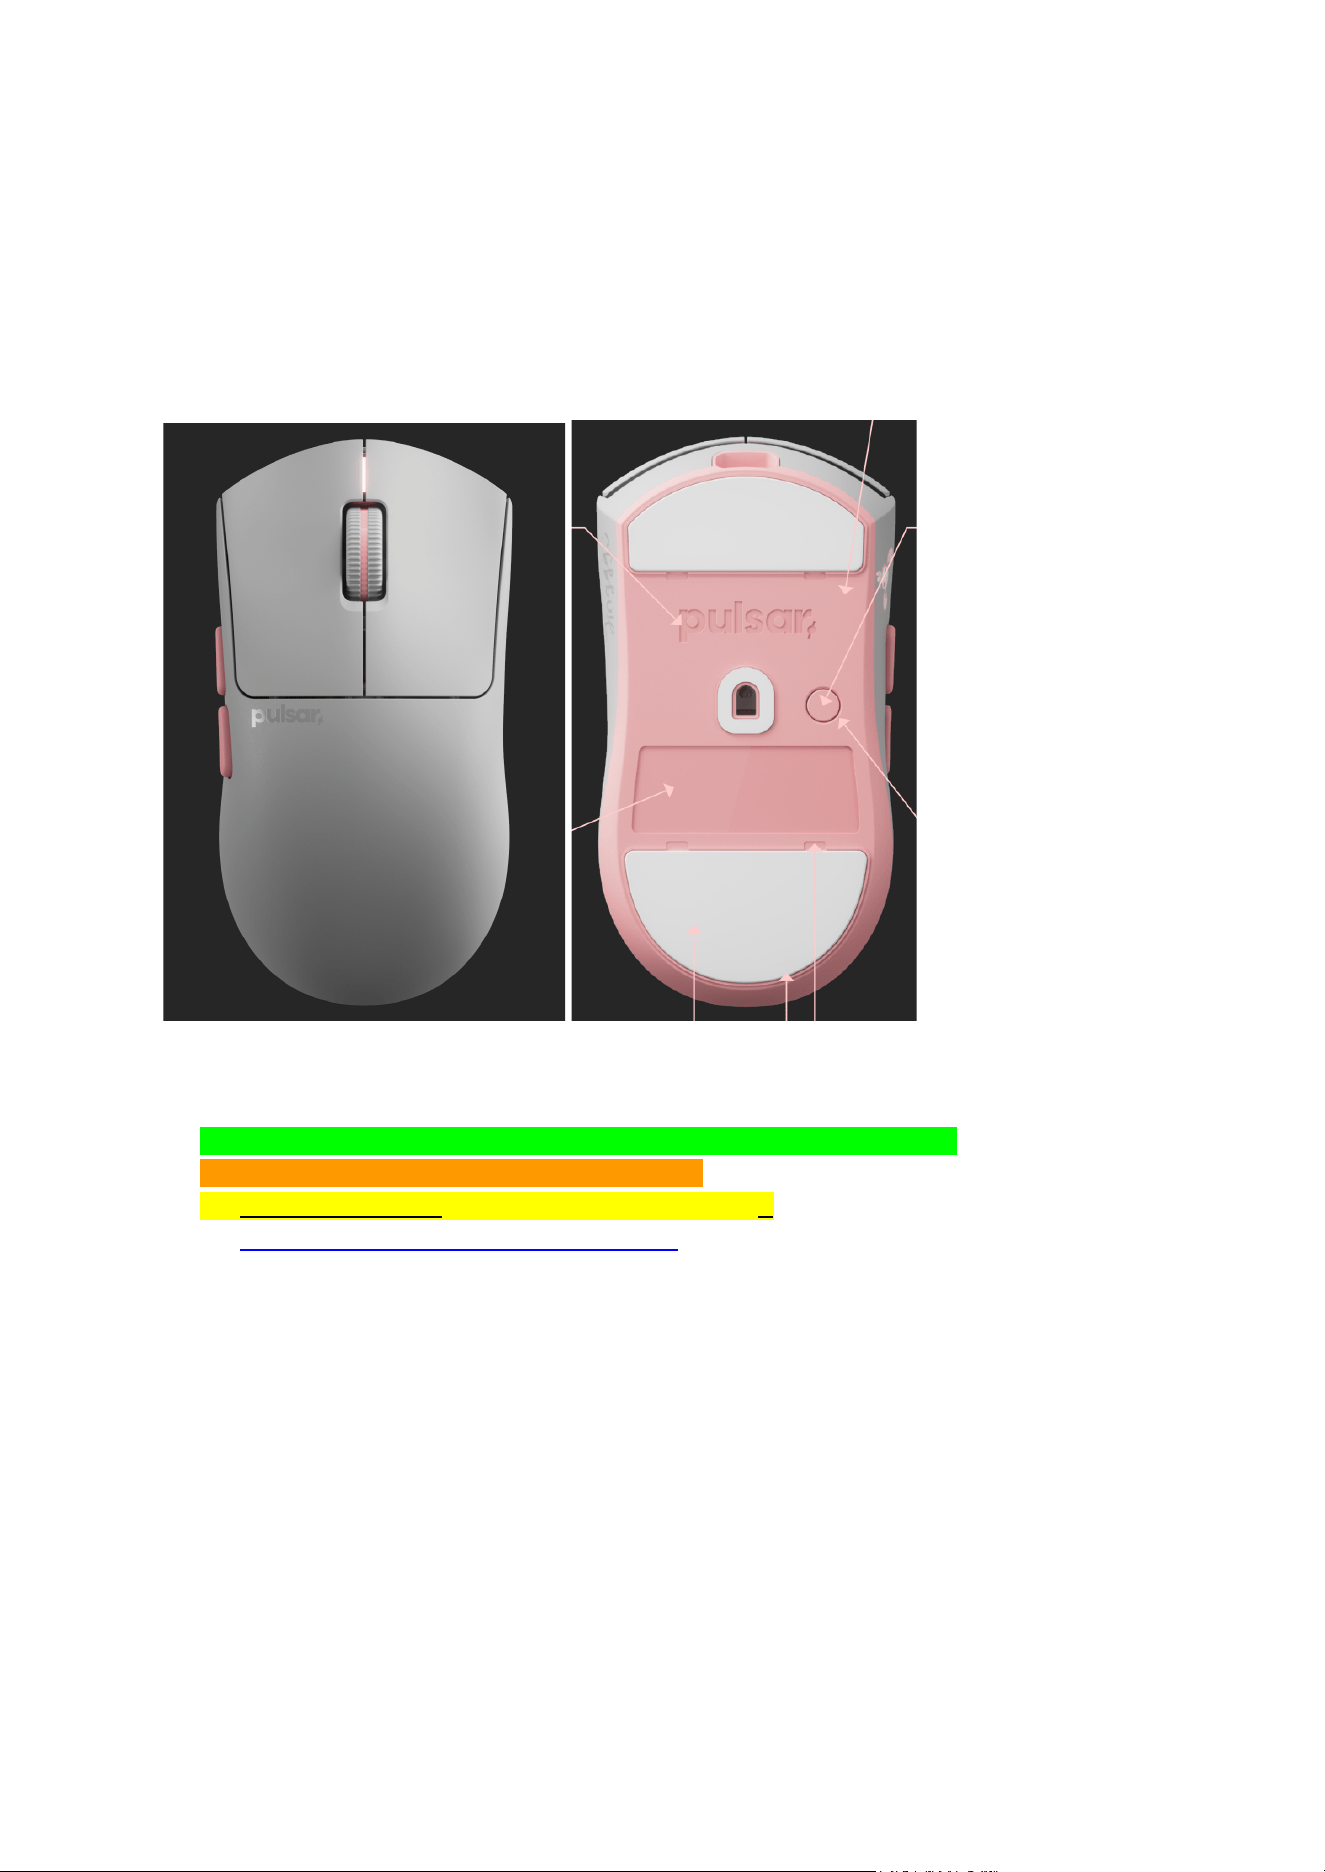
1. HS USB Type-C
2. 6 * Button (Right,Left,Wheel,Side1,Side2,Combo(DPI&Power))
3. 1 * Encoder(TTC Gold)
4. 1 * RGB LED (DPI LED)
VID; 0x3710 / PID; 0x7502 / String ; Pulsar Pro Series Jinggg-X
Mouse : nRF52840 + WCH[CH32V305GBU6]
Dongle : CX52660(Pulsar)-Link 8K Dongle
● Pulsar Link 8k Dongle( 2 * RGB Color LED, 2 * Button) Use as it is
● Wired/Wireless : 8KHz polling rate Support
● Switch (right/left) : Pulsar Optical (FE) 55g ~60g))
● No Power Switch : ( 3 seconds power ic)
● The current highest level of Latency
● Power consumption : (Ultra Low Current LOD)
● Battery : 300mAh/3.7V/1.11Wh (F&G : TW 602030 /300mAh)
● Web Driver Support & PC Driver Support
● DPI or Power On/Off(3S) Support
● Turbo Mode Support
● Rotation Calibration Support
● Low power save mode Support
● Battery Warning Support
● Sensor: Pulsar XS1
● Encoder: TTC GOLD DUST PROOF(Pulsar)
● LED ; 1 * RGB LED
< Mouse LED Color Specification>
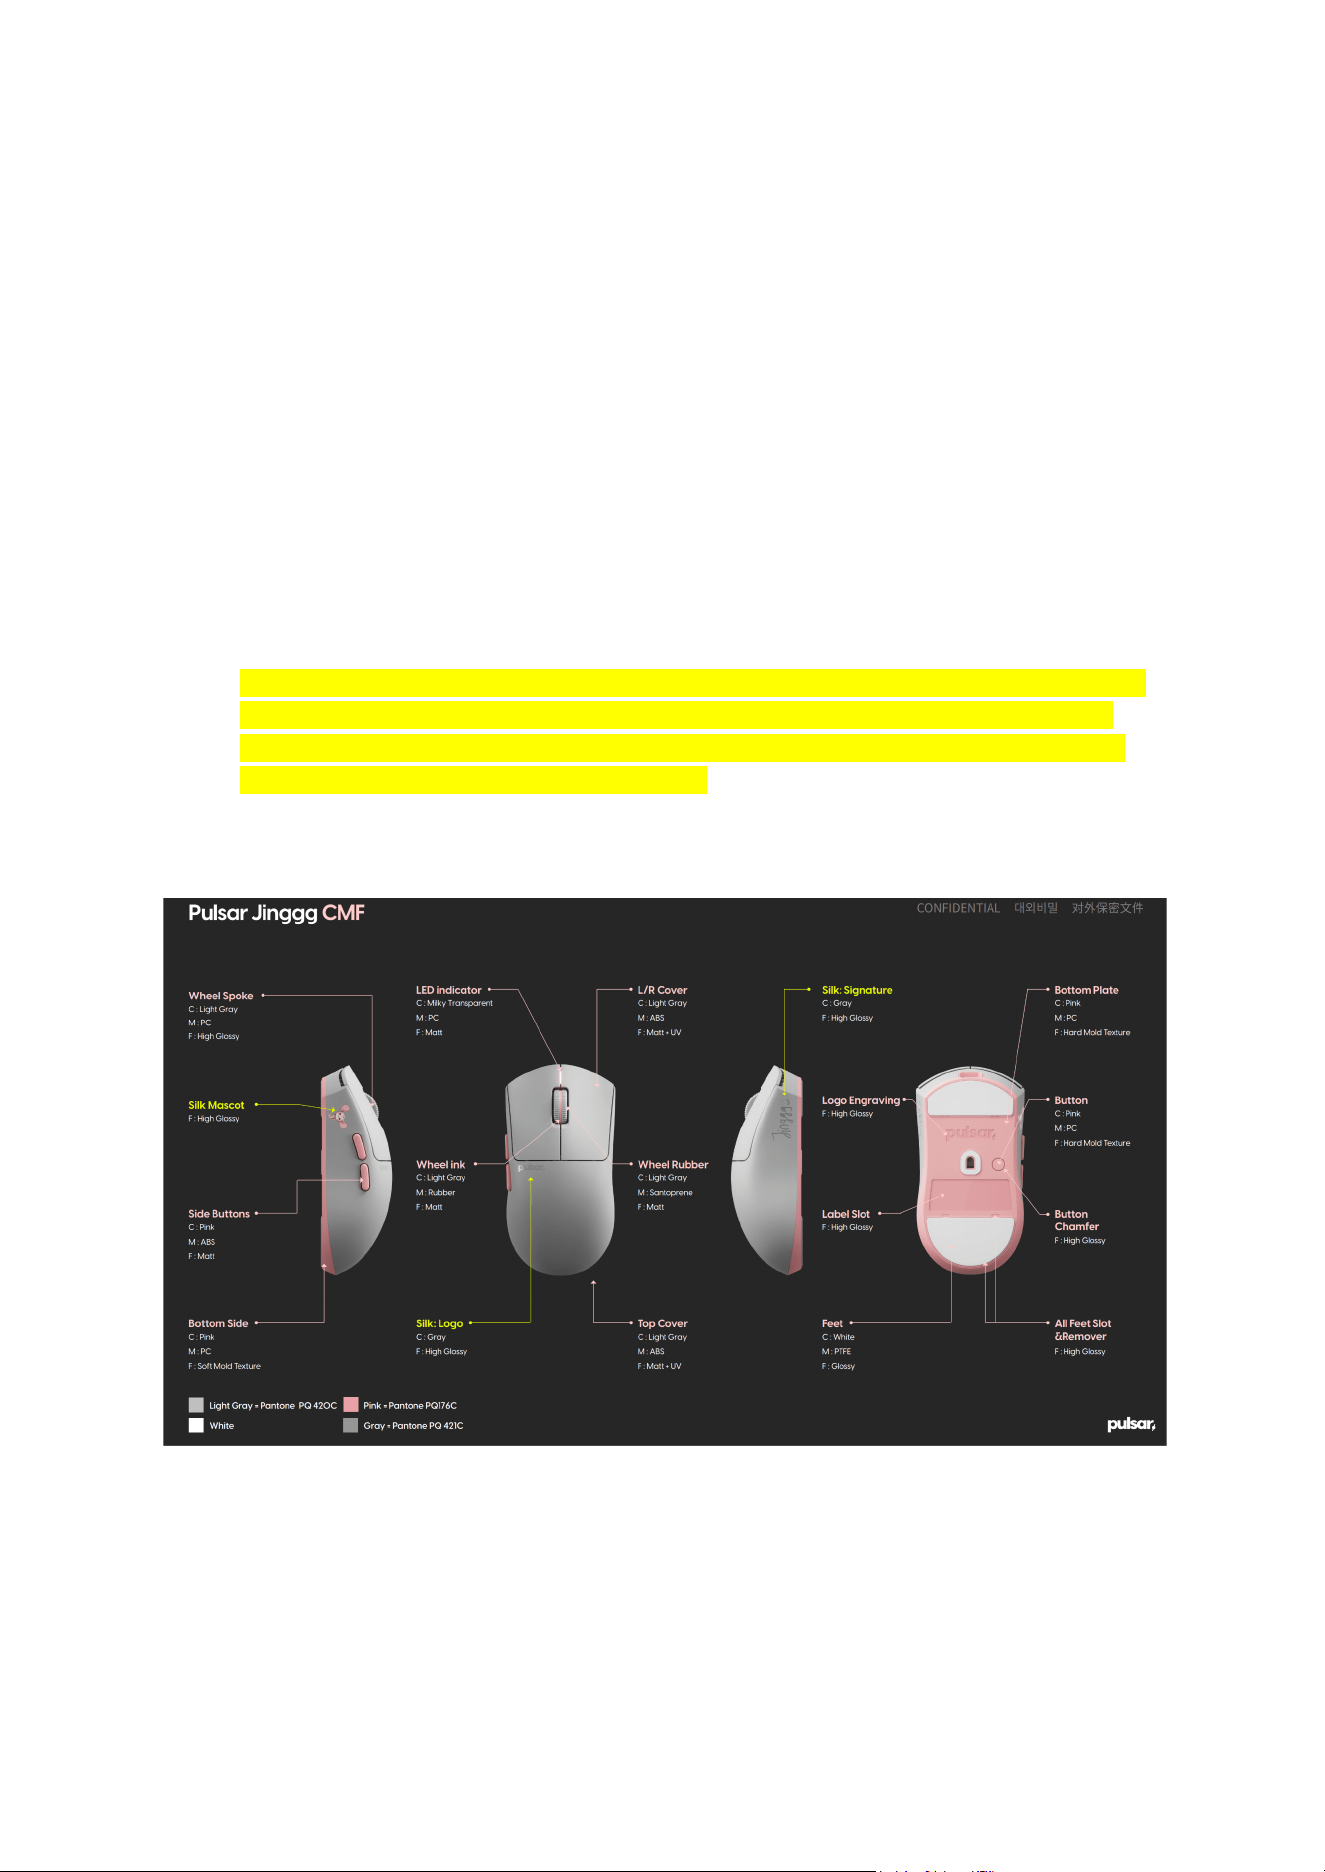
● Charging(wire) ; Red
● Charging Complete(Wire) ; Blue
● DPI Change When Charging ; DPI Color, 3 time Blink
● Battery Warning Battery < 15%); red blinks
● DPI = Light Blue(400), Blue(800)Default, Green(1600), Yellow(3200), Orange(6400),
Pink(12800)
< DPI & Power Combo Button >
1. DPI(<3s) : DPI = (400, 800, 600, 3200, 6400 ,12800)
2. Power(>3s) ON/OFF :
(Press the DPI&Power button for more than 3 seconds)
(Power ON = White LED blinks 5 times)
Power Off = If you press and hold for more than 1.5 seconds, it will turn white, and if
you press and hold for more than 3 seconds, it will turn off and the white LED will
power off. (If you release the button within 3 seconds after the white light turns on,
neither the DPI nor the power off will work.)
<CMF>
< Pulsar Link 8K Dongle Specification>
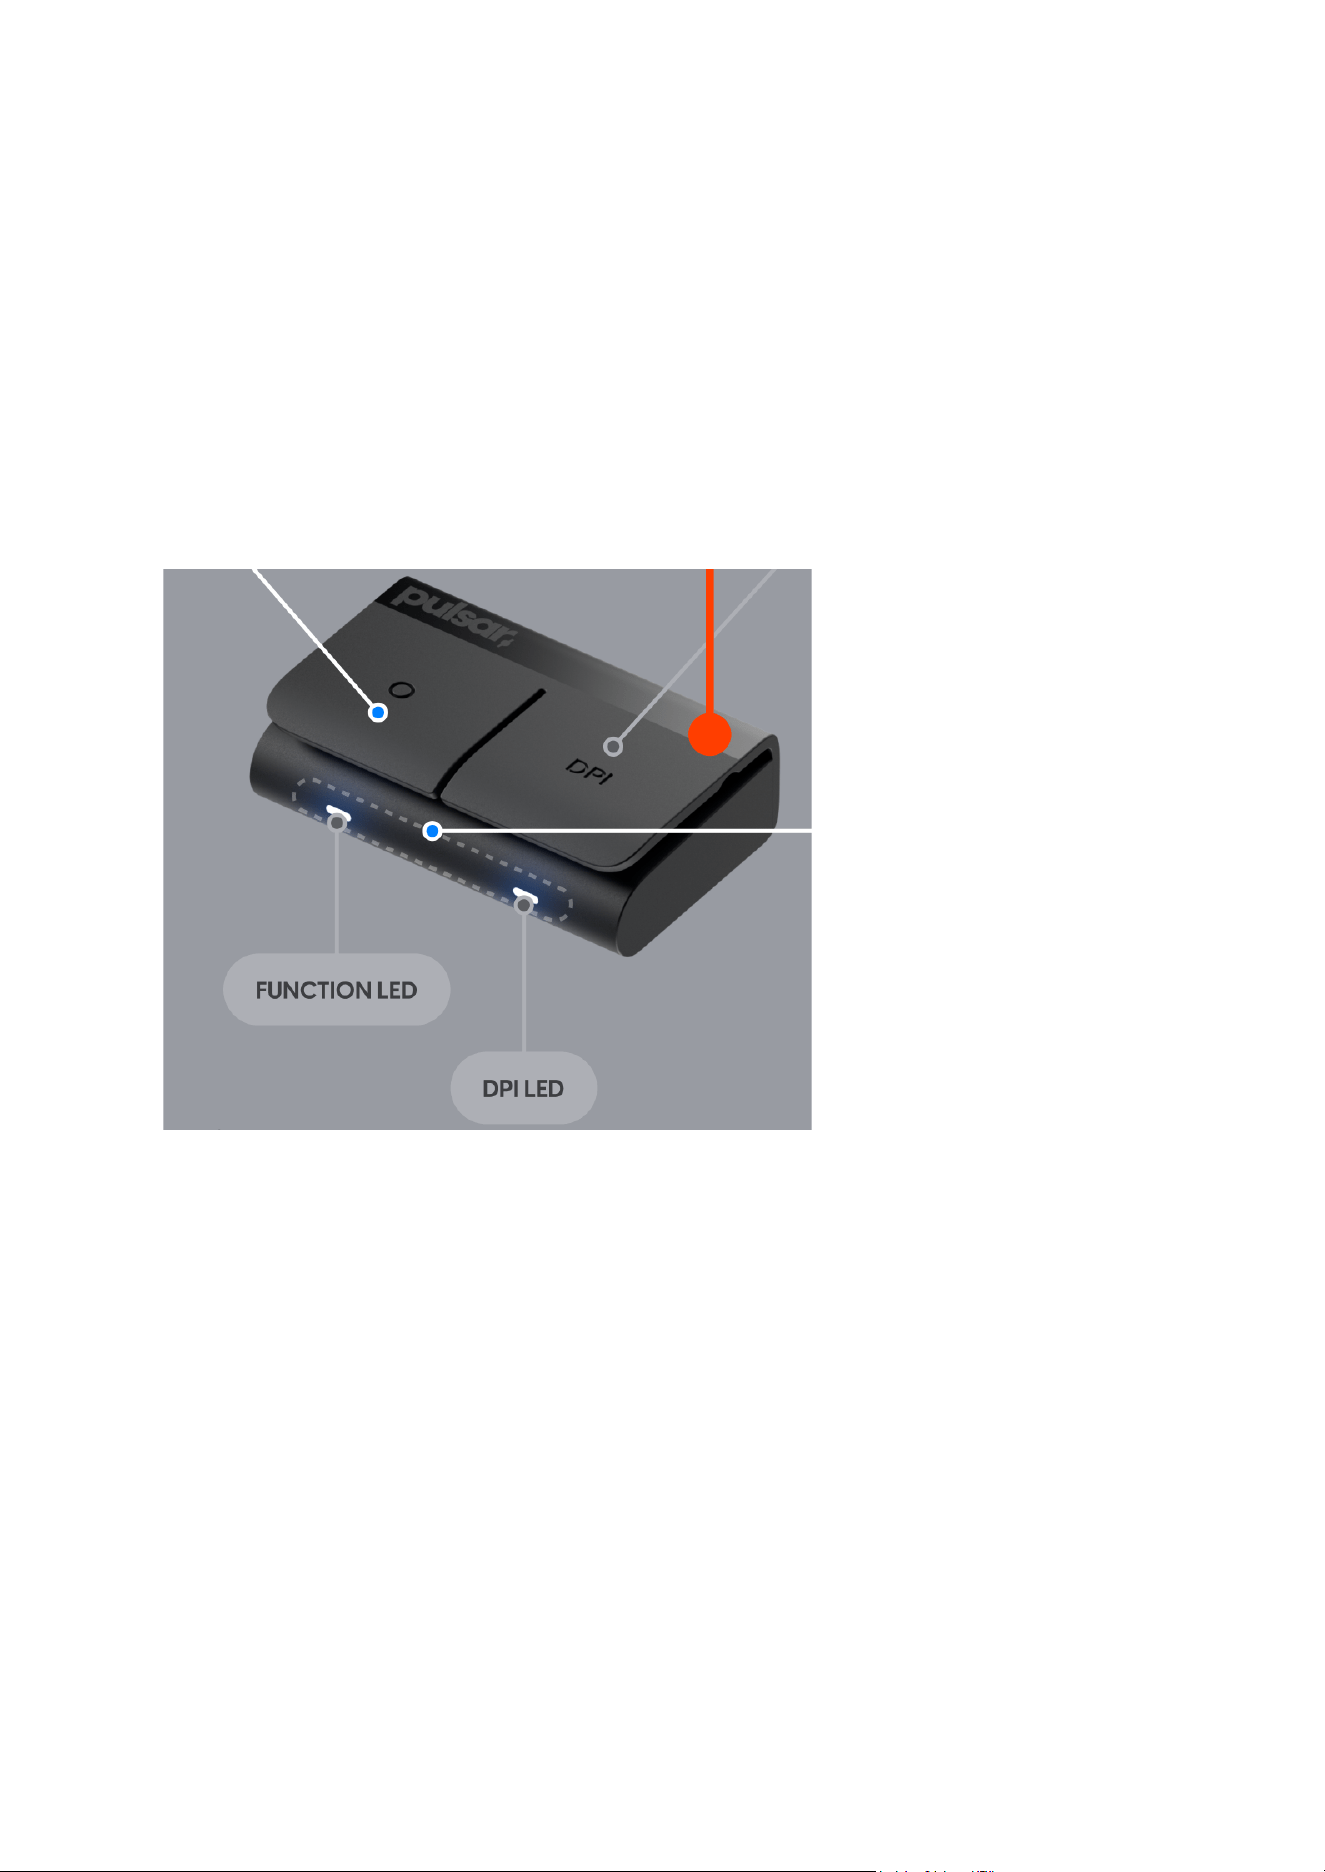
VID; 0x3710 / PID; 0x5501 / String ; Pulsar Link 8K Dongle
< Interface >
1. HS USB Type-C
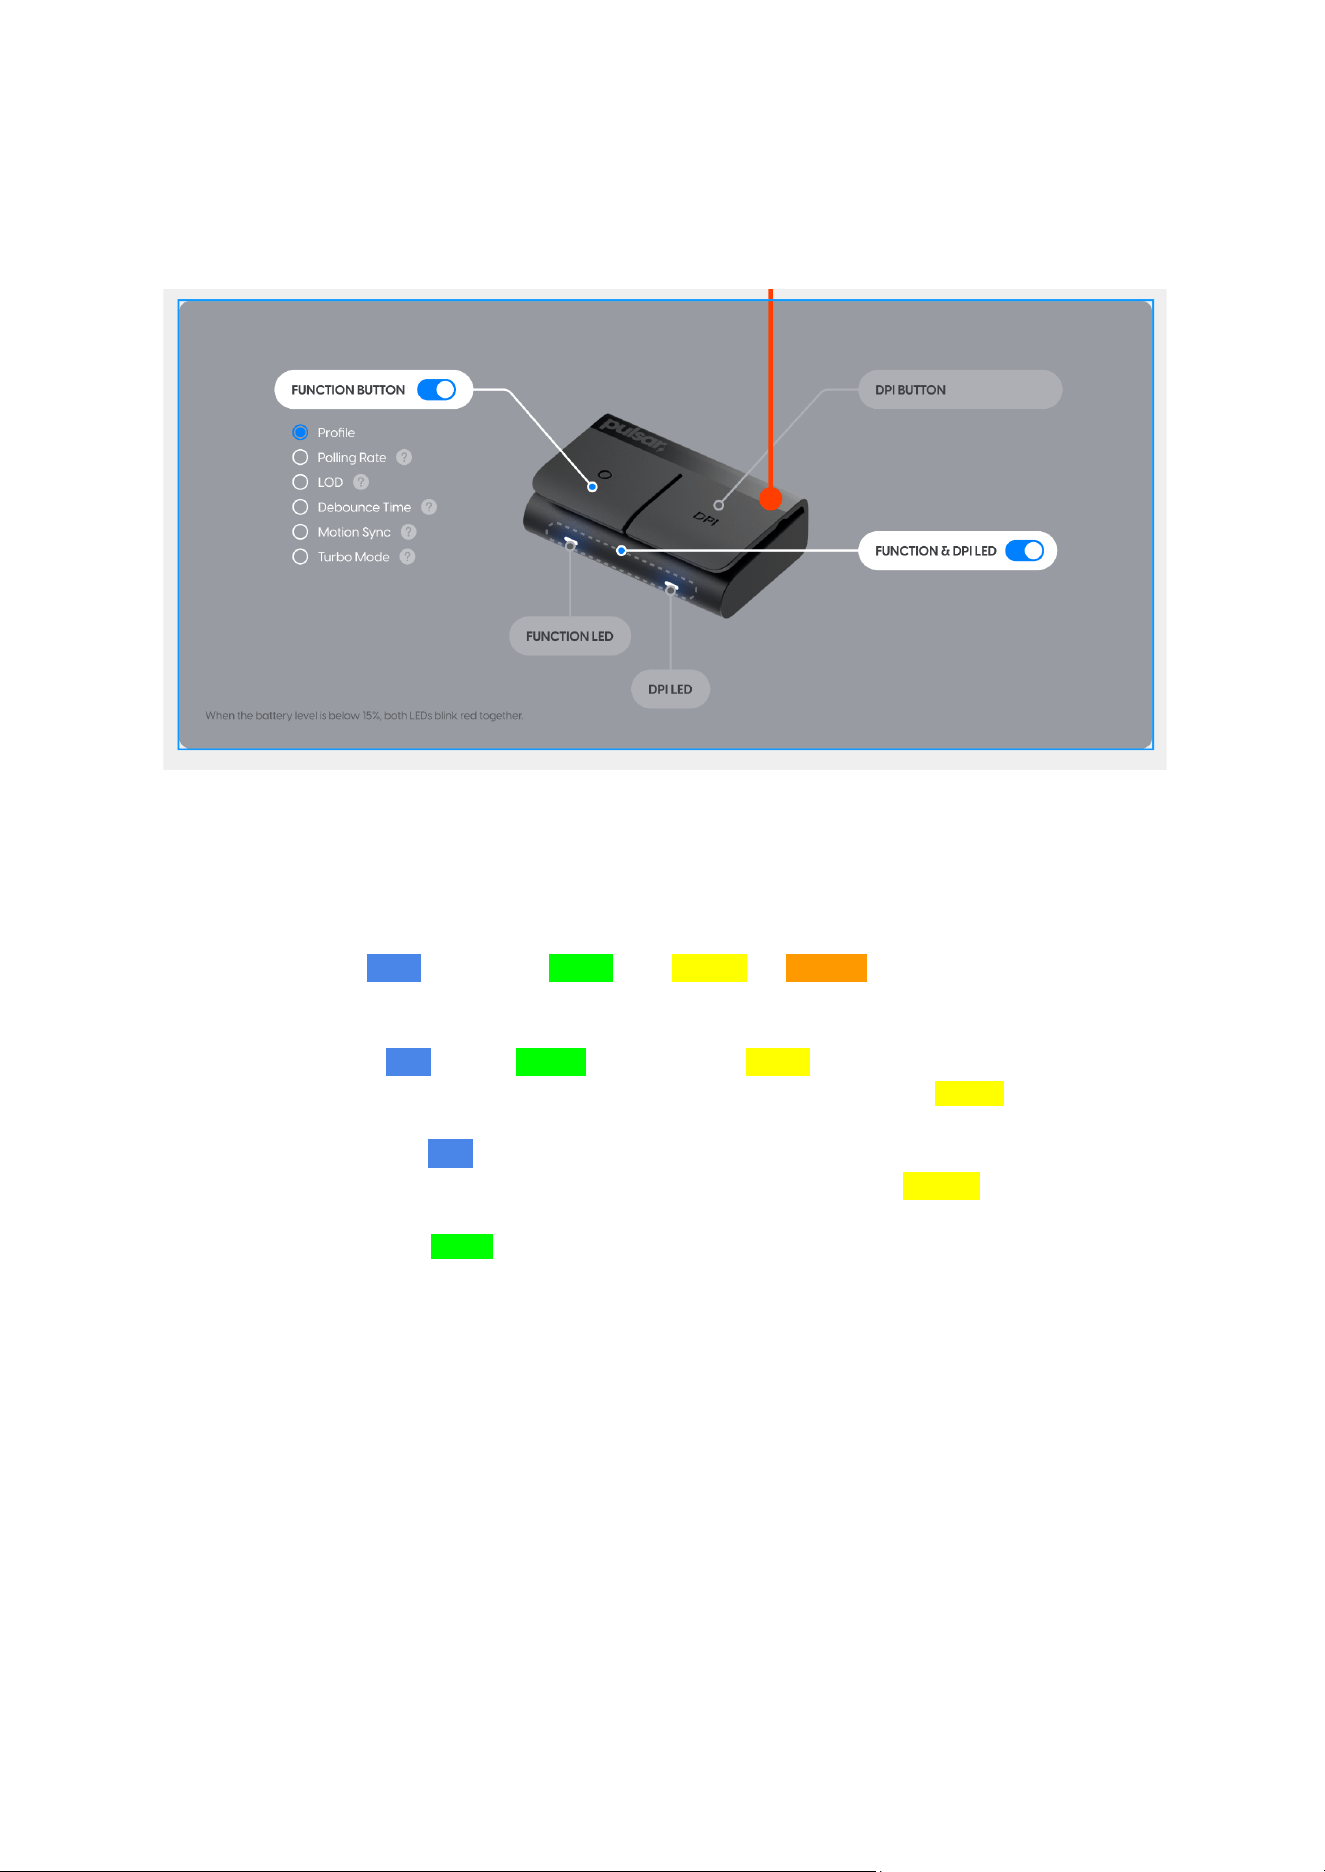
2. 2 * Button (DPI button & FUNCTION Button)
3. 2 * RGB LED (DPI LED & FUNCTION LED)
< Function > - (ENG)
1. DPI stage change and DPI stage display
2. FUNCTION Button function assignment (configurable in the driver) (Profile Default)
(Select from : off, Profile (default), Polling rate, LOD, Debounce Time, Motion Sync, and
Turbo mode)
3. FUNCTION button function change and FUNCTION LED display
4. LED on/off setting (configurable in the driver)
5. LED brightness setting (configurable in the driver) Removed on October 10th due to
firmware support request
6. Dongle <-> Mouse connection information(Current setting status color)
(When the LED is on, 2pcs LEDs turn on/off depending on the connection)
(No information displayed if the LED is set to off)
7. Battery warning display (Mouse battery below 15%) = Both FUNCTION
LED and DPI LED blink red (Operates even when the LED is set to off)
8. FUNCTION Button : off = button lock / on : selected function operation
< Function > - (KOR)
9. DPI stage 변경 및 DPI stage 표시
10. FUNCTION Button 기능 할당(드라이버에서 설정가능) (Profile Default)
(off, Profile(default), Polling rate, LOD, Debounce Time, Motion Sync, Turbo mode에서
선택)
11. FUNCTION Button으로 기능 설정 변경 및 FUNCTION LED표시
12. LED on/off 설정 (드라이버에서 설정가능)
13. LED 밝기설정 (드라이버에서 설정가능) 10월 10일 펌웨어 지원 요청으로 삭제됨
14. Dongle <-> Mouse 연결 정보(현재 설정 상태 색상)
(LED가 on일때, 2개 LED가 연결에 따라 on/off됨)
(LED가 off 셋팅되어 있으면 정보표시 안함)
15. Battery warning 표시 (Mouse battery below 15%) = Both FUNCTION LED
and DPI LED blink red (LED가 off설정되어 있어도 동작함)
16. FUNCTION Button : off = 버튼 잠금 / on : 선택된 기능 동작
< PULSAR LED Color Specification >
● Mouse ←→ Dongle DisConnect = Dongle LED off
● Battery Alarm = Battery <15% → Red Blink (Displayed even when LED is set to off)
● Profile = 1( Blue )Default, 2( Green ), 3( Yellow ), 4( Orange )
● DPI = Light Blue(400), Blue(800)Default, Green(1600), Yellow(3200), Orange(6400),
Pink(12800)
● LOD = 0.7mm(Blue), 1mm(Green)Default, 2mm(Yellow)
● Debounce Time = 0mm(Light Blue), 1mm(Blue), 2-3mm(Green), 4mm(Yellow)Default,
5-6mm(Orange), 7-10mm(Pink), 11-18mm(White)
● Motion Sync = ON(Blue), OFF(White)Default
● Polling Rate = 125Hz(Light Blue), 250Hz(Blue), 500Hz(Green), 1K(Yellow)Default,
2K(Orange), 4K(Pink), 8K(White)
● Turbo Mode = ON(Green), OFF(White)Default

FCC Statement
Changes or modifications not expressly approved by the party responsible for compliance could
void the user's authority to operate the equipment.
This equipment has been tested and found to comply with the limits for a Class B digital device,
pursuant to Part 15 of the FCC Rules. These limits are designed to provide reasonable
protection against harmful interference in a residential installation. This equipment generates
uses and can radiate radio frequency energy and, if not installed and used in accordance with
the instructions, may cause harmful interference to radio communications. However, there is no
guarantee that interference will not occur in a particular installation. If this equipment does
cause harmful interference to radio or television reception, which can be determined by turning
the equipment off and on, the user is encouraged to try to correct the interference by one or
more of the following measures:
-- Reorient or relocate the receiving antenna.
-- Increase the separation between the equipment and receiver.
-- Connect the equipment into an outlet on a circuit different from that to which the receiver is
connected.
-- Consult the dealer or an experienced radio/TV technician for help
This device complies with part 15 of the FCC rules. Operation is subject to the following two
conditions (1)this device may not cause harmful interference, and (2) this device must accept
any interference received, including interference that may cause undesired operation.
This equipment complies with FCC radiation exposure limits set forth for an uncontrolled
environment.