UM-BJS-0055-V1
Read Carefully Before Use
Keep for Future Reference
Bearing Puller
& Bushing Driver Set
User Manual


Contact Us
Thank you for choosing our products! If you have any questions or comments,
contact us and we'll address your issues ASAP!
https://orionmotortech.com/
@OrionMotorTech
Read this disclaimer completely and carefully before
proceeding with the rest of the manual content.
1. Product Modifications
Any modifications or alterations to Orion Motor Tech (OMT)
products void any warranties and may result in damage or
injury. OMT shall not be liable for any damages resulting
from such modifications or alterations.
2. Compliance with Laws
Customers shall be liable for ensuring that the use of
OMT products complies with all applicable laws and
regulations in their respective jurisdictions. OMT shall not
be responsible for any violations of laws or regulations
resulting from the use of OMT products.
3. Correct Use
Always use OMT products only as directed in the
accompanying manuals. Failure to follow instructions may
result in injury or damage.
Always ensure the assembly, installation, operation,
maintenance, or repair of OMT products is carried out by
a competent person.
Regular maintenance should be performed throughout
the lifecycle of OMT products. You are responsible for
ensuring the products operate as intended.
Always wear appropriate protective gear.
4. Third-Party Products
OMT shall not be liable for any damages or losses
resulting from the use of third-party products in
conjunction with OMT products. Customers shall refer to
the third-party's guidelines and/or warranties (if any) for
any third-party products used.
5. Limitation of Liability
OMT shall not be liable for any direct, indirect, punitive,
incidental, special, or consequential damages to property
or life, whatsoever arising out of or connected with the
use or misuse of OMT products. In no event shall OMT’s
liability exceed the value of the products sold.
6. Warranty
Refer to the sales page for warranty information.
This disclaimer states the entire obligation of OMT with
respect to OMT products. If any part of this disclaimer is
determined to be void, invalid, unenforceable, or illegal,
including but not limited to the warranty disclaimers, liability
disclaimers, and liability limitations set forth above, the invalid
or unenforceable provision will be deemed superseded by
a valid and enforceable provision that most closely matches
the intent of the original provision and the remainder of the
agreement shall remain in full force and effect.
Disclaimer

1
Safety Information
• The following instructions are for general guidance only. ALWAYS perform repairs in full compliance with your vehicle’s
service manual. After completing any repair, test your vehicle at a low speed in your workshop before resuming regular use.
Failure to do so may result in serious personal injury or property damage.
• DO NOT allow use by children, individuals with physical or mental conditions that could impair safe operation, or anyone
unfamiliar with this product and its compatible air conditioning, fuel, and transmission systems.
• ALWAYS use personal protective equipment (PPE) suitable for your task. While using this product, always wear ANSI-
approved eye and hand protection. Nonslip footwear is highly recommended. Other equipment, such as ear, head, and body
protection, may also be necessary depending on your work.
• ALWAYS read and understand your vehicle's specific safety warnings and instructions before using this kit. Use only the
correct fluids, pressures, adapters, and other necessary components for your vehicle. Ensure the parking brake is engaged
before beginning any work. Use a jack and jack stands rated to support the full weight of your vehicle. Never touch any
heated surface with exposed skin.
• DO NOT overreach. Keep proper footing and balance at all times.
• Keep this product in good working condition. Check for misalignment, binding, wear, or other damage before each use. If
any damage is found, repair or replace the affected components before further use. If this product is used in a commercial
or workshop setting, clearly label any damaged parts with "DO NOT USE" and ensure they are repaired or replaced before
being used again. ONLY use identical parts for any replacement.
• DO NOT use this product if you are tired or under the influence of drugs, alcohol, or strong medication.
• Keep the work area clean and well-lit. Cluttered or dark areas can increase the risk of accidents.
• For best results, keep the kit clean and dry. Remove any fluid, oil, or grease before and after use, particularly from the
handle and fittings.
• Dress appropriately for automotive servicing. Do not wear loose clothing or jewelry. Keep hair, clothing, gloves, hoses, and
tools away from moving parts during use.
• In case of an accident or injury, keep a first aid kit and a communication device (e.g., a phone) readily available. Be familiar
with the location of nearby emergency medical facilities.
• Automotive servicing involves inherent risks. This manual and your vehicle’s service manual cannot cover every possible
scenario. ALWAYS use sound judgment and caution. Seek proper training if you are unsure how to proceed.
2
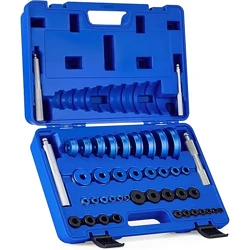
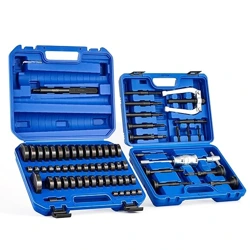
Package List
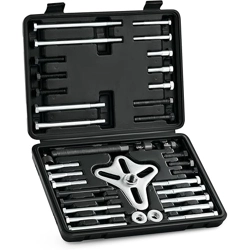
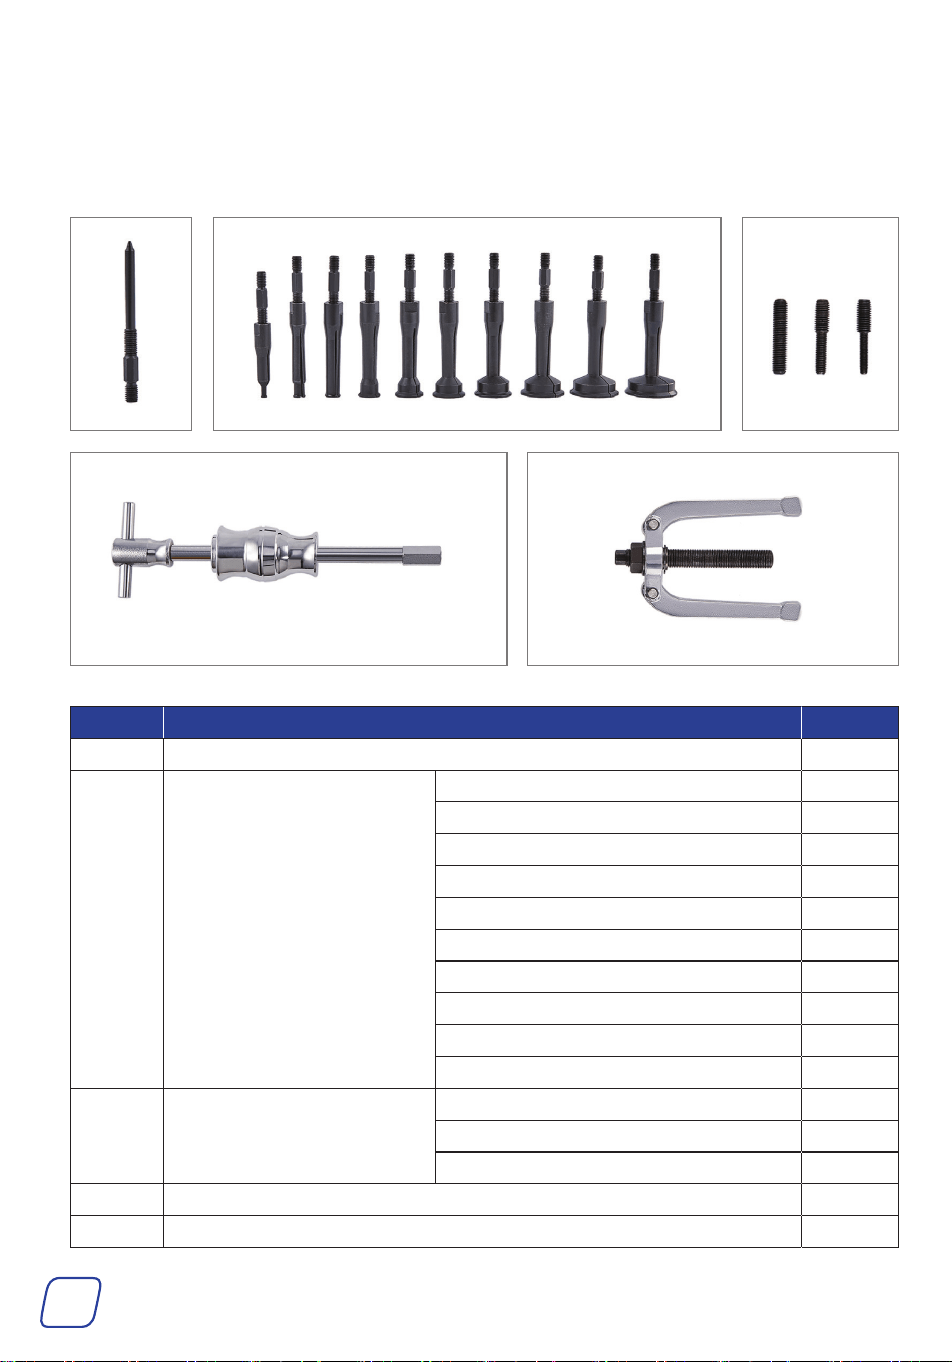
Bearing Puller Set
C
D E
BA
No. Item Qty.
A Spare Collet Bolt 1
B Split Collets
6–13 mm 1
10–17 mm 1
15.5–22 mm 1
22–29 mm 1
28.5–35 mm 1
35.5–39 mm 1
38.5–45 mm 1
42.5–49 mm 1
48.5–55 mm 1
52.5–59 mm 1
C Screw Adapters
M10 × 1.5 1
M10 × 1.5 to M8 × 1.25 1
M10 × 1.5 to M6 × 1.0 1
D Sliding Hammer 1
E Counterstay 1
3
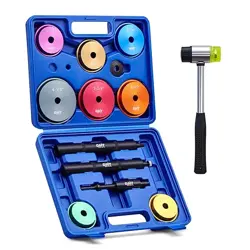
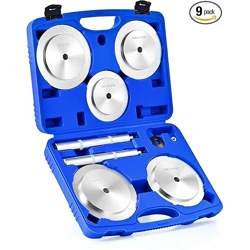
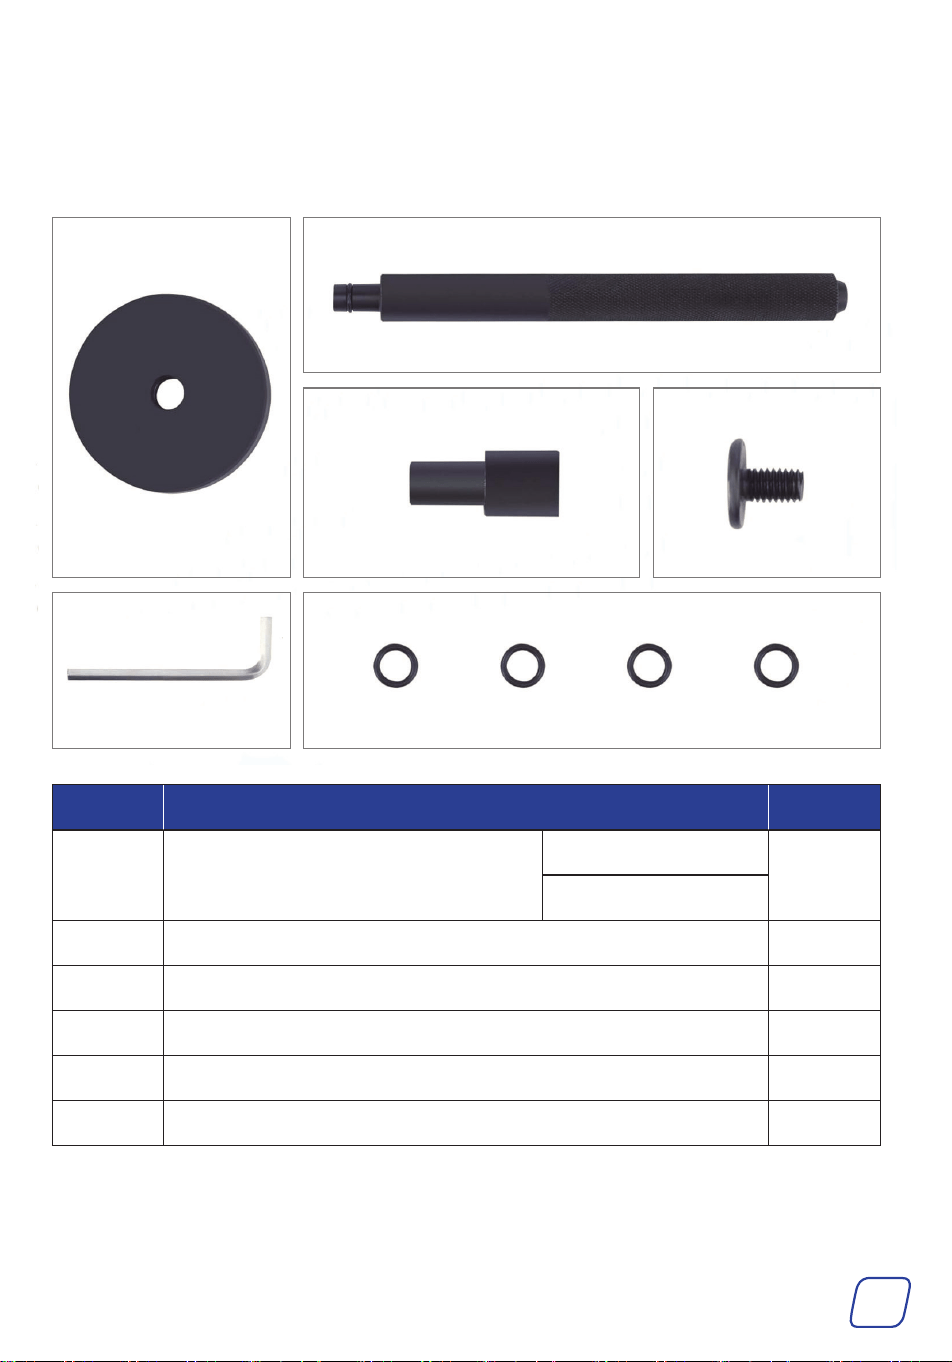
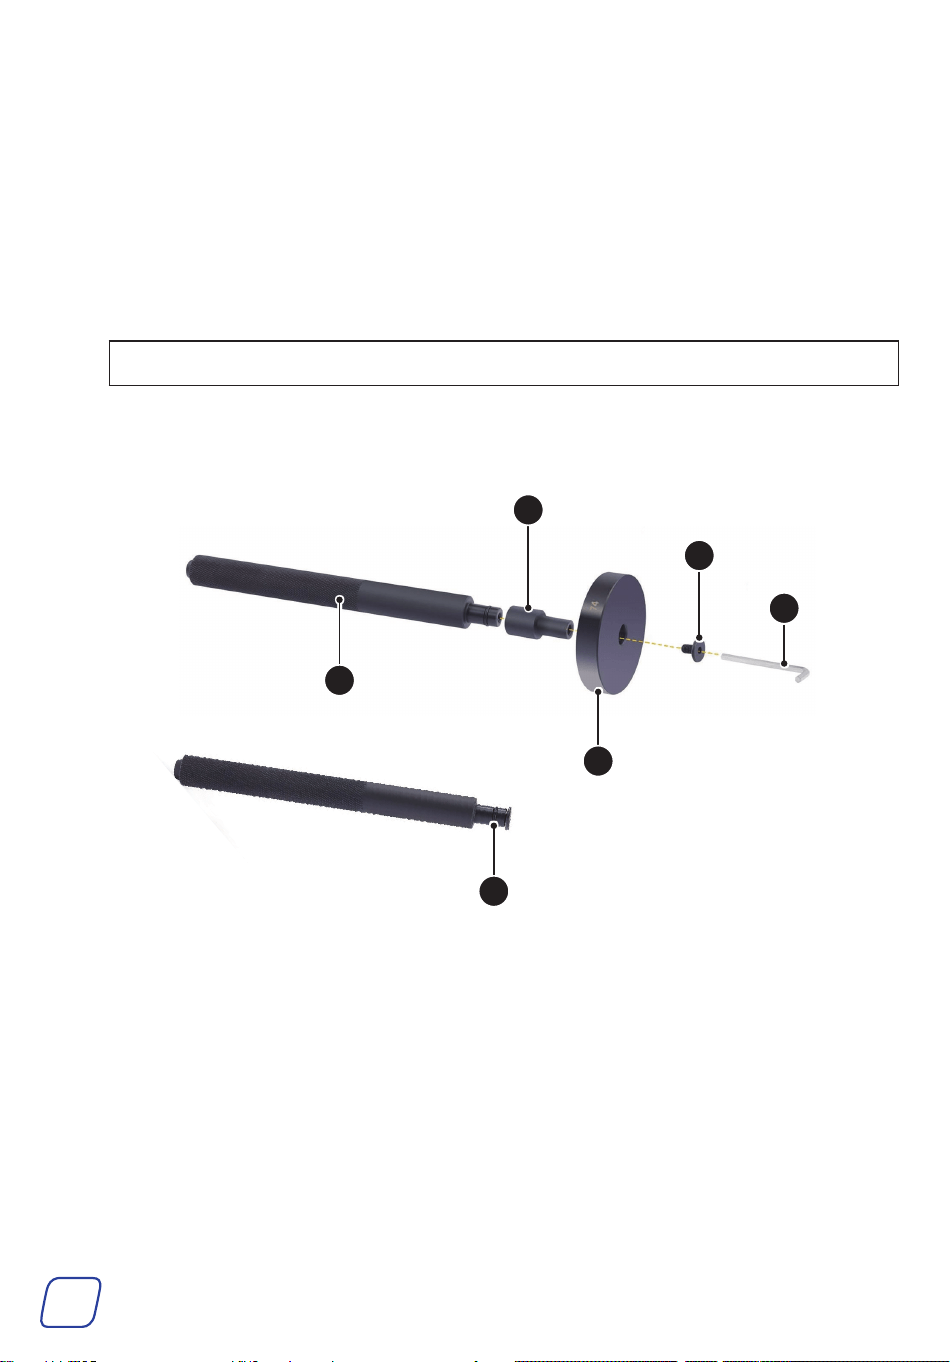
Bushing Driver Set
No. Item Qty.
1 Long Handle Shaft
Ø20 mm
1
Ø11.9 mm
2 Quick-Connect Shaft 1
3 Bushing Discs* 49
4 Bolts 2
5 4 mm Hex Wrench 1
6 Ø12 mm Rubber O-Rings 4
* Dimensions are marked on the surface of the bushing discs.
3
1
2 4
5 6
4
Operation
• Shut off the engine before servicing. Ensure the vehicle is stationary and the engine has
cooled to room temperature before performing any maintenance or adjustments.
• DO NOT force the tool. Excessive force may result in serious personal injury or property
damage.
• Be extremely careful with possible pinching points, moving parts, or components that may
suddenly spring out during use.
• ENSURE your work area is stable, clean, and free of clutter or hazards that may cause
accidents.
• For your safety, proper training is strongly recommended before using the tool. Lack of
training can lead to serious injury.
• ALWAYS use the correct tools and personal protective equipment (PPE) before operation.
Preparation
1. Park your vehicle on a stable level surface, shutting off the engine and engaging the parking
brake.
2. Chock the wheels to prevent accidental slipping.
If necessary, lift the vehicle using a hydraulic jack and secure it on jack stands.
3. Ideally, wait until the engine to cool down.
If this is impractical in your case, put on heat-resistant PPE BEFORE continuing on your
way.
5
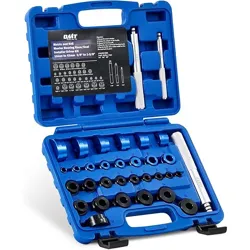
Removing a Bearing
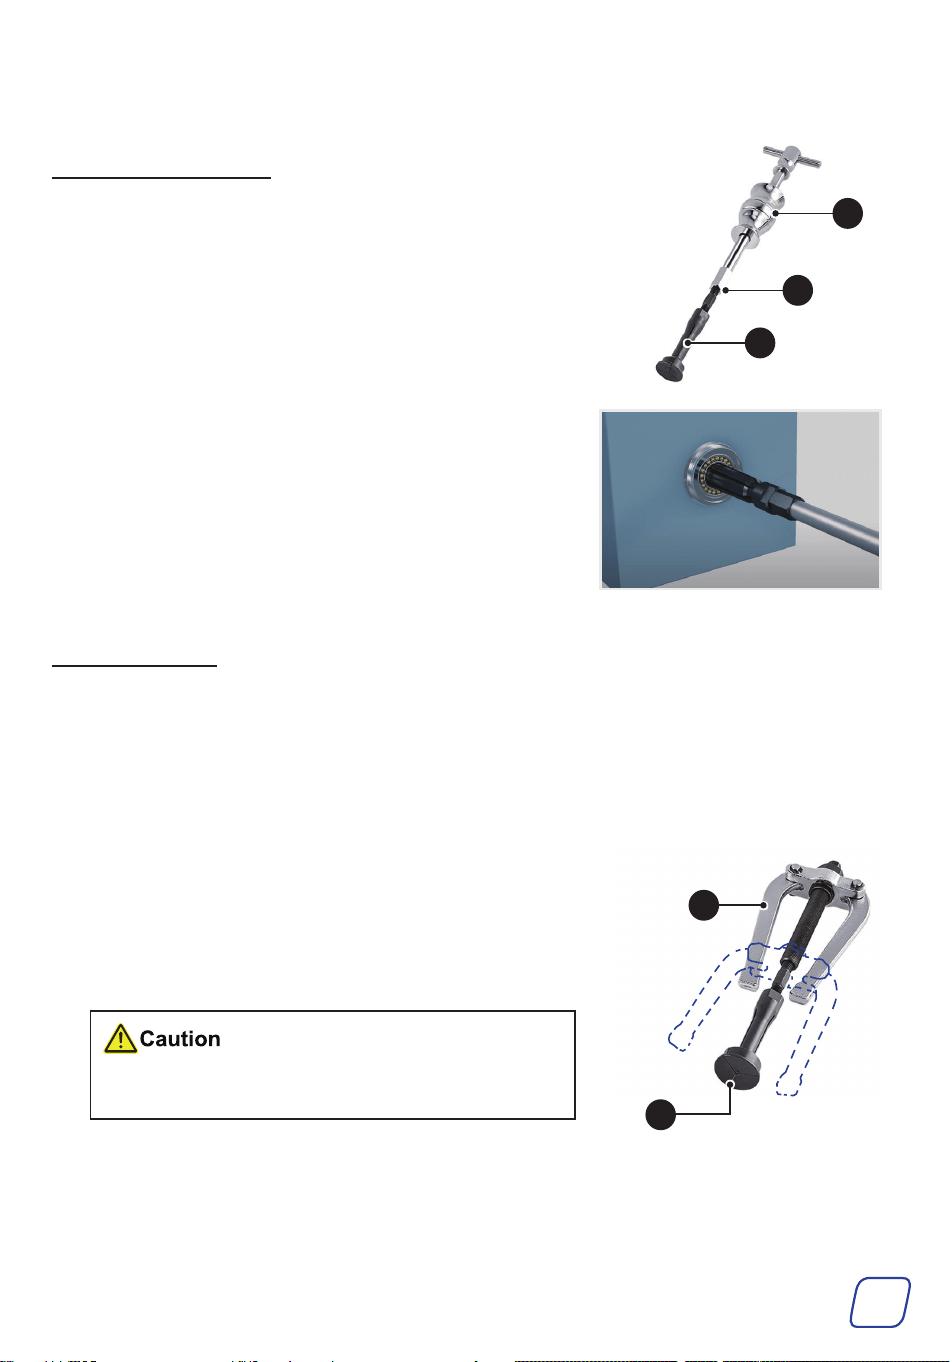
Sliding Hammer
1. Select the correct split collet (B).
2. Feed the collet through the inner race of your bearing.
3. Connect the collet to the sliding hammer (D) using the
correct screw adapter (C).
4. Turn the tool’s handle until the collet expands and grips
the bearing race.
5. Yank the weight on the sliding hammer back and forth
until the bearing comes off.
6. Disassemble the tool and remove the bearing from the
collet.
C
B
D
B
E
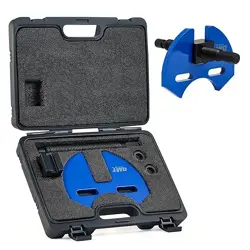
Counterstay
1. Select the correct split collet (B).
2. Fit the collet into the bearing that needs to be removed.
3. Expand the collet by tightening its bolt until it firmly grips
the bearing.
4. Turn the end nut of the counterstay (E) until its jaws move
to a correct position on its center bolt.
5. Connect the counterstay to the collet.
6. Turn the nut on the counterstay’s center bolt until the
jaws press tightly against the surface where the bearing
is located.
Use shims or protective pads to prevent damage to
the surface where the counterstay applies pressure.
7. Continue to turn the center bolt’s nut until the bearing is
pulled out of its housing.
8. Shrink the collet by turning its bolt counterclockwise and
remove the bearing from the tool.
6
Installing a Bushing
1. Clean the housing of your bushing, removing any grime or swarf.
2. Select the bushing disc (3) that matches the bushing in outer diameter.
3. Connect the long handle shaft (1) to the bushing disc as shown.
If necessary, add the quick-connect shaft (2) for the connection.
4. Position the bolt (4) against the shaft, tightening it with the provided hex wrench (5).
Note: Replace the O-ring with a provided spare (6) if it is damaged.
5. Fit the bushing into the housing.
6. Align the bushing disc with the bushing.
7. Tap the long handle shaft using a rubber mallet (not included), cramming the bushing into the
housing.
2
(Optional)
5
4
1
3
6

7
Maintenance
• Clean this product using a dry brush or cloth after each use.
If a damp cloth is necessary, dry this product completely after cleaning.
• DO NOT use harsh abrasives or caustic chemicals.
• DO NOT soak in ANY cleaning fluid.
• Periodically check this product for any misalignment, binding, wear, or damage.
Realign or replace any faulty items before further use.
• For best results, lubricate this product with high-quality anti-corrosive oil (not included)
between uses.
• If the tools are not going to be used for a long time, clean and lubricate them before storage.
Keep them in a cool, dry place out of reach of children.
User Manual
Rev. 14 Aug. 2025