
Read Carefully Before Use
Keep for Future Reference
UM-BJS-0045-V1
Pinion Bearing
Race Driver Set
User Manual
4-1/8"
3"
2-7/8"
2-27/32"
2-11/16"
3-3/4"
3-1/2" 3-1/4"

Contact Us
Thank you for choosing our products! If you have any questions or comments,
contact us and we'll address your issues ASAP!
support@orionmotortech.com
https://orionmotortech.com/
@OrionMotorTech
Disclaimer
Read this disclaimer completely and carefully before
proceeding with the rest of the manual content.
1. Product Modifications
Any modifications or alterations to Orion Motor Tech (OMT)
products void any warranties and may result in damage or
injury. OMT shall not be liable for any damages resulting
from such modifications or alterations.
2. Compliance with Laws
Customers shall be liable for ensuring that the use of
OMT products complies with all applicable laws and
regulations in their respective jurisdictions. OMT shall not
be responsible for any violations of laws or regulations
resulting from the use of OMT products.
3. Correct Use
Always use OMT products only as directed in the
accompanying manuals. Failure to follow instructions may
result in injury or damage.
Always ensure the assembly, installation, operation,
maintenance, or repair of OMT products is carried out by
a competent person.
Regular maintenance should be performed throughout
the lifecycle of OMT products. You are responsible for
ensuring the products operate as intended.
Always wear appropriate protective gear.
4. Third-Party Products
OMT shall not be liable for any damages or losses
resulting from the use of third-party products in
conjunction with OMT products. Customers shall refer to
the third-party's guidelines or/and warranties (if any) for
any third-party products used.
5. Limitation of Liability
OMT shall not be liable for any direct, indirect, punitive,
incidental, special, or consequential damages to property
or life, whatsoever arising out of or connected with the
use or misuse of OMT products. In no event shall OMT’s
liability exceed the value of the products sold.
6. Warranty
Refer to the sales page for warranty information.
This disclaimer states the entire obligation of OMT with
respect to OMT products. If any part of this disclaimer is
determined to be void, invalid, unenforceable, or illegal,
including but not limited to the warranty disclaimers, liability
disclaimers, and liability limitations set forth above, the invalid
or unenforceable provision will be deemed superseded by
a valid and enforceable provision that most closely matches
the intent of the original provision and the remainder of the
agreement shall remain in full force and effect.

• The instructions provided herein are only for general information. ALWAYS perform all repairs in full compliance with
your machinery’s service manual. After any repair, test your engine and machinery in your workshop and at low speed
before returning to regular use. Failure to do so may result in serious property damage and severe personal injury.
• DO NOT allow use by children, persons whose mental or physical condition precludes safe use, or persons unfamiliar
with this product and its compatible vehicle systems.
• DO NOT use while under the influence of alcohol, drugs, or any medication that negatively affects your judgment or
reflexes. Keep children and bystanders away during use.
• Keep your work site clean and well-lit. Poorly lit and cluttered work areas increase the risk of accidents and should be
avoided.
• ALWAYS use personal protective equipment (PPE) suitable to your task. ALWAYS wear ANSI and OSHA-approved
eye, breathing, and hand protection while using this product. Regular use of this product typically produces microscopic
particles known to the state of California to cause cancer, congenital disabilities, or other reproductive harm. Nonslip
footwear is also highly recommended. Other equipment such as ear, head, and body protection may also be necessary
depending on your work, work environment, and other equipment.
• ALWAYS read and understand your machinery's specific safety warnings and instructions before using this kit. Use
the correct fluids, pressures, adapters, etc., for your machinery. Make sure the machinery is fully supported and parked
before beginning any work. NEVER touch any heated surface with exposed skin.
• Before servicing your machinery, turn off its engine and refer to its manufacturer's service and repair manual for
instructions on safely securing the machinery with chocks, jacks, stands, etc.
• In case of an accident or injury, have a first aid kit and a communication device (e.g., a phone) readily available. Know
the location of emergency medical facilities.
• Machinery repair is an inherently dangerous activity. This manual and the separate machinery service manual cannot
cover all possible situations that may arise. ALWAYS exercise discretion and good judgment. Seek training if needed.
• For best results, keep the kit clean and dry. Remove any fluid, oil, or grease before and after work.
• Dress appropriately for automotive servicing. DO NOT wear loose clothing or jewelry, and keep hair, clothing, gloves,
hoses, and tools away from any moving parts during use.
• If a component is particularly stubborn, avoid applying excessive force that could damage the puller or the workpiece.
Instead, apply penetrating oil, allow it time to work, and gradually apply force.
• Maintain this product. Check for misalignment, binding, wear, or other damage before use. If any damage is detected,
repair or replace the defective components before further use. In a large shop, mark such tools “DO NOT USE” until
they have been repaired. ONLY replace components with identical parts.
Safety Information
1
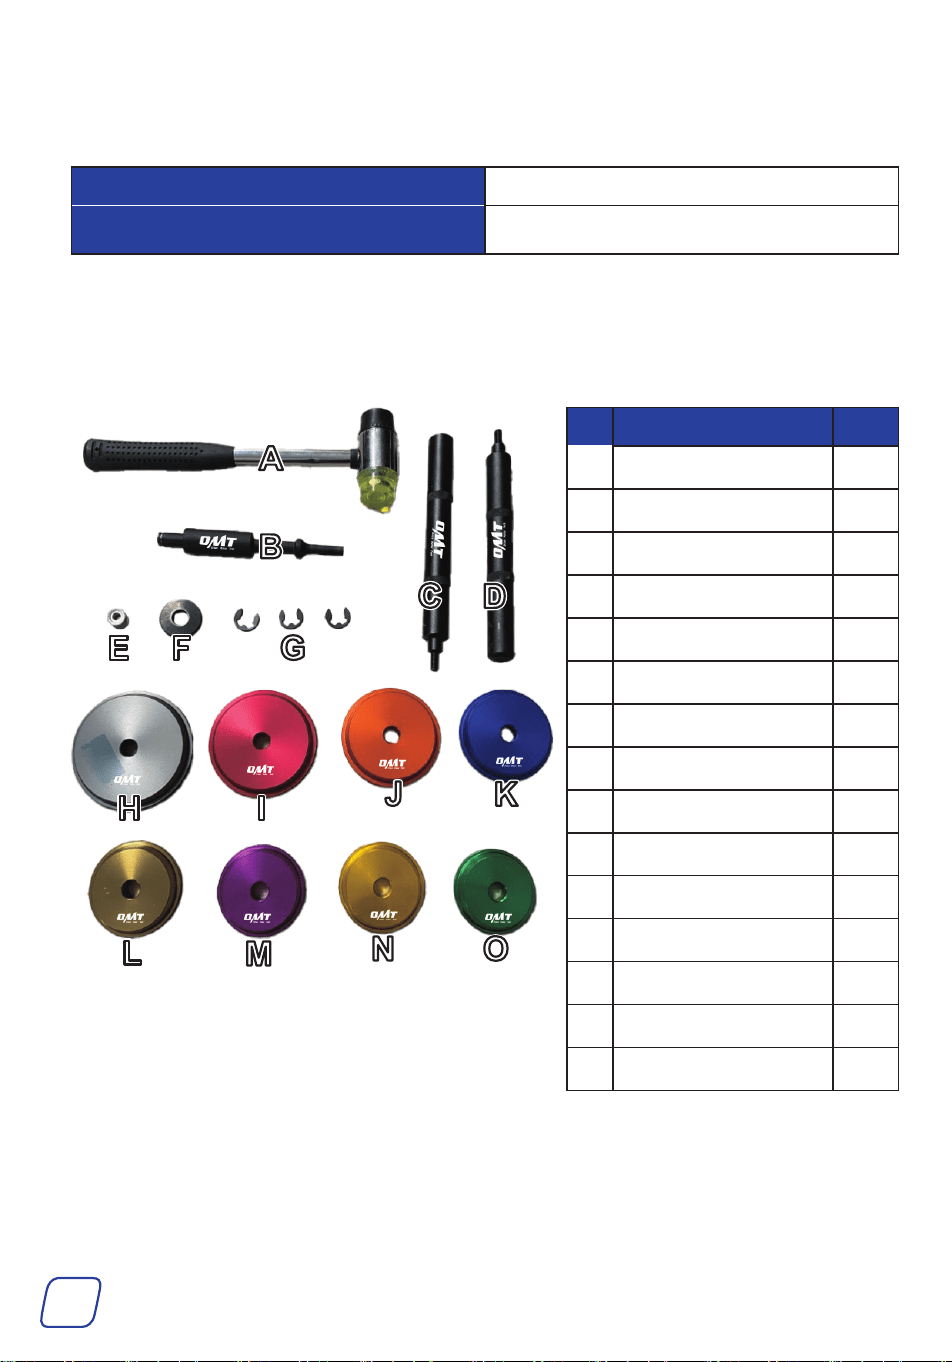
Specifications
Parts List
Dimensions 13 × 3.54 × 15 in.
Weight 9.04 lb.
No. Item Qty.
A Hammer 1
B Pneumatic Handle 1
C Wide Knurled Handle 1
D Narrow Knurled Handle 1
E Nut 1
F Washer 1
G Circlips 3
H 4-1/8" Adapter 1
I 3-3/4" Adapter 1
J 3-1/2" Adapter 1
K 3-1/4" Adapter 1
L 3" Adapter 1
M 2-7/8" Adapter 1
N 2-27/32" Adapter 1
O 2-11/16" Adapter 1
4-1/8"
3"
2-7/8"
2-27/32"
2-11/16"
3-3/4"
3-1/2" 3-1/4"

2
Operation
• Shut the engine off before servicing, make sure the vehicle is stationary for easy
maintenance, and that the engine has cooled to room temperature before maintenance
or adjustments.
• ALWAYS use the correct tools and personal protective equipment (PPE) before
performing any operation. Be extremely careful with possible pinching points, moving
parts, or parts that may suddenly spring out.
• ALWAYS ensure the vehicle is secure when it is supported by a jack or lift.
• For your safety, we recommend completing training before using these tools. Serious
injury could happen due to a lack of training
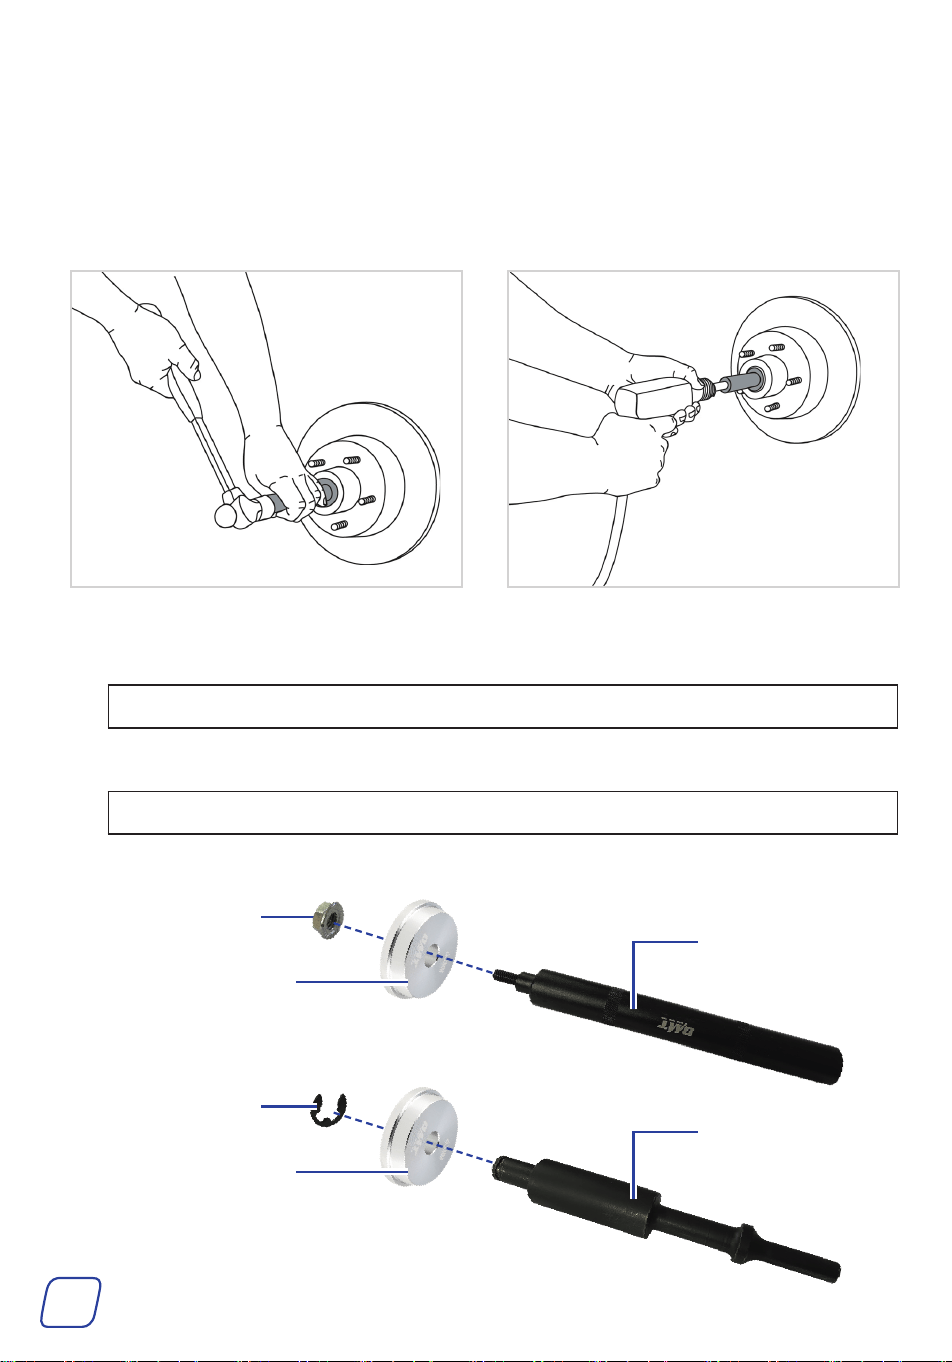
Installing the Race
1. Select the appropriate adapter and handle for the size and type of bearing to be installed.
Note: The tapered side of the adapter must match the bearing race exactly.
2. Insert the handle into the adapter.
Note: The tapered side of the adapter should face the bearing.
3. Secure the handle to the adapter as shown.
Nut
Circlip
Manual
Pneumatic
Adapter
Adapter
Wide / Narrow
Knurled Handle
Pneumatic Handle
3
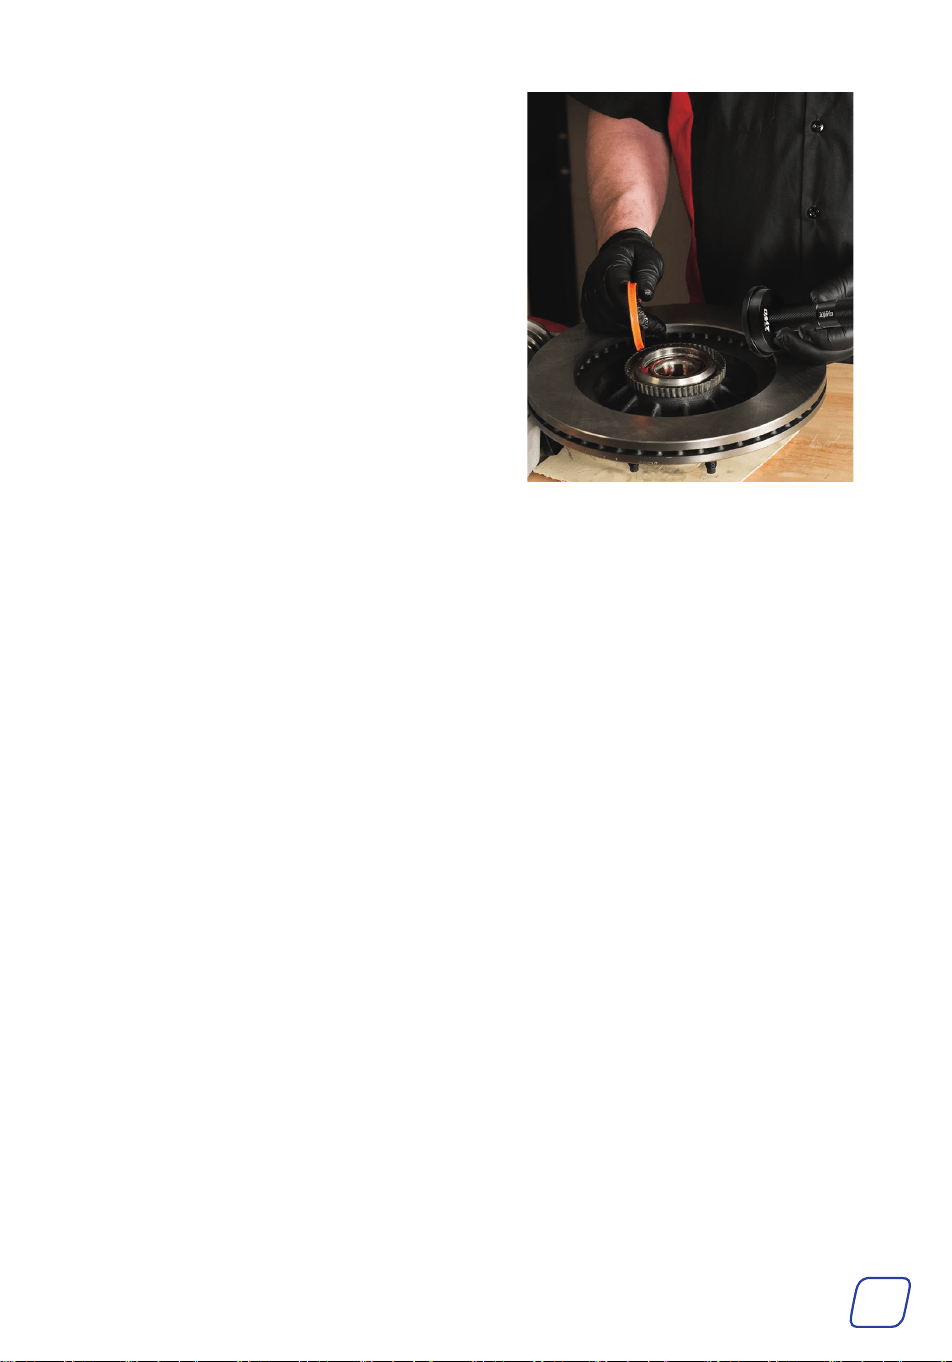
4. Place the outer race onto the housing of the bearing.
5. Align the tapered side of the adapter with the race.
6. Apply pressure to the handle, pressing the race into the housing until the race is flush with
the housing rim.
Manual Pneumatic
Installing the Seal
1. Select the appropriate adapter and handle for the size and type of bearing to be installed.
Note: The flat side of the adapter should be slightly larger than the seal.
2. Insert the selected handle into the selected adapter.
Note: The flat side of the adapter should face the bearing.
3. Secure the handle to the adapter as shown.
Nut
Circlip
Manual
Pneumatic
Adapter
Wide / Narrow
Knurled Handle
Adapter
Pneumatic Handle
4
4. Place the seal into the designated groove
of the bearing’s outer or inner ring.
5. Apply pressure to the handle, pressing
the race into the seal into the designated
seal groove until the seal is flush with the
race.
Maintenance
• Check the parts of this tool periodically for any wear or damage. Repair or replace any
defective parts before further use.
• Clean with a soft cloth. Do not use abrasive tools for cleaning. Do not use caustic chemicals.
• If you will not be using this tool set for an extended period, coat the surfaces with quality anti-
corrosion oil, and store them in the original storage box at a location inaccessible to children
and away from direct sunlight.

Scan for the latest user manual
Rev. 24 Apr. 2025