USE THE HANDLE
The tool can be used as a handheld tool or the
pivoting handle attachment (and optional pole extension)
can be used to extend your reach, provide a wider range
of motion, and help to reduce interference with the tool's
sensors.
To attach handle to the tool:
1. Open the hatch by pressing the
dimpled area. The hatch will lift up.
(
Figure C)
2. Align the handle so that the
button on the tip of the handle is
flush against the hatch door.
Push down gently until it snaps
securely in place. (
Figure D)
To remove the handle:
1. Hold the tool in place with one
hand.
2. With the other handle, pull the
handle up from the base.
To use the optional extension pole
(sold separately), first assemble
the pole sections together into the
length you will need, then align the
threaded end of the pole with the
bottom of the handle and screw
securely into place. (
Figure E)
CUSTOMIZE DISPLAY
Depth Indicator displays either centimeters (cm) or
inches (in). To switch from metric to imperial, press and
hold both Power and Mode Buttons for 13 seconds.
Audio On/Off controls the sound made when target is
located.
To turn sound on or off, press and hold the
Mode/Audio Button for 2 seconds.
The tool has a backlit LCD display.
To turn off the
backlight
, press and hold both Power and Mode Buttons
for 2 seconds.
Repeat to turn the display backlight on again.
TURN TOOL ON / OFF
To turn on, press and hold Power Button
until display illuminates (approximately
1 second).
NOTE: Tool always powers up in Normal Scan
Mode, indicated by icon to the right.
To calibrate, turn tool on, then press and release
Power Button.
To turn off, press and hold Power Button for 3 seconds.
Tool will turn off automatically after 2 minutes of
inactivity.
SCAN IN NORMAL SCAN MODE
This tool is designed to locate metal behind or beneath a
surface, including concrete. It can locate metal as deep as
6" (15 cm), depending on the settings used.
It is specifically tuned to locate
1
⁄2" (13 mm) copper pipe
and #4 rebar. For other metal objects, depth readings will
be less accurate.
• #4 steel rebar and
1
⁄2" (13 mm) copper pipe can be
found within +/–
1
⁄2" (13 mm) accuracy in both Normal
and DeepScan Modes
• Small objects, like nail heads, will be shallower than
indicated
• A
1
⁄4" (6 mm) copper pipe will be about 30% shallower
than indicated
• A
3
⁄4" (19 mm) copper pipe will be about 2% deeper
than indicated
NOTE: For best results, calibrate tool away
from metal.
As you move the tool toward a target, the Plus / Minus
icon will show
. If you move away from the target,
it will show
.
1. Before scanning, clear debris, including sand and
gravel, from the area. If the scanning surface is rough,
cover it with thin cardboard. (The thickness of the
cardboard should be subtracted from the depth reading to
determine the actual depth of the target).
2. Scan from side to side.
(
Figure A)
As you near a target, the Magnet
Icon will show. (
Figure B)
The
icon indicates that the target
is ferrous (magnetic) metal. The
indicates a non-ferrous target.
If Audio is on (
), a tone will emit
when over the target.
The Depth Indicator also shows the
approximate depth of the target.
3. Mark this spot.
4. When the tool goes beyond the
target, the
changes to .
Reverse direction, and the icon will return to
.
5. Mark this spot as well.
The midpoint between the two marks is the approximate
location of the metal target.
6. Scan the same area, but in a vertical direction.
Repeat the scan for multiple targets, or to fully identify
target using a grid pattern, marking each target as found.
USE DEEPSCAN MODE
To use DeepScan Mode:
1. Turn tool on. It always starts in Normal Scan Mode.
2. Press and hold both Power and Mode Buttons for
1 second, then release. (If you hold for 2 seconds, you will
turn off the display backlight.)
3. Follow steps 1–6 as described under SCAN IN
NORMAL SCAN MODE.
To return to Normal Scan Mode, press the button again,
or turn the tool off and then back on.
RECALIBRATE FOR MORE ACCURACY
The MT 7 calibrates automatically when the tool is turned
on. However, depth accuracy is dependent on materials in
the vicinity of the scan, particularly when metallic minerals
may be present in the concrete,
as is common.
Recalibration will not affect the position accuracy but will
be helpful in making a final determination of depth.
• If the tool is unable to calibrate for any reason,
all icons on the tool’s display will flash. If this happens,
there is too much metal near the tool to calibrate
properly. Move the tool to another location and perform
the calibration process again by quickly pressing and
releasing the Recalibration Button.
• If the target is near a large mass of metal, the tool may
not be able to locate the center. Recalibrate and/or move
the tool away and move back slowly.
• If the tool is calibrated too close to the target, it
may indicate there is no metal in the area when
there is. To check this, calibrate the tool in several
locations, then compare results. Always perform several
scans of an area to confirm that consistent results are
achieved.
To recalibrate:
1. Locate an area on the surface free of metal. If a tight
pattern exists, calibrate at a midpoint between targets. In
this situation, accuracy may be affected and recalibration
may not improve the overall depth accuracy.
2. Scan the target area again. A final determination of
depth can now be obtained.
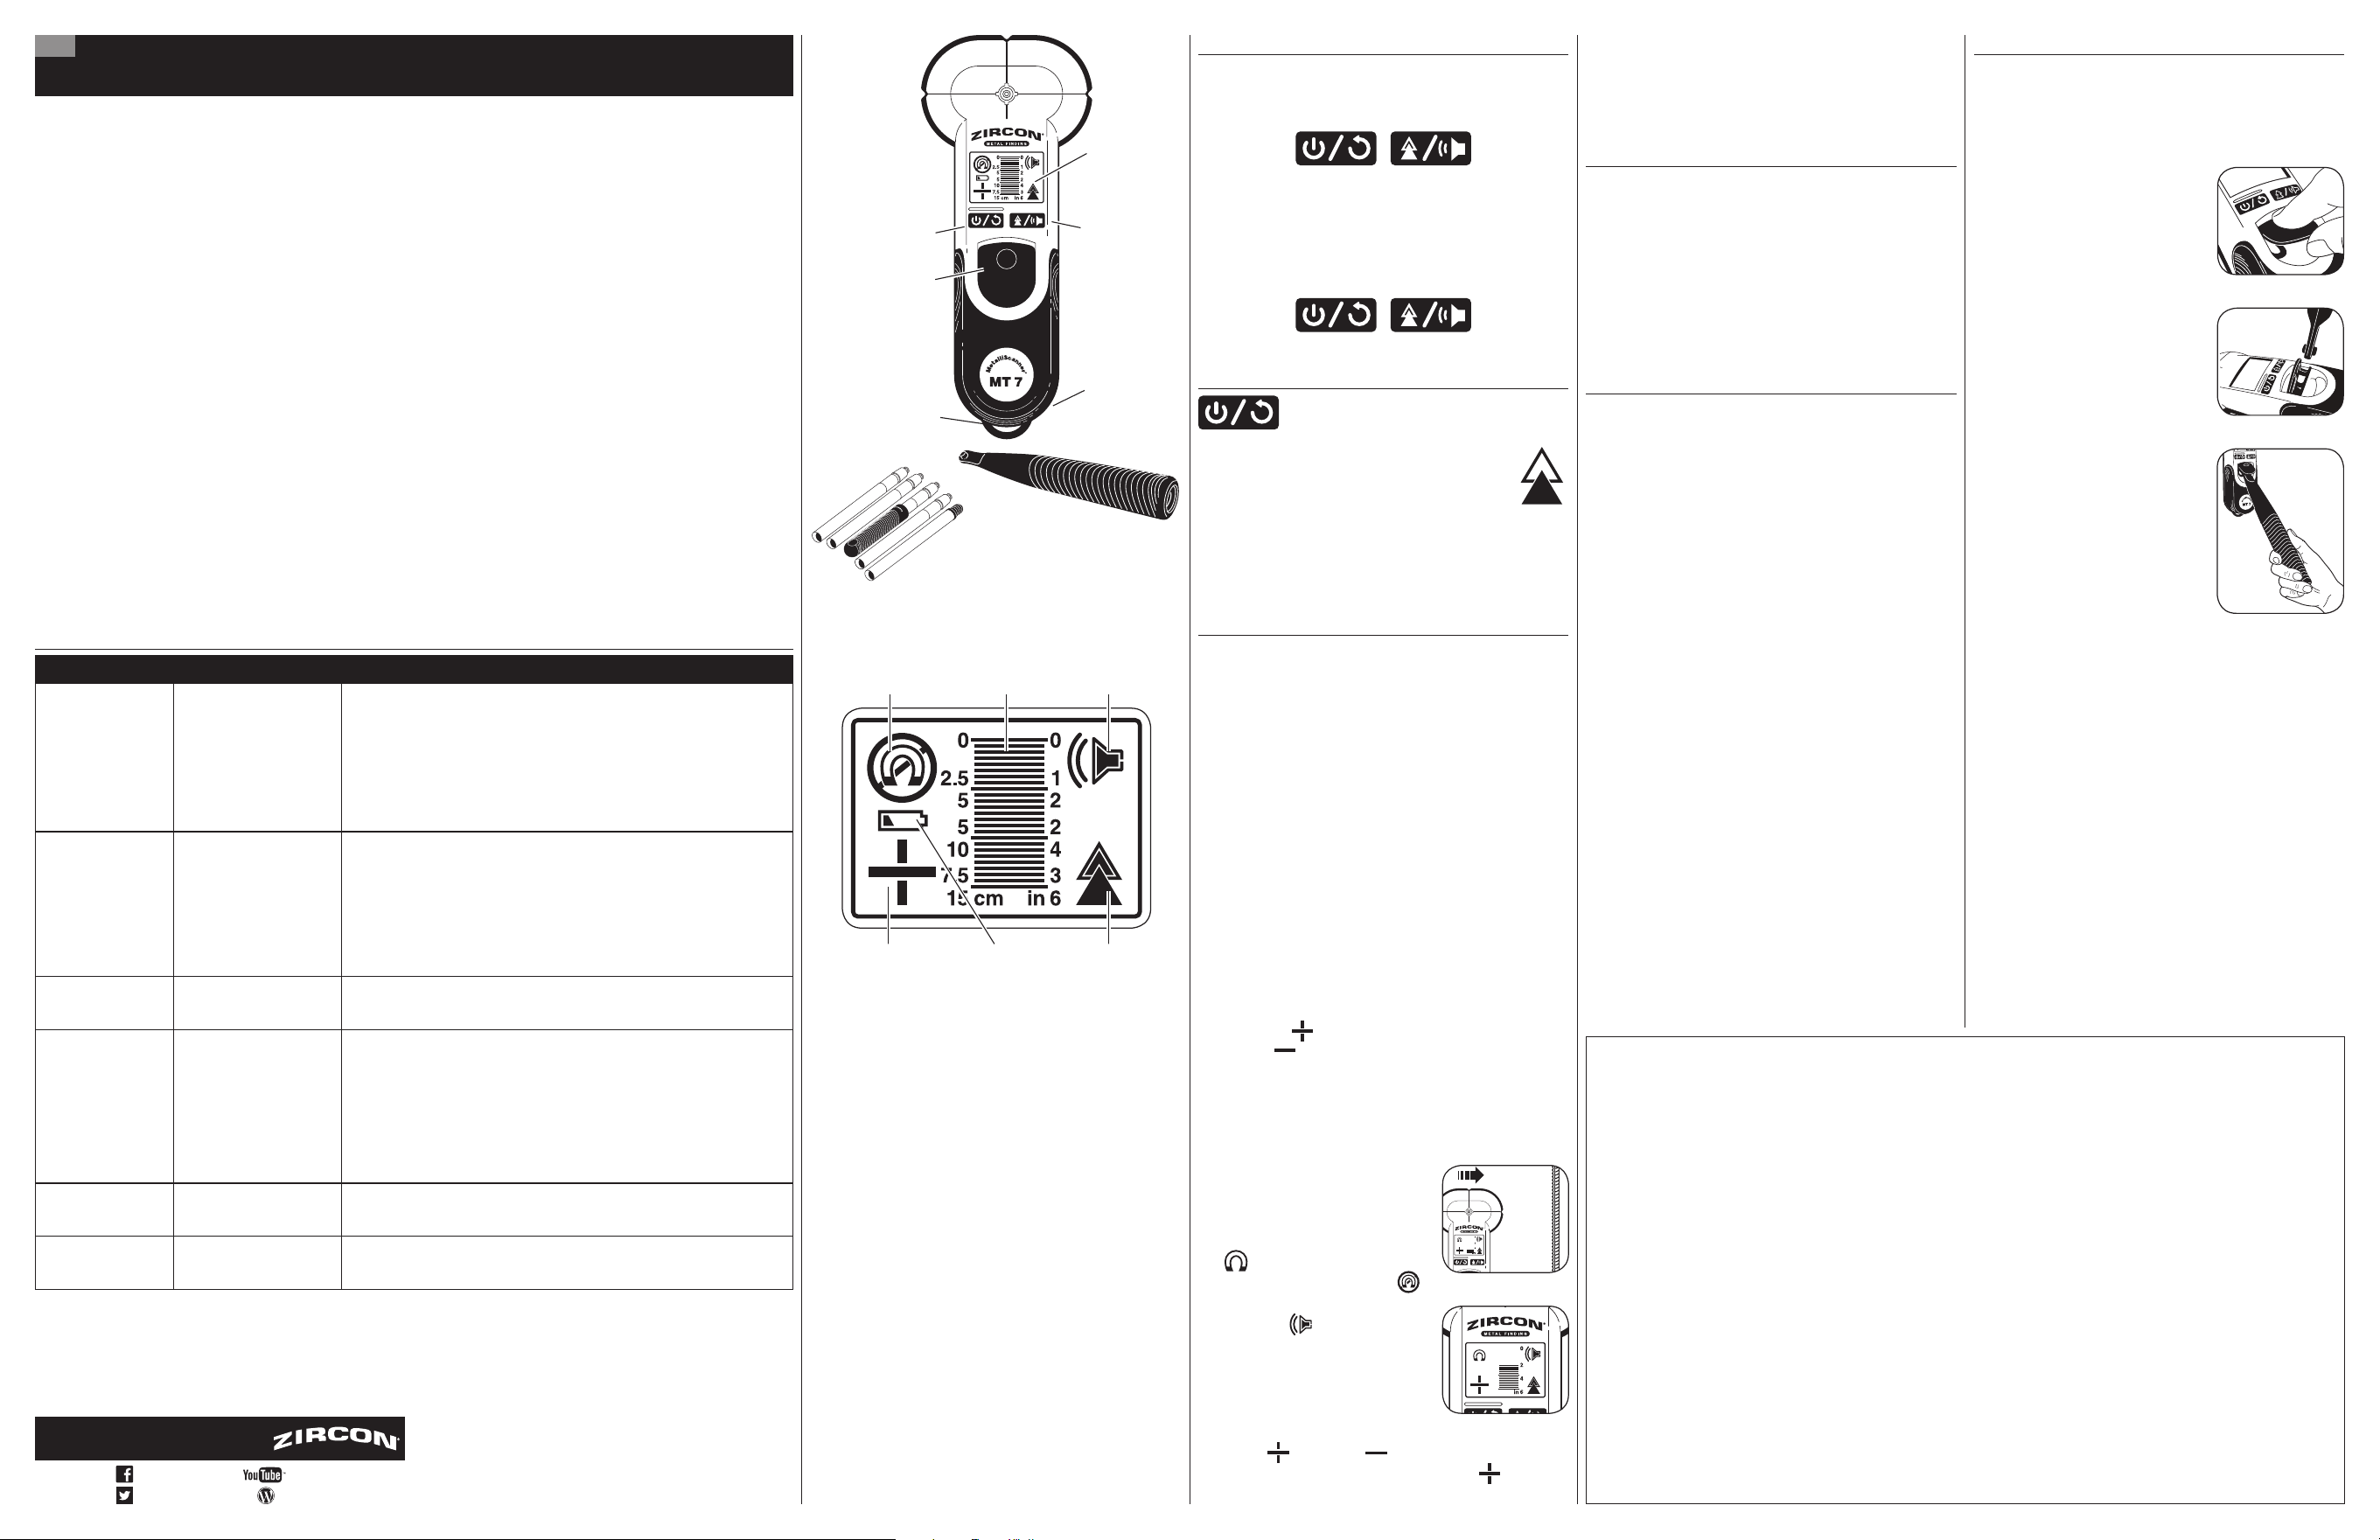
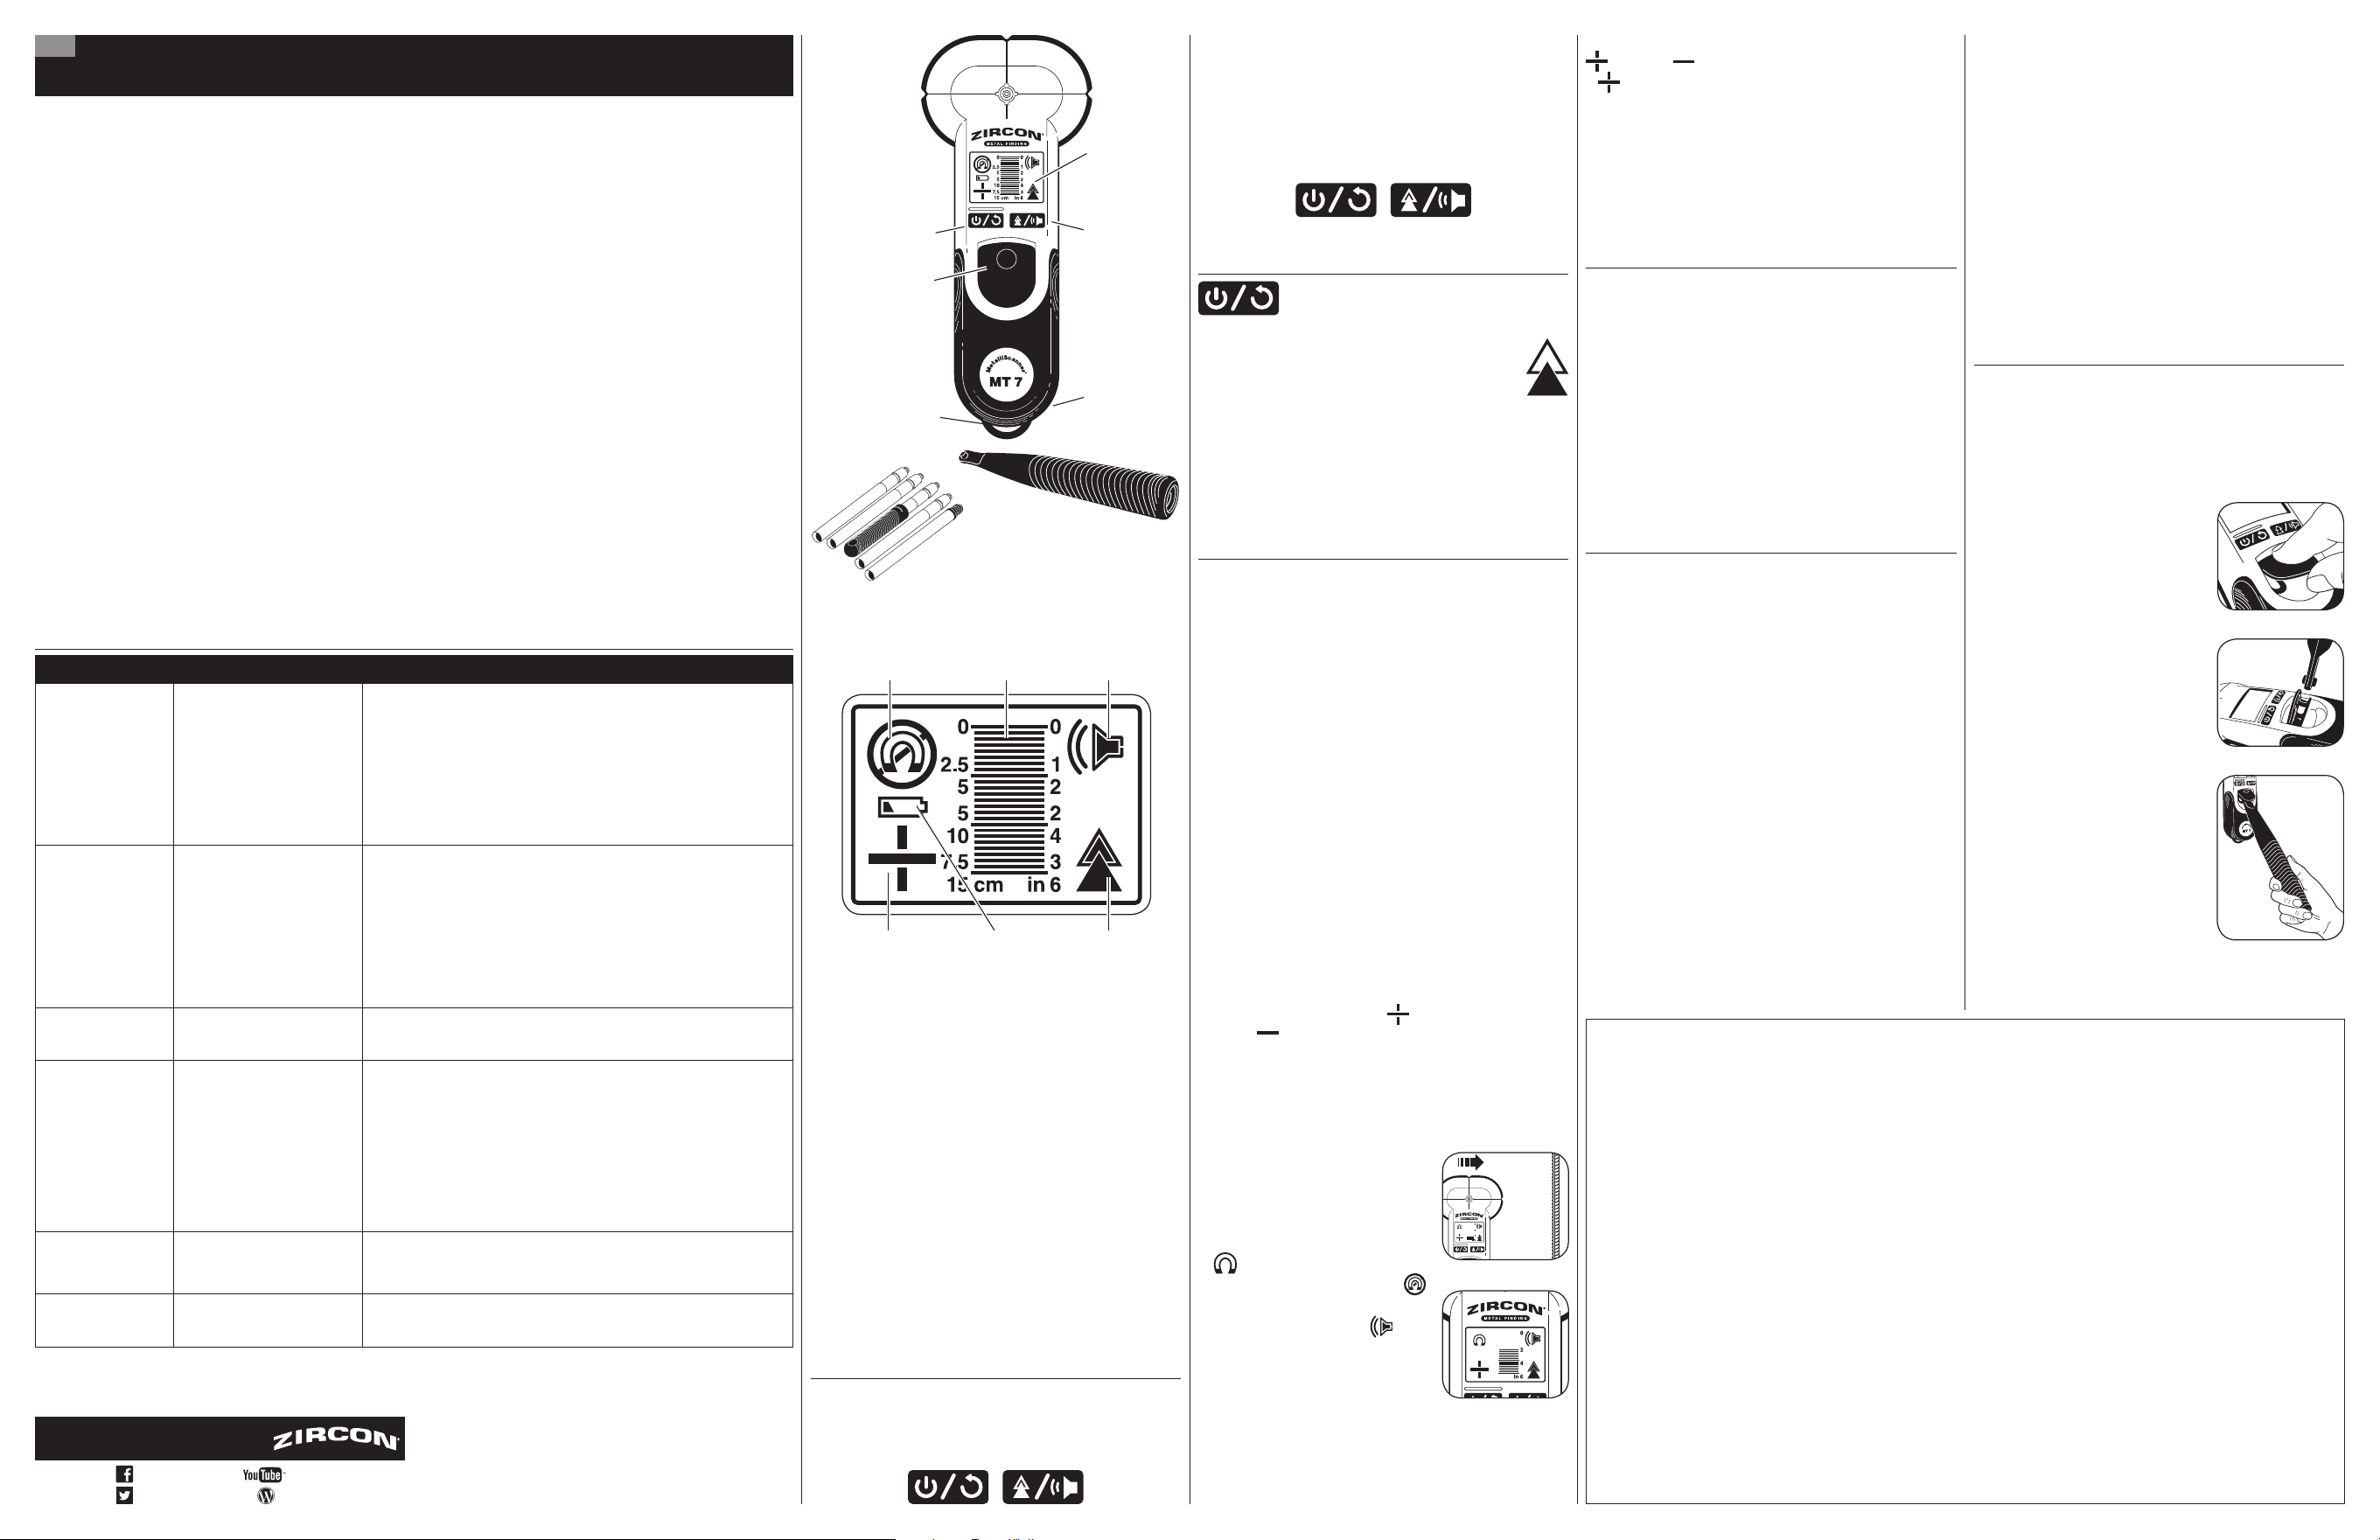
Backlit LCD
Display
Handle
Attachment
Battery
Door Tab
(on back)
Magnet Icon
(Ferrous/
Non-Ferrous
Indicator)
Mode/Audio
Button
Power/
Recalibration
Button
Lanyard Loop
Low
Battery
Indicator
Plus / Minus Icon
(Direction Indicator)
LIMITED 1 YEAR WARRANTY
Zircon Corporation (“Zircon”) warrants to the product
owner that this product will be free from defects in
materials and workmanship for one year from the
original date of purchase. Any defective product
returned to Zircon within the warranty period to the
address below, freight prepaid, along with proof of
purchase, will be repaired or replaced, at Zircon’s
option. Repair or replacement may be made with a
new or refurbished product or components, at Zircon’s
sole discretion. If the returned product is no longer
available, Zircon may replace the product with a
similar product of similar function. This warranty is
limited to the electronic circuitry of the product and
original case of the product, and specifically excludes
any damage caused by abuse, modification, handling
contrary to these instructions, other unreasonable use,
or neglect. This is your sole and exclusive remedy for
breach of this Limited Warranty.
This Limited Warranty is in lieu of all other warranties,
express or implied, and no other representations or
claims of a similar nature will bind or obligate Zircon.
Any implied warranties applicable to this product
that cannot be disclaimed are limited to the one year
period following its purchase. This Limited Warranty
does not cover consumable parts, including batteries,
or software, even if packaged with the product.
IN NO EVENT WILL ZIRCON BE LIABLE FOR ANY
SPECIAL, INCIDENTAL OR CONSEQUENTIAL DAMAGES
RESULTING FROM POSSESSION, USE OR MALFUNCTION
OF THIS PRODUCT.
Some states do not allow limitations on certain
implied warranties and/or the limitation on incidental
or consequential damages, so the above limitations
and exclusions may not apply to you. This warranty
gives you specific legal rights, and you may also have
other rights which vary from state to state.
Return products for warranty service, freight prepaid
with proof of purchase (a dated sales receipt) to:
Zircon Corporation, Attn: Returns Department
1580 Dell Avenue
Campbell, CA 95008-6992 USA
Be sure to include your name and return address.
Allow 4–6 weeks for delivery.
Customer Service: 1-800-245-9265 or 1-408-963-4550
Monday–Friday, 8:00 a.m.–5:00 p.m. PT
[email protected] • www.zircon.com
©2018 Zircon Corporation • P/N 66468 • Rev E 05/18
DeepScan, MetalliScanner, and Zircon are registered
trademarks or trademarks of Zircon Corporation.
BEFORE YOU BEGIN
- Always use a new alkaline battery with an extended expiration date at least 3 years beyond the current date.
Be sure not to pull on wires when disconnecting an old battery.
- Do not rely exclusively on the tool to locate items behind a surface. Use other information to help locate such
items before penetrating the surface, including construction plans and visible points of entry of pipes and wiring into
scanned surface.
- Readings should always be consistent and repeatable.
- Other objects commonly contained in walls, floors, or ceilings are water pipes, gas lines, firestops, and electrical wiring.
- Sensing depth and accuracy can vary depending on scanning environment conditions such as mineral content, moisture,
texture and consistency of the wall materials.
- Always turn off power when working near electrical wires.
- Depending on the proximity of electrical wiring or pipes to the wall surface, the tool may detect them in the same
manner as other metal. Caution should always be used when nailing, cutting, or drilling in walls, floors, and ceilings that
may contain these items.
- Targets deeper than 6" (15 cm) may not be detected.
- Avoid wearing jewelry, including a watch, while scanning, as the metal in the jewelry could interfere with readings.
TROUBLESHOOTING & CONSTRUCTION TIPS
SITUATION LIKELY CAUSE SOLUTION
Difficulty detecting
metal accurately.
Metal objects grouped too
closely prevent calibration.
• Avoid wearing jewelry, including watches, during scan. Remove large
metal tools from area when feasible.
• Use a constant light pressure during scan.
• Allow 5 – 10 minutes for temperature to stabilize before operating if
unit has been moved to an area with a 10ºF (5 – 6ºC) change or greater
(such as from air-conditioned building to outdoors on a warm day).
• Scan in both horizontal and vertical directions.
Inaccurate calibration
and/or depth reading
because magnetic/
non-magnetic objects
positioned side-by-
side or on top of
each other.
• Calibrated directly over
a metal target.
• Concrete and rebar are
in segments that could
have been poured at
different times.
• Calibrate away from metal to accurately determine depths. Move the tool
over a few inches (5 – 8 cm) and recalibrate.
• Make sure the tool touches the surface it is scanning.
• Do not rely on a single calibration for the entire area. Prescan each
segment separately; calibrate and determine depth of targets for each
segment of concrete.
• For maximum accuracy on concrete, make sure the concrete is fully cured.
Calibration is lost. Tool was turned off. Recalibrate every time you turn tool on.
Beep doesn’t seem
relative to targets.
• Scanning near the edge
of a piece of concrete.
• Target is more than 6"
(15 cm) deep; unit will
not beep at the same
time as Plus / Minus Icon
changes and maximum
depth bars appear.
Ignore beep and rely on depth bars to locate target.
Backlight and all
icons are on.
A calibration error
has occurred.
Reposition the tool and recalibrate.
Low Battery
Indicator flashes.
Low battery. Install new 9-volt alkaline battery with an extended expiration date.
EN
Visit www.zircon.com for the
most current instructions.
FCC Part 15 Class B Registration Warning: This device complies
with Part 15 of FCC Rules. Operation is subject to the following
two conditions: (1) this device may not cause harmful interference,
and (2) this device must accept any interference received, including
interference that may cause undesired operation.
ZirconCorporation ZirconTV
ZirconTools
|
ZirconToolPro
ZirconTools
MetalliScanner
®
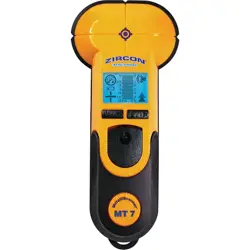
MT 7
Electronic Metal Locator
Hatch for
Handle
Attachment
Extension Pole (optional)
Audio
On/Off
Indicator
Depth Indicator
(shows
centimeters
or inches)
Normal Scan/
DeepScan
®
Mode Indicator
The MetalliScanner MT 7 electronic metal locator can not
only locate metal studs, but can be used to find metal in
residential, commercial, or industrial construction (including
behind or under concrete):
• Automatically differentiates between ferrous (magnetic)
metal such as iron, and non-ferrous (non-magnetic)
metal such as copper piping
• Specifically tuned to locate
1
⁄2" (13 mm) copper pipe
or or #4 rebar
• Detects approximate depth up to 6" (15 cm)
There are two scanning modes:
• Normal Scan locates metal up to 3" (7.5 cm) under
scanned surface
• DeepScan locates metal up to 6" (15 cm) under
scanned surface
INCLUDES: Metal Carrying Case
Figure A
Figure B
Figure C
Figure D
Figure E
• Si el detector es calibrado muy cerca del
objetivo, puede indicar que no hay ningún metal
en el área cuando en realidad si lo haya. Para
revisar esto, calibre el detector en diferentes ubicaciones,
luego compare los resultados. Siempre realice varios
escaneos de un área para confirmar que se logran
resultados consistentes.
Para recalibrar:
1. Localice un área en la superficie libre de metal.
Si existe un patrón ajustado, calibre en un punto medio
entre los objetivos. En esta situación, la precisión puede
verse afectada y la recalibración puede no mejorar la
precisión general.
2. Escanee el área del objetivo nuevamente. Entonces se
podrá obtener una determinación final de la profundidad.
UTILIZAR MANGO PIVOTANTE
El detector puede ser utilizado como un detector de mano,
o el mango pivotante (y el poste de extensión opcional)
se puede utilizar para extender su alcance, proporcionar
un rango de movimiento más amplio y ayudar a reducir la
interferencia con los sensores del detector.
Para adjuntar el mango al detector:
1. Abra la ventanilla presionando el
área con hoyuelos. La ventanilla se
levantará. (
Figura C)
2. Alinee el mango de modo que
el botón en la punta del mango
quede al ras contra la puerta de
la ventanilla. Presione hacia abajo
suavemente hasta que encaje de
manera segura en su lugar. (
Figura
D
)
Para quitar el mango:
1. Sostenga el detector en su lugar
con una mano.
2. Con la otra mano, tire del mango
hacia arriba desde la base.
Para utilizar el poste de extensión
opcional (se vende por separado),
primero ensamble las secciones
del poste juntas en la longitud que
necesite, luego alinee el extremo
roscado del poste con la parte
inferior del mango y atorníllelo en
su lugar. (
Figura E)
Boton de Modo/Audio controla el sonido que se
produce cuando se localiza el objetivo.
Para activar o
desactivar el sonido,
mantenga presionado el Botón
de Modo/Audio durante 2 segundos.
El detector tiene una pantalla grande LCD retroiluminada.
Para apagar la luz de fondo, mantenga presionados
los Botones de Encendido y de Modo durante 2 segundos.
Repita para encender nuevamente la pantalla.
ENCENDER / APAGAR EL DETECTOR
Para encender, mantenga presionado el
Botón de Encendido hasta que la pantalla se
ilumine (aproximadamente 1 segundo).
NOTA: El detector siempre se enciende en el
modo Normal Scan, indicado por el icono a
la derecha.
Para calibrar, encienda el detector, después presione y
suelte el Botón de Encendido.
Para apagar, presione y mantenga presionado el Botón
de Encendido durante 3 segundos.
El detector se apagará automáticamente después de
2 minutos de inactividad.
ESCANEAR EN MODO NORMAL SCAN
Este detector está diseñado para localizar metal detrás
o debajo de una superficie, incluyendo el concreto.
Puede localizar metal hasta 6" (15 cm) de profundidad,
dependiendo de la configuración utilizada.
Está específicamente ajustado para localizar tubos de cobre
de
1
⁄2" (13 mm) o barras de refuerzo #4. Para otros objetos
metálicos, la lectura de profundidad será menos precisa.
• Las barras de refuerzo #4 y tubos de cobre de
1
⁄2"
(13 mm) se pueden encontrar con una precisión de +/–
1
⁄2" (13 mm) en ambos modos de escaneo Normal
y DeepScan
• Los objetos pequeños, como las cabezas de los clavos,
estarán menos profundos de lo indicado
• Un tubo de cobre de
1
⁄4" (6 mm) estará
aproximadamente un 30% menos profundo que
lo indicado
• Un tubo de cobre de
3
⁄4" (19 mm) estrá
aproximadamente un 2% más profundo que lo indicado
NOTA: Para obtener mejores resultados, calibre la
herramienta lejos del metal.
A medida que mueva el detector hacia un objetivo,
el Icono Más/Menos mostrará
. Si se aleja del objeto,
mostrará
.
1. Antes de escanear, despeje los desechos, incluyendo
arena y grava, del área. Si la superficie de escaneo es
rugosa, cúbrala con cartulina fina. (El espesor del cartón se
debe restar la lectura de profundidad para determinar la
profundidad real del objetivo.)
2. Escanee de un lado a otro.
(
Figura A)
Cuando se acerque a un objeto,
se mostrará el Icono de Imán.
(
Figure B)
El
icono indica que el objetivo
es metal ferroso (magnético). El
indica un objetivo no ferroso.
Si el audio está encendido (
), el
detector emitirá un tono cuando esté
sobre el objetivo.
El Indicador de Profundidad además
muestra la profundidad aproximada
del objeto.
3. Marque este punto.
4. Cuando el detector va más allá del objetivo, el icono
cambia a . Invierta la dirección, y el icono volverá
a
.
5. Marque este punto también.
El punto medio entre ambas marcas es la ubicación
aproximada del objetivo de metal.
6. Escanee la misma área nuevamente, pero en dirección
vertical. Repita el escaneo para objetivos múltiples, o para
identificar completamente el objetivo usando un patrón de
cuadrícula, marque cada objetivo encontrado.
UTILIZAR MODO DEEPSCAN
Para utilizar el modo DeepScan:
1. Encienda el detector. Siempre comienza en el modo
Normal Scan.
2. Mantenga presionados los Botones de Encendido y de
Modo durante 1 segundo, luego suéltelo. (Si lo mantiene
pulsado durante 2 segundos, apagará la luz de fondo de
la pantalla).
3. Siga los pasos 1 – 6 como se describe en ESCANEAR
EN MODO NORMAL SCAN.
Para volver al modo Normal Scan, presione el botón
nuevamente o apague el detector y vuelva
a encenderlo.
RECALIBRAR PARA MAYOR PRECISIÓN
El MT 7 se calibra automáticamente cuando está
encendido. Sin embargo, la precisión de la profundidad
depende de los materiales en las proximidades del escaneo,
en particular cuando los minerales metálicos pueden estar
presentes en el hormigón, como es común.
La recalibración no afectará la precisión de la posición,
pero será útil para realizar una determinación final de la
profundidad.
• Si el detector es incapaz de calibrarse por algún motivo,
todos los iconos de la pantalla del detector parpadearán.
Si esto sucede, hay demasiado metal cerca del detector
para calibrarlo correctamente. Mueva el detector a otra
ubicación y realice nuevamente el proceso de calibración
presionando y soltando el Botón de Calibración.
• Si el objetivo está cerca de una gran masa de metal,
es posible que el detector no pueda localizar el centro.
Vuelva a recalibrar y / o mueva el detector y muévalo
lentamente.
Pantalla LCD
Retroiluminada
Mango
Pivotante
Tapa de
Batería (en la
parte posterior)
Indicador de
encendido/
apagado de
audio
Botón de
Modo/Audio
Botón de
Encendido/
Recalibración
Presilla para Cuerda
de Seguridad
Indicador de
Batería Baja
Icono Más/Menos
(Indicador de dirección)
GARANTIA LIMITADA DE 1 AÑO
El Corporativo Zircon (“Zircon”) garantiza al cliente
que este producto se encuentra libre de defectos en
sus materiales y mano de obra por un periodo de
un año a partir de la fecha de su compra. Cualquier
producto defectuoso devuelto a Zircon dentro del
periodo de garantía a la dirección indicada abajo, con
flete prepagado y comprobante de la compra, será
reparado o reemplazado a discreción de Zircon. La
reparación o reemplazo puede hacerse con un producto
y componentes nuevos o restaurados a discreción de
Zircon. Si el producto devuelto ya no está disponible,
Zircon puede sustituir el producto por un producto similar
en base a su funcionamiento. Esta garantía se limita a los
circuitos electrónicos del producto y a su carcasa original,
y específicamente excluye cualquier daño causado por
abuso, modificación, manejo contrario de uso de estas
instrucciones, otro uso no razonable o negligencia.
Este es su único y exclusivo recurso para el
incumplimiento de esta Garantía Limitada.
Esta garantía limitada es una parte de otras garantías,
expresas o implícitas y Zircon no será responsable por
ninguna otra afirmación o reclamo de naturaleza similar.
Toda garantía implícita que se aplique a este producto
está limitada a un periodo de un año a partir de la fecha
de su compra. Esta garantía limitada no cubre las piezas
consumibles, incluidas como las baterías o el software,
incluso si están empaquetadas con el producto.
EN NINGÚN CASO ZIRCON SERÁ RESPONSABLE POR
CUALQUIER DAÑO ESPECIAL, INCIDENTAL O COMO
CONSECUENCIA DE LA POSESIÓN, USO O EL MAL
FUNCIONAMIENTO DE ESTE PRODUCTO.
Algunos estados no permiten limitaciones en cuanto
al periodo de duración de una garantía implícita y/o
a la exclusión o a la limitación de daños secundarios
o consecuentes, de modo que las limitaciones y/o
exclusiones mencionadas anteriormente pueden no ser
aplicables en su caso. Esta garantía le otorga derechos
legales específicos, y Usted también podría tener otros
derechos que pueden variar de estado a estado.
Envíe el producto con flete prepagado y el comprobante
con la fecha de compra (recibo de ventas con fecha) a:
Zircon Corporation, Attn: Returns Department
1580 Dell Avenue
Campbell, CA 95008-6992 USA
Asegúrese de incluir su nombre y dirección para la
devolución. Permita de 4 a 6 semanas para la entrega.
Atención al Cliente, 1-800-245-9265 ó 1-408-963-4550
Lunes a Viernes, 8:00 a.m. a 5:00 p.m. Hora Estándar
del Pacífico
[email protected] • www.zircon.com
©2018 Zircon Corporation • P/N 66468 • Rev E 05/18
DeepScan, MultiScanner, y Zircon son marcas de fábrica
registradas o marcas registradas de Zircon Corporation.
ANTES DE EMPEZAR
- Siempre utilice una nueva batería alcalina con una fecha de vencimiento extendida superior a 3 años. Asegúrese de no
tirar de los cables al desconectar la batería.
- No confié exclusivamente en el detector para localizar objetos detrás de la superficie. Utilice información adicional
para ayudar a localizar los objetos antes de penetrar la superficie. La información incluye planos de construcción,
puntos visibles de entrada de las tuberías y el cableado en las paredes, como en un sótano, y las separaciones estándar
entre las vigas.
- Las lecturas siempre deben ser consistentes y repetibles.
- Otros objetos comunes en paredes, pisos o techos son tuberías de agua, líneas de gas, barrera cortafuego, y cableado
eléctrico.
- La profundidad y precisión de detección del detector pueden variar dependiendo de las condiciones ambientales del
escaneo, como el contenido mineral, la humedad, la textura y consistencia de las paredes.
- Siempre apague la electricidad cuando trabaje cerca de cables eléctricos.
- Dependiendo de la proximidad de conexiones eléctricas o tuberías a la superficie de la pared, el detector puede
detectarlos de la misma manera que las vigas. Es necesario tener precaución siempre al clavar, cortar o taladrar en
paredes, pisos y cielorrasos que puedan contener estos elementos.
- No se localizarán objetivos de más de 6" (15 cm) de profundidad.
- Evite usar joyería, incluyendo un reloj, mientras escanea, ya que el metal de la joyería podría interferir con las lecturas.
CONSEJOS ÚTILES & CONSEJOS PARA CONSTRUCCIÓN
SITUACIÓN CAUSAS PROBABLES SOLUCIONES
Dificultad para
detectar metal
correctamente.
Objetos metálicos agrupados
demasiado cerca impiden la
calibración.
• Evite usar joyería, incluyendo un reloj, durante el escaneo. Retire las
herramientas de metal grandes del área cuando sea posible.
• Use una presión ligera constante durante el escaneo.
• Espere de 5 – 10 minutos para que la temperatura se estabilice antes
de la operación, si la unidad se movió a un área con un cambio de 10°F
(5 – 6°C) o superior (como desde un edificio con aire acondicionado al
aire libre en un día cálido).
• Escanee en ambas direcciones horizontales y verticales.
Calibración inexacta
y/o lectura de
profundidad debido a
objetos magnéticos/
no magnéticos
colocados uno al
lado del otro o uno
encima del otro.
• Calibrado directamente
sobre un objetivo metálico.
• El hormigón y las barras
de refuerzo están en
segmentos que podrían
haber sido colados en
diferentes ocasiones.
• Calibre lejos de metal para determinar con precisión las profundidades.
Mueva la unidad unos cuantos pulgadas (5 – 8 cm) y vuelva a calibrar.
• Asegúrese de que el detector toque la superficie que está escaneando.
• No confíe en una sola calibración para toda la zona. Escanee
previamente cada segmento por separado; calibre y determine la
profundidad de los objectivos para cada segmento de hormigón.
• Para una precisión máxima en el hormigón, asegúrese de que el
hormigón esté completamente curado.
La calibración
se pierde.
El detector se apagada.
El detector se recalibra automáticamente cuando se enciende. Recalibre
según sea necesario para lecturas más precisas presionado el botón CAL.
El sonido no
parece relativo a
los objetivos.
• Escaneo cerca del borde de
un pedazo de concreto.
• El objetivo tiene más de
6" (15 cm) de profundidad;
la unidad no emitirá un
sonido al mismo tiempo
que aparezcan cambios
de Más/Menos y barras de
profundidad máxima.
Ignore el sonido y confíe en las barras de profundidad para localizar
el objetivo.
La retroiluminación
y todos los iconos se
muestran.
Se produjo un error
de calibración.
Reposicione el detector y recalibre de nuevo.
Parpadea el Indicador
de Batería Baja.
Batería baja.
Instale una nueva batería alcalina de 9 voltios con una fecha de
vencimiento extendida.
ES
Visit www.zircon.com for the
most current instructions.
Advertencia de Registro de la Parte 15 del FCC Clase B: Este aparato
cumple con las reglas Parte 15 de la FCC. Su operación está sujeta
a las siguientes dos condiciones: (1) este aparato no puede causar
interferencia dañina, y (2) este aparato debe aceptar cualquier
interferencia recibida, incluyendo la interferencia que pueda causar
la operación no deseada.
ZirconCorporation ZirconTV
ZirconTools
|
ZirconToolPro
ZirconTools
Ventanilla
para el Mango
Pivotante
Poste de Extensión (opcional)
Indicador de
Encendido/
Apagado
de Audio
Indicador de
Profundidad
(muestra centímetros
o pulgadas)
Indicador de modos
Normal Scan/
DeepScan
®
El localizador electrónico de metales MetalliScanner MT 7
no sólo puede localizar vigas metálicas, sino que también
puede utilizarse para encontrar metal en construcciones
residenciales, comerciales o industriales (incluso detrás o
debajo del concreto):
• Automáticamente diferencia entre metales ferrosos
(magnéticos) como el hierro y metales no ferrosos (no
magnéticos) como el cobre
• Está específicamente ajustado para localizar tubos de
cobre de
1
⁄2" (13 mm) o barras de refuerzo #4
• Detecta aproximadamente hasta 6" (15 cm) de
profundidad
2 modos de escaneo:
• Modo Normal Scan localiza metal hasta 3" (7.5 cm)
debajo de la superficie escaneada
• Modo DeepScan localiza metal hasta 6" (15 cm)
debajo de la superficie escaneada
PERSONALIZAR PANTALLA
Indicador de Profundidad muestra centímetros (cm)
o pulgadas (pulg). Para cambiar del sistema métrico al
imperial, mantenga presionados los Botones de Encendido
y de Modo durante 13 segundos.
INCLUYE: Estuche de transporte de Metal
Figura A
Figura B
Figura C
Figura D
Figura E
MetalliScanner
®
MT 7
Localizador Electrónico de Metal