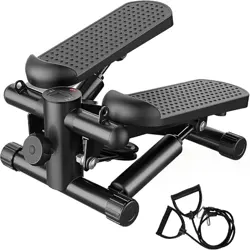
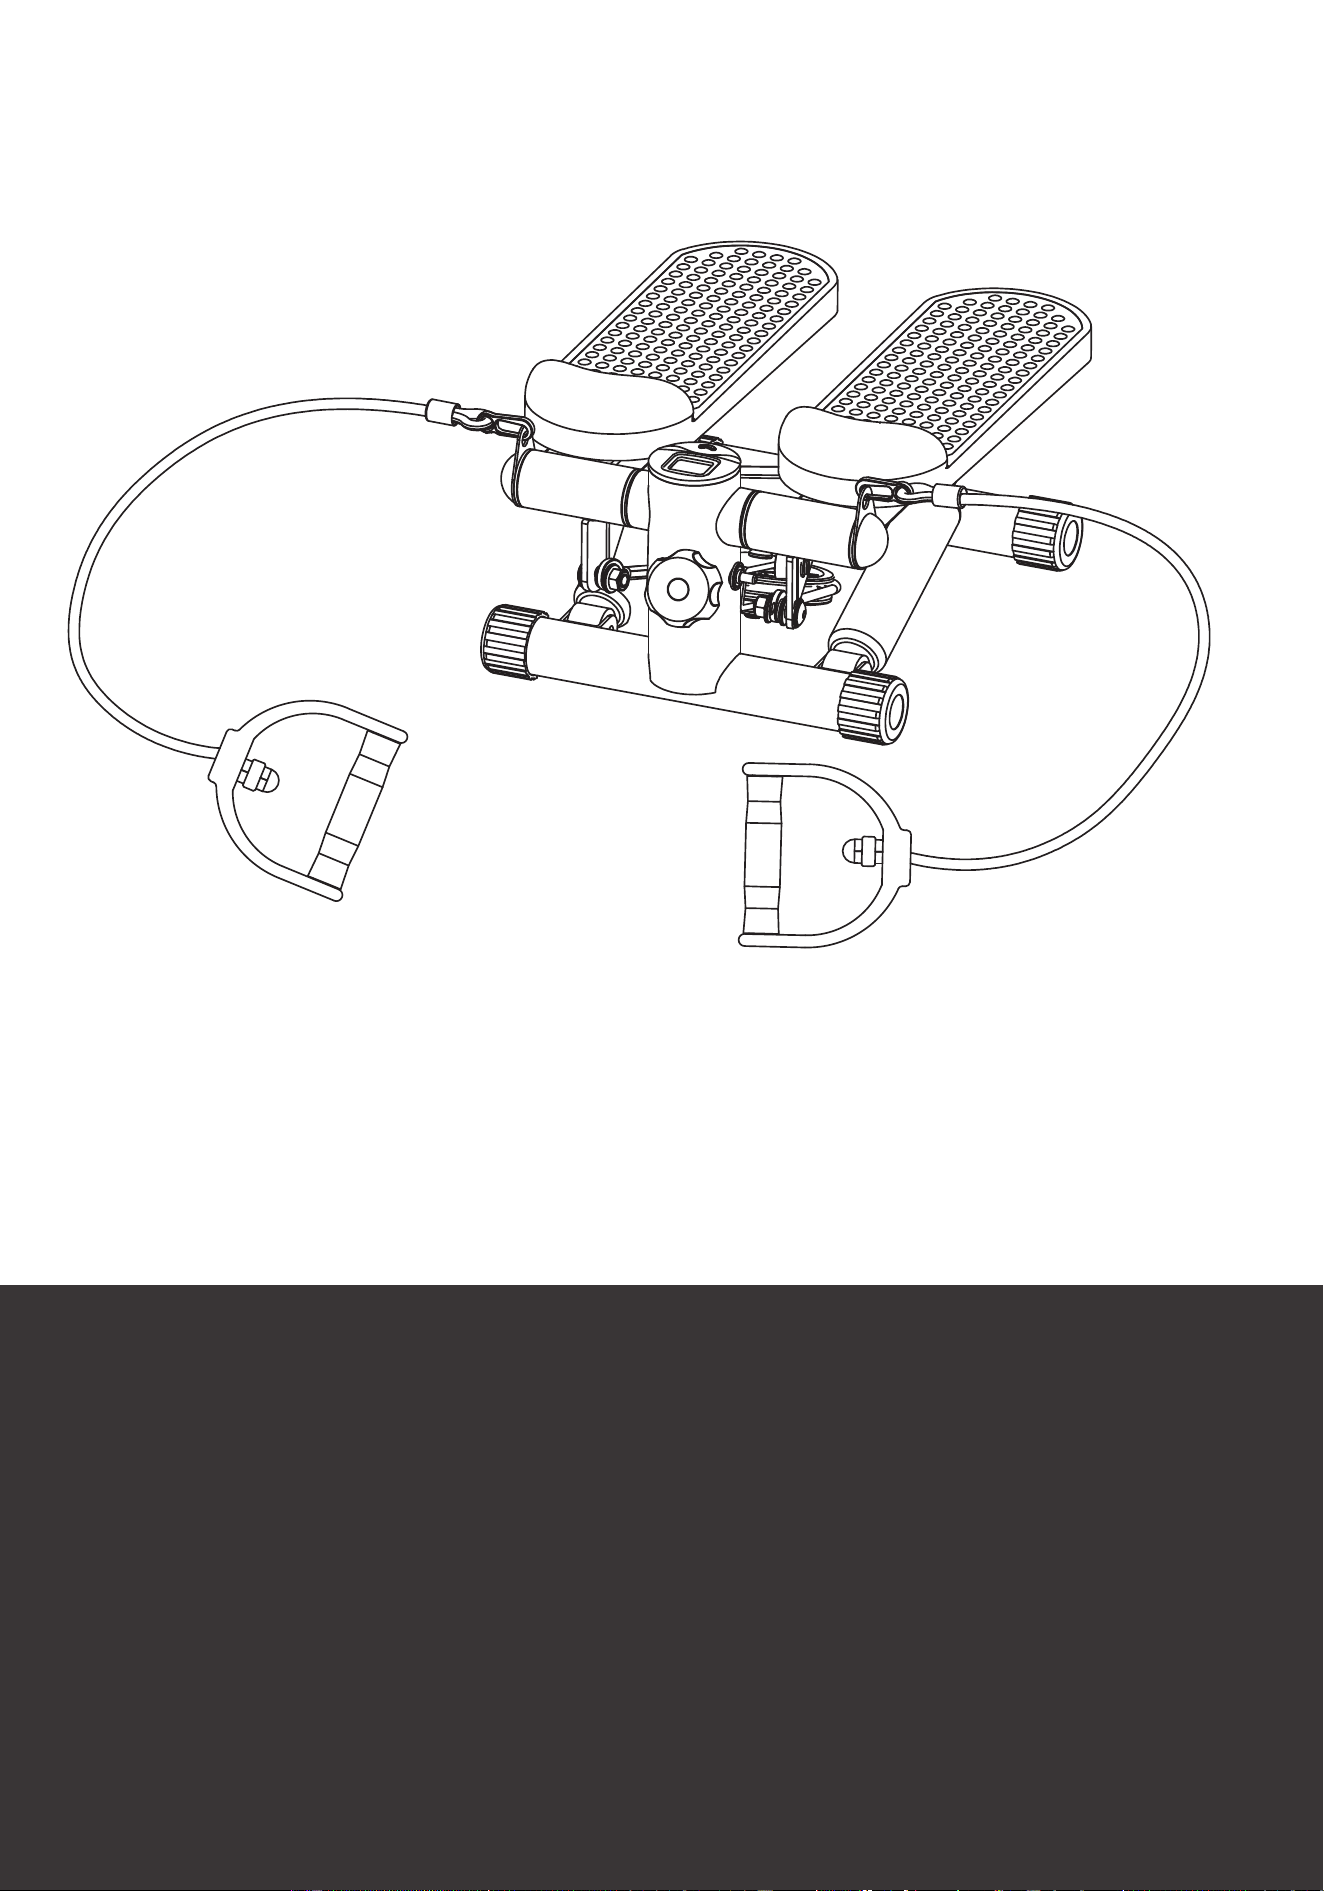
StairStepper
HJ-Customer[email protected]
Instruction Manual
(909)637-7665 | (909)637-7593
EST
TBJ-J0
1-V2
9:00AM--17:00PM

Thank you for choosing our product. To ensure your safety and health, please use
this equipment correctly. It is important to read this entire manual before assembling
and using the equipment. Safe and effective use can only be ensured if the equipment
is assembled, maintained, and used properly. It is your responsibility to ensure that all
users of the equipment are aware of all warnings and precautions.
WARNING: This product can expose you to one or more chemicals known to
the State of California to cause cancer and birth defects or reproductive harm.
For more information go to www.P65Warnings.ca.gov.
1. Before starting any exercise program you should consult your physician to determine
whether you have any medical or physical conditions that could put your health and safety
at risk, or prevent you from using the equipment properly. Your physician’s advice is
essential if you are taking medications that affect your heart rate, blood pressure, or
cholesterol level.
2. Be aware of your body’s signals. Incorrect or excessive exercise can damage your
health. Stop exercising if you experience any of the following symptoms: pain,
chest tightness, irregular heartbeat, and extreme shortness of breath,
lightheadedness, dizziness or feelings of nausea. If you do experience any of these
conditions, you should consult your physician before continuing your exercise program.
3. Keep children and pets away from the equipment. The equipment is designed for
adult use only.
4. Use the equipment on a solid, flat level surface with a protective cover for your floor
or carpet. To ensure safety, the equipment should have at least 2 feet of free space
all around it.
5. Ensure that all nuts and bolts are securely tightened before using the equipment.
The safety of the equipment can only be maintained if it is regularly examined for
damage and/or wear and tear.
6. It is recommended that you lubricate all moving parts monthly.
7. Always use the equipment as indicated. If you find any defective components while
assembling or checking the equipment, or if you hear any unusual noises coming
from the equipment during exercise, stop using the equipment immediately and don’t
use the equipment until the problem has been fixed.
8. Wear suitable clothing while using the equipment. Avoid wearing loose clothing that
may become entangled in the equipment.
9. Do not place fingers or objects into moving parts of the exercise equipment.
10.This equipment is not suitable for therapeutic use.
11. Be cautious when lifting and moving the equipment. Always use proper lifting
techniques and seek assistance if necessary.
12.This equipment is designed for indoor use only! It is not intended for commercial use!
IMPORTANT SAFETY INFORMATION
9
8
7
6
5
3
2
1
4
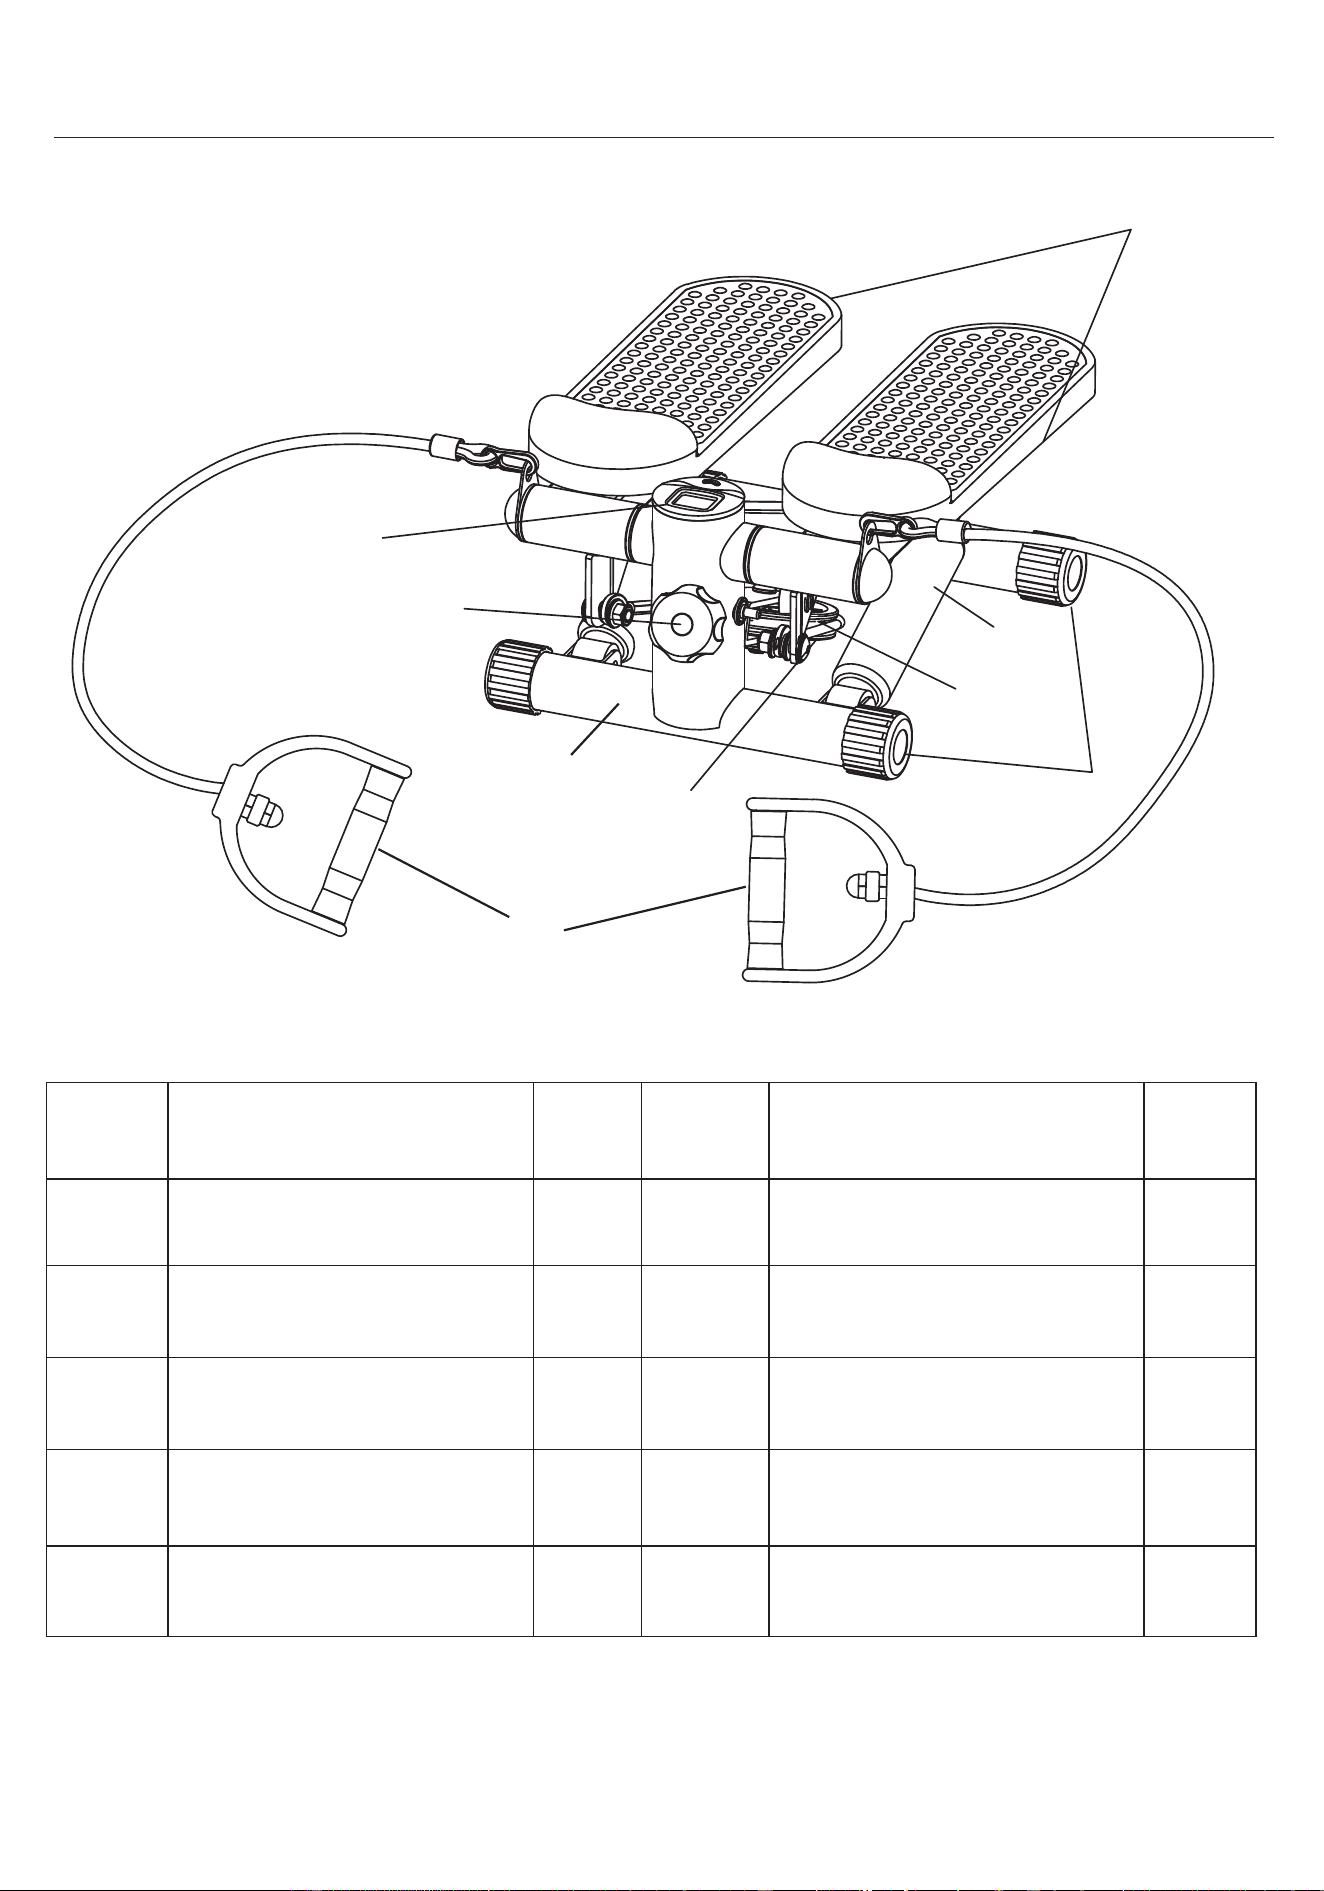
NO.
PART NAME
QTY NO.
PART NAME QTY
1
2
3
4
6
7
8
2
2
4
1
1
1
1
2
Pedal
Hydraulic rod
Plastic foot cap
Balance wheel
Main frame
Knob
Digital display
9
Resistance band
5 1
Wire rope
EXPLODED DRAWING
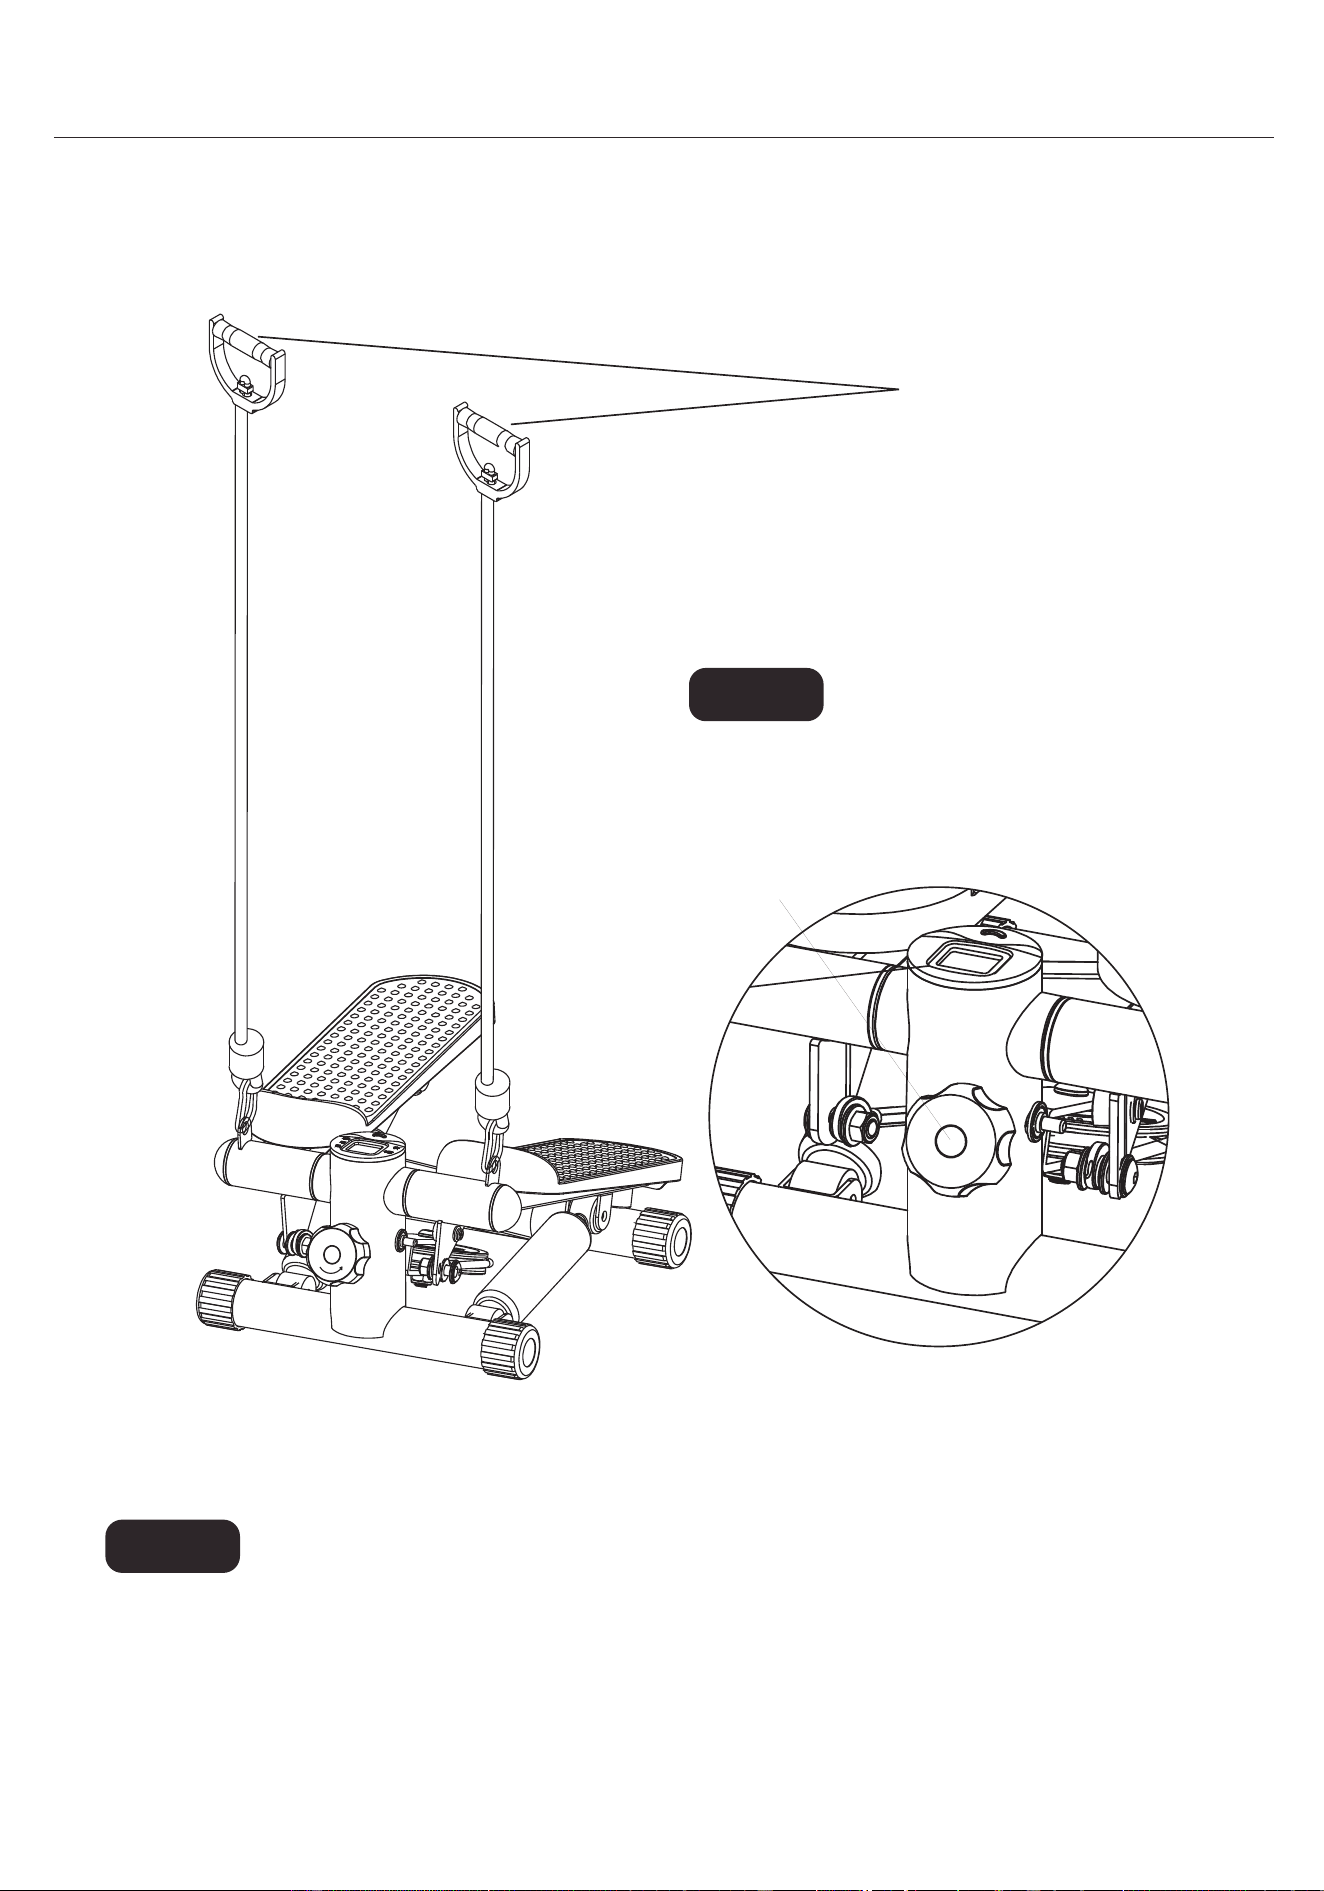
When adjusting the knob, please lift one pedal and keep the other
pedal stationary. Then lift the Stair Stepper and rotate the knob
clockwise to tighten.
STEP1: Take out the stepper from shipping carton.
STEP2: Rotate the knob (No.7),
The Stair Stepper arrives completely assembled.
Start by carefully removing the machine from the shipping carton and placing all
components on a flat surface.
to alter the pedal’s movement range.
STEP3: Install the resistance band (No.9).
STEP4: Stand on the pedals.
Clockwise rotation increases pressure,
and counterclockwise rotation decreas-
es pressure.
SET UP INSTRUCTIONS
7
9
NOTE:
NOTE:
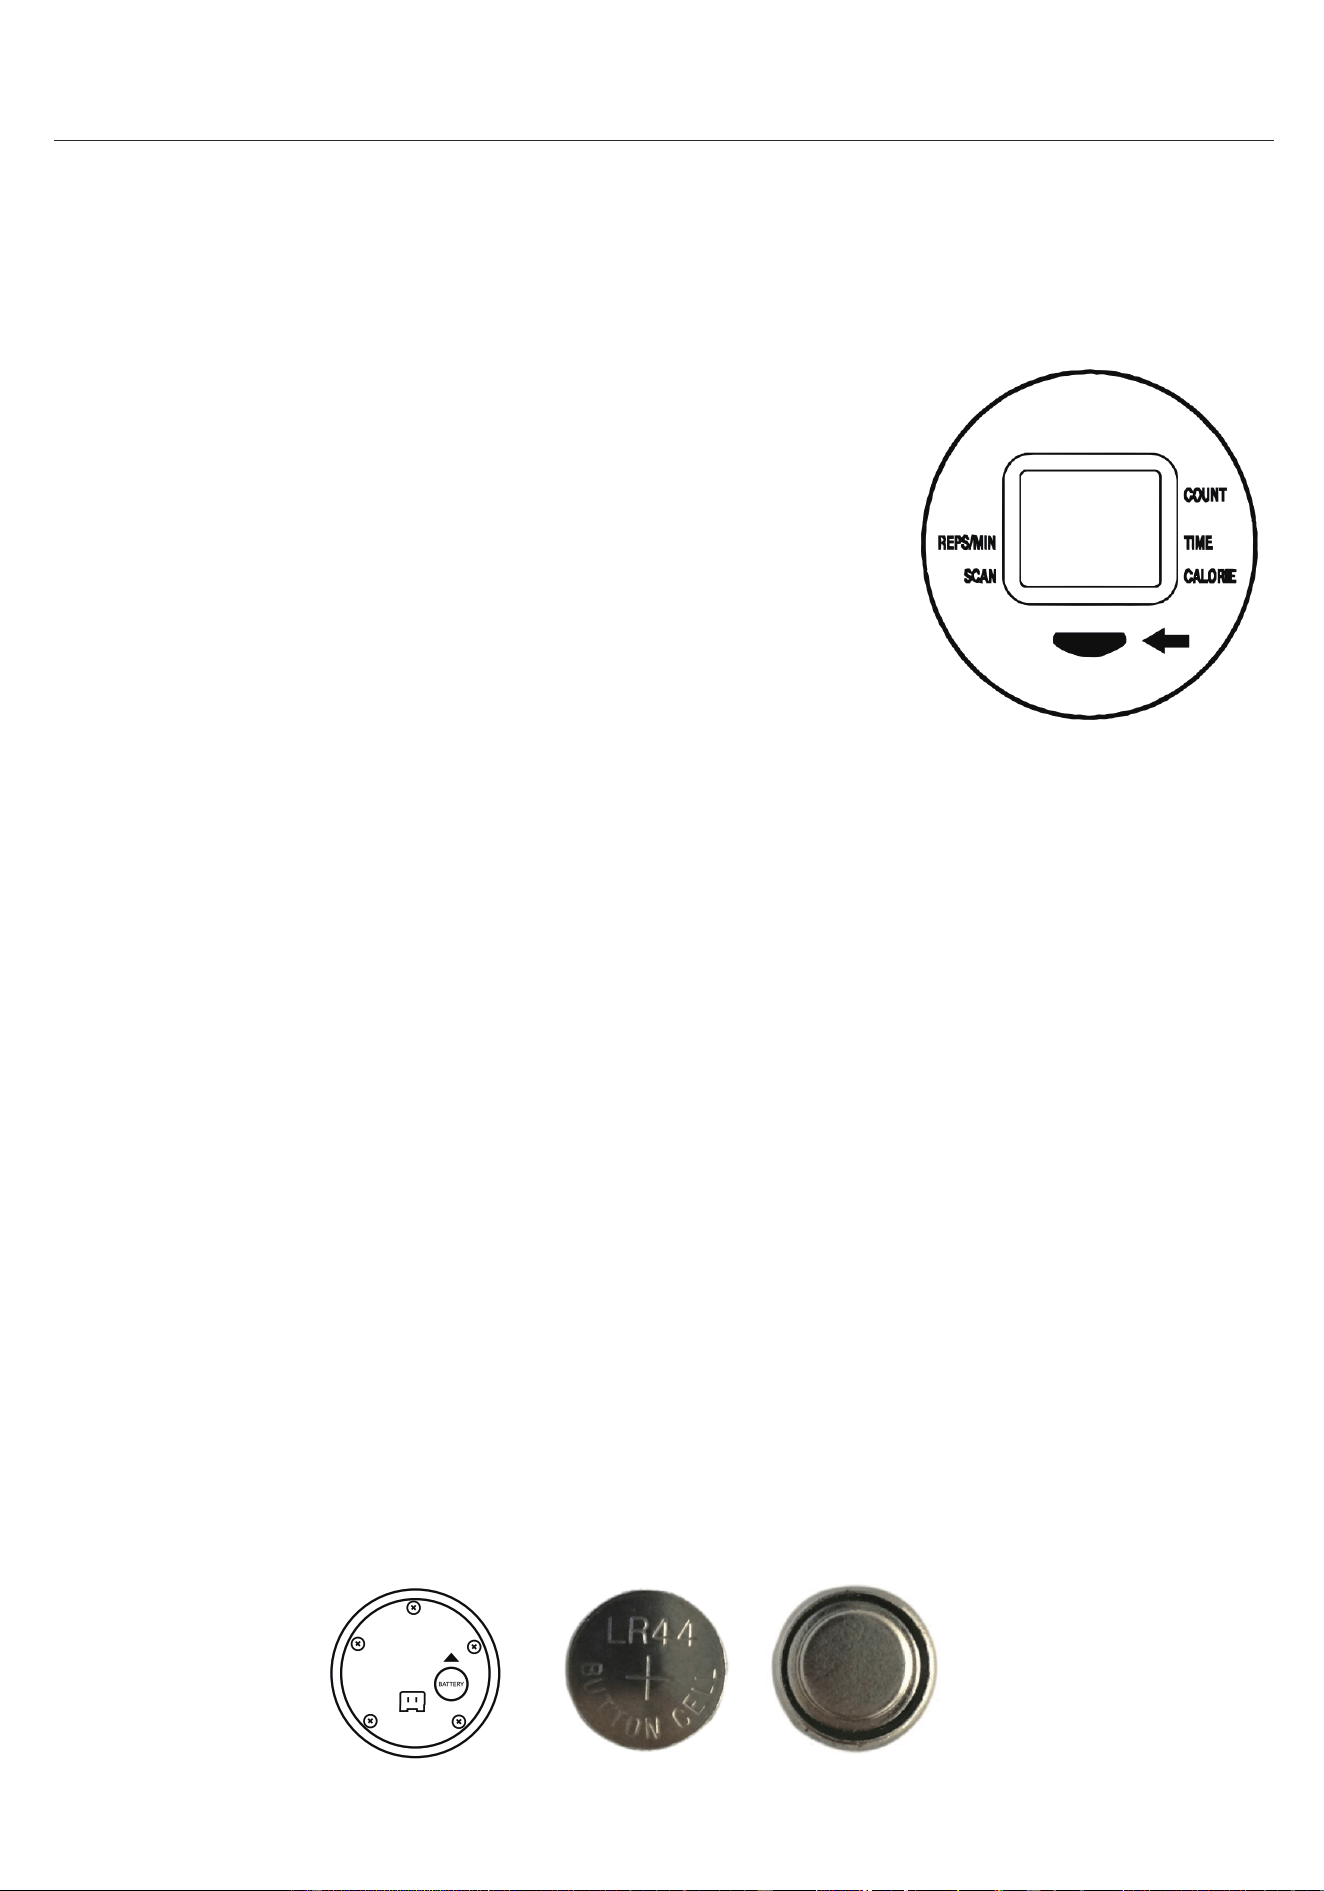
MODE: Press the button to select a function (TIME, COUNT, REPS/MIN, CALORIES, SCAN),
or press and hold for 3 seconds to reset all values.
BUTTON FUNCTIONS:
1. If there is a problem with the display, please replace the battery to improve
performance. Replacing the battery will reset all settings.
2. Please use one button cell battery as a power supply. One battery is pre-installed
in the device.
NOTE:
SCAN: Automatically cycles through each function in sequence.
TIME: Displays the total duration of an exercise, ranging
from 00:00-99:59.
COUNT: Automatically accumulates the steps taken during
exercise.
REPS/MIN: Displays steps per minute during the exercise.
CALORIES: Displays the estimated calories
burned during an exercise session.
FUNCTIONS :
Auto ON/OFF - The digital display will activate when you press MODE or when you begin
stepping. If there's no signal for approximately 4 minutes, the display will automatically turn off.
When you are not stepping, the display shows 'STOP'.
Display - The display always shows the count at the top.The lower section of the display
shows REPS/MIN, TIME, or CAL. Press MODE to select a function, and an arrow will
indicate the selected one.
SCAN - If the arrow points to SCAN, the display will automatically cycle through the following
sequence: REPS/MIN, TIME, CAL. An arrow will point to the currently displayed function.
Reset – Press and hold the 'MODE' button for 3 seconds to reset all values.
OPERATING INSTRUCTIONS :
MODE
DIGITAL DISPLAY
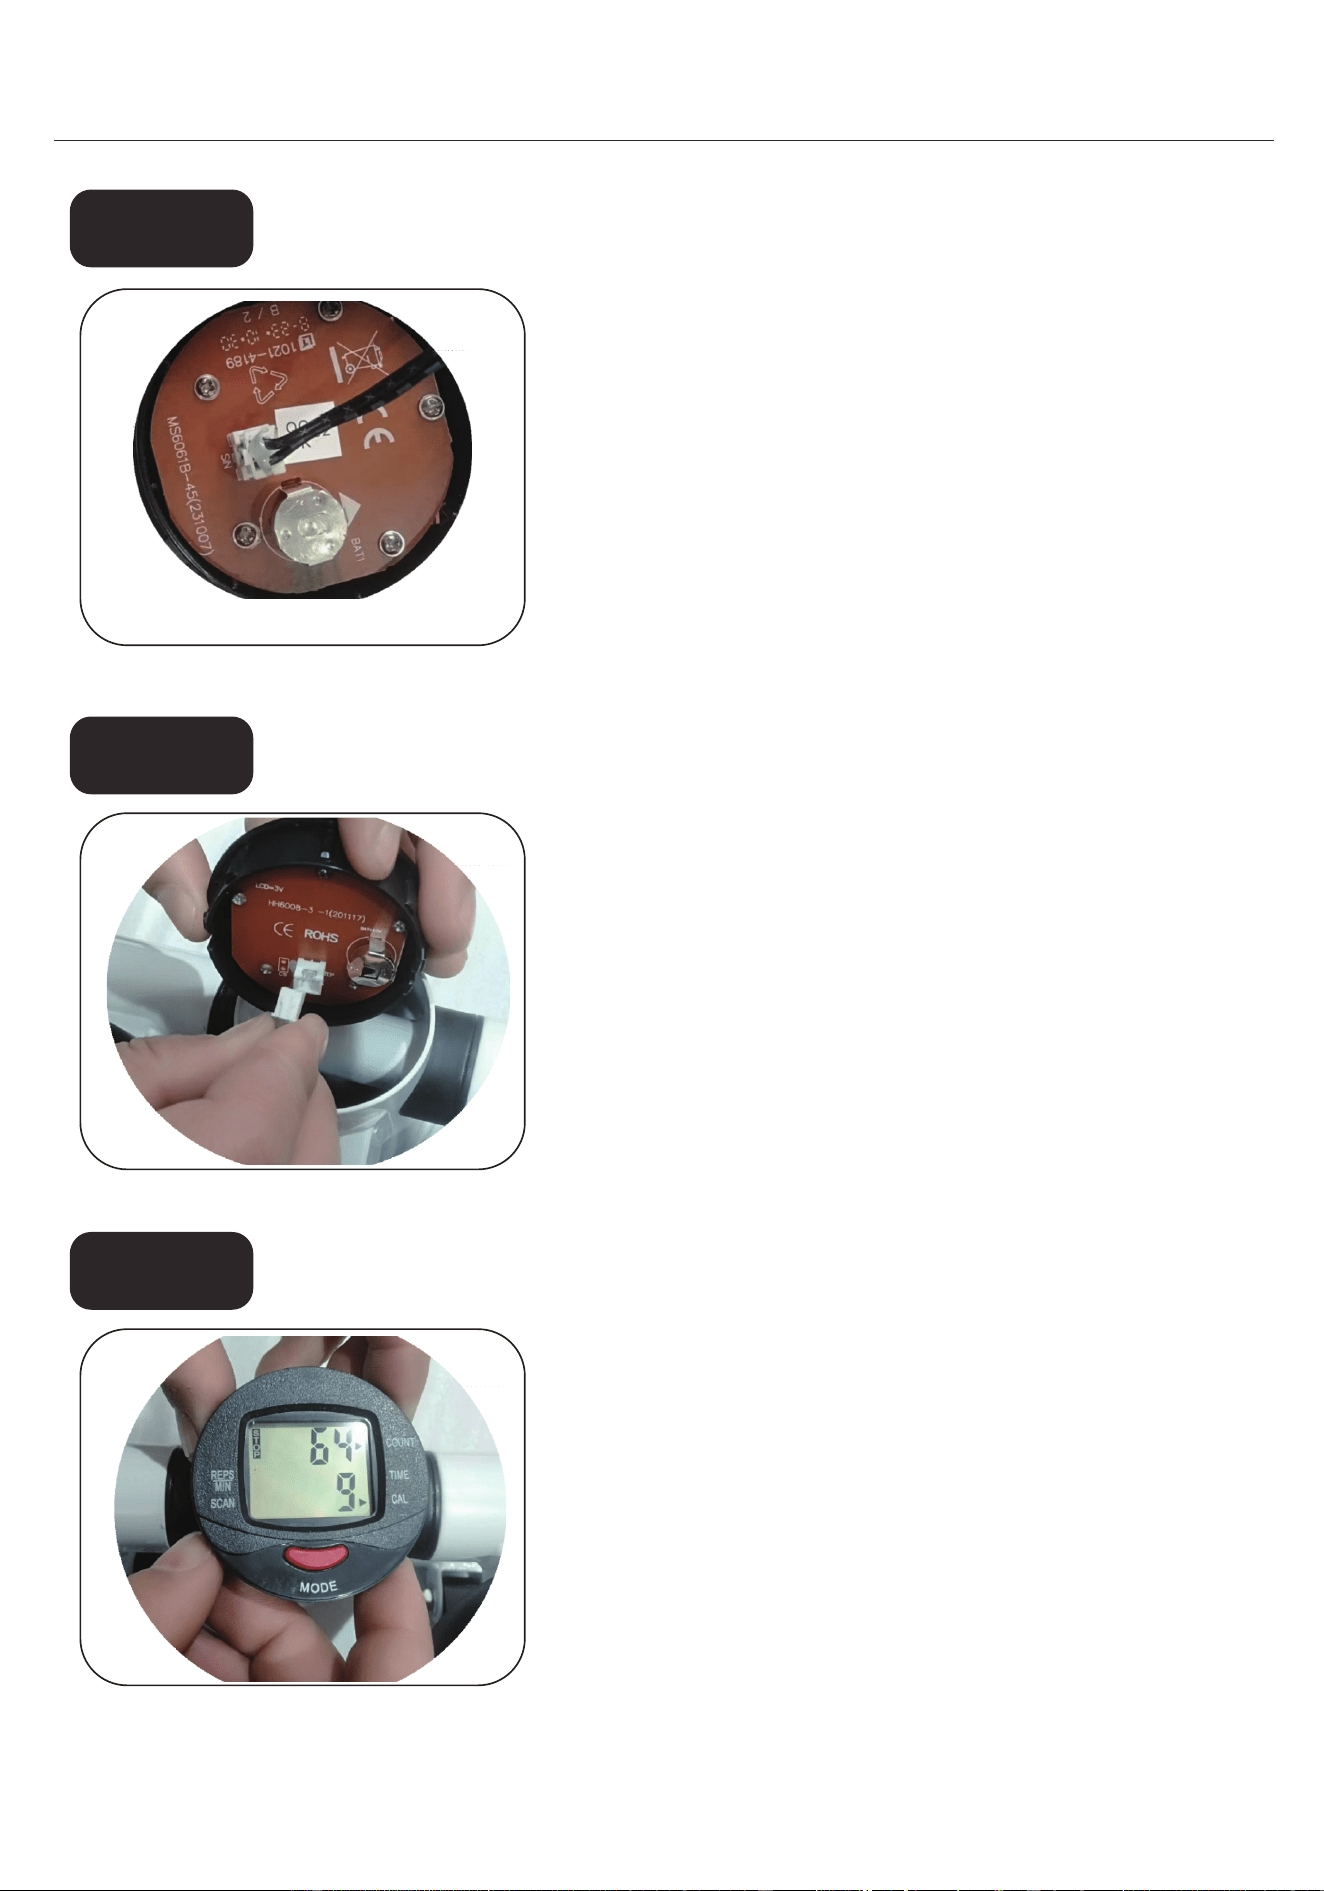
Open the Digital display (No.8),
remove the old button, and install
the new battery in the correct position.
Connect the Digital display(No.8)
to the cable from the Main frame
(No.6).
Install the Digital display (No.8)
into Main frame (No. 6)
1 x Button cell battery
HOW TO REMOVE BATTERY
Step 1
Step 2
Step 3

1. Lubrication of all moving parts is essential to the longevity and optimal performance of
your machine. We recommend a clear aerosol or silicone spray.
Note: Do not use oil based lubricants as they will attract dust, dirt and grime, and will
eventually clog up and erode bushings and sealed bearings.
2. All pulleys and bushings should be checked regularly for signs of wear.
3. Check and adjust cable tension periodically as it will maintain proper function.
4. Periodically check all moving parts, bands and grips for signs of wear or damage.
If there is a problem or replacement part is necessary, STOP USING THE EQUIPMENT and
immediately contact customer service. Replace parts using only authorized parts.
5. When checking the bolts and nuts, be sure they are all fully fastened. If there is a bolt or
nut that continuously loosens obtain a replacement through your local retailer.
6. Check welds to be free of cracks.
Failure to perform routine maintenance could result in
personal injury and/or equipment damage.
MAINTENANCE
Technical Support
Other Info
Thank you for choosing this product. We strive to provide you with the
best quality products and services in the industry. Should you have
any issues, please don't hesitate to contact us.
(909)637-7665 | (909)637-7593
HJ-Customer[email protected]