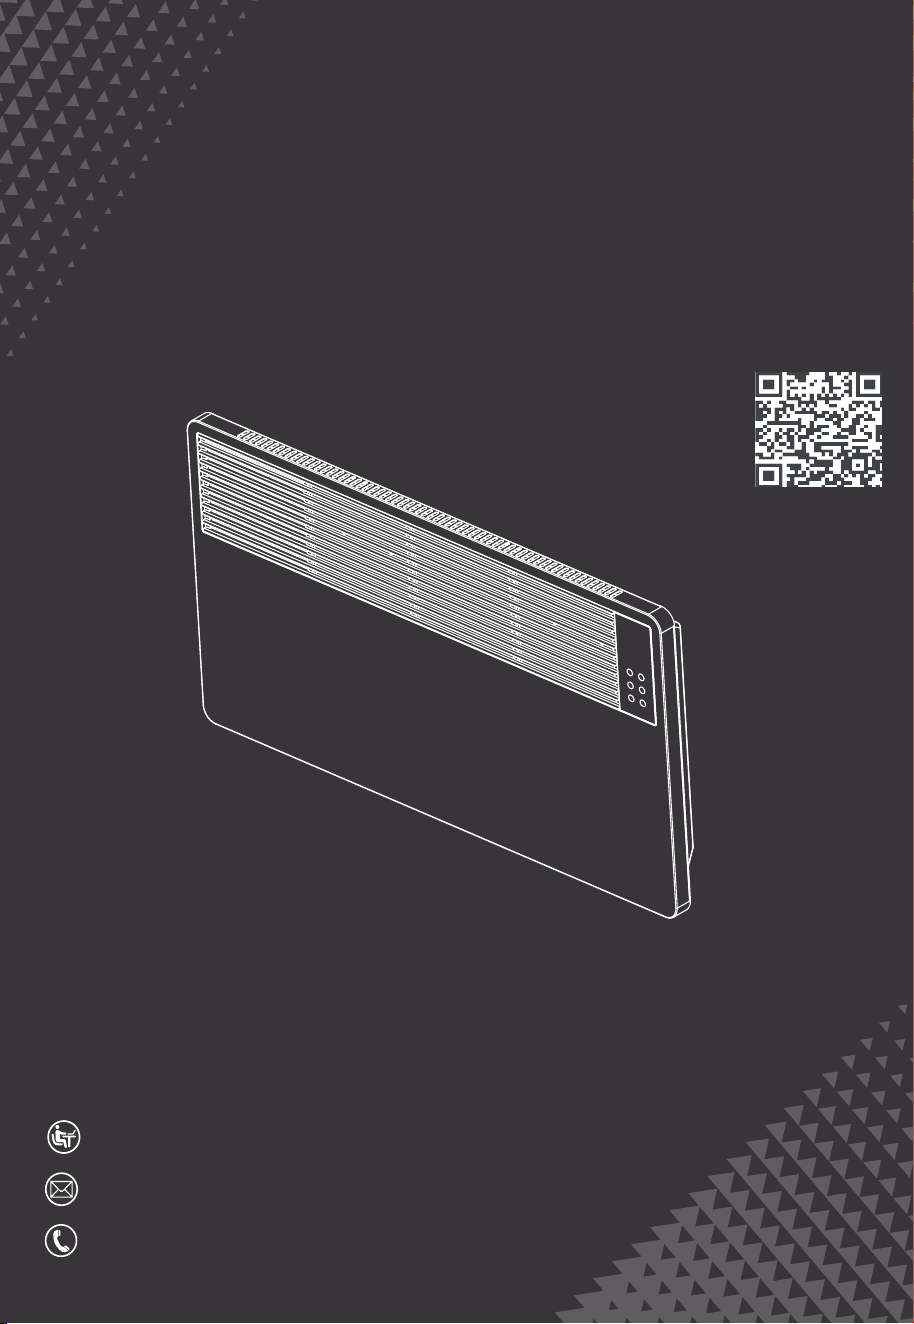
Instruction Manual
AM-QNQ85WD-B25WT
AM-QNQ85WD-B25GY
HJ-Customer-[email protected]
EST 9:00AM--17:00PM
6269443420 | 6267435564
Panel Convector Heater


CONTENTS
Specifications
Safety Information
Product Overview
1
1
2
Warranty Information
4
Operation
6
Care and Maintenance
6

Specifications
1
Read this instruction manual carefully before use and keep it for future reference.
Model HT9604W
Rated Voltage 120 V
Frequency 60 Hz
Rated Power 1500 W (750 W + 750 W)
Safety Information
1. Read this instruction manual carefully before using the heater. Follow all instructions provided in this
manual.
2. To prevent overheating, do not cover the heater.
3. Do not place the heater close to or directly below an electrical outlet.
4. Do not use the heater in damp or wet locations, such as bathrooms or areas where it may come into
contact with water. Prevent water from dripping or splashing into the control panel. Do not use the
heater in areas where flammable or explosive gases are present.
5. If the power cord is damaged, it must be replaced by the manufacturer, its service agent, or similarly
qualified personnel with an identical replacement cord to avoid a hazard.
6. Place the heater on a stable, level surface. Do not use the heater if it is tilted or upside down.
7. Do not place clothing, towels, or other items directly on the heater to dry.
8. Turn off the heater and unplug it when it is not in use or left unattended. Do not turn the heater on or
off by plugging in or unplugging the power cord.
9. Turn off the heater, unplug it, and allow the unit to cool completely before cleaning.
10. Do not allow the power cord to come into contact with the heater while it is operating.
11. If the heater malfunctions or fails to operate properly, turn it off immediately. Have it inspected and
repaired by qualified service personnel. Do not disassemble the heater or replace any parts yourself.
12. Do not plug the heater and other high-power appliances into the same outlet, as this may overload
the circuit and create a fire hazard.
13. Do not use an extension cord with the heater.
14. Do not use the heater with a programmer, timer, or any other device that switches the heater on
automatically.
15. Do not insert fingers, sticks, or any other objects into the openings of the heater.
16. To avoid burns, do not allow bare skin to come into direct contact with the surface of the heater
while it is operating.
2
Product Overview
Warning:
17. Keep towels, clothing, bedding, curtains, and other flammable materials at least 3 ft (0.9 m) away
from the heater. Keep the heater away from furniture and other items that may warp or discolor
when exposed to heat.
18. Do not place or hang any objects within 3 ft (0.9 m) above the heater.
19. Always supervise children when the heater is in use. Do not allow them to touch the heater.
20. Avoid frequently opening doors or windows while the heater is operating, as this may reduce heating
performance.
21. Do not use the heater outdoors.
22. Keep this instruction manual for future reference.
• This heater may be used by persons with reduced physical, sensory, or mental capabilities, or lack of
experience and knowledge, provided they have been given supervision or instruction concerning safe
use of the heater and understand the hazards involved.
• Children may use this heater only under close adult supervision. They must not operate the heater
without adult supervision.
• Cleaning and user maintenance must not be performed by children.
• To reduce the risk of electric shock, always unplug the heater from the electrical outlet when it is not
in use and before cleaning.
• Do not use this heater in the immediate surroundings of a bathtub, a shower, or a swimming pool.
• Do not use the heater if it is damaged or shows visible signs of damage.
• Use the heater only on a stable, level surface.
• Do not use this heater in small rooms occupied by persons who are unable to leave the room on their
own, unless constant supervision is provided.
• To reduce the risk of fire, keep textiles, curtains, and other flammable materials at least 3 ft (0.9 m)
away from the air outlet.
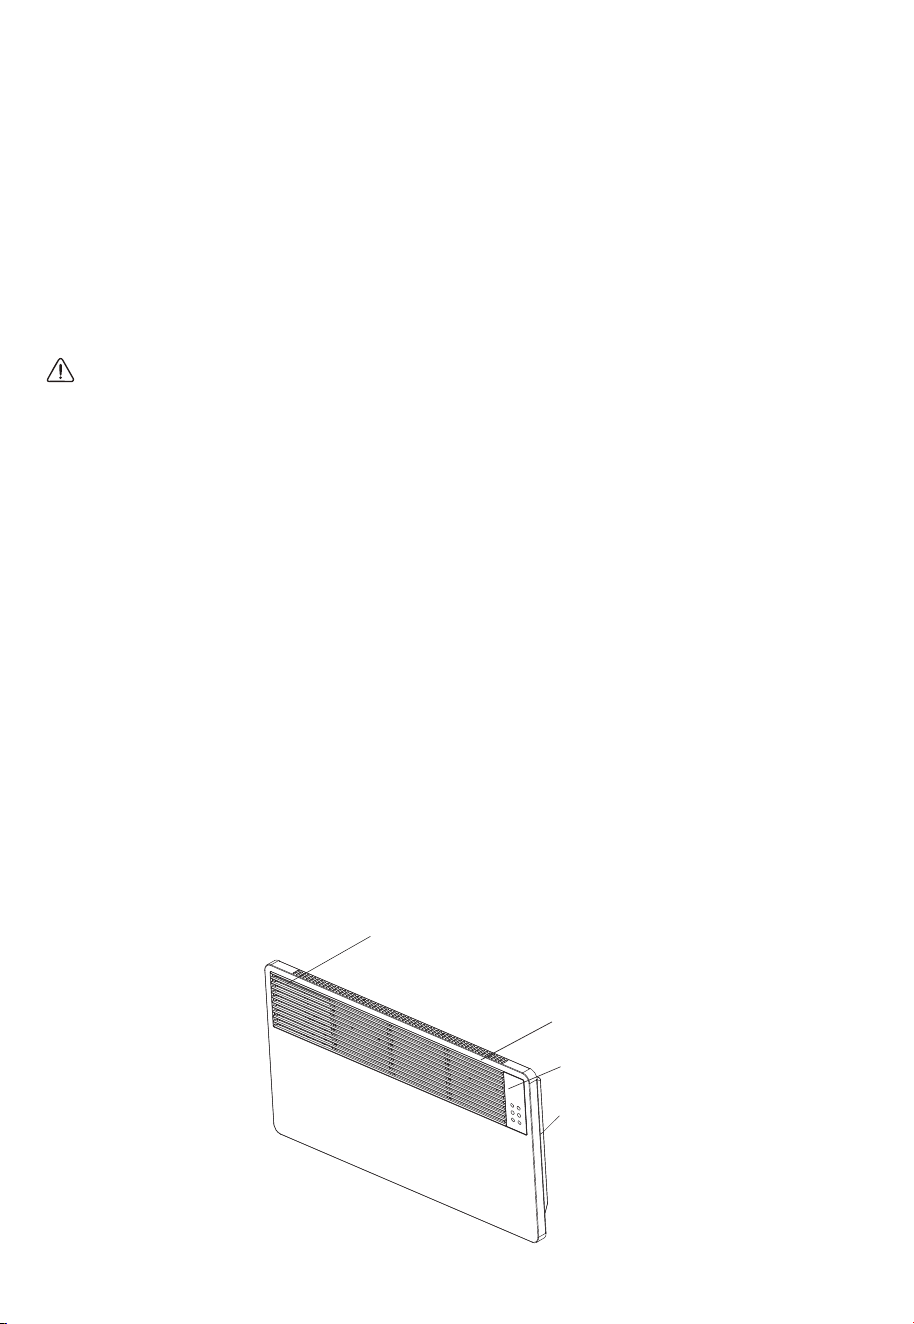
Air Outlet
Front Panel
Control Panel
Rear Panel
3
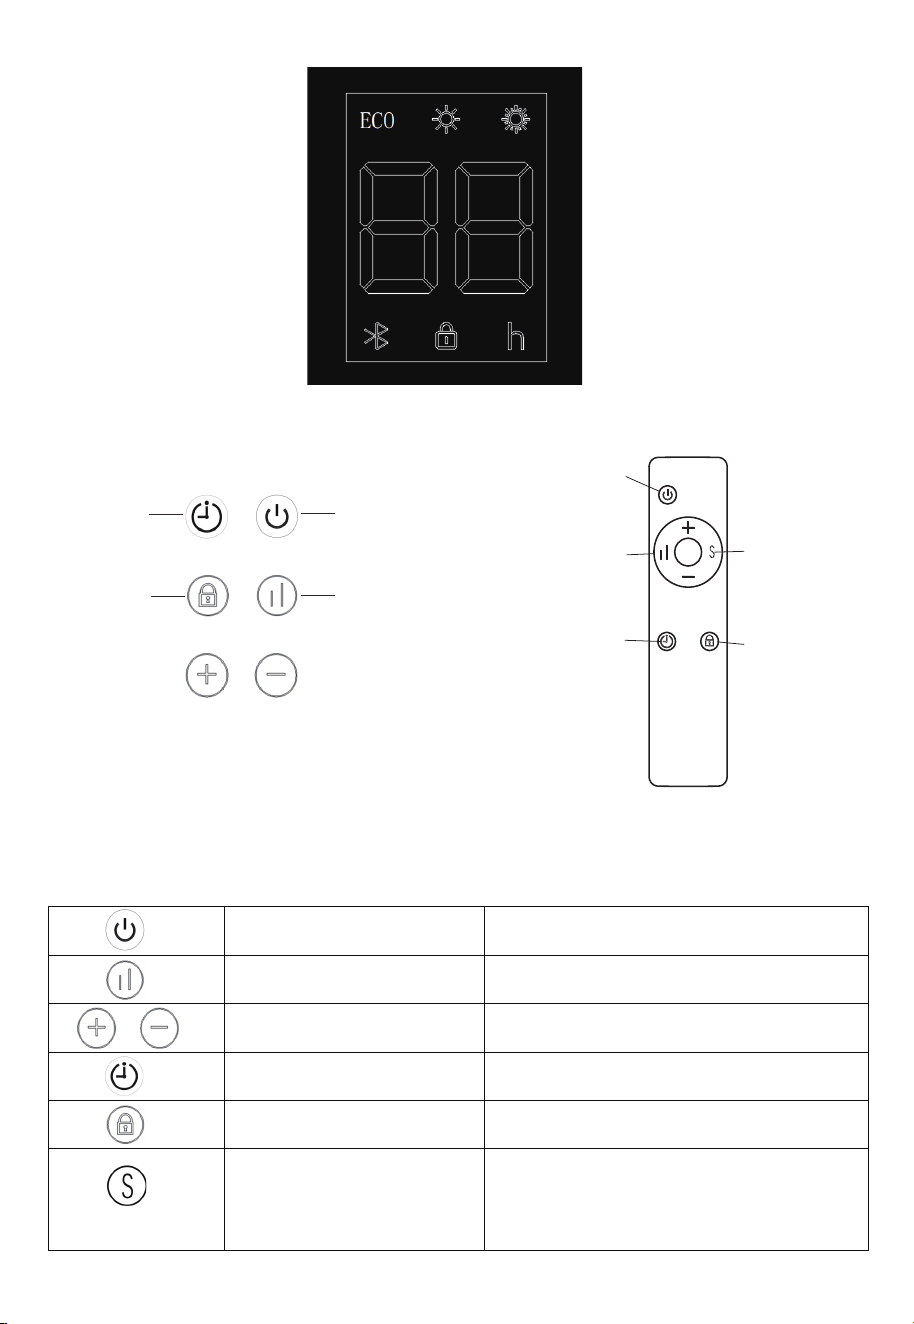
Display: The heater features a digital display. All indicators and settings are displayed in white.
Remote Control
Timer Button
Child Lock Button
Control Panel
Power/Standby Button
Mode Button
Power/Standby Button
Mode Button
Timer Button
Display Off Button
Child Lock Button
The buttons on the control panel function the same as the corresponding buttons on the remote control.
(Remote Control)
Power/Standby Button
Mode Button
"+" / "-" Buttons
Timer Button
Child Lock Button
Display Off Button
Press to turn the heater on or place it in Standby
mode.
Press to switch between Low Heat, High Heat, and
ECO Mode.
Press to adjust the set temperature or timer setting.
Press to enable or disable the timer function.
Press to enable or disable the child lock function.
While the heater is operating, press and hold the
Display Off Button for 3 seconds to turn off the
display and enter Display Off mode. While in Display
Off mode, press any button to light up the display
and exit Display Off mode.

4
Operation
Pre-Use Check
Before using the heater, check the following:
• Make sure the power cord is not damaged or worn.
• Verify that the power supply matches the voltage specified on the heater's rating label. Ensure the
electrical outlet is properly grounded and rated for the heater's electrical requirements before use.
If it is not, have the outlet replaced by a qualified electrician.
1. Plugging In the Heater
When the heater is plugged into a power outlet, it enters Standby mode. The buzzer beeps once, and
all display icons illuminate briefly. After 1 second, only "--" remains displayed. If no buttons are pressed
for 1 minute, the display brightness automatically dims to 30% of its normal brightness. If no buttons are
pressed for 3 minutes, the display turns off automatically.
2. Turning the Heater On/Off
Press the Power/Standby Button once. The heater beeps once and starts operating in High Heat mode.
The display shows 77°F. While the heater is operating, press the Power/Standby Button again to place
the heater in Standby mode.
Note:
① When the heater is turned on for the first time or after power has been disconnected, it starts in
High Heat mode by default.
② If power has not been disconnected, the heater resumes the previously selected heating mode.
The timer setting is not retained
3. Enabling or Disabling the Child Lock
• While the heater is operating, press and hold the Child Lock Button for 3 seconds to enable the Child
Lock function. The Child Lock Indicator lights up to indicate that the function is enabled. (While the
Child Lock function is enabled, all buttons are disabled.)
• To disable the Child Lock function, press and hold the Child Lock Button again for 3 seconds. The
Child Lock Indicator turns off.
5
4. Selecting the Heating Mode and Setting the Temperature
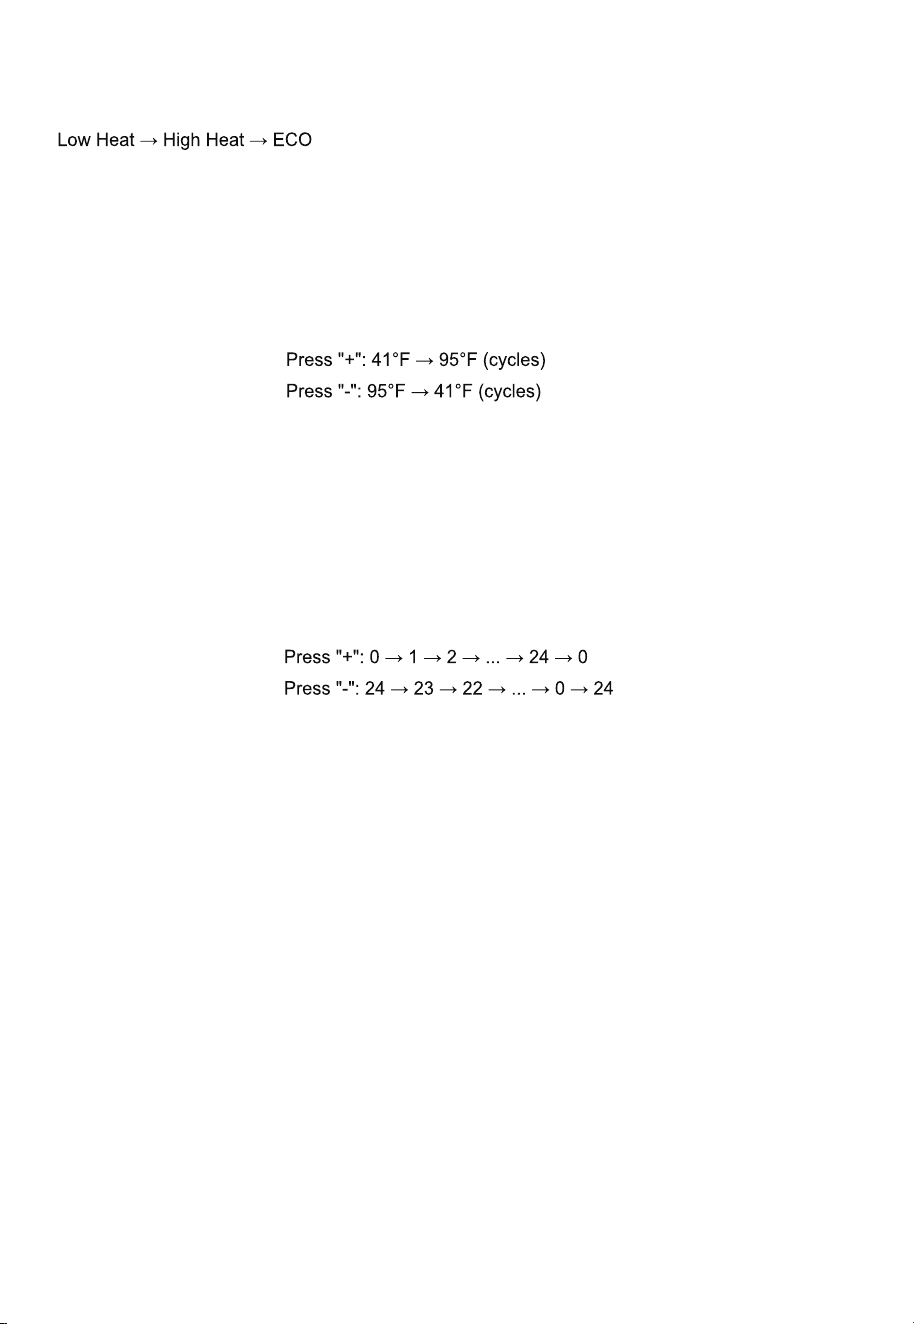
Press the Mode Button to select the desired heating mode. The modes cycle in the following order:
• In Low Heat or High Heat mode, press the "+" or "-" button to adjust the set temperature. The
temperature is displayed in °F. Each press changes the setting by 1°F, and the temperature setting
cycles between 41°F and 95°F.
• Press and hold the "+" or "-" button to adjust the temperature continuously at a rate of 3 °F per second.
The selected temperature is automatically saved after 5 seconds of no button operation.
Temperature adjustment range:
• The heater starts heating when the set temperature is more than 3°F above the ambient temperature.
• The heater stops heating when the set temperature is equal to or lower than the ambient temperature.
5. Setting the Auto Shut-Off Timer
While the heater is operating, press the Timer Button. The "h" icon lights up and flashes. Press the
"+" or "-" button to set the timer. The timer setting can be adjusted from 0 to 24 hours. If no buttons
are pressed for 5 seconds, the selected time is saved, the "h" icon remains lit, and the timer is enabled.
Timer adjustment:
While the timer is active, press the Timer Button once to view the remaining time.
To cancel the timer, set the timer to 0.
6. Bluetooth Connection
Bluetooth is enabled by default when the heater is turned on. Download the “Landbook” app and follow
the in-app instructions to search for and connect to the heater. Once the Bluetooth connection is
established, the Bluetooth Indicator lights up.
7. Other Functions
Display Off Mode
If no buttons are pressed for 3 minutes, the display turns off automatically.

6
Temperature Sensor Protection
If the temperature sensor is short-circuited or open-circuited in any operating mode, the display shows
E1 or E0, and the error code flashes.
Audible Feedback
When the heater is in Standby or operating mode, a valid button operation (using either the control
panel or the remote control) is confirmed with one beep. If the operation cannot be performed, two
beeps sound to indicate an invalid operation. Operations that fail due to the remote control being out
of range are not included.
Heating Mode Display
When switching heating modes, only the corresponding mode indicator changes. The display does not
show "01" or "02".
Care and Maintenance
Avoid bumping or scratching the heater, as damage to the surface coating may cause rust. If the heater
will not be used for an extended period, unplug it, wipe it clean with a soft, dry cloth, and store it in its
original packaging in a cool, dry place. Never clean the heater with water.
Warranty Information
1. This product is covered by a one (1)-year limited warranty against defects in materials and
workmanship, valid only for the original purchaser. The warranty period begins on the date of retail
purchase and is non-transferable.
2. This warranty does not cover normal wear and tear, or any damage resulting from misuse, negligent
use, use with improper voltage or current, failure to follow the operating instructions, or any
disassembly, repair, or modification not authorized by our after-sales service.
3. Additionally, this warranty does not cover damages caused by Acts of God (such as fire, flood,
hurricanes, or tornadoes) or force majeure events (such as arson, power outages, riots, or vandalism).
4. This warranty gives you specific legal rights, and you may also have other rights which vary from state
to state (or province to province). Some states (or provinces) do not allow limitations on how long an
implied warranty lasts, or the exclusion or limitation of incidental or consequential damages, so the
above limitations or exclusions may not apply to you.


Technical Support
Other Info
Thank you for choosing this product. We strive to provide you with the
best quality products and service in the industry. Should you have
any issues, please don't hesitate to contact us.
6269443420 | 6267435564