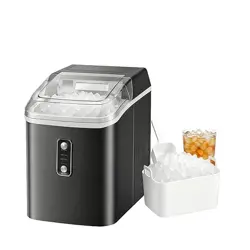
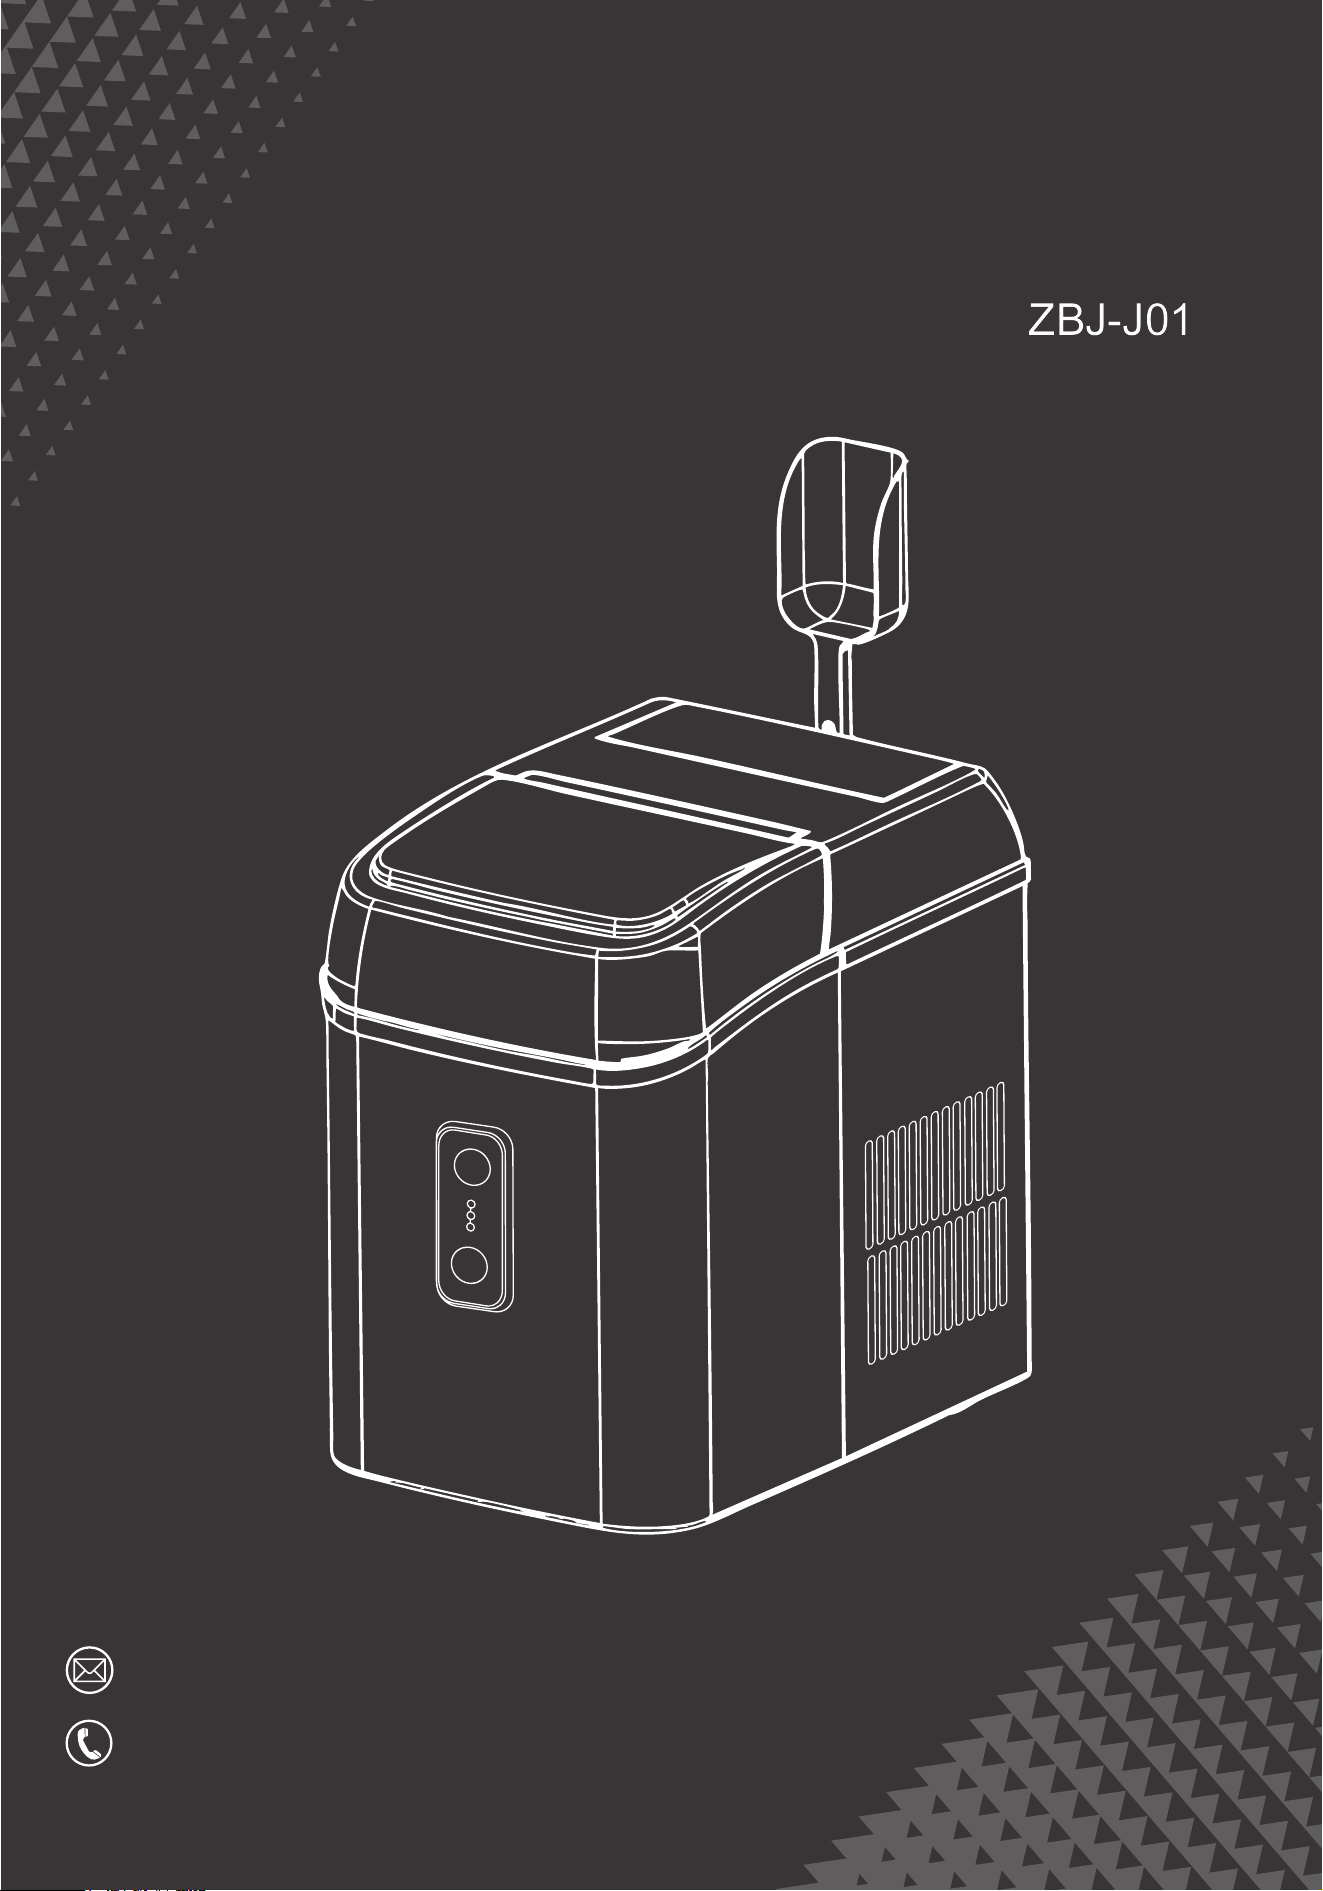
Ice Maker
Instruction Manual
HJ-Customer[email protected]
(909)637-7665 | (909)637-7593
EST
ZBJ-J01
9:00AM--17:00PM

TABLE OF CONTENTS
1. Important Safety Instructions 1
3
4
5
7
8
2. Product Introduction
3. Control Panel Introduction
4. Operating Procedures and Maintenance
5. Troubleshooting
6. Technical Specifications
KIND REMINDER
• Thank you for choosing our ice maker.
• Please check that your order has arrived in good condition
and confirm receipt.
• If you have any questions or problems, please feel free to
contact us for assistance.
• Please take a few minutes to read this manual carefully.
• Proper maintenance and operation of this machine can
maximize the machine's performance.

1
Important Safety Instructions
Do not plug or unplug the power cord with wet hands.
Use a proper outlet that complies with national and local standards.
Ensure the outlet is well-grounded and the plug is fully inserted.
Improper grounding may pose a risk of electric shock. Do not cover the
cord; keep it away from walkways and water.
The use of an extension cord is not recommended as it may cause over-
heating or fire. If necessary, use one with at least a 1.5mm diameter.
Do not clean the ice maker with flammable liquids to avoid fire or explo
-
sion.
Do not store explosive or combustible items, such as aerosol sprays,
in the appliance.
Do not tip over the ice maker; it should not be tilted more than 45
degrees. If tipped, set it upright for 24 hours before use.
Minors should use the appliance under adult supervision.
Clean the machine thoroughly and check for leaks after filling before use.
Place the ice maker away from direct sunlight, heat sources, and
radiation. Keep it level with at least 15 cm of clearance on all sides
for proper ventilation.
Only fill with room-temperature drinking water; do not add hot water,
milk, juice, cola, etc., to avoid damaging the machine.
When using household appliances, it is essential to adhere to the basic
safety guidelines to reduce the risk of fire, electric shock, and harm to
persons or property. Please read the following safety instructions
carefully before using this appliance:
1.
2.
3.
4.
5.
6.
7.
8.
9.
10.
11.
If not used for an extended period, drain the water from the reservoir
and inner tank, and dry the inner tank before storage.
12.

2
If unused for a long time, clean the machine thoroughly before use
and ensure no cleaning solution remains. Discard any ice made within
the first hour of use.
Disconnect the power before cleaning or servicing.
If the power cord is damaged, do not operate the machine. Contact
after-sales service or have a professional replace it.
This machine uses a flammable refrigerant. During servicing, keep
ignition sources away and ensure proper ventilation.
Do not attempt to repair or replace any parts unless expressly
instructed by the manufacturer; all servicing should be done under a
technician’s guidance.
The refrigeration system contains high-pressure refrigerant. Do not
tamper with it; only professionals should service it.
Use the machine in a well-ventilated area with an ambient tempera
-
ture between 10°C and 38°C.
Install the machine away from wind, rain, water mist, and electro
magnetic interference.
The insulation material of the unit is flammable EPS. Keep away from
This appliance is intended for household and similar use, including:
fire and do not burn. When discarding, it should be handled by a p ro-
fessional.
Farms, hotels, motels, and residential environments.
Bed-and-breakfast environments.
Catering and similar non-retail applications.
13.
14.
15.
16.
17.
18.
19.
20.
21.
22 .
The appliance is to be installed in accordance with the Safety Standard
for Refrigeration Systems, ASHRAE 15.
23 .
The appliance shall not be installed in corridors or hallways of public 24
buildings.
.
3
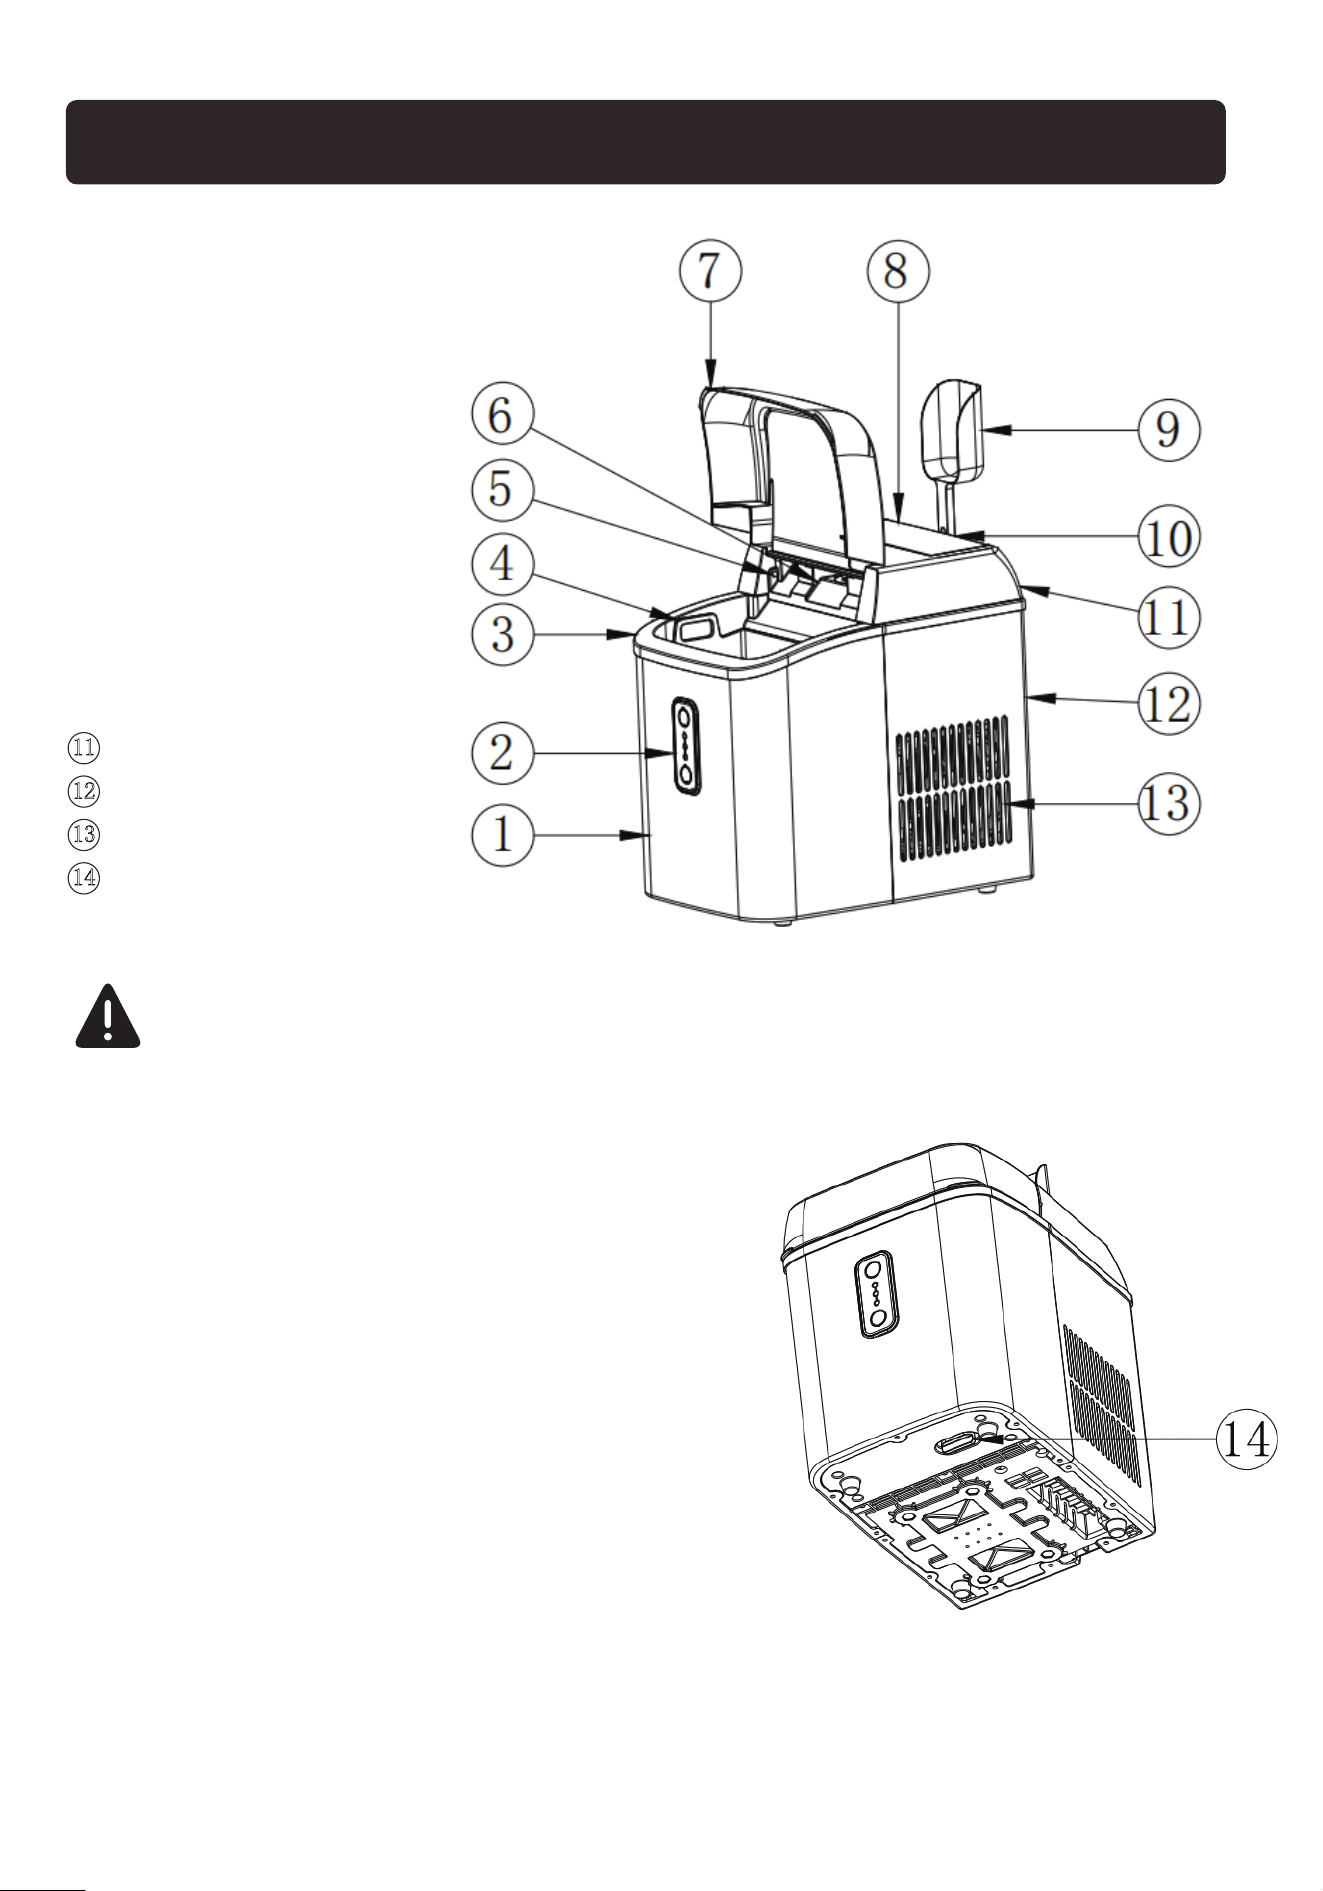
Product Introduction
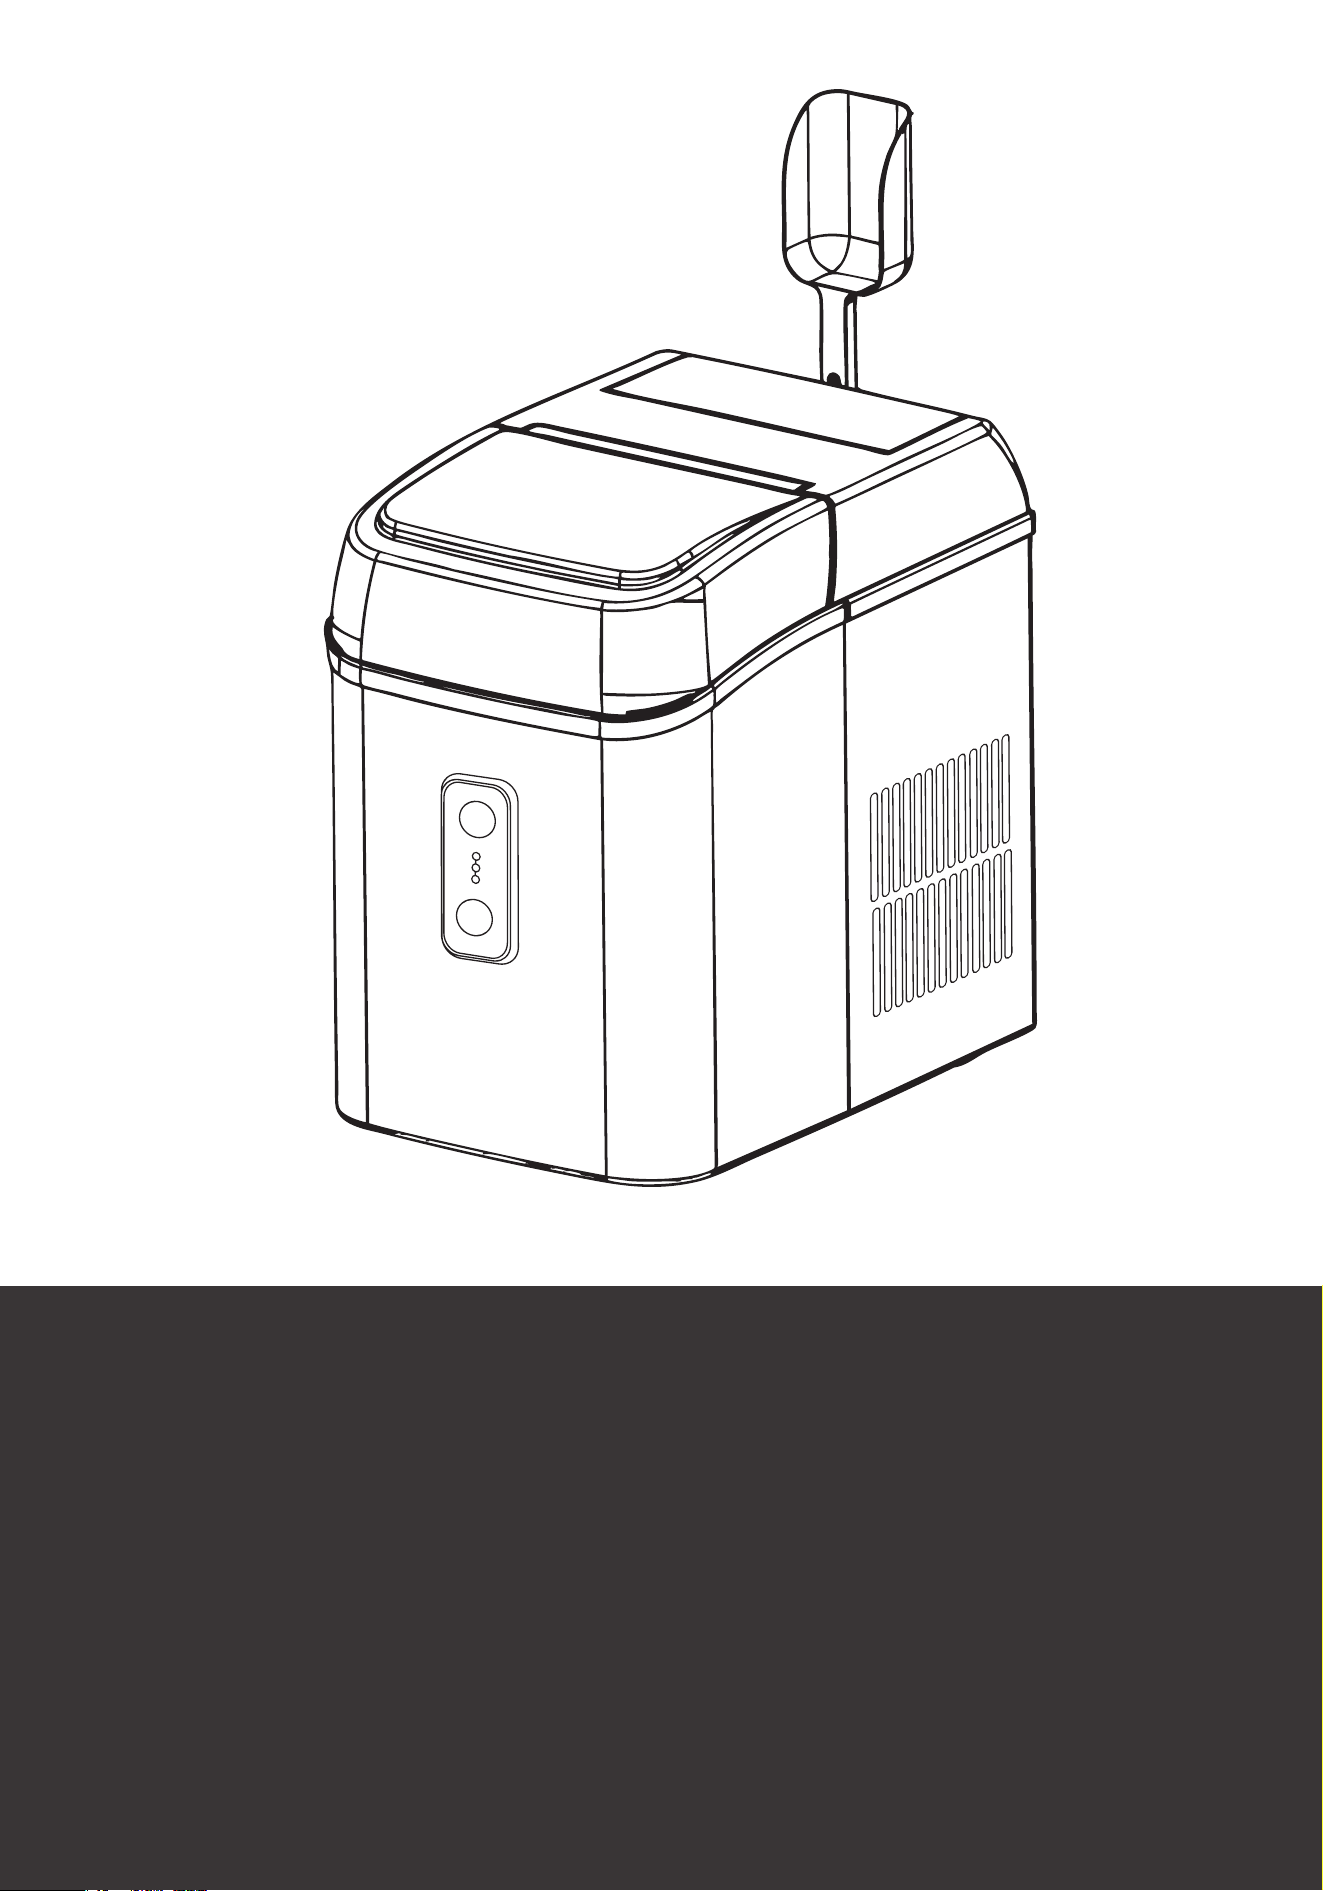
① Front cover
② Control panel
③ Inner tank
④ Ice basket
⑤ Ice full sensor
⑥ Ice outlet
⑦ Transparent lid
⑧ Rear flip cover
⑨ Ice scoop
⑩ Ice scoop holder
Top cover
Rear cover
Air outlet
Drain plug
11
12
13
14
1.Air outlet: Ensure proper airflow by keeping
the air outlet clear, with at least cm of
space from any obstructions.
2.Drain plug: After each use or cleaning,
remove the drain plug at the bottom to drain
any wastewater.
3.Rear flip cover: Before use, open the rear flip
cover to clean the inside of the water tank.
4.Ice outlet: Never touch the ice outlet with
your hands or any objects while the machine
is powered on.
5.Ice full sensor: Do not block the ice full
sensor during operation.
Note:
4
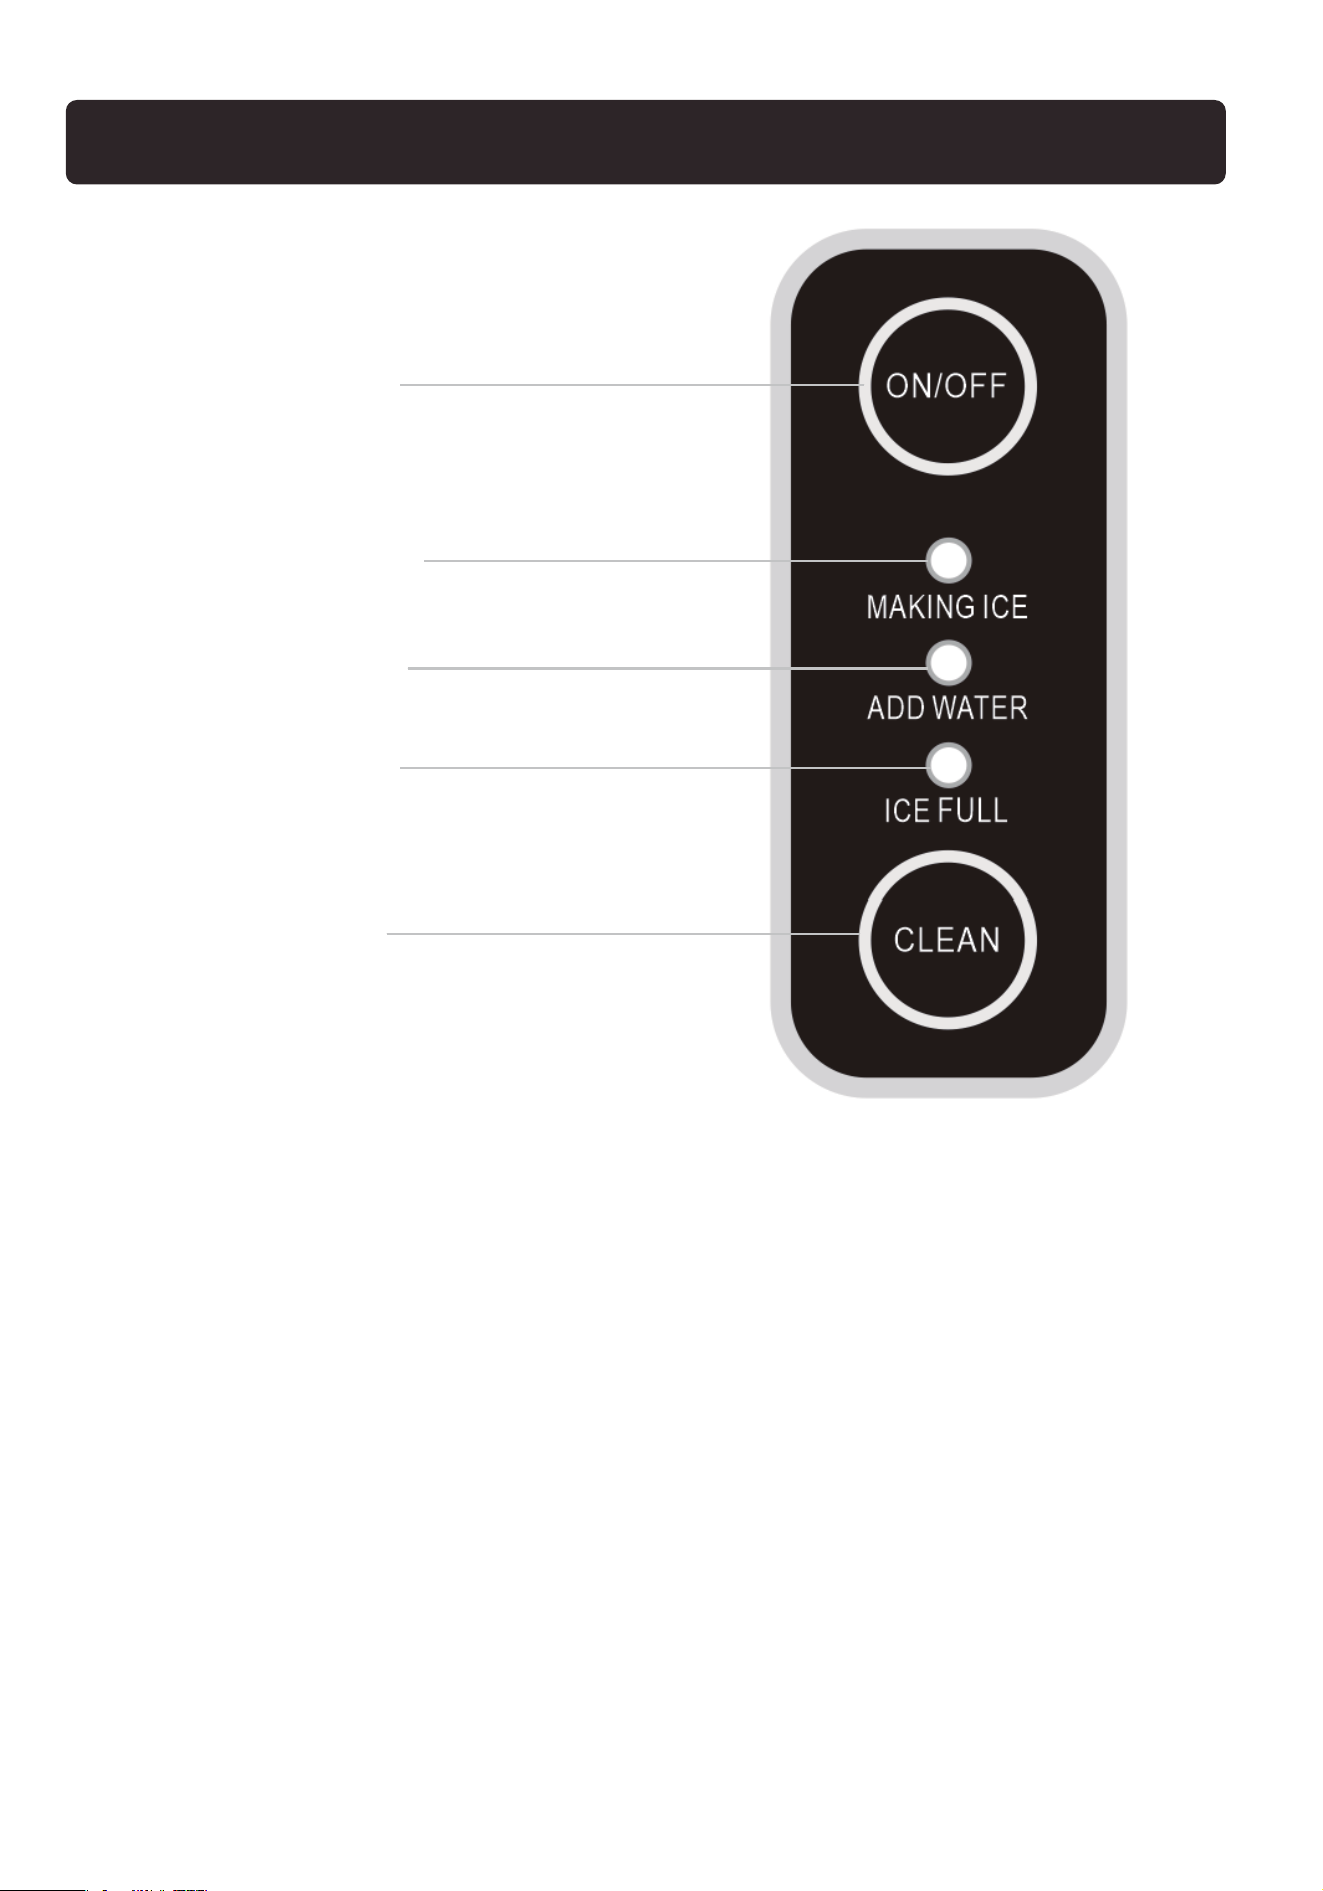
Control Panel Introduction
Power Button
Ice-Making
Indicator Light
Low-Water
Indicator Light
Ice-Full
Indicator Light
Clean Button

5
Operating Procedures and Maintenance
#FGPSFDPOOFDUJOHUIFQPXFSDPSEQMBDFUIFNBDIJOFVQSJHIUGPS
IPVSTUPBMMPXUIFSFGSJHFSBOUUPTFUUMF3FNPWFBMMQBDLBHJOH
NBUFSJBMTJODMVEJOHGPBNCBHTUBQFFUD*GBOZQBSUTBSFNJTTJOH
QMFBTFDPOUBDUPVSBGUFSTBMFTTFSWJDFQSPNQUMZ
5IFNBDIJOFTIPVMECFQMBDFEPOBTUBCMFMFWFMTVSGBDFUPTVQ
QPSUJUTXFJHIUXIFOMMFEXJUIXBUFSPSJDF
6TFUIFNBDIJOFJOBXFMMWFOUJMBUFEBSFBXJUIBUFNQFSBUVSFCF
UXFFOn$BOEn$%POPUJOTUBMMPSPQFSBUFUIFNBDIJOFJOBO
FODMPTFETQBDFTVDIBTBDMPTFESPPN
,FFQUIFNBDIJOFBXBZGSPNGBDUPSTTVDIBTXJOESBJOXBUFS
NJTUPSFMFDUSPNBHOFUJDJOUFSGFSFODF
%POPUQMBDFUIFNBDIJOFOFBSIJHIUFNQFSBUVSFTPVSDFTTVDIBT
PWFOTPSHSJMMT
5PFOTVSFMPOHUFSNQFSGPSNBODFVTFMUFSFEPSQVSJFEXBUFS
"WPJEBEEJOHIPUXBUFSNJMLKVJDFDPMBPSPUIFSMJRVJETUPQSFWFOU
EBNBHF$MFBOUIFNBDIJOFTFYUFSJPSBOESFNPWFEVTUGSPNUIF
CPUUPNPGUIFUBOLXJUIDJUSJDBDJEFWFSZPUIFSXFFL
BEFORE USING YOU SHOULD KNOW
1MBDFUIFNBDIJOFPOBBUTVSGBDFPQFOUIFGSPOUDPWFSSFNPWF
UIFJDFCBTLFUBOEQPVSESJOLJOHXBUFSJOUPUIFXBUFSUBOLFOTVSJOH
UIFXBUFSMFWFMEPFTOPUFYDFFEUIF."9MJOF
3FUVSOUIFJDFCBTLFUFOTVSJOHUIFXBUFSMFWFMJTCFMPXUIFCPUUPN
PGUIFCBTLFUBOEDMPTFUIFGSPOUDPWFS
HOW TO USE YOUR ICE MAKER:

6
1MVHUIFQPXFSDPSEJOUPUIFTPDLFUBOEDPOOFDUJUUPUIFSBUFE
QPXFSTVQQMZ
1PXFSPOUIFNBDIJOFBOEPODFUIFJDFNBLJOHJOEJDBUPSMJHIUBTI
FTQSFTTUIF0/0''CVUUPO5IFJDFNBLJOHJOEJDBUPSMJHIUXJMM
SFNBJOPOJOEJDBUJOHUIFNBDIJOFJTJOJDFNBLJOHNPEF
5PTUPQJDFNBLJOHQSFTTUIF0/0''CVUUPOUPFOUFSTUBOECZ
NPEFBOEUIFJDFNBLJOHJOEJDBUPSMJHIUXJMMBTI
*OTUBOECZNPEFQSFTTBOEIPMEUIF$-&"/CVUUPOGPSTFD
POET"MMUISFFMJHIUTXJMMBTIBOEUIFNBDIJOFXJMMFOUFS
TFMGDMFBOJOHNPEF5IFDMFBOJOHQSPDFTTMBTUTNJOVUFT5PFYJU
DMFBOJOHNPEFEVSJOHUIFQSPDFTTQSFTTUIF$-&"/CVUUPOUP
SFUVSOUPTUBOECZ
8IFOUIFXBUFSMFWFMJTMPXUIF"%%8"5&3JOEJDBUPSMJHIUXJMM
UVSOPOBOEUIFNBDIJOFXJMMTUPQXPSLJOH"GUFSBEEJOHXBUFSEPOPU
FYDFFEUIF."9XBUFSMFWFMQSFTTUIF0/0''CVUUPOUPSFTUBSU
8IFOUIF*$&'6--JOEJDBUPSMJHIUUVSOTPOUIFJDFCBTLFUJT
GVMMBOEJDFNBLJOHXJMMTUPQ0QFOUIFGSPOUDPWFSSFNPWFUIFJDF
CBTLFUBOEFNQUZUIFJDF5IFOSFUVSOUIFJDFCBTLFU"GUFS
TFDPOETUIF*$&'6--JOEJDBUPSMJHIUXJMMUVSOPBOEUIFNBDIJOF
XJMMSFTVNFPQFSBUJPO
'PSSTUUJNFVTFPSBGUFSQSPMPOHFEJOBDUJWJUZJUTSFDPNNFOEFEUP
DMFBOUIFNBDIJOFCFGPSFNBLJOHJDF%JTDBSEBOZJDFNBEFXJUIJOUIF
STUIPVSPGVTF
8IFOOPUJOVTFQMFBTFUVSOPUIFJDFNBLFSBOEVOQMVHUIF
QPXFSDPSE
7
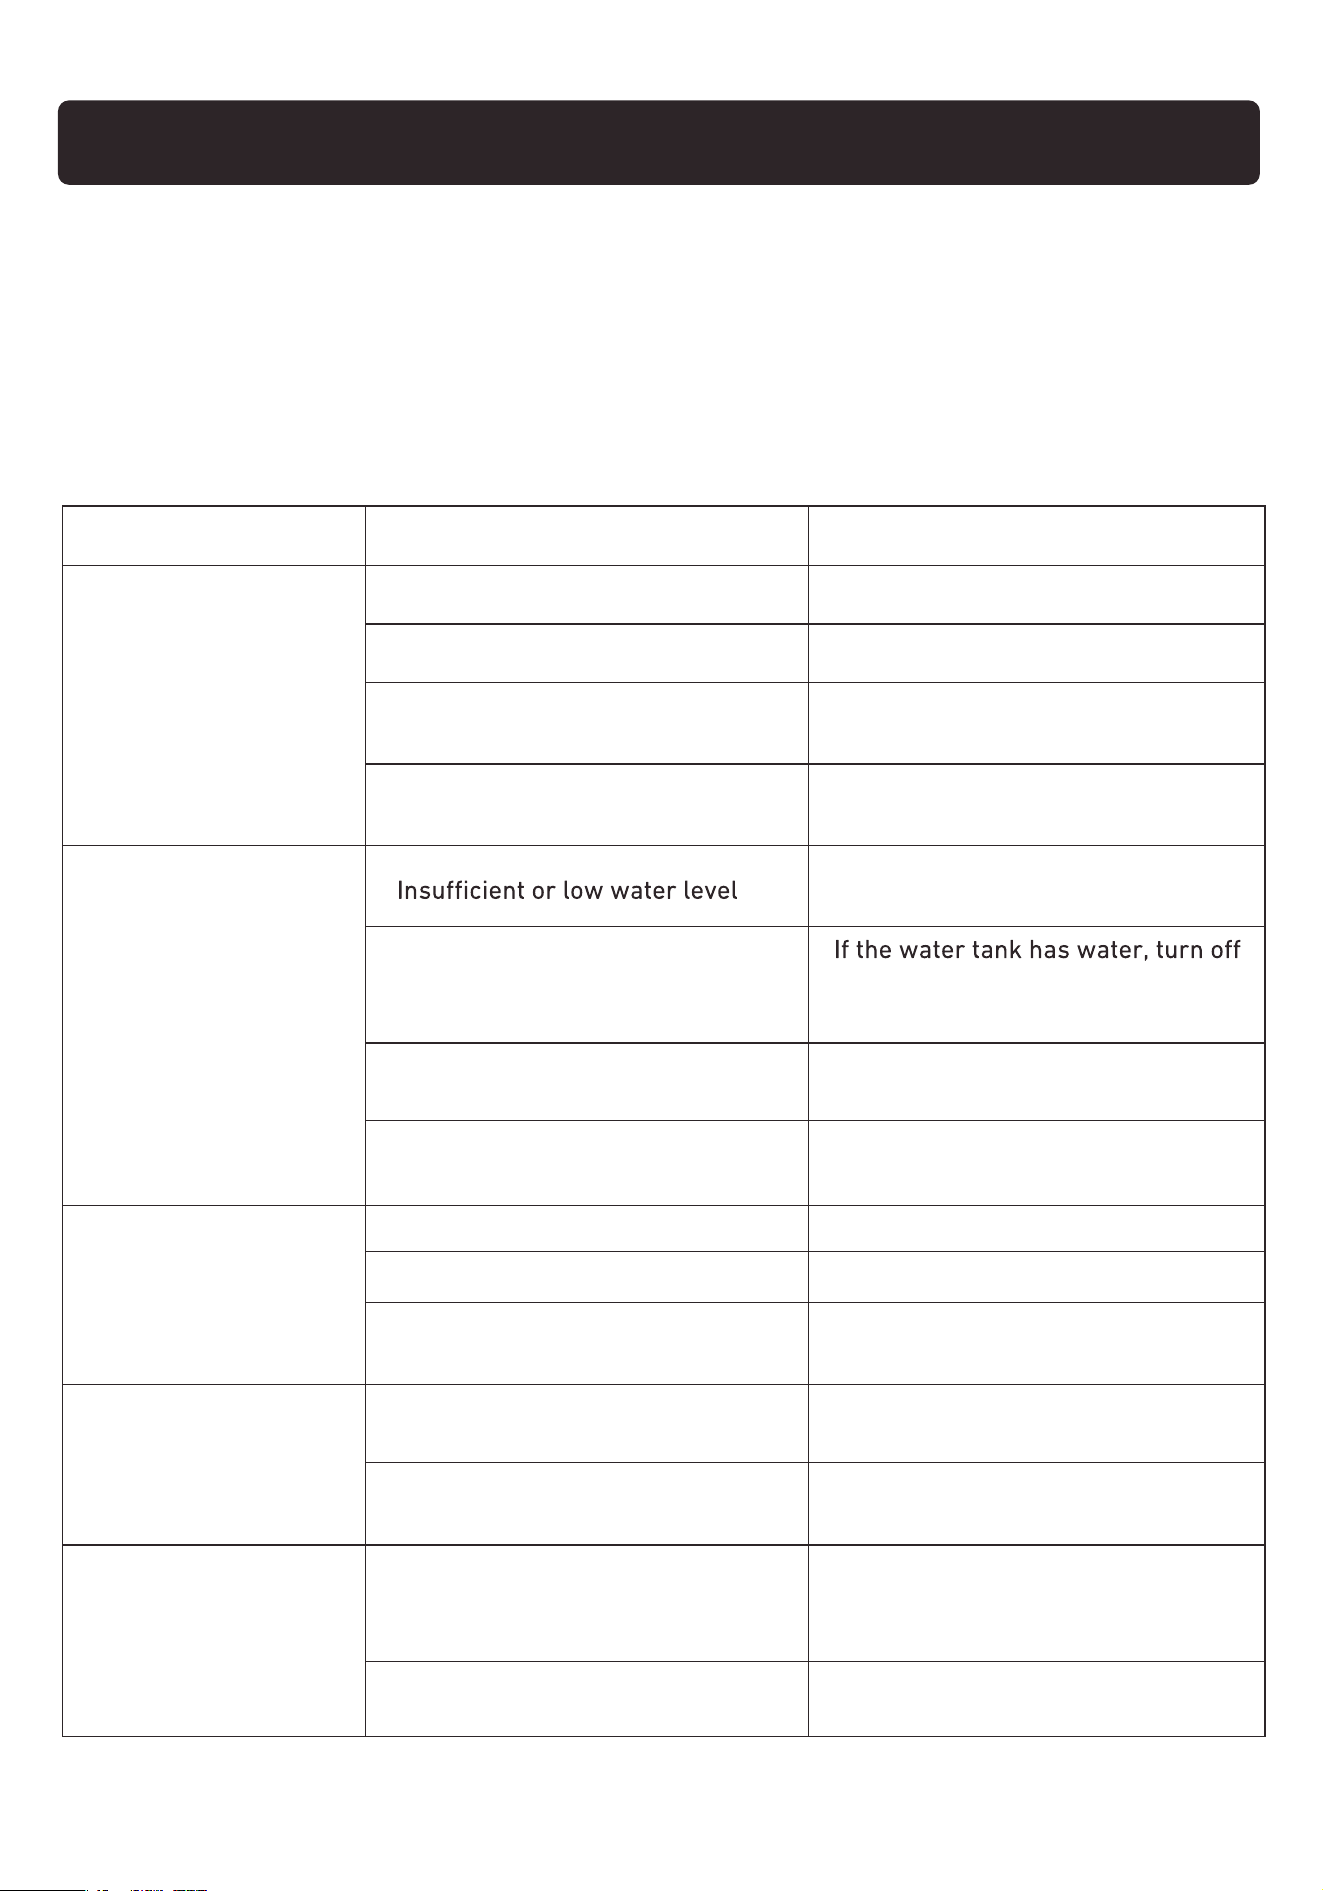
If the machine malfunctions, please wait for it to stop automatically.
You can resolve the issue using the methods in the table below. How-
ever, do not disassemble, inspect, or repair the machine without pro-
fessional guidance.
Troubleshooting:
Issue
Low-water Light On
Ice-full Light On
Water Leakage
No Ice Production,
Slow Ice Making,
or Incomplete Ice
Formation
Cause Solution
Contact a professional technician
or after-sales service for repair.
Please add water and restart the
machine.
the power for 2 minutes, then
restart the machine.
Contact a professional technician or
after-sales service for repair.
Contact a professional technician
or after-sales service for repair.
Remove the ice.
Clean the sensor probe.
Contact a professional technician or
after-sales service for repair.
Remove and reinsert the drain
plug properly.
Contact a professional technician
or after-sales service for repair.
No Power/
No Response
Power not connected Ensure the power is connected.
Check if the socket has power.No power at the socket
Power cord not
securely plugged in
Power cord is damaged
Faulty water sensor
Water pump jammed or damaged
Faulty water level switch
Ice basket full
Faulty ice-full sensor
Damaged ice-full sensor
Drain plug not properly inserted
Internal water pipe connector
not installed
Ambient or water temperature
too high or too low
Refrigerant leakage or blockage
Operate the machine in an ambient
temperature range of 10℃-38℃
and use water at 7℃-32℃.
Contact a professional technician
or after-sales service for repair.
Reinsert the power cord securely.
8
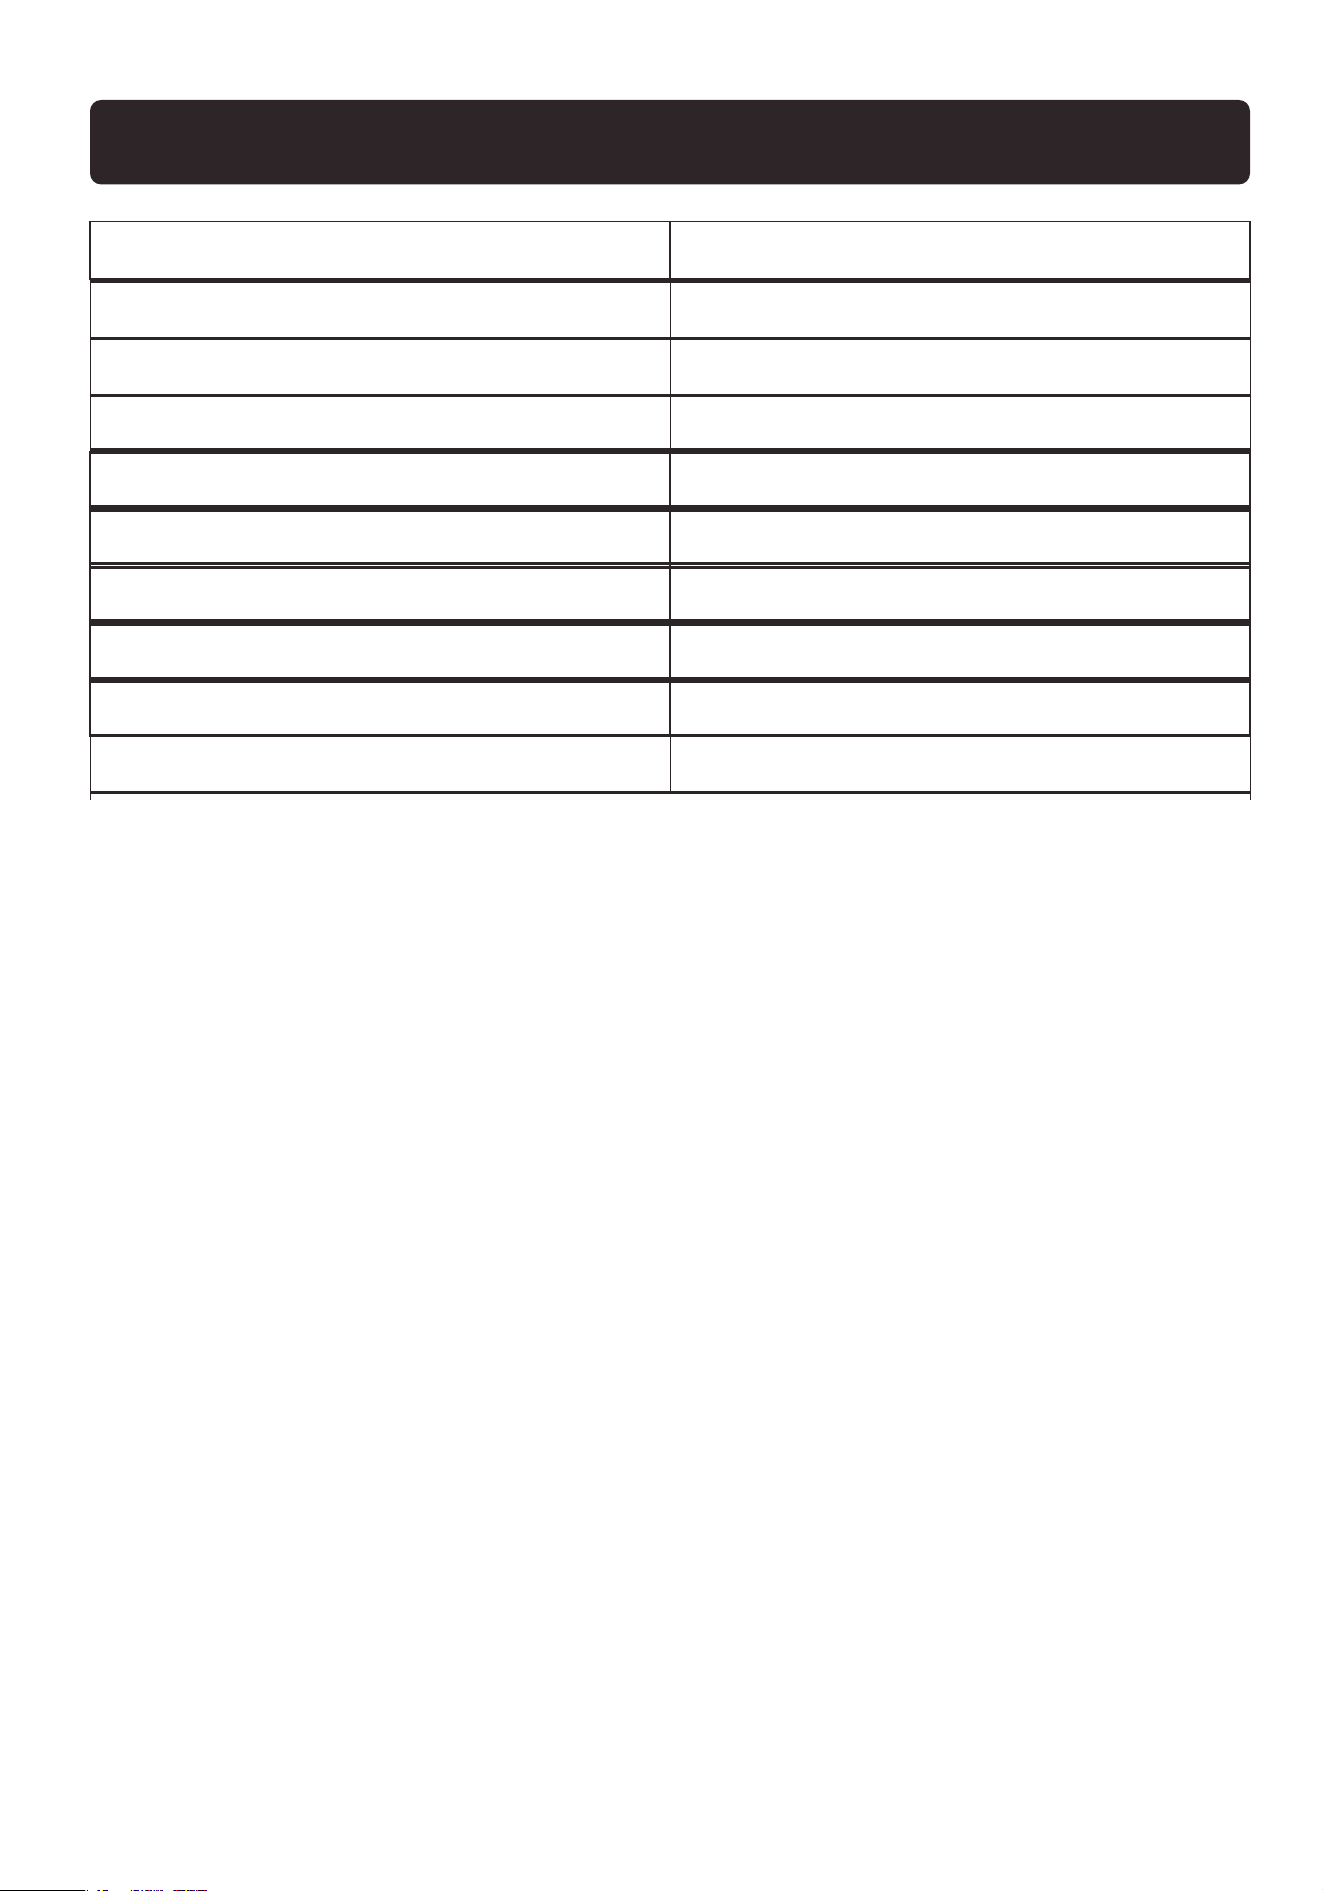
Model
Rated Voltage/Frequency
Thank You
For choosing our ice maker!
Technical Specifications
Rated Current
Input Power
Refrigerant/Refrigerant charge
Insulation Type
Net Weight
Gross Weight
Overall Dimensions
WBJ-01NA
110V-120VAC/60HZ
1.7A
115W
R600a/0.56oz
EPS
8.3KG
9KG
315*220*315mm
Packaging Dimensions 355*270*375mm
9
Technical Support
Thank you for choosing this product. We strive to provide you with the
best quality products and services in the industry. Should you have
any issues, please don't hesitate to contact us.
(909)637-7665 | (909)637-7593
HJ-Customer[email protected]