Overview
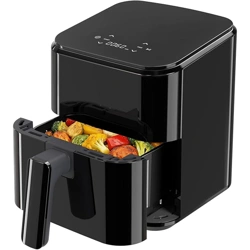
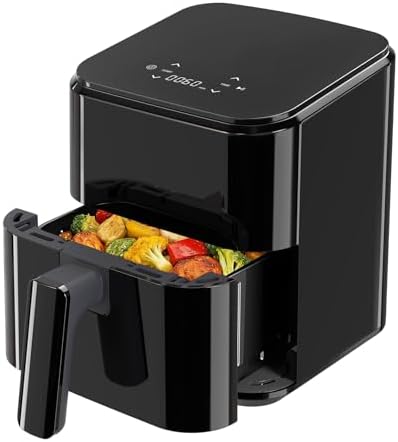
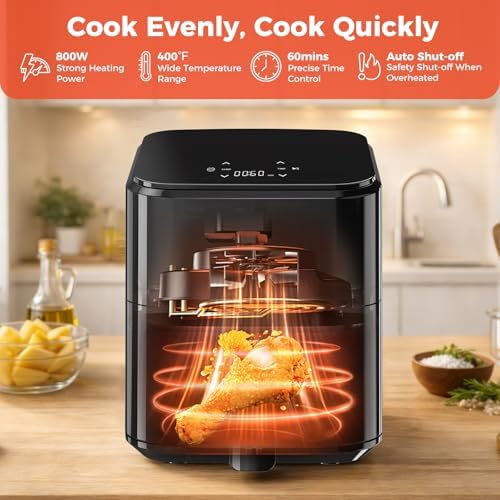
This manual provides instructions for the safe and effective use of the NEWBULIG 3 Qt Compact Digital Air Fryer. This appliance is a countertop convection oven that cooks by circulating hot air, requiring little to no oil. It features a digital touchscreen control panel, a non-stick crisper plate, and a dishwasher-safe basket.

Safety Information
WARNING: To reduce the risk of fire, electric shock, or injury:
- Read all instructions before using the appliance.
- Do not immerse the power cord, plug, or main unit in water or other liquids.
- This appliance is for household use only. Do not use outdoors.
- Place the air fryer on a stable, level, heat-resistant surface. Maintain at least 5 inches of free space on all sides and above the appliance during operation.
- Do not place the appliance on or near a hot gas or electric burner, or in a heated oven.
- Do not cover the air inlet and outlet openings during use.
- Extreme caution must be used when moving an appliance containing hot oil or other hot liquids.
- Do not touch hot surfaces. Use handles or knobs. Always use oven mitts.
- Unplug the appliance from the outlet when not in use and before cleaning. Allow to cool before putting on or taking off parts, and before cleaning.
- Do not operate the appliance with a damaged cord or plug, or after the appliance malfunctions, or has been damaged in any manner.
- The use of accessory attachments not recommended by the manufacturer may cause injuries.
Product Specifications
| Specification | Detail |
|---|
| Model | AH-KZG2725-3BK-RC |
| Capacity | 3.17 Quarts (3 Liters) |
| Power | 800 Watts, 120 Volts |
| Temperature Range | Up to 400°F (200°C) |
| Control Method | Digital Touchscreen |
| Dimensions (D x W x H) | 10.04" x 8.27" x 11.02" |
| Weight | Approximately 5.27 lbs |
| Material (Basket/Plate) | Plastic with Non-Stick Coating |
| Included Components | Main Unit, Cooking Basket, Crisper Plate |
Parts and Components
- Main Housing: Contains the heating element and fan.
- Control Panel: Digital touchscreen for setting time and temperature.
- Power Cord: Connects to a standard 120V outlet.
- Cooking Basket: Removable, square-shaped basket with handle. Dishwasher safe.
- Crisper Plate: Non-stick plate that sits inside the basket to hold food and allow air circulation. Dishwasher safe.
Control Panel Guide
The touchscreen control panel is located on the top of the appliance.

- Power Button: Turns the appliance on and off.
- Temperature Control (+/-): Adjusts the cooking temperature in increments. Range is up to 400°F.
- Timer Control (+/-): Adjusts the cooking time in minute increments.
- Start/Pause Button: Begins the cooking cycle or pauses a cycle in progress.
- Display: Shows the set temperature, remaining time, and cooking status.
Auto Shutoff: The appliance will automatically turn off when the timer reaches zero.
Initial Use and Preheating
- Remove all packaging materials and stickers.
- Wash the basket and crisper plate with warm, soapy water. Rinse and dry thoroughly. (They are dishwasher safe).
- Place the air fryer on a stable, heat-resistant countertop.
- Insert the crisper plate into the basket.
- Slide the basket into the main unit until it clicks into place.
- Plug the power cord into an electrical outlet.
- It is recommended to preheat the air fryer before adding food for optimal results. To preheat:
- Press the Power button.
- Set the desired temperature using the Temperature controls.
- Set the timer for 3 minutes.
- Press Start. The unit will run empty to reach the set temperature.
Basic Cooking Guide
- Prepare Food: Pat food dry with a paper towel. Lightly coat with oil, if desired, for crispier results. Do not overfill the basket.
- Load the Basket: Place food in a single layer on the crisper plate inside the basket. Ensure food does not block the air vent at the top of the basket.
- Insert Basket: Carefully slide the loaded basket into the air fryer.
- Set Controls:
- Press Power.
- Set the temperature using the +/- buttons.
- Set the cooking time using the +/- buttons.
- Start Cooking: Press the Start button. The display will show the countdown timer.
- Check Food: For even cooking, you may pull the basket out halfway through the cooking time to shake or turn the food. The heating will pause when the basket is removed and resume when it is reinserted.
- End of Cycle: When the timer reaches zero, the appliance will beep and shut off automatically. The food is ready.
- Remove Food: Use oven mitts to pull the basket out by its handle. Empty food onto a plate using tongs.
Note: Cooking times and temperatures will vary depending on the type, quantity, and size of the food. Refer to recipe guides for specific recommendations.
Cleaning and Maintenance
- Unplug the appliance and allow it to cool completely before cleaning.
- Basket & Crisper Plate: These components are dishwasher safe (top rack recommended). For hand washing, use warm soapy water and a non-abrasive sponge. The non-stick surface allows for easy cleaning. Do not use metal utensils or abrasive cleaners.
- Main Unit Interior & Exterior: Wipe the inside of the cooking chamber and the outside of the unit with a damp, soft cloth. Do not use abrasive cleaners or scouring pads.
- Heating Element: Do not immerse the main unit in water. Do not clean the heating element directly with any object.
- Ensure all parts are completely dry before reassembling and storing.
Troubleshooting
| Problem | Possible Cause | Solution |
|---|
| Appliance does not turn on. | Not plugged in.
Power outlet not working. | Plug into a working outlet.
Check circuit breaker. |
| Food is not cooked evenly. | Basket is overloaded.
Food not shaken during cooking. | Cook in smaller batches.
Shake basket halfway through cook time. |
| Food is not crispy. | Food is too wet.
Insufficient oil (if required by recipe).
Temperature too low. | Pat food dry before cooking.
Lightly coat with oil.
Increase temperature slightly. |
| Smoke is emitted. | Excess oil dripping from fatty foods.
Food debris in the bottom of the unit. | Trim excess fat from meat.
Ensure unit is clean before use. |
| Error code on display. | Overheating or malfunction. | Unplug the appliance, let it cool for 30 minutes, then try again. If problem persists, discontinue use. |
Storage
Ensure the appliance is completely cool, clean, and dry before storage. The compact and lightweight design (approx. 5 lbs) allows for easy placement in a cabinet. Store the cord neatly to prevent damage.
Warranty and Support
This product is covered by a 1-Year Manufacturer's Warranty from NEWBULIG. For warranty service or product support, contact the seller through your Amazon purchase history or visit the NEWBULIG Store page on Amazon.