HJ-Customer-Service@outlook.com
EST 9:00AM--17:00PM
6269443420 | 6267435564
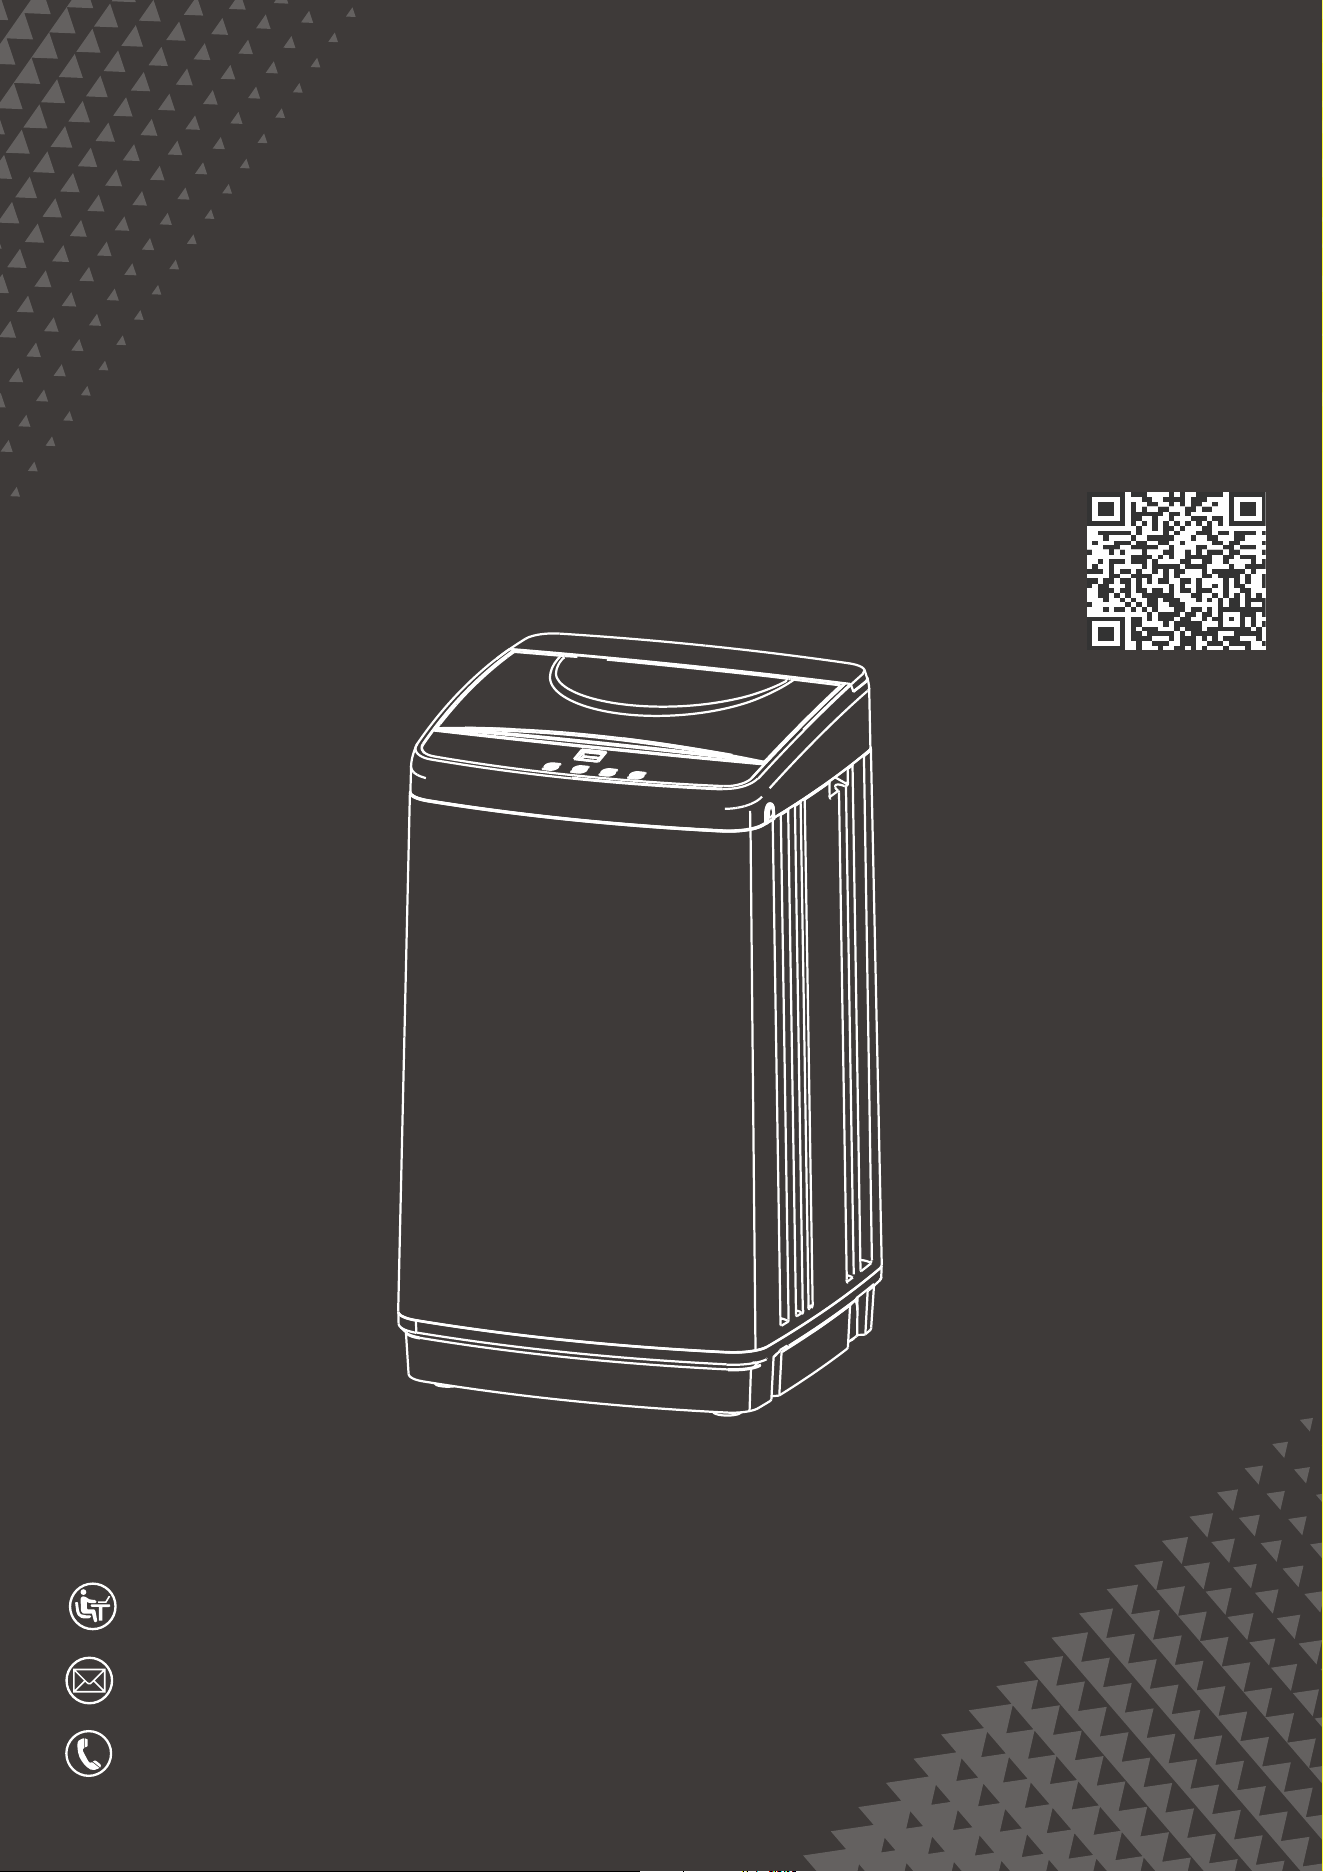
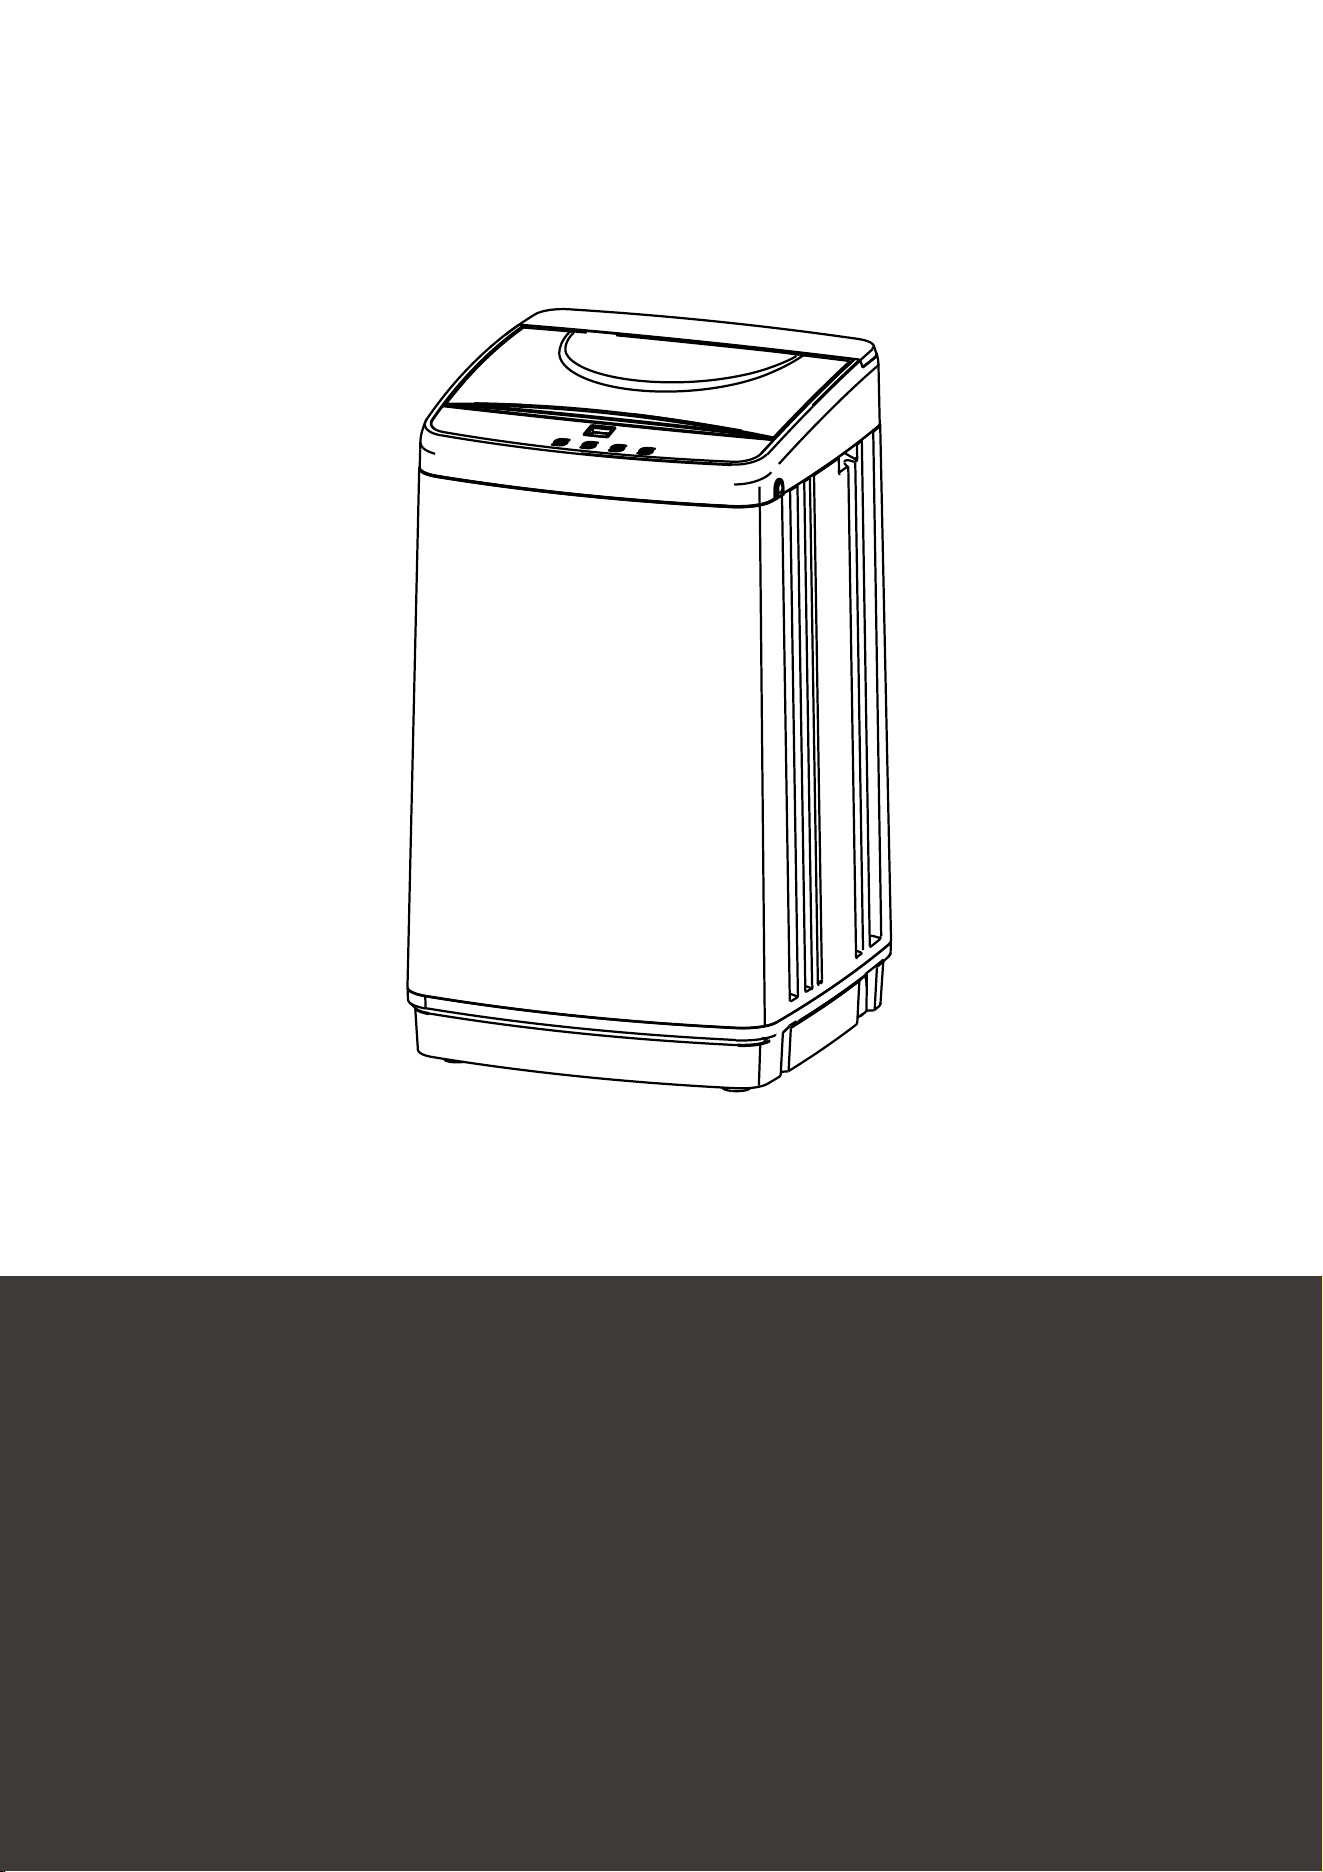
Instruction Manual
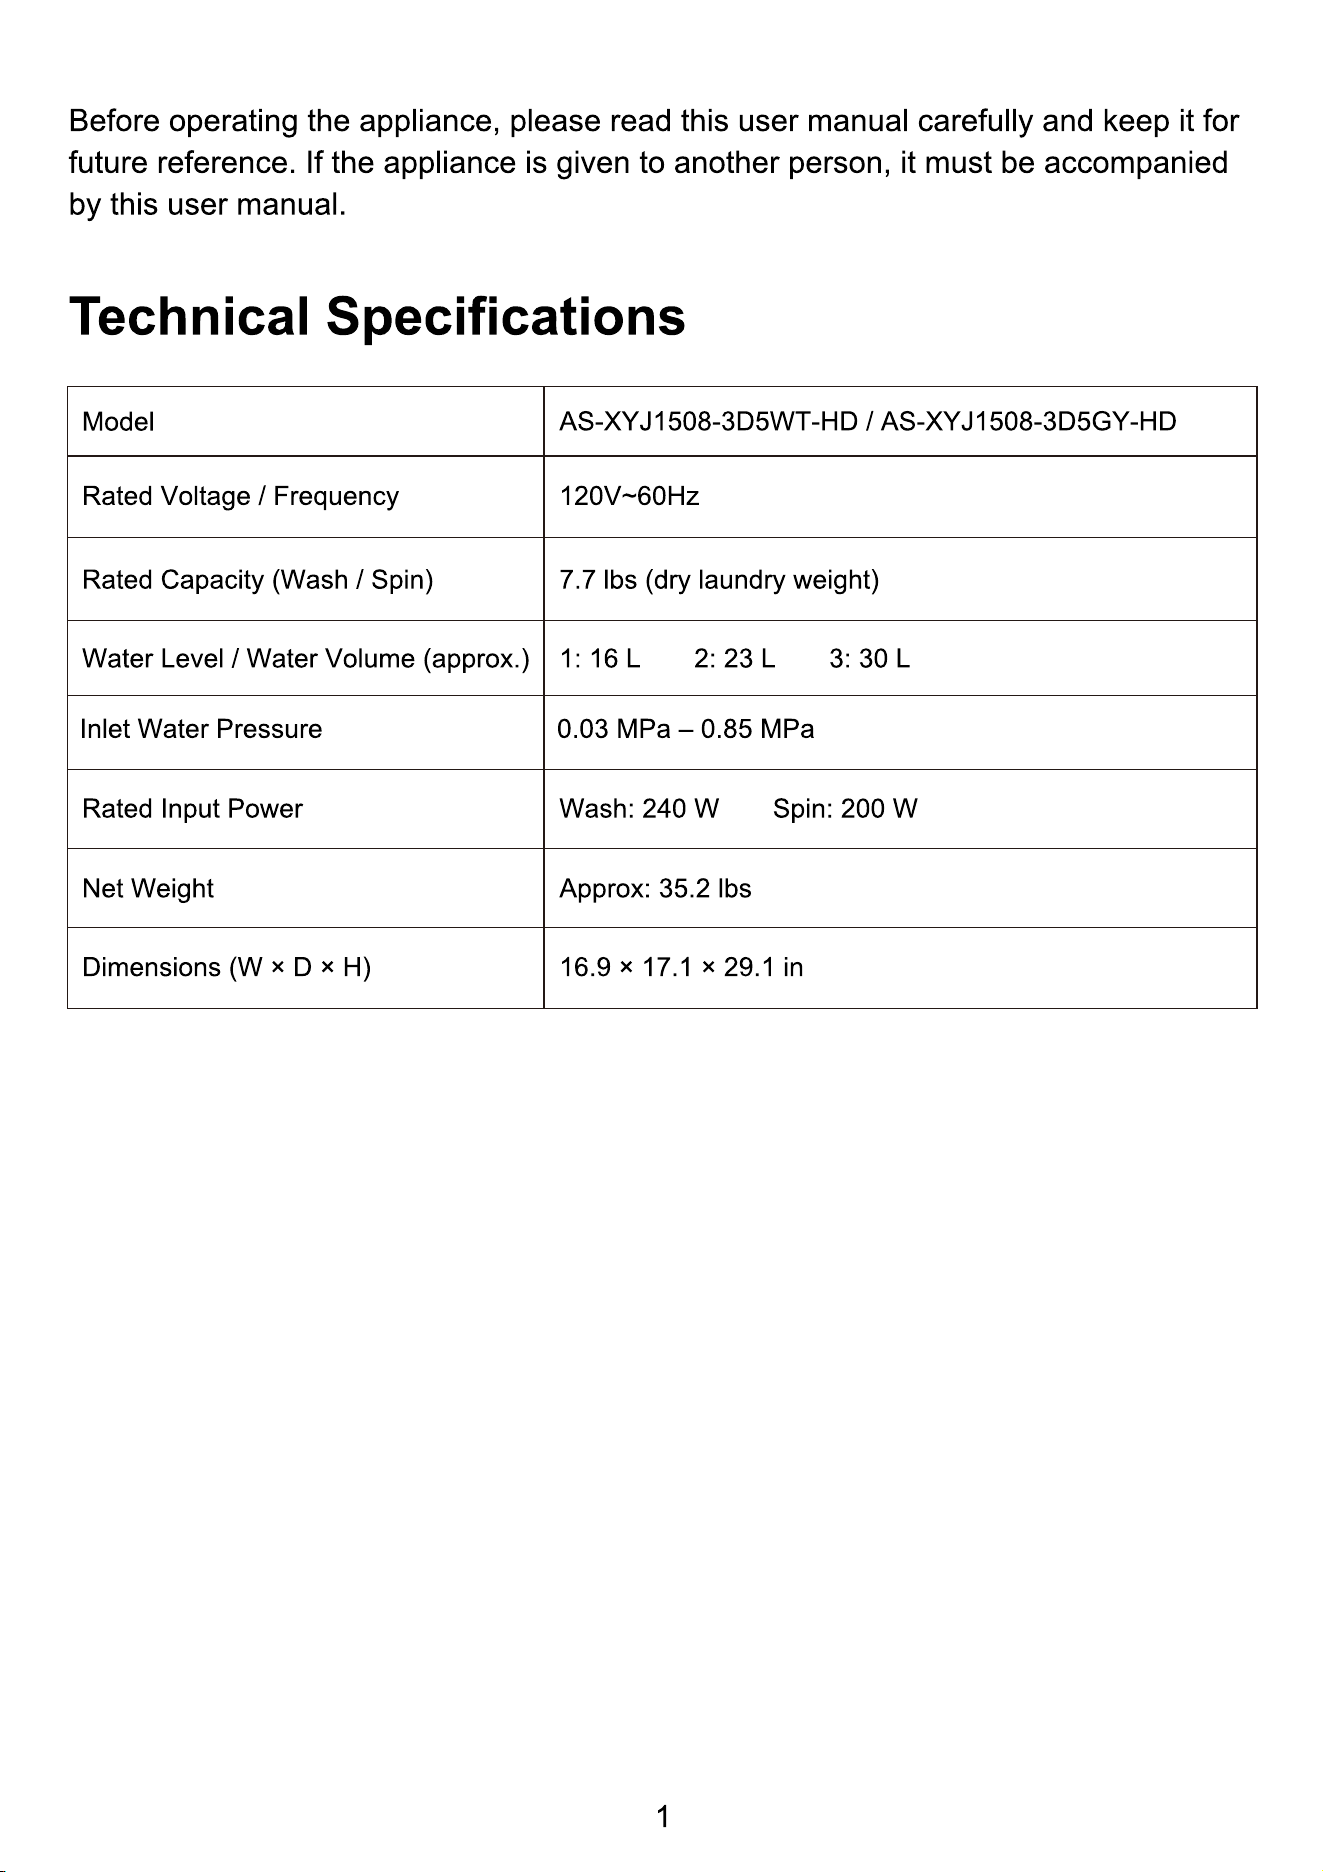
AS-XYJ1508-3D5
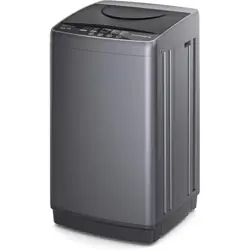
Washing Machine
Portable

1
2
5
Technical Specifications
6
7
8
9
10
12
12
13
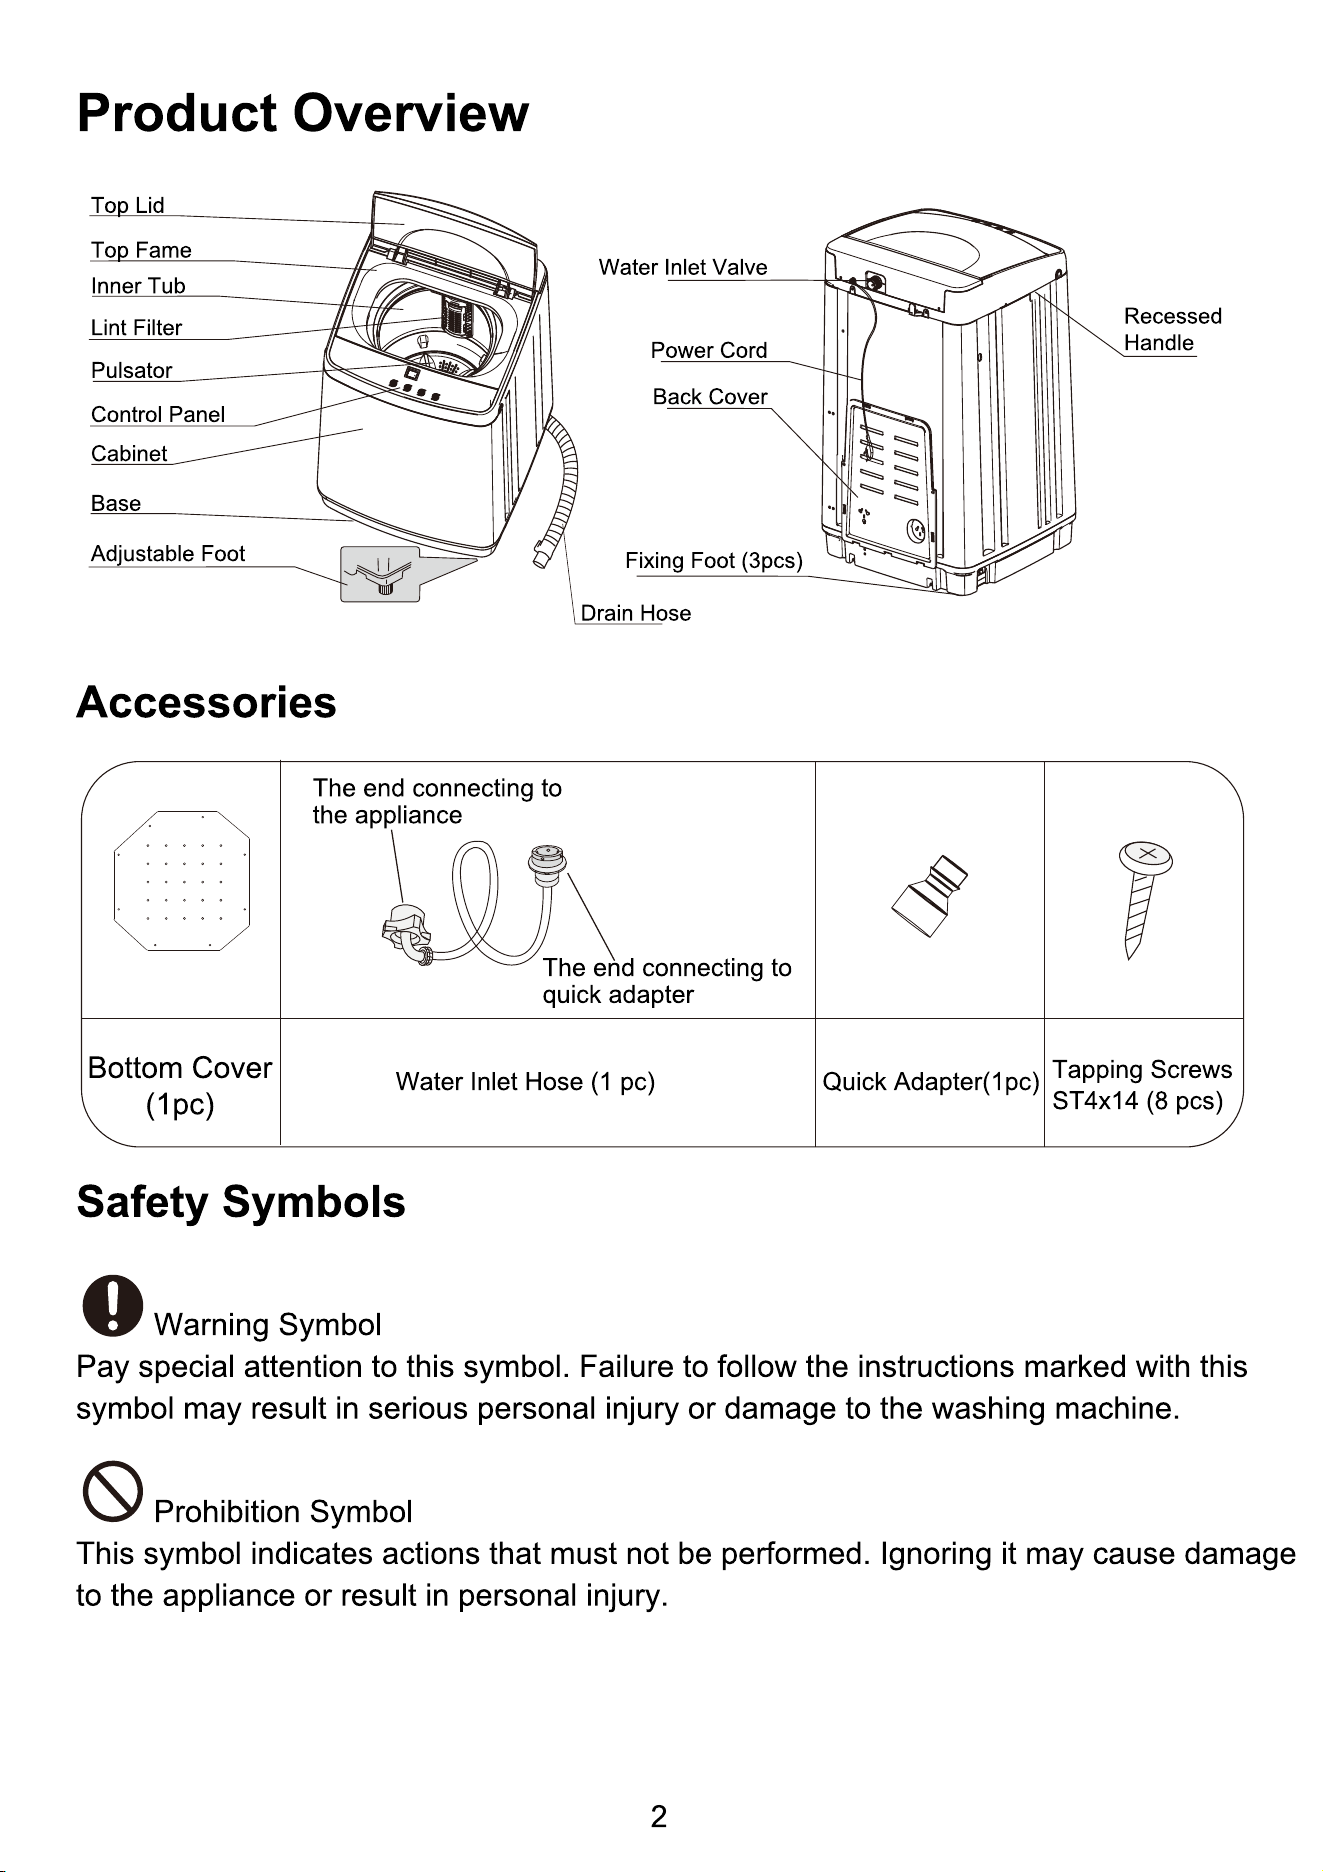
Product Overview
Installation and Setup
Using the Drain Hose
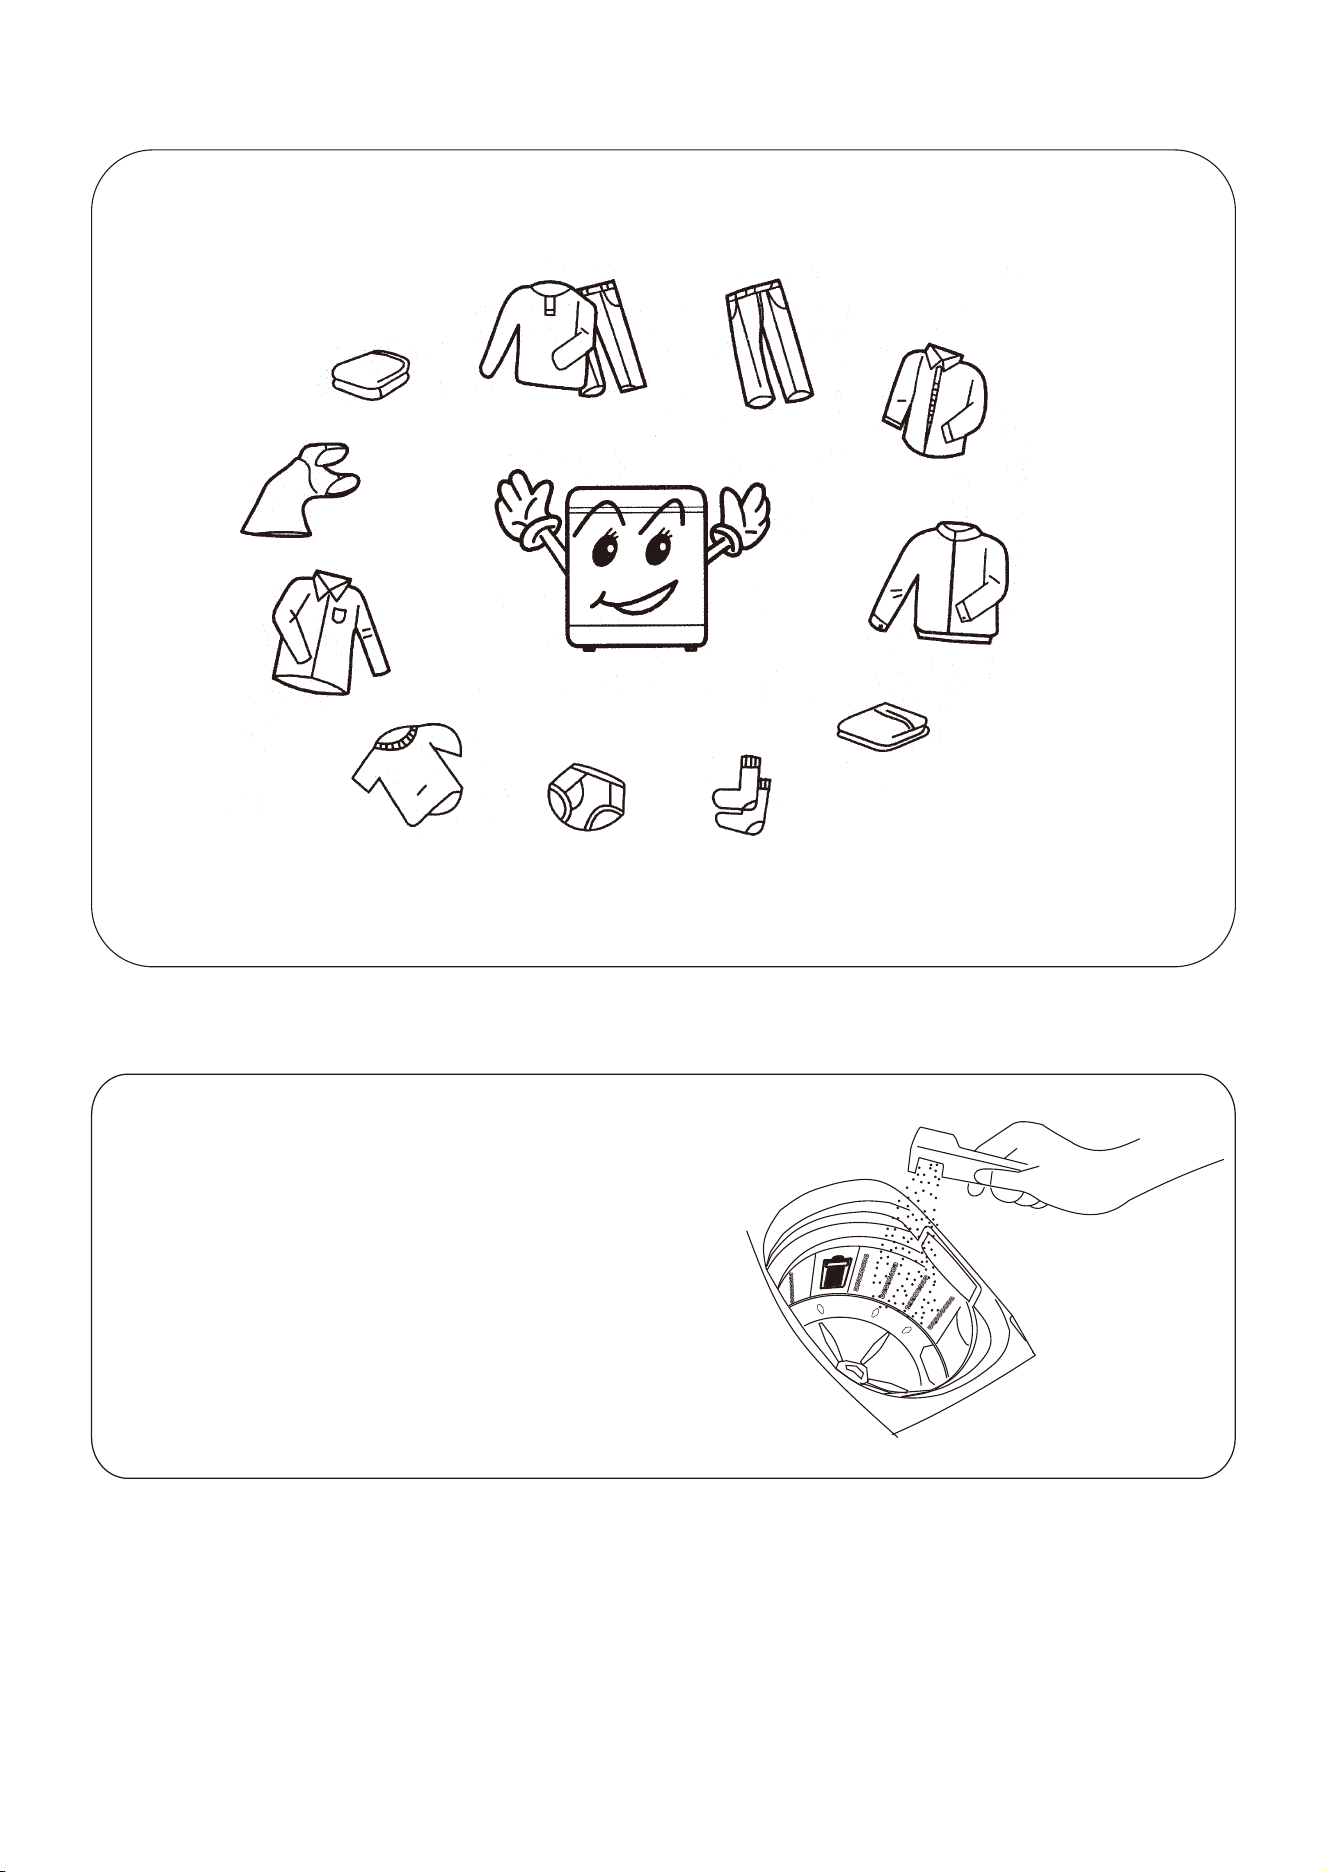
Loading the Laundry
Use of Detergent
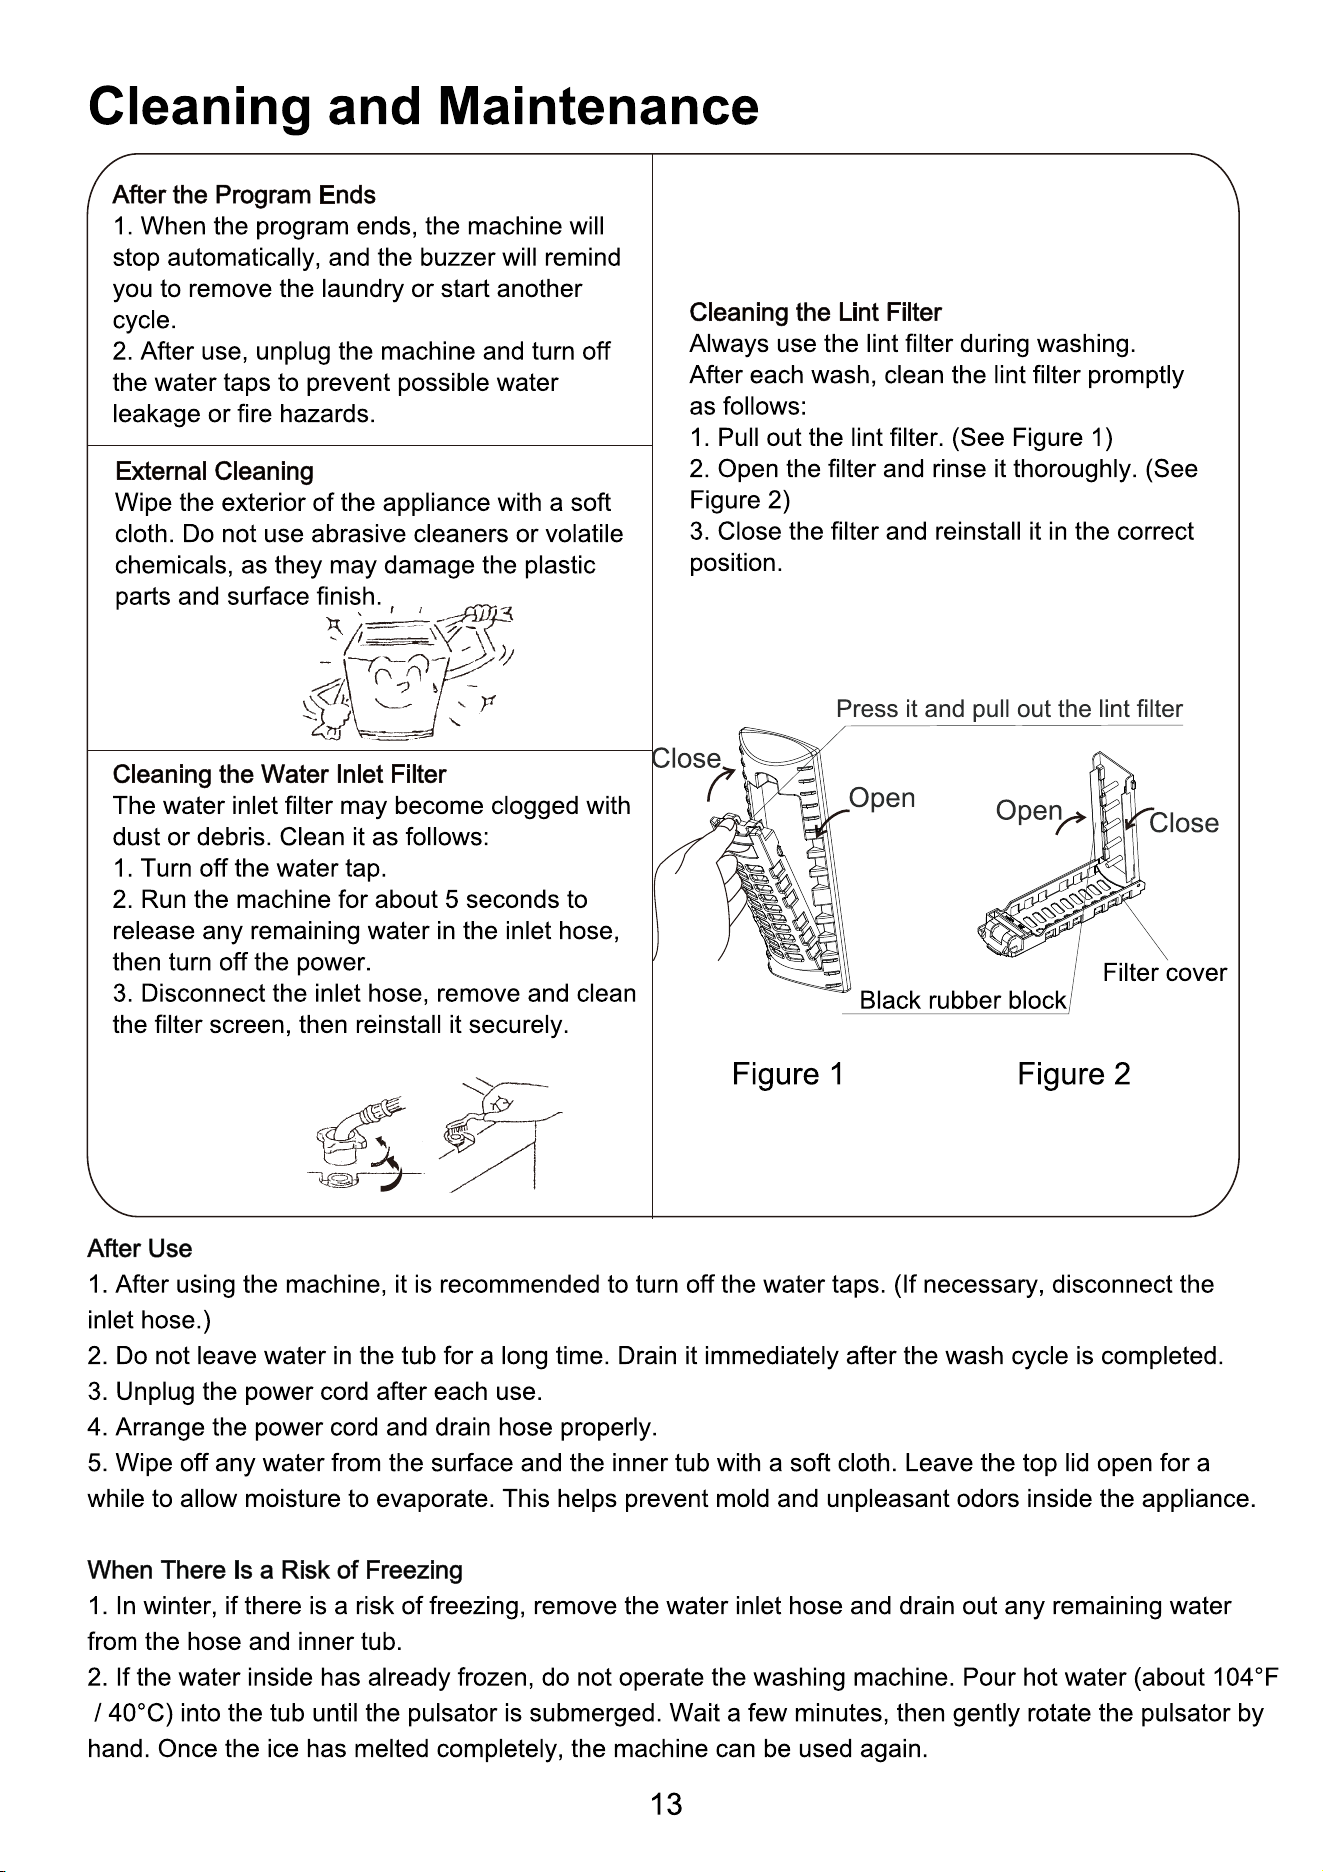
Control Panel Overview
Operating Steps
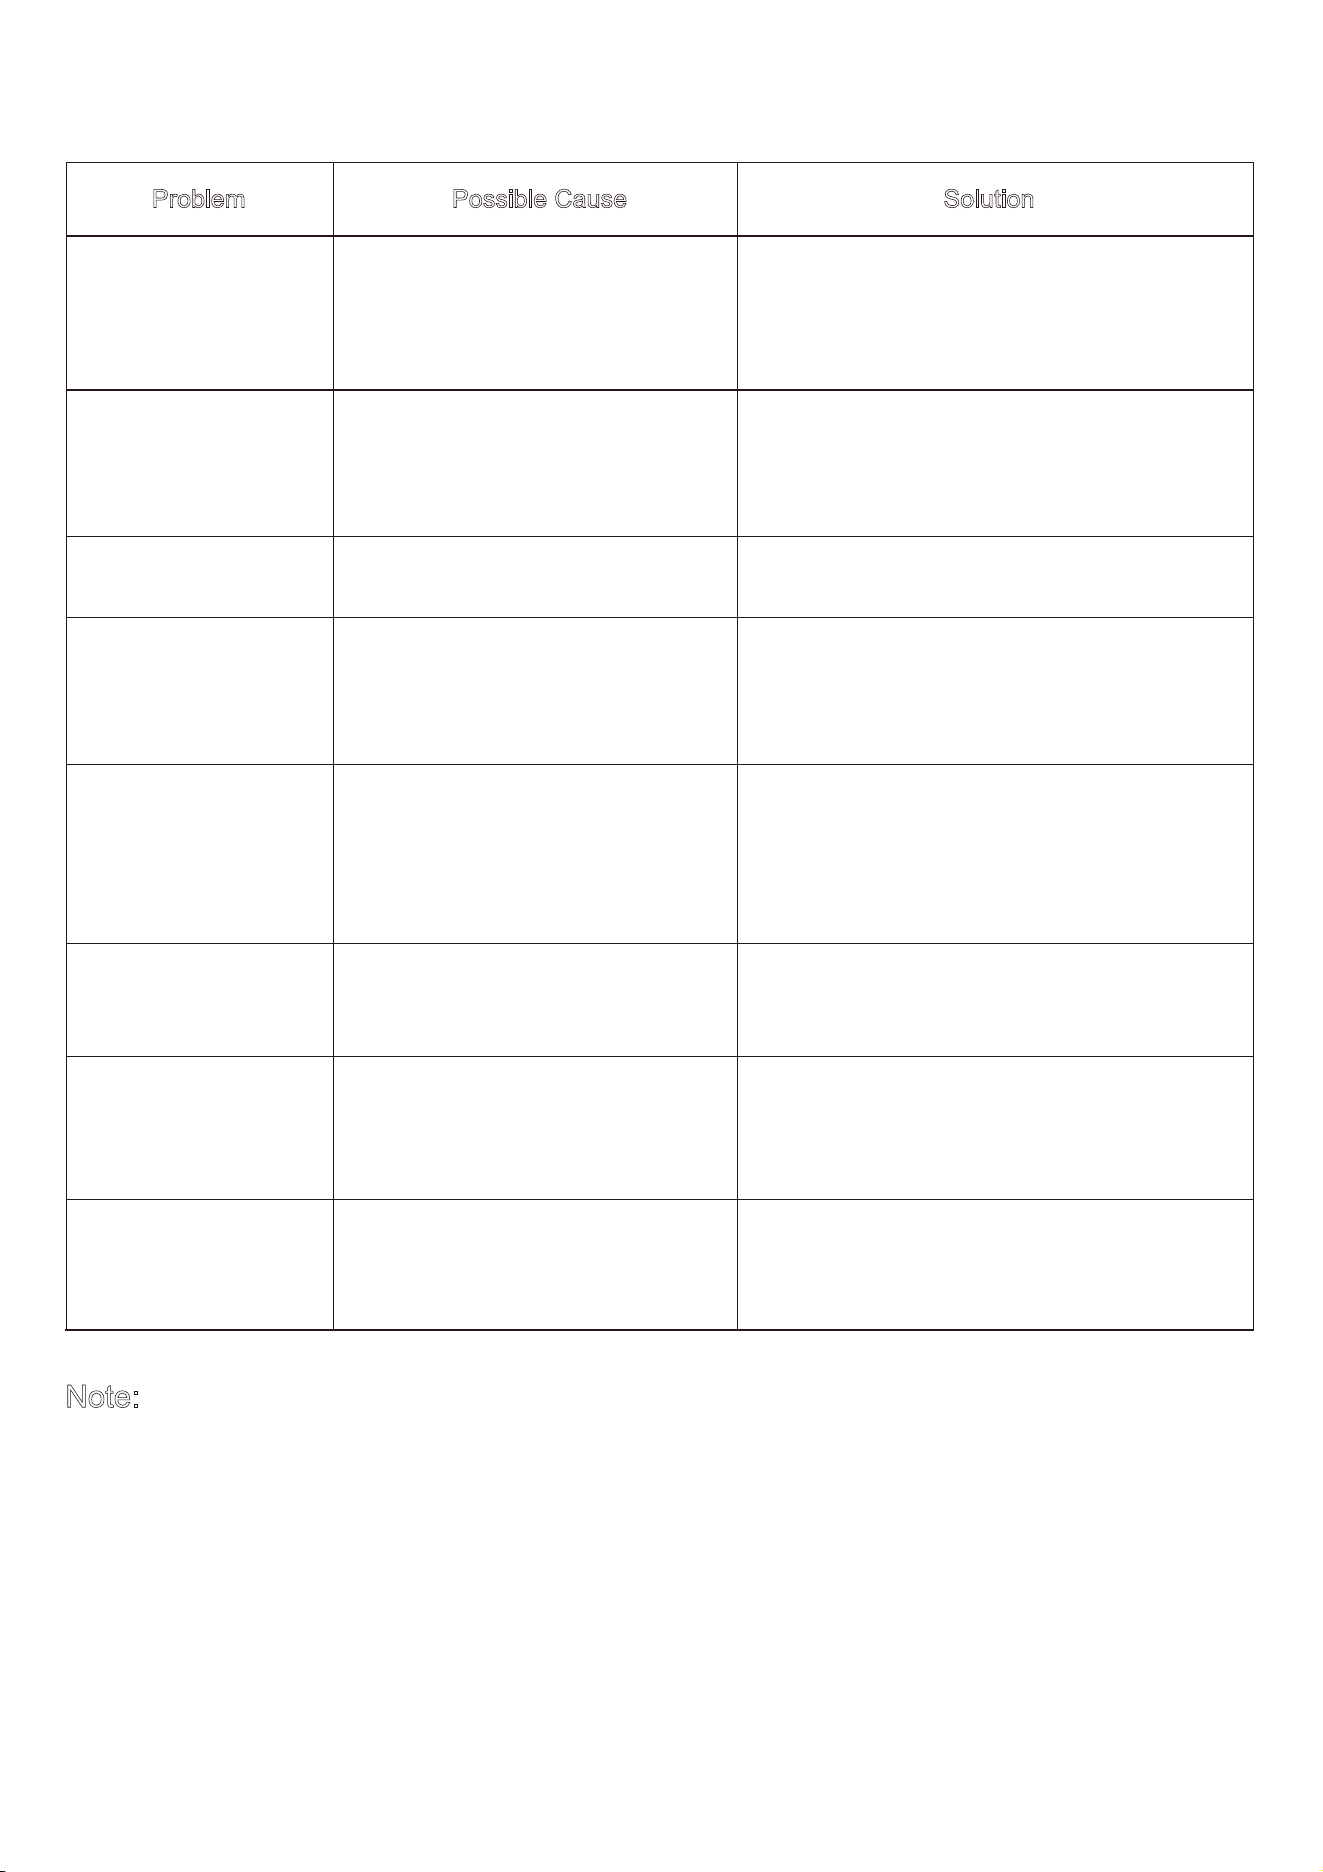
Cleaning and Maintenance
14
15
Troubleshooting
Error Codes and Protective Functions
17
Warranty Information
3
Safety Instructions
Water Inlet Installation
Preparation Before Use
Table of Contents
(4-pin interface)G 1/2"
3
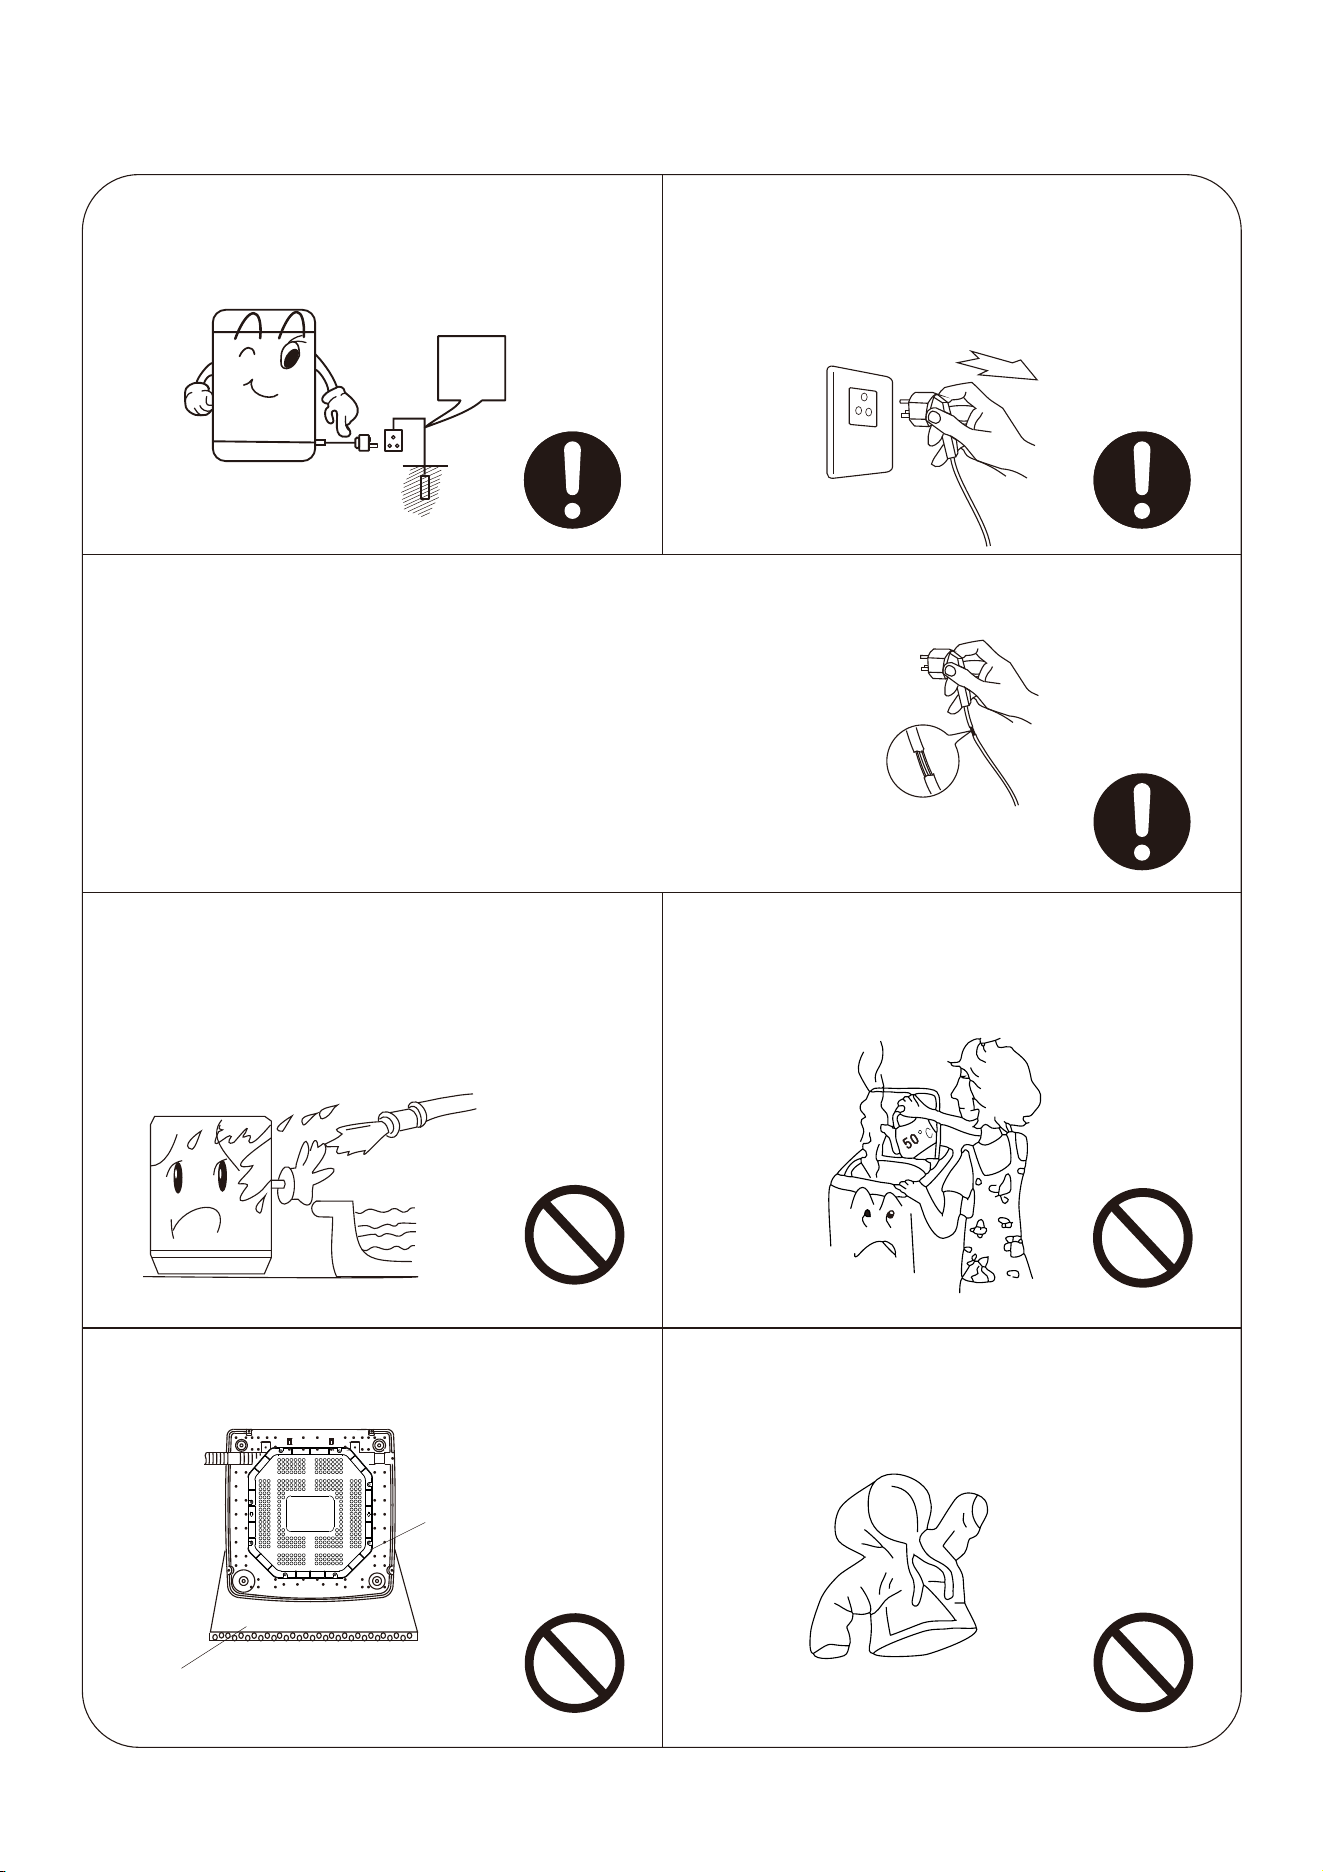
Safety Instructions
Plug the appliance into a properly grounded
120V AC outlet.
Ground
wire
1) Do not plug in or unplug the power cord with
wet hands.
2) Always unplug the appliance and turn off the
water supply before moving, cleaning, or when it
is not in use.
1) Do not bend, stretch, twist, or press the power cord.
2) If the power cord or plug is damaged, or if the outlet becomes
loose, stop using the appliance immediately and have it replaced
or repaired by a qualified technician.
3) Keep the plug pins clean and dry. If they become dirty, wipe
them carefully with a dry cloth.
1) Don’t install the washing machine in
bathrooms or damp locations.
2) Do not wash the appliance with water,
and do not place wet clothes on the control
panel.
Do not use water hotter than 122 °F (50 °C)
for washing.
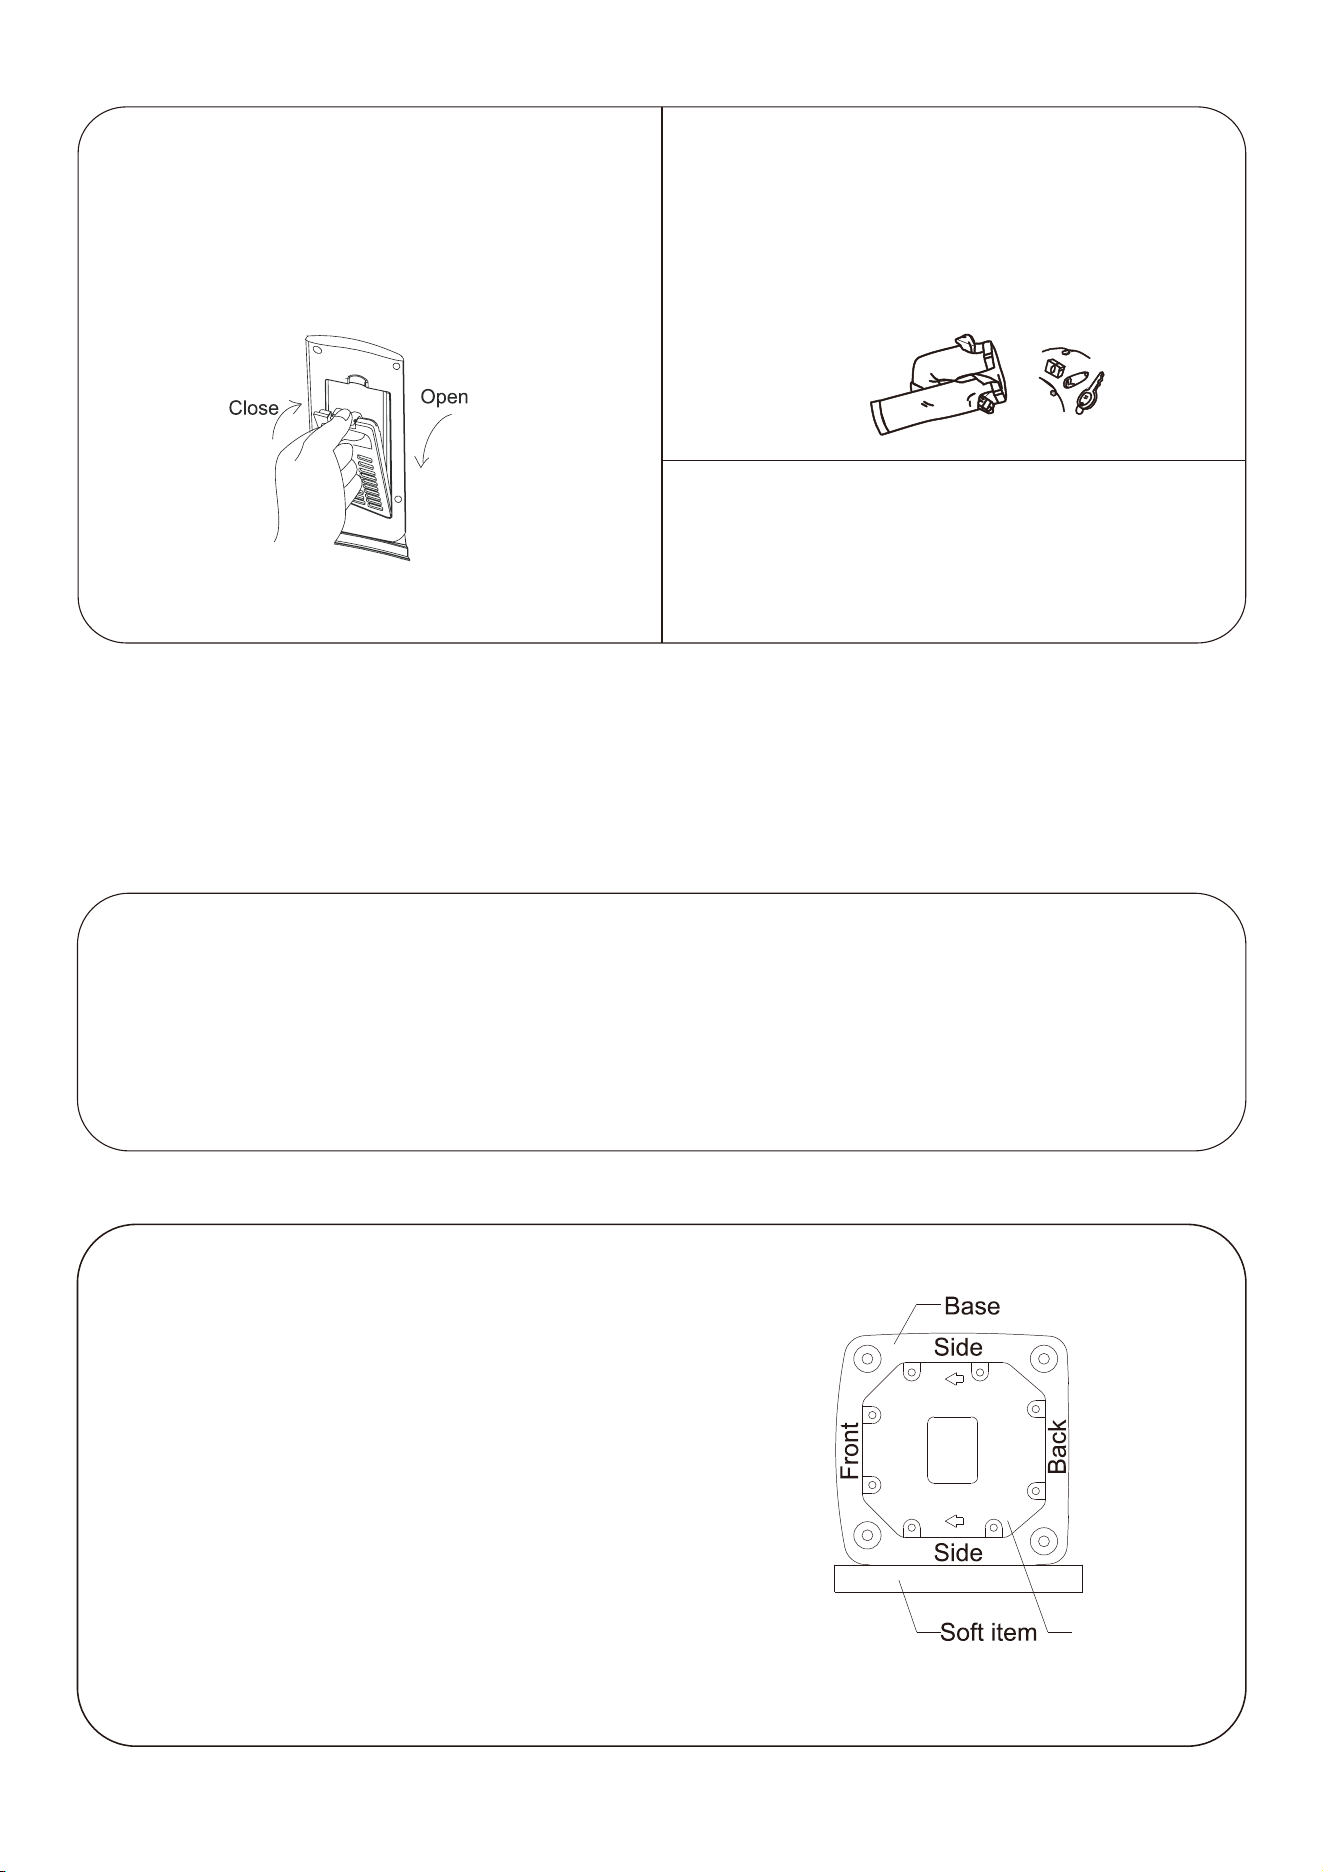
If the appliance is placed on a carpeted floor,
adjust the feet to ensure proper air circulation.
Bottom Ventilation
Holes
Soft Item (do not block vents)
Do not wash raincoats, bike covers, feathered
garments, or other waterproof items, as they may
cause abnormal vibrations during spinning.
4
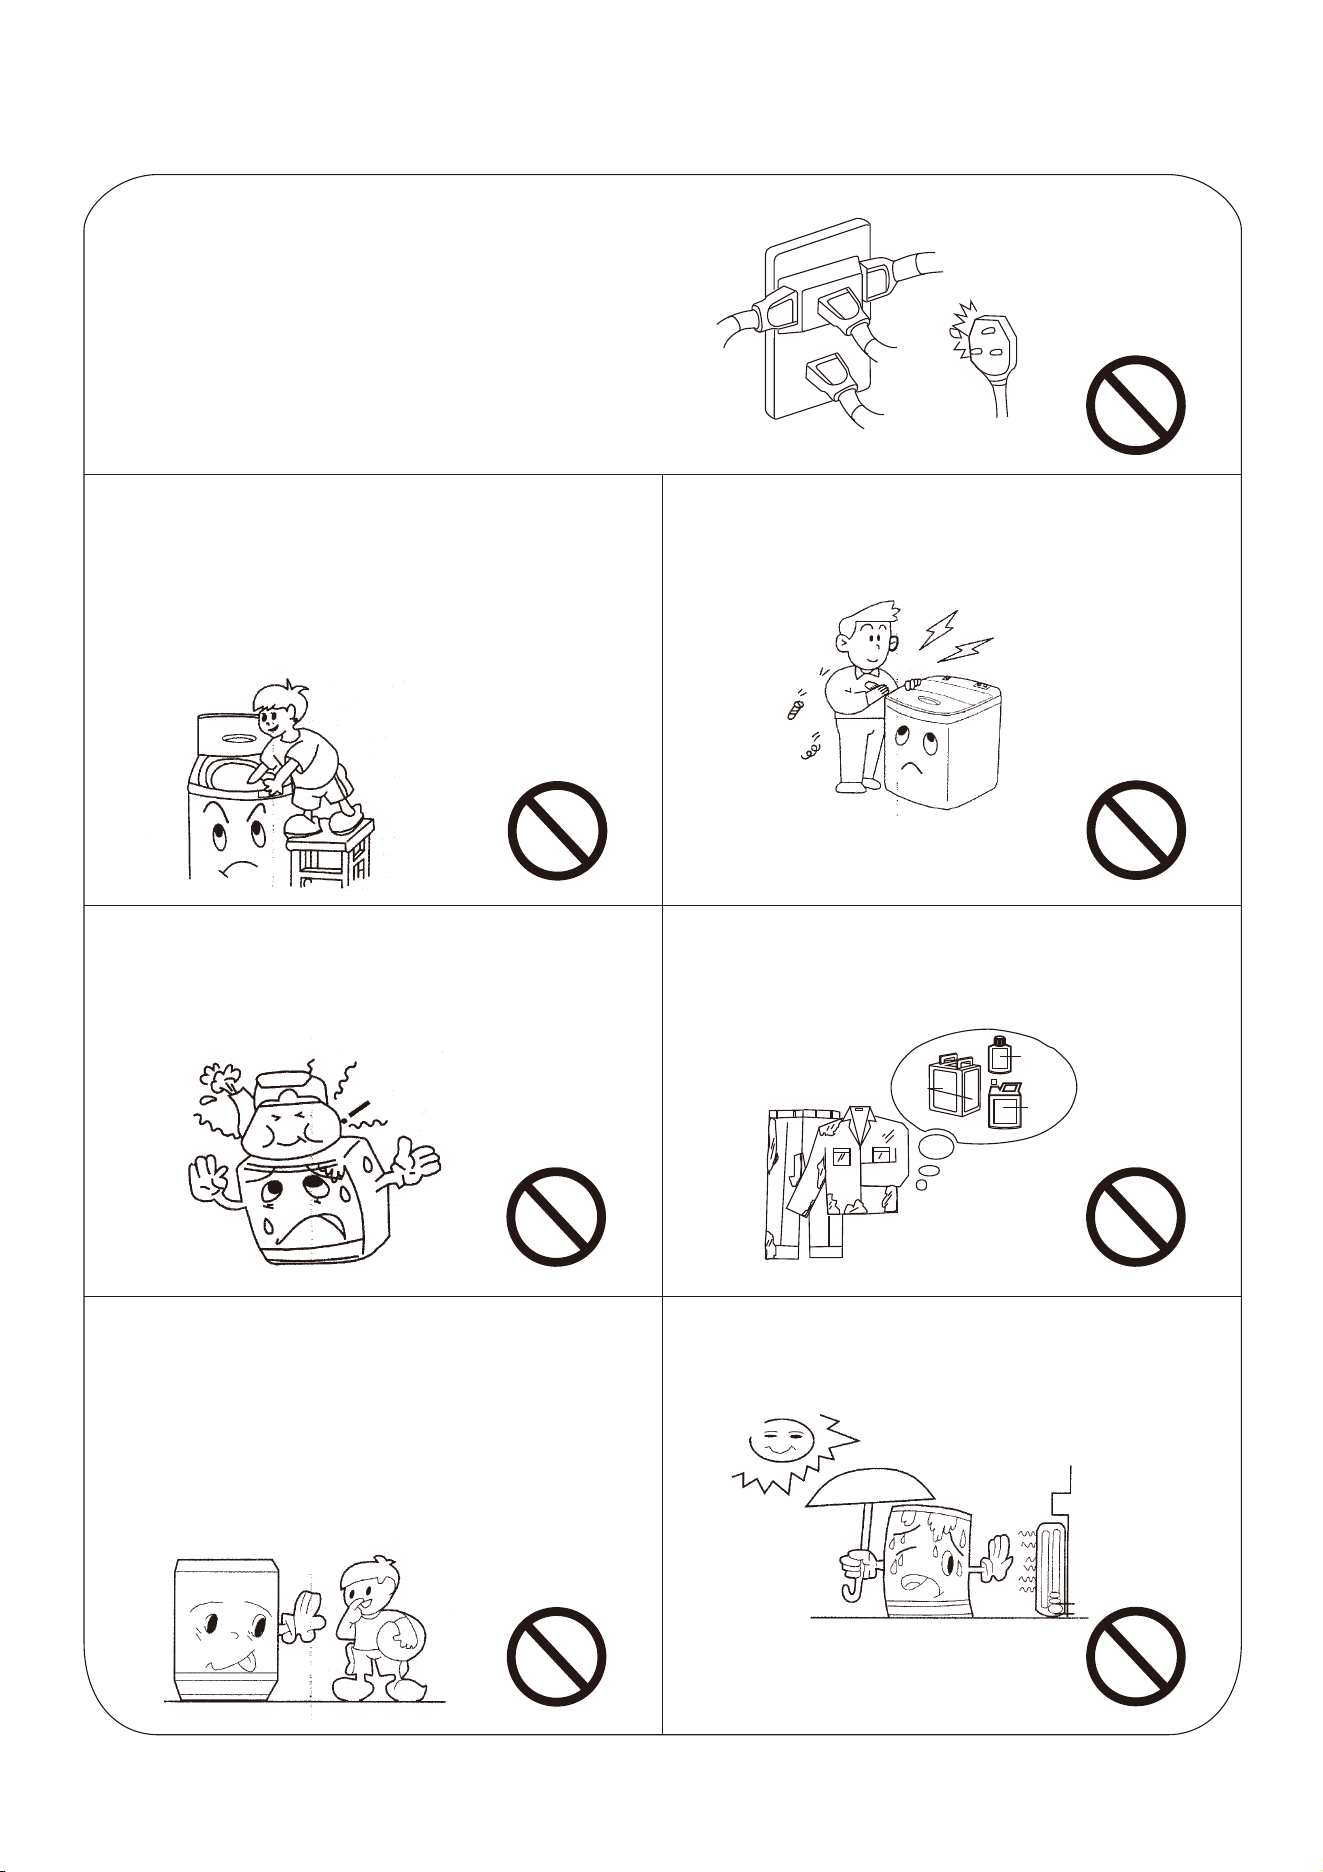
1) Do not plug other appliances into the same outlet.
2) Do not use a damaged plug or a loose outlet.
1) Do not put your hands into the appliance
while it is running. Even at low spin speeds,
this is very dangerous.
2) Keep children away from the appliance.
Do not allow them to climb on it.
Do not alter or modify the appliance in
any way!
Do not overload the appliance or place hot
items (such as a kettle with hot water) on top
of the appliance.
Do not machine wash clothing that has been
in contact with flammable or volatile petroleum
products (e.g., gasoline, kerosene).
1) This appliance is not intended for use by
persons (including children) with reduced
physical, sensory, or mental abilities, or lack
of experience, unless they are supervised or
instructed by a responsible person.
2) Children should be supervised to prevent
them from playing with the appliance.
Keep the appliance away from direct sunlight
and other heat sources, such as heaters.
Gasoline
Benzene
Alcohol
5
To prevent lint from blocking the drain
outlet during washing, keep the lint filter
in good condition, install it in the proper
position, and clean it regularly.
Do not place any objects such as coins,
safety pins, nails, screws, stones, or other
hard, sharp materials into the appliance, as
they may cause serious damage.
1) Before washing, make sure the water tap is
open and the inlet hose is connected properly.
2) Use low-foaming detergent.
Installation and Setup
Install and adjust the appliance according to this manual. This is important for your
safety and proper operation.
Unpacking
1. Unpack the carton and remove the bottom panel.
2. Open the top lid of the appliance and take out all accessories.
3. Remove all packaging materials, including the polystyrene base.
4. Keep all packaging materials in case the appliance needs to be moved again.
Installing the Bottom Cover
1) As shown in the right figure, lay the appliance
carefully on its side and place it on a soft surface
to avoid scratching.
2) Make sure the marked side of the bottom cover
faces outward, and ensure the arrow on the cover
points toward the front of the appliance.
3) Align the screw holes on the bottom of the
appliance with those on the bottom cover.
4) Use the supplied screws to fasten the bottom
cover securely.
Bottom cover
6
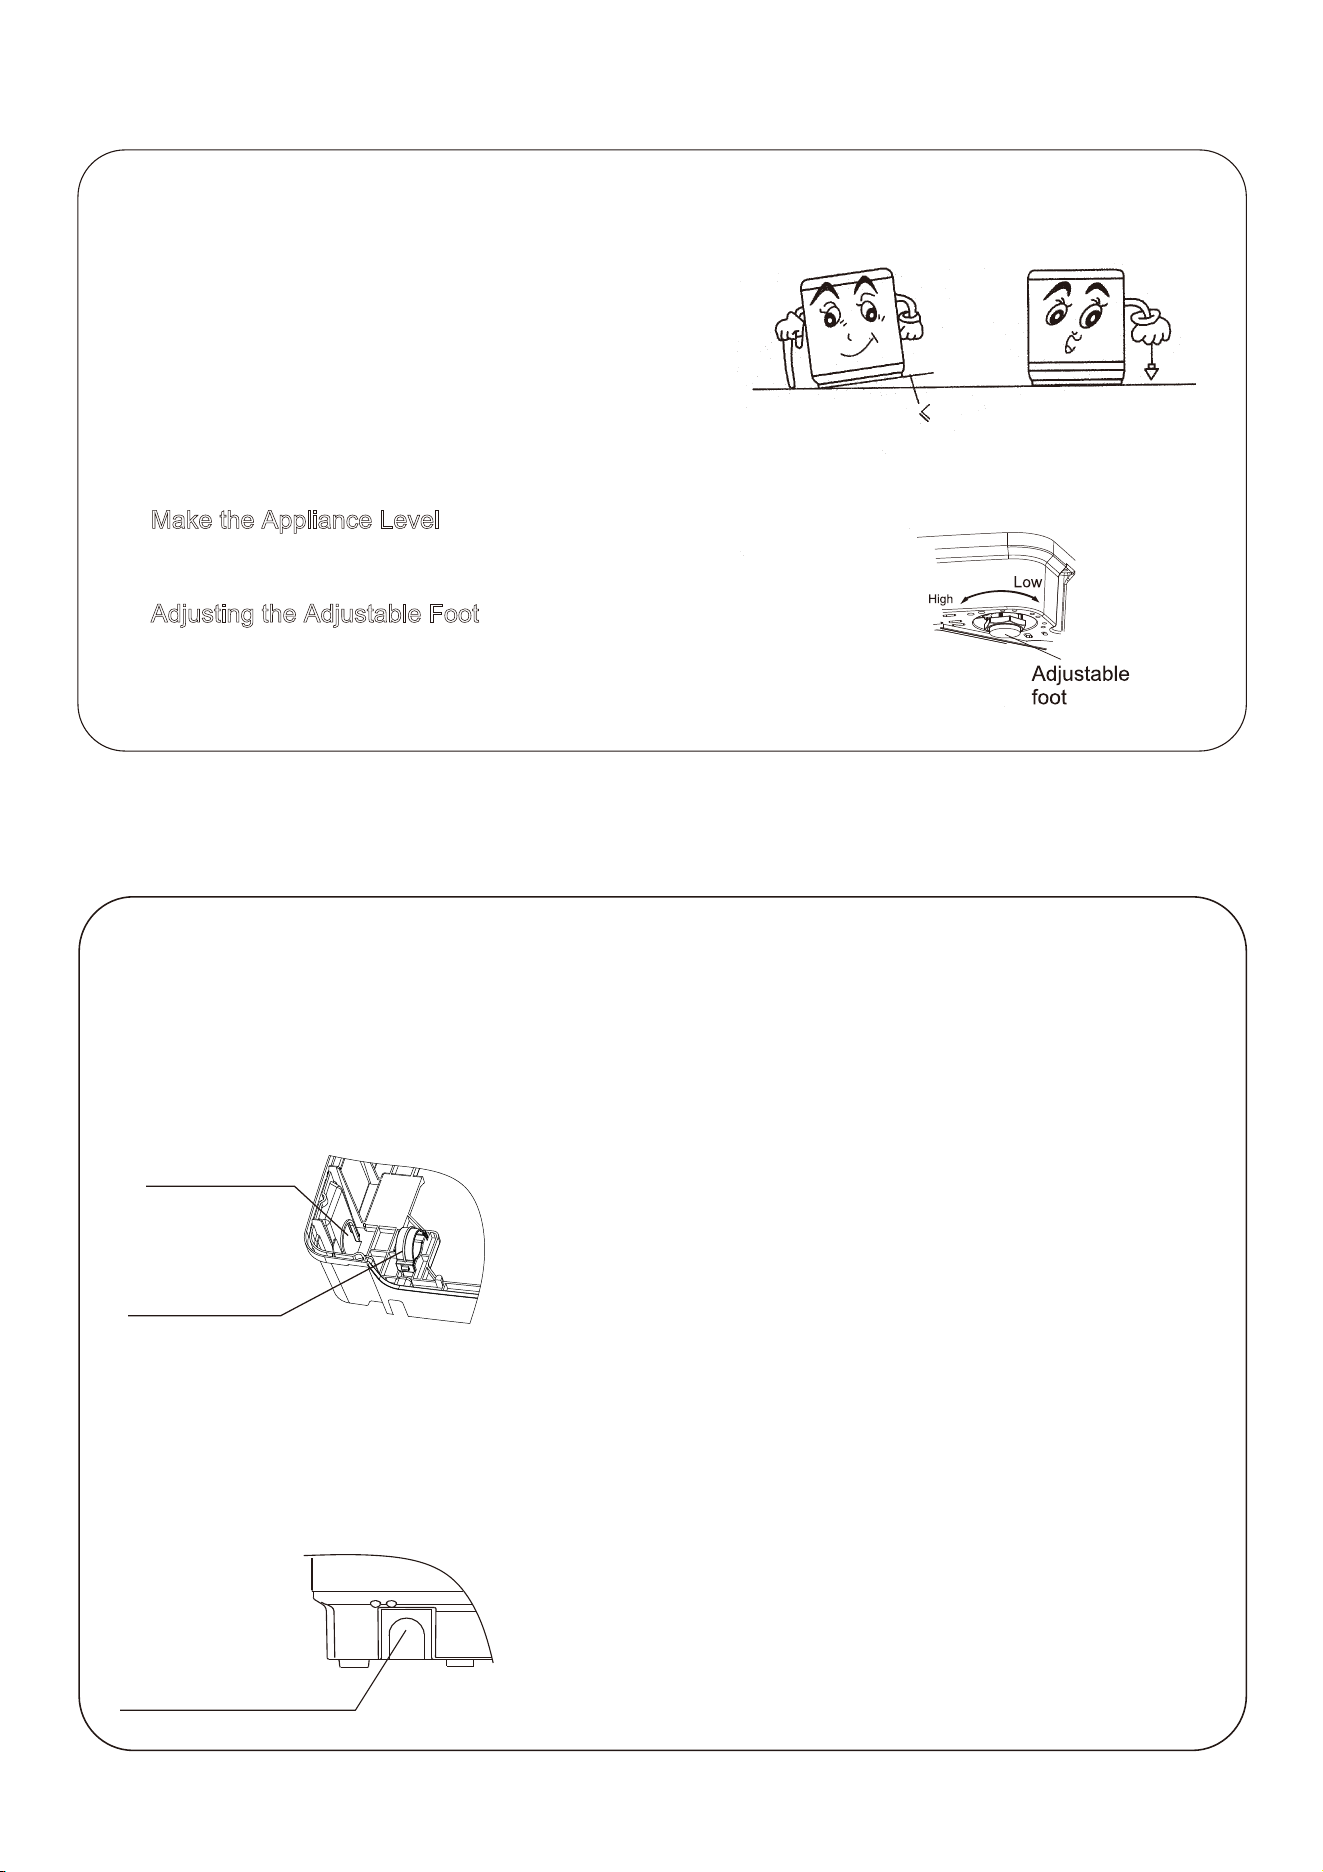
Positioning and Leveling
1) The distance between the appliance and the wall should be at least 1.97 in.
2) The maximum allowable tilt of the appliance base is 1°.
3) An uneven or slanted surface may cause the appliance to stop operating or become unstable.
4) Adjust it using the following methods:
① Make the Appliance Level
Use a plumb line or spirit level to check if the appliance is level.
② Adjusting the Adjustable Foot
1) Lift the adjustable foot slightly and rotate it to adjust the height.
2) Adjust the feet to the appropriate height to ensure the appliance
is stable and level.
How to Change the Direction of the Drain Hose
Using the Drain Hose
1. Lay the washing machine gently on a soft
surface with the front side facing down. Remove
the screws on the back cover and take off the
back cover.
2. Press the drain hose lightly and remove the
hose clamp to release the hose. (Sectional view
inside the washing machine)
3. Remove the drain hose port stopper on the other
side of the base. The stopper is secured with two
clips. Check the fixing position through the opening
at the back. (Sectional view of the left side of the
washing machine)
4. Pull the inner drain hose to the other side,
taking care not to twist or bend it. Reattach
the hose using the hose clamp, insert the
drain hose port stopper into the previous side,
then place the machine upright and secure the
back cover with screws.
Drain Hose Port
Hose Clamp
(Cross-section view inside the washing machine)
Drain Hose Port Stopper
(Cross-sectional view of the left side of the washing machine)
1°
7
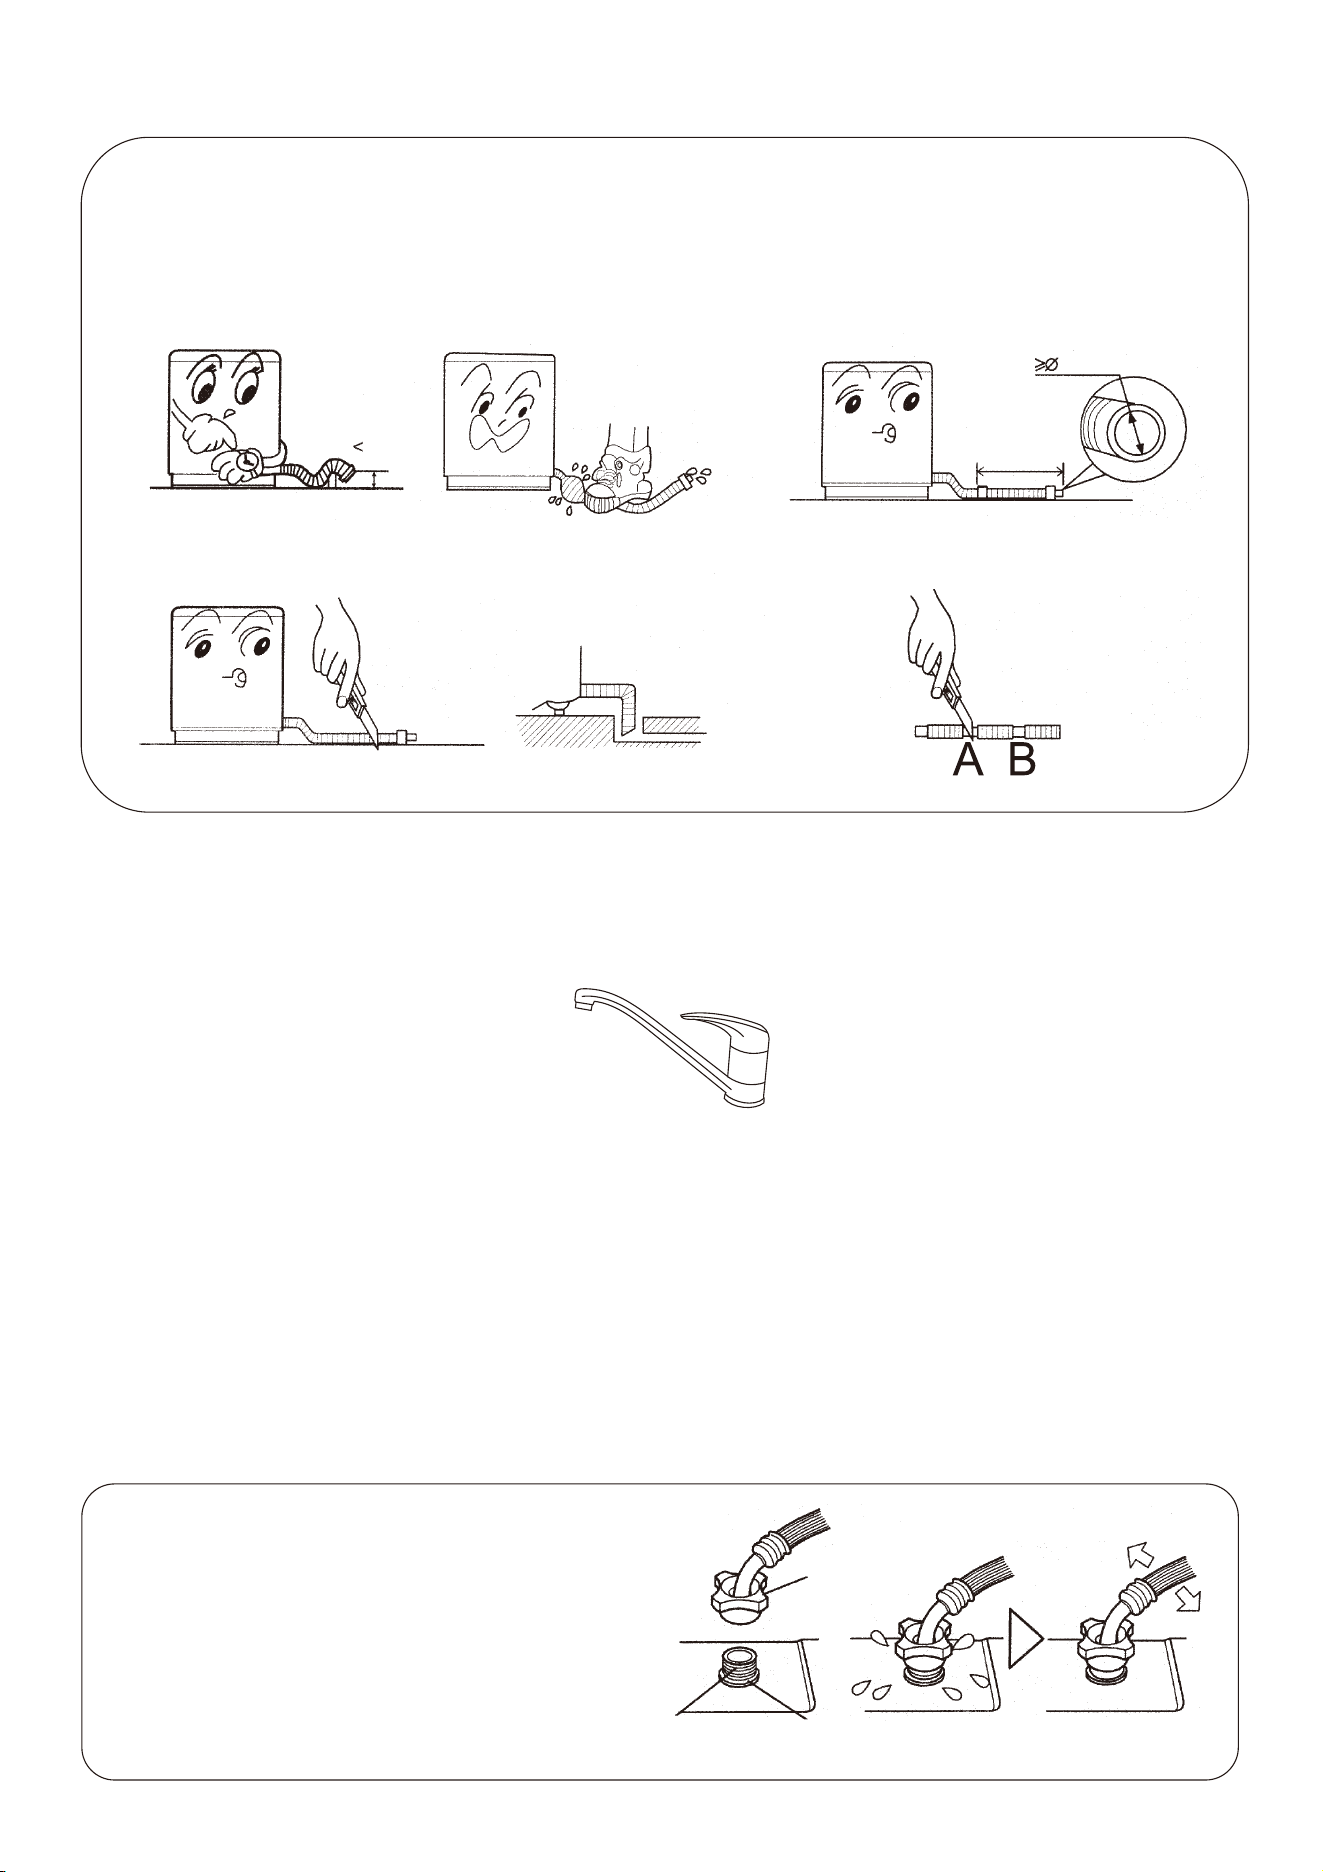
Water Drainage
1. Ensure the drain hose allows water to flow
smoothly. The height of the drain outlet should
be less than 3.94 in. Otherwise, drainage may
be slow, and the machine could stop during
operation.
2. Do not step on or press the drain hose.
3. If the drain hose is too long, cut the front end
diagonally to ensure smooth water flow.
4. If an additional hose is required, purchase
one with an inner diameter of at least 1.18 in
and a length not exceeding 59.06 in.
5. If the additional drain hose is too long, cut it
at point A or B as shown.
Water Inlet Installation
3.94 in
1.18 in
≤59.06 in
Suitable tap(in kitchen or bathroom)
The quick adapter is designed for easy connection to a standard tap, such as those typically found in
kitchens or bathrooms.
1. Connect one end of the inlet hose to the water inlet valve on the washing machine.
2. lf the tap has internal threads, remove the aerator (if any) from the spout. Place the black rubber washer
on top of the adapter, then screw the adapter into the tap securely.
3. lf the tap has external threads, remove the black washer from the top of the adapter, then screw the
adapter onto the external threads of the tap.
4. Pull back the white ring on the adapter to connect both parts together until they lock firmly.
Connect the Inlet Hose to the Washing Machine
1. Do not remove the filter cushion inside the inlet
valve connector. Before each use, check whether
the filter cushion is in place or damaged.
2. Place the inlet hose connector onto the inlet valve
connector.
3. Tighten the inlet hose connector, then gently
swing the hose to make sure it is securely
connected.
Inlet Valve Connector Filter Cushion
Inlet Hose
Connector
8
Preparation Before Use
1. This appliance must be properly grounded.
Ensure the power outlet is grounded before
plugging in the appliance. Do not connect the
grounding terminal to a gas pipe, water pipe,
or telephone line.
2. Connect the water inlet hose and turn on the
water tap.
3. Place the drain hose securely into the sink or
designated drainage area.
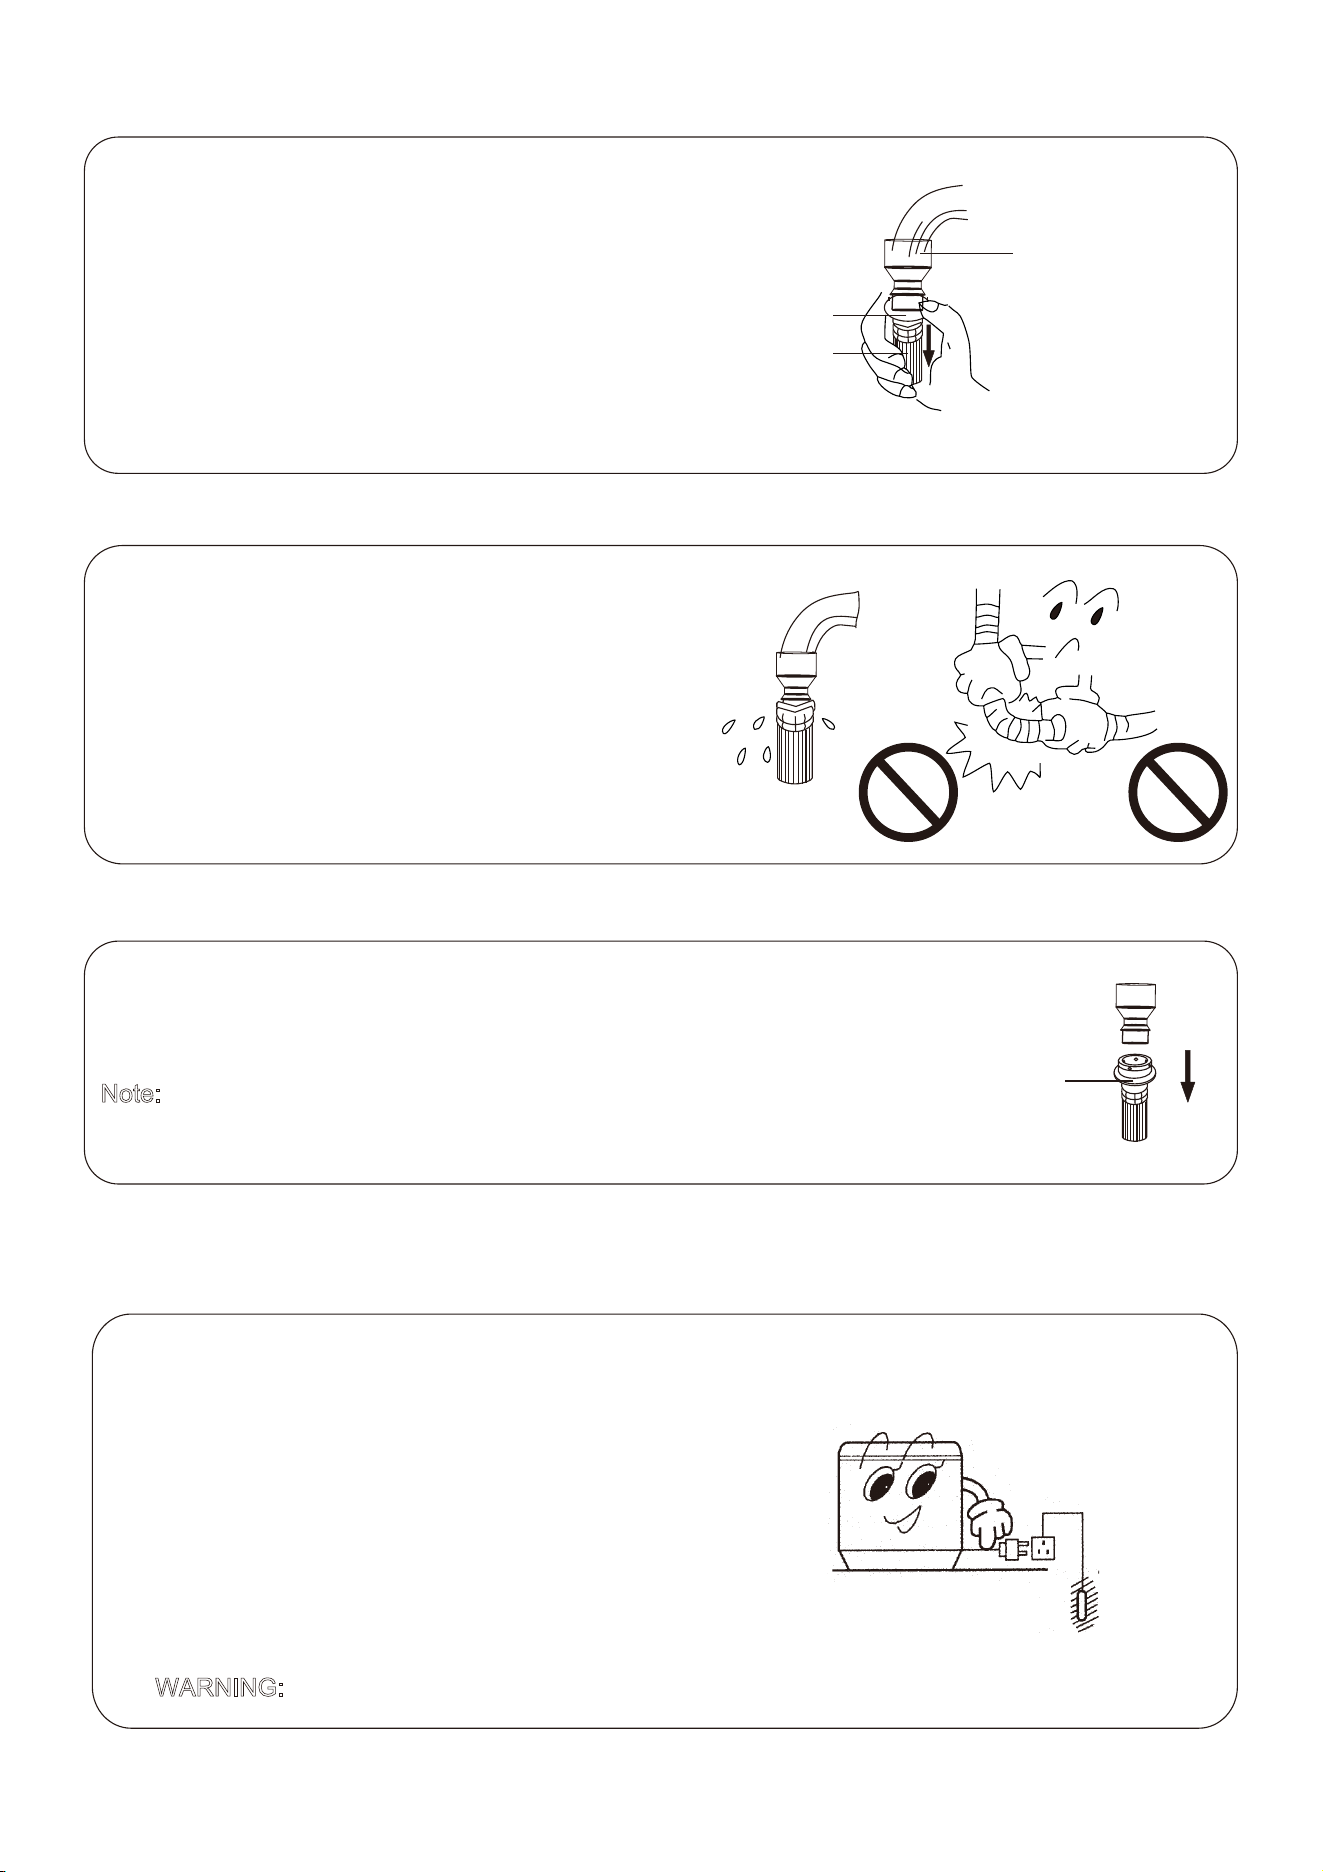
WARNING:
Water temperature should be less than 122°F (50°C).
Connect the Inlet Hose with the Quick Adapter
1. As shown, pull down the locking sleeve and
insert the quick adapter into the inlet hose.
2. Hook the locking lever onto the quick adapter,
then release the sleeve until a clicking sound is
heard.
Check All Water Inlet Connections
1. Gently swing the inlet hose to make sure all
connections are securely fastened.
2. After installation, open the tap and check for any
leaks.
3. Do not bend or stretch the inlet hose excessively.
4. Before each use, inspect all connection points to
ensure they are properly installed and firmly fitted to
prevent any loosening or leakage.
Disconnect the Inlet Hose
1. Close the tap.
2. Press the locking lever, push down the sleeve, and pull off the water
inlet hose.
Note:
If the machine is used frequently, the quick adapter may be left
attached to the tap to prevent damage to the fixing screw.
Locking Sleeve
Water Inlet Hose
Quick Adapter
Locking Sleeve
9
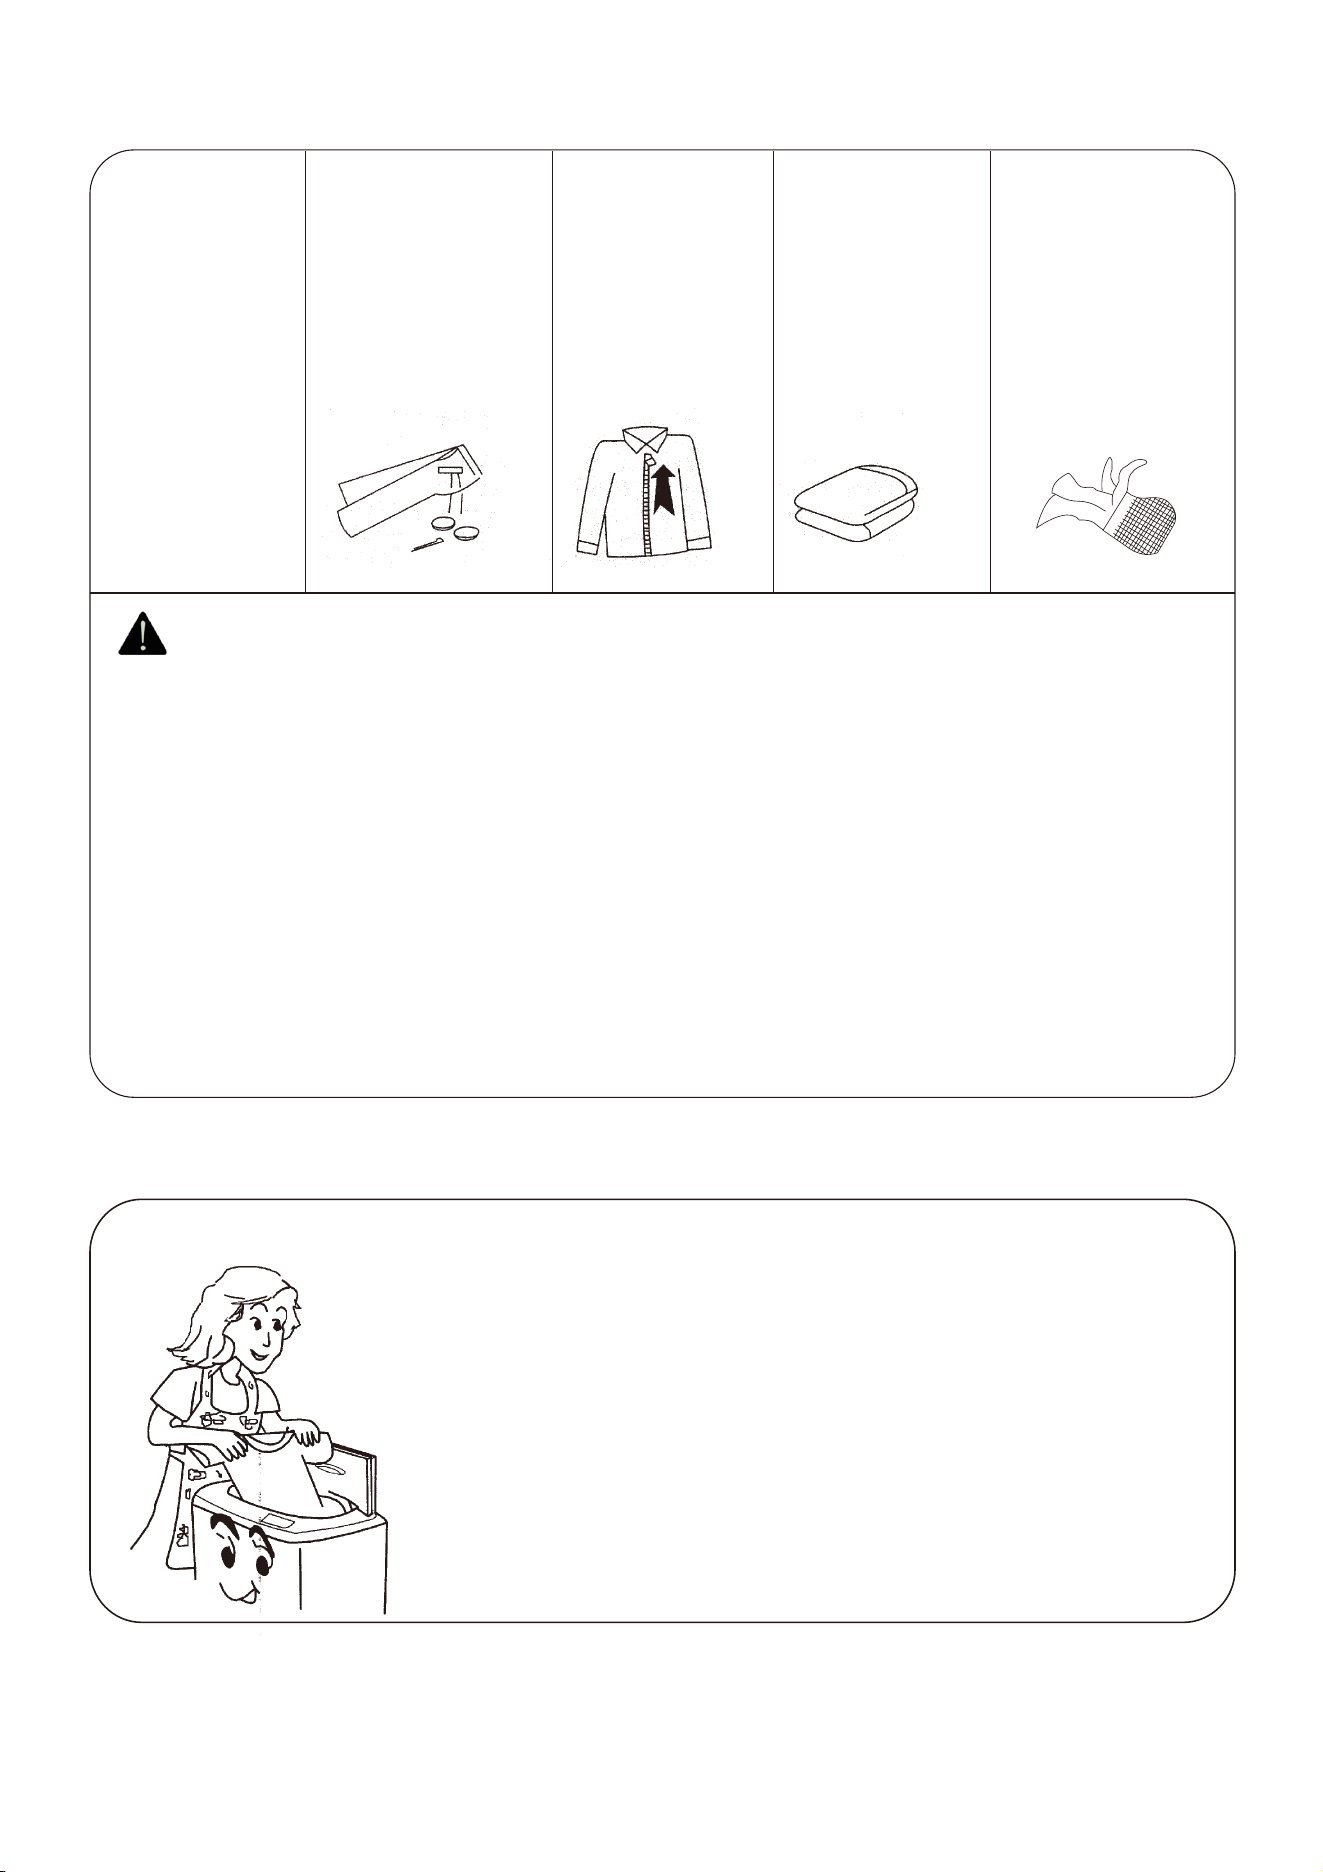
Before Washing
Check if any items have
special washing
requirements.
Before washing, empty all
pockets of small objects that
may have been left inside
(coins, keys, screws, and so
on), as these could damage
the drain pump.
Fasten all buttons, tie long
straps, and close all
zippers.
Do not overload the
machine. Load the
laundry loosely,
alternating large
and small items.
Sort the laundry by fabric
type, colorfastness, and
level of dirtiness. Place
delicate items, woolens,
and items prone to wear
and tear into a washing bag.
Important Notes Before Washing:
A. Check that all items are machine washable.
B. Wash new colored items separately the first time. Do not wash white items with colored items.
C. Please soak non-absorbent items by hand.
D. Some stains, such as fruit, wine, grass, and rust, are difficult to remove and should be treated
before washing with suitable stain removers, which can be found in most stores. In some cases,
soaking the stained item with a pre-soak product or enzyme-based detergent before washing may
help.
E. Turn nap fabrics and items with long fibers inside out before putting them into the machine.
F. Do not put items contaminated with chemicals directly into the machine.
G. Very small items (handkerchiefs, ribbons, socks, and similar items) should be washed in a
laundry bag or pillowcase.
1. Do not exceed the rated load capacity. The washing and spinning
capacities of the machine refer to the maximum weight of standard
laundry in a dry condition.
2. The actual load capacity may vary depending on the thickness,
size, and type of the laundry. Ensure the laundry can move freely
during washing.
3. Do not select a high water level when the load is less than 2.20 lbs
to prevent water from splashing.
Loading the Laundry
10
Reference Weight of Laundry Items
Work suit (top and bottom)
– cotton, about 2.47 lbs
Blended-fabric coat
– about 1.76 lbs
Cotton jacket –
about 1.76 lbs
Single bed sheet – cotton,
about 1.32 lbs
Socks (blended fabric)
– about 0.11 lbs
Cotton underpants
– about 0.15 lbs
Cotton undershirt
– about 0.40 lbs
Cotton shirt
– about
0.66 lbs
Cotton pajamas
– about 0.44 lbs
Cotton blanket
– about 1.98 lbs
Jeans – about 1.76 lbs
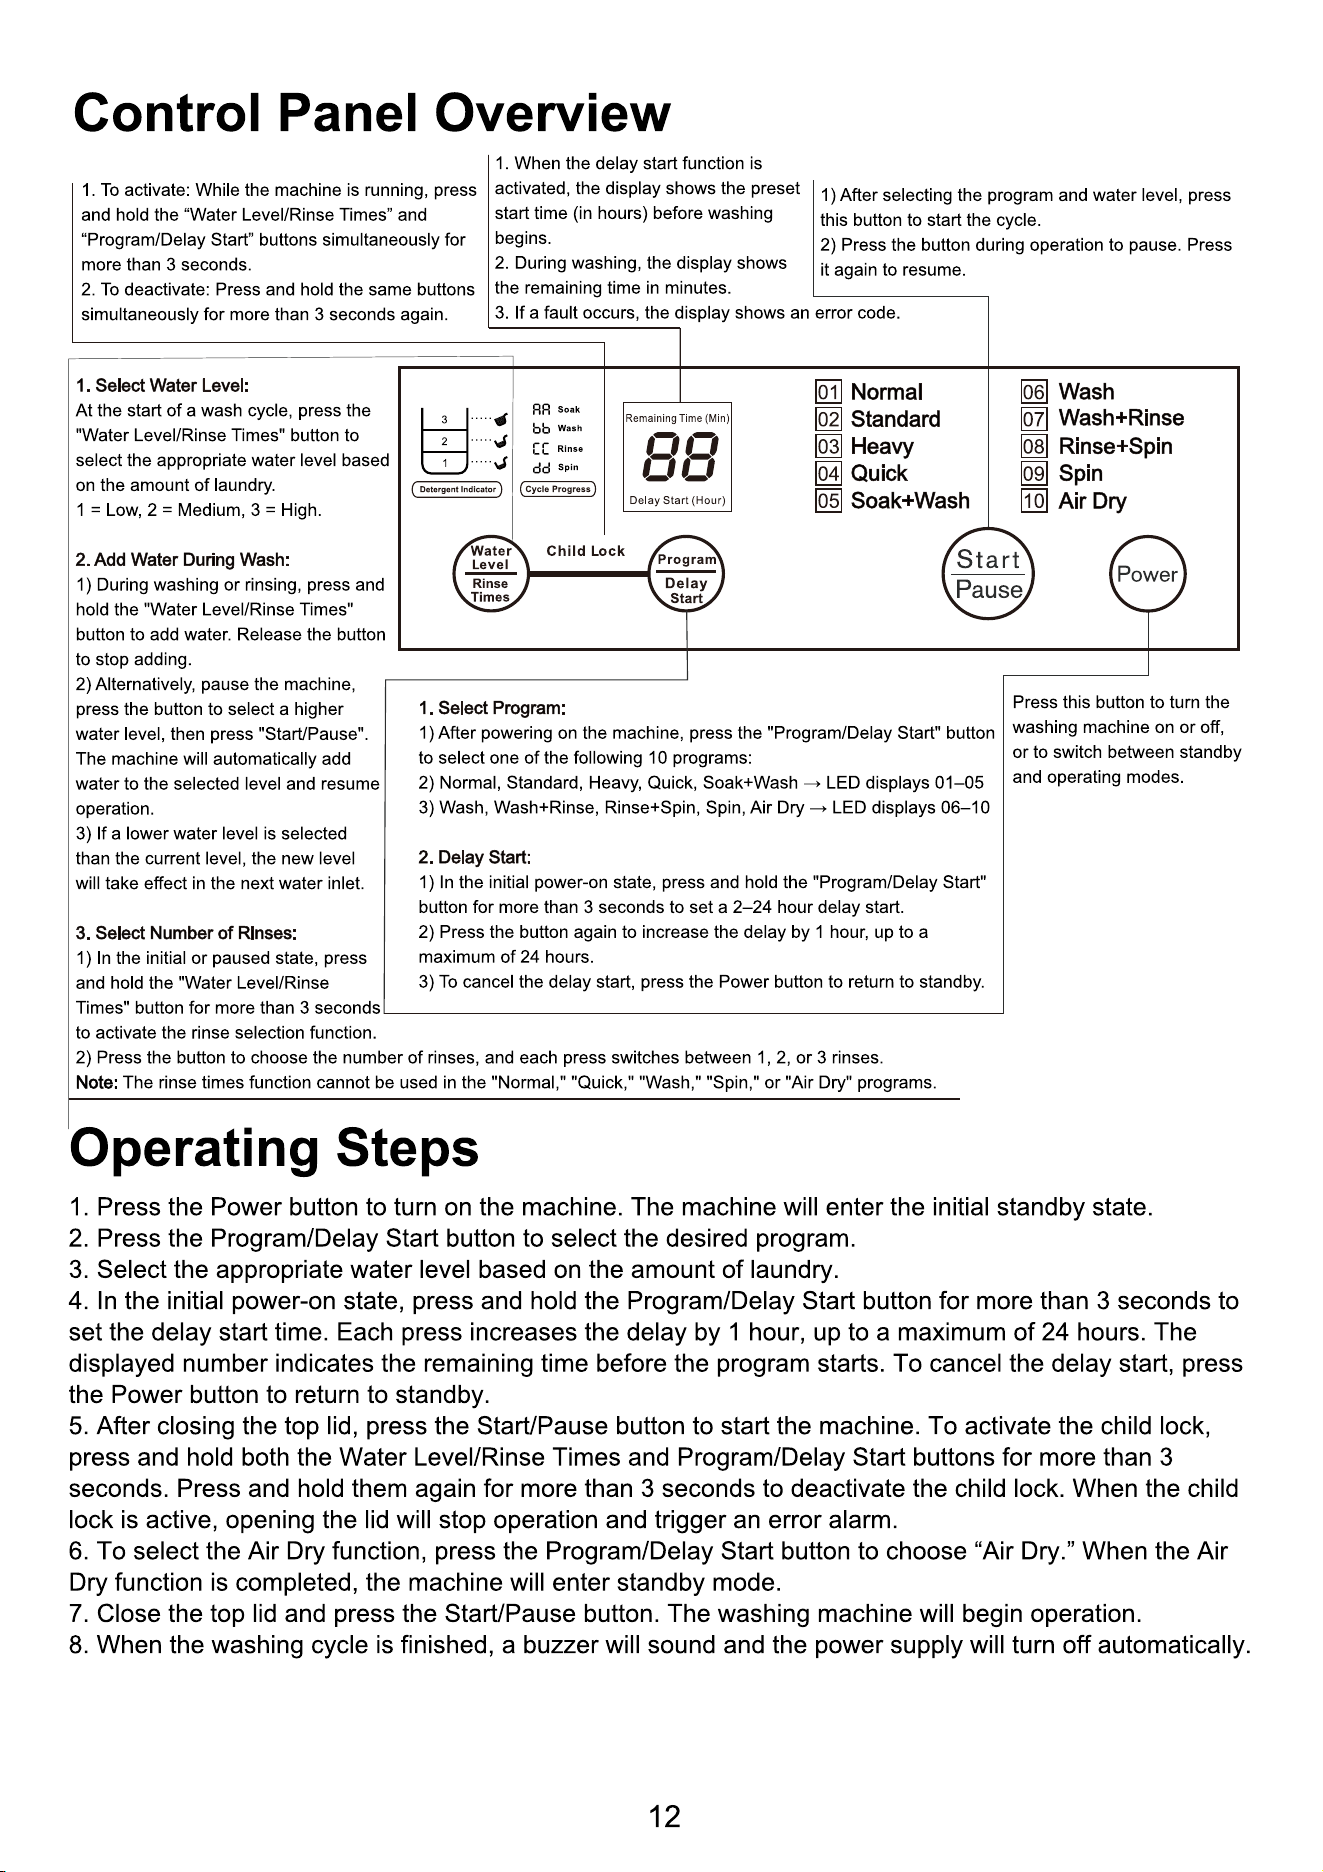
1. Put the detergent powder into the tub as shown
in the right figure.
2. Then close the lid.
3. We recommend using a low-sudsing detergent.
Use of Detergent

11
Method 1: Dissolving Directly in the Machine
1. Set the water level to Low.
2. Add the washing powder and run for about 30 seconds to dissolve it completely.
3. Put the laundry into the tub and select a suitable water level.
Method 2: Dissolving in Advance
1. Prepare warm water (about 86°F) in a container.
2. Pour the washing powder into the water while stirring until it is fully dissolved.
Notes:
1. Washing powder may leave residues on clothes if used excessively. Use only the proper amount.
2. If low-quality or expired washing powder is used by mistake, it may cause residue buildup inside
the tub. Please clean the tub regularly.
Using Washing Powder
1. Fill the tub to the selected water level, dilute the bleach in a container, and pour it slowly into the
tub.
2. Do not use bleach on colored or patterned laundry, as it may cause discoloration.
3. Do not pour bleach directly onto the laundry.
4. Refer to the product label for the correct usage and quantity.
5. Dissolve powdered bleach completely before use.
How to Use Bleach
Notes:
1. For the proper amount of concentrated washing powder, follow the instructions on its package.
2. To avoid splashing and detergent waste, use a lower water level when washing a small load of
laundry.
Troubleshooting
Problem Possible Cause Solution
No display on the
control panel
- Power plug is not fully inserted.
- No power in the outlet.
- Power switch is not turned on.
- Power supply has been cut off.
- Insert the plug securely.
- Check the power outlet or try another one.
- Press the power switch.
- Check the household power supply.
Water inlet hose leaks
Does not drain
Does not fill with water
Spin stops and water
fills again during spin
cycle
“Spin” program
selected, but the tub
does not spin
Spin is intermittent
when starting
Some water flows from
the drain hose before
first use
- Hose connector at the tap is
not tightened properly.
- Hose connection to the washing
machine is loose.
- Reinstall the inlet hose.
- Tighten both connections securely.
- Drain hose is not placed properly.
- Drain hose is bent or blocked.
- Place the drain hose lower to the ground.
- Straighten or clean the drain hose.
- Water supply is cut off.
- Tap is closed.
- Inlet filter is blocked.
- Resume the water supply.
- Open the water tap.
- Clean the inlet filter (see “Cleaning and
Maintenance”).
- The laundry load is unbalanced
or too small/too large.
- The machine is not placed on a
stable surface.
- Redistribute the laundry evenly and restart
the spin cycle.
- Make sure the machine is placed on a
level surface.
- The lid is not closed properly.
- The lid was opened during
draining.
- Close the lid securely before spinning.
- Keep the lid closed during operation.
Normal operation. No action required.
The remaining water is from
factory testing.
Normal condition. No action required.
Note:
If the problem persists after performing the above checks, unplug the appliance and
contact our after-sales service immediately. Do not attempt to repair this product
yourself, as it may cause electric shock or other hazards.
14
The machine is automatically
balancing the laundry load.

The top lid is opened after
the child lock is activated.
Water level sensor
malfunction.
Error Codes and Protective Functions
1.Error Codes
Code
E0
E1
E2
E3
E4
E5
E7
E6
F1
Description
Solution
The top lid is open when the
preset program starts.
Close the top lid and reset the alarm.
After draining for 5 minutes,
the water level has not
decreased properly.
Open the lid and check according to the
“Troubleshooting” section. Then close the lid
and reset the alarm.
The top lid is open during the
spin cycle.
The laundry load is
unbalanced during spinning.
Open the lid, redistribute the laundry evenly,
then close the lid and reset the alarm.
After 50 minutes of water
filling, the required water
level is still not reached.
Open the lid and check according to the
“Troubleshooting” section. Then close the lid
and reset the alarm.
Close the top lid and reset the alarm.
The water level exceeds the
overflow level.
Memory input/output error
detected.
Drain the excess water until the normal level
is reached.
Close the top lid and reset the alarm. If the
issue persists, contact our after-sales service.
Unplug the power cord and contact a
qualified technician.
15
Close the top lid and reset the alarm.
2. Imbalance Adjustment
1) During the spin cycle, if the laundry is unevenly distributed in the tub, it may cause
excessive vibration.
2) This washing machine is equipped with an automatic imbalance adjustment system.
The built-in vibration detection system continuously monitors the spin condition. When
the vibration exceeds a certain level, the system automatically redistributes the load to
balance the drum.
3. Automatic Power Cut-off
1) If the Start/Pause button is not pressed within 10 minutes after pressing the Power
button, the power supply will turn off automatically.
2) The power supply will also turn off automatically after the washing cycle is completed.
4. Child Lock
1) While the machine is running, press and hold the “Water Level/Rinse Times” and
“Program/Delay Start” buttons simultaneously for 3 seconds to activate the Child Lock
function.
2) The LED display will show “CL”.
3) To deactivate the Child Lock, press and hold the same two buttons again for more
than 3 seconds. The display will then return to show the remaining time.
4) Once the Child Lock is activated, all buttons—including the Power button—are
disabled.
5) If the top lid is opened while the machine is operating, the machine will pause and
the “E5” error code will appear on the display.
6) If the lid is closed within 5 seconds, the alarm will stop and the washing process will
resume.
7) If the lid remains open for more than 5 seconds, the machine will automatically drain
the water to a safe level.
8) During this process, an alarm will sound for 10 seconds every 10 minutes to indicate
a fault condition.
9) If the lid remains open, the machine cannot resume operation.
16

17
Warranty Information
1. This product is covered by a one (1) -year limited warranty against defects in
materials and workmanship, valid only for the original purchaser. The warranty period
begins on the date of retail purchase and is non-transferable.
2. This warranty does not cover normal wear and tear, or any damage resulting from
misuse, negligent use, use with improper voltage or current, failure to follow the
operating instructions, or any disassembly, repair, or modification not authorized by
our after-sales service.
3. Additionally, this warranty does not cover damages caused by Acts of God (such as
fire, flood, hurricanes, or tornadoes) or force majeure events (such as arson, power
outages, riots, or vandalism).
4. This warranty gives you specific legal rights, and you may also have other rights
which vary from state to state (or province to province). Some states (or provinces) do
not allow limitations on how long an implied warranty lasts, or the exclusion or limitation
of incidental or consequential damages, so the above limitations or exclusions may not
apply to you.
Technical Support
Other Info
Thank you for choosing this product. We strive to provide you with the
best quality products and service in the industry. Should you have
any issues, please don't hesitate to contact us.
6269443420 | 6267435564