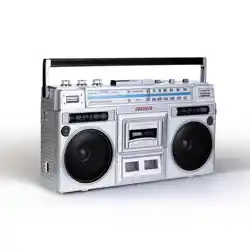
CD-2012
Thank you for purchasing our personal audio products.
High-quality CD player is an electronic acoustic technology
product carefully designed by our company. To obtain the
perfect use effect and prolong the service life of this
product, correct use are very important, please read this
manual carefully before use it.

CONTENTS
VERY IMPORTANT TIPS
FUNCTION DESCRIPTION
REMOTE CONTROL DESCRIPTION
POWER SUPPLY
CD / MP3 DISC OPERATION
USB OPERATION
AUX OPERATION
TAPE OPERATION
BLUETOOTH OPERATION
RADIO OPERATION
SPECIFICATIONS
SAFETY INSTRUCTIONS
WARRANTY
PACKING LIST
— 1 —
VERY IMPORTANT TIPS
When using this product, please follow
the prescribed steps, otherwise you
may be exposed to harmful radiation.
This CD player is a CLASS 1 LASER
product.
When the CD cover is opened or
carelessly closed, an invisible laser
will be generated.
Please do not touch the bald head
at will, otherwise it will affect the
playback performance.
The lightning flash with arrowhead
symbol within an equilateral triangle
is intended to alert the user to the
presence of uninsulated “hazardous
voltage” within product's enclosure,
which may be sufficient to induce a
risk of electric shock to persons.
VERY IMPORTANT TIPS
Do n ot tou ch

FUNCTION DESCRIPTION
1.Antenna
2.Handle
3.CD Door Switch
4.Tape Pause Button
5.Tape Stop/Tape Door Eject Button
6.Tape Fast Forward Button
7.Tape Fast Rewind Button
8.Tape Playback Button
9.Tape Record Button
10.Next Song/Fast Forward Button
11.Previous Song/Fast Rewind Button
12.Play/Pause Button
13.Power ON/OFF Button
14.Stop Button
15.Charging Reminders
16.Remote Control Receiving Point
17.EQ Button
18.Function Selector Button
19.Repeat Button
20.Volume Decrease Button-
21.Volume Increase Button+
22.Tape Door Close
23.Speakers
24.Earphone Jack
25.USB Socket
26.Audio Input Interface(AUX)
27.Battery Compartment
28.DC Charging Port
4 5
9
8
6
7
2
1
3
11
12
24
25
26
27
28
19 21
201814 16
13 15
10
22
23 23
17
— —2

REMOTE CONTROL DESCRIPTION
Figure 1
Figure 2
3 — —
Mute
Mode
Repeat
V+
V-
Programmiing
NextPrevious
EQ
Number 0-9
1.Mute:product mute.
2.Mode:in the power on status, press this function button to
select different functions. The sequence is: CD Play-Tape
Play-Radio-Bluetooth-USB-AUX Conversion.
3.Repeat:repeat button to cycle through songs when playing
USB flash disk/CD/MP3 discs.
4.Stop:stop to play song.
5.V+:volume increase.
6.Previous:short press to the previous song, long press to fast
backwards.
7.Pla
y/pause:song play and pause.
8.Next:short press to the next song, long press to fast forward.
9.V-:volume decrease
10.EQ:when the product is working, press EQ button to change
different music effects, namely: FLA-CLA-ROC-POP-JAZ(Flat
- Classical - Rock - Pop - Jazz).
11.Programming:In the stop state ( STOP ) , press the (RPOG) button
on the remote controls to program songs. Press previous/next button
( / )toselect the song you want to program, then press (RPOG)
button to confirm after programming. Press the play/pause button ( )
Play/pause
Stop

POWER SUPPLY
1.DC Power: plug one end of the DC power cord into the DC power
jack of this product, and plug the other end into the 110-120V
household power outlet.
2.Please do not tear off the "Warning" sticker and do not open the
battery compartment
NOTE:
1.This product can only use the DC power supply voltage indicated
on the manual or the casing.
2.When unplugging the DC power cord, hold the plug with by hand
instead of pulling on the cord.
3.Never touch the DC power plug when your hands are wet,
otherwise it may cause electric shock.
4.The power cord should be fixed to avoid twisting or trampling.
5.Do not use power sockets with too thin and extended wires. If the
Outlet is overloaded, it will cause fire or electric shock.
6.If the product is not used for a long time, please unplug the DC
power plug from the socket.
to play in the sequence of the programmed songs.
— 4 —

CD / MP3 DISC OPERATION
1. Press and hold the power on/off button, and press the
function selector button( ) on the unit or remote control
to select CD/MP3 mode. LCD shown as“ ”
2.Press to open the CD compartment door, and place the disc
printing surface upward on the spindle of the CD movement.
Then close the CD compartment door, the song will be played
automatically in a fifteen seconds, and the LCD will display the
serial number of your current song. The format of the disc,such
as "CD", "MP3", etc.
3.During playback, short press the previous/next button(
) to jump to the previous/next song; long press the previous/next
button( ) to fast rewind or fast forward.
4.Press the play / pause button ( ) once to temporarily
stop playing, and press this button again to resume playing.
5.If you need to stop playing halfway, press the stop button
( ) to stop playing.
6.Press the volume increase button ( ) or the volume
decrease button ( ) to adjust the volume appropriately
.
7.When the product is working, press the EQ button( ) on
the unit or on the remote control to change different music
effects, namely: FLA-CLA-ROC-POP-JAZ (Flat - Classical -
Rock - Pop - Jazz).
— 5 —
CD

TAPE OPERATION
1.Press the function selector button ( ) to select the TAPE function.
(LCD shown as “ ”)
2.Press the tape stop / eject button ( ) to open the tape door,
place the tape correctly and close the tape door.
3.Press the tape playback button ( ) to play, and press the volume
increase button ( ) or the volume decrease button ( ) to adjust
the volume appropriately.
4.Press the tape pause button ( ) once to temporarily stop playing,
and press the tape pause button ( ) again to resume playing.
TAPE PLAYBACK
Figure 3
Single Cycle
Figure 5
Figure 4
— 6 —
8.Repeat function:
In the process of playing CD, press the repeat button ( )
once, the current song you listen to will enter into single cycle,
and displayed on the LCD as shown in figure 3;
Press the repeat button tow times, the whole disc will be
played repeatedly, and displayed on the LCD as shown in
figure 4;
Press the repeat button three times, the whole disc will be
pla
yed randomly. Displayed on the LCD as shown in figure 5;
Press the repeat button four times to resume normal playback.
9.Programming:In the stop state ( STOP ) , press the (RPOG) button
on the remote controls to program songs. Press previous/next button
( / )toselect the song you want to program, then press (RPOG)
button to confirm after programming. Press the play/pause button
( )to play in the sequence of the programmed songs.

5.To fast forward or fast rewind the tape, just press the tape fast
forward button ( ) or the tape fast rewind button ( ), then press
tape playback ( ) button again to play.
6.When the magnetic stripe in the tape reaches the end, the tape
playback will stop automatically.
7.If you want to stop playback halfway and take out the tape, press
the tape stop / eject button ( ) once to stop, and press twice to
open the tape door.
1.This product has function of built-in microphone input tape. It can
record sound under CD/Radio/Bluetooth/USB/AUX mode.
NOTE: Voice cannot be recorded.
2.Press to open the tape door and put in a tape on it. Then press to
choose one of the CD/Radio/Bluetooth/USB/AUX mode you
want to record. When it playing, press the tape playback button ( )
and tape recordbutton ( ) at the same time to start record.
3.Press the tape stop / eject button ( ) to stop record, then press
the function selector button ( ) to select the TAPE function. (LCD
shown as " ").
4.Press the tape fast rewind button ( ) to back to the sound you
record, then press the tape playback( ) button to play.
1.Press the function selector button ( ) to enter the radio state.
(LCD shown as " ").
2.Press the volume increase button ( ) or the volume decrease
button ( ) to adjust the volume appropriately.
3.Short press the ( / ) button to adjust the frequency with
0.05MHz forward or backward, long press the button( / ) to
quickly adjust the frequency, long press the button ( ) to quickly
search the channel, short press the button ( ) to adjust the searched
channel forward, short press ( ) to adjust the searched channel
— 7 —
RADIO OPERATION
TAPE RECORDING

backward. The LCD will display the corresponding radio frequency.
4.Pull out the antenna to get a good reception.
1.Press the function selector button ( ) to select "BT" mode(LCD
shown as " "),at this time, Bluetooth works in pairing state.
2.Turn on Bluetooth on your mobile phone or other devices, click
Search Bluetooth device(Bluetooth name:"CD-2012") pairing, and the
pairing is successful after hearing the voice prompt.
3.When Bluetooth is playing, short press the ( )button to
play / pause.
4.After Bluetooth pairing, long press the ( ) button to clear
the Bluetooth connection function.
1.Insert the USB with MP3 format into the corresponding USB socket
press the function switch button ( ) to switch to USB playback
mode(LCD shown as " "), then you can play song after the
machine detects it.
2.USB playback operation method is the same as the section
"CD/MP3 Disc Operation."
1.Short press the function selector button ( ), select the AUX
function,then connect the external sound source to this machine with
AUX cord, the song will be played after the machine detects it.
(LCD shown as " ").
2.The machine has the function of amplifying and outputting all
external sound sources (such as mobile phone, MP3 player, tape
Walkman, CD player, etc.).
BLUETOOTH OPERATION
USB OPERATION
AUX OPERATION
— 8 —

SPECIFICATIONS
SAFETY INSTRUCTIONS
Frequency
※Use Environment
1.Do not expose the machine to rain or damp places, and place and use the machine
away from bathtubs, washing boxes, swimming pools, etc
2.Do not put any source of danger on the device (for example, objects filled with liquid,
lighted candles).
3.Do not use the machine near heat sources, including radiator pipes, heaters or other
appliances that generate heat.
4.Put the machine on a flat surface to use.
5.The machine should be placed in a location with sufficient ventilation space around it,
and there should be 5-10 cm of space around the front and rear of the machine, so that
the machine can have enough space for ventilation.
-Do not place the machine on a bed, blanket or similar surface to prevent the vents of the
machine from being blocked, and do not cover the machine with tablecloths, paper, etc.
6.Be careful not to let solids or liquids enter the body from the radio.
7.Water vapor may condense on the laser lens under the following conditions:
-When the unit is moved from a cold place to a warm place;
-When the heating system has just opened;
-When the machine is used in a very humid room;
-When the unit is cooled by the air conditioning system.
-When condensation occurs in the unit, the system cannot operate normally.
If this happens, you can temporarily stop using the unit for a few hours before operating
it again.
The machine should not be exposed to water droplets or splashes, and objects filled with
liquids such as vases should not be placed on the equipment.
CD format
Bluetooth
Insert voltage
Battery capacity
Size
Weight
FM: 87.5-108MHZ
CD/CD-R/CD-RW
Bluetooth 5.3
DC 9V 2A
7.4V / 2000mA
237x219x118mm/9.33x8.62x4.65in
1.34kg/2.95lb
— 9 —

※Precautions
1. In the event of a thunderstorm and you will not use the machine for
a long time, you should unplug the DC power plug from the socket or
take out the battery to prevent battery fluid from leaking and damaging
the machine.
2. When playing, the battery life is limited, please use DC power as
much as possible.
3. The battery (battery pack or battery pack) should not be used in an
overheated environment (such as direct sunlight, open flames or similar
environments) .
※Maintenance
Please place the machine in a well-ventilated place, not in the sun or
other places that generate high temperature and humidity. During
maintenance, please use a soft cloth moistened with a thinner detergent
to wipe the body. Do not use strong solvents such as alcohol, stupid
or thinner.
CD Player 1
1
1
1
1
DC Power Cord
AUX Cord
Remote Control
User Manual
1.This CD boombox has full 12-month warranty against manufacturing
defects.
2.The warranty period begins form the date of purchase.
— 10 —
WARRANTY
PACKING LIST

This device complies with Part 15 of the FCC rules. Operation is subjected to the
following two conditions:
(1) this device may not cause harmful interference, and (2) this device must
accept any interference received, including interference that may cause undesired
operation.
Changes or modifications not expressly approved by the party responsible for
compliance could void your authority to operate the equipment.
Changes or modifications not expressly approved by the party responsible for
compliance could void your authority to operate the equipment.
FCC Radiation Exposure Statement
This equipment complies with FCC radiation exposure limits set forth for
an uncontrolled environment without restriction.
FCC VOC
This equipment has been tested and found to comply with the limits for a Class B
digital device, pursuant to Part 15 of the FCC Rules. These limits are designed to
provide reasonable protection against harmful interference in a residential
installation. This equipment generates, uses and can radiate radio frequency
energy and, if not installed and used in accordance with the instructions, may
cause harmful interference to radio communications. However, there is no
guarantee that interference will not occur in a particular installation. If this
equipment does cause harmful interference to radio or television reception, which
can be determined by turning the equipment off and on, the user is encouraged to
try to correct the interference by one or more of the following measures:
-- Reorient or relocate the receiving antenna.
-- Increase the separation between the equipment and receiver.
-- Connect the equipment into an outlet on a circuit different from that to which the
receiver is connected.
-- Consult the dealer or an experienced radio/TV technician for help.