User’s Manual
Item: AI7013

Important Safety Precautions
1. READ AND FOLLOW ALL INSTRUCTIONS. HEED ALL WARNINGS .
2. Do not use device near water.
3. Clean only with dry cloth.
4. Do not block any ventilation openings.
5. Keep external objects away at a minimum distance of 4 inches around the device for sufficient ventilation.
6. The ventilation should not be impeded by covering the ventilation openings with items, such as newspapers, table-cloths, curtains, etc.
7. No naked flame sources, such as lighted candles, should be placed on or next to the device.
8. Do not operate near any heat sources such as radiators, heat registers, stoves, or other devices (including amplifiers) that produce heat.
9. Only use attachments/accessories specified by the manufacturer.
10. Unplug this device during lightning storms or when unused for a long period of time.
11. This appliance shall not be exposed to dripping or splashing water and that no object filled with liquids such as vases shall be placed
on or next to the device.
12. Upon completion of any service or repairs to this product, ask the service technician to perform safety checks.
13. Object and Liquid Entry - Never push objects of any kind into this product through openings as they may touch dangerous voltage points
or short-out parts that could result in a fire or electric shock. Never spill liquid of any kind on the product.
14. Damage Requiring Service - Unplug this product from the wall outlet and refer servicing to qualified service personnel under the
following conditions:
a) If liquid has been spilled, or objects have fallen into or onto the product.
b) If the product has been exposed to rain or water.
c) If the product does not operate normally by following the operating instructions. Adjust only those controls that are covered by the
operating instructions as an improper adjustment of other controls may result in damage and will often require extensive work by a
qualified technician to restore the product to its normal operation.
d) If the product has been dropped or damaged in any way.
e) When the product exhibits a distinct change in performance.
15. Disconnect plugs completely from sockets.
16. Do not expose batteries to excessive heat.
17. Excessive sound pressure from earphones and headphone can cause hearing loss.
18. Dispose batteries properly based on local laws and regulations.
1

2
Table of Contents
INTRODUCTION
3
WHAT’S INCLUDED
3
SPECIFICATIONS
3
YOUR BOOMBOX
4-5
POWERING YOUR BOOMBOX
6
WIRED CONNECTION
7
AUDIO CONTROL
7
BLUETOOTH
8
PLAYING FROM USB/MicroSD
9
LISTENING TO CASSETTE TAPES
10
LISTENING TO THE RADIO
11
RECORDING TO USB AND MicroSD
12-13
CONNECTING HEADPHONES
14
TROUBLESHOOTING
15
CARE AND MAINTENANCE
16
FCC STATEMENT
17
WARRANTY
18

3
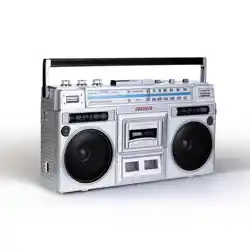
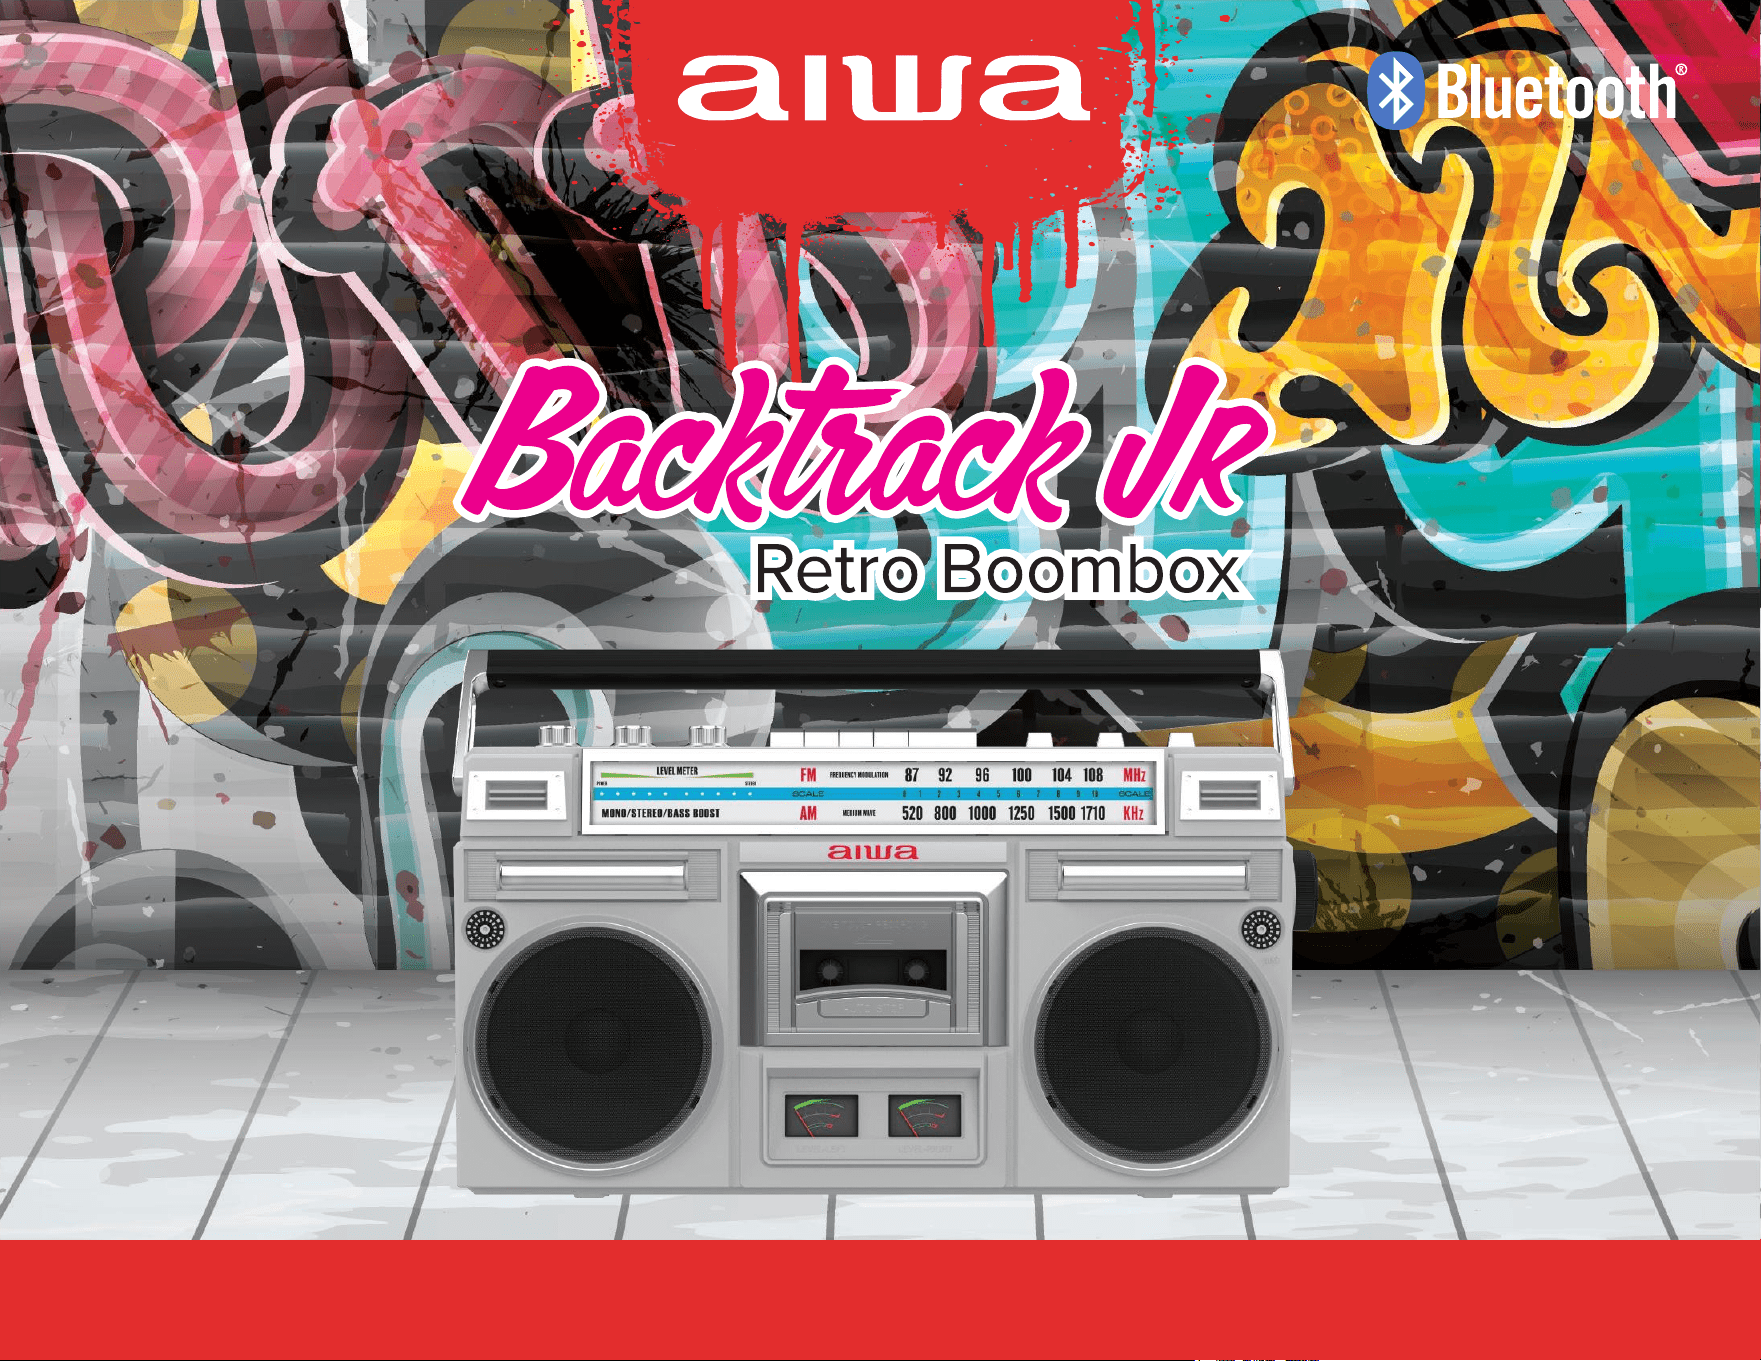
--Backtrack JR Retro Boombox
--Power Cable
--User’s Manual
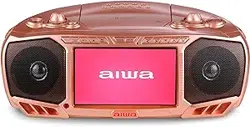
Thank you for purchasing your AIWA Backtrack JR Retro Boombox. You can use your boombox with most smartphones and Bluetooth
--Bluetooth Range: Up to 100 feet (30.5 Meters)
--Power: 28W Peak Total
--Frequency Response: 80Hz - 10kHz
--Radio Frequency Range: 520 - 1710 kHz (AM), 87 - 108 MHz (FM)
--Input Voltage: 120 VAC, 60 Hz
--USB Charging Port: 5V, 0.15A
--USB/Micro SD Card File Types: .MP3, .WAV
--USB/Micro SD Card File System: FAT32
--USB/Micro SD Card Maximum File Size: 32GB
--AUX-IN & Headphone Jack: 3.5mm/ 1/8”
--Supported Cassette Types: Type 1 (normal bias), Type 2 (Chome - high bias), Type 3 (FeCr), Type 4 (Metal)
--Optional Battery Type: Six “D” Alkaline batteries (Not Included)
devices to stream music or play cassette tapes. To get the best results, please read this manual first before using your boombox.
Introduction
WHAT’S INCLUDED
Specifications
4
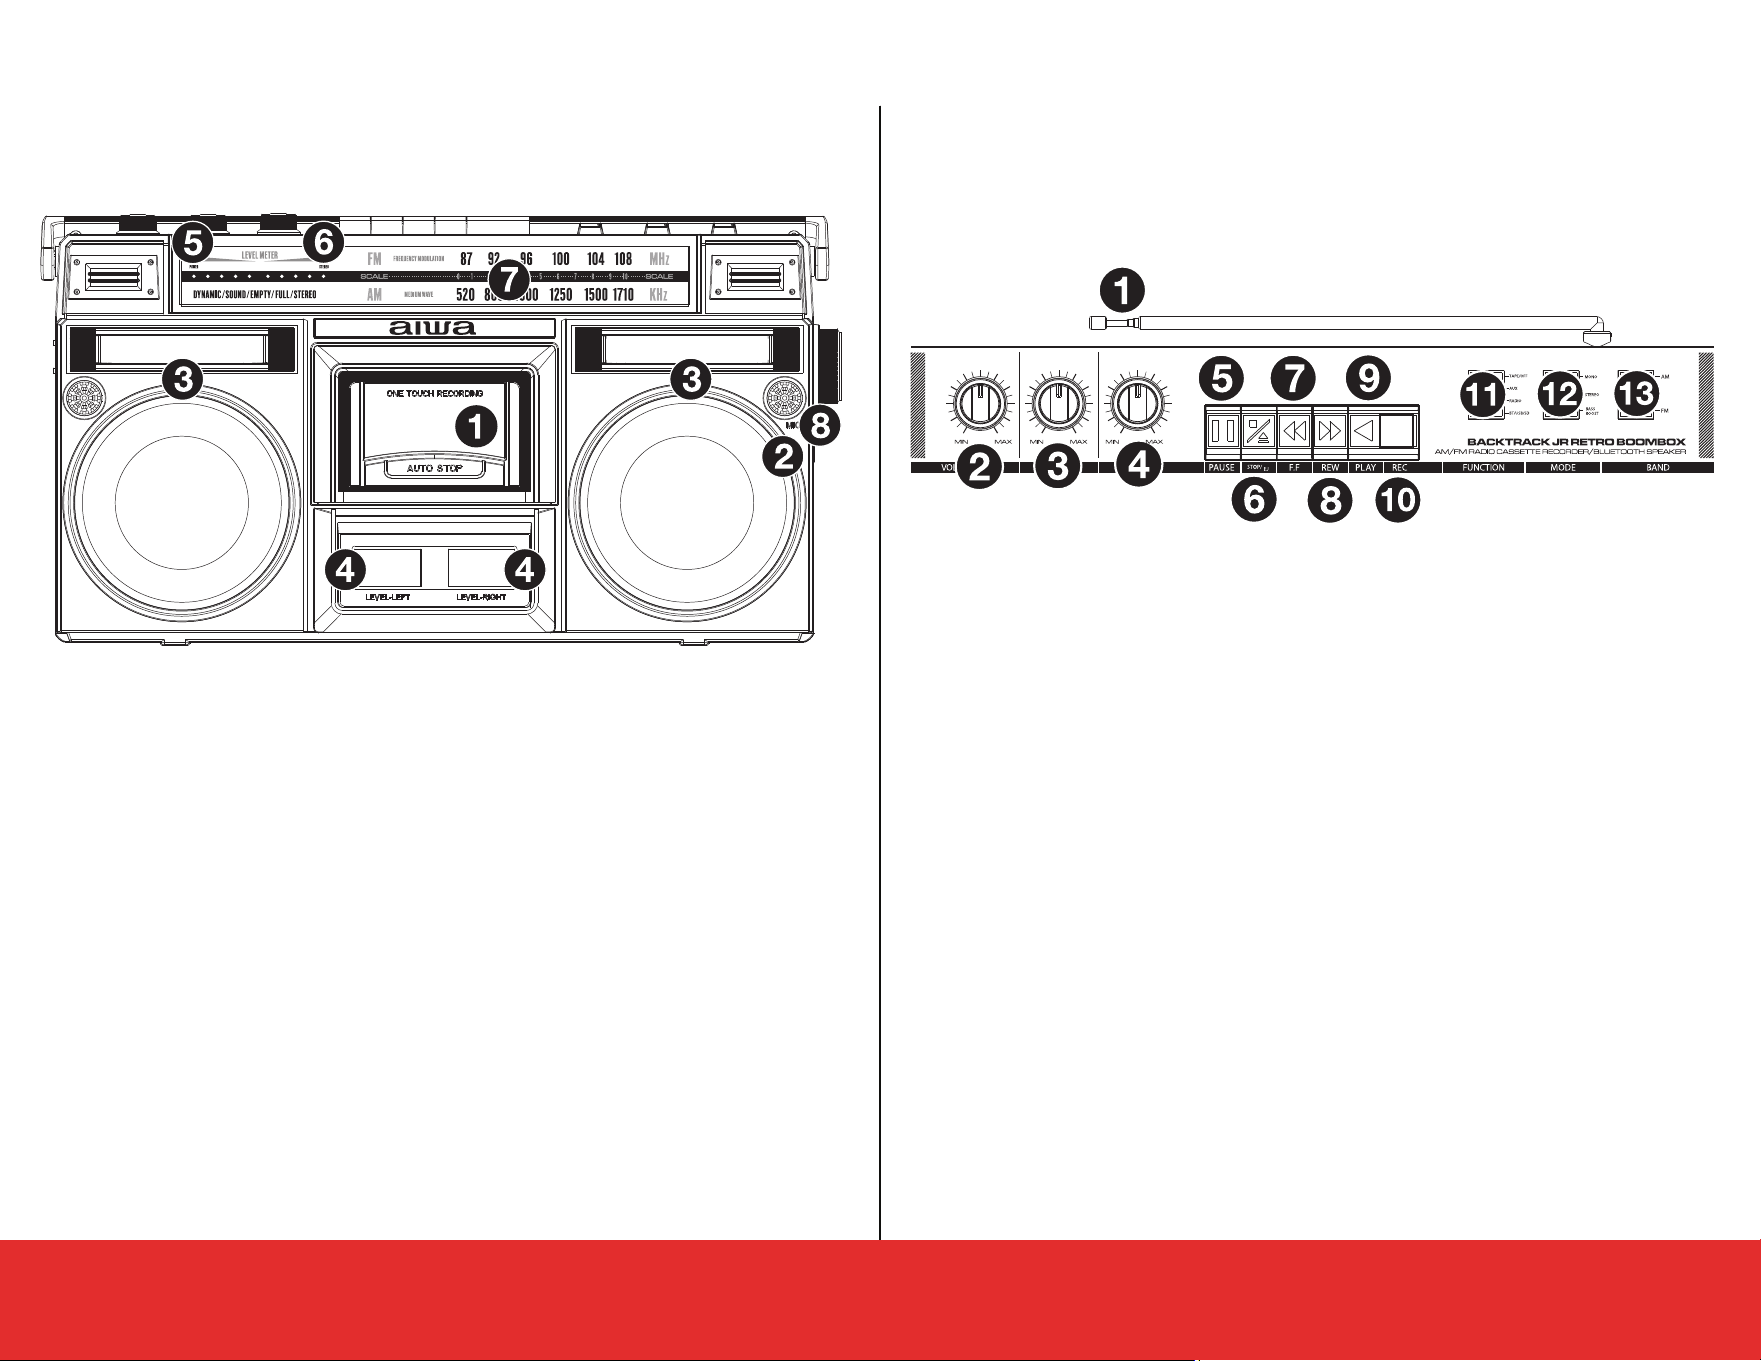
Your Boombox
1. Cassette Holder
2. Internal Mic
3. Speakers
4. Level Display
5. Power LED Light
6. Stereo LED light
7. Radio Channel Display
8. Tuning Dial
1. Antenna
2. Volume Adjustment Knob
3. Bass Control Knob
4. Treble Adjustment knob
5. Cassette Pause Button
6. Cassette Stop/Eject Button
7. Cassette Fast Forward Button
8. Cassette Rewind Button
9. Cassette Play Button
10. Cassette Record Button
11. Mode Switch
12. Audio Mode Switch
13. Band Switch
Front View Top View
5
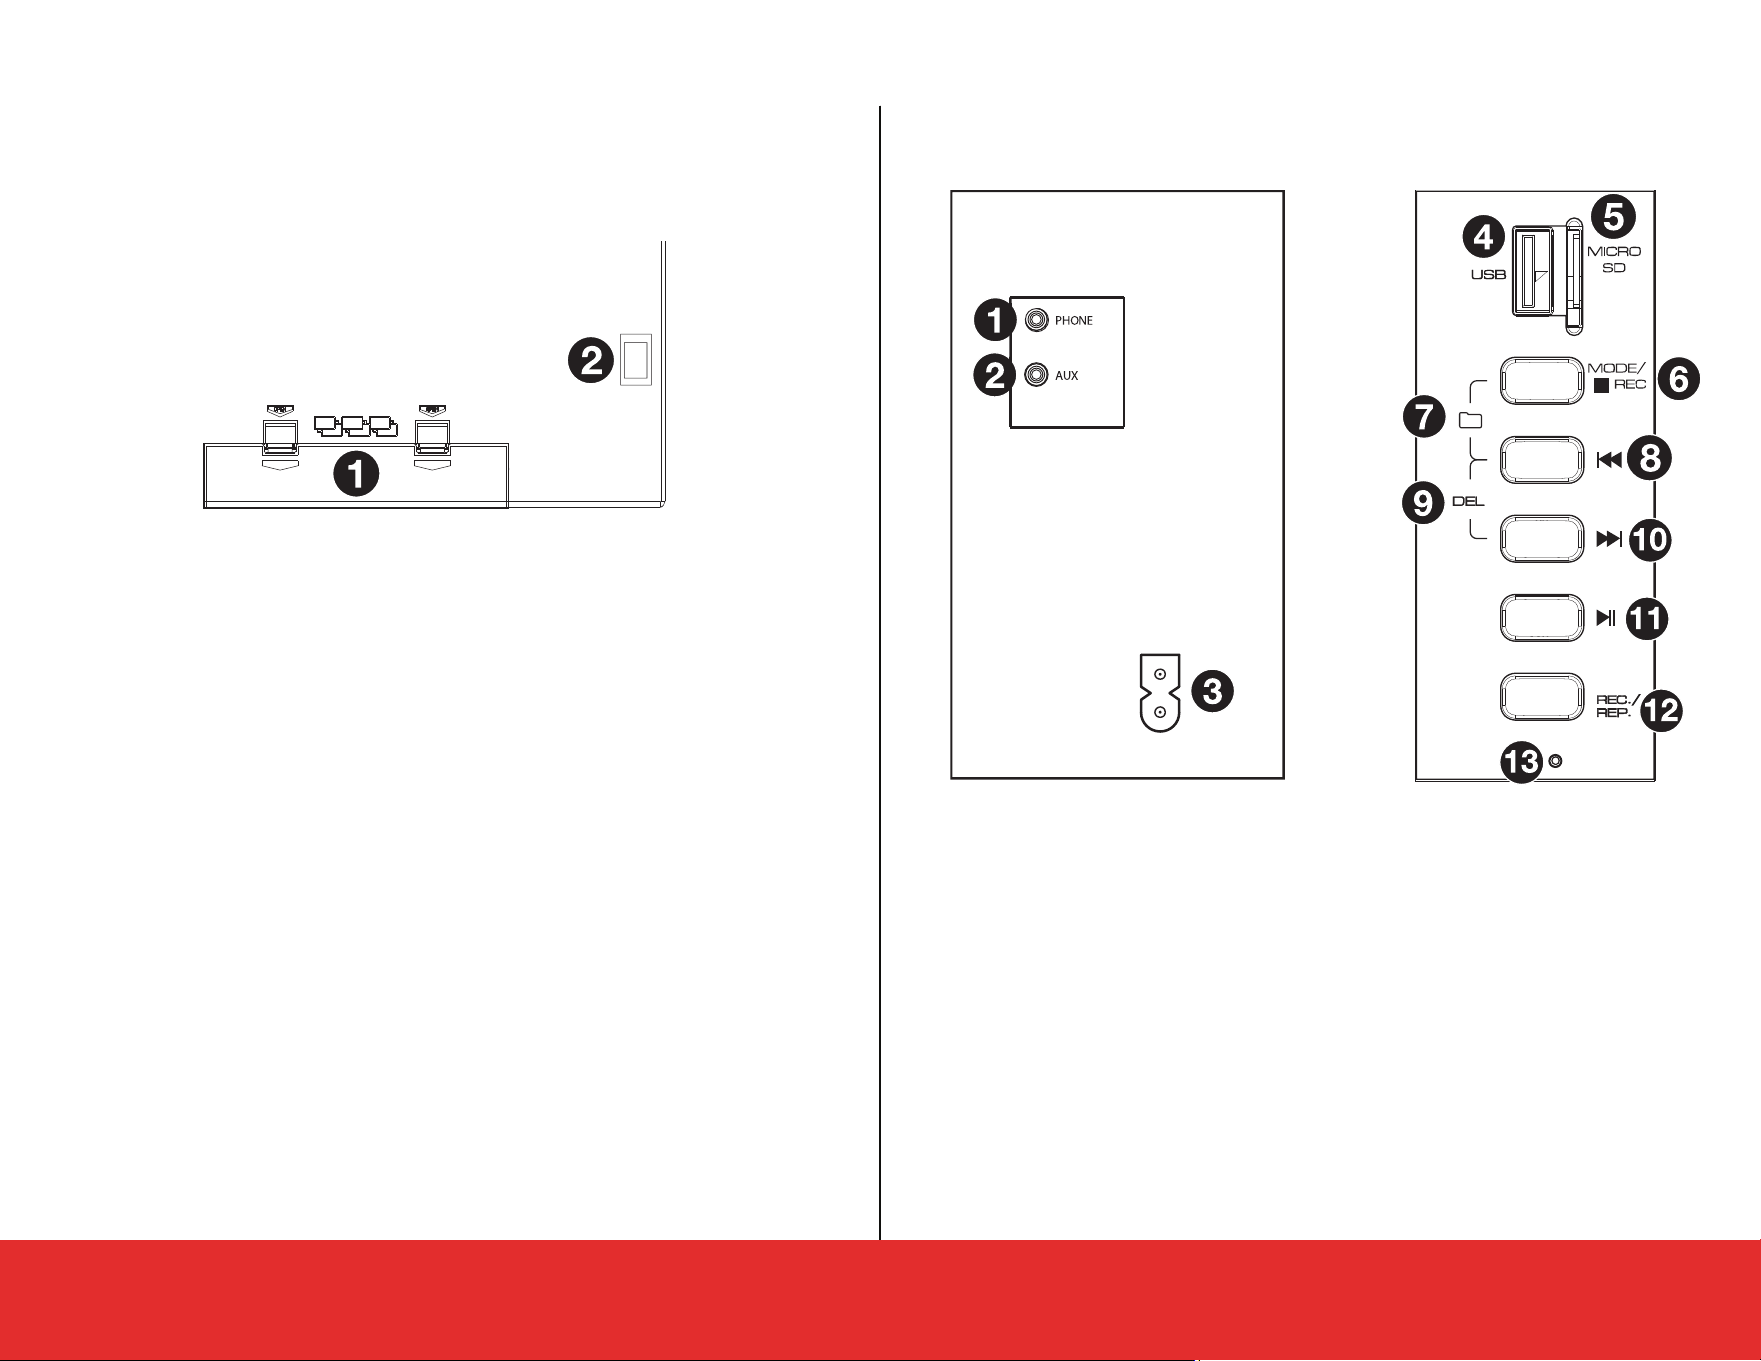
Your Boombox (Cont.)
Rear Panel View
Side View
1. Battery Compartment
2. Power Switch
1. Headphone Output
2. Aux Input
3. Power Input
4. USB Port
5. Micro SD Card Slot
6. Mode/Stop Recording Button
7. Switch Folders Button
8. Previous Track Button
9. Delete Track Button
10. Next Track Button
11. Play/Pause Button
12. Record/Repeat Button
13. Media Status Light
6
Powering your Boombox
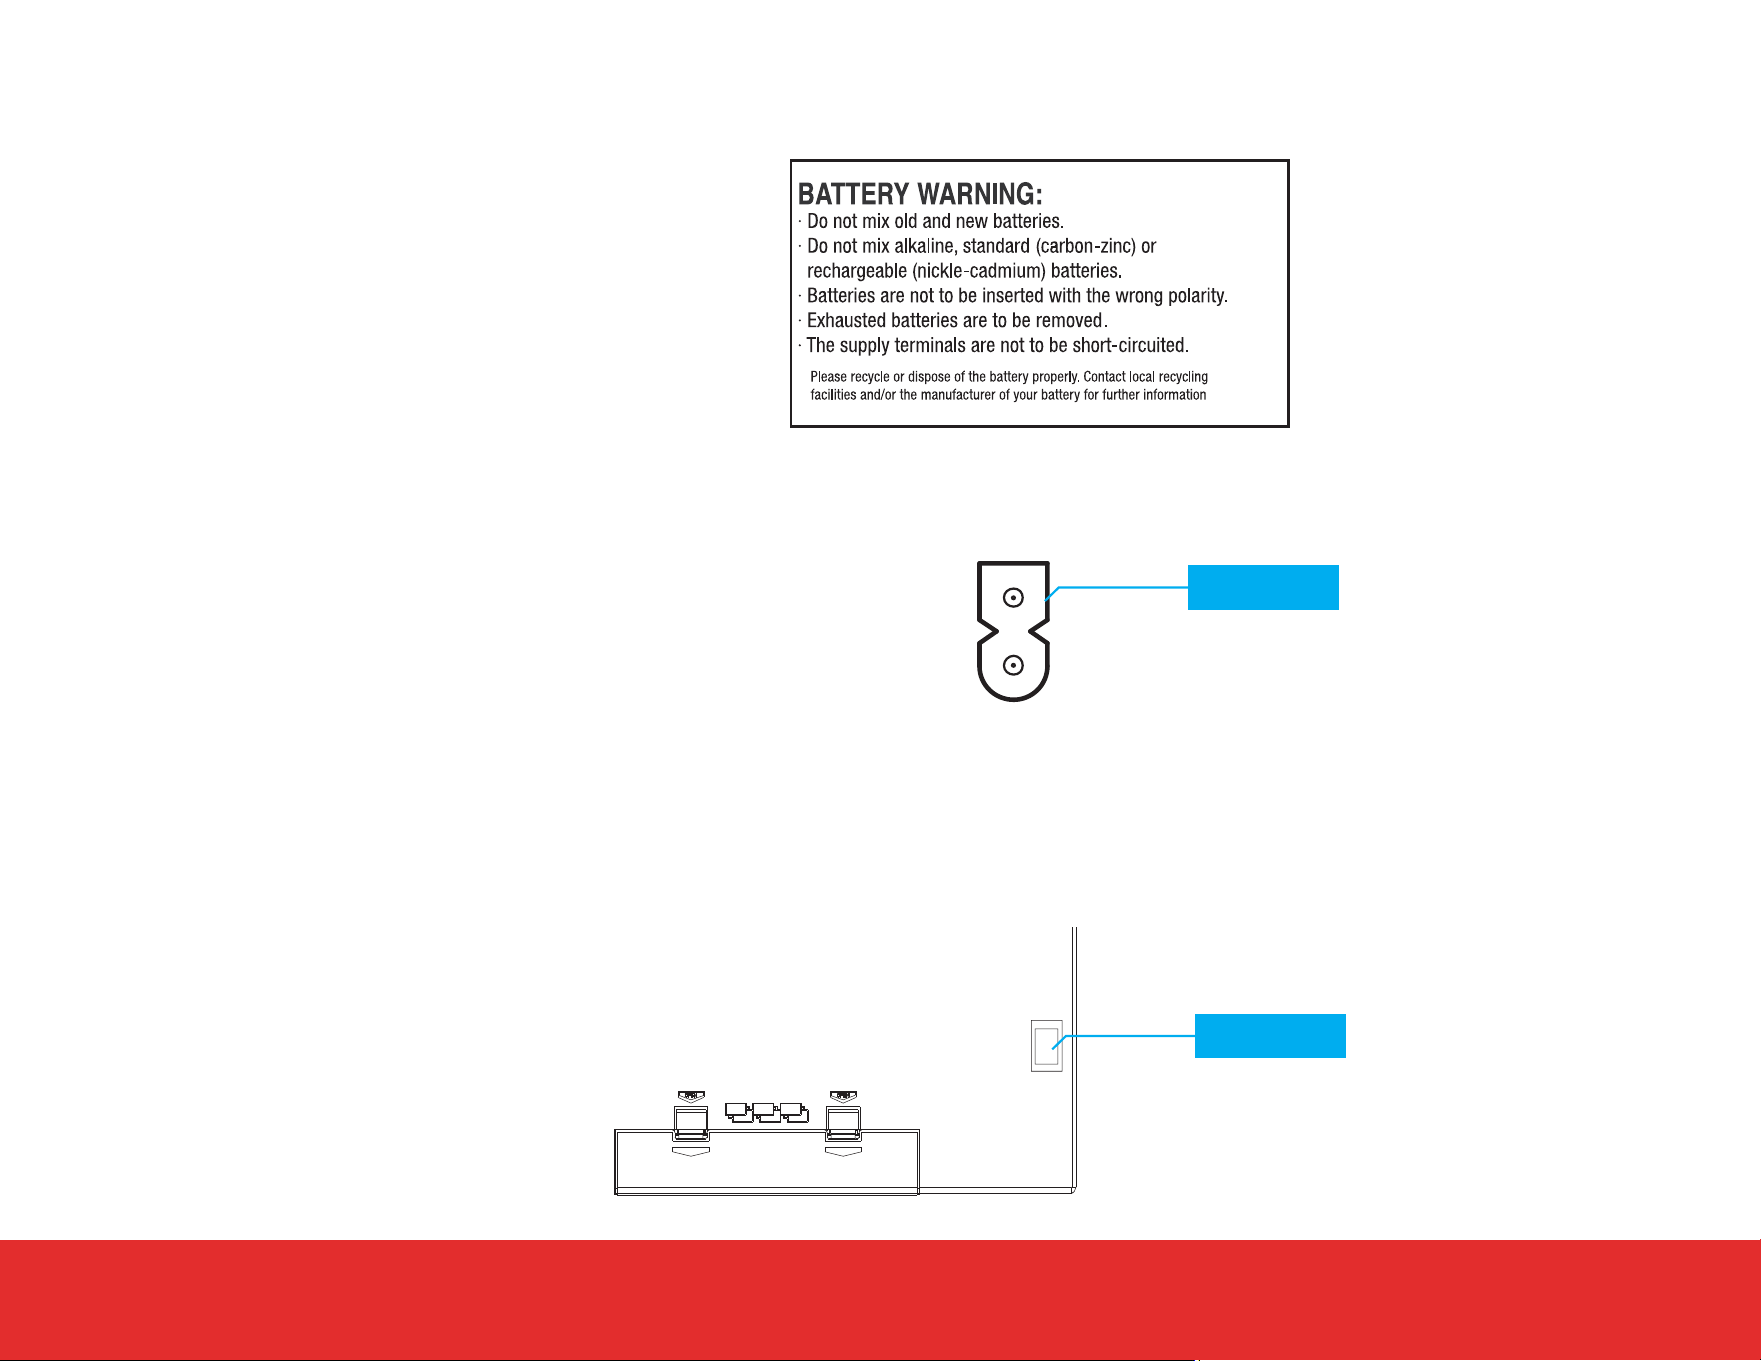
Inserting Batteries
Using the AC Cable
Powering ON/OFF
If you want to use your boombox wirelessly, insert
six D Alkaline batteries (not included) into the
battery compartment at the back of your boombox.
To insert, first push the battery compartment cover
downward to remove it. Then, insert the six D
Alkaline batteries with the correct polarity (+,-) as
displayed in the battery compartment.
Alternatively, you can power your boombox using the included AC Power
cable. Insert one end of the AC Power cable into the Power Input on your
device, then plug the other end into a suitable power outlet.
If the device is operating through the included AC Cable, to power ON, set the power switch located on the back of the device to ON. To turn
the device OFF, set the power switch to OFF.
If the device is operating through inserted batteries, set the Mode Switch to Tape to conserve batteries.
Power Switch
Power Input

7
Wired Connection
The Aux/Line Input can be connected to the Line or Headphone output of a suitable music player, TV, etc.
Connecting to an External Playback Device
1. Plug one end of a 3.5mm Audio Jack cable (not supplied) into the AUX Input.
2. Connect the other end of the cable to the audio output of the external device.
3. Set the Mode Switch to the AUX position to enable playing audio from the connected device.
NOTE: Certain devices may require volume adjustment from both the Boombox and connected device.
Audio Control
In most modes, the following audio functions are available:
Volume
-Adjust the volume with the Volume Adjustment knob.
Bass
-Adjust the treble with the Treble Adjustment knob.
-Adjust the bass with the Bass Control knob.
8
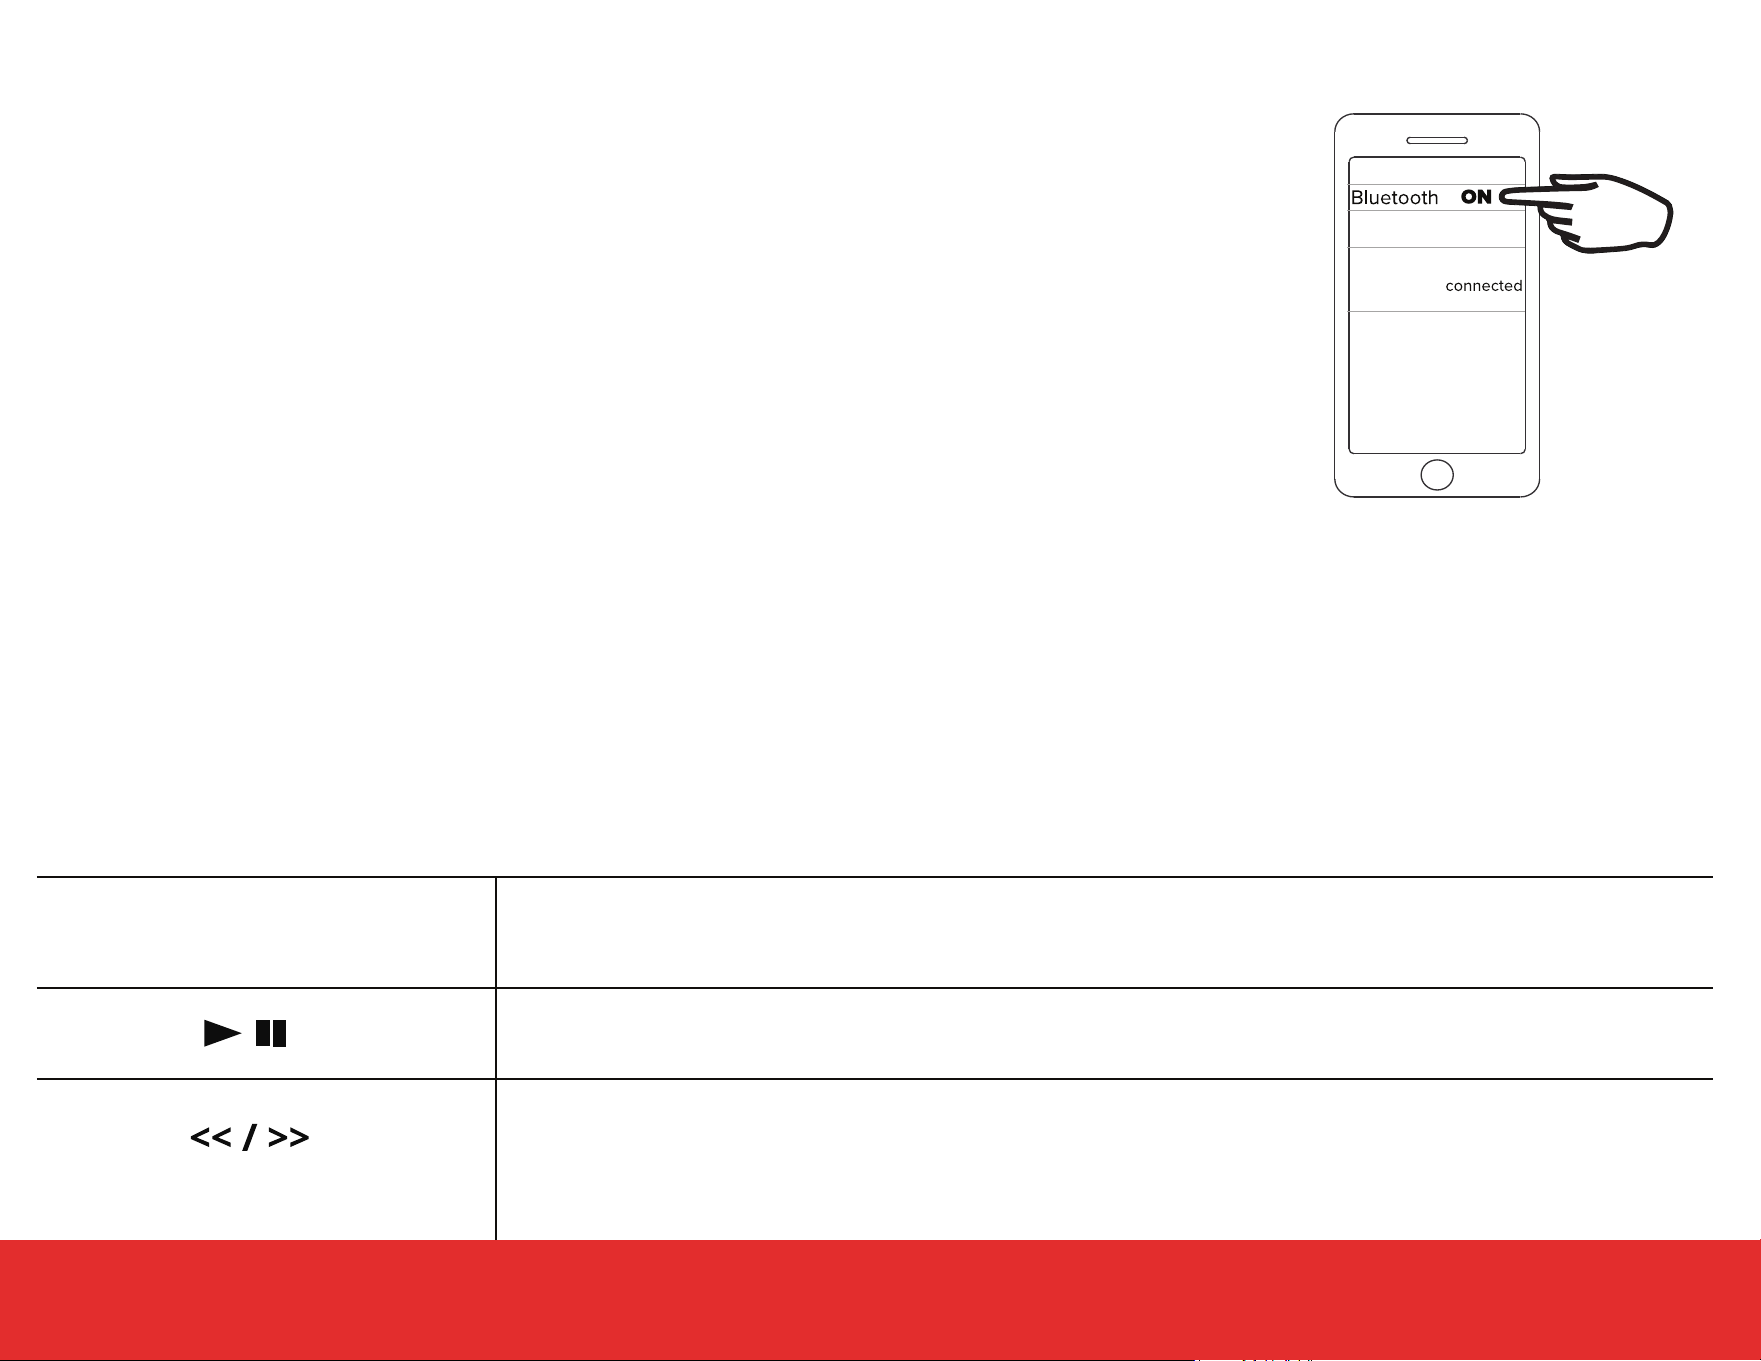
Connecting Bluetooth Device for the First Time
1. Set the Mode Switch to the BT/USB/SD position.
2. Activate the Bluetooth function on your external device.
3. Connect to the device listed as “AIWA BacktrackJR” on your external Bluetooth device.
NOTE: If your Bluetooth device prompts for a pairing code, enter “0000”.
4. A voice prompt will say “Bluetooth pairing” while pairing. Pairing is successful when the voice
prompt says “Bluetooth connected”.
Disconnect from Bluetooth
To disconnect from Bluetooth, turn Bluetooth OFF on your external device or set the Mode Switch to another position. Alternatively, you
can press and hold the Play/Pause Button. A voice prompt will say “Bluetooth disconnected” after the Bluetooth connection is successfully
disconnected.
NOTE: External devices that have already paired once are connected automatically when powered ON and Bluetooth is enabled.
Bluetooth Controls
Playback of tracks, volume, and special functions can be controlled from both your external device and the boombox. The available
functions depend on your external device and the software used.
bluetooth
Volume Adjustment Knob
Decrease or increase the volume. Make sure that the volume on the external device is set loud
enough for an adequete imput signal.
Press and hold the Previous Track Button to go to the previous song in the track. Press and hold
the Next Track Button to go to the next song in the track.
Start or pause playback.
AIWA BacktrackJR

9
Playing from USB/MicroSD
Inserting a USB Stick
-Plug the USB stick into the USB port.
-Set the Mode Switch to the BT/USB/SD position.
-Press the Mode/Stop Recording Button to set to USB mode.
NOTE: USB devices cannot be charged through the USB port.
Inserting MicroSD Card
-Plug the MicroSD card into the MicroSD port.
-Set the Mode Switch to BT/USB/SD mode.
-Press the Mode/Stop Recording Button to set to SD mode.
Starting/Pausing/Stopping Playback
-Press the Play/Pause Button to start and stop the currently playing track.
-Use the Mode/Stop Recording Button to stop playback completely.
Track Selection/Rewind/Fast-forward
-Press the Previous Track Button to return to the previous track. Press the Next Track Button to skip to the next track.
-Press and hold the Previous Track Button to rewind. Press and hold the Next Track Button to fast-forward.
Selecting Folders
When you play MP3 files, they can be stored in various folders on your connected device. To select a folder to play from, follow the following
steps.
-Stop playback with the Stop Button.
-To change folders on an MP3 storage device, press the Mode/Stop Recording and Previous Track Buttons simultaneously.
-Start playback in the selected folder with the Play/Pause Button.
NOTE: Not all storage media are compatible with the boombox. Depending on compatibility, certain functions may be limited or disabled.
NOTE: The Mode/Stop Recording Button can be used to switch between BT and USB and/or SD modes if a USB or SD is plugged in.

10
listening to cassette tapes listening to cassette tapes
Type I (’Ferric’/Normal/120uS/Low Bias), Type II (’Chrome’/70uS/High Bias) , Type III(FeCr), and Type IV (Metal) Tapes (with or without noise
reduction) can be played.
Set the Mode Switch to the TAPE position.
NOTE: The TAPE position is also used as the OFF position when no tape is being played.
Inserting/Ejecting Cassette Tapes
-Press the Cassette Stop/Eject Button to open the cassette compartment. Insert a cassette with the tape side down into the guide rails inside
the compartment. The side that faces forward will be played.
-Close the compartment.
-To eject the cassette, push the Cassette Stop/Eject Button. If playback is active, stop playback before ejecting to avoid damaging the cassette.
Playing/Stopping/Pausing the Cassette
-Press the Cassette Play Button to play the cassette.
-Press the Cassette Stop/Eject Button to stop playback.
-Press the Cassette Pause Button to pause playback.
NOTE: When the tape reaches the end, playback automatically ends.
Rewind and Fast-forward
-Press the Cassette Rewind or Cassette Fast Forward Buttons to rewind or fast-forward the tape.
-Press the Cassette Stop/Eject Button to stop rewinding and fast-forwarding. Press the button if the end of the tape has been reached.
IMPORTANT: Do not change directly between fast-forward and rewind. Make sure to stop the tape before changing between rewind and
fast-forward.
Recording to the Cassette
You can record from multiple sources onto a cassette. Set the Mode Switch to your desired position.
-Set to BT/USB/SD to record from a source of Bluetooth,USB, or MicroSD.
-Set to AUX to record from an AUX connection.
-Set to Tape to record from the built-in microphone.
-Set to Radio to record from the radio.
Press the Cassette Record Button to start recording to the inserted cassette. If recording from an AUX connection, press the Record and Play
buttons simultaneously. To temporarily pause the recording, press the Cassette Pause Button. To stop recording completely, press the Cassette
Stop/Eject Button.

11
listening to the Radio
Aligning the Antenna
There is a antenna on top of the device for radio reception.
-Carefully remove the movable end of the antenna from the back of the device and extend it out completely. Carefully turn and swivel the
antenna until there is reception.
Using the Radio
-Set the Mode Switch to Radio.
-Set the Band Switch to FM or AM (medium wave).
Tuning
-Turn the Tuning Dial to tune to the desired frequency.

12
Recording to USB AND MicroSD
You can record from all sources onto a USB stick or MicroSD card.
Recording from the Internal Microphone
-Plug a USB stick into the USB port or insert a MicroSD card into the MicroSD socket.
NOTE: Do not insert both a USB and a MicroSD card at the same time.
-Set the Mode Switch to the BT/USB/SD position.
-Set the mode to USB or SD playback. If there is an audio track on the USB, playback may begin.
-Press and hold the Record/Repeat Button on the side panel. Speak towards the Internal Microphone for better quality.
-To stop recording, press the Mode/Stop Recording Button on the side panel.
Recording from a Cassette
-Set the Mode Switch to the TAPE position. This position is also used to turn the radio OFF when no tape is playing.
-Press the Cassette Start/Eject Button and insert a cassette.
-Plug a USB stick into the USB port or insert a MicroSD card into the MicroSD socket.
NOTE: Do not insert both a USB and a MicroSD card at the same time.
-Press the Cassette Play Button to start playing the cassette.
-Start recording onto the USB stick or the MicroSD card by pressing and holding the Record/Repeat Button on the side panel.
-To stop recording, press the Mode/Stop Recording Button on the side panel.
Recording from AUX Input
-Set the Mode Switch to the AUX position.
-Connect a compatible device using the AUX Input.
-Plug a USB stick into the USB port or insert a MicroSD card into the MicroSD socket.
NOTE: Do not insert both a USB and a MicroSD card at the same time.
-Start playback of the connected external audio device. Adjust the volume and check the levels on the Level Display.
-Start recording onto the USB stick or the MicroSD card by pressing and holding the Record/Repeat Button on the side panel.
-To stop recording, press the Mode/Stop Recording Button on the side panel.

13
Recording to USB and microsd (CONT.)
Recording from the Radio
-Set the Mode Switch to Radio.
-Set the Band Switch to FM or AM (medium wave).
-Select the desired radio station using the Tune Dial.
-Plug a USB stick into the USB port or insert a MicroSD card into the MicroSD socket.
NOTE: Do not insert both a USB and a MicroSD card at the same time.
-Start playing from the radio and adjust the antenna for the best quality.
-Start recording onto the USB stick or the MicroSD card by pressing and holding the Record/Repeat Button on the side panel.
-To stop recording, press the Mode/Stop Recording Button on the side panel.
Recording from Bluetooth
-Plug a USB stick into the USB port or insert a MicroSD card into the MicroSD socket.
NOTE: Do not insert both a USB and a MicroSD card at the same time.
-Set the Mode Switch to the BT/USB/SD position.
-Pair and connect with your desired mobile device.
-Start recording onto the USB stick or the MicroSD card by pressing and holding the Record/Repeat Button on the side panel.
-Play audio from your Bluetooth-connected device.
-To stop recording, press the Mode/Stop Recording Button on the side panel.
14
Connecting headphones
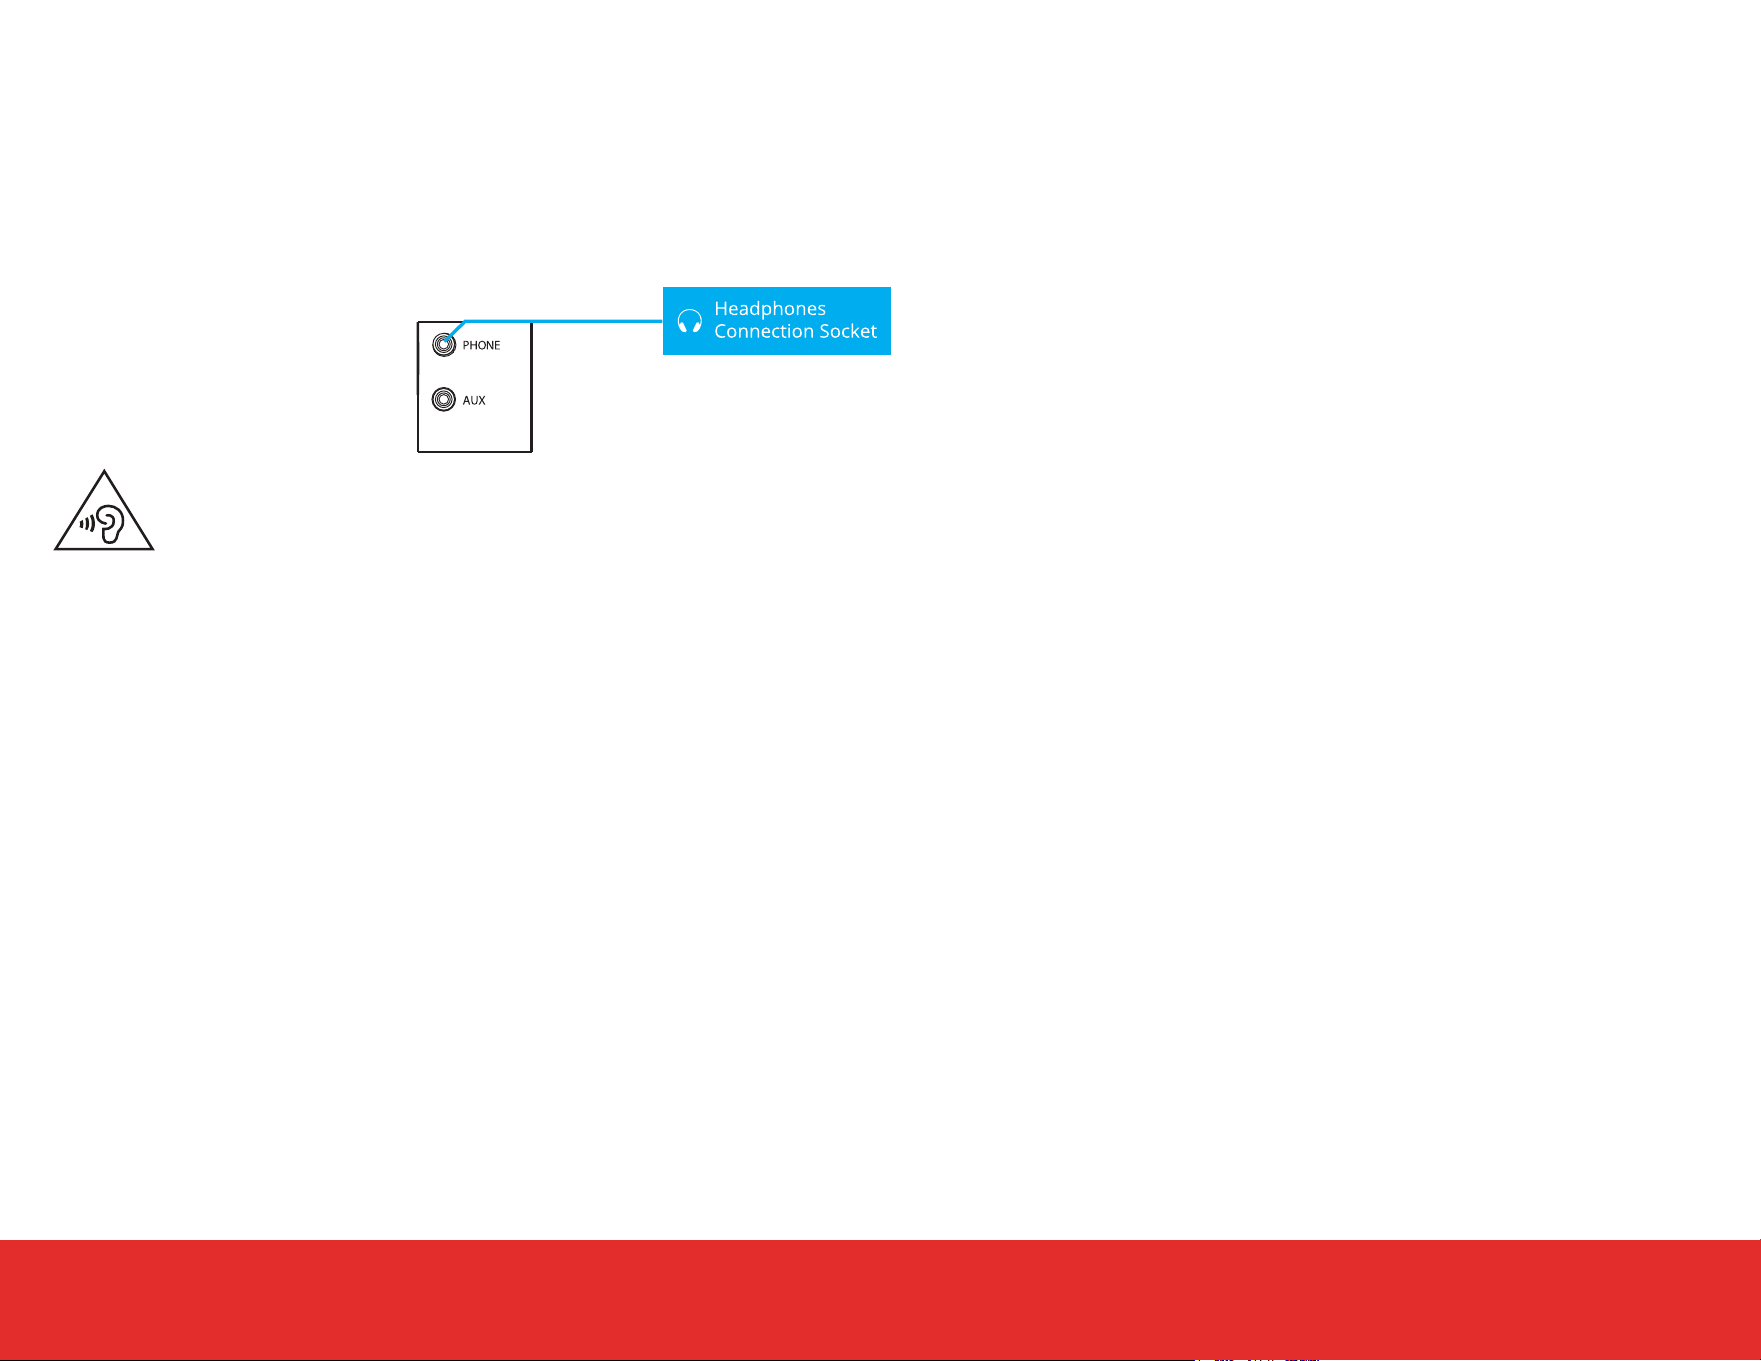
-Insert headphones with a 3.5mm/1/8” jack plug into the Headphone Output.
-When headphones are connected, the speakers are disabled.
-Use the Volume Knob to control the audio level.
Warning
To prevent possible hearing damage, do not listen at high volume levels for long
periods. For your own safety, please be aware of your surroundings when using
these headphones.

15
troubleshooting
Problem Possible Cause Remedy
The device cannot be switched
on.
A) The batteries may be dead.
B) The AC power cable may not be connected properly.
C) The Mode Switch may be in the TAPE/OFF position.
D)The rear Power switch may be Off.
The batteries may be dead.
The station signal is weak.
A) The Volume is set too low.
B) If a device is connected via AUX IN or Bluetooth:
The volume on the external device is too low.
C) The batteries could be flat.
D) Wrong source selected.
The device switches off when it is
in use.
No or poor radio reception.
No Sound
A) If the device is operated using batteries, check that the batteries
are inserted correctly.
B) Ensure the AC power cable is properly connected.
C/D) Check the position of all switches.
A) Adjust the frequency of the stations.
B) Move the radio to a different location or change the direction of the
antenna to improve the reception, if necessary.
A) Increase the volume as required
B) Increase the volume on the external device.
C) Operate the device with the AC power cable or change the batter-
ies.
D) Check if the correct source is selected on the Mode Switch. Check
if AUX is plugged in over-riding BT/USB/SD. Check if you need to press
MODE to switch between BT,USB, and SD sources if a USB or MicroSD
is plugged in.
Operate the device using the AC power cable or replace the batteries.

16
1. Do not subject the unit to excessive force, shock, dust or extreme temperatures.
2. To prevent fire or shock hazard, disconnect your unit from the AC power source when cleaning.
3. Do not tamper with the internal components of the unit.
4. Clean your unit with a dry cloth. Solvents or detergents should never be used.
5. Avoid leaving your unit in direct sunlight or in hot, humid or dusty places.
6. Keep your unit away from heating appliances and sources of electrical noise such as fluorescent lamps or motors.
7.If the front panel becomes dirty or smudged with fingerprints it may be cleaned with a soft cloth slightly dampened with a mild soap and
water solution. Never use abrasive cloths or polishes as these will damage the finish of your device.
CAUTION: Never allow any water or other liquids to get inside the unit while cleaning.
8.Never tug or yank on charging cables while they are connected to your boombox. Connect and disconnect these cables as carefully as
possible.
9. Please recycle or dispose of your boombox properly based on the laws and rules of your municipality. Contact local recycling facilities
and/or the manufacturer of your boombox for further information.
Care and maintenance

17
FCC Statement
Changes or modifications not expressly approved by the party responsible for compliance could void the user’s authority to operate the
equipment.
This device complies with Part 15 of the FCC Rules. Operation is subject to the following two conditions: (1) this device may not cause
harmful interference, and (2) this device must accept any interference received, including interference that may cause undesired oper-
ation.
This equipment has been tested and found to comply with the limits for a Class B digital device, pursuant to Part 15 of the FCC Rules.
These limits are designed to provide reasonable protection against harmful interference in a residential installation. This equipment
generates, uses and can radiate radio frequency energy and, if not installed and used in accordance with the instructions, may cause
harmful interference to radio communications. However, there is no guarantee that interference will not occur in a particular installa-
tion.
If this equipment does cause harmful interference to radio or television reception, which can be determined by turning the equipment off
and on, the user is encouraged to try to correct the interference by one or more of the following measures:
-- Reorient or relocate the receiving antenna.
-- Increase the separation between the equipment and receiver.
-- Connect the equipment into an outlet on a circuit different from that to which the receiver is connected.
-- Consult the dealer or an experienced radio/TV technician for help.
FCC Radiation Exposure Statement:
The equipment complies with FCC Radiation exposure limit set forth for uncontrolled environment. The device shall be operated and
installed without restrcition.

18
Warranty
This warranty covers the original consumer purchaser only and is not
transferable.
This warranty covers products that fail to function properly UNDER NORMAL USAGE, due to defects in material or workmanship. Your
product will be repaired or replaced at no charge for parts or labor for a period of one year.
What Is Not Covered By Warranty
Damages or malfunctions not resulting from defects in material or
workmanship and damages or malfunctions from other than normal use, including but limited to, repair by unauthorized parties,
tampering, modification or accident.
To Obtain Warranty Service and Troubleshooting Information:
Call (800) 592-9541 or visit our website at www.aiwa.us.com.
To receive Warranty service along with the name and address of an authorized product service center, the original consumer purchaser
must contact us for problem determination and service procedures. Proof of purchase in the form of a bill of sale or receipted invoice,
evidencing that the product is within the applicable Warranty period(s), MUST be presented in order to obtain the requested service.
It is your responsibility to properly package and send any defective products along with a dated copy of proof of purchase, a written
explanation of the problem, and a valid return address of the authorized service center at your expense. Do not include any other items
or accessories with the defective product. Any products received by the authorized service center that are not covered by warranty will
be returned unrepaired.
© 2026 Aiwa Acquisitions LLC. All rights reserved. AIWA and associated marks
are owned by Aiwa Acquisitions and used under license.
Keep all relevant information for future reference.
The Bluetooth® word mark and logos are registered trademarks owned by the
Bluetooth SIG, Inc. and any use of such marks by Sakar International is under license.
AIWA
Edison, NJ 08817
1-800-592-9541
www.aiwa.us.com