◆ Cleaning and storage of the record player:
1. Unplug the power supply before cleaning.
2. Use a soft dry cloth dampened with water to wipe off dirt and dust.
3. Do not use benzene, thinners or similar agents.
4. Pack the unit properly for storage if it will not be used for a long time.
5. Avoid high-temperature and high-humidity storage environments.
◆ Stylus cleaning:
1. Use a small soft brush to clean the stylus when it gets dirty or dusty.
2. Gently clean the stylus in one direction from its base outwards with the soft brush,
repeating several times.
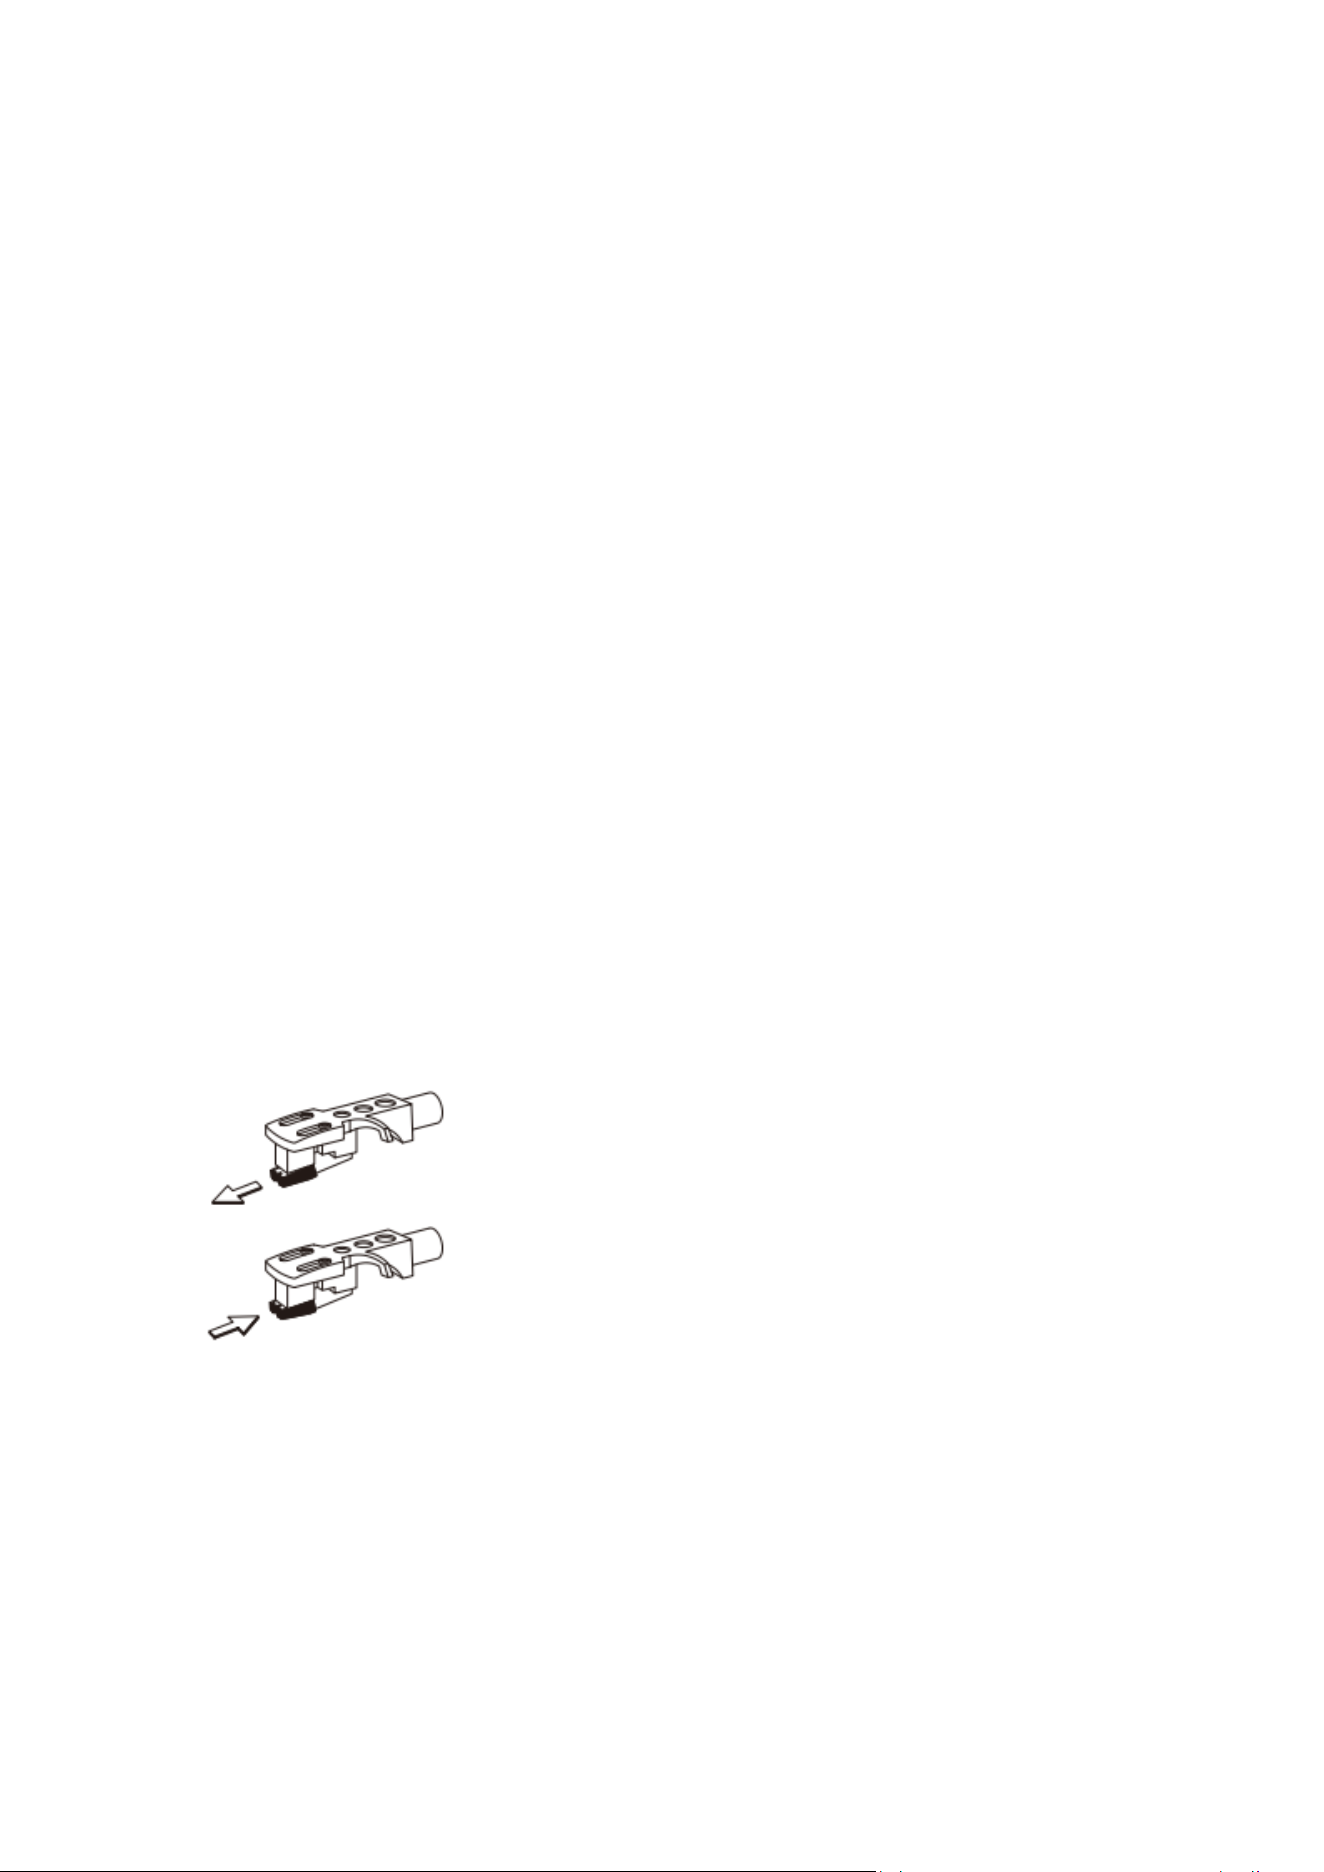
Stylus Replacement
The stylus is a consumable part. It will wear over time, resulting in degraded sound
quality. ◆ It is recommended to replace the stylus after 500 hours of use! ◆ The
cartridge is a Moving Magnet (MM) type and is not easily damaged unless subjected
to man-made impact.
◆ Removing the old stylus:
1. Turn off the power before removing the old stylus.
2. Grip the plastic housing of the stylus and pull outward with balanced force.
3. Once the stylus assembly loosens, pull the stylus shell forward to remove it.
◆ Installing a new stylus:
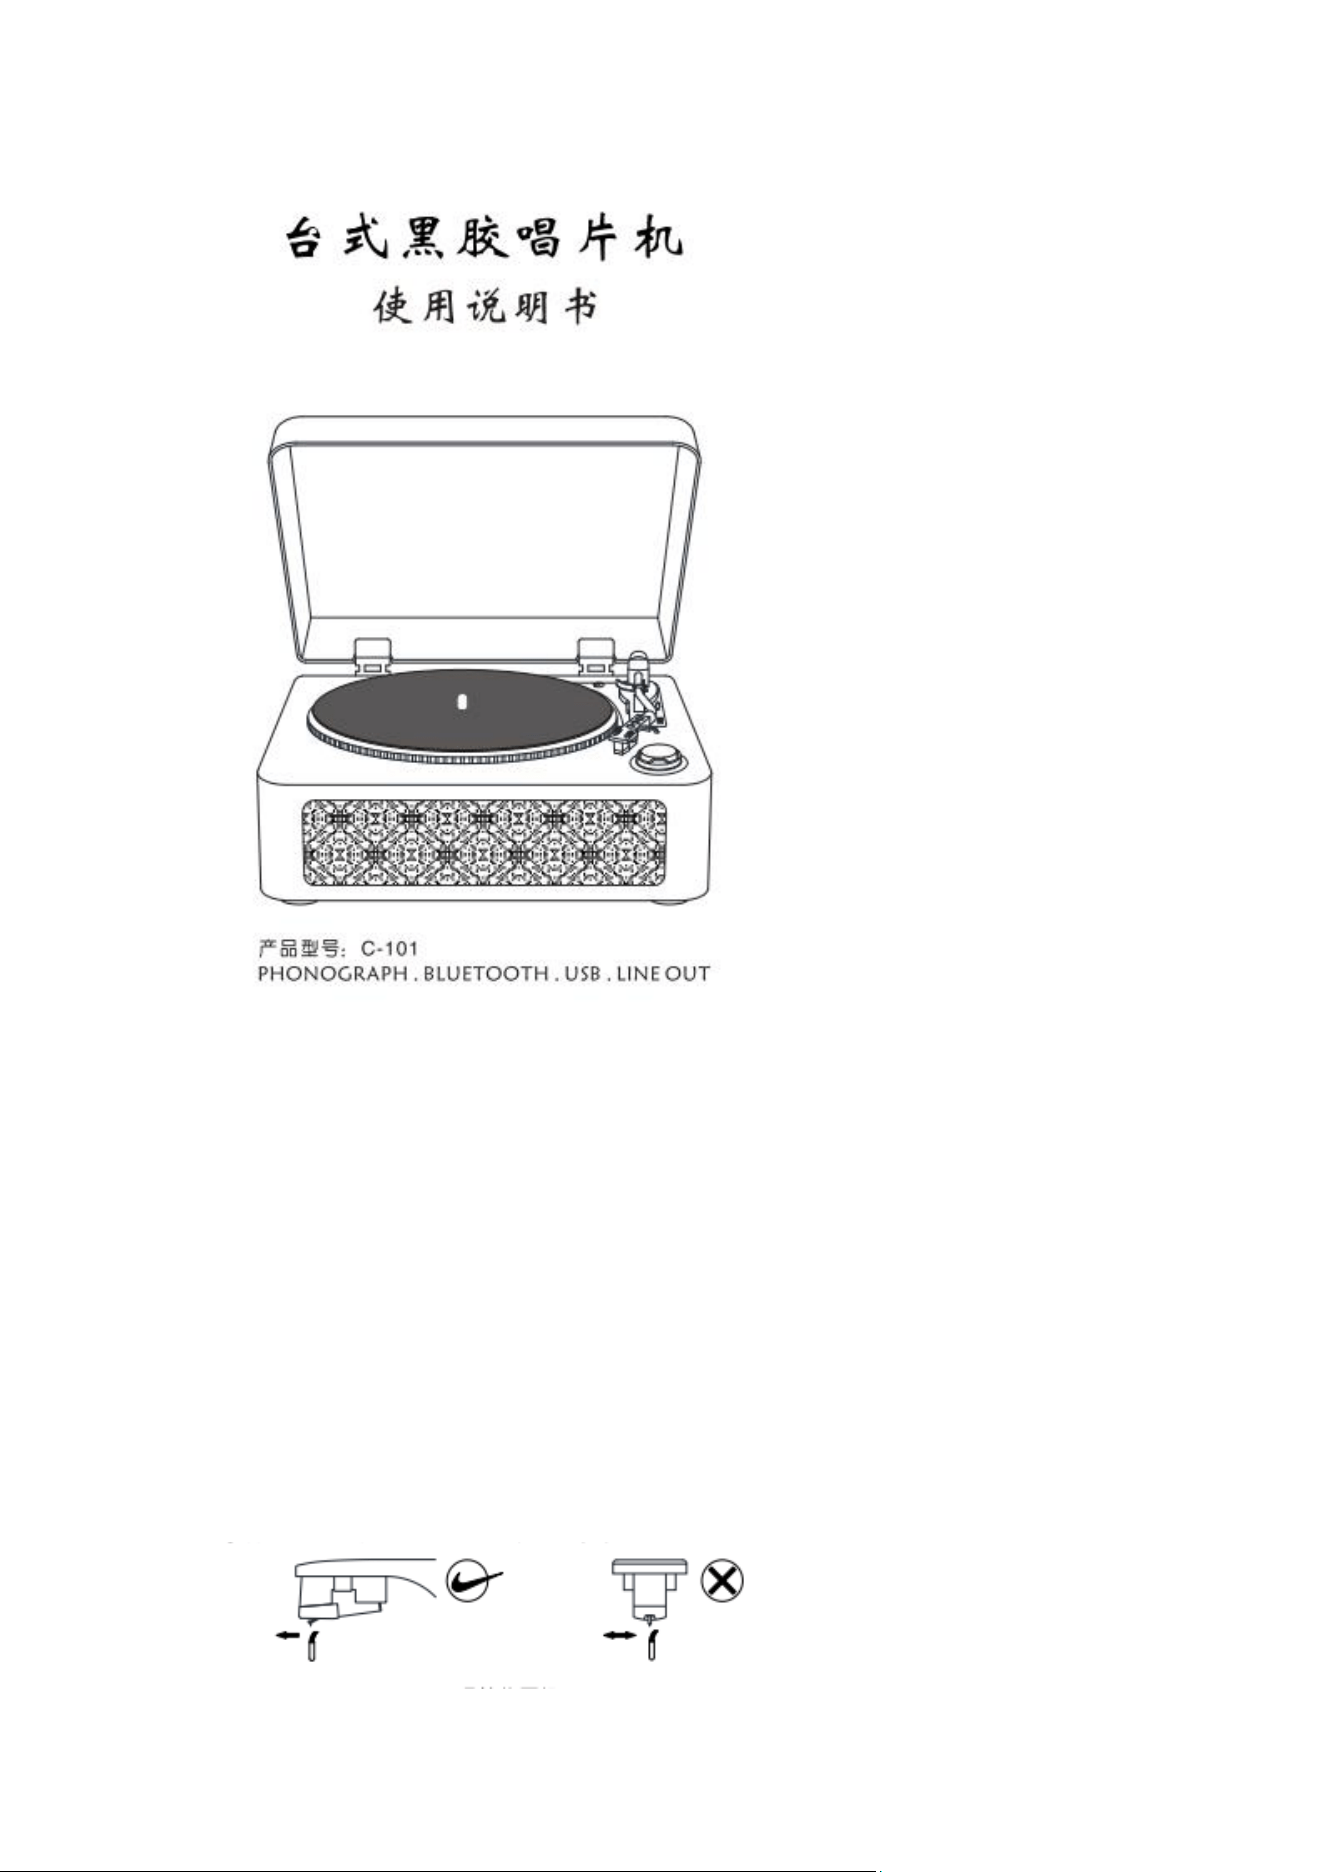
1. Handle with care during installation! Ensure the stylus is not damaged.
2. Align the protruding plastic tab on the bottom of the stylus with the slot on the cartridge
and insert it.
3. Gently hold the stylus plastic shell with your index finger and thumb, then push forward.
4. Push until the front plastic of the stylus is flush with the cartridge. Installation is
complete.
◆ After installation, check the gap between the stylus and cartridge. The installation
is successful if the gap is small and uniform, and the front plastic of the stylus sits
flush with the cartridge.
abnormal power supply, disassembly, repair or modification, dropping, man-made
factors, environmental factors, natural disasters and other causes shall not be
covered by free repair.
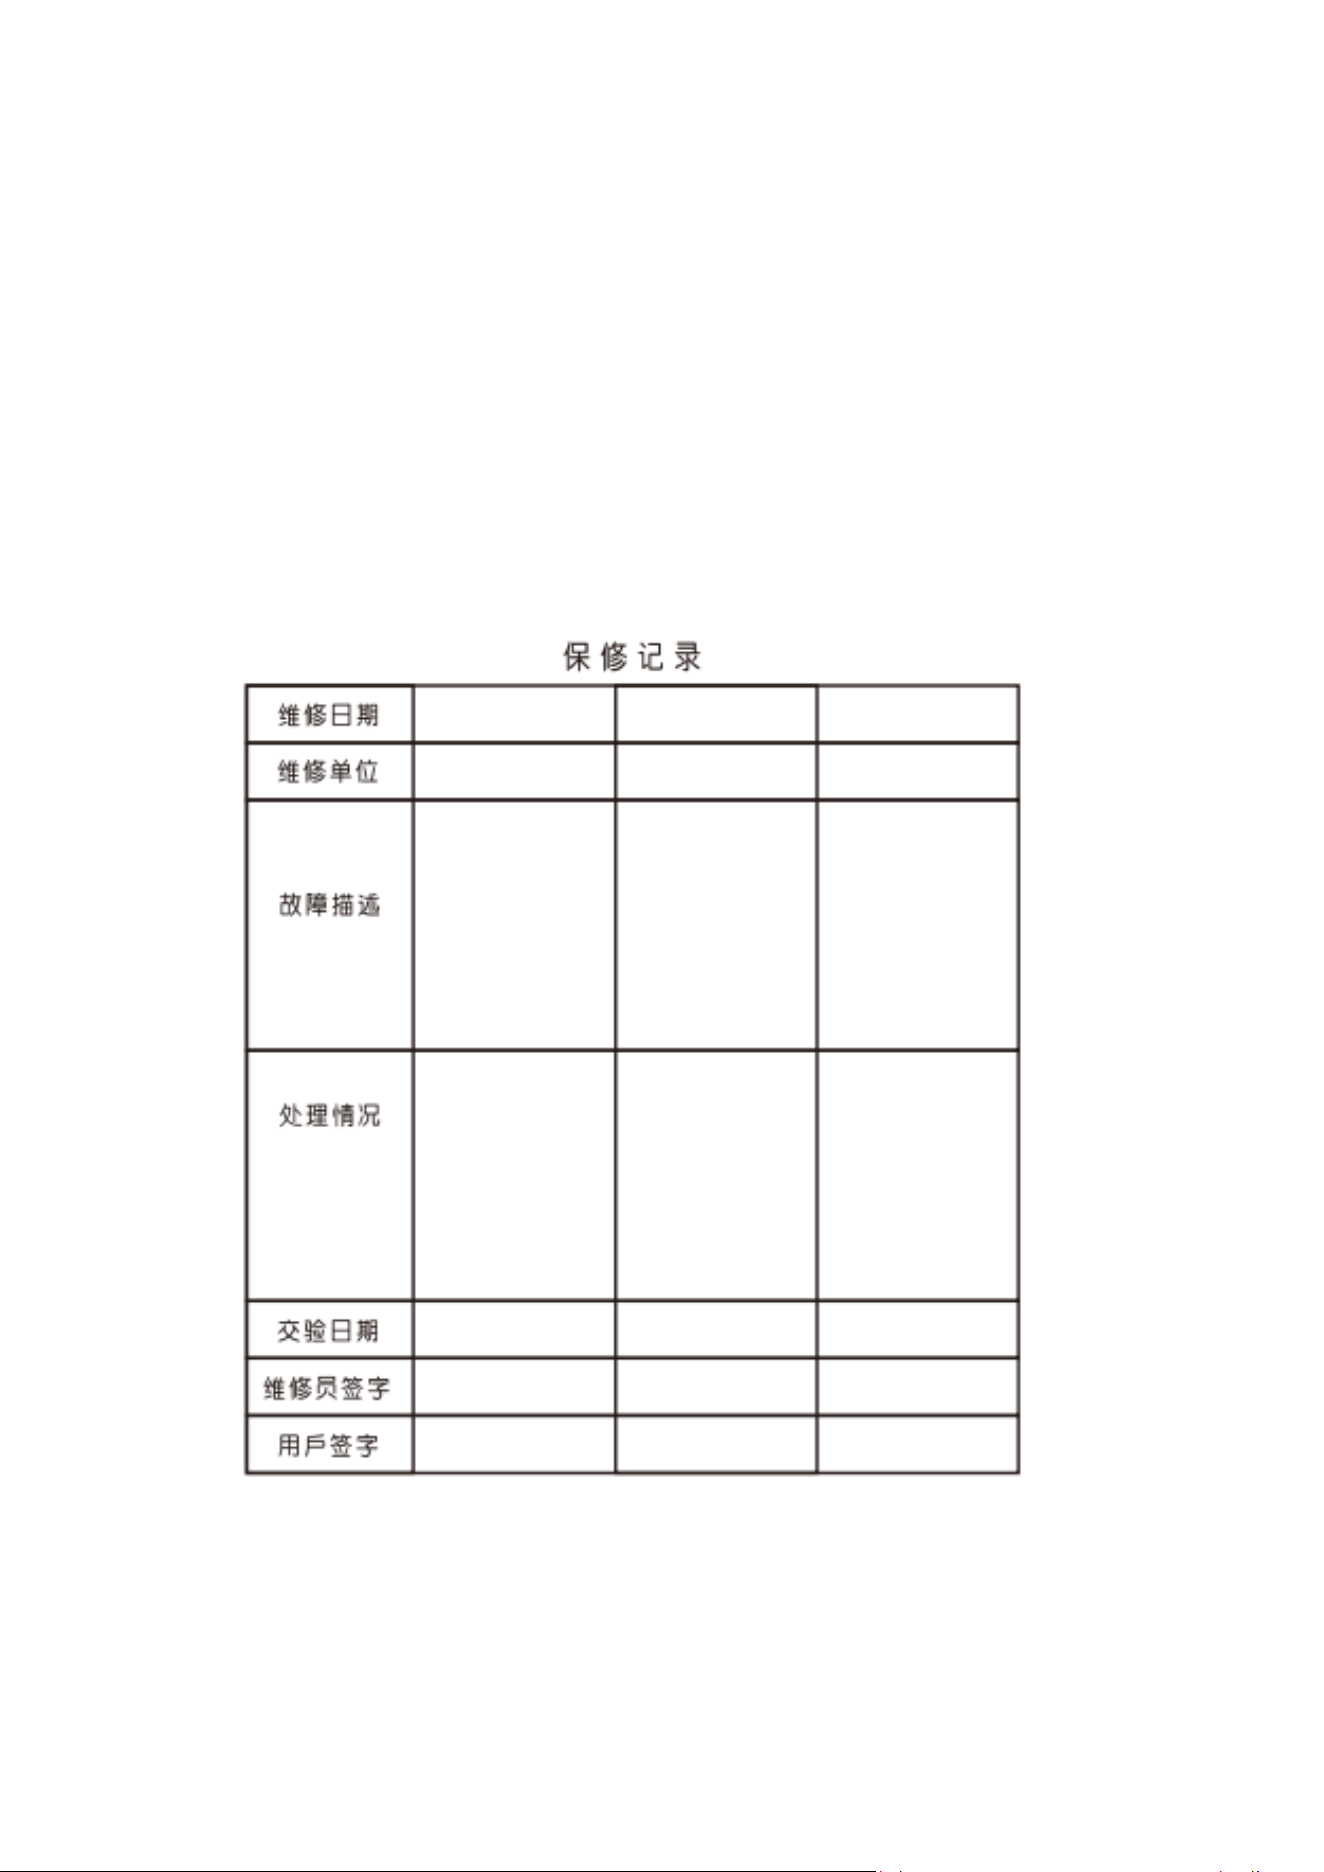
Warranty Terms
◆ Please keep this User Guide properly. This warranty record serves as your
warranty certificate.
◆ The whole unit is covered by free warranty for twelve months (excluding
mechanical consumable parts). The manufacturer provides lifetime after-sales
maintenance service.
◆ Damage caused by improper operation, abnormal power supply, disassembly,
repair or modification, dropping, man-made factors, environmental factors, natural
disasters and other causes shall not be covered by free repair.

Friendly Reminders
◆ Store and use the product at room temperature. Do not use it in
high-temperature, high-humidity or harsh environments, such as direct sunlight,
near open flames, bathrooms, rainy exposure, dusty surroundings, etc.
◆ Keep the product dry and never immerse it in water. Water may cause short
circuits in electronic components, which could result in product damage or fire
hazards.
◆ The USB port is only for USB flash drive playback. It does NOT support charging.
Plugging in charging devices may damage this product.
◆ Place it stably. Falling from high places may cause personal injury or product
damage.
◆ If the unit is damaged, please contact customer service or have it repaired by
professionals.
◆ Power the product with the rated voltage specified in【Specifications】.
◆ If not in use for a long period, turn off the power switch or unplug the power
cord.
◆ Adjust the volume during playback so it will not disturb others’ daily life, for a
more pleasant experience!
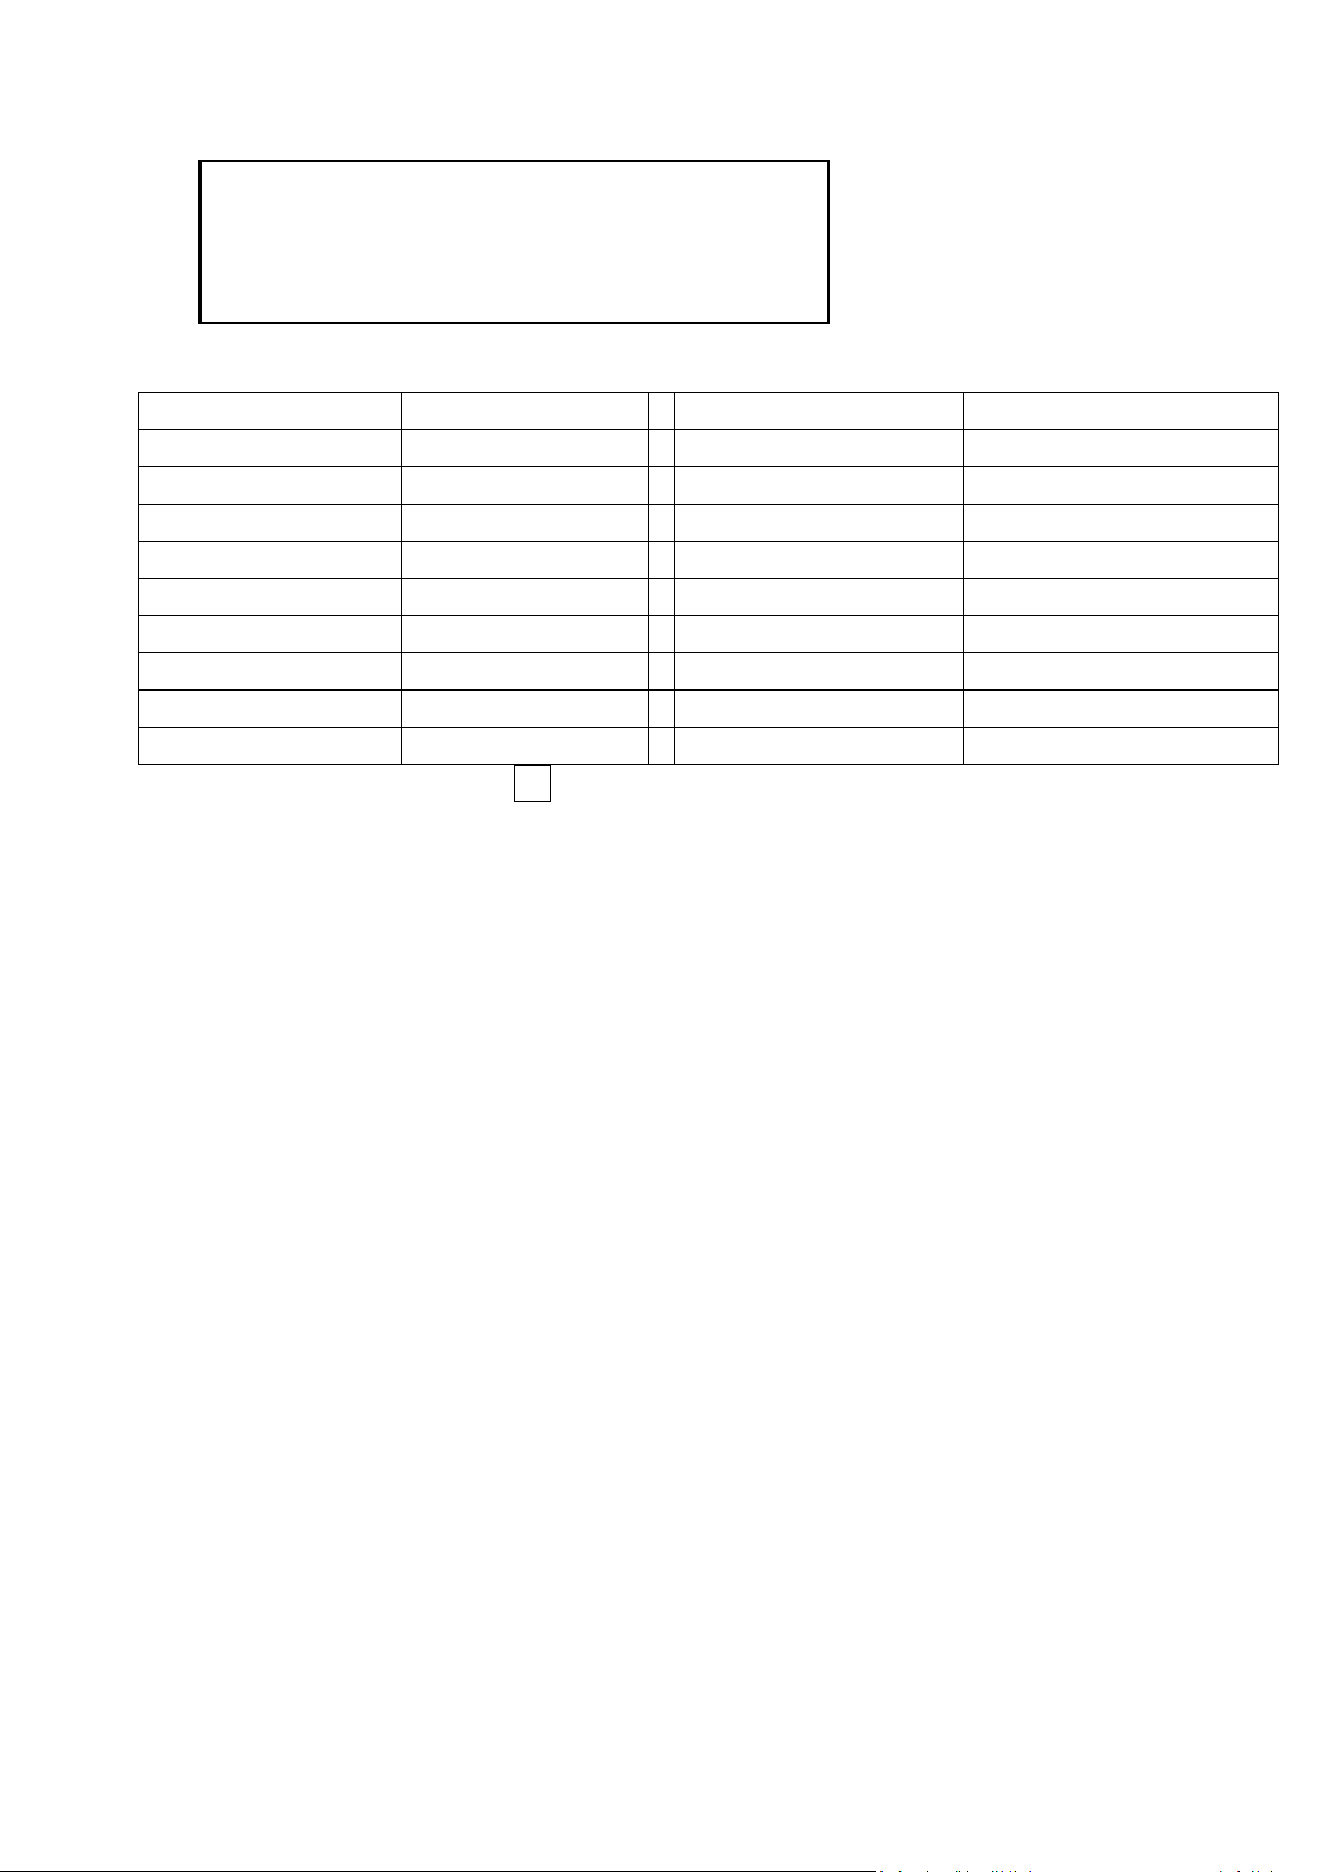
Specifications
Model
C-101
1
Playback Modes
唱盘/蓝牙/USB/LINE
CabinetMaterial
Wooden
Audio Formats
APE/FLAC/MP3/WMA/WMV
Dimensions
372*327*175MM
Storage Type
32GB
Weight
5.3KG
Bluetooth Range
20 米
Temp. Range
-10C 至 40C
RemoteControl Range
5 米
Speaker Driver
3.5in40*2
Frequency Response
20Hz-20KHz
Peak Power
20W*2
Record Size
7in/10in/12in
Audio Output
500mV
Turntable Speed
33u/a/45/78 RPM
Power Adapter
110-220V ~50/60Hz
Channel Separation
15db/1K
DevicePowerSupply
12Vm2A
StylusTrackingForce
3G 士 0.5G

Turntable Common Faults & Troubleshooting
Common Faults
Troubleshooting
Turntable does not spin
• Check if the power cord is connected properly.•
Check that the power switch is turned on and the
indicator light is on.• Confirm the turntable
playback mode is selected and the red light is lit.
Skipping during
playback
• Check whether the record is warped.• Check whether
the record is scratched or worn.• Check if the
stylus is heavily worn.• Check if the pause bracket
is in place.
Howling during playback
• Vibration from speakers transmitted through the
surface to the turntable may cause howling.•
Vibration sources near the turntable (such as fans,
speakers) may cause howling.• Place the unit on a
relatively stable surface.
Noise during playback
• Check if dust has accumulated on the stylus.•
Check if the record is dusty, dirty or scratched.•
Check whether the stylus is damaged.
Turntable spins but no
sound
• Check if the pause lever is fully lowered.• Check
whether the cartridge or stylus is damaged.
Playback speed too fast
/ too slow
• Check if the record mat is slipping.• Check that
the speed switch setting matches the record’s
required speed.
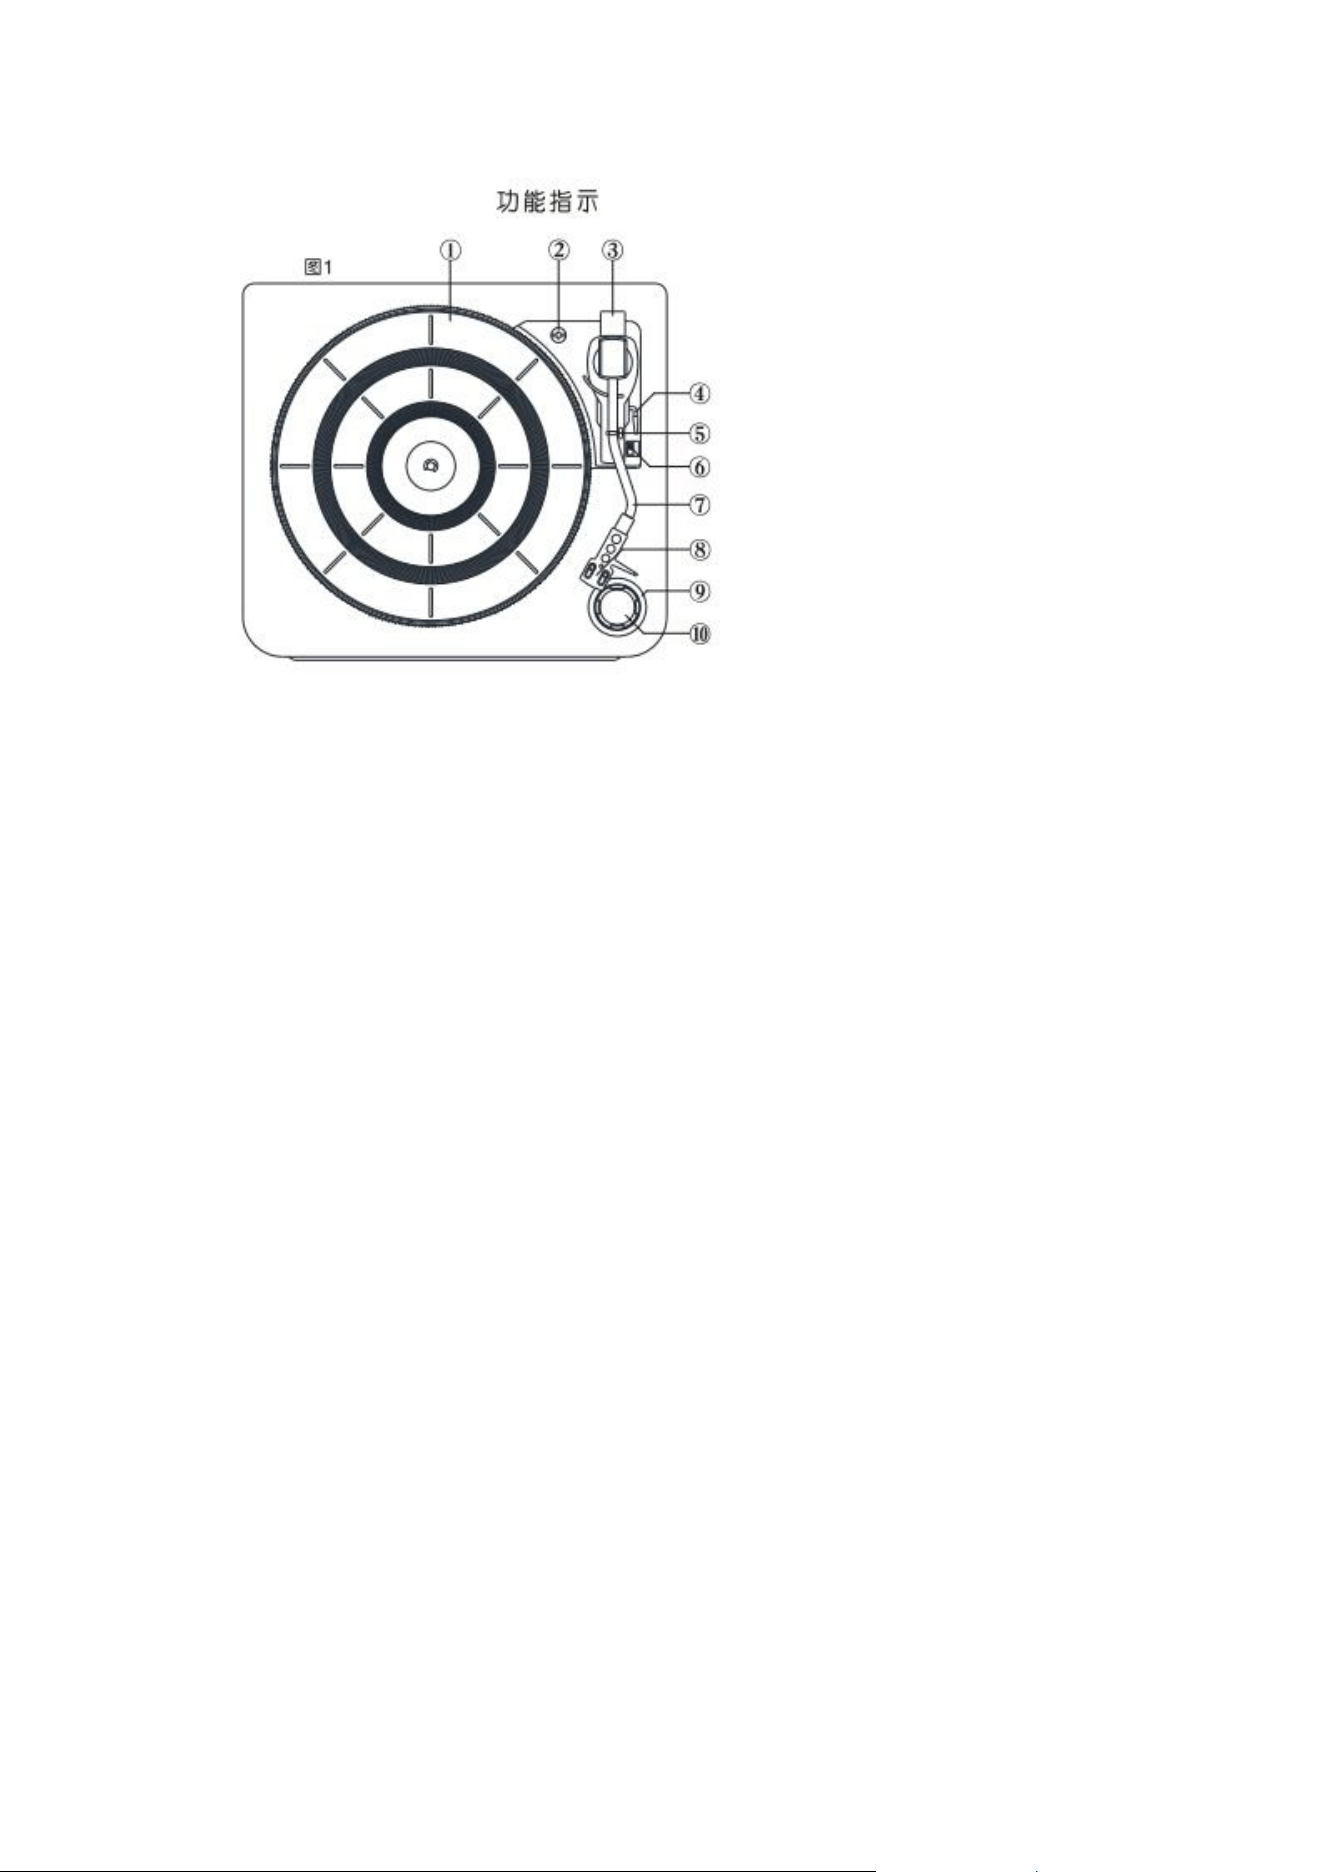
Figure 1 Indication Description:
① Turntable Platter ② Platter Screw ③ Counterweight Fixing ④ Pause Control
Lever ⑤ Tonearm Lock Clip ⑥ Speed Switch ⑦ Tonearm ⑧ Cartridge ⑨
Function Indicator:
• Red --- Turntable
• Blue --- Bluetooth
• Green --- USB
⑩ Function / Volume Knob:
• Rotate --- Adjust Volume
• Short Press --- Power On / Function Switch
• Long Press --- Power Off
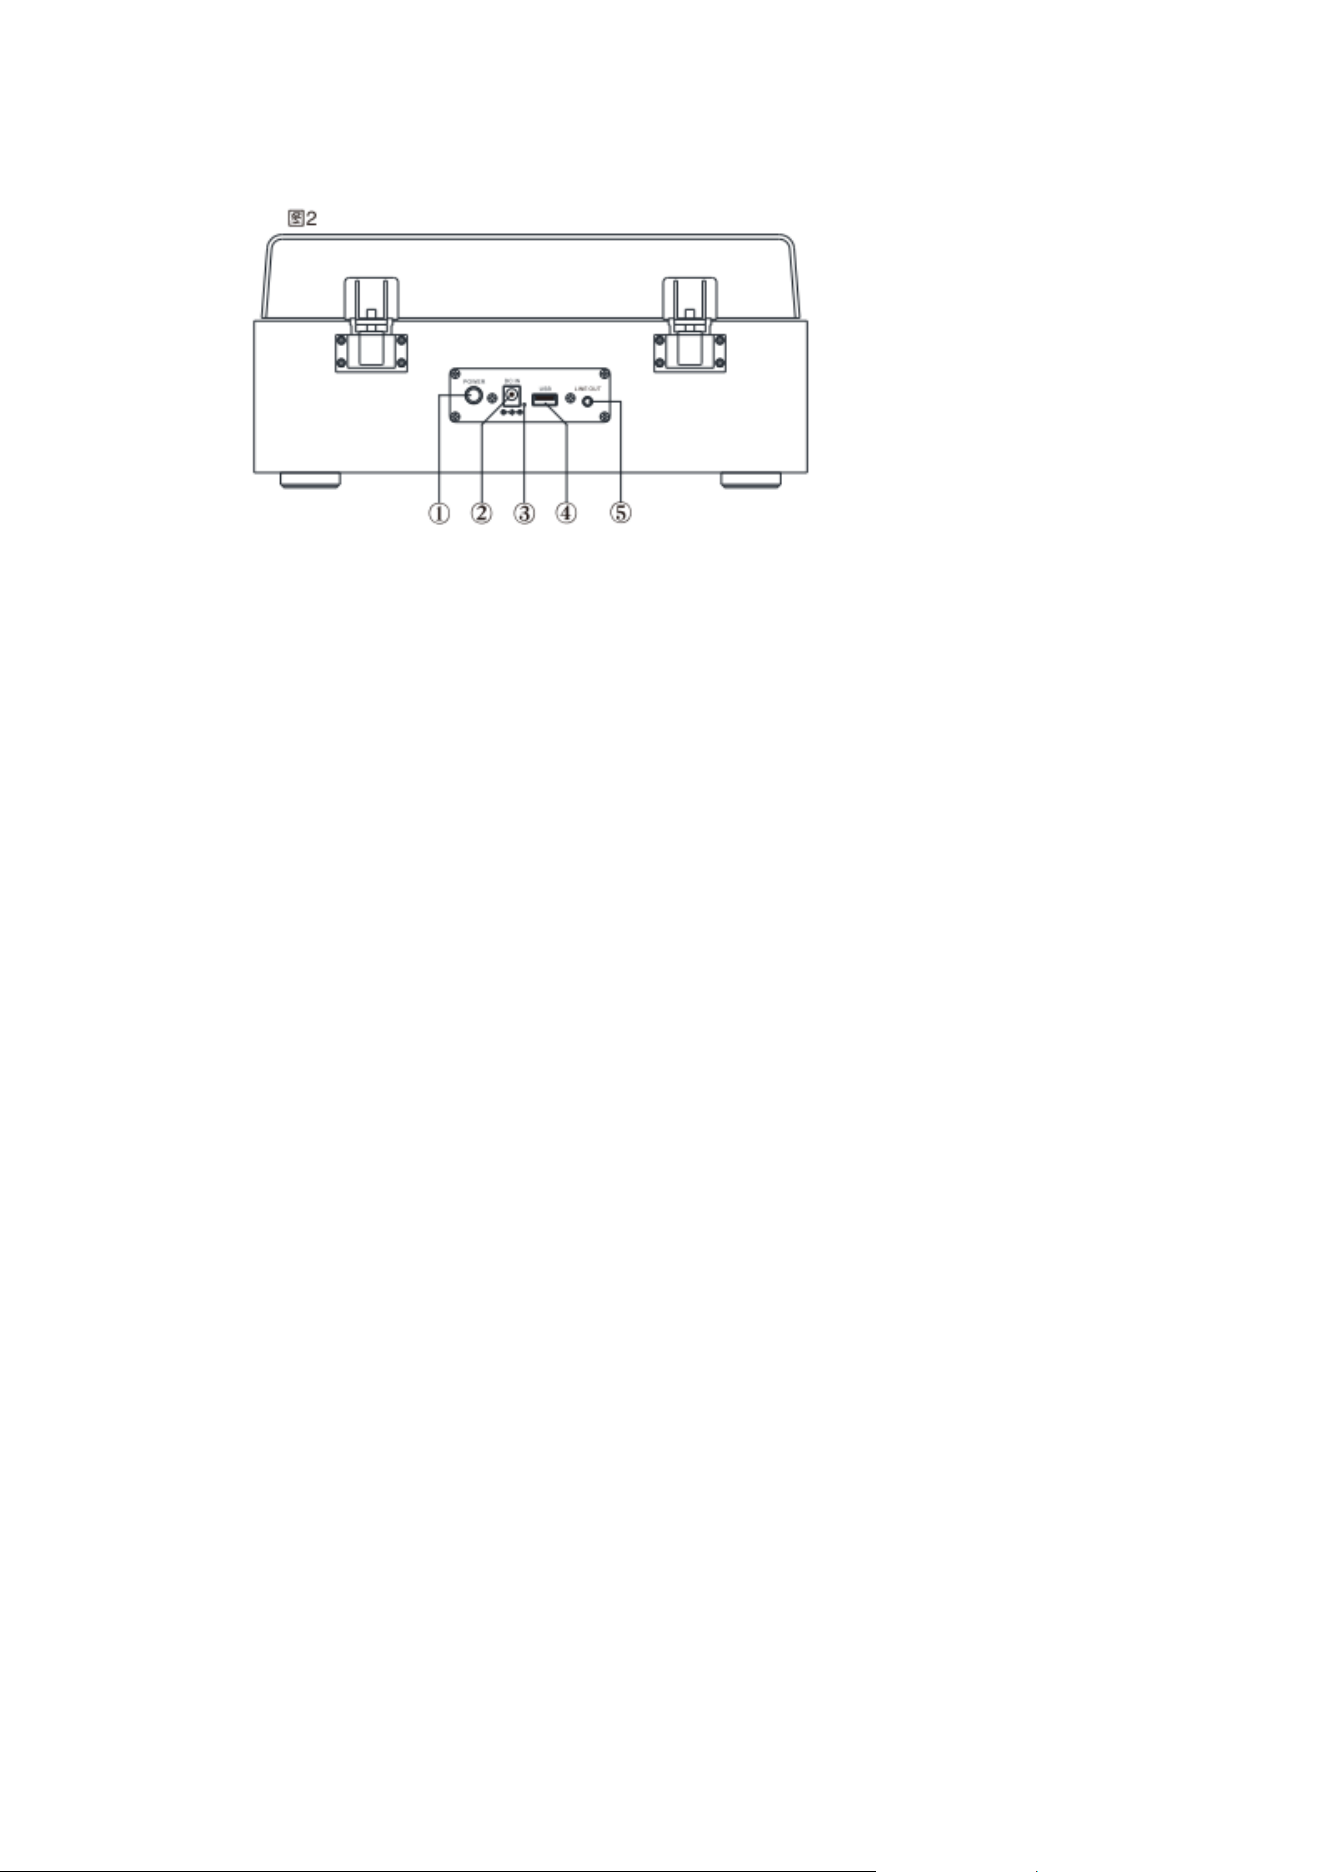
Figure 2 Indication Description:
① Power Switch (Push-on / Pop-off Switch)
② Power Jack (DC 12V/2A)
③ Power Indicator Light
④ USB Port (No external device charging function)
⑤ Audio Output Port (Max. 500mV)

Operation Instructions
Turntable Mode
◆ Remove the packaging materials of the turntable and gently take off the stylus protective cover (Figure 3).
◆ Release the tonearm lock clip (Figure 1-⑤).
◆ Rotate the platter screw (Figure 1-②) downward to make the platter balanced, loose and flexible.
◆ Swing the tonearm left and right several times for smoother playback.
◆ Connect the unit to a DC12V/2A power supply, turn on the power switch on the rear of the main unit (Figure 2-①), then
press the Function/Volume Knob (Figure 1-⑩) to power on.
◆ Short press the Function/Volume Knob (Figure 1-⑩) to select Turntable Mode. The red indicator lights up (Figure 1-⑨)
with a voice prompt.
◆ Place your favorite record on the platter (Figure 1-①).
◆ Adjust the Speed Switch (Figure 1-⑥) to match the record speed (33, 45, 78 RPM).
◆ Lift the tonearm (Figure 1-⑦) using the Pause Control Lever (Figure 1-④), and slowly lower the cartridge above the record.
◆ Release the Pause Control Lever (Figure 1-④), adjust the volume (Figure 1-⑩), and music playback starts. ◆ After playing
the whole record, the tonearm will automatically return and stop playback.
Bluetooth Mode
◆ Short press the Function/Volume Knob (Figure 1-⑩) to select Bluetooth Mode. The blue indicator lights up (Figure 1-⑨)
with a voice prompt. ◆ Pair with your phone or other Bluetooth transmitting devices. Bluetooth name: C101. ◆ Adjust the
volume (Figure 1-⑩) to play music. ◆ Functions can also be operated on the Bluetooth transmitting device.
USB Flash Drive Mode
◆ Short press the Function/Volume Knob (Figure 1-⑩) to select USB Mode. The green indicator lights up (Figure 1-⑨) with a
voice prompt. ◆ Compatible with audio formats: APE, FLAC, MP3, WMA, WMV. ◆ Supports a maximum storage capacity of
32GB. ◆ Insert a USB drive with audio files, adjust the volume (Figure 1-⑩), and the music will play in loop.
LINE OUT
◆ Plug the audio cable (with 3.5mm stereo plug) into the LINE OUT port of the unit. ◆ After the audio cable is connected, the
unit automatically switches to LINE OUT mode, and the built-in speaker will be muted. ◆ Maximum audio output: 500mV.
Sound reproduction requires an active speaker or power amplifier. ◆ The output volume can be adjusted via the unit’s Volume
Knob (Figure 1-⑩). ◆ Select playback mode and play music.

Remote Control
① Play/Pause ---- Not available in Turntable Mode
② Next Track ---- Not available in Turntable Mode
③ Standby ---- Enter low-power mode
④ Function Switch ---- A USB drive must be inserted for USB Mode
⑤ Light Switch ---- Function indicator light on/off
⑥ Back ---- Return to the previous playback mode
⑦ Mute ---- Mute mode
⑧ Volume Down ---- 32 volume levels; single press decreases 1 level / long press
for rapid decrease
⑨ Previous Track ---- Not available in Turntable Mode
⑩ Volume Up ---- 32 volume levels; single press increases 1 level / long press for
rapid increase
Note: The remote sensor is located on the Function/Volume Knob (Figure 1-⑨).
Point the remote control downward toward the sensor for operation!

FCC Warnning:
This equipment has been tested and found to comply with the limits for a Class B digital device,
pursuant to part 15 of the FCC Rules. These limits are designed to provide
reasonable
protection againstharmful interference in a residential installation. This equipment generates,
uses and can radiateradio
frequency
energy
and,
if
not
installed
and
used
in
accordance
with
the
instructions,
maycause
harmful
interference
to
radio
communications.
However,
there
is
no
guarantee
thatinterference
will
not
occur
in
a
particular
installation.
If
this
equipment
does
cause
harmfulinterference to radio or television reception, which can be
determined by turning the equipmentoff
and
on,
the
user
is
encouraged
to
try
to
correct
the
interference
by
one
or
more
of
thefollowing measures:
•
Reorient or relocate the receiving antenna.
•
Increase the separation between the equipment and receiver.
•
Connect the equipment into an outlet on a circuit different from that to which the receiver is
connected.
• Consult the dealer or an experienced radio/TV technician for help.
Caution:
Any
changes
or
modifications
to
this
device
not
explicitly
approved
by
manufacturer
could void your authority to operate this equipment.
This
device
complies
with
part
15
of
the
FCC
Rules.
Operation
is
subject
to
the
following
two
conditions:
(1)This
device
may
not
cause
harmful
interference,
and
(2)
this
device
must
accept
any
interference received, including interference that may cause undesired operation.
This
equipment
complies
with
FCC
radiation
exposure
limits
set
forth
for
an
uncontrolled
environment.
This
equipment
should
be
installed
and
operated
with
minimum
distance
20cm
between the radiator and your body.