
Leoseek 电子变速系统用户手册
SAFETY INSTRUCTIONS | 安全须知
Please fully read and understand all safety instructions before installation. Improper
component installation creates severe safety risks and may result in serious bodily
injury or death. If you have any doubts about assembly procedures, please consult a
professional bicycle mechanic for assistance.
安装前请完整阅读并充分理解全部安全说明。零部件安装操作不当会产生重大安全隐
患,极易造成重伤甚至死亡。若您对装配流程存在任何疑问,请寻求专业自行车技师
协助操作。
WARNING | 警示
FCC COMPLIANCE STATEMENT | FCC 合规声明
1. Device Compliance Conditions | 设备合规条件
English
This device complies with Part 15 of the FCC Rules. Operation is subject to the
following two conditions:
(1) This device shall not cause harmful interference;
(2) This device must accept any received interference, including interference that
may lead to unintended operation.
中文
本设备符合 FCC 规则第 15 部分要求,使用时需满足以下两项条件:
(1)本设备不得产生有害射频干扰;
(2)本设备需耐受所有接收干扰,包括会造成设备误动作的干扰。
2. Modification Warning | 改装警示
CAUTION: Any changes or modifications not explicitly approved by the compliance
responsible party will invalidate the user’s authorization to operate this equipment.

警告:未经合规责任方书面明确许可,擅自改动、改装本设备,将直接取消用户使用
本设备的合法权限。
3. Class B Digital Device Interference Notice | B 类数字设
备干扰说明
NOTE: This equipment has passed testing and complies with the limits for Class B
digital devices under Part 15 of the FCC Rules. These limits are designed to provide
reasonable protection against harmful interference in residential environments. This
equipment generates, uses and radiates radio frequency energy. If not installed and
operated in accordance with the manual, it may cause harmful interference to radio
communications. However, interference cannot be completely ruled out in certain
installation scenarios.
If this equipment causes harmful interference to radio or television reception
(verifiable by power cycling the device), users may resolve interference via one or
more of the following methods:
(1)Reorient or relocate the receiving antenna;
(2)Increase the separation distance between this equipment and the receiver;
(3)Plug the equipment into a power outlet on a separate circuit from the receiver;
(4)Contact your dealer or an experienced radio & television technician for support.
备注:本设备经检测符合 FCC 规则第 15 部分 B 类数字设备限值标准。该标准旨在居
家使用环境下提供合理防护,规避有害射频干扰。本设备会产生、消耗并辐射射频能
量,若未按手册规范安装使用,可能对无线电通信产生有害干扰,但无法保证任意安
装环境下零干扰。
若设备对收音机、电视接收产生干扰(可通过开关机验证),用户可采用以下一种或
多种方式消除干扰:
(1)调整接收天线朝向或摆放位置;
(2)增大本设备与接收设备的间距;
(3)将设备接入与接收设备分属不同回路的电源插座;
(4)联系经销商或专业广电维修技师寻求帮助。
4. RF Radiation Exposure Warning | 射频辐射安全警示
The device has been evaluated to meet general RF exposure requirement. The
device can be used in portable exposure condition without restriction.
该设备已通过评估,符合一般射频暴露要求。可在便携式暴露条件下无限制使用。

Manual Description | 手册说明
This manual serves as a full system installation guide, covering unboxing all
components through to road riding. Please complete installation and setup strictly in
the sequence specified in this manual; do not start the next step before finishing the
current procedure.
本手册为整套变速系统完整安装指南,覆盖零部件拆箱至装车骑行全流程。请严格按
照手册规定顺序完成安装调试,未完成当前步骤前,请勿进行下一步操作。
Catalogue 目录(增加 app 链接,快速入门)
1. Tools and Supplies / 装配所需工具
2. Controller / 指拨
3. Rear Derailleur / 后拨链器
4. Battery Charging / 电池充电说明
5. Battery Installation / 电池安装步骤
6. System Pairing / 系统配对操作
7. Shifting Operation / 变速操作
8. Rear Derailleur Installation / 后拨链器安装
9. Controller Installation / 指拨安装
10. Derailleur Adjustments / 变速器微调设置
11. Overview of Indicator Lights / 指示灯状态说明
12. Maintenance / 保养维护
Tools Needed for Assembly 装配所需工具
Special professional tools and accessories are required for assembly. We
recommend installation to be performed by a professional bicycle mechanic.
装配需使用专用专业工具与配件,建议交由专业自行车技师完成安装。

CONTROLLER 指拨
English Label
中文名称
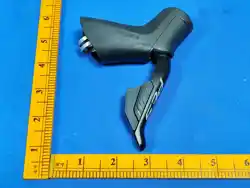
A. Push Buttons
A.
操作按键
B. LED Indicator
B. LED
指示灯
C. Clamp
C.
固定锁环
D. Plug Screw
D.
安装螺丝
E. Dip switch (pairing/mode
switching)
E. 功能按键(配对 / 模式切
换)
F. Battery Cover
F.
电池仓盖
REAR DERAILLEUR 后拨链器
English Label
中文名称
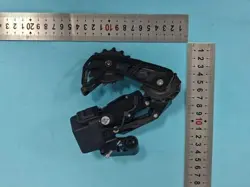
A. Battery Latch
A. 电池锁扣
B. Mounting Bolt
B. 安装固定螺栓
C. High Limit Screw
C.
高速限位螺丝
D. Low Limit Screw
D. 低速限位螺丝
E. LED Indicator
E. LED
指示灯
F. Guide Roller
F. 导轮
G. Battery
G. 电池
H. Adjust Screw
H. 微调螺丝

I. Safety clasp
I. 安全保险卡扣
BATTERY CHARGING 电池充电说明
Charging Operation 充电操作
1. Insert the battery into the charger
2. Start charging process
3.
Remove battery once fully charged
中文
1. 用磁吸充电线进行充电
2. 充电线规格如图,请使用官方充电配件。
3. 充满电后取出电池
LED Indicator Description 指示灯状态说明
English
中文
Red light steady: Charging
in progress
红灯常亮:正在充电
Light off: Fully charged
灯熄灭:充电完成
Light flashing: Over-
temperature protection
triggered
灯光闪烁:进入电池保护模
式
BATTERY INSTALLATION 电池安装
Installation Steps 安装步骤
English
1. Slide the battery latch toward the "OPEN" mark
2. Insert the battery into the rear derailleur battery compartment
3.
Fasten the safety clasp tightly

4.
Slide the latch opposite to the "OPEN" direction to lock
中文
1.
将电池锁扣向
“OPEN”
标识方向滑动解锁
2. 将电池装入后拨链器电池仓
3. 扣紧安全卡扣
4. 将锁扣向“OPEN”反方向滑动完成锁定
Notes 注意事项
1. The battery latch can only lock securely when the battery is fully installed in place.
2.
Repeat the above installation steps when replacing the battery.
3. Do not force insertion or removal of the battery, as this may damage the battery or
rear derailleur.
中文
1.
电池安装到位后,锁扣才能正常锁紧。
2. 更换电池时,请重复上述全套安装步骤。
3. 禁止暴力拆装电池,否则会损坏电池或后拨链器。
System Pairing 系统配对
Pairing Operation Steps 配对操作流程
English
1. Install batteries into both the rear derailleur and controller, then mount the
derailleur and controller on the bicycle.
2.
Long press the combined key: hold the Dip switch + upshift/downshift button
simultaneously.
3. Indicator Light Status Definition:Solid white light: Enter pairing mode, pairing in
progress; Solid white light switches to solid green: Pairing connection successful;
Solid green light switches to flashing green: Devices exchanging data; Indicator light
fully off: Full pairing process completed
中文
1.
分别为后拨链器、指拨装入电池,再将二者安装至车辆。
2. 长按组合按键:同时按住拨码按键+升档/降档按键(需在后变电池安装后 10 秒内
完成)。

3. 指示灯状态释义:按键白灯:配对丢失,无配对配件。白灯常亮:进入配对模式,
正在配对;白灯转绿灯常亮:配对连接成功;绿灯常亮转为绿灯闪烁:设备间数据交
互中;指示灯完全熄灭:整套配对流程完成
Precautions 配对注意事项
1. The rear derailleur and controller are pre-paired before factory shipment; re-
pairing is not required for normal use.
2.
Battery disassembly or installation is unnecessary when operating the shifter’s
Dip switch.
3.
If misoperation occurs during pairing, restart the full pairing procedure from the
beginning.
4.
No re-pairing needed after battery replacement.
5.
Re-pairing is mandatory if any component is replaced, added or removed.
1. 出厂时后拨链器与指拨已预先完成配对,正常使用无需重新配对。
2. 操作指拨功能按键时,无需拆装电池。
3. 配对过程出现误操作,请从头重新执行整套配对流程。
4. 更换电池后无需重新配对。
5. 若更换部件后,必须重新配对。
Shifting Operation 变速操作
Press the upshift button to shift the rear derailleur outward toward the smallest
cassette cog. Hold the button continuously for multiple consecutive shifts. Each tap of
the shift lever triggers one flash of the controller LED; continuous tapping results in
continuous LED flashing.
Press the downshift button to shift the rear derailleur inward toward the largest
cassette cog. Hold the button continuously for multiple consecutive shifts. Each tap of
the shift lever triggers one flash of the controller LED; continuous tapping results in
continuous LED flashing.
按下升档按键,后拨链器向外侧最小飞轮齿片移动;长按按键可连续多档升档。每拨
动一次指拨拨杆,指拨 LED 指示灯闪烁一次;持续拨动拨杆,指示灯持续闪烁。
连续变档功能可使用 app 关闭
按下降档按键,后拨链器向内侧最大飞轮齿片移动;长按按键可连续多档降档。每拨
动一次指拨拨杆,指拨 LED 指示灯闪烁一次;持续拨动拨杆,指示灯持续闪烁。

Rear Derailleur Installation 后拨链器安装
Use a 5 mm hex wrench to secure the rear derailleur to the frame hanger. Thread the
matching chain sequentially through the two guide rollers of the derailleur. Optimal
shifting performance is achieved when the gap between the inner flat surface of the
chainstay and the outer side of the smallest cassette cog measures 4–6 mm.
使用 5mm 内六角扳手将后拨链器固定于车架尾勾,将适配链条依次穿过后拨两组导轮。
后下叉内侧平面与飞轮最小齿片外侧间距保持 4–6mm 时,后拨变速性能达到最佳。
Precautions 安装注意事项
1. Mounting bolt tightening torque: 8.0–10.0 N·m
2. Improper tightening may cause the following faults: - Deformation of the hanger
mounting hole; - Inability to assemble or disassemble components; - Degraded
shifting performance
3.
Do not apply grease to the mounting bolt or frame hanger threaded hole.
4. Use of mismatched chain specifications will reduce shifting reliability, and may
cause equipment failure in severe cases.
5. This rear derailleur is compatible with 28T–36T cassettes.
1. 安装螺栓锁紧扭矩:8.0–10.0 N·m;
2. 锁紧力度不当会引发以下故障:- 尾勾安装孔变形;- 零部件无法正常拆装;- 变速
手感变差、变速不准;
3. 禁止在安装螺栓与尾勾螺纹孔涂抹润滑脂;
4. 使用规格不匹配的链条会降低变速稳定性,严重时造成设备故障;
5.
本公司所有变速器适配的最低速别链条为
10
链条(链条厚度最大为:
xxx
)
6. 本后拨链器适配的飞轮需参考下面规格列表。
RDX
Controller Installation 指拨安装
English
Use a 2.5 mm hex wrench to attach the shift controller to the handlebar, rotate it to a
comfortable operating angle, then tighten the mounting nut.
使用
2.5mm
内六角扳手将指拨固定在车把上,旋转至舒适操作角度后锁紧安装螺母。
Precautions 安装注意事项

1. Mounting bolt tightening torque: 2.0–4.0 N·m
2. Do not apply grease to the mounting bolt or inner surface of the lock ring.
1. 安装螺栓锁紧扭矩:2.0–4.0 N·m;
2. 禁止在安装螺栓、锁环内侧涂抹润滑脂。
Derailleur Adjustments 变速器微调设置
1. Single-Stage Fine Adjustment 单档微调
Press and hold the coding button on the side of the shift lever. Once the indicator
light flashes blue, the unit enters single-step fine adjustment mode. Users may make
tiny step-by-step adjustments to the rear derailleur position via the dedicated mobile
app or handlebar shift lever. Continue fine-tuning until center A of the rear derailleur
guide roller is perfectly aligned with the center of the smallest cassette cog to
complete single-step fine adjustment.
请优先使用整体微调,将大部分档位对齐后针对个别变速异常档位再使用单档微调。
长按指拨侧边拨码按键,指示灯蓝色闪烁即进入单档微调模式;可通过配套手机 APP
或车把指拨逐档微量调节后拨位置;持续微调,直至后拨导轮 A 中心点与飞轮最小齿
盘中心完全对齐,即完成单档微调。
2. Overall Fine Adjustment 整体微调
Press and hold the coding button on the side of the shift lever. A steady blue light
indicates entry into overall fine adjustment mode. Synchronously fine-tune all gears
via the supporting APP or handlebar shift lever. Continue adjusting until the center
point A of the rear derailleur guide pulley is precisely aligned with the center of every
cassette cog. The overall fine adjustment is finished when shifting runs smoothly on
all gears with no chain rub.
长按指拨侧边功能按键,蓝灯常亮即为进入整体微调模式;可通过配套 APP 或车把指
拨同步微调全部档位;持续调节,让后拨导轮 A 中心点与飞轮所有齿盘中心精准对齐,
全部档位变速顺畅、无蹭链,整体微调完成。个别档位无法对齐时可进入单档微调进
行调节。
3. Supplementary Operation Tips 补充操作提示
Press and hold the coding button after fine-tuning. The blue light will turn off,
parameters will be saved automatically and the unit exits fine adjustment mode.
Single-step fine adjustment is used for chain rub on the smallest cassette cog and
abnormal noise in high-speed gears. Overall fine adjustment applies to chain rub
across all gears and overall shifting offset. It is recommended to adjust only 1 click

per fine-tune operation. Do not make large adjustments at a time to prevent chain
drop.
微调完成后长按拨码按键,蓝灯熄灭即自动保存参数并退出微调模式;单档微调适用
于最小飞轮蹭链、高速档位异响问题;整体微调用于全档位蹭链、整体变速位置偏移
场景;每次微调建议仅调节 1 小格,切勿一次性大幅调节,防止链条脱落。
Overview of Indicator Lights 指示灯概述
This chapter summarizes all indicator light statuses of the electronic shifting system,
covering battery charging, device pairing, fine adjustment modes and over-
temperature protection, which can intuitively judge the working state and operating
results of the equipment.
本章节汇总电子变速系统全部指示灯工作状态,涵盖电池充电、设备配对、档位微调、
温度保护四大使用场景,可直观判断设备运行状态与操作结果,是设备调试、故障排
查的核心参考依据。
1. Charging Indicator Status |
充电指示灯状态
Steady red light: Charging in progress; Light off: Fully charged; Flashing light: Over-
temperature protection activated, charging suspended.
红灯常亮:设备正在充电;灯光熄灭:电池已充满电;灯光闪烁:电池触发温度保护
模式,暂停充电。
2. Pairing Indicator Status |
系统配对指示灯状态
Steady white light: Entering pairing mode (pairing in progress); White light switches
to steady green light: Pairing successful; Steady green light switches to flashing
green light: Device data exchanging; Indicator light off: Pairing process completed.
白灯常亮:进入配对模式,设备正在配对;白灯转绿灯常亮:设备配对连接成功;绿
灯常亮转绿灯闪烁:设备间正在进行数据交互;指示灯完全熄灭:整套配对流程全部
完成。
3. Fine Adjustment Indicator Status | 档位微调指示灯状态
Flashing blue light: Single-stage fine adjustment mode; Steady blue light: Overall fine
adjustment mode; Hold the coding button after adjustment, blue light turns off,
parameters saved and exit adjustment mode automatically.
蓝灯闪烁:进入单档微调模式;蓝灯常亮:进入整体微调模式;微调完成后长按拨码
键,蓝灯熄灭,参数自动保存并退出微调模式。
4. Shifting Indicator Status | 变速操作指示灯状态
Single tap the shift button: indicator flashes once; Continuous tapping: indicator
flashes continuously for consecutive shifting actions.

单次拨动指拨按键,指示灯单次闪烁;持续拨动指拨按键,指示灯持续闪烁,对应连
续变速动作。
Maintenance 保养维护
Regularly clean the sediment and oil stains on the surfaces of the rear derailleur,
guide rollers and cassette to keep the shifting structure clean and smooth. Regularly
check the battery level, the tightness of safety latches and screw torque to avoid
loose parts and shifting jamming after long-term use. Remove the battery for
separate storage if the equipment is not in use for a long time to extend the service
life of the device.
定期清理后拨链器、导轮及飞轮表面泥沙、油污,保持变速结构清洁顺畅;定期检查
电池电量、锁扣紧固状态及螺丝扭矩,避免长期使用出现松动、变速卡顿;长期不使
用设备时,请取出电池单独存放,延长设备使用寿命。