
Installation - New Construction (continued)
5
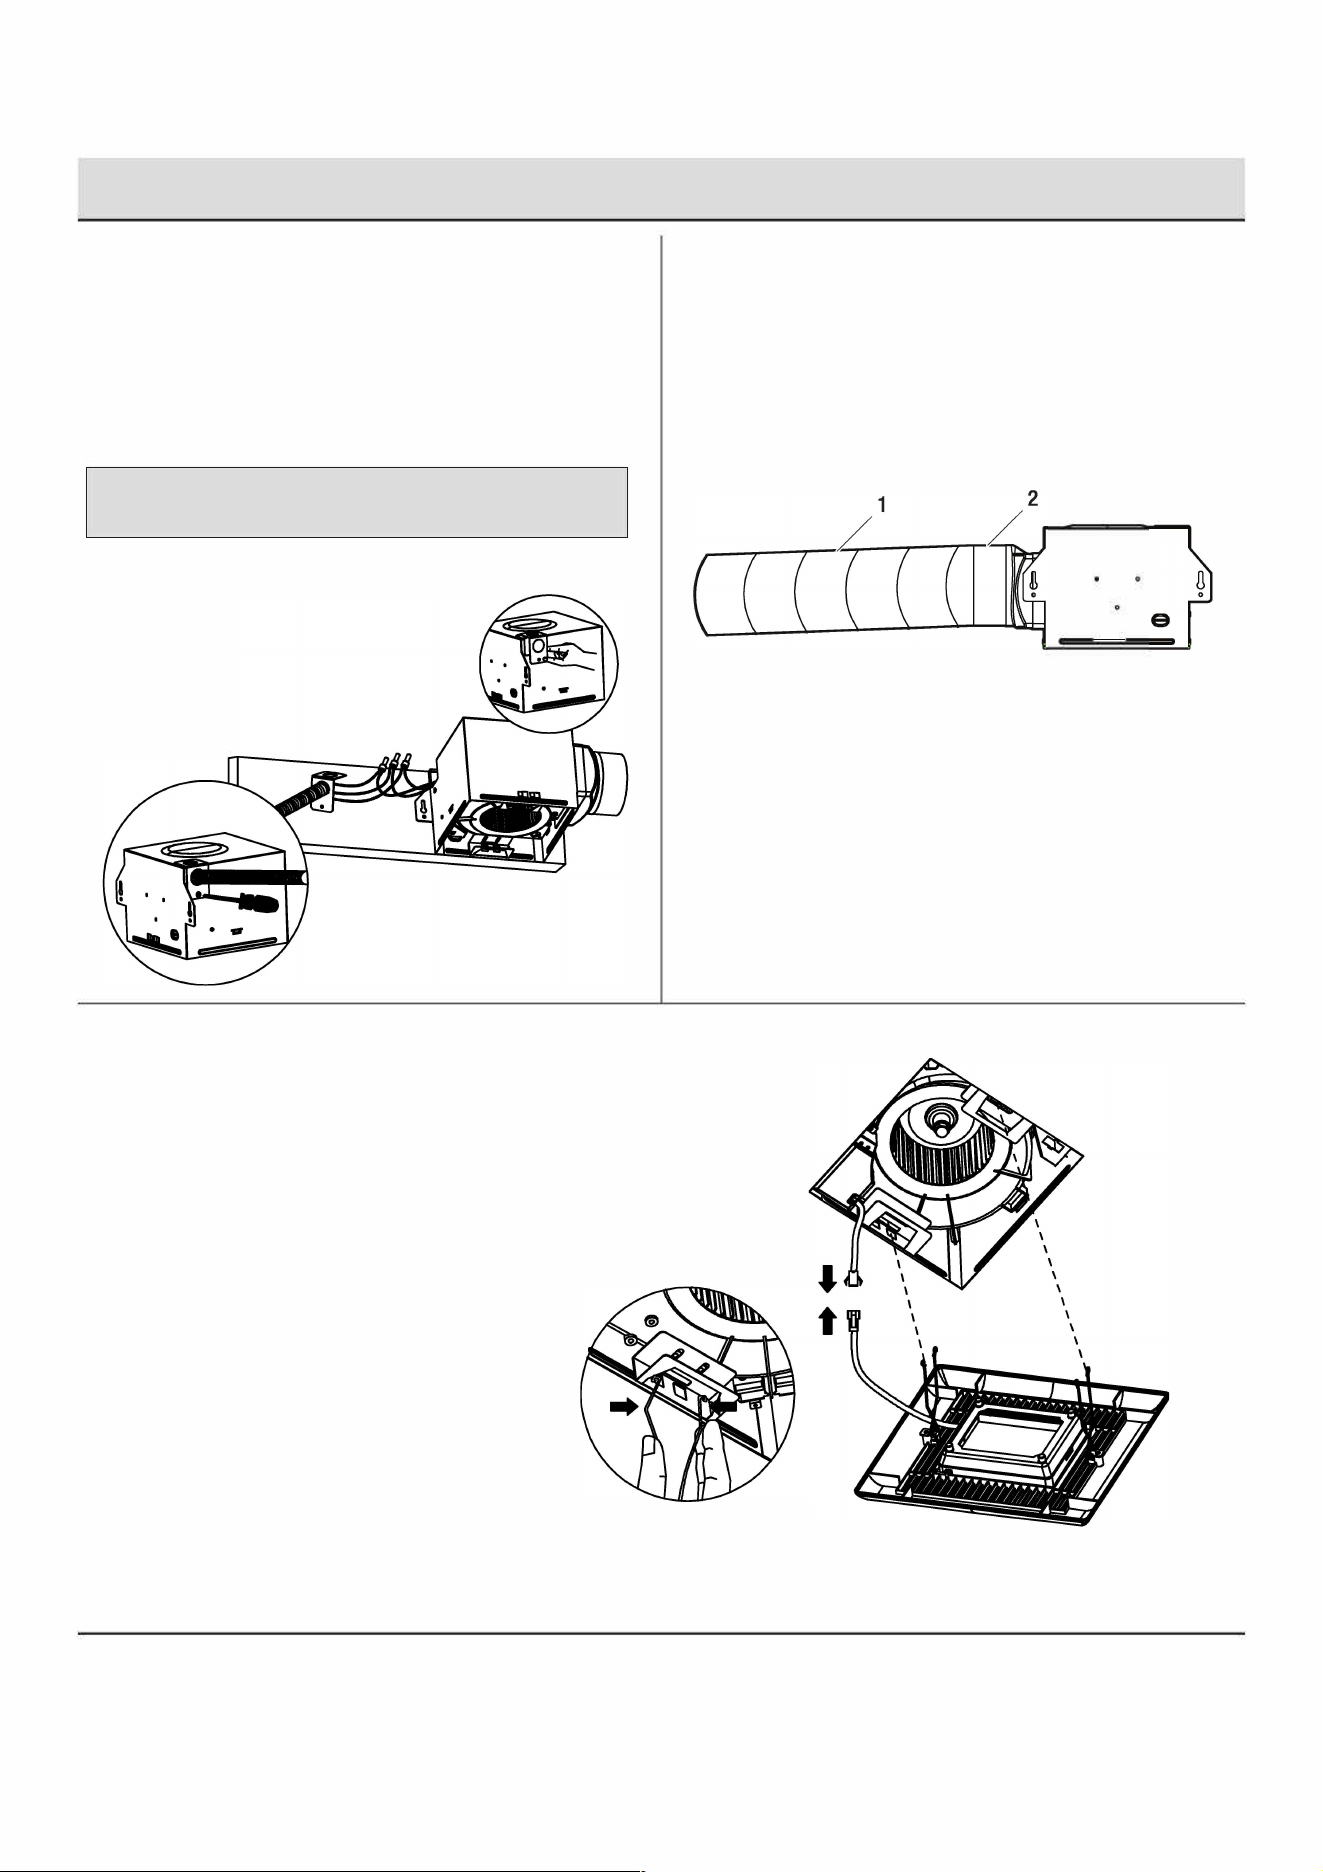
Connecting the house and fan wires
□ Pull the house wire thro
ugh the fan
J
-Box cover through hole,
using the appropriate wire clamp (not included), secure wire to
cover. Using UL approved wire nuts (not included), secure 120
C house wiring from the wall switch to the fan as shown in
the wiring diagram. 14AWG is the smallest conductor that shall
be used for branch-circuit wiring.
� CAUTION: Make sure power is switched o at service
� panel before staing installation.
□ Push the wires back through the hole. Reaach the wiring
box cover.
7 Installing the grille
□ Pinch the mounting springs on the grille (B) and inse
them into the narrow rectangular slots inside the fan ).
Push the grille (B) up toward the ceiling.
□ rn on electricity at the breaker box aer finishing
installation
7
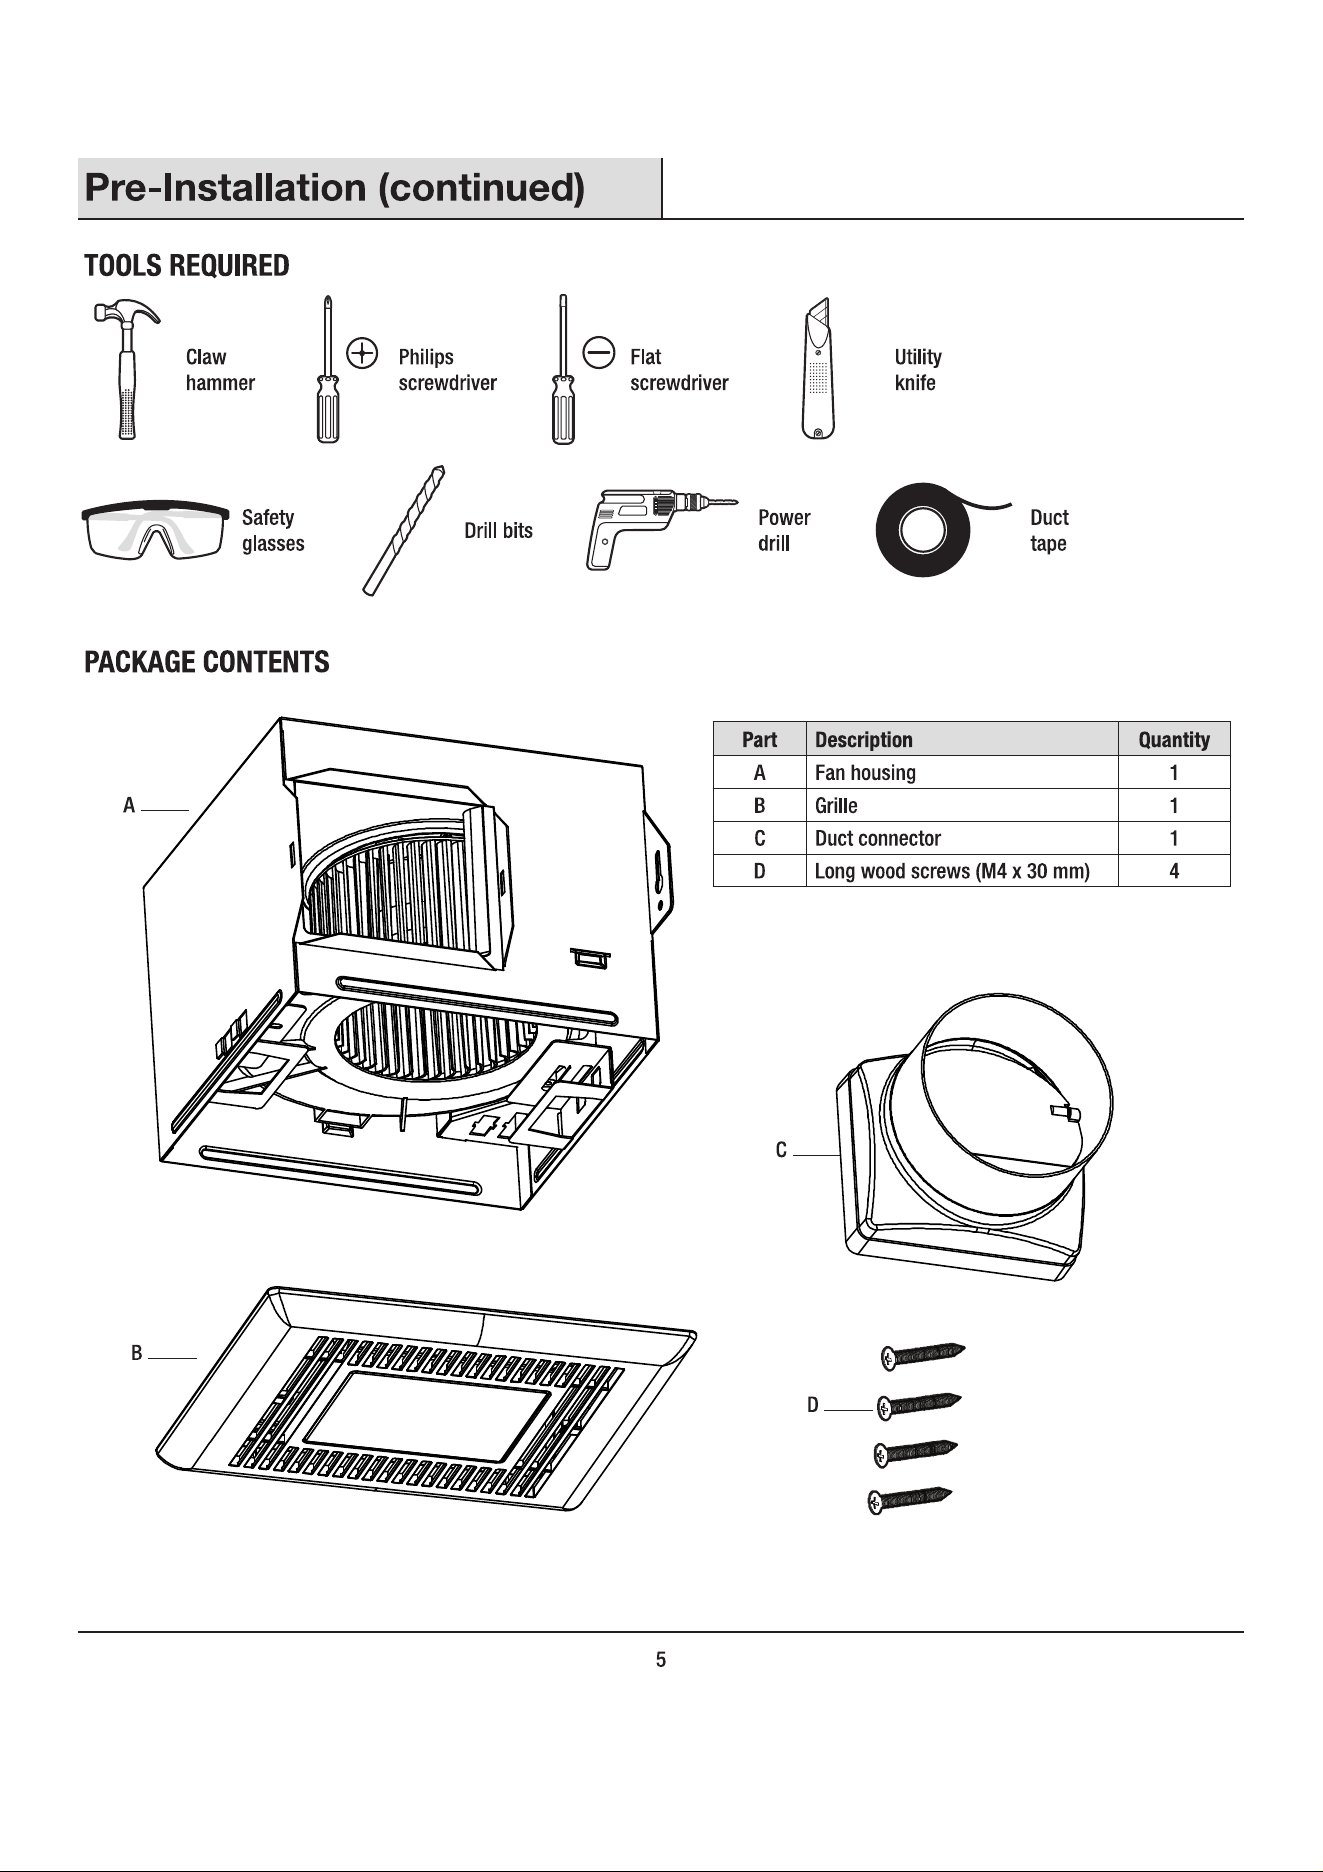
6 Installing the duct
□ Install a circular 4 in. duct (not included) and secure it with
duct tape or clamps (neither included).
□ Finish ceiling work. The ceiling hole should be aligned with
the edge of the fan housing.

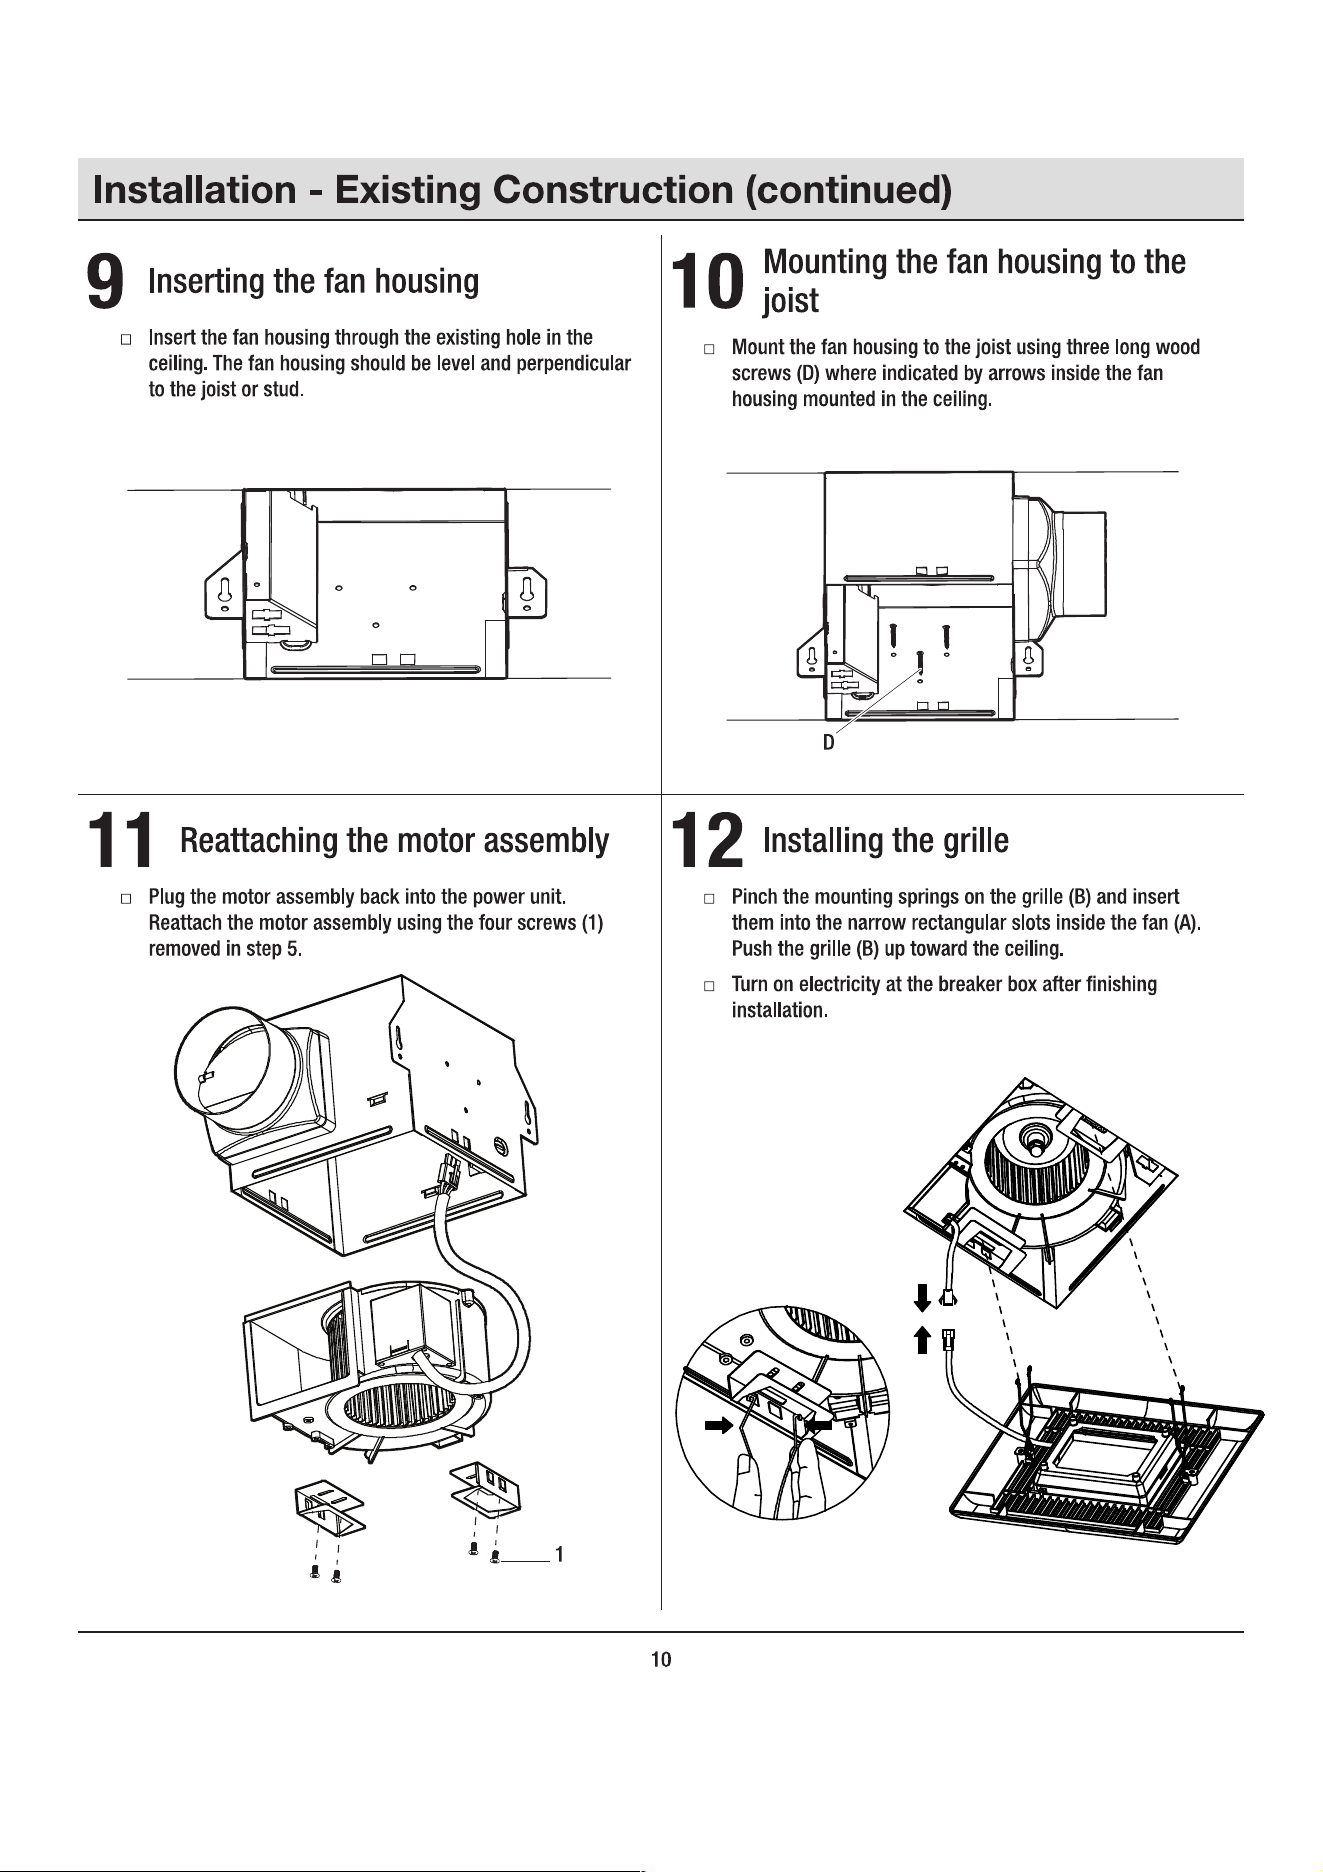
Installation - Existing Construction (continued)
5
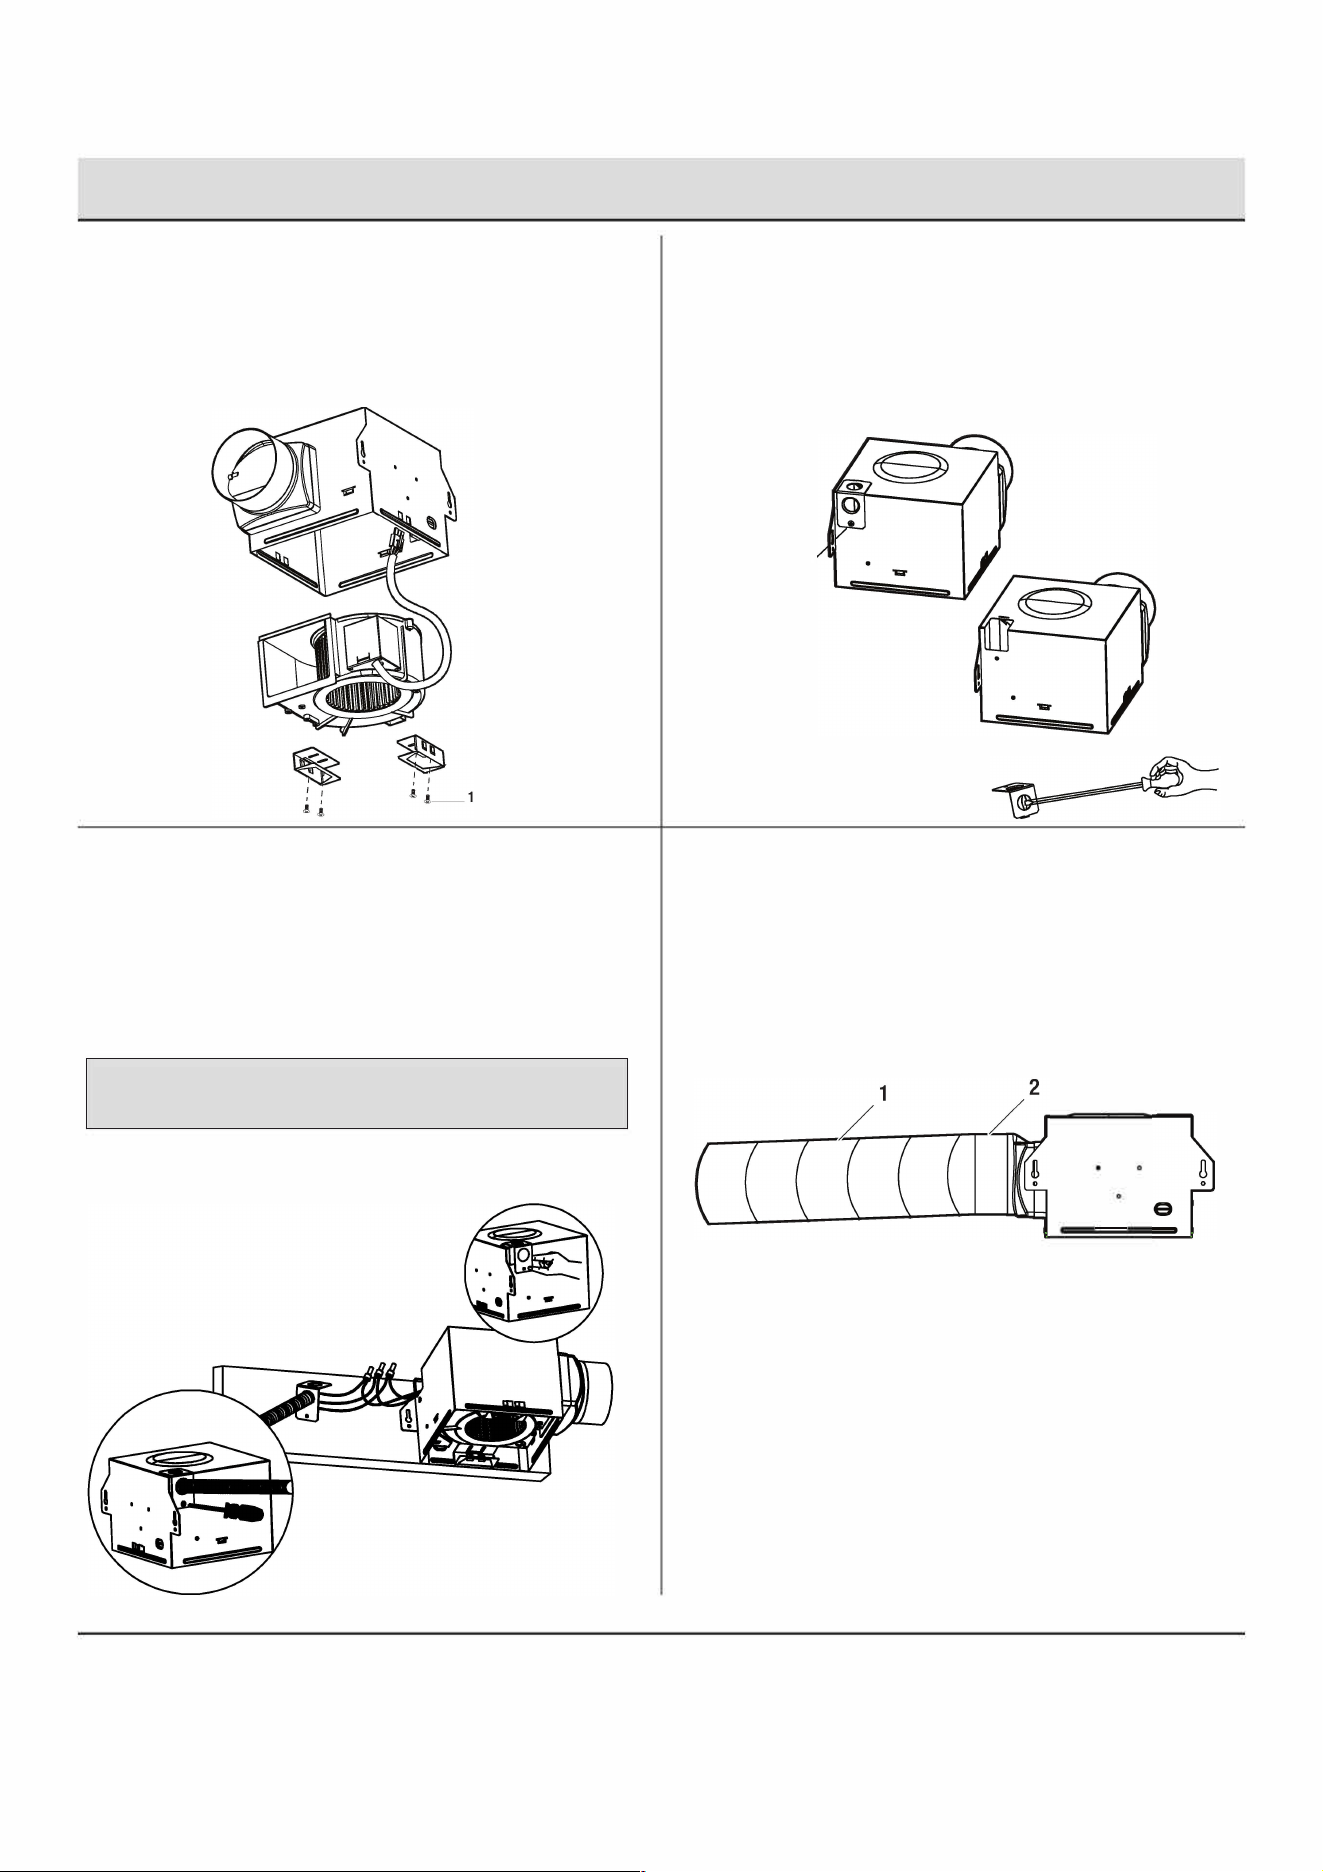
Removing the fan motor assembly
□ Remove the four screws (1) that hold the fan motor
assembly in place. Remove the fan motor assembly from
the fan housing. Unplug the fan power unit.
7
Connecting the house and fan wires
□ P
ull the house wire through the fan
J
-
B
ox cover through
hole, using the appropriate wire clamp (not included), secure
wire to cover. Using UL approved wire nuts (not included),
secure 120
V
AC house wiring from the wall switch to the
fan as shown in the wiring diagram. 14AWG is the smallest
conductor that shall be used for branch-circuit wiring.
□
� CAUTION: Make sure power is switched o at service
� panel before staing installation.
□ Push the wires back through the hole. Reaach the wiring
box cover.
9
6
Removing the wiring box housing
□ Remove the wiring box cover from the fan housing with
a Phillips head screwdriver (not included). Remove the
wiring knockout from the wiring box cover with a flathead
screwdriver (not included).
/
/
8 Installing the duct
□ Install a circular 4 in. duct (not included) (1) and secure it
with duct tape or clamps (neither included) (2) .
□ Finish ceiling work. The ceiling hole should be aligned with
the edge of the fan housing.
ntilation Fan Operation
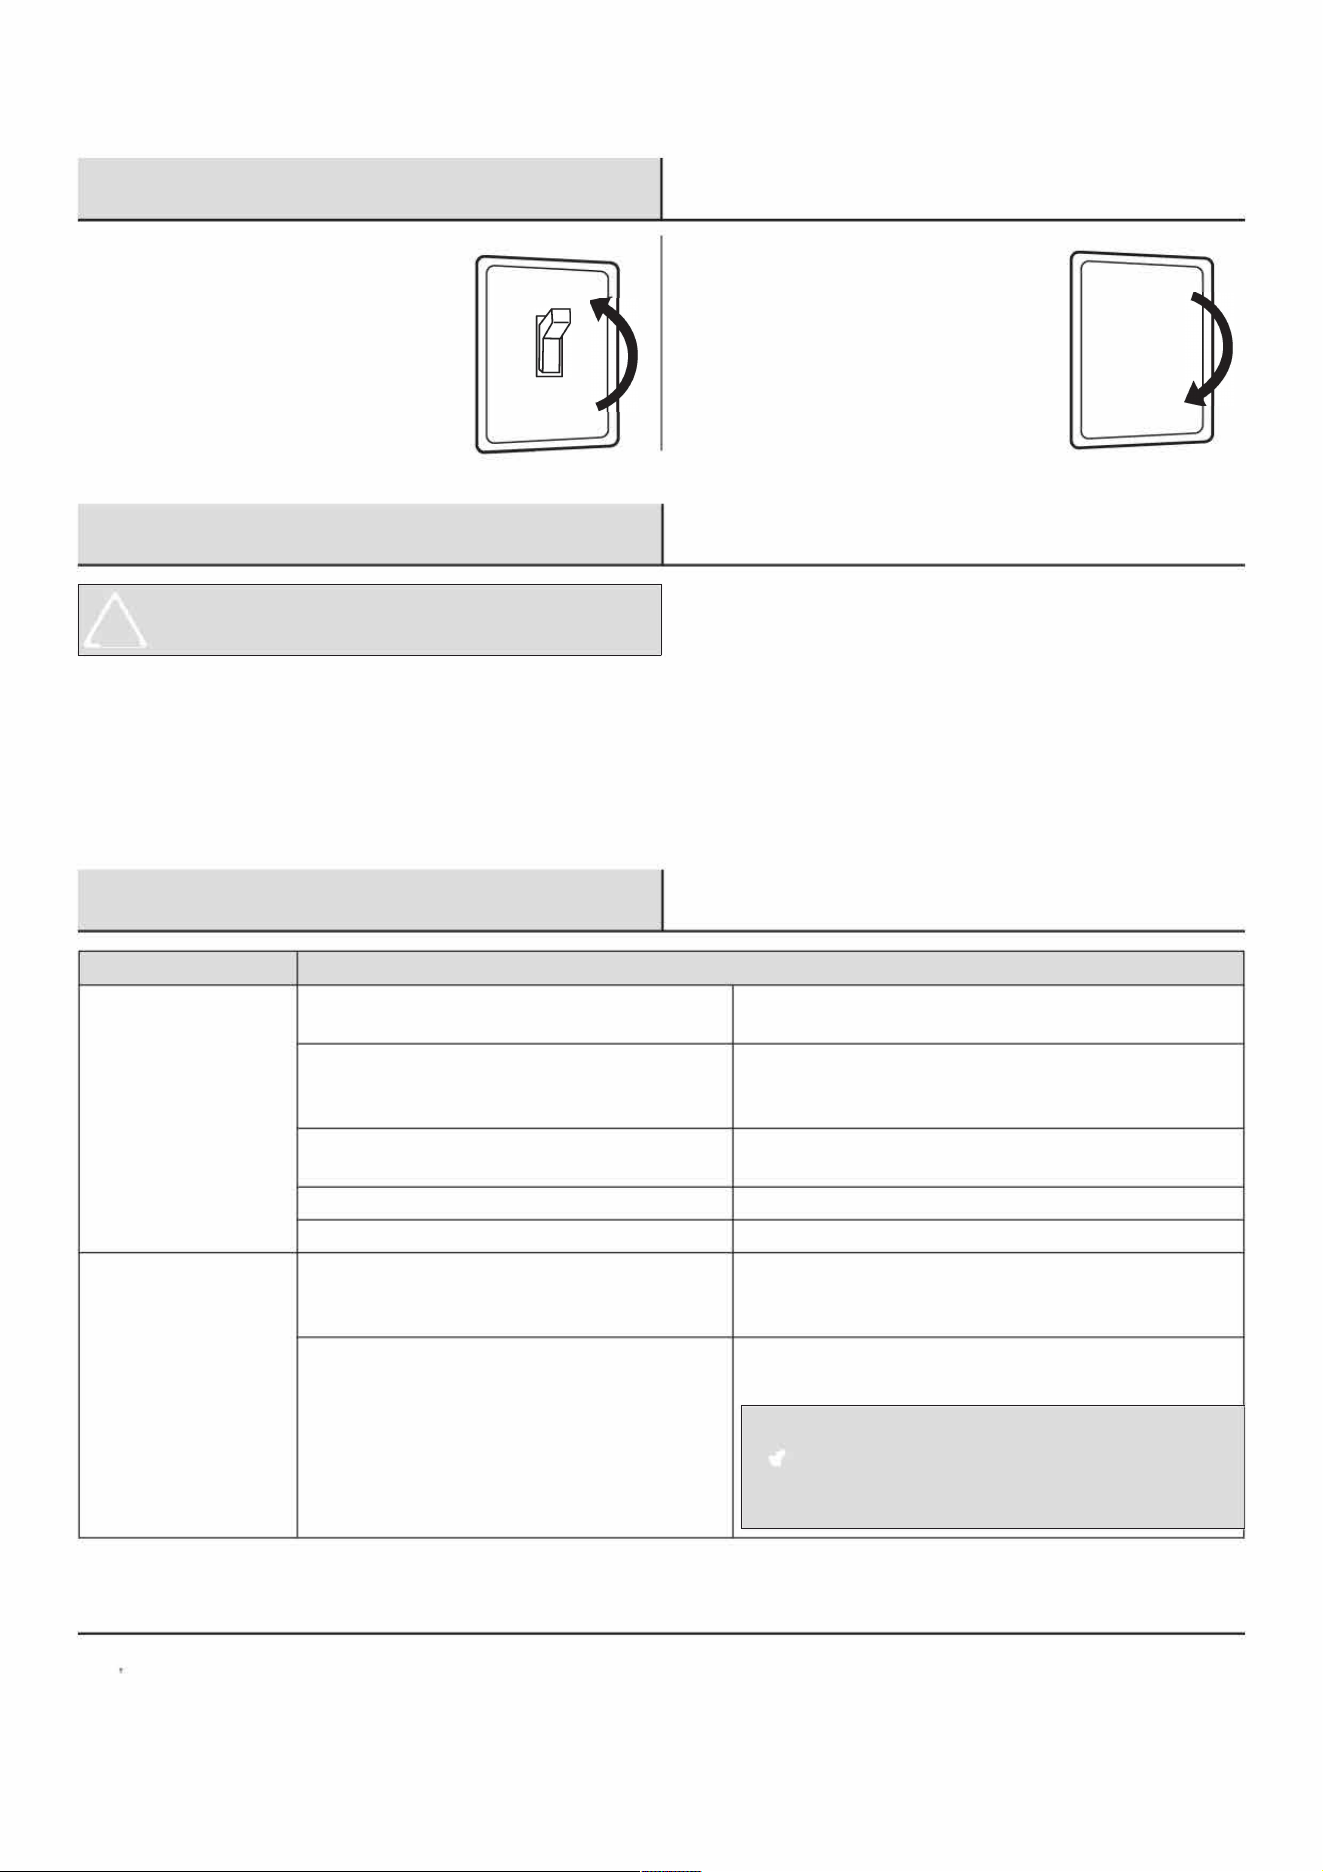
1 rning the fan on
0
2
Turning the fan o
0
□ Move the wall switch to the ON
position to turn the fan on.
□ Move the wall switch to the OFF
position to turn the fan o.
0
0
Care and Maintenance
�
WARNING: Disconnect power supply before servicing.
□ See SAFETY INFORMATION before proceeding. Routine maintenance should be done at least once a year.
□ Never use solvents, thinner or harsh chemicals for cleaning the fan.
□ Do not allow water to enter the motor.
□ Do not immerse metal pas in water.
oubleshooting
Problem
Solution
The fan seems louder
The CFM is too great.
Be sure the CFM rating on the fan matches the square
than it should.
footage of your room.
The damper is damaged or not working properly.
Check the damper to ensure it is opening and closing
properly. If the damper has become damaged, please call
Customer Service.
The bend in the duct is too close to the fan
Be sure you do not have any sharp bends in the duct closer
discharge. than 18 in. to the fan discharge.
The fan discharge is reduced to fit a smaller duct.
Use the recommended size ducting to reduce fan noise.
The fan body is not aached securely.
Be sure the fan is securely aached to the ceiling joists.
The fan is not clearing
There is insuicient ailow intake in the room.
Be sure a door or window is slightly ajar or opened to allow
the room.
ailow. The fan is not able to draw air out of the room
without enough ailow to draw from.
There is insuicient CFM.
Be sure the CFM rating on the fan matches the
requirements for your room size.
NOTE: Using a tissue is not the correct method for
�
determining if the fan is operating properly. If the fan
clears steam from the room within approximately
15 minutes of completeing your shower, then the fan is
operating properly.
� 866-MAXXIMA (629-9462) � www.maxximastyle.com
�
125 Cabot Court Hauppauge, NY 11788