14
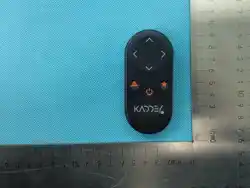
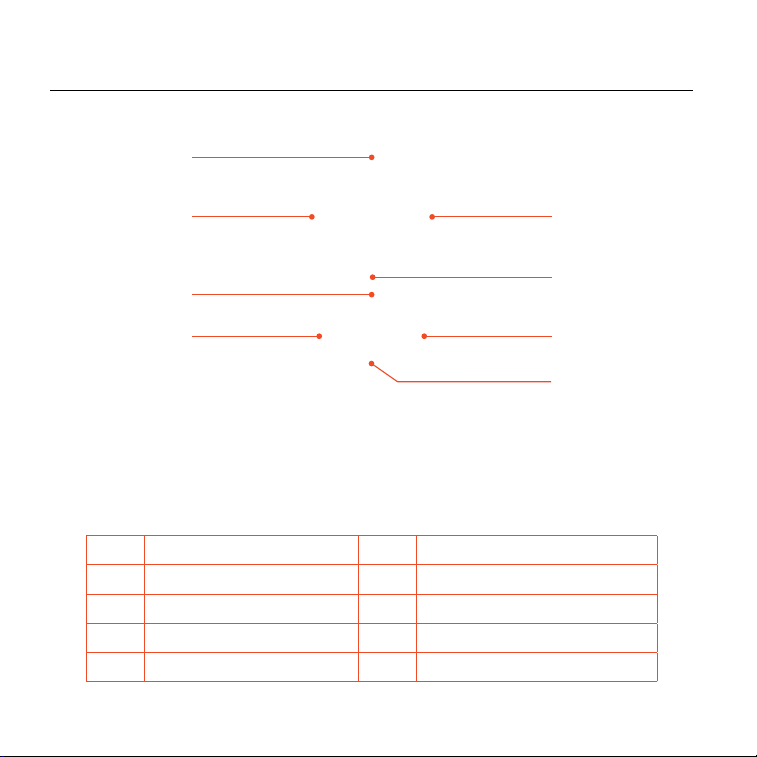
Remote Introduction
2
6
5
7
3
1
4
8
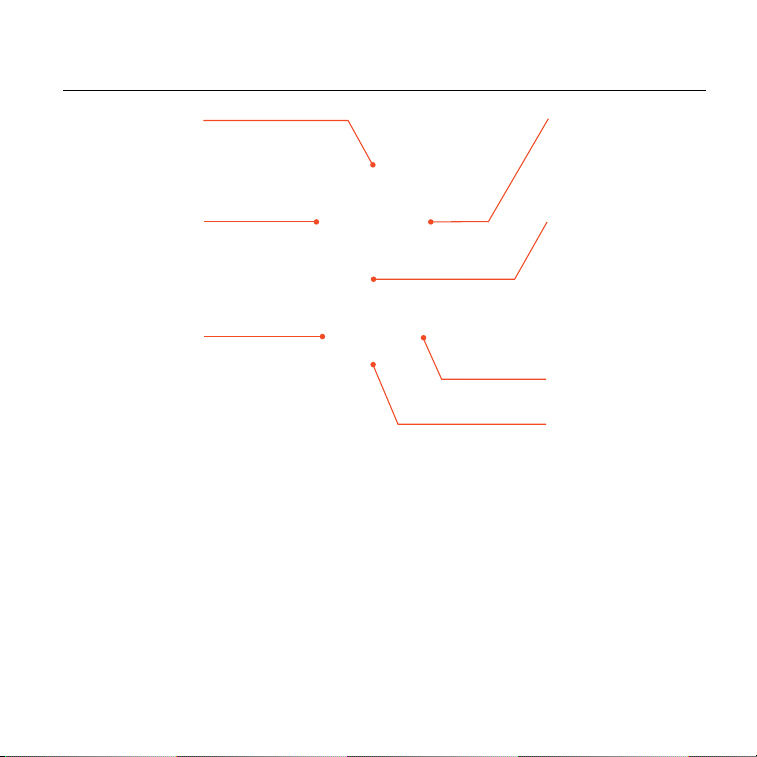
No. Name No. Name
1 Speed up 5 Indicator LED
2 Steer left 6 Pocket Lock
3 Steer right 7 Celebration buon
4 Speed down / Reverse 8 Power buon
28
Driving Controls - With the remote
Controls with Remote:
First, make sure the remote is paired with the Pacesync unit (page 44). Once paired, the
remote stays active throughout your round, so you can switch between hand and remote
control at any time. Using both together gives a uniquely seamless driving experience,
leing you match your control preference to the course and the weather. The next page
explains each input and function in detail.
When operated by remote the tilt stop activates at 8°. If the trolley tilts beyond this angle,
it stops automatically to prevent tipping — return it to level ground to continue.
The remote has a nominal range of 50 metres, and the trolley stops automatically if it
moves out of range. Even so, we recommend keeping it within 25 metres so you can clearly
see any obstacles in its way.
The remote is best suited to open sections. For tight spots, bridges, or moving near
people, cars, or obstacles, switch to hand control.
Detailed
walkthrough
A full charge lasts 12+ hours.
However, we recommend charging
the remote after each round, using
the USB-C port on the Pacesync
unit or any standard USB-C charger.
29
Celebration buon
Power buon
Pocket Lock
Short press: locks
all buons of the
remote. Deactivate by
pressing any direc-
tional buon for 2s.
* The remote switches o automatically after 15 minutes without input or 60 seconds
without connection. To save baery, turn it o when not in use.
Power buon
Short press: brings
the trolley to a stop.
Hold 5 seconds: turn
remote on/o.
Celebration buon
Press while the trolley
stands still: Celebrate
your birdies by
starting a celebration
sequence.
Speed Down
Press: per step.
Hold: continuous
decrease.
Press when station-
ary: trolley reverses.
Speed Up
Press: per step.
Hold: continuous
increase.
Steer Right
Hold: steer right.
Release: continue
straight.
Steer Left
Hold: steer left.
Release: continue
straight.
Pocket Lock

30
Carrying the Remote - In your pocket
The easiest way to keep the remote within reach is in your pocket. As golfers ourselves,
we wanted you to have the controls right where you need them. That is why the remote is
designed to be carried comfortably and safely throughout your round.
To prevent accidental inputs while it’s in your pocket, use the Pocket Lock. A short press
on the Pocket Lock buon locks all the remote’s buons, shown by the red LED. To unlock,
hold any of the direction buons for two seconds.
With the buons locked, you can put the remote in your pocket and swing freely,
without the trolley responding to an accidental press.

31
Carrying the Remote - On the frame
Prefer to keep the remote on the trolley? The remote has a built-in clip on the back that
easily snaps anywhere onto the aluminium frame. Press it onto the frame as shown below,
and pull it straight o to remove. This keeps the remote visible and within easy reach as
you play.
45
Remote Status
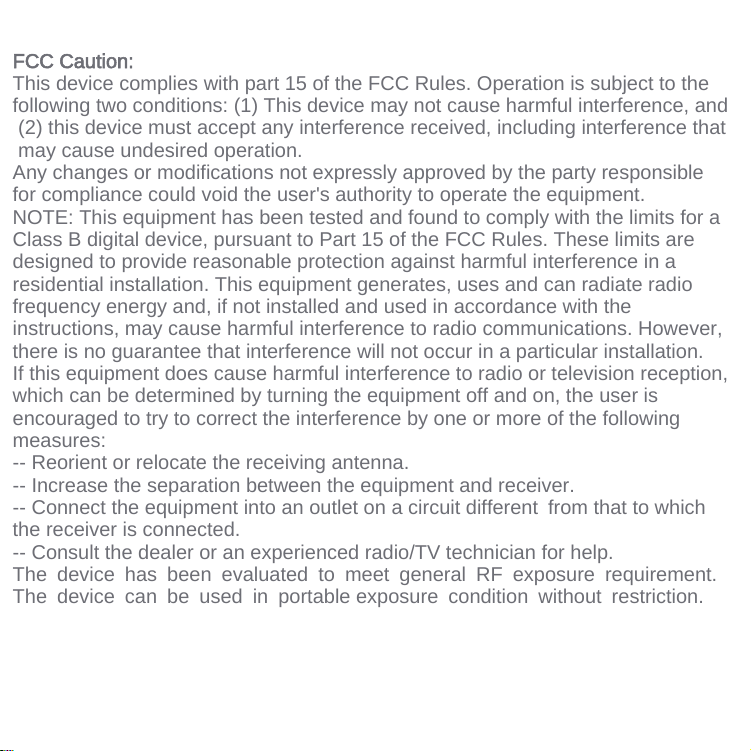
Status LED reference:
The remote indicator LED indicates the status of the remote.
Below an overview of the paern and meaning of each status.
Topic Colour Paern Meaning What to do
Power White Blink, every 2s Remote is on
Connection Green Single blink Connected
Red Single blink Not connected Switch Pacesync
On/O
Pairing Green/
Red
Alternating Pairing mode Follow the pairing
steps (page 44)
Green Fast blink Not paired Start pairing
Lock Red or
Green
Double blink Pocket lock active 2s hold to unlock
(p. 30)
Green 3 quick blinks Unlocked
Baery Red Slow blink Baery low Charge the remote
Red Pulsing (fading) Charging
Green Steady Fully charged Disconnect charger
FCC Caution:
This device complies with part 15 of the FCC Rules. Operation is subject to the
following two conditions: (1) This device may not cause harmful interference, and
(2) this device must accept any interference received, including interference that
may cause undesired operation.
Any changes or modifications not expressly approved by the party responsible
for compliance could void the user's authority to operate the equipment.
NOTE: This equipment has been tested and found to comply with the limits for a
Class B digital device, pursuant to Part 15 of the FCC Rules. These limits are
designed to provide reasonable protection against harmful interference in a
residential installation. This equipment generates, uses and can radiate radio
frequency energy and, if not installed and used in accordance with the
instructions, may cause harmful interference to radio communications. However,
there is no guarantee that interference will not occur in a particular installation.
If this equipment does cause harmful interference to radio or television reception,
which can be determined by turning the equipment off and on, the user is
encouraged to try to correct the interference by one or more of the following
measures:
-- Reorient or relocate the receiving antenna.
-- Increase the separation between the equipment and receiver.
-- Connect the equipment into an outlet on a circuit different from that to which
the receiver is connected.
-- Consult the dealer or an experienced radio/TV technician for help.
The device has been evaluated to meet general RF exposure requirement.
The device can be used in portable exposure condition without restriction.