- 1 -
Sainlogic-SA9
Quick Setup Guide
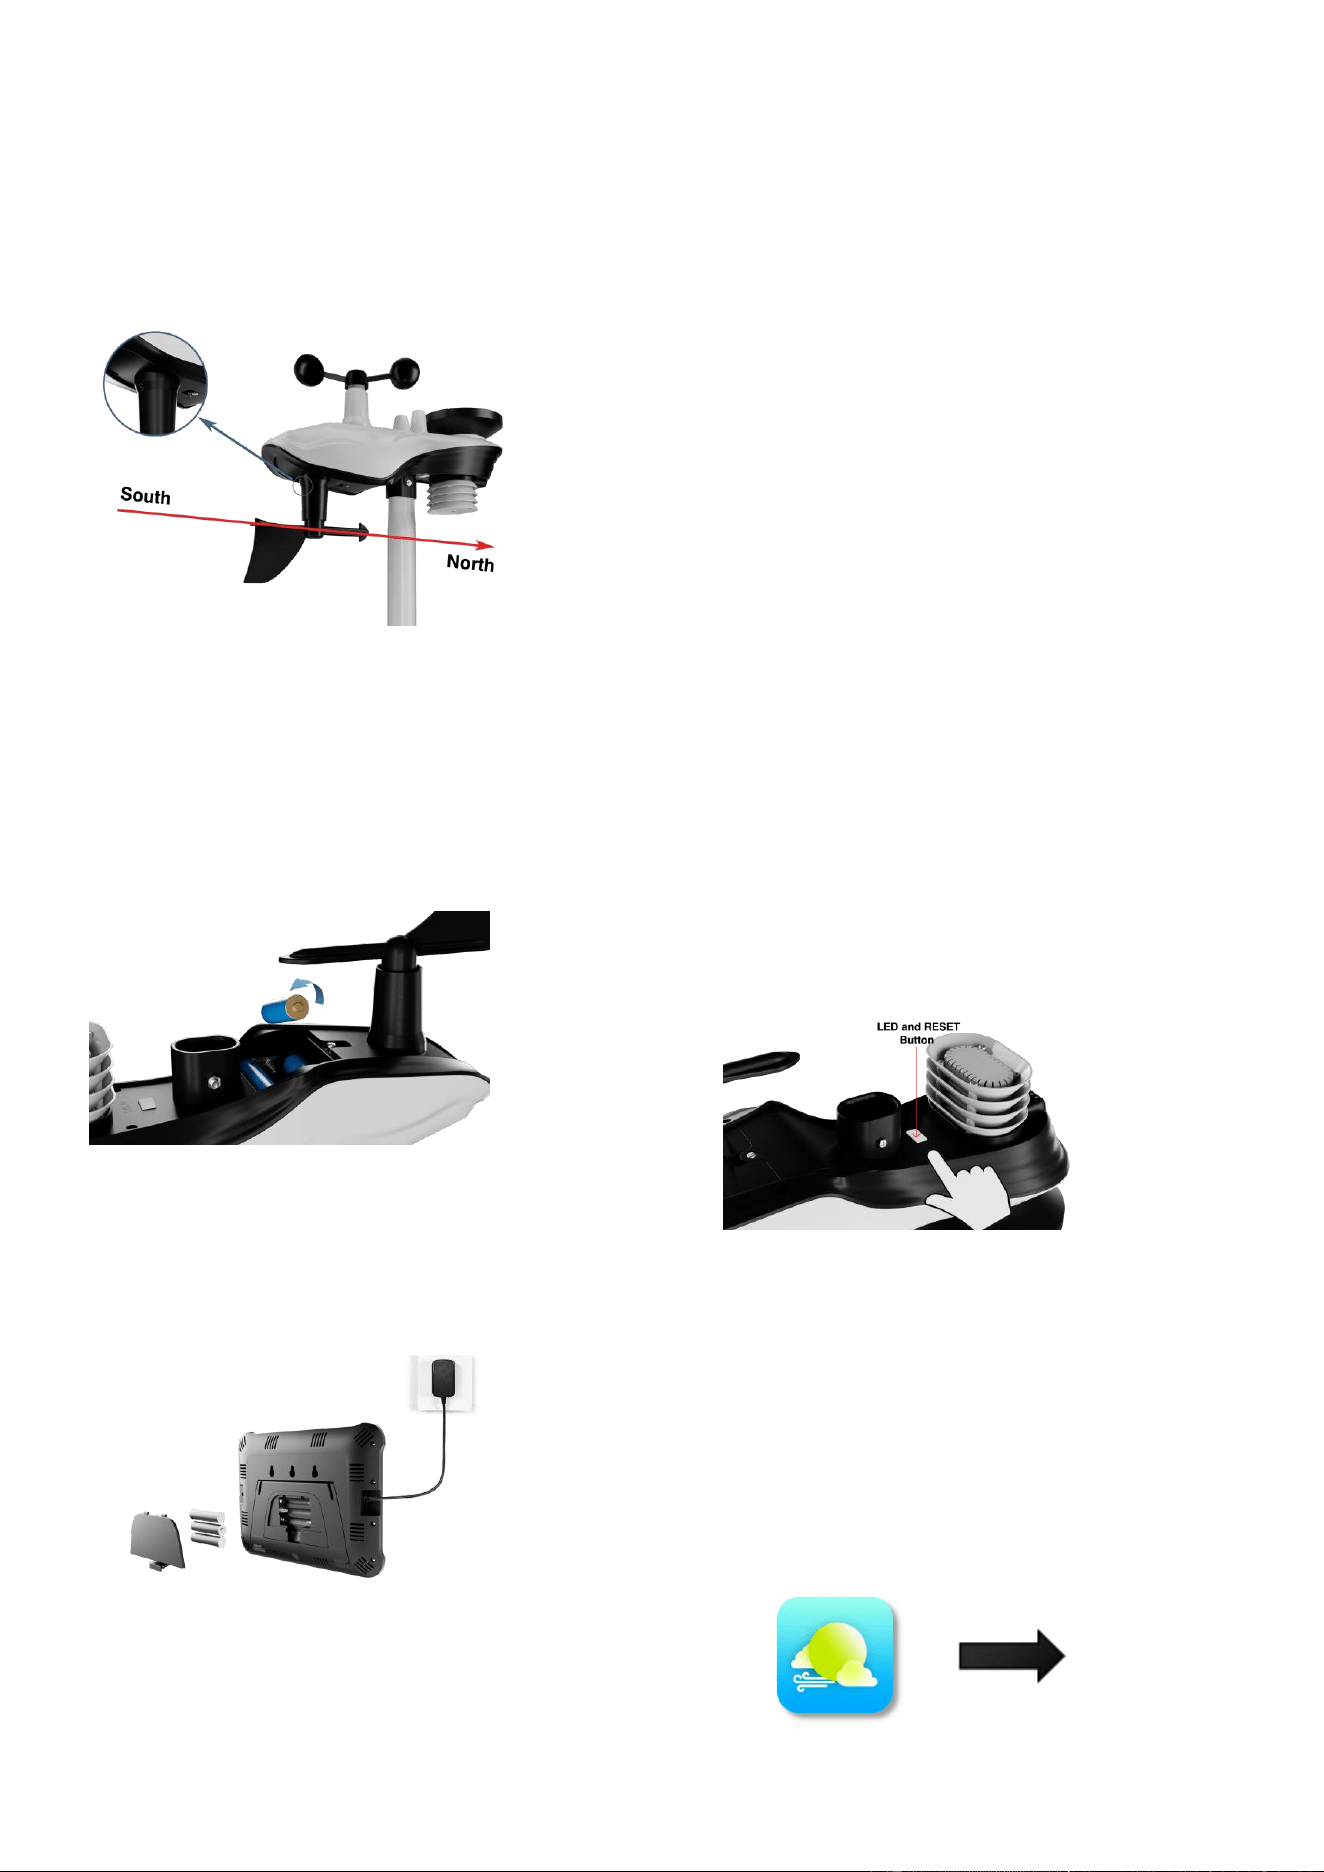
Step 1:
Locate the battery door on the bottom of
the transmitter, remove the retaining screws on the
back of the sensor, remove the battery door, insert
3 new AA batteries and close the battery door.
Step 3:
1. Plug in the display console with the power adapter.2.
Remove the battery door on the back of the display
and install three AAA (alkaline or lithium)batteries.
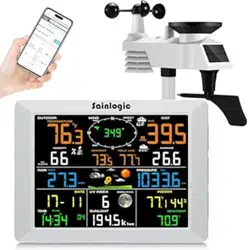
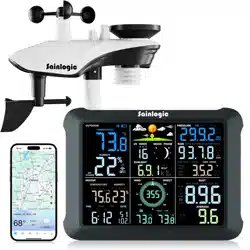
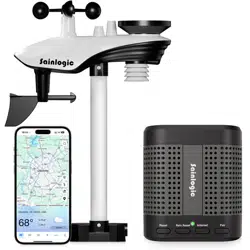
Product Includes:
-Integrated outdoor transmitter
- Display Console
- Rain collector
- Wind Cups
- Wind Vane
- Mounting brackets and accessories
- Instruction manual
- Power Adapter
Recommended Tools:
- Precision screwdriver (for small Phillips
screws)
- Compass or GPS (for wind direction
calibration)
- Adjustable wrenc
If outdoor data is still not displayed, press and hold the
CHANNEL/+key for three seconds until a dash is
displayed.
h
Step 2:
After installing the batteries, the Integrated
Outdoor Sensor LED will illuminate for 3
seconds and then blink every 16 seconds. If it
does not flash, press the reset button.
Referring to the instructions on the
following page.
Learn how to make the display connect to
WiFi and how to download the
Weatherseed APP and register to log in.
- 2 -
Step 4:
Please search "Weatherseed" APP in Google Play Store or IOS
App Store.
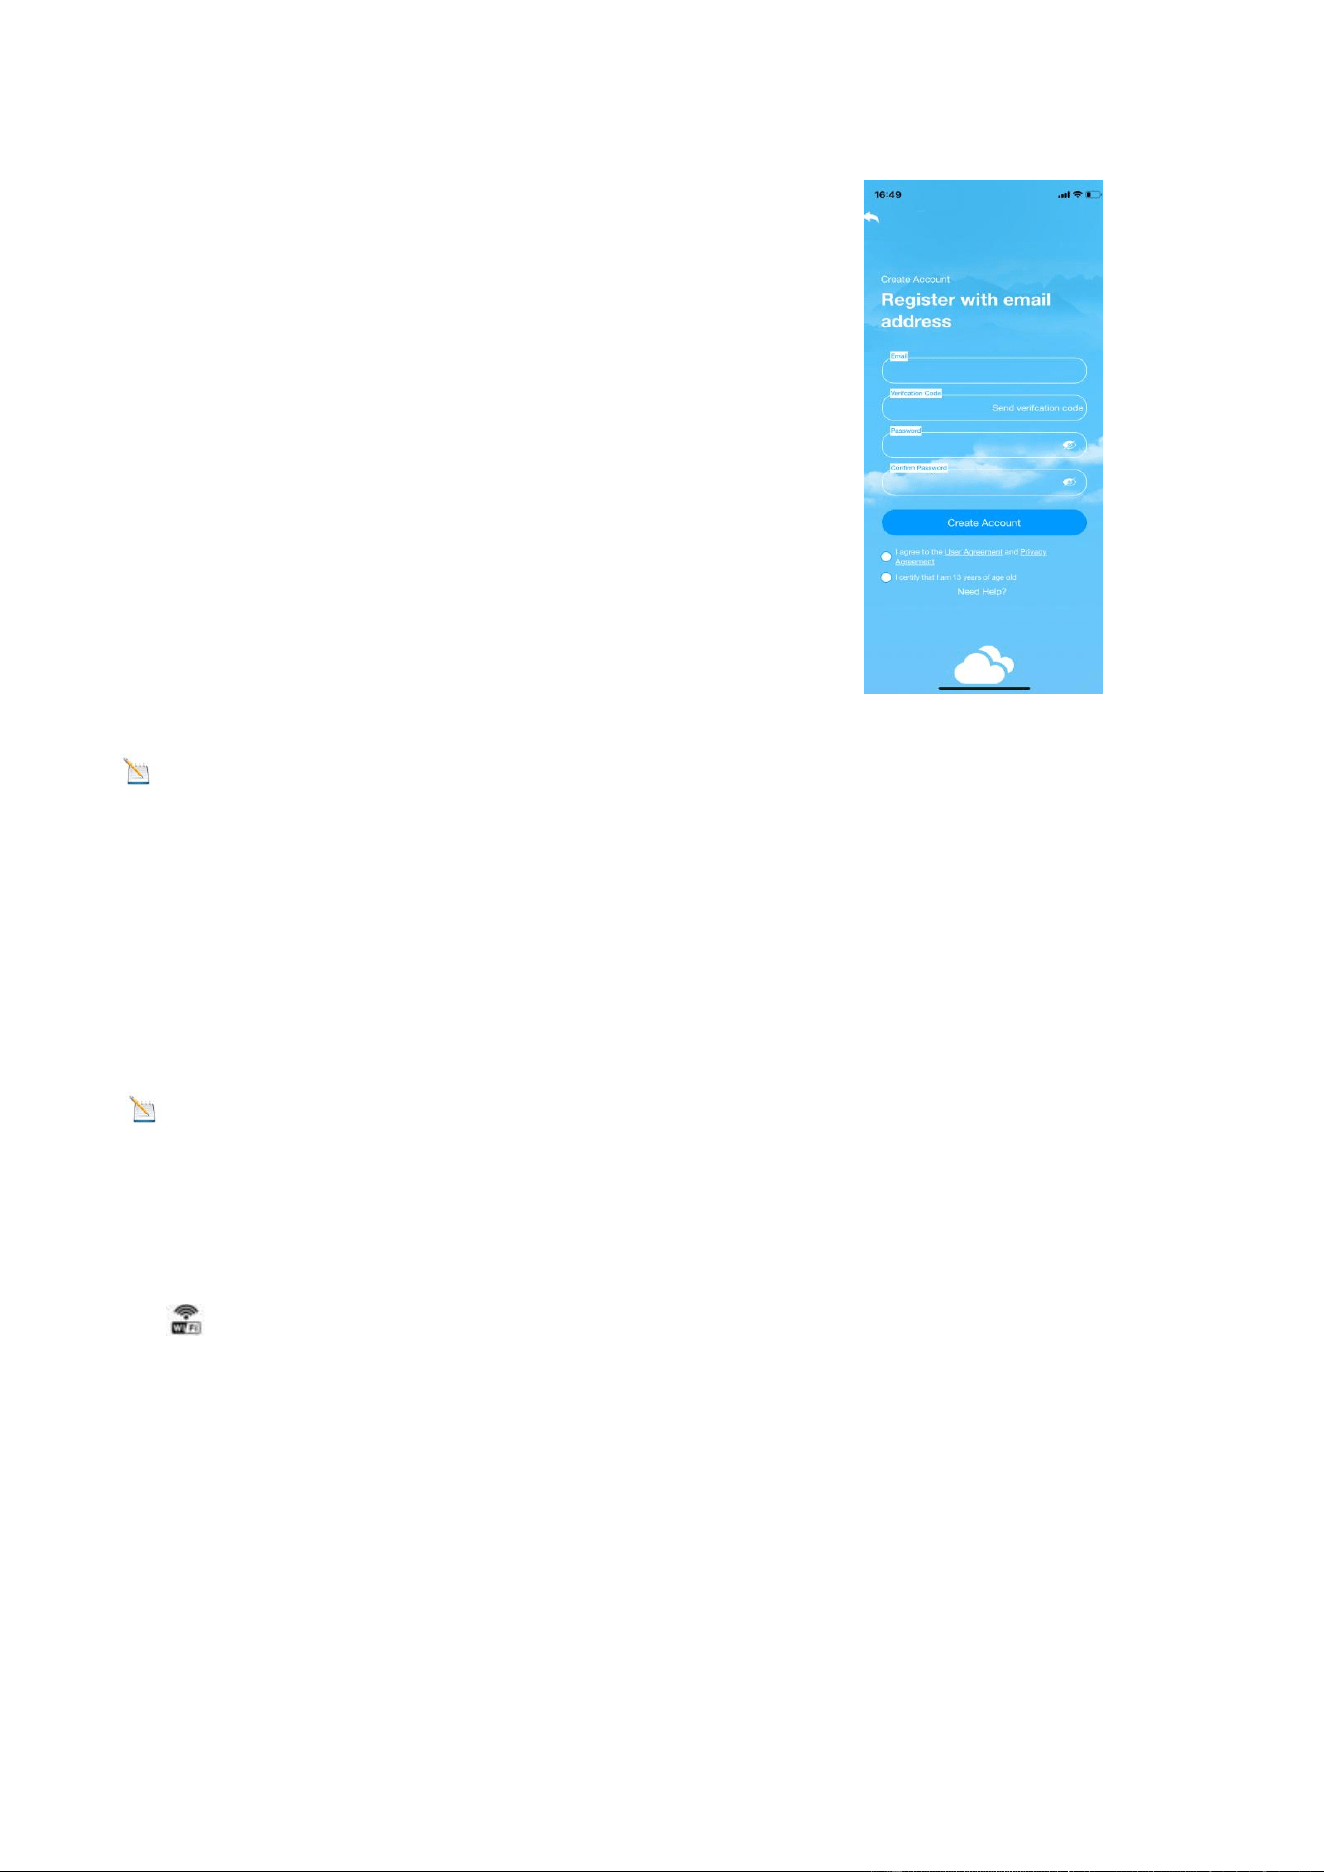
Step 5:
Register and login to your own Weatherseed account:
(1) Fill in the e-mail address;
(2)Send a verification code to the e-mail address and enter
the code;
(3) Set a password;
(4)Confirm the password (must be consistent with the set
password);
(5)Check the user agreement and proof of age;
(6) Register account.
Note: The display console only supports 2.4 GHz signals.
If you have a dual-band router (2.4 GHz and 5.0 GHz), make sure the router's 2.4 GHz
band is turned on. And separate it from the SSID of the 5.0 GHz channel for accurate
connection to 2.4 GHz.
Step 6: WiFi Connection Steps
Note
:
Please don't choose the wrong type and model, ifyou choose the wrong one,
you can't matchthe network successfully.
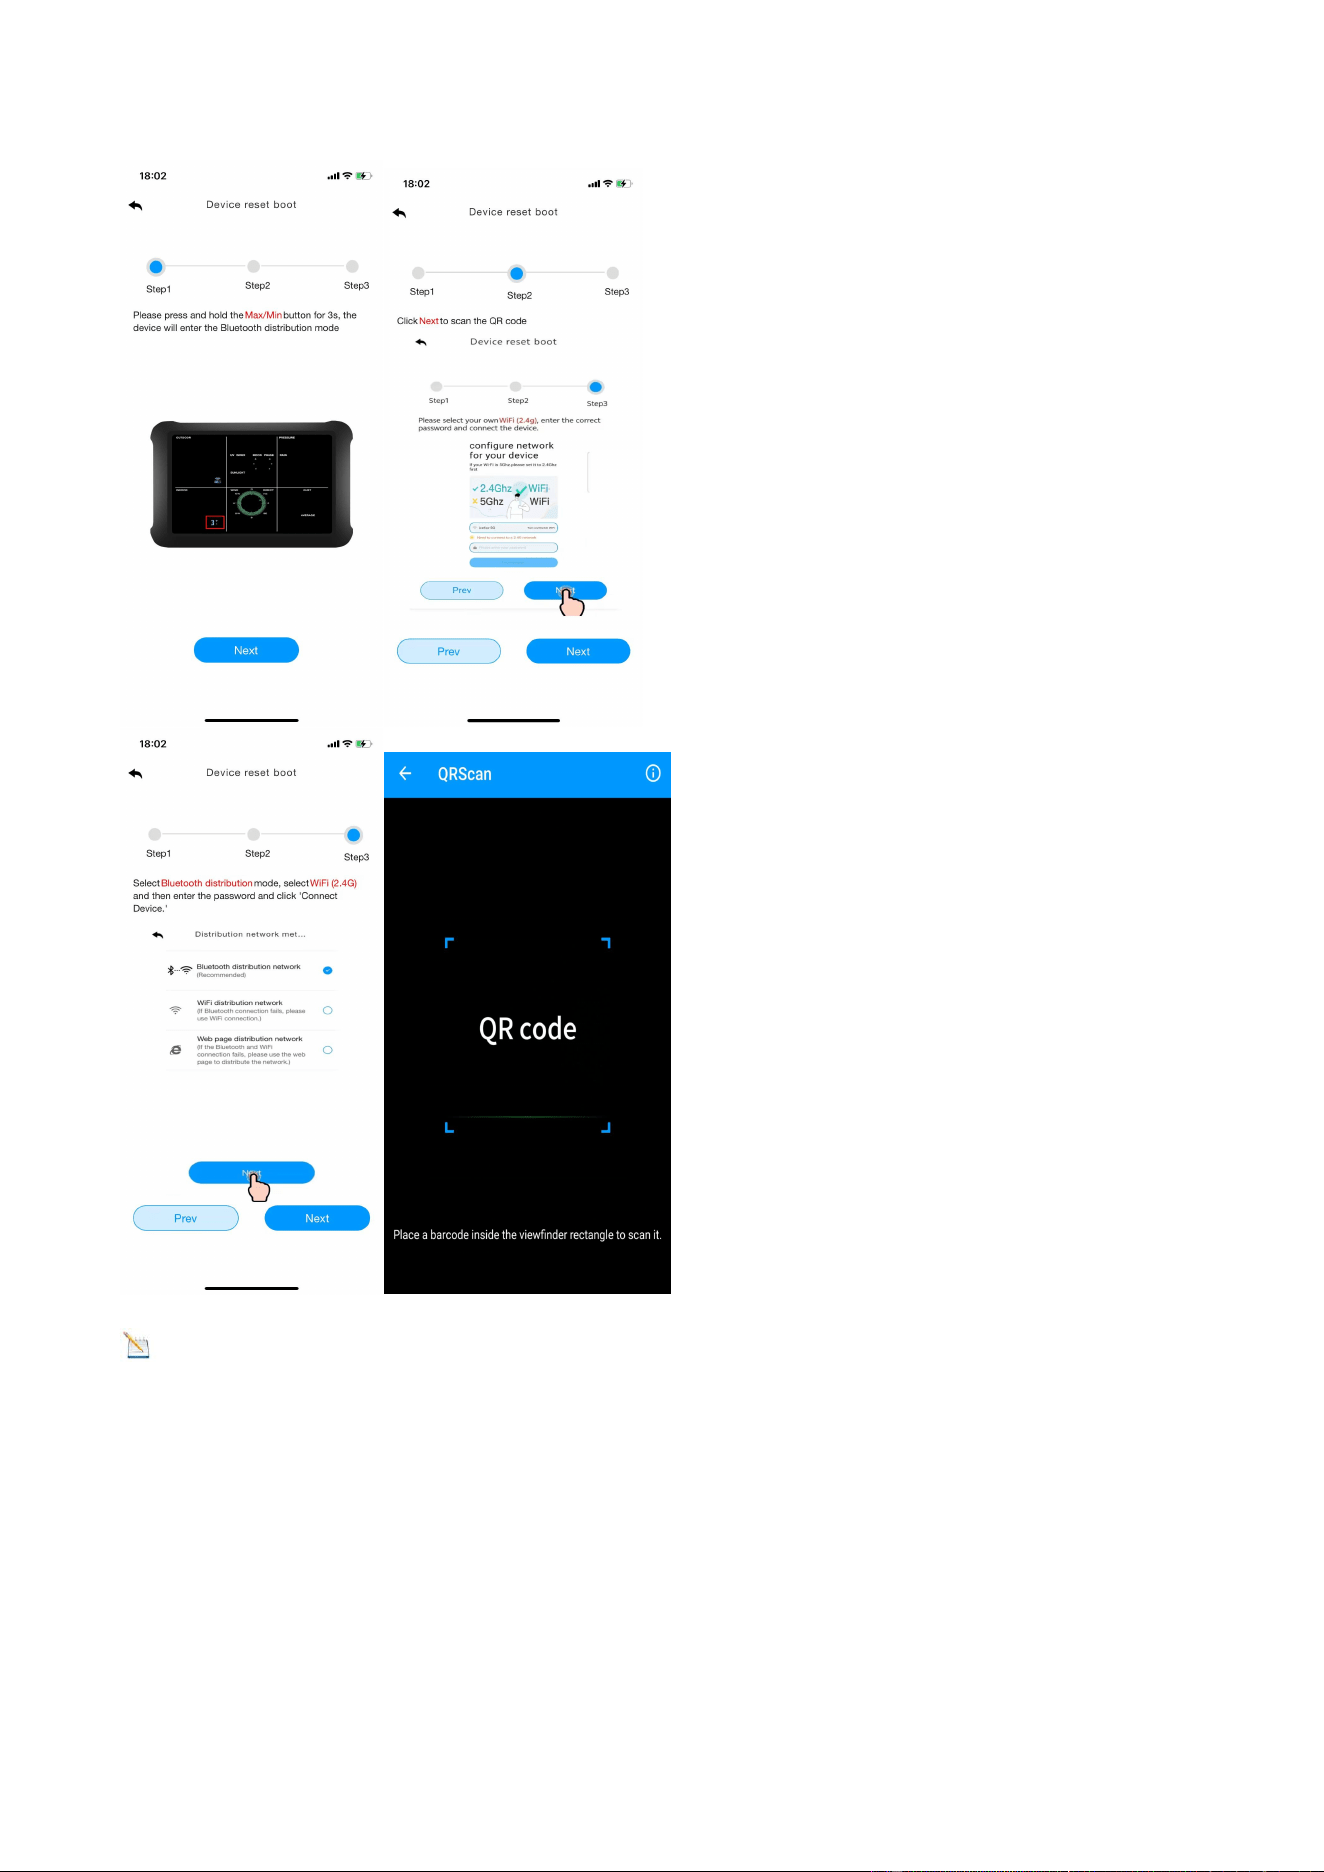
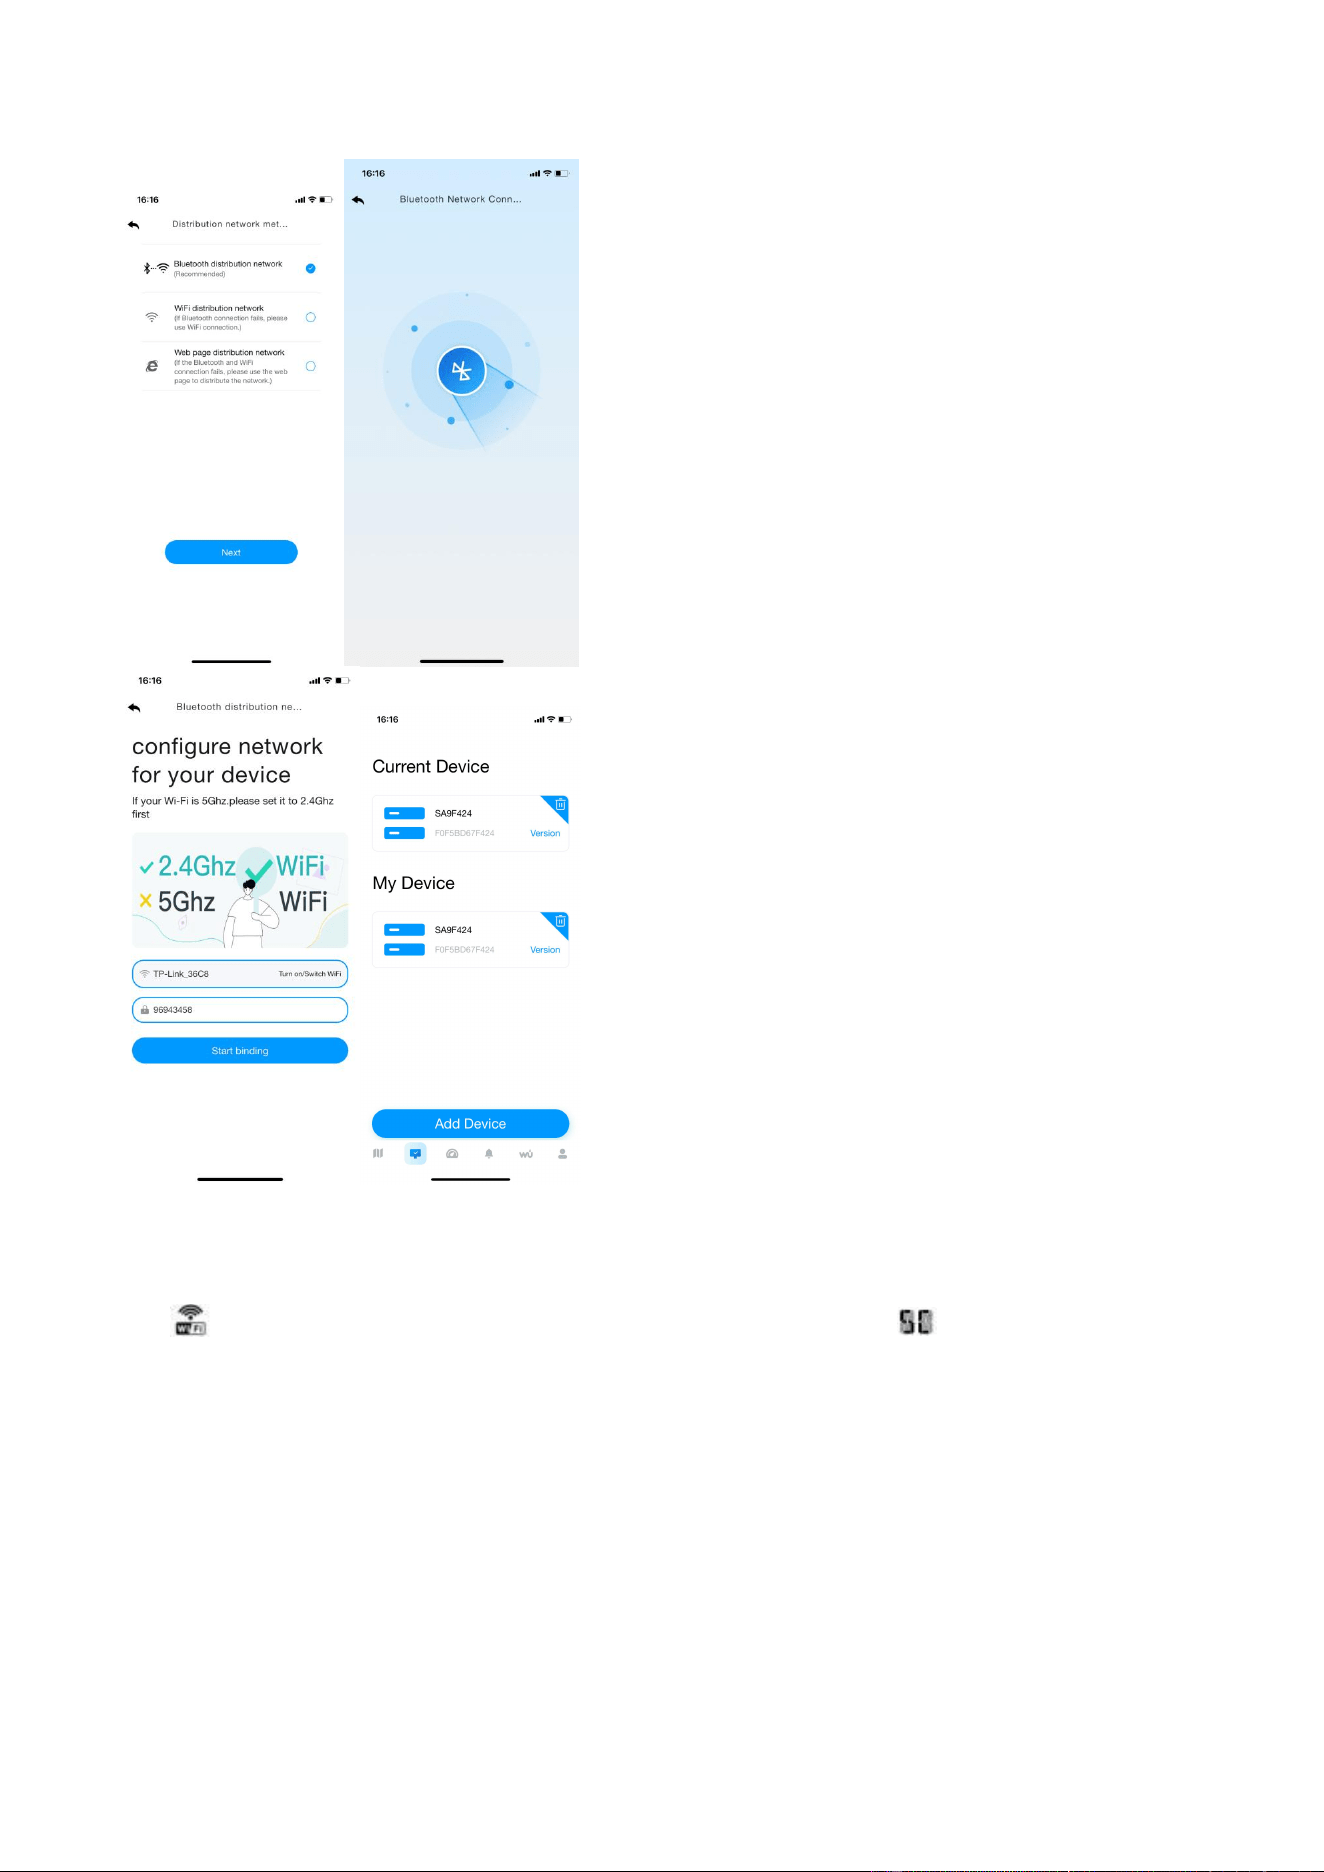
1. Bluetooth Distribution Network Mode(Recommend)
Press and hold the MAX/MIN/- key to enter the distribution network mode, the WiFi
icon will flash and the BI icon will be shown in the date area.
After the display enters the " Bluetooth distribution network " mode, please open the APP to
start networking:
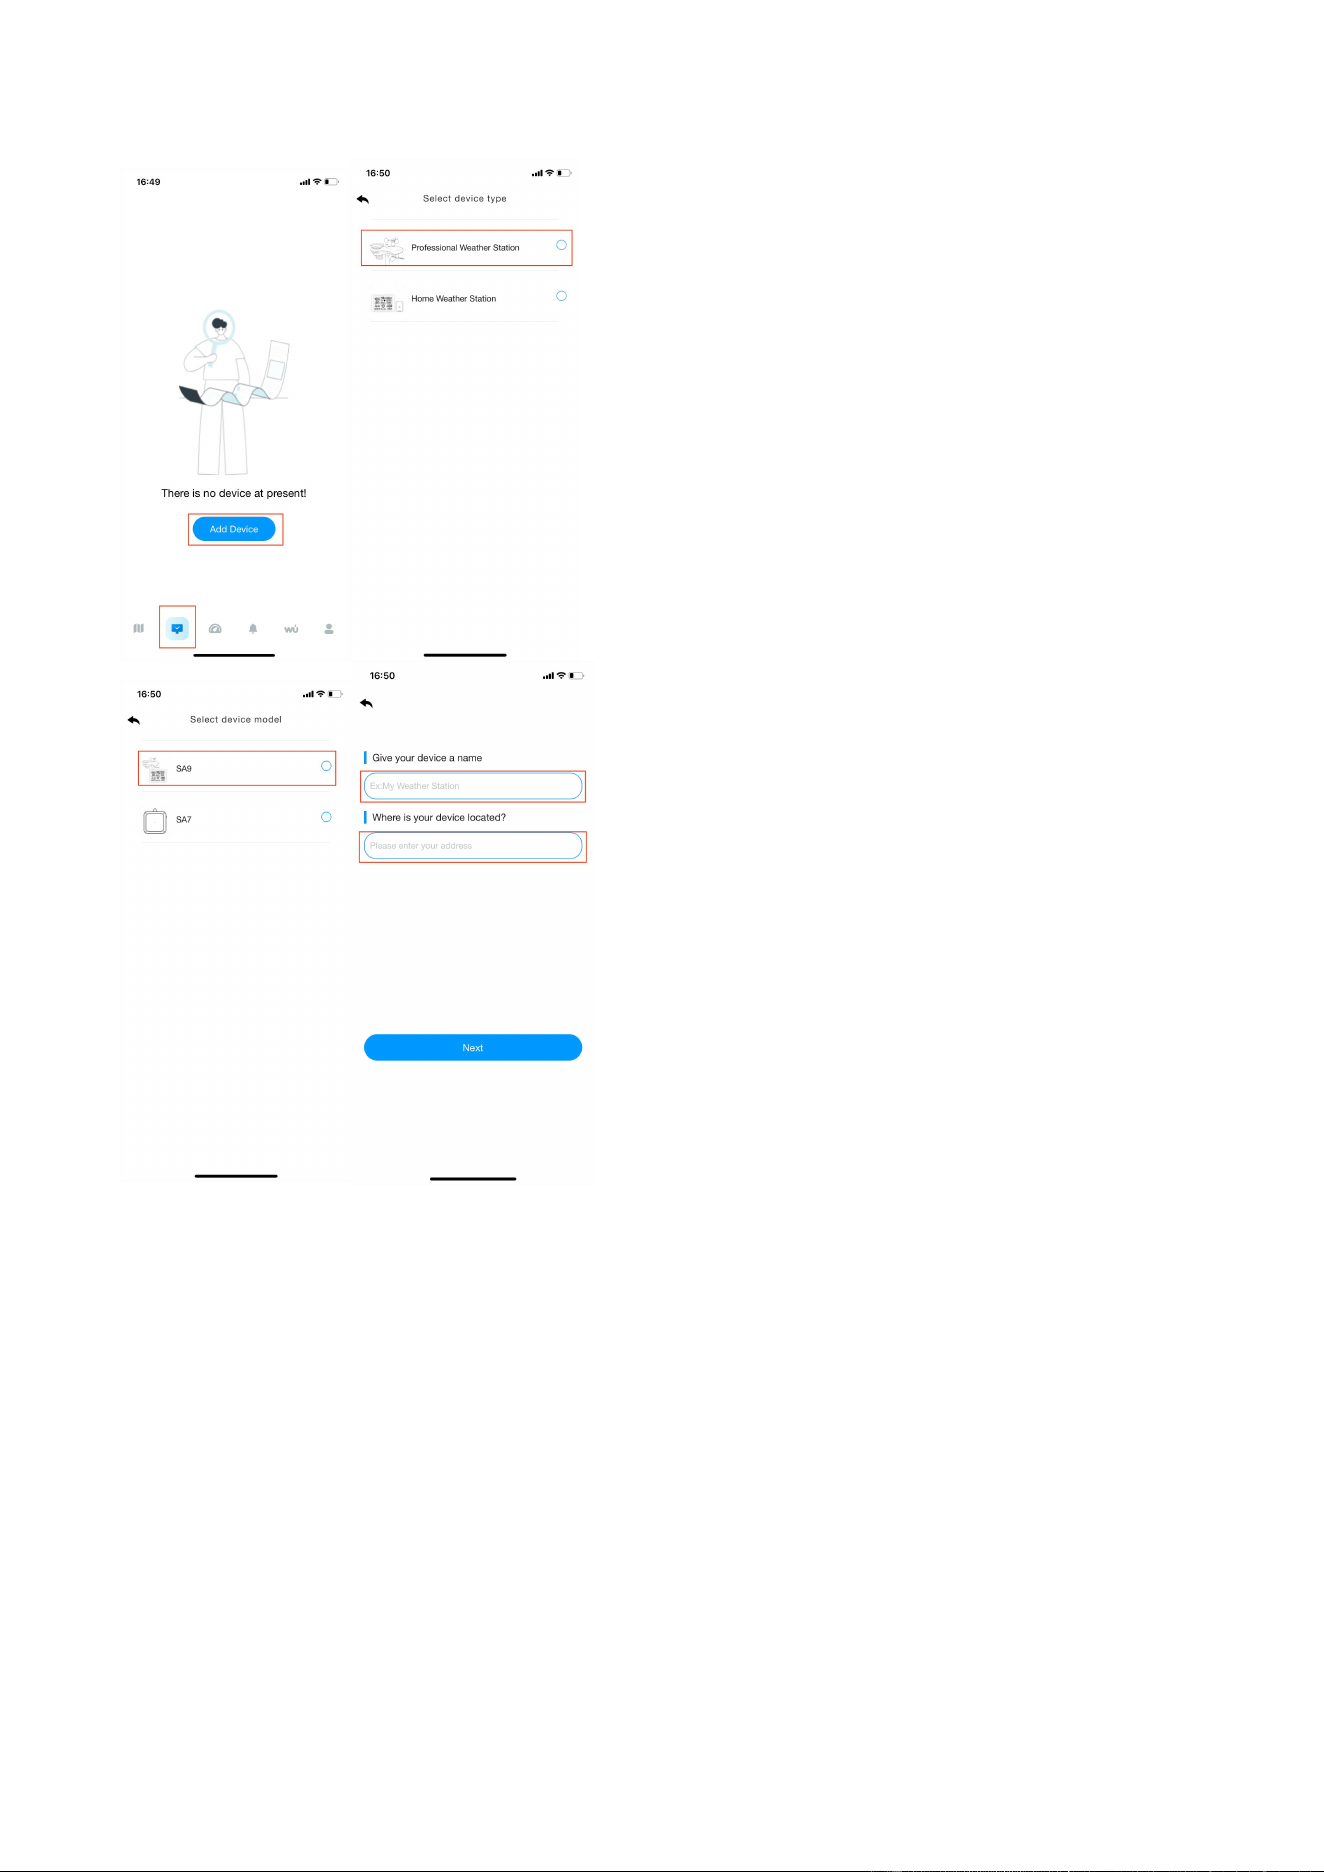
(1) Select product model. Set the name and location by yourself;
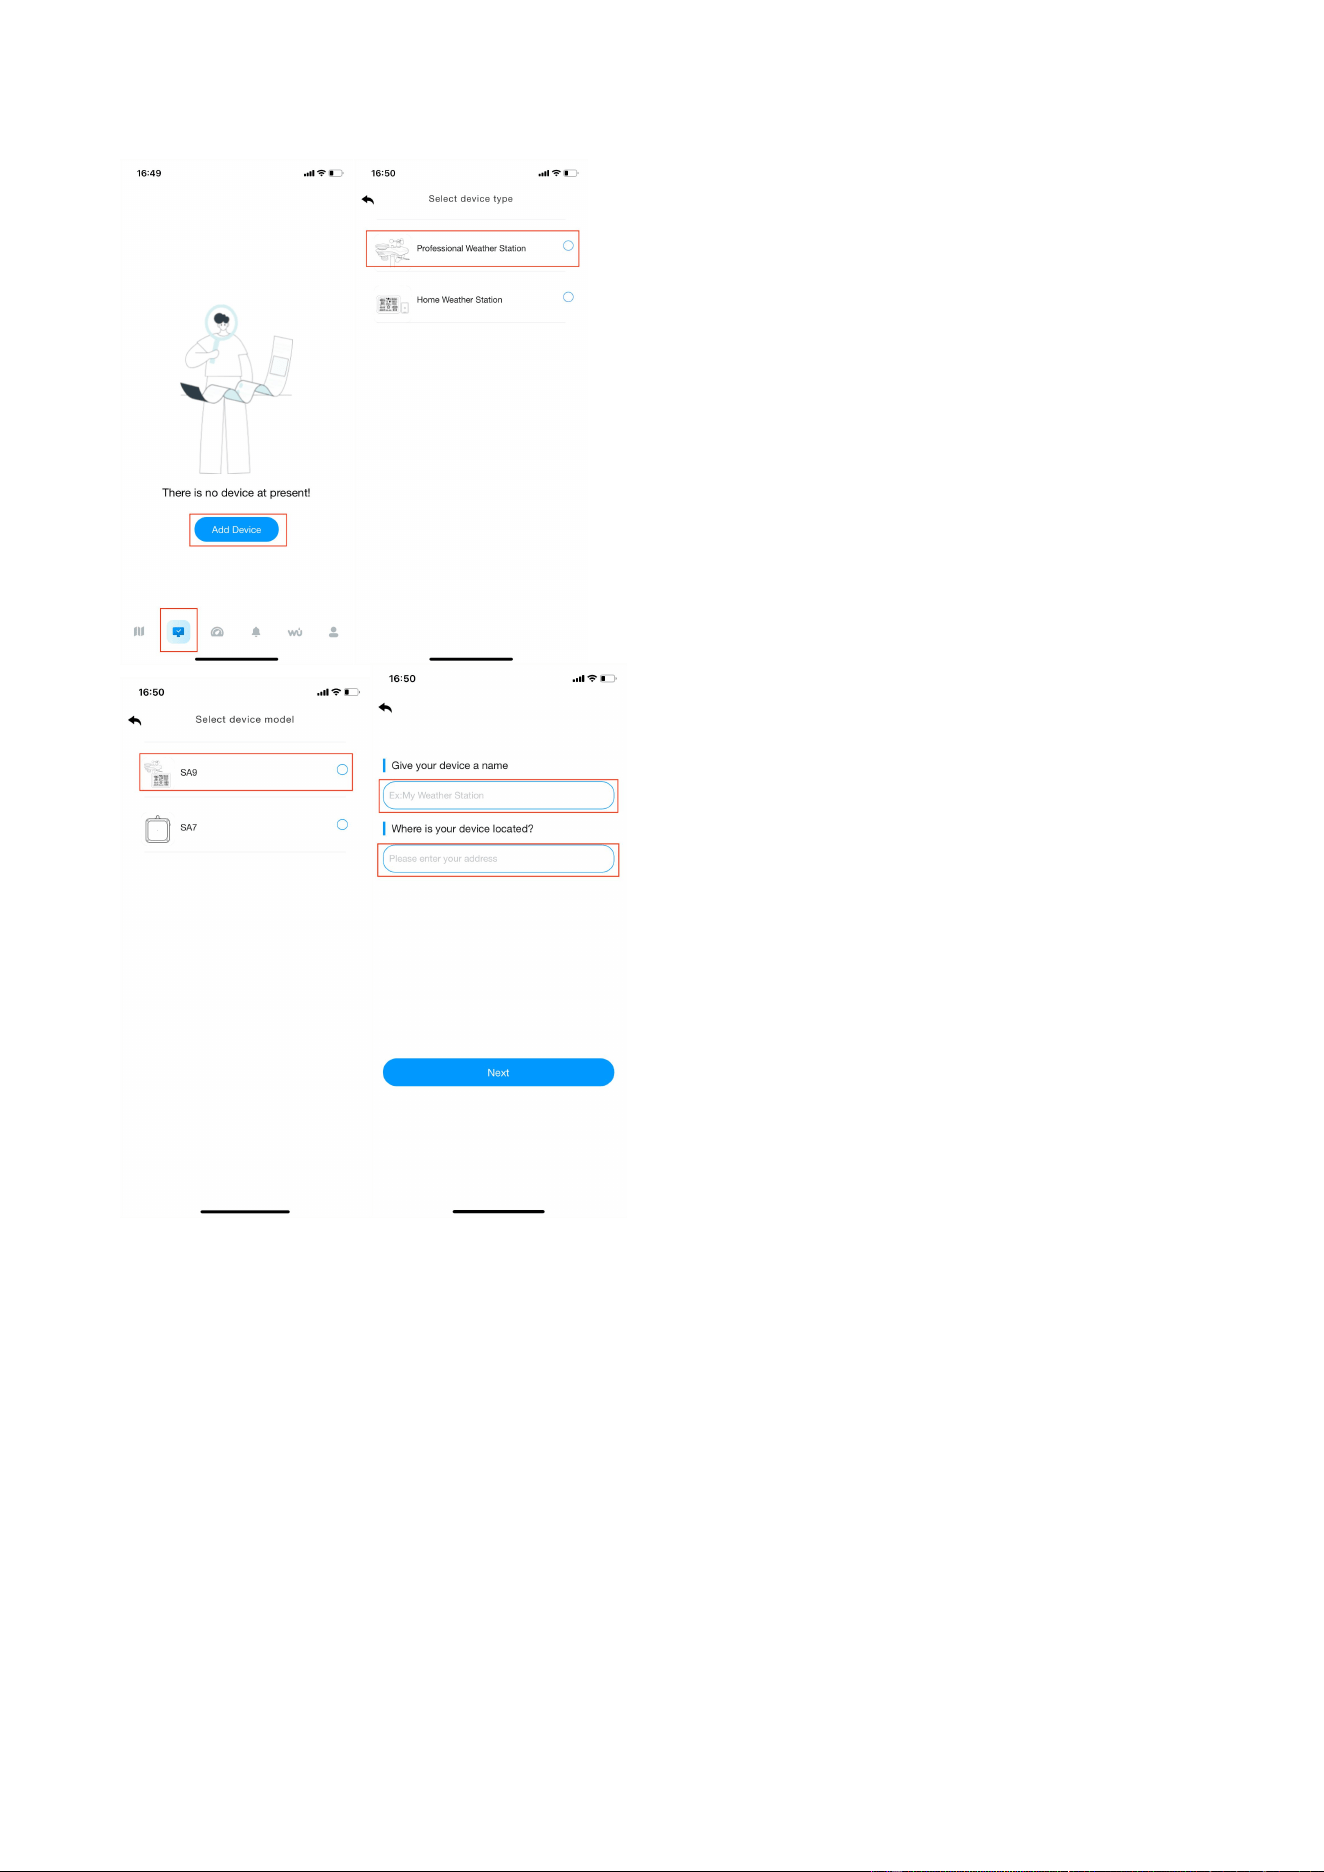
- 3 -
(2) Follow steps 1 through 3 for WiFi connectivity, scan the QR code and then select the
distribution method.
- 4 -
Note
:
The QR code is attached to the back of the display.
(3) Select the “ Bluetooth distribution network"to automatically search for Bluetooth signals
and pairing. After successful pairing, jump to WiFi interface. Please select 2.4ghz WiFi and
enter the password.
- 5 -
2. WiFi Distribution Network Mode
Press and hold the MAX/MIN/- key to enter the distribution network mode, the WiFi
icon
will
flash, then short press the SET key once, and the SC icon will be shown in
the date area.
After the display enters the " WiFi distribution network " mode, please open the APP to start
networking:
(1) Select product model. Set the name and location by yourself;
- 6 -
(2) Follow steps 1 through 3 for WiFi connectivity, scan the QR code and
then select the distribution method.

- 7 -
(3) Choose the “ Wifi distribution network“ mode, select the router WiFi name (2.4g), then
enter the password and click next.
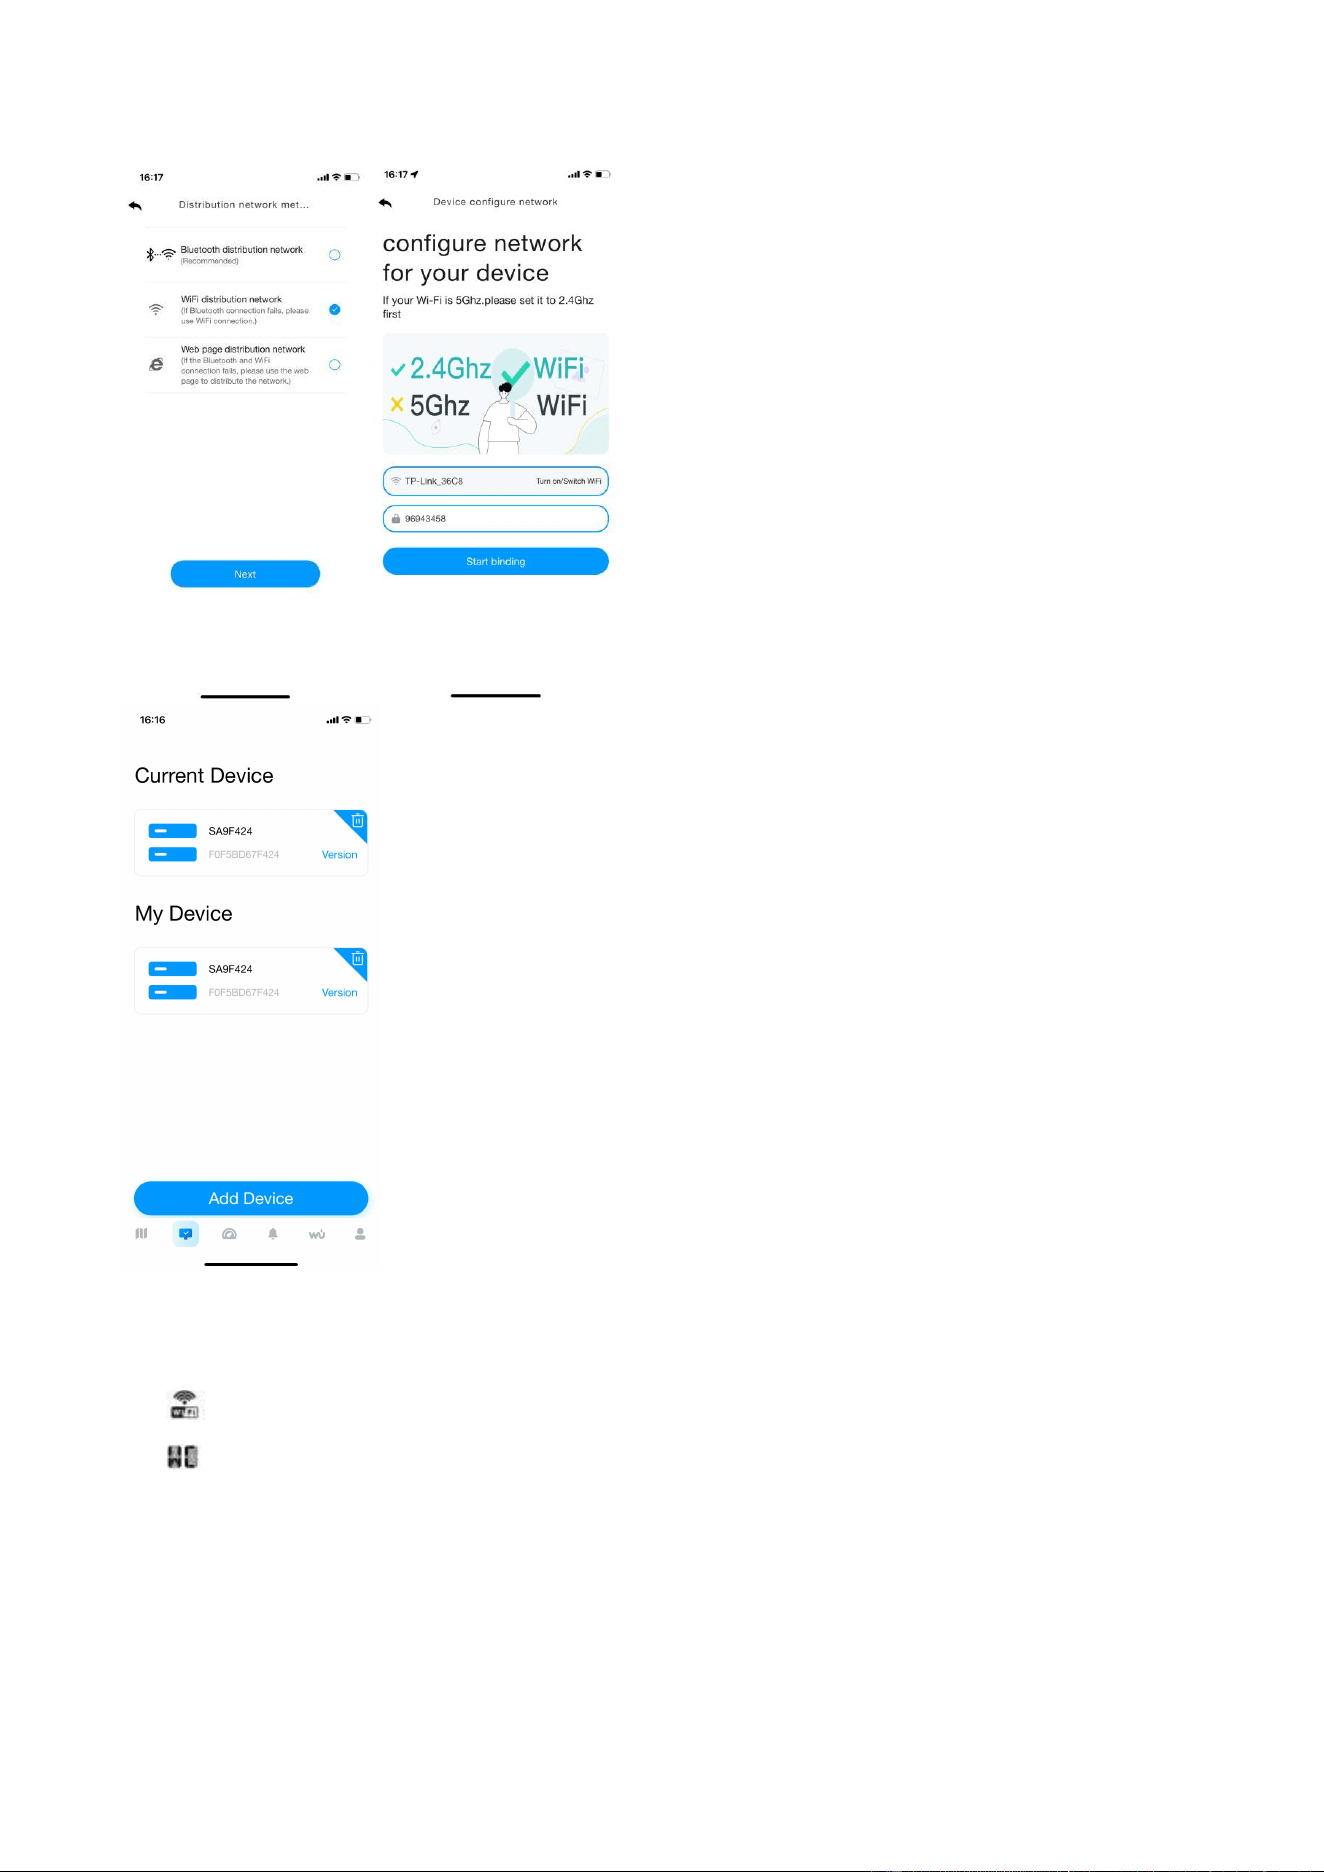
- 8 -
3. Web page distribution network mode
Press and hold the MAX/MIN/- key to enter the distribution network mode, the WiFi
icon will flash, then press the SET key briefly twice, the SC icon will be converted to WC
icon .
After the display enters the " Web page distribution network" mode, please follow steps to
connect the WiFi:
(1)Select product model. Set the name and location by yourself;

- 9 -
(2)Follow steps 1 through 3 for WiFi connectivity, scan the QR code and then select the
distribution method.

- 10 -
(3)Choose the " Web page distribution network" mode. Click Go to connect to WiFi.
Automatically jump to the WiFi list screen, click Connect " weatherseed " WiFi.
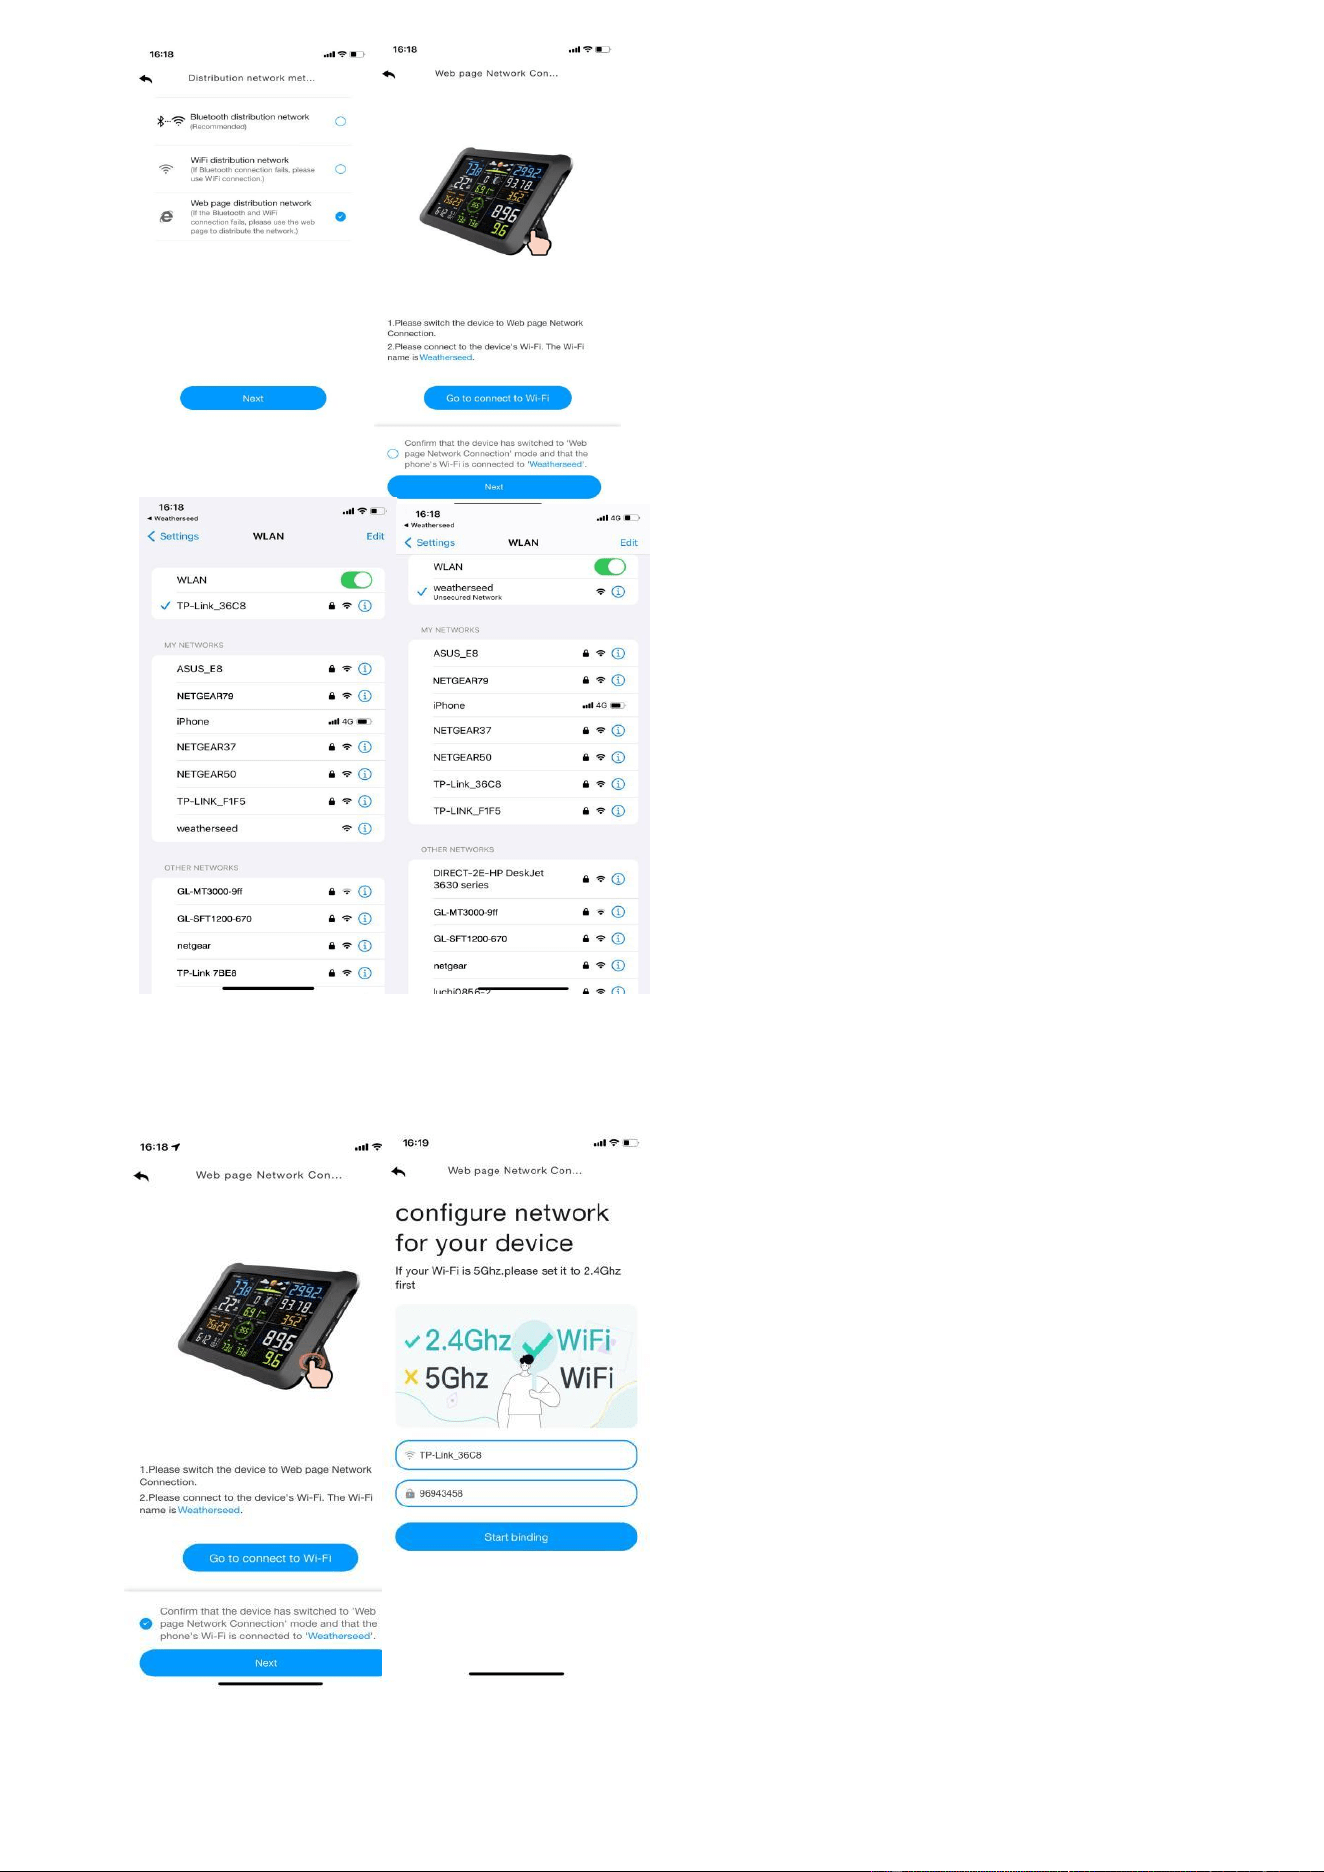
- 11 -
(4) Return to the app, click the confirmation dot and click " Next". Please select
2.4ghz WiFi, enter the password and click " Connect".
- 12 -
Note: Android system can select WiFi. IOS system needs to manually enter the WiFi
name.
If you have any questions, please feel free to contact us. You can reach us via Customer Support
Email, Customer Support phone,or social media accounts.
Customer Support Email :info@sainlogic.com
Website:www.sainlogic.com
Customer Support Phone: +1 508 758 0493 (Mon-Sat 10 a.m. - 2 p.m, Eastern Standard Time)
YouTube:
https://www.youtube.com/@sainlogicbrand
Facebook:
https://www.facebook.com/sainlogicofficial
Instagram:
https://www.instagram.com/sainlogic_official/
Twitter:
https://twitter.com/sainlogicbrand
TikTok:
https://www.tiktok.com/@sainlogic