
Infrared Smart Heater
Instruction Manual
Model No.: SUNMORE
Power Supply: AC 120V/60Hz 1500W
PLEASE READ THIS MANUAL CAREFULLY BEFORE OPERATING THE APPLIANCE

CONTENTS
IMPORTANT SAFETY INSTRUCTIONS.....................................1
INTRODUCTION..............................................................................3
INSTALLATION...............................................................................4
REMOTE CONTROL.......................................................................9
TROUBLESHOOTING...................................................................11
CLEANING .....................................................................................12
MAINTENANCE.............................................................................12
WARRANTY ....................................................................................14

1
Warning
THESE INSTRUCTIONS SHOULD BE READ CAREFULLY AND RETAINED FOR FUTURE REFERENCE,
We cannot be liable for any damages caused by failure to observe these instructions.
IMPORTANT SAFETY INSTRUCTIONS
READ CAREFULLY-The infrared heater is designed for safe operation. Nevertheless, installation,
maintenance and operation of the heater can be dangerous. Observing the following procedures
will reduce the risk of fire, electric shock, injury to persons and keep installation time to a
minimum. Save these instructions for future use.
1. Read all instruction before using this heater.
2. Remove the unit from it’s packaging and check to make sure it is in good condition before using.
3. Do not let children play with parts of package (such as plastic bags).
4. Check the household voltage to ensure it matches the heater’s rated specification.
5. Check the power cord and plug carefully before use, to make sure that they are not damaged.
6. Before unplugging the power cord, be sure to turn off the power, when turning on the heater,
be sure your hands are dry to prevent from electric shock.
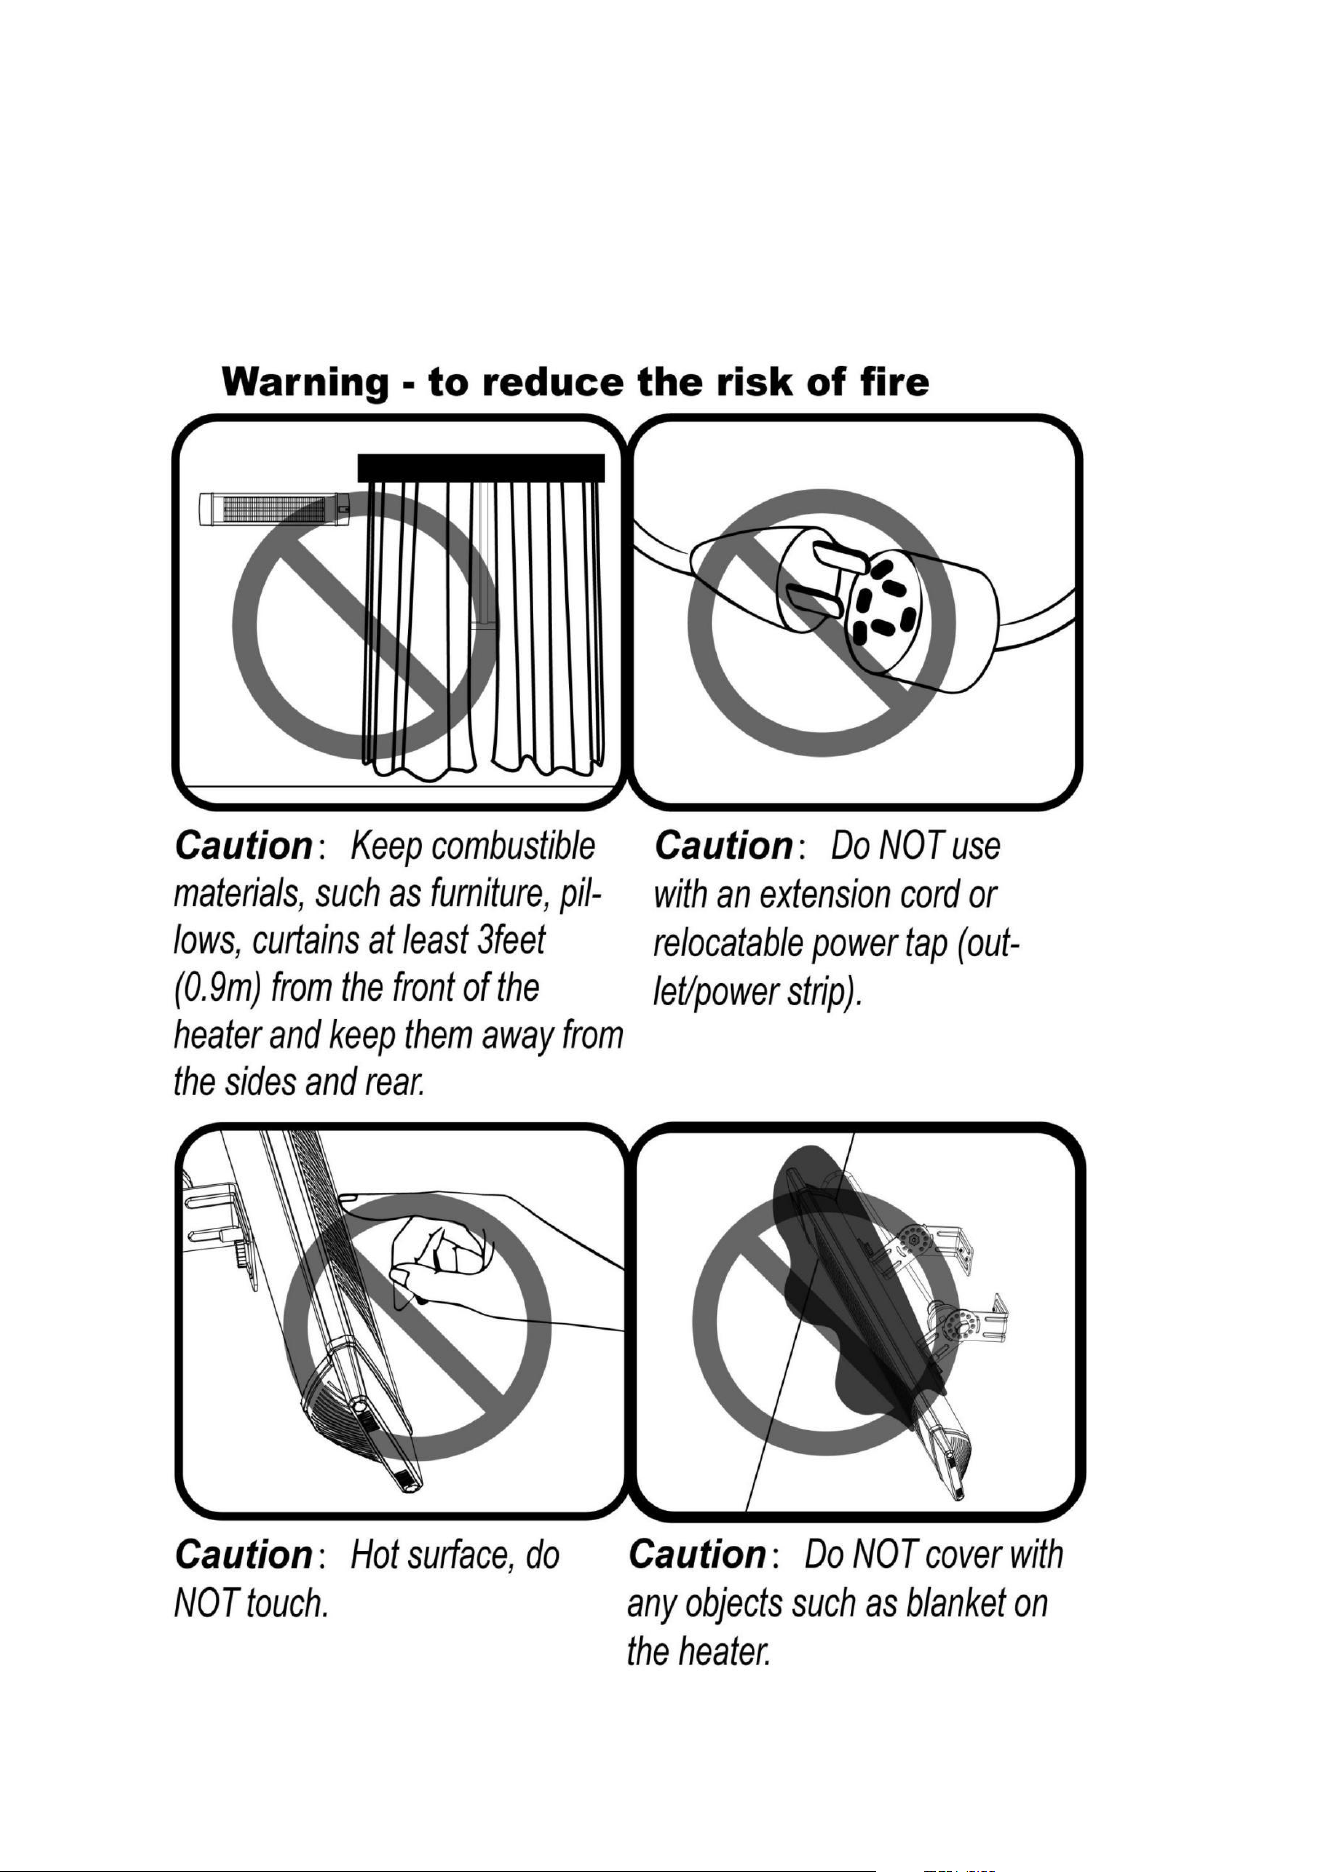
7. This heater is hot when in use. To avoid burns, do not let bare skin touch hot surfaces. If
provided, use handles when moving this heater. Keep combustible materials, such as furniture,
pillows, bedding, papers, clothes, and curtains at least 3 feet (0.9 m) from the front of the heater
and keep them away from the sides and rear.
8. Extreme caution is necessary when any heater is used by or near children or invalids and
whenever the heater is left operating and unattended.
9. Do not use near or in the immediate vicinity of a bath or swimming pool or any source of liquid.
10. To protect against electric shock, do not immerse cord or plug in water or any other liquid.
11. Do not insert or allow foreign objects to enter any ventilation or exhaust opening, as this may
cause an electric shock, fire or damage to the heater.
12. Always unplug the heater when not in use.
13. Connect to properly grounded outlets only.
14. Always plug heaters directly into a wall outlet/receptacle. Never use with an extension cord or
relocatable power tap (outlet/power strip).
15. Do not allow cord to overhang the counter top where it can be easily pulled by children.
16. Do not put fingers or foreign objects into the grill while in operation.

2
17. Do not leave the appliance unattended when in use.
18. This heater is not intended for use in bathrooms, laundry and similar indoor locations, never
put heater where it may fall into a bathtub or other water container.
19. No liability can be accepted for any damage caused by non compliance with these instructions
or any other improper use or mishandling.
20. This appliance is not intended for use by persons (including children) with reduces physical,
sensory or mental capabilities or lack of experience and knowledge unless they have been given
supervision or instruction concerning the use of the appliance by a person responsible for their
safety. Children and vulnerable people should be supervised to ensure they do not play with the
appliance.
21. Use this heater only as described in this manual. Any other use not recommended by the
manufacturer may cause fire, electric shock, or injury to persons.
22. Do not operate any heater with a damaged cord or plug or after the heater malfunctions, has
been dropped or damaged in any manner. Disconnect power at service panel and have heater
inspected by a reputable electrician before reusing. If the supply cord is damaged in any way, it
must be replaced by the manufacturer or its service agent or a similarly qualified person in order
to avoid a hazard.
23. Do not run cord under carpeting. Do not cover cord with throw rugs, runners, or similar
coverings. Do not route cord under furniture or appliances. Arrange cord away from traffic area
and where it will not be tripped over.
24. To disconnect heater, turn controls to off, then remove plug from outlet.
25. To prevent overheating of this appliance, keep the air inlets and outlets clean and free of
anything that may cause blockage. Check all inlets and outlets from time to time to ensure it is
clear of any dirt or dust accumulation. DO NOT COVER.
26. A heater has hot and arcing or sparking parts inside. Do not use it in areas where gasoline,
paint, or flammable liquids are used or stored.
27. Parts of the heater may exceed 200℃ , contact with the heating tube, reflector, or metal parts
near the heating tube, may cause severe BURNS . To avoid burns, do not let bare skin touch hot
surface.
28. NEVER place hands under the heating elements. ALWAYS allow heating element to cool at
least 10 minutes before touching the heating tube or adjacent parts.
3
29. This product contains recyclable materials. Do not dispose this product as unsorted municipal
waste. Please contact your local municipality for the nearest collection point.
INTRODUCTION
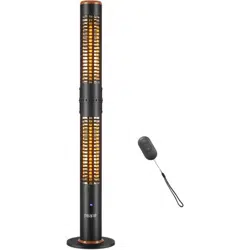
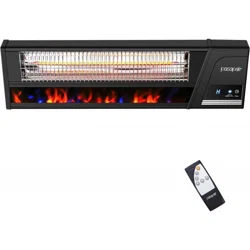
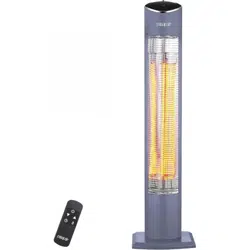
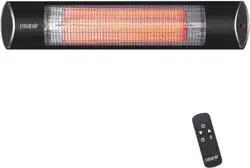
The SUNMORE carbon infrared heaters produce instant and comfortable heat like the sun. These
robust and weatherproof heaters are designed for domestic and commercial heating applications
within indoor and outdoor areas.
Model
SUNMORE
Voltage
AC 120V
Wattage
1500W
Hertz
60Hz
Dimensions W×H×D
34.05*6.29*3.38in
86.5cm*16cm *8.6cm
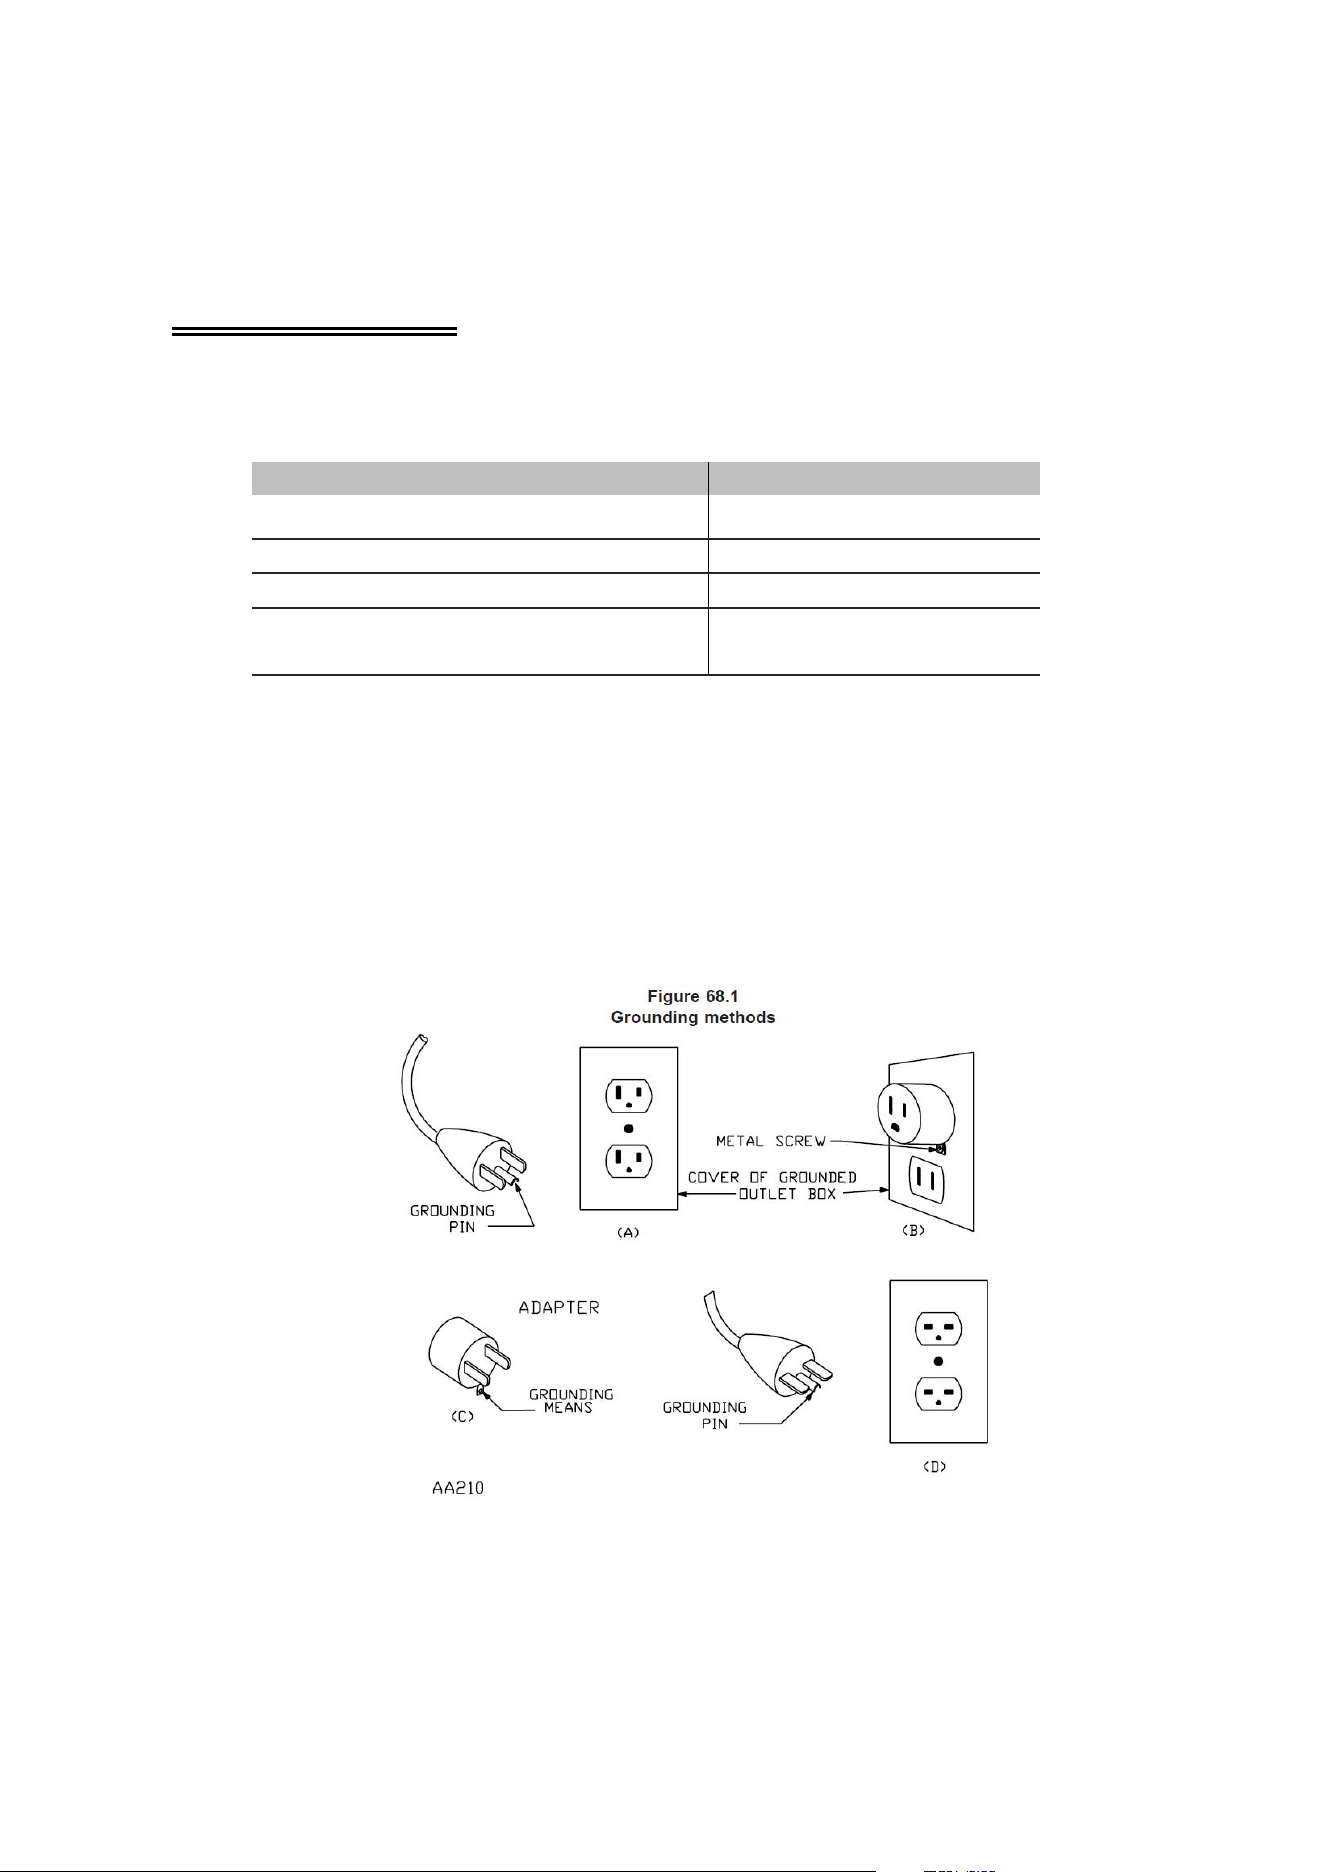
This heater is for use on 120 volts. The cord has a plug as shown at A in Figure 68.1. An adapter as
shown at C is available for connecting three-blade grounding-type plugs to two-slot receptacles.
The green grounding lug extending from the adapter must be connected to a permanent ground
such as a properly grounded outlet box. The adapter should not be used if a three-slot grounded
receptacle is available.

4
INSTALLATION
Tools Needed :
* Pencil *Hammer *Level *Screw Driver *Power Drill and drill bits
A mounting bracket is provided with the heater which has been specifically designed to allow this
product to be fitted to ceiling before drilling the holders for the ceiling is solid and
that there are no hidden water pipes or electric wires.
ATTENTION! The appliance must be installed on the solid surfaces like concrete, wood or metal
etc.
Important: Ensure that the supply cables is well mounted and that it does not come into contact
with reflector of the heater or that does not trail into heated area, the supply cable can be fixed to
the metal mounting bracket behind heater with plastic zip ties.
1. This heater should be installed by a competent person, i.e. a qualified electrician.
2. Always disconnected the heater from the electricity supply and allow it to cool before
installation.
3. This heater can be mounted in a horizontal or vertical manner, but for a higher efficiency we
recommend horizontal usage.
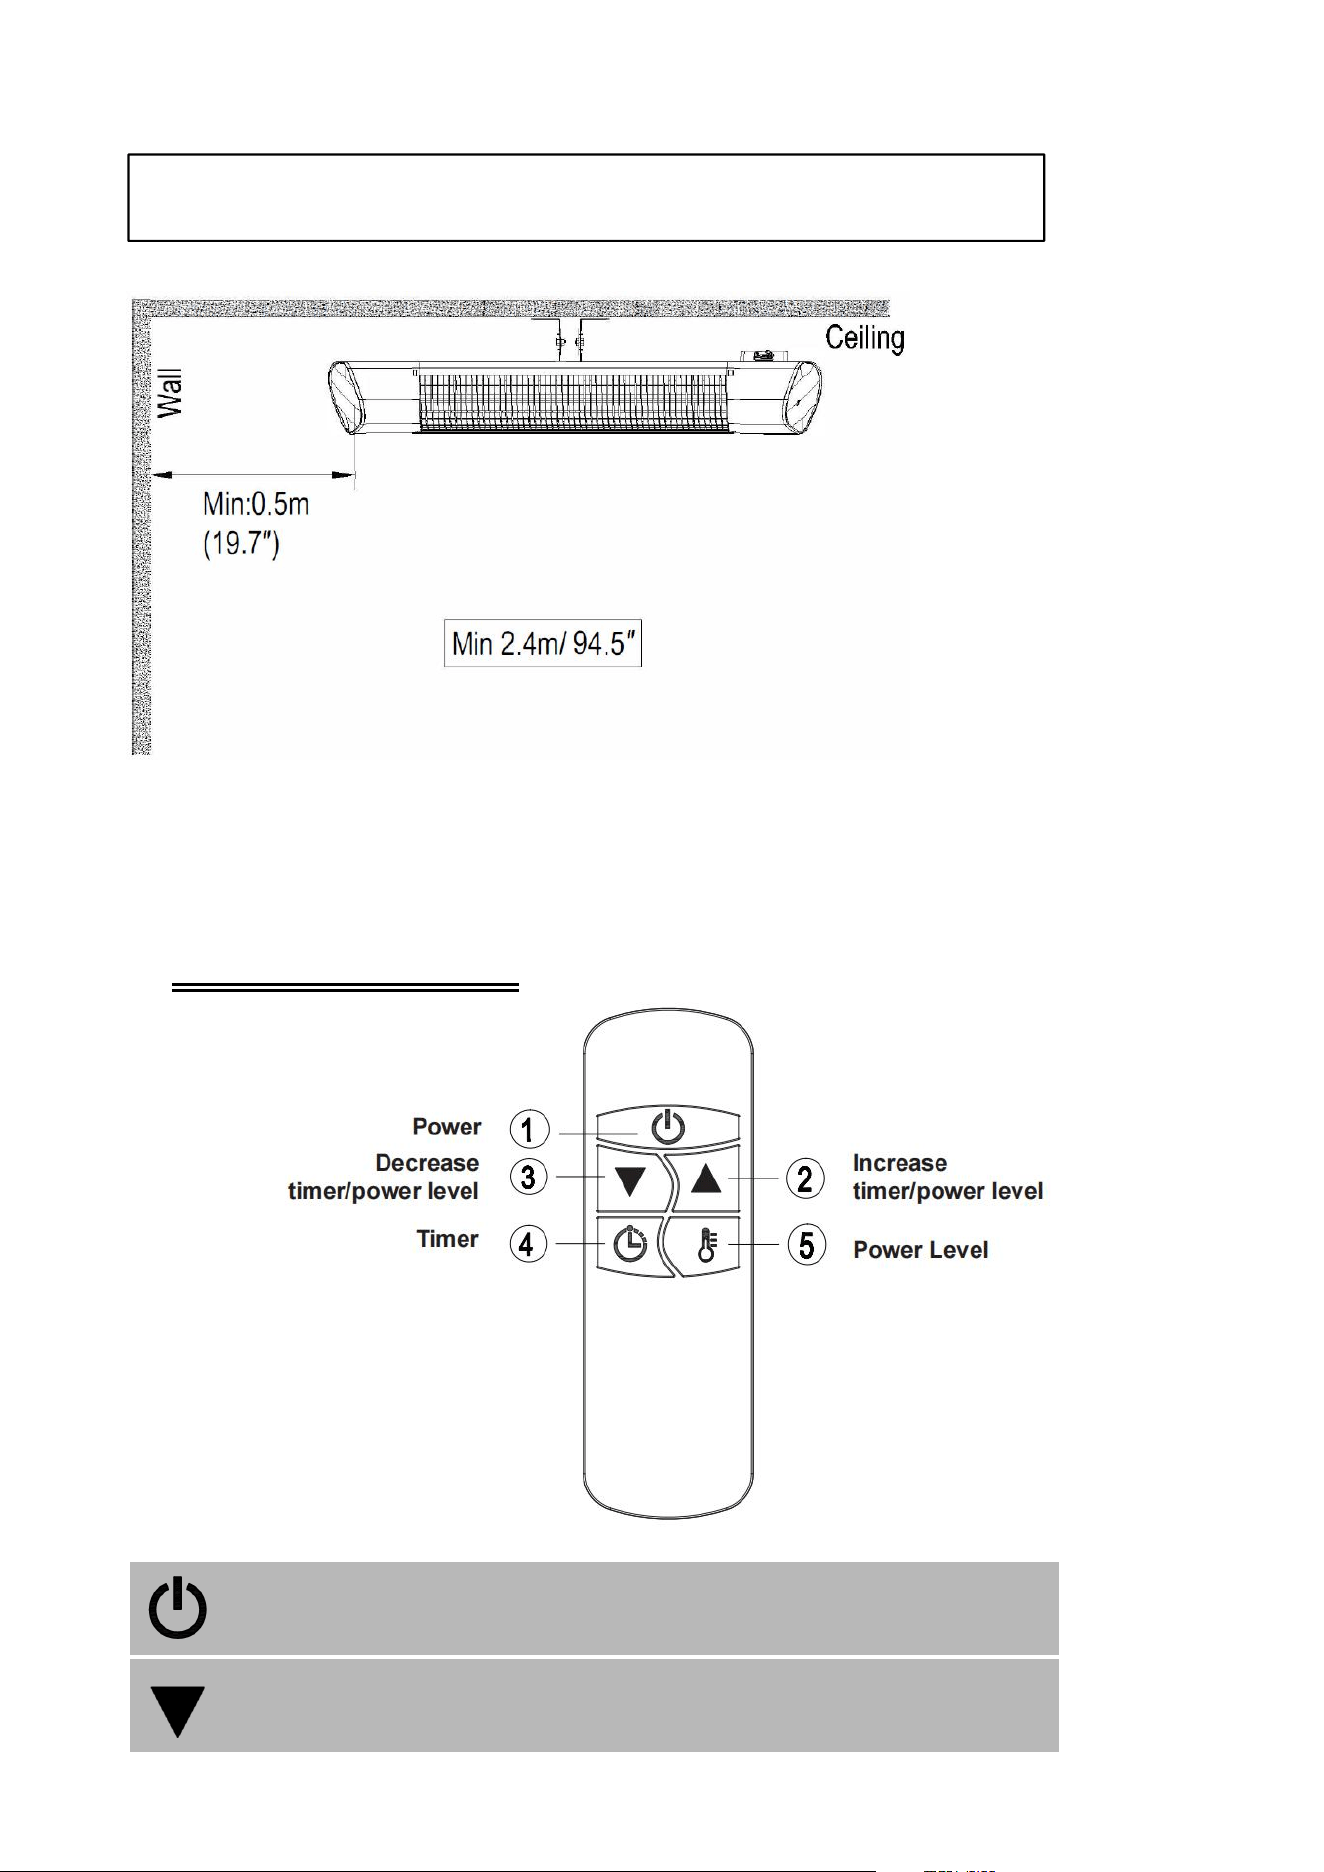
4. For ceiling mounting, the lowest part of the heater must be located at or above a
minimum height of 2.4m/94.5” from ground level, so that the heater cannot be touched when
in operation.
5. For ceiling mounting, there must be a 2.4m/94.5” distance from your appliance to the ground.
6. For both horizontal and vertical mounting on the ceiling, there must be a min. distance of
0.4m/15.8” between the appliance.
7. The distance from your appliance from the corners should be min. 0.4m/15.8” for vertical use
and min. 0.5m/19.7” for horizontal use.
8. When installed to the ceiling, there must be a distance of 0.5m/19.7” between corners and the
appliance.
9. The distance of your appliance from the living beings is to be min 1m/39.4”.
10. The distance from the front side of the heater to materials such as wood, carton, cloth etc.,
must be min 1m/39.4”.
11. When mounting horizontally or to a ceiling, do not position the heater at an angle more than
90°and less than 45°.
12. The supply cable must be at the lower end of the heater if the heater is installed at an angle or
vertically.
13. Keep the supply cord away from the body of the heater which will get hot during use.
14. Do not install the heater on an inflammable surface.
15. Observe the minimum safe distance between the heater body and the inflammable surfaces
when mounted.
16. The heater should always have a minimum clearance of 0.5m/19.7” from the adjacent wall.
17. If the heater is to be used outside, a weather-proof outlet is recommended.
18. Before drilling, ensure that there are no wires or water pipes in the area where the heater is to
be installed.
19. The heater must be installed on the mounting brackets provided.
20. Fasten the brackets securely to the mounting surface and the backside of the heater using the
nuts and screws supplied.
5
21. Fasten the heater securely on the brackets using the nuts and bolts supplied.
22. The brackets can be used to adjust the direction of the heater, adjust the heater angle by
loosening the two bolts on the wall mounting bracket, tighten the bolts again when the
desired angle is reached.
6
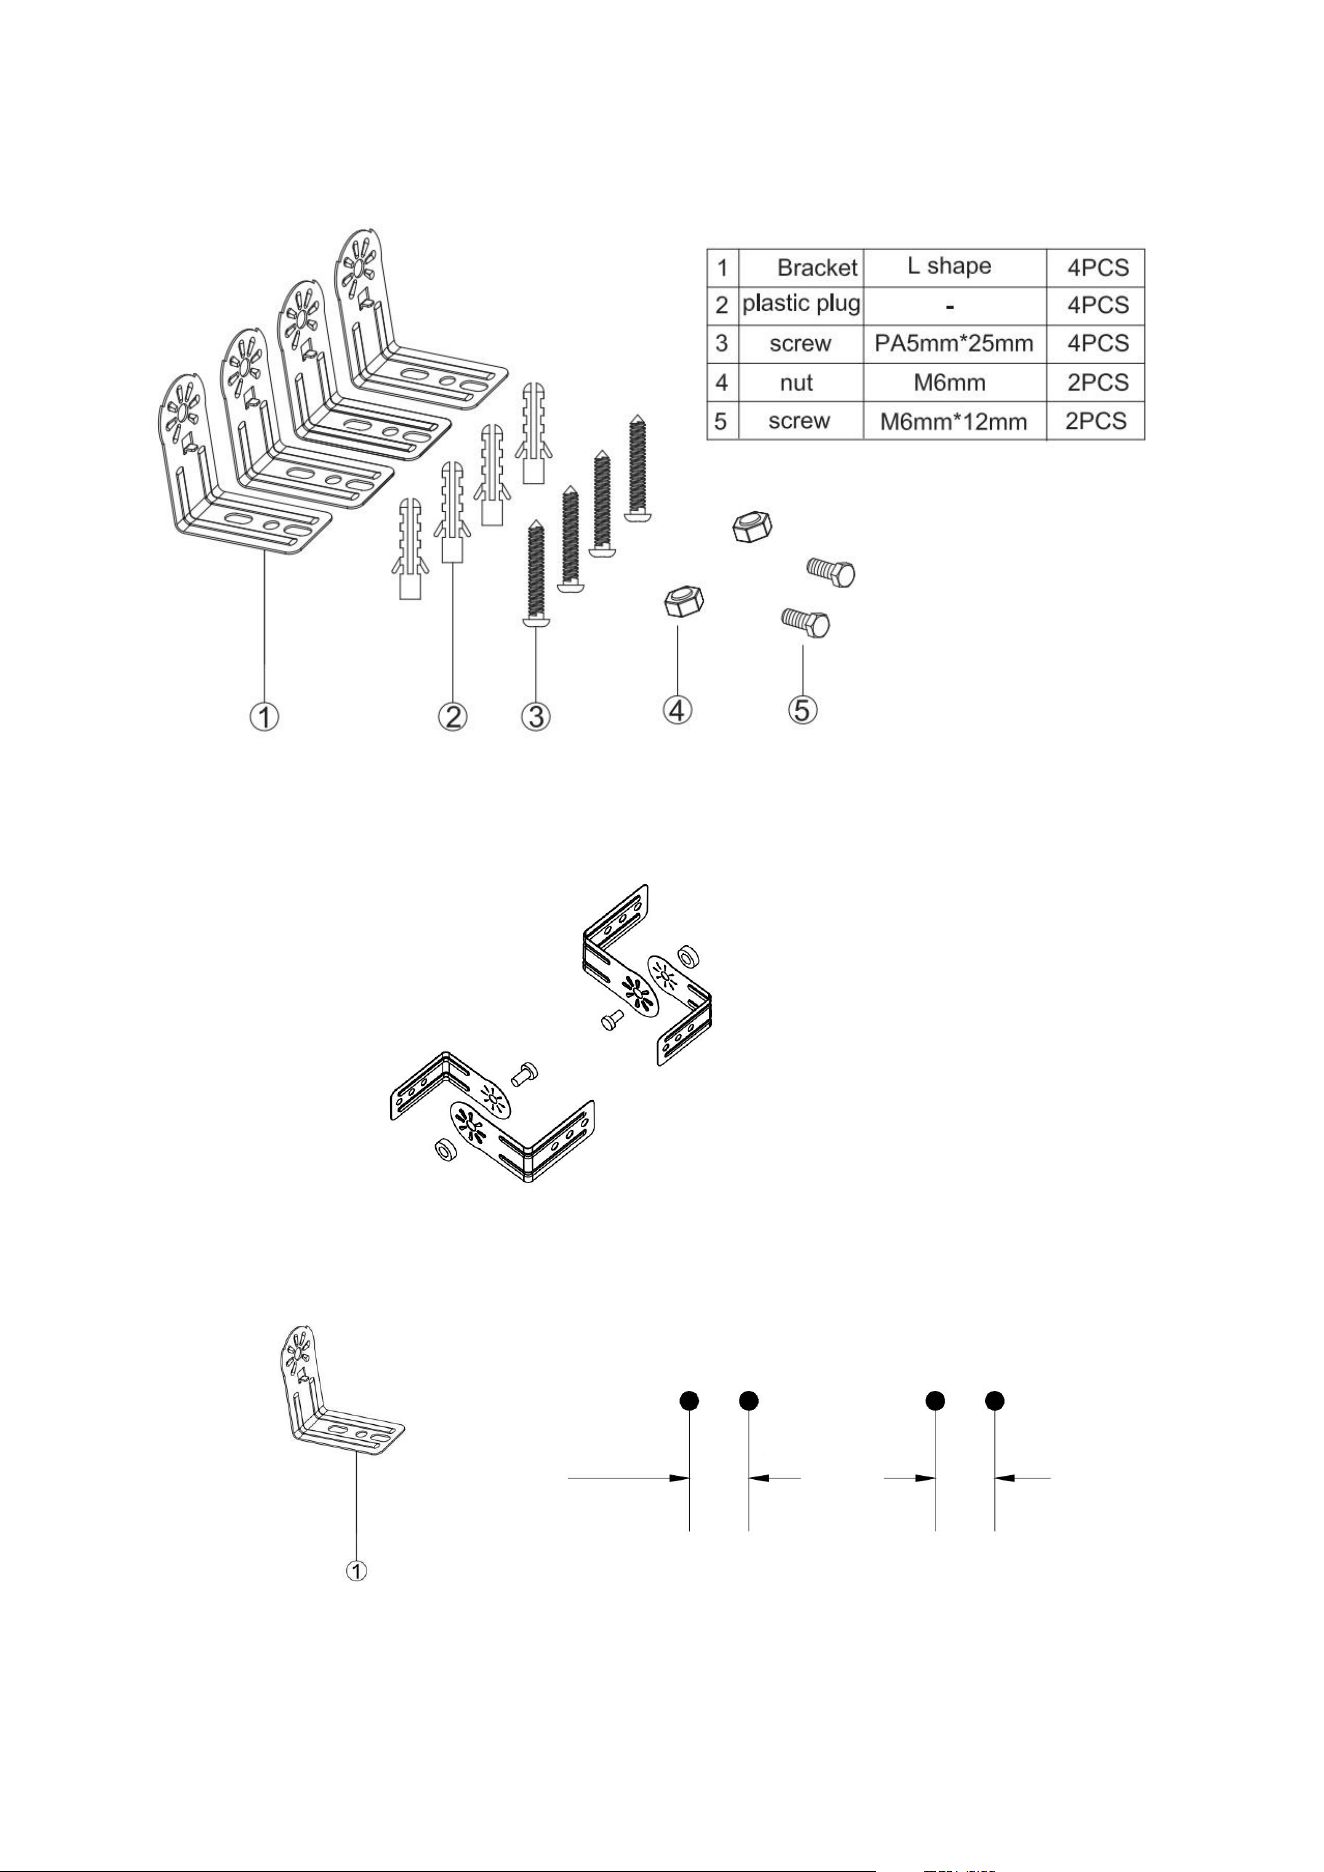
Installation Accessories:
Mounting step
1. L shaped Bracket installation
Fasten the L shaped bracket using the screws and nuts provided (no. 4, no.5)
2. Mark holes on the place where the heater to be mounted with a pencil, use the L shaped
bracket to mark each 2holes distance.
1.1 "
1.1 "
11.8"-
7
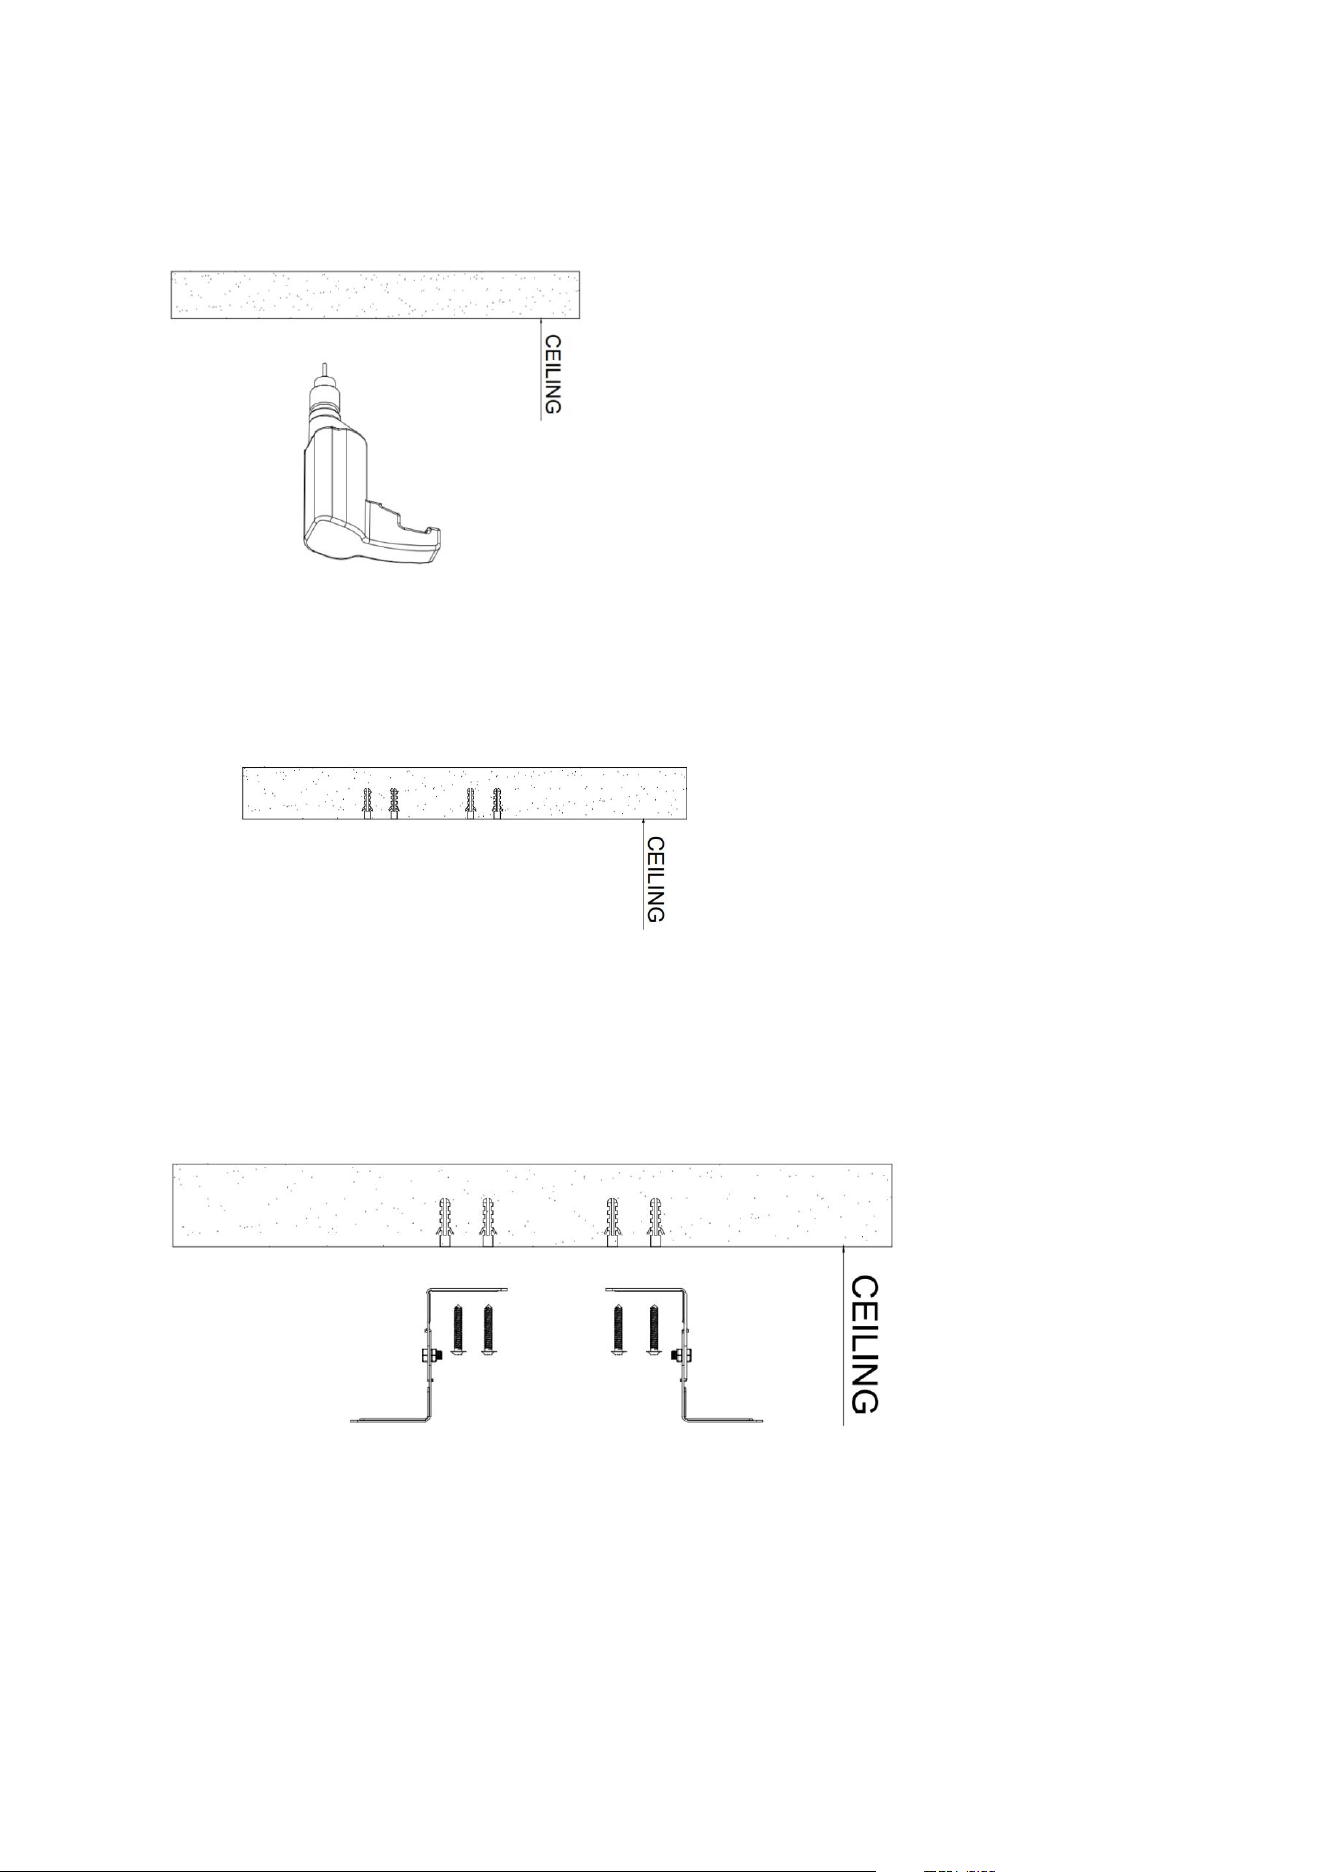
3. Drill holes with a smaller diameter drill bit than the plastic anchors
4. Insert the point end of plastic anchor into the holes, Tap the anchor with a hammer until the
anchor is flush
5. Using a screwdriver attach the mounting bracket to the holes which with plastic anchor inside.

8
6. Fasten the heater on the L shaped bracket with wing nuts on the back of heater
7. Ceiling Mounting Height: maintain at least 2.4m / 94.5” distance from the heater to the
ground as below shown.
The heater is designed with tip-over protection circuit. For ceiling-mounted, the adjustment
range is 15 ° angle. The heater’s working angle is between 45 ° - 60 ° as shown in below. When
the heater exceeds a 60 ° angle, it automatically turns off, but suggest mounted within 45 ° for a
better choice.
Working angle from 45 ° to 60 °
Working area is 15 ° angle
9
The heater must be installed at least 2.4M above the floor grade
Attention: cable should not passing thought the heater.
REMOTE CONTROL
Control Functions
Turn ON or turn OFF the heater
Push the button repeatedly to decrease power level/timer
THE HEATER SHOULD NOT FACE VERTICALLY TO THE FLOOR
Attention: cable should not pass through the heater
10
Noted: All heaters and their remote controls have the same frequency, so it is possible to
control several heaters with just one remote.
Inserting Batteries(not included)
Insert 2 AAA/ Alkaline type batteries into your remote control
1. Flip the backside of your remote control and pull out battery cover. Insert the batteries in
accordance with the instructions and polarity the batteries.
2. Change the batteries in the same way depicted above.
NOTICE:
1. Replace the old batteries with the same type batteries. Otherwise, your heater may not
function well.
2. Pull out the batteries in case of long terms of disuse to prevent leakage which may impair your
remote control.
3. Do not allow water or liquid to get into the remote control.
Caution:
When the appliance is not operated for a long period of time, cleaning or maintenance is
conducted or when the location of the heater is changed, the heater should be turned to OFF and
unplugged from the electrical connection.
Periodic inspection and removal of dirt and contaminants will ensure that equipment can be
operated safely.
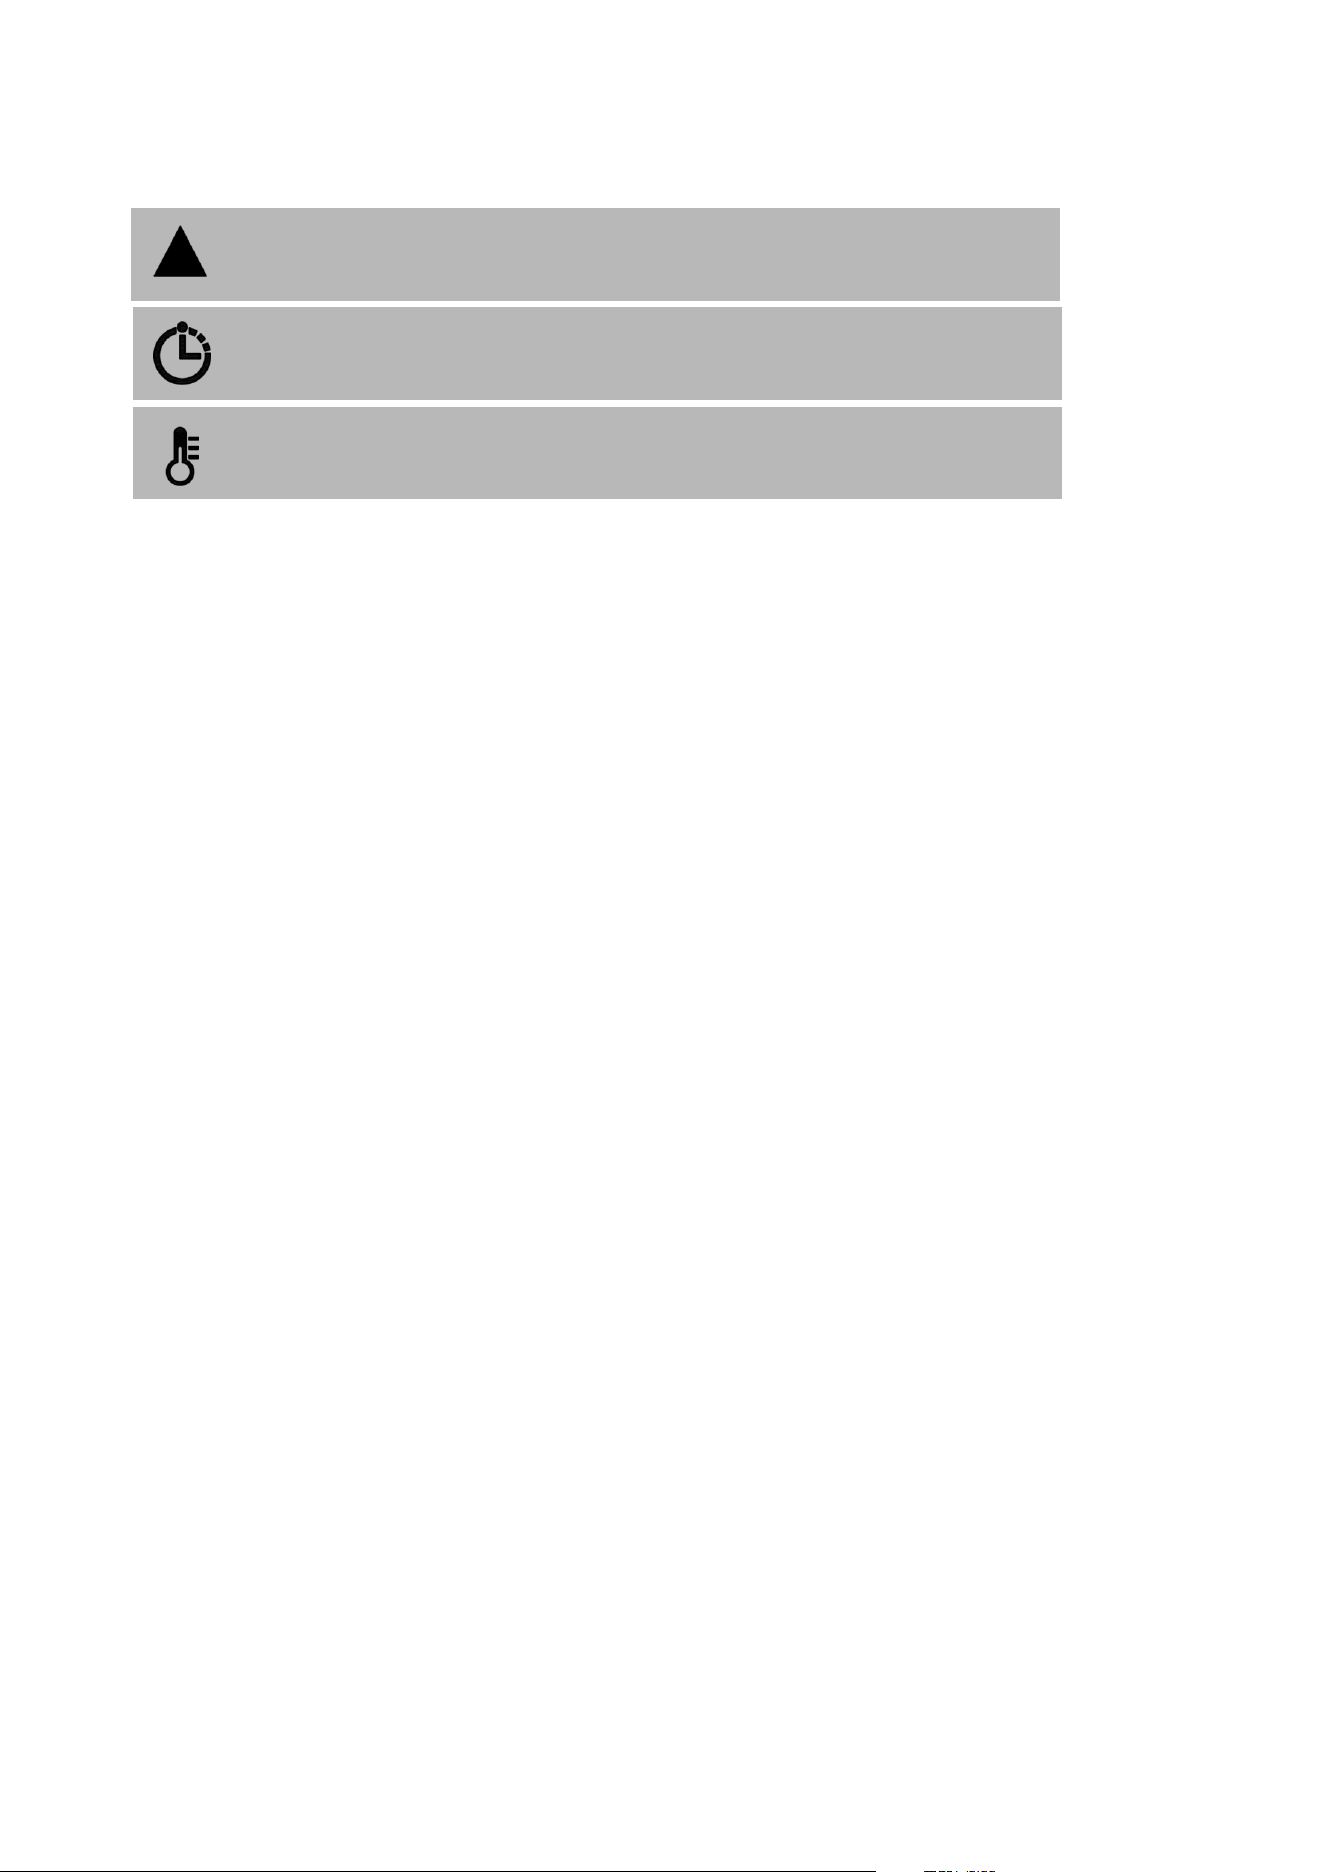
Set the timer from 0H-24H, when the timer ends, the heater
will stop automatically. To cancel, set the time to 0 hour.
Set the power level from L1-L3.
Push the button repeatedly to increase power level/timer
11
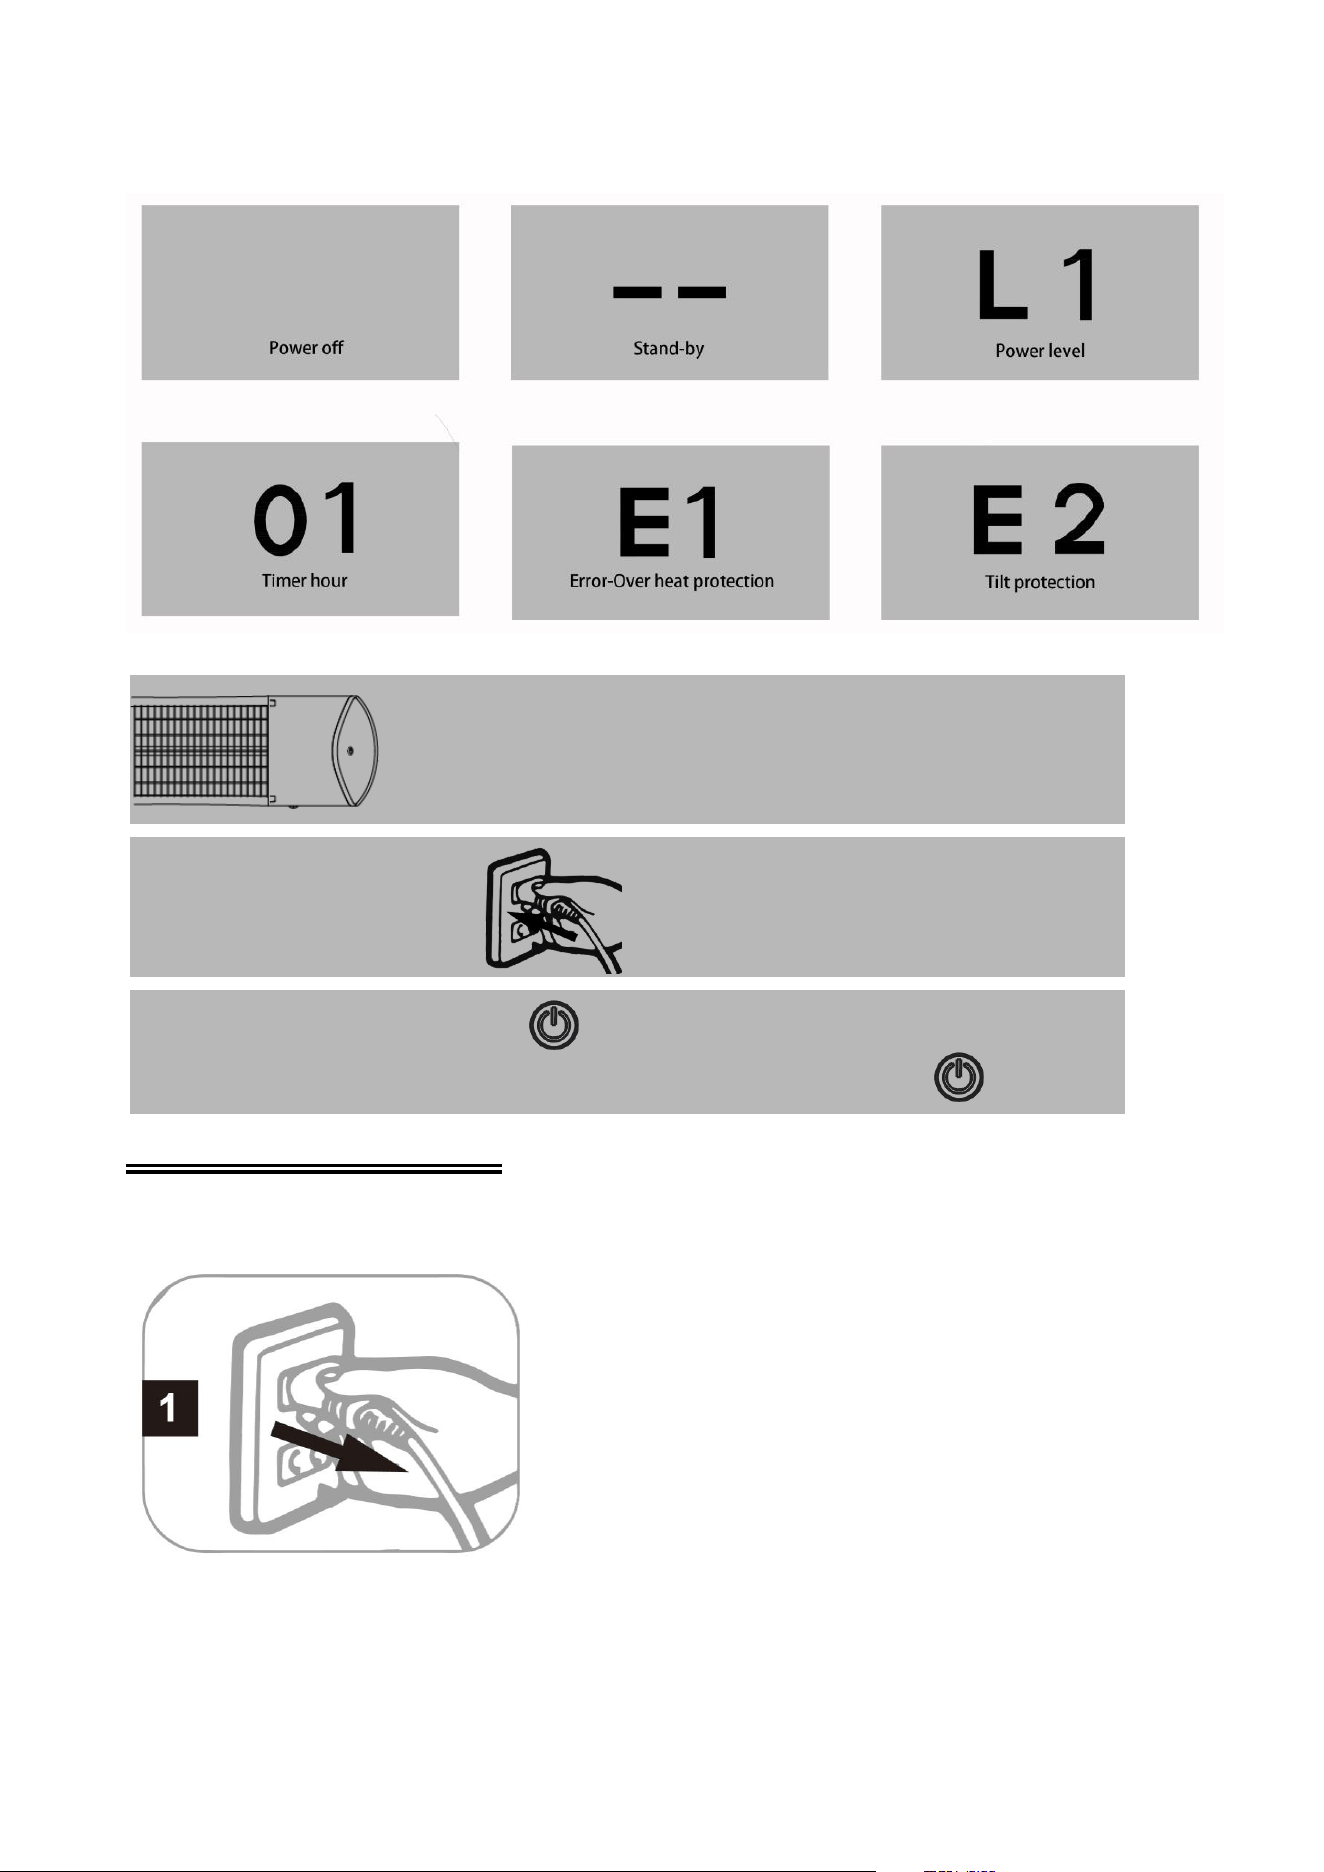
LED Display
Button Switch:
TROUBLE SHOOTING
1. Check if the power cord is plugged into an electrical outlet, if not, plugged in.
2. Check if electricity to the main fuse is working.
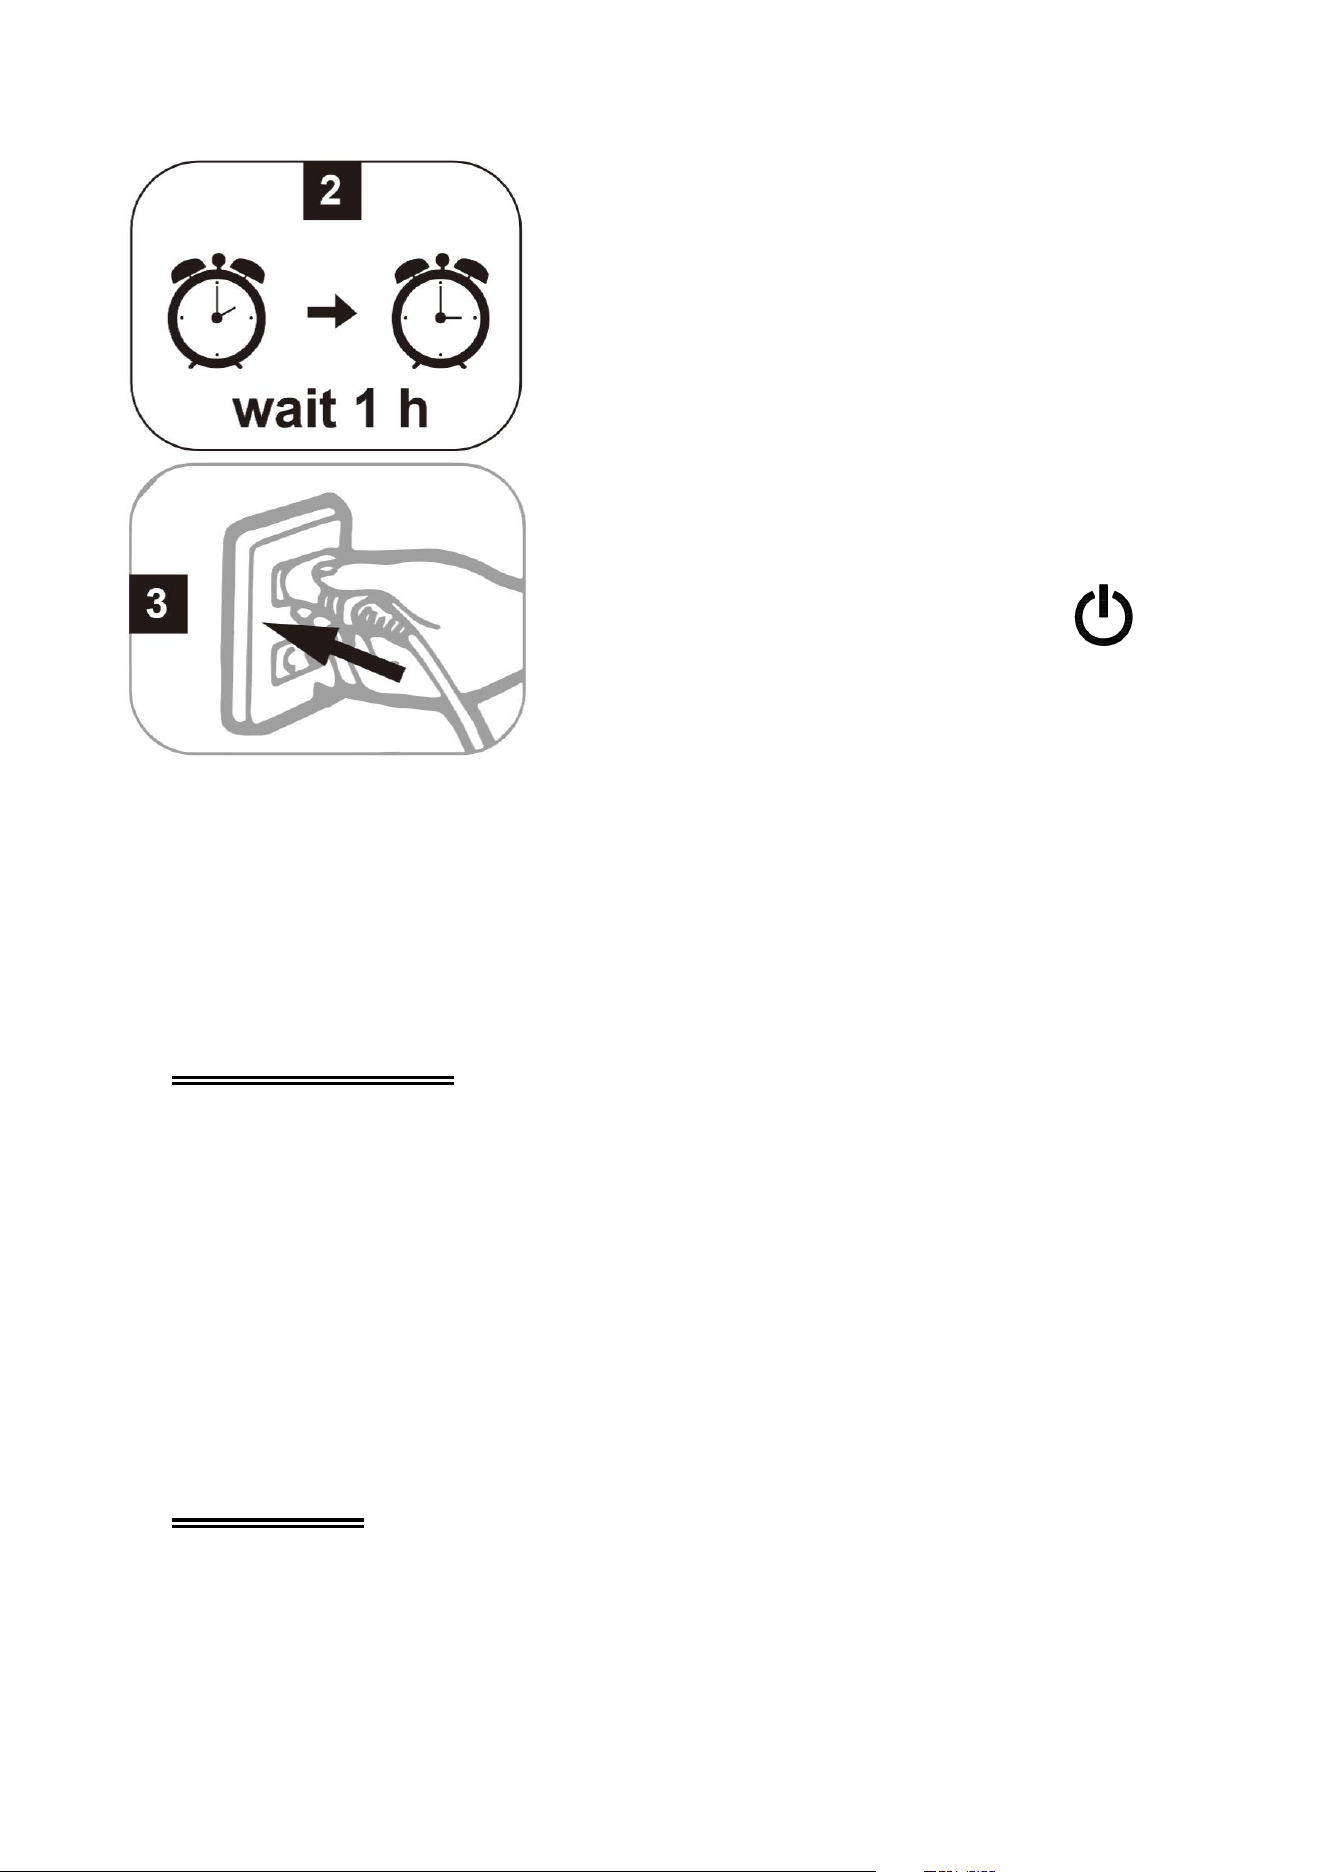
3. “ E1 “ Error on display(Over heat protection)
Step 1: pull the plug out
Step 1: Plug in the heater
Step 2: Turn on the button switch , the product is in standby mode display (- -);
adjust the heating level L1-L3 by repeatedly pressing the button switch .
12
Noted: thermostat device take action to automatically turn off the heater given the unit overheat,
cooling down the heater after 1 hours and re-start the heater.
4. “ E2 “ Error on display(Tilt protection)
Check the installation angle of the heater. Adjust the angle and restart the heater.
5. L1,2,3 shows in display, but no heat: Overheat protection or Bulb is damaged. Follow above
E1 error display solution’s step, if still no heat, arrange for replacement bulb with local Dealer
accordingly.
MAINTENANCE
Attention! Careful and regular maintenance of your heater considering our instructions assume
great importance so as to attain a long efficient operation of your appliance.
1. Check the filthiness of the Reflector and IR-Filament at least once a month. If necessary, apply
cleaning and maintenance instructions.
2. The number of checks may be increased considering the amount of the dust in the
environment.
3. Check the deformation of the Reflector, Wire and Frame visually while cleaning the appliance.
In case of deformation, consult to your technical service.
4. Check the Power Cord and Plug visually while cleaning the appliance. In case of deformation,
consult to your technical service.
CLEANING
Regular and careful cleaning helps your infrared heater operate efficiently for many trouble free
years. To clean your heater follow steps below:
1. Unplug the power cord for your safety before cleaning your appliance.
Step 2: wait 1 hour until heater cool down
Step 3: put the plug in and press the button
to restart the heater

13
2. Make sure the heater is cool before continuing.
3. To keep the heater clean, the outer shell maybe cleaned with a soft, damp cloth. You may use a
mild detergent if necessary. After cleaning, dry the unit with a soft cloth. (CAUTION: DO NOT let
liquids enter the heater).
4. DO NOT use alcohol, gasoline, abrasive powders, furniture polish or rough brushes to clean the
heater. This may cause damage or deterioration to the surface of the heater.
5. DO NOT immerse the heater in water
6. Wait until the heater is completely dry before use.
Storage: Store the heater in a cool, dry location when not in use to prevent dust and dirt build up.
Use packaging carton to store.
ATTENTION:
1. Always disconnect the heater from the electricity supply and allow it to cool before attempting
to work on it.
2. If the heater has collected dust or dirt inside the unit or around the heating element, have to
unit cleaned by a qualified service agent. Do not operate the heater in this condition.
3. The only maintenance required is cleaning of the external surfaces of the heater.
4. Do not touch the heating element with bare fingers, as residue from your hand could affect
the life of the lamp. If it is accidentally touched, remove the finger marks with a soft cloth
moistened with mentholated spirit or alcohol.
5. Do not attempt to repair or adjust any electrical or mechanical functions on this heater.
6. The heater contains no user serviceable parts. Should the product suffer damage or
breakdown, it must be returned to the manufacturer or its service agent.
7. Damaged supply cords to be replaced by the manufacturer, service agent or similarly qualified
person in order to avoid hazard.
RECYCLING
At the end of the electrical products useful life it should not be disposed of with household waste.
Please recycle where facilities exist. Check with your Local Authority or retailer for recycling advice
in your country.
Manufacturer:HEYUAN XINDA QUARTZ ELECTRIC APPLIANCE CO., LTD.
Add.:Inside Linjiang Industry Park, Economy Development Zone, Jiangdong New Zone,
Heyuan, Guangdong, China

14
WARRANTY
Thank you for choosing PASAPAIR product. We sincerely hope that you are satisfied with it.
The manufacturer's warranty covers the product for a period of 12 months from the date of purchase
against manufacturing faults. All warranties are automatically kept track of in our system, so there
is no need to register your product.
Any help or questions during use, please contact us via website www.pasapairhome.com, send
warranty card, a photo or a video if there’s broken spare part or not working machine so that we can
be much more clear about your problems and offer you the best solution.
Please fill in the table and email it within 10 days from the date of purchase.