
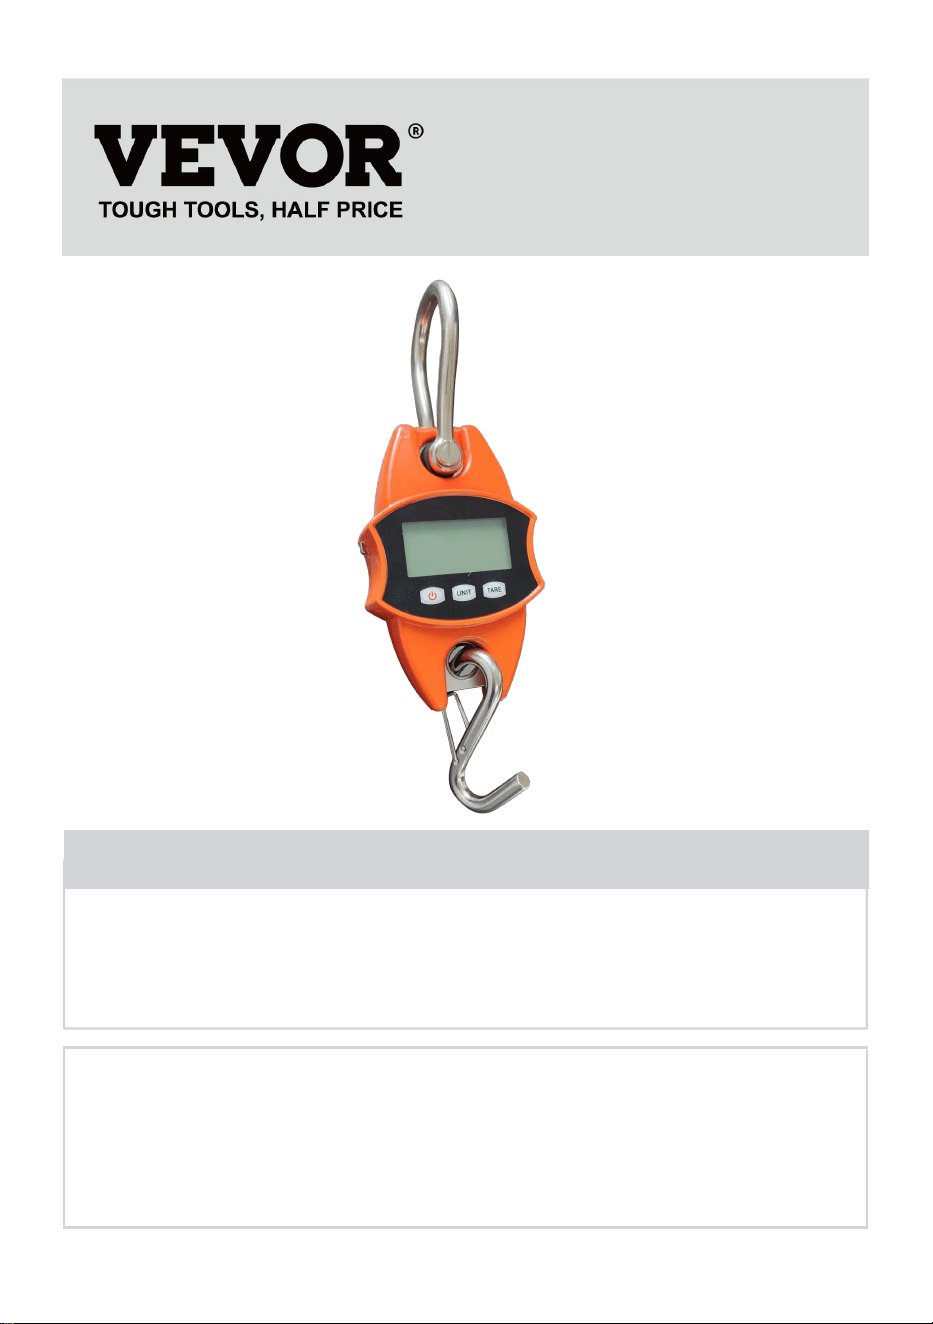
Technical Support and E-Warranty Certificate
www.vevor.com/support
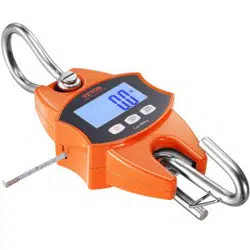
CRANE SCALE
MODEL: SF921
We continue to be committed to provide you tools with competitive price.
"Save Half", "Half Price" or any other similar expressions used by us only represents an
estimate of savings you might benefit from buying certain tools with us compared to the major
top brands and does not necessarily mean to cover all categories of tools offered by us. You
are kindly reminded to verify carefully when you are placing an order with us if you are
actually saving half in comparison with the top major brands.

- 1 -
MODEL: SF921
Have product questions? Need technical support? Please feel free to
contact us:
Technical Support and E-Warranty Certificate
www.vevor.com/support
NEED HELP? CONTACT US!
This is the original instruction, please read all manual instructions
carefully before operating. VEVOR reserves a clear interpretation of our
user manual. The appearance of the product shall be subject to the
product you received. Please forgive us that we won't inform you again if
there are any technology or software updates on our product.
CRANE SCALE
- 2 -
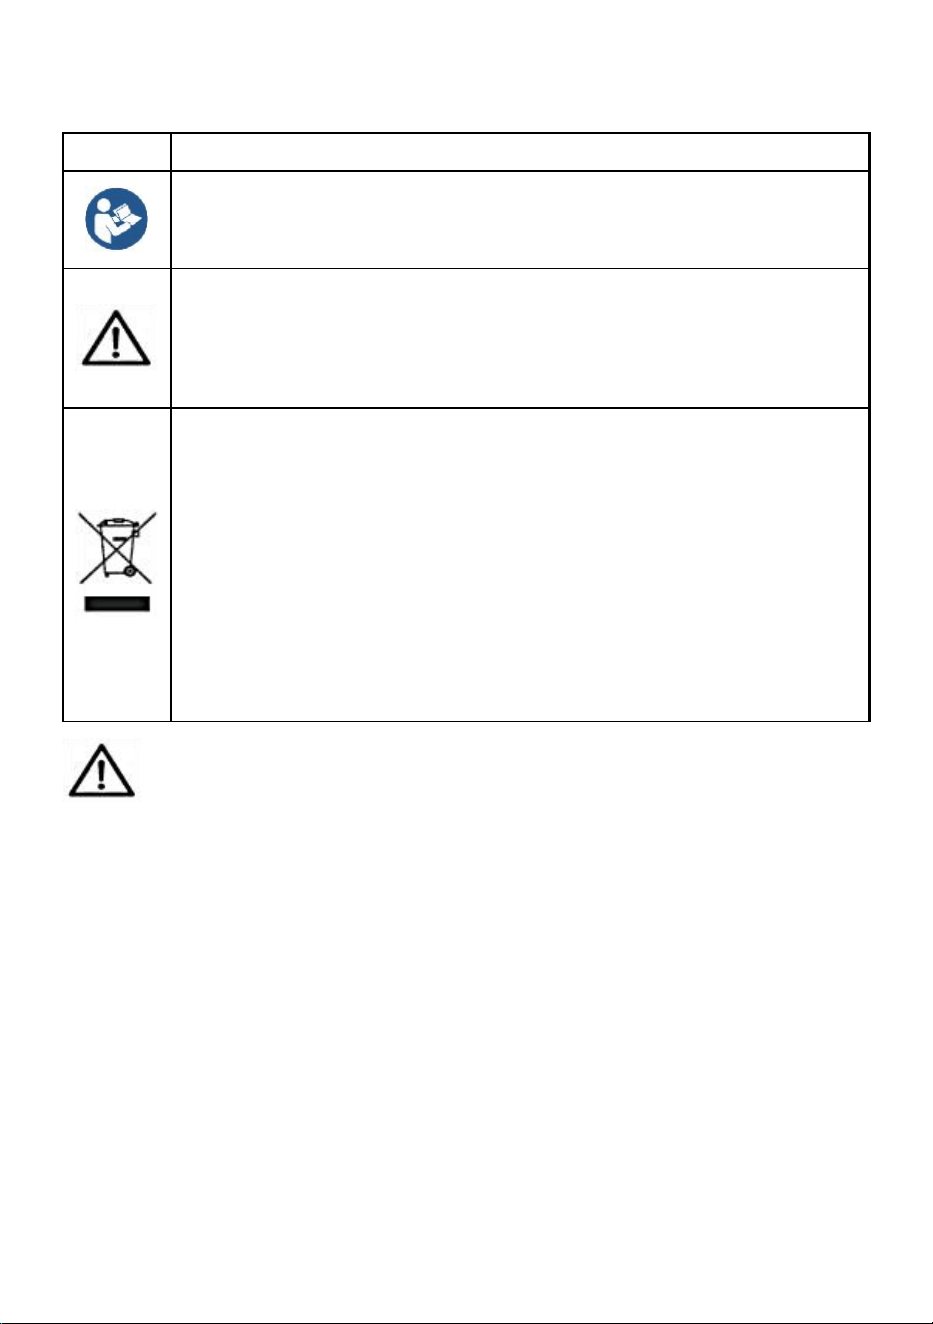
GENERAL SAFETY RULES
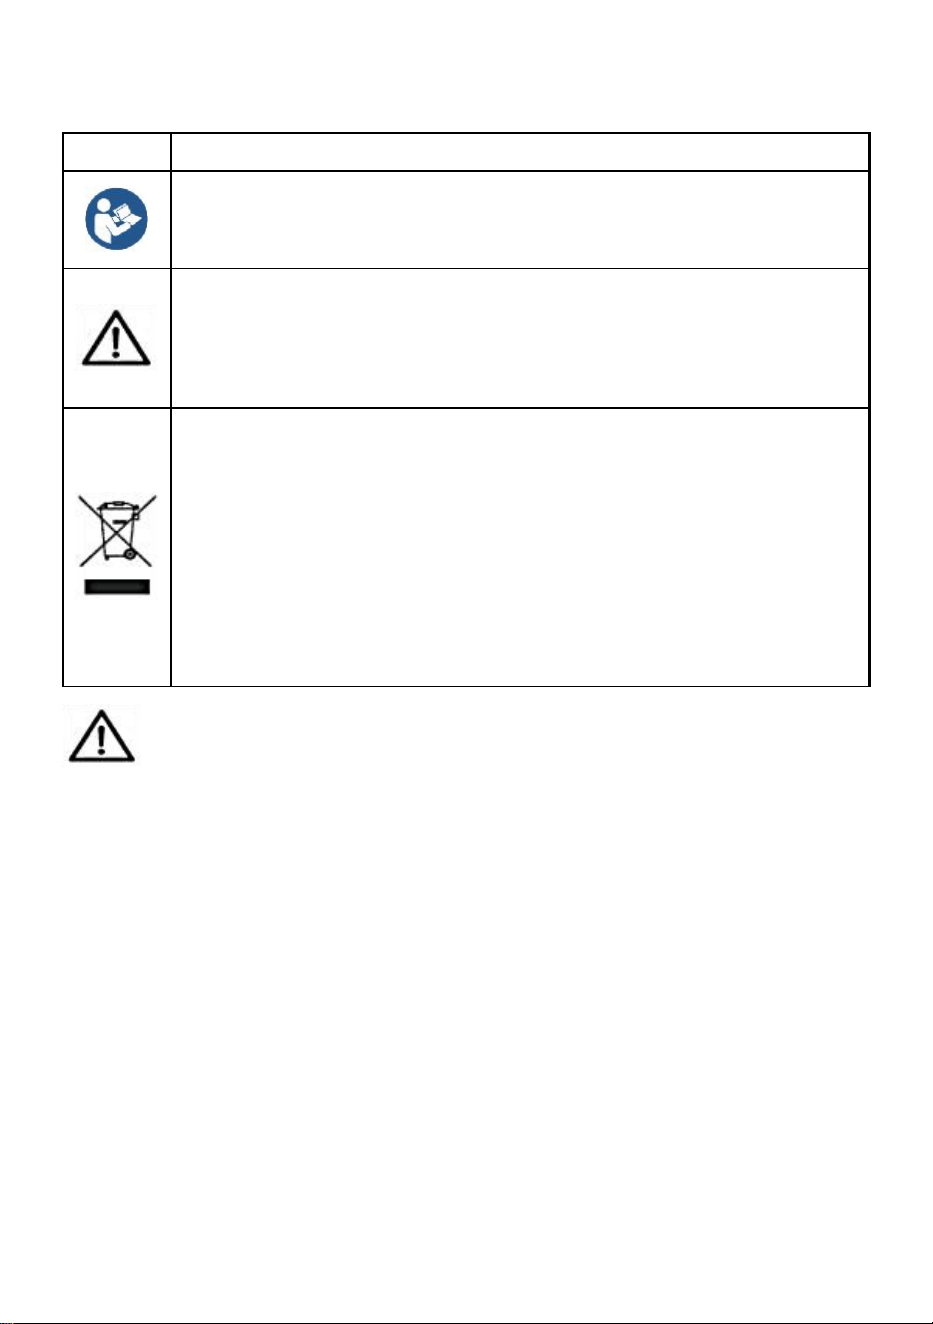
Symbol
Symbol Description
Warning - To reduce the risk of injury, the user must read the
instructions manual carefully.
This symbol, placed before a safety comment, indicates a kind of
precaution, warning, or danger. Ignoring this warning may lead to
an accident. To reduce the risk of injury, fire, or electrocution,
please always follow the recommendations shown below.
Disposal information:
This product is subject to the provision of European Directive
2012/19/EC. The symbol showing a wheelie bin crossed through
indicates that the product requires separate refuse collection in
the European Union. This applies to the product and all
accessories marked with this symbol. Products marked as such
may not be discarded with normal domestic waste but must be
taken to a collection point for recycling electrical and electronic
devices.
General safety instructions
WARNING! Read all safety warnings and notes. Failure to follow the
instructions listed below may result in electrical shock, fire, and/or injury.
For good performance and precise measurement, be careful with
daily operation and maintenance.
WORK AREA SAFETY
a) Keep the application area clean and well-lit. Unclean and dark areas
lead to accidents.
b) Do not use power tools in explosive environments, such as in the
presence of flammable liquids, gases, or vapors. Power tools generate
sparks that can ignite dust or vapors.
c) Keep children and bystanders away when operating the appliance.
- 3 -
Distractions can lead to loss of control over the device.
Please read all operating instructions prior to use. Scales are precision
measuring devices and should always be handled with proper care.
1. This is not a toy. Keep out of reach of children.
2. Remove all loads from the scale when not in use.
3. Remove all batteries prior to long-term storage.
4. Danger! Do not overload this scale. This can cause damage to the unit and
possible injury to the user.
5. Please check the hook and ring before using.
6. Keep away from direct sunlight, moisture, heat, and vibration.
7. Do not use the scale during inclement weather.
8. Media used to hang the scale should be rated at least 5 times the scale's
maximum weight capacity.
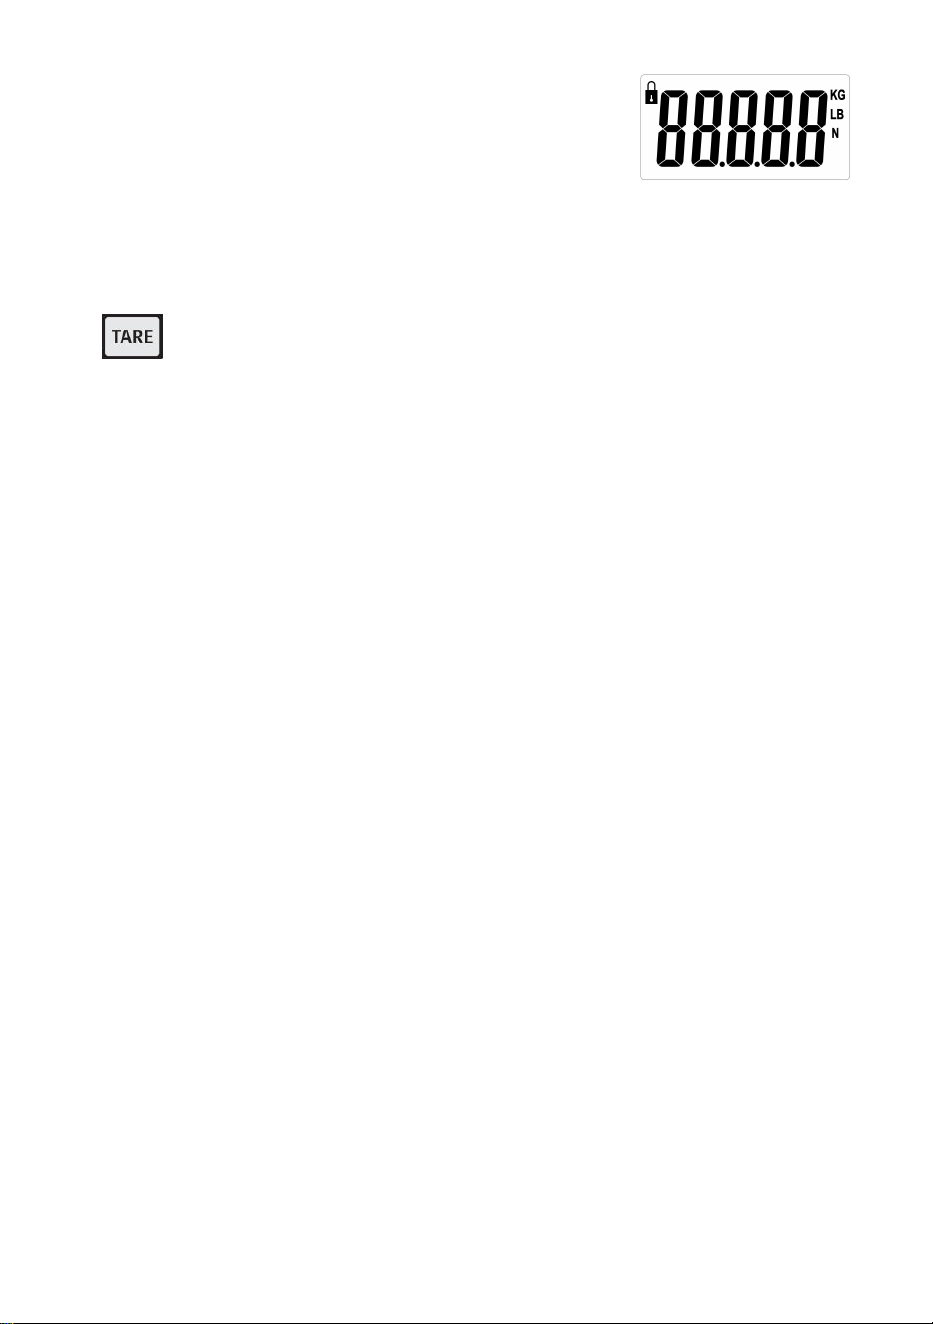
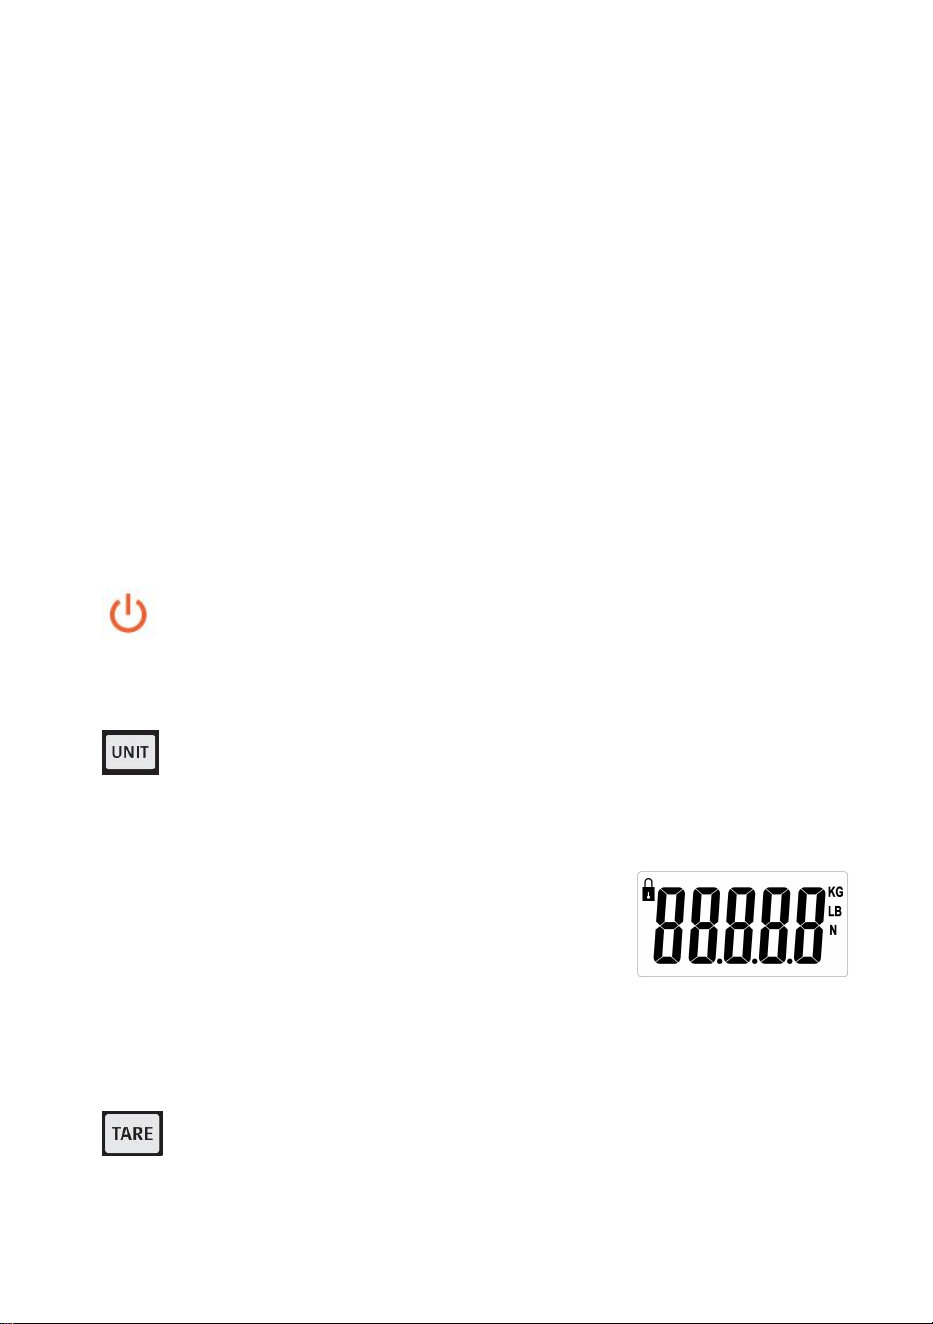
Button Functions
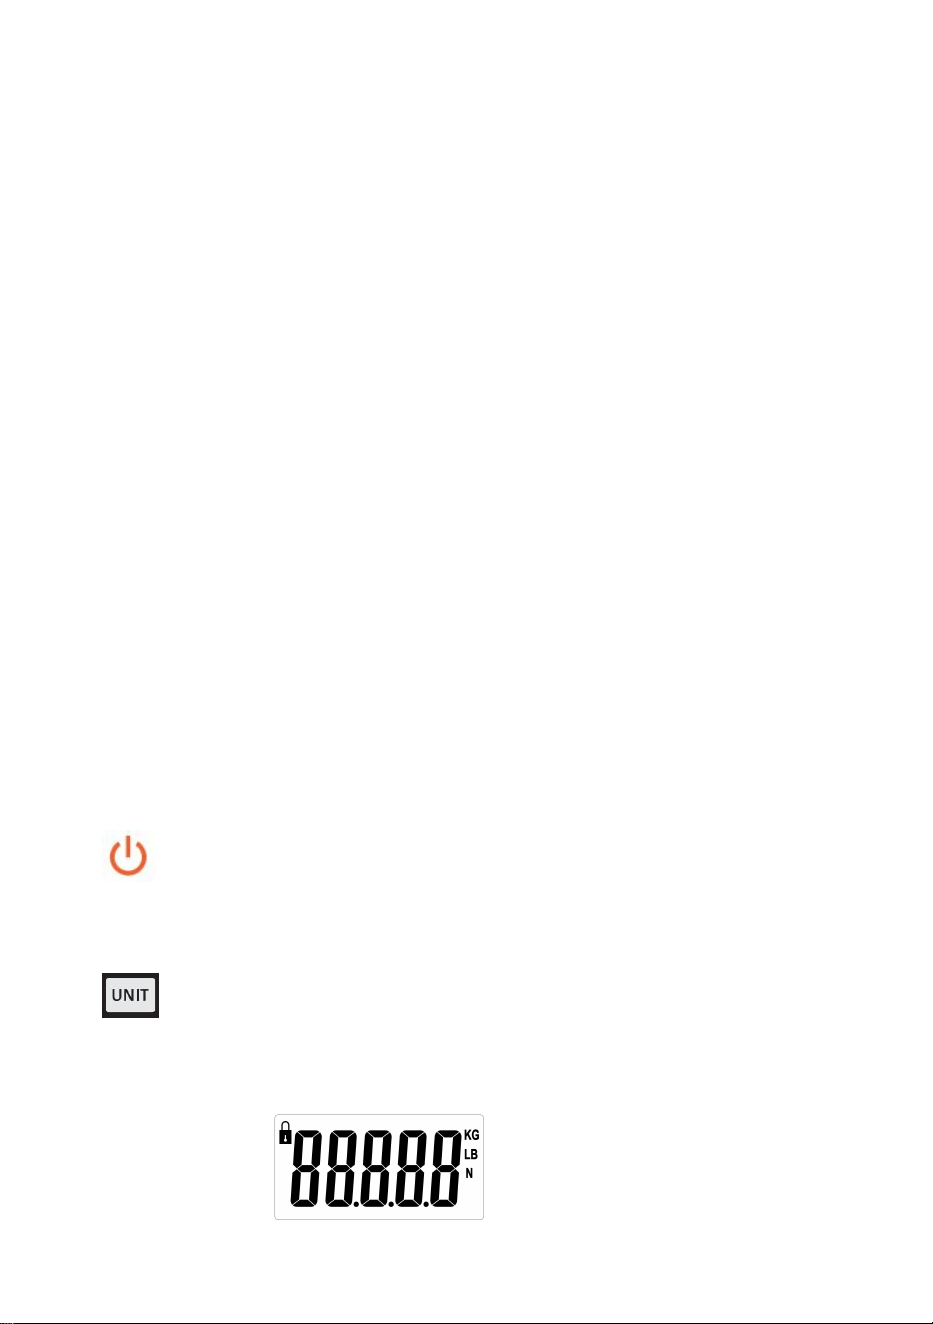
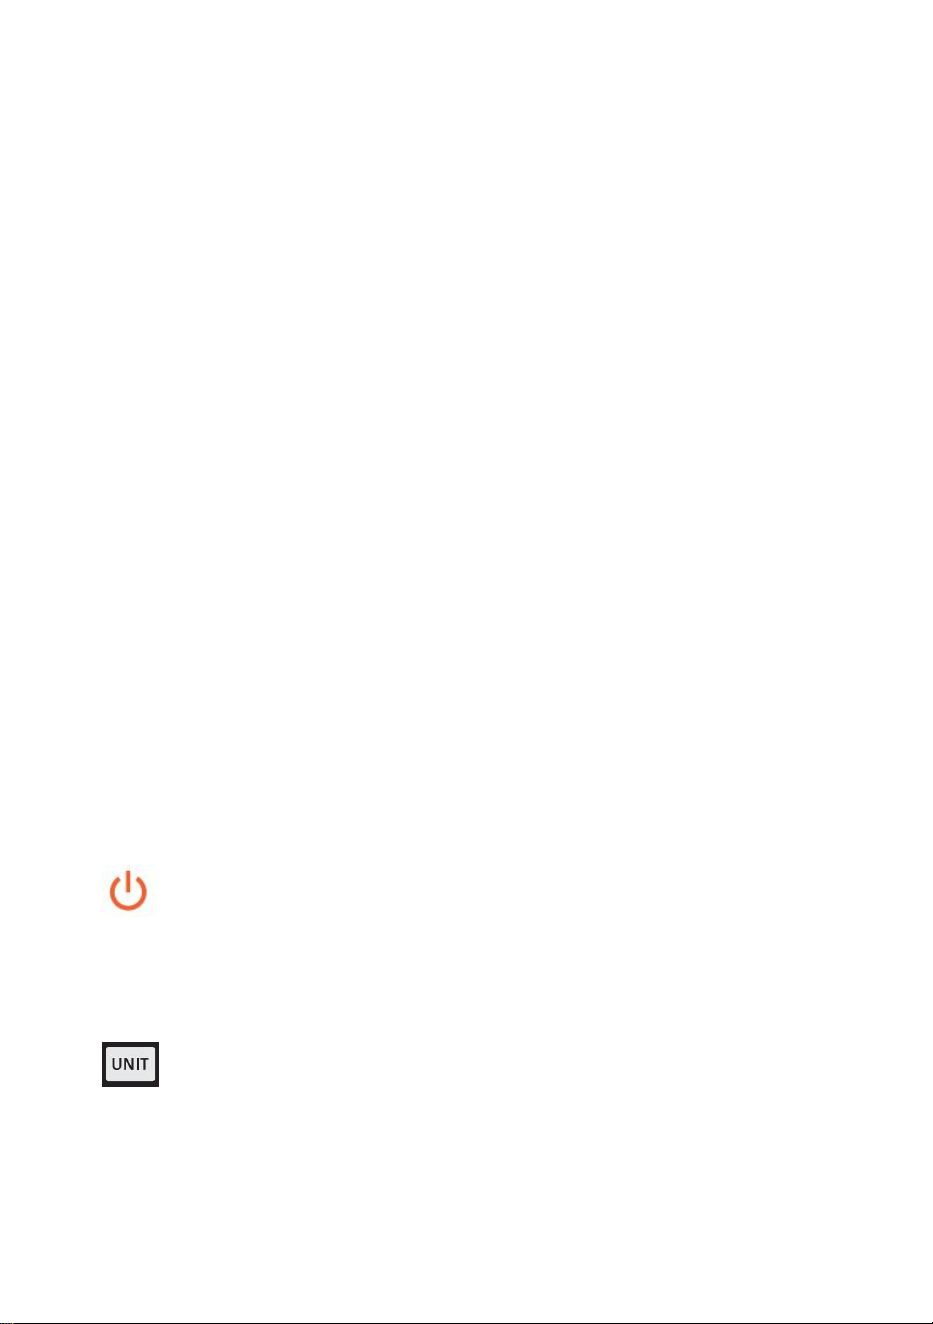
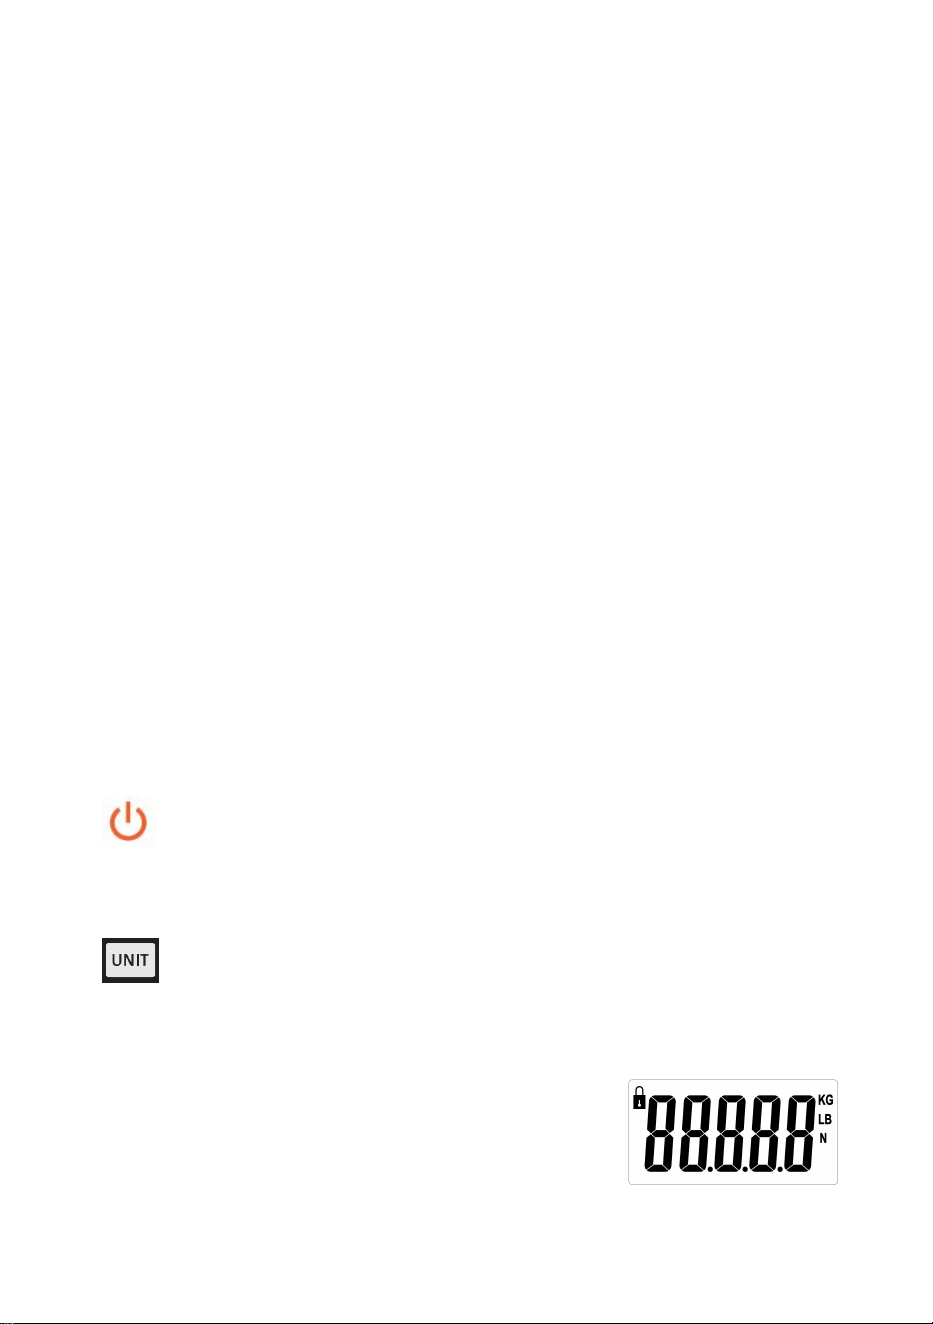
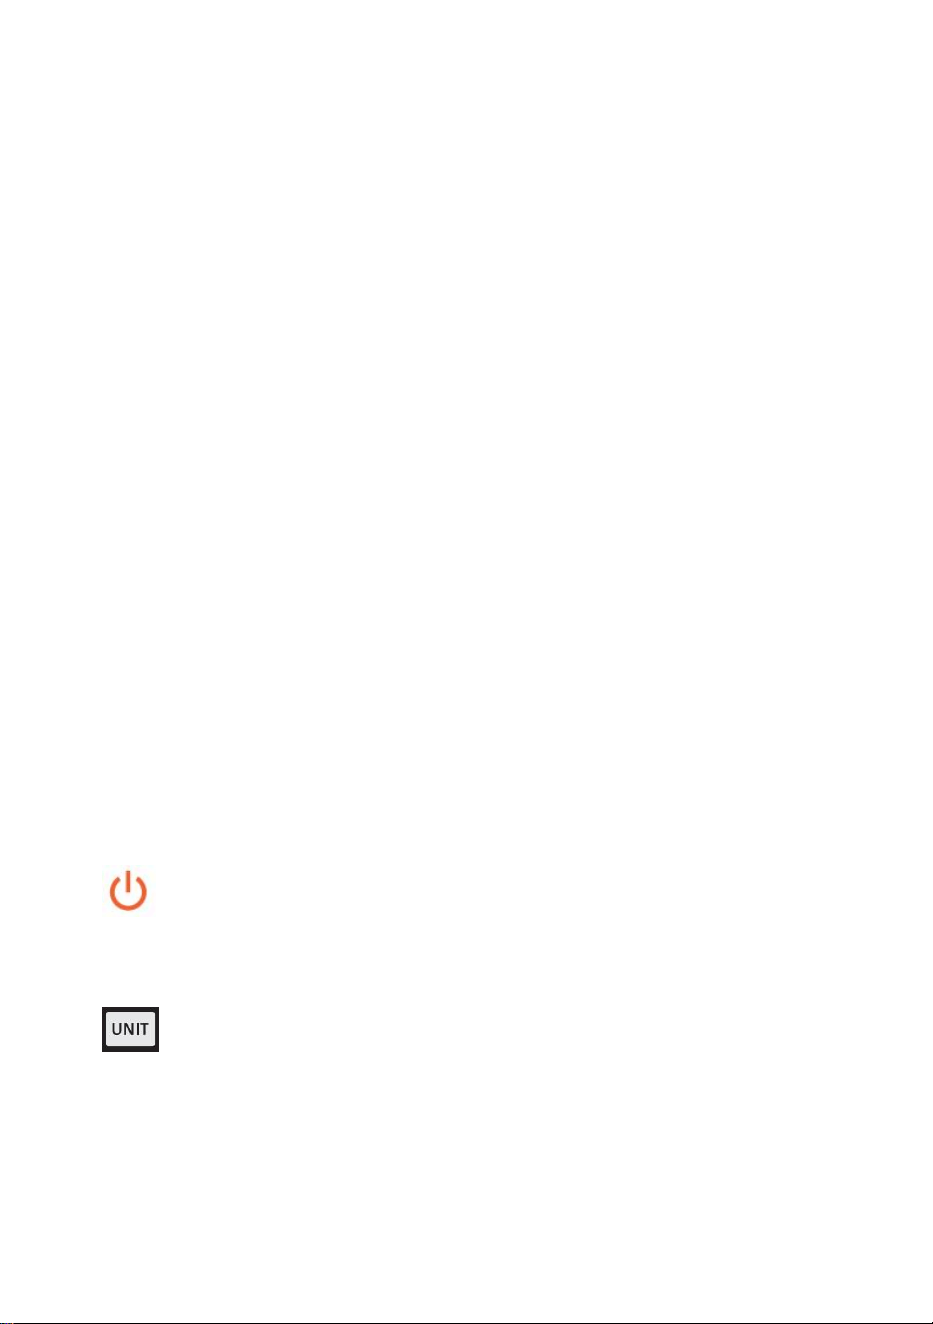
1. ON/Off : Pressing this button will turn the unit on and off if there is no
load on the scale. If there is a load on a scale, pressing this button will tare
the weight of the load.
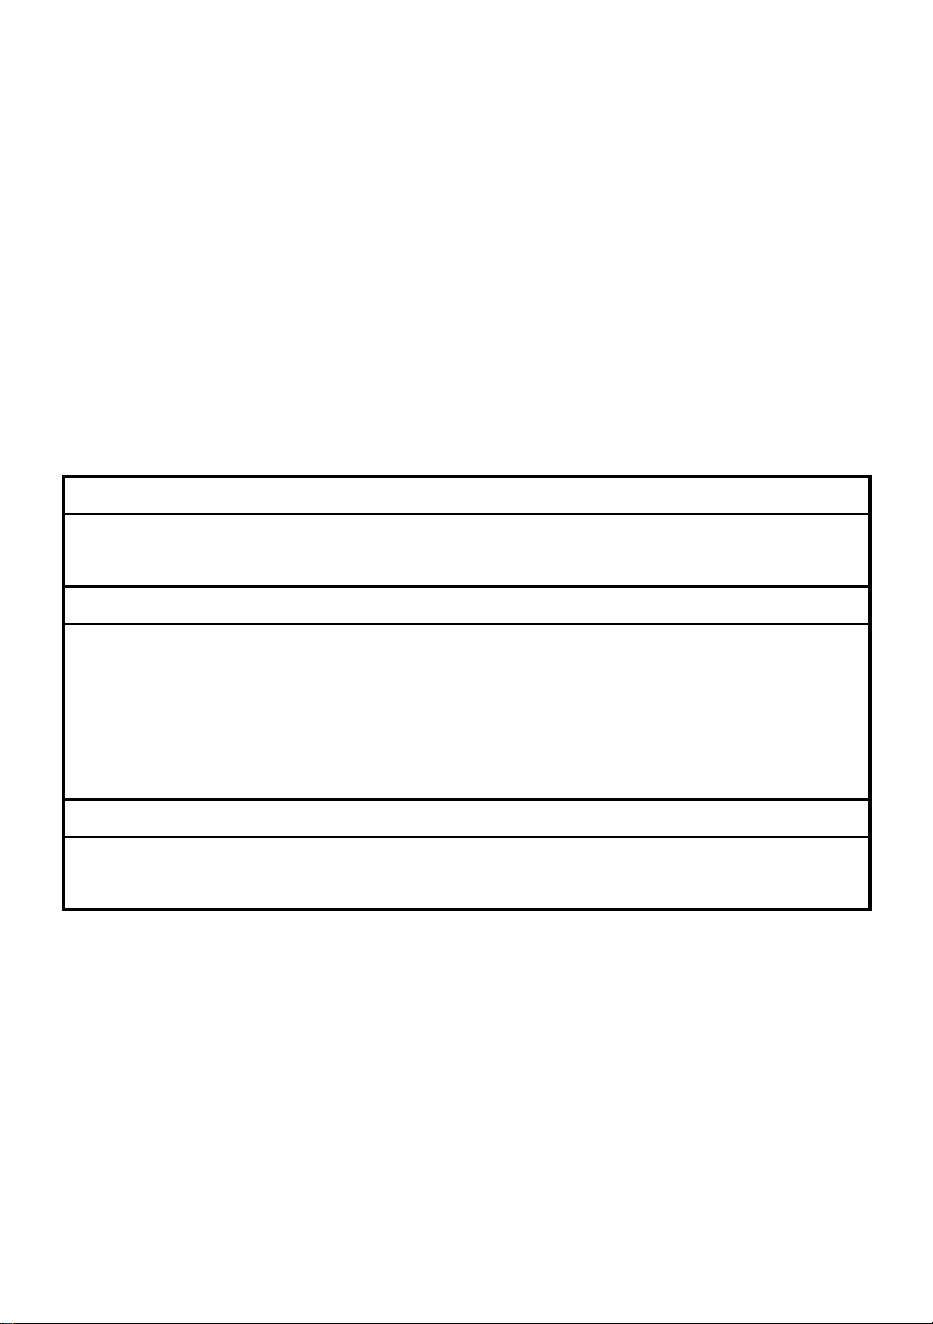
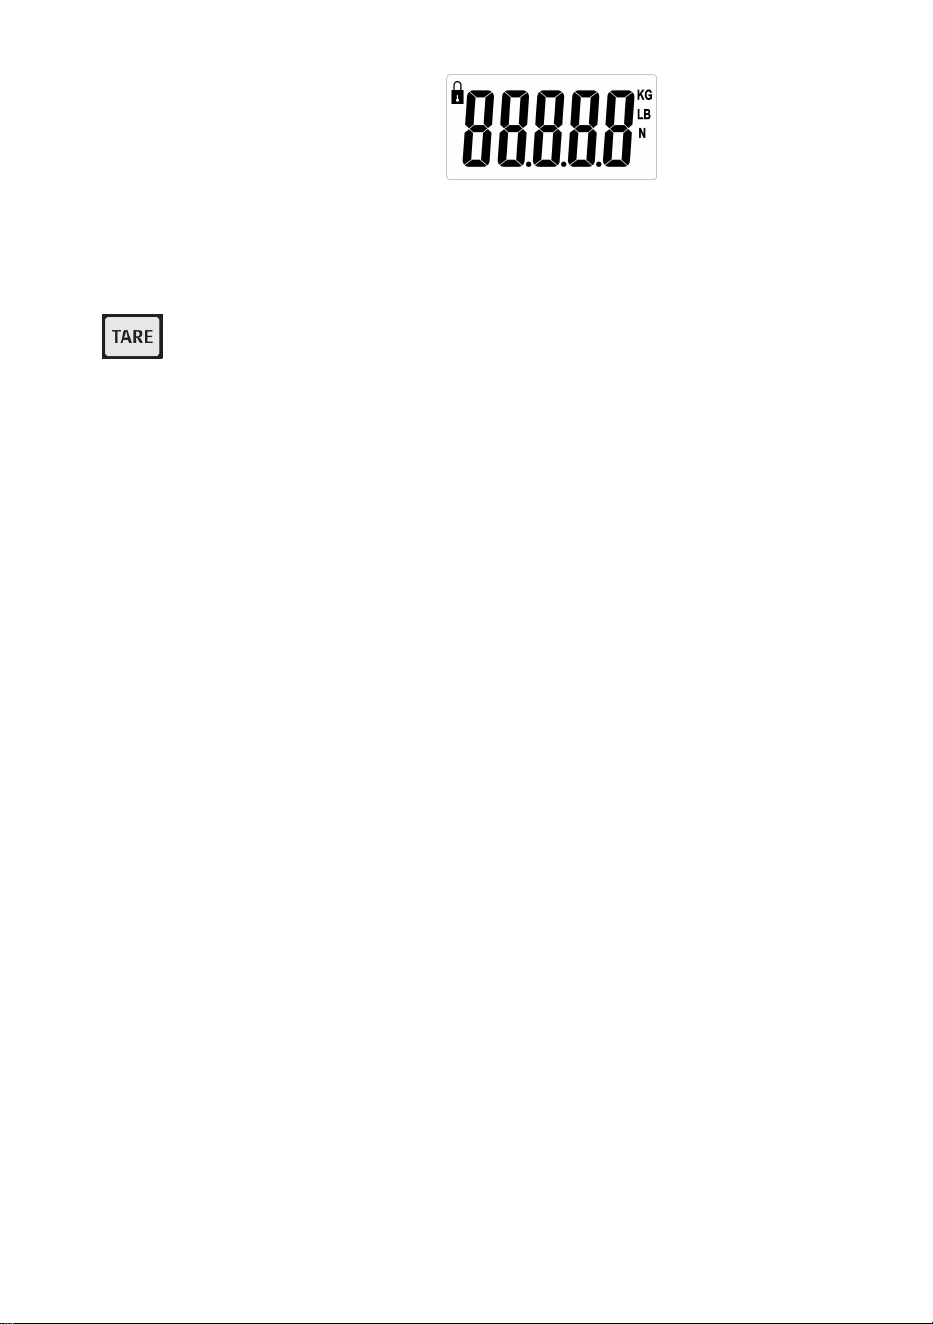
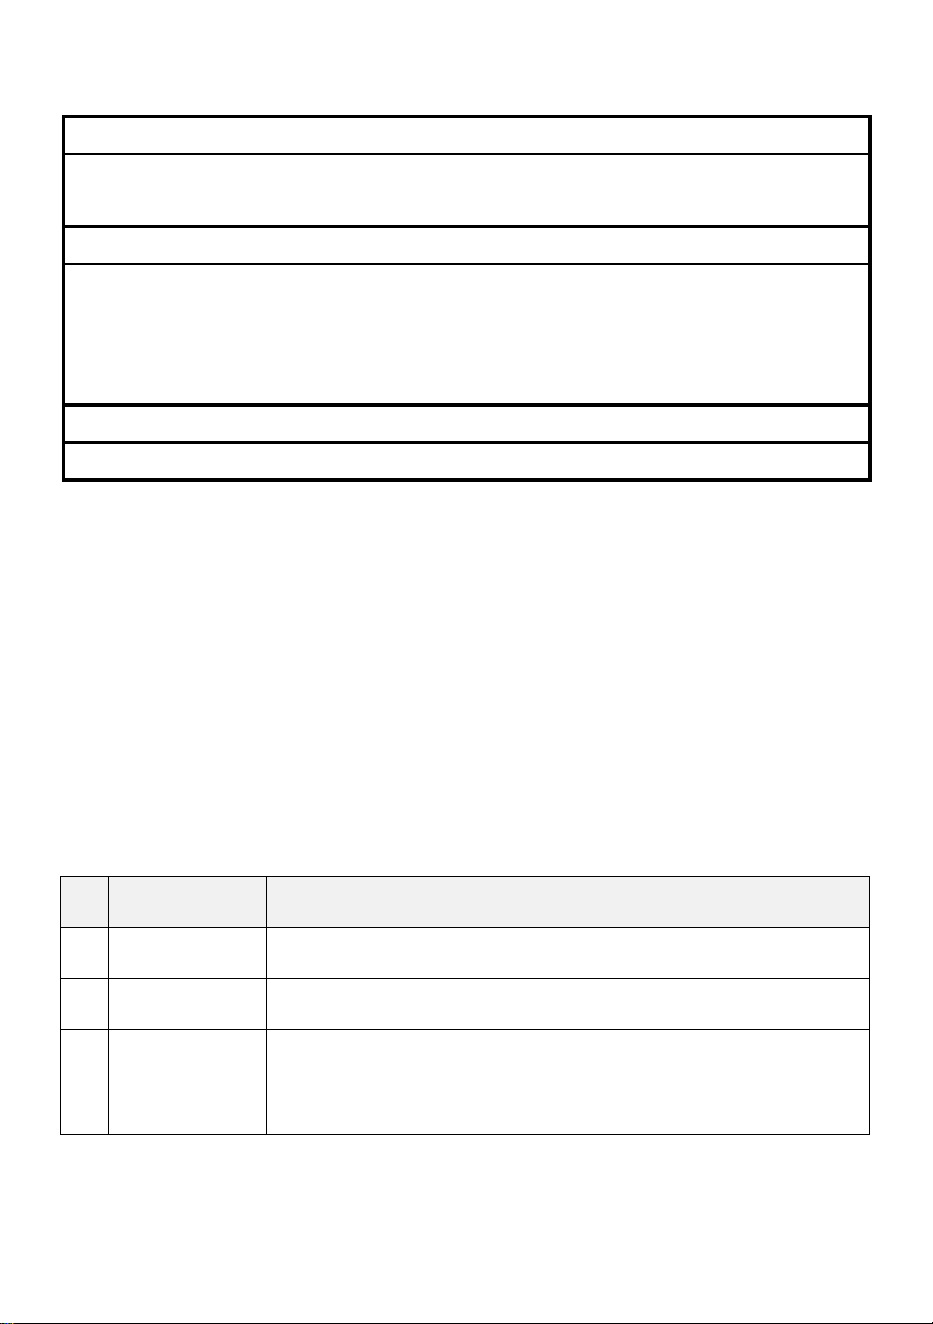
2. UNIT/HOLD Button: Pressing this button will “Hold” the displayed
weight. This way, the items being weighed can be removed from the scale,
and the weight will still be visible to the user.
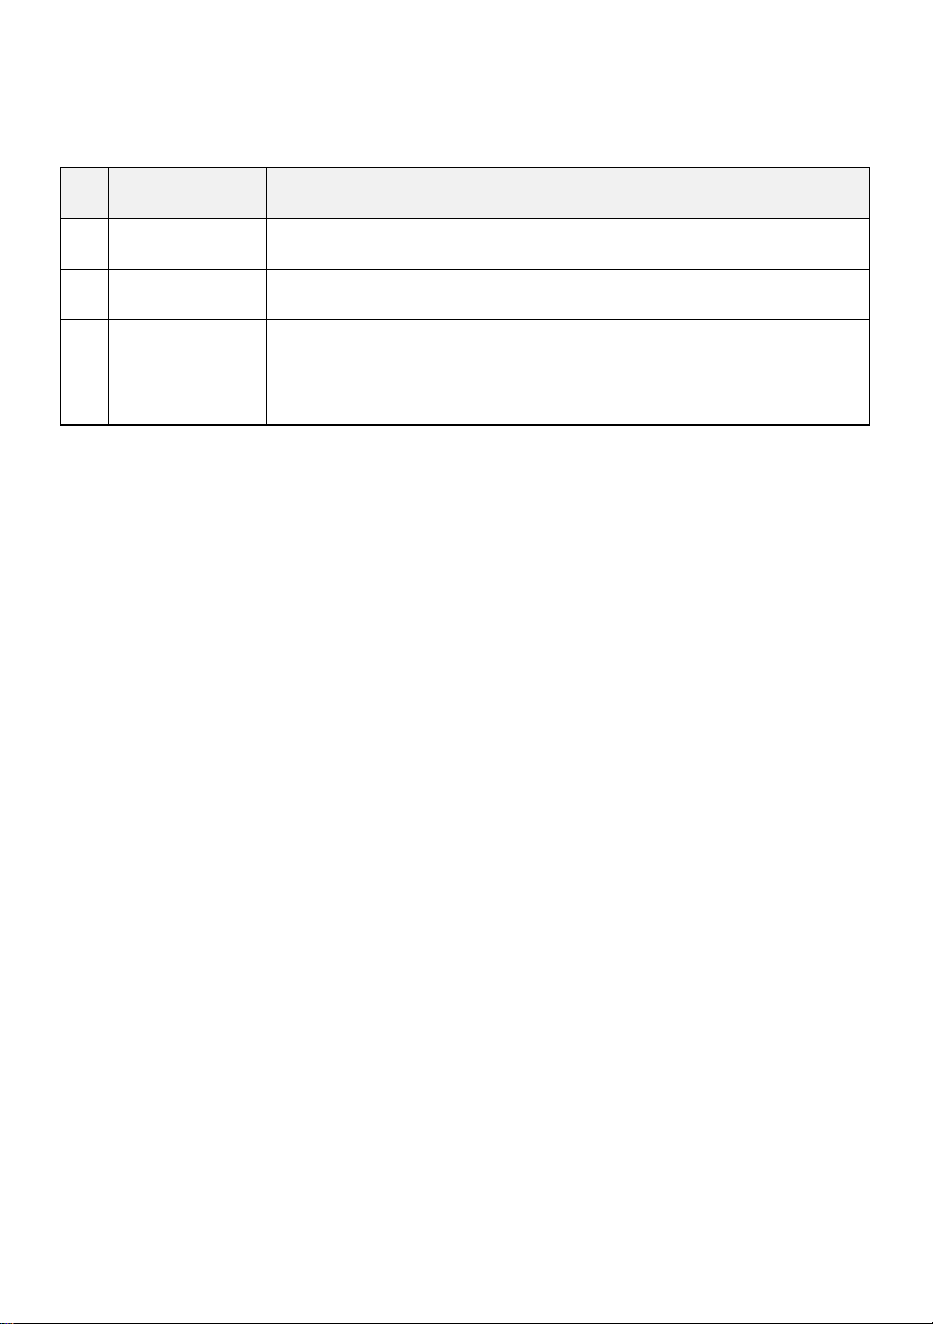
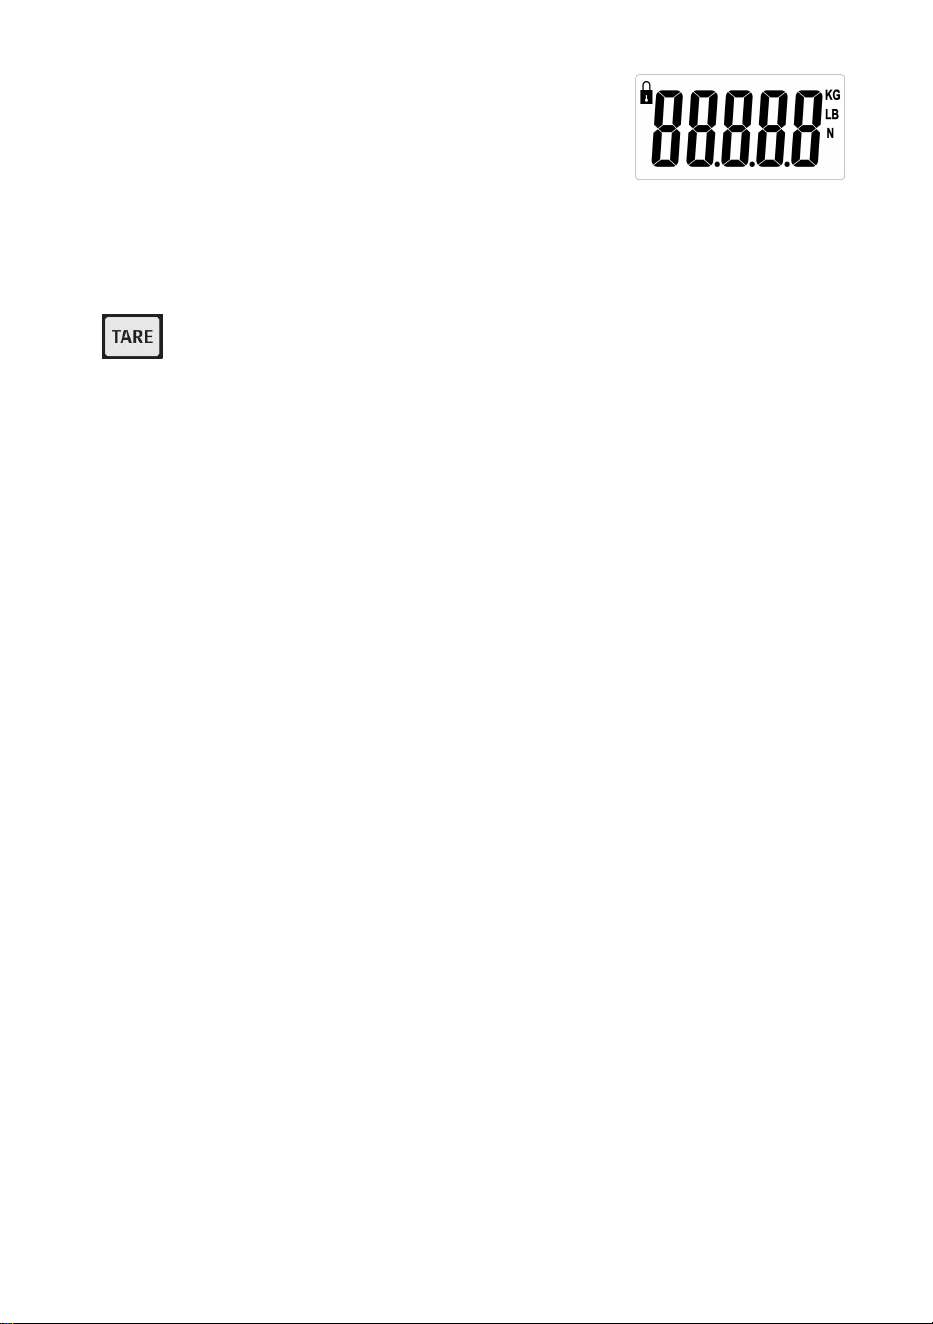
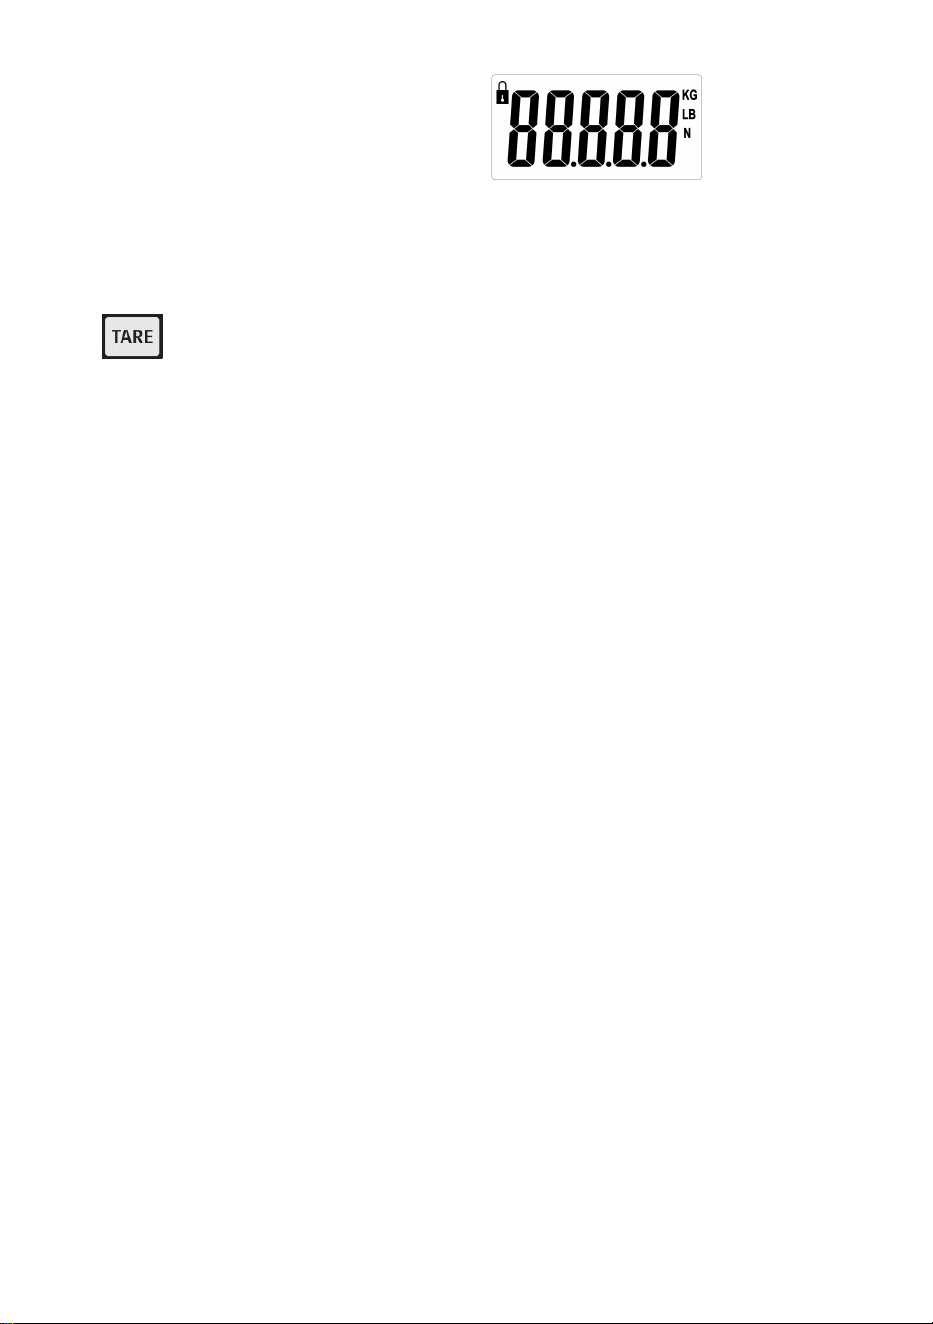
When turn on the scale,it will appear
,
pressing this
button changes the unit of measure for the scale between Newton (N),
Pounds (lb), and Kilograms (kg). The unit of measure is indicated by the
arrow on the right side of the display.
3. TARE Button: The tare function will eliminate the weight hanging on
the scale, such as a container or vessel. This will give the weight only of the
items added to the container.

- 4 -
4. Standby time: no weight change, no button operation, automatic shutdown
in 5 minutes by default; in zero state, press and hold the TARE button, press
the TARE button to switch off time, select "5" (minutes), "-" (no automatic
shutdown) , "1" (minute), "3" (minute), press UNIT to confirm.
5. PEAK function: In the off state, press and hold the TARE key, press the
ON/OFF key to turn on the machine, display H_ON, and return to zero; the
peak value lock function is turned on, and the maximum weight value will be
displayed and locked when loading weight; after power off, hold down the
TARE key and press ON /OFF key to power on, display H_OFF and return to
zero, the peak value lock function is off, and the actual weight value will be
displayed when the weight is loaded and not locked.
6. Battery: 1.5V * 2AA
7. Min weight: 0.3lb,Max capacity: 880lb
8. Unit : KG/LB/N
Instructions for Use
1. Prior to use, make sure the area you are going to use the scale in provides
enough room for operation.
2. Prior to use, make sure the area you are going to use the scale in provides
enough room for operation.
3. Turn the scale ON.
4. Fix the scale to the designated hanging media by unscrewing the retaining
pin on the Top Hook.
5. Remove the top hook from the scale, making sure not to misplace any of the
rubber washers on the scale.
6. Then, thread the Top Hook through the chosen media. Reattach the Top
Hook to the scale with the retaining pin. Secure the retaining pin with the
included cotter pin.
7. Make sure the scale is secure prior to setting the lower hook in the lower
hook hole.
8. Place the items to be weighed on the lower hook.
9. Please remove any loads from the scale immediately after weighing.
Damage to the scale can result from loads being on the scale for prolonged
periods.

- 5 -
Troubleshooting
Problem: The scale does not turn on.
Solution: Check to make sure batteries are inserted correctly and functional; change
batteries if necessary.
Problem: The scale turns on, but the incorrect weight is displayed.
Solution: Was there a load on the scale when it was turned on?
Is the scale secure and stable?
Are the items to be weighed above the scale's capacity?
After making sure none of these apply, turn the scale off and back on.
Problem: O L is displayed.
Solution: Make sure that the load is less than the operating capacity of the scale.
Calibration:
1. Switch the scale on.
2. Press the UNIT button and long-press it until the message “cal” is
shown on the display.
3. The calibration function has been activated.
4. When a value is shown(5, 10, 20), place the corresponding weight on
the scale pan (5 = 5kg, 10=10kg, 20=20kg).
5. Wait until the message “PASS” is shown.
6. The calibration procedure is finished.
Items
Description
1
Name
Crane Scale
2
Model
SF921
3
Parameter
Rating(s): 2x1.5AA
(
3VDC
)
Capacity: 400kg/880Ib
Division: 0.1lb

Manufacturer: Shanghaimuxinmuyeyouxiangongsi
Address: Shuangchenglu 803nong11hao1602A-1609shi, baoshanqu,
shanghai 200000 CN.
Imported to AUS: SIHAO PTY LTD, 1 ROKEVA STREETEASTWOOD NSW
2122 Australia
Imported to USA: Sanven Technology Ltd., Suite 250, 9166 Anaheim Place,
Rancho Cucamonga, CA 91730
REP
EC
E-CrossStu GmbH
Mainzer Landstr.69, 60329 Frankfurt am Main.
REP
UK
YH CONSULTING LIMITED.
C/O YH Consulting Limited Office 147, Centurion House,
London Road, Staines-upon-Thames, Surrey, TW18 4AX


Assistance technique et certificat de garantie électronique
www.vevor.com/support
BALANCE À GRUE
MODÈLE : SF921
We continue to be committed to provide you tools with competitive price.
"Save Half", "Half Price" or any other similar expressions used by us only represents an
estimate of savings you might benefit from buying certain tools with us compared to the major
top brands and does not necessarily mean to cover all categories of tools offered by us. You
are kindly reminded to verify carefully when you are placing an order with us if you are
actually saving half in comparison with the top major brands.
- 1 -
MODÈLE : SF921
Have product questions? Need technical support? Please feel free to
contact us:
Technical Support and E-Warranty Certificate
www.vevor.com/support
NEED HELP? CONTACT US!
This is the original instruction, please read all manual instructions
carefully before operating. VEVOR reserves a clear interpretation of our
user manual. The appearance of the product shall be subject to the
product you received. Please forgive us that we won't inform you again if
there are any technology or software updates on our product.
CRANE SCALE

- 2 -
RÈGLES GÉNÉRALES DE SÉCURITÉ
Symbole
Description du symbole
Avertissement - Pour réduire le risque de blessure, l'utilisateur
doit lire attentivement le manuel d'instructions.
Ce symbole, placé avant un commentaire de sécurité, indique
un type de précaution, d'avertissement ou de danger. Ignorer
cet avertissement peut entraîner un accident. Pour réduire le
risque de blessure, d'incendie ou d'électrocution, veuillez
toujours suivre les recommandations ci-dessous.
Informations sur l'élimination :
Ce produit est soumis aux dispositions de la directive
européenne 2012/19/CE. Le symbole représentant une poubelle
barrée indique que le produit doit faire l'objet d'une collecte
sélective des déchets dans l'Union européenne. Cela s'applique
au produit et à tous les accessoires marqués de ce symbole.
Les produits marqués comme tels ne peuvent pas être jetés
avec les ordures ménagères normales mais doivent être
déposés dans un point de collecte pour le recyclage des
appareils électriques et électroniques.
Consignes générales de sécurité
AVERTISSEMENT ! Lisez tous les avertissements et notes de sécurité.
Le non-respect des instructions ci-dessous peut entraîner un choc
électrique, un incendie et/ou des blessures.
Pour de bonnes performances et une mesure précise, soyez prudent
lors du fonctionnement et de l'entretien quotidiens.
SÉCURITÉ DE LA ZONE DE TRAVAIL
a) Maintenir la zone d'application propre et bien éclairée. Les zones
sales et sombres sont propices aux accidents.
b) N'utilisez pas d'outils électriques dans des environnements
- 3 -
explosifs, par exemple en présence de liquides, de gaz ou de vapeurs
inflammables. Les outils électriques génèrent des étincelles qui peuvent
enflammer la poussière ou les vapeurs.
c) Tenir les enfants et les personnes présentes à l'écart de l'appareil
pendant son utilisation. Les distractions peuvent entraîner une perte de
contrôle de l'appareil.
Veuillez lire toutes les instructions d'utilisation avant utilisation. Les
balances sont des appareils de mesure de précision et doivent toujours
être manipulées avec soin.
9. Ceci n'est pas un jouet. Tenir hors de portée des enfants.
10. Retirez toutes les charges de la balance lorsqu’elle n’est pas utilisée.
11.Retirez toutes les piles avant un stockage à long terme.
12. Danger ! Ne surchargez pas cette balance. Cela peut endommager
l'appareil et blesser l'utilisateur.
13. Veuillez vérifier le crochet et l'anneau avant utilisation.
14. Tenir à l’abri de la lumière directe du soleil, de l’humidité, de la chaleur et des
vibrations.
15. N'utilisez pas la balance en cas d'intempéries.
16. Le support utilisé pour suspendre la balance doit être évalué à au moins 5
fois la capacité de poids maximale de la balance.
Fonctions des boutons
9. Marche/Arrêt : Appuyez sur ce bouton pour allumer et éteindre
l'appareil s'il n'y a pas de charge sur la balance. Si une charge est posée sur
la balance, appuyez sur ce bouton pour tarer le poids de la charge.
10. Bouton UNIT/HOLD : appuyez sur ce bouton pour « maintenir » le
poids affiché. De cette façon, les articles pesés peuvent être retirés de la
balance et le poids sera toujours visible pour l'utilisateur.
icône s'affiche
.
En appuyant sur ce bouton, l'unité

- 4 -
de mesure de la balance change entre Newton (N), Livres (lb) et
Kilogrammes (kg). L'unité de mesure est indiquée par la flèche sur le côté
droit de l'écran.
11. Bouton TARE : La fonction tare permet d'éliminer le poids suspendu à
la balance, tel qu'un récipient ou un récipient. Cela donnera uniquement le
poids des articles ajoutés au récipient.
12. Autonomie en veille : pas de changement de poids, pas d'opération de
bouton, arrêt automatique dans 5 minutes par défaut ; à l'état zéro, appuyez
et maintenez enfoncé le bouton TARE, appuyez sur le bouton TARE pour
éteindre le temps, sélectionnez « 5 » (minutes), « - » (pas d'arrêt
automatique), « 1 » (minute), « 3 » (minute), appuyez sur UNIT pour
confirmer.
13. Fonction PEAK : À l'état éteint, maintenez la touche TARE enfoncée,
appuyez sur la touche ON/OFF pour allumer la machine, afficher H_ON et
revenir à zéro ; la fonction de verrouillage de la valeur de crête est activée et
la valeur de poids maximale sera affichée et verrouillée lors du chargement
du poids ; après la mise hors tension, maintenez la touche TARE enfoncée et
appuyez sur la touche ON/OFF pour allumer, afficher H_OFF et revenir à
zéro, la fonction de verrouillage de la valeur de crête est désactivée et la
valeur de poids réelle sera affichée lorsque le poids est chargé et non
verrouillé.
14. Batterie : 1,5 V x 2 AA
15. Poids minimum : 0,3 lb, capacité maximale : 880 lb
16. Unité : KG/LB/N
Mode d'emploi
10. Avant utilisation, assurez-vous que la zone dans laquelle vous allez utiliser la
balance offre suffisamment d'espace pour son fonctionnement.
11. Avant utilisation, assurez-vous que la zone dans laquelle vous allez utiliser la
balance offre suffisamment d'espace pour son fonctionnement.
12. Allumez la balance.
13. Fixez la balance au support de suspension désigné en dévissant la goupille
de retenue sur le crochet supérieur.
14. Retirez le crochet supérieur de la balance, en veillant à ne pas égarer les
- 5 -
rondelles en caoutchouc sur la balance.
15. Ensuite, enfilez le crochet supérieur dans le support choisi. Rattachez le
crochet supérieur à la balance avec la goupille de retenue. Fixez la goupille
de retenue avec la goupille fendue fournie.
16. Assurez-vous que la balance est bien fixée avant de placer le crochet
inférieur dans le trou du crochet inférieur.
17. Placez les objets à peser sur le crochet inférieur.
18. Retirez immédiatement toute charge de la balance après la pesée. La
balance peut être endommagée si des charges restent sur la balance
pendant une période prolongée.
Dépannage
Problème : la balance ne s'allume pas.
Solution : Vérifiez que les piles sont correctement insérées et fonctionnelles ; changez
les piles si nécessaire.
Problème : la balance s'allume, mais le poids affiché est incorrect.
Solution : Y avait-il une charge sur la balance lorsqu'elle a été allumée ?
La balance est-elle sûre et stable ?
Les articles à peser dépassent-ils la capacité de la balance ?
Après vous être assuré qu’aucun de ces cas ne s’applique, éteignez puis rallumez la
balance.
Problème : OLs'affiche.
Solution : Assurez-vous que la charge est inférieure à la capacité de fonctionnement
de la balance.
Étalonnage:
7. Allumez la balance.
8. Appuyez sur le bouton UNIT et maintenez-le enfoncé jusqu'à ce que le
message « cal » s'affiche sur l'écran.
9. La fonction d'étalonnage a été activée.
10. Lorsqu'une valeur est affichée (5, 10, 20), placez le poids
correspondant sur le plateau de la balance (5 = 5 kg, 10 = 10 kg, 20 =
20 kg).
- 6 -
11. Attendez que le message « PASS » s’affiche.
12. La procédure d'étalonnage est terminée.
Articles
Description
1
Nom
Balance à grue
2
Modèle
SF921
3
Paramètre
Puissance nominale : 2 x 1,5 AA (3 V CC)
Capacité : 400 kg/880 lb
Division: 0,1 lb

Fabricant : Shanghaimuxinmuyeyouxiangongsi
Adresse : Shuangchenglu 803nong11hao1602A-1609shi, baoshanqu,
Shanghai 200000 CN.
Importé en Australie : SIHAO PTY LTD, 1 ROKEVA STREET, ASTWOOD
NSW 2122 Australie
Importé aux États-Unis : Sanven Technology Ltd., Suite 250, 9166 Anaheim
Place, Rancho Cucamonga, CA 91730
REP
EC
E-CrossStu GmbH
Mainzer Landstr.69, 60329 Frankfurt am Main.
REP
UK
YH CONSULTING LIMITED.
C/O YH Consulting Limited Office 147, Centurion House,
London Road, Staines-upon-Thames, Surrey, TW18 4AX


Technischer Support und E-Garantie-Zertifikat
www.vevor.com/support
KRANWAAGE
MODELL: SF921
We continue to be committed to provide you tools with competitive price.
"Save Half", "Half Price" or any other similar expressions used by us only represents an
estimate of savings you might benefit from buying certain tools with us compared to the major
top brands and does not necessarily mean to cover all categories of tools offered by us. You
are kindly reminded to verify carefully when you are placing an order with us if you are
actually saving half in comparison with the top major brands.

- 1 -
MODELL: SF921
Have product questions? Need technical support? Please feel free to
contact us:
Technical Support and E-Warranty Certificate
www.vevor.com/support
NEED HELP? CONTACT US!
This is the original instruction, please read all manual instructions
carefully before operating. VEVOR reserves a clear interpretation of our
user manual. The appearance of the product shall be subject to the
product you received. Please forgive us that we won't inform you again if
there are any technology or software updates on our product.
CRANE SCALE
- 2 -
ALLGEMEINE SICHERHEITSREGELN
Symbol
Symbol Beschreibung
Achtung – Um das Verletzungsrisiko zu verringern, muss der
Benutzer die Bedienungsanleitung sorgfältig lesen.
Dieses Symbol vor einem Sicherheitshinweis weist auf eine
Vorsichtsmaßnahme, Warnung oder Gefahr hin. Das Ignorieren
dieser Warnung kann zu einem Unfall führen. Um das Risiko von
Verletzungen, Bränden oder Stromschlägen zu verringern,
befolgen Sie bitte immer die unten aufgeführten Empfehlungen.
Hinweise zur Entsorgung:
Dieses Produkt unterliegt den Bestimmungen der europäischen
Richtlinie 2012/19/EU. Das Symbol einer durchgestrichenen
Mülltonne auf Rädern weist darauf hin, dass dieses Produkt in
der Europäischen Union einer getrennten Müllentsorgung
unterliegt. Dies gilt für das Produkt und alle mit diesem Symbol
gekennzeichneten Zubehörteile. So gekennzeichnete Produkte
dürfen nicht im normalen Hausmüll entsorgt werden, sondern
müssen an einer Sammelstelle für das Recycling von elektrischen
und elektronischen Geräten abgegeben werden.
Allgemeine Sicherheitshinweise
WARNUNG! Lesen Sie alle Sicherheitswarnungen und Hinweise. Die
Nichtbeachtung der unten aufgeführten Anweisungen kann zu
Stromschlägen, Bränden und/oder Verletzungen führen.
Um eine gute Leistung und präzise Messungen zu erzielen, gehen Sie
bei der täglichen Bedienung und Wartung sorgfältig vor.
SICHERHEIT AM ARBEITSBEREICH
a) Halten Sie den Anwendungsbereich sauber und gut beleuchtet.
Unsaubere und dunkle Bereiche führen zu Unfällen.
b) Verwenden Sie Elektrowerkzeuge nicht in explosiven Umgebungen,
- 3 -
in denen sich brennbare Flüssigkeiten, Gase oder Dämpfe befinden.
Elektrowerkzeuge erzeugen Funken, die Staub oder Dämpfe entzünden
können.
c) Halten Sie Kinder und andere Personen während des Betriebs des
Gerätes fern. Ablenkung kann zum Verlust der Kontrolle über das Gerät
führen.
Bitte lesen Sie vor der Inbetriebnahme die Bedienungsanleitung sorgfältig
durch. Waagen sind Präzisionsmessgeräte und sollten immer mit der
nötigen Sorgfalt behandelt werden.
17. Dies ist kein Spielzeug. Außerhalb der Reichweite von Kindern
aufbewahren.
18. Entfernen Sie sämtliche Lasten von der Waage, wenn sie nicht verwendet
wird.
19. Vor einer längeren Lagerung alle Batterien entfernen.
20. Gefahr! Überlasten Sie die Waage nicht. Dies kann zu Schäden am Gerät
und möglichen Verletzungen des Benutzers führen.
21. Bitte überprüfen Sie Haken und Ring vor der Verwendung.
22. Vor direkter Sonneneinstrahlung, Feuchtigkeit, Hitze und Vibration schützen.
23. Benutzen Sie die Waage nicht bei schlechtem Wetter.
24. Das zum Aufhängen der Waage verwendete Medium muss mindestens für
das Fünffache der maximalen Gewichtskapazität der Waage ausgelegt sein.
Tastenfunktionen
17. EIN/AUS: Durch Drücken dieser Taste wird das Gerät ein- und
ausgeschaltet, wenn sich keine Last auf der Waage befindet. Wenn sich eine
Last auf der Waage befindet, wird durch Drücken dieser Taste das Gewicht
der Last tariert.
18. UNIT/HOLD-Taste: Durch Drücken dieser Taste wird das angezeigte
Gewicht „gehalten“. Auf diese Weise können die zu wiegenden Gegenstände
von der Waage entfernt werden, und das Gewicht ist für den Benutzer
weiterhin sichtbar.
- 4 -
Beim Einschalten der Waage wird angezeigt
:
Durch Drücken dieser Taste wird die Maßeinheit der Waage zwischen
Newton (N), Pfund (lb) und Kilogramm (kg) geändert. Die Maßeinheit wird
durch den Pfeil auf der rechten Seite des Displays angezeigt.
19. TARE-Taste : Mit der Tara-Funktion können Sie das Gewicht von auf
der Waage hängenden Gegenständen (z. B. Behältern oder Gefäßen)
eliminieren. Dadurch wird nur das Gewicht der in den Behälter gegebenen
Gegenstände angezeigt.
20. Standby-Zeit : Keine Gewichtsänderung, keine Tastenbetätigung,
standardmäßig automatische Abschaltung nach 5 Minuten; im Nullzustand
die TARE-Taste gedrückt halten, die TARE-Taste drücken, um die Zeit
auszuschalten, „5“ (Minuten), „ - “ (keine automatische Abschaltung),
„1“ (Minute), „3“ (Minute) auswählen, zur Bestätigung UNIT drücken.
21. PEAK-Funktion : Im ausgeschalteten Zustand die TARE-Taste gedrückt
halten, die ON/OFF-Taste drücken, um das Gerät einzuschalten, H_ON
anzuzeigen und auf Null zurückzukehren; die Spitzenwert-Sperrfunktion ist
eingeschaltet und der maximale Gewichtswert wird beim Laden des
Gewichts angezeigt und gesperrt; nach dem Ausschalten die TARE-Taste
gedrückt halten und die ON/OFF-Taste drücken, um das Gerät einzuschalten,
H_OFF anzuzeigen und auf Null zurückzukehren, die
Spitzenwert-Sperrfunktion ist ausgeschaltet und der tatsächliche
Gewichtswert wird angezeigt, wenn das Gewicht geladen und nicht gesperrt
ist.
22. Batterie: 1,5 V * 2 AA
23. Mindestgewicht: 0,3 lb, Maximale Kapazität: 880 lb
24. Einheit: KG/LB/N
Gebrauchsanweisung
19. Stellen Sie vor der Verwendung sicher, dass der Bereich, in dem Sie die
Waage verwenden möchten, ausreichend Platz für den Betrieb bietet.
20. Stellen Sie vor der Verwendung sicher, dass der Bereich, in dem Sie die

- 5 -
Waage verwenden möchten, ausreichend Platz für den Betrieb bietet.
21. Schalten Sie die Waage ein.
22. Befestigen Sie die Waage am vorgesehenen Aufhängemedium, indem Sie
den Haltestift am oberen Haken abschrauben.
23. Entfernen Sie den oberen Haken von der Waage und achten Sie dabei
darauf, dass Sie keine der Gummischeiben auf der Waage verlegen.
24. Fädeln Sie dann den oberen Haken durch das gewählte Medium. Befestigen
Sie den oberen Haken mit dem Haltestift wieder an der Waage. Sichern Sie
den Haltestift mit dem mitgelieferten Splint.
25. Stellen Sie sicher, dass die Waage sicher ist, bevor Sie den unteren Haken in
das untere Hakenloch einsetzen.
26. Legen Sie das zu wiegende Gut auf den unteren Haken.
27. Bitte entlasten Sie die Waage sofort nach dem Wiegen. Längeres Belasten
der Waage kann zu Schäden an der Waage führen.
Fehlerbehebung
Problem: Die Waage lässt sich nicht einschalten.
Lösung: Prüfen Sie, ob die Batterien richtig eingelegt sind und funktionieren und
wechseln Sie sie ggf.
Problem: Die Waage schaltet sich ein, aber es wird das falsche Gewicht angezeigt.
Lösung: Lag beim Einschalten eine Last auf der Waage?
Ist die Waage sicher und stabil?
Übersteigen die zu wiegenden Gegenstände die Kapazität der Waage?
Nachdem Sie sichergestellt haben, dass keiner dieser Punkte zutrifft, schalten Sie die
Waage aus und wieder ein.
Problem: OLwird angezeigt.
Lösung: Stellen Sie sicher, dass die Last geringer ist als die Betriebskapazität der
Waage.
Kalibrierung:
13. Schalten Sie die Waage ein.
14. Drücken Sie die UNIT-Taste und halten Sie sie gedrückt, bis die
Meldung „cal“ im Display angezeigt wird.

- 6 -
15. Die Kalibrierungsfunktion wurde aktiviert.
16. Wenn ein Wert angezeigt wird (5, 10, 20), legen Sie das
entsprechende Gewicht auf die Waagschale (5 = 5 kg, 10 = 10 kg, 20
= 20 kg).
17. Warten Sie, bis die Meldung „PASS“ angezeigt wird.
18. Der Kalibrierungsvorgang ist abgeschlossen.
Artikel
Beschreibung
1
Name
Kranwaage
2
Modell
SF921
3
Parameter
Nennleistung(en): 2x1,5AA
(
3VDC
)
Kapazität: 400 kg/880 lb
Teilung: 0,1 Pfund

Hersteller: Shanghaimuxinmuyeyouxiangongsi
Adresse: Shuangchenglu 803nong11hao1602A-1609shi, baoshanqu,
Shanghai 200000 CN.
Nach AUS importiert: SIHAO PTY LTD, 1 ROKEVA STREETEASTWOOD
NSW 2122 Australien
Importiert in die USA: Sanven Technology Ltd., Suite 250, 9166 Anaheim
Place, Rancho Cucamonga, CA 91730
REP
EC
E-CrossStu GmbH
Mainzer Landstr.69, 60329 Frankfurt am Main.
REP
UK
YH CONSULTING LIMITED.
C/O YH Consulting Limited Office 147, Centurion House,
London Road, Staines-upon-Thames, Surrey, TW18 4AX


Supporto tecnico e certificato di garanzia elettronica
www.vevor.com/support
BILANCIA PER GRU
MODELLO: SF921
We continue to be committed to provide you tools with competitive price.
"Save Half", "Half Price" or any other similar expressions used by us only represents an
estimate of savings you might benefit from buying certain tools with us compared to the major
top brands and does not necessarily mean to cover all categories of tools offered by us. You
are kindly reminded to verify carefully when you are placing an order with us if you are
actually saving half in comparison with the top major brands.

- 1 -
MODELLO: SF921
Have product questions? Need technical support? Please feel free to
contact us:
Technical Support and E-Warranty Certificate
www.vevor.com/support
NEED HELP? CONTACT US!
This is the original instruction, please read all manual instructions
carefully before operating. VEVOR reserves a clear interpretation of our
user manual. The appearance of the product shall be subject to the
product you received. Please forgive us that we won't inform you again if
there are any technology or software updates on our product.
CRANE SCALE

- 2 -
NORME GENERALI DI SICUREZZA
Simbolo
Descrizione del simbolo
Attenzione - Per ridurre il rischio di lesioni, l'utente deve leggere
attentamente il manuale di istruzioni.
Questo simbolo, posto prima di un commento sulla sicurezza,
indica un tipo di precauzione, avviso o pericolo. Ignorare questo
avviso può causare un incidente. Per ridurre il rischio di lesioni,
incendi o folgorazione, seguire sempre le raccomandazioni
indicate di seguito.
Informazioni sullo smaltimento:
Questo prodotto è soggetto alle disposizioni della Direttiva
Europea 2012/19/CE. Il simbolo raffigurante un bidone della
spazzatura barrato indica che il prodotto richiede la raccolta
differenziata dei rifiuti nell'Unione Europea. Ciò si applica al
prodotto e a tutti gli accessori contrassegnati con questo
simbolo. I prodotti contrassegnati come tali non possono essere
smaltiti con i normali rifiuti domestici, ma devono essere portati in
un punto di raccolta per il riciclaggio di dispositivi elettrici ed
elettronici.
Istruzioni generali di sicurezza
ATTENZIONE! Leggere tutte le avvertenze e le note di sicurezza. La
mancata osservanza delle istruzioni elencate di seguito può causare
scosse elettriche, incendi e/o lesioni.
Per ottenere buone prestazioni e misurazioni precise, prestare
attenzione al funzionamento e alla manutenzione quotidiani.
SICUREZZA NELL'AREA DI LAVORO
a) Mantenere l'area di applicazione pulita e ben illuminata. Le aree
sporche e buie causano incidenti.
b) Non utilizzare utensili elettrici in ambienti esplosivi, come in
- 3 -
presenza di liquidi, gas o vapori infiammabili. Gli utensili elettrici
generano scintille che possono incendiare polvere o vapori.
c) Tenere lontani i bambini e gli astanti quando si utilizza
l'apparecchio. Le distrazioni possono portare alla perdita di controllo sul
dispositivo.
Si prega di leggere tutte le istruzioni operative prima dell'uso. Le bilance
sono dispositivi di misurazione di precisione e devono sempre essere
maneggiate con la dovuta cura.
25. Questo non è un giocattolo. Tenere fuori dalla portata dei bambini.
26. Rimuovere tutti i carichi dalla bilancia quando non la si utilizza.
27. Rimuovere tutte le batterie prima di un lungo periodo di inutilizzo.
28. Pericolo! Non sovraccaricare questa bilancia. Ciò può causare danni
all'unità e possibili lesioni all'utente.
29. Controllare il gancio e l'anello prima dell'uso.
30. Tenere al riparo dalla luce solare diretta, dall'umidità, dal calore e dalle
vibrazioni.
31. Non utilizzare la bilancia in caso di maltempo.
32. Il supporto utilizzato per appendere la bilancia deve avere una portata pari
ad almeno 5 volte la portata massima della bilancia.
Funzioni dei pulsanti
25. ON/Off: premendo questo pulsante si accende e si spegne l'unità se
non c'è carico sulla bilancia. Se c'è un carico sulla bilancia, premendo questo
pulsante si tara il peso del carico.
26. Pulsante UNIT/HOLD: premendo questo pulsante si “bloccherà” il
peso visualizzato. In questo modo, gli articoli pesati possono essere rimossi
dalla bilancia e il peso sarà ancora visibile all'utente.
Quando si accende la bilancia, apparirà
,
premendo questo pulsante cambia l'unità di misura per la bilancia tra

- 4 -
Newton (N), Libbre (lb) e Chilogrammi (kg). L'unità di misura è indicata dalla
freccia sul lato destro del display.
27. Pulsante TARA : la funzione tara eliminerà il peso appeso alla bilancia,
come un contenitore o un recipiente. Ciò fornirà il peso solo degli articoli
aggiunti al contenitore.
28. Tempo di standby : nessuna variazione di peso, nessuna pressione di
pulsante, spegnimento automatico dopo 5 minuti per impostazione
predefinita; in stato zero, tenere premuto il pulsante TARE, premere il
pulsante TARE per spegnere il tempo, selezionare "5" (minuti), " - " (nessuno
spegnimento automatico), "1" (minuti), "3" (minuti), premere UNIT per
confermare.
29. Funzione PEAK : nello stato spento, tenere premuto il tasto TARE, premere
il tasto ON/OFF per accendere la macchina, visualizzare H_ON e tornare a
zero; la funzione di blocco del valore di picco è attivata e il valore del peso
massimo verrà visualizzato e bloccato durante il caricamento del peso; dopo
lo spegnimento, tenere premuto il tasto TARE e premere il tasto ON/OFF per
accendere, visualizzare H_OFF e tornare a zero, la funzione di blocco del
valore di picco è disattivata e il valore del peso effettivo verrà visualizzato
quando il peso è caricato e non bloccato.
30. Batteria: 1,5 V * 2 AA
31. Peso minimo: 0,3 libbre, capacità massima: 880 libbre
32. Unità: KG/LB/N
Istruzioni per l'uso
28. Prima dell'uso, assicurarsi che l'area in cui si intende utilizzare la bilancia offra
spazio sufficiente per il funzionamento.
29. Prima dell'uso, assicurarsi che l'area in cui si intende utilizzare la bilancia offra
spazio sufficiente per il funzionamento.
30. Accendere la bilancia.
31. Fissare la bilancia al supporto di sospensione designato svitando il perno di
fissaggio sul gancio superiore.
32. Rimuovere il gancio superiore dalla bilancia, facendo attenzione a non
spostare nessuna delle rondelle di gomma sulla bilancia.
33. Quindi, infilare il gancio superiore attraverso il supporto scelto. Riattaccare il
- 5 -
gancio superiore alla bilancia con il perno di fissaggio. Fissare il perno di
fissaggio con la coppiglia inclusa.
34. Assicurarsi che la bilancia sia fissata saldamente prima di posizionare il
gancio inferiore nel relativo foro.
35. Posizionare gli articoli da pesare sul gancio inferiore.
36. Si prega di rimuovere qualsiasi carico dalla bilancia immediatamente dopo la
pesatura. La presenza di carichi sulla bilancia per periodi prolungati può
causare danni alla bilancia.
Risoluzione dei problemi
Problema: la bilancia non si accende.
Soluzione: verificare che le batterie siano inserite correttamente e funzionino;
sostituirle se necessario.
Problema: la bilancia si accende, ma viene visualizzato un peso errato.
Soluzione: la bilancia era carica quando l'ho accesa?
La bilancia è sicura e stabile?
Gli articoli da pesare superano la capacità della bilancia?
Dopo esserti assicurato che nessuna di queste condizioni sia applicabile, spegni e
riaccendi la bilancia.
Problema: viene visualizzato OL.
Soluzione: assicurarsi che il carico sia inferiore alla capacità operativa della bilancia.
Calibrazione:
19. Accendere la bilancia.
20. Premere il pulsante UNIT e tenerlo premuto finché sul display non
viene visualizzato il messaggio “cal”.
21. La funzione di calibrazione è stata attivata.
22. Quando viene visualizzato un valore (5, 10, 20), posizionare il peso
corrispondente sul piatto della bilancia (5 = 5 kg, 10 = 10 kg, 20 = 20
kg).
23. Attendere che venga visualizzato il messaggio “PASS”.
24. La procedura di calibrazione è terminata.
- 6 -
Elementi
Descrizione
1
Nome
Bilancia per gru
2
Modello
SF921
3
Parametro
Valutazione(i): 2x1,5AA (3 VDC)
Capacità: 400kg/880Ib
Divisione: 0,1 libbre

Produttore: Shanghaimuxinmuyeyouxiangongsi
Indirizzo: Shuangchenglu 803nong11hao1602A-1609shi, baoshanqu,
shanghai 200000 CN.
Importato in AUS: SIHAO PTY LTD, 1 ROKEVA STREETEASTWOOD NSW
2122 Australia
Importato negli USA: Sanven Technology Ltd., Suite 250, 9166 Anaheim
Place, Rancho Cucamonga, CA 91730
REP
EC
E-CrossStu GmbH
Mainzer Landstr.69, 60329 Frankfurt am Main.
REP
UK
YH CONSULTING LIMITED.
C/O YH Consulting Limited Office 147, Centurion House,
London Road, Staines-upon-Thames, Surrey, TW18 4AX


Soporte técnico y certificado de garantía electrónica
www.vevor.com/support
BÁSCULA DE GRÚA
MODELO: SF921
We continue to be committed to provide you tools with competitive price.
"Save Half", "Half Price" or any other similar expressions used by us only represents an
estimate of savings you might benefit from buying certain tools with us compared to the major
top brands and does not necessarily mean to cover all categories of tools offered by us. You
are kindly reminded to verify carefully when you are placing an order with us if you are
actually saving half in comparison with the top major brands.

- 1 -
MODELO: SF921
Have product questions? Need technical support? Please feel free to
contact us:
Technical Support and E-Warranty Certificate
www.vevor.com/support
NEED HELP? CONTACT US!
This is the original instruction, please read all manual instructions
carefully before operating. VEVOR reserves a clear interpretation of our
user manual. The appearance of the product shall be subject to the
product you received. Please forgive us that we won't inform you again if
there are any technology or software updates on our product.
CRANE SCALE
- 2 -
NORMAS GENERALES DE SEGURIDAD
Símbolo
Descripción del símbolo
Advertencia - Para reducir el riesgo de lesiones, el usuario debe
leer atentamente el manual de instrucciones.
Este símbolo, colocado antes de un comentario de seguridad,
indica un tipo de precaución, advertencia o peligro. Ignorar esta
advertencia puede provocar un accidente. Para reducir el riesgo
de lesiones, incendios o electrocución, siga siempre las
recomendaciones que se muestran a continuación.
Información de eliminación:
Este producto está sujeto a las disposiciones de la Directiva
Europea 2012/19/CE. El símbolo que muestra un contenedor de
basura tachado indica que el producto requiere una recogida
selectiva de residuos en la Unión Europea. Esto se aplica al
producto y a todos los accesorios marcados con este símbolo.
Los productos marcados como tales no pueden desecharse con
los residuos domésticos normales, sino que deben llevarse a un
punto de recogida para reciclar dispositivos eléctricos y
electrónicos.
Instrucciones generales de seguridad
¡ADVERTENCIA! Lea todas las advertencias y notas de seguridad. Si
no sigue las instrucciones que se indican a continuación, puede sufrir una
descarga eléctrica, un incendio o lesiones.
Para un buen rendimiento y una medición precisa, tenga cuidado con
la operación y el mantenimiento diarios.
SEGURIDAD EN EL ÁREA DE TRABAJO
a) Mantener la zona de aplicación limpia y bien iluminada. Las zonas
sucias y oscuras pueden provocar accidentes.
b) No utilice herramientas eléctricas en entornos explosivos, como
- 3 -
en presencia de líquidos, gases o vapores inflamables. Las
herramientas eléctricas generan chispas que pueden encender el polvo o
los vapores.
c) Mantenga a los niños y a otras personas alejadas del aparato
cuando lo utilice. Las distracciones pueden provocar la pérdida de
control sobre el aparato.
Lea todas las instrucciones de uso antes de utilizar la báscula. Las
básculas son dispositivos de medición de precisión y siempre deben
manipularse con el debido cuidado.
33. Este producto no es un juguete. Mantener fuera del alcance de los niños.
34. Retire todas las cargas de la báscula cuando no esté en uso.
35. Retire todas las baterías antes de almacenar el producto durante un período
prolongado.
36. ¡Peligro! No sobrecargue la báscula, ya que podría dañarla y provocar
lesiones al usuario.
37. Por favor, compruebe el gancho y el anillo antes de usarlo.
38. Mantener alejado de la luz solar directa, la humedad, el calor y la vibración.
39. No utilice la báscula durante condiciones climáticas adversas.
40. Los medios utilizados para colgar la báscula deben tener una capacidad
nominal al menos 5 veces superior a la capacidad máxima de peso de la
báscula.
Funciones de los botones
33. ENCENDIDO/APAGADO: Al presionar este botón, la unidad se
encenderá y apagará si no hay carga en la báscula. Si hay una carga en la
báscula, al presionar este botón se tarará el peso de la carga.
34. Botón UNIT/HOLD: Al presionar este botón se “mantendrá” el peso
mostrado. De esta manera, los elementos que se están pesando se pueden
quitar de la báscula y el peso seguirá siendo visible para el usuario.
- 4 -
Al encender la báscula, aparecerá
.
Al presionar
este botón, se cambia la unidad de medida de la báscula entre Newton (N),
Libras (lb) y Kilogramos (kg). La unidad de medida se indica mediante la
flecha en el lado derecho de la pantalla.
35. Botón TARA: La función de tara eliminará el peso que cuelga sobre la
báscula, como un contenedor o recipiente. Esto dará el peso únicamente de
los elementos agregados al contenedor.
36. Tiempo de espera : sin cambio de peso, sin operación de botón, apagado
automático en 5 minutos de forma predeterminada; en estado cero, presione
y mantenga presionado el botón TARE, presione el botón TARE para apagar
el tiempo, seleccione "5" (minutos), " - " (sin apagado automático), "1"
(minuto), "3" (minuto), presione UNIT para confirmar.
37. Función PEAK : en el estado apagado, presione y mantenga presionada la
tecla TARE, presione la tecla ON/OFF para encender la máquina, mostrar
H_ON y volver a cero; la función de bloqueo del valor pico se activa y el valor
de peso máximo se mostrará y bloqueará al cargar peso; después de apagar,
mantenga presionada la tecla TARE y presione la tecla ON/OFF para
encender, mostrar H_OFF y volver a cero, la función de bloqueo del valor
pico está desactivada y el valor de peso real se mostrará cuando el peso
esté cargado y no bloqueado.
38. Batería: 1,5 V * 2 AA
39. Peso mínimo: 0,3 lb, capacidad máxima: 880 lb
40. Unidad: KG/LB/N
Instrucciones de uso
37. Antes de usar la báscula, asegúrese de que el área donde la va a utilizar
tenga suficiente espacio para su funcionamiento.
38. Antes de usar la báscula, asegúrese de que el área donde la va a utilizar
tenga suficiente espacio para su funcionamiento.
39. Encienda la báscula.
40. Fije la báscula al medio de suspensión designado desatornillando el pasador
- 5 -
de retención en el gancho superior.
41. Retire el gancho superior de la báscula, asegurándose de no perder ninguna
de las arandelas de goma en la báscula.
42. A continuación, pase el gancho superior por el material elegido. Vuelva a
colocar el gancho superior en la balanza con el pasador de retención.
Asegure el pasador de retención con el pasador de chaveta incluido.
43. Asegúrese de que la báscula esté segura antes de colocar el gancho inferior
en el orificio del gancho inferior.
44. Coloque los artículos a pesar en el gancho inferior.
45. Retire cualquier carga de la báscula inmediatamente después de pesarla. La
báscula puede sufrir daños si se deja carga sobre ella durante períodos
prolongados.
Solución de problemas
Problema: La báscula no se enciende.
Solución: Verifique que las baterías estén insertadas correctamente y funcionen;
cámbielas si es necesario.
Problema: La báscula se enciende, pero se muestra un peso incorrecto.
Solución: ¿Había una carga en la báscula cuando se encendió?
¿La báscula es segura y estable?
¿Los artículos que se van a pesar superan la capacidad de la báscula?
Después de asegurarse de que ninguno de estos casos se aplica, apague la báscula y
vuelva a encenderla.
Problema: se muestra OL.
Solución: Asegúrese de que la carga sea menor que la capacidad operativa de la
báscula.
Calibración:
25. Encienda la báscula.
26. Presione el botón UNIT y manténgalo presionado hasta que aparezca
el mensaje “cal” en la pantalla.
27. Se ha activado la función de calibración.
28. Cuando se muestra un valor (5, 10, 20), coloque el peso
- 6 -
correspondiente en el platillo de la balanza (5 = 5 kg, 10 = 10 kg, 20 =
20 kg).
29. Espere hasta que se muestre el mensaje “PASS”.
30. El procedimiento de calibración ha finalizado.
Elementos
Descripción
1
Nombre
Báscula de grúa
2
Modelo
SF921
3
Parámetro
Clasificación(es): 2x1,5 AA (3 V CC)
Capacidad: 400 kg/880 lb
División: 0,1 lb

Fabricante: Shanghaimuxinmuyeyouxiangongsi
Dirección: Shuangchenglu 803nong11hao1602A-1609shi, baoshanqu,
shanghai 200000 CN.
Importado a AUS: SIHAO PTY LTD, 1 ROKEVA STREETEASTWOOD NSW
2122 Australia
Importado a EE. UU.: Sanven Technology Ltd., Suite 250, 9166 Anaheim
Place, Rancho Cucamonga, CA 91730
REP
EC
E-CrossStu GmbH
Mainzer Landstr.69, 60329 Frankfurt am Main.
REP
UK
YH CONSULTING LIMITED.
C/O YH Consulting Limited Office 147, Centurion House,
London Road, Staines-upon-Thames, Surrey, TW18 4AX


Wsparcie techniczne i certyfikat e-gwarancji
www.vevor.com/support
WAGA DŹWIGOWA
MODEL: SF921
We continue to be committed to provide you tools with competitive price.
"Save Half", "Half Price" or any other similar expressions used by us only represents an
estimate of savings you might benefit from buying certain tools with us compared to the major
top brands and does not necessarily mean to cover all categories of tools offered by us. You
are kindly reminded to verify carefully when you are placing an order with us if you are
actually saving half in comparison with the top major brands.

- 1 -
MODEL: SF921
Have product questions? Need technical support? Please feel free to
contact us:
Technical Support and E-Warranty Certificate
www.vevor.com/support
NEED HELP? CONTACT US!
This is the original instruction, please read all manual instructions
carefully before operating. VEVOR reserves a clear interpretation of our
user manual. The appearance of the product shall be subject to the
product you received. Please forgive us that we won't inform you again if
there are any technology or software updates on our product.
CRANE SCALE

- 2 -
OGÓLNE ZASADY BEZPIECZEŃSTWA
Symbol
Opis symbolu
Ostrzeżenie - Aby zminimalizować ryzyko obrażeń, użytkownik
powinien uważnie przeczytać instrukcję obsługi.
Ten symbol, umieszczony przed komentarzem dotyczącym
bezpieczeństwa, wskazuje na rodzaj ostrożności, ostrzeżenia lub
niebezpieczeństwa. Zignorowanie tego ostrzeżenia może
doprowadzić do wypadku. Aby zmniejszyć ryzyko obrażeń,
pożaru lub porażenia prądem, zawsze postępuj zgodnie z
zaleceniami podanymi poniżej.
Informacje dotyczące utylizacji:
Ten produkt podlega postanowieniom Dyrektywy Europejskiej
2012/19/WE. Symbol przedstawiający przekreślony kosz na
śmieci na kółkach oznacza, że produkt wymaga oddzielnej zbiórki
odpadów w Unii Europejskiej. Dotyczy to produktu i wszystkich
akcesoriów oznaczonych tym symbolem. Produktów
oznaczonych w ten sposób nie można wyrzucać razem ze
zwykłymi odpadami domowymi, ale należy je oddać do punktu
zbiórki w celu recyklingu urządzeń elektrycznych i
elektronicznych.
Ogólne instrukcje bezpieczeństwa
OSTRZEŻENIE! Przeczytaj wszystkie ostrzeżenia i uwagi dotyczące
bezpieczeństwa. Nieprzestrzeganie poniższych instrukcji może
skutkować porażeniem prądem, pożarem i/lub obrażeniami.
Aby zapewnić dobrą wydajność i precyzję pomiarów, należy
zachować ostrożność podczas codziennej obsługi i konserwacji.
BEZPIECZEŃSTWO W MIEJSCU PRACY
a) Utrzymuj obszar aplikacji w czystości i dobrym oświetleniu. Brudne
i ciemne obszary prowadzą do wypadków.
- 3 -
b) Nie używaj elektronarzędzi w środowiskach zagrożonych
wybuchem, takich jak obecność łatwopalnych cieczy, gazów lub
oparów. Elektronarzędzia generują iskry, które mogą zapalić pył lub opary.
c) Trzymaj dzieci i osoby postronne z dala od urządzenia podczas
jego obsługi. Rozproszenie uwagi może prowadzić do utraty kontroli nad
urządzeniem.
Przed użyciem należy przeczytać wszystkie instrukcje obsługi. Wagi są
precyzyjnymi urządzeniami pomiarowymi i zawsze należy obchodzić się z
nimi z należytą ostrożnością.
41. To nie jest zabawka. Trzymać poza zasięgiem dzieci.
42. Jeżeli waga nie jest używana, należy ją odciążyć.
43. Przed długotrwałym przechowywaniem należy wyjąć wszystkie baterie.
44. Niebezpieczeństwo! Nie przeciążaj tej wagi. Może to spowodować
uszkodzenie urządzenia i możliwe obrażenia użytkownika.
45. Przed użyciem sprawdź haczyk i kółko.
46. Chronić przed bezpośrednim działaniem promieni słonecznych, wilgocią,
ciepłem i wibracjami.
47. Nie należy używać wagi przy niesprzyjającej pogodzie.
48. Nośniki, na których będzie zawieszona waga, powinny mieć udźwig co
najmniej 5 razy większy od maksymalnego udźwigu wagi.
Funkcje przycisków
41. WŁ./WYŁ.: Naciśnięcie tego przycisku spowoduje włączenie i
wyłączenie urządzenia, jeśli na wadze nie ma ładunku. Jeśli na wadze
znajduje się ładunek, naciśnięcie tego przycisku spowoduje wytarowanie
ciężaru ładunku.
42. Przycisk UNIT/HOLD: Naciśnięcie tego przycisku spowoduje
„zatrzymanie” wyświetlanej masy. W ten sposób ważone przedmioty można
usunąć z wagi, a masa będzie nadal widoczna dla użytkownika.
- 4 -
Po włączeniu wagi pojawi się
,
naciśnięcie tego
przycisku zmienia jednostkę miary wagi pomiędzy Newtonami (N), Funtami
(lb) i Kilogramami (kg). Jednostka miary jest wskazywana przez strzałkę po
prawej stronie wyświetlacza.
43. Przycisk TARE : Funkcja tary wyeliminuje ciężar wiszący na wadze,
taki jak pojemnik lub naczynie. Spowoduje to podanie ciężaru tylko
przedmiotów dodanych do pojemnika.
44. Czas czuwania : bez zmiany wagi, bez naciskania przycisków,
automatyczne wyłączenie po 5 minutach (domyślnie); w stanie zerowym
naciśnij i przytrzymaj przycisk TARE, naciśnij przycisk TARE, aby wyłączyć
czas, wybierz „5” (minuty), „ - ” (brak automatycznego wyłączania), „1”
(minuta), „3” (minuta), naciśnij UNIT, aby potwierdzić.
45. Funkcja PEAK : W stanie wyłączonym naciśnij i przytrzymaj przycisk TARE,
naciśnij przycisk ON/OFF, aby włączyć maszynę, wyświetlić H_ON i
powrócić do zera; funkcja blokady wartości szczytowej jest włączona, a
maksymalna wartość ciężaru zostanie wyświetlona i zablokowana podczas
ładowania ciężaru; po wyłączeniu zasilania przytrzymaj przycisk TARE i
naciśnij przycisk ON/OFF, aby włączyć zasilanie, wyświetlić H_OFF i
powrócić do zera, funkcja blokady wartości szczytowej jest wyłączona, a
rzeczywista wartość ciężaru zostanie wyświetlona, gdy ciężar jest
załadowany i niezablokowany.
46. Bateria: 1,5 V * 2AA
47. Minimalna waga: 0,3 funta, maksymalna pojemność: 880 funtów
48. Jednostka: KG/LB/N
Instrukcja użytkowania
46. Przed użyciem upewnij się, że miejsce, w którym zamierzasz używać wagi,
zapewnia wystarczająco dużo przestrzeni do pracy.
47. Przed użyciem upewnij się, że miejsce, w którym zamierzasz używać wagi,
zapewnia wystarczająco dużo przestrzeni do pracy.
48. Włącz wagę.
- 5 -
49. Zamocuj wagę do wyznaczonego wiszącego nośnika odkręcając sworzeń
mocujący na górnym haku.
50. Zdejmij górny hak z wagi, upewniając się, że nie zgubiłeś żadnej z
gumowych podkładek wagi.
51. Następnie przewlecz hak górny przez wybrane medium. Ponownie
przymocuj hak górny do wagi za pomocą kołka zabezpieczającego.
Zabezpiecz kołek zabezpieczający za pomocą dołączonego zawleczki.
52. Przed umieszczeniem dolnego haka w dolnym otworze haka należy upewnić
się, że waga jest bezpiecznie zamocowana.
53. Umieść przedmioty, które chcesz zważyć, na dolnym haczyku.
54. Proszę natychmiast po ważeniu usunąć wszelkie ładunki z wagi.
Uszkodzenie wagi może być wynikiem długotrwałego pozostawania
ładunków na wadze.
Rozwiązywanie problemów
Problem: Waga się nie włącza.
Rozwiązanie: Sprawdź, czy baterie są prawidłowo włożone i działają. W razie potrzeby
wymień baterie.
Problem: Waga włącza się, ale wyświetlana jest nieprawidłowa masa.
Rozwiązanie: Czy waga była obciążona w momencie jej włączenia?
Czy waga jest bezpieczna i stabilna?
Czy przedmioty, które mają zostać zważone, przekraczają dopuszczalny ciężar wagi?
Po upewnieniu się, że żadna z powyższych sytuacji nie ma zastosowania, wyłącz
wagę i włącz ją ponownie.
Problem: Wyświetla się OL.
Rozwiązanie: Upewnij się, że obciążenie jest mniejsze niż udźwig roboczy wagi.
Kalibrowanie:
31. Włącz wagę.
32. Naciśnij przycisk UNIT i przytrzymaj go długo, aż na wyświetlaczu
pojawi się komunikat „cal”.
33. Funkcja kalibracji została aktywowana.
34. Gdy wyświetli się wartość (5, 10, 20), umieść odpowiedni ciężar na
- 6 -
szalce wagi (5 = 5 kg, 10 = 10 kg, 20 = 20 kg).
35. Poczekaj, aż wyświetli się komunikat „PASS”.
36. Procedura kalibracji została zakończona.
Rzeczy
Opis
1
Nazwa
Waga dźwigowa
2
Model
SF921
3
Parametr
Moc znamionowa: 2x1,5AA (3VDC)
Nośność: 400 kg/880 funtów
Podział: 0,1 funta

Producent: Shanghaimuxinmuyeyouxiangongsi
Adres: Shuangchenglu 803nong11hao1602A-1609shi, baoshanqu, szanghaj
200000 CN.
Importowane do AUS: SIHAO PTY LTD, 1 ROKEVA STREETEASTWOOD
NSW 2122 Australia
Importowane do USA: Sanven Technology Ltd., Suite 250, 9166 Anaheim
Place, Rancho Cucamonga, CA 91730
REP
EC
E-CrossStu GmbH
Mainzer Landstr.69, 60329 Frankfurt am Main.
REP
UK
YH CONSULTING LIMITED.
C/O YH Consulting Limited Office 147, Centurion House,
London Road, Staines-upon-Thames, Surrey, TW18 4AX


Technische ondersteuning en e-garantiecertificaat
www.vevor.com/support
KRAANWEEGSCHAAL
MODEL: SF921
We continue to be committed to provide you tools with competitive price.
"Save Half", "Half Price" or any other similar expressions used by us only represents an
estimate of savings you might benefit from buying certain tools with us compared to the major
top brands and does not necessarily mean to cover all categories of tools offered by us. You
are kindly reminded to verify carefully when you are placing an order with us if you are
actually saving half in comparison with the top major brands.

- 1 -
MODEL: SF921
Have product questions? Need technical support? Please feel free to
contact us:
Technical Support and E-Warranty Certificate
www.vevor.com/support
NEED HELP? CONTACT US!
This is the original instruction, please read all manual instructions
carefully before operating. VEVOR reserves a clear interpretation of our
user manual. The appearance of the product shall be subject to the
product you received. Please forgive us that we won't inform you again if
there are any technology or software updates on our product.
CRANE SCALE
- 2 -
ALGEMENE VEILIGHEIDSREGELS
Symbool
Symbool Beschrijving
Waarschuwing - Om het risico op letsel te verkleinen, moet de
gebruiker de gebruiksaanwijzing zorgvuldig lezen.
Dit symbool, geplaatst voor een veiligheidsopmerking, geeft een
soort voorzorgsmaatregel, waarschuwing of gevaar aan. Het
negeren van deze waarschuwing kan leiden tot een ongeluk.
Om het risico op letsel, brand of elektrocutie te verminderen,
dient u altijd de onderstaande aanbevelingen op te volgen.
Informatie over verwijdering:
Dit product valt onder de bepalingen van de Europese richtlijn
2012/19/EG. Het symbool met een doorgestreepte afvalbak
geeft aan dat het product in de Europese Unie gescheiden
afvalinzameling vereist. Dit geldt voor het product en alle
accessoires die met dit symbool zijn gemarkeerd. Producten die
als zodanig zijn gemarkeerd, mogen niet met het normale
huishoudelijke afval worden weggegooid, maar moeten worden
ingeleverd bij een inzamelpunt voor recycling van elektrische en
elektronische apparaten.
Algemene veiligheidsinstructies
WAARSCHUWING! Lees alle veiligheidswaarschuwingen en
-opmerkingen. Het niet opvolgen van de onderstaande instructies kan
leiden tot elektrische schokken, brand en/of letsel.
Voor goede prestaties en nauwkeurige metingen dient u voorzichtig
te zijn bij de dagelijkse bediening en het onderhoud.
VEILIGHEID OP DE WERKPLEK
a) Houd het toepassingsgebied schoon en goed verlicht. Onreine en
donkere gebieden leiden tot ongelukken.
b) Gebruik geen elektrisch gereedschap in explosieve omgevingen,

- 3 -
zoals in de aanwezigheid van ontvlambare vloeistoffen, gassen of
dampen. Elektrisch gereedschap genereert vonken die stof of dampen
kunnen ontsteken.
c) Houd kinderen en omstanders uit de buurt wanneer u het apparaat
bedient. Afleidingen kunnen leiden tot verlies van controle over het
apparaat.
Lees alle gebruiksaanwijzingen voor gebruik. Weegschalen zijn
precisiemeetinstrumenten en moeten altijd met de juiste zorg worden
behandeld.
49. Dit is geen speelgoed. Buiten bereik van kinderen houden.
50. Verwijder alle lasten van de weegschaal wanneer u deze niet gebruikt.
51. Verwijder alle batterijen voordat u het apparaat voor langere tijd opbergt.
52. Gevaar! Overbelast deze weegschaal niet. Dit kan schade aan het apparaat
en mogelijk letsel bij de gebruiker veroorzaken.
53. Controleer de haak en de ring voor gebruik.
54. Bescherm tegen direct zonlicht, vocht, hitte en trillingen.
55. Gebruik de weegschaal niet bij slecht weer.
56. Het materiaal dat u gebruikt om de weegschaal op te hangen, moet
minimaal 5 keer zo zwaar zijn als het maximale draagvermogen van de
weegschaal.
Knopfuncties
49. AAN/UIT: Als u op deze knop drukt, wordt het apparaat aan- en
uitgezet als er geen lading op de weegschaal ligt. Als er een lading op de
weegschaal ligt, wordt het gewicht van de lading getarreerd als u op deze
knop drukt.
50. UNIT/HOLD-knop: Als u op deze knop drukt, wordt het weergegeven
gewicht "vastgehouden". Op deze manier kunnen de items die worden
gewogen van de weegschaal worden verwijderd en blijft het gewicht
zichtbaar voor de gebruiker.
- 4 -
Wanneer u de weegschaal aanzet, verschijnt er
,
door op deze knop te drukken verandert de meeteenheid voor de
weegschaal tussen Newton (N), Pond (lb) en Kilogram (kg). De meeteenheid
wordt aangegeven door de pijl aan de rechterkant van het display.
51. TARE-knop : De tarrafunctie verwijdert het gewicht dat aan de
weegschaal hangt, zoals een container of vat. Dit geeft alleen het gewicht
van de items die aan de container zijn toegevoegd.
52. Standby-tijd : geen gewichtsverandering, geen knopbediening,
automatische uitschakeling na 5 minuten standaard; in de nulstand de
TARE-knop ingedrukt houden, op de TARE-knop drukken om de tijd uit te
schakelen, "5" (minuten), " - " (geen automatische uitschakeling), "1" (minuut),
"3" (minuut) selecteren en op UNIT drukken om te bevestigen.
53. PEAK-functie : Houd in de uitgeschakelde stand de TARE-toets ingedrukt
en druk op de AAN/UIT-toets om de machine in te schakelen. H_ON wordt
weergegeven en de machine keert terug naar nul. De vergrendelingsfunctie
voor de piekwaarde is ingeschakeld en de maximale gewichtswaarde wordt
weergegeven en vergrendeld bij het laden van gewicht. Houd na het
uitschakelen de TARE-toets ingedrukt en druk op de AAN/UIT-toets om de
machine in te schakelen. H_OFF wordt weergegeven en de machine keert
terug naar nul. De vergrendelingsfunctie voor de piekwaarde is uitgeschakeld
en de werkelijke gewichtswaarde wordt weergegeven wanneer het gewicht
is geladen en niet is vergrendeld.
54. Batterij: 1,5 V * 2 AA
55. Minimaal gewicht: 0,3 lb, maximale capaciteit: 880 lb
56. Eenheid: KG/LB/N
Gebruiksaanwijzing
55. Controleer vóór gebruik of de ruimte waarin u de weegschaal gaat gebruiken,
voldoende ruimte biedt om de weegschaal te kunnen bedienen.
56. Controleer vóór gebruik of de ruimte waarin u de weegschaal gaat gebruiken,
voldoende ruimte biedt om de weegschaal te kunnen bedienen.
- 5 -
57. Zet de weegschaal AAN.
58. Bevestig de weegschaal aan het daarvoor bestemde ophangmedium door
de borgpen op de bovenste haak los te draaien.
59. Verwijder de bovenste haak van de weegschaal en zorg ervoor dat u geen
van de rubberen ringen op de weegschaal kwijtraakt.
60. Rijg vervolgens de Top Hook door het gekozen medium. Bevestig de Top
Hook opnieuw aan de weegschaal met de borgpen. Bevestig de borgpen
met de meegeleverde splitpen.
61. Controleer of de weegschaal goed vastzit voordat u de onderste haak in het
onderste haakgat plaatst.
62. Plaats de te wegen artikelen op de onderste haak.
63. Verwijder alle ladingen direct na het wegen van de weegschaal. Schade aan
de weegschaal kan ontstaan als ladingen langere tijd op de weegschaal
liggen.
Probleemoplossing
Probleem: De weegschaal gaat niet aan.
Oplossing: Controleer of de batterijen correct zijn geplaatst en of ze werken. Vervang
de batterijen indien nodig.
Probleem: De weegschaal gaat aan, maar het verkeerde gewicht wordt weergegeven.
Oplossing: Lag er een last op de weegschaal toen deze werd ingeschakeld?
Is de weegschaal veilig en stabiel?
Zijn de te wegen artikelen zwaarder dan de capaciteit van de weegschaal?
Controleer of geen van bovenstaande situaties van toepassing is en zet de weegschaal
uit en weer aan.
Probleem: OLwordt weergegeven.
Oplossing: Zorg ervoor dat de belasting lager is dan de bedrijfscapaciteit van de
weegschaal.
Kalibratie:
37. Zet de weegschaal aan.
38. Druk op de UNIT-knop en houd deze lang ingedrukt totdat de melding
"cal" op het display verschijnt.
- 6 -
39. De kalibratiefunctie is geactiveerd.
40. Wanneer er een waarde wordt weergegeven (5, 10, 20), plaatst u het
bijbehorende gewicht op de weegschaal (5 = 5 kg, 10 = 10 kg, 20 = 20
kg).
41. Wacht tot het bericht “PASS” verschijnt.
42. De kalibratieprocedure is voltooid.
Artikelen
Beschrijving
1
Naam
Kraanweegschaal
2
Model
SF921
3
Parameter
Nominale waarde(n): 2x1.5AA
(
3VDC
)
Capaciteit: 400kg/880Ib
Divisie: 0,1 pond
Fabrikant: Shanghaimuxinmuyeyouxiangongsi
Adres: Shuangchenglu 803nong11hao1602A-1609shi, baoshanqu, shanghai
200000 CN.
Geïmporteerd naar AUS: SIHAO PTY LTD, 1 ROKEVA
STREETEASTWOOD NSW 2122 Australië
Geïmporteerd naar de VS: Sanven Technology Ltd., Suite 250, 9166
Anaheim Place, Rancho Cucamonga, CA 91730
REP
EC
E-CrossStu GmbH
Mainzer Landstr.69, 60329 Frankfurt am Main.
REP
UK
YH CONSULTING LIMITED.
C/O YH Consulting Limited Office 147, Centurion House,
London Road, Staines-upon-Thames, Surrey, TW18 4AX


Teknisk support och e-garanticertifikat
www.vevor.com/support
KRANVÅG
MODELL: SF921
We continue to be committed to provide you tools with competitive price.
"Save Half", "Half Price" or any other similar expressions used by us only represents an
estimate of savings you might benefit from buying certain tools with us compared to the major
top brands and does not necessarily mean to cover all categories of tools offered by us. You
are kindly reminded to verify carefully when you are placing an order with us if you are
actually saving half in comparison with the top major brands.

- 1 -
MODELL: SF921
Have product questions? Need technical support? Please feel free to
contact us:
Technical Support and E-Warranty Certificate
www.vevor.com/support
NEED HELP? CONTACT US!
This is the original instruction, please read all manual instructions
carefully before operating. VEVOR reserves a clear interpretation of our
user manual. The appearance of the product shall be subject to the
product you received. Please forgive us that we won't inform you again if
there are any technology or software updates on our product.
CRANE SCALE
- 2 -
ALLMÄNNA SÄKERHETSFÖRESKRIFTER
Symbol
Symbol Beskrivning
Varning - För att minska risken för skada måste användaren läsa
bruksanvisningen noggrant.
Denna symbol, placerad före en säkerhetskommentar, indikerar
en slags försiktighetsåtgärd, varning eller fara. Att ignorera denna
varning kan leda till en olycka. För att minska risken för skada,
brand eller elstöt, följ alltid rekommendationerna nedan.
Avfallshanteringsinformation:
Denna produkt omfattas av bestämmelserna i det europeiska
direktivet 2012/19/EC. Symbolen som visar en soptunna korsad
anger att produkten kräver separat sophämtning i EU. Detta
gäller för produkten och alla tillbehör märkta med denna symbol.
Produkter märkta som sådana får inte kasseras tillsammans med
vanligt hushållsavfall utan måste lämnas till en insamlingsplats för
återvinning av elektriska och elektroniska apparater.
Allmänna säkerhetsanvisningar
VARNING! Läs alla säkerhetsvarningar och anmärkningar.
Underlåtenhet att följa instruktionerna nedan kan leda till elektriska stötar,
brand och/eller skada.
För bra prestanda och exakt mätning, var försiktig med daglig drift
och underhåll.
SÄKERHET FÖR ARBETSOMRÅDE
a) Håll applikationsområdet rent och väl upplyst. Orena och mörka
områden leder till olyckor.
b) Använd inte elverktyg i explosiva miljöer, som i närvaro av
brandfarliga vätskor, gaser eller ångor. Elverktyg genererar gnistor som
kan antända damm eller ångor.
c) Håll barn och åskådare borta när du använder apparaten.
- 3 -
Distraktioner kan leda till att du förlorar kontrollen över enheten.
Läs alla bruksanvisningar före användning. Vågar är
precisionsmätanordningar och ska alltid hanteras varsamt.
57. Det här är ingen leksak. Förvaras utom räckhåll för barn.
58. Ta bort all last från vågen när den inte används.
59. Ta bort alla batterier före långtidsförvaring.
60. Fara! Överbelasta inte denna våg. Detta kan orsaka skador på enheten och
möjlig skada på användaren.
61. Kontrollera kroken och ringen före användning.
62. Håll borta från direkt solljus, fukt, värme och vibrationer.
63. Använd inte vågen vid dåligt väder.
64. Medier som används för att hänga vågen bör klassas som minst 5 gånger
vågens maximala viktkapacitet.
Knappfunktioner
57. PÅ/Av: Genom att trycka på den här knappen slås enheten på och av
om vågen inte belastas. Om det finns en last på en våg tar en tryckning på
denna knapp vikten på lasten.
58. UNIT/HOLD-knapp: Genom att trycka på denna knapp "håller" den
visade vikten. På så sätt kan föremålen som vägs tas bort från vågen och
vikten kommer fortfarande att vara synlig för användaren.
När du slår på skalan, kommer den att visas
,
genom att trycka på den här knappen ändras måttenheten för skalan mellan
Newton (N), Pounds (lb) och Kilogram (kg). Måttenheten indikeras av pilen
på höger sida av displayen.
59. TARA-knapp : Tarafunktionen eliminerar vikten som hänger på vågen,
såsom en behållare eller ett kärl. Detta ger bara vikten av de föremål som
lagts till behållaren.

- 4 -
60. Standbytid : ingen viktändring, ingen knappmanövrering, automatisk
avstängning på 5 minuter som standard; i nollläge, tryck och håll in
TARE-knappen, tryck på TARE-knappen för att stänga av tiden, välj "5"
(minuter), " - " (ingen automatisk avstängning), "1" (minut), "3" (minut) , tryck
på UNIT för att bekräfta.
61. PEAK-funktion : I avstängt läge, tryck och håll ned TARE-tangenten, tryck
på ON/OFF-knappen för att slå på maskinen, visa H_ON och återgå till noll;
toppvärdeslåsfunktionen är påslagen och maxviktsvärdet visas och låses när
vikt lastas; efter avstängning, håll ner TARE-tangenten och tryck på
ON/OFF-tangenten för att slå på, visa H_OFF och återgå till noll,
toppvärdeslåsfunktionen är avstängd och det faktiska viktvärdet kommer att
visas när vikten är laddad och inte låst .
62. Batteri: 1,5V * 2AA
63. Min vikt: 0,3 lb, Max kapacitet: 880 lb
64. Enhet: KG/LB/N
Bruksanvisning
64. Före användning, se till att området där du ska använda vågen ger tillräckligt
med utrymme för användning.
65. Före användning, se till att området där du ska använda vågen ger tillräckligt
med utrymme för användning.
66. Slå PÅ vågen.
67. Fäst vågen på det avsedda hängande mediet genom att skruva loss
hållarstiftet på den övre kroken.
68. Ta bort den övre kroken från vågen, se till att inte ta bort någon av
gummibrickorna på vågen.
69. Trä sedan den övre kroken genom det valda mediet. Sätt tillbaka den övre
kroken på vågen med hållarstiftet. Fäst hållarstiftet med den medföljande
saxsprinten.
70. Se till att vågen sitter fast innan du sätter den nedre kroken i det nedre
krokhålet.
71. Placera föremålen som ska vägas på den nedre kroken.
72. Ta bort eventuella laster från vågen omedelbart efter vägning. Skador på
vågen kan orsakas av belastningar på vågen under långa perioder.
- 5 -
Felsökning
Problem: Vågen slås inte på.
Lösning: Kontrollera att batterierna är korrekt isatta och fungerar; byt batterier vid
behov.
Problem: Vågen slås på, men den felaktiga vikten visas.
Lösning: Var det en belastning på vågen när den slogs på?
Är vågen säker och stabil?
Är föremålen som ska vägas över vågens kapacitet?
Efter att ha kontrollerat att inget av dessa gäller, stäng av vågen och slå på den igen.
Problem: OLvisas.
Lösning: Se till att belastningen är mindre än vågens driftskapacitet.
Kalibrering:
43. Slå på vågen.
44. Tryck på UNIT-knappen och håll den intryckt tills meddelandet "cal"
visas på displayen.
45. Kalibreringsfunktionen har aktiverats.
46. När ett värde visas (5, 10, 20), placerar du motsvarande vikt på vågen
(5 = 5 kg, 10 = 10 kg, 20 = 20 kg).
47. Vänta tills meddelandet "PASS" visas.
48. Kalibreringsproceduren är avslutad.
Föremål
Beskrivning
1
Namn
Kranvåg
2
Modell
SF921
3
Parameter
Betyg: 2x1,5AA
(
3VDC
)
Kapacitet: 400kg/880Ib
Division: 0,1 lb

Tillverkare: Shanghaimuxinmuyeyouxiangongsi
Adress: Shuangchenglu 803nong11hao1602A-1609shi, baoshanqu,
shanghai 200000 CN.
Importerad till AUS: SIHAO PTY LTD, 1 ROKEVA STREETEASTWOOD
NSW 2122 Australien
Importerad till USA: Sanven Technology Ltd., Suite 250, 9166 Anaheim
Place, Rancho Cucamonga, CA 91730
REP
EC
E-CrossStu GmbH
Mainzer Landstr.69, 60329 Frankfurt am Main.
REP
UK
YH CONSULTING LIMITED.
C/O YH Consulting Limited Office 147, Centurion House,
London Road, Staines-upon-Thames, Surrey, TW18 4AX

