
Manual de instrucciones
Instruction manual
Manuel d’instructions
Bedienungsanleitung
Manuale di istruzioni
Manual de instruções
Instrukcja obsługi
Návod k použití
05406
HYDROBOOST 10000 LIBERTY
Hidrolimpiadora con batería/Pressure washer with battery

HYDROBOOST 10000 LIBERTYHYDROBOOST 10000 LIBERTY
35
ENGLISH
HYDROBOOST 10000 LIBERTY
34
ESPAÑOL
HYDROBOOST 10000 LIBERTY
Si la incidencia ha sido originada por el desgaste normal de las piezas debido al uso.
El servicio de garantía cubre todos los defectos de fabricación durante 2 años en base a la
legislación vigente, excepto piezas consumibles. En caso de mal uso por parte del usuario el
servicio de garantía no se hará responsable de la reparación.
Si en alguna ocasión detecta una incidencia con el producto o tiene alguna consulta, póngase
en contacto con el Servicio de Asistencia Técnica ocial de Cecotec a través del número de
teléfono +34 96 321 07 28.
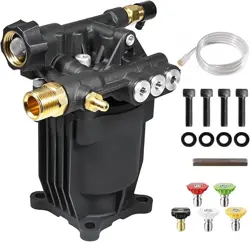
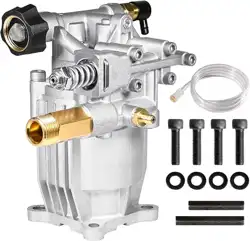
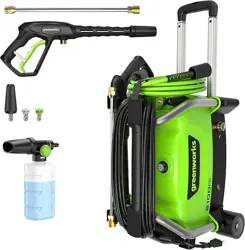
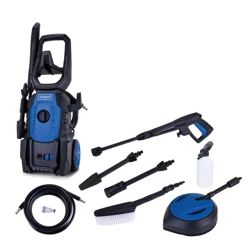
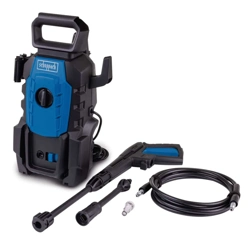
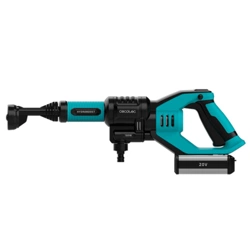
1. PARTS AND COMPONENTS
Fig. 1
1. ECO/Turbo mode button
2. Safety lock
3. Trigger (On/O)
4. Battery opening button
5. Battery
6. Water inlet
7. Multi-angle nozzle
8. Hose connector
9. Inlet hose
10. Hose clamp
11. Water inlet’s lter
12. Bottle for soap
13. Charger
14. Travel bag
2. BEFORE USE
Take the product out of the box.
Remove all packaging material.
Make sure all parts and accessories are included, and check that they do not show any signs of
damage. If there are any, contact the ocial Technical Support Service of Cecotec.
Dry the device completely before using it for the rst time.
Charging the battery
Do not use other chargers than the one provided by Cecotec to charge the battery. Do not let
any metal objects touch the battery as this may cause a short circuit.
The battery will not be fully charged at rst. Charge it before using it for the rst time and also
if it has not been used in a long time. Press the battery’s green button to display its remaining
power.
In order to charge the battery, plug the charger into a suitable power outlet.
A red light will indicate that the battery pack is correctly connected with the charger and that
it is charging.
When the battery is fully charged, the green light will turn on. Unplug the battery.
If the battery starts ashing a red light, it means there is a battery failure. In this case, remove
the battery and reinsert it. If the battery is correctly charged but the red light still ashes, the
battery may be invalid.
HYDROBOOST 10000 LIBERTYHYDROBOOST 10000 LIBERTY
3736
ENGLISH ENGLISH
HYDROBOOST 10000 LIBERTYHYDROBOOST 10000 LIBERTY
Indicator status Status description
Red light is always on Charging
Green light is always on Finished charging
Flashing red light Battery failure
3. PRODUCT ASSEMBLY
Step Figure
Removing the battery. Fig. 2
Charging the battery. Check the charging instructions for further details. Fig. 3
Battery indicator Fig. 4
Installing the battery. Fig. 5
Installation
Installing the multi-function nozzle
Note: When the nozzle is installed, shake the nozzle gently to check if it’s
correctly installed.
Fig. 6
Fig. 7
Connecting the water inlet’s hose
Note: When the hose is installed, shake the nozzle gently to check if it’s
correctly installed.
Fig. 8
Fig. 9
Operation
Select the operating mode.
The device can operate under two modes: High mode, which is used for
cleaning the most stubborn dirt, and the Energy-saving mode (ECO), to
clean the easier dirt.
Fig. 10
Operation
Note: The air inside the hose must be drained every time the device is
used. Hold the device below the waist (<1.5 m) and select the high pressure
mode. The water will be suctioned with the hose and will be ejected. This
process takes about 15 seconds.
Fig. 11
Select the water-spray eect
The water-spray eect (multi-angle nozzle) must be selected according to
the working conditions. The 0º, 15º and 40º modes are suitable for cleaning
and watering.
Do not use turbid, muddy or corrosive water.
Warning Fig. 12
Fig. 13
Other
The device can also be used with other accessories.
Assemble the detergent bottle to remove by spraying on the most
stubborn dirt. Adjust the detergent-spray rate by turning the knob.
Use only soap for pressure washers.
The proportion of water and soap should be: 5,4 % of soap and 94.6 % of
water, 1:19 approximately.
Try the soap where it will not be too visible before using the device.
Open the bottle for soap and ll it with water and soap.
Cover it again.
Remove the lance.
Install the bottle for soap in the spray gun.
Let the soap act on the surface for some minutes. In the meantime, scrub
the dirtiest zones with a brush. Do not let the soap touch the surface.
Remove the bottle for soap from the spray gun and replace it for the lance.
You can also remove it from the tip of the lance.
Clean the soap from the surface.
Note: Wash the bottle for soap with water after each use.
Final rinse
Start the nal rinse from the bottom to the top. Make sure the surface is
correctly rinsed and that the dirt has completely been removed.
Fig. 14
Fig. 15
Assemble a long nozzle (lance) to clean the dirt on the ground or in walls.
Adjust the fan’s spray angle by rotating the tip.
Fig. 16
Fig. 17
Cleaning the inlet’s connector. Fig. 18
Cleaning the inlet lter. Fig. 19
4. OPERATION
Adjusting water stream
The angle of the water stream coming out of the nozzle can be adjusted with the pulverising
nozzle by rotating the tip. This will vary the water pattern from approximately a 0° narrow
high-impact stream to a 60° wide fan spray.
Fig. 20
This appliance oers 2 modes:
Focused mode

HYDROBOOST 10000 LIBERTYHYDROBOOST 10000 LIBERTY
3938
ENGLISH ENGLISH
HYDROBOOST 10000 LIBERTYHYDROBOOST 10000 LIBERTY
The angle of the water stream coming out of the nozzle may be adjusted with the pulverising
nozzle. Turn the nozzle to select the focused stream, which has a high impact on the cleaning
surface and results in maximum deep cleaning in a concentrated area. This narrow high-
impact stream must be used cautiously, as it may damage some surfaces.
Note: Pay special attention when cleaning delicate surfaces such as bodywork o wheel rims,
lacquered surfaces, wood, paint, etc.
Fig. 21
Spray mode
Turn the pulverising nozzle to select the at-fan pattern. A wide stream will distribute the
impact of water over a larger area, resulting in excellent cleaning action with a reduced risk of
surface damage. Large surface areas can be cleaned more quickly using a wider stream.
Fig. 22
Product operation
Note: The motor on this pressure washer does not run continuously. It only runs when the
trigger of the spray gun is squeezed. After following the start-up procedures in this manual,
press the safety-lock button and the trigger at the same time, then release the safety-lock
button. The device will operate as long as the trigger is pressed.
Nozzle cleaning
A clogged or partially clogged nozzle can cause a signicant reduction of water coming out of
the nozzle and cause the unit to pulsate while spraying. To clean out the nozzle:
Turn o and unplug the unit.
Turn o water supply. Relieve any pressure trapped in the high-pressure by squeezing the
trigger 2-3 times.
Separate the lance from the gun.
Rotate the nozzle to the narrow stream setting.
Use any type of pointed element such as an unfolded paper clip to clean the nozzle. Insert the
wire into the nozzle hole and move back and forth until debris is dislodged.
Fig. 23
Remove debris by back-ushing water through the nozzle. To do this, point the end of a garden
hose (with water running) to the nozzle’s end for 30-60 seconds.
Angle from the high-pressure hose to the cleaning surface
When spraying water against a surface, maximum impact is reached when the water strikes
the surface head on. However, this type of impact tends to cause dirt particles to imbed in the
surface, thereby preventing the desired cleaning action.
The optimum angle for spraying water against a cleaning surface if 45 degrees.
Spraying water against a surface at this angle provides for the most benecial impact force
combined with ecient removal of debris from the surface.
Distance from cleaning surface
The impact force of the water is increased as the pulverising nozzle is moved closer to the
surface.
How to avoid damaging surfaces
Damage to cleaning surfaces occurs because the impact force of the water exceeds the
hardness of the surface. The impact force can be varied by controlling the three previously
noted items. Never use a narrow high impact stream on a surface that is susceptible to damage.
Avoid spraying windows with a narrow high impact stream as this may cause breakage.
The surest way to avoid damaging surfaces is to follow these steps:
Before triggering the gun, adjust the pulverising nozzle to a wide stream.
First, follow the distance and angle instructions above.
Vary the spray angle, stream type and the distance to the cleaning surface until optimum
cleaning eciency is achieved without damaging the surface.
Cleaning process
Surface preparation
Clean the area of furniture and make sure all windows and doors are closed tight. Also, make
sure that all plants and trees near the cleaning area are protected by a drop cloth.
Initial high-pressure rinse
Spray the cleaning surface with water to clear o any dirt or grime that may have collected
on the surface. Before triggering the gun, adjust the pulverising nozzle to a wide stream and
slowly adjust it to the desired stream. This will avoid applying too much concentrated spray to
the surface which could cause damage.
Final rinse
Start the nal rinse at the bottom and work upward. Make sure the surface is thoroughly
rinsed and that al dirt is removed.
Shut down
Release the trigger.
Remove the water supply.
Warning: Do not turn the water supply o before turning the motor o. Serious damage could
occur.
Tips for extending the product’s service life
Never operate unit without water.
Do not use the device with hot water.

HYDROBOOST 10000 LIBERTYHYDROBOOST 10000 LIBERTY
4140
ENGLISH ENGLISH
HYDROBOOST 10000 LIBERTYHYDROBOOST 10000 LIBERTY
Before adjusting the pulverising nozzle’s pressure (high-to-low or low-to-high) release trigger.
Anti-impurities lter
This model includes a transparent male connector with an anti-scale lter to which the hose is
connected, preventing scale from building up.
5. CLEANING AND MAINTENANCE
Disconnect the appliance from the power supply and allow it to cool down before cleaning.
Use a soft, damp cloth to clean the product’s surface.
Do not immerse the appliance in water or other liquid.
Do not use abrasive scouring pads, powders or cleaners.
Maintenance of the water lter
Remove the transparent cover of the lter, then remove the dirt in the lter and rinse the parts
with water. Put the transparent cover back.
Cleaning and preservation
Remove the water inlet and the hose before storing it. Pour out the water inside the device and
the hose.
Remove the battery and store it separately if the device is not going to be used for a long time.
6. TROUBLESHOOTING
Problem Cause Solution
ECO indicator light ashes. Low battery. Charge the battery.
The device does not turn on. Low battery. Charge the battery.
Sudden power outage. Temperature too high,
overheating protection.
Turn the device again once
the temperature is lower.
Low water content. Filtering blockage that leads
to a poor water intake.
Clean the water inlet’s lter
and the water inlet.
Inlet hose bent. Replace or straighten the
inlet hose.
Water contains impurities Replace the water.
The device does not absorb
the water
Water inlet’s leakage. Tighten the inlet’s joint.
Poor connection between
water inlet and water inlet’s
connector.
Reassemble the inlet and
outlet accessories.
The water inlet’s lter is not
correctly assembled.
Assemble it correctly.
The device takes longer to
absorb water.
Device on Energy-saving
mode.
Deactivate ECO mode and
switch to normal mode.
Multi-function nozzle leaks. Multi-function nozzle is not
correctly assembled.
Insert the multi-function
nozzle in the device and then
rotate it.
Multi-function nozzle leaks. The nozzle is not correctly
assembled.
Rotate the nozzle to the
indicating mark.
Why can’t I charge the battery? Check if the charger and the battery are
compatible.
The battery can only be inserted into the
charger in one direction.
Turn the battery until it can be inserted into
the charger. When the charger’s indicator light
turns red, it means it is charging.
Why does the battery’s charging time change? The charging time is aected by many factors,
but this does not mean the device is defective.
If the battery is only partially discharged, it
will take less time to charge it back.
If the battery’s temperature and the room
temperature are low, the battery will take
longer to charge.
If the battery is too hot, the overheating-
protection system will disconnect the device
automatically. If this happens, unplug the
device from the socket and the battery from
the charger and then start charging it again
after it cools down.
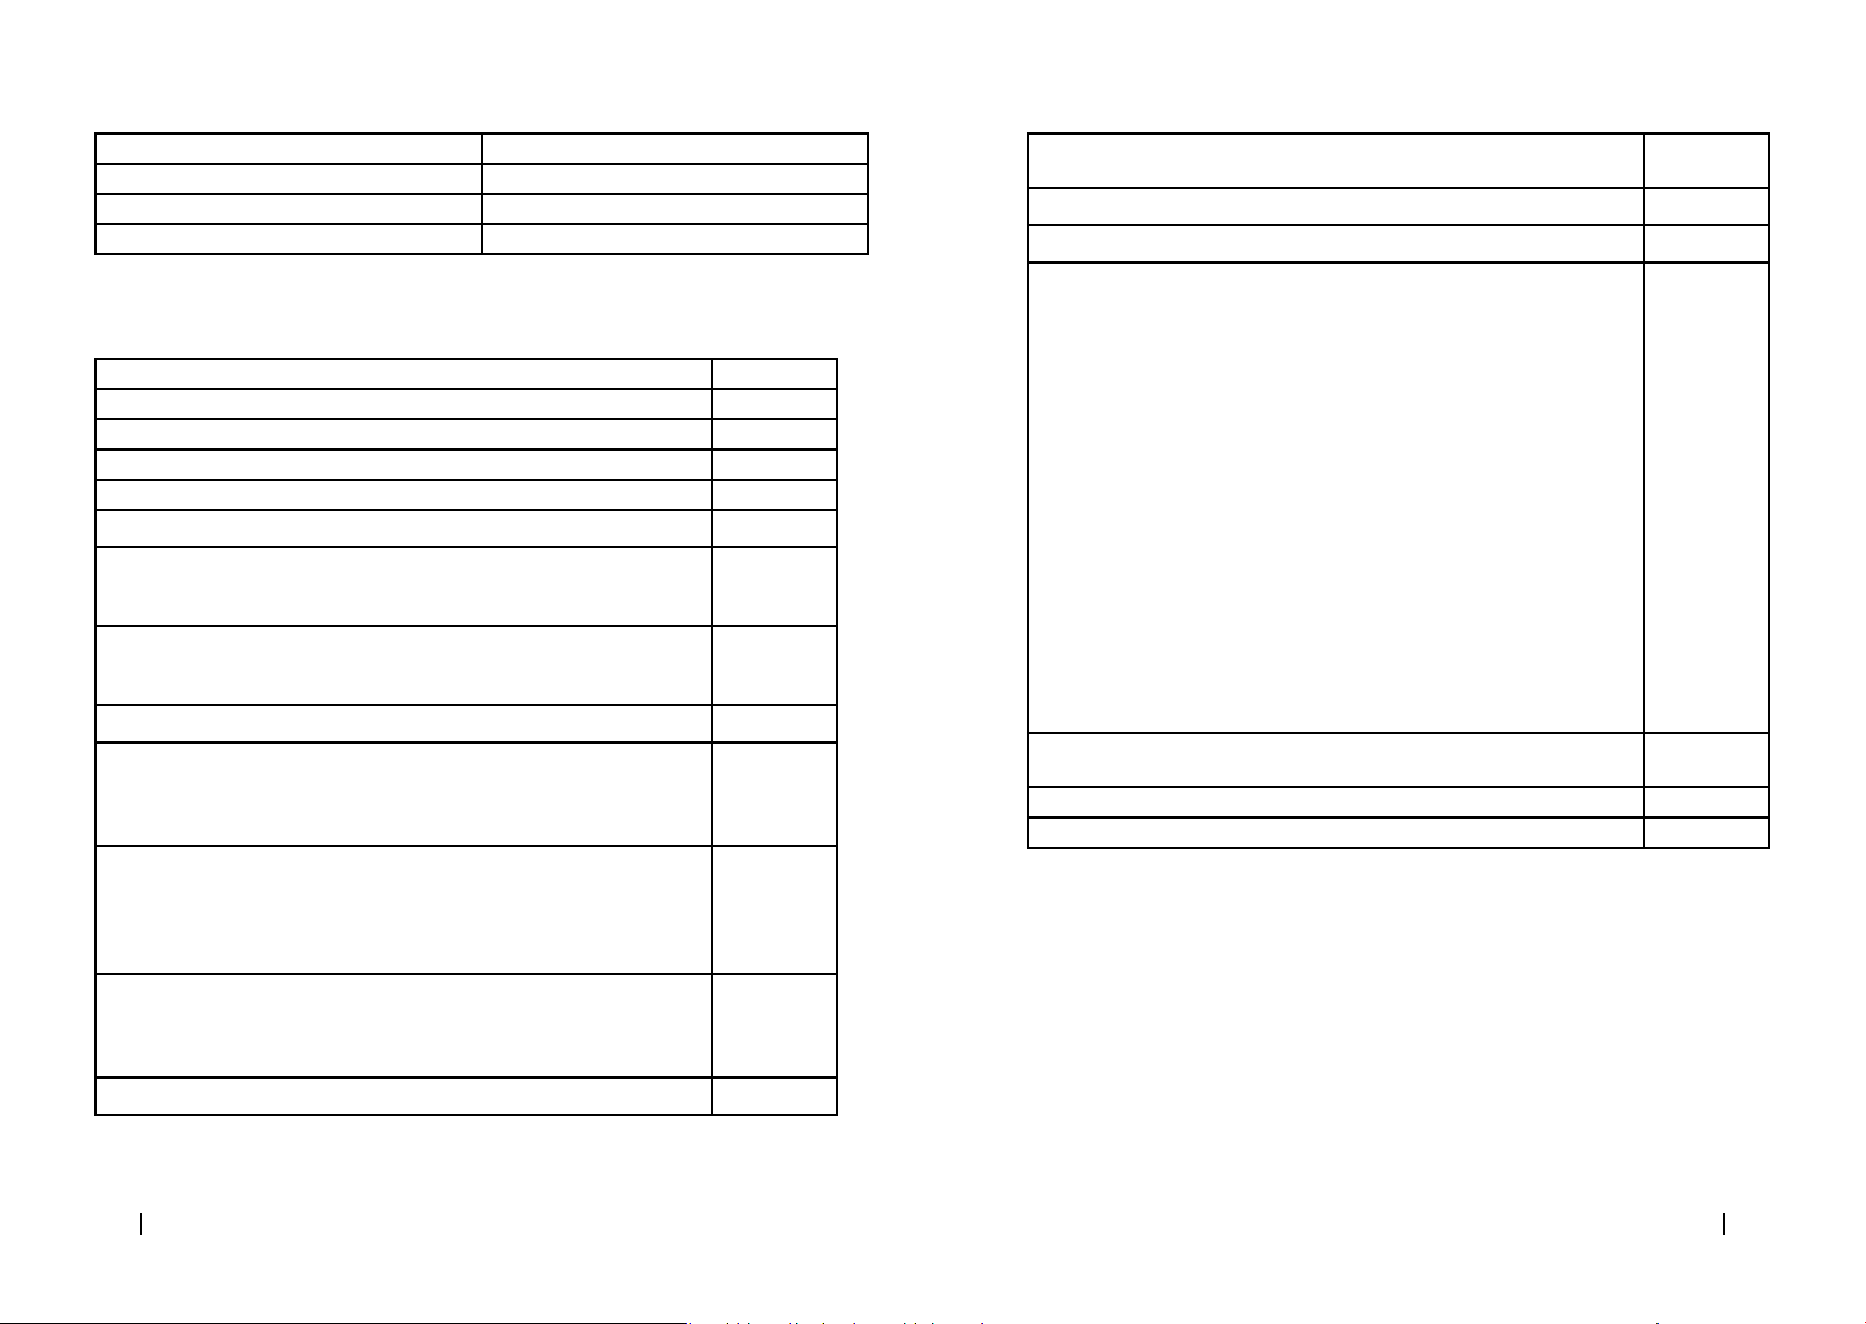
7. TECHNICAL SPECIFICATIONS
Product reference: 05406

HYDROBOOST 10000 LIBERTYHYDROBOOST 10000 LIBERTY
43
FRANÇAIS
HYDROBOOST 10000 LIBERTY
42
ENGLISH
HYDROBOOST 10000 LIBERTY
Product: HydroBoost 10000 Liberty
Battery: 20 V DC, 2500 mAh, 40 Wh
Charger (Input): 100-240 V AC, 50/60 Hz, Max 1.2 A
Charger (Output): 20 V DC, 1000 mA
Rated Pressure: 2.4 Mpa (24 bar)
Max. Flow: 3 l/min (180 l/hour)
IP X5
8. DISPOSAL OF OLD ELECTRICAL APPLIANCES
The European directive 2012/19/EU on Waste Electrical and Electronic
Equipment (WEEE), species that old household electrical appliances must
not be disposed of with the normal unsorted municipal waste. Old appliances
must be collected separately, in order to optimize the recovery and recycling
of the materials they contain and reduce the impact on human health and
the environment.
The crossed out “wheeled bin” symbol on the product reminds you of your obligation to dispose
of the appliance correctly. If the product has a built-in battery or uses batteries, they should be
removed from the appliance and disposed of appropriately.
Consumers must contact their local authorities or retailer for information concerning the
correct disposal of old appliances and/or their batteries.
9. TECHNICAL SUPPORT SERVICE AND WARRANTY
This product is under warranty for 2 years from the date of purchase, as long as the proof
of purchase is submitted, the product is in perfect physical condition, and it has been given
proper use, as explained in this instruction manual.
The warranty will not cover the following situations:
The product has been used for purposes other than those intended for it, misused, beaten,
exposed to moisture, immersed in liquid or corrosive substances, as well as any other fault
attributable to the customer.
The product has been disassembled, modied, or repaired by persons, not authorised by the
ocial Technical Support Service of Cecotec.
Faults deriving from the normal wear and tear of its parts, due to use.
The warranty service covers every manufacturing defects of your appliance for 2 years, based
on current legislation, except consumable parts. In the event of misuse, the warranty will not
apply.
If at any moment you detect any problem with your product or have any doubt, do not hesitate
to contact Cecotec Technical Support Service at +34 963 210 728.
1. PIÈCES ET COMPOSANTS
Img. 1
1. Bouton mode Eco/Turbo
2. Système de blocage
3. Gâchette (ON/OFF)
4. Bouton d’ouverture de la batterie
5. Batterie
6. Entrée de l’eau
7. Buse multifonctions
8. Connecteur du tuyau
9. Entrée du tuyau
10. Collier de xation du tuyau
11. Filtre d’entrée d’eau
12. Canon à mousse
13. Chargeur
14. Sac de voyage
2. AVANT UTILISATION
Sortez l’appareil de sa boîte.
Retirez tout le matériel qui compose l’emballage.
Veuillez vériez que toutes les pièces et les accessoires sont inclus dans la boîte et qu’ils ne
sont pas abîmés. Dans le cas où il y aurait des pièces abimées, veuillez contacter le Service
Après-Vente Ociel de Cecotec.
Sortez l’appareil de sa boîte lorsque vous allez l’utiliser pour la première fois.
Comment charger la batterie
N'utilisez pas d'autre chargeur que celui fourni par Cecotec. Ne laissez aucun objet métallique
entrer en contact avec la batterie, faible risque de court-circuit.
La batterie n’est pas complètement chargée. Chargez-la avant d’utiliser l’appareil pour la
première fois. Chargez-la aussi s’il fait longtemps que vous ne l’utilisez pas. Appuyez sur le
bouton vert de la batterie pour voir le niveau de batterie restant.
Pour la charger, branchez le chargeur sur une prise de courant.
Un témoin rouge vous indiquera que la batterie a bien été connectée et qu’elle est en train de
charger.
Une fois la batterie complètement rechargée, le témoin vert s’allumera. Débranchez la batterie.
Une lumière rouge clignotante sur la batterie indique qu’une erreur s’est produite. Dans ce
cas, enlevez la batterie et insérez-la à nouveau. Si la batterie est complètement chargée et la
lumière continue à clignoter, la batterie pourrait ne pas être valide.
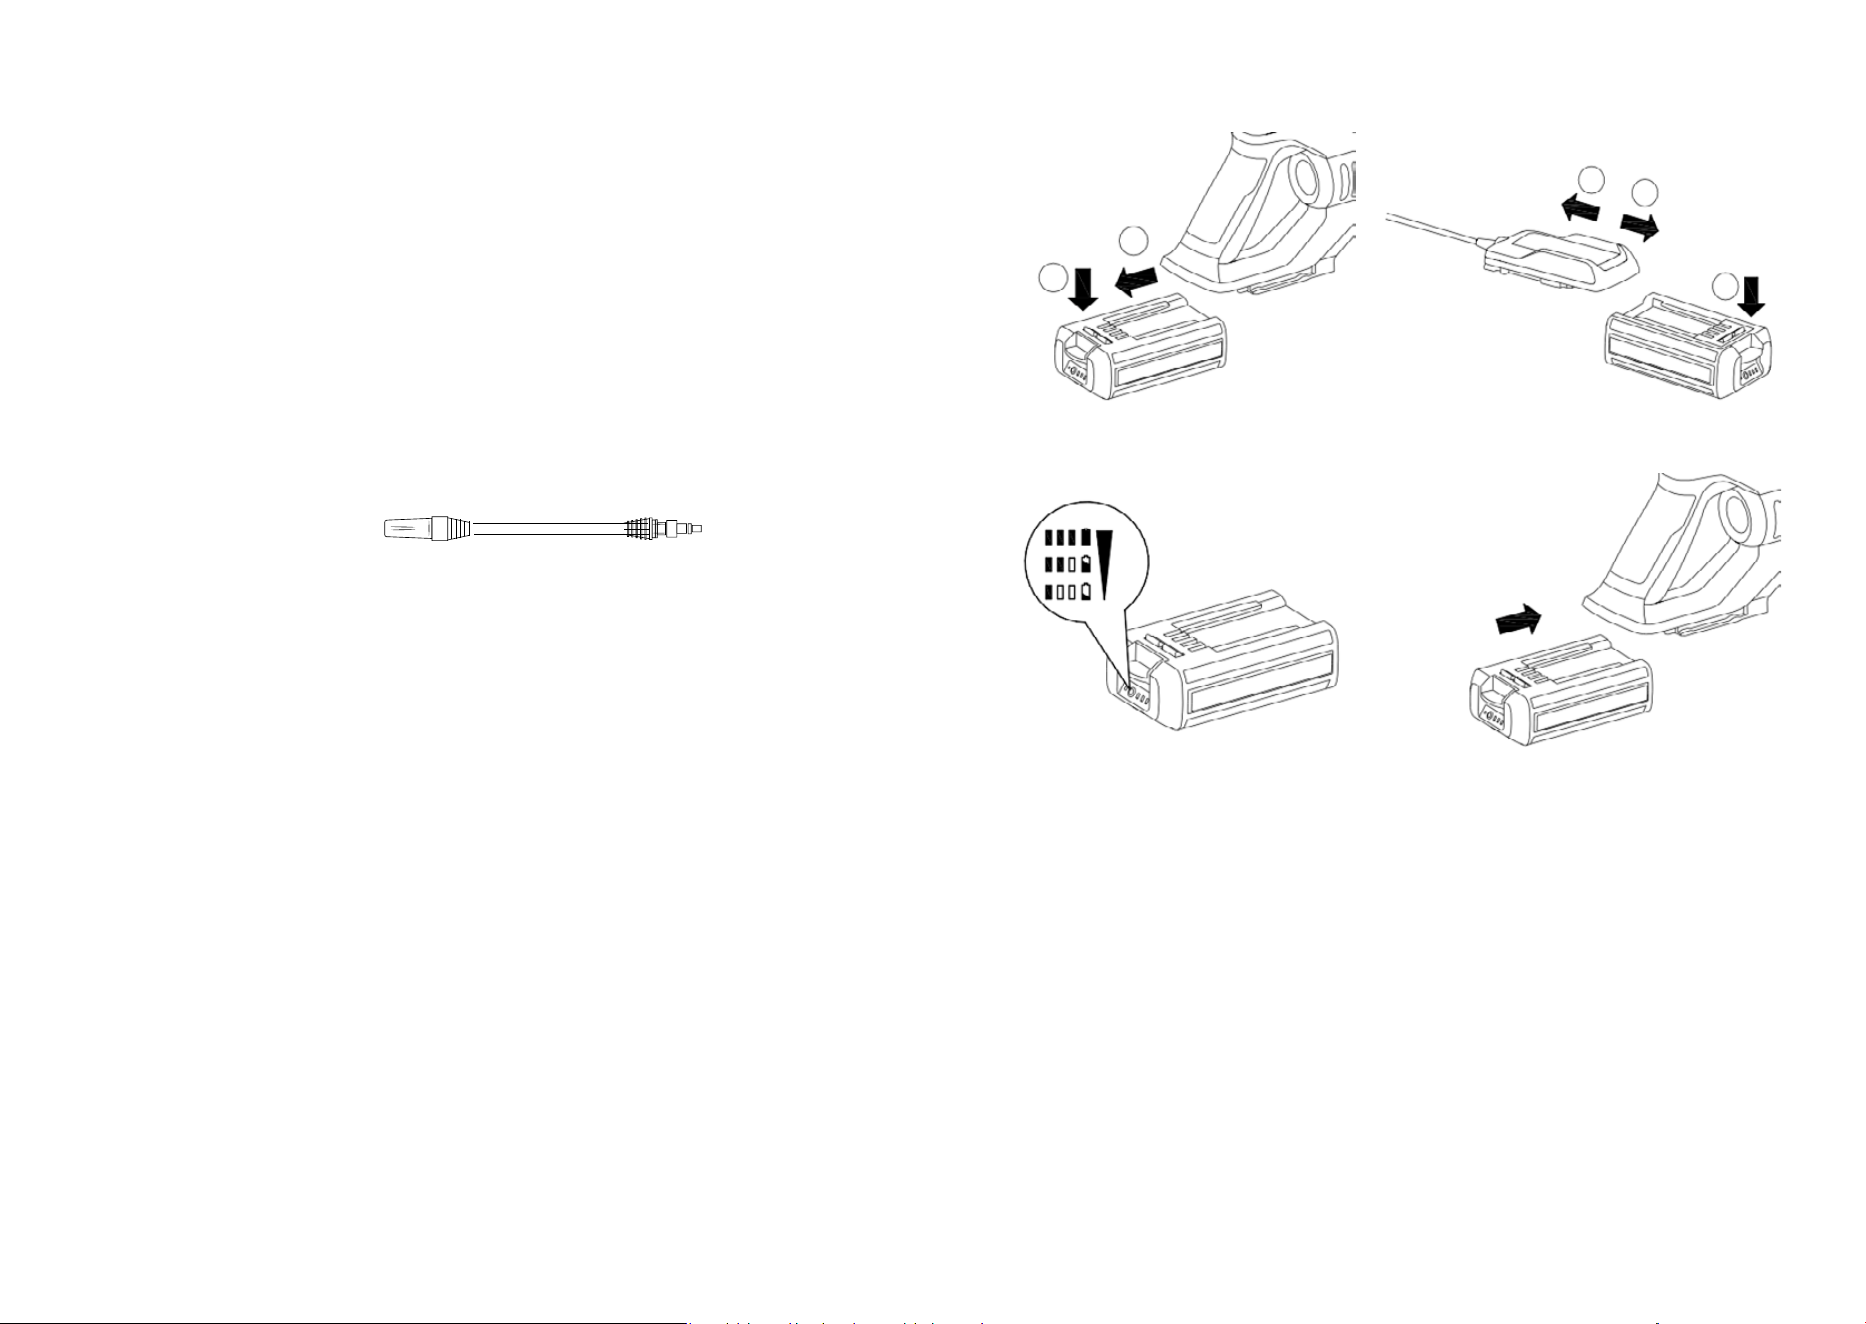
Fig./Img./Abb./Afb./ Rys./Obr. 1
1
2
3
4
5
13
14
128
15
9
10
11
6
7
Fig./Img./Abb./Afb./ Rys./Obr. 2 Fig./Img./Abb./Afb./ Rys./Obr. 3
Fig./Img./Abb./Afb./ Rys./Obr. 4 Fig./Img./Abb./Afb./ Rys./Obr. 5
Fig./Img./Abb./Afb./ Rys./Obr. 5.1 Fig./Img./Abb./Afb./ Rys./Obr. 6
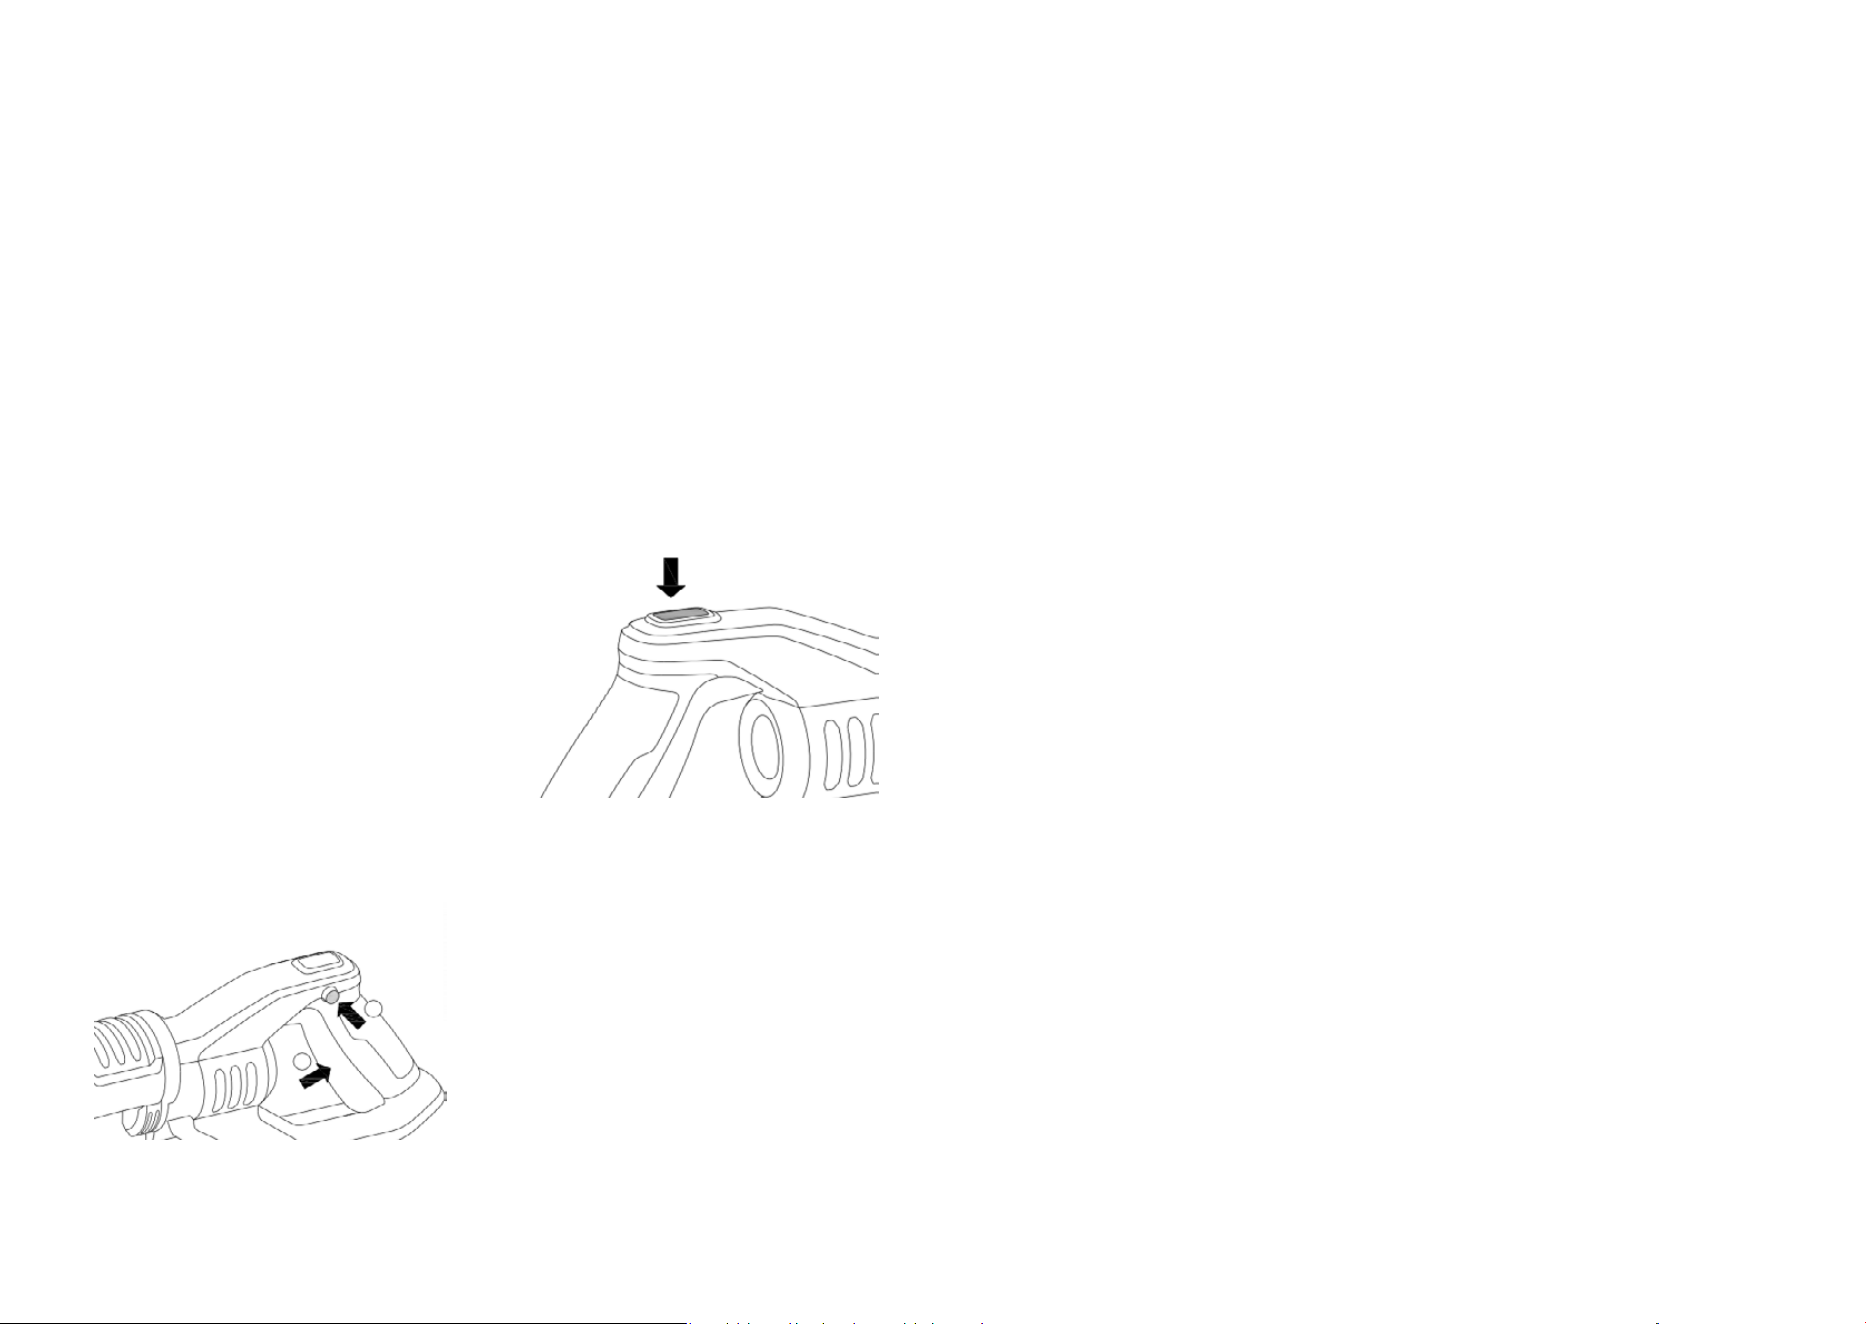
Fig./Img./Abb./Afb./ Rys./Obr. 7 Fig./Img./Abb./Afb./ Rys./Obr. 8
Fig./Img./Abb./Afb./ Rys./Obr. 9 Fig./Img./Abb./Afb./ Rys./Obr. 10
Fig./Img./Abb./Afb./ Rys./Obr. 11
Fig./Img./Abb./Afb./ Rys./Obr. 12
Fig./Img./Abb./Afb./ Rys./Obr. 13 Fig./Img./Abb./Afb./ Rys./Obr. 14
Fig./Img./Abb./Afb./ Rys./Obr. 15 Fig./Img./Abb./Afb./ Rys./Obr. 16
Fig./Img./Abb./Afb./ Rys./Obr. 17 Fig./Img./Abb./Afb./ Rys./Obr. 18

Fig./Img./Abb./Afb./ Rys./Obr. 19 Fig./Img./Abb./Afb./ Rys./Obr. 20
Fig./Img./Abb./Afb./ Rys./Obr. 21 Fig./Img./Abb./Afb./ Rys./Obr. 22
Fig./Img./Abb./Afb./ Rys./Obr. 23

aire. Mantenga las aperturas libres de objetos, despejadas de polvo y
pelusas, y no las tapone con ropa o los dedos. Mantenga el pelo alejado
de las partes en movimiento.
Apague y desenchufe el producto de la fuente de alimentación cuando
no se vaya a utilizar por un tiempo, antes de limpiarlo, antes de montar
o desmontar los componentes y antes de retirar la batería.
No altere la batería de ninguna forma.
No utilice ninguna batería que no le haya sido proporcionada con el
producto original de Cecotec.
No coja el adaptador de corriente por el cable ni enrolle el cable a su
para guardarlo.
Utilice el dispositivo en lugares donde la temperatura ambiente esté
entre 5 y 40 ºC.
Asegúrese de que el ltro de alta eciencia y el cepillo están instalados
correctamente antes de poner el dispositivo en funcionamiento.
Tire del enchufe para desconectarlo, no tire del cable.
No sumerja el cable, el enchufe o cualquier otra parte del producto en
agua o cualquier otro líquido, ni exponga las conexiones eléctricas al
agua. Asegúrese de que tiene las manos completamente secas antes de
tocar el enchufe o encender el producto.
El aparato no debe ser usado por niños desde 0 hasta 12 años.
Este electrodoméstico puede ser usado por niños a partir de 12 años de
edad si están continuamente supervisados.
Este producto puede ser usado por personas con capacidades
físicas, sensoriales o mentales reducidas, o con falta de experiencia
y conocimiento si están supervisados o han recibido instrucción
concerniente al uso del aparato de una forma segura y entienden los
riesgos que este implica.
Supervise a los niños para asegurarse de que no jueguen con
Grupo Cecotec Innovaciones S. L.
C/de la Pinadeta s/n, 46930
Quart de Poblet, Valencia, Spain
www.cecotec.es
YVLI01200903