EN
Quick guide
THANK YOU FOR BUYING A HOTPOINT-ARISTON
PRODUCT
In order to receive a more complete assistance, please
register your product on www . register10 . eu
PLEASE SCAN THE QR CODE ON
YOUR APPLIANCE IN ORDER TO
REACH MORE INFORMATION
Before using the appliance carefully read the Safety
Instruction.
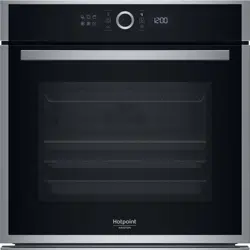
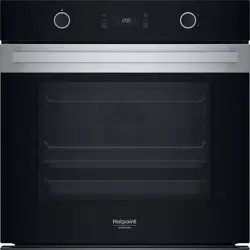
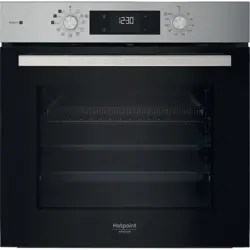
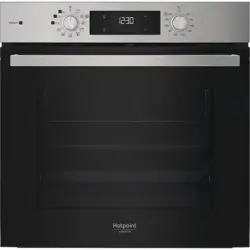
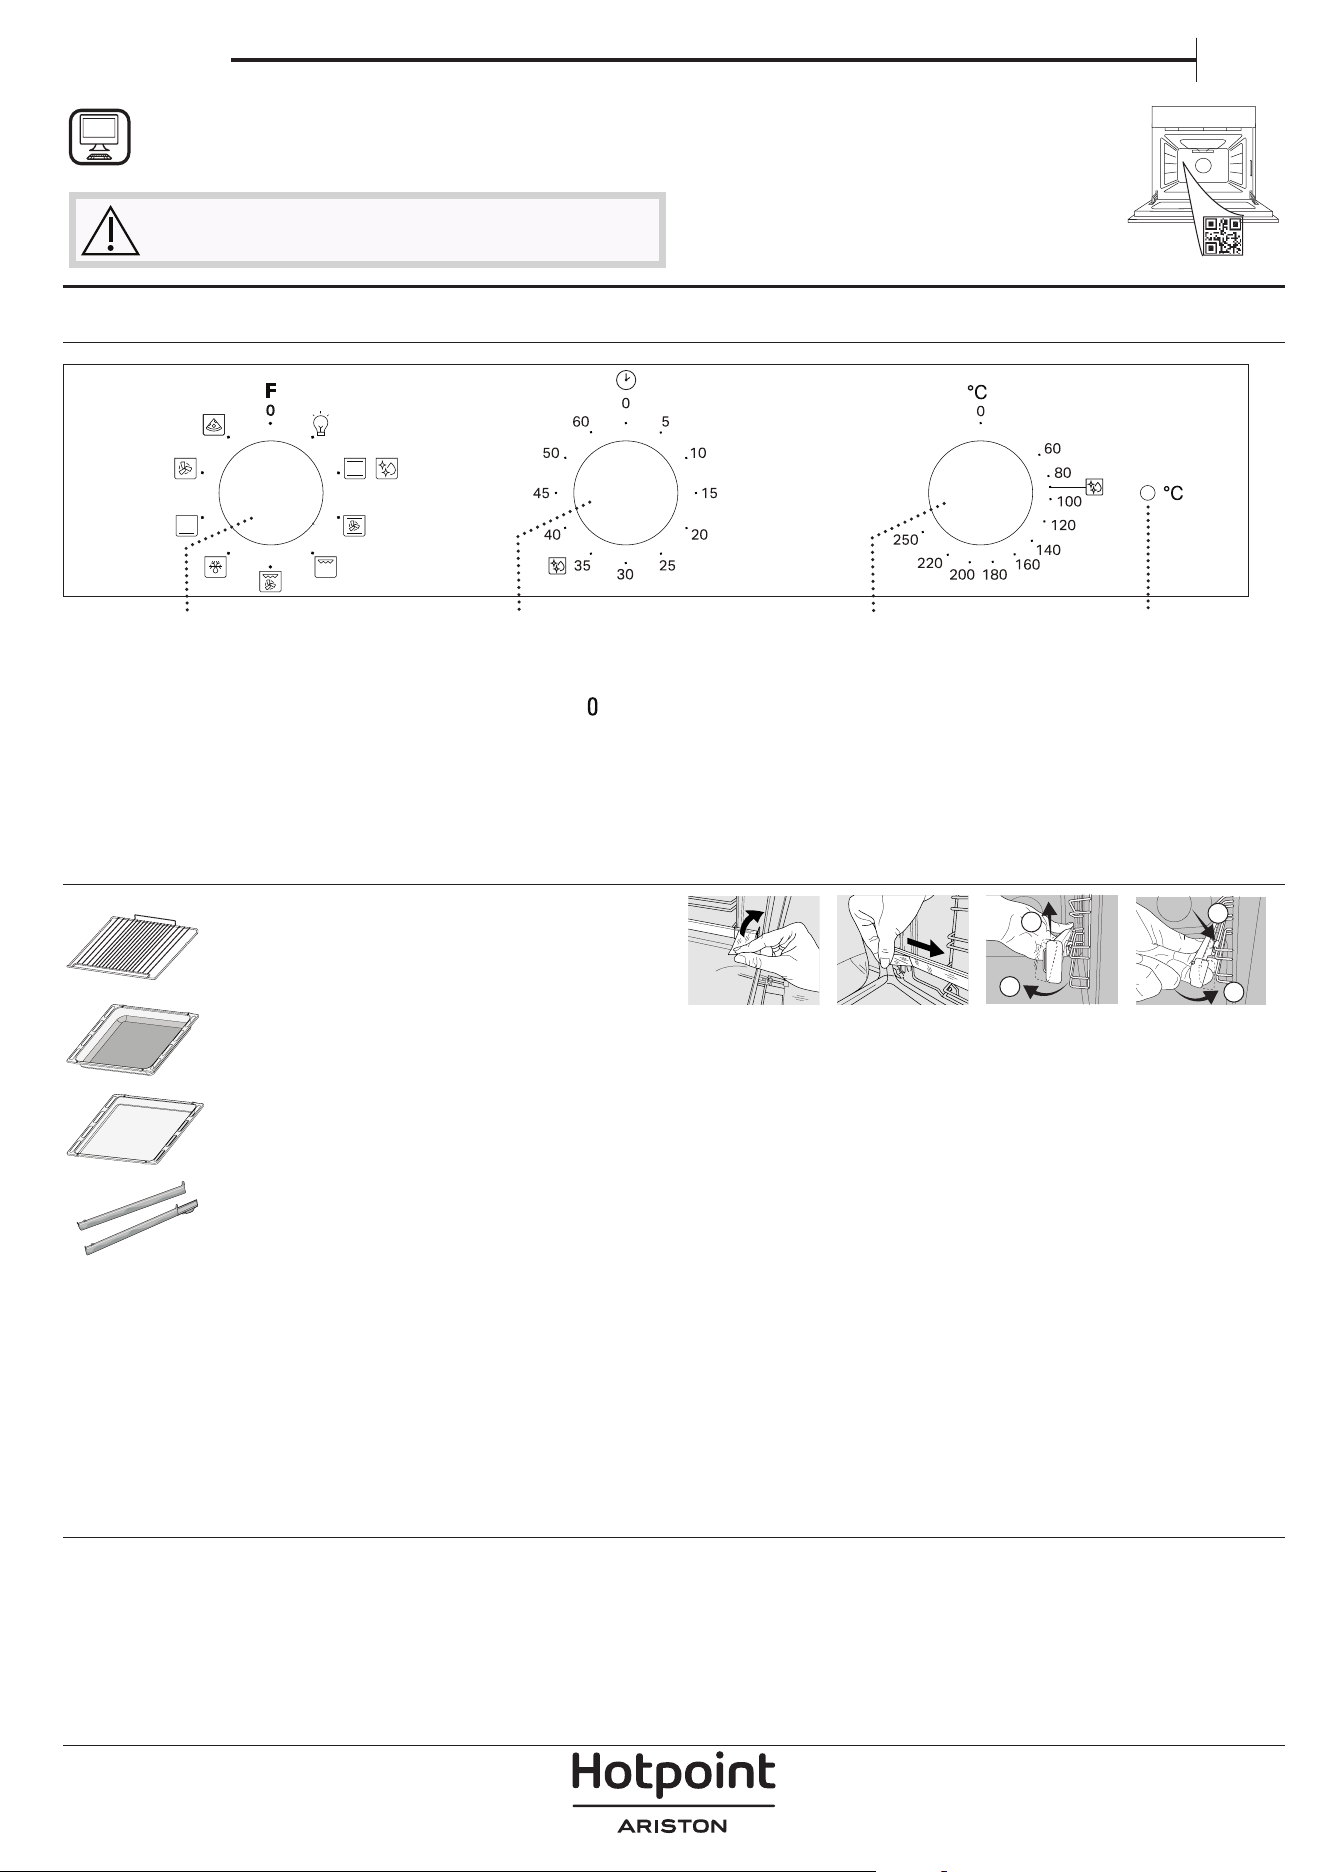
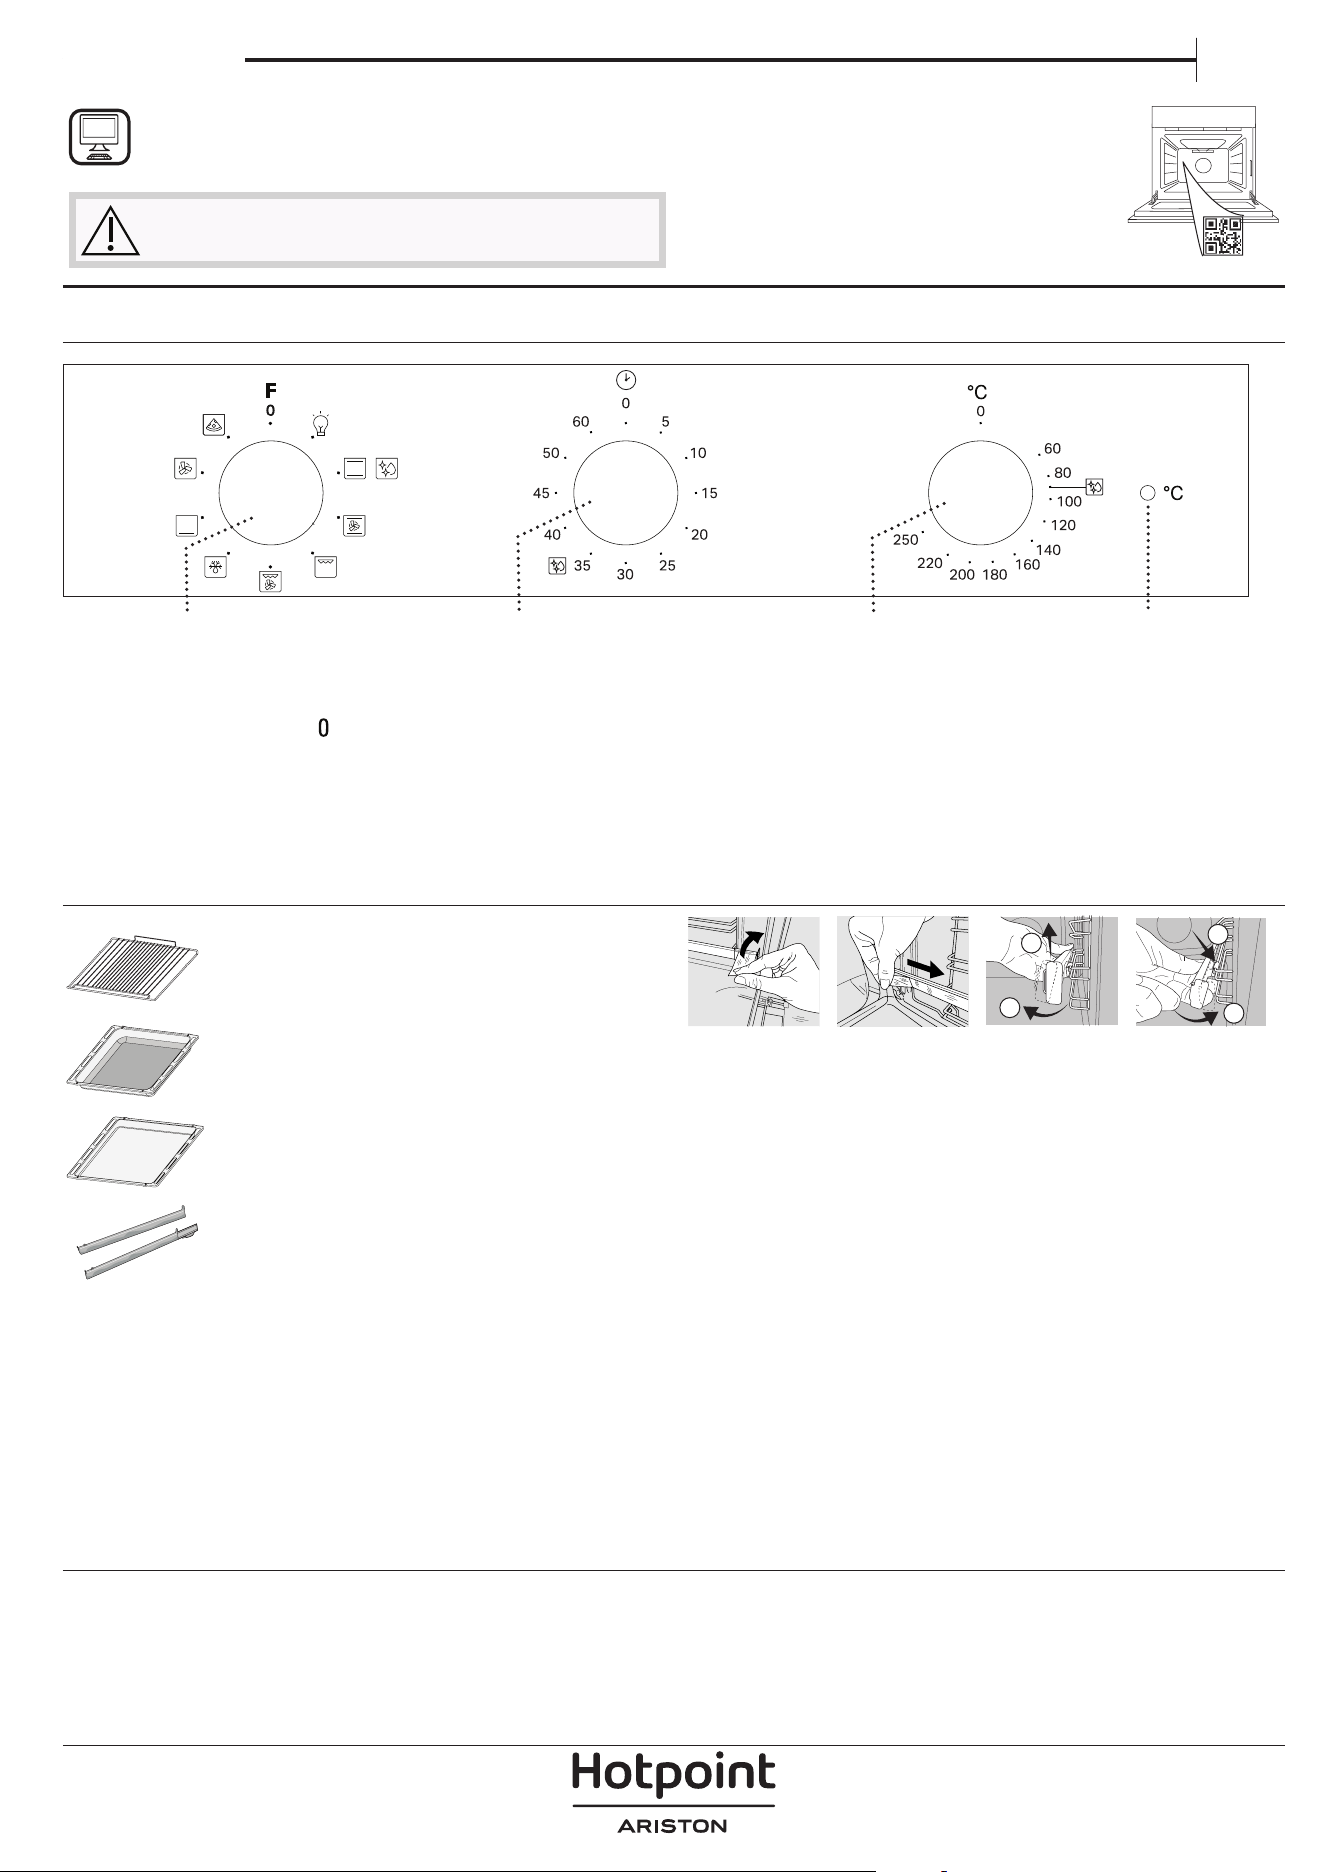
CONTROL PANEL
1. SELECTION KNOB
For switching the oven on by selecting a function. Turn to the
position to switch the oven off.
2. TIMER KNOB
Useful as a timer.
3. THERMOSTAT KNOB
Turn to select a desired temperature, activating the selected function.
4. LED THERMOSTAT/PREHEATING
Switches on during the heating process. Switches off once the desired
temperature reached.
Please note: Type of knob may vary from model type. If the knobs are
push-activated, push down on the center of the knob to release it from
seating.
ACCESSORIES
WIRESHELF
Use to cook food or as a support for pans, cake tins
and other ovenproof items of cookware.
DRIP TRAY*
Use as an oven tray for cooking meat, fish,
vegetables, focaccia, etc. or position underneath the
wire shelf to collect cooking juices.
BAKING TRAY*
Use for cooking all bread and pastry products, but
also for roasts, fish en papillotte, etc.
SLIDING RUNNERS*
To facilitate inserting or removing accessories.
* Availble only on certain models
The number and the type of accessories may vary depending on which model
is purchased. Other accessories can be purchased separately from the After-
sales Service.
INSERTING THE WIRE SHELF AND OTHER ACCESSORIES
Insert the wire shelf onto the level you require by holding it tilted
slightly upwards and resting the raised rear side (pointing upwards)
down first. Then slide it horizontally along the runners as far as
possible. Other accessories, like the baking tray, are to be inserted
horizontally, letting them slide on the runners.
1
2
1
2
[c] [d][a]
[b]
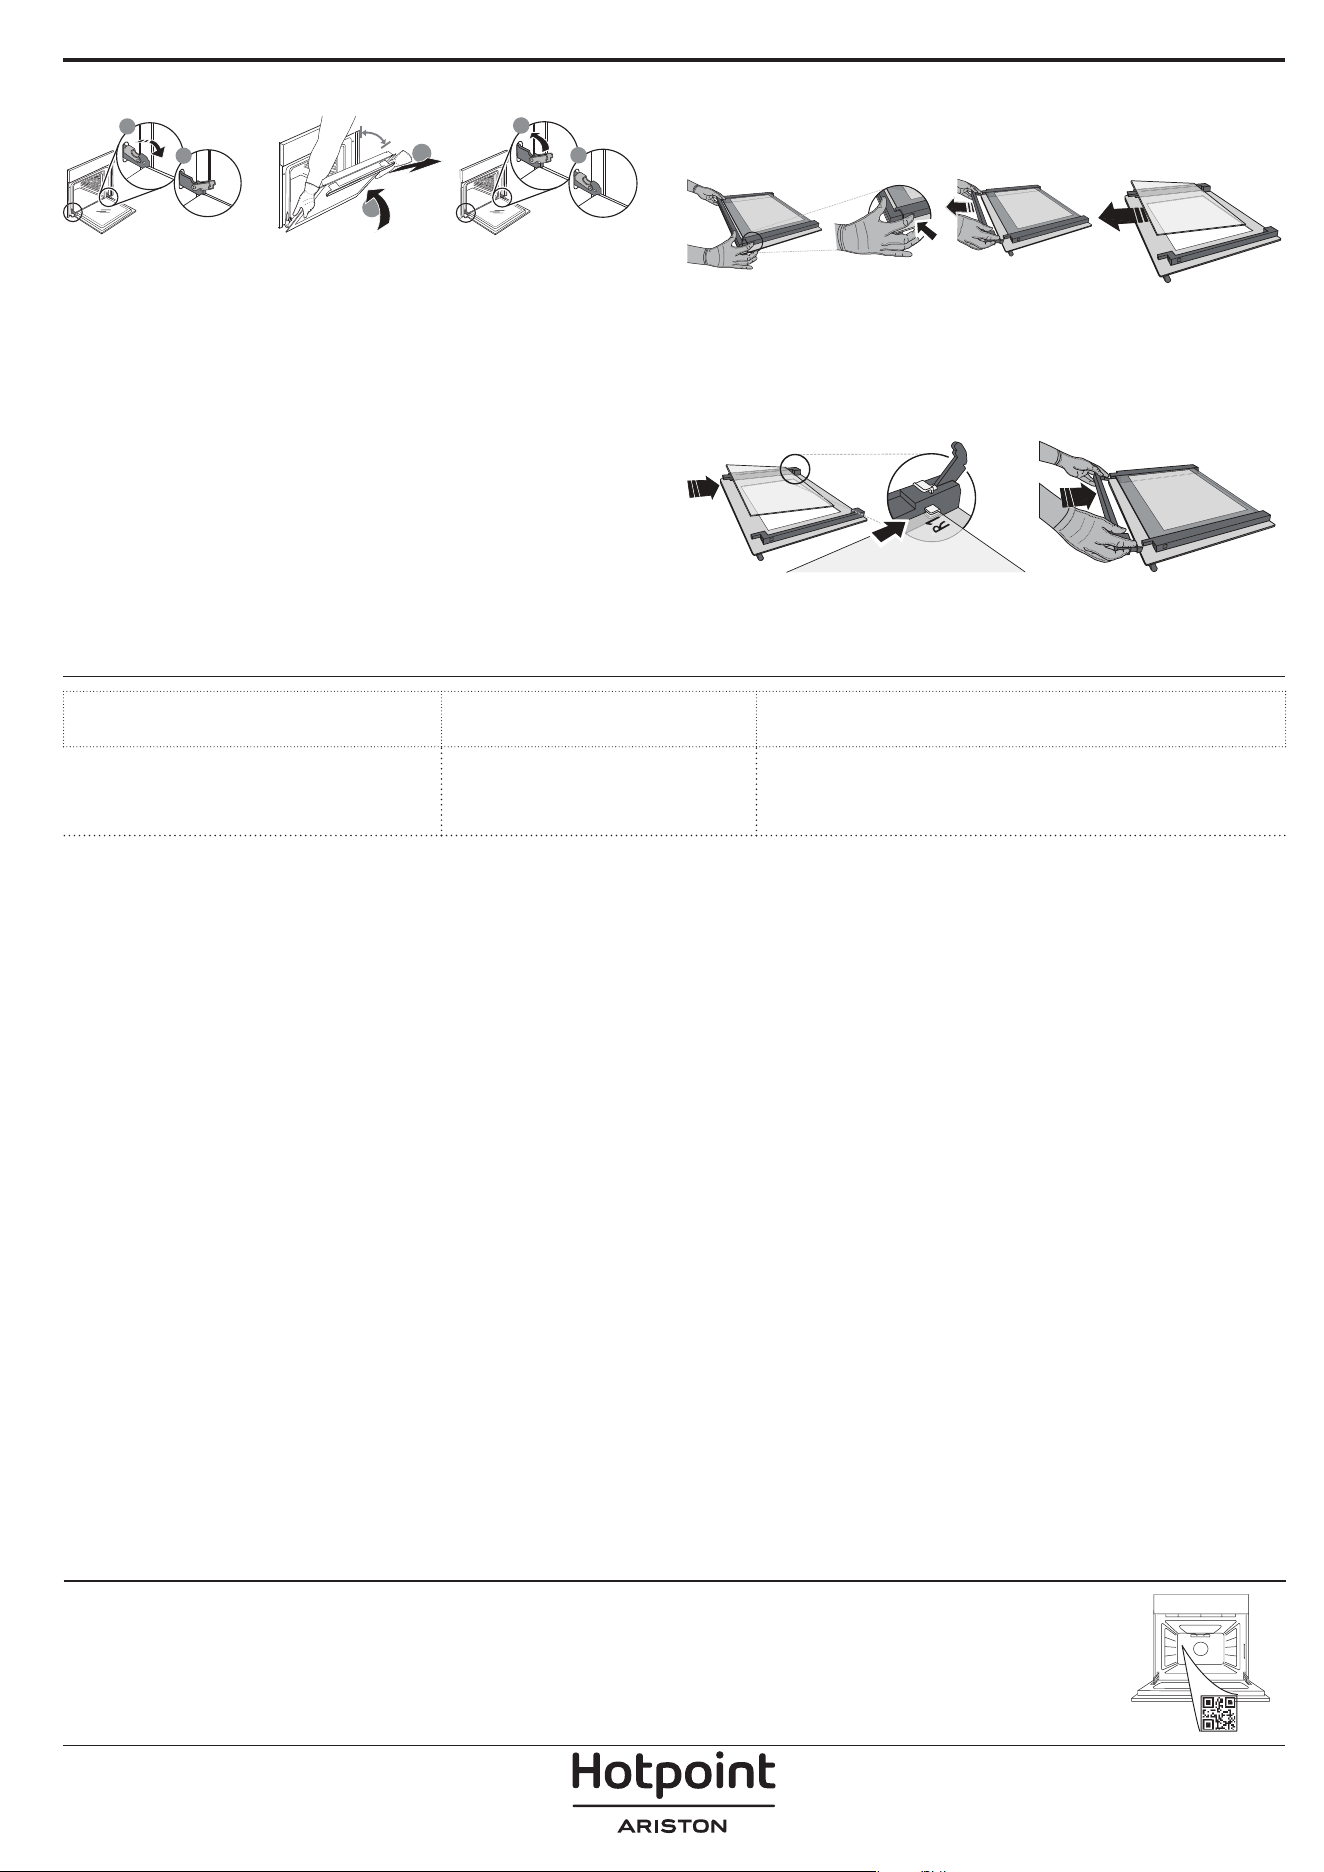
SLIDING SHELVES AND SHELF GUIDES
Before using the oven remove the protective tape [a] and then remove
the protective foil [b] from the sliding runners.
REMOVING THE SLIDING RUNNERS [c]
Pull the lower part of the sliding runner to uncouple the lower hooks
(1) and pull the the sliding runners upwards, removing them from the
upper hooks (2).
REFITTING THE SLIDING RUNNERS [d]
Hook the upper hooks on the shelf guides (1) then press the lower part
of the sliding runners against the shelf guides, until the lower hooks
are clicking (2).
REMOVING AND REFITTING THE SHELF GUIDES
To remove the shelf guides, firmly grip the external part of the guide,
and pull it towards you to extract the support and the two internal pins
from the lodging.
To reposition the shelf guides, position them near the cavity and
initially insert the two pins into their lodgings. Next, position the
external part near its lodging, insert the support, and firmly press
towards the wall of the cavity to make sure the shelf guide is properly
secured.
FIRST TIME USE
A new oven may release odours that have been left behind during
manufacturing: this is completely normal.
Before starting to cook food, we therefore recommend heating the
oven with it empty in order to remove any possible odours.
Remove any protective cardboard or transparent film from the oven
and remove any accessories from inside it.
Heat the oven to 250 °C for about one hour. The oven must be empty
during this time.
Please note: It is advisable to air the room after using the appliance for the
first time.
1
2
3
4
DAILY USE
1. SELECT A FUNCTION
To select a function, turn the selection knob to the symbol for the
function you require: the display will light up and an audible signal will
sound.
2. ACTIVATE A FUNCTION
MANUAL
To start the function you have selected, turn the thermostat knob to set
the temperature you require.
DIAMOND CLEAN
To activate the “Diamond Clean” cleaning function, pour 100 - 120
ml of drinking water into the bottom of the oven, then turn all the 3
knobs (selection knob, timer knob, thermostat knob) to icon
. The
function will activate automatically and its duration is 35 minutes.
3.
PREHEATING
Once the function starts, an audible signal and a flashing icon
on
the display indicate that the preheating phase has been activated.
At the end of this phase, an audible signal and the fixed icon
on the
display will indicate that the oven has reached the set temperature: at
this point, place the food inside and proceed with cooking.
4. SETTING THE TIMER
The timer knob can be used to set a cooking time of between 1 and
60 minutes. To set cooking time, after selecting the required cooking
function, turn the knob right round in a clockwise direction and then
turn it back in the opposite direction to the desired cooking duration.
NOTES
• Do not cover the inside of the oven with aluminium foil.
• Never drag pots or pans across the bottom of the oven as this
could damage the enamel coating.
•
Do not place heavy weights on the door and do not hold on to
the door.
CLEANING AND MAINTENANCE
EXTERIOR SURFACES
Clean the surfaces with a damp microfibre cloth. If they are very dirty,
add a few drops of pH-neutral detergent. Finish off with a dry cloth.
Do not use corrosive or abrasive detergents. If any of these products
inadvertently comes into contact with the surfaces of the appliance,
clean immediately with a damp microfibre cloth.
INTERIOR SURFACES
After every use, leave the oven to cool and then clean it, preferably
while it is still warm, to remove any deposits or stains caused by
food residues. To dry any condensation that has formed as a result
of cooking foods with a high water content, leave the oven to cool
completely and then wipe it with a cloth or sponge.
The door can be easily removed and refitted to facilitate cleaning of the
glass. Clean the glass in the door with a suitable liquid detergent.
ACCESSORIES
Soak the accessories in a washing-up liquid solution after use, handling
them with oven gloves if they are still hot. Food residues can be
removed using a washing-up brush or a sponge.
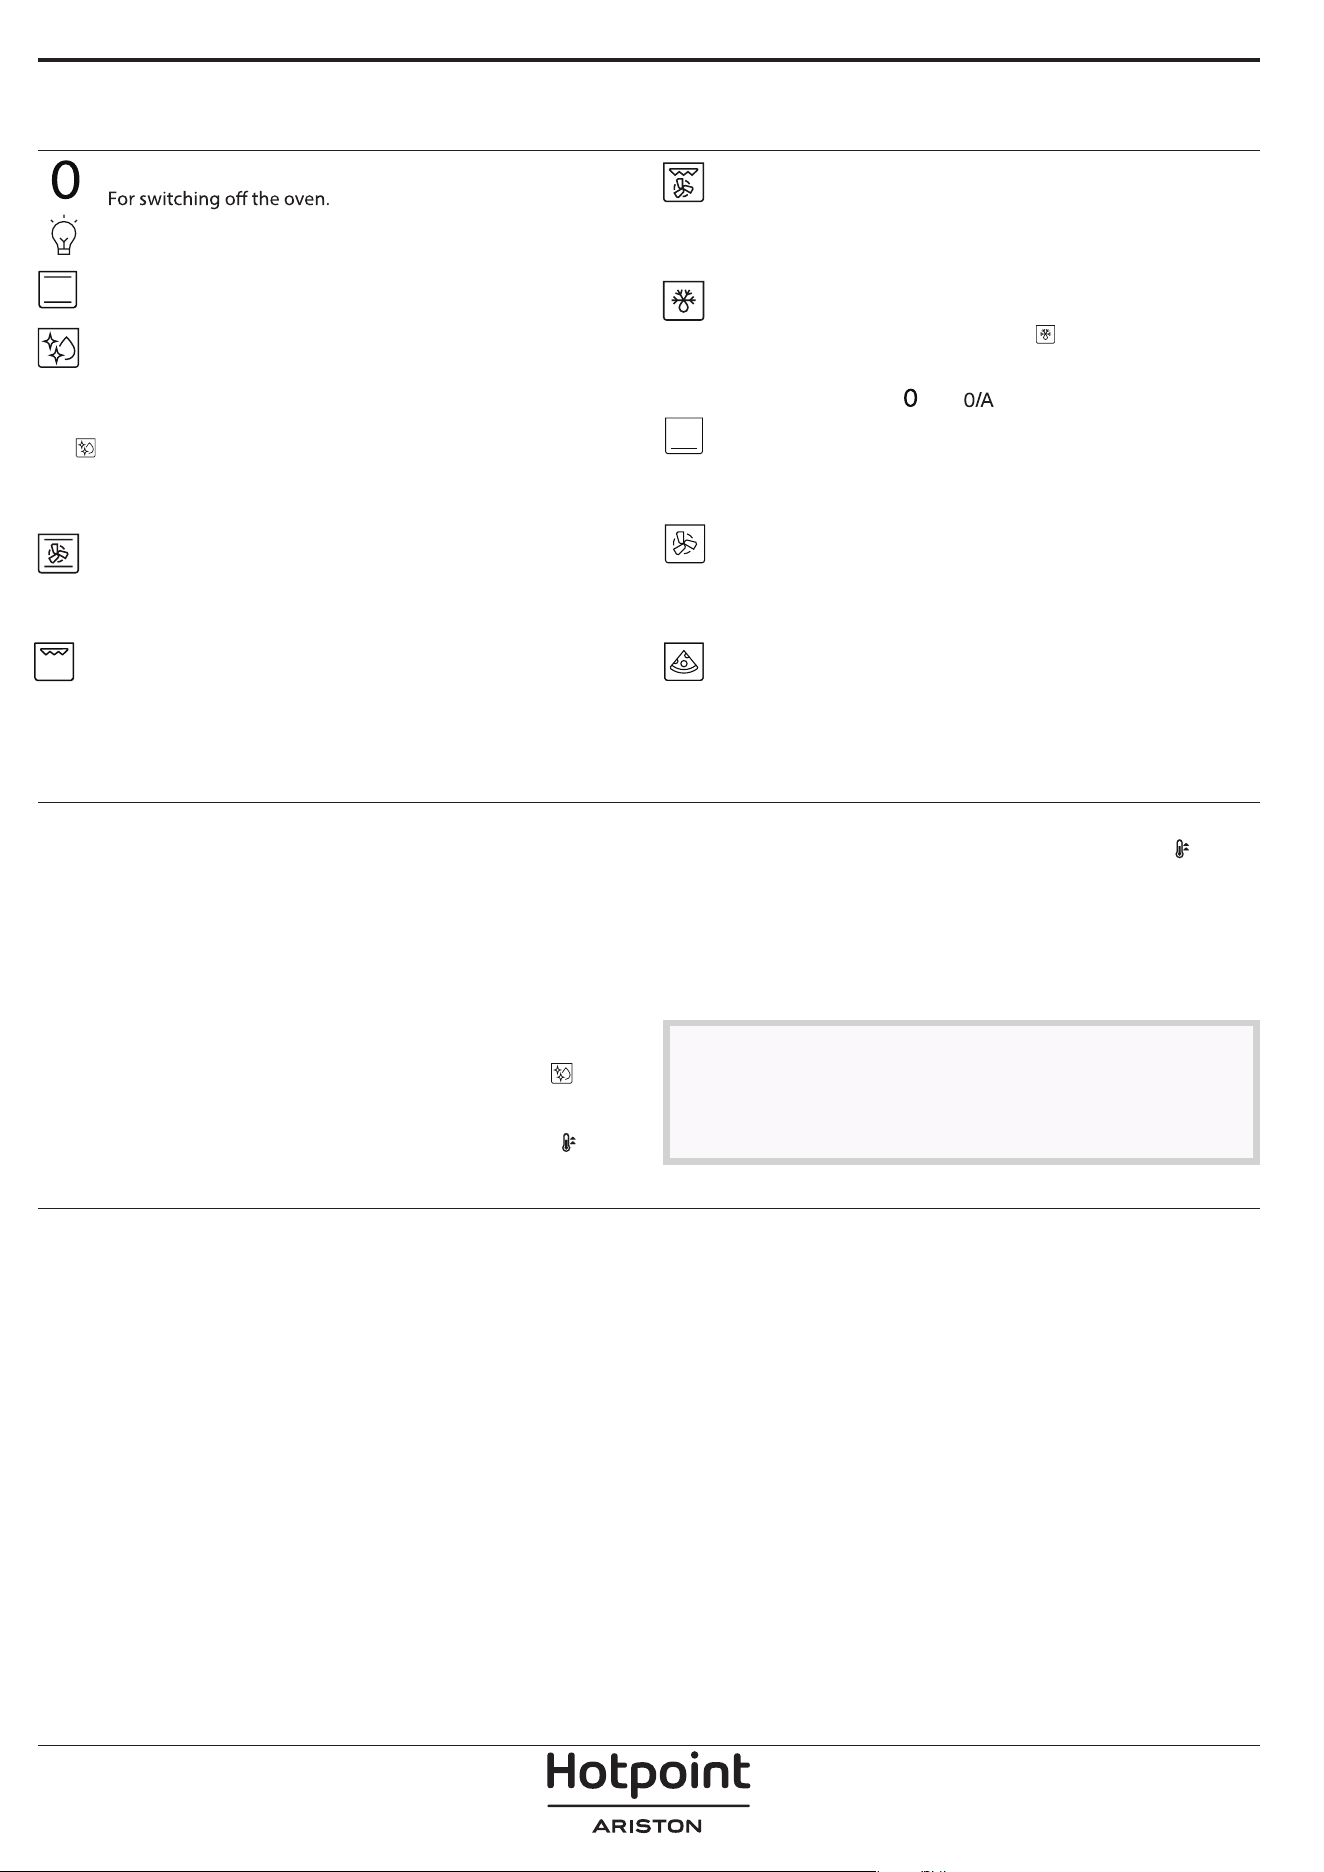
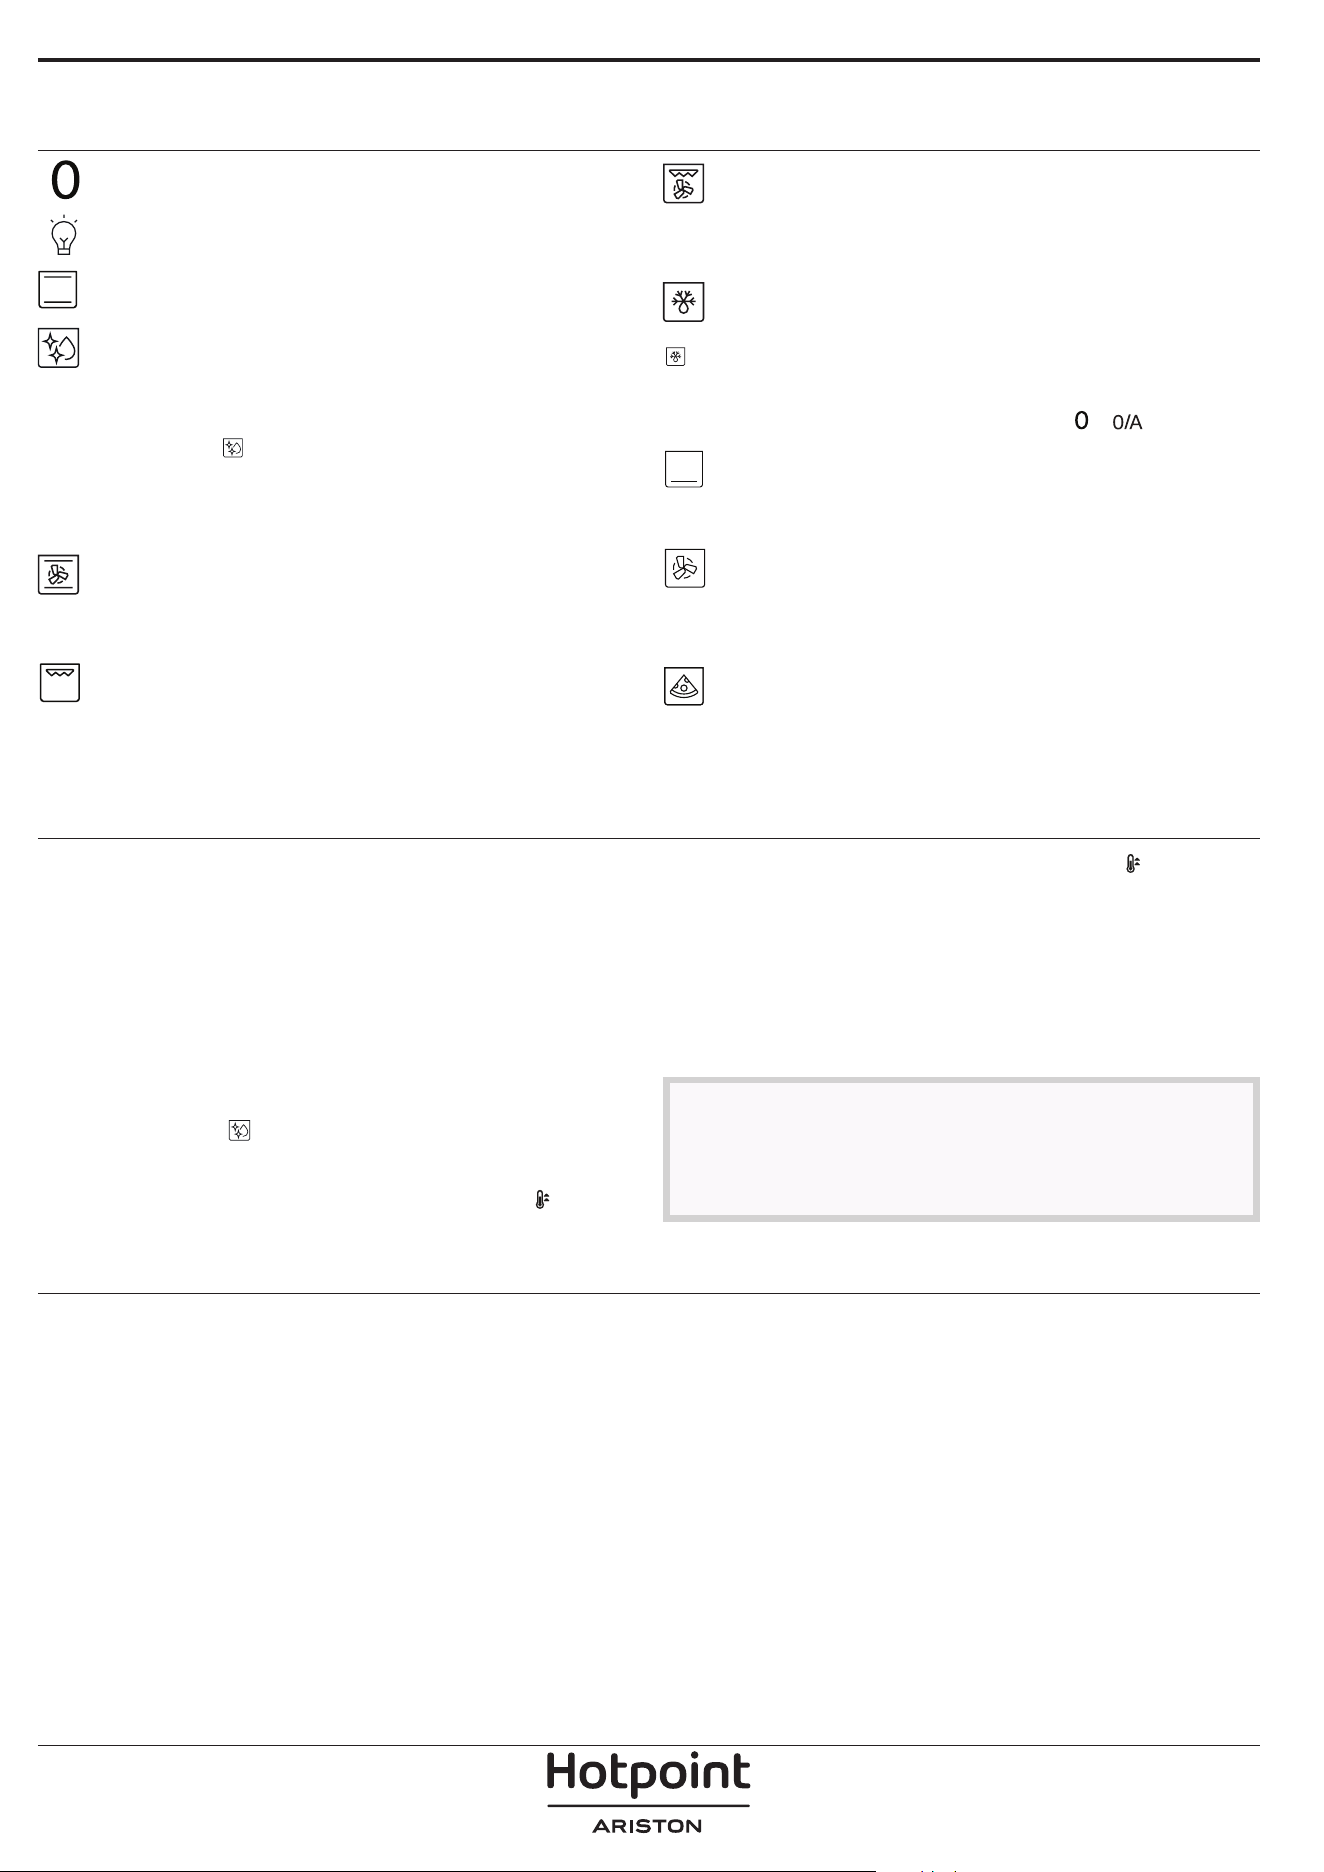
FUNCTIONS
OFF
LIGHT
For switching on the light in the compartment.
CONVENTIONAL
For cooking any kind of dish on one shelf only.
DIAMOND CLEAN (AVAILABLE ONLY ON CERTAIN MODELS)
TURBO GRILL
For roasting large joints of meat (legs, roast beef, chicken). We
recommend using a dripping pan to collect the cooking juices: position
the pan on any of the levels below the wire shelf and add 200 ml of
drinking water.
DEFROST
For defrosting food more quickly. To activate the defrosting
function turn the selection knob to the icon
then turn the
thermostat knob clockwise to any temperature. This function does not
heat so any temperature can be used. When defrosting is completed
turn the two controls to the
and positions.
The action of the steam released during this special low-
temperature cleaning cycle allows dirt and food residues to be
removed with ease. Pour 100-120 ml of drinking water on the bottom
of the oven then turn the selection knob and the thermostat knob to
the
icon. It is best to use the function for 35 minutes.
Activate the function when the oven is cold and let it cool down
for 15 minutes once the cycle ends. The position of the icon does not
correspond to the temperature reached during the cleaning cycle.
BOTTOM
CONVECTION BAKE
FORCED AIR
To cook on a maximum of two shelves at the same time. It is
a good idea to swap the position of the baking trays halfway through
cooking.
GRILL
PIZZA
For grilling steaks, kebabs and sausages, cooking vegetables
au gratin or toasting bread. When grilling meat, we recommend using
a dripping pan to collect the cooking juices: position the pan on any of
the levels below the wire shelf and add 200 ml of drinking water.
For browning the bottom of the dishes. The function can also
be used for slow cooking, to finish cooking very liquid dishes (sweet or
savour) or to thicken sauces and gravies.
For cooking different foods that require the same cooking
temperature on several shelves (maximum three) at the same time. This
function can be used to cook different foods without odours being
transferred from one food to another.
For baking different types and sizes of pizza or focaccia. It is
advisable to place food on 2nd level. Preheat the oven before cooking.
Policies, standard documentation and additional product information can be found by:
• Using the QR code in your appliance
• Visiting our website docs . hotpoint . eu
• Alternatively, contact our After-sales Service (See phone number in the warranty booklet). When contacting our After-
sales Service, please state the codes provided on your product's identification plate.
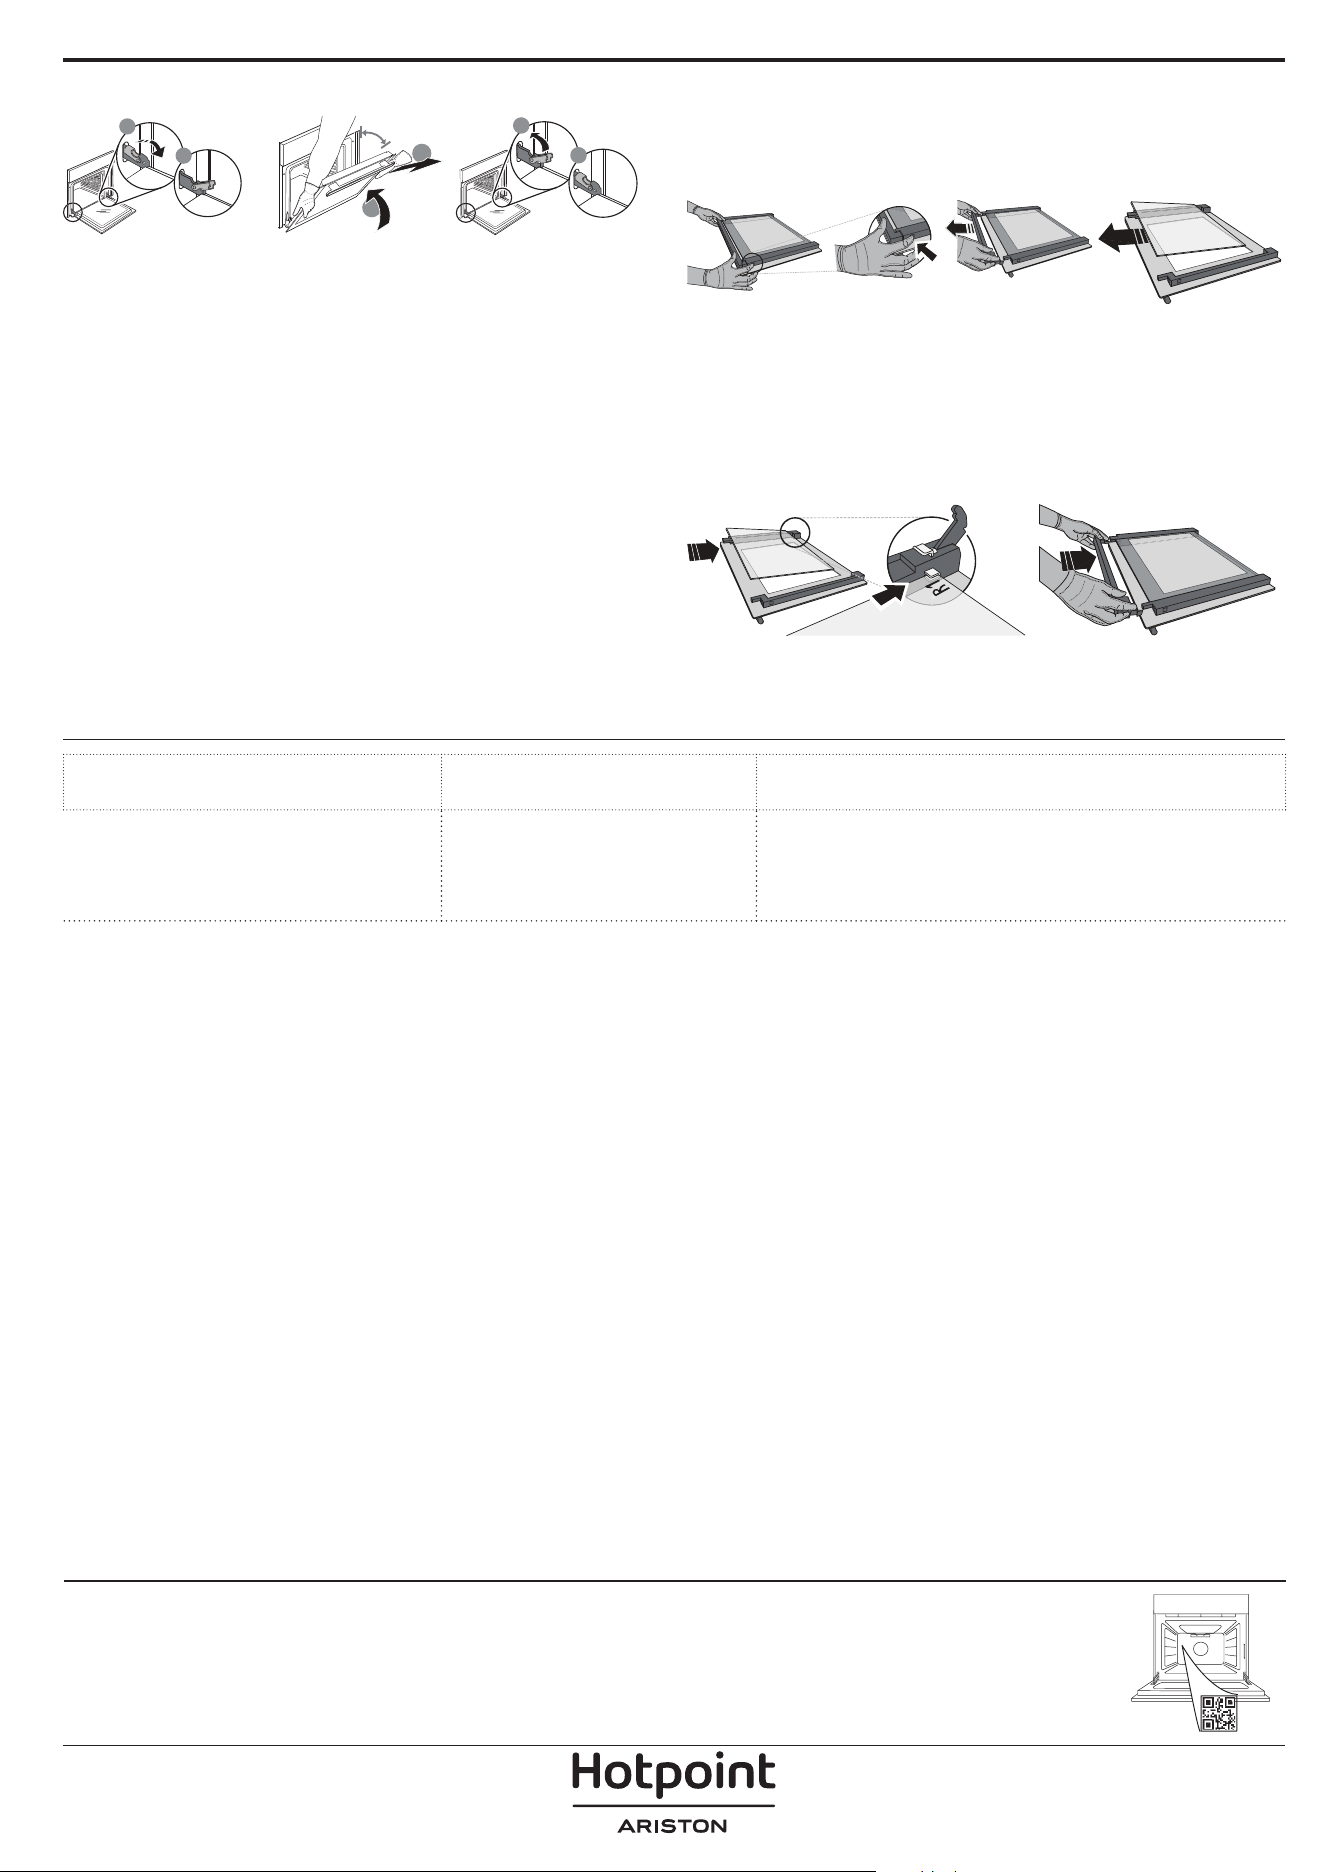
REMOVING AND REFITTING THE DOOR
b
a
a
b
~15°
b
a
1. To remove the door, open it fully and lower the catches until they are
in the unlock position.
2. Close the door as much as you can. Take a firm hold of the door with
both hands – do not hold it by the handle. Simply remove the door by
continuing to close it while pulling it upwards at the same time until it
is released from its seating. Put the door to one side, resting it on a soft
surface.
3. Refit the door by moving it towards the oven, aligning the hooks
of the hinges with their seating and securing the upper part onto its
seating.
4. Lower the door and then open it fully. Lower the catches into their
original position: Make sure that you lower them down completely.
Apply gentle pressure to check that the catches are in the correct
position.
5. Try closing the door and check to make sure that it lines up with the
control panel. If it does not, repeat the steps above: The door could
become damaged if it does not work properly.
CLEANING OF THE DOOR GLASSES
1. After removing the door and resting it on a soft surface with the
handle downwards, simultaneously press the two retaining clips and
remove the upper edge of the door by pulling it towards you.
2. Lift and firmly hold the inner glass with both hands, remove it and
place it on a soft surface before cleaning it.
3. Refit the intermediate pane (marked with “1R”)
before refitting the inside pane: To position the panes of glass correctly,
make sure that the “R” mark can be seen in the left-hand corner. First
insert the long side of the glass marked “R” into the support seats, then
lower it into position. Repeat this procedure for both panes of glass.
4. Refit the upper edge: A click will indicate correct positioning. Make
sure the seal is secure before refitting the door.
TROUBLESHOOTING
Problem Possible cause Solution
The oven is not working.
Power cut.
Disconnection from the mains.
Check for the presence of mains electrical power and
whether the oven is connected to the electricity supply.
Turn off the oven and restart it to see if the fault persists.
IT
Guida rapida
GRAZIE PER AVERE ACQUISTATO UN PRODOTTO
HOTPOINT‑ARISTON
Per ricevere un'assistenza più completa, registrare il
prodotto su www . register10 . eu
SCANSIONARE IL CODICE QR
SUL PROPRIO APPARECCHIO
PER OTTENERE MAGGIORI
INFORMAZIONI
Prima di utilizzare l'apparecchio leggere attentamente le
istruzioni di sicurezza.
PANNELLO COMANDI
1. MANOPOLA DI SELEZIONE
Per accendere il forno selezionando una funzione. Per spegnere il
forno, ruotare sulla posizione
.
2. MANOPOLA DEL TIMER
Utilizzabile come timer.
3. MANOPOLA TERMOSTATO
Ruotare per selezionare la temperatura e attivare la funzione
desiderata.
4. SPIA TERMOSTATO / PRERISCALDAMENTO
Si accende durante la fase di riscaldamento. Si spegne al
raggiungimento della temperatura desiderata.
Note: Il tipo di manopola può variare a seconda del modello. Se le
manopole sono attivate a pressione, spingere verso il basso il centro
della manopola per sbloccarla dalla relativa sede.
ACCESSORI
GRIGLIA METALLICA
Utilizzare per cuocere gli alimenti o come supporto
per teglie, tortiere e altre pentole da forno.
LECCARDA*
Utilizzare come teglia da forno per cucinare carne,
pesce, verdure, focacce, ecc. o posizionare sotto la
griglia per raccogliere i succhi di cottura.
TEGLIA*
Utilizzare per la cottura di tutti i prodotti di
panetteria e pasticceria, ma anche per arrosti, pesce
en papillotte, ecc.
GUIDE DI SCORRIMENTO*
Per facilitare l'inserimento o la rimozione degli
accessori.
1
2
1
2
[c] [d][a]
[b]
GRIGLIE SCORREVOLI E GUIDE LATERALI
Prima di utilizzare il forno rimuovere il nastro di protezione [a] e
successivamente rimuovere la pellicola protettiva [b] dalle guide di
scorrimento.
RIMOZIONE DELLE GUIDE DI SCORRIMENTO [c]
Tirare la parte inferiore della guida di scorrimento per sganciare i ganci
inferiori (1) e tirare le guide di scorrimento verso l'alto, rimuovendole
dai ganci superiori (2).
RIMONTAGGIO DELLE GUIDE DI SCORRIMENTO [d]
Agganciare i ganci superiori alle guide dei ripiani (1), quindi premere
la parte inferiore delle guide di scorrimento contro le guide dei ripiani,
fino a far scattare i ganci inferiori (2).
RIMUOVERE E RIMONTARE LE GRIGLIE LATERALI
Per rimuovere le griglie laterali, impugnare la parte esterna della griglia
e tirarla verso di sé per estrarre il supporto e i due perni interni dai
rispettivi alloggiamenti.
Per riapplicare le griglie laterali, posizionarle vicino alla parete interna
del forno e inserire dapprima i due perni nei rispettivi alloggiamenti.
Posizionare quindi la parte esterna vicino alla sua sede, inserire il
supporto e spingere con decisione verso la parete del forno per fissare
saldamente la griglia.
* Disponibile solo su alcuni modelli
Il numero e il tipo di accessori possono variare a seconda del modello
acquistato
. È possibile acquistare separatamente altri accessori presso il
Servizio Assistenza Tecnica.
INSERIRE LA GRIGLIA E GLI ALTRI ACCESSORI
Inserire la griglia tenendola leggermente inclinata verso l'alto,
appoggiando dapprima il lato posteriore rialzato - orientato verso l'alto
- sul livello desiderato. In seguito, farla scivolare orizzontalmente sulle
guide fino a fine corsa. Gli altri accessori, per esempio la teglia, vanno
inseriti orizzontalmente facendoli scivolare sulle guide.
PRIMO UTILIZZO
Un nuovo forno può rilasciare degli odori dovuti alla lavorazione di
fabbrica: questo è normale.
Prima di cucinare gli alimenti è dunque raccomandato di riscaldare a
vuoto il forno per rimuovere ogni odore.
Rimuovere il cartone protettivo o la pellicola trasparente dal forno e
togliere gli accessori dal suo interno.
Riscaldare il forno a 250 °C per circa un'ora. Durante questa procedura il
forno deve essere vuoto.
Note: si raccomanda di ventilare il locale dopo il primo utilizzo.
1
2
3
4
FUNZIONI
OFF
Per spegnere il forno.
LAMPADA
Per accendere la luce nel forno.
STATICO
Per cuocere qualsiasi tipo di pietanza su un solo ripiano.
L'azione del vapore rilasciato durante questo speciale ciclo di
pulizia a bassa temperatura permette di rimuovere facilmente sporco
e residui di cibo. Versare 100-120 ml di acqua potabile sul fondo del
forno, quindi ruotare la manopola di
selezione e la manopola del
termostato sull'icona
. Si consiglia di utilizzare la funzione per 35
minuti.
Attivare la funzione a forno freddo e lasciarlo raffreddare per 15
minuti al termine del ciclo. La posizione dell'icona non corrisponde
alla temperatura raggiunta durante il ciclo di pulizia.
VENTILATO
Per cuocere fino ad un massimo di due ripiani
contemporaneamente. Si consiglia di invertire la posizione delle teglie
a metà cottura.
GRILL
Per grigliare bistecche, spiedini e salsicce, cucinare verdure
gratinate o tostare il pane. Quando si griglia la carne, si consiglia di
utilizzare una leccarda per raccogliere i succhi di cottura: posizionarla
un livello sotto la griglia e aggiungere 200 ml di acqua potabile.
TURBO GRILL
Per arrostire grandi tagli di carne (cosce, roast beef, pollo). Si
consiglia di utilizzare una leccarda per raccogliere i succhi di cottura:
posizionarla un livello sotto la griglia e aggiungere 200 ml di acqua
potabile.
SCONGELAMENTO
Per velocizzare lo scongelamento degli alimenti. Per attivare la
funzione di scongelamento, ruotare la manopola di selezione sull'icona
, quindi ruotare la manopola del termostato in senso orario su
qualsiasi temperatura. Questa funzione non riscalda, quindi può
essere utilizzata qualsiasi temperatura. Quando lo scongelamento è
terminato, ruotare i due comandi nelle posizioni
e .
USO QUOTIDIANO
1. SELEZIONARE UNA FUNZIONE
Per selezionare una funzione, ruotare la manopola di selezione in
corrispondenza del simbolo per la funzione desiderata: il display si
accende e il forno emette un segnale acustico.
2. AVVIARE UNA FUNZIONE
MANUALE
Per avviare la funzione selezionata, ruotare la manopola termostato per
impostare la temperatura desiderata.
DIAMOND CLEAN
Per attivare la funzione di pulizia "Diamond Clean", versare 100 - 120
ml di acqua potabile sul fondo del forno, quindi ruotare tutte e 3 le
manopole (manopola di selezione, manopola del timer e manopola del
termostato) sull'icona
. La funzione si attiverà automaticamente e la
sua durata sarà di 35 minuti.
3. PRERISCALDAMENTO
Una volta avviata la funzione, un segnale acustico e l’icona
lampeggiante sul display segnalano che si è attivata la fase di
preriscaldamento.
Al termine di questa fase, un segnale acustico e l’icona
fissa
sul display indicheranno che il forno ha raggiunto la temperatura
impostata: a questo punto, posizionare gli alimenti all'interno e
procedere con la cottura.
4. IMPOSTAZIONE DEL TIMER
Con la manopola del timer è possibile impostare un tempo di cottura
compreso tra 1 e 60 minuti. Per impostare il tempo di cottura, dopo
avere selezionato la funzione di cottura richiesta, ruotare la manopola
in senso orario e quindi riportarla nella direzione opposta sulla durata
di cottura desiderata.
NOTE
• Non coprire l'interno del forno con pellicola di alluminio.
• Non trascinare pentole o tegami sul fondo del forno, perché
così facendo si potrebbe rovinare lo smalto.
• Non posizionare oggetti pesanti sulla porta e non aggrapparsi
alla porta.
PULIZIA E MANUTENZIONE
SUPERFICI ESTERNE
Pulire le superfici con un panno in microfibra umido. Se molto sporche,
aggiungere qualche goccia di detergente con pH neutro. Asciugare
con un panno.
Non utilizzare detergenti corrosivi o abrasivi. Se inavvertitamente uno
di questi prodotti dovesse venire a contatto con le superfici, pulire
subito con un panno in microfibra umido.
SUPERFICI INTERNE
Dopo ogni uso, lasciare raffreddare il forno e pulirlo preferibilmente
quando è ancora tiepido per rimuovere incrostazioni e macchie dovute
a residui di cibo. Per asciugare la condensa dovuta alla cottura di
alimenti con un elevato contenuto di acqua, utilizzare a forno freddo
un panno o una spugna.
Per facilitare la pulizia dei vetri è possibile rimuovere e smontare la
porta. Pulire i vetri della porta con detergenti liquidi specifici.
ACCESSORI
Mettere a bagno gli accessori con detersivo per piatti dopo l'uso,
maneggiandoli con guanti da forno, se ancora caldi. I residui di cibo
possono essere rimossi con una spazzola per piatti o con una spugna.
Per dorare le pietanze alla base. Questa funzione può anche
essere utilizzata per le cotture lente, per ultimare la cottura di piatti
molto liquidi (dolci o salate) o per addensare salse e condimenti.
TERMOV
ENTILATO
Per cuocere contemporaneamente su più ripiani (massimo tre)
alimenti diversi che richiedono la medesima temperatura di cottura.
Questa funzione permette di eseguire la cottura senza trasmissione di
odori da un alimento all’altro.
PIZZA
Per cuocere pizze e focacce di diversi tipi e formati. È
consigliabile inserire la pietanza nel forno al 2° livello. Si consiglia di
preriscaldare il forno prima della cottura.
BOTTOM (INFERIORE)
DIAMOND CLEAN (DISPONIBILE SOLO IN ALCUNI MODELLI)
Per le linee guida, la documentazione standard e altre informazioni sui prodotti:
• Utilizzare il codice QR sul proprio apparecchio
• Visitare il sito web docs . hotpoint . eu
• Oppure, contattare il Servizio Assistenza Tecnica (al numero di telefono riportato sul libretto di garanzia). Prima di
contattare il Servizio Assistenza Clienti, prepararsi a fornire i codici riportati sulla targhetta matricola del prodotto.
RIMOZIONE E MONTAGGIO DELLA PORTA
b
a
a
b
~15°
b
a
1. Per rimuovere la porta, aprirla completamente e abbassare i fermi
fino alla posizione di sblocco.
2. Chiudere la porta fino a quando è possibile. Prendere saldamente
la porta con entrambe le mani, evitando di tenerla per la maniglia.
È sufficiente rimuovere la porta continuando a chiuderla e tirandola
contemporaneamente verso l'alto, finché non si sgancia dalla propria
sede. Togliere la porta e appoggiarla su un piano morbido.
3. Per rimontare la porta, avvicinarla al forno allineando i ganci
delle cerniere alle proprie sedi e ancorare la parte superiore agli
alloggiamenti.
4. Abbassare la porta e poi aprirla completamente. Abbassare i fermi
nella posizione originale: fare attenzione che siano completamente
abbassati.
Applicare una leggera pressione per verificare che i fermi siano nella
posizione corretta.
5. Provare a chiudere la porta, verificando che sia allineata al pannello
di controllo. Nel caso non lo fosse, ripetere i passi sopra descritti: La
porta potrebbe danneggiarsi se non funziona correttamente.
PULIZIA DEI VETRI DELLA PORTA
1. Dopo aver smontato la porta e averla appoggiata su un ripiano
morbido con la maniglia verso il basso, premere contemporaneamente
le due clip di fissaggio ed estrarre il profilo superiore della porta
tirandolo verso di sé.
2. Sollevare e prendere saldamente il vetro interno con due mani,
rimuoverlo e appoggiarlo su un piano morbido prima di eseguire la
pulizia.
3. Riapplicare il vetro intermedio (contrassegnato con “1R”)
prima di rimontare il pannello interno: Per posizionare correttamente
i pannelli di vetro, assicurarsi che il marchio "R" sia visibile nell'angolo
sinistro. Inserire innanzitutto il lato lungo del vetro contrassegnato con
la lettera "R" nelle sedi di supporto, quindi abbassarlo in posizione.
Ripeta questa procedura per entrambi i pannelli di vetro.
4. Rimontare il profilo superiore: Un clic indicherà il posizionamento
corretto. Verificare che la tenuta sia salda prima di rimontare la porta.
RISOLUZIONE DEI PROBLEMI
Problema Possibile causa Soluzione
Il forno non funziona.
Interruzione di corrente elettrica.
Disconnessione dalla rete
principale.
Verificare che ci sia tensione in rete e che il forno sia
collegato all'alimentazione elettrica.
Spegnere e riaccendere il forno e verificare se
l'inconveniente persiste.


400020023396