
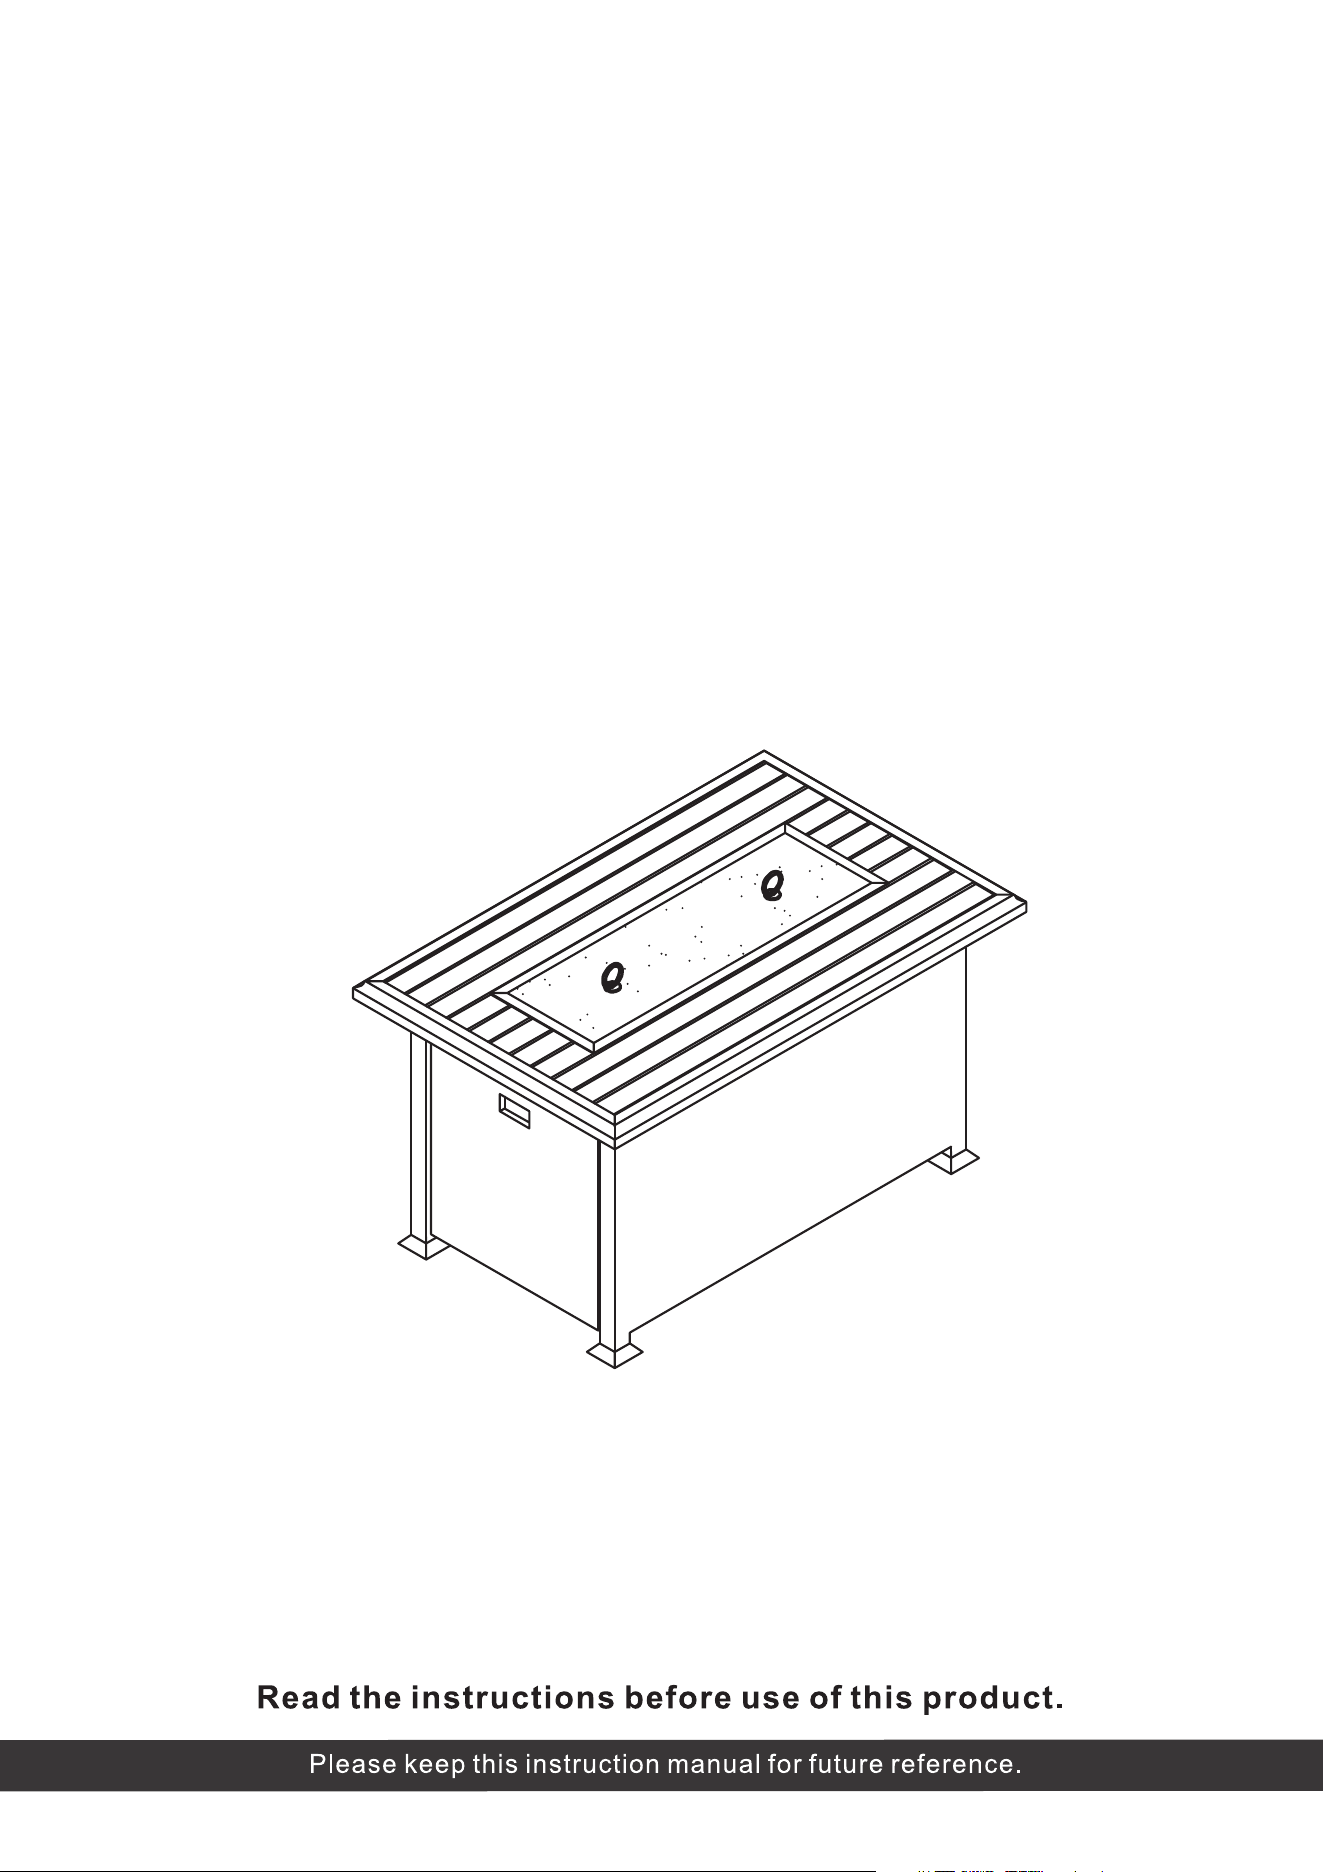
Outdoor Fire Pit Table
Assembly Manual
©
Copyright 2016 - 2023 Kozyard LLC. | All Rights Reserved.
Version:20231006
• Prior to assembly, ensure that you lay out and identify all the parts listed in
the parts list.
• Tighten all nuts and bolts securely. Hand-tighten all bolts before use. Avoid
using power tools or applying excessive force during assembly and bolt tight-
ening.
• If you encounter any difficulties during assembly or if any part is missing or
damaged, please don't hesitate to contact our customer service team via
email at info@kozyard.com or by calling our toll-free number at
866-355-0018.
Assembly Instructions
Care and warranty
• We recommend the use of furniture covers to protect the patio fire pit when not
in use.
• Clean the frame components and fabric with a mild soap solution, then rinse
thoroughly. Avoid using bleach, acid, or any other solvents on either the fabric or
frame components.
• To prolong the life and beauty of your patio fire pit table, we recommend storing it
in a dry and protective area during off-season periods.
• For a comprehensive warranty policy, please visit www.kozyard.com. Be aware
that warranty terms can change without prior notification.
• For the best performance and safety of your chair, inspect and tighten all bolts
and fasteners regularly
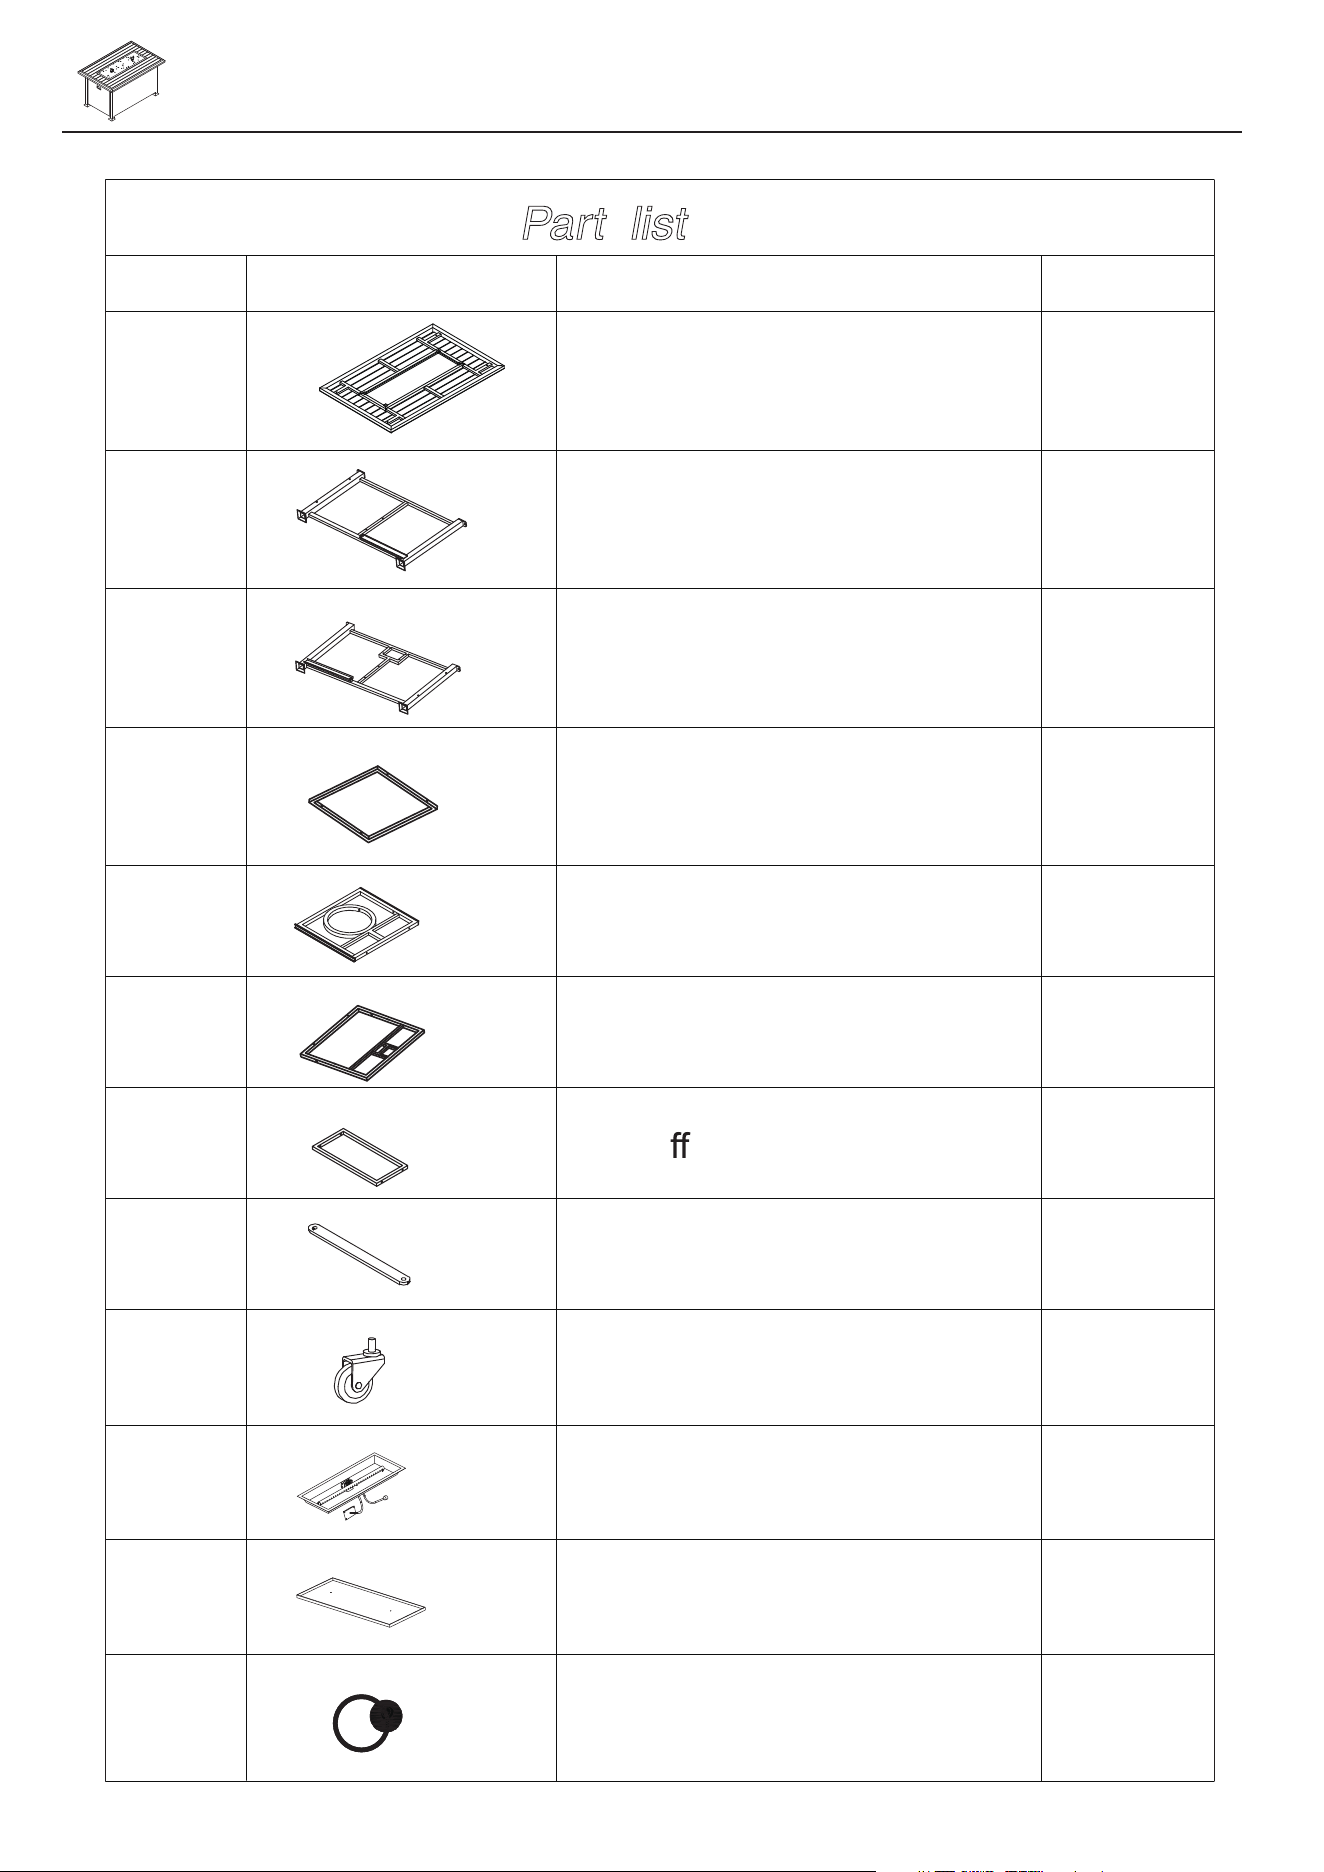
Sti ener Panel
Right Side Panel
Gas Cylinder Base
Left Side Panel
Rear Panel
Door
Bracket
Caster
Burner
Burner Lid
Pull Ring
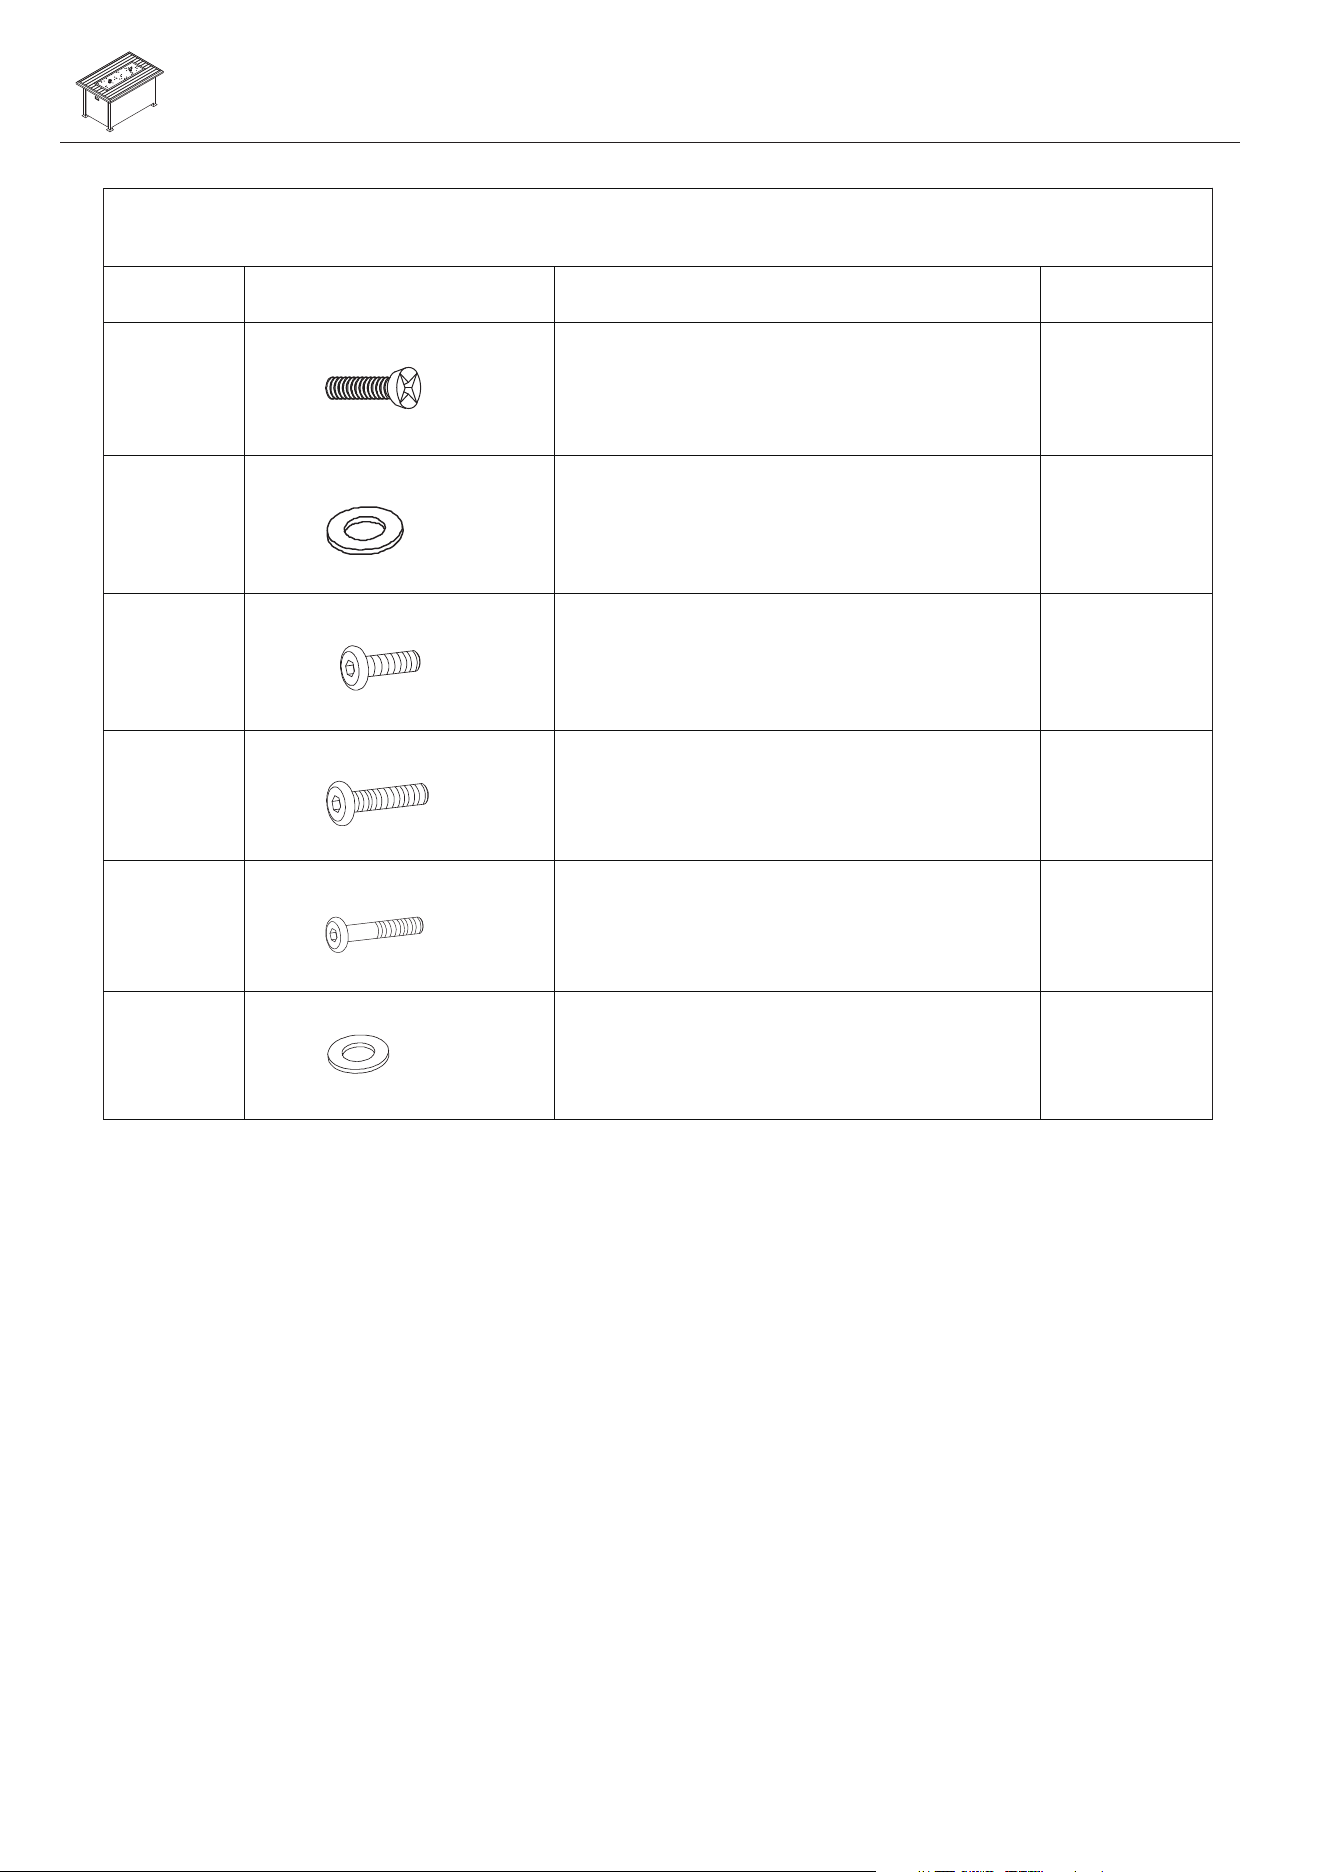
Part
Img
Description
Qty
A
B
C
D
E
F
G
H
I
1PC
1PC
1PC
1PC
1PC
1PC
1PC
1PC
J
K
L
2PCS
1PC
1PC
2PCS
Table Top
Part list
1PC
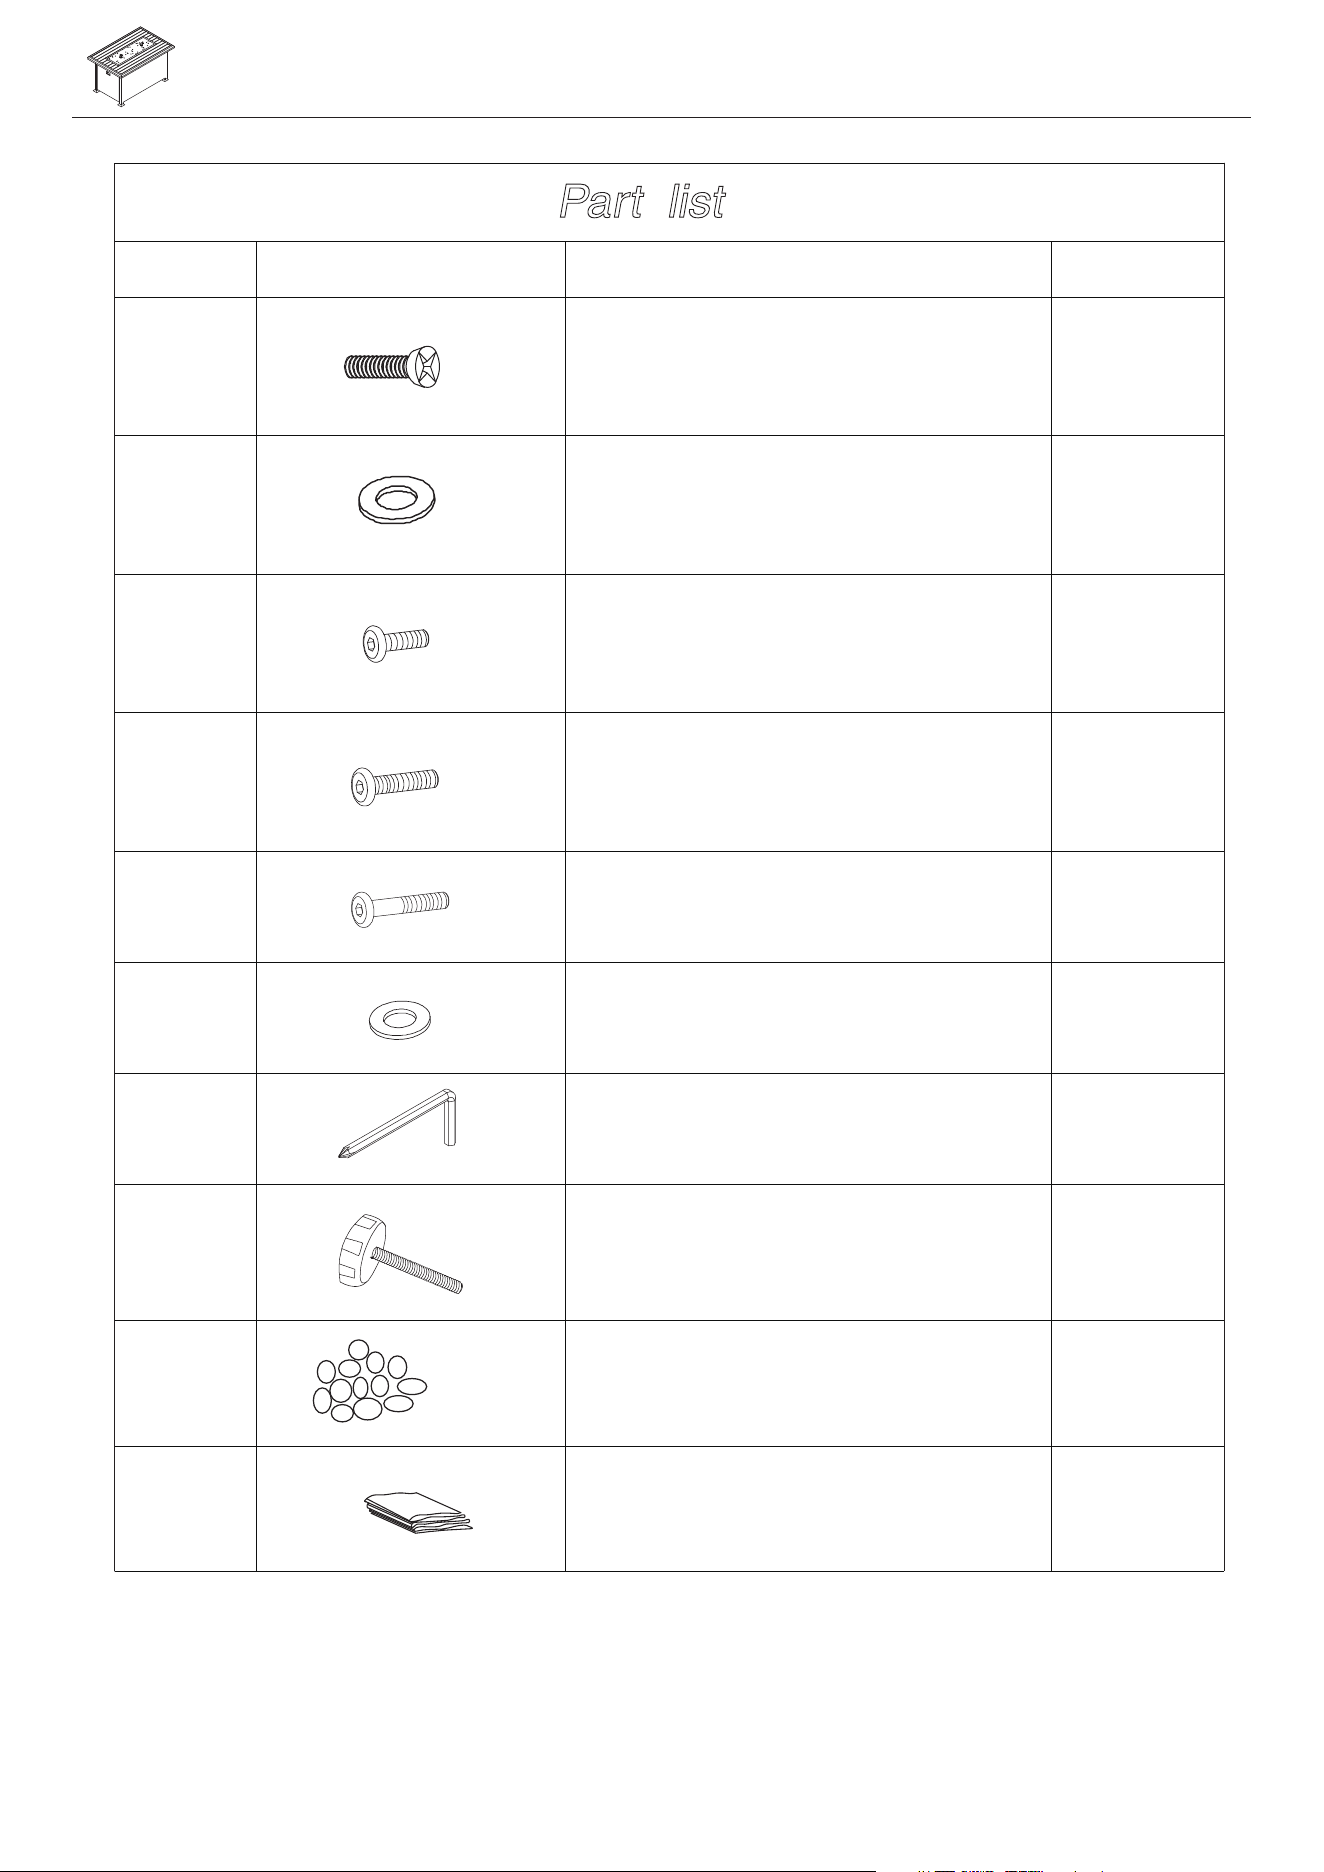
V
Cover
1PC
1PC
U
6 KGS
Knob
Glass Stones
Part
Img
Description
Qty
M
N
O
P
Q
R
S
T
Bolt M4*6
Washer M4
Bolt M6*15
2PCS
2PCS
16PCS
Bolt M6*35
4PCS
Bolt M6*40
6PCS
Washer M6
22PCS
Allen wrench
Part list
Extra
Part
Img
Description
Qty
M
N
P
Q
R
O
1PC
1PC
2PCS
1PC
1PC
3PCS
Bolt M4*6
Washer M4
Bolt M6*15
Bolt M6*35
Bolt M6*40
Washer M6
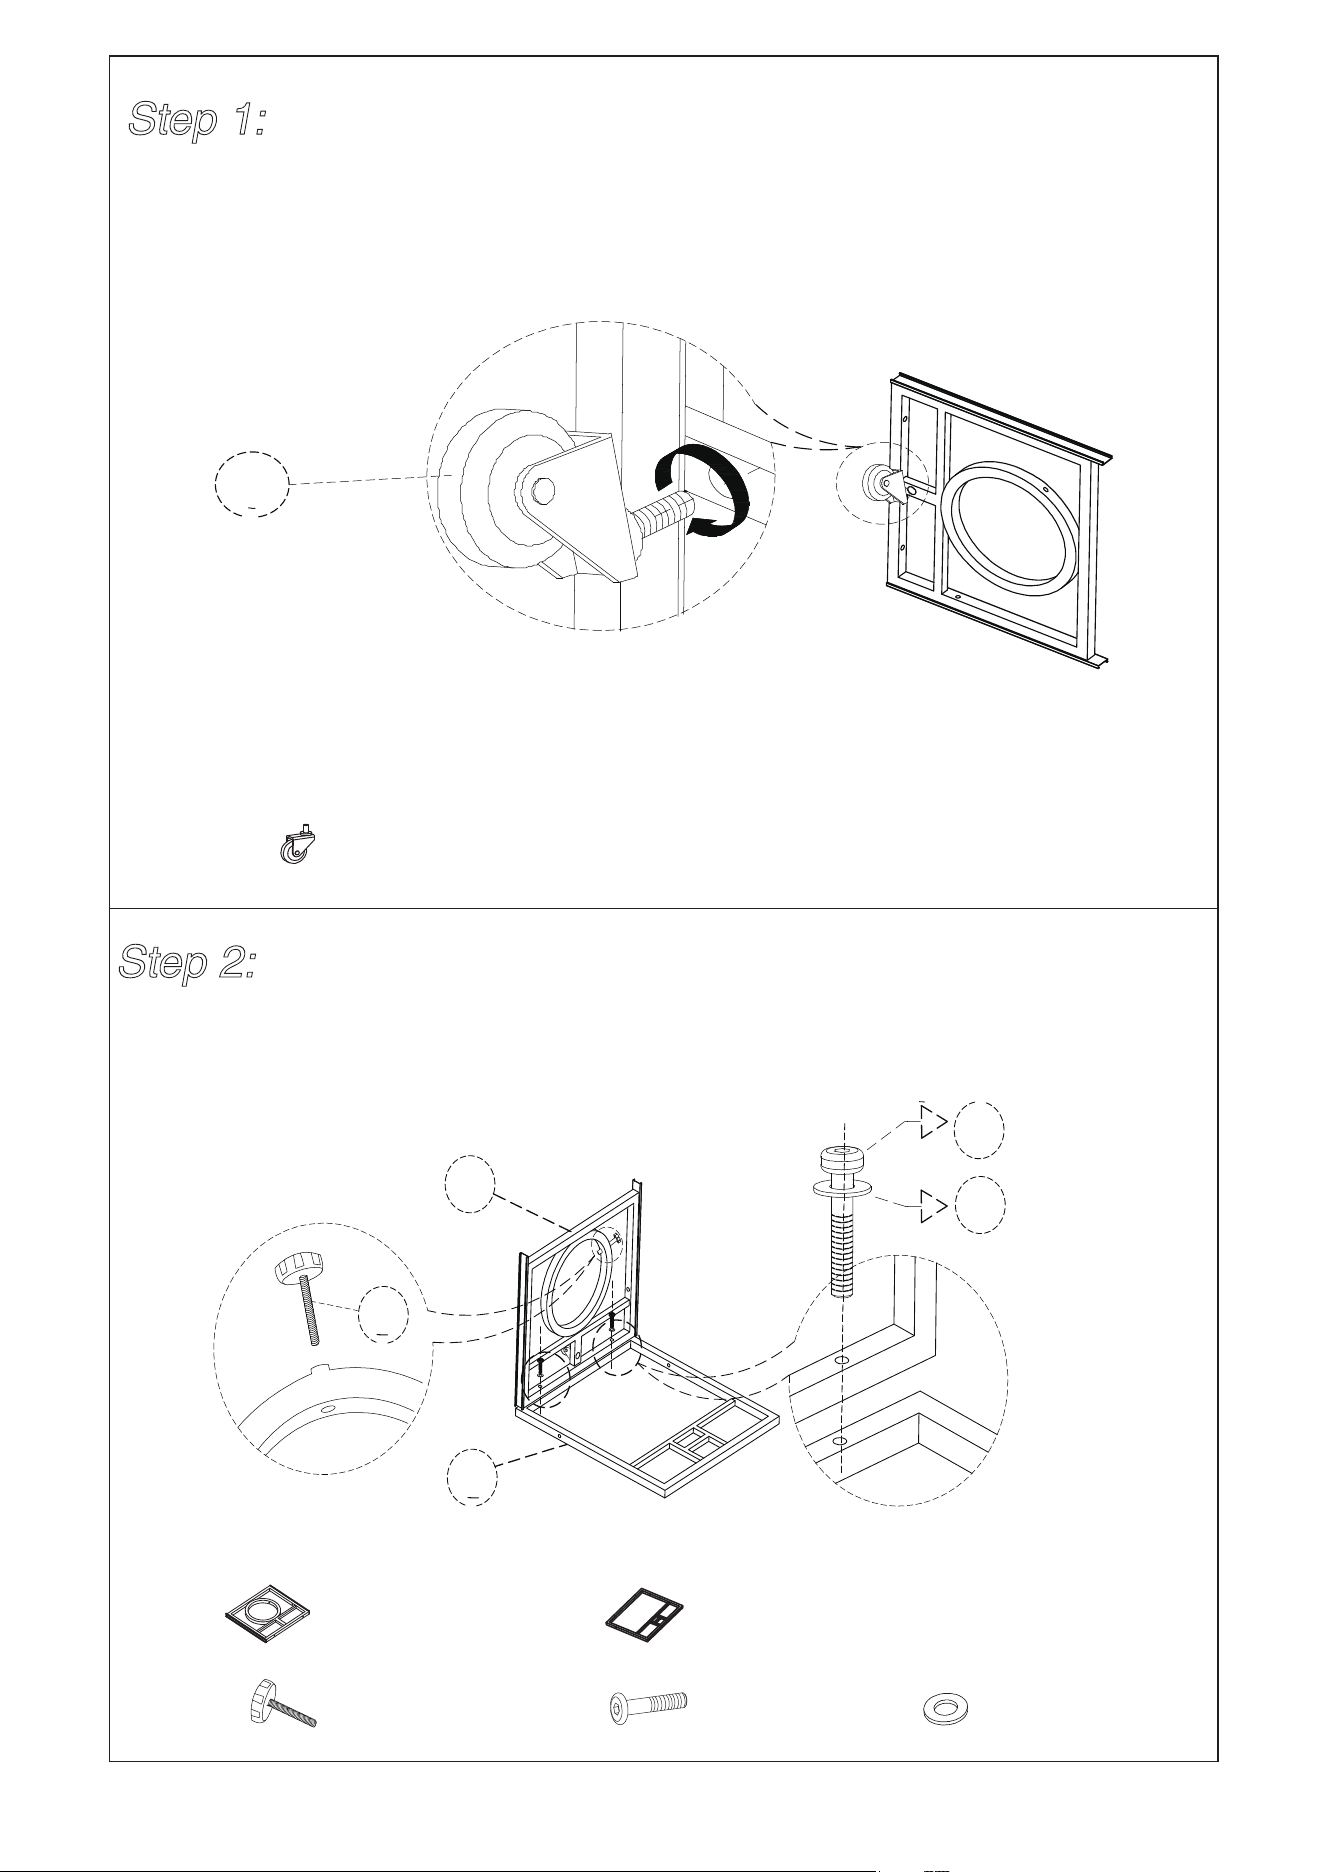
I
x1
I
Screw caster (I) to gas cylinder base (E).
T
x1
Q
R
x2
x2
E
F
x1
x1
E
F
Q
R
T
Attach gas cylinder base (E) to door (F) using bolts (Q) and
washers (R). Install the knob (T).
NOTE: Please do not fully tighten bolts until unit is fully assembled.
Step 1:
Step 2:
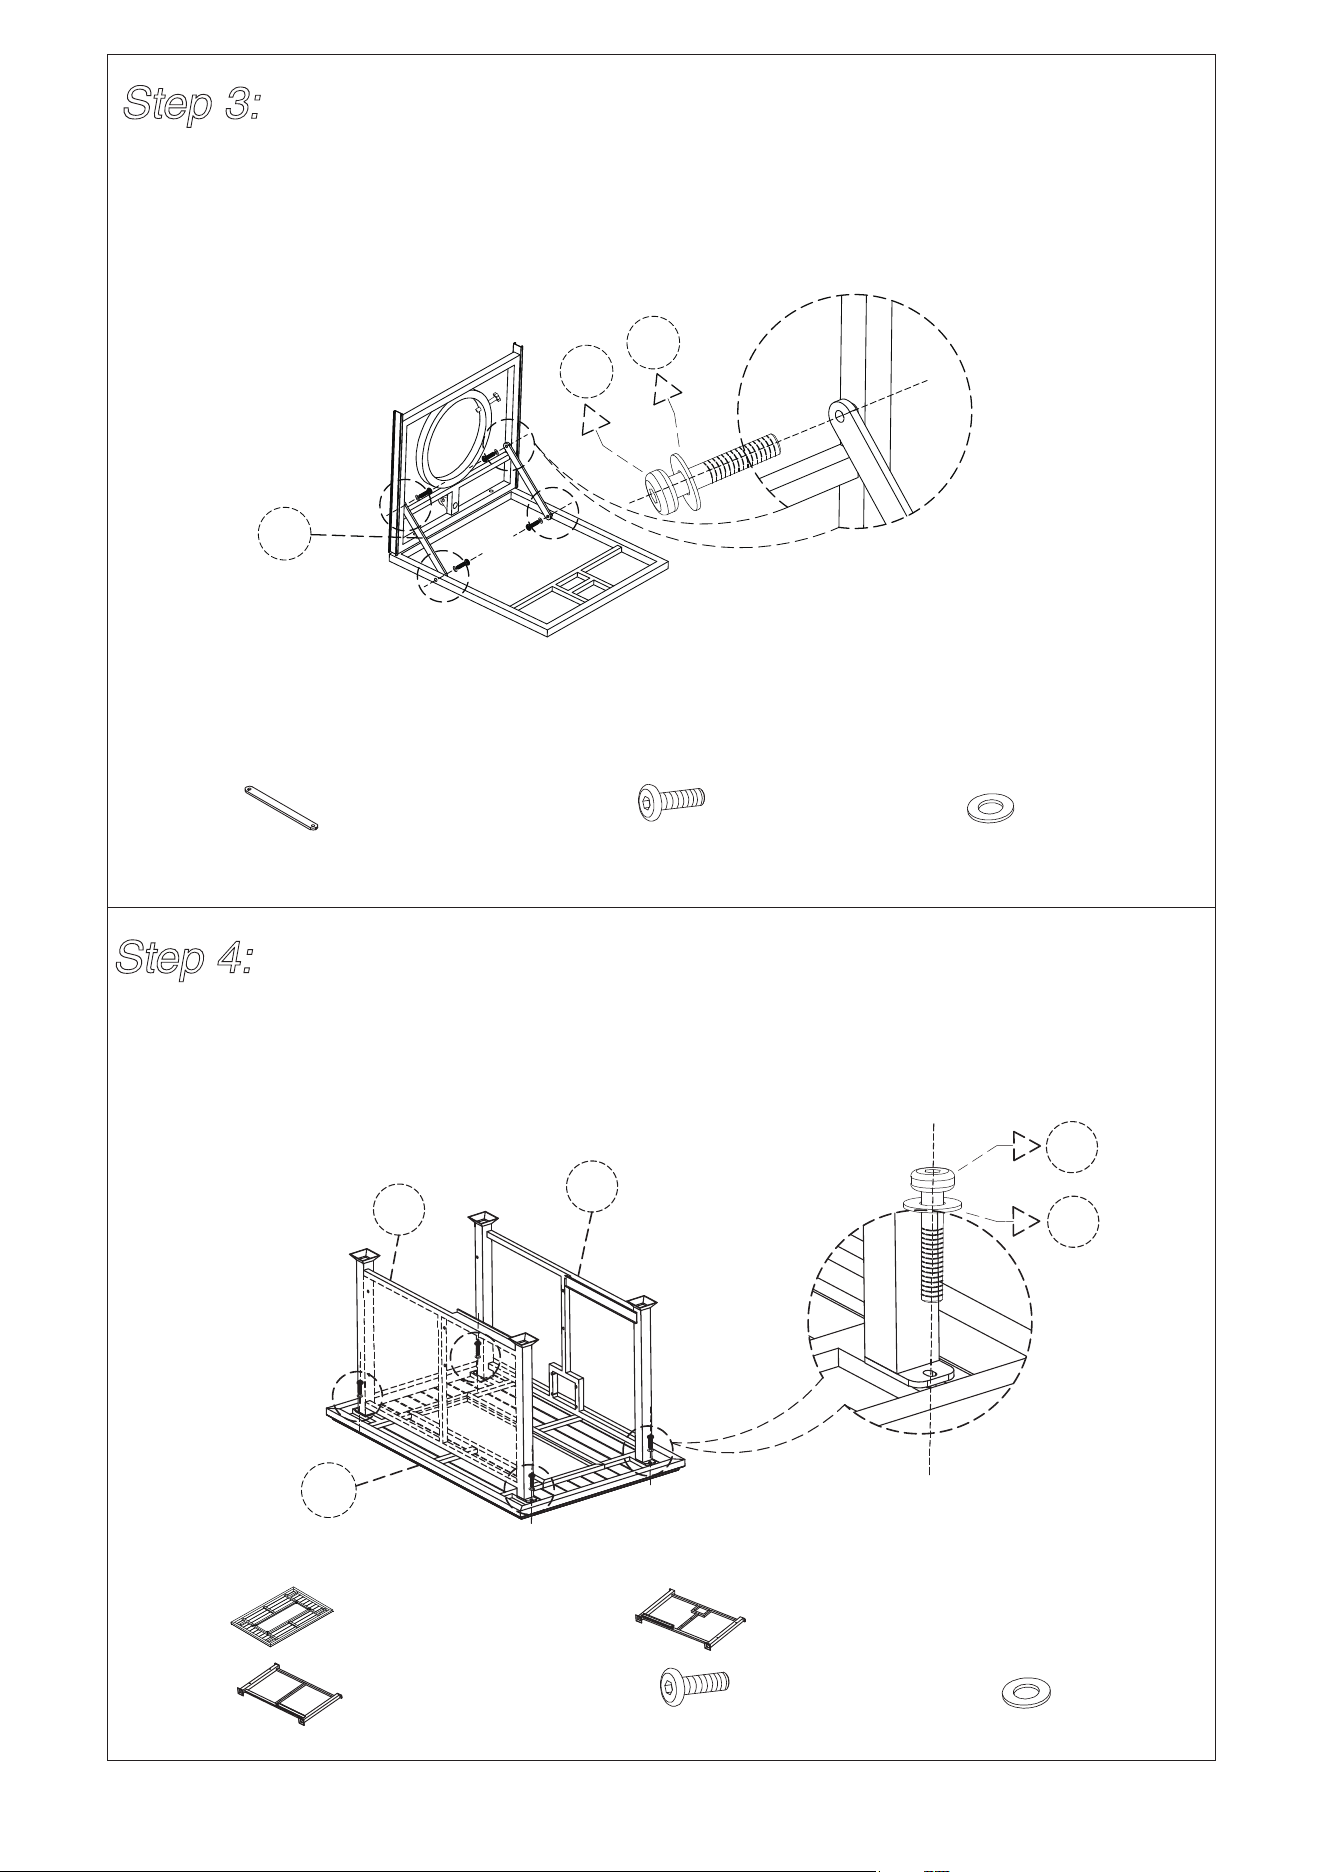
R
x4
O
x4
A
B
C
x1
x1
x1
A
using bolts (O) and washers (R).
Attach right side panel (B) and left side panel (C) to table top (A)
NOTE: Please do not fully tighten bolts until unit is fully assembled.
O
R
C
B
H
O
R
x 2
x 4
x 4
O
R
H
NOTE: Please fully tighten all bolts at this time.
Attach brackets (H) to gas cylinder base (E) and door (F)
using bolts (O) and washers (R).
Step 3:
Step 4:
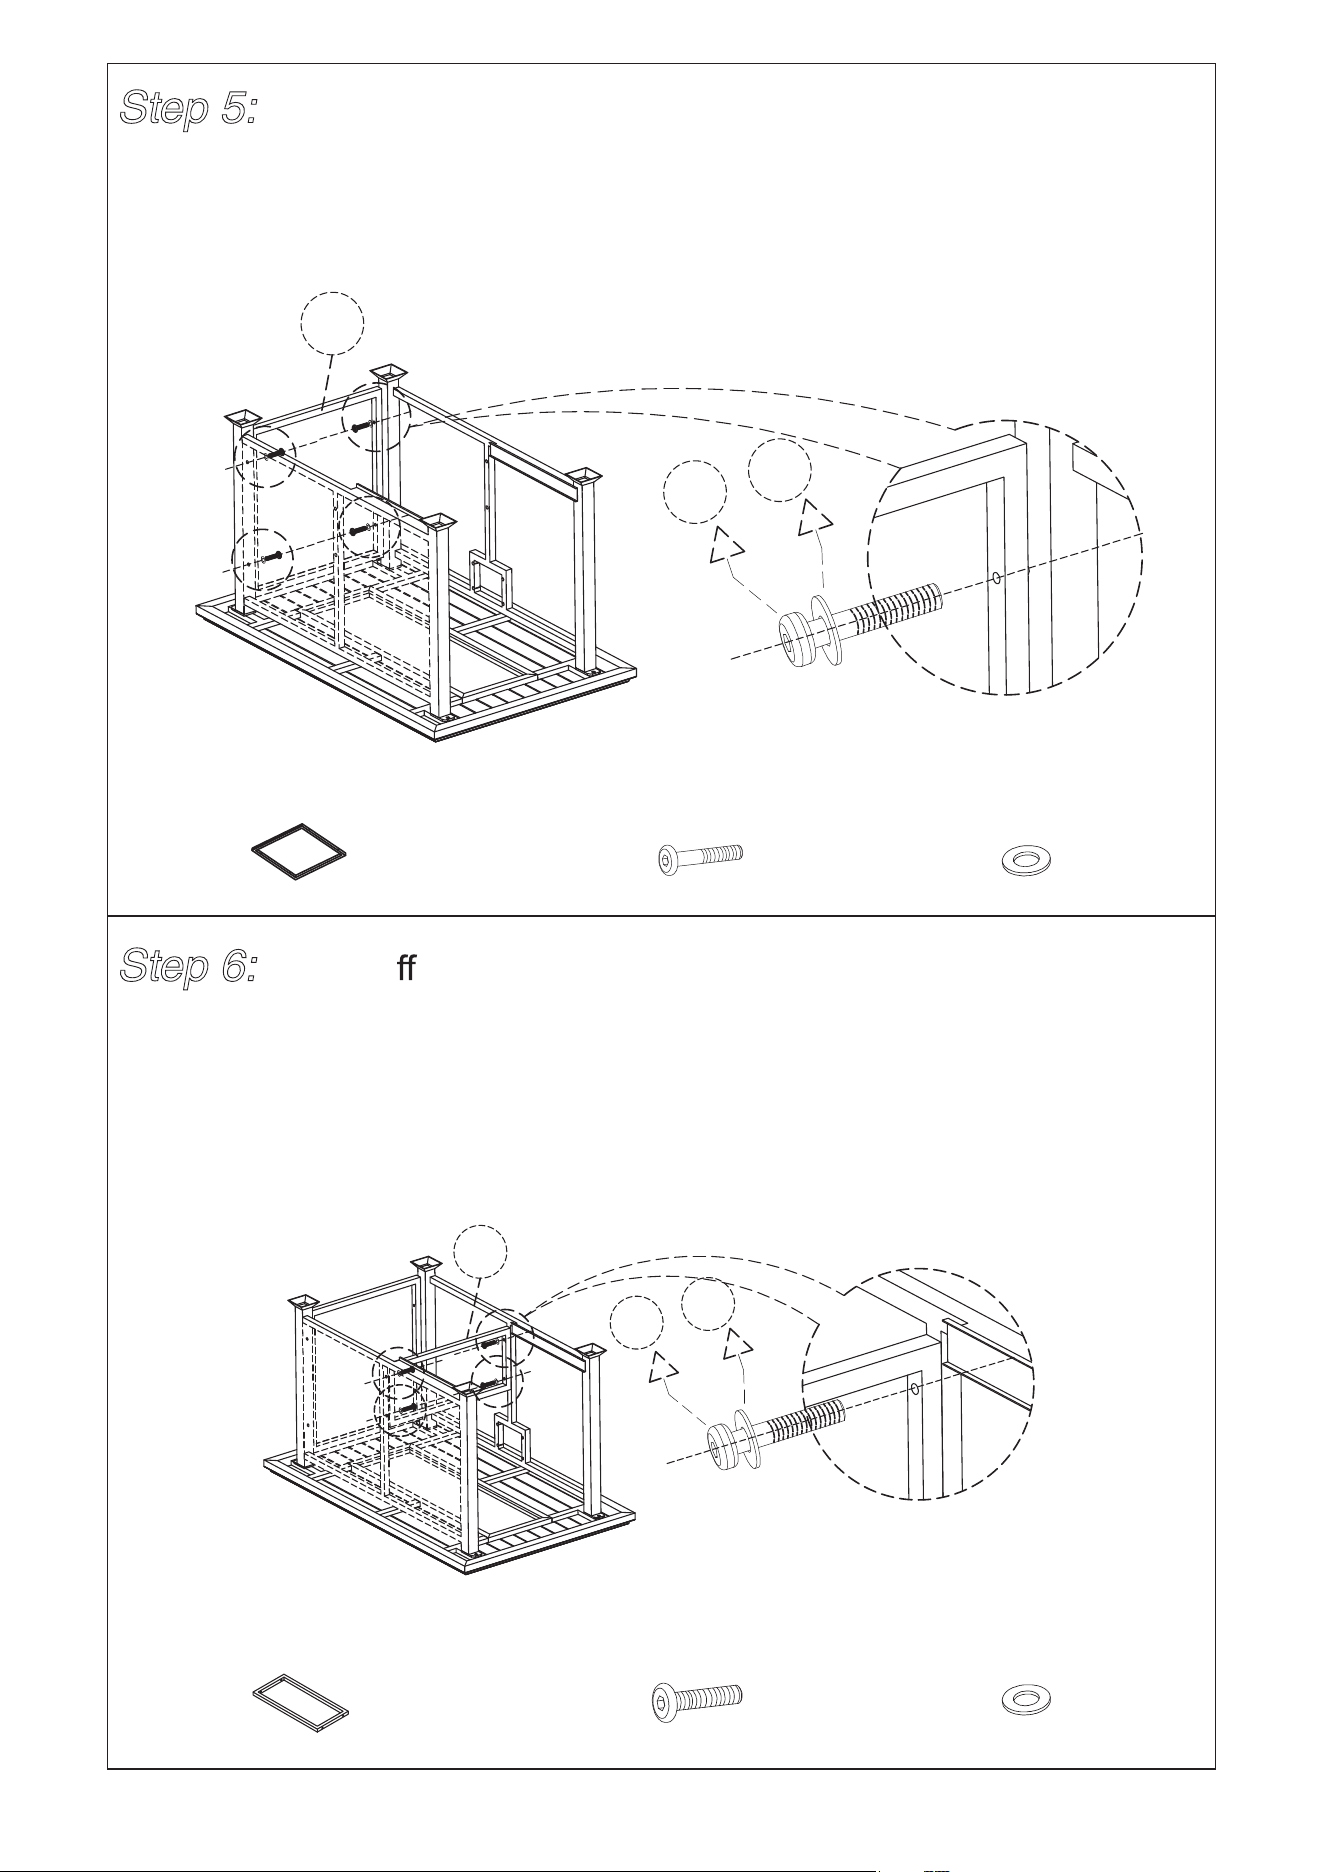
Q
R
x4
x4
R
x4
NOTE: Please fully tighten all bolts at this time.
D
x1
G
P
x1
x4
using bolts(Q) and washers (R).
NOTE: Please do not fully tighten bolts until unit is fully assembled.
using bolts (P) and washers (R).
Attach rear panel (D) to right side panel (B) and left side panel (C)
Attach
sti ener panel (G) to side panel (B) and left side panel (C)
R
Q
D
R
P
G
Step 5:
Step 6:
J
O
x8
O
R
J
O
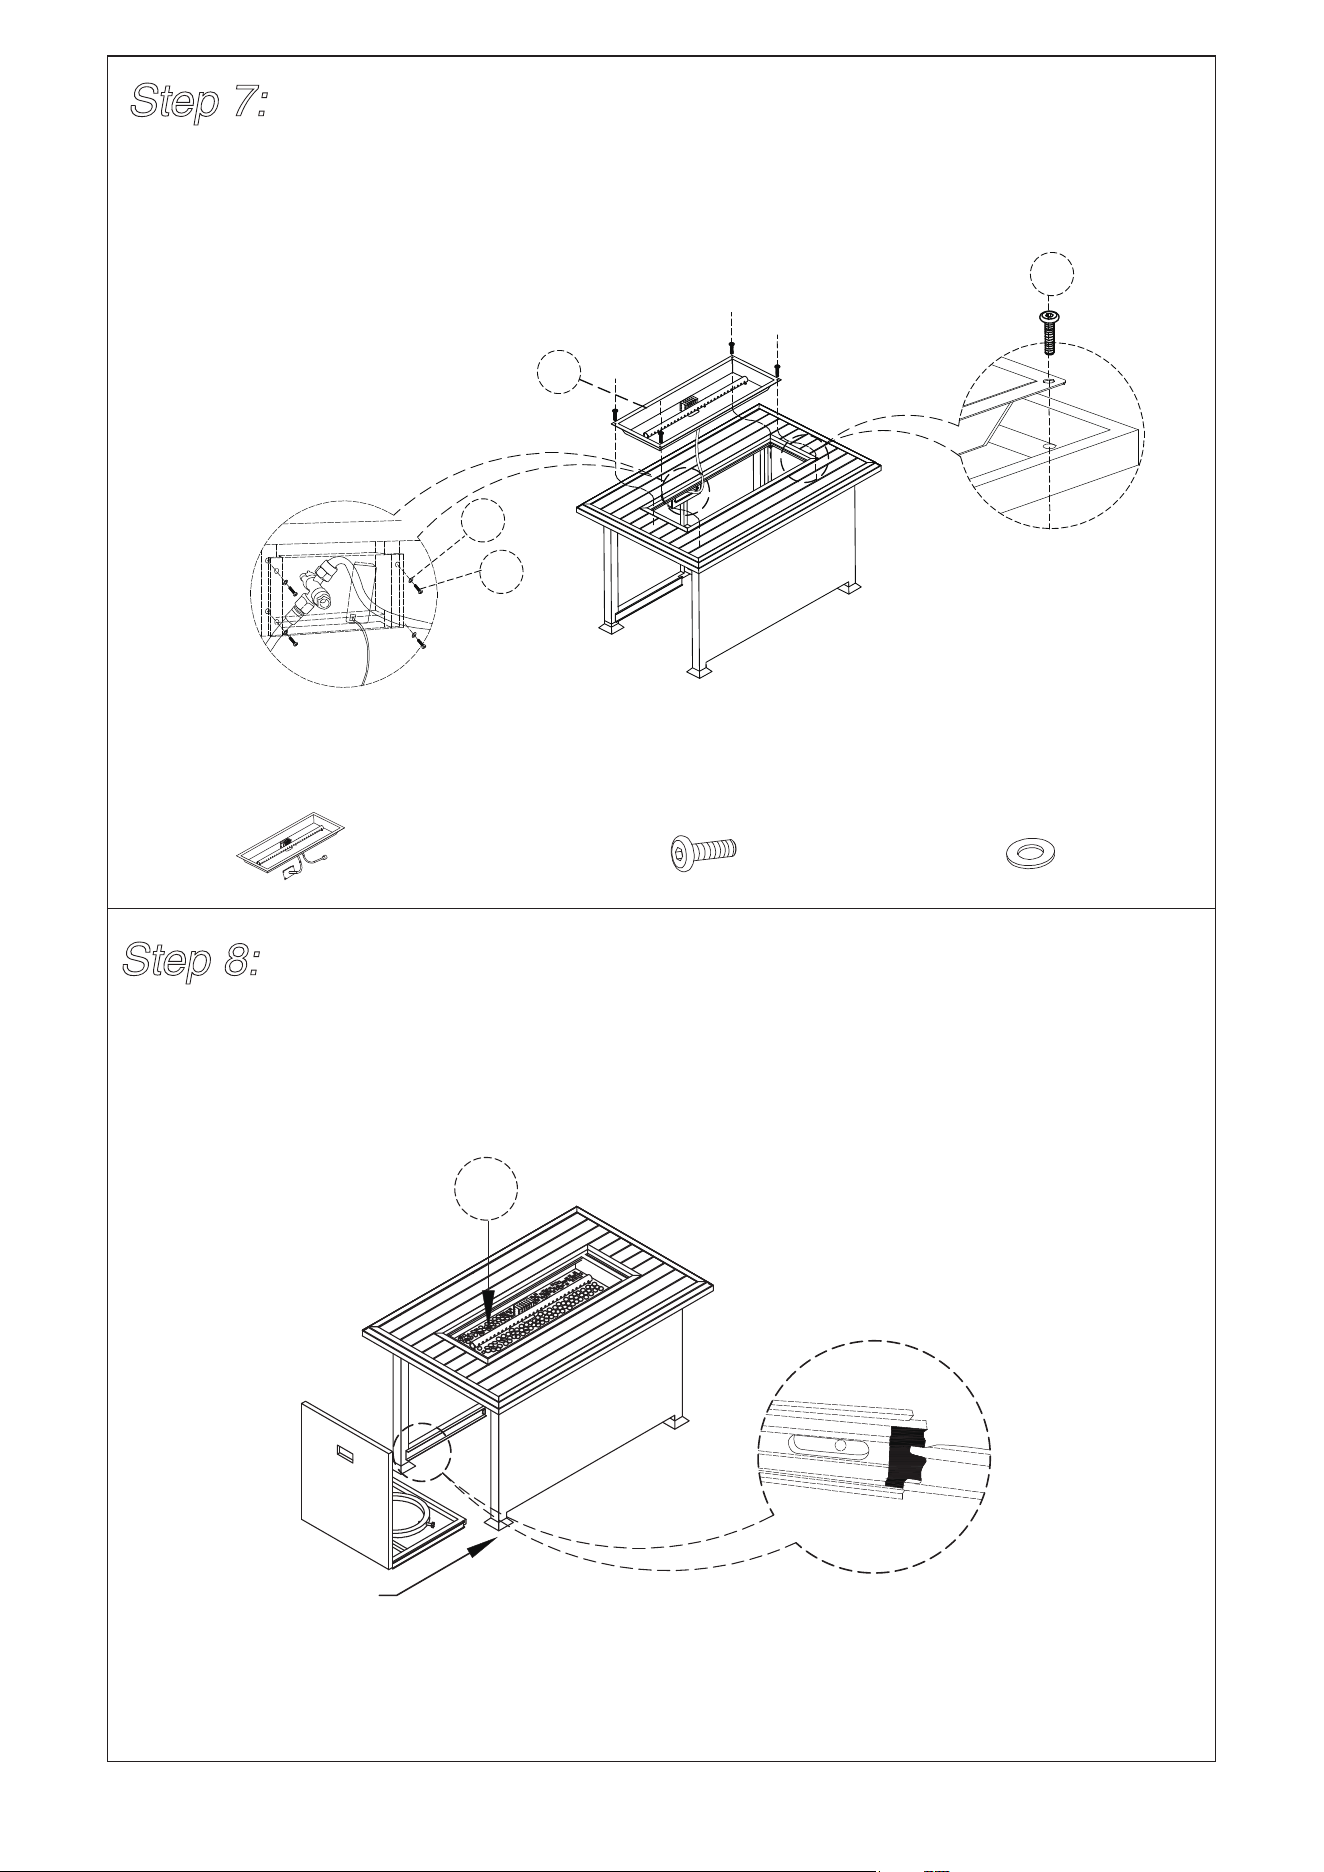
Attach burner (J) to table top (A) using bolts (O). And attach control
panel to left side panel (C) using bolts (O) and washers (R).
Insert Door and Gas Cylinder Base (E&F) into the guide rail and
push it to the end.
NOTE: Please fully tighten all bolts at this time.
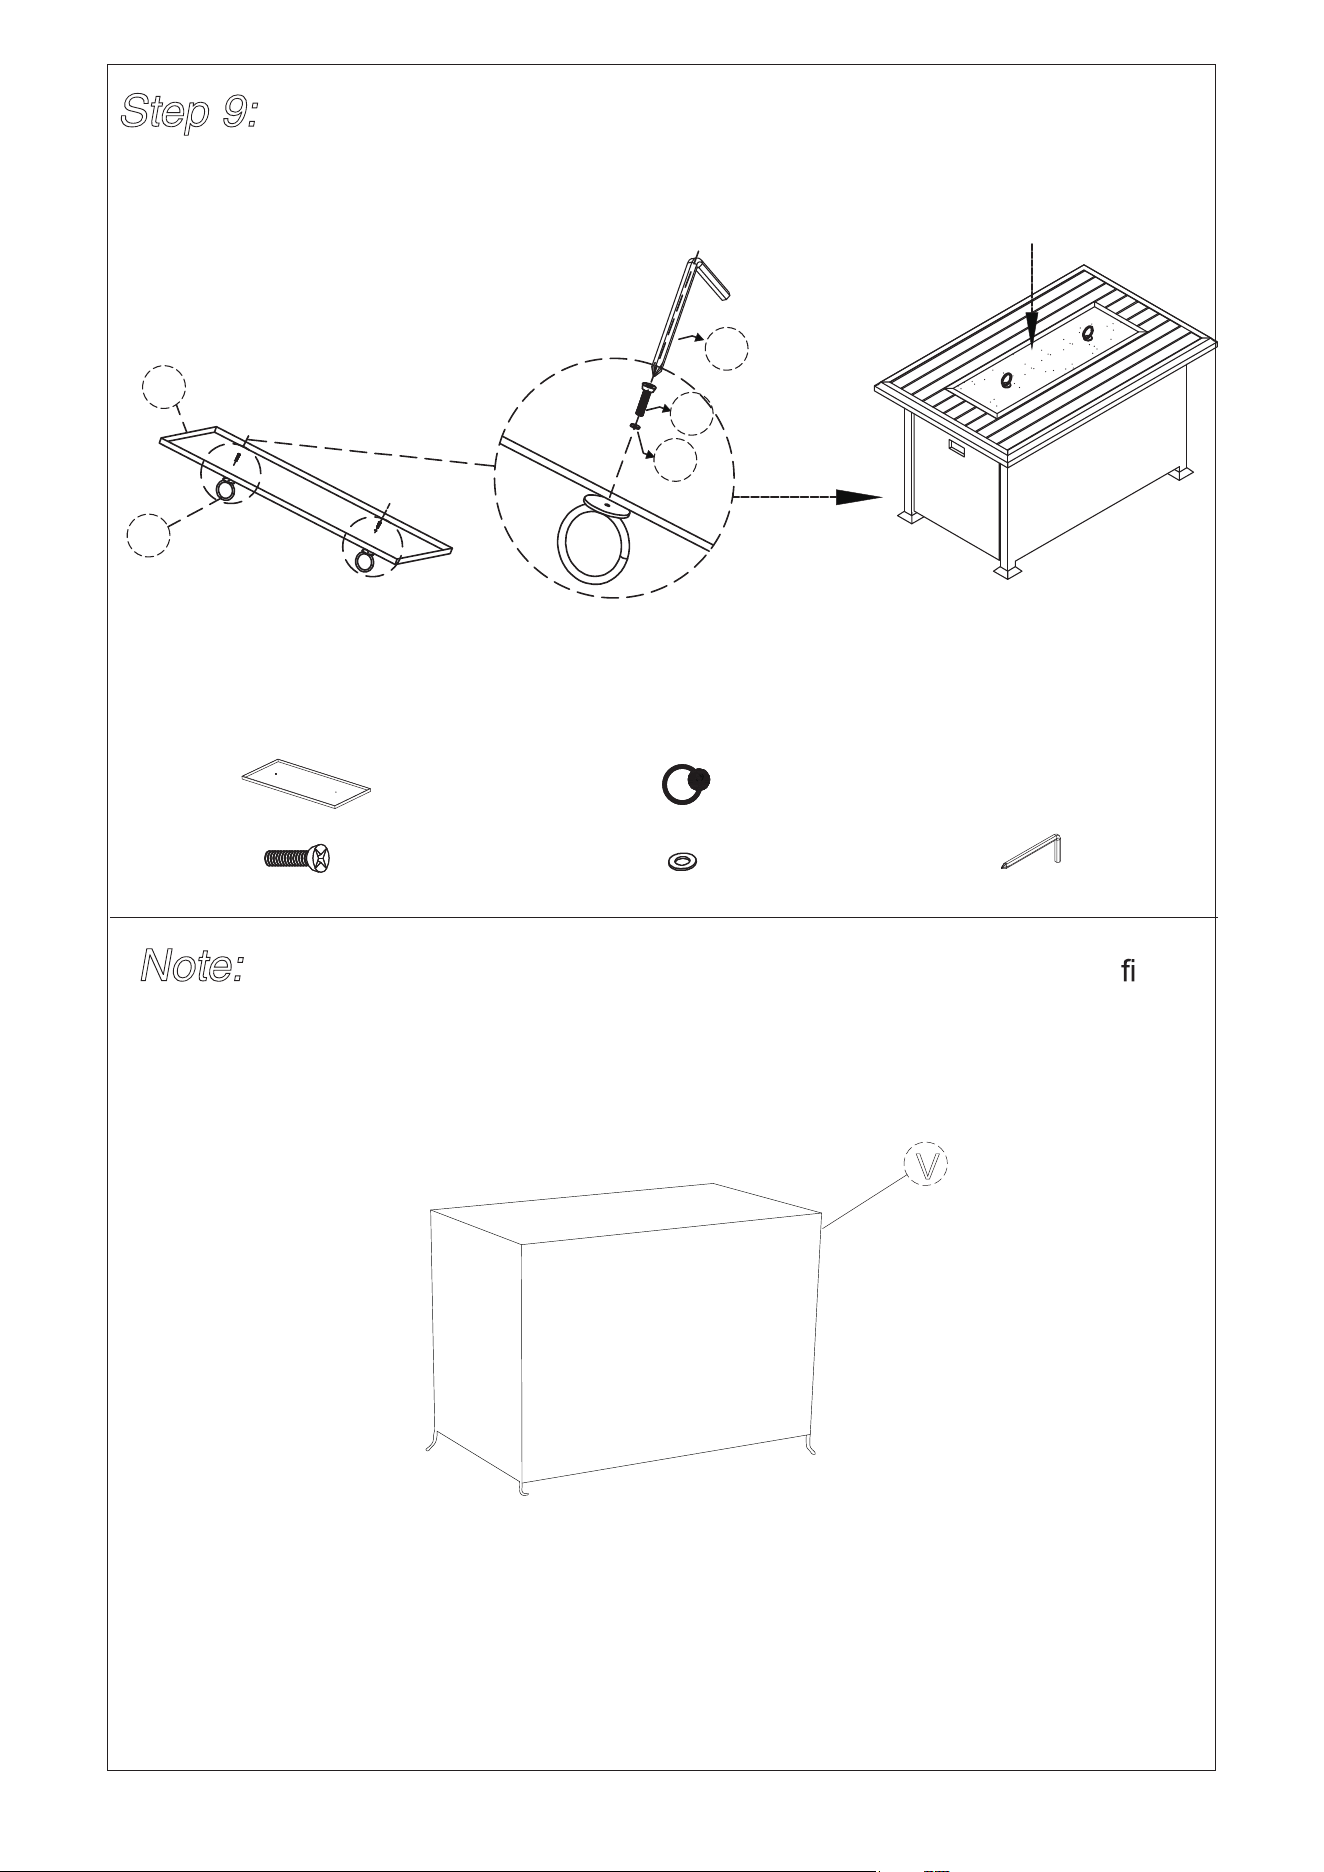
U
NOTE: Please pour the glass stones (U) into the burner at the this time
and place them evenly.
R
x4
Step 7:
Step 8:
x1
x2
x1
V
We recommend the use of furniture covers to protect the patio re
pit when not in use.
x2
x2
L
Please remove the wind guard before you use waterproof table
cover.
Attach pull ring (L) to burner lid (K) using bolts (M) and washers (N).
L
K
M
S
N
K
L
M
N
S
Step 9:
Note:

Follow us on Instagram
www.instagram.com/kozyard
Upload a picture of your Kozyard
product in your home with the
hashtag #kozyard share with your
friends.
Toll free: 1-866-355-0018
www.kozyard.com
email: support@kozyard.com
©
Copyright 2016 - 2023 Kozyard LLC. | All Rights Reserved.