
Technical Support and E-Warranty Certificate www.vevor.com/support
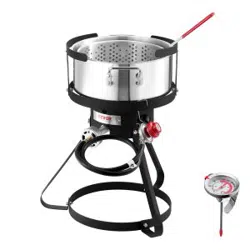
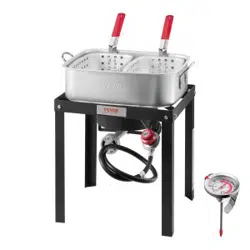
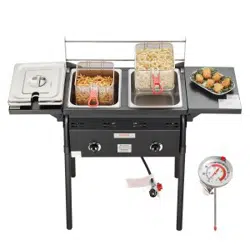
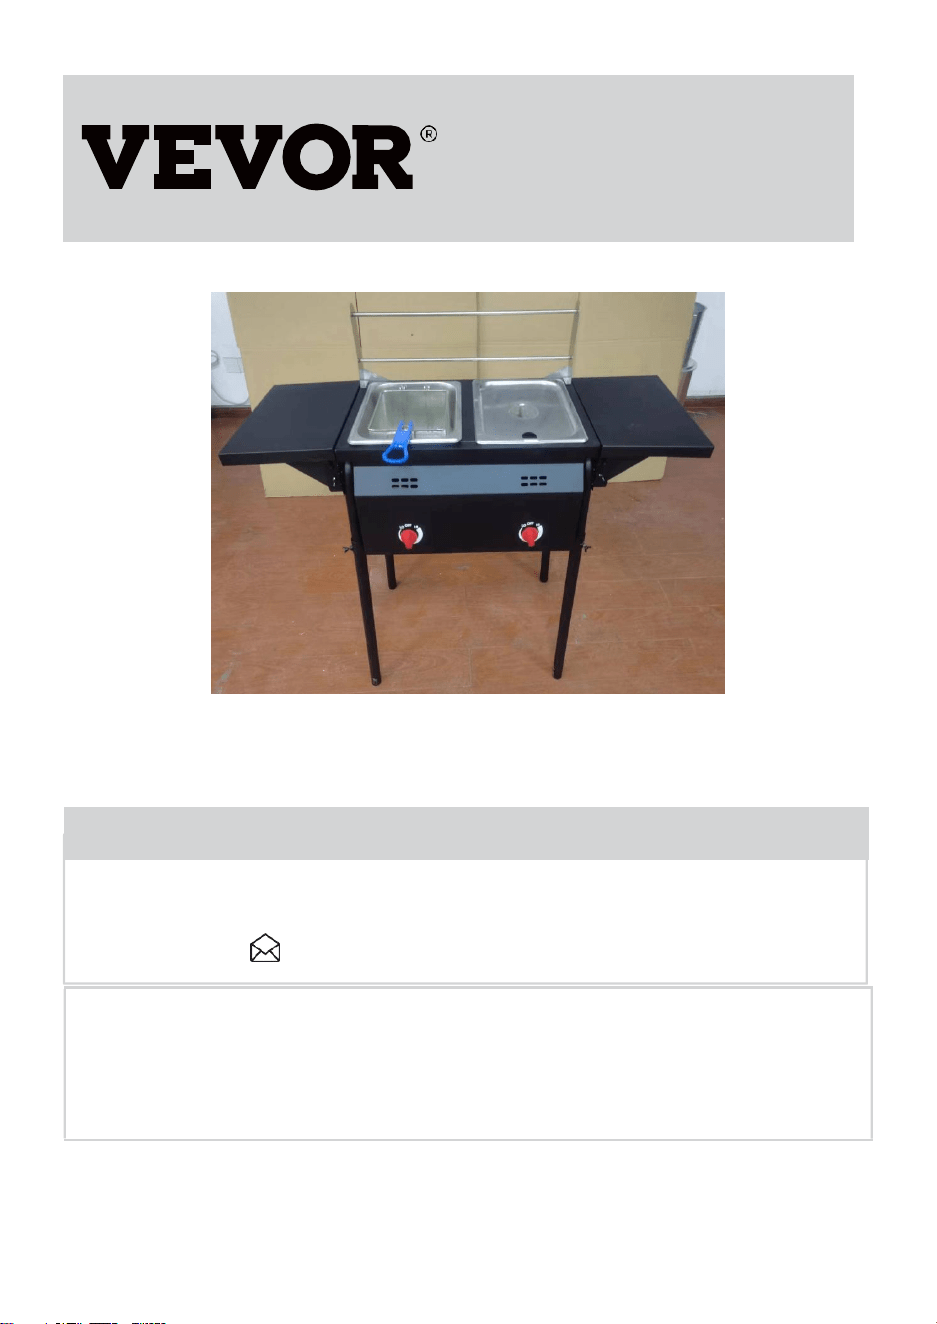
Commercial Gas Fryer
USER MANUAL
We continue to be committed to provide you tools with competitive price. "Save
Half", "Half Price" or any other similar expressions used by us only represents
an estimate of savings you might benefit from buying certain tools with us
compared to the major top brands and doses not necessarily mean to cover all
categories of tools offered by us. You are kindly reminded to verify carefully
when you are placing an order with us if you are actually saving half in
comparison with the top major brands.
- 1 -
Model:DBFY01
Have product questions? Need technical support? Please feel free to
contact us:
CustomerService@vevor.com
NEED HELP? CONTACT US!
This is the original instruction, please read all manual instructions
carefully before operating. VEVOR reserves a clear interpretation of our
user manual. The appearance of the product shall be subject to the
product you received. Please forgive us that we won't inform you again if
there are any technology or software updates on our product.
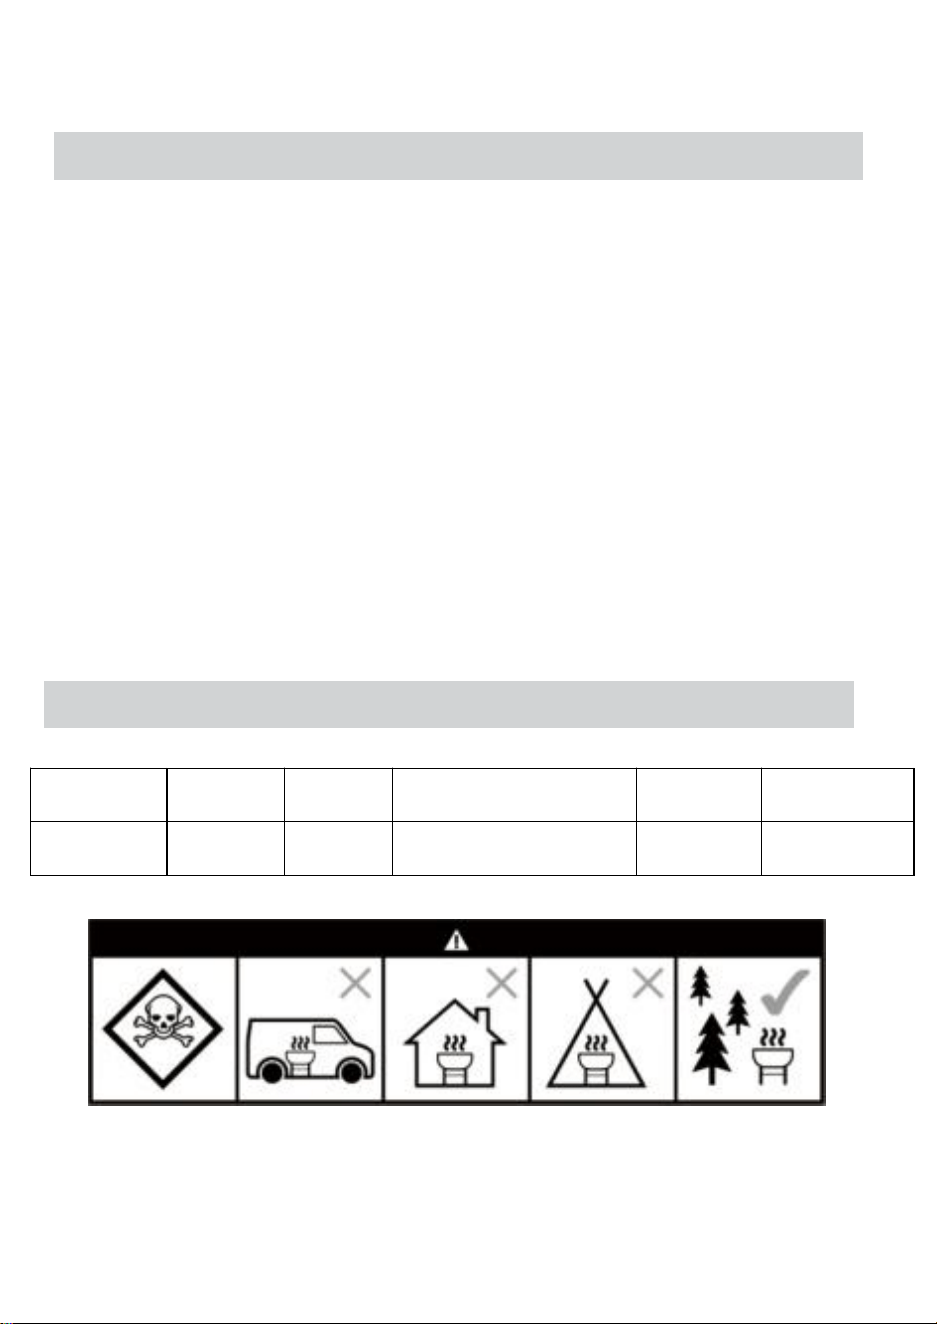
USE OUTDOORS
Commercial Gas
Fryer
- 2 -
Thank you using this product. In order to make sure that you can operate
the machine correctly, read this instruction carefully before operation and
keep it properly for future reference. Please be sure to read the
precautions and safety rules in this page to ensure your safe use.
WARNING
FOR YOUR SAFETY:
For Outdoor Use Only (outside any enclosure)
WARNING
FOR YOUR SAFETY:
1. Improper installation,adjustment,alteration,service or maintenance
can cause injury or property damage.
2. Read the instaliation,operation,and maintenance instructions
thoroughly before installing or servicing this equipment.
3. Failure to follow these instructions could result in fire or
exploslon,which could cause property damage,personal injury,or
death.
4. This instruction manual contains important information necessary
for the proper assembly and safe use of the appliance.
5. Read and follow all warnings and instructions before assembling
and using the appliance.
6. Follow all wamings and instructions when using the appliance.
7. Keep this manual for furture reference.
WARNING
FOR YOUR SAFETY:
1.Hazardous fire or explosion may result If Instructions are Ignored
2.It is the consumer's responsibility to see that the barbecue is properly
assembled, installed, and taken care of Failure to follow instructions in
this manual could result in bodily injury and/or property damage.
3.Read the instructions before using the appliance.
4.Retain this manual for future reference.
5.Use outdoors only.
6.Warning accessible parts may be very hot. Keep young children away.
7.Do not move the appliance during use.
8.Turn off the gas supply at the gas cylinder after use.
9.Do not modify the appliance.
- 3 -
10.This appliance must be kept away from flammable materials during use.
11.The regulator and hose must be connected correctly to the appliance.
12. A spanner must be used to tighten the nut onto the connection thread.
13.Do not keep any gas cylinder inside the barbecue trolley when
using. Its forbid to insert / put gas cylinder in to the appliance.
DANGER
FOR YOUR SAFETYIF YOU SMELL GAS:
1. Turn off gas supply at gas cylinder.
2. Extinguish all naked flames; do not operate any electrical appliances.
3. Ventilate the area.
4. Check for leaks as detailed in this manual.
5. If odour persists, contact your dealer or gas supplier immediately.
WARNING
FOR YOUR SAFETY:
PRECAUTIONS:
1.Leak test all connections after each cylinder refill or before each use.
2.Never check for leaks with a match or open flame.
3.Do not store of use gasoline or other flammable vapours and liquids in
the vicinity of this or any other appliance.
4.Any LP cylinder not connected for use shall not be stored in the vicinity
of this or any other appliance.
DANGER
Never operate this appliance unattended.
- 4 -
PRODUCT PARAMETERS
WARNING: Whilst every effort has made in manufacture of your barbecue
to remove any sharp edge, you should handle all components with care to
avoid accidental injury.
Tools required: Either a crosshead or flat-bladed screwdriver and either
a spanner or a pair pliers.
1.Please read all instructions thoroughly before proceeding.
2.Find a large, clean area in which to assemble your Commercial Gas
Fryer. Please refer to the parts list and assembly diagram as necessary.
3.Assembly of the Commercial Gas Fryer involves many large
components, it is advisable to have two people assemble the unit.
NOTICE:Make sure all the plastic protection rip off before assembling!
Model No.
#of Heat
Tubes
BTU/hr.
product size
Applicabl
e gas
Capacity
DBFY01
2
150000
44.88"x15.35"x41.3"
Propane
2
Gal/Oil pan
Assembly
- 5 -
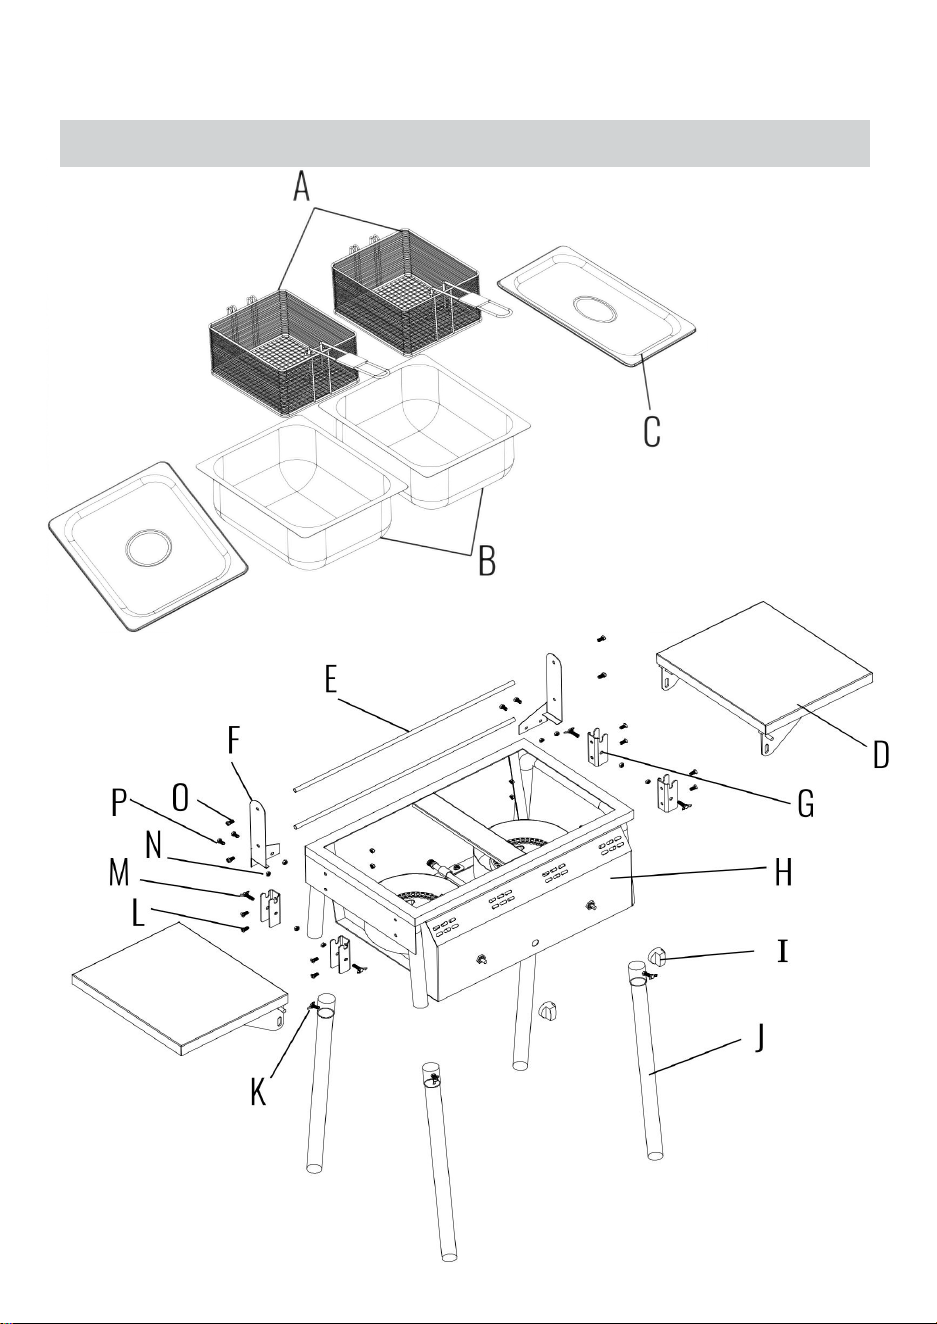
Expanded view&(Part List)

- 6 -
Assembly
A: Fried blue x 2 PCS B:
Oil pan
x 2 PCS
C: Pot
x 2 PCS
D:
Side table x 2 PCS
E: Hanging rod x 2 PCS F:
Bracket x 2 PCS
G: Side table bracket x 4PCS H:
Host
x 1 PCS
I : Knob x 2 PCS J:
Legs
x 4 PCS
K: Eye-screw(M6*10)
x 4PCS
L
:
screws M6*12 x 8 PCS
M: Eye-screw(M6*35) x 4PCS N:Nut
(M6) x 16 PCS
O: screws M4*8 x 4PCS P:
screws M6*10 x 4 PCS
- 7 -
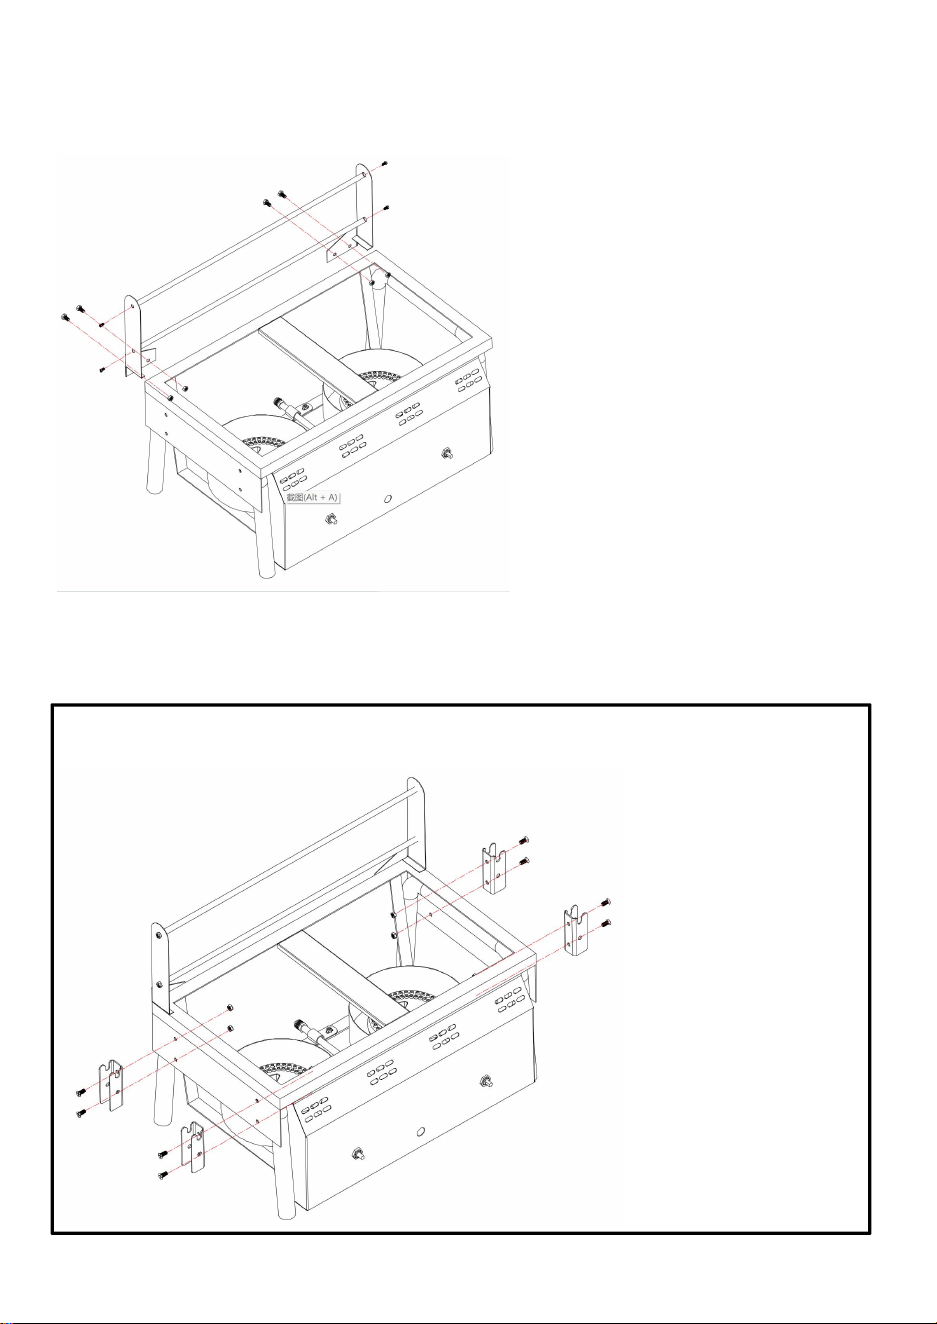
O( screws M4*8 x 4PCS); N( Nut (M6) x 4PCS) ; P( screws M6*10 x
4 PCS );E(Hanging rod x 2 PCS ) ; F( Bracket x 2PCS );H:Host x 1
Step 1:
As shown in the
figure, first assemble
E and F with screws,
and then assemble
them on Host H
G:( Side table bracket x 4PCS) ; N( Nut (M6) x 8PCS) ; L( screws
Step 2:
As shown in the
figure, Stent G is
fixed on H
- 8 -
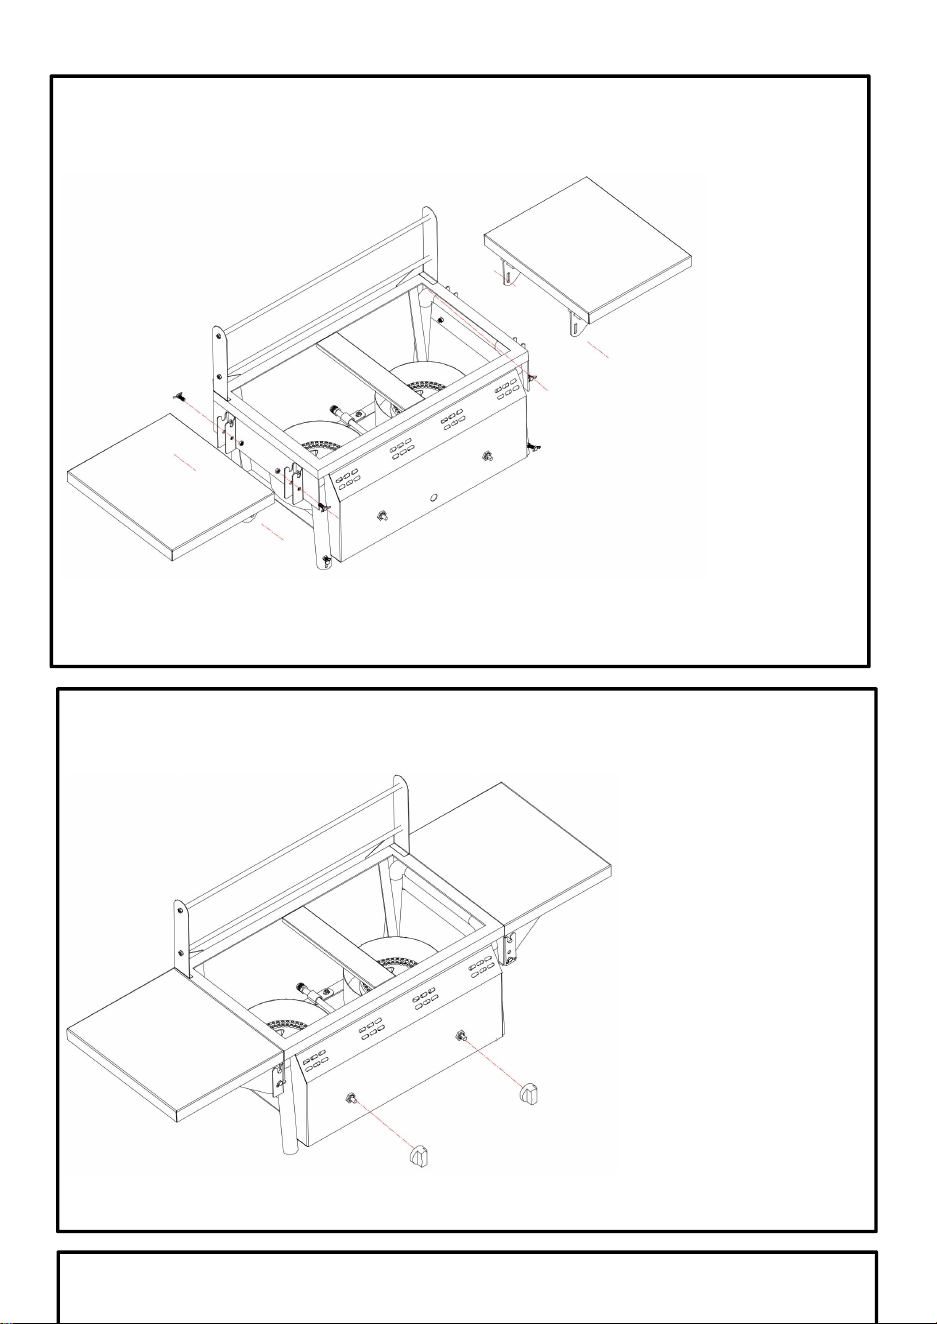
M( Eye-screw(M6*35) x 4PCS); N( Nut (M6) x 4PCS) ; D( Side table x
2 PCS )
Step 3:
As shown in the
figure, D is assembled
on G and fixed with
K and N
I ( Knob x 2 PCS );
Step 4:
As shown, insert the
knob I into the
needle valve notch
and press it
- 9 -
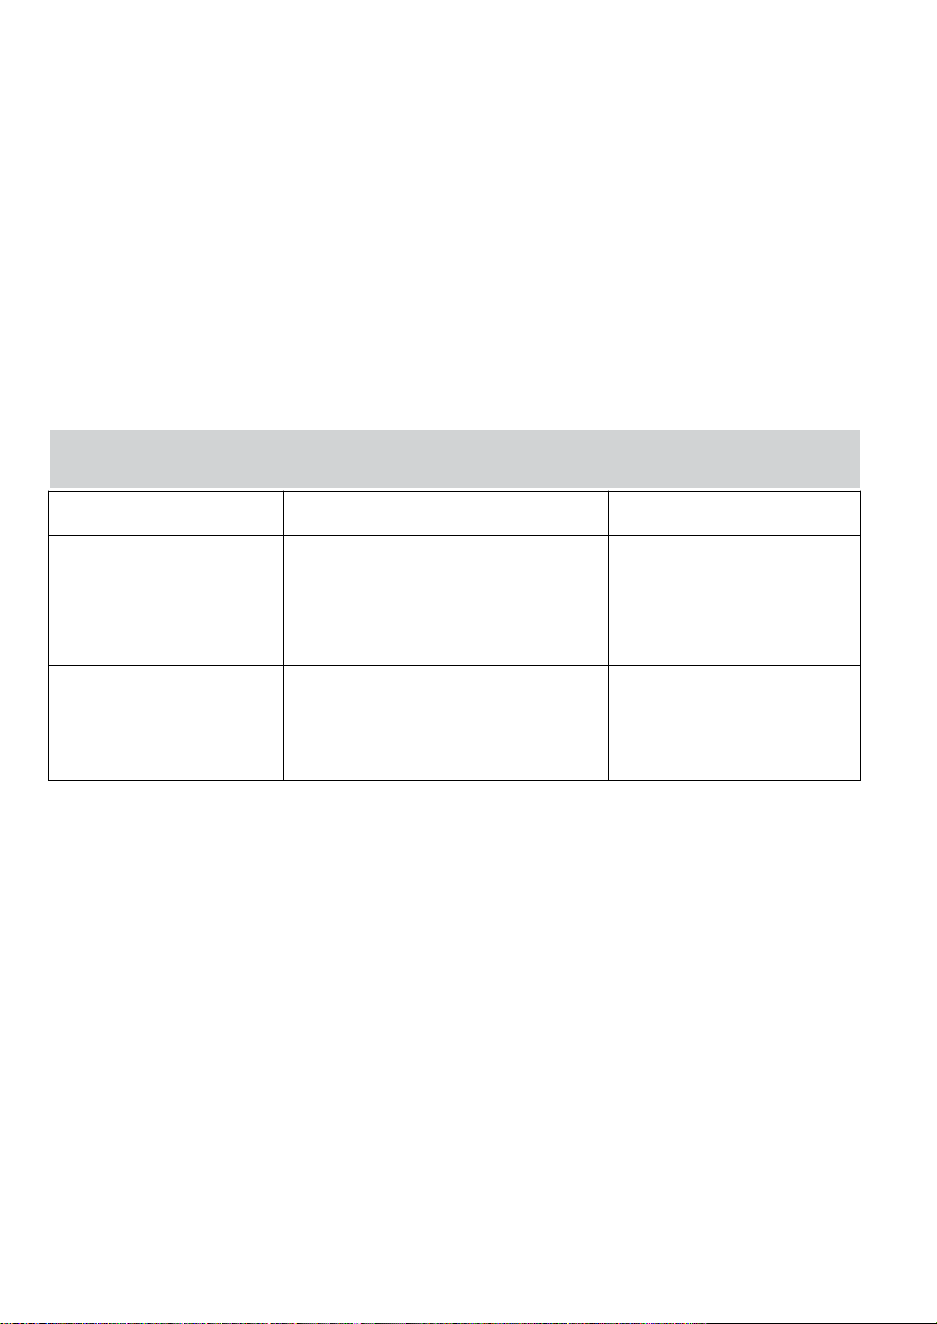
Step 6:
Put the remaining
accessories into the
machine and
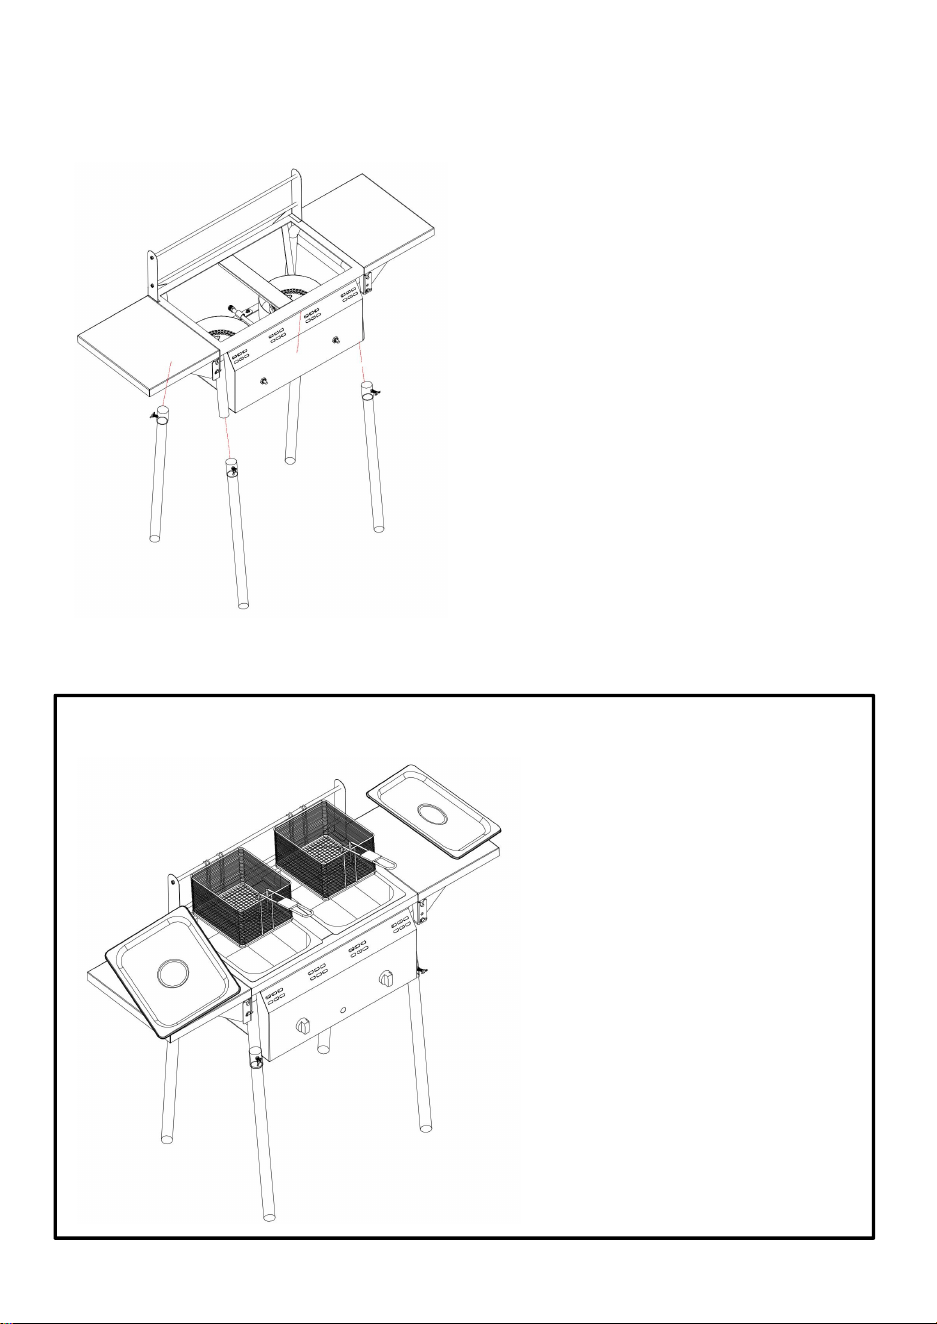
J(Legs x 4 PCS ); K(Eye-screw(M6*10) x 4PCS )
Step 5:
Insert all legs K into
the sleeve of HOST H
as shown and lock it
with a butterfly
A(Fried blue x 2 PCS ) ; B( Oil pan x 2 PCS );C ( Pot x 2 PCS )

- 10 -
IMPORTANT:
Read the following instructions carefully and be sure your barbecue is
properly installed, assembled and cared for. Failure to follow these
instructions may result in serious bodily injury and/or property damage.
If you have any questions concerning assembly or operation, consult your
dealer or LPG Gas Company.
Your Commercial Gas Fryer can be used with gas cylinders between
5 kg and 15 kg. Follow the technical information as stated in the
instruction manual and check with your local gas supplier to have a
suitable gas cylinder for your barbecue.
NOTE FOR CONSUMER: Retain for future Reference
CONNECTING THE GAS CYLINDER TO THE PRODUCT
This appliance is only suitable for use with low-pressure butane or
propane gas or LPG mixtures, fitted with the appropriate low-pressure
regulator via a flexible hose.
The hose should be secured to the regulator and the appliance with hose
clips. Make sure the flexible hose could not come in contact with hot
surface and avoid twisting.
Please consult your LPG dealer for information regarding a suitable
regulator for the gas cylinder.
Regulator and Hose
Use only regulators and hose approved for LP Gas at the above pressures.
The life expectancy of the regulator is estimated as 2 years.
The use of the wrong regulator or hose is unsafe: always check that you
have the correct items before operating the barbecue.
The hose used must conform to the relevant standard for the country of
use. Worn or damaged hose must be replaced. Ensure that the hose is not
obstructed, kinked, or in contact with any part of the product other than at
its connection.

- 11 -
For Flexible hose:
Avoid twisting the flexible tube when the appliance is in use. The
length of flexible hose shall not exceed 1.5m. In Finland, the length
shall not exceed 1.2m. The hose should certified according to
applicable EN Standard and comply with local code.
Storage of Appliance
Storage of an appliance indoors is only permissible if the cylinder is
disconnected and removed from the appliance. When the appliance is not
to be used for a period of time it should be stored in its original packaging
and stored in a dry dust free environment.
Gas Cylinder
The gas cylinder should not be dropped or handled roughly! If the
appliance is not in use, the cylinder must be disconnected. Replace the
protective cap on the cylinder after disconnecting the cylinder from the
appliance.
Always connect or replace the cylinder in a well-ventilated area and away
from any source of ignition, never in the presence of a flame, spark or heat
source.
Cylinders must be stored outdoors in an upright position and out of the
reach of children. The cylinder must never be stored where temperatures
can reach over 50°C. Do not store the cylinder near flames, pilot lights or
other sources of ignition. DO NOT SMOKE.
This product is designed for use outdoors, away from any flammable
materials. It is important that there are no overhead obstructions and
that there is a minimum distance of 122cm from the side or rear of the
appliance. It is important that the ventilation openings of the appliance are
not obstructed. The product must be used on a level, stable surface. The
appliance should be protected from direct draughts and shall be positioned
or protected against direct penetration by any trickling water (e.g. rain)
Make sure that the gas cylinder compartment (if any) is not
obstructed, keep it ventilated and clean.
Parts sealed by the manufacturer or his agent must not be altered by
the user. No modifications should be made to any part of this product

- 12 -
and repairs and maintenance should only be carried out by a CORGI
registered service engineer.
Connection to Appliance
Before connection, ensure that there is no debris caught in the head of the
gas cylinder, regulator, burner and burner ports. Spiders and insects can
nest within and clog the burner/venturi tube at the orifice. A clogged burner
can lead to a fire beneath the appliance.
Clean burner holes with a heavy-duty pipe cleaner.
Fit the hose to the appliance using a spanner to tighten it onto the
connection thread. If the hose is replaced it must be secured to the
appliance and regulator connections with hose clips. Disconnect the
regulator from the cylinder (according to the directions supplied with the
regulator) when the barbecue is not in use.
The Product must be used in a well ventilated area. Do not obstruct the
flow of combustion air to the burner when the product is in use. ONLY
USE THIS PRODUCT OUTDOORS.
TO CHECK FOR LEAKS
Make 2-3 fluid ounces of leak detecting solution by mixing one part
washing up liquid with 3 parts water.
Ensure the control valve is "OFF”.
Connect the regulator to the cylinder and ON/OFF valve to the
burner, ensure the connections are secure then turn ON the gas.
Brush the soapy solution onto the hose and all joints. If bubbles
appear you have a leak, which must be rectified before use.
Retest after fixing the fault.
Turn OFF the gas at the cylinder after testing.
If leakage is detected and cannot be rectified. Do not attempt to cure
BEFORE USE CHECK FOR LEAKS
Never check for leaks with a naked flame, always use
a soapy water solution

- 13 -
leakage but consult your gas dealer.
1. Remove the pot before trying to light the burner.
2. Turn all the control knobs clockwise to "OFF" position.
3. Connect the regulator to the gas bottle. Turn the gas supply "ON"
at the regulator. Check with the use of soapy water for any gas
leakage between the bottle and the regulator.
4. Press the left front control knob while turning counterclockwise to
the "low" position to ignite on the left burner with the igniter, which
will light the left hand burner. Observe if the burner is lit. If you do
not repeat this procedure.
5. If the burner has not lit after retrying wait 5 minutes and repeat
step 4.
6. Adjust the heat by turning the knob to the High/Low position.
7. If the burner does not light. Light the appliance with a match
using the lighting hole in the side of the appliance. Consult your
gas dealer to rectify the ignition.
8. To light the remaining burners in sequence from left to right, and
repeat 4 above.
9. After the burner is lit, put the oil pan on the rack
(Note: Do not dry cook the empty pan, and the amount of oil
cannot exceed the "MAX" line)
10. Check the oil temperature with a thermometer, and after
reaching the frying temperature corresponding to the temperature,
use the fried blue to start cooking
(Note: Food needs to be thawed before frying)
11. To turn the Product 'OFF' turn the cylinder valve or regulator
switch to the 'OFF' position and then turn the control knob on the
appliance clockwise to the 'OFF' position.
Warning: If the burner fails to ignite, turn the control knob off
(clockwise) and also turn the cylinder valve off. Wait five minutes
before attempting to relight with ignition sequence.
Warning: Before cooking for the first time, wash the oil pan with
clean water and dry it with a cloth; Each time it is used, it should
not be dry cooked in an empty pot, and the oil should not exceed
the "max" line of the oil pan
Licahtinci Instructions for barbecue

- 14 -
Clean your product after each USE. DO NOT use abrasive or
flammable cleaners, as it will damage the parts of the product and
may start a fire. Clean in warm soapy water.
Warning: Accessible parts may be very hot. Keep young
children away from the hot appliance at all times (even while
cooling down!).
It is recommended to use protective gloves (eg oven gloves)when
using the device
CAUTION: All cleaning and maintenance should be carried out
when the product is cool and with the fuel supply turned OFF at the
gas cylinder.
Turn the gas OFF at the control knob and disconnect the cylinder.
Remove cooling grate.
Clean the burner with a soft brush or blow clean with compressed air
and wipe with a cloth.
Clean any clogged ports with a pipe cleaner or stiff wire (such as an
opened paper clip).
CLEANING AND CARECLEANING AND CARE
- 15 -
Inspect burner for any damage (cracks or holes). If damage is found,
replace with a new burner. Reinstall the burner, check to ensure that
the Gas valve orifices are correctly positioned and secured inside
the burner inlet (venturi).
SERVICING
Your Commercial Gas Fryer should be serviced annually by a
competent registered person.
PROBLEM
POSSIBLE CAUSE
SOLUTION
Burner not be ignited with
an igniter
1.LG gas cylinder is empty
2.Faulty regulator
3.Obstructions in burner
4.Obstructions in gas jets or gas hose
1 .Replace with full cylinder
2.Have regulator checked or
replace
3.Clean burner
4.Clean jets and gas hose
Low flame or flashback (fire
in burner tube-a hissing or
roaring noise may be heard)
1.LP gas cylinder too small
2.Obstructions in burner
3.Obstructions in gas jets or gas hose
4.Windy conditions
1.Use larger cylinder
2.Clean burner
3.Clean jets and gas hose
4.Use Product in a more
sheltered position
TROUBLE SHOOTING

Technical Support and E-Warranty Certificate