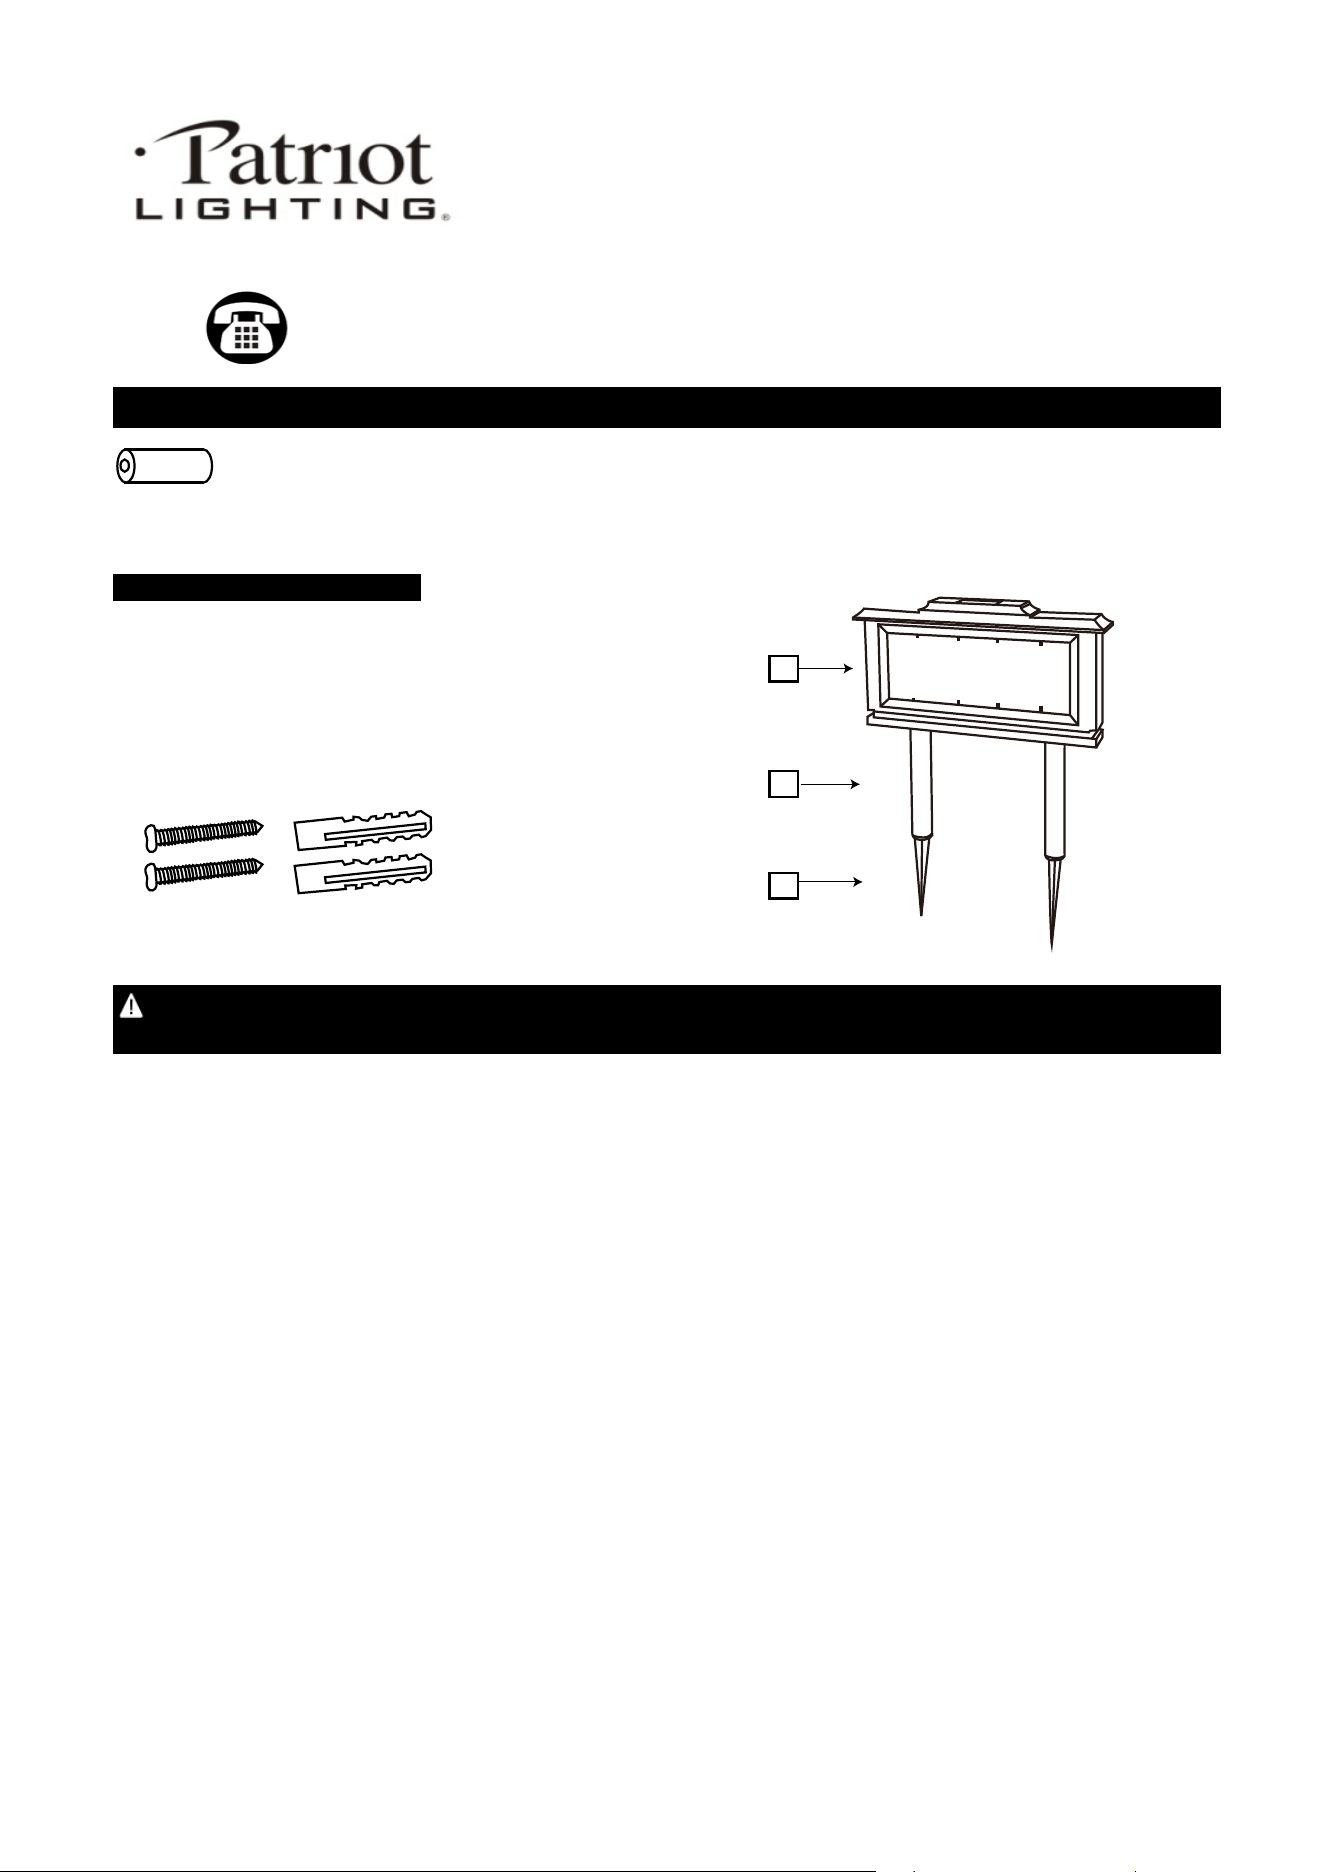
PACKAGE CONTENTS
Includes (1) AA 600 mAh Ni-Mh rechargeable battery.
LED
The lifetime for LEDs is estimated to be 100,000 hours. It should never need to be replaced.
A
Address head
B
Connection tube
C
Ground stake
CLEANING AND MAINTENANCE: Please use a damp cloth to clean the solar panel. Do not use any chemical or abrasive
cleaner. It is important to ensure that no moisture enters into the solar light. Replacement parts may be ordered by using
the fixture model number and part's name; call the phone number located at the top and bottom of this instruction manual.
RECHARGEABLE BATTERY: This product contains (1) AA 600 mAh Ni-Mh rechargeable battery.When the battery
expires, it must be recycled or disposed of properly. Please contact your local waste disposal authority for correct
procedure. Do not put battery into fire.
Read all instructions before assembly. Failure to do so may result in faulty assembly and
potential injury.
FUNCTION: The built-in solar panels convert sunlight into electricity. The rechargeable battery stores the energy and
converts the power into light for use during the night. The lighting hours of the solar light depends on the geographical
location and weather condition. Stronger or longer exposure to sunlight enables the battery to store more energy and
provide longer lighting hours.
LOCATION: It is important to select an outdoor location with full, direct sunlight where the solar panel can receive at least 8
hours of sunlight each day. Shady areas will not enable batteries to be fully charged. This will reduce the lighting hours at
night. It is also important to avoid placing the solar light by light sources, such as street lights or porch lights, which may
cause the solar light to turn off automatically. The solar light is designated for outdoor usage and ideal for night lighting of
garden, paths, etc.
Sku Number:343-6107
Solar Light
Model Number: 35344
Questions, problems, missing parts?
Before returning to your retailer, call our customer service at 1-866-827-5104
Monday – Friday 7:00 a.m. – 5:00 p.m. CST
REF. PARTS NAME
A
C
B
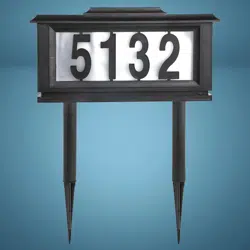
5132
LETTER AND NUMBER INSTALLATION:
● Place the address sign on a level surface. Select the address letters and numbers that meet your requirements. Take
note of the peg tabs located on the top and bottom of each letter/number.
● Locate the corners of the frame. Gently pull and lift the corners of the frame to reveal the letter/number insert holes.
● Working 1 letter/number at a time, align the pegs connected to the letters/numbers with the holes located on the frame.
Push down until the number or letter is securely seated on the frame. Repeat until the desired address configuration is complete.
● Once all letters and numbers are secured, replace the frame by aligning the corners of the frame and pressing until secure.
2 screws & 2 mounting screws
3 sets of 0-9 0 1 2 3∙∙∙∙∙∙∙9
1 set of letter A-Z A B C D ∙∙∙∙∙∙∙Z
The light does not come on at night:
Make sure solar panel is clean and free of dirt and debris. If needed use a damp cloth to clean the solar panel. Do not
use any chemical or abrasive cleaner. It is important to ensure that no moisture enters into the solar light.
TROUBLESHOOTING
Make sure pull plastic tag.
Check the rechargeable battery and make sure that it is in contact to the metal plate and the polarity is correct. If the
battery is worn out, replace the battery with a AA 600 mAh Ni-Mh rechargeable battery.
Always keep the solar light distant from other night light sources, such as exterior lights. Reposition the light to avoid
close contact with other night light sources.
ASSEMBLY AND BATTERY REPLACEMENT INSTRUCTIONS
ASSEMBLY (Ground and Wall Mounting Instructions)
NOTE: Wall mounting hardware not included. Wall mount at your own risk. Certain exterior surfaces are not conducive to wall
mounting, including concrete, brick, stone, and certain siding types and attempting to screw into these surfaces may cause
damage to your home or business. Professional installation when wall mounting is advisable.
● Decide where you want to setup the solar powered address sign. Make sure that the sign is in direct sunlight and the numbers
are visible from the street. If hanging the address sign, be sure to choose a stable location either attached to the house or
another hard surface. If using the included ground stakes, make sure that the numbers are facing the street and the
numbers are clearly visible.
● For placing the address sign in the ground, find a unobstructed location to insert the ground stakes.
● Insert the stakes into the bottom of the sign. Secure into place.
● Insert the sign with stakes into the ground.
CAUTION: Do not push hard or damage to the sign may occur. If the ground is hard, first loosen the soil with a shovel
or trowel.
● For wall mounting the address sign, choose a secure, drillable surface.Locate the 2 screw mounting holes on the back of the s
ign. Accurately measure distance between the 2 holes. Using a pencil, ruler, and level, replicate the measurement on the wall,
making sure the 2 marks are level.
● Using a screwdriver or drill, screw 2 mounting screws into the wall.
● Once secured, mount the sign onto the screws.
● Your setup is now complete.
Questions, problems, missing parts?
Before returning to your retailer, call our customer service at 1-866-827-5104
Monda
y
– Frida
y
7:00 a.m. – 5:00
p
.m. CS
T
BATTERY INSTALLATION:
● Remove all contents from packaging.
● Locate the battery compartment on the bottom of the sign. Using a small screwdriver, remove the 4 screws and remove the
battery compartment cover.
● Insert the 1 rechargeable AA batteries according to the polarity diagram located inside the battery compartment. Once the
batteries have been inserted, replace the battery compartment cover and secure with the 4 screws. Do not overtighten.
