

To reduce the risk of injury, the user must read and understand the Operator’s
Manual before using this product. Save these instructions for future reference.
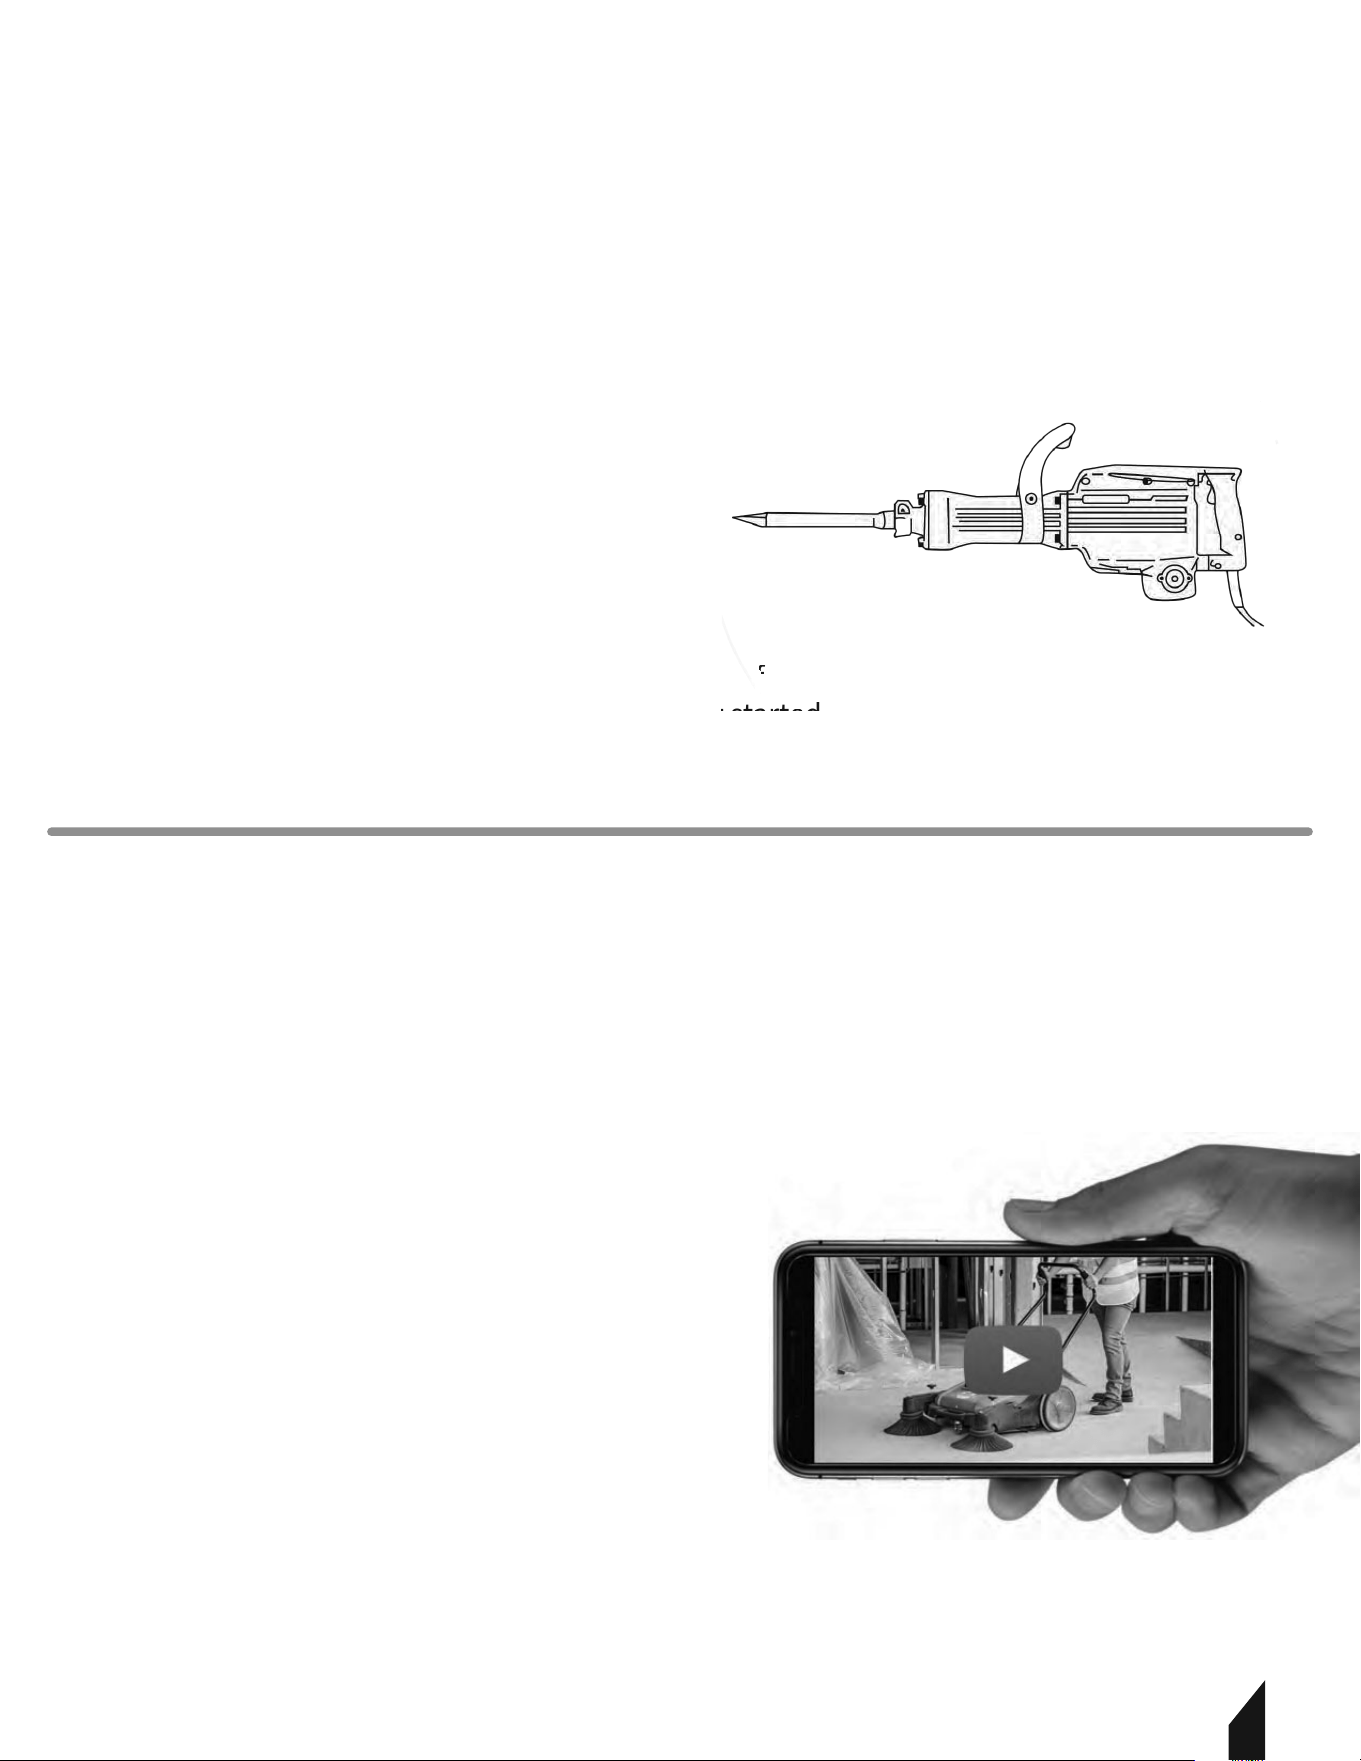
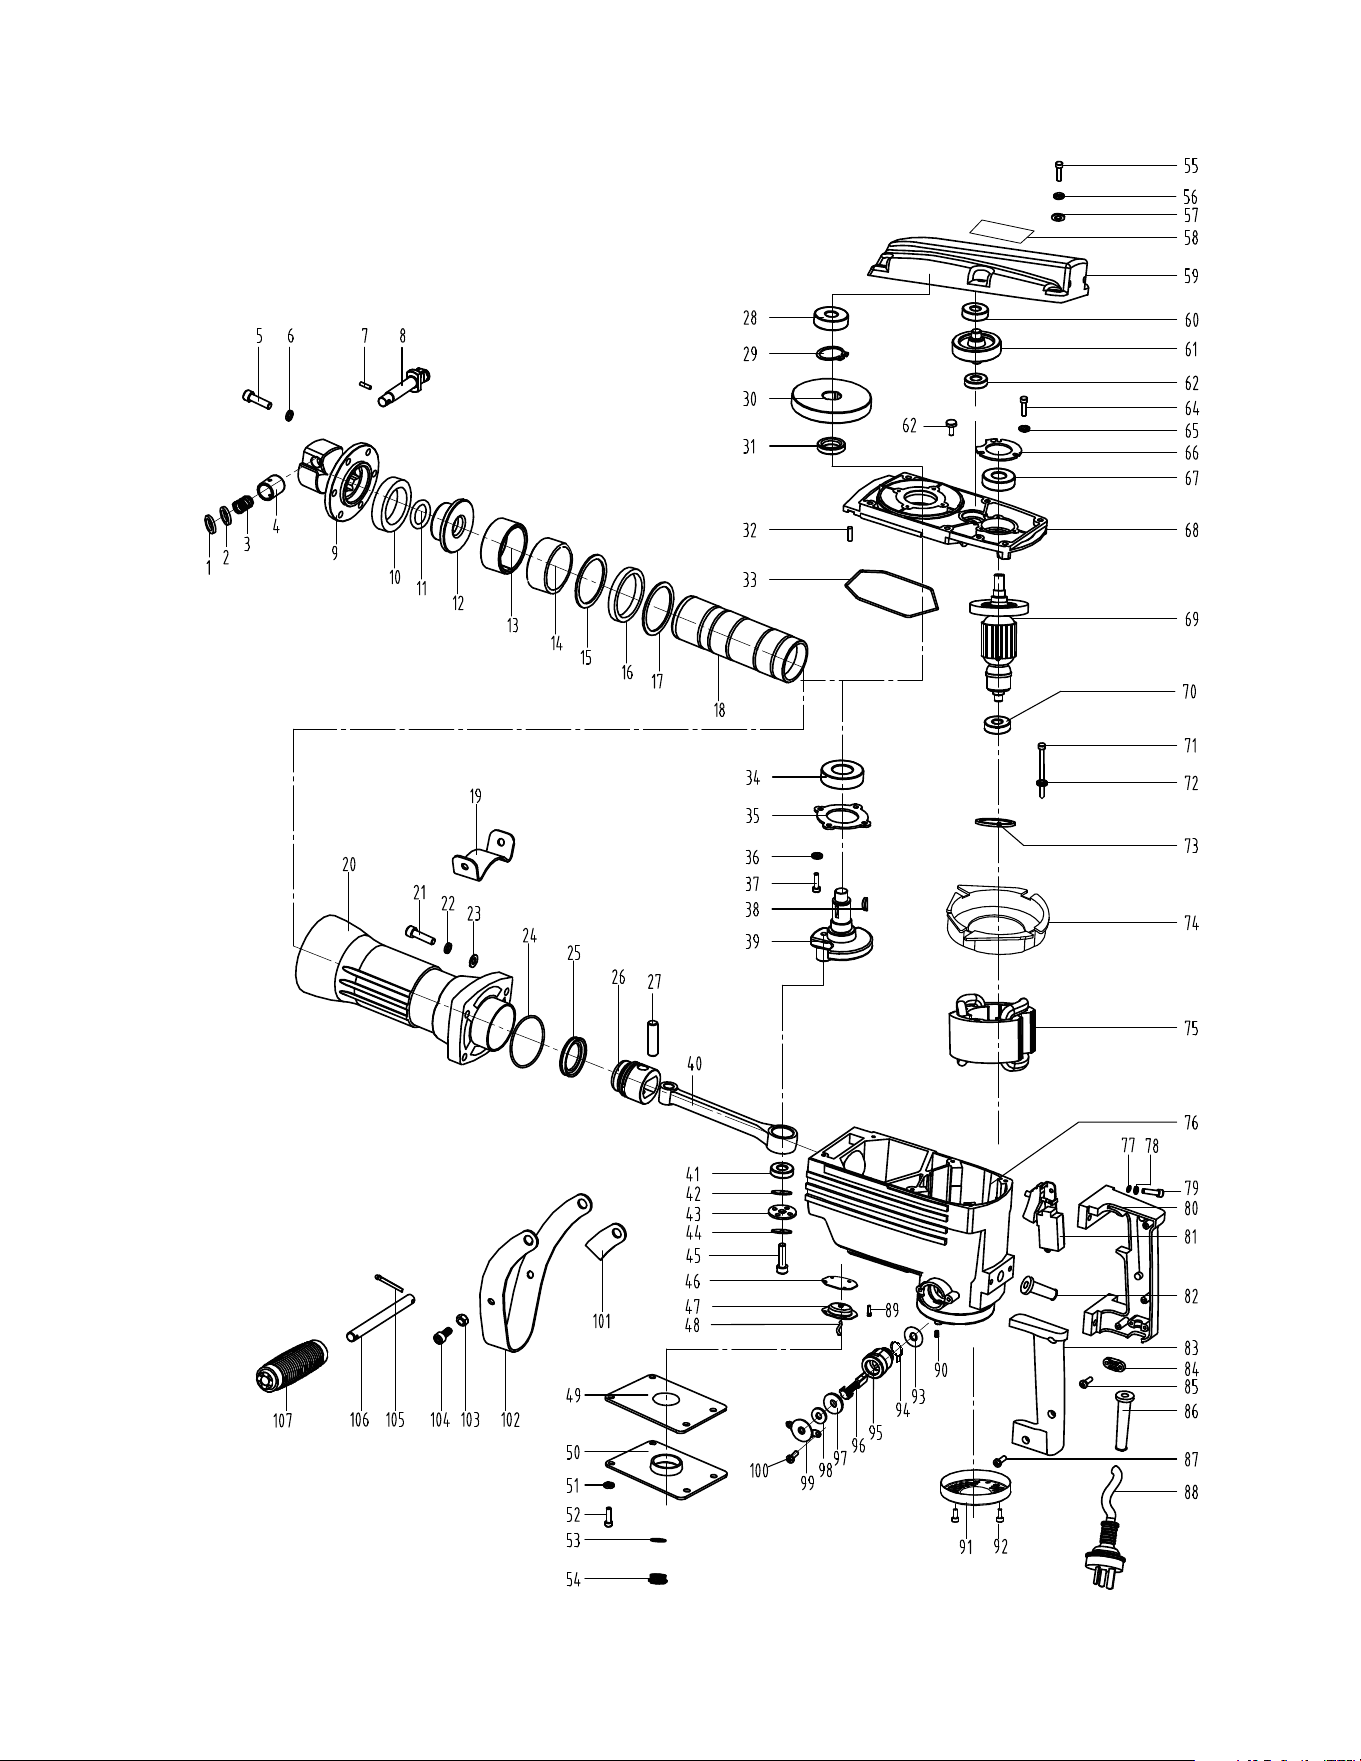
DEMOLITON HAMMER
Operations Manual
W
A
R
R
A
N
T
Y
MODEL NUMBER: TDH3512
Reference page 8

2
Table of Contents
1. SAFETY INFORMATION
1.1 Fire Safety
1.2 General Safety
1.3 Service Safety
1.4 Operation Safety
2. PRODUCT DATA
2.1 Specifications
2.2 Product Diagram
3. OPERATION
3.1 Start- Up
3.2 Installing Chisel
3.3 Auxiliary Handle
4. SERVICE
5. DEMOLISH/PLANE
6. TROLLEY INSTALLATION (OPTIONAL)
7. TOOL LUBRICATION
8. RECYCLE
9. ACCESSORIES OPTION
10. REPLACEMENT PARTS
11. MAINTENANCE RECORD
12. WARRANTY
12.1 Warranty Claims
13. SERVICE CENTERS
5
5
6
6
7
7
8
8
8
9
9
9
9
10
11
11
11
11
11
12
13
13
13
3
Register Your Equipment
Thank you for purchasing TOMAHAWK® equipment! Your product is covered by the
TOMAHAWK® Warranty policy, but in order to activate your warranty, we need you to register
your product. In addition to activating your equipment warranty, product registration will
grant you access to important product updates, streamlined customer service and more.
INCLUDED WITH YOUR REGISTRATION
☑ Equipment Warranty Activation
☑ Product Updates
☑ Streamlined Customer Service
☑ Exclusive Discounts and Sales
STEPS TO REGISTER YOUR EQUIPMENT
1. Visit www.tomahawk-power.com
2. Choose “Product Registration” at the bottom of the page
3. Enter your equipment’s serial number to get started
4. Provide all required information
5. Submit Registration
Equipment Resources
TOMAHAWK® Customer Service doesn’t stop at checkout. We understand to keep a job-site
running smoothly - the proper equipment, spare parts, instruction manuals, and more are
needed at the drop of a hat. Visit www.tomahawk-power.com to gain access to the incredible
resources below.
How To Video Library
More of a visual person? Visit our Video Library for equipment
assembly instructions, troubleshooting tips, and more!
Found at the TOMAHAWK® Resource Center
Manual and Assembly Guide Library
Visit our Manual Library if you are looking for a lost
operations manual or a particular spare part?
Found on the TOMAHAWK® Manuals Page
Service Requests
In need of a quick fix or a service center referral? Submit a
Service Request and a TOMAHAWK® Technician will respond
shortly to get you the help you need.
Choose “Service Request” at the bottom of www.tomahawk-power.com
m
o
f
f
tt
h
h
e pag
e
t start
e
e
d
d

This manual provides information and procedures to safely operate and maintain this
model. For your own safety and protection from injury, carefully read, understand and
observe the safety instructions described in this manual.
Keep this manual or a copy of it with the machine. If you lose this manual or need an
additional copy, please contact TOMAHAWK® or visit
www.tomahawk-power.com This
machine is built with user safety in mind; however, it can present hazards if improperly
operated and serviced. Follow operating instructions carefully. If you have questions about
operating or servicing this equipment, please contact TOMAHAWK®.
The information contained in this manual is based on machines in production at the time of
publication. TOMAHAWK® reserves the right to change any portion of this information
without notice.
No part of this publication may be reproduced in any form or by any means, electronic or
mechanical, including photocopying, without express written permission from
TOMAHAWK®.
Any type of reproduction or distribution not authorized by TOMAHAWK® represents an
infringement of valid copyrights and will be prosecuted. We expressly reserve the right to
make technical modifications, even without due notice, which aim at improving our
machines or their safety standards.
1. Safety Information
This manual contains DANGER, WARNING, CAUTION, and NOTE callouts which must be
followed to reduce the possibility of personal injury, damage to the equipment, or improper
service.
This is the safety alert symbol. It is used to alert you to potential personal injury
hazards. Obey all safety messages that follow this symbol to avoid possible injury
or death.
DANGER indicates an imminently hazardous situation which, if not avoided, will
result in death or serious injury.
WARNING indicates a potentially hazardous situation which, if not avoided, could
result in death or serious injury.
CAUTION indicates a potentially hazardous situation which, if not avoided, may
result in minor or moderate injury.
DANGER
WARNING
CAUTION
4

5
1.1 Fire Safety
If your machine catches fire, turn o the electric supply. Using a dry powder or C02 fire
extinguisher, put out the fire. If the fire cannot be put out, keep away and call the fire
department. If you are in any doubt about the safety condition of your machine, please
consult TOMAHAWK®.
1.2 General Safety
Familiarity and proper training are required for the safe operation of equipment!
Equipment operated improperly or by untrained personnel can be dangerous! Read
the operating instructions contained in both this manual and the engine manual and
familiarize yourself with the location and proper use of all controls. Inexperienced
operators should receive instruction from someone familiar with the equipment before
being allowed to operate the machine.
1.2.1 Keep your work area clean and well-lit. Cluttered and dark areas can lead to accidents.
1.2.2 DO NOT use power tools in explosive environments, such as areas with flammable
liquids, gases, or dust.
1.2.3 Power tools can create sparks that may ignite dust or fumes.
1.2.4 Keep children and bystanders away while using a power tool. Distractions can cause
you to lose focus and may lead to injury.
1.2.5 Always ensure the power tool plugs must fit the outlet.
1.2.6 Never modify the plug.
1.2.7 DO NOT use adapter plugs with grounded (earthed) power tools. Using unmodified
plugs with matching outlets reduces the risk of electric shock.
1.2.8 Avoid contact with grounded surfaces like pipes, radiators, ranges, and refrigerators.
There is a higher risk of electric shock if your body is grounded.
1.2.9 DO NOT expose power tools to rain or wet conditions. Water entering a power tool
increases the risk of electric shock.
1.2.10 DO NOT abuse the cord. NEVER use it to carry, pull, or unplug the power tool. Keep
the cord away from heat, oil, sharp edges, or moving parts.
1.2.11 When using a power tool outdoors, use an extension cord rated for outdoor use.
Using a cord designed for outdoor conditions reduces the risk of electric shock.
1.2.12 If using a power tool in a damp location is unavoidable, use a residual current device
(RCD) protected supply. An RCD reduces the risk of electric shock.
WARNING

6
1.3 Service Safety
1.3 .1 Stay alert, pay attention to what you're doing, and use common sense when operating
a power tool. DO NOT use a power tool if you are tired or under the influence of drugs,
alcohol, or medication. A moment of inattention could lead to serious injury.
1.3.2 Use safety equipment at all times. Always wear eye protection. Depending on the
conditions, using equipment such as a dust mask, non-slip safety shoes, a hard hat, and
hearing protection will help reduce the risk of personal injury.
1.3.3 1*$$ )/'./-/$)"ю& .0- /# .2$/#$.$)/# *Ȃ+*.$/$*) !*- +'0""$)"$)
the power tool.
1.3.4 Carrying a power tool with your finger on the switch or plugging it in with the switch
on could cause an accident.
1.3.5 Remove any adjusting key or wrench before turning the power tool on. A wrench or
& 4' ȅ*)-*//$)"+-/*0'0. + -.*)'$)%0-4ю
1.3.6 DO NOT overreach. Always maintain proper footing and balance. This will help you
maintain better control of the power tool in unexpected situations.
1.3.7 Dress appropriately. DO NOT wear loose clothing or jewelry. Keep your hair, clothing,
and gloves away from moving parts. Loose clothes, jewelry, or long hair can get caught in
moving parts.
• Always disconnect the electrical plug when changing chisels, performing repairs,
maintenance, or making adjustments.
• This demolition breaker is not for use by individuals under 16 years old.
• Keep the tool out of reach of children.
• Use only the original parts supplied.
1.4 Operation Safety
Symbol
Meaning
)'4ȅ -- $)"/#$.*+ -/$*)()0')!*''*2$)"''
instructions,can you operate the tool safely.
The cord is damaged or broken, do not touch the cord, immediately
/0-)*Ȃ/# +*2 -.0++'4/*/#$.0)$/)$.*)) //# ' /-$'
plug at once.
Always wear eye protection, gloves, and safety shoes. Additionally,
wear hearing protection to prevent hearing damage.
Do not expose this unit to water or rain. Avoid operating the tool in
damp or wet conditions, and do not use it in dark working
environments.
7
1.4.1 Be cautious of hidden wires, gas pipes, water pipes, and telephone cables.
Always check the working area first (Dial Before You Dig).
1.4.2 The power voltage should match the one specified on the nameplate. This tool is
designed for a voltage of 230V.
1.4.3 If dust extraction and collection devices are provided, ensure they are properly
connected and used. Using these devices can help reduce dust-related hazards.
1.4.4 Special Warning for Demolition Hammer/Breaker:
Wear ear protection. Prolonged exposure to noise can cause hearing loss.
Always use the auxiliary handle with the tool. Loss of control can result in personal injury.
Additional Safety Instructions for Your Hammer Drill:
WARNING To reduce the risk of injury, DO NOT dispose of waste electrical
products with household waste. Please recycle where facilities are available.
WARNING During work pauses, such as when changing equipment,
performing maintenance, or making adjustments, always unplug the tool.
ȅ -- (*1$)"/# *-/$*)*1 -я/& *0//# 0.#*1 -я/# )- (*1
the worn bush. Insert a new bush, and then reattach the bush cover and
decoration cover.
2. PRODUCT DATA
2.1 SPECIFICATIONS
MODEL TDH3512
Power
Amperage
1500 W
12.5 A
Hertz
60HZ
Voltage
110 V
RPM
Impact
1800 RPM
45 J
Demo/ Breaker Class
35
Noise Level
Bit Type
101 dB
1-1/8 Hex
WARNING
WARNING
8
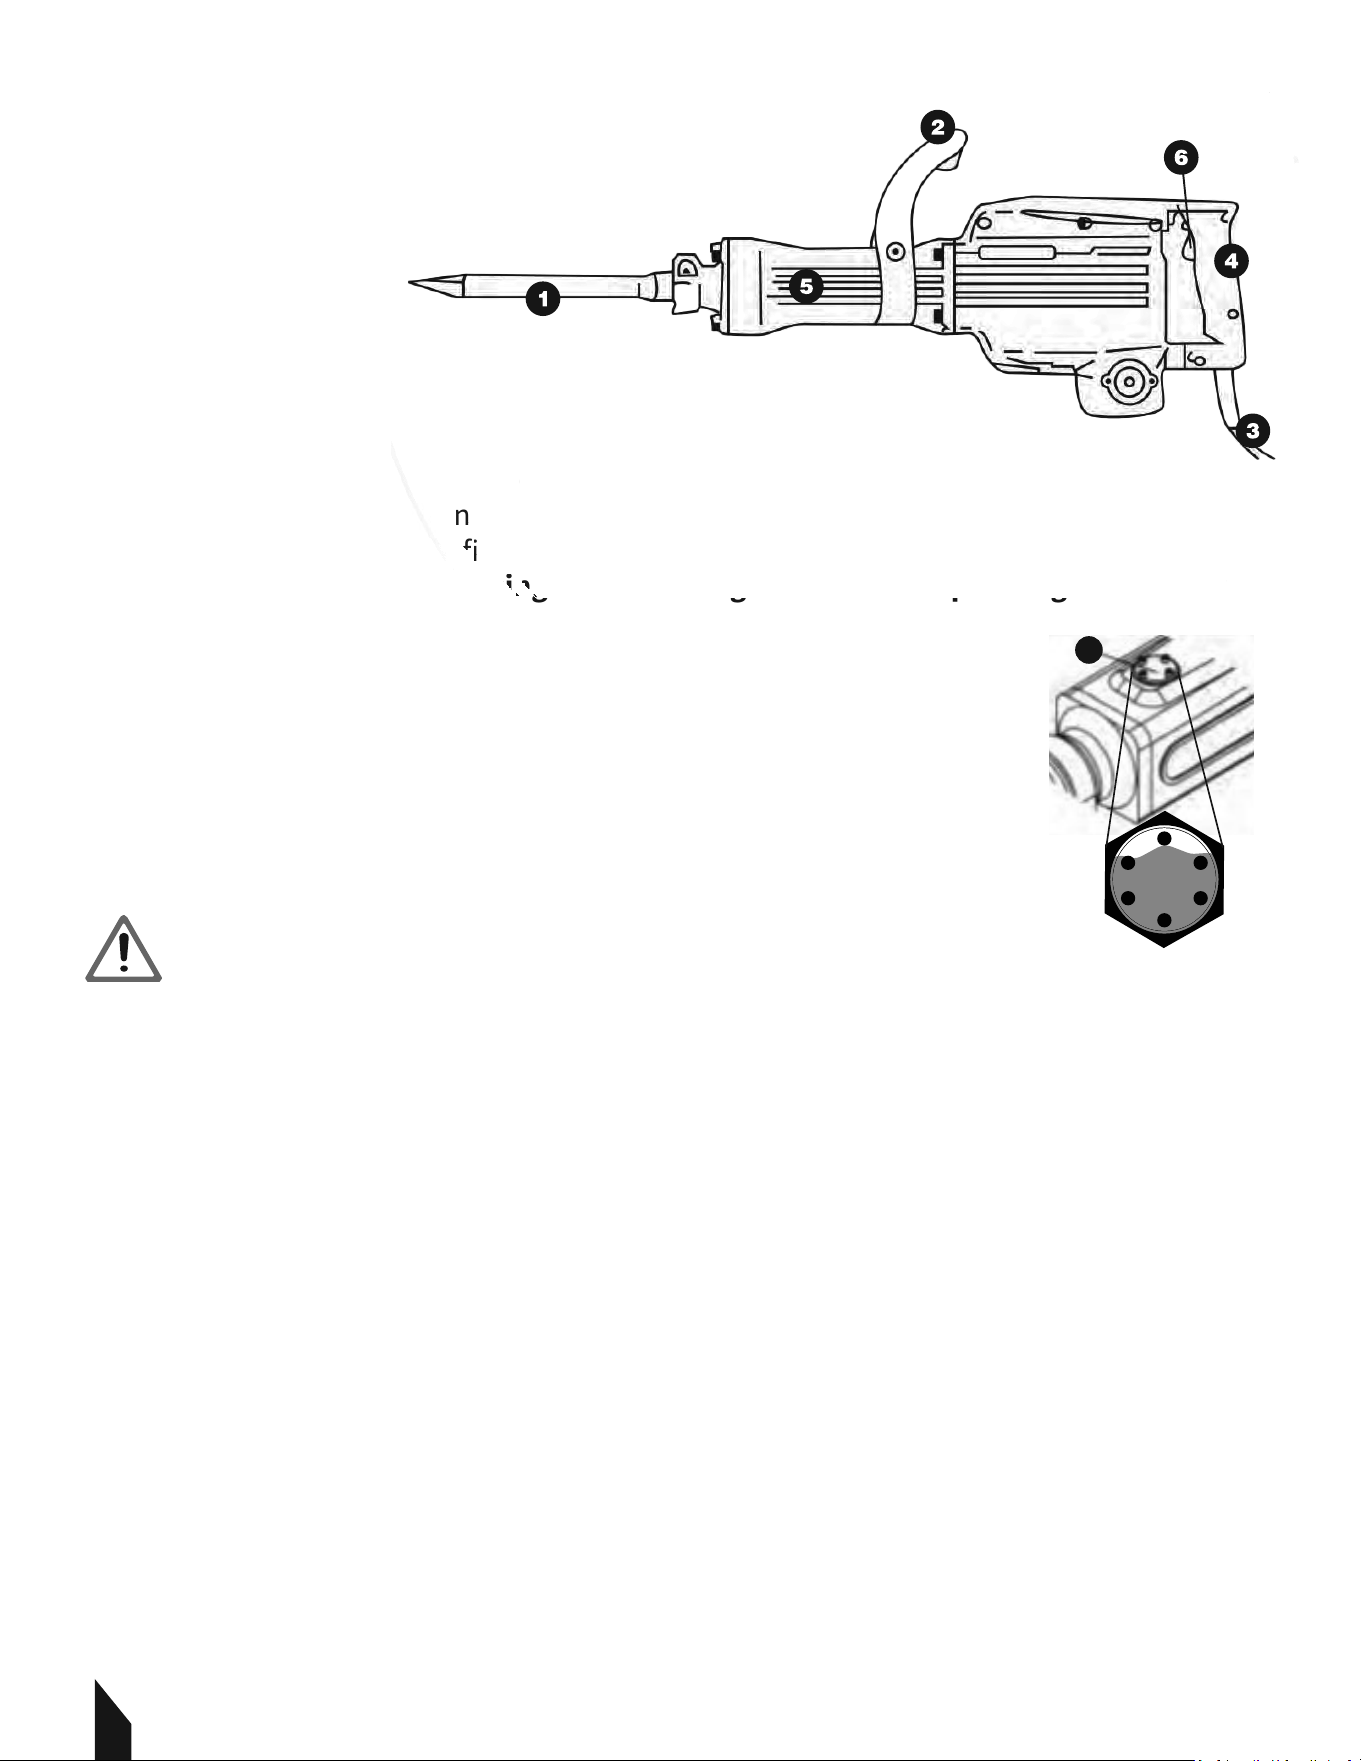
2.2 Product Diagram
3. OPERATION
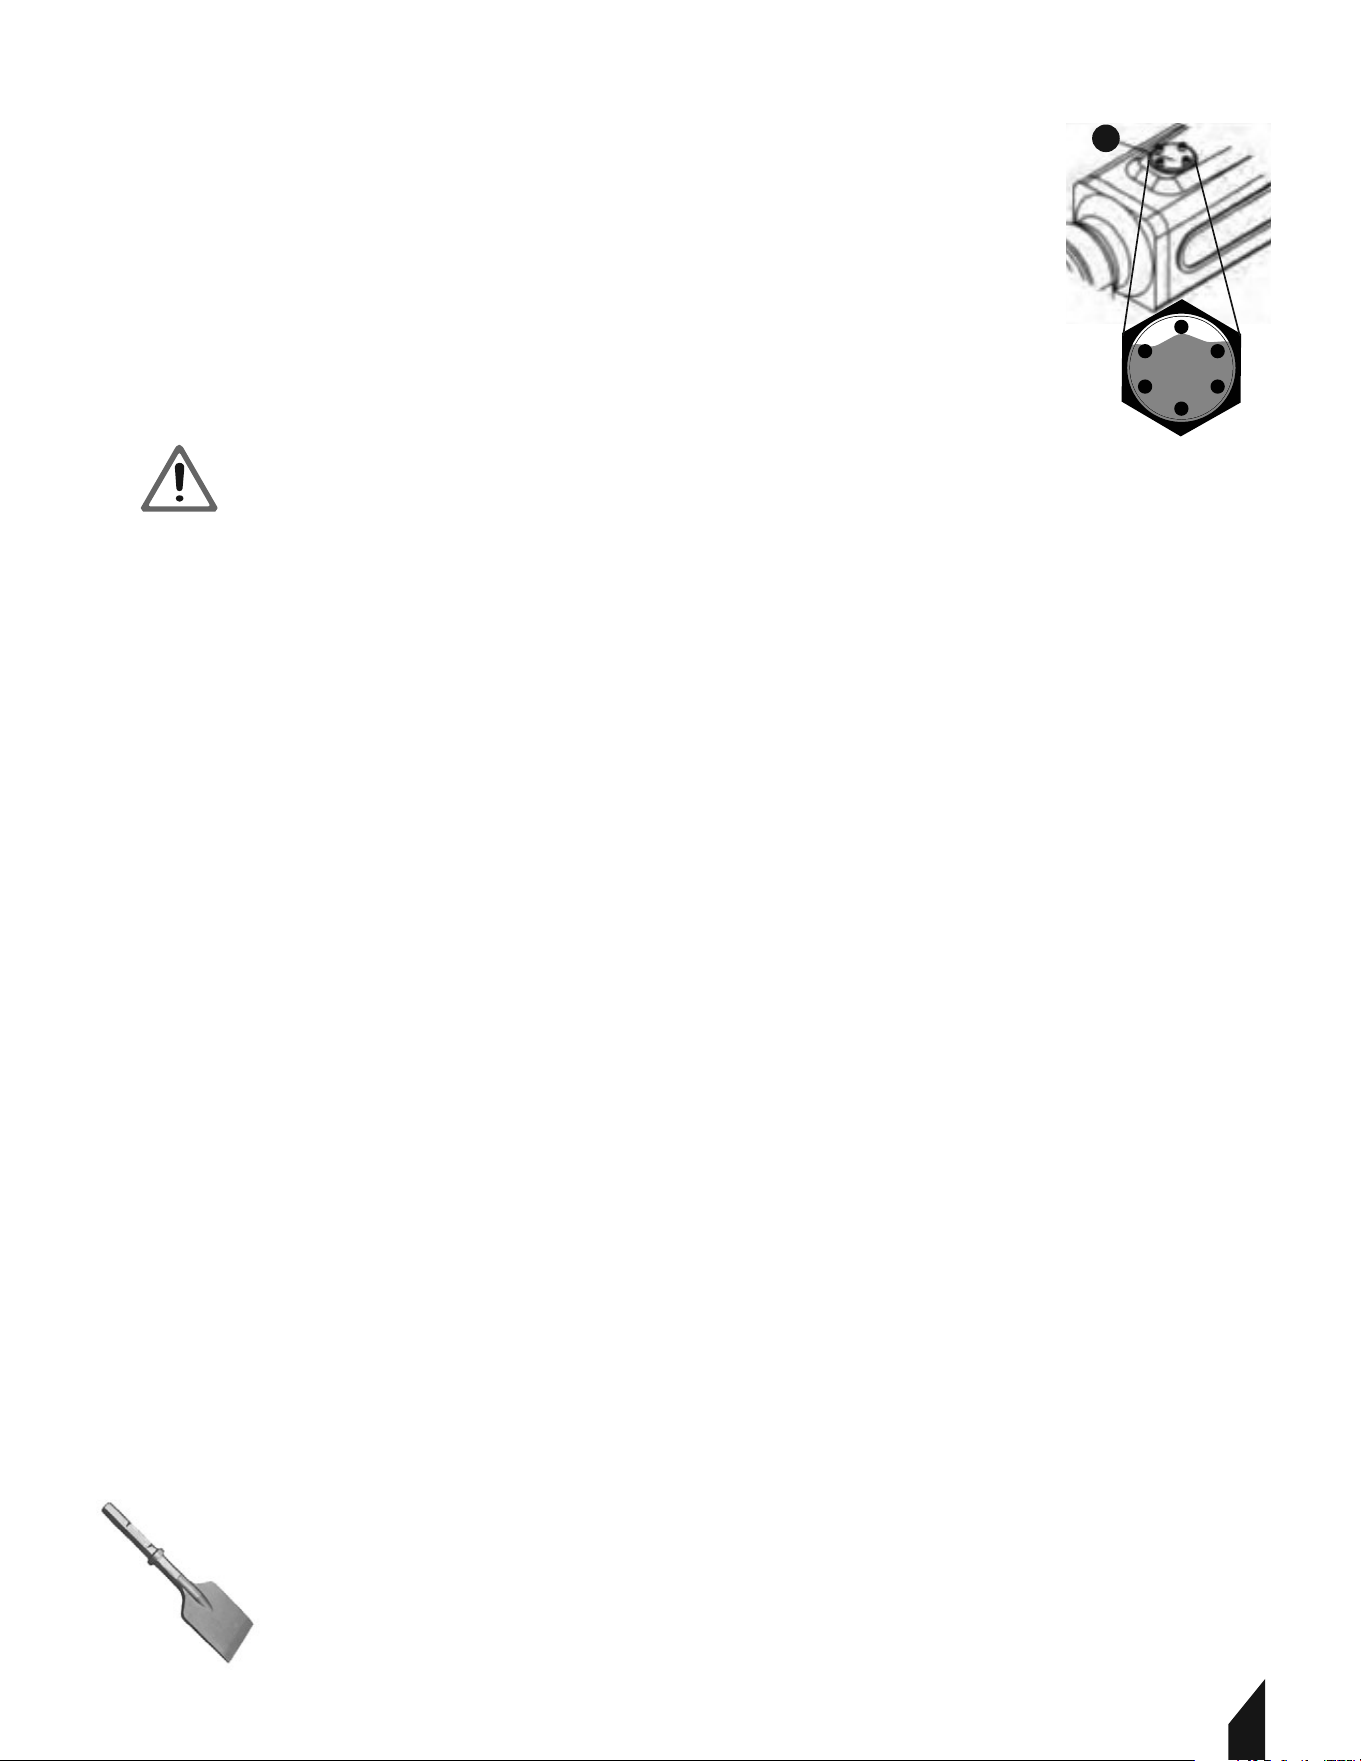
3.1 Lubrication Before First Use
To ensure optimal performance and a long service life, your demolition hammer requires
proper lubrication before its first use.
IMPORTANT: Fill the gear housing with 75W-90 gear oil before operating the tool for
the first time.
1. Apply New Grease:
-Open the oil cover.
-Wipe out the old lubricant using a clean towel.
-Apply exactly 1.6 oz of 75W-90 gear oil to the gear housing
(about three quarter full (1).
FIGURE 1 illustrates the proper fill level.
CAUTION Adding more than 1.6 oz of gear oil can impair
tool function.
3.2 DO NOT force the power tool. Use the correct tool for your application. The right power
tool will do the job better and safer at the rate for which it was designed.
3.3 DO NOT0. /# +*2 -/**'$!/# .2$/#* .)*//0-)*))*Ȃ+-*+ -'4ю+*2 -/**'
that cannot be controlled with the switch is dangerous and must be repaired.
3.4 Disconnect the plug from the power source before making any adjustments, changing
accessories, or storing the power tool. This helps prevent accidental starting of the tool.
3.5 Store idle power tools out of reach of children and do not allow anyone unfamiliar with
the tool or its instructions to operate it. Power tools are dangerous in the hands of
untrained users.
3.6 Maintain your power tools. Check for misalignment, binding of moving parts, broken
+-/.я*-)4*/# -*)$/$*)/#/(4Ȃ /*+ -/$*)ю!(" я#1 /# /**'- +$-
before use. Many accidents are caused by poorly maintained tools.
3.7 Keep cutting tools sharp and clean. Well-maintained, sharp cutting tools are less likely to
bind and are easier to control.
3.8 Use the power tool, accessories, and tool bits according to the instructions and for their
intended purpose. Take into account the working conditions and the task at hand. Using the
tool for operations it wasn't designed for could create a hazardous situation.
e
First Use
o
rm
a
a
n
n
c
c
e and a long service life, your demolition hammer requires
o
re its
f
f
i
i
rr
s
s
t
t
use
.
e
ar hou
s
s
i
i
nn
g
g
w
i
th 75W-90
g
ear o
i
l before o
p
erat
i
n
g
the tool for
1. 1-1/8 Hex Hammer Bits
2. Auxiliary Handle
3. Cord
4. Vibration Control
5. Metal housing
6. )ѶȂ2$/#
FIGURE-1
1
CAUTION

9
3.1 Start-Up
3.1.1 To operate the tool, simply press the switch. FIGURE 2.
3.1.2 For continuous operation, press the switch and then
press the locking button(2).
3.1.3 To stop the tool, press the switch (I) again and release it.
3.2 Installing Chisel
3.2.1 When installing or removing accessories, ensure that
the tool is turned OFF and the cord is unplugged. FIGURE 3.
3.2.2 Clean all components and apply a light coat of machine
grease.
3.2.3 Pull out the bolt (1) and rotate it to turn the range
towards the motor housing.
3.2.4 Insert the chisel attachment into the tool holder
through the dust shield (2), twisting and pushing inward until
it locks automatically into place.
3.3 Auxiliary Handle
3.3.1The tool must be supported with the auxiliary handle
(1), which can swivel 360°. FIGURE 4.
3.3.2 To reposition and/or swivel the handle, loosen the
hand grip (2) move the handle to the desired position along
the barrel and securely tighten the hand grip(3).
4.SERVICE
Have your power tool serviced by a qualified repair technician using only identical
replacement parts. This ensures that the safety features of the power tool are maintained.
Contact support@tomahawk-power.com to get started.
5. DEMOLISH/PLANE
Hold the tool firmly with both hands and press the switch (1). While operating, ensure you
maintain a firm grip to prevent the tool from rebounding out of control. DO NOT apply
3 ..$1 !*- я./#$.2$'')*/$(+-*1 Ȃ$$ )4ю
CAUTION During operation, oil or grease may spray from between the drill
and cylinder box. Take care to ensure this does not create a slippery or unsafe
working environment.
CAUTION!/# /**'$.' ȅ0)0. !*-) 3/ ) + -$**-0. $)*'
weather conditions, run the unit continuously for 3 to 5 minutes to warm it
up and prevent damage.
CAUTION
CAUTION
FIGURE-2
FIGURE-3
1
1
2
2
FIGURE-4
1
2
3
10
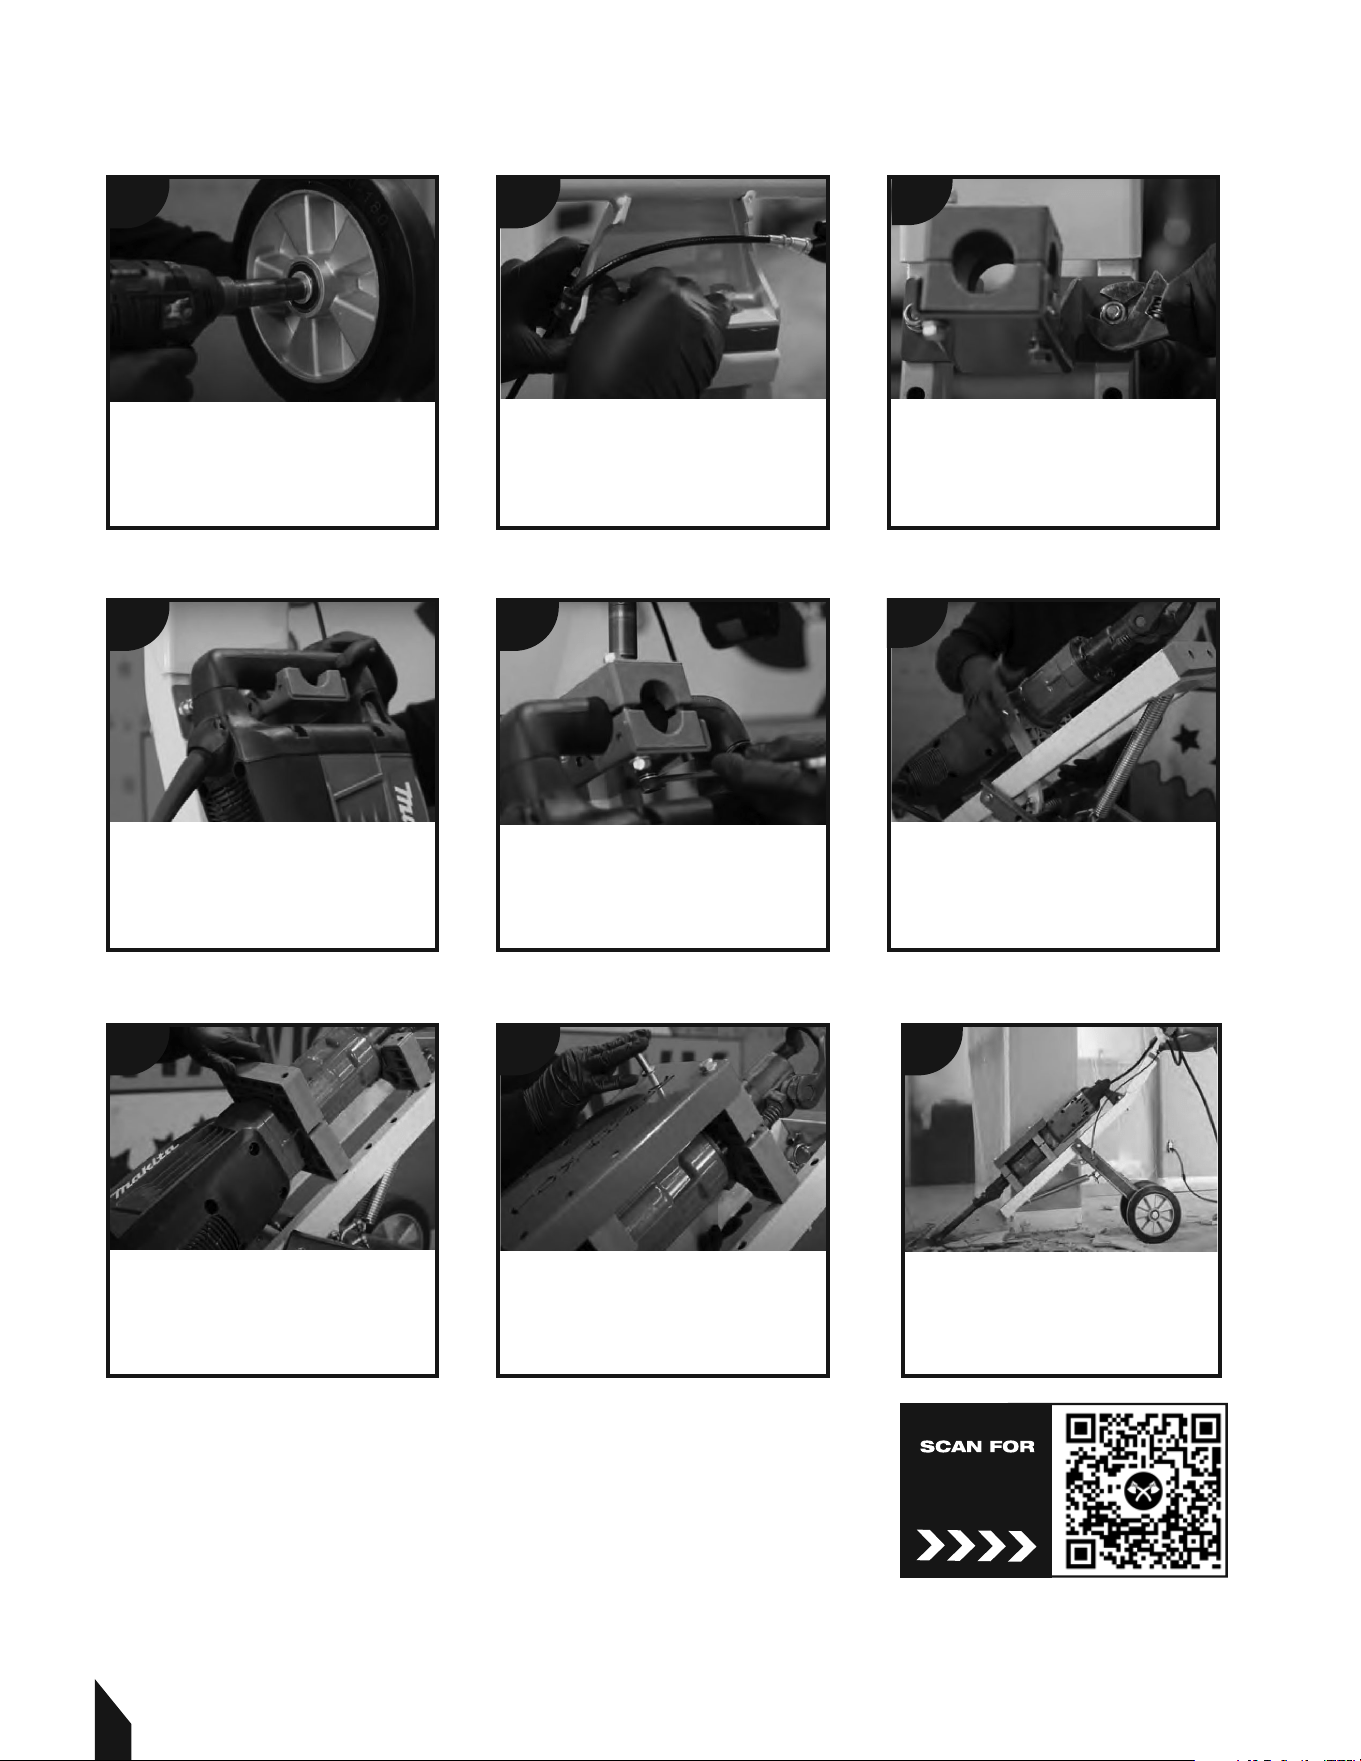
6. TROLLEY INSTALLATION (OPTIONAL)
Remove the bolts and washers from
the trolley base. Slide each wheel
onto the peg and secure them with
bolts and washers. Tighten
everything using a 13mm socket.
Remove the top portion of the
mount and slide the demo
hammer handle into position.
Align the top halves of the
hammer mounts with the
corresponding lower halves.
Attach the top block and secure
the upper mount with bolts and
washers using a 13mm socket.
Align the housing plate with the
hammer mounts. Once aligned,
secure it in place with 4 long
bolts and a 17mm socket.
Your Demo Hammer Trolley
is now assembled.
Flip the trolley onto the handles
and align the lower halves of
the hammer mounts with the
mounting holes on the
hammer and trolley.
Remove the bolts and washers
from the top of the trolley. Align
the handles with the bolt holes
and secure them in place using
a 19mm socket.
Attach the upper mount to the top
of the frame and secure it in place
using a 13mm socket and
an adjustable wrench.
1
4 5
6
8 97
2
3
Tomahawk Power | San Diego, California
(866) 577 4476 | www.tomahawk-power.com
STEP-BY-STEP
ASSEMBLY
VIDEO
7. TOOL LUBRICATION
NOTE: Your tool has been properly pre-lubricated.
7.1 When the tool has been used for more than 50 to 60 hours or if it
appears to be losing its power. DO NOT use more than the 1.6 oz
of 75W-90 gear oil . FIGURE 5.
7.2 First, open the oil cover and clean out the old lubricant with
a towel. Then, re-grease the demo hammer with 1.6oz of 75W-90
gear oil .
CAUTION DO NOT over-grease the tool with more than 1.6 oz of gear oil, as
this may cause the tool to function improperly.
NOTE: It is recommended to re-grease the tool's gears with Castrol LMM Grease. Using
other lubricants may damage the tool. Incorrect tool maintenance or lubrication will void
the warranty.
8. RECYCLE
8.1 Check with your local authority or retailer for recycling guidance.
8.2 Recycle raw materials instead of disposing of them as waste.
8.3 The machine, accessories, and packaging should be sorted for
environmentally-friendly recycling. These instructions are printed on recycled paper,
manufactured without chlorine.
8.4 Plastic components are recycled based on their composition.
9. REPLACEMENT PARTS
9.1 For replacement parts and technical questions visit www.tomahawk-power.com
9.2 Not all equipment components are available for replacement. The illustrations within this
manual are a convenient reference to the location and position of parts in the assembly
sequence.
9.3 When ordering parts, the following will be required: equipment model number, serial
number/lot, date code, and description.
9.4 The distributor reserves the right to make design changes and/or improvements to
equipment, parts, accessories, and manuals without notice.
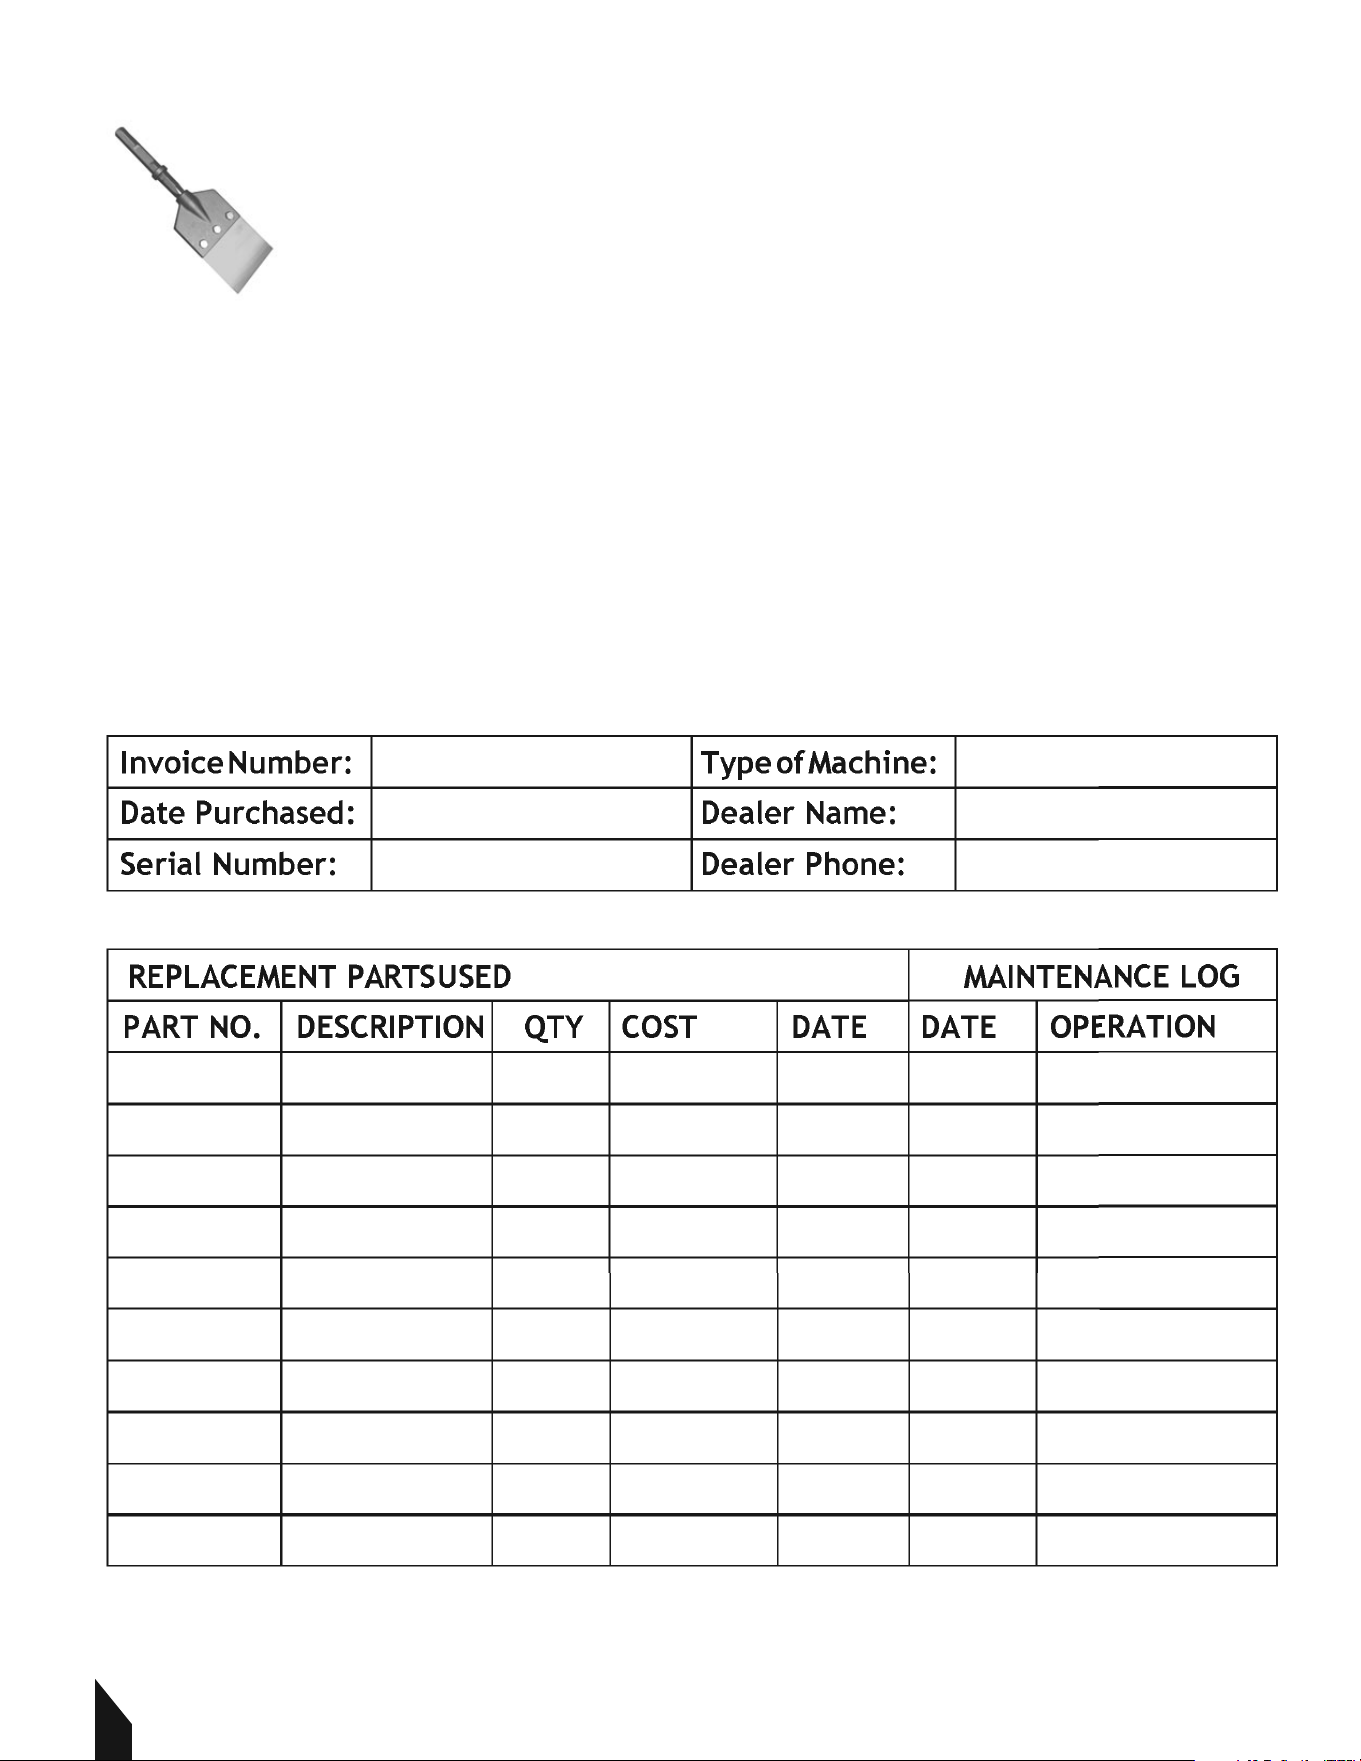
10. ACCESSORIES OPTION
TBHX-WS - Wood Scraper Attachment
Compatible with: Bosch 11335K, Makita 1307, 1317, 1520, 1512 and Bauer
1632E-B
11
CAUTION
FIGURE-5
1
12
TBHX-TS - Tile Scraper Attachment
Compatible with: Bosch 11335K, Makita 1307, 1317, 1520, 1512 and Bauer
1632E-B
-! /!*-- )*1/$*)+-*% /.я$/ Ȃ*-/' ..'4#)' ./*0"#(/ -$'.)
stubborn adhesives.
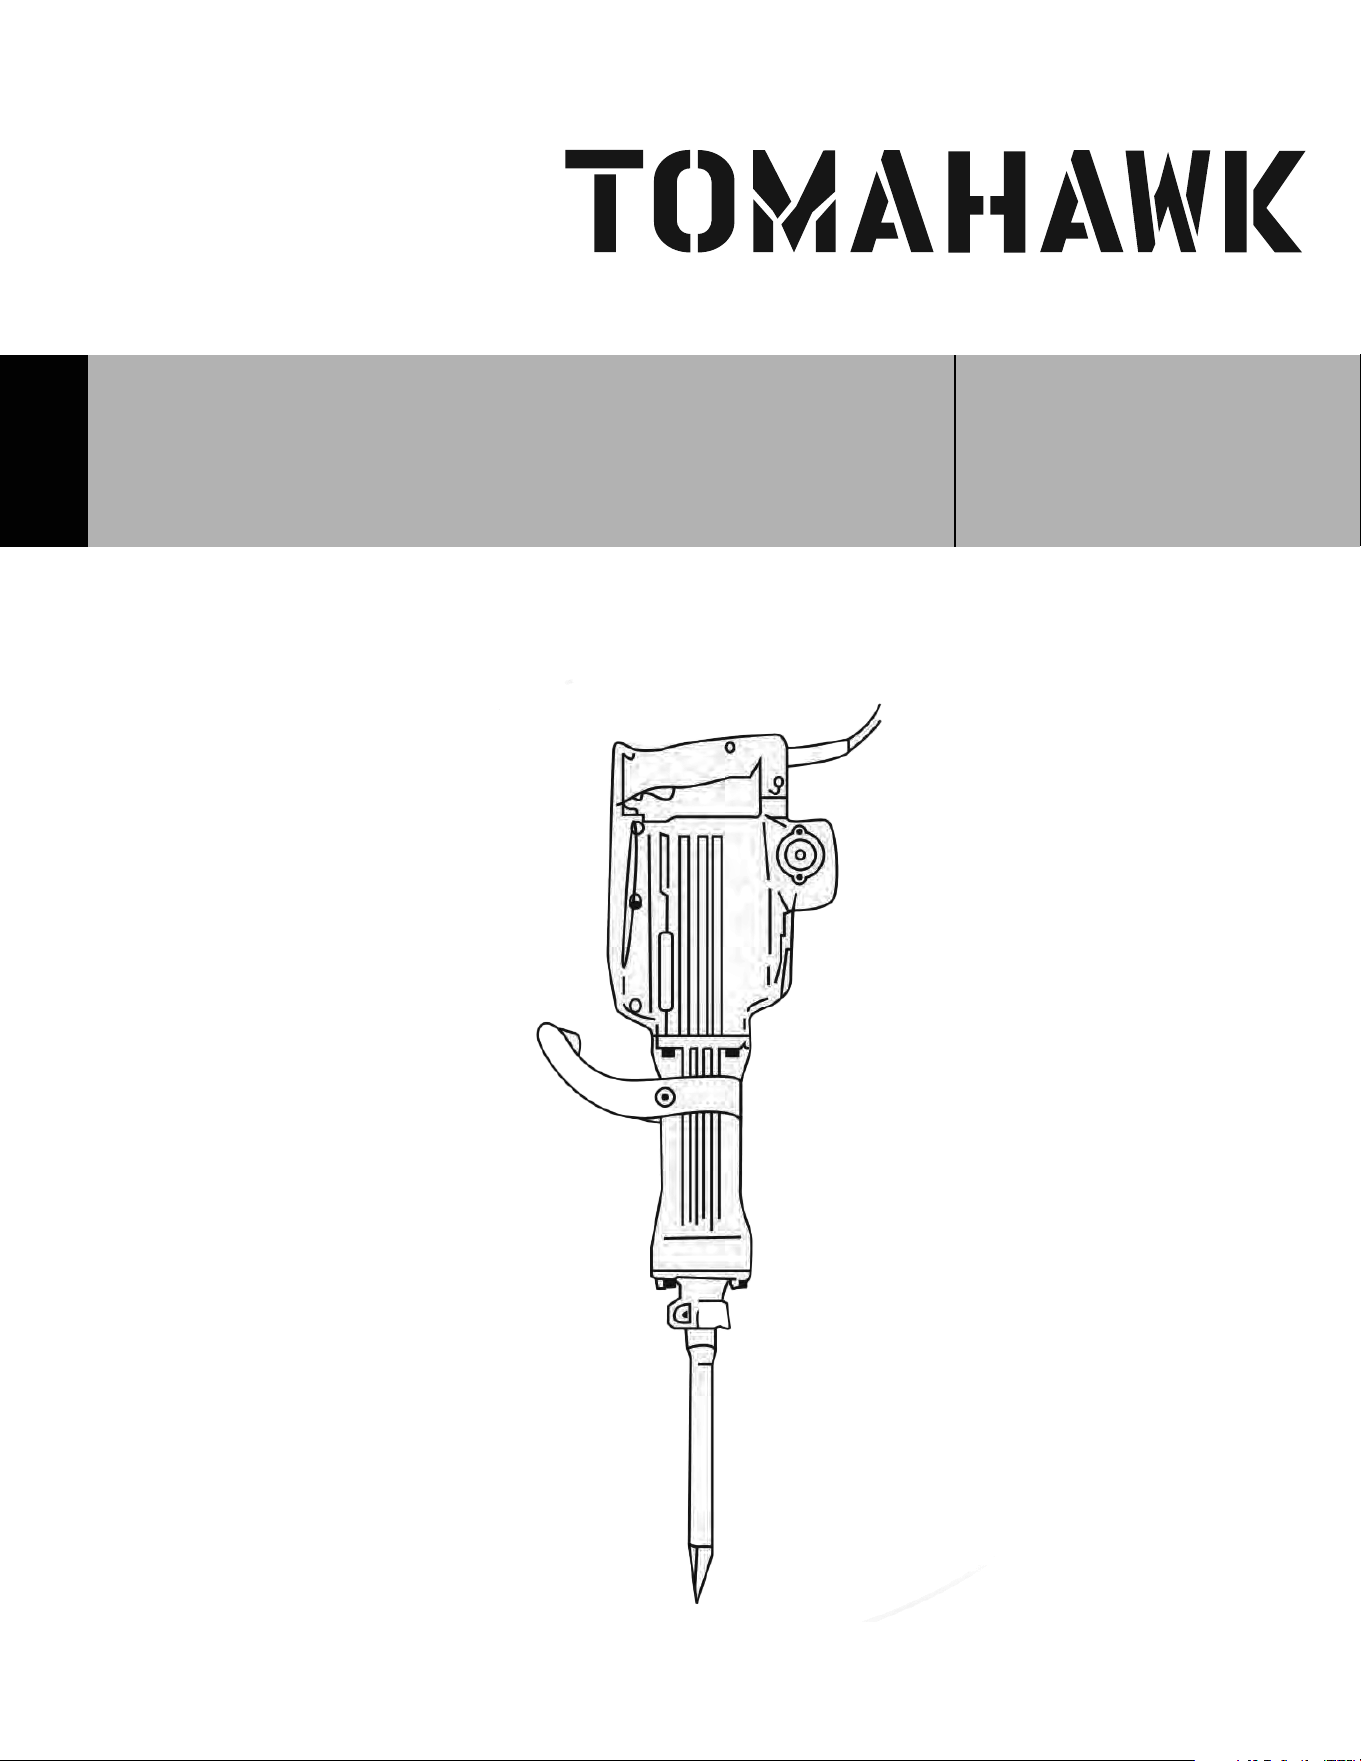
11. MAINTENANCE RECORD
TOMAHAWK® tools are assembled with care and will provide years of service when
properly maintained. Preventative maintenance and routine service are essential to the
long life of your equipment. Adhere to reading through this manual thoroughly. You will
find that you can do some of the regular maintenance yourself. However, when in need of
parts or major service, be sure to contact a TOMAHAWK® Technician. For your
convenience we have provided this space to record relevant data about your
TOMAHAWK® equipment.

13
12. EQUIPMENT WARRANTY
Your new TOMAHAWK® equipment is warranted to the original purchaser for a period of
one-year (12 months) from the original date of purchase. The TOMAHAWK® warranty is
against defects in design, materials and workmanship.
The following are not covered under the warranty:
12.1 Damage caused by abuse, misuse, dropping or other similar damage caused by or as a
result of failure to follow assembly, operation or user maintenance instructions.
12.2 Alterations, additions or repairs carried out by persons other than TOMAHAWK® or their
recognized agents.
12.3 Transportation or shipment costs to and from TOMAHAWK® or their recognized agents,
for repair or assessment against a warranty claim, on any machine.
12.4 Materials and/or labor costs to renew, repair or replace components due to fair
wear and tear.
12.5 TOMAHAWK® and/or their recognized agents, directors, employees or insurers will not
be held liable for consequential or other damages, losses or expenses in connection with or
by reason of or the inability to use the machine for any purpose.
12.1 Warranty Claims
Before submitting any warranty claim, you will need to register your
new TOMAHAWK® equipment through www.tomahawk-power.com
or email support@tomahawk-power.com.
Follow the steps on page 3 or scan this QR codes to complete
/# ,0$+( )/- "$./-/$*)юȅ -- "$./-/$*)$.*(+' / я
all warranty claims should firstly be directed to TOMAHAWK®
through the online Service Request form found at
www.tomahawk-power.com/pages/service-request.
13. SERVICES CENTERS
Our service centers are equipped to handle your equipment maintenance and repair needs
Ȃ$$ )/'4ю$/#) /2*-&*!0/#*-$5 '*'. -1$ '*/$*).я4*0)!$) 3+ -/
support and genuine parts needed to keep your equipment running smoothly. All locations
are listed on the webpage https://tomahawk-power.com/pages/find-a-service-center.
For Service Call (866) 577- 4476

FAST TRACK YOUR
FIXER UPPER
The Tomahawk Demo Hammer Trolley is designed to
make heavy-duty demolition tasks easier and more
Ȃ$$ )/ю # /# - 4*0ї- - &$)" 0+ *)- / я /$' я *-
.+#'/я /#$. 0-' /-*'' 4 /& . /# 2 $"#/ *Ȃ 4*0-
#).)''*2.!*-+- $. я*)/-*'' (*'$/$*)ѓ
Item #: TDHT55
TOMAHAWK DEMO
HAMMER TROLLEY
www.tomahawk-power.com
IN LESS TIME
For big areas and busy schedules, Tomahawk 38” push sweepers cover a
wider path to reach more surface area so you can finish sweeping faster
around indoor and outdoor spaces and on wet or dry surfaces!
DEMOLITION HAMMER
Parts Manual
MODEL NUMBER: TDH3512

PART LIST
1
1
40
Washer 1
79 1
2
Connecting
rod Handle
1
41
Washer 1
80 1
3
Needle
bearing switch
1
42
Spring 1
81 1
Flat
washer
4
guard
1
43
Lock
sleeve 1
82 1
5 hole gland
5
Handle
6
44
M10X40 Screw
183 1
Flat
washer
6
Plate
6
45
Λ 10
flat washer
184
M8X25 screw
2
7
4X14
screw
1
46
4X18
pin
185
Bowl washer
1
8
Cable guard
1
47
Lock
rod
1
Bowl
86 3
9
4X16 screw
1
48
Iron head
187
Oil wick
1
10
Cable
plug
1
49
Dampling
ring
188
Fual cap pad
4
11
M4X12
head screw
1
50 1 89
23.6X5.1
seal ring Fual cap
2
12
M5X8 screw
1
51
Shank
sleeve
490
M5X12screw
1
13
Rear
cover
1Mouse
52 1 91 2
Oil
hole seal ring
14
M5X12 screw
1
53
Mouse
cover
192
Oil hole
2
15
1
Carbon brush spring
54
Mouse
washer
693
6X45 screw
2
16
M5X12screw
1
55
Damper
694
Spring
wahser
2
17
1
Carbon brush washer
56
Mouse
washer
695
Flat wahser
2
18
1
Brush
terminal
57
Cylinder
196
Sticker
2
19
Brush
cap
1Hoop
58 1 97
Gear
cover
2
20
Carbon brush
1
59
12X44piston pin
198
6201 bearing
2
21
1
Carbon brush washer
60 1
Gear
99
Cylinder
case
4
22
4
M4X12 head screw
61
8X40
screw
1 100
6001
bearing
2
23
Rubber cover
4
62 2
Λ 8
spring washer
101
5X12 nut
1
24
Handle
holder
4
63
Λ 8
flat washer
3102
M5X12 screw
2
25
M8
nut
1
64
62X2.5seal ring
3 103 2
Λ 5 spring washer
26
8X16 screw
1
65
Piston
ring
1 104 2
6203 bearing cover
27
1
Opening bolt
66
Piston
1105
6203
bearing
1
28
Handle spindle
1
67
6302
bearing
1 106
Inner cover
1
29
Auxiliary handle
1
68 1
Λ 22shaȅ
clip Rotor
30
1Gear
69 1
31
6201
bearing
1
70
Distance
ring
2
32
2
71
Λ 5
spring washer
5X12pin
2
33
5X60 screw
1
72
7seal
ring
1
34
S
pring
wahser
1
73
6205
bearing
1
35
Fan shroud
1
74 1
36
Stator6205 bearing cover
4
75 1
37
Λ 5
spring washer Gear box
4
76
M5X14 screw
4
38
2
κ6 flat wahser
77
4X16 key
4
39
κ
6
spring washer
1
78 4
Eccentric shaȅ
6X25 screw
No.
Qty
Description No.
Qty
Description
No.
Qty
Description
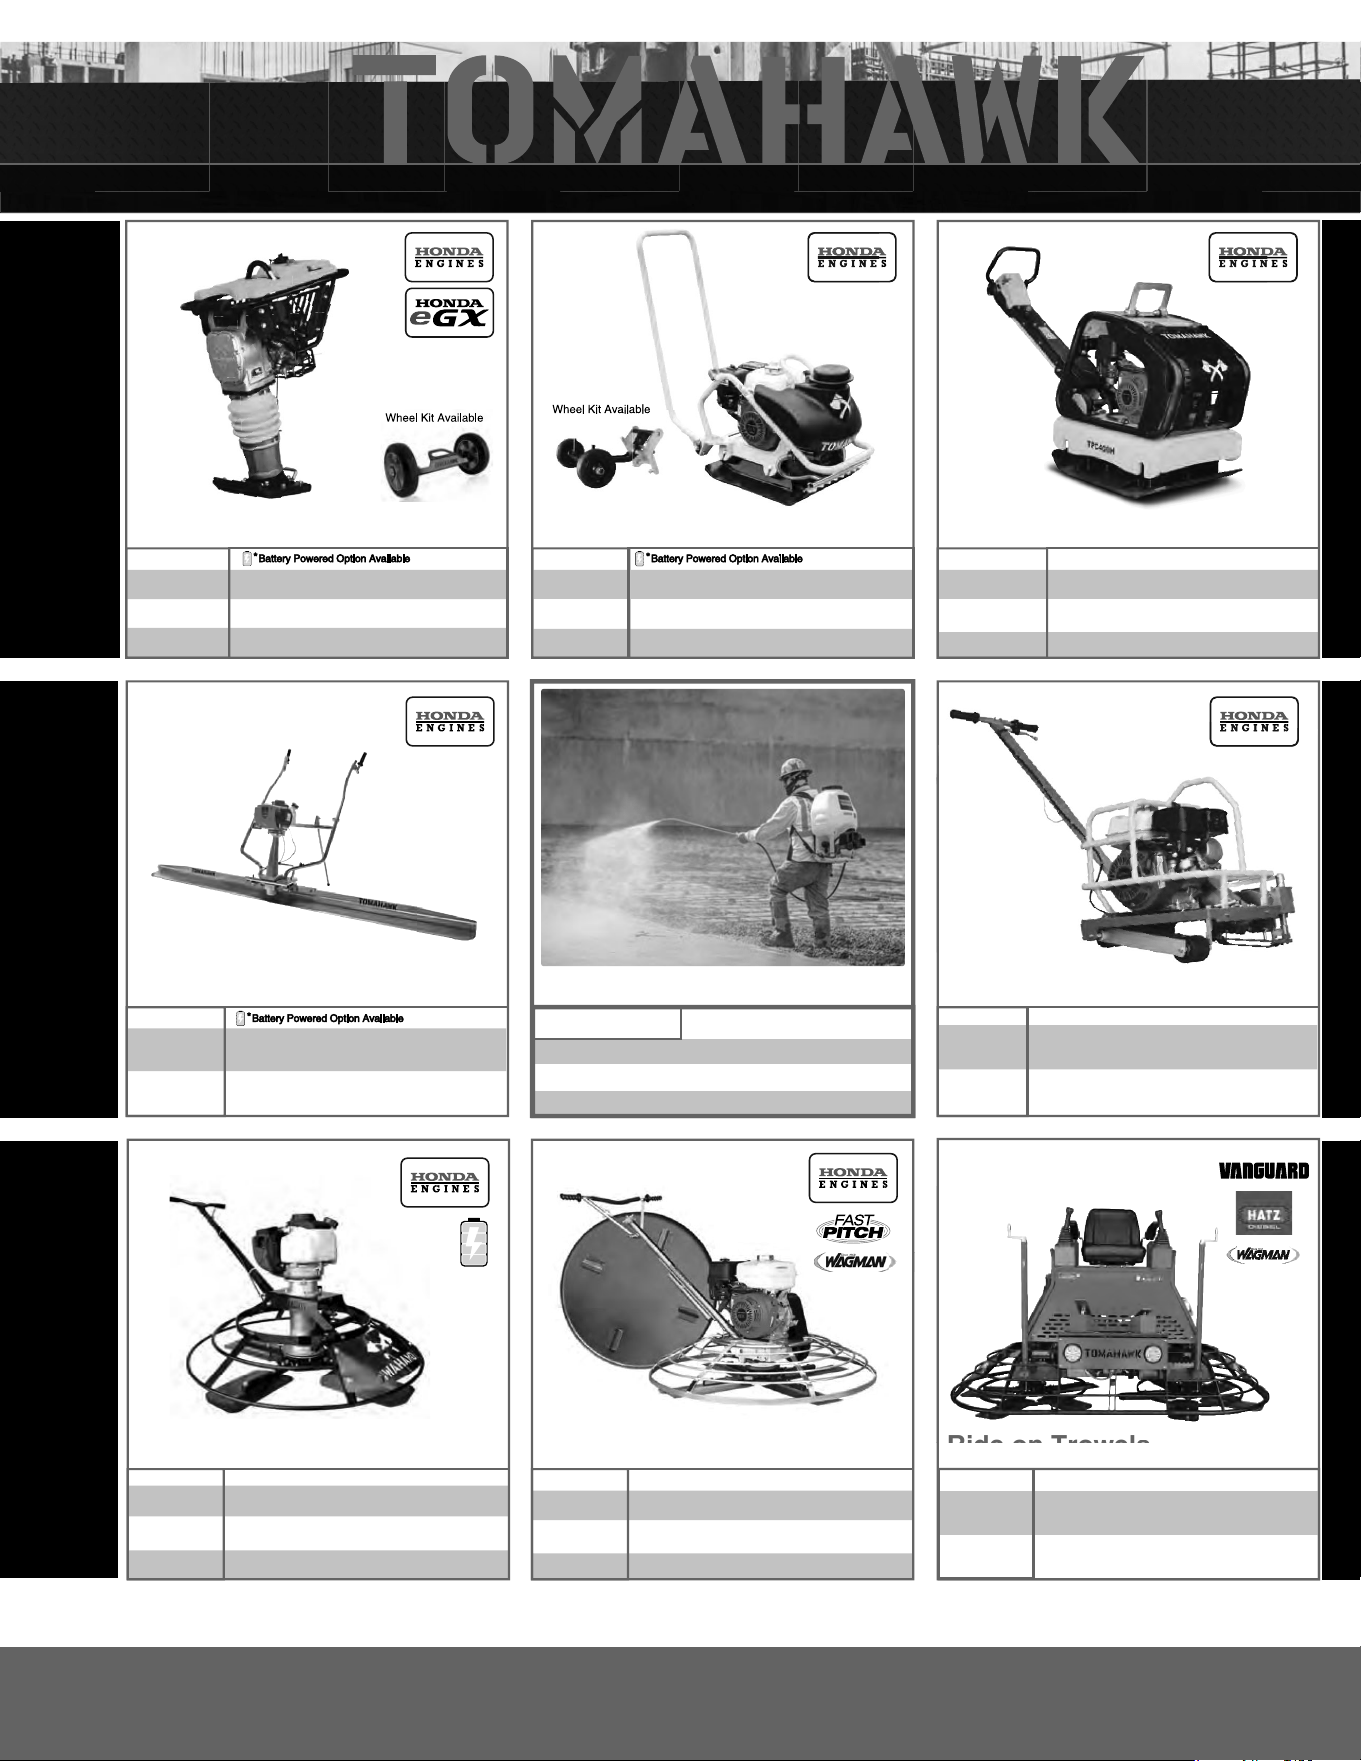
Rammers
8 ft Hydraulic Steer, 35 HP Vanguard,
CVT Clutch, 180 RPM
10 ft Full Hydrostatic, 74 HP Hatz
Diesel
Part#:
TPT24H
TPT36H
TPT46H
Part#:
JXPT30H
eJXPT30
JXPT30T
Part#:
TRT46V
TRT60V
2 ft Edger, Honda GX160, 0-28
o
Blade Pitch
3 ft, Honda GX160/GX270, 0-28
o
Blade Pitch
4 ft, Honda GX270/GX390, 0-28
o
Blade Pitch
HAVE QUESTIONS?
Contact us. We’re here to help!
Email us at [email protected]
Forward Plate Compactors
Reverse Plate Compactors
Part#:
TR68H
JX60H
eJX60H
TVSA-H
eTVSA
Part#:
Part#:
TPC80H
COMPACTION
Power Screeds
Porta-Trowels
Concrete Sprayers
Walk Behind Trowels Ride on Trowels
Early Entry Saws
Part#:
6-16 ft Magnesium Blades
Honda GX35, Adjustable Handles
6-16 ft Magnesium Blades
36V/5 Ah Battery, Adjustable Handles
Part#:
TFS6H
TFS10H
Part#: TCS6.5
6" Blade Diameter, Blade Compatibility,
Honda GX120
10" Blade Diameter, Self Propelled,
Blade Compatibility, Honda GX270/GX390
CONCRETETROWELS
(866) 577-4476
TPC85H
TPC90H
TPC170H
TPC100H
TPC400H
Ride on Trowel
s
Equipment Guide
3,000 lbs/sq ft, Honda, 21”x17” Plate
3,200 lbs/sq ft, Honda, 23”x17” Plate
3,400 lbs/sq ft, Honda, 22”x20” Plate
3,500 lbs/sq ft, Honda, 19”×14” Plate
7,000 lbs/sq ft, Honda, 28”x20” Plate
11,690 lbs/sq ft, Honda, 32”x22” Plate
56 lbs; 18 ft Pole, 30" Diameter, 4-Blade ,
Honda GX35,0-28
o
Blade Pitch
56 lbs; 18 ft Pole, 30" Diameter, 4-Blade , 36V,
7.5A h,0 -28
o
Blade Pitch
56 lbs; 18 ft Pole, 30" Diameter, 4-Blade ,
Honda GX35,0-28
o
Blade Pitch
Adjustable from 0-450 PSI
Handles 30% + Solids,1.8 HP 2 Stroke Motor, 24"
Brass Wand 0.5 GPM, Fan Nozzle Included,
Spray 15,000 ft
2
in 10 Minutes
3,550 lbs/sq ft, Honda GX120
3,350 lbs/sq ft, Honda GX100
3,350 lbs/sq ft, Honda GXE2.0S
Items Listed Includes Combo Blades

3.7 Gal. Tank, Tomahawk 3HP 2 Stroke Engine,
Horizontal Reach: 40ft, Vertical Reach: 25+ft,
50-100 microns, 490 CFM / 220 MPH Air Speed
4 Gal. Tank, 0.7 kW/7.5 Ah, 2hrs @ 1/2 Load,
1hr at Full Load, Spray Reach of 25 - 30ft, 100 -
300 microns, 400 CFM / 150 MPH Air Speed
QUIET INVERTER SERIES
QUIET INVERTER SERIES
Fertilizer SpreadersBackpack Foggers
Part#:
TGDR10
TSCP8
4,000 - 7,000 Watt Series
10,500 - 17,000 Watt Series
Concrete Scarifier
Floor Sweepers
Grinders and Scrapers
Part#:
TSCAR8H
eTSCAR8
Trash Water Pumps
Part#:
TW2H
TW3H
TW4H
3" Pump, Honda GX270, 375 GPM, Elevation:
89ft, Suction: 25ft
2" Pump, Honda GX160, 164 GPM, Elevation:
85ft, Suction: 26ft
4" Pump, Honda GX390, 580 GPM, Elevation:
91ft, Suction: 26ft
QUIET INVERTER SERIES
OUTDOOR POWER GENERATORSFLOORING
www.tomahawk-power.com
(866) 577-4476
ASSEMBLED IN THE
PARTS SOURCED GLOBALLY
USA
TG2000i
TG3000i
TG4500iEFI
2,000 - 4,500 Watt Series
Equipment Guide
10" Disc, 120V, 1/32" Per Pass,
11 AMP, 1.5 HP, 1,725 RPM
8" Blade, 120V, 11 AMP, 3/4 HP,
1,725 RPM, Carpet & Tile Remover
Honda GX160, 350 - 500ft
2
/hr,
OSHA Compliant Vacuum Port,
8" CT Drum Kit, 1/8" Per Pass
2.3HP, 2800 RPM, 350 - 500ft
2
/hr,
OSHA Compliant, 1/8" Per Pass
22" Working Width, Double Broom System,
6 Gallons
30" Working Width, Battery Powered Triple
Broom System, 13.5 Gallons
38" Working Width, Triple Broom System,
14.5 Gallons
4,000w Max / 3,500w Rated, Honda
Engine
5,500w Max / 5,000w Rated, 120/220V
7,000w Max / 6,500w Rated, Honda
Engine
TG4000H
TG5500i
TG7000H
17,000w Max / 14,500w Rated
120/240V, Run Time 14hrs @ 25% Load,
CARB Compliant, GFCI, CO Detector,
Voltage Selector, Electric Start
10,500w Max / 8,500w Rated
120/220V, Run Time 14.5hrs @ 25% Load
TG9000i
TG17000i
92
63
2,200w Max / 2,000w Rated
3,300w Max / 3,000w Rated,
120/220V, 30 AMP Twist Lock
4,500w Max / 3,800w Rated
20A (120V), Electric, Remote
Part#:
eTMD14
TMD14
4 Gal.Tank, Powered by Tomahawk 3HP
2 Stroke Engine, Horizontal Reach of 30 ft,
Displacement of 63.3 cc, MPA of 1.0 - 2.5
5 Gal.Tank, 0.7 kW/7.5 Ah, 36V, Spray Reach
of 25 - 30 ft, Up to 2 hrs at Half load, 1 hr at
Full Load, 2 Hours Charge Time
Part#:
eTGS30
TGS30
Part#:
eTOS22
eTOS30
TOS38
Assorted Blade Choices Assorted Blade Choices
Assorted Brush Choices
2
2" Working Width, Double Broom System,
6 Gallons
e
TOS2
2
38" Working Width, Triple Broom System
,
14.5 Gallons
TOS38

TOMAHAWK®, LLC
San Diego, CA
Sales Support
(866) 577-4476
Equipment Support
(866) 577-4476
www.tomahawk-power.com
Tomahawk understands to keep a job-site running smoothly the proper equipment and
spare parts are needed at the drop of a hat. With same day shipping and faster
delivery times, count on Tomahawk to keep you powered throughout the day! With
long lasting parts and engines, Tomahawk equipment will be the star of your fleet for
years to come. Visit www.tomahawk-power.com to get started today!
Power Your World
FACEBOOK
facebook.com/TomahawkPowerUSA
YOUTUBE
youtube.com/TomahawkPower
INSTAGRAM
@tomahawkpower