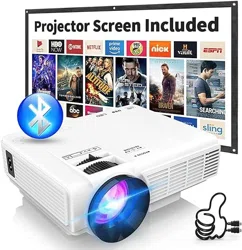
Mini Home Projector Quick Start & Troubleshooting Guide
Caution: Hot air is exhausted from the ventilation openings, do not put anything flammable near the projector. To prevent fire, do not cover ventilation openings, make sure that the projector is in a well ventilated area. Avoid confined spaces.
Caution: To prevent shock, do not open the projector unit body. There are no user servicable parts inside.
Warning: To prevent fire or shock, do not expose the projector to rain or water. If using outdoors, store in a dry area and do not leave unattended for prolonged periods of time.
Air Circulation - There are openings on the unit for ventilation. To avoid the risk of overheating do not block or cover them.
Do NOT look into the projector lense when the projector is on. The bright light may cause eye damage.
Please contact [email protected] for support.
1. Introduction
The Dr. J HI-04 Mini Home Projector is a portable projector intended for home use. It can be connected to phones, computers, gaming systems, and other devices, to project an image. This projector is a budget model, it is not intended to be used in a professional setting. This projector is best suited for movies and videos, it is not recommended for:
- Professional settings and screenings, the projection size is limited;
- PowerPoint, Word, or Excel presentations, the content will be too difficult to read;
- Viewing in bright settings, ensure to project content in a dark area.
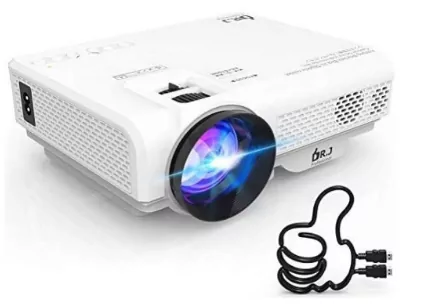
1.1 Product Overview
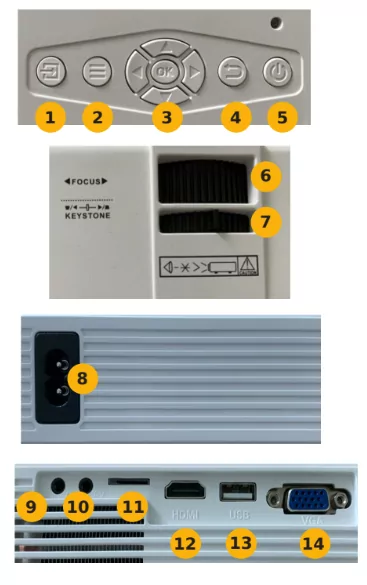
- Input
- Menu
- Navigation/OK
- Return
- Power
- Focus
- Keystone
- Power adaptor
- 3.5 mm jack
- AV jack
- SD port
- HDMI port
- USB port
- VGA port
1.2 Feature Overview
The Dr. J HI-04 Mini Home Projector is a portable projector intended for home use. It can be used for streaming sports games indoors or having movie nights outside. The projector features a 1280x720 resolution for crisp images.
The Dr. J HI-04 Mini Home Projector can be connected with:
- Phones or tablets
- Gaming Consoles
- Computers
- Amazon Firesticks
- DVD players
- USBs
The projection size can vary from 32 - 170 inches.
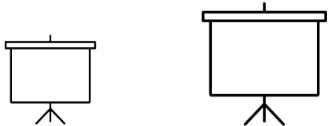
The projector has a +/- 15 degree keystone adjustment function.
It boasts 50,000 hours of lamp life.
1.3 Projection Settings
The Dr. J HI-04 Mini Home Projector has 4 projection settings, based on how the projector is positioned. The 4 settings are:
- Front
- Rear
- Front ceiling
- Rear ceiling
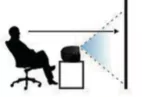
1.2.1 Front Projection
Front projection is the factory default setting. It allows users to project from a table/shelf in front of the screen, like a traditional projector.
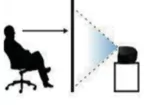
1.2.2 Rear Projection
Rear projection is when the projector is placed behind a translucent screen and projects an image that appears mirrored.
To correct the mirrored image, select Menu > Settings > Picture > Projection Mode - FLIP.
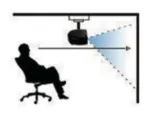
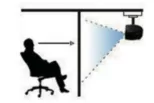
1.2.3 Front Ceiling Projection
Front ceiling projection is intended for users who mount their projectors to the ceiling, in front of a screen. Because the projector is intended to be mounted upside-down, the image output will also appear upside-down.
To correct the upside-down image, select Menu > Settings > Picture > Projection mode and select "front".
1.2.4 Rear Ceiling Projection
Front ceiling projection is intended for users who mount their projectors to the ceiling, behind a translucent screen. Because the projector is intended to be mounted upside-down, the image output will also appear upside-down, as well as mirrored because it is being projected from behind.
To correct the upside-down image, select Menu > Settings > Picture > Projection mode and select "front" and "flip".
2. Installation
2.1 Mounting
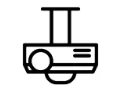
Mounting the projector to the ceiling or a tripod is optional and requires a mount that is not included. If Front Ceiling Mounting or Rear Ceiling Mounting, please see sections 1.2.3 and 1.2.4 to optimize image projection for mounting.
2.2 Non-mounted set up
The projector should be set up on a flat, stable surface, pointing straight on, directly at the screen or wall.
2.3 Connecting to power
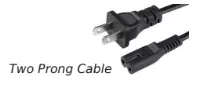
Connect the two-pronged AC side of the power cable to the plug on the right side of the projector and plug the other side of the cable into a wall socket.
The light above the power button should glow red once the cable is plugged in.
3. Connecting to Devices
The Dr. J HI-04 Mini Home Projector can be connected to using several different cables, such as HDMI, USB, and VGA.
Note: VGA cables do not support audio. If connecting with a VGA cable, use a 3.5mm audio cable to connect device audio with the projector.
3.1 Connecting to Computers
There are two ways to connect the Dr. J HI-04 Mini Home Projector to a laptop or desktop computer (both Windows or Mac).
3.1.1 Using an HDMI cable
To connect to a computer using an HDMI cable, plug in an HDMI cable into the computer's HDMI port.
If the computer does not have an HDMI port, an adaptor can be purchased and used.
Connect the other side of the HDMI to the HDMI port located on the left side of the projector.
Select the Input Source Button > HDMI
3.2 Connecting to phone/tablet
To connect a phone or a tablet, use an HDMI to lightning cable/USB C adaptor (not included).
Connect the HDMI cable to the adaptor port.
Connect the other side of the HDMI to the HDMI port located on the left side of the projector.
Select the Input Source Button > HDMI
3.3 Connecting to gaming console consoles
To connect to a gaming console, plug in an HDMI cable into the computer's HDMI port.
Connect the other side of the HDMI to the HDMI port located on the left side of the projector.
Select the Input Source Button > HDMI
Note: If connecting to an Xbox, go into Xbox Settings> Digital Audio Output and select PCM.
3.4 Connecting to USB/Memory Card
Connect the USB/Memory to the projector's USB port or if using a memory card, connect an adaptor to the USB port.
Select the desired folder/content for viewing.
Select the Input Source Button > DMP
3.5 Connecting to Other Devices
Find the appropriate connection method based on what ports the device has:
- HDMI (or adaptor)
- VGA
- USB (or adaptor)
Select the appropriate source based on the cable being used and connection method:
- HDMI - HDMI
- VGA - VGA
- USB - DMP
If unable to connect a desired device, please contact [email protected] for support.
4. Image Output Adjustment
4.1 Focus
The Focus adjustment wheel can be turned left and right to sharpen or blur the image, depending on the distance of the projector from the screen or wall.
Turn the wheel left or right until the image reaches the desired sharpness.
4.2 Keystone
The Keystone adjustment wheel can be turned left and right to adjust the shape of the projected image. It should only be used if an image is not being projected from straight on and appears distorted.
The Keystone adjustment fixes skewed image output, making it rectangular.
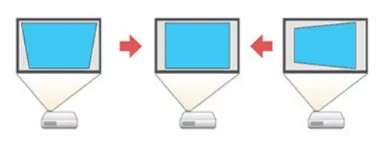
NOTE: The Dr. J HI-04 Mini Home Projector only has a keystone adjustment of +/- 15 degrees, it can only fix slightly skewed image outputs.
5.1 Image adjustments
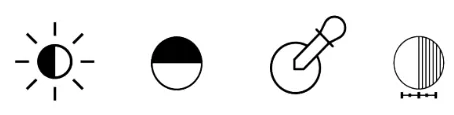
The projection output settings can be accessed by selecting Menu>Picture>Picture Mode
There are 3 pre-set picture modes:
- Vivid - image output has rich, high contrast colours
- Medium - image output has regular toned colours
- Soft - image output has duller, lower contrast colours
These pre-sets are non-customizable, their contrast, brightness, colour, and sharpness cannot be adjusted.
And 1 custom picture mode:
- User - image output can be customized.
5.1.1 Custom image adjustments
To adjust contrast, brightness, colour, and sharpness, select Menu>Picture> Picture mode> User.
Adjustments can be made using sliders, to increase or decrease contrast, brightness, colour, and sharpness.
5.2 Sound Adjustments
The sound settings can be accessed by selecting Menu> Sound>Sound Mode
There are 4 pre-set sound modes, based on the best use case scenario:
- Medium - default setting
- Movie - optimized for movies and TV shows
- Music - optimized for music rich content like concerts
- Sports - optimized for projecting sporting events
These pre-sets are non-customizable, their treble and bass cannot be adjusted.
And 1 custom sound mode:
- User - treble and bass can be adjusted
5.2.1 Custom Sound adjustments
To adjust the treble and bass, select Menu>Sound> Sound mode> User.
Adjustments can be made using sliders, to increase or decrease treble and bass.
6. Troubleshooting
6.1 Colour looks off
If the image output colour looks off, i.e. the reds look pink, select Settings > Picture > Picture mode - User
Adjust brightness, contrast, colour, and saturation as needed
6.2 Blurry/Bad Picture Quality
If the picture looks blurry or fuzzy, adjust the focus to increase sharpness.
If the picture looks washed out/too dark, select Settings > Picture > Picture mode - User
Adjust brightness, contrast, colour, and saturation as needed.
6.3 Words Appear Fuzzy
Please note that this projector was not intended for use in a professional setting, the output quality is not high enough to be able to present PowerPoints or other documents.
Subtitles should not be a problem to read. To increase the clarity of words, adjust the focus to increase sharpness.
6.4 No or low sound
If connecting with a VGA cable, use a 3.5mm headphone line to connect device audio with the projector.
If using HDMI, USB, or other means of connection, please contact [email protected] for support.
We will send you an update to upload to the projector to restore sound for both internal and external speakers.
6.5 Projector fan is too noisy
The projector fan should not be louder than the audio output. However, noise from the fan is inevitable as it keeps the projector from overheating.
Please see section 6.4 if the fan drowns out the audio output.