
Technical Support and E-Warranty Certificate www.vevor.com/support
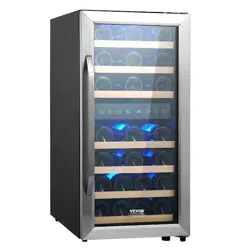
FREESTANDING WINE REFRIGERATOR
MODEL:CWC-600B
We continue to be committed to provide you tools with competitive price.
"Save Half", "Half Price" or any other similar expressions used by us only represents an
estimate of savings you might benefit from buying certain tools with us compared to the major
top brands and does not necessarily mean to cover all categories of tools offered by us. You
are kindly reminded to verify carefully when you are placing an order with us if you are
actually saving half in comparison with the top major brands.

- 1 -
MODEL:CWC-100B
Have product questions? Need technical support? Please feel free to
contact us:
Technical Support and E-Warranty Certificate
www.vevor.com/support
NEED HELP? CONTACT US!
This is the original instruction, please read all manual instructions
carefully before operating. VEVOR reserves a clear interpretation of our
user manual. The appearance of the product shall be subject to the
product you received. Please forgive us that we won't inform you again if
there are any technology or software updates on our product.
COMPRESSOR CIGAR
HUMIDOR
- 2 -
Warning-To reduce the risk of injury, user must read
instructions manual carefully.
This product is subject to the provision of European Directive
2012/19/EC. The symbol showing a wheelie bin crossed
through indicates that the product requires separate refuse
collection in the European Union. This applies to the product
and all accessories marked with this symbol. Products marked
as such may not be discarded with normal domestic waste, but
must be taken to a collection point for recycling electrical and
electronic devices
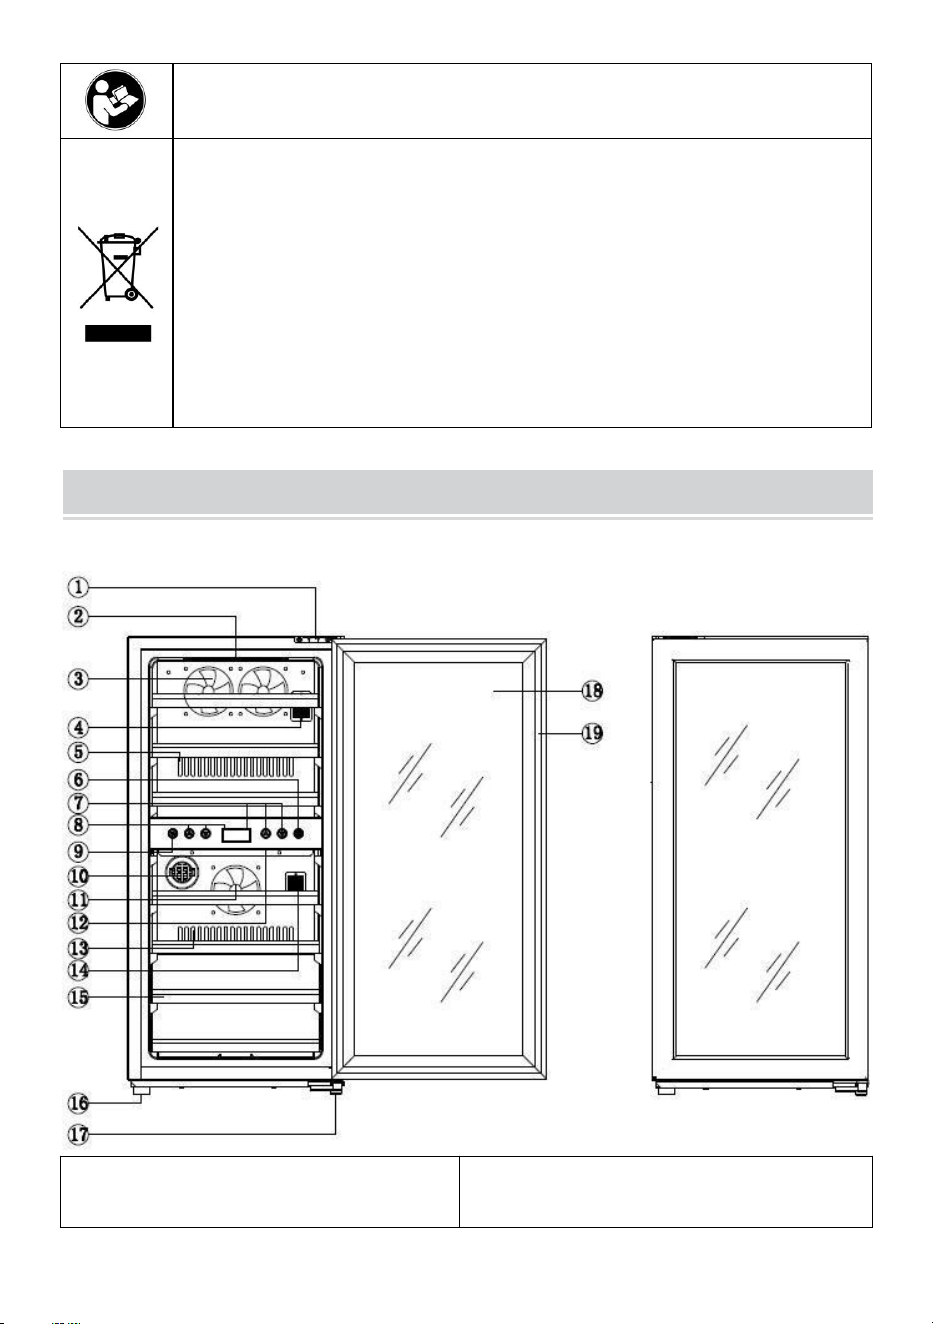
Product Brief
CWC-100B
1.Upper Hinge
2.Upper zone Light
10.Carbon filter
11.Lower zone Fan
- 3 -
3.Upper zone Fan
4.Upper zone Temperature Sensor
5.Upper zone Exhaust window
6.Light switch
7.Lower zone temperature
8.Upper zone temperature
9.Temperature switch
12.Lower zone Light
13.Lower zone Exhaust window
14.Lower zone Temperature Sensor
15.Shelf 16.Foot
17.Lower Hinge
18.Glass
19.Door seal
Safety Precautions
WARNING
To reduce the risk of fire, electrical shock, or injury
when using your appliance, follow these basic
precautions:
• PLEASE READ all instructions before installing, operating, or servicing
the appliance.
• Danger and Warning: Failure to follow this safety statement will result in
severe personal injury or death, property or equipment damage.
• RISK OF CHILD ENTRAPMENT. Before you throw away your old
refrigerator or freezer, take off the doors andleave shelves in place so
children may not easily climb inside. Keep children away from the
beverage & wine cooler, avoid them put fingers in air outlet on the kick
plate.
• SHOCK HAZARD - Electrical Grounding required.
• Never attempt to repair or perform maintenance on the unit until the
electricity has been
disconnected.
• Never remove the round grounding prong from the plug and never use a
two-prong grounding
adaptor.
• Altering, cutting of power cord, removal of power cord, removal of power
plug, or direct wiring can cause serious injury, fire or loss of property and
life, and will void the warranty.
• Never use an extension cord to connect power to the unit.

- 4 -
• Always keep the working area dry.
Important Precautions
• Do not lift unit by door handle.
• Do keep the door closed before installing into cabinet.
• Be sure the kick-plate on the front bottom is free from obstruction.
Obstructing free airflow can cause the unit to malfunction and will void the
warranty.
• Allow unit temperature to stabilize for 24 hours before use.
• Do not block any internal fans.
• Use only genuine supplier's replacement parts. Imitation parts can
damage the unit, affect its operation or performance and may void the
warranty.
CARE AND MAINTENANCE
Cleaning your Beverage & Wine Cooler
• Unplug the beverage & wine cooler and remove the bottles.
• Wash the inside with warm water or baking soda solution. The solution
should be about 2 tablespoons of baking soda to a quart of water.
• The outside of beverage & wine cooler should be cleaned with mild
detergent or warm water.
• Draw out the water box at the bottom, and wash.
Moving your Beverage & Wine Cooler
• Remove all the bottles.
• Securely tape down all loose items inside your beverage & wine cooler.
• Turn the leveling legs up to the base to avoid damage.
• Tape the door.
• Be sure the beverage & wine cooler stays in the upright position during
transportation.

- 5 -
INSTALLATION INSTRUCTIONS
Before using your beverage & wine cooler:
• This appliance is designed to be free standing only, and should not be
recessed or built-in.
• Place your unit on a floor that is strong enough to support the unit when it
is fully loaded. To level your unit, adjust the leveling legs at the bottom of
the unit.
• This appliance is not designed to be installed inside of a cabinet where
the front is covered by any type of door.
• Allow 10 cm of space between the top, the back and sides of the wine unit,
which allows the proper air circulation to cool the compressor and
condenser.
• Remove the exterior and interior packing
• Clean the interior surface with lukewarm water using a soft cloth.
• Place your appliance on a floor that is strong enough to support the
appliance when it is fully loaded.
• To level your appliance, adjust the front legs at the bottom of the
appliance.
• Before connecting the appliance to the power outlet, let it stand upright for
at least 24 hours. This will reduce the possibility of malfunction in the
cooling system from handling during transportation.
• Choose a cool, shady location, out of direct sunlight, to prevent ambient
temperature fluctuations of your beverage & wine cooler.
• After 24 hours, plug in beverage & wine cooler, and allow interior to adjust
to optimal temperature before adding any bottles.
• After 24 additional hours, fill with wine bottles. Allow beverage & wine
cooler to adjust to reach your set temperature.
• To remove a wine bottle, gently pull shelf out a little, lift upper shelf slightly,
and carefully remove bottles.
• To install the door handle(only for CWC-100B): For shipment, the door
handle has been stored inside of the unit binding
to the wood shelves. To install the handle, the door gasket should be gently
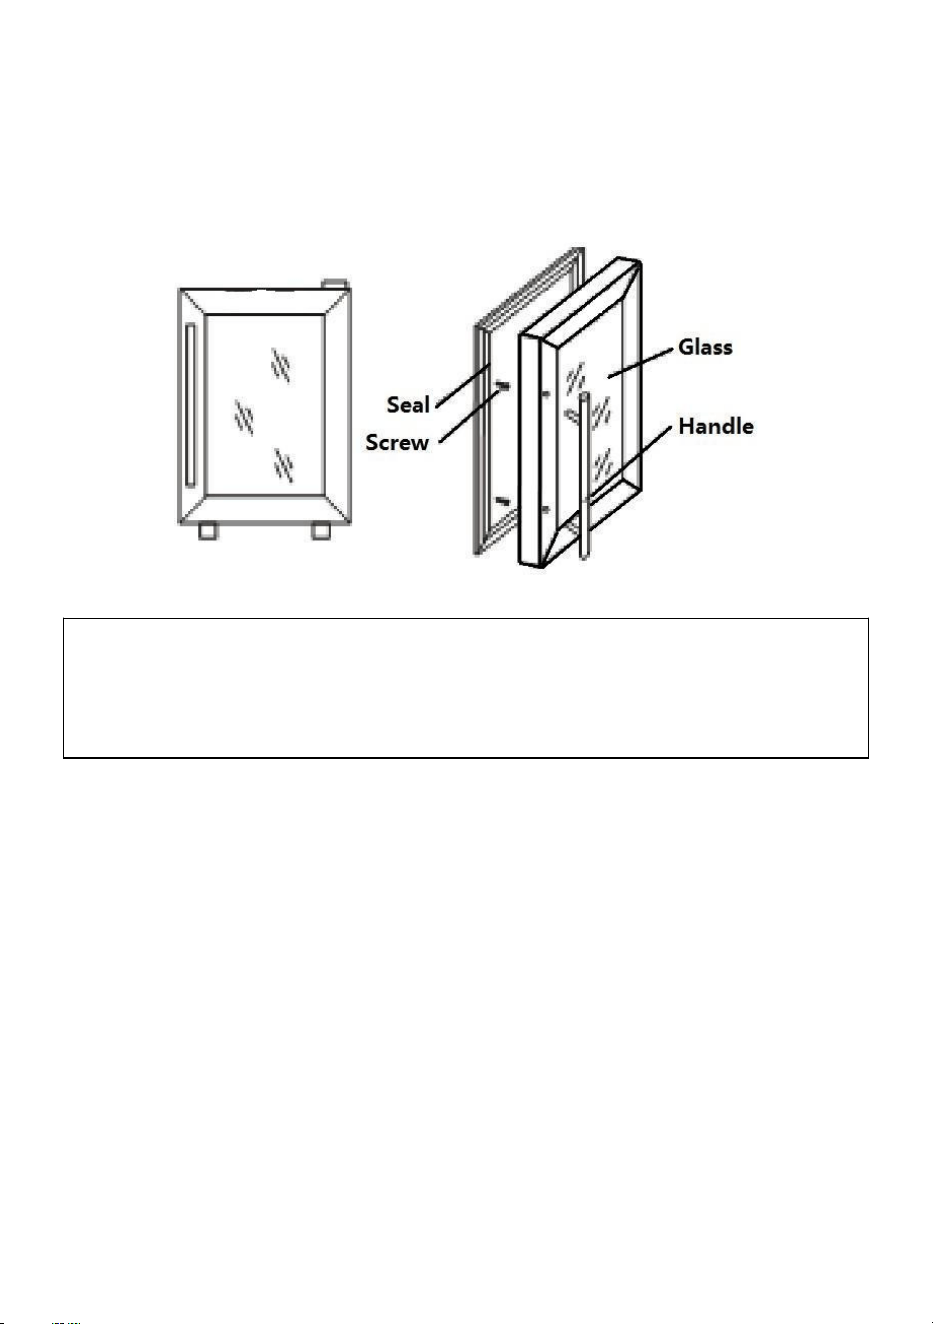
- 6 -
pulled back where it covers
the screw holes for the handle, then the handle should be attached by
screwing into place with the two
screws which are packed in the box with this Instruction Manual and other
spare parts.
Electrical Connection
Warning
Improper use of the grounded plug can result in the risk of electrical
shock. If the power cord is damaged, have it replaced by an authorized
Products Service Center.
This unit should be properly grounded for your safety. The power cord of
this unit is equipped with a schuko plug which mates with wall outlets to
minimize the possibility of electrical shock. Do not under any
circumstances cut or remove the ground wine from the power cord
supplied.
Use of extension cords is not recommended.
This unit requires a standard 220V-50Hz electrical outlet with schuko plug.
The cord should be secured behind the wine cooler and not exposed or
dangling to prevent accidental injury
- 7 -
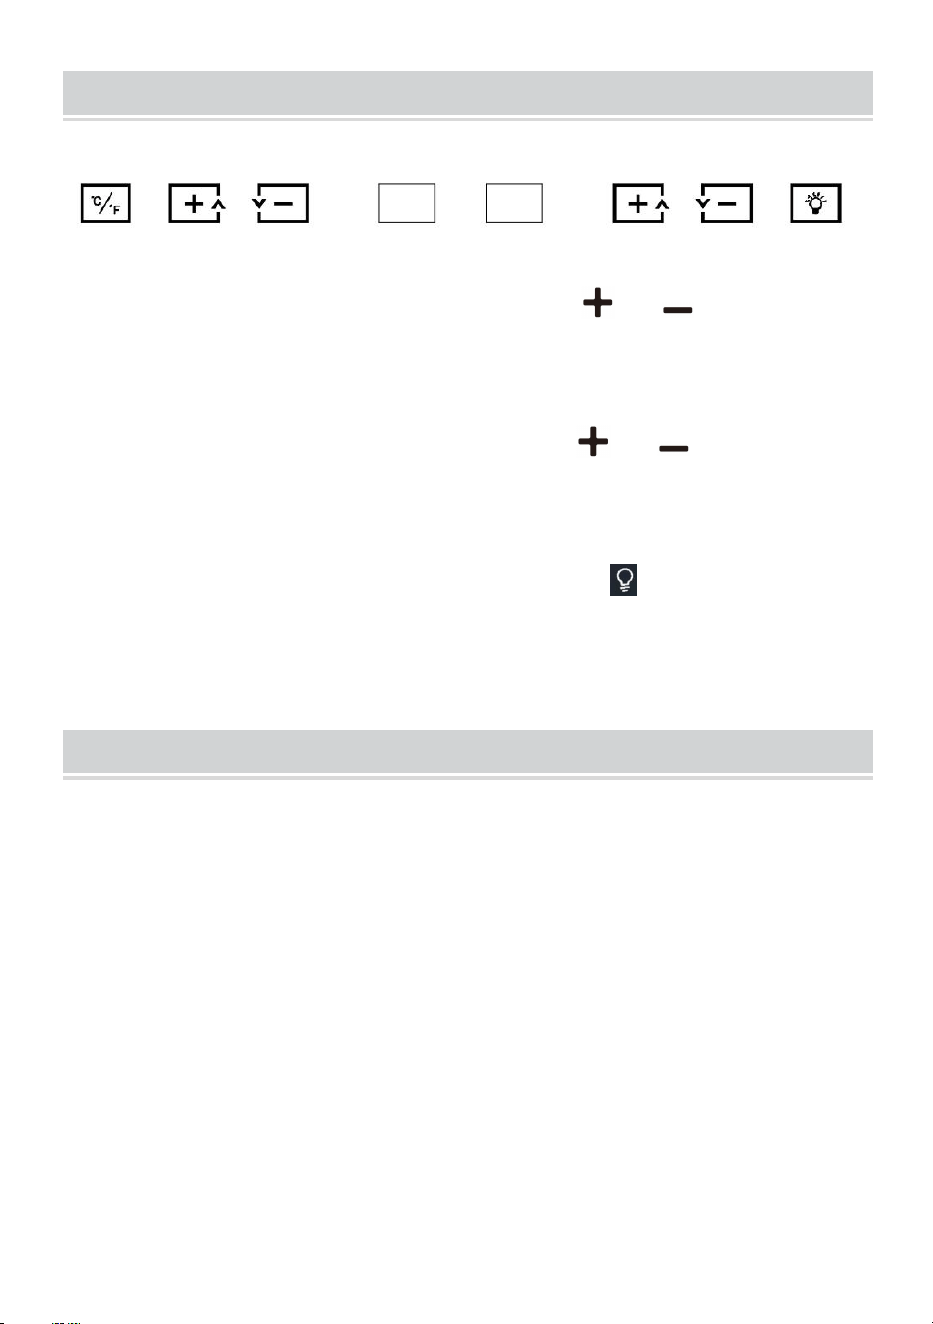
Function and operation
The Control Panel:
How to use the press-buttons on the Display Panel:
• To control the upper zone temperature, press or button on t he
left side. Each press would adjust the temperature by 1° C between 5~10°
C.
• To control the lower zone temperature, press or button on the
right side. Each press would adjust the temperature by 1° C between
10~18° C.
• To turn on or off the internal LED lighting , press button on the right.
• To switch the temperature display from Celsius Degree to be Fahrenheit
Degree or vice versa, press °C/°F button.
Safety Precautions
• Before using the appliance, please read this user manual to ensure that
you gain the maximum benefit from it.
WARNING:
1)This appliance is not intended for use by persons (including children)
with reduced physical, sensory or mental capabilities, or lack of experience
and knowledge, unless they have been given supervision or instruction
concerning use of the appliance by a person responsible for their safety.
2)Children should be supervised to ensure that they do not play with the
appliance.
3)This appliance can be used by children aged from 8 years and above
and persons with reduced physical, sensory or mental capabilities or lack
of experience and knowledge if they have been given supervision or

- 8 -
instruction concerning use of the appliance in a safe way and understand
the hazards involved. Children shall not play with the appliance. Cleaning
and user maintenance shall not be made by children without supervision.
4)If the supply cord is damaged, it must be replaced by the manufacturer,
its service agent or similarly qualified persons in order to avoid a hazard.
5)To avoid a hazard due to instability of the appliance, it must be fixed in
accordance with the instructions.
6)When positioning the appliance, ensure the supply cord is not trapped or
damaged.
7)Do not locate multiple portable socket-outlets or portable power supplies
at the rear of the appliance.
8)Keep ventilation openings, in the appliance enclosure or in the built-in
structure, clear of obstruction.
9)Do not use mechanical devices or other means to accelerate the
defrosting process, other than those recommended by the manufacturer.
10)Do not damage the refrigerant circuit.
11)Do not use electrical appliances inside the drink storage compartments
of the appliance, unless they are of the type recommended by the
manufacturer.
12)Do not store explosive substances such as aerosol cans with a
flammable propellant in this appliance.
13)This appliance is intended to be used in household and similar
applications such as
-staff kitchen areas in shops, offices and other working environments;
-farm houses and by clients in hotels, motels and other residential type
environments;
-bed and breakfast type environments;
-catering and similar non-retail applications.
14)Children aged from 3 to 8 years are allowed to load and unload
refrigerating appliances.
15)To avoid contamination of drink, please respect the following
instructions:
-Opening the door for long periods can cause a significant increase of the
- 9 -
temperature in thecompartments of the appliance.
-Clean regularly surfaces that can come in contact with drink and
accessible drainage systems.
-Clean water tanks if they have not been used for 48 h; flush the water
system connected to a water supply if water has not been drawn for 5
days.
-If the refrigerating appliance is left empty for long periods, switch off,
defrost, clean, dry, and leave the door open to prevent mould developing
within the appliance.
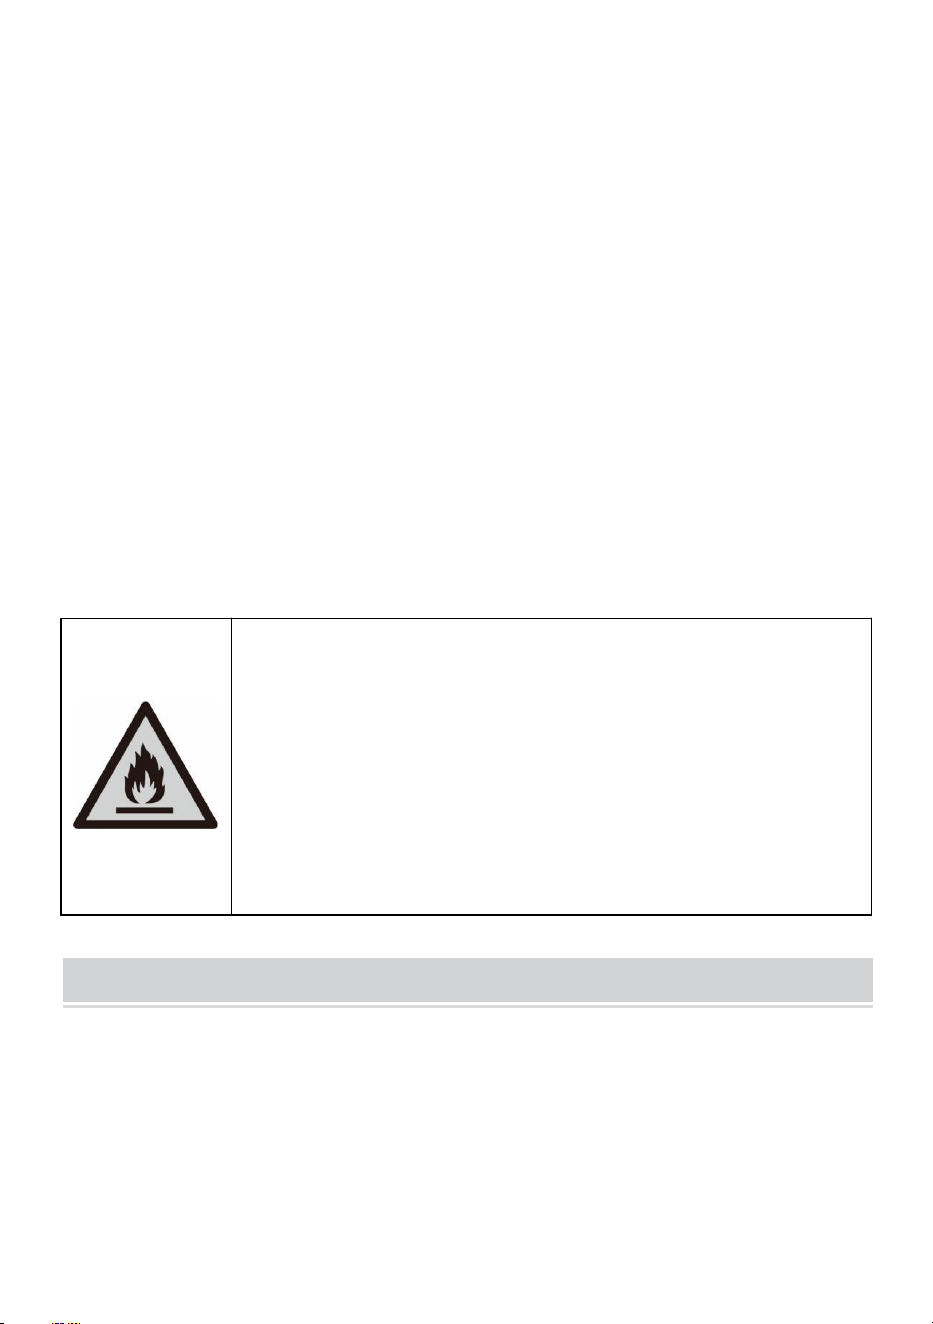
• Note: This appliance contains flammable refrigerant R600a and foaming
agent cyclopentane.
Please avoid contact fire when you transport and use it.
Please ask professional for servicing when the machine broke down.
Please send it to your local appointed disposal station when you discard it.
-Save these instructions-
During using, service and disposal the appliance, please
pay attention to symbol similar as left side, which is
located on rear of appliance (rear panel or compressor)
and with yellow or orange color.
It’s risk of fire warning symbol. There are flammable
materials in refrigerant pipes and compressor.
Please be far away fire source during using, service and
disposal.
Troubleshooting methods
You can solve many common beverage & wine cooler problems easily,
saving you the cost of a possible
service call. Try the suggestion below to see if you can solve the problem
before calling the service center.
- 10 -
PROBLEM
POSSIBLE CAUSE
Wine cooler does
not operate.
Not plugged in using different voltage.
The circuit breaker tripped or a blown fuse.
Wine cooler is not
cold enough.
Check the temperature control setting.
External environment may require a higher setting.
The door is open too often.
The door is not closed completely.
The door seal does not seal properly.
The wine cooler does not have the correct clearance.
The light does not
work.
Check the service center.
Vibrations.
Check to assure that the wine cooler is level.
The wine cooler
seems to make
too much noise.
The wine cooler is not level.
Check the fan.
The door will not
close properly.
The wine cooler is not level.
The doors were reversed and not properly installed.
The seal is weak.
The shaves out of position.
LED could not
display.
Main control board does not work.
PCB Problem.
There is some problem with the plug.
LED display error.
Weak quality of display.
Temperature point is out off.
Buttons are not
functional.
Temperature controller panel is damaged.
- 11 -
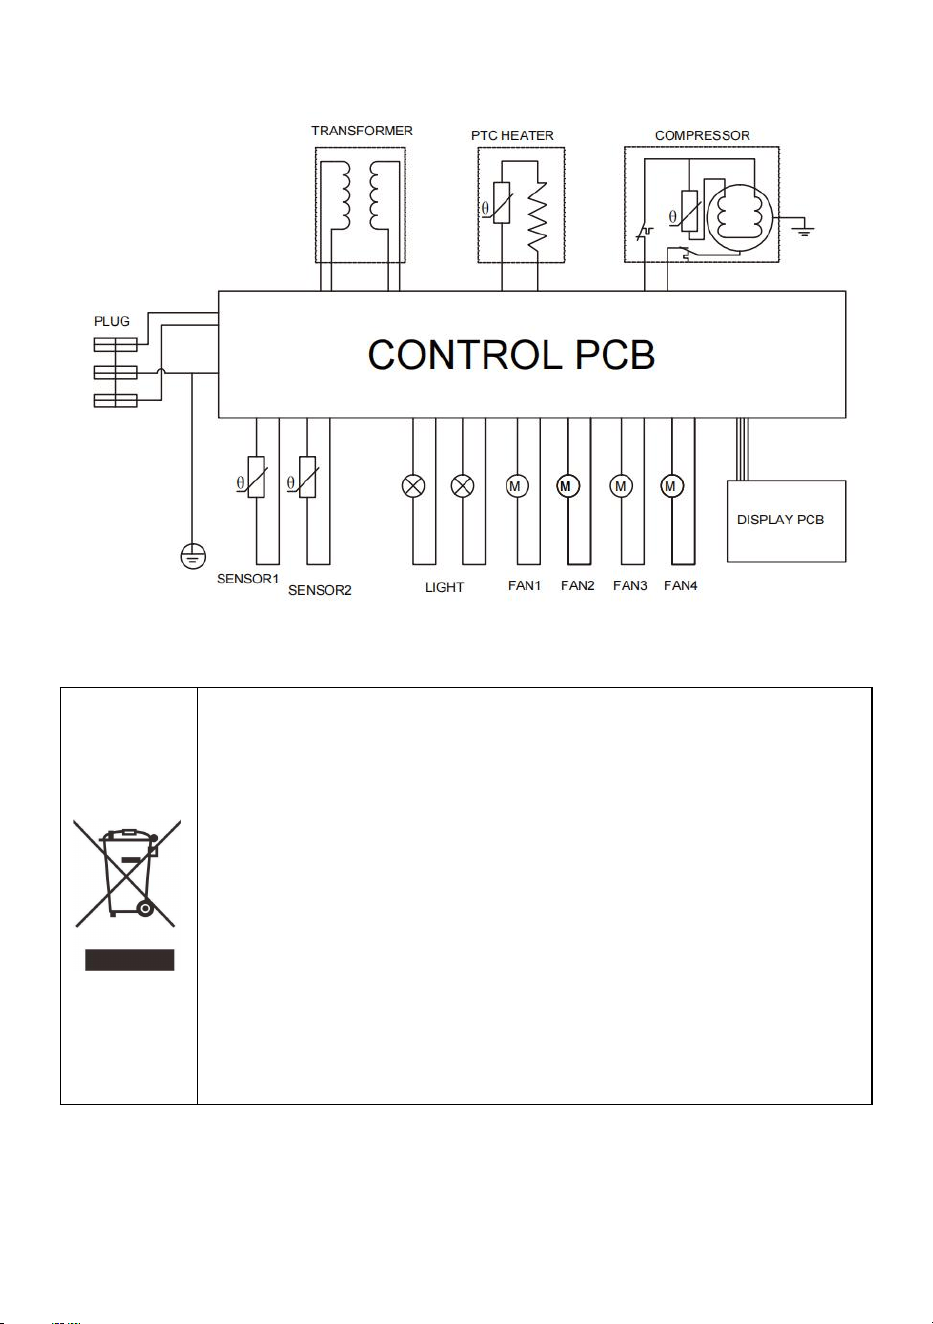
WIRING DIAGRAM
Correct disposal of this product
This symbol on the product, or in its packaging, indicates
that this product may not be treated as household waste.
Instead, it should be taken to the appropriate waste
collection point for the recycling of electrical and electronic
equipment. By ensuring this product is disposed of correctly,
you will help prevent potential negative consequences for
the environment and human health, which could otherwise
be caused by the inappropriate waste handling of this
product. For more detailed information about the recycling of
this product, please contact your local council, your
household waste disposal service, or the shop where you
purchased the product.