1
Owner’s Manual
READ AND SAVE THESE INSTRUCTIONS
Before returning to the store, please reach out to us first.
Need help or have a missing part?
1-888 850 5221 (Mon-Fri, 8:00 am-5:00 pm PST)
lucharkitchen.com
18555 GALE AVE, CITY OF INDUSTRY, CA 91748
Model number: LC-145A1EQ-BS
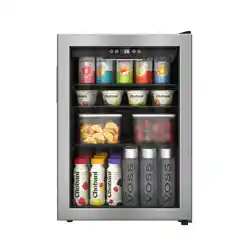
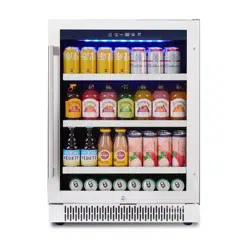
24" Compressor Beverage Refrigerator
READ AND SAVE THESE INSTRUCTIONS
2
TABLE OF CONTENTS
INSTALLATION INSTRUCTIONS
7
OPERATING YOUR BEVERAGE REFRIGERATOR
11
TROUBLE SHOOTING GUIDE
15
IMPORTANT SAFETY RULES
3
PARTS & FEATURES
6
5
CARE & MAINTENANCE
13
IMPORTANT SAFETY INSTRUCTIONS
THE WARRANTY
16
READ AND SAVE THESE INSTRUCTIONS
3
Before the appliance is used, it must be properly positioned and installed as
described in this manual, so read the manual carefully. To reduce the risk of fire,
electrical shock or injury when using the appliance, follow basic precaution,
including the following:
t
●
●
●
●
●
●
●
●
●
●
●
●
●
●
●
●
●
DANGER
WARNING
IMPORTANT SAFETY RULES
Plug into a grounded 3-prong outlet, do not remove grounding prong, do not
use an adapter, and do not use an extension cord.
Replace all panels before operating.
It is recommended that a separate circuit, serving only your appliance be
provided. Use receptacles that cannot be turned off by a switch or pull chain.
Never clean appliance parts with flammable fluids. These fumes can create a
fire hazard or explosion. And do not store or use gasoline or other flammable
vapours and liquids in the vicinity of this or any other appliance. The fumes
can create a fire hazard or explosion.
Before proceeding with cleaning and maintenance operations, make sure the
power line of the unit is disconnected.
Do not connect or disconnect the electric plug when your hands are wet.
Unplug the appliance or disconnect power before cleaning or servicing. Fail-
ure to do so can result in electrical shock or death.
Do not attempt to repair or replace any part of your appliance unless it is
specifically recommended in this material. All other servicing should be
referred to a qualified technician.
Use two or more people to move and install appliance. Failure to do so can
result in back or other injury.
To ensure proper ventilation for your appliance, the front of the unit must be
completely unobstructed. Choose a well-ventilated area with temperatures
above 60°F (16°C) and below 90°F (32°C). This unit must be installed in an
area protected from the element, such as wind, rain, water spray or drips.
The appliance should not be located next to ovens, grills or other sources of
high heat.
The appliance must be installed with all electrical, water and drain connec-
tions in accordance with state and local codes. A standard electrical supply
(115 V AC only, 60 Hz), properly grounded in accordance with the National
Electrical Code and local codes and ordinances is required.
Do not kink or pinch the power supply cord of appliance.
The fuse (or circuit breaker) size should be 15 amperes.
It is important for the appliance to be levelled in order to work properly. You
may need to make several adjustments to level it.
Never allow children to operate, play with or crawl inside the appliance.
Do not use solvent-based cleaning agents of abrasives on the interior. These
cleaners may damage or discolour the interior.
Do not use this apparatus for other than its intended purpose.
READ AND SAVE THESE INSTRUCTIONS
4
●
For your safety, observe the following recommendations.
●
●
●
●
●
●
●
●
●
●
●
●
DANGER
WARNING
IMPORTANT SAFETY RULES
FLAMMABLE REFRIGERANT GAS
Safety Guidelines
This appliance contains a small quantity of R600a refrigerant which is envi-
ronmentally friendly, but flammable. It does not damage the ozone layer, nor
does it increase the greenhouse effect.
During transportation and installation, ensure that the tubing of the refrigerant
circuit is not damaged.
Avoid using or manipulating sharp objects near by the appliances.
Leaking refrigerant can ignite and may damage the eyes.
In the event any damage does occur, avoid exposure to open fires and any
device which creates a spark. Disconnect the appliance from the mains
power.
Thoroughly ventilate the room in which the appliance is located for several
minutes.
Notify Customer Service for necessary action and advice.
The room for installing the appliance must be at least 1 cubic metre per 8
grams of refrigerant. The refrigerant quantity contained in this appliance is
listed above in grams; it is also noted on the Rating Plate of the appliance.
Risk of fire or explosion: Flammable refrigerant used. Consult repair manual /
owner’s guide before attempting to service this product. All safety precautions
must be followed.
Risk of fire or explosion: Dispose of property in accordance with federal or
local regulations.
Risk of fire or explosion due puncturing of the refrigerant tubing. Follow
handling instructions carefully.
To prevent a child from being entrapped, keep out of reach of children and
not in the vicinity of the cooler.
Risk of fire or explosion. Flammable refrigerant used.
DO NOT use mechanical devices to defrost refrigerator. DO NOT puncture
refrigerant tubing.
Risk of fire or explosion. Flammable refrigerant used. To be repaired only by
trained service personnel. DO NOT puncture refrigerant tubing.
READ AND SAVE THESE INSTRUCTIONS
5
WARNING
To reduce the risk of fire, electrical shock, or injury when
using your appliance, follow these basic precautions:
● Read all instructions before using the beverage refrigerator
beverage refrigerator
● DANGER or WARNING: Risk of child entrapment.
Child entrapment and suffocation are not problems of the past. Junked or
abandoned appliances are still dangerous.
● Before you throw away your old take off the door but
leave the
shelves in place so that children may not easily climb inside.
● Never allow children to operate, play with, or crawl inside the appliance.
● Never clean appliance parts with flammable fluids. The fumes can create a fire
hazard or explosion.
● Do not store or use gasoline or any other flammable vapours and liquids in the
vicinity of this or any other appliance. The fumes can create a fire hazard or
explosion.
IMPORTANT SAFETY INSTRUCTIONS
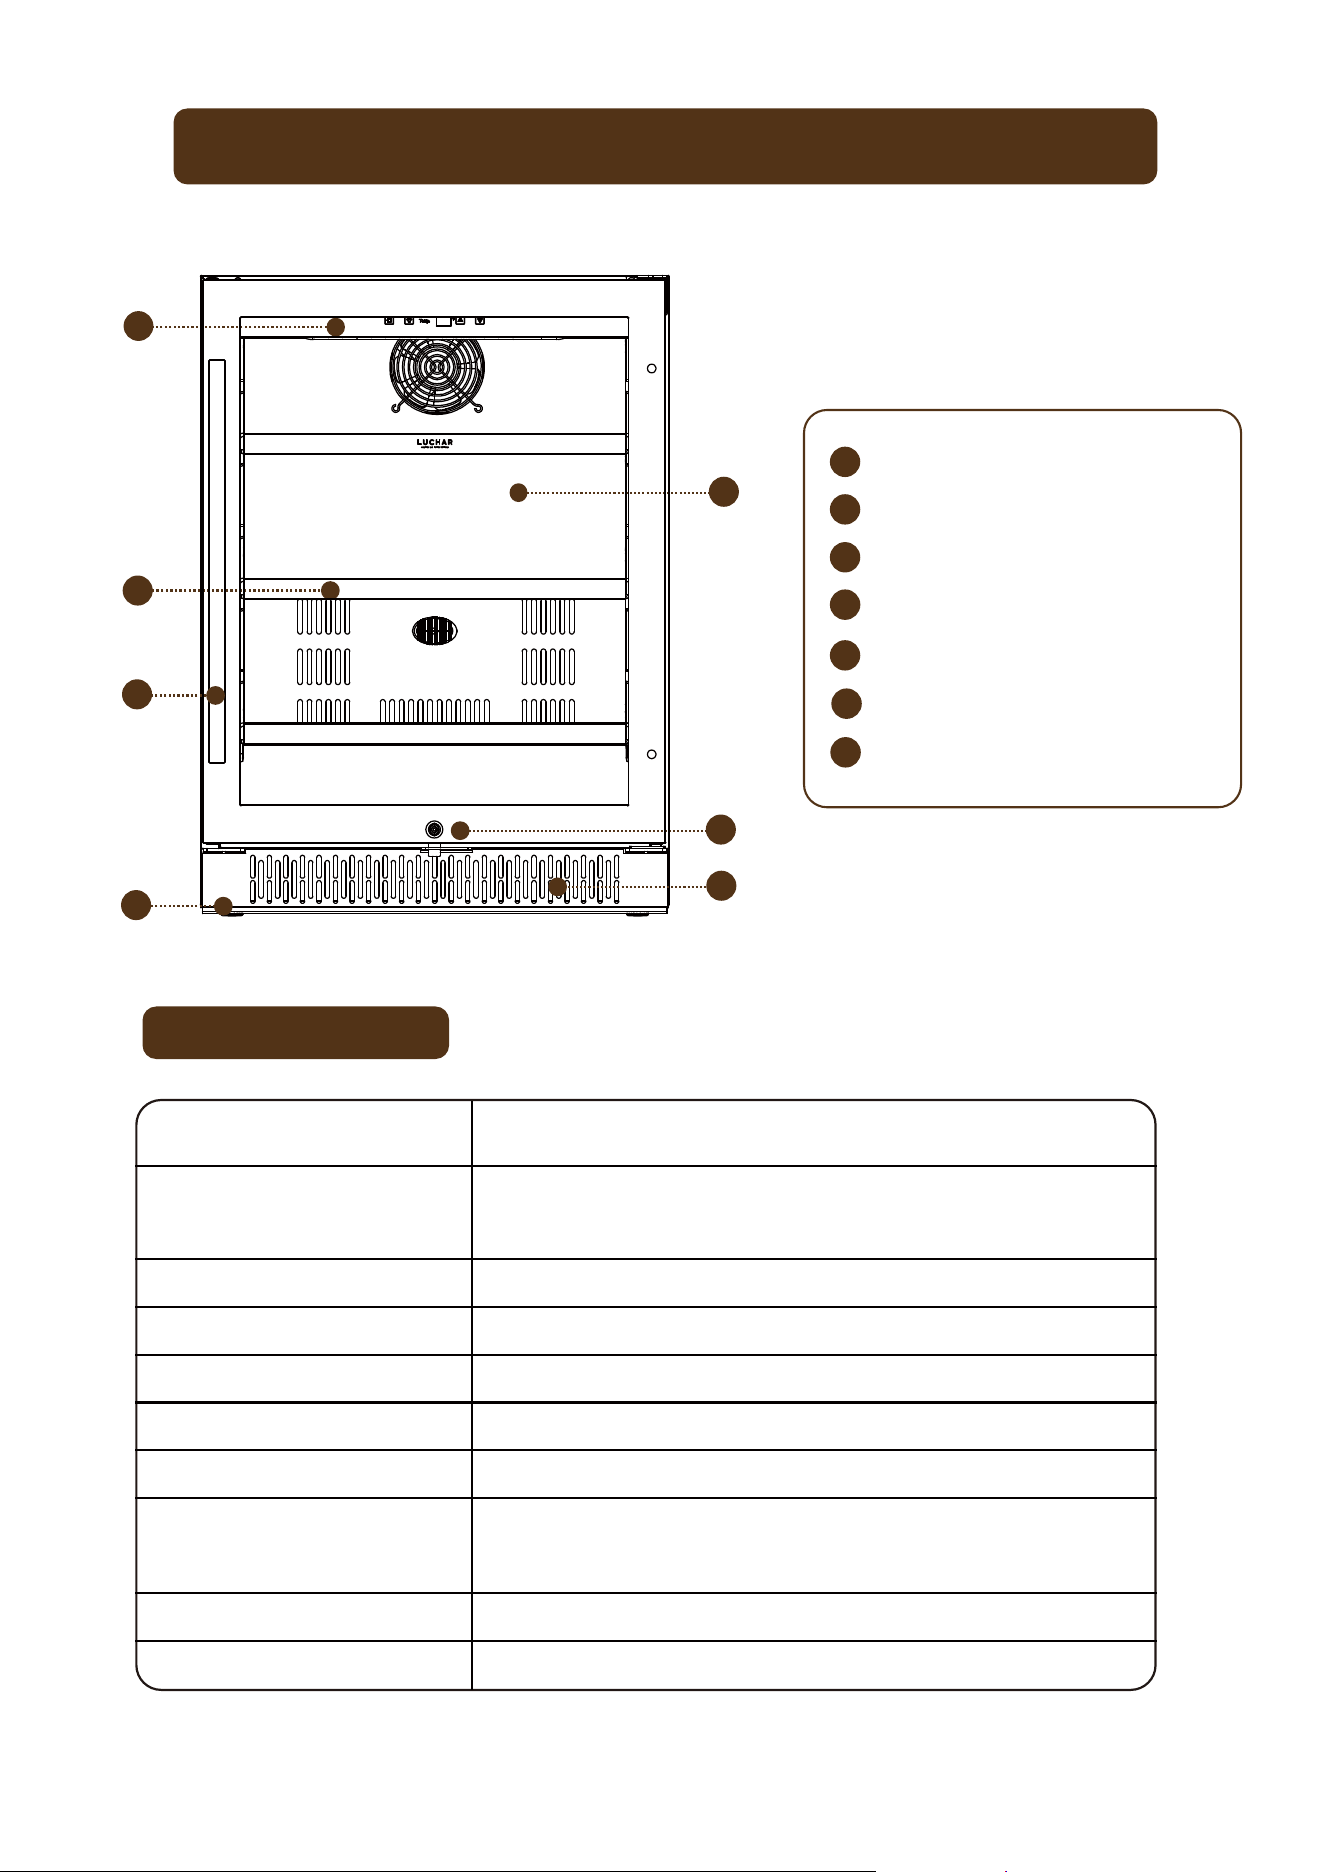
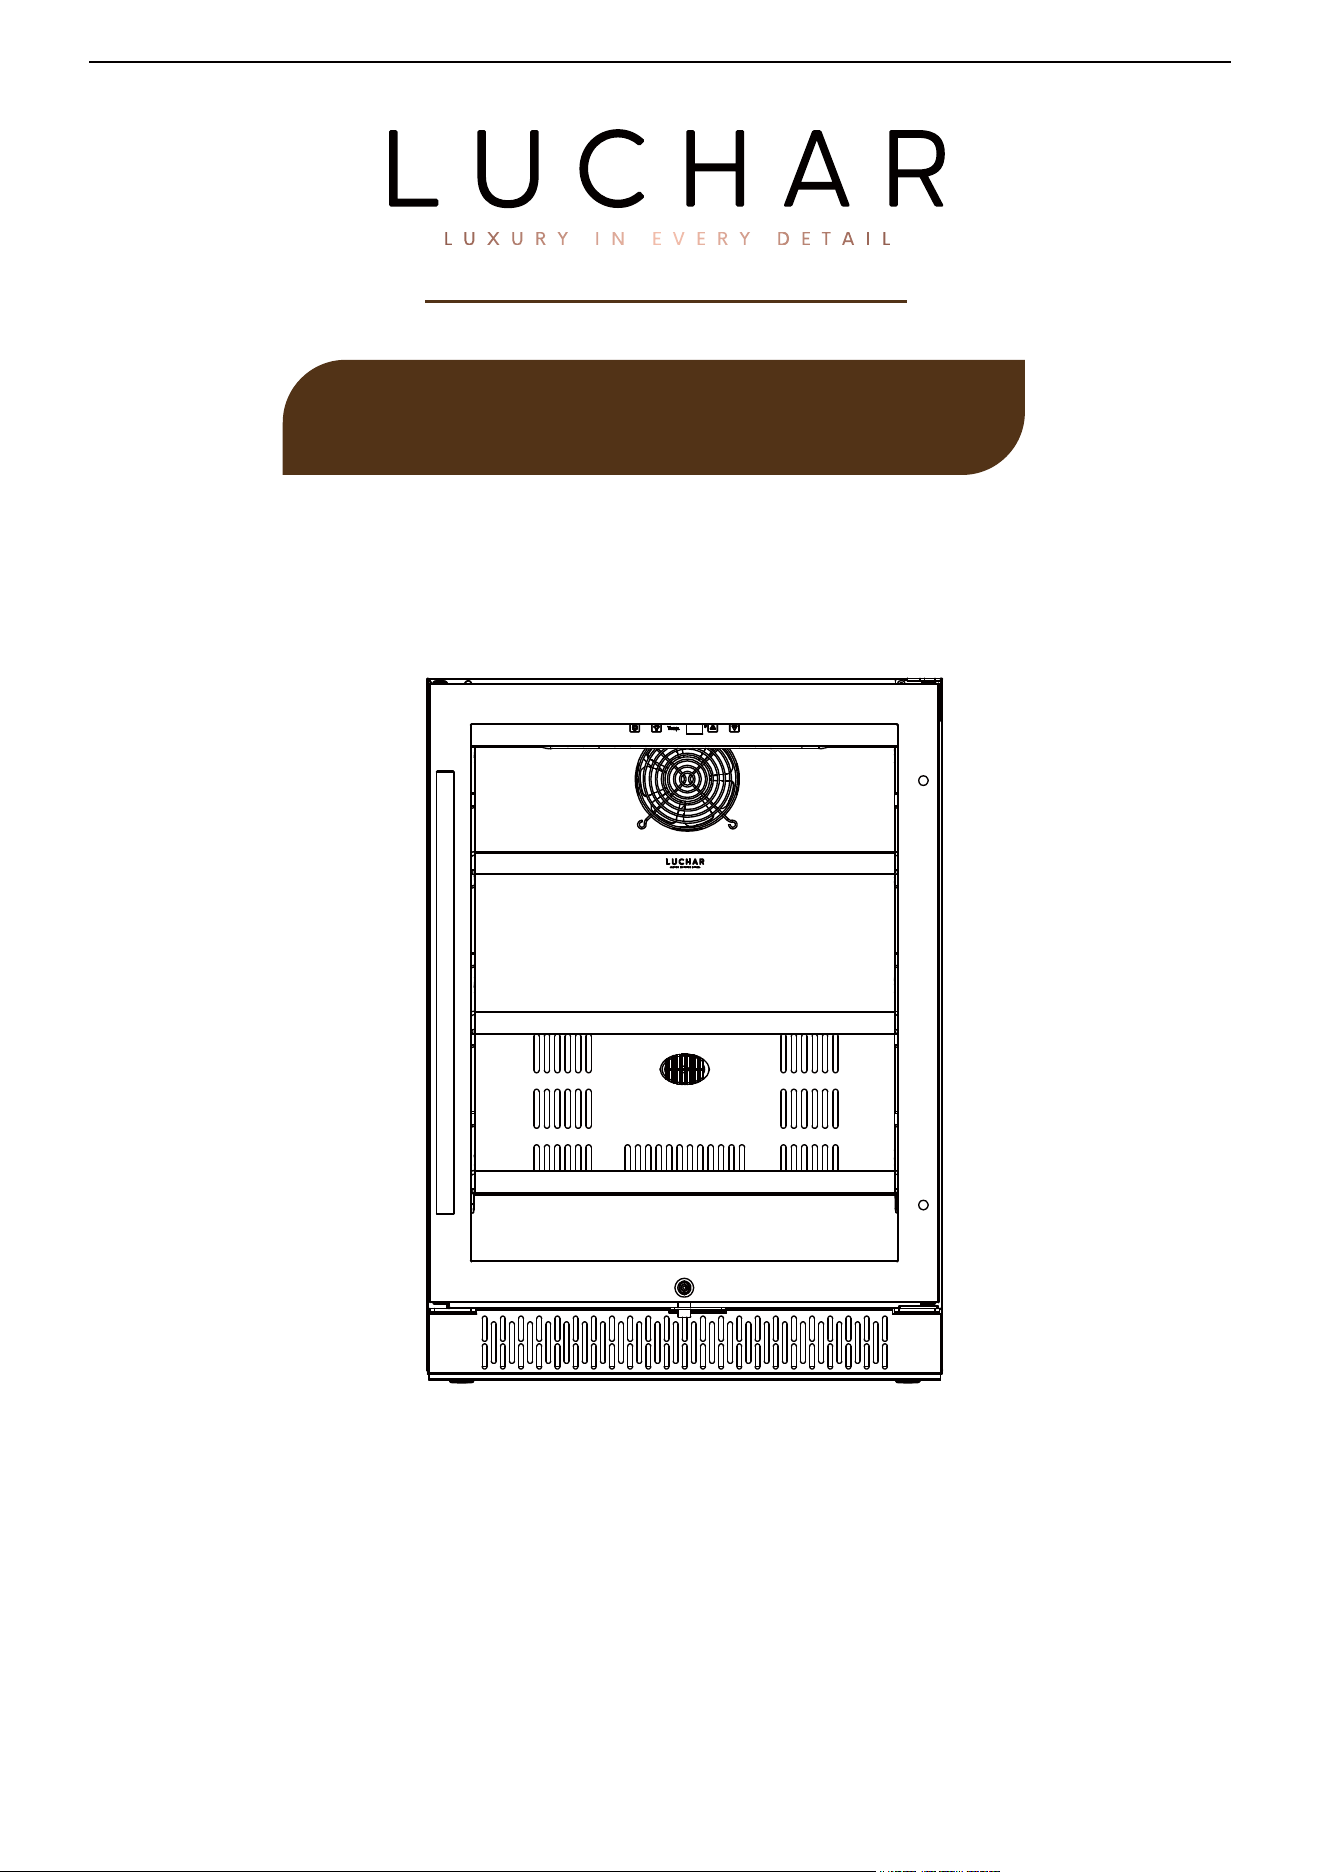
PARTS & FEATURES
6
5
4
7
1
1
Double Tempered Glass Door
7
Metal Shelves x3
3 Stainless Steel Handle
5 Security Lock
6 Base Grille
2 Adjustable Legs
4
Control Panel
LED
Technical Data:
Model: LC-145A1EQ-BS
Capacity :
5.12 Cubic Feet
(164 standard 12 oz. beverage cans)
Voltage: 115V / 60Hz
Rated Current: 1.2A
Temperature Range: 34°F - 54°F (1°C - 12°C)
Net Weight: 92.7 lbs
Gross Weight: 116 lbs
Unit Dimension:
23.4" W x 22.4" D x 32.3" H
24" D with handles installed
Packaging Dimension: 27.5" W x 26.8" D x 35.2" H
Refrigerant: R600a
3
6
2
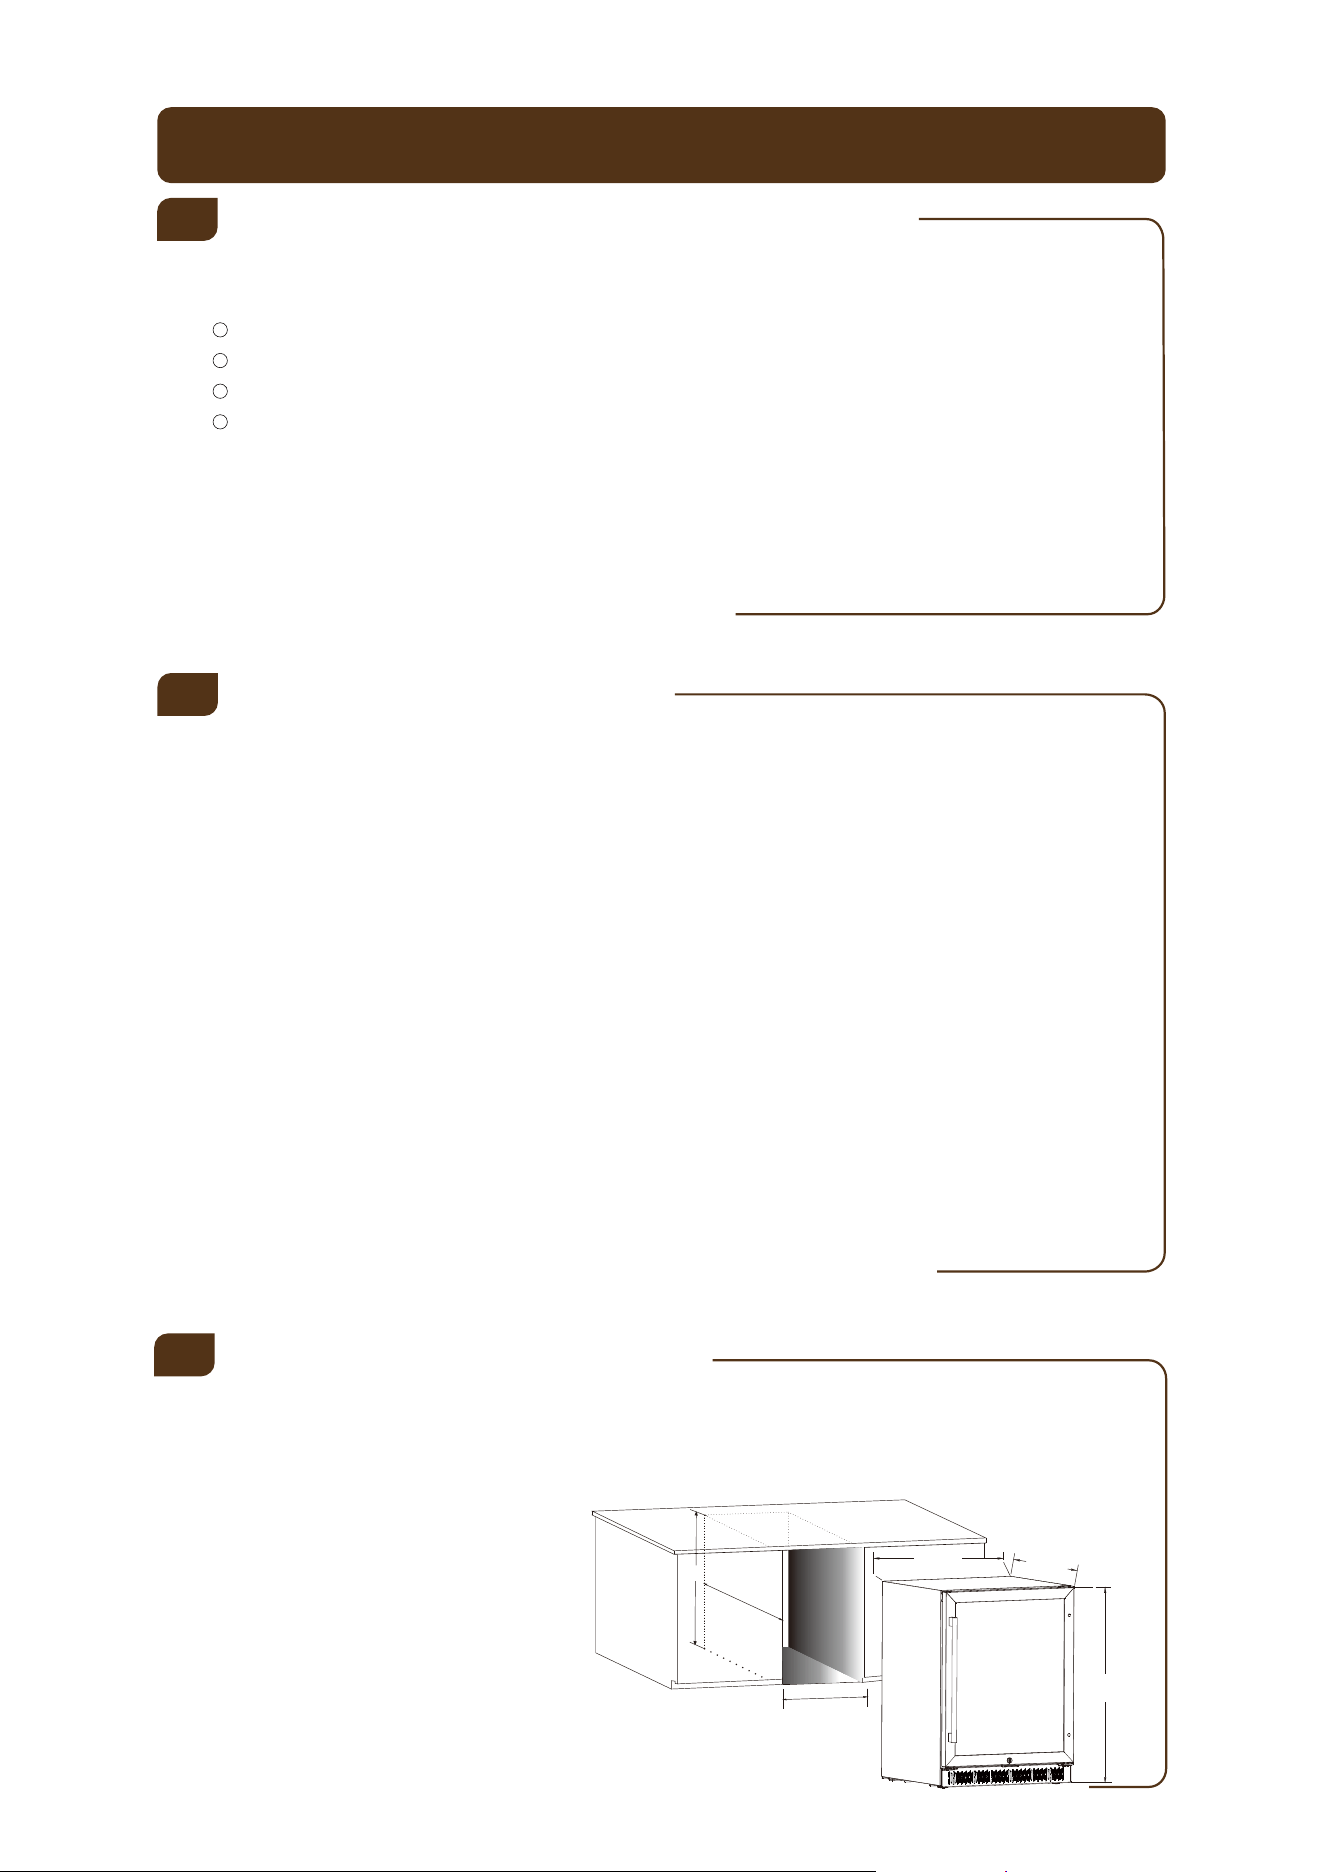
INSTALLATION INSTRUCTIONS
7
Before Using the Beverage Refrigerator
● Remove the exterior and interior packing.
● Check to be sure you have all of the following parts:
3 shelves
Keys
Handle
Instruction Manual
● Before connecting the product to the power source, let it stand upright for
approximately twenty four (24) hours. This will reduce the possibility of a
malfunction in the cooling system from handling during transportation.
● Clean the interior surface with lukewarm water using a soft cloth.
●
●
●
●
●
Install the handle on the left side of the door.
Installation of the product
1
2
For built-in installation, leave a ¼” (6 mm) gap around the beverage refrigerator,
including the sides and top, to ensure proper ventilation for cooling the compressor
and condenser. Also, avoid obstructing the front exhaust vent, as this may negatively
affect the unit's operation.
Built-in Cabinet Instructions
3
32.55"H
22.65"D
23.65"W
(2
4.25
"wi
t
h Han
d
le)
Minimum Width: 23.65" (60.1 cm)
Minimum Depth: 22.65" (57.6 cm)
Minimum Height: 32.55" (82.7 cm)
Cabinet opening dimensions
This appliance is designed to be for free standing installation or built-in (fully
recessed). Place your product on a floor that is strong enough to support it
when it is fully loaded. To level the product, adjust the front leveling legs at the
bottom of the unit.
Locate the product away from direct sunlight and sources of heat (stove, heater,
radiator, etc.). Direct sunlight may affect the acrylic coating and heat sources
may increase electrical consumption. Extreme cold ambient temperatures may
also cause the unit not to perform properly. Don’t install in a location where the
temperature will fall below 60ºF (16ºC). Avoid locating the unit in a moist area.
For best performance, it is recommended that you install the appliance in a
location with an ambient temperature between 72º-78ºF. If the ambient tem-
perature is above or below recommended temperatures, the performance of the
unit may be affected.
Plug the unit into an exclusive, properly installed-grounded wall outlet. Do not
under any circumstances cut or remove the third (ground) prong from the power
cord. Any questions concerning power and/or grounding should be directed
toward a certified electrician or an authorized service center.
32.3"H
22.4"D
23.4"W

WARNING : Improper use of the grounded plug can result in the risk of
electrical shock. If the power cord is damaged, have it replaced by an
authorized service center.
INSTALLATION INSTRUCTIONS
●
●
●
Free Standing Instructions
4
8
Electrical Connection
5
Extension Cord
Because of potential safety hazards under certain conditions, it is strongly
recommended that you do not use an extension cord with this appliance. However,
if you must use an extension cord it is absolutely necessary that it be a UL/CUL-
Listed, 3-wire grounding type appliance extension cord having a grounding type
plug and outlet and that the electrical rating of the cord be 115 volts and at least
10 amperes.
6
For freestanding installation, it is recommended to leave a 5-inch (127mm) gap
between the back and sides of the unit to allow sufficient airflow for cooling the
compressor and condenser.
This appliance should be properly grounded for your safety. The power cord of
this appliance is equipped with a three-prong plug which mates with standard
three prong wall outlets to minimize the possibility of electrical shock.
Do not under any circumstances cut or remove the third ground prong from the
power cord supplied. For personal safety, this appliance must be properly
grounded.
This appliance requires a standard 115/120 Volt AC ~/60Hz electrical ground
outlet with three-prong. Have the wall outlet and circuit checked by a qualified
electrician to make sure the outlet is properly grounded. When a standard
2-prong wall outlet is encountered, it is your responsibility and obligation to have
it replaced with a properly grounded 3-prong wall outlet. The cord should be
secured behind the appliance and not left exposed or dangling to prevent acci-
dental injury.
The appliance should always be plugged into its own individual electrical outlet
which has a voltage rating that matches the rating label on the appliance. This
provides the best performance and also prevent overloading house wiring circuits
that could cause a fire hazard from overheated. Never unplug the appliance by
pulling the power cord. Always grip the plug firmly and pull straight out from the
receptacle. Repair or replace immediately all power cords that have become
frayed or otherwise damaged. Do not use a cord that shows cracks or abrasion
damage along its length or at either end. When moving the appliance, be careful
not to damage the power cord.
INSTALLATION INSTRUCTIONS
9
Power bar with Surge Protection (recommended)
Most electrical appliances use a series of electric control boards to operate.
These boards are very susceptible to power surges and could be damaged or
destroyed.
If the appliance is going to be used in an area or if your city / country is prone to
power surges / outages; it is suggested that you use a power surge protector for
all electrical devices / appliances you use. The surge protector that you select
must have a surge block high enough to protect the appliance it is conne
cted to.
If you have any questions regarding the type and size of surge protector, you need
to contact a licensed electrician in your area.
Installing the Handle
TThis beverage refrigerator includes a stainless steel handle. To install the handle
please follow the below instructions:
1. Remove the door gasket where the handle should be installed on the left
side of the door, as shown below. You won't need tool since the gasket can
be removed by hand. You can start with a corner if you can't remove it from
the center.
2. Use the two handle screws, lock washer and flat washer included in the bag
containing the instruction manu
al and insert them into the side of the door
from the inside to the outside.
3. Align the holes in the handle with the screws, tighten the screws using the
screwdriver until the base of the handle is at the level of the door and that
the handle is tight but not too tight to damage the assembly.
4. Replace the gasket the door in place.
Gasket
Flat washer
Lock washer
Screw
Handle
Door frame
7
8
1
2
3
4
5
6
INSTALLATION INSTRUCTIONS
10
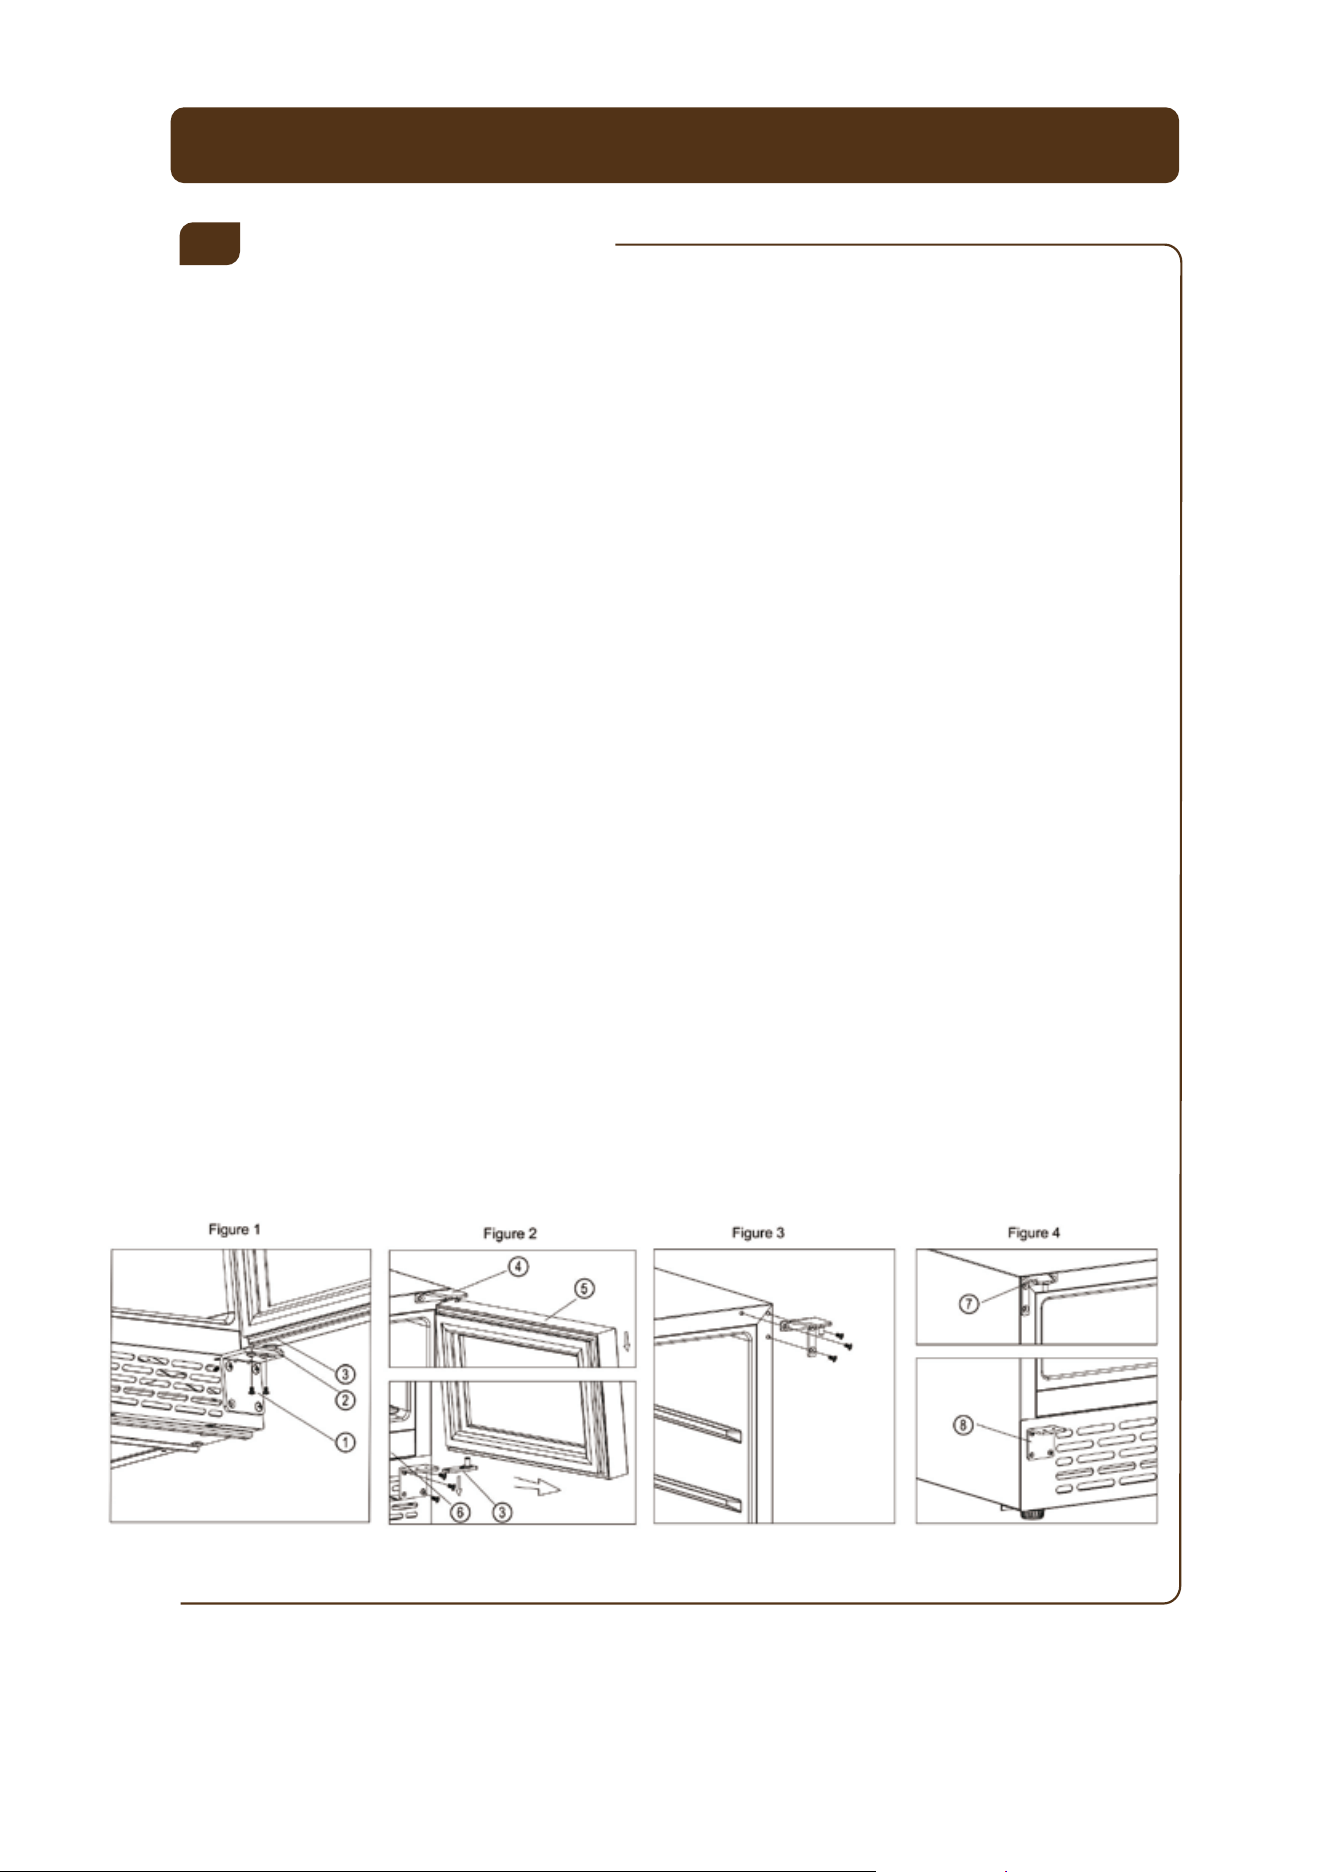
Reversing the Door
9
1.Remove the bottom hinge holder (2) by unscrewing the two lock screws (1). Be
careful to hold the glass door firmly after removing the screws. (Figure 1)
2.Gently pull down to remove the glass door from the right top hinge and place it on
a padded surface to avoid the risk of damage. Remove the lower hinge on the vent
grill by prying using a screwdriver and move it to the right side of the door where the
door was just removed from the hinge.
3.Unscrew and transfer the lower hinge (6) and lower hinge holder (3) to the oppo-
site side, making sure to line up the screw holes. (Figure 2)
4.Using a flat-head screwdriver, gently pry up the decorative hinge cover plate from
the top left of the unit and the round black decorative cover caps on the upper left
side corner of the inside cabinet frame. Use them to cover the screw holes from the
right-hand side.
5.Move the top hinge from the right-hand side to the left-hand side of cabinet(7). by
removing the screws. (Figure 3/4)
6.Relocate the door to the left-hand side of cabinet by placing the door hinge holes
into the hinge, then screw the bottom hinge assembly onto the left designated
position and tighten after the door is leveled. (Figure 4)
7.Peel the door gasket back to reveal the pre-installed door handle screws and
decorative screw covers. Using a small flat-head screwdriver unscrew and reverse
the location of the door handle screws with the screw covers.
8.Install the door handle using the handle installation instructions.
11
It is recommended you install the beverage refrigerator in a place where the ambient
temperature is between 19ºC-24ºC (66ºF-75ºF). If the ambient temperature is above
or below recommended temperatures, the performance of the unit may be affected.
For example, placing your unit in extreme cold or hot conditions may cause interior
temperatures to fluctuate. The range of 5ºC-22ºC (40ºF-72ºF) may not be reached.
The temperature range of product is 34°F-54°F (1°C - 12°C).
The temperature will increase by 1°C or 1°F if you touch UP once, or the temperature
will decrease by 1°C or 1°F if you touch DOWN once. To view the setting
temperature at any time, touch the UP or DOWN marks. The setting temperature will
temporarily flash in the LED display for 5 seconds. The internal storage temperature
will appear in blue on the temperature display window.
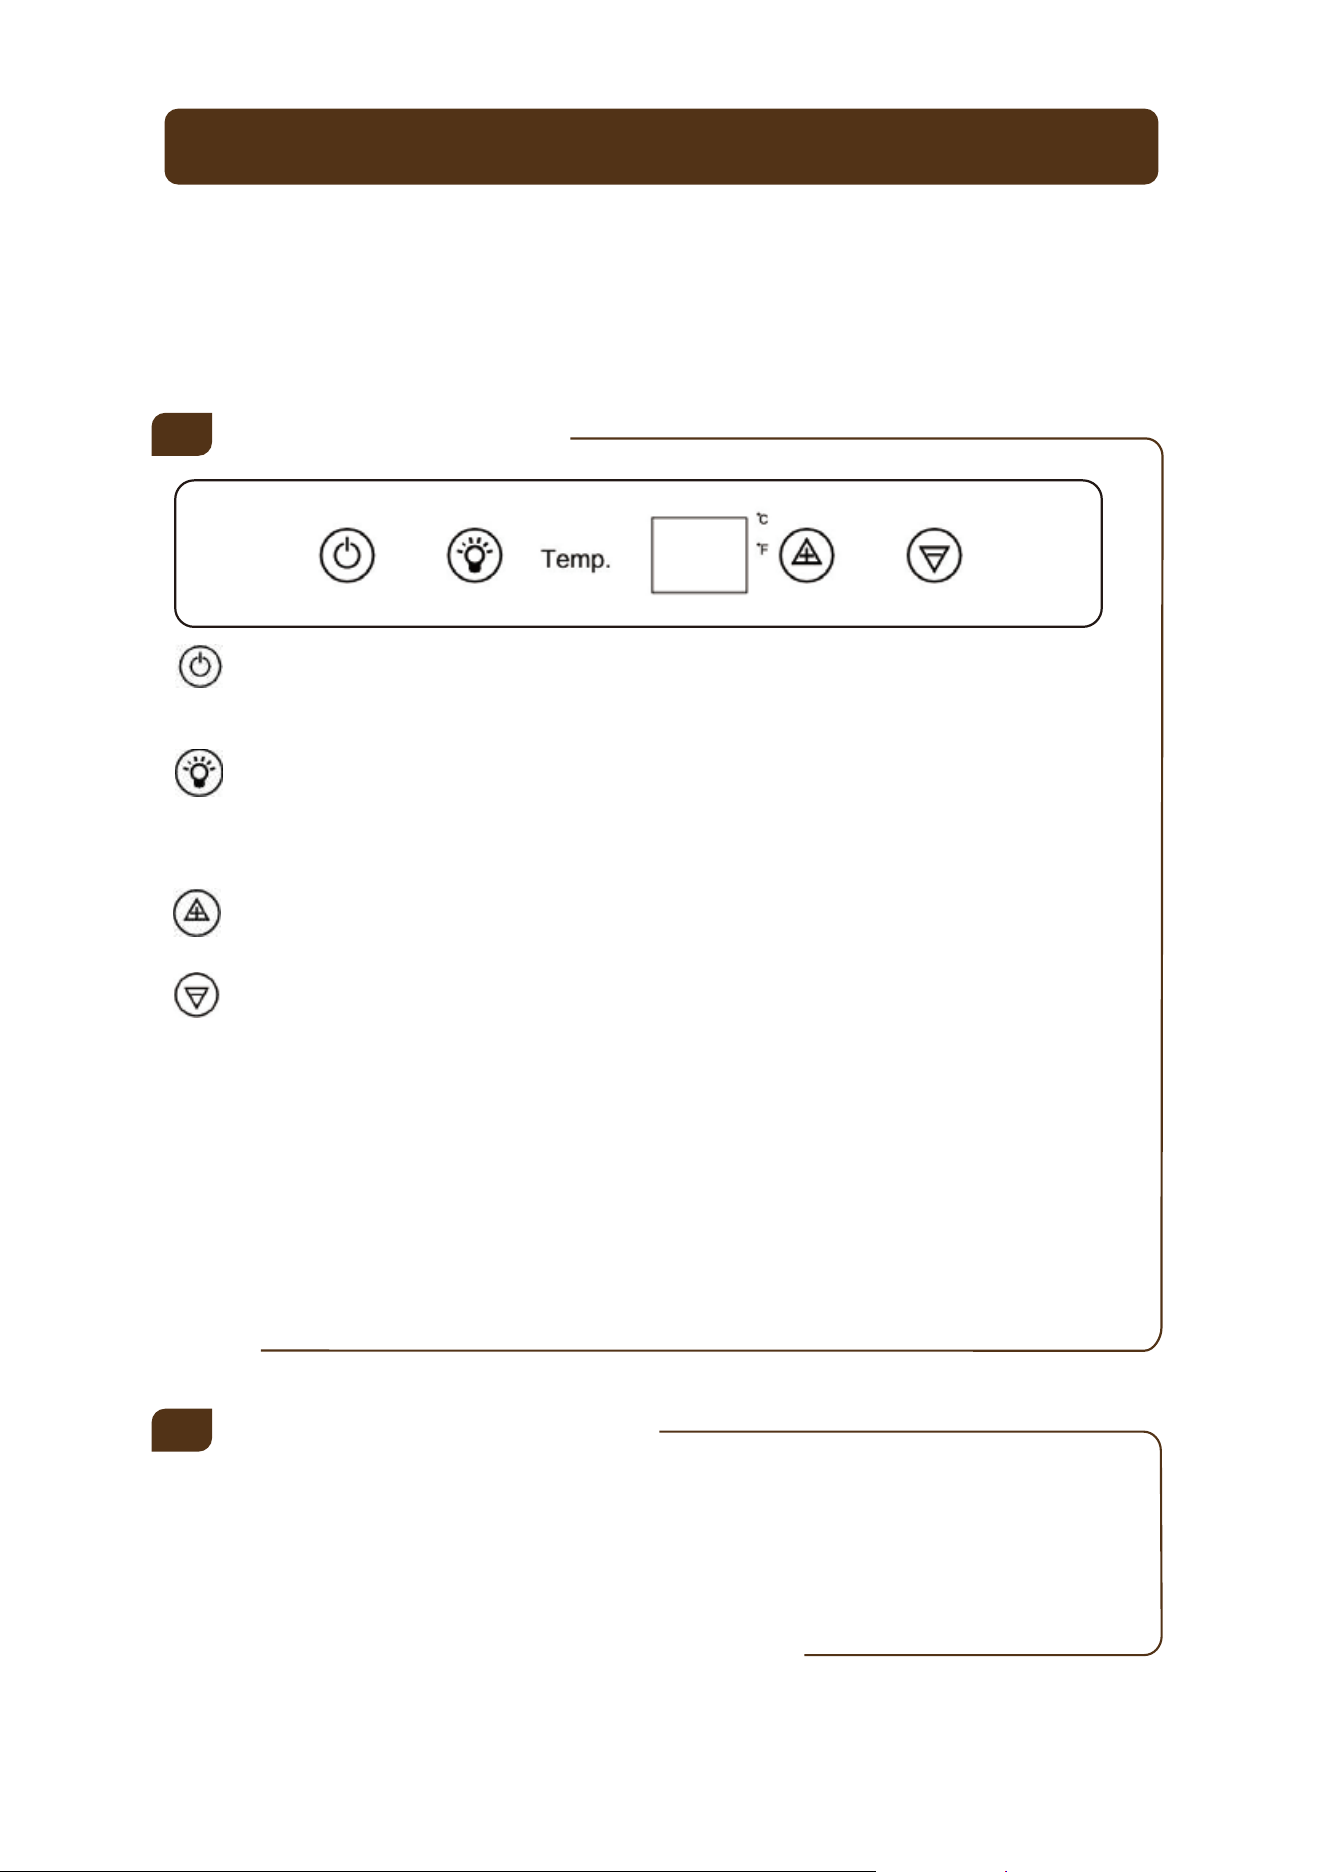
LED Control Panel
TEMPERATURE DISPLAY:
NOTE: If the unit is unplugged, if the power is lost, or turned off, you must wait 3
to 5 minutes before restarting the unit. If you attempt to restart before this time
delay, the beverage refrigerator will not start.
Setting the Temperature
2
1
ON/OFF: To turn on or off the unit, press on the ON/OFF buttons at the
same time for 5 seconds.
INSIDE LIGHTING: To turn on or off the lighting, press on the light button.
[+] BUTTON: To increase the temperature by 1°C or 1°F
[ - ] BUTTON: To decrease the temperature by 1°C or 1°F
OPERATING YOUR BEVERAGE REFRIGERATOR
Press on the light button for 5 seconds.
The display will change and show you your preference (°C or °F).
When you use the beverage refrigerator for the first time or restart beverage
refrigeratorr after having been shut off for a long time, there could be a few
degrees variance between the temperature you select and the one indicated on
the LED readout. This is normal and it is due to the length of the activation time.
Once beverage refrigerator is running for a few hours everything will be back to
normal.
12
Door Lock
Your unit is provided with a lock and key. The keys are located inside the plastic
bag that contains the Instruction Manual. Insert the key into the lock and turn it
counter clockwise to unlock the door. To lock the door do the reverse operation
making sure metal pin is engaged completely. Remove the key and place it in a
secure place for safekeeping.
3
OPERATING YOUR BEVERAGE REFRIGERATOR
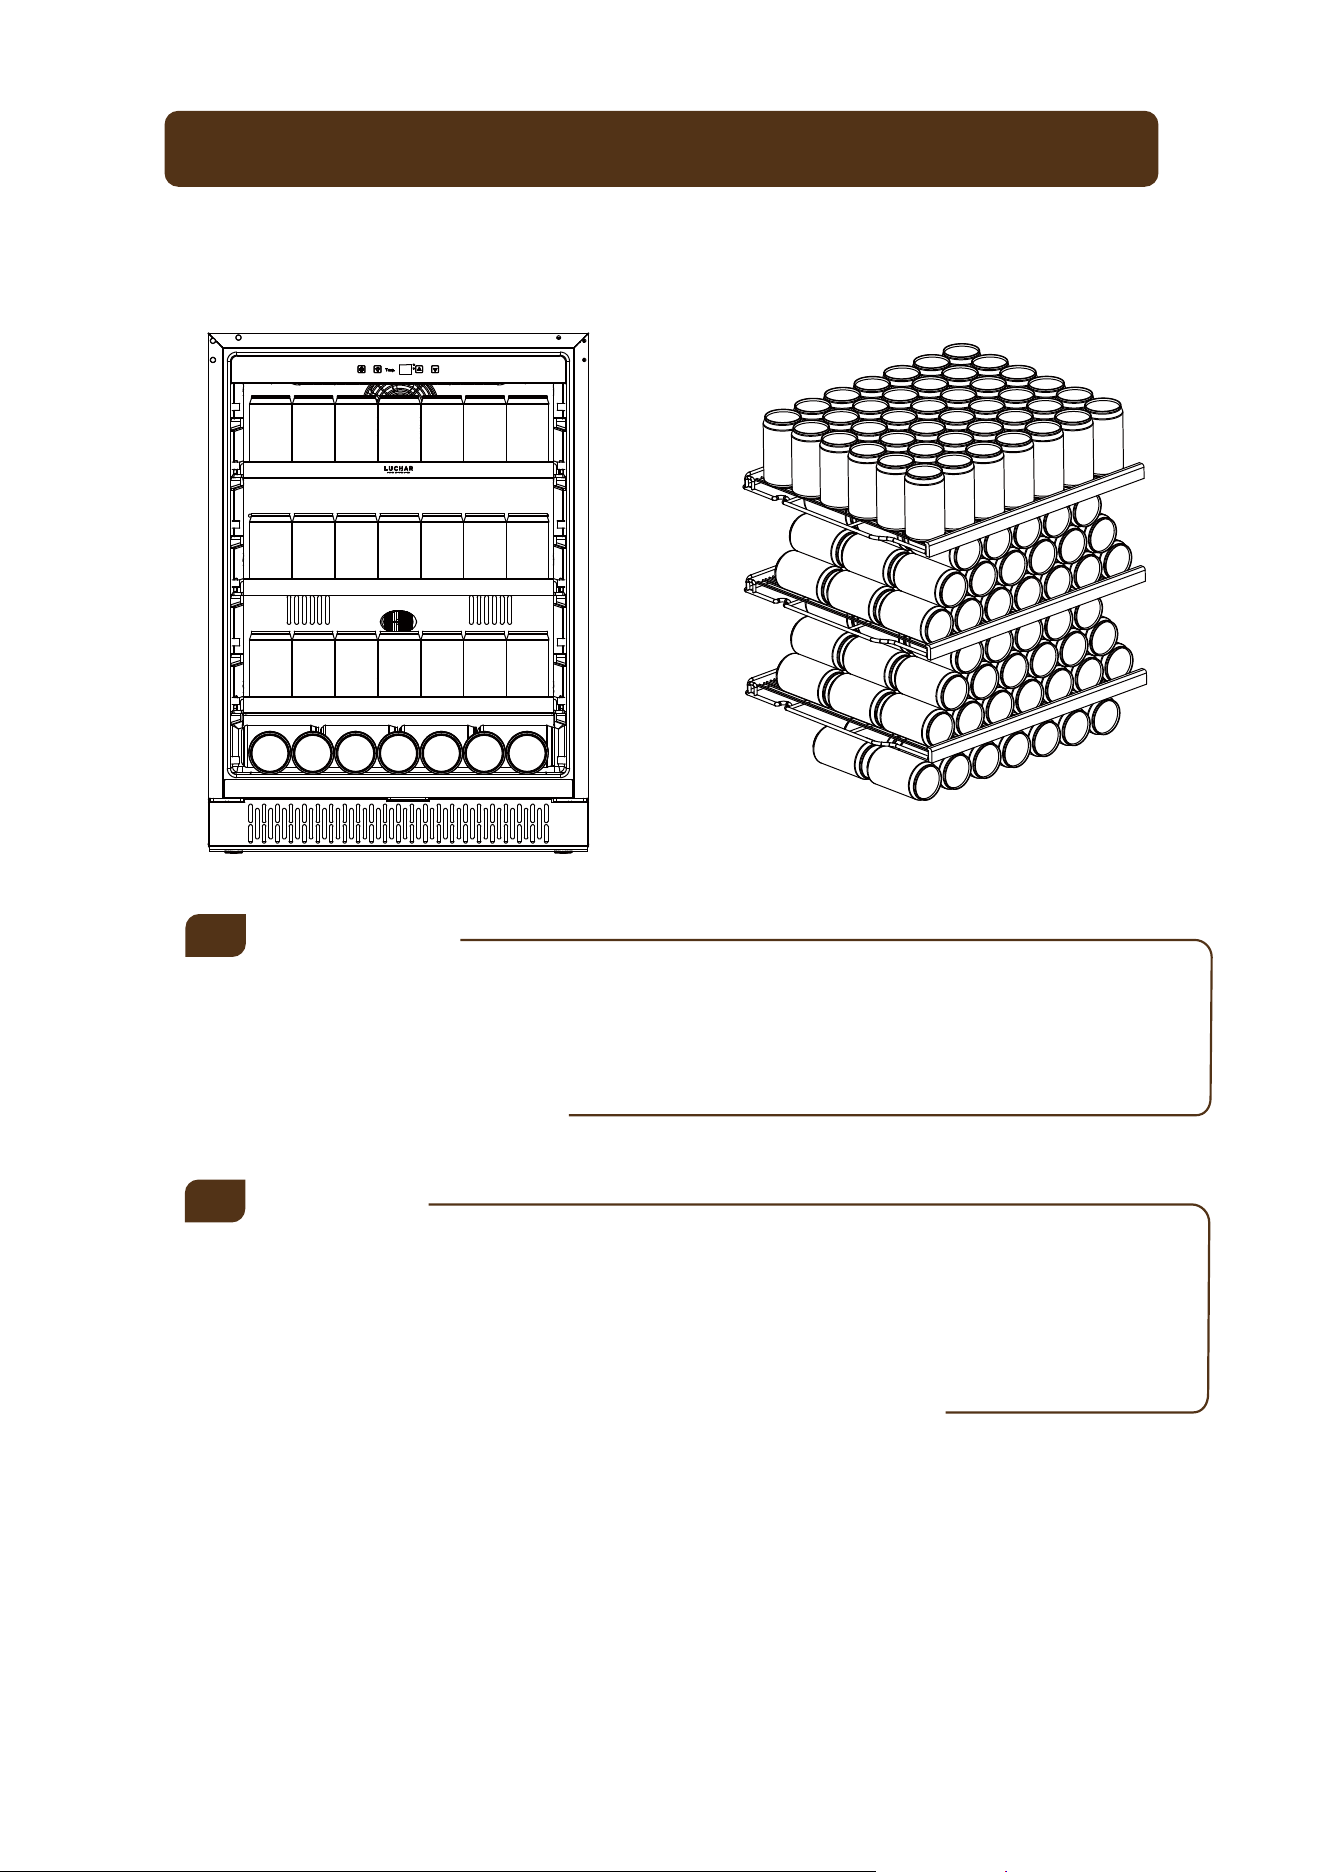
Shelves
To prevent damaging the door gasket, make sure to have the door all the way
opened when pulling shelves out of the product. For easy access to the bottles,
you must pull the shelves approximately 1/3 out of the cabinet.
5
This appliance comes with 3 wire shelves featuring a decorative front. The shelves
are designed to be easily removable and slide out smoothly.
Large Storage Capacity
Total:42+54+54+14=164bottles
13
CARE & MAINTENANCE
Moving the Beverage Refrigerator
1. Remove all items (bottles)
2. Tape down securely all loose items (shelves) inside your appliance.
3. Turn the adjustable leg up to the base to avoid damage.
4. Tape the door shut.
5.
6. Protect outside of appliance with a blanket, or similar item.
Energy Saving Tips
Ensure that the unit has proper allowances on all sides for proper ventilation.
Never cover any air vents.
Only open the cooler door for as long as necessary. Frequent opening of the door
will affect internal temperature.
4
5
Cleaning the Beverage Refrigerator
Turn off the power, unplug the appliance, and remove all items including shelves.
Wash the inside surfaces with a warm water and baking soda solution. The
solution should be about 2 tablespoons of baking soda to 1 cup of water. Wash
the shelves with a mild detergent solution. Wring excess water out of the sponge
or cloth when cleaning area of the controls, or any electrical parts. Wash the
outside cabinet with warm water and mild liquid detergent. Rinse well and wipe dry
with a
clean soft cloth.
ATTENTION: By not disconnecting the unit during operation, you will expose
yourself to risk of electric shock or personal injury.
Automatic Defrosting
The unit defrost automatically. The evaporator behind the rear wall of the unit
defrosts automatically. The condensate collects in the drainage channel behind
the rear wall of the unit, and flows through the drainage hole into the drip tray by
the compressor where it evaporates.
Power Failure
Most power failures are corrected within a few hours and should not affect the
temperature of your appliance if you minimize the number of times the door is
opened. If the power is going to be off for a longer period of time, you need to take
the proper steps to protect your contents.
1
2
3
Be sure the appliance stays secure in the upright position during transpor-
tation. If you absolutely need to transport beverage refrigerator horizontally,
transport beverage refrigeratoron its back (door on top).
The beverage refrigerator should be located in the coolest area of the room,
away from heat producing appliances, and out of the direct sunlight.
14
CARE & MAINTENANCE
●
●
Remove the shelves and set aside to be replaced
once you have changed the filter
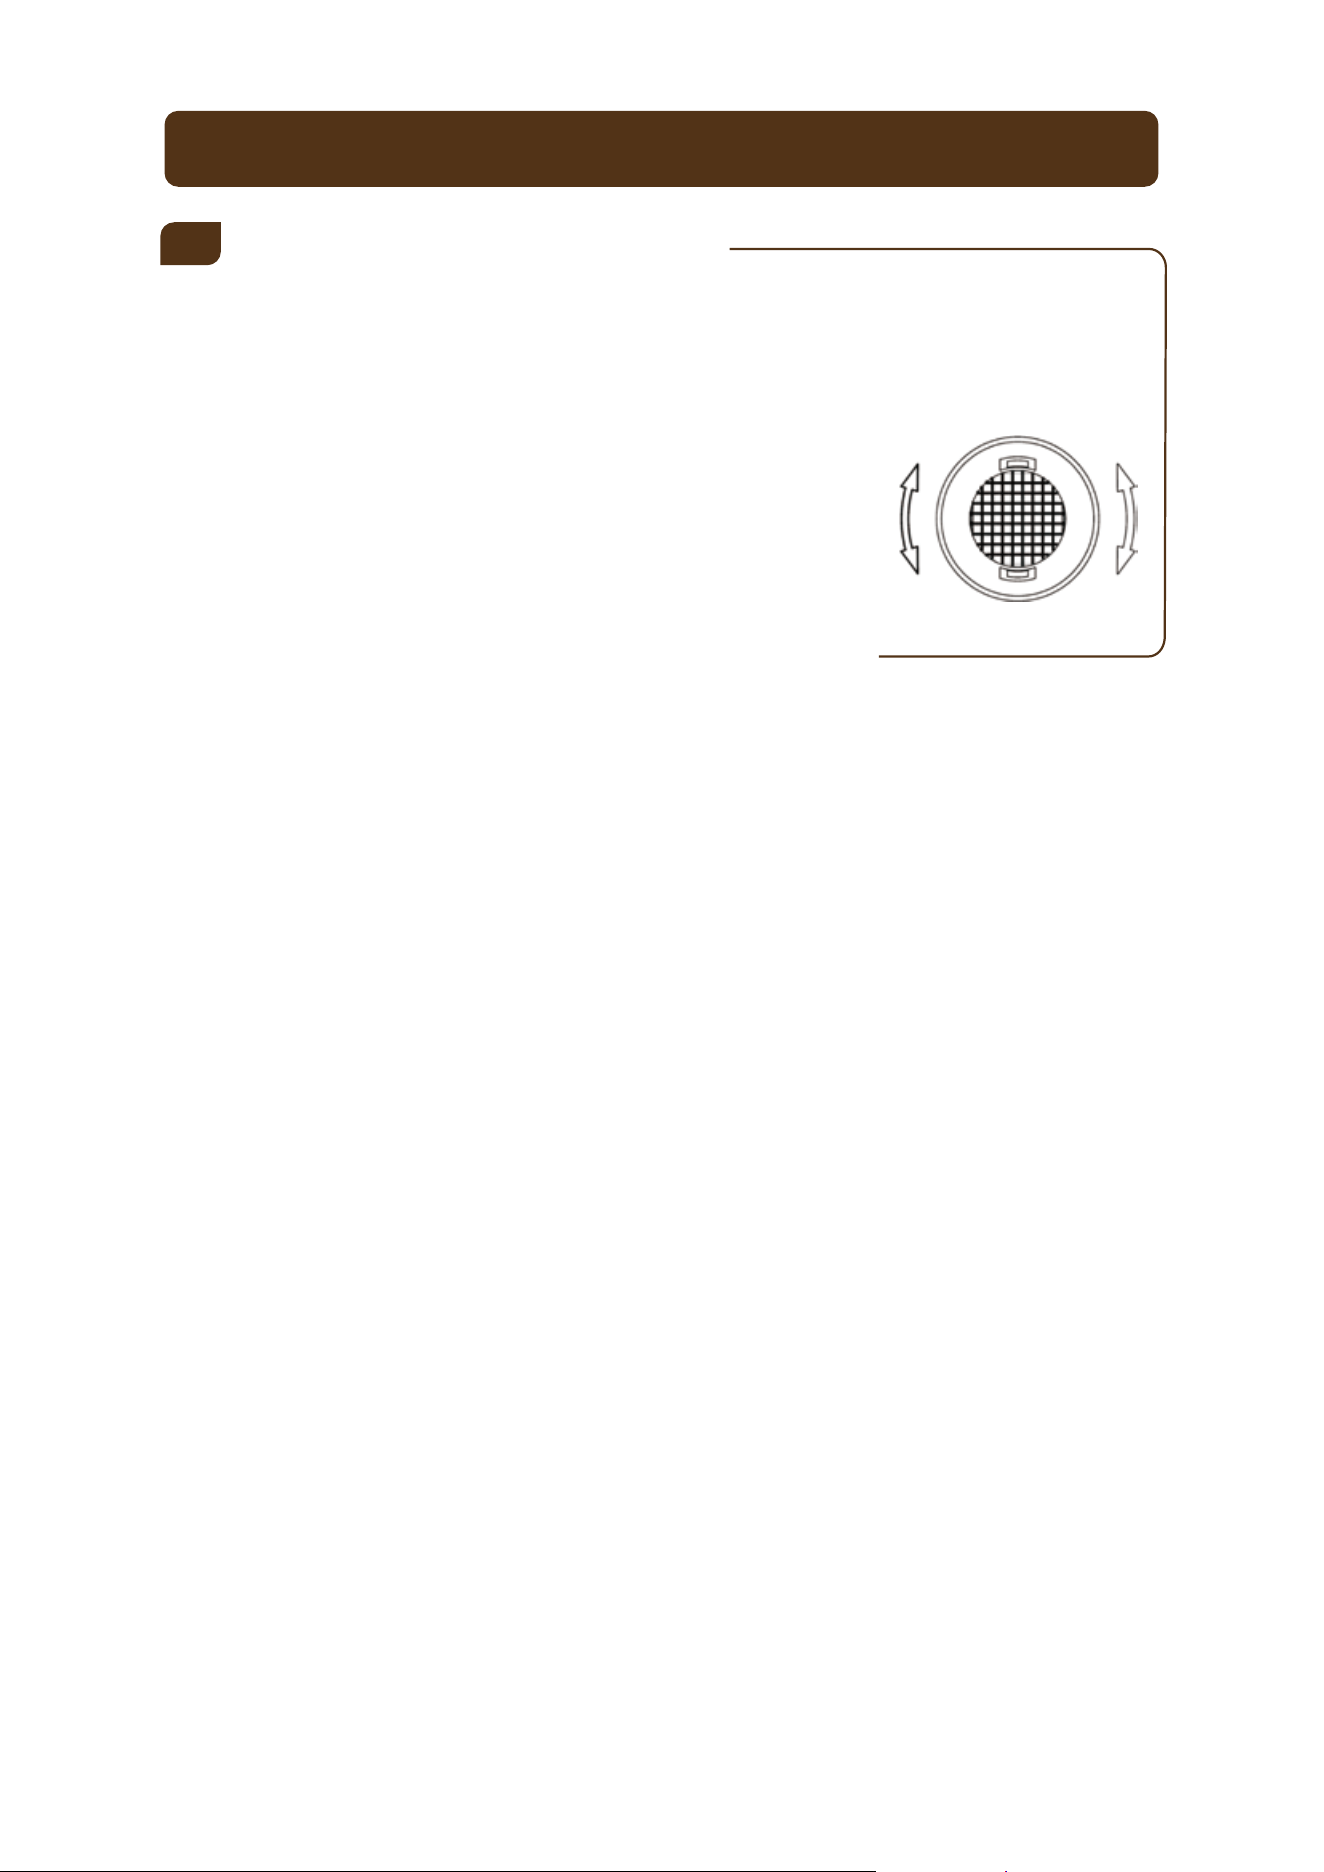
● Hold the filter and turn it at 45 degrees in the
counter-clockwise direction and then pull it out.
● Remove the existing filter and replace with a new
6
Charcoal Filtration System
Your beverage refrigerator is equipped with an active charcoal filtration system to
ensure air purity and to maintain an odour free cabinet for the storage of your
beverage. The filter is located at the bottom of the rear panel inside your beverage
refrigerator. Keep in mind, that this filter should be changed every 12 months.
Remove the bottles stored on the two (2) shelves in
front of the filter.
15
TROUBLE SHOOTING GUIDE
PROBLEM
POSSIBLE CAUSE
SOLUTION
Not plugged in.
The appliance is turned off.
The circuit breaker tripped or a blown fuse.
Plug the unit.
Turn on the unit.
Check the breaker and/or fuses.
The fans turn on
and off
frequently.
Fan is always
running
The light does
not work.
Product does
not operate.
Product is
not cold enough.
The room temperature is hotter than normal.
A large amount of contents has been
added to the unit.
The door is opened too often or not closed
completely.
Close the door properly.
Check the door gasket.
There is insufficient ventilation.
External environment may require a higher setting.
The door is not completely closed or the door
seal is not working properly.
Lower the temperature of the fridge.
Place the beverage fridge in an area with
proper ventilation and clearances. Make
sure nothing is blocking the front grille.
Close the door tightly. Do not keep the
door open for extended periods of time.
Replace the seal on the door if necessary.
The temperature control is not set correctly.
The door gasket does not seal properly.
This is simply a function of the cooling system. The lower the setting, the more the fan will run. If the room is very
warm, the cooler will run more. The unit has been designed to run continuously when operating at the lower
temperatures.
Contact the manufacturer.
There may be a problem with the
display board.
Not plugged in.
The circuit breaker tripped or a blown fuse.
The light button is “OFF”.
Plug the unit.
Check the breaker and/or fuses.
The compressor
turns on and
off frequently.
Inside light f
lashe.s
Display shows
EL OR EH
Frost
appears in
the unit.
The door will not
close properly.
Adjust the unit’s feet and ensure the unit is level.
Check the door hinges to makesure they are
properly installed.
Clean the door gasket.
Place the shelves properly.
The unit is not level.
The door was reversed and not
properly installed.
The gasket is dirty.
The shelves are out of position.
Turn off the beverage fridge, unplug it, and remove
the frost buildup manually.
Reconnect the power once the ice has thawed.
If problem persists, contact for service instructions.
There is excess humidity or the
interior temperature is too low.
Vibrations.
The product
seems to make
too much noise.
Contact the manufacturer.
Adjust temperature to resolve.
The unit is not levelled
Check to assure that the beverage refrigerator is level.
Make sure the bottles don’t touch each others.
Remove the object.
The bottles are vibrating.
There is an object under the unit.
Allow sufficient clearance around the unit.
Level the beverage refrigerator.
The rattling noise may come from the flow of the
refrigerant, which is normal. As each cycle ends,
you may hear gurgling sounds caused by the flow
of refrigerant in your beverage refrigerator.
Contraction and expansion of the inside walls may
cause popping and crackling noises.
Check the fan to make sure there is no debris or
obstruction. If not, contact the manufacturer.
The air temperature sensor in the
corresponding temperature zone has failed.
In some instances, this is normal the light
may flash when the automatic defrost
function starts to work. Set temperature is
higher than inner temperature.
The unit is not level.
The fan may be obstructed
There is insufficient ventilation. The unit is too close to a
wall or another surface.
In order to circulate the air and maintain the set temperature inside the cabinet the fans must cycle on and off
even when the compressor is off. The fans will cycle ON and OFF while the compressor is off approximately
every 20 seconds, this is called “Semi-speed status”. This cycle is normal and meant both to circulate the air as
well as ensure the continued operational status of the fans. If the fan stops completely and does not complete
this cycle the fan is non-operational.
You can solve many common beverage refrigerator problems with ease, potentially
avoiding the expense of a service visit. Consider trying the suggestions below before
reaching out to service team.
16
THE WARRANTY
1 YEAR WARRANTY
PARTS & LABOUR
3 YEAR WARRANTY
COMPRESSOR
For a year (12 months) from the date of
delivery by the original owner, we will, at
its option, repair or replace any part of
the unit, which proves to be defective in
material or workmanship under normal
use.
For the 2
nd
through the 3
rd
year from
date of original delivery, we will provide
a replacement compressor free of
charge due to a failure.
WHAT IS NOT COVERED
● Damage due to such things as
accident, misuse, abuse,
mishandling, neglect
, acts of God,
fires, earthquakes, floods, high winds,
government, war, riot or labour
troubles, strikes, lockouts, delay of
carrier, or any cause beyond the
control of the Seller whether similar or
dissimilar to the foregoing.
●
Content losses due to spoilage.
● Incidental or consequential damages.
● Parts and labour costs for the
following will not be considered as
warranty:
● Door springs, and/or frames.
● Inner door panels, door rails
and/or door supports.
● Light bulbs and/or plastic housing.
● Plastic cabinet liners.
● Punctured evaporator that voids the
warranty on the complete sealed
system.
● Repairs performed by unauthorized
servicers.
● Service calls that do not involve
defects in material or workmanship
such as customer education, door
reversal, or proper installation.
● Service calls that are related to
external problems, such as abuse,
misuse, inadequate electrical
power, accidents, fire, floods, or
acts of God.
● Replacement of house fuses or
resetting circuit breakers.
● Failure of the product if it is used for
other than its intended purpose.
● This warranty does not apply
outside Canada or the Continental
USA.
You are responsible for the service
labour and freight charges. Cost to
move the beverage refrigerator to the
servicers’ shop and back to the user's
home, as may be required, are the
user's responsibility.
During this period we will provide all
parts and labour necessary to correct
such defects free of charge, so long as
the unit has been installed and operat-
ed in accordance with the written
instructions in this manual.
Purchaser understands and acknowledges that the goods purchased are beverage
refrigerator. Purchaser assumes all risk of using this unit, including risk of spoilage,
humidity variations, temperature variations, leaks, fire, water damage, mold, mildew,
dryness, and similar perils that might occur.


(888) 850 5221 Mon-Fri, 8:00 am-5:00 pm PST
lucharkitchen.com
18555 GALE AVE, CITY OF INDUSTRY, CA 91748