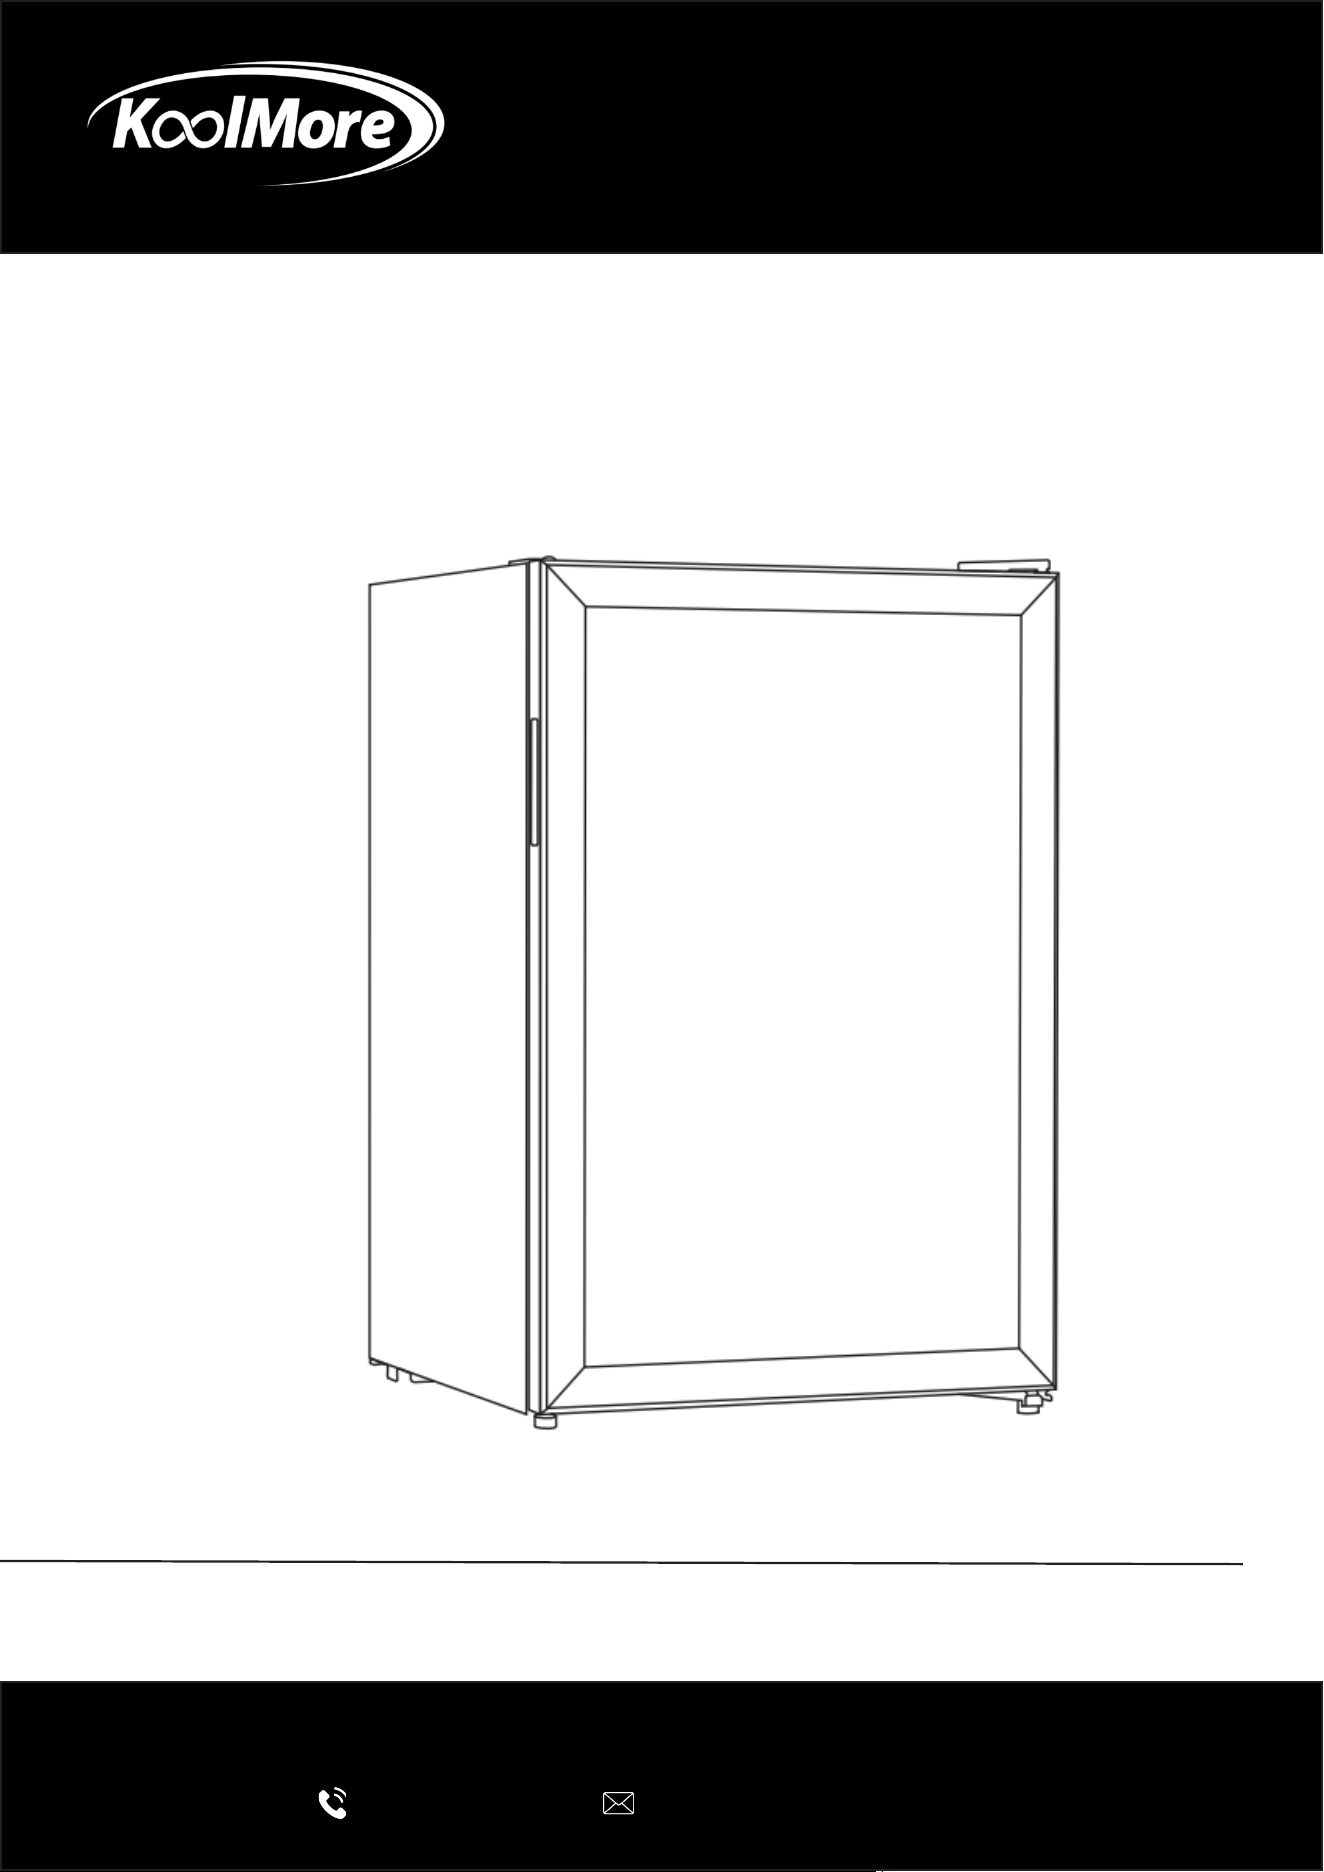
BEVERAGE REFRIGERATOR
Beverage Refrigerator Merchandiser
User Manual
Please read this manual carefully to ensure proper installation and safe
operation of your appliance.
For any service related issues, please contact us:
718-576-6342
suppor[email protected]
Models: KM-BR25SS, KM-BR45SS
Stay informed with the latest information for your
KoolMore appliance.
Scan the QR code below to access the most recent User Manual
on our website, which is constantly being updated and improved.
If you need any assistance or have questions, our customer support
team is here to help.
Phone: 718-576-6342 Email: suppor[email protected]
Please write down the model number and serial number below for future reference. Both numbers are located on the
rating label on the back of your unit or inside of the unit and are needed to obtain warranty service. You may also
want to staple your receipt to this manual as it is your proof of purchase and may also be needed for service
under warranty.
Model Number:
Serial Number:
Date of Purchase:
To better serve you, please do the following before contacting customer service:
If you received a damaged product, immediately contact the retailer or dealer that sold you the product.
Read and follow this User Manual carefully to help you install, use, and maintain your unit.
Refer to the Troubleshooting section of this manual as it will help you diagnose and solve many common issues.

3
Contents
Safety ............................................................................................ 4
Product Overview ........................................................................... 6
Installation and Transportation ...................................................... 7
Reversing the Door Swing .............................................................. 8
Operation ....................................................................................... 9
Maintenance .................................................................................. 10
Troubleshooting ............................................................................. 11
Warranty ........................................................................................ 12

4
Safety
• Electrical Requirements
The rated voltage is 110-120, and the rated frequency is 60Hz.
If the voltage is too low or too high, the compressor may be damaged.
• Grounding (Earthing)
Always use a properly grounded (three-prong) outlet.
Ensure the outlet can handle the required electrical load.
Do not use damaged outlets or cords.
Make sure the plug is fully inserted into the outlet to prevent overheating or re.
In case of emergency, unplug the unit immediately.
• Power Cord Safety
Do not damage or modify the power cord.
Always grasp the plug when unplugging; do not pull on the cord.
Use caution when moving the unit to avoid damaging the cord.
• Handling and Transport
Avoid applying pressure to the glass doors, as they may break.
Handle the unit carefully during transport to prevent damage.
• When Not in Use
If the unit will not be used for an extended period, unplug it.
Keep the appliance in a secure location and prevent children from playing with it.
Place the unit in a stable, xed position.
• Gas Safety
If you detect a gas leak, turn off the gas supply rst, then ventilate the area by opening doors
and windows.
Do not unplug the unit during a gas leak.
• Intended Use
This unit is designed for refrigeration only.
Do not store frozen food, as this may affect product quality.
• Fire and Hazard Prevention
Do not store gasoline or other ammable liquids near the unit.
Do not place hazardous materials such as explosives, chemicals, acids, or corrosive substanc-
es inside the unit.
• Child Safety
Supervise children to prevent injury.
Do not allow children to climb into or play inside the unit.
Keep hands and feet away from the compressor area and rear openings.
Warning: Wrong operations will cause users damaged or even dead.
Attention: Wrong operations will cause users or the appliance damaged.
The wrong operations should be prohibited.
The right operations should be performed strictly.
It is a high temperature danger warning.

5
• Service and Modications
Do not attempt to modify or repair the unit yourself.
Repairs and maintenance must be performed only by qualied technicians.
Additional Safety Precautions
• Water Protection
Do not spray or wash the unit with water.
Do not install the unit in damp or wet locations, as this may pose an electrical hazard or cause
a re.
• Disconnecting Power
Always unplug the unit before cleaning, servicing, or during a power failure.
After unplugging, wait at least 5 minutes before reconnecting power to protect the compressor.
• Shelf Installation
Install shelves securely and correctly.
This unit is intended for food storage only.
Do not use it to store chemicals, medical supplies, or other non-food items.
Warnings
• WARNING: Keep ventilation openings clear of obstruction.
• WARNING: Do not use mechanical devices or other means to accelerate the defrosting pro-
cess, unless recommended by the manufacturer.
• WARNING: Do not damage the refrigerant circuit.
• WARNING: Do not use electrical appliances inside the storage compartment unless recom-
mended by the manufacturer.
6
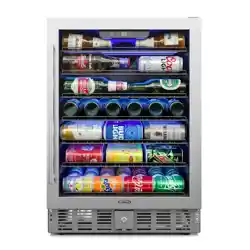
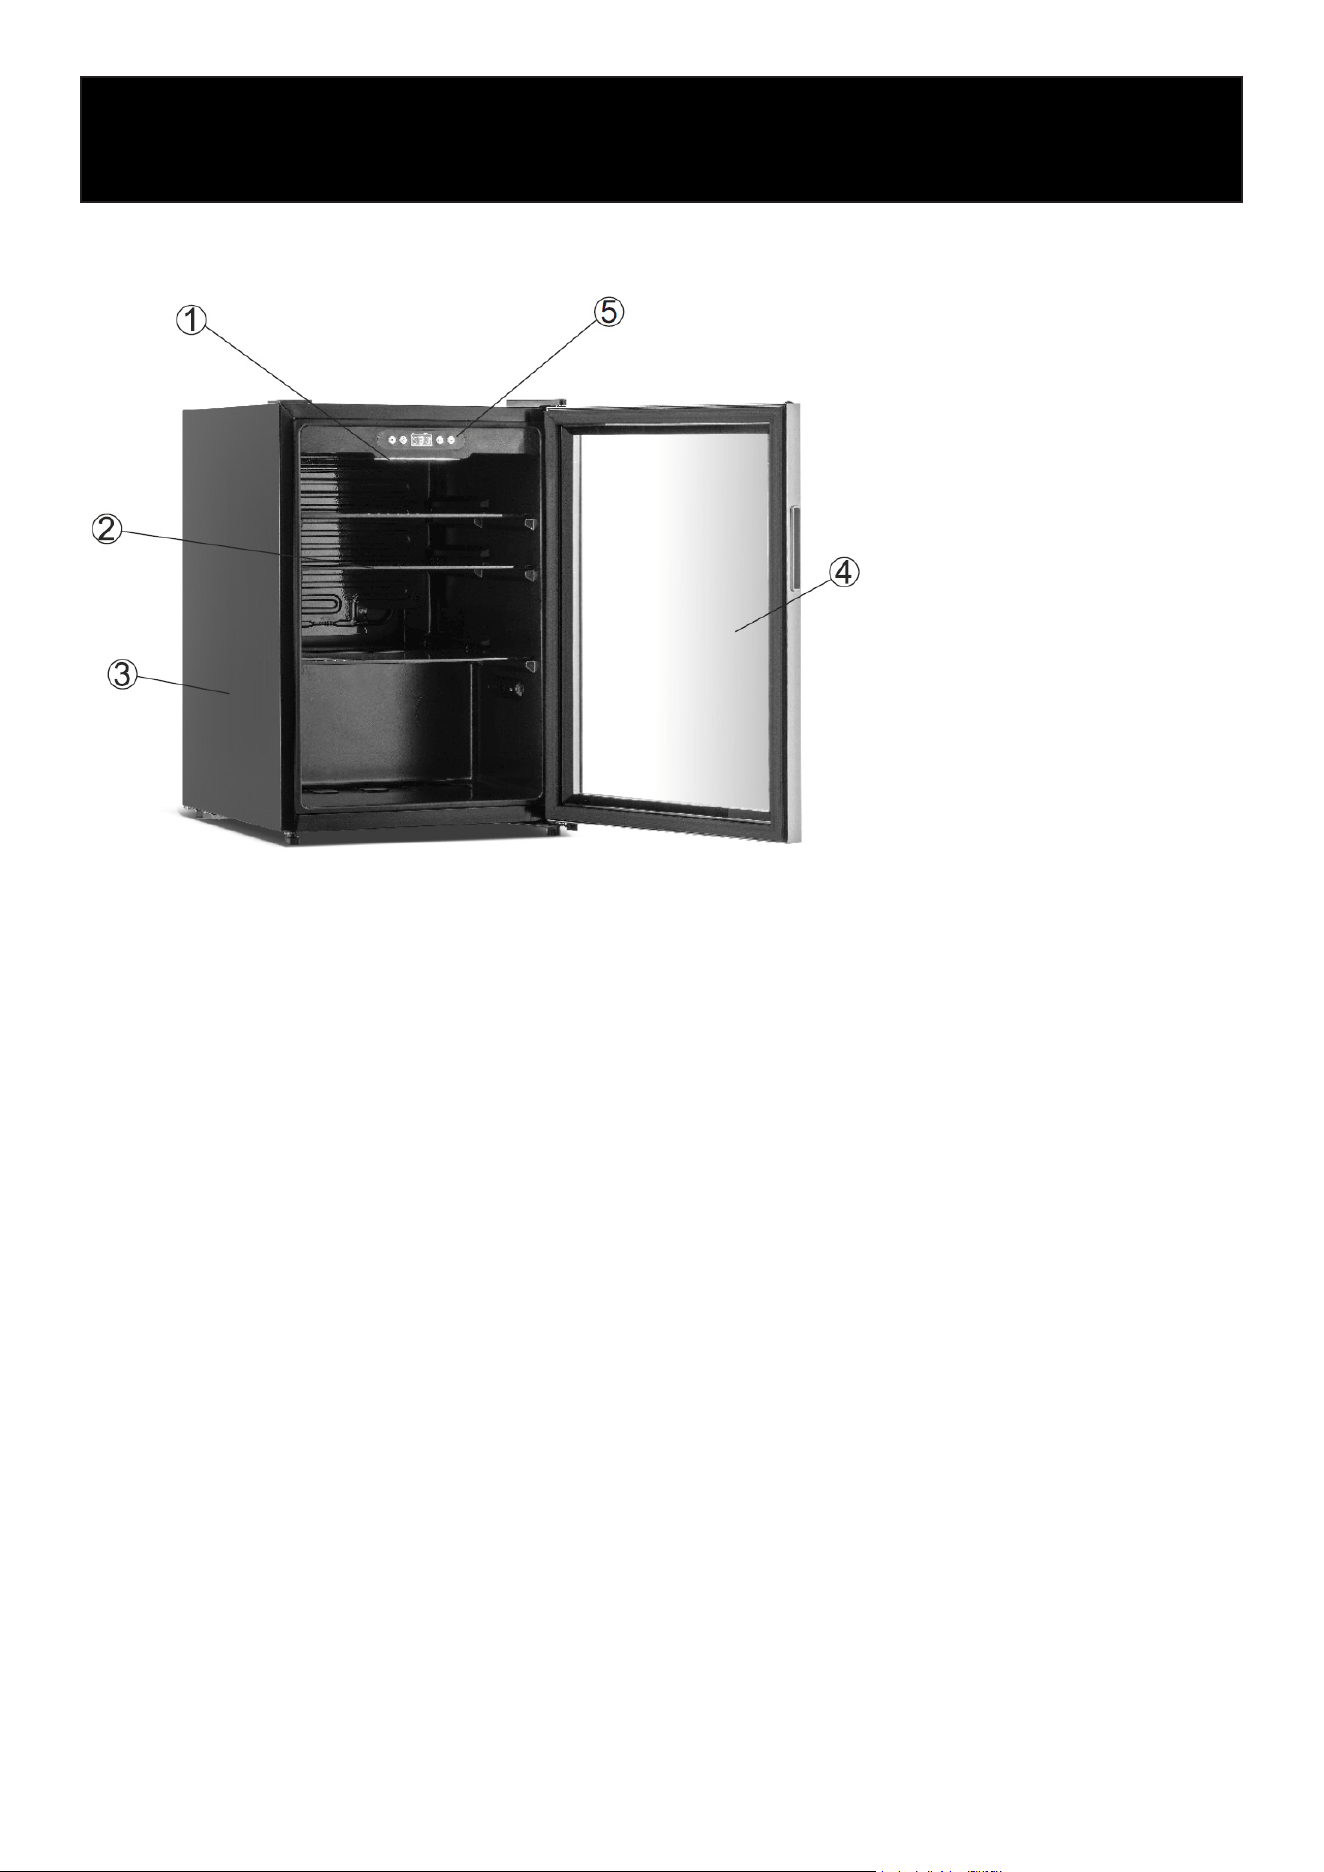
Product Overview
The below picture is for your reference. There maybe some differences from your appliance.
1. Light
2. Shelf
3. Body
4. Glass door
5. Digital controller
Product Overview
• Energy-Ecient Cooling: Advanced cooling system enhances performance while reducing
energy consumption.
• Quiet Operation: Designed for ultra-quiet performance, making it ideal for homes, oces, or
commercial spaces.
• Durable Glass Door: Sleek, sturdy glass door provides clear visibility of contents while main-
taining insulation.
• Adjustable Feet: Easily level the unit on uneven surfaces for stable placement.
• Rapid Cooling: Powerful refrigeration system ensures fast and consistent temperature control.

Installation and Transportation
• When unpacking, ensure all accessories are included. Repack securely before transporting if
needed.
• Handle the unit with care during transport. Avoid strong impacts or tilting the unit more than
45° to protect the cooling system.
• Leave at least 4 inches (10 cm) of clearance on the sides and back during installation to ensure
proper airow and operation.
• Before connecting to power, remove all protective packaging, including the plug cover. Let the
unit run for a short time before loading food or beverages.
• Place the unit on a at, stable surface. If elevation is needed, use a solid base—do not use soft
or ammable materials, and remove all packaging from underneath.
• Keep the unit dry. If water is present, wipe it immediately with a soft cloth to prevent damage
and maintain insulation.
• Do not install the unit in extremely cold environments or outdoors where it may be exposed to
rain.
• Avoid placing the unit near heat sources or in direct sunlight, as this may affect performance.
7
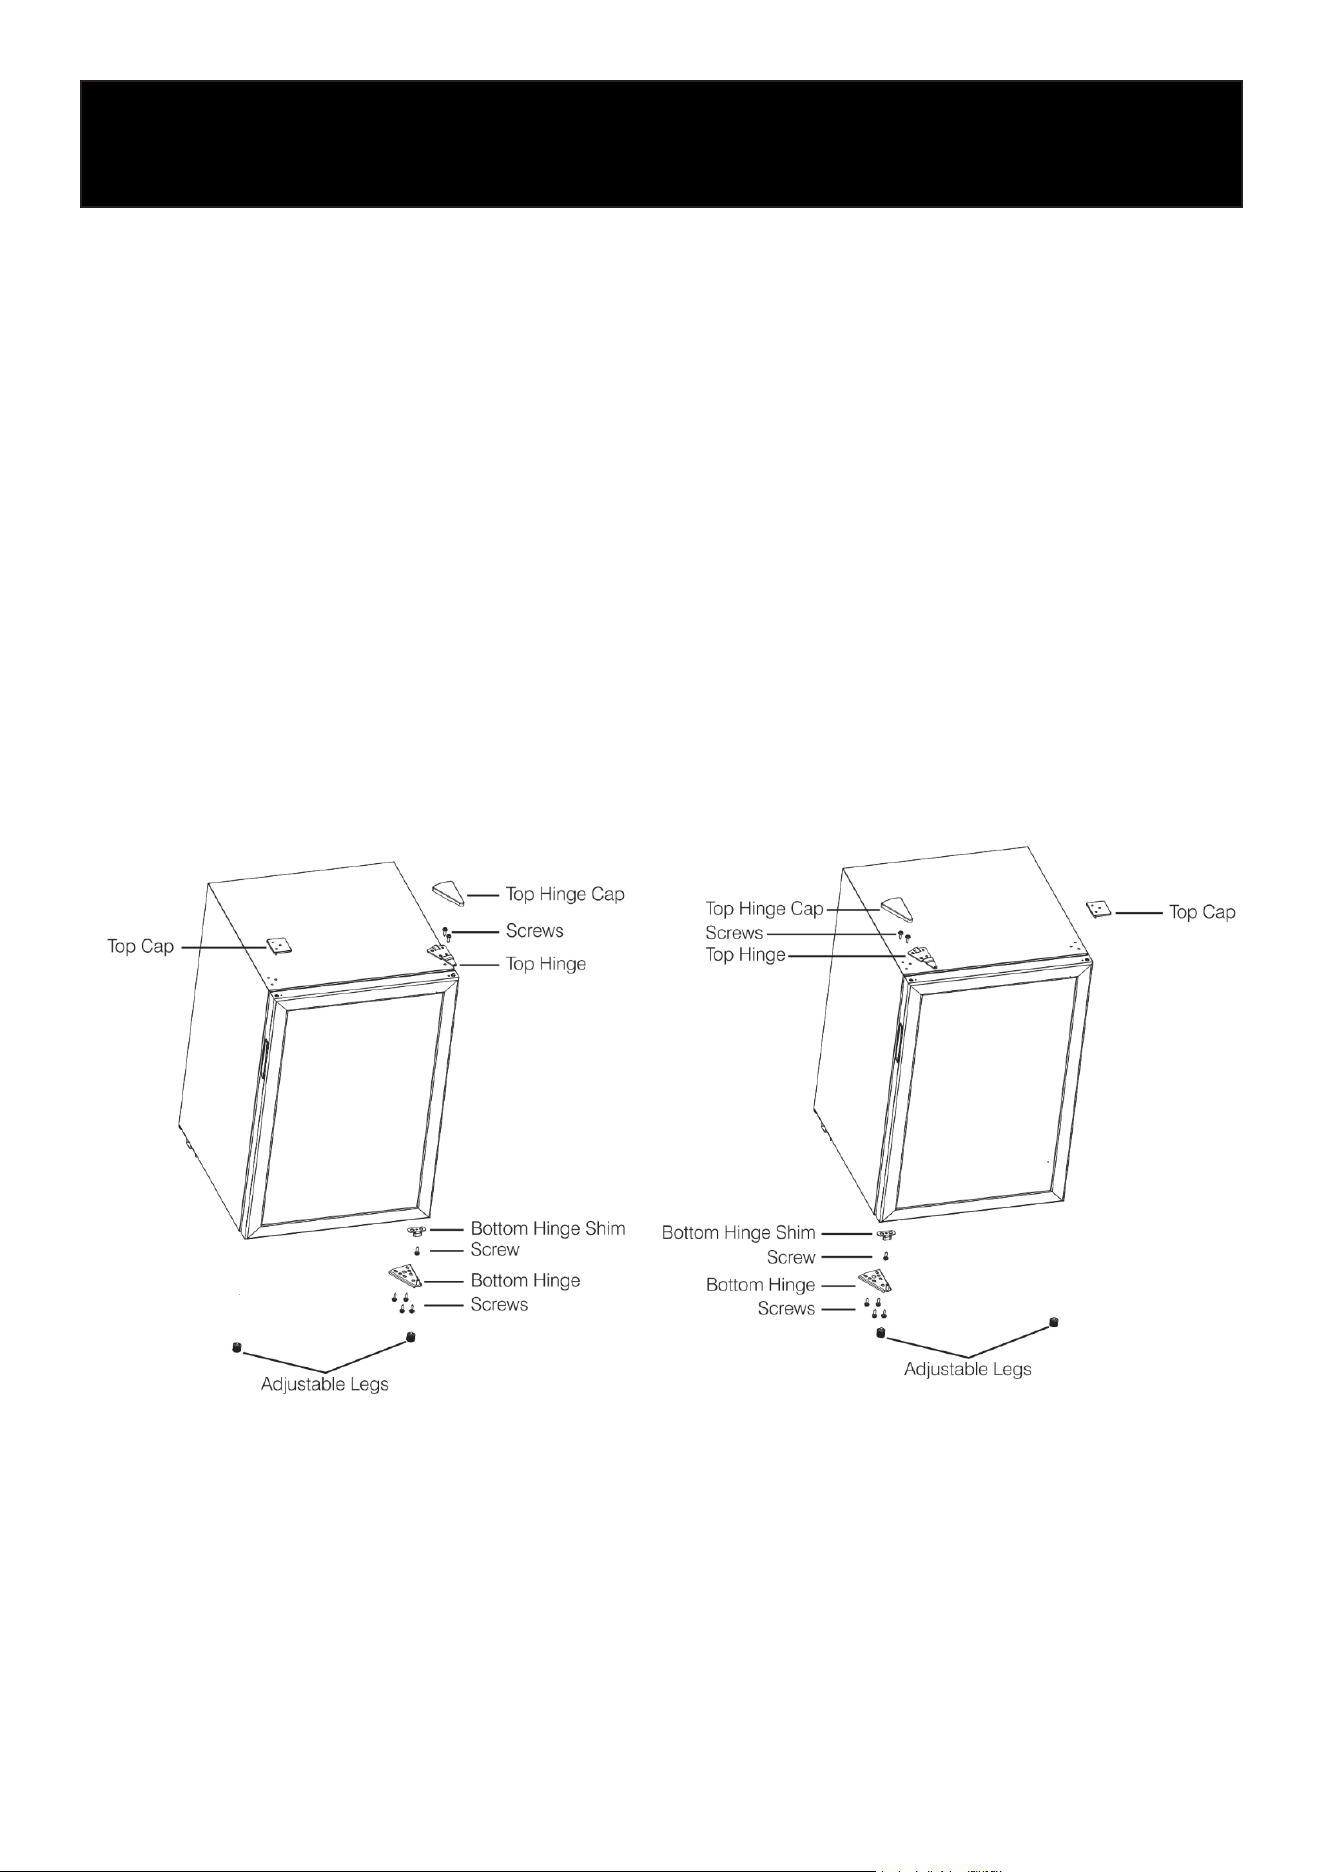
Reversing the Door Swing
This appliance has the capability of the door opening from either the left or right side. The unit is
delivered to you with the door opening from the left side. The following instructions are for your
reference only.
1. Remove top hinge cap. Unscrew and remove the top hinge. Keep the screws so they can be
used on the opposite side.
2. Remove the right adjustable leg, unscrew the bottom hinge and hinge shim. Save the screws.
3. Lift the door up and away from the appliance.
4. Remove top cap from opposite corner (left) and cover exposed holes (right).
5. Remove left adjustable leg, ax bottom hinge shim and bottom hinge with reserved screws.
Screw on the left adjustable feet.
6. Place the door on the left bottom hinge. Ensure that the door is aligned horizontally and verti-
cally before attaching the top hinge.
7. Attach the top hinge and snap on the top hinge cap.
8
First-Time Operation
• Place the unit in a proper, level position and open the door briey to allow ventilation.
• Although the unit is cleaned at the factory, we recommend cleaning it again before rst use.
• Run the unit empty and set the thermostat to begin cooling. The compressor may operate lon-
ger than usual during the initial startup.
• Once the internal temperature has reached the desired level, the unit will cycle automatically.
For best results, wait until the interior is fully cooled before loading beverages or products.
9
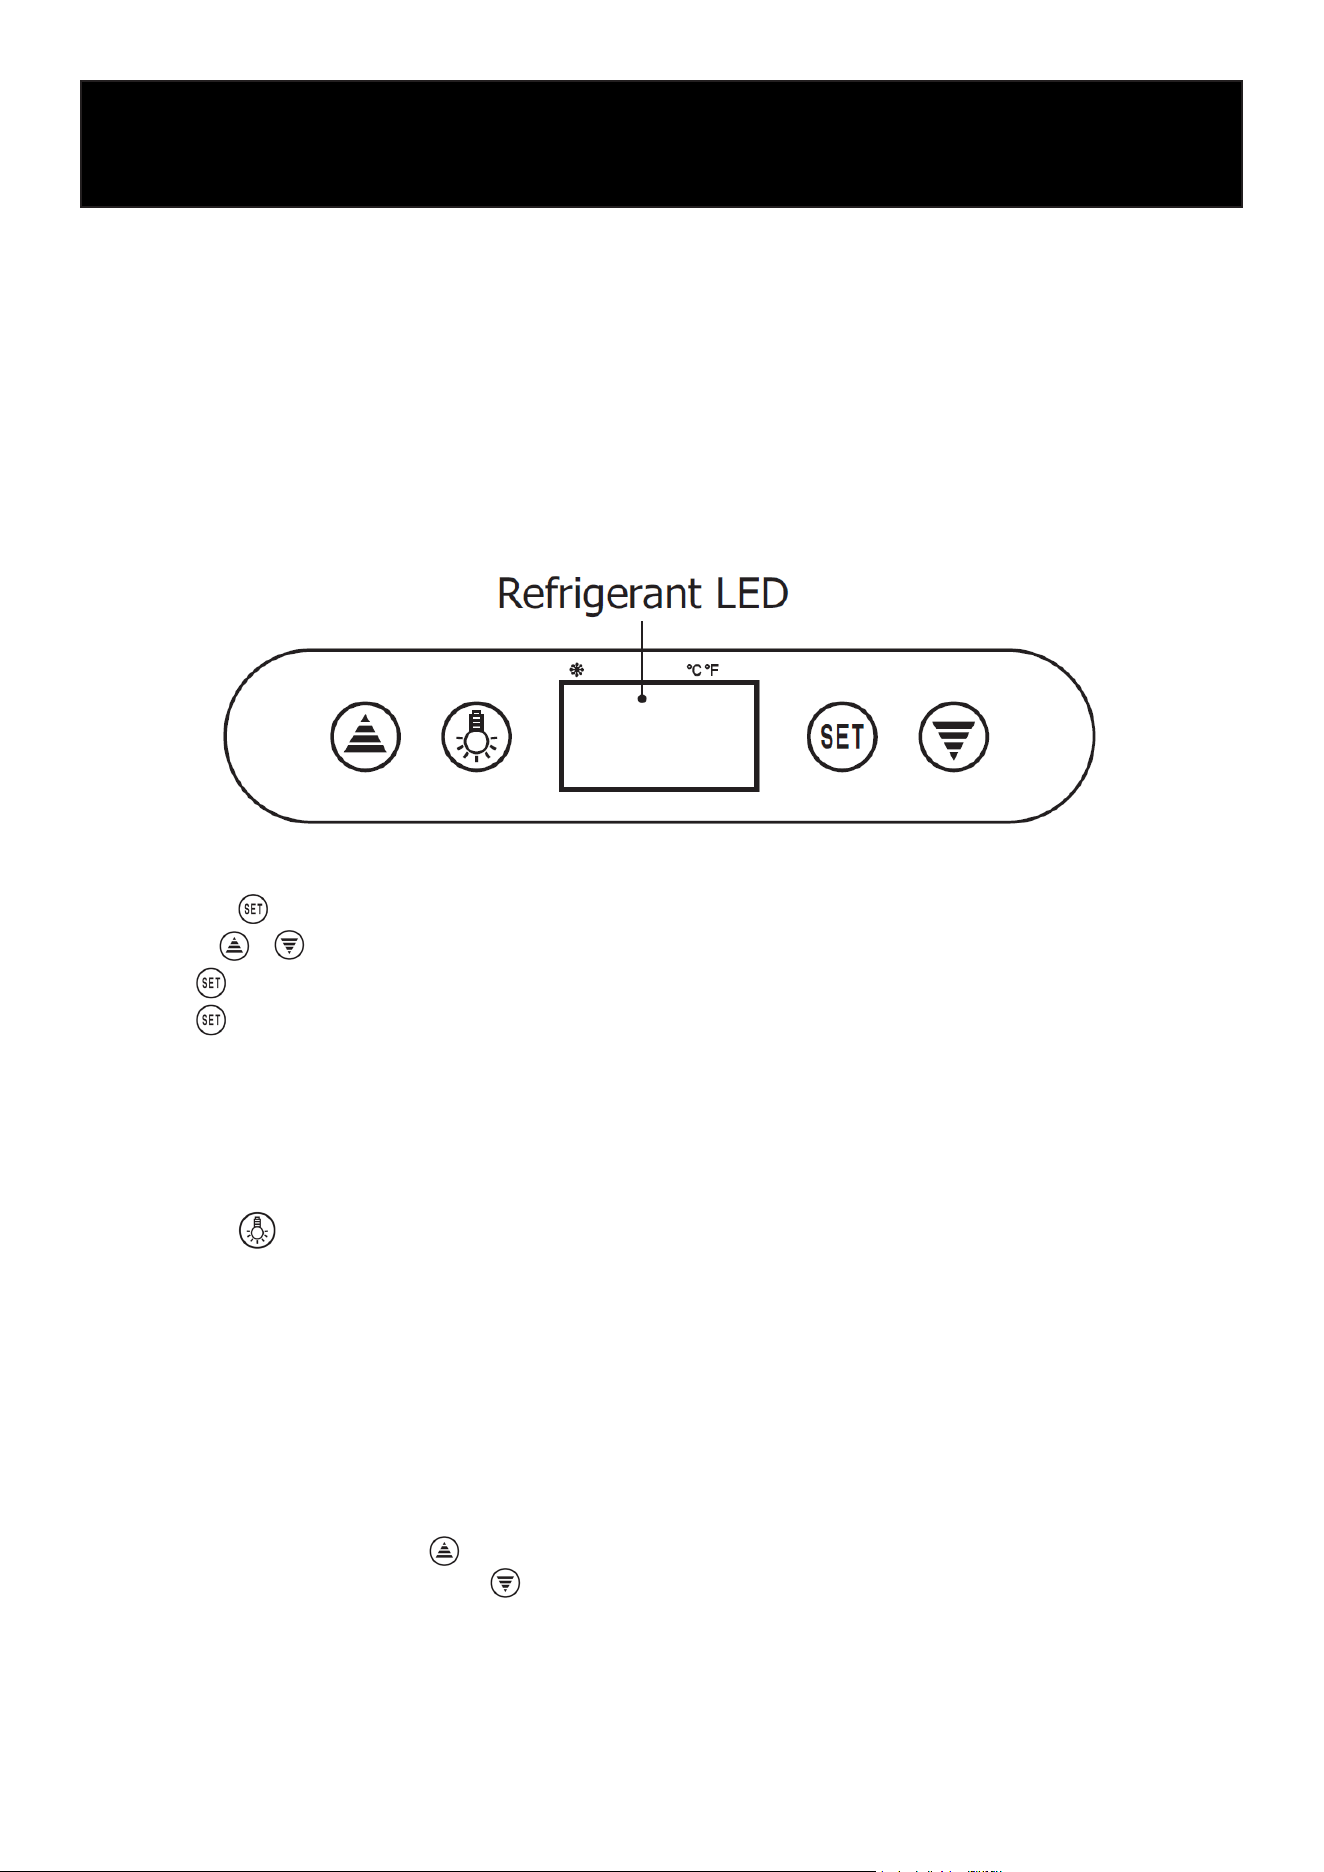
Control Panel
1. Setting the Temperature
Press the button to display the current set temperature.
Use the / buttons to adjust the temperature.
Press again to save the selected value.
Press to exit and return to the current internal temperature display.
If no buttons are pressed for 10 seconds, the display will automatically return to the internal
temperature.
Adjustable temperature range: 32°F – 60°F
2. Light Function
Press the button to turn the light on.
Press it again to turn the light off.
3. Refrigerant LED Indicator
The LED remains on during active cooling.
When the internal temperature is stable, the LED will ash.
4. Digital Controller Reset
• If the display shows “Disorder”:
1. Press and hold the button for 2 seconds until you hear a beep.
2. Then press and hold the button for 6 seconds until it beeps again.
3. The display will ash for 3 seconds and reset to factory settings.
Operation

10
Cleaning
• Always unplug the unit before cleaning.
• Use a soft cloth or sponge with clean water or mild soap.
• Do not use harsh chemicals, such as acidic or alkaline solutions, or hot water.
• Avoid using water directly inside the compressor compartment. After cleaning, dry all surfaces
thoroughly to prevent rust.
• Allow hot food or beverages to cool before placing them inside, as this can affect cooling per-
formance.
• Arrange items inside the unit with space between them to ensure proper airow. Do not block
air vents, as this may reduce eciency or cause damage.
• Minimize how often the door is opened, and keep it closed when not in use to conserve energy.
• After turning off the unit or in the event of a power interruption, wait at least 5 minutes before
restarting to protect the compressor.
• If the internal temperature rises due to a power outage or malfunction, unplug the unit and
allow it to stabilize before restarting.
• If the unit will not be used for an extended period, unplug it, clean it thoroughly, and store it
properly.
Defrosting
• The unit features automatic defrosting. When the compressor stops, frost will melt and drain
into the collection tray.
• Water in the tray will evaporate during normal operation, so manual defrosting is not required.
Lamp Replacement
• If the interior light is damaged, contact a qualied technician for service. Do not attempt to
replace it yourself.
Maintenance
11
Faults and Diagnosing
Troubleshooting
No Cooling Poor Cooling Performance
• Check if there is a power outage.
• Make sure the plug is properly connected to the
outlet.
• Check if the fuse is turned on.
• If the appliance uses a surge protector, make sure it
is working properly.
• Make sure the thermostat is set correctly.
• Ensure the appliance is not exposed to direct sunlight
or placed near heat sources.
• Check for dust buildup on the compressor and con-
denser.
• Avoid overloading the appliance with too many items.
• Make sure there is enough space between stored
items for proper airow.
• Check if any items inside are warm.
• Avoid opening the door too frequently.
• Make sure the door is fully closed.
• Check if there is excessive frost buildup inside the
unit.
Appliance Runs Continuously Excessive Noise
• Check if the thermostat is set too high.
• Avoid placing too many items inside.
• Make sure the room temperature is not too high.
• Make sure the appliance is placed on a at, stable
surface.
• Ensure the appliance is not touching walls or other
objects.
• Check that it is not in contact with anything that may
vibrate easily.
Important
If the issue cannot be resolved using this guide, please contact KoolMore Customer Service. Do
not attempt to repair the appliance yourself.

12
WARRANTY
LIMITED WARRANTY
KoolMore Supply Inc. extends a limited warranty to the original purchaser, guaranteeing that this KoolMore product is
free from manufacturing defects in material or workmanship for one year from the date of purchase.
Should you discover any such defect within the warranty period, KoolMore Supply Inc. reserves the right to repair or re-
place the product without charge, or to cover the cost of replacement parts and repair labor needed to correct defects
present at the time of purchase or resulting from regular usage, when the appliance has been installed, operated, and
maintained as per the instructions provided.
At its sole discretion, KoolMore Supply Inc. may decide to replace the product. In such an event, your replacement
appliance will carry the warranty for the remaining term of the original unit’s warranty period.
This warranty is valid exclusively to the original purchaser of the product and only applicable within the United States.
The warranty commences from the date of original consumer purchase. Proof of the original purchase date will be
required to obtain service under this warranty.
Under this limited warranty, your sole and exclusive remedy will be product repair, as outlined above. All services must
be provided by a KoolMore designated service company.
KoolMore shall not be responsible or liable for any loss, spoilage, or damage to food, beverages, pharmaceuticals,
medical supplies, or any other contents stored in the unit resulting from failure, malfunction, defects, improper instal-
lation, improper use, power interruption, or any other cause. Any such losses are expressly excluded from coverage
under this warranty.
To claim warranty or request repair service:
Email [email protected]. Please include your name, address, phone number, warranty repair request, and a copy
of your proof of purchase receipt. Alternatively, visit koolmore.com and use the Contact Us page. A KoolMore custom-
er service representative will promptly arrange service for your appliance.
We thank you for choosing KoolMore.
WARRANTY EXCLUSIONS
This limited warranty will not cover:
1. Failure of the product to perform during power failures or interruptions, or due to inadequate electrical service.
2. Damage incurred during transportation or handling.
3. Damage caused by accidents, vermin, lightning, winds, re, oods, or acts of God.
4. Damage resulting from accidents, alterations, misuse, abuse, improper installation, repair, or maintenance. This
includes using any external device that alters or converts the voltage or frequency of electricity.
5. Unauthorized product modications, repairs by unauthorized centers, or use of non-approved replacement parts.
6. Abnormal cleaning and maintenance not aligned with the user’s manual.
7. Use of incompatible accessories or components.
8. Any costs associated with repairs or replacements under these excluded circumstances shall be the responsibility
of the consumer.