This paper can be recycled.
This product is for the domestic market only. Product voltage does not work overseas.
Please read this user manual before use for your safety and proper product use.
A warranty card is included in this user manual.
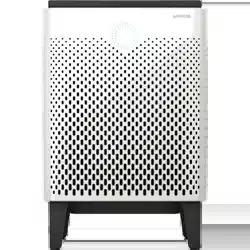
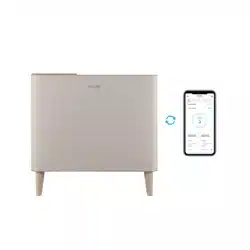
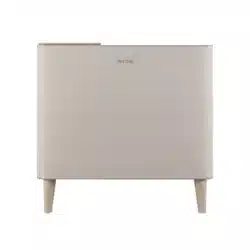
Coway Air Purier
Airmega 240(W) / Airmega 240(I)
01
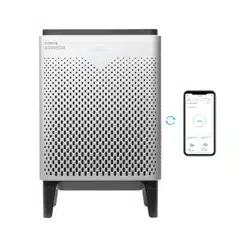
Real-time Air Quality Display
The air quality sensor allows you to check the "Indoor Air Quality (IAQ)" in
real-time through the four-level color display.
Superior Air Cleaning
Coway Airmega 240 is equipped with a powerful Green True HEPA™ lter
and smartly optimizes lter system to remove contaminants according to the
room’s current air quality.
Filter Replacement Indicator for Cleaning and Replacement
It noties the lter cleaning and replacement cycles for customers' lter
management convenience.
- Pre-lter, Max2 lter
Customizable High-Performance Filter System
Its structure allows customers to remove the lter easily
for cleaning / replacement.
Sophisticated Design
Slim and sophisticated design that ts everywhere.
FEATURES

ENGLISH / 02
DEAR CUSTOMERS
COWAY
Thank you for purchasing the Coway air purier.
Please read this user manual carefully for correct use and maintenance.
You can refer to the user manual to troubleshoot product issues while using it.
Please keep this user manual in a safe place as it includes the product warranty.
CONTENTS
- Please keep the user manual in an accessible area where it can be seen. -
For Information How to Use
Maintenance
Others
| 03 | SAFETY INFORMATION
Danger
Warning
Caution
| 07 | PART NAMES
| 09 | AIR PURIFICATION
PROCESS
| 10 | BEFORE USE
How to install Filter
| 11 | INDICATORS AND
BUTTONS
| 13 | HOW TO USE
| 14 | ADJUST PARTICLE SENSOR
| 15 | HOW TO CLEAN
Product
Filter
| 17 | HOW TO REPLACE FILTER
| 19 | TROUBLESHOOTING
| 20 | SPECIFICATION
| 24 | WARRANTY
03
SAFETY INFORMATION
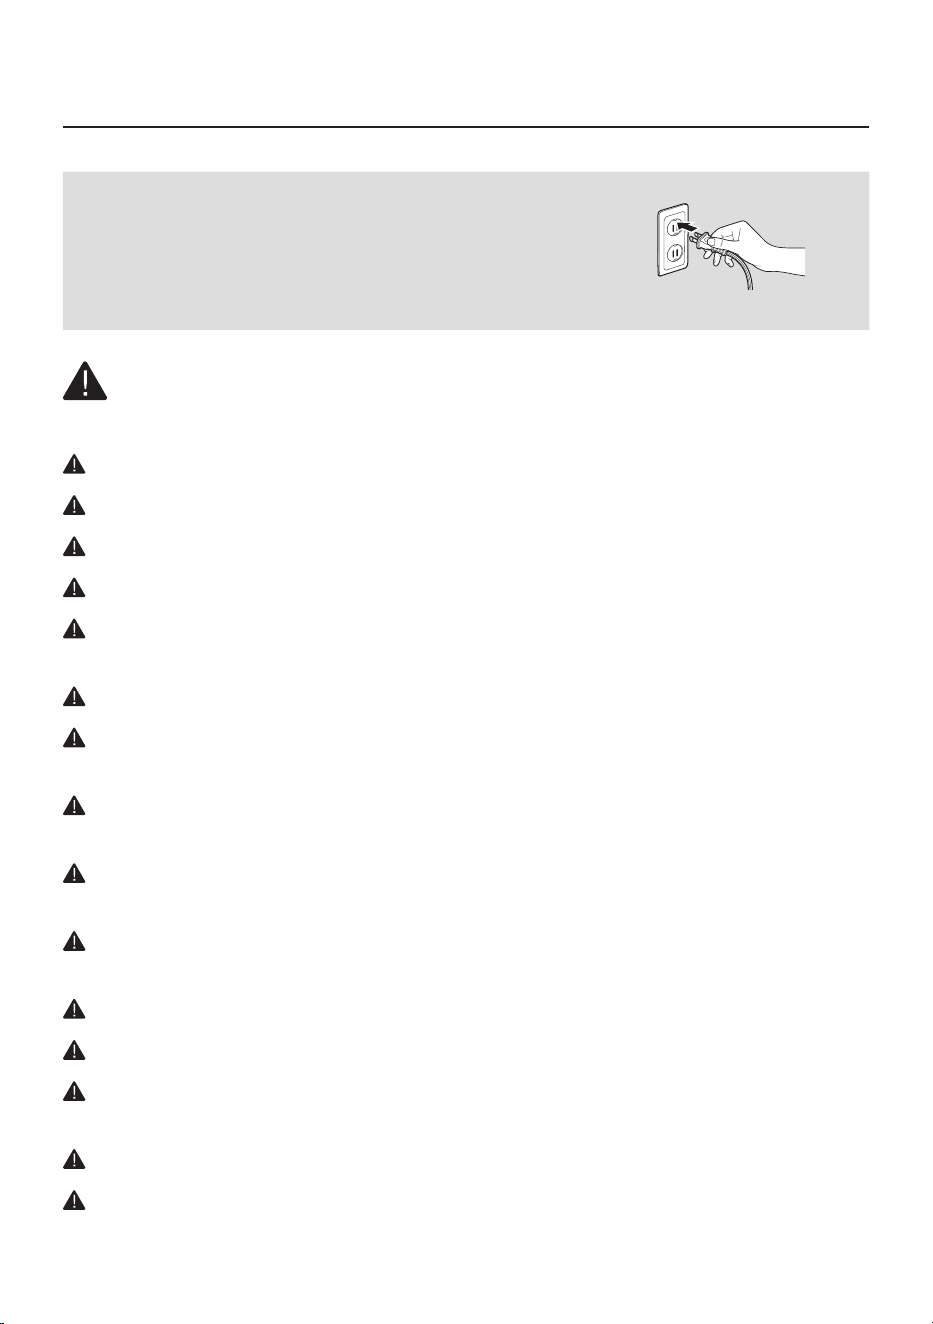
Do not use damaged power plugs or loose sockets.
The power plug must be plugged into 120 V~, 60 Hz.
Do not pull on the power cord to move the device.
Do not touch the power plug with wet hands.
To avoid damaging or warping the power cord, do not use excessive force to
bend the power cord or put heavy objects on top of it.
Do not repeatedly connect and disconnect the power plug.
If water enters the power supply, unplug the power and completely dry before
using again.
Be sure to unplug the power during product repair, maintenance or part
replacement.
If the power plug's pins or contact area become covered in dust or water, wipe
them thoroughly.
Do not plug several electric appliances into one socket, and use only a dedicated
socket.
Unplug the power when not used for a long time.
Do not carelessly connect or tamper with the power cord.
If the power cord is damaged, do not replace it yourself. Contact a service
center to have it replaced.
Do not install near electric heaters.
Do not put on top of electric products like heaters or televisions.
The following information is for user
safety that should be observed.
It is to ensure user safety and prevent property damage.
Please read the precautions carefully and use the
product correctly.
120 V~, 60 Hz only
DANGER : Failing to follow the precautions below may result in serious
injury or even death.
ENGLISH / 04
For Information
Do not install in places with a lot of humidity or dust or places where water
(rainwater) splashes.
Do not use or store combustible gases or ammable materials near this product.
If there is a strange sound, burning smell, or smoke from the device, immediately
unplug the power plug and contact a service center.
Never immerse the product in water.
Do not spray ammable materials such as insecticides or air fresheners on the
intake.
Do not open, repair, or modify the device yourself.
Do not put bowls of water, chemicals, food, small metal objects, or ammable
materials on top of this product.
Unplug the power before cleaning.
If the purier falls over and gets wet during use, A/S maintenance is required
before further use.
Do not spray water directly on the device or use benzene, thinners, etc. to wipe
it during cleaning.
Do not insert sharp objects such as picks into the air quality sensor.
Do not put ngers or foreign matter (pins, sticks, coins, etc.) into the vent.
Do not let children hang from or climb on the purier.
Be careful that children do not put their hands in the vent.
Replace the lter with a new one when the time comes.
Do not spray water directly on the purier.

05
SAFETY INFORMATION
Do not unplug by pulling on the power cord.
Plug into a power socket connected to an earth leakage circuit breaker (current
sensitivity 30 mA or less).
If extending the power cord, only use with sockets and cords of
250V / 15A and use by itself.
Do not use in baths, showers, swimming pools, or other areas where the purier
may be in direct contact with water.
Do not unplug the power or move the purier while it is operating.
If unusual sound, odor, or smoke comes from the purier, immediately unplug
the power and call our service center.
Do not install on a slope.
Do not excessively impact or use excessive force on this product.
Use at least 20 cm away from walls or other objects on each side.
Install the purier in a place where it is not blocked on any side so air can
circulate well.
Install at least 2 m away from TVs and other electronic items.
Do not use in BBQ or other restaurants where odor, smoke, or oil may occur.
Do not use in direct sunlight.
Do not install in a high place.
Do not use extreme force on the purier.
Do not push or lean on the purier. The purier may fall over.
Do not use for a long time in places that are sealed or where children, the
elderly, or sick people are.
WARNING : Failing to follow the precautions below may result in
considerable physical injury or property damage.
CAUTION : Failing to follow the precautions below may result in slight
physical injury or property damage.

ENGLISH / 06
For Information
Do not block the vent with laundry or curtains.
Remove dust from the pre-lter with a vacuum cleaner or water.
Periodically wash the pre-lter and dry it well in a shady place with good
ventilation.
People with physical, sensory, or mental impairment as well as children must be
supervised or guided while using the device.
It is advisable to supervise children so they do not play with the device.
This appliance can be used by children aged from 8 years and above and persons
with reduced physical, sensory or mental capabilities or lack of experience and
knowledge if they have been given supervision or instruction concerning use of
the appliance in a safe way and understand the hazards involved.
This appliance has a polarized plug(one blade is wider than the other). To reduce
the risk of electric shock, this plug is intended to t in a polarized outlet only one
way. If the plug does not t fully in the outlet, reverse the plug. If it still does not
t, contact a qualied electrician. Do not attempt to defeat this safety feature.
READ AND SAVE THESE INSTRUCTIONS
07
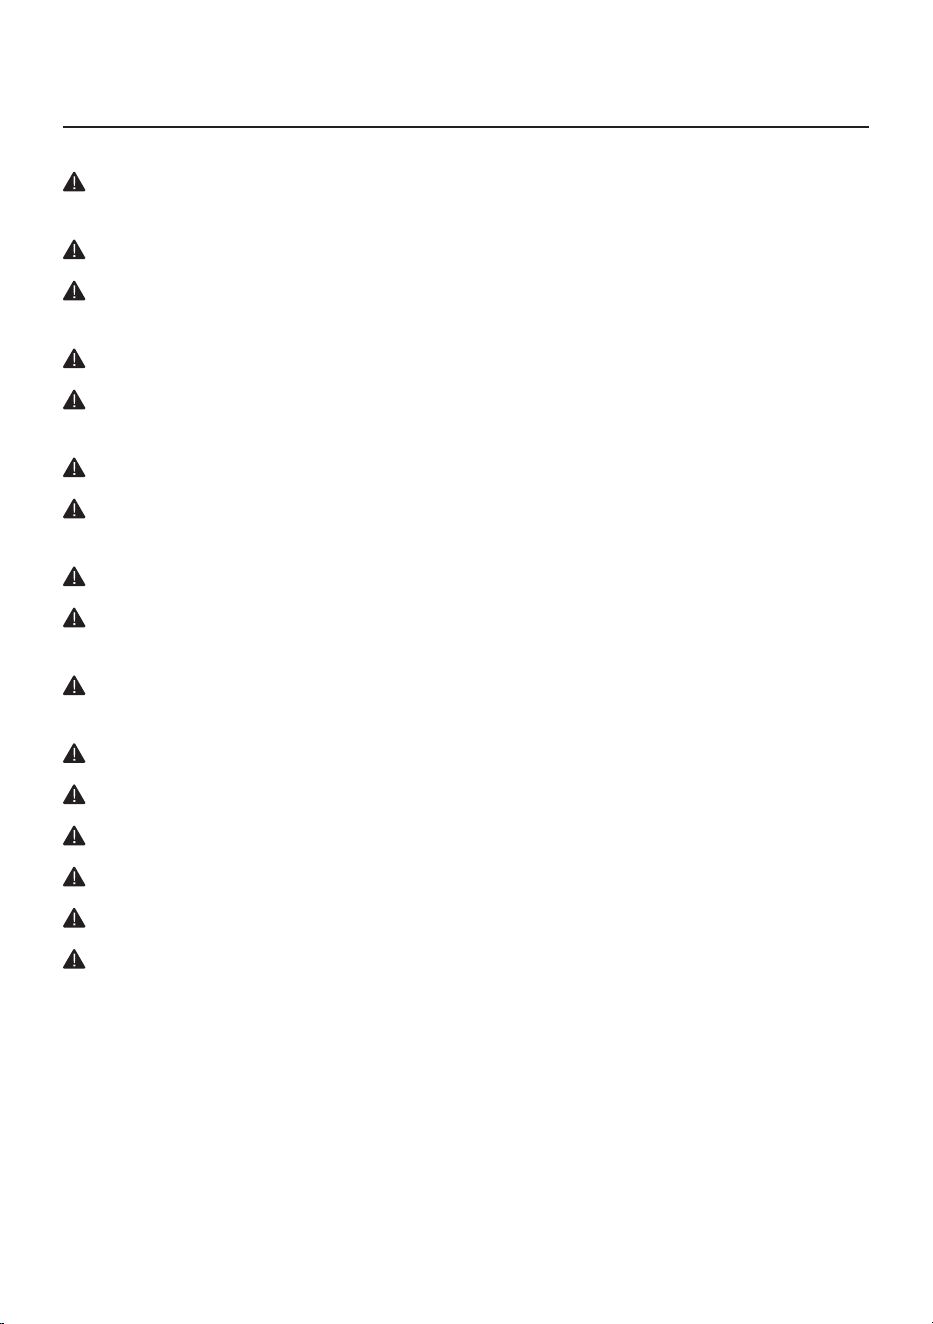
Top
Control panel
Air outlet grille
PART NAMES
Front / Rear
Air outlet
Air quality
sensor
Power cord
Air inlet
Front cover

ENGLISH / 08
USER MANUAL CARD-FILTER REPLACEMENT
MANUAL-PRODUCT
REGISTRATION
For Information
Accessories
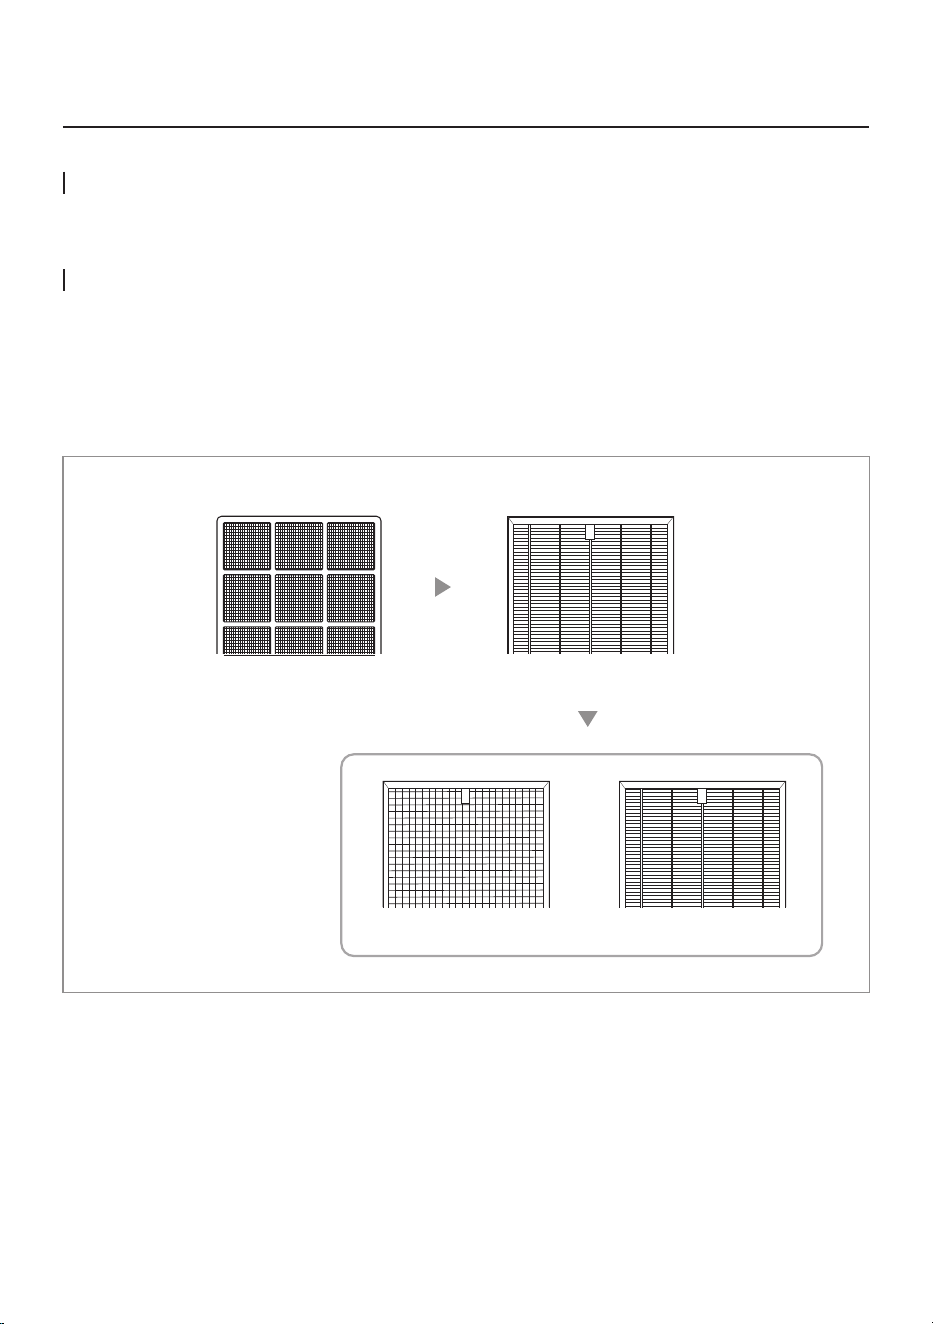
09
1. Pre-lter 2. Max2 lter
2-1. Activated Carbon 2-2. Green True HEPA™
AIR PURIFICATION PROCESS
For Information
Pre-lter
Removes large dust particles, mold, hair, and pet hair.
Max2 lter (Activated Carbon + Green True HEPA™)
Captures and reduces more than 99 % of VOCs and odors such as NH3, CH3CHO, CH3COOH. It also
captures and reduces up to 99.97 % of airborne particles, allergens, and contaminants down to 0.3 microns
in size.
ENGLISH / 10
BEFORE USE
How to Use
Please check before use!
This product is for 120 V~, 60 Hz only.
Make sure to connect the power plug to a grounded 120 V~, 60 Hz outlet.
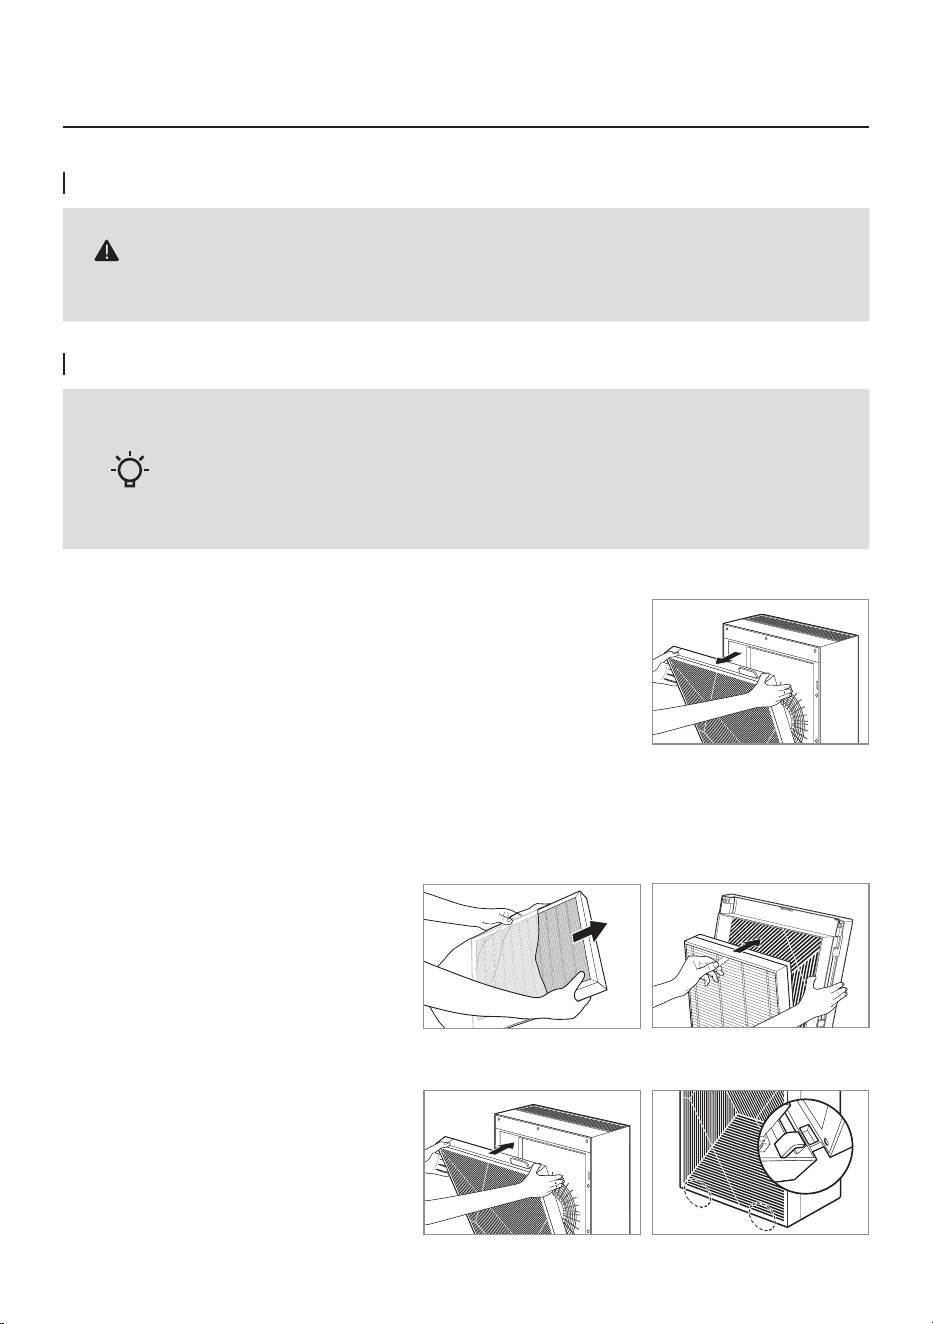
How to Install Filter
- Be sure to remove the packaging plastic wrapping before installing the lter.
- Use the lter indoors only.
- Unplug the power cord from the outlet when not using the product.
- Check the front of the lter when installing it.
Tips
1. Open the front cover.
Pull the top of the front cover to open it.
2. Take out the lter and remove the packaging plastic wrapping.
Remove the packaging plastic from all filters except the pre-filter and assemble the product according to
the filter assembly sequence.
3. Close the front cover.
Align the two projections on the bottom
of the front cover with the grooves and
push in the cover to fix it.
* The product will not operate if the
front cover is not fixed correctly.
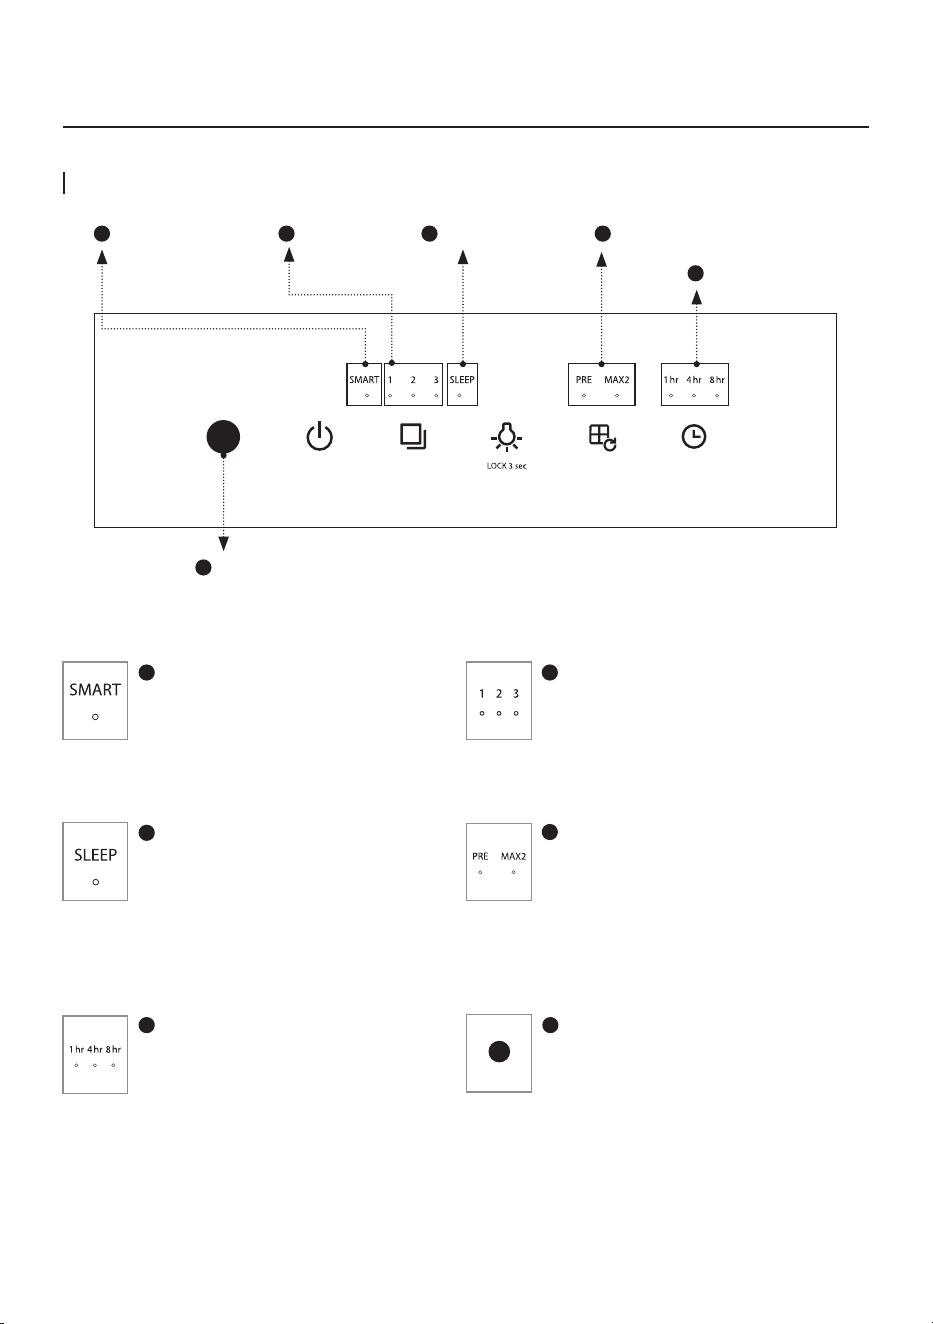
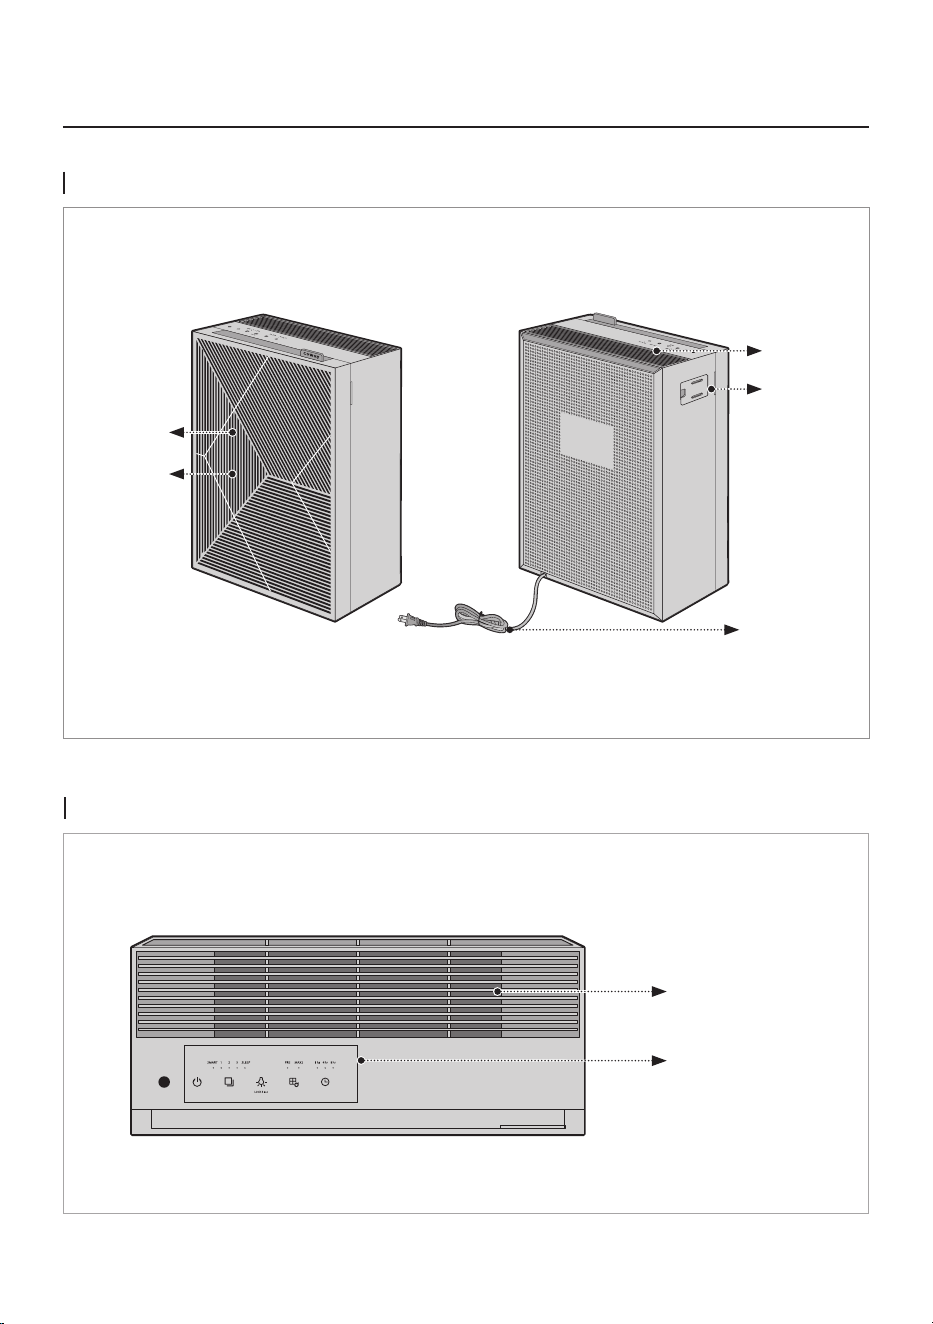
11
2
Speed Indicator
It shows the current fan speed.
Each indicator is turned on as per its
airflow speed.
1
SMART Mode Indicator
It turns on when the SMART mode is
activated.
3
Sleep Mode Indicator
It turns on when sleep mode is
activated.
5
Timer Indicator
It turns on when the timer is
activated.
6
Air Quality Indicator
It displays the current pollution level
of the room.
4
Filter replacement Indicator
Replace the lter when this indicator
is on.
Refer to lter replacement cycle for
each lter.
INDICATORS AND BUTTONS
Indicators
1
SMART Mode Indicator
6
Air Quality Indicator
2
Speed Indicator
3
Sleep Mode Indicator
4
Filter replacement Indicator
5
Timer Indicator
ENGLISH / 12
1
Power Button
Use this button to turn the air
purifier on or off.
* To power off, press and hold the
power button for one second.
3
Light / Child lock Button
Use when turning ON / OFF the Air
Quality Indicator. The Air Quality
Indicator is turned off after pressing the
button once. The Air Quality Indicator is
turned on after pressing the button one
more time.
Press and hold for 3 seconds to lock all
functions on the control panel. Press and
hold for 3 seconds again to unlock.
5
Timer Button
Touch the timer button until the
indicator light displays the desired time.
4
Filter reset Button
When the filter replacement indicator
is turned on, press the corresponding
button for more than 3 seconds after
cleaning and replacing the filter.
The indicator stays on during the filter
cleaning/replacement cycle. When the
cleaning cycle or life becomes less than
2%, the corresponding indicator will
emit an orange color light.
2
Mode Button
Use this button to adjust the fan
speed. Available settings for the fan
speed are SMART → 1 → 2 → 3 →
SLEEP.
How to Use
Buttons
1
Power Button
2
Mode Button
3
Light /
Child lock Button
4
Filter reset Button
5
Timer Button
13
SMART Mode
Automatically optimizes the speed setting 1 through 3 based on the level of indoor air quality detected by
dust sensor. This mode is recommended for general users.
Pollution Level 1 Pollution Level 2 Pollution Level 3, 4
Speed Auto Level 1 Auto Level 2 Auto Level 3
Manual & SMART Mode
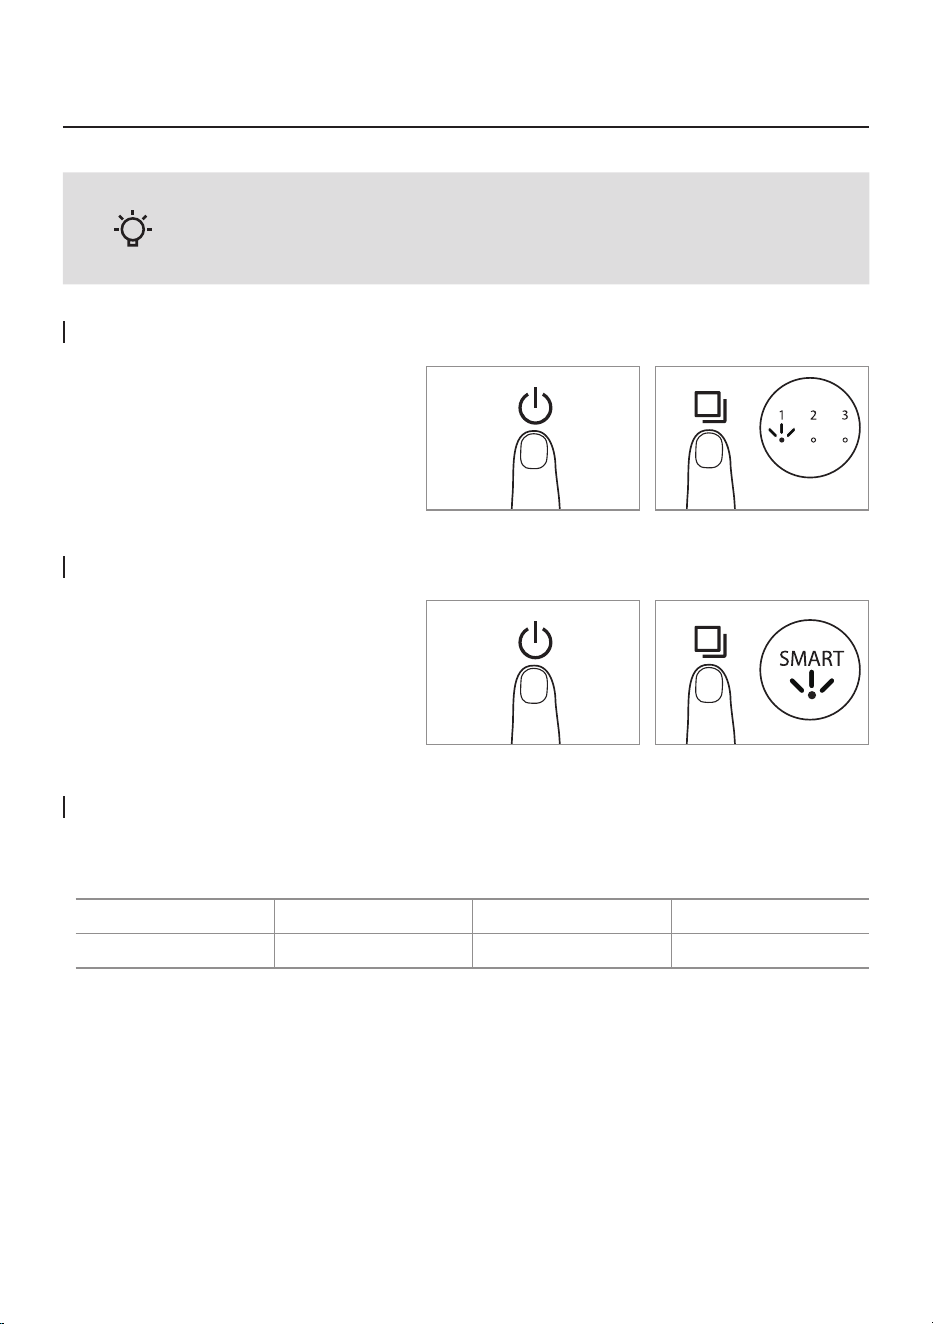
How to Use SMART Mode
Press the Power button and then select
the speed of the fan by pressing the
Speed button.
(SMART → 1 → 2 → 3 → SLEEP)
Press the Power button and select the
SMART mode by pressing the Speed
button.
- Plug the air purier into an outlet before operating the product.
- The product operates in SMART mode by default when turned on.
HOW TO USE
Tips
ENGLISH / 14
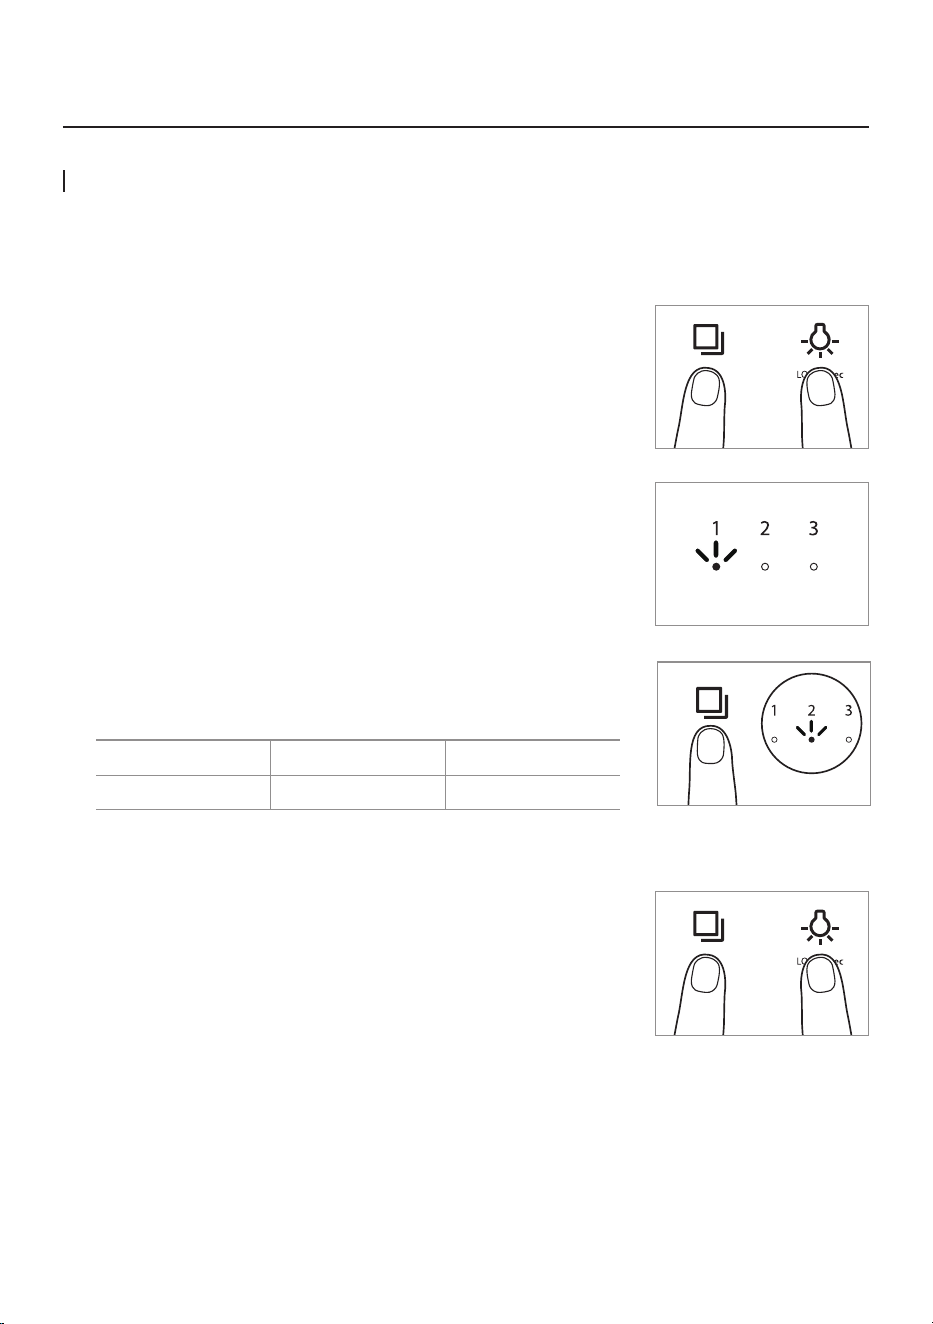
How to adjust the sensitivity of the air quality sensor
The air quality sensor is set to standard sensitivity when the product is shipped out. If the pollution level stays
at the highest level after 2 hours of operation or remains at the lowest level for more than 1 hour when the air
does not seem clean. In that case, users can adjust the sensitivity of the air quality sensor as follows.
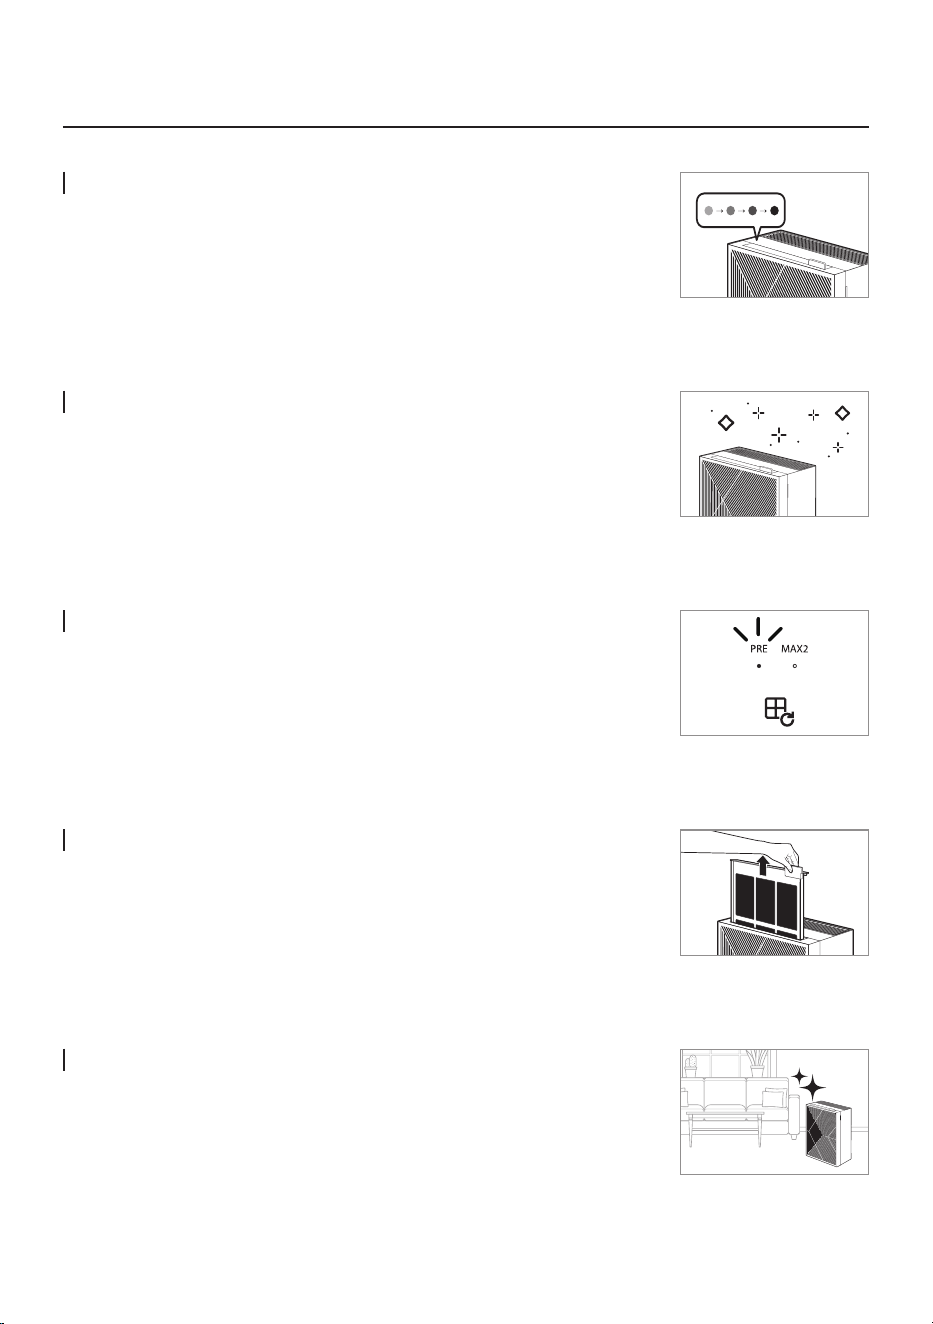
1. While the product is operating, press the Mode button and the Light
button at the same time for more than 2 seconds.
2. The speed indicator ashes at an approximately
0.5 second interval.
3. Press the Mode button to adjust to the desired sensitivity.
The speed indicator blinks as shown below once sensor sensitivity is
selected.
Level 1 Level 2 Level 3
High Standard Low
4. Press the Mode button and the Light button simultaneously for more
than 2 seconds, the selected sensitivity will be inputted, and the
product will start operating normally.
* If the Mode button and the light button are not pressed for 10 seconds,
the selected sensitivity of the sensor is automatically entered.
2 sec.
2 sec.
Flash
ADJUST PARTICLE SENSOR
How to Use
15
HOW TO CLEAN
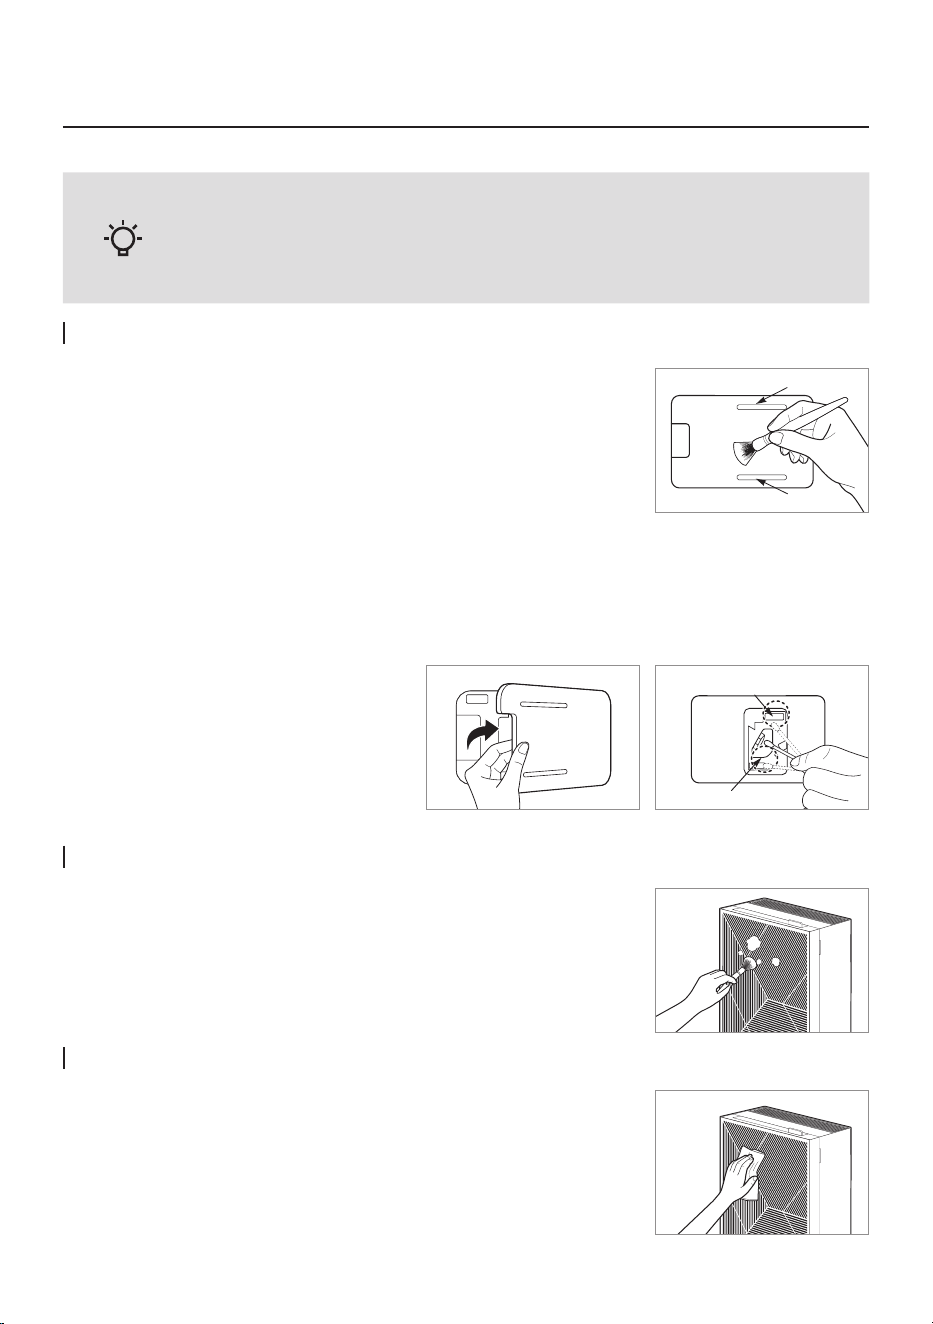
Cleaning the Air Quality sensor (every 2 months)
How to Clean Front Cover
How to Clean Main Body of Product
Use a soft cloth or brush to wipe off the dust on the surface of the
front cover.
* Use a slightly wet cloth to wipe when contamination is high
(Do not use abrasive).
Use a dry and soft cloth to wipe it.
* Use a slightly wet cloth to wipe when contamination is high
(Do not use abrasive).
- Always unplug the air purier before cleaning.
- Do not use detergents that contain organic solvents (solvent, thinner, etc), bleach,
chlorine, or abrasives.
- Do not put the air purier in water or spray water directly on it.
1. Use a soft brush or vacuum cleaner to clean the air quality sensor's air
inlet and outlet.
2. Open the air quality sensor cover on the right-hand side of the product.
Wipe the lens, dust inlet, and dust outlet with a dry cotton swab.
* Without regular cleaning, the performance of the air quality sensor deteriorates.
* The cleaning cycle differs depending on the operating environment. When using the product in a dusty
environment, clean the sensor more often.
Air outlet
Air inlet
Dust outlet
Dust inlet
Tips
ENGLISH / 16
Maintenance
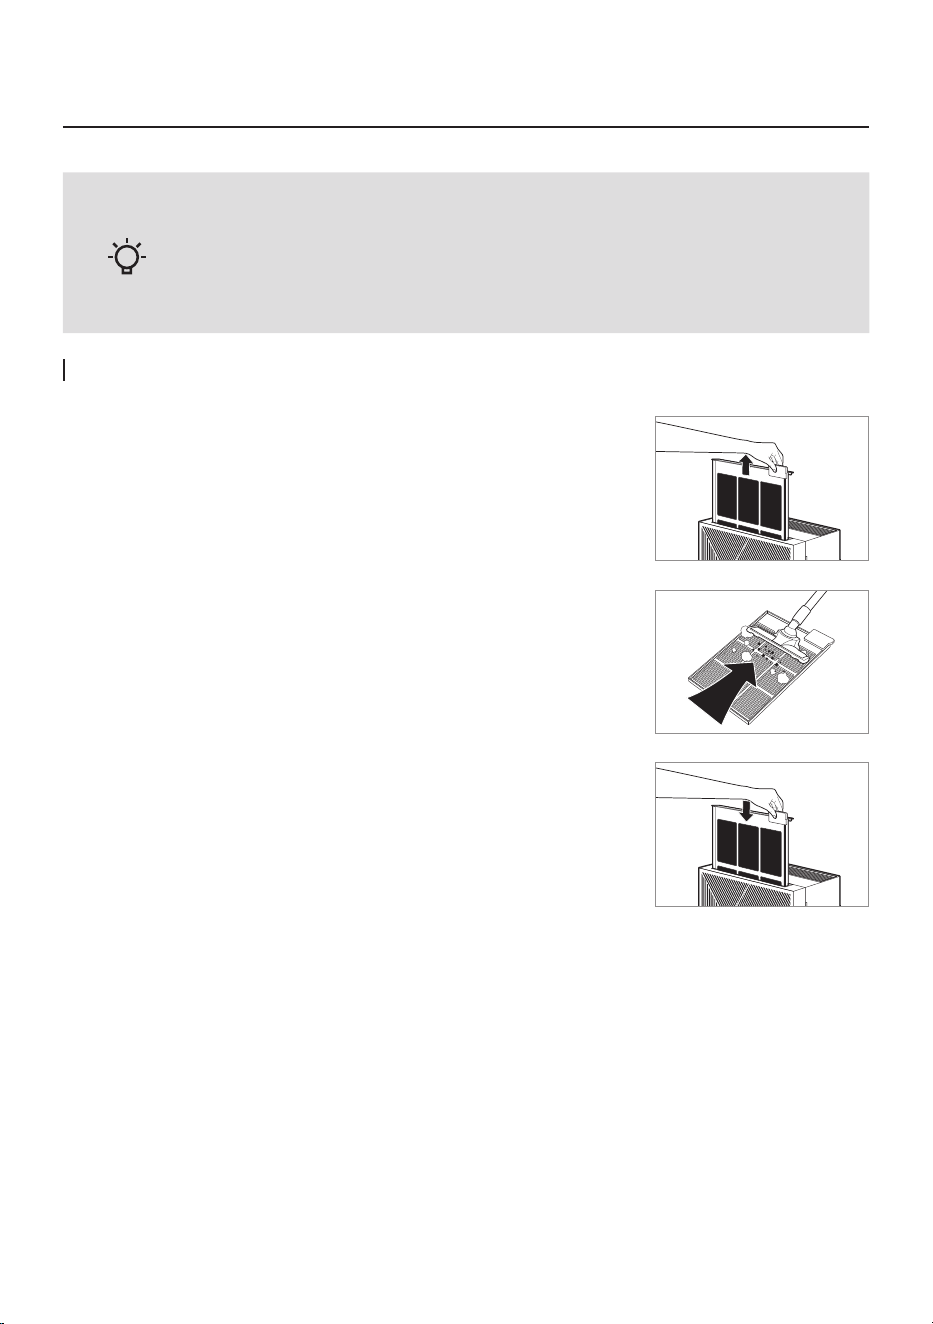
Pre-lter (every two weeks)
- Always unplug the air purier before cleaning the lter.
- The pre-lter can be restored by removing dust or washing with water.
- Failure to clean the pre-lter for a long time may result in poor product
performance.
- The Max2 lter cannot be restored by cleaning.
Never wash these lters with water.
1. The pre-lter can be easily removed without disassembling the product.
Pull the Pre-lter handle to take it out.
2. Remove dust with a vacuum cleaner or water depending
on the degree of pollution.
3. Dry the pre-lter entirely and install the lter on the product.
* You may hang dry the wet pre-lter on the front cover of the product
using the hook at the top of the pre-lter.
* To install the pre-lter, insert it entirely into the product.
Tips

17
HOW TO REPLACE FILTER
How to Replace
- Refer to the lter installation method on page 10 to replace the lter.
- Be sure to check the front side when installing the lter.
- Use a genuine Coway lter to maintain the optimal performance of the product.
- Always unplug the power cord before replacing the lter.
* It is based on 8-hour use per day at level 3 speed.
* Filter replacement cycle is a recommendation and may vary depending on the environment.
Filter Cleaning and Replacement Cycle
Filter Cycles
Method
Pre-lter Every 2~4 weeks Cleaning
Max2 lter Every 1 year Replacement
ENGLISH / 18
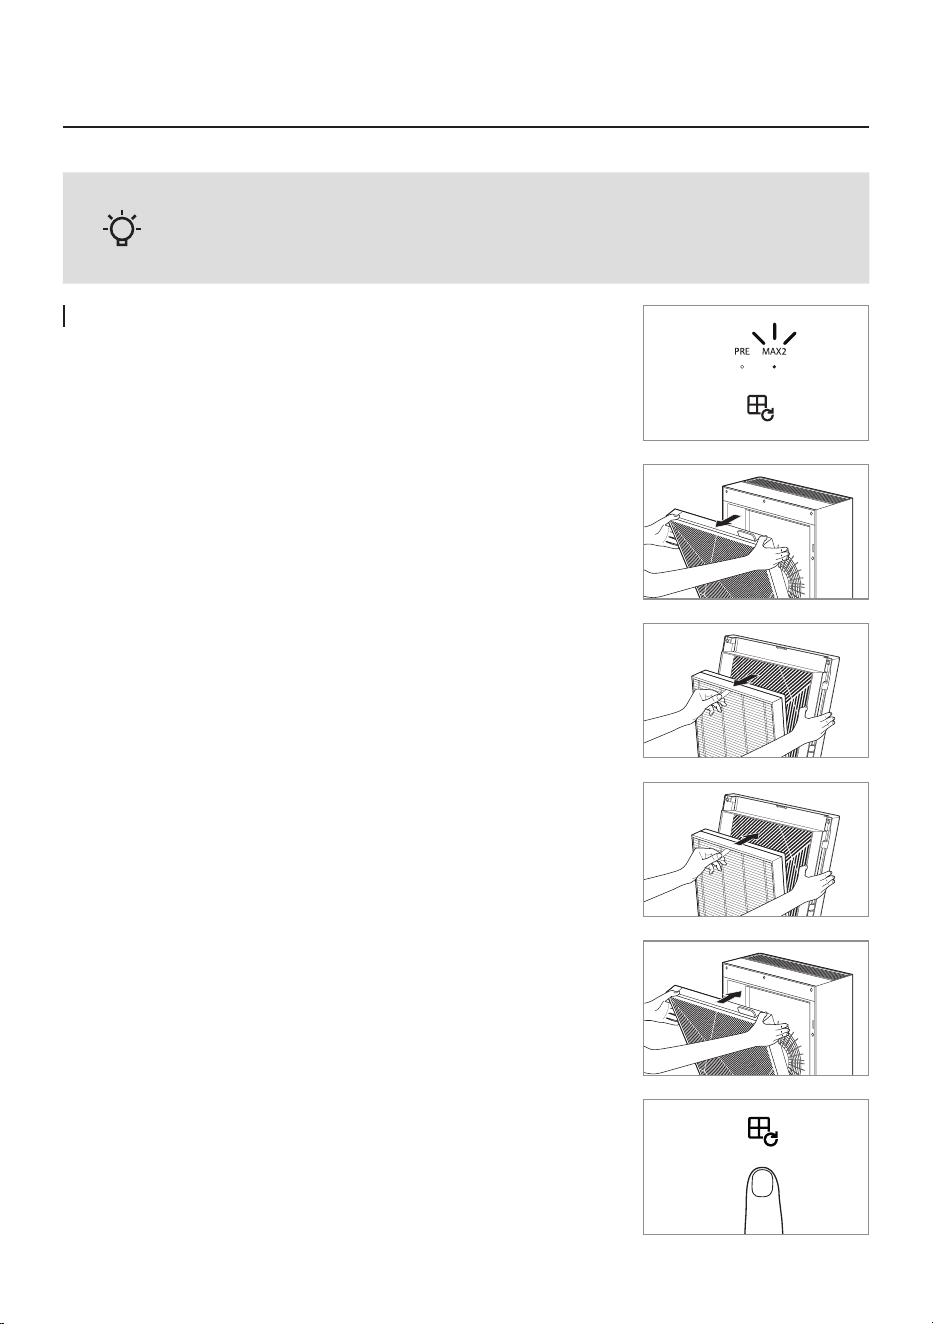
Maintenance
- The cover with the lter attached may damage if it is dropped while
moving, so do not move it upside down.
- Max2 lters are consumables.
How to Replace Max2 lter (Replace every 12 months)
PRE LED: Pre-lter
MAX2 LED: Max2 lter
1. Open the front cover and remove the lter set entirely.
* It prevents dust generation inside the space.
2. Move to where the lter replacement is possible and separate the
Max2 lter.
3. Clean / Wash the area except for the lter and dry it before
assembling the new lter.
* Check the front display of the lter.
* Assemble the Max2 lter
* Put the Max2 lter, then push the fastening material areas of the frame.
4. After assembling to the product, close the front cover.
5. Reset the indicator by pressing the air quality indicator light on/off
button & lter replacement button for 3 seconds.
3 sec.
Tips

19
TROUBLESHOOTING
Problems Check Possible solutions
No air is blowing.
• Is the power cord connected ?
Connect the power cord to an electric
outlet for 120 V~, 60 Hz.
• Is the display part all turned off ?
Press the power button and then select the
desired function.
• Isn’t the power gone out ?
Use the air purier after the power comes
back on.
• Is the front cover closed ? Close the front cover properly.
The airow
speed does not
change.
• Isn’t it in manual ?
Set the desired operating mode.
The airow speed
is signicantly
weaker than
before.
•
Isn’t the lter cleaning or
replacement time passed ?
Check the lter cleaning and replacement
cycles and then clean / replace the lter(s)
if necessary.
A bad smell
comes out of the
air outlet.
• Isn’t the lter cleaning or
replacement time passed ?
Check the lter cleaning and replacement
cycles and then clean / replace the lter(s) if
necessary.
The color of the air
quality indicator
always stays the
same.
• Isn’t there dust on the air quality
sensor’s lens ?
Clean the lens of the air quality sensor.
• Does the pollution level keep
indicating a high level ?
Adjust the sensitivity of the air quality
sensor to Insensitive or standard.
• Does the pollution level keep
indicating a low level ?
Adjust the sensitivity of the air quality
sensor to sensitive or standard.
The air quality
indicator is
ashing.
• Ask service center.
When other
functional
problems are
detected.
• Check the symptoms, unplug the product, and ask service center.
▶ For more information, please contact us: INFO@COWAYMEGA.COM / 1-800-285-0982
The air purier may operate abnormally not because of the product malfunction but because of minor causes
or because the user is not familiar with the product use. In such a case, problems can be solved easily even
without help from the service center just by checking the following. If the problem persists after checking the
following, contact the service center.

ENGLISH / 20
Others
SPECIFICATION
Product name
Air Purier
Model name Airmega 240(W) , Airmega 240(I)
Rated voltage 120 V~, 60 Hz
Power consumption 60 W
Filter
Washable Pre-Filter + Max2 lter set
(Activated Carbon + Green True HEPA™)
Installation location Indoor
Coverage area 403 ft2 (43 ㎡)*
Size (WxDxH) 16.7 x 8.3 x 22.8 inch (42.3 x 21 x 58 cm)
Product weight 21 lb (9.5 kg)
▶ There may be slight changes to the specications for improving the product’s performance.
▶ The energy efciency of this ENERGY STAR certied model is measured based on a ratio between
the model’s CADR for Smoke and the electrical energy it consumes, or CADR/Watt.

21
MEMO

ENGLISH / 22
MEMO

23
MEMO

LIMITED WARRANTY (USA/CANADA/MEXICO)
ARBITRATION NOTICE: THIS LIMITED WARRANTY
CONTAINS AN ARBITRATION PROVISION THAT
REQUIRES YOU AND COWAY TO RESOLVE
DISPUTES BY BINDING ARBITRATION INSTEAD OF
IN COURT, UNLESS YOU CHOOSE TO OPT OUT. IN
ARBITRATION, CLASS ACTIONS AND JURY TRIALS
ARE NOT PERMITTED. PLEASE SEE THE SECTION
TITLED “PROCEDURE FOR RESOLVING DISPUTES”
BELOW.
Should the motor or other electronic parts of Coway’s
product fail due to a defect in materials or workmanship
under normal home use, during the warranty period set
forth below, Coway will at its option repair or replace
the part and/or the product. This limited warranty is
valid only to the original retail purchaser of the product
and applies only when purchased and used within the
United States, Canada and Mexico. Proof of original
retail purchase and the video of the issue are required
to obtain warranty service under this Limited Warranty.
Warranty PeriodWarranty Period Scope of WarrantyScope of Warranty RemarkRemark
One (1) year from date of One (1) year from date of
original retail purchaseoriginal retail purchase
Any internal/functional Any internal/functional
partsparts
Filter excludedFilter excluded
Three (3) years from date Three (3) years from date
of original retail purchase of original retail purchase
Motor and electronic partsMotor and electronic parts
*
Replacement products and parts are warranted for the
remaining portion of the original warranty period or ninety
(90) days, whichever is greater.
*
Replacement products and parts may be new or remanufactured.
THIS WARRANTY IS IN LIEU OF ANY OTHER
WARRANTY, EXPRESS OR IMPLIED, INCLUDING
WITHOUT LIMITATION, ANY WARRANTY OF
MERCHANTABILITY OR FITNESS FOR A PARTICULAR
PURPOSE. TO THE EXTENT ANY IMPLIED WARRANTY
IS REQUIRED BY LAW, IT IS LIMITED IN DURATION TO
THE EXPRESS WARRANTY PERIOD ABOVE. NEITHER
THE MANUFACTURER NOR ITS DISTRIBUTOR SHALL
BE LIABLE FOR ANY INCIDENTAL, CONSEQUENTIAL,
INDIRECT, SPECIAL, OR PUNITIVE DAMAGES OF
ANY NATURE, INCLUDING WITHOUT LIMITATION,
LOST REVENUES OR PROFITS, OR ANY OTHER
DAMAGE WHETHER BASED IN CONTRACT, TORT, OR
OTHERWISE.
Some states, provinces, or countries do not allow the
exclusion or limitation of incidental or consequential
damages or limitations on how long an implied
warranty lasts. Therefore, the above exclusion or
limitation may not apply to you. This warranty gives
you specic legal rights, and you may also have other
rights which vary from state to state.
THIS LIMITED WARRANTY DOES NOT COVER:
Service trips to deliver, pick up, or install or repair the
product; instruction to the customer on operation
of the product; repair or replacement of fuses or
correction of wiring or plumbing, or correction of
unauthorized repairs/installation.
Failure of the product to perform during power
failures and interrupted or inadequate electrical
service.
Damage caused by leaky or broken water pipes, frozen
water pipes, restricted drain lines, inadequate or
interrupted water supply or inadequate supply of air.
Damage resulting from operating the product in a
corrosive atmosphere or contrary to the instructions
outlined in the owner’s manual of the product.
Damage to the product caused by accidents, pests and
vermin, lightning, wind, re, oods, or acts of God.
Damage or failure caused by unauthorized
modication or alteration, or use for other than the
intended purpose.
Damage or failure of fan caused during the
shipment or by misuse of the customer.
Damage or failure caused by incorrect electrical
current, voltage, or plumbing codes, commercial or
industrial use, or use of accessories, components,
or consumable cleaning products which are not
approved by Coway.
Damage caused by transportation and handling,
including scratches, dents, chips, and/or other damage
to the nish of your product, unless such damage
results from defects in materials or workmanship on
the motor or other electronic parts and is reported
within one (1) week of delivery.
Damage or missing items to any display, open box,
discounted, or refurbished product.
ENGLISH / 24

Products with original serial numbers that have been
removed, altered, or cannot be readily determined.
Model and serial numbers, along with original retail
sales receipts, are required for warranty validation.
Increases in utility costs and additional utility expenses.
Repairs when the product is used for other than normal
and usual household use (e.g., commercial use, in ofces
and recreational facilities) or contrary to the instructions
outlined in the product’s owner’s manual.
Costs associated with removal of the product from your
home for repairs.
The removal and reinstallation of the product if it is
installed in an inaccessible location or is not installed
in accordance with published installation instructions,
including the owner’s and installation manuals of Coway.
Damage resulting from misuse, abuse, improper
installation, repair, or maintenance. Improper repair
includes use of parts not approved or specied by
Coway.
The cost of repair or replacement under these excluded
circumstances shall be borne by the consumer.
TO OBTAIN WARRANTY SERVICE:
Please contact Coway at 1-800-285-0982 between
8:00am and 5:00pm PT, Monday through Friday, to
speak with an authorized representative of Coway.
Your warranty claim le will be opened, and you will
be instructed to send the proof of purchase, video
footage showing the alleged defect and the product
to the address designated by the representative.
Within 45 days from its receipt of said proof, video
footage and the product, Coway will either (i) send
you the repaired or replaced product at no charge to
you or (ii) send you your original product at your costs
if your warranty claim is denied, which will be promptly
notied by Coway. THE PROOF OF PURCHASE,
VIDEO FOOTAGE AND THE PRODUCT SHALL BE
RECEIVED BY COWAY WITHIN 30 DAYS AFTER
YOUR WARRANTY CLAIM FILE IS OPENED.
For additional product information, please visit
Coway’s website at http://www.cowaymega.com
For further assistance, please write:
Coway USA, Inc. 4221 Wilshire Blvd., STE 210 Los
Angeles, CA 90010
PROCEDURE FOR RESOLVING DISPUTES:
ALL DISPUTES BETWEEN YOU AND COWAY
ARISING OUT OF OR RELATING IN ANY WAY TO
THIS LIMITED WARRANTY OR THE PRODUCT SHALL
BE RESOLVED EXCLUSIVELY THROUGH BINDING
ARBITRATION, AND NOT IN A COURT OF GENERAL
JURISDICTION. BINDING ARBITRATION MEANS
THAT YOU AND COWAY ARE EACH WAIVING
THE RIGHT TO A JURY TRIAL AND TO BRING OR
PARTICIPATE IN A CLASS ACTION.
Denitions. For the purposes of this section,
references to “Coway” mean Coway USA, Inc., its
parents, subsidiaries and afliates, and each of their
ofcers, directors, employees, agents, beneciaries,
predecessors in interest, successors, assigns and
suppliers; references to “dispute” or “claim” shall
include any dispute, claim or controversy of any kind
whatsoever (whether based in contract, tort, statute,
regulation, ordinance, fraud, misrepresentation or any
other legal or equitable theory) arising out of or relating
in any way to the sale, condition or performance of the
product or this Limited Warranty.
Notice of Dispute. In the event you intend to
commence an arbitration proceeding, you must rst
notify Coway in writing at least 30 days in advance of
initiating the arbitration by sending a letter to Coway at
Coway USA, Inc., Attn: Legal Department- Arbitration,
4221 Wilshire Blvd., STE 210, Los Angeles, CA 90010.
You and Coway agree to engage in good faith
discussions in an attempt to amicably resolve your
claim. The notice must provide your name, address,
and telephone number; identify the product that is the
subject of the claim; and describe the nature of the
claim and the relief being sought. If you and Coway
are unable to resolve the dispute within 30 days, either
party may proceed to le a claim for arbitration.
Agreement to Binding Arbitration and Class Action
Waiver. Upon failure to resolve the dispute during the
30 day period after sending written notice to Coway,
you and Coway agree to resolve any claims between us
only by binding arbitration on an individual basis, unless
you opt out as provided below. Any dispute between
you and Coway shall not be combined or consolidated
with a dispute involving any other person’s or entity’s
product or claim. More specically, without limitation
of the foregoing, any dispute between you and Coway
shall not under any circumstances proceed as part of
a class or representative action. Instead of arbitration,
either party may bring an individual action in small
claims court, but that small claims court action may not
be brought on a class or representative basis.
25

Arbitration Rules and Procedures. To begin
arbitration of a claim, either you or Coway must make
a written demand for arbitration. The arbitration will be
administered by the American Arbitration Association
(“AAA”) and will be conducted before a single
arbitrator under the AAA’s Consumer Arbitration
Rules that are in effect at the time the arbitration is
initiated (referred to as the “AAA Rules”) and under
the procedures set forth in this section. The AAA Rules
are available online at www.adr.org/consumer. Send a
copy of your written demand for arbitration, as well
as a copy of this provision, to the AAA in the manner
described in the AAA Rules. You must also send a copy
of your written demand to Coway at Coway USA, Inc.,
Attn: Legal Department- Arbitration, 4221 Wilshire
Blvd., STE 210, Los Angeles, CA 90010. If there is a
conict between the AAA Rules and the rules set
forth in this section, the rules set forth in this section
will govern. This arbitration provision is governed
by the Federal Arbitration Act. Judgment may be
entered on the arbitrator’s award in any court of
competent jurisdiction. All issues are for the arbitrator
to decide, except that issues relating to the scope and
enforceability of the arbitration provision and to the
arbitrability of the dispute are for the court to decide.
The arbitrator is bound by the terms of this provision.
Governing Law. The law of the state of your residence
shall govern this Limited Warranty and any disputes
between us except to the extent that such law is
preempted by or inconsistent with applicable federal
law.
Fees/Costs. If you prevail in the arbitration, Coway
will pay your attorneys’ fees and expenses as long as
they are reasonable, by considering factors including,
but not limited to, the purchase amount and claim
amount. Notwithstanding the foregoing, if applicable
law allows for an award of reasonable attorneys’ fees
and expenses, an arbitrator can award them to the same
extent that a court would. If the arbitrator nds either
the substance of your claim or the relief sought in the
demand is frivolous or brought for an improper purpose
(as measured by the standards set forth in Federal
Rule of Civil Procedure 11(b)), then the payment of all
arbitration fees will be governed by the AAA Rules. In
such a situation, you agree to reimburse Coway for all
monies previously disbursed by it which are otherwise
your obligation to pay under the AAA Rules.
Hearings and Location. If your claim is for $25,000 or
less, you may choose to have the arbitration conducted
solely on the basis of (1) documents submitted to the
arbitrator, (2) through a telephonic hearing, or (3) by
an in-person hearing as established by the AAA Rules.
If your claim exceeds $25,000, the right to a hearing
will be determined by the AAA Rules. Any in-person
arbitration hearings will be held at a location within
the federal judicial district in which you reside unless
we both agree to another location or we agree to a
telephonic arbitration.
Opt Out. You may opt out of this dispute resolution
procedure. If you opt out, neither you nor Coway
can require the other to participate in an arbitration
proceeding. To opt out, you must send notice to Coway
no later than 30 calendar days from the date of the
rst consumer purchaser’s purchase of the product by
either: (i) sending an e-mail to [email protected]
with the subject line: “Arbitration Opt Out” or (ii) calling
1-800-285-0982. You must include in the opt out e-mail
or provide by telephone: (a) your name and address;
(b) the date on which the product was purchased; (c)
the product model name or model number; and (d) the
serial number (the serial number can be found on the
product.
You may only opt out of the dispute resolution
procedure in the manner described above (that is, by
e-mail or telephone); no other form of notice will be
effective to opt out of this dispute resolution procedure.
Opting out of this dispute resolution procedure will not
affect the coverage of the Limited Warranty in any way,
and you will continue to enjoy the full benets of the
Limited Warranty. If you keep this product and do not
opt out, then you accept all terms and conditions of the
arbitration provision described above.
ENGLISH / 26
9239962
001
www.cowaymega.com