Secure the Font & attach the pipe (underneath)
5
Test for leaks
7
8
Cleaning and general maintenance
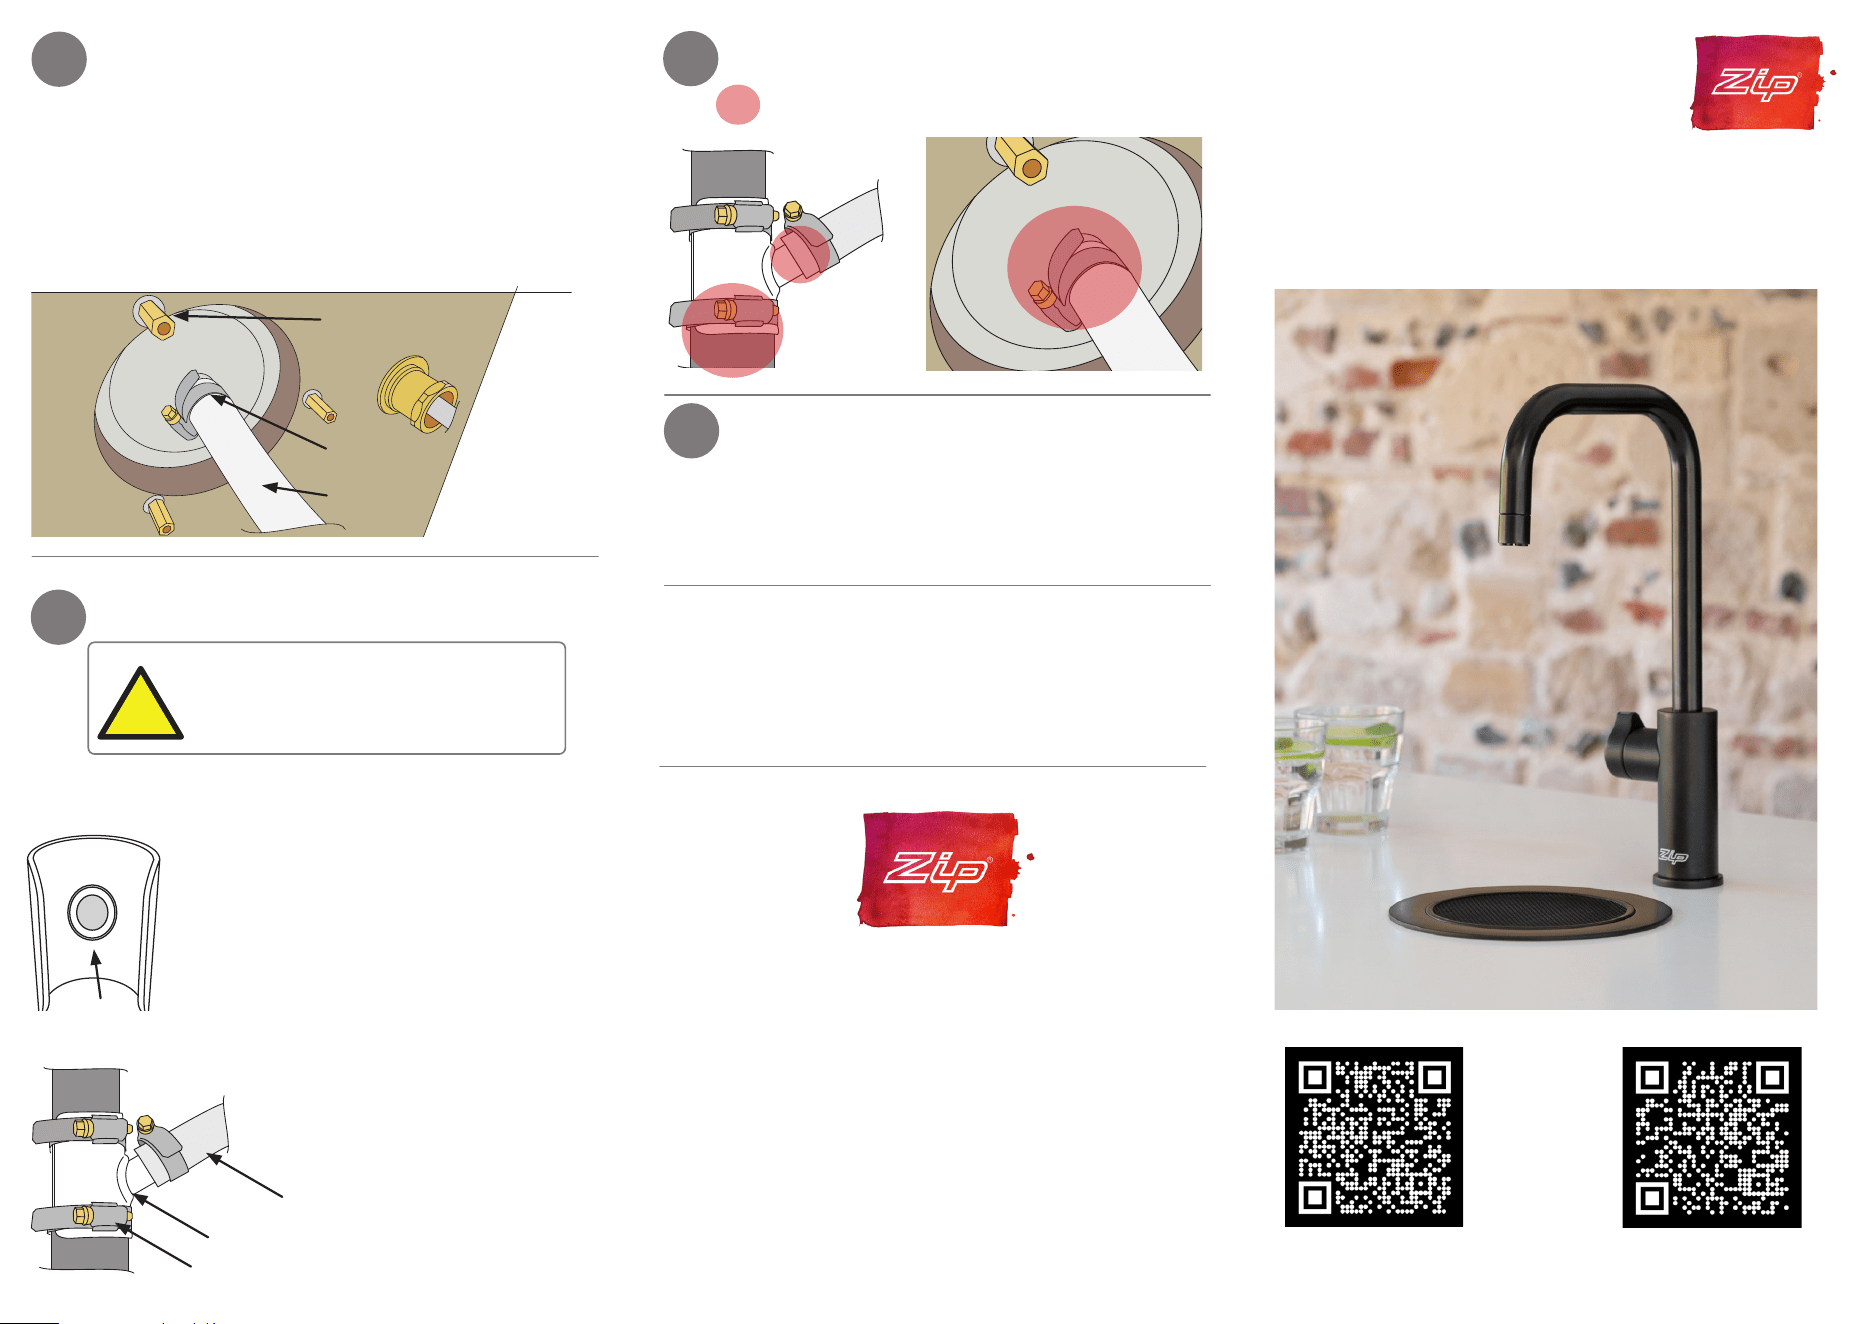
Zip HydroTap
Standalone Font
Installation instructions
For Arc, Cube, Classic, Classic Plus, Elite, Elite Plus,
Micro, Touch-Free Wave Taps
Wipe surfaces with a damp cloth and then wipe dry
with a clean, dry cloth. Do not use disinfectant sprays
without wiping dry afterwards.
3x Font mounting
nut and washer
Drain pipe
Worm drive
clamp
Test for leaks here, re-seal if required.
Australia UK
803151 v1.21 11.21 Standalone font instructions
Zip Water (Aust) Pty Ltd
ABN 46 000 578 727
67 - 77 Allingham Street, Condell Park, NSW 2200
Postal: Locked Bag 80, Bankstown 1885, Australia
(+612) 9796 3100 | Free Call (Aust): 1800 947 827
www.zipwater.com
Zip Water UK
Trafalgar House
Rash’s Green, Dereham,
Norfolk NR19 1JG
0345 6 005 005 | [email protected].uk
specify.zipwater.co.uk
• Secure the Font with mounting nuts and washers.
• Secure flexible drain pipe with a worm drive clamp. Ensure
braided clear reinforced tubing is used.
• If required, use the elbow fitting (supplied) under the Font
to prevent hose kinks.
• Maximum tube length should not exceed 1 metre.
Visit our website to download the manuals
Prepare the drainage point
6
!
• Locate pipe branch attachment
temporarily in position on vertical pipe,
upstream from a drain trap.
• Mark spigot hole position, remove
attachment & drill out 13mm diameter.
• Apply sealant to spigot groove.
• Ensuring spigot is pointing upwards, snap
attachment into place over hole.
• Ensure excess silicone is cleared at drain
entry before final hose connection.
• Secure with worm drive clamps.
• Attach drain pipe to spigot.
• Secure with worm drive clamp.
Sealant
groove
Pipe branch attachment
Flexible pipe from Font
Worm drive clamps
Pipe branch
attachment
Position upstream of a drain trap.
Drain pipe must have constant fall.
Ensure there are no kinks or sags.
Note: If you are experiencing drain-away issues after
correct installation, you can consider installing an AAV
(Air Admittance Valve) in accordance with your local
plumbing code.
Using these instructions
Positioning
Ensure that Font is positioned to minimise
the risks of scalding by dispensing boiling
water while using the tap.
!
1
• Position Tap and Font using the template provided,
See .
• Position Command Centre and Tap as close
together as possible.
Be aware of the risks of hazards which could
cause harm when using tools. Assess the
risks before starting the installation.
Tools needed for Font installation (not supplied)
In addition to normal tools, the following (or equivalent
equipment) will be required.
• 35mm diameter hole saw for tap mounting hole.
• 140mm diameter hole saw for Font mounting hole.
• 13mm diameter drill for drainage point.
• 10mm drill for Font mounting stud clearance holes.
• Tube spanner for fixing the Font assembly.
!
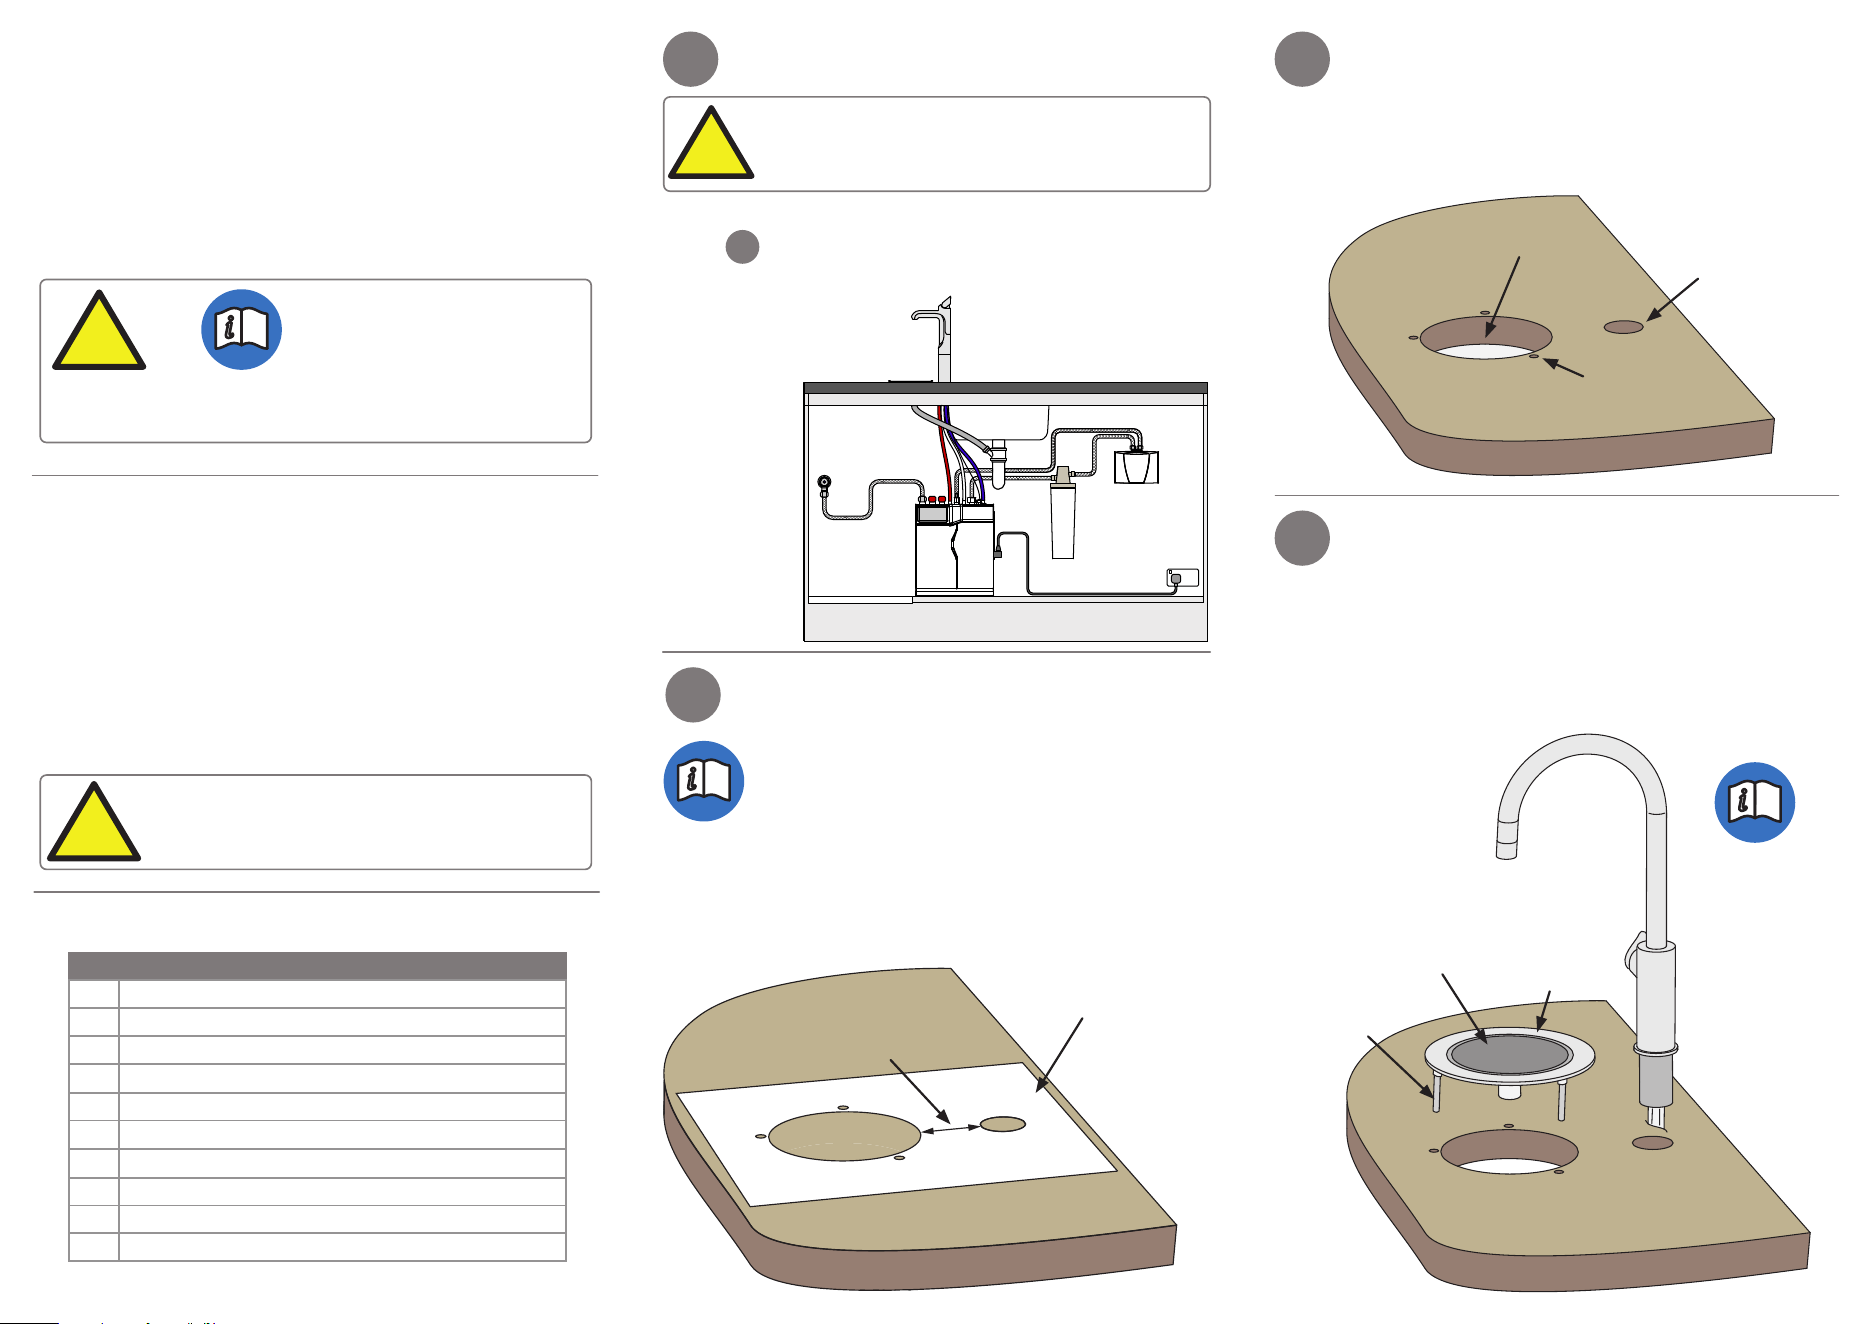
Mark out the font position
2
3
Cut the holes
BC Compact
• Place the transparent film template (supplied) in
position on the work surface.
• Mark out the hole positions and centres.
4
Mount the font
If mounting the HydroTap at the same
time, refer to the installation instructions
supplied with the HydroTap for its
installation
Template
• 140mm diameter clearance for Font bowl.
• 10mm diameter clearance for mounting studs.
• 35mm diameter tap clearance hole.
Font bowl
clearance
3x mounting
stud clearance
Tap hole
• Apply a light coat of silicone sealant to underside of
Font rim, to seal to work surface.
• Screw mounting studs into font flange bosses.
• Locate Font & and lightly press into position.
• (Ensure that the HydroTap is positioned such that it
dispensed into the
centre of the font).
Font body
Detachable
Font grille
3x mounting studs
Refer to
HydroTap
installation
instructions
2
Check spacing dimension
for required tap type
Please refer to all safety and installation requirements
detailed in the installation instructions for the
HydroTap Command Centre (supplied with the
product and online), prior to installation of, or any
change to, the complete system.
Before commencing the
installation,download
& read the HydroTap
installation instructions
!
Read the
instructions
WARNING
Parts supplied in the kit
Qty Description
1 Font body
1 Detachable Font grille
3
Mounting studs
3
Mounting nuts
3 Mounting washers
1
Pipe branch attachment
2
Worm drive clamps for pipe branch attachment
2 Worm drive clamps for flexible drain hose
1 Transparent film template (part no. 806988)
1 Drain hose PVC 19mm ID
