
Functions of the machine and
procedures for placing originals
and loading paper
BEFORE USING THE MACHINE
Operation of the touch screen and
customisation of the user interface
OPERATION OF THE MACHINE
Configuring settings to make
the machine easier to use
SETTING MODE
Useful features of this machine
CONVENIENT USE OF THE MACHINE
Click to go to
chapter index
Using the manual finishing function
MANUAL FINISHING
MA
g the manual finishing function
ANU
A
ANU
A
AL FINISHING
AL FINISHING
Using the printer function
PRINTER
Using the copy function
COPIER
About the specifications
APPENDIX
User's Manual
Questions and answers and
care instructions
TROUBLESHOOTING
DIGITAL FULL COLOR MULTIFUNCTIONAL SYSTEM
MODEL:
BP-90C70
BP-90C80
Using the scan function
SCANNER
Storing jobs as files on the
local drive
DOCUMENT FILING

i
HOW TO USE THIS MANUAL
Click a button below to move to the page that you wish to view.
The following explanation assumes that Adobe Reader is being used (Some buttons do not appear in the default state.).
(1) Return to top page button
If an operation does not proceed as expected, click this
button to start over again.
(2) Back one page button
Displays the previous page.
(3) Forward one page button
Displays the next page.
(4) Return to previously displayed page button
Displays the page that was displayed before the current
page.
(5) Title button
Displays the page of the title indicated by the button.
(6) Contents button
Displays the contents of each chapter.
For example, if the current page is part of the printer
chapter, the table of contents of the printer chapter
appears.
(1) (2) (3) (4)
(6)
(5)
(6)
(5)
If a button does not appear, refer to Adobe Reader Help to display the button.
ii
ABOUT OPERATION MANUAL
This manual explains how to use the BP-90C70/BP-90C80 digital full color multifunctional system.
Please note
• For information on installing the drivers and software cited in this manual, please refer to the Software Setup Guide.
• For information on your operating system, please refer to your operating system manual or the online Help function.
• The explanations of screens and procedures in a Windows environment are primarily for Windows
®
10. The screens may be
different depending on the version of the operating system or the software application.
• The explanations of screens and procedures for use in a macOS environment generally assume that macOS 11 is being used
and a PPD driver is installed. The screens may be different depending on the version of the operating system or the software
application.
• Wherever "BP-xxxxx" appears in this manual, please substitute your model name for "xxxxx".
• Considerable care has been taken in preparing this manual. If you have any comments or concerns about the manual, please
contact your dealer or nearest SHARP Service Department.
• This product has undergone strict quality control and inspection procedures. In the unlikely event that a defect or other problem
is discovered, please contact your dealer or nearest SHARP Service Department.
• Aside from instances provided for by law, SHARP is not responsible for failures occurring during the use of the product or its
options, or failures due to incorrect operation of the product and its options, or other failures, or for any damage that occurs due
to use of the product.
Warning
• Reproduction, adaptation or translation of the contents of the manual without prior written permission is prohibited, except as
allowed under copyright laws.
• All information in this manual is subject to change without notice.
Illustrations and the operation panel and touch panel shown in this manual
The peripheral devices are generally optional, however, some models include certain peripheral devices as standard equipment.
The explanations in this manual assume the BP-90C80.
For some functions and procedures, the explanations assume that devices other than the above are installed.
Icons used in the manuals
The icons in the manuals indicate the following types of information:
The display screens, messages, and key names shown in the manual may differ from those on the actual machine
due to product improvements and modifications.
This alerts you to a situation that could result in
death or serious personal injury. This alerts
you to a situation that could result in personal
injury or damage to properties.
This explains how to stop or correct an operation.
This alerts you to a situation where there is a
risk of machine damage or failure.
This describes a routine work relevant to setting mode.
This supplements function or operation
procedure.

1-1
BEFORE USING THE MACHINE
PART NAMES AND FUNCTION. . . . . . . . . . . . . . . . . . . . . 1-2
EXTERIOR . . . . . . . . . . . . . . . . . . . . . . . . . . . . . . . . . . . . 1-2
INTERIOR . . . . . . . . . . . . . . . . . . . . . . . . . . . . . . . . . . . . 1-5
AUTOMATIC DOCUMENT FEEDER AND DOCUMENT
GLASS . . . . . . . . . . . . . . . . . . . . . . . . . . . . . . . . . . . . . . . 1-6
SIDE AND BACK . . . . . . . . . . . . . . . . . . . . . . . . . . . . . . . 1-7
OPERATION PANEL . . . . . . . . . . . . . . . . . . . . . . . . . . . . 1-8
TURNING ON THE POWER . . . . . . . . . . . . . . . . . . . . . . . . 1-9
TURNING ON THE POWER . . . . . . . . . . . . . . . . . . . . . . 1-9
TURNING OFF THE POWER . . . . . . . . . . . . . . . . . . . . . 1-9
RESTART THE MACHINE. . . . . . . . . . . . . . . . . . . . . . . . 1-9
LOADING PAPER
IMPORTANT POINTS ABOUT PAPER . . . . . . . . . . . . . . 1-10
NAMES AND LOCATIONS OF TRAYS . . . . . . . . . . . . . 1-10
THE DEFINITION OF "R" IN PAPER SIZE . . . . . . . . . . 1-11
APPLICABLE PAPER TYPES . . . . . . . . . . . . . . . . . . . . 1-12
LOADING PAPER IN THE TRAY 1/2 . . . . . . . . . . . . . . . . 1-16
CHANGING THE PAPER SIZE . . . . . . . . . . . . . . . . . . . 1-18
LOADING PAPER IN THE TRAY 3/4 . . . . . . . . . . . . . . . . 1-20
LOADING TAB PAPER INTO TRAY 4. . . . . . . . . . . . . . 1-22
LOADING PAPER IN THE LARGE CAPACITY
TRAY . . . . . . . . . . . . . . . . . . . . . . . . . . . . . . . . . . . . . . . . . 1-24
LARGE CAPACITY TRAY (MX-LC12) . . . . . . . . . . . . . . 1-24
LARGE CAPACITY TRAY (MX-LCX3 N) . . . . . . . . . . . . 1-26
LOADING PAPER IN THE LARGE CAPACITY
TRAYS. . . . . . . . . . . . . . . . . . . . . . . . . . . . . . . . . . . . . . . . 1-30
LOADING THE TAB PAPER . . . . . . . . . . . . . . . . . . . . . 1-32
CHANGING THE PAPER SIZE . . . . . . . . . . . . . . . . . . . 1-34
LOADING PAPER INTO THE BYPASS TRAY. . . . . . . . . 1-36
HOW TO PLACE THE ORIGINAL . . . . . . . . . . . . . . . . . 1-36
LOADING TAB PAPER . . . . . . . . . . . . . . . . . . . . . . . . . 1-37
INSERTING TRANSPARENCY FILM . . . . . . . . . . . . . . 1-37
LOADING ENVELOPES . . . . . . . . . . . . . . . . . . . . . . . . 1-38
LOADING PAPER INTO THE BYPASS TRAY (ON THE
MACHINE) . . . . . . . . . . . . . . . . . . . . . . . . . . . . . . . . . . . 1-41
LOADING PAPER INTO THE BYPASS TRAY (ON THE
LARGE CAPACITY TRAYS) . . . . . . . . . . . . . . . . . . . . . 1-42
HOW TO PLACE THE LONG PAPER GUIDE. . . . . . . . 1-44
HOW TO PLACE THE ORIGINAL
SELECTING A PROCEDURE FOR PLACING THE
ORIGINAL DEPENDING ON THE TYPE AND STATUS
OF THE ORIGINAL . . . . . . . . . . . . . . . . . . . . . . . . . . . . . . 1-45
DETECTABLE ORIGINAL SIZES . . . . . . . . . . . . . . . . . 1-45
AUTOMATIC DOCUMENT FEEDER . . . . . . . . . . . . . . . . 1-47
PREVENTIVE LIGHT TO INDICATE ORIGINAL LEFT
BEHIND . . . . . . . . . . . . . . . . . . . . . . . . . . . . . . . . . . . . . 1-49
ORIGINAL SETTING INDICATOR. . . . . . . . . . . . . . . . . 1-50
SKEW FEED PREVENTION. . . . . . . . . . . . . . . . . . . . . . 1-50
DOUBLE FEED DETECTION . . . . . . . . . . . . . . . . . . . . . 1-50
DOCUMENT GLASS . . . . . . . . . . . . . . . . . . . . . . . . . . . . . 1-51
PERIPHERAL DEVICES
PERIPHERAL DEVICES . . . . . . . . . . . . . . . . . . . . . . . . . . 1-53
FINISHER (LARGE STACKER). . . . . . . . . . . . . . . . . . . . . 1-55
PART NAMES. . . . . . . . . . . . . . . . . . . . . . . . . . . . . . . . . 1-55
SUPPLIES. . . . . . . . . . . . . . . . . . . . . . . . . . . . . . . . . . . .1-56
REPLACING THE CARTRIDGE . . . . . . . . . . . . . . . . . . .1-56
DISCARDING STAPLE WASTE . . . . . . . . . . . . . . . . . . .1-58
SADDLE STITCH FINISHER (LARGE STACKER). . . . . .1-60
PART NAMES. . . . . . . . . . . . . . . . . . . . . . . . . . . . . . . . . 1-60
SUPPLIES. . . . . . . . . . . . . . . . . . . . . . . . . . . . . . . . . . . .1-61
REPLACING THE CARTRIDGE . . . . . . . . . . . . . . . . . . .1-61
DISCARDING STAPLE WASTE . . . . . . . . . . . . . . . . . . .1-66
DISCARDING PAPER WASTE. . . . . . . . . . . . . . . . . . . .1-67
PUNCH MODULE (MX-PN13A/B/C/D) . . . . . . . . . . . . . . . 1-69
DISCARDING PUNCH WASTE . . . . . . . . . . . . . . . . . . .1-69
FOLDING UNIT . . . . . . . . . . . . . . . . . . . . . . . . . . . . . . . . . 1-71
PART NAMES. . . . . . . . . . . . . . . . . . . . . . . . . . . . . . . . . 1-71
INSERTER . . . . . . . . . . . . . . . . . . . . . . . . . . . . . . . . . . . . . 1-72
PART NAMES. . . . . . . . . . . . . . . . . . . . . . . . . . . . . . . . . 1-72
STATUS INDICATORS . . . . . . . . . . . . . . . . . . . . . . . . . . .1-73
PART NAMES. . . . . . . . . . . . . . . . . . . . . . . . . . . . . . . . . 1-73
MAINTENANCE
REGULAR MAINTENANCE . . . . . . . . . . . . . . . . . . . . . . . 1-74
CLEANING THE DOCUMENT GLASS AND
AUTOMATIC DOCUMENT FEEDER . . . . . . . . . . . . . . .1-74
CLEANING THE LASER UNIT . . . . . . . . . . . . . . . . . . . . 1-77
CLEANING THE BYPASS FEED ROLLER . . . . . . . . . .1-81
CLEANING THE PAPER FEED ROLLER. . . . . . . . . . . . 1-83
REPLACEMENT OF TONER CARTRIDGE . . . . . . . . . . .1-84
REPLACEMENT MESSAGE. . . . . . . . . . . . . . . . . . . . . .1-84
REPLACING THE TONER COLLECTION
CONTAINER . . . . . . . . . . . . . . . . . . . . . . . . . . . . . . . . . . . 1-87
BEFORE USING THE MACHINE
1-2
BEFORE USING THE MACHINE►BEFORE USING THE MACHINE
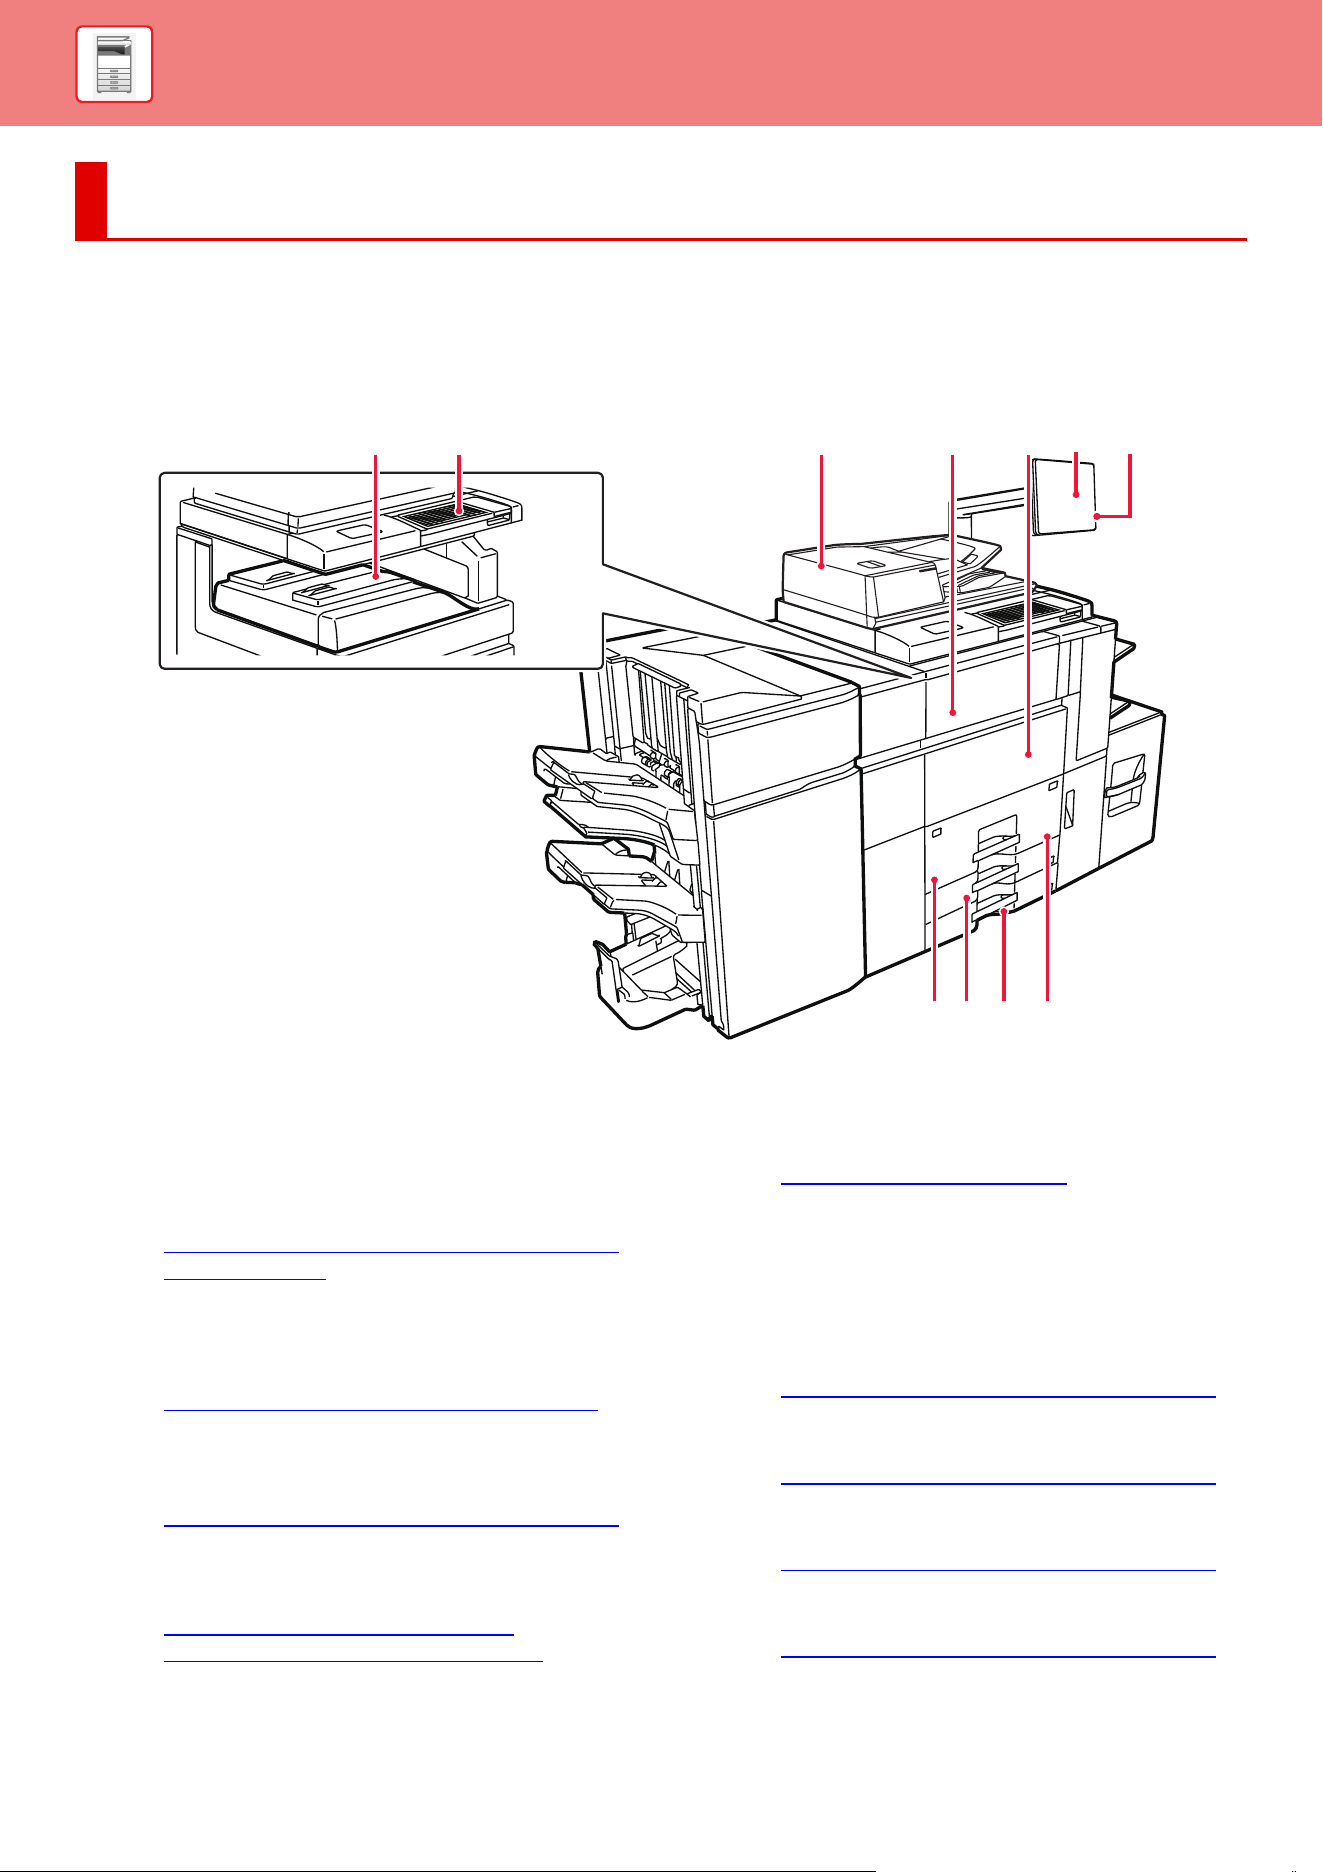
PART NAMES AND FUNCTION
EXTERIOR
(1) Output tray (center tray)
*
Printed paper is output into this tray.
(2) Keyboard
Use this as a substitute for the soft keyboard displayed
on the touch panel. When not being used, it can be
stored under the operation panel.
► NAMES AND FUNCTIONS OF SOFT KEYBOARD
KEYS (page 2-62)
(3) Automatic document feeder
This automatically feeds and scans multiple originals.
Both sides of 2-sided originals can be automatically
scanned at one time.
► AUTOMATIC DOCUMENT FEEDER (page 1-47)
(4) Toner cover (Upper front cover)
Open this cover to replace the toner cartridge or to
remove misfed paper in the paper pass unit.
►
REPLACEMENT OF TONER CARTRIDGE (page 1-84)
(5) Front cover
Open this cover to switch the main power switch to "On"
or "Off".
► TURNING ON
THE POWER (page 1-9)
► CLEANING THE LASER UNIT (page 1-77)
(6) Operation panel
This panel hosts the [Power] button, main power
indicator, and touch panel. Use the touch panel to
operate each of these functions.
► OPERATION PANEL (page 1-8)
(7) USB connector (A type)
This is used to connect a USB device such as a USB
memory device to the machine.
For the USB cable, use a shielded cable.
Supports USB 2.0 (Hi-Speed).
(8) Tray 1
Store paper in this tray. Up to 1200 sheets can be stored.
► LOADING PAPER IN THE TRAY 1/2 (page
1-16)
(9) Tray 3
Store paper in this tray. Up to 500 sheets can be stored.
► LOADING PAPER IN THE TRAY 3/4 (page
1-20)
(10) Tray 4
Store paper in this tray. Up to 500 sheets can be stored.
► LOADING PAPER IN THE TRAY 3/4 (page
1-20)
(11) Tray 2
Store paper in this tray. Up to 800 sheets can be stored.
► LOADING PAPER IN THE TRAY 1/2 (page
1-16)
* Peripheral device.
BEFORE USING THE MACHINE
(8) (9) (10) (11)
(1)
(2)
(3) (4) (5)
(6)
(7)
1-3
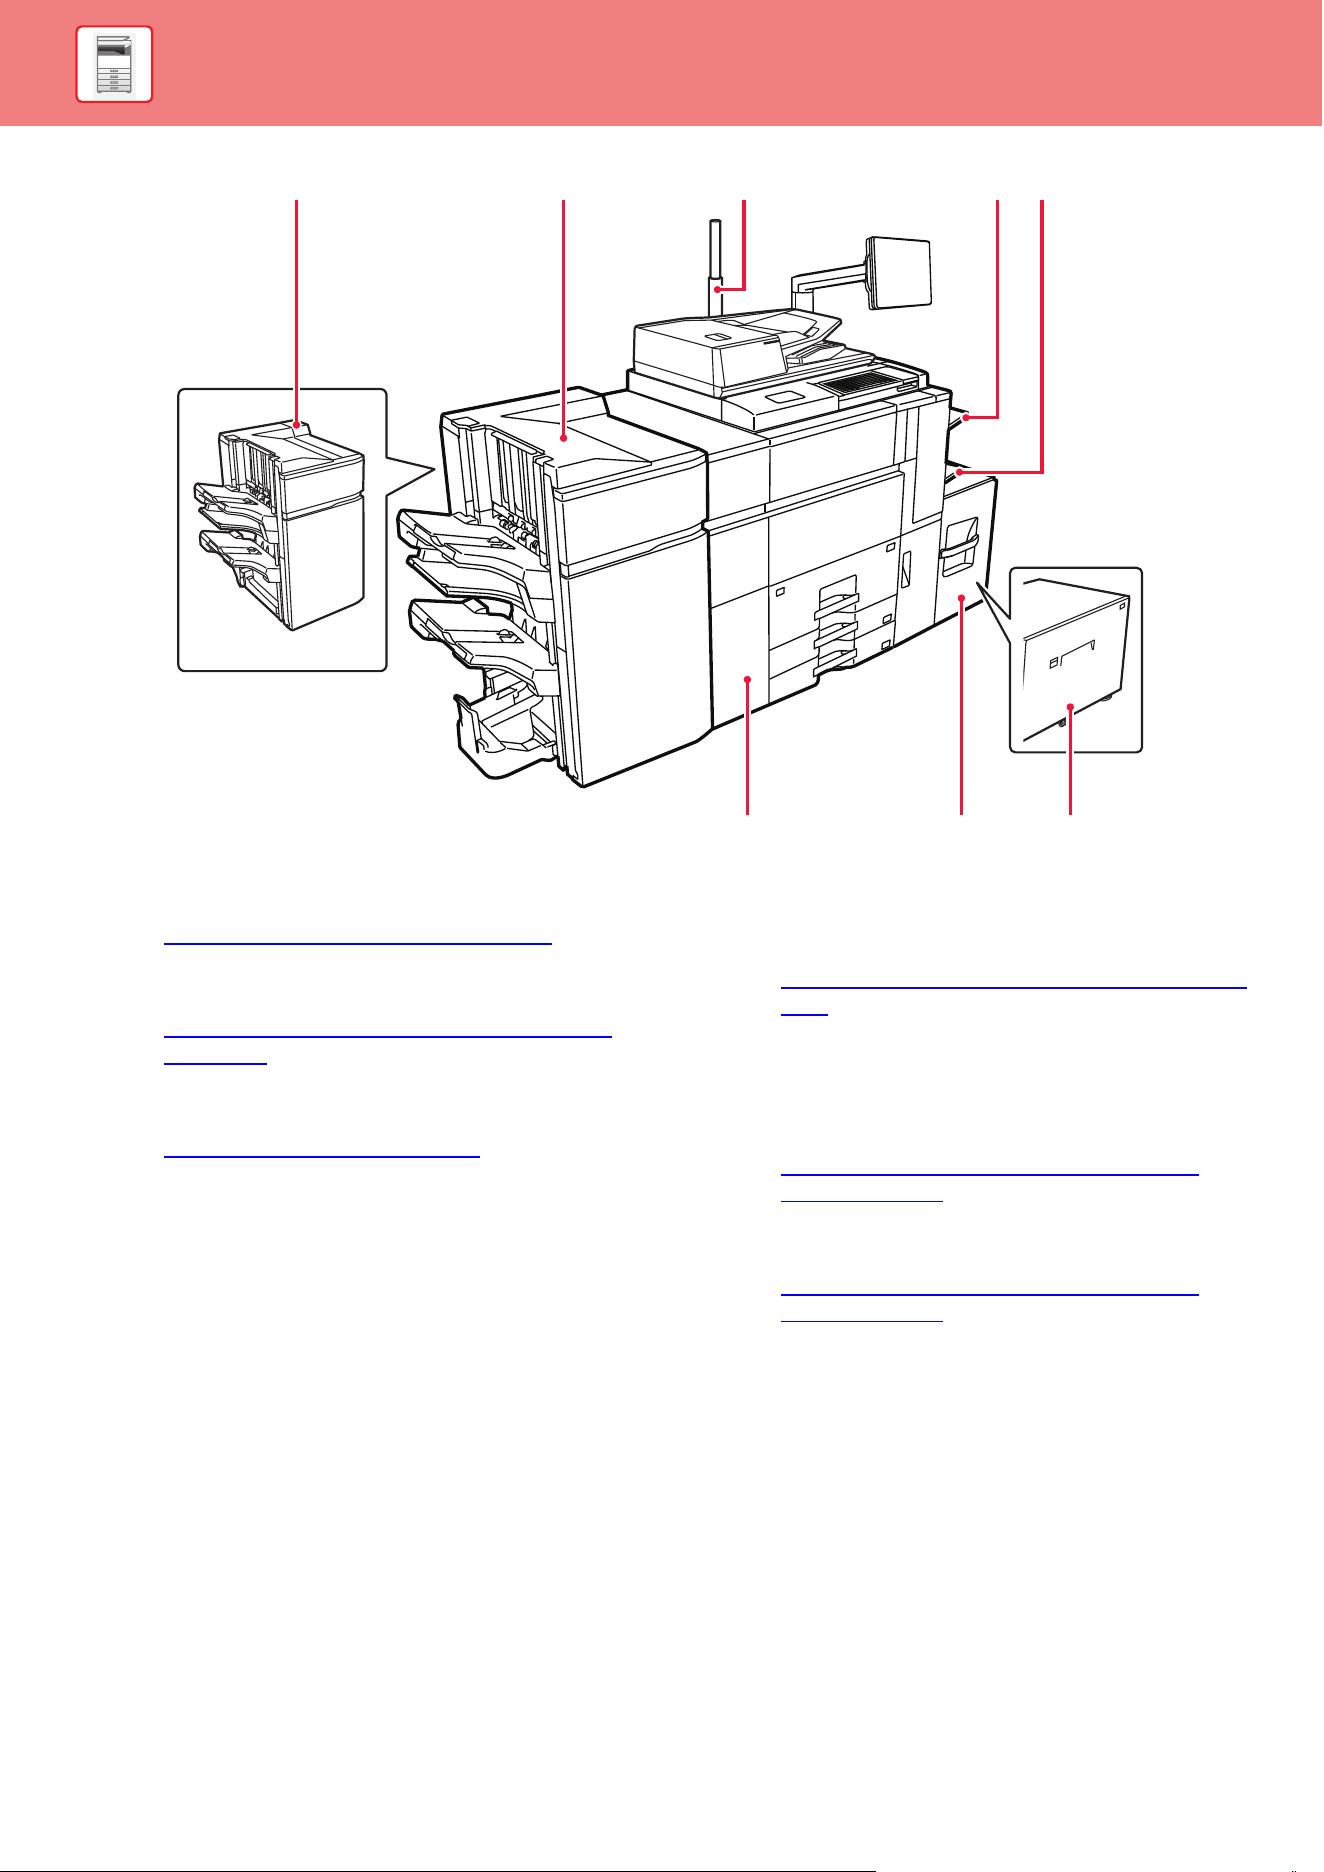
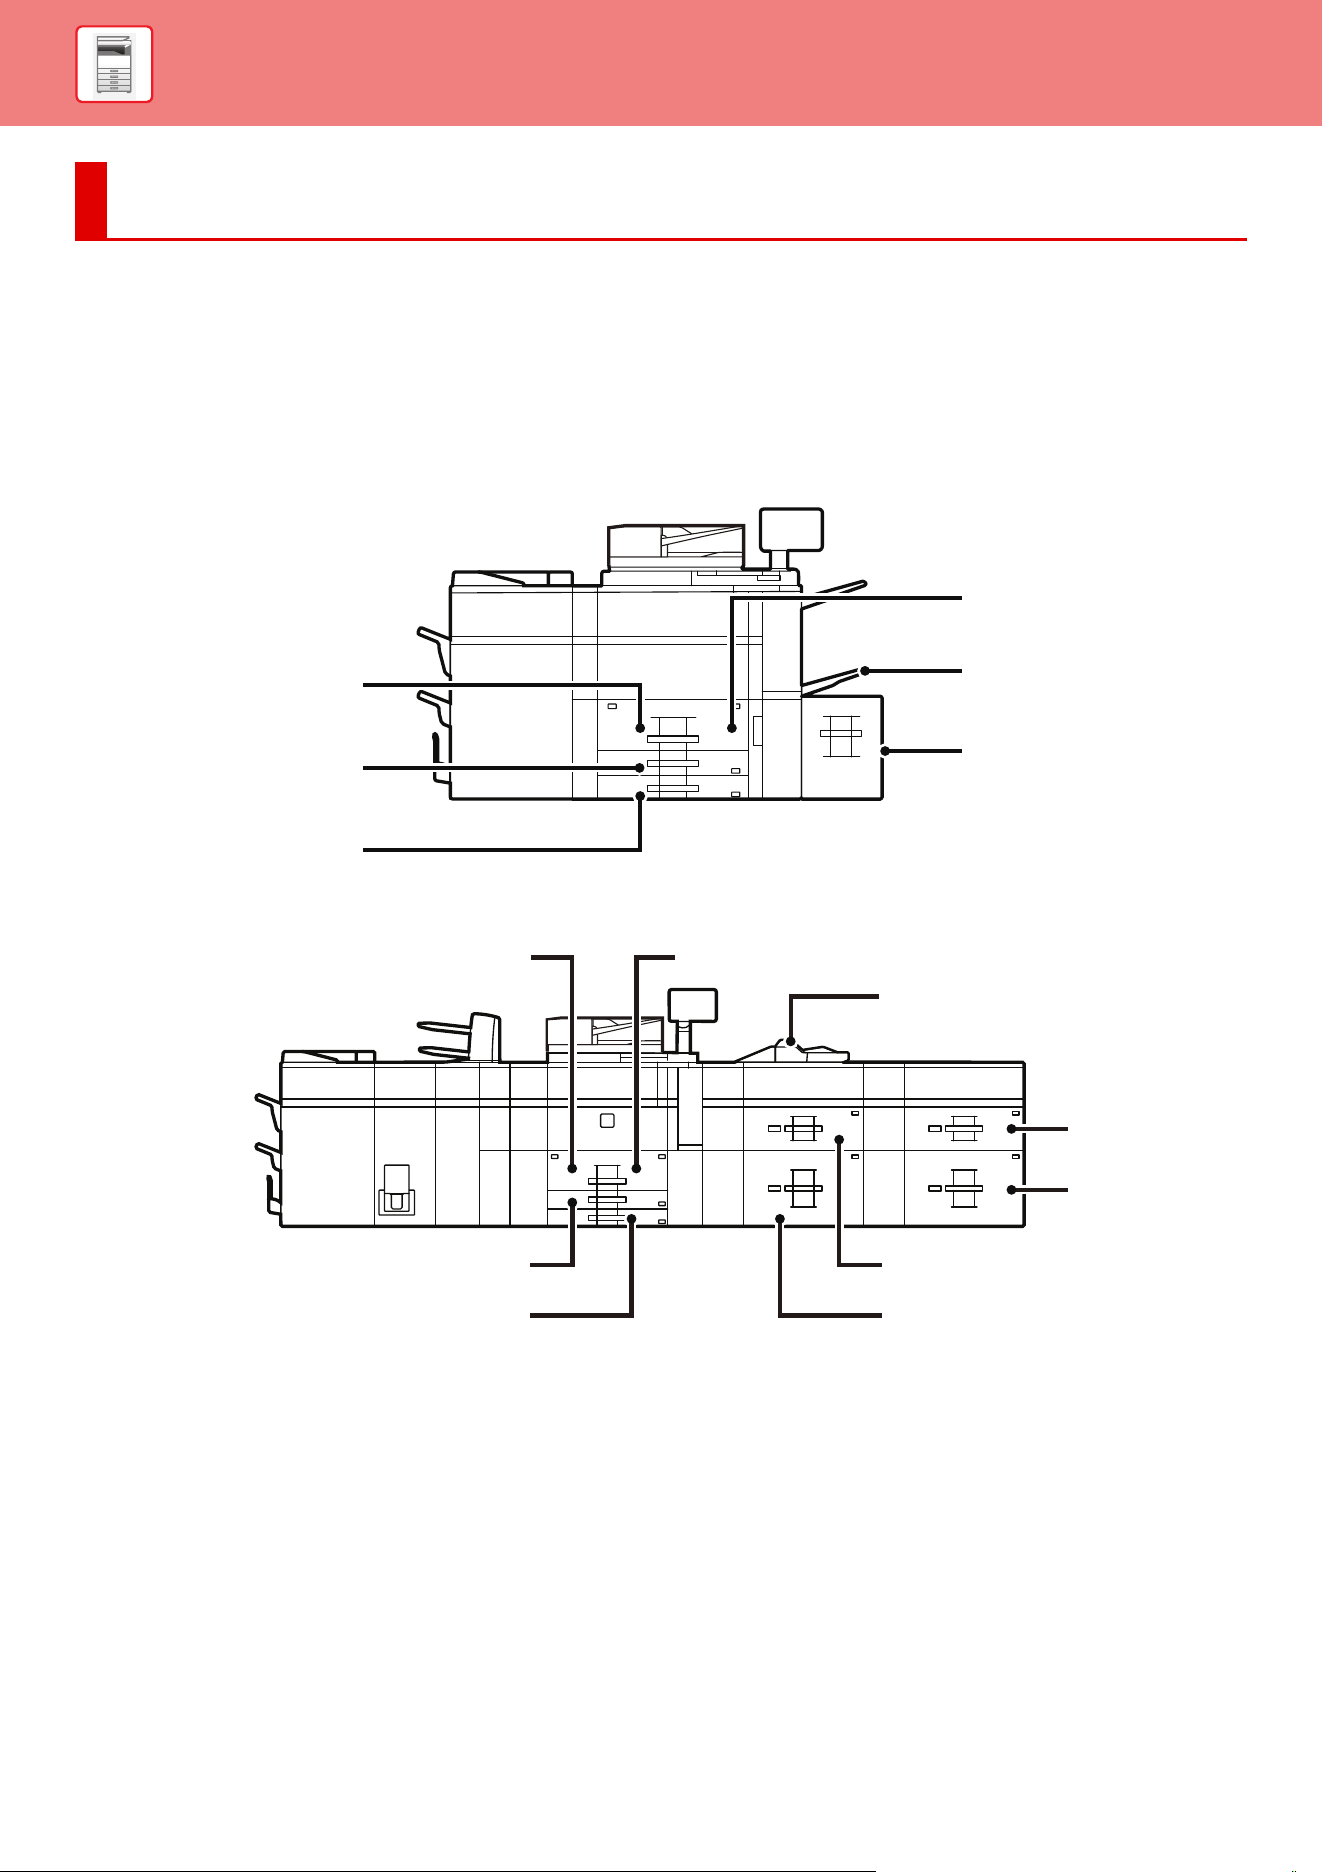
BEFORE USING THE MACHINE►BEFORE USING THE MACHINE
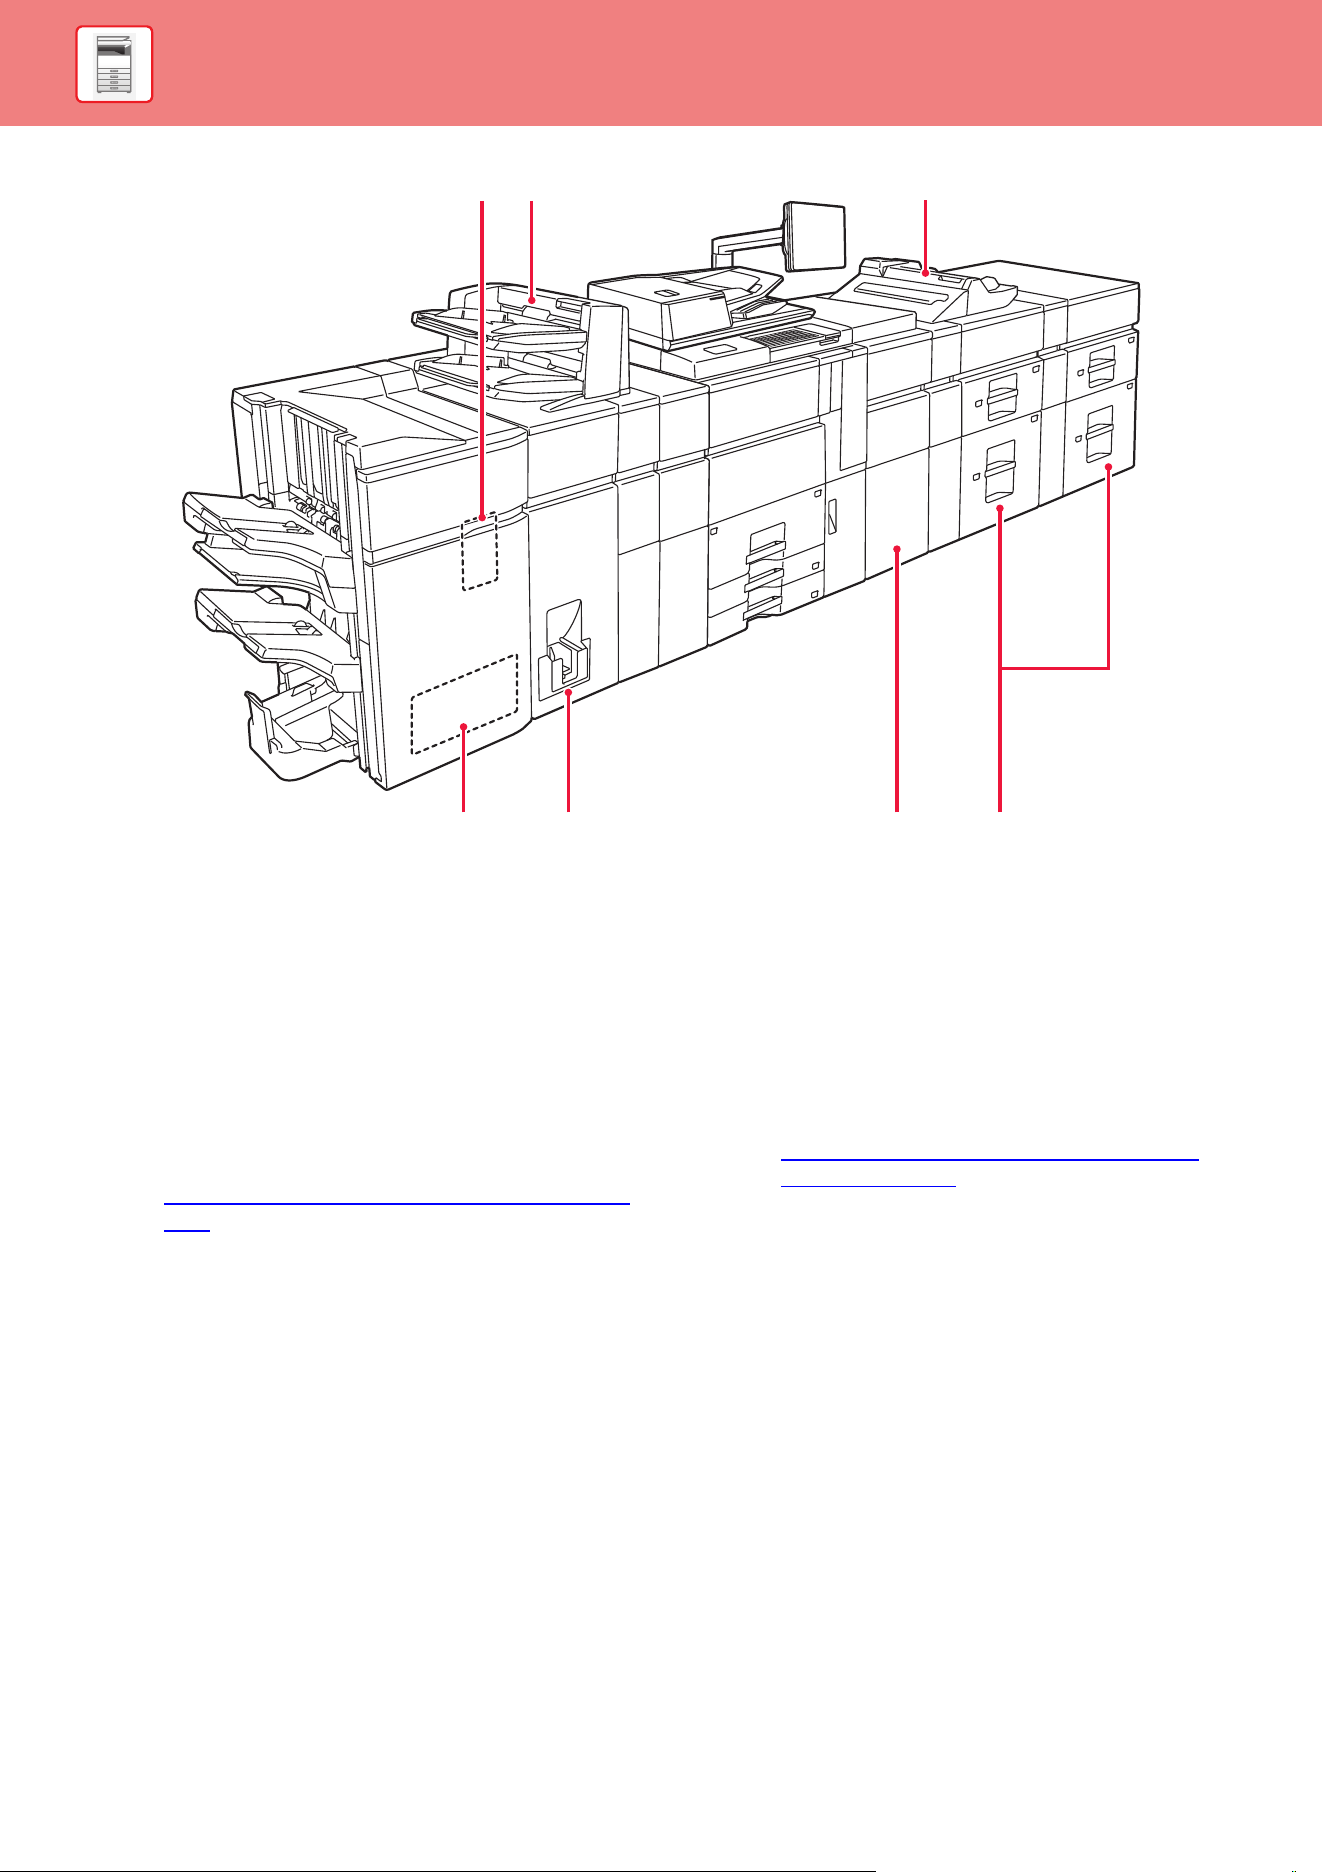
(12) Finisher (large stacker)
*
This staples and outputs paper.
► FINISHER (LARGE STACKER) (page 1-55)
(13) Saddle stitch finisher (large stacker)
*
This staples and folds paper.
► SADDL
E STITCH FINISHER (LARGE STACKER)
(page 1-60)
(14) Status indicator
*
The status of the machine is indicated.
► ST
ATUS INDICATORS (page 1-73)
(15) Right tray
*
As required, paper can be output into the right tray.
(16) Bypass tray
*
Use this tray to feed paper manually.
When loading paper larger than A4R or 8-1/2" × 11"R,
pull out the extension guide.
► LOADING PAP
ER INTO THE BYPASS TRAY (page
1-36)
(17) Curl correction unit
*
This punches and outputs paper.
(18) Tray 5 (MX-LC12)
*
Store paper in this tray. Up to 3500 sheets can be stored.
► LOADING PAPER IN THE
LARGE CAPACITY
TRAY (page 1-24)
(19) Tray 5 (MX-LCX3 N)
*
Store paper in this tray. Up to 3000 sheets can be stored.
► LOADING PAPER IN THE
LARGE CAPACITY
TRAY (page 1-24)
* Peripheral device.
(18)(17) (19)
(12) (13)
(14) (15) (16)
1-4
BEFORE USING THE MACHINE►BEFORE USING THE MACHINE
(20) Punch module
*
This punches and outputs paper.
(21) Inserter
*
Covers and insertion sheets to be inserted into printed
sheets can be loaded.
Using the manual finishing function, you can directly feed
paper into the finisher or saddle stitch finisher to staple,
punch or fold the paper.
(22) Bypass tray
*
Use this tray to feed paper manually.
When loading paper larger than A4R or 8-1/2" × 11"R,
pull out the extension guide.
► LOADING PAPER INTO THE BYPASS TRAY (page
1-36)
(23) Trimming module
*
This trims the excess of saddle-stitched output.
(24) Folding unit
*
This folds and outputs paper.
(25) Paper pass unit
*
This feeds paper to the machine.
(26) Large capacity trays
*
Store paper in this tray. Up to 2500 sheets can be stored
in each tray.
► LOADING PAPER IN THE
LARGE CAPACITY
TRAYS (page 1-30)
* Peripheral device.
(23) (24) (25) (26)
(21) (22)(20)
1-5
BEFORE USING THE MACHINE►BEFORE USING THE MACHINE
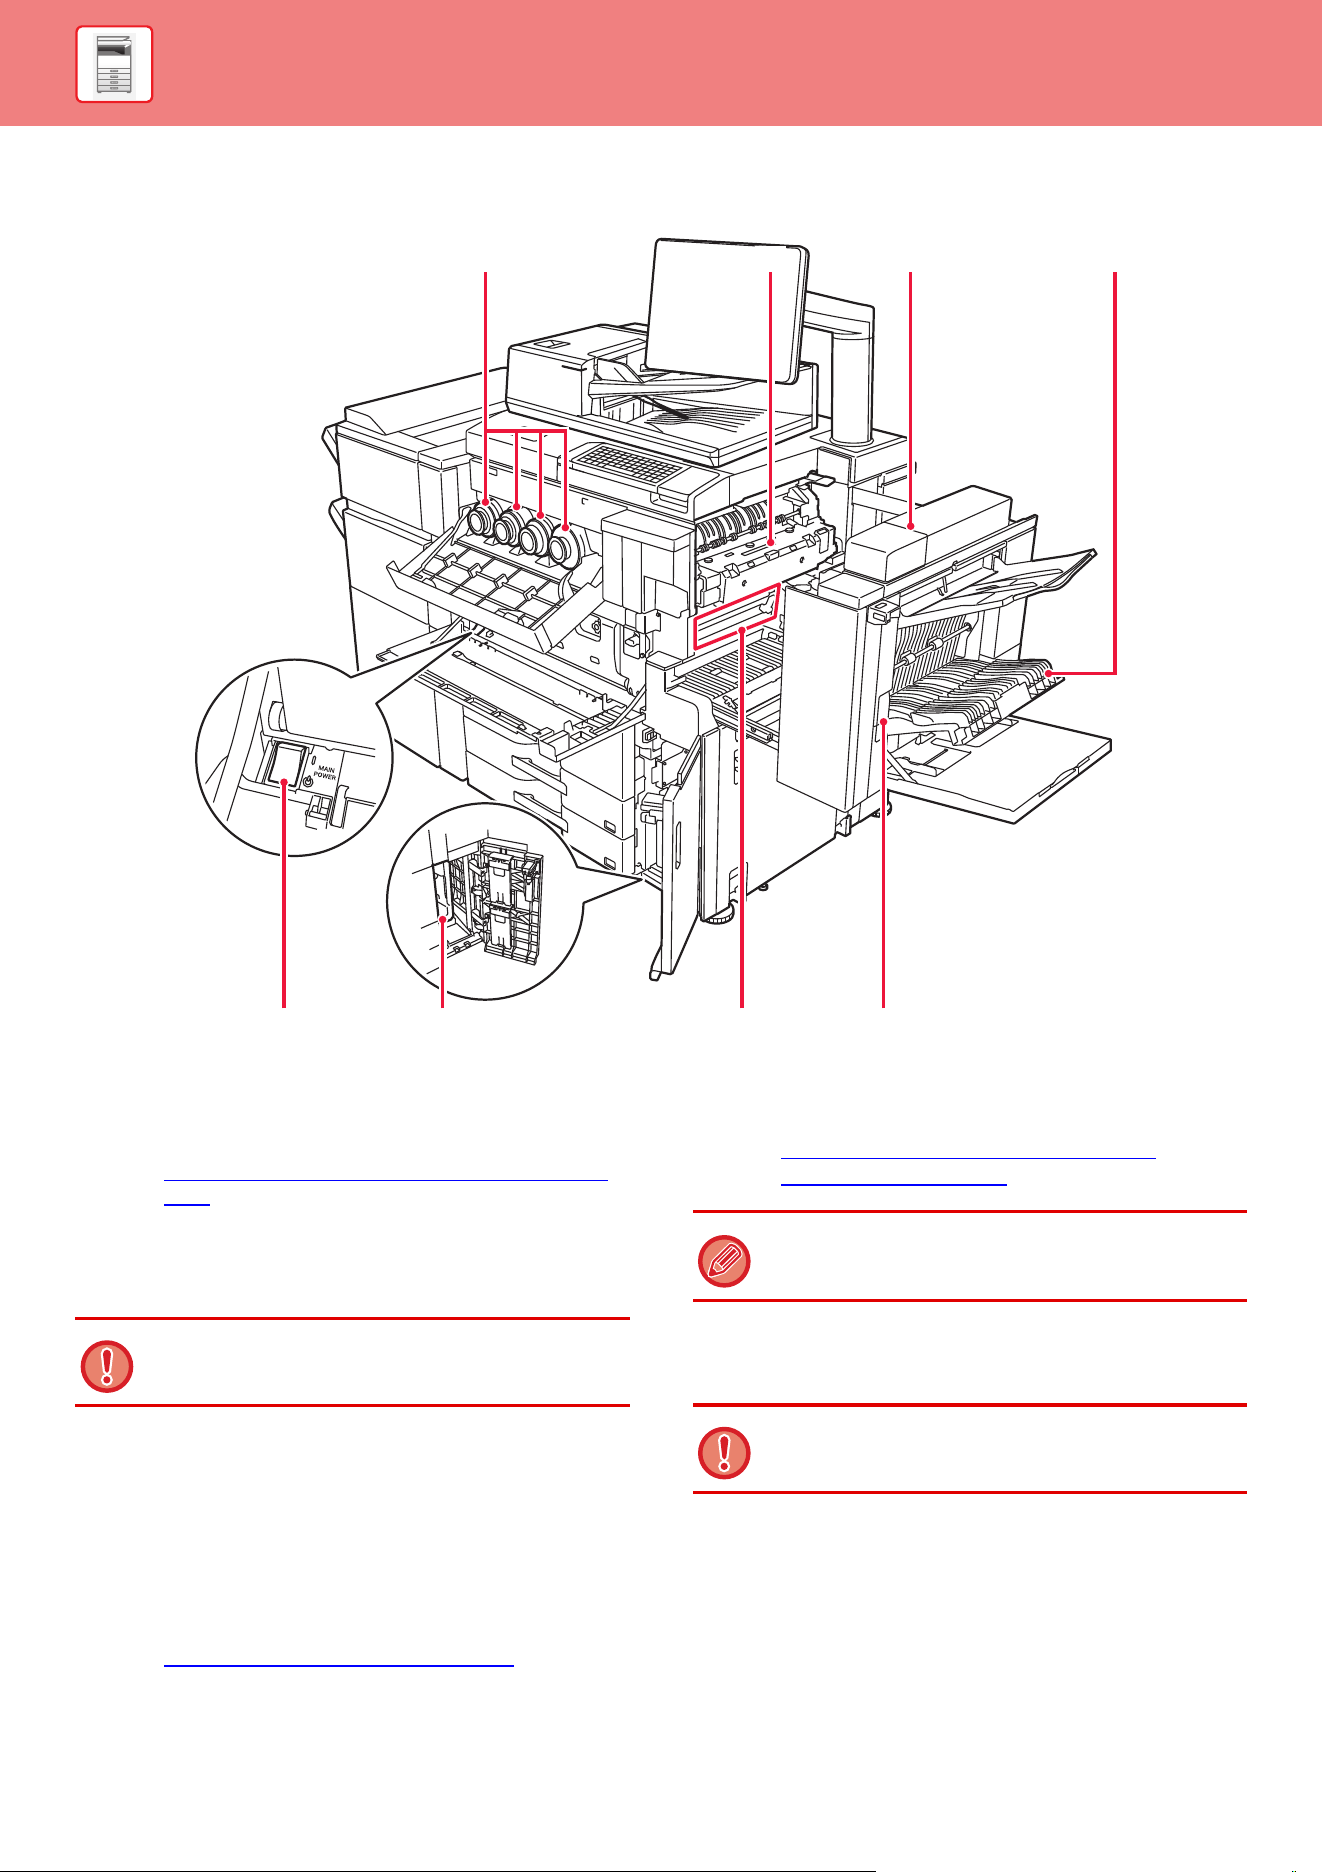
INTERIOR
(1) Toner cartridge
This cartridge contains toner.
When the toner in a cartridge runs out, the cartridge of
the color that ran out must be replaced.
► REPLACEMENT OF TONER CARTRIDGE (page
1-84)
(2) Fusing unit
Heat is applied here to fuse the transferred image onto
the paper.
(3) Right side cover
Open this cover to remove a misfeed.
(4) Paper reversing section cover
This unit is used for reversing paper when 2-sided
printing is performed. Open this cover to remove a paper
misfeed.
(5) The main power switch
Use this switch to turn on the power for the machine.
► TURNING ON
THE POWER (page 1-9)
(6) Toner collection container
This container collects excess toner that remains after
printing.
► REPL
ACING THE TONER COLLECTION
CONTAINER (page 1-87)
(7) Transfer belt
This belt takes the image formed with toner off the
photoconductive unit and transfers the image onto paper.
(8) Right side cover release lever
To remove a paper misfeed, pull and hold this lever up to
open the right side cover.
(1) (2) (3)
(5) (6) (8)(7)
(4)
The fusing unit is hot. Take care not to burn yourself
when removing a misfeed.
A service technician collects replaced toner collection
container.
Do not touch or damage the transfer belt.
This may cause a defective image.
1-6
BEFORE USING THE MACHINE►BEFORE USING THE MACHINE
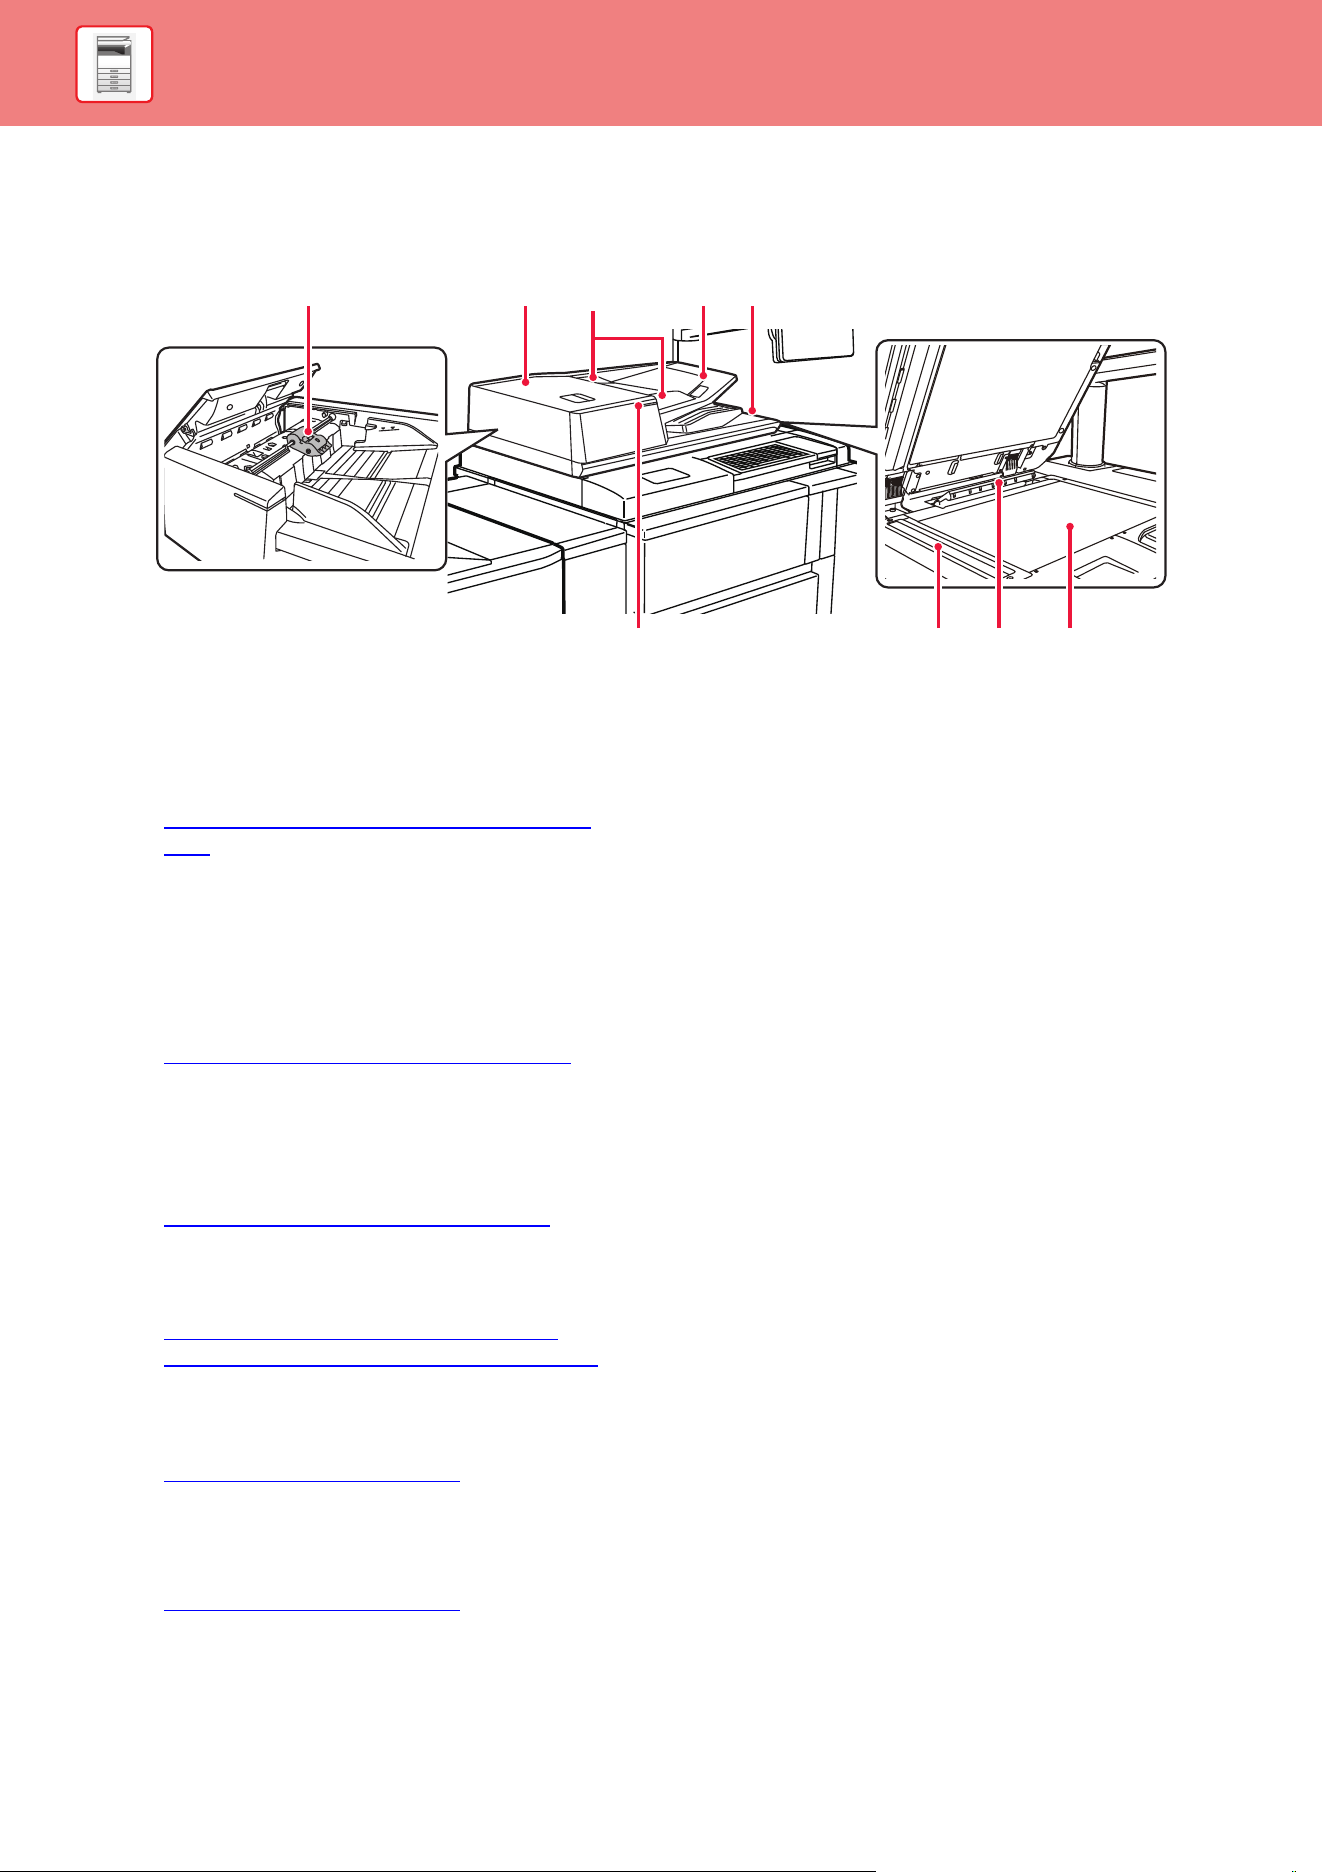
AUTOMATIC DOCUMENT FEEDER AND DOCUMENT
GLASS
(1) Paper feed roller
This roller rotates to automatically feed the original.
(2) Document feeding cover
Open this cover to remove an original misfeed.
This cover is also opened to clean the paper feed roller.
► CLEANING THE PAPER FEED ROLLER (page
1-83)
(3) Original guides
These guides help ensure that the original is scanned
correctly.
Adjust the guides to the width of the original.
(4) Document feeder tray
Place the original.
Place the original with the print side facing up.
►
AUTOMATIC DOCUMENT FEEDER (page 1-47)
(5) Original exit tray
The original is discharged to this tray after scanning.
(6) Original setting indicator
This indicator lights when the document is correctly
loaded on the document feeder tray.
►
ORIGINAL SETTING INDICATOR (page 1-50)
(7) Scanning area
Originals placed in the automatic document feeder are
scanned here.
► CL
EANING THE DOCUMENT GLASS AND
AUTOMATIC DOCUMENT FEEDER (page 1-74)
(8) Original size detector
This unit detects the size of an original placed on the
document glass.
► DOCUMENT GLASS (page 1-51)
(9) Document glass
If you want to scan books or other thick originals that
cannot be fed through the automatic document feeder,
place them on this glass.
► DOCUMENT GLASS (page 1-51)
(4)(2)(1) (5)
(3)
(7)(6) (8) (9)
1-7
BEFORE USING THE MACHINE►BEFORE USING THE MACHINE
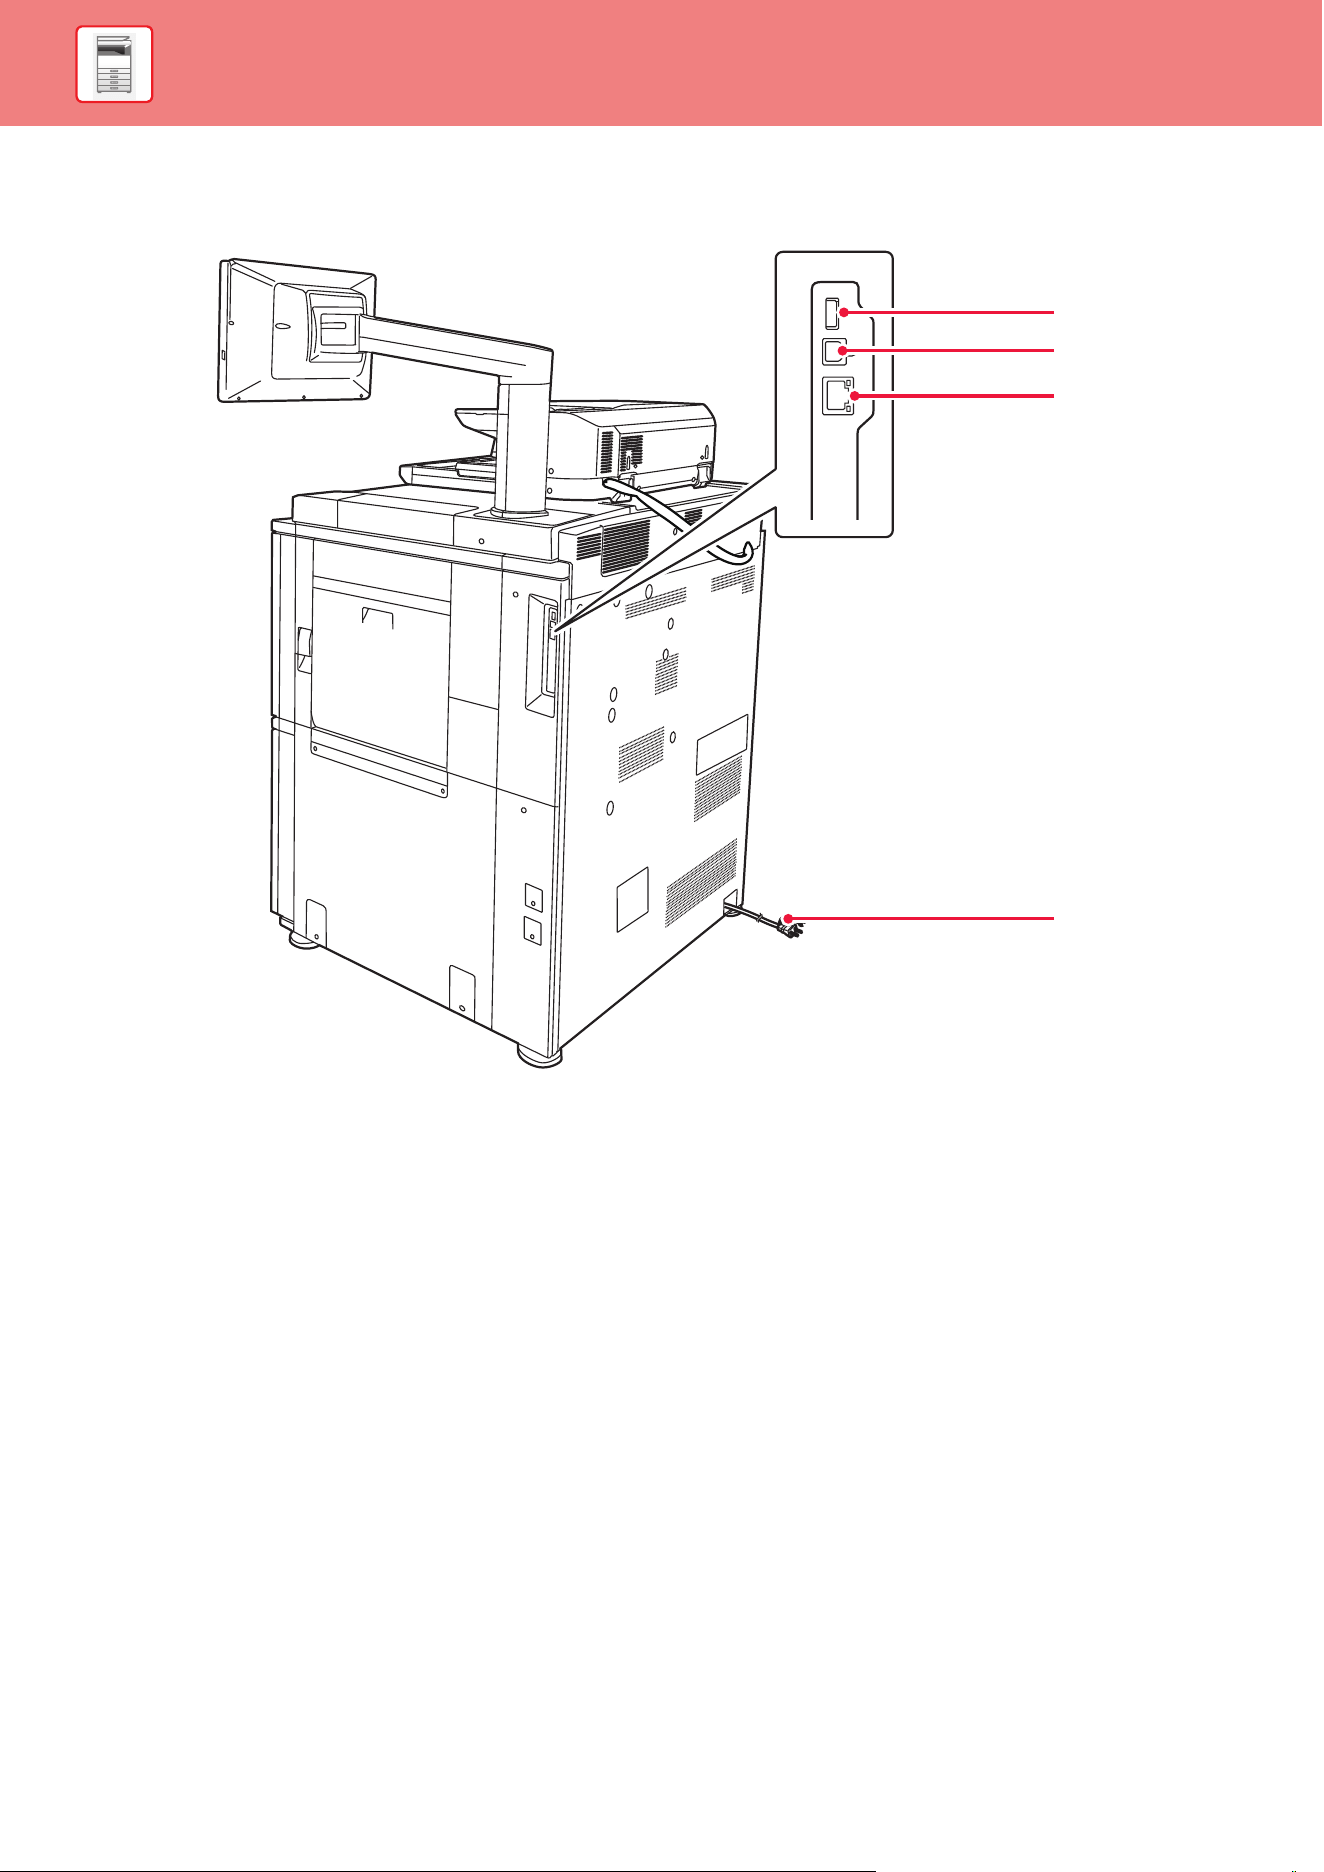
SIDE AND BACK
(1) USB connector (A type)
This is used to connect a USB device such as a USB
memory device to the machine.
Supports USB 2.0 (Hi-Speed) and USB3.0
(SuperSpeed).
(2) USB connector (B type)
Cannot be used.
(3) LAN connector
Connect the LAN cable to this connector when the
machine is used on a network.
Use a shielded LAN cable.
(4) Power plug
(1)
(3)
(2)
(4)
1-8
BEFORE USING THE MACHINE►BEFORE USING THE MACHINE
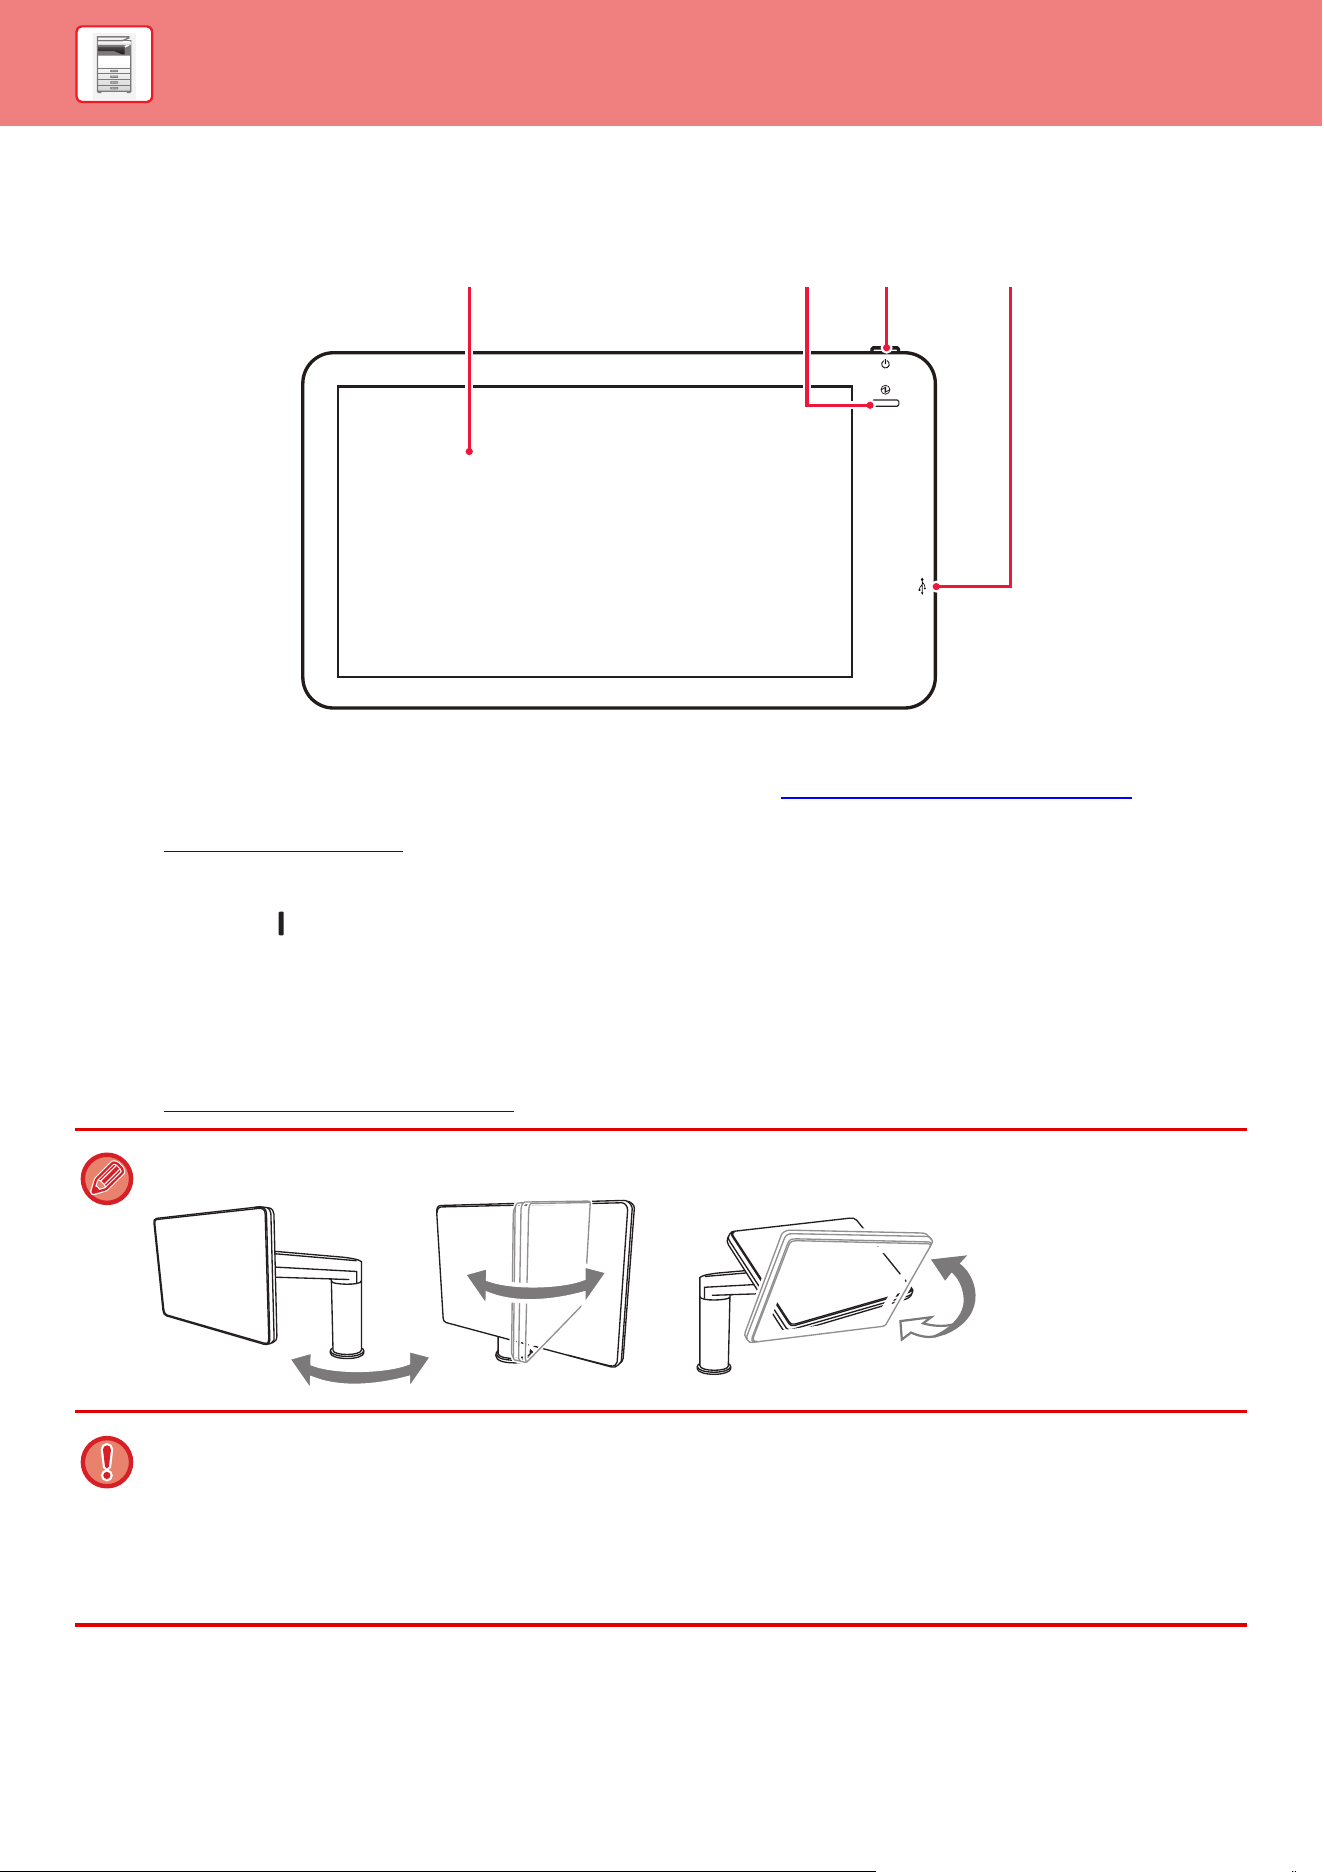
OPERATION PANEL
This section describes the names and functions of the respective parts of the operation panel.
(1) Touch panel
Messages and keys appear on the touch panel display.
Operate the machine by directly tapping the displayed
keys.
► TOUCH PANEL (page 2-2)
(2) Main power indicator
This indicator lights up when the machine's main power
switch is in the “ ” position.
Blinks blue during the time that the [Power] button does
not operate immediately after the main power switch is
switched on.
This indicator will also blink blue when receiving printer
data.
This indicator blinks yellow during Auto Power Shut-Off
mode.
► TURNING ON
THE POWER (page 1-9)
(3) [Power] button
Use this button to turn the machine's power on and off.
► TURNING
ON THE POWER (page 1-9)
(4) USB connector (A type)
This is used to connect a USB device such as a USB
memory device to the machine.
Supports USB 2.0 (Hi-Speed).
(1)
(2) (4)
(3)
You can change the angle of the operation panel.
• The touch panel is a capacitance type.
• Use your finger to operate the touch panel. If you operate it with a pen, it may not work properly. Also, be aware that
precious metals such as accessories may cause unintended touch movements.
• Do not touch the touch panel while the unit is starting up. If you touch the touch panel, it may not operate normally.
Example:
Turn on the main power switch, press the [Power] button, and wait until the home screen is displayed.
Returning from auto power shutoff.
1-9
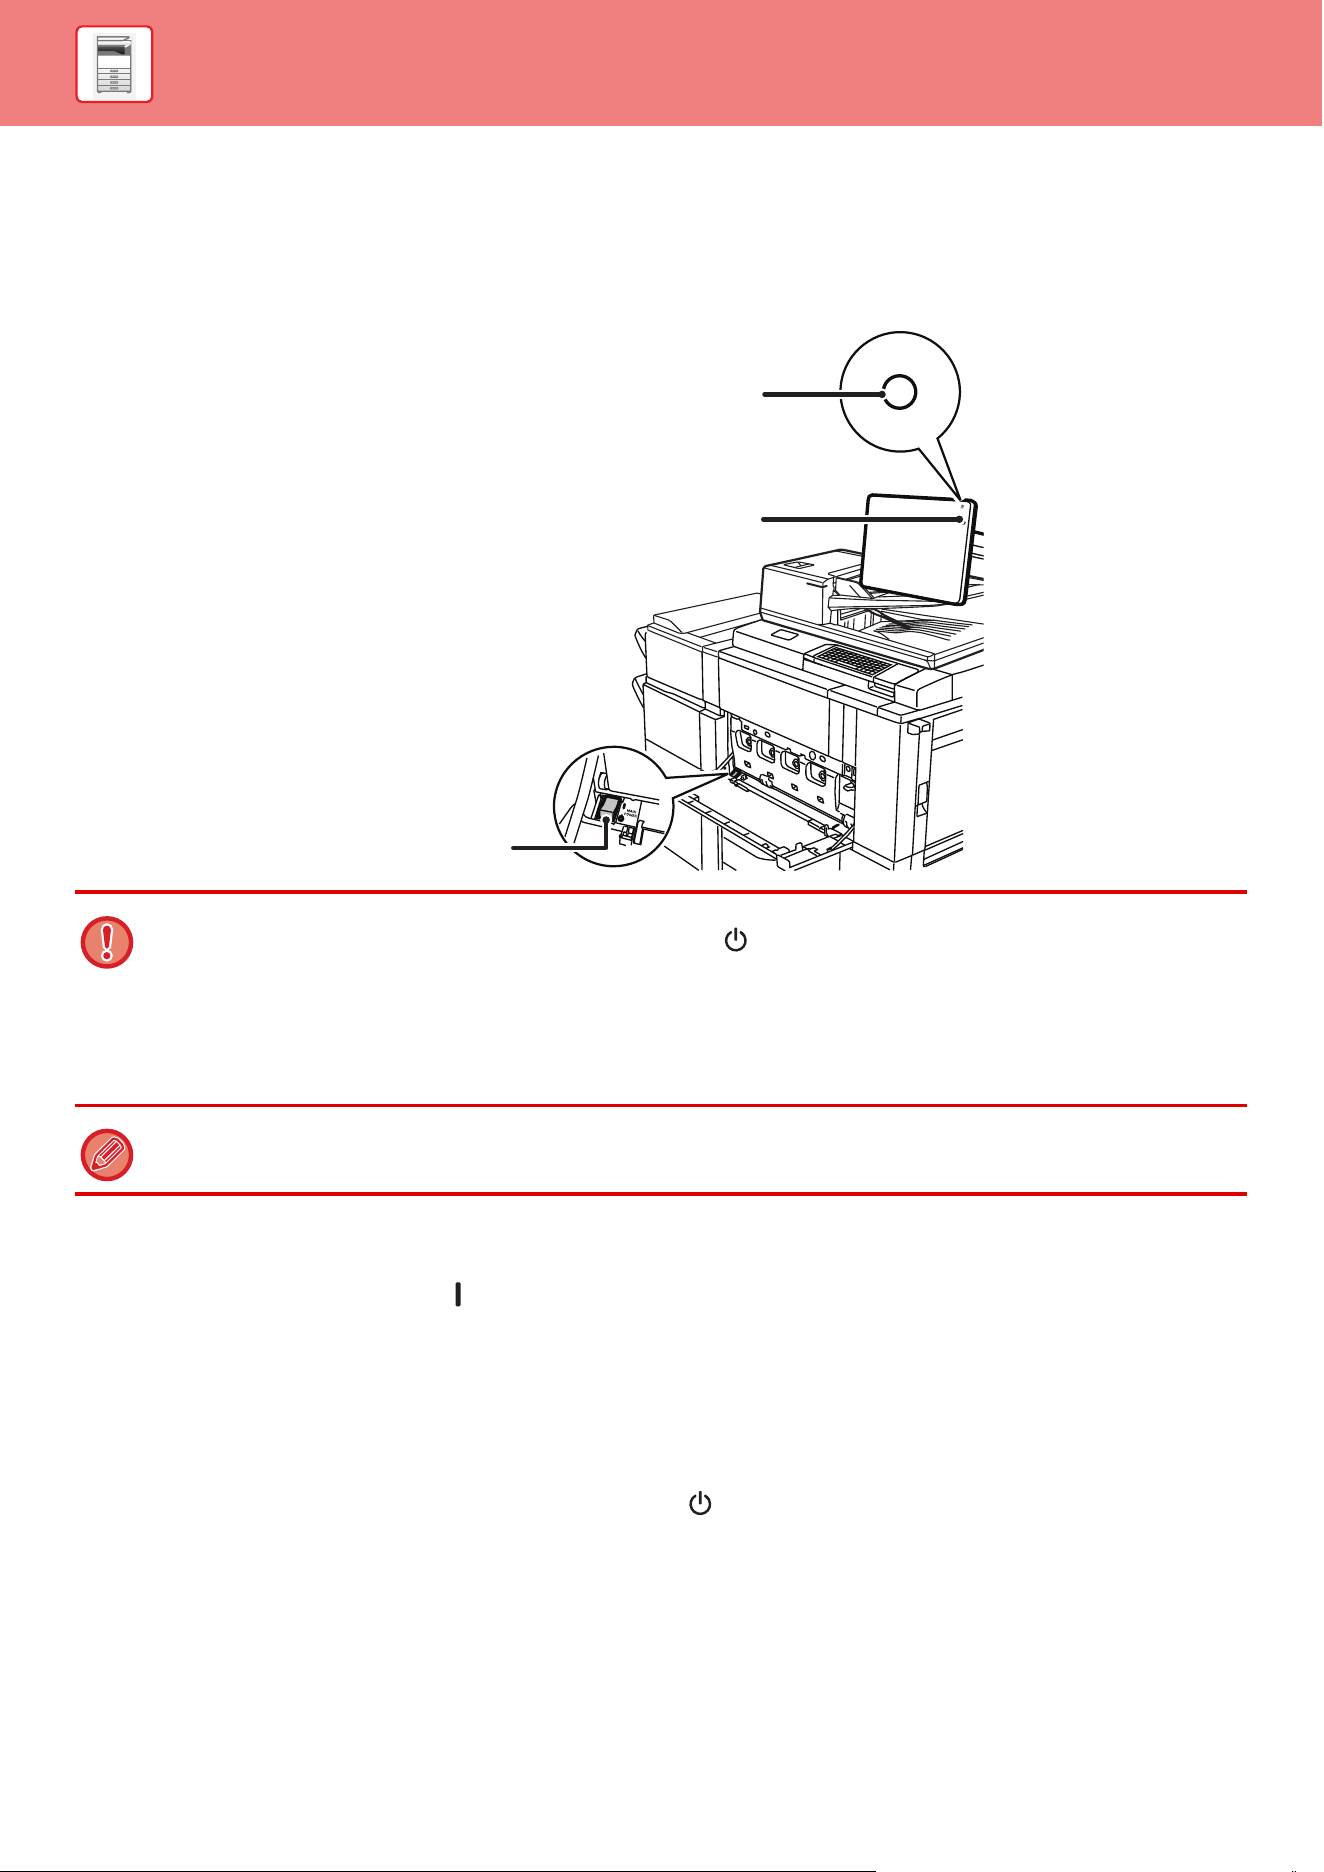
BEFORE USING THE MACHINE►BEFORE USING THE MACHINE
TURNING ON THE POWER
This section describes how to turn on/off the machine's power and how to restart the machine.
Operate two power switches: the main power switch inside the front cover, located in the lower left corner, and the
[Power] button on the operation panel.
TURNING ON THE POWER
• Turn the main power switch to the " " position.
• When the main power indicator lights in blue, press the [Power] button.
TURNING OFF THE POWER
After pressing the [Power] button, tap the [Power Off] key on the touch.
To turn off the power for a long time, press the [Power] button to turn off the power, and after the screen display on the
operation panel disappears, set the main power switch to the " " position.
RESTART THE MACHINE
Press the [Power] button to turn off the power, and then tap the [Power Off] key on the touch panel. After that, press the
[Power] button again to turn on the power.
• When turning off the main power switch, be sure to press the [Power] button on the operation panel, tap the [Turn off] key
on the touch panel, and then set the main power switch to the " " position.
• In a sudden case of main power outage, turn the power for the machine back on and then turn it off in the correct order.
If the machine is left for a long time with the main power having been turned off prior to the [Power] button being turned off,
abnormal noises, degraded image quality or other problems may result.
• Turn off both the [Power] button and the main power switch and unplug the power cord if you suspect a machine failure, if
there is a bad thunderstorm nearby, or when you are moving the machine.
In order for some settings to take effect, the machine must be restarted. In some states of the machine, restarting with the
[Power] button may not make the settings take effect. In this case, turn off the main power switch and then turn it on again.
Main power indicator
Main power switch
[Power] button
1-11
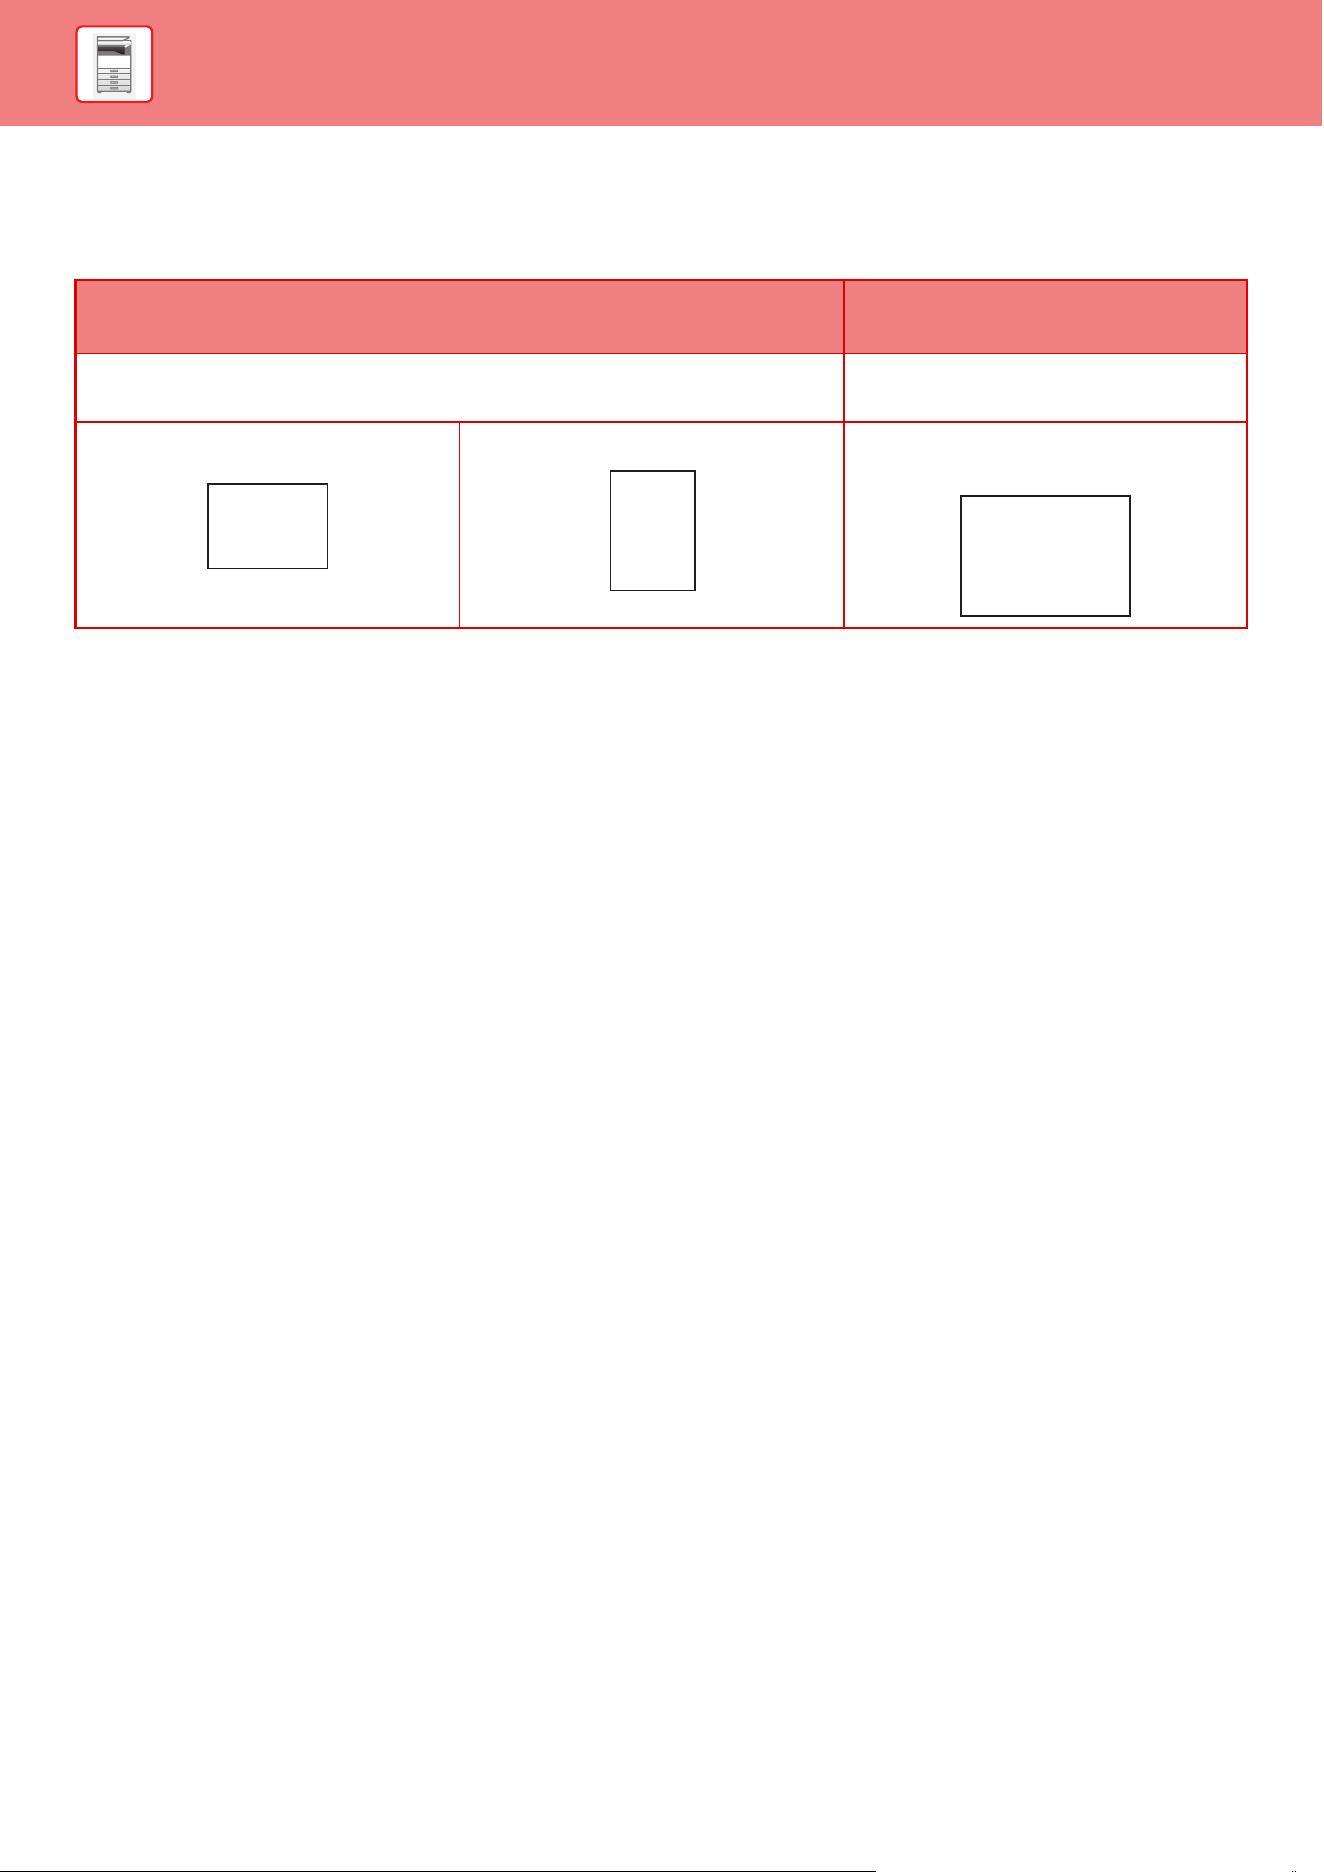
BEFORE USING THE MACHINE►LOADING PAPER
THE DEFINITION OF "R" IN PAPER SIZE
To indicate the landscape setting, "R" is added to the end of the name of a paper size enabled for both landscape and
portrait settings.
Paper that can be set either in the portrait or landscape orientation Paper that can only be set in the
landscape orientation
8-1/2" x 11", A4, B5 12" x 18", 11" x 17", 8-1/2" x 14", 8-1/2" x
13", SRA3, A3W, A3, B4, SRA4
Paper set in the landscape orientation Paper set in the portrait orientation Can be placed only in the landscape
orientation
8-1/2" x 11"R
(
A4R
)
8-1/2" x 11"
(
A4
)
11" x 17"
(A3)
1-12
BEFORE USING THE MACHINE►LOADING PAPER
APPLICABLE PAPER TYPES
This section describes paper types that can be used and those that cannot be used.
All types of paper other than plain paper are referred to as special media.
Useable paper
Specifications of plain paper, heavy paper and thin paper
*1 If the paper that you normally use is Recycled, Pre-Punched, Pre-Printed, Letter Head, Color, or User Type 1 to 11, set an appropriate paper
weight in “Settings” – [System Settings] → [Common Settings] → [Paper Settings] → [Paper Tray Settings] → [Paper Weight].
*2 Heavy paper of 110 lbs. cover to 130 lbs. cover (301 g/m
2
to 360 g/m
2
) can also be used in the bypass tray (on the machine) and the large capacity
trays. When this paper type is used, specify the Paper Settings in the system settings.
• Various types of paper are commercially available, some of which cannot be used on the machine.
Before using any paper, consult the dealer or nearest SHARP Service Department.
• The image quality and toner fusibility of paper may change due to ambient conditions, operating conditions, and paper
characteristics, resulting in image quality inferior to that of Sharp standard paper.
Before using any paper, consult the dealer or nearest SHARP Service Department.
• The use of non-recommended or non-usable paper may result in skewed feeding, misfeeds, poor toner fusing (the toner
does not adhere to the paper well and can be rubbed off), or machine failure.
• The use of non-recommended paper may result in misfeeds or poor image quality. Before using non-recommended paper,
check whether printing can be performed properly.
Plain Paper
*1
Plain
Paper 1
16 lbs. bond to 24 lbs. bond (60 g/m
2
to 89 g/m
2
)
Plain
Paper 2
24 lbs. bond to 28 lbs. bond (90 g/m
2
to 105 g/m
2
)
Heavy paper
*2
Heavy
paper 1
28 lbs. bond to 65 lbs. cover (106 g/m
2
to 176 g/m
2
)
Heavy
paper 2
65 lbs. cover to 80 lbs. cover (177 g/m
2
to 220 g/m
2
)
Heavy
paper 3
80 lbs. cover to 140 lbs. index (221 g/m
2
to 256 g/m
2
)
Heavy
paper 4
140 lbs. index to 110 lbs. cover (257 g/m
2
to 300 g/m
2
)
Thin paper 13 lbs. bond to 16 lbs. bond (55 g/m
2
to 59 g/m
2
)
• The category of "Useable paper" is based on Sharp standard paper.
• If non-recommended paper is used, print quality may be affected even if a paper type setting that accords with the above
paper divisions is selected. In that case, try setting the paper type to a type that is slightly heavier or slightly lighter than
normal. For more information, consult the dealer or nearest SHARP Service Department.
• For paper specifications, see the specifications in the "Start Guide".
• Recycled paper, colored paper and pre-punched paper must meet the same specifications as plain paper.
Before using any paper, consult the dealer or nearest SHARP Service Department.
• If the paper that was output is significantly curled, remove the paper from the cassette, turn the paper over so it is face
down, and resume use.
• The use of dump or dry paper may result in poor transfer, fusing and paper feed. So store opened paper in a sealed plastic
bag with a zipper.
1-13
BEFORE USING THE MACHINE►LOADING PAPER
Specifications of paper that can be used for two-sided printing
Types of paper that can be set in each tray
Paper Type Plain, Recycled, Color, Letter Head, Pre-Printed, Punched, Glossy Paper, Embossed, Heavy
Paper (28 lbs. bond (106 g/m
2
) to 130 lbs. cover (360 g/m
2
))
Paper Size 13" x 19", 12" x 18", 11" x 17", 8-1/2" x 14", 8-1/2" x 13-1/2", 8-1/2" x 13-2/5", 8-1/2" x 13",
8-1/2" x 11", 8-1/2" x 11"R, 5-1/2" x 8-1/2"R, 7-1/4" x 10-1/2", 9" x 12", SRA3, A3W, A3, B4,
SRA4, A4, A4W, A4R, B5, B5R, A5R
• For detailed information on the sizes and types of paper that can be loaded into each tray of the machine, see
"SPECIFICATIONS (page 11-2)
" and “Paper Tray Settings (page 9-101)".
• Recycled paper, colored paper and pre-punched paper must meet the same specifications as plain paper.
Before using any paper, consult the dealer or nearest SHARP Service Department.
Tray
1/2
Tray
3
Tray
4
Bypass
tray
Tray 5
Large
capacity
tray
(MX-LC1
2/
MX-LCX
3 N)
Large capacity
trays
Bypass
tray
(for
large
capacity
trays)
Inserter
(Upper /
Lower)
Tray
5/7
Tray
6/8
Thin paper - - - Yes - Yes Yes Yes -
Plain paper 1
(16 to 24 lbs bond
(60 to 89 g/m
2
))
Yes Yes Yes Yes Yes Yes Yes Yes Yes
Plain paper 2
(24 to 28 lbs bond
(90 to 105 g/m
2
))
Yes Yes Yes Yes Yes Yes Yes Yes Yes
Recycled paper Yes Yes Yes Yes Yes Yes Yes Yes Yes
Color Yes Yes Yes Yes Yes Yes Yes Yes Yes
Letter head Yes Yes Yes Yes Yes Yes Yes Yes Yes
Pre-printed Yes Yes Yes Yes Yes Yes Yes Yes Yes
Pre-punched Yes Yes Yes Yes Yes Yes Yes Yes Yes
Heavy paper 1:
28 lbs bond to 65
lbs cover
(106 g/m
2
to 176
g/m
2
)
- Yes Yes Yes Yes Yes Yes Yes Yes
Heavy paper 2:
65 lbs cover to 80
lbs cover (177
g/m
2
to 220 g/m
2
)
- Yes Yes Yes Yes Yes Yes Yes Yes
Heavy paper 3:
80 lbs cover to
140 lbs index
(221 g/m
2
to 256
g/m
2
)
- Yes Yes Yes - Yes Yes - -
1-14
BEFORE USING THE MACHINE►LOADING PAPER
Yes: Can be used
-: Cannot be used
* Tray 4 can only be loaded with Com9, Com10, and Monarch envelopes.
Setting orientation of the print side
The setting orientation varies for the print side of paper, depending on the tray used. For "Letter Head" and
"Pre-Printed", set the paper in the reverse orientation.
Place with the print side facing the direction indicated below.
Heavy paper 4:
140 lbs index to
110 lbs cover
(257 g/m
2
to 300
g/m
2
)
- Yes Yes Yes - Yes Yes - -
Heavy paper:
110 lbs cover to
130 lbs cover
(301 g/m
2
to 360
g/m
2
)
- - - Yes - Yes Yes - -
Embossed - - Yes Yes - Yes Yes - -
Envelope - - Yes
*
Yes - - - - -
Tab paper - - Yes Yes - Yes Yes Yes -
Transparency film - - Yes Yes - Yes Yes Yes -
Labels - - Yes Yes - Yes Yes - -
Glossy paper - - - Yes - Yes Yes - -
Tray In normal
status
With letter head or pre-printed paper set
Trays 1 - 4 Facing up Facing down
Bypass, Tray 5, Tray 6, Tray 7,
Tray 8
Facing down Facing up
When [Disabling of Duplex] is set for "Letter Head" or "Pre-Printed", set the print side in the same orientation as for the
ordinary operation.
Tray
1/2
Tray
3
Tray
4
Bypass
tray
Tray 5
Large
capacity
tray
(MX-LC1
2/
MX-LCX
3 N)
Large capacity
trays
Bypass
tray
(for
large
capacity
trays)
Inserter
(Upper /
Lower)
Tray
5/7
Tray
6/8

1-15
BEFORE USING THE MACHINE►LOADING PAPER
Paper that cannot be used
• Special media for an ink jet printer
(fine paper, glossy paper, glossy film, etc.)
• Carbon paper or thermal paper
• Pasted paper
• Paper with clips
• Paper with fold marks
• Torn paper
• Oil-feed transparency film
• Thin paper less than 15 lbs (55 g/m
2
)
• Heavy paper as thick as 130 lbs. cover (360 g/m
2
) over
• Irregularly shaped paper
• Stapled paper
• Damp paper
• Curled paper
• Paper whose print side or reverse side has been already printed on by printer or multifunction device.
• Paper with a wave-like pattern due to moisture absorption
• Paper with creases
• Paper with dust
Non-recommended paper
• Iron-on transfer paper
• Japanese paper
• Perforated paper
1-16
BEFORE USING THE MACHINE►LOADING PAPER
LOADING PAPER IN THE TRAY 1/2
A maximum of 1200 sheets of 8-1/2" × 11" (A4) paper can be loaded into tray 1.
A maximum of 800 sheets of 8-1/2" × 11" (A4) paper can be loaded into tray 2.
If you loaded paper of a different type or size from the paper previously loaded, be sure to check the settings in "Settings
(administrator)". An incorrect setting may cause print failure, printing on paper of an incorrect size, or type or paper misfeeds.
Do not place heavy objects on the tray or press down on the tray.
To check the type and size of paper:
[Tray Settings] in the home screen or in "Settings", select [Status] → [Machine Identification] → [Paper Input Tray Status].
To set the type and size of paper:
Set this in [Tray Settings] in the home screen or in "Settings", select [System Settings] → [Common Settings] → [Paper
Settings] → [Paper Tray Settings].
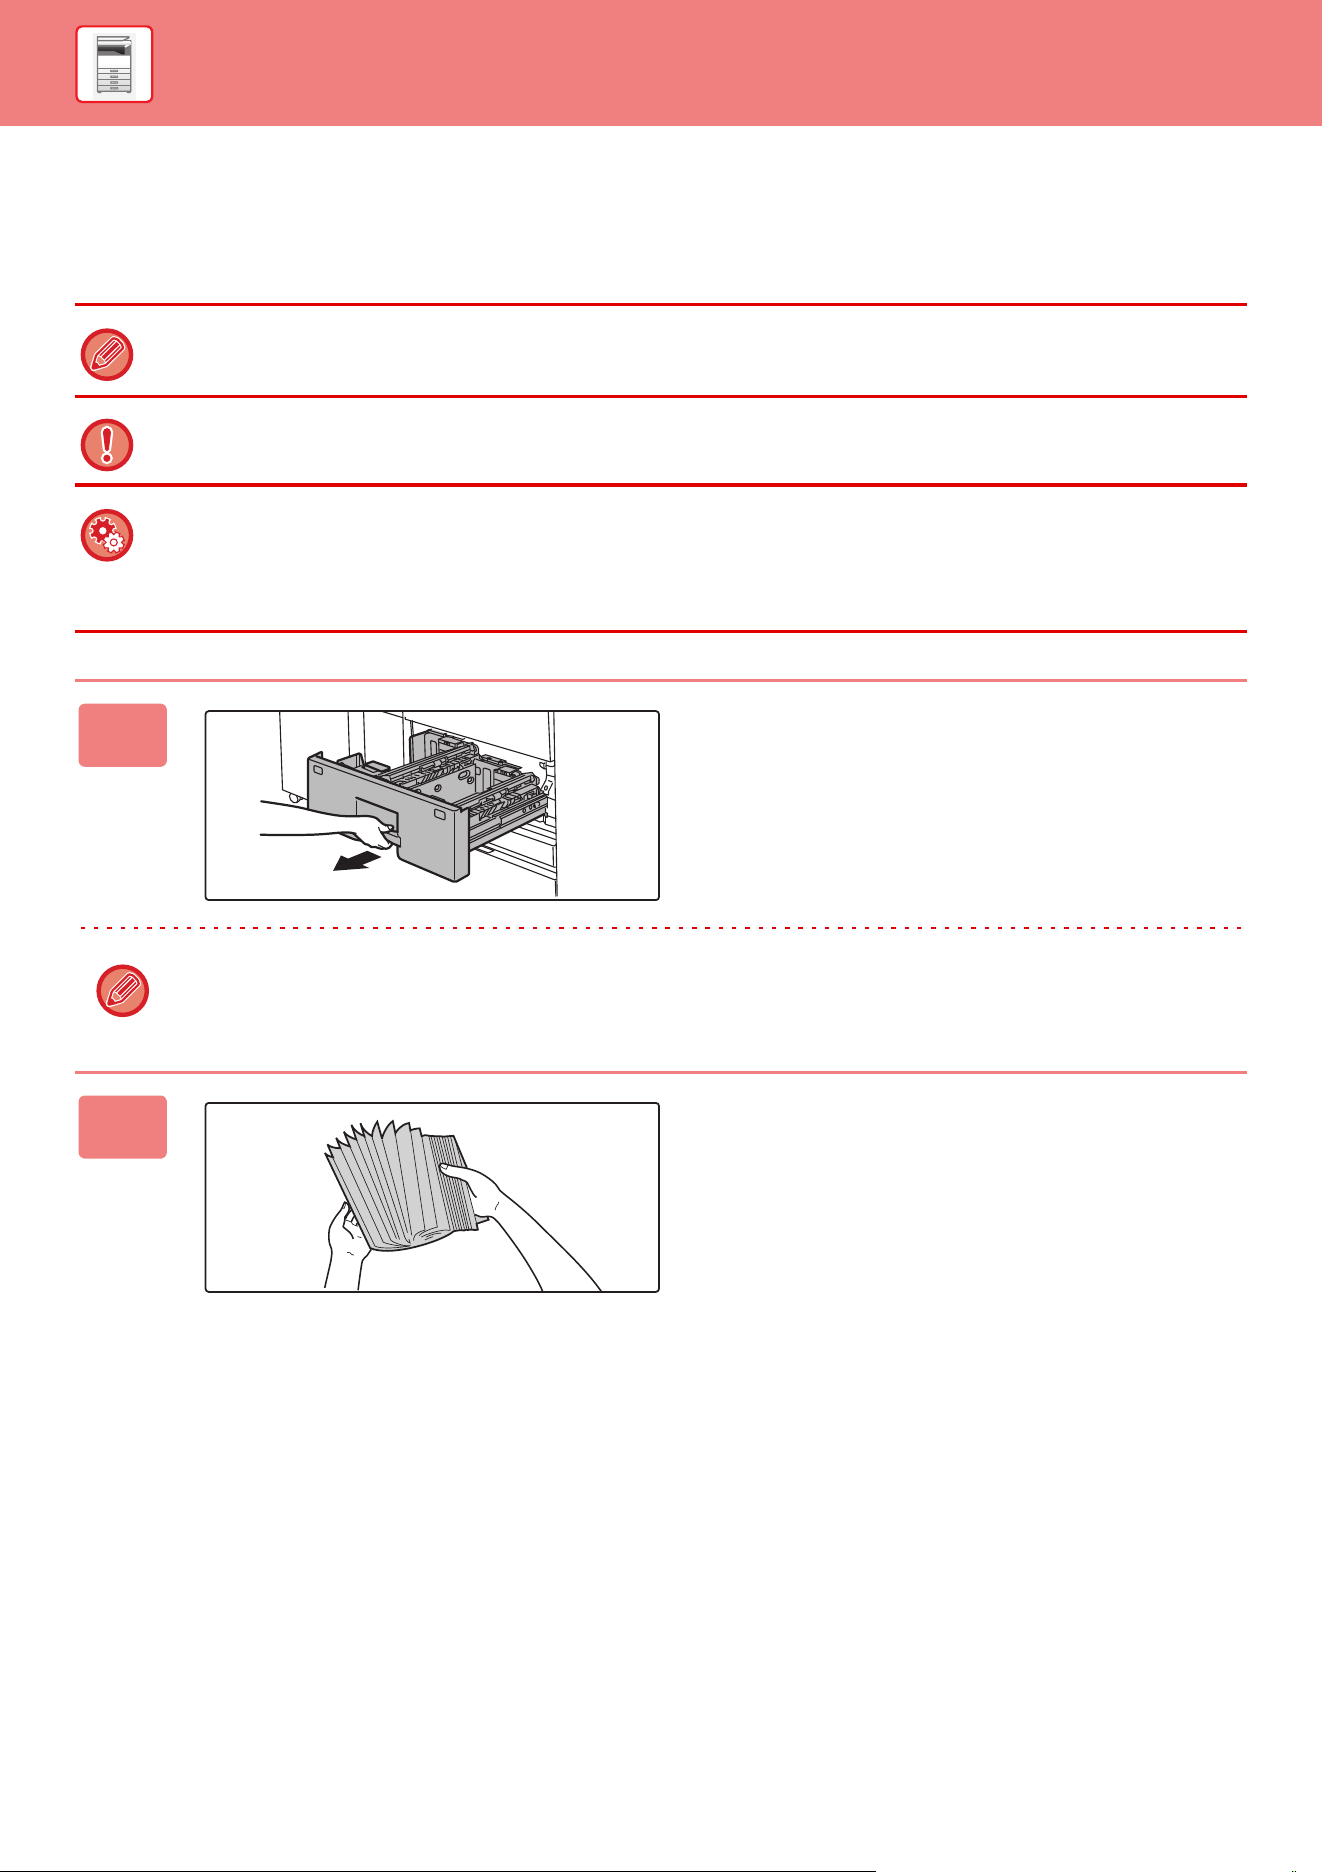
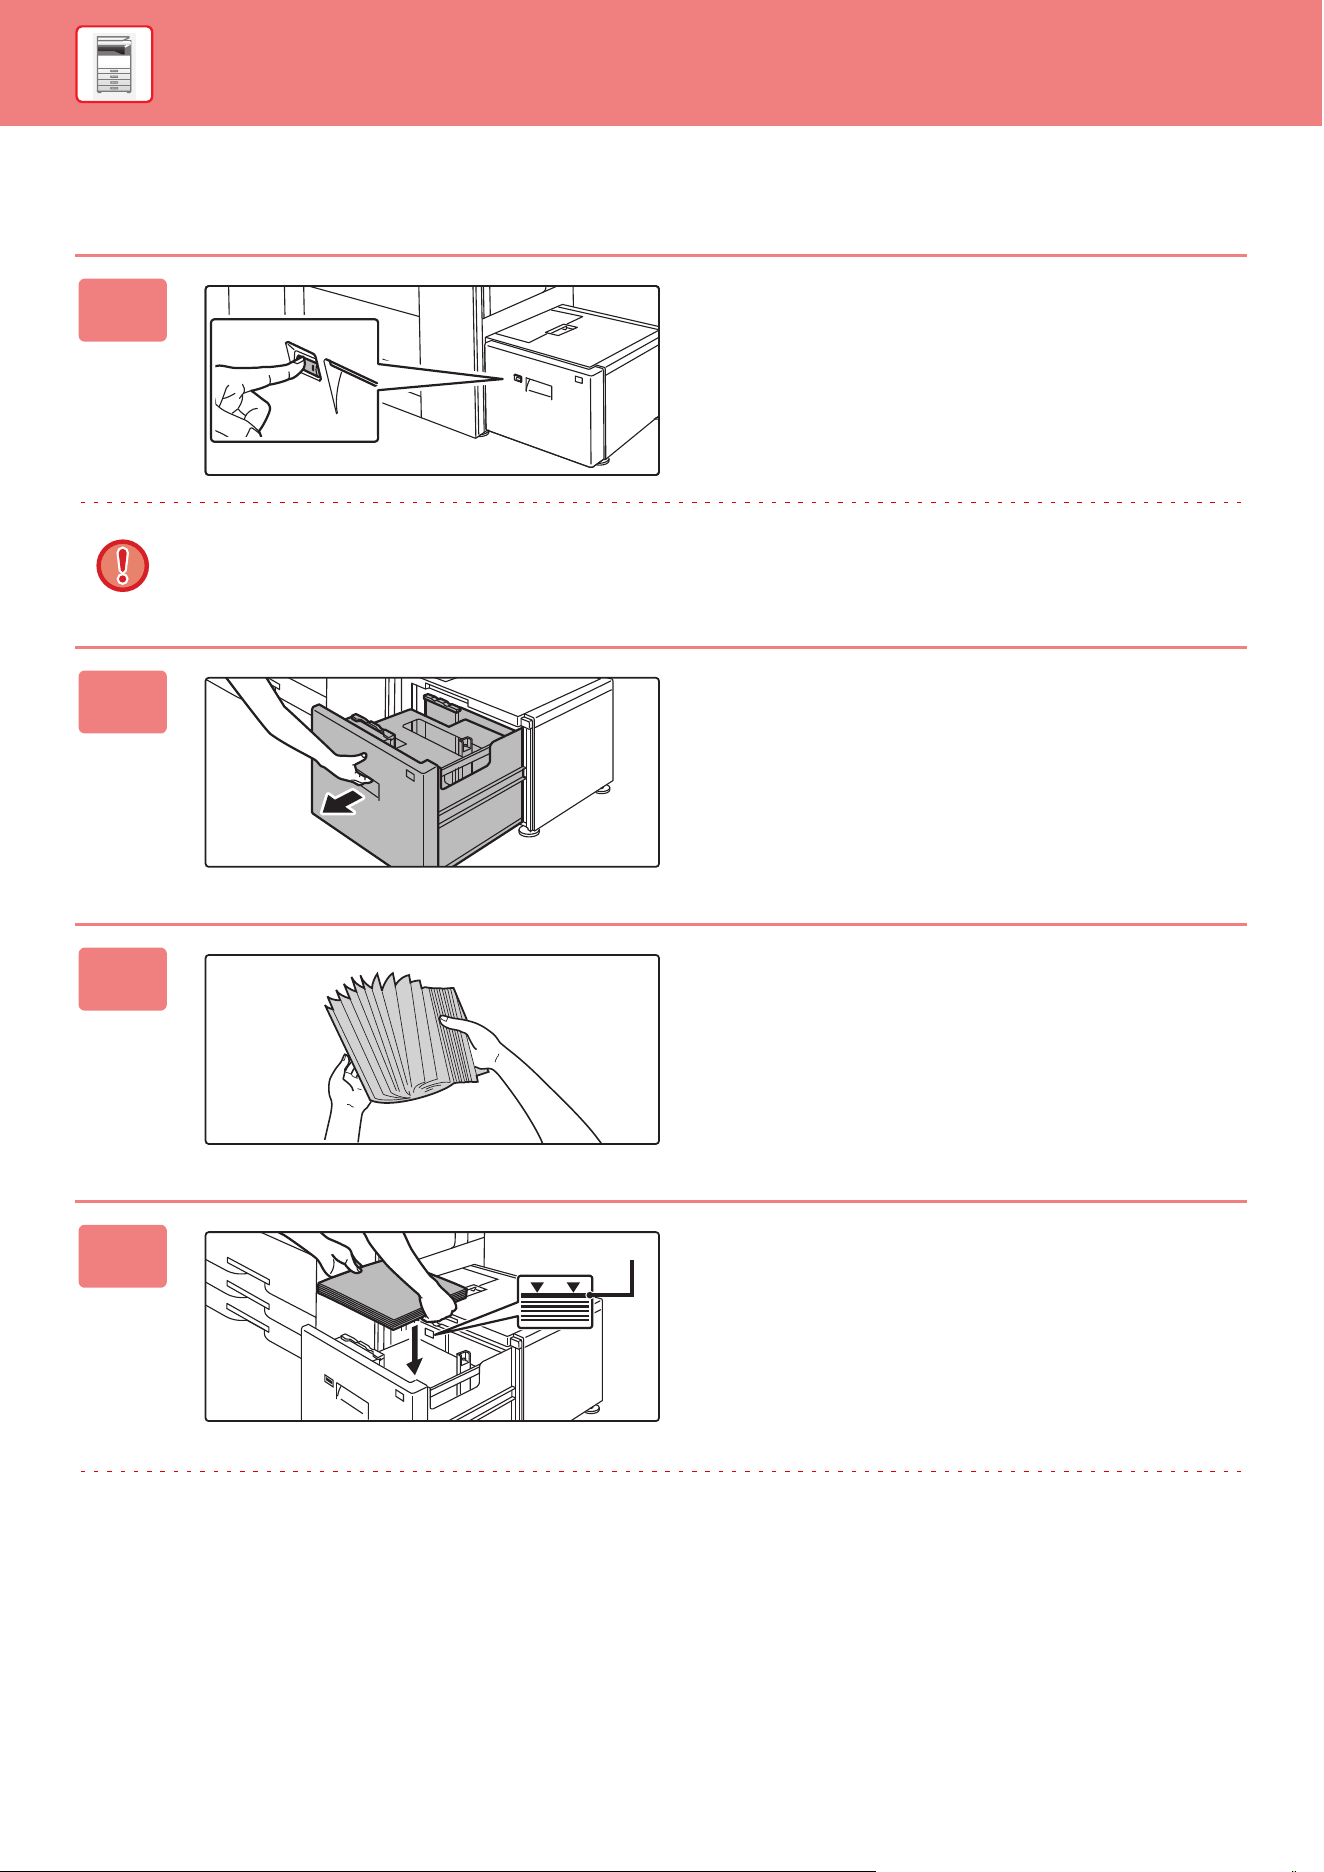
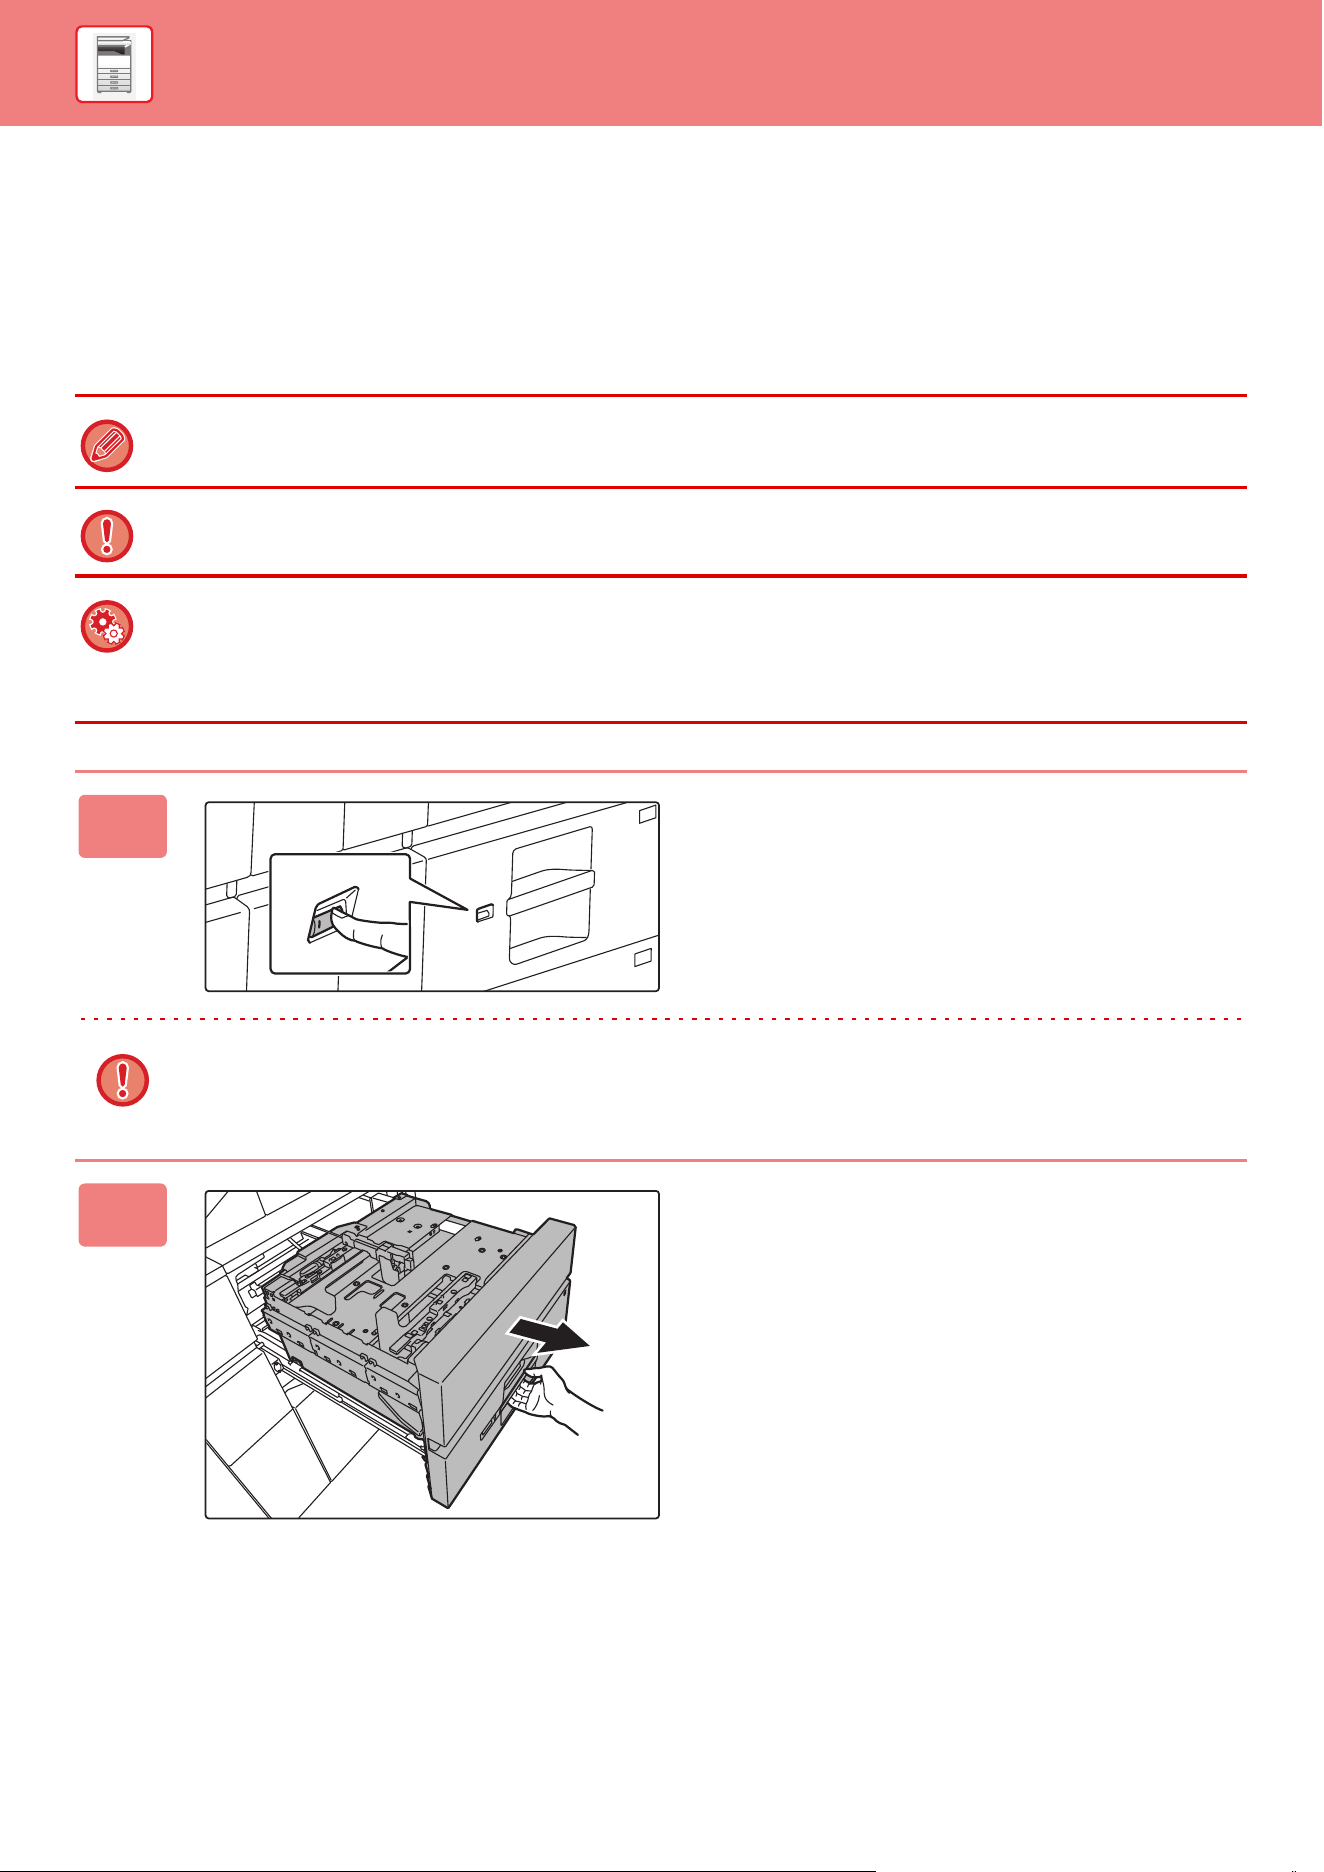
1
Pull out the paper tray.
Gently pull the tray out until it stops.
Keep holding the handle until the lock is released.
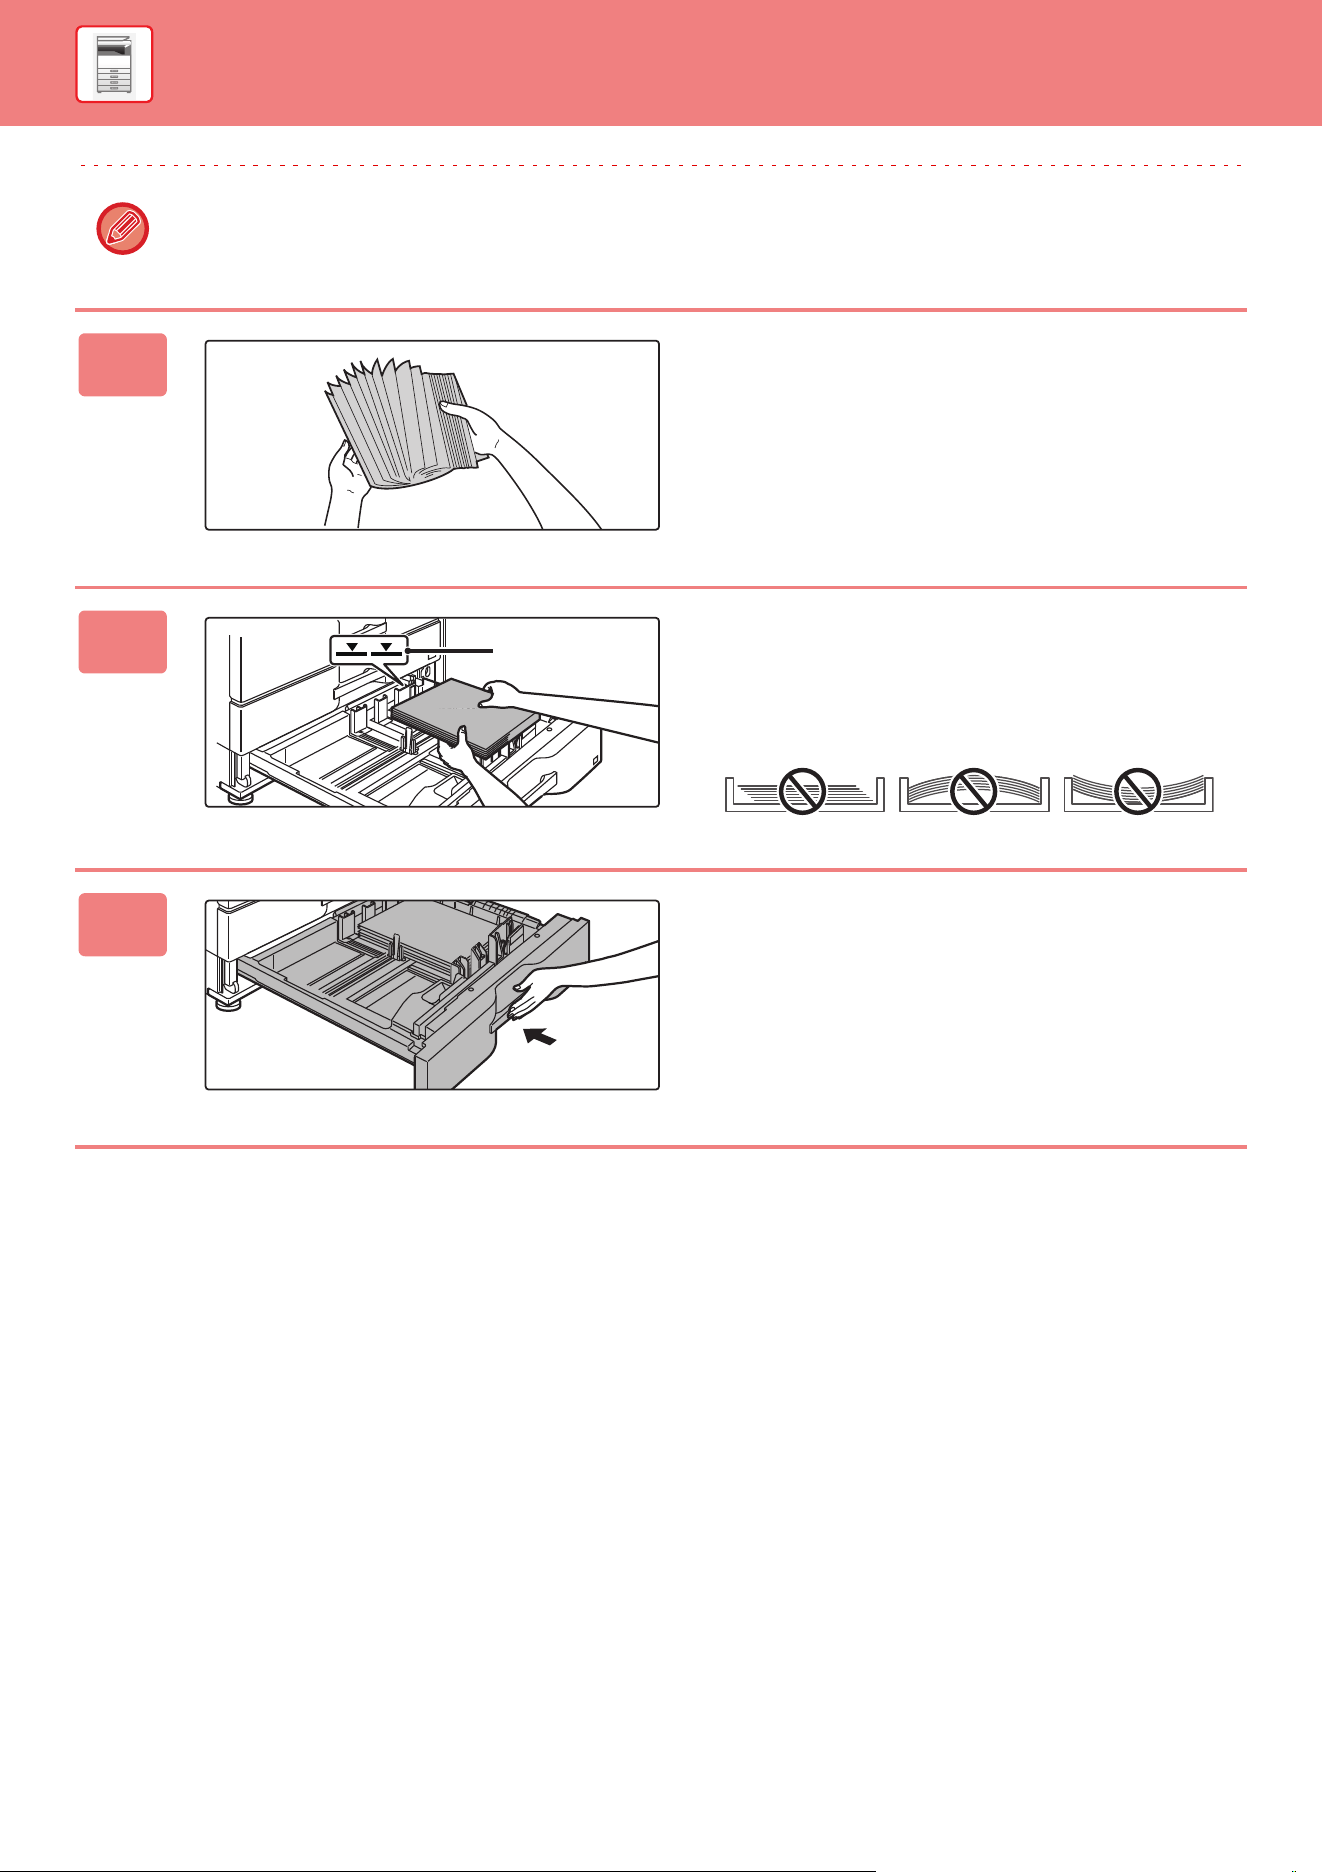
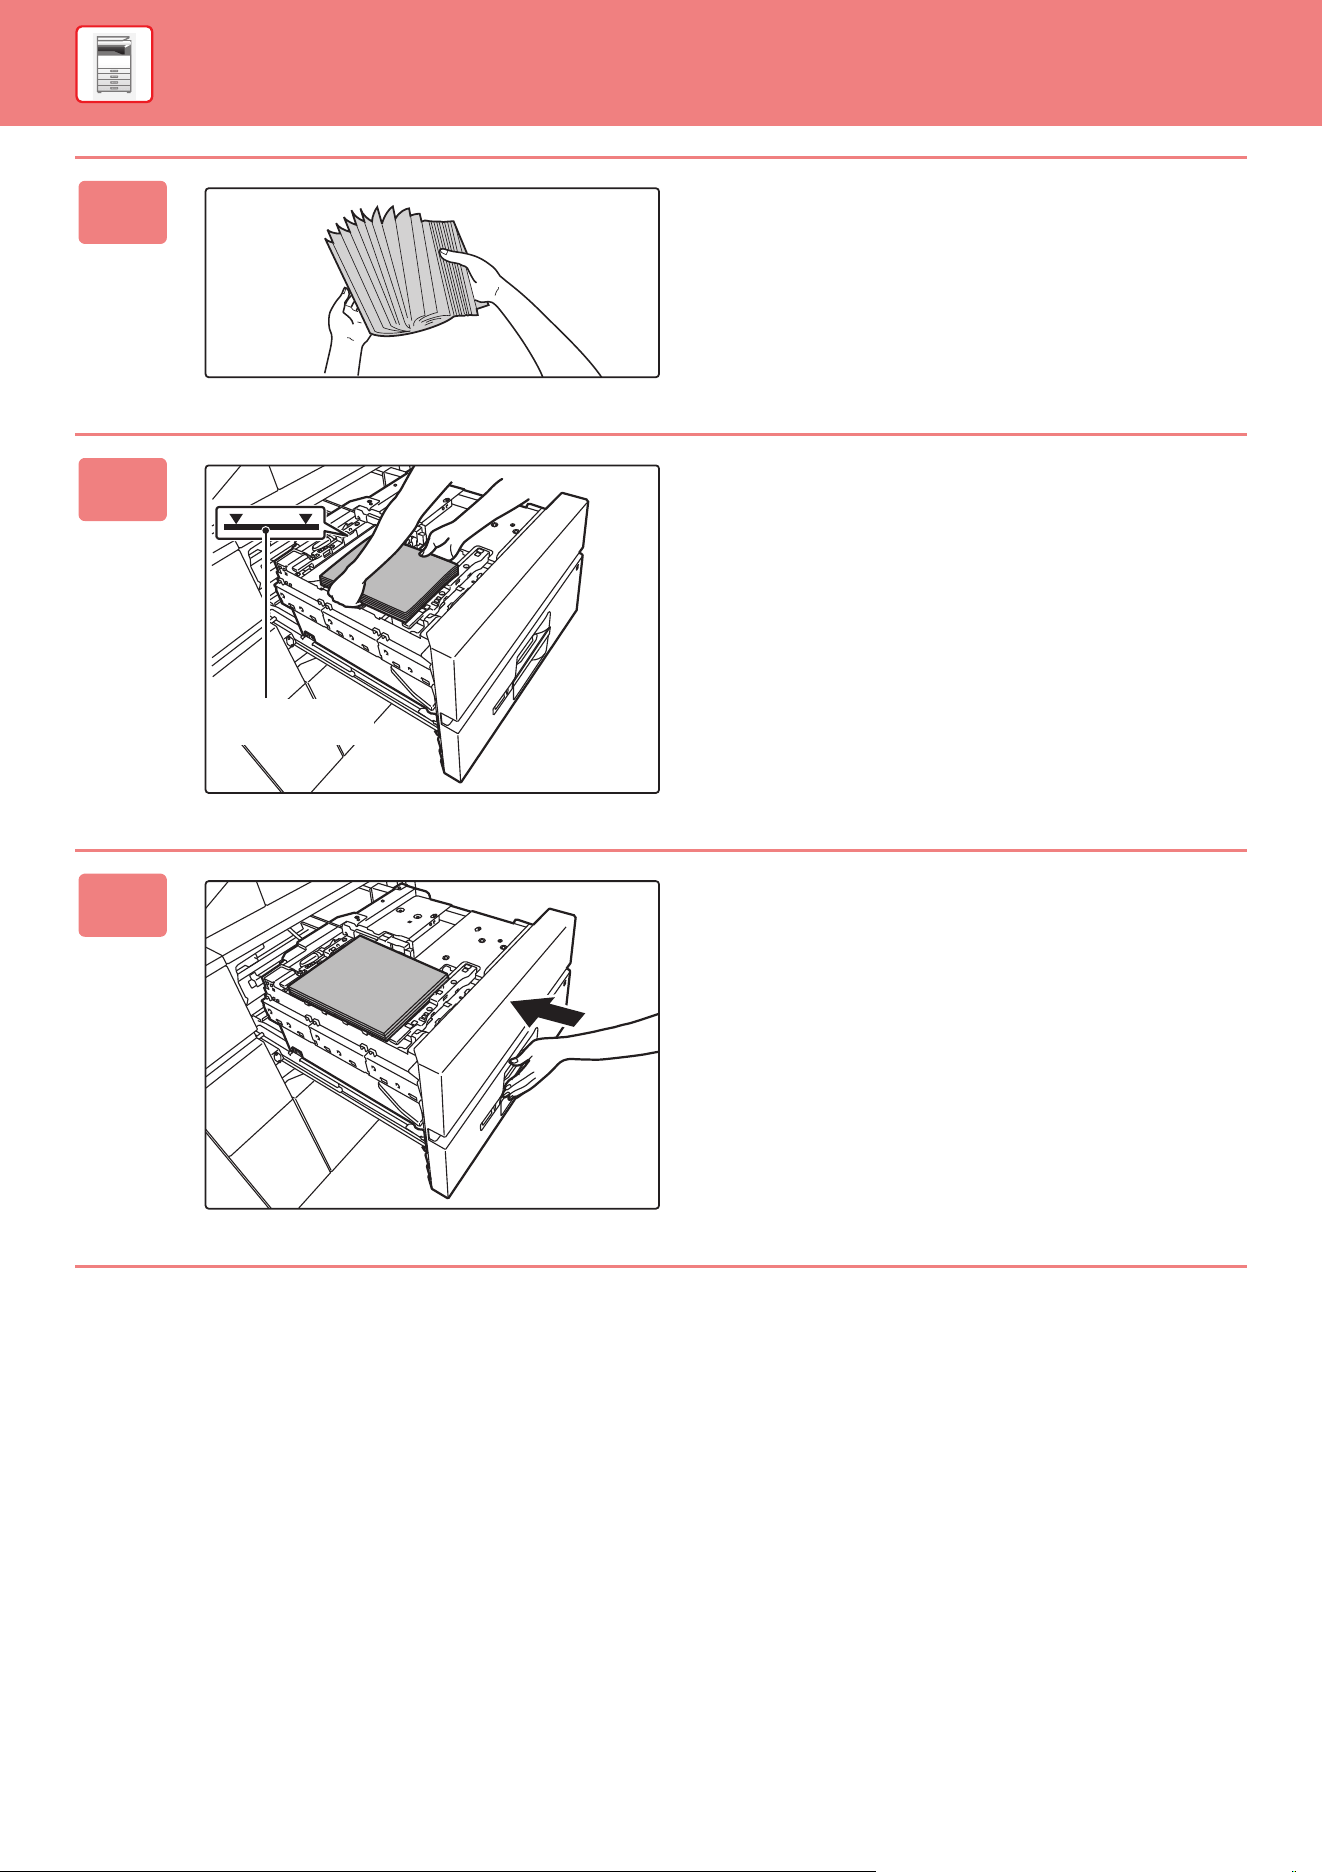
2
Fan the paper.
Fan the paper well before loading it. If the paper is not
fanned, multiple sheets may feed at once and cause a
misfeed.
1-17
BEFORE USING THE MACHINE►LOADING PAPER
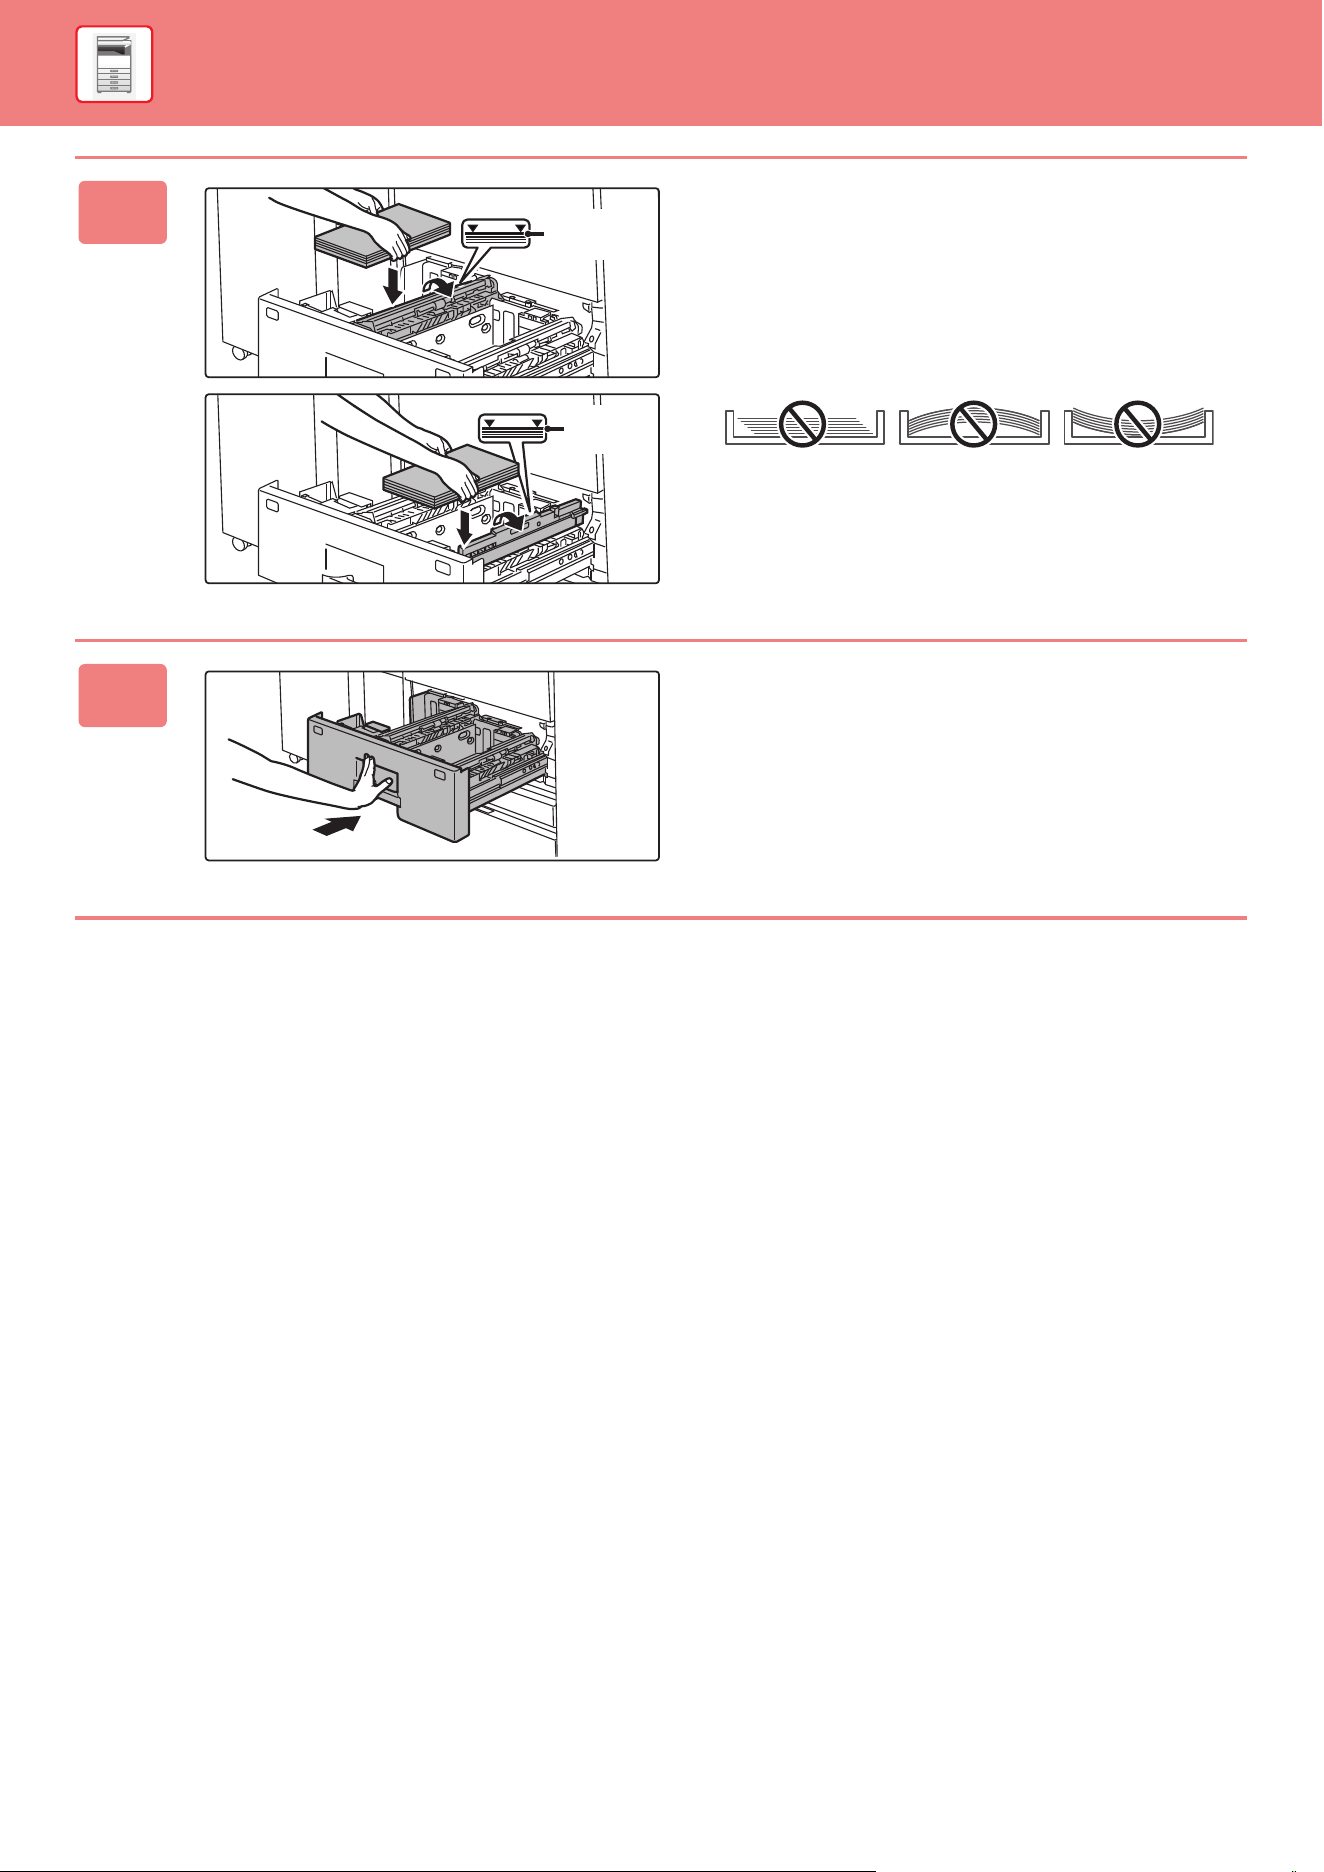
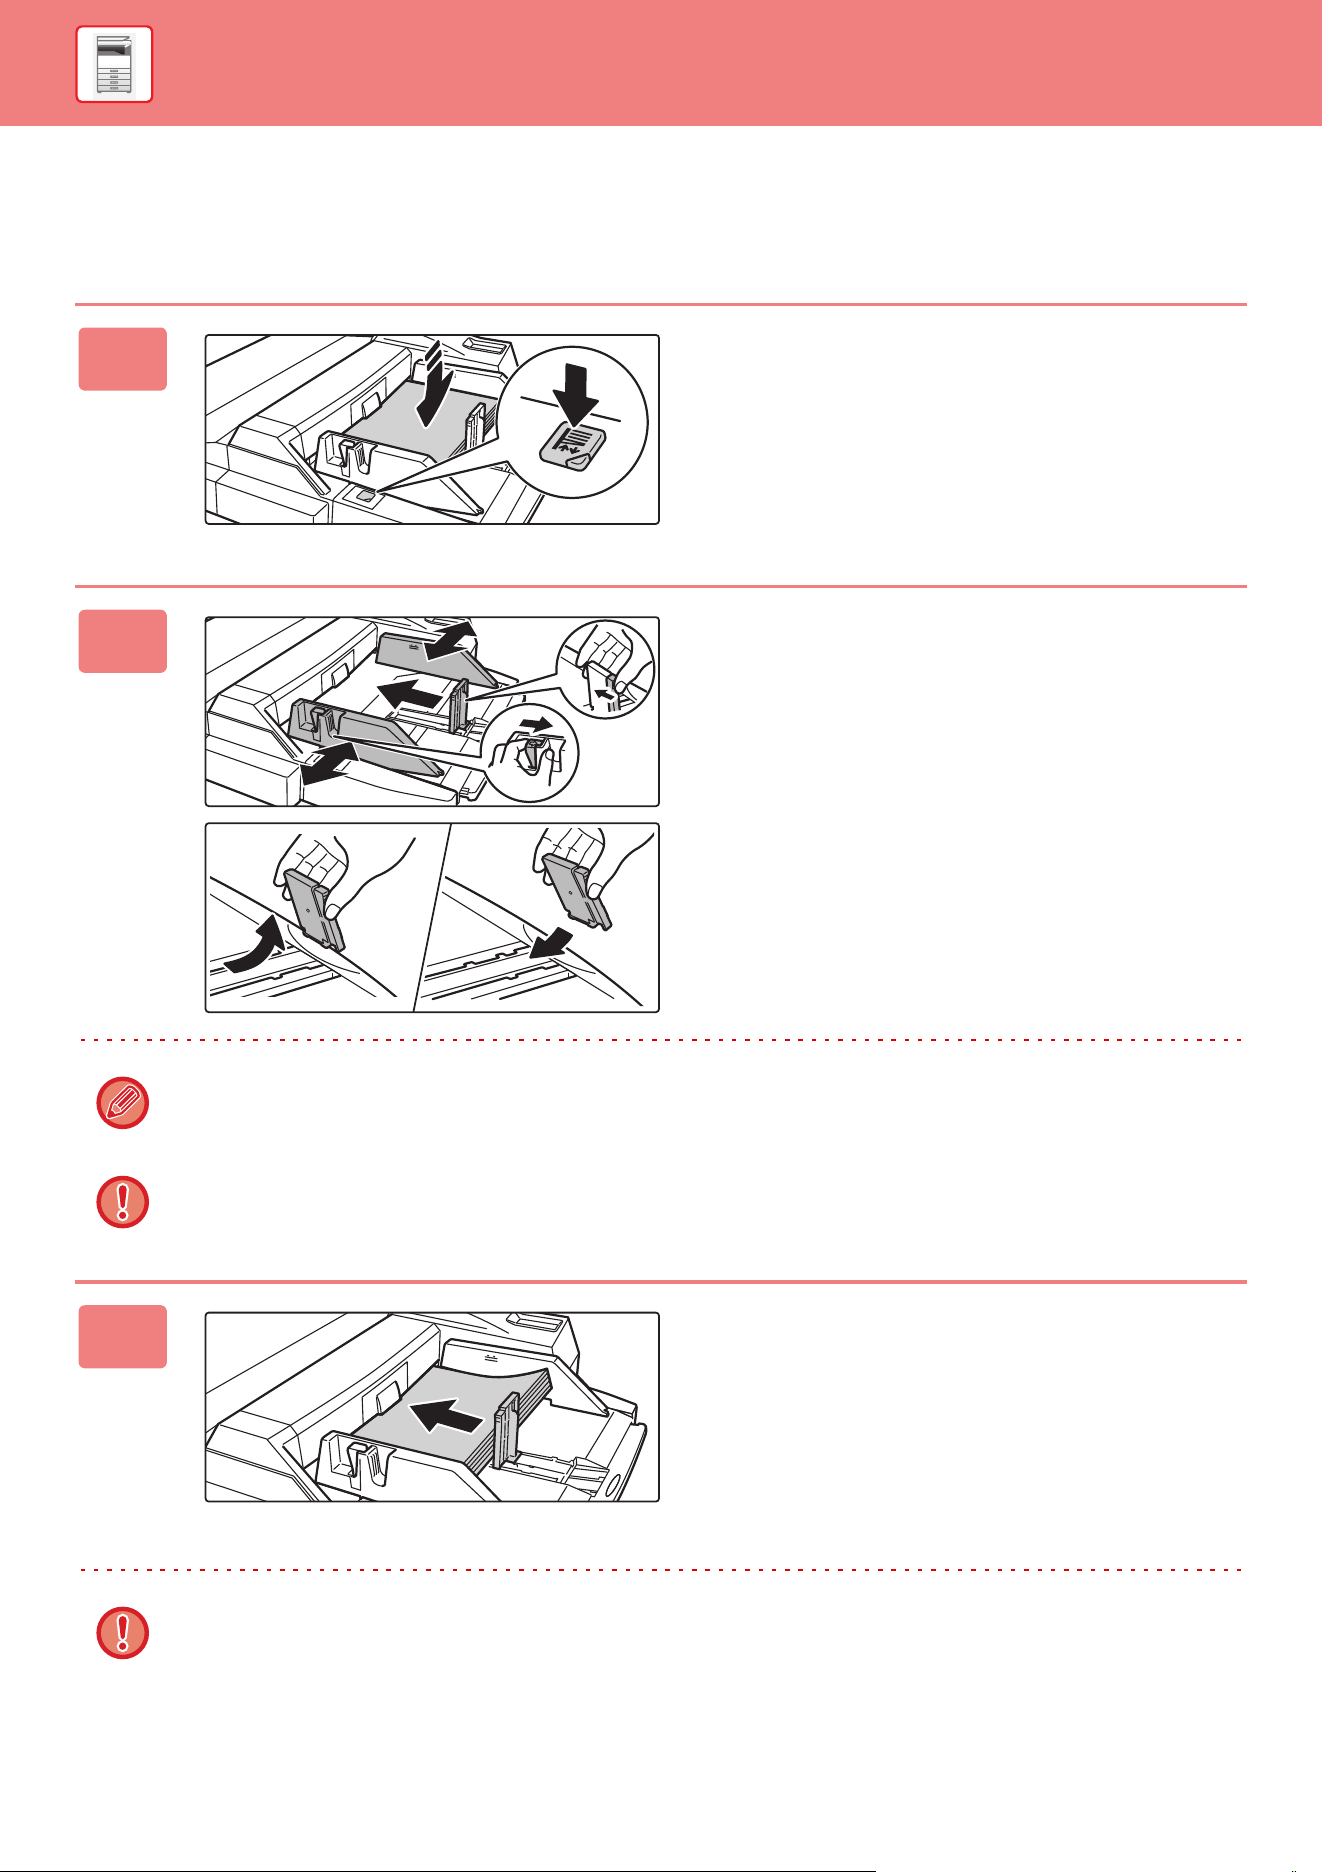
3
Lift the feed roller, and place paper
into the tray.
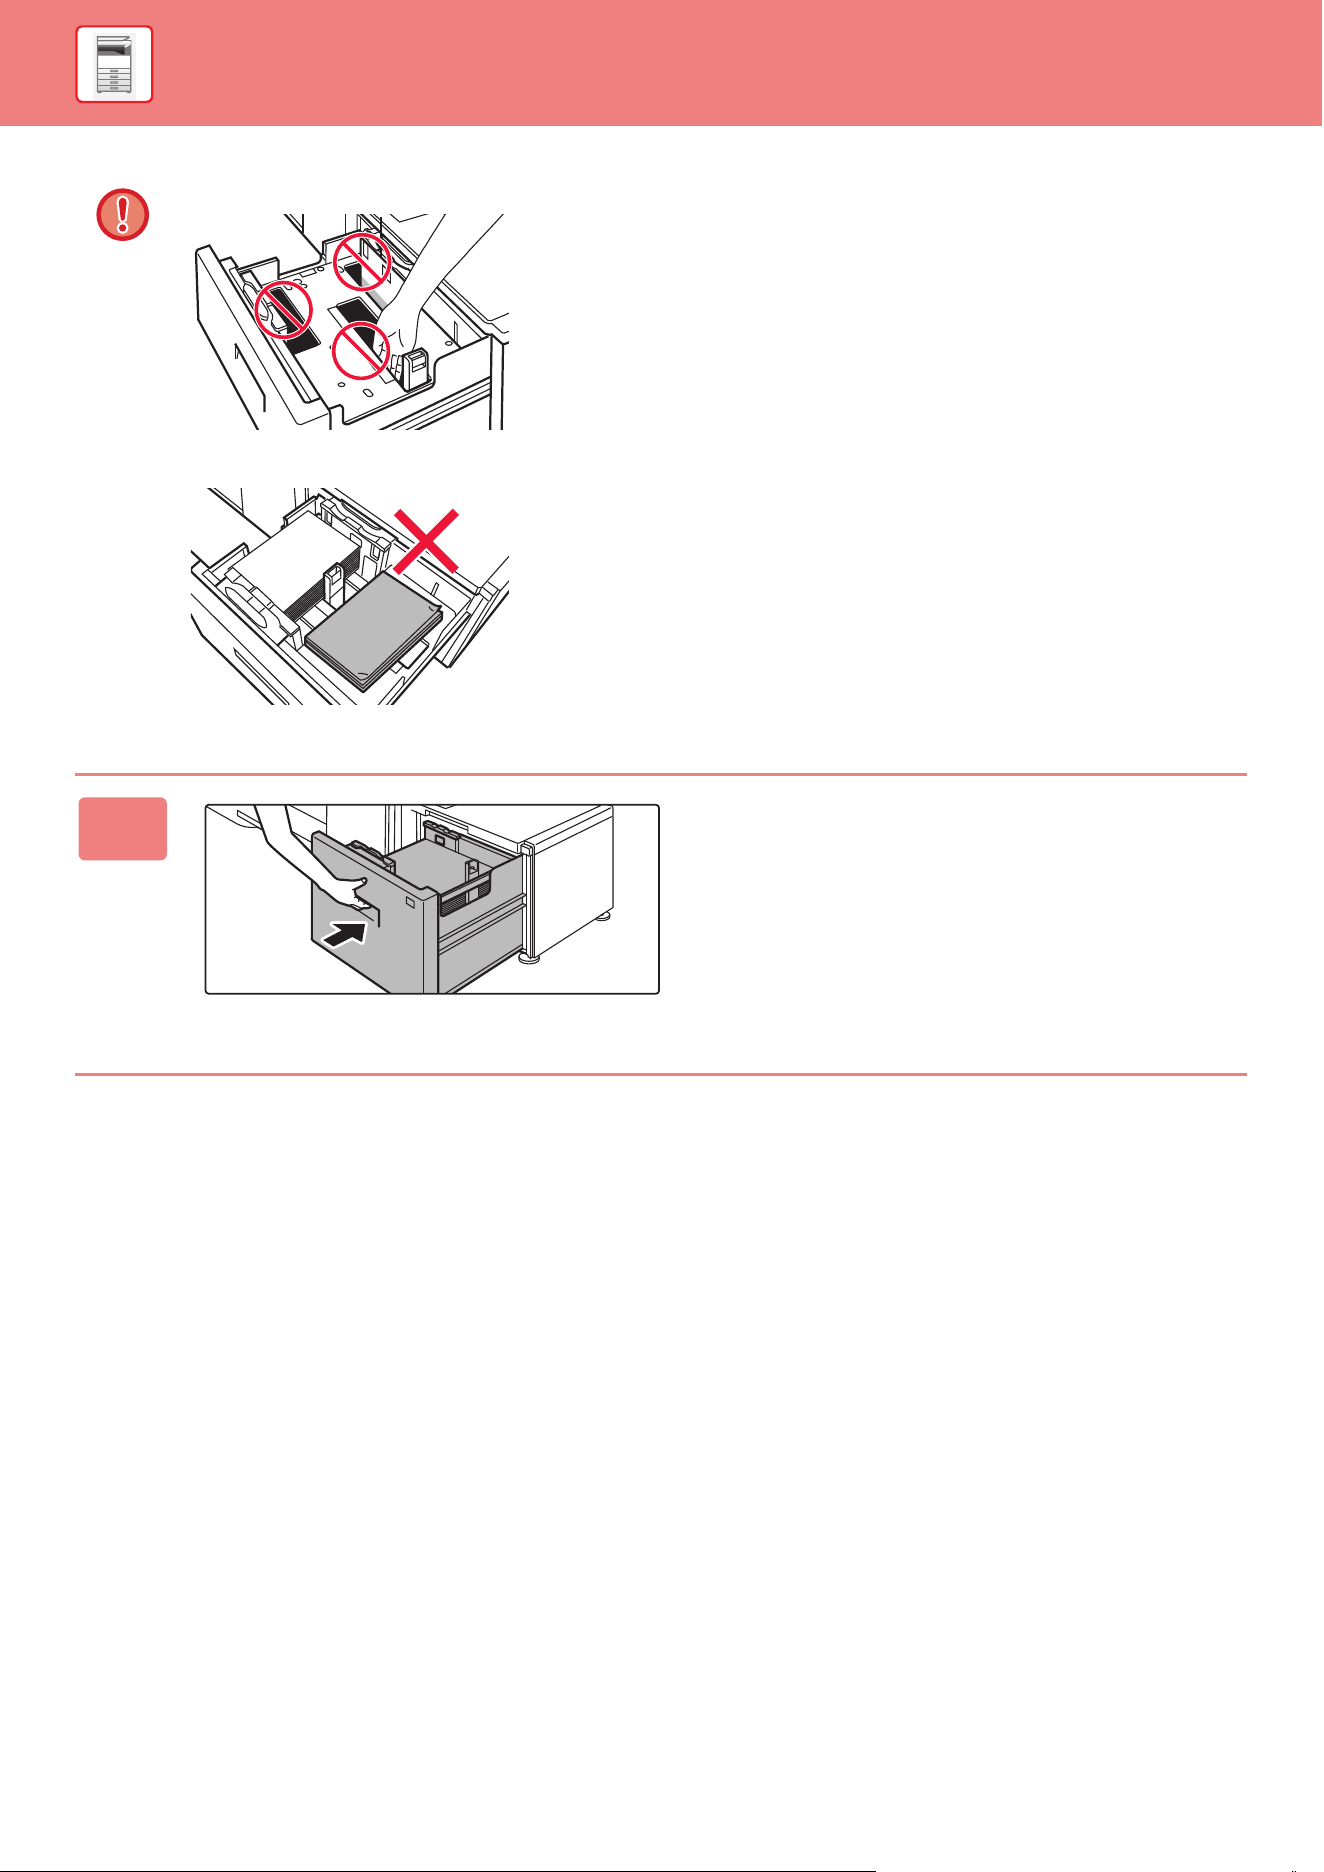
• Load the paper with the print side facing up. The stack
must not be higher than the indicator line (maximum of
1200 sheets for tray 1, or maximum of 800 sheets for tray
2).
• Do not load the paper as shown below.
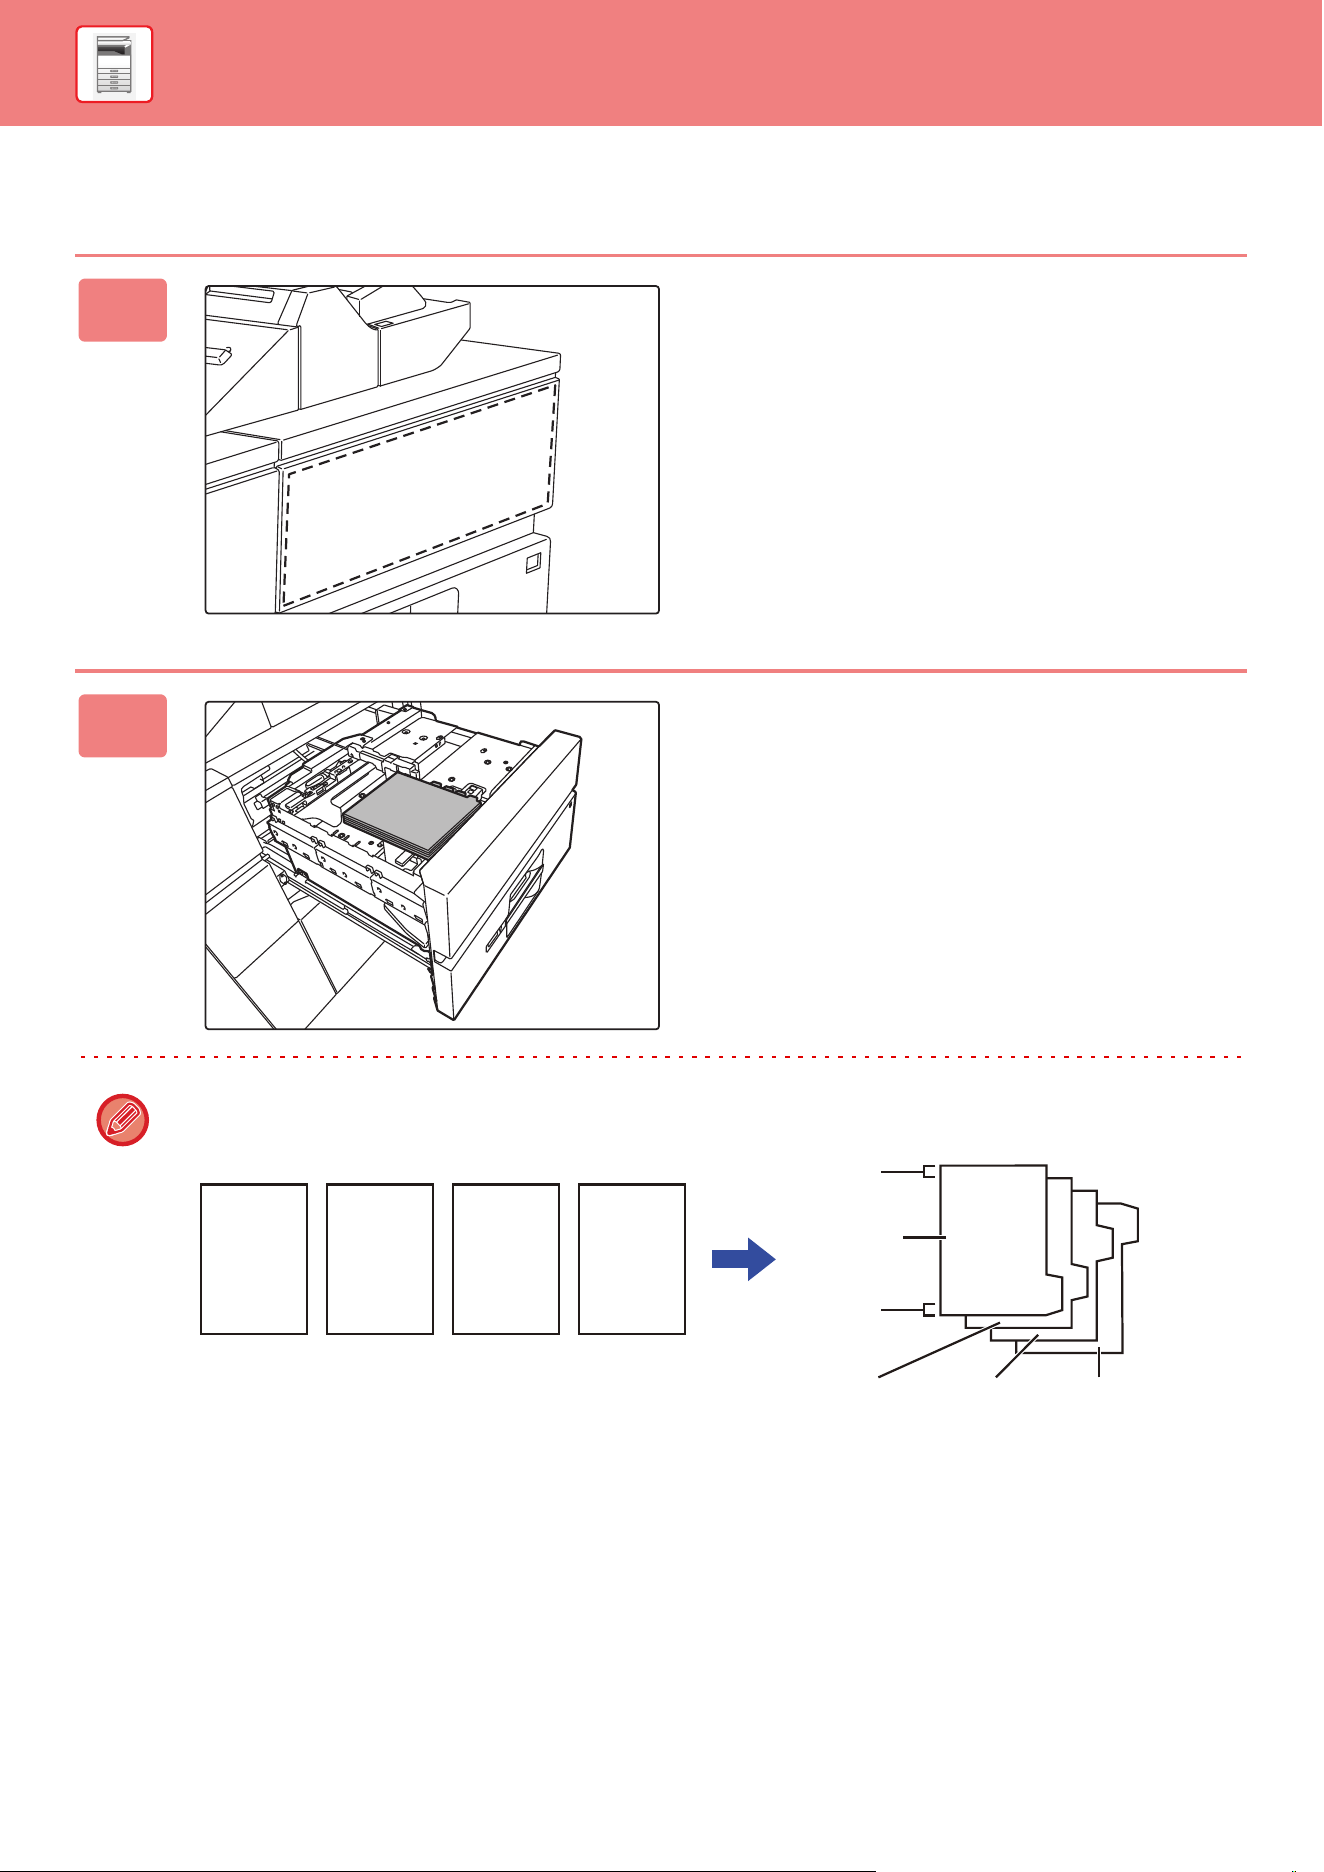
4
Lower the feed roller, and gently push
the paper tray into the machine.
Push the tray firmly all the way into the machine slowly.
Forcefully inserting the paper may cause skewed feeding
and paper misfeeds.
Indicator
line
Indicator
line
1-18
BEFORE USING THE MACHINE►LOADING PAPER
CHANGING THE PAPER SIZE
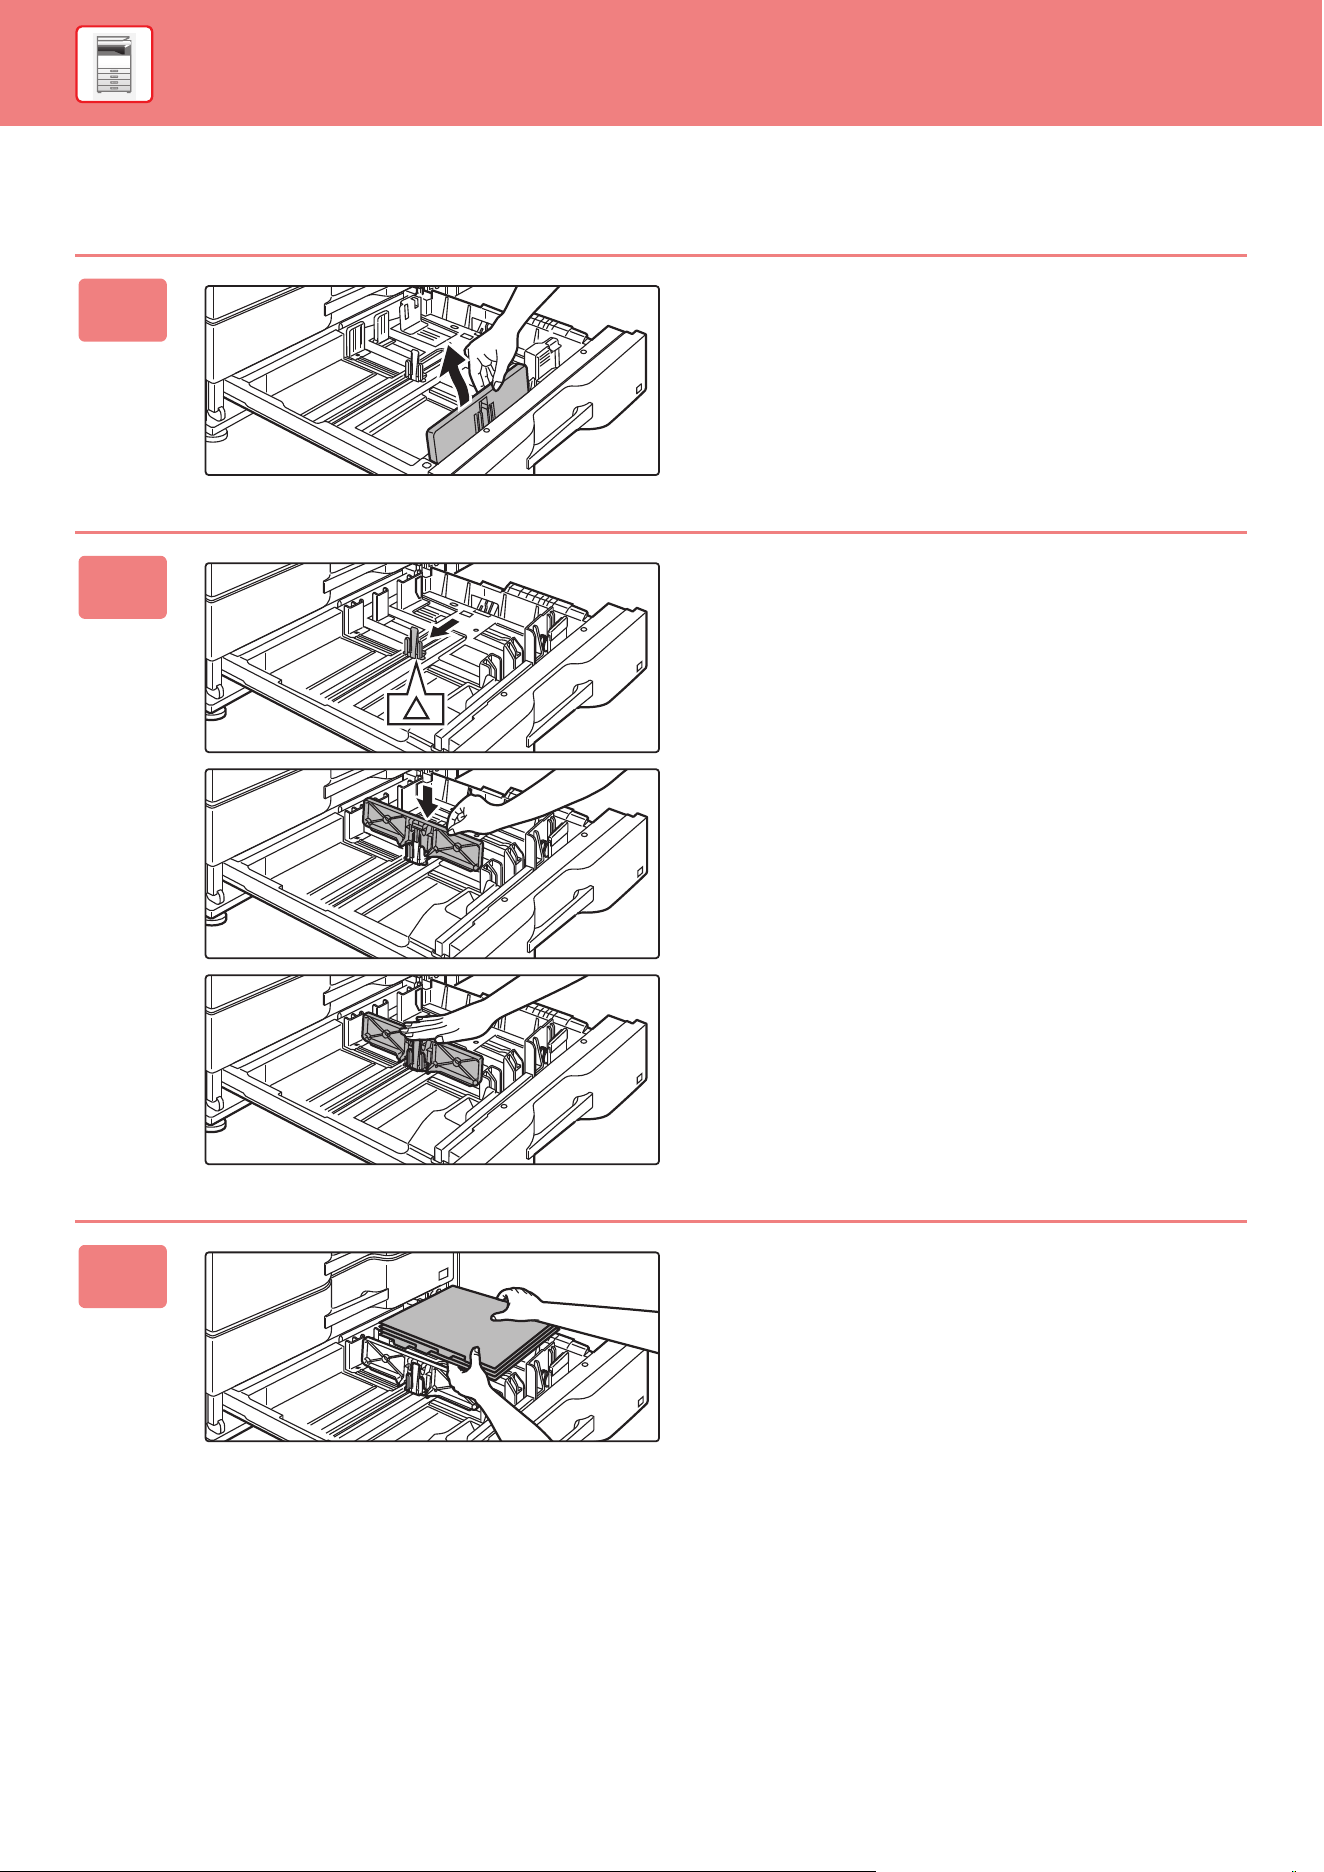
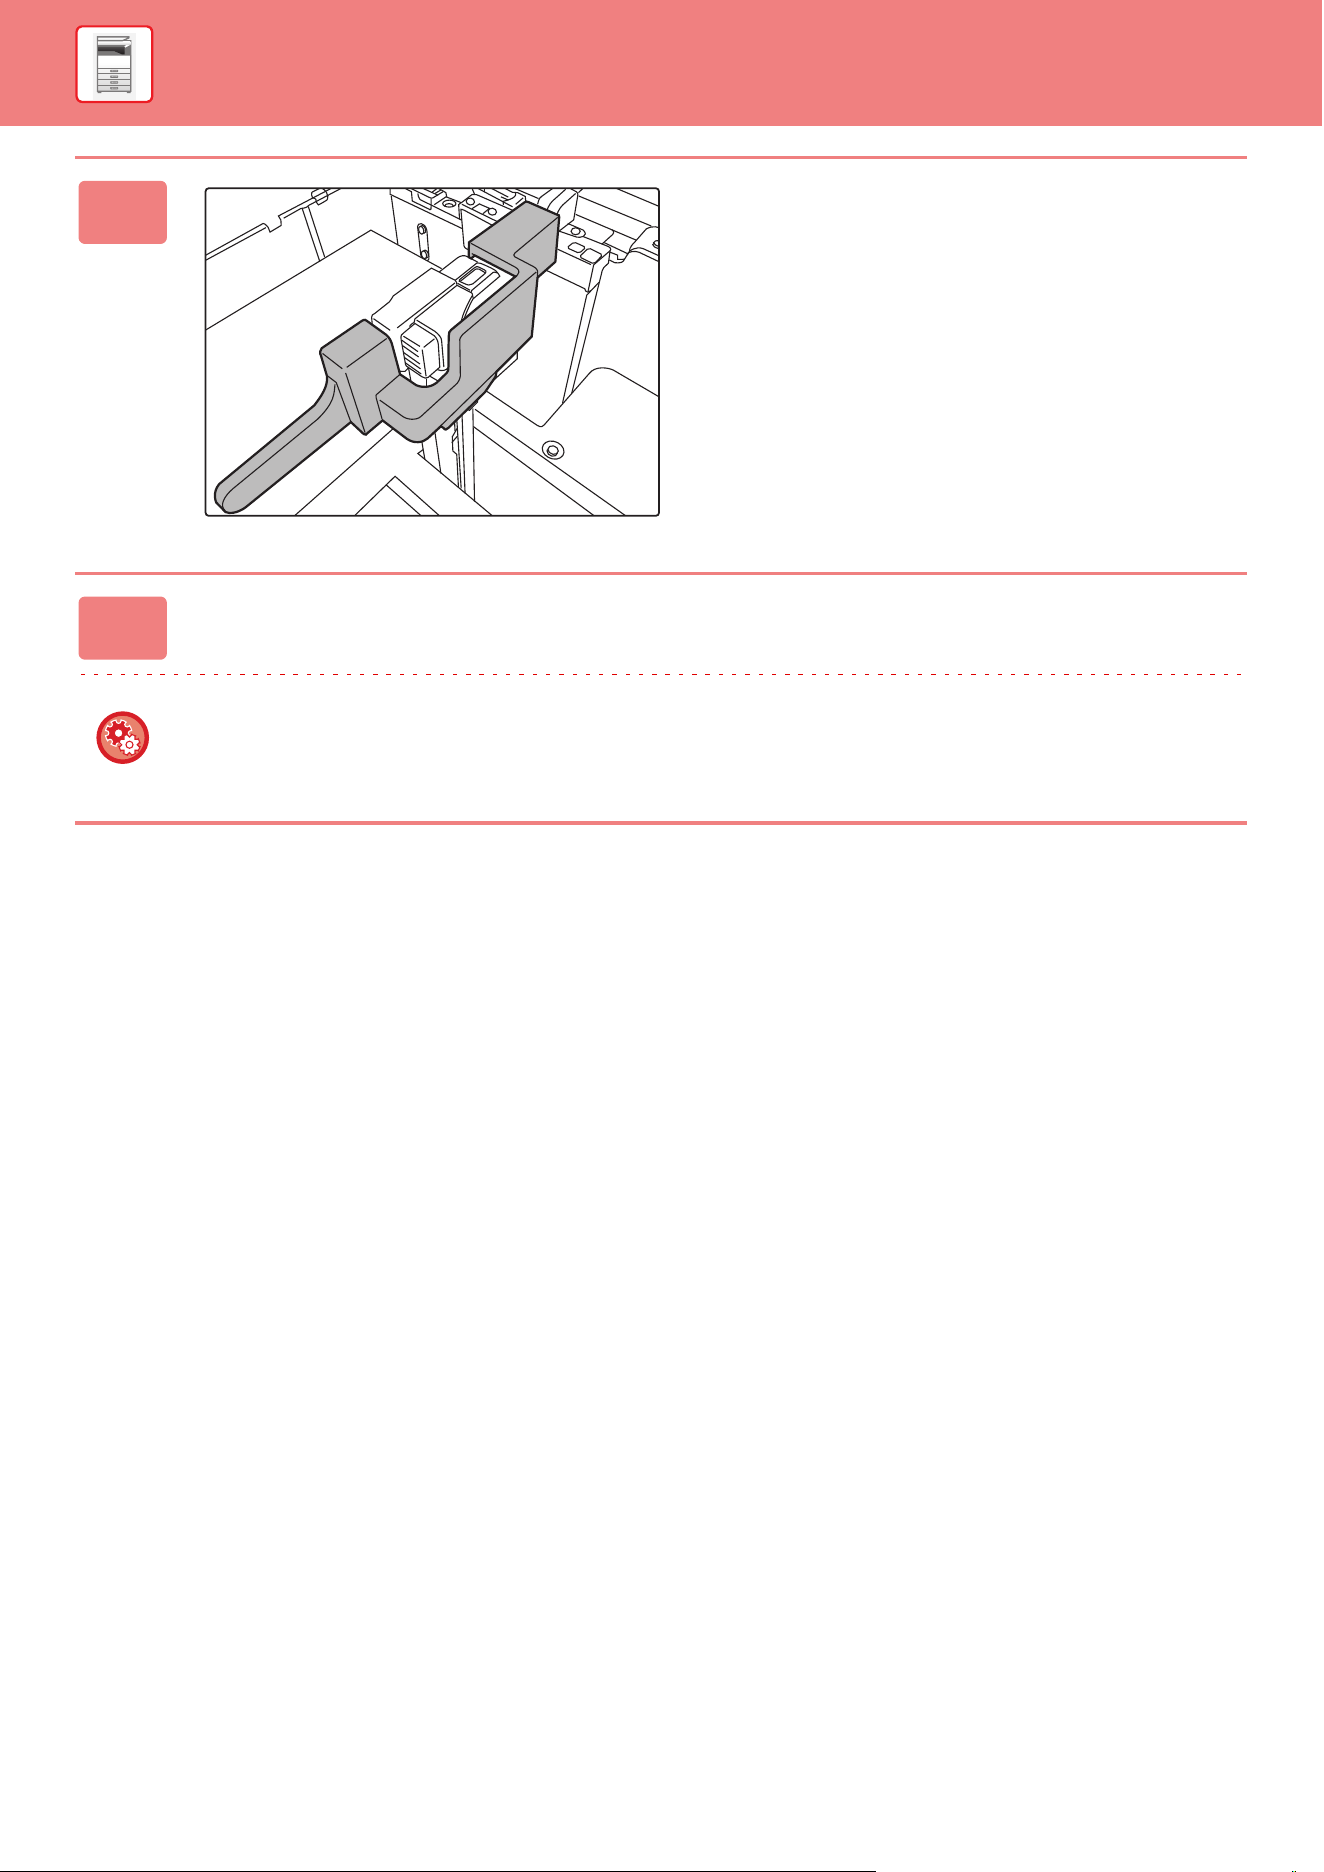
1
Remove the paper size guide.
With the base of the tray pressed all the way down, hold
down the hook at the bottom on the paper size guide and
pull the paper size guide up slightly.
Before changing the paper size of tray 2, raise the paper guide.
2
Attach the paper size guide and
transparent sheet appropriately for the
size of paper to be used.
(1) Align the bottom of the paper size guide
with the appropriate slot on the base of
the tray.
Align the paper size guide with the slot for the paper
size to be used (indicated by the paper size mark).
(2) Align the holes at the top of the paper
size guide with the protrusions that
secure the paper size guide.
Align with the holes for the paper size to be used
(indicated by the paper size mark).
(3) Push in the paper guide so that it locks
into place.
Push the paper size guide in until the hook at the
bottom locks into place. (You will hear a "click" when
the hook locks.) Move the paper size guide slightly to
verify that it has locked into place.
Tray 2
Tray 1
Paper guide
Hook
Transparent
sheet
A4
LT
LT
A4
(1)
(2)
(3)
Transparent
sheet
1-19
BEFORE USING THE MACHINE►LOADING PAPER
• When attaching the paper size guide, place the transparent sheet in direct contact with the base of the tray in the
correct orientation as shown.
• The slot or hole with the "LT" mark is for 8-1/2" x 11" size.
When attaching the paper size guide, make sure that the top and bottom of the guide are aligned to the same paper size.
If the top and bottom of the paper size guide are not aligned to the same paper size, skewed feeding and misfeeds will
result.
3
Repeat steps 1 and 2 to adjust the far
paper guide to the paper size to be
used.
Be sure to adjust the far paper guide to the same size as the
near paper guide.
When removing and attaching the far paper size guide, take
care not to hit the front cover of the machine.
Adjusting only one paper guide may result in skewed feeding or misfeeds.
4
Set the paper size and paper type.
Be sure to set the paper size and paper type by selecting [Tray Settings] in the home screen or in "Settings", select
[System Settings] → [Common Settings] → [Paper Settings] → [Paper Tray Settings].
If the paper size setting is not configured correctly, automatic paper selection will not operate correctly and printing may
take place on the wrong size or type of paper or a misfeed may occur.
Transparent sheet
1-20
BEFORE USING THE MACHINE►LOADING PAPER
LOADING PAPER IN THE TRAY 3/4
A maximum of 500 sheets of paper from 12" × 18" to 7-1/4" × 10-1/2"R (A3W to B5R) can be loaded into tray 3.
A maximum of 500 sheets of paper from 12" × 18" to 5-1/2" × 8-1/2"R (A3W wide to A5R) can be loaded into tray 4.
• Other than plain paper, special media such as transparency film and tab paper can be loaded into tray 4.
To load tab paper, the dedicated guide must be installed.
If you loaded paper of a different type or size from the paper previously loaded, be sure to check the settings in "Settings
(administrator)". An incorrect setting may cause print failure, printing on paper of an incorrect size, or type or paper mis-
feeds.
• Tray 4 can only be loaded with Com9, Com10, and Monarch envelopes.
Do not place heavy objects on the tray or press down on the tray.
To check the type and size of paper:
[Tray Settings] in the home screen or in "Settings", select [Status] → [Machine Identification] → [Paper Input Tray Status].
To set the type and size of paper:
Set this in [Tray Settings] in the home screen or in "Settings", select [System Settings] → [Common Settings] → [Paper
Settings] → [Paper Tray Settings].
1
Pull out the paper tray.
Gently pull the tray out until it stops.
To load paper, go to step 3.
To load a different size of paper, go to the next step.
Keep holding the handle until the lock is released.
2
Adjust guide plates A and B by
squeezing their lock levers and sliding
them to match the longitudinal and
transversal dimensions of the paper to
be loaded.
(1) Squeeze the lock knob on guide plate A
and slide to the desired paper size.
(2) Squeeze the lock knob on guide plate B
and slide to the desired paper size. If slid
to a standard paper size, guide plate B
will lock automatically.
(3) For a non-standard paper size, after
sliding guide plate B to the desired size,
press the lock button (C).
(A)
(B)
(C)
1-21
BEFORE USING THE MACHINE►LOADING PAPER
A non-standard size of paper can only be loaded in tray 4. A non-standard size of paper cannot be loaded in tray 3.
3
Fan the paper.
Fan the paper well before loading it. If the paper is not
fanned, multiple sheets may feed at once and cause a
misfeed.
4
Insert the paper into the tray.
• Load the paper with the print side facing up. The stack
must not be higher than the indicator line (maximum of
500 sheets).
• Do not load the paper as shown below.
5
Gently push the paper tray into the
machine.
Push the tray firmly all the way into the machine slowly.
Forcefully inserting the paper may cause skewed feeding
and paper misfeeds.
Indicator line
1-22
BEFORE USING THE MACHINE►LOADING PAPER
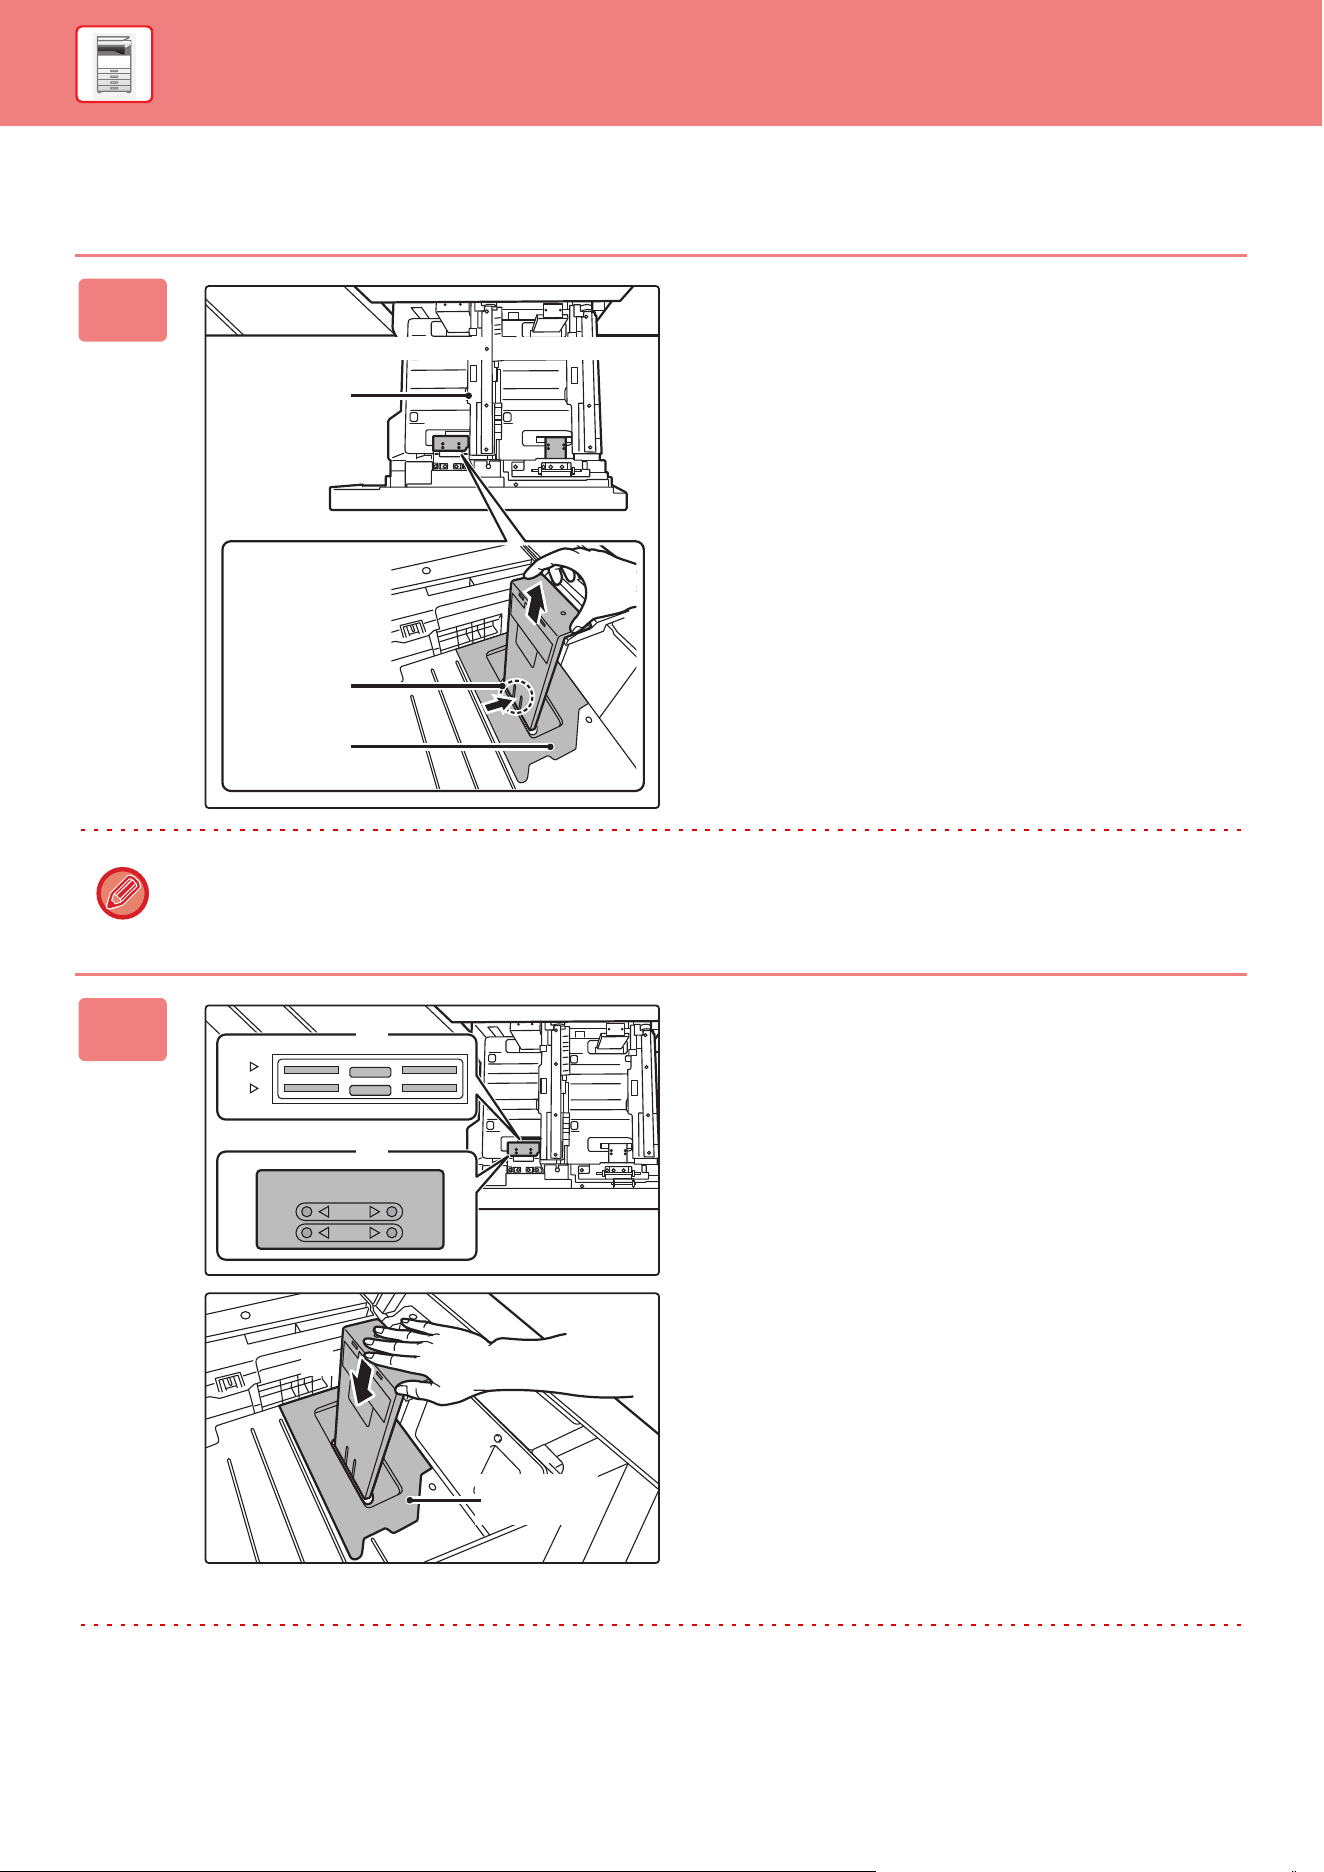
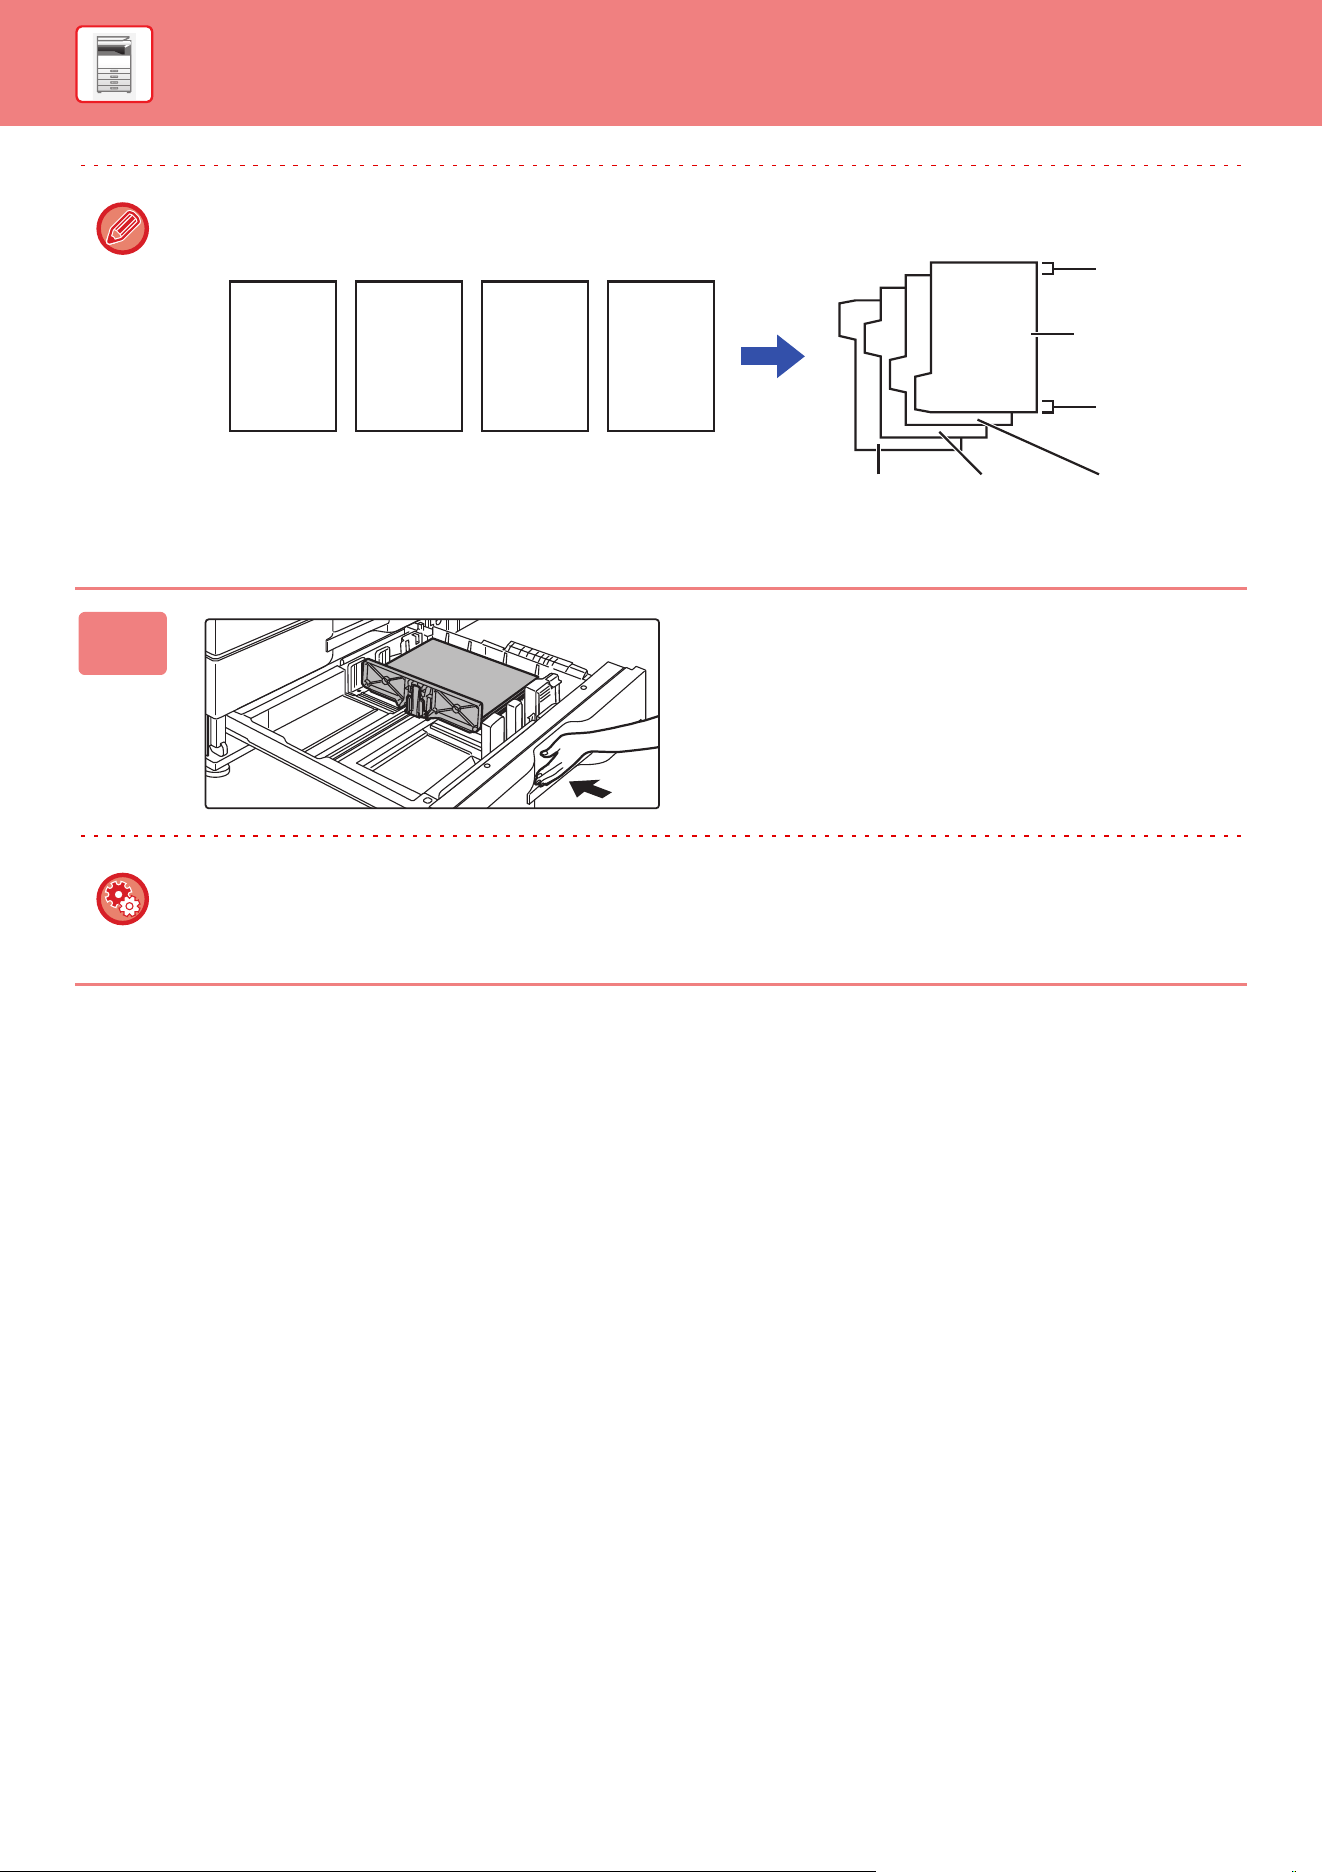
LOADING TAB PAPER INTO TRAY 4
1
Remove the tab paper guide.
The guide is stored inside tray 4.
2
Pull out the tray and install the guide.
Adjust the guide plates to the triangle mark position.
Install the guide so that it may cover the guide plates.
Adjust the guide plates in the tray to match the longitudinal
and transversal dimensions of the paper to be loaded.
3
Insert the tab paper into the tray.
Place the tab paper with the print side facing up so that the
tab is to the left.
1-23
BEFORE USING THE MACHINE►LOADING PAPER
See the following figure and adjust the tab position of the tab paper.
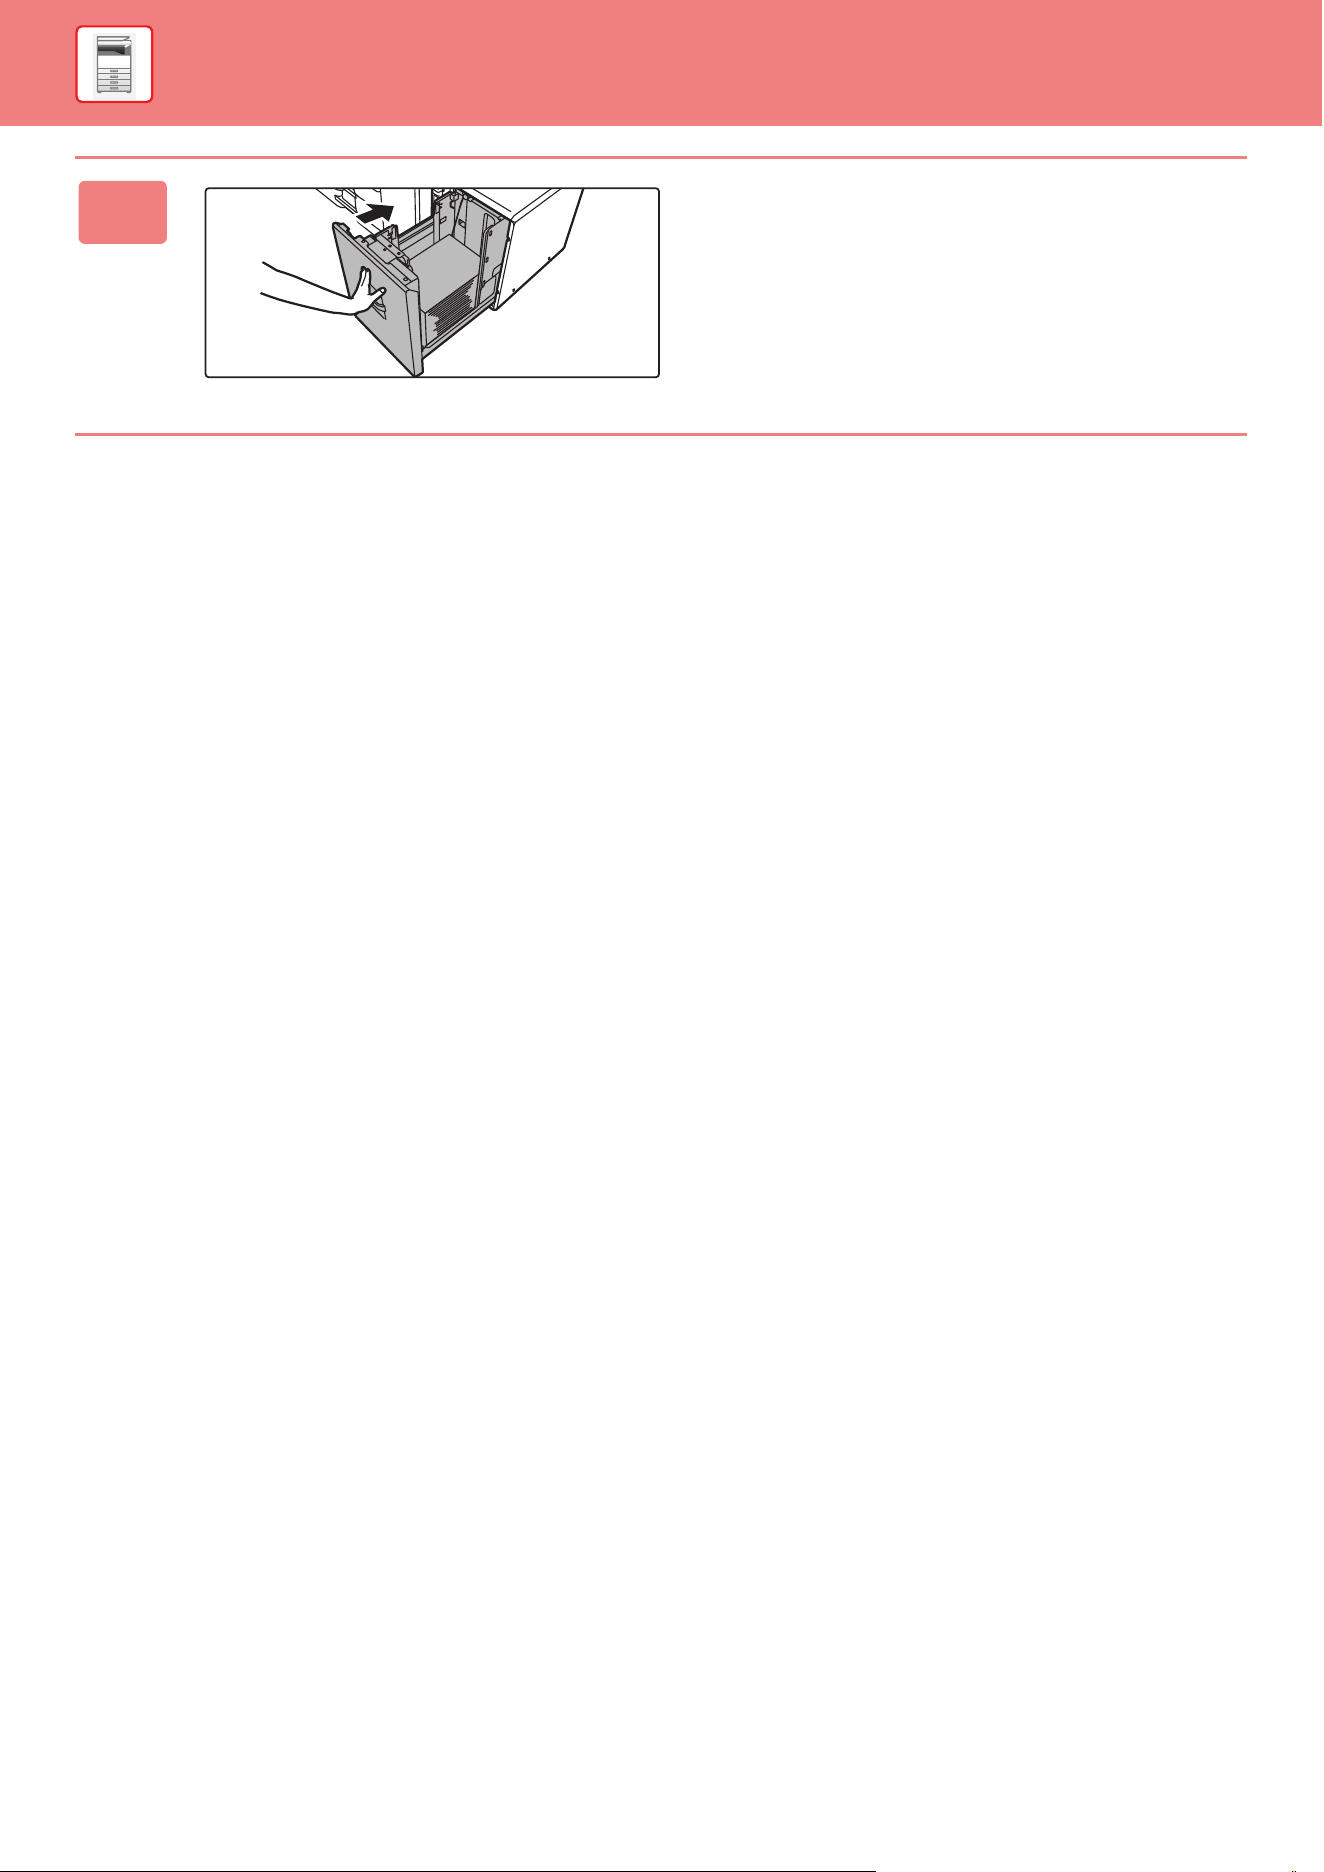
4
Gently push the tray into the machine,
and set the paper type to tab paper.
Using "Paper Tray Settings" in the system settings, set the
paper type to tab paper.
To set the paper type to tab paper:
Set this in [Tray Settings] in the home screen or in "Settings", select [System Settings] → [Common Settings] → [Paper
Settings] → [Paper Tray Settings].
GHI
DEF
ABC
JKL
Originals
Tab paper
1st page
1st page
2nd page
2nd page
3rd page
3rd page
4th page
4th page
Top edge
Tail edge
Side 1

1-24
BEFORE USING THE MACHINE►LOADING PAPER
LOADING PAPER IN THE LARGE CAPACITY
TRAY
Use the large capacity tray for outputting massive prints that cannot be processed using the regular tray.
Large capacity tray (MX-LC12) stores a maximum of 3500 sheets of 8-1/2" × 11", A4 and B5 paper.
Large capacity tray (MX-LCX3 N) stores a maximum of 3000 sheets of paper from 12" × 18" (A3W) to 8-1/2" × 11"R
(B5).
When changing the paper size, consult the dealer or nearest SHARP Service Department.
LARGE CAPACITY TRAY (MX-LC12)
Do not place heavy objects on the tray or press down on the tray.
To check the type and size of paper:
[Tray Settings] in the home screen or in "Settings", select [Status] → [Machine Identification] → [Paper Input Tray Status].
To set the type and size of paper:
Set this in [Tray Settings] in the home screen or in "Settings", select [System Settings] → [Common Settings] → [Paper
Settings] → [Paper Tray Settings].
1
Pull out the paper tray.
Gently pull the tray out until it stops.
2
Fan the paper.
Fan the paper well before loading it. If the paper is not
fanned, multiple sheets may feed at once and cause a
misfeed.
3
Place the paper in the center of the
paper table.
Load the paper with the print side facing down. The stack
must not be higher than the indicator line (maximum of 3500
sheets).
Indicator
line
1-26
BEFORE USING THE MACHINE►LOADING PAPER
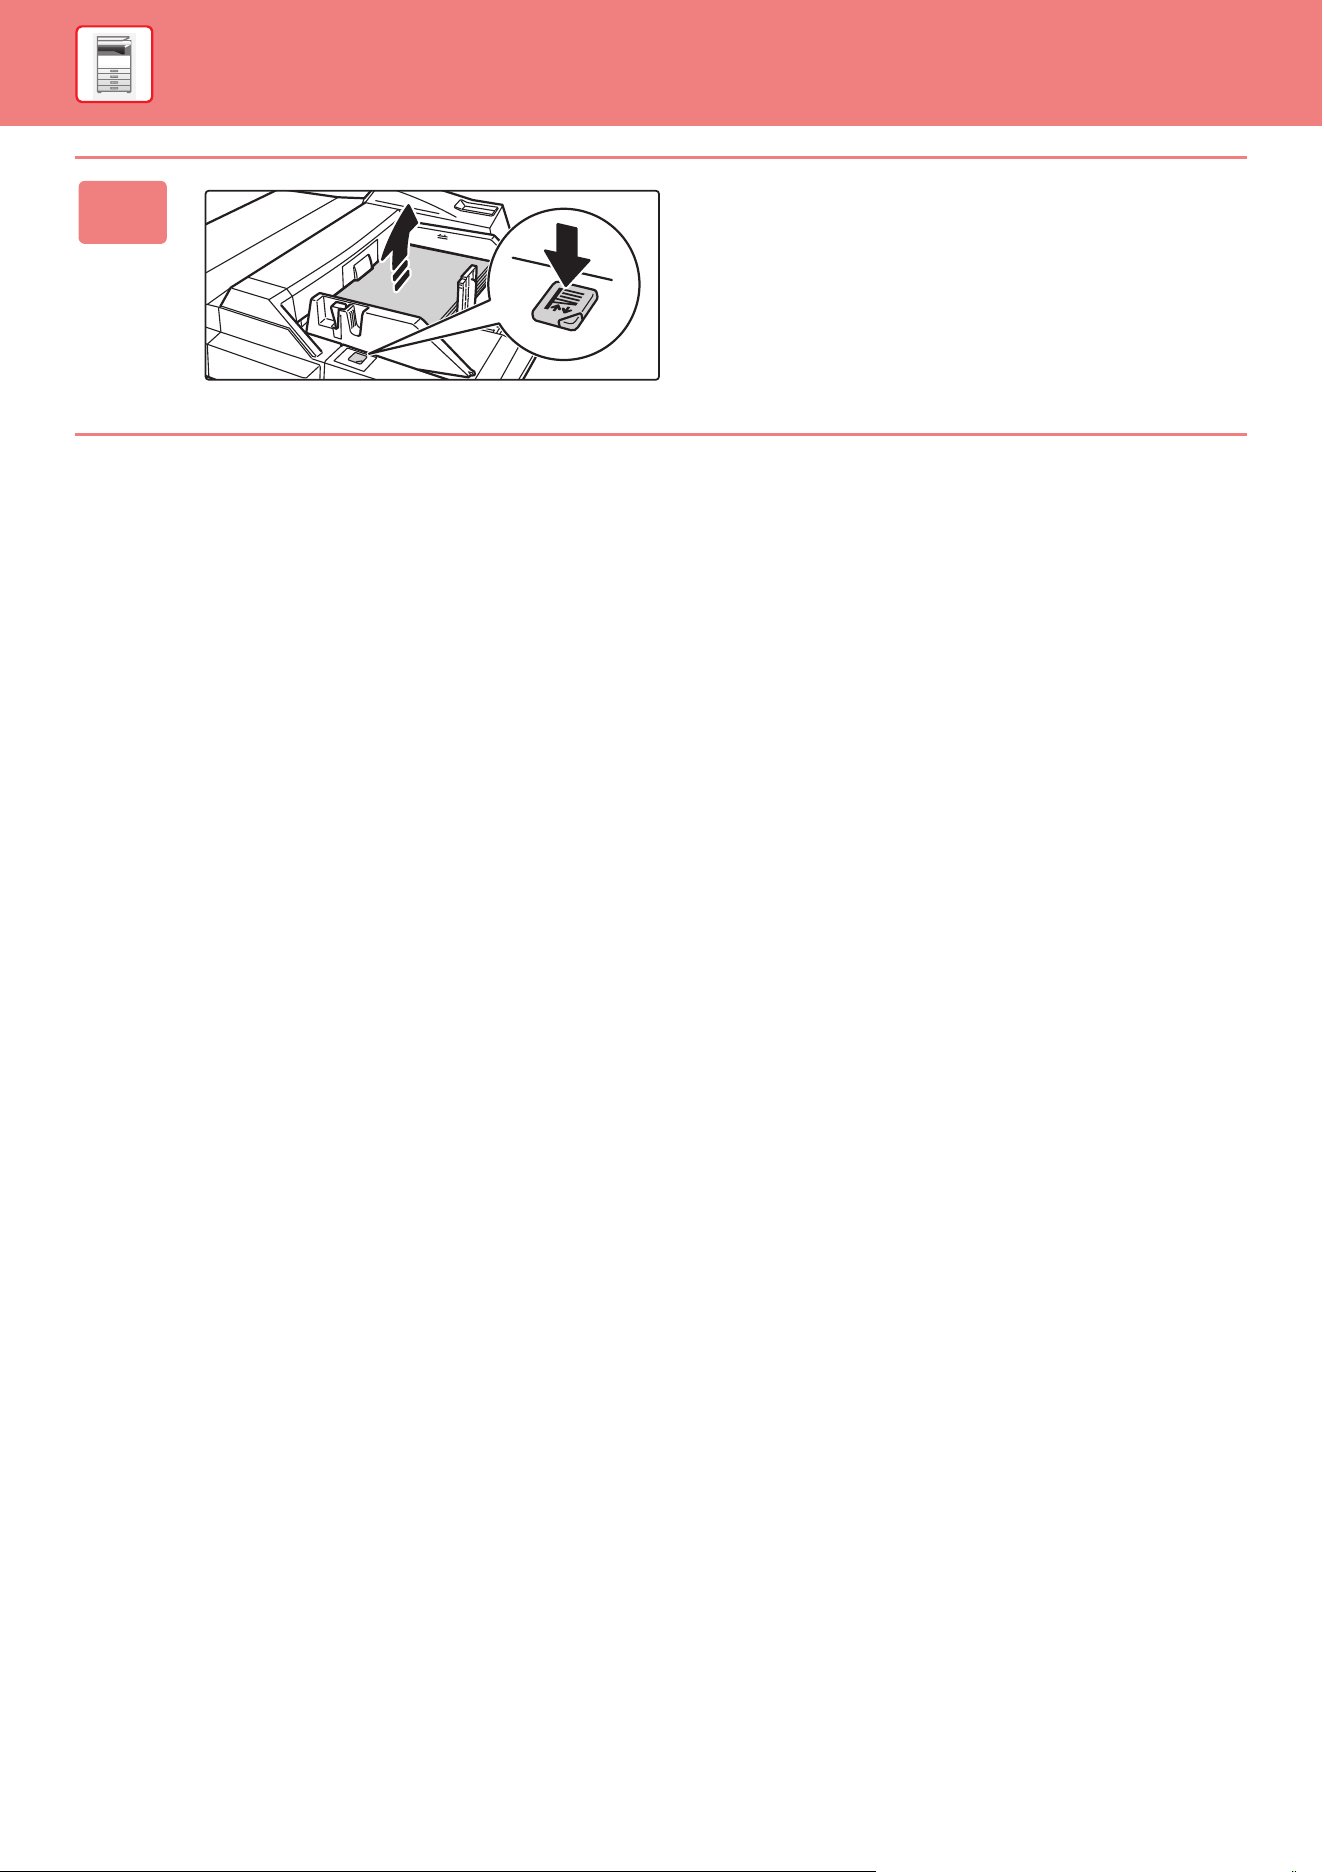
LARGE CAPACITY TRAY (MX-LCX3 N)
1
Press the operation button.
The operation button blinks, and the tray paper table goes
down to the paper loading position. Wait until the operation
button light goes off.
Do not pull out the tray until the light goes off. If you pull out the tray forcibly while the button lights up or blinks, a
machine failure may be resulted.
2
Pull out the paper tray.
Gently pull the tray out until it stops.
3
Fan the paper.
Fan the paper well before loading it. If the paper is not
fanned, multiple sheets may feed at once and cause a
misfeed.
4
Place the paper in the center of the
paper table.
Load the paper with the print side facing down. The stack
must not be higher than the indicator line (maximum of 3000
sheets).
When a certain volume of paper is loaded, the paper table
automatically goes down slightly and stops. Repeat this
operation in the same way to load paper.
Indicator line
1-27
BEFORE USING THE MACHINE►LOADING PAPER
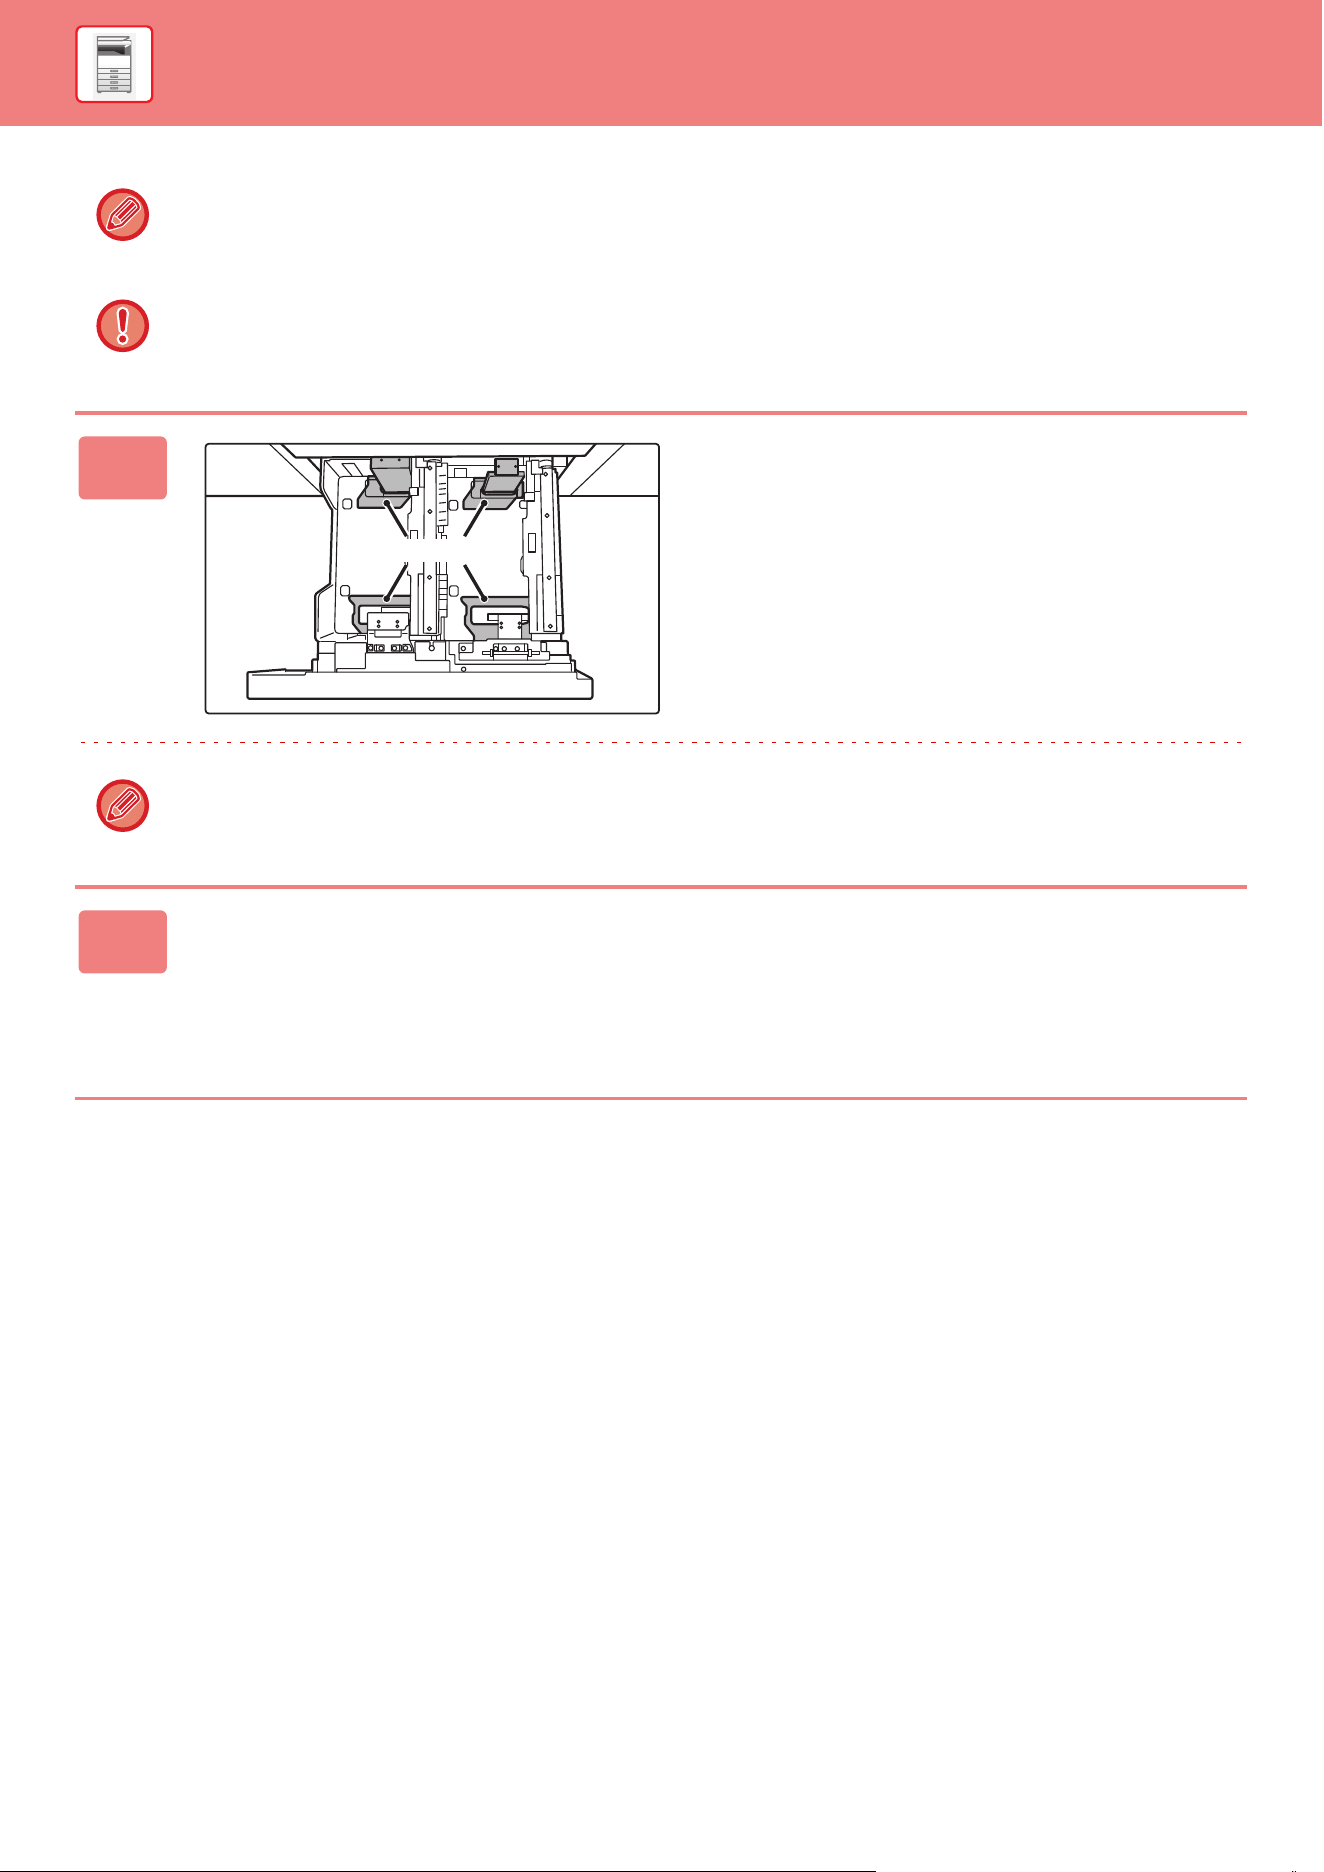
• Do not insert your hand into the space inside the paper table when you load paper.
• Do not insert spare paper or objects into the space inside the tray.
5
Gently push the paper tray into the
machine.
Push the tray firmly all the way into the machine slowly.
Forcefully inserting the paper may cause skewed feeding
and paper misfeeds.
The paper table goes up after the tray is pushed in. The
operation button blinks while the paper table goes up. The
button lights up when the paper table has gone up.
1-28
BEFORE USING THE MACHINE►LOADING PAPER
Changing the paper size for the large capacity tray (MX-LCX3 N)
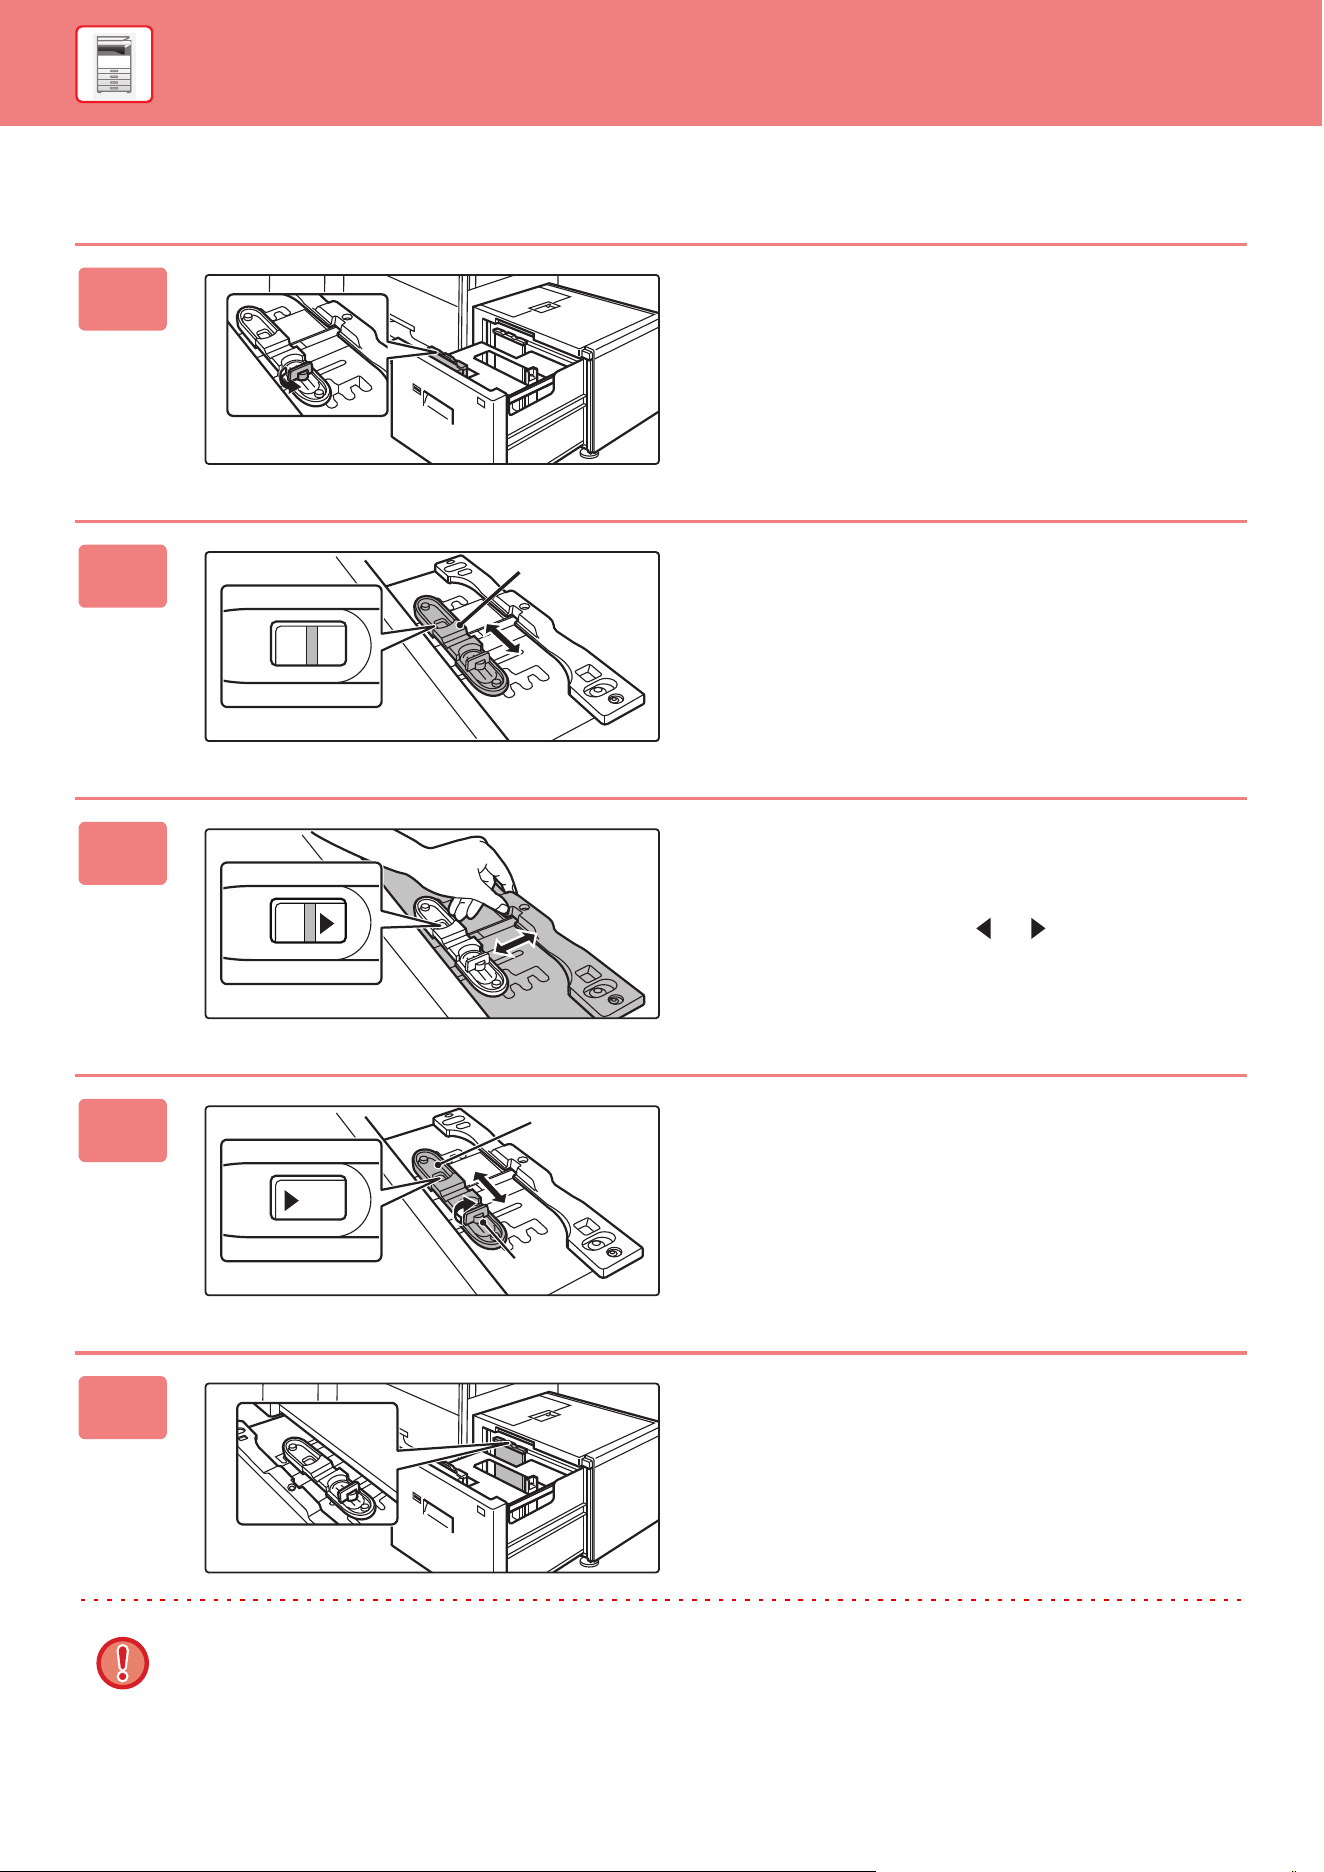
1
Loosen the paper guide screw.
2
Slide the plate of the paper guide.
Slide the plate until the red line appears at the center of the
size window of the plate.
3
Adjust the paper guide to the paper
size that will be used.
Slide the paper guide forward or backward until the size
mark of the paper to be used ( or ) appears in the size
window of the plate.
4
Secure the paper guide.
(1) Slide the plate of the paper guide.
Slide the plate until the paper size to be used appears
in the size window of the plate.
(2) Tighten the paper guide screw.
5
Repeat steps 1 through 4 to adjust the
far paper guide to the paper size to be
used.
Be sure to adjust the far paper guide to the same paper size
as the near paper guide.
Adjusting only one paper guide may result in skewed feeding or misfeeds.
Plate
11
(1)
(2)
1-29
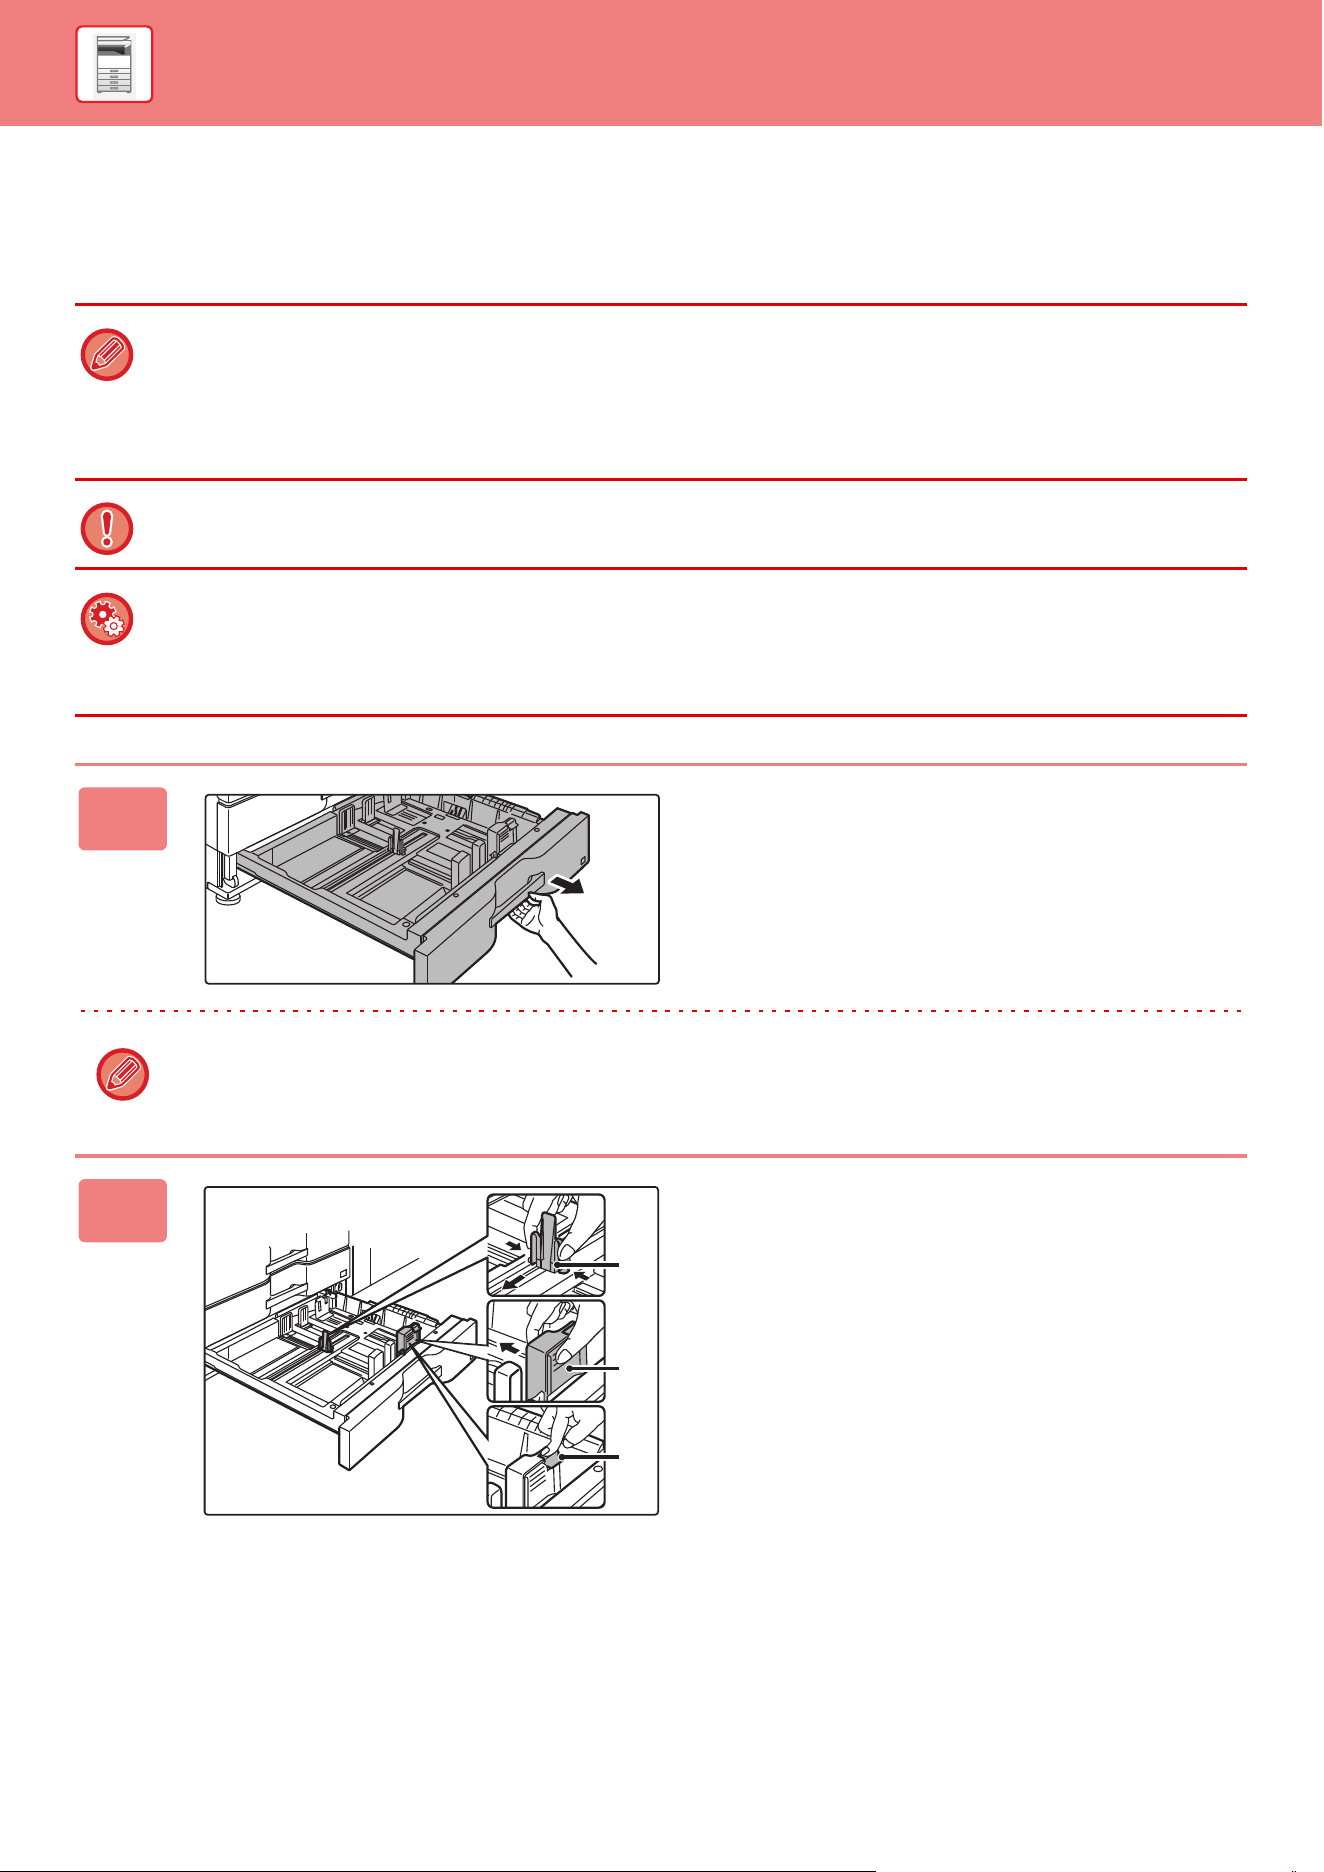
BEFORE USING THE MACHINE►LOADING PAPER
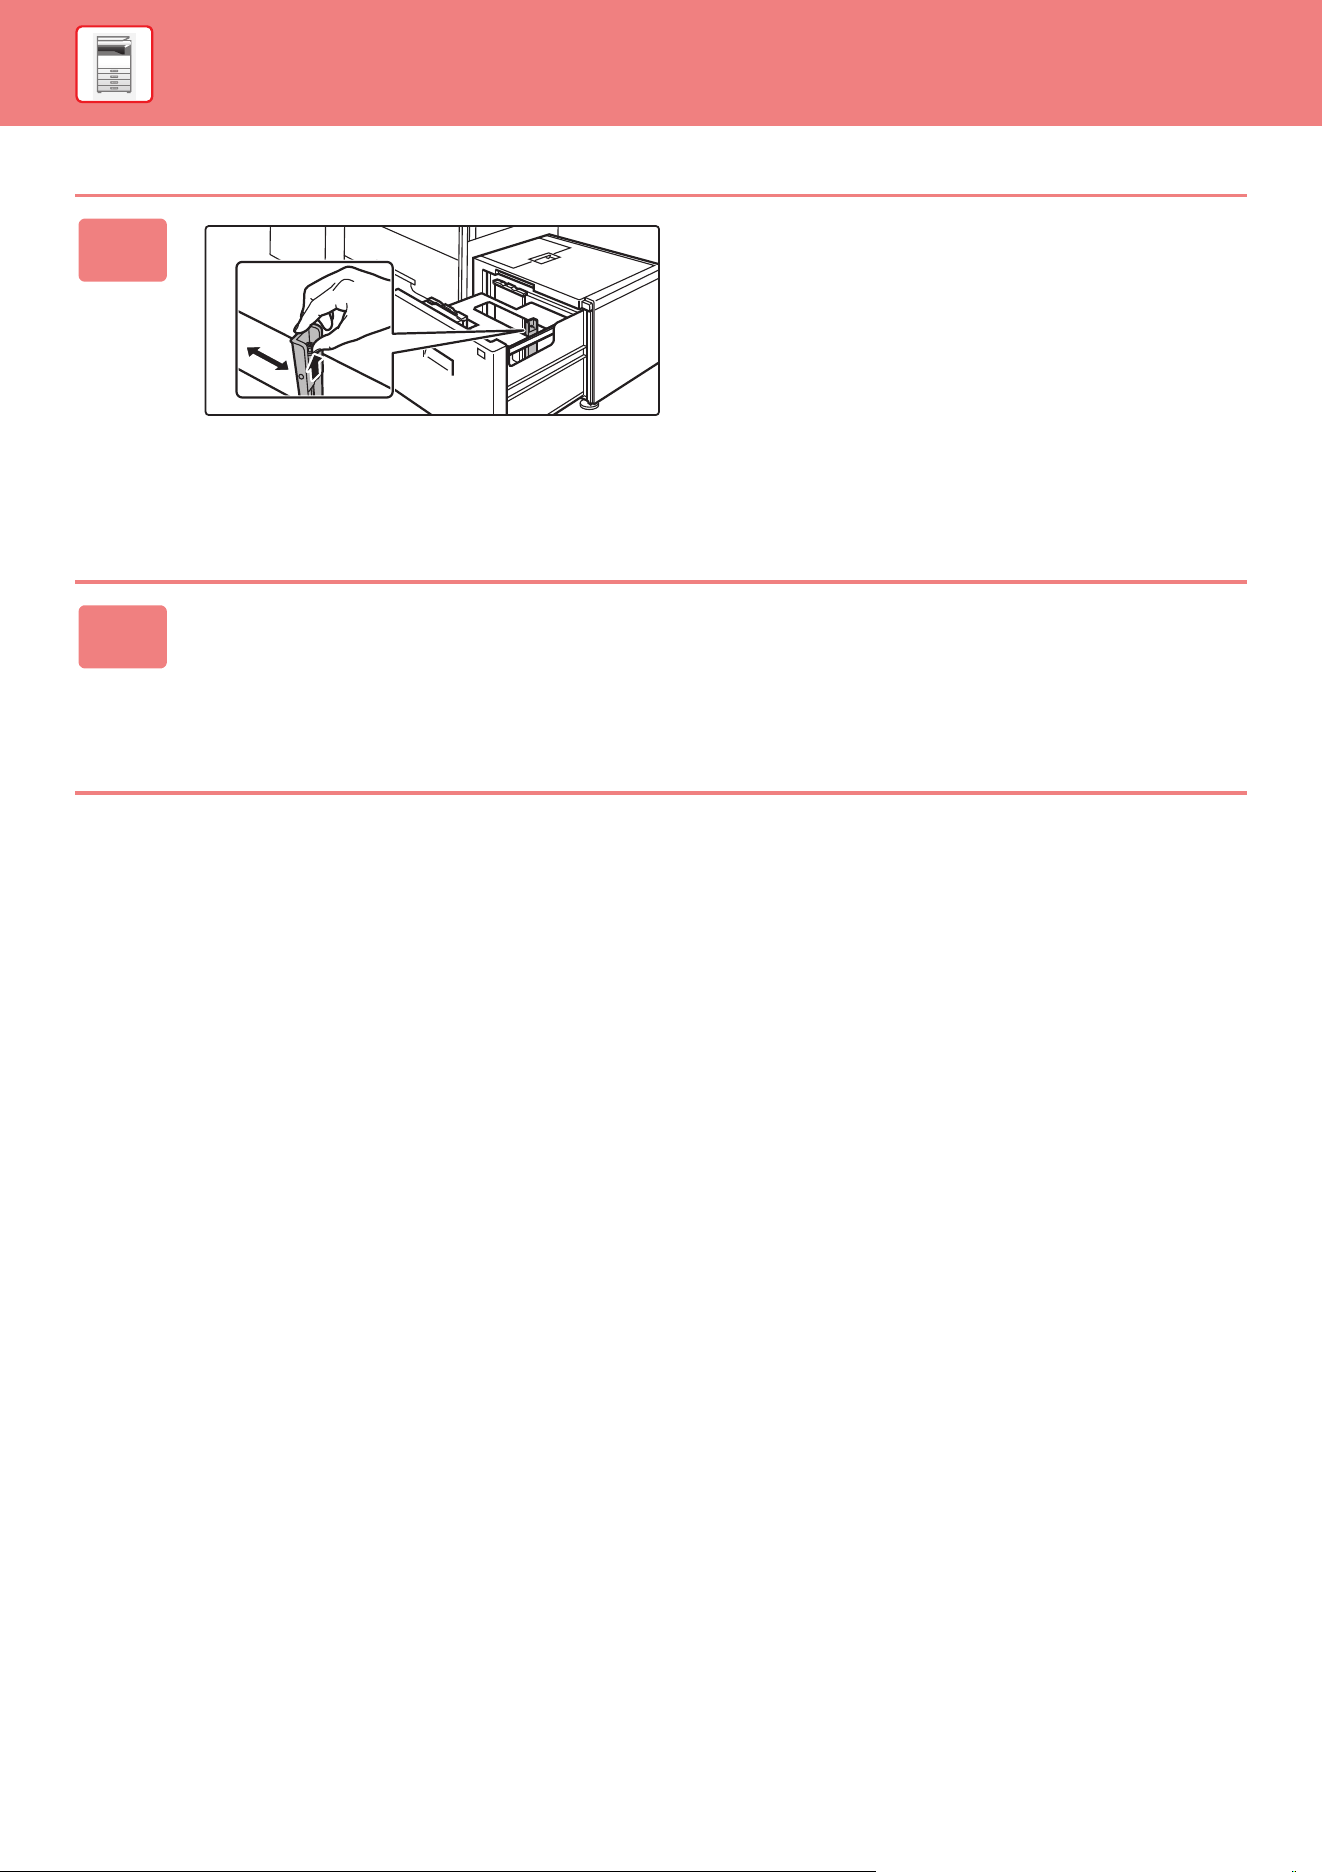
6
Change the right paper guide to the
paper size to be used.
(1) While holding up the paper guide lock,
slide the paper guide to the paper size to
be used.
(2) Release the paper guide lock.
(3) Move the paper guide slightly to the right
and left so that it locks into place.
You will hear a "click" when the paper guide locks.
7
Set the paper size and paper type.
Be sure to set the paper size and paper type by selecting [Tray Settings] in the home screen or in "Settings", select
[System Settings] → [Common Settings] → [Paper Settings] → [Paper Tray Settings].
If the paper size setting is not configured correctly, automatic paper selection will not operate correctly and printing may
take place on the wrong size or type of paper or a misfeed may occur.
1-30
BEFORE USING THE MACHINE►LOADING PAPER
LOADING PAPER IN THE LARGE CAPACITY
TRAYS
Use the large capacity trays for outputting massive prints that cannot be processed using the regular tray.
The large capacity trays store a maximum of 5000 sheets of paper (2500 sheets for tray 5 and 2500 sheets for tray 6)
from 12" × 18" (A3W) to 7-1/4" × 10-1/2"R (B5R).
Other than plain paper, special media such as tab paper and transparency film can be loaded into the large capacity trays.
To load tab paper, the dedicated guide must be installed.
Do not place heavy objects on the tray or press down on the tray.
To check the type and size of paper:
[Tray Settings] in the home screen or in "Settings", select [Status] → [Machine Identification] → [Paper Input Tray Status].
To set the type and size of paper:
Set this in [Tray Settings] in the home screen or in "Settings", select [System Settings] → [Common Settings] → [Paper
Settings] → [Paper Tray Settings].
1
Press the operation button.
The operation button blinks, and the tray paper table goes
down to the paper loading position. Wait until the operation
button light goes off.
Do not pull out the tray until the light goes off. If you pull out the tray forcibly while the button lights up or blinks, a
machine failure may be resulted.
2
Pull out the paper tray.
Gently pull the tray out until it stops.
1-31
BEFORE USING THE MACHINE►LOADING PAPER
3
Fan the paper.
Fan the paper well before loading it. If the paper is not
fanned, multiple sheets may feed at once and cause a
misfeed.
4
Load the paper.
Load the paper with the print side facing down. The stack
must not be higher than the indicator line (maximum of 2500
sheets).
5
Gently push the paper tray into the
machine.
Push the tray firmly all the way into the machine slowly.
Forcefully inserting the paper may cause skewed feeding
and paper misfeeds.
The paper table goes up after the tray is pushed in.
The operation button blinks while the paper table goes up.
The button lights up when the paper table has gone up.
Indicator line
1-32
BEFORE USING THE MACHINE►LOADING PAPER
LOADING THE TAB PAPER
1
Remove the tab paper guide.
The guide is stored in the upper tray.
2
Insert the tab paper into the tray.
Place the tab paper with the print side facing up so that the
tab is to the right.
See the following figure and adjust the tab position of the tab paper.
GHI
DEF
ABC
JKL
Originals
1st page
Tab paper
2nd page 3rd page 4th page
2nd page 3rd page 4th page
1st page
Top edge
Tail edge
Side 2
1-33
BEFORE USING THE MACHINE►LOADING PAPER
3
Place the tab paper guide.
Place the guide on the top of the tab paper.
4
Gently push the tray into the machine, and set the paper type to tab paper.
Using "Paper Tray Settings" in the system settings, set the paper type to tab paper.
To set the paper type to tab paper:
Set this in [Tray Settings] in the home screen or in "Settings", select [System Settings] → [Common Settings] → [Paper
Settings] → [Paper Tray Settings].

1-34
BEFORE USING THE MACHINE►LOADING PAPER
CHANGING THE PAPER SIZE
1
Loosen the paper guide screw.
2
Slide the plate of the paper guide.
Slide the plate until the red line appears at the center of the
size window of the plate.
Both near and far plates slides when you slide one of those.
3
Adjust the paper guide to the paper
size that will be used.
Slide the paper guide forward or backward until the size
mark of the paper to be used ( or ) appears in the size
window of the plate.
Both near and far plates slides when you slide one of those.
4
Secure the paper guide.
(1) Slide the plate of the paper guide.
Slide the plate until the paper size to be used appears
in the size window of the plate.
Both near and far plates slides when you slide one of
those.
(2) Tighten the paper guide screw.
Tighten both far and near paper guide screws.
11
(1)
(2)
1-35
BEFORE USING THE MACHINE►LOADING PAPER
5
Change the right paper guide to the
paper size to be used.
(1) While holding the paper guide lock, slide
the paper guide to the paper size to be
used.
(2) Release the paper guide lock.
(3) Move the paper guide slightly to the right
and left so that it locks into place.
You will hear a "click" when the paper guide locks.
6
Set the paper size and paper type.
Be sure to set the paper size and paper type by selecting [Tray Settings] in the home screen or in "Settings", select
[System Settings] → [Common Settings] → [Paper Settings] → [Paper Tray Settings].
If the paper size setting is not configured correctly, automatic paper selection will not operate correctly and printing may
take place on the wrong size or type of paper or a misfeed may occur.

1-36
BEFORE USING THE MACHINE►LOADING PAPER
LOADING PAPER INTO THE BYPASS TRAY
Use the bypass tray for printing on plain paper, label sheets, tab paper, and other special media.
A maximum of 100 sheets of paper can be loaded into the bypass tray (on the machine), or a maximum of 500 sheets
can be loaded in the bypass tray (on the large capacity trays), and continuous printing is possible as is the case with
other trays.
For detailed information on the sizes and types of paper that can be loaded into the bypass tray, see "SPECIFICATIONS
(page 11-2)" and "Paper Tray Settings (page 9-101)".
HOW TO PLACE THE ORIGINAL
Load paper up to 7-1/4" × 10-1/2" (A5) size in landscape orientation.
• When using plain paper other than Sharp standard paper or special media other than SHARP-recommended transparency
film, or when printing on the reverse side of paper that has been printed on one side, load paper one sheet at a time.
Loading more than one sheet at a time will cause misfeeds.
• Before loading paper, straighten any curling in the paper.
• When adding paper, remove any paper remaining in the bypass tray, combine it with the paper to be added, and reload as
a single stack. If paper is added without removing the remaining paper, a misfeed may result.
Bypass tray (on the machine) Bypass tray (on the large capacity trays)
1-37
BEFORE USING THE MACHINE►LOADING PAPER
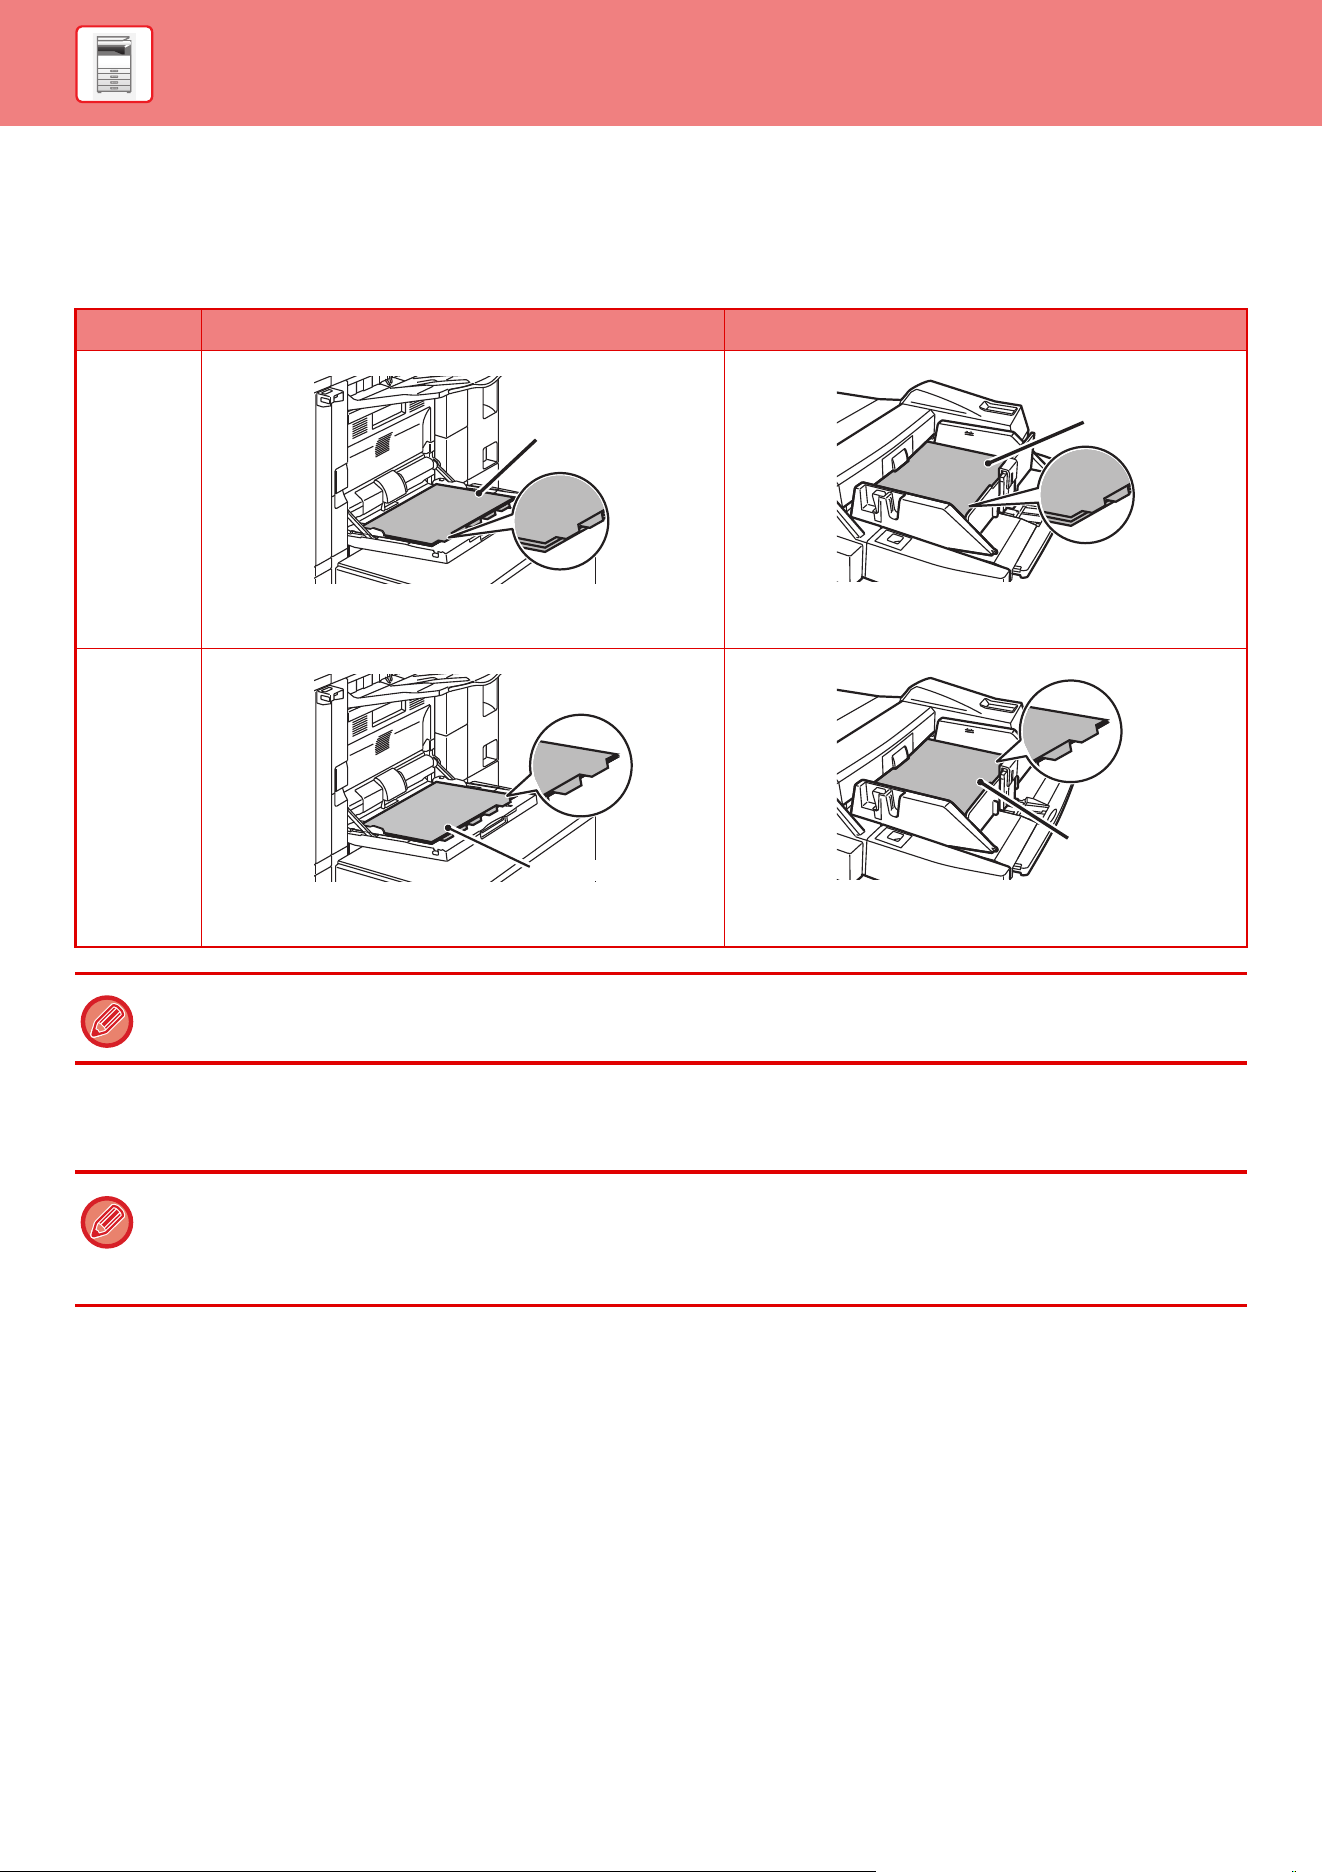
LOADING TAB PAPER
When printing on tab paper, be sure to place the paper with the print side facing down.
For the bypass tray (on the large capacity trays), the dedicated guide must be installed in the bypass tray guides at the
rear end. The dedicated guide is in the upper side of the large capacity trays.
INSERTING TRANSPARENCY FILM
Bypass tray (on the machine) Bypass tray (on the large capacity trays)
Left
Place the first sheet of tab paper so that the tab faces
toward you.
Place the first sheet of tab paper so that the tab faces
toward you.
Right
Place the first sheet of tab paper so that the tab faces
away from you.
Place the first sheet of tab paper so that the tab faces
away from you.
Use only tab paper that is made of paper. Tab paper made of a material other than paper (film, etc.) cannot be used.
To copy onto the tabs of tab paper, [Tab Copy] in "Others" is useful.
• Use SHARP-recommended transparency film.
• When loading multiple sheets of transparency film into the bypass tray, fan the sheets several times before loading.
• When printing on transparency film, remove each sheet as it is printed and output from the machine. Allowing sheets to
stack in the output tray may result in curling.
Side 2
Side 2
Side 2
Side 2
1-38
BEFORE USING THE MACHINE►LOADING PAPER
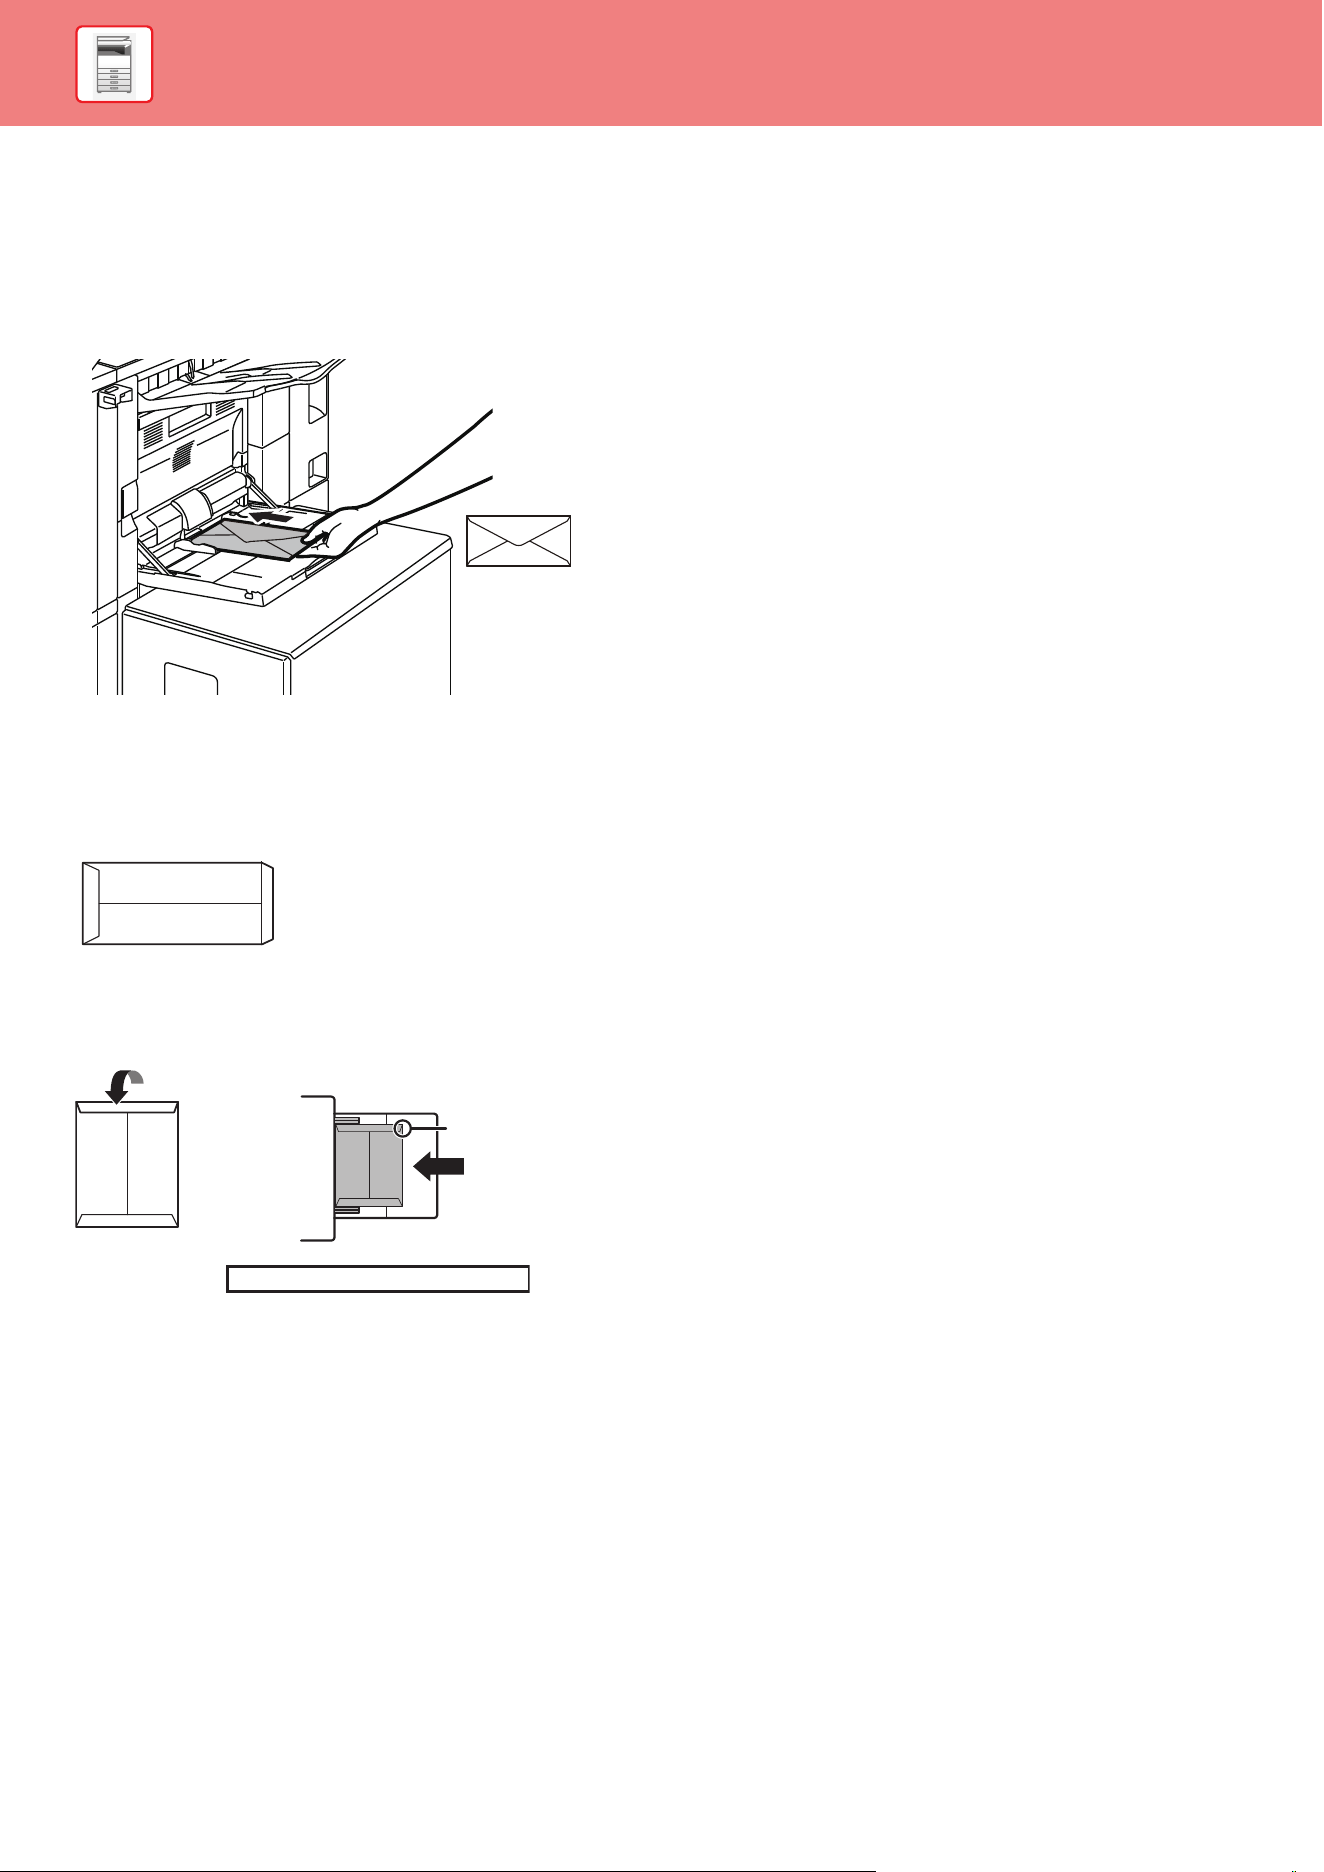
LOADING ENVELOPES
When loading envelopes into the bypass tray, place them in the orientation as shown in the figure.
Placing envelopes
Only the front side of envelopes can be printed on or copied to. Place the front side facing down.
When placing DL
• Open the flap of the envelope.
• Place so that the flap is on the right.
When placing C4, C5, or C6
• Close the flap of the envelope.
• Place so that the flap is on the back side.
When printing the front side
Place the front side facing down.
Flap
Address printing

1-39
BEFORE USING THE MACHINE►LOADING PAPER
Important points when using envelopes
• Do not print on both sides of an envelope. This may result in misfeeds or poor print quality.
• Restrictions apply to some types of envelopes. For more information, consult a qualified service technician.
• Some operating environments may cause creasing, smudging, misfeeds, poor toner fusing, or machine failure.
• Fold the flap of the envelope and make a sharp crease at the fold. A misfeed may occur if the flap is up.
• Do not use the following envelopes:
•Those with a metal piece, a plastic hook or a ribbon hook
•Those with a string for closing
•Those with a window
•Those with a lining
•Those with an uneven surface, finished with titling or emboss
•Duplex envelopes or those with adhesive or other synthetic material for sealing
•Hand-made envelopes
•Those containing air inside
•Those damaged with a crease, fold mark or tear
• Envelopes with the corner gluing position on the back not aligned with the corner edge cannot be used as it may
cause creasing.
• Print quality is not guaranteed in the area 13/32" (10 mm) around the edges of the envelope.
• Print quality is not guaranteed on parts of envelopes where there is a large step-like change of thickness, such as on
four-layer parts or parts less than three layers.
• In the case of landscape envelopes, make sure that flaps are not in the range where the bypass feed roller moves on.
• Press envelopes to bleed air inside, and press creases on all 4 sides well before setting. In addition, when envelopes
are warped or bent, straighten them using hard objects such as pencil or ruler before setting.
• Align on a flat surface
• Some envelopes may not be usable due to the shape of the flap or the type of envelope.
Can be used
Cannot be used
OK No-good OK No-good
Bypass feed roller

1-40
BEFORE USING THE MACHINE►LOADING PAPER
Important points when using embossed paper/label sheets
• The effect of asperity surfaces of embossed paper may affect the print quality depending on the type of embossed
paper.
For more information, consult the dealer or nearest SHARP Service Department.
• Some labels may have to be loaded into the bypass tray in the specified orientation. Follow such instructions.
If a form is already printed on the labels, and the print images and the preprinted form do not line up, adjust the
application or printer driver settings to rotate the print images.
• Do not use the following types of label sheets.
•Label sheets without an adhesive copy or label copy
•Label sheets with adhesive exposed
•Label sheets with a specified feeding direction that is not supported by the machine
•A label sheet that has already been fed or has some labels removed
•Label sheets consisting of multiple sheets
•Label sheets that do not support laser printing
•Label sheets that cannot withstand heat
•Label sheets that have perforations in the backing paper
•Label sheets with slits in the backing paper
•Non-standard label sheets
•Label sheets with adhesive that has deteriorated due to prolonged storage or otherwise
•Label sheets with cutouts that expose the backing paper
•Curled or otherwise deformed label sheets
•Torn or creased label sheets
1-41
BEFORE USING THE MACHINE►LOADING PAPER
LOADING PAPER INTO THE BYPASS TRAY (ON THE
MACHINE)
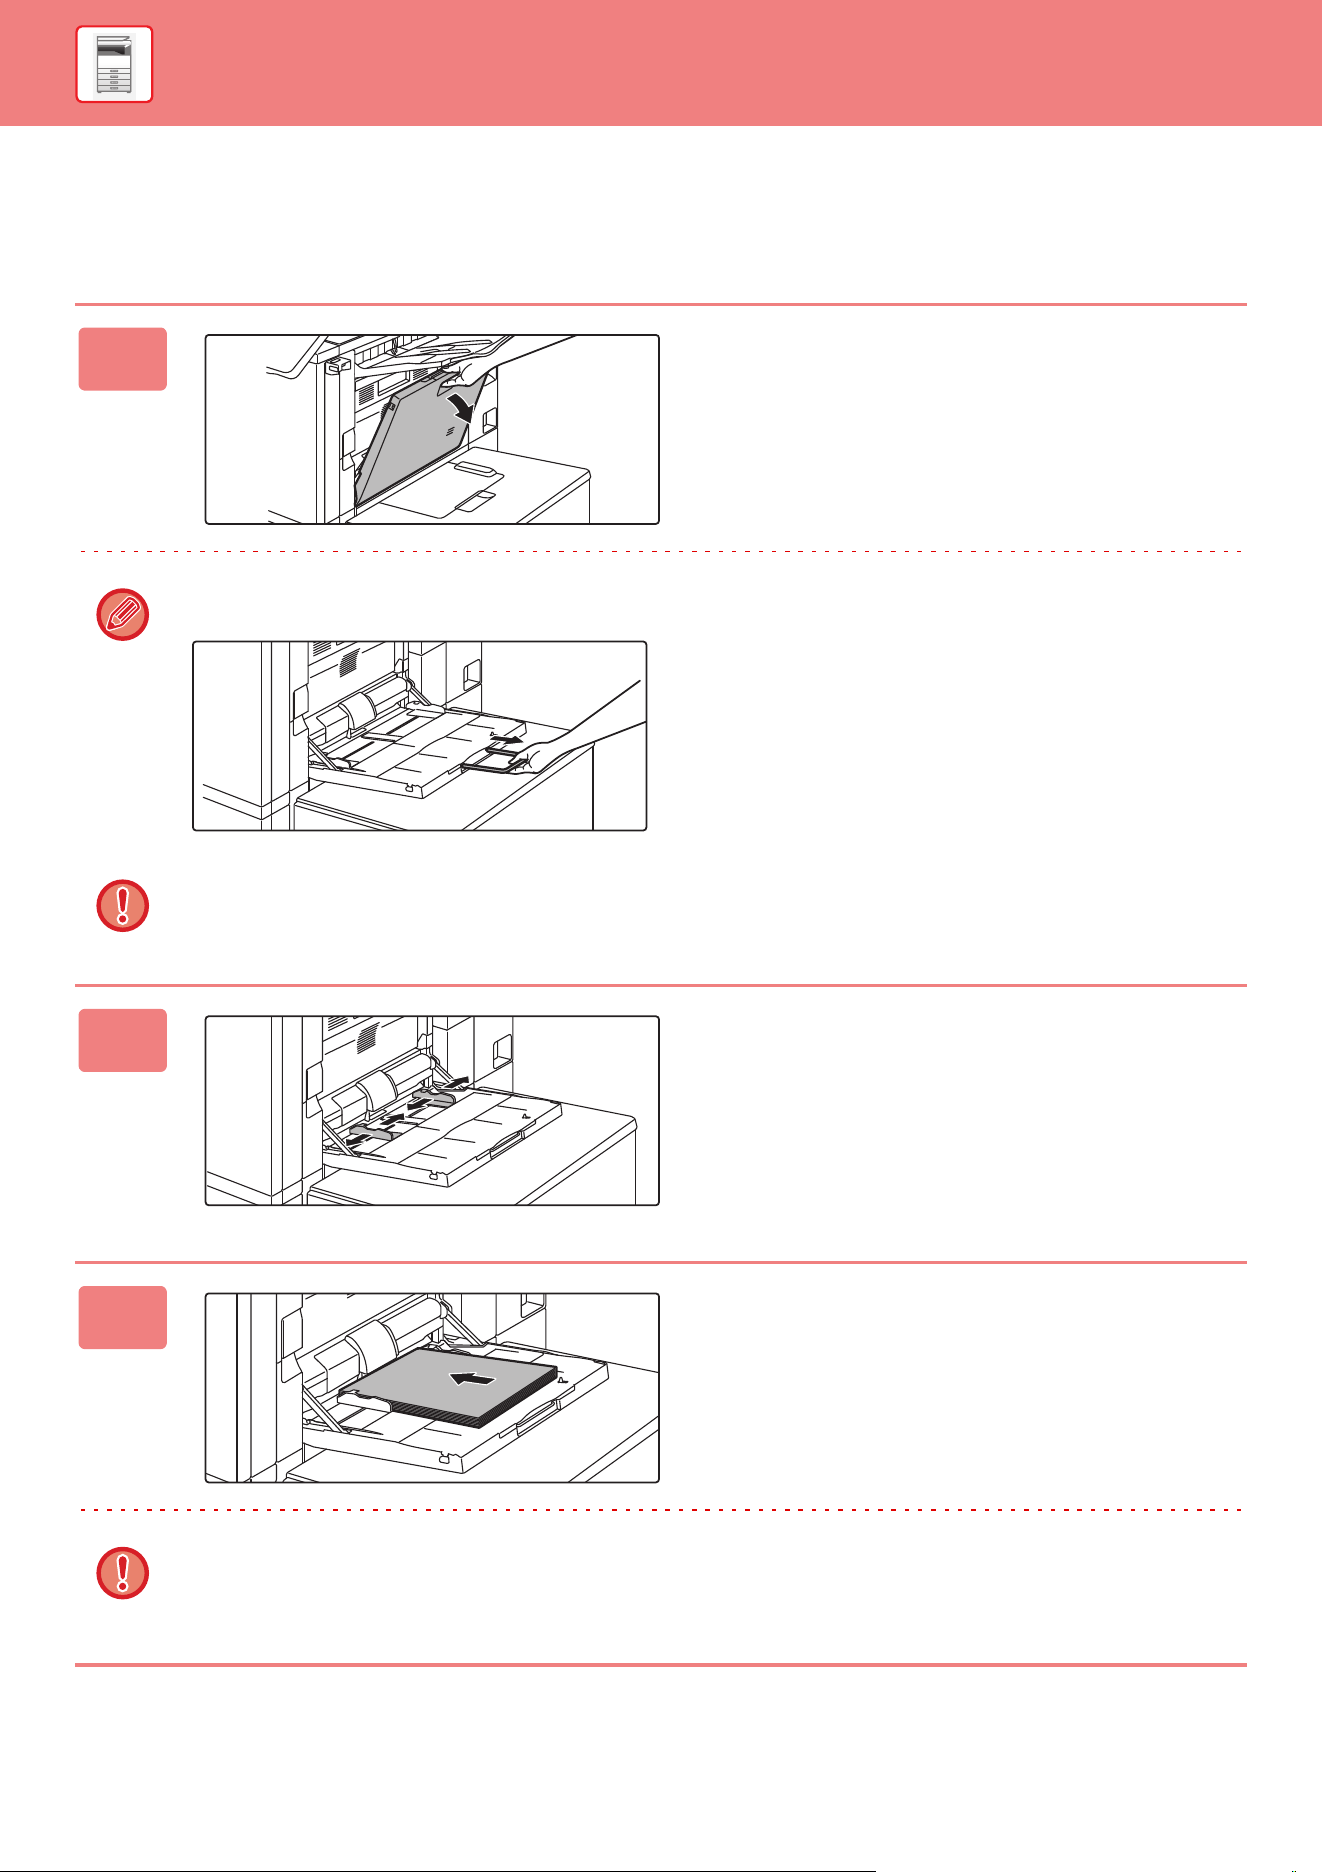
1
Open the bypass tray.
When loading paper larger than 8-1/2" × 11"R or A4R, pull out the extension guide.
Pull the bypass tray extension all the way out.
Do not place heavy objects on the bypass tray or press down on the tray.
2
Adjust the bypass tray guides to the
size of paper to be loaded.
3
Insert the paper along the bypass tray
guides all the way into the bypass tray
until it stops.
Load paper with the print side facing down.
• Do not force the paper in.
• If the bypass tray guides are set wider than the paper, move the bypass tray guides in until they correctly fit the width
of the paper. If the bypass guides are set too wide, the paper may skew or be creased.
1-42
BEFORE USING THE MACHINE►LOADING PAPER
LOADING PAPER INTO THE BYPASS TRAY (ON THE
LARGE CAPACITY TRAYS)
1
To replace the paper in the bypass
tray, press the operation button and
remove the paper.
The paper table goes down. The operation button blinks
while the paper table goes down. The button lights up when
the paper table has gone down. Do not remove the paper
until the button ceases blinking.
2
Adjust the bypass tray guides to the
size of paper to be loaded.
Grasp the guide lock lever to adjust the bypass tray guides
to the paper size. Be sure to adjust the bypass tray guides at
the rear end.
When loading paper larger than 8-1/2" × 11"R or A4R, be
sure to pull out the bypass tray extension. Remove the
bypass tray guide at the rear end and attach them to the
inserter tray.
• Pull the bypass tray extension all the way out.
• When loading paper larger than 8-1/2" × 14", or A3W, remove the bypass tray guides at the rear end.
Do not place heavy objects on the bypass tray or press down on the tray.
3
Insert the paper along the bypass tray
guides all the way into the bypass tray
until it stops and adjust the right-side
guide.
Load paper with the print side facing down.
The stack must not be higher than the indicator line.
A maximum of 500 sheets of paper can be loaded into the
tray.
• Do not force the paper in.
• If the bypass tray guides are set wider than the paper, move the bypass tray guides in until they correctly fit the width
of the paper. If the bypass guides are set too wide, the paper may skew or be creased.
1-44
BEFORE USING THE MACHINE►LOADING PAPER
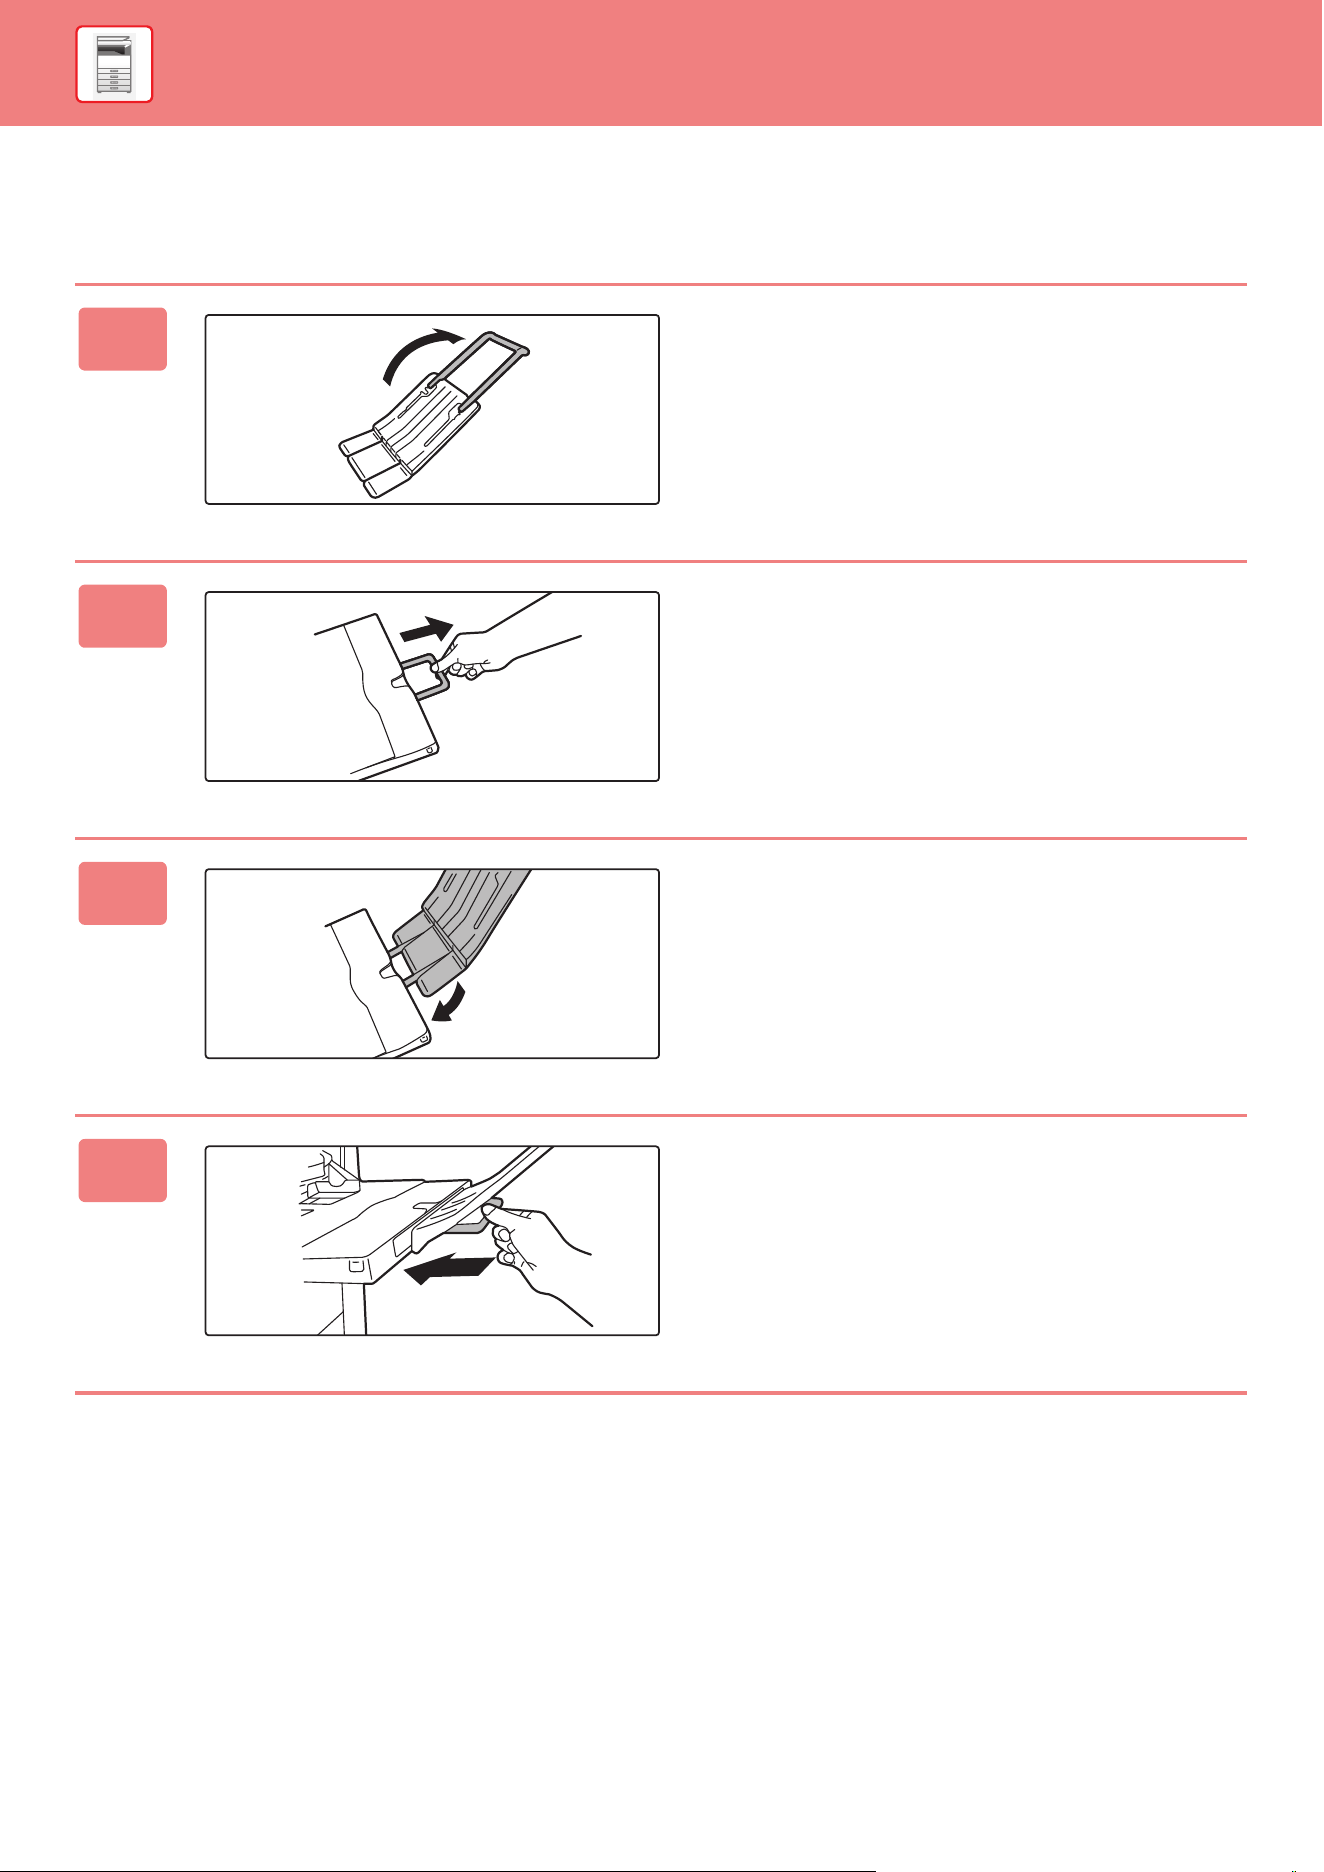
HOW TO PLACE THE LONG PAPER GUIDE
The steps for attaching the optional long paper feeding tray to the bypass tray are explained below.
1
Extend the auxiliary guide of the long
paper feeding tray.
2
Pull out the extension guide of the
bypass tray.
3
Attach the long paper feeding tray
onto the extension guide of the bypass
tray.
4
Replace the extension guide of the
bypass tray.

1-45
BEFORE USING THE MACHINE►HOW TO PLACE THE ORIGINAL
SELECTING A PROCEDURE FOR PLACING
THE ORIGINAL DEPENDING ON THE TYPE
AND STATUS OF THE ORIGINAL
Place the original in the automatic document feeder. Depending the type and status of the original, use the document
glass. Follow the instructions to select the method for placing the original.
AUTOMATIC DOCUMENT FEEDER
(page 1-47)
DETECTABLE ORIGINAL SIZES
In "Settings (administrator)", select [System Settings] → [Common Settings] → [Device Control] → [Condition Settings]
→ [Original Size Detector Setting].
One of the 8 groups of standard original sizes shown below can be selected for detection by the original size detection
function.
HOW TO PLACE THE ORIGINAL
Selection
s
Detectable original sizes
Document glass Document feeder tray (automatic document
feeder)
AB-1 A3, A4, A4R, A5, B4, B5, B5R A3, A4, A4R, A5, A5R, A6R, B4, B5, B5R, 11" x 17",
8-1/2" x 14", 8-1/2" x 11"
AB-2 A3, A4, A4R, A5, B5, B5R, 216 mm x 330 mm (8-1/2"
x 13")
A3, A4, A4R, A5, A5R, A6R, B4, B5, B5R, 11" x 17",
8-1/2" x 11", 216 mm x 330 mm (8-1/2" x 13")
AB-3 A4, A4R, A5, B4, 8K, 16K, 16KR A3, A4, A4R, A5, A5R, A6R, B4, 11" x 17",
8-1/2" x 11", 216 mm x 330 mm (8-1/2" x 13"), 8K,
16K, 16KR
AB-4 216 mm x 340 mm (8-1/2" x 13-2/5"), A3, A4, A4R, A5,
B5, B5R
A3, A4, A4R, A5, A5R, A6R, B4, B5, B5R, 11" x 17",
8-1/2" x 11", 216 mm x 340 mm (8-1/2" x 13-2/5")
AB-5 216 mm x 343 mm (8-1/2" x 13-1/2"), A3, A4, A4R, A5,
B5, B5R
A3, A4, A4R, A5, A5R, A6R, B4, B5, B5R, 11" x 17",
8-1/2" x 11", 216 mm x 343 mm (8-1/2" x 13-1/2")
Inch-1 11" x 17", 8-1/2" x 14", 8-1/2" x 11", 8-1/2" x 11"R,
5-1/2" x 8-1/2"
11" x 17", 8-1/2" x 14", 8-1/2" x 11", 8-1/2" x 11"R,
5-1/2" x 8-1/2", 5-1/2" x 8-1/2"R, A3, A4
Inch-2 11" x 17", 216 mm x 330 mm (8-1/2" x 13"), 8-1/2" x
11", 8-1/2" x 11"R, 5-1/2" x 8-1/2"
11" x 17", 216 mm x 330 mm (8-1/2" x 13"),
8-1/2" x 11", 8-1/2" x 11"R, 5-1/2" x 8-1/2",
5-1/2" x 8-1/2"R, A3, A4
Inch-3 11" x 17", 8-1/2" x 13-2/5" (216 mm x 340 mm), 8-1/2"
x 11", 8-1/2" x 11"R, 5-1/2" x 8-1/2"
11" x 17", 8-1/2" x 13-2/5 (216 mm x 340 mm),
8-1/2" x 11", 8-1/2" x 11"R, 5-1/2" x 8-1/2",
5-1/2" x 8-1/2"R, A3, A4

1-46
BEFORE USING THE MACHINE►HOW TO PLACE THE ORIGINAL
Original Feeding Mode
The following original feeding modes can be set to operate by default in copy, image send, and scan to local drive.
When a mode is frequently used, this saves you from having to select the mode in another mode each time you need to
use it.
In "Settings (administrator)", select [System Settings] → [Common Settings] → [Device Control] → [Condition Settings]
→ [Original Feeding Mode].
• Mixed Size Doc. Different Width
• Slow Scan Mode
• Blank Page Skip
1-47
BEFORE USING THE MACHINE►HOW TO PLACE THE ORIGINAL
AUTOMATIC DOCUMENT FEEDER
This section explains how to place originals in the automatic document feeder.
• Place originals of different sizes together, if needed, in the automatic document feeder. In that case, use the "Others"
function in each mode to set [Mixed Size Original].
• See the following pages for the combinations of document sizes that can be loaded.
Copy: SCANNING ORIGINALS OF DIFFERENT SIZES (MIXED SIZE ORIGINAL) (page 3-103)
Scanner: SCANNING ORIGINALS OF DIFFERENT SIZES (MIXED SIZE ORIGINAL) (page 5-85)
• Before inserting originals into the document feeder tray, be sure to remove any staples or paper clips.
• If originals have damp spots due to correction fluid, ink or paste up glue, wait until the originals are dry before making
copies. Otherwise the interior of the machine or the document glass may be soiled.
• Do not use the following originals. Incorrect original size detection, original misfeeds, and smudges may result.
Transparency film or other transparent material for backup copy, tracing paper, carbon paper, thermal paper or
originals printed with thermal transfer ink ribbon should not be fed through the document feeder. Originals to be fed
through the feeder should not be damaged, crumpled, folded, loosely pasted together, or have cut-out holes. Originals
with multiple punched holes other than two-hole or three-hole punched paper may not feed correctly.
• Business cards may not be scanned correctly depending on the condition, material, shape and processing method
used. (Business cards can be set in the automatic document feeder.)
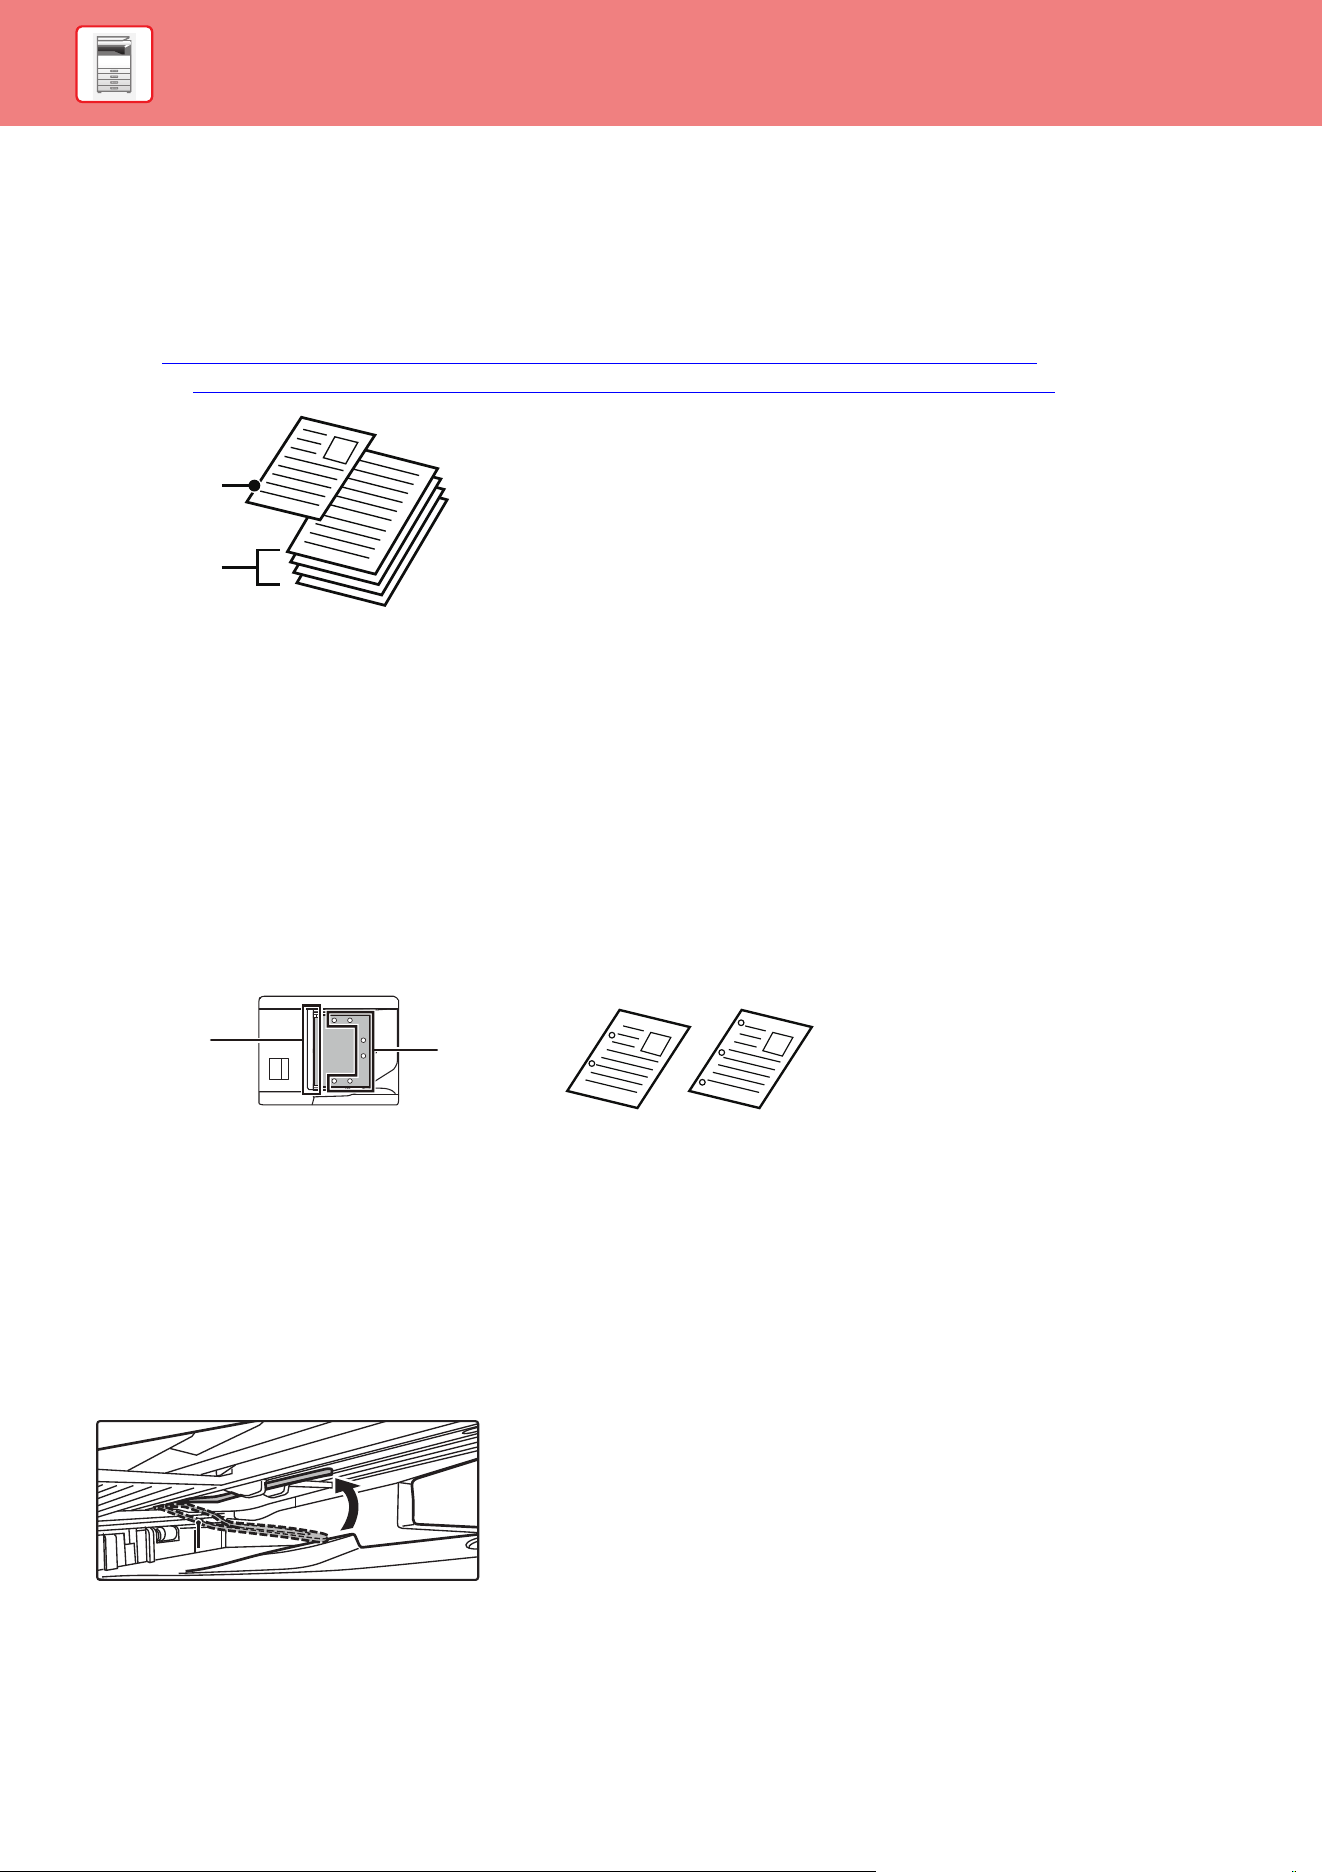
• When using originals with two or three holes, place them so that the punched edge is at a position away from the feed
slot of the document feeder tray. Specify the orientation of the original using [Original].
• Depending on the condition of the original, the type of paper, and the temperature and humidity of the environment in
which the machine is used, multiple sheets of paper may be fed at the same time and may not be scanned correctly,
or the ejected originals may not be neatly aligned.
It may be improved by the following settings.
• For copying: Set the resolution to 600x600dpi
• For scan transmission: use "Preview"
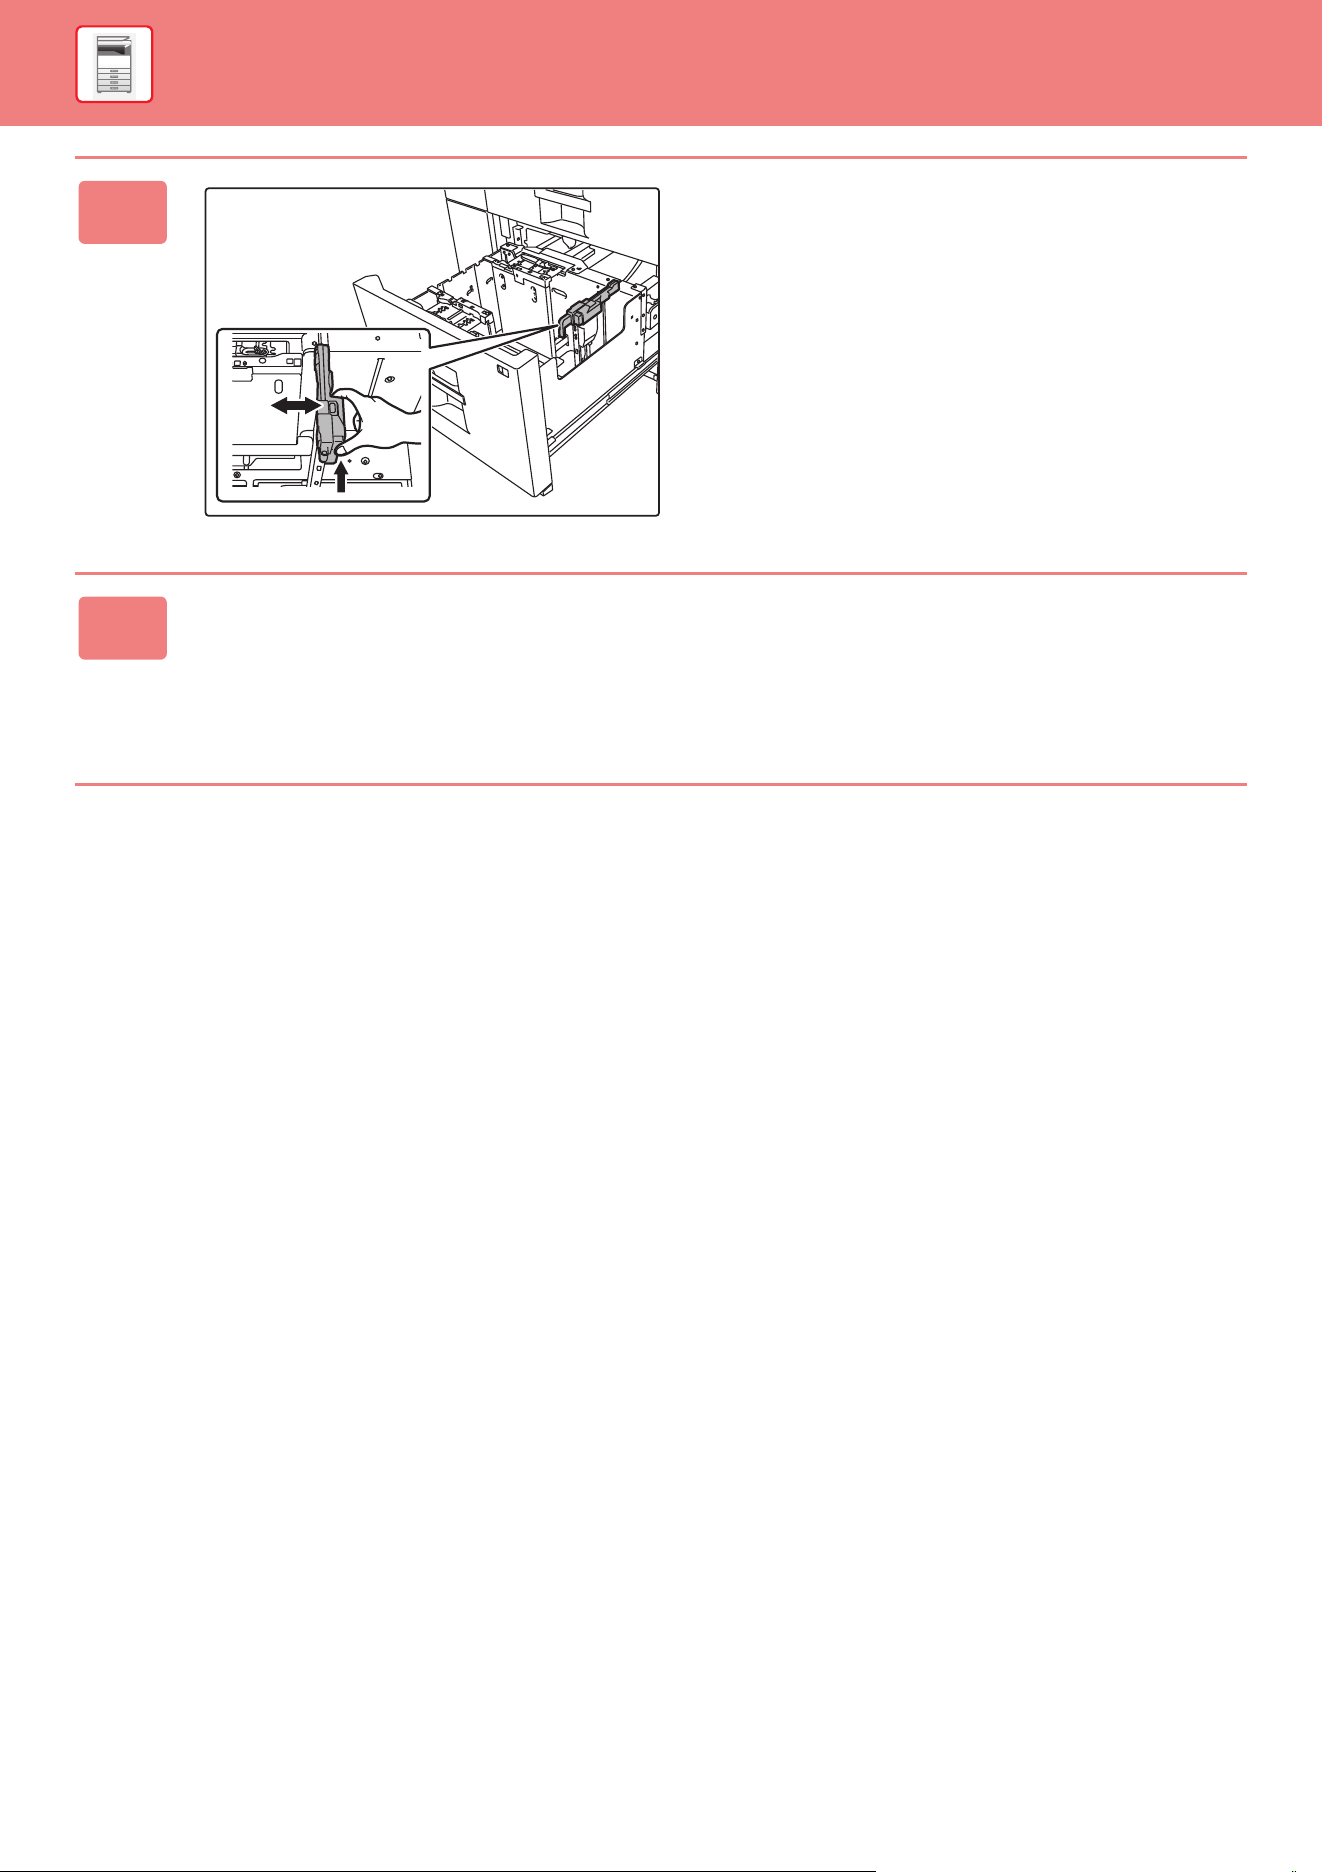
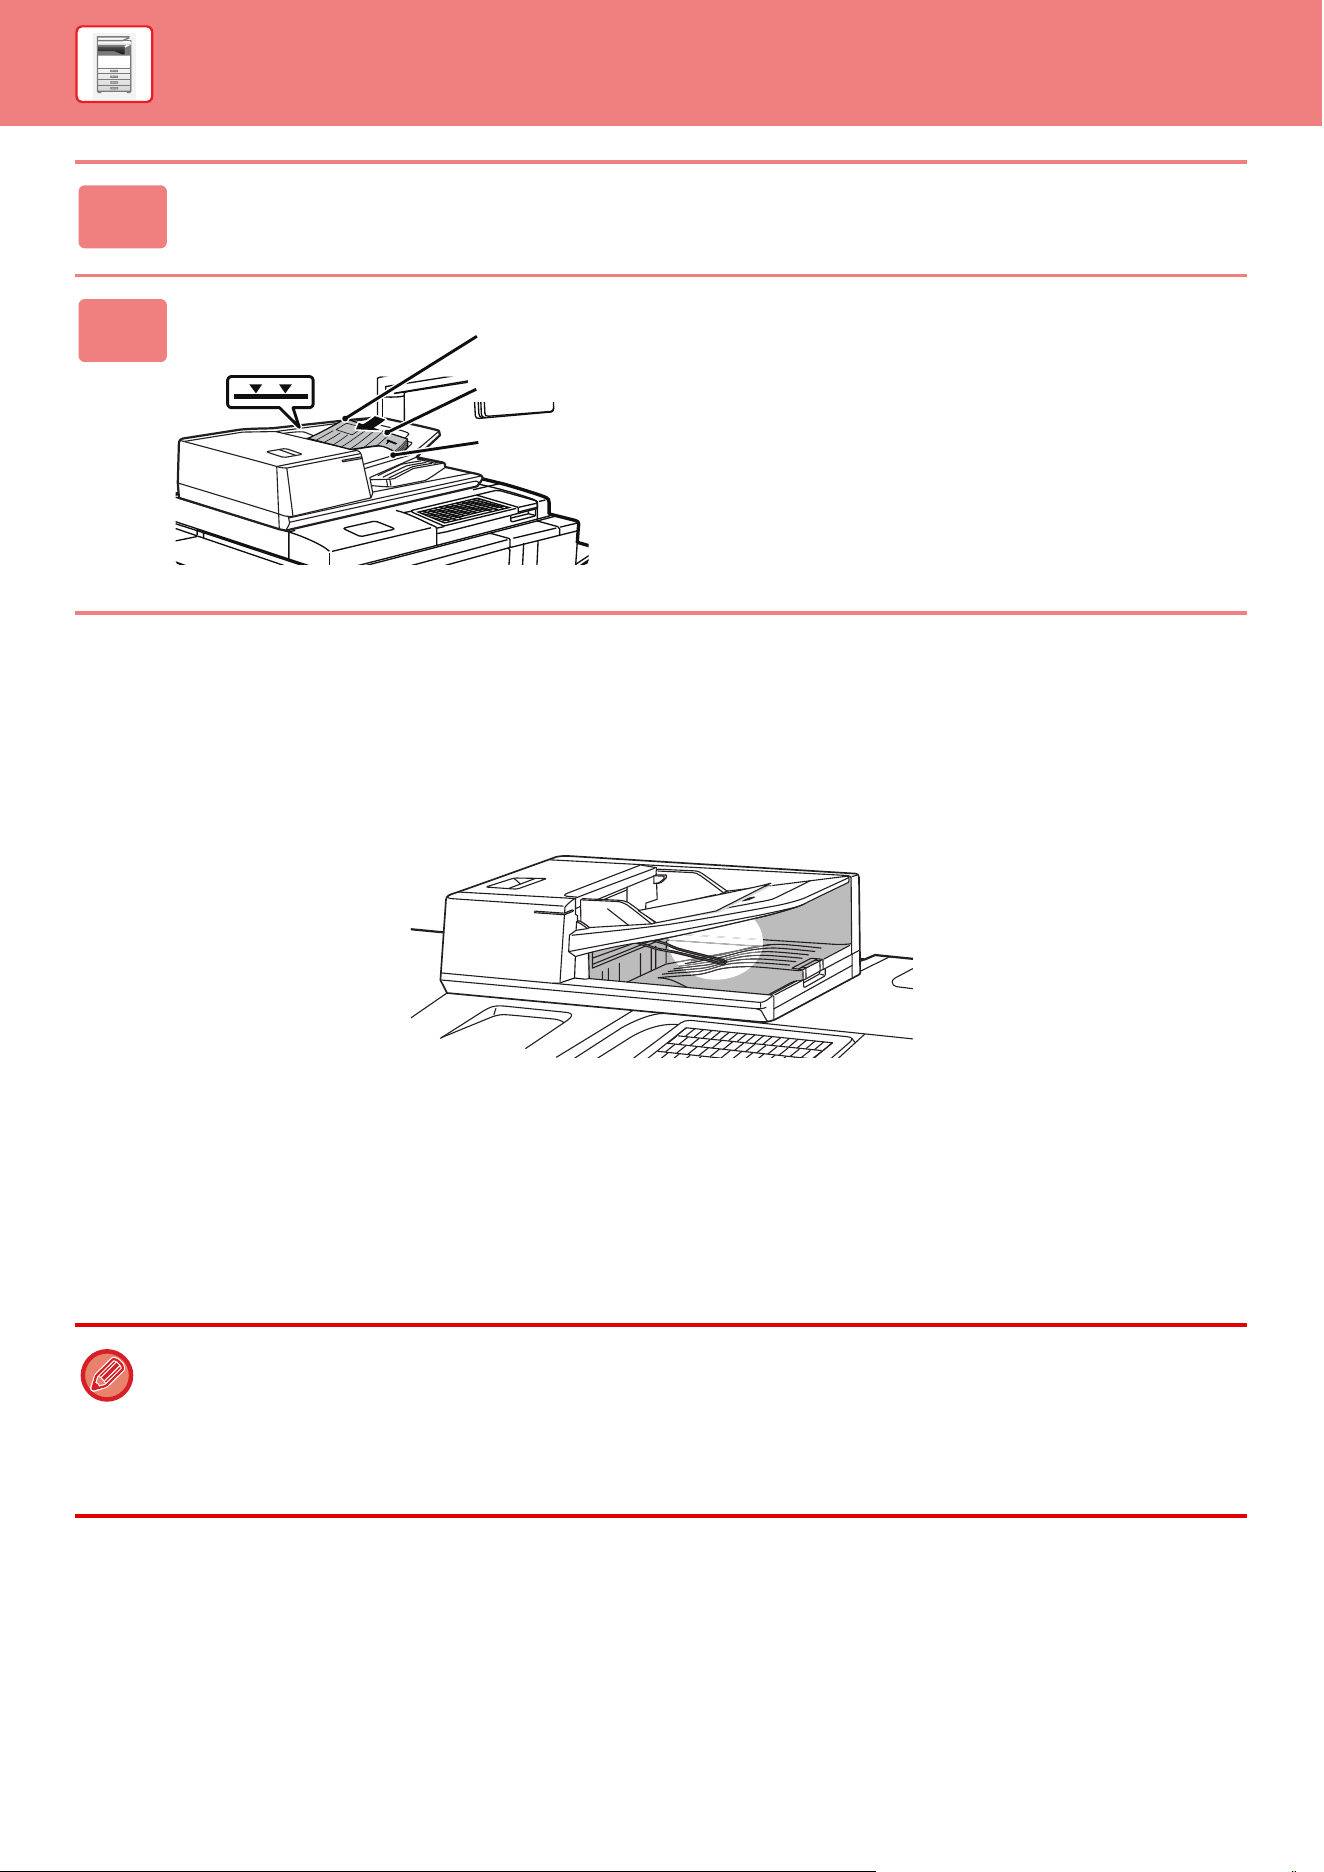
• When the document rolls in the original exit tray on the automatic document feeder, fix the paper fixing arm at the
center to the top.
8-1/2" x 11" (A4)
5-1/2" x 8-1/2" (B5)
Feed slot
Hole positions
1-48
BEFORE USING THE MACHINE►HOW TO PLACE THE ORIGINAL
Allowed original sizes
Allowed original weights
To scan originals from 9 to 13- lbs Bond (35 to 49 g/m
2
), use "Slow Scan Mode" in the "Others" function. Scanning
without using "Slow Scan Mode" may result in original misfeeds.
When "Slow Scan Mode" is selected, automatic 2-sided scanning is not possible.
To scan originals 32 lbs Bond to 80 lbs Cover (158 to 220 g/m
2
), use "Heavy Paper Scan" in the "Others" function.
Scanning without using "Heavy Paper Scan" may result in original misfeeds.
Minimum original size Maximum original size
Standard size
(Minimum size that can be automatically detected)
5-1/2" (longitudinal) × 8-1/2" (transversal)
A6R: 105 mm (longitudinal) × 148 mm (transversal)
Non-standard size
(Minimum size that can be specified manually)
2-1/64" (longitudinal) x 5-3/64" (transversal)
51 mm (longitudinal) x 128 mm (transversal)
Business card: 51 mm (longitudinal) x 89 mm (transversal)
Standard size
(Maximum size that can be automatically detected)
11" (longitudinal) x 17" (transversal)
A3: 297 mm (longitudinal) x 420 mm (transversal)
12" × 18" (A3W) cannot be used.
Non-standard size
(Maximum size that can be specified manually)
Copy mode:
11-5/8" (longitudinal) x 17" (transversal)
297 mm (longitudinal) x 432 mm (transversal)
Image send mode:
11" (longitudinal) × 39-3/8" (transversal)
297 mm (longitudinal) × 1000 mm (transversal)
• When the original is a non-standard size, see the appropriate explanation below for the mode you are using.
• COPIER: "STORING FREQUENTLY USED OR
IGINAL SIZES (page 3-32)"
• IMAGE SEND: "SPECIFYING THE ORIGINAL SCAN SIZE USIN
G NUMERIC VALUES (page 5-61)"
• In Imaging send mode, to load a 39-3/8" (1000 mm) long original, you need to set the scan size to [Long Size]. In image
sending mode, see "SPECIFYING THE ORIGINAL SCAN SIZE IN PAPER S
IZE (page 5-59)" and "SPECIFYING THE
ORIGINAL SCAN SIZE USING NUMERIC VALUES (page 5-61)".
BP-90C70/BP-90C80 1-sided scanning: 9 lbs Bond to 80 lbs Cover (35 to 220 g/m
2
)
2-sided scanning: 13 lbs Bond to 80 lbs Cover (50 to 220 g/m
2
)
Business card: Thickness, 0.1mm to 0.2mm
1-49
BEFORE USING THE MACHINE►HOW TO PLACE THE ORIGINAL
PREVENTIVE LIGHT TO INDICATE ORIGINAL LEFT BEHIND
In order to prevent originals being left behind, the automatic document feeder incorporates a lamp on the top of the
original exit tray.
This lamp detects a document on the automatic document feeder, and starts blinking after the last original is output from
the original exit tray.
Light turning off
The preventive light to indicate original left behind will turn off in the event of the following.
• When the scanned original is removed
• After the preventive light to indicate original left behind blinks three times, repeated three times
• When a new original is placed in the automatic document feeder, and a job started
• When the machine enters sleep mode
• When use of the automatic document feeder is prohibited
1
Make sure that there is no original on the document glass.
2
Place the original.
Up to 300 sheets can be inserted.
After scanning is finished on the automatic document feeder,
remove originals from the original exit tray.
• When the preventive light to indicate original left behind is blinking, placing the original on the document glass will not turn
off the preventive light to indicate original left behind.
•
The preventive light to indicate original left behind will not turn off by only placing an original on the automatic document feeder.
• The preventive light to indicate original left behind will not turn off even if the operation panel is off.
• If the preventive light to indicate original left behind turns off, this will not flash even if an original is left on the automatic
document feeder.
Below the indicator line
Align the edges evenly
and face them up
Insert to the end
Fit to the Original Size

1-50
BEFORE USING THE MACHINE►HOW TO PLACE THE ORIGINAL
ORIGINAL SETTING INDICATOR
The original setting indicator lights when the document is correctly loaded on the document feeder tray.
If the original setting indicator is lit, it is possible for a user who has difficulty in confirming that a document is loaded on
the document feeder tray to confirm that the document is loaded.
SKEW FEED PREVENTION
The automatic document feeder is equipped with a skewed feed prevention function. When a document is loaded at an
angle, the function stops loading the document as misfeed.
DOUBLE FEED DETECTION
This automatic document feeder is equipped with a double feed detection function.
If you attempt to scan multiple originals at the same time, scanning stops as misfeed.
1-51
BEFORE USING THE MACHINE►HOW TO PLACE THE ORIGINAL
DOCUMENT GLASS
This section describes the steps for setting the original on the document glass.
Allowed original sizes
• Close the automatic document feeder slowly. Abruptly closing the automatic document feeder may damage it.
• Take care that your fingers are not pinched when closing the automatic document feeder.
Minimum original size Maximum original size
Standard size
(Minimum size that can be automatically detected)
8-1/2" (longitudinal) × 5-1/2" (transversal)
A5: 210 mm (longitudinal) × 148 mm, (transversal)
Non-standard size
(Minimum size that can be specified manually)
1" (longitudinal) x 1" (transversal)
25 mm (longitudinal) x 25 mm (transversal)
Standard size
(Maximum size that can be automatically detected)
11" (longitudinal) x 17" (transversal)
A3: 297 mm (longitudinal) x 420 mm (transversal)
Non-standard size
(Maximum size that can be specified manually)
11-5/8" (longitudinal) x 17" (transversal)
297 mm (longitudinal) x 432 mm (transversal)
When the original is a non-standard size, see the appropriate explanation below for the mode you are using.
• COPIER: "STORING FREQUENTLY USED ORIGINAL SIZES (
page 3-32)"
• IMAGE SEND: "SPECIFYING THE ORIGINAL SCAN SIZE
USING NUMERIC VALUES (page 5-61)"
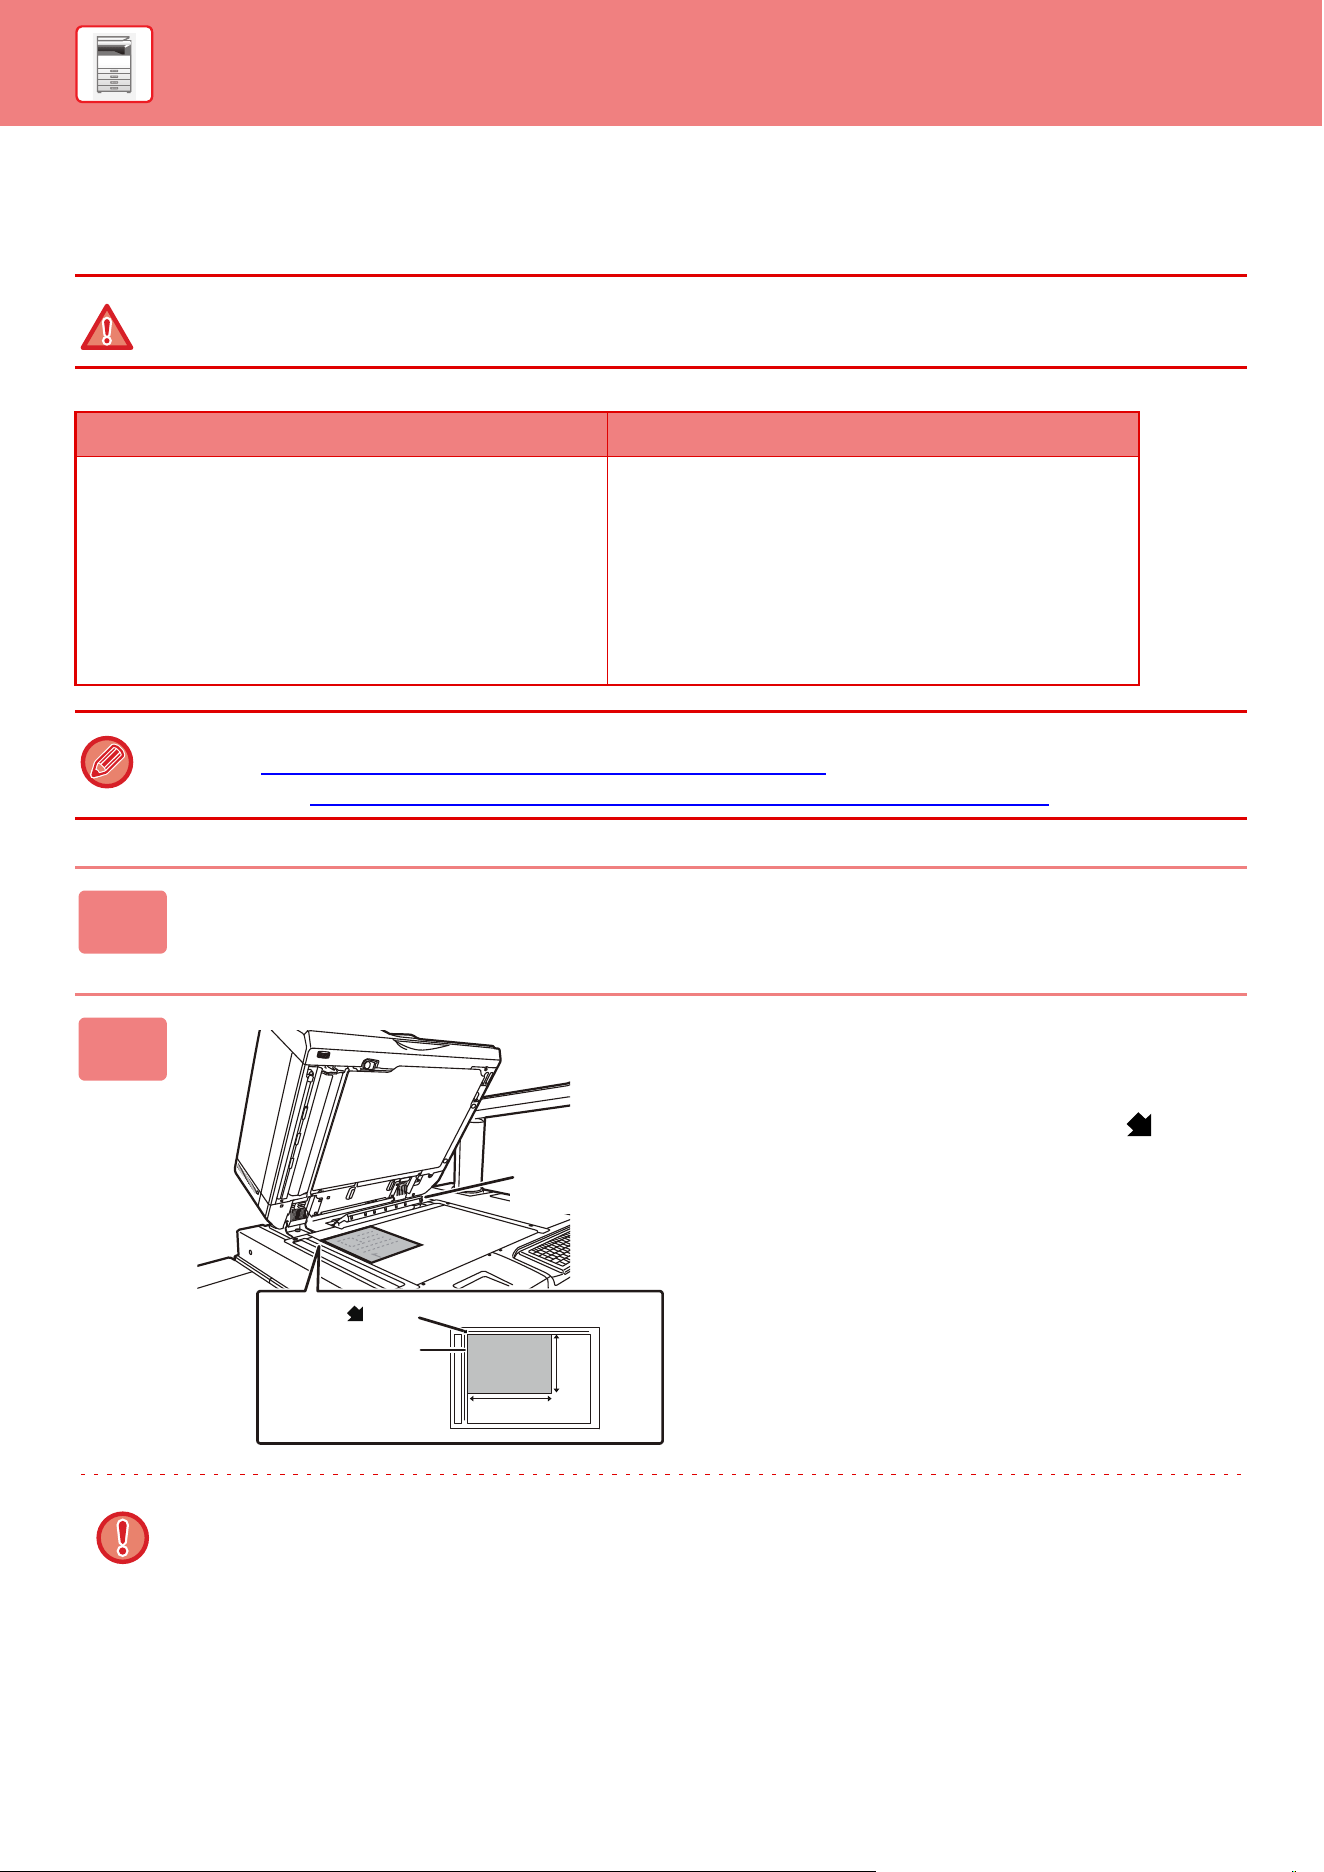
1
Open the automatic document feeder.
2
Load the paper with the print side
facing down.
Place the original face down and align the top left corner of
the original with back left (at the tip of the mark ) of the
document glass.
Do not place any objects under the original size detector.
Closing the automatic document feeder with an object underneath may damage the original size detector or disable
correct detection of the original size.
X
Y
Original size
detector
Mark
Document glass
scale

1-52
BEFORE USING THE MACHINE►HOW TO PLACE THE ORIGINAL
3
Close the automatic document feeder.
After placing the original, close the automatic document feeder. If the unit is left open, parts outside of the original will be
copied in black, causing excessive use of toner.
• When closing, open the automatic document feeder all the way and then close it.
• If originals have damp spots due to correction fluid, ink or paste up glue, wait until the originals are dry before making
copies. Otherwise the interior of the machine or the document glass may be soiled.

1-53
BEFORE USING THE MACHINE►PERIPHERAL DEVICES
PERIPHERAL DEVICES
Peripheral devices can be installed on the machine to increase its range of functionality.
The peripheral devices are generally optional. However, some models include certain peripheral devices as standard
equipment.
(As of April, 2023)
PERIPHERAL DEVICES
Product name Product
number
Description
Large capacity tray MX-LC12 Additional tray. A maximum of 3500 sheets of paper can be
placed.
MX-LCX3 N Additional tray. A maximum of 3000 sheets of paper can be
placed.
Large capacity trays MX-LC13 N Additional tray. A maximum of 5000 sheets of paper can be
placed.
Paper pass unit MX-RB12 N This unit is required for installing a finisher or saddle stitch
finisher.
MX-RB14 This unit is required to facilitate connection of large capacity trays.
Connection module MX-RB17 This unit is required to facilitate connection of two large capacity
trays.
Multi bypass tray MX-MF10 Additional tray. A maximum of 100 sheets of paper can be placed.
MX-MF11 Additional tray. A maximum of 500 sheets of paper can be placed.
Install this tray on the large capacity trays.
Exit tray unit MX-TR14 Output tray to be installed in the right of the machine.
Exit tray cabinet MX-TU14 Output tray to be installed in the center of the machine. This unit is
required when a finisher or saddle stitch finisher is not installed.
Long paper feeding tray MX-LT10 When using long paper, the long paper is loaded in the bypass
tray.
Finisher (large stacker) MX-FN21 Output device that enables the use of the staple function and
offset function. A maximum of 100 sheets of paper can be stapled.
Saddle stitch finisher
(large stacker)
MX-FN22 Output device that enables use of the staple function, offset
function and pamphlet copy function. A maximum of 100 sheets of
paper can be stapled.
Punch module MX-PN13A
MX-PN13B
MX-PN13C
MX-PN13D
This unit punches holes in copies and other output. A finisher
(large stacker) or saddle stitch finisher (large stacker) is required.
Trimming module MX-TM10 This unit trims the excess portions of saddle-stitched sheets. A
saddle stitch finisher (large stacker) is required.
Folding unit MX-FD10 This unit folds and outputs paper. A finisher (large stacker) or
saddle stitch finisher (large stacker) is required.
Inserter MX-CF11 This unit inserts covers and insertion sheets. This unit can also
feed paper to a finisher (large stacker) or saddle stitch finisher
(large stacker) for finishing.
1-54
BEFORE USING THE MACHINE►PERIPHERAL DEVICES
Curl correction unit MX-RB27 This unit corrects curls in printed paper. This unit is required for
installing a finisher (large stacker), saddle stitch finisher (large
stacker), folding unit or inserter.
Relay unit MX-RB13 This unit is required for directly installing a finisher (large stacker)
or saddle stitch finisher (large stacker) and inserter.
Barcode Font Kit MX-PF10 Adds barcode fonts to the machine.
Application Integration Module MX-AMX1
MX-AMX1L
The application integration module can be combined with the
network scanner function to append a metadata file to a scanned
image file.
Application Communication Module BP-AM10
BP-AM10L
This links the machine to an external application over a network.
External Account Module BP-AM11
BP-AM11L
This is required to use an external account application on the
machine.
Staple cartridge MX-SCX2 Staples paper. A finisher (large stacker) or saddle stitch finisher
(large stacker) is required.
MX-SCX1 Saddle stitches paper. A saddle stitch finisher (large stacker) is
required.
Status indicator MX-SL10 N The status of the machine is indicated.
High capacity SSD BP-SD10 Extends the local drive capacity of the machine.
Data security kit BP-FR12U
BP-FR12UL
The data which is being stored in the local drive and memory of
this machine is stored in encrypted form. Furthermore, after copy
and print data has been output and after scanner transmissions,
the data is automatically deleted in order to securely protect
important information.
Virus detection kit BP-VD10
BP-VD10L
VIRUS SCAN (page 8-39)
Product name Product
number
Description
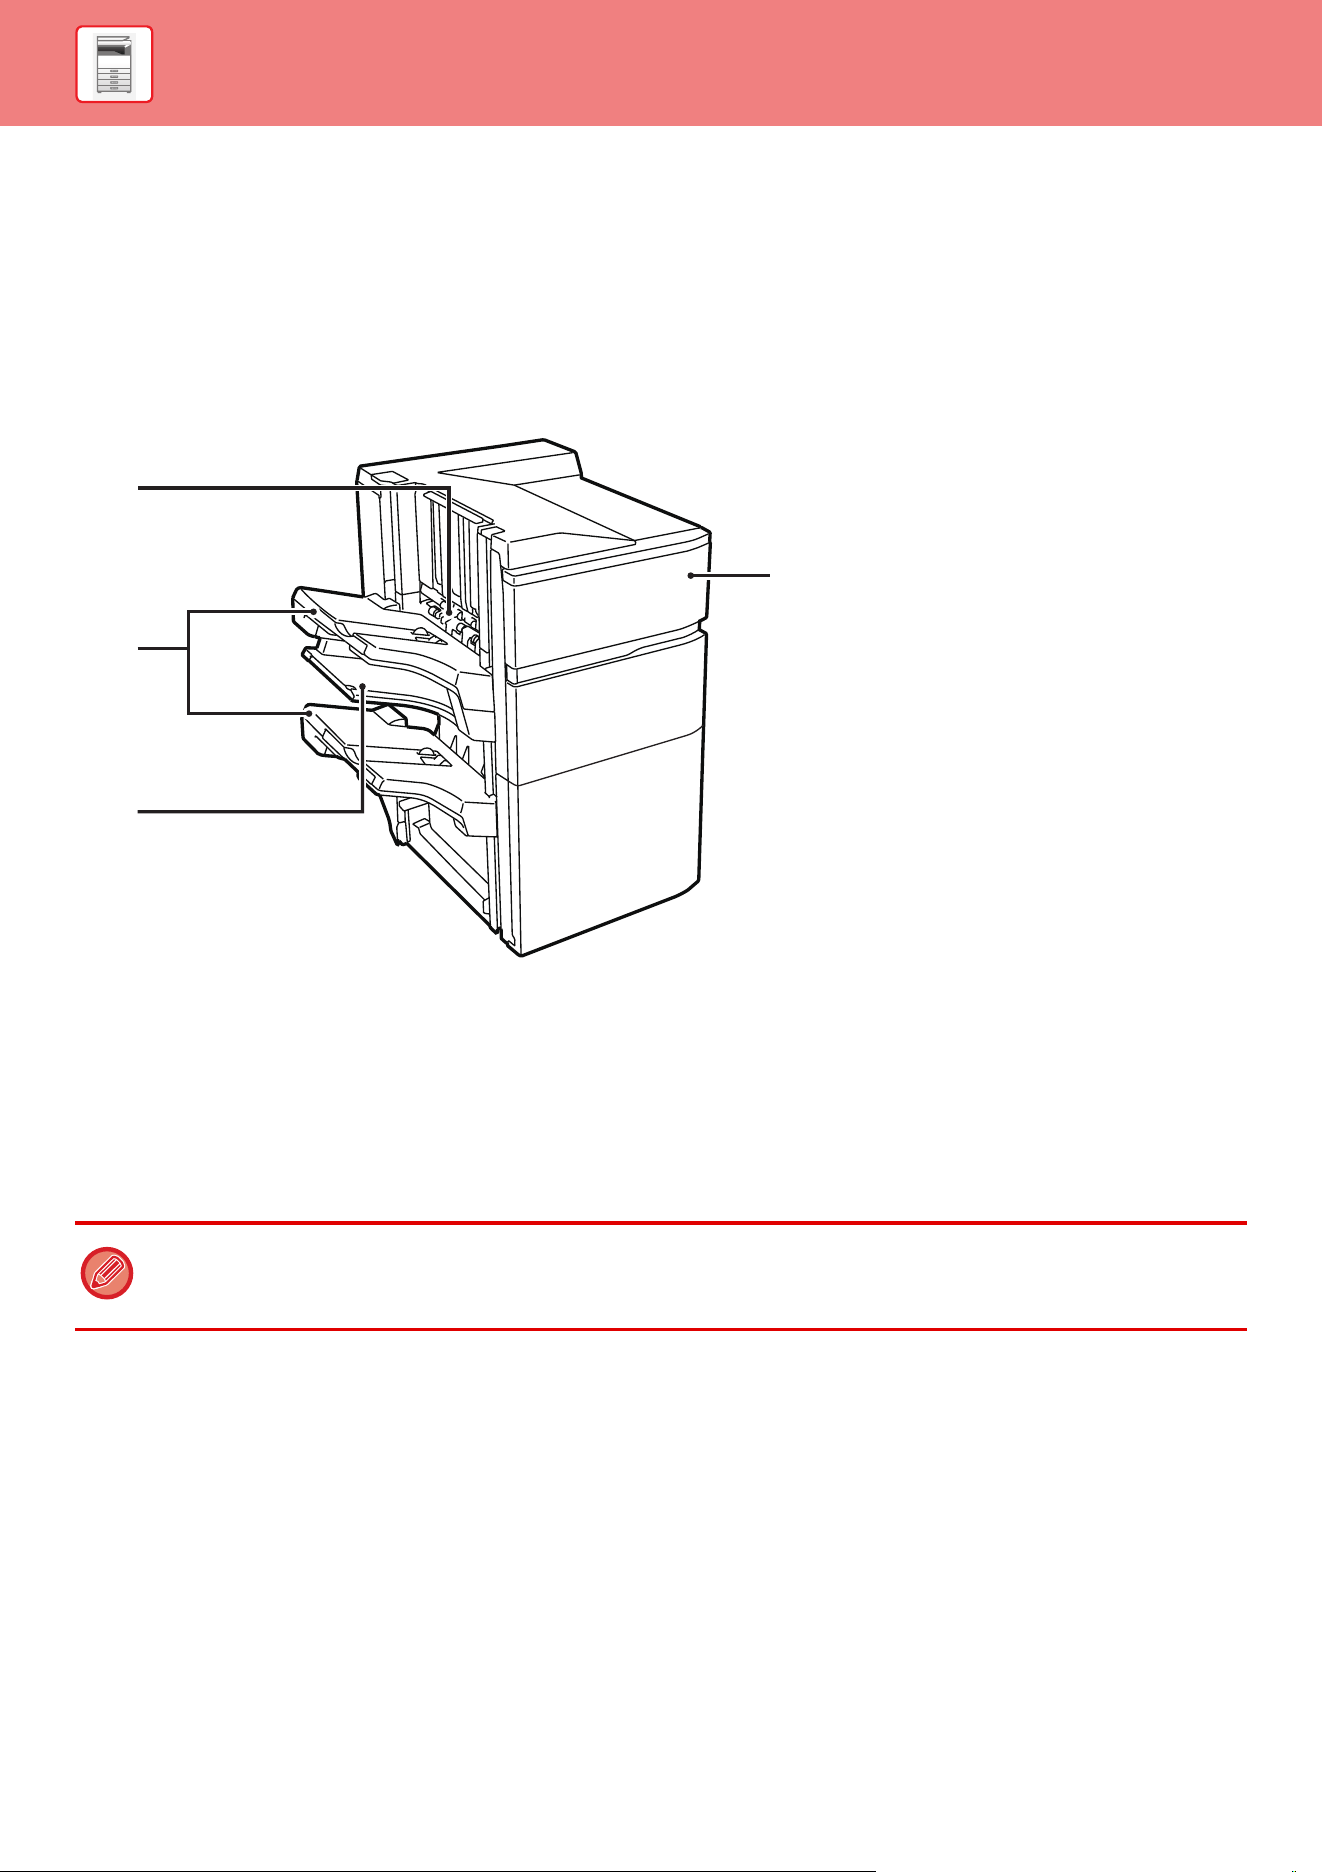
1-55
BEFORE USING THE MACHINE►PERIPHERAL DEVICES
FINISHER (LARGE STACKER)
This includes the offset function that outputs sorted paper while staggering each set of paper and the staple sort function
that staples each set of prints.
Installing an optional hole punch module allows you to punch holes in printed paper.
PART NAMES
(1) Staple compiler
This temporarily stacks paper to be stapled.
(2) Output tray
Stapled and offset output is delivered to this tray.
The tray is slidable. Extend the tray for printing on
large-size paper (larger than 8-1/2" × 11" (A4)).
(3) Middle output tray
Output paper that will not be offset in this tray.
The tray is slidable. Extend the tray for printing on
large-size paper (larger than 8-1/2" × 11" (A4)).
(4) Front cover
Open this cover to replace the staple cartridge or remove
a staple jam.
(2)
(1)
(3)
(4)
• Do not place heavy objects on the finisher or press down on the finisher (large stacker).
• Exercise caution when you turn on the power and when printing is taking place, as the tray may move up and down.
• A finisher (large stacker) cannot be installed simultaneously with a saddle stitch finisher.
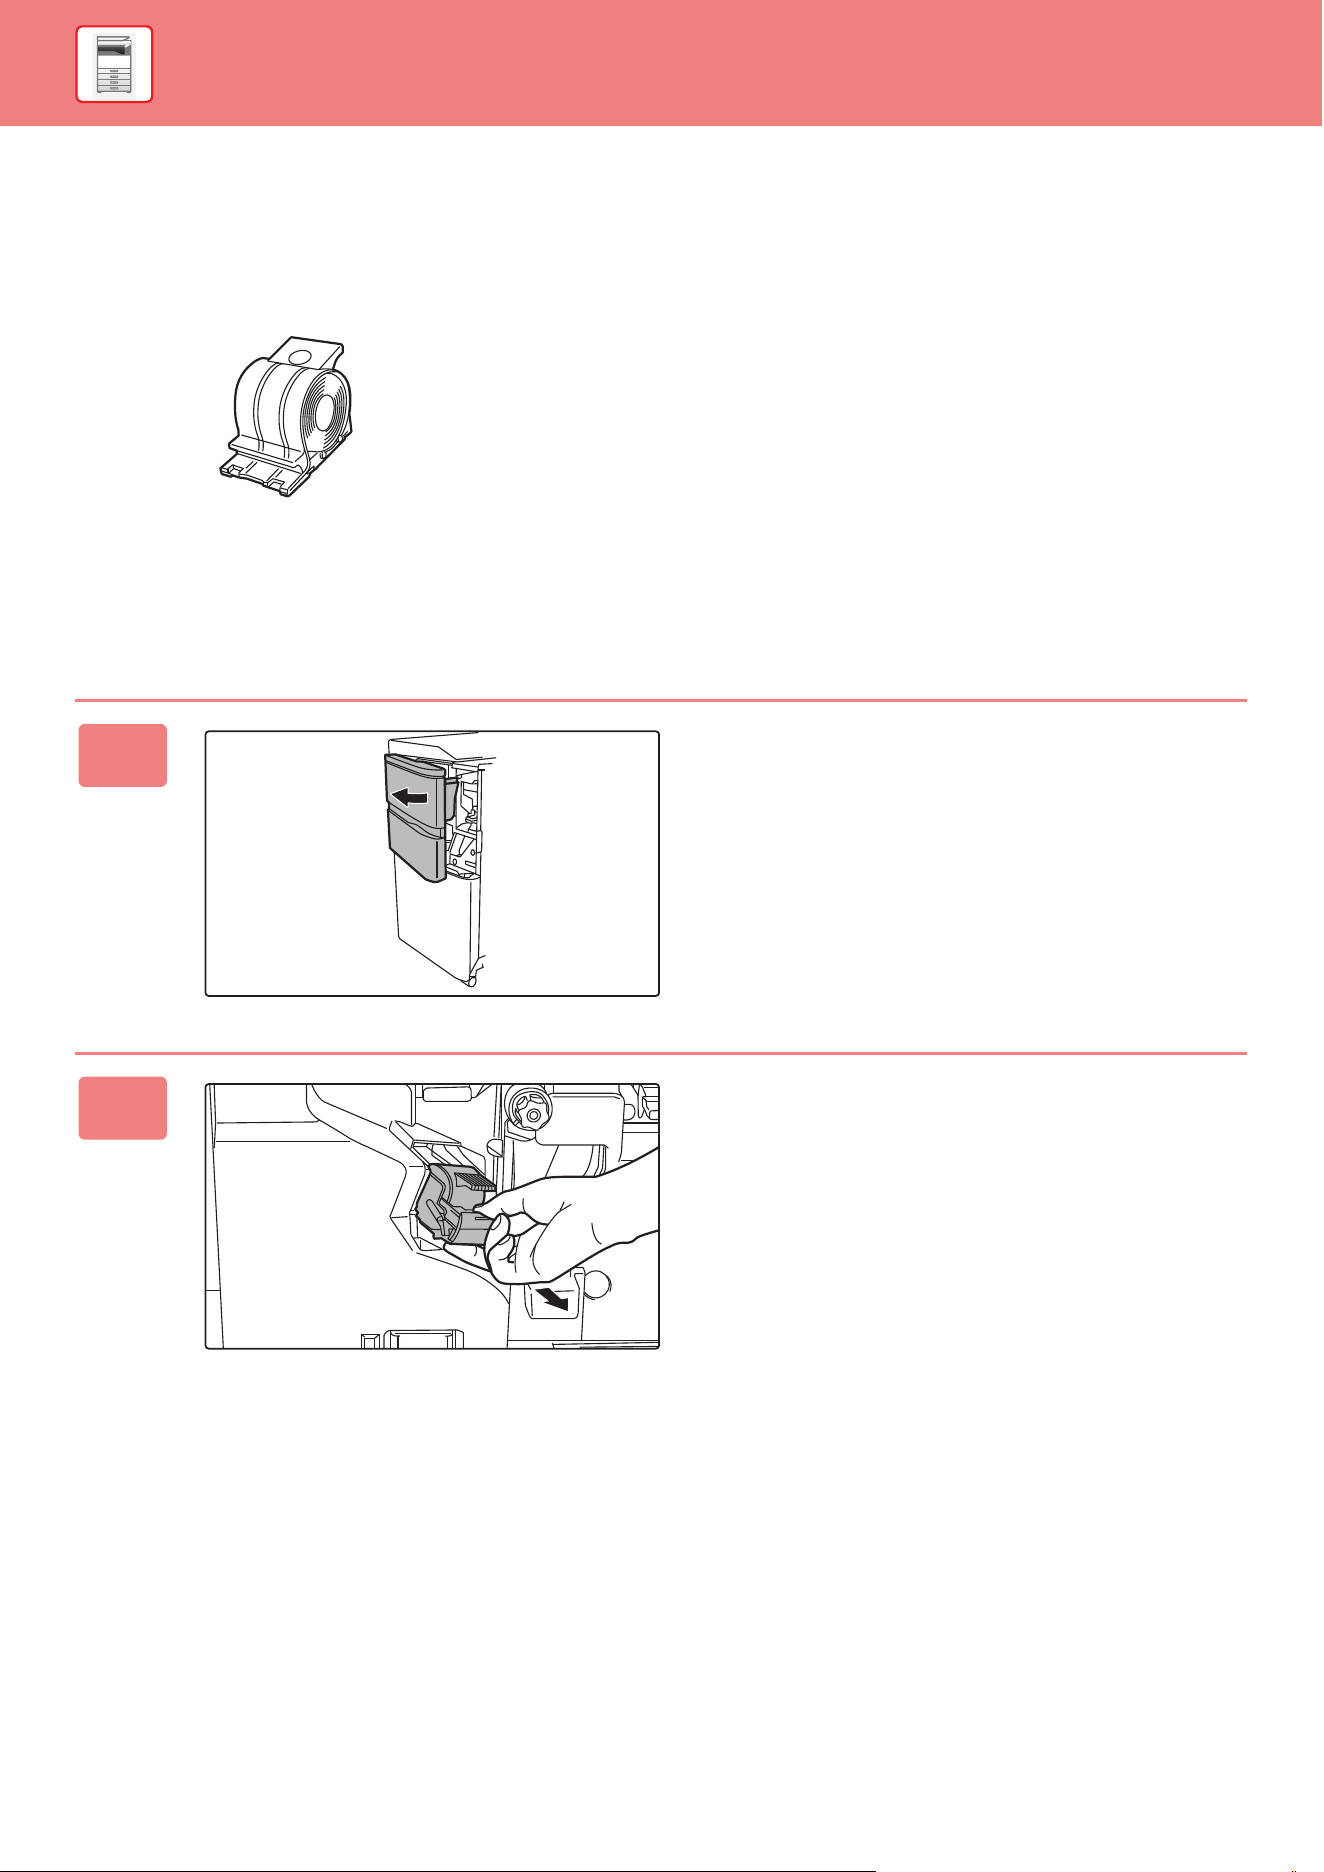
1-56
BEFORE USING THE MACHINE►PERIPHERAL DEVICES
SUPPLIES
The finisher (large stacker) requires the following staple cartridge:
Staple cartridge (approx. 5000 staples per cartridge × three cartridges)
MX-SCX2
REPLACING THE CARTRIDGE
When the staple cartridge runs out of staples, a message will appear in the operation panel. Follow the operation
procedure to replace the staple cartridge.
1
Open the front cover.
2
Squeeze the green parts of the staple
case and pull the case up and then
out.
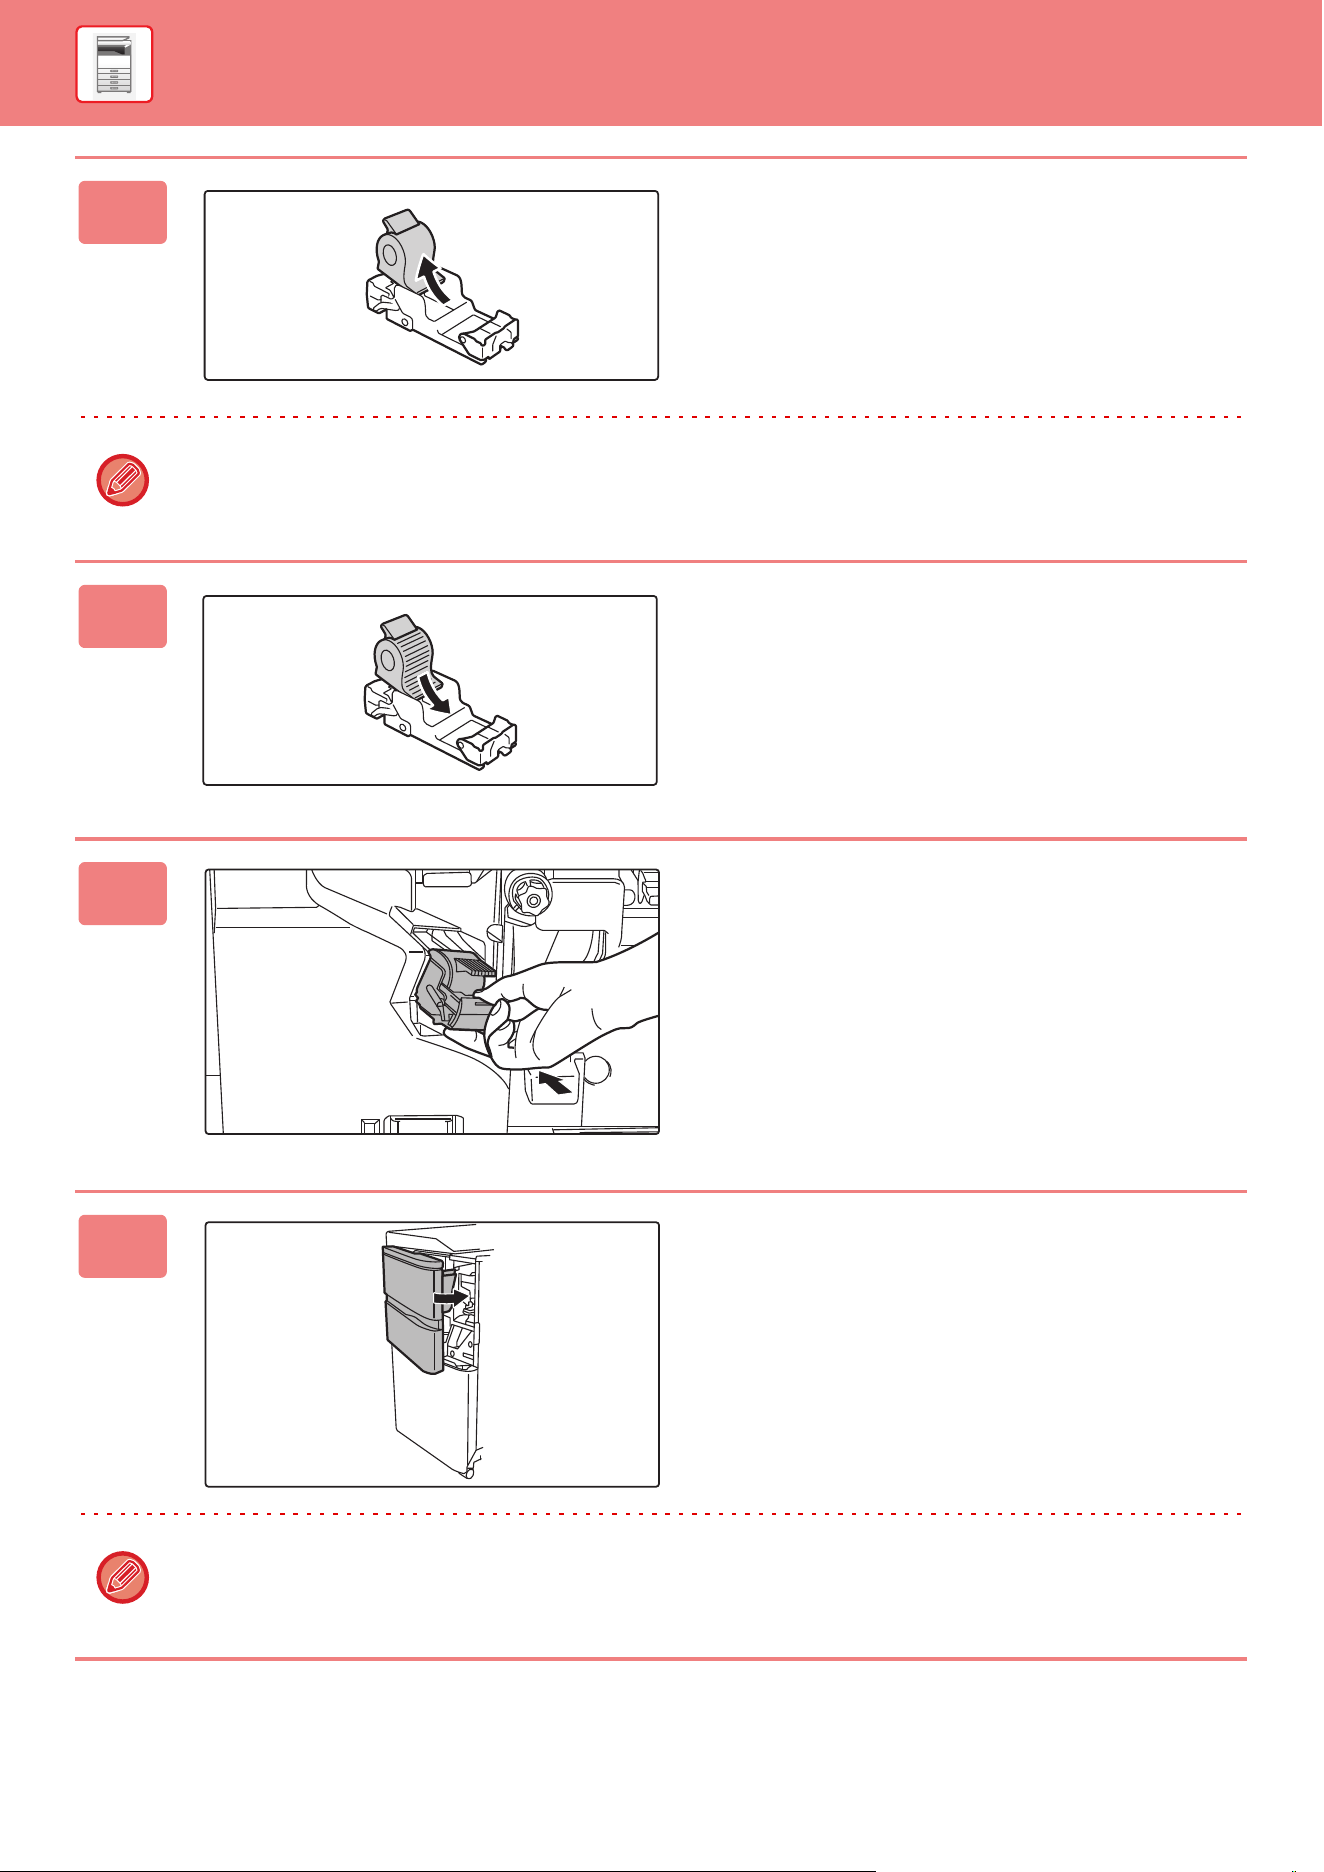
1-57
BEFORE USING THE MACHINE►PERIPHERAL DEVICES
3
Remove the empty staple cartridge.
When staples remain, the staple cartridge cannot be removed.
4
Insert a new staple cartridge into the
staple case.
Push the staple case in until it clicks into place.
5
Install a staple case.
Push the staple case in until it clicks into place.
6
Close the front cover.
Make a proof copy in staple sort function to verify that stapling takes place correctly.
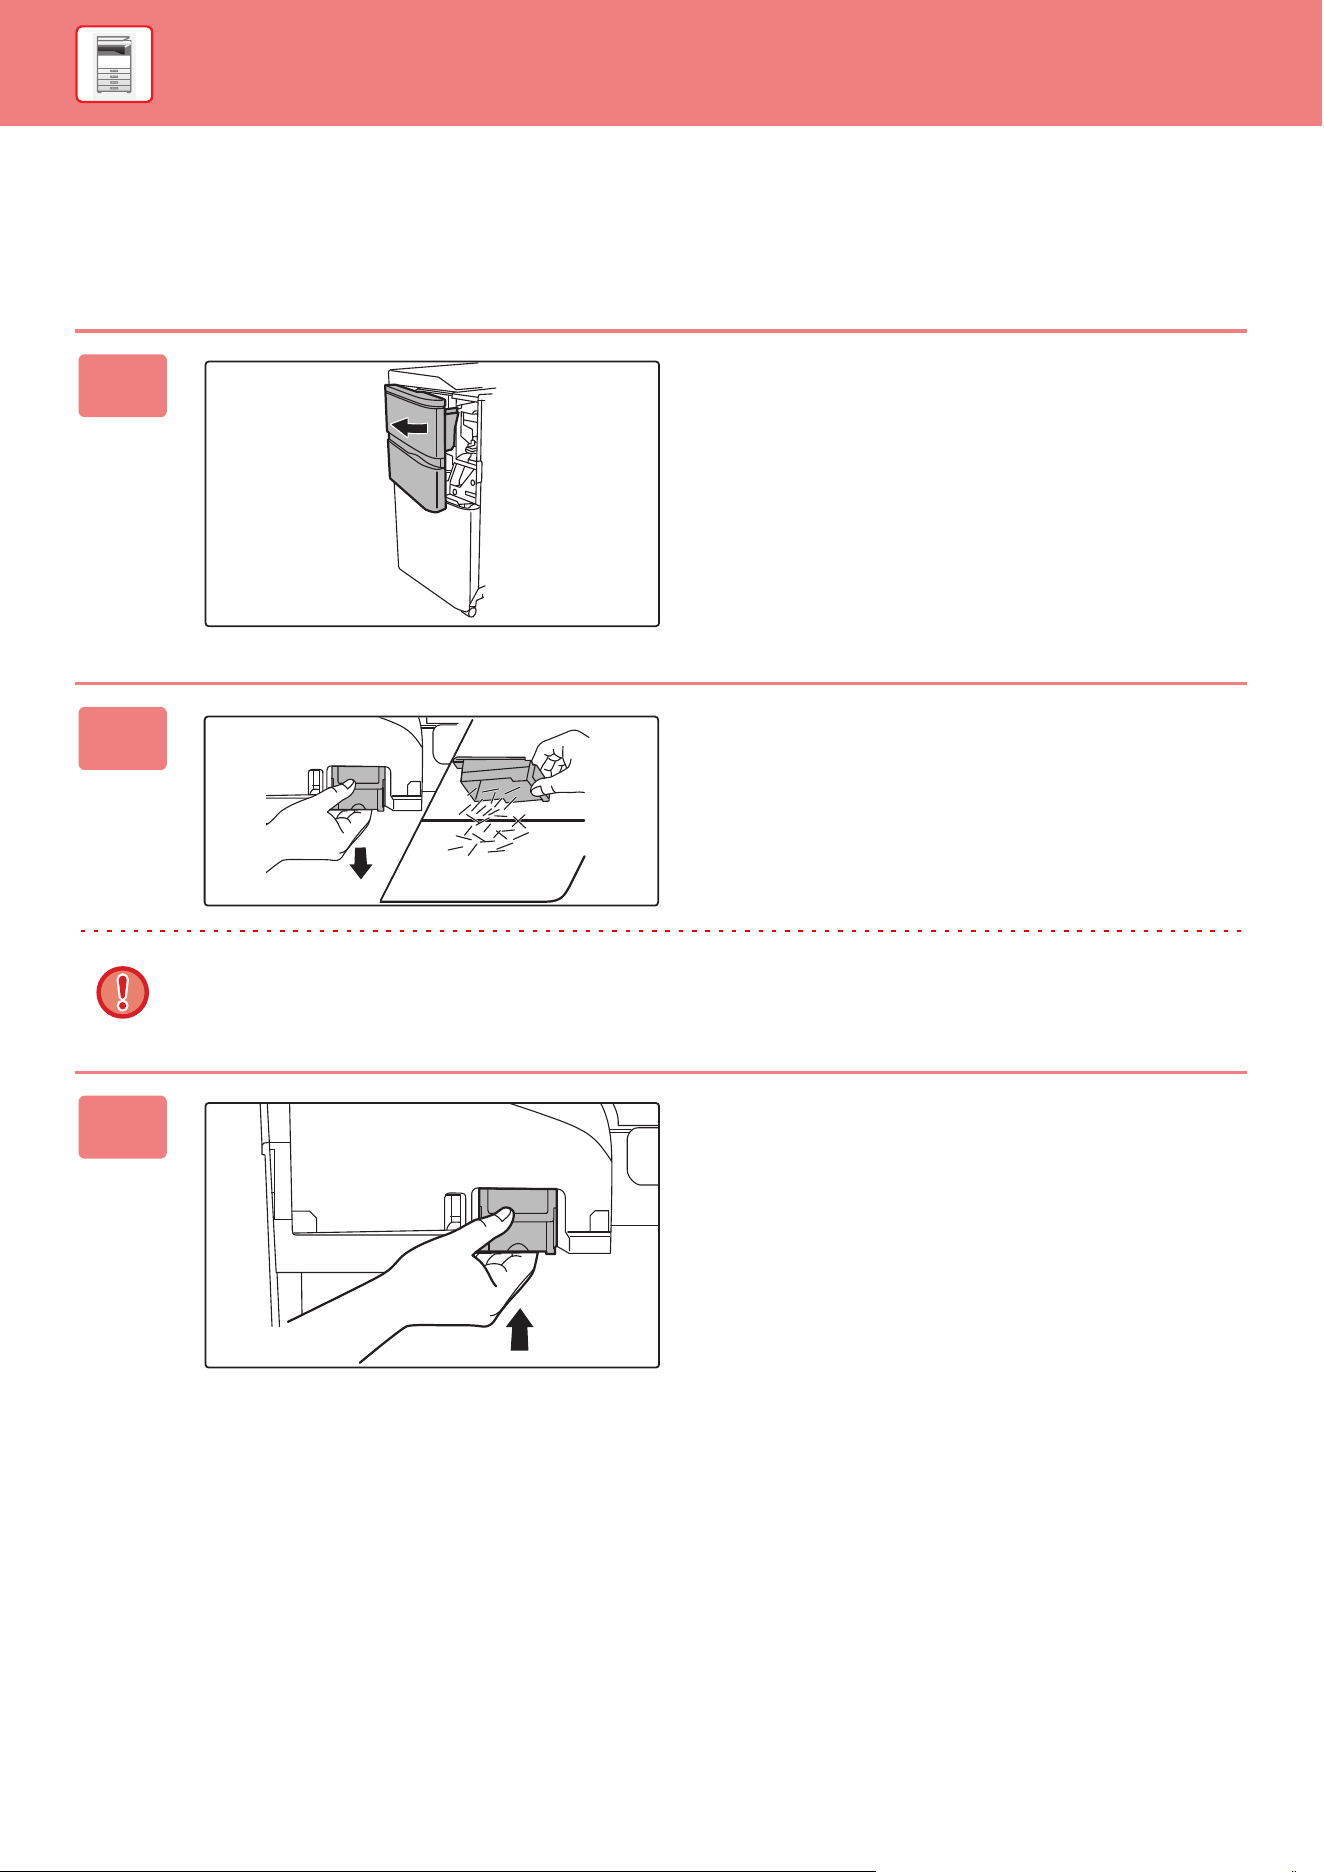
1-58
BEFORE USING THE MACHINE►PERIPHERAL DEVICES
DISCARDING STAPLE WASTE
When a finisher is used for stapling, staple waste is produced.
The staple waste is collected in the staple waste box.
Follow the steps below to discard staple waste.
1
Open the front cover.
2
Grasp the tab of the staple waste box,
gently pull out the box, and discard the
staple waste.
• Do not put your fingers into the staple waste box. The staples may prick and injure your fingers.
• Do not discard the staple waste in a plastic bag. The staples may create holes in the bag.
3
Replace the staple waste box.
Make sure that the staple waste box is replaced correctly.

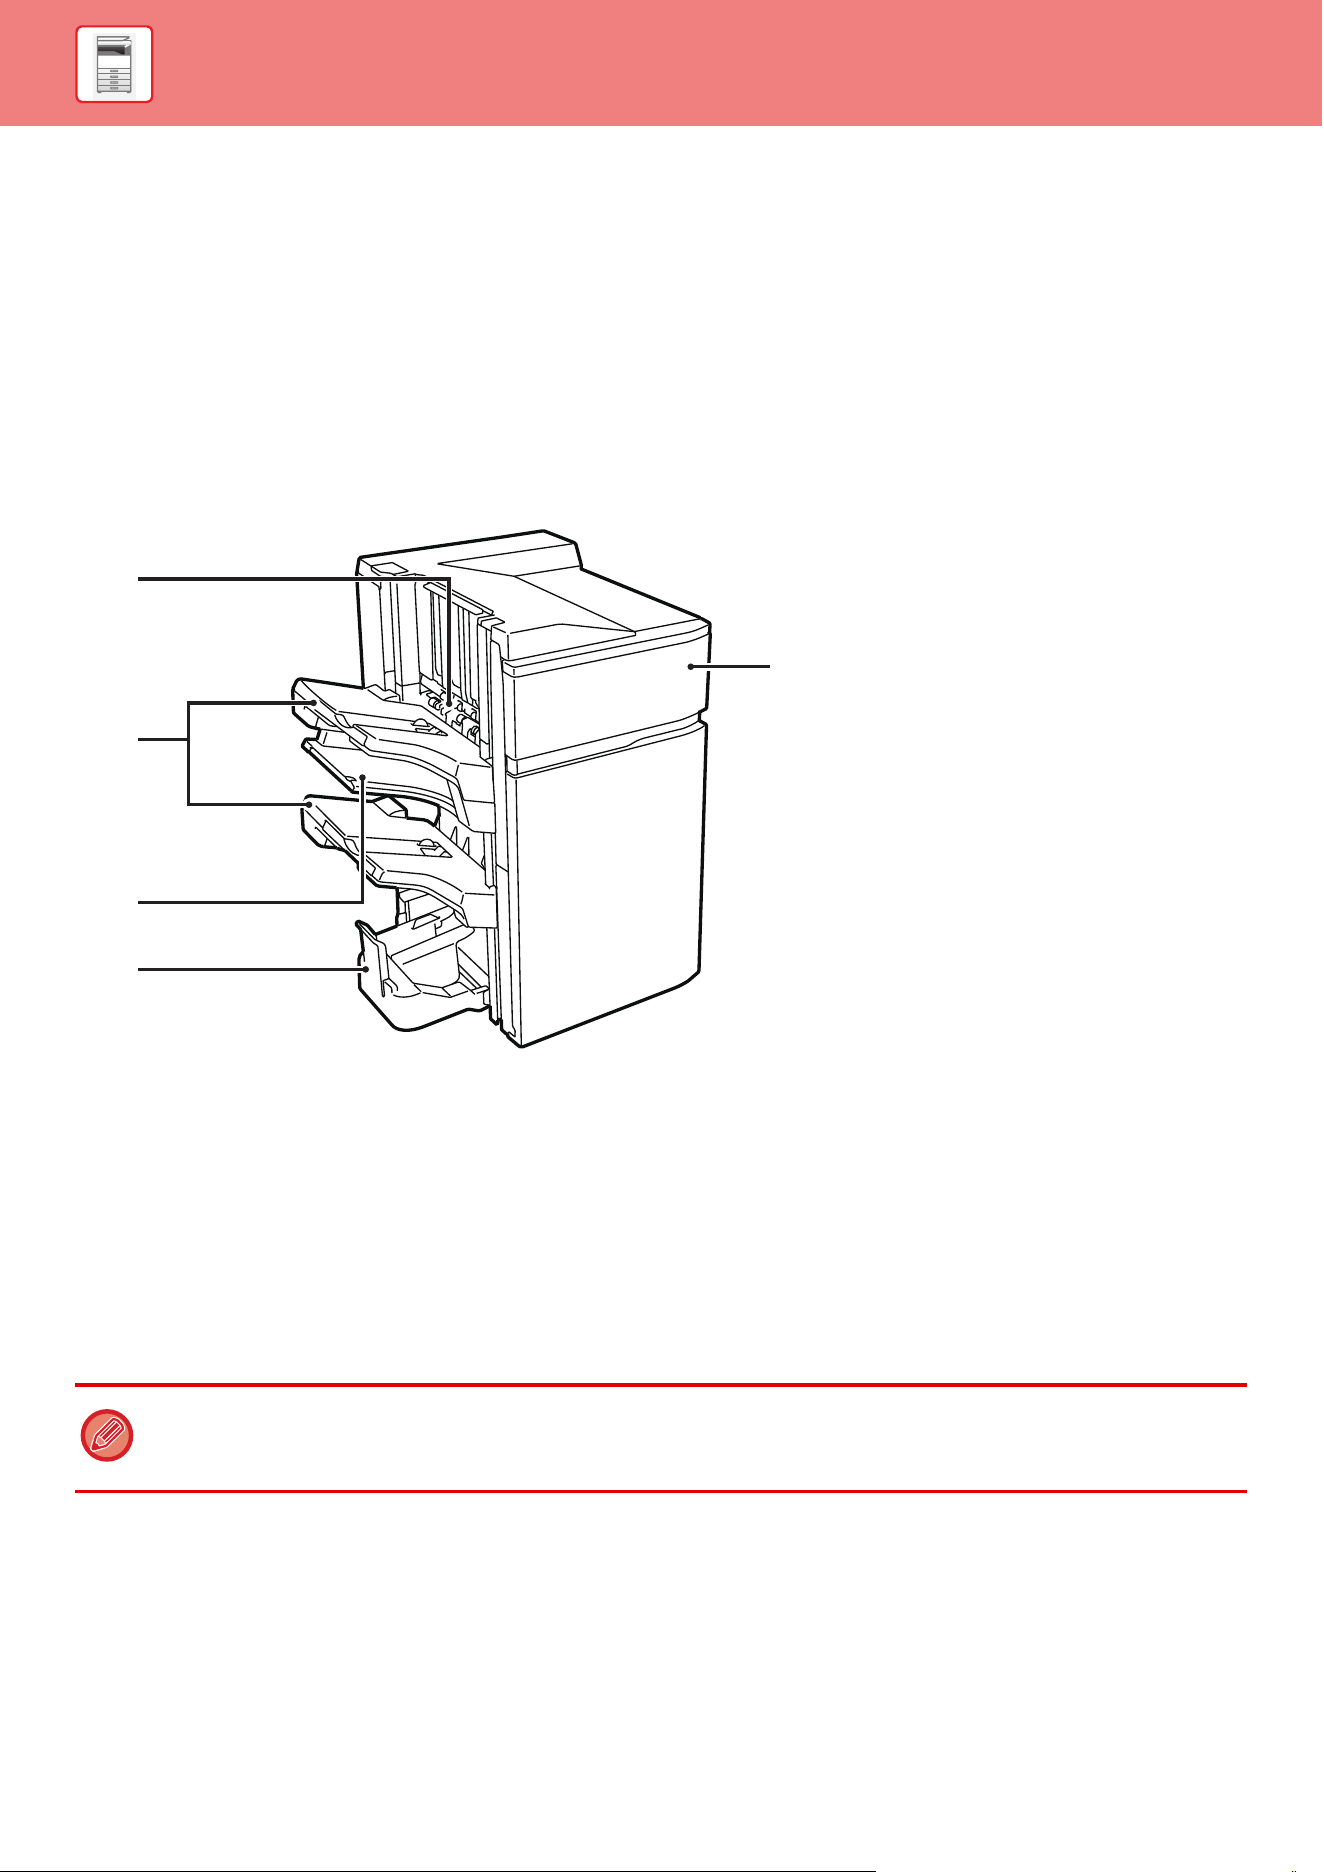
1-60
BEFORE USING THE MACHINE►PERIPHERAL DEVICES
SADDLE STITCH FINISHER (LARGE
STACKER)
This includes the offset function that outputs sorted sheets of paper while staggering each set of paper, the staple sort
function that staples each set of prints, the saddle stitch function that staples the center of the sheets and folds the
sheets in half, and the paper folding function that folds paper in half.
Installing an optional hole punch module allows you to punch holes in printed paper.
PART NAMES
(1) Staple compiler
This temporarily stacks paper to be stapled.
(2) Output tray
Stapled and offset output is delivered to this tray.Stapled
and offset output is delivered to this tray.
The tray is slidable. Extend the tray for printing on
large-size paper (larger than 8-1/2" × 11" (A4)).
(3) Middle output tray
Output paper that will not be offset in this tray.
The tray is slidable. Extend the tray for printing on
large-size paper (larger than 8-1/2" × 11" (A4)).
(4) Saddle stitch tray
Saddle-stitched output is delivered to this tray.
(5) Front cover
Open this cover to replace the staple cartridge or remove
a staple jam.
(2)
(4)
(1)
(5)
(3)
• Do not place heavy objects on the finisher or press down on the finisher (large stacker).
• Exercise caution when you turn on the power and when printing is taking place, as the tray may move up and down.
• A saddle stitch finisher (large stacker) cannot be installed simultaneously with a finisher.
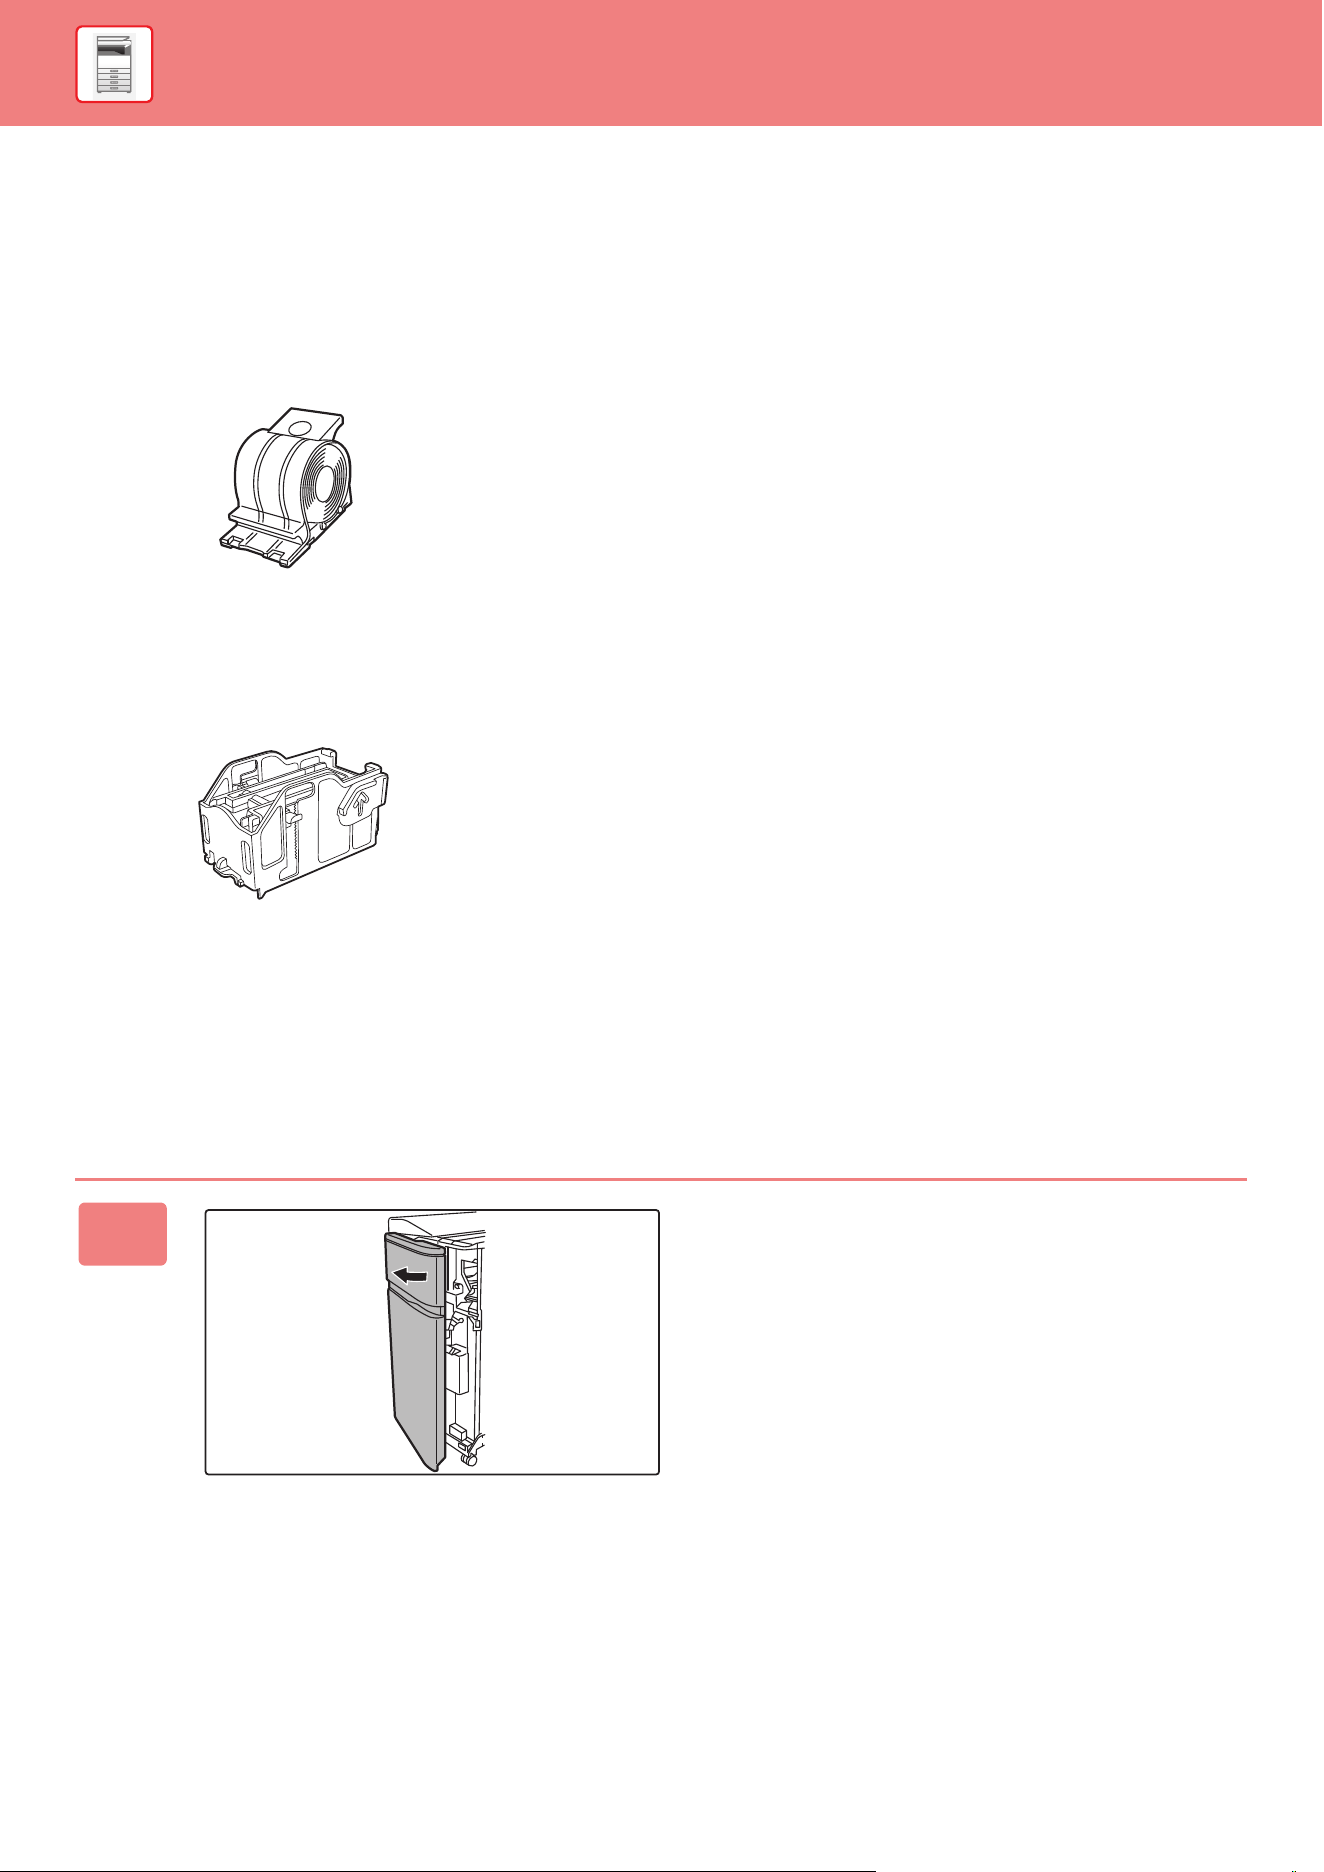
1-61
BEFORE USING THE MACHINE►PERIPHERAL DEVICES
SUPPLIES
The saddle stitch finisher (large stacker) requires the following staple cartridge:
Finisher unit
Staple cartridge (approx. 5000 staples per cartridge × three cartridges)
MX-SCX2
Saddle stitch unit
Staple cartridge (approx. 5000 staples per cartridge × four cartridges)
MX-SCX1
REPLACING THE CARTRIDGE
Finisher unit
When the staple cartridge runs out of staples, a message will appear in the operation panel. Follow the operation
procedure to replace the staple cartridge.
1
Open the front cover.
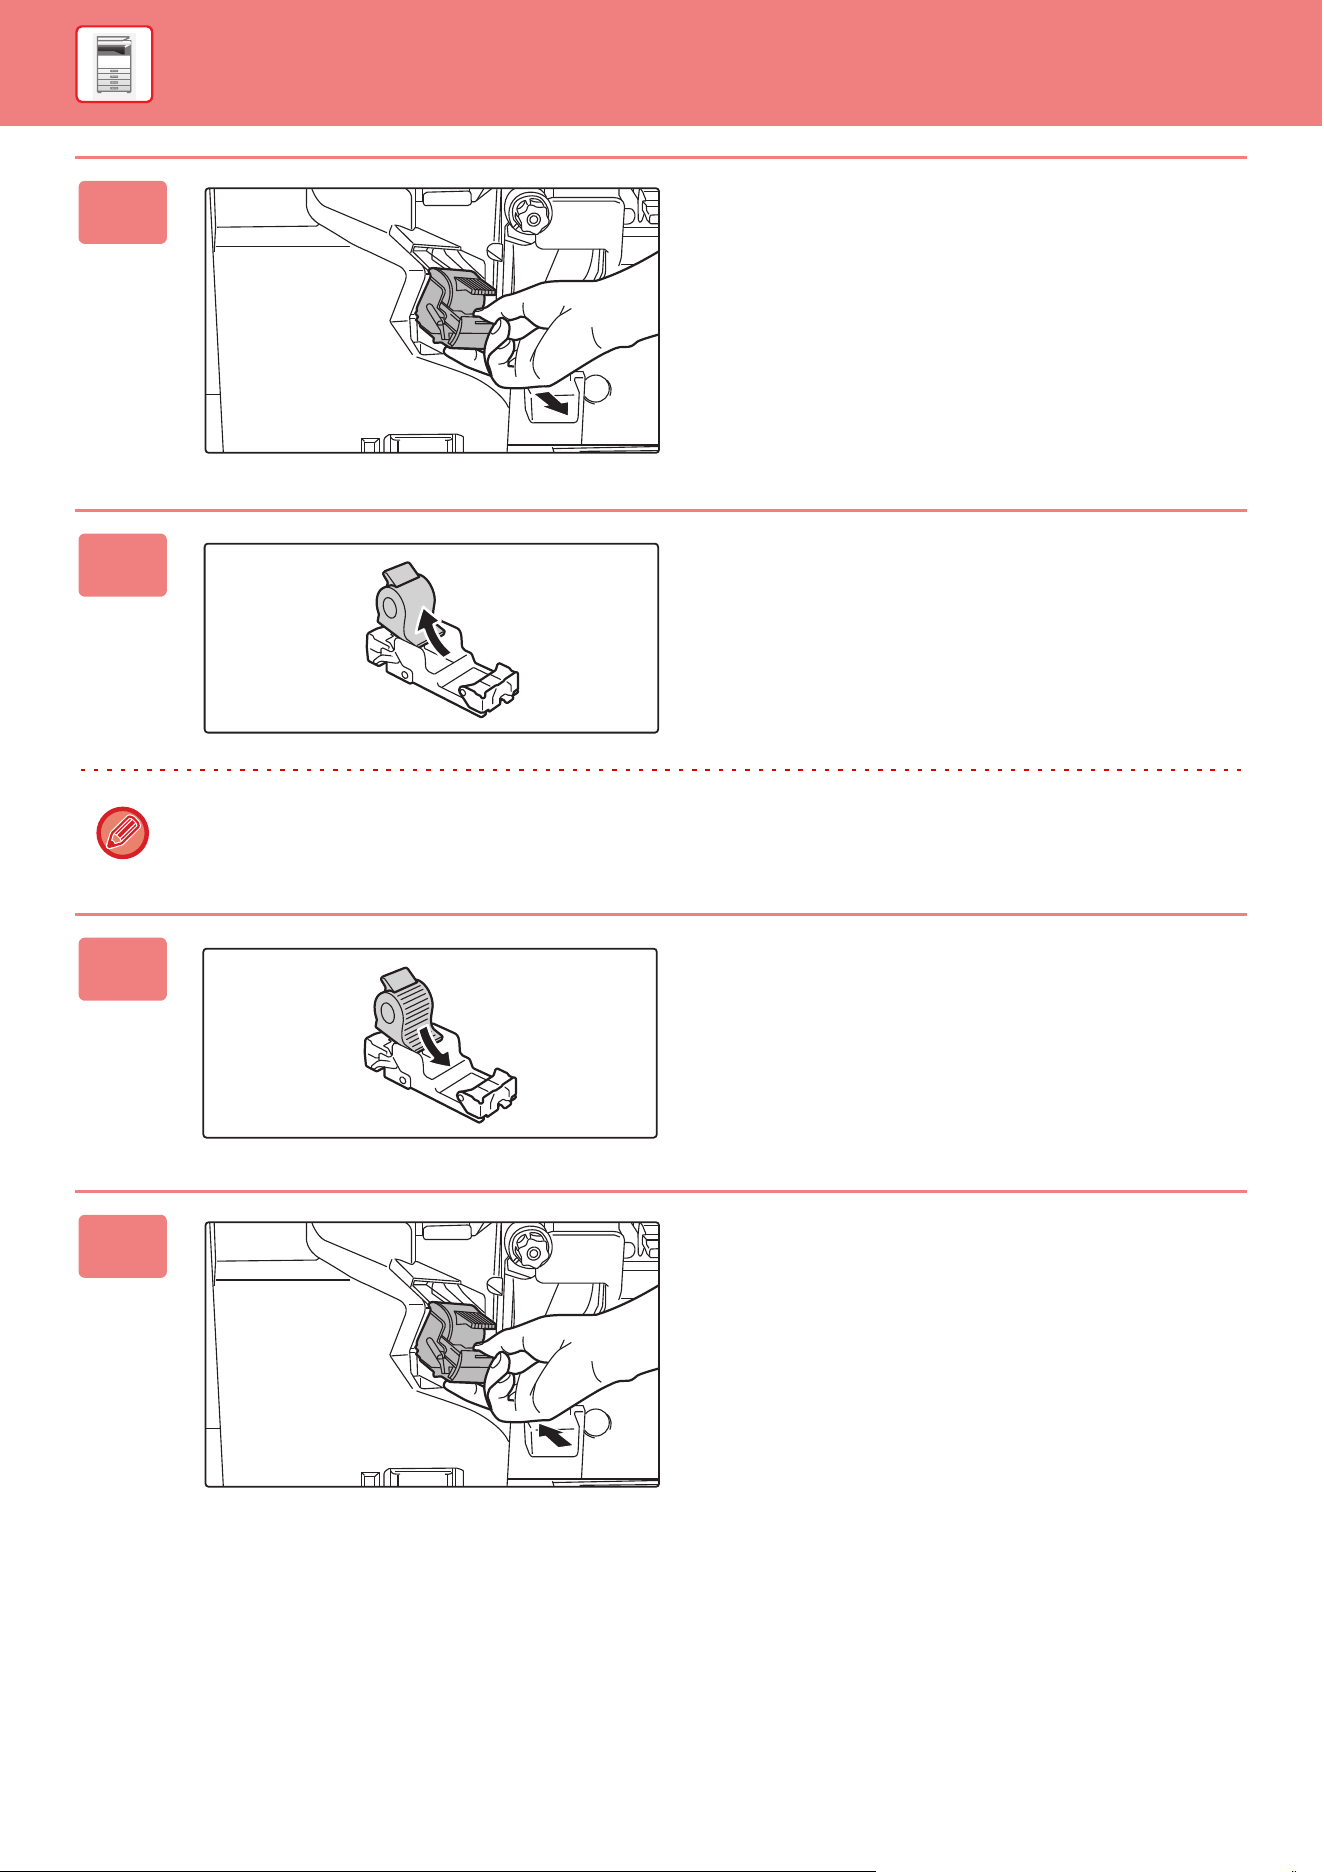
1-62
BEFORE USING THE MACHINE►PERIPHERAL DEVICES
2
Squeeze the green parts of the staple
case and pull the case up and then
out.
3
Remove the empty staple cartridge.
When staples remain, the staple cartridge cannot be removed.
4
Insert a new staple cartridge into the
staple case.
Push the staple case in until it clicks into place.
5
Install a staple case.
Push the staple case in until it clicks into place.
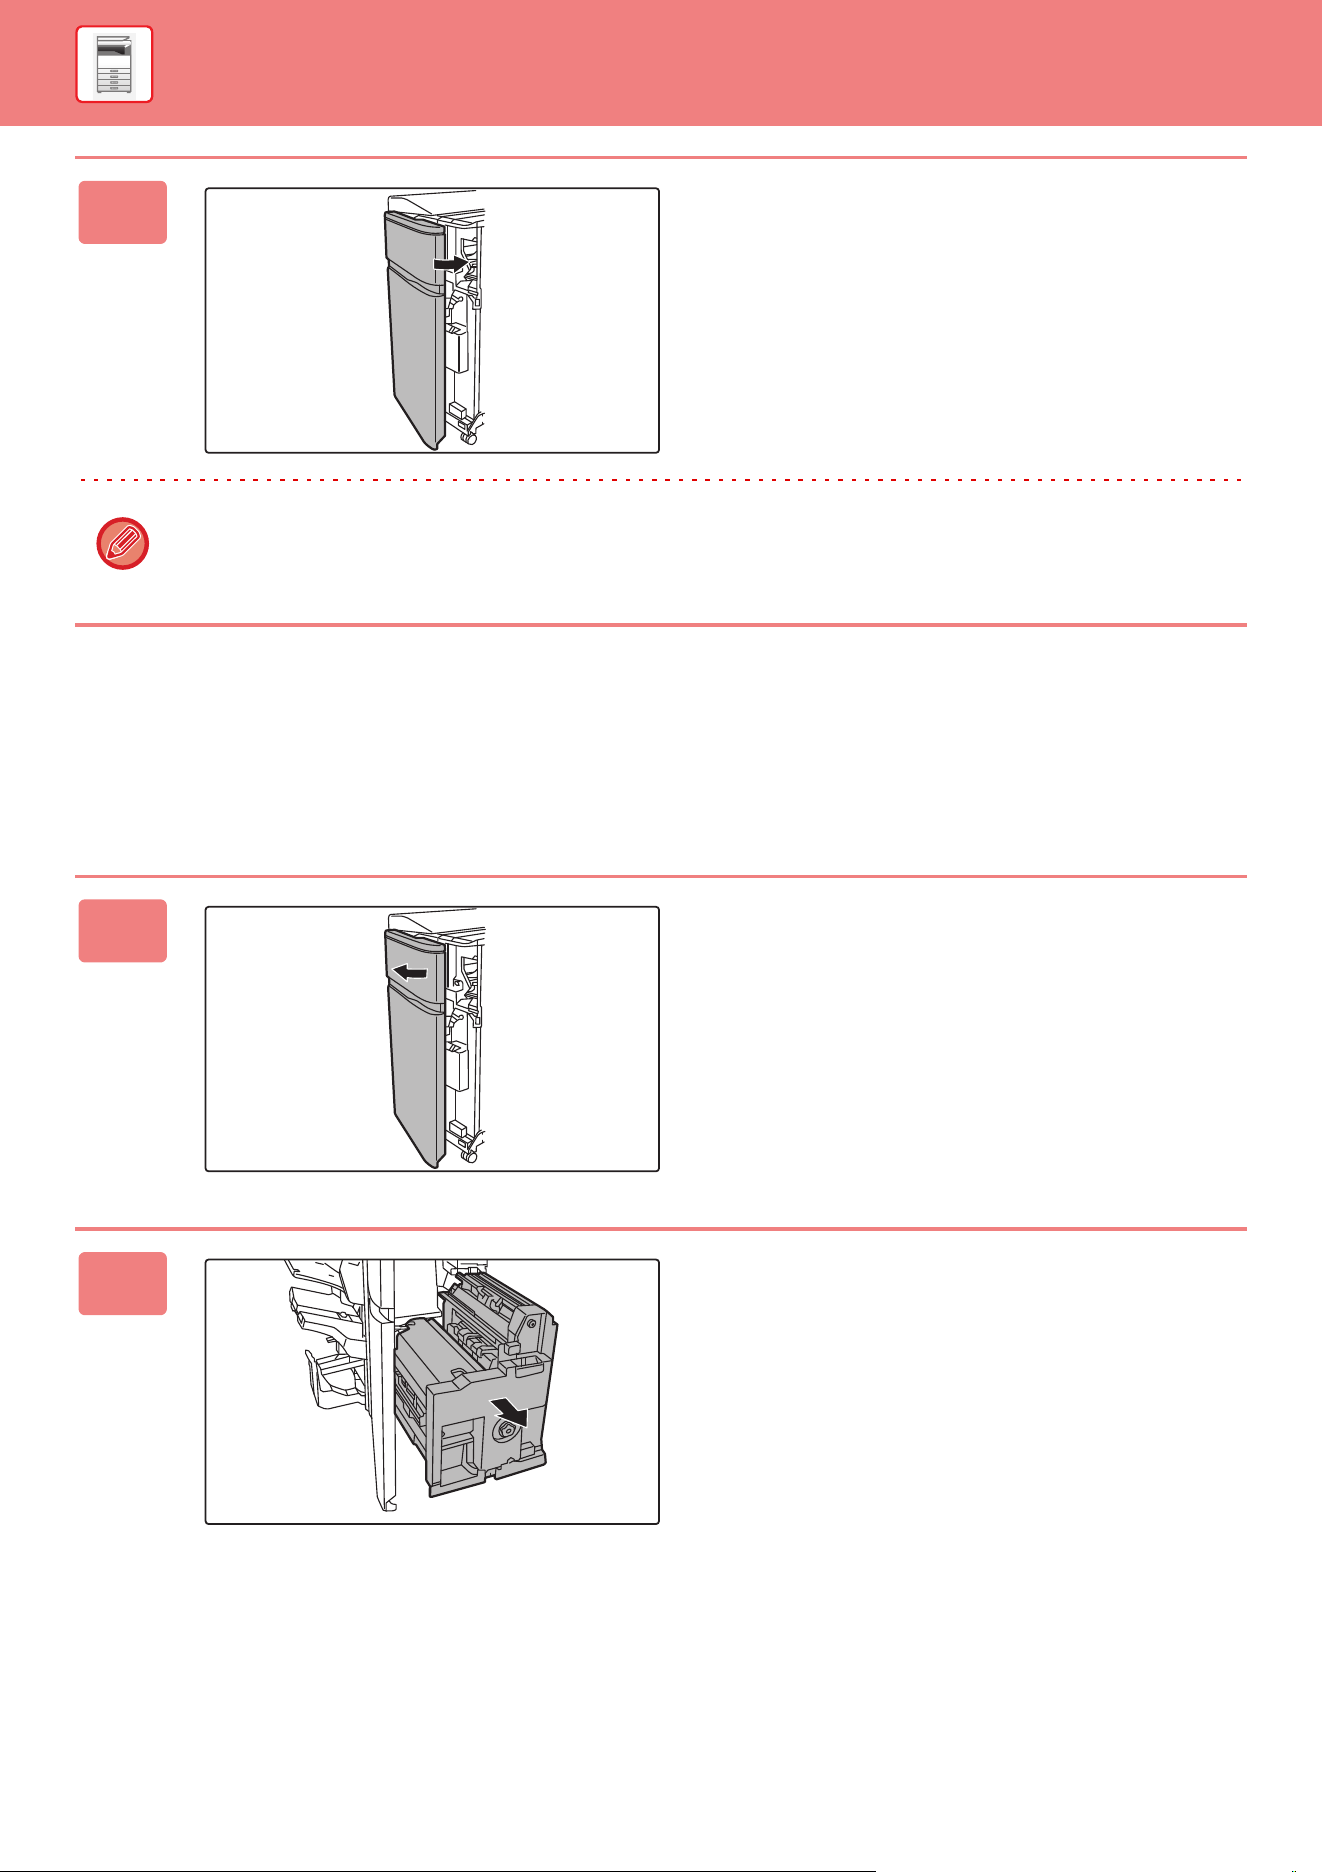
1-63
BEFORE USING THE MACHINE►PERIPHERAL DEVICES
Saddle stitch unit
When the staple cartridge runs out of staples, a message will appear in the operation panel. Follow the operation
procedure to replace the staple cartridge.
Before starting this procedure, remove all output from the output tray of the saddle stitch finisher (large stacker). Do not
replace removed output back in the output tray.
6
Close the front cover.
Make a proof copy in staple sort function to verify that stapling takes place correctly.
1
Open the front cover.
2
Grasp the handle on the saddle stitch
unit and pull it slowly out until it stops.
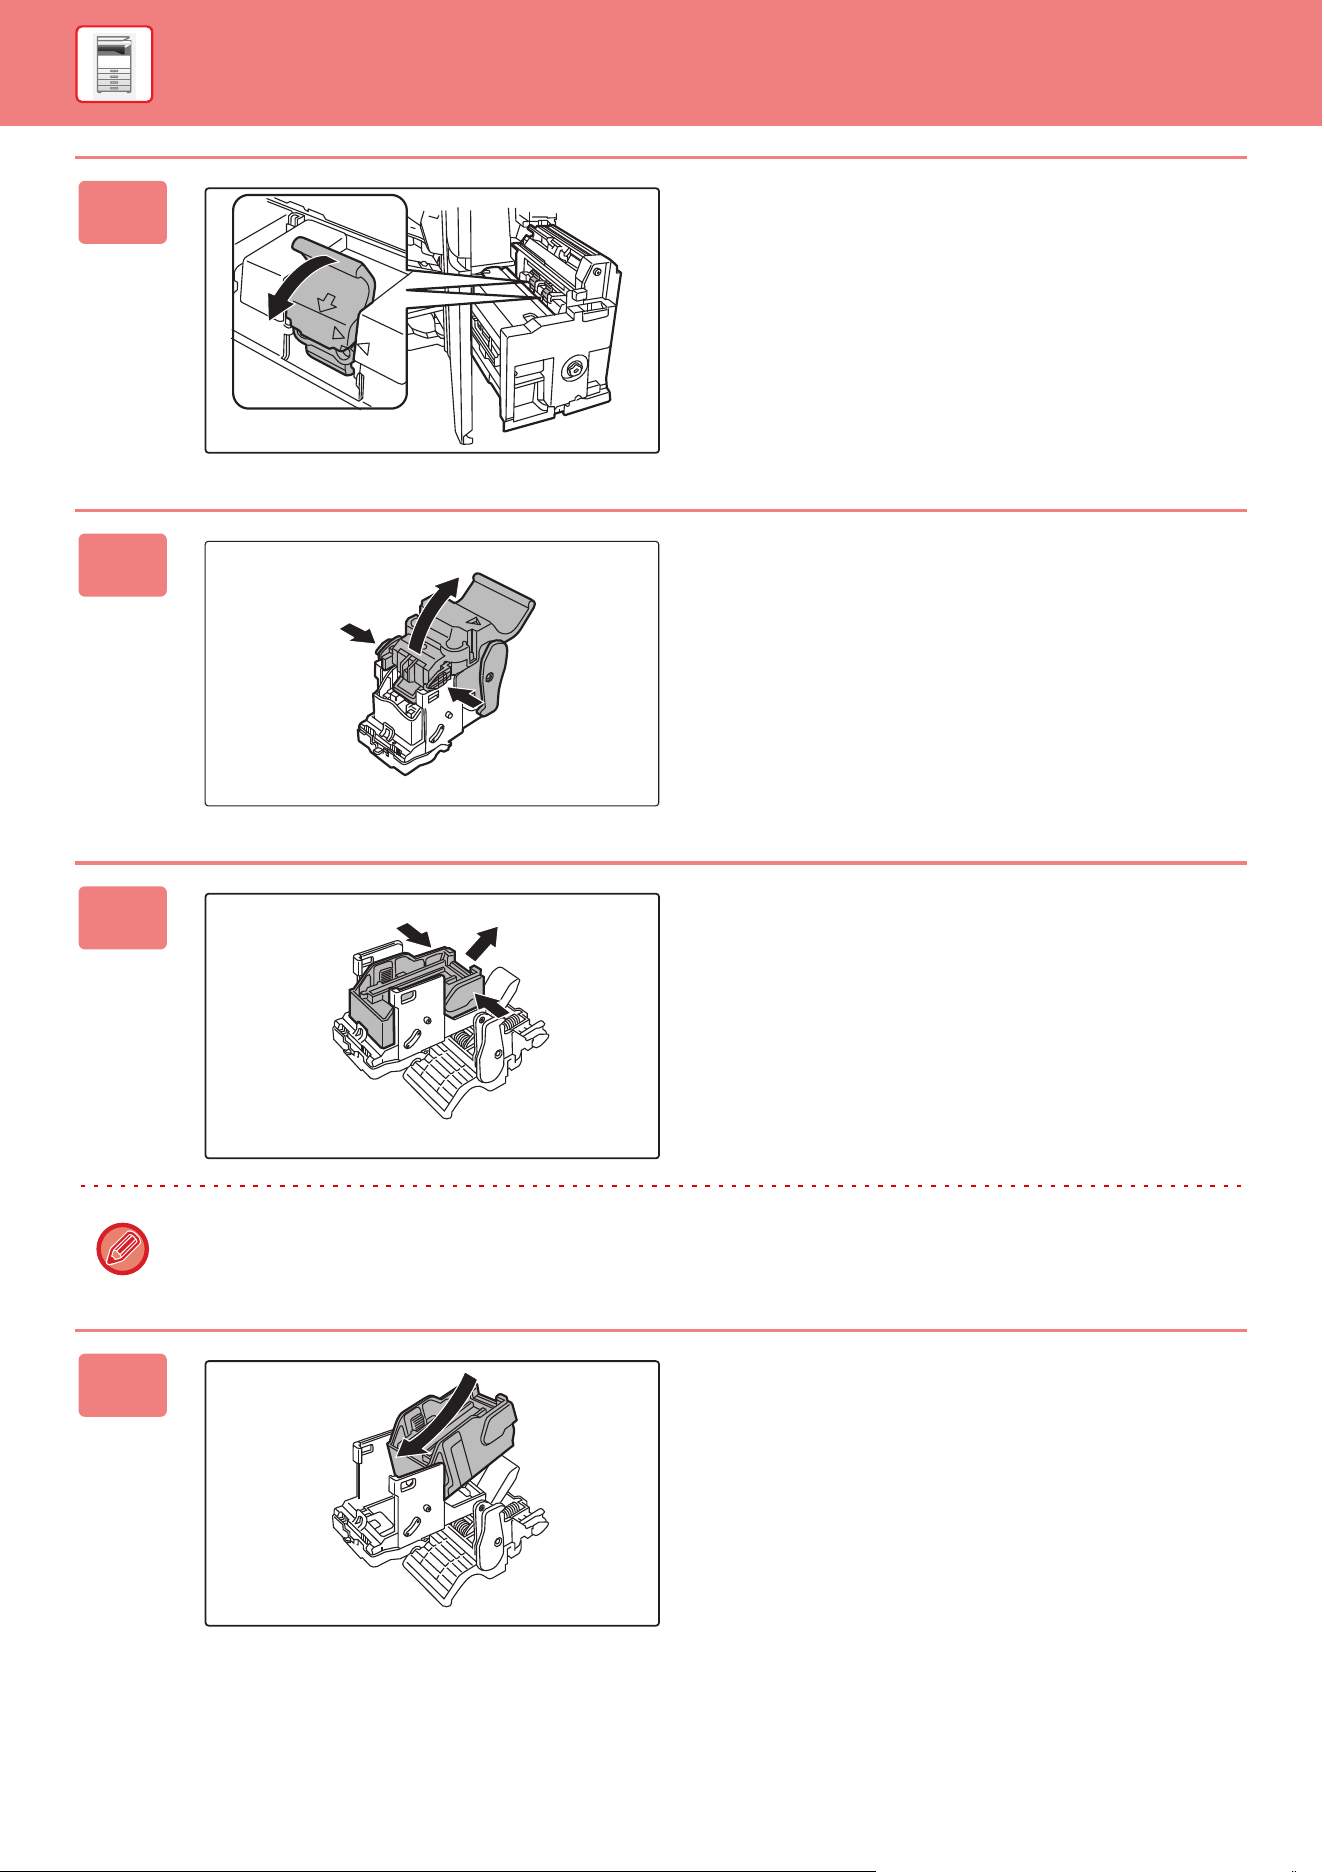
1-64
BEFORE USING THE MACHINE►PERIPHERAL DEVICES
3
Lower the staple case release lever
and remove the staple case.
Pull the staple case out to the left.
Replace both staple cartridges.
4
Press the lock button to open the
release lever.
5
Remove the empty staple cartridge.
Press the lock button to open the release lever.
6
Install a new staple cartridge.
Push the staple case in until it clicks into place.
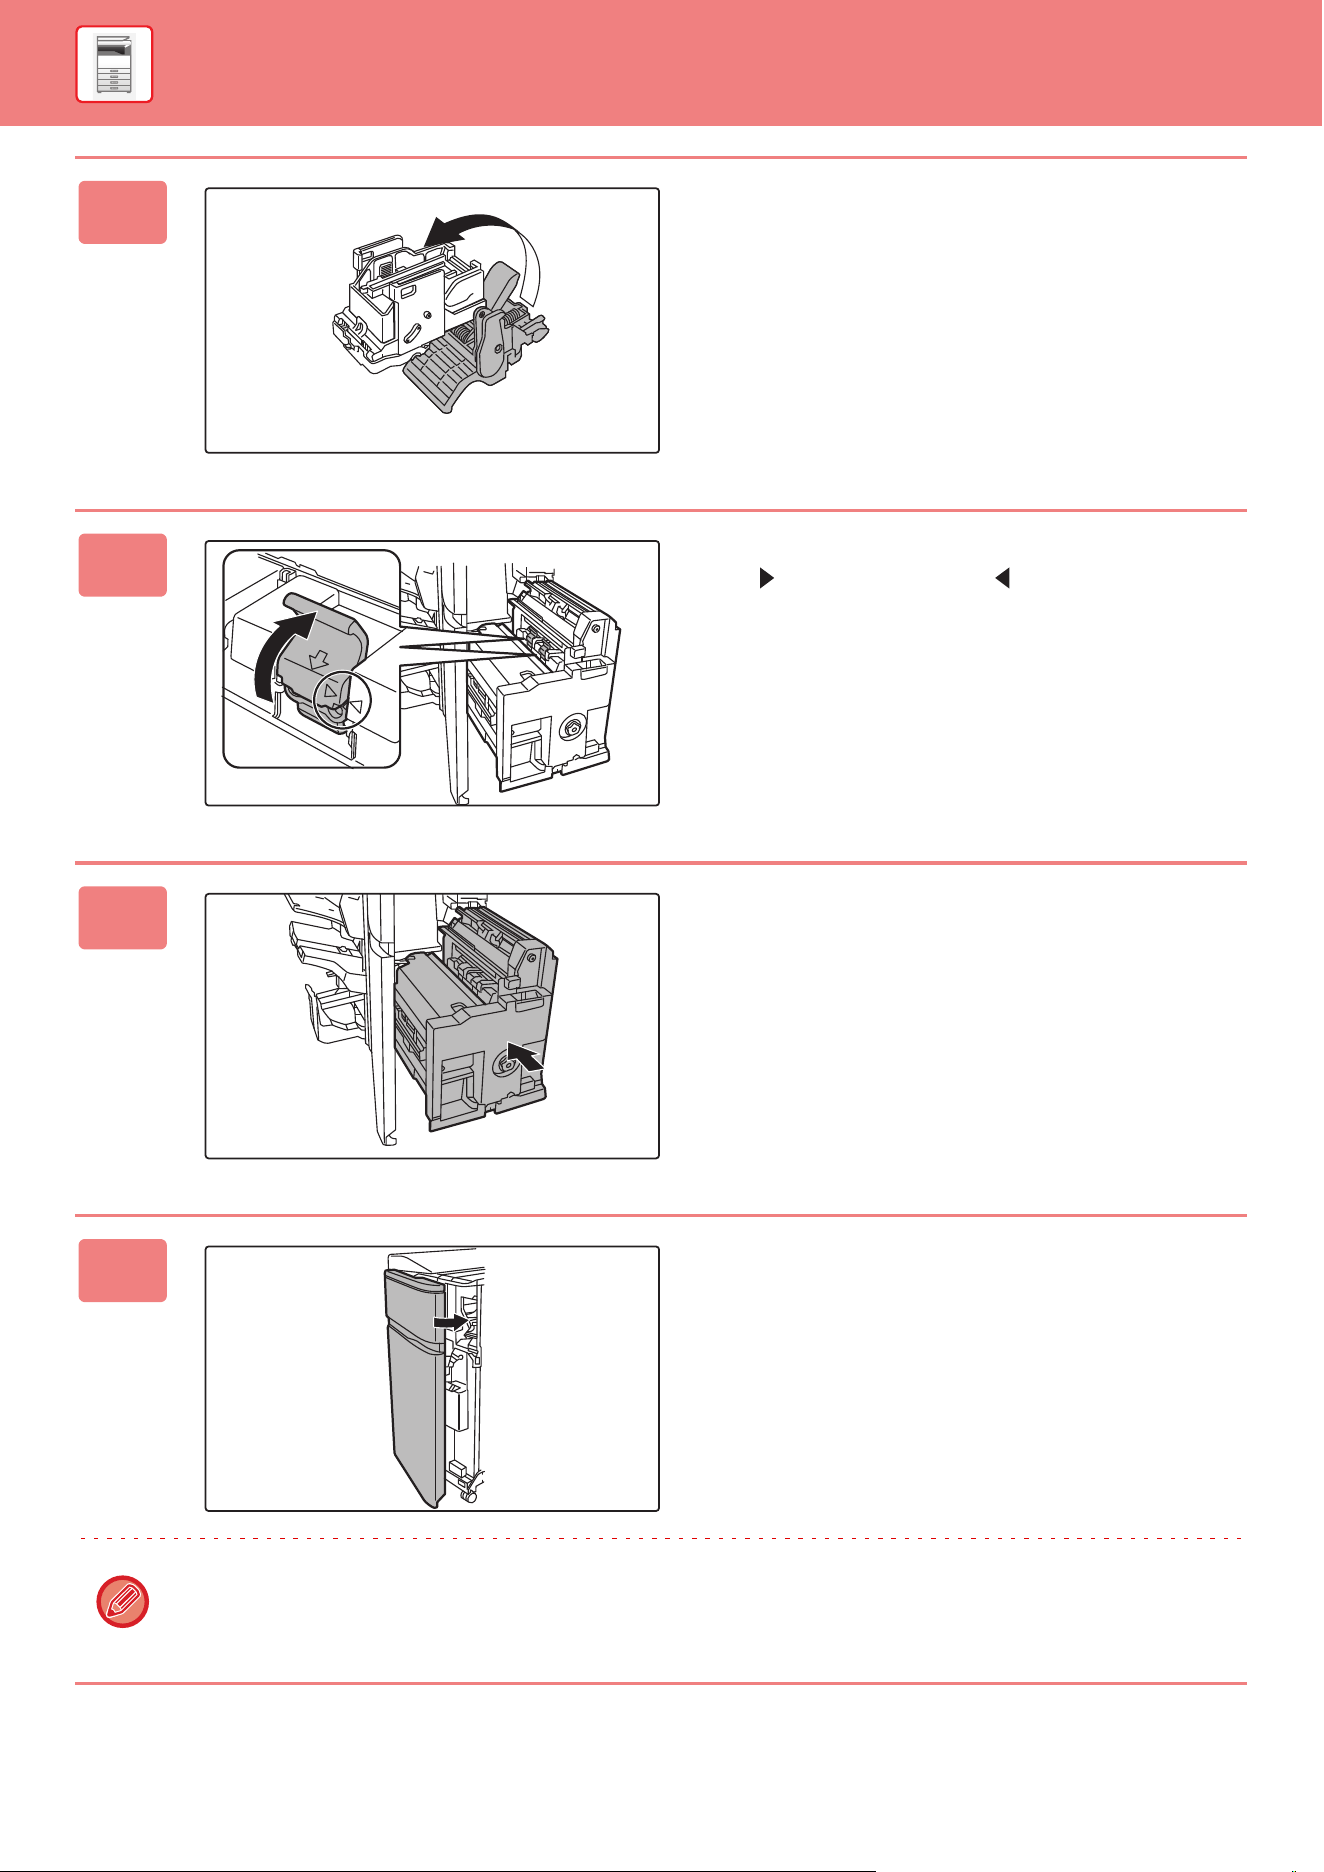
1-65
BEFORE USING THE MACHINE►PERIPHERAL DEVICES
7
Press the lock button to open the
release lever.
8
Push the staple case firmly back in.
Align of the staple case with of the unit.
Push the staple case in until it clicks into place.
9
Push the saddle stitch unit in.
10
Close the front cover.
Make a test print or copy using the saddle stitch function to verify that stapling takes place correctly.
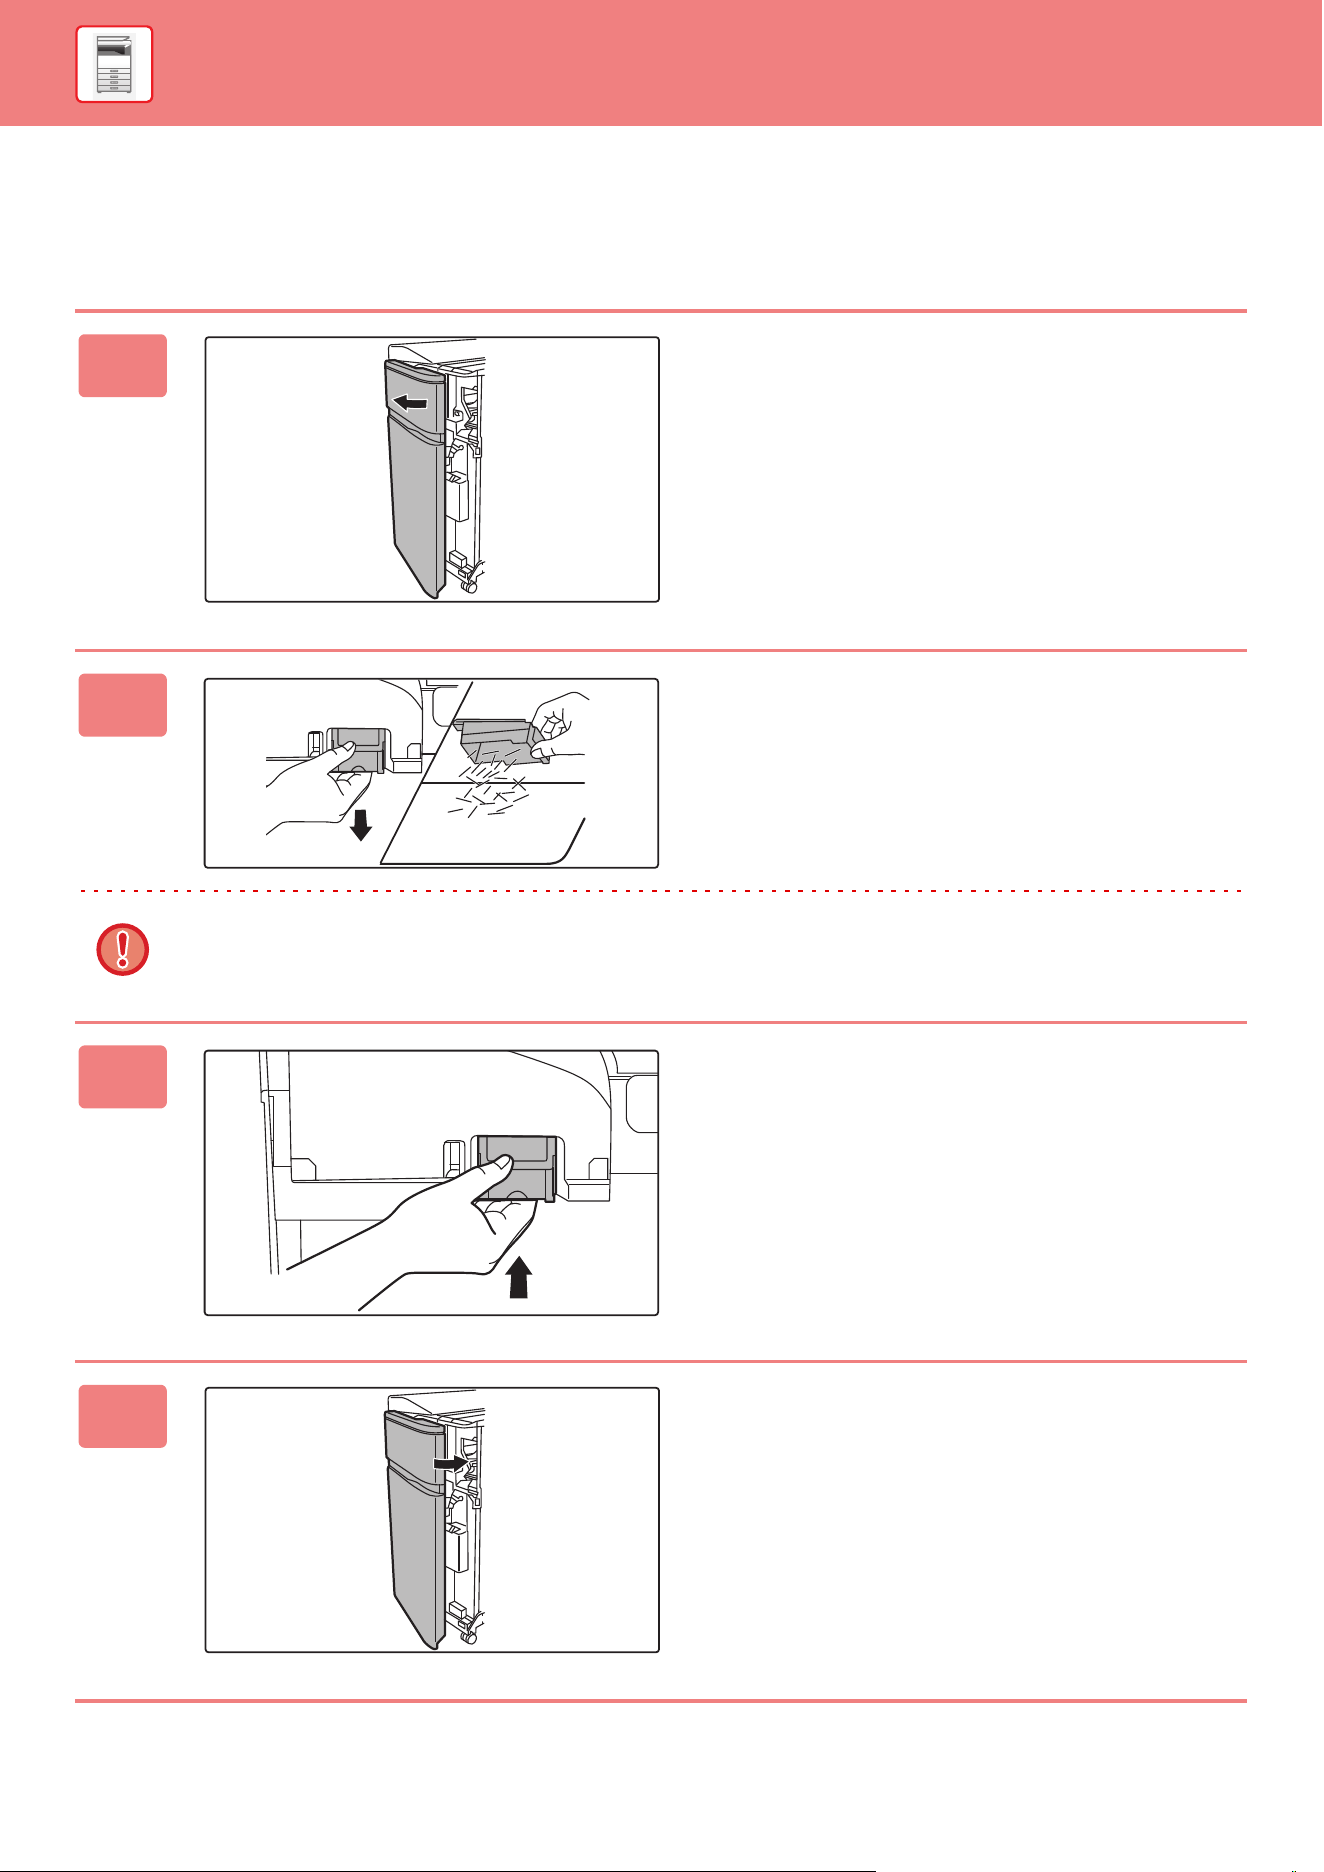
1-66
BEFORE USING THE MACHINE►PERIPHERAL DEVICES
DISCARDING STAPLE WASTE
When a finisher is used for stapling, staple waste is produced.
The staple waste is collected in the staple waste box.
Follow the steps below to discard staple waste.
1
Open the front cover.
2
Grasp the tab of the staple waste box,
gently pull out the box, and discard the
staple waste.
• Do not put your fingers into the staple waste box. The staples may prick and injure your fingers.
• Do not discard the staple waste in a plastic bag. The staples may create holes in the bag.
3
Replace the staple waste box.
Make sure that the staple waste box is replaced correctly.
4
Close the front cover.
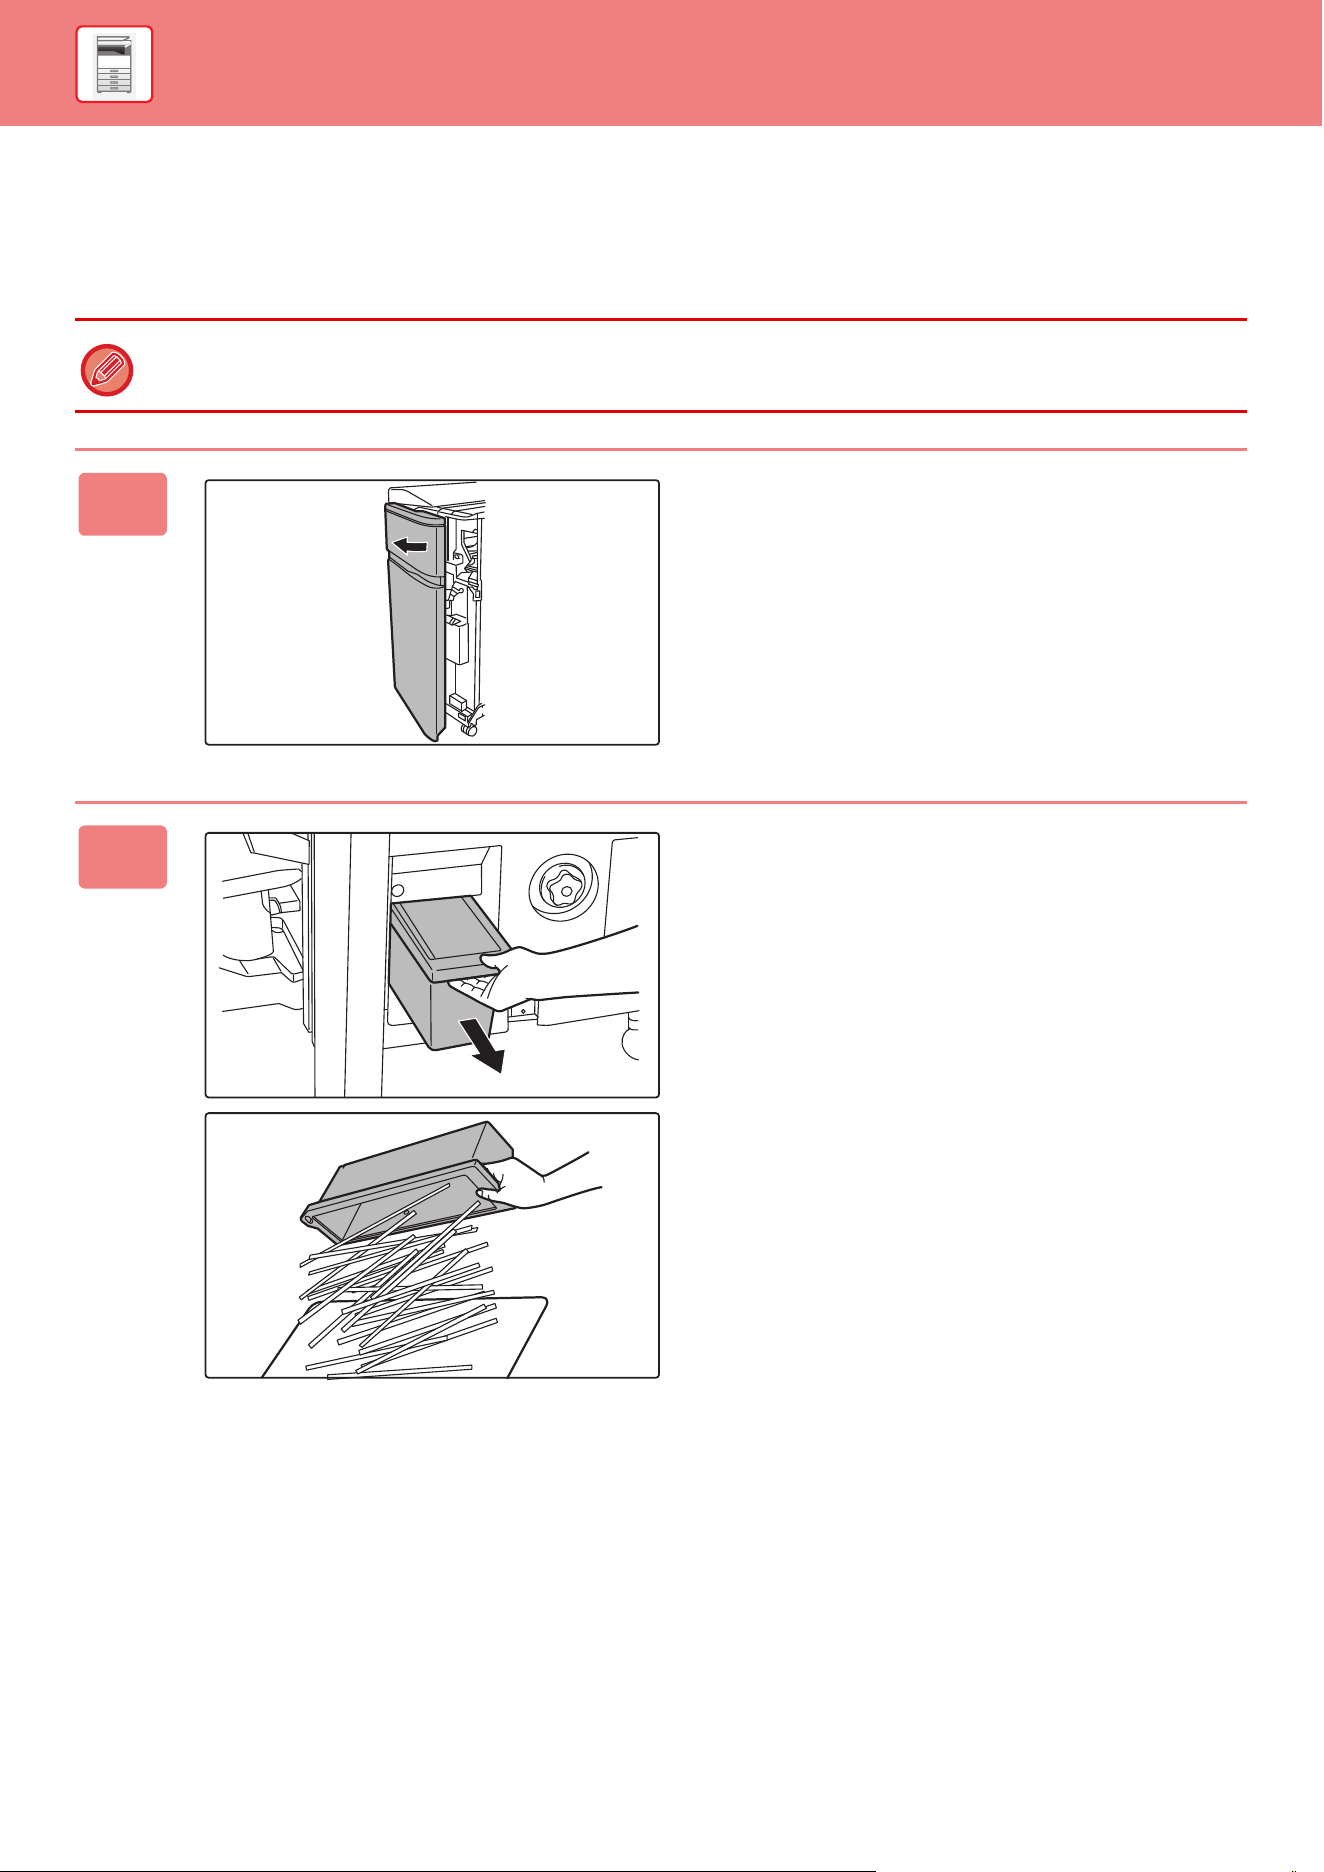
1-67
BEFORE USING THE MACHINE►PERIPHERAL DEVICES
DISCARDING PAPER WASTE
When folded paper is trimmed in trimmer settings, paper waste is generated.
Paper waste is collected in the paper waste box.
Follow the operation procedure to remove paper waste.
Using the trimmer function trims a side drop at the time of folding, creating a neat finish.
1
Open the front cover.
2
Grasp the paper waste box handle,
gently pull out the box, and discard the
paper waste.
Discard the paper waste into a plastic bag or other
container, being careful not to let any waste scatter.
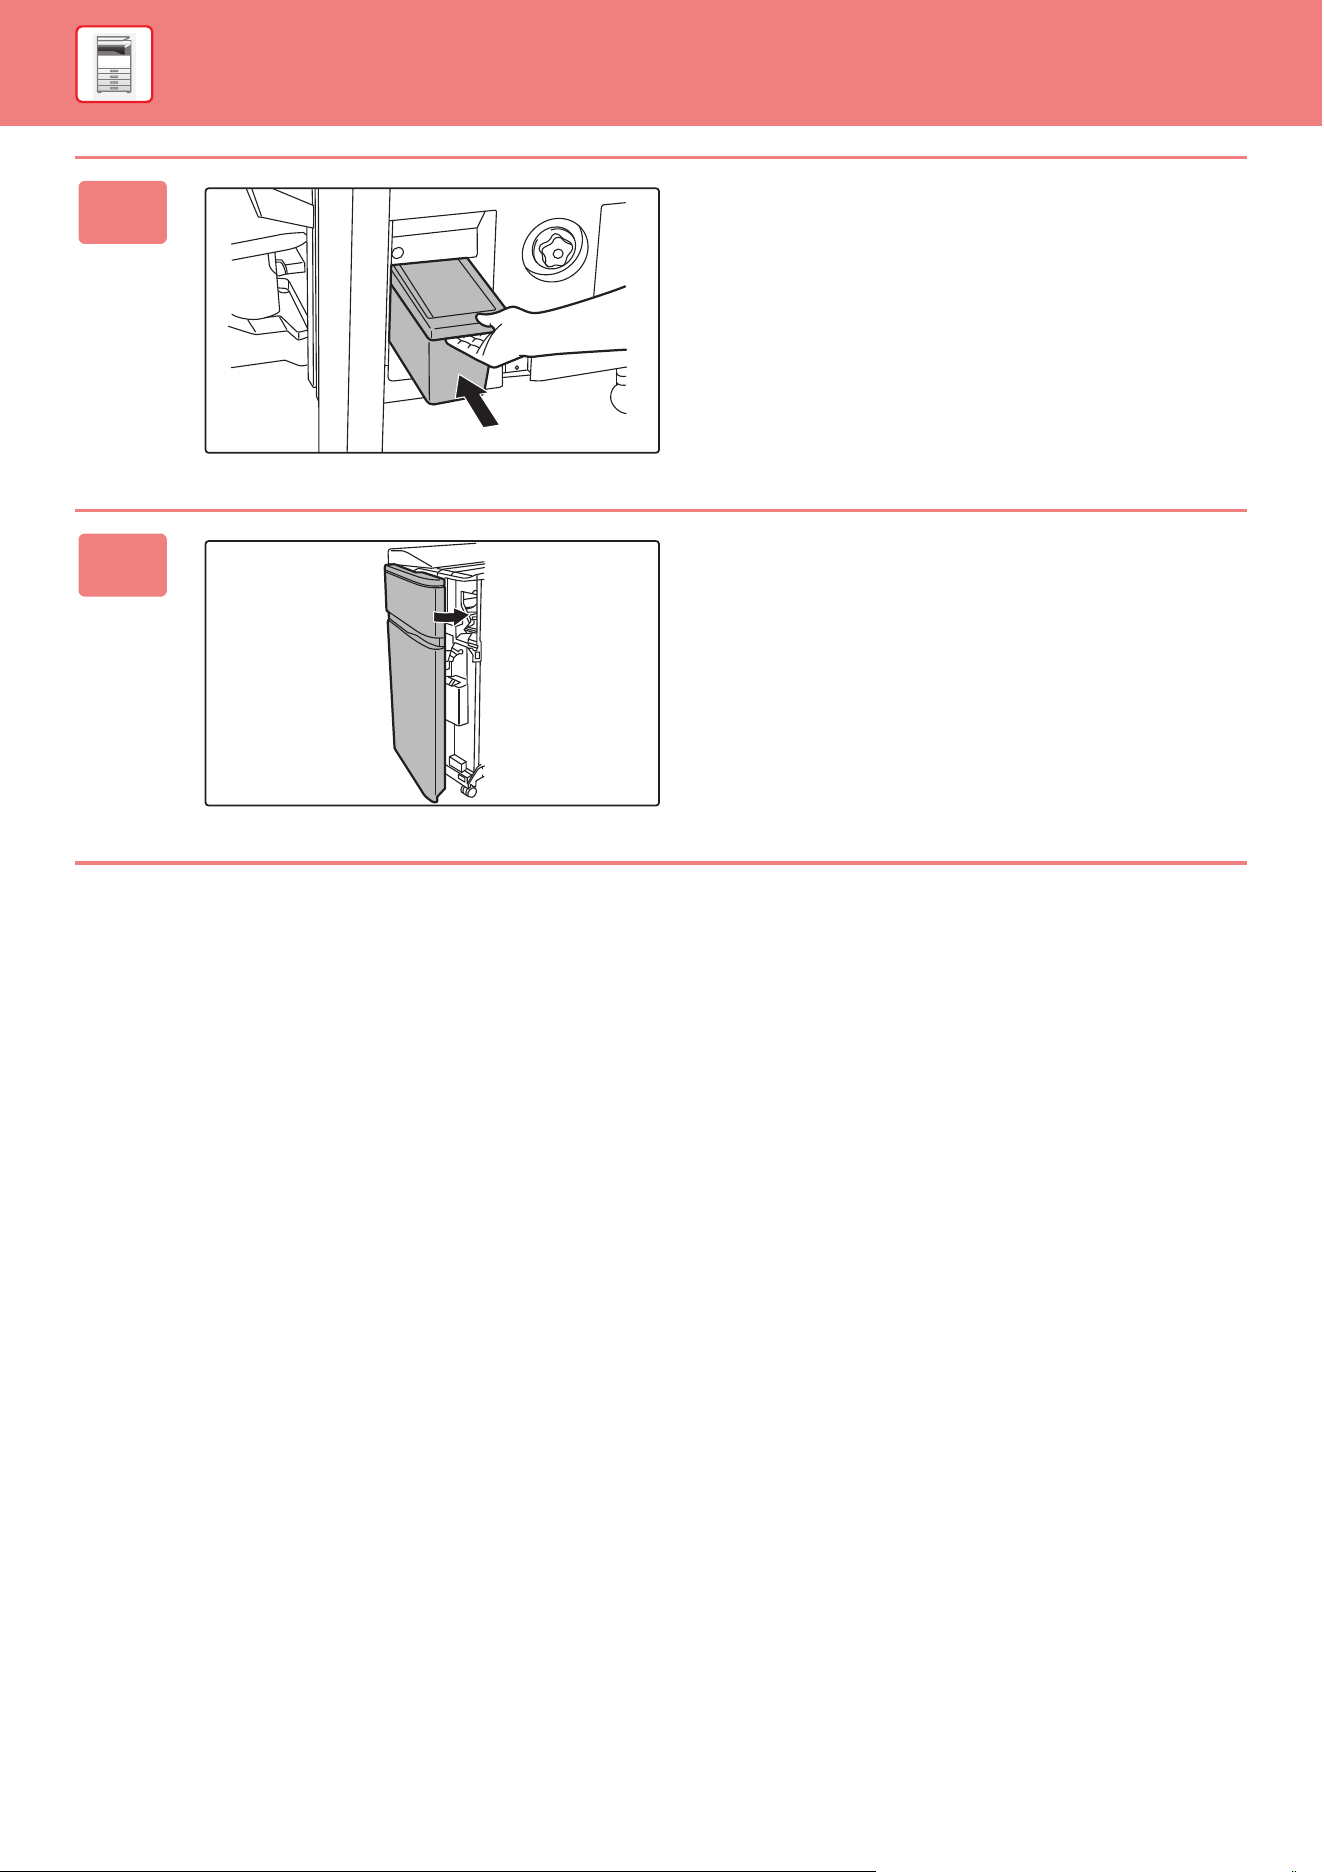
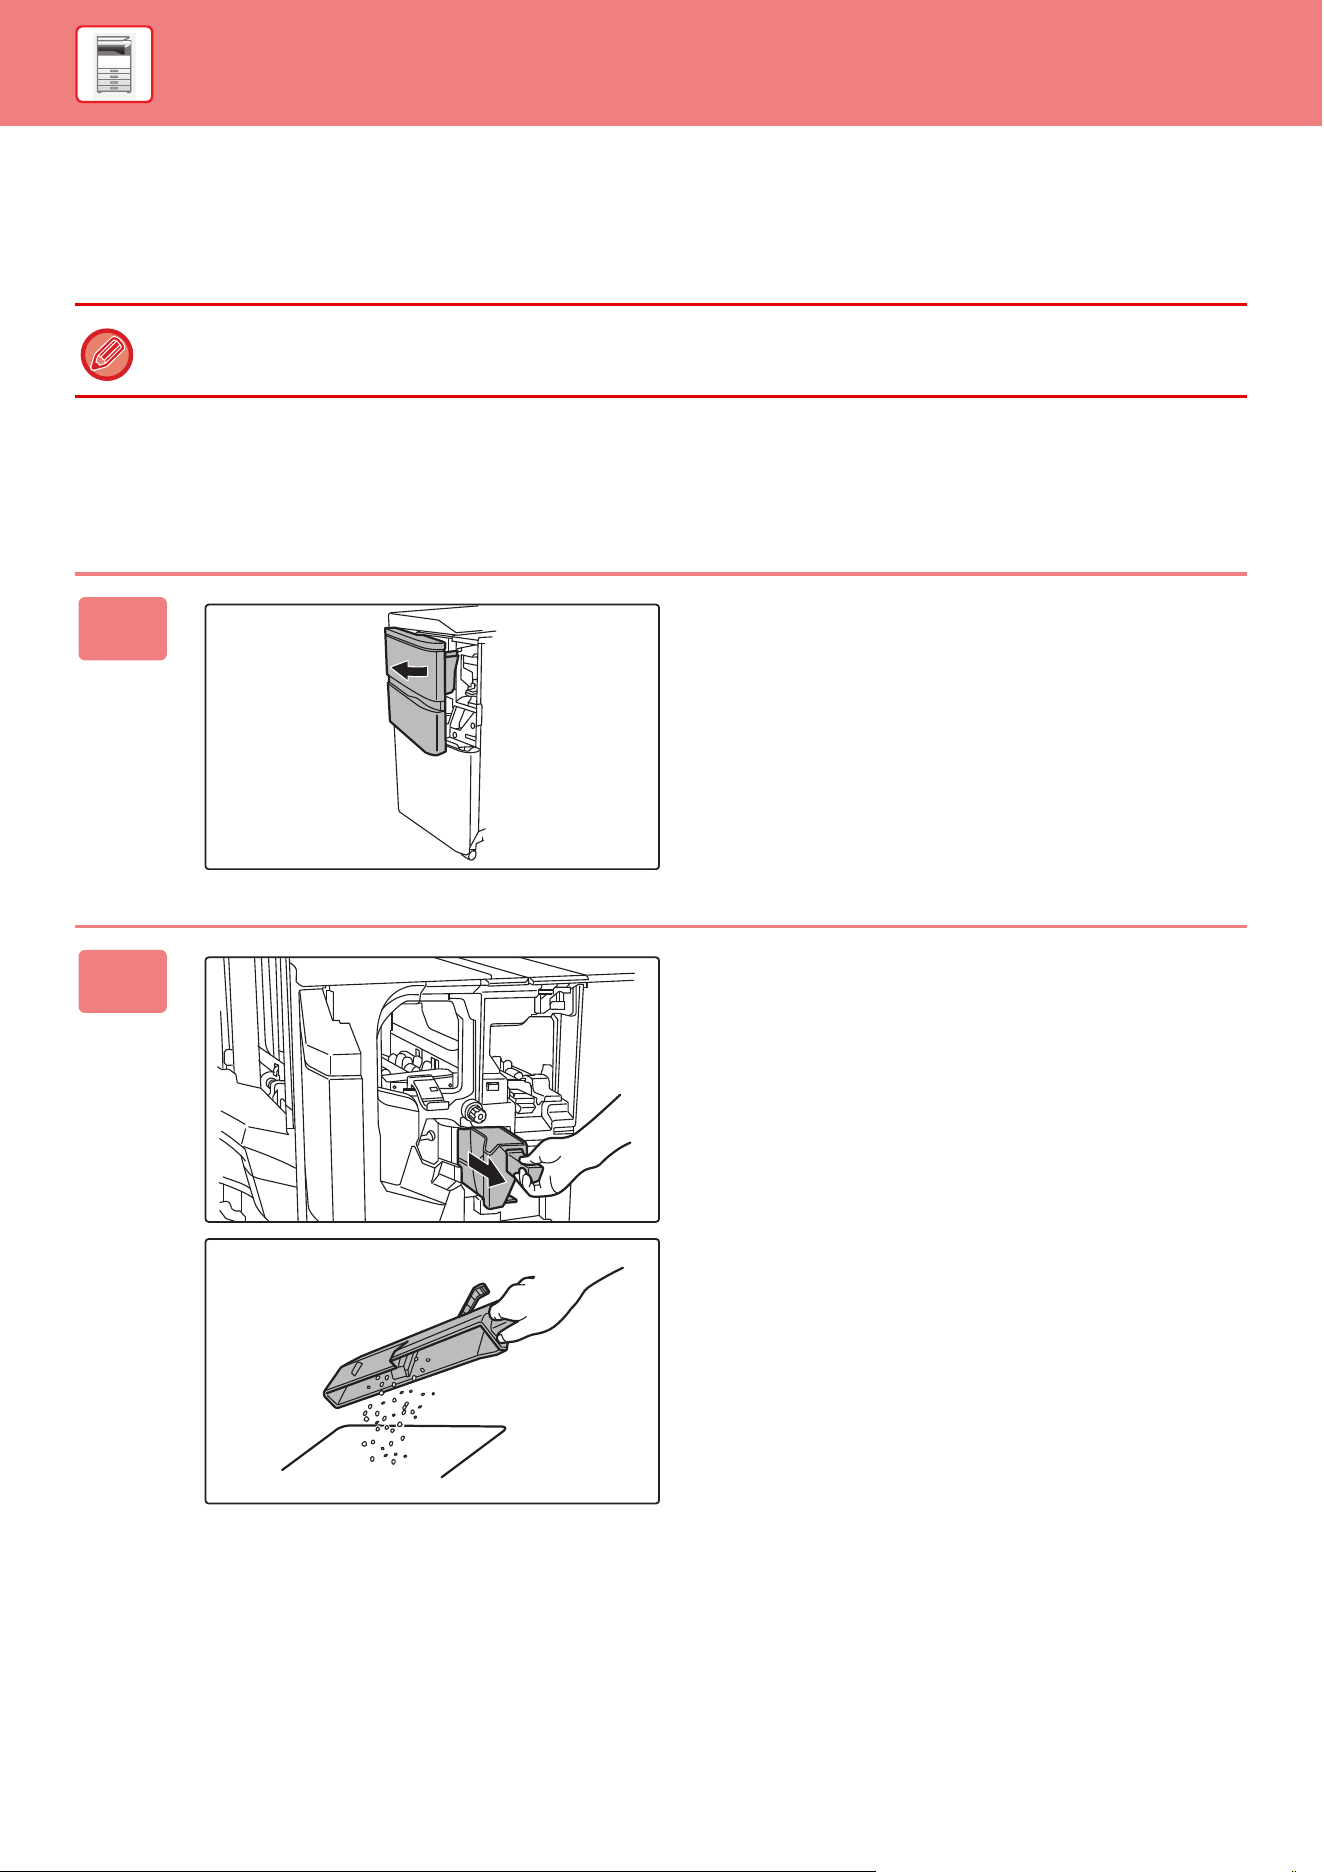
1-69
BEFORE USING THE MACHINE►PERIPHERAL DEVICES
PUNCH MODULE (MX-PN13A/B/C/D)
The punch module can be installed on a finisher (large stacker) or saddle stitch finisher (large stacker) to punch holes in
paper to be output.
DISCARDING PUNCH WASTE
Punch waste from punched holes is collected in the punch waste box.
Follow the operation procedure to replace punch waste.
A saddle stitch finisher or finisher (large stacker) is required to install the punch module (100-sheet punching).
1
Open the front cover.
2
Grasp the punch waste box handle,
gently pull out the box, and discard the
punch waste.
Discard the punch waste in a plastic bag or other container,
taking care not to let the waste scatter.
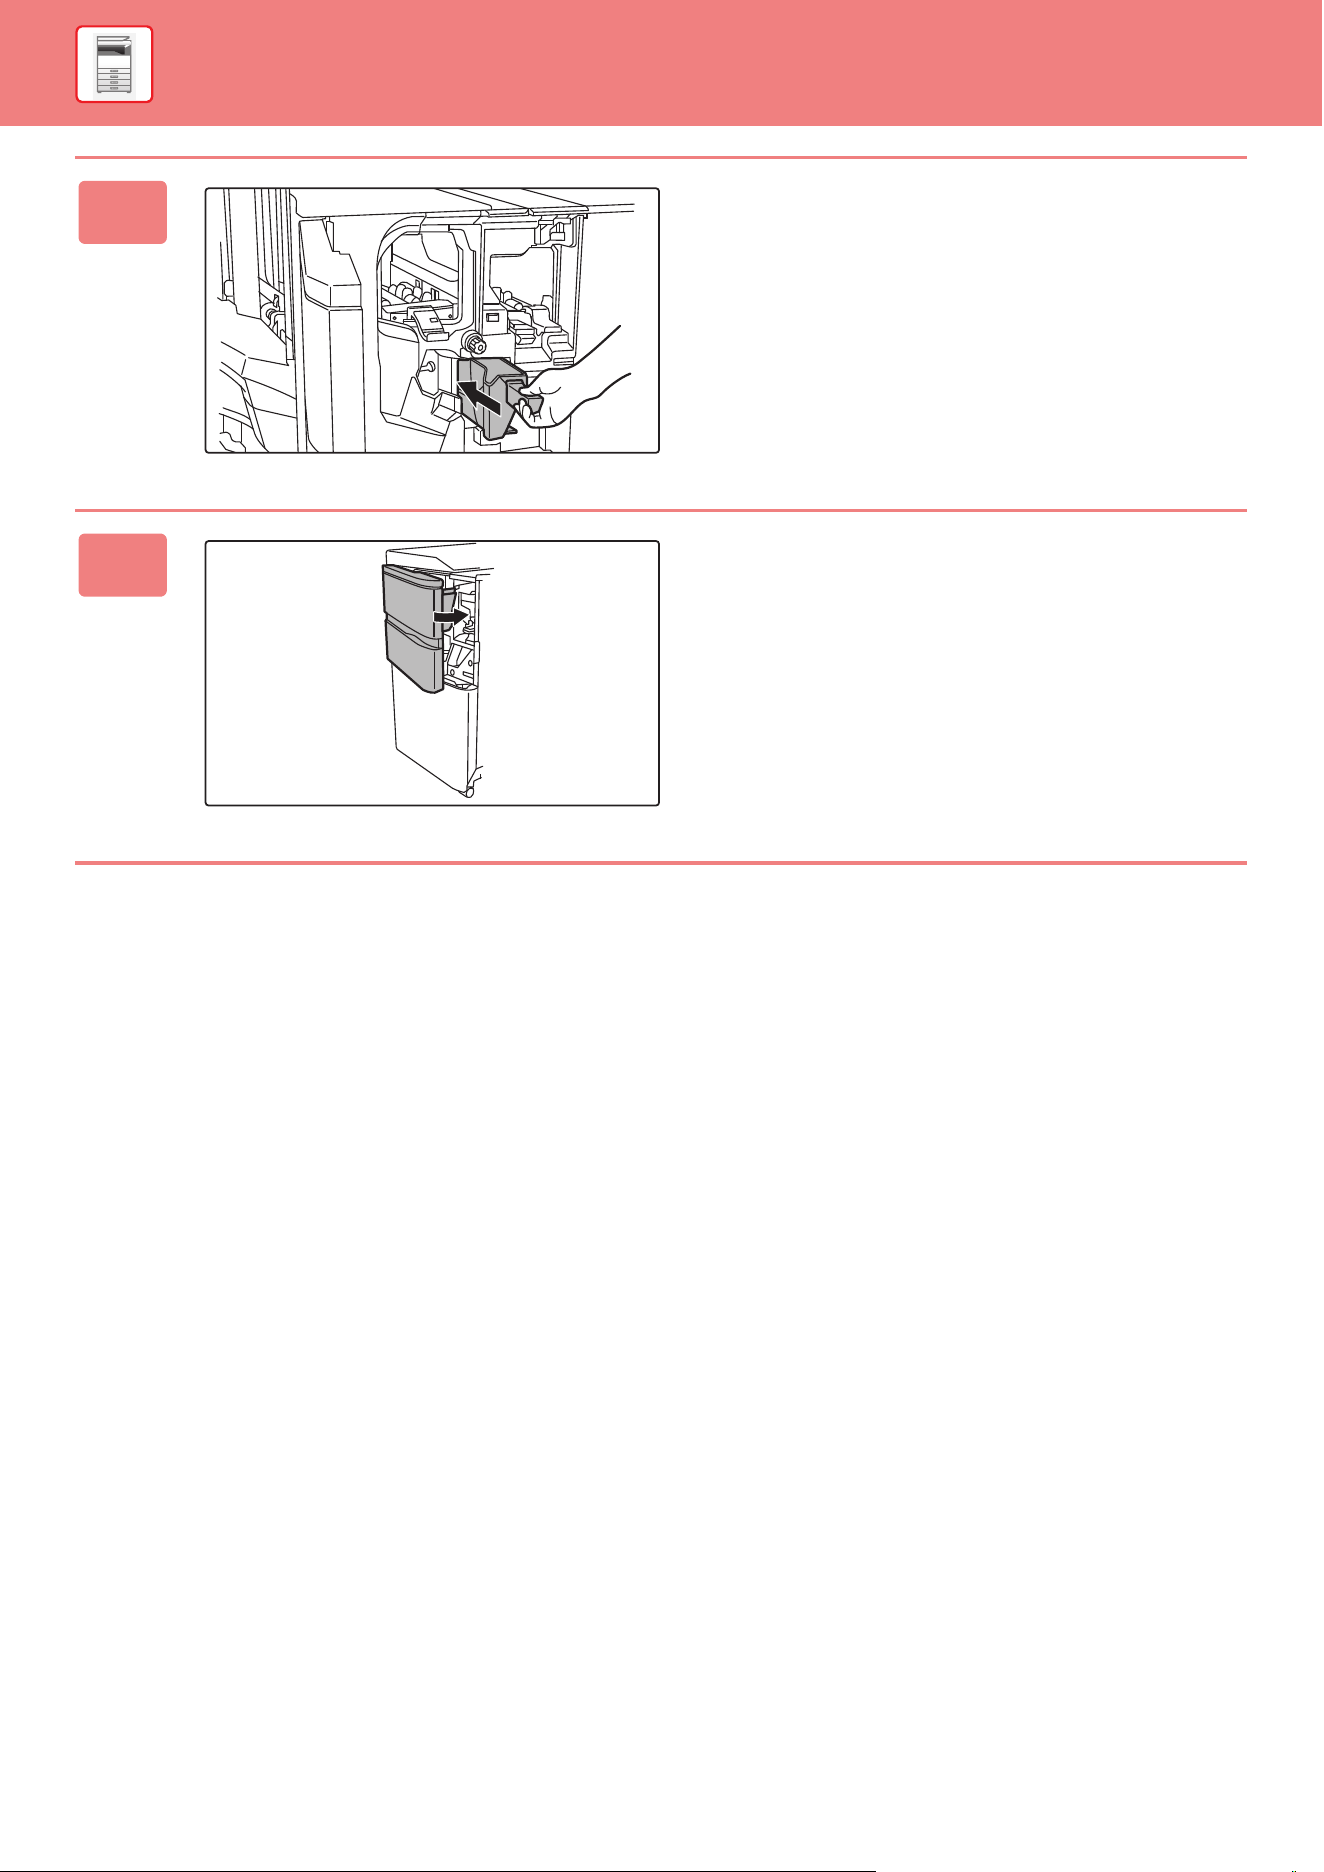
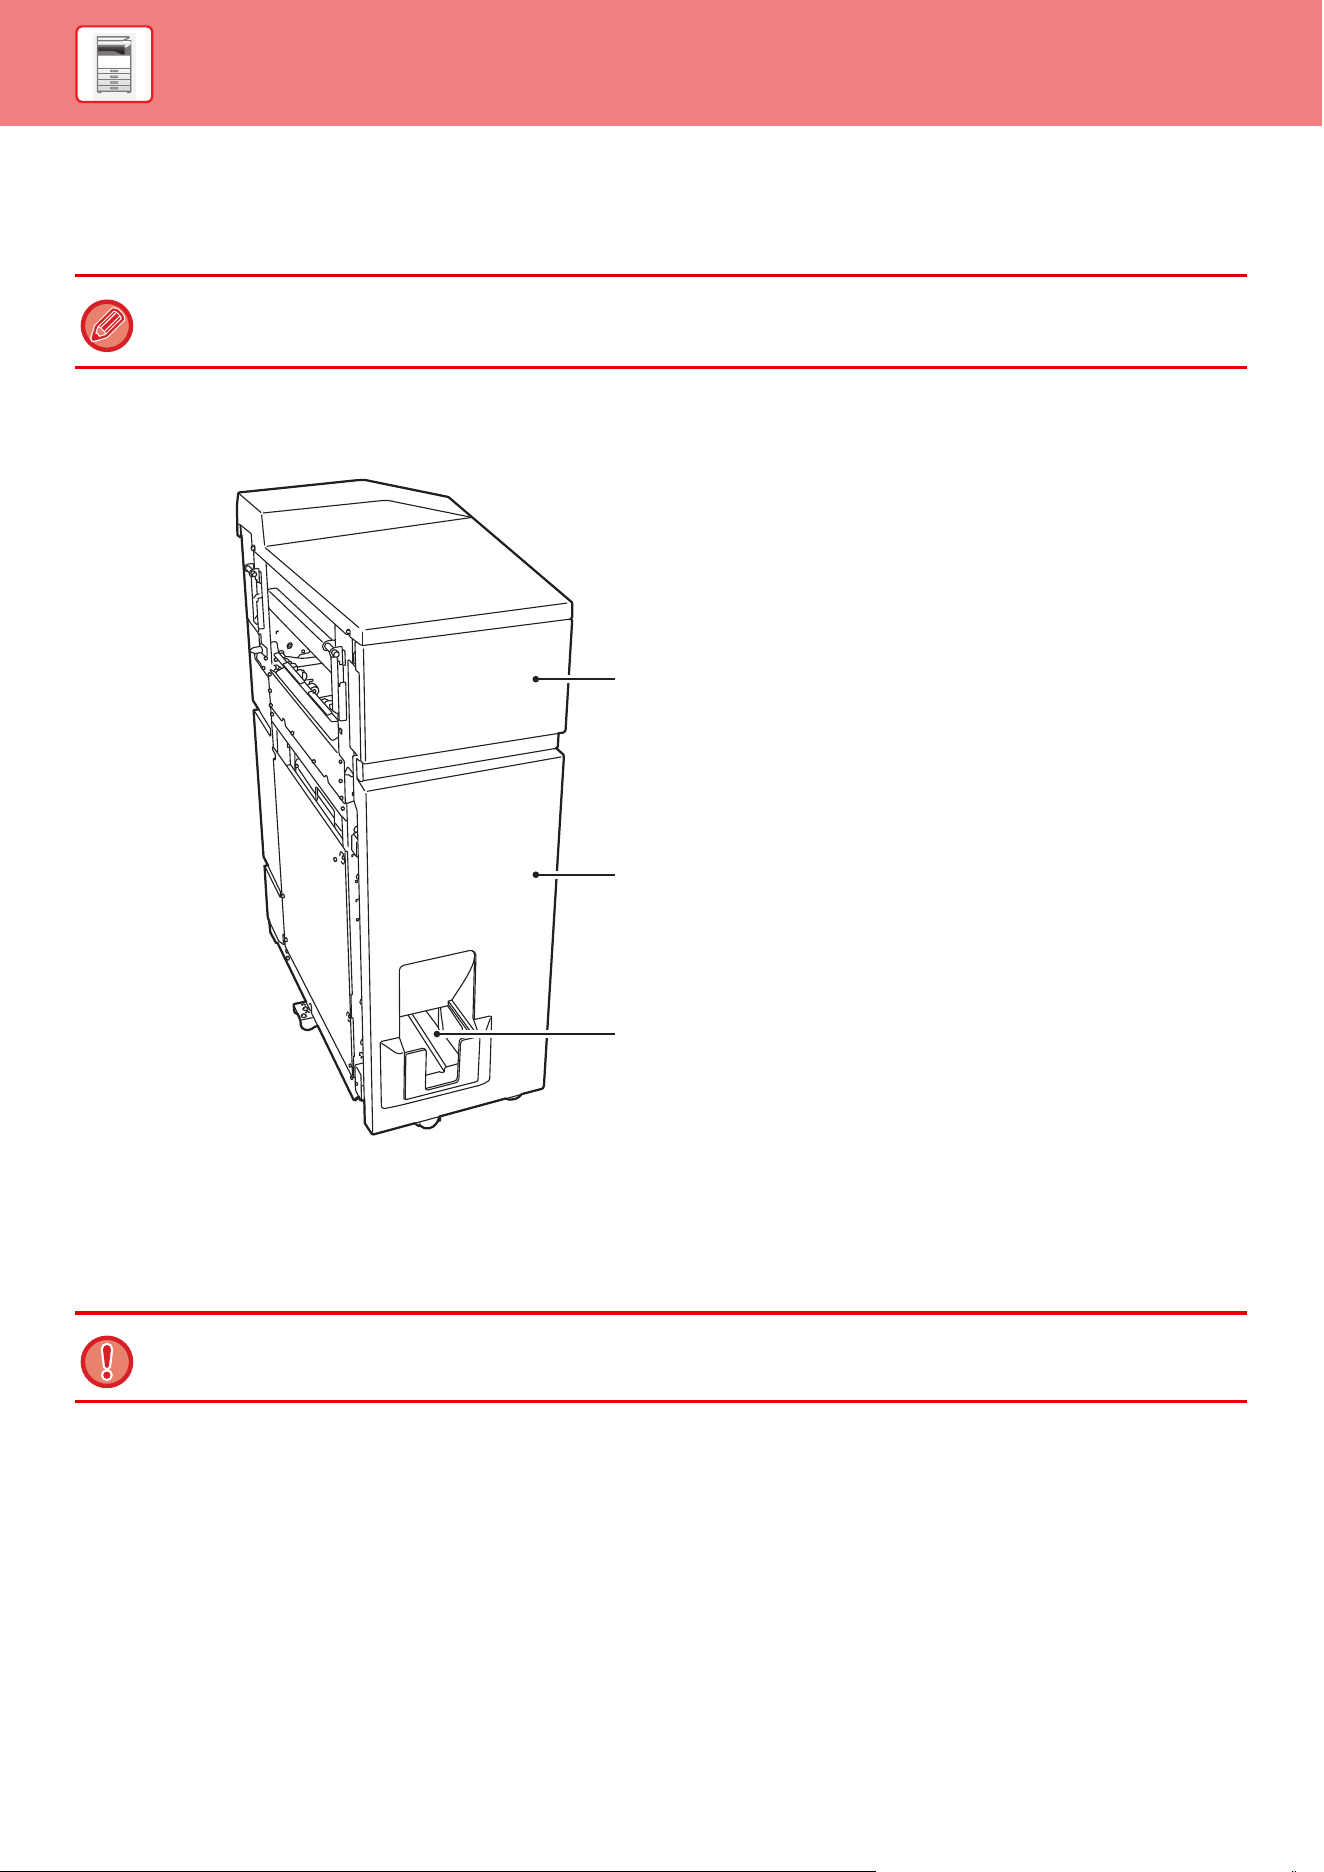
1-71
BEFORE USING THE MACHINE►PERIPHERAL DEVICES
FOLDING UNIT
A folding unit can be used for Z-Fold, C-Fold, Accordion Fold, Double Fold, and Half Fold.
PART NAMES
(1) Top cover
Open this cover to remove a paper misfeed.
(2) Bottom cover
Open this cover to remove a paper misfeed.
(3) Output tray of folding unit
Folded output is delivered to this tray.
A finisher (large stacker) or saddle sti
tch finisher (large stacker) is required to install the folding unit.
(1)
(2)
(3)
Do not place heavy objects on the folding unit or press down on the folding unit.
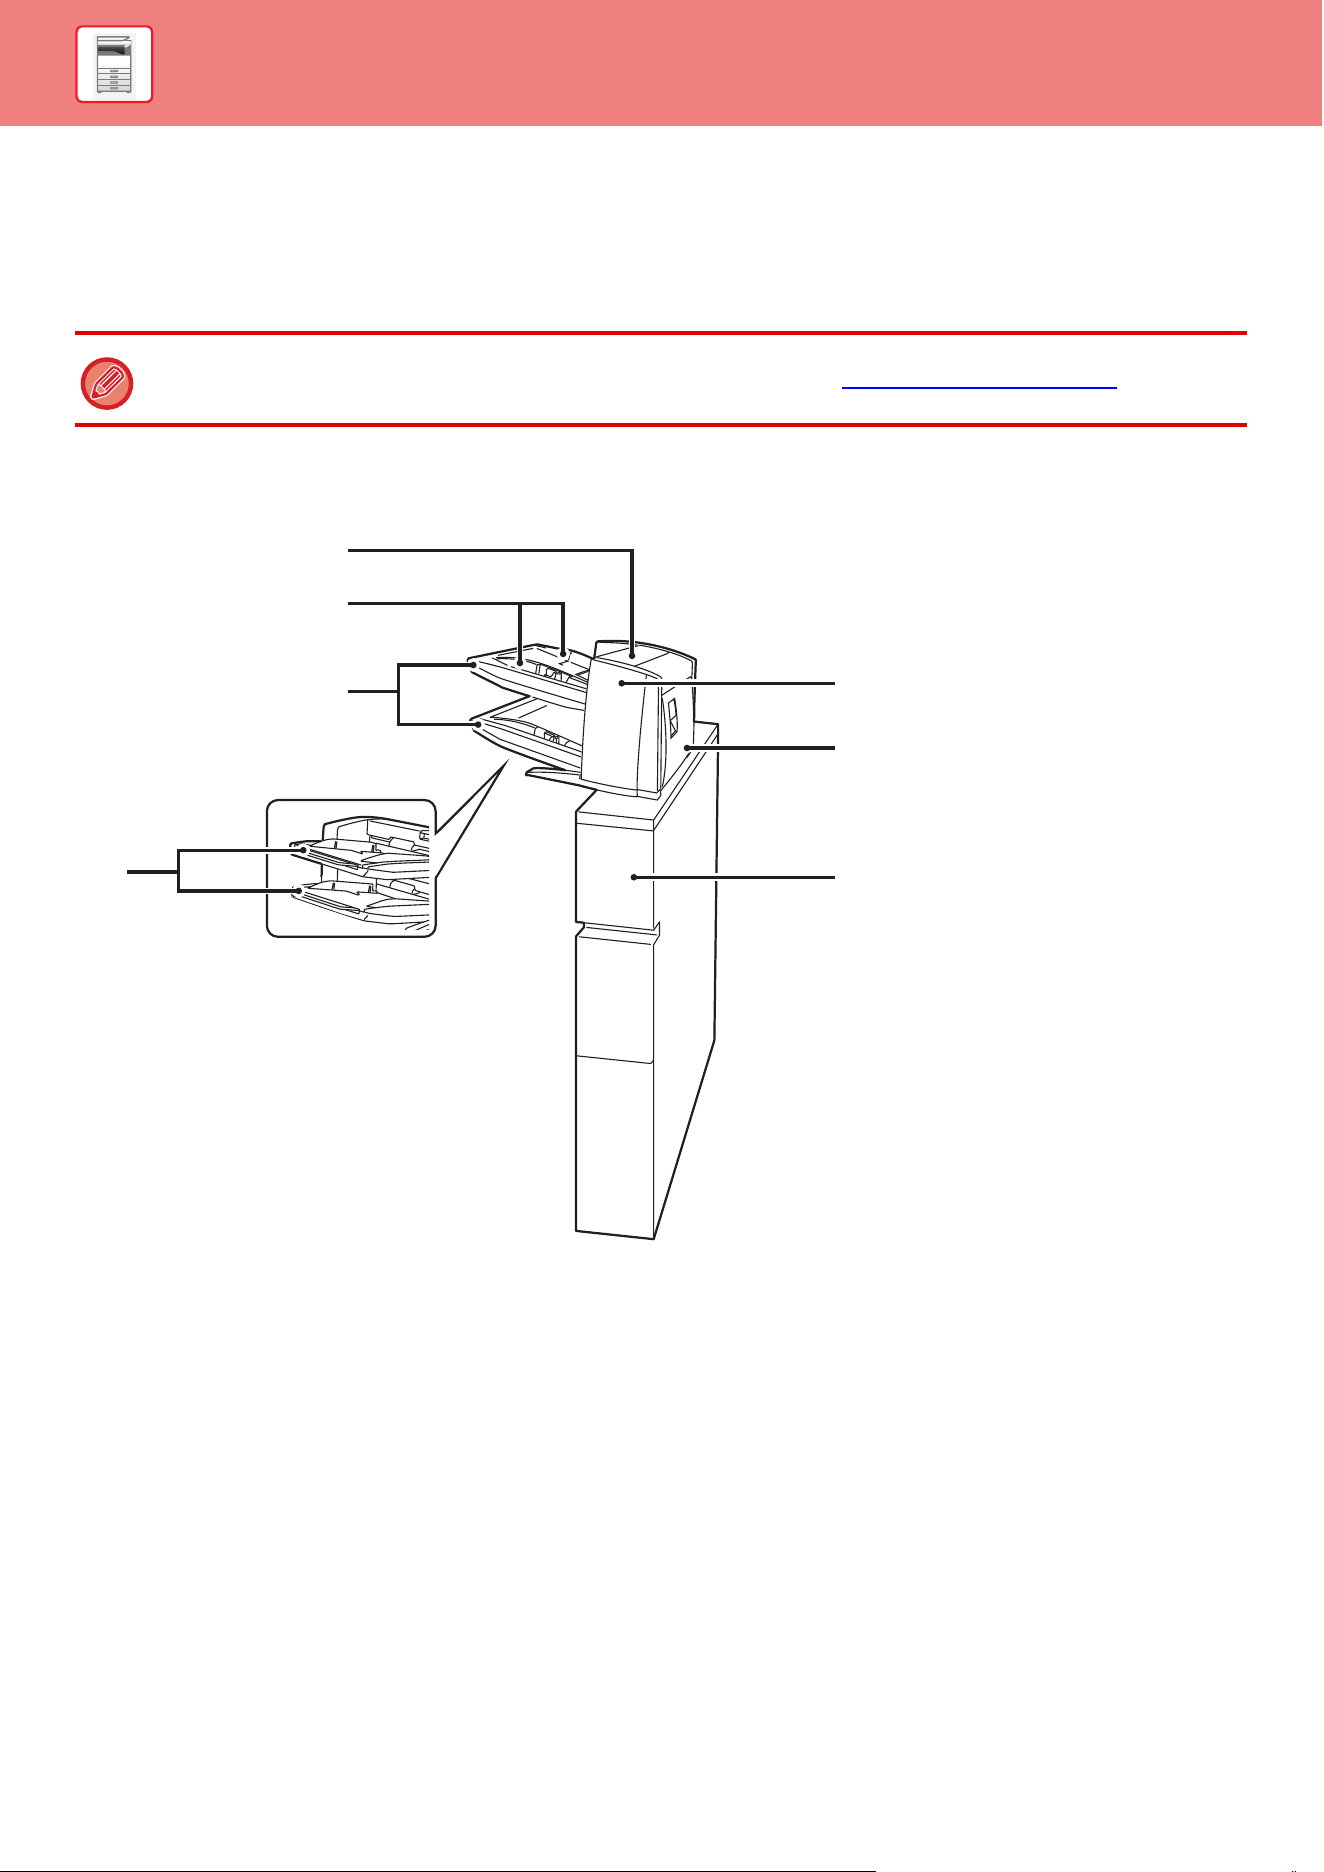
1-72
BEFORE USING THE MACHINE►PERIPHERAL DEVICES
INSERTER
Covers and insertion sheets to be inserted into printed sheets can be loaded.
Using the manual finishing function, you can directly feed paper into the finisher (large stacker) or saddle stitch finisher
(large stacker) to staple, punch or fold the paper.
PART NAMES
(1) Paper insertion unit cover
Open this cover to remove a paper misfeed.
(2) Paper guide
Push the lock lever to adjust to the paper size.
(3) Paper tray (upper/lower)
Insert paper or printed paper. A maximum of 200 sheets
of paper can be loaded into each tray.
(4) Bypass tray extension
Extend this when loading paper larger than 8-1/2" × 11"R
or A4R.
(5) Paper transfer unit front cover
Open this cover to remove a paper misfeed.
(6) Paper transfer unit rear cover
Open this cover to remove a paper misfeed.
(7) Cover
Open this cover to remove a paper misfeed.
For detailed information on paper that can be lo
aded into the inserter, see the "SPECIFICATIONS (page 11-2)".
(5)
(6)
(7)
(4)
(3)
(2)
(1)
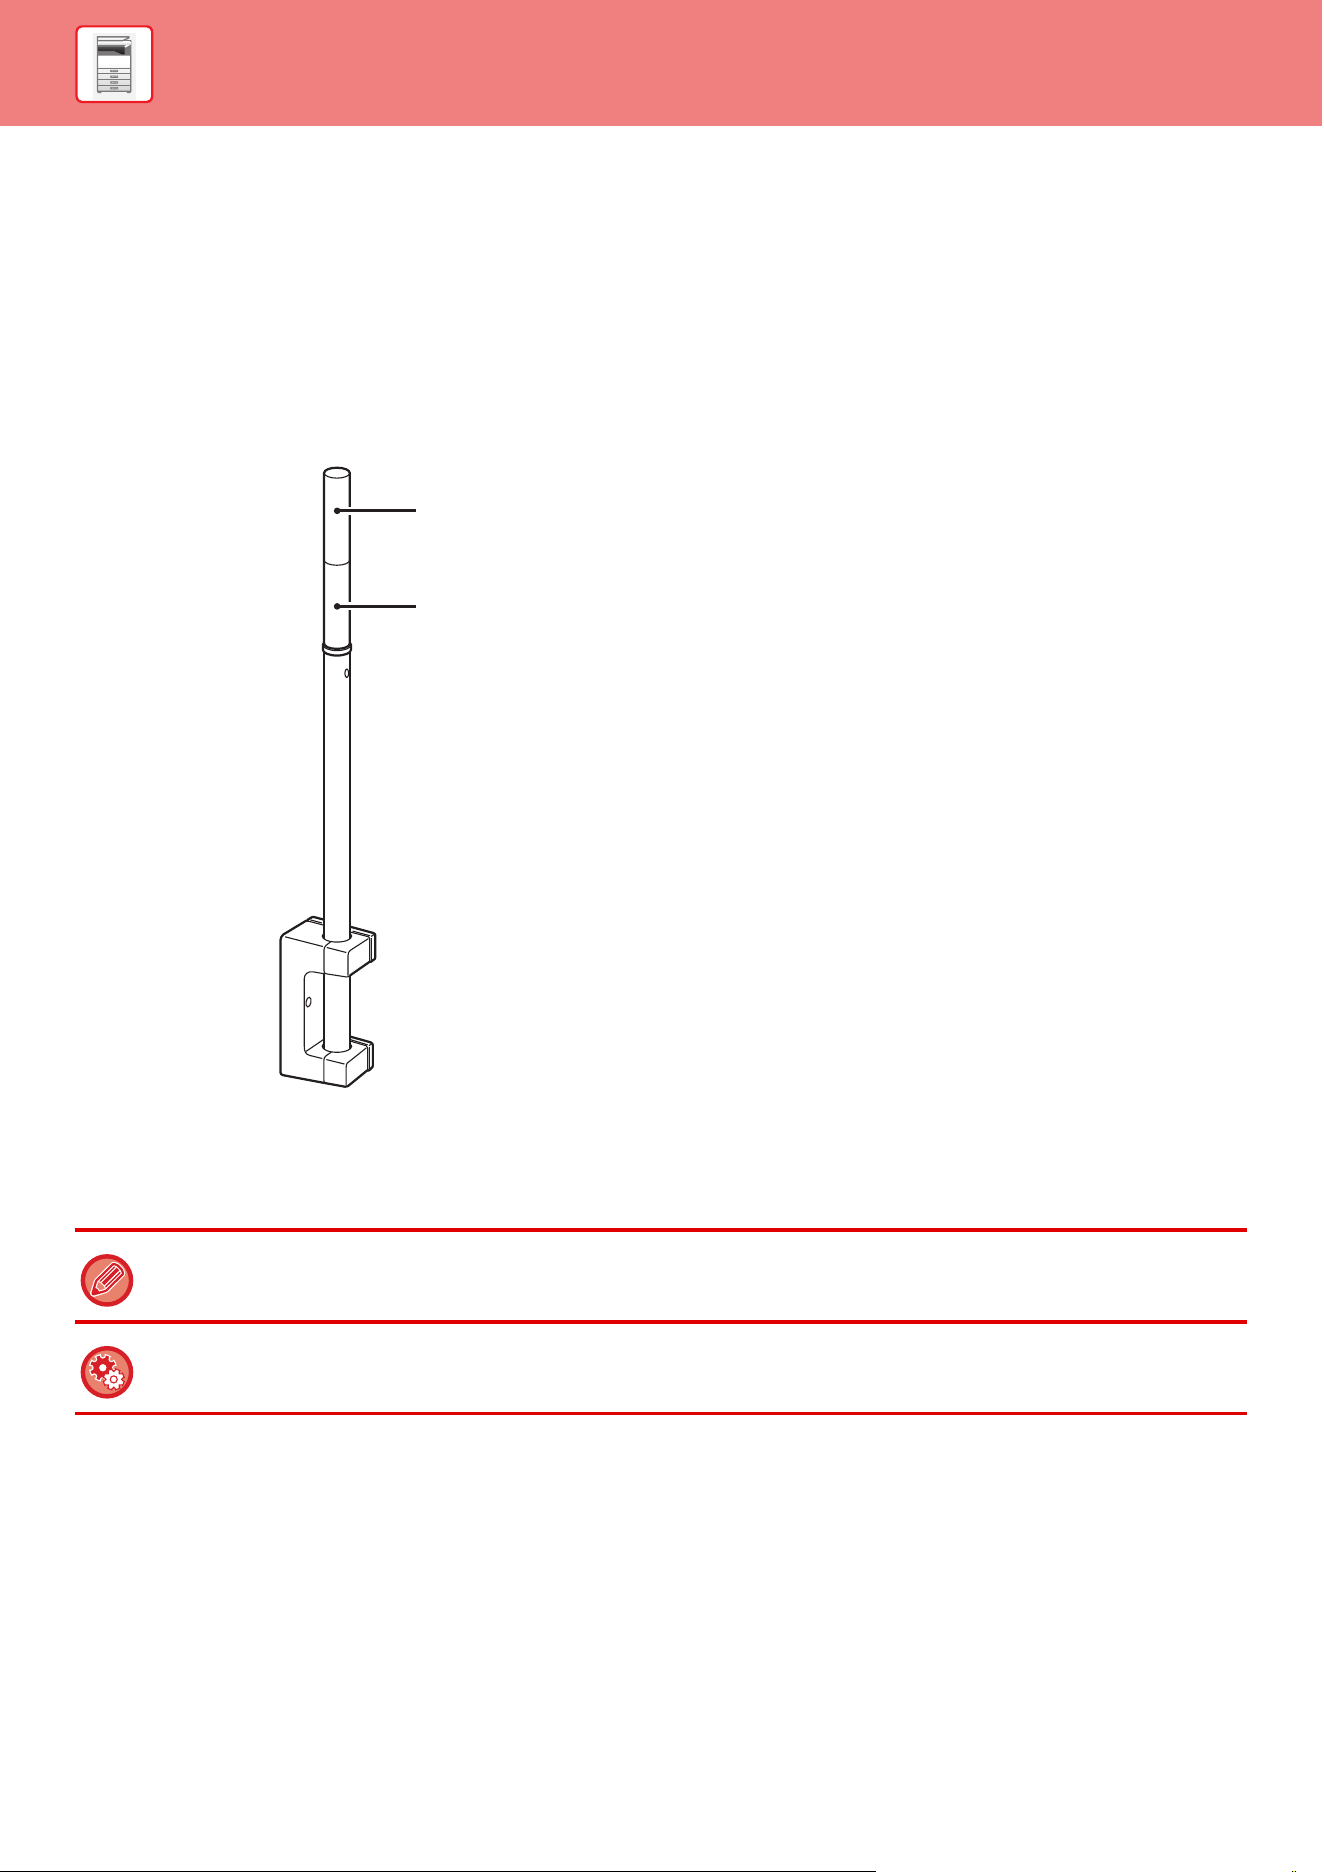
1-73
BEFORE USING THE MACHINE►PERIPHERAL DEVICES
STATUS INDICATORS
These indicators show the status of the machine. The green indicator lights up or blinks according to the job
management of the machine. The red indicator lights up or blinks when an error occurs. It lights up when an error occurs
but the machine is still able to be used, and blinks when the machine is not able to be used due to an error. In setting
mode, you can change the operation settings for the status indicators.
PART NAMES
(1) Indicator (Red)
The red indicator lights up or blinks when an error occurs.
(2) Indicator (Green)
The green indicator lights up or blinks according to the
job management of the machine.
(1)
(2)
In Auto Power Shut-Off mode, the status indicators go off.
To change the conditions for the status indicators to light up or blink:
In "Settings (administrator)", select [System Settings] → [Common Settings] → [Device Control] → [Status Indicator Setting].
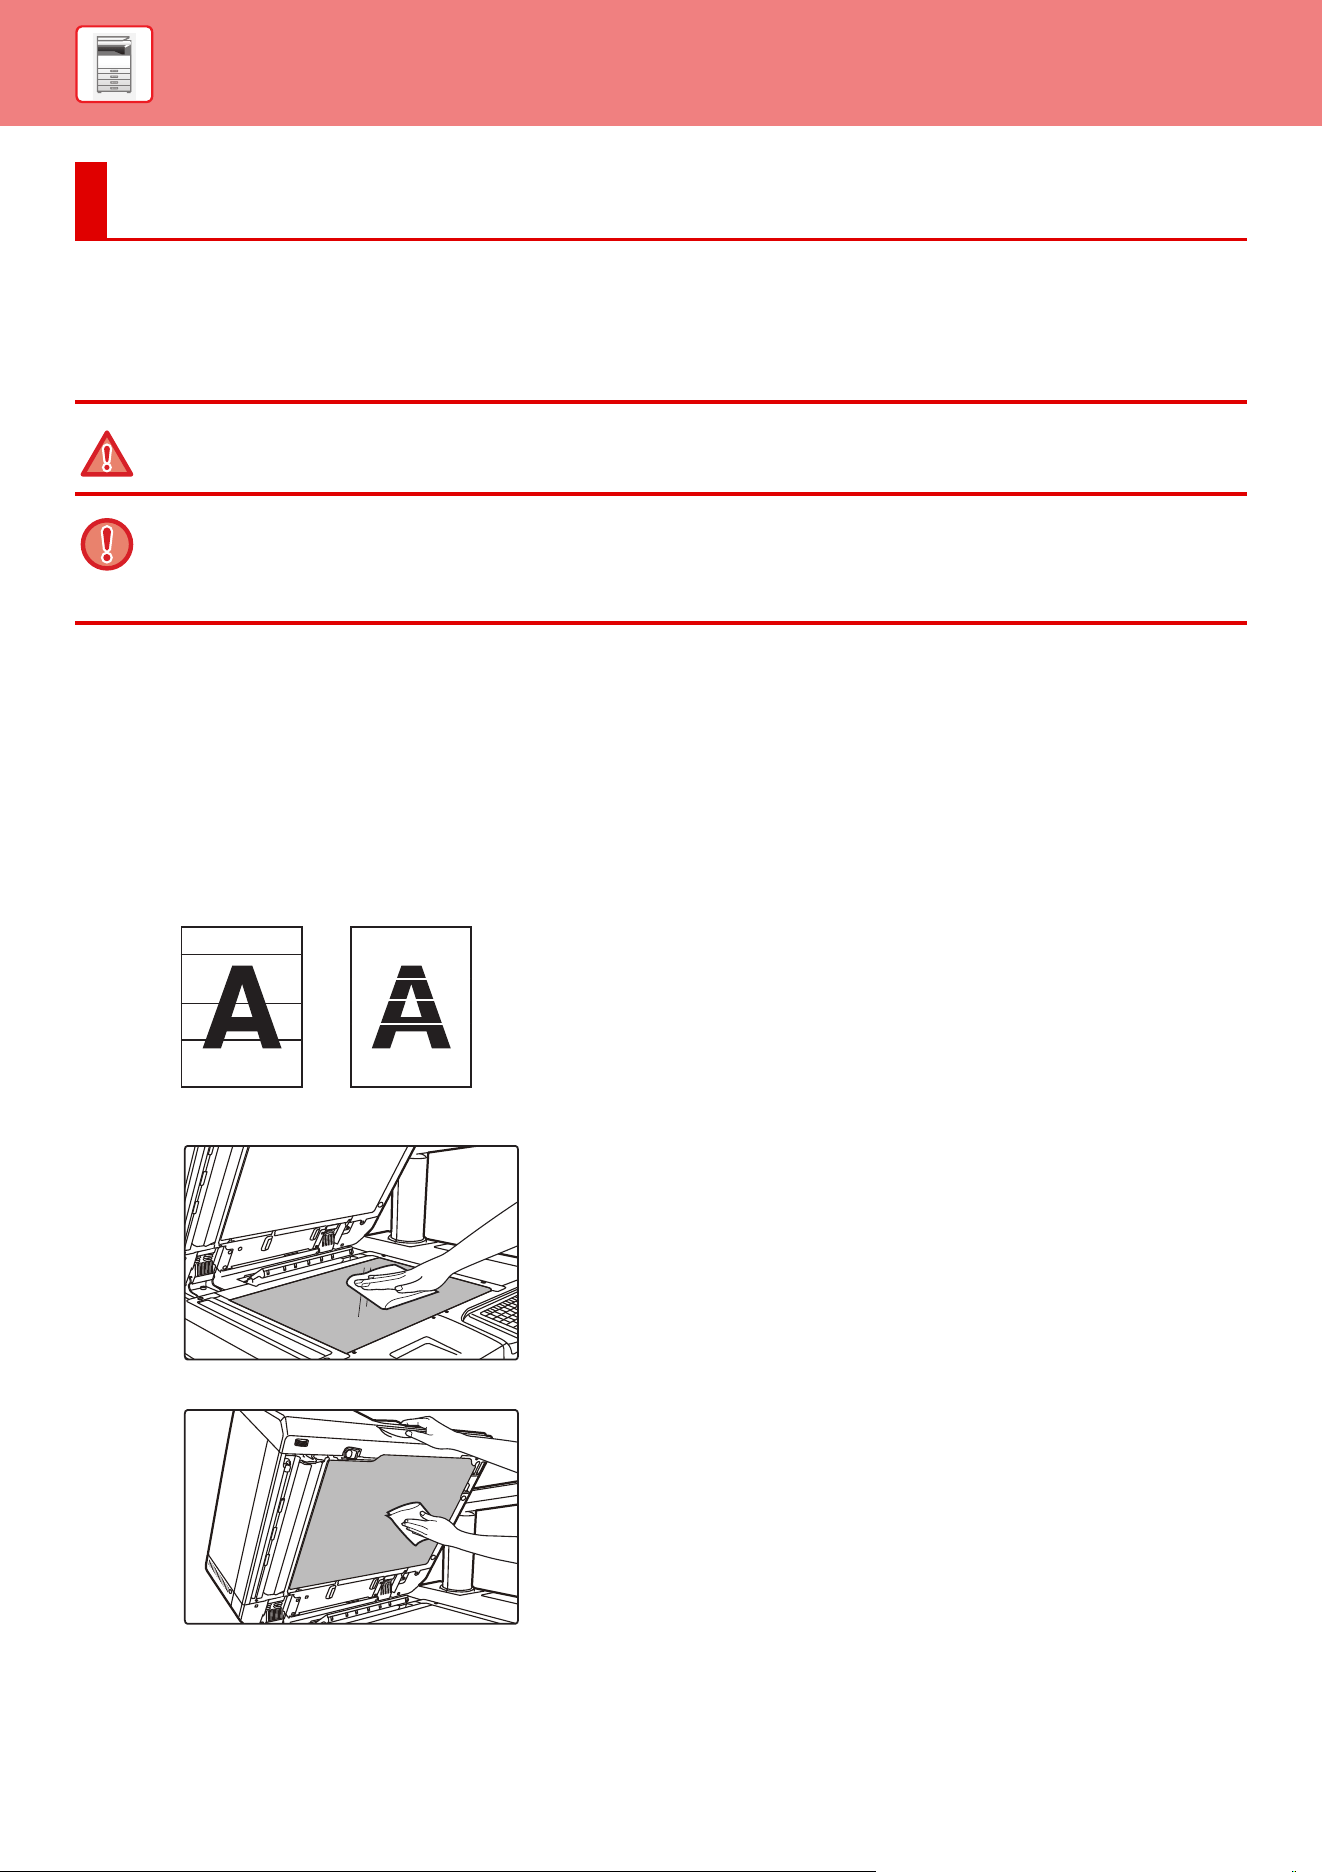
1-74
BEFORE USING THE MACHINE►MAINTENANCE
REGULAR MAINTENANCE
To ensure that the machine continues to provide top quality performance, periodically clean the machine.
CLEANING THE DOCUMENT GLASS AND AUTOMATIC
DOCUMENT FEEDER
If the document glass or document backplate sheet becomes dirty, the dirt will appear as dirty spots, colored lines, or
white lines in the scanned image. Keep these parts clean at all times.
Wipe the parts with a clean, soft cloth.
If necessary, moisten the cloth with water or a small amount of neutral detergent. After that, wipe with a clean dry cloth.
Examples of lines in the image
Document glass
Document backplate sheet
MAINTENANCE
Do not use a flammable spray to clean the machine. If gas from the spray comes in contact with hot electrical components or
the fusing unit inside the machine, fire or electrical shock may result.
• Do not use thinner, benzene, or similar volatile cleaning agents to clean the machine. These may degrade or discolor the
housing.
• Use a soft cloth to gently wipe off dirt from the area on the operation panel with a mirror-like finish (shown at right). If you
use a stiff cloth or rub hard, the surface may be damaged.
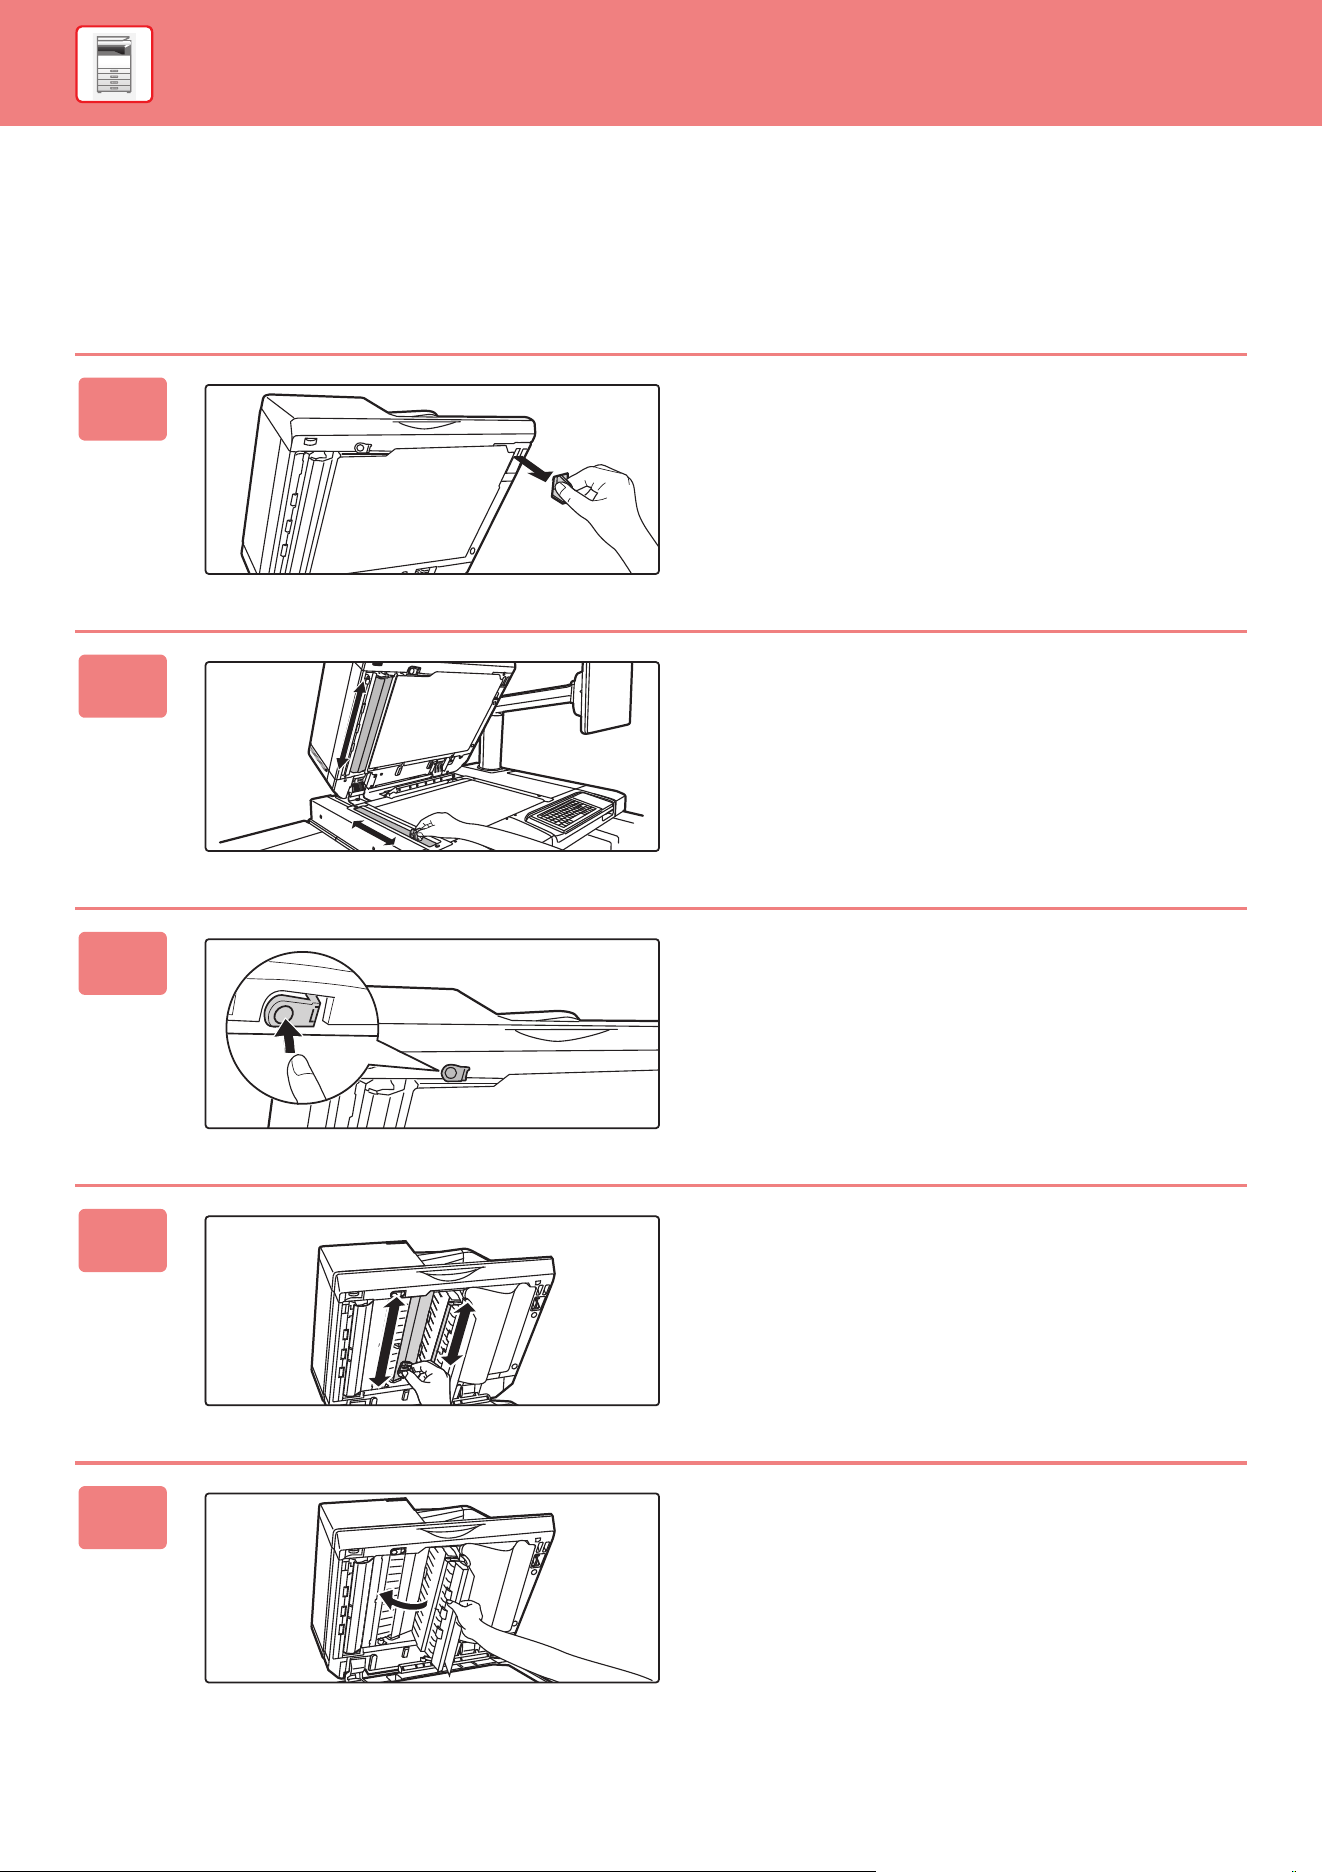
1-75
BEFORE USING THE MACHINE►MAINTENANCE
SCANNING AREA
If black lines or white lines appear in images scanned using the automatic document feeder, clean the scanning area(the
thin long glass next to the document glass).
To clean this part, use the glass cleaner that is stored in the automatic document feeder. After using the glass cleaner,
be sure to return it to its storage position.
1
Open the automatic document feeder
and remove the glass cleaner.
2
Clean the document scanning area on
the document glass with the glass
cleaner.
One scanning area is on the document glass and the other
is inside the automatic document feeder.
3
Open the scanning area cover on the
automatic document feeder.
Push in the release switch to release the cover.
4
Clean the scanning area in the
automatic document feeder.
5
Close the cover.

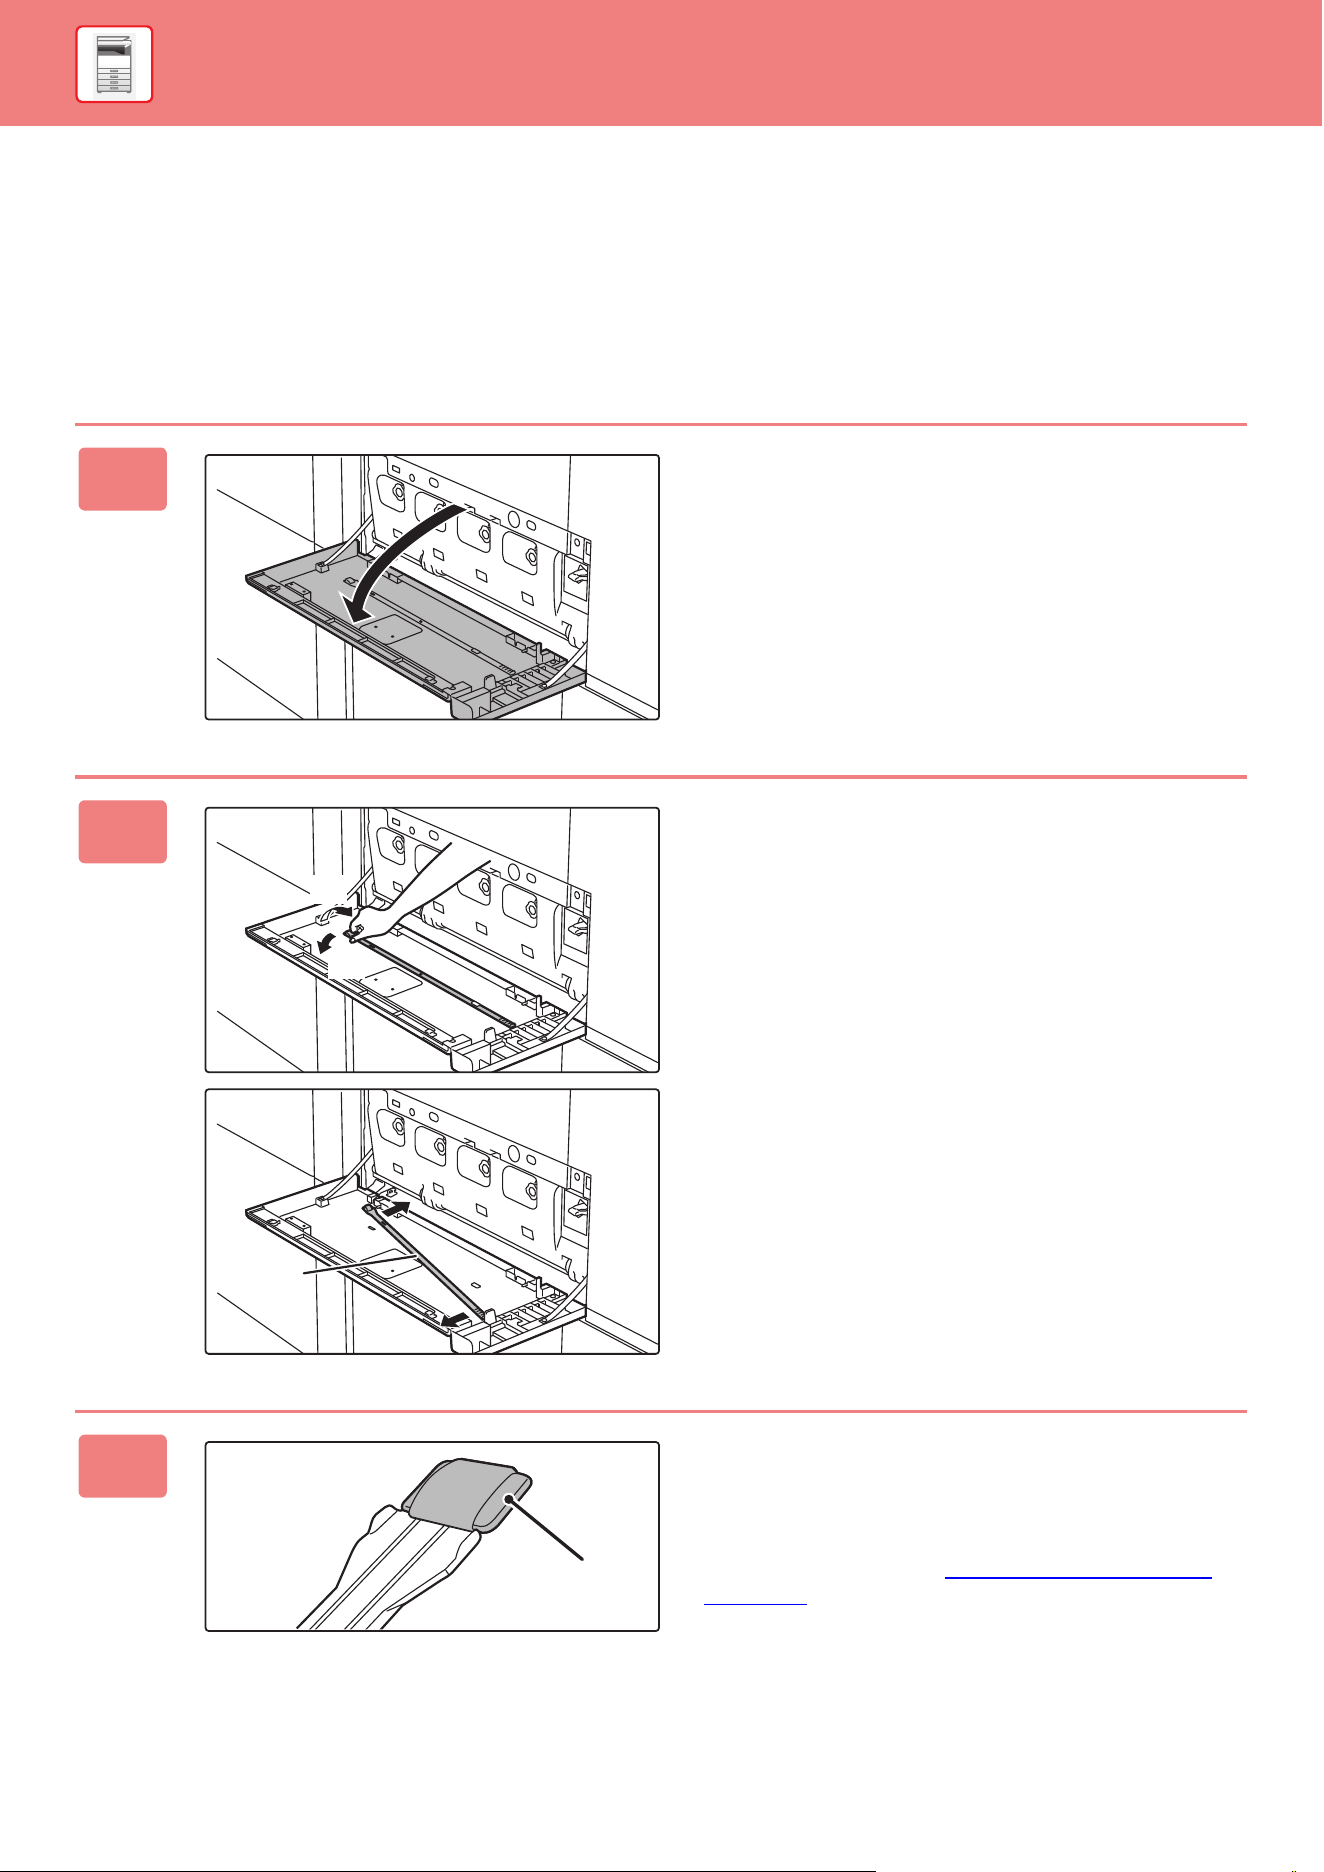
1-77
BEFORE USING THE MACHINE►MAINTENANCE
CLEANING THE LASER UNIT
When the laser unit inside the machine becomes dirty, line patterns (colored lines) may form in the printed image.
Identifying lines (colored lines) caused by a dirty laser unit
• Colored lines always appear in the same place. (The lines are never black.)
• Colored lines appear in parallel with the direction of paper feeding.
• Colored lines appear not only on output from a copier but also on prints from a computer. (The same lines appear on
both copies and print jobs.)
If conditions similar to the above occur, clean the laser unit as explained below.
1
Open the front cover.
2
Take out the cleaning tool for the laser
unit.
The cleaning tool is attached to the front cover of the
machine.
(1) Push the left-hand side of the cleaning
tool to detach it from the hook.
(2) Put it over the hook to place in on the
back side.
(3) Turn the cleaning tool around the boss to
detach it from the right-hand hook.
3
Make sure that the cleaner at the tip of
the cleaning tool is not dirty.
If the cleaner is dirty, remove the cleaner from the cleaning
tool and replace it with a clean one. For more information on
replacing the cleaner, see "REPLACING THE CLEANER
(page 1-79)".
(1)
(2)
(3)
Boss
Cleaner
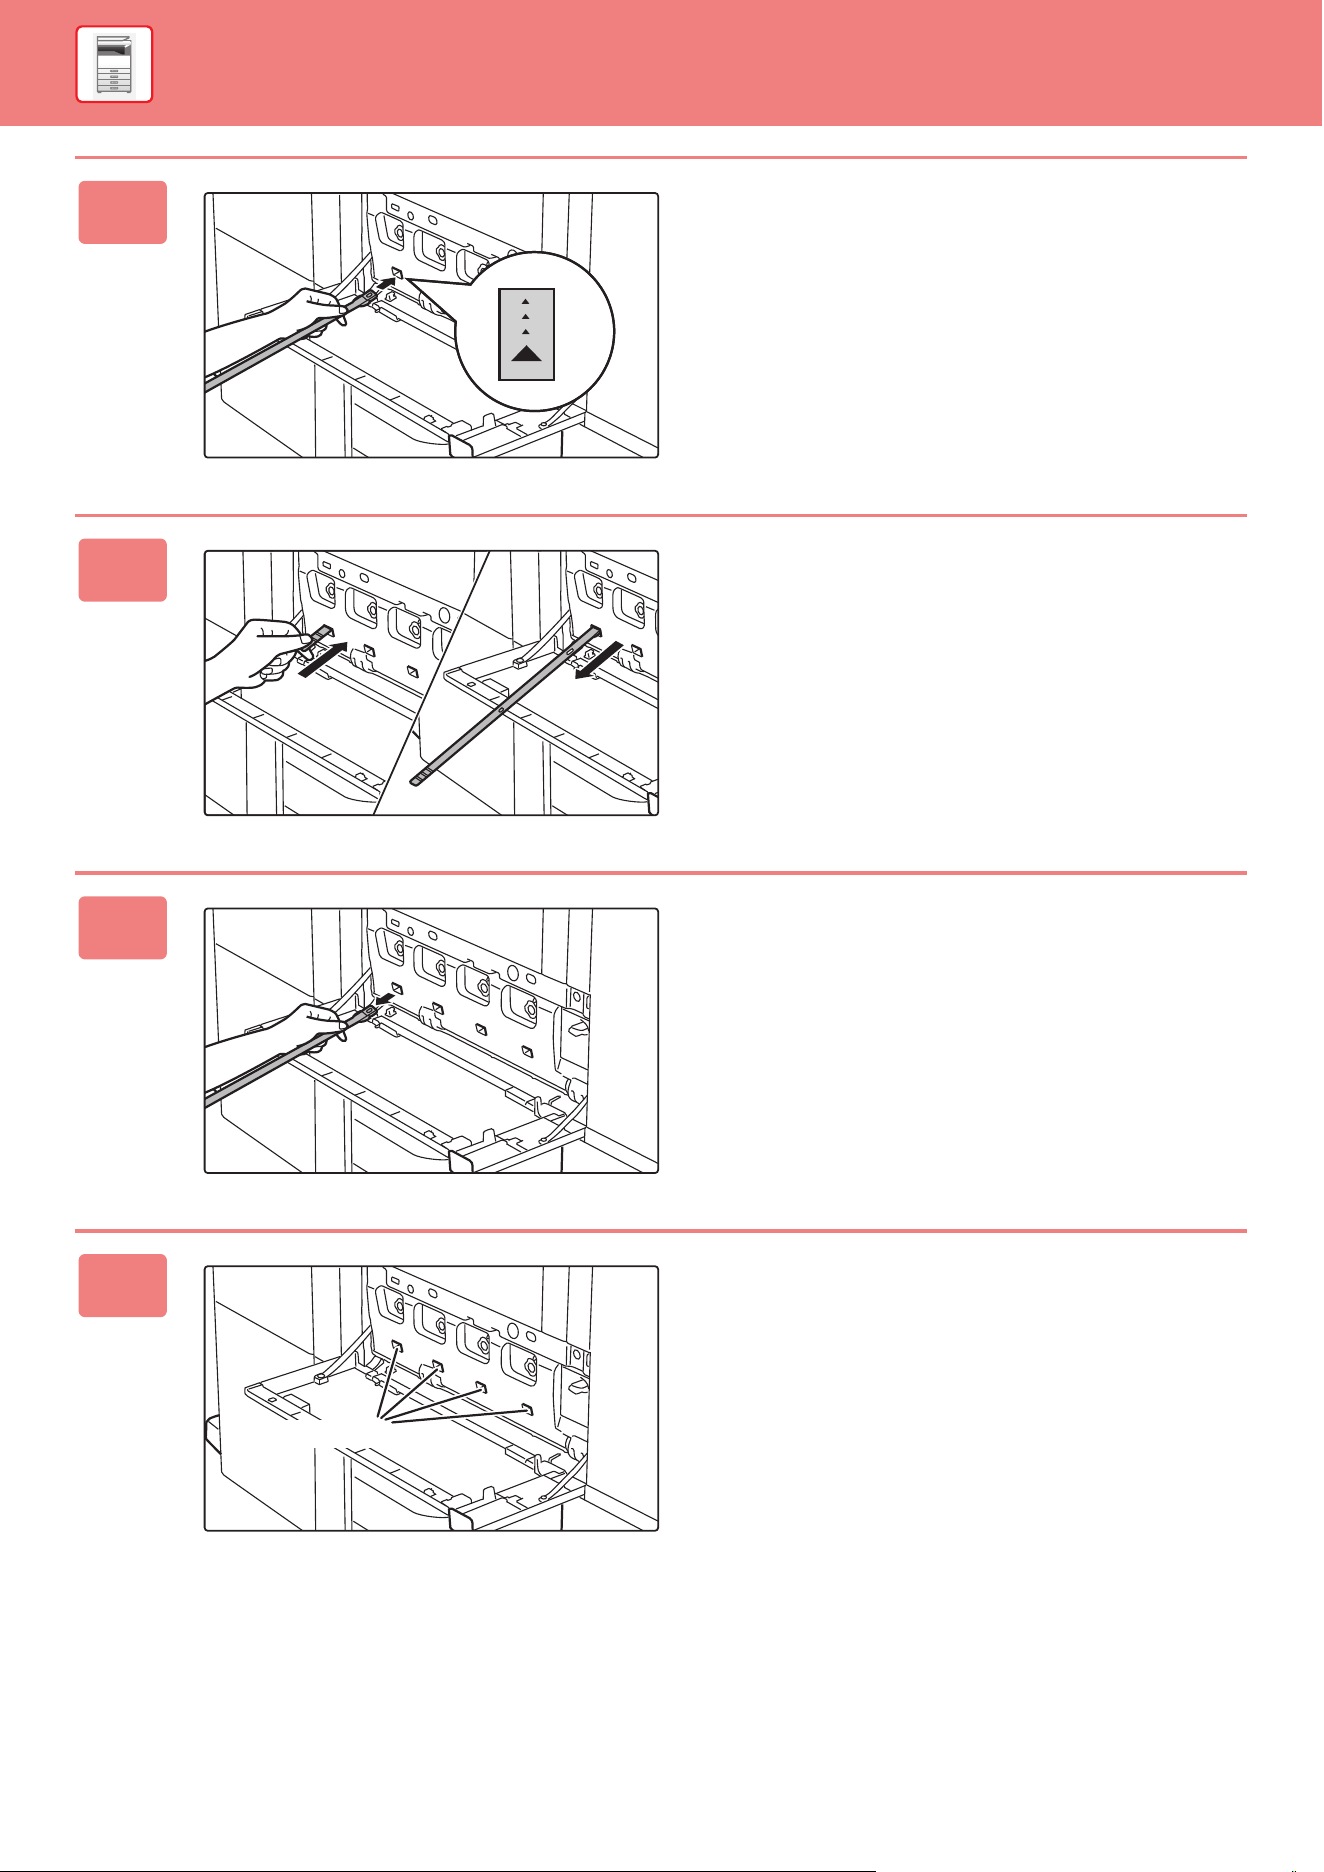
1-78
BEFORE USING THE MACHINE►MAINTENANCE
4
Point the cleaner down and slowly
insert the tool into the hole to be
cleaned in the laser unit.
Be sure to point the cleaner down. Labels similar to (A) are
attached to areas that require cleaning.
5
Insert the cleaning tool all the way into
the hole and then pull it back out.
Pull the cleaning tool out until you feel the tip of the tool
leave the cleaning surface of the laser unit.
6
Repeat steps 4 to 5 two or three times
and then remove the cleaning tool.
7
Repeat steps 4 to 6 to clean all holes
(4 holes) in the laser unit.
There are a total of four holes to be cleaned in the laser unit.
Clean all holes.
(A)
Cleaning points
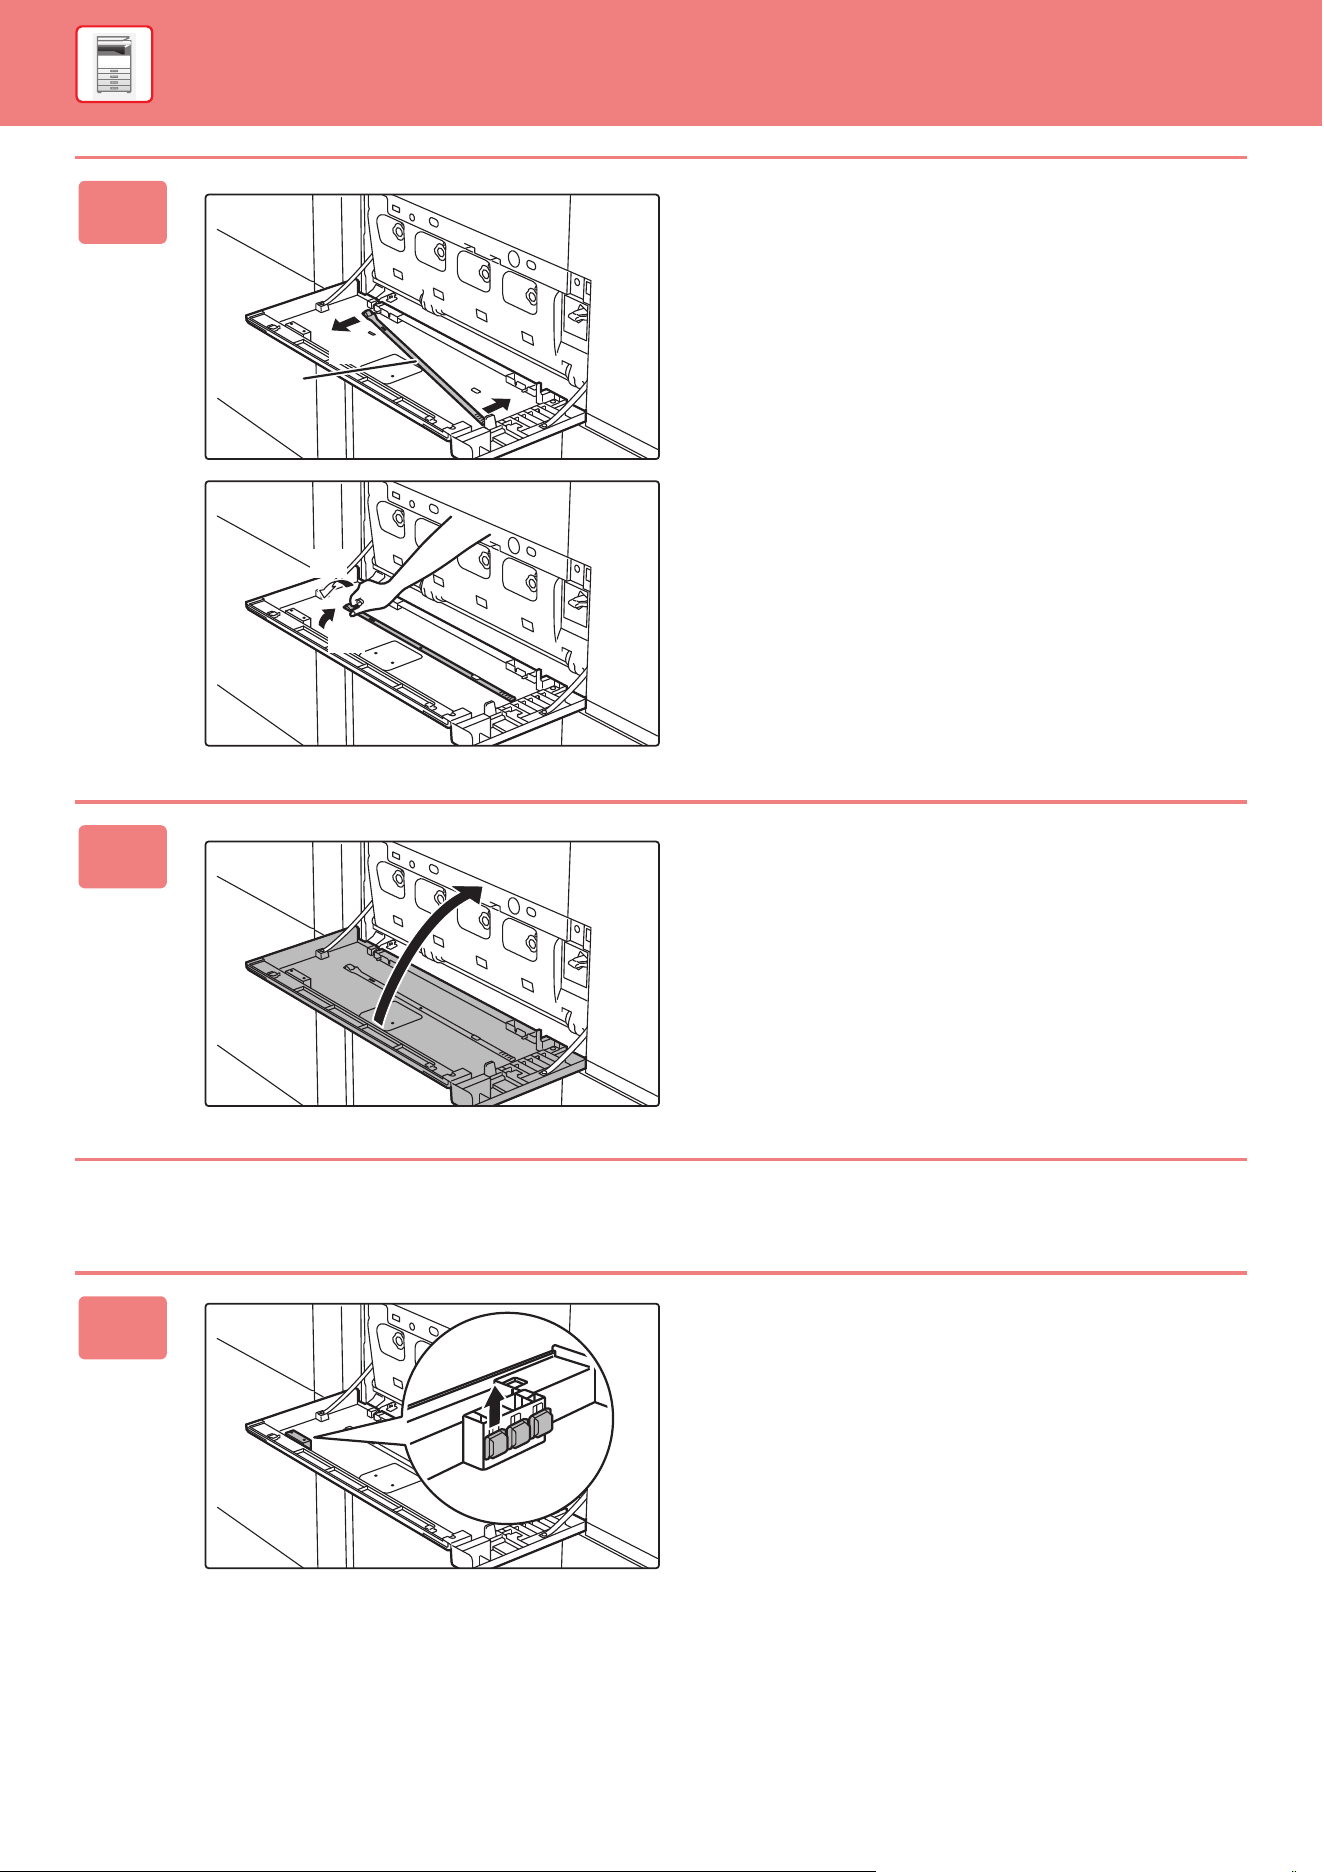
1-79
BEFORE USING THE MACHINE►MAINTENANCE
REPLACING THE CLEANER
8
Replace the cleaning tool.
(1) Engage the cleaning tool onto the boss
and turn it around it, and then put the
edge (non-cleaner side) on the right-hand
hook.
(2) Put the left-hand side of the cleaning tool
over the hook to place it on the near side.
(3) Turn the cleaning tool onto hook.
9
Close the front cover.
1
Open the front cover and take out a
replacement cleaner.
Replacement cleaners are stored in the front cover.
Grasp the end of the cleaner and pull it out of the cover.
(1)
Boss
(3)
(2)
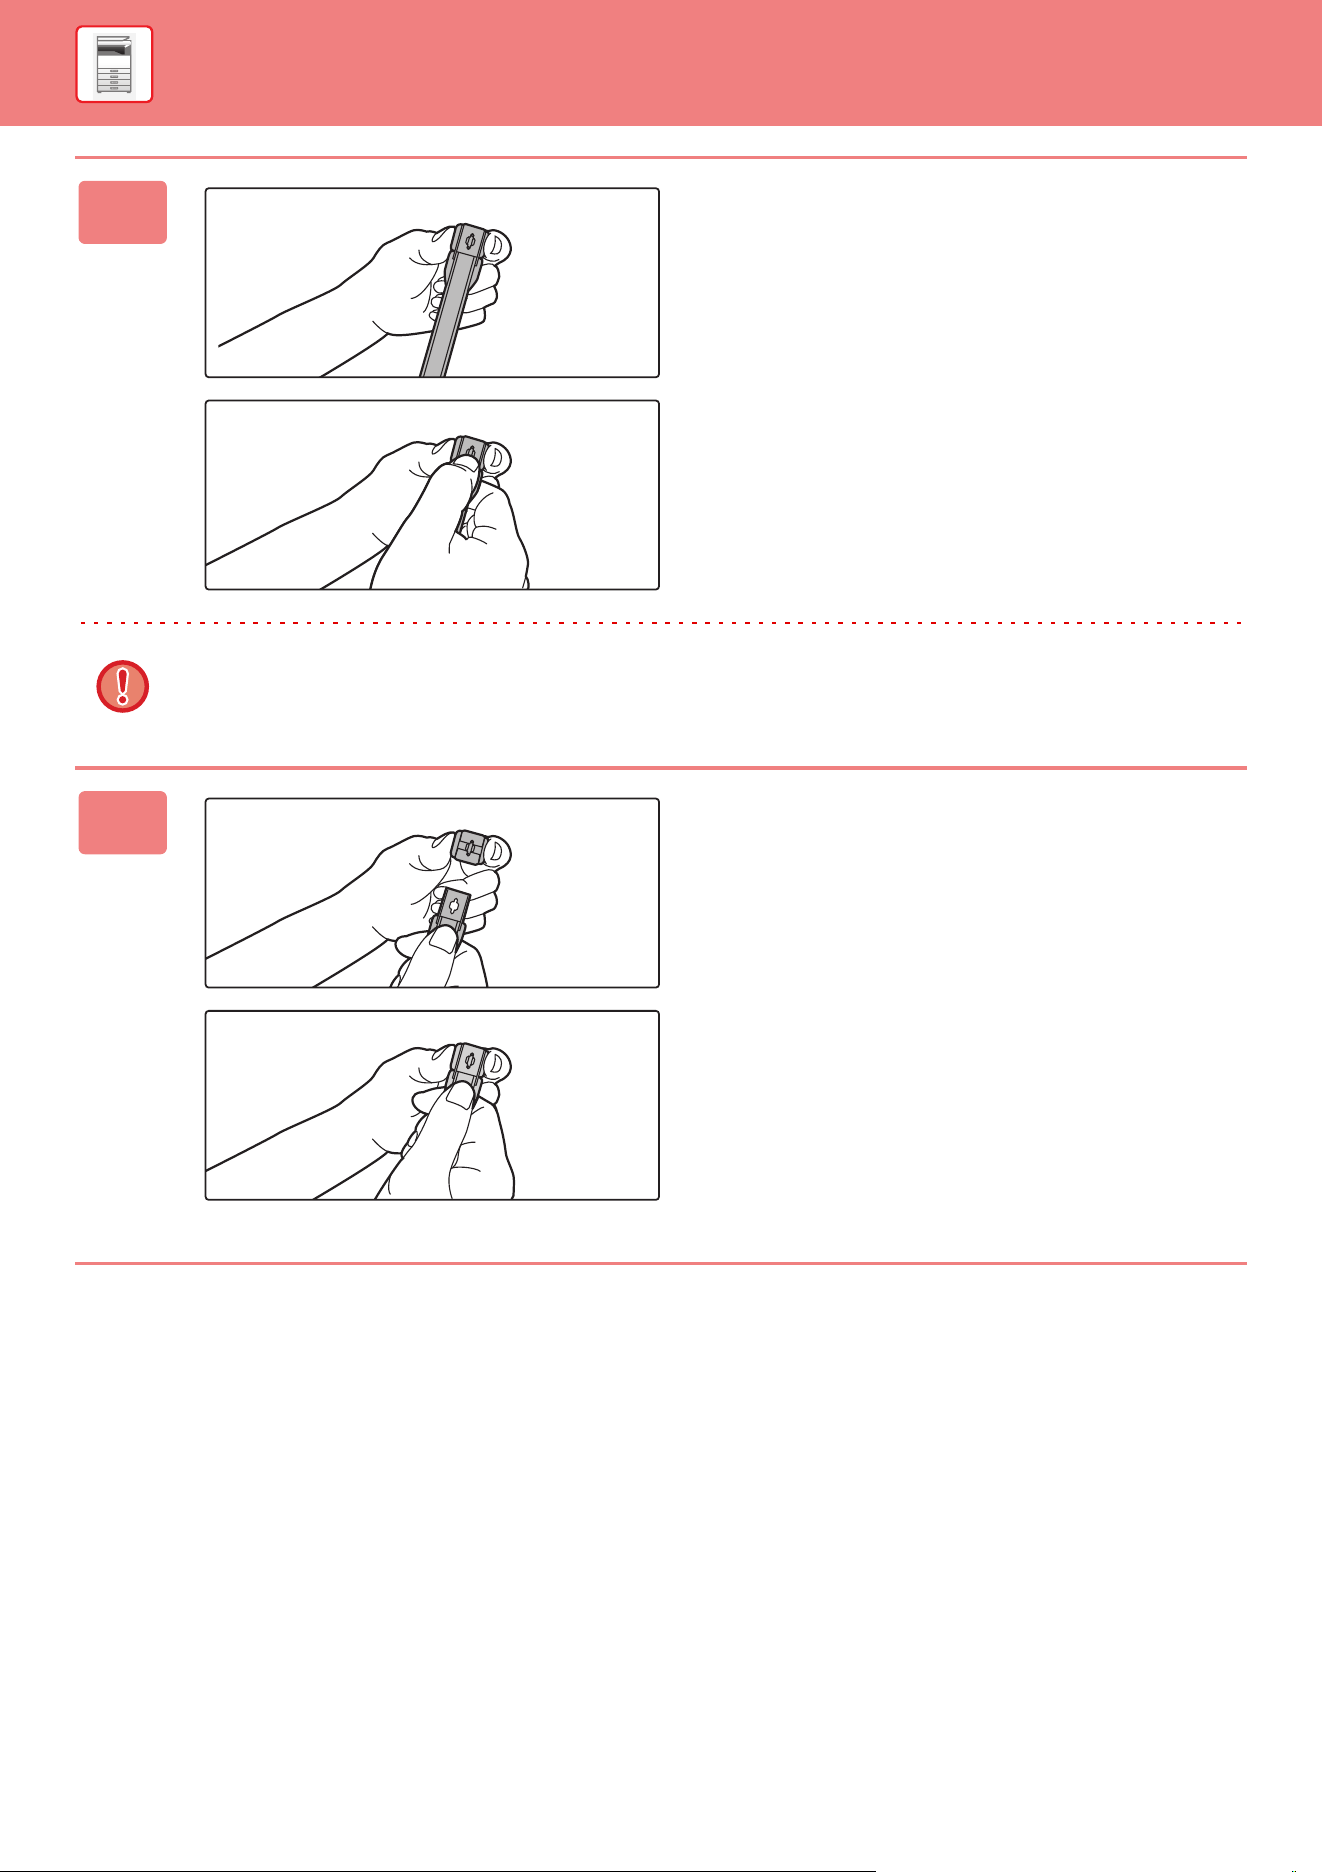
1-80
BEFORE USING THE MACHINE►MAINTENANCE
2
Remove the dirty cleaner from the tip
of the cleaning tool.
While firmly grasping the tool where the cleaner is attached,
use your other hand to press down on the hook that secures
the cleaner, and remove the cleaner.
Put the removed cleaner back on the inner cover. After replacing the cleaner, be sure to close the inner cover.
3
Attach the new cleaner to the cleaning
tool.
Align the cleaner hook with the attachment hole in the
cleaning tool. Hold the cleaner firmly and push the cleaning
tool in.
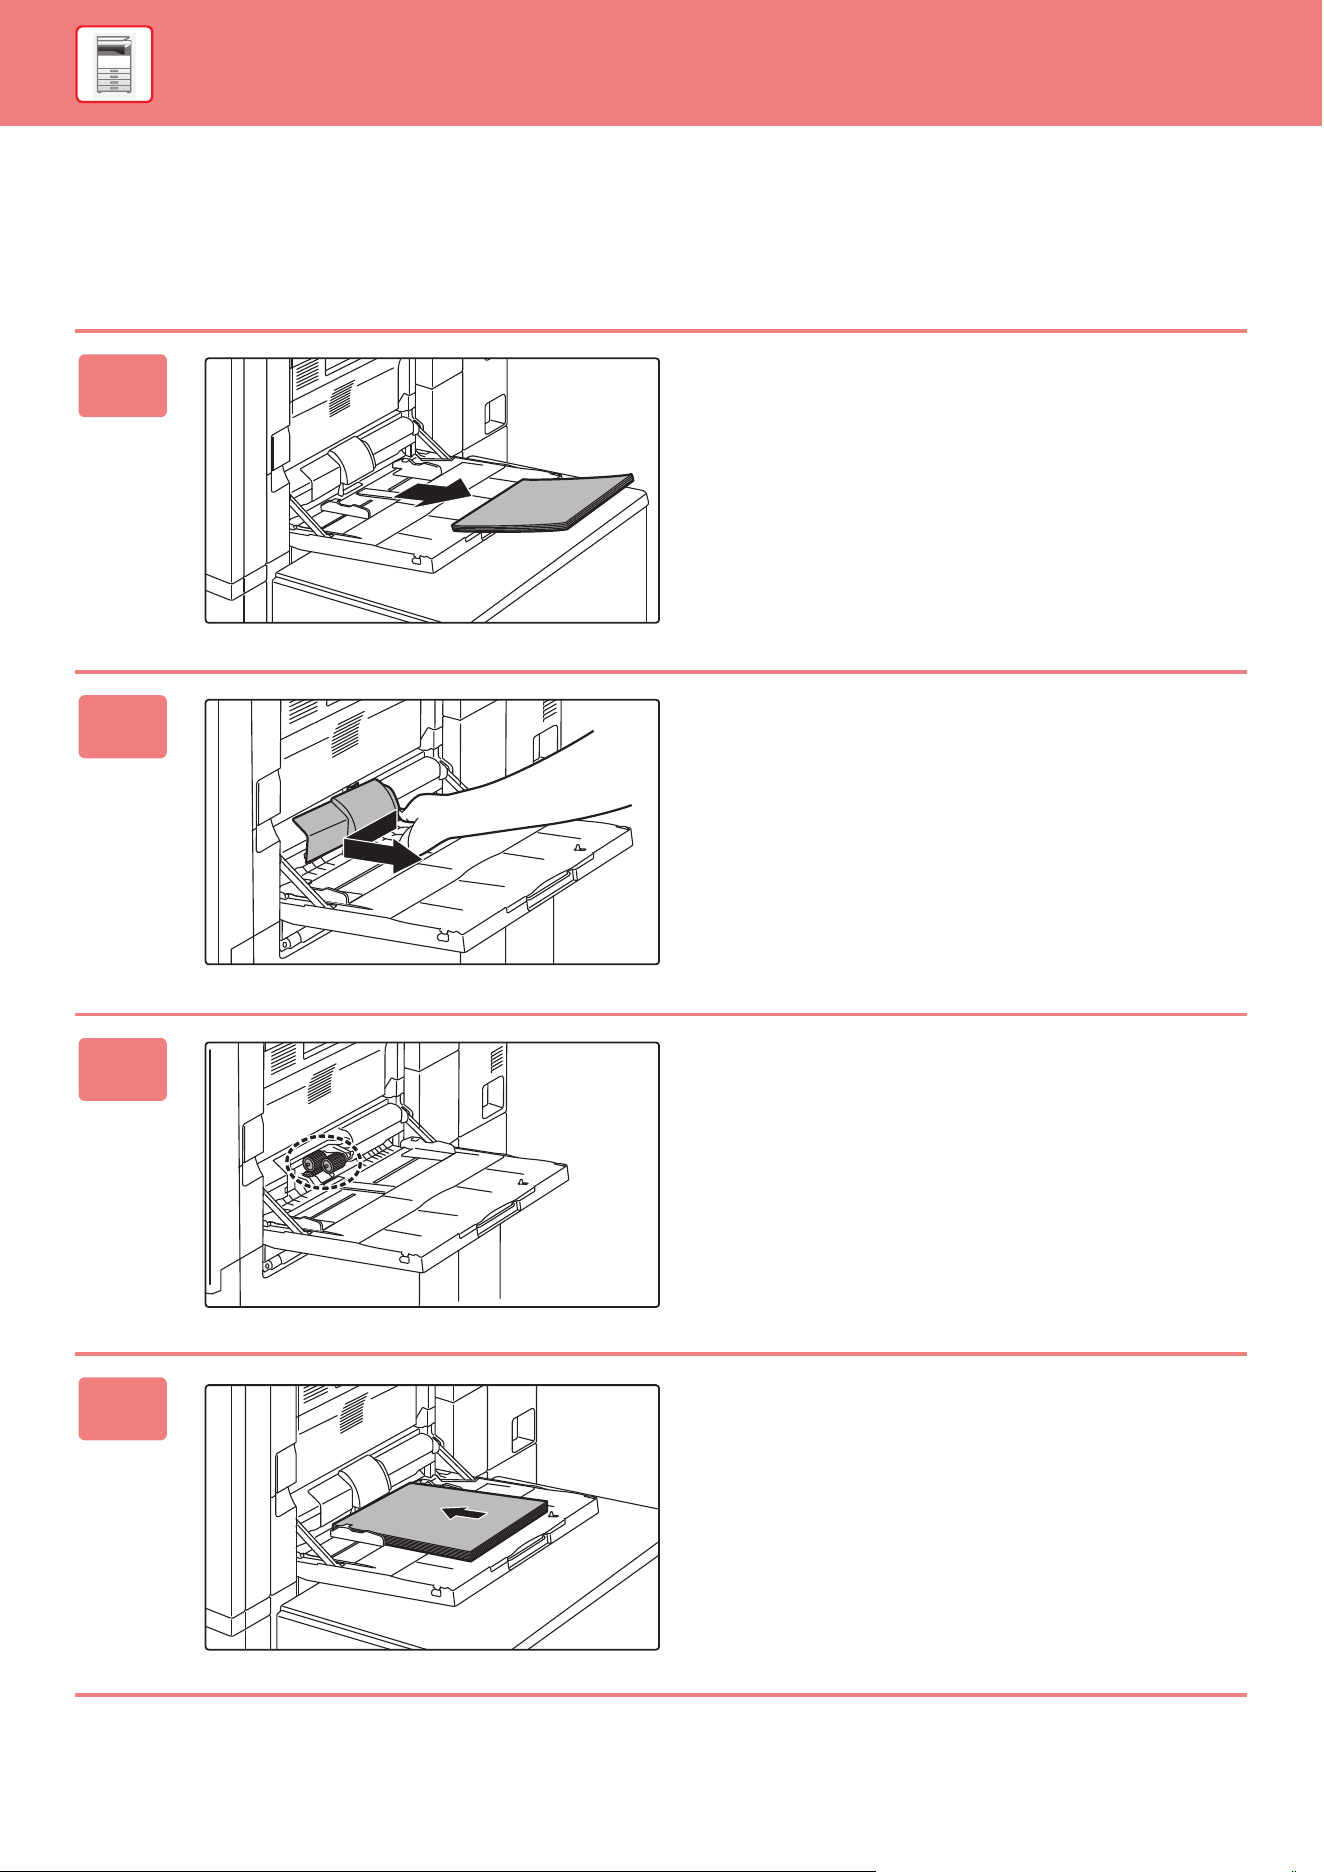
1-81
BEFORE USING THE MACHINE►MAINTENANCE
CLEANING THE BYPASS FEED ROLLER
If paper misfeed frequently occur in the bypass tray, clean the bypass feed roller. Wipe the surface of the feed roller with
a clean soft cloth moistened with water or a neutral detergent.
Bypass tray (on the machine)
1
Remove paper.
2
Remove the maintenance cover.
3
Clean the bypass feed roller.
Install the maintenance cover after the cleaning is
completed.
4
Load the paper.
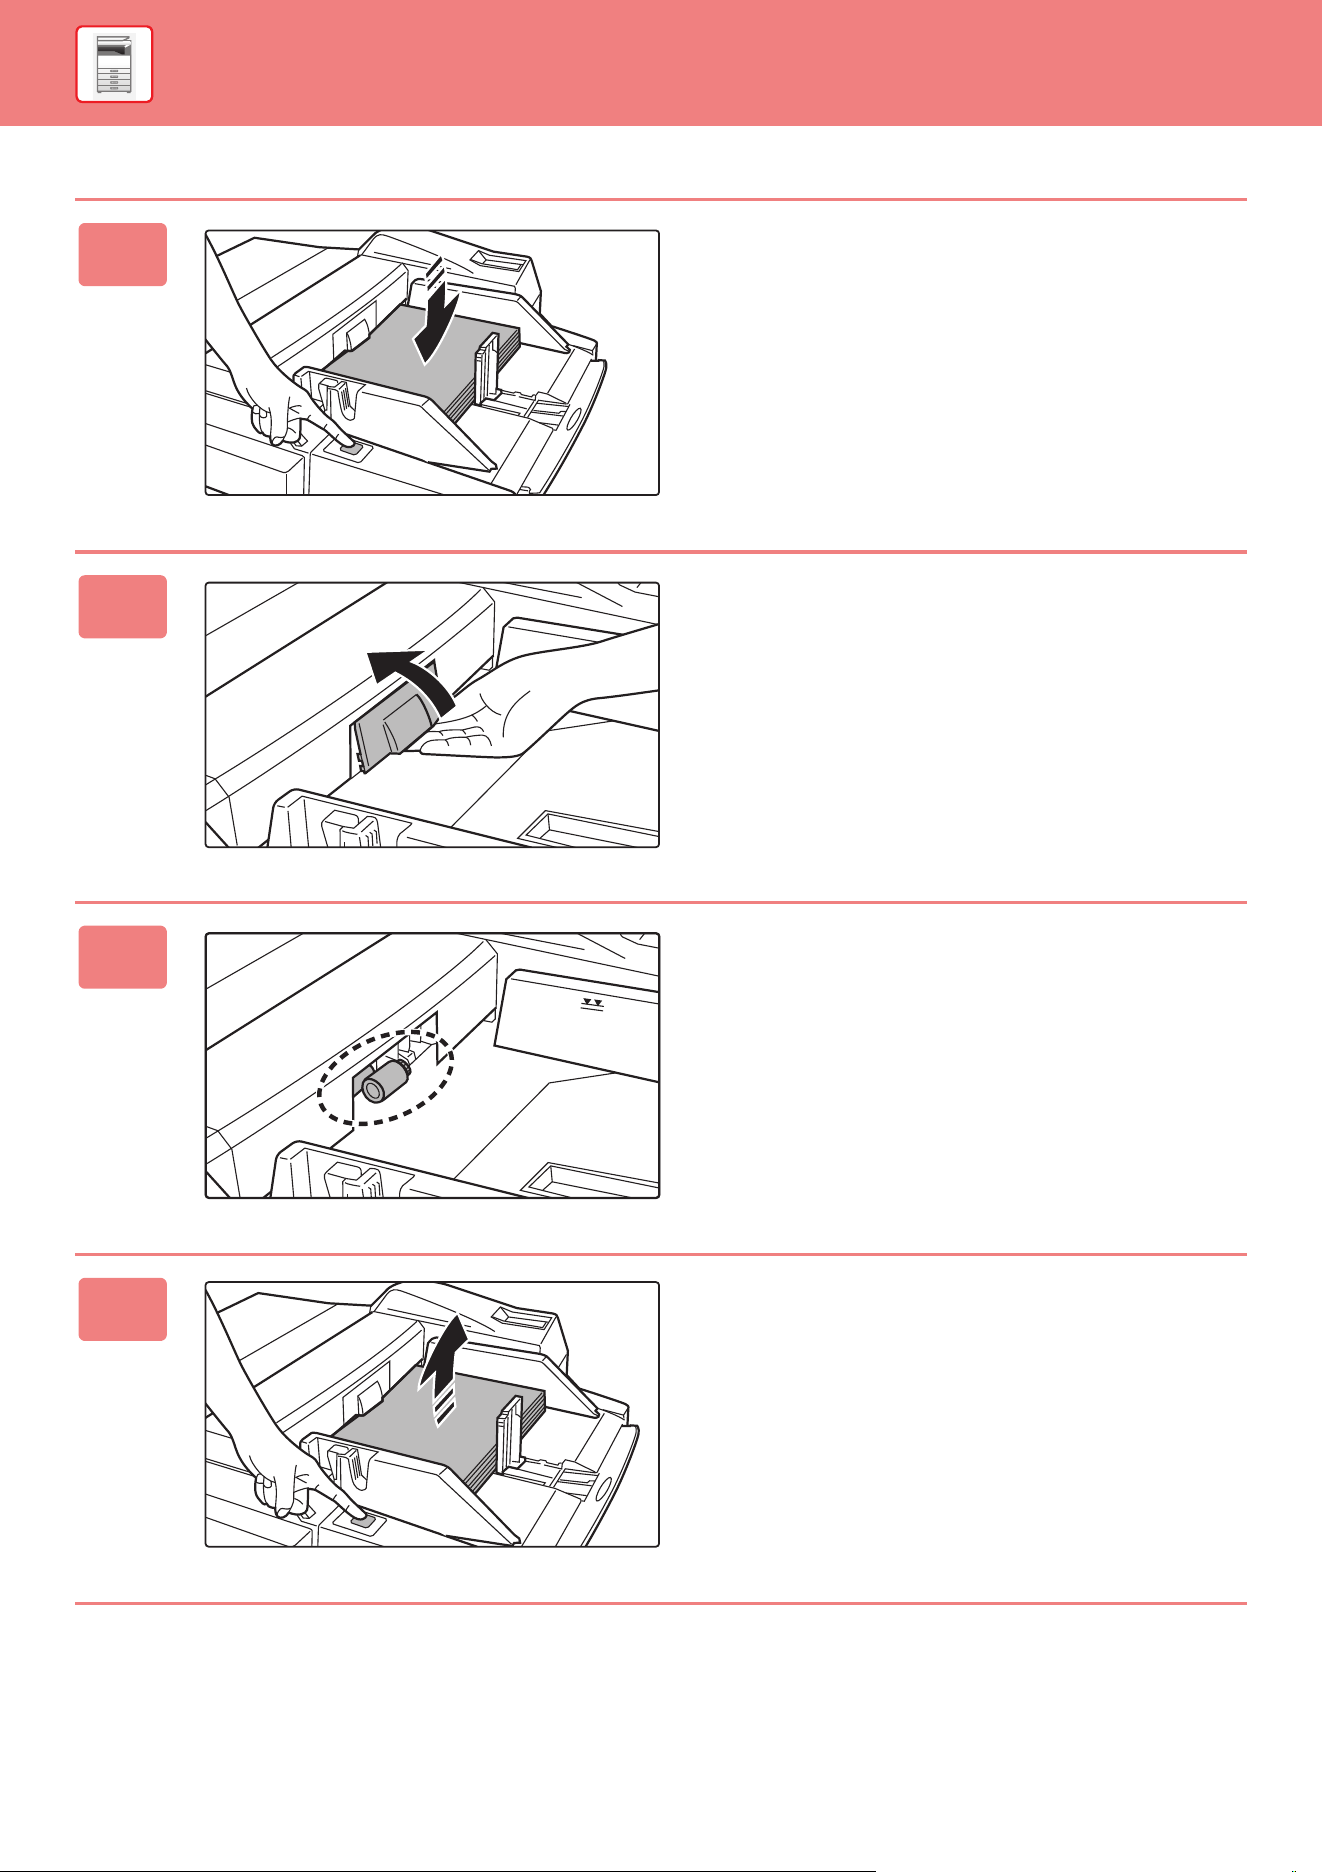
1-82
BEFORE USING THE MACHINE►MAINTENANCE
Bypass tray (large capacity trays)
1
Press the operation button and
remove paper.
The paper table goes down. The operation button blinks
while the paper table goes down. The button lights up when
the paper table has gone down. Do not remove the paper
until the button ceases blinking.
2
Remove the maintenance cover.
3
Clean the bypass feed roller.
Install the maintenance cover after the cleaning is
completed.
4
Load the paper and press the
operation button.
The paper table goes up when the operation button is
pressed.
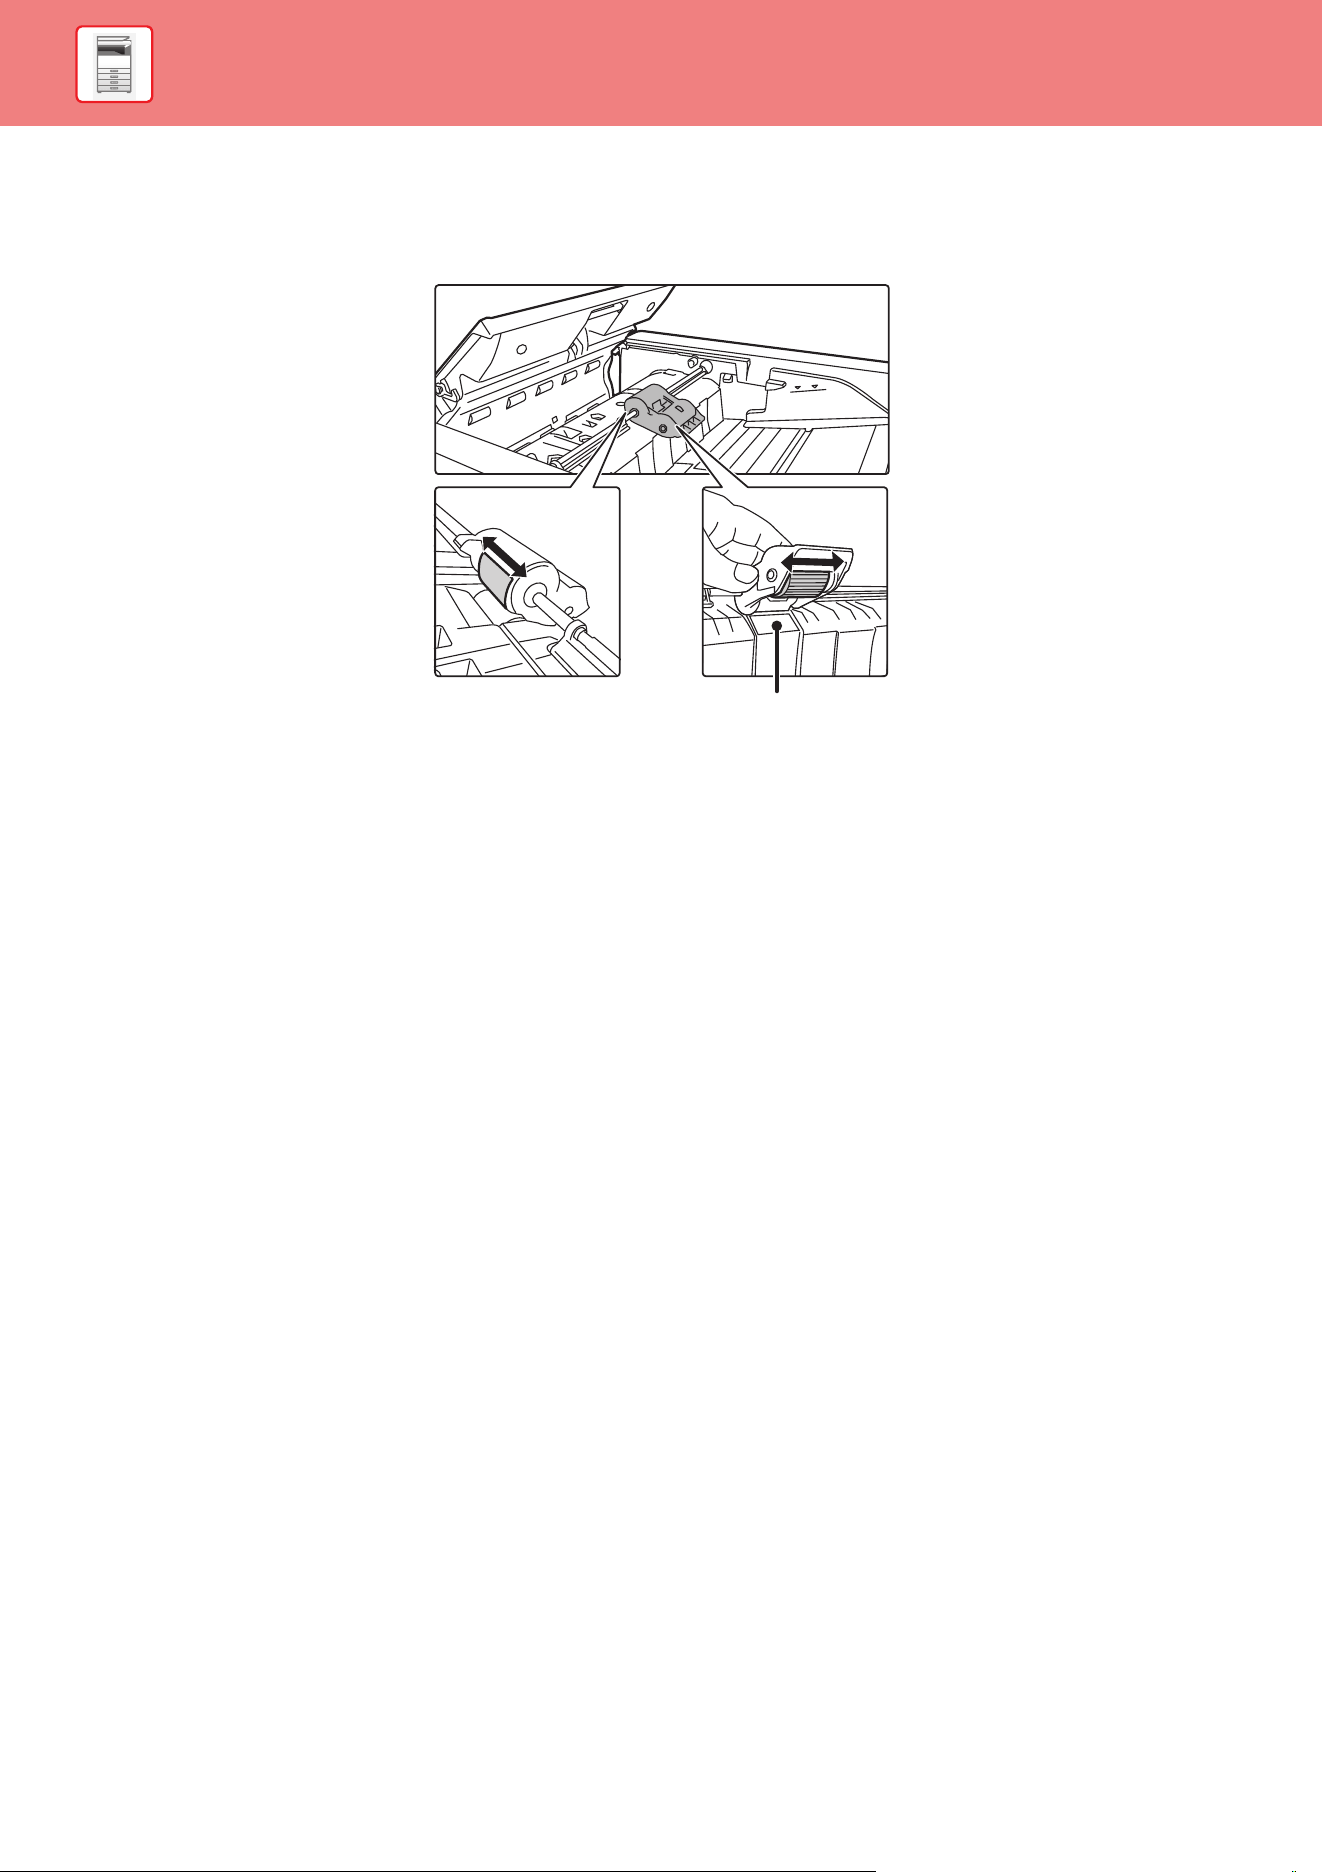
1-83
BEFORE USING THE MACHINE►MAINTENANCE
CLEANING THE PAPER FEED ROLLER
When using the automatic document feeder, if the placed original is smudged or jammed, wipe the surface of the paper
feed roller in the direction of the arrow with a clean, soft cloth moistened with water or a neutral detergent.
Be careful not to bend or detach the plastic
sheet.
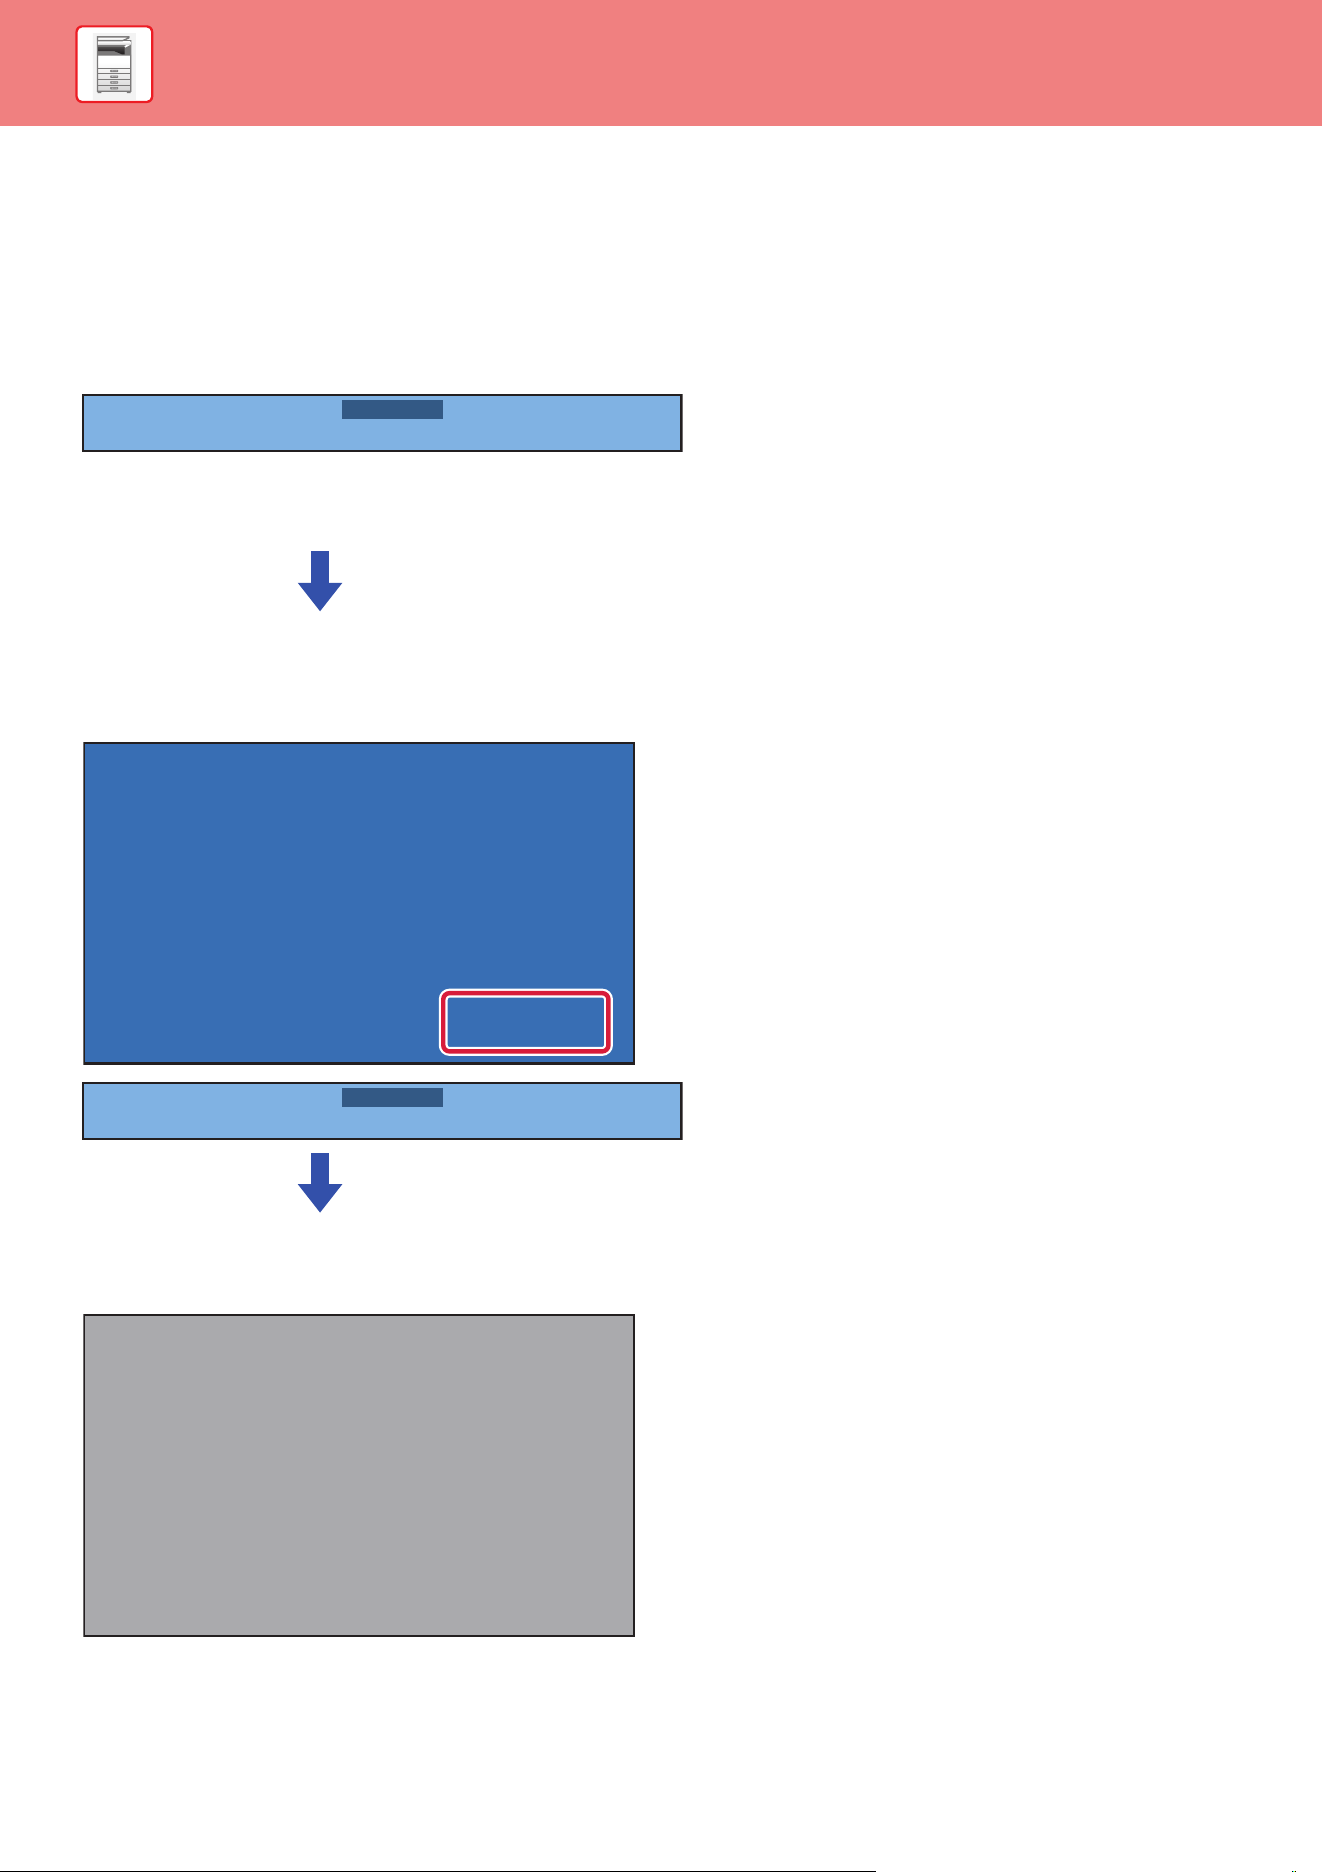
1-84
BEFORE USING THE MACHINE►MAINTENANCE
REPLACEMENT OF TONER CARTRIDGE
Always replace the toner cartridge after the "Change the toner cartridge." message appears. You should keep one set of
replacement toner cartridges on hand so that you can replace a toner cartridge immediately when toner runs out.
REPLACEMENT MESSAGE
When this message appears, prepare a toner cartridge for replacement.
"(□□□□)" indicates the color of toner cartridge that must be readied.
Y:Yellow toner, M:Magenta toner, C:Cyan toner, and Bk:Black toner
If you continue printing, the following message appears.
Colors that have run out of toner are indicated in (□□□□).
When this message appears, replace a toner cartridge for replacement.
In this state, printing is possible.
If you continue to use the machine, the following message will appear when the toner runs out.
Colors that have run out of toner are indicated in (□□□□).
Replace the toner cartridge with a one of the relevant color.
Toner Low. (□□□□)(Do not replace
cartridge until requested.)
Change the toner cartridge.
(□□□□)
OK
Ready to scan for copy.
(□□□□ Change the toner supply.)
Change the toner cartridge.
(□□□□)
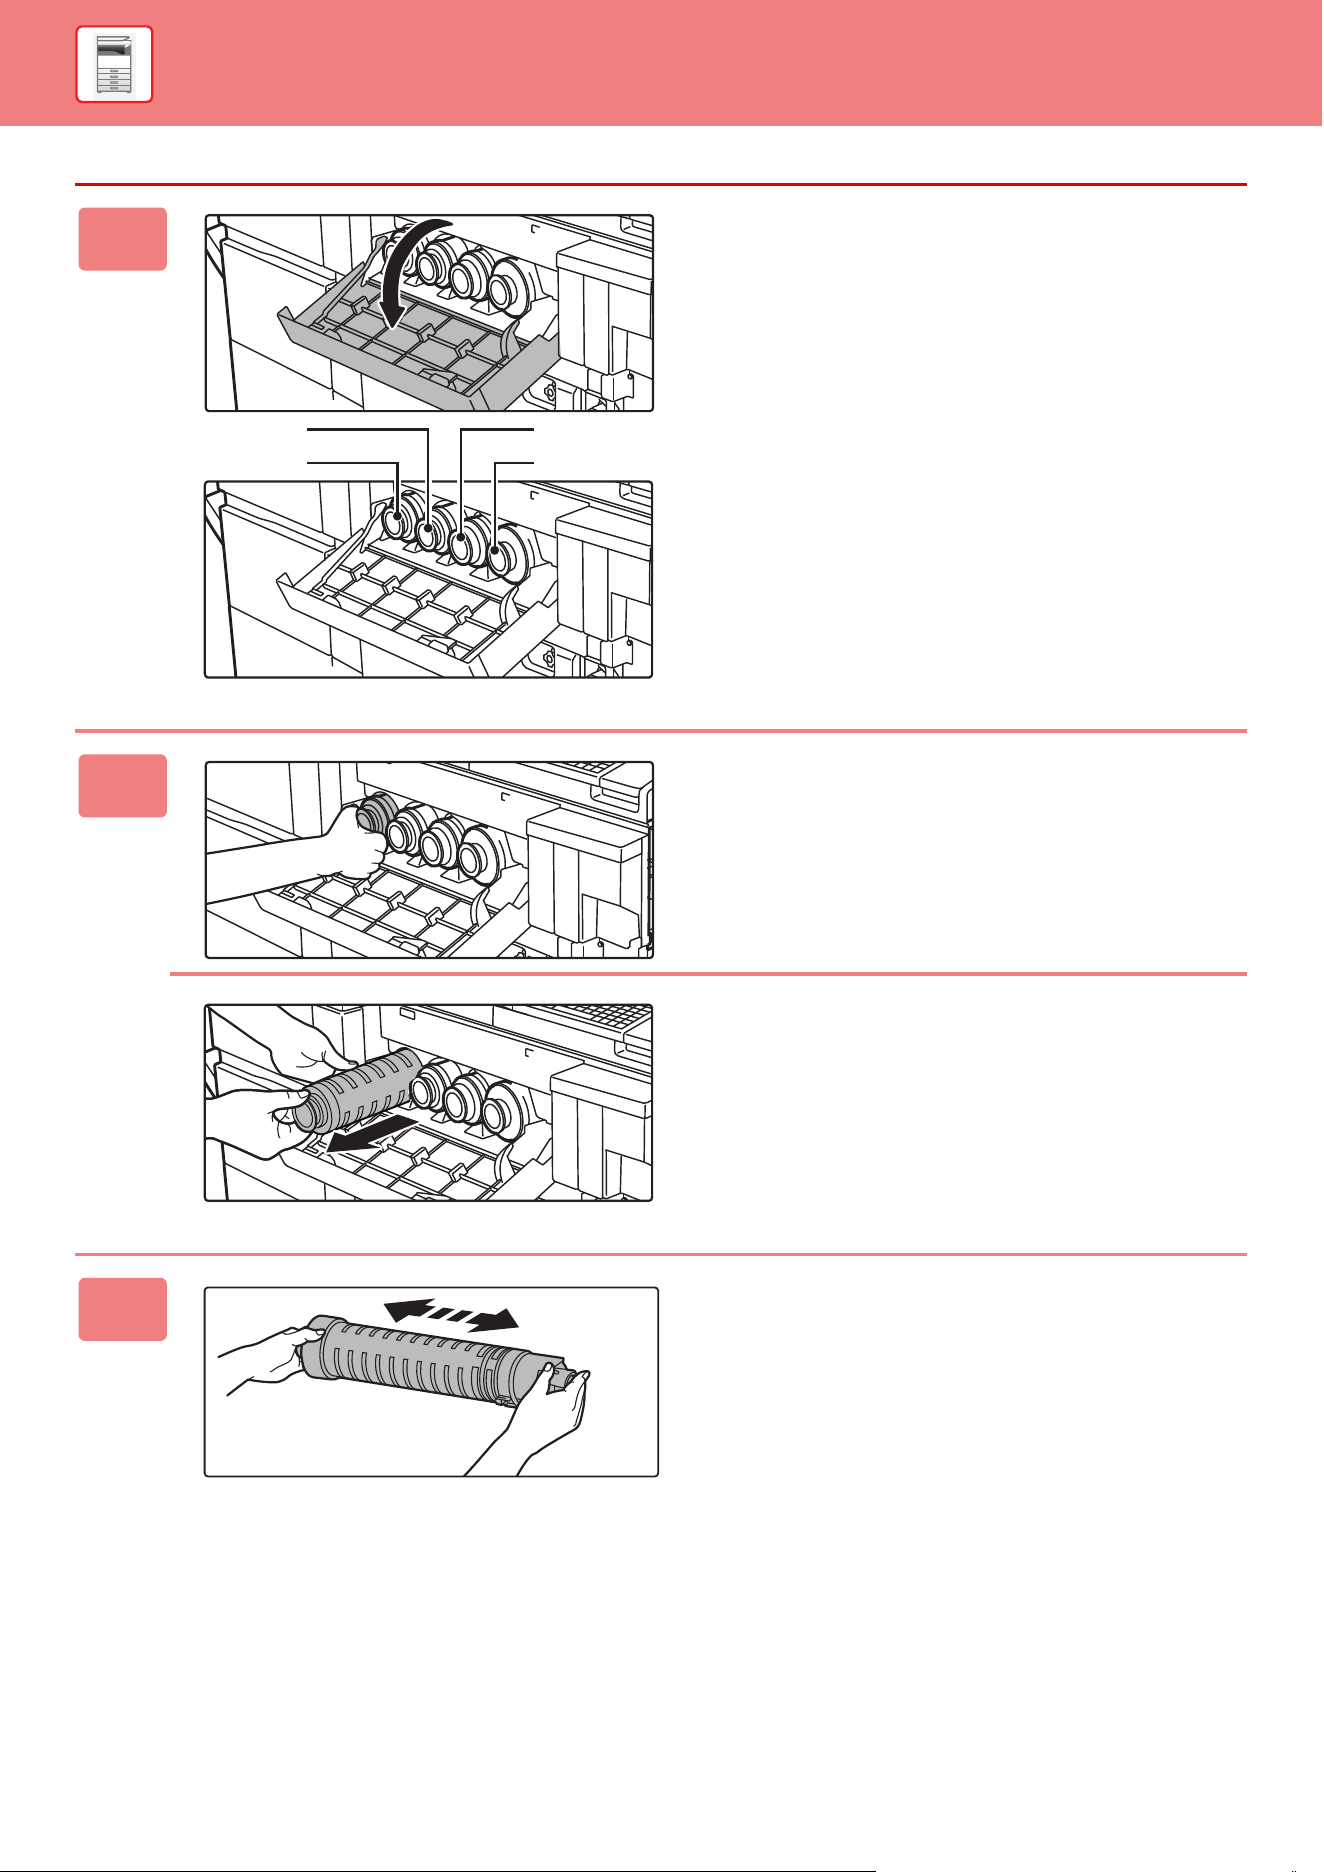
1-85
BEFORE USING THE MACHINE►MAINTENANCE
1
Open the toner cover.
2
Pull the toner cartridge toward you.
Gently pull out the toner cartridge horizontally.
If the cartridge is pulled out abruptly, toner may spill out.
(Example) Replacing the yellow toner
cartridge.
Hold the toner cartridge with both hands as shown and
slowly pull it out of the machine.
3
Take a new toner cartridge out of its
package and shake it horizontally five
or six times.
CyanMagenta
Yellow
Black

1-86
BEFORE USING THE MACHINE►MAINTENANCE
4
Slowly insert the new toner cartridge
on the level.
A toner cartridge of a different color cannot be installed. Be sure to install a toner cartridge of the same color.
5
Push the cartridge in until it locks
securely in place.
6
Close the toner cover.
After the toner cartridge is replaced, the machine
automatically enters image adjustment mode. Do not open
the front cover while this is taking place.
• Do not throw a toner cartridge into a fire. Toner may fly and cause burns.
• Store toner cartridges out of reach of small children.
• If a toner cartridge is stored upright, the toner may harden and become unusable. Always store toner cartridges on their
side.
• If a toner cartridge other than a SHARP-recommended toner cartridge is used, the machine may not attain full quality and
performance and there is a risk of damage to the machine. Be sure to use a SHARP-recommended toner cartridge.
• Be sure to install four toner cartridges (Y/M/C/Bk).
• If any one of the toner colors runs out, color printing will no longer be possible.
If the Y, M, or C toners run out but a quantity of Bk toner still remains, printing is performed in black and white.
• Depending on your conditions of use, the color may become light or the image blurred.
• Your service technician will collect used toner cartridges.
• To view the approximate amount of toner remaining (indicated in %), hold down the [Home Screen] key during printing or
in standby mode. When the percentage falls to "25-0%", keep a toner cartridge for replacement purposes before toner runs
out.
• When toner runs out while the home screen is displayed, the "Toner Empty" message appears in the upper right corner of
the screen.
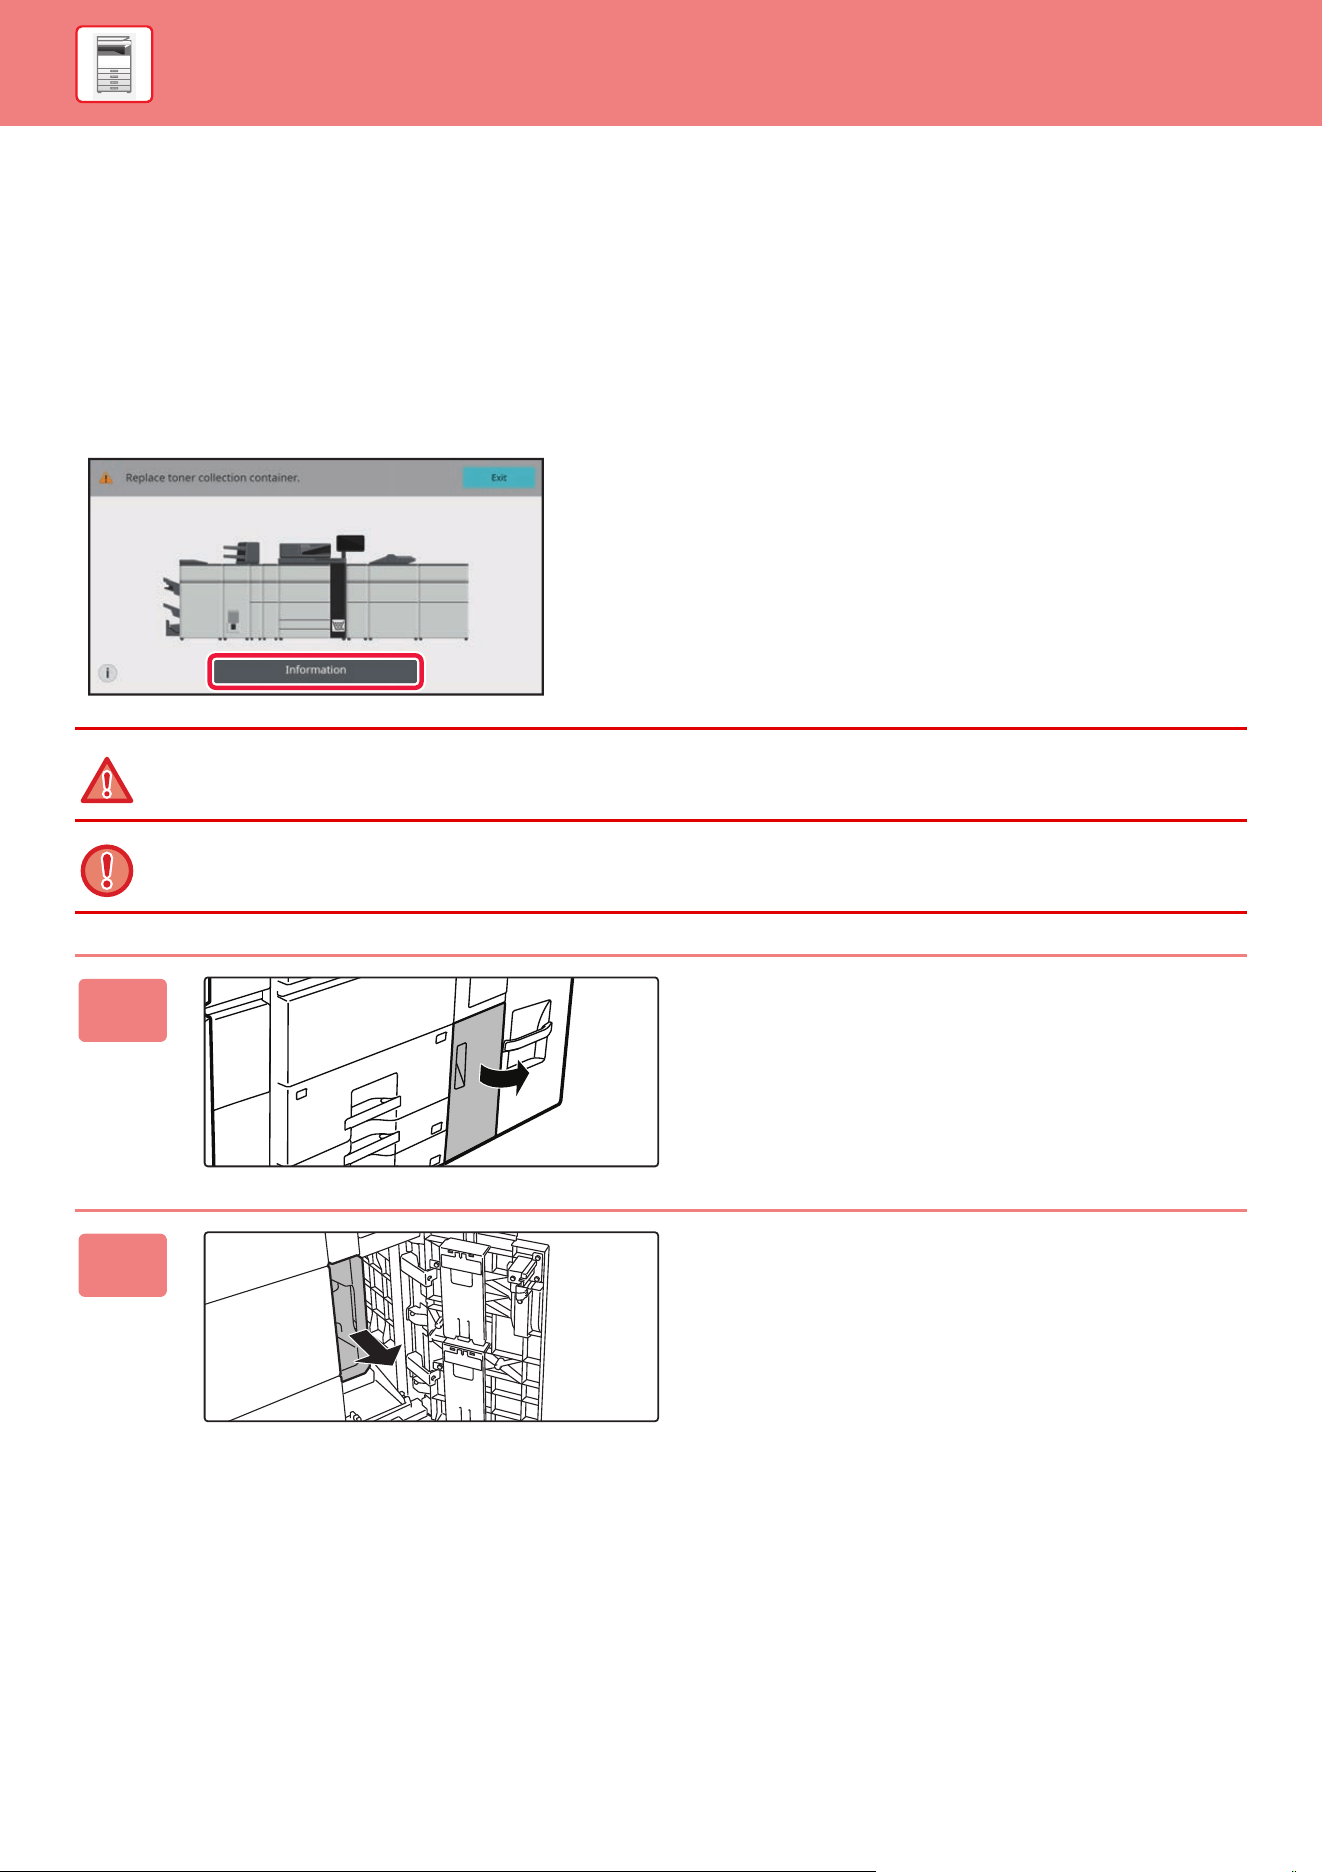
1-87
BEFORE USING THE MACHINE►MAINTENANCE
REPLACING THE TONER COLLECTION
CONTAINER
The toner collection container collects excess toner that is produced during printing. When the toner collection container
becomes full, the message "Replace toner collection container." will appear.
Replace the toner collection container as instructed by the message in the touch panel.
When the key is tapped, instructions for replacing the toner collection container will appear. Follow the instructions.
When the toner collection container is replaced, the message will automatically disappear.
• Do not throw the toner collection container into a fire. Toner may fly and cause burns.
• Store the toner collection container out of the reach of small children.
Do not touch the internal cords or connectors.
1
Open the cover for toner collection
container.
2
Remove the toner collection container.
Hold the handle of the toner collection container and slowly
remove it toward you.
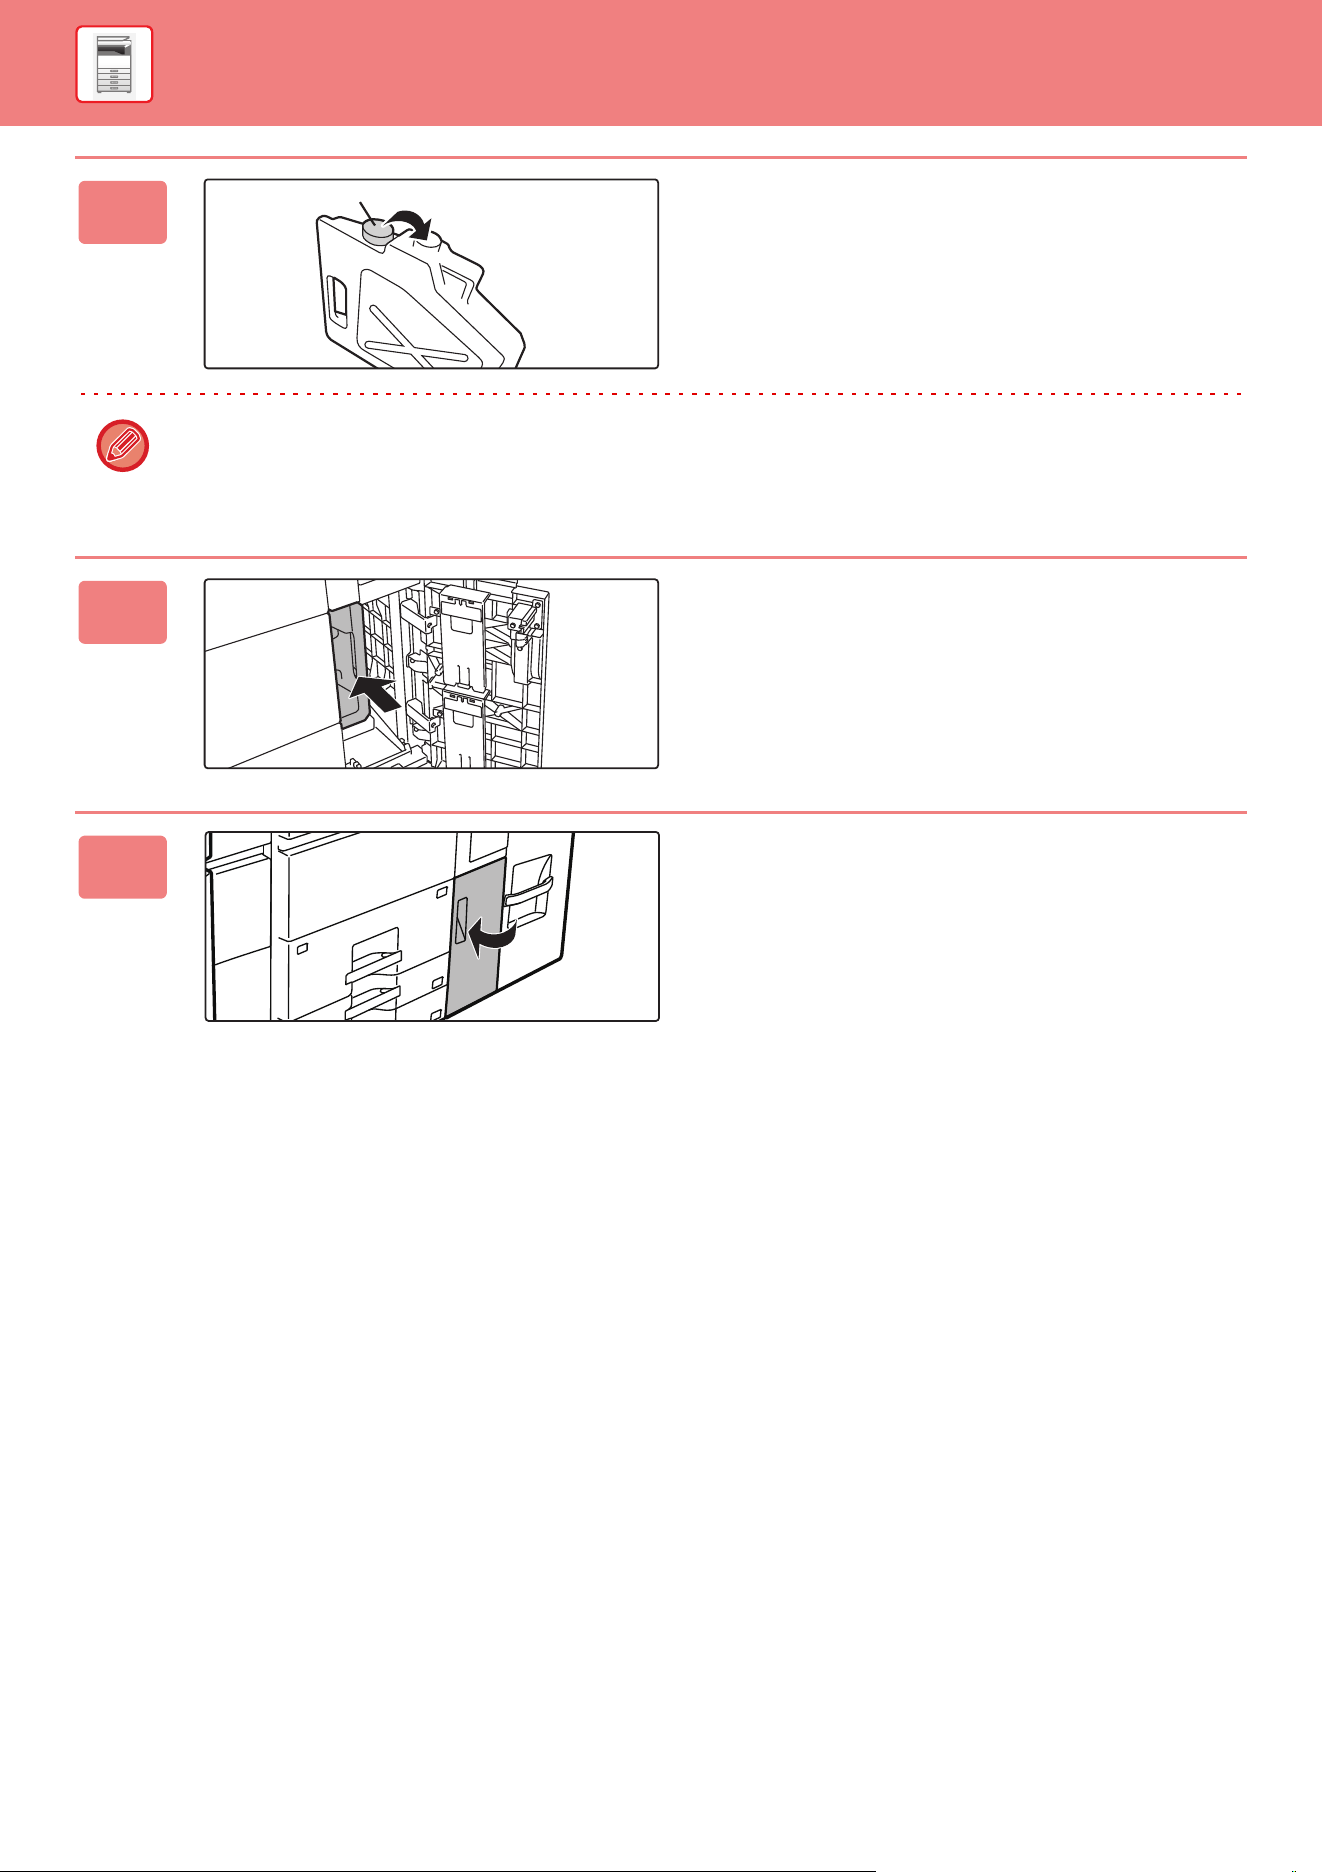
1-88
BEFORE USING THE MACHINE►MAINTENANCE
3
Place the toner collection container on
a flat surface and close the cap.
Place a sheet of paper such as newspaper on the surface
before placing the toner collection container.
• Keep the toner collection container in an upright position without collapsing it.
• Do not point the holes down as used toner will spill out.
• Do not throw away the removed toner collection container, instead place it in the plastic bag provided and keep it in
the box in which it was packed.
4
Install a new toner collection
container.
Hold the handle of the toner collection container and push it
all the way in.
5
Close the cover for toner collection
container.
Cap

2-1
TOUCH PANEL
TOUCH TYPES . . . . . . . . . . . . . . . . . . . . . . . . . . . . . . . . . . 2-2
OPERATION TYPES . . . . . . . . . . . . . . . . . . . . . . . . . . . . 2-2
OPERATION OF FREQUENTLY USED KEYS . . . . . . . . 2-5
ACTION PANEL . . . . . . . . . . . . . . . . . . . . . . . . . . . . . . . . . 2-6
MACHINE STATUS SCREEN. . . . . . . . . . . . . . . . . . . . . . . 2-6
HOME SCREEN AND PREVIEW SCREEN
HOME SCREEN . . . . . . . . . . . . . . . . . . . . . . . . . . . . . . . . . 2-7
OVERVIEW . . . . . . . . . . . . . . . . . . . . . . . . . . . . . . . . . . . 2-7
ICON INDICATING THE STATUS OF THE
MACHINE. . . . . . . . . . . . . . . . . . . . . . . . . . . . . . . . . . . . . 2-9
PREVIEW SCREEN. . . . . . . . . . . . . . . . . . . . . . . . . . . . 2-11
CHANGE THE DISPLAY OF THE TOUCH
PANEL
EDITING THE HOME SCREEN . . . . . . . . . . . . . . . . . . . . 2-19
ADDING SHORTCUT KEYS . . . . . . . . . . . . . . . . . . . . . 2-19
EDITING SHORTCUT KEYS . . . . . . . . . . . . . . . . . . . . . 2-22
CHANGING A SHORTCUT KEY . . . . . . . . . . . . . . . . . . 2-25
ADDING A SHORTCUT KEY IMAGE . . . . . . . . . . . . . . 2-28
MOVING A SHORTCUT KEY . . . . . . . . . . . . . . . . . . . . 2-30
RETURNING THE SHORTCUT KEYS TO THE
FACTORY DEFAULT STATE . . . . . . . . . . . . . . . . . . . . 2-32
CHANGING THE TRANSPARENCY OF A SHORTCUT
KEY . . . . . . . . . . . . . . . . . . . . . . . . . . . . . . . . . . . . . . . . 2-35
CHANGING THE LAYOUT PATTERN OF THE HOME
SCREEN . . . . . . . . . . . . . . . . . . . . . . . . . . . . . . . . . . . . 2-37
SELECTING A MFP DISPLAY PATTERN FOR THE
HOME SCREEN. . . . . . . . . . . . . . . . . . . . . . . . . . . . . . . 2-39
CHANGING THE COLOR OF TEXT ON THE HOME
SCREEN . . . . . . . . . . . . . . . . . . . . . . . . . . . . . . . . . . . . 2-41
CHANGING THE BACKGROUND IMAGE OF THE
HOME SCREEN. . . . . . . . . . . . . . . . . . . . . . . . . . . . . . . 2-43
CHANGING THE FIXED KEYS . . . . . . . . . . . . . . . . . . . 2-46
INCREASING THE TEXT SIZE . . . . . . . . . . . . . . . . . . . 2-48
CHANGING THE LANGUAGE USED ON THE
MACHINE. . . . . . . . . . . . . . . . . . . . . . . . . . . . . . . . . . . . 2-49
CHANGING THE POSITION OF THE [Home Screen]
KEY . . . . . . . . . . . . . . . . . . . . . . . . . . . . . . . . . . . . . . . . 2-51
JOB MANAGEMENT
STOPPING/DELETING A JOB, PRIORITY
PROCESSING AND CHECKING THE STATUS . . . . . . . . 2-53
TYPES OF JOB MANAGEMENT SCREENS . . . . . . . . .2-53
STOPPING/DELETING A JOB IN PROGRESS OR
RESERVED. . . . . . . . . . . . . . . . . . . . . . . . . . . . . . . . . . .2-55
PRIORITY PROCESSING OF A RESERVED JOB . . . .2-56
CHECKING A RESERVED JOB OR THE JOB IN
PROGRESS . . . . . . . . . . . . . . . . . . . . . . . . . . . . . . . . . . 2-58
CHECKING COMPLETED JOBS . . . . . . . . . . . . . . . . . . 2-59
READING THE JOB LIST . . . . . . . . . . . . . . . . . . . . . . . .2-60
CHARACTER ENTRY
CHARACTER ENTRY . . . . . . . . . . . . . . . . . . . . . . . . . . . .2-62
NAMES AND FUNCTIONS OF SOFT KEYBOARD
KEYS. . . . . . . . . . . . . . . . . . . . . . . . . . . . . . . . . . . . . . . .2-62
SET THE KEYBOARD SETTING . . . . . . . . . . . . . . . . . .2-63
OPERATION OF THE MACHINE
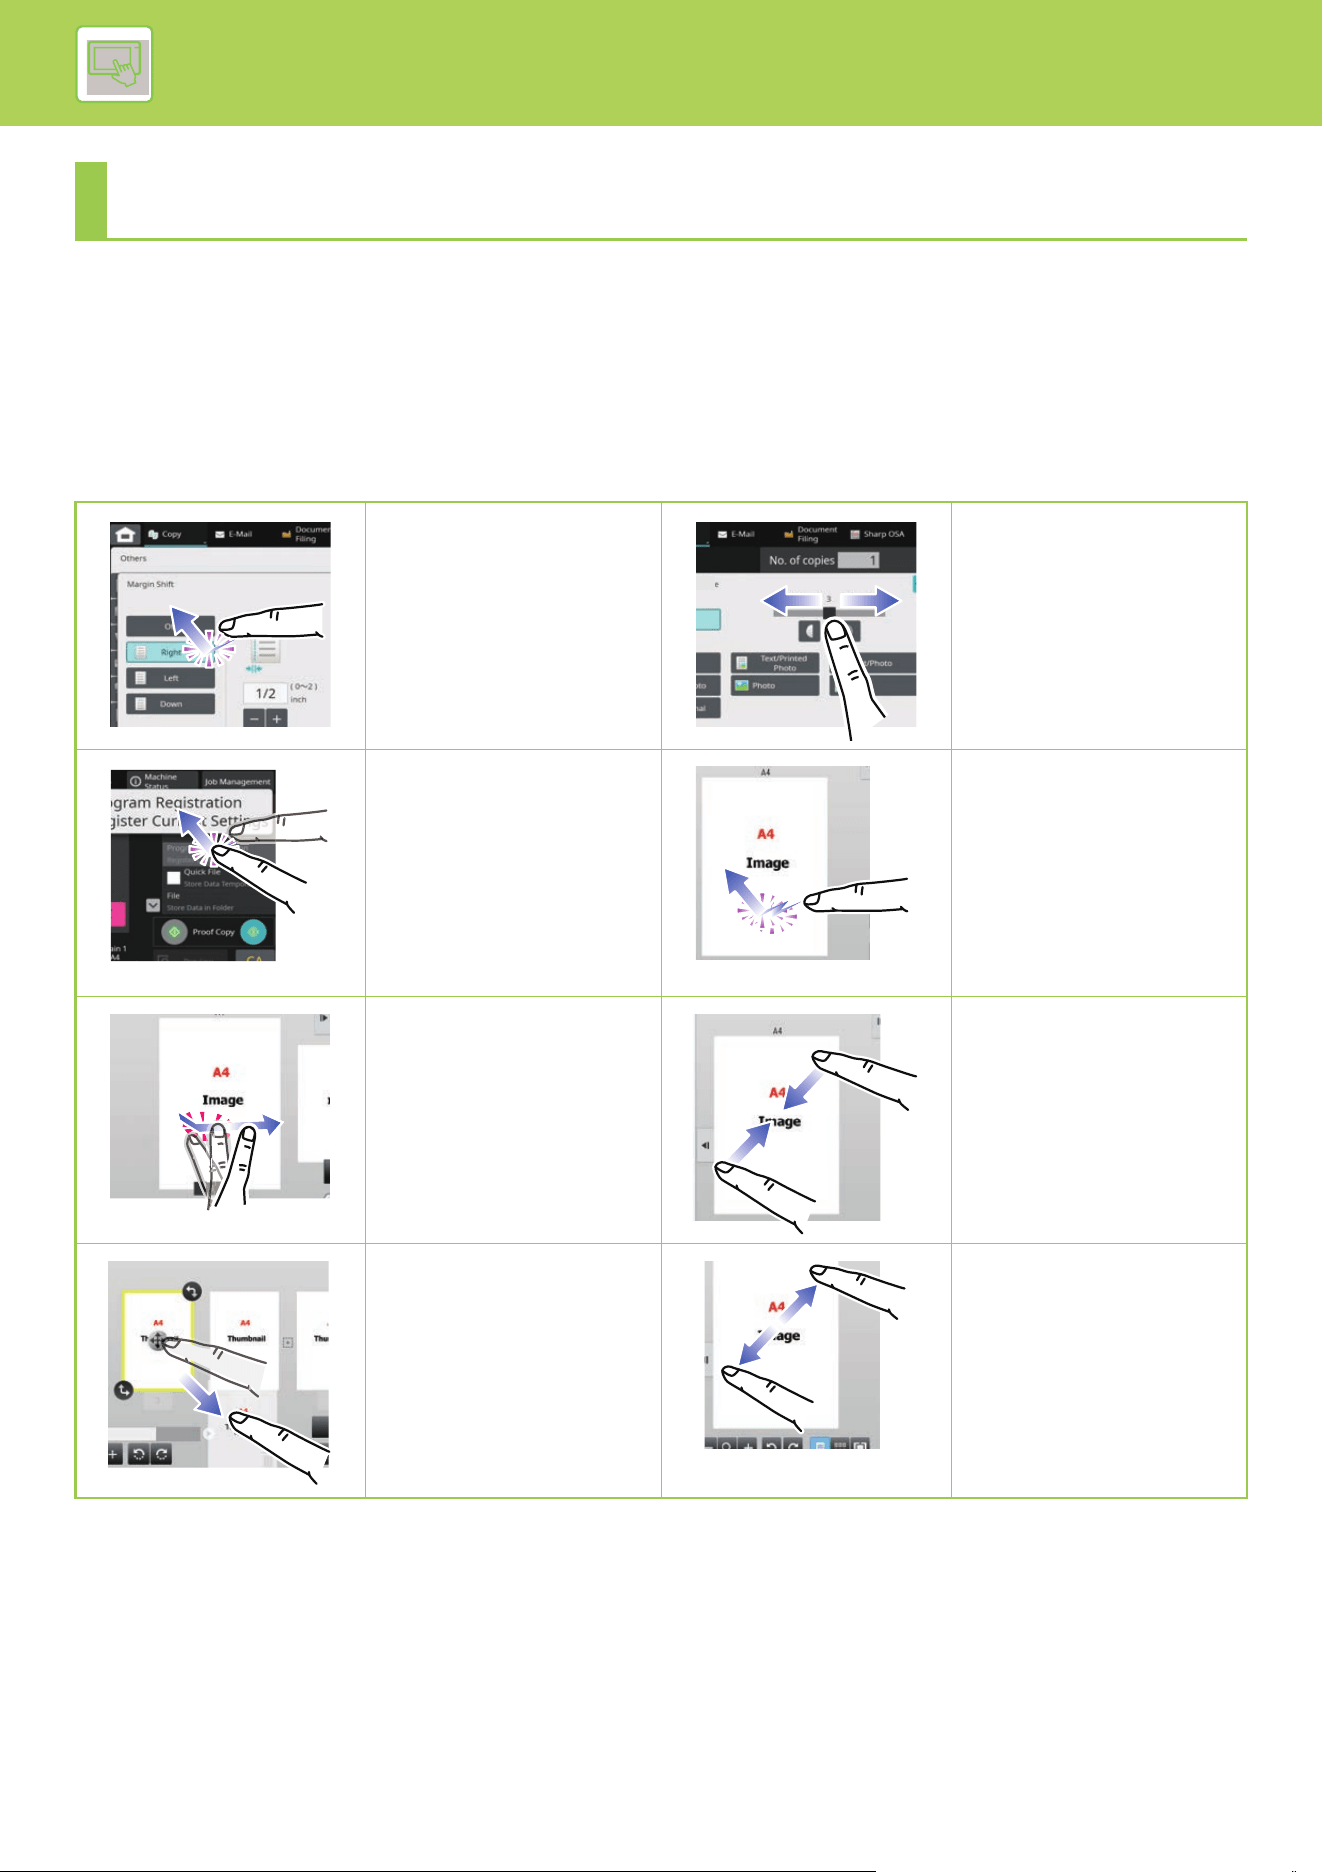
2-2
OPERATION OF THE MACHINE►TOUCH PANEL
TOUCH TYPES
OPERATION TYPES
In addition to tapping, equivalent to conventional touching, the touch panel of the machine can be operated by long
touching, flicking and sliding.
TOUCH PANEL
Tapping
Touch the panel with your
finger and then lift it quickly.
Use this method to select a
key, tab or check box.
Sliding
Slide the scroll bar (with your
finger touching the panel) to
scroll up and down a list with
a large number of items.
Long touching
Touch the panel with your
finger and hold it for a while.
Keep holding (long touching)
it on the action panel or
characters in the text box to
display characters in a
balloon.
Double tapping
Touch the screen twice. Use
this operation to enlarge the
image in the preview.
Flicking
Flick the panel to scroll a
preview image quickly.
Pinch
Touch the screen with two
fingers and move them
toward each other. This is
used to reduce the browser
and preview display.
Dragging
Drag (slide your finger
touching the panel in a
random direction) to replace
a page in the original during
preview.
Spread
Touch the screen with two
fingers and move them away
from each other. This is used
to enlarge the browser and
preview display.
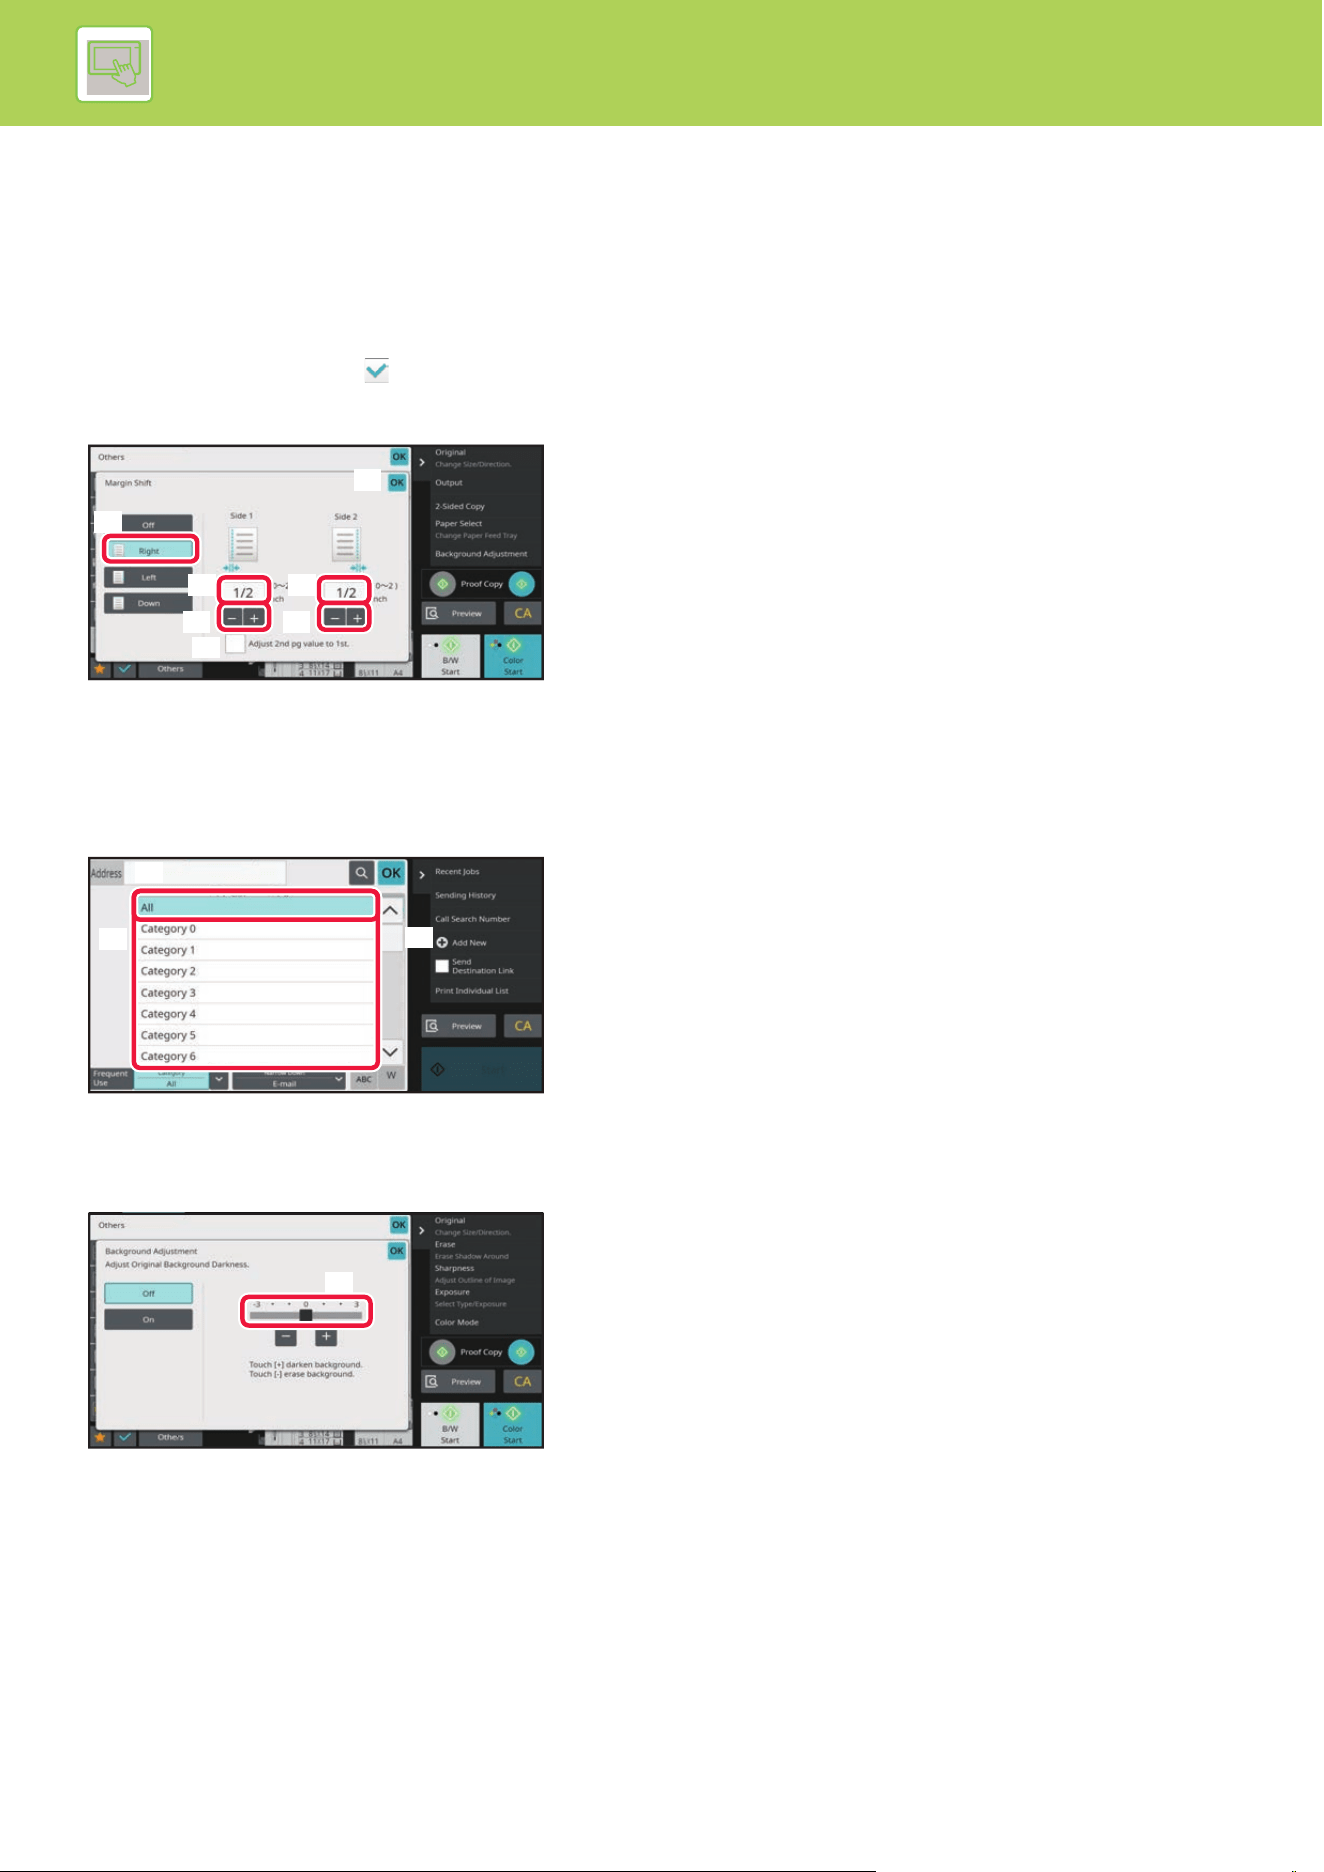
2-3
OPERATION OF THE MACHINE►TOUCH PANEL
Operation on respective screens
Key (tapping)
A. Tap to select an item. The selected key turns into a different color.
B. Tap numeric keys to enter numbers.
C. Tap to increase or decrease the value. Long touching causes the value to be increased or decreased until you stop
touching.
D. Tap to enter a checkmark and enable the setting.
E. Tap here to close the screen
List (tapping, sliding and flicking)
A. Tap to select an item. The selected item turns into a different color.
B. Slide the bar up and down. It appears when the item does not fit in the screen.
C. Flick the key upwards or downwards. The item scrolls up or down.
Slider (sliding)
A. Slide the knob from side to side.
(A)
(B) (B)
(E)
(C)
(D)
(C)
(A)
(C)
(B)
(A)
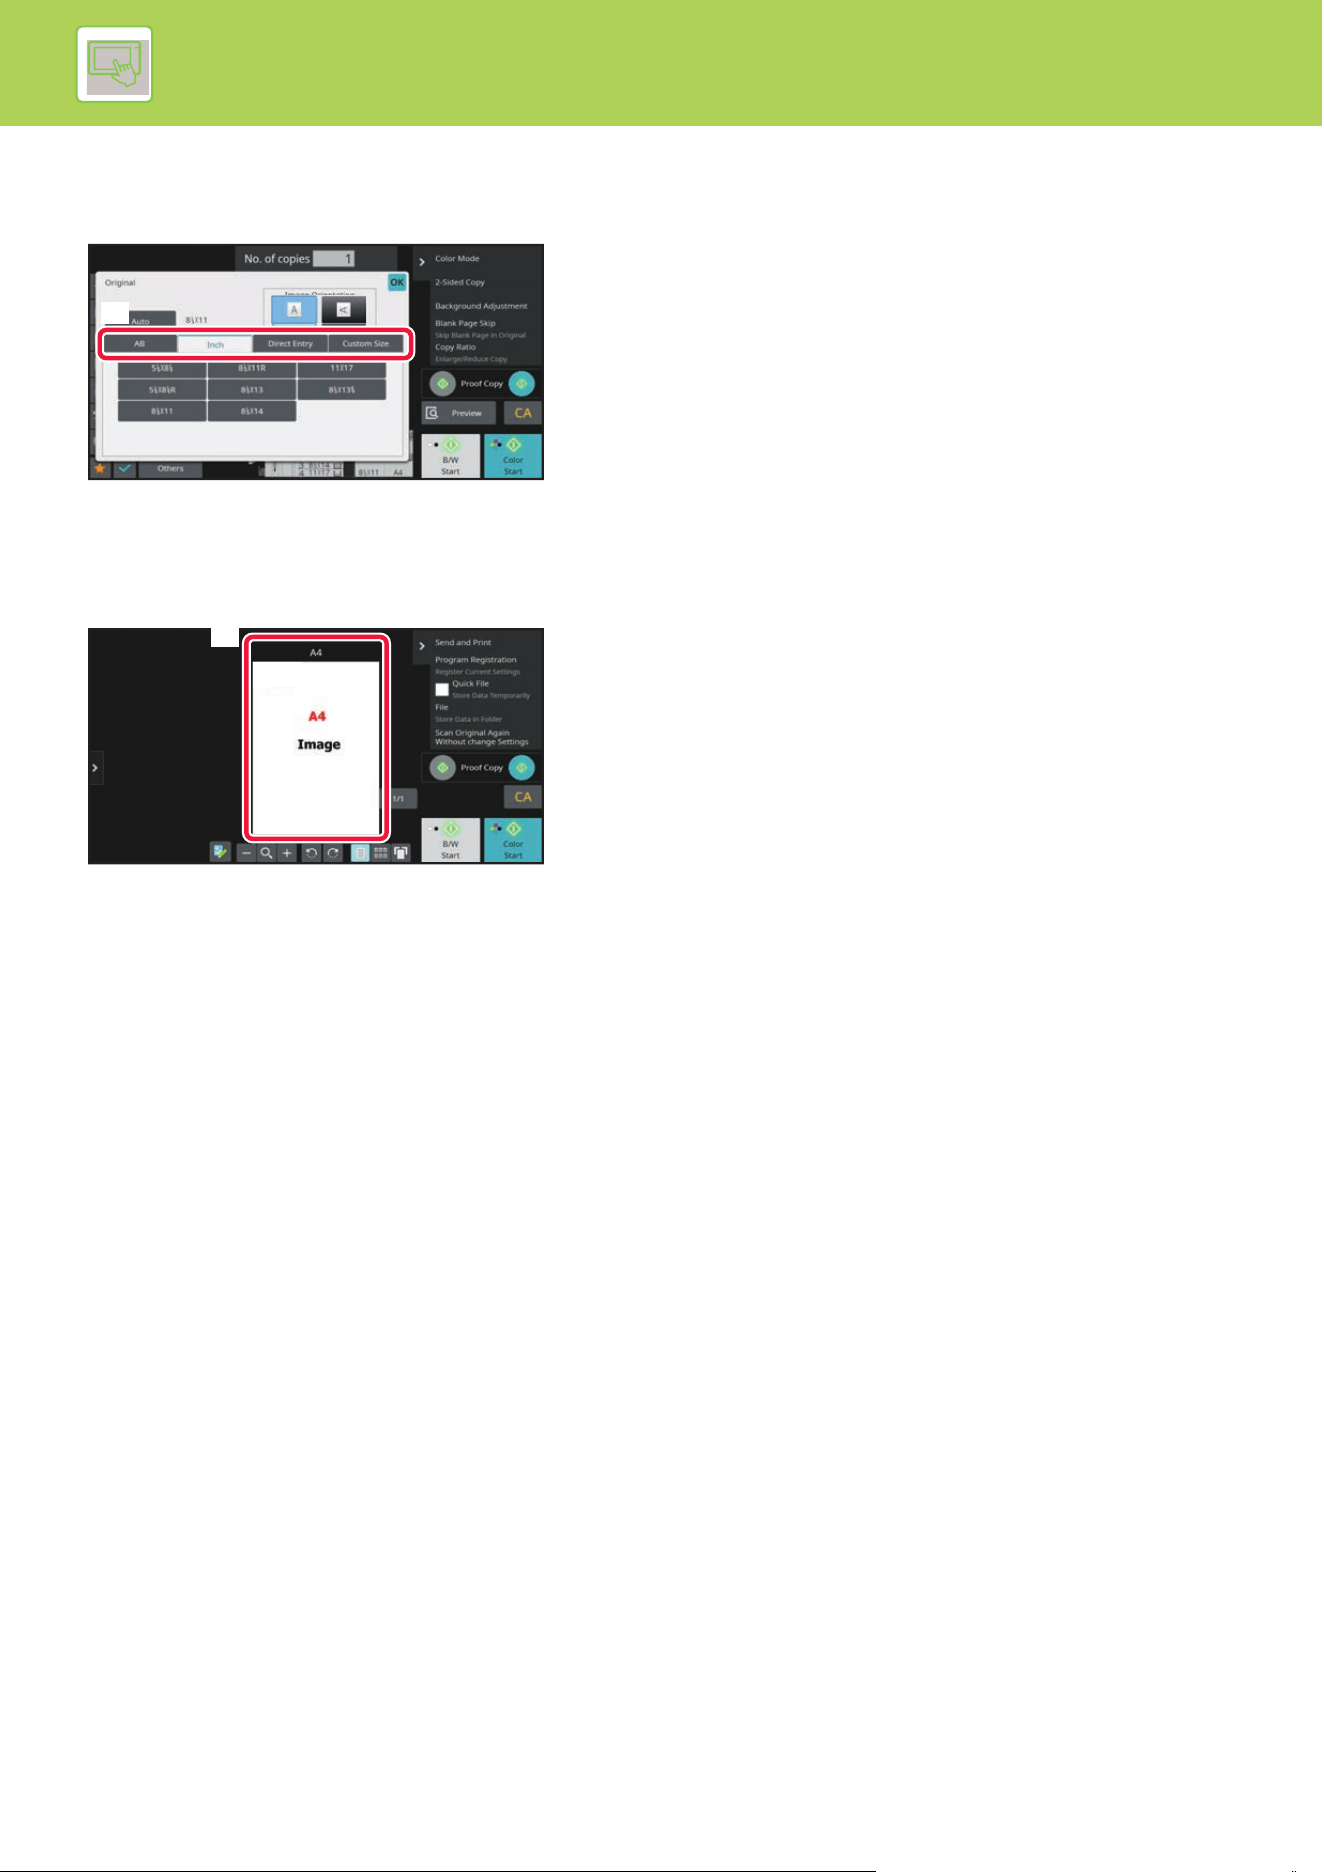
2-4
OPERATION OF THE MACHINE►TOUCH PANEL
Tab (tapping)
A. Tap a tab to switch what is displayed.
Preview screen (Double tapping/ Pinch/ Spread)
A. When a preview screen is "pinched", the screen image is reduced. When "spread", the image is enlarged.
When "Double tapping", the image is also enlarged.
(A)
(A)
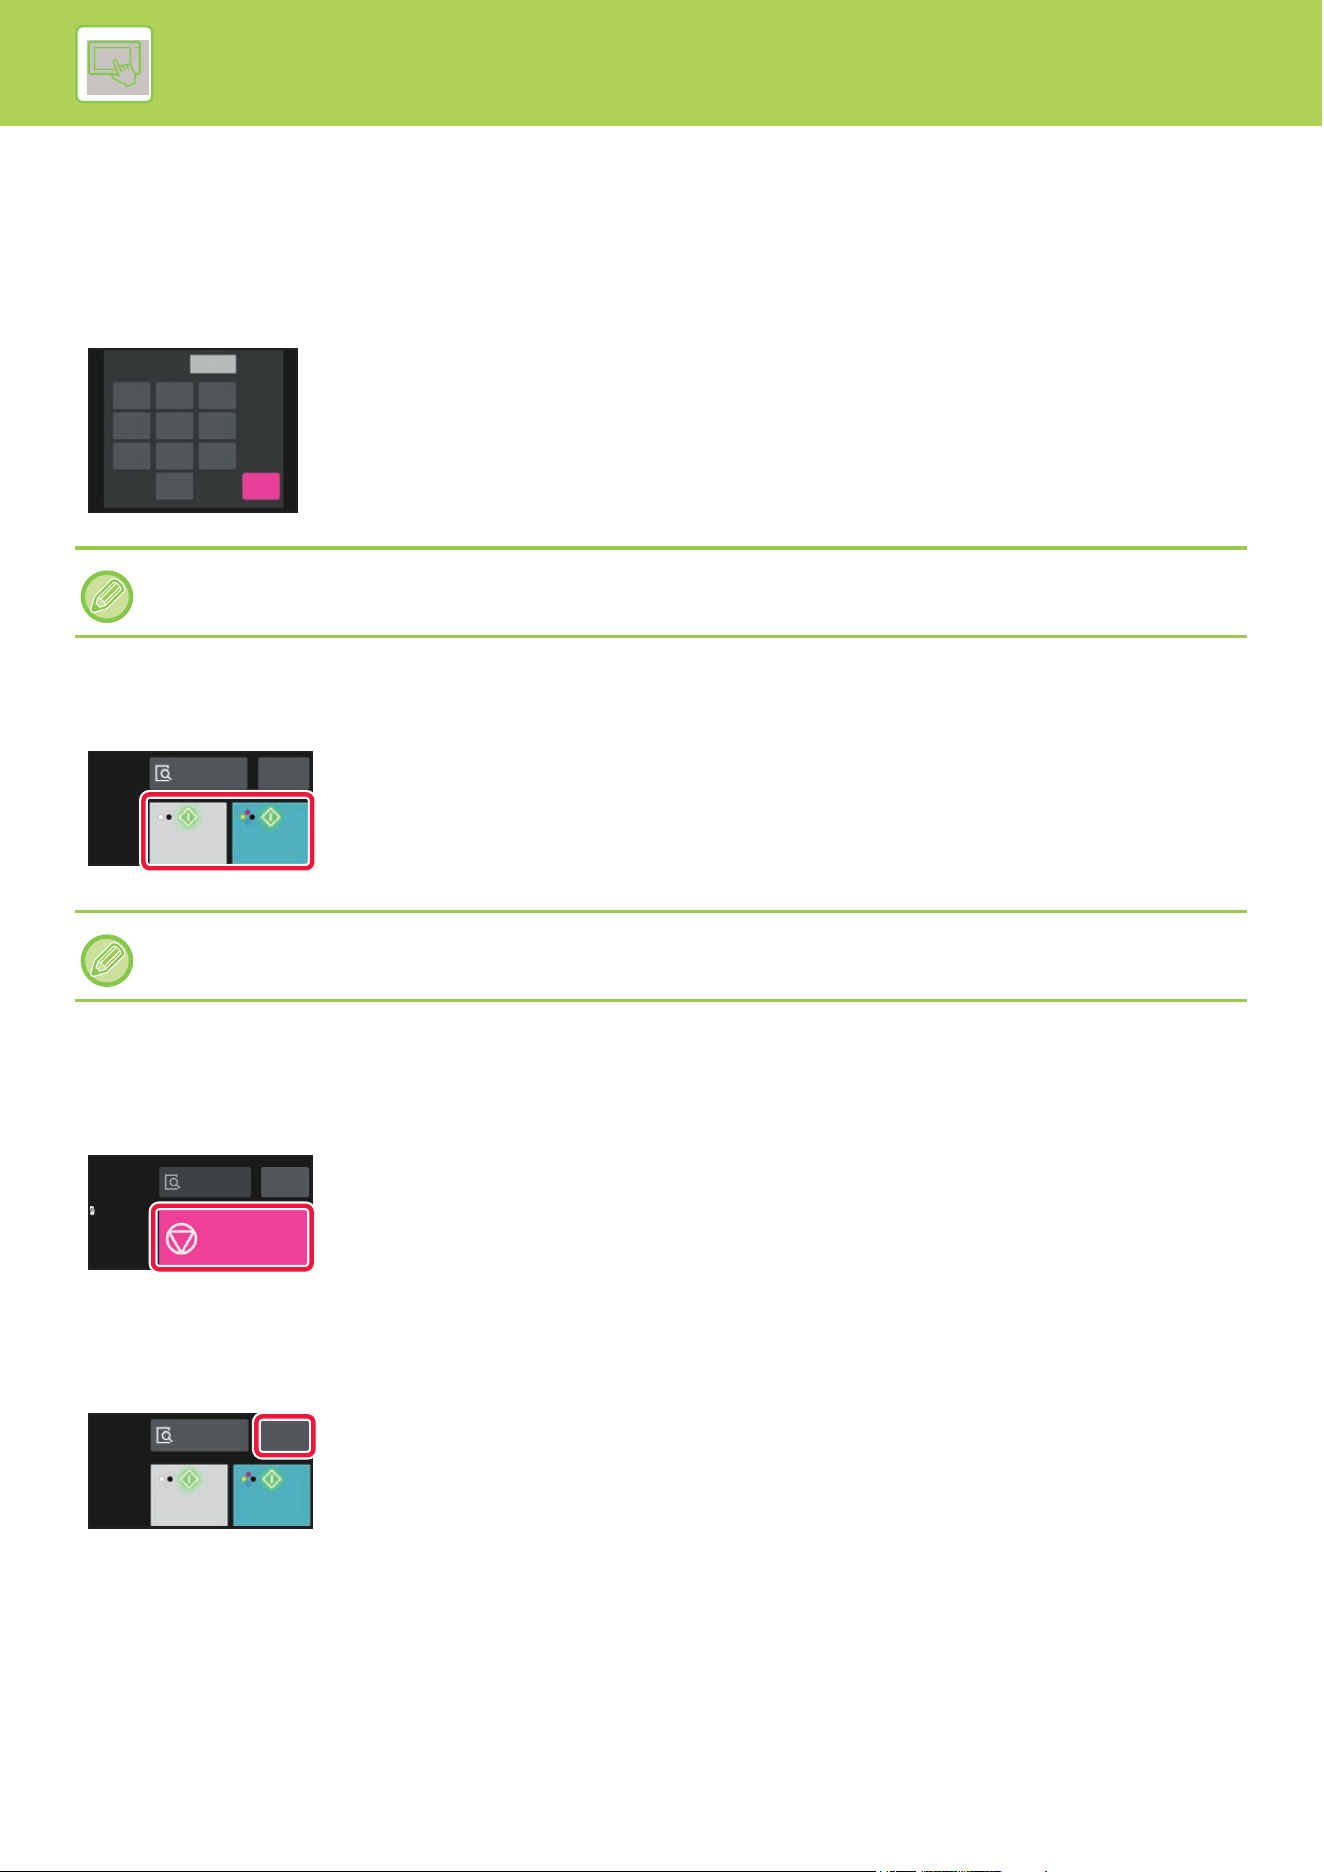
2-5
OPERATION OF THE MACHINE►TOUCH PANEL
OPERATION OF FREQUENTLY USED KEYS
Numeric keys
Tap a number to enter it.
To clear the entered number, tap the [C] key
[Start] key ([B/W Start] key and [Color Start] key)
Tap to perform a print or send job.
[Cancel Copy] key, [Storing Canceled] key, [Cancel Scan] key, [Sending
canceled] key
Tap to stop copying, printing, or transmission.
[CA] key
Tap to cancel all settings and restore the initial status in each mode.
On the address screen, you can enter characters other than numbers, and a different key layout is provided. You can also
move the cursor by using the [←] and [→] keys. Tap the [C] key to delete one character to the left of the cursor.
In copy mode, [B/W Start] and [Color Start] keys are displayed.
1
1
4
7
5
8
6
9
2
0
3
C
No. of copies
Start
Color
Start
CA
B/W
Preview
Cancel Copy
CA
Preview
CA
Start
Color
Start
B/W
Preview
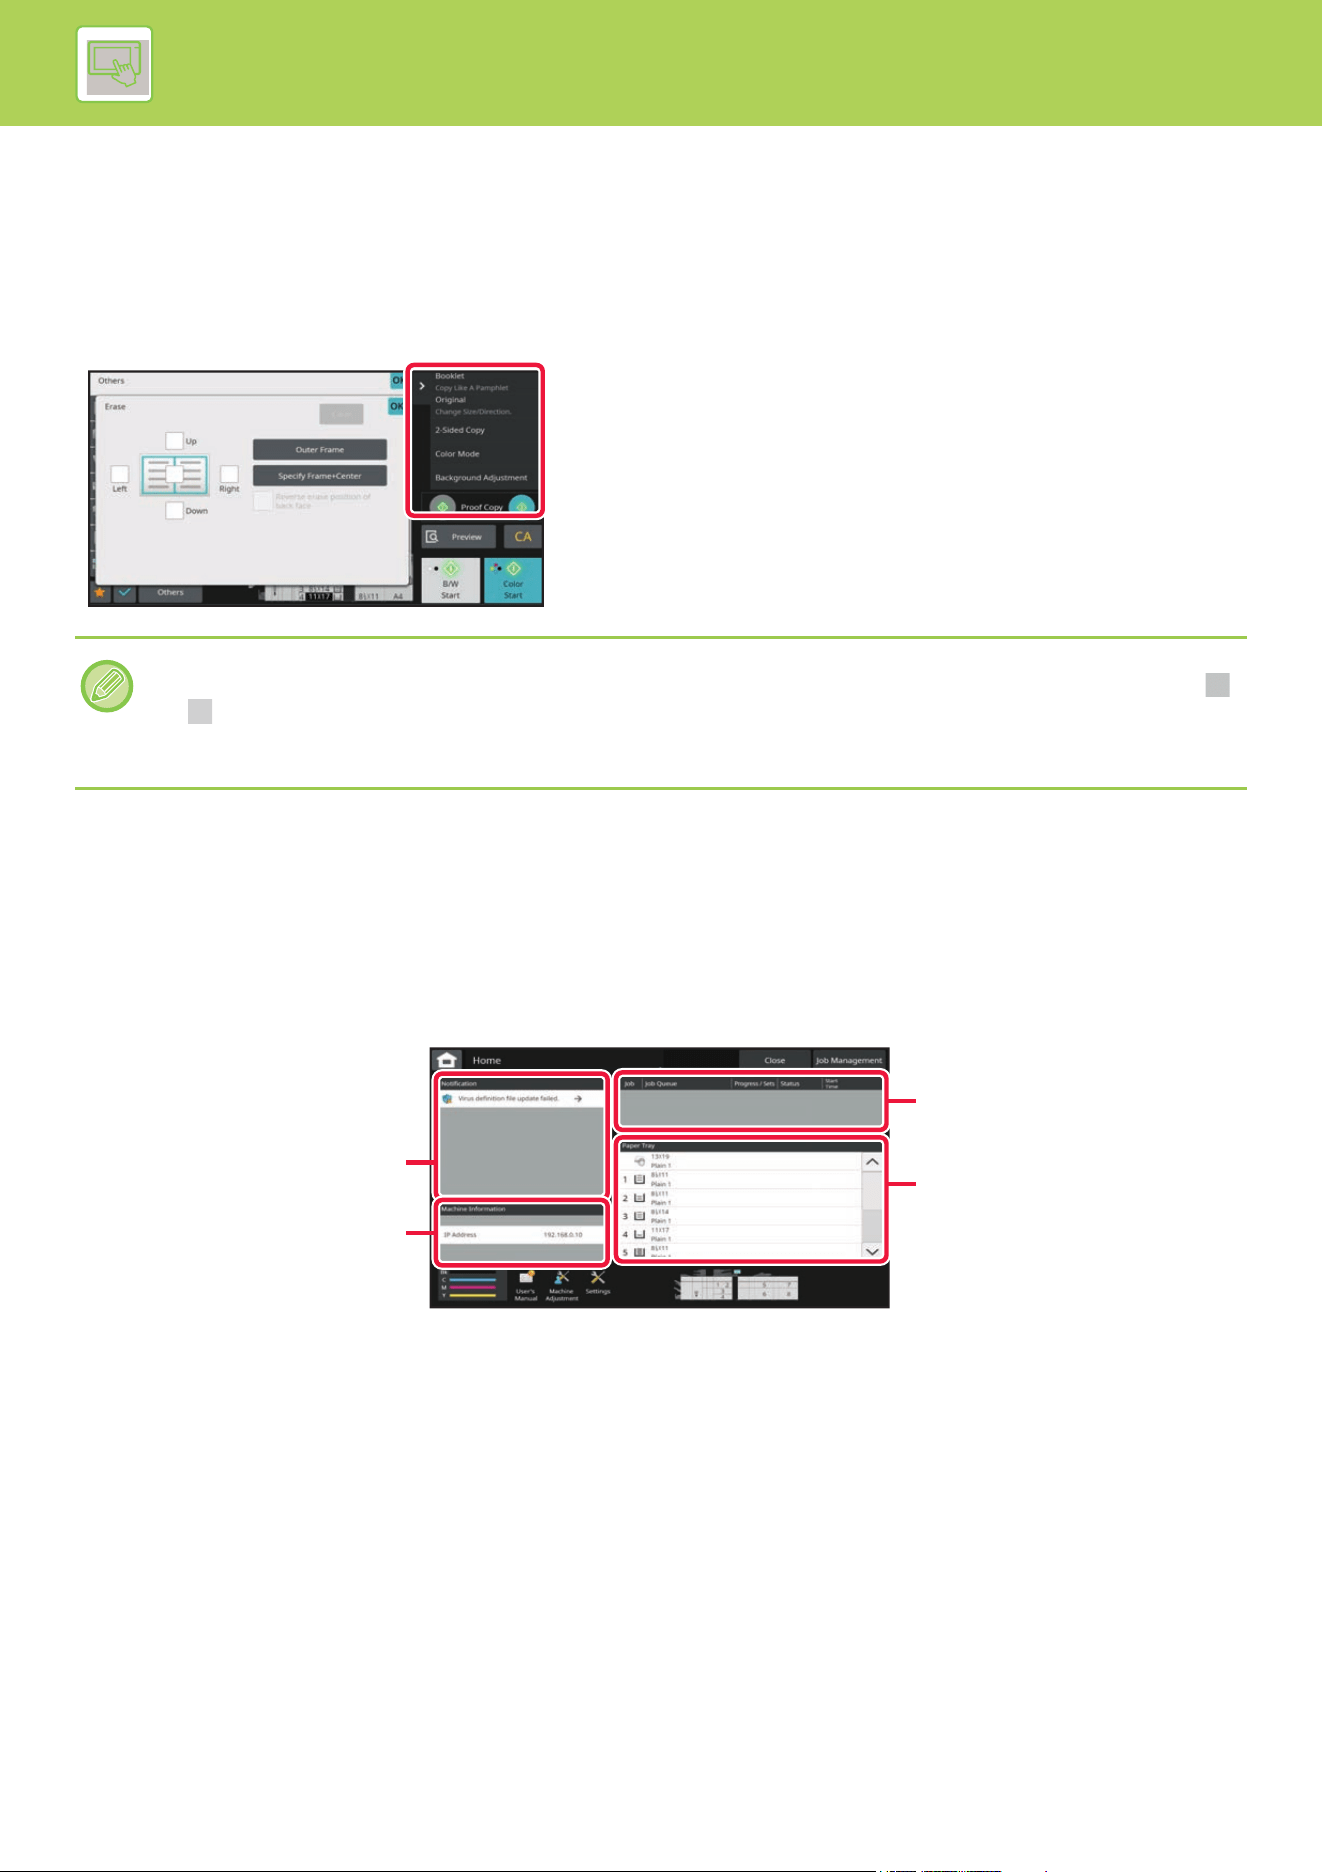
2-6
OPERATION OF THE MACHINE►TOUCH PANEL
ACTION PANEL
Recommended functions are displayed on the action panel when you configure functions in each mode.
From the action panel, you can configure functions or combine the configured function with a function displayed on the
action panel.
If the action panel does not appear, tap the action panel tab.
MACHINE STATUS SCREEN
Tap the [Machine Status] key in the Machine Status area at the top of the touch screen to display the Machine Status
screen.
In addition, in case that an error has occurred to this machine, this screen is displayed automatically to show the details
of an error.
(1) Notification
If there is an error which requires an user operation to
recover, such as toner outage or transmission error, an
instruction is displayed here.
If → is displayed on the right side of the Notification list,
tap → to jump to the setting screen where the error
originated in.
Notifications disappear from the list when problems are
resolved.
(2) Machine Information
The connection information of the machine is displayed.
(3) Job list
A list of jobs is displayed.
(4) Paper Tray
Size, type, and remaining amount of paper inside the
machine are displayed. Tap here to jump to the Paper
Tray Settings screen.
The functions displayed on the action panel vary depending on the mode or th
e functions that have been configured.
If too many functions have been configured to be displayed on the action panel, you can slide the panel vertically or tap
and to view all.
In enlarge display mode, part of the text on the action panel may not be displayed. To display the whole text, long-touch the
partially hidden key or slide the tab of the action panel to the left.
(1)
(2)
(3)
(4)
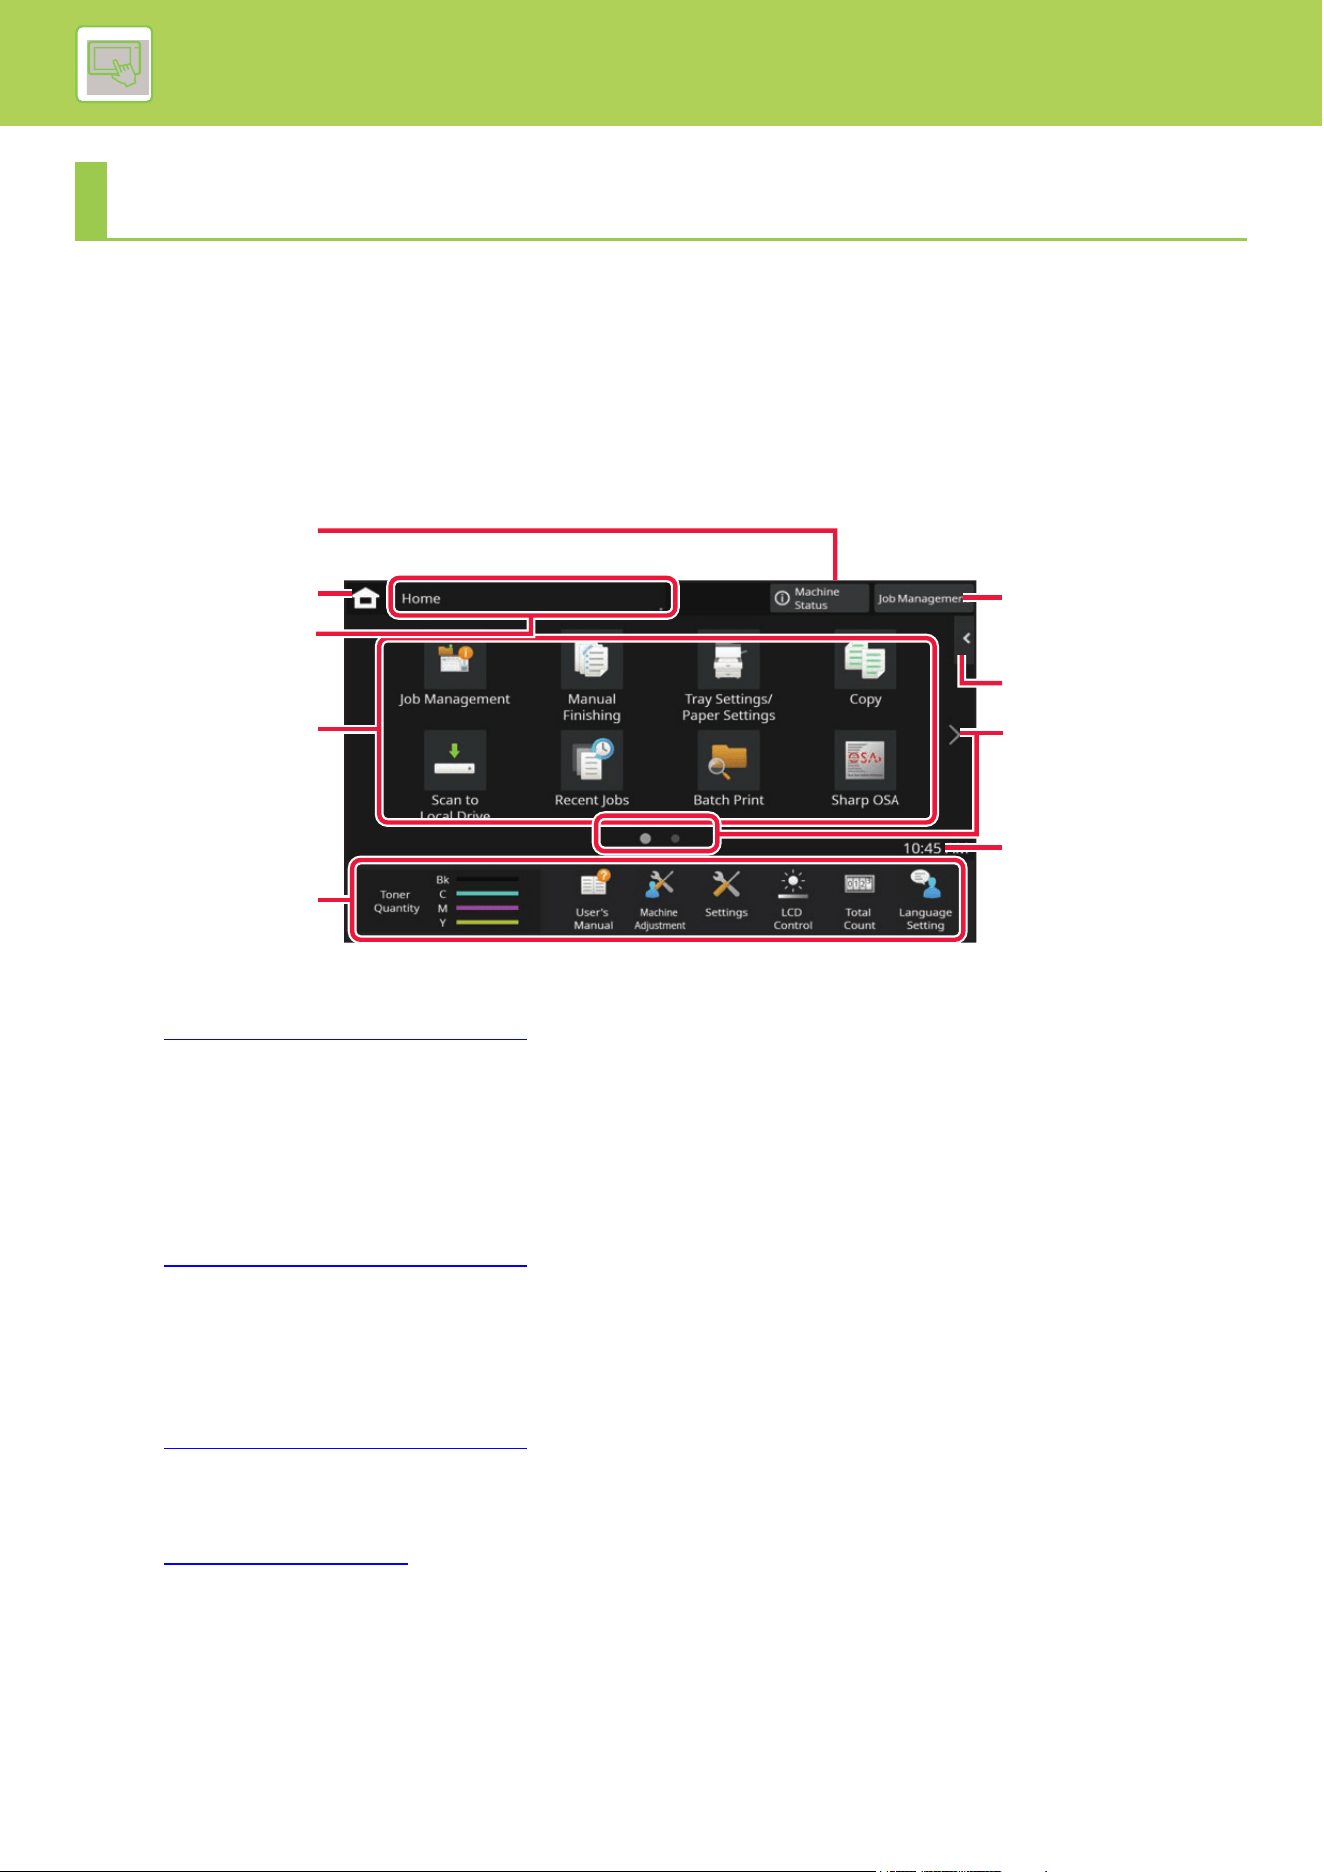
2-7
OPERATION OF THE MACHINE►HOME SCREEN AND PREVIEW SCREEN
HOME SCREEN
Tapping the [Home Screen] key displays the home screen on the touch panel. The home screen displays the keys for
selecting modes or functions.
OVERVIEW
(1) Machine Status Information area
Tap this area to display the Machine Status screen.
► MACHINE STATUS SCREEN
(page 2-6)
(2) [Home Screen]
Switch to the home screen.
(3) Mode selection area
The mode selection screen is displayed.
(4) Shortcut keys
Select shortcut keys for modes or functions.
► MACHINE STATUS
SCREEN (page 2-6)
(5) Fixed display key
Use these keys to select functions that make the
machine easier to use.
(6) [Job Management] key
Displays the job in progress or waiting with text or icon.
► MACHINE STATUS
SCREEN (page 2-6)
(7) Action panel
Select functions that can be utilized in respective modes.
Tap the tab, and the list of function keys is displayed.
► ACTION PANEL
(page 2-6)
(8) Home screen page switching key
Switch the pages for
displaying shortcut keys.
(9) Clock
Displays the time.
HOME SCREEN AND PREVIEW SCREEN
(2)
(3)
(
7
)
(9)
(6)
(
8
)
(5)
(4)
(1)

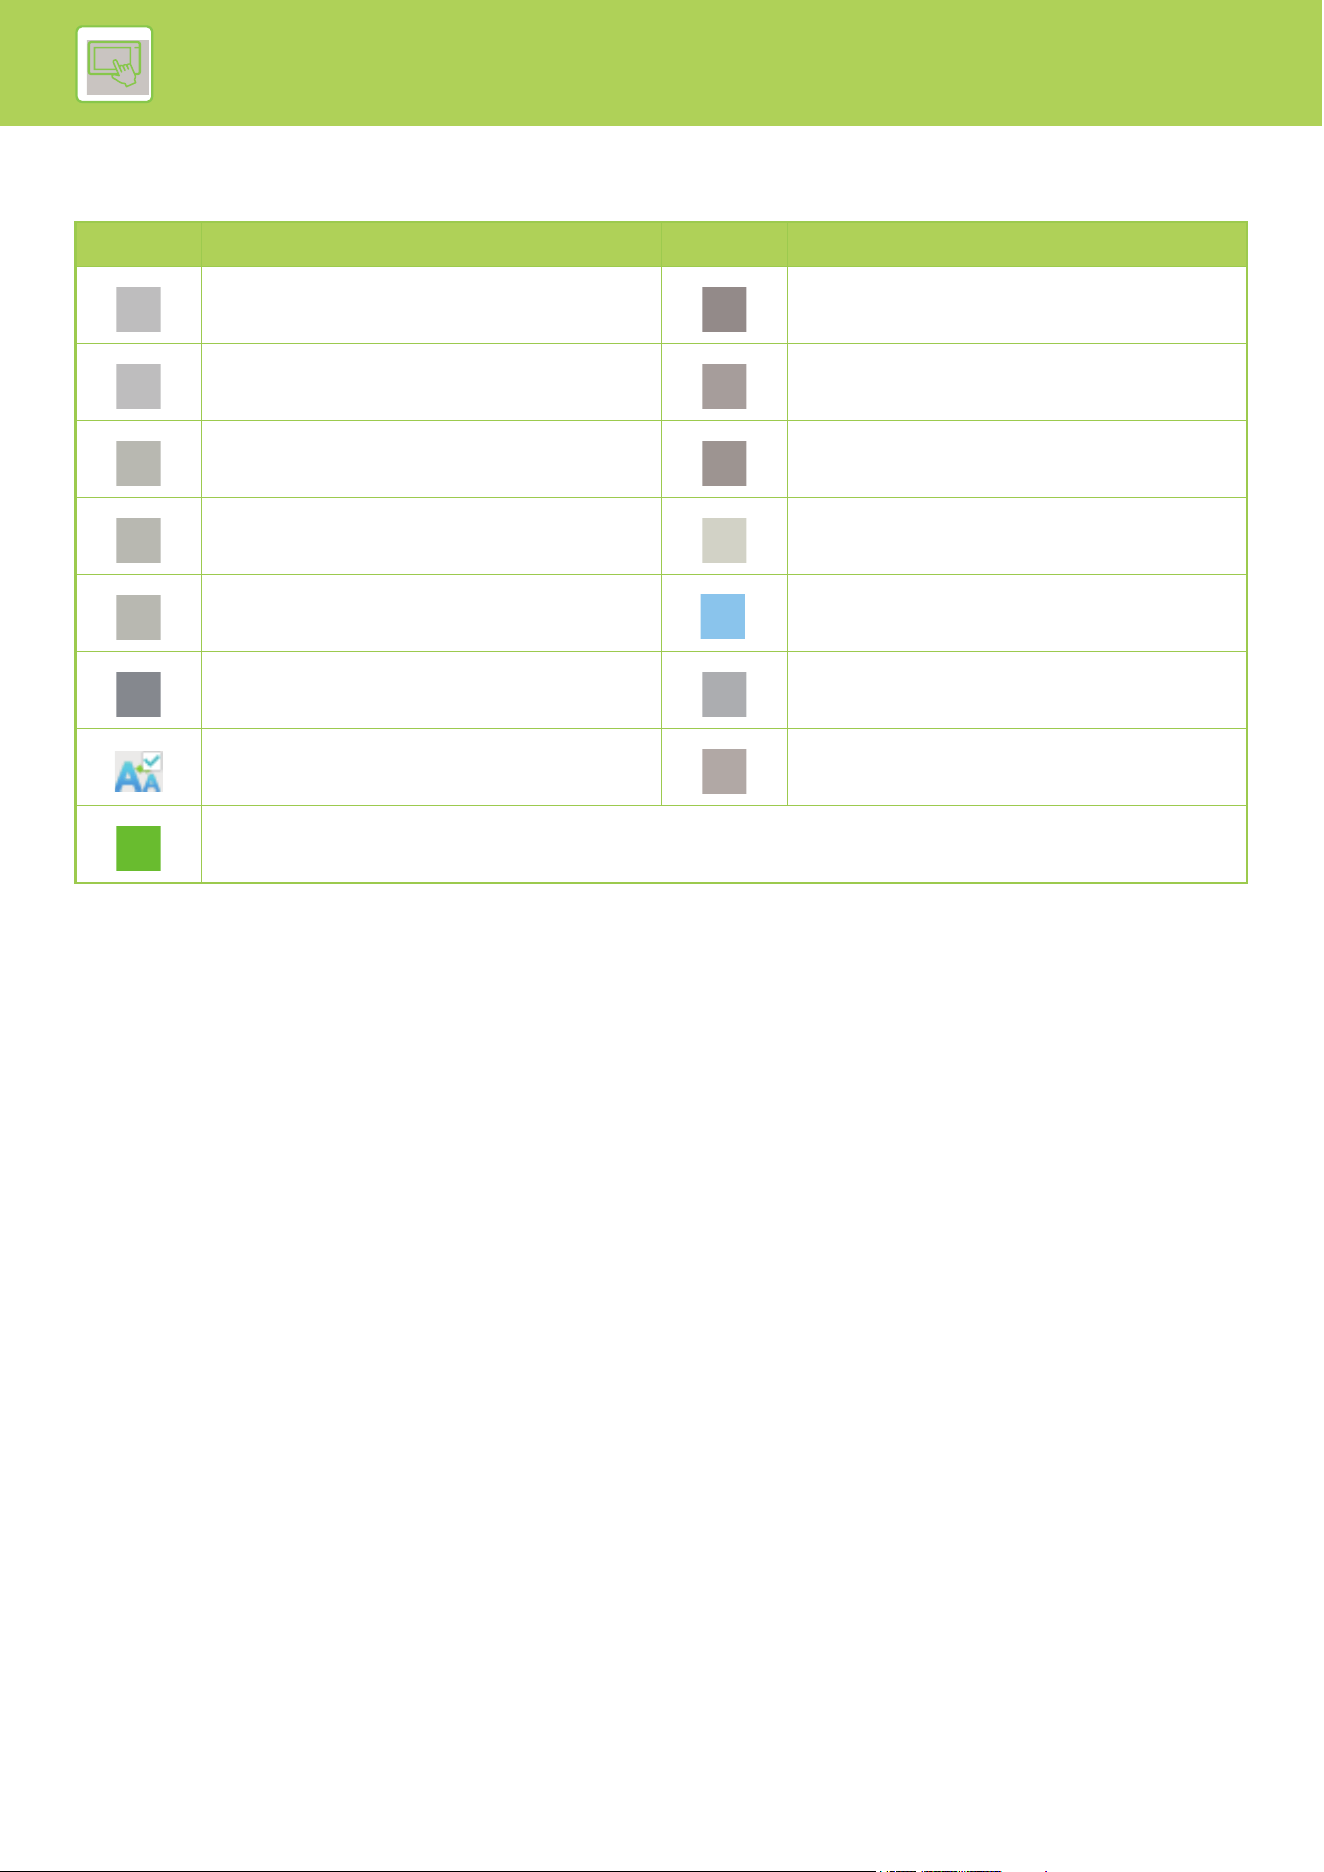
2-9
OPERATION OF THE MACHINE►HOME SCREEN AND PREVIEW SCREEN
ICON INDICATING THE STATUS OF THE MACHINE
Icon Machine status Icon Machine status
Printer data is being processed.
A USB device is installed.
Printer data is being printed. The field support system is enabled.
Send data exists. Single-byte alphanumeric character entry
Forward error data exists. A data security kit is installed.
Received data exists. A LAN cable is not connected.
OSA communication is in progress. A maintenance notification is issued.
Enlarge display mode is enabled. Remote operation is in progress.
Eco mode is enabled.
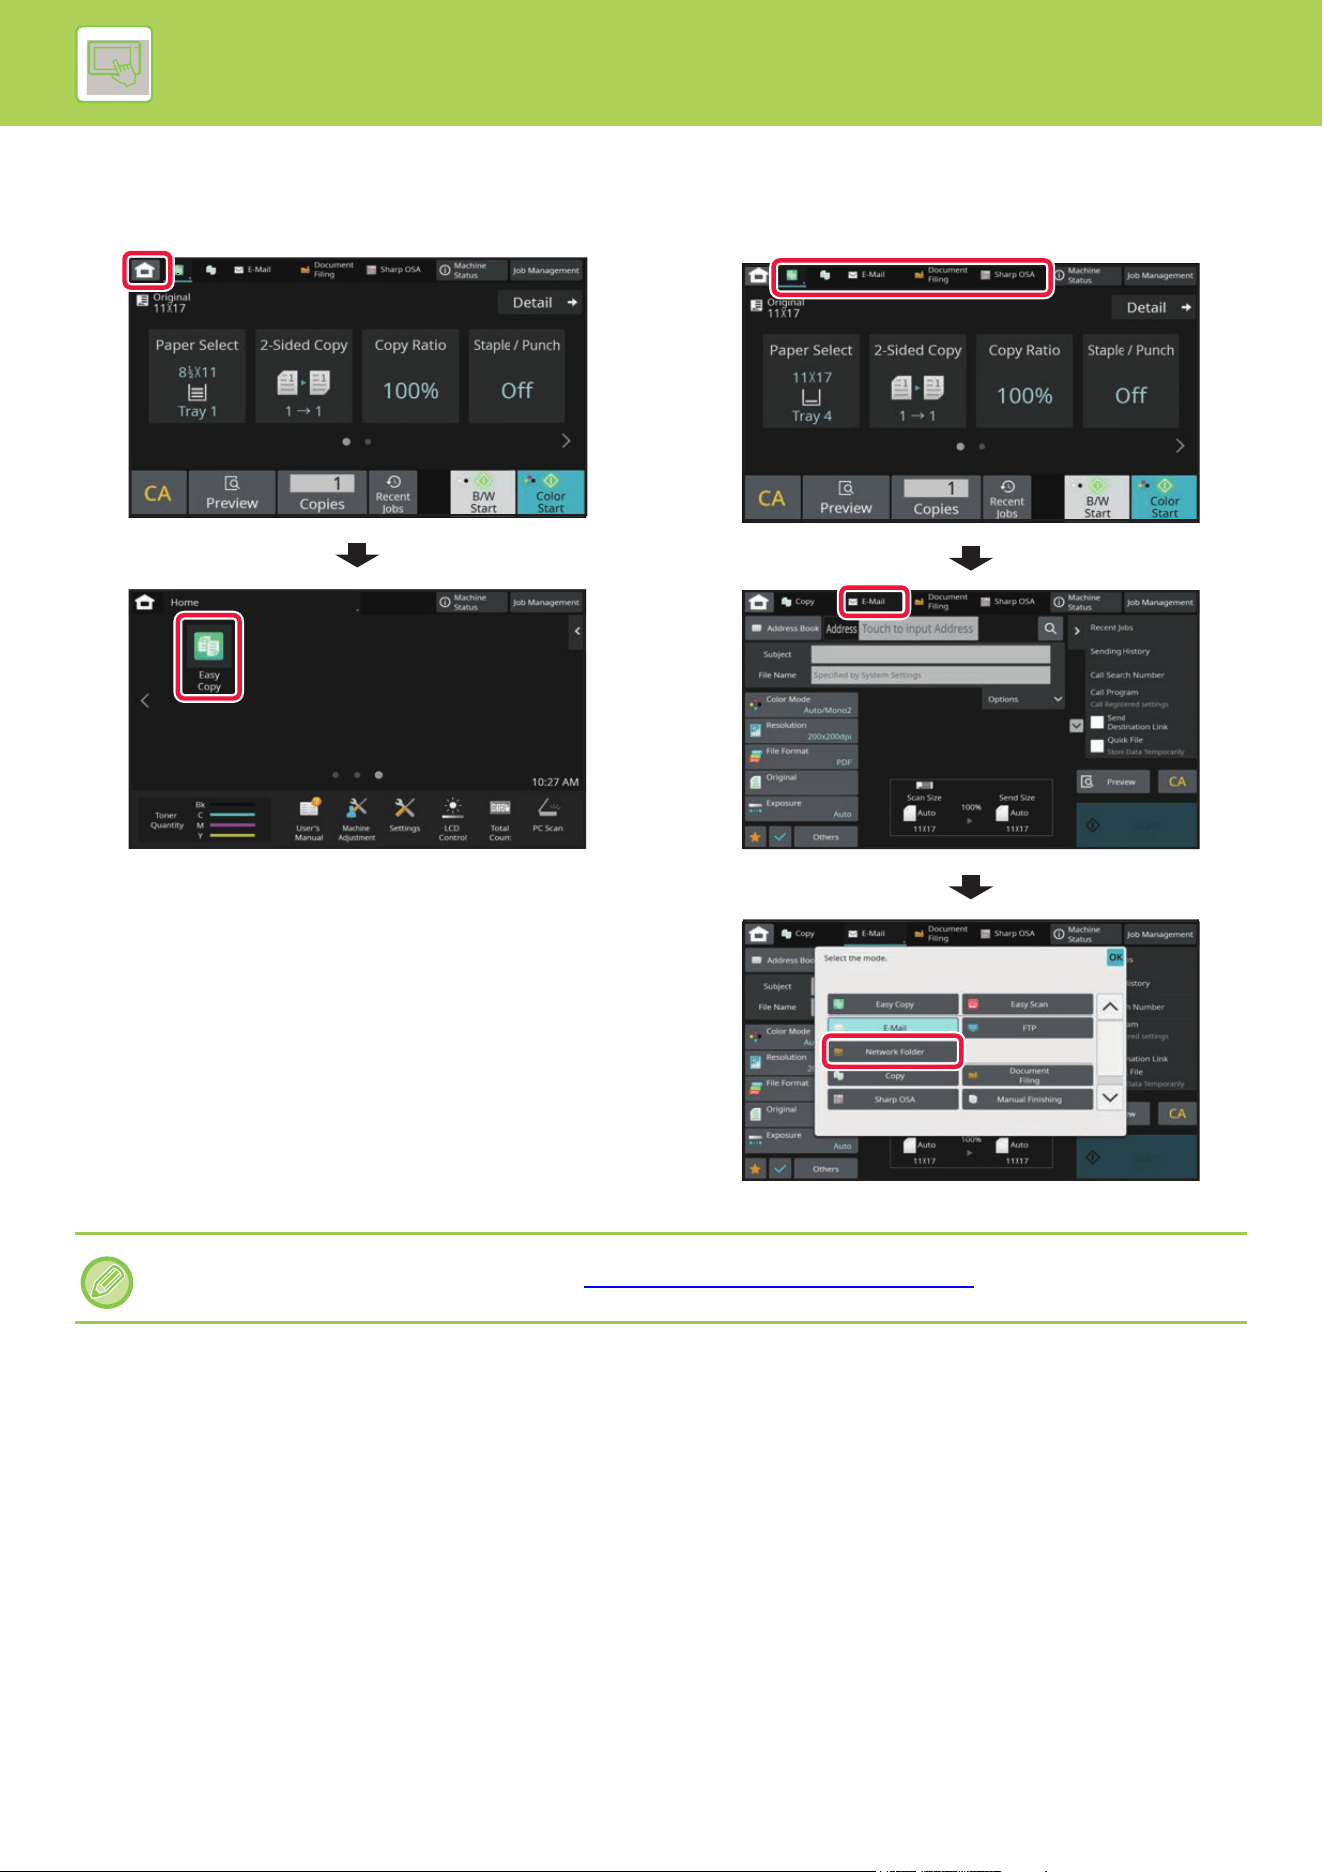
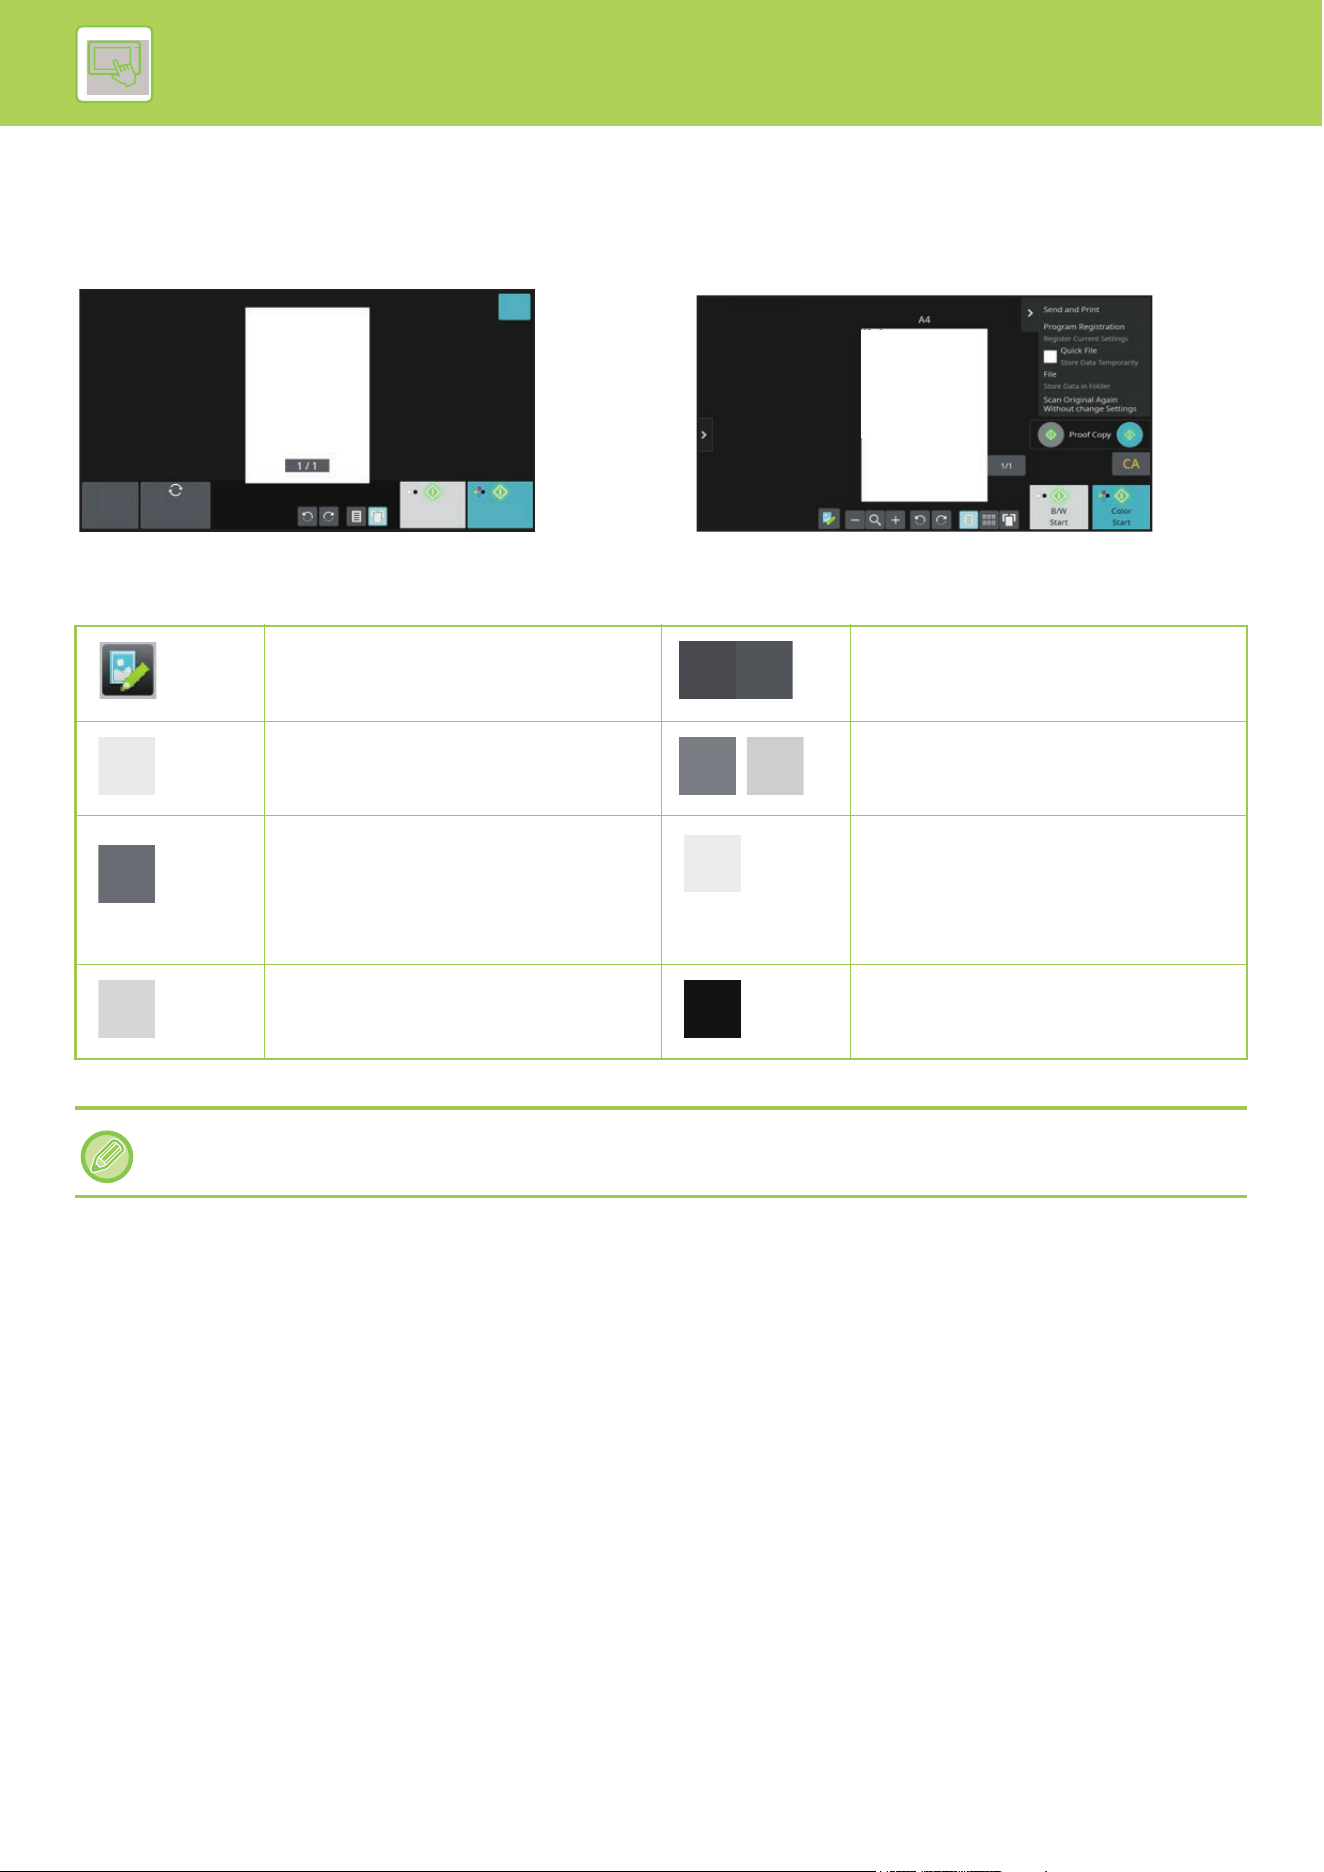
2-11
OPERATION OF THE MACHINE►HOME SCREEN AND PREVIEW SCREEN
PREVIEW SCREEN
In the preview screen, you can view output images or images stored in the machine using the touch panel.
[Easy mode] [Normal mode]
Keys used in the preview screen
* Can also be used in Easy mode.
B/W
Start
Color
Start
Preview
Scan
Again
CA
OK
8½x11
This changes the mode to edit mode.
Pages of the original can be changed,
rotated, or deleted.
*
This rotates the preview image of whole
page in the arrow's direction. The
printing result is not rotated.
*
This reduces the image. ,
*
This displays preview images of
respective pages.
*
This displays the scroll bar for
enlargement/reduction operations.
Moving the slider to the left reduces the
image, and moving the slider to the right
enlarges the image.
This displays thumbnails of preview
images.
*
This enlarges the image.
*
This displays pages in a 3D view.
• The display position of an image can be moved by dragging it while it is enlarged.
• To enlarge an image, double-tap it when the preview image is displayed by page.
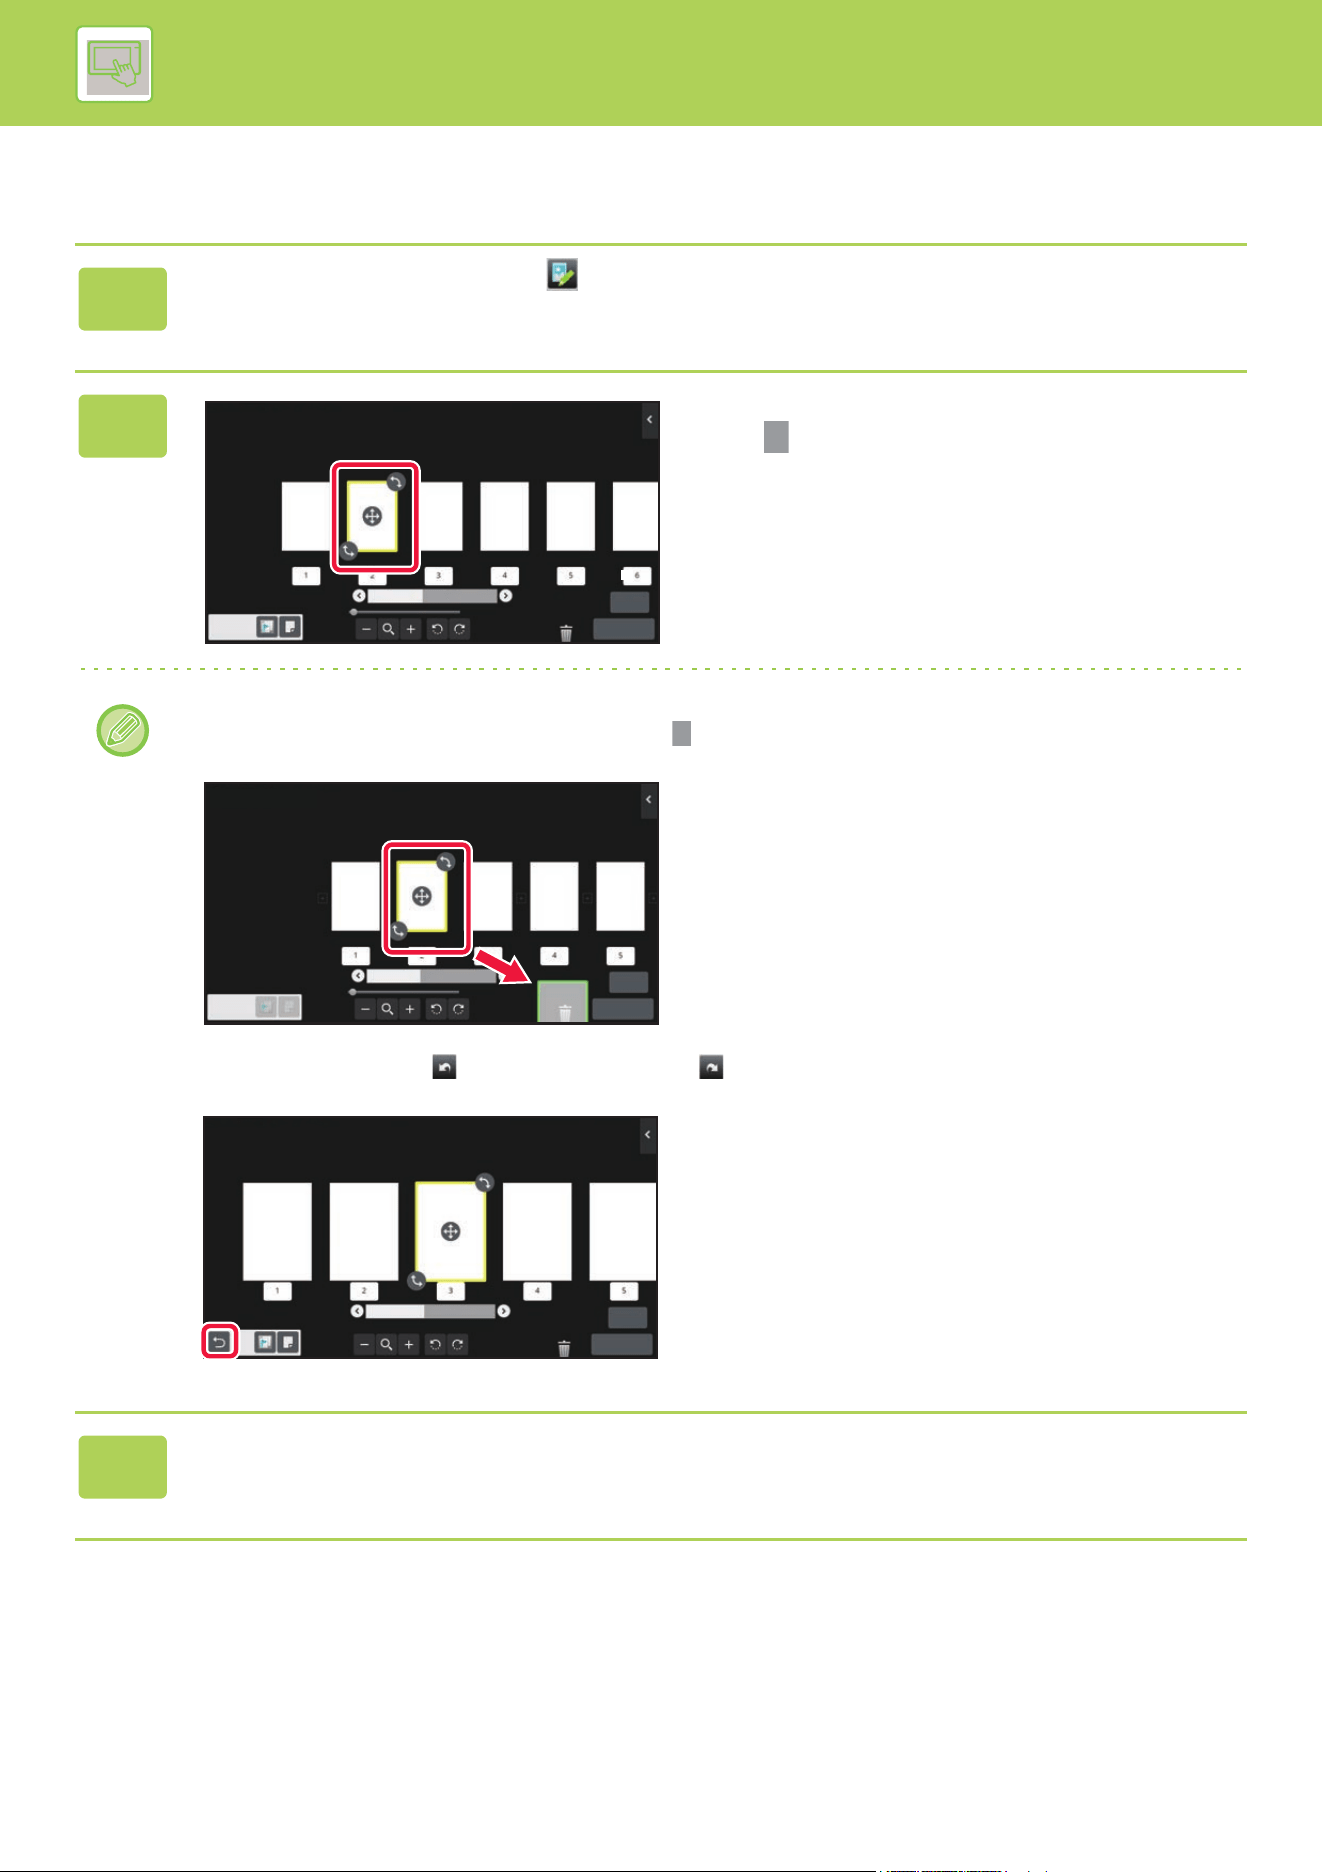
2-12
OPERATION OF THE MACHINE►HOME SCREEN AND PREVIEW SCREEN
Deleting a page
1
In the preview screen, tap to switch to edit mode.
2
Tap the page you want to delete, and
tap .
• You can also delete the page by tapping [Delete the Page] on the action panel.
• You can also delete the page by dragging a page to .
• To undo the deletion, tap . To redo the deletion, tap .
3
Tap the [Edit End] key.
6
Edit End
5
6
Edit End
Select the location
to move.
6
Edit End
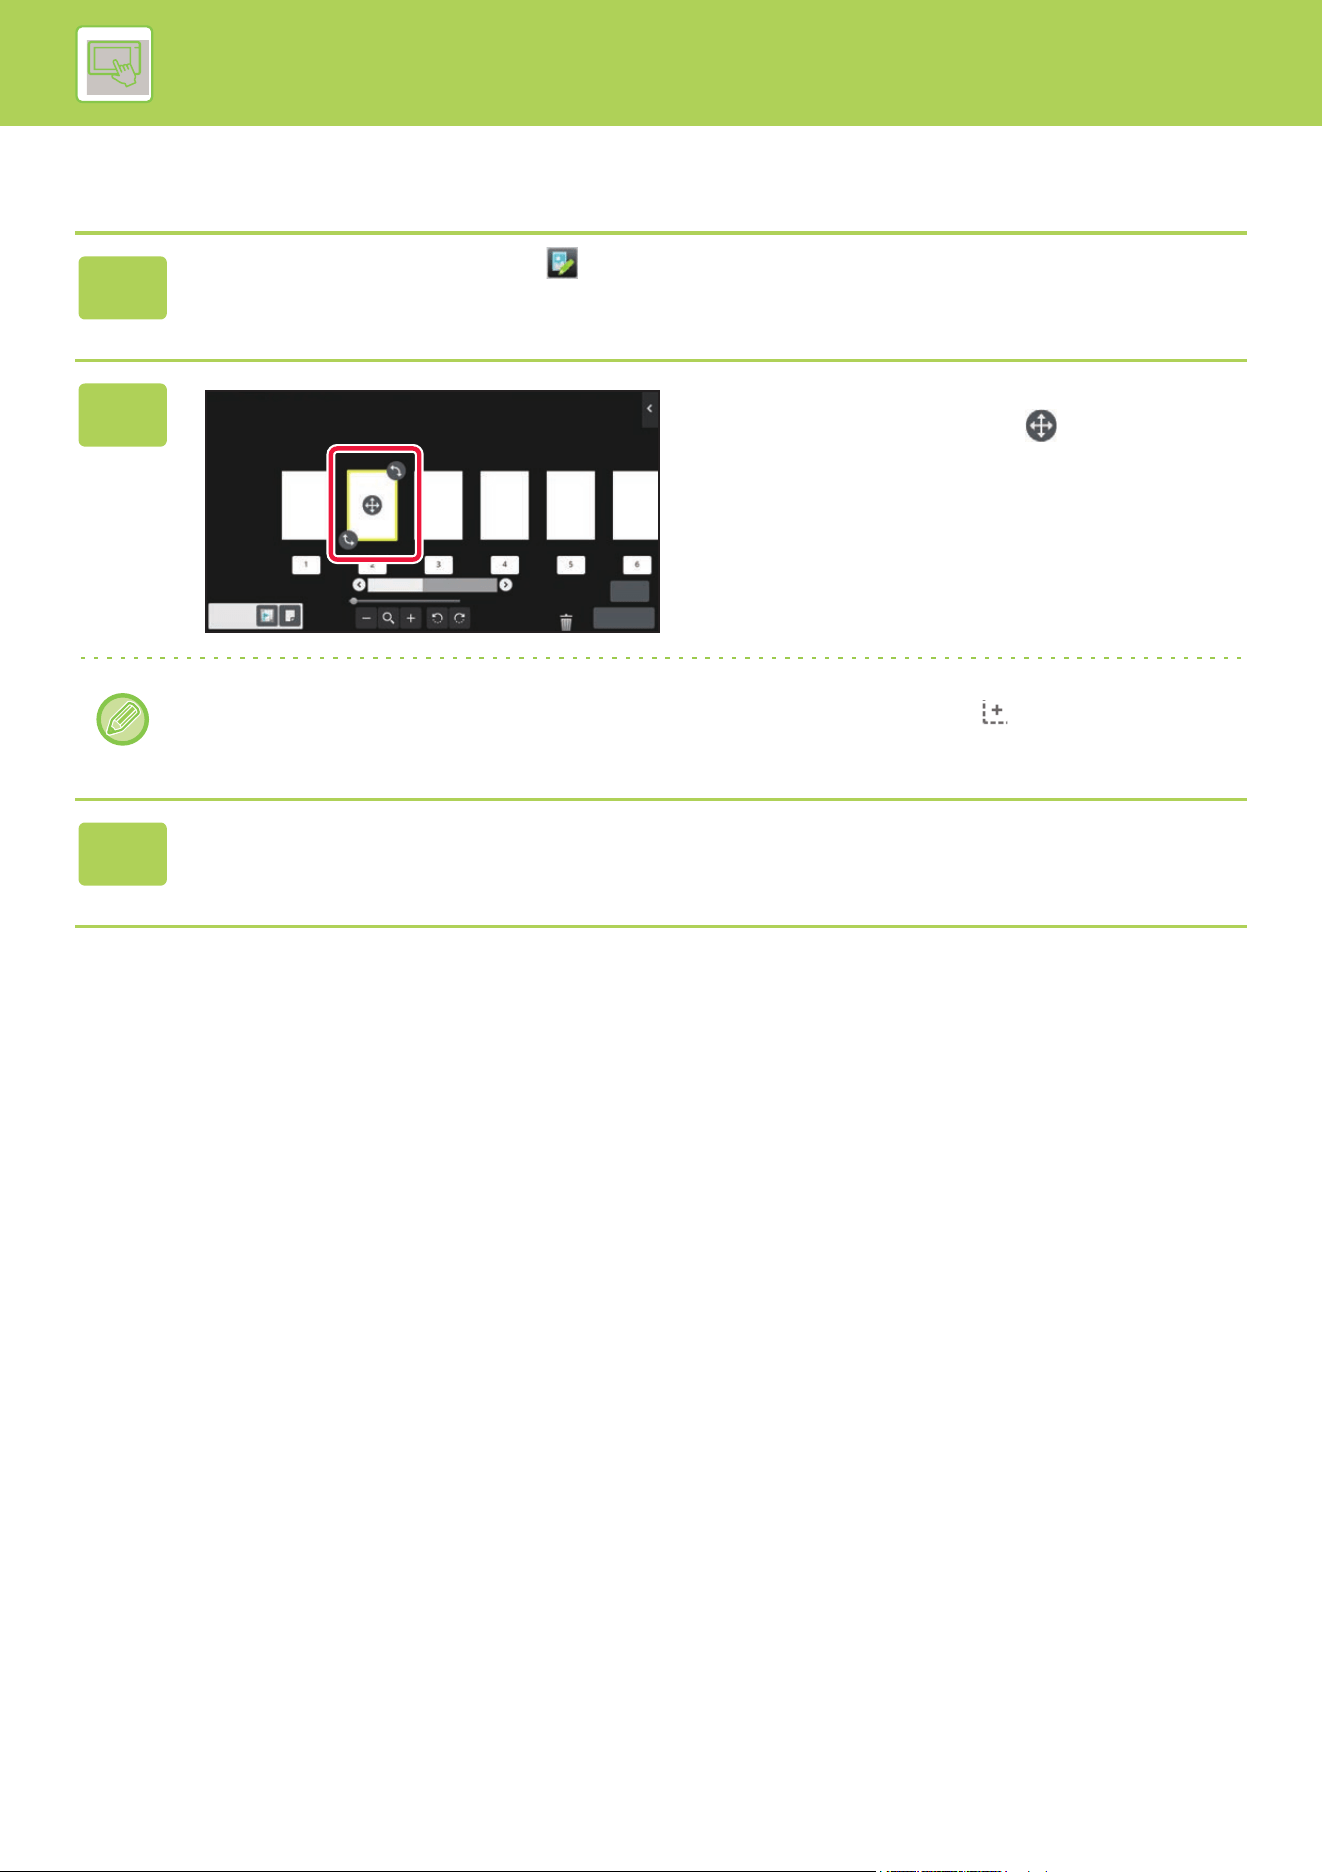
2-13
OPERATION OF THE MACHINE►HOME SCREEN AND PREVIEW SCREEN
Moving a page
1
In the preview screen, tap to switch to edit mode.
2
Tap the page you want to move, and
drag to move the page.
You can also move the page by tapping [Move the Page] on the action panel and then tap of the destination.
3
Tap the [Edit End] key.
6
Edit End
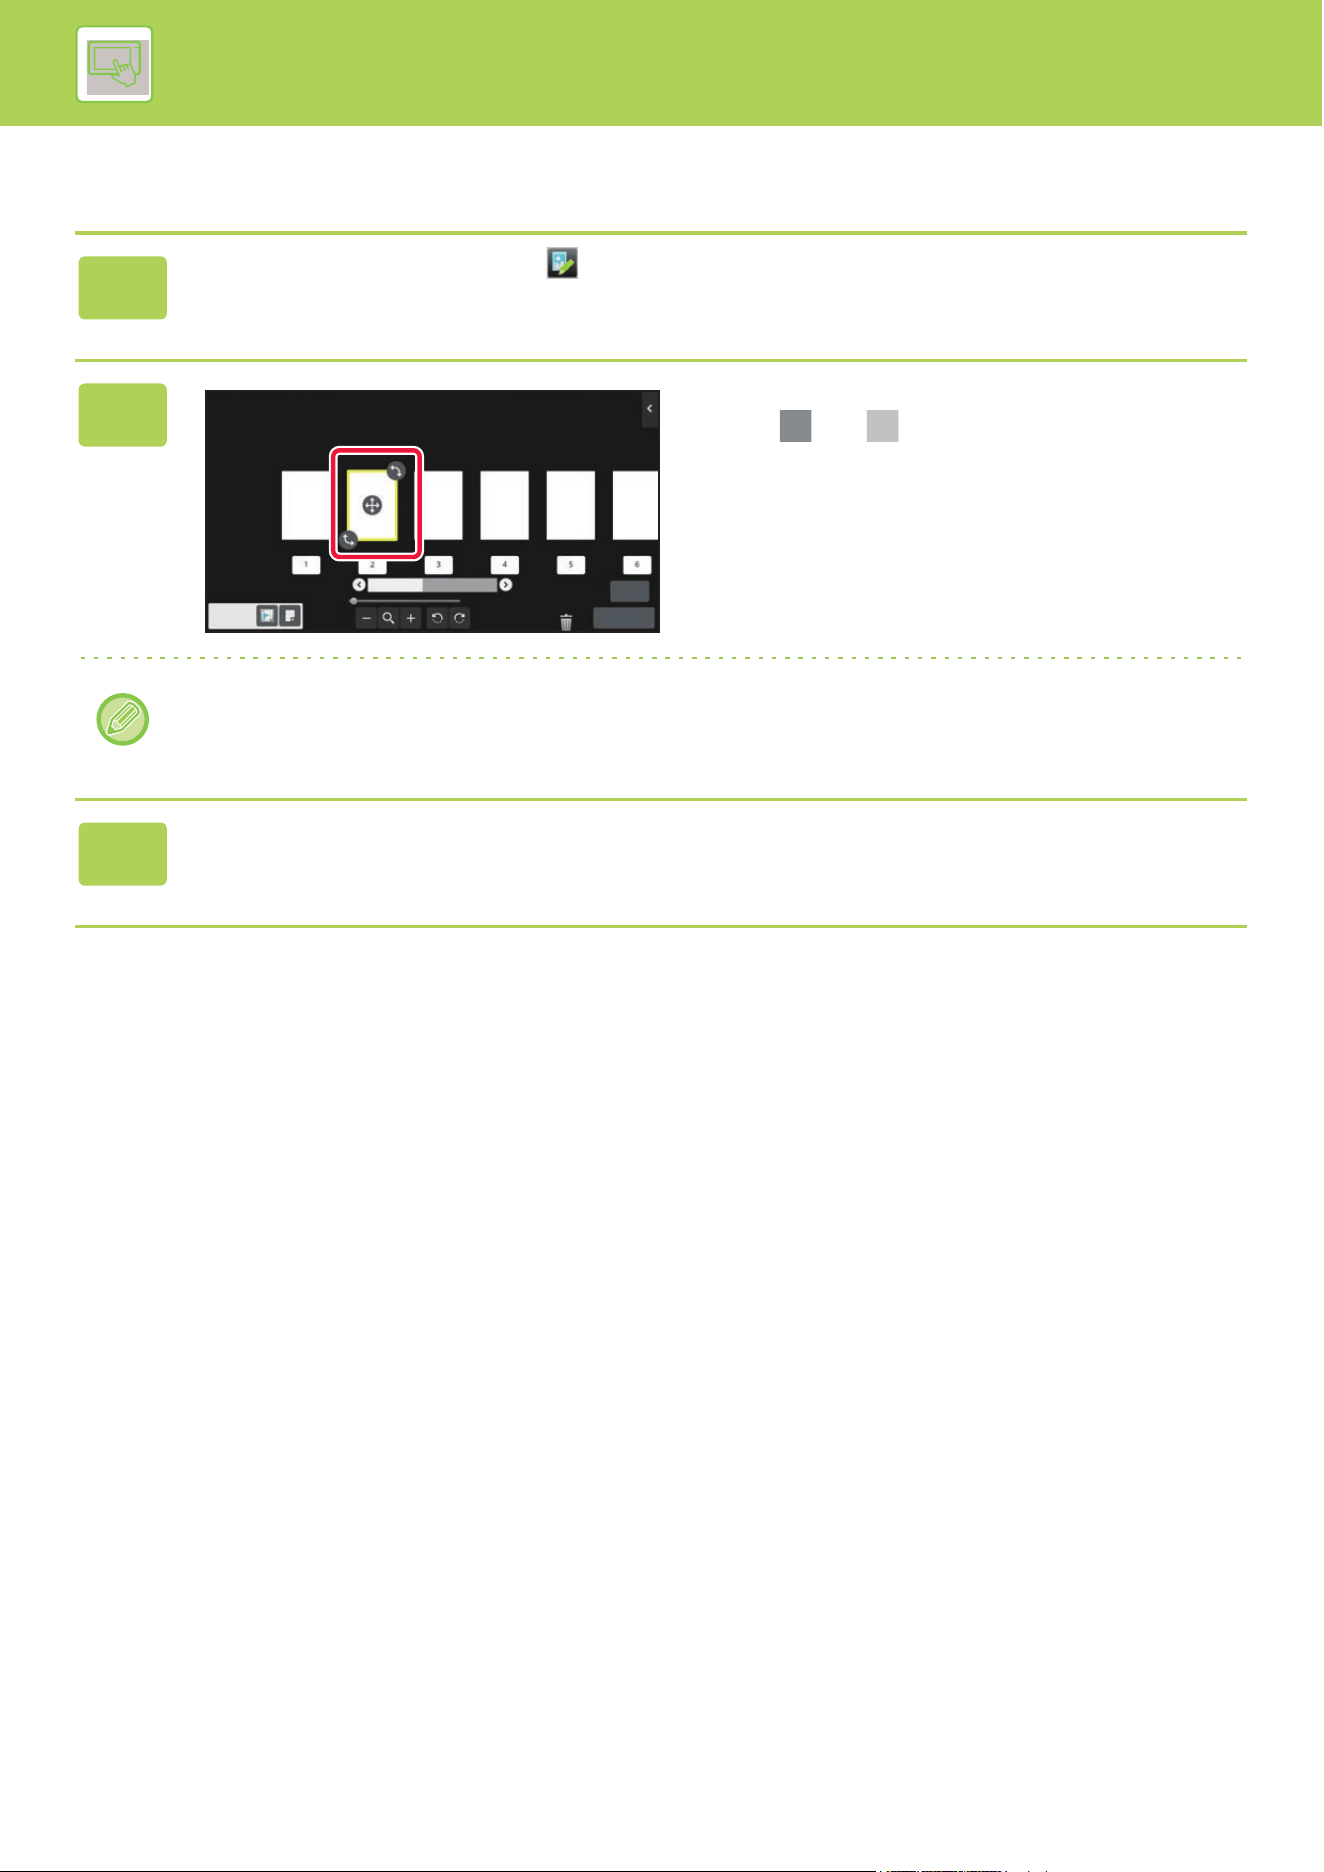
2-14
OPERATION OF THE MACHINE►HOME SCREEN AND PREVIEW SCREEN
Rotating a page
1
In the preview screen, tap to switch to edit mode.
2
Tap the page you want to rotate, and
drag or to rotate the page.
You can also rotate the page by tapping [Rotate 180 Degrees] (Copy mode only) or [Rotate 90 Degrees] (Scanner mode
only) on the action panel.
3
Tap the [Edit End] key.
1
Edit End
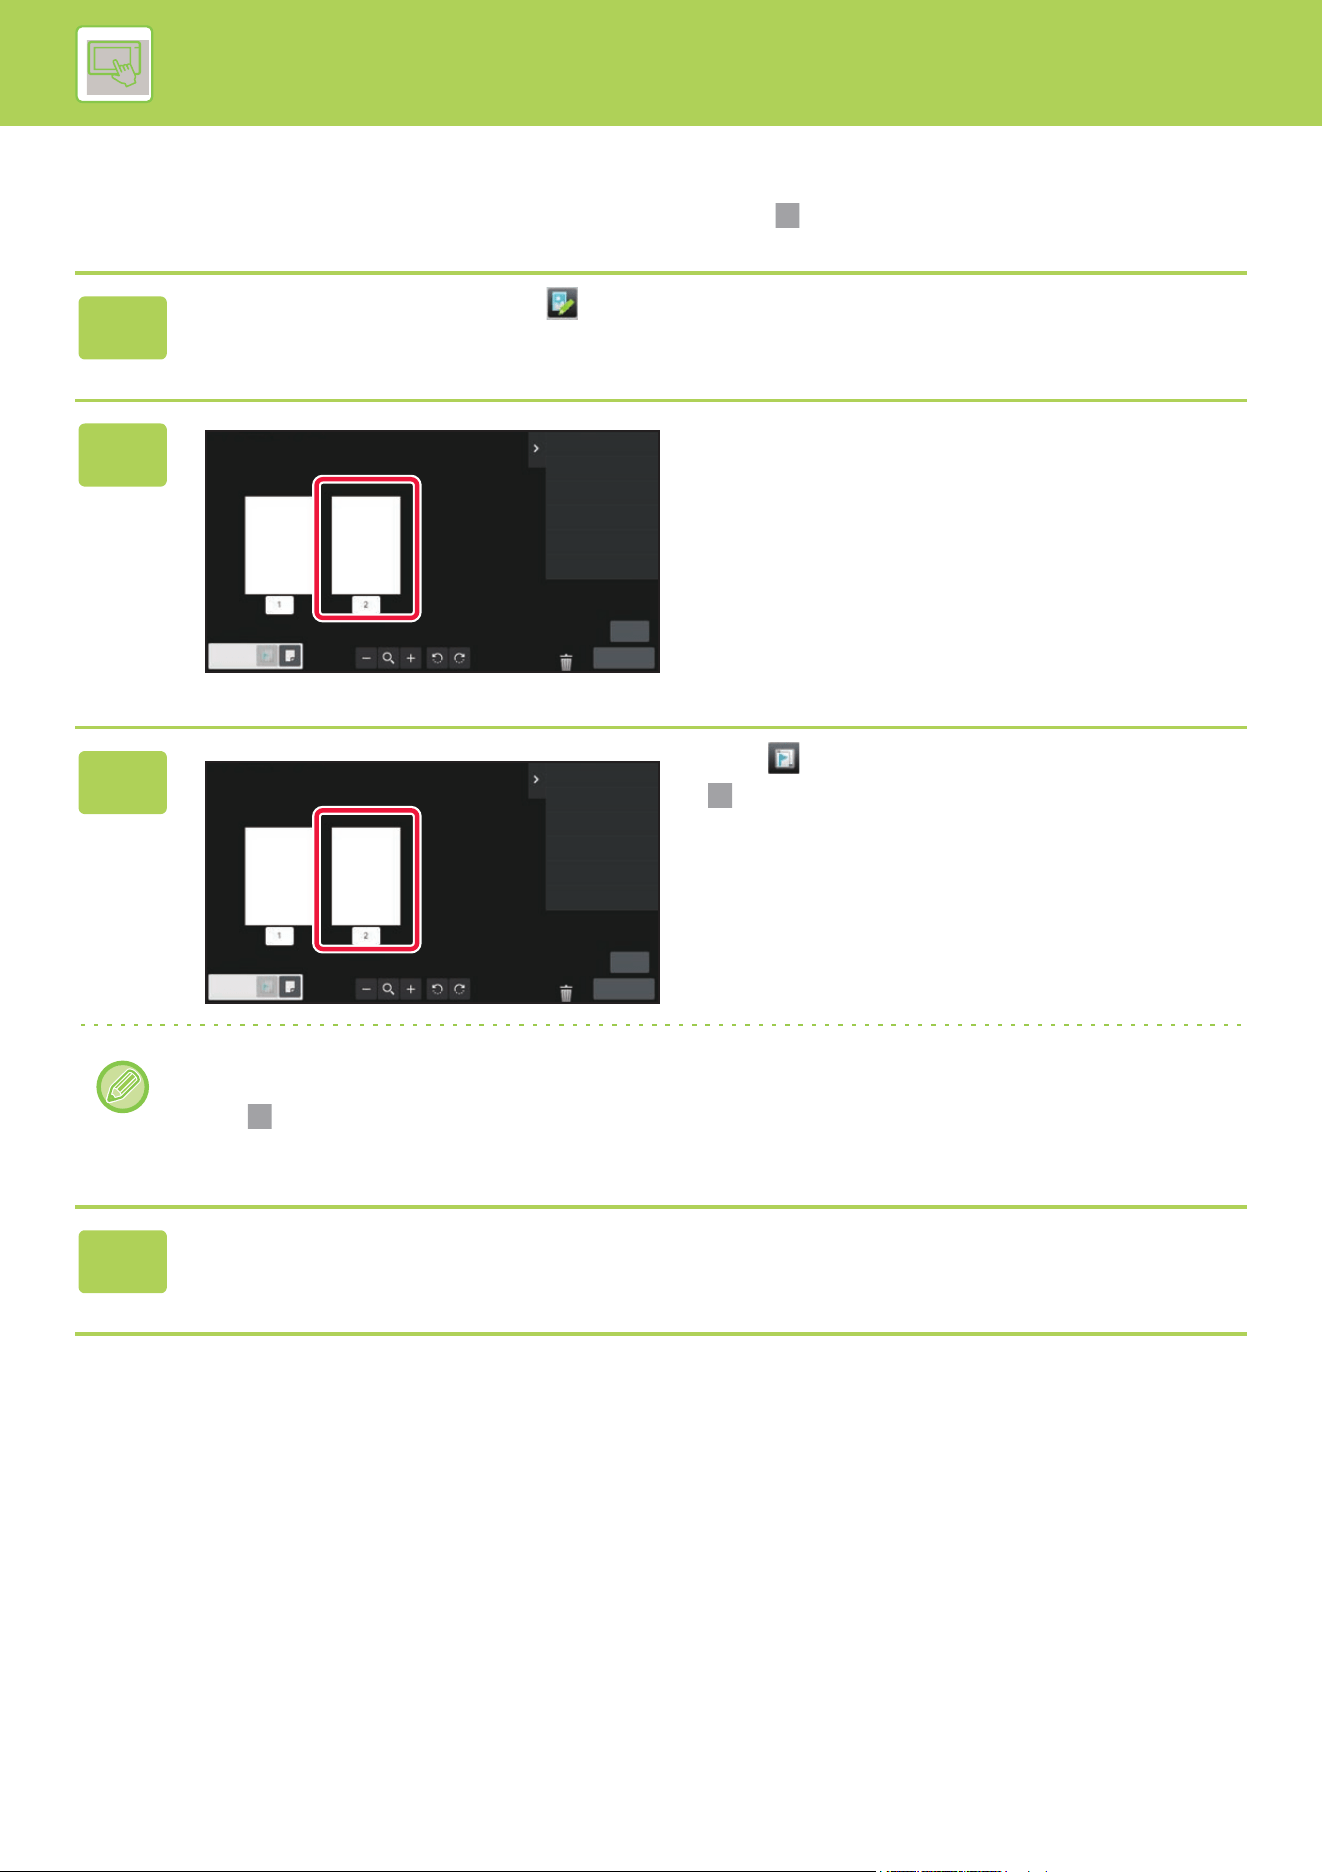
2-15
OPERATION OF THE MACHINE►HOME SCREEN AND PREVIEW SCREEN
Setting chapter inserts
When N-Up or 2-Sided is specified, you can move a page marked with to the first page.
1
In the preview screen, tap to switch to edit mode.
2
Tap the page you want to set chapter
inserts.
3
Tap .
is displayed on the page.
• You can also set chapter inserts by tapping [Specify Chapter Inserts] on the action panel.
• To cancel the Chapter Inserts setting:
Tap displayed on the page, or select the page and tap [Cancel Chapter Inserts of Selected Page.] on the
action panel.
4
Tap the [Edit End] key.
2
Edit End
Erase Specified Range
Erase Specified Original Area
Move the Page
Rotate 180 Degrees
Insert Blank Page
Delete the Page
2
Edit End
Erase Specified Range
Erase Specified Original Area
Move the Page
Rotate 180 Degrees
Insert Blank Page
Delete the Page
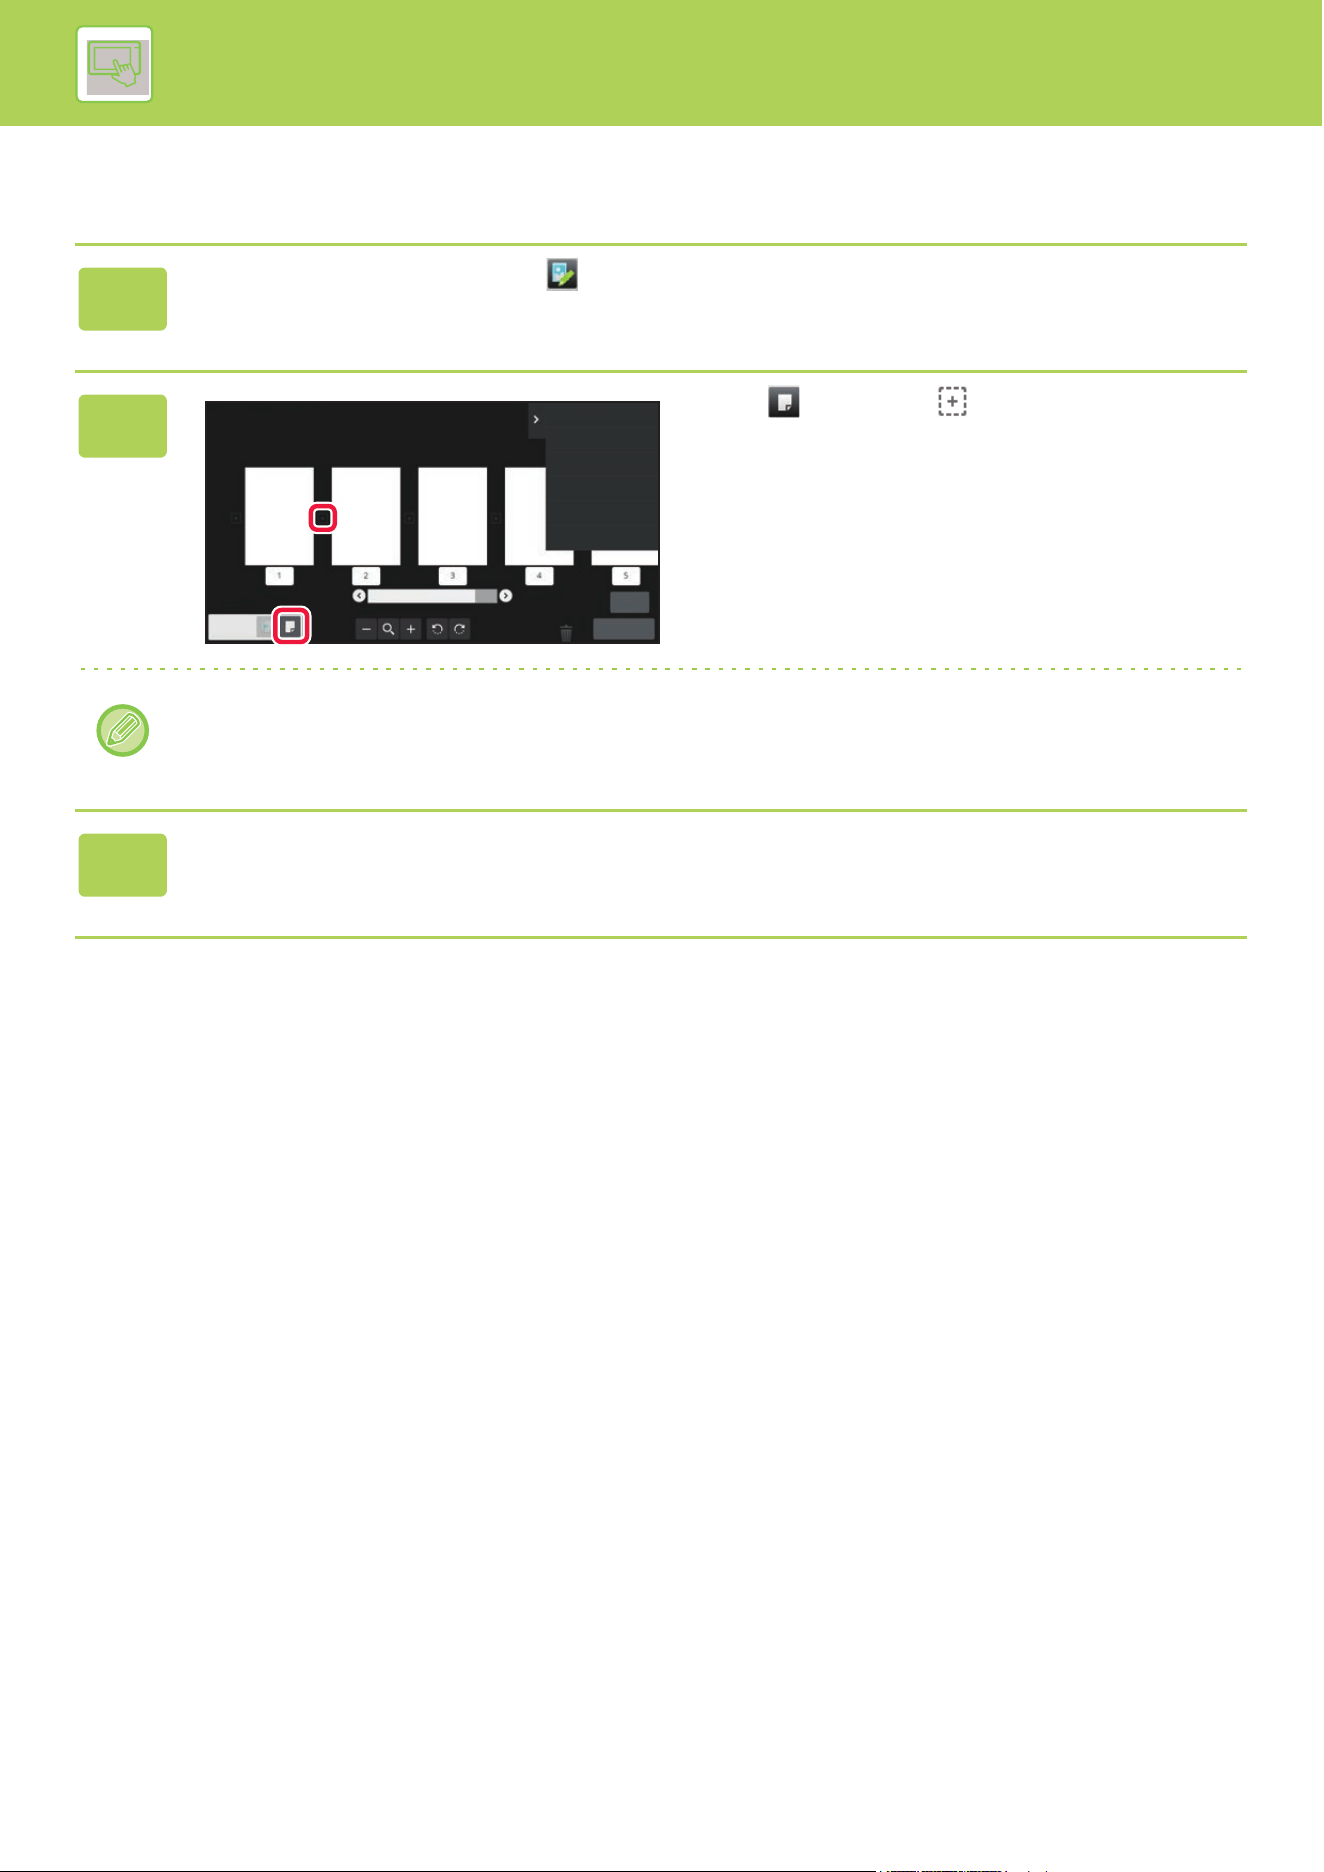
2-16
OPERATION OF THE MACHINE►HOME SCREEN AND PREVIEW SCREEN
Inserting a blank page
1
In the preview screen, tap to switch to edit mode.
2
Tap , and tap for the location
into which you want to insert a blank
page.
You can also insert a blank page by tapping [Insert Blank Page] on the action panel.
3
Tap the [Edit End] key.
Cancel and ReturnSelect the location to insert blank
page.
6
Edit End
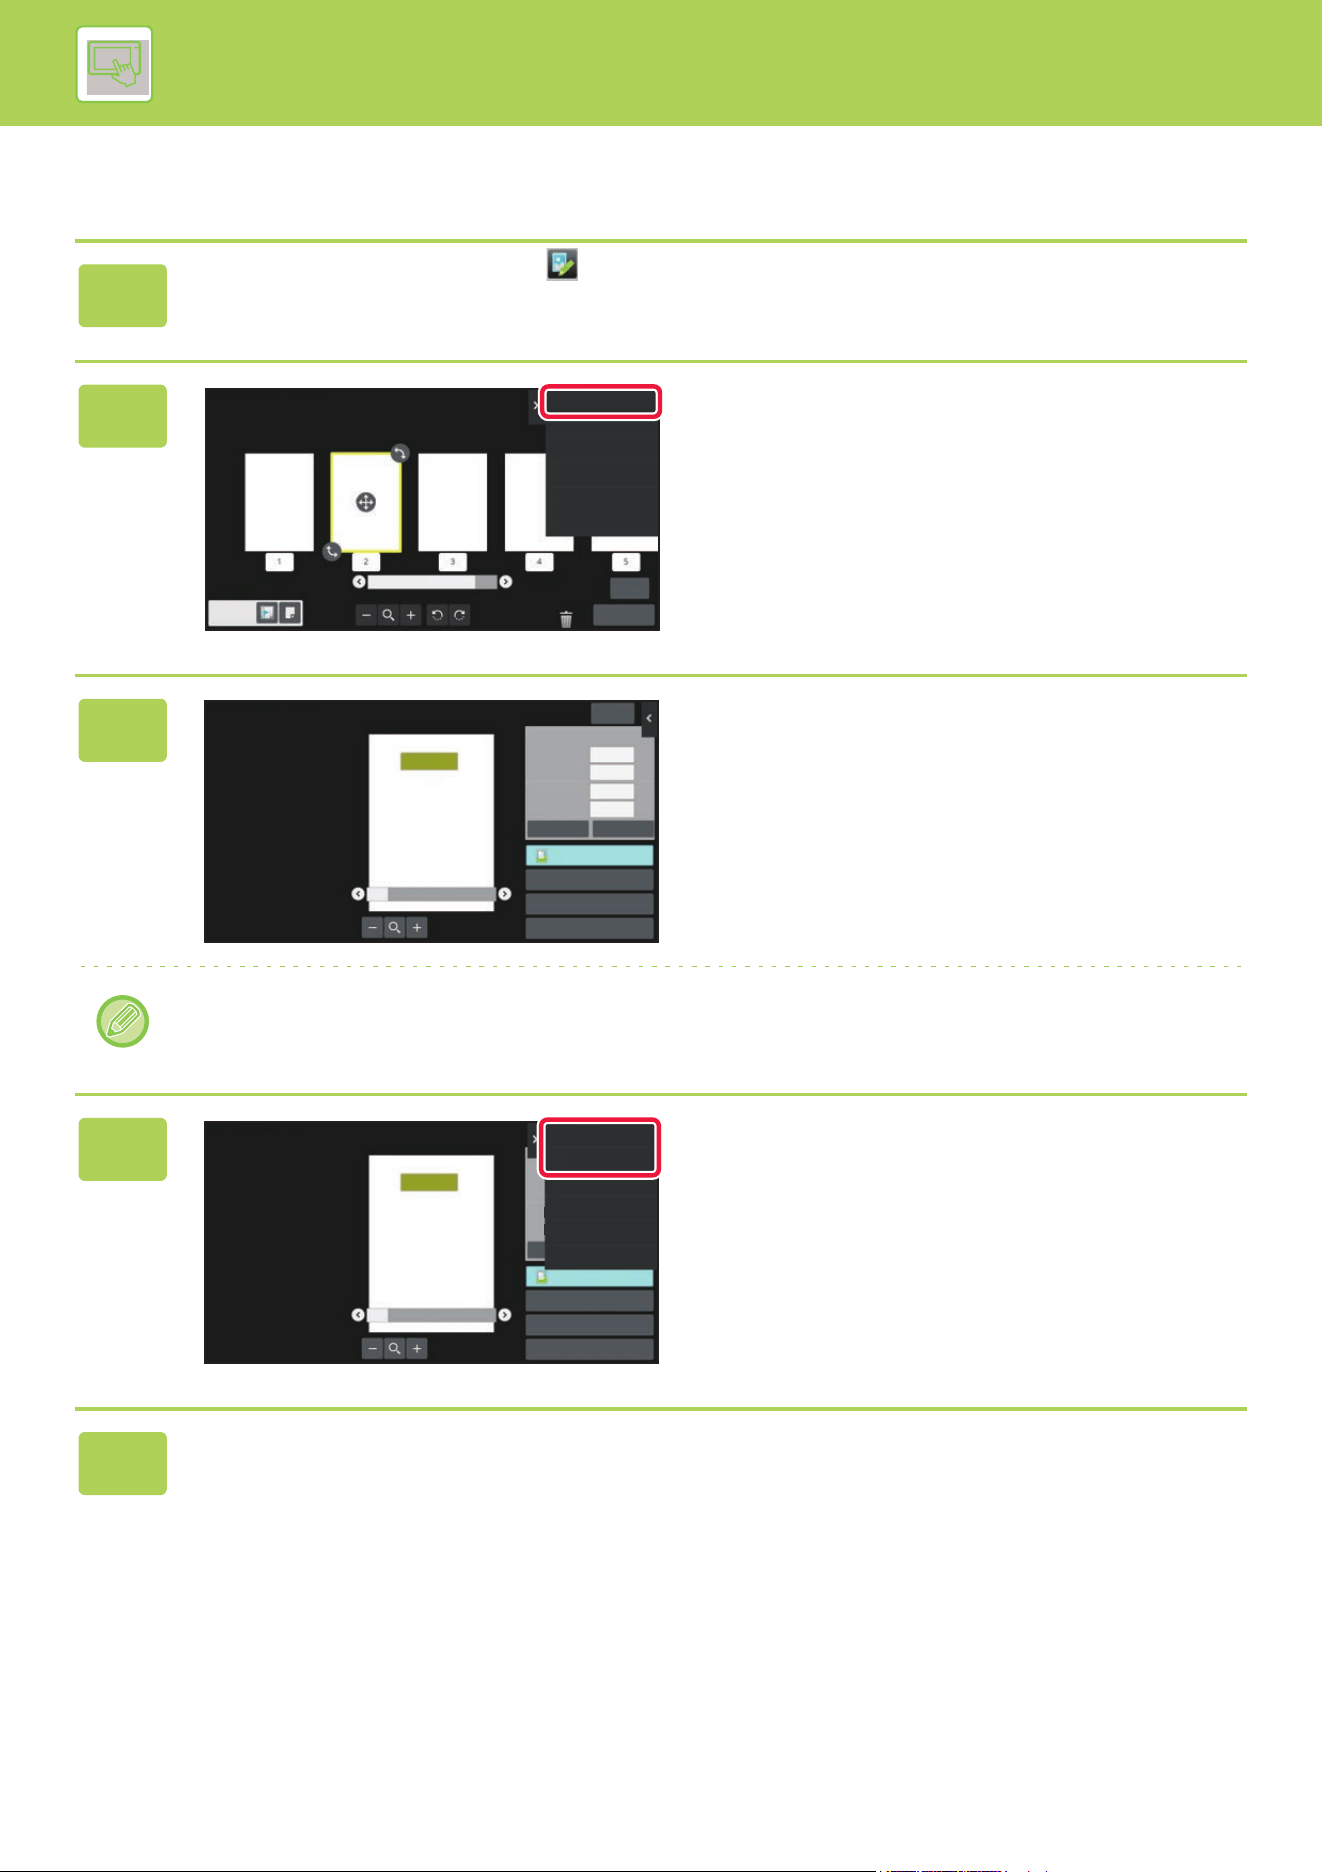
2-17
OPERATION OF THE MACHINE►HOME SCREEN AND PREVIEW SCREEN
Deleting part of the original image
1
In the preview screen, tap to switch to edit mode.
2
Tap [Erase Specified Range] on the
action panel.
3
Follow the on-screen instructions to
specify the erase range.
Specify the erase range and then tap the [Execute] key.
To delete the image outside the selected range, tap [Reverse Erase Range] on the action panel.
4
On the action panel, select [Apply This
Erase Position to All Pages.] or [Apply
This Erase Position to This Page.].
5
As necessary, repeat the steps to specify the erase range and the pages to
which it is applied.
6
Erase Specified Range
Erase Specified Original Area
Move the Page
Rotate 180 Degrees
Specify Chapter Inserts
Insert Blank Page
Delete the Page
Edit End
Erase Specified Range
Clear OK
Exit
Specify Range2
Specify Range3
Specify Range4
Height
Start Point
Width
X0
0
0
0
Y
Specify Range2
Specify Range3
Specify Range4
Height
Start Point
Width
Erase Specified Range
Reverse Erase Range
Apply This Erase
Position to All Pages.
Apply This Erase
Position to This Page.
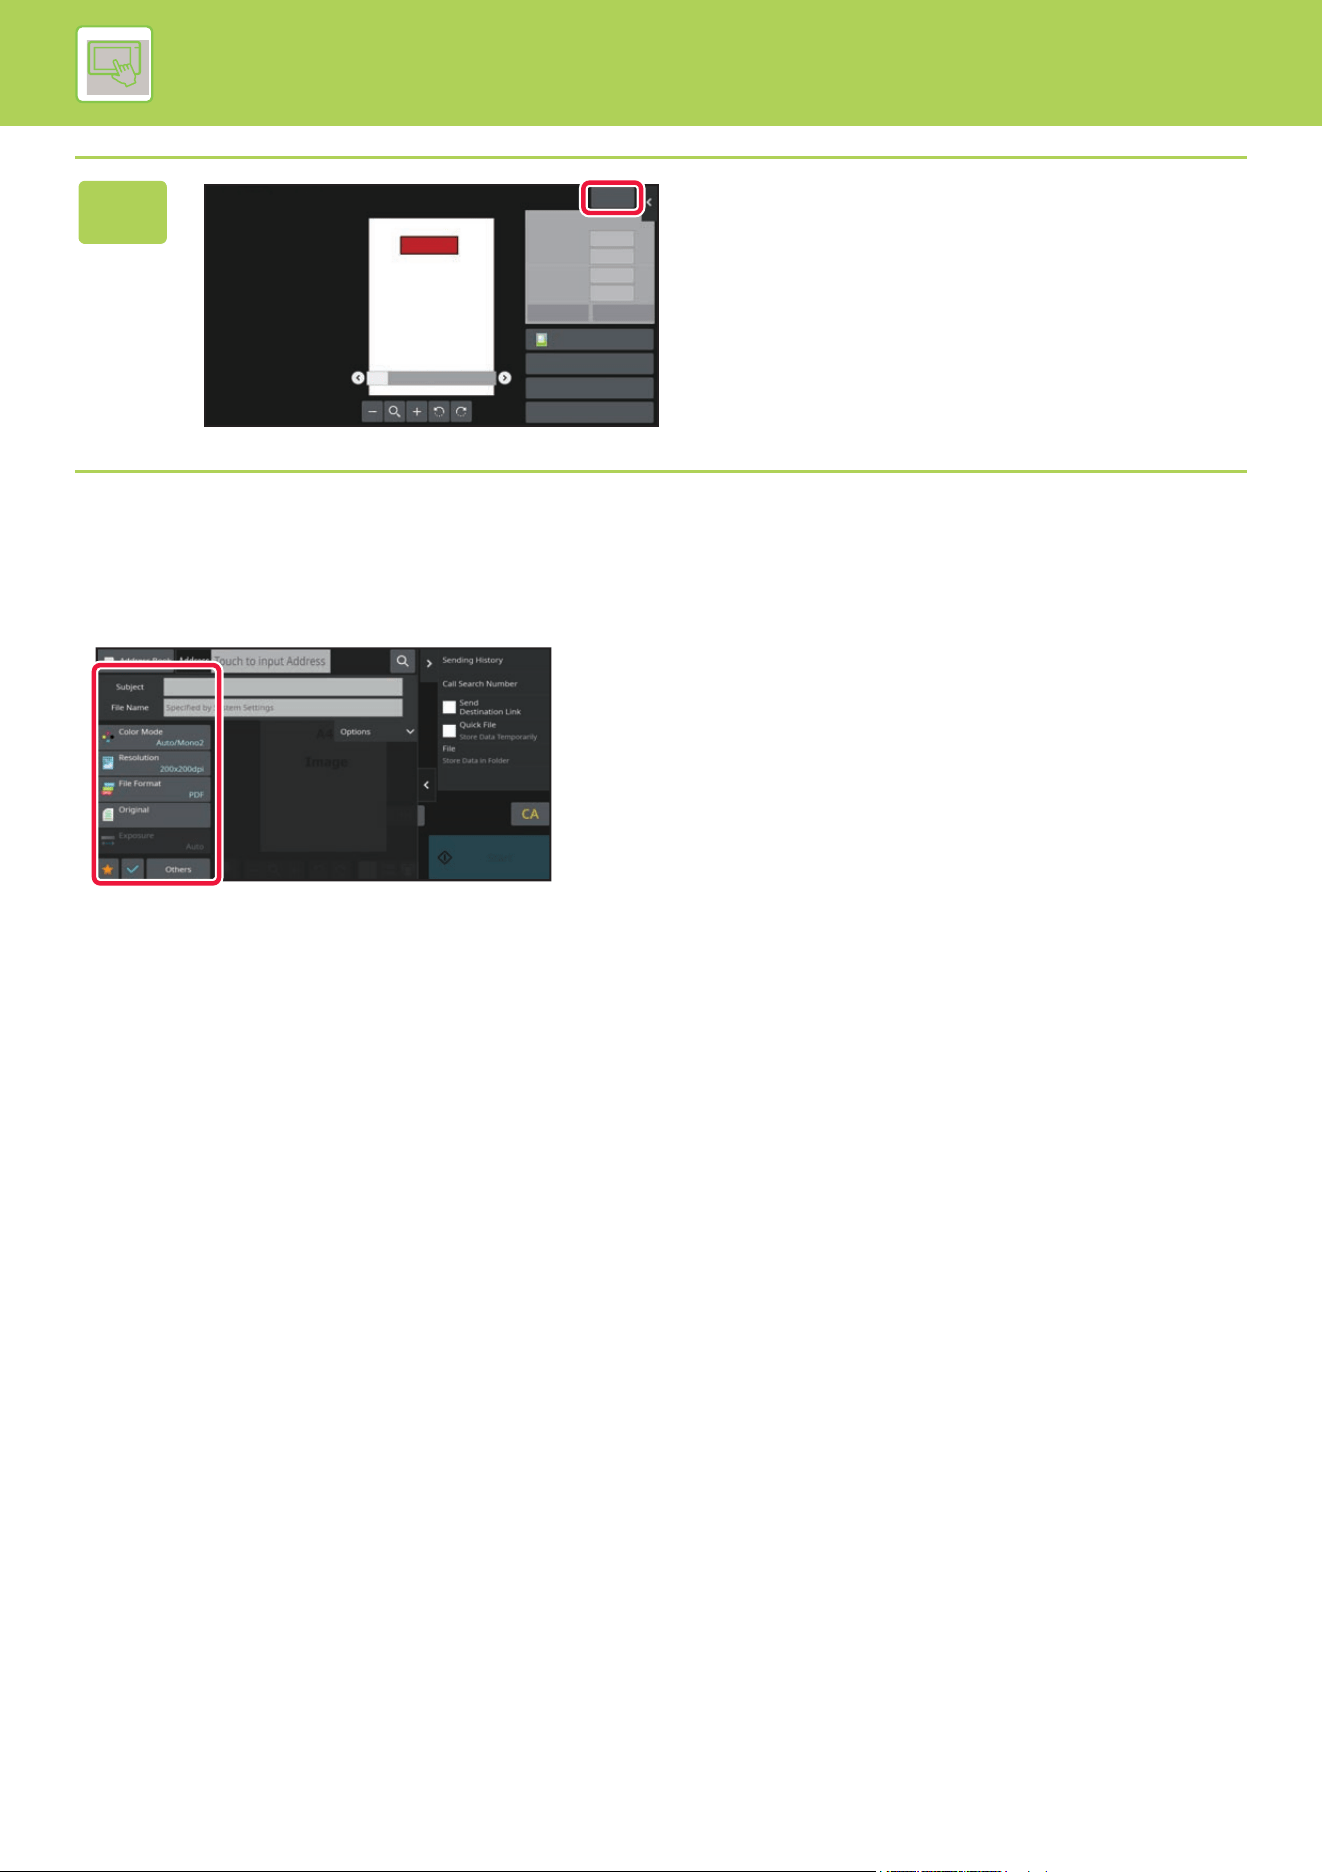
2-18
OPERATION OF THE MACHINE►HOME SCREEN AND PREVIEW SCREEN
Changing the settings
Tapping the tab on the left of the screen allows you to change the settings.
You cannot tap the keys for functions whose settings cannot be changed.
6
Tap the [Exit] key.
Erase Specified Range
Clear OK
Exit
Specify Range2
Erase Range1
Specify Range3
Specify Range4
Height
Start Point
Width
X0
0
0
0
Y
1/1
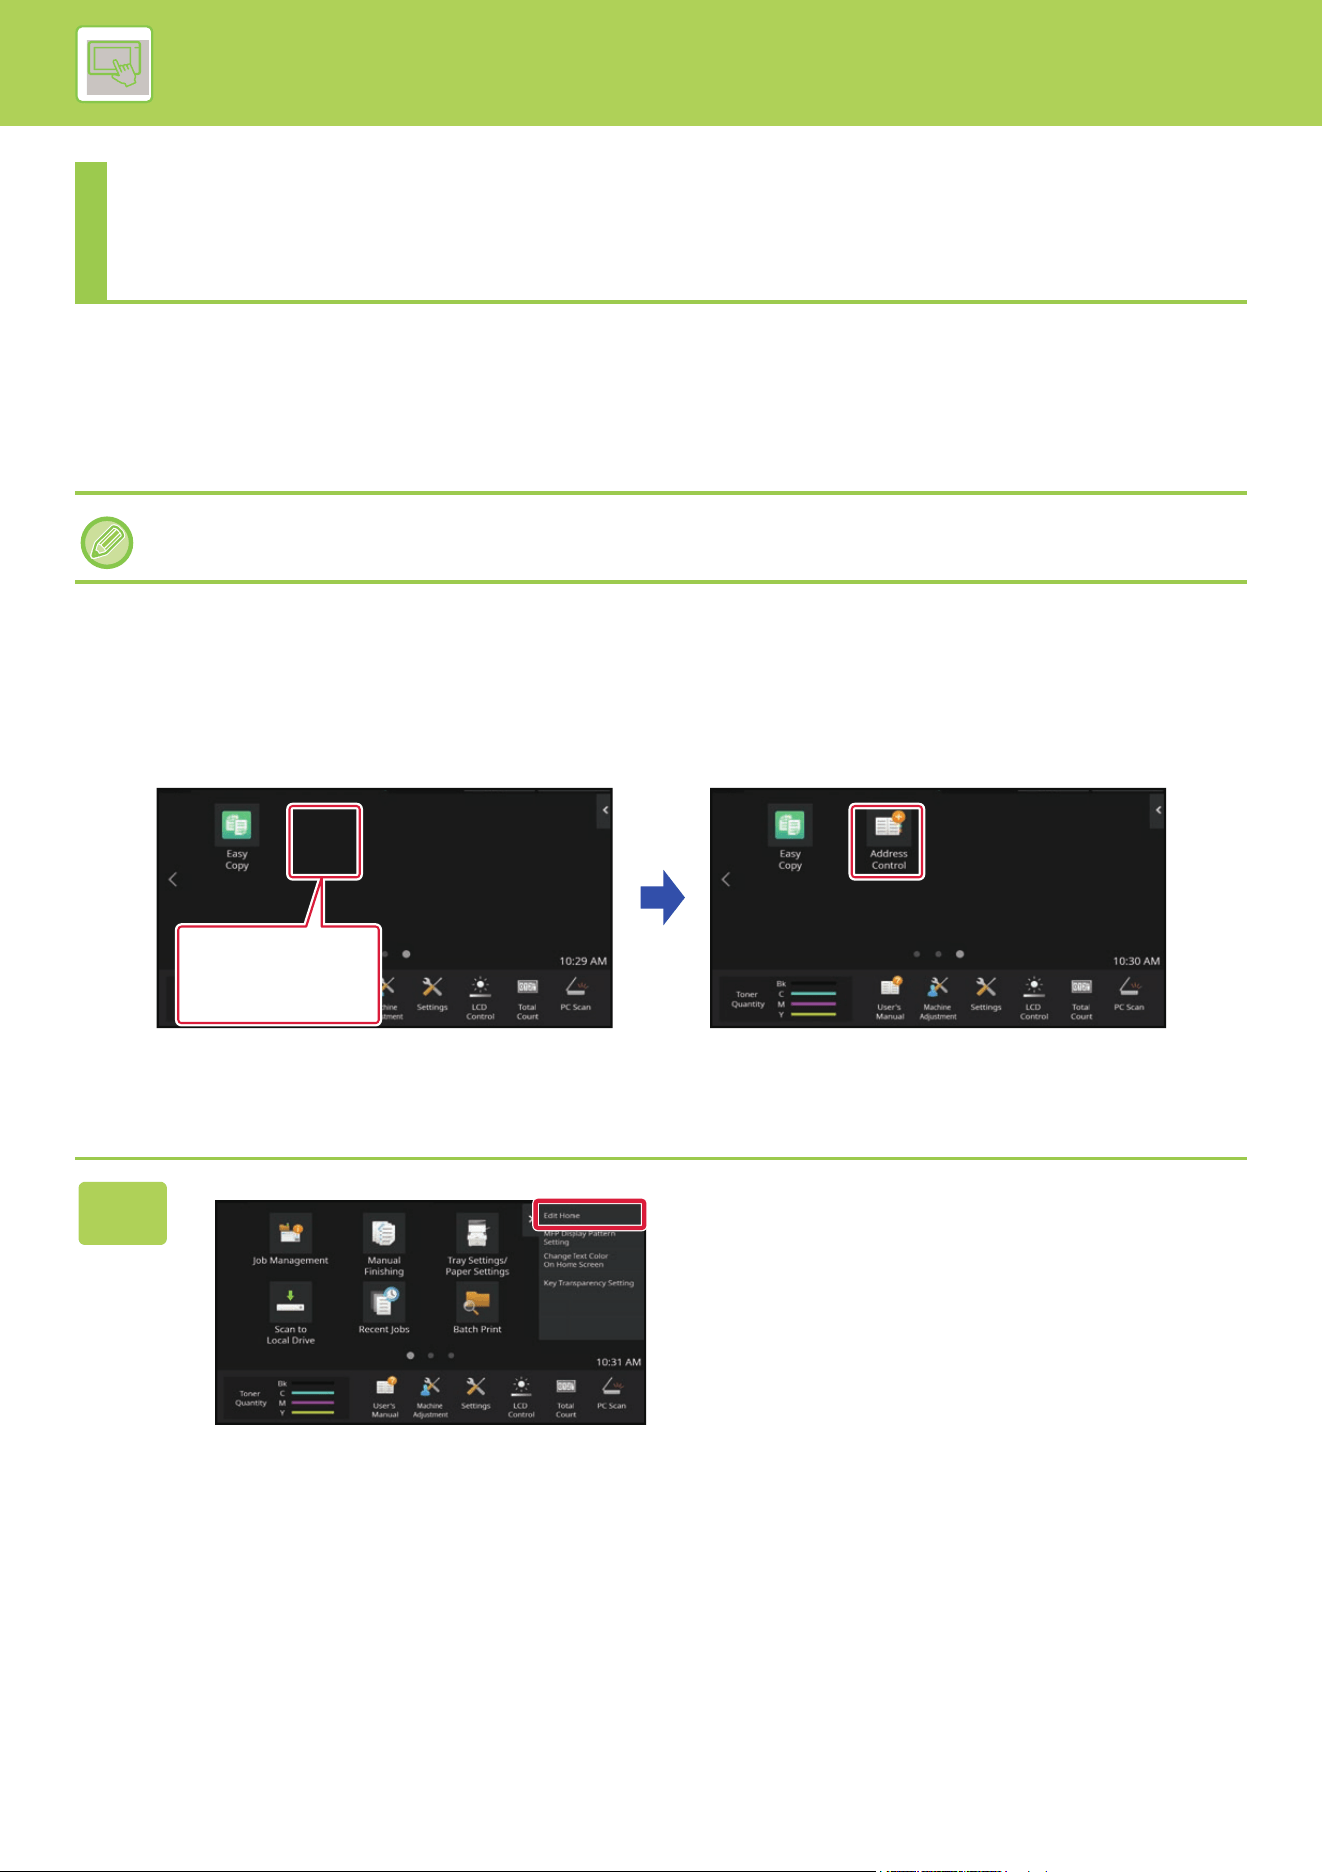
2-19
OPERATION OF THE MACHINE►CHANGE THE DISPLAY OF THE TOUCH PANEL
EDITING THE HOME SCREEN
In the home screen, you can change the number of shortcut keys shown and change shortcut keys.
This includes changing the background and text color, and changing the background to a custom image.
ADDING SHORTCUT KEYS
This section explains how to add a shortcut key to the home screen.
You can add a shortcut key using the touch panel, or from the Web page. In the Web page, you can change a shortcut
key image to any custom image.
From the touch panel
CHANGE THE DISPLAY OF THE TOUCH
PANEL
Depending on the model used, the screen layout may vary and some keys may not be displayed.
1
Open the action panel on the home
screen, and tap [Edit Home].
I want to add the
[Address Control]
shortcut key
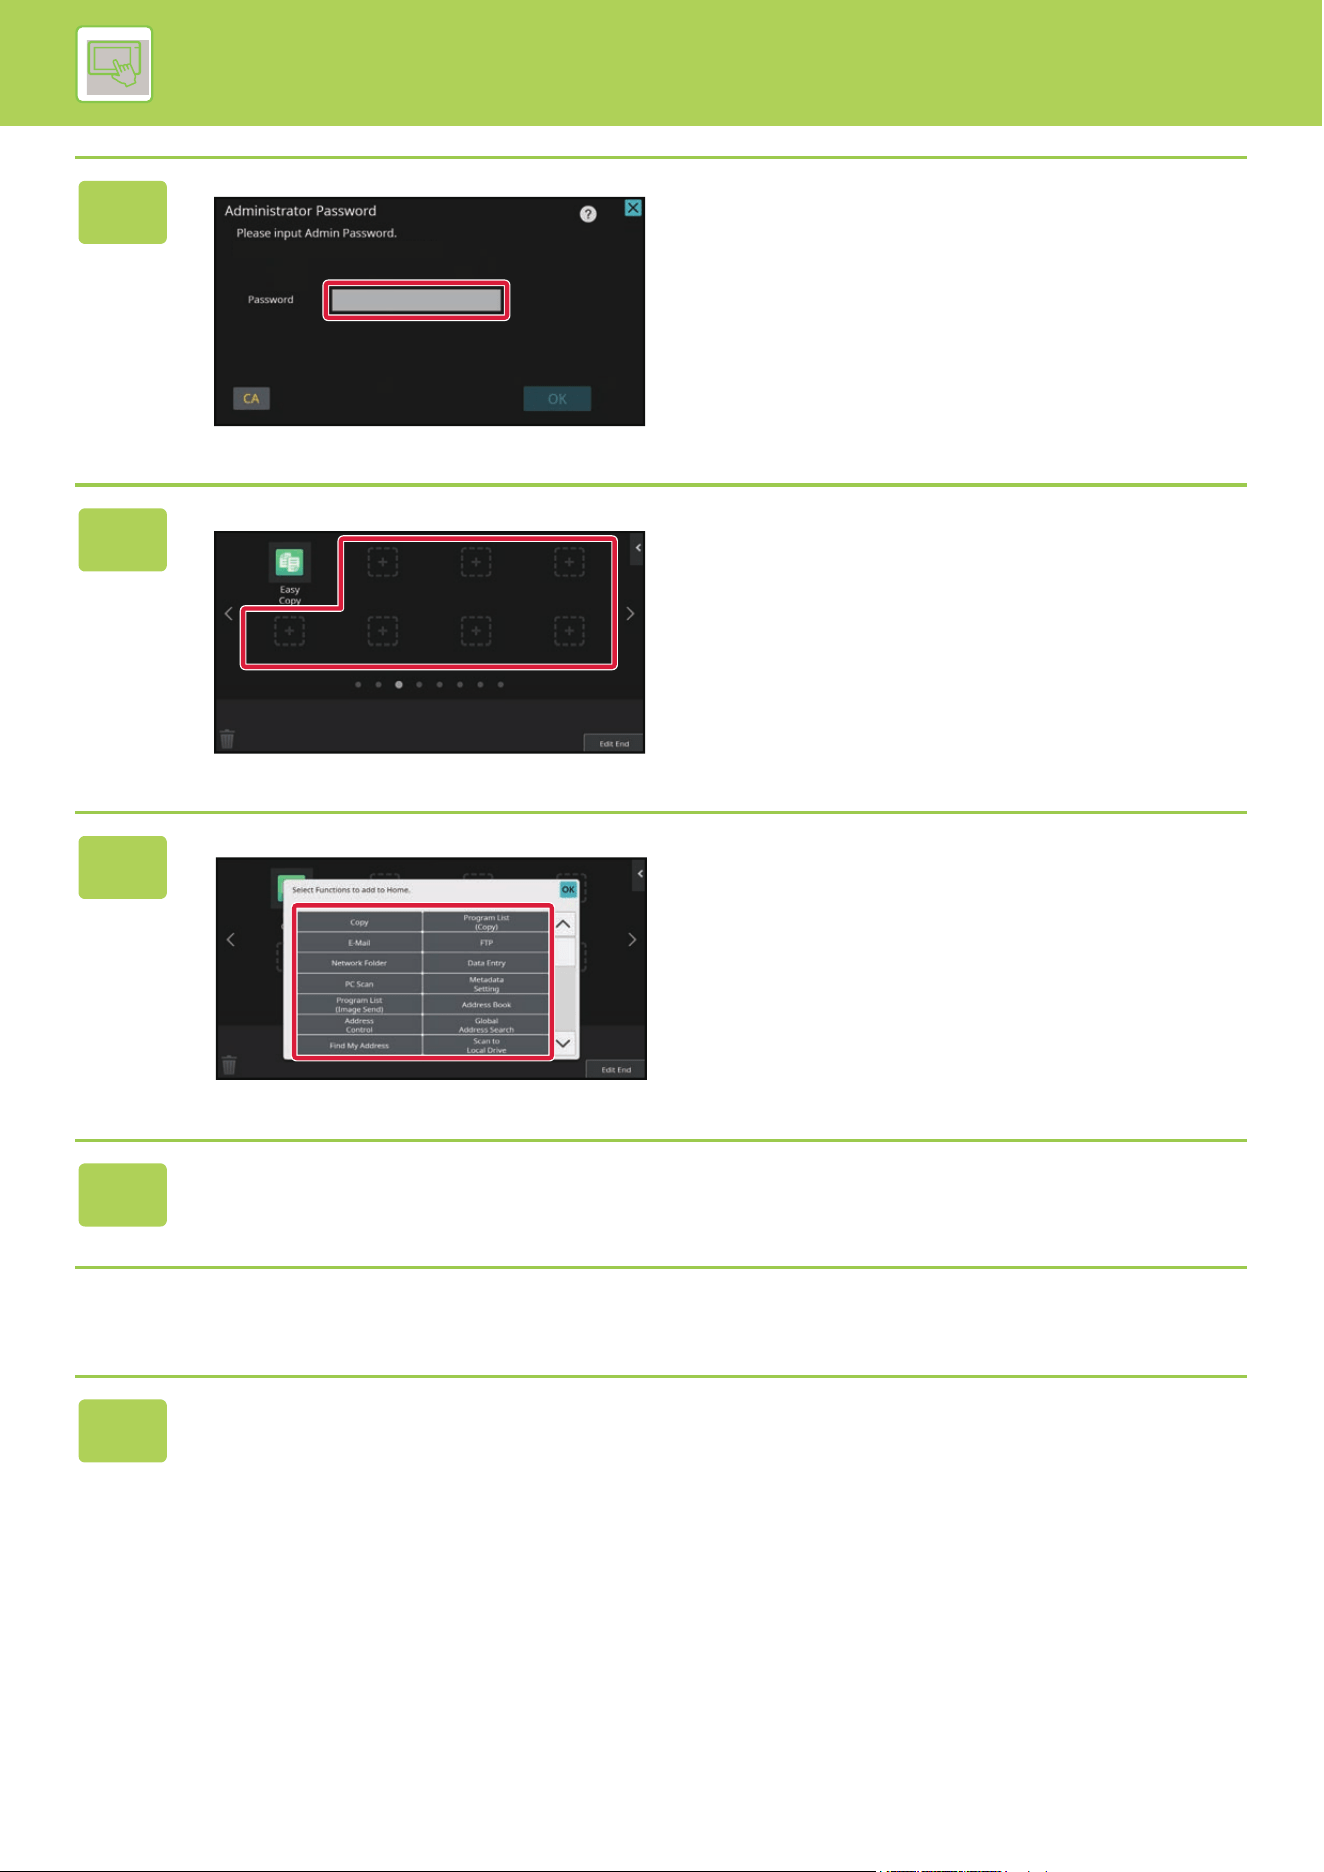
2-20
OPERATION OF THE MACHINE►CHANGE THE DISPLAY OF THE TOUCH PANEL
From the Web page
2
The administrator password screen
appears. Enter your password.
Enter the administrator password.
3
Tap an empty shortcut key location.
4
Tap the function you want to add.
The shortcut key will be added to the selected location.
5
After completing the settings, tap the [Logout] key.
1
Enter the IP address set in the machine in the address bar of your web
browser.
In the factory default state, you must enter your user password after entering the IP address.
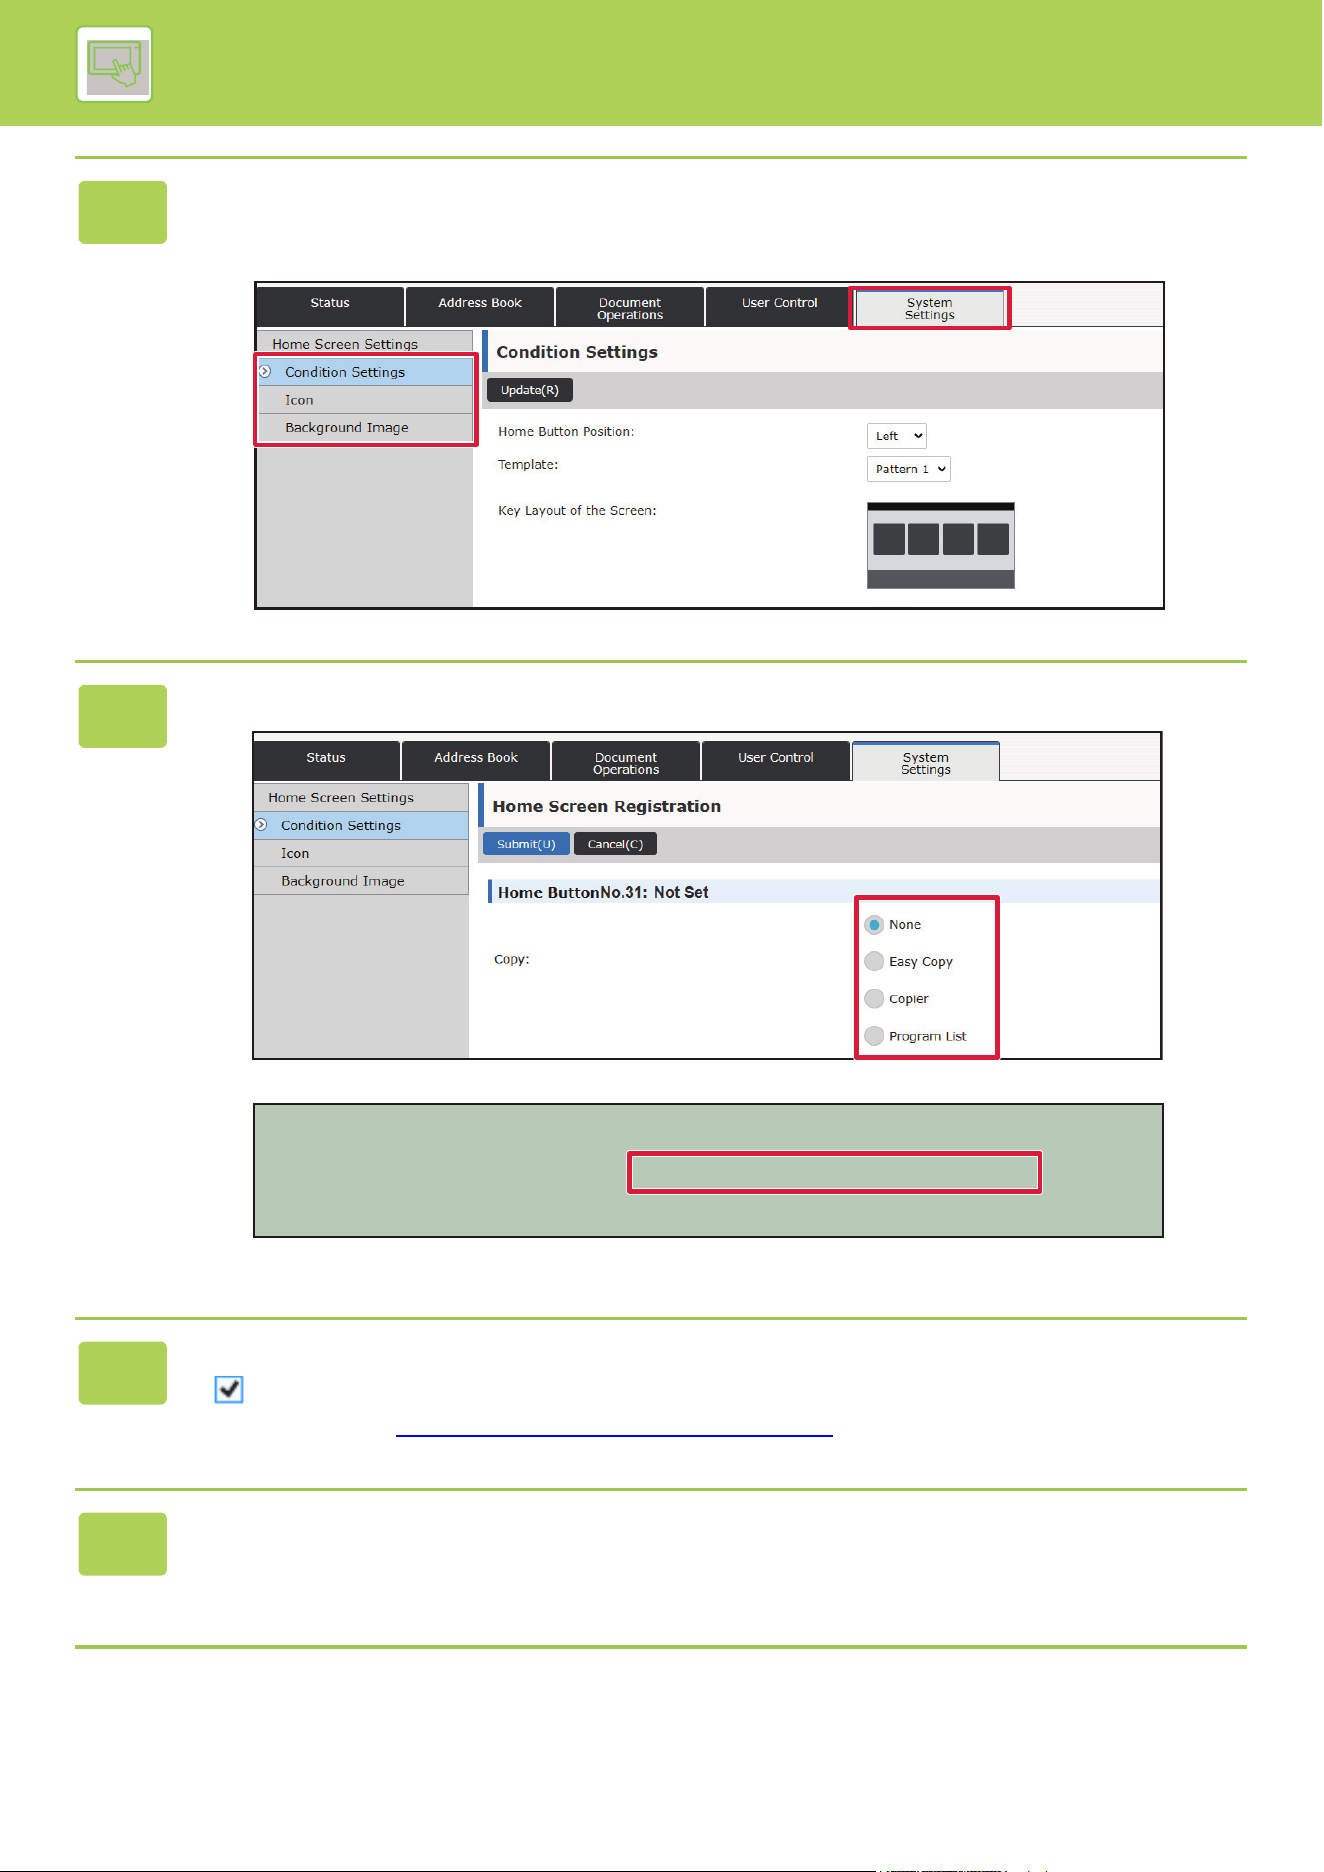
2-21
OPERATION OF THE MACHINE►CHANGE THE DISPLAY OF THE TOUCH PANEL
2
On the Web page, click the [System Settings] tab → [Home Screen Settings].
Some settings may require that you enter your user password after clicking [Home Screen Settings]. If you did not
perform user authentication, you must enter the administrator password.
3
Select the function you want to add.
To change the name of a shortcut key, select [Custom] in [Key Name] and enter the desired name in the text box.
To change the image of a shortcut key, go to the next step. If you are not changing the image, go to step 5.
4
To change the image of a shortcut key, set the [Use Custom Image] checkbox
to , and select a previously added image with [Select File].
To save an image, see "ADDING A SHORTCUT KEY IMAGE (page 2-28)".
5
When you have finished configuring the settings, click the [Submit] button.
The settings are saved in the machine and applied.
When you have finished settings, click the [Logout] button and close your Web browser.
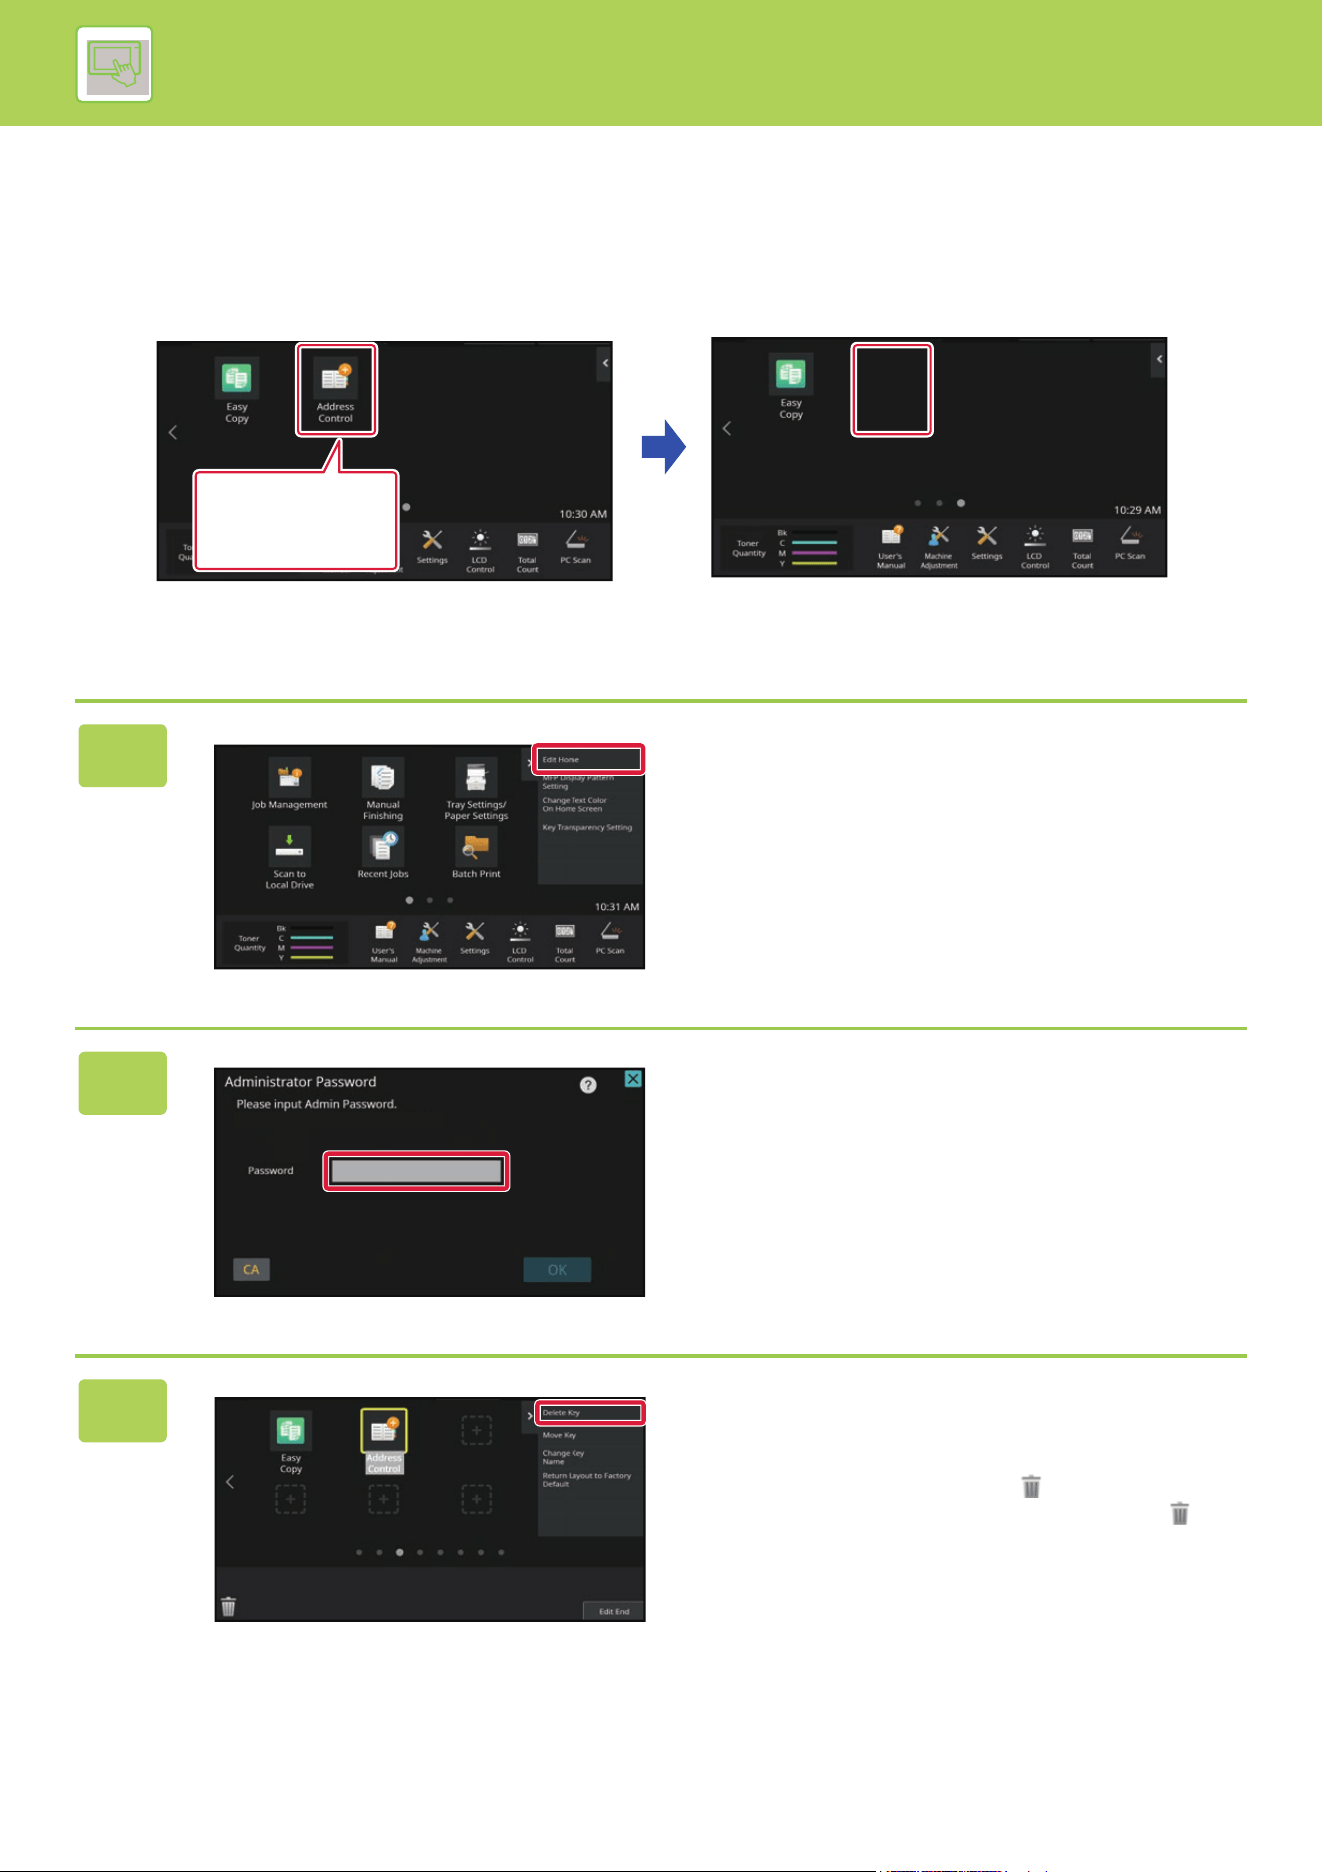
2-22
OPERATION OF THE MACHINE►CHANGE THE DISPLAY OF THE TOUCH PANEL
EDITING SHORTCUT KEYS
You can add shortcut keys to the home screen, and delete unneeded shortcut keys.
You can also change the display order of the shortcut keys and change names and images to make the machine easier
to use.
From the touch panel
1
Open the action panel on the home
screen, and tap [Edit Home].
2
The administrator password screen
appears. Enter your password.
Enter the administrator password.
3
Tap the shortcut key you want to
delete, and tap [Delete Key].
A yellow frame appears around the selected shortcut key.
With the shortcut key selected, tap
You can also delete by dragging the shortcut key to .
I want to delete
the [Address
Control ] shortcut
key.

2-23
OPERATION OF THE MACHINE►CHANGE THE DISPLAY OF THE TOUCH PANEL
From the Web page
4
Tap the [Yes] key.
The selected shortcut key will be deleted.
5
After completing the settings, tap the [Logout] key.
1
Enter the IP address set in the machine in the address bar of your web
browser.
In the factory default state, you must enter your user password after entering the IP address.
2
On the Web page, click the [System Settings] tab → [Home Screen Settings].
Some settings may require that you enter your user password after clicking [Home Screen Settings]. If you did not
perform user authentication, you must enter the administrator password.
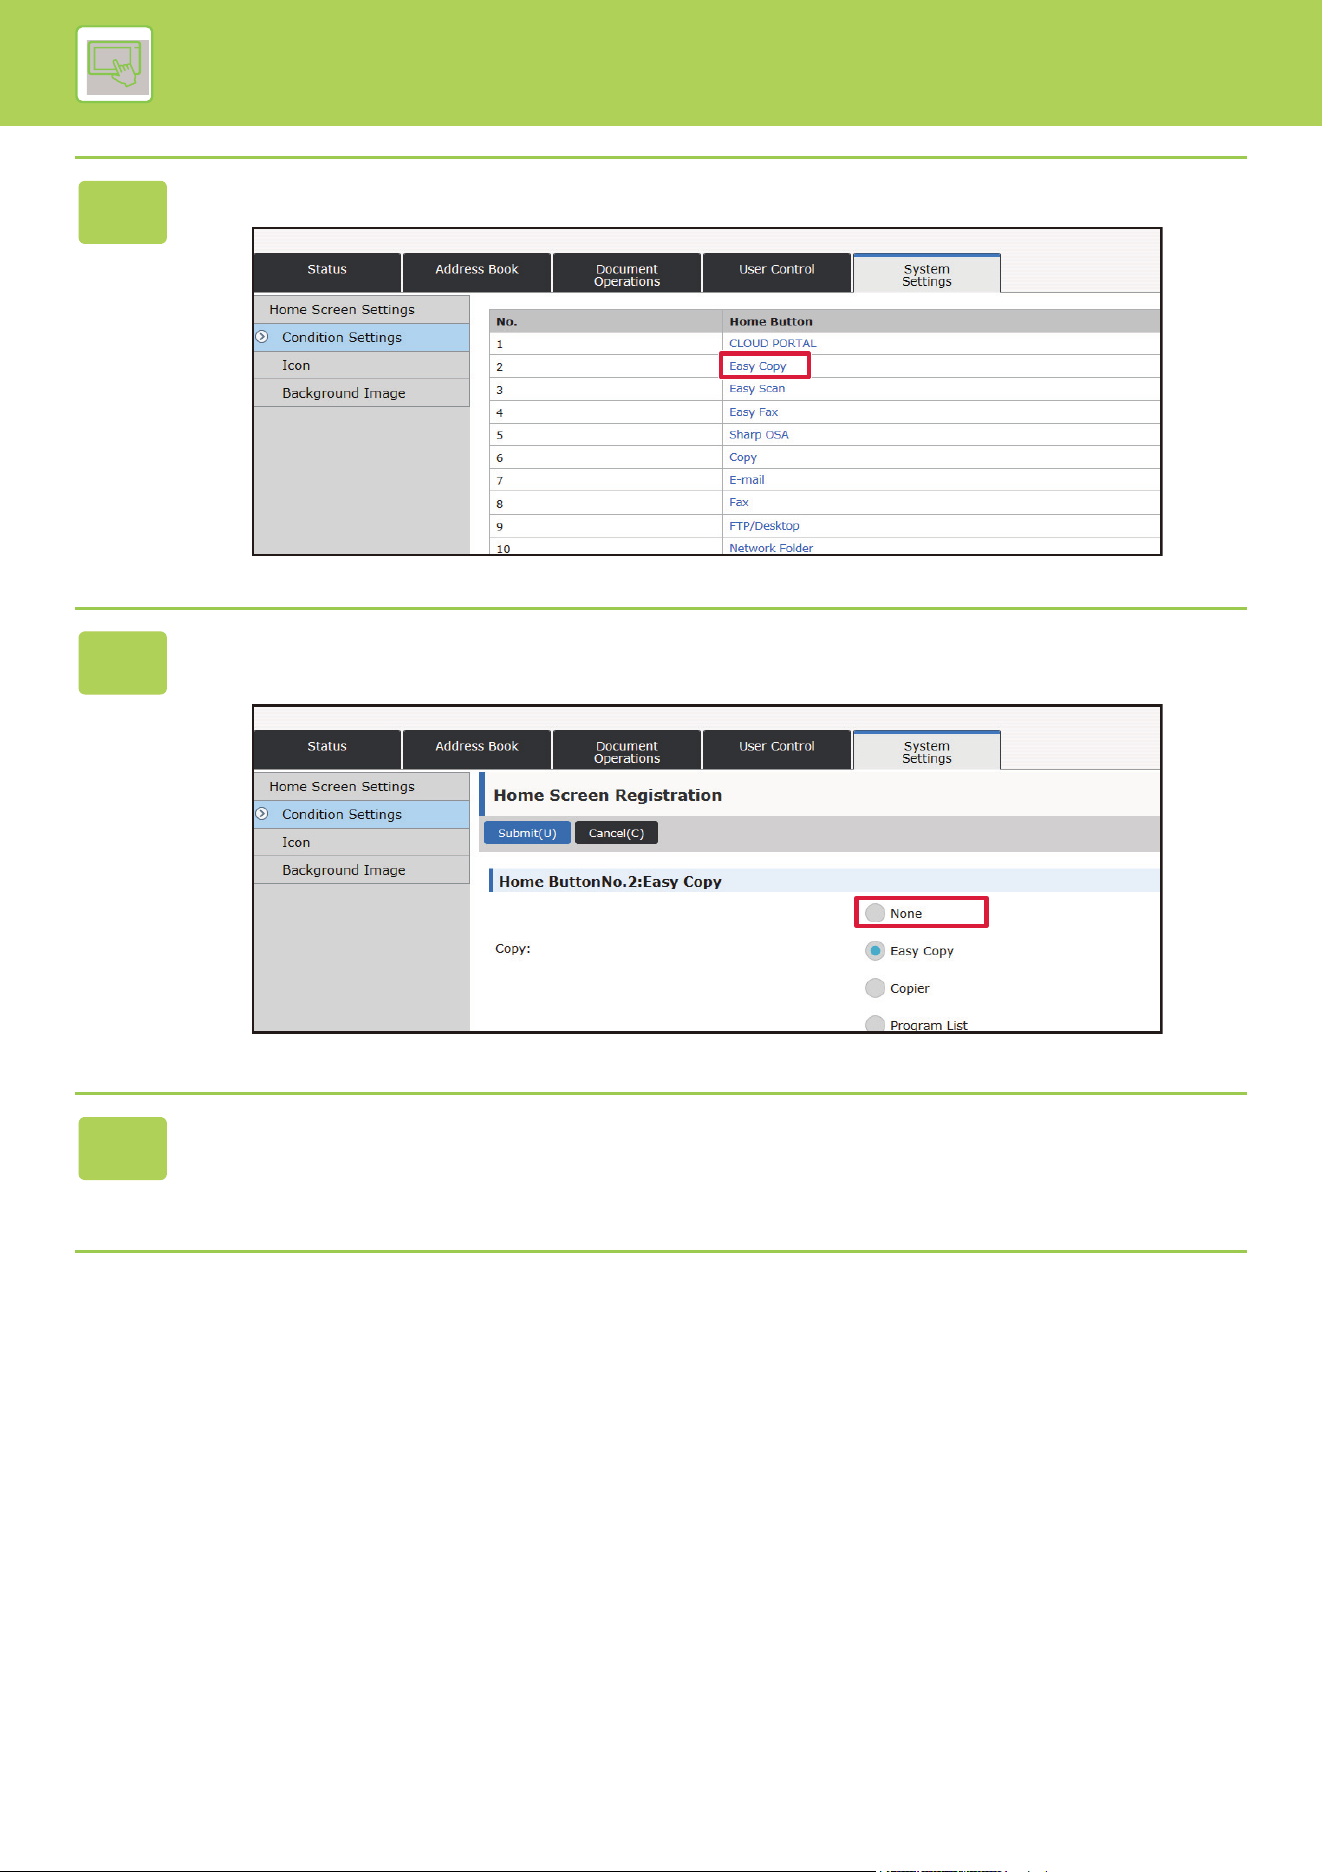
2-24
OPERATION OF THE MACHINE►CHANGE THE DISPLAY OF THE TOUCH PANEL
3
Click [Condition Settings] and click the shortcut key you want to delete.
4
Select [None] and click the [Submit] button.
When you click the [Submit] button, the [Home Screen Registration] screen closes.
5
When you have finished configuring the settings, click the [Submit] button.
The settings are saved in the machine and applied.
When you have finished settings, click the [Logout] button and close your Web browser.
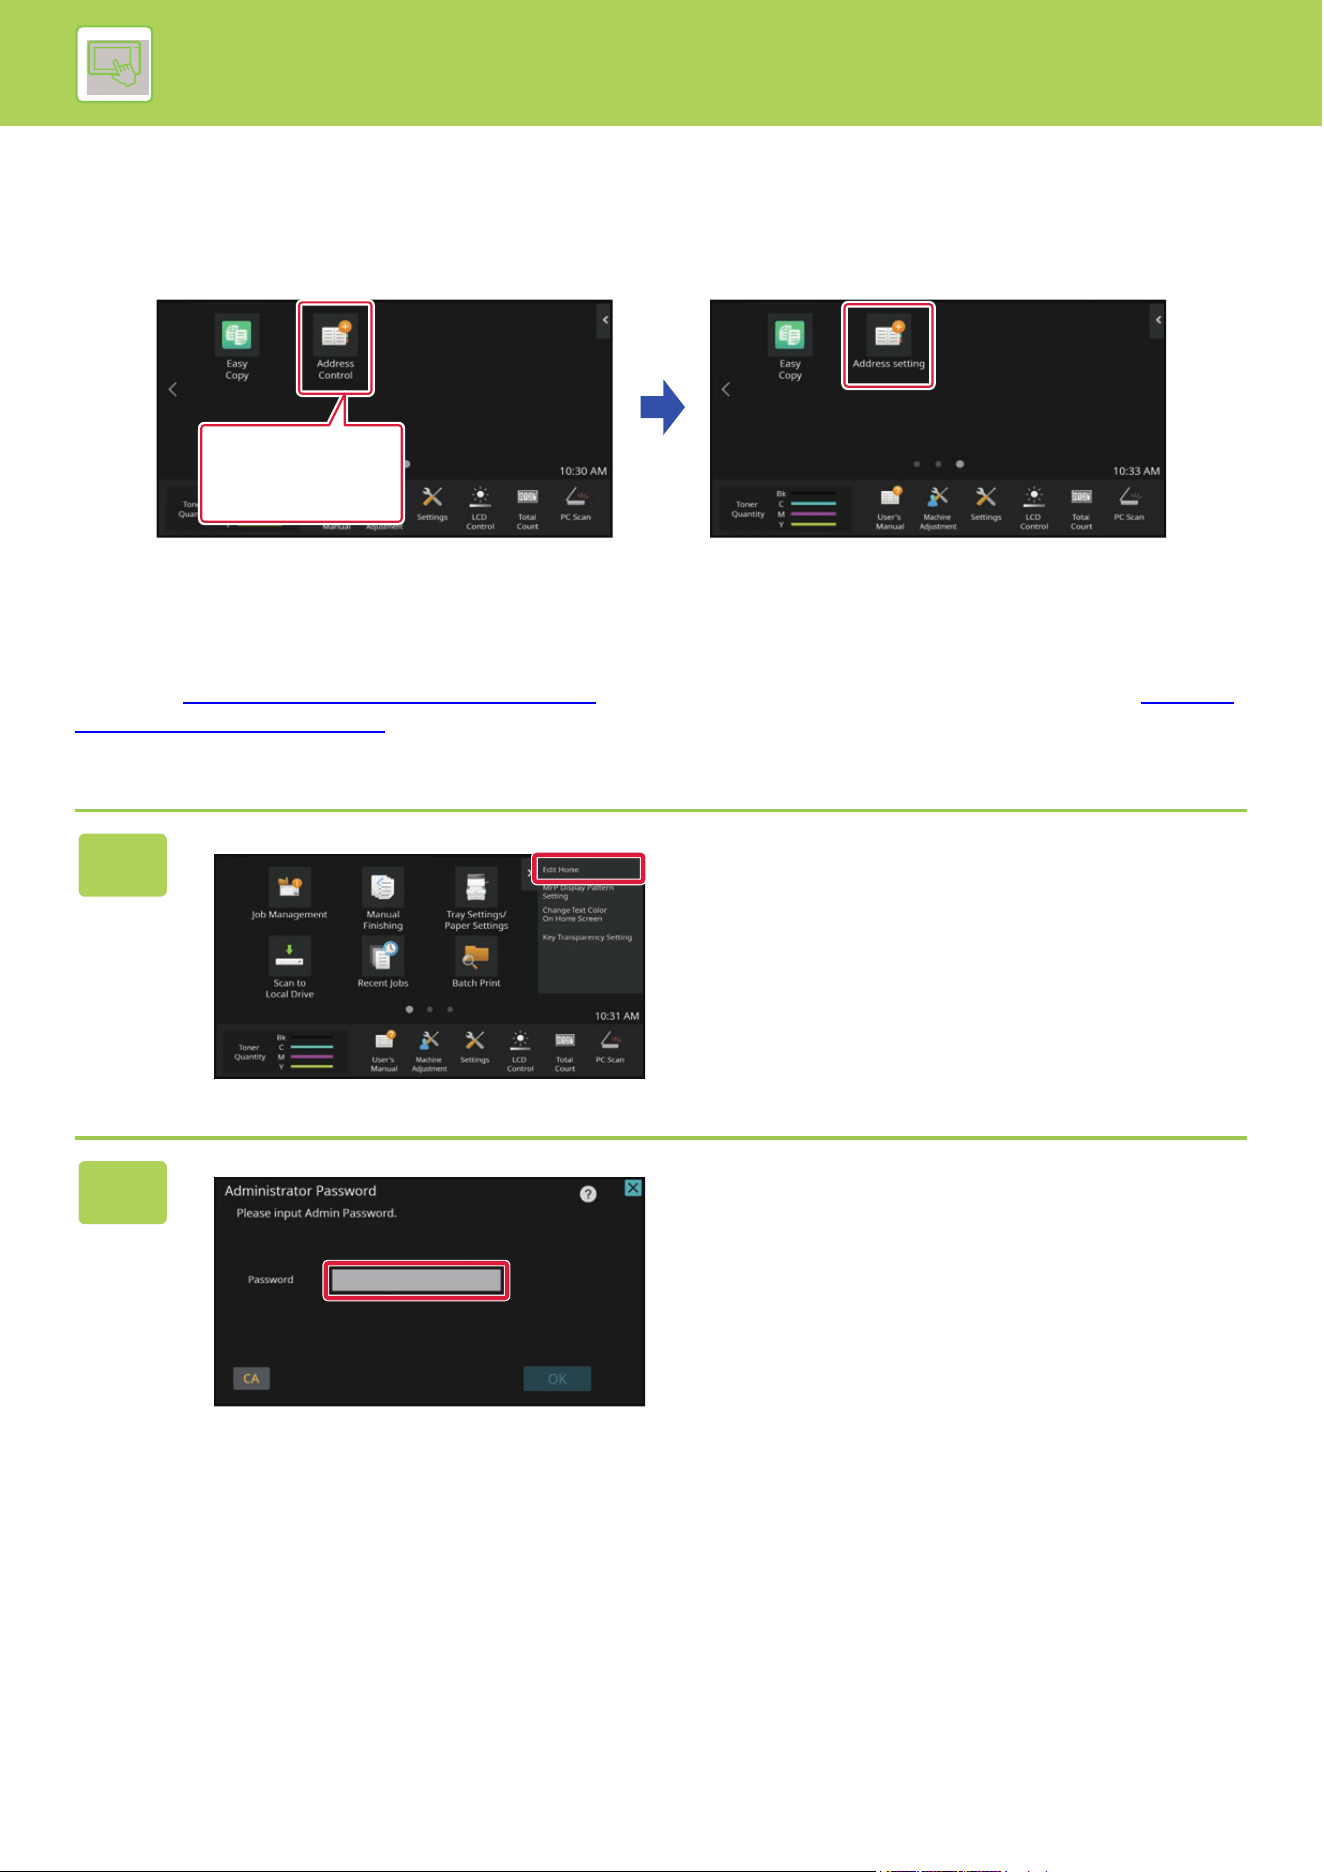
2-25
OPERATION OF THE MACHINE►CHANGE THE DISPLAY OF THE TOUCH PANEL
CHANGING A SHORTCUT KEY
This section explains how to change a shortcut key in the home screen.
Only the name can be changed from the touch panel. You can change the icon image from the Web page.
From the touch panel
To change a shortcut key from the touch panel, move the shortcut key in the desired location away from that location,
and then register the new shortcut key in the location that has been freed. For information about how to move shortcut
keys, see "MOVING A SHORTCUT KEY
(page 2-30)". For information about how to add shortcut keys, see "ADDING
SHORTCUT KEYS (page 2-19)".
This section explains how to change the name of a shortcut key.
1
Open the action panel on the home
screen, and tap [Edit Home].
2
The administrator password screen
appears. Enter your password.
Enter the administrator password.
I want to change
the [Address
Control] shortcut
key
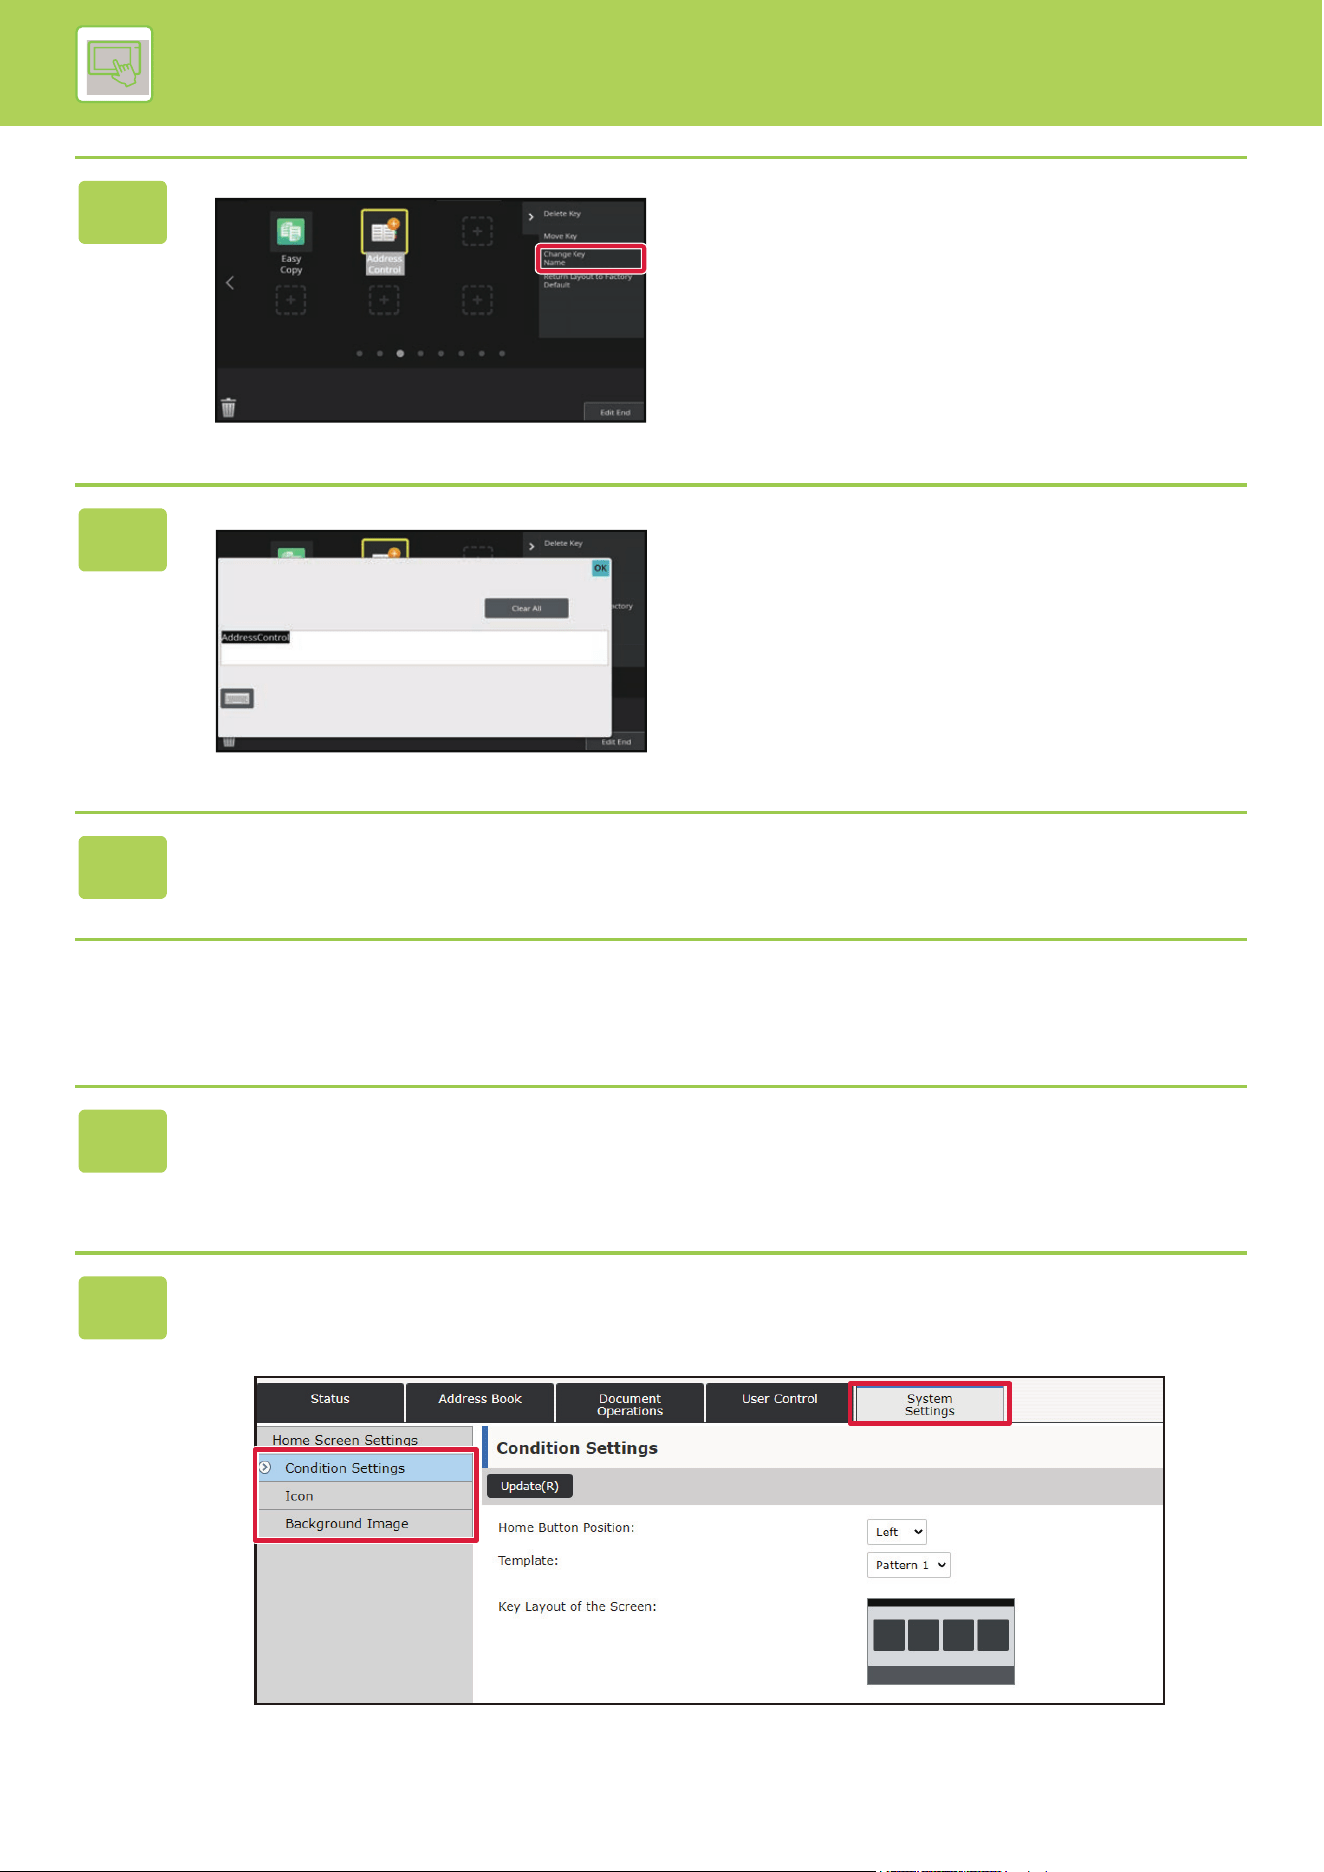
2-26
OPERATION OF THE MACHINE►CHANGE THE DISPLAY OF THE TOUCH PANEL
From the Web page
3
A yellow frame appears around the
selected shortcut key.
A yellow frame appears around the selected shortcut key.
4
Enter the new name by keyboard.
Enter the name, and tap the [OK] key.
5
After completing the settings, tap the [Logout] key.
1
Enter the IP address set in the machine in the address bar of your web
browser.
In the factory default state, you must enter your user password after entering the IP address.
2
On the Web page, click the [System Settings] tab → [Home Screen Settings].
Some settings may require that you enter your user password after clicking [Home Screen Settings]. If you did not
perform user authentication, you must enter the administrator password.
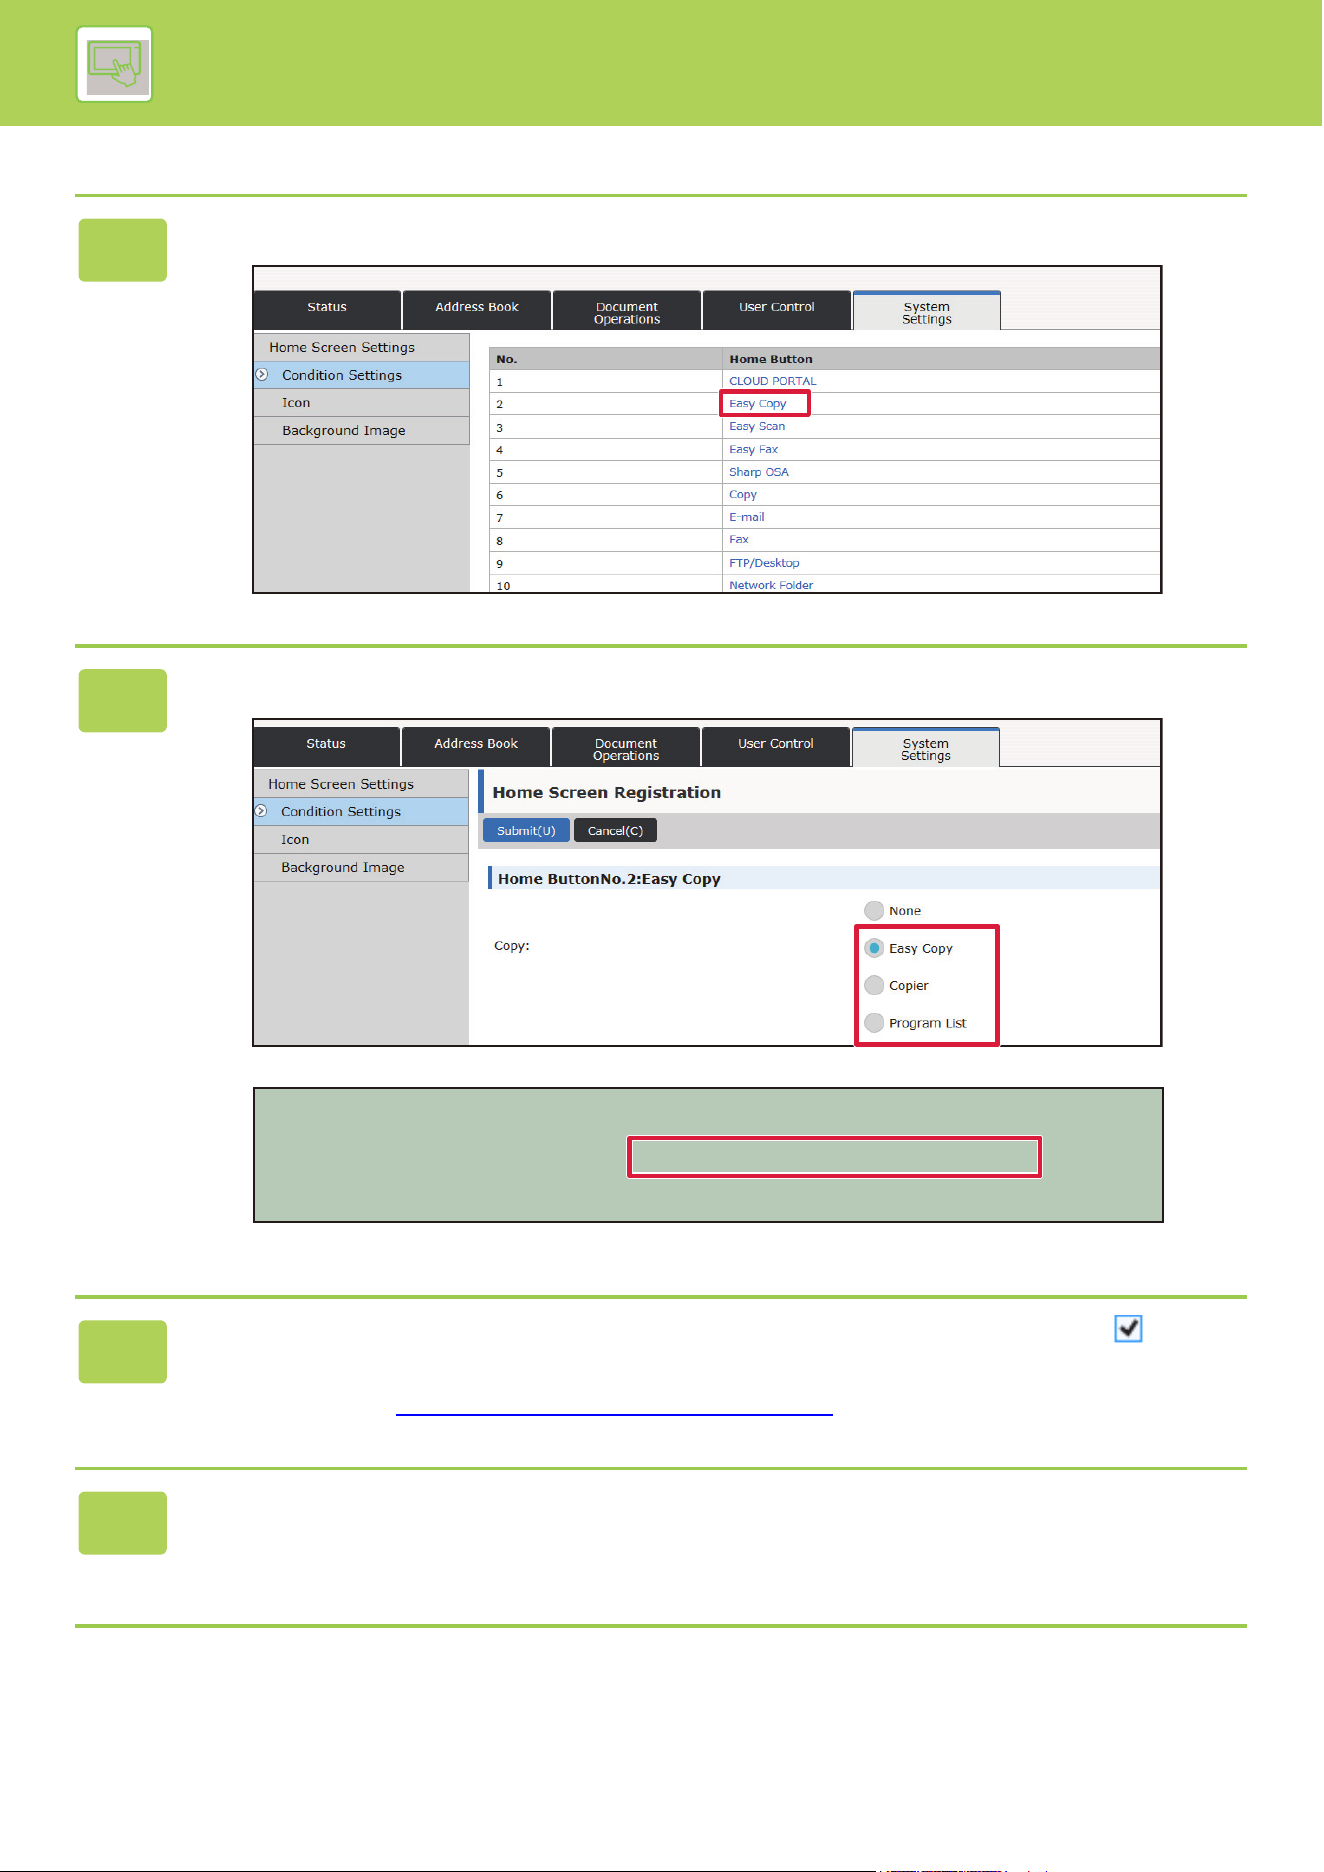
2-27
OPERATION OF THE MACHINE►CHANGE THE DISPLAY OF THE TOUCH PANEL
3
Click [Condition Settings], and click the shortcut key you want to change.
4
Select the desired function.
To change the name of a shortcut key, select [Custom] in [Key Name] and enter the desired name in the text box.
To change the image of a shortcut key, go to the next step. If you are not changing the image, go to step 5.
5
To change the icon image, set the [Use Custom Image] checkbox to , and
select a previously added image with [Select File].
To save an image, see "ADDING A SHORTCUT KEY IMAGE (page 2-28)"
6
When you have finished configuring the settings, click the [Submit] button.
The settings are saved in the machine and applied.
When you have finished settings, click the [Logout] button and close your Web browser.
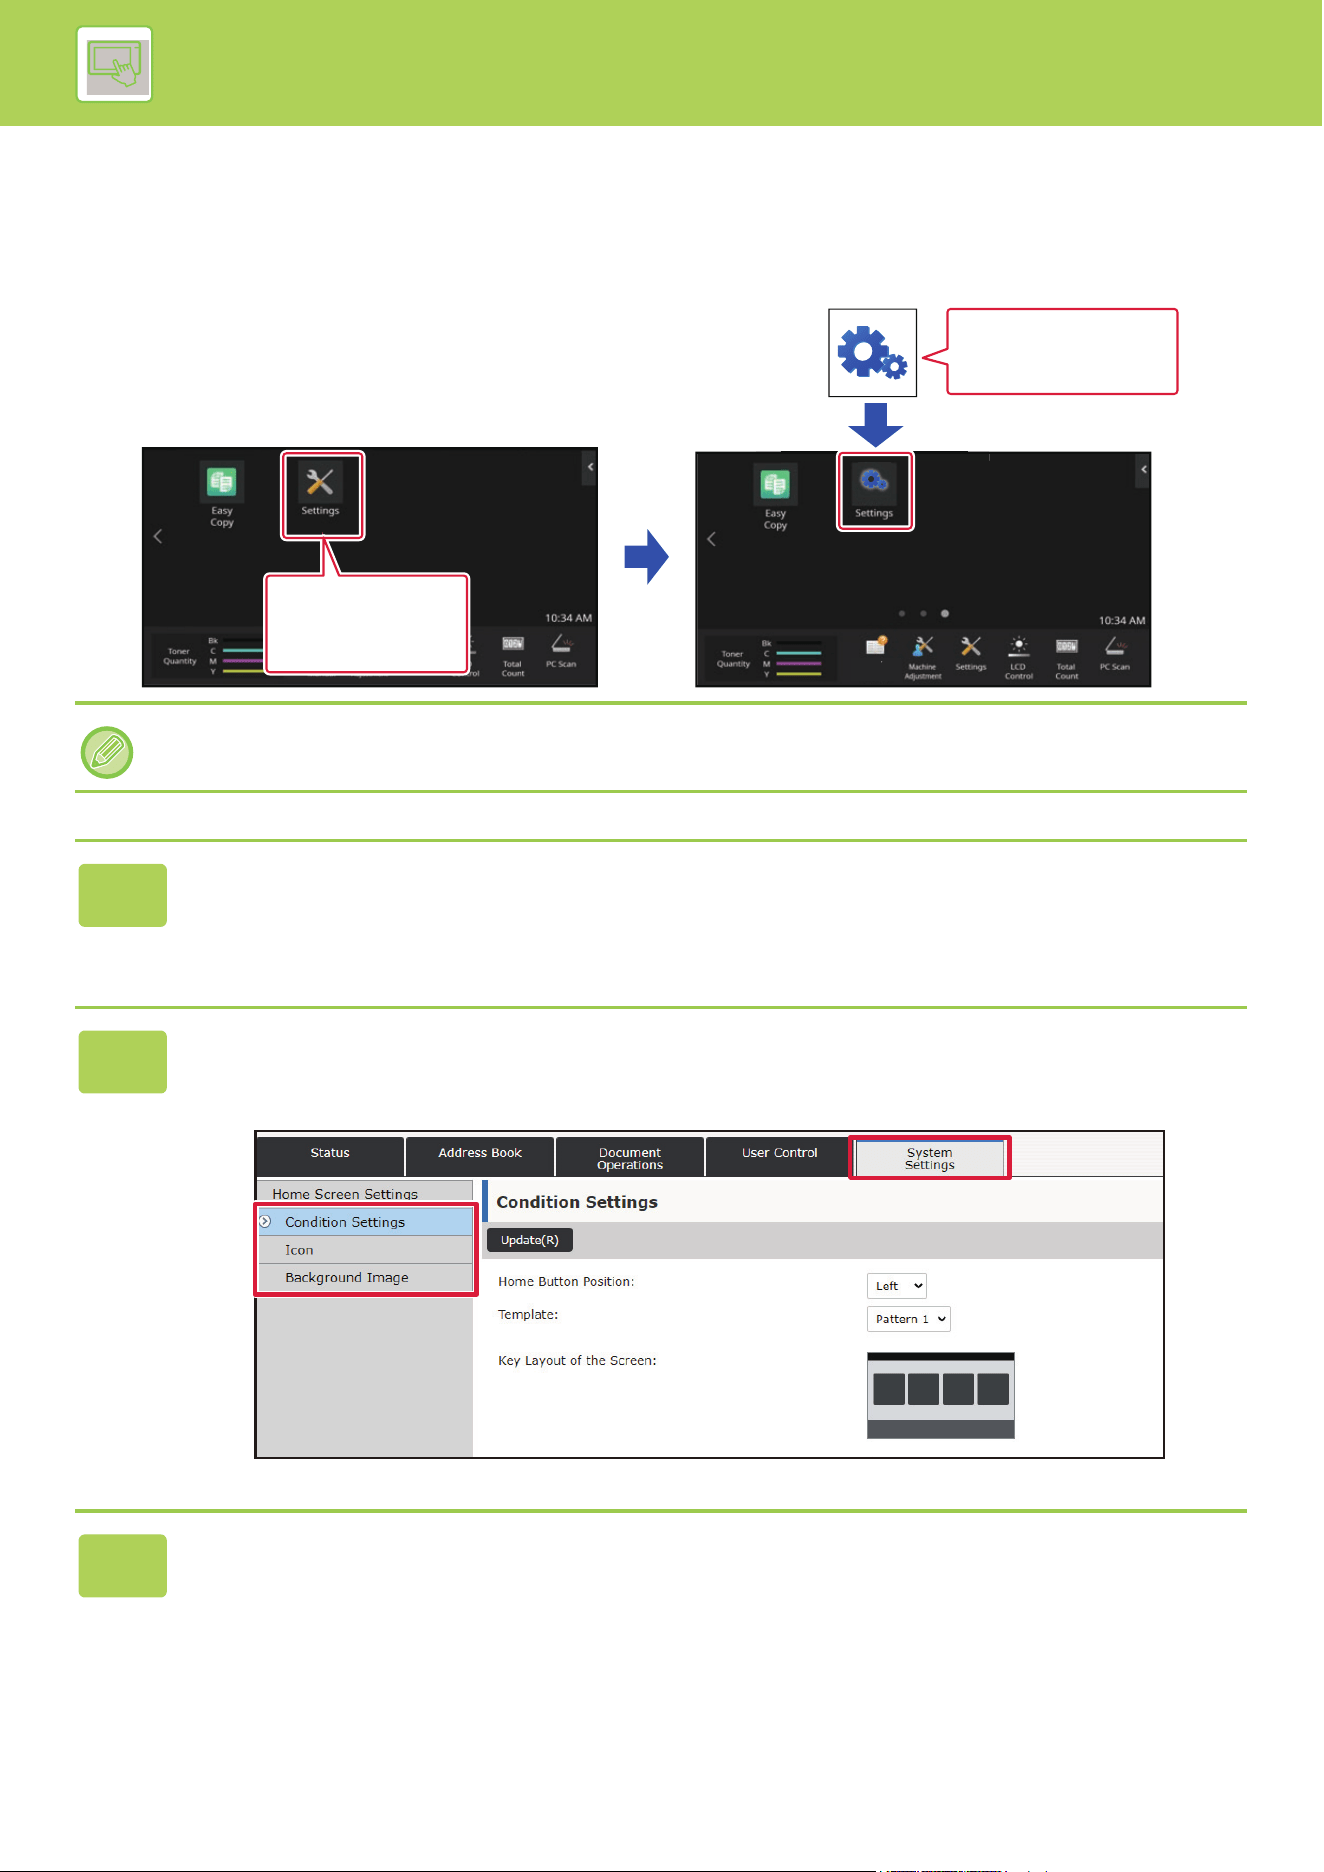
2-28
OPERATION OF THE MACHINE►CHANGE THE DISPLAY OF THE TOUCH PANEL
ADDING A SHORTCUT KEY IMAGE
To change a shortcut key image to a new image, you must first add the new image.
This section explains how to add an image. Images are added by using the Web page.
Icon images are automatically enlarged or reduced to match the size of the shortcut keys.
1
Enter the IP address set in the machine in the address bar of your web
browser.
In the factory default state, you must enter your user password after entering the IP address.
2
On the Web page, click the [System Settings] tab → [Home Screen Settings].
Some settings may require that you enter your user password after clicking [Home Screen Settings]. If you did not
perform user authentication, you must enter the administrator password.
3
Click [Icon].
I want to add this
image
I want to change
the [Settings]
shortcut key.
U
ser
’
s
Ma
n
ua
l
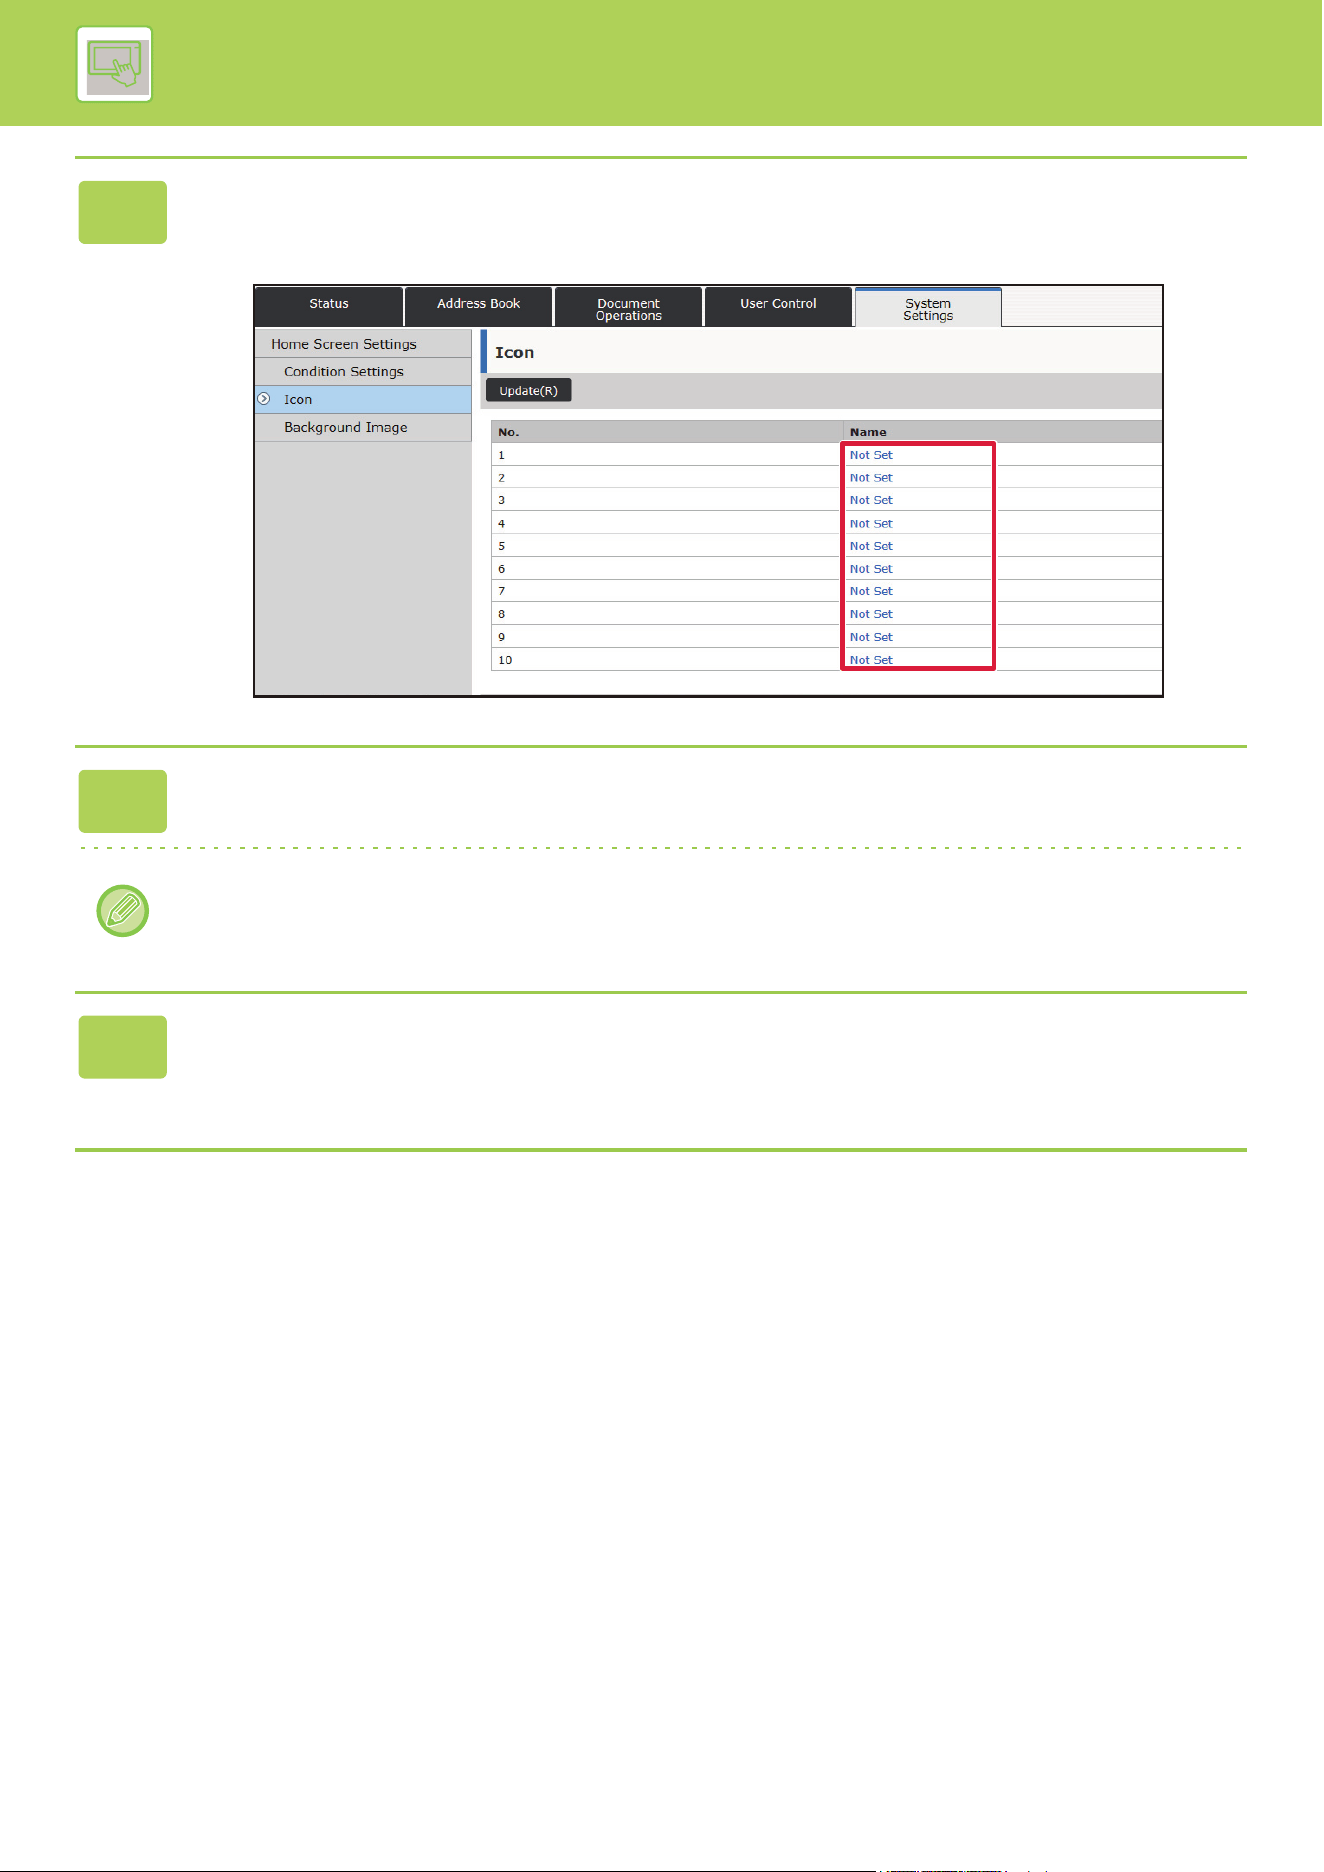
2-29
OPERATION OF THE MACHINE►CHANGE THE DISPLAY OF THE TOUCH PANEL
4
Select any item
If you are adding a new image, click "Not Set". If "Not Set" items are all in use, click an unneeded item in the already
added items.
5
Select the file to be added in "Select File".
Click the [Browse] button, and select the image to be submitted.
• File formats that can be used are JPEG, GIF and PNG (jpeg, jpg, jpe, jfif, gif and png).
• The maximum file size of an image that can be used for a shortcut key is 50 KB.
6
When you have finished configuring the settings, click the [Submit] button.
The settings are saved in the machine and applied.
When you have finished settings, click the [Logout] button and close your Web browser.
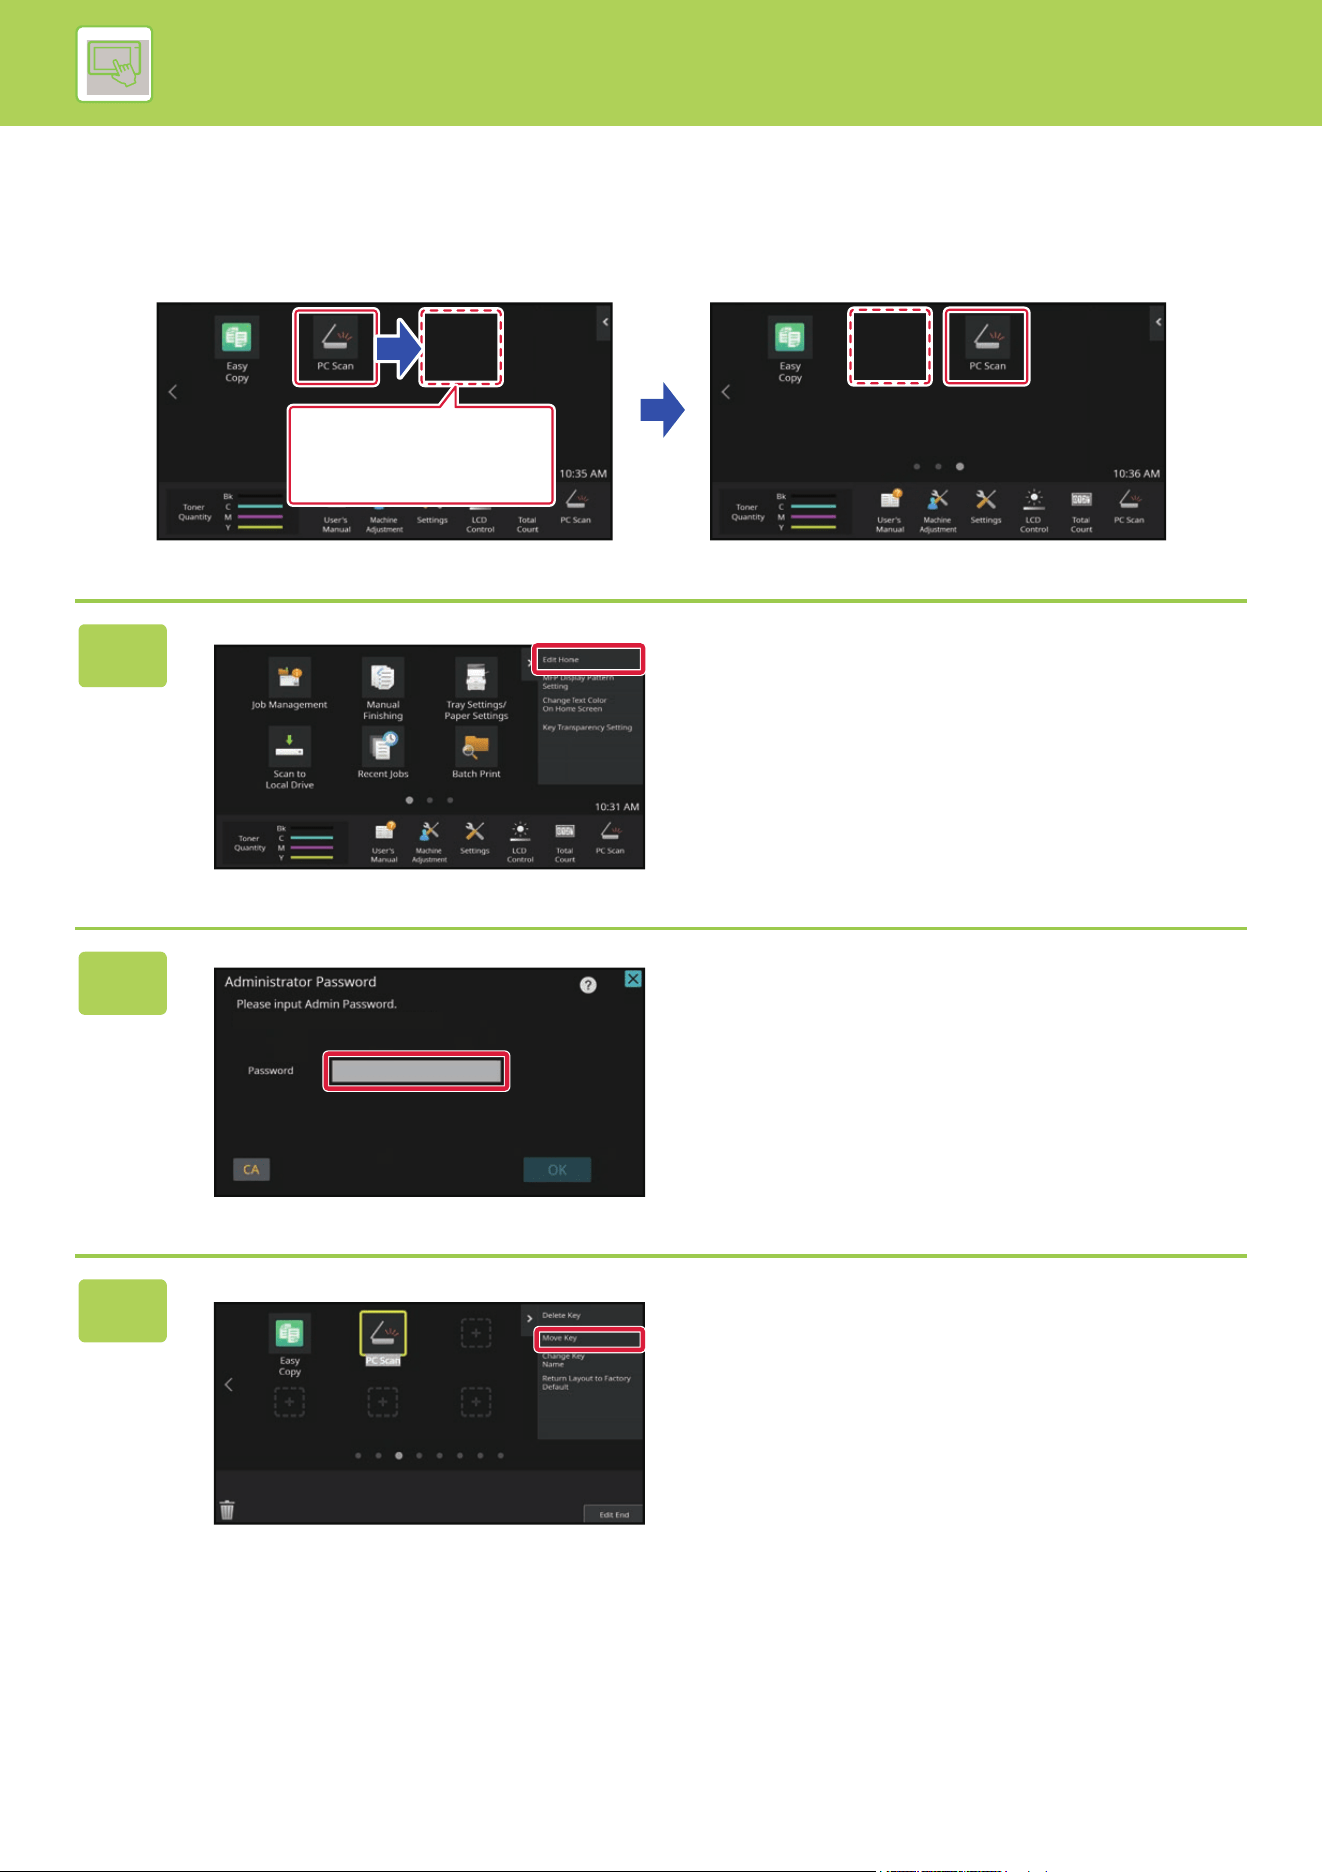
2-30
OPERATION OF THE MACHINE►CHANGE THE DISPLAY OF THE TOUCH PANEL
MOVING A SHORTCUT KEY
This section explains how to move a shortcut key in the home screen.
Shortcut keys are moved by using the touch panel.
1
Open the action panel on the home
screen, and tap [Edit Home].
2
The administrator password screen
appears. Enter your password.
Enter the administrator password.
3
Tap the shortcut key you want to
move, and tap [Move Key].
A yellow frame appears around the selected shortcut key.
I want to move the
[PC Scan] shortcut
key.
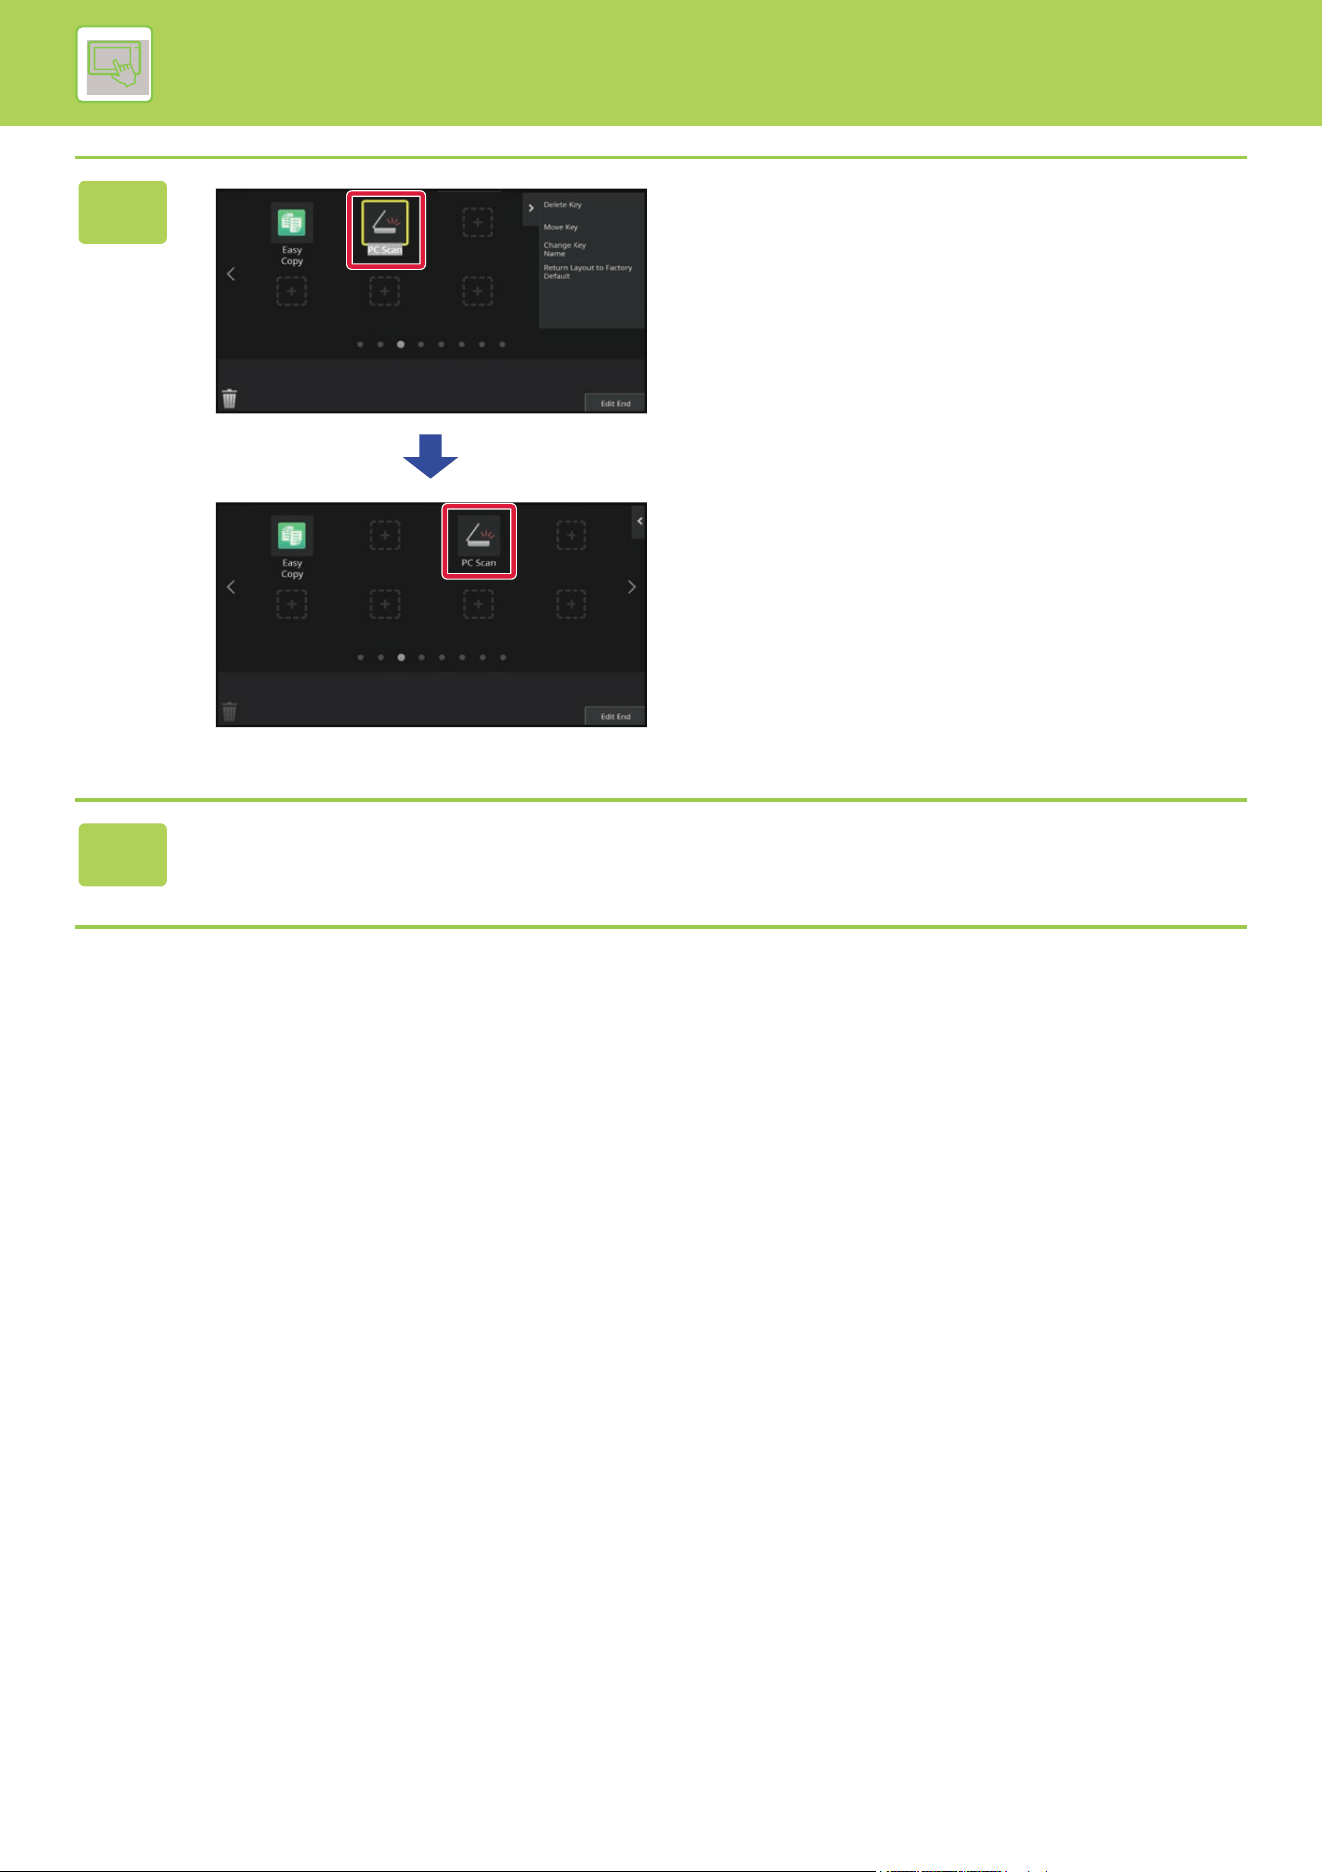
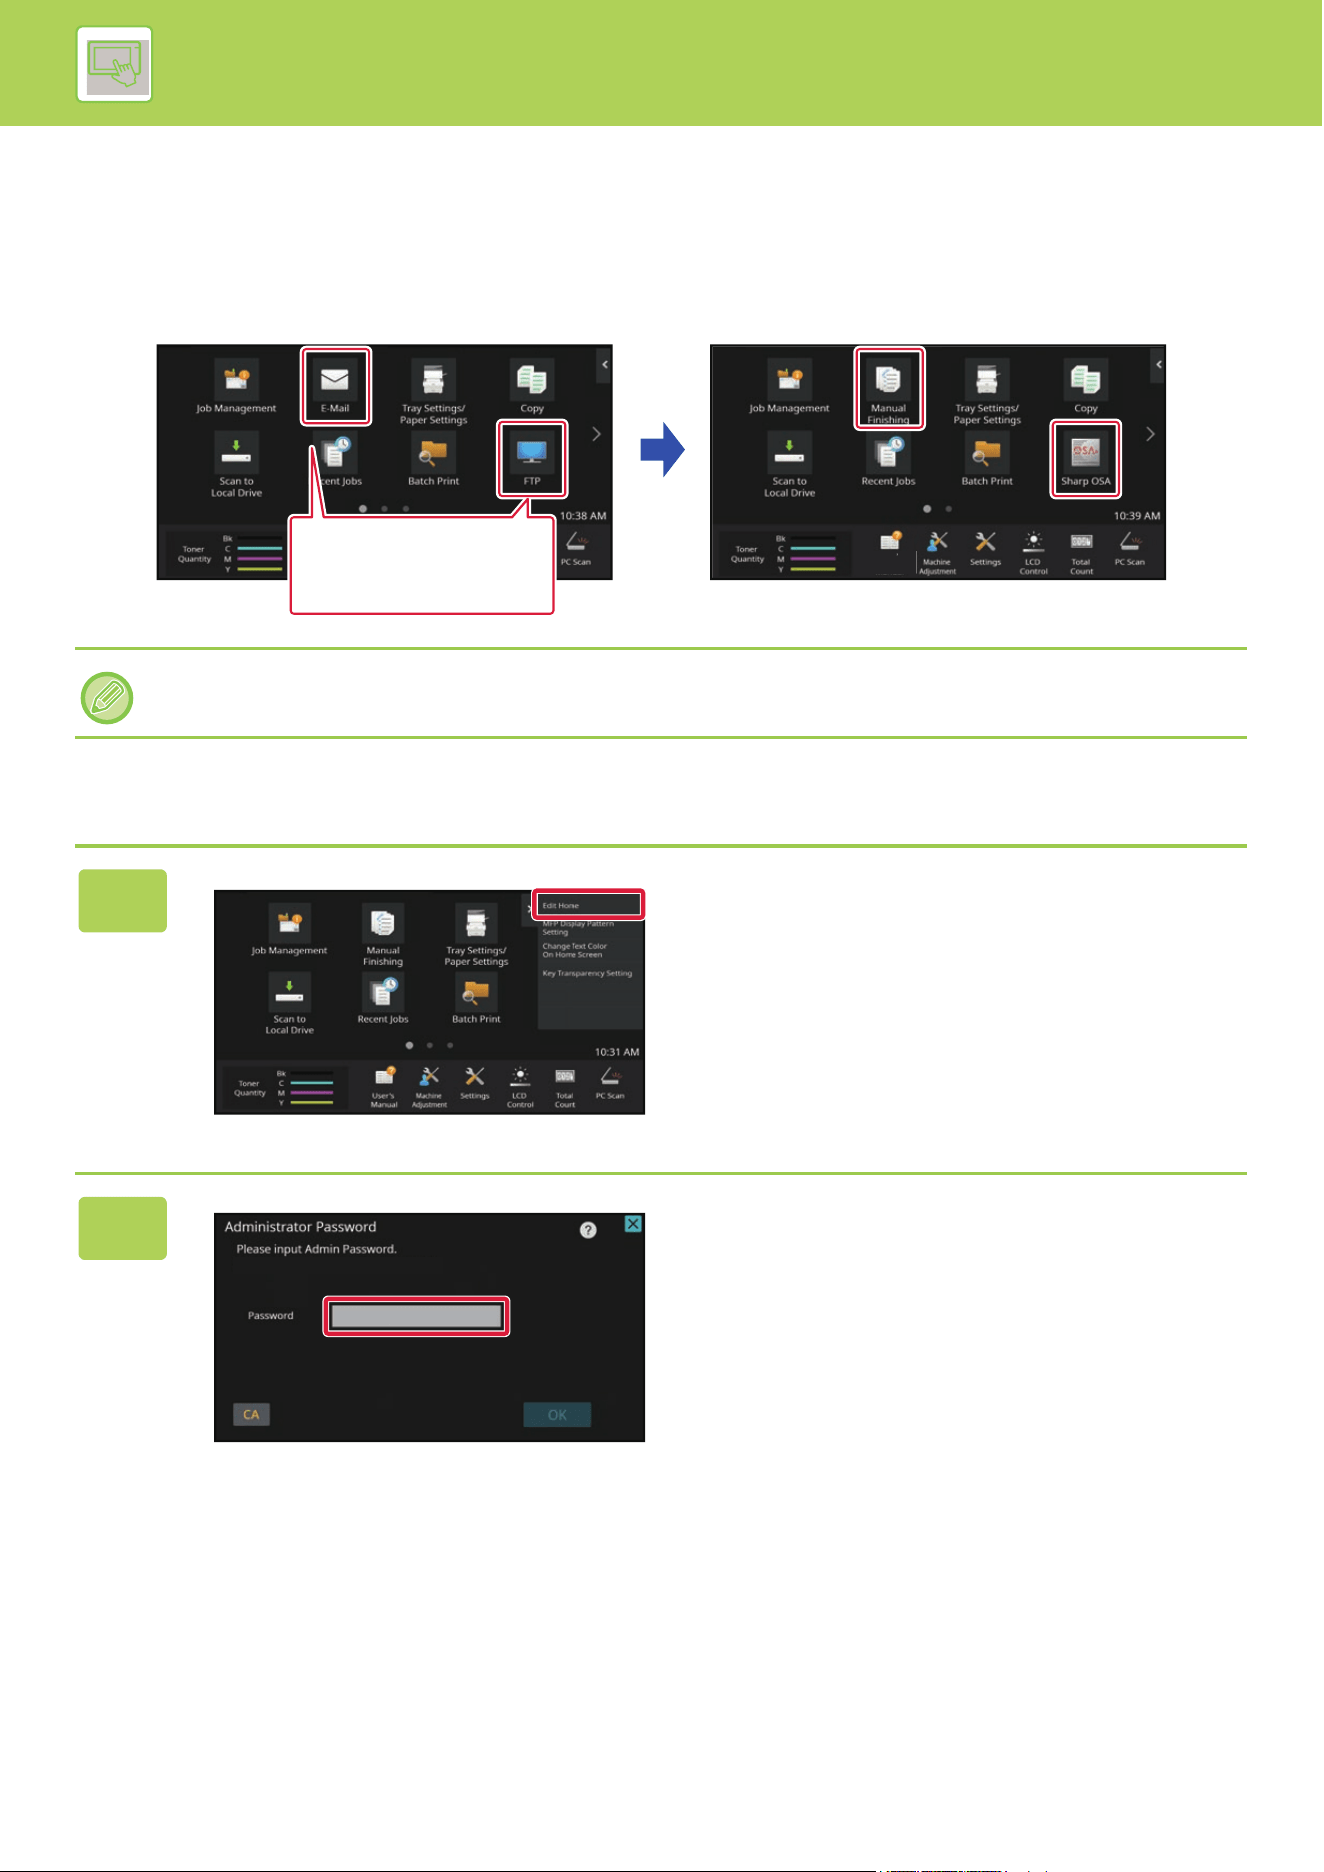
2-32
OPERATION OF THE MACHINE►CHANGE THE DISPLAY OF THE TOUCH PANEL
RETURNING THE SHORTCUT KEYS TO THE FACTORY
DEFAULT STATE
This section explains how to return the shortcut keys in the home screen to the factory default state.
This procedure can be performed from the touch panel or from the Web page.
From the touch panel
The positions, names, and images of the shortcut keys are returned to the factory default state.
1
Open the action panel on the home
screen, and tap [Edit Home].
2
The administrator password screen
appears. Enter your password.
Enter the administrator password.
U
ser
’
s
M
anual
I want to return
changed shortcut keys
to the factory default
state.
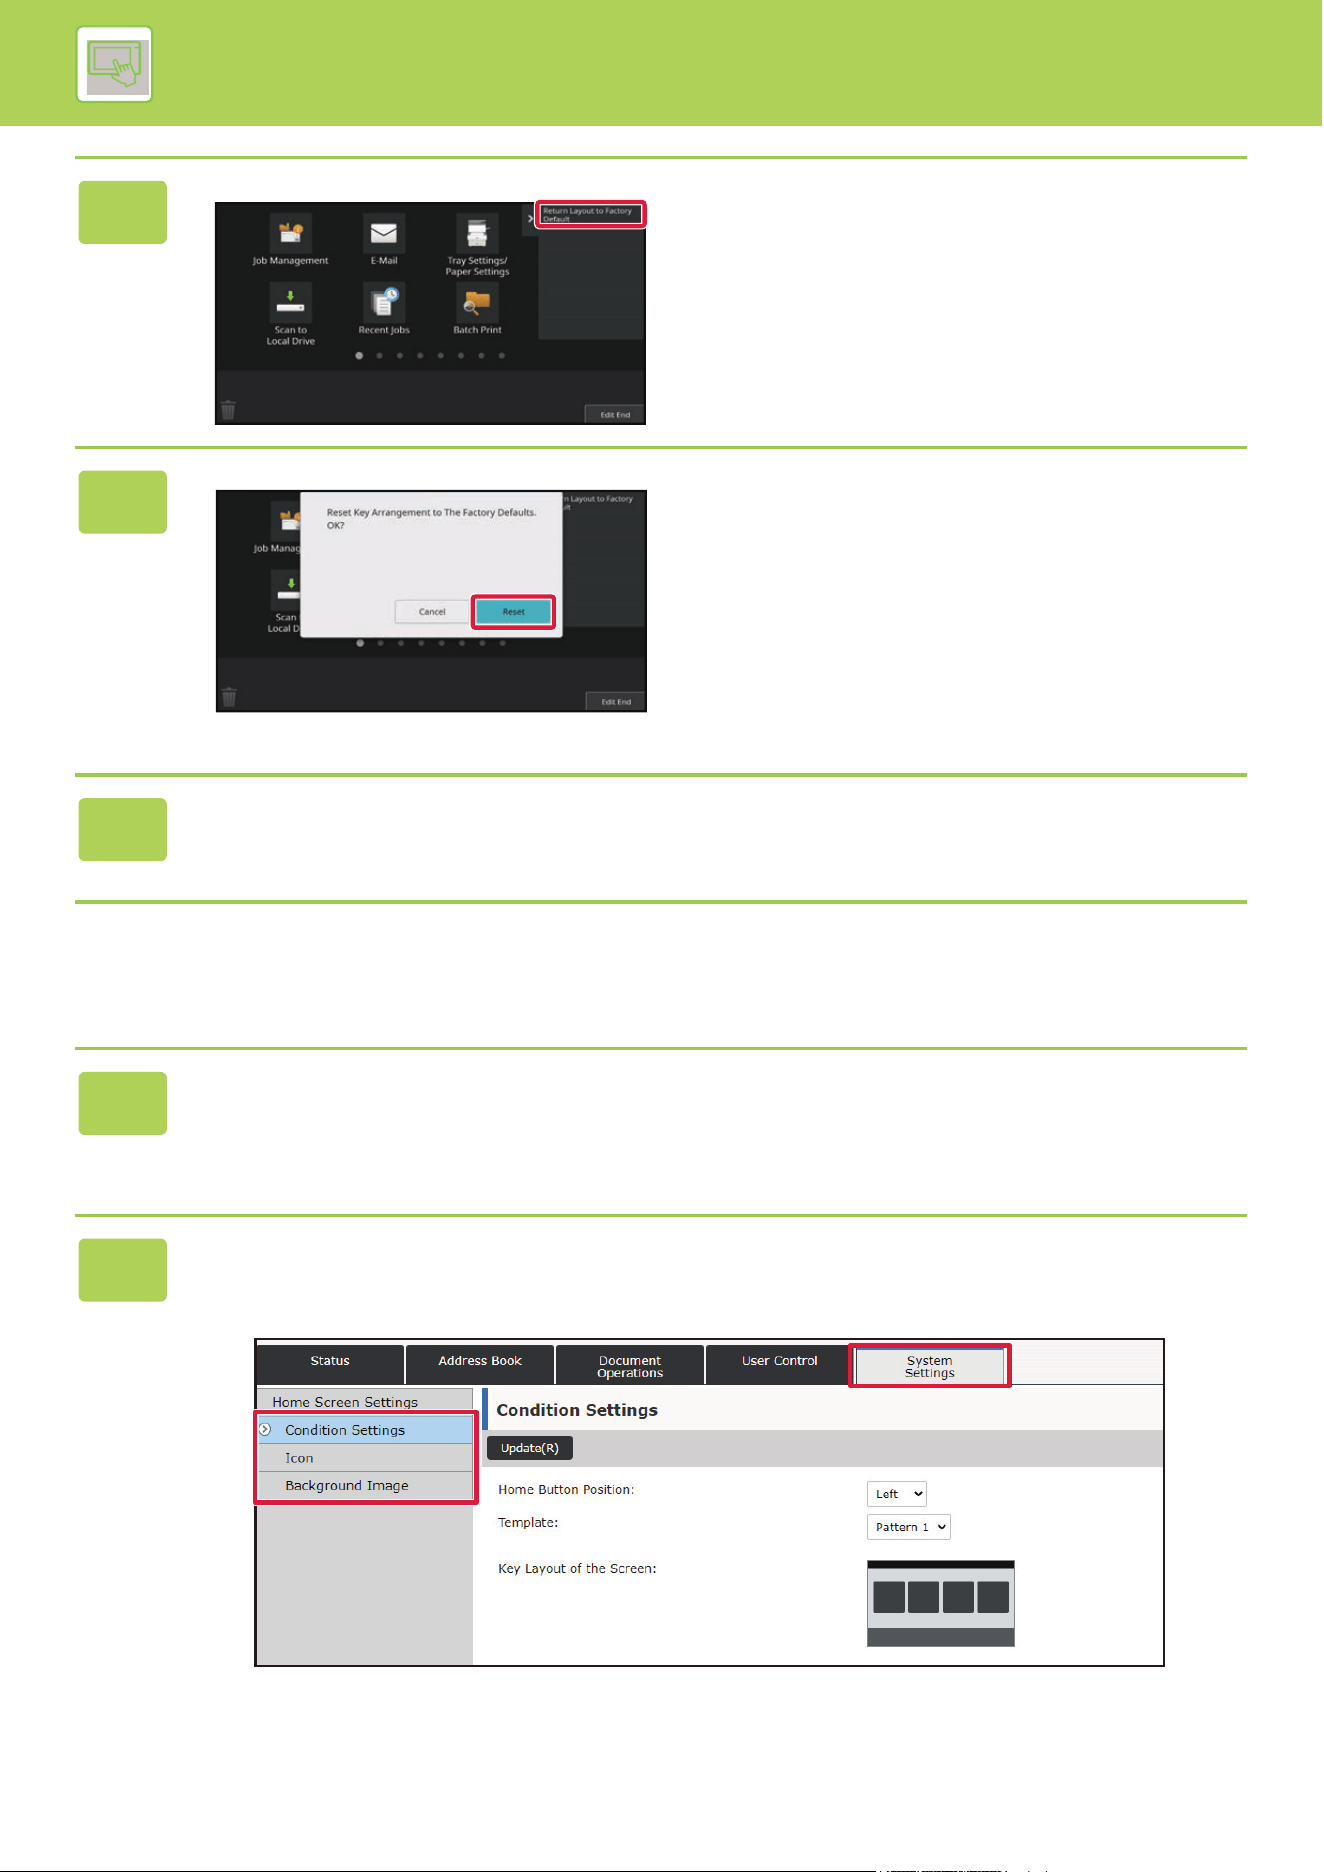
2-33
OPERATION OF THE MACHINE►CHANGE THE DISPLAY OF THE TOUCH PANEL
From the Web page
3
Tap [Return Layout to Factory Default]
on the action panel.
4
Tap the [Reset] key.
The shortcut keys are returned to the factory default state.
5
After completing the settings, tap the [Logout] key.
1
Enter the IP address set in the machine in the address bar of your web
browser.
In the factory default state, you must enter your user password after entering the IP address.
2
On the Web page, click the [System Settings] tab → [Home Screen Settings].
Some settings may require that you enter your user password after clicking [Home Screen Settings]. If you did not
perform user authentication, you must enter the administrator password.
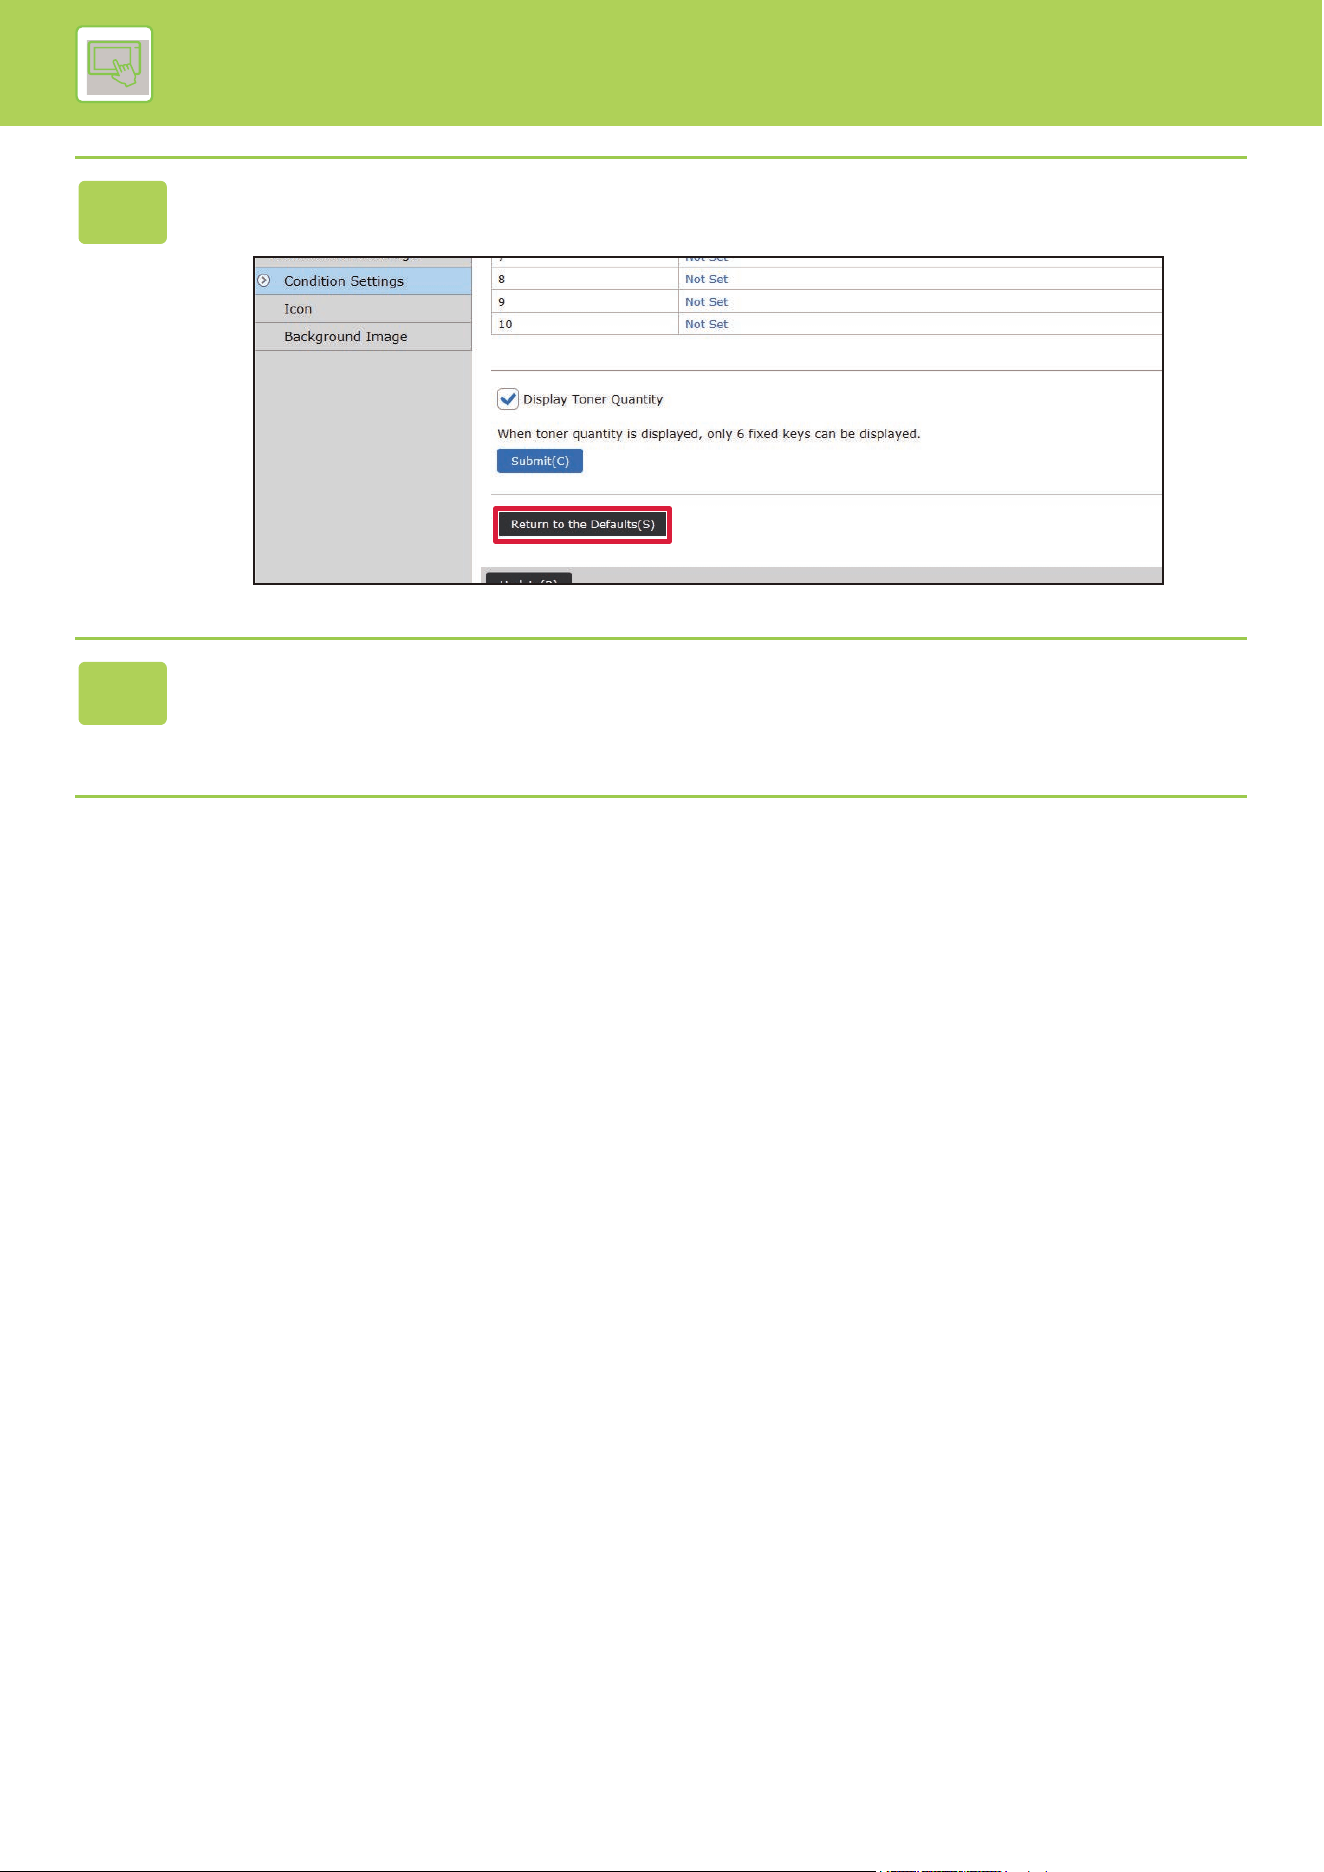
2-34
OPERATION OF THE MACHINE►CHANGE THE DISPLAY OF THE TOUCH PANEL
3
Click [Condition Settings], and click the [Return to the Defaults] button.
A confirmation window appears. Click the [OK] button.
4
When you have finished configuring the settings, click the [Submit] button.
The settings are saved in the machine and applied.
When you have finished settings, click the [Logout] button and close your Web browser.
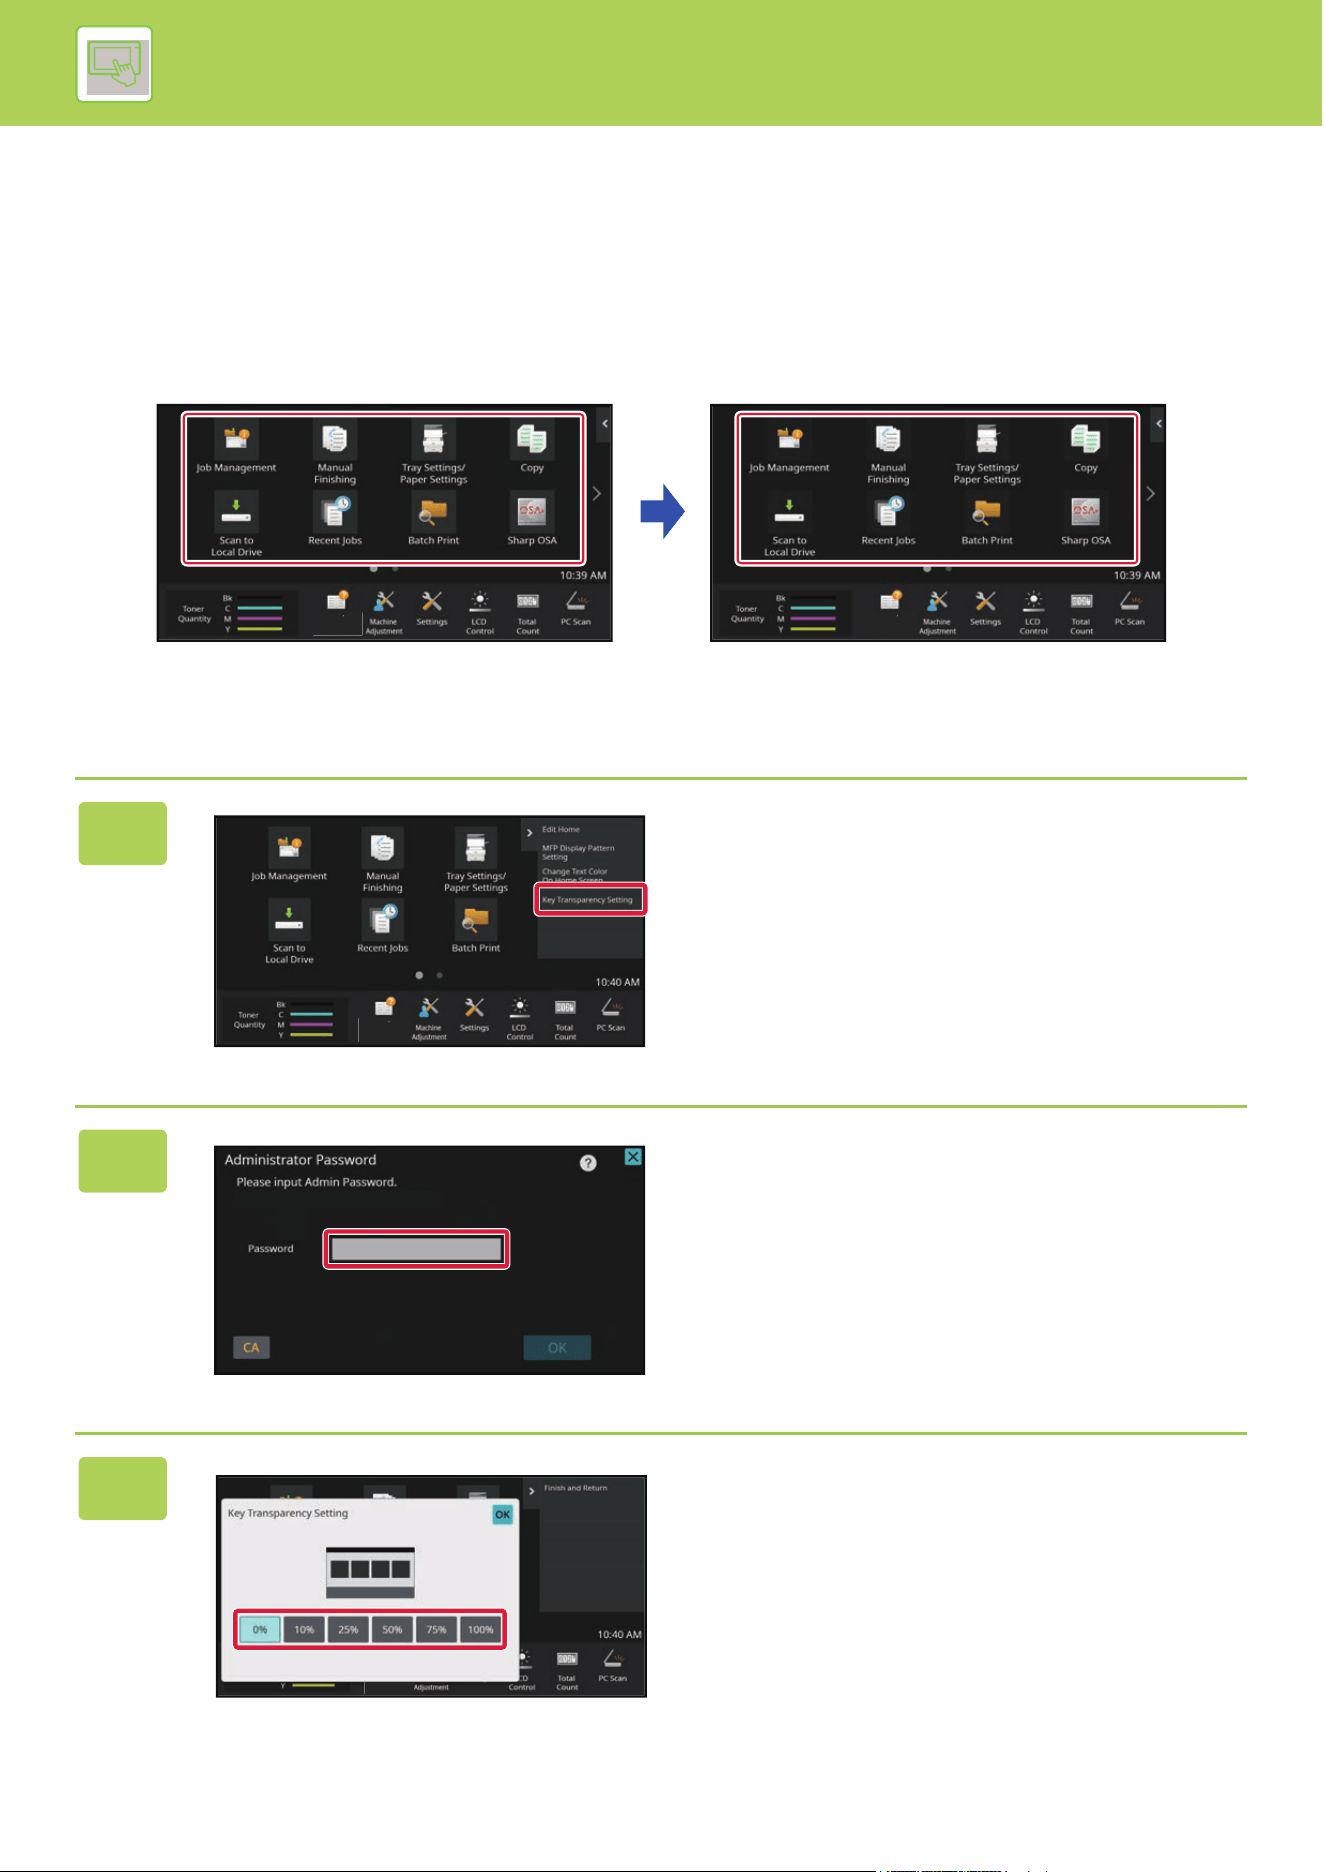
2-35
OPERATION OF THE MACHINE►CHANGE THE DISPLAY OF THE TOUCH PANEL
CHANGING THE TRANSPARENCY OF A SHORTCUT
KEY
You can change the transparency of the shortcut keys.
If you want to change the background of your home screen to show what's behind the shortcut keys, increase the
transparency to make it easier to see what's behind the shortcut keys.
This procedure can be performed from the touch panel or from the Web page.
From the touch panel
1
Open the action panel on the home
screen, and tap [Key Transparency
Setting].
2
The administrator password screen
appears. Enter your password.
Enter the administrator password.
3
Select the level of transparency you
wish to set.
U
ser
’
s
M
anua
l
U
ser
’
s
M
a
n
ua
l
U
ser
’
s
M
a
n
ua
l
M
a
n
ua
l
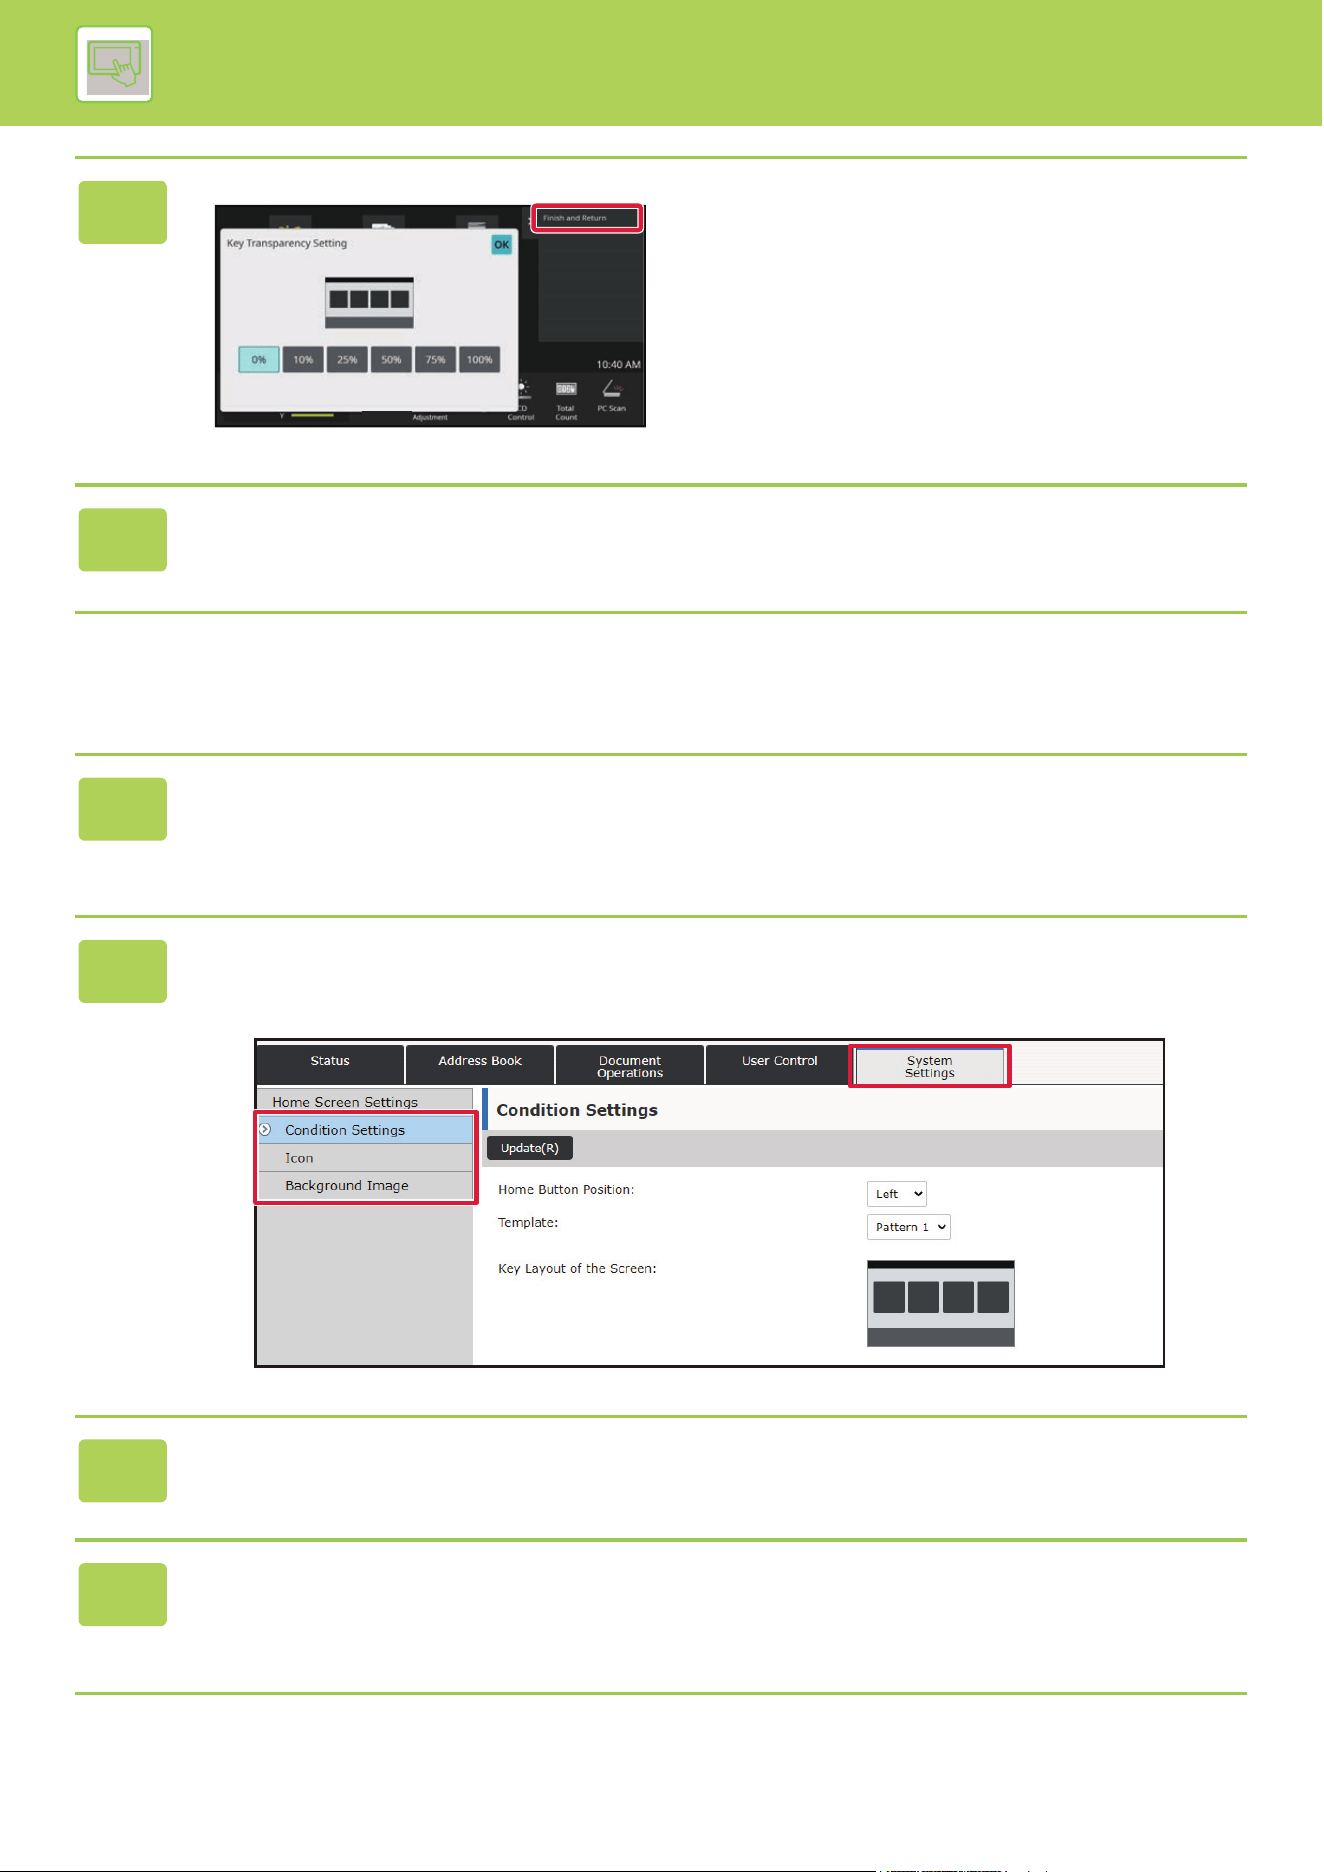
2-36
OPERATION OF THE MACHINE►CHANGE THE DISPLAY OF THE TOUCH PANEL
From the Web page
4
Tap the [Finish and Return] key.
5
After completing the settings, tap the [Logout] key.
1
Enter the IP address set in the machine in the address bar of your web
browser.
In the factory default state, you must enter your user password after entering the IP address.
2
On the Web page, click the [System Settings] tab → [Home Screen Settings].
Some settings may require that you enter your user password after clicking [Home Screen Settings]. If you did not
perform user authentication, you must enter the administrator password.
3
Click [Condition Settings], and click the [Key Transparency Setting] button.
4
When you have finished configuring the settings, click the [Submit] button.
The settings are saved in the machine and applied.
When you have finished settings, click the [Logout] button and close your Web browser.
M
a
n
ua
l
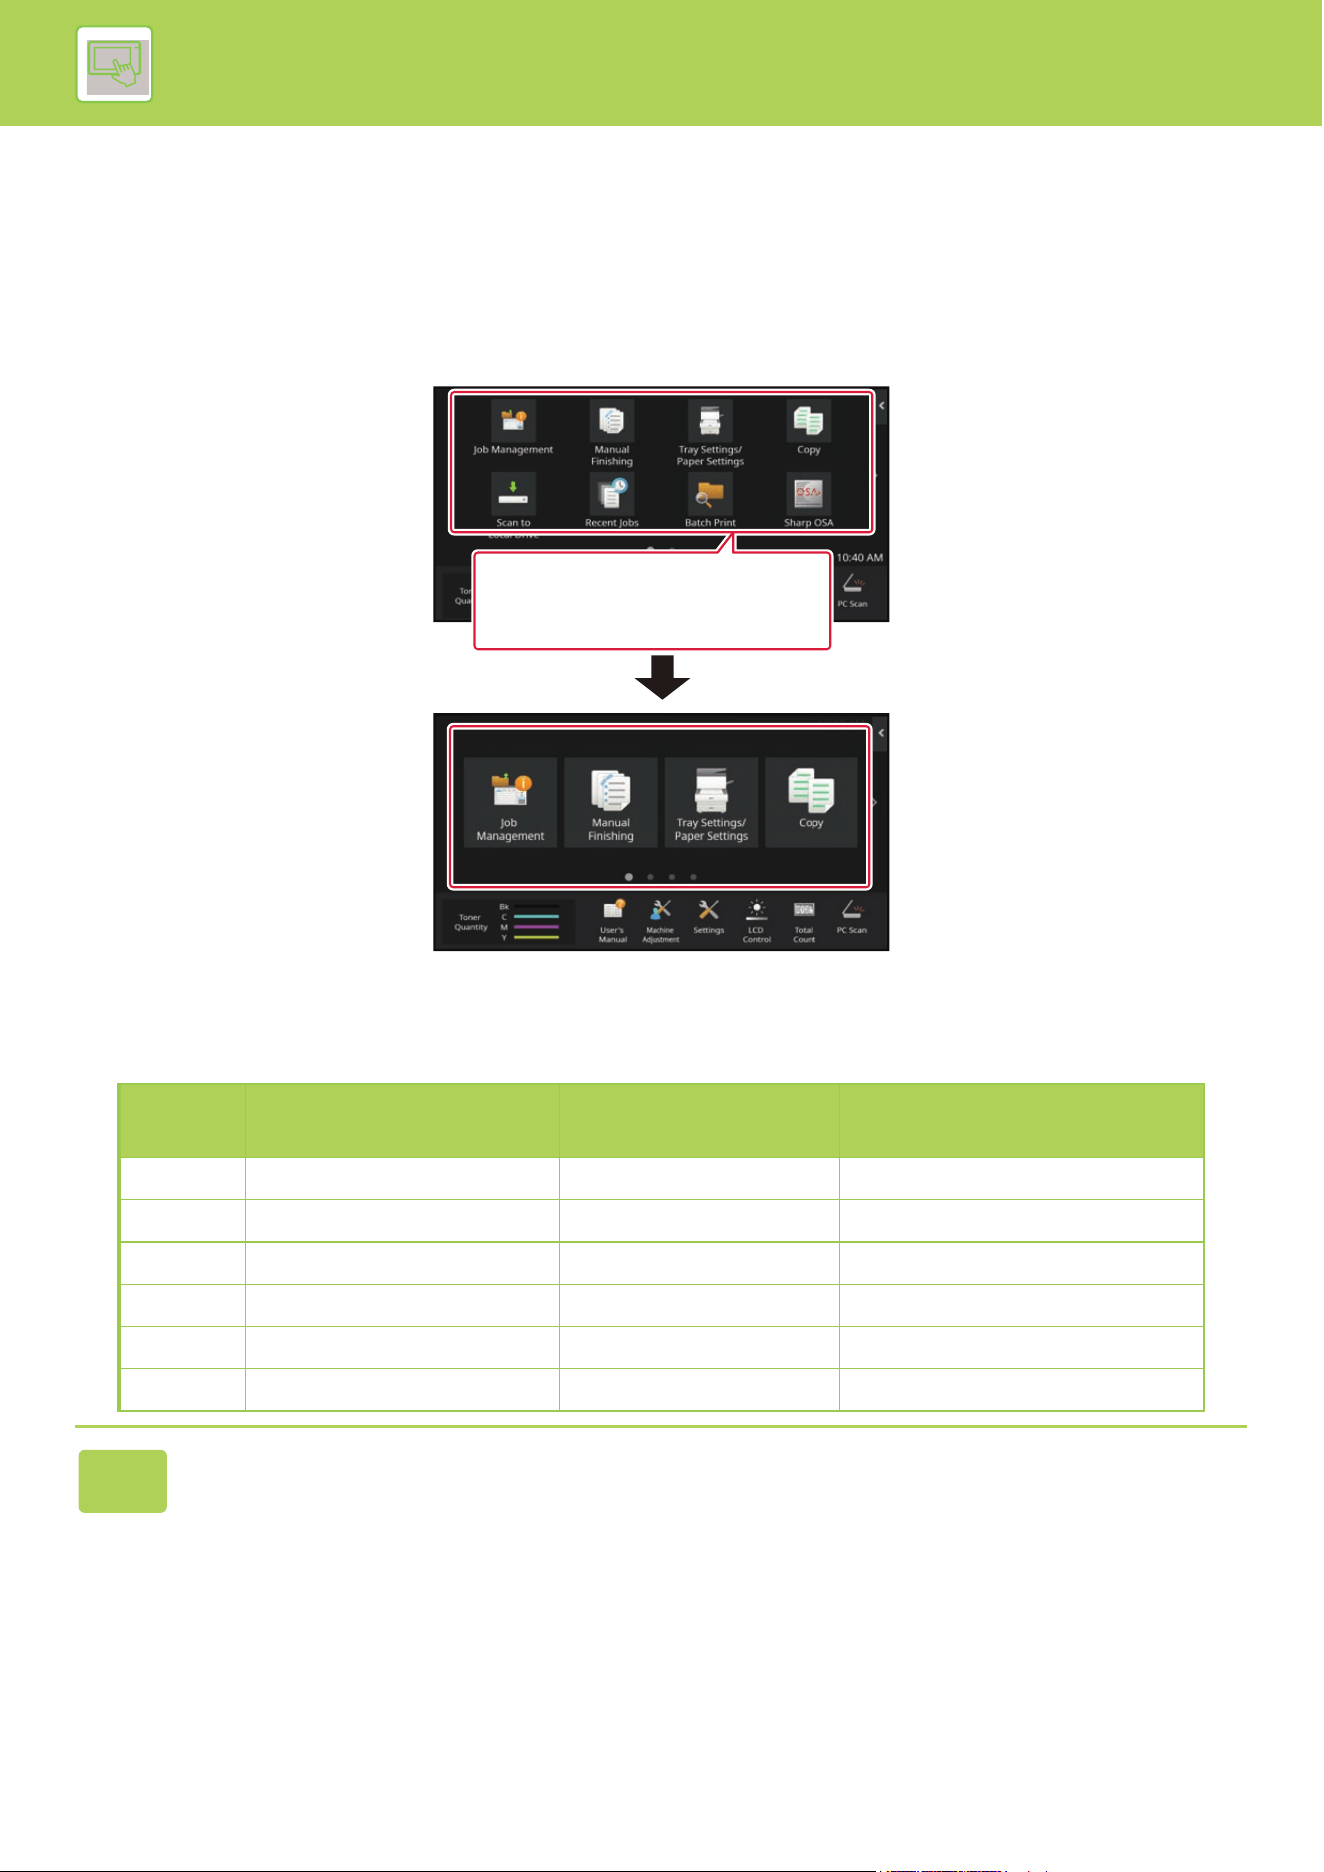
2-37
OPERATION OF THE MACHINE►CHANGE THE DISPLAY OF THE TOUCH PANEL
CHANGING THE LAYOUT PATTERN OF THE HOME
SCREEN
Multiple home screen layout patterns are preset in the machine. These include a layout pattern that reduces the display
size of the shortcut keys to increase the number of keys shown, and a layout pattern that eliminates the fixed key display
area to increase the number of shortcut keys shown. The layout pattern can be changed in the Web page.
Home screen layout patterns
Six layout patterns are available.
Pattern Number of shortcut keys
displayed per screen
Fixed key area Maximum number of screens
1 4 Yes 15 screens
2 8 No 8 screens
3 8 Yes 8 screens
4 12 No 5 screens
5 12 Yes 5 screens
6 18 No 4 screens
1
Enter the IP address set in the machine in the address bar of your web
browser.
In the factory default state, you must enter your user password after entering the IP address.
User's
Manual
I want to show more shortcut keys
in the home screen by reducing the
size of the keys.

2-38
OPERATION OF THE MACHINE►CHANGE THE DISPLAY OF THE TOUCH PANEL
2
On the Web page, click the [System Settings] tab → [Home Screen Settings].
Some settings may require that you enter your user password after clicking [Home Screen Settings]. If you did not
perform user authentication, you must enter the administrator password.
3
Click [Condition Settings] and select the desired layout pattern from the
"Template".
4
When you have finished configuring the settings, click the [Submit] button.
The settings are saved in the machine and applied.
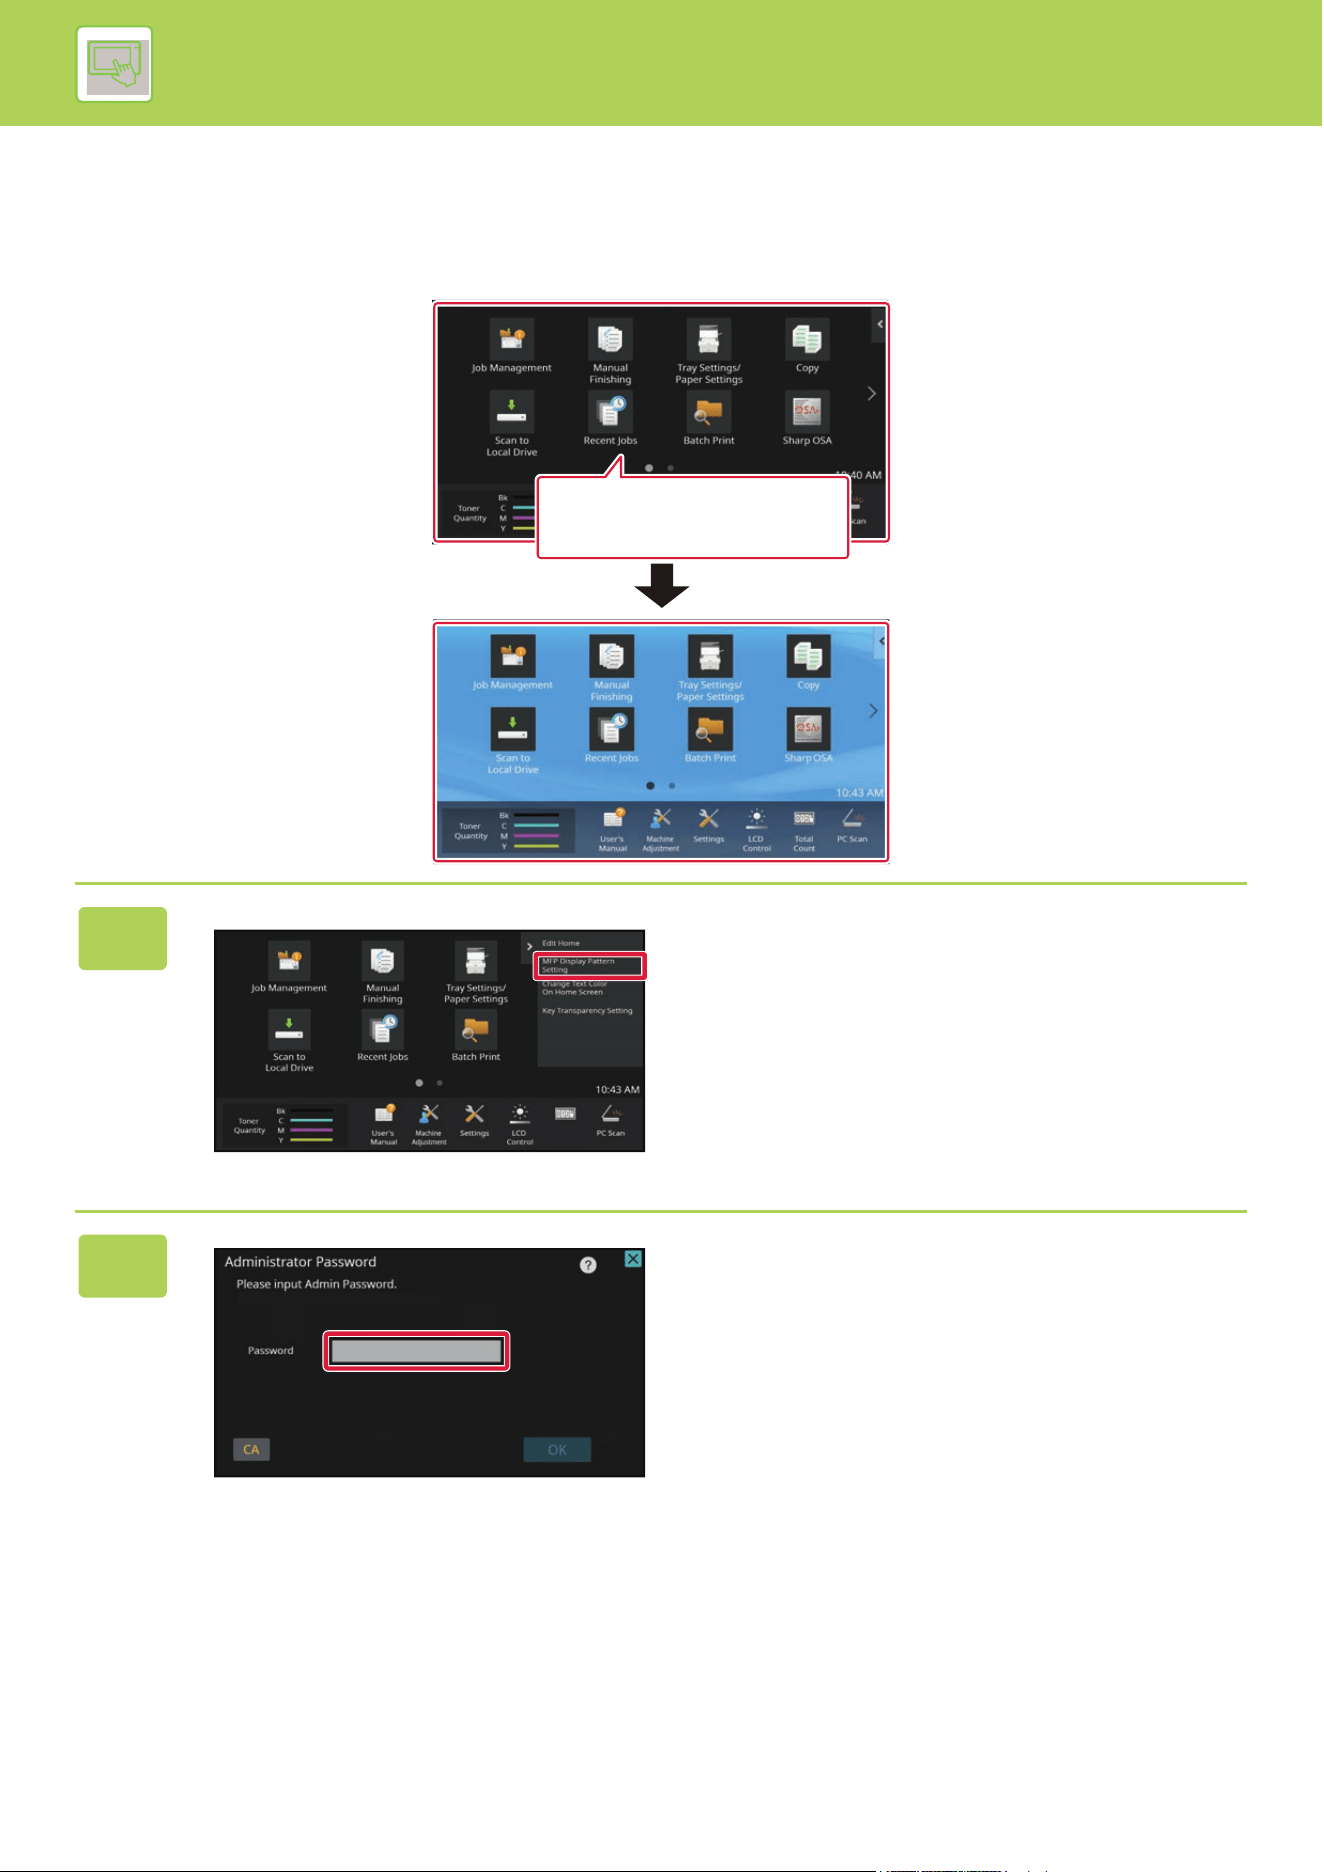
2-39
OPERATION OF THE MACHINE►CHANGE THE DISPLAY OF THE TOUCH PANEL
SELECTING A MFP DISPLAY PATTERN FOR THE
HOME SCREEN
Multiple color patterns are preset in the machine. You can change the color pattern from the touch panel.
1
Open the action panel on the home
screen, and tap [MFP Display Pattern
Setting].
2
The administrator password screen
appears. Enter your password.
Enter the administrator password.
User's
Manual
I want to change the color
pattern of the home screen.
LCD
Control
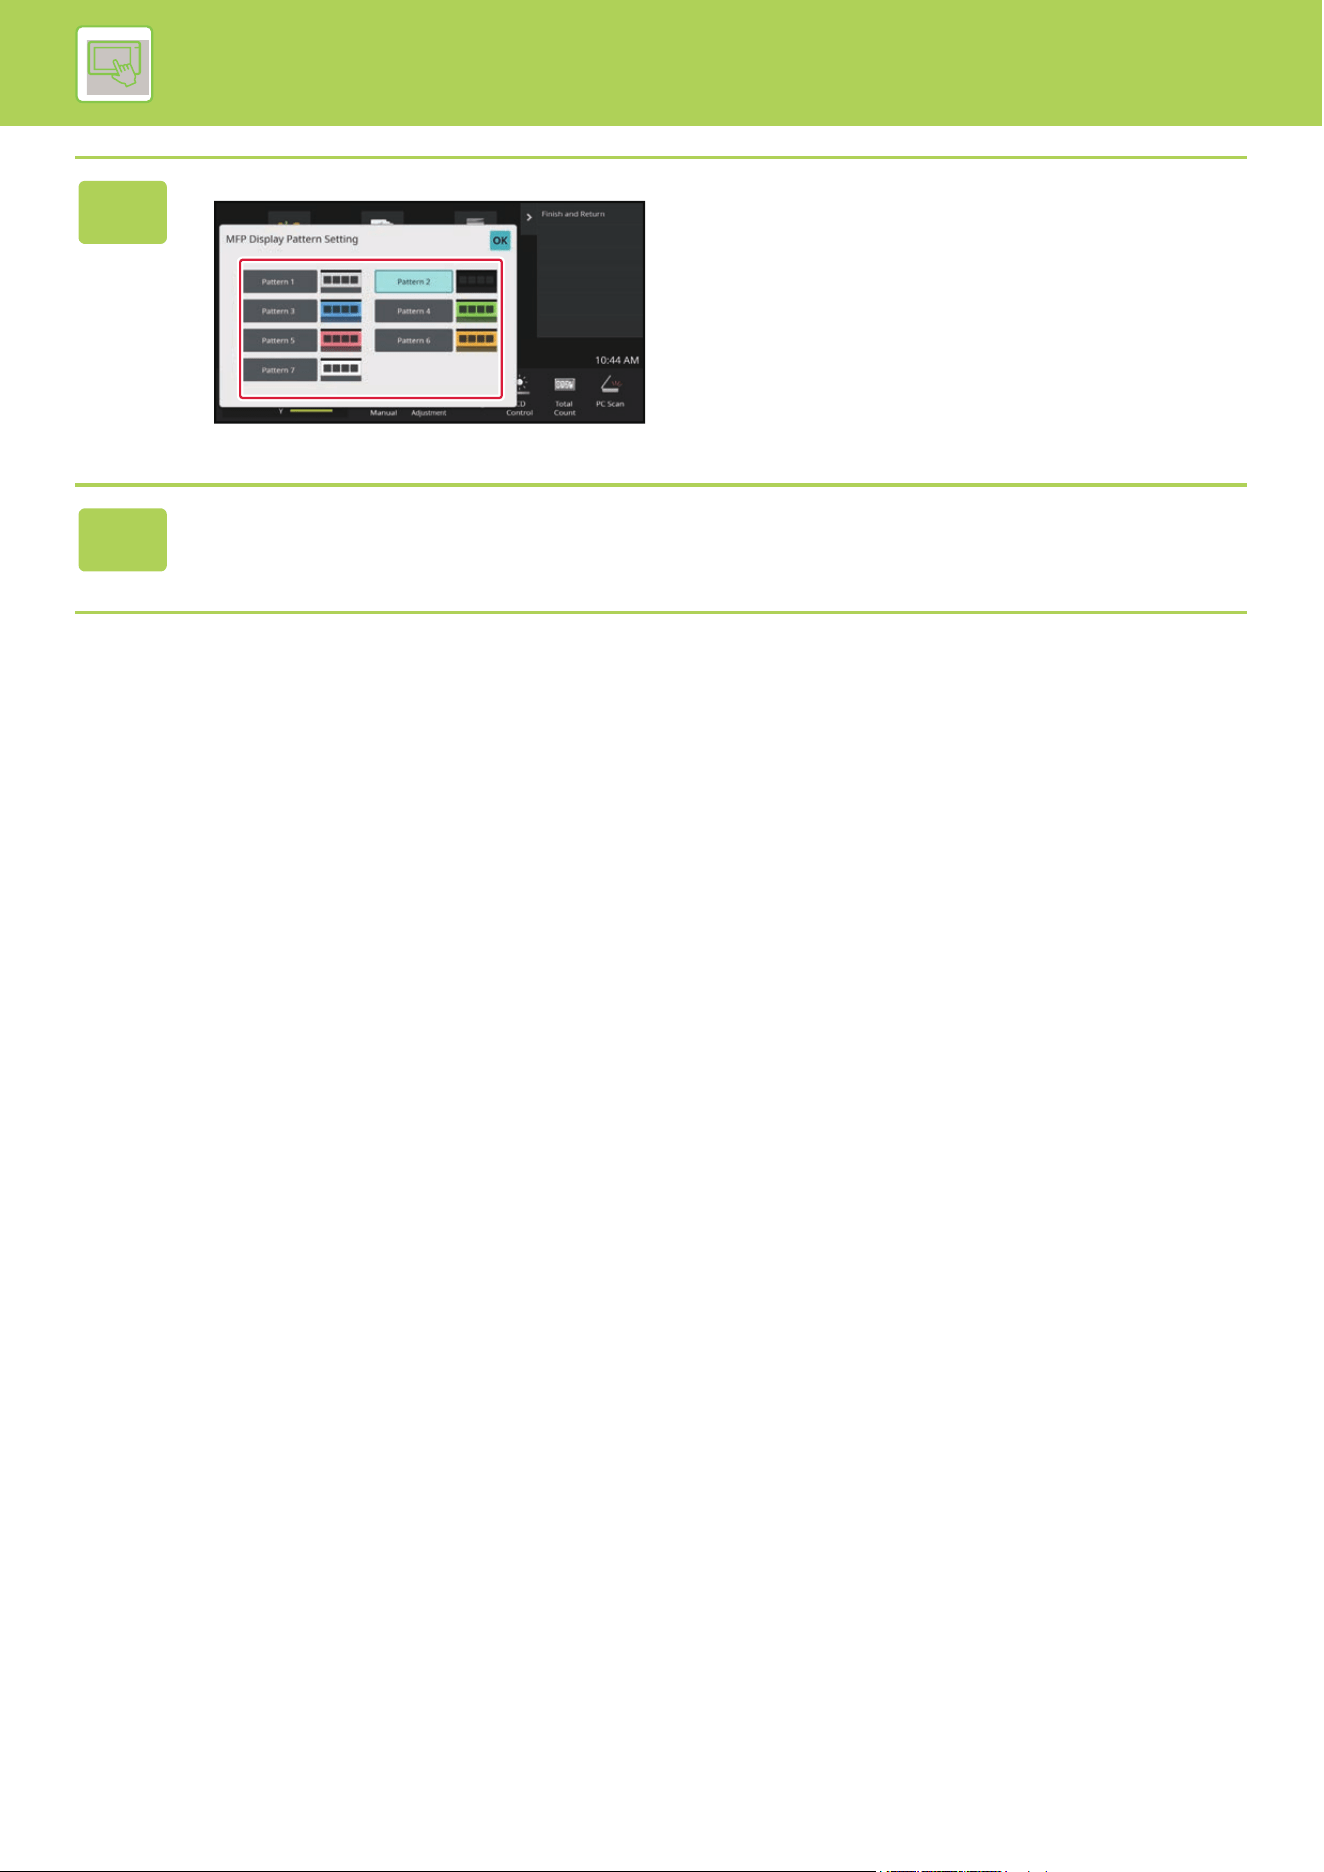
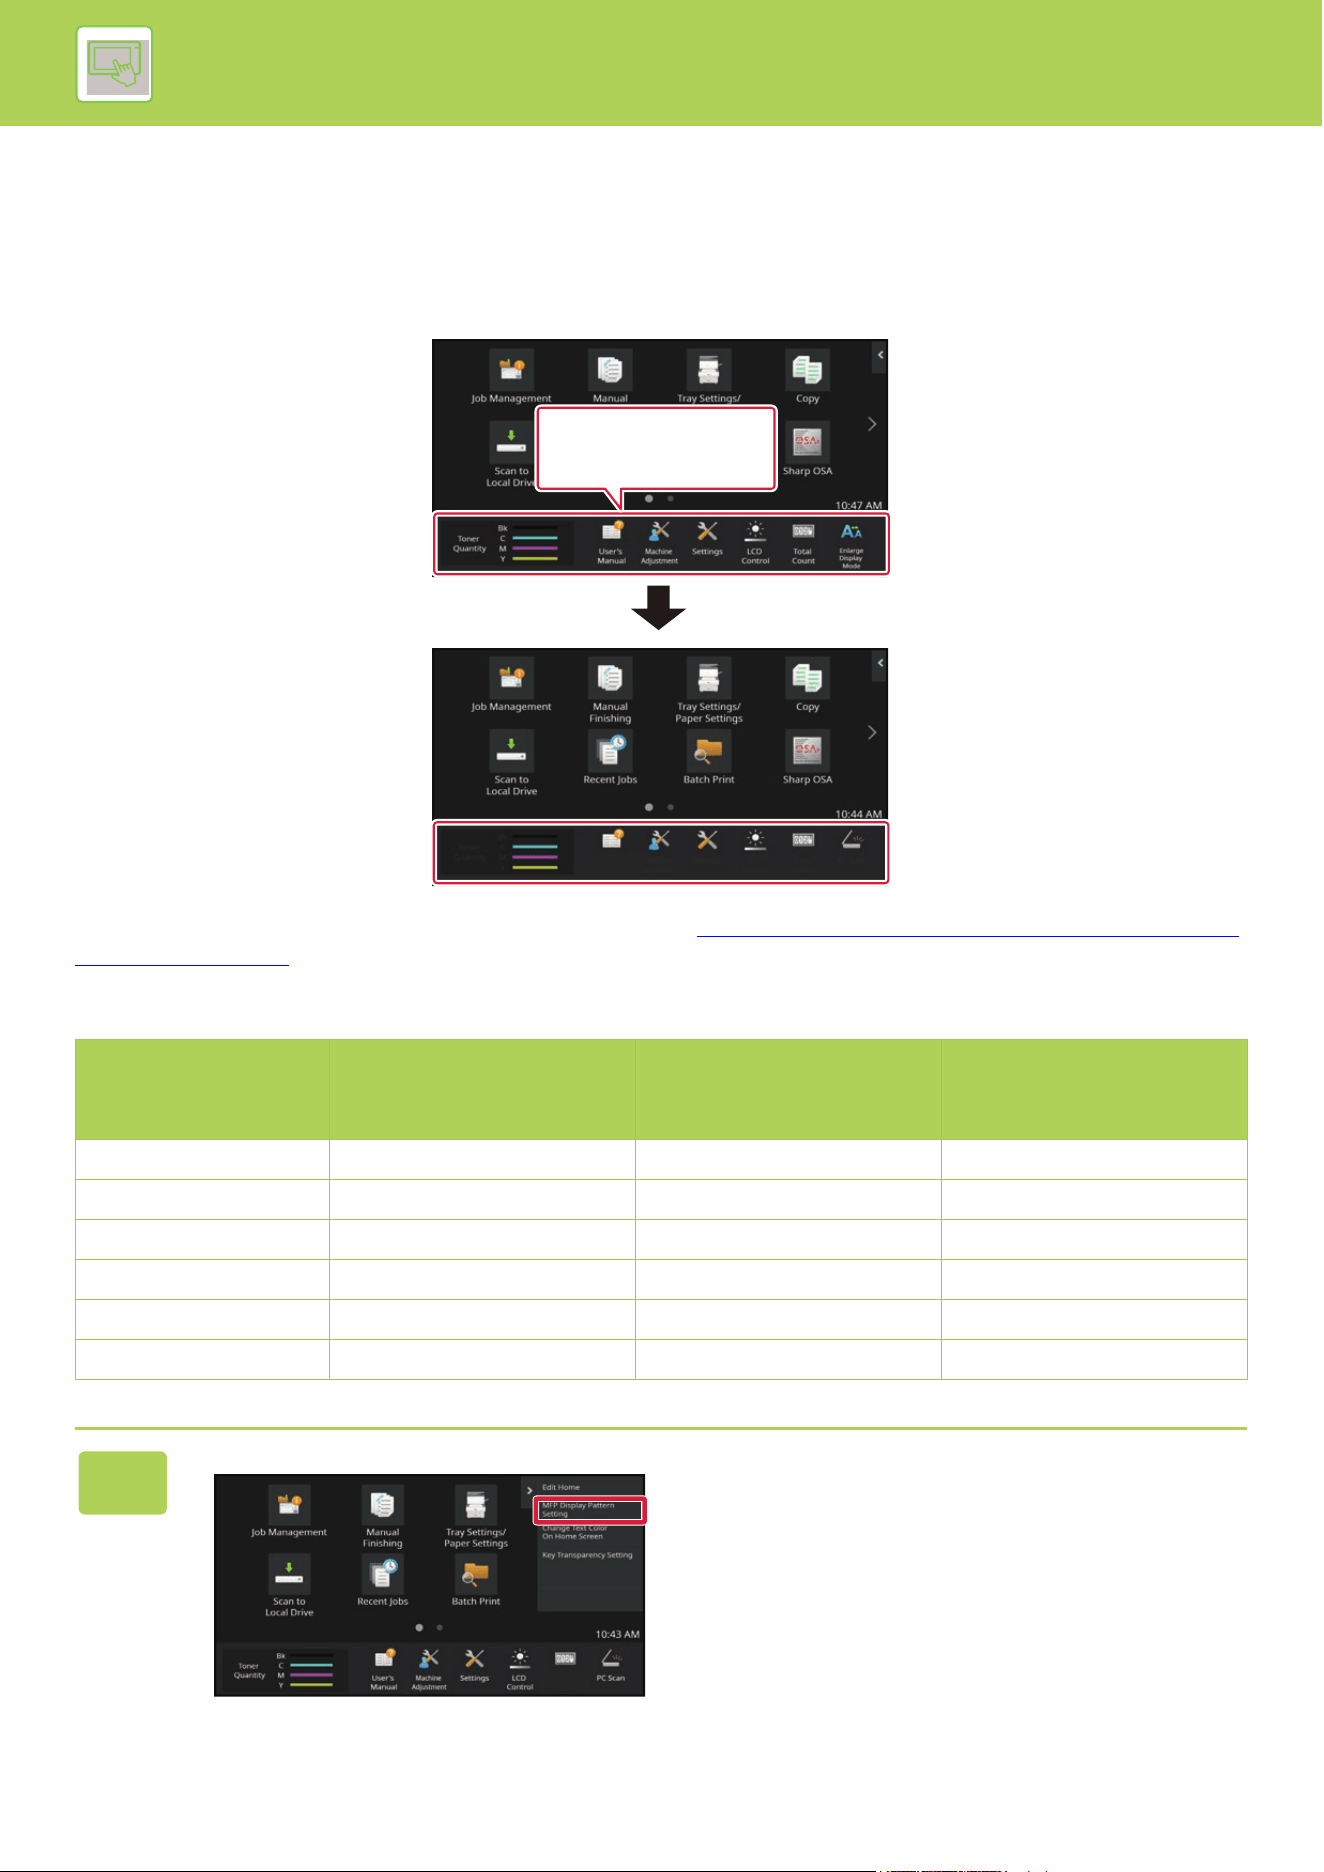
2-41
OPERATION OF THE MACHINE►CHANGE THE DISPLAY OF THE TOUCH PANEL
CHANGING THE COLOR OF TEXT ON THE HOME
SCREEN
You can change the color of the text in shortcut keys, fixed keys, and the clock on the home screen to white or black.
The color is changed using the touch panel.
The color of text on the home screen varies depending on the layout pattern.
For information about layout patterns of the home screen, see "CHANGING THE LAYOUT PATTERN OF THE HOME
SCREEN (page 2-37)".
Factory default text colors
Home screen layout patterns and text colors
Layout Pattern Scrolling Area
(Text color of shortcut
key)
Fixed Area
(Text color of fixed keys)
Clock
(Text color of clock)
1 White White Black
2 White No Black
3 Black White Black
4 Black No Black
5 Black White Black
6 Black No Black
1
Open the action panel on the home
screen, and tap [Change Text Color On
Home Screen].
Easy
Copy
Easy
Scan
Operation
Guide
I want to change the
text color to black.
LCD
Control
LCD
Control
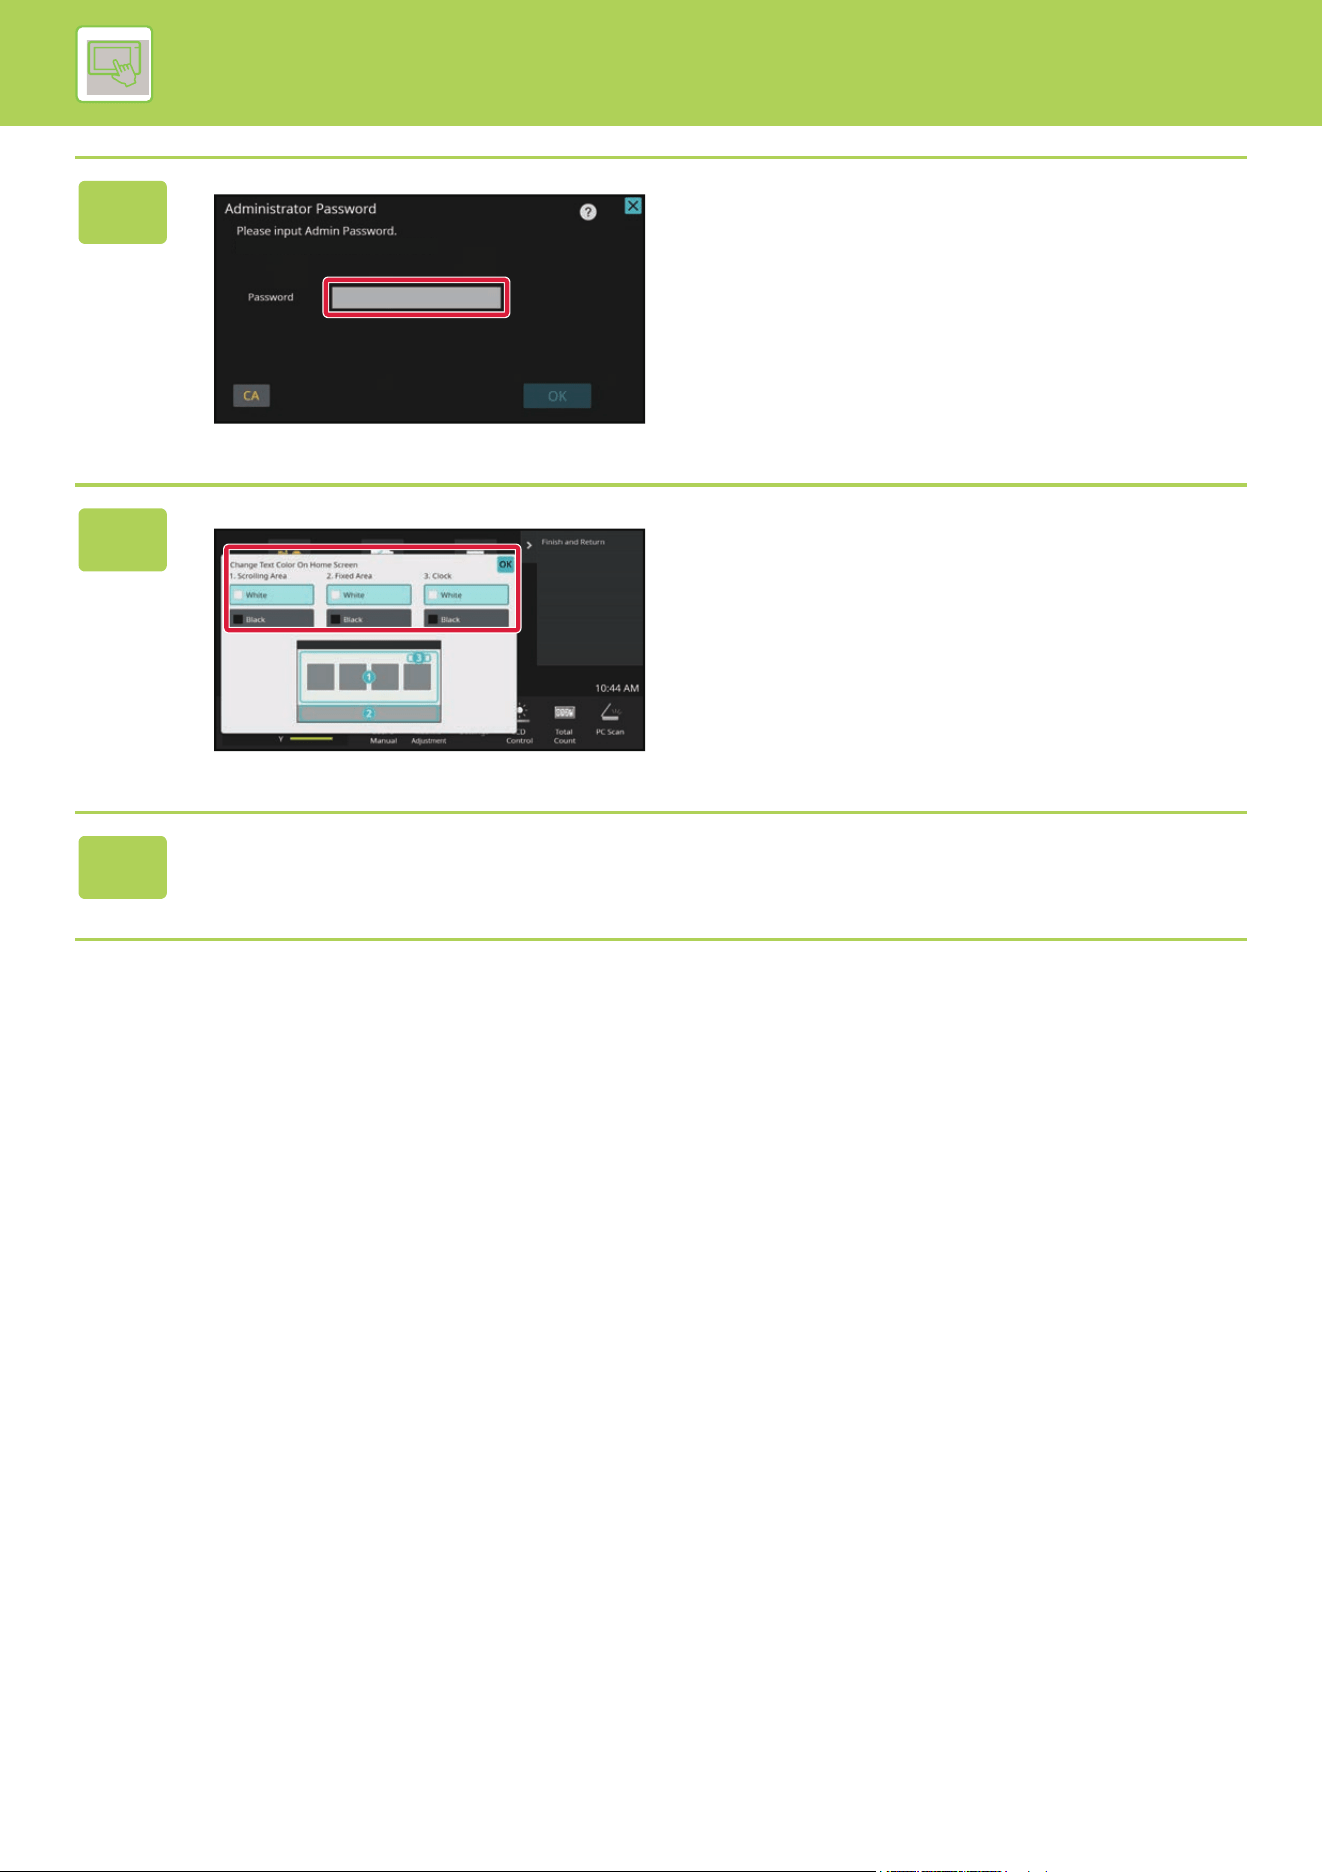
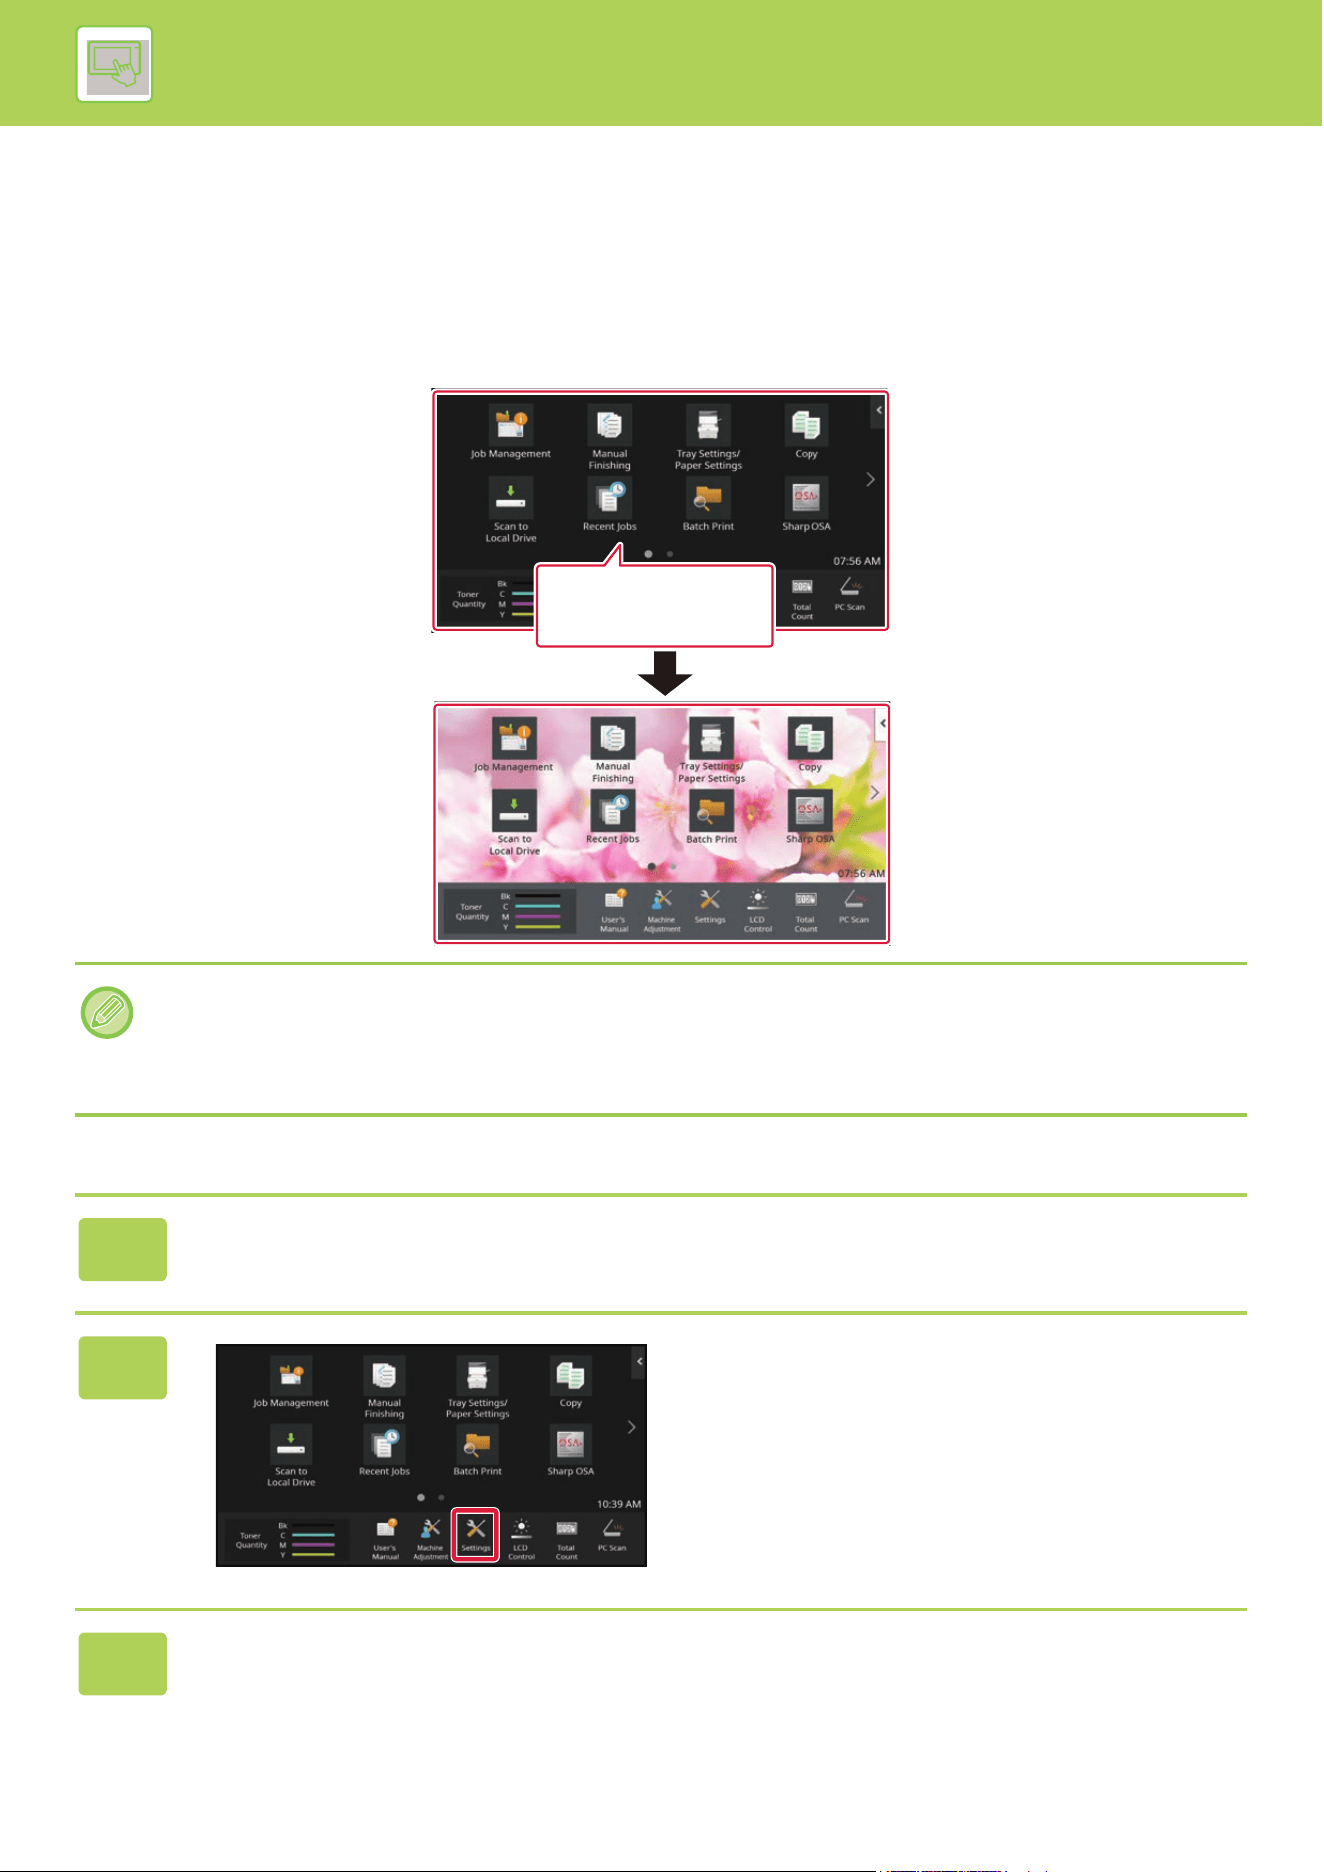
2-43
OPERATION OF THE MACHINE►CHANGE THE DISPLAY OF THE TOUCH PANEL
CHANGING THE BACKGROUND IMAGE OF THE HOME
SCREEN
You can change the background image of the home screen to a custom image.
This procedure can be performed from the touch panel or from the Web page.
To change the image from the touch panel, first save the desired image in a USB device and connect the device to the
machine.
From the touch panel
The display size of the background image is 1024 dots x 544 dots.
The height of the image is adjusted to the display height, and the width is adjusted to the display width.
Because the height and width are enlarged/reduced separately, some images may become distorted.
If you want to display the image correctly, adjust the size of the image to the display size of the background image in
advance.
1
Connect the USB device containing the desired image to the machine.
When the USB device is connected to the machine, the popup window will be appeared. Tap the [OK] key.
2
Tap the [Settings] key on the Home
screen.
The screen changes to the settings screen.
3
Tap [System Settings] → [Home Screen Settings] → [Background Image],
and then tap [Change] key.
The "Register Background Image" screen will be appeared.
User's
Manual
Enlarge
Display
Settings
I want to change the
background image.
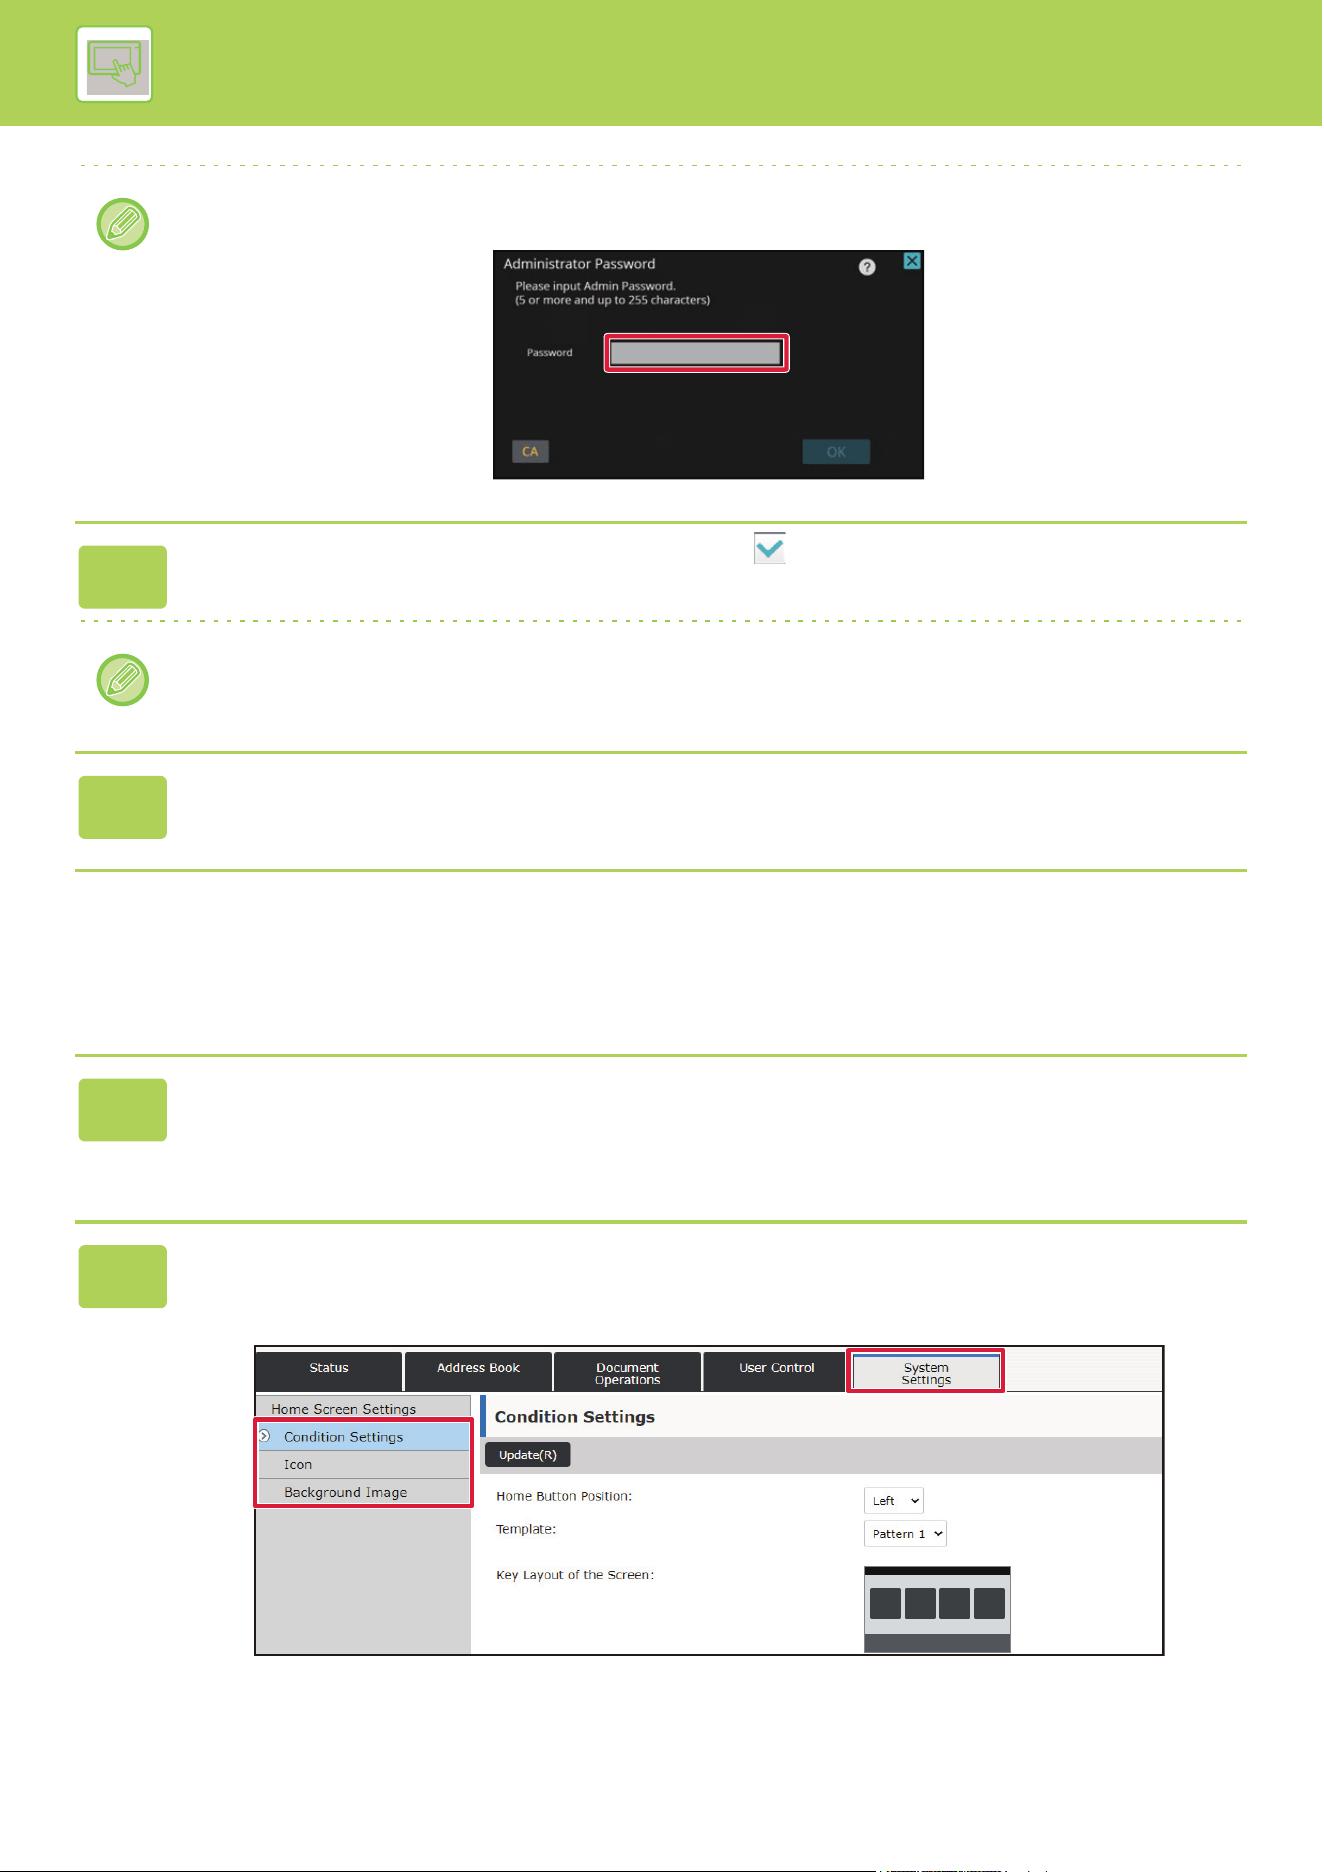
2-44
OPERATION OF THE MACHINE►CHANGE THE DISPLAY OF THE TOUCH PANEL
From the Web page
The administrator password entry screen will appear while you are selecting settings.
Enter the administrator password and log in.
4
Set the [Use Custom Image] checkbox to , and select the desired image
with [Folder Name/File Name].
File formats that can be used are JPEG, GIF and PNG (jpeg, jpg, jpe, jfif, gif and png).
The maximum file size of an image that can be used for the background image is 640 KB.
5
Click the [Store] button.
After all U/I customize settings are completed, tap the [Logout] key.
1
Enter the IP address set in the machine in the address bar of your web
browser.
In the factory default state, you must enter your user password after entering the IP address.
2
On the Web page, click the [System Settings] tab → [Home Screen Settings].
Some settings may require that you enter your user password after clicking [Home Screen Settings]. If you did not
perform user authentication, you must enter the administrator password.
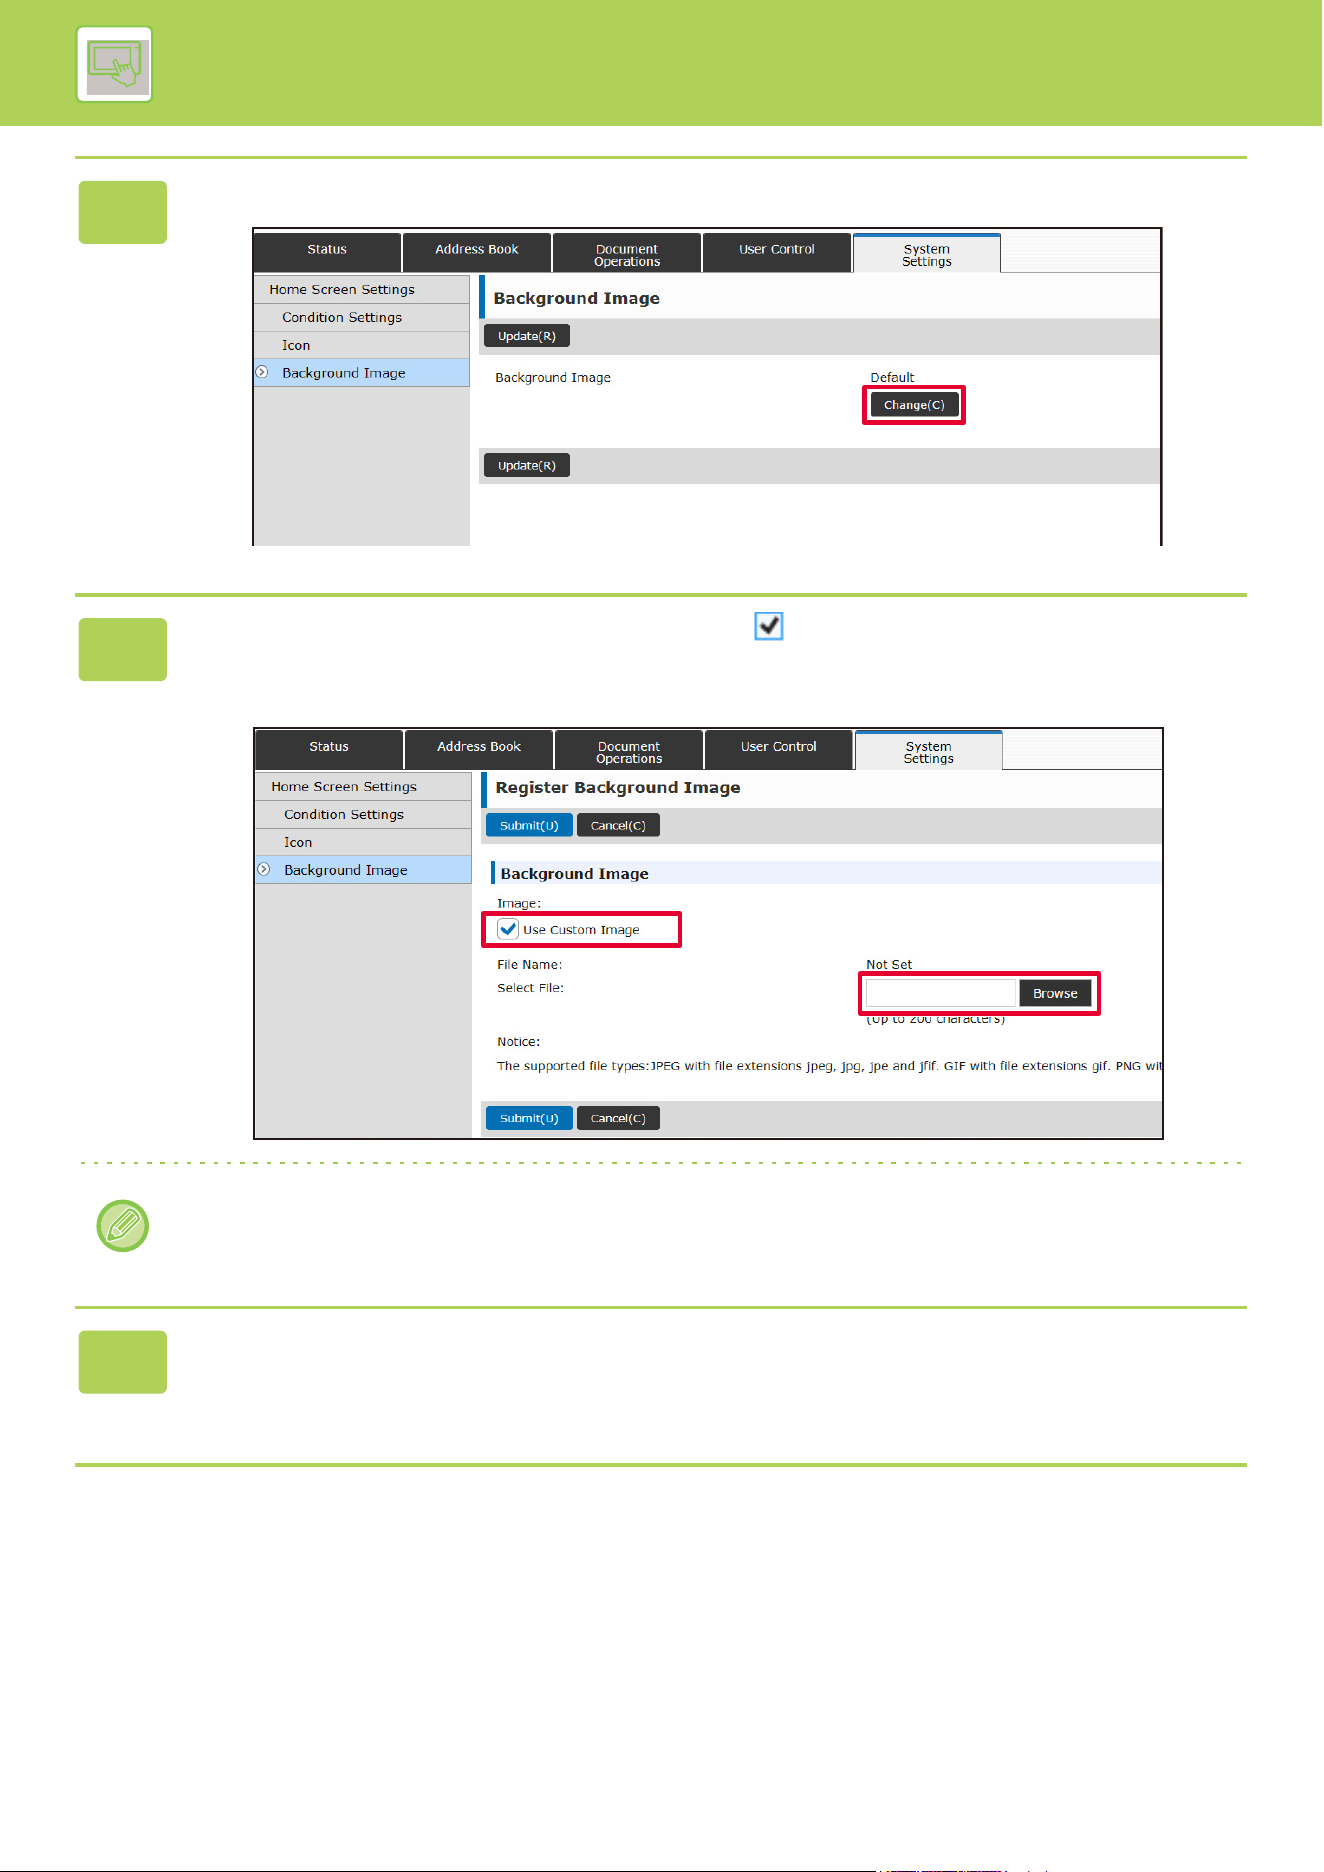
2-45
OPERATION OF THE MACHINE►CHANGE THE DISPLAY OF THE TOUCH PANEL
3
Click the [Change] button in [Background Image].
4
Set the [Use Custom Image] checkbox to , and select the image with
[Select File].
Click [Browse] to select the image.
File formats that can be used are JPEG, GIF and PNG (jpeg, jpg, jpe, jfif, gif and png).
The maximum file size of an image that can be used for the background image is 640 KB.
5
When you have finished configuring the settings, click the [Submit] button.
The settings are saved in the machine and applied.
When you have finished settings, click the [Logout] button and close your Web browser.
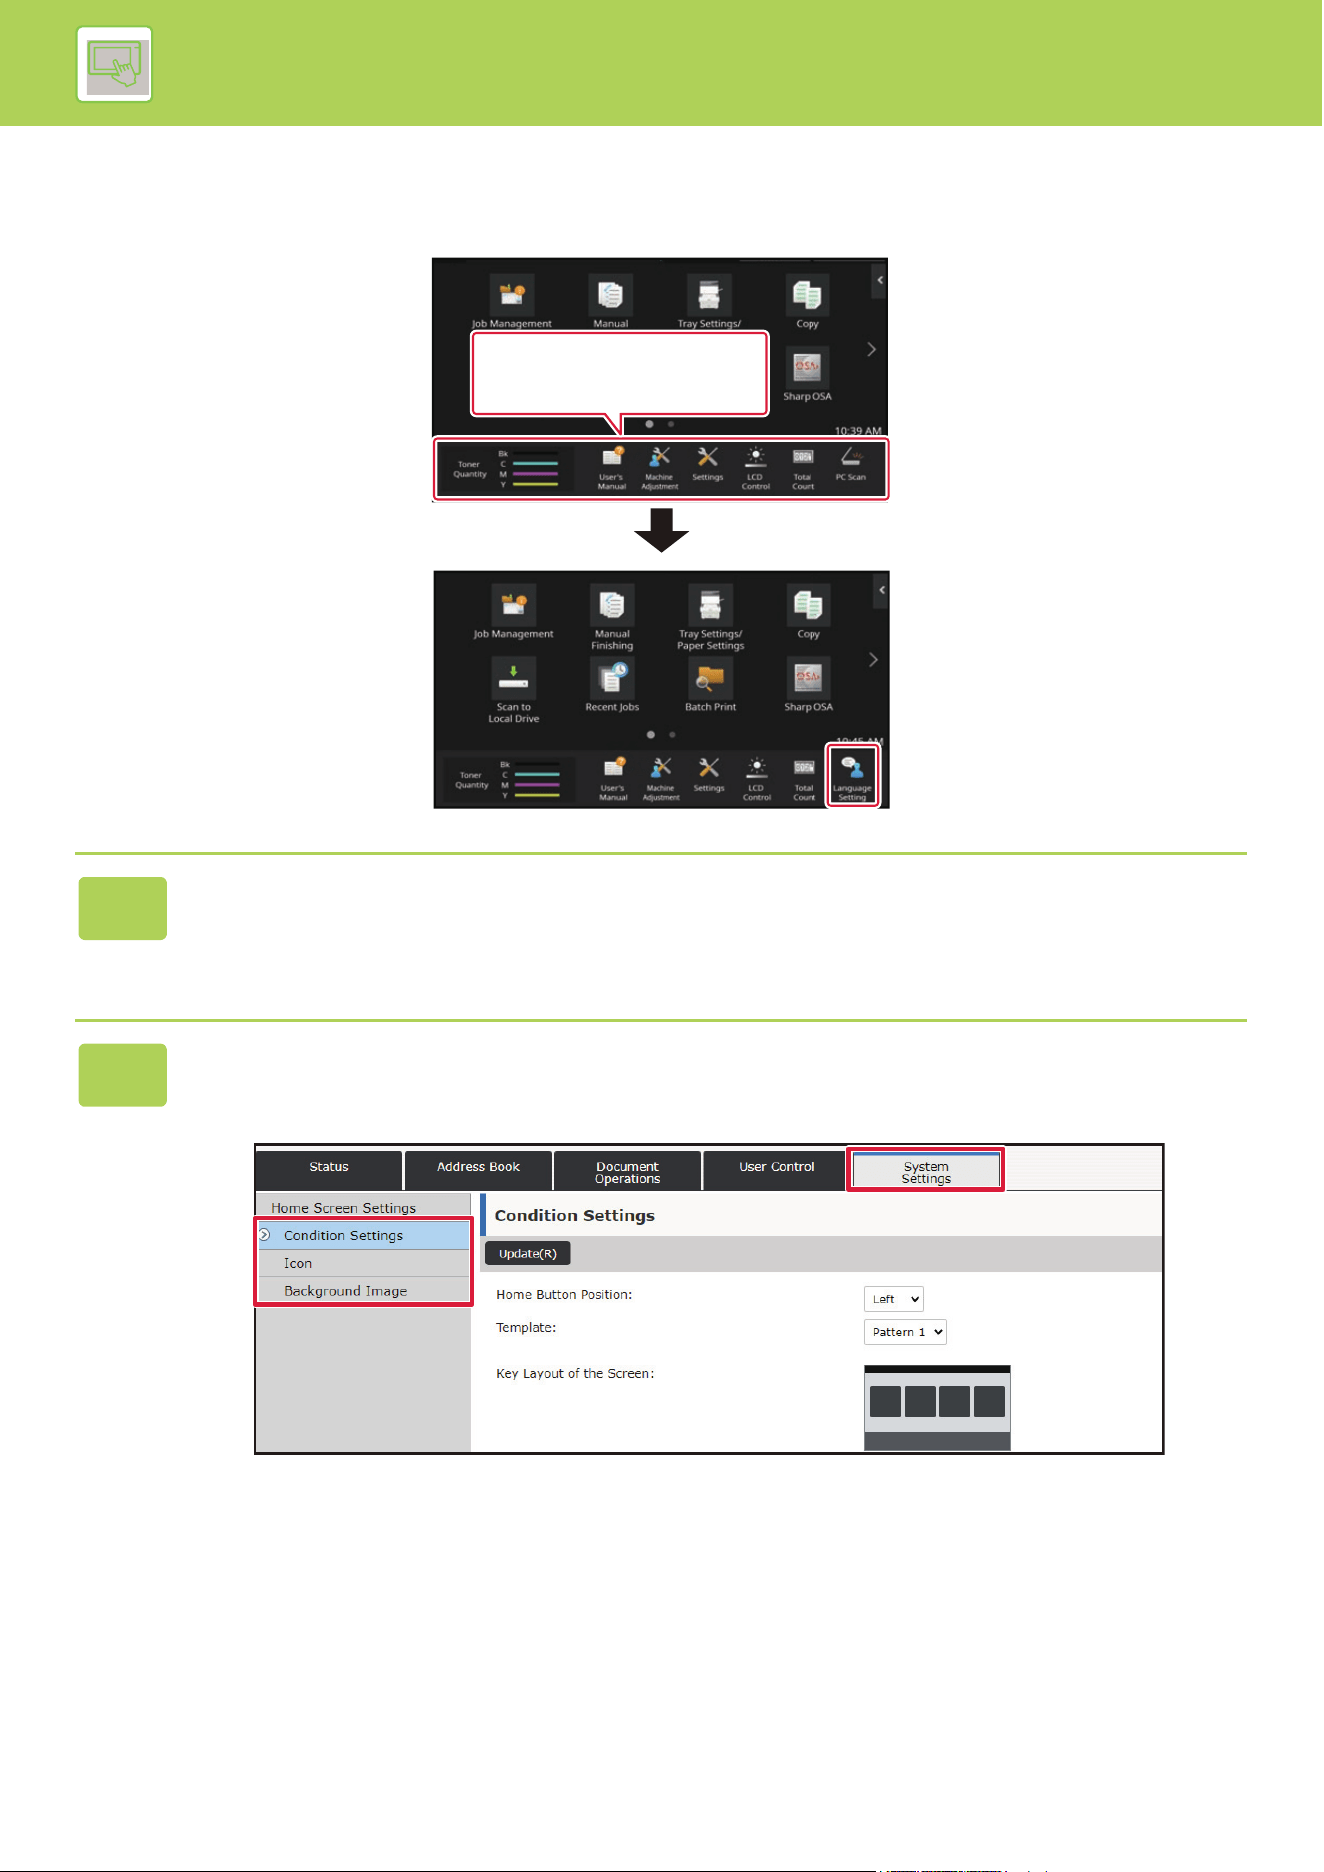
2-46
OPERATION OF THE MACHINE►CHANGE THE DISPLAY OF THE TOUCH PANEL
CHANGING THE FIXED KEYS
You can change the fixed keys. The fixed keys are changed using the Web page.
1
Enter the IP address set in the machine in the address bar of your web
browser.
In the factory default state, you must enter your user password after entering the IP address.
2
On the Web page, click the [System Settings] tab → [Home Screen Settings].
Some settings may require that you enter your user password after clicking [Home Screen Settings]. If you did not
perform user authentication, you must enter the administrator password.
I want to add "Language
Setting" in the fixed key
display area.
2-47
OPERATION OF THE MACHINE►CHANGE THE DISPLAY OF THE TOUCH PANEL
3
Click [Condition Settings], and click the desired item under "Fix Key".
You can click [Not Set] to add a new fixed key.
4
Select the function you want to add, and click the [Submit] button.
When you click the [Submit] button, the [Home Screen Registration] screen closes.
5
When you have finished configuring the settings, click the [Submit] button.
The settings are saved in the machine and applied.
When you have finished settings, click the [Logout] button and close your Web browser.
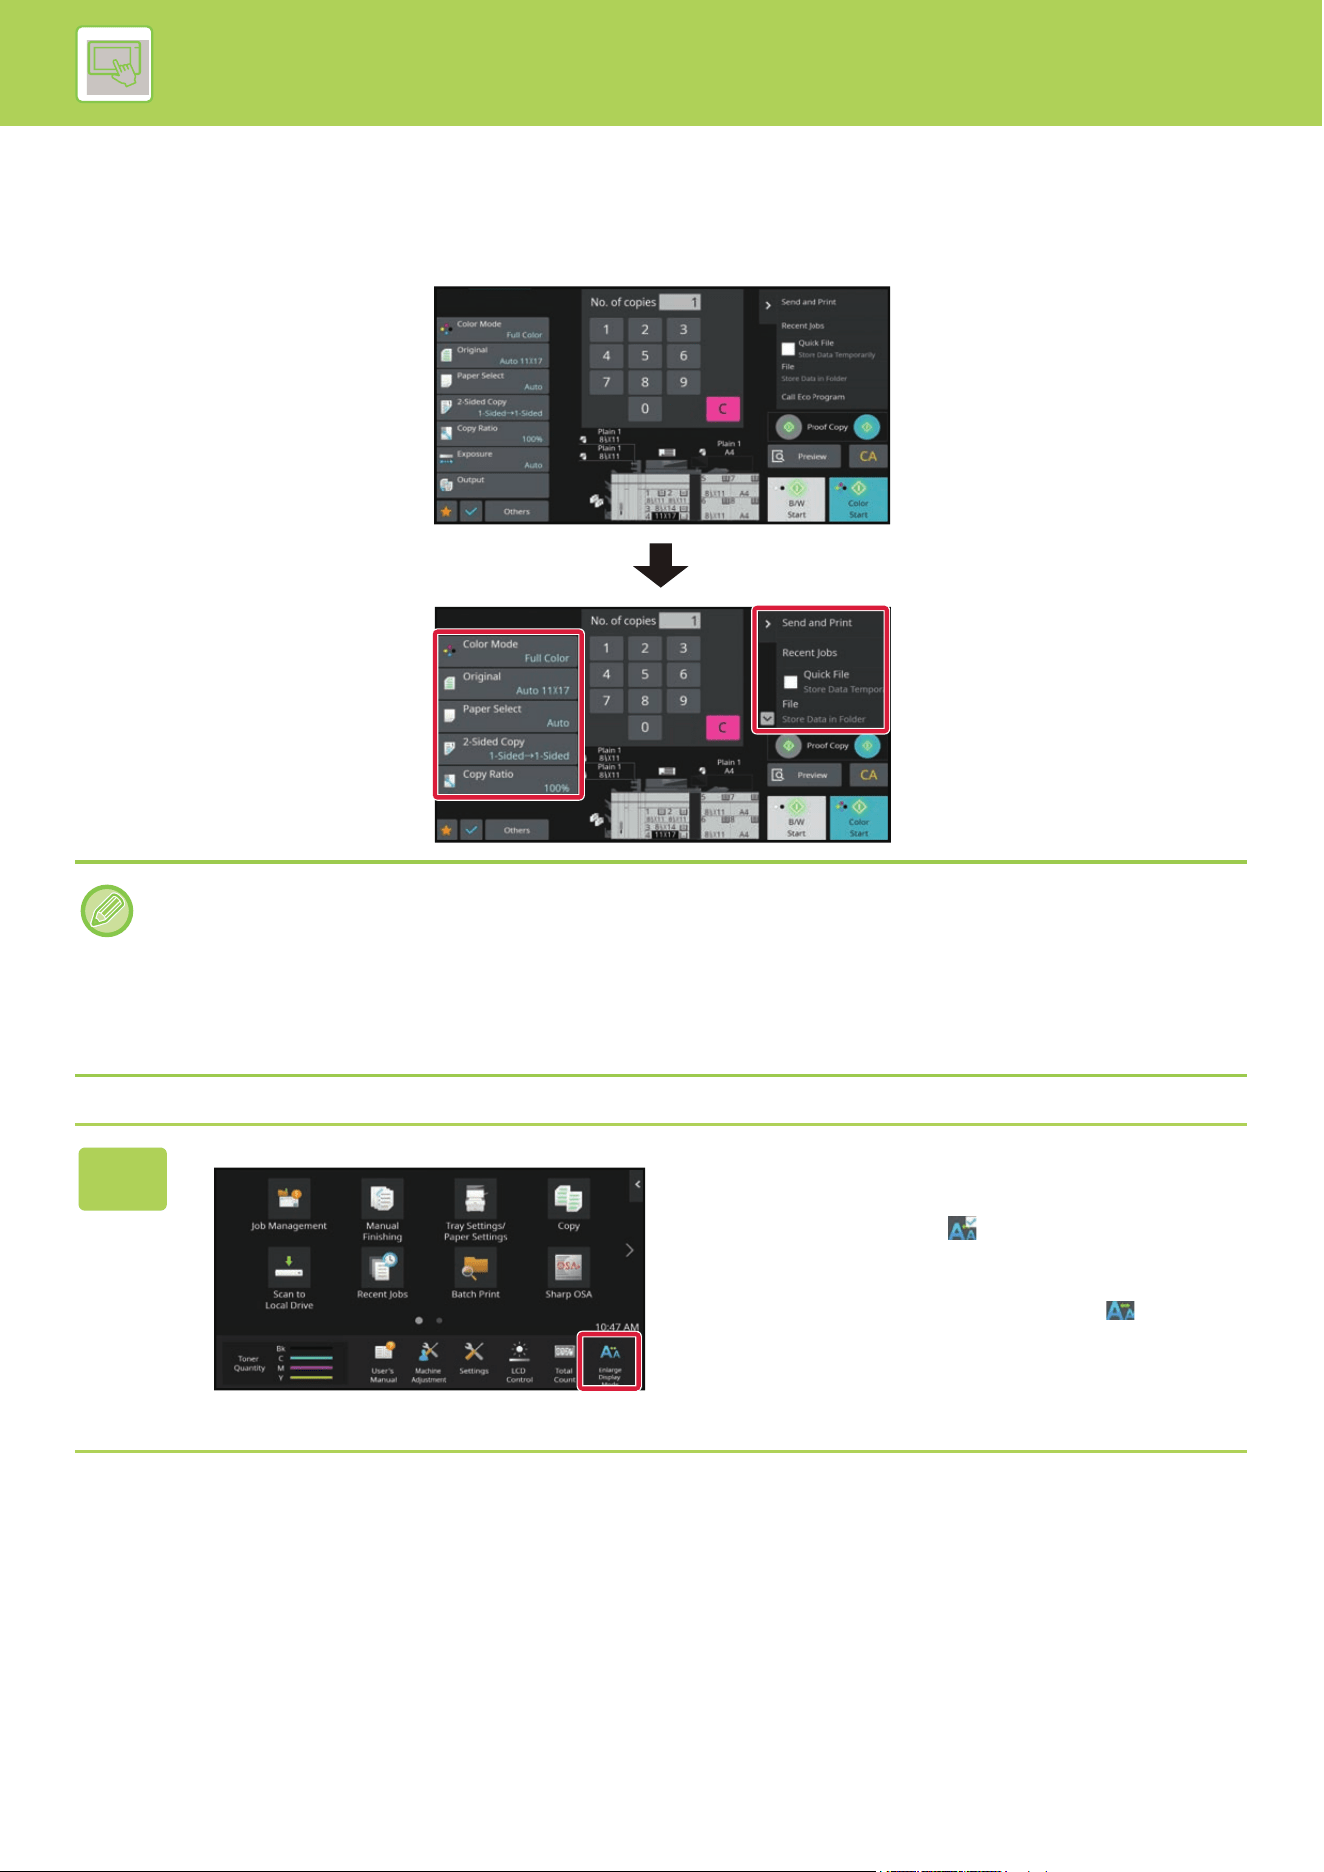
2-48
OPERATION OF THE MACHINE►CHANGE THE DISPLAY OF THE TOUCH PANEL
INCREASING THE TEXT SIZE
In a Normal mode screen such as copy or image send, you can enlarge the character size and interval. This function is
selected on the touch panel.
• The setting keys and the action panel will increase the text size. Setting items that no longer appear on the action panel
can be displayed by tapping the scroll keys. Setting keys that no longer appear (the [Exposure] key in this example) can be
displayed by tapping the [Others] key.
• In screens other than Normal mode of each function such as Easy mode and settings, the size of characters and keys
does not change.
• Increasing the text size may decrease the number of keys displayed in the base screen and other screens of each
function.
1
Tap the [Enlarge Display Mode] key in
the home screen.
The key image changes to and enlarge display mode is
enabled.
To cancel enlarge display mode, tap the [Enlarge Display
Mode] key again. The key image changes to and
enlarge display mode is canceled.
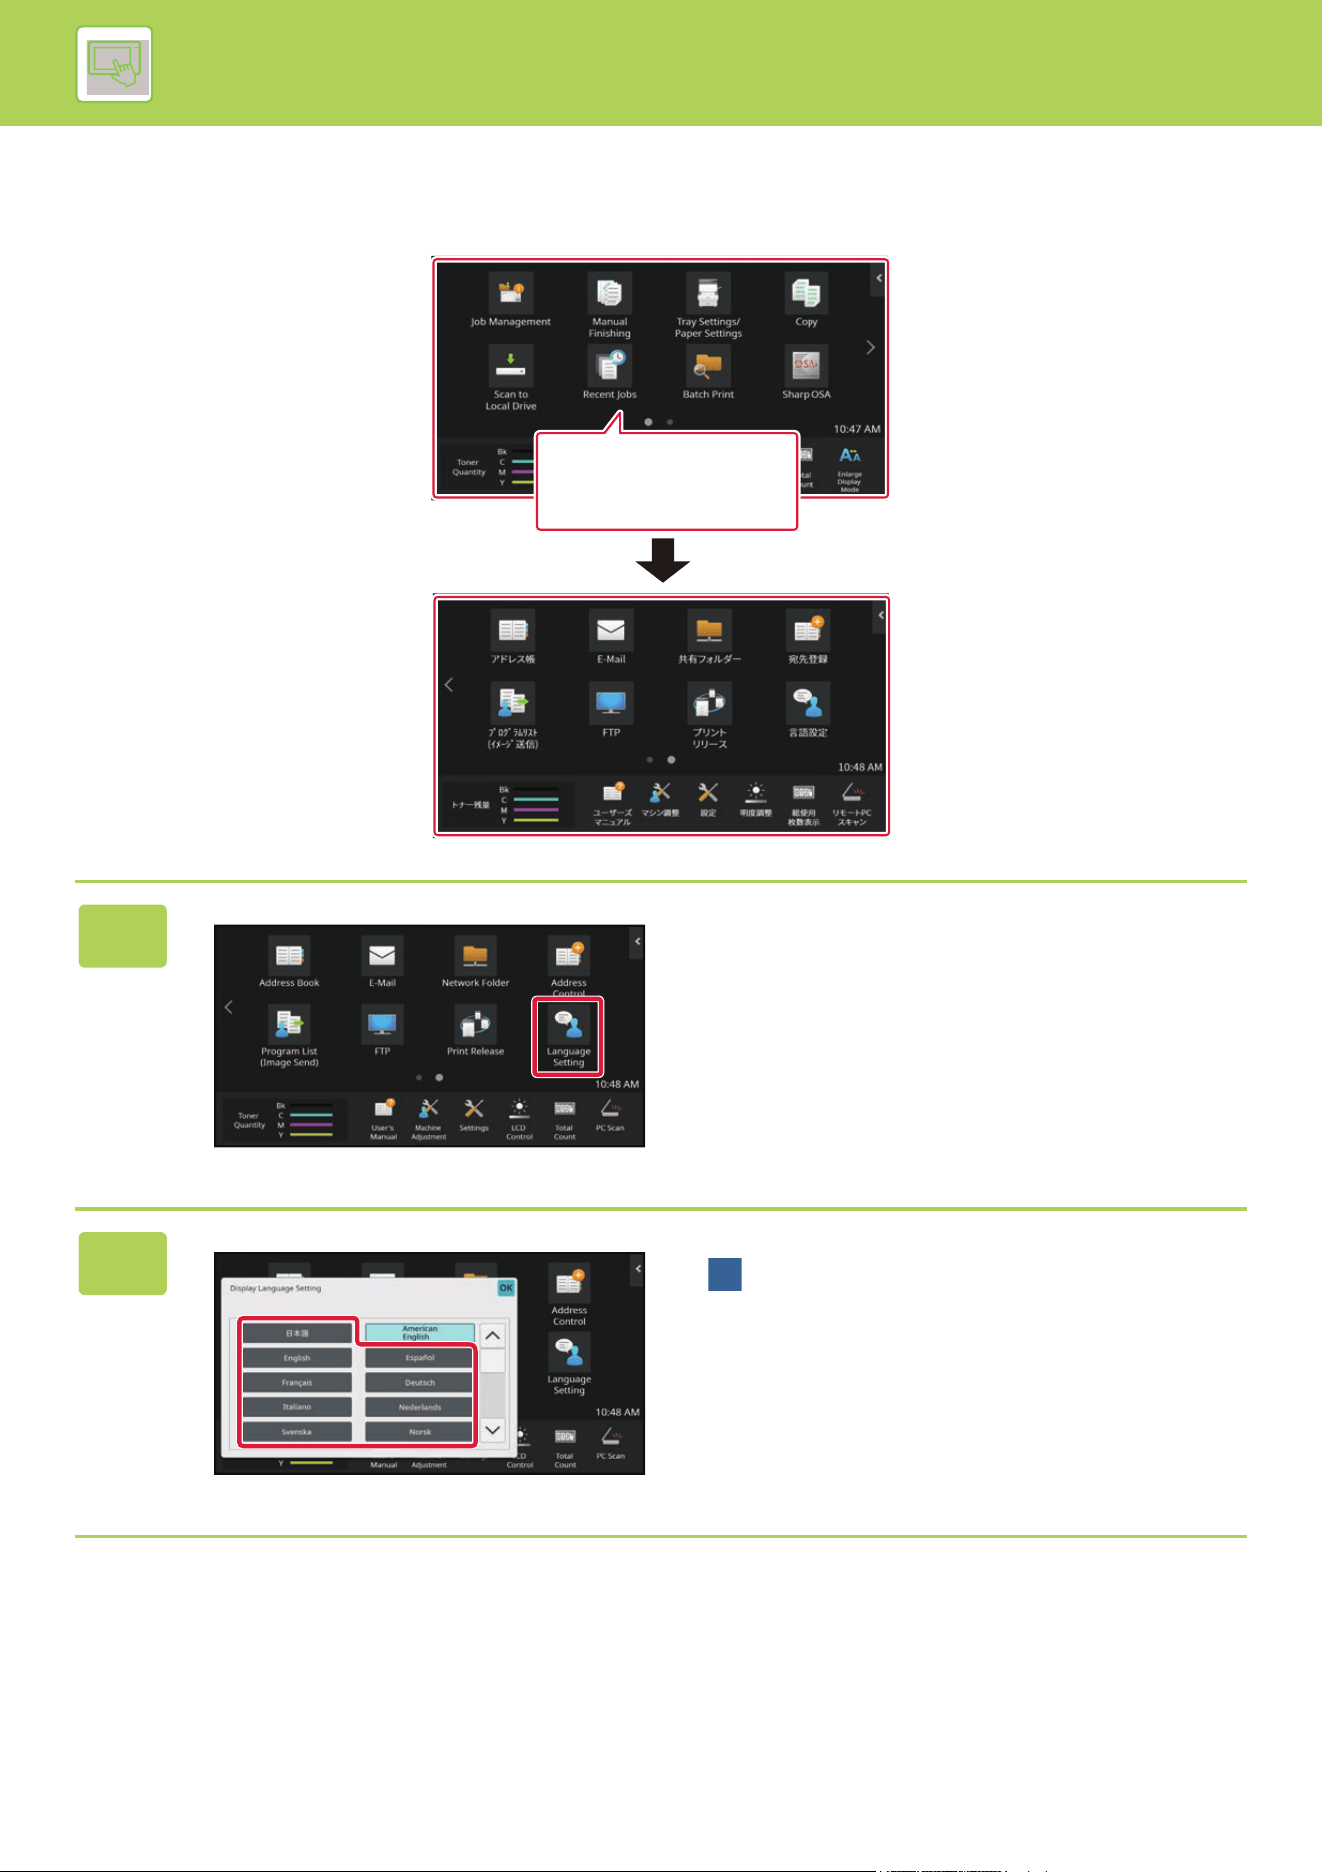
2-49
OPERATION OF THE MACHINE►CHANGE THE DISPLAY OF THE TOUCH PANEL
CHANGING THE LANGUAGE USED ON THE MACHINE
You can change the language used in the home screen.
1
Tap the [Language Setting] key on the
home screen.
2
Select the desired language and tap
.
The display changes to the selected language.
User's
Manual
I want to change the
language to Japanese.

2-50
OPERATION OF THE MACHINE►CHANGE THE DISPLAY OF THE TOUCH PANEL
From the Web page
1
Enter the IP address set in the machine in the address bar of your web
browser.
In the factory default state, you must enter your user password after entering the IP address.
2
On the Web page, click the [System Settings] tab → [Common Settings]→
[Operation Settings]→ [Condition Settings]→ [Language Setting].
This settings may require that you enter your user password. If you did not perform user authentication, you must enter
the administrator password.
3
Select the language you want to change from the list.
4
When you have finished configuring the settings, click the [Submit] button.
The settings are saved in the machine and applied.
When you have finished settings, click the [Logout] button and close your Web browser.
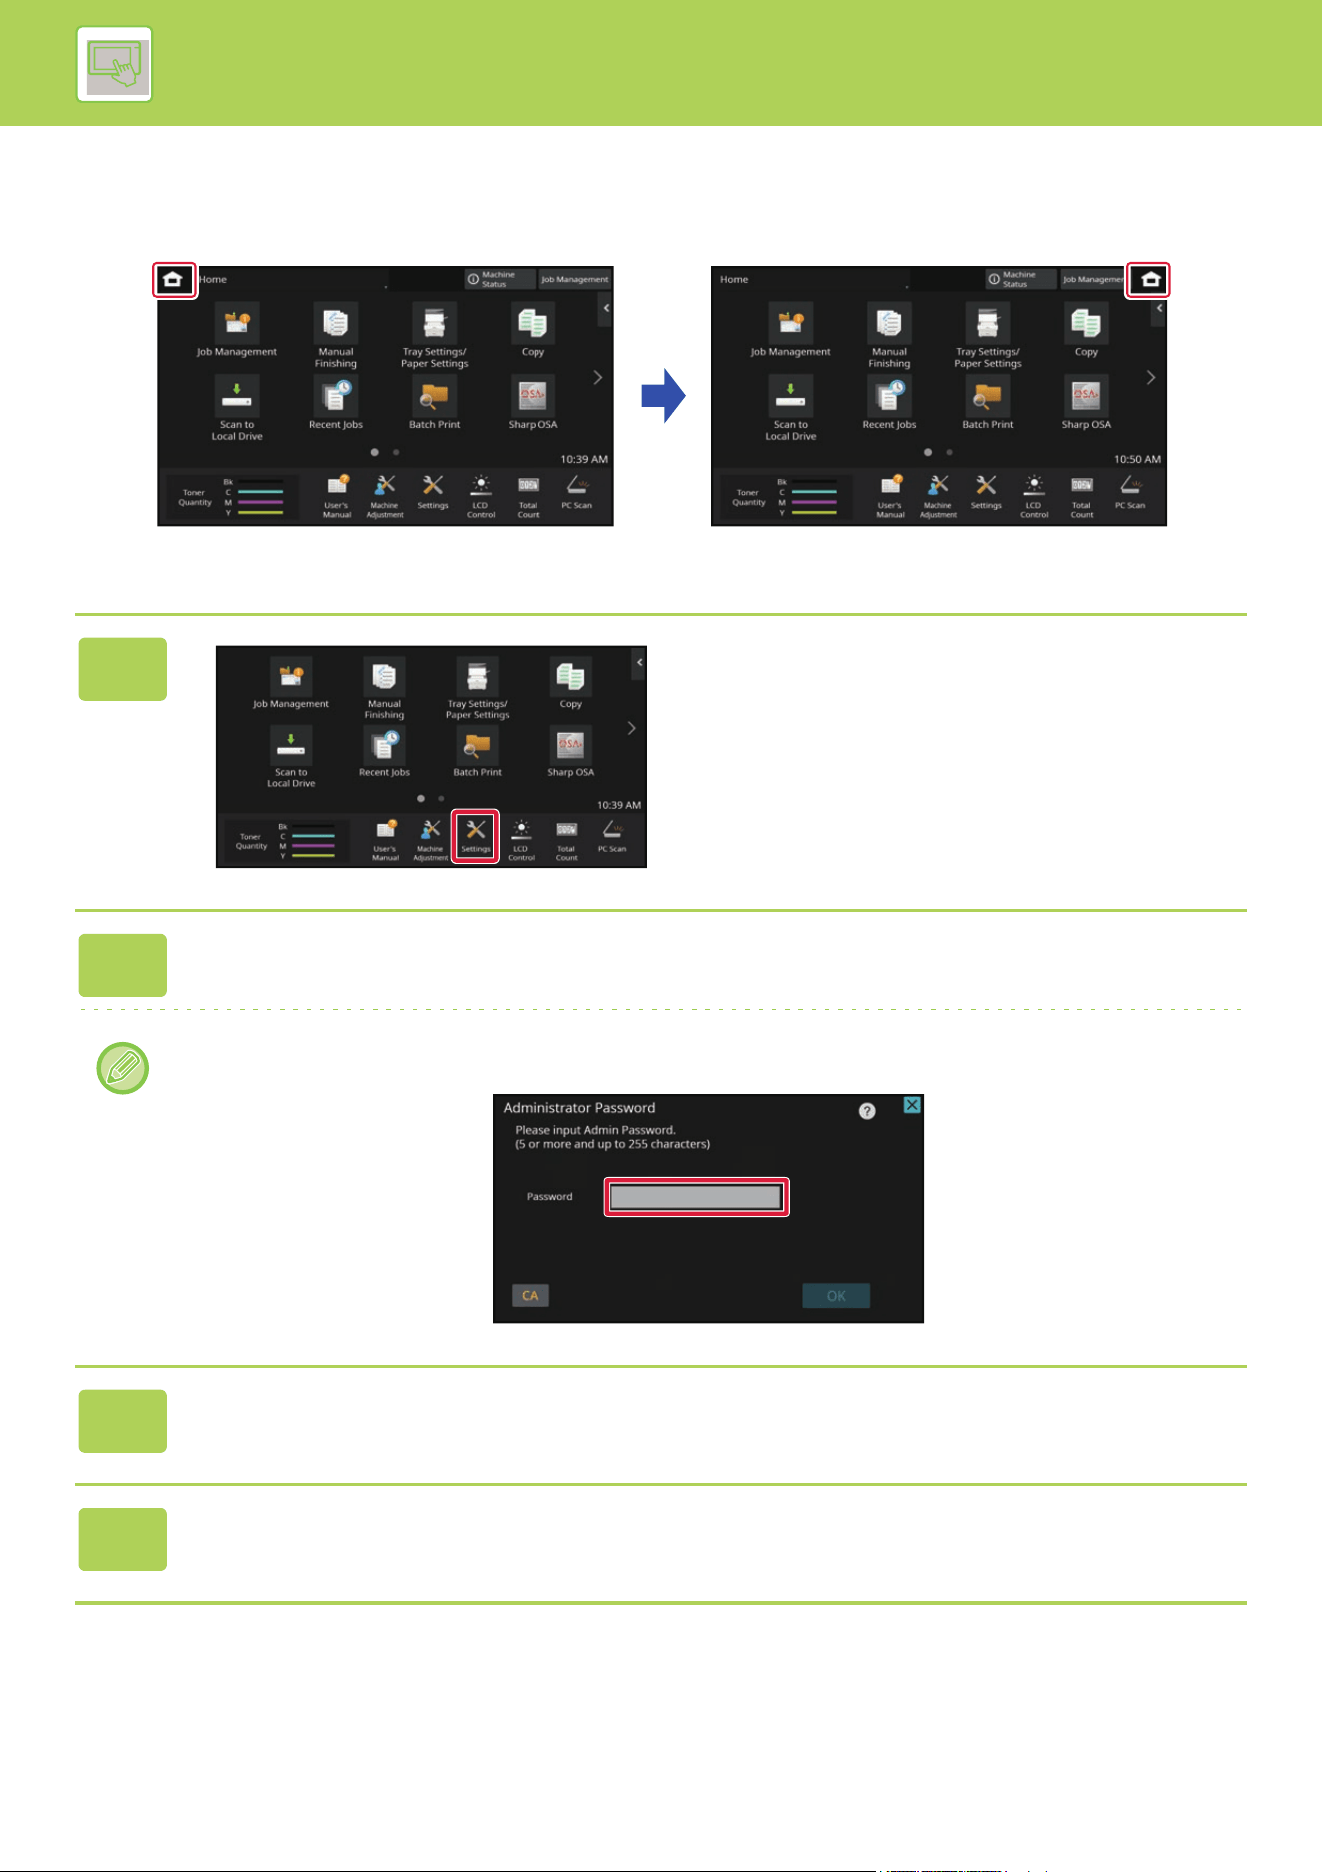
2-51
OPERATION OF THE MACHINE►CHANGE THE DISPLAY OF THE TOUCH PANEL
CHANGING THE POSITION OF THE [Home Screen] KEY
You can change the position of the [Home Screen] key.
From the touch panel
1
Tap the [Settings] key on the Home
screen.
The screen changes to the settings screen.
2
Tap [System Settings] → [Home Screen Settings] and then tap [Home Button
Position] key.
The administrator password entry screen will appear while you are selecting settings.
Enter the administrator password and log in.
3
Select [Left] or [Right]
4
Click the [Store] button.
After settings are completed, tap the [Logout] key.

2-52
OPERATION OF THE MACHINE►CHANGE THE DISPLAY OF THE TOUCH PANEL
From the Web page
1
Enter the IP address set in the machine in the address bar of your web
browser.
In the factory default state, you must enter your user password after entering the IP address.
2
On the Web page, click the [System Settings] tab → [Home Screen Settings]
→ [Home Button Position].
Some settings may require that you enter your user password after clicking [Home Screen Settings]. If you did not
perform user authentication, you must enter the administrator password.
3
Select [Left] or [Right]
4
When you have finished configuring the settings, click the [Submit] button.
The settings are saved in the machine and applied.
When you have finished settings, click the [Logout] button and close your Web browser.
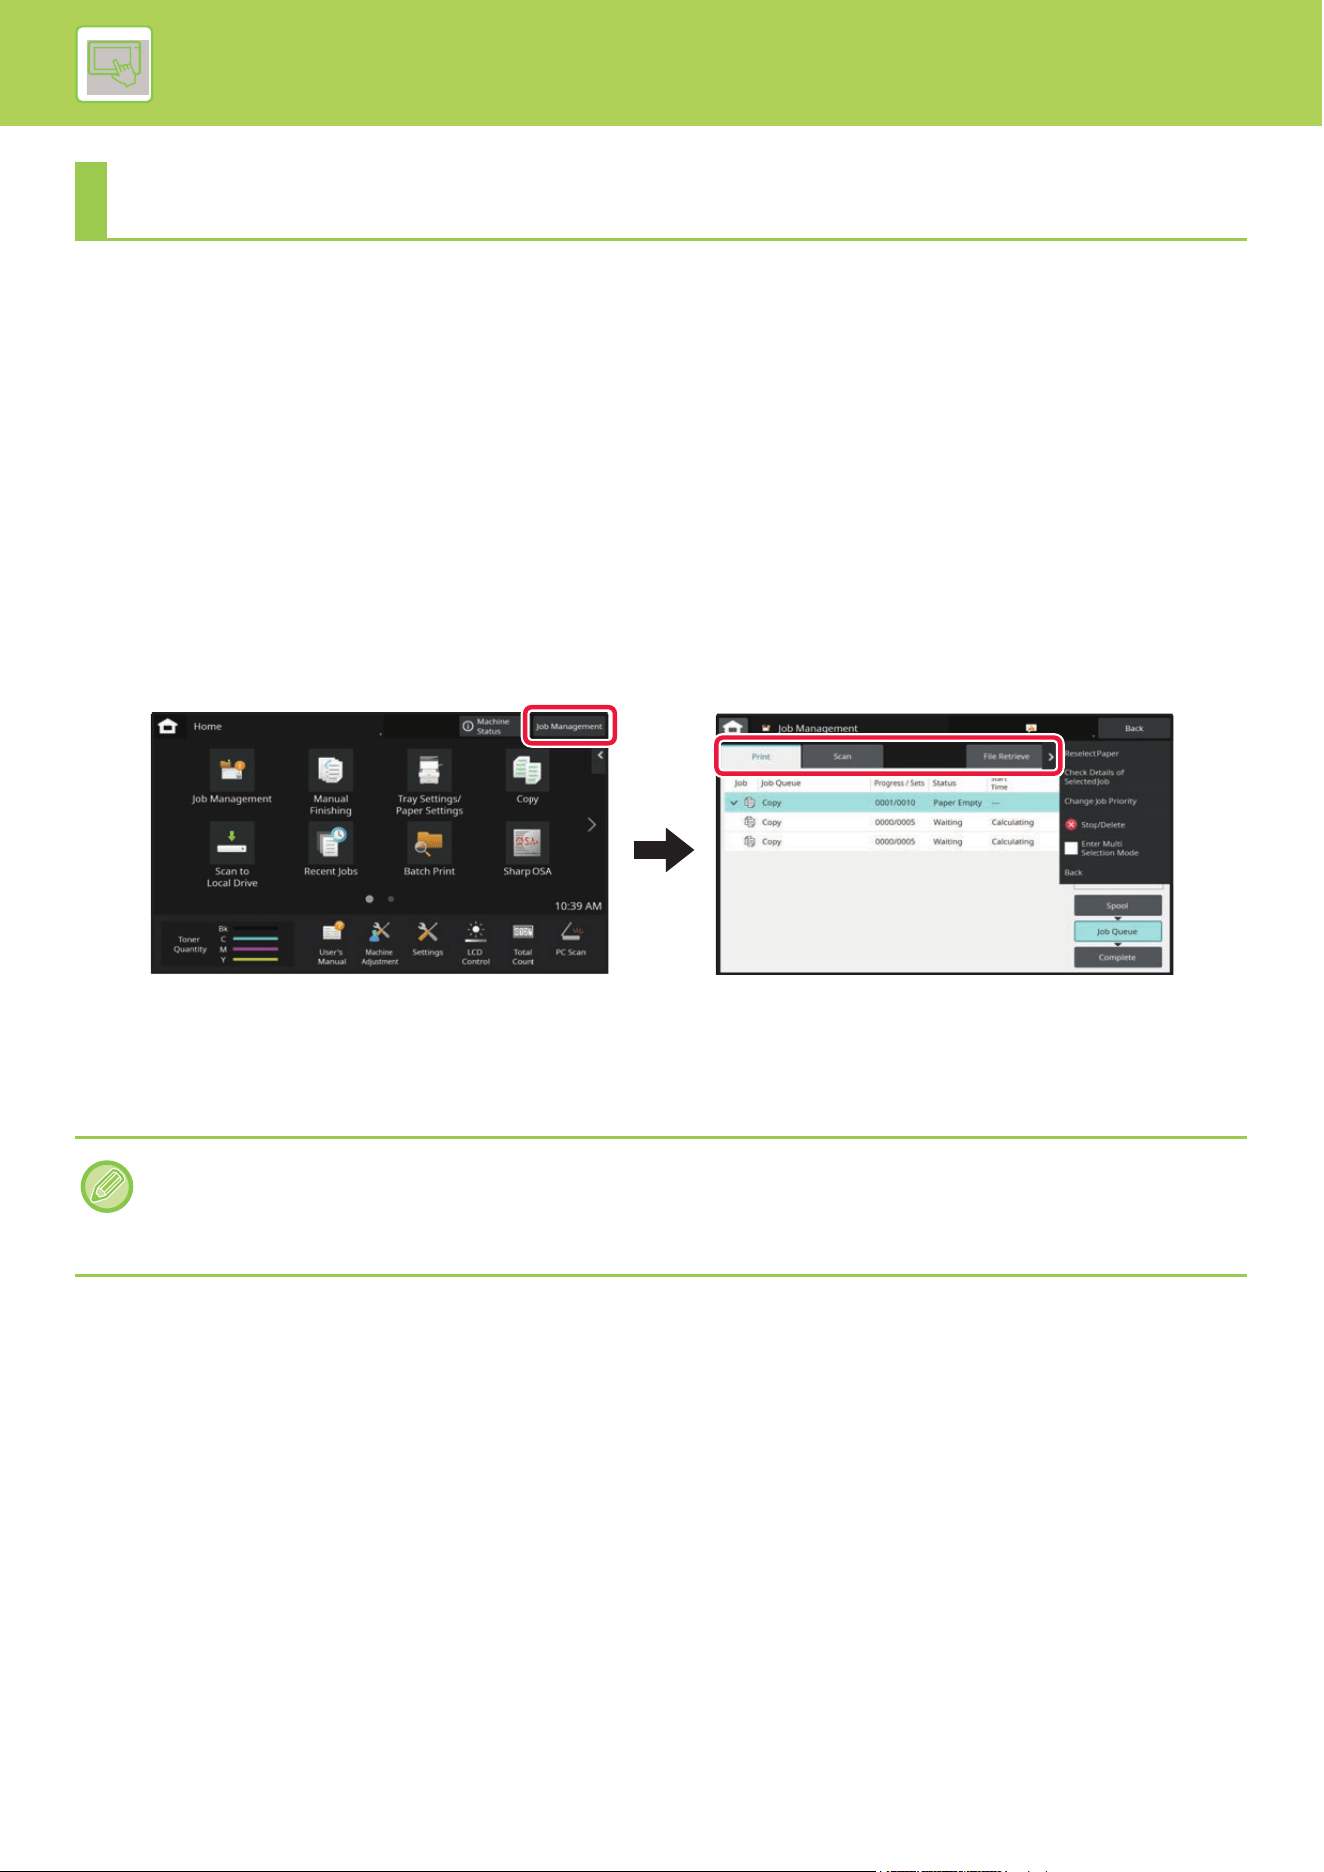
2-53
OPERATION OF THE MACHINE►JOB MANAGEMENT
STOPPING/DELETING A JOB, PRIORITY
PROCESSING AND CHECKING THE
STATUS
TYPES OF JOB MANAGEMENT SCREENS
When you tap the job management display, the job management screen appears. Tap it again to return to the previous
mode.
The job management screen is divided into the following four tabs, enabling you to select a job list by tapping a desired
tab.
•Print
Lists print jobs such as copying, printing from a PC, Scan to FTP job, Scan to Network Folder job, USB direct print,
printing of Data List from system settings, reprint jobs and printing for other received data.
• Scan
Lists send jobs of e-mail messages and FTP send jobs.
JOB MANAGEMENT
The background of the job management display changes as follows:
• Green: Job in progress
• Yellow: Warming up/waiting
• Red: Waiting for error clearing

2-54
OPERATION OF THE MACHINE►JOB MANAGEMENT
Jobs move among the lists according to the processing status, from [Spool], [Job Queue] and [Complete], in that order.
To switch the job list display to the display by processing status, tap the [Spool], [Job Queue] or [Complete] key as
desired.
• Spool list
Lists print jobs up to the transfer to the machine. The jobs move to the Job Queue list after the transfer is completed.
If you printed an encrypted PDF file by direct print, enter the password from here to print the file.
• Job Queue list
Lists jobs in progress and in the queue for copying, printing from a computer. This list also displays jobs in progress
and in the queue for sending image data. The jobs move to the Complete list after printing or sending is completed.
• Complete list
Lists jobs through with copying, printing or sending.
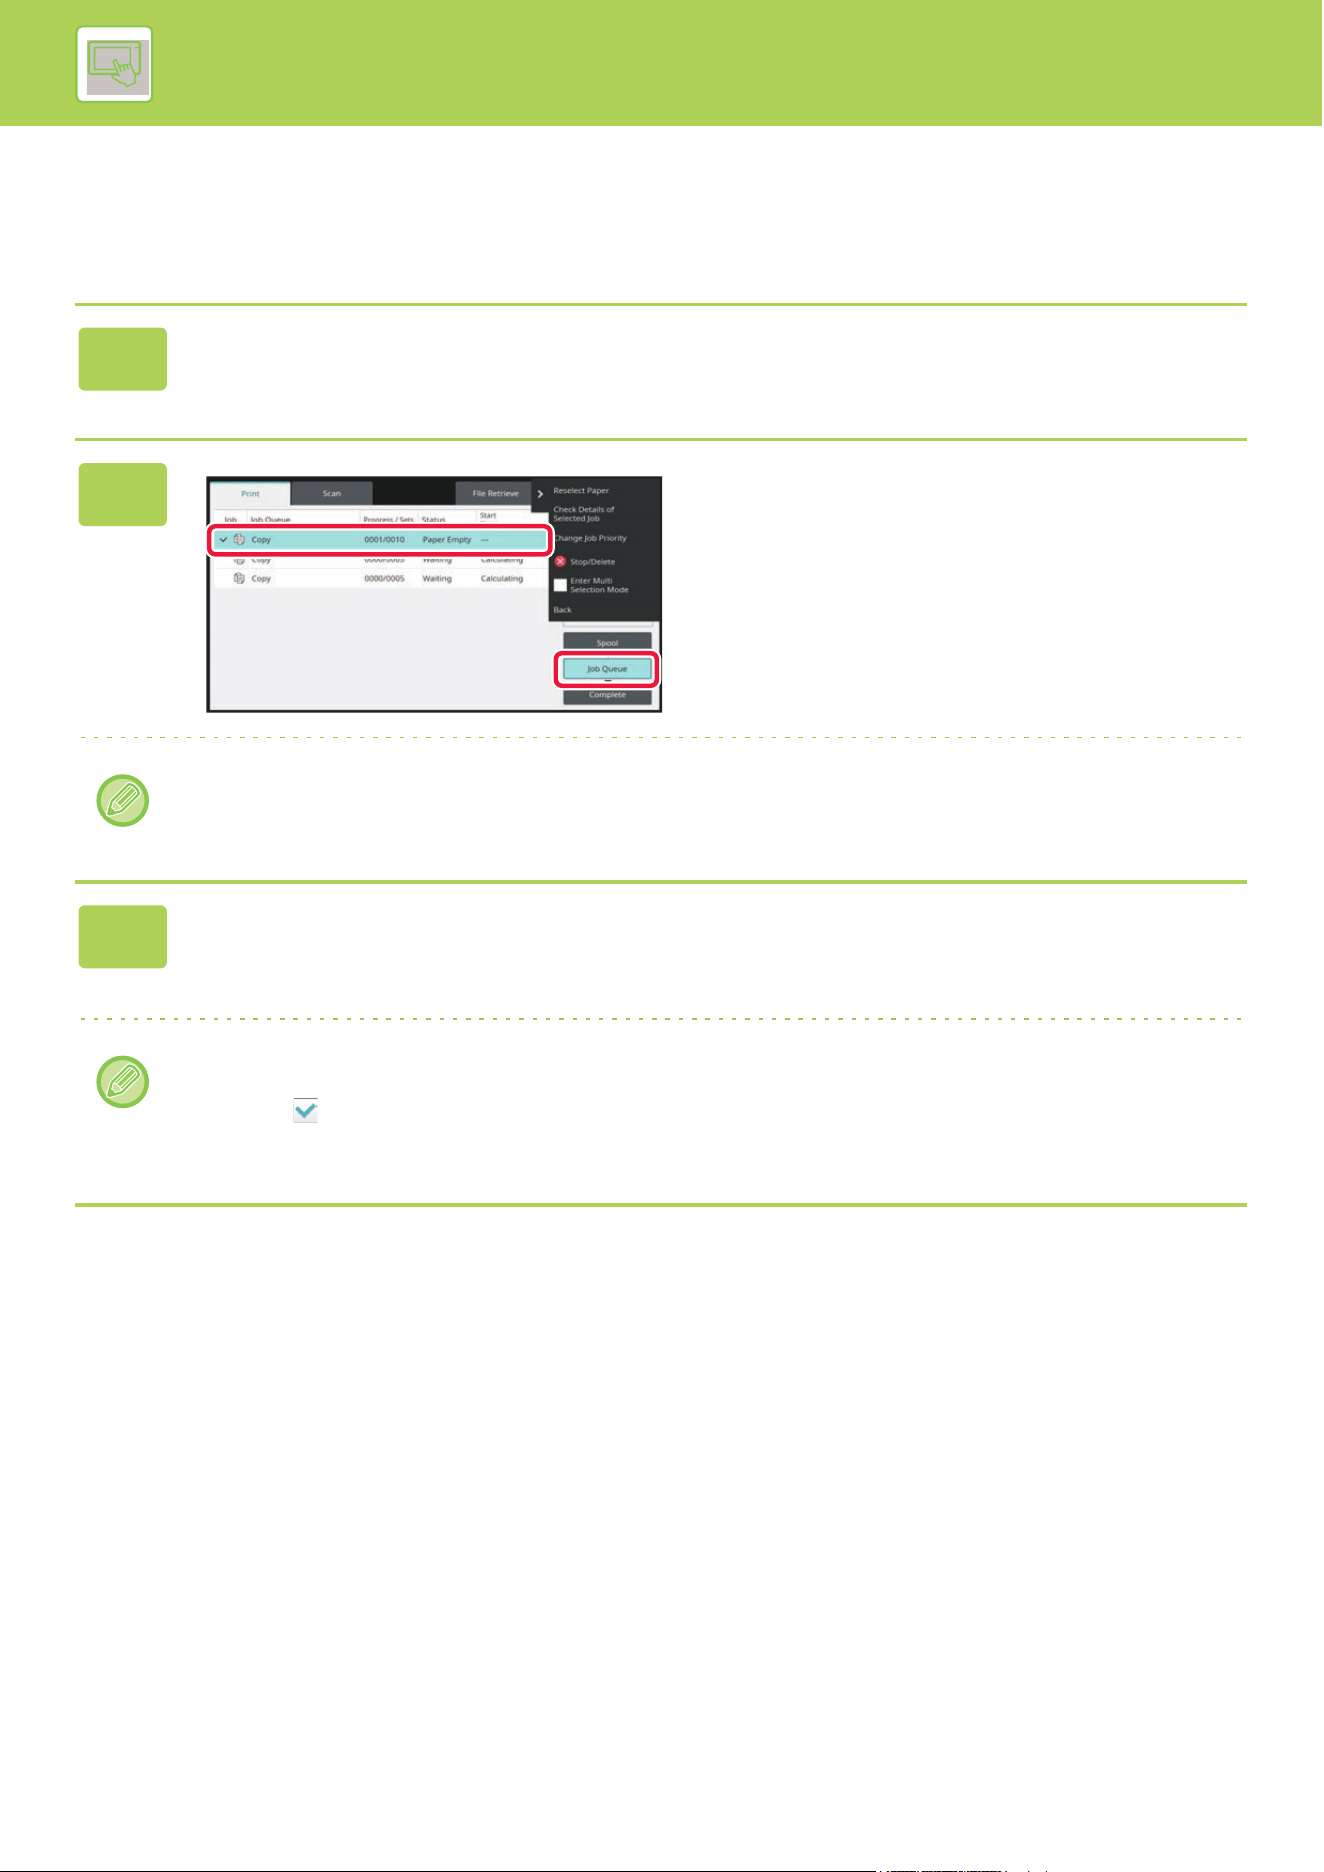
2-55
OPERATION OF THE MACHINE►JOB MANAGEMENT
STOPPING/DELETING A JOB IN PROGRESS OR
RESERVED
1
Tap the job management display and tap the tab for the job that you wish to
stop or delete.
2
Tap the [Job Queue] key.
When you wish to stop a print job being sent from the computer, tap the [Spool] key.
3
Tap the job that you wish to stop or delete, and then tap [Stop/Delete] on the
action panel.
When a screen appears that allows you to confirm that you do want to stop the job, tap the [Cancel] key.
• If the machine runs out of paper during a copy or print job, you can cancel the job from the job management screen.
• To delete more than one job, operate the check box for [Enter Plural Selection Mode] on the action panel so that it
looks like .
• A job set for transfer cannot be canceled.
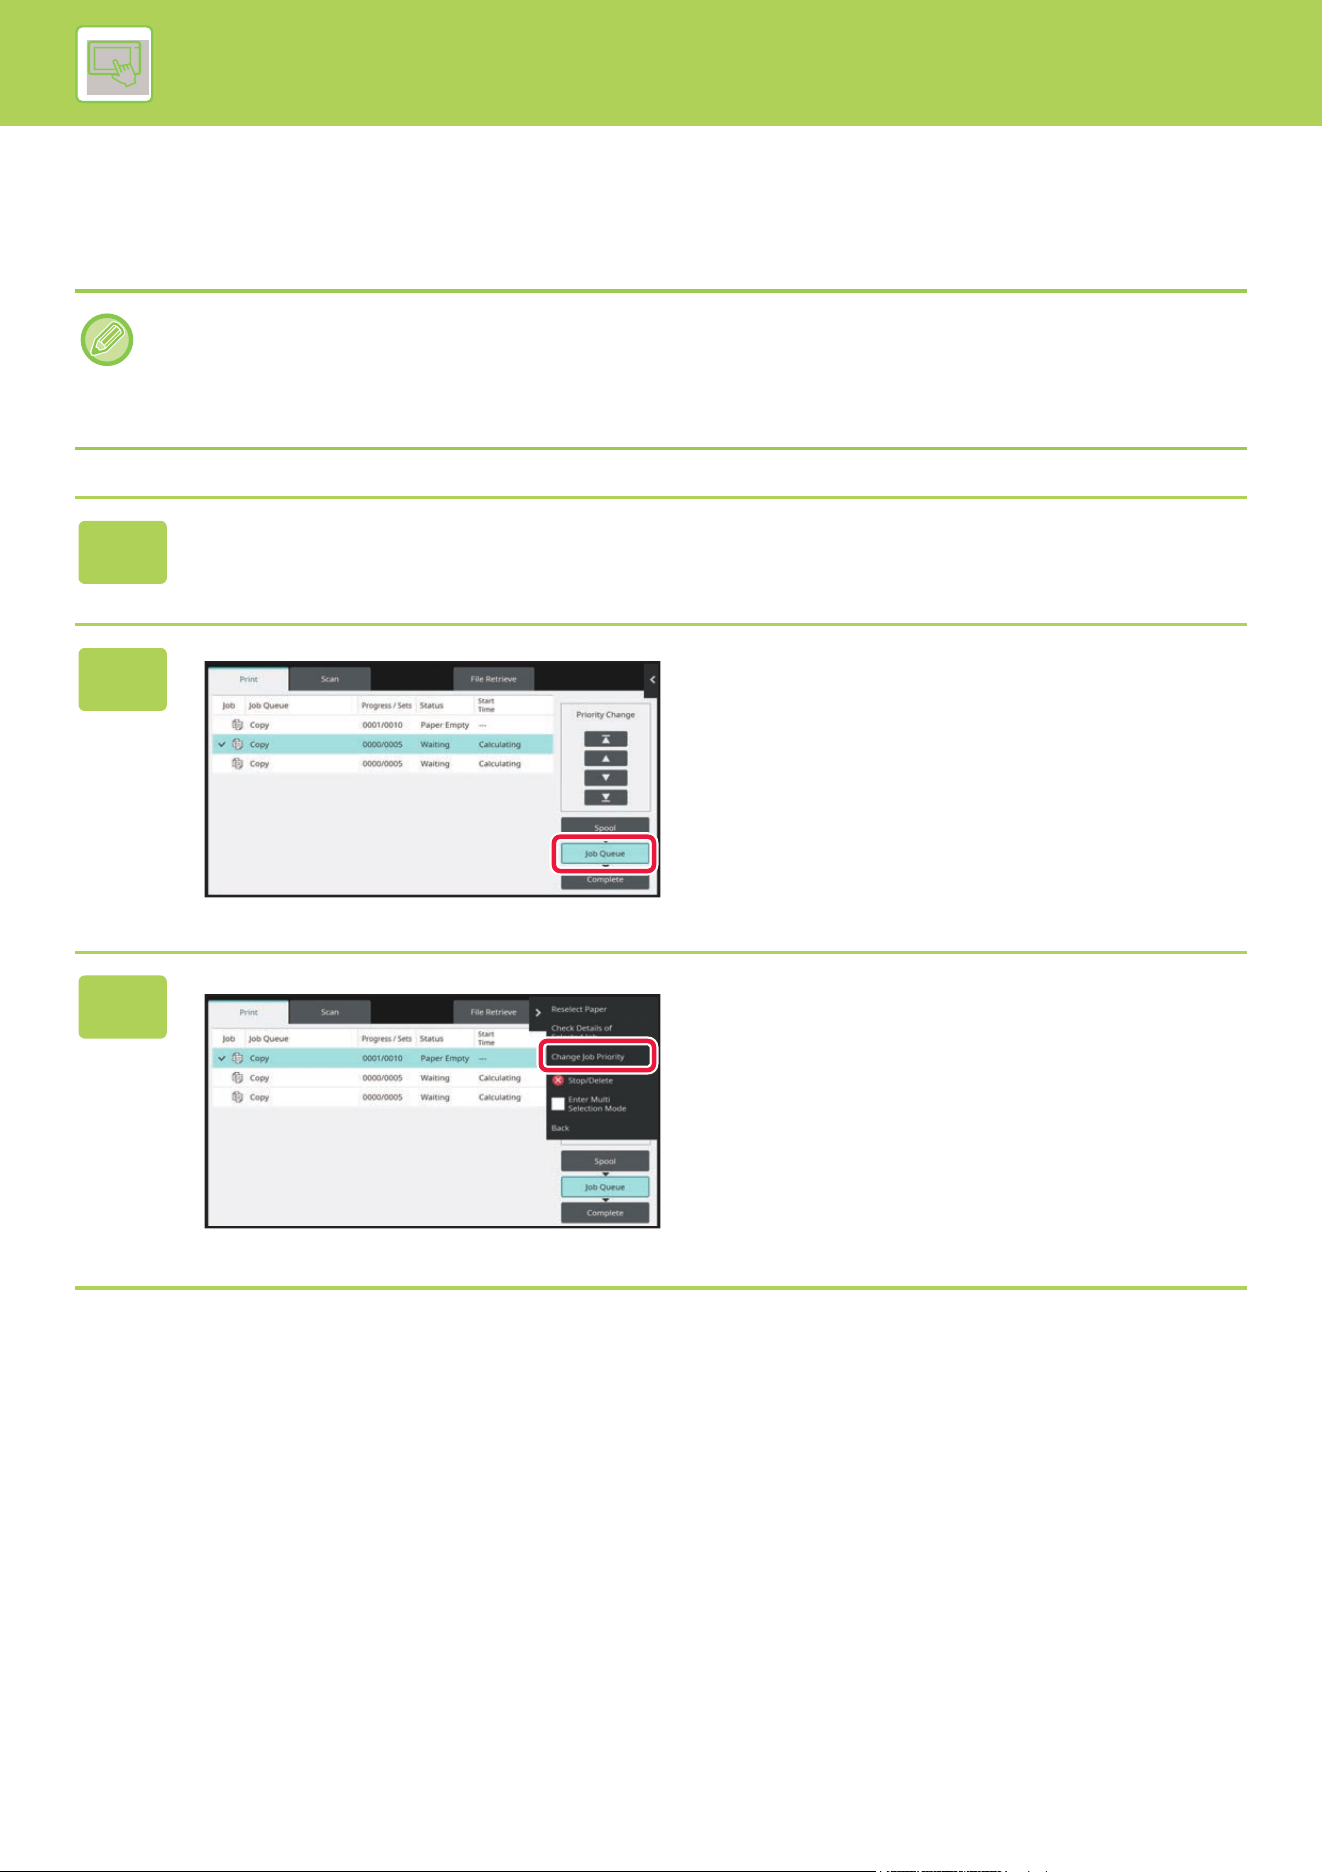
2-56
OPERATION OF THE MACHINE►JOB MANAGEMENT
PRIORITY PROCESSING OF A RESERVED JOB
This function gives priority to processing of copied or image send jobs arising later to jobs already in a queue for printing
or sending.
Priority processing operation varies, as follows, depending on the job type.
• Job on the print tab
The job currently in progress is suspended to let the priority job make interruption.
• Job on the scan tab
The priority job is moved directly under the job currently in progress.
1
Tap the job management display and tap the job for priority processing.
2
Tap the [Job Queue] key.
3
Tap the job for priority processing and
then tap [Change Job Priority] on the
action panel.
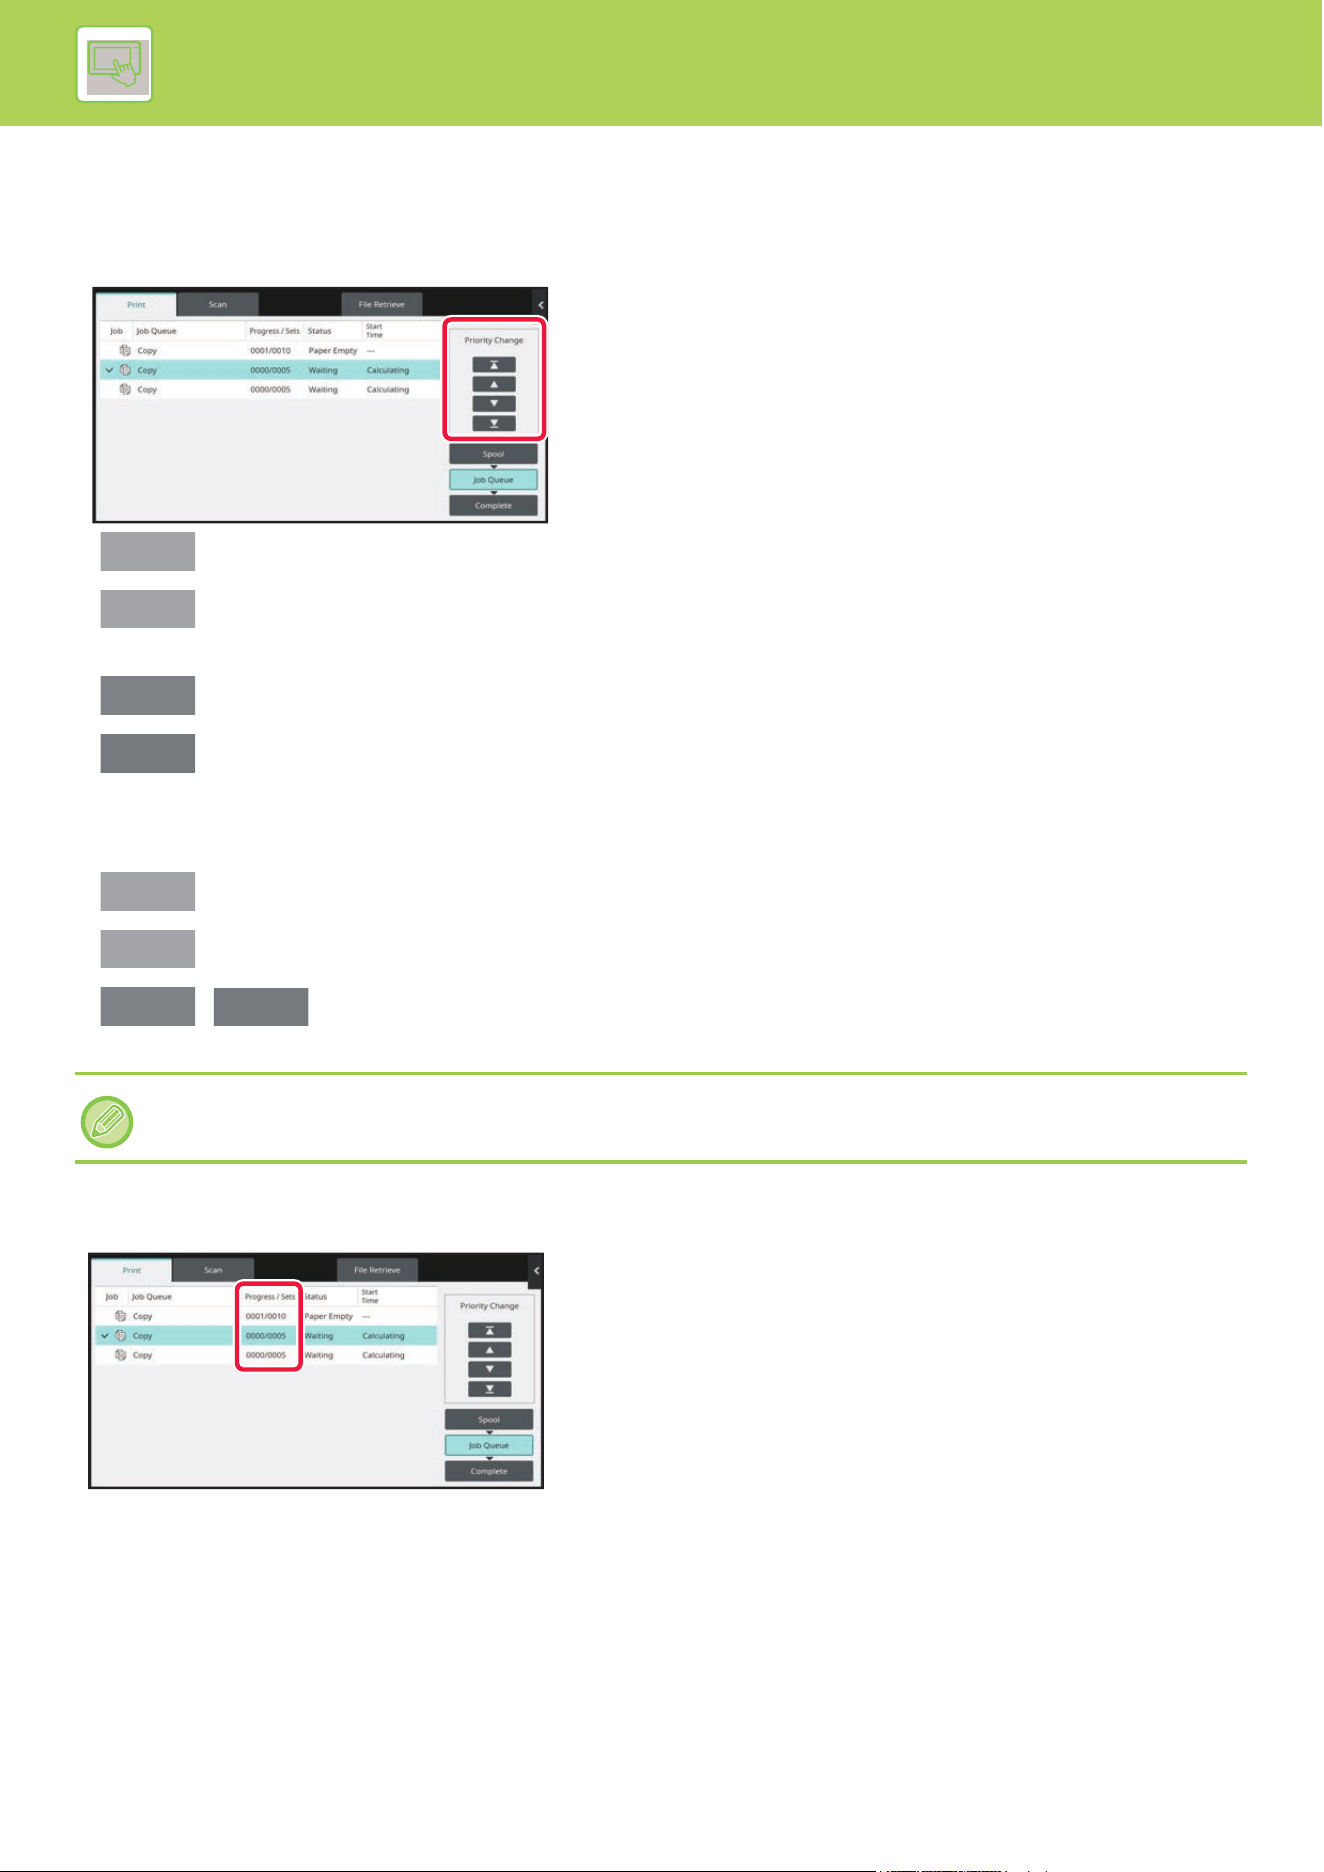
2-57
OPERATION OF THE MACHINE►JOB MANAGEMENT
Changing the job order
If there is a job in progress, an interrupt job can be performed, or a job can be moved down in the queue to change the
job order. Tap the key of the job you want to move, and tap the "Priority Change" key.
•key
Moves the selected job to the top of the queue. The current job will be interrupted and the selected job starts.
•key
Moves the selected job up one position. When the second job from the top is selected, tapping this key interrupts the
current job and starts the selected job.
•key
Moves the selected job down one position.
•key
Moves the selected job to the bottom of the queue.
Scanner job with a timer setting
When a scanner job with a timer setting is selected, tapping the order change keys moves the job as follows.
•key
The timer setting is canceled and the job moves to the position after the job in progress (second from top).
•key
The timer setting is canceled and the job moves to the lowest position in the queue (if there are 3 jobs, the 4th position)
• , key
These keys cannot be used.
In print tab, you can switch the display in the "Job Queue" screen between the number of printed copies and remaining
copies to be printed for each job.
The jobs below cannot be moved.
Job currently in progress, interrupt copy jobs, list print jobs, and jobs when Passing Prohibited is set in the system settings.
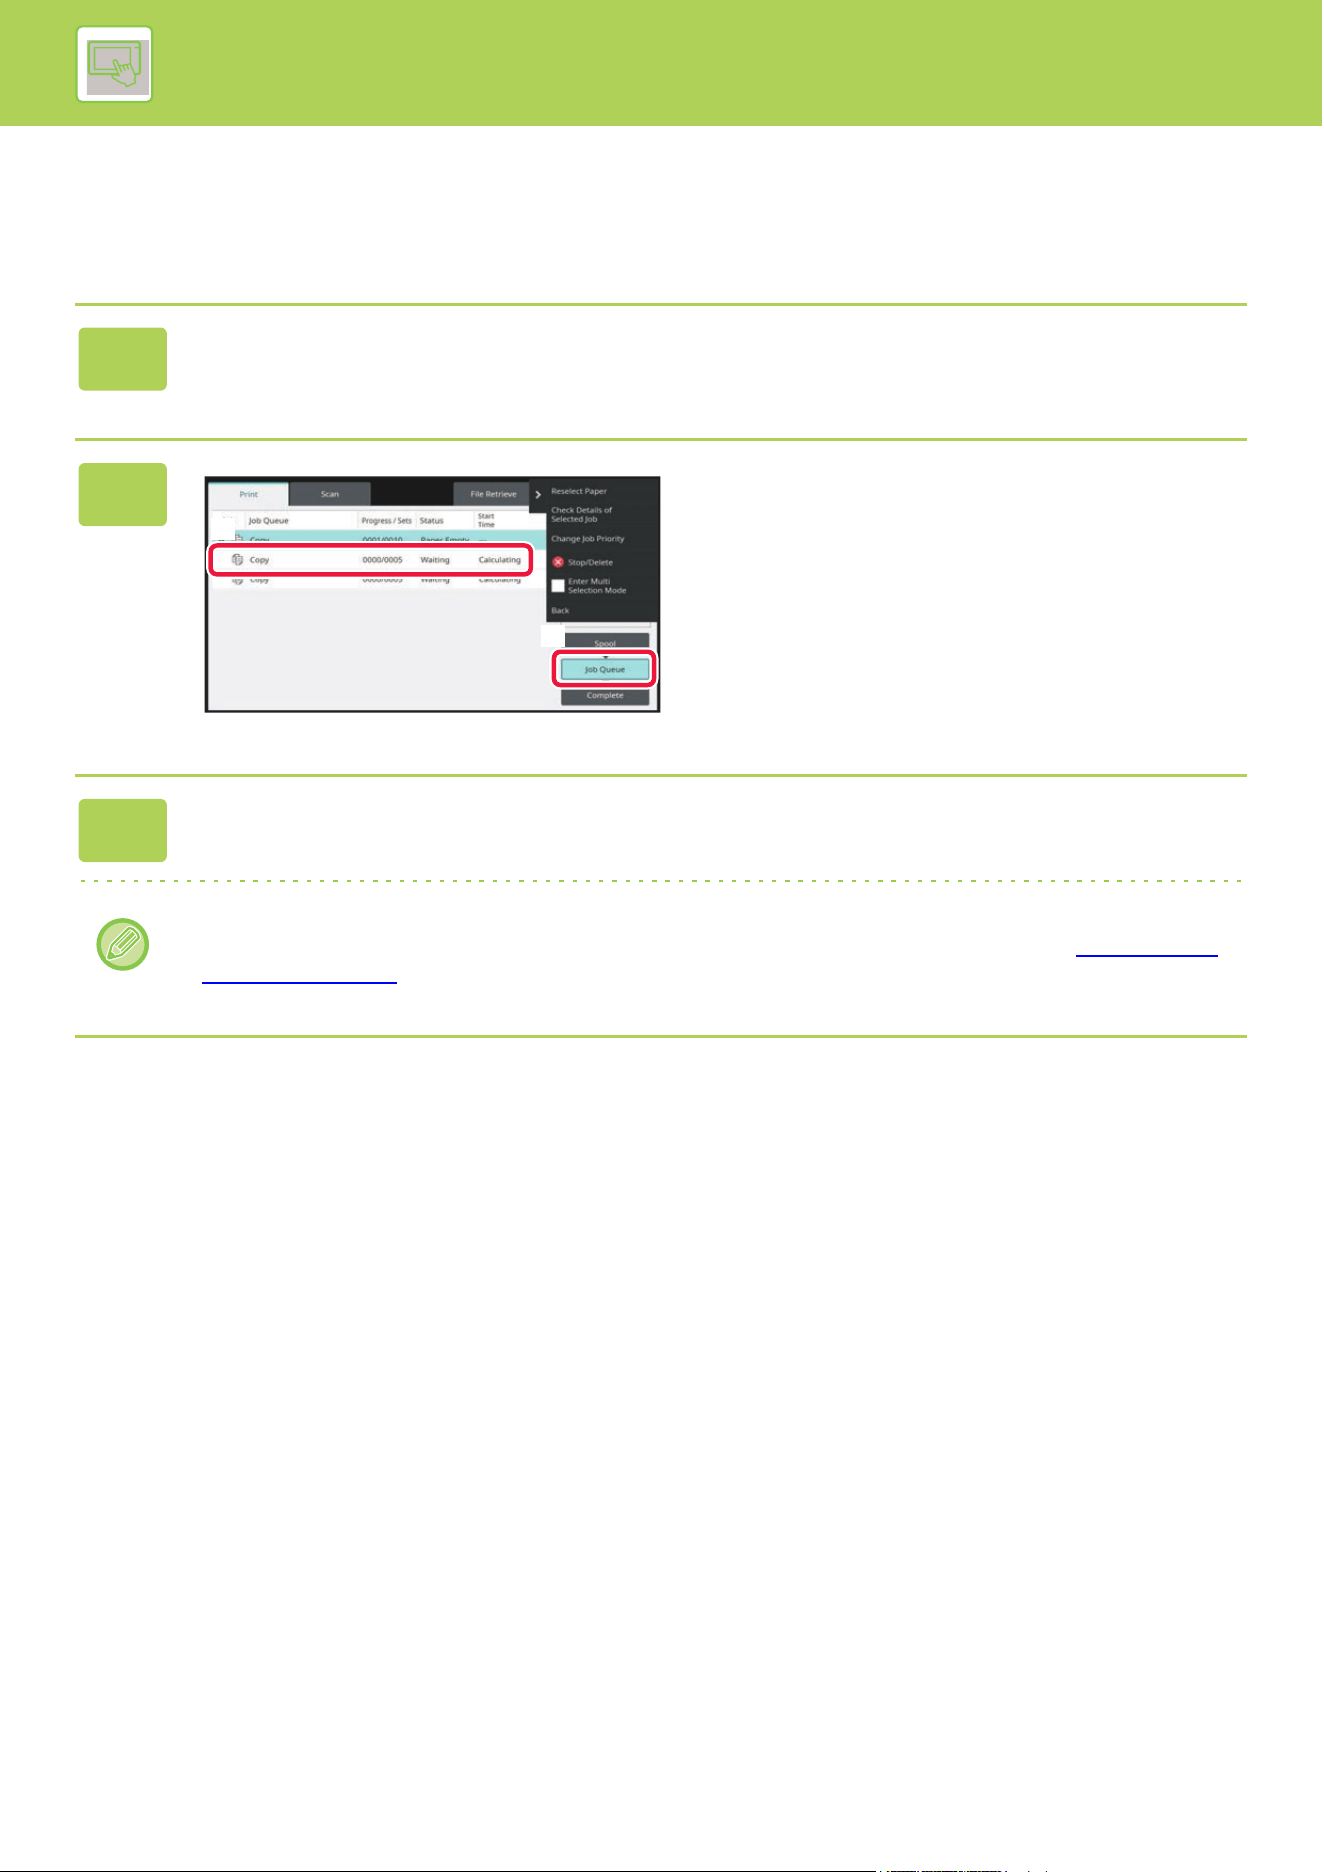
2-58
OPERATION OF THE MACHINE►JOB MANAGEMENT
CHECKING A RESERVED JOB OR THE JOB IN
PROGRESS
1
Tap the job management display and tap the tab for the job whose contents
you wish to check.
2
Tap the [Job Queue] key.
3
Tap the job whose contents you wish to check and then tap [Check Details of
Selected Job] on the action panel.
• Different job contents appear in different modes.
• For information on the icons displayed on the job keys or the messages displayed in "Status", see "READING THE
JOB LIST (page 2-60)".
(1)
(2)
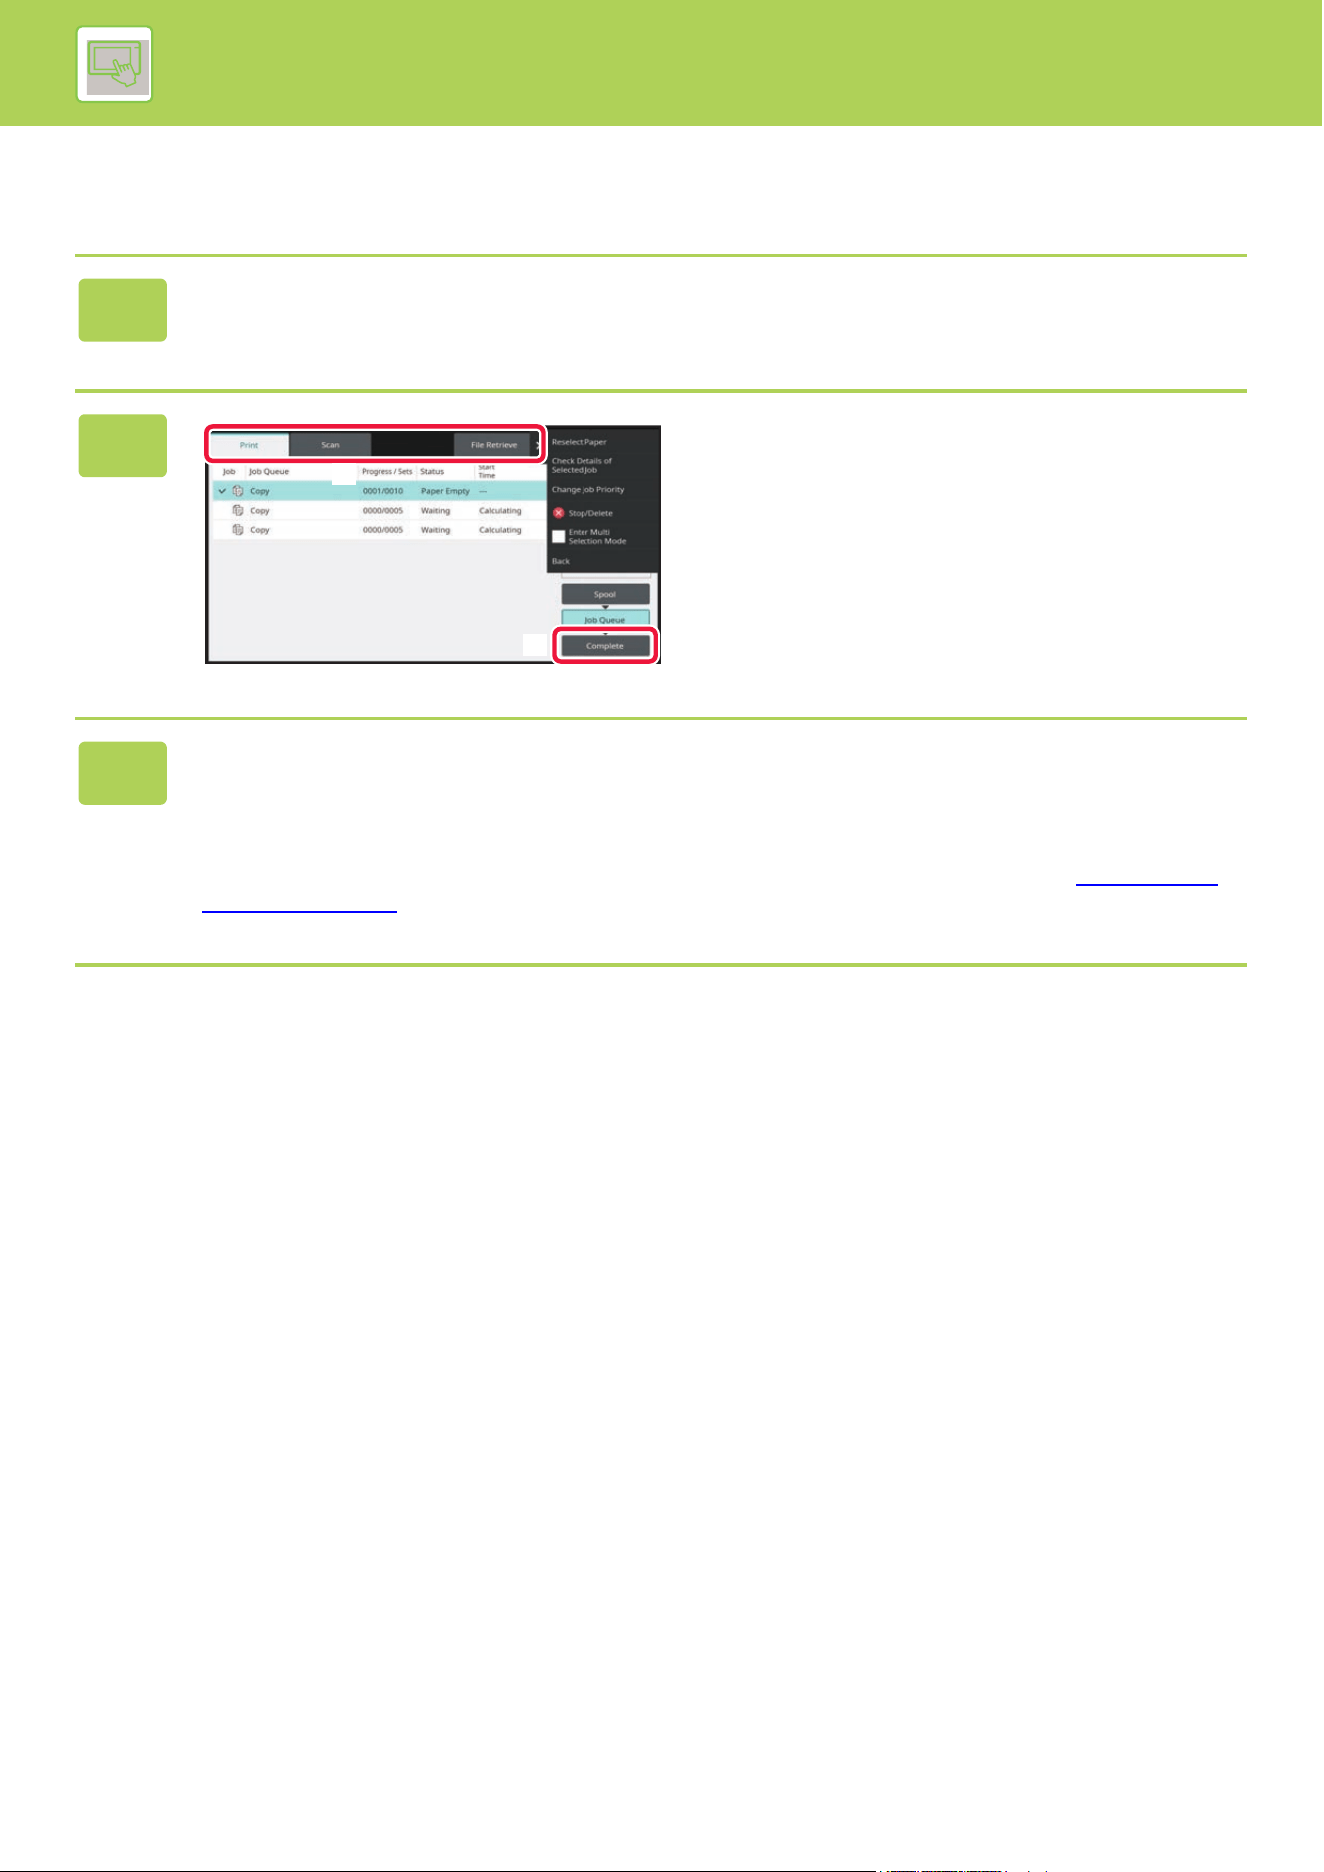
2-59
OPERATION OF THE MACHINE►JOB MANAGEMENT
CHECKING COMPLETED JOBS
1
Tap the job management display and tap the tab for the job whose contents
you wish to check.
2
Tap the [Complete] key.
3
Tap the job whose contents you wish to check and then tap [Check Details of
Selected Job] on the action panel.
Jobs you can check are displayed as keys so that you can tap them.
• Different job contents appear in different modes.
• For information on the icons displayed on the job keys or the messages displayed in "Status", see "READING THE
JOB LIST (page 2-60)".
(1)
(2)
2-60
OPERATION OF THE MACHINE►JOB MANAGEMENT
READING THE JOB LIST
The meaning of each job icon and message displayed in "Status" is as follows:
Icons indicating the job type
Print job (RGB/CMYK) Copy job
Scan to E-mail job Scan to FTP job
Scan to Network Folder job Scan to Local Drive file print job
Tandem copy/print job OSA Scan Job
2-61
OPERATION OF THE MACHINE►JOB MANAGEMENT
Messages displayed in "Status"
Job in progress
Reserved job
Completed job
Display Status
"Printing" Print job in progress
"Copying" Copy job in progress
"Connecting" Connecting
"Sending" Sending
"Receiving" Receiving
"Processing" Processing
"Stopped" The job has been stopped
"Toner Empty" Toner Empty
"Paper Empty" Paper Empty
"Paper Jam" Paper jam
"Waiting" Waiting
"Warming up" Warming up
"Limit" Having reached the account limit
"Report Wait" Transmission confirmation reception timeout
"Error" An error occurred while the job was being executed
Display Status
"Waiting" The job is waiting to be executed
"Retry Mode" The job is being retried due to a communication error or other problem
A day and time is displayed Timer transmission job (the specified time is displayed)
Display Status
"OK" Normal termination
"Send OK" Transmission was completed.
"Forward OK" The received data/received data (each file) has been forwarded.
"Stopped" The job was stopped.
"Delete" Deleted received data in the image check screen.
"Number of successful
transmission
destinations/Total
destinations OK"
Completion of a broadcast transmission, serial polling, or inbound routing operation.
If transmission to 3 destinations was successful out of a total of 5, "003/005 OK" will appear.
"NGxxxxxx" Transmission/reception was not successful because a communication error occurred (a 6-digit
error code appears in xxxxxx.)
"Error" An error occurred while the job was being executed.
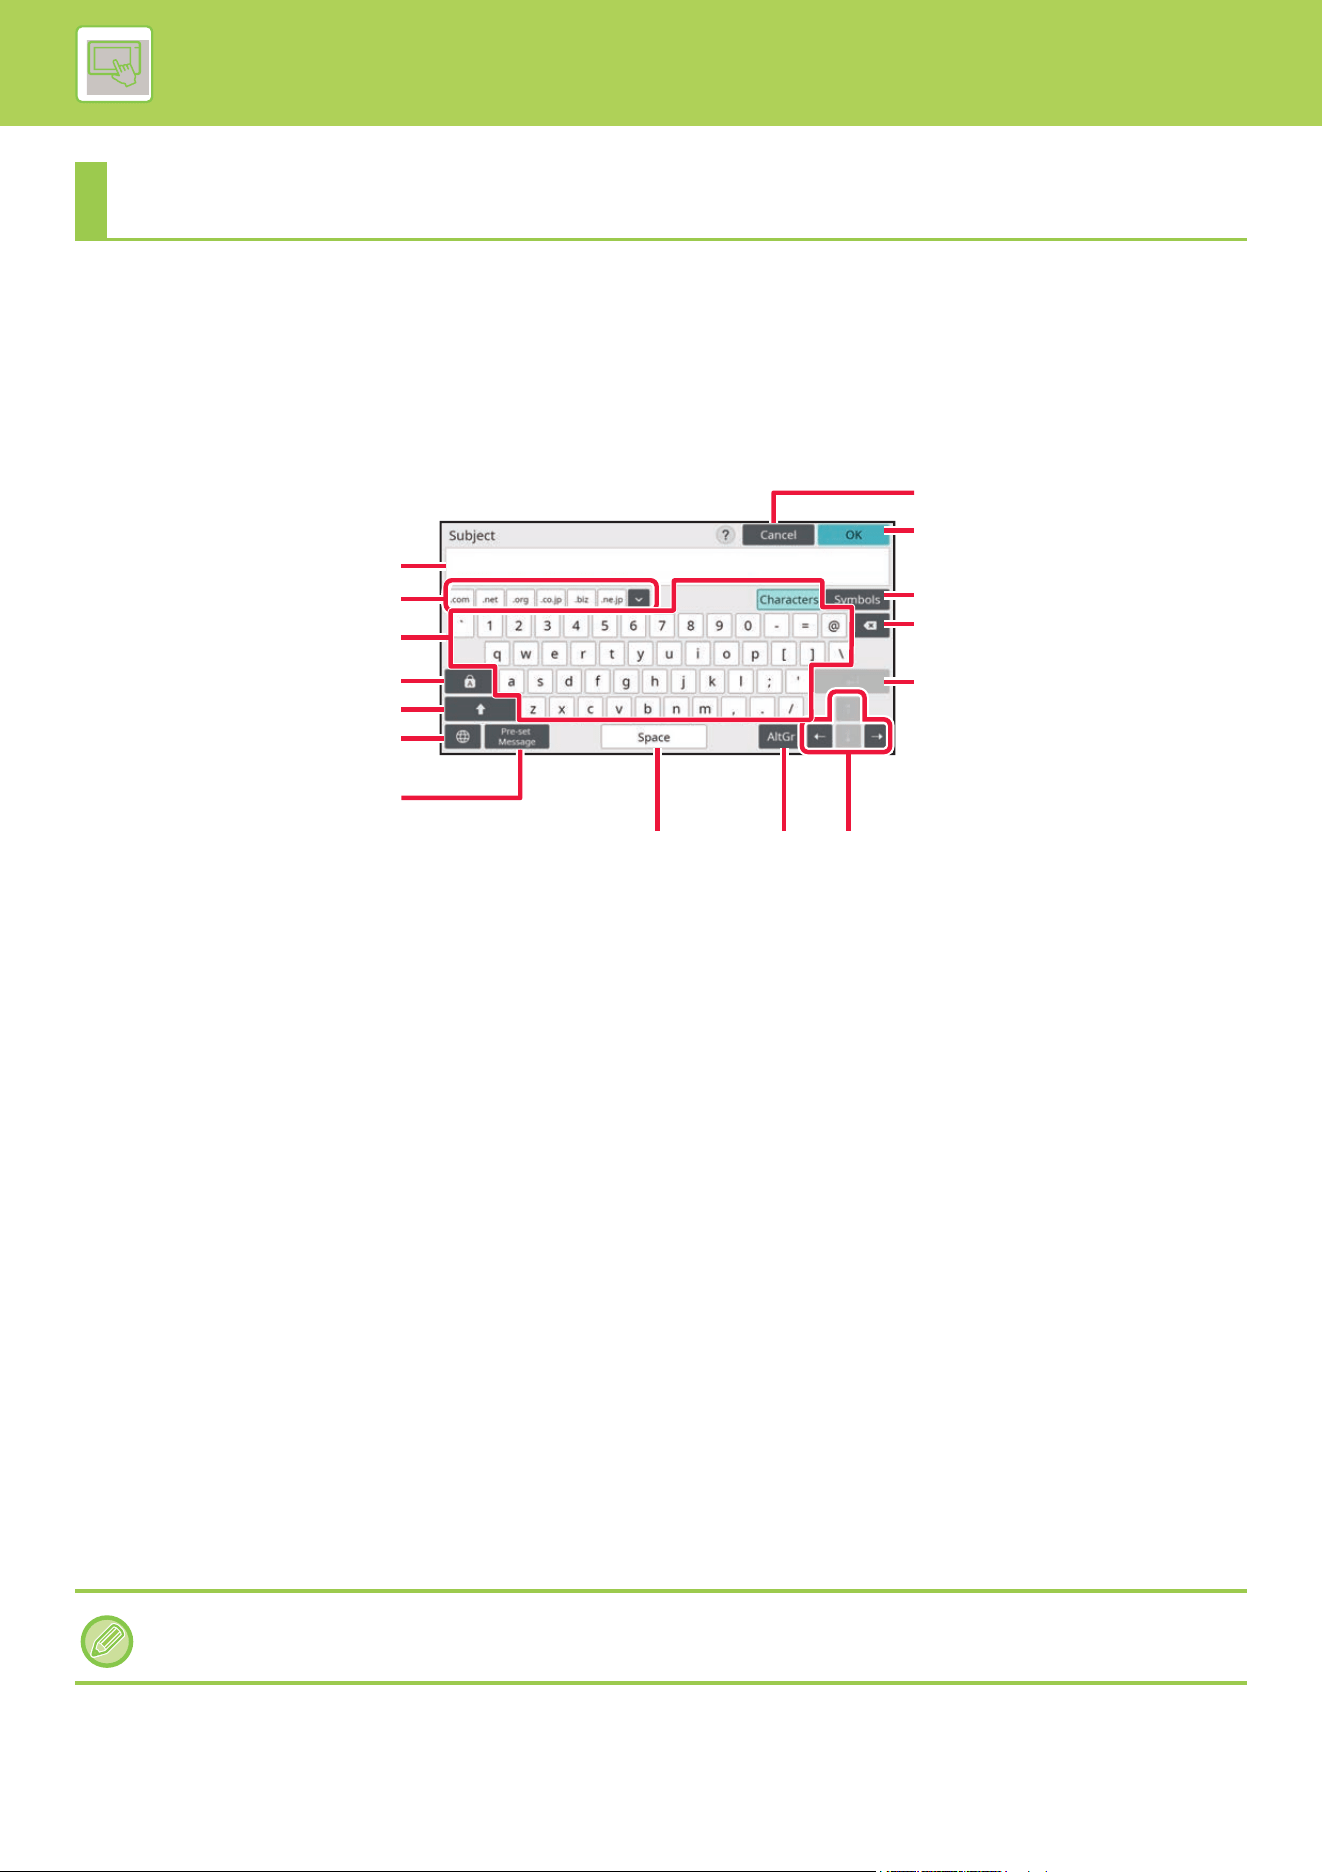
2-62
OPERATION OF THE MACHINE►CHARACTER ENTRY
CHARACTER ENTRY
NAMES AND FUNCTIONS OF SOFT KEYBOARD KEYS
Display the soft keyboard to register the name of a file, program, folder or user.
(1) Text input area
Displays the entered text.
(2) Registered word key
Retrieves the stored words. Use "Settings" to store
words.
(3) Keyboard
Tap a key to enter text.
The key types vary depending on the selected entry
mode.
(4) [Caps] key
Switches the alphabet to upper case. Use this key to
enter a series of capital letters.
(5) [Shift] key
Switch the alphabet to uppercase.
(6) Keyboard Select
Switches the key layout.
(7) Pre-Set Select
Use this to retrieve a previously stored subject for e-mail
or pre-set text.
(8) [Cancel] key
Exits the soft keyboard.
(9) [OK] key
Finalizes the entered characters and exits the soft
keyboard.
(10) [Symbols] key
Switch to other input modes.
(11) Backspace key
Deletes one character to the left.
(12) [Enter] key
Temporarily fixes the converted characters or inserts a
line break.
(13) [Space] key
Converts the entered characters. The [Space] key inserts
a space between words if there are no characters
specified to be converted.
(14) [AltGr] key
Used to enter accented characters and special symbols.
(15) Cursor keys
Used to move the cursor or to change the range of the
specified conversion target.
CHARACTER ENTRY
(1)
(8)
(11)
(12)
(10)
(9)
(13)
(14) (15)
(2)
(3)
(6)
(4)
(7)
(5)
The soft keyboard shown here is an image for your reference. Different keys may be enabled depending on the actual
situation and condition under which you enter characters.

2-63
OPERATION OF THE MACHINE►CHARACTER ENTRY
SET THE KEYBOARD SETTING
In "Settings (administrator)", select [System Settings] → [Common Settings] → [Operation Settings] → [Keyboard
Settings].
Keyboard Settings
Default Keyboard Setting
Configure settings for the keyboard used for entry on the text.
Keyboard Select
Change the key layout and display according to the set language.
Set Keyboard Priority
When an external keyboard is connected, set whether the external keyboard or the keyboard shown on the touch panel
(soft keyboard) is given priority.
Soft Keyboard Template Setting
Register a text that you frequently use when entering an address or domain name in advance. Enter a maximum of 16
characters.

3-1
BEFORE USING THE MACHINE AS A
COPIER
COPY MODE. . . . . . . . . . . . . . . . . . . . . . . . . . . . . . . . . . . . 3-3
EASY MODE . . . . . . . . . . . . . . . . . . . . . . . . . . . . . . . . . . 3-3
NORMAL MODE . . . . . . . . . . . . . . . . . . . . . . . . . . . . . . . 3-5
SELECTING COPY MODE . . . . . . . . . . . . . . . . . . . . . . . 3-5
BASIC PROCEDURE FOR MAKING
COPIES
COPYING . . . . . . . . . . . . . . . . . . . . . . . . . . . . . . . . . . . . . . 3-6
DEFAULT SETTINGS FOR COPYING . . . . . . . . . . . . . 3-10
CHECKING THE ORIGINAL SIZE . . . . . . . . . . . . . . . . . . 3-11
EASY MODE . . . . . . . . . . . . . . . . . . . . . . . . . . . . . . . . . 3-11
NORMAL MODE . . . . . . . . . . . . . . . . . . . . . . . . . . . . . . 3-11
SELECTING THE PAPER TRAY FOR COPYING . . . . . . 3-13
AUTOMATIC 2-SIDED COPYING. . . . . . . . . . . . . . . . . . . 3-14
USING THE AUTOMATIC DOCUMENT FEEDER FOR
2-SIDED COPYING . . . . . . . . . . . . . . . . . . . . . . . . . . . . 3-14
USING THE DOCUMENT GLASS FOR 2-SIDED
COPYING. . . . . . . . . . . . . . . . . . . . . . . . . . . . . . . . . . . . 3-15
COPY COLOR MODES. . . . . . . . . . . . . . . . . . . . . . . . . . . 3-17
COPYING IN TWO COLORS. . . . . . . . . . . . . . . . . . . . . 3-18
COPYING IN SINGLE COLOR . . . . . . . . . . . . . . . . . . . 3-19
CHANGING THE EXPOSURE AND ORIGINAL IMAGE
TYPE . . . . . . . . . . . . . . . . . . . . . . . . . . . . . . . . . . . . . . . . . 3-20
AUTOMATIC ADJUSTMENT OF EXPOSURE AND
ORIGINAL TYPE . . . . . . . . . . . . . . . . . . . . . . . . . . . . . . 3-20
MANUAL ADJUSTMENT OF EXPOSURE AND
ORIGINAL TYPE . . . . . . . . . . . . . . . . . . . . . . . . . . . . . . 3-20
ENLARGE/REDUCE . . . . . . . . . . . . . . . . . . . . . . . . . . . . . 3-22
AUTO RATIO SELECT. . . . . . . . . . . . . . . . . . . . . . . . . . 3-22
MANUAL RATIO SELECTION . . . . . . . . . . . . . . . . . . . . 3-23
ENLARGING/REDUCING THE LENGTH AND WIDTH
SEPARATELY . . . . . . . . . . . . . . . . . . . . . . . . . . . . . . . . 3-26
SELECTING THE ORIENTATION AND SIZE OF THE
ORIGINAL . . . . . . . . . . . . . . . . . . . . . . . . . . . . . . . . . . . . . 3-29
SPECIFYING THE ORIENTATION OF THE
ORIGINAL . . . . . . . . . . . . . . . . . . . . . . . . . . . . . . . . . . . 3-29
SPECIFY THE ORIENTATION AND SIZE OF THE
ORIGINAL . . . . . . . . . . . . . . . . . . . . . . . . . . . . . . . . . . . 3-29
SPECIFYING THE ORIENTATION AND SIZE OF A
NON-STANDARD SIZE ORIGINALS. . . . . . . . . . . . . . . 3-31
STORING FREQUENTLY USED ORIGINAL SIZES . . . . 3-32
STORING ORIGINAL SIZES (MODIFY/DELETE) . . . . . 3-32
MAKING COPIES USING THE BYPASS TRAY. . . . . . . . 3-35
MAKING COPIES USING THE BYPASS TRAY . . . . . . 3-35
SPECIFYING A TYPE AND SIZE OF PAPER LOADED
ON BYPASS TRAY . . . . . . . . . . . . . . . . . . . . . . . . . . . . 3-36
OUTPUT . . . . . . . . . . . . . . . . . . . . . . . . . . . . . . . . . . . . . . 3-37
CHANGING OUTPUT DESTINATION . . . . . . . . . . . . . . 3-39
SORT/GROUP SETTING. . . . . . . . . . . . . . . . . . . . . . . . 3-40
STAPLE SETTINGS . . . . . . . . . . . . . . . . . . . . . . . . . . . .3-41
PUNCH SETTINGS. . . . . . . . . . . . . . . . . . . . . . . . . . . . .3-47
FOLD SETTING . . . . . . . . . . . . . . . . . . . . . . . . . . . . . . .3-49
INSERTING SEPARATOR PAGES BETWEEN
COPIES OR JOBS . . . . . . . . . . . . . . . . . . . . . . . . . . . . .3-55
BATCH COPY FUNCTIONS . . . . . . . . . . . . . . . . . . . . . . .3-57
COPYING MULTIPLE ORIGINALS AS A SINGLE
PAGE (N-Up). . . . . . . . . . . . . . . . . . . . . . . . . . . . . . . . . .3-57
COPYING EACH FACING PAGE OF A BOUND
DOCUMENT (DUAL PAGE COPY) . . . . . . . . . . . . . . . . 3-59
COPYING BOTH SIDES OF A CARD AS A SINGLE
PAGE (CARD SHOT) . . . . . . . . . . . . . . . . . . . . . . . . . . .3-61
REPEATING THE SAME IMAGE ON ONE SHEET
(REPEAT LAYOUT) . . . . . . . . . . . . . . . . . . . . . . . . . . . .3-63
COPYING MULTIPLE BUSINESS CARDS (BUSINESS
CARD COPY) . . . . . . . . . . . . . . . . . . . . . . . . . . . . . . . . .3-68
OTHER FUNCTIONS
OUTPUT AND LAYOUT EDITING FUNCTIONS. . . . . . . . 3-71
MAKING COPIES IN PAMPHLET FORMAT
(BOOKLET). . . . . . . . . . . . . . . . . . . . . . . . . . . . . . . . . . . 3-71
COPYING MULTIPLE ORIGINALS ON EACH
BOOKLET PAGE (BOOKLET 2-Up/4-Up) . . . . . . . . . . .3-74
COPYING A PAMPHLET (BOOK COPY) . . . . . . . . . . . .3-77
SPLITTING A PAMPHLET ORIGINAL BY PAGE
(BOOK DIVIDE). . . . . . . . . . . . . . . . . . . . . . . . . . . . . . . .3-80
PAPER, AND TIME SAVING FUNCTIONS . . . . . . . . . . . . 3-81
SKIPPING BLANK PAGES IN AN ORIGINAL (BLANK
PAGE SKIP) . . . . . . . . . . . . . . . . . . . . . . . . . . . . . . . . . . 3-81
ADJUSTING THE BACKGROUND BY MAKING LIGHT
AREAS OF THE ORIGINAL DARKER OR LIGHTER
(BACKGROUND ADJUSTMENT). . . . . . . . . . . . . . . . . . 3-83
MAKING A PROOF COPY (PROOF COPY) . . . . . . . . .3-85
CHECKING THE NUMBER OF SCANNED ORIGINAL
SHEETS (ORIGINAL COUNT) . . . . . . . . . . . . . . . . . . . . 3-87
USING TWO MACHINES TO REDUCE THE COPY
TIME (TANDEM COPY) . . . . . . . . . . . . . . . . . . . . . . . . .3-88
SECURITY REINFORCEMENT FUNCTIONS . . . . . . . . . .3-90
PADDING UNAUTHORIZED COPY PREVENTION
DATA (HIDDEN PATTERN PRINT) . . . . . . . . . . . . . . . . 3-90
OUTPUT POSITION AND MARGIN ADJUSTMENT
FUNCTIONS. . . . . . . . . . . . . . . . . . . . . . . . . . . . . . . . . . . .3-92
ADDING MARGINS (MARGIN SHIFT) . . . . . . . . . . . . . . 3-92
ERASING PERIPHERAL SHADOWS FOR COPYING
(ERASE) . . . . . . . . . . . . . . . . . . . . . . . . . . . . . . . . . . . . .3-94
COPYING ORIGINALS WITH NO EDGE CUT-OFF
(FULL BLEED COPY) . . . . . . . . . . . . . . . . . . . . . . . . . . .3-96
COPYING IN THE CENTER OF THE PAPER
(CENTERING). . . . . . . . . . . . . . . . . . . . . . . . . . . . . . . . . 3-97
SPECIFYING A PAPER POSITION (POSITION
IMAGE) . . . . . . . . . . . . . . . . . . . . . . . . . . . . . . . . . . . . . . 3-98
SCANNING FUNCTIONS. . . . . . . . . . . . . . . . . . . . . . . . . 3-100
COPIER

3-2
COPIER
COLLECTIVELY SCANNING A LARGE NUMBER OF
ORIGINALS (JOB BUILD) . . . . . . . . . . . . . . . . . . . . . . 3-100
SCANNING ORIGINALS OF DIFFERENT SIZES
(MIXED SIZE ORIGINAL). . . . . . . . . . . . . . . . . . . . . . . 3-103
SCANNING THIN ORIGINALS (SLOW SCAN
MODE) . . . . . . . . . . . . . . . . . . . . . . . . . . . . . . . . . . . . . 3-106
SCANNING HEAVY ORIGINALS (HEAVY PAPER
SCAN) . . . . . . . . . . . . . . . . . . . . . . . . . . . . . . . . . . . . . 3-107
ADJUSTING RESOLUTION WHEN SCANNING
(RESOLUTION) . . . . . . . . . . . . . . . . . . . . . . . . . . . . . . 3-108
TEXT AND IMAGE ADDITION FUNCTIONS . . . . . . . . . 3-109
PRINTING DATES, PAGE NUMBERS, AND
WATERMARKS (STAMP) . . . . . . . . . . . . . . . . . . . . . . 3-109
ADDING A REGISTERED IMAGE TO AN ORIGINAL
(CUSTOM IMAGE). . . . . . . . . . . . . . . . . . . . . . . . . . . . 3-112
INSERTING COVERS IN COPIES
(COVERS/INSERTS) . . . . . . . . . . . . . . . . . . . . . . . . . . 3-115
INSERTING INSERTION SHEETS IN COPIES
(COVERS/INSERTS) . . . . . . . . . . . . . . . . . . . . . . . . . . 3-123
CHECKING, EDITING, AND DELETING THE PAGE
LAYOUT OF COVERS AND INSERTION SHEETS
(PAGE LAYOUT) . . . . . . . . . . . . . . . . . . . . . . . . . . . . . 3-127
INSERTING INSERTION SHEETS IN BETWEEN
TRANSPARENCY FILMS (TRANSPARENCY
INSERTS). . . . . . . . . . . . . . . . . . . . . . . . . . . . . . . . . . . 3-128
FUNCTIONS FOR SPECIFIC USES. . . . . . . . . . . . . . . . 3-130
COPYING CAPTIONS ONTO TAB PAPER (TAB
COPY) . . . . . . . . . . . . . . . . . . . . . . . . . . . . . . . . . . . . . 3-130
MAKING A POSTER-SIZED COPY (MULTI-PAGE
ENLARGEMENT). . . . . . . . . . . . . . . . . . . . . . . . . . . . . 3-133
COPYING WITH MIRROR IMAGE (MIRROR
IMAGE). . . . . . . . . . . . . . . . . . . . . . . . . . . . . . . . . . . . . 3-135
OUTPUT AND DENSITY ADJUSTMENT
FUNCTIONS . . . . . . . . . . . . . . . . . . . . . . . . . . . . . . . . . . 3-136
REVERSING WHITE AND BLACK IN A COPY (B/W
REVERSE) . . . . . . . . . . . . . . . . . . . . . . . . . . . . . . . . . . 3-136
EASY ADJUSTMENT OF THE IMAGE QUALITY
(QUICK IMAGE QUALITY ADJUSTMENT) . . . . . . . . . 3-137
ADJUSTING RED/GREEN/BLUE IN COPIES (RGB
ADJUST) . . . . . . . . . . . . . . . . . . . . . . . . . . . . . . . . . . . 3-138
ADJUSTING THE SHARPNESS OF AN IMAGE
(SHARPNESS). . . . . . . . . . . . . . . . . . . . . . . . . . . . . . . 3-139
ADJUSTING THE COLOR (COLOR
BALANCE) . . . . . . . . . . . . . . . . . . . . . . . . . . . . . . . . . . 3-140
ADJUSTING THE BRIGHTNESS OF A COPY
(BRIGHTNESS) . . . . . . . . . . . . . . . . . . . . . . . . . . . . . . 3-142
ADJUSTING THE INTENSITY OF A COPY
(INTENSITY) . . . . . . . . . . . . . . . . . . . . . . . . . . . . . . . . 3-143
CONVENIENT COPY FUNCTIONS
INTERRUPT COPY . . . . . . . . . . . . . . . . . . . . . . . . . . . . . 3-144
SEND DATA WHILE COPYING. . . . . . . . . . . . . . . . . . . . 3-145
COPY JOBS. . . . . . . . . . . . . . . . . . . . . . . . . . . . . . . . . . . 3-146
PROGRAMS. . . . . . . . . . . . . . . . . . . . . . . . . . . . . . . . . . .3-147
STORING A PROGRAM . . . . . . . . . . . . . . . . . . . . . . . . 3-147
RETRIEVING A PROGRAM . . . . . . . . . . . . . . . . . . . . . 3-149
DELETING AND RENAMING A PROGRAM . . . . . . . .3-150
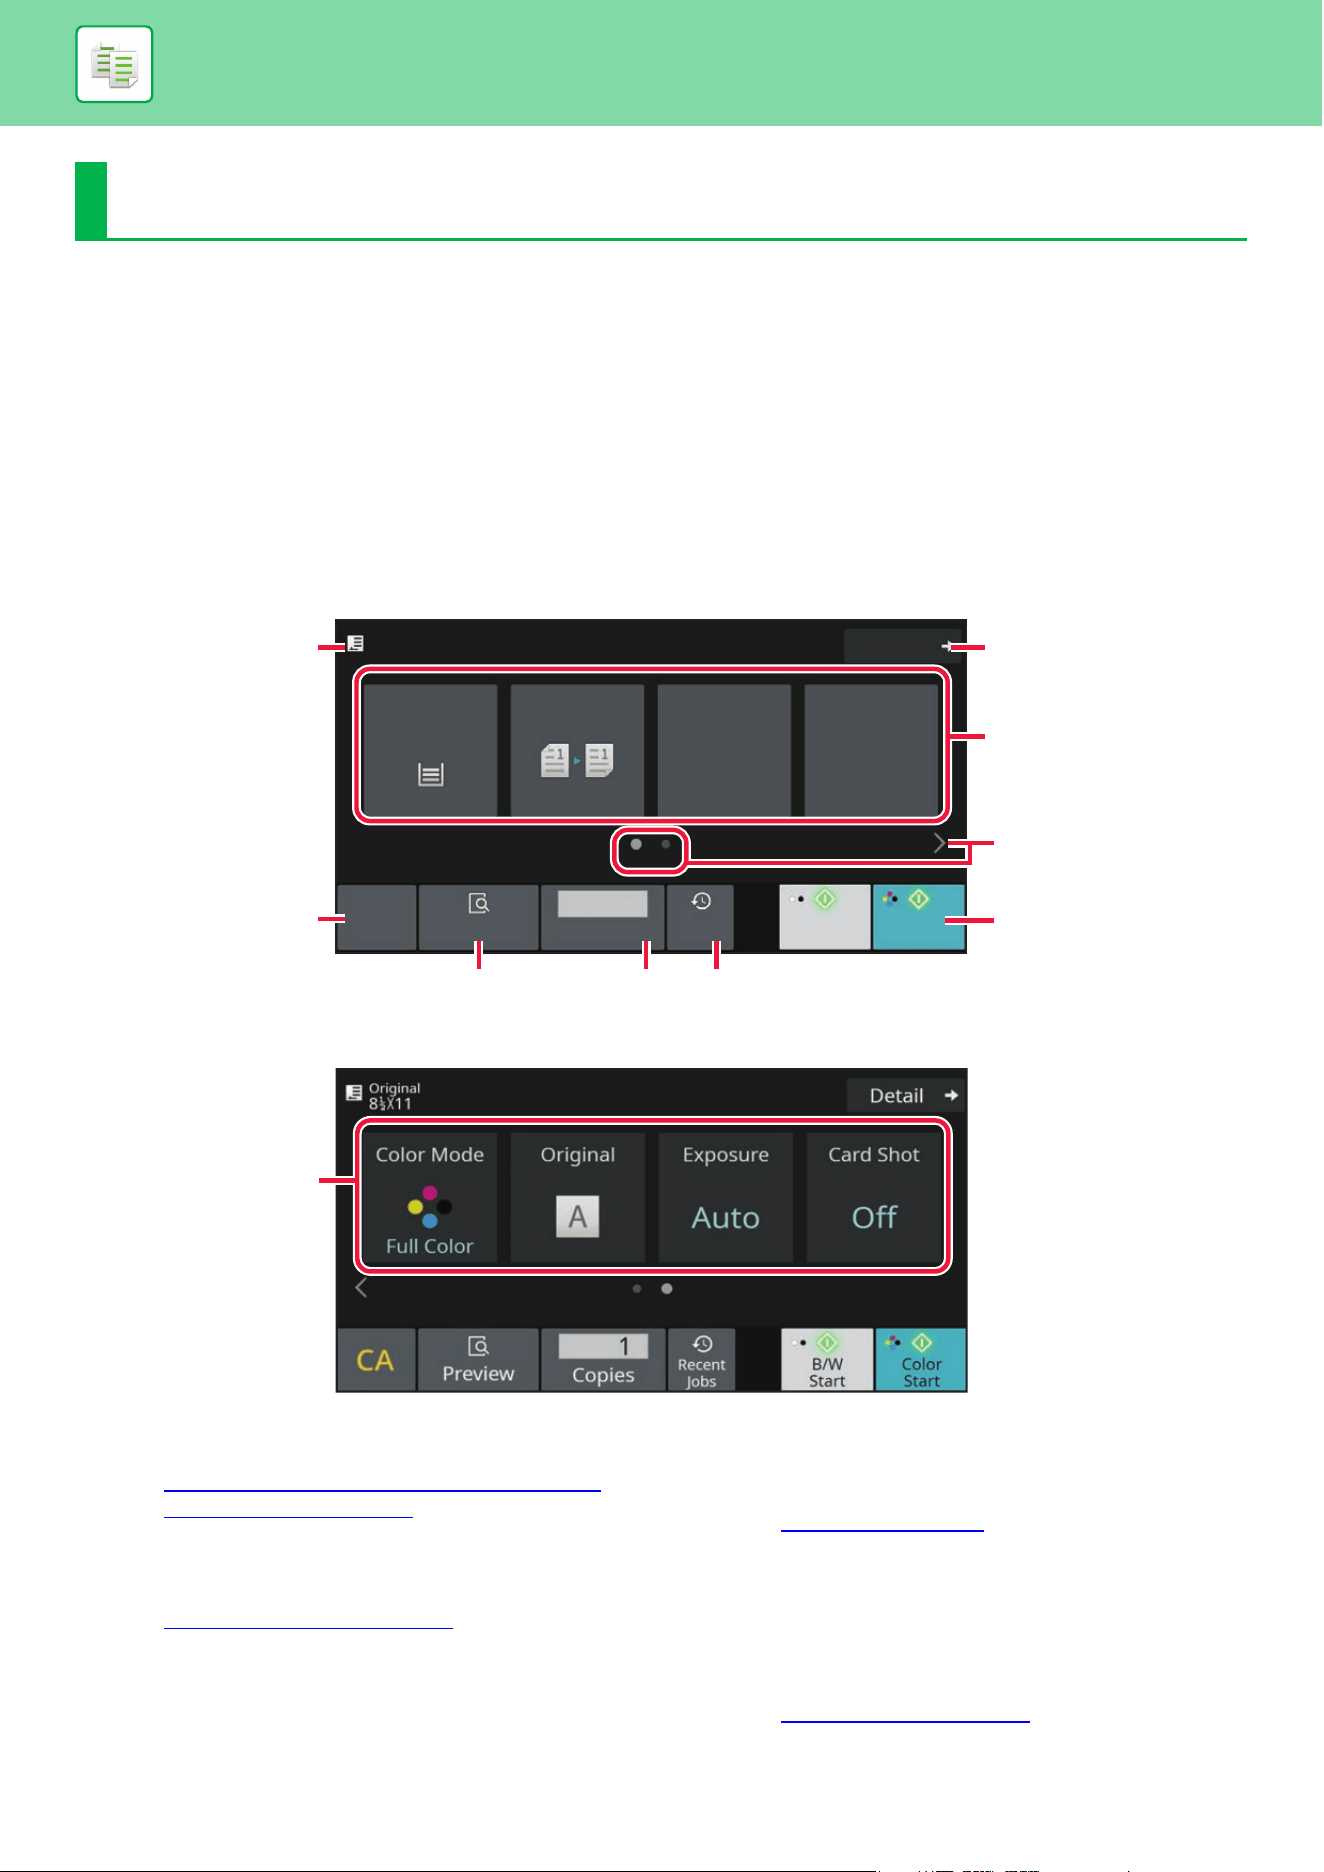
3-3
COPIER►BEFORE USING THE MACHINE AS A COPIER
COPY MODE
There are two modes for copying: easy mode and normal mode.
Easy mode is limited to frequently used functions that allow you to smoothly perform most copy jobs.
If you need to select detailed settings or special functions, use normal mode. All functions can be used in normal mode.
EASY MODE
Easy mode makes it easy to select basic settings for copying.
1st screen
2nd screen
(1) Show the size of the placed original.
► SELECTING THE ORIENTATION AND SIZE OF
THE ORIGINAL (page 3-29)
(2) Reset all settings.
(3) Show the size of the placed original.
► PREVIEW SCREEN
(page 2-11)
(4) Enter the number of copies.
(5) Recently used job setting can be loaded.
► Re
cent jobs (page 2-8)
(6) Starts black and white or color copying.
(7) Change the function display.
(8) Select function to be set up.
(9) Change to normal mode.
► NORMAL MODE (page 3-5)
BEFORE USING THE MACHINE AS A COPIER
CA
Preview
Copies
B/W
Staple / Punch
Copy Ratio
2-Sided Copy
Paper
Select
Tray 1
1 → 1
Start
Color
Start
100%
Detail
Original
8½x11
Off
Recent
Jobs
1
8½x11
(3)
(2)
(1)
(9)
(8)
(7)
(6)
(5)
(4)
(8)

3-4
COPIER►BEFORE USING THE MACHINE AS A COPIER
The following features can be set in easy mode.
• Paper Select
SELECTING THE PAPER TRAY FOR COPYING (page 3-13)
• 2-Side Copy
AUTOMATIC 2-SIDED COPYING (page 3-14)
• Copy Ratio
ENLARGE/REDUCE (page 3-22)
• Staple/Punch
OUTPUT (page 3-37)
• Color Mode
COPY COLOR MODES (page 3-17)
•Original
SELECTING THE ORIENTATION AND SIZE OF THE
ORIGINAL (page 3-29)
• Exposure
CHANGING THE EXPOSURE AND ORIGINAL IMAGE TYPE
(page 3-20)
•N-Up
COPYING MULTIPLE ORIGINALS AS A SIN
GLE PAGE (N-Up) (page 3-57)
• Card Shot
COPYING BOTH SIDES OF A CARD AS A SINGLE
PAGE (CARD SHOT) (page 3-61)
• Job Build
COLLECTIVELY SCANNING A LARGE
NUMBER OF ORIGINALS (JOB BUILD) (page 3-100)
• Blank Page Skip
SKIPPING BLANK PAGES IN AN
ORIGINAL (BLANK PAGE SKIP) (page 3-81)
• Dual Page Copy
COPYING EACH FACING PAGE OF A BOUND DOC
UMENT (DUAL PAGE COPY) (page 3-59)
• To select a function in easy mode
In "Settings (administrator)", select [System Settings] → [Common Settings] → [Operation Settings] → [Easy Mode Settings]
→ [Easy Copy].
• To cancel the warning message displayed when switching from easy mode to normal mode
In "Settings (administrator)", select [System Settings] → [Common Settings] → [Operation Settings] → [Easy Mode Settings]
→ [Display a Confirmation Message when Selecting "Detail" in Easy Modes] to disable this setting.
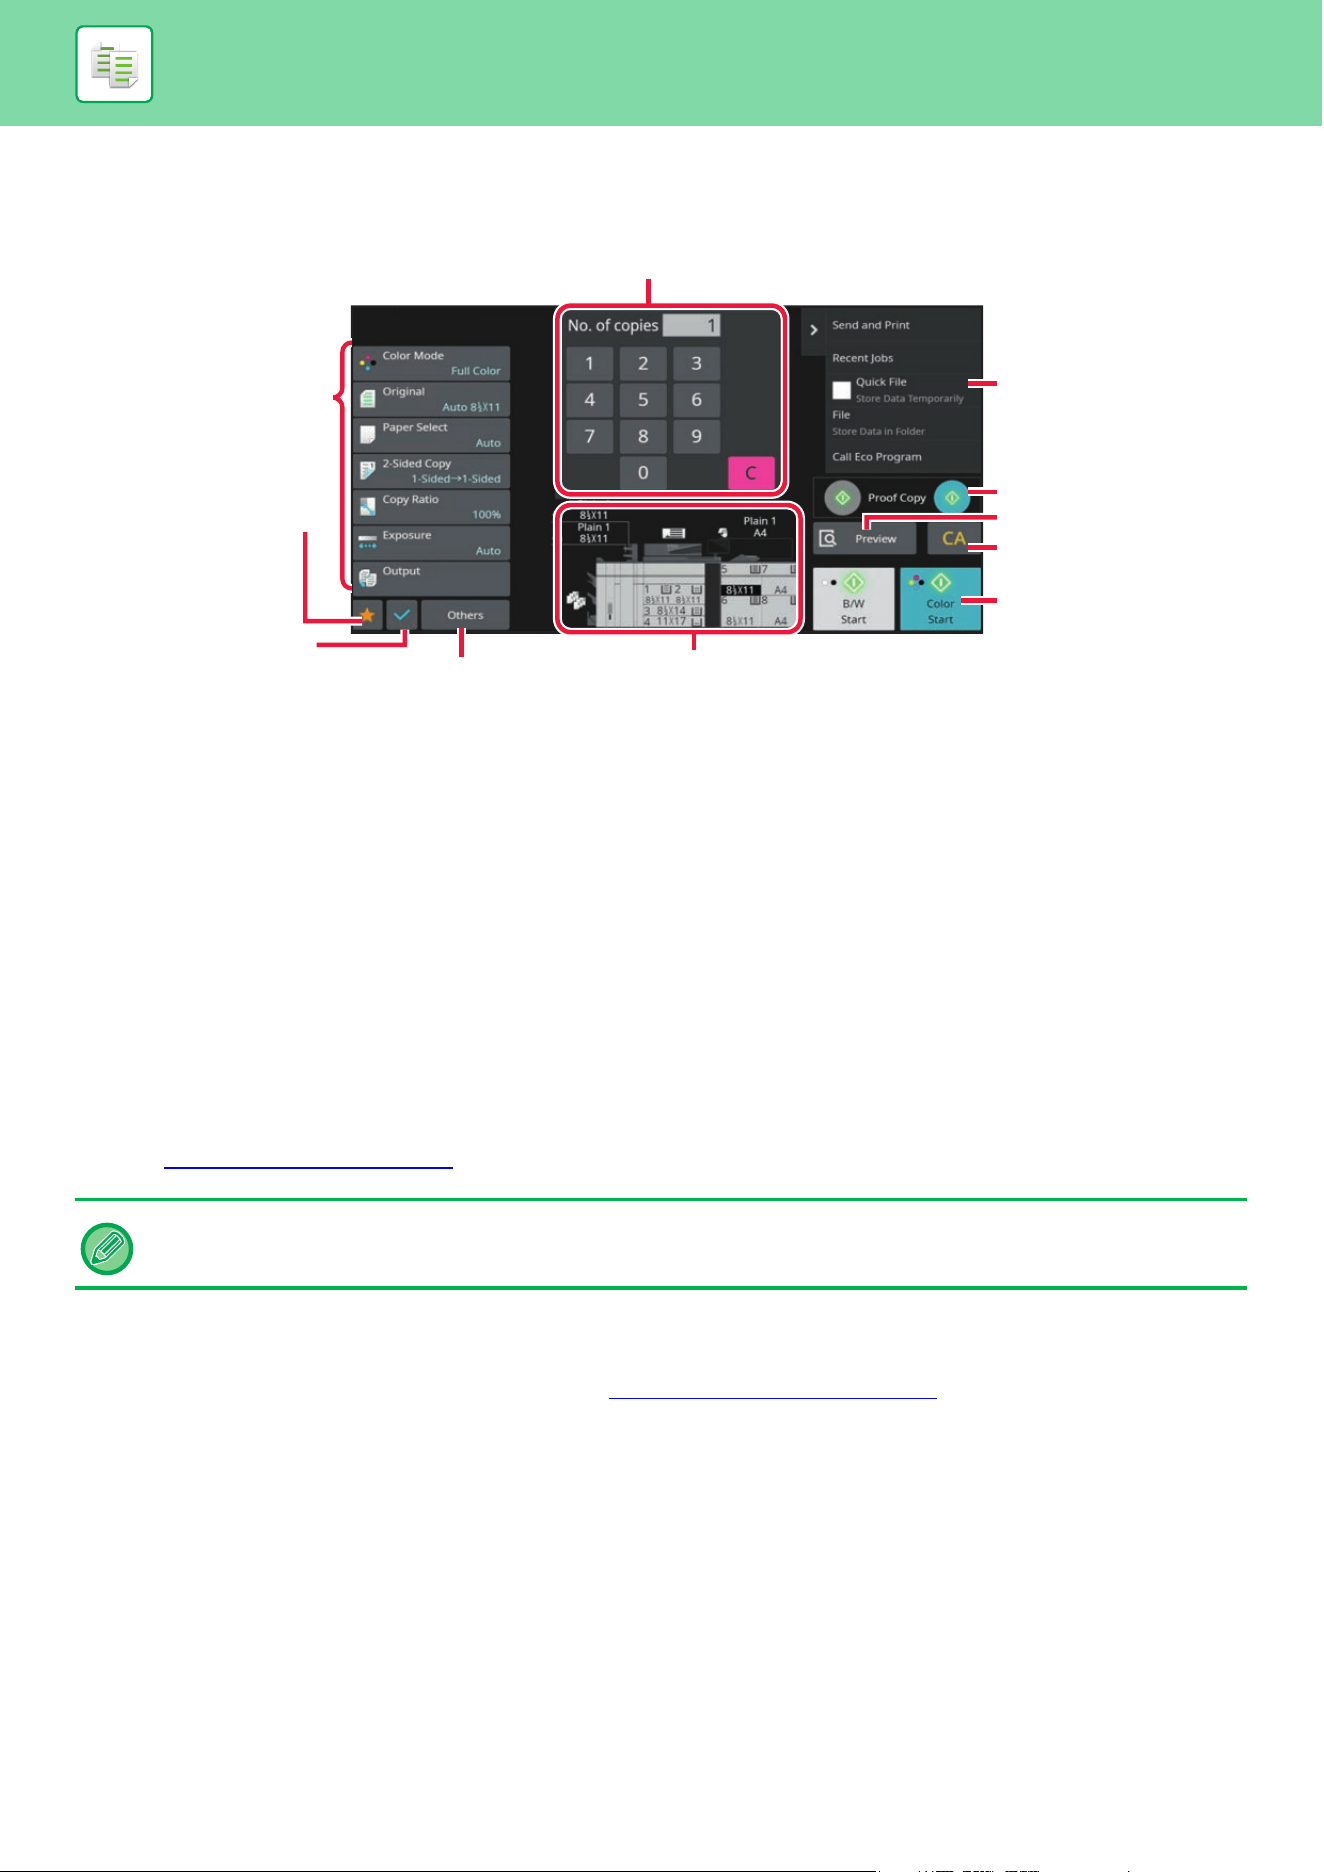
3-5
COPIER►BEFORE USING THE MACHINE AS A COPIER
NORMAL MODE
Normal mode lets you select any function setting that can be used for copying.
(1) Setting keys used for copying.
(2) Your favorite setting items will be displayed. Register
frequently used [Other] and programs. Favorites can
be registered when you register a program.
(3) Check the current settings.
(4) Display keys other than the Setting keys indicated
above.
(5) Indicates the presence or absence of an original and
the size of paper loaded in each tray. Tap to open the
paper select screen.
(6) Starts black and white or color copying.
(7) Reset all settings.
(8) Scans the original and shows a preview image.
► PREVIEW SCREEN
(page 2-11)
(9) Used to make a proof copy.
(10) Displays the functions that can be utilized in copy
mode.
(11) Enter the number of copies.
SELECTING COPY MODE
Change the copy mode to other mode as explained in CHANGING MODES (page 2-10).
(11)
(5)
(4)
(3)
(2)
(1)
(6)
(7)
(8)
(10)
(9)
The displayed contents of the above screen will vary depending on the devices installed.
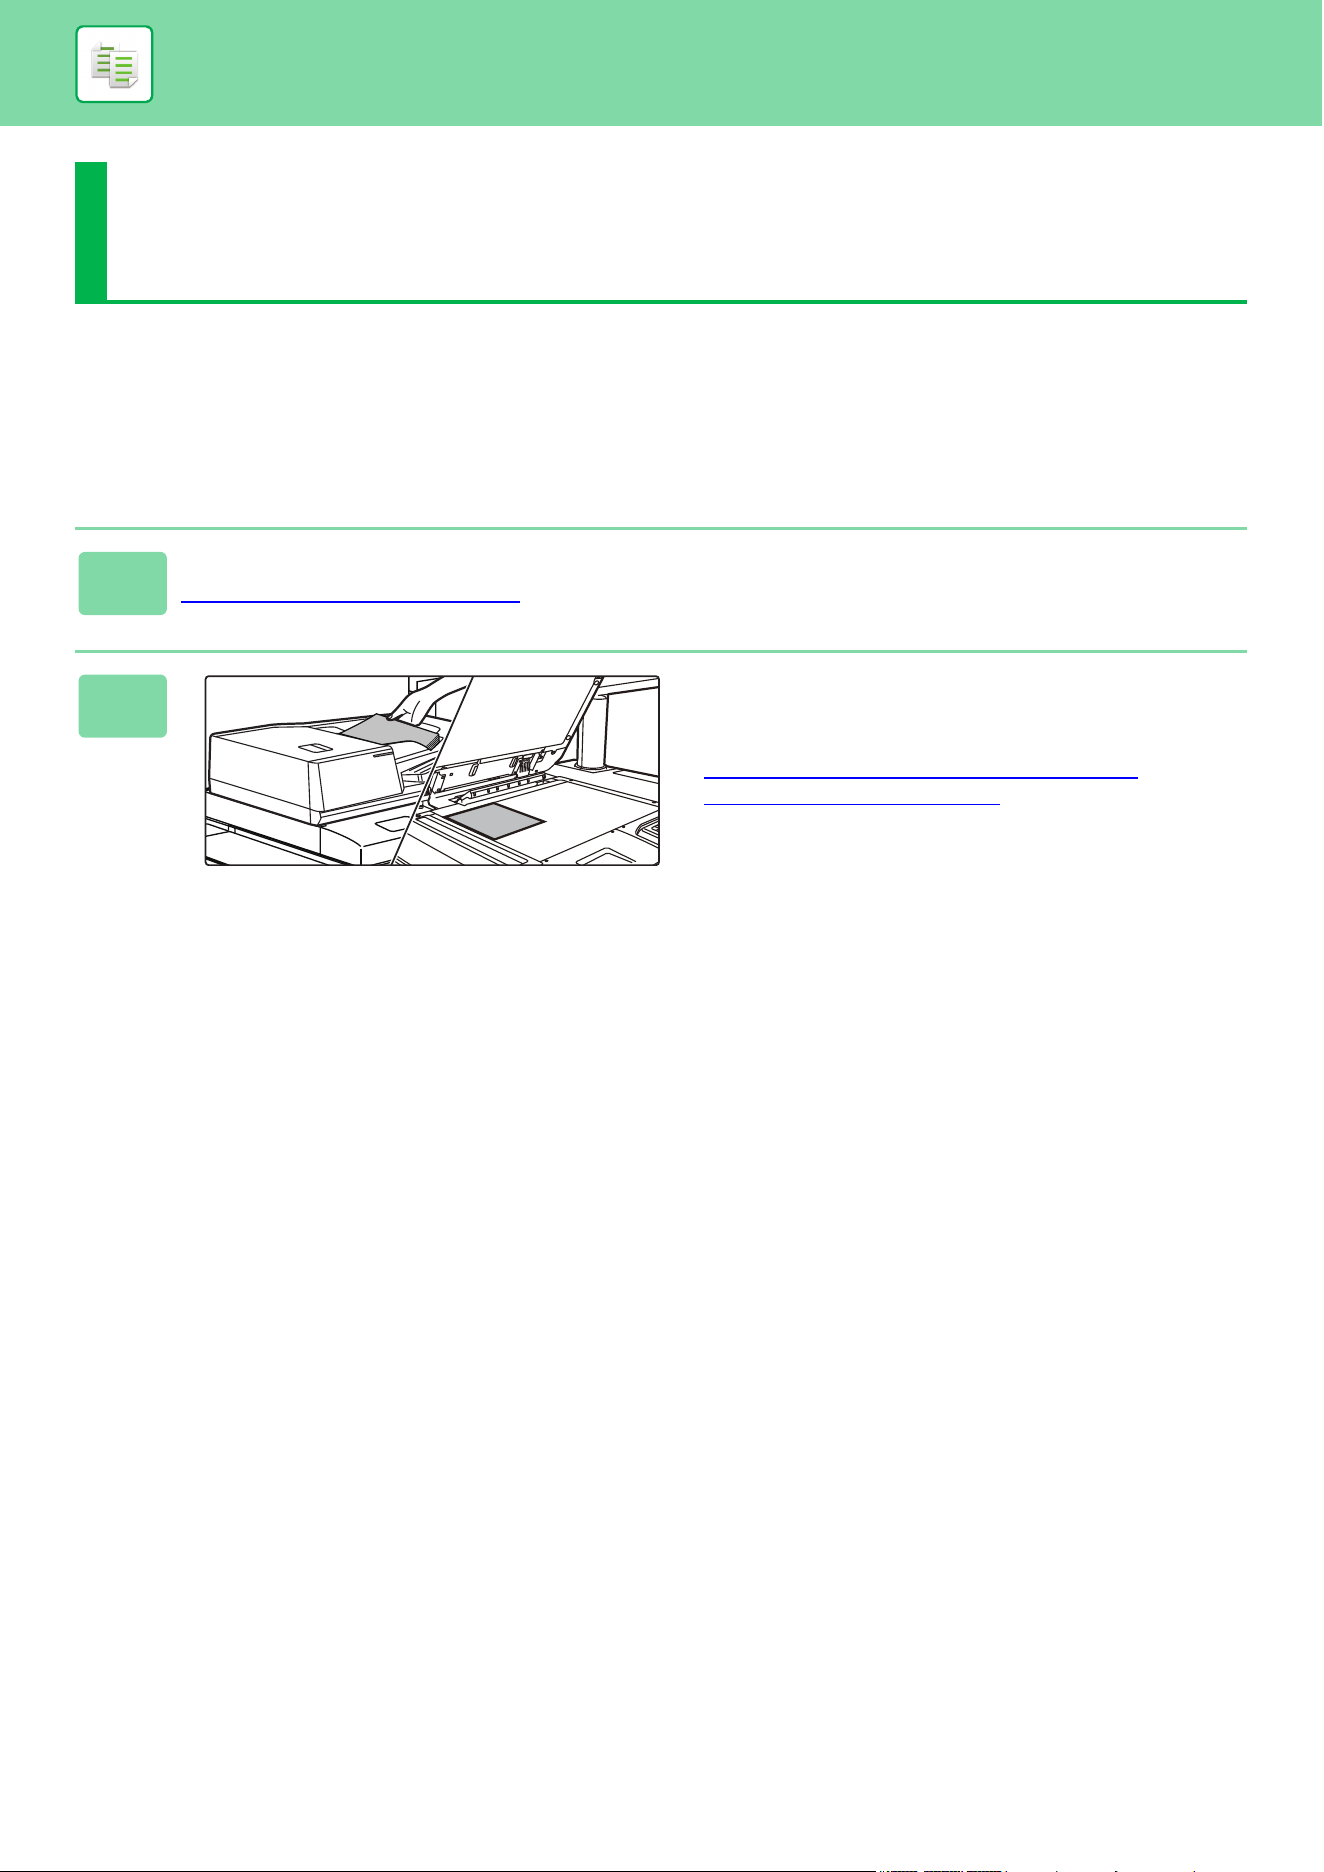
3-6
COPIER►BASIC PROCEDURE FOR MAKING COPIES
COPYING
This section explains the basic procedure for copying. Select settings in the order shown below to ensure that the copy
operation takes place smoothly.
For detailed procedures for selecting the settings, see the explanation of each setting in this chapter.
BASIC PROCEDURE FOR MAKING
COPIES
1
Switch to copy mode.
SELECTING COPY MODE (page 3-5)
2
Place the original.
Place the original in the document feeder tray of the
automatic document feeder, or on the document glass.
AUTOMATIC DOCUMENT FEEDER (page 1-47)
DOCUMENT GLASS (page 1-51)
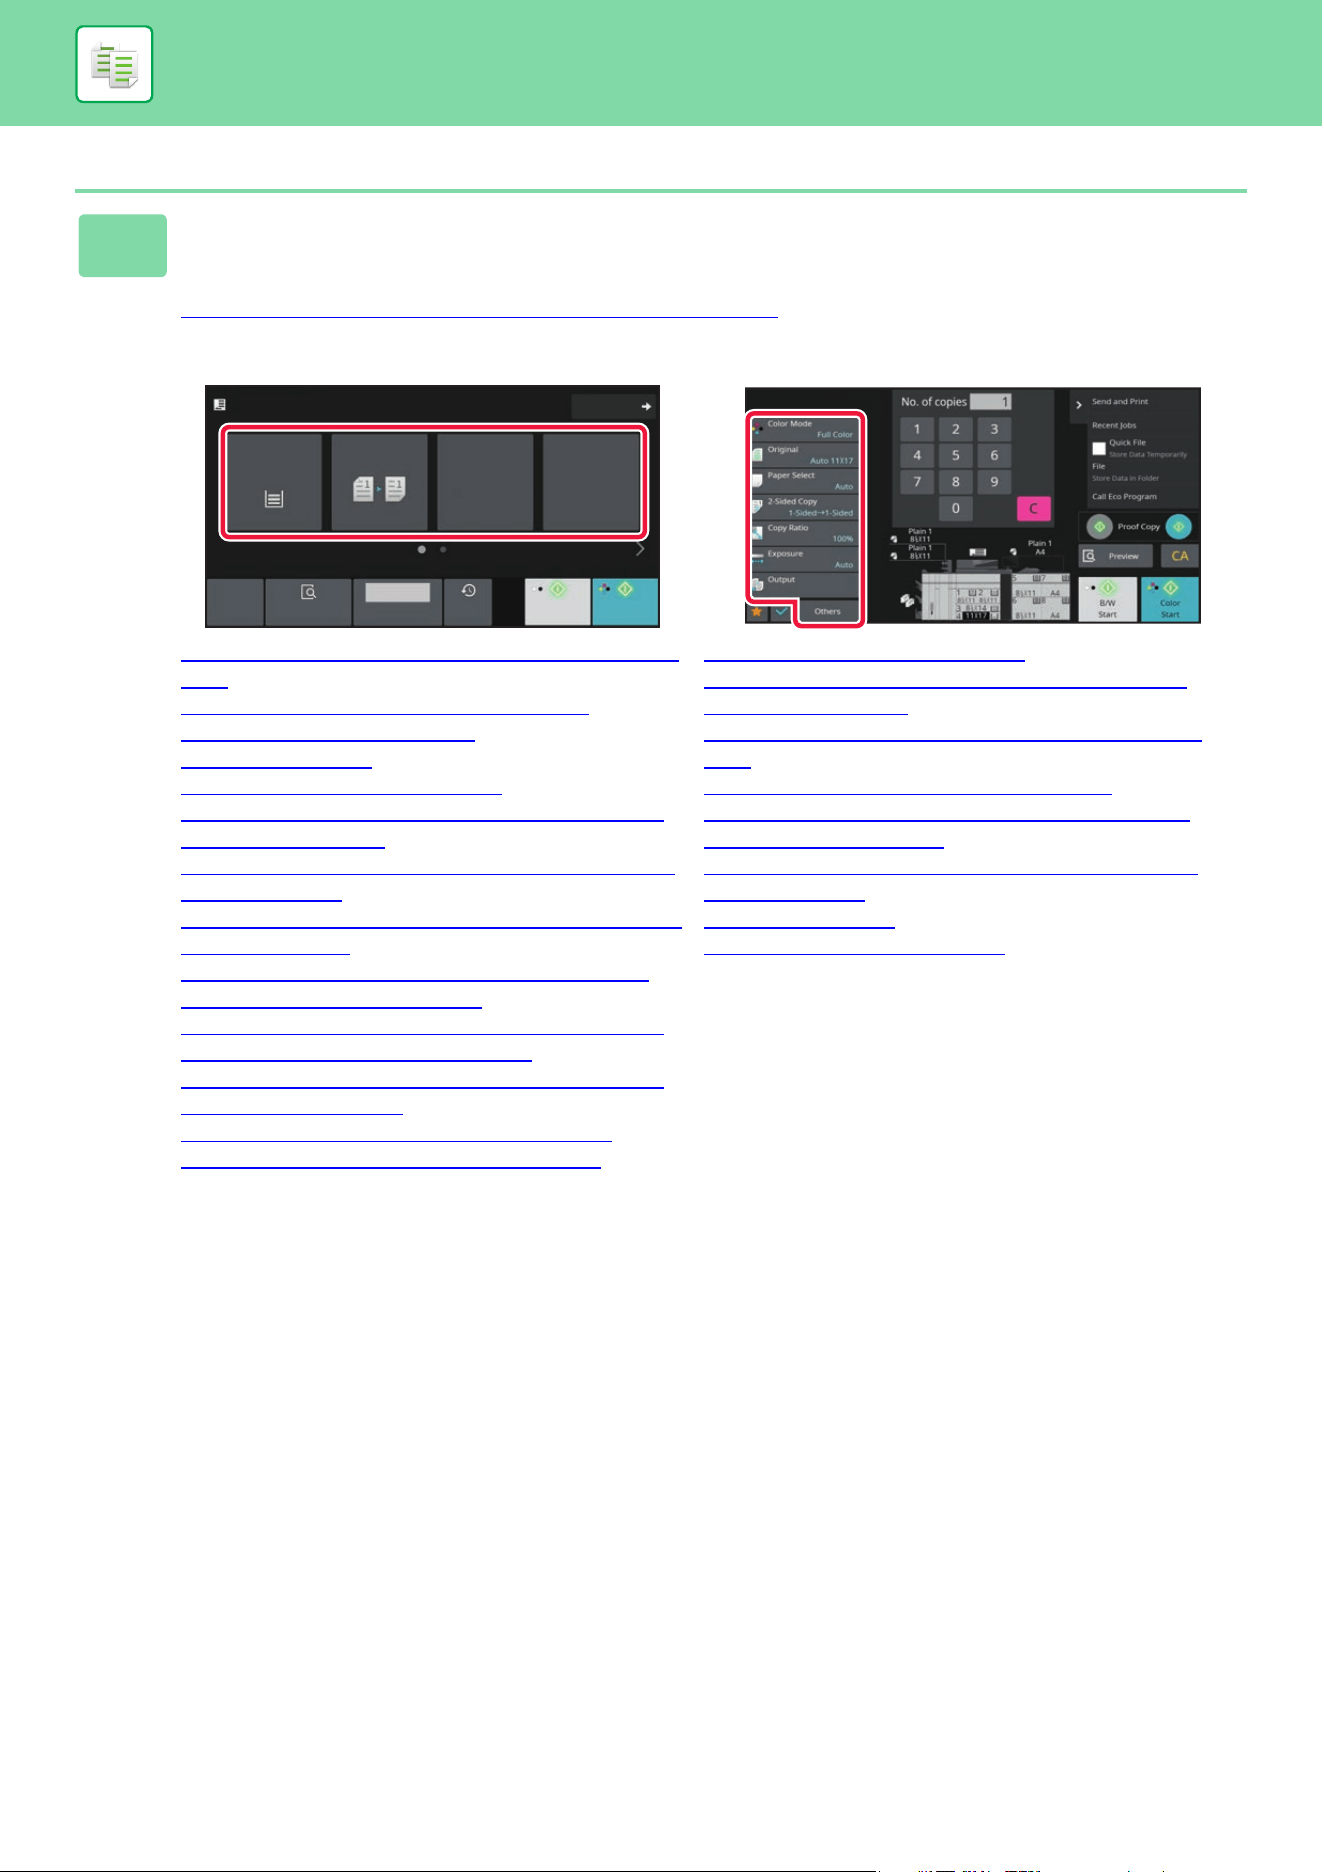
3-7
COPIER►BASIC PROCEDURE FOR MAKING COPIES
3
Select functions.
Specify the original scan size, exposure, resolution, etc.
Tap the [Original] key and specify the orientation of the original to have the orientation be correctly recognized.
SPECIFYING THE ORIENTATION OF THE ORIGINAL
(page 3-29)
In Easy mode
SELECTING THE PAPER TRAY FOR COPYING
(page
3-13)
AUTOMATIC 2-SIDED COPYING (page 3-14)
ENLARGE/REDUCE (page 3-22)
OUTPUT (page 3-37)
COPY COLOR MODES (page 3-17)
SELECTING THE ORIENTATION AND SIZE OF THE
ORIGINAL (page 3-29)
CHANGING THE EXPOSURE AND ORIGINAL IMAGE
TYPE (page 3-20)
COPYING MULTIPLE ORIGINALS AS A SINGLE PAGE
(N-Up) (page 3-57)
COPYING BOTH SIDES OF A CARD AS A SINGLE
PAGE (CARD SHOT) (page 3-61)
COLLECTIVELY SCANNING A LARGE NUMBER OF
ORIGINALS (JOB BUILD) (page 3-100)
SKIPPING BLANK PAGES IN AN ORIGINAL (BLANK
PAGE SKIP) (page 3-81)
COPYING EACH FACING PAGE OF A BOUND
DOCUMENT (DUAL PAGE COPY) (page 3-59)
In Normal mode
COPY COLOR MODES
(page 3-17)
SELECTING THE ORIENTATION AND SIZE OF THE
ORIGINAL (page 3-29)
SELECTING THE PAPER TRAY FOR COPYING (page
3-13)
AUTOMATIC 2-SIDED COPYING (page 3-14)
ENLARGING/REDUCING THE LENGTH AND WIDTH
SEPARATELY (page 3-26)
CHANGING THE EXPOSURE AND ORIGINAL IMAGE
TYPE (page 3-20)
OUTPUT (page 3-37)
OTHER FUNCTIONS (page 3-71)
Original
8½x11
Detail
Staple / Punch
Copy Ratio
2-Sided Copy
Paper
Select
8½x11
Tray 1
1 → 1
100%
Off
Preview
B/W
Start
Color
Start
Copies
Recent
Jobs
1
CA
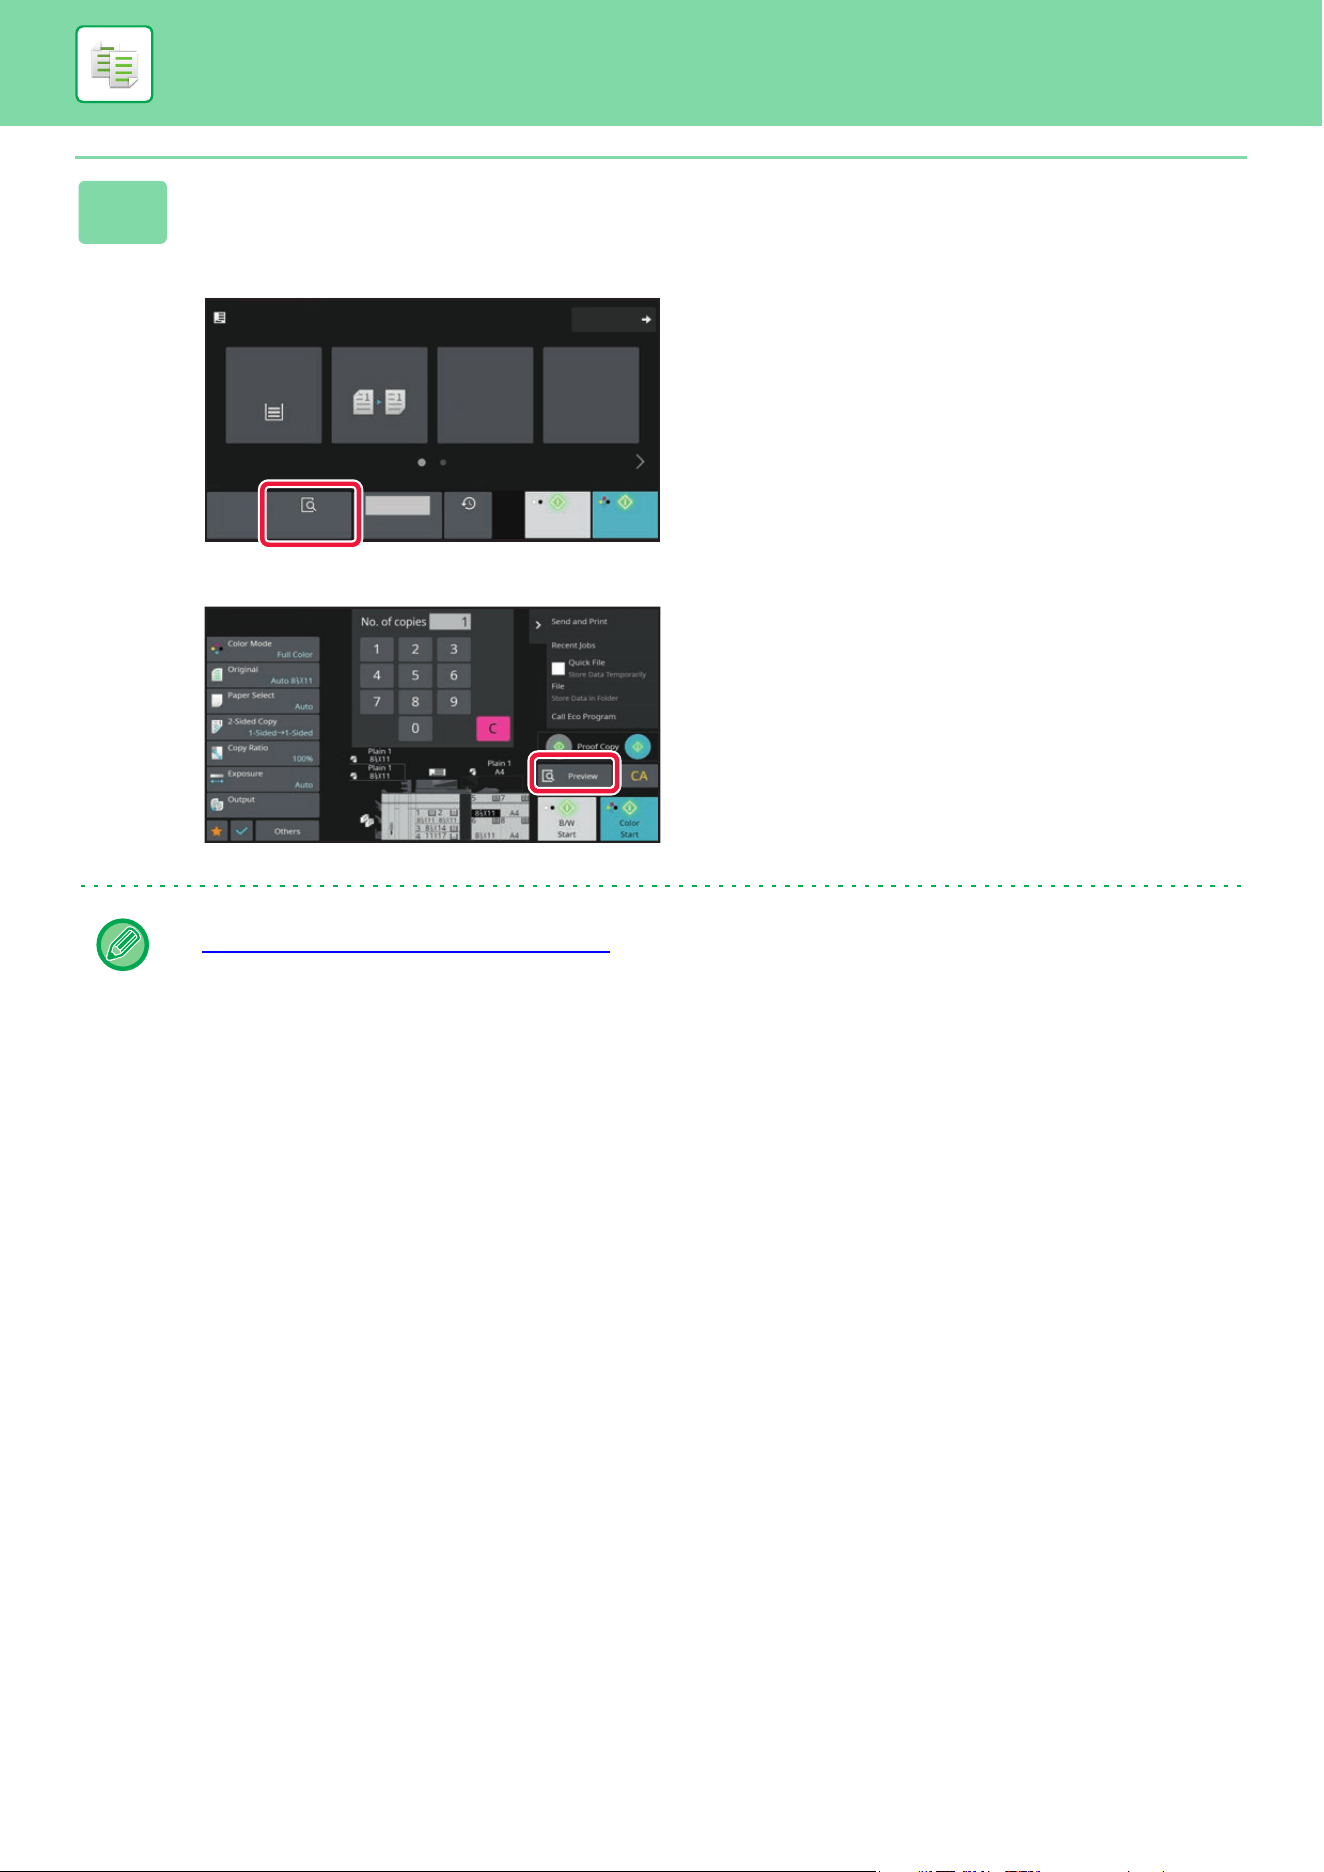
3-8
COPIER►BASIC PROCEDURE FOR MAKING COPIES
4
Scan the original.
Tap the [Preview] key to scan the original.
In Easy mode
In Normal mode
5
• To make 2-sided copies, configure the 2-sided copy settings before scanning the original.
AUTOMATIC 2-SIDED COPYING
(page 3-14)
• When not checking the preview image, tap the [Color Start] or [B/W Start] key to start copying.
CA
Original
8½x11
Detail
Staple / Punch
Copy Ratio
2-Sided Copy
Paper
Select
8½x11
Tray 1
1 → 1
100%
Off
Preview
B/W
Start
Color
Start
Copies
Recent
Jobs
1
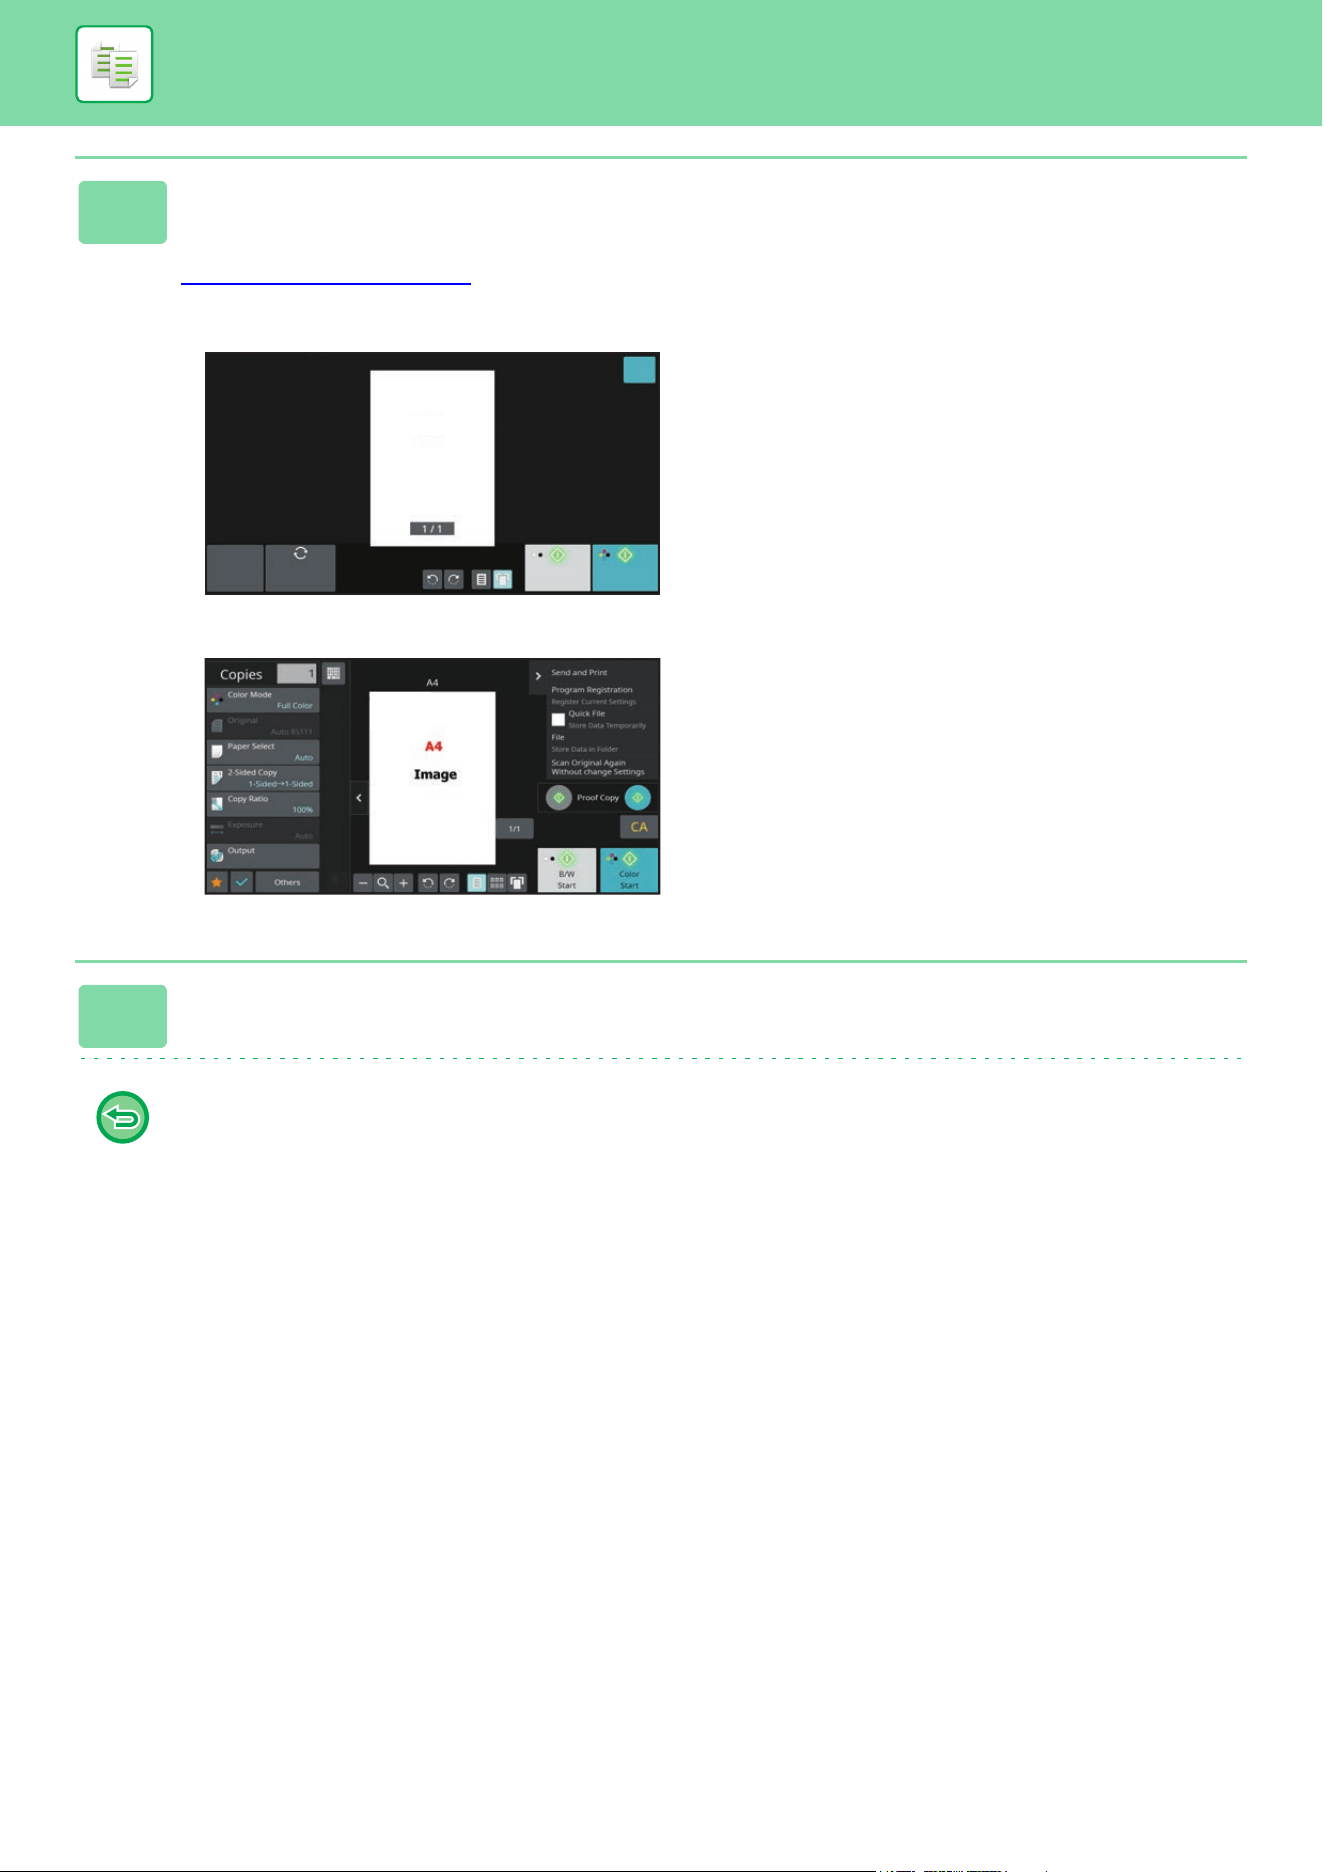
3-9
COPIER►BASIC PROCEDURE FOR MAKING COPIES
6
Check the preview image.
Display the preview image of the scanned original.
In the preview screen, check the settings such as color mode and 2-sided copy.
PREVIEW SCREEN (page 2-11)
In Easy mode
In Normal mode
7
8
Tap the [Color Start] or [B/W Start] key to start copying.
When making only one set of copies, you do not need to specify the number of copies.
• To cancel all settings, tap the [CA] key.
When the [CA] key is tapped, all settings selected to that point are cleared and you will return to the base screen.
• To cancel copying, tap the [Cancel Copy] key.
Preview
B/W
Start
Color
Start
Scan
Again
OK
A4
1 / 1
CA
8½x11
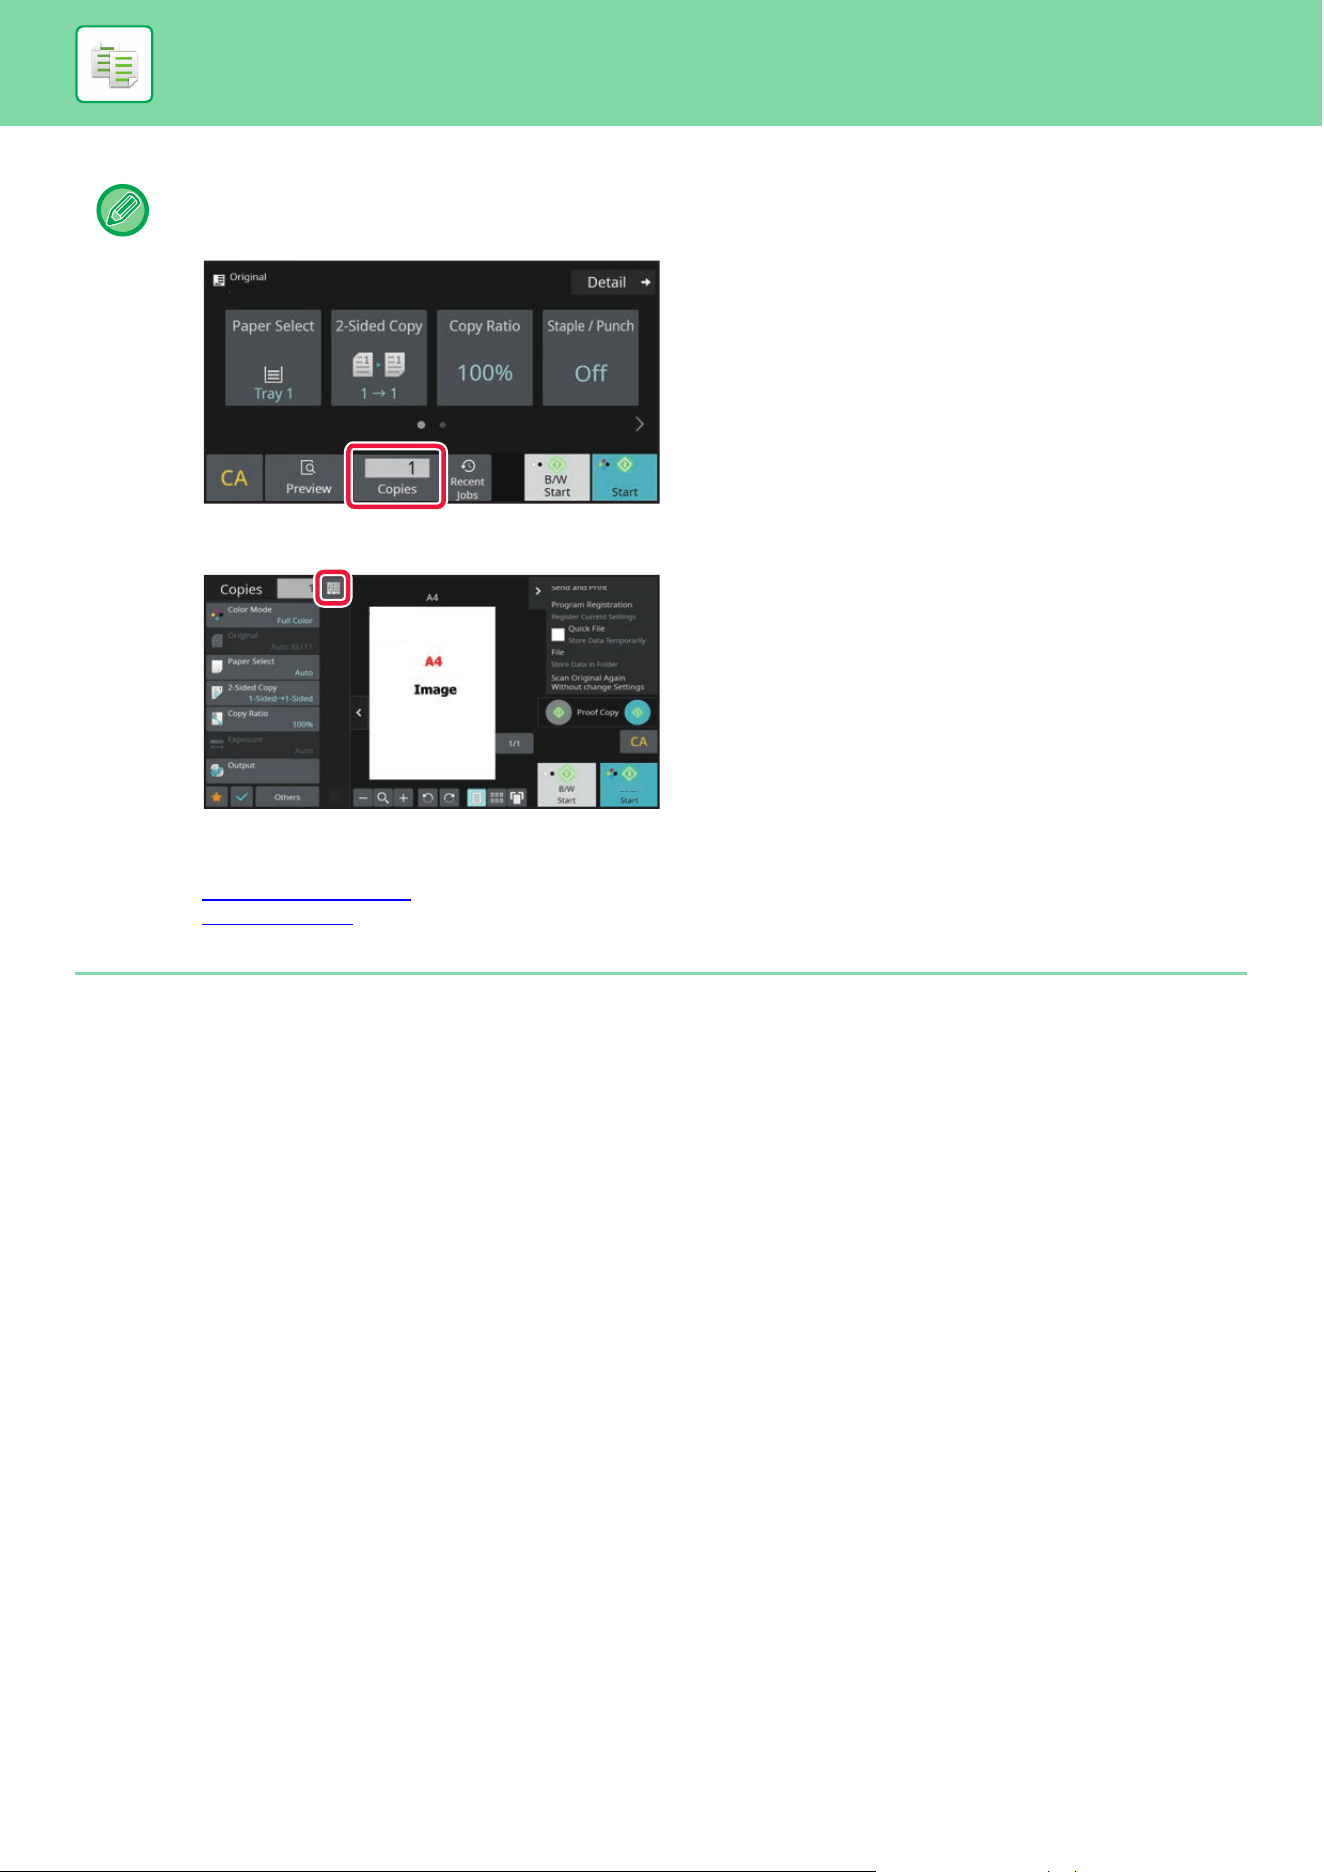
3-10
COPIER►BASIC PROCEDURE FOR MAKING COPIES
DEFAULT SETTINGS FOR COPYING
Set in “Default Settings” of “Copy Settings” in the System Settings.
• To make two or more sets of copies:
Tap the copies display key to specify the number of copies.
In Easy mode
In Normal mode
• In normal mode, you can tap [File] or [Quick File] on the action panel before starting the copy job to save the scanned
original as a file.
QUICK FILE
(page 6-9)
FILE (page 6-10)
8½x11
Color
8½x11
Color
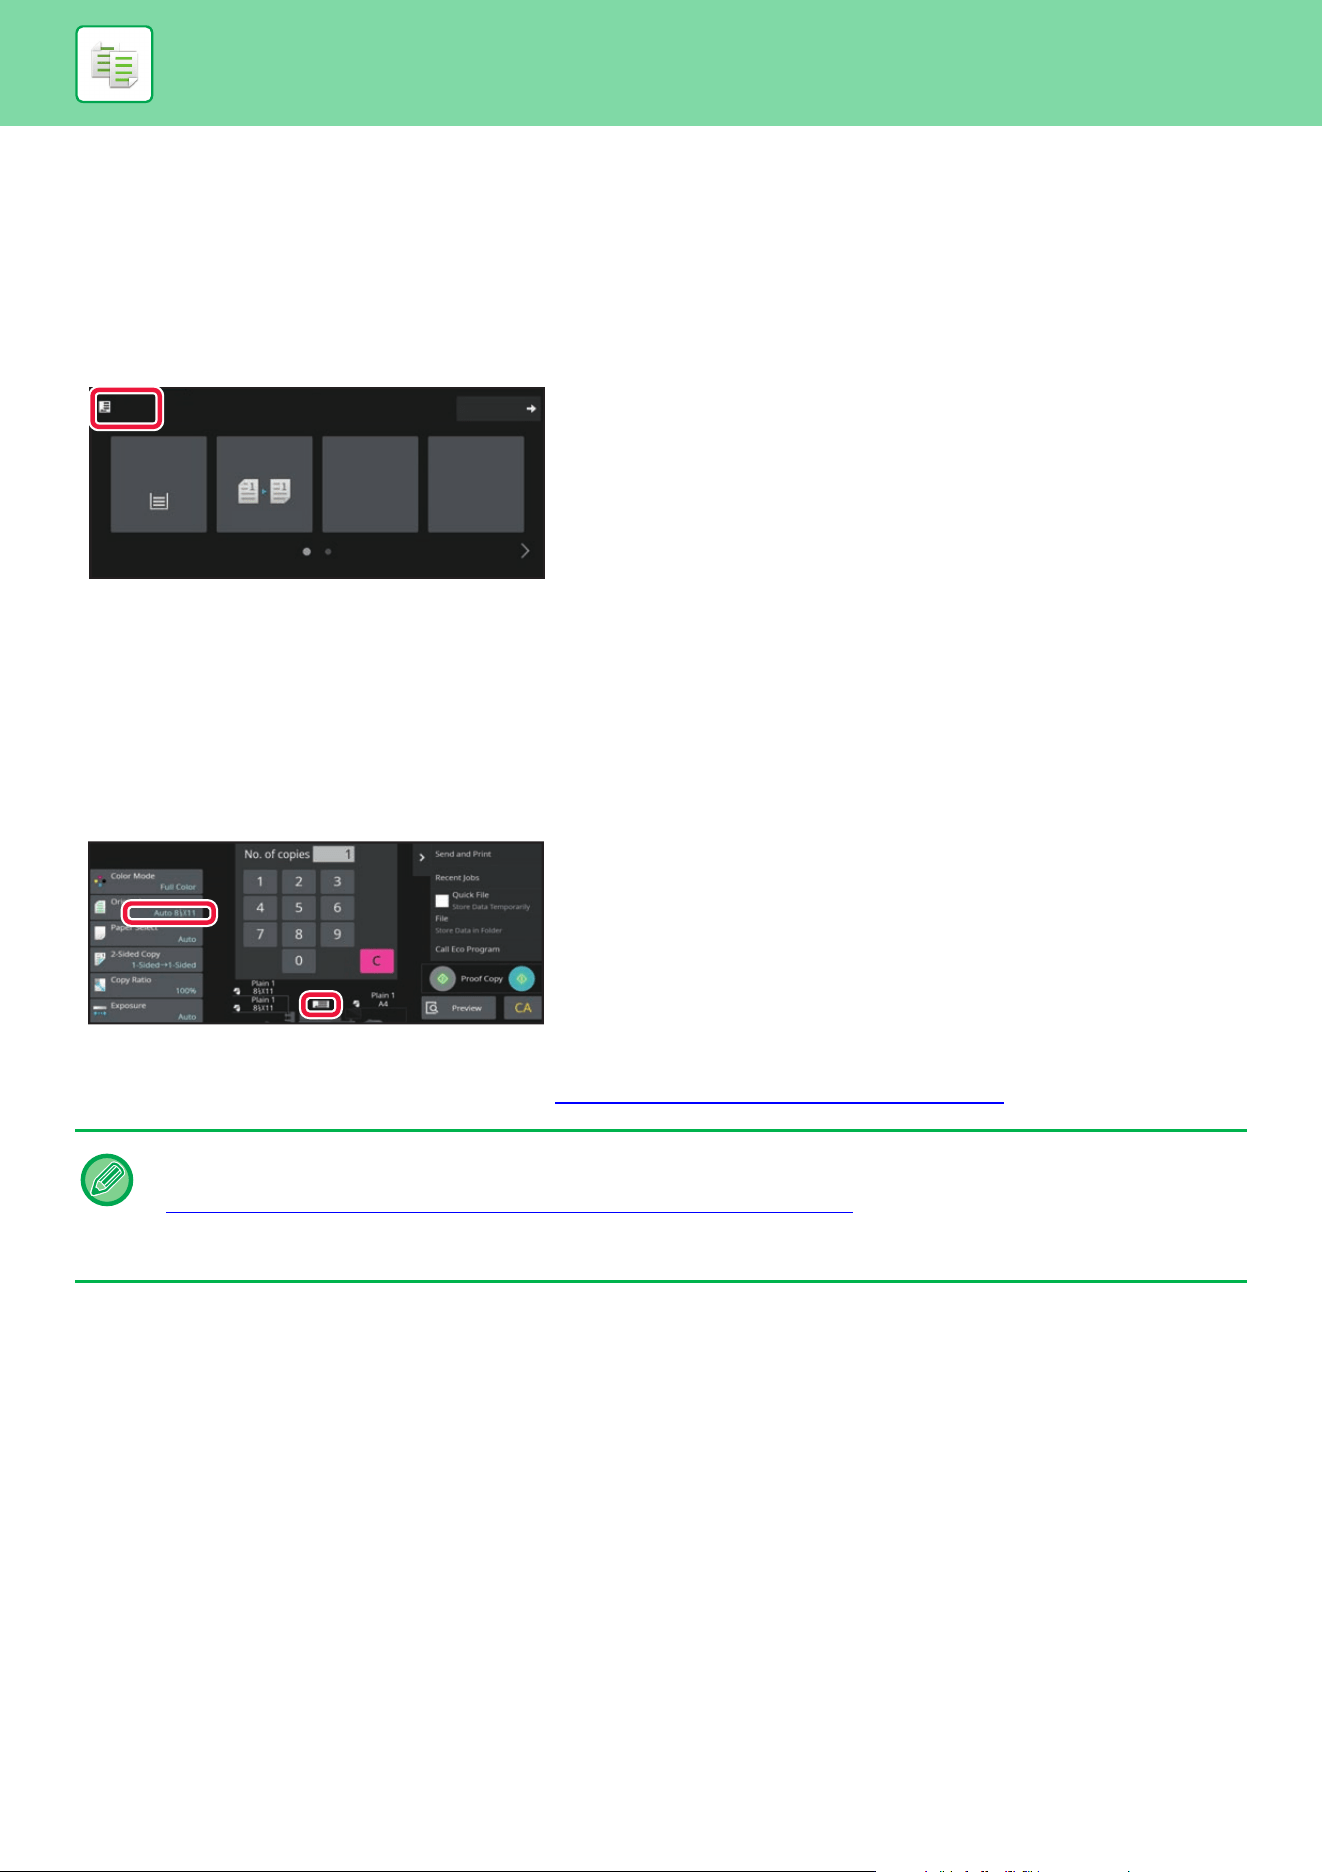
3-11
COPIER►BASIC PROCEDURE FOR MAKING COPIES
CHECKING THE ORIGINAL SIZE
EASY MODE
The size of the placed original is displayed in the upper left corner of the screen.
When you place the original in the automatic document feeder, the original icon appears next to the original size.
NORMAL MODE
Check the size of the placed original on the display of the [Original] key.
If the original size is set to [Auto], the automatically detected size (standard size) is displayed. If the original size is
specified manually, the specified original size is displayed.
When you place the original in the automatic document feeder, the original icon appears above the automatic document
feeder.
Standard sizes
Standard sizes are sizes that the machine can automatically detect.
For standard sizes that can be detected, refer to DETECTABLE ORIGINAL SIZES (page 1-45)
.
• Even when [Original] is set to [Auto], some original sizes may be detected as other one that is near the standard size.
In this case, manually set the original size.
SELECTING THE ORIENTATION AND SIZE OF THE ORIGINAL
(page 3-29)
• When placing a non-standard size original on the document glass, you can make it easier for the size to be detected by
placing a blank sheet of 8-1/2" x 11" (A4), 5-1/2" x 8-1/2" (B5), or other standard size of paper on top of the original.
Original
8½x11
Detail
Staple / Punch
Copy Ratio
2-Sided Copy
Paper
Select
8½x11
Tray 1
1 → 1
100%
Off
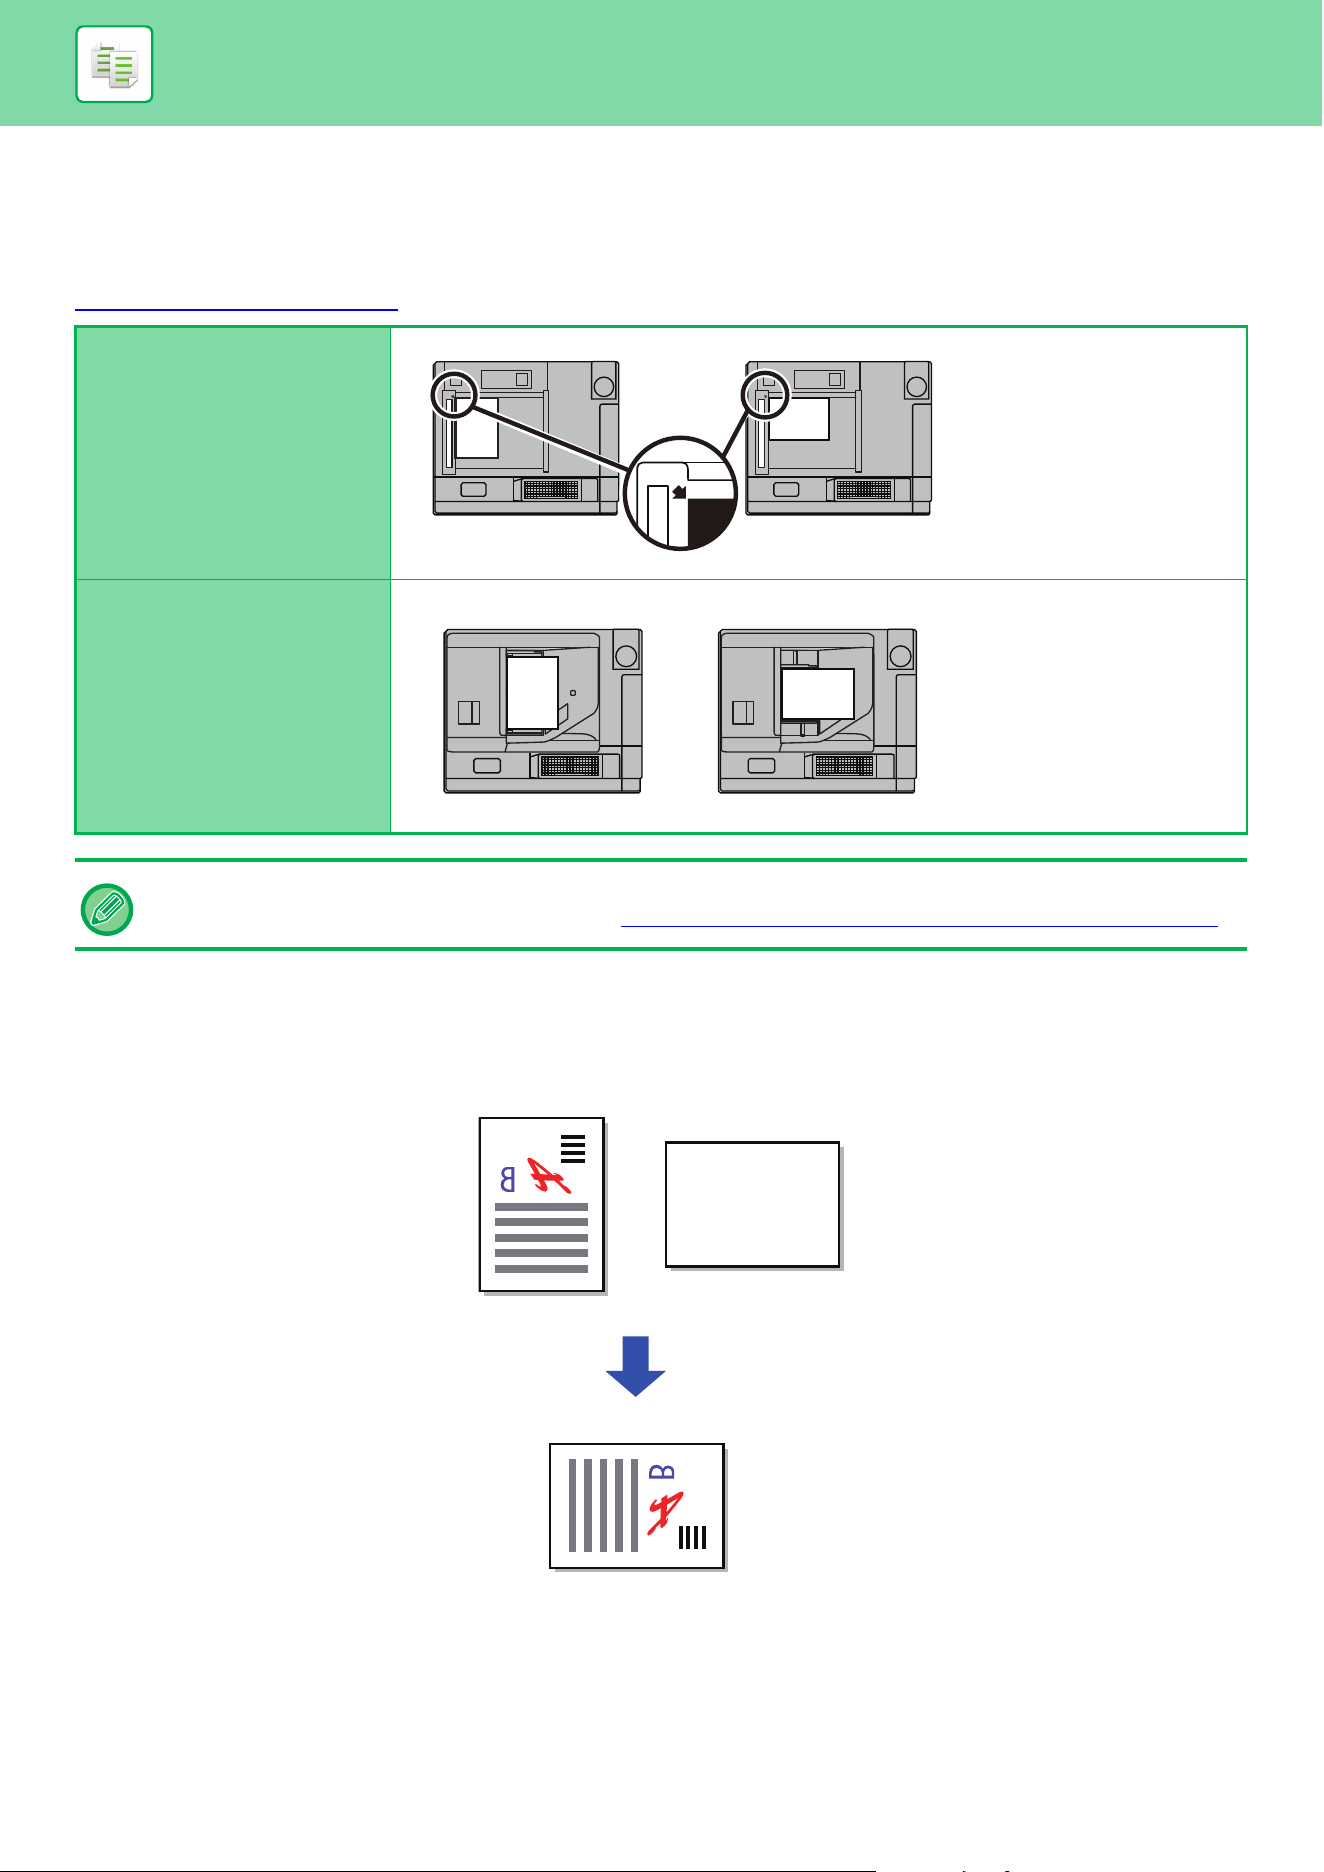
3-12
COPIER►BASIC PROCEDURE FOR MAKING COPIES
Orientation of placed original
Place the original as shown below.
If you place the original in an incorrect orientation, it may result in punching at an unexpected position or stapling.
On "Preview Screen", view the image orientation or preview image.
PREVIEW SCREEN (page 2-11)
Automatic copy image rotation (Rotation Copy)
If the orientation is different between the original and paper, the original image will be automatically rotated 90 degrees
to match the paper.
Document glass
Document feeder tray
Set the orientation of the image to ensure that the orientation of the placed original is correctly recognized.
For information on the orientation of the original, see "SPECIFYING THE ORIENTATION OF THE ORIGINAL
(page 3-29)".
abc
abc
abc
abc
Originals
Paper
Output
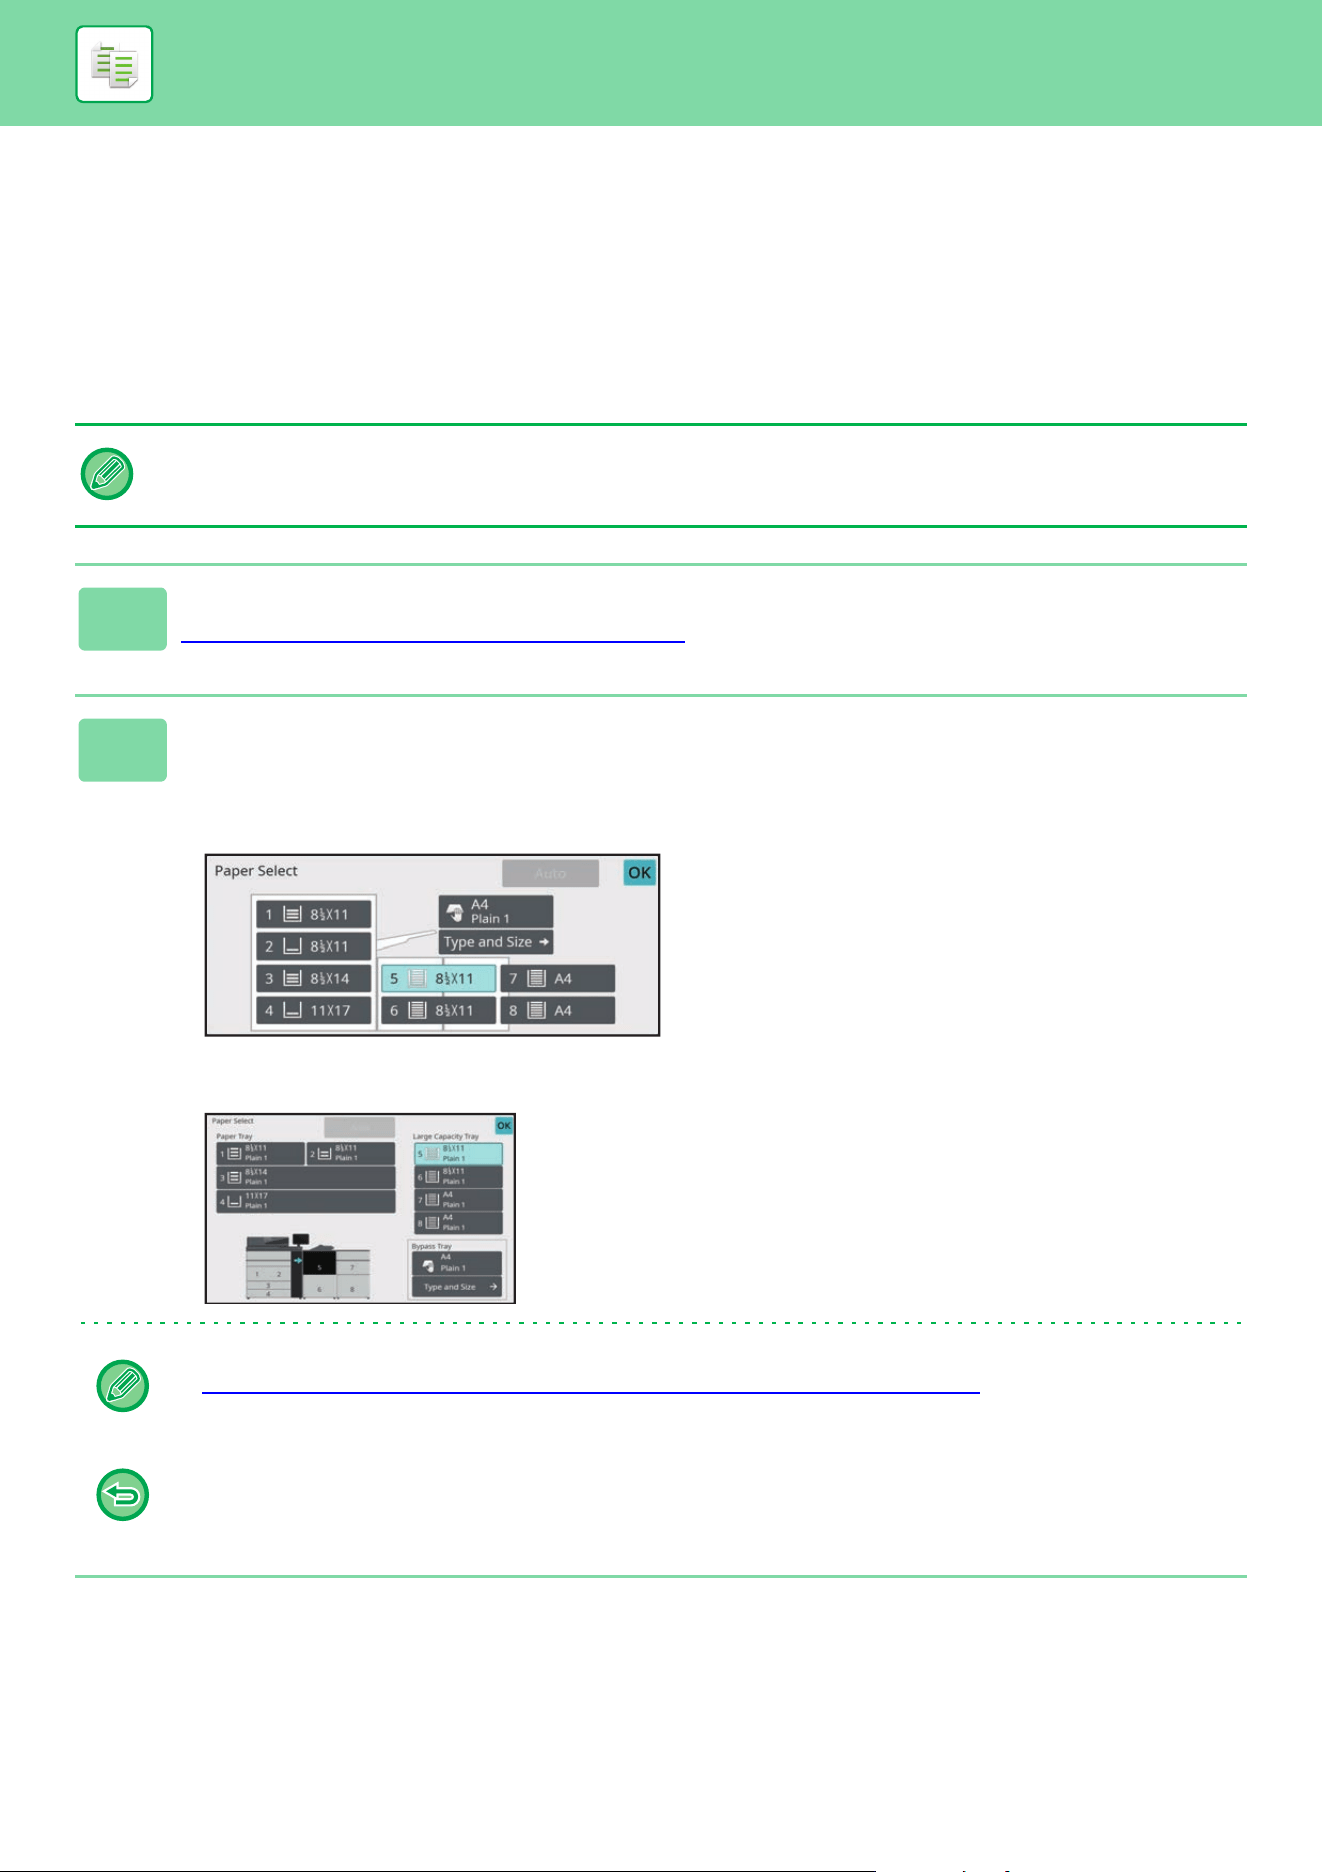
3-13
COPIER►BASIC PROCEDURE FOR MAKING COPIES
SELECTING THE PAPER TRAY FOR
COPYING
The machine is set to automatically select a tray that has the same size of paper as the size of the placed original (Auto
Paper Select).
If the original size cannot be detected correctly because it is a non-standard size or when you want to change the paper
size for copying, you can select the paper tray manually.
• If the selected tray runs out of paper during a copy job and there is another tray that has the same size and type of paper,
that tray will be automatically selected and the copy job will continue.
• If a suitable size of copy paper is not loaded, copying may stop.
1
Tap the [Paper Select] key.
BASIC PROCEDURE FOR MAKING COPIES (page 3-6)
2
Tap the required tray key.
After the settings are completed, tap [OK] key.
In Easy mode
In Normal mode
3
• When the bypass tray is selected, specify the paper type and size based on the paper loaded into the bypass tray.
SPECIFYING A TYPE AND SIZE OF PAPER LOADED ON BYPASS TRAY
(page 3-36)
• In normal mode, you can also open the [Paper Select] screen by tapping the machine image on the base screen.
To automatically select the tray, tap the [Auto] key.
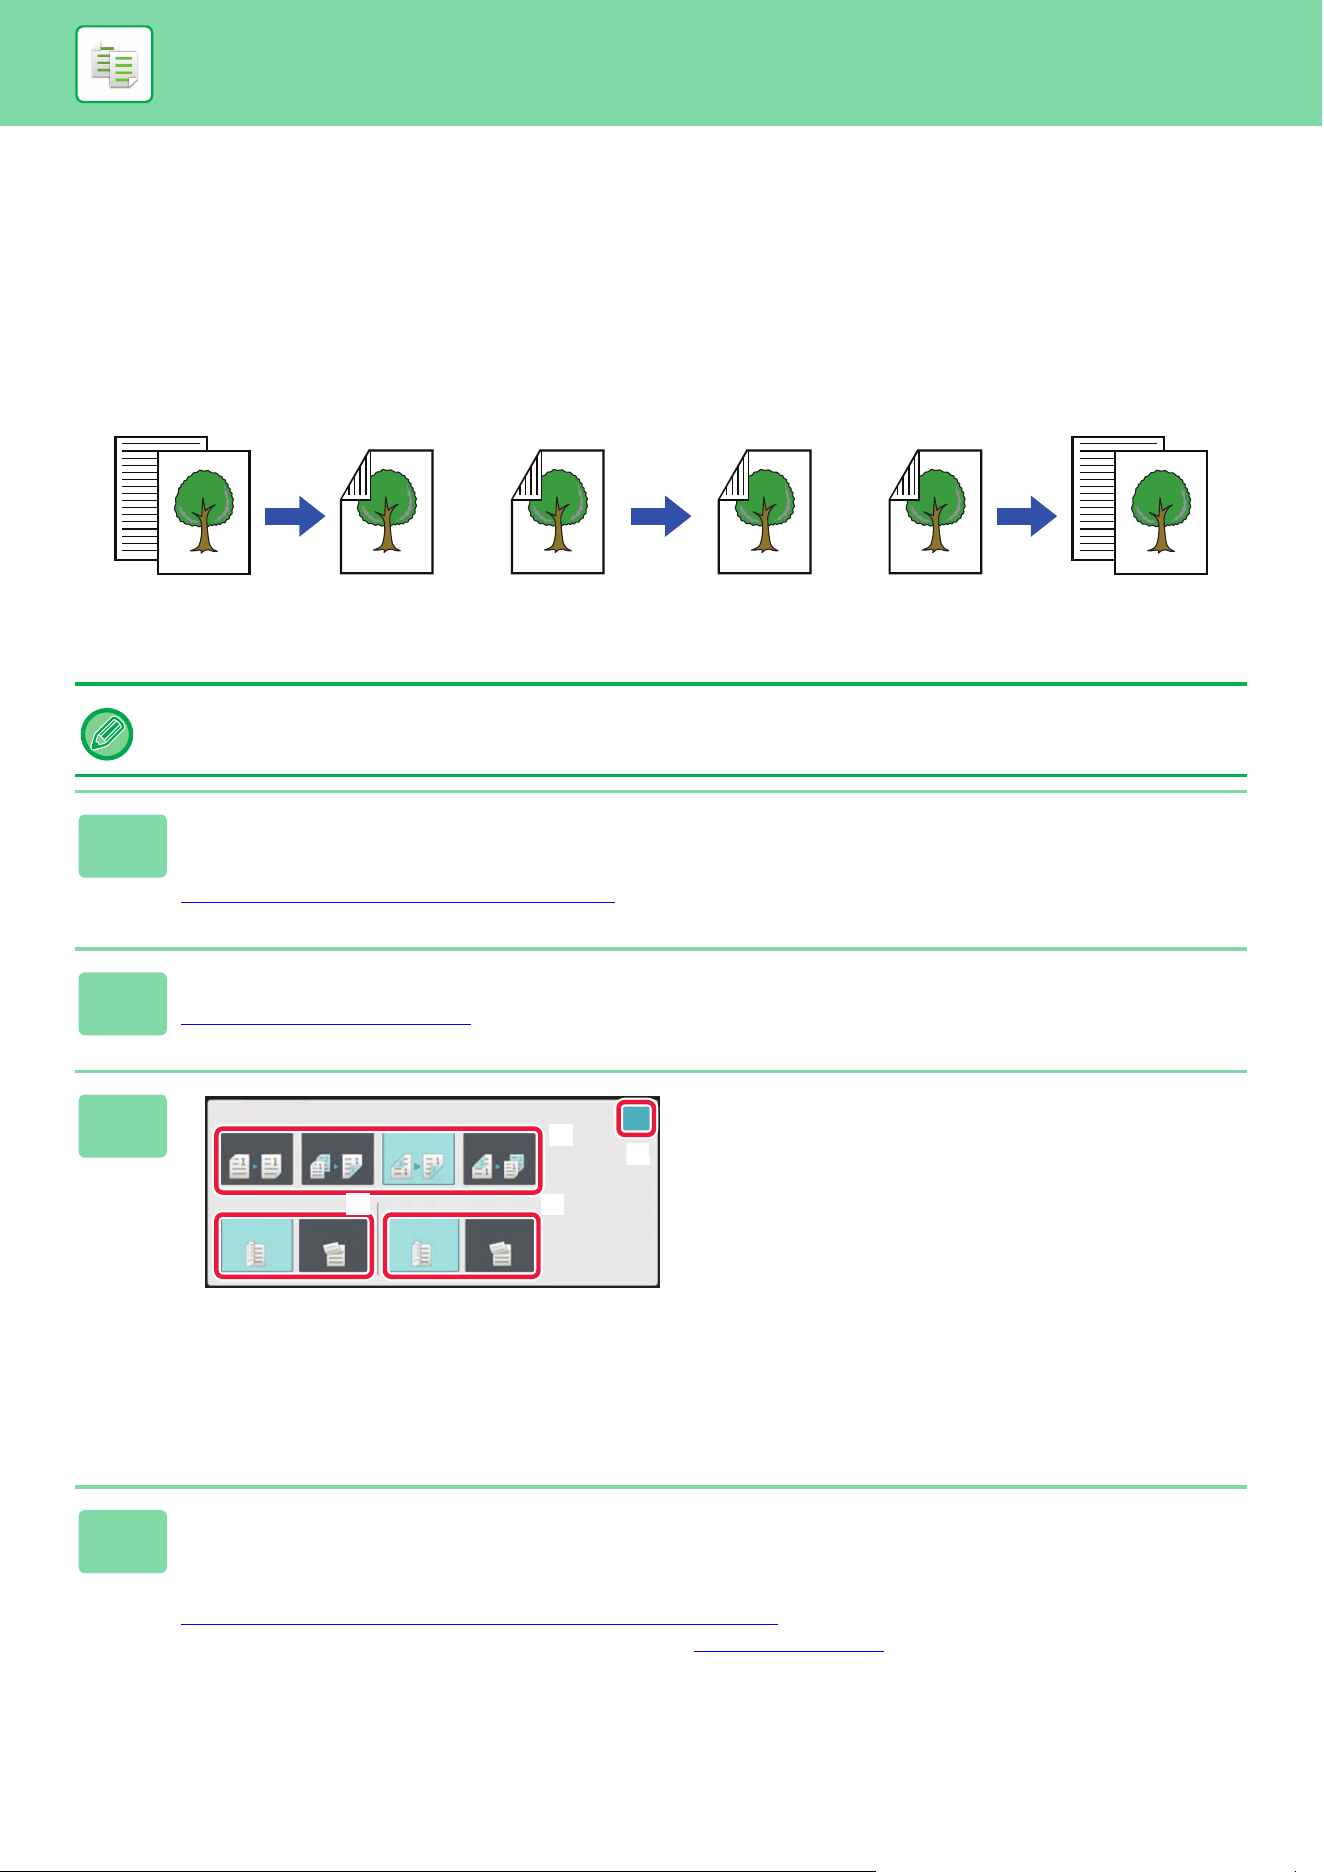
3-14
COPIER►BASIC PROCEDURE FOR MAKING COPIES
AUTOMATIC 2-SIDED COPYING
USING THE AUTOMATIC DOCUMENT FEEDER FOR
2-SIDED COPYING
• To make 2-sided copies, configure the 2-sided copy settings before scanning the original.
• Dual-side copy helps to save paper.
1
Place the original in the document feeder tray of the automatic document
feeder.
AUTOMATIC DOCUMENT FEEDER (page 1-47)
2
Tap the [2-Sided Copy] key.
PREVIEW SCREEN (page 2-11)
3
Select 2-sided copy mode.
(1) Select the 2-sided copy type.
(2) When the original is set to "2-Sided",
select "Book" or "Tablet" in "Original
Binding".
(3) When the output is set to "2-Sided",
select "Book" or "Tablet" in "Output
Binding".
(4) After the settings are completed, tap
[OK].
4
Check the paper (tray) and color mode you want to use for copying, and tap
the keys for any other settings you want to select.
Tap the [Original] key and specify the orientation of the original to have the orientation be correctly recognized.
SPECIFYING THE ORIENTATION OF THE ORIGINAL
(page 3-29)
For details on the functions that can be set, see step 3 in "COPYING (page 3-6)".
Originals
Automatic 2-sided copying of
1-side originals
Automatic 2-sided copying of
2-side originals
1-sided copying of 2-sided
originals
Copies Originals Copies Originals Copies
2-Sided Copy
Original Binding
Output Binding
Tablet
1 → 2
Tablet
Book
Book
2 → 1
2 → 2
1 → 1
OK
(1)
(2)
(3)
(4)
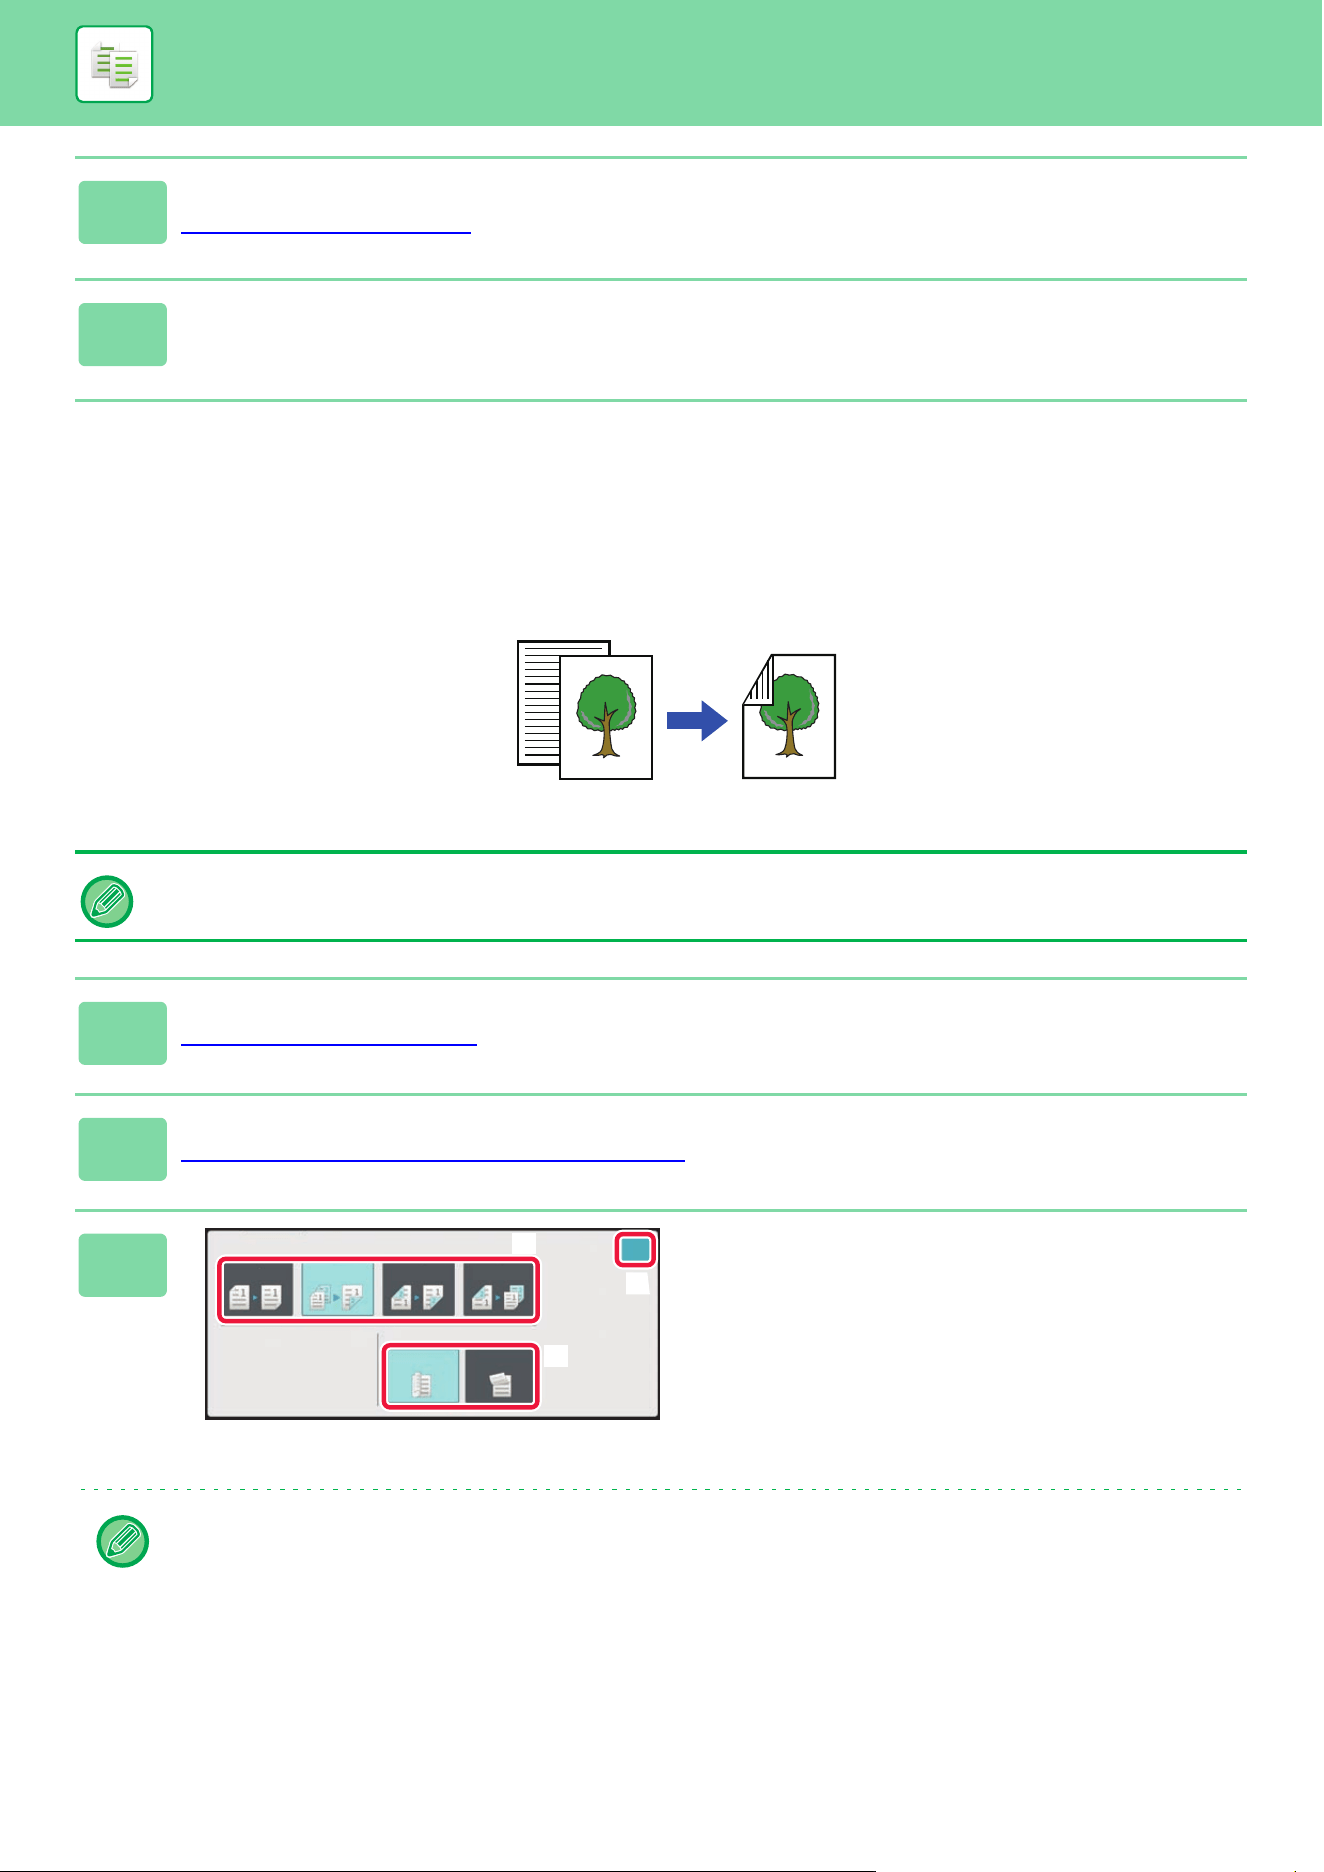
3-15
COPIER►BASIC PROCEDURE FOR MAKING COPIES
USING THE DOCUMENT GLASS FOR 2-SIDED
COPYING
5
Check the preview.
PREVIEW SCREEN (page 2-11)
6
Tap the [Color Start] or [B/W Start] key to start copying.
Dual-side copy helps to save paper.
1
Place the original on the document glass.
DOCUMENT GLASS (page 1-51)
2
Tap the [2-Sided Copy] key.
BASIC PROCEDURE FOR MAKING COPIES (page 3-6)
3
Select the 2-sided copy mode.
(1) Tap the [1 → 2] key.
(2) When the output is set to "2-Sided",
select "Book" or "Tablet" in "Output
Binding".
(3) After the settings are completed, tap
[OK].
•The [2 → 2] key and [1 → 2] key cannot be used when copying from the document glass.
• Depending on the size of the placed original, there may be cases where the same size of paper as the original is not
selected automatically. In this event, change the paper tray manually.
Originals
Automatic 2-sided copying of 1-sided originals
Copy
2-Sided Copy
Output Binding
1 → 2
Tablet
Book
2 → 1
2 → 2
1 → 1
OK
(3)
(1)
(2)

3-16
COPIER►BASIC PROCEDURE FOR MAKING COPIES
4
Check the paper (tray) and color mode you want to use for copying, and tap
the keys for any other settings you want to select.
Tap the [Original] key and specify the orientation of the original to have the orientation be correctly recognized.
SPECIFYING THE ORIENTATION OF THE ORIGINAL
(page 3-29)
For details on the functions that can be set, see step 3 in "COPYING (page 3-6)".
5
Tap the [Color Start] or [B/W Start] key.
6
Set the next original, and tap the [Color Start] or [B/W Start] key to scan the
original.
Tap the same key you tapped in step 5.
Repeat this step until all originals have been scanned.
7
Tap the [Read-End] key to start
copying.
Read-End
Place next original. Press [Start].
When finished, press [Read-End].
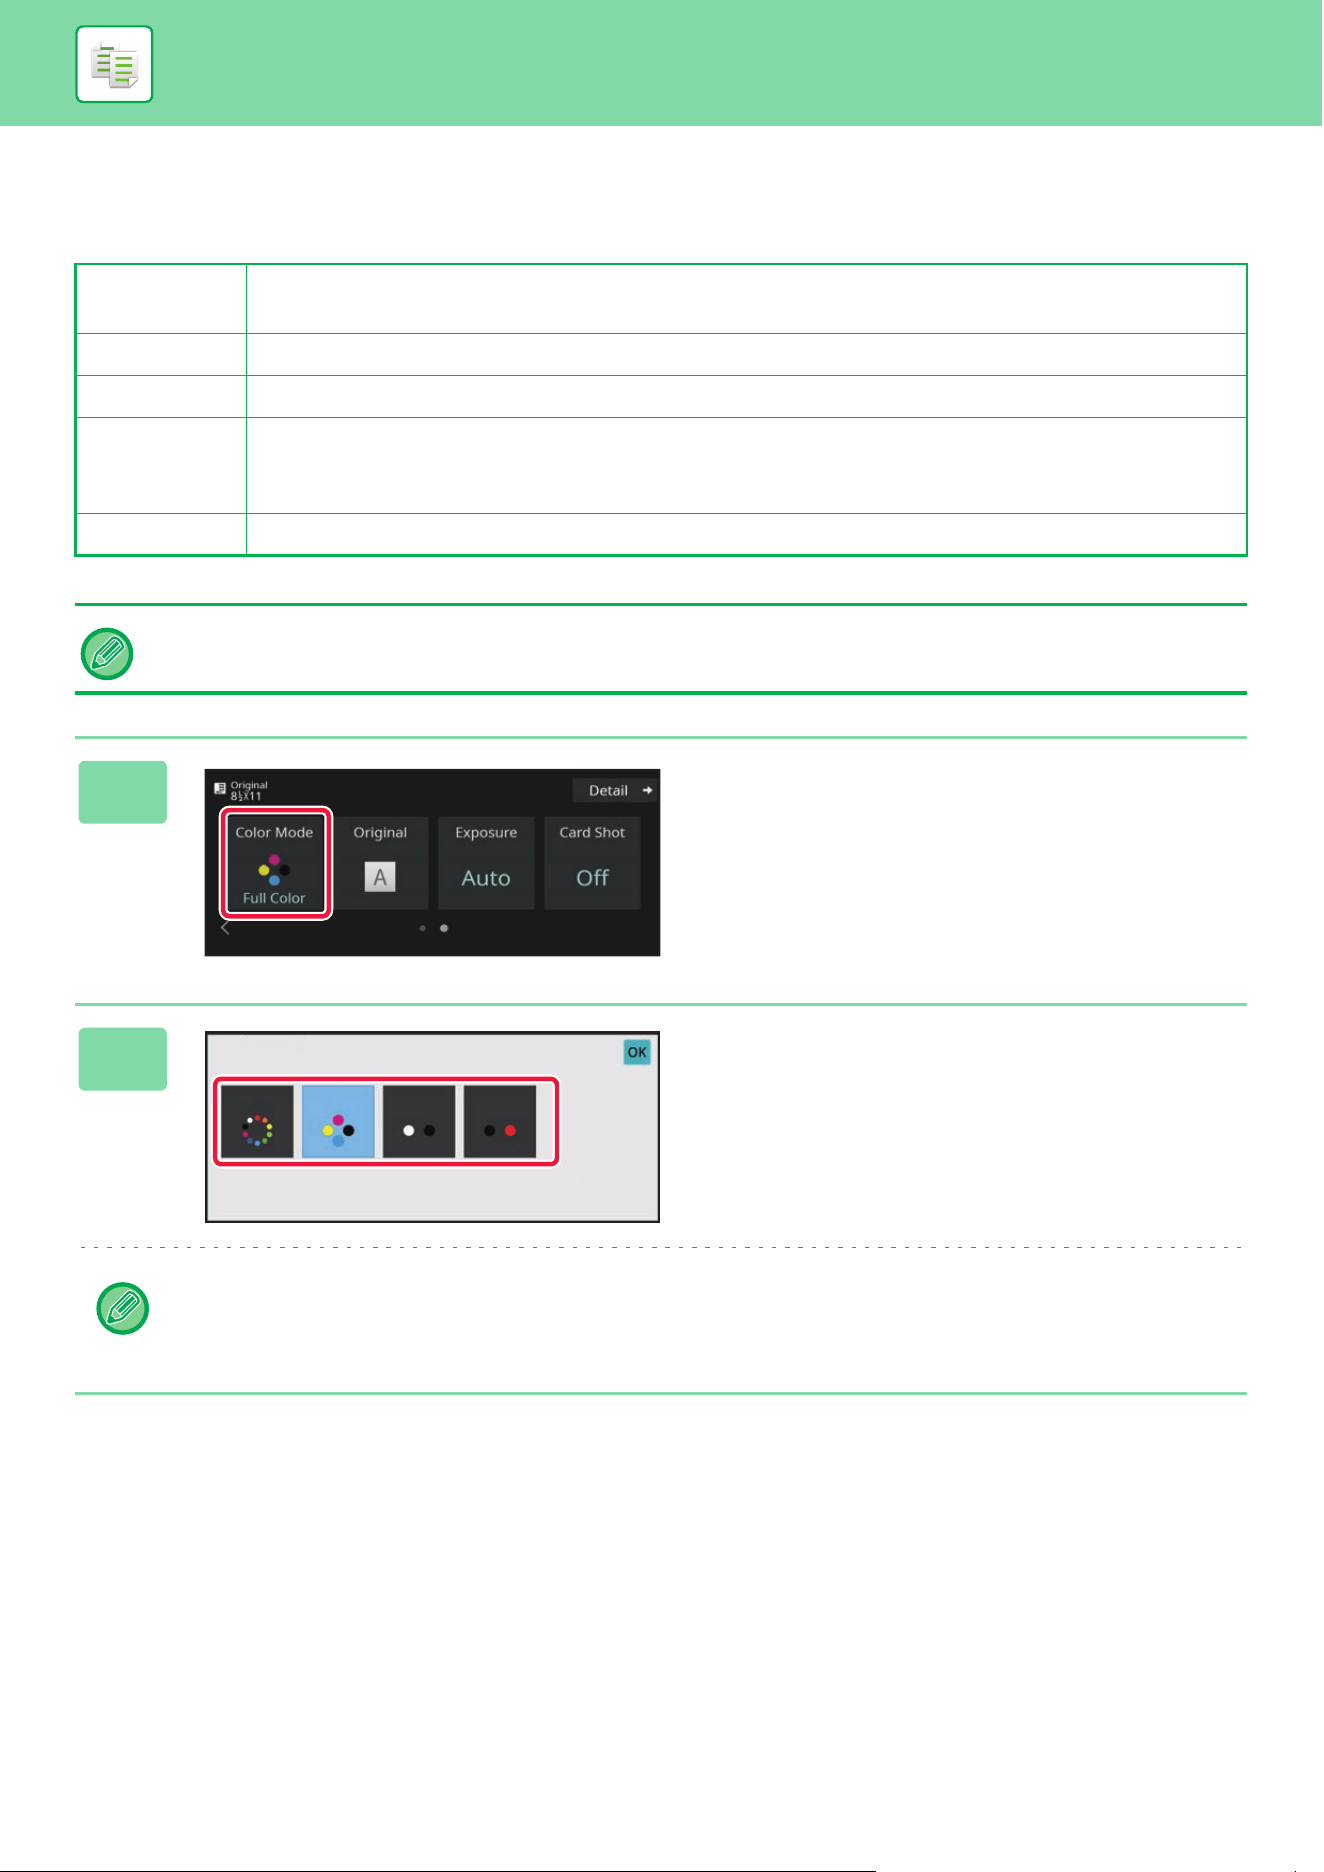
3-17
COPIER►BASIC PROCEDURE FOR MAKING COPIES
COPY COLOR MODES
Select the color mode from Auto, Full Color, B/W, 2 Color, and Single Color.
* Can be set in normal mode.
Auto The machine automatically detects whether each original is color or black & white and switches the mode
appropriately (full color for a color original or black & white for a black & white original).
Full Color The original is copied in full color.
B/W The original is copied in black and white.
2 Color The original is copied in two colors by changing a specific color used in the original to another color. If red is
set to a specific color, reddish parts in an original are extracted, and changed to the specified color to make a
copy.
Single Color
*
The original is copied in any one color regardless of the colors used in the original.
If any color mode is selected, copying takes place in black and white when you tap the [B/W Start] key.
1
Tap the [Color Mode] key.
2
Select the color mode.
After the settings are completed, tap [OK] key.
Check that the specified color mode is selected.
• When auto mode is used, there may be some originals for which switching between color and black & white does not
take place correctly. If so, tap the [Color Start] or [B/W Start] key to manually switch between color and black & white.
• When [B/W Start] is selected, the [Color Start] key cannot be tapped.
Full
Color
B/W
Auto
2 Color
Color Mode
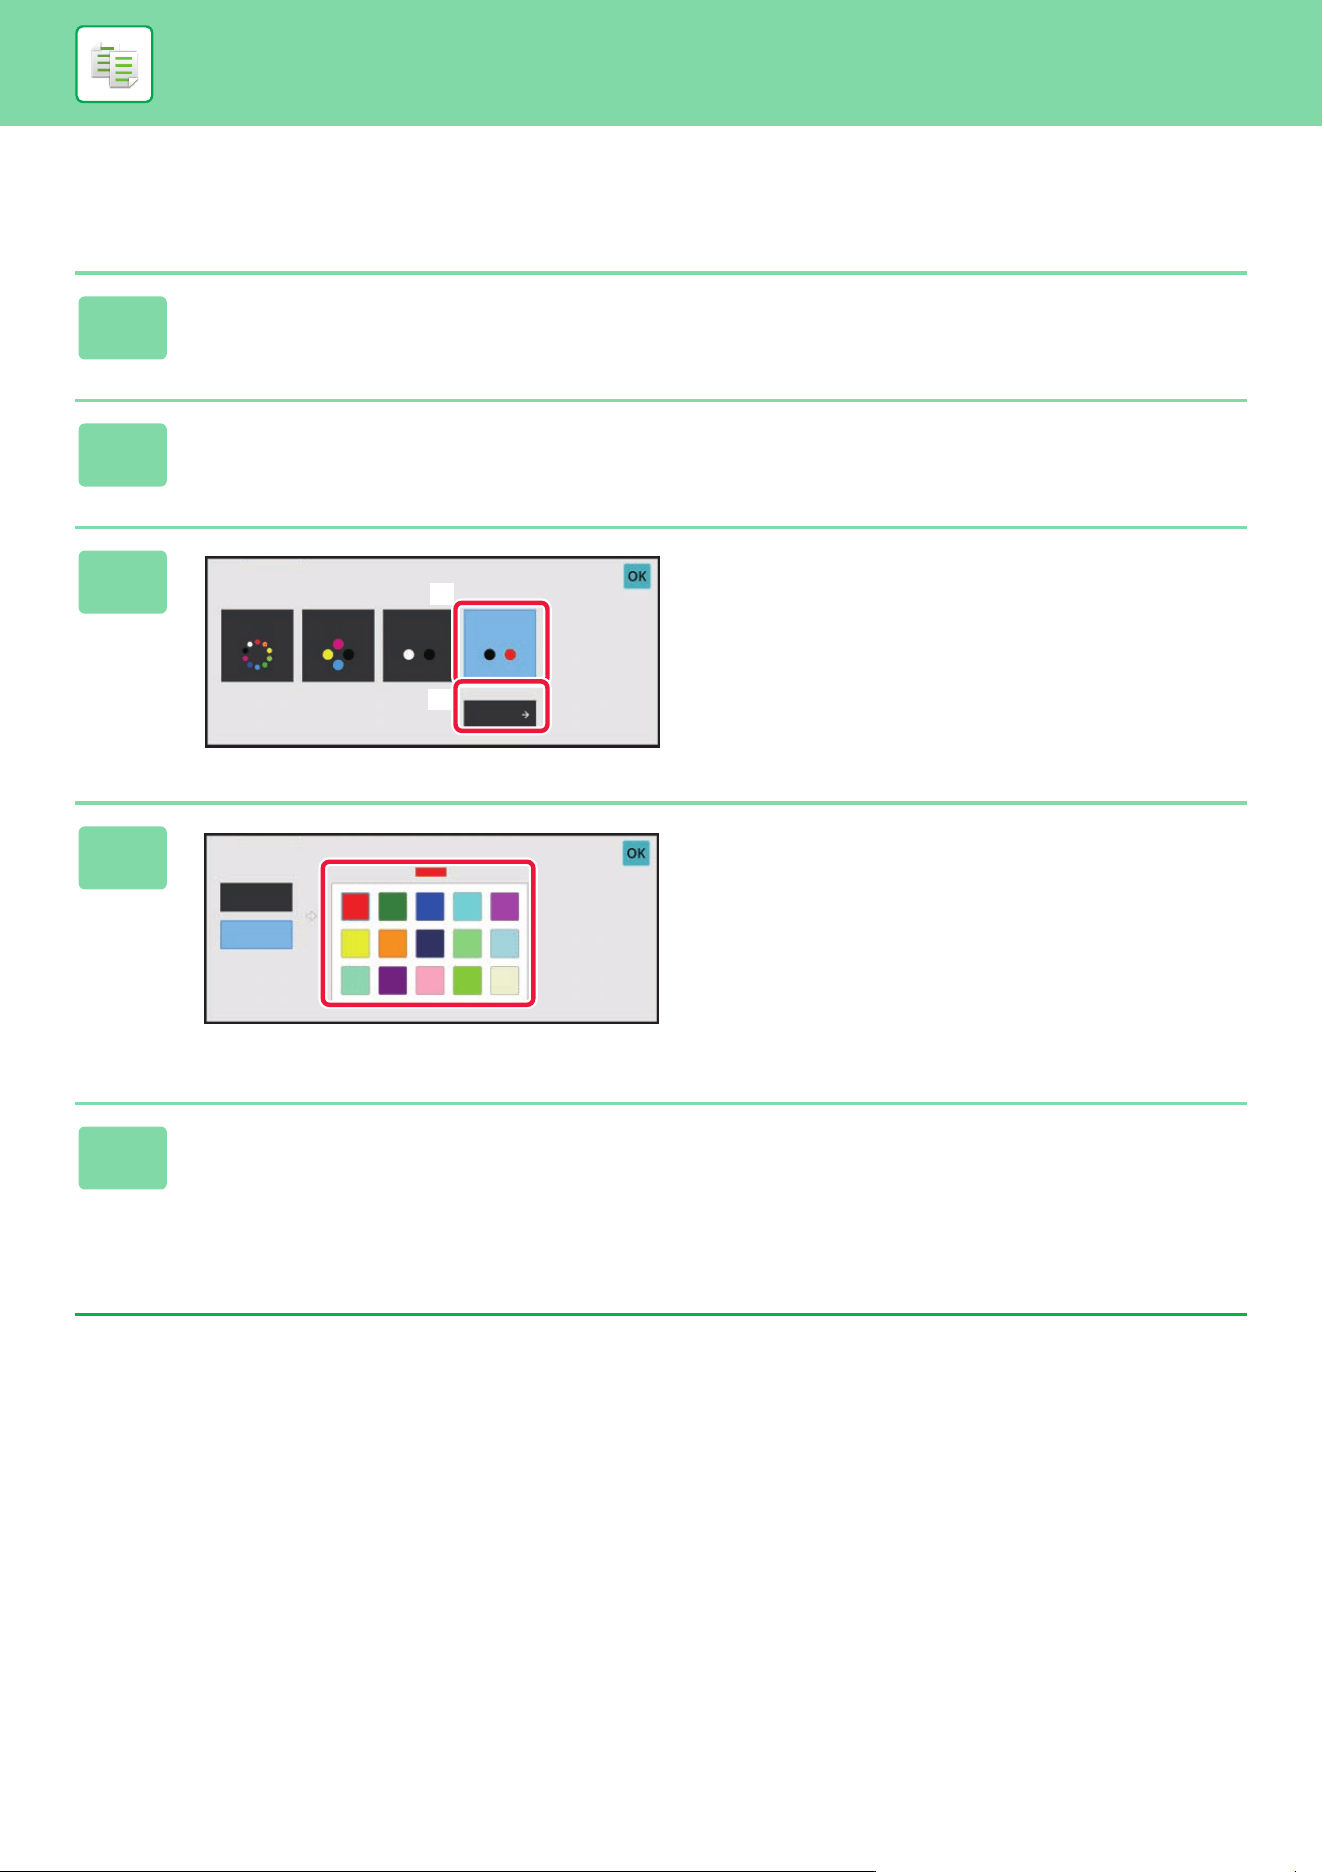
3-18
COPIER►BASIC PROCEDURE FOR MAKING COPIES
COPYING IN TWO COLORS
The original is copied in two colors by changing a specific color to another color.
1
Tap the [Color Mode] key.
2
Tap the [2 Color] key.
3
Tap the [Change] key.
4
Tap the key of the color to be extracted
to specify the extract color.
• [Except Black]:
Extracts black parts in an original, and changes non-black
parts to the specified color.
• [Reddish Color]:
Extracts reddish parts in an original, and changes them to
the specified color.
5
Specify the color to change the extracted color to.
After the settings are completed, tap the [OK] key on the [2 Color] screen, and check that the changed setting is
displayed at the side of [2 Color] key on the color mode screen.
After you have checked it, tap [OK].
Check that the specified color mode is selected.
Change
Reddish Color
B/W
Auto
2 Color
Color Mode
Full
Color
(3)
(2)
Except Black
Reddish
Color
2 Color
Selected Color
Specified Color
Red
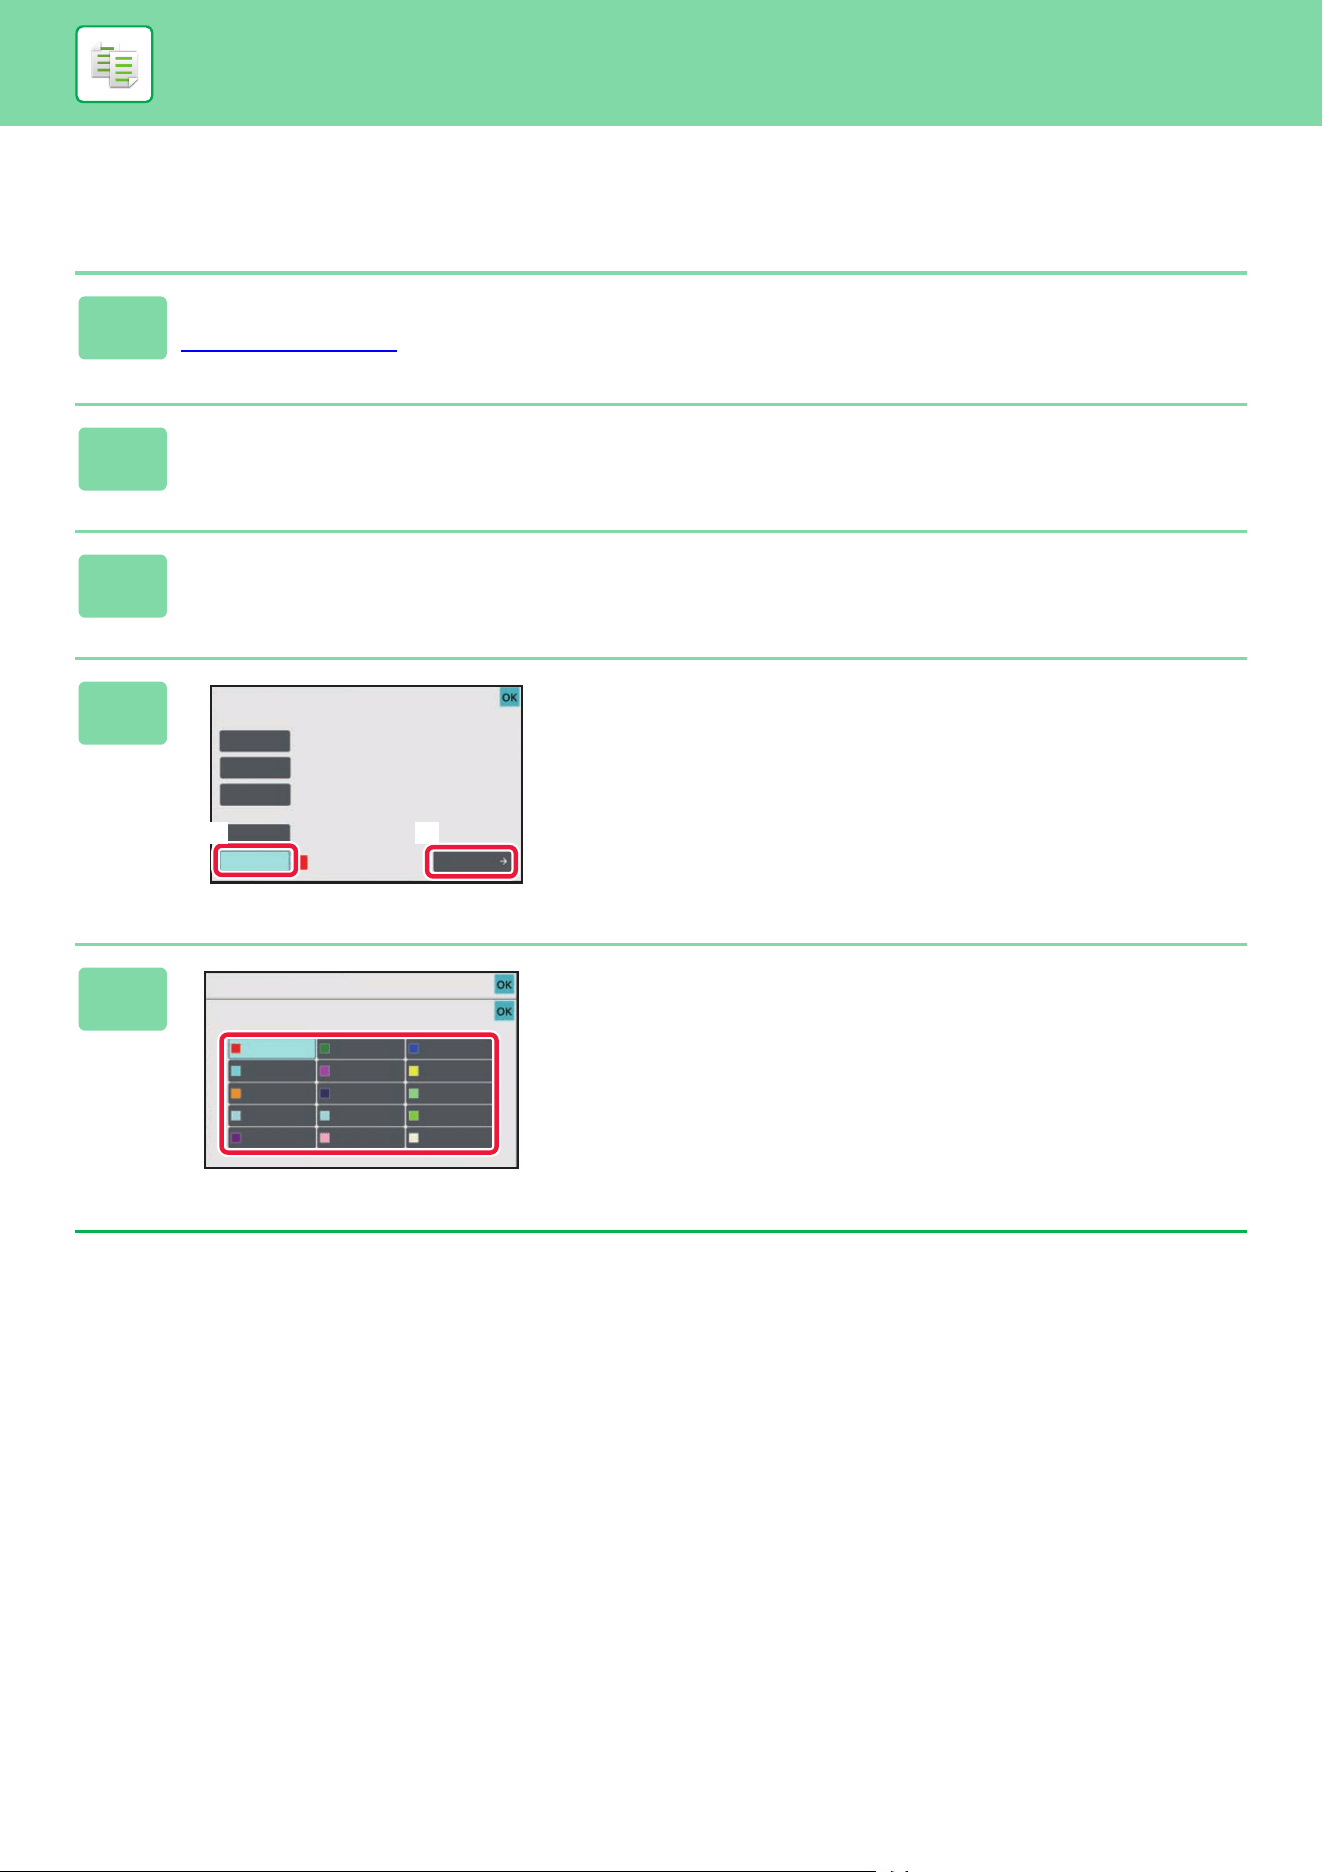
3-19
COPIER►BASIC PROCEDURE FOR MAKING COPIES
COPYING IN SINGLE COLOR
The original is copied in any one color.
1
Tap the [Detail] key to change to normal mode.
EASY MODE (page 3-3)
2
Tap the [Color Mode] key.
3
Tap the [Single Color] key.
4
Tap the [Change] key.
5
Tap a color you wish to use.
After the settings are completed, tap [OK] on the [Single
Color] screen, and check that the changed setting is
displayed at the side of [Single Color] key on the color mode
screen.
After you have checked it, tap [OK] on the [Color Mode]
screen.
Change
Auto
Full Color
B/W
2 Color
Single Color
Red
Color Mode
(4)(3)
Color Mode
Single Color
Red
Green
Magenta
Yellow
Cyan
Orange
Light Blue
Purple
Aquamarine
Pink
Beige
Yellow Green
Navy
Light Green
Blue
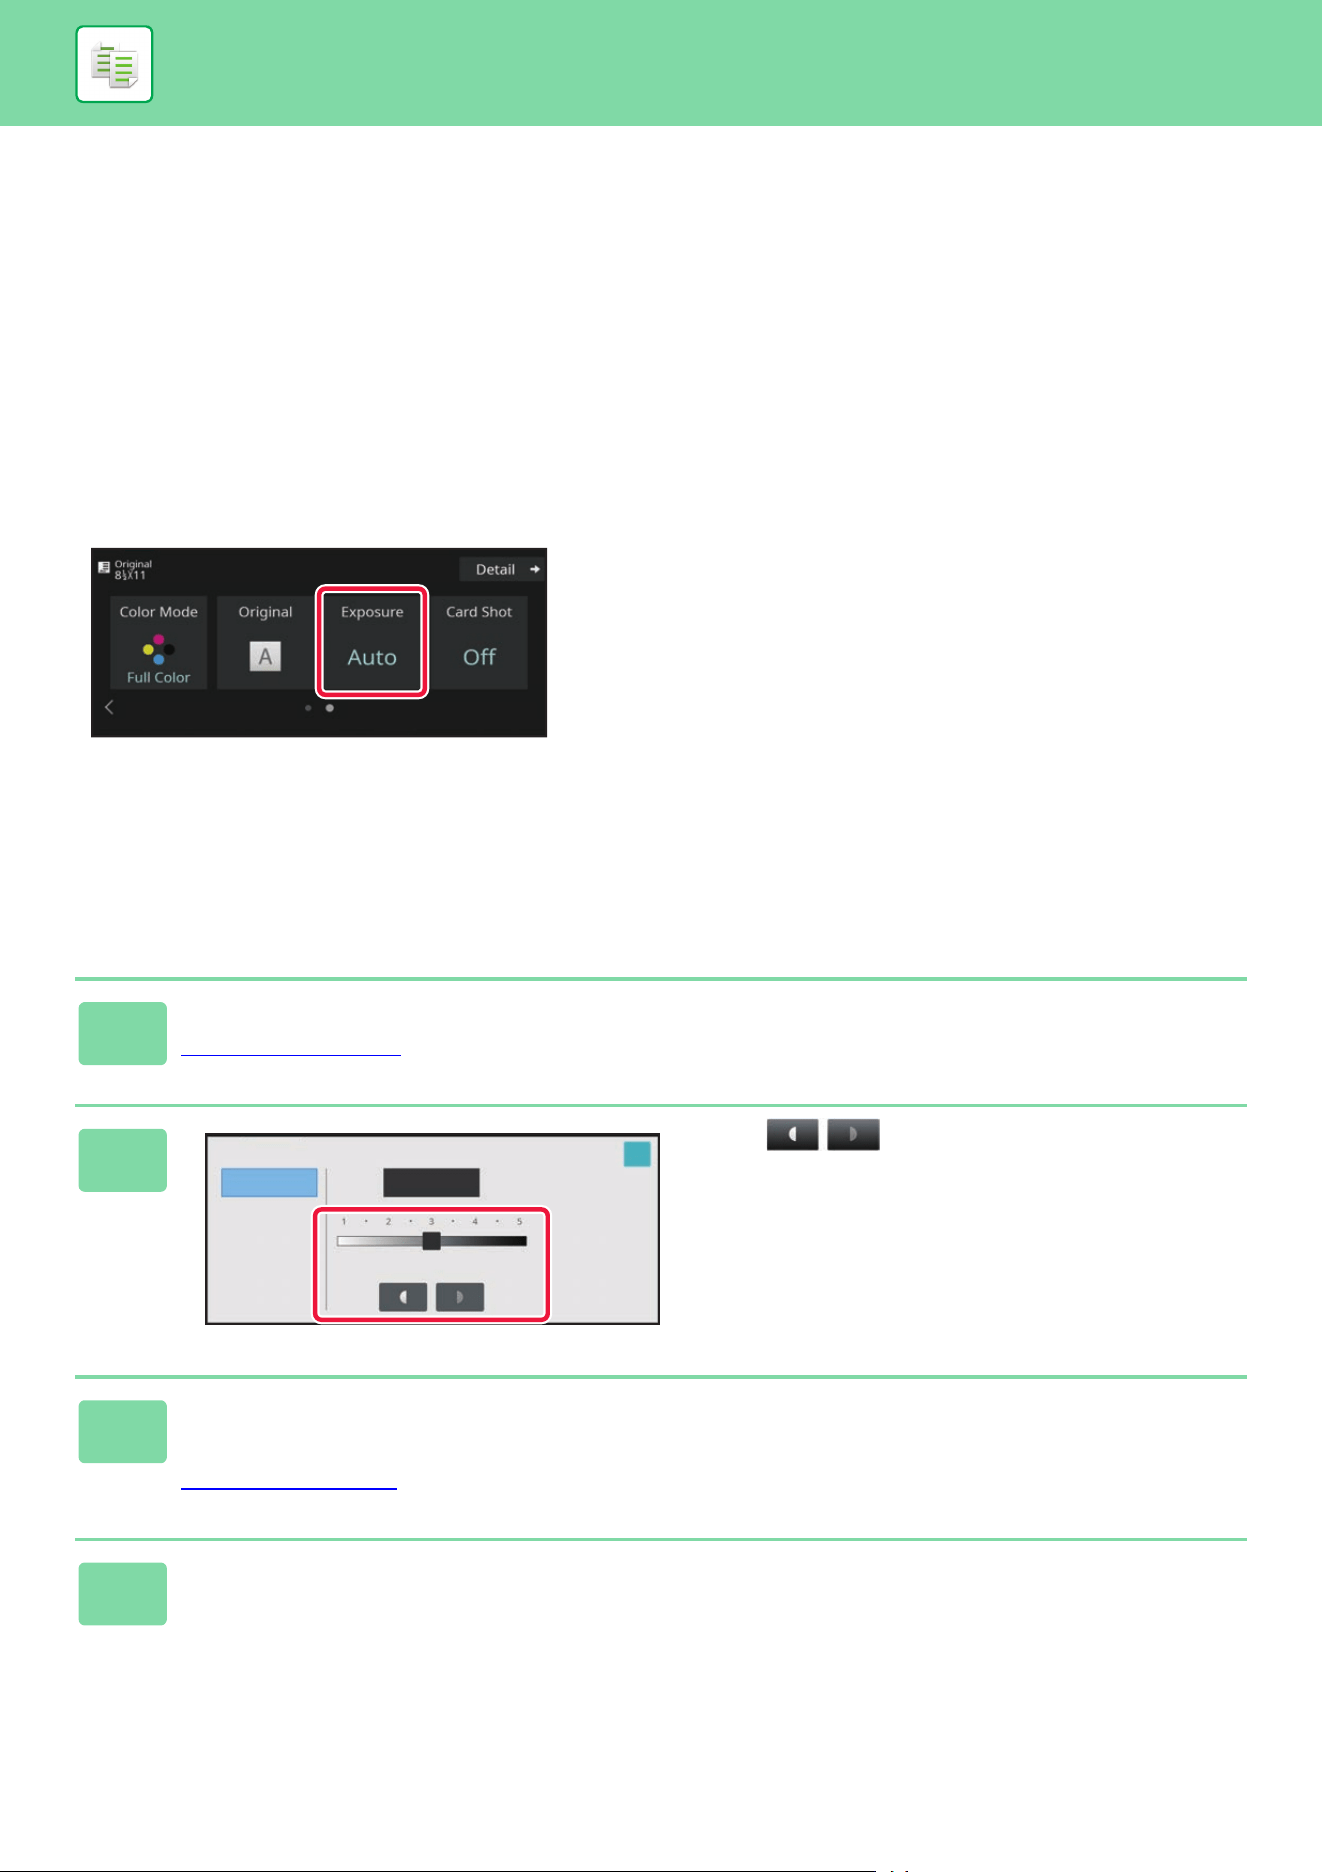
3-20
COPIER►BASIC PROCEDURE FOR MAKING COPIES
CHANGING THE EXPOSURE AND ORIGINAL
IMAGE TYPE
AUTOMATIC ADJUSTMENT OF EXPOSURE AND
ORIGINAL TYPE
Automatic exposure adjustment operates by default to automatically adjust the exposure level and original type as
appropriate for the original being copied. ([Auto] is displayed.)
This function automatically adjusts the image during black & white copying and full color copying to obtain the most
suitable copy.
MANUAL ADJUSTMENT OF EXPOSURE AND
ORIGINAL TYPE
This section explains how to select the original type depending on the original to be copied or manually adjust the
exposure.
1
Tap the [Exposure] key.
COPY MODE (page 3-3)
2
Tap or slide the slider to
adjust the copy exposure.
After the adjustment, tap [OK] key.
This completes the procedure in easy mode.
3
To select more detailed settings, tap the [Detail] key to switch to normal
mode.
EASY MODE (page 3-3)
4
Tap the [Exposure] key.
Exposure
Auto
Manual
Lighten
Darken
OK
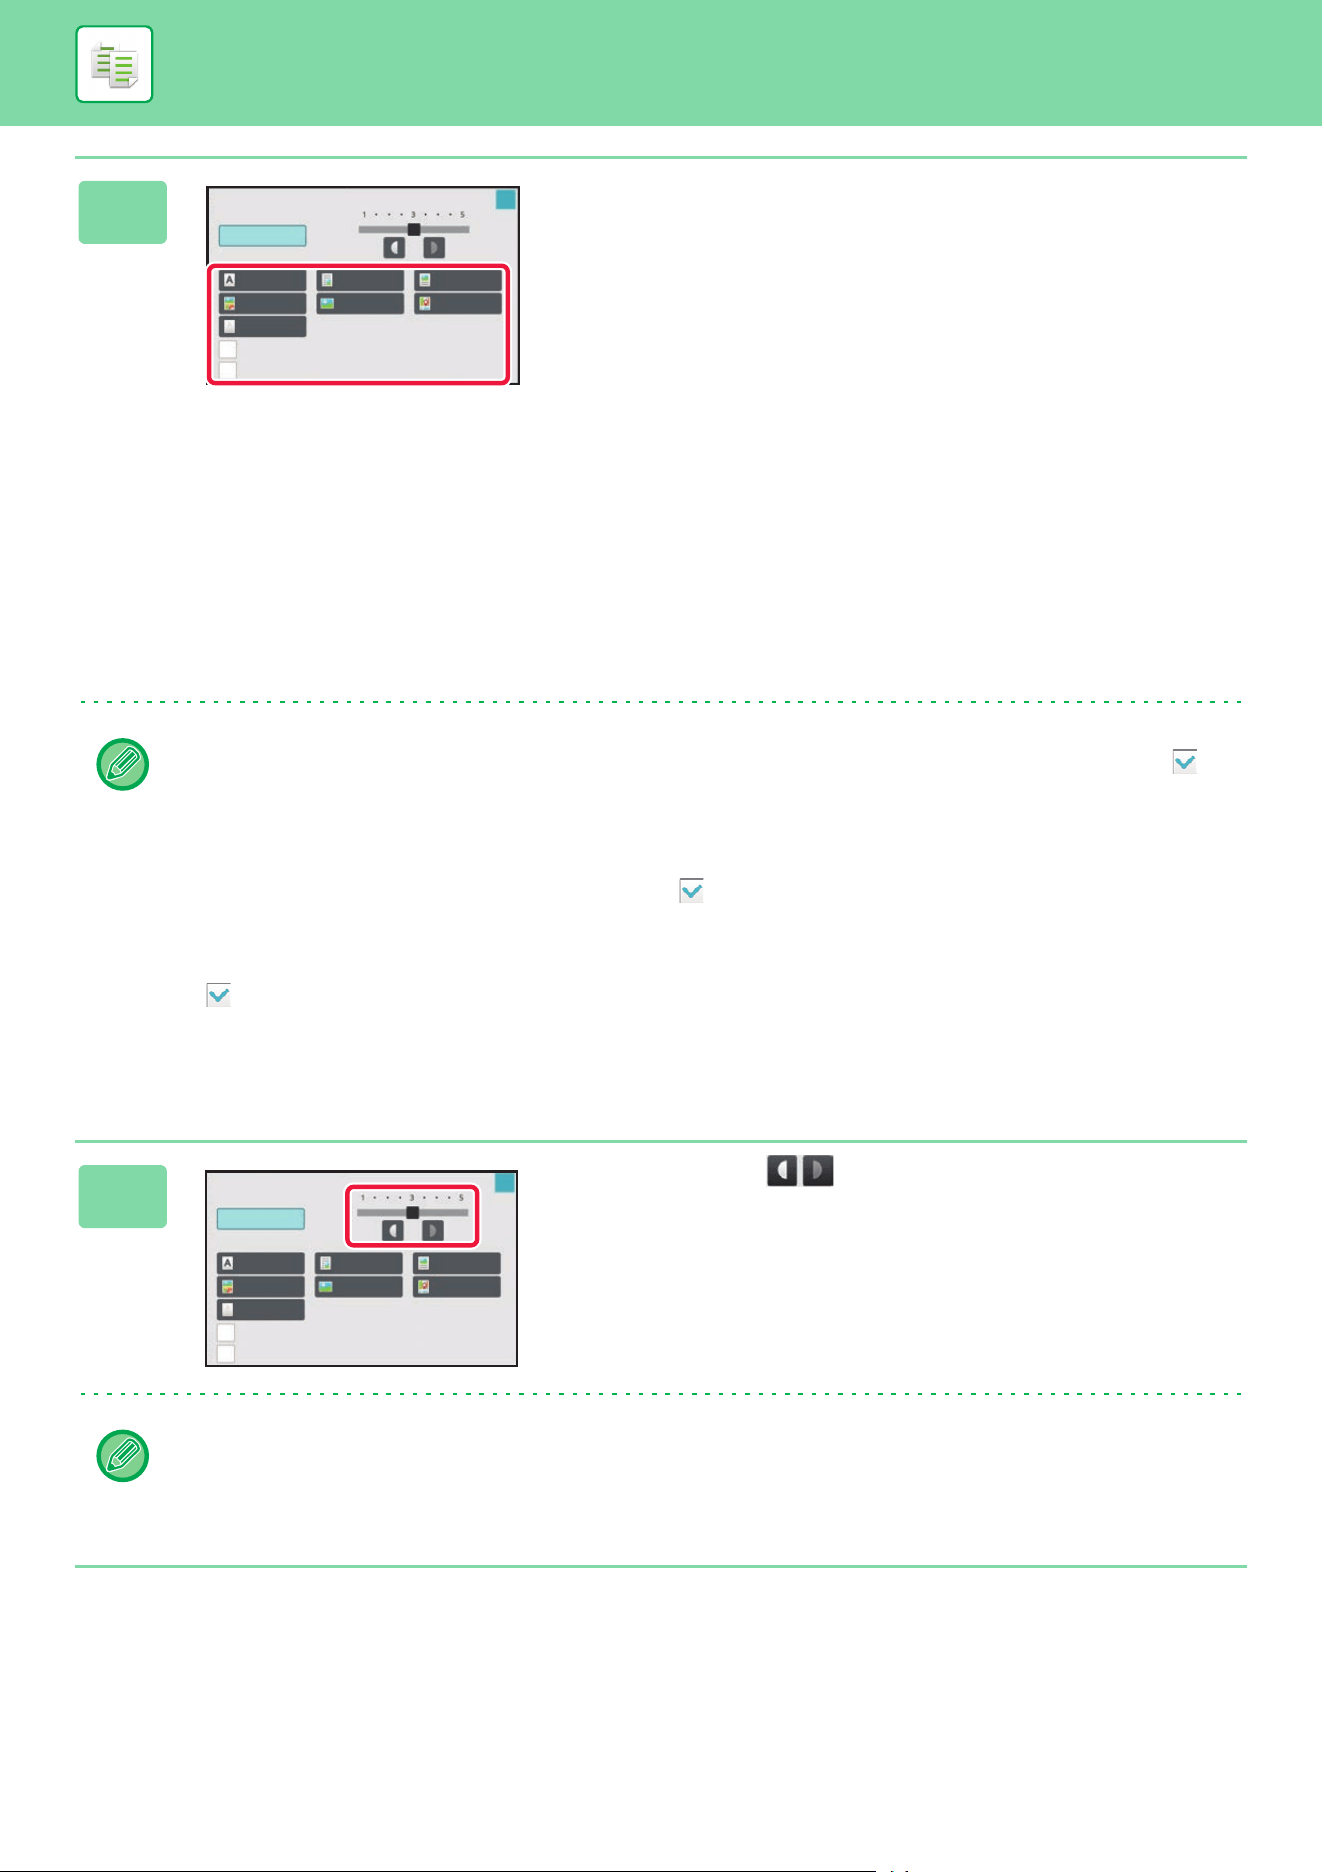
3-21
COPIER►BASIC PROCEDURE FOR MAKING COPIES
5
Tap the required original image type
key to specify the original type.
Tap the key matching the original.
Original image type select keys
• Text : Use this mode for regular text documents.
• Text/Printed Photo : This mode provides the best balance for copying an original which contains both text and printed
photographs, such as a magazine or catalogue.
• Text/Photo : This mode provides the best balance for copying an original which contains both text and photographs,
such as a text document with a photo pasted on.
• Printed Photo : This mode is best for copying printed photographs, such as photos in a magazine or catalogue.
• Photo : Use this mode to copy photos.
• Map : This mode is best for copying the light color shading and fine text found on most maps.
• Light Original : Use this mode for originals with light pencil writing.
• When using a copy or printed page from the machine as an original:
When using a copy or printed page from the machine as an original, tap the [Copy of Copy] checkbox so that ap-
pears.
[Copy of Copy] is available when [Auto], [Text], [Printed Photo], or [Text/Printed Photo] is selected as the original image
type.
• To enhance the color of a color copy:
Tap the [Color Tone Enhancement] checkbox so that appears.
Set the [Color Tone Enhancement] when you select an original type.
• When you want to make fluorescent marker parts more visible:
When using a page with highlitd lines as an original, tap the [Copy Original with Highlighted Lines] checkbox so that
appears.
• [Copy of Copy] and [Color Tone Enhancement] cannot be specified together.
• [Copy of Copy], [Color Tone Enhancement], [Copy Original with Highlighted Lines] and [Intensity] of "Others" cannot
be combined.
6
Tap or slide the slider to adjust
the copy exposure.
If you adjust the exposure with the original type selected to
[Auto], the original image type is automatically selected to
[Text/Printed Photo].
After the adjustment, tap [OK] key.
Guidelines for the exposure level when [Text] is selected for "Exposure/Original Type"
1 to 2: Dark originals such as a newspaper
3: Normal density originals
4 to 5: Originals written in pencil or light colored text
OK
Exposure/Original Type
Auto
Copy of Copy
Copy Original with
Highlighted Lines
Text/Photo
Map
Tex t
Text/Printed
Photo
Printed Photo
Light Original
Photo
Manual
OK
Exposure/Original Type
Auto
Manual
Copy of Copy
Copy Original with
Highlighted Lines
Text/Photo
Map
Tex t
Text/Printed
Photo
Printed Photo
Light Original
Photo
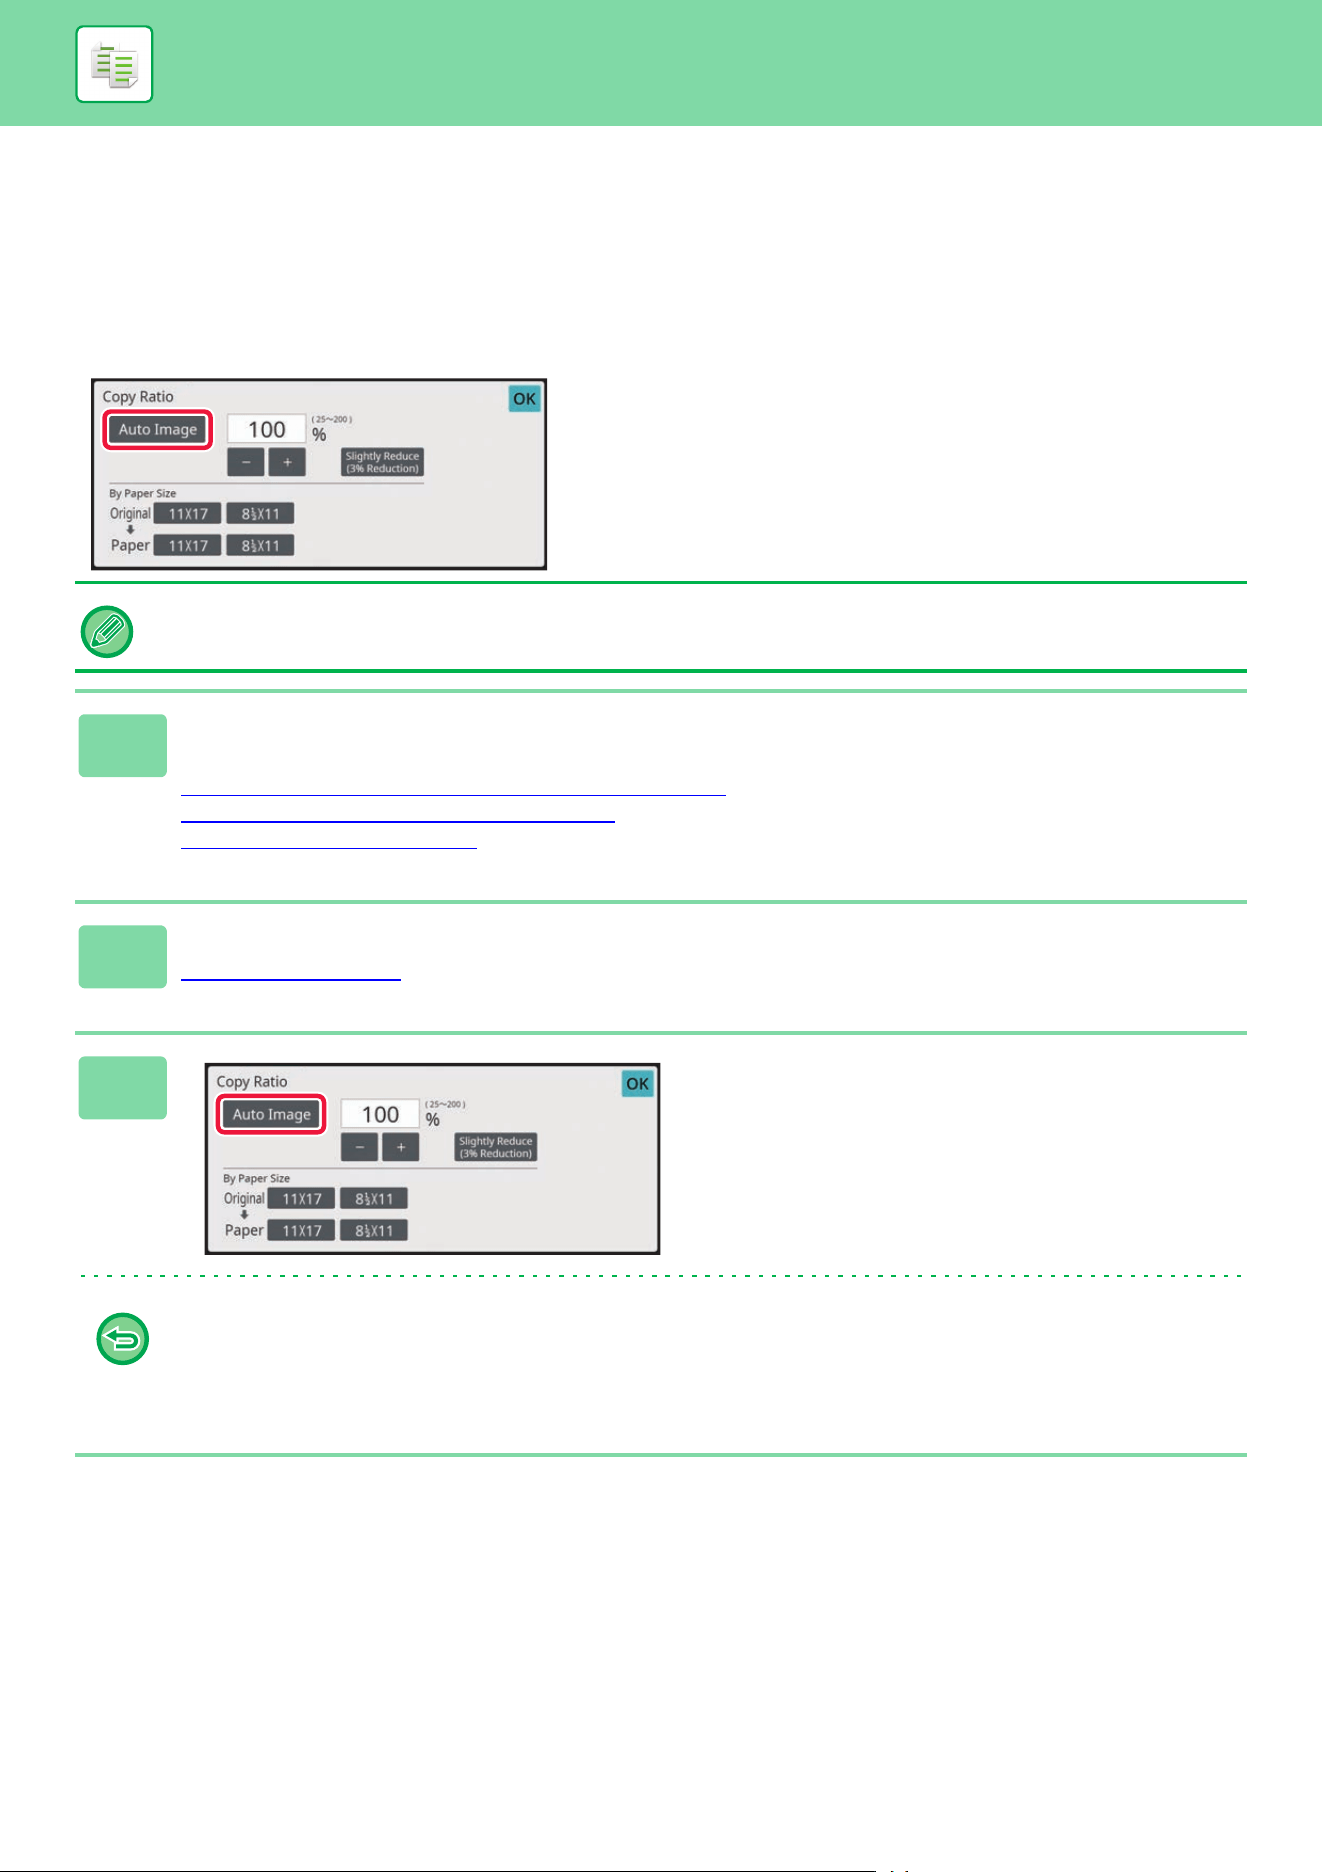
3-22
COPIER►BASIC PROCEDURE FOR MAKING COPIES
ENLARGE/REDUCE
AUTO RATIO SELECT
This section explains how to automatically select the appropriate ratio to meet the paper size when manually changing
the paper tray to make a copy on paper that has a size different from the original.
For a non-standard size original, the size must be entered in order to use Auto Image.
1
Manually select the paper tray, and place the original.
Place the original in the document feeder tray of the automatic document feeder, or on the document glass.
SELECTING THE PAPER TRAY FOR COPYING
(page 3-13)
AUTOMATIC DOCUMENT FEEDER (page 1-47)
DOCUMENT GLASS (page 1-51)
2
Tap the [Copy Ratio] key.
COPY MODE (page 3-3)
3
Tap the [Auto Image] key.
The reduction or enlargement ratio is automatically selected
based on the original size and the selected paper size.
The automatically selected ratio will appear in the ratio
display.
• To cancel the Auto Ratio Selection setting:
Tap [Auto Image] to deselect it.
• To return the ratio to 100%:
Tap the [100%] key.
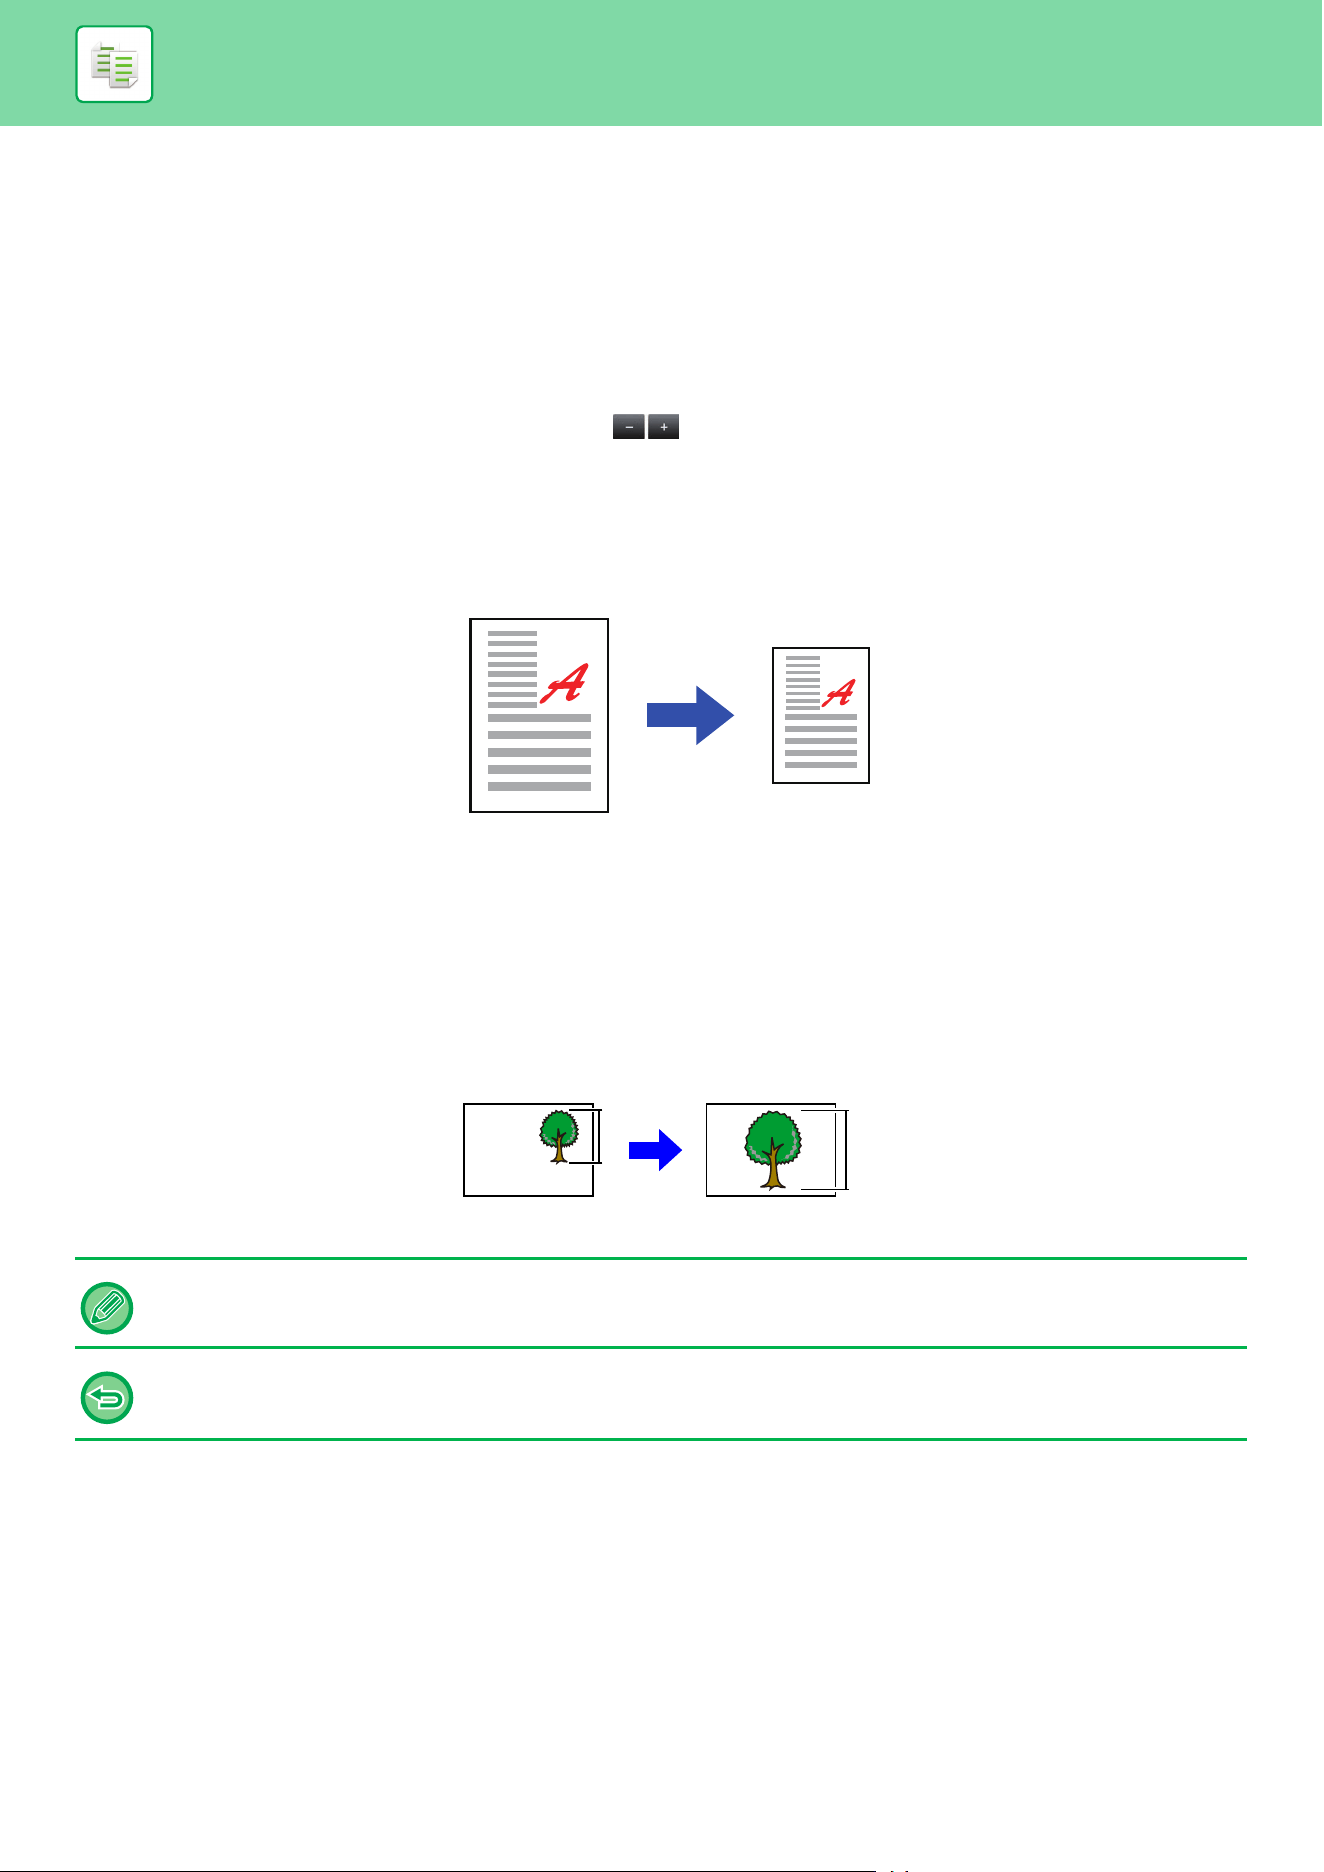
3-23
COPIER►BASIC PROCEDURE FOR MAKING COPIES
MANUAL RATIO SELECTION
This section explains how to specify any ratio when making a copy on paper that has a size different from the original or
changing the image size for copying.
The following three methods can be used to specify the ratio.
Using the preset ratio key
You can select the enlargement or reduction ratio between commonly used fixed sizes from the preset ratio keys.
Up to two ratio values can be added to preset ratio keys, respectively for enlargement and reduction.
Specifying the desired zoom ratio
You can adjust the zoom ratio in 1% increments using or the 10 key to specify the desired zoom ratio.
Specifying the paper size
Specify the paper sizes of the original and output to automatically obtain the appropriate ratio.
For example, when you select 11" x 17" (A3) as the original size and 8-1/2" x 11" (A4) as the paper size, the ratio is
automatically set to 64% (70%).
Specifying the image dimensions
Specify the image sizes of the original and output to automatically obtain the appropriate ratio.
To make a copy with the same ratio between the vertical and horizontal sizes, enter either one of the vertical and
horizontal sizes.
For example, when you enter 90mm as the source size and 135mm as the output size, the aspect ratio will be
automatically set to 150%.
When the automatic document feeder is used, the vertical and horizontal ratio selection ranges are both between 25% to
200%.
To return the ratio to 100%:
Tap the [100%] key.
Original size: 11" x 17" Copy size: 8-1/2" × 11"
64%
150%
Image size: 90mm Output size: 135mm
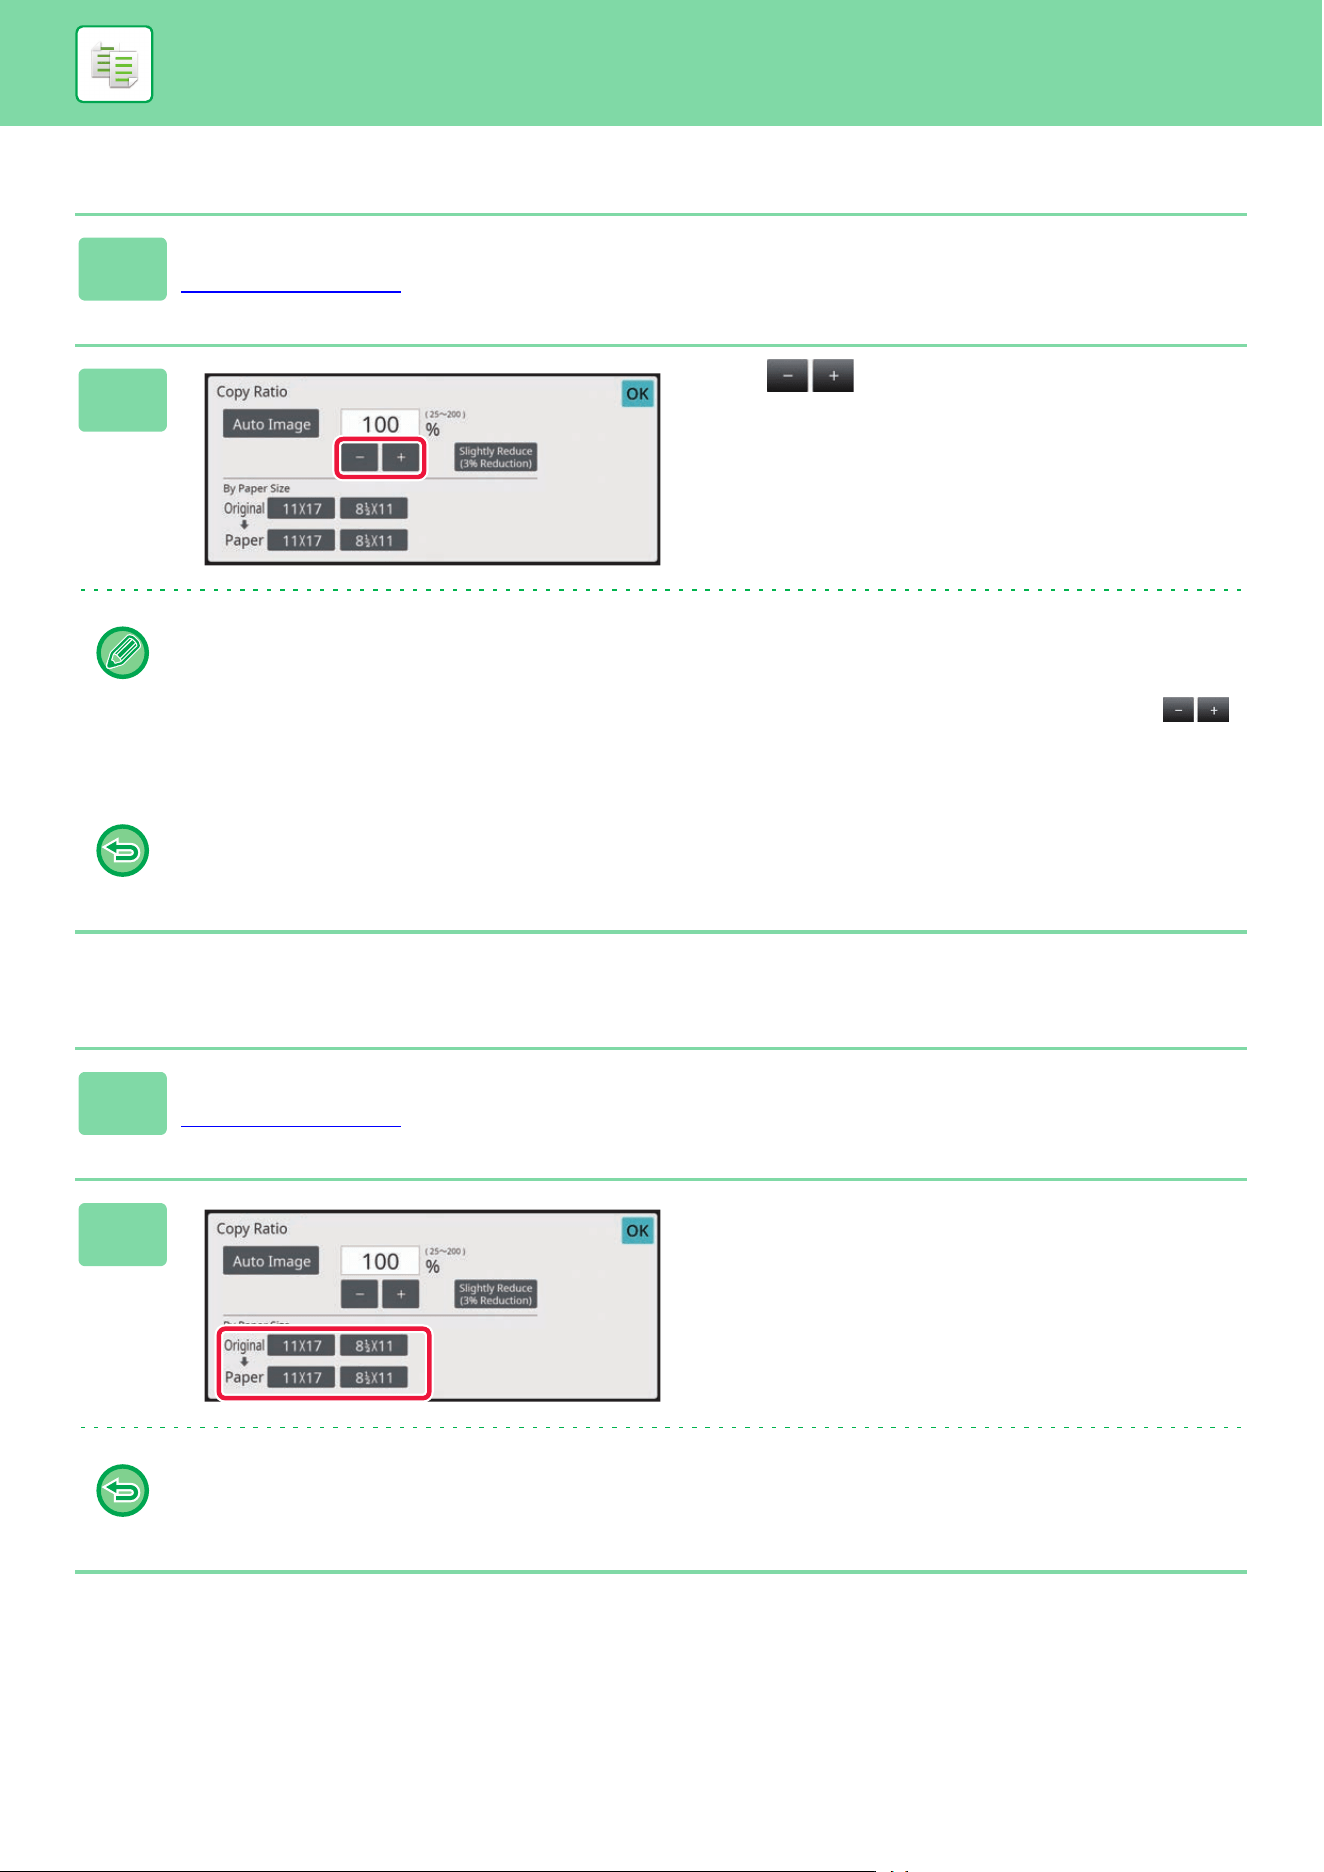
3-24
COPIER►BASIC PROCEDURE FOR MAKING COPIES
Using the preset ratio key
Specifying the paper size
1
Tap the [Copy Ratio] key.
COPY MODE (page 3-3)
2
Tap to set the ratio.
After the settings are completed, tap [OK] key.
Check that a paper size suitable for the ratio is selected.
• If you tap the [Slightly Reduce (3% Reduction)] key, the ratio will be set lower than the specified one by 3%.
In normal mode
• There are two setting screens. Use the [Other Ratio] key to switch between the screens.
• To quickly set the area, first specify a value close to the desired value by the numeric keys, then adjust it with .
• Up to two frequently used ratio values can be added to the preset ratio key, respectively for enlargement and
reduction.
To cancel all settings:
Tap the [CA] key.
1
Tap the [Copy Ratio] key.
COPY MODE (page 3-3)
2
Specify the original size (paper size of
the loaded original) and the copy size
(paper size of the copy output).
After the settings are completed, tap [OK] key.
To cancel all settings:
Tap the [CA] key.
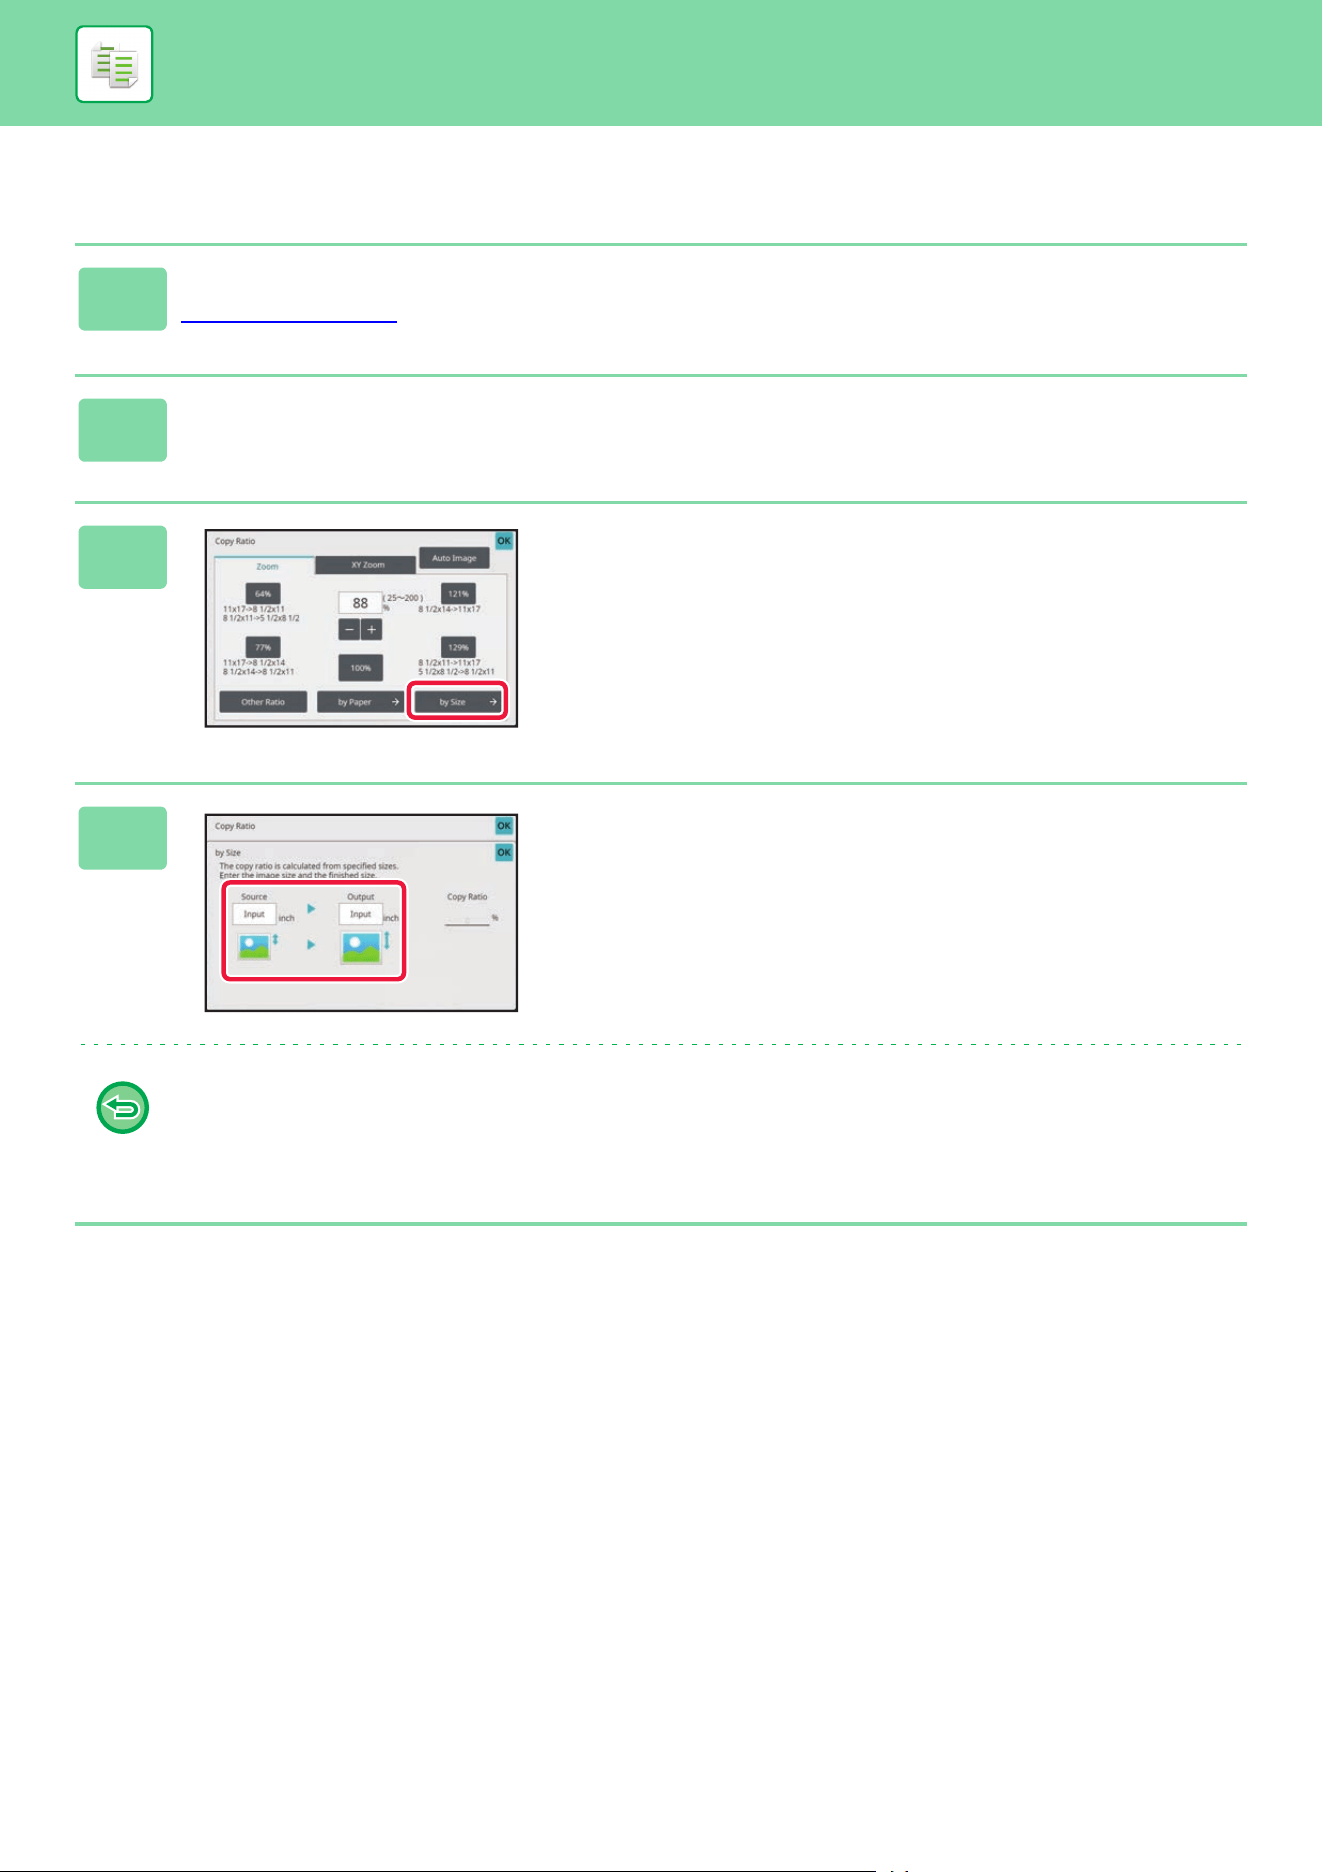
3-25
COPIER►BASIC PROCEDURE FOR MAKING COPIES
Specifying the image dimensions
1
Tap the [Detail] key to change to normal mode.
EASY MODE (page 3-3)
2
Tap the [Copy Ratio] key.
3
Tap the [by Size] key of the [Zoom] tab.
4
Specify the image size (dimensions of
the image to be enlarged or reduced)
and the output size (dimensions of the
enlarged and reduced images).
Tap the area of image size and output size, and enter the
sizes using the numeric keys.
After the settings are completed, tap [OK] key.
• If you have entered an incorrect size:
Tap the [C] key on the numeric keys that appears when you tap the entry area, and set to the correct size.
• To cancel all settings:
Tap the [CA] key.
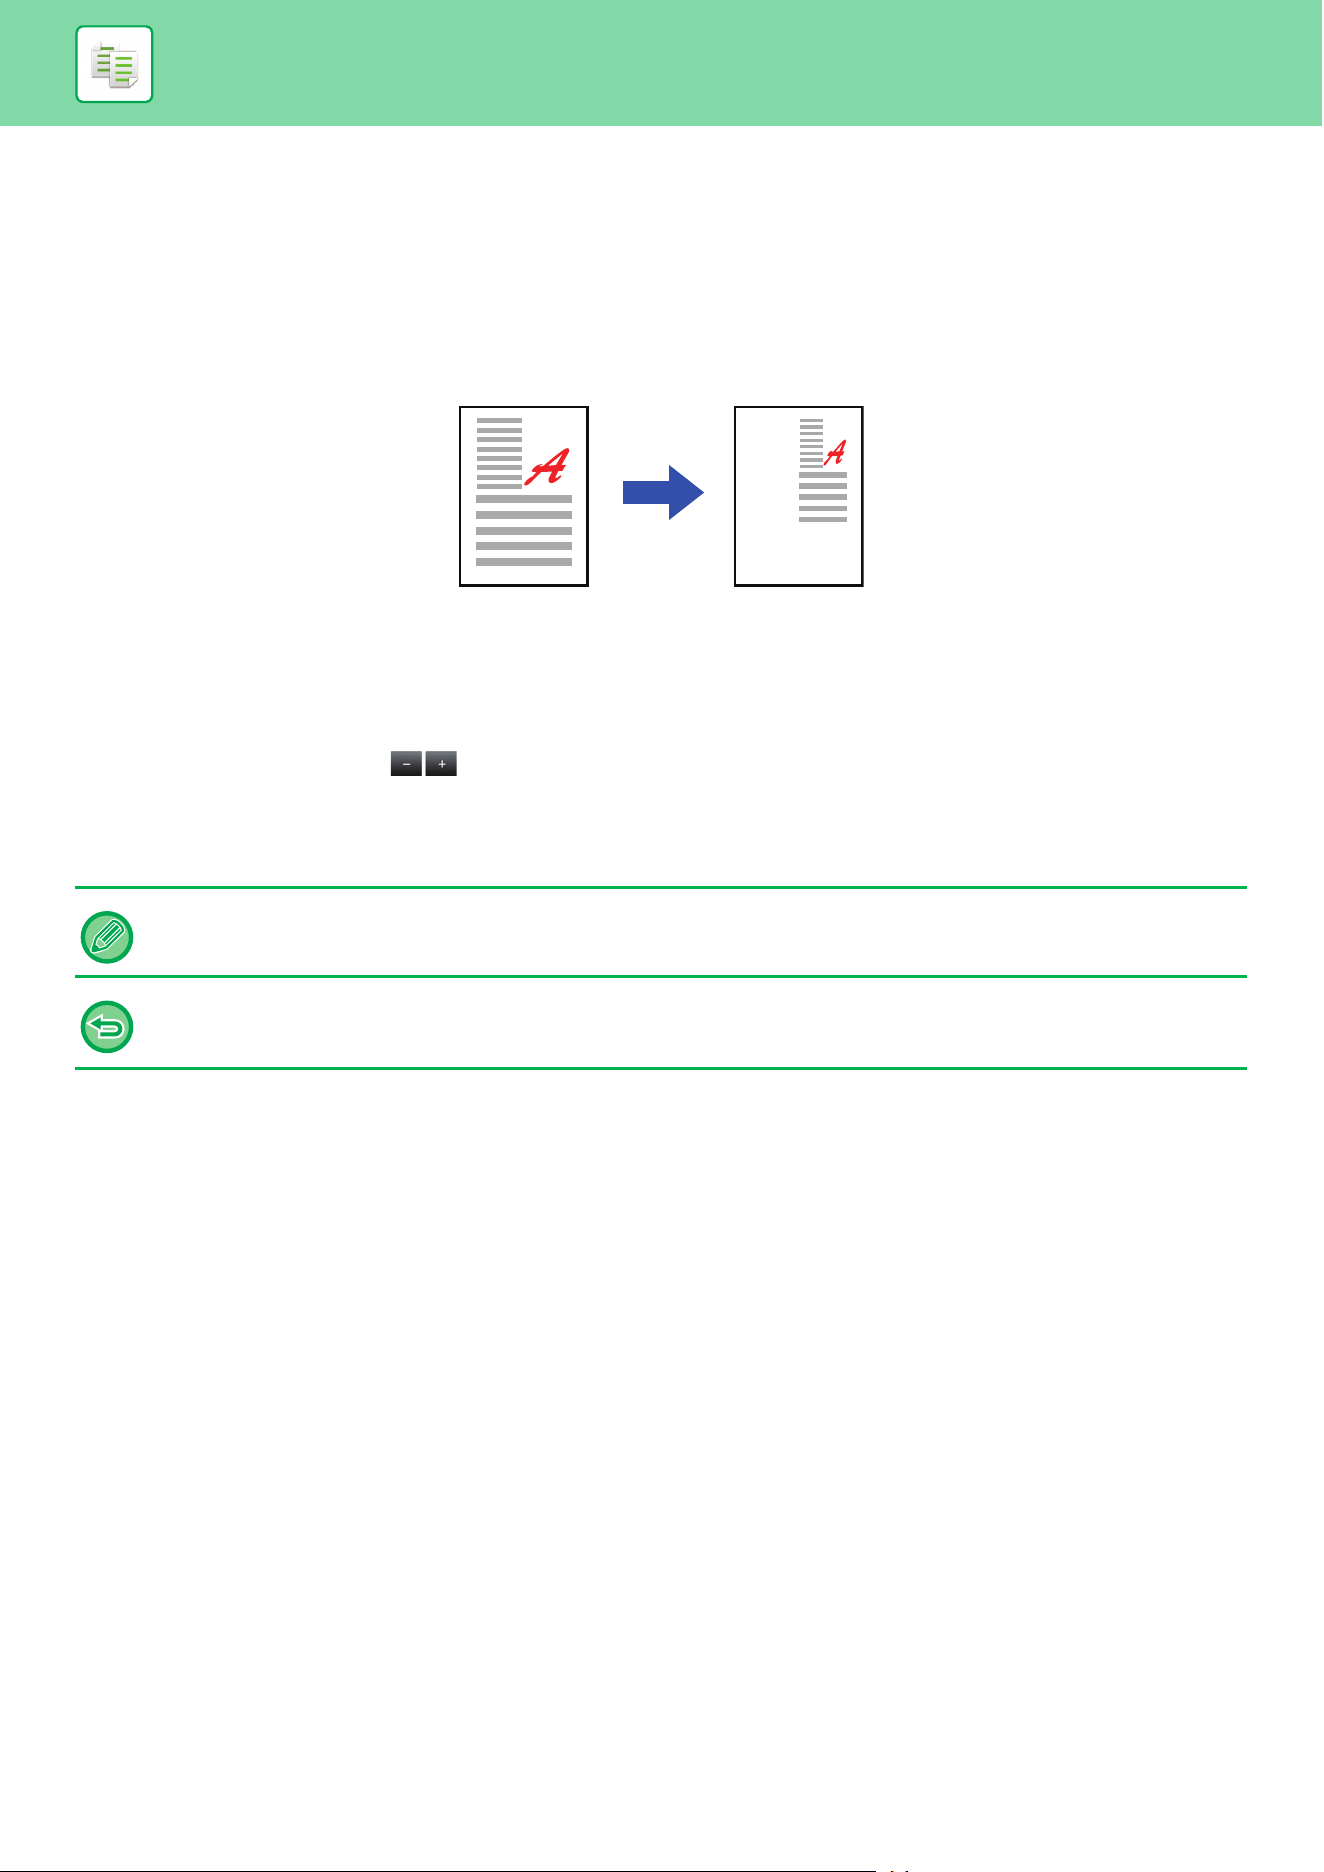
3-26
COPIER►BASIC PROCEDURE FOR MAKING COPIES
ENLARGING/REDUCING THE LENGTH AND WIDTH
SEPARATELY
This section explains how to individually specify the horizontal and vertical copy ratios.
When 50% is selected for the horizontal ratio and 70% is selected for the vertical ratio
The following two methods can be used to specify the ratio.
Using the preset ratio key
Specify any ratio by combination of preset ratio key, which is pre-registered.
Specify the desired ratio
Specify any ratio by combining , which allows you to adjust the ratio in 1% increments.
Specifying the image dimensions
Specify the image sizes of the original and output to automatically obtain the appropriate ratio.
Enter the vertical and horizontal sizes.
When the automatic document feeder is used, the vertical and horizontal ratio selection ranges are both between 25% to
200%.
To cancel the XY zoom setting:
Tap the [Zoom] tab or the [CA] key.
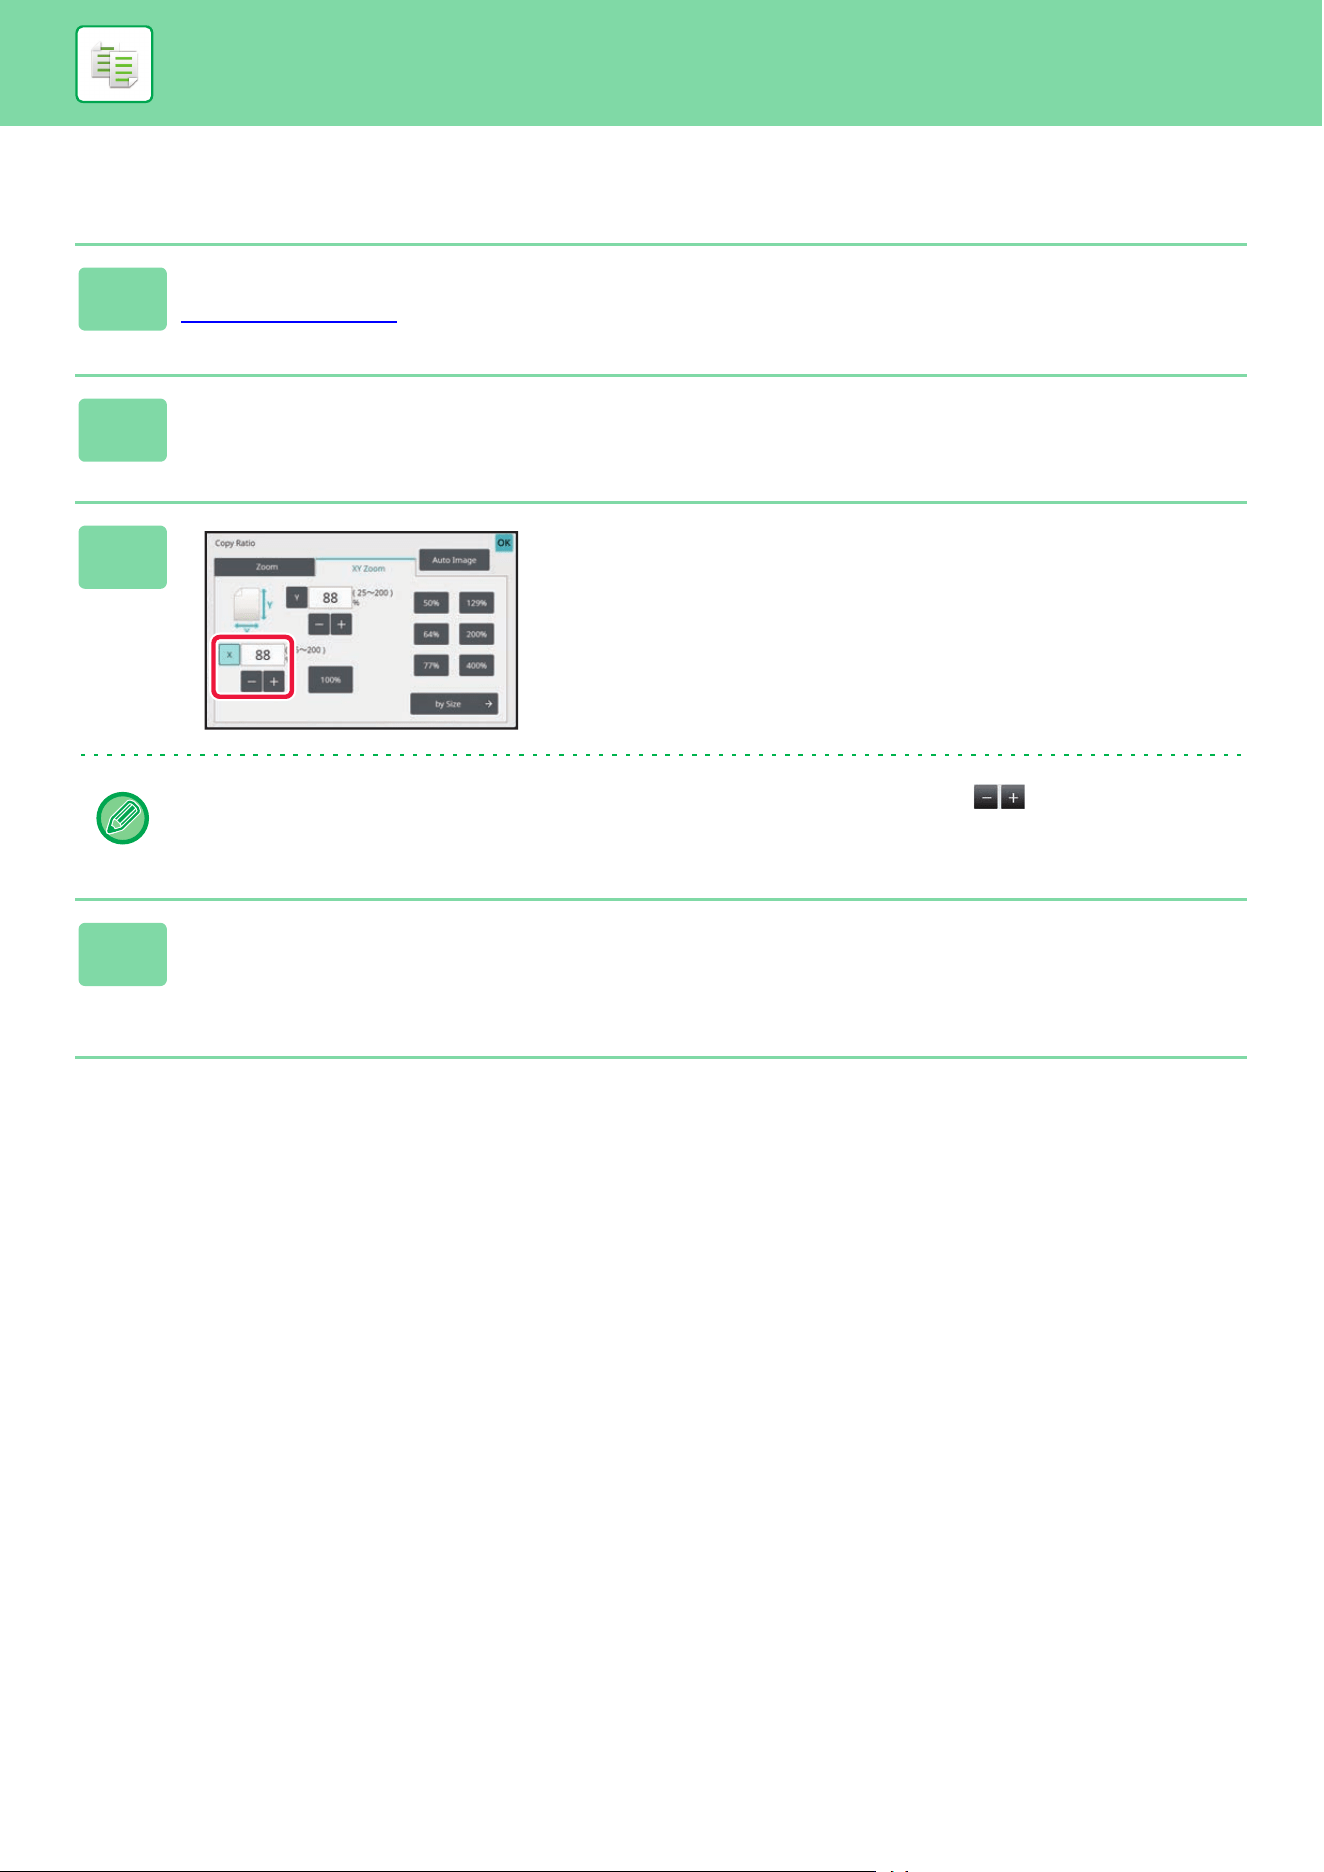
3-27
COPIER►BASIC PROCEDURE FOR MAKING COPIES
Using the preset ratio key
1
Tap the [Detail] key to change to normal mode.
EASY MODE (page 3-3)
2
Tap the [Copy Ratio] key, and then tap the [XY Zoom] tab.
3
Tap the [X] key, and set the X
(horizontal) ratio.
• To quickly set the ratio, first specify a value close to the desired one, then adjust it with .
• Tap each area of the X (horizontal) and Y (vertical) directions, and enter the sizes using the numeric keys.
4
Tap the [Y] key, and set the Y (vertical) ratio in the same way as the [X] key.
After the settings are completed, tap [OK] key.
Check that a paper size suitable for the ratio is selected.
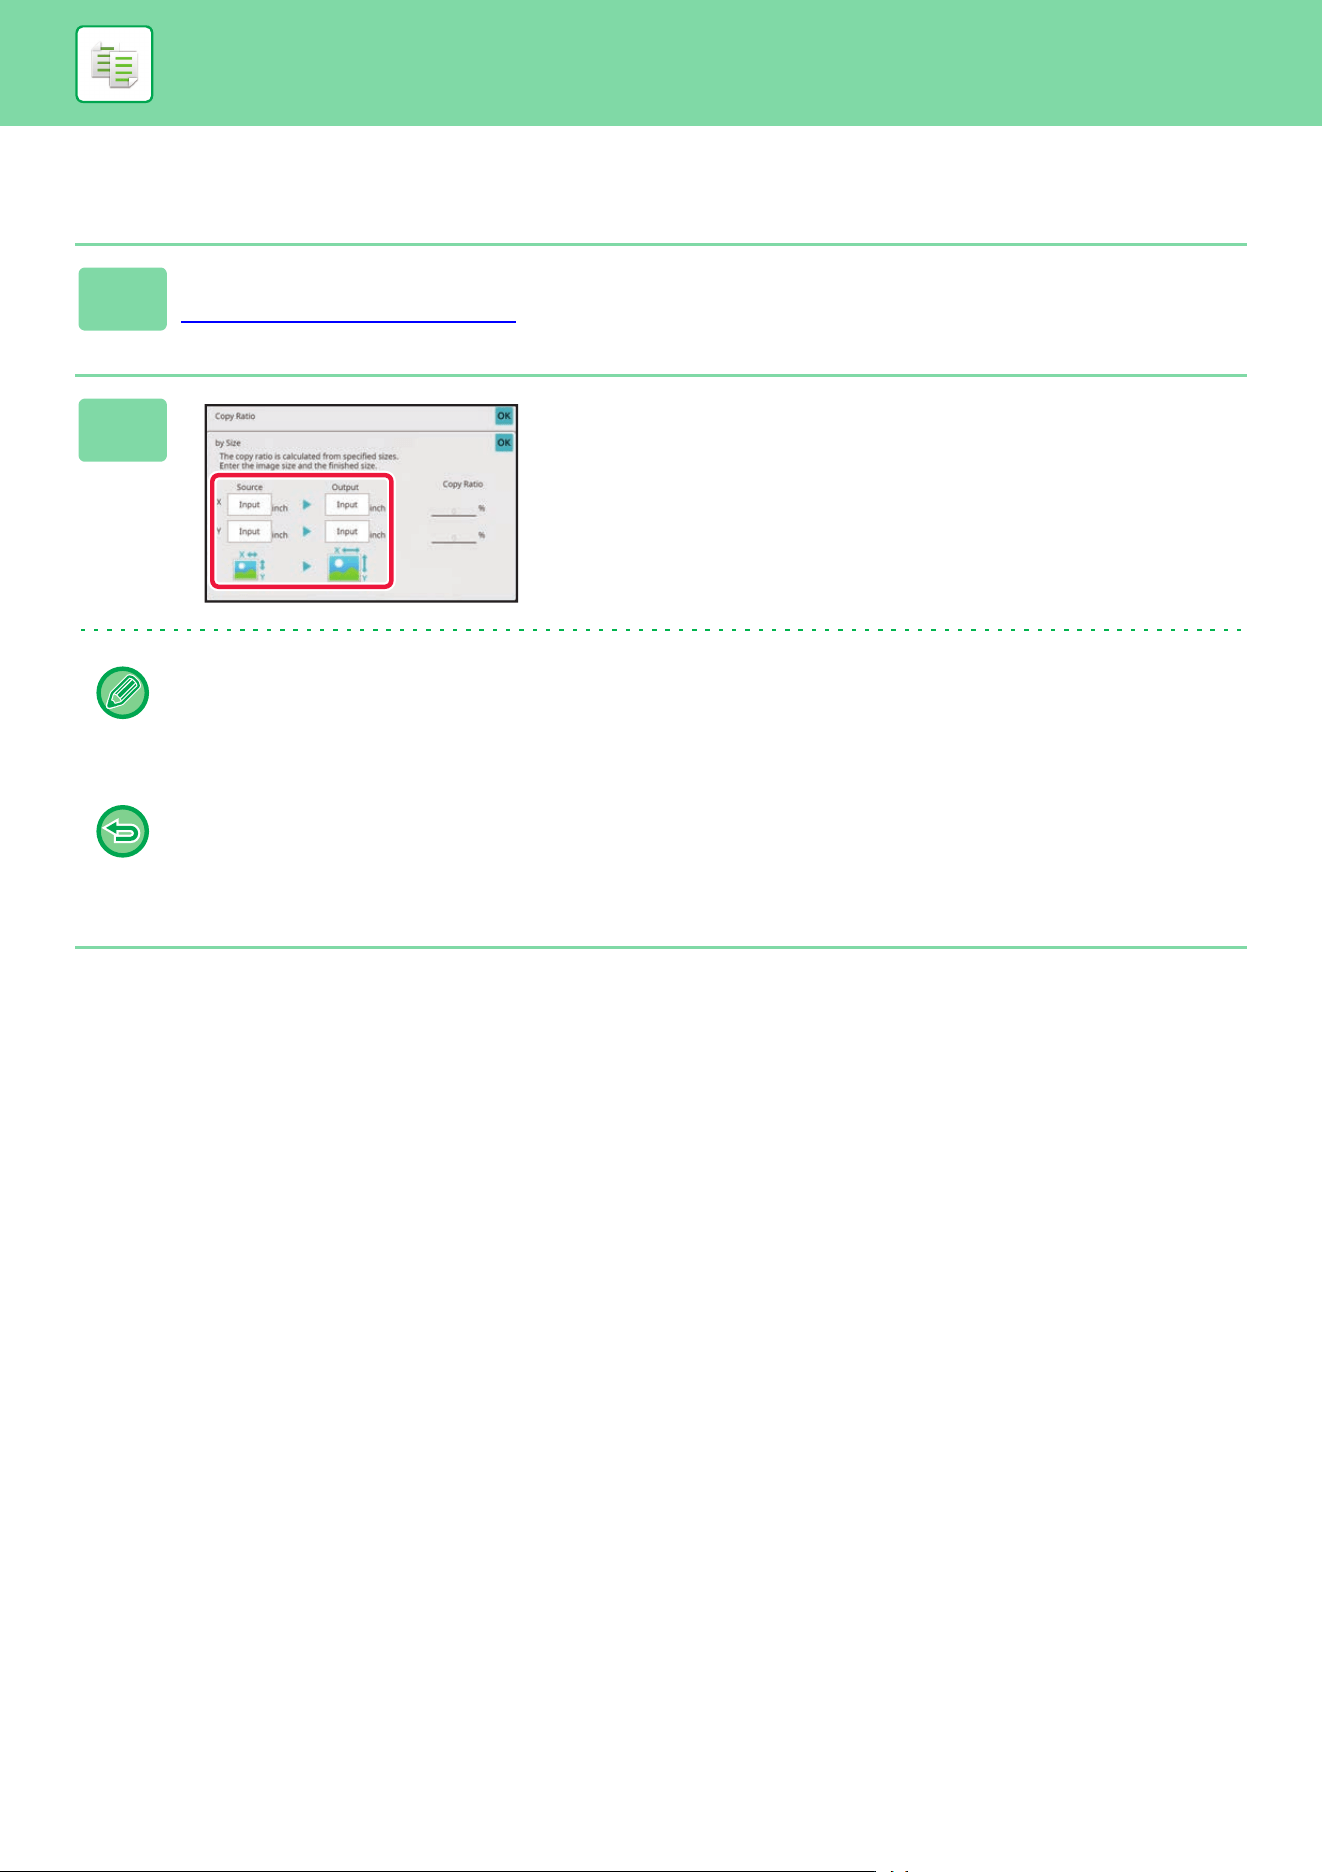
3-28
COPIER►BASIC PROCEDURE FOR MAKING COPIES
Specifying the image dimensions
1
Tap the [by Size] key.
Using the preset ratio key (page 3-24)
2
Specify the X and Y dimensions of the
image size and those of the output
size.
Check that a paper size suitable for the ratio is selected.
After the settings are completed, tap [OK] key.
Tap the image size and output size areas, and enter the sizes using the numeric keys.
• If you have entered an incorrect size:
Tap the [C] key on the numeric keys that appears when you tap the entry area, and set to the correct size.
• To cancel all settings:
Tap the [CA] key.
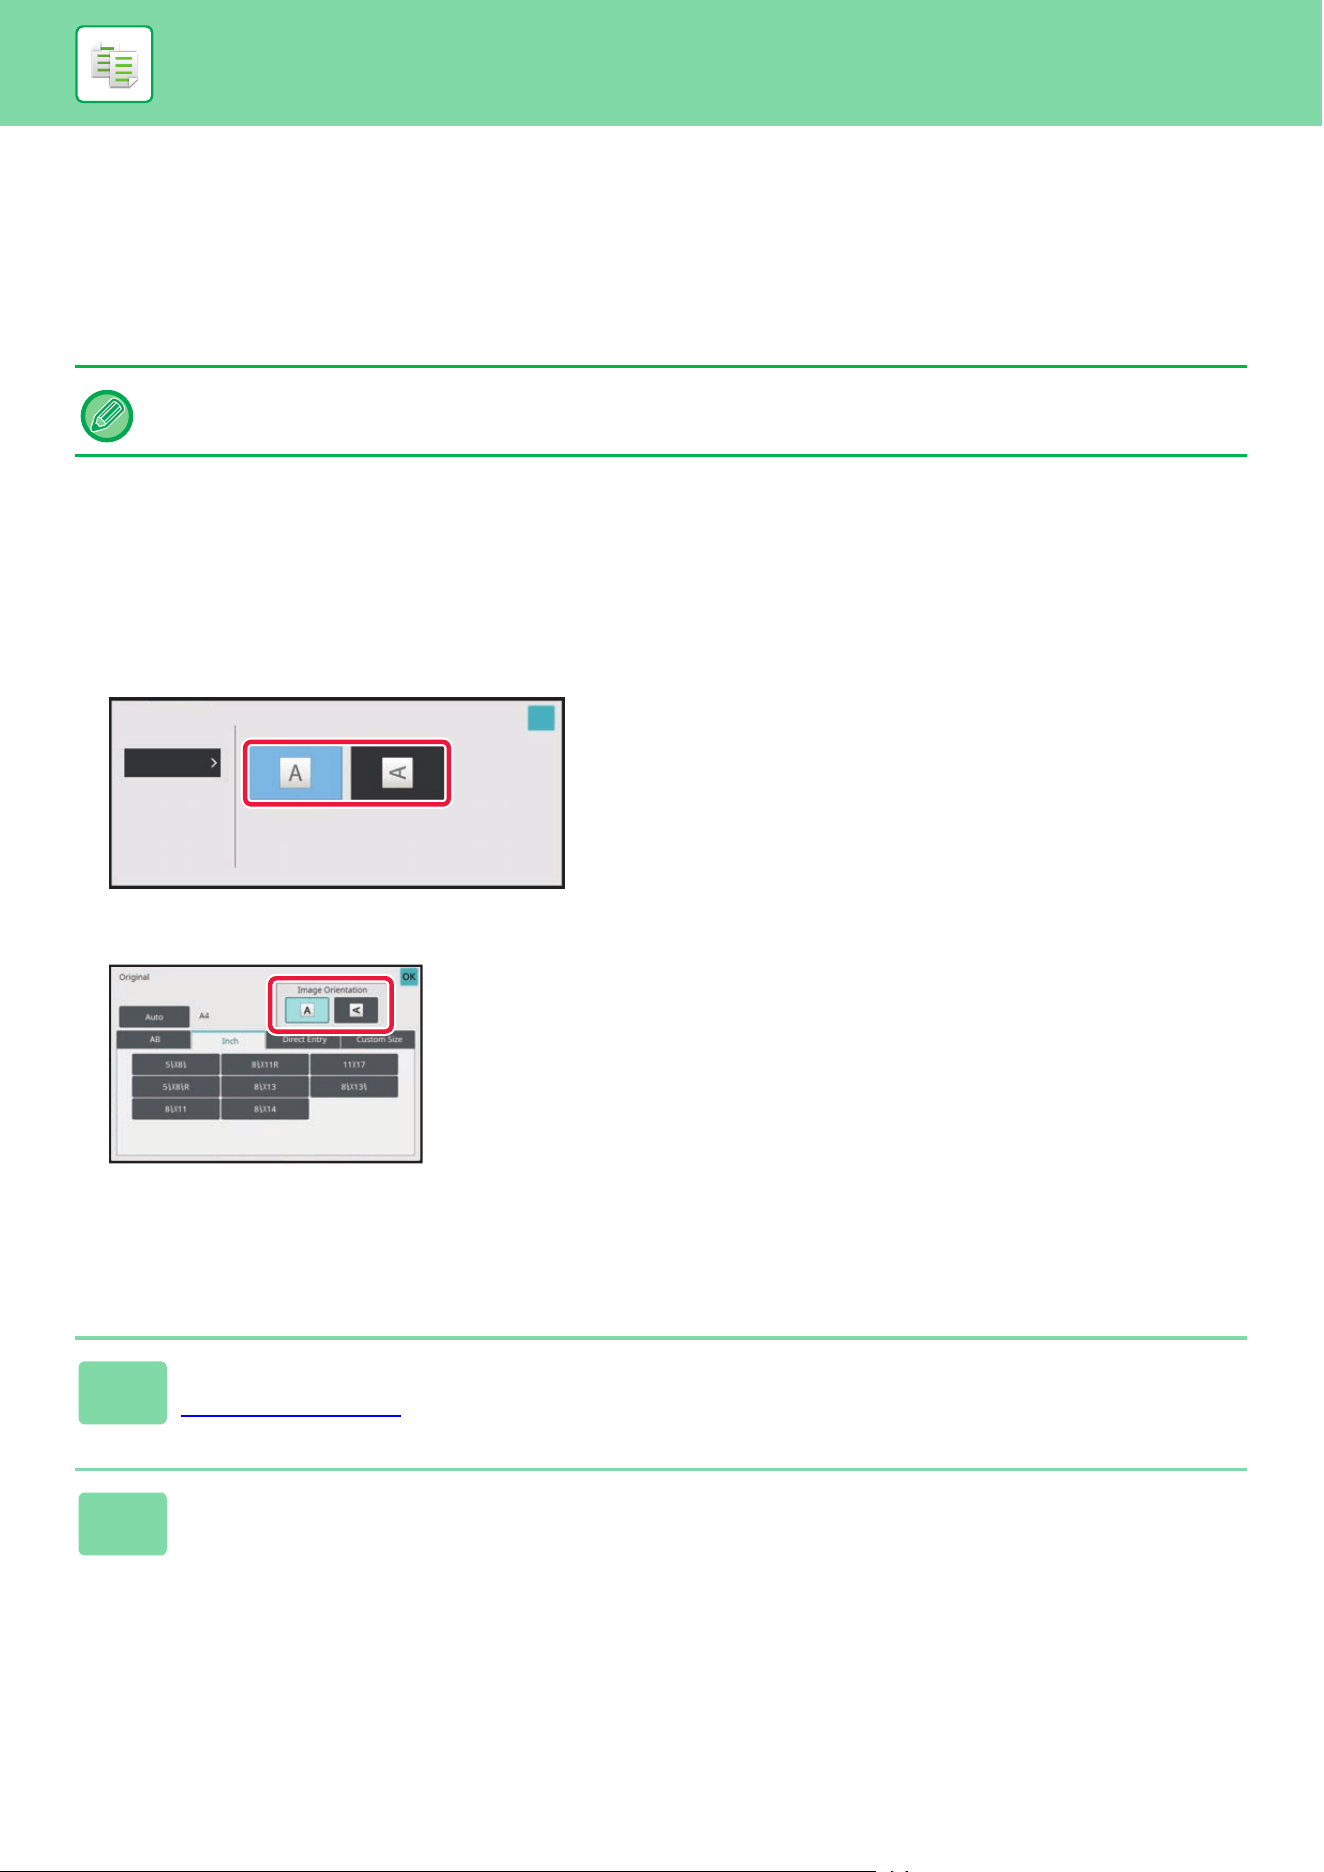
3-29
COPIER►BASIC PROCEDURE FOR MAKING COPIES
SELECTING THE ORIENTATION AND SIZE
OF THE ORIGINAL
When the original size is a non-standard size or is not detected correctly, manually specify the original size.
Set the orientation of the image to ensure that the orientation of the placed original is correctly recognized.
SPECIFYING THE ORIENTATION OF THE ORIGINAL
By specifying the starting side (top or left side) of the placed original, the orientation of the original will be correctly
recognized.
Finishing position settings and N-Up layout settings are specified using the recognized orientation.
SPECIFY THE ORIENTATION AND SIZE OF THE
ORIGINAL
Set the orientation and size of the original before scanning the original
In Easy mode
In Normal mode
1
Tap the [Original] key to set the orientation of the original.
COPY MODE (page 3-3)
2
Tap the [Auto] key.
Image Orientation
Original
Size
Auto
OK

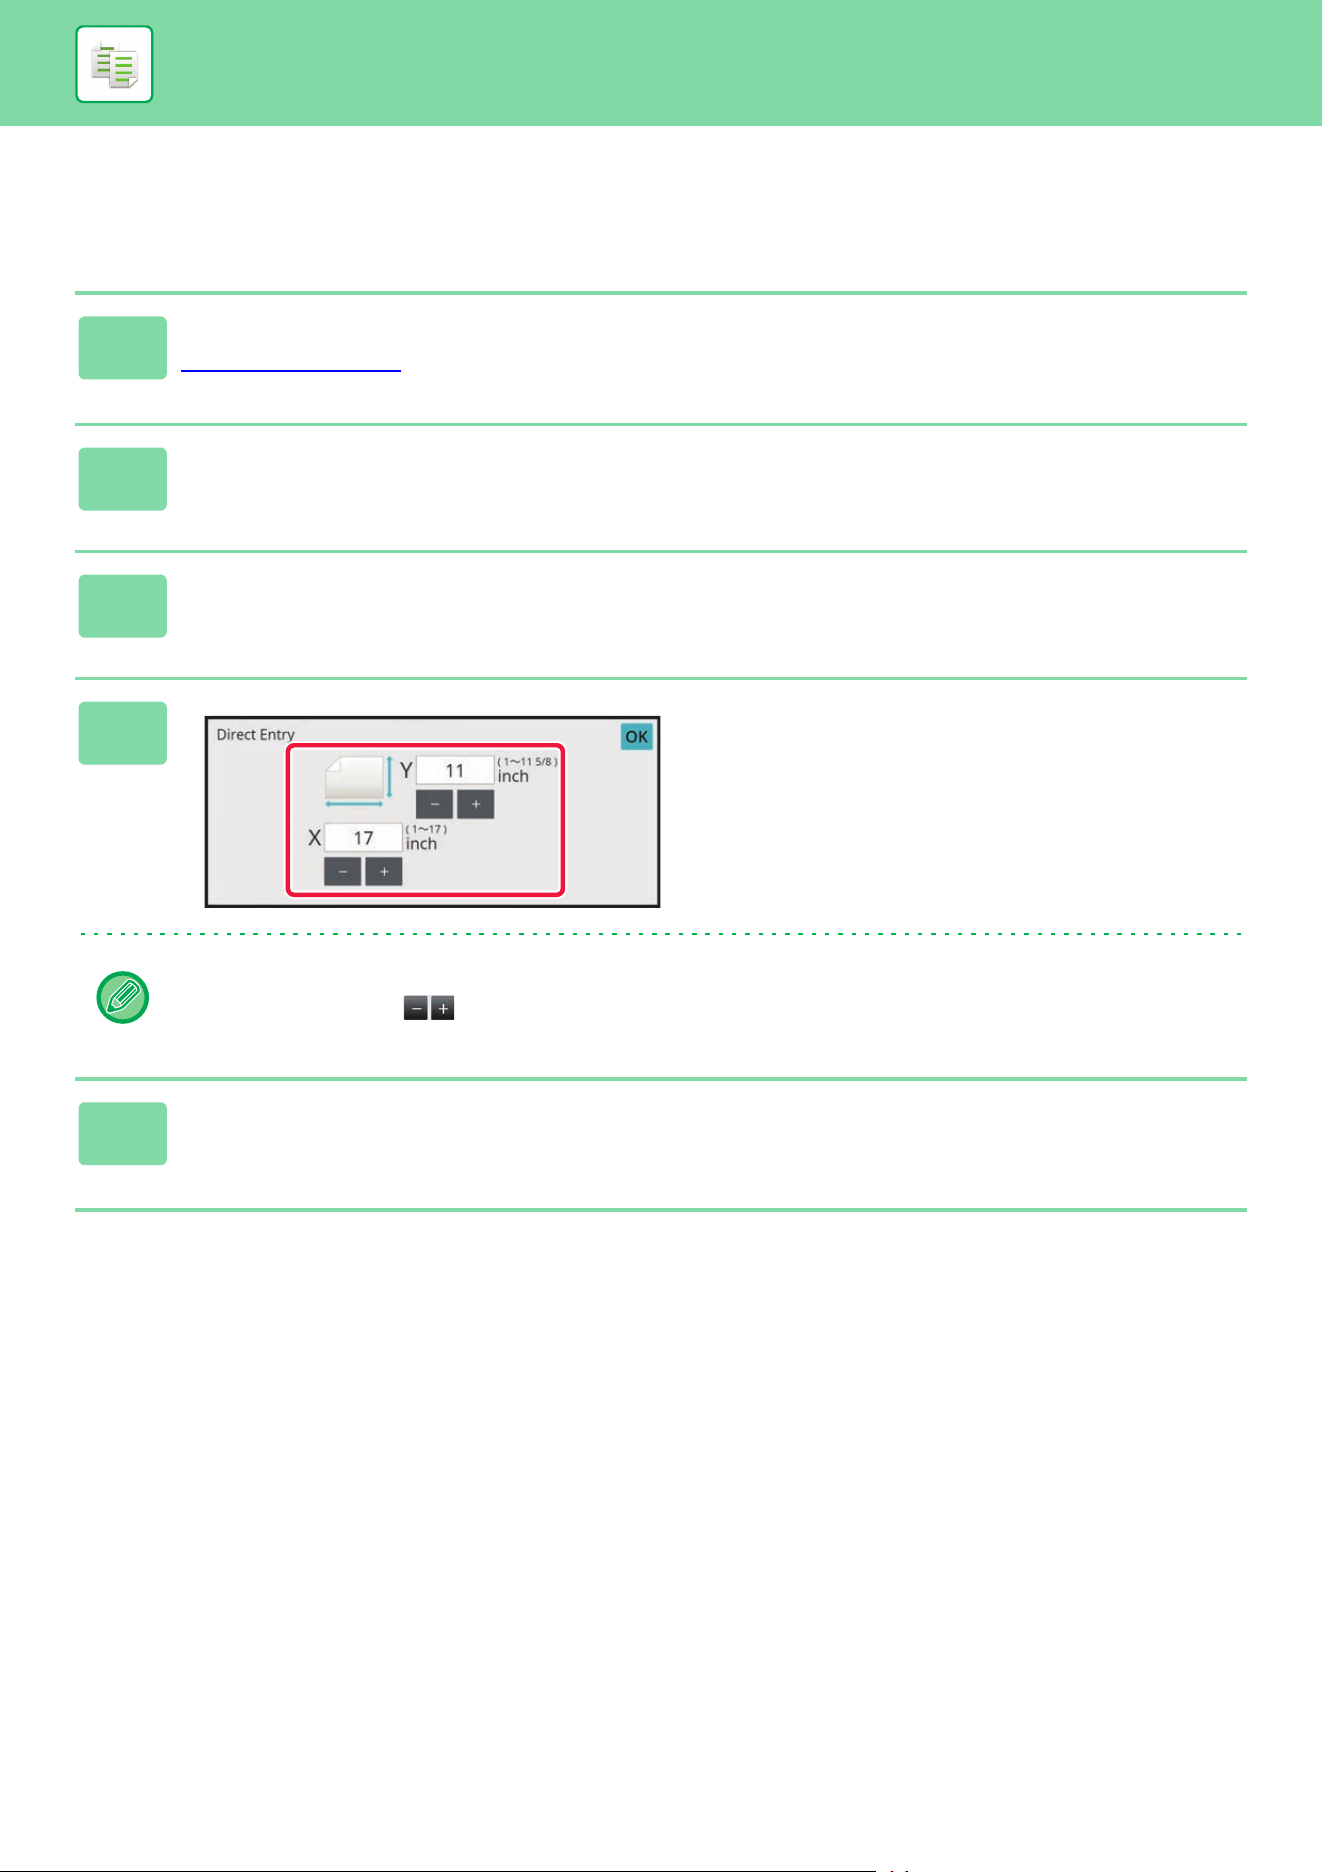
3-31
COPIER►BASIC PROCEDURE FOR MAKING COPIES
SPECIFYING THE ORIENTATION AND SIZE OF A
NON-STANDARD SIZE ORIGINALS
1
Tap the [Original] key to set the orientation of the original.
COPY MODE (page 3-3)
2
Tap the [Auto] key.
3
Tap the [Direct Entry] key.
4
Specify the original size.
After the settings are completed, tap [OK] key.
• Tap the areas displaying width and height sizes respectively, and enter the sizes using the numeric keys.
• It is convenient to use to finely adjust the entered size.
5
Tap the [OK] key.
Make sure that the original size you have set is displayed in the upper left corner of the screen.
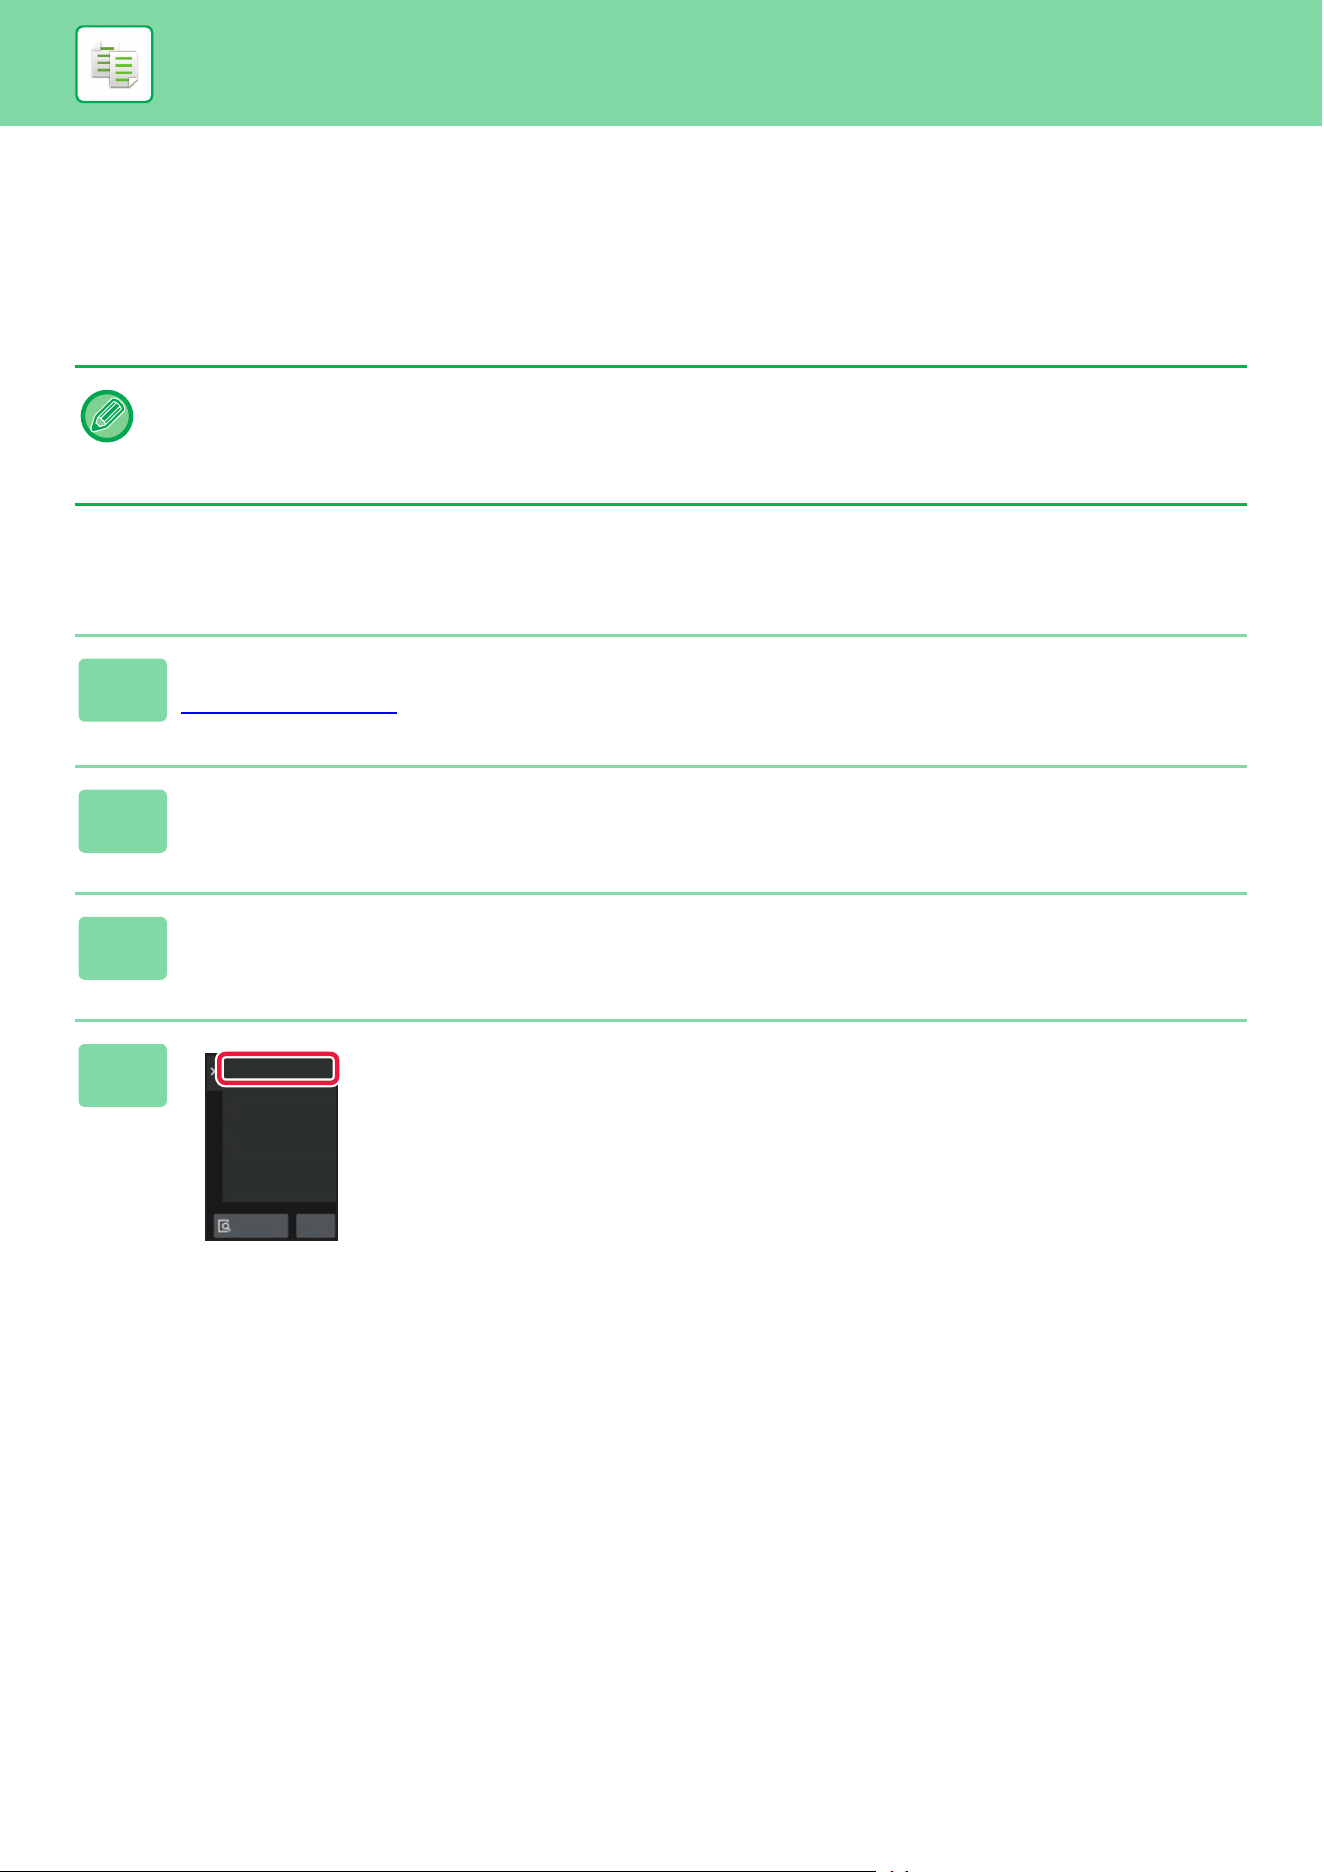
3-32
COPIER►BASIC PROCEDURE FOR MAKING COPIES
STORING FREQUENTLY USED ORIGINAL
SIZES
Store the frequently used non-standard original sizes. This section explains how to store, retrieve, change, and delete
non-standard original sizes.
STORING ORIGINAL SIZES (MODIFY/DELETE)
• The stored original size will be retained even if the main power is turned off.
• A total of up to 12 non-standard original sizes can be registered for copying and image sending.
• The added original sizes will also appear in other modes.
• You can register, modify, and delete the original size only in Normal mode.
1
Tap the [Detail] key to change to normal mode.
EASY MODE (page 3-3)
2
Tap the [Original] key.
3
Tap the [Custom Size] tab.
4
Tap [Store/Delete Original Size] on the
action panel.
Preview
Skip Blank Page in Original
Copy Ratio
Enlarge/Reduce Copy
Blank Page Sk ip
Background Adjustment
2-Sided Copy
Color Mode
Store/Delete
Original Size
CA
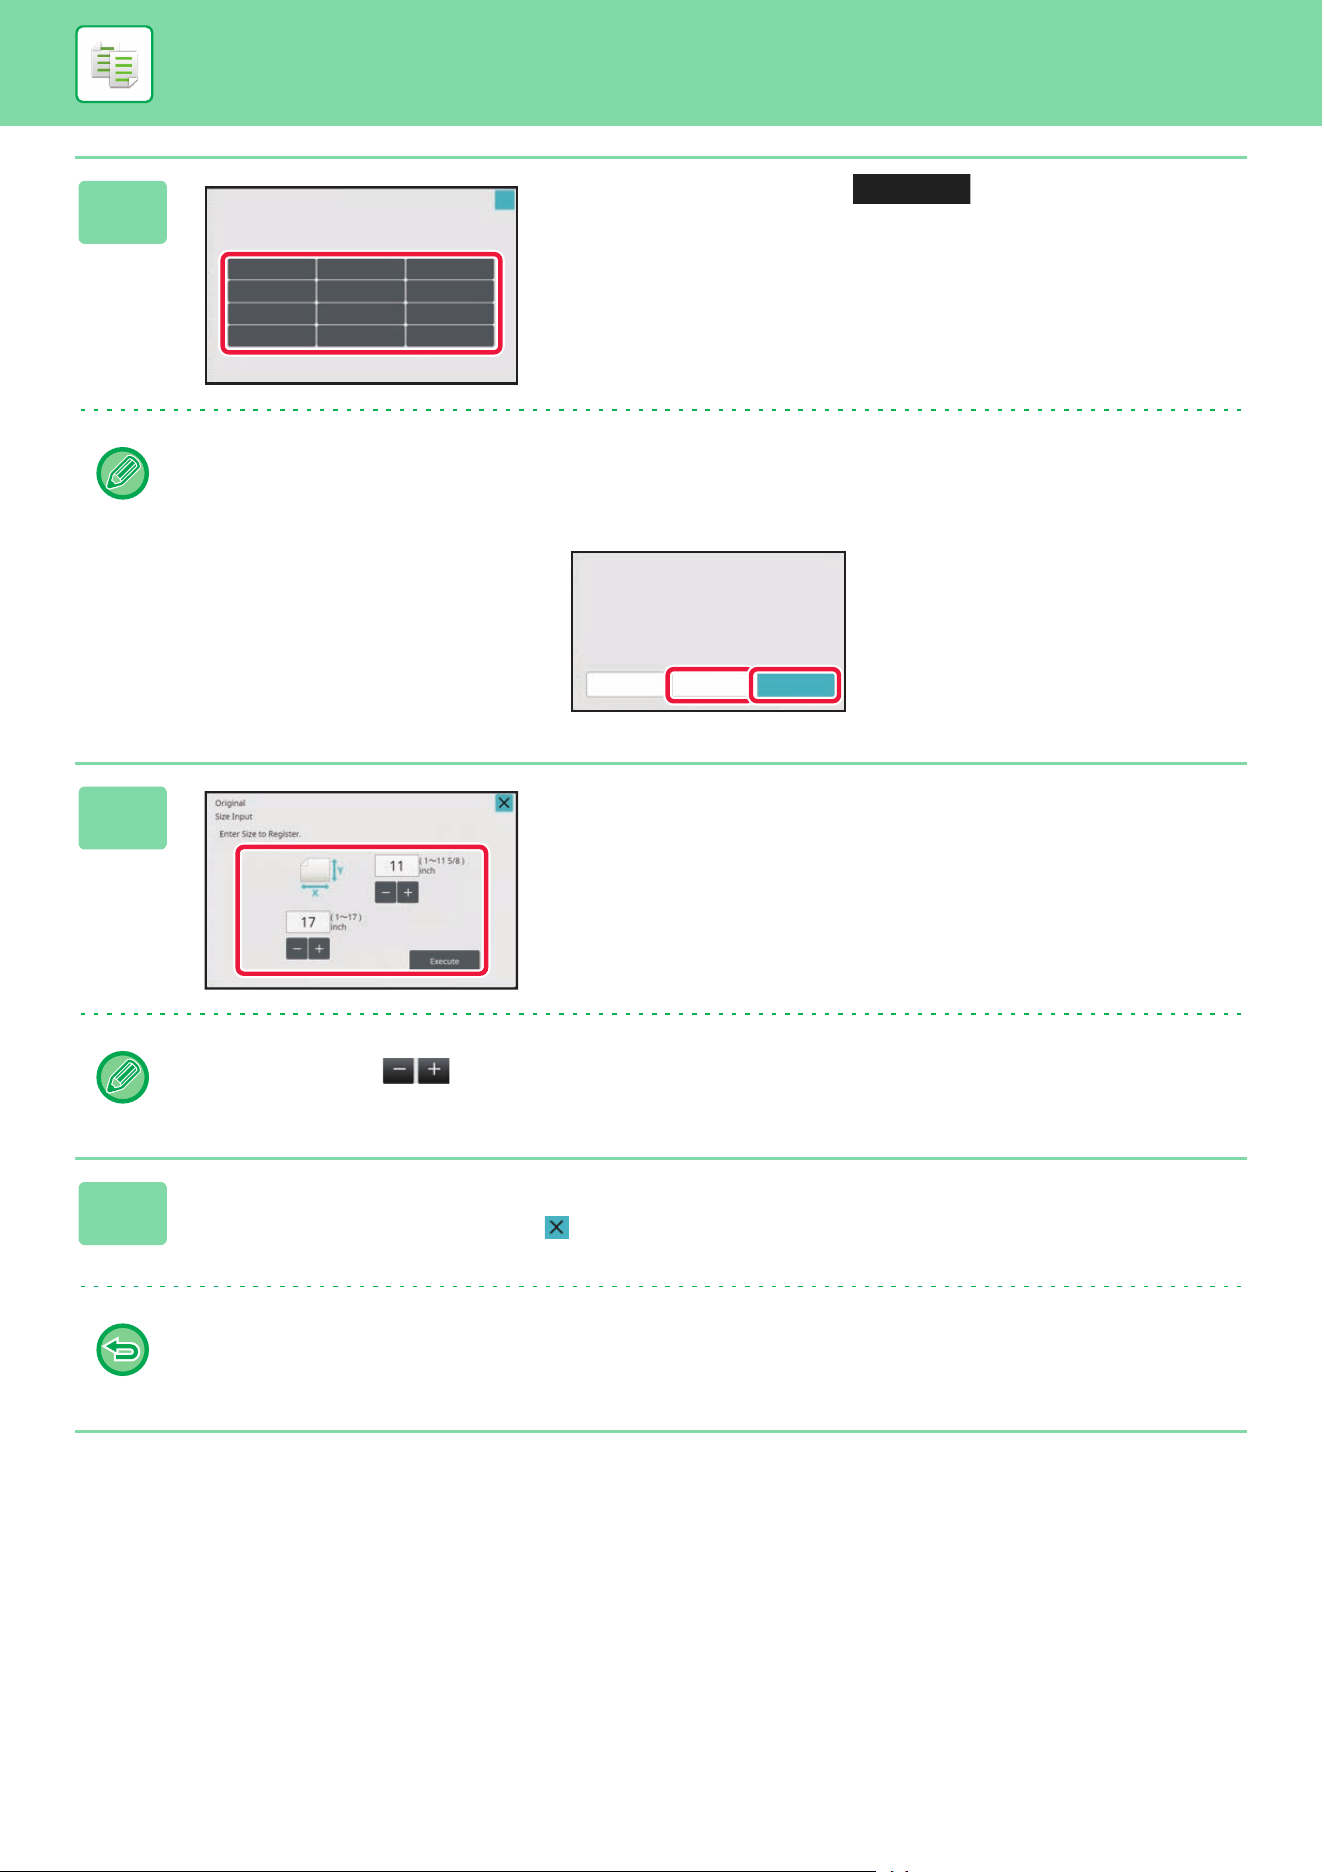
3-33
COPIER►BASIC PROCEDURE FOR MAKING COPIES
5
Tap a key ( ) for storing a
custom original size.
Tap a key that does not show a size.
To modify or delete a previously stored key:
Tap the key that you want to modify or delete. The following screen will appear.
• To modify the key, tap the [Modify] key and go to the next step.
• To delete the key, tap the [Delete] key. Make sure that the original size has been cleared and tap the [OK] key.
6
Specify the original size.
Tap the areas displaying width and height sizes respectively,
and enter the sizes using the numeric keys.
It is convenient to use to finely adjust the entered size.
7
Tap the [OK] key.
After the settings are completed, tap the key, and check that the key of the size stored on the original screen is
added properly. After you have checked it, tap [OK].
To cancel the operation:
Tap the [CA] key.
Store/Delete
Original
OK
Select the size key to store/delete
the custom original size.
Delete
Modify
Cancel
A custom size has al ready been stored
in this location.
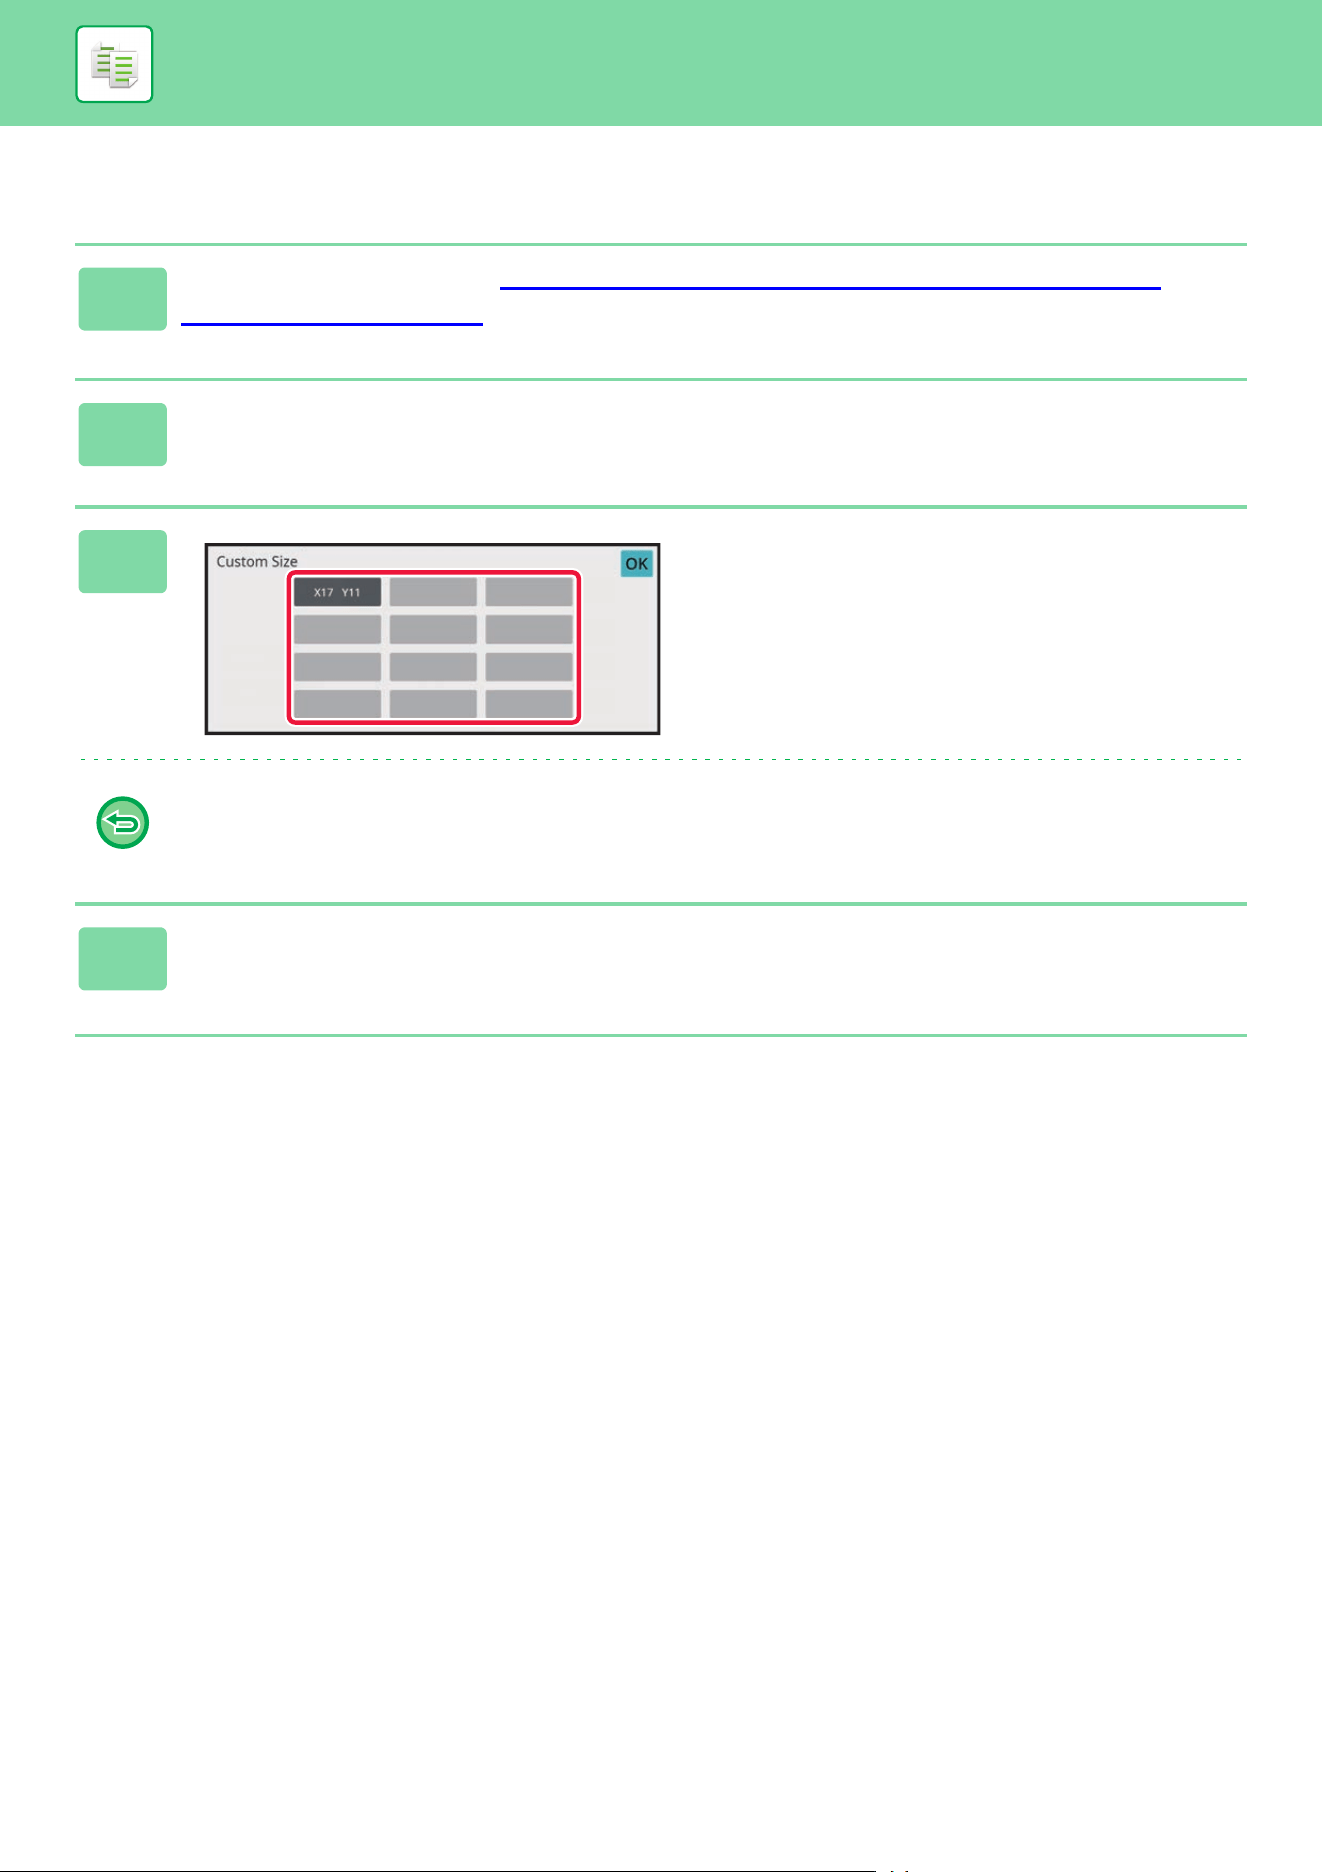
3-34
COPIER►BASIC PROCEDURE FOR MAKING COPIES
Retrieving a stored original size
1
Perform steps 1 to 2 in SPECIFY THE ORIENTATION AND SIZE OF THE
ORIGINAL (page 3-29).
2
Tap the [Custom Size] key.
3
Tap the key of the original size that
you wish to retrieve.
After selecting the key of the original size, tap the [OK] key.
To cancel the operation
Tap the [CA] key.
4
Tap the [OK] key.
Make sure that the original size you have set is displayed in the upper left corner of the screen.
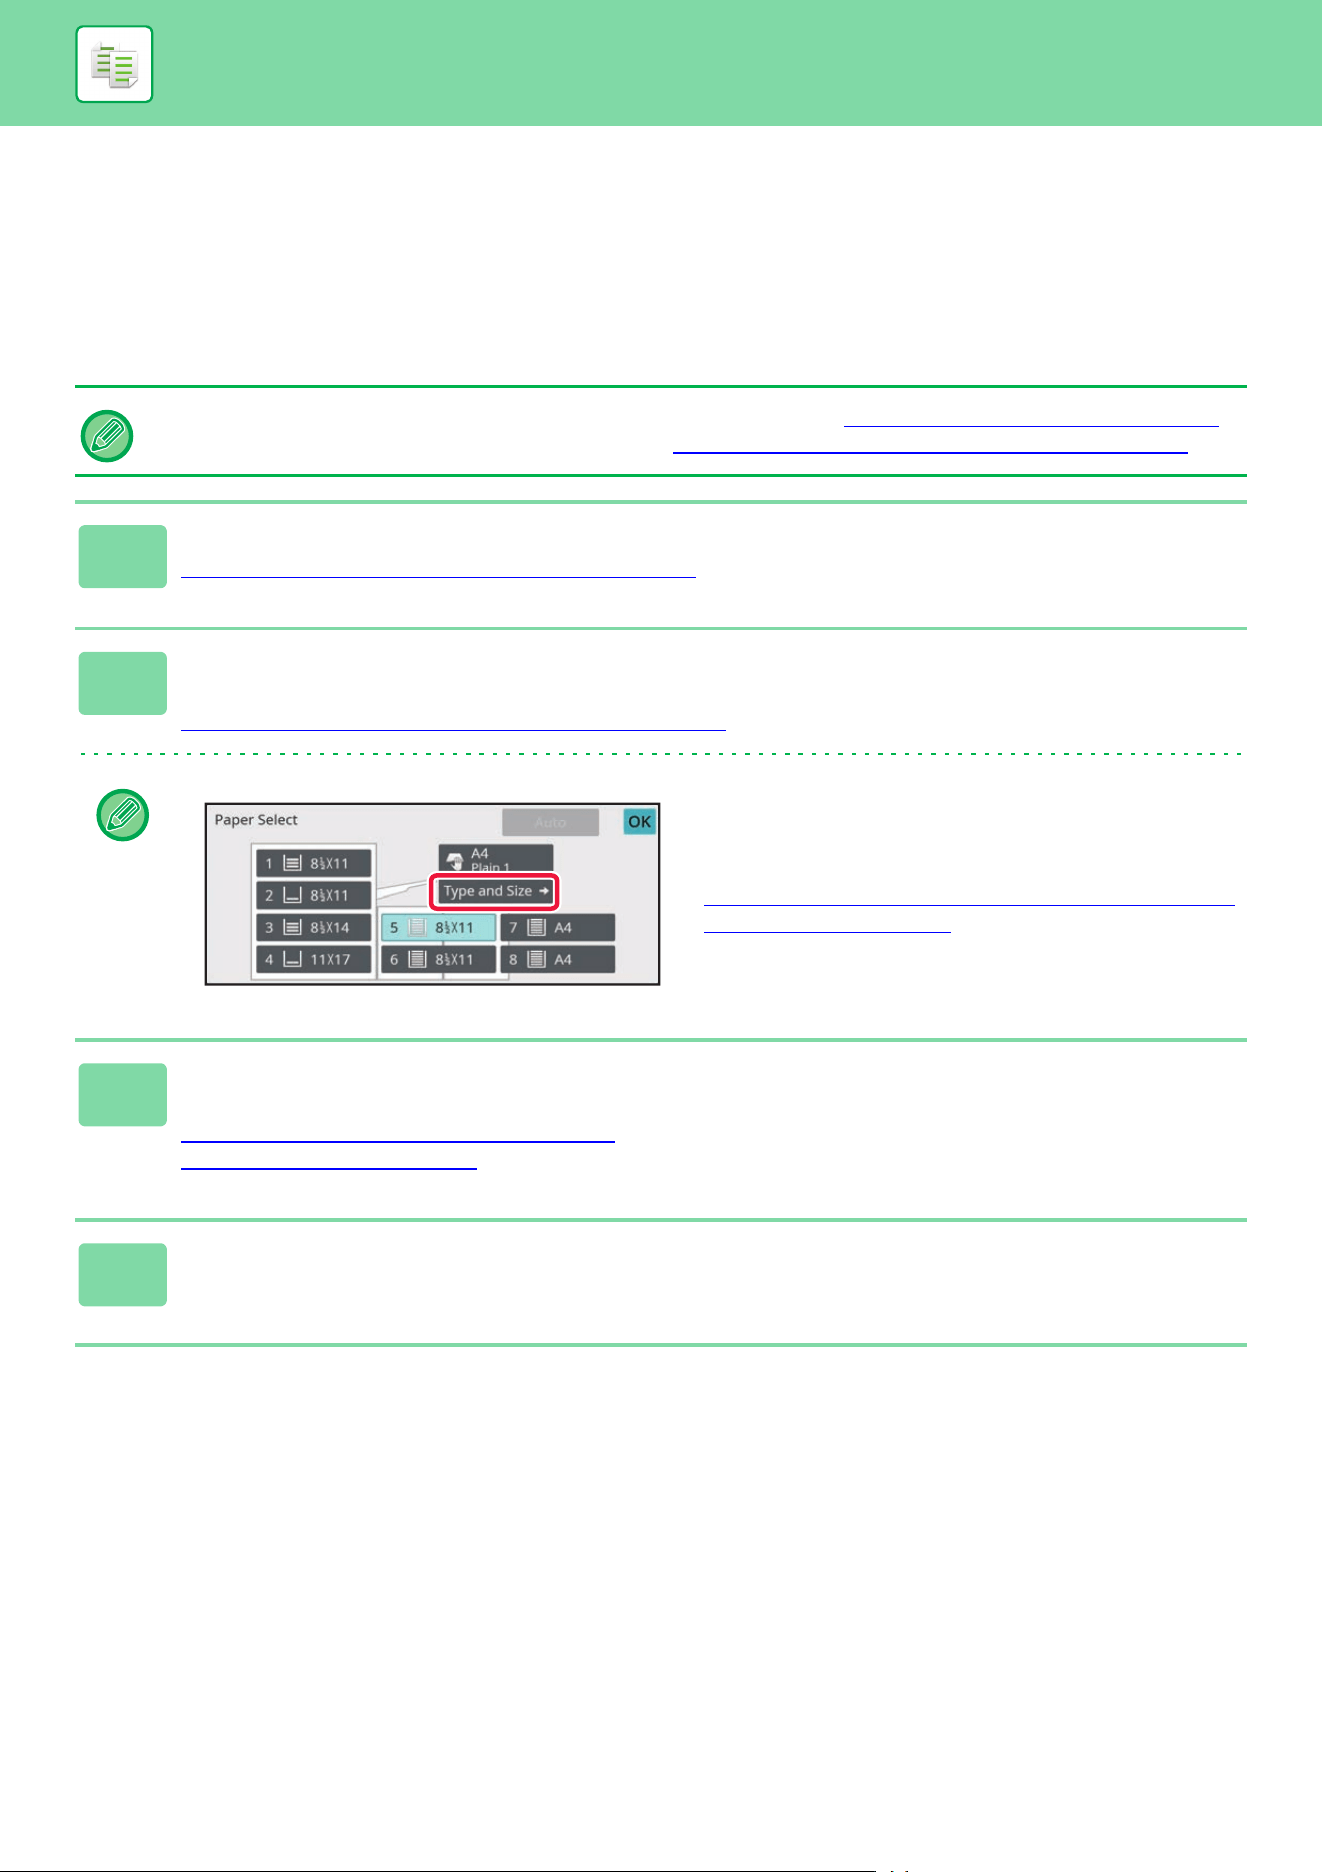
3-35
COPIER►BASIC PROCEDURE FOR MAKING COPIES
MAKING COPIES USING THE BYPASS TRAY
MAKING COPIES USING THE BYPASS TRAY
In addition to plain paper, the bypass tray allows you to make copies on transparency film, envelopes, tab paper, and
other special media.
For detailed information on paper that can be loaded into the bypass tray, see "APPLICABLE PAPER TYPES (page 1-12)".
For precautions on loading paper into the bypass tray, see "LOADING PAPER INTO THE BYPASS TRAY (page 1-36)
".
1
Load paper into the bypass tray.
LOADING PAPER INTO THE BYPASS TRAY (page 1-36)
2
Tap the [Paper Select] key, and tap the bypass tray key.
The bypass tray key displays the size and type of the loaded paper.
SELECTING THE PAPER TRAY FOR COPYING
(page 3-13)
When the setting requires change, tap the [Type and Size]
key and select the paper size and type.
SPECIFYING A TYPE AND SIZE OF PAPER LOADED ON
BYPASS TRAY (page 3-36)
3
Place the original.
Place the original in the document feeder tray of the automatic document feeder, or on the document glass.
AUTOMATIC DOCUMENT FEEDER (page 1-47)
DOCUMENT GLASS (page 1-51)
4
Tap the [Color Start] or [B/W Start] key to start copying.
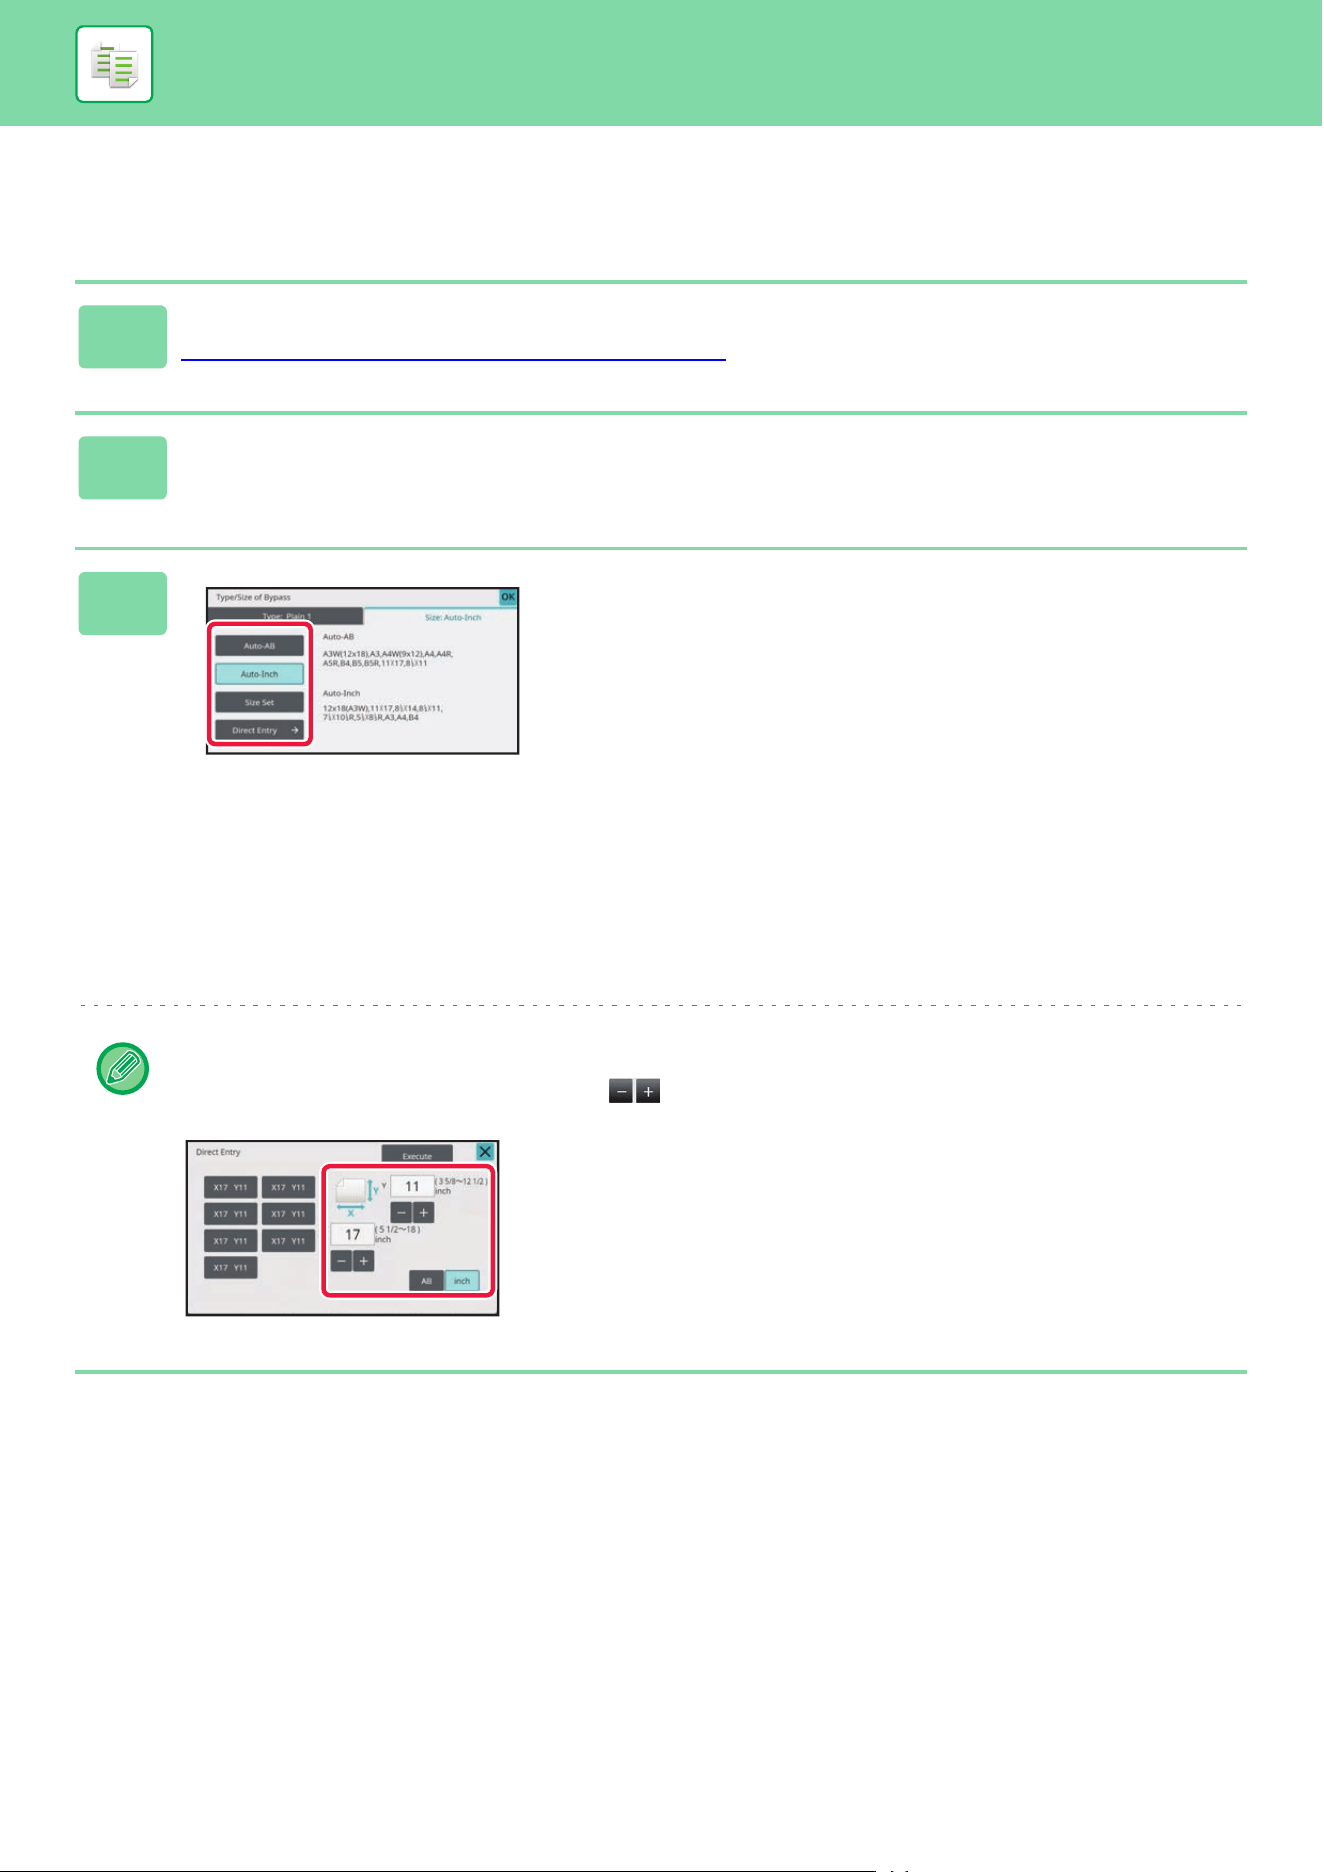
3-36
COPIER►BASIC PROCEDURE FOR MAKING COPIES
SPECIFYING A TYPE AND SIZE OF PAPER LOADED ON
BYPASS TRAY
1
Tap the [Paper Select] key.
SELECTING THE PAPER TRAY FOR COPYING (page 3-13)
2
Tap the [Type and Size] key, and tap the key that meets the type of the loaded
paper.
3
Tap the [Size] tab, and tap the key that
meets the size of the loaded paper.
• [Auto-AB]:
Automatically detects the appropriate AB paper size when
loading paper such as A4 or B5.
• [Auto-Inch]:
Automatically detects the appropriate inch paper size
when loading paper such as 8-1/2"x11".
• [Size Set]:
Tap this key to manually specify the paper size that is not
detected automatically.
• [Direct Entry]:
Tap this key to enter a numeric value for the size of the
loaded paper.
After the settings are completed, tap [OK] key.
To directly enter a paper size
Tap the [inch] key to set a paper size in inches, or tap the [AB] key to set it in millimeters.
After you have entered the paper size using the key, tap the [OK] key.

3-37
COPIER►BASIC PROCEDURE FOR MAKING COPIES
OUTPUT
Configure the output settings for copies using Sort, Group, Offset, Separator Page, Staple, Punch, or Fold. Also specify
the output destination of copies.
You can tap the [Output] key in normal mode to configure settings for all output functions.
Settings for the staple and punch functions can also be configured from simple mode.
Output Tray
Specify the destination to output copies.
If a finisher (large stacker) or saddle stitch finisher (large stacker) is installed, you can select [Upper Tray], [Middle Tray],
or [Lower Tray].
Offset
This function outputs copies while shifting them set by set. Setting the checkbox to enables the offset function, and
setting it to disables the function.
This function is available when a finisher or saddle stitch finisher is installed and [Upper Tray], [Lower Tray] or [Finisher Tray]
is selected as the output tray.
Selecting the staple function clears the Offset checkmark automatically.
Output screen of normal mode
Offset enabled Offset disabled
3-38
COPIER►BASIC PROCEDURE FOR MAKING COPIES
Separator Page
This function inserts separator pages for every specified number of copies or for every job before they are output.
REPEATING THE SAME IMAGE ON ONE SHEET (REPEAT LAYOUT)
(page 3-63)
Sort/Group
Select the sorting method when copying the scanned original.
"Sort" sorts the scanned original on a set basis, and outputs them. "Group" sorts the scanned original on a page basis,
and outputs them.
SORT/GROUP SETTING
(page 3-40)
Staple
Each set of copies can be stapled, or the sheets can be folded at the center and stapled.
Staple ON (excluding saddle stitch)
(page 3-42)
Saddle Stitch (page 3-43)
Punch
This function punches copies and outputs them.
PUNCH SETTINGS
(page 3-47)
Fold
Copies can be folded and output.
FOLD SETTING
(page 3-49)
• The staple function is available only when the finisher or saddle stitch finisher is installed.
• The saddle stitch function is available only when the saddle stitch finisher is installed.
The punch function is available only when the punch module is installed.
The folding function is available when a finisher or saddle finisher is installed and [Upper Tray], [Lower Tray] or [Finisher
Tray] is selected as the paper output destination.
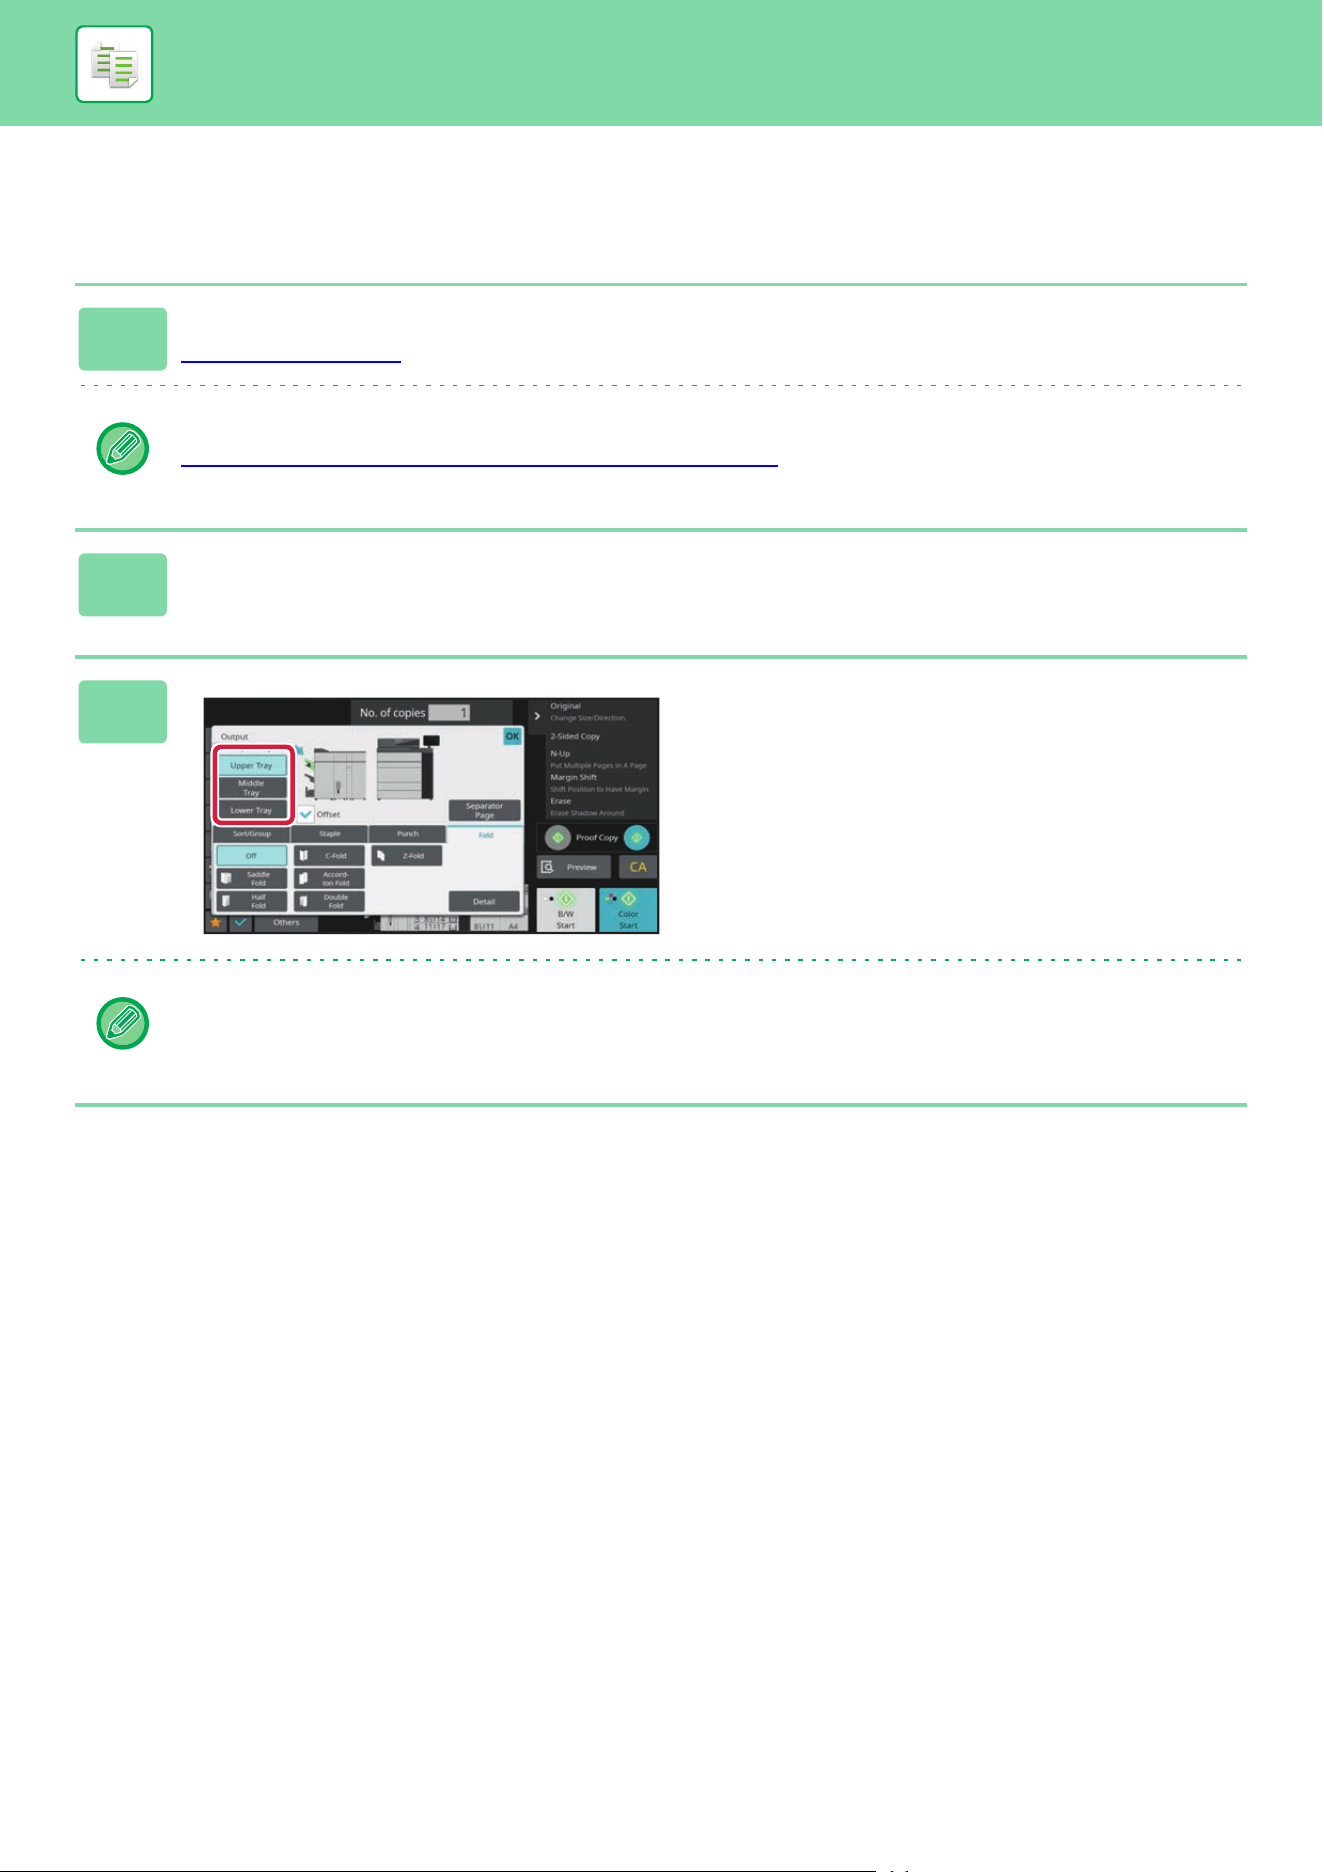
3-39
COPIER►BASIC PROCEDURE FOR MAKING COPIES
CHANGING OUTPUT DESTINATION
Specify the destination to output copies.
1
Tap the [Detail] key to change to normal mode.
COPY MODE (page 3-3)
Tap the [Original] key and specify the orientation of the original to have the orientation be correctly recognized.
SPECIFYING THE ORIENTATION OF THE ORIGINAL
(page 3-29)
2
Tap the [Output] key.
3
Select the output tray from "Output
Tray".
After the settings are completed, tap [OK] key.
If a finisher (large stacker) or saddle stitch finisher (large stacker) is installed, select the [Upper Tray], [Middle Tray] or
[Lower Tray] key.
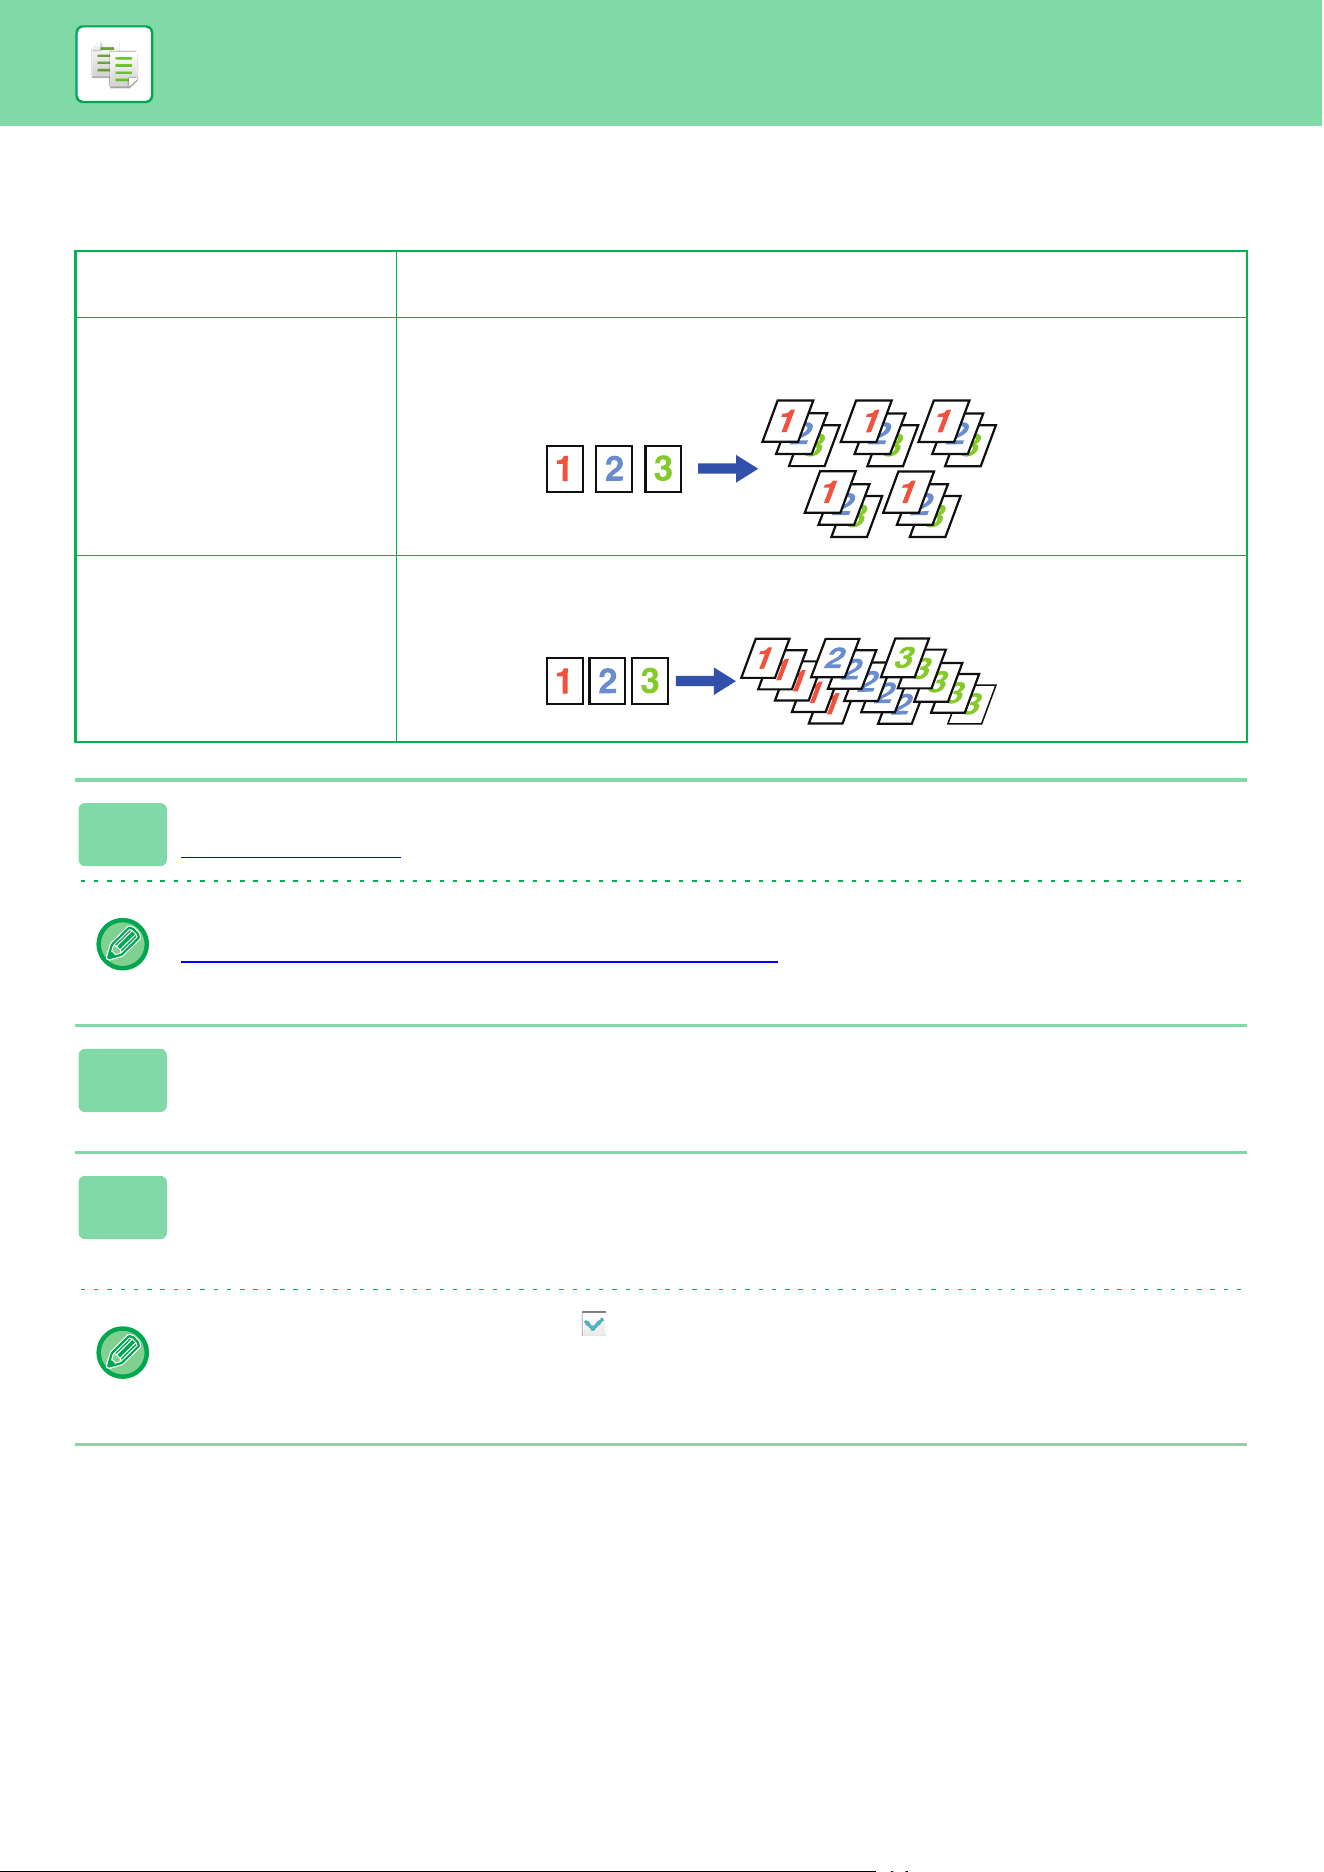
3-40
COPIER►BASIC PROCEDURE FOR MAKING COPIES
SORT/GROUP SETTING
This section explains how to select the sorting method when outputting the scanned original.
Auto Enables the sort mode when the original is placed in the automatic document feeder, and
enables the group mode when the original is placed on the document glass.
Sort Sorts the scanned original on a set basis, and outputs them.
Example: When 5 is set for the number of copies in sorting
Group Groups the scanned original on a page basis, and outputs them.
Example: When 5 is set for the number of copies in grouping
1
Tap the [Detail] key to change to normal mode.
COPY MODE (page 3-3)
Tap the [Original] key and specify the orientation of the original to have the orientation be correctly recognized.
SPECIFYING THE ORIENTATION OF THE ORIGINAL
(page 3-29)
2
Tap the [Output] key.
3
Tap the [Sort/Group] tab, then tap the [Auto] key, the [Sort] key, or the
[Group] key.
After the settings are completed, tap [OK] key.
• You can select the offset output checkbox to have each set of output be offset from the previous set to enable
easy removal from the output tray.
• To change the output tray, tap the [Output Tray] key, and select the output destination.
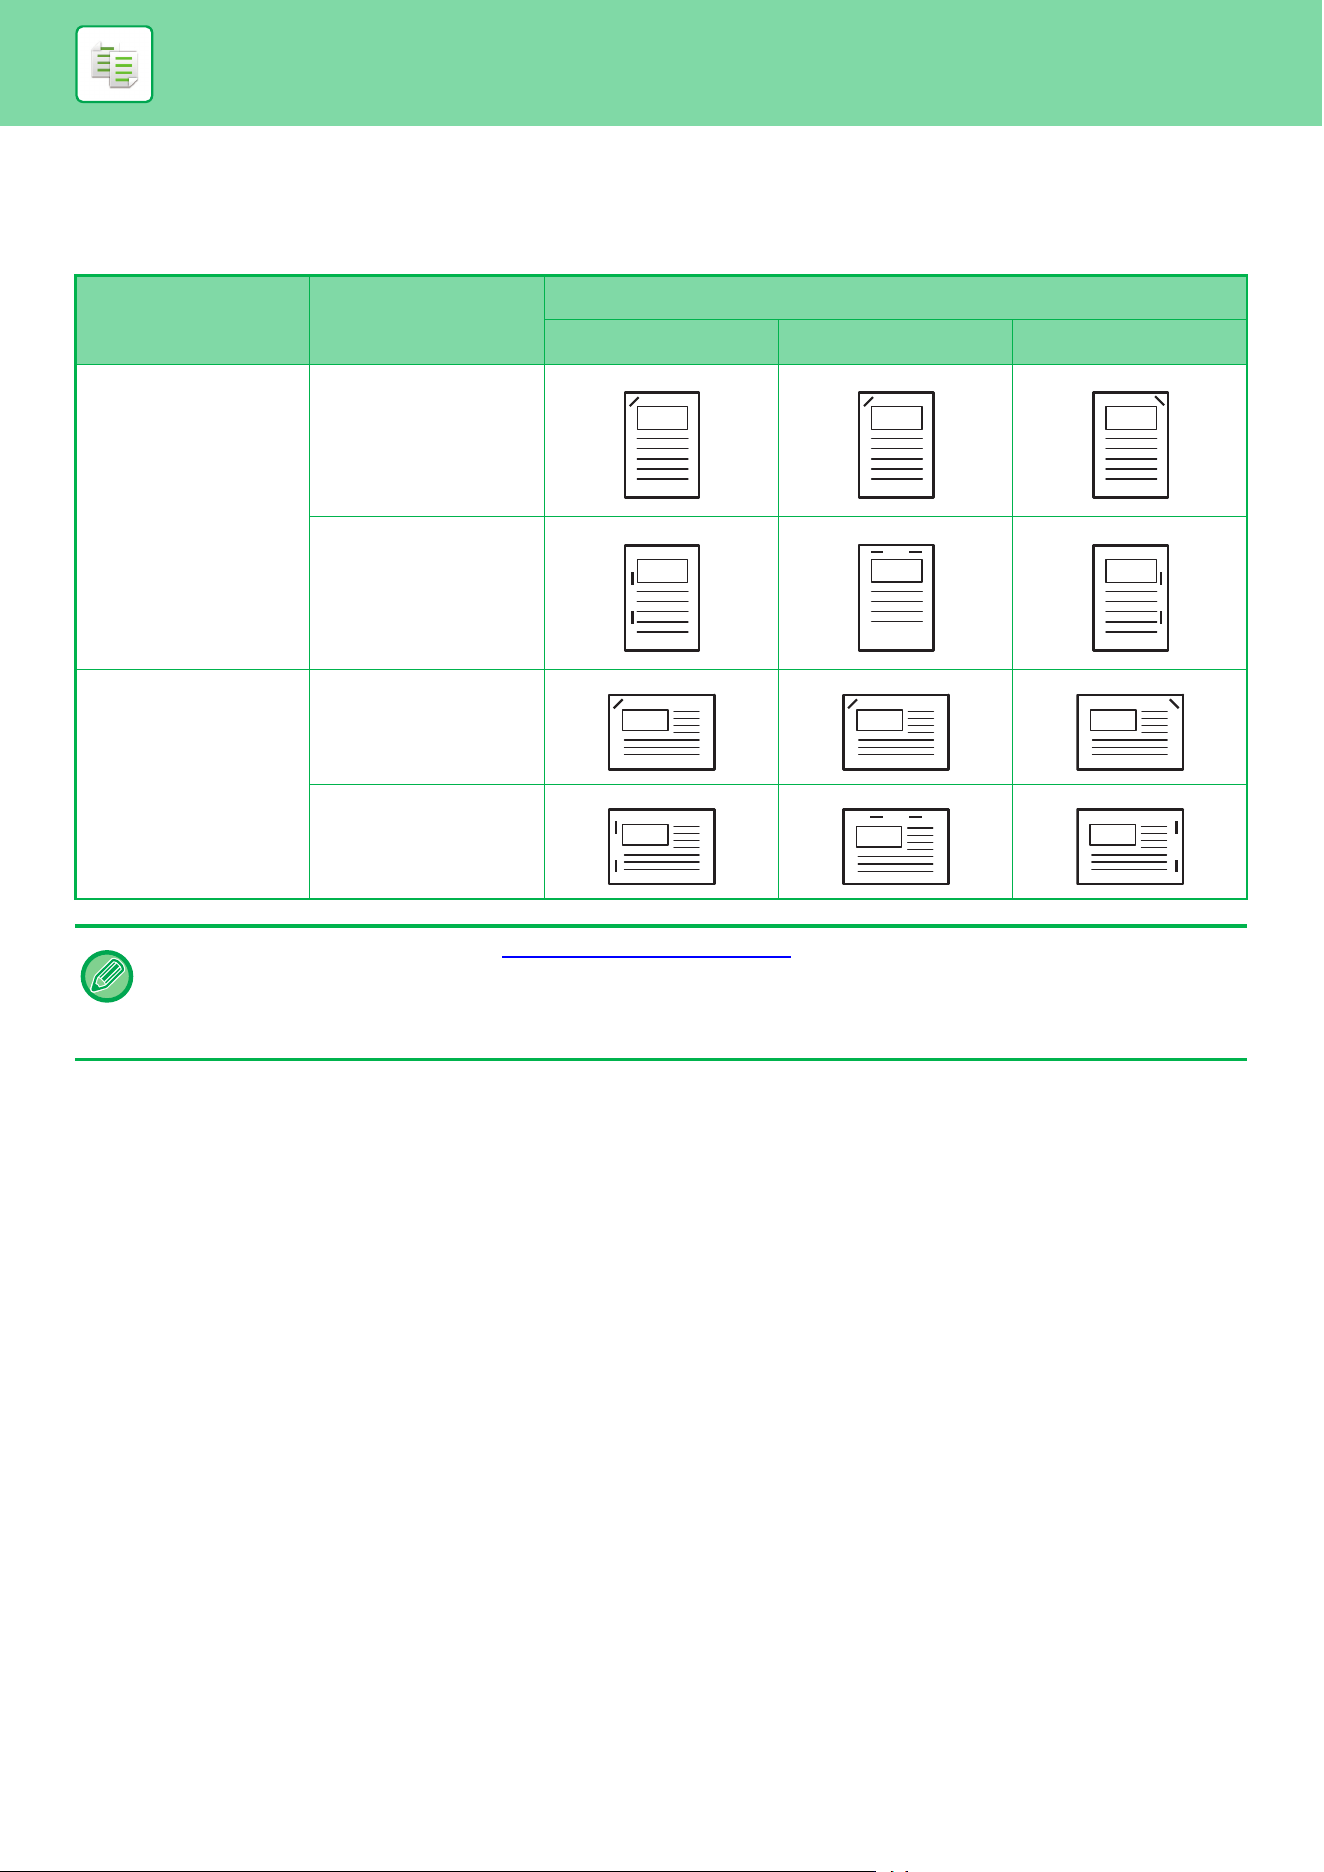
3-41
COPIER►BASIC PROCEDURE FOR MAKING COPIES
STAPLE SETTINGS
Specify whether or not the set of output will be stapled.
Portrait orientation
Original
Orientation
Staple Staple Position
Left Top Right
Portrait orientation 1 Staples
2 Staples
Landscape orientation 1 Staples
2 Staples
• You can view staple positions on the "PREVIEW SCREEN (page 2-11)". Text will be printed at the preset size regardless
of the copy ratio or paper size setting.
• A finisher or saddle stitch finisher is required to use the staple function.
• A saddle stitch finisher is required to use the saddle stitch function.
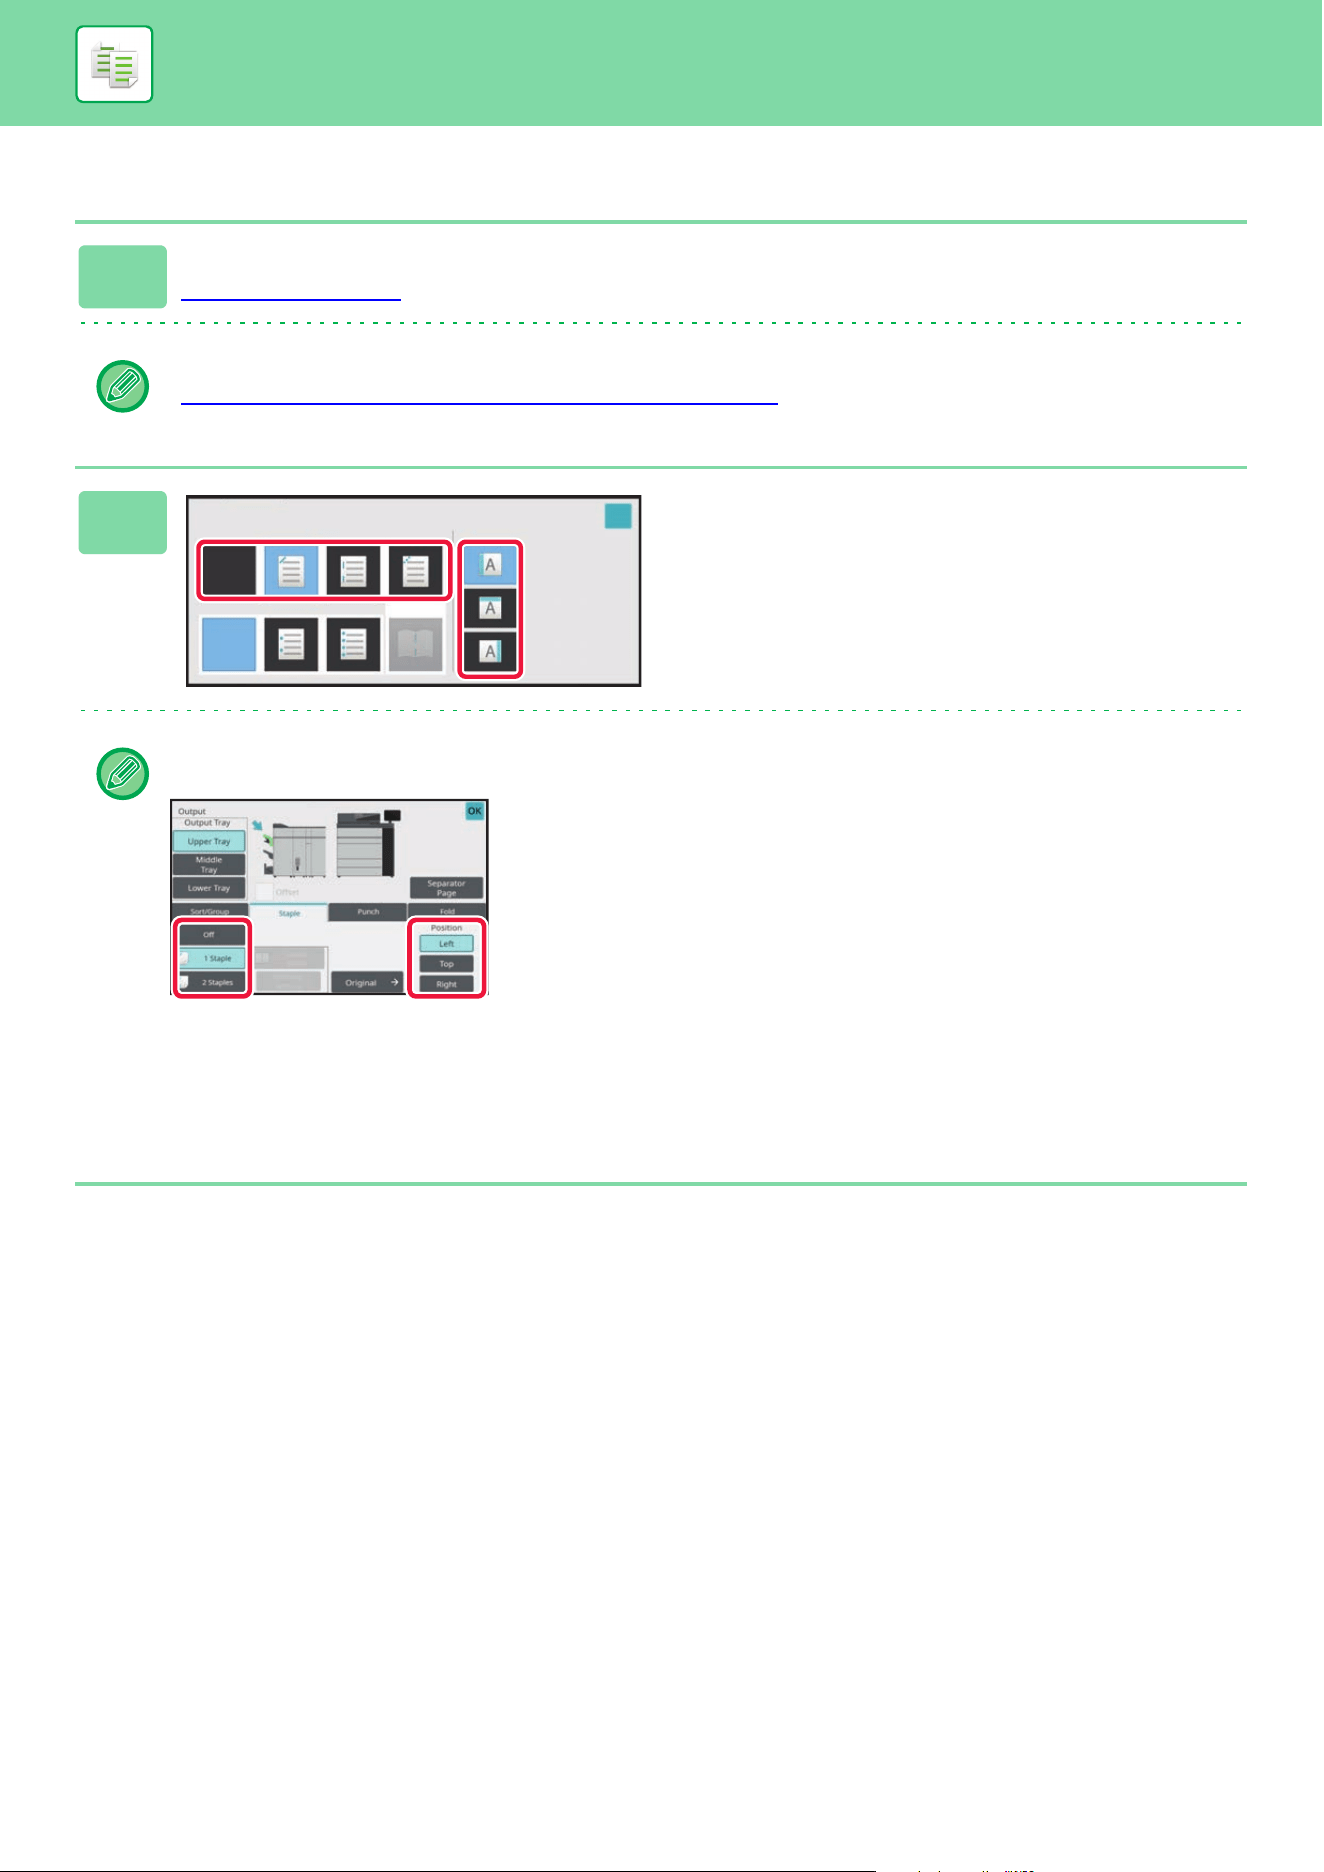
3-42
COPIER►BASIC PROCEDURE FOR MAKING COPIES
Staple ON (excluding saddle stitch)
1
Tap the [Staple / Punch] key.
COPY MODE (page 3-3)
Tap the [Original] key and specify the orientation of the original to have the orientation be correctly recognized.
SPECIFYING THE ORIENTATION OF THE ORIGINAL
(page 3-29)
2
Select the number of staples and
staple position.
After the settings are completed, tap [OK] key.
In normal mode
• Tap the [Output] key and [Staple] tab.
• To change the output paper output tray, select the output destination in [Output Tray] of [Other functions] before
setting the staples.
• If the number of scanned originals exceeds the staple sheet limit, a message is displayed. Tap [Continue] or [Cancel].
[Cancel]: Cancels the staple sort setting.
[Continue]: Continues sorting without stapling.
Staple / Punch
Staple
Off
Off
Position
Punch
OK
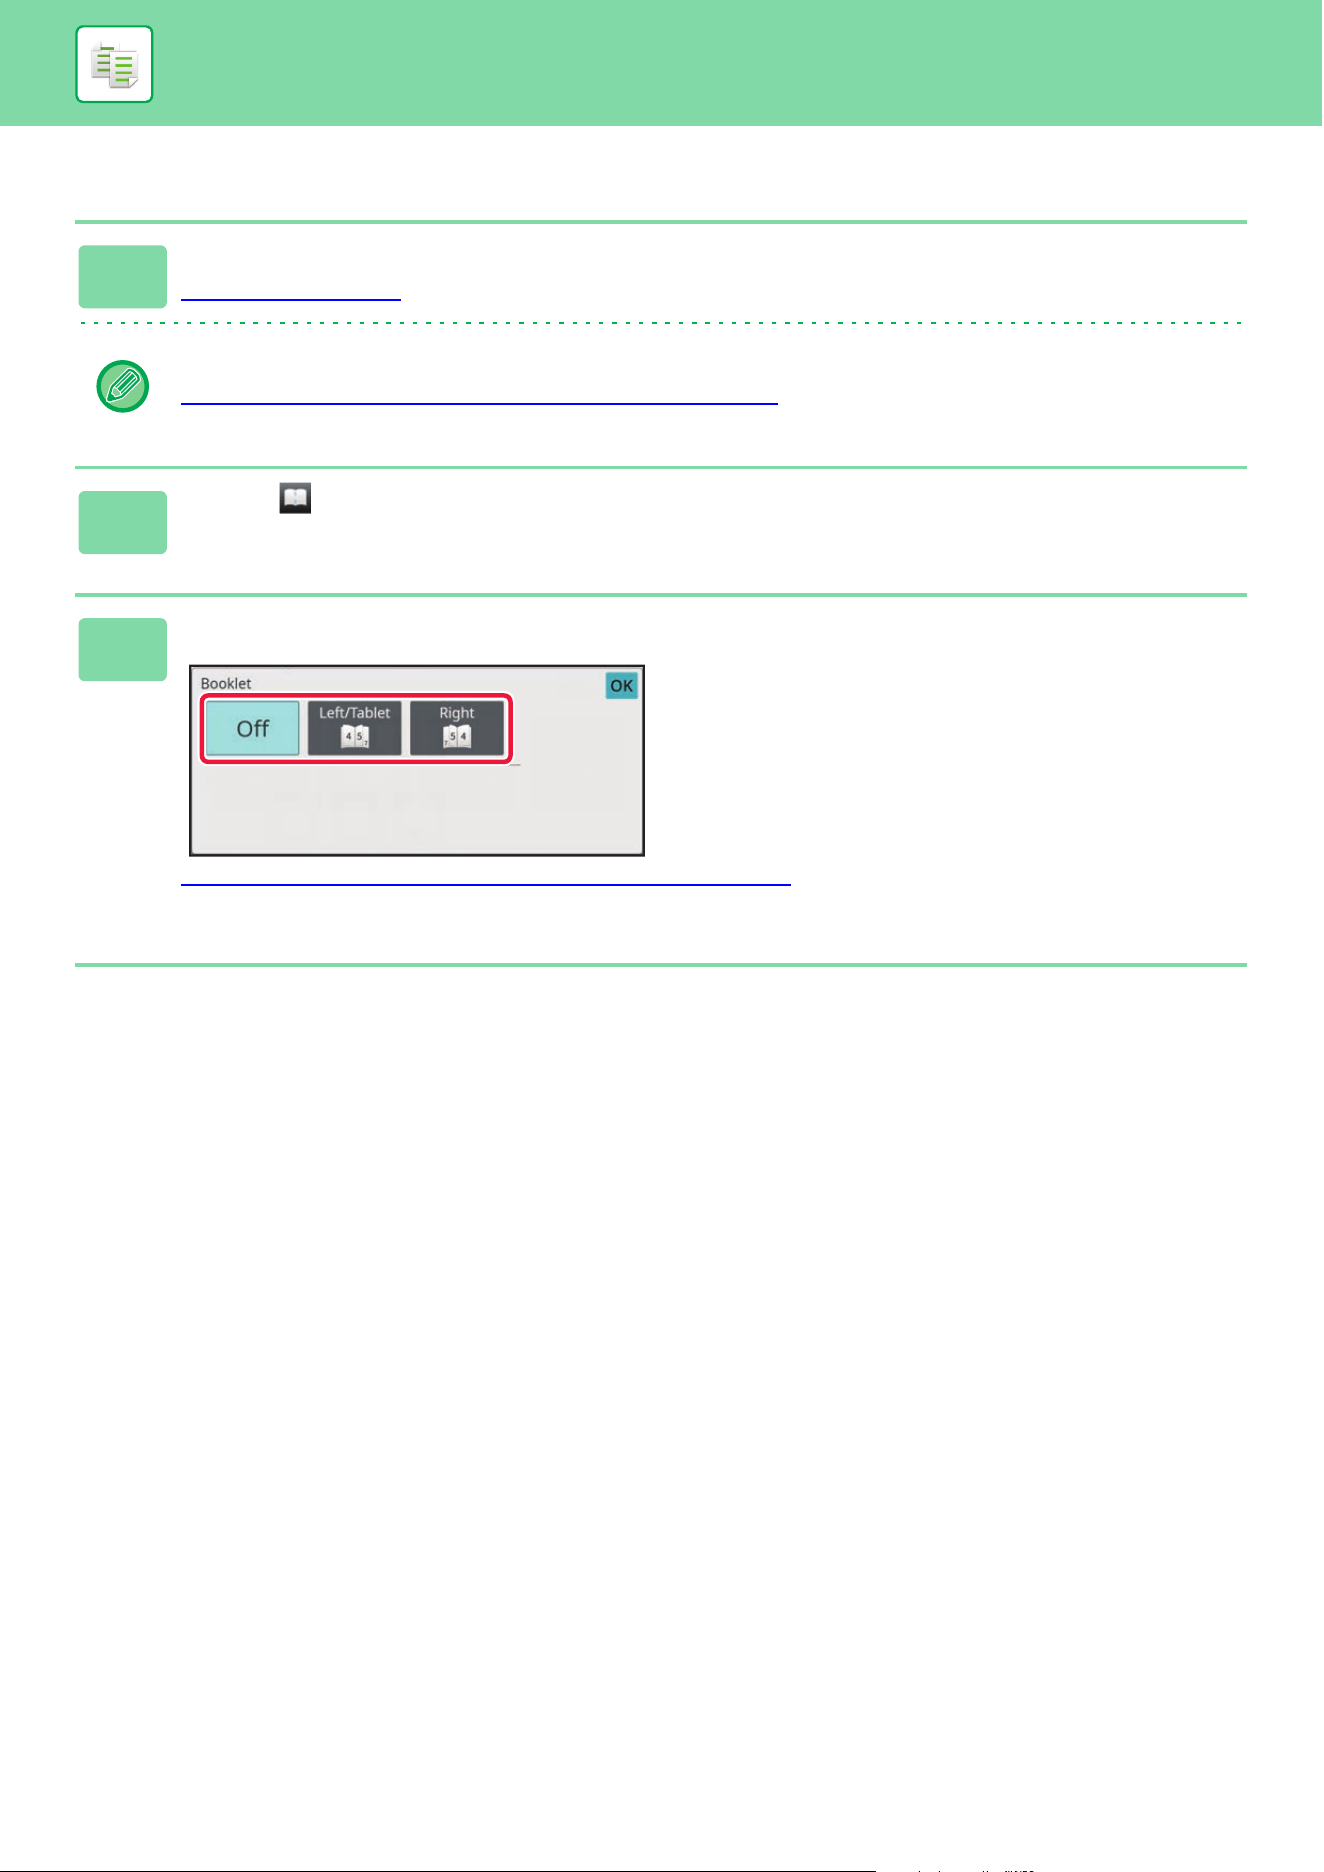
3-43
COPIER►BASIC PROCEDURE FOR MAKING COPIES
Saddle Stitch
1
Tap the [Staple / Punch] key.
COPY MODE (page 3-3)
Tap the [Original] key and specify the orientation of the original to have the orientation be correctly recognized.
SPECIFYING THE ORIENTATION OF THE ORIGINAL
(page 3-29)
2
Select .
3
Select binding edge and original settings.
MAKING COPIES IN PAMPHLET FORMAT (BOOKLET) (page 3-71)
After the settings are completed, tap [OK] key.
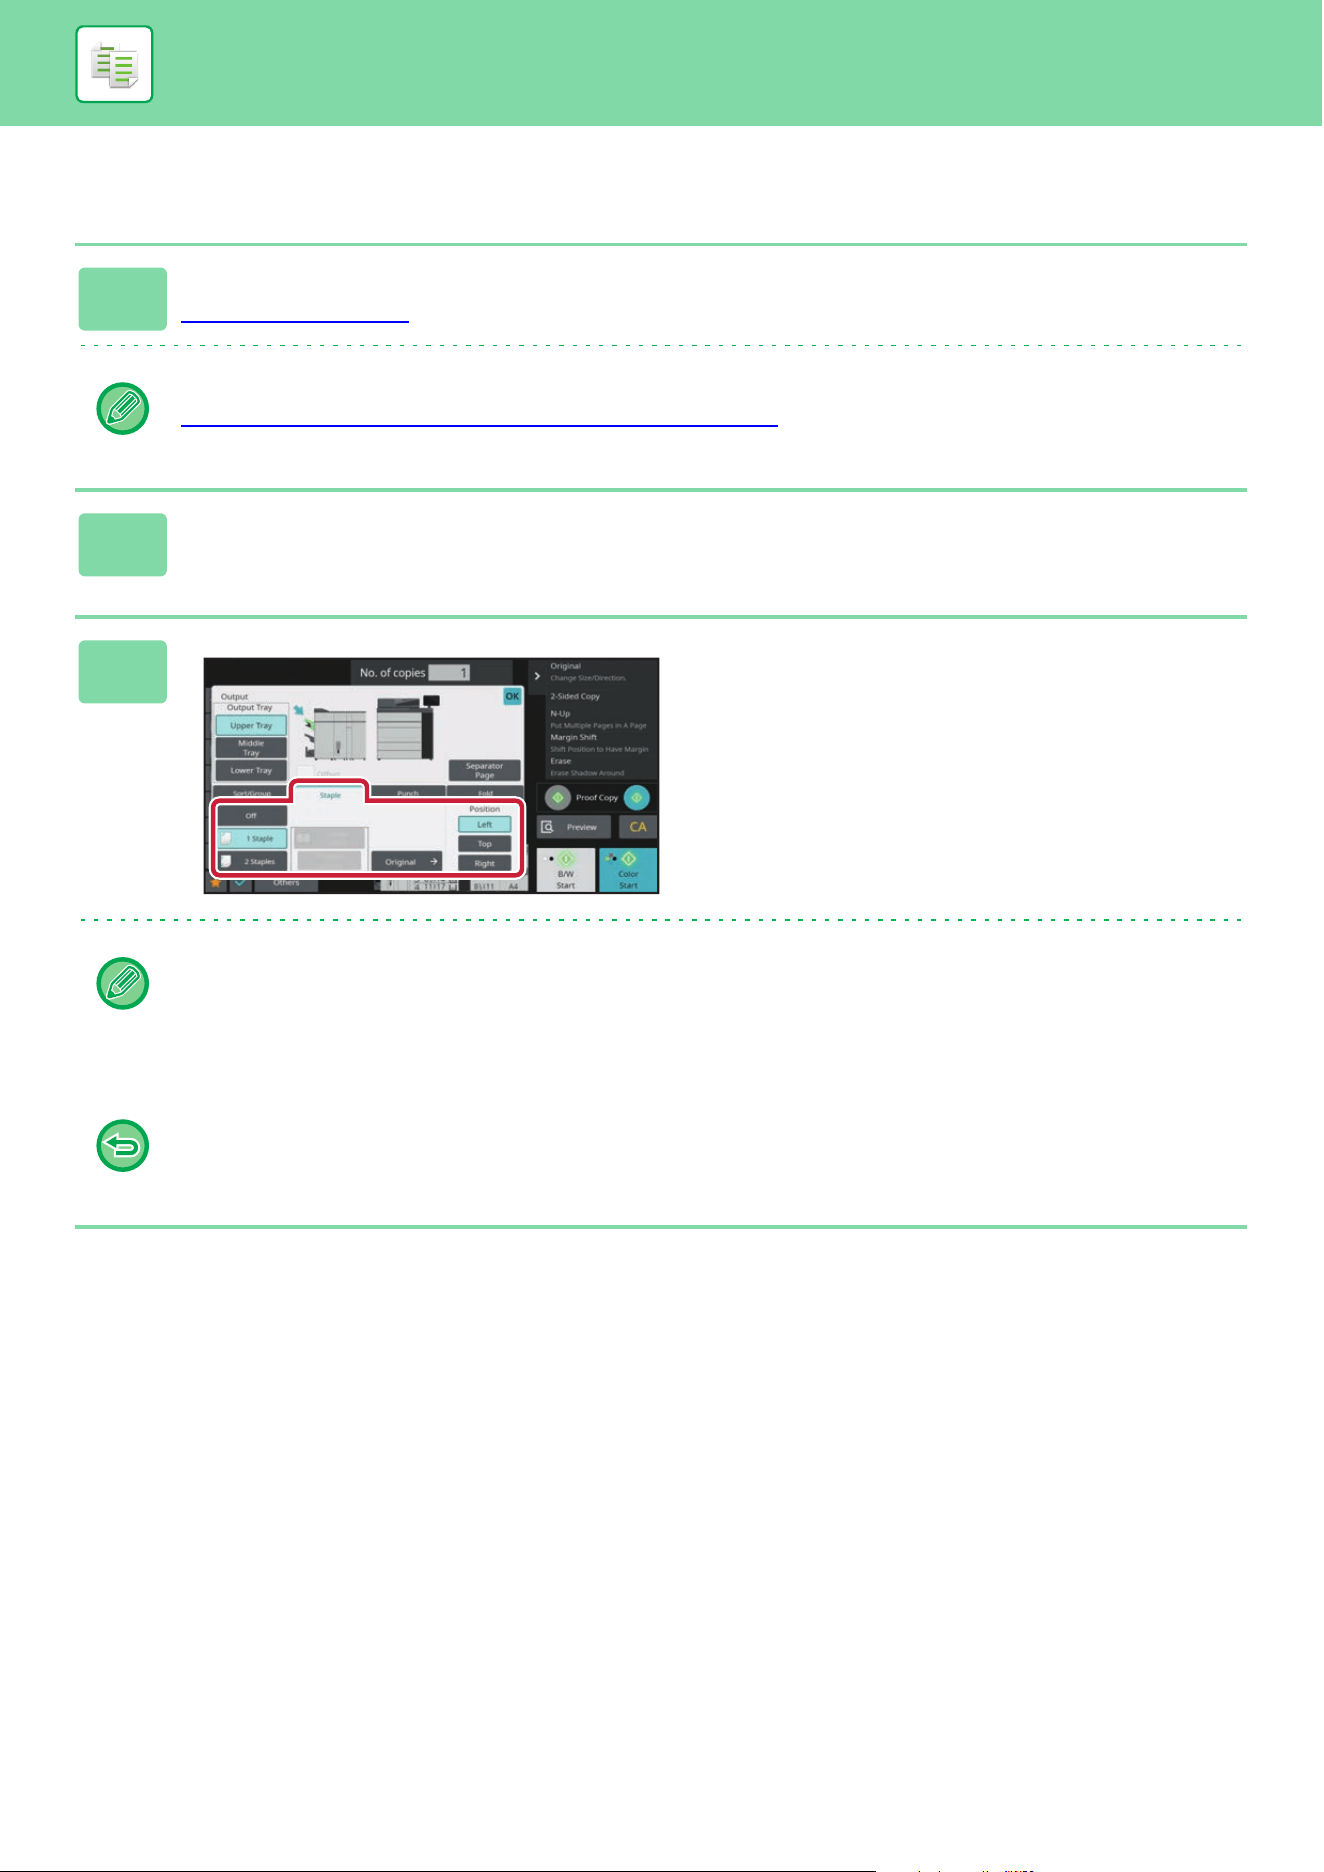
3-44
COPIER►BASIC PROCEDURE FOR MAKING COPIES
Staple settings in normal mode
1
Tap the [Detail] key to change to normal mode.
EASY MODE (page 3-11)
Tap the [Original] key and specify the orientation of the original to have the orientation be correctly recognized.
SPECIFYING THE ORIENTATION OF THE ORIGINAL
(page 3-29)
2
Tap the [Output] key.
3
Tap the [Staple] tab, and tap the staple
position key.
Staple position can be selected from "Position" when
selecting keys other than [Off], [1 Staple (Diagonal)], and
[Saddle Stitch].
After the settings are completed, tap [OK] key.
• If you perform 1-staple stapling with a finisher or saddle stitch finisher installed, all staples will be stapled diagonally.
• If the number of scanned originals exceeds the staple sheet limit, a message is displayed. Tap the [Continue] or
[Cancel] key.
[Continue]: Continues sorting without stapling.
[Cancel]: Cancels the staple sort setting.
To cancel the staple function:
Tap the [Off] key.
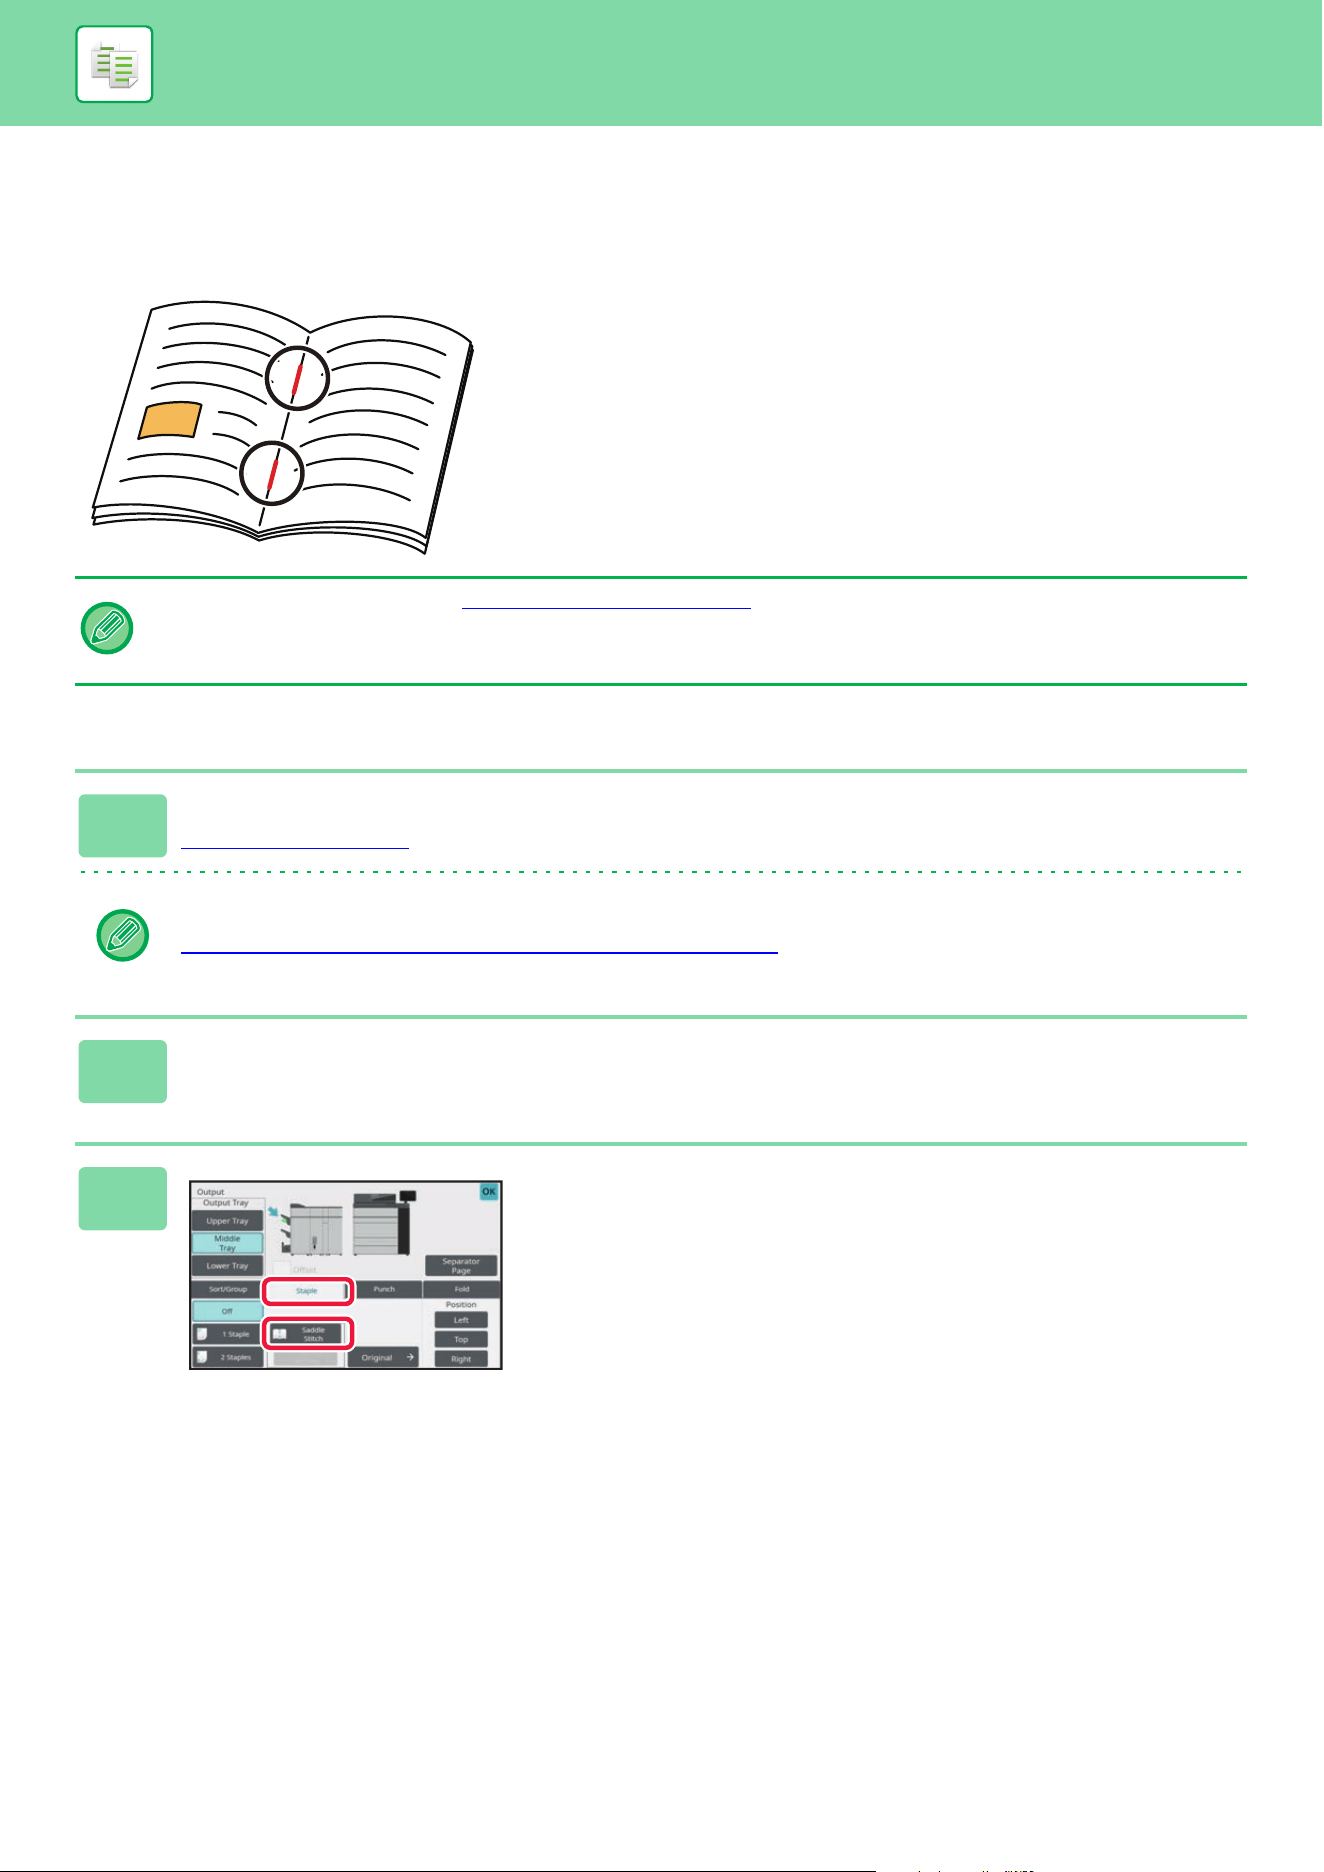
3-45
COPIER►BASIC PROCEDURE FOR MAKING COPIES
Saddle stitching for sorted copies
This function staples each set of copies at two positions in the center of paper, folds them in half, and outputs them. For
saddle folding, it trims a side drop, offering a good-looking output image.
The setting procedure in normal mode is explained.
Saddle Stitch (Normal mode)
• You can view staple positions in "PREVIEW SCREEN (page 2-11)".
• A saddle stitch finisher is required to use the saddle stitch function.
• The trimmer function is available when a trimmer unit is installed on the machine.
1
Tap the [Detail] key to change to normal mode.
EASY MODE (page 3-11)
Tap the [Original] key and specify the orientation of the original to have the orientation be correctly recognized.
SPECIFYING THE ORIENTATION OF THE ORIGINAL
(page 3-29)
2
Tap the [Output] key.
3
Tap the [Staple] tab, and tap the
[Saddle Stitch] key.
5
6
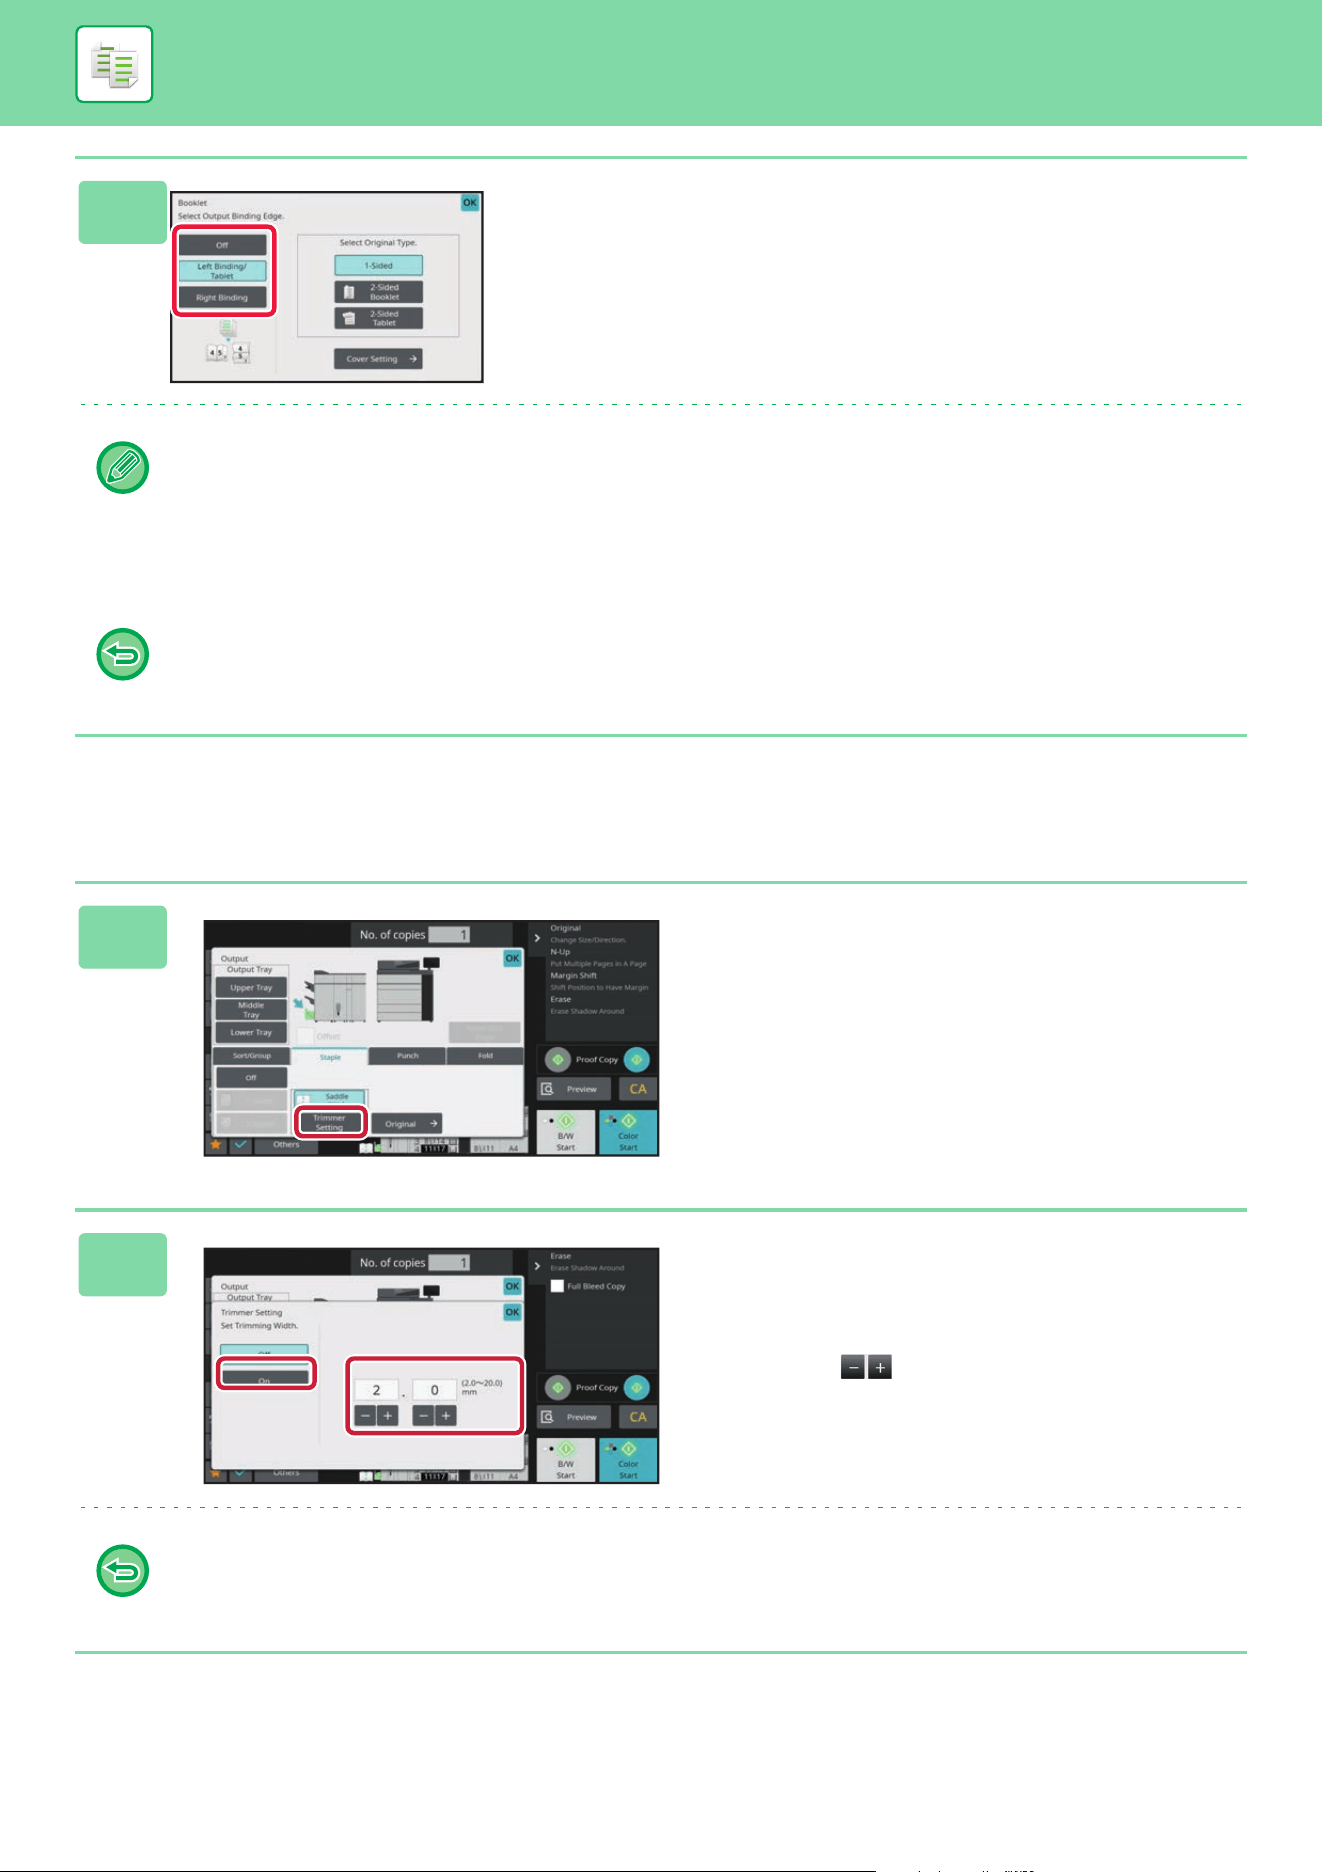
3-46
COPIER►BASIC PROCEDURE FOR MAKING COPIES
Trimmer Setting
4
Tap the [Left Binding/Tablet] or [Right
Binding] key to select an original and
configure the cover sheet setting.
After the settings are completed, tap [OK] key.
• The original will be scanned from the innermost side when folded.
• If the number of scanned originals exceeds the staple sheet limit, a message is displayed. Tap [Divide], [Continue] or
[Cancel].
[Cancel].: Cancels printing.
[Divide]: Divide the document into the number of sheets that can be stapled and saddle staple them.
[Continue]: Continue printing without saddle stapling.
To cancel the Saddle Stitch:
Tap the [Off] key.
1
When Saddle Stitch is selected, tap the
[Trimmer Setting] key.
2
Tap the [On] key, and specify the
trimming width.
Tap the numeric value display field of the trimming width,
and enter the allowable range using the numeric keys.
Otherwise, tap . After the settings are completed, tap
[OK] key.
To cancel the Trimmer Setting:
Tap the [Off] key.
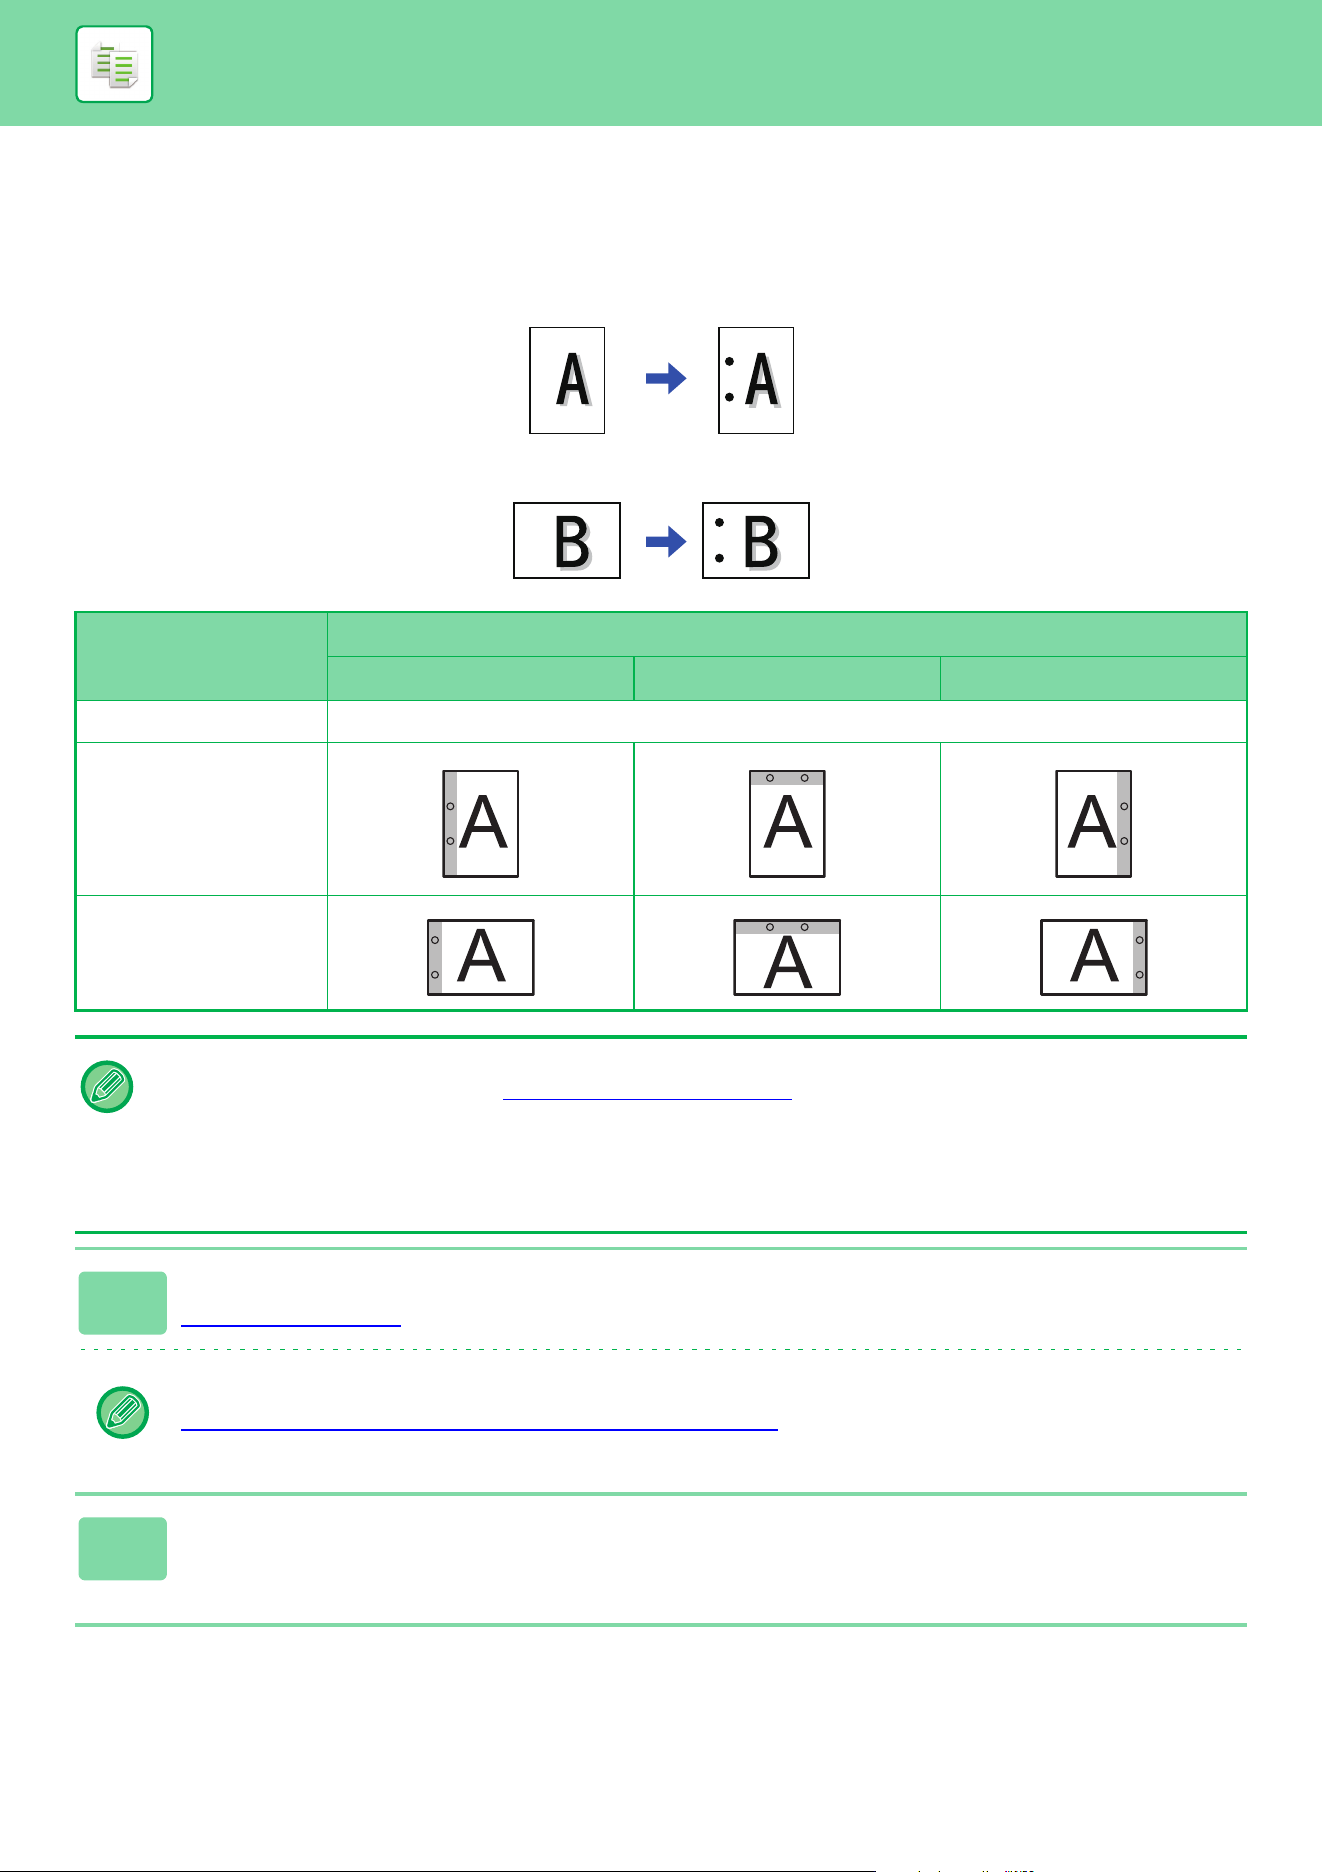
3-47
COPIER►BASIC PROCEDURE FOR MAKING COPIES
PUNCH SETTINGS
This function punches copies and outputs them to the tray.
Example: When the original is in either portrait or landscape orientation, and the punch position is set to the left
Original Orientation Punch Position
Left Top Right
OFF Does not punch.
Portrait orientation
Landscape orientation
• When staple and punch are set at the same time, punch positions are linked to staple positions.
• You can view punch positions on the "PREVIEW SCREEN (page 2-11)
".
• A punch module is required for paper punch.
• You cannot use 12" x 18" (A3W) size paper or special media such as transparency film and tab paper.
• You cannot use a paper punch together with the staple and paper folding.
However, it can be used with them if the paper size used is 11" × 17", A3, B4 or 8K for Z-fold.
1
Tap the [Staple / Punch] key.
COPY MODE (page 3-3)
Tap the [Original] key and specify the orientation of the original to have the orientation be correctly recognized.
SPECIFYING THE ORIENTATION OF THE ORIGINAL
(page 3-29)
2
Select punching and set the position.
After the settings are completed, tap [OK].
Original 1 Punch Positions
Original 2 Punch Positions

3-48
COPIER►BASIC PROCEDURE FOR MAKING COPIES
Normal mode
1
Tap the [Detail] key to change to normal mode.
EASY MODE (page 3-11)
Tap the [Original] key and specify the orientation of the original to have the orientation be correctly recognized.
SPECIFYING THE ORIENTATION OF THE ORIGINAL
(page 3-29)
2
Tap the [Output] key.
3
Tap the [Punch] tab, select punching
and set the position.
To change the output tray, tap the [Output Tray] key, and
select the output destination.
After the settings are completed, tap [OK] key.
To cancel the punch Setting:
Tap the [Off] key.
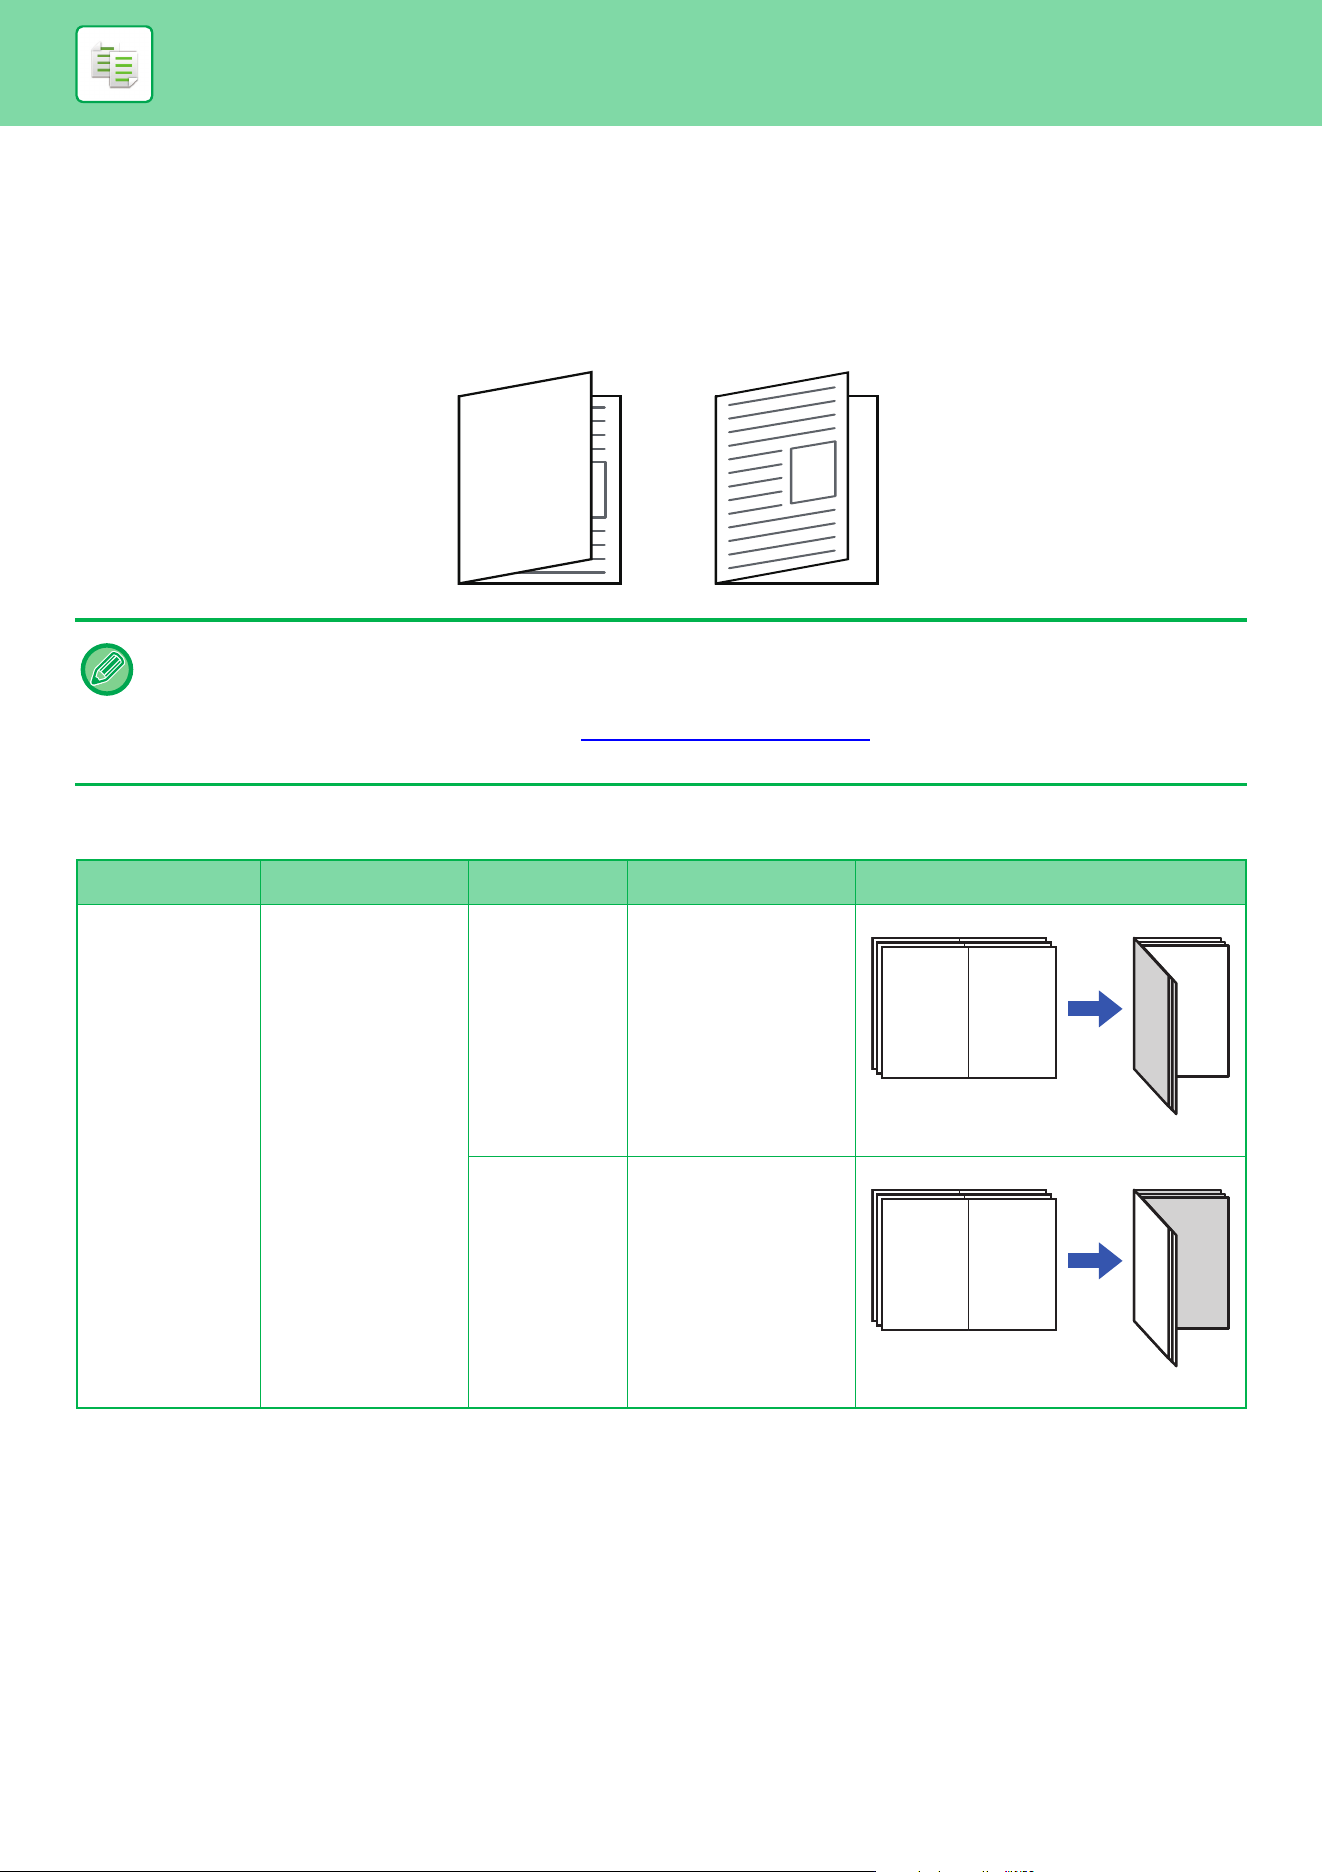
3-49
COPIER►BASIC PROCEDURE FOR MAKING COPIES
FOLD SETTING
This function is used to fold copies before delivery to the output tray.
When a paper folding unit is installed, you can fold papers in Z-fold and C-fold.
When a saddle stitch finisher is installed, you can use saddle folds.
The paper sizes that can be selected vary depending on the type of paper fold.
Example: Fold Inside, Fold Outside
Types of folds and paper sizes available
• A saddle stitch finisher is required to use Saddle Fold.
• The paper folding function cannot be used with the staple and hole punch function. However, it can be used with them if
the paper size for Z-folding is set to 11" × 17", A3, or B4.
• You can check the selected folding method in "PREVIEW SCREEN (page 2-11)
".
• A folding unit is required to use Half Fold, C-Fold, Accordion Fold, Double Fold, and Z-Fold.
Folding types Usable paper Print Side Fold Orientation Folding image
Saddle Fold Saddle stitch
finisher (large
stacker): A3W, A3,
B4, A4R, SRA3,
13" × 19",
12" × 18",
11" × 17",
8-1/2" × 14",
8-1/2" × 13-1/2",
8-1/2" × 13-2/5",
8-1/2" × 13",
8-1/2" × 11"R, 8K
Inside -
Outside -
B
B
B
A
A
A
BA
BA
BA
B
A
B
A
B
A
BA
BA
BA
A
B
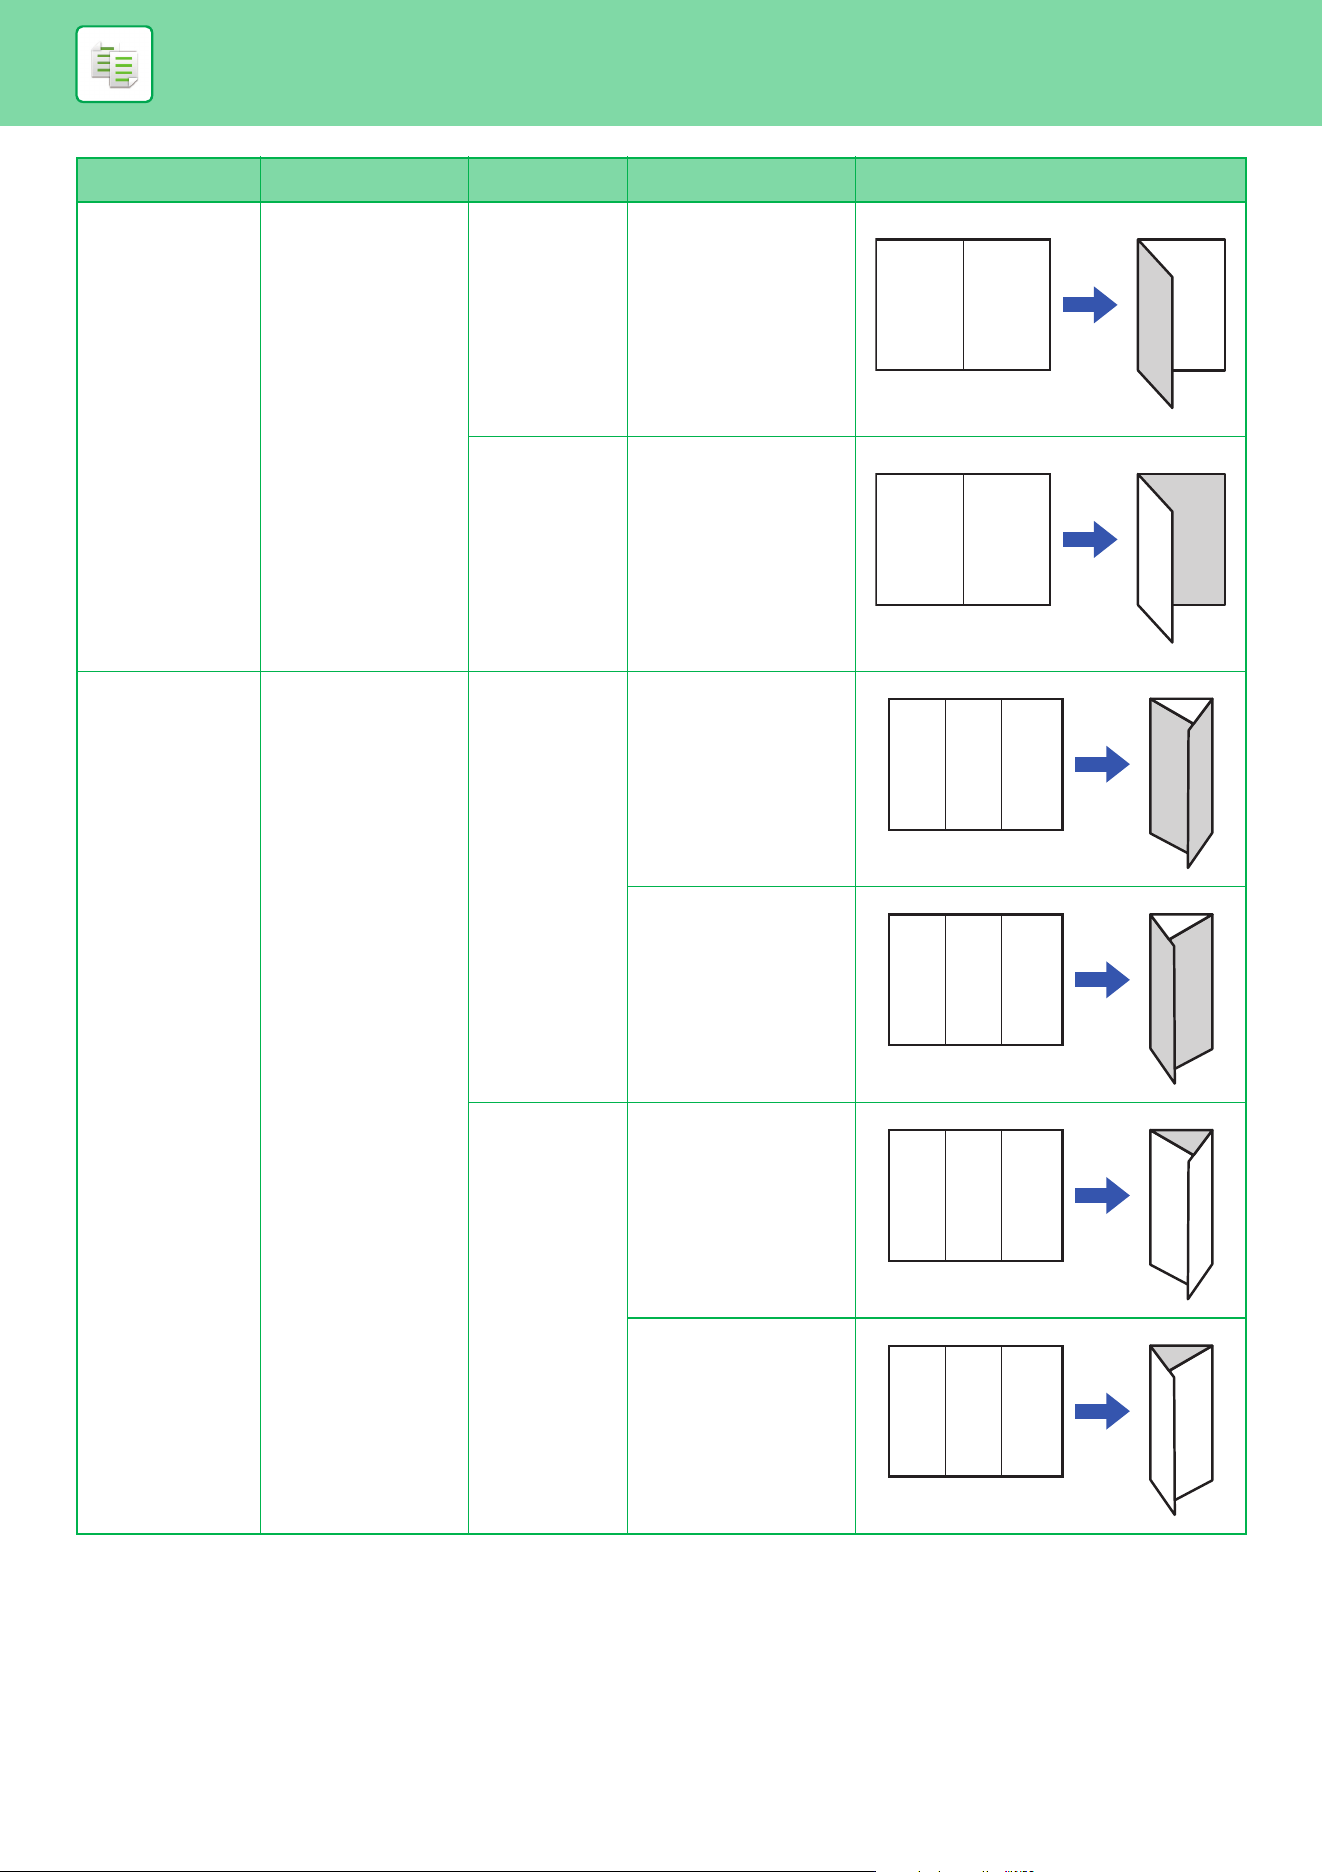
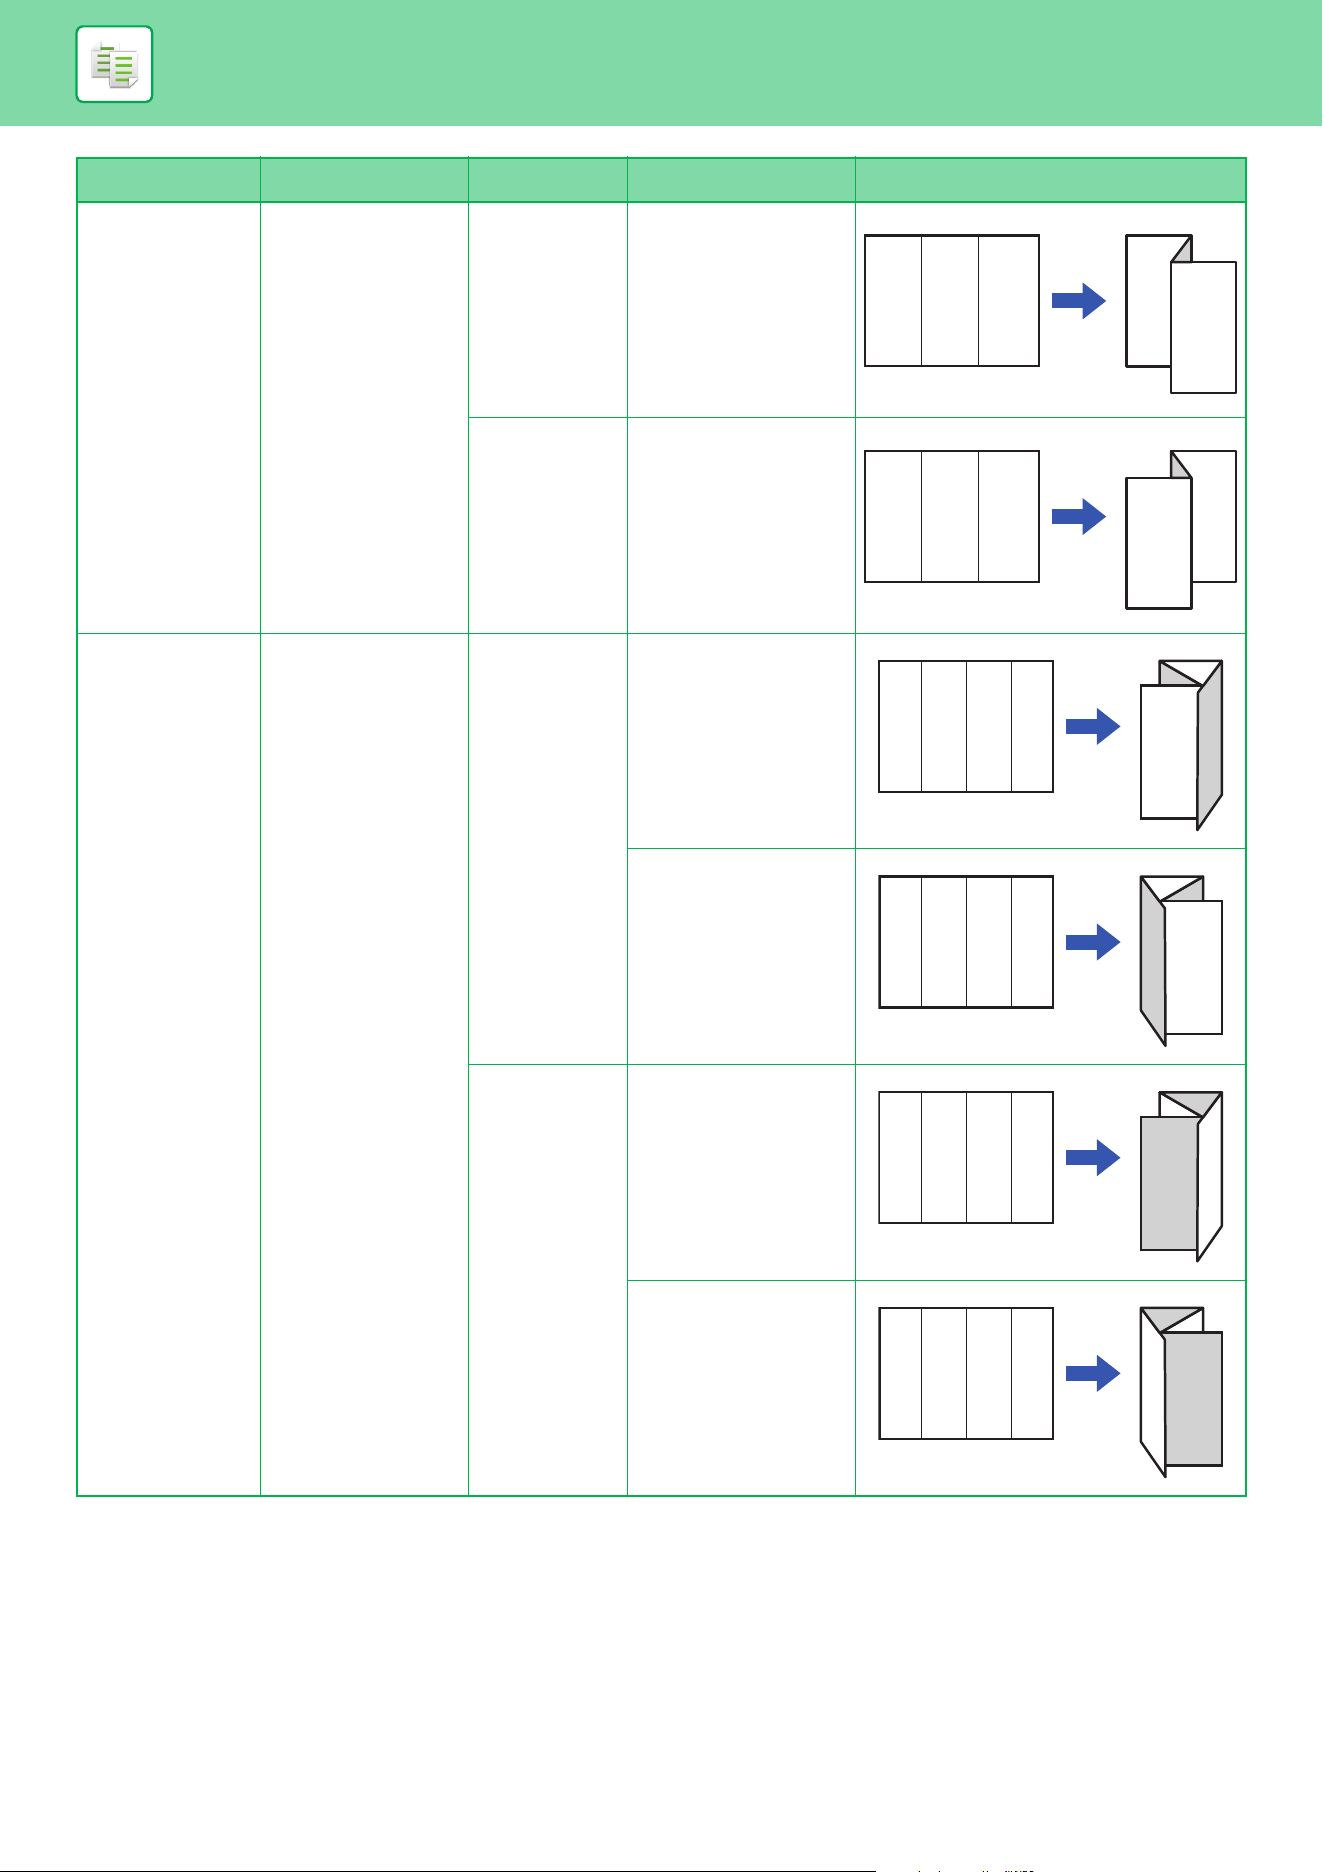
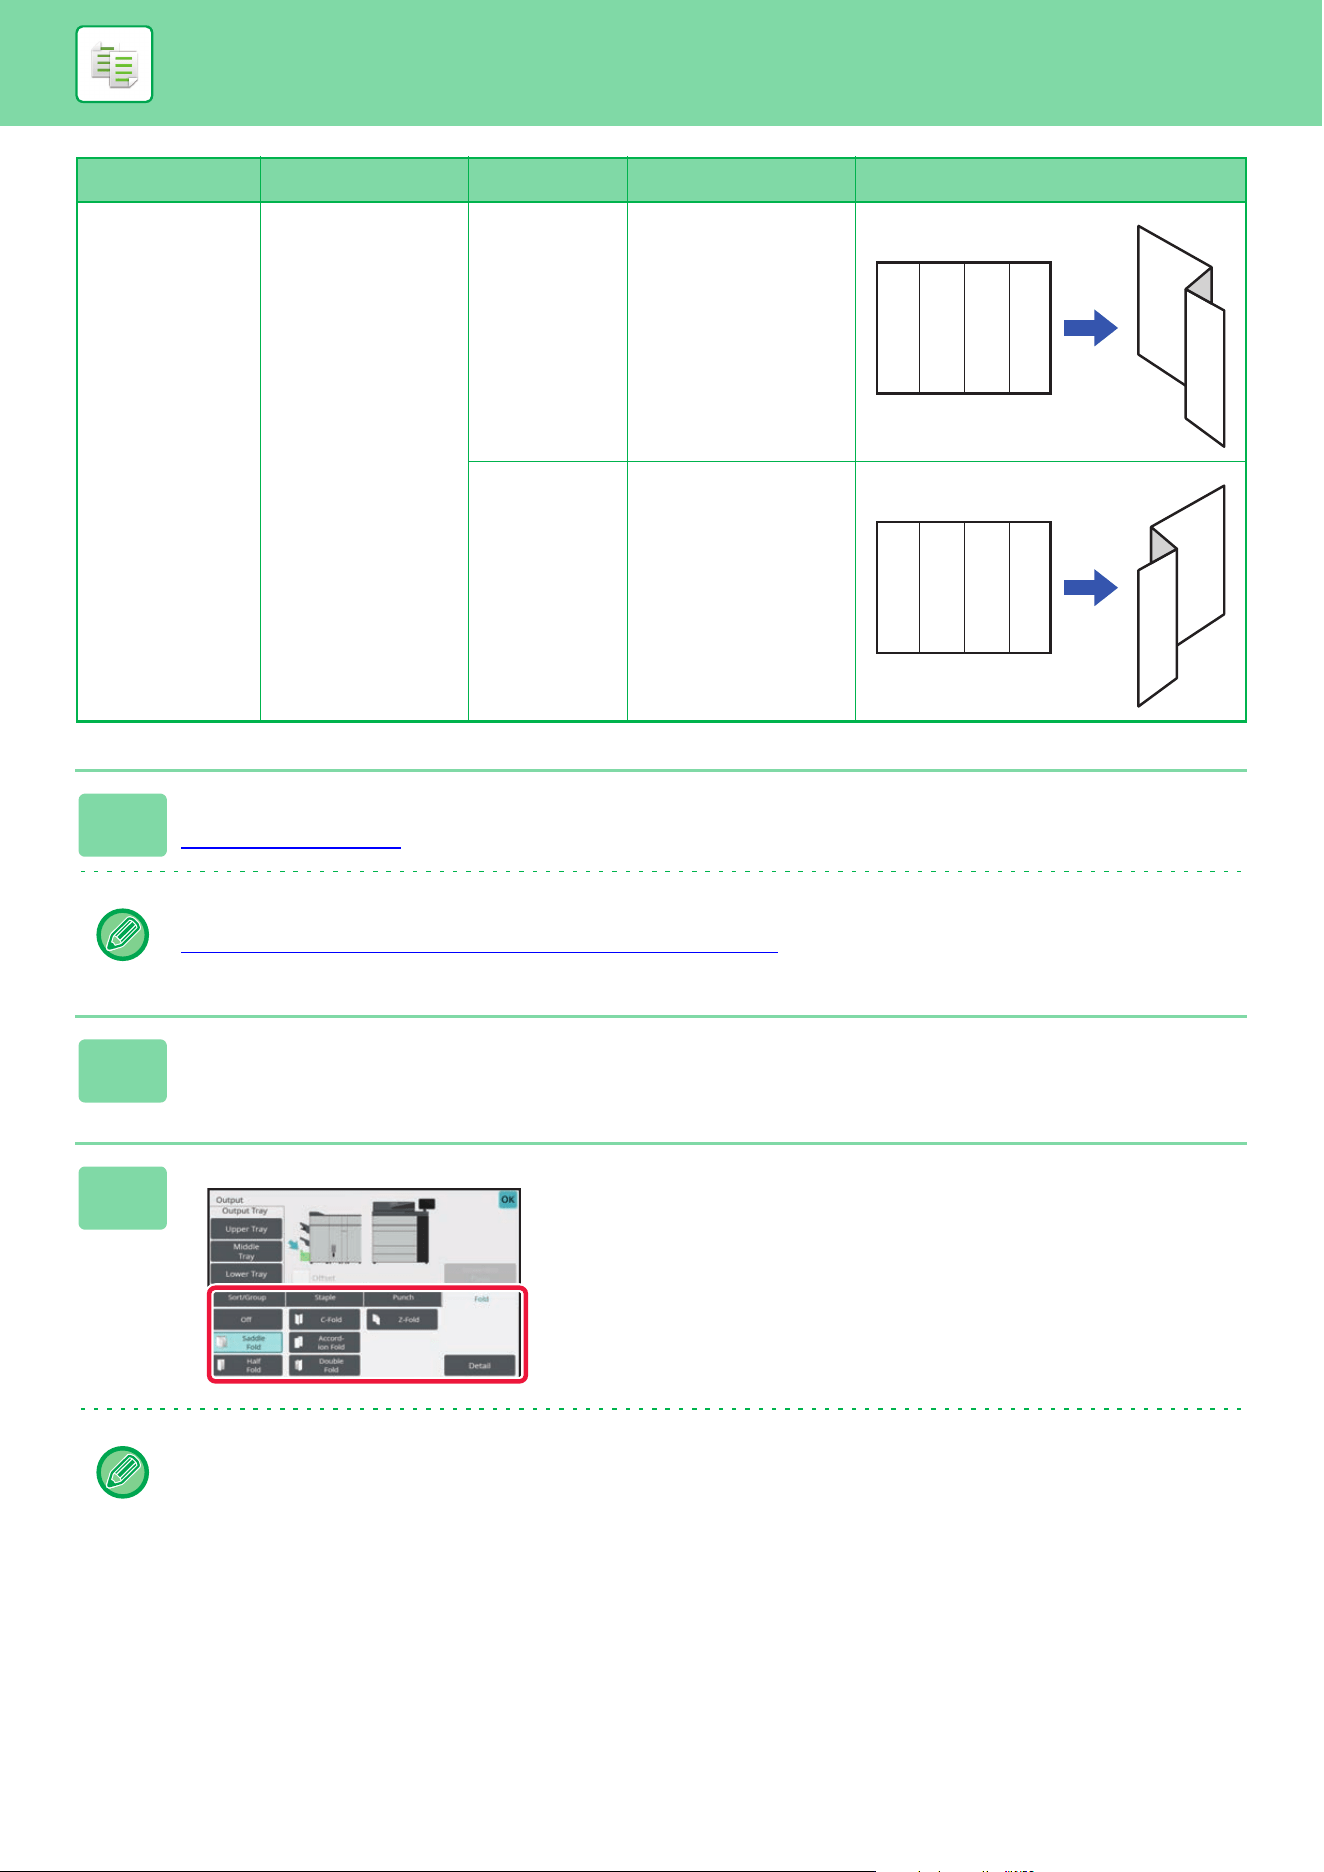
3-52
COPIER►BASIC PROCEDURE FOR MAKING COPIES
Z-Fold 11" × 17",
8-1/2" × 14",
8-1/2" × 11"R, A3,
B4, A4R
- Open Right
- Open Left
1
Tap the [Detail] key to change to normal mode.
COPY MODE (page 3-3)
Tap the [Original] key and specify the orientation of the original to have the orientation be correctly recognized.
SPECIFYING THE ORIENTATION OF THE ORIGINAL
(page 3-29)
2
Tap the [Output] key.
3
Tap the [Fold] tab, and tap the folding
type key.
To cancel the paper folding function:
Tap the [Off] key.
Folding types Usable paper Print Side Fold Orientation Folding image
ABCD
A
B
D
ABCD
D
C
A
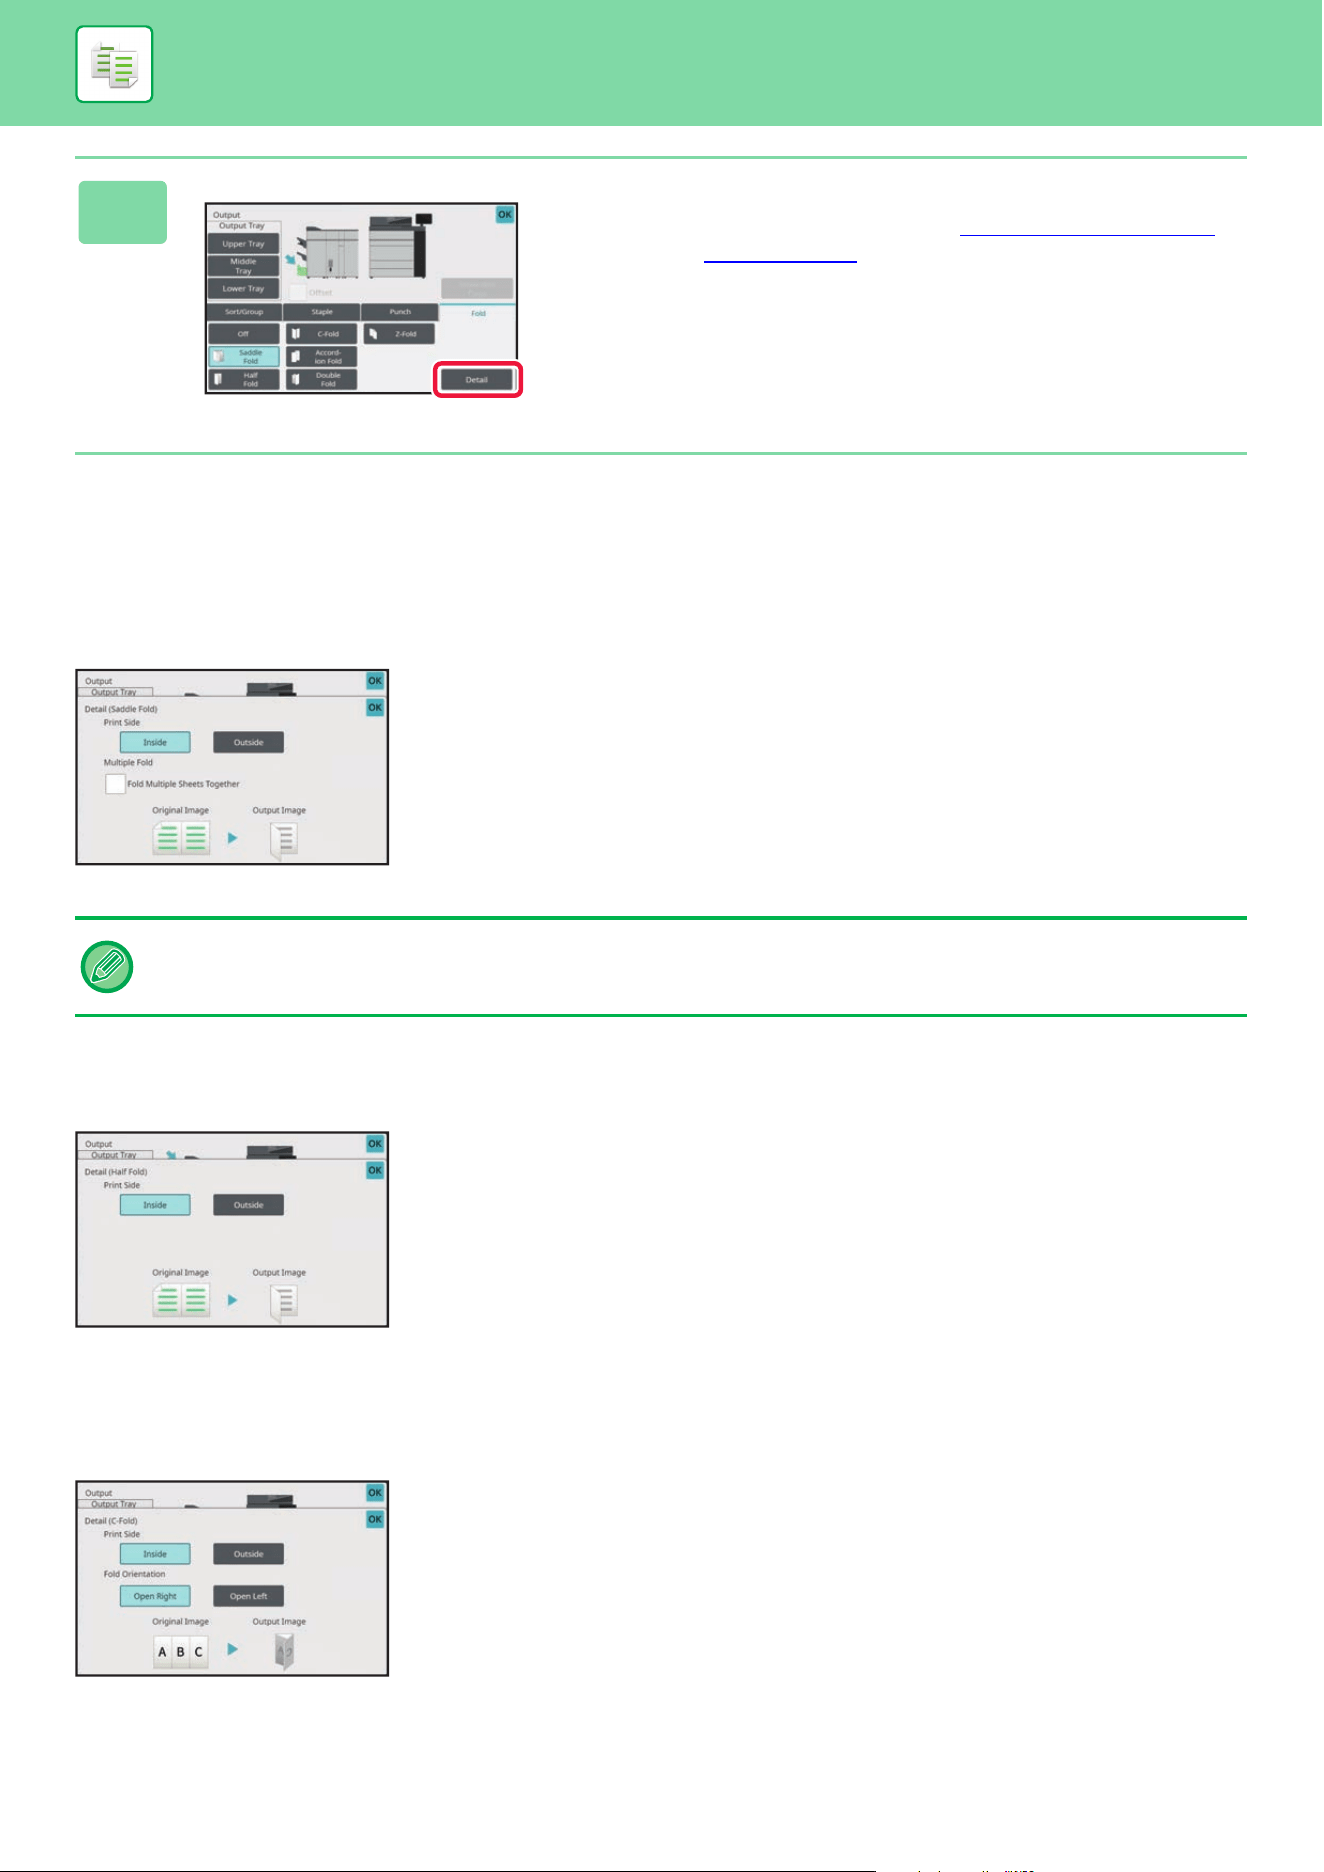
3-53
COPIER►BASIC PROCEDURE FOR MAKING COPIES
Detail Type for each Folding Type
Saddle Fold
Specify "Print Side" and "Multiple Fold".
Half Fold
Specify "Print Side".
C-Fold
Specify "Print Side" and "Fold Orientation".
4
Tap the [Detail] key.
For the setting method, see "Detail Type for each Folding
Type (page 3-53)".
After the settings are completed, tap the [OK] key.
The Multiple Fold function folds five sheets at a time. For example, if an original has 12 A4 size plain sheets, they are folded
three times in total: 5 sheets + 5 sheets + 2 sheets. However, some types of paper reduces the number of sheets that are
folded every set. For example, heavy paper is folded on a three-sheet basis.
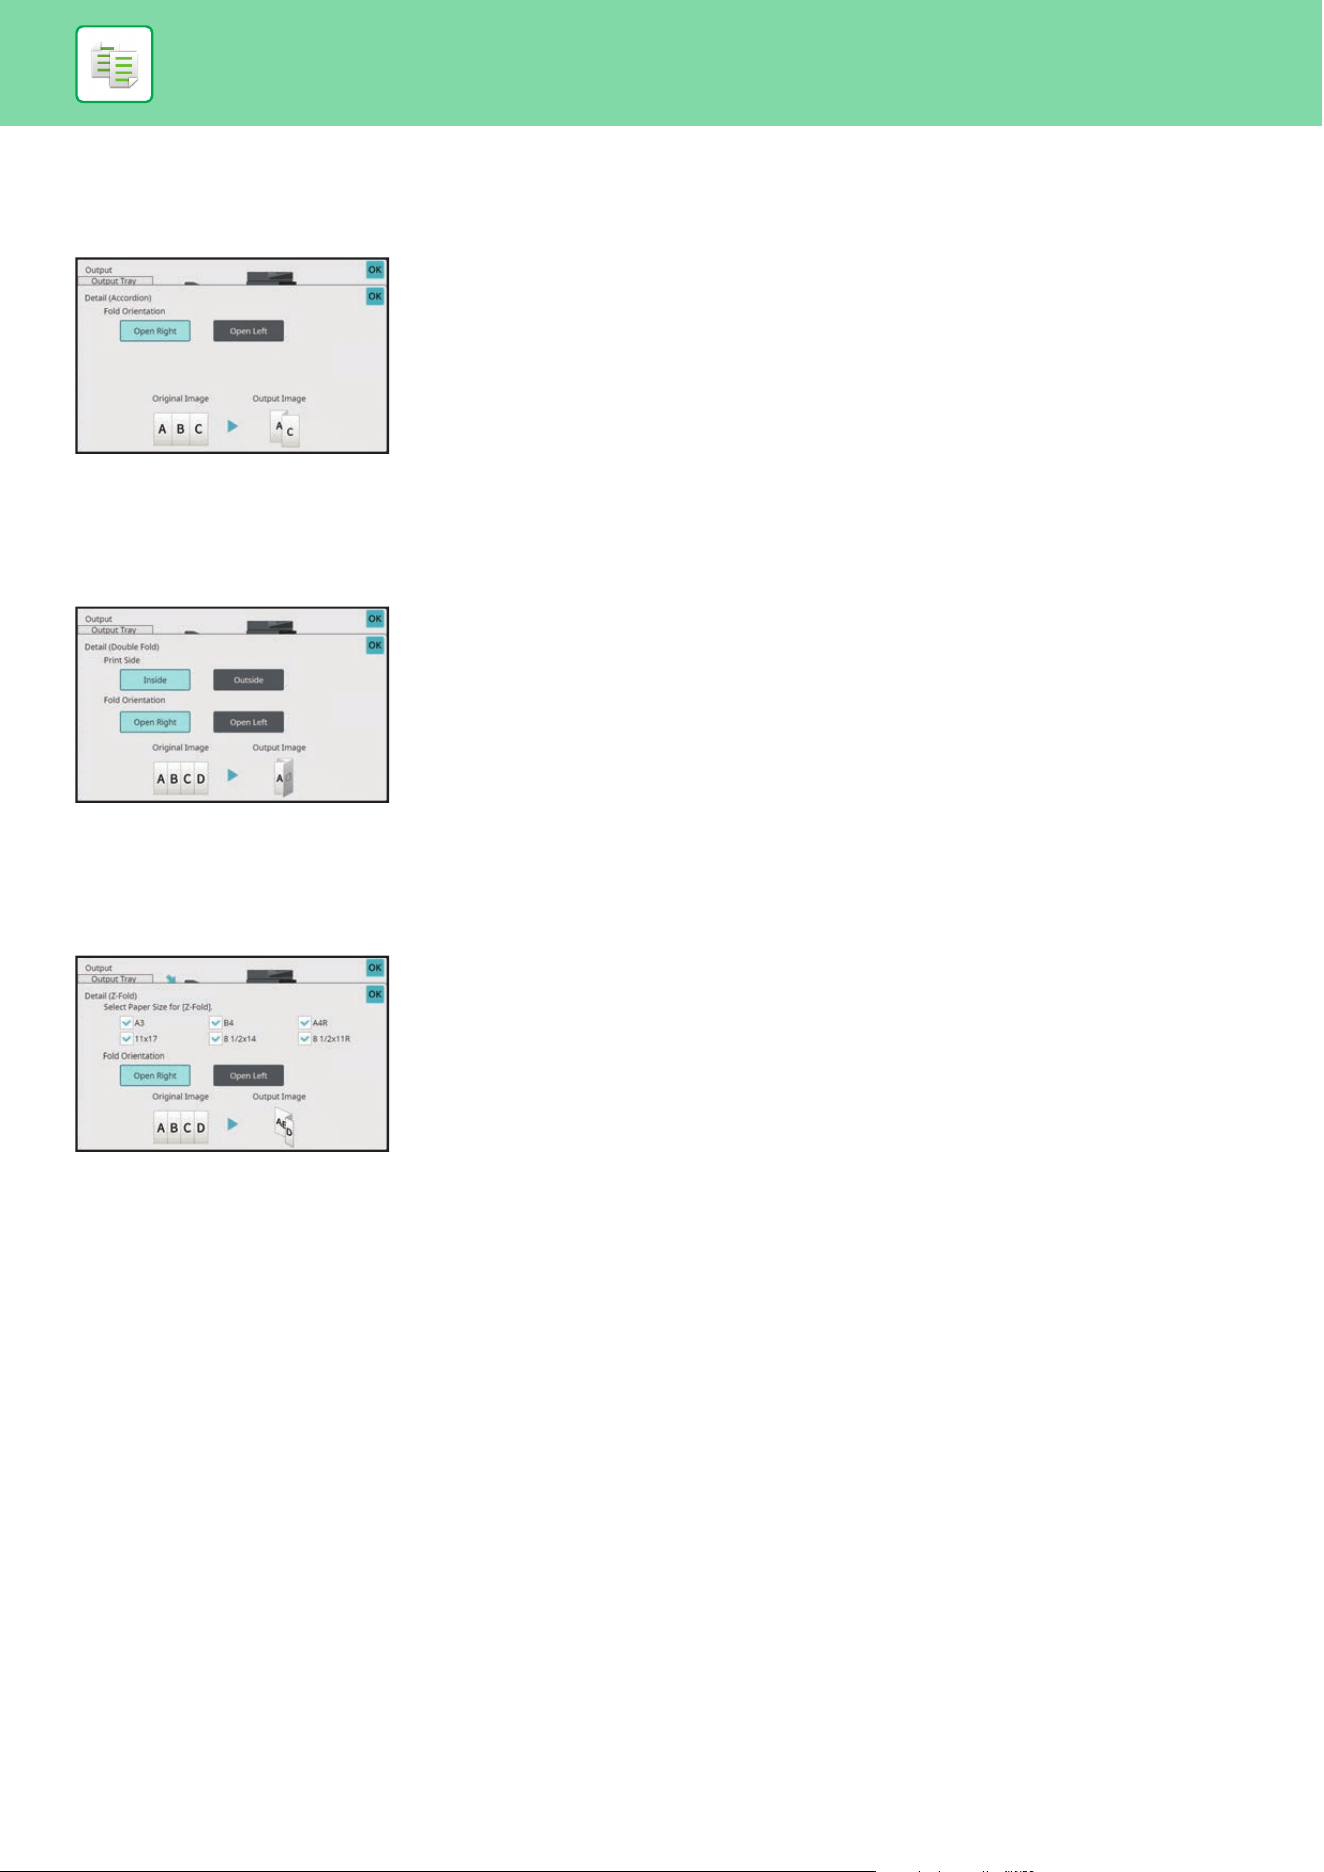
3-55
COPIER►BASIC PROCEDURE FOR MAKING COPIES
INSERTING SEPARATOR PAGES BETWEEN COPIES
OR JOBS
This function inserts separator pages between each set of copies or between each job.
When you insert separator pages between sets of copies, you can specify whether to insert the separator page before or
after each set. You can also specify the number of copies that makes one set.
When you insert separator pages between jobs, you can specify whether to insert a separator page before or after each job.
Separator page insertion examples
In the following examples, four copies of a two-page original are output.
Inserting a separator page before each set of two copies
Inserting a separator page after each set of two copies
Inserting separator pages before and after a job
• When this function is combined with Sort/Group and Staple/Punch, Z-fold and half fold are not applied to the separator
pages.
• This function cannot be used with the saddle stitch or fold function.
• This function cannot be used in combination with staple/punch and insertion of divider for each job.
• When used in combination with the offset function, a separator page is never offset by itself; the separator page is always
offset together with the set of output.
1
Tap the [Detail] key to change to normal mode.
COPY MODE (page 3-3)
Tap the [Original] key and specify the orientation of the original to have the orientation be correctly recognized.
SPECIFYING THE ORIENTATION OF THE ORIGINAL
(page 3-29)
2
Tap the [Output] key.
1 12 2 1 2 1 2
Insert before each set Insert before each set
1 12 2 1 2 1 2
Insert after each set
Insert after each set
1 12 2 1 2 1 2
Insert Before Job Insert After Job
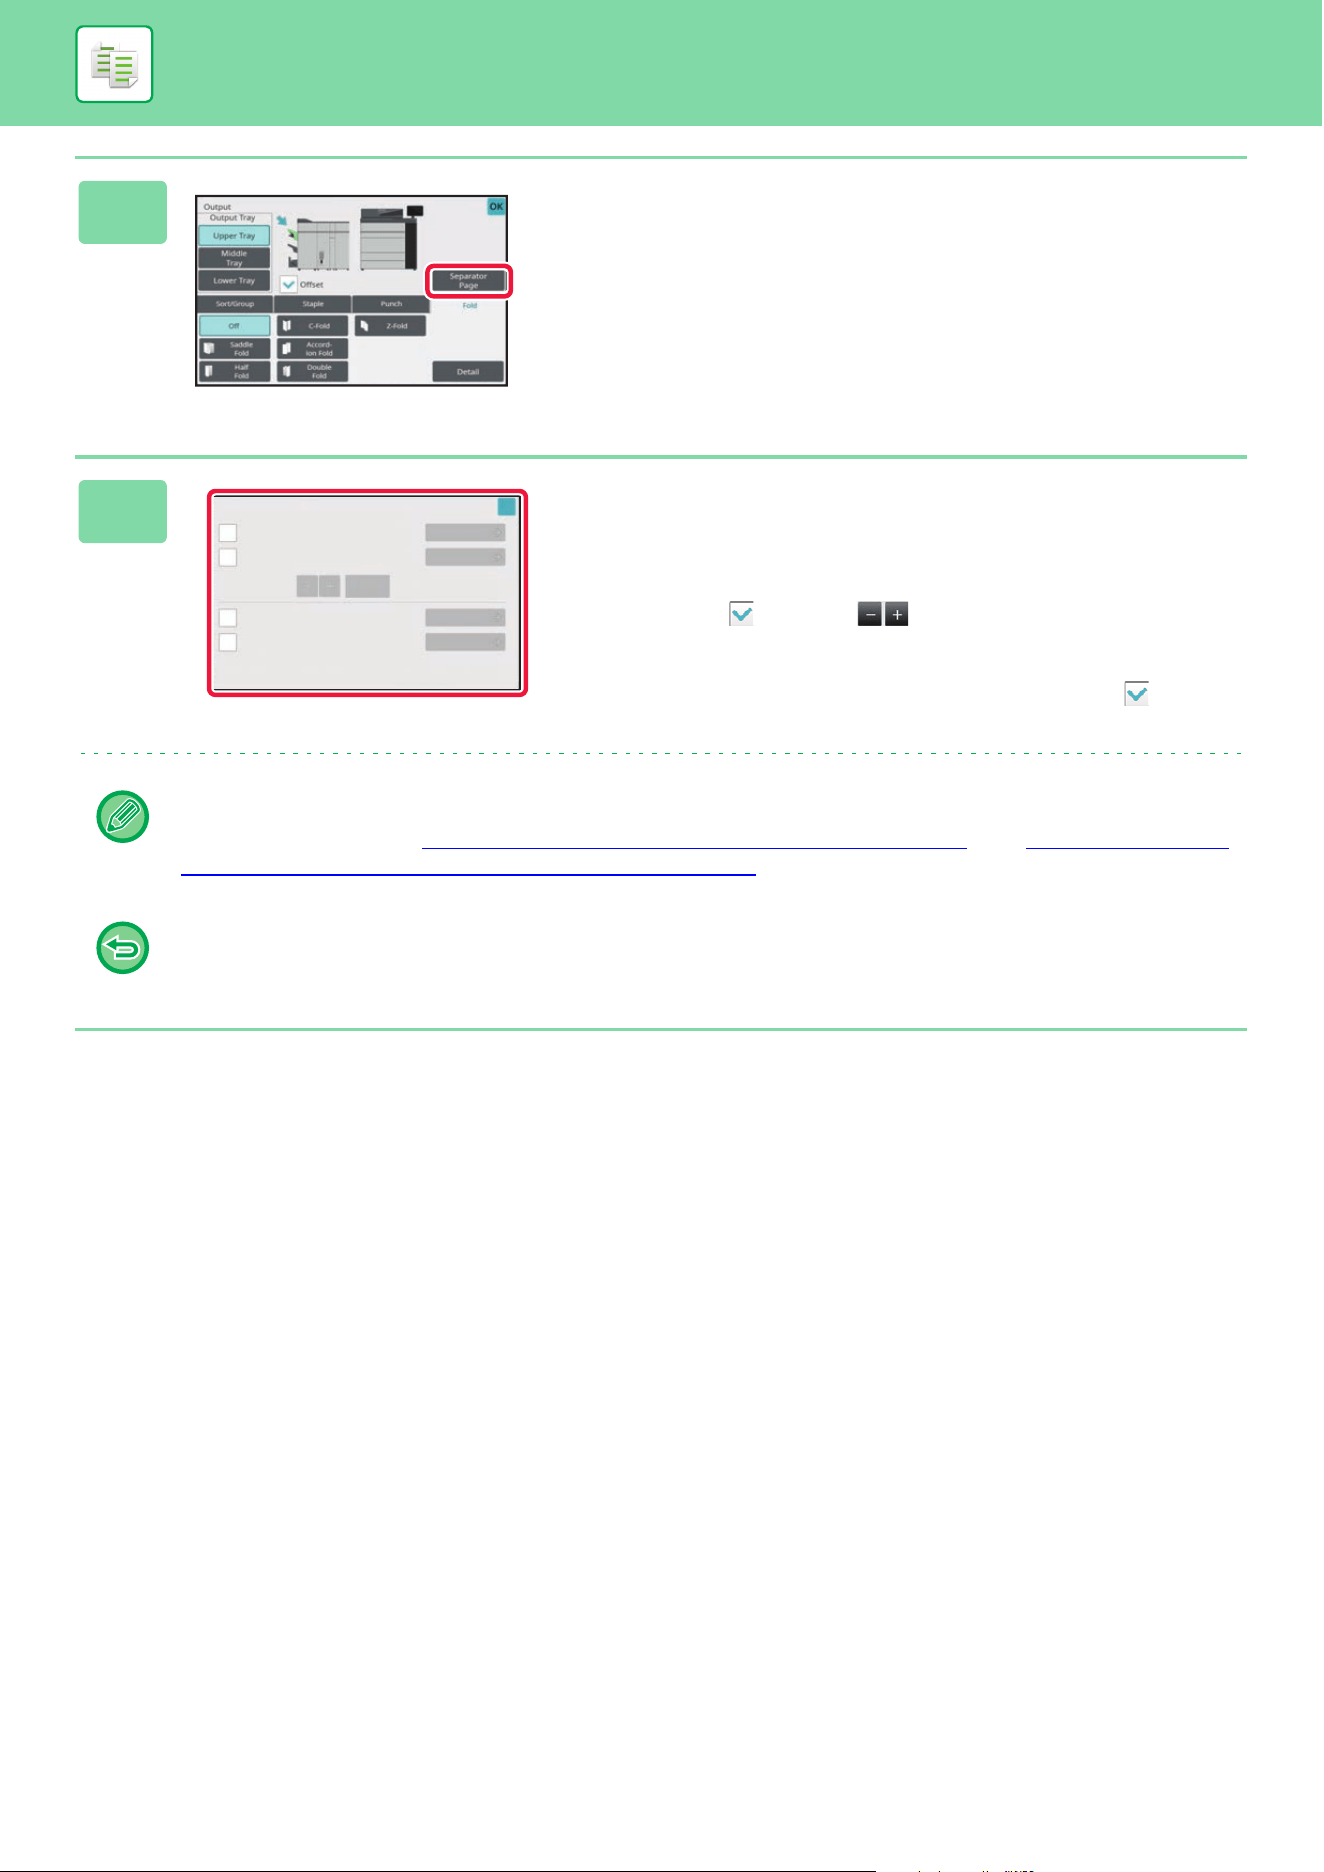
3-56
COPIER►BASIC PROCEDURE FOR MAKING COPIES
3
Tap the [Separator Page] key.
4
Specify the separator page insertion
mode.
• To insert separator pages between sets of copies, set the
[Insert Top of Sets] or [Insert End of Sets] checkbox to
. Next, tap to specify the number of copies in
each set.
• To insert separator pages between jobs, set the [Insert
Before Job] or [Insert After Job] checkbox to .
• After the settings are completed, tap [OK] key.
To change the separator page tray:
Tap the [Paper Tray] key to display the tray selection screen. Tap the separator page tray in the tray selection screen.
For more information, see "SELECTING THE PAPER TRAY FOR COPYING (page 3-13)" and "SPECIFYING A TYPE
AND SIZE OF PAPER LOADED ON BYPASS TRAY (page 3-36)".
To cancel the separator page insertion setting:
Clear the checkmark for separator page insertion mode.
Separator Page
Insert Top of Sets
Insert End of Sets
Paper Tray
Paper Tray
Bypass
Bypass
Insert Before Job
Insert After Job
Paper Tray
Paper Tray
Bypass
Bypass
1
(1~9999)
OK
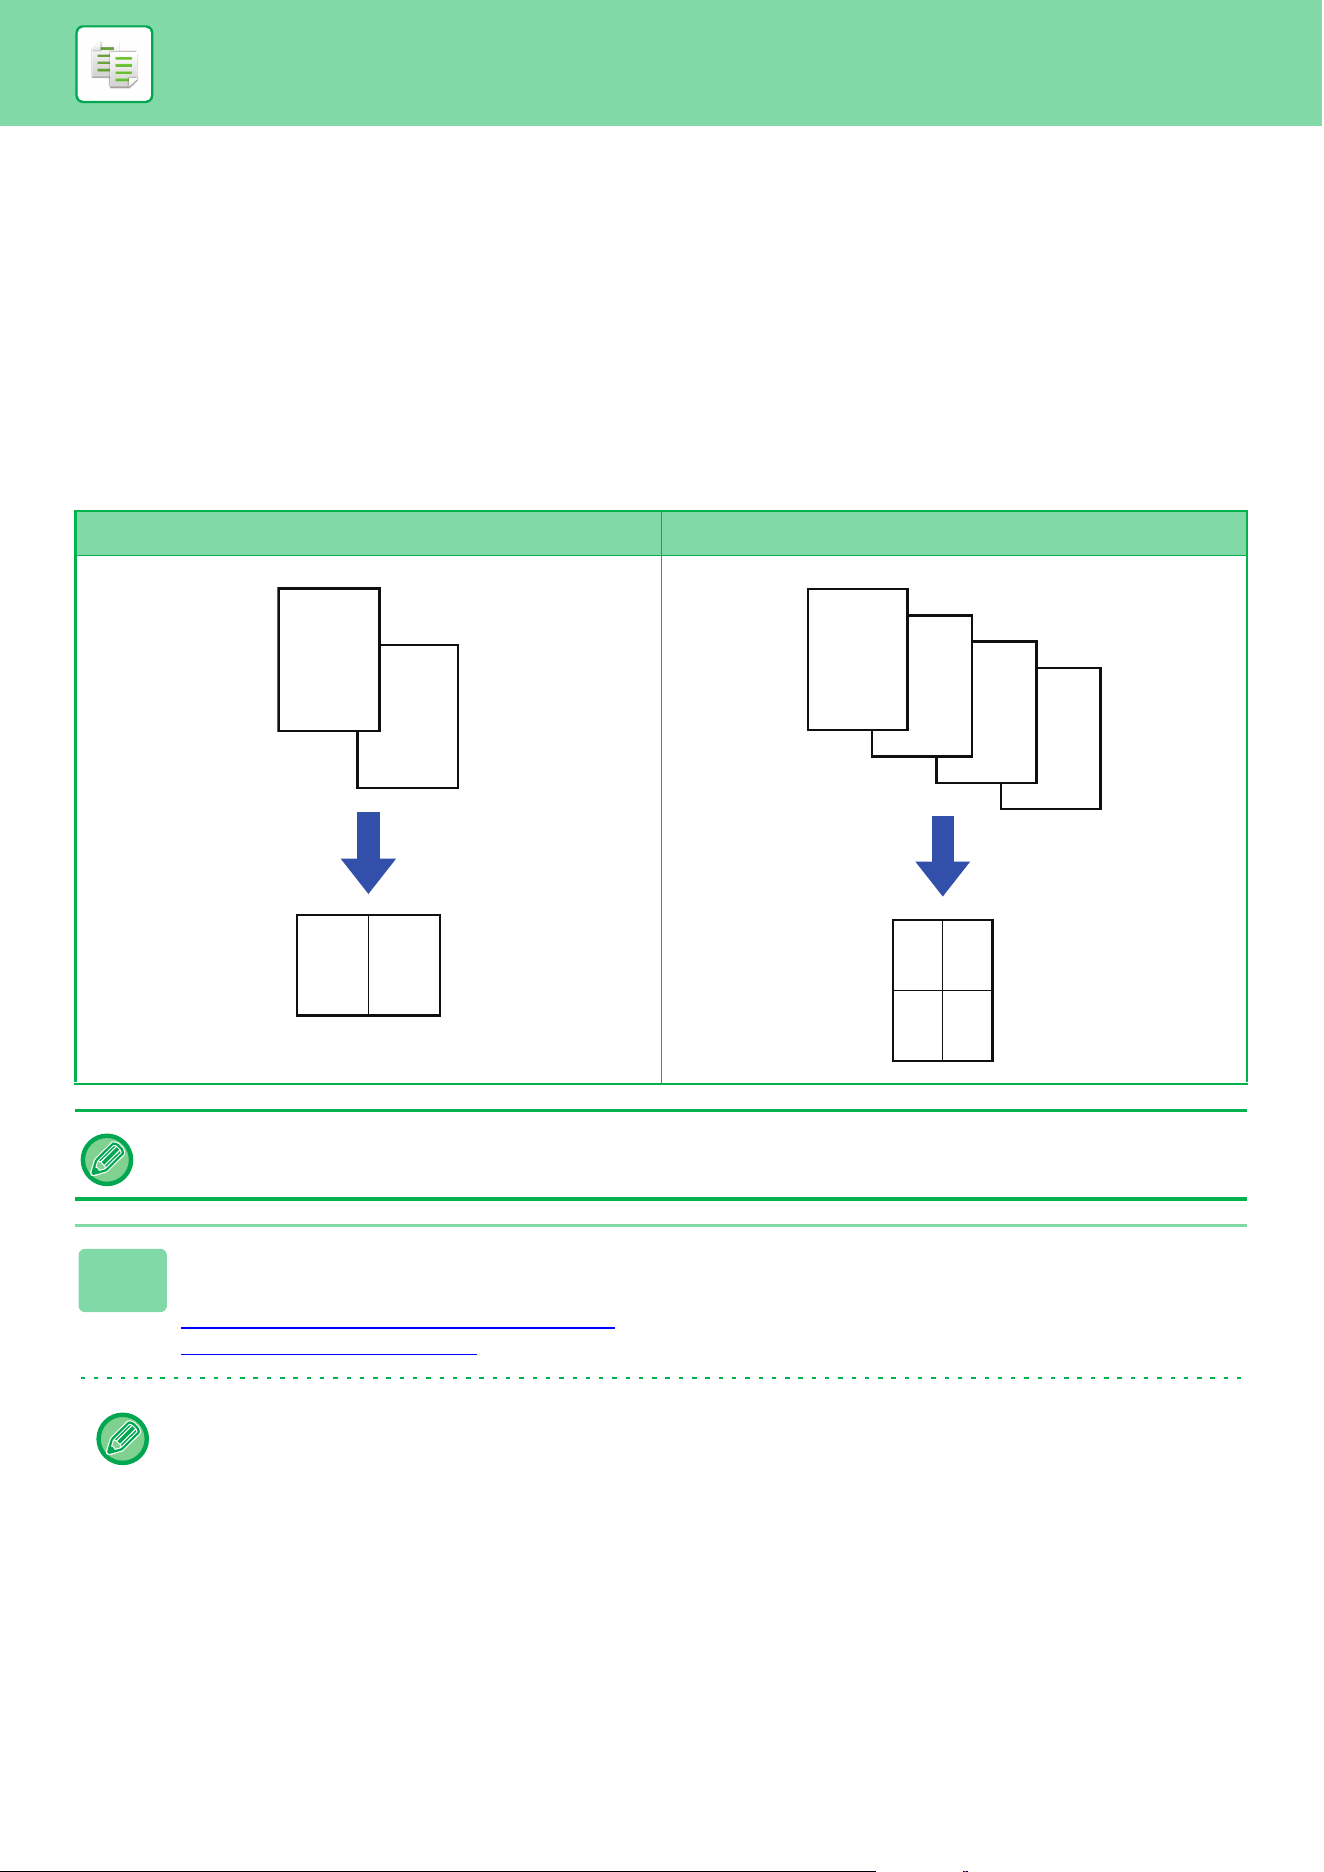
3-57
COPIER►BASIC PROCEDURE FOR MAKING COPIES
BATCH COPY FUNCTIONS
COPYING MULTIPLE ORIGINALS AS A SINGLE PAGE
(N-Up)
This function copies multiple original pages onto a single sheet of paper in a uniform layout.
Select 2-Up to copy two original pages onto one sheet, 4-Up to copy four original pages onto one sheet, or 8-Up to copy
eight original pages onto one sheet.
This function is convenient when you wish to present multiple pages in a compact format, or show a view of all pages in
a document.
2-Up copying 4-Up copying
When inserting a cover sheet, select Cover Setting to copy only a front sheet to one page and collectively copy the second
and subsequent pages.
1
Place the original.
Place the original in the document feeder tray of the automatic document feeder, or on the document glass.
AUTOMATIC DOCUMENT FEEDER (page 1-47)
DOCUMENT GLASS (page 1-51)
When using the document glass to scan multiple original pages, change the original and tap the [Color Start] or [B/W
Start] key.
B
A
A B
D
C
B
A
AB
C
D
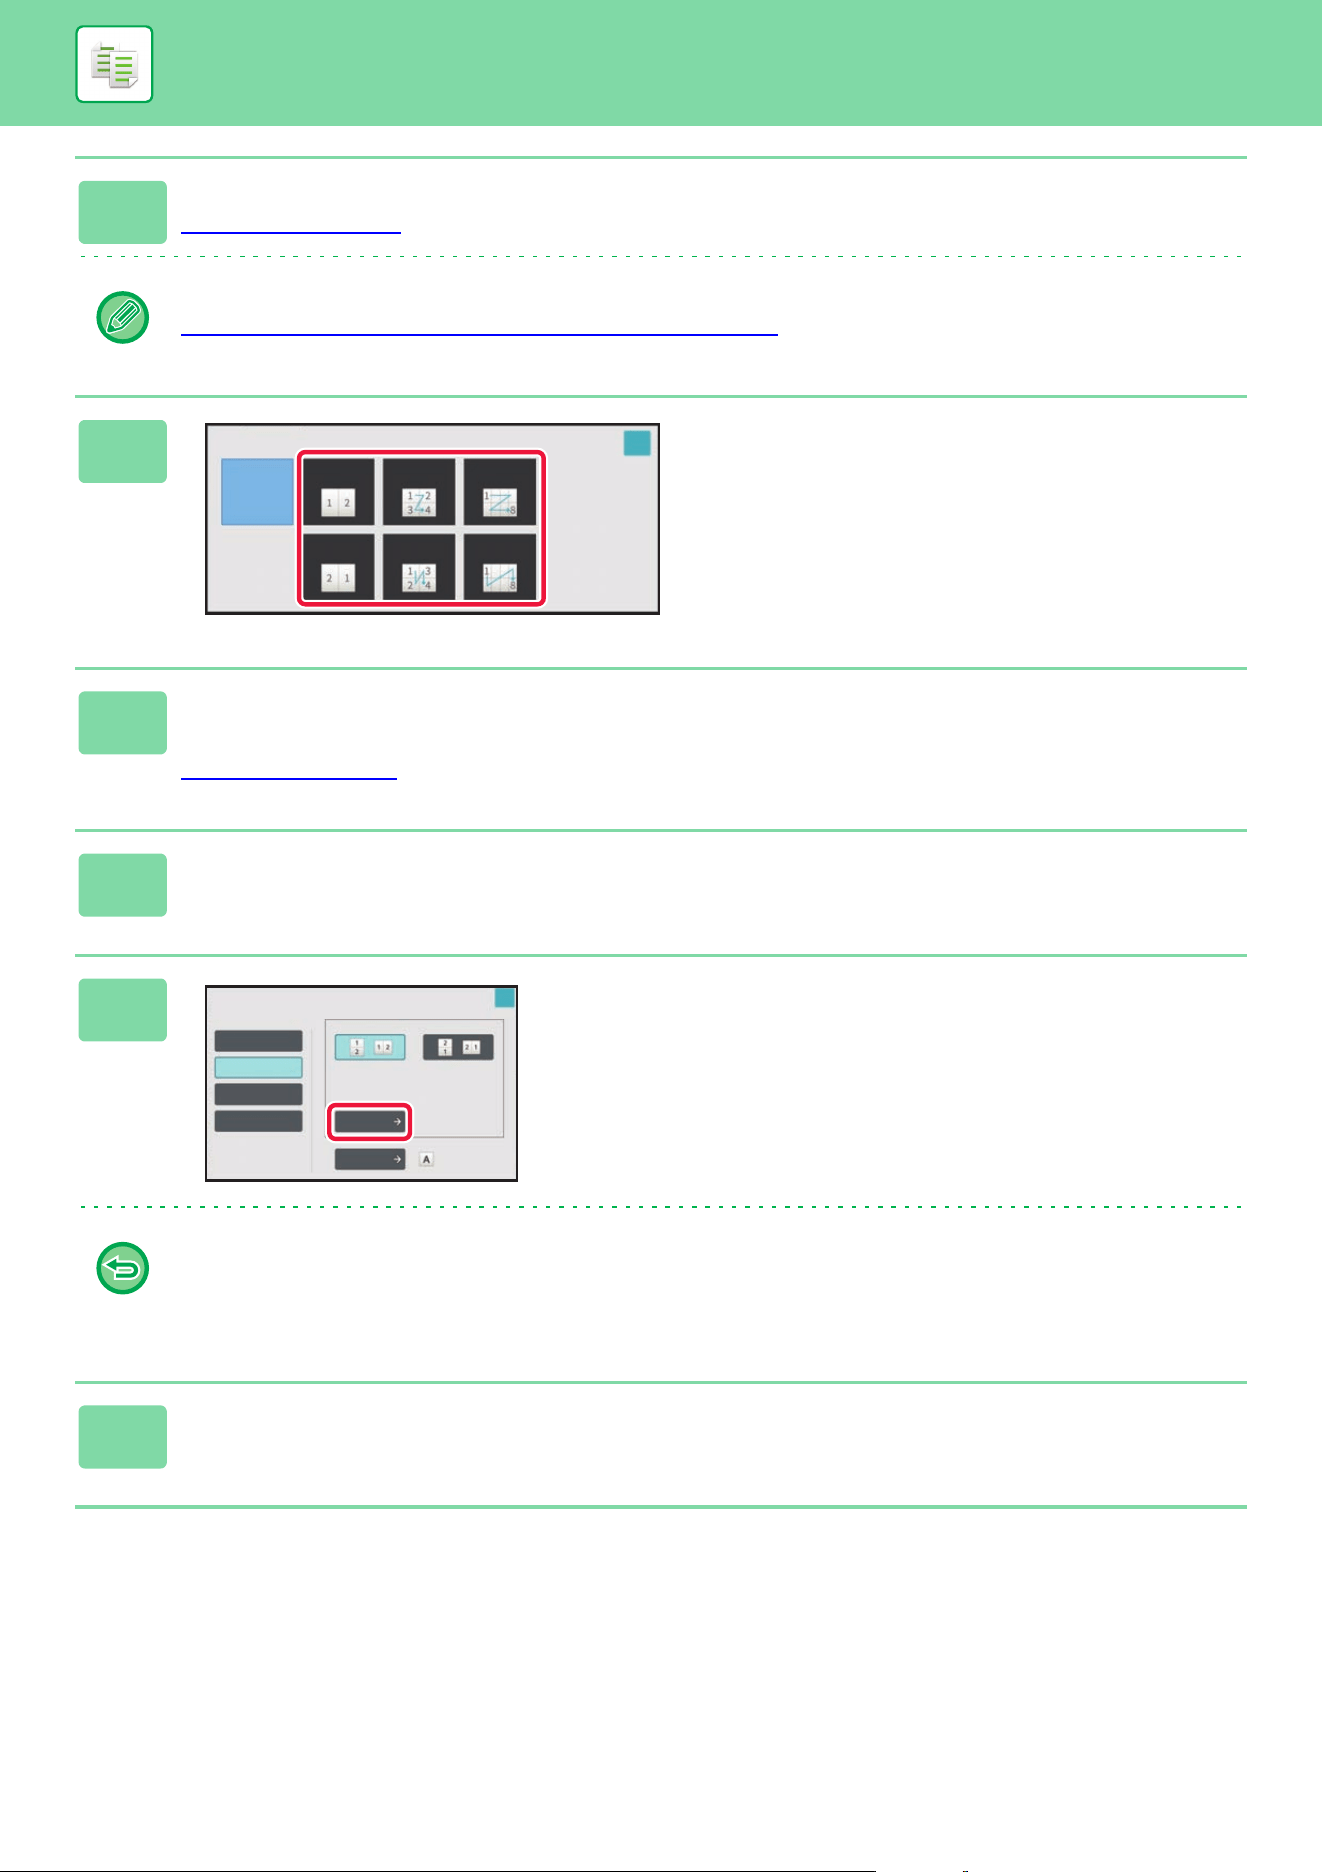
3-58
COPIER►BASIC PROCEDURE FOR MAKING COPIES
2
Tap the [N-Up] key.
COPY MODE (page 3-3)
Tap the [Original] key and specify the orientation of the original to have the orientation be correctly recognized.
SPECIFYING THE ORIENTATION OF THE ORIGINAL
(page 3-29)
3
Tap the number of originals you want
to copy collectively, and select the
layout key.
If needed, the images will be rotated.
If you have finished selecting settings, go to step 7.
4
To select more detailed settings, tap the [Detail] key to switch to normal
mode.
EASY MODE (page 3-3)
5
Tap the [Others] key, and tap the [N-Up] key.
6
Tap [Border], and select the border.
A line can be inserted between pages arranged on a sheet.
After the settings are completed, tap [OK] key.
• To cancel the N-Up setting:
Tap the [Off] key.
• To cancel all settings:
Tap the [CA] key.
7
Tap the [Color Start] or [B/W Start] key to start copying.
N-Up
O
2-Up
4-Up 8-Up
2-Up
4-Up
8-Up
OK
N-Up
Select the number of pages and page layout.
Off
2-Up
4-Up
8-Up
Layout
Border
Off
Original
OK
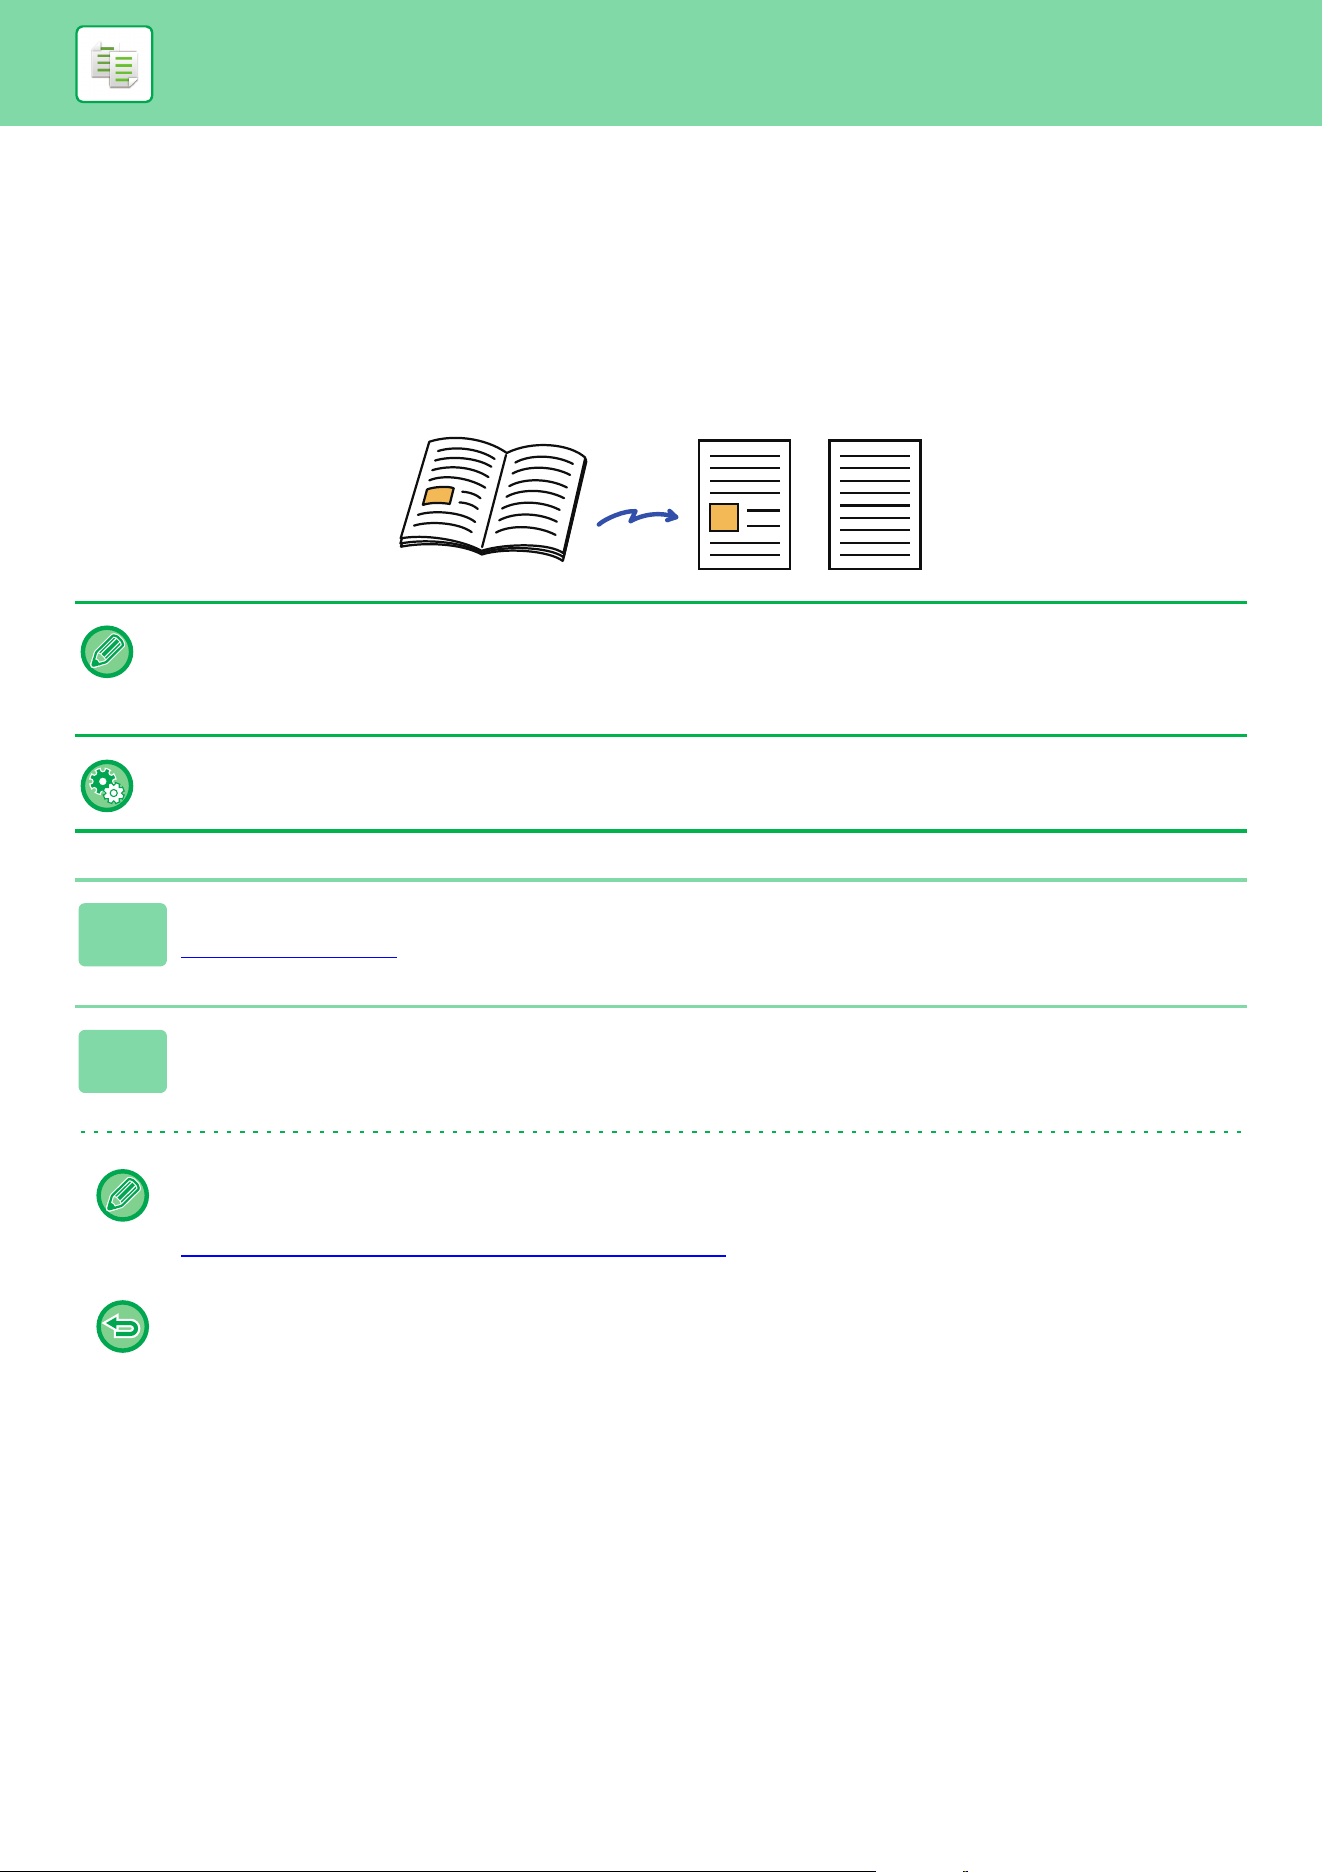
3-59
COPIER►BASIC PROCEDURE FOR MAKING COPIES
COPYING EACH FACING PAGE OF A BOUND
DOCUMENT (DUAL PAGE COPY)
This function copies the left and right half of an original successively. This function is useful when making copies of the
facing pages of a book or other bound document.
Copying the facing pages of a book or bound document
Books and bound documents are copied into 2 separate pages.
• Specify dual page copy before scanning the original.
• To erase shadows caused by the binding of a book or other bound document, use the erase function.
This function cannot be used in combination with Center Erase.
• This function cannot be used in combination with 2-sided Original and Image Orientation: Horizontal.
To use Dual Page Copy in Easy mode
In "Settings (administrator)", select [System Settings] → [Common Settings] → [Operation Settings] → [Easy Mode Settings]
→ [Easy Copy].
1
Tap the [Detail] key to change to normal mode.
EASY MODE (page 3-3)
2
Tap the [Others] key, and tap the [Dual Page Copy] key.
A checkmark appears on the icon.
After the settings are completed, tap the [OK] key.
When dual page copy is selected, 8-1/2" x 11" (A4) size paper is automatically selected.
If you want to use paper in another tray, tap the [Paper Select] key and select the tray containing the desired paper from
the paper tray selection screen that appears.
SELECTING THE PAPER TRAY FOR COPYING
(page 3-13)
To cancel the dual page copy setting:
Tap the [Dual Page Copy] key to uncheck it.
5
6
56
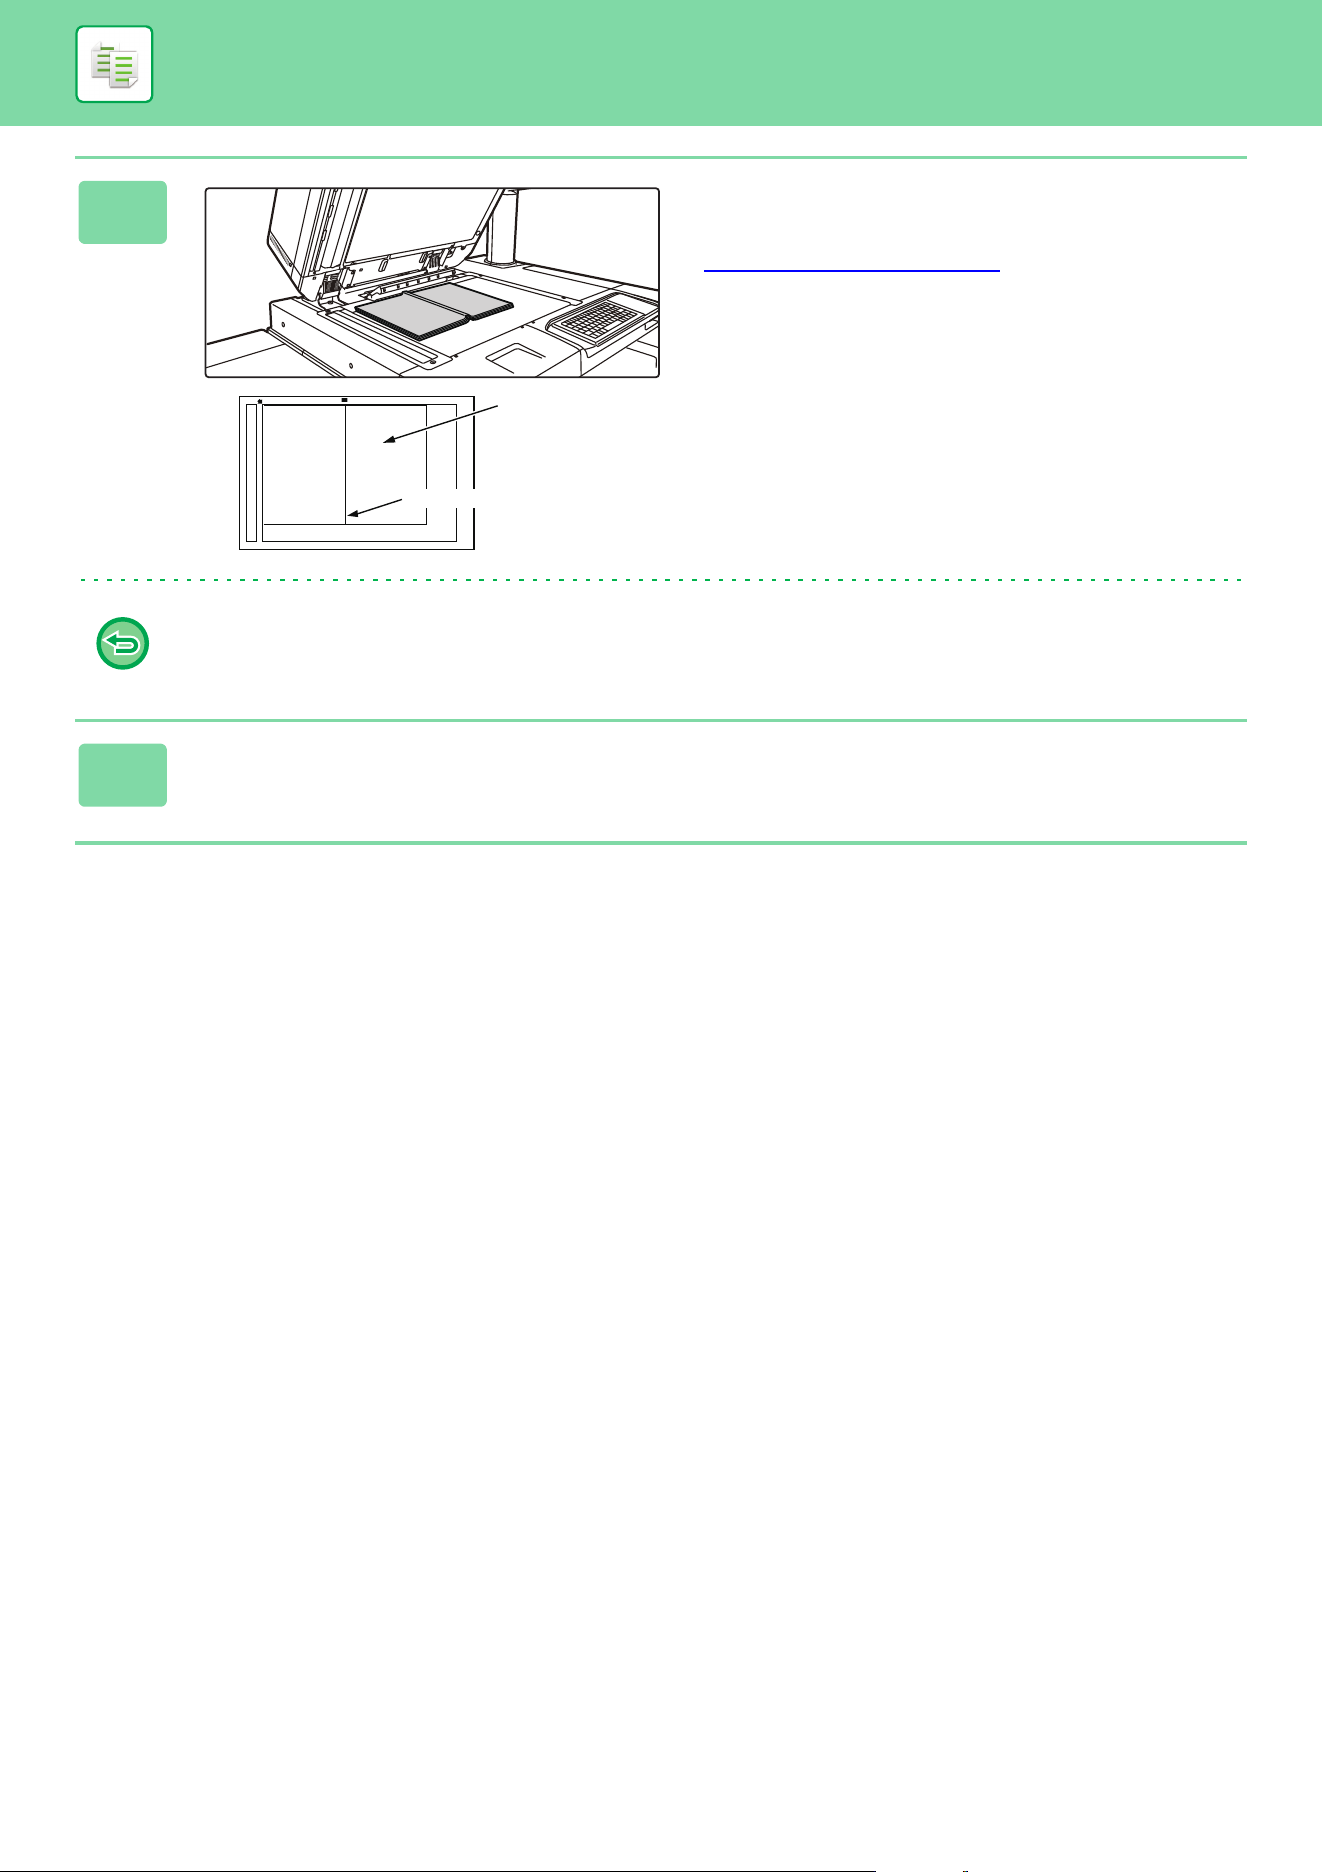

3-61
COPIER►BASIC PROCEDURE FOR MAKING COPIES
COPYING BOTH SIDES OF A CARD AS A SINGLE PAGE
(CARD SHOT)
This function copies the front and reverse sides of a card on one sheet, not on separate sheets.
This function is convenient for making copies for identification purposes and helps save paper.
For example, both sides of a card can be copied to a single sheet in A4 portrait or landscape.
1
Select the paper to be used for card shot.
Set a paper by referring to the "SELECTING THE PAPER TRAY FOR COPYING (page 3-13)".
2
Tap the [Detail] key to change to normal mode.
EASY MODE (page 3-3)
3
Tap the [Others] key, and tap the [Card Shot] key.
4
Tap the [On] key, and specify the
original size as required.
After the settings are completed, tap [OK] and [Back] keys in
sequence.
Back
Example of an 8-1/2" x 11" (A4)
size portrait copy
Example of an 8-1/2" x 11" (A4)
size landscape copy
Front
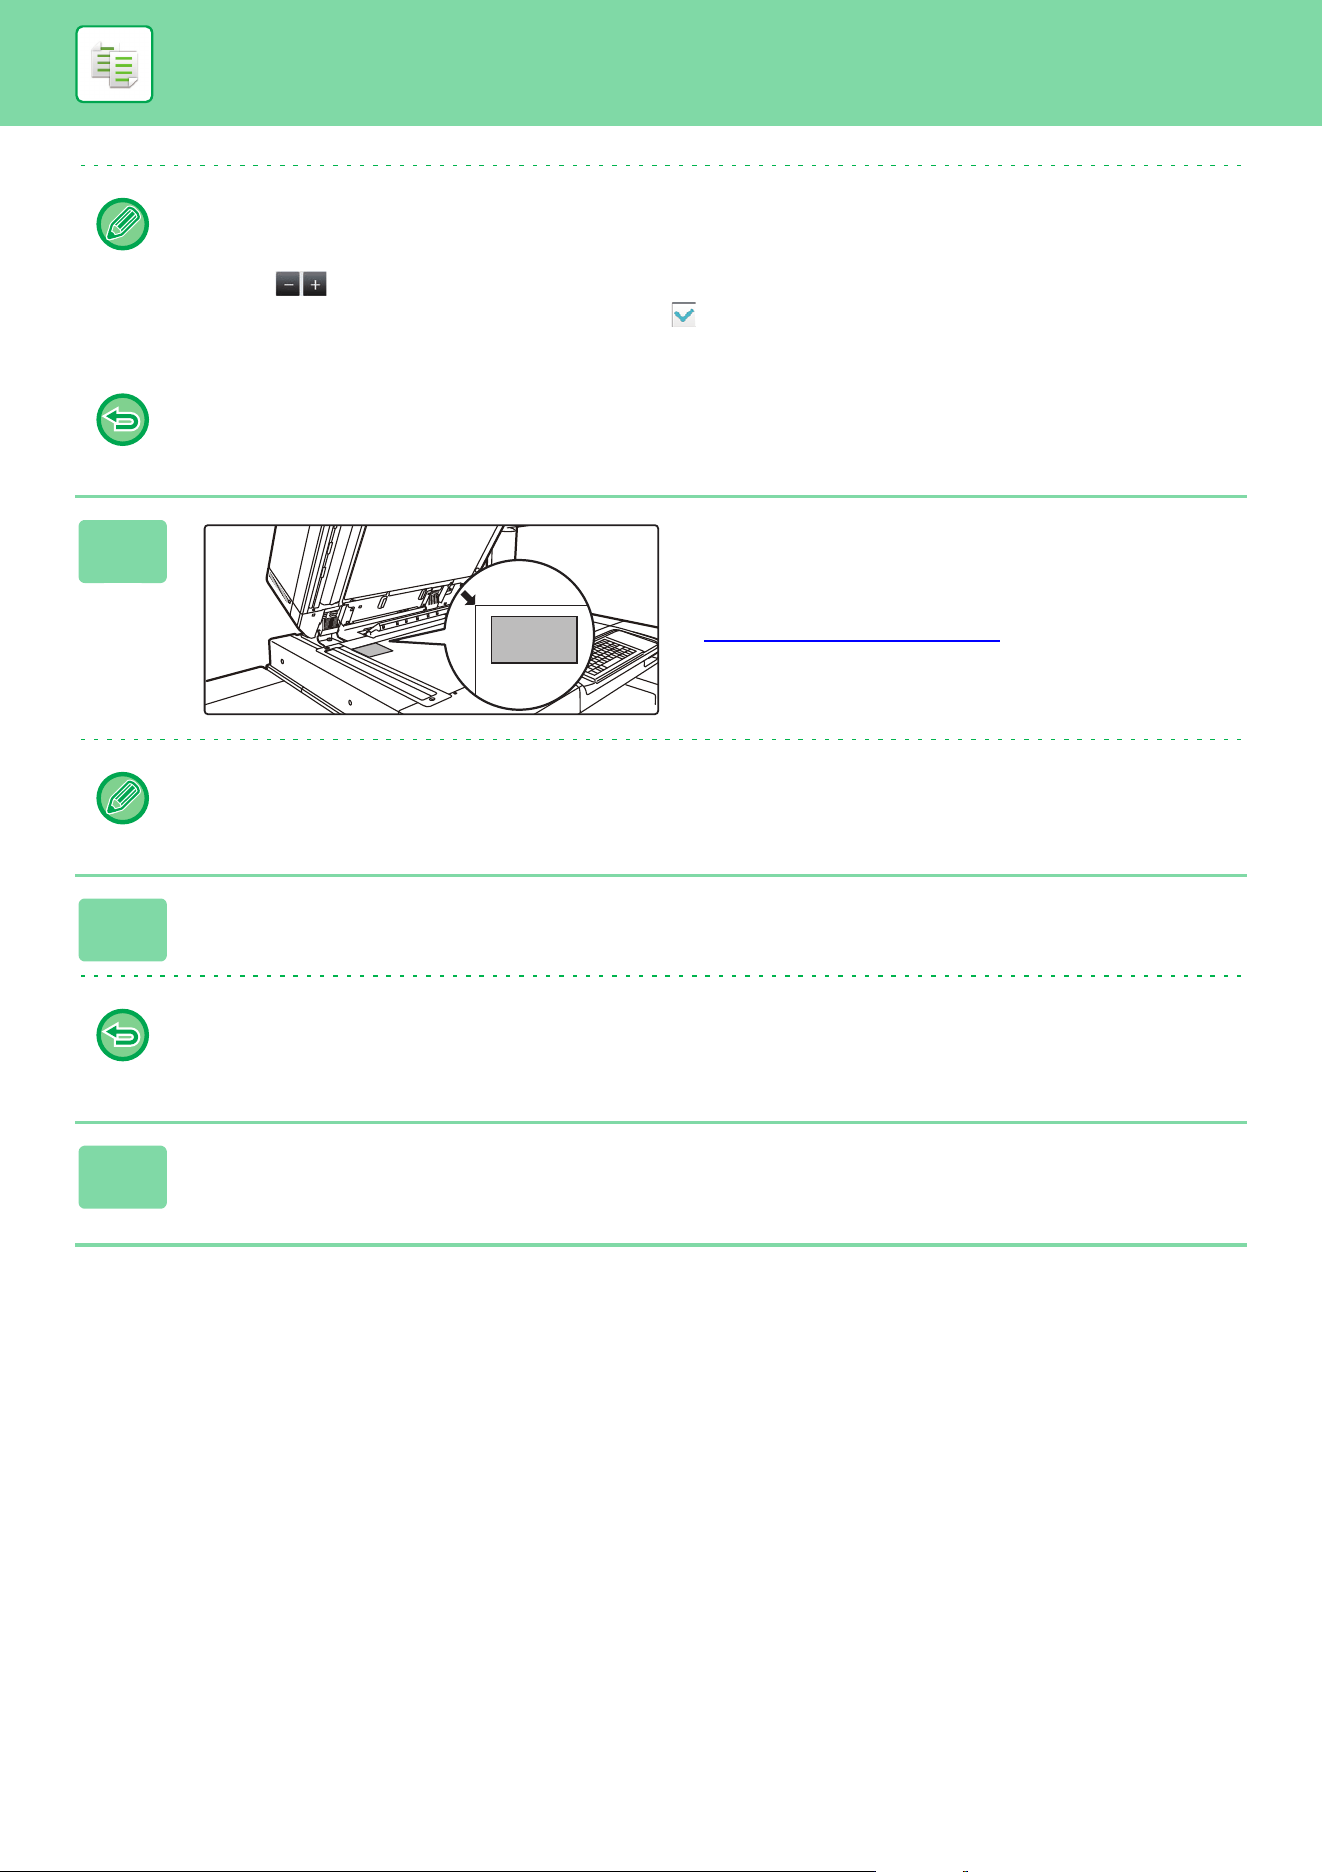
3-62
COPIER►BASIC PROCEDURE FOR MAKING COPIES
• Tap the areas displaying width and height sizes respectively, and enter the sizes using the numeric keys.
• If the image is missing, enter a slightly larger size.
• To quickly set the size, first specify a value close to the desired ratio value by the numeric keys, then adjust it by
tapping .
• When you set the [Adjust to Paper Size] checkbox to , the original is enlarged or reduced with the ratio appropriate
to the original size.
To cancel the Card Shot settings:
Tap the [Off] key.
5
Place a card face down on the
document glass, and tap the [Color
Start] or [B/W Start] key.
DOCUMENT GLASS (page 1-51)
• If the image is missing, shift the original inward and set it.
6
Place a card face up on the document glass, and tap the [Color Start] or [B/W
Start] key to scan the reverse side.
• Copy settings cannot be changed when scanning additional pages.
• To cancel all settings:
Tap the [CA] key.
7
Tap the [Read-End] key to start copying.
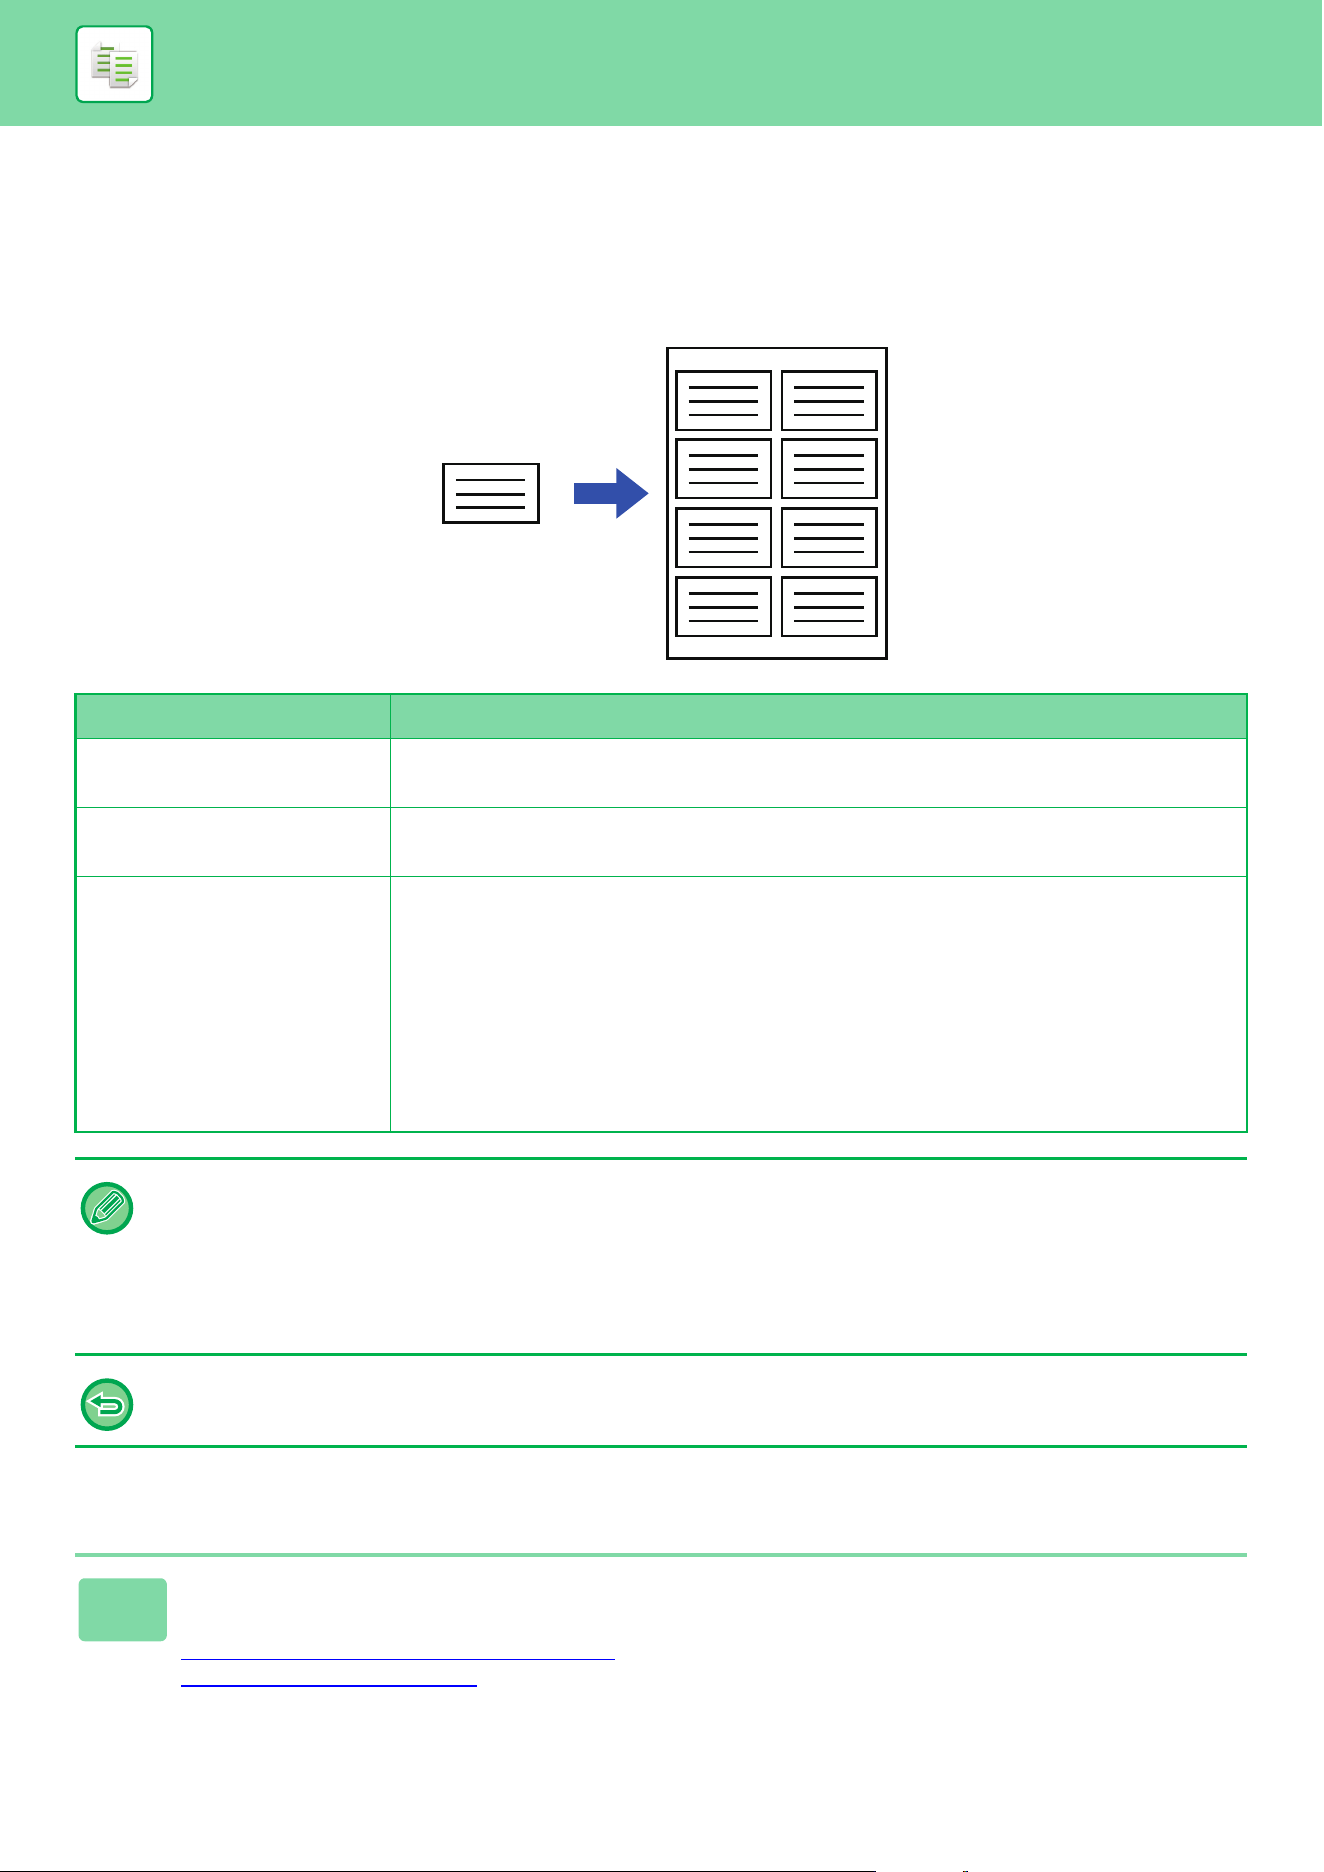
3-63
COPIER►BASIC PROCEDURE FOR MAKING COPIES
REPEATING THE SAME IMAGE ON ONE SHEET
(REPEAT LAYOUT)
This function copies multiple same original images on one sheet.
You can set any of the following three types of repeat copy.
Copy by automatically calculating the repeat count (Auto Repeat)
Repeat method Description
Auto Repeat The maximum repeat count to copy images on a sheet is calculated automatically according
to the original size, paper size, and copy ratio being selected from the base screen.
Fixed Repeat When you select a repeat count, original size, and paper size to copy images on a sheet, the
copy ratio is calculated automatically and the original is copied.
Photo Repeat This function repeatedly copies on 8-1/2" x 11" (A4) or 11" x 17" (A3) papers without changing
the copy ratio of the photo size original. You can select any of the following five types of
original size:
• E/L Size, Postcard (Up to 3" x 5" (148 mm x 105 mm))
• Up to 5" x 7" (100 mm x 150 mm)
• Card (Up to 2-1/2" x 4" (70 mm x 100 mm))
• ID Photo (Up to 2-1/2" x 2-1/2" (65 mm x 70 mm))
• Card (Up to 2-1/8" x 2-5/8" (57 mm x 100 mm))
* Reduction will be 95%.
• Repeat Layout cannot be selected in easy mode.
• Repeat Layout must be specified before scanning the original.
• If the copy ratio automatically obtained in [Fixed Repeat] exceeds 25 to 400% (using document glass) or 25 to 200%
(using automatic document feeder), it will result in an error. Select the number of faces to repeat again.
• Always place an original on the document glass for photo repeating.
• Repeat Layout can be combined with Staple / Punch or Saddle Stitch.
• This function cannot be combined with Mixed Size Original or 2-Sided Copy.
• Photo Repeat cannot be combined with Image Orientation.
1
Place the original.
Place the original in the document feeder tray of the automatic document feeder, or on the document glass.
AUTOMATIC DOCUMENT FEEDER (page 1-47)
DOCUMENT GLASS (page 1-51)
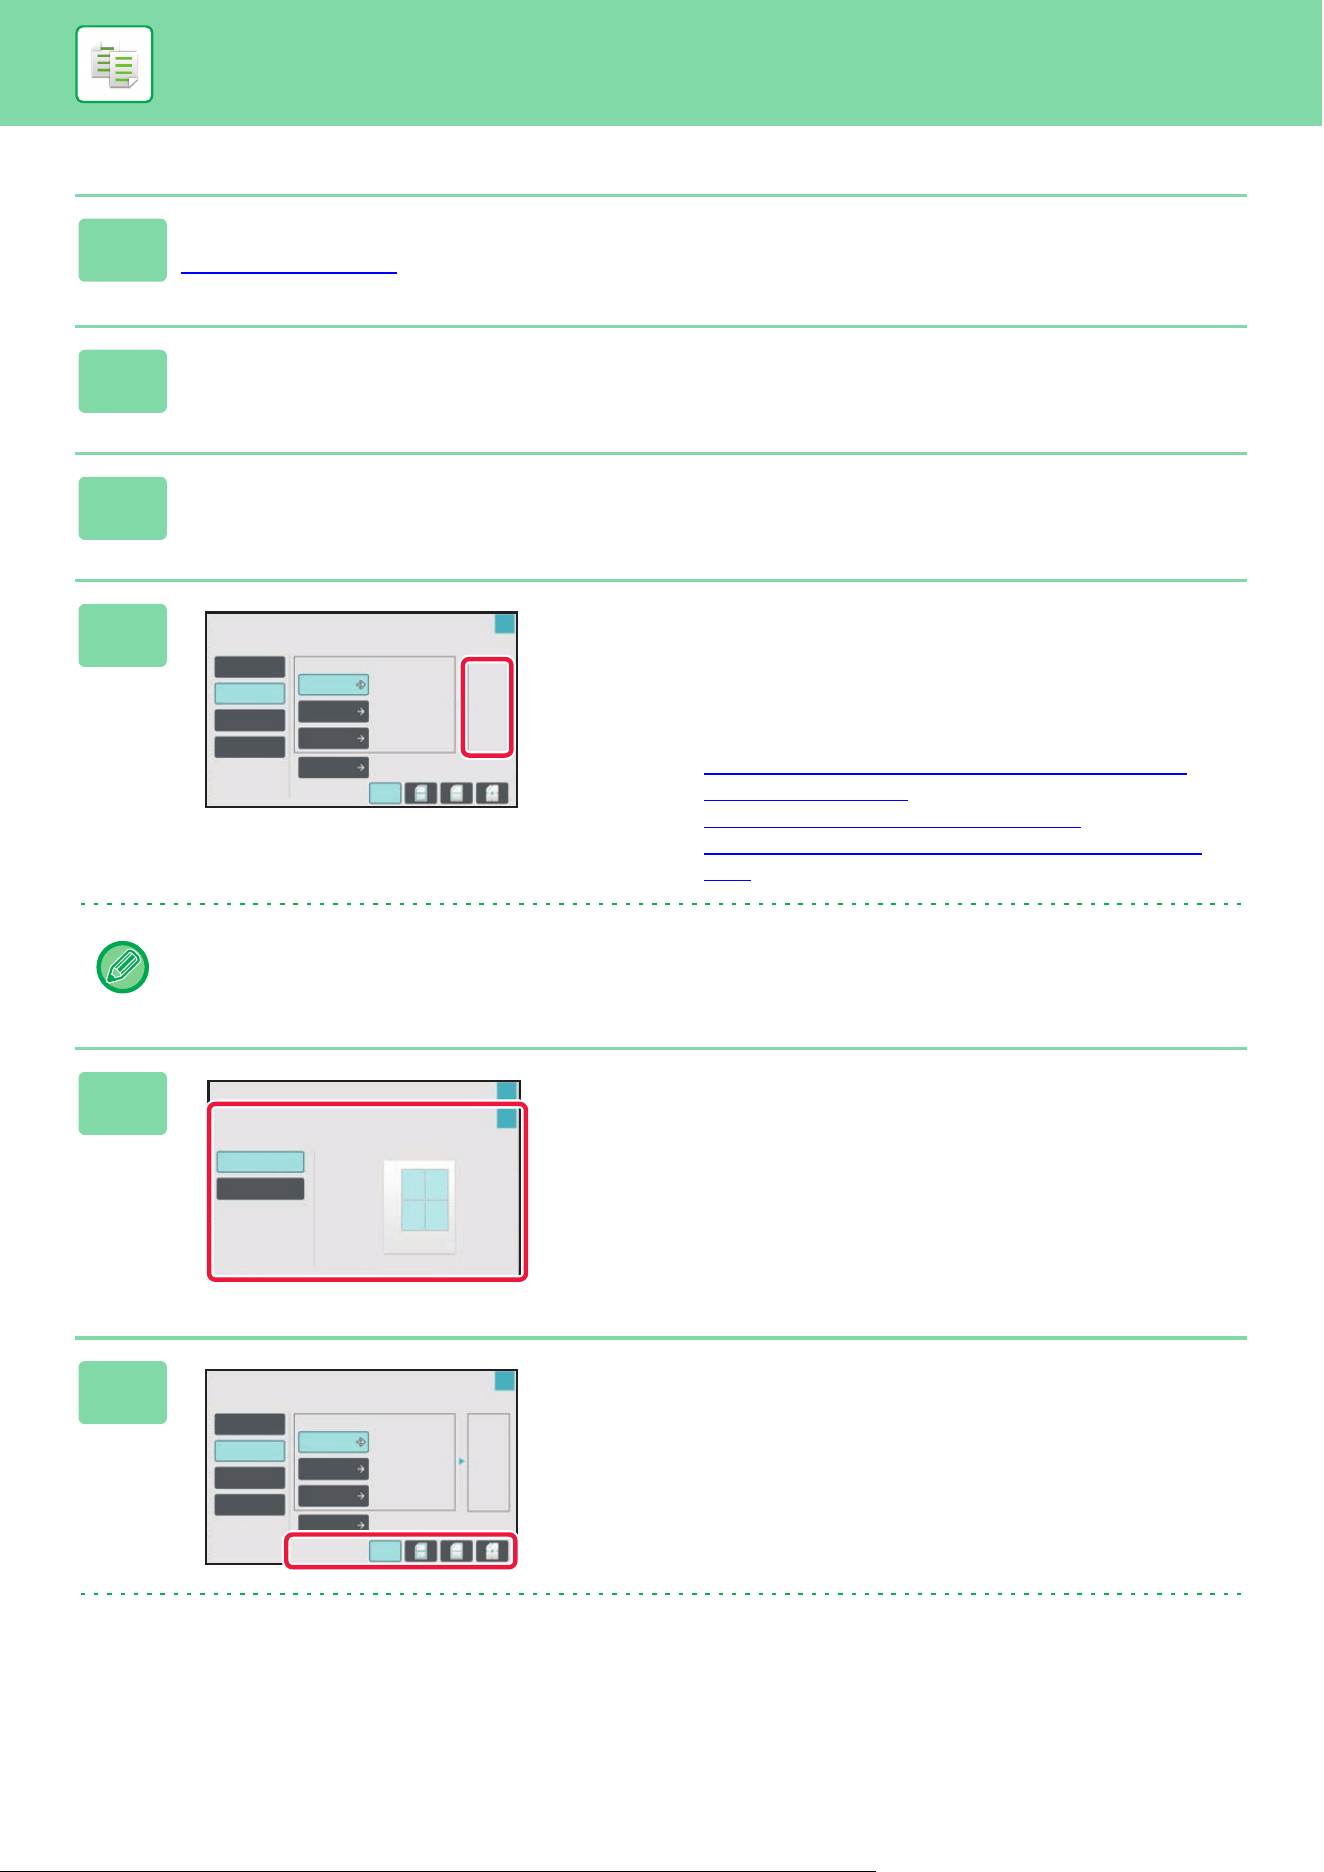
3-64
COPIER►BASIC PROCEDURE FOR MAKING COPIES
2
Tap the [Detail] key to change to normal mode.
EASY MODE (page 3-3)
3
Tap the [Others] key, and then tap the [Repeat Layout] key.
4
Tap the [Auto Repeat] key.
5
Check the repeat faces which have
been calculated automatically.
Change the original size, paper size, or copy ratio by tapping
the respective [Original], [Paper Select], or [Copy Ratio] key
when necessary.
SELECTING THE ORIENTATION AND SIZE OF THE
ORIGINAL (page 3-29)
MANUAL RATIO SELECTION (page 3-23)
SELECTING THE PAPER TRAY FOR COPYING (page
3-13)
Set so that there are one or more repeat faces.
6
Tap the [Layout] key.
Tap the [Layout w/o spacing] key or the [Layout evenly
spaced] key, and then tap the [OK] key.
7
Specify the repeat partition line.
After the settings are completed, tap [OK] key.
O
Current Setting
Repeat
Number
Original
Paper Select
Copy Ratio
Auto Repeat
Fixed Repeat
Photo Repeat
Auto Layout of Repeat Face Based on Original, Paper Size and Ratio.
Repeat Layout
Layout w/o spacing
Layout
Parting Line
O
1
OK
Auto A4
8½x11
100%
Repeat Layout
OK
OK
Layout
Select Image Layout.
Layout w/o spacing
Layout evenly spaced
Off
Current Setting
Repeat
Number
1
OK
Original
Paper Select
Copy Ratio
Auto Repeat
Fixed Repeat
Photo Repeat
Auto Layout of Repeat Face Based on Original, Paper Size and Ratio.
Repeat Layout
Layout w/o spacing
Layout
Parting Line
Off
Auto A4
A3
100%
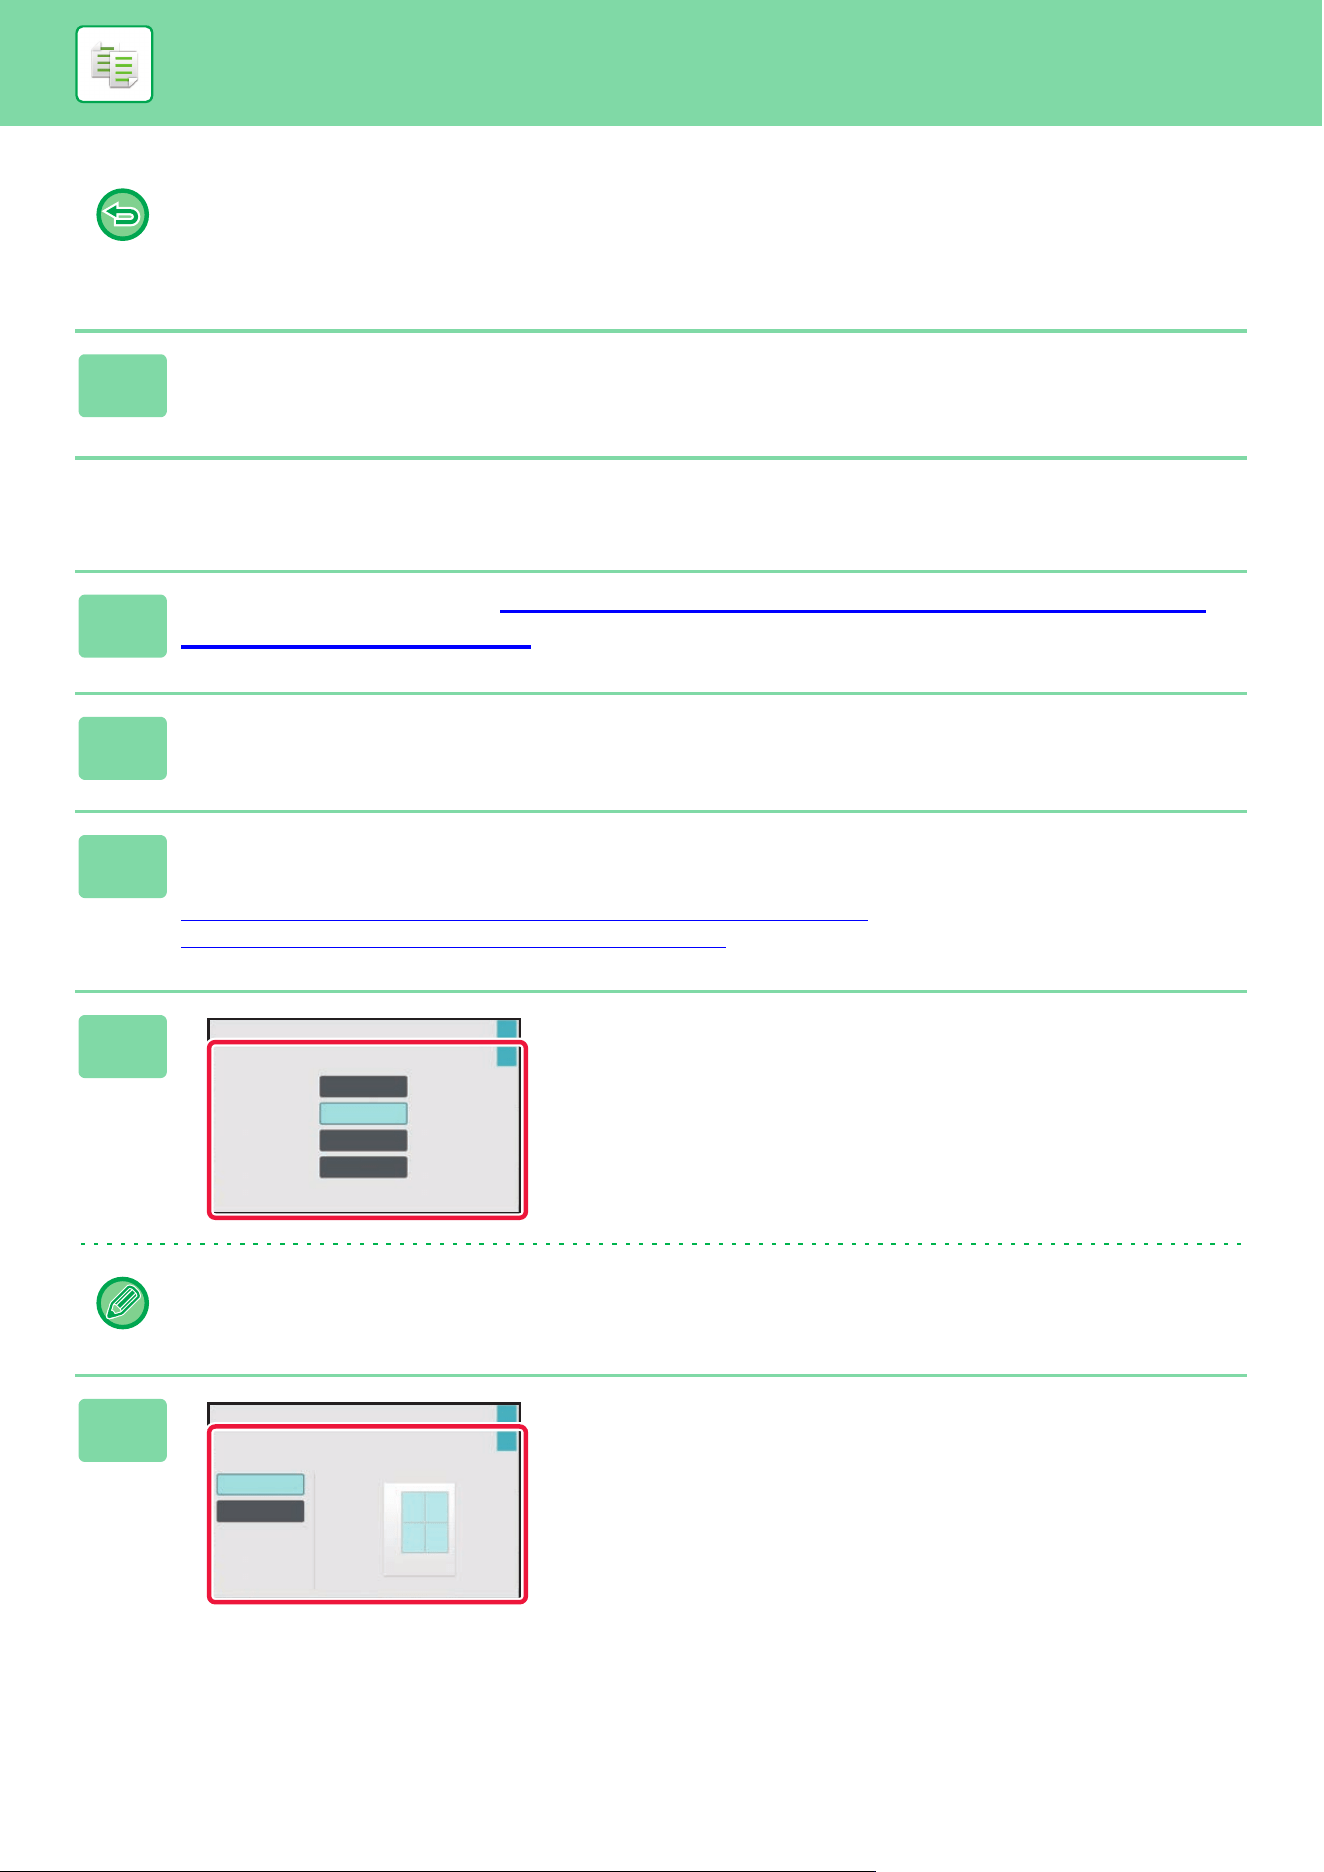
3-65
COPIER►BASIC PROCEDURE FOR MAKING COPIES
Copy by specifying a repeat count (Fixed Repeat)
• To cancel the Auto Repeat setting:
Tap the [Off] key.
• To cancel all settings:
Tap the [CA] key.
8
Tap the [Color Start] or [B/W Start] key to start copying.
1
Perform steps 1 to 3 in Copy by automatically calculating the repeat count
(Auto Repeat) (page 3-63).
2
Tap the [Fixed Repeat] key.
3
Tap the [Original] and [Paper Select] keys to select an original size and a
paper size, respectively.
SELECTING THE ORIENTATION AND SIZE OF THE ORIGINAL (page 3-29)
SELECTING THE PAPER TRAY FOR COPYING (page 3-13)
4
Tap [No. of Faces] to set a repeat
count.
After the settings are completed, tap [OK] key.
The automatic calculation result is shown as the copy ratio.
If the calculated copy ratio exceeds the range from 25% to 400% (using document glass) or 25 to 200% (using automatic
document feeder), an error occurs.
5
Tap the [Layout] key.
Tap the [Layout w/o spacing] key or the [Layout evenly
spaced] key, and then tap the [OK] key.
Repeat Layout
No. of Faces
OK
OK
4 Repeat
2 Repeat
8 Repeat
16 Repeat
Repeat Layout
OK
OK
Layout
Select Image Layout.
Layout w/o spacing
Layout evenly spaced

3-66
COPIER►BASIC PROCEDURE FOR MAKING COPIES
Repeat a photo size original in actual size (Photo Repeat)
6
Specify the repeat partition line.
After the settings are completed, tap [OK] key.
• To cancel the fixed repeat setting:
Tap the [Off] key.
• To cancel all settings:
Tap the [CA] key.
7
Tap the [Color Start] or [B/W Start] key to start copying.
1
Perform steps 1 to 3 in Copy by automatically calculating the repeat count
(Auto Repeat) (page 3-63).
2
Tap the [Photo Repeat] key.
3
Place the original on the document glass.
4
Tap the [Original] key and select an original size.
When you tap the original size key, the original direction is indicated in the "How To Set". Place the original to meet the
displayed orientation.
After the settings are completed, tap [OK] key.
5
Tap the [Paper Select] key and select a
paper size.
After the settings are completed, tap [OK] and [Back] keys in
sequence.
The automatic calculation result is shown as the copy ratio.
When you tap the [*Up to 57x100mm(Card) *~ 2 1/8 x 2 5/8"] key on the [Original] screen, you can select the A4 paper
size only.
~130x90mm/3x5”
A4/8½x11
100%
Repeat
Number
4
OK
Repeat Layout
Auto Layout of Repeat Face Based on Original, Paper Size and Ratio.
Auto Repeat
Fixed Repeat
Photo Repeat
Off
Current Setting
Original
Paper Select
Copy Ratio

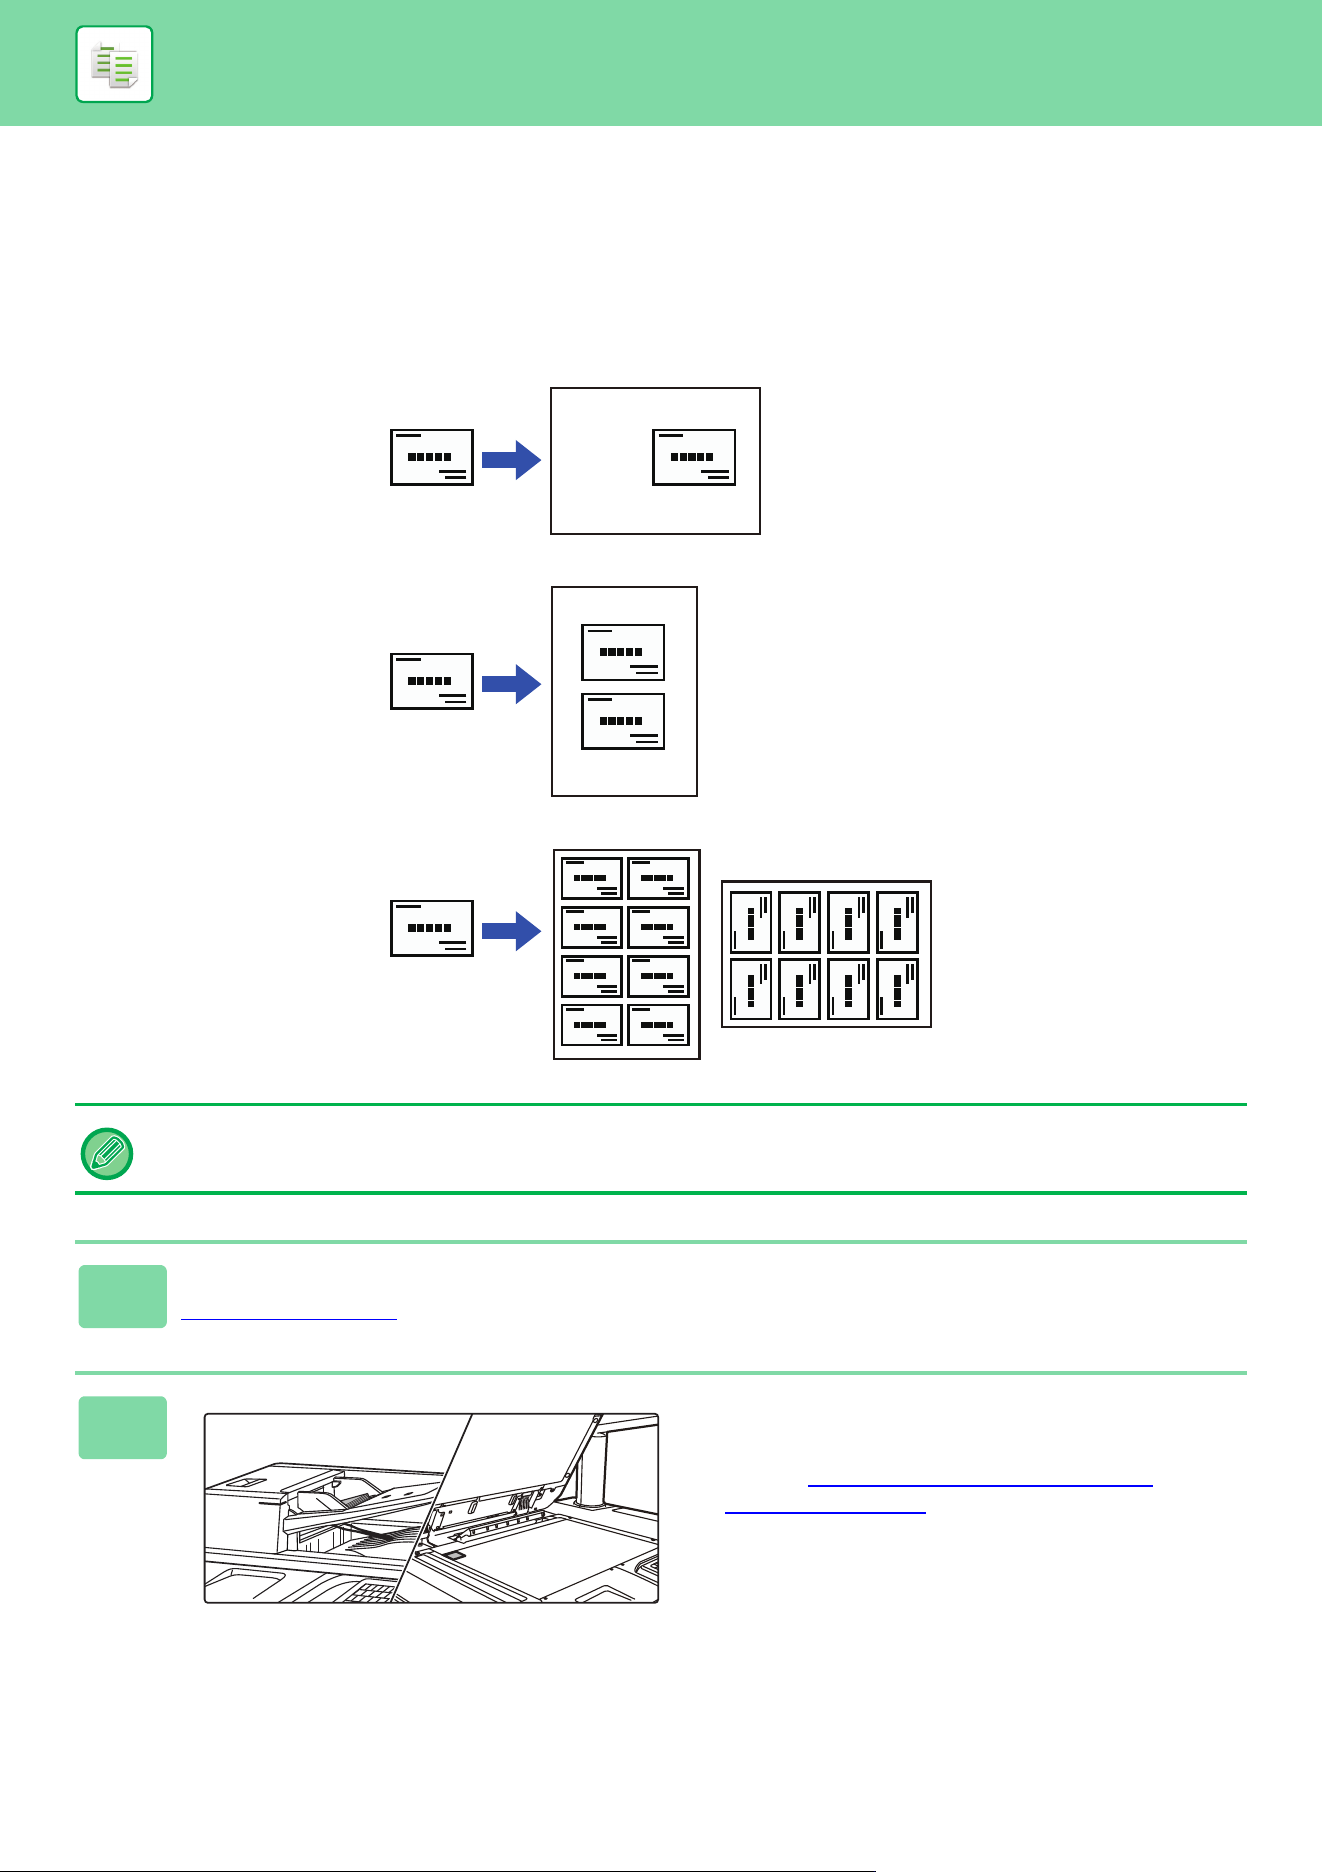
3-68
COPIER►BASIC PROCEDURE FOR MAKING COPIES
COPYING MULTIPLE BUSINESS CARDS
(BUSINESS CARD COPY)
Business Card Copy can be used to copy up to 8 business cards on one sheet of paper.
This function can be used when you want to create the list of business cards, and when you want to file business cards.
1-Sheet Layout, 2-Sheet Layout, 8-Sheet Layout
Business Card Copy cannot be selected in easy mode.
1
Tap the [Detail] key to change to normal mode.
EASY MODE (page 3-3)
2
Place a business card, and select the
paper to be used to copy the card.
• Refer to "SELECTING THE PAPER TRAY FOR
COPYING (page 3-13)" to select the paper.
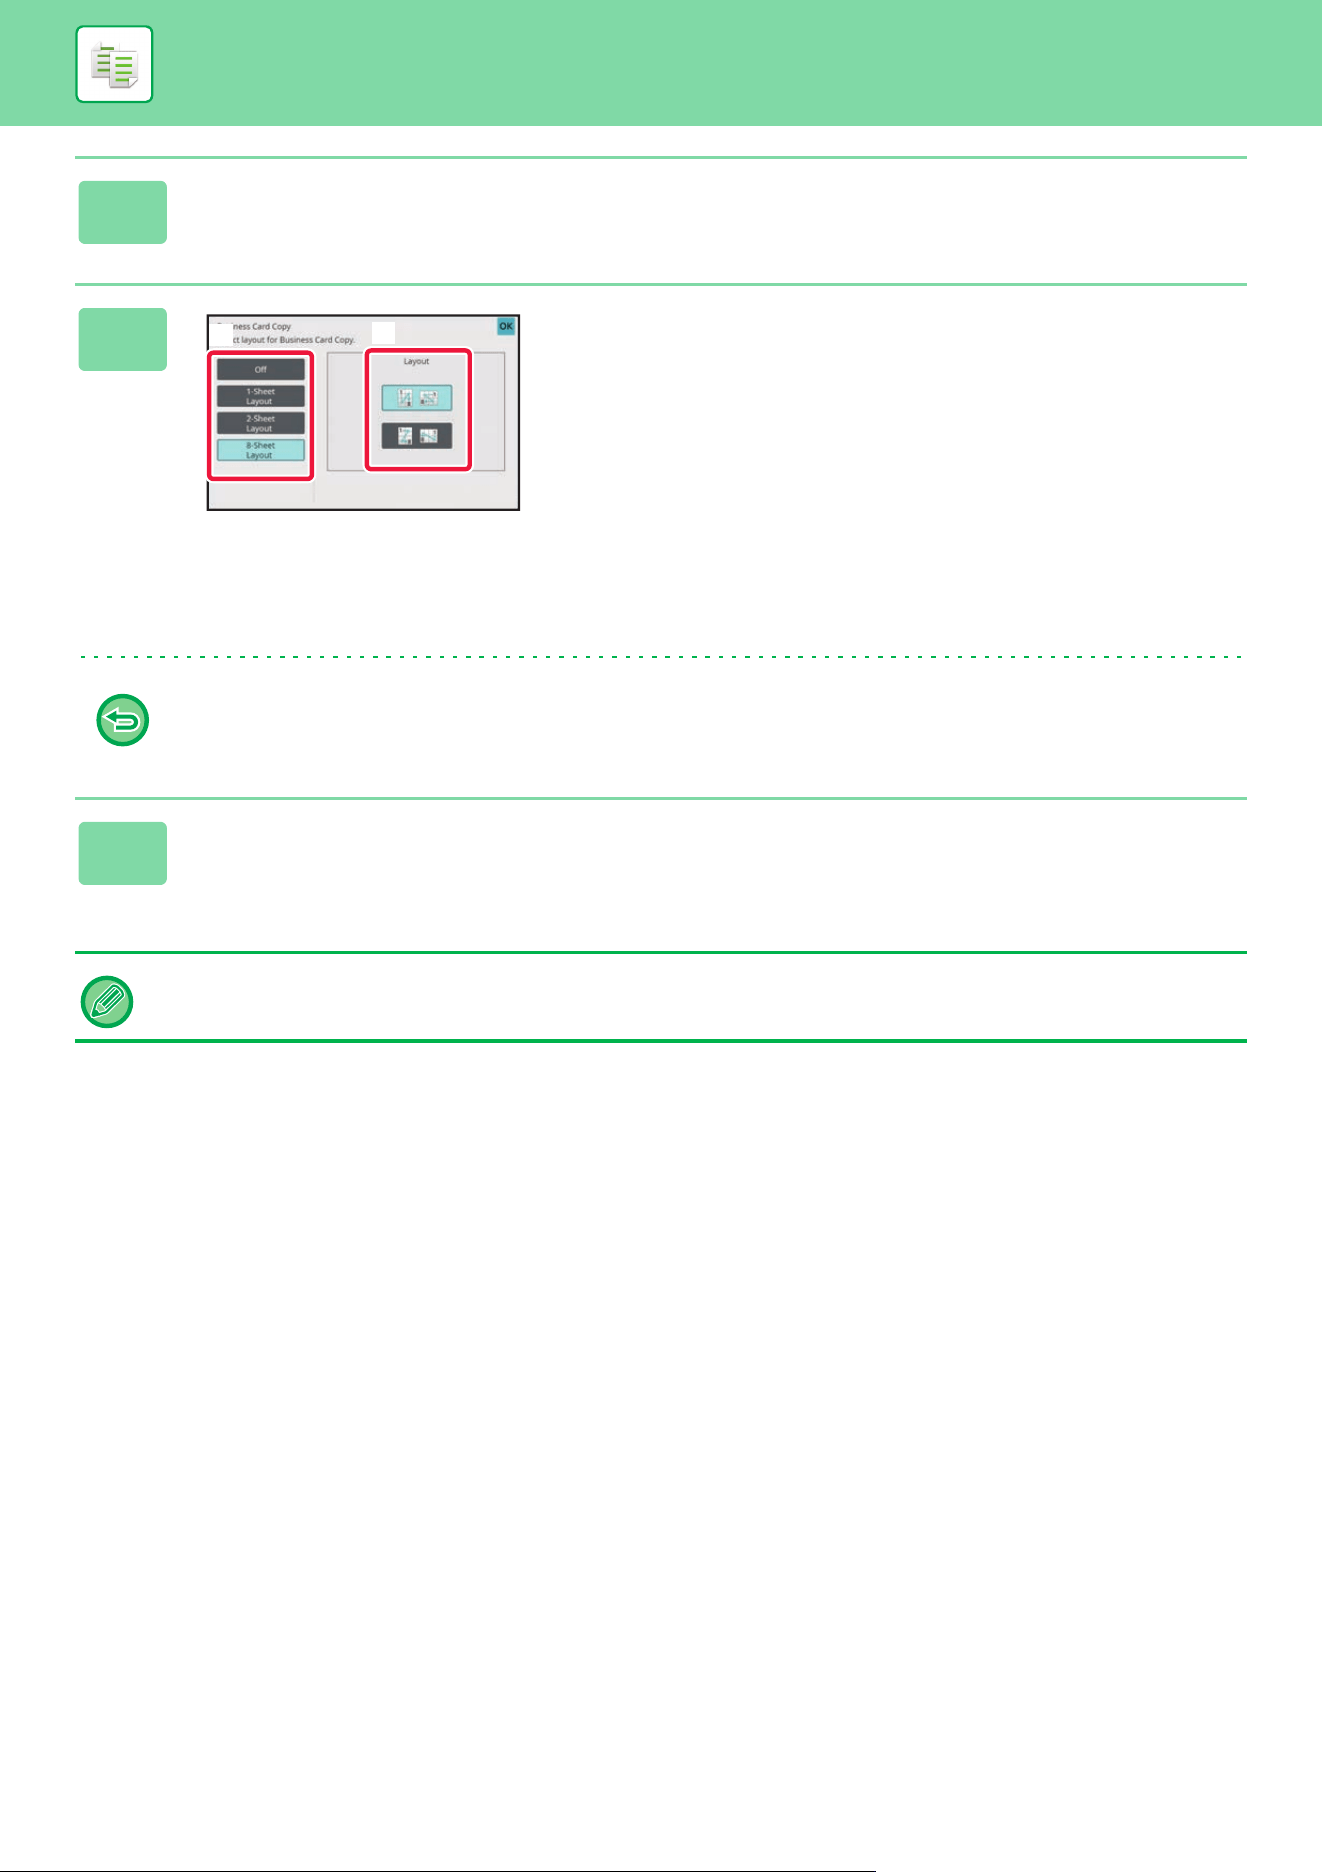
3-69
COPIER►BASIC PROCEDURE FOR MAKING COPIES
3
Tap the [Others] key, and then tap the [Business Card Copy] key.
4
Specify settings for Business Card
Copy.
(1) Specify the number of business cards to
be copied and touch the [1-Sheet Layout]
key or the [2-Sheet Layout] or the
[8-Sheet Layout] key.
(2) When [8-Sheet Layout] is selected, select
the desired layout from "Layout".
After the settings are completed, tap [OK] and [Back] keys in
sequence.
• To Business Card Copy setting:
Tap the [Off] key.
• To cancel all settings:
Tap the [CA] key.
5
Tap the [Start] key to start copying.
The zoom is fixed at 100%.
A4
(1)
(2)
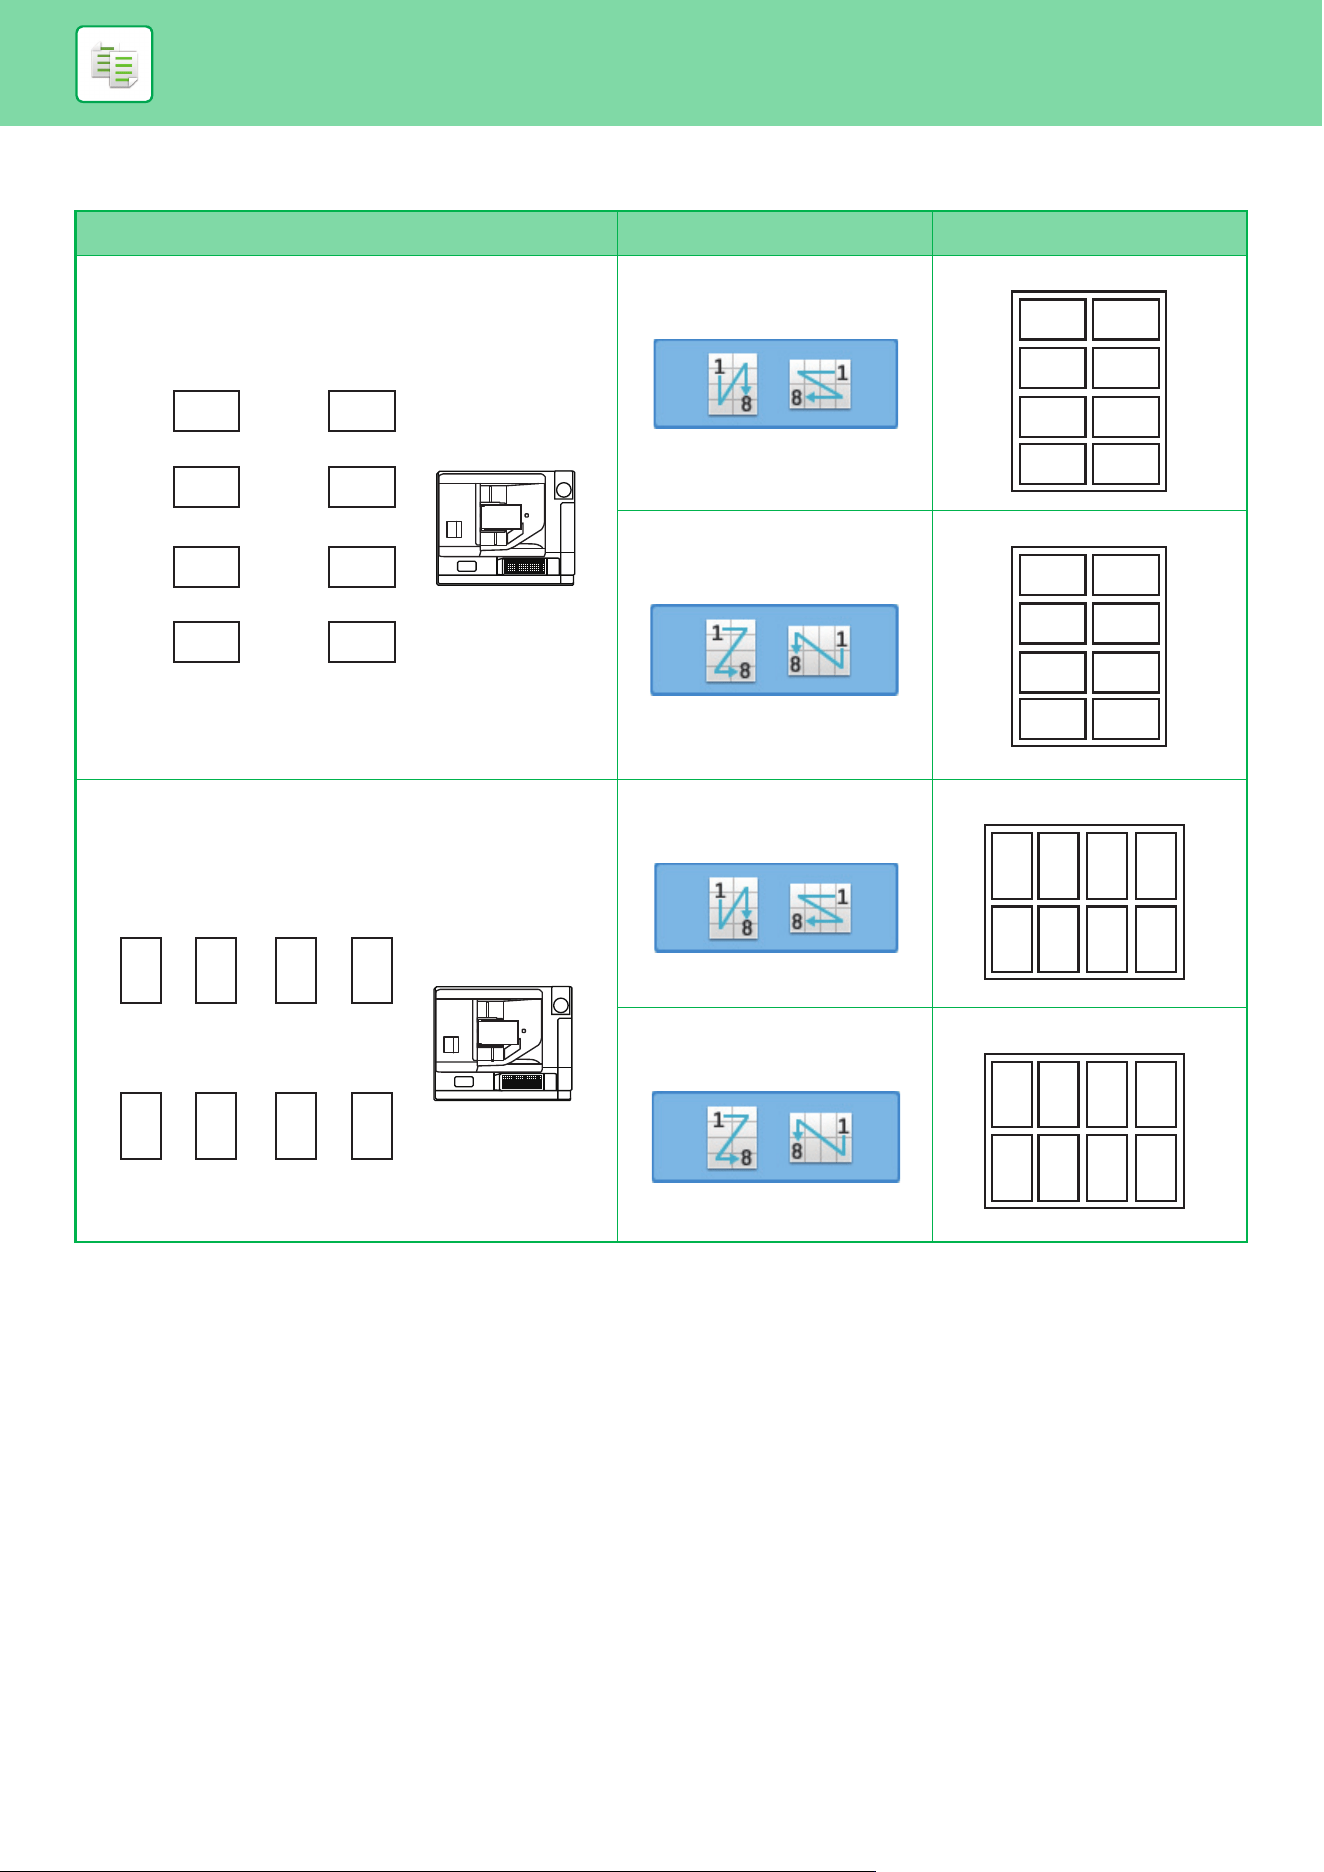
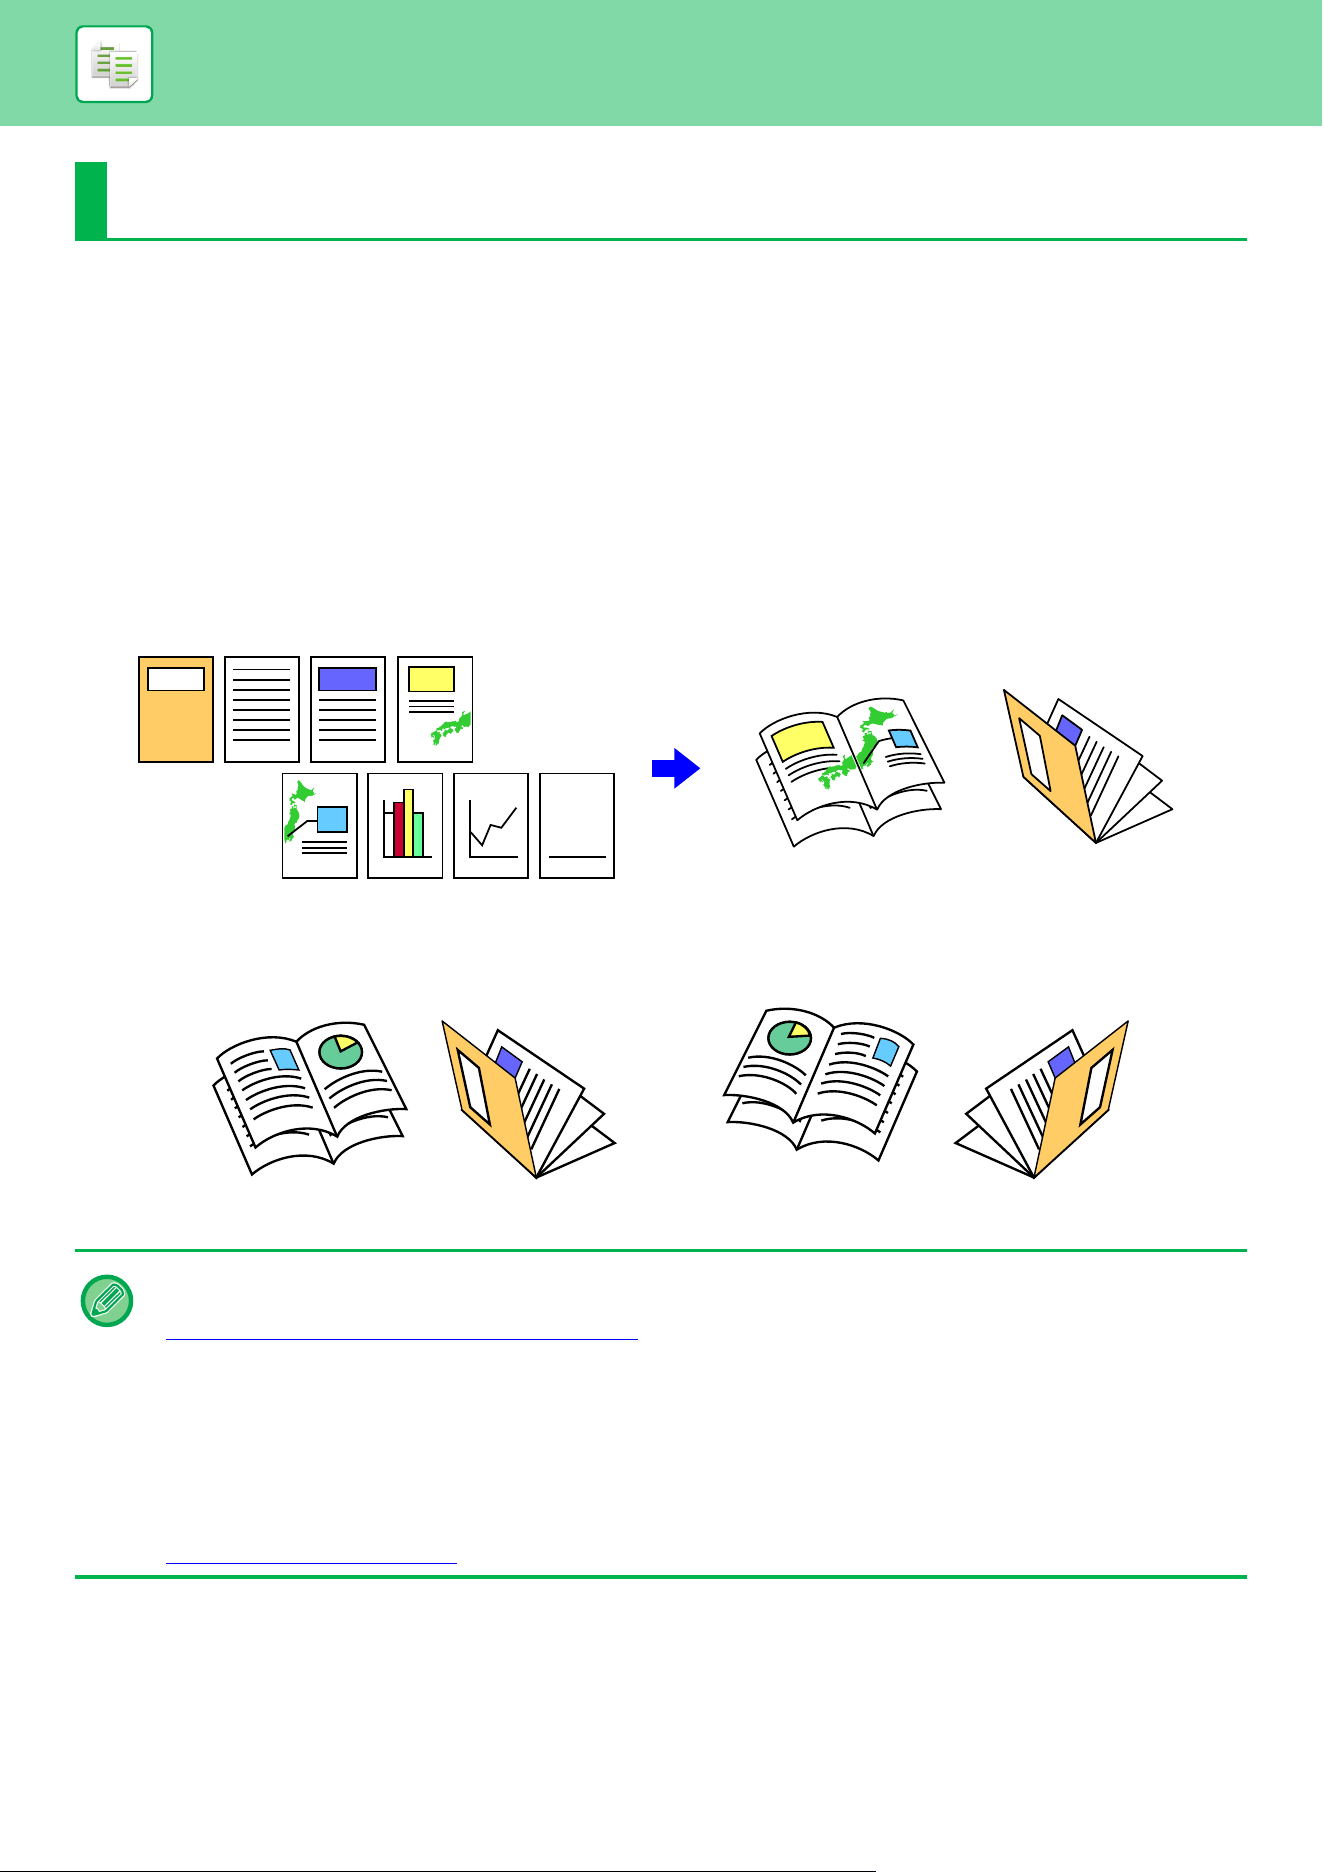
3-71
COPIER►OTHER FUNCTIONS
OUTPUT AND LAYOUT EDITING
FUNCTIONS
MAKING COPIES IN PAMPHLET FORMAT (BOOKLET)
Copies made by "Booklet" can be folded at the center to create a booklet.
This function is convenient for arranging copies into an attractive booklet or pamphlet.
Booklet copy using 8 original pages
Binding side
OTHER FUNCTIONS
• Booklet cannot be selected in easy mode.
• To make Booklet copies of a book or other bound original, use the book copy function.
COPYING A PAMPHLET (BOOK COPY)
(page 3-77)
• When Booklet is selected, 2-sided copying mode is automatically selected. When settings are selected that prevent
2-sided copying, the booklet function cannot be used.
• Scan the originals in order from the first page to the last page. The order of copying will be automatically adjusted by the
machine. Four original pages will be copied onto each sheet of paper. Blank pages will be automatically produced at the
end of pamphlet copies if the number of original pages is not a multiple of four.
• When a saddle stitch finisher is installed, you can select [Staple Sort] and set the Saddle Stitch (Staple each set of copies
at two positions in the center of paper).
STAPLE SETTINGS
(page 3-41)
765
432
7
2
5
3
7
5
4
Originals Staple to create a booklet
7
2
7
5
3
5
4
7
2
7
5
3
4
5
Left Binding Right Binding
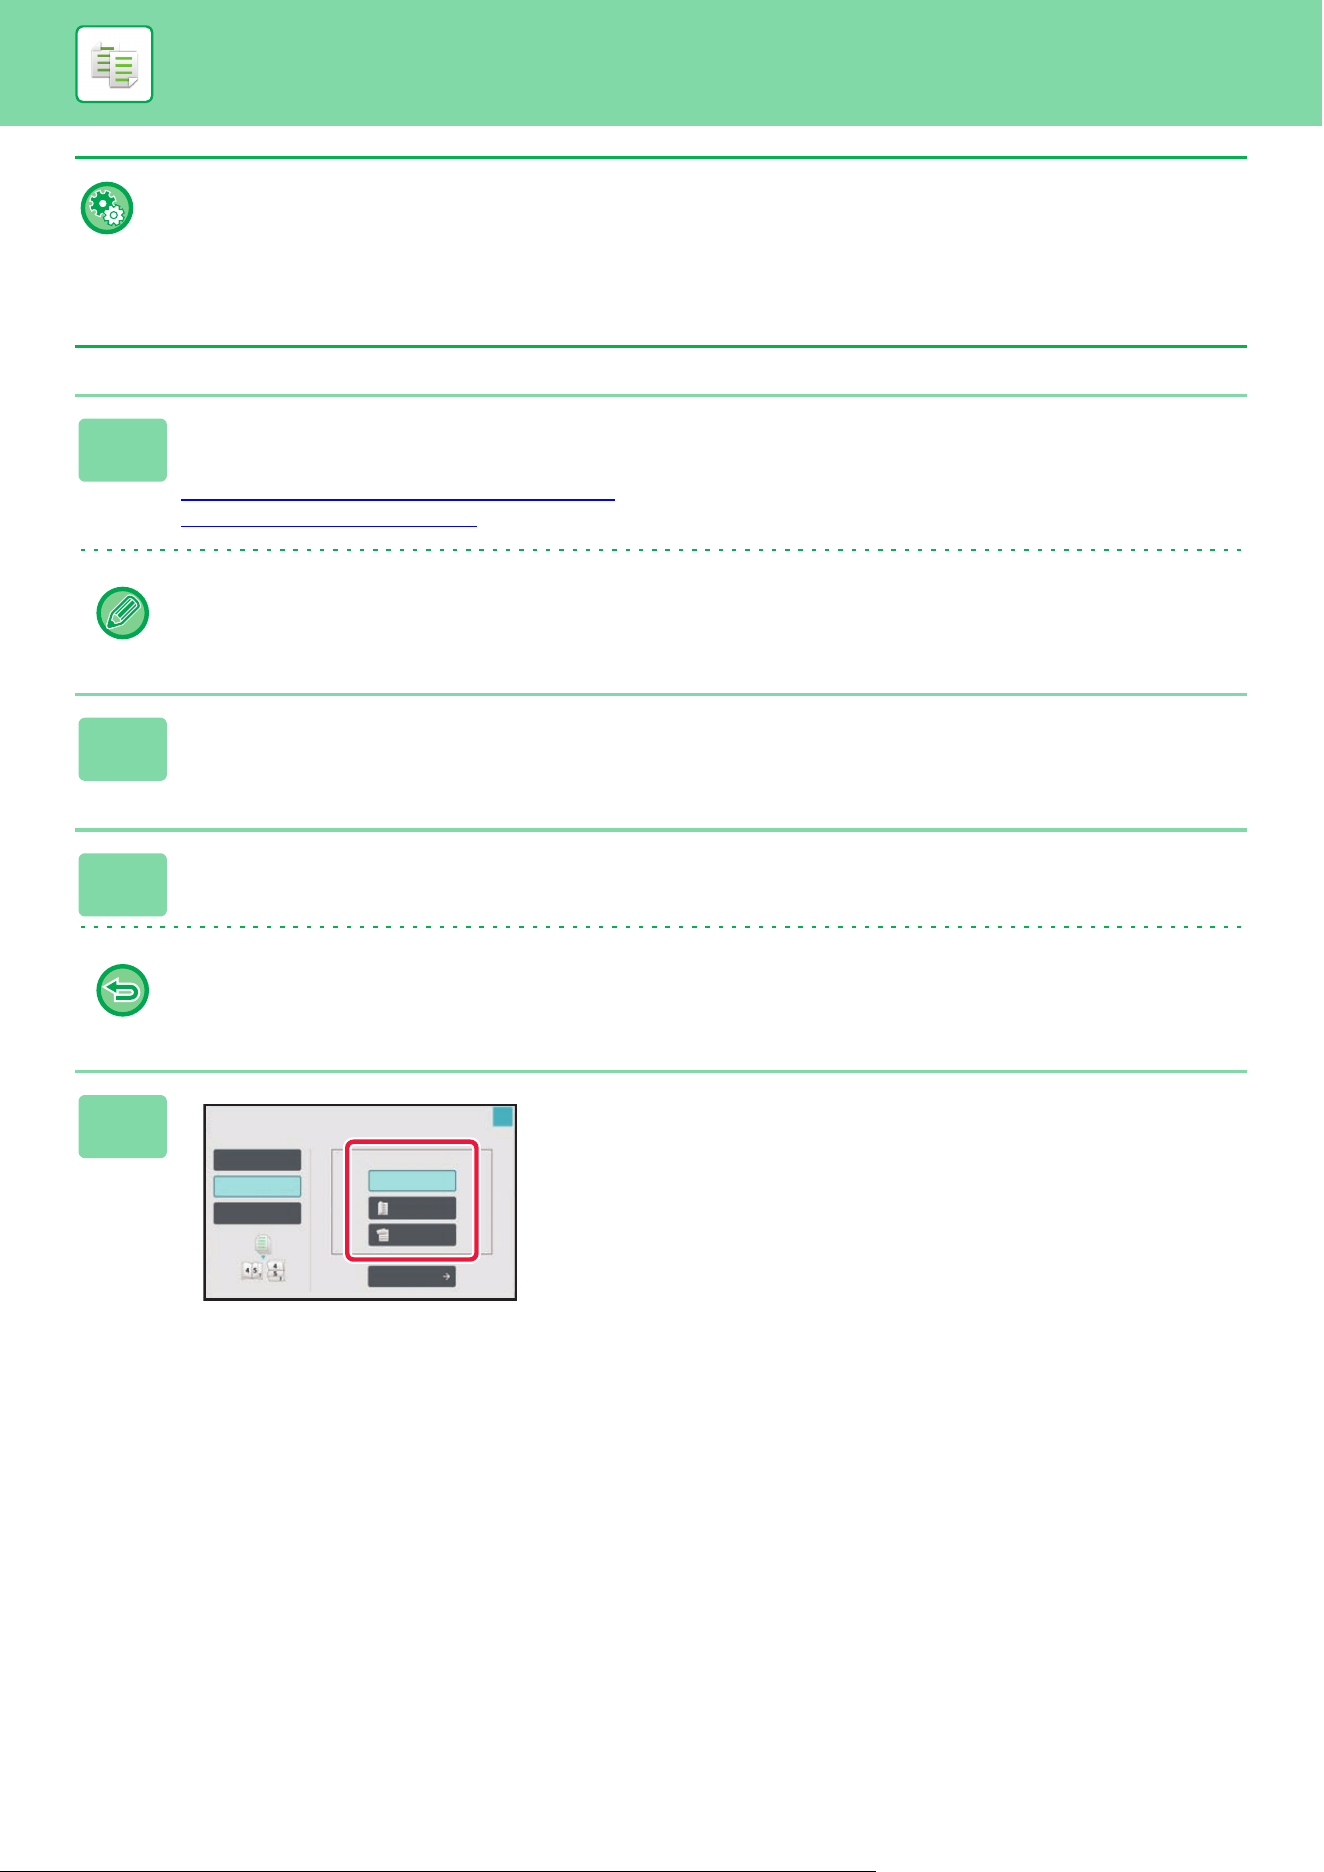
3-72
COPIER►OTHER FUNCTIONS
To staple copies automatically when Booklet is enabled:
• From the "Settings (administrator)", select [System Settings] → [Common Settings] → [Device Control] → [Condition
Settings] → [Automatic Saddle Stitch].
• This is used to activate Saddle Stitch automatically when Booklet is enabled when a saddle stitch finisher is installed.
When [Automatic Saddle Stitch] is set to [OFF], only the booklet function can be used without saddle stitch stapling.
• Booklet and paper fold functions cannot be used simultaneously.
1
Place the original.
Place the original in the document feeder tray of the automatic document feeder, or on the document glass.
AUTOMATIC DOCUMENT FEEDER
(page 1-47)
DOCUMENT GLASS (page 1-51)
If the originals are 2-sided, place them in the document feeder tray.
2
Tap the [Others] key and then the [Booklet] key, or tap the [Staple Sort] key
and then the [Saddle Stitch] key.
3
Select the binding edge.
To cancel the booklet setting:
Tap the [Off] key.
4
Tap the [1-Sided], [2-Sided Booklet] or
[2-Sided Tablet] key as appropriate for
the original.
When not inserting a cover, go to step 6.
Booklet
Select Output Binding Edge.
Off
Right Binding
Left Binding/
Tablet
2-Sided
Booklet
1-Sided
2-Sided
Tablet
Cover Setting
OK
Select Original Type.

3-73
COPIER►OTHER FUNCTIONS
5
When inserting a cover, tap the [Cover Setting] key, and tap the [On] key.
After the settings are completed, tap the [OK] and [Back] keys in sequence.
To change the cover input tray:
Tap the [Paper Tray] key to display the tray selection screen.
Tap the cover input tray on the tray selection screen.
For more information, see “SELECTING THE PAPER TRAY FOR COPYING
(page 3-13)”.
• If the cover will be copied on, label sheets, transparency film, and tab paper cannot be used.
• To cancel all settings:
Tap the [CA] key.
6
Tap the [Color Start] or [B/W Start] key to start copying.
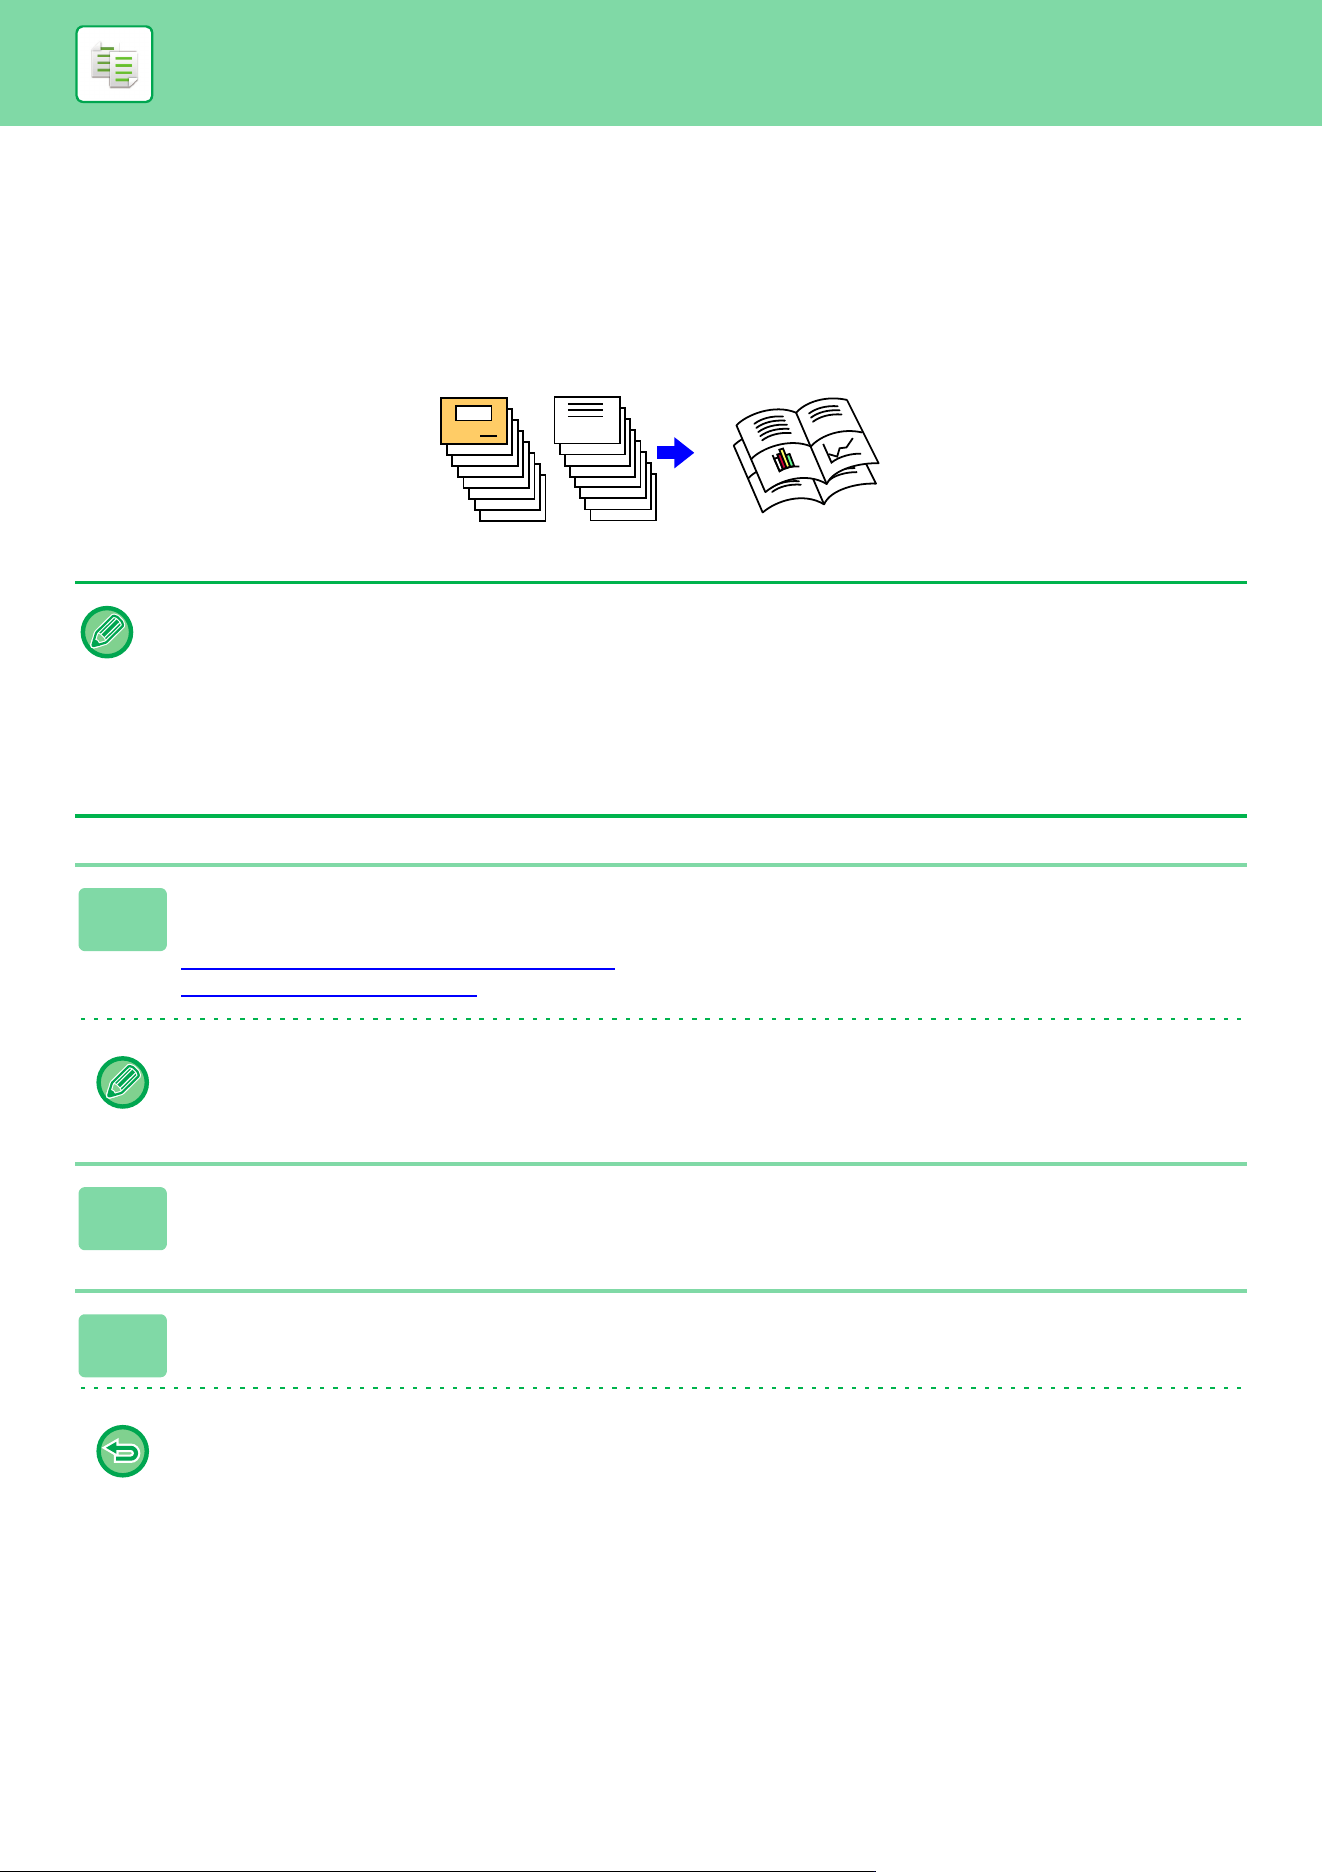
3-74
COPIER►OTHER FUNCTIONS
COPYING MULTIPLE ORIGINALS ON EACH BOOKLET
PAGE (BOOKLET 2-Up/4-Up)
This function copies two or four original pages equally on one page of pamphlet copy paper.
This function is convenient for arranging minimum number of copies into an attractive booklet or pamphlet format.
• Booklet 2-Up/4-Up cannot be selected in easy mode.
• The following paper sizes and number of sheets are available for booklet 2-Up or 4-Up.
Paper size:12"x 18", 11"x 17", 8-1/2"x 14", 8-1/2"x 11"R,A3W, A3, B4, A4R, B5R
Number of stapled sheets:Max. 15 sheets
• Scan the originals in order from the first page to the last page. The order of copying will be automatically adjusted by the
machine.
Eight or 16 original pages will be copied onto each sheet of paper. Blank pages will be automatically produced at the end if
the number of original pages is not a multiple of eight or 16.
1
Place the original.
Place the original in the document feeder tray of the automatic document feeder, or on the document glass.
AUTOMATIC DOCUMENT FEEDER
(page 1-47)
DOCUMENT GLASS (page 1-51)
If the originals are 2-sided, place them in the document feeder tray.
2
Tap the [Staple Sort] key, and tap the [Saddle Stitch] key.
3
Select the binding edge.
To cancel the booklet setting:
Tap the [Off] key.
8
14
4
3
7
6
5
4
3
2
15
14
13
12
11
10
9
10
8
9
7
Originals Booklet 2-Up
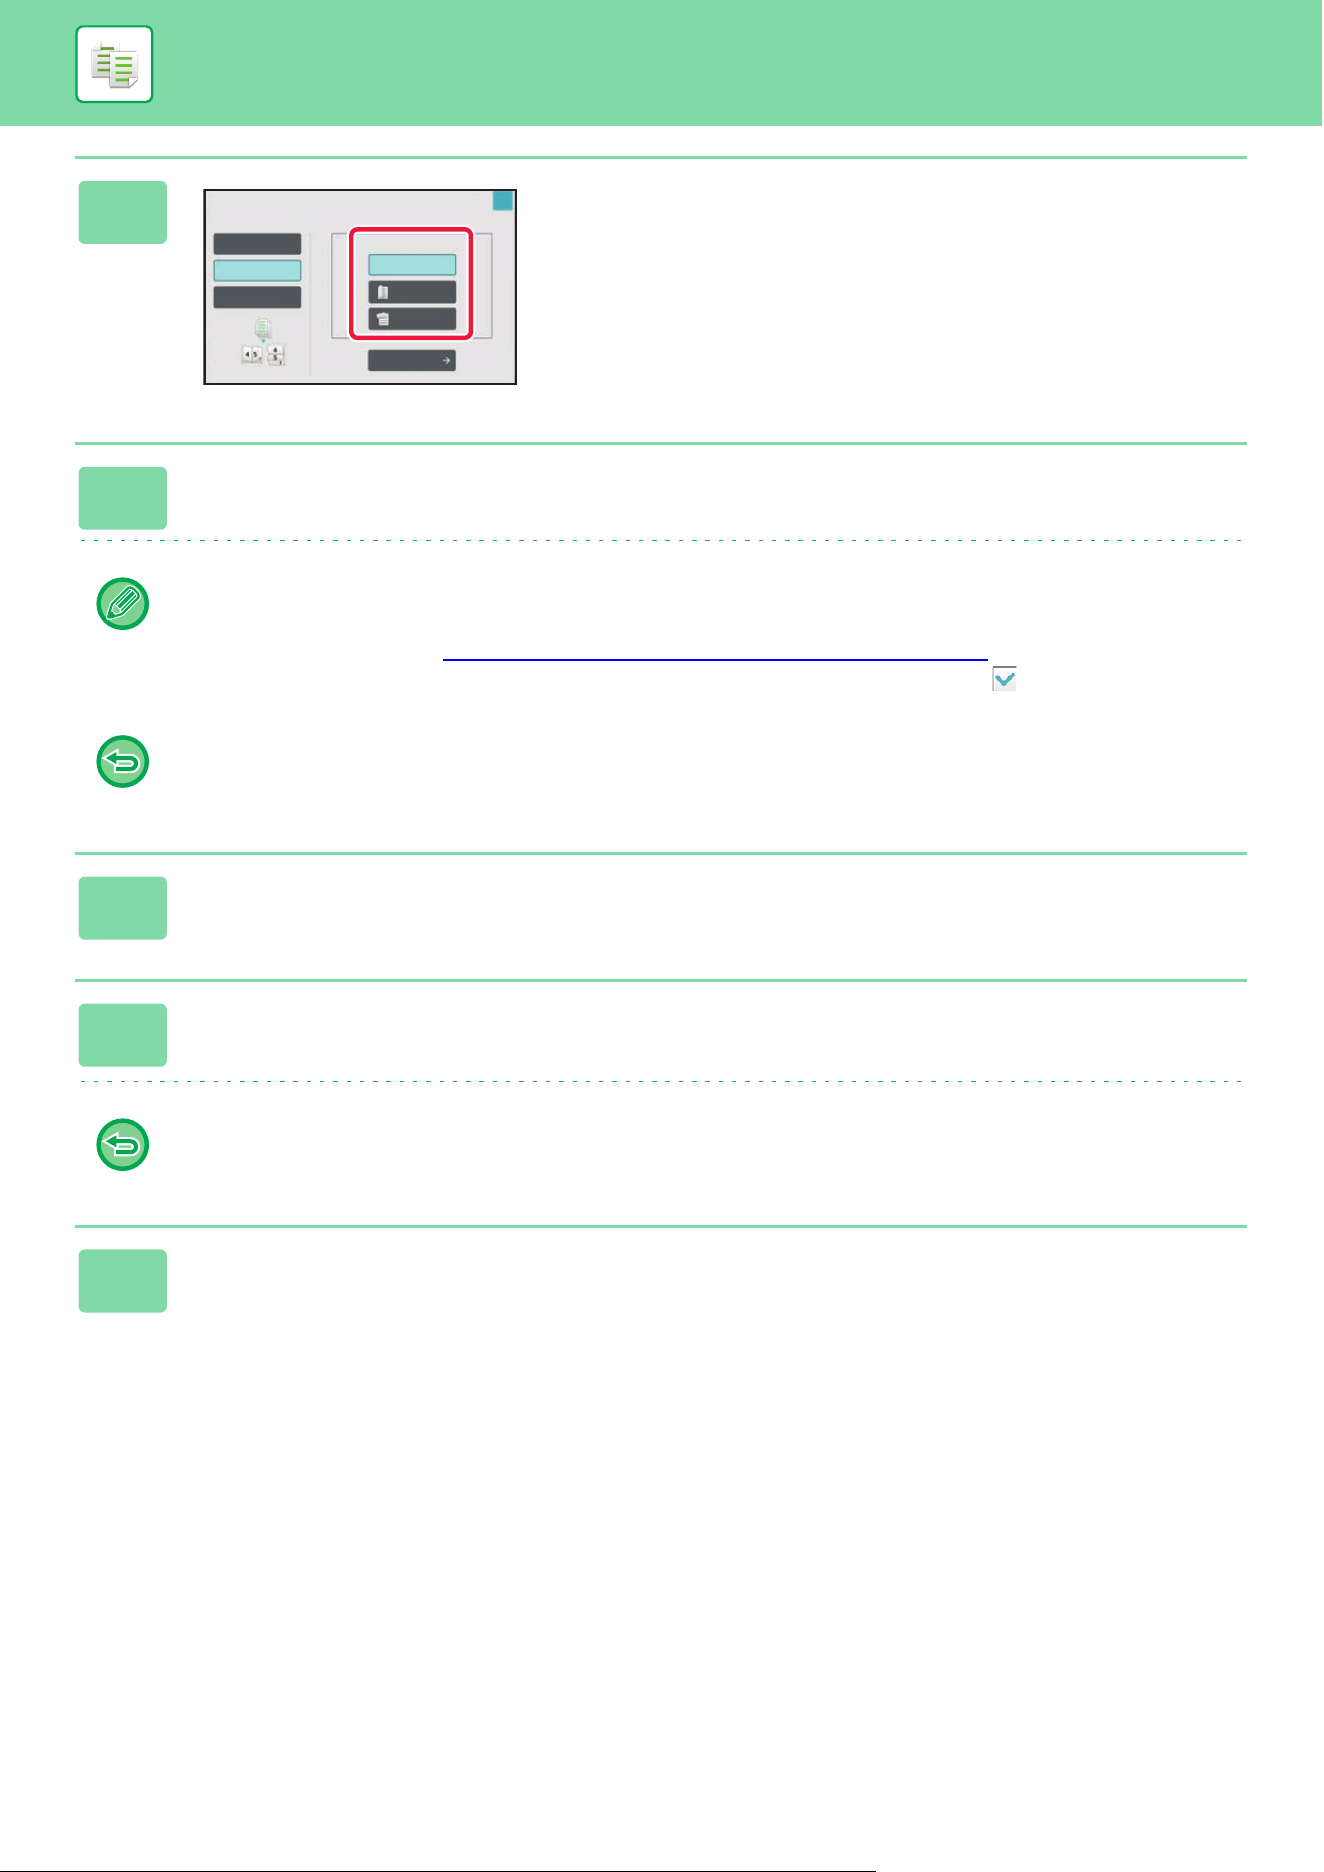
3-75
COPIER►OTHER FUNCTIONS
4
Tap the [1-Sided], [2-Sided Booklet] or
[2-Sided Tablet] key as appropriate for
the original.
When not inserting a cover, go to step 6.
5
When inserting a cover, tap the [Cover Setting] key, and tap the [On] key.
• To change the cover input tray:
Tap the [Paper Tray] key to display the tray selection screen.
Tap the cover input tray on the tray selection screen.
For more information, see “SELECTING THE PAPER TRAY FOR COPYING (page 3-13)”.
• To make a copy on a cover sheet, check the [Make Copy on Cover (Duplex)] box so that appears.
• If the cover will be copied on, label sheets, transparency film, and tab paper cannot be used.
• To cancel all settings:
Tap the [CA] key.
6
Tap [N-Up] on the action panel.
7
Tap the key of the N-Up sheets you wish to use.
If needed, the images will be rotated.
To cancel the N-Up setting
Tap the [Off] key.
8
Select the layout.
Off
Right Binding
Left Binding/
Tablet
1-Sided
Cover Setting
Select Original Type.
Booklet
Select Output Binding Edge.
2-Sided
Booklet
2-Sided
Tablet
OK
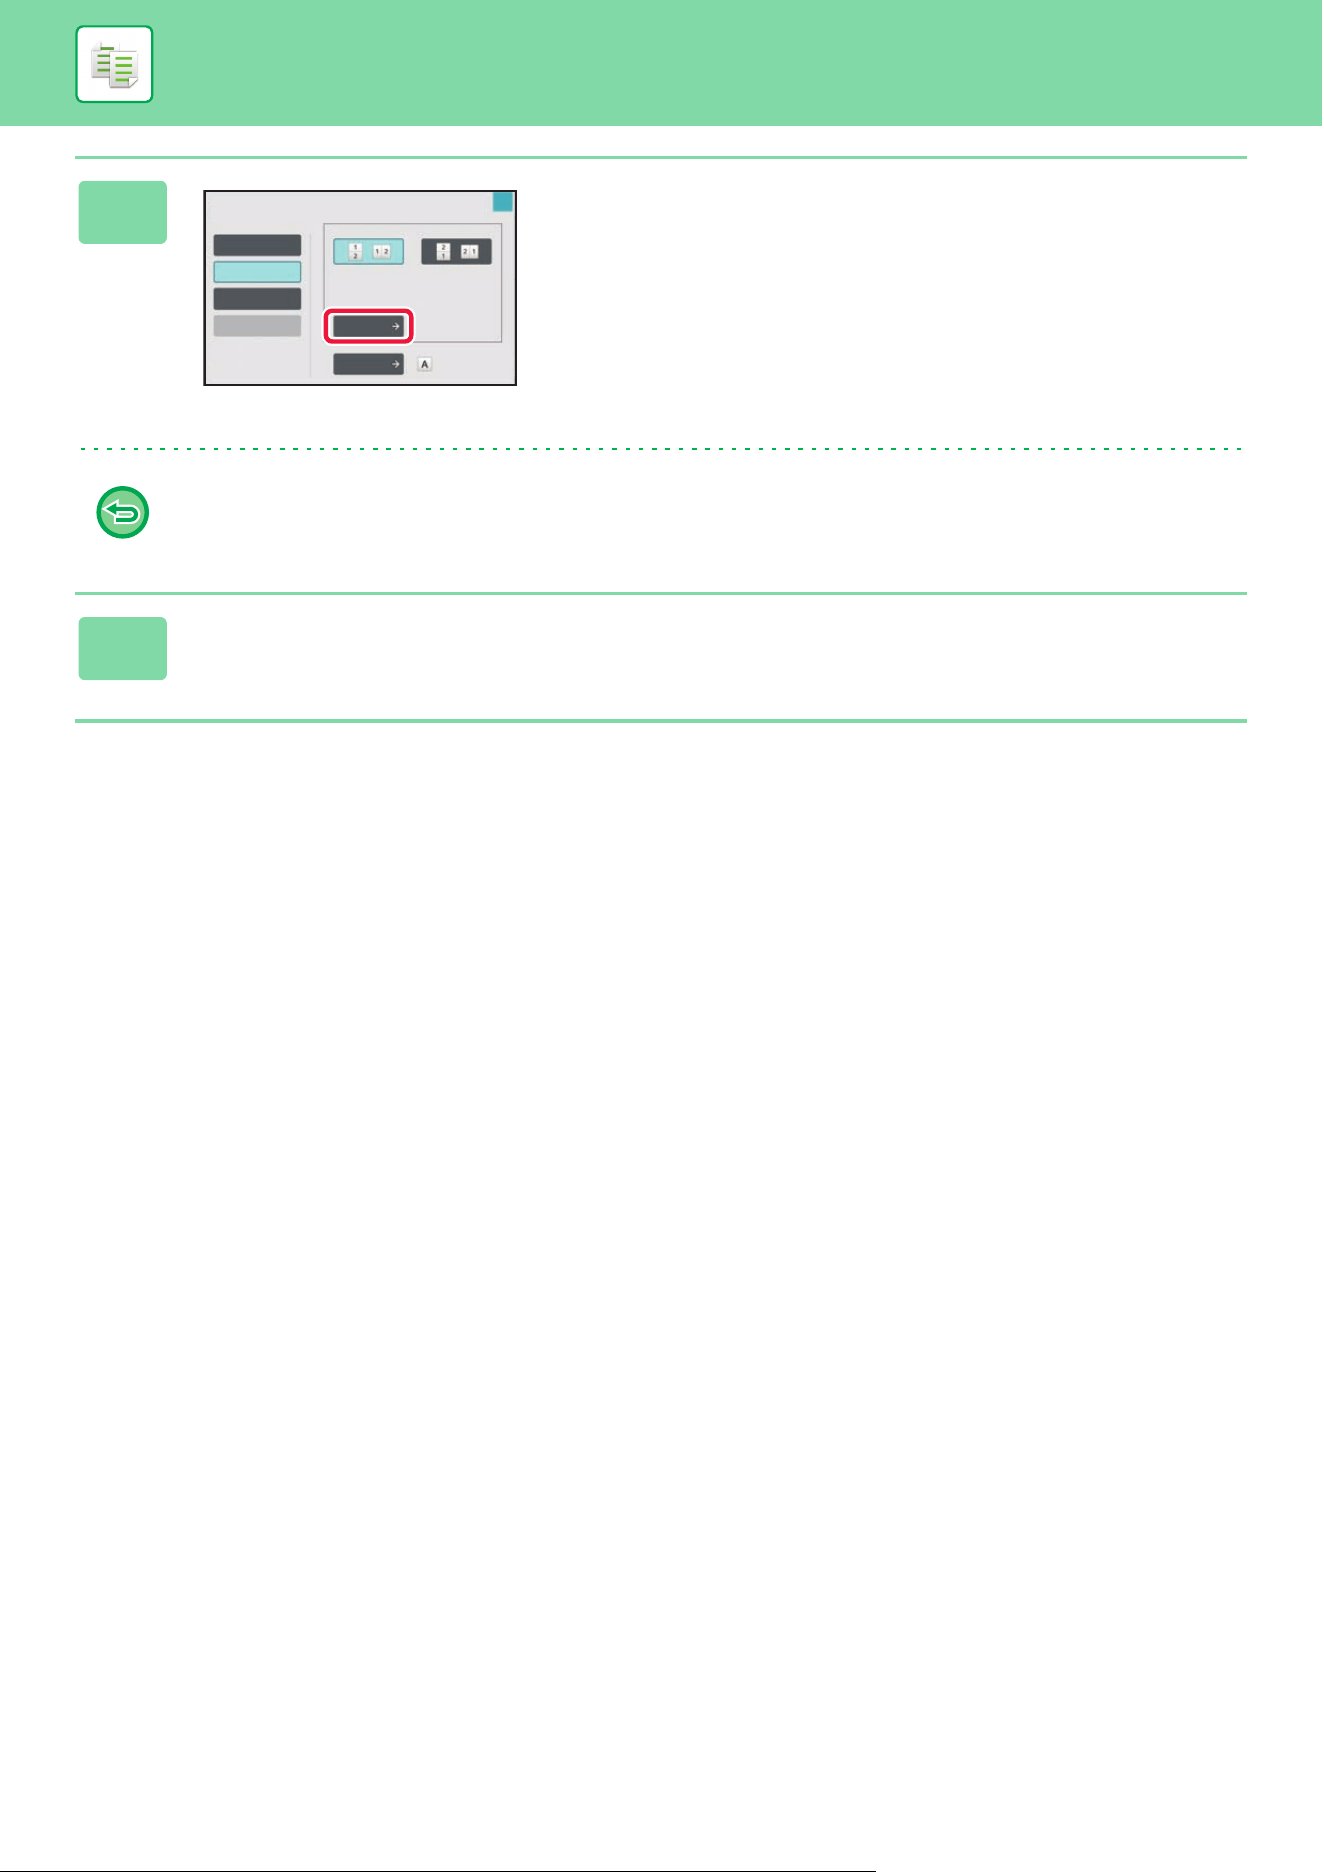
3-76
COPIER►OTHER FUNCTIONS
9
Tap [Border], and select the border.
A line can be inserted between pages arranged on a sheet.
After the settings are completed, tap [OK] key twice, and
[Back] keys in sequence.
To cancel all settings:
Tap the [CA] key.
10
Tap the [Color Start] or [B/W Start] key to start copying.
N-Up
Select Original Type to Arrange in 1 Page.
Off
4-Up
8-Up
2-Up
Layout
Border
Original
Off
OK
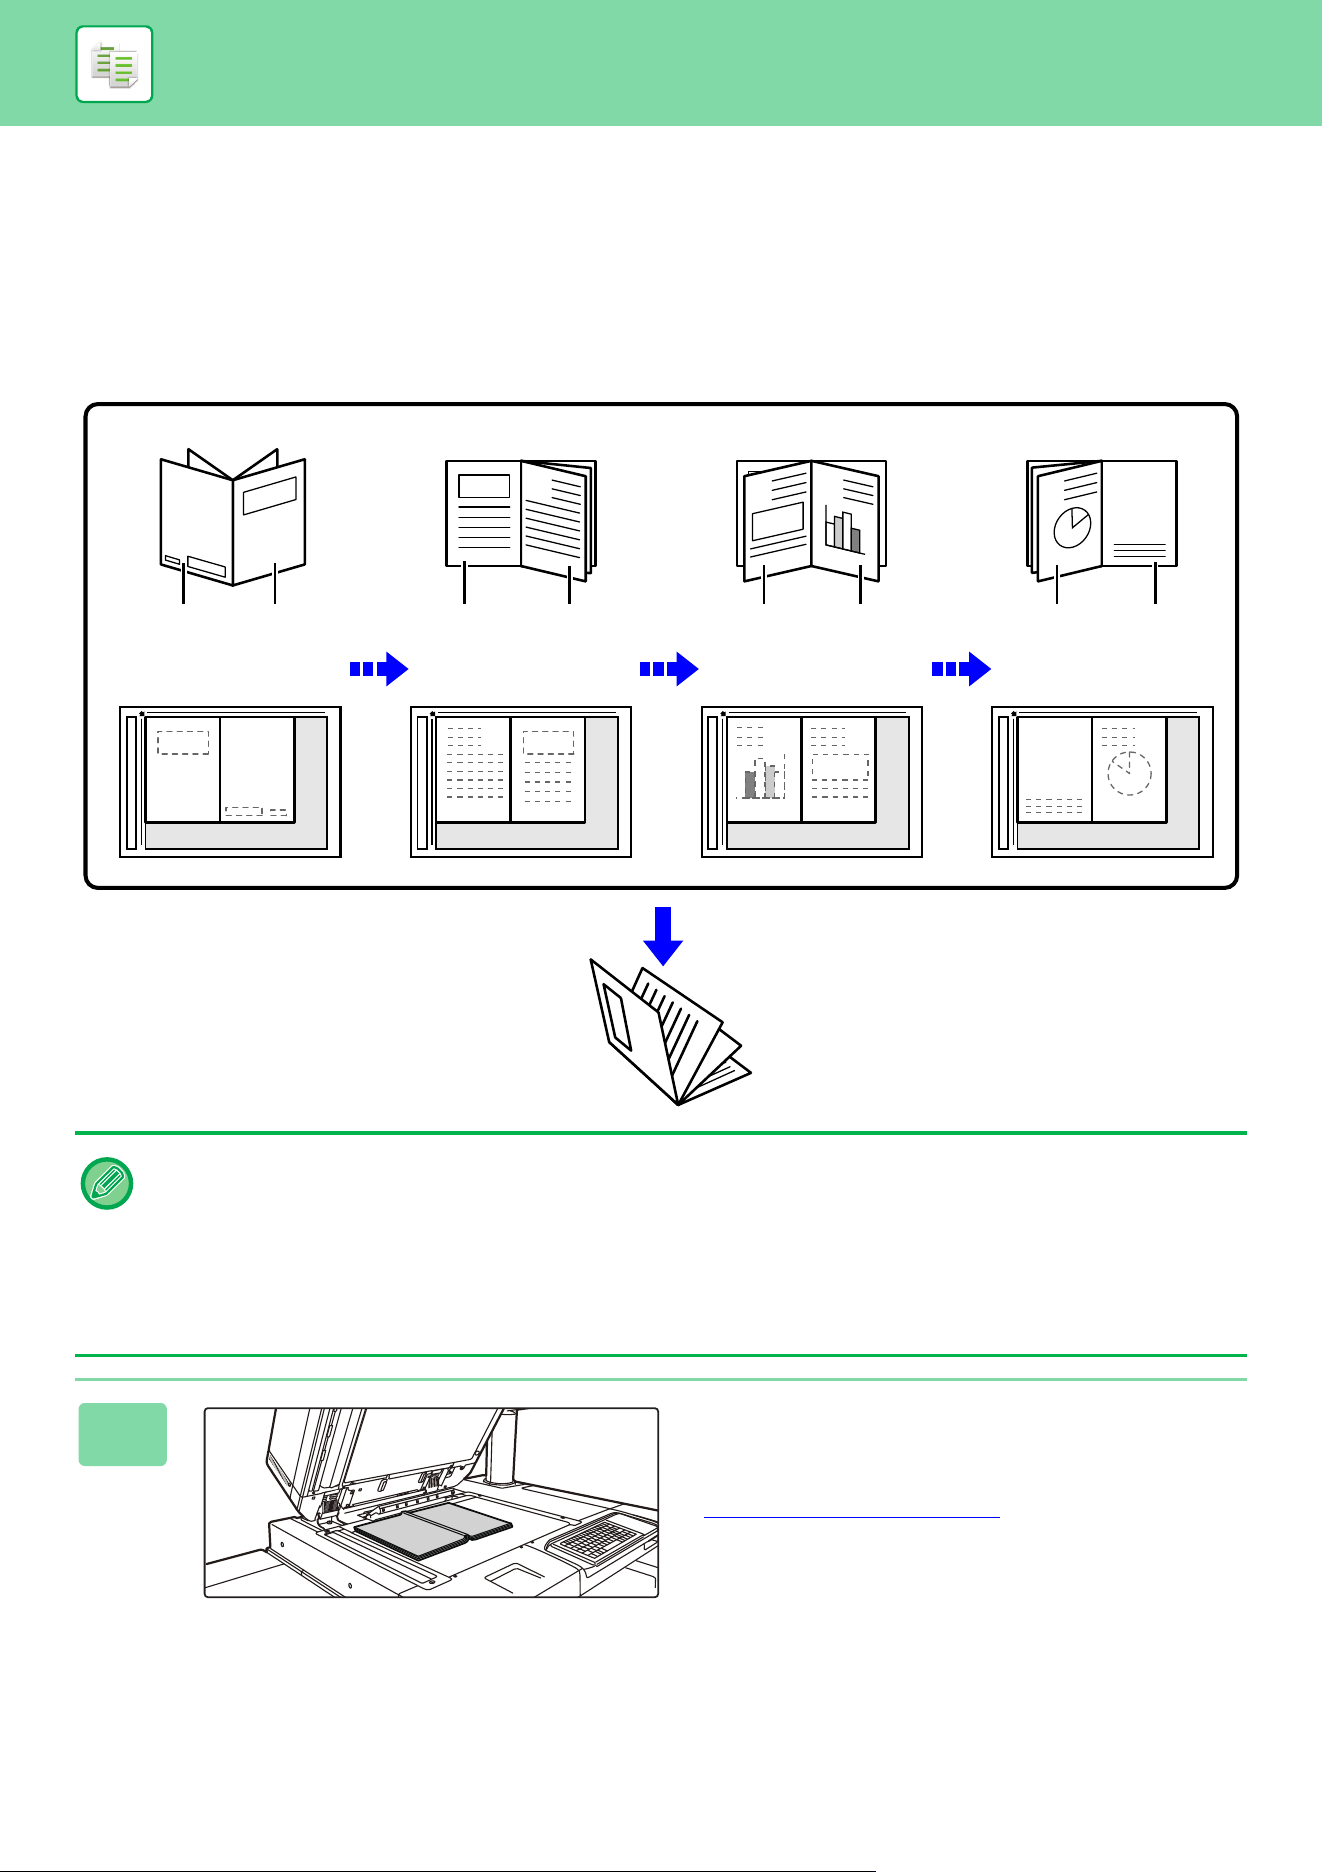
3-77
COPIER►OTHER FUNCTIONS
COPYING A PAMPHLET (BOOK COPY)
This function makes a copy of the two facing pages of an open book or other bound document.
Copies made with this function can be folded at the center to create a booklet.
This function is convenient for arranging copies into an attractive booklet or pamphlet.
Book copy flow (when the original has 4 pages)
Scan the original in the order of "cover and back cover" → "inside of cover and 1st page" → "2nd and 3rd page" → "4th
page and inside of back cover" to copy.
• Book Copy cannot be selected in easy mode.
• Book Copy must be specified before scanning the original.
• Four original pages will be copied onto each sheet of paper. Blank pages will be automatically added at the end if the total
number of original pages is not a multiple of four.
• This function can be combined with saddle stitch or fold if a saddle stitch finisher is installed.
• When the book copy function is selected, 2-sided copying mode is automatically selected.
When settings are selected that prevent 2-sided copying, the book copy function cannot be used.
1
Place the original on the document
glass.
Place the opened pages of the "front and last sheets".
DOCUMENT GLASS
(page 1-51)
C
3
B
2
A
1
D
4
A
1
B
2
C
3
D
4
3
1
3rd page 4th page
Inside of
back cover
Originals
Back cover
Place the original
Cover Inside of cover 1st page 2nd page
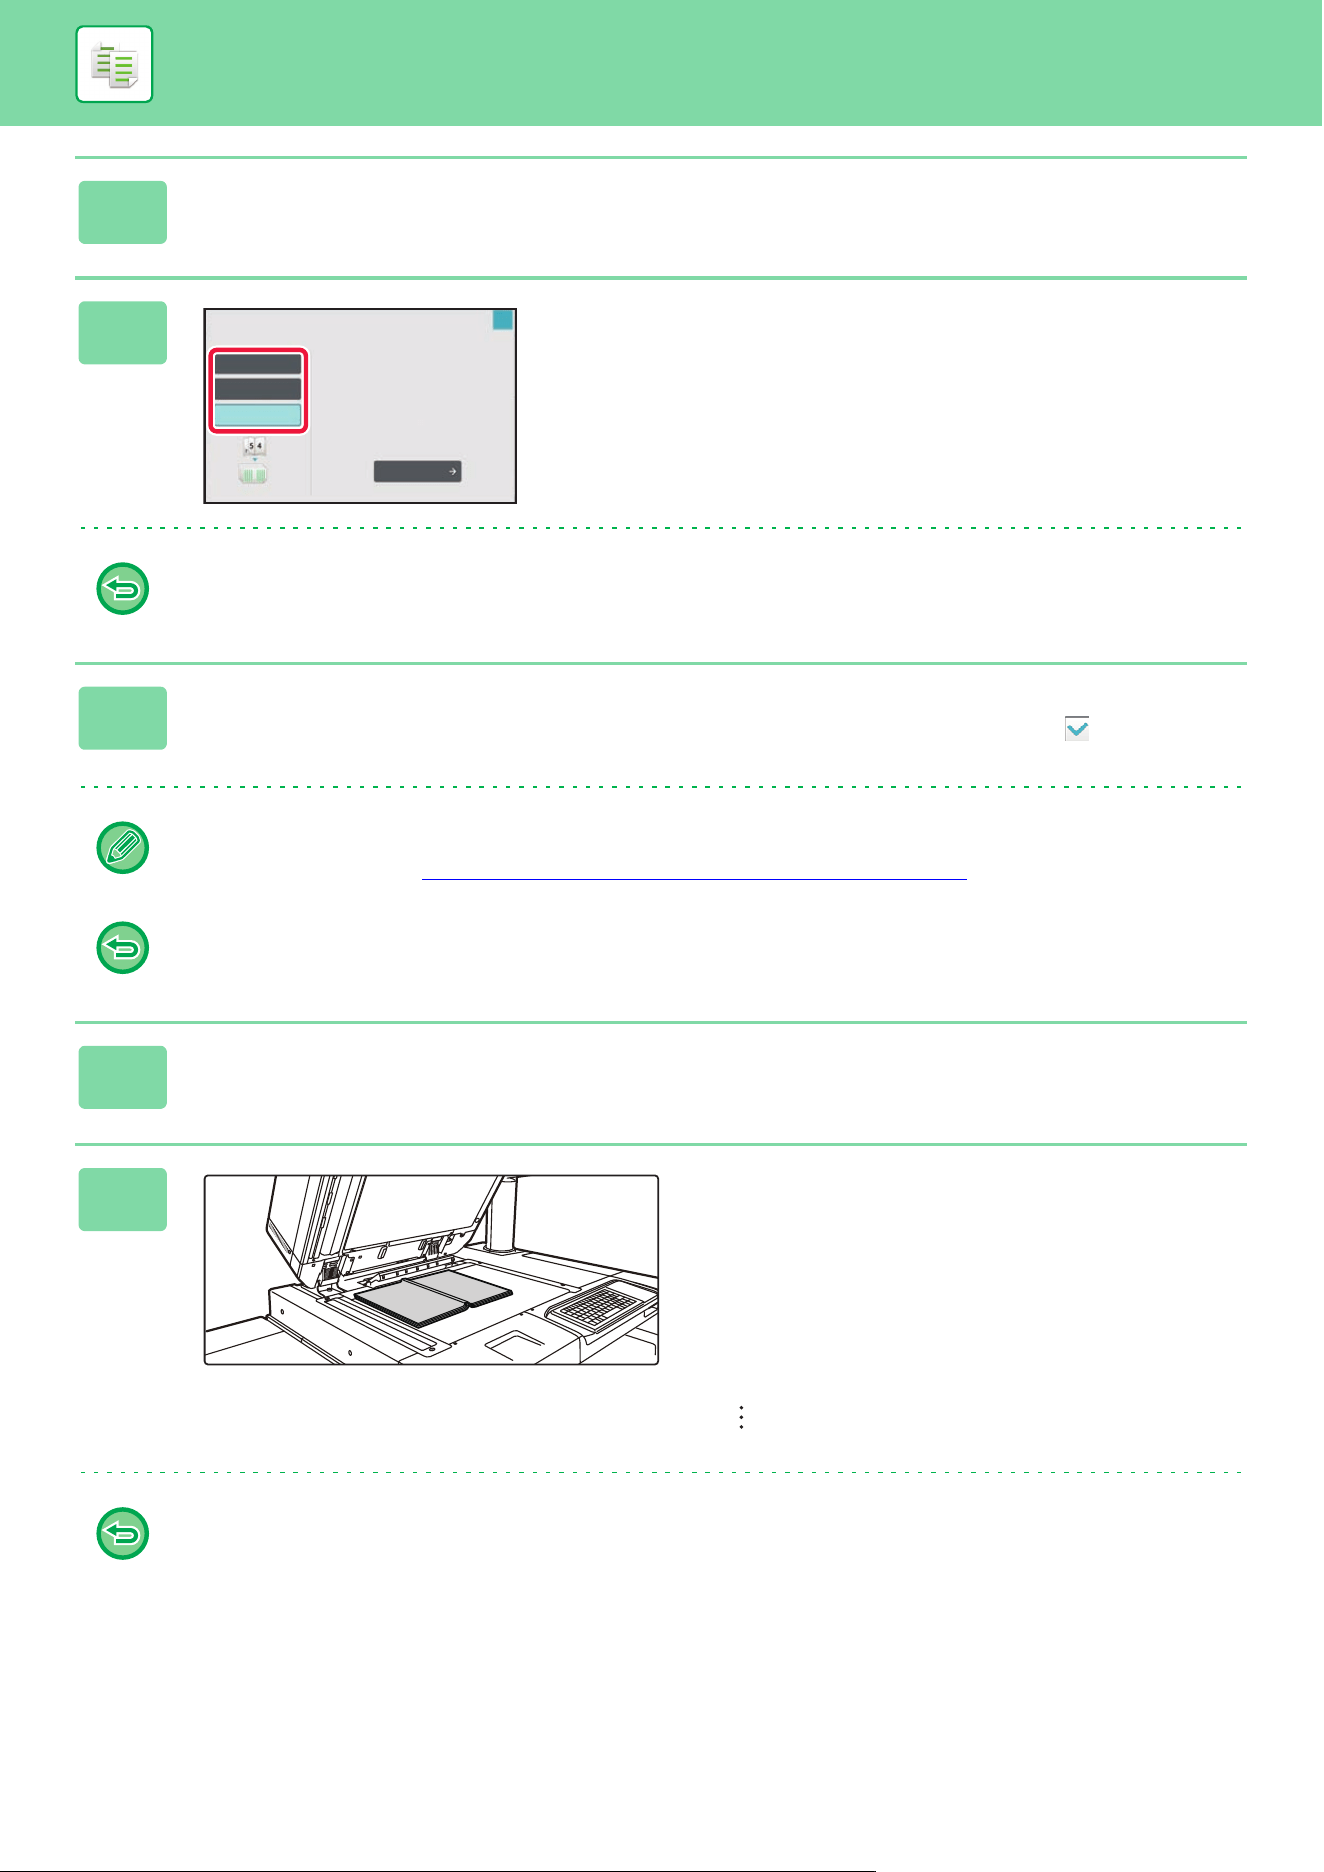
3-78
COPIER►OTHER FUNCTIONS
2
Tap the [Others] key, and tap the [Book Copy] key.
3
Select a binding position.
When not inserting a cover, tap the [OK] and [Back] keys in
sequence. Then, go to step 5.
To cancel the book copy setting:
Tap the [Off] key.
4
When inserting a cover, tap the [Cover Setting] key, and tap the [On] key.
To make a copy on the inserted cover sheet, check the [Make Copy on Cover (Duplex)] box so that appears.
After the settings are completed, tap the [OK] and [Back] keys in sequence.
To change the cover input tray:
Tap the [Paper Tray] key to display the tray selection screen. Tap the cover input tray on the tray selection screen.
For more information, see “SELECTING THE PAPER TRAY FOR COPYING (page 3-13)”.
• If the cover will be copied on, label sheets, transparency film, and tab paper cannot be used.
• This setting is not available when the covers/inserts function is disabled in the setting mode.
5
Tap the [Color Start] or [B/W Start] key to scan the first original page.
Scanning of the original starts.
6
Place the next opened original pages,
and tap the [Color Start] or [B/W Start]
key.
Tap the same key you tapped in step 5.
Repeat this step until all original pages have been scanned.
Scan the remaining original pages in the following order:
Inside of the front cover and the 1st page (facing pages)
The 2nd and 3rd pages (facing pages)
The last page and inside of back cover (facing pages)
• Copy settings cannot be changed when scanning additional pages.
• To cancel all settings:
Tap the [CA] key.
Book Copy
Select Original Binding Edge.
Off
Right Binding
Left Binding
Cover Setting
OK

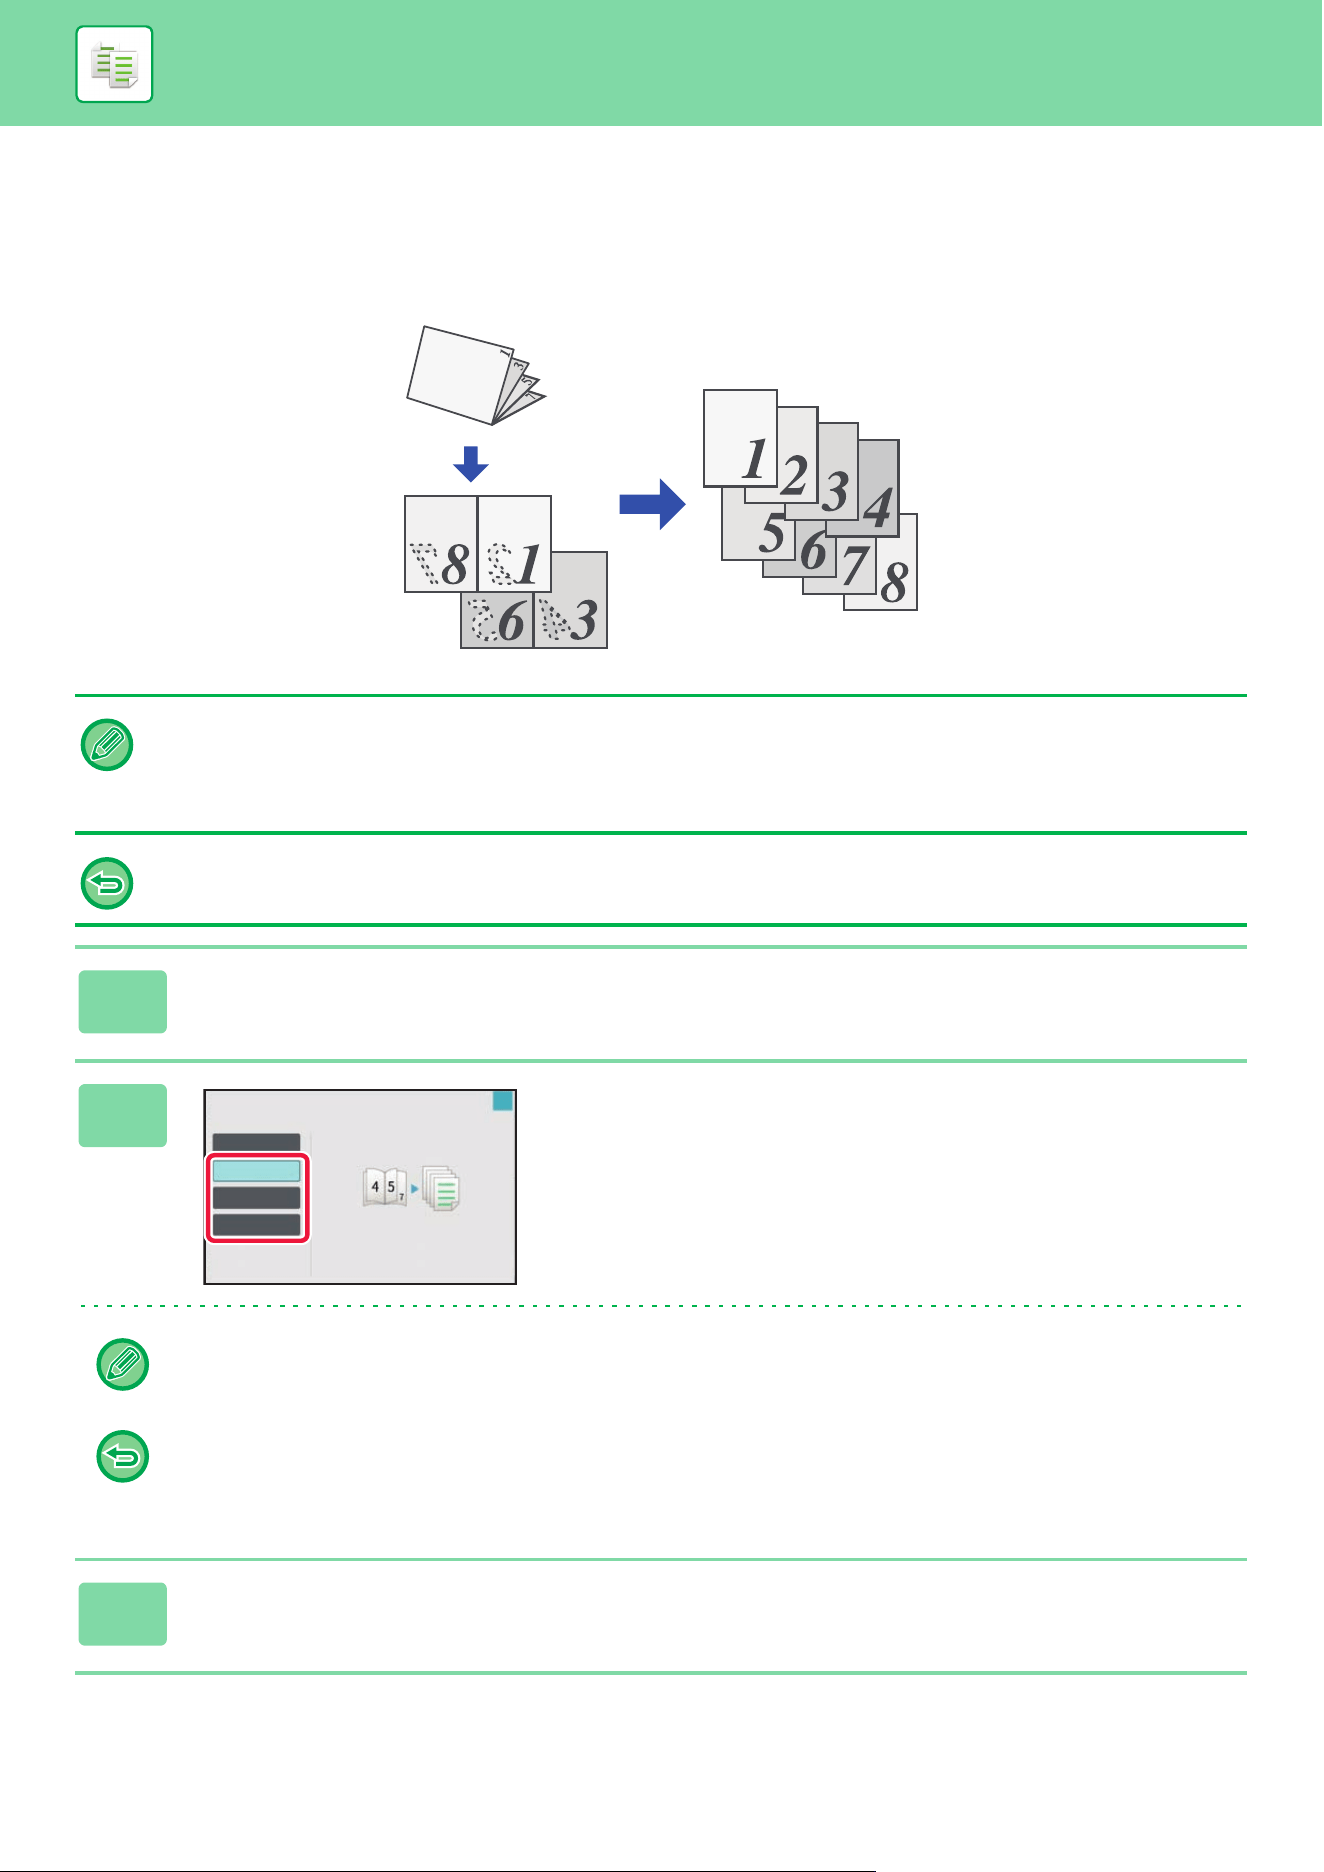
3-80
COPIER►OTHER FUNCTIONS
SPLITTING A PAMPHLET ORIGINAL BY PAGE
(BOOK DIVIDE)
This function splits a saddle-stitch original such as a catalogue or a pamphlet page by page, and copies in sequence.
• Book Divide cannot be selected in easy mode.
• Book Divide must be specified before scanning the original.
• This function supports three original binding edges: left binding, right binding, and top open.
• The scanned original is split in the center.
The document glass is not available for this function.
1
Tap the [Others] key, and tap the [Book Divide] key.
2
Select the binding edge of the
pamphlet original.
Check the preview image displayed in the screen, and make sure that the binding edge is correct.
• To cancel the Book Divide setting:
Tap the [Off] key.
• To cancel all settings:
Tap the [CA] key.
3
Tap the [Color Start] or [B/W Start] key to start copying.
Book Divide
Select Original Binding Edge.
Off
Right Binding
Left Binding
Tablet
OK
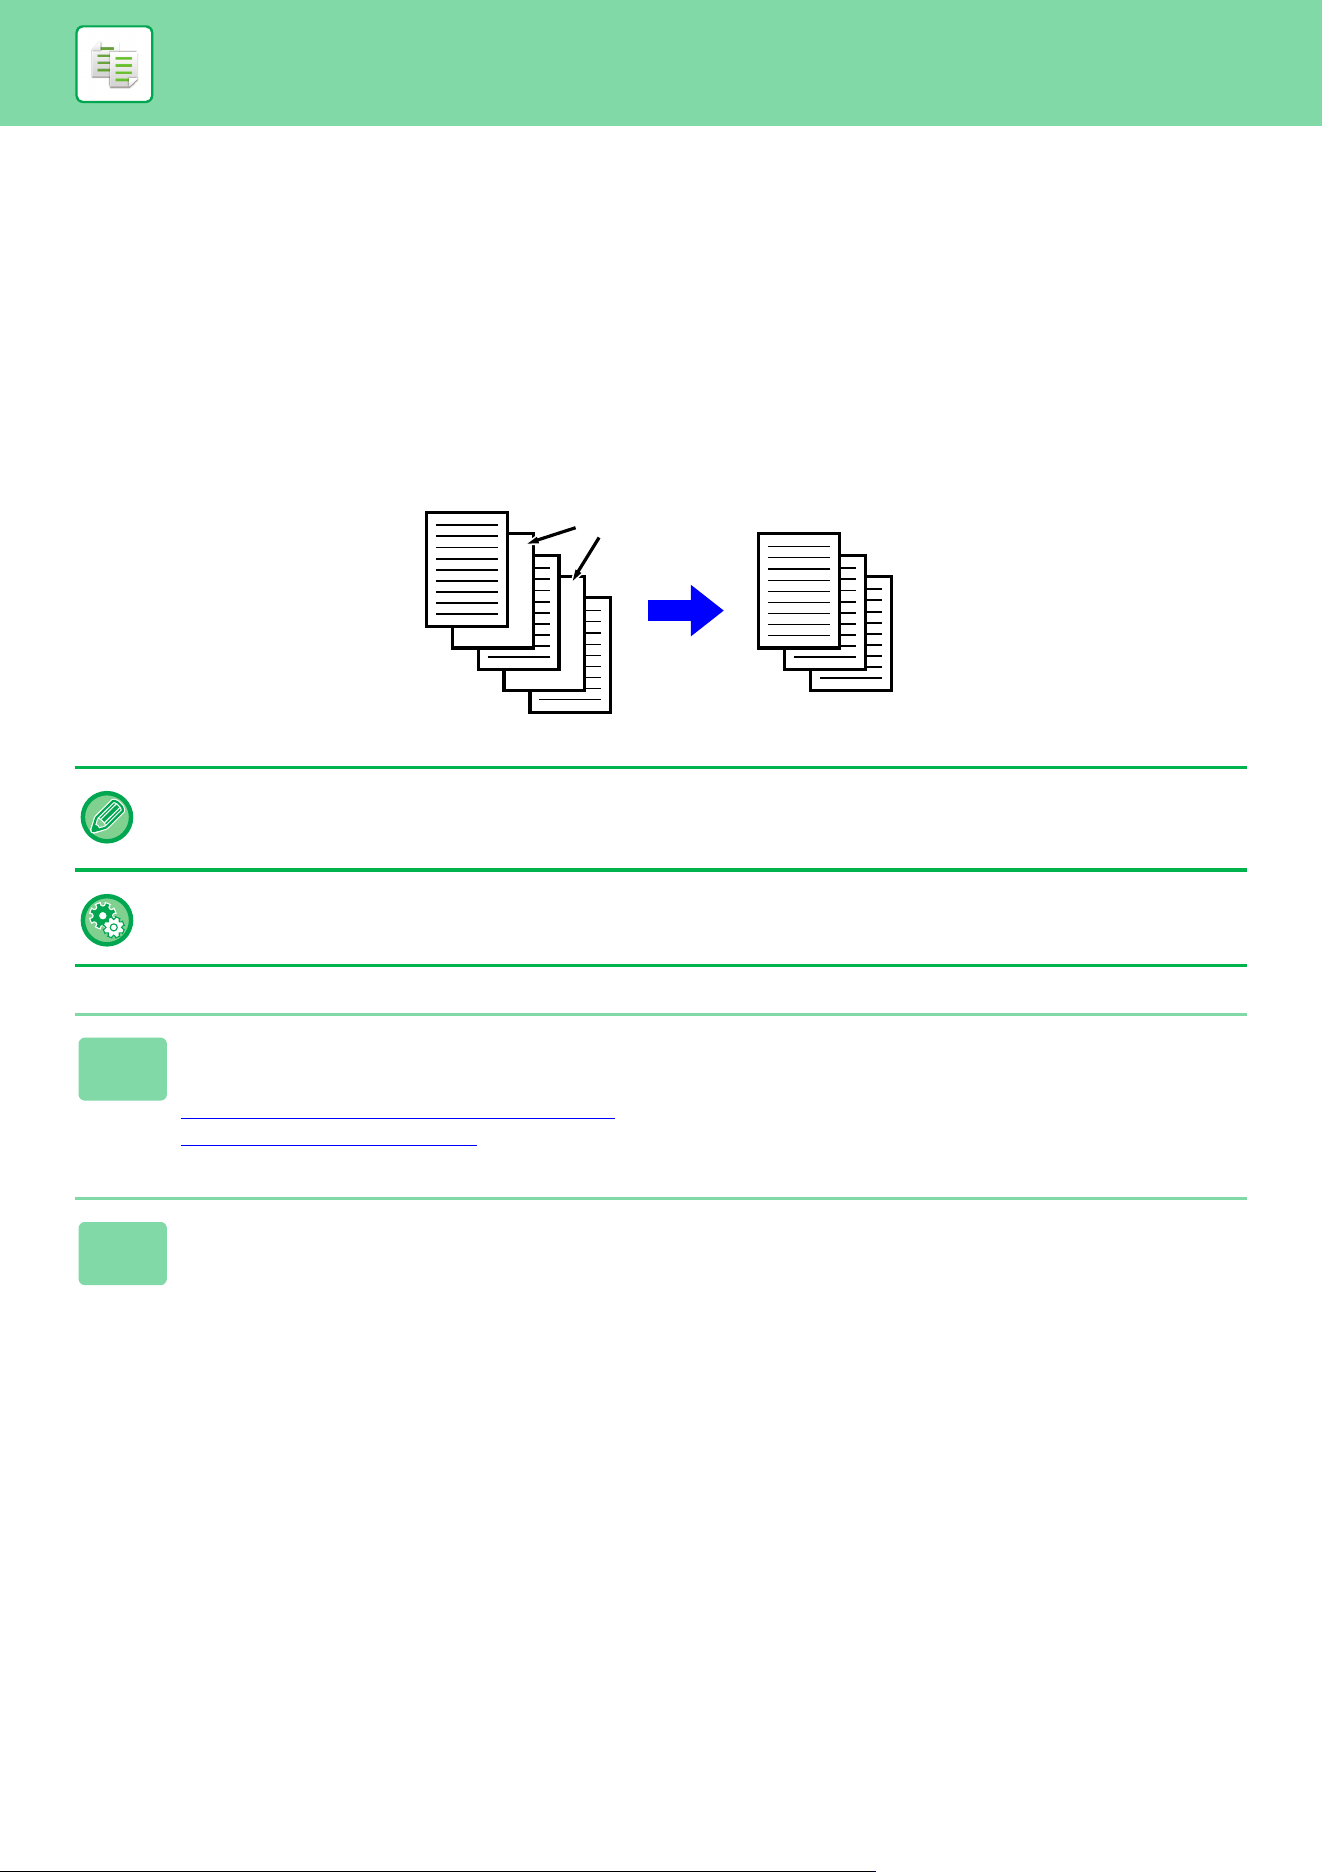
3-81
COPIER►OTHER FUNCTIONS
PAPER, AND TIME SAVING FUNCTIONS
SKIPPING BLANK PAGES IN AN ORIGINAL (BLANK
PAGE SKIP)
If the scanned original contains blank pages, this function skips them to copy only non-blank pages.
The machine detects blank pages, enabling you to skip useless copies without checking an original.
• If an original of which one side is blank is scanned, blank pages are skipped for 2-sided copying.
• Depending on the original, some pages that are not blank may be detected as blank pages and thus not being copied, and
some pages that are blank may not be detected as blank and thus copied.
To use Blank Page Skip in Easy mode
In "Settings (administrator)", select [System Settings] → [Common Settings] → [Operation Settings] → [Easy Mode Settings]
→ [Easy Copy].
1
Place the original.
Place the original in the document feeder tray of the automatic document feeder, or on the document glass.
AUTOMATIC DOCUMENT FEEDER
(page 1-47)
DOCUMENT GLASS (page 1-51)
2
Tap the [Others] key, and tap the [Blank Page Skip] key.
Blank page
Copy
The blank pages
are not copied.
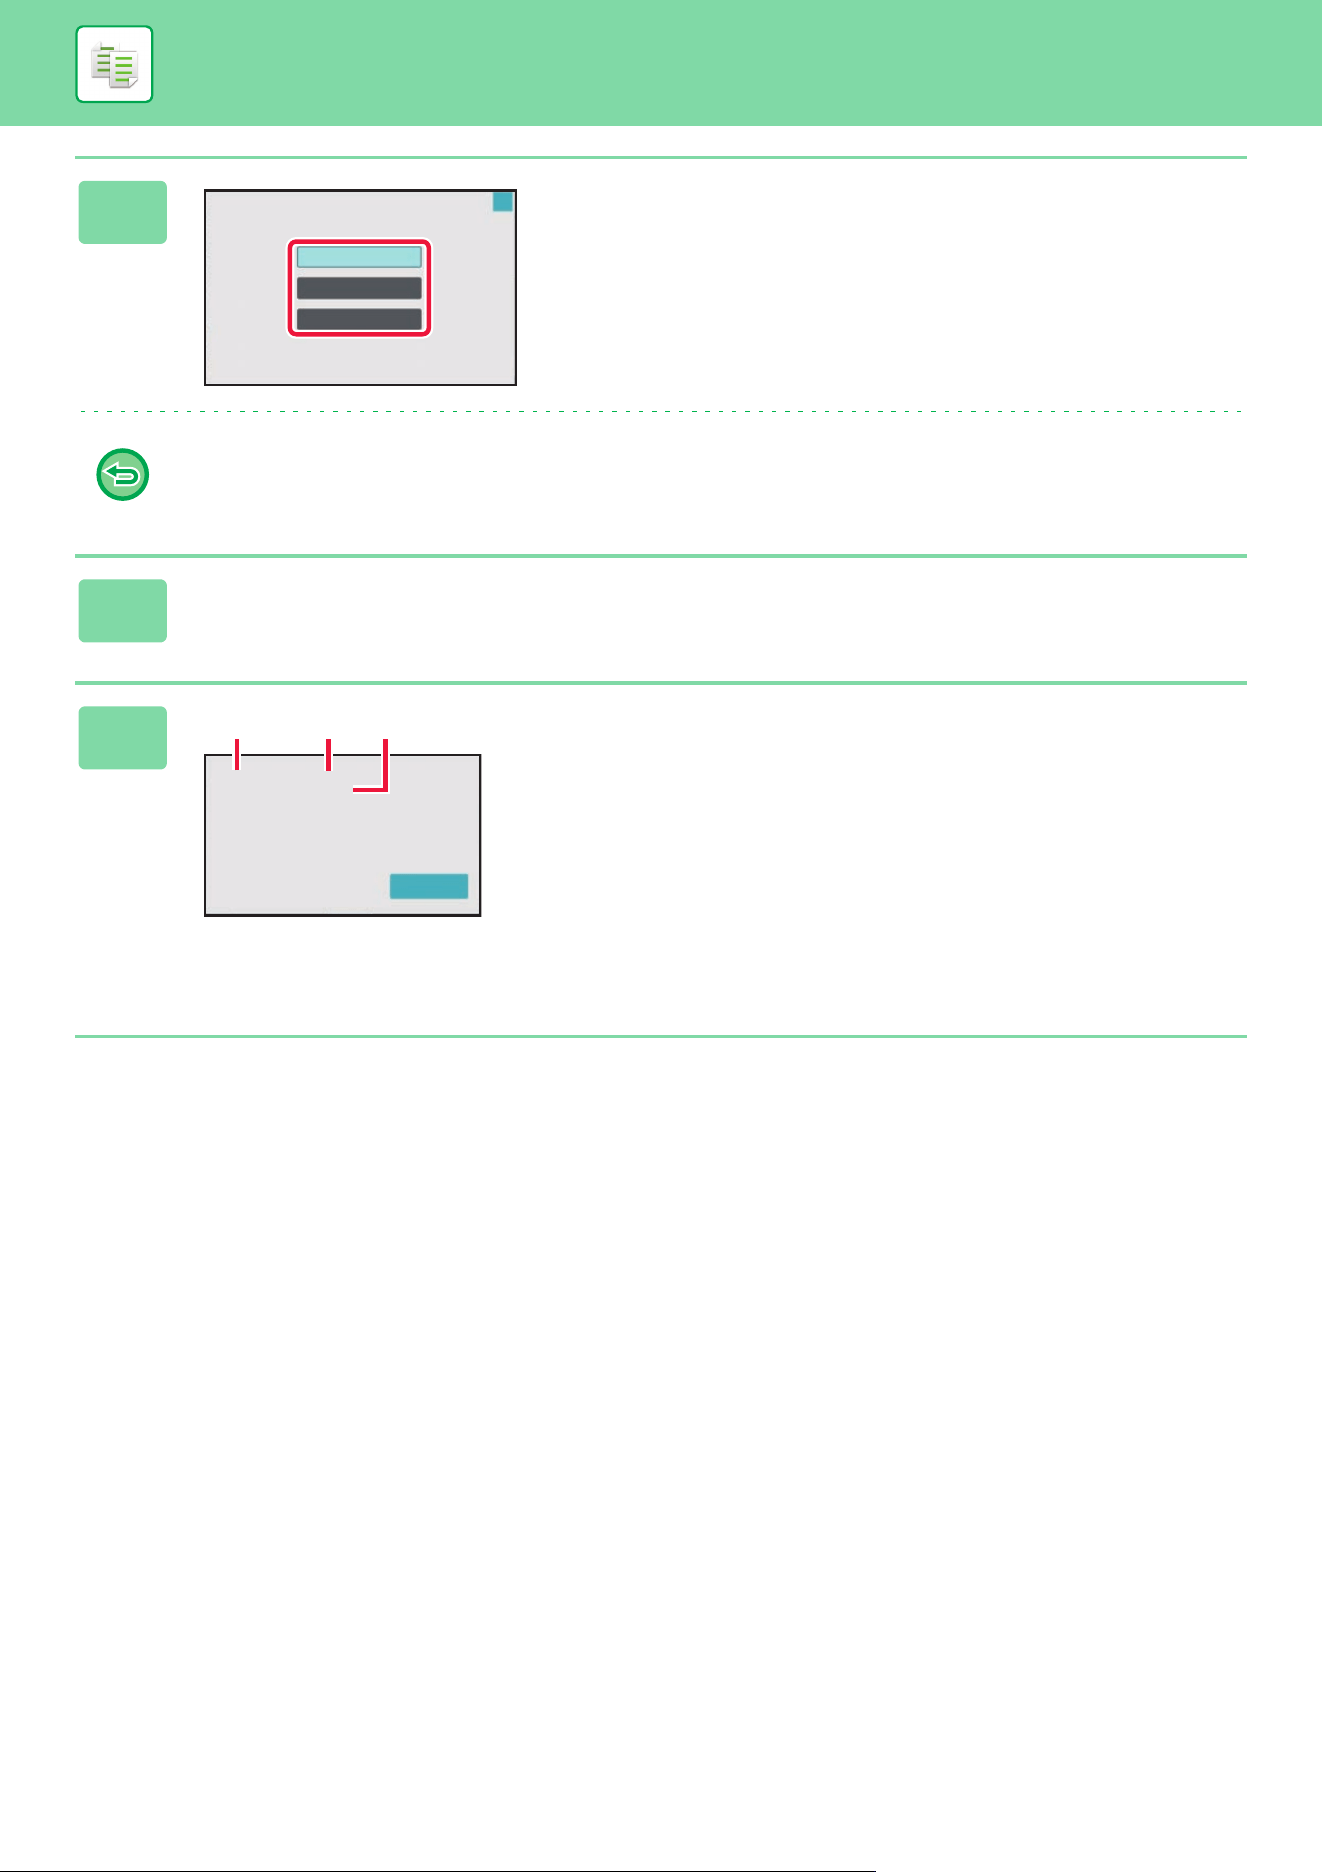
3-82
COPIER►OTHER FUNCTIONS
3
Tap the [Skip Blank Page] or [Skip
Blank and Back Shadow] key.
After the settings are completed, tap [OK] and [Back] keys in
sequence.
To cancel all settings:
Tap the [CA] key.
4
Tap the [Color Start] or [B/W Start] key.
5
Check the confirmation message, and
tap the [OK] key to start copying.
On the confirmation screen, the number of scanned original
sheets appears in (A), the number of scanned sides in (B),
and the number of copies excluding blank pages in (C).
For example, if five original sheets that include two blank
pages are scanned by duplex scanning, the result is
displayed as follows:
5 pages of original have been scanned. (P.10)
Copy 8 pages of originals.
Blank Page Skip
OK
Off
Skip Blank Page
Skip Blank and Back Shadow
5 sheets of original (P.10)
have been scanned. Copy 8%.3s@ pages
of the original.
Execute the job?
OK
(A)
(B)
(C)
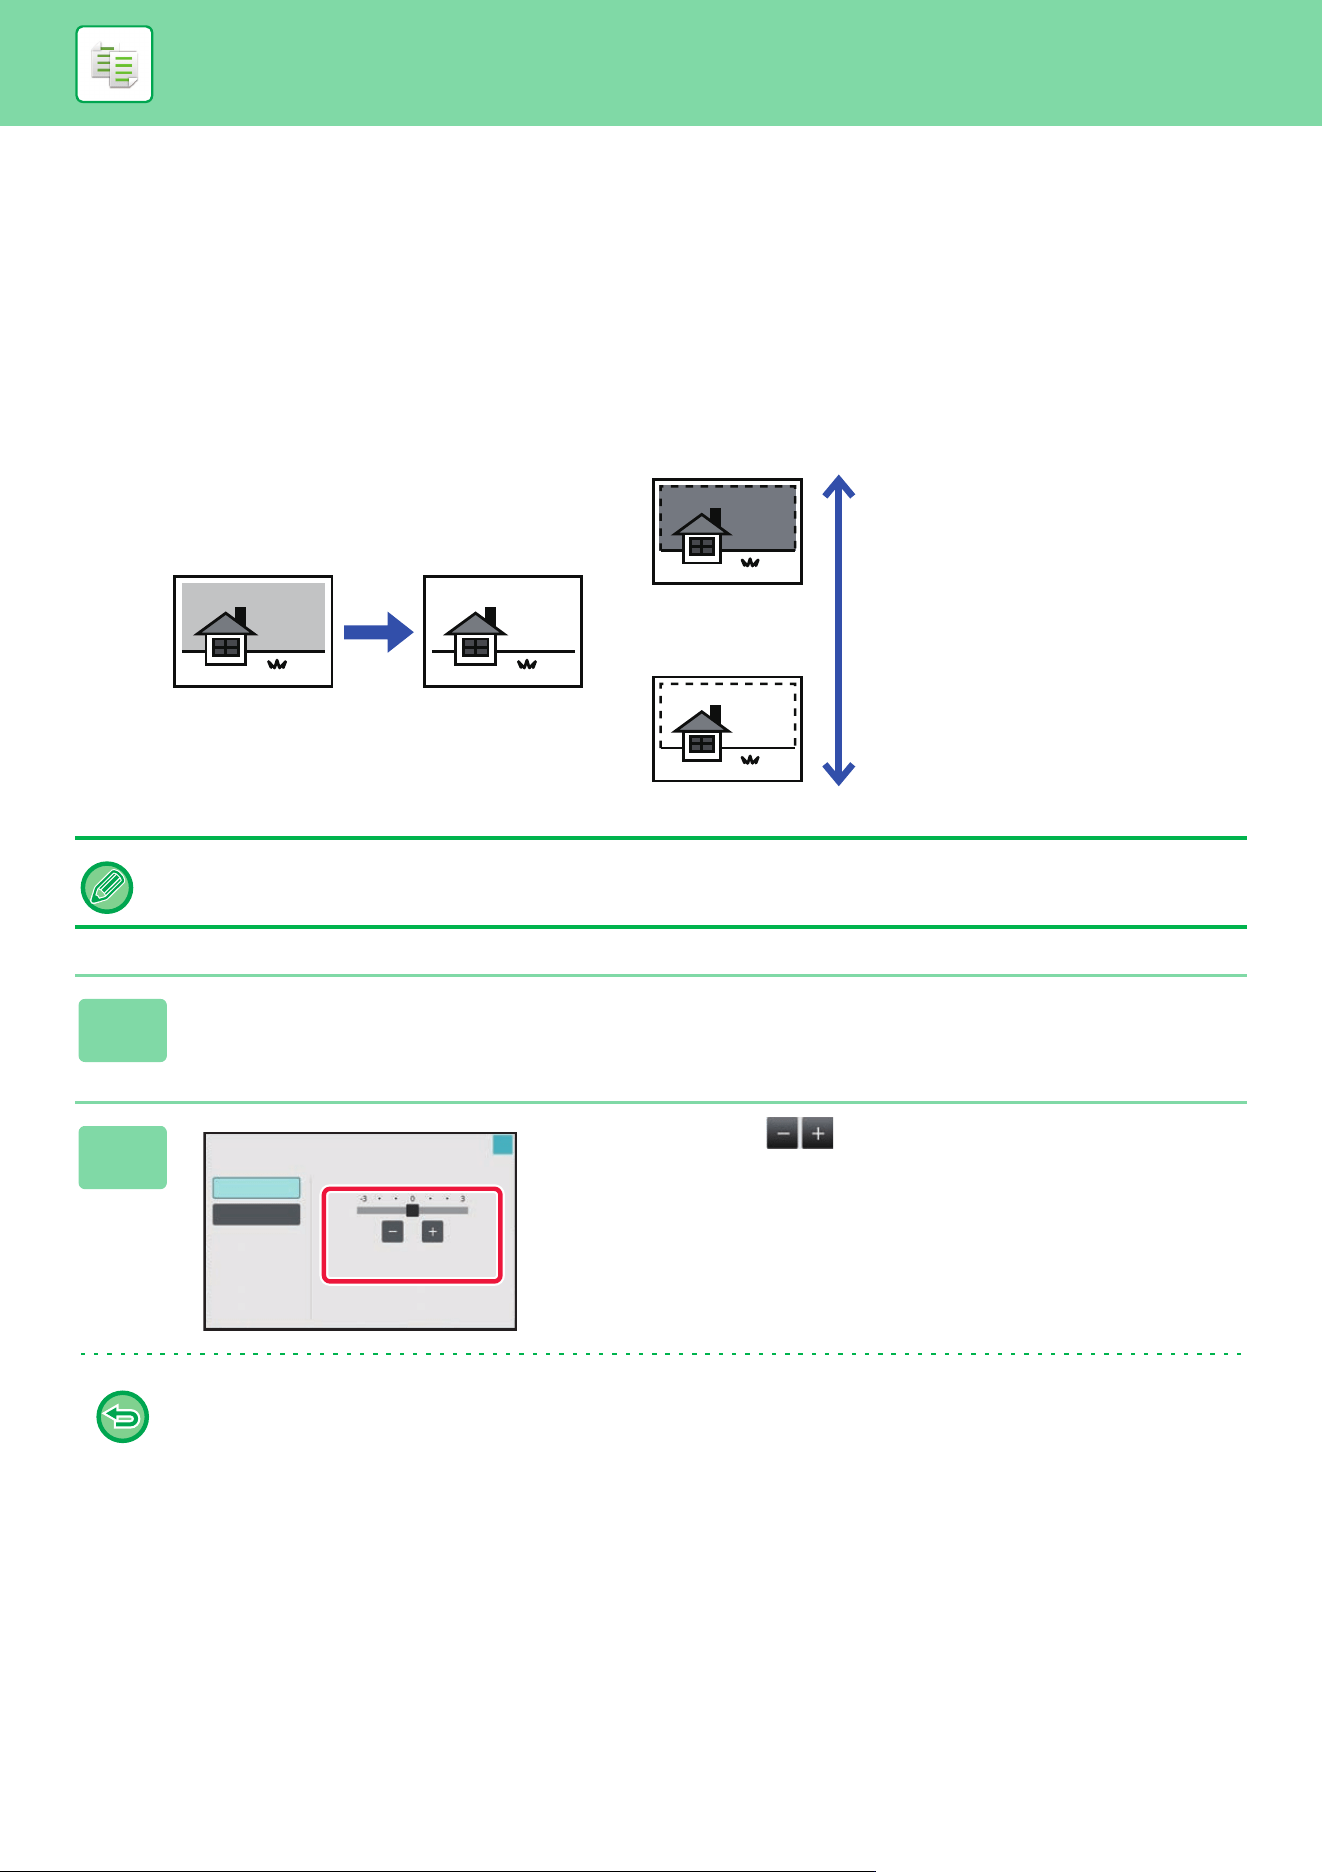
3-83
COPIER►OTHER FUNCTIONS
ADJUSTING THE BACKGROUND BY MAKING LIGHT
AREAS OF THE ORIGINAL DARKER OR LIGHTER
(BACKGROUND ADJUSTMENT)
You can adjust the background by making light areas of the original darker or lighter.
Changing the level of [Background Adjustment] to the [+] side makes the background darker, while changing to the [-]
side makes it lighter.
Darkness of the light area can be adjusted by this function.
• Background Adjustment cannot be selected in easy mode.
• You must select Background Adjustment before scanning the original.
1
Tap the [Others] key, and tap the [Background Adjustment] key.
2
Tap or move the slider to set the
value.
After the settings are completed, tap [OK] and [Back] keys in
sequence.
To cancel the Background Adjustment setting:
Tap the [Off] key.
[+] makes the background darker.
[-] makes the background lighter.
Level [-]
Level [+]
Adjust light areas in
this way.
Background Adjustment
Adjust Original Background Darkness.
Off
On
Touch [+] darken background.
Touch [-] erase background.
OK

3-84
COPIER►OTHER FUNCTIONS
3
Place the original.
Place the original in the document feeder tray of the automatic document feeder, or on the document glass.
AUTOMATIC DOCUMENT FEEDER
(page 1-47)
DOCUMENT GLASS (page 1-51)
To cancel all settings:
Tap the [CA] key.
4
Tap the [Color Start] or [B/W Start] key to start copying.
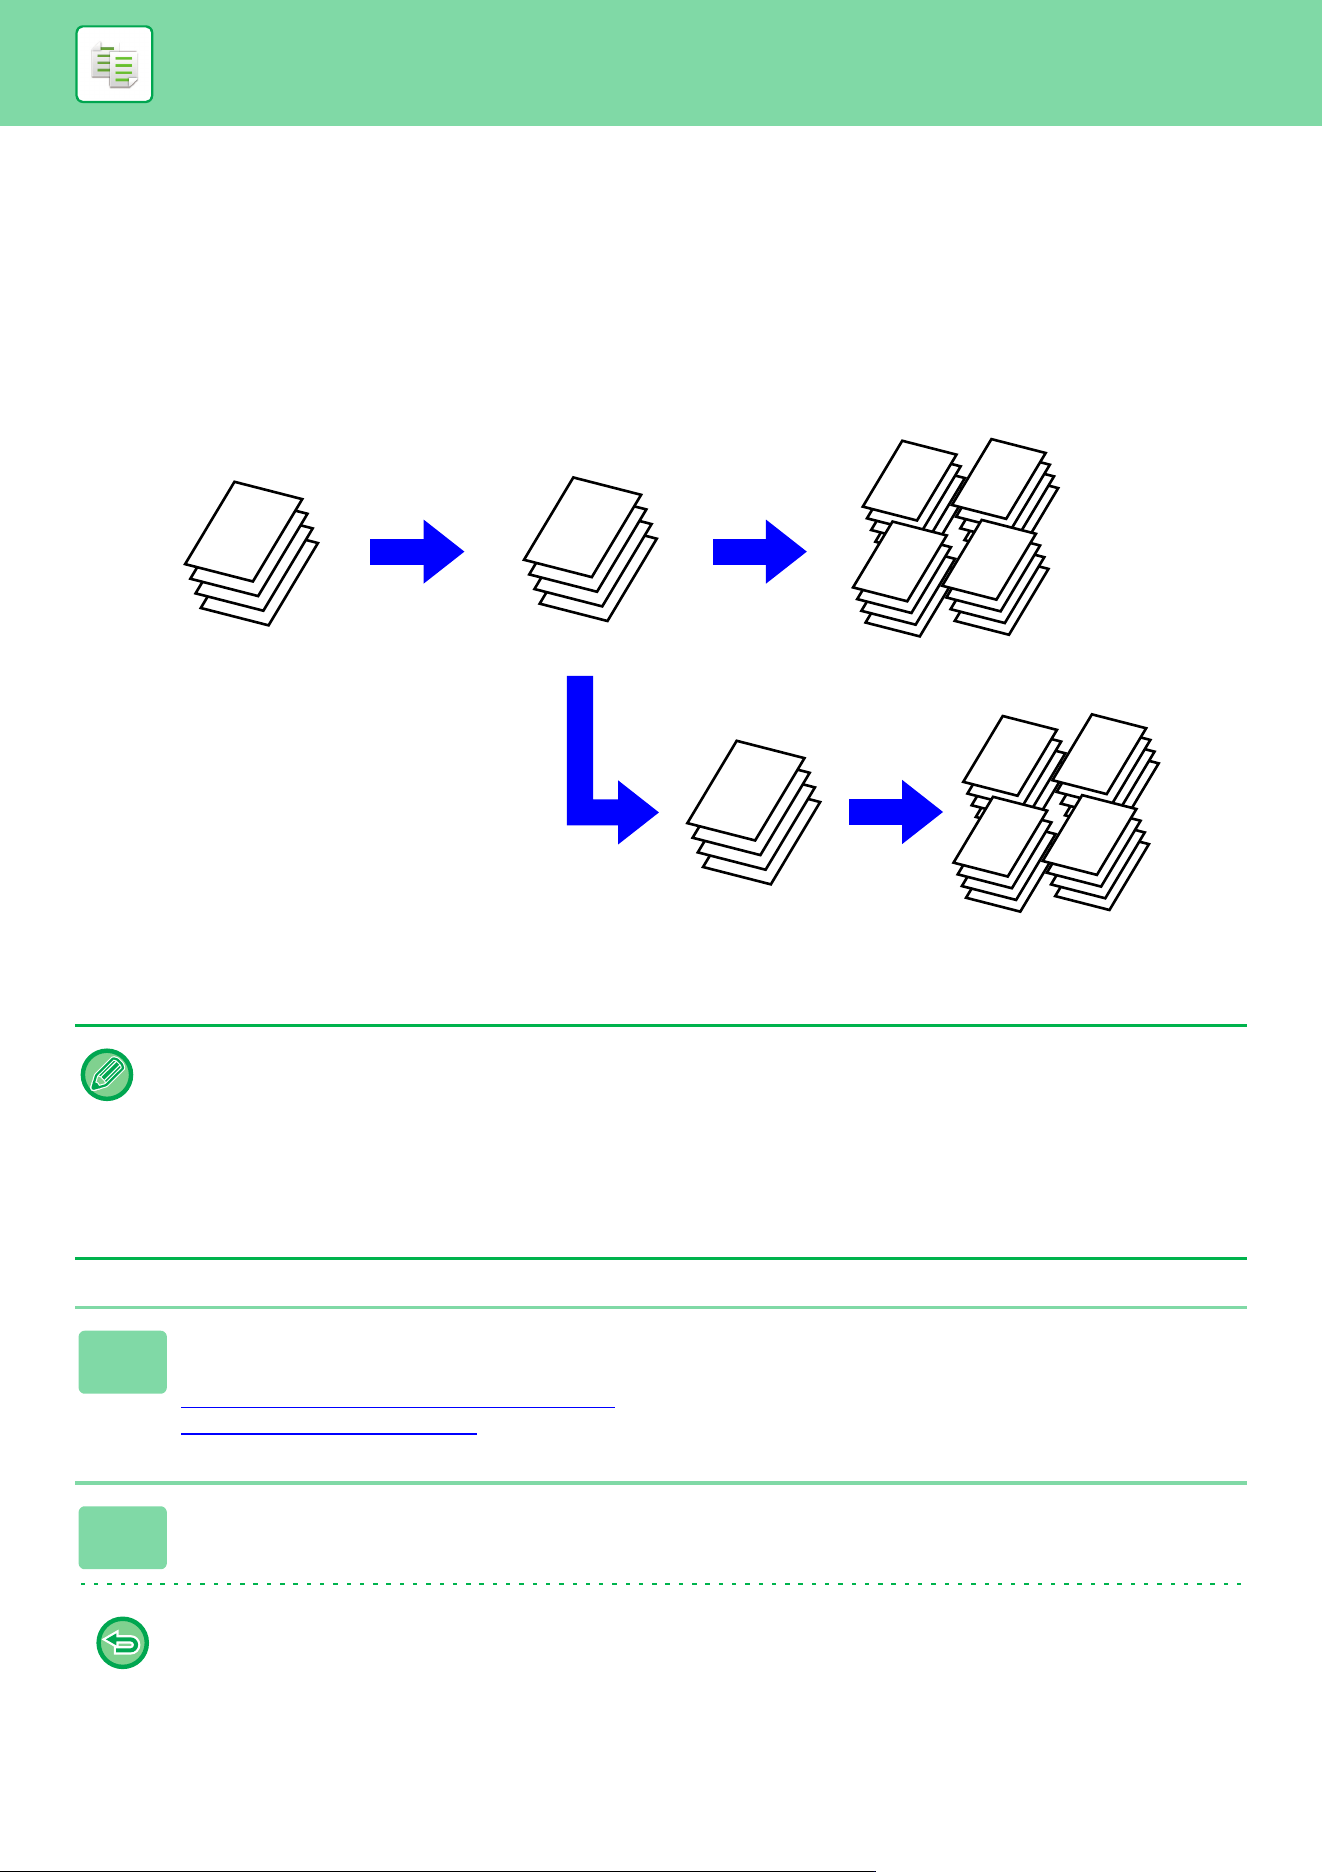
3-85
COPIER►OTHER FUNCTIONS
MAKING A PROOF COPY (PROOF COPY)
This function makes a proof copy before printing the specified number of copies. Check the preview image with a proof
copy. If necessary, change the settings.Using this function stores the scanned original in the machine, saving you the
trouble of re-scanning the original in the changed setting.
Proof copy flow
• Proof Copy cannot be selected in easy mode.
• Proof Copy must be specified before scanning the original.
• If Proof Copy is executed while the machine is printing another job, the job in progress is interrupted, and a proof copy is
printed preferentially. The interrupted job will resume after proof copying has been completed.
However, if proof copy is executed during printing of a job for which both 2-sided printing and staple function are enabled,
the proof copy will be printed after the job in progress is finished.
If the [Start Print] key is tapped to execute printing of the remaining sets while the machine is printing another job, the re-
maining sets will be printed after all previously reserved jobs are completed.
1
Place the original.
Place the original in the document feeder tray of the automatic document feeder, or on the document glass.
AUTOMATIC DOCUMENT FEEDER
(page 1-47)
DOCUMENT GLASS (page 1-51)
2
As necessary, specify the required functions such as "Exposure" and "Copy
Ratio".
To cancel all settings:
Tap the [CA] key.
A
A
A
A
A
A
A
A
A
A
A
A
A
A
A
A
A
A
A
A
A
A
A
A
A
A
A
A
A
A
A
A
A
A
A
A
A
A
A
A
A
A
A
A
Adjust the settings
If OK
Select "Proof Copy" and
set 5 sets of copies
One set of copies is
printed for you to check
After adjustment, one set is
printed for you to check
The remaining 4 sets
are printed
The remaining 4 sets are
printed
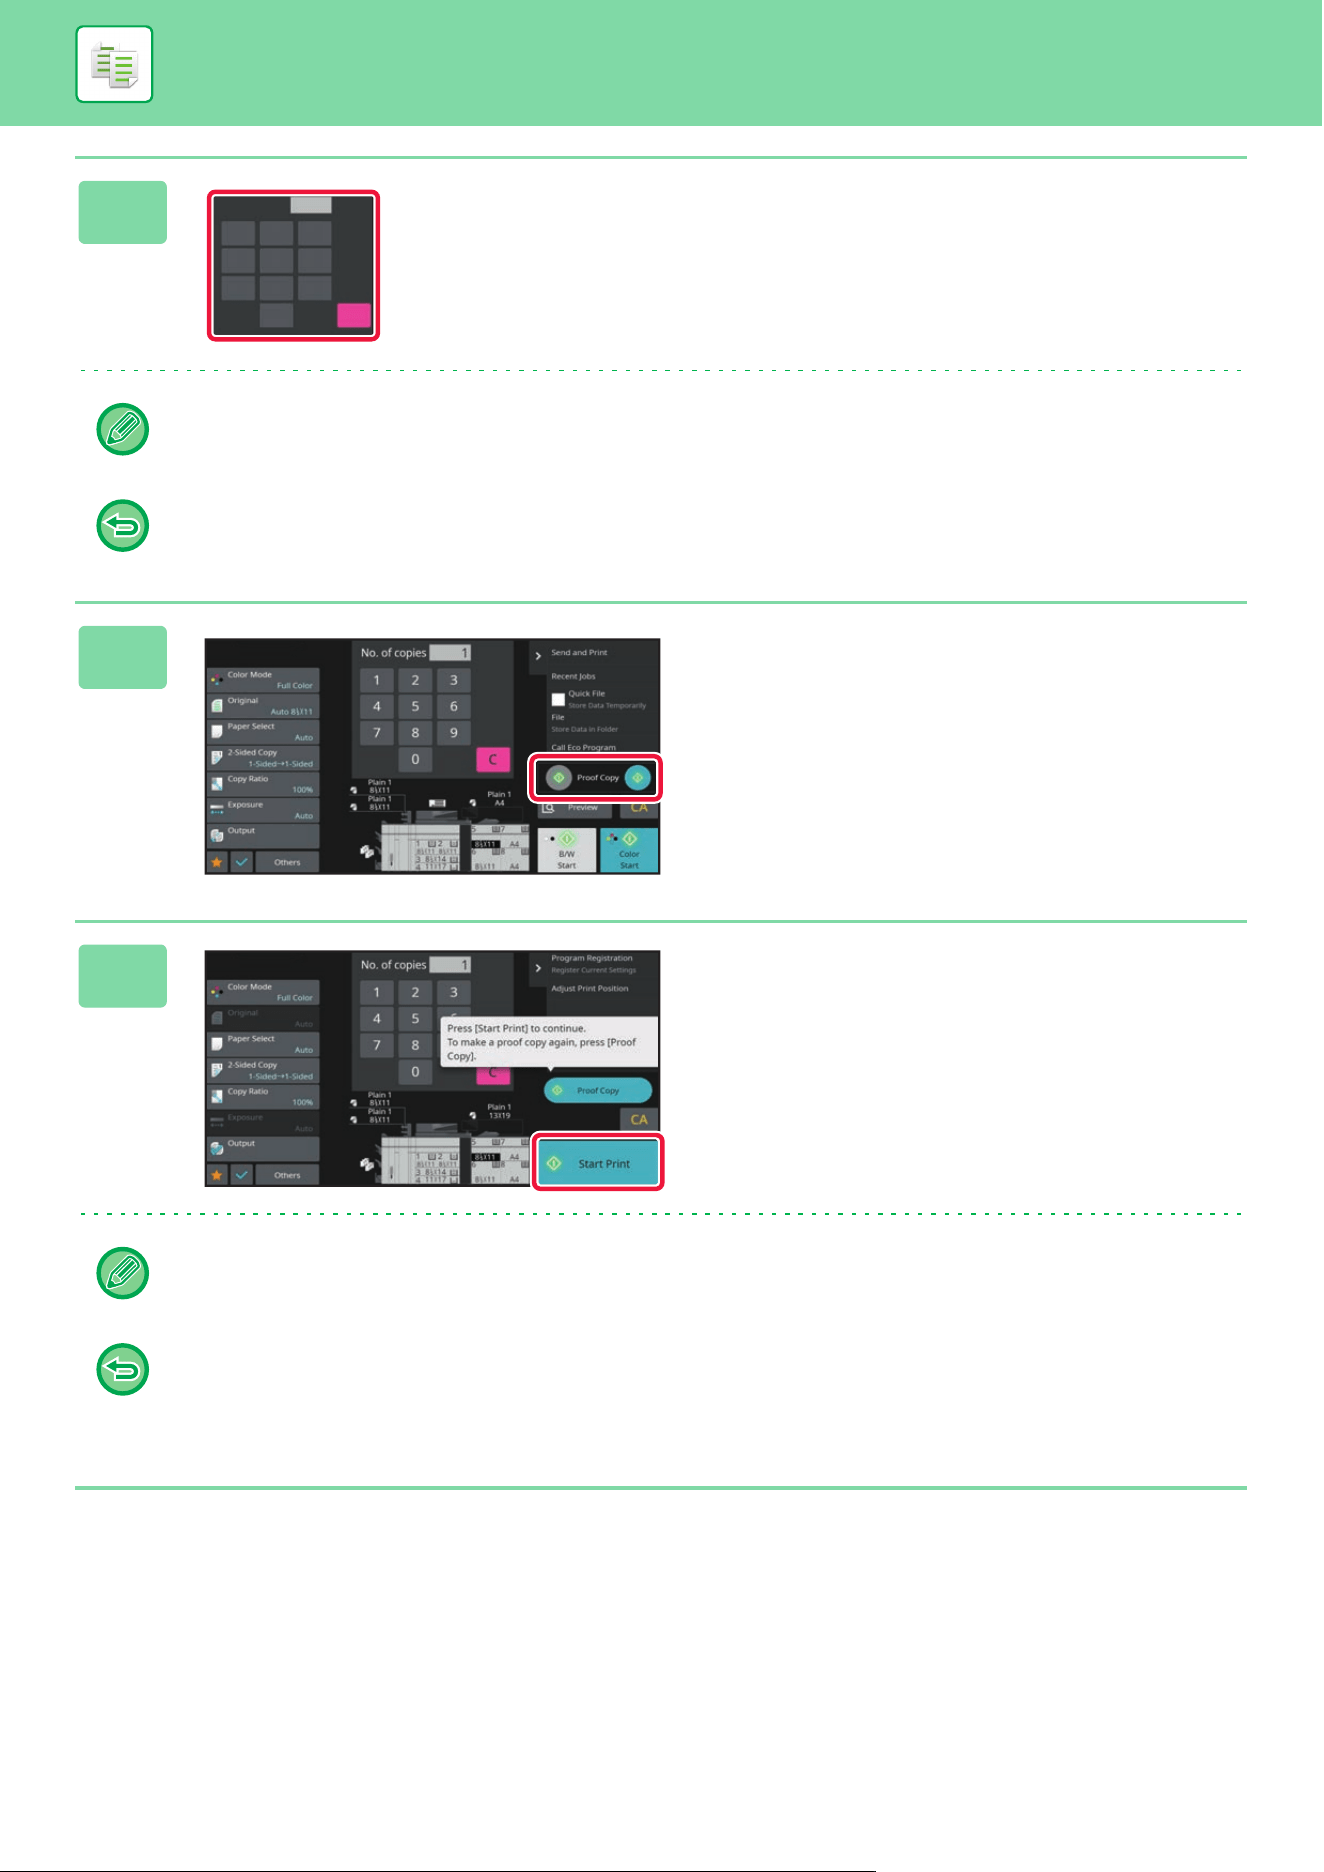
3-86
COPIER►OTHER FUNCTIONS
3
Set the number of copies (number of
sets) using the numeric keys.
Up to 9999 copies (sets) can be set.
If an incorrect number of copies is set
Tap the [C] key, and enter the correct number.
4
Tap the [Proof Copy] key.
Make only one set of copies.
5
Check the copy result. If no problem is
found, tap the [Start Print] key.
As necessary, change the settings and repeat proof copying
until you are satisfied with the copy result.
You can also change the number of copies. To change the number of copies, use the numeric keys.
• In Proof Copy, unavailable function keys are not displayed.
• Some available functions may be restricted.
• To cancel all settings:
Tap the [CA] key.
No. of copies
1
1
4
7
5
8
6
9
23
0
C
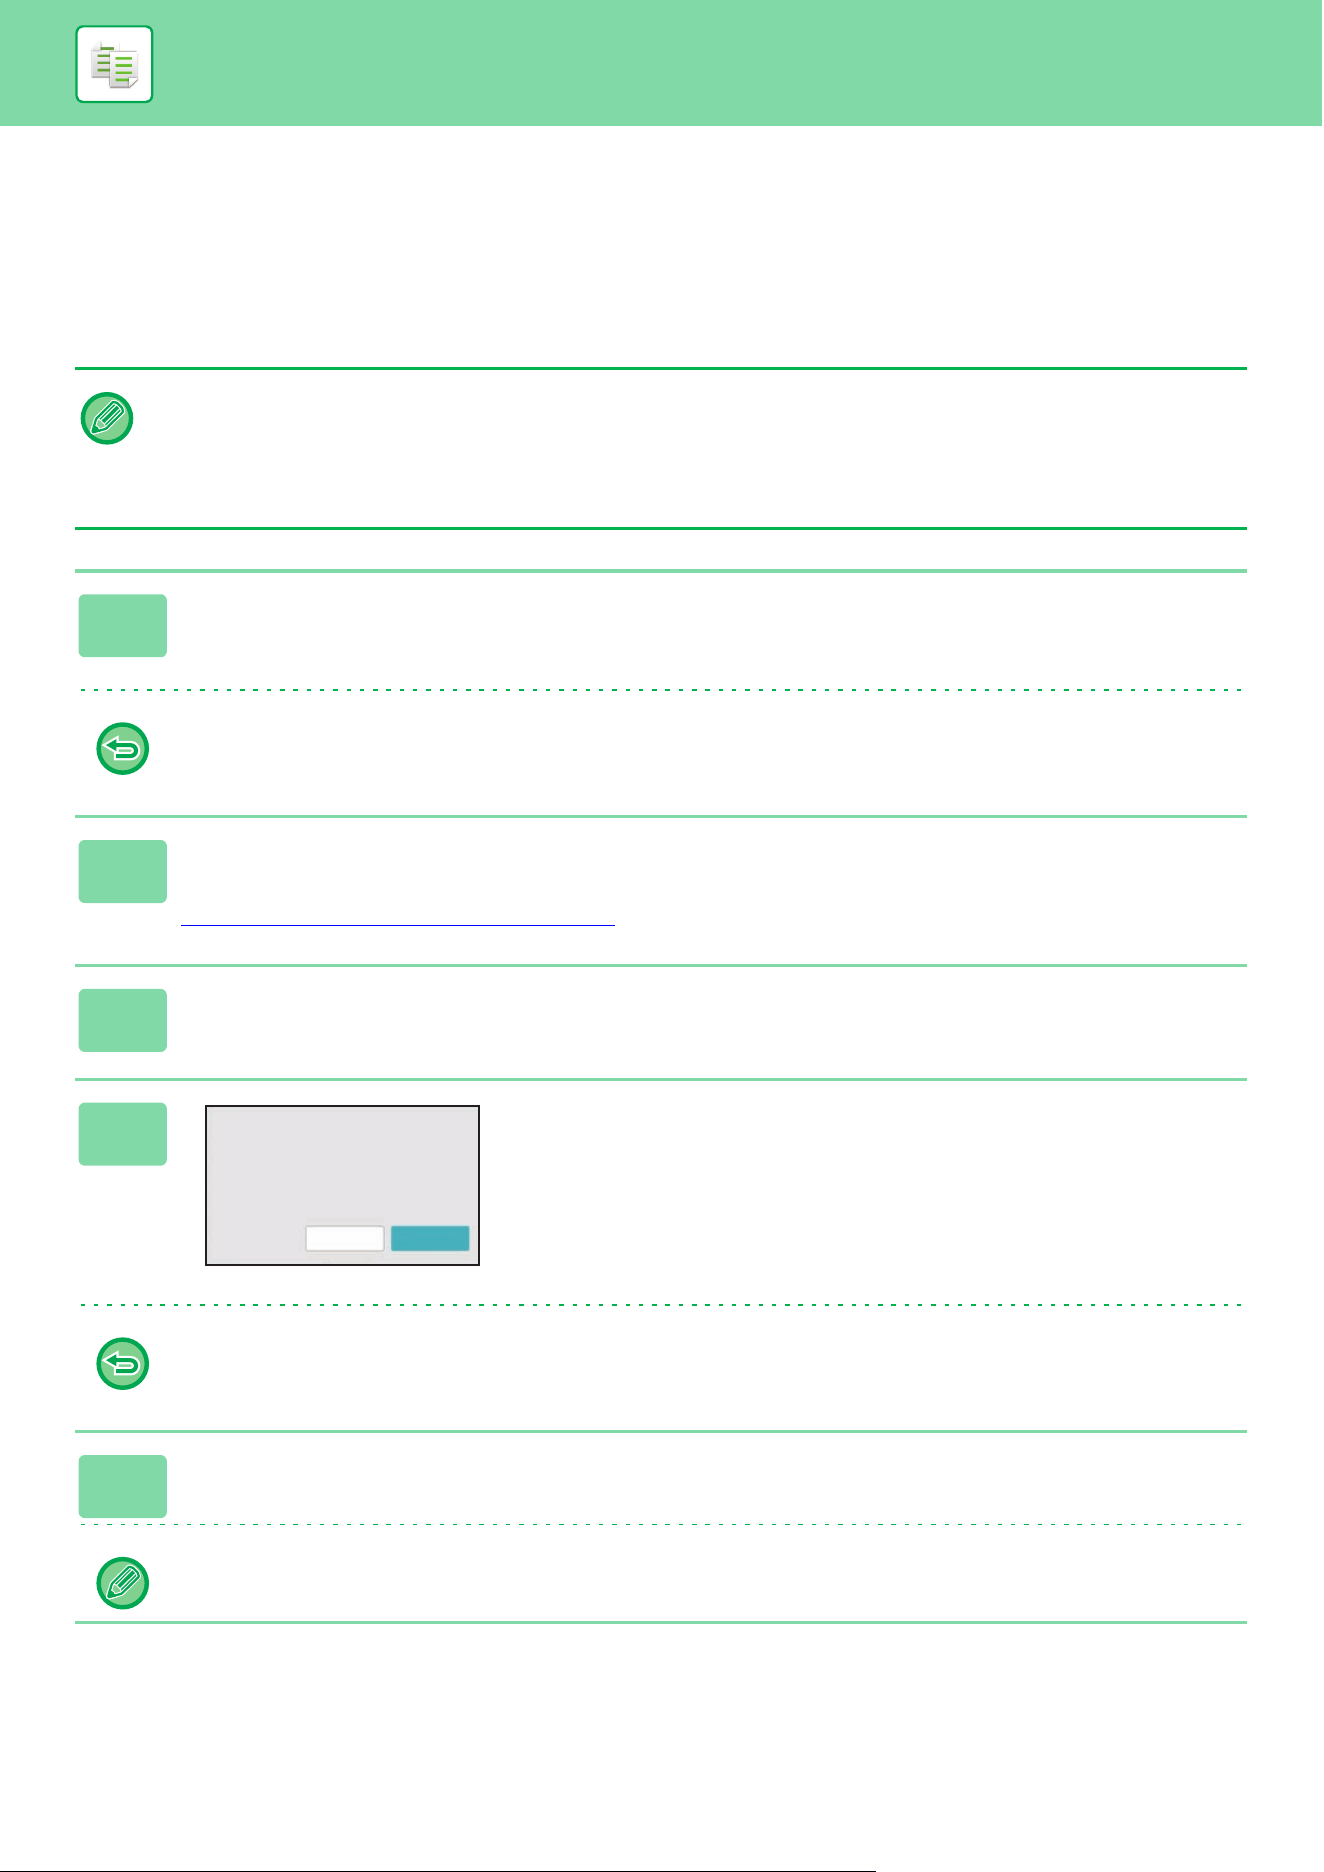
3-87
COPIER►OTHER FUNCTIONS
CHECKING THE NUMBER OF SCANNED ORIGINAL
SHEETS (ORIGINAL COUNT)
This function counts the number of scanned original sheets, and displays the result before making a copy.
By allowing you to check the number of original sheets that were scanned, this helps reduce the occurrence of copy
mistakes.
• Original count cannot be selected in easy mode.
• The count result is displayed with the number of scanned original sheets, not the number of scanned original pages. For
example, when 2-sided copying is performed using one original, the number "1" will appear to indicate that one original
sheet was scanned, not "2" to indicate the front-side page and the reverse side page.
• Original Count must be specified before scanning the original.
1
Tap the [Others] key, and tap the [Original Count] key.
A checkmark appears on the icon.
After the settings are completed, tap the [Back] key.
To cancel the Original Count setting:
Tap the [Original Count] key to uncheck it.
2
Place the original in the document feeder tray of the automatic document
feeder.
AUTOMATIC DOCUMENT FEEDER (page 1-47)
3
Tap the [Color Start] or [B/W Start] key.
4
Check the number of original sheets.
The number that is displayed is the number of scanned
original sheets, not the number of scanned original pages.
For example, when 2-sided copying is performed using one
original, the number "1" will appear to indicate that one
original sheet was scanned, not "2" to indicate the front-side
page and the reverse side page.
If the displayed number of original sheets is different from the actual number of sheets
Tap the [Cancel] key to stop the job.
5
Tap the [OK] key to start copying.
If this function is combined with [Job Build], the count result is displayed after the [Read-End] key has been tapped.
OK
Cancel
1 pages of original
have been scanned.
Copy the scanned data?
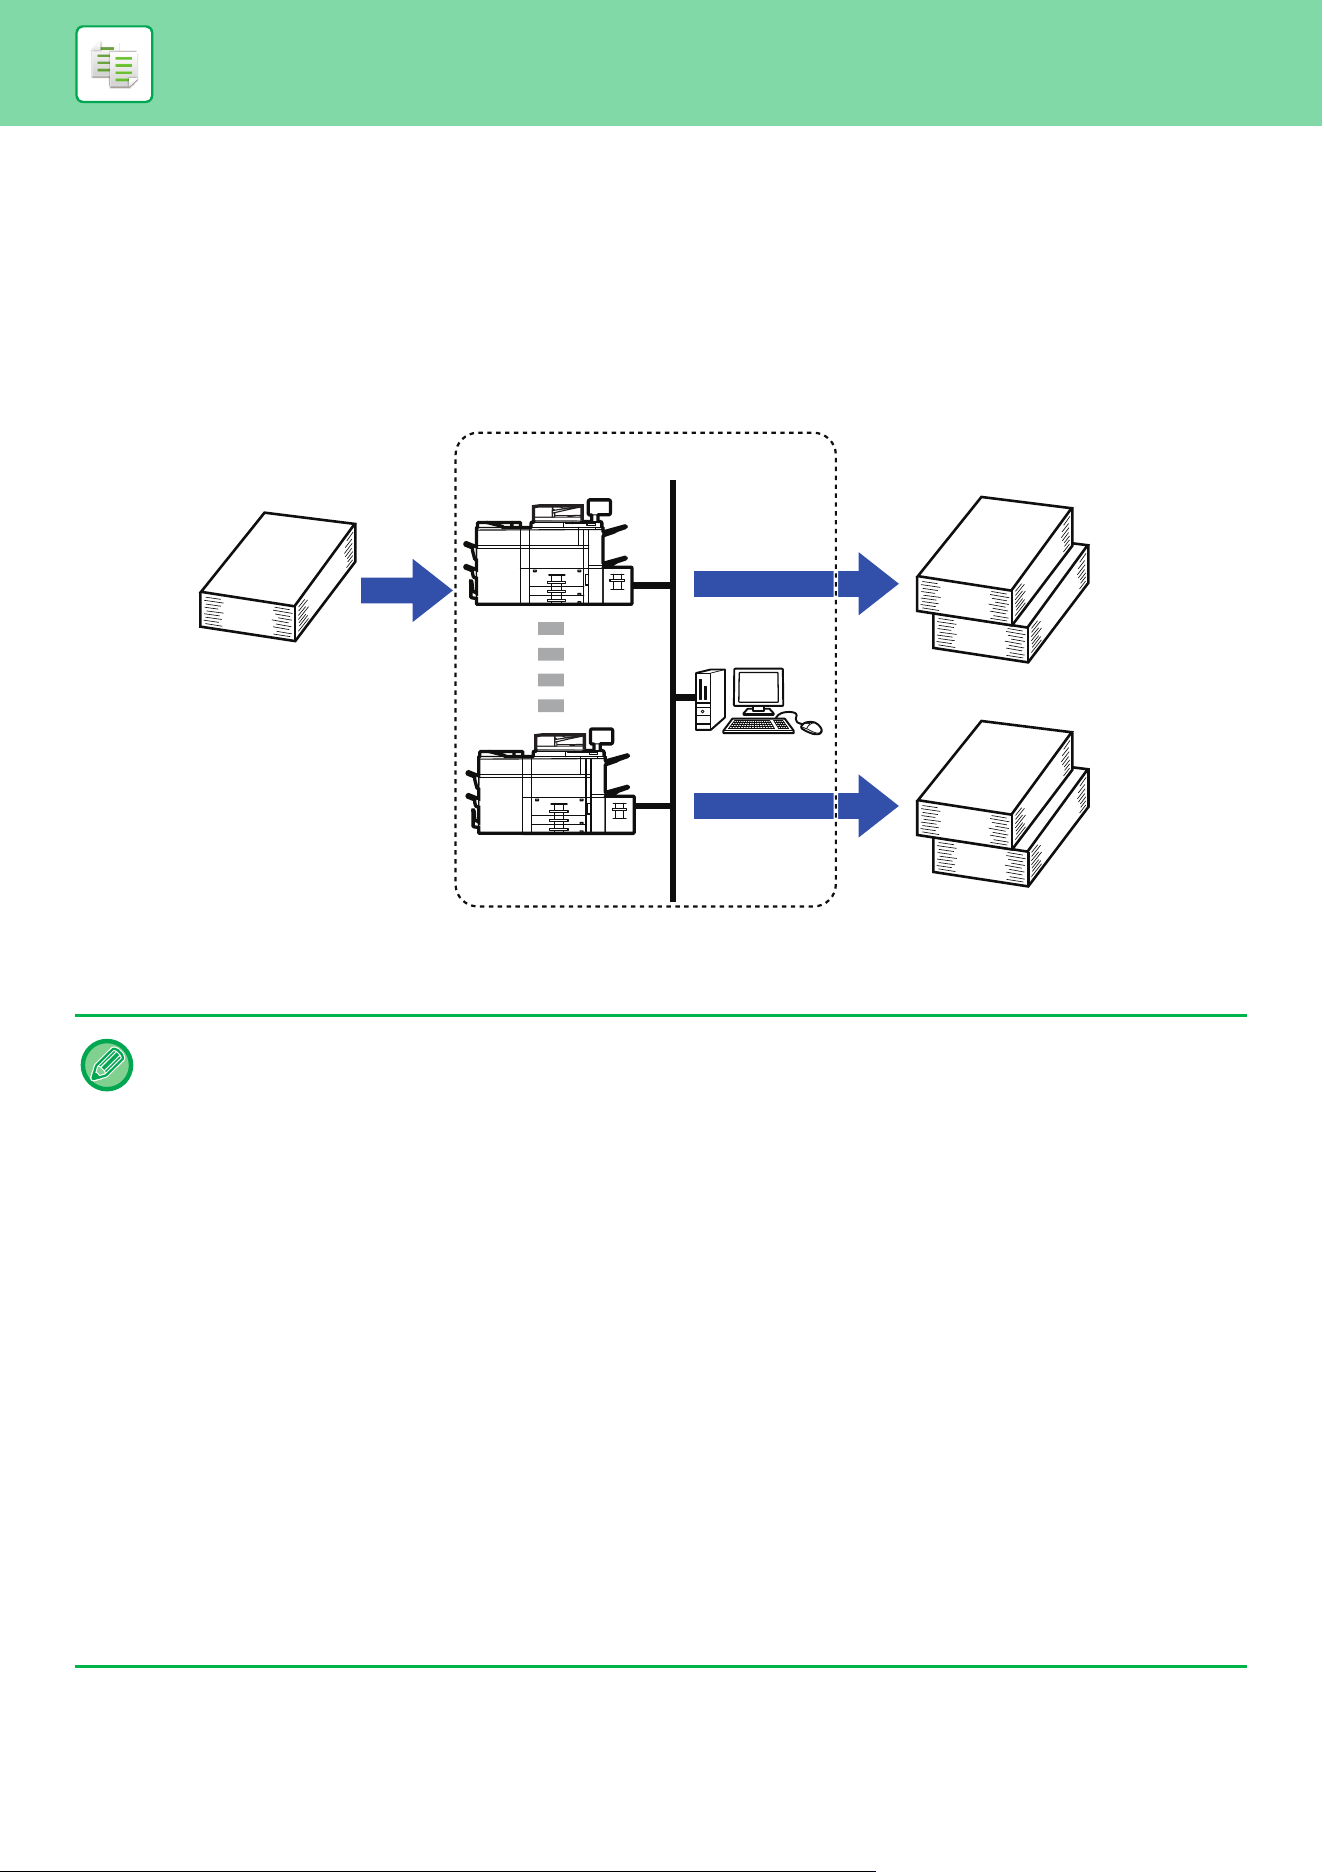
3-88
COPIER►OTHER FUNCTIONS
USING TWO MACHINES TO REDUCE THE COPY TIME
(TANDEM COPY)
This function shares a copy job half-and-half between two machines connected to the network, enabling the reduction of
the copy time.
Primary unit and secondary unit
The primary unit performs only scanning, and a secondary unit registered in the primary unit performs only printing
without scanning the original.
• Tandem Copy cannot be selected in easy mode.
• To use this function, two machines must be connected to your network.
• Even if more machines are connected to the network, this function can only be used to have one other machine share a
job.
• To configure the tandem connection setting, register IP address information of the secondary unit in the primary unit. For
the port number, it is best to use the initial setting (50001). Unless you experience difficulty with this setting, do not change
the port number. The tandem setting should be configured by your network administrator. If the primary unit and secondary
unit will switch roles, configure the IP address of the primary unit in the secondary unit. The same port number can be used
for both machines.
• In this situation:
A saddle stitch finisher is installed in the primary unit while not installed in a secondary unit.
• Tandem Copy is enabled when specifying copies without stapling.
• Tandem Copy is disabled when specifying copies with stapling.
As shown here, if Tandem Copy is enabled using a function provided in the primary unit and not provided in a secondary
unit, a message will appear.
• If a machine runs out of paper
If either the primary unit or the secondary unit run out of paper, the machine that ran out of paper will hold the job while the
machine that still has paper continues the job. When paper is added to the machine that ran out, the job resumes.
• If user authentication is specified
• Tandem Copy is enabled when user authentication is specified in the primary unit.
• Tandem Copy is disabled when user authentication is specified in the secondary unit while it is not specified in the
primary unit.
• If an odd number of sets is being made, one more set is output to the primary unit.
Execute 4 sets of copies
2 sets of copies
2 sets of copies
Network environment
Secondary
unit
Primary
unit
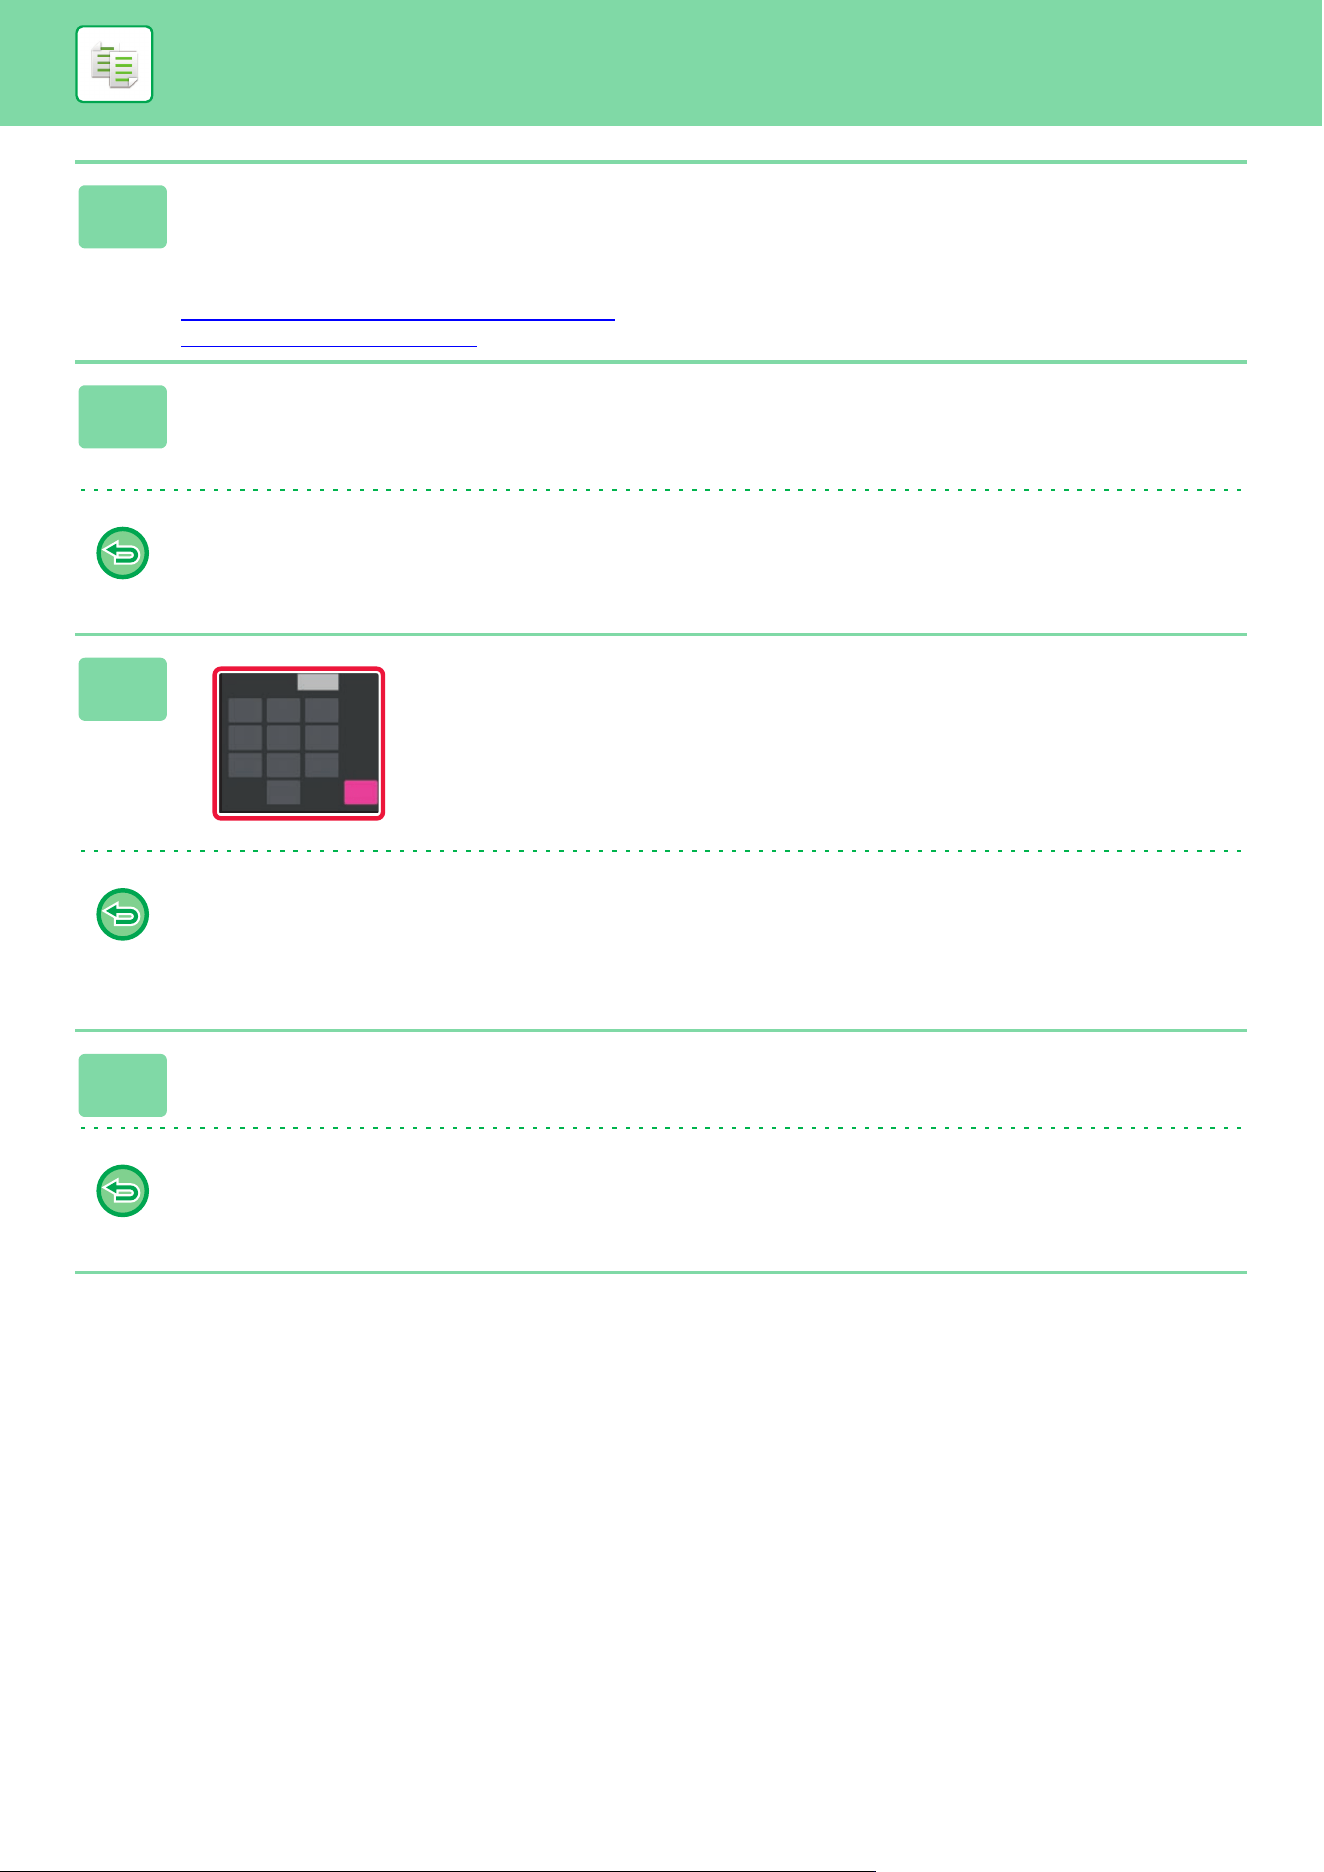
3-89
COPIER►OTHER FUNCTIONS
1
Place the original.
Place the original in the document feeder tray of the automatic document feeder, or on the document glass.
When using the document glass to scan multiple original pages, change the original and tap the [Color Start] or [B/W
Start] key.
AUTOMATIC DOCUMENT FEEDER
(page 1-47)
DOCUMENT GLASS (page 1-51)
2
Tap the [Others] key, and tap the [Tandem Copy] key.
A checkmark appears on the icon.
After the settings are completed, tap the [Back] key.
To cancel the Tandem Copy setting:
Tap the [Tandem Copy] key to uncheck it.
3
Tap the number of copies key to
specify the number of copies.
Up to 9999 copies (sets) can be set. The specified number
of copies are shared between the primary unit and
secondary unit. If the number of copies is odd, the primary
unit makes more copies than the secondary unit.
• If an incorrect number of copies is set:
Tap the [C] key and then enter the correct number.
• To cancel all settings:
Tap the [CA] key.
4
Tap the [Color Start] or [B/W Start] key to start copying.
To cancel Tandem Copy:
Tap the [Cancel Copy] keys on both the primary unit and secondary unit.
No. of copies
1
4
7
5
8
6
9
2
0
3
C
1

3-90
COPIER►OTHER FUNCTIONS
SECURITY REINFORCEMENT FUNCTIONS
PADDING UNAUTHORIZED COPY PREVENTION DATA
(HIDDEN PATTERN PRINT)
Characters to prevent unauthorized copying such as pre-set or customized text are placed as invisible characters in a
background pattern.
When an output sheet with a pattern print is copied, the hidden characters will appear.
• Hidden Pattern Print cannot be selected in easy mode.
• "Hidden Pattern Print" is a function provided for the purpose of deterring unauthorized copying. It does not guarantee the
prevention of information leakage.
• Text may not be completely hidden on an output sheet with a hidden pattern print under certain machine conditions. In
such a case, adjust the contrast by selecting the [Hidden Pattern Print Setting] from the "Settings (administrator)".
• When copying an output sheet with a hidden pattern print, the hidden pattern may not emerge depending on settings other
than "Hidden Pattern Print".
• The hidden pattern may not emerge on copies with certain types of devices or under certain setting conditions used to
copy an output sheet with a hidden pattern print.
1
Place the original.
Place the original in the document feeder tray of the automatic document feeder, or on the document glass.
AUTOMATIC DOCUMENT FEEDER
(page 1-47)
DOCUMENT GLASS (page 1-51)
2
Tap the [Others] key, and tap the [Hidden Pattern Print] key.
AB
CD
AB
CD
DO’NOT COPY
DO’NOT COPY
AB
CD
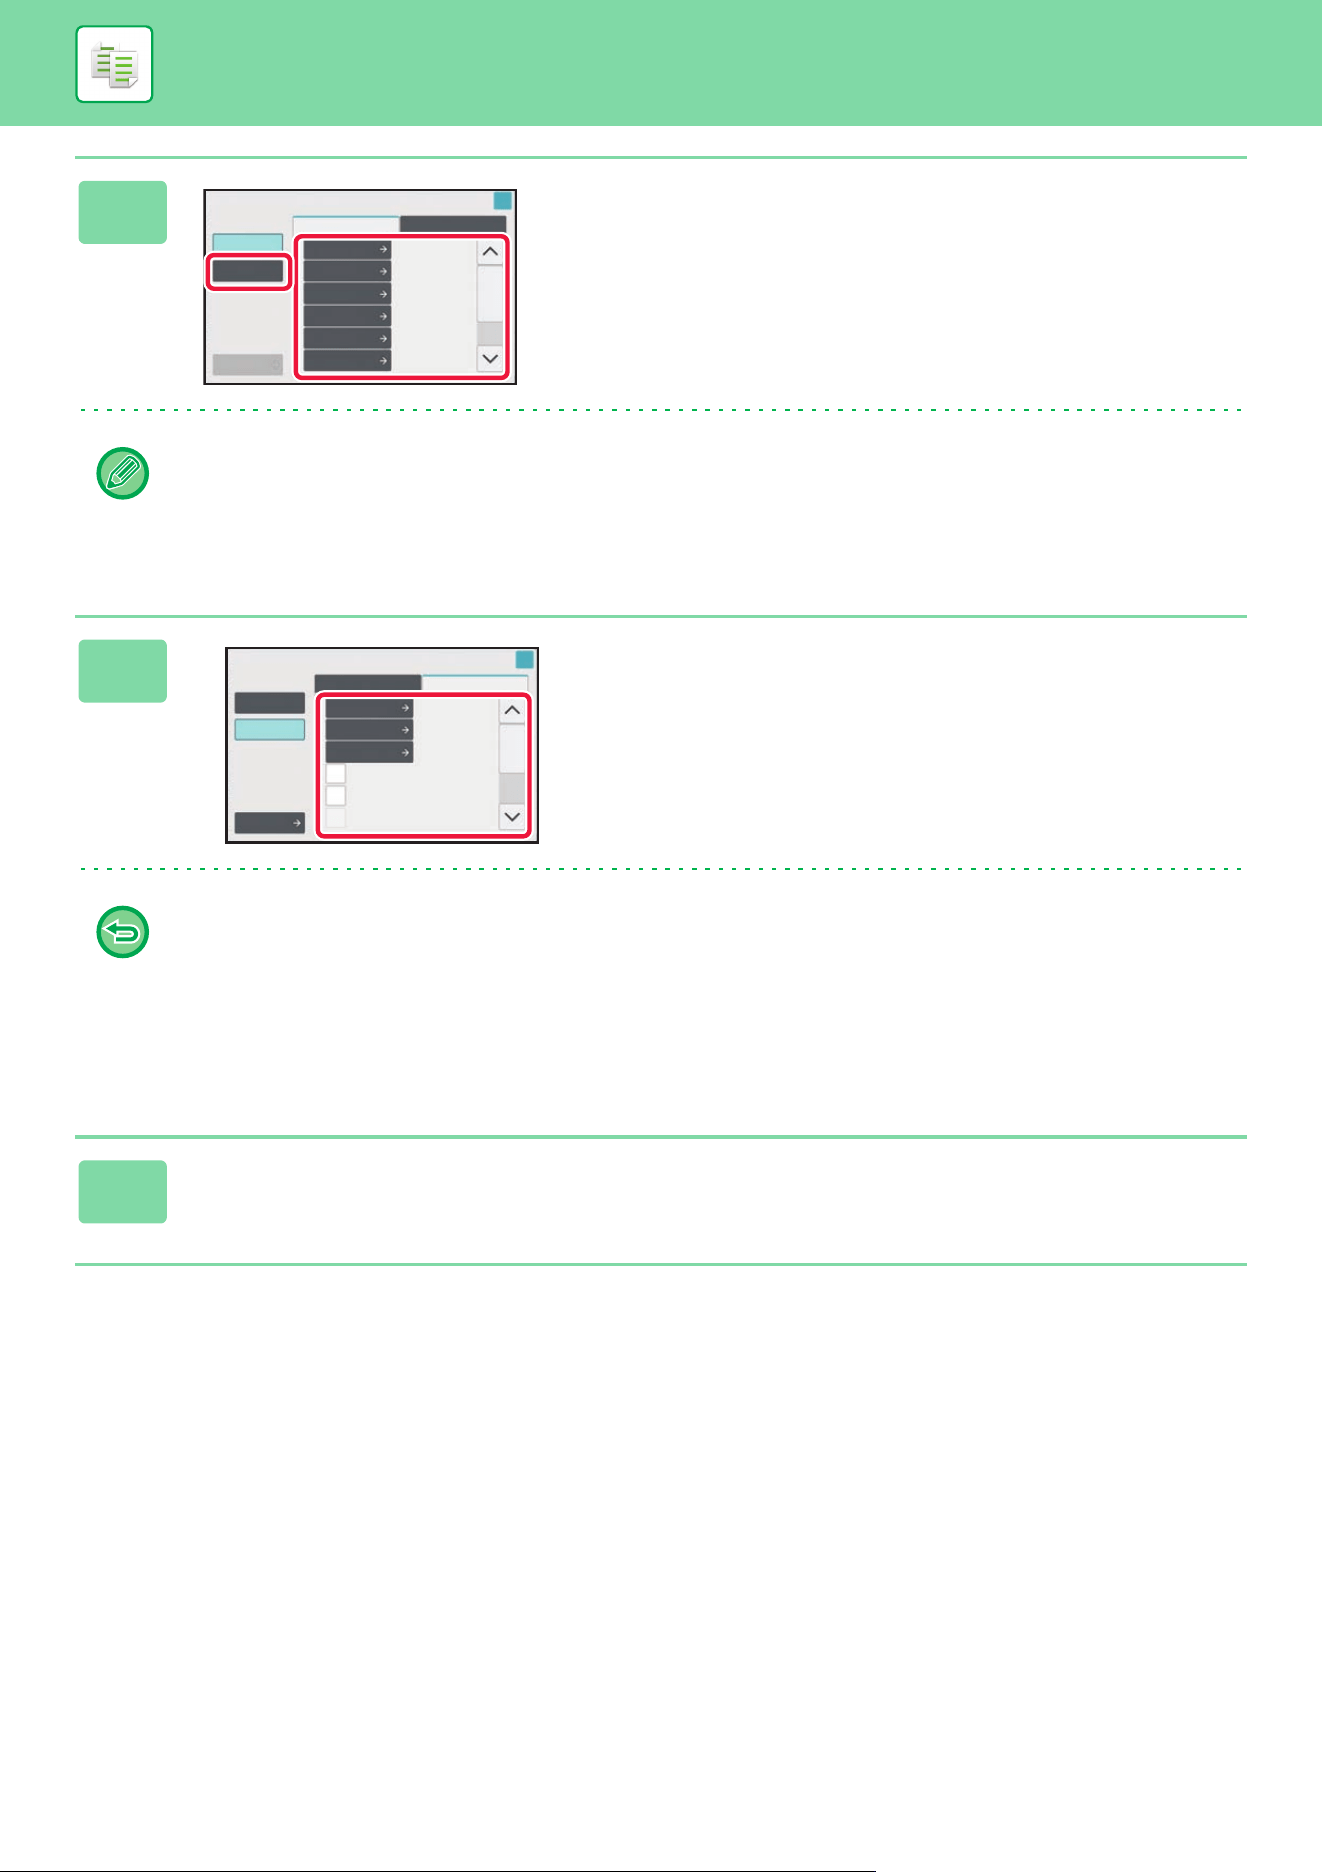
3-91
COPIER►OTHER FUNCTIONS
3
Tap the [On] key, and specify each
item in the [Default Settings] tab as
required.
• We recommend you to select the [Positive] option for the "Method".
• The black background pattern is printed in the following cases even when you set the [Print Color] to "Magenta" or
"Cyan":
If the color mode is set to "B/W"
If the black and white mode is determined automatically
4
Specify each item in the [Print
Contents Setting] tab as required.
To specify print settings, you can select the required one
from pre-set text or use the soft keyboard. You can also print
serial number and account job ID.
After the settings are completed, tap [OK] and [Back] keys in
sequence.
• To cancel the Hidden Pattern Print setting:
Tap the [Off] key.
• Tapping the [Function Rev.] key displays the settings of the [Print Contents Setting] tab.
• The hidden pattern print preview may slightly differ from the actual pattern and exposure as the preview is used for
simple pattern color checking.
• To cancel all settings:
Tap the [CA] key.
5
Tap the [Color Start] or [B/W Start] key to start copying.
O
On
Function Rev.
Default Settings Print Contents Setting
OK
Print Col or
Black
Standard
0°
48 point
Standard
Pattern 1
Exposure
Font Size
Angle
Font Style
Camouage
Pattern
Hidden Pattern Print
Hidden Pattern Print
O
On
Function Rev.
Default Settings
Print Contents Setting
OK
Pre- Set Word
DO NOT COPY
Not
Input
Pre- Set Text
Direct Entry
Serial Number
Account J ob ID
Logi n Name/User Number
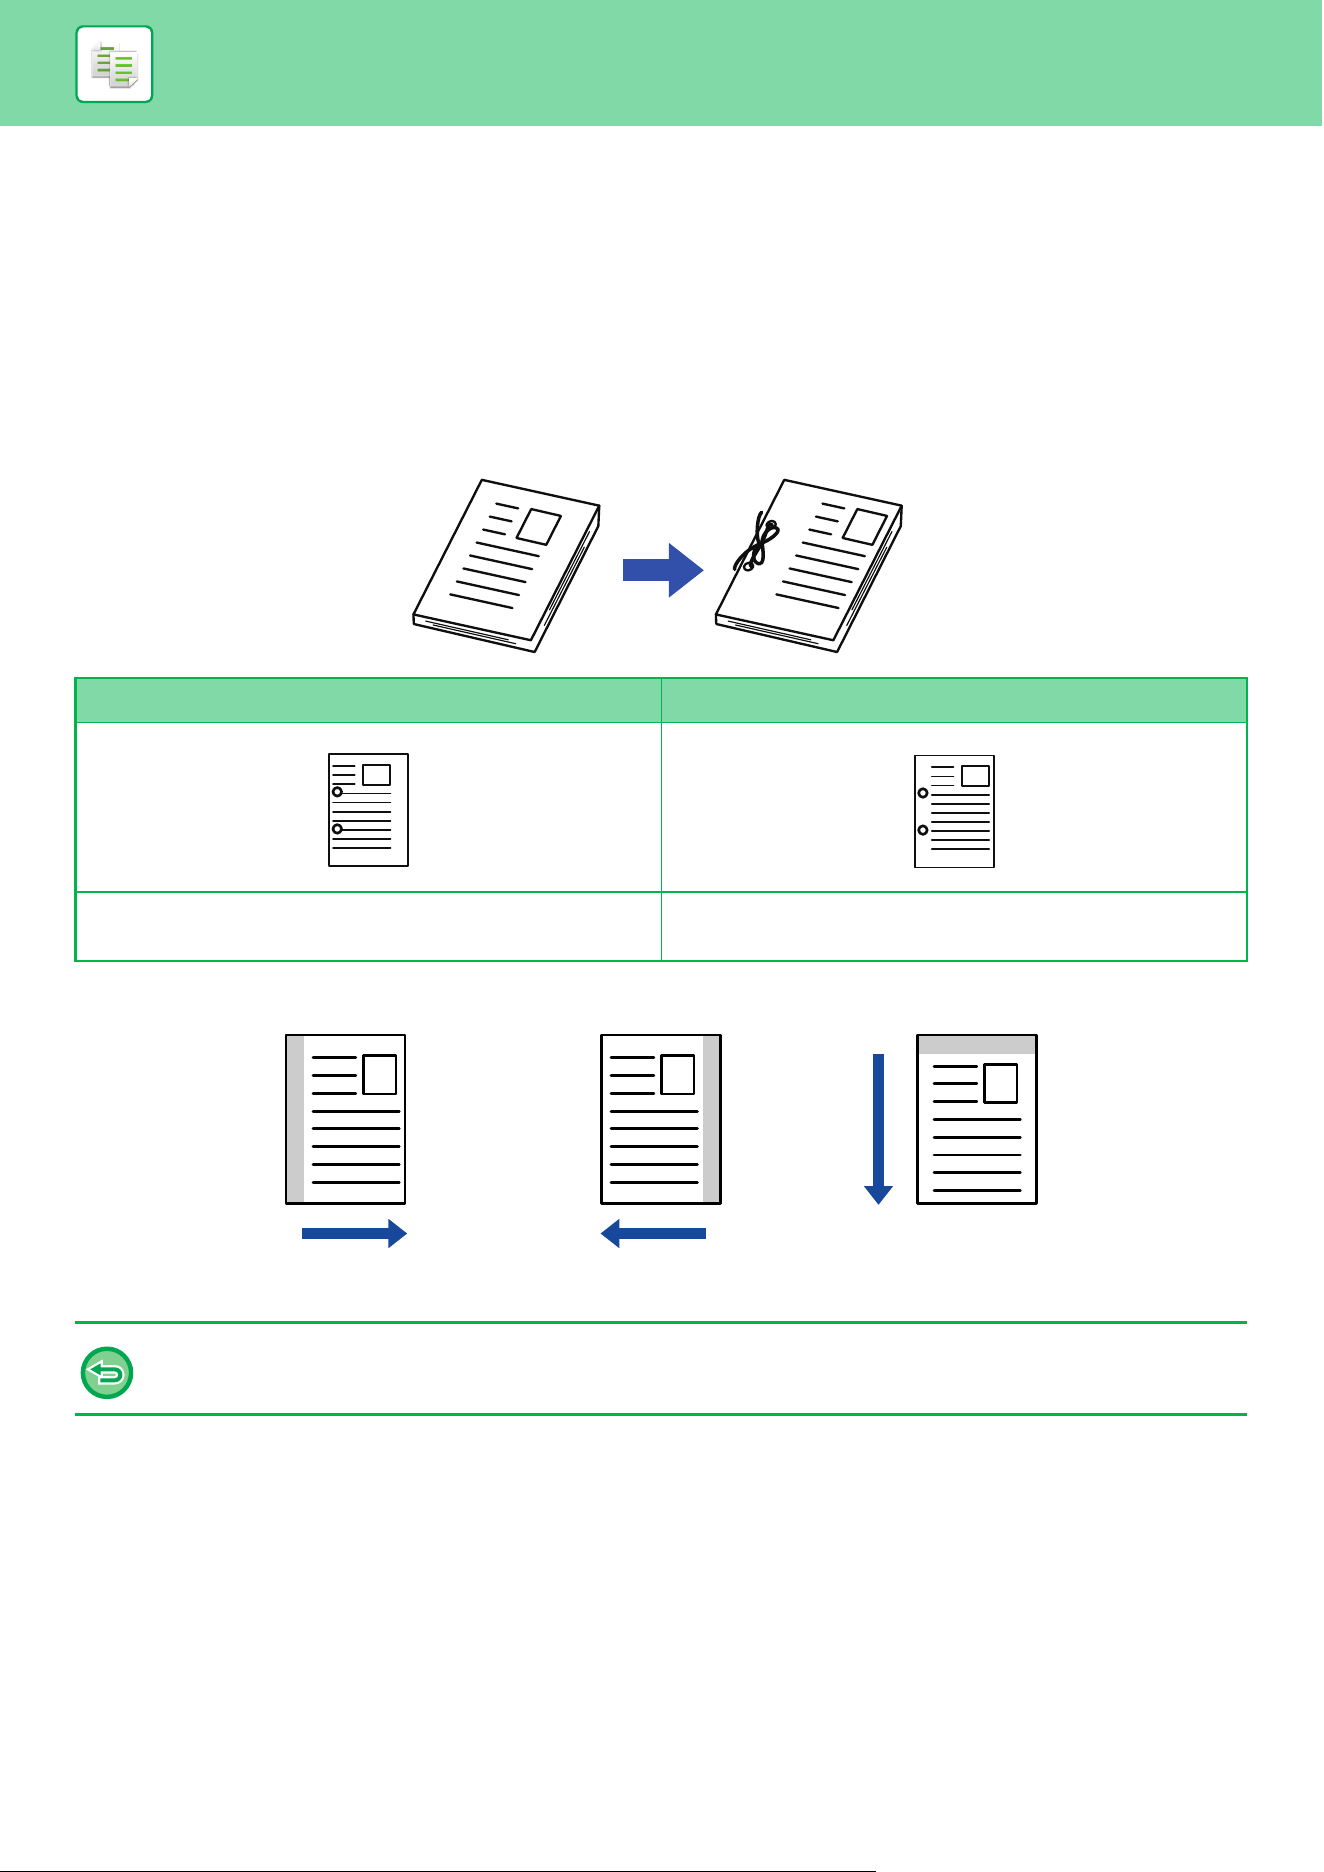
3-92
COPIER►OTHER FUNCTIONS
OUTPUT POSITION AND MARGIN
ADJUSTMENT FUNCTIONS
ADDING MARGINS (MARGIN SHIFT)
This function shifts the copy image right, left or down to adjust the margin.
This is convenient when you wish to bind the copies with a string or in a binder.
Shifting the image to the right so the copies can be bound at the left edge
Margin Shift
Not using the Margin Shift Using the Margin Shift
The punch holes cut off part of the image. The image is moved to allow space for the holes so the image
is not cut off.
• Margin Shift cannot be selected in easy mode.
• Rotation copy cannot be used in combination with the margin shift function.
1
1
1
1
Right Left
Down
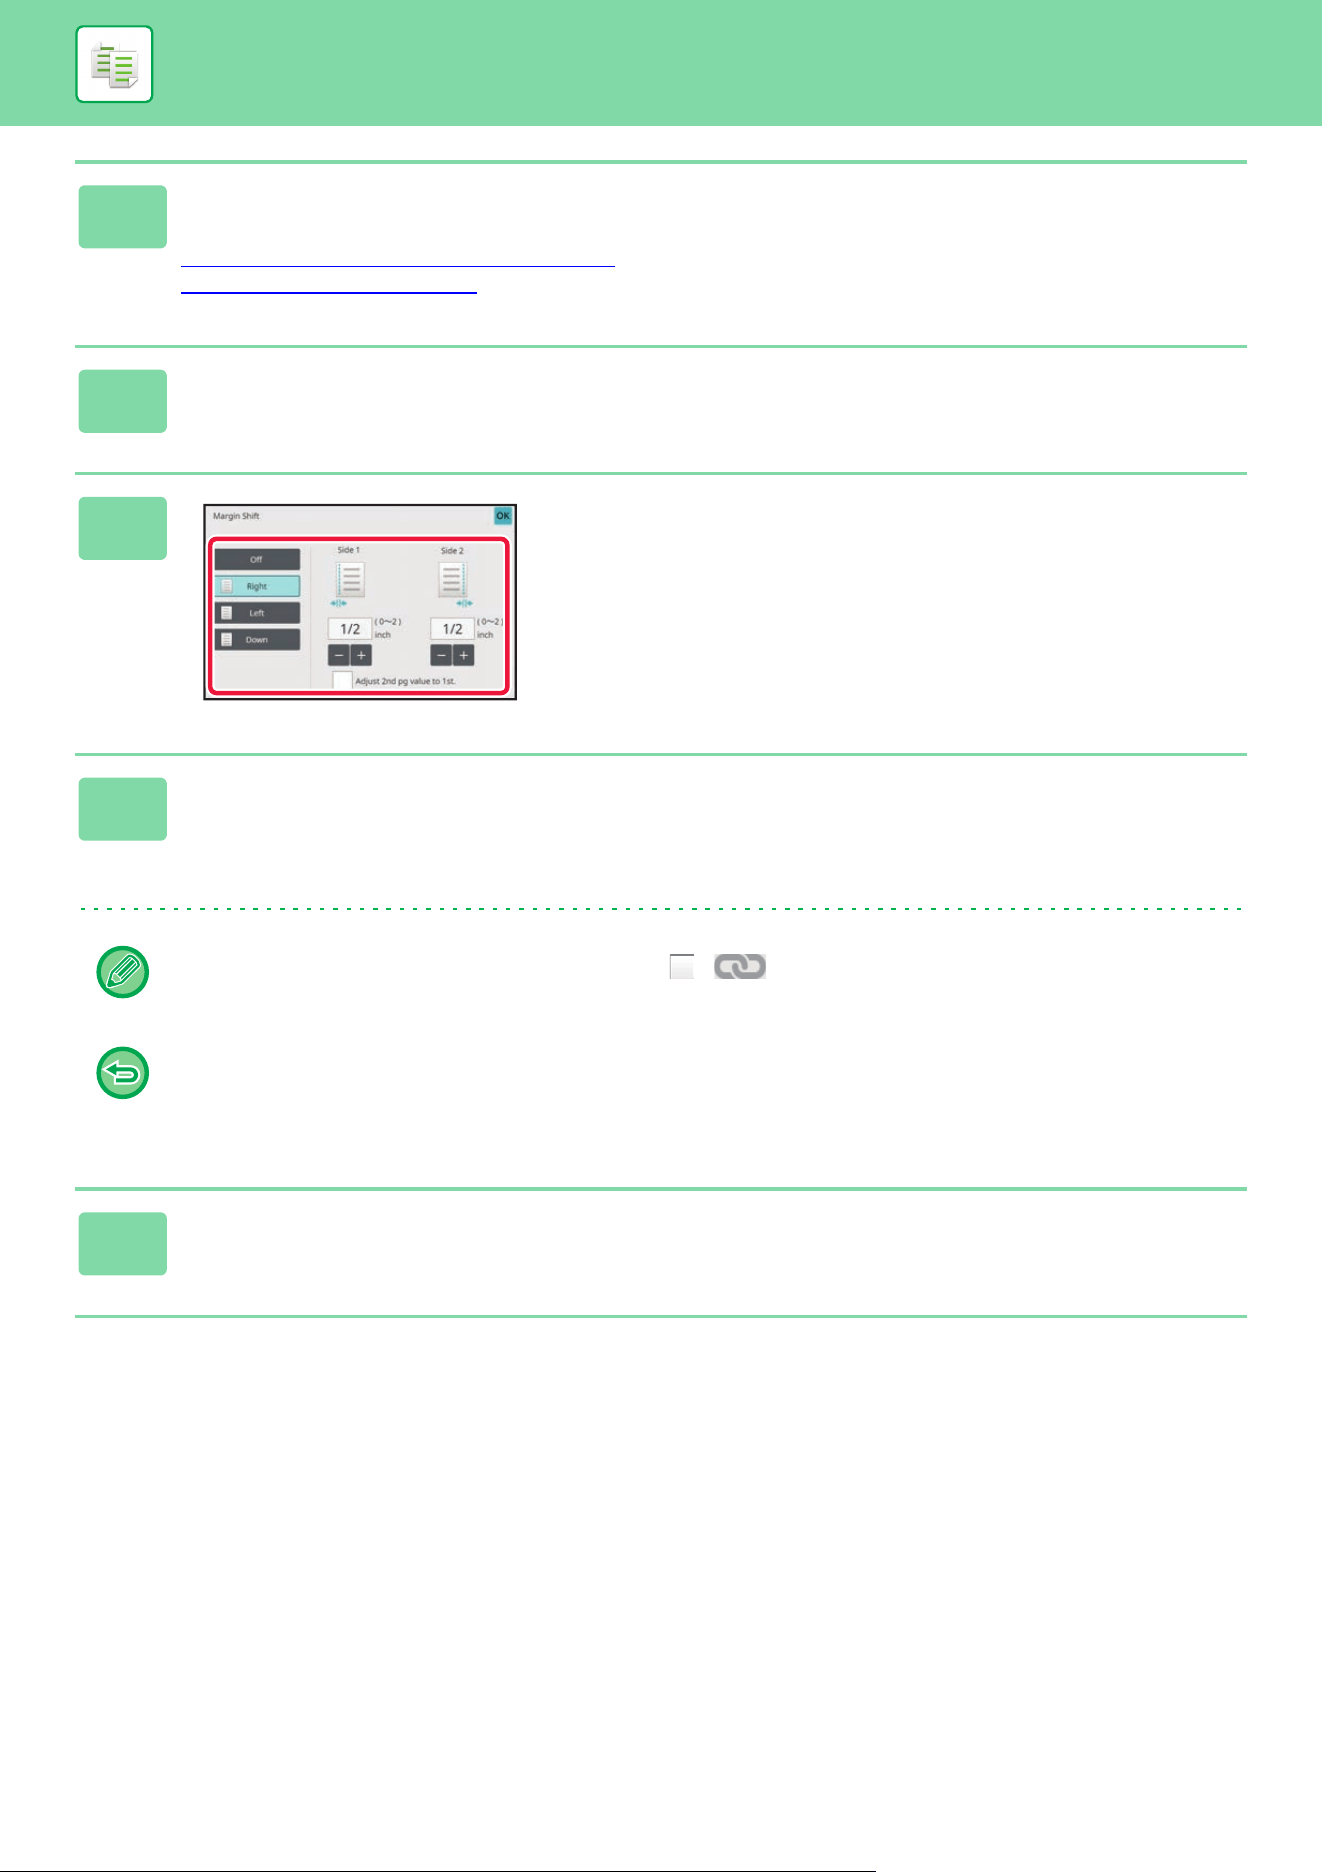
3-93
COPIER►OTHER FUNCTIONS
1
Place the original.
Place the original in the document feeder tray of the automatic document feeder, or on the document glass.
AUTOMATIC DOCUMENT FEEDER
(page 1-47)
DOCUMENT GLASS (page 1-51)
2
Tap the [Others] key, and tap the [Margin Shift] key.
3
Tap the image shift direction.
4
Sets a margin shift width.
Tap the numeric value display indicating the margin shift area on the front side or reverse side, and enter the area using
the numeric keys.
After the settings are completed, tap [OK] and [Back] keys in sequence.
If you set the [Adjust 2nd pg value to 1st.] checkbox to , goes out and you can set sides 1 and 2 separately.
• To cancel the margin shift setting:
Tap the [Off] key.
• To cancel all settings:
Tap the [CA] key.
5
Tap the [Color Start] or [B/W Start] key to start copying.
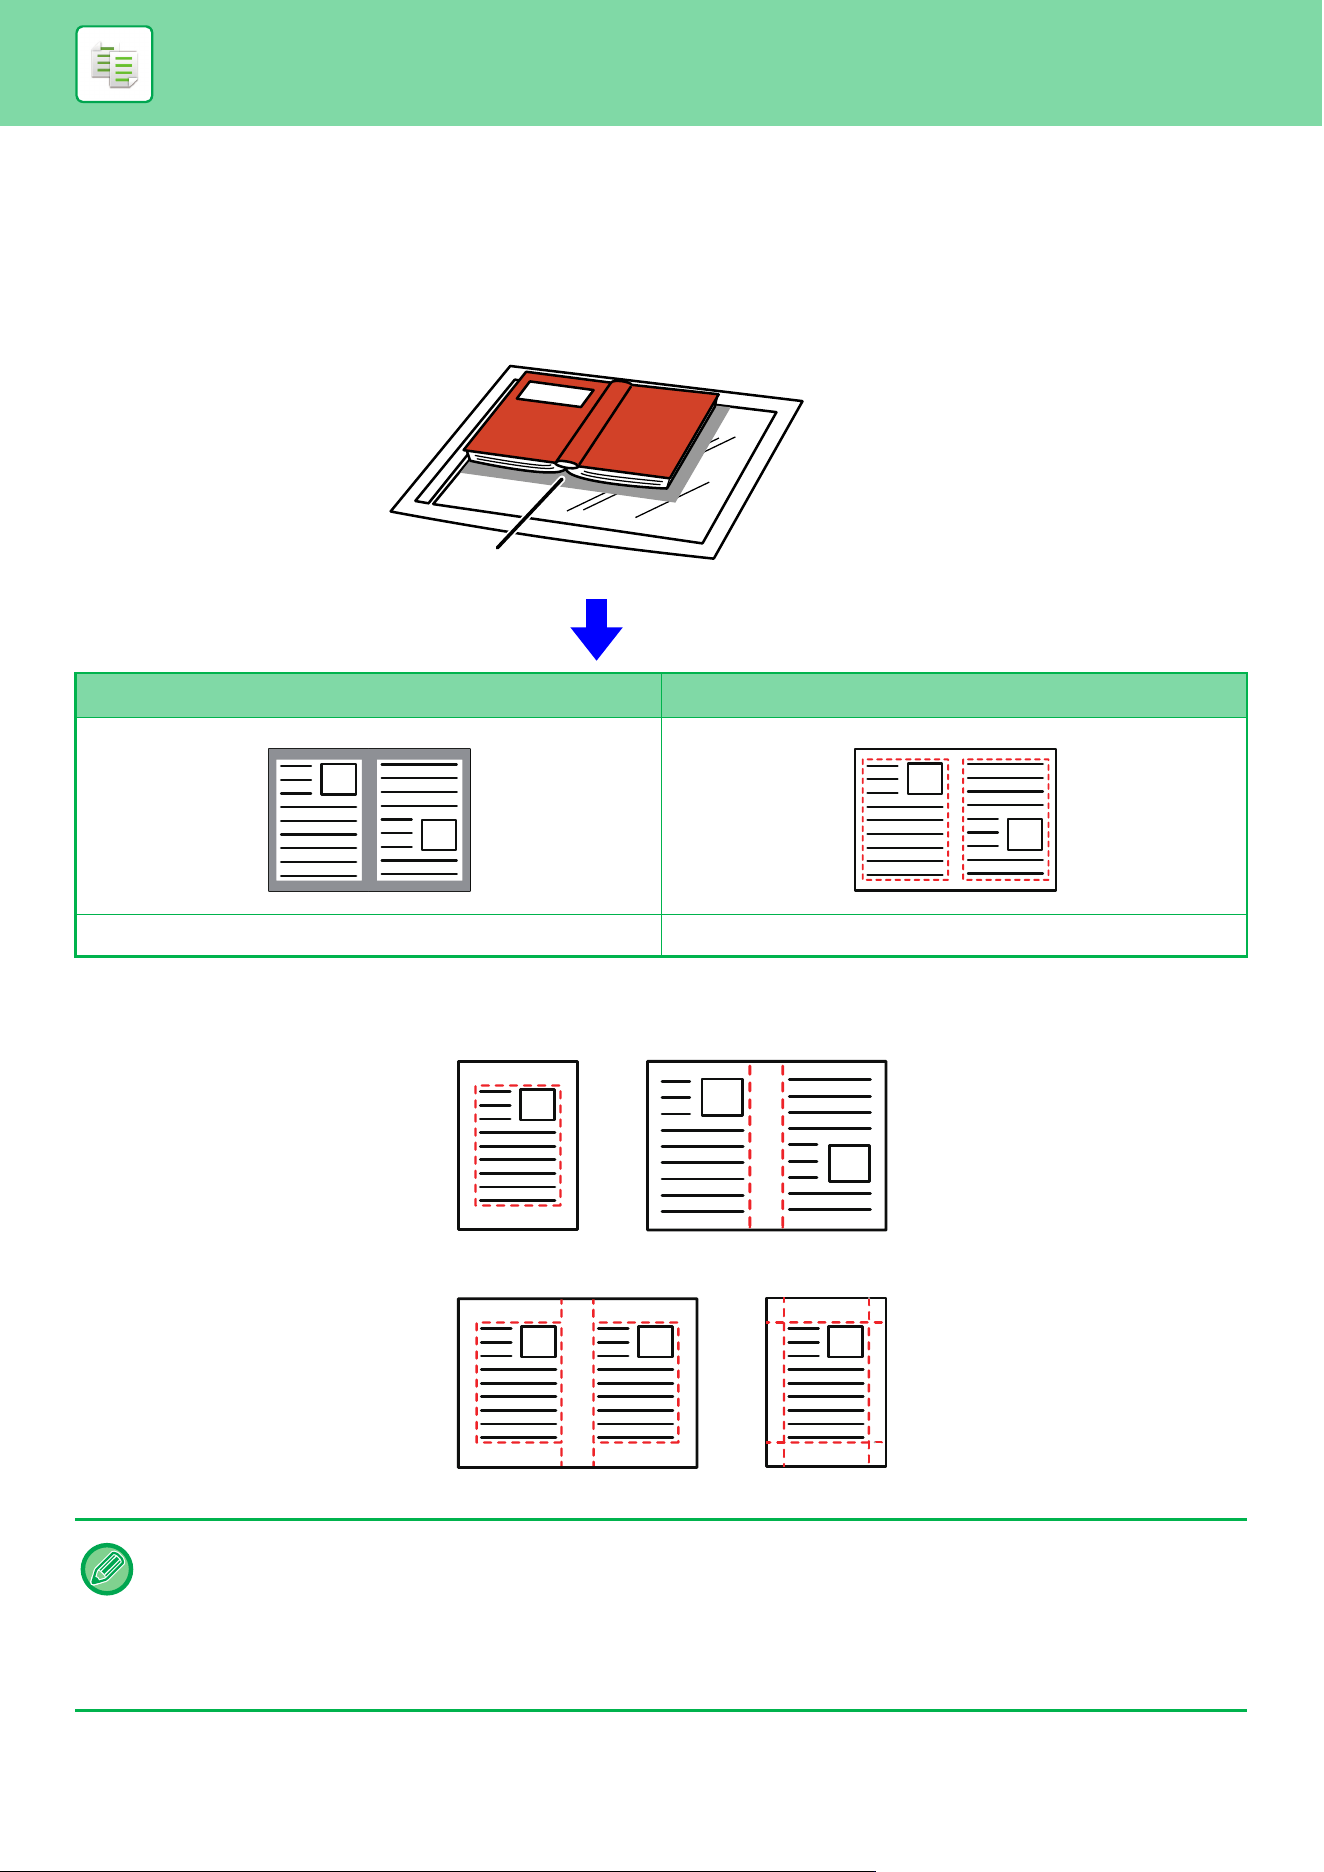
3-94
COPIER►OTHER FUNCTIONS
ERASING PERIPHERAL SHADOWS FOR COPYING
(ERASE)
The erase function is used to erase shadows around the edges of copies that occur when copying thick originals or
books.
When a thick book is copied
Erase modes (Outer Frame Erase, Center Erase, Edge + Center Erase, Side Erase)
Not using the Erase Using the Erase
Shadows appear on the copy Shadows do not appear on the copy
• Erase cannot be selected in easy mode.
• If a ratio setting is used in combination with an erase setting, the erase width will change according to the selected ratio. If
the erase width setting is 1" (20 mm) and the image is reduced to 50%, the erase width will be 1/2" (10 mm).
• This function erases the parts of the image where shadows tend to form, but does not detect shadows and erase only the
shadows.
• When Erase is selected, the orientation of the original is automatically set to portrait.
Shadows appear here
Outer Frame Erase Center Erase
Edge + Center Erase Side Erase
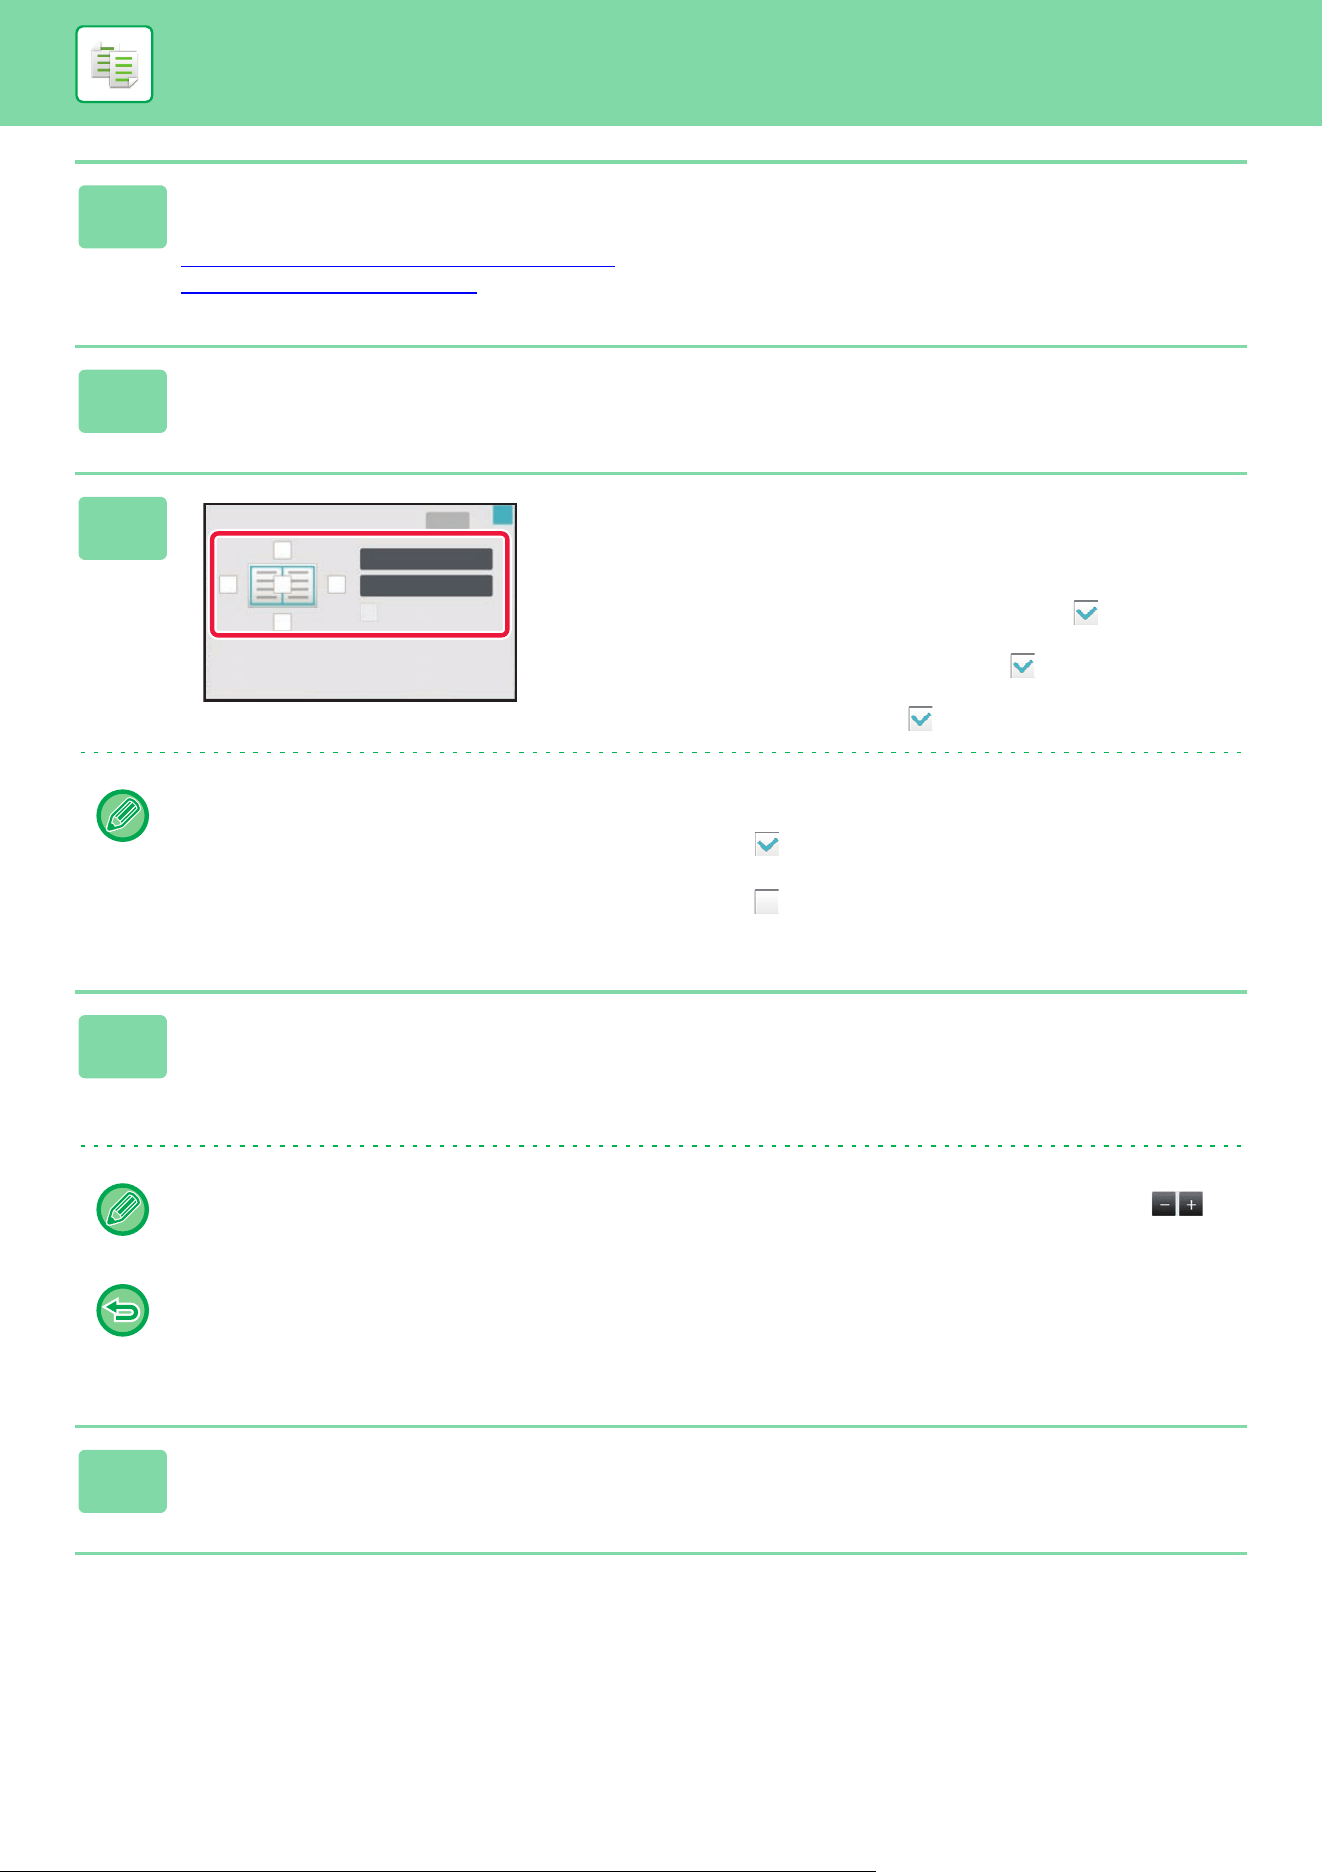
3-95
COPIER►OTHER FUNCTIONS
1
Place the original.
Place the original in the document feeder tray of the automatic document feeder, or on the document glass.
AUTOMATIC DOCUMENT FEEDER
(page 1-47)
DOCUMENT GLASS (page 1-51)
2
Tap the [Others] key, and tap the [Erase] key.
3
Tap the checkbox of the edge that you
wish to erase, and specify the erase
position.
Check that the tapped checkbox is set to .
If the [Outer Frame] key is tapped, the [Up], [Down], [Left],
and [Right] checkboxes are set to .
If the [Specify Frame+Center] key is tapped, all the
checkboxes are set to .
Specify the erase edge on the reverse side when erasing edges of one to three sides of Up, Down, Left, and Right on
the front side to scan a 2-sided original.
• If the [Reverse erase position of back face] checkbox is set to , the edge in the position opposite to the erased
edge on the front side will be erased.
• If the [Reverse erase position of back face] checkbox is set to , the edge in the same position as on the front side
will be erased.
4
Specify the erase width.
Tap the numeric value display indicating the erase width area on the front side or reverse side, and enter the area using
the numeric keys.
After the settings are completed, tap [OK] and [Back] keys in sequence.
To quickly set the area, first specify a value close to the desired value by the numeric keys, then adjust it with .
• To cancel the erase setting:
Tap the [Clear] key.
• To cancel all settings:
Tap the [CA] key.
5
Tap the [Color Start] or [B/W Start] key to start copying.
Erase
Up
Down
Right
Left
Reverse Erase Position of The Back
Face
Outer Frame
Specify Frame+Center
Clear
OK
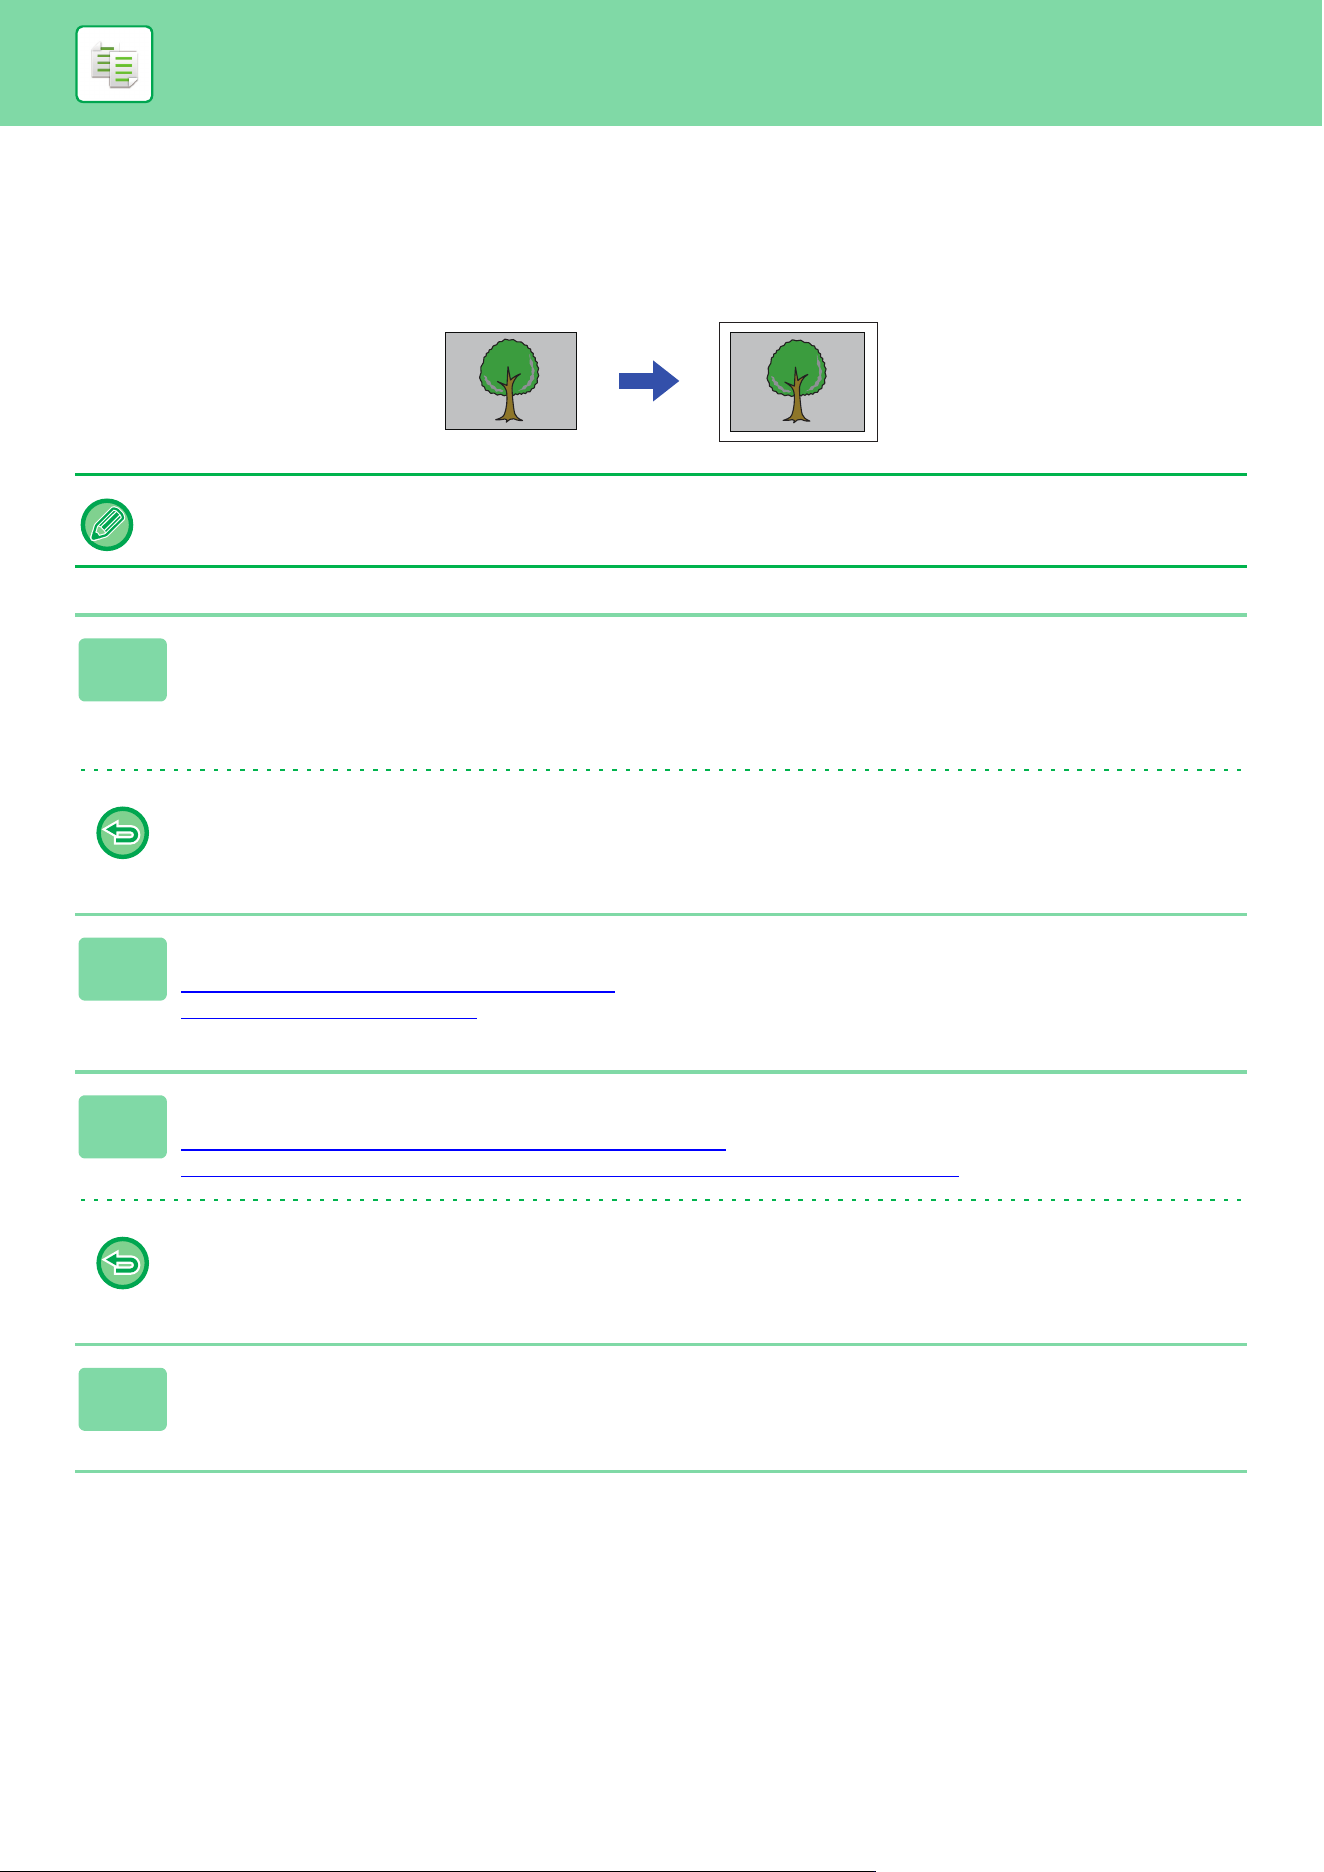
3-96
COPIER►OTHER FUNCTIONS
COPYING ORIGINALS WITH NO EDGE CUT-OFF (FULL
BLEED COPY)
This feature lets you copy an entire original to paper larger than the original size with no image cut-off at the edges.
• Full Bleed Copy cannot be selected in easy mode.
• The punch function cannot be used.
1
Tap the [Others] key, and tap the [Full Bleed Copy] key.
"Select larger paper size than output image size of original." is displayed on the page.
Tap [OK] key.
When you have finished selecting other settings, tap the [Back] key.
To cancel the full bleed copy setting:
Tap the [Full Bleed Copy] key to uncheck it.
2
Place the original.
AUTOMATIC DOCUMENT FEEDER (page 1-47)
DOCUMENT GLASS (page 1-51)
3
Select paper larger than the output image
SELECTING THE PAPER TRAY FOR COPYING (page 3-13)
SPECIFYING A TYPE AND SIZE OF PAPER LOADED ON BYPASS TRAY (page 3-36)
To cancel all settings:
Tap the [CA] key.
4
Tap the [Color Start] or [B/W Start] key to start copying.

3-97
COPIER►OTHER FUNCTIONS
COPYING IN THE CENTER OF THE PAPER
(CENTERING)
This function centers the copied image on the paper.
This lets you place the image in the center of the paper when the original size is smaller than the paper size or when the
image is reduced.
Not using the centering function Using the centering function
• Centering cannot be selected in easy mode.
• Centering must be specified before scanning the original.
• When the original size or the paper size is displayed as a special size, this function cannot be used.
• This function cannot be used in combination with an enlargement setting. If enlargement of 101% or more is selected, the
enlargement is automatically returned to 100%.
1
Tap the [Others] key, and tap the [Centering] key.
A checkmark appears on the icon.
After the settings are completed, tap the [Back] key.
• To cancel the centering setting:
Tap the [Centering] key to clear the checkmark.
• To cancel all settings:
Tap the [CA] key.
2
Tap the [Color Start] or [B/W Start] key to start copying.
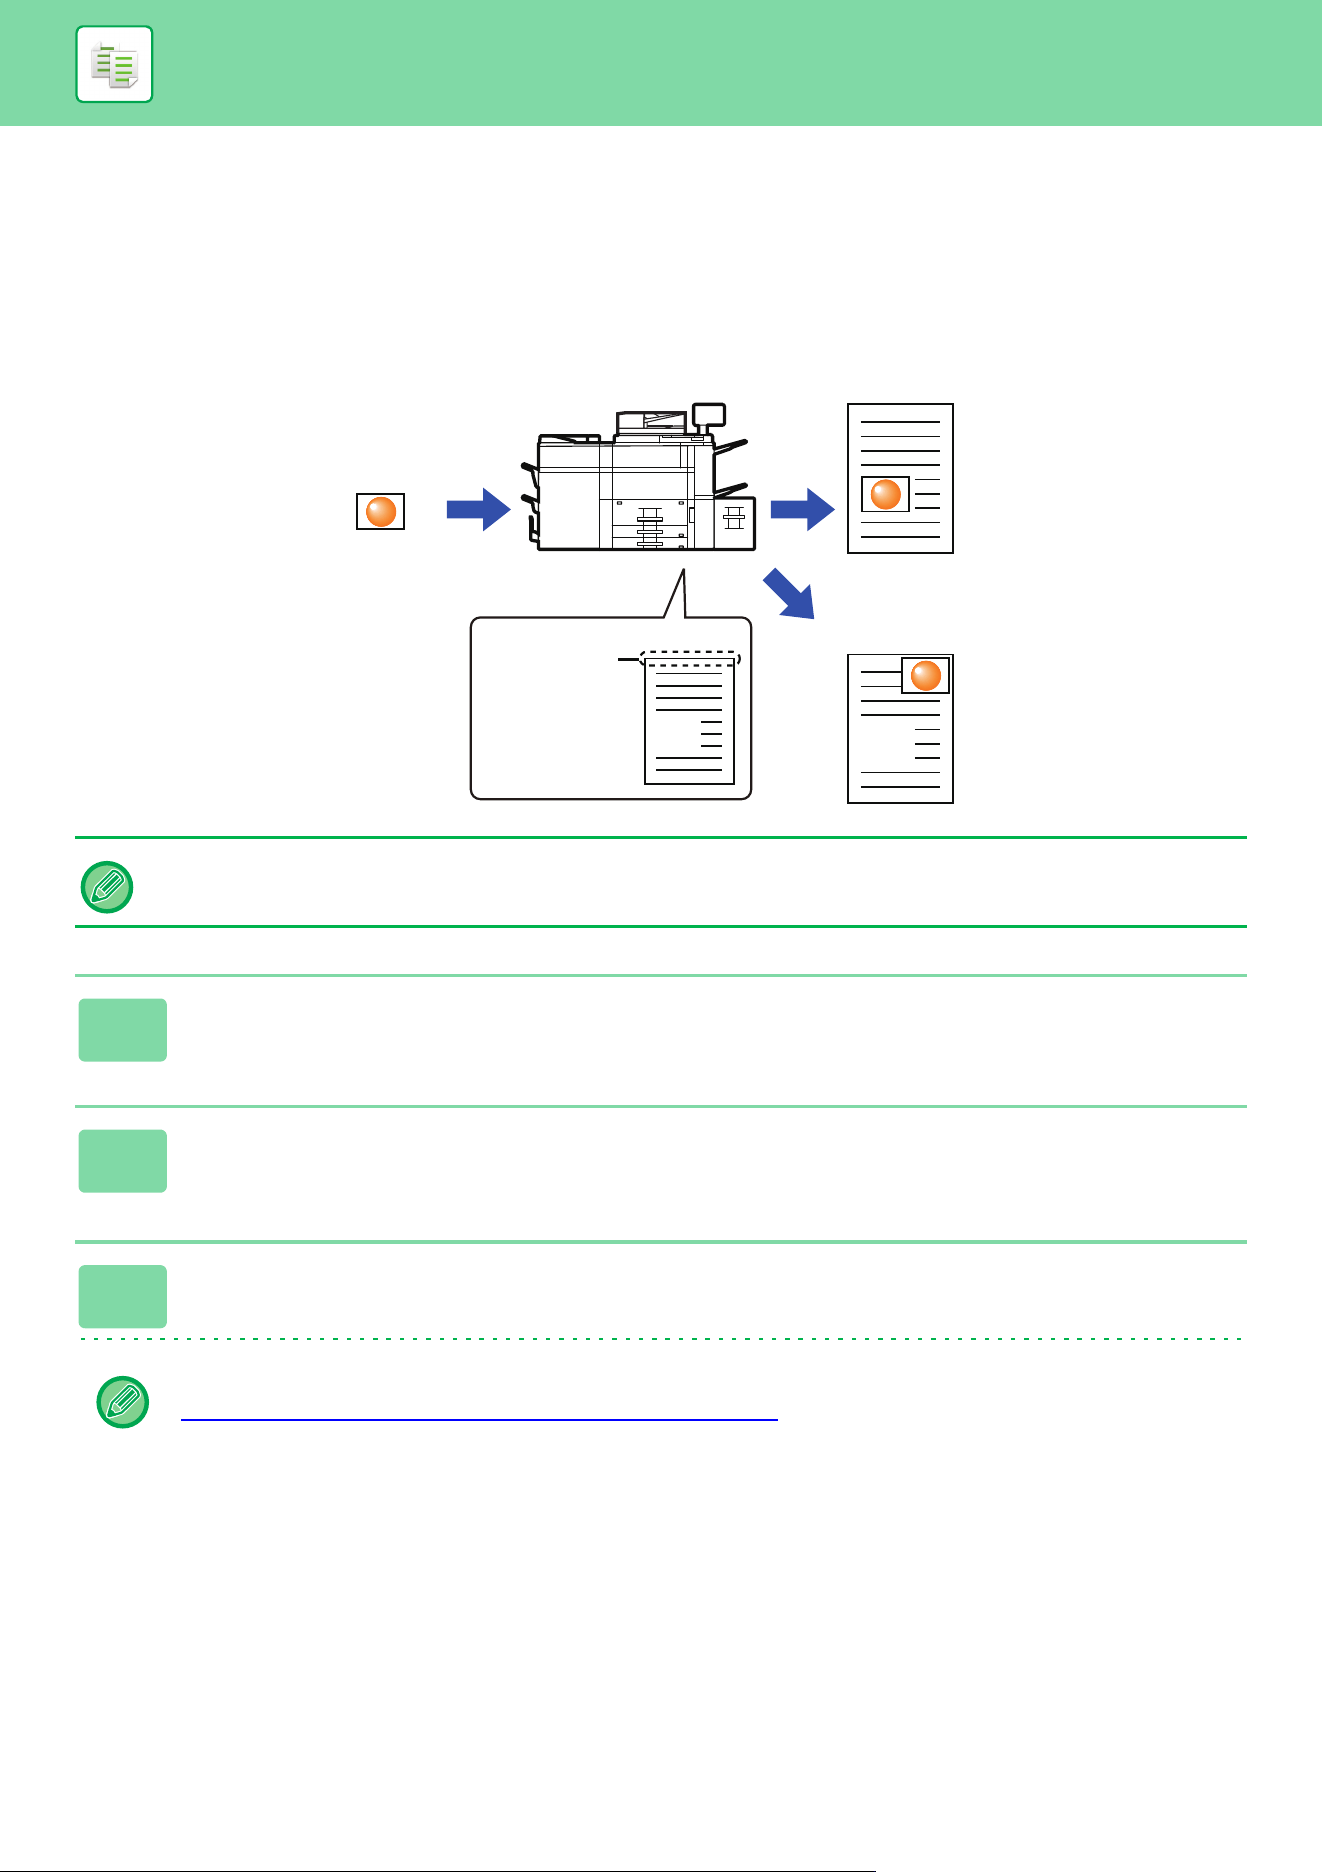
3-98
COPIER►OTHER FUNCTIONS
SPECIFYING A PAPER POSITION (POSITION IMAGE)
This function moves the scanned original to a specified position to make a copy.
You can make a copy in any desired position as you can fine adjust the position.
We recommend that you specify the top as the starting side of the original.
Position Image cannot be selected in easy mode.
1
Copy the original that you want to use for Move Copy.
Copying is performed without using move copy.
2
Measure the movement amount with the top as the starting side of the output
copy.
3
Tap the [Others] key, and tap the [Position Image] key.
Tap the [Original] key and specify the orientation of the original to have the orientation be correctly recognized.
SPECIFYING THE ORIENTATION OF THE ORIGINAL
(page 3-29)
Printing paper
Originals
Position Image is used
Position Image is not used
Top edge of
paper
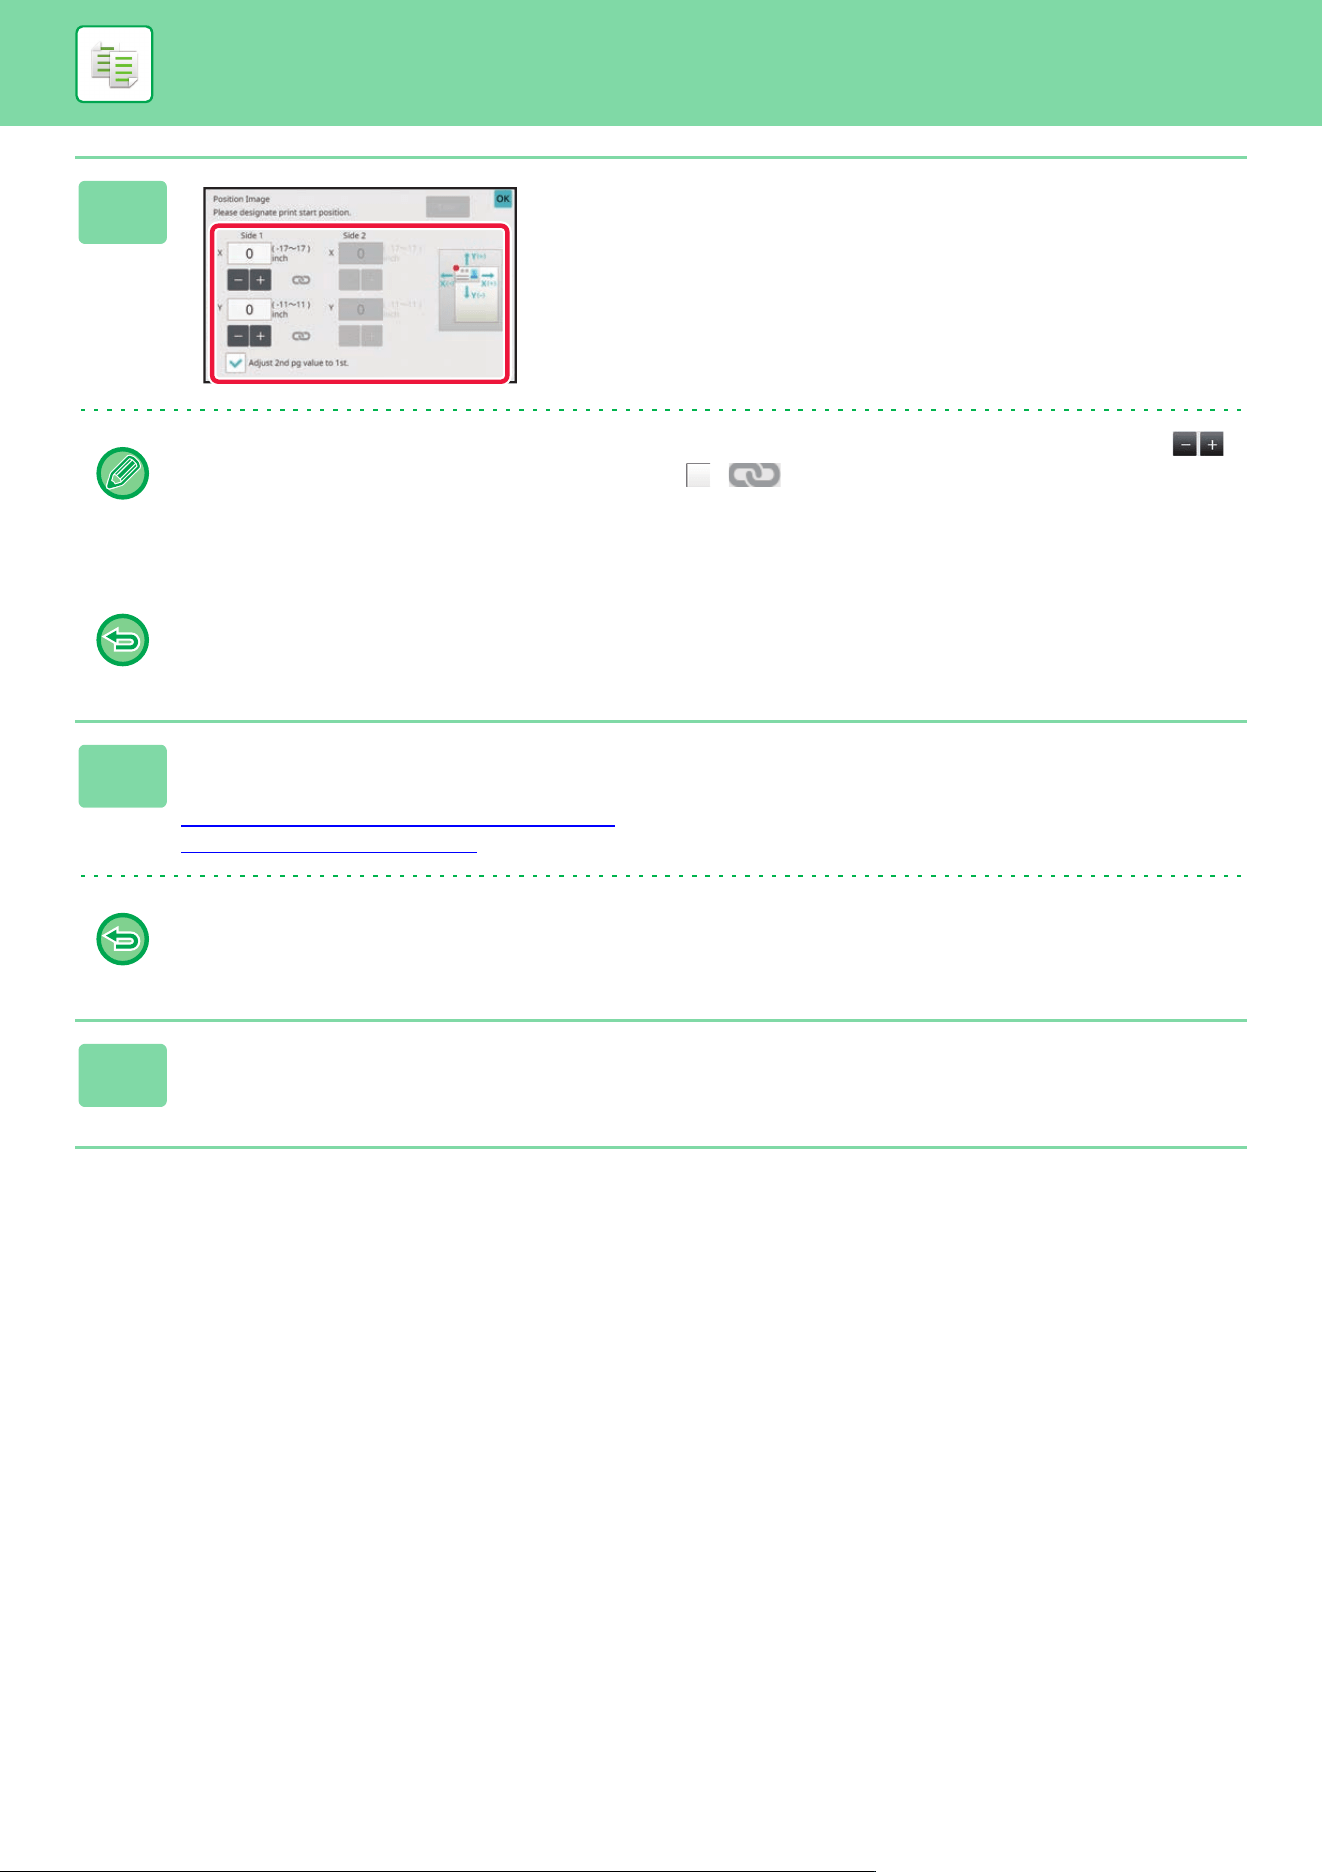
3-99
COPIER►OTHER FUNCTIONS
4
Sets a movement distance.
Tap the area indicating the movement distance on the front
or reverse side, and enter the distance using numeric keys.
After the settings are completed, tap [OK] and [Back] keys in
sequence.
• To quickly set the area, first specify a value close to the desired value by the numeric keys, then adjust it with .
• If you set the [Adjust 2nd pg value to 1st.] checkbox to , goes out and you can set sides 1 and 2 separately.
• If you want to copy in the horizontal orientation, specify "Left" as the starting side of the original.
Even if you copied in the horizontal orientation, setting the starting side of the original to the top enables measurement
of the movement distance in the same way as in the vertical orientation.
To cancel the Position Image setting:
Tap the [Clear] key.
5
Place the original.
Place the original in the document feeder tray of the automatic document feeder, or on the document glass.
AUTOMATIC DOCUMENT FEEDER
(page 1-47)
DOCUMENT GLASS (page 1-51)
To cancel all settings:
Tap the [CA] key.
6
Tap the [Color Start] or [B/W Start] key to start copying.
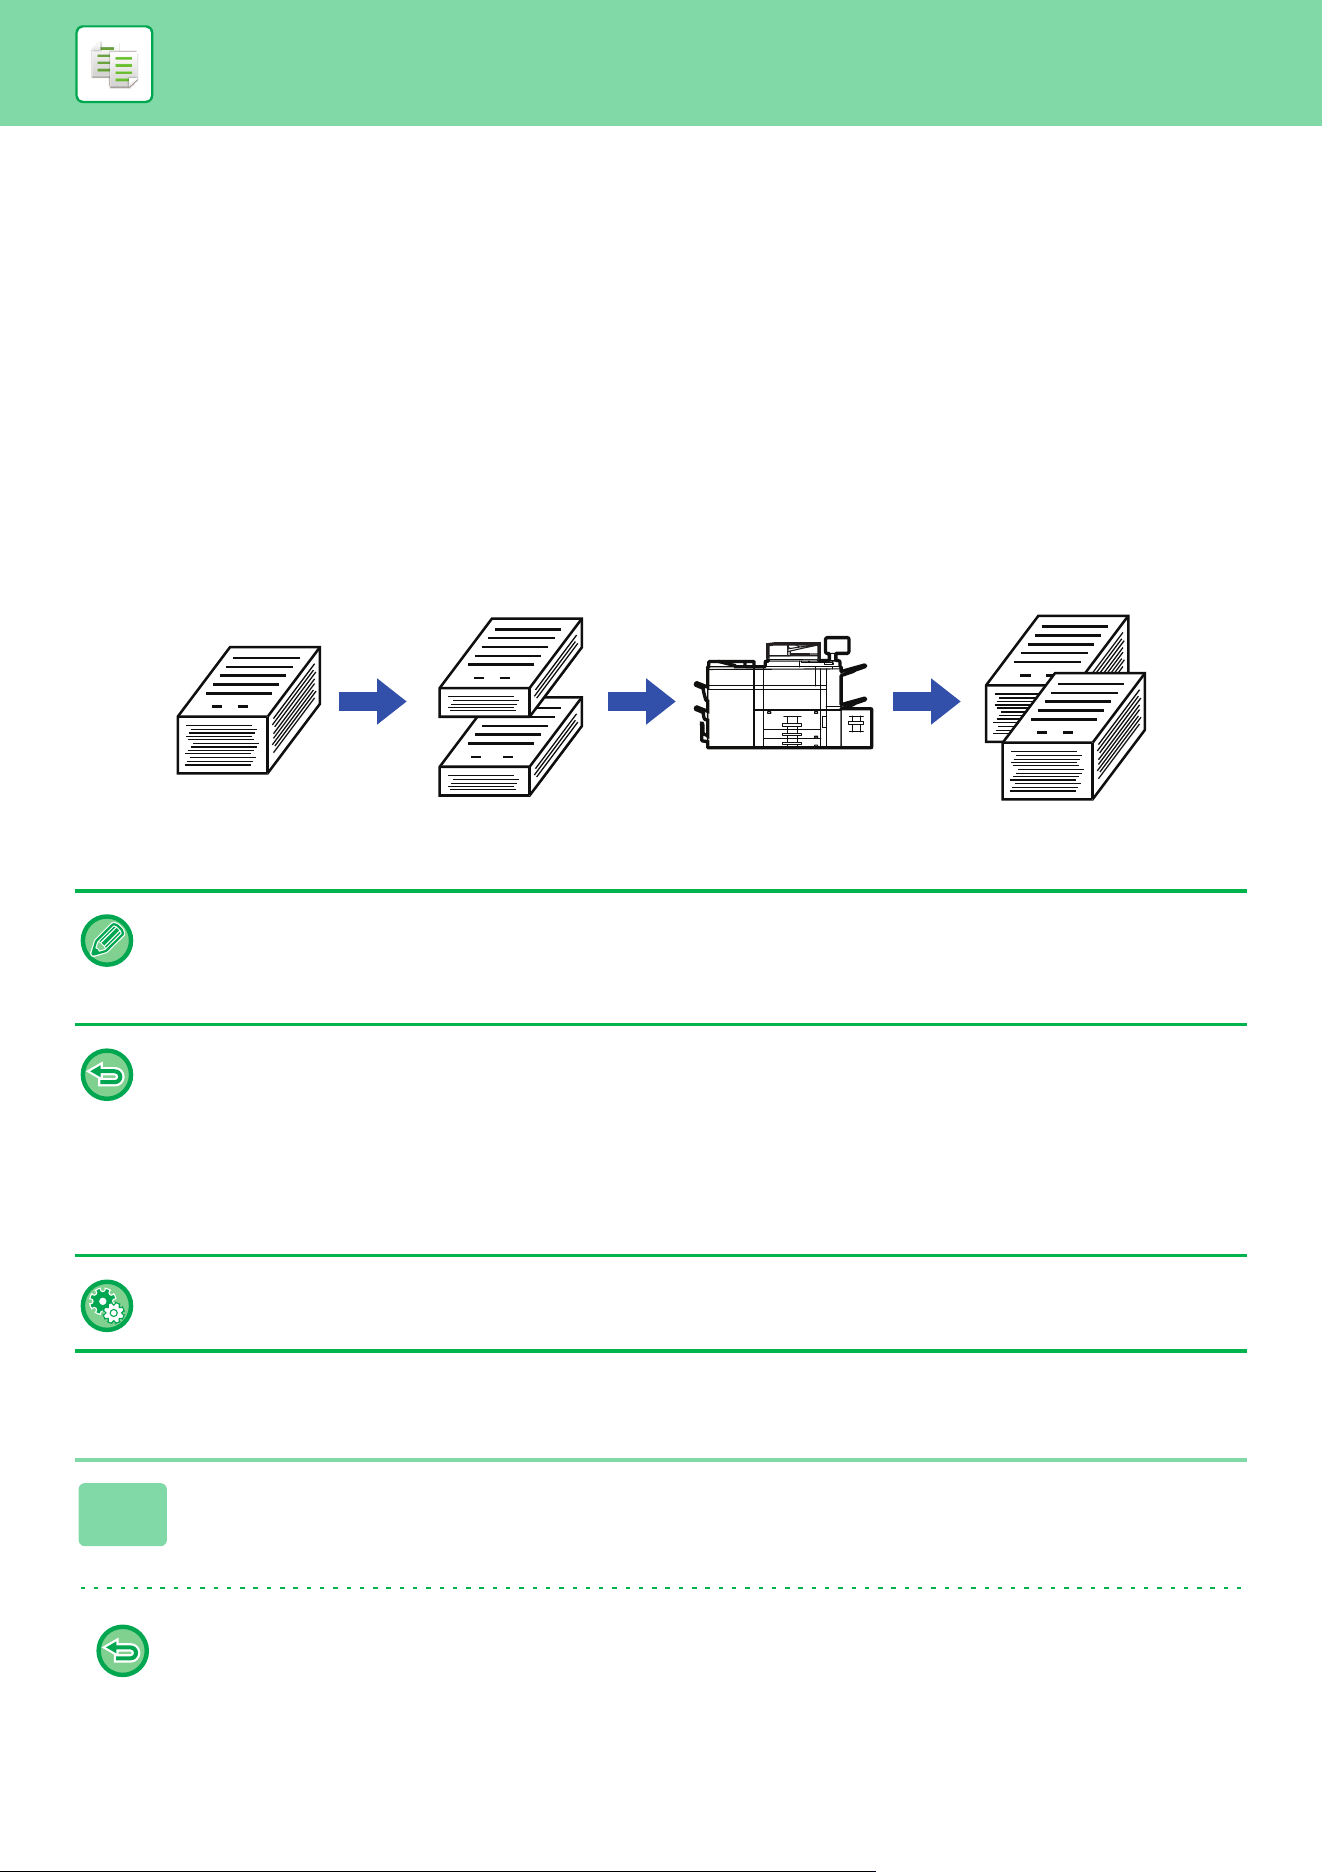
3-100
COPIER►OTHER FUNCTIONS
SCANNING FUNCTIONS
COLLECTIVELY SCANNING A LARGE NUMBER OF
ORIGINALS (JOB BUILD)
This function divides the originals into sets and feeds each set through the automatic document feeder one set at a time
when copying a very large number of originals.
This saves you the trouble of sorting the copies.
When scanning originals that are separated into sets, scan the set that has the first page first.
The individual copy settings can be configured for each set of originals to be scanned separately.
Up to 100 sets of originals can be scanned for one job.
Copying in job build mode
• You must select Job Build mode before scanning the original.
• If you needed to change all original settings, change before scanning the original.
• If the Quick File Folder of document filing mode is full, copying in job build mode will be impeded. Delete unnecessary files
from the Quick File Folder.
The Job Build mode cannot be combined with other functions.
• Dual Page Copy
• Book Copy
• Card shot
• Multi-Page Enlargement
• Book Divide
• Repeat Layout
To use Job Build in Easy mode
In "Settings (administrator)", select [System Settings] → [Common Settings] → [Operation Settings] → [Easy Mode Settings]
→ [Easy Copy].
1
Tap the [Others] key, and tap the [Job Build] key.
A checkmark appears on the icon.
After the settings are completed, tap the [OK] key.
To cancel the job build setting
Tap the [Job Build] key to uncheck it.
1
1
1
101
1
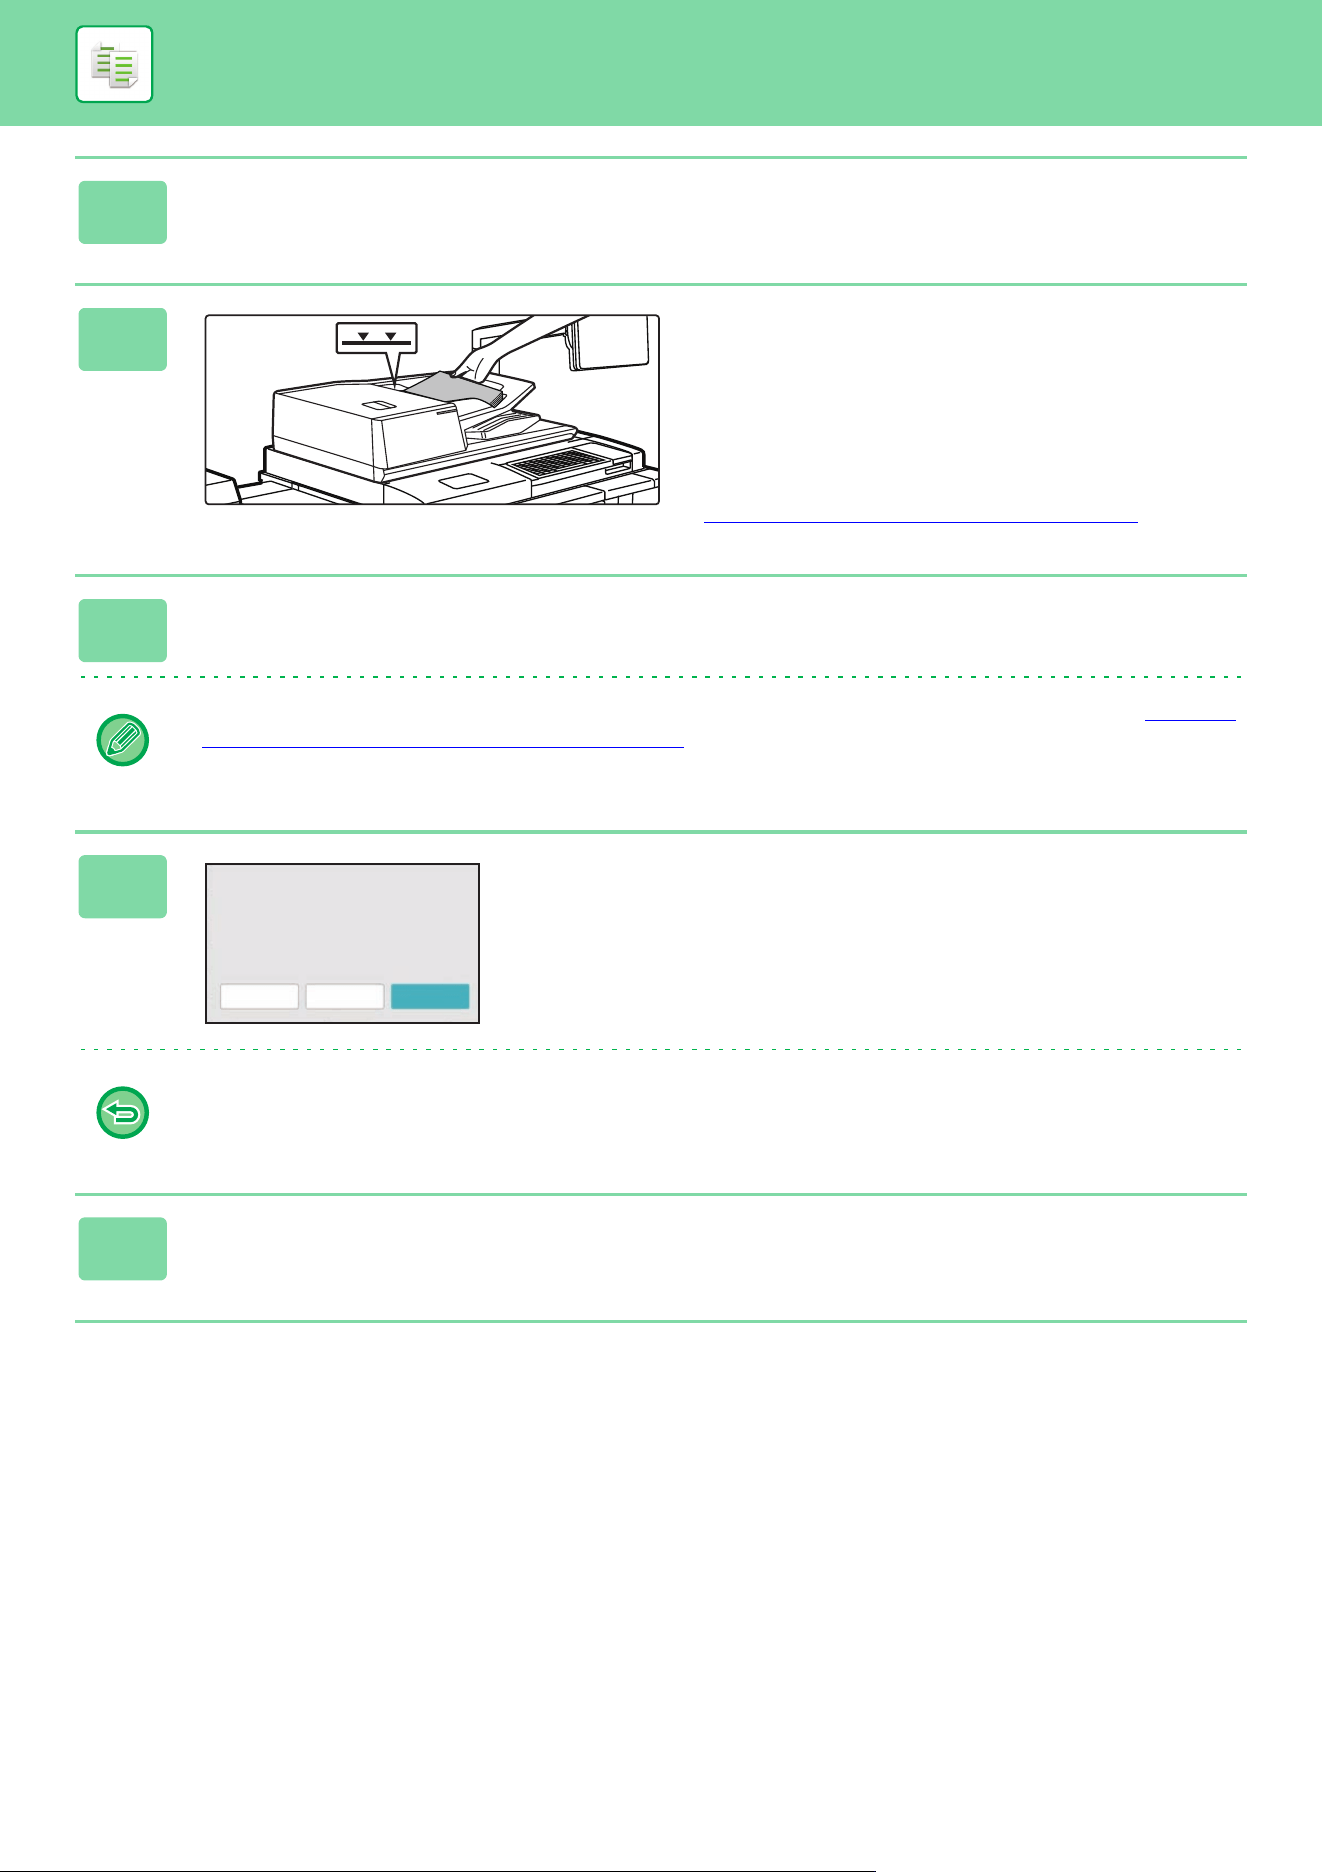
3-101
COPIER►OTHER FUNCTIONS
2
Change settings as needed.
3
Place the original in the document
feeder tray of the automatic document
feeder, and tap the [Start] key to scan
the first original.
Insert the originals all the way into the document feeder tray.
Originals can be stacked up to the indicator line.
AUTOMATIC DOCUMENT FEEDER
(page 1-47)
4
Place the next set of originals and tap the [Start] key.
Repeat this step until all originals have been scanned.
• To change copy settings for each set of originals, tap the [Change Setting] key. For more information, see “Changing
the copy settings for each set of originals (page 3-102)”.
• If you tap the [Preview] key, you cannot scan additional pages.
5
Repeat until all pages have been
scanned and check the preview image
in the preview screen.
To cancel all settings:
Tap the [CA] key.
6
Tap the [Read-End] key to start copying.
Read-End
Preview
Change Setting
Place next original.
Press [Start] to scan original.
[Change Setting]:
Change setting of next original.
[Preview]:
Finish scan and display preview.

3-102
COPIER►OTHER FUNCTIONS
Changing the copy settings for each set of originals
As necessary, change copy settings for each set of originals.
Perform the steps below before scanning the next set of originals in step 4 of “Copying in job build mode
(page 3-100)".
A [Separator Page] setting cannot be changed for the second and later sets.
1
Tap the [Change Setting] key.
2
Change copy settings.
3
Place the next set of originals and tap the [Start] key.
Repeat this step until all originals have been scanned.
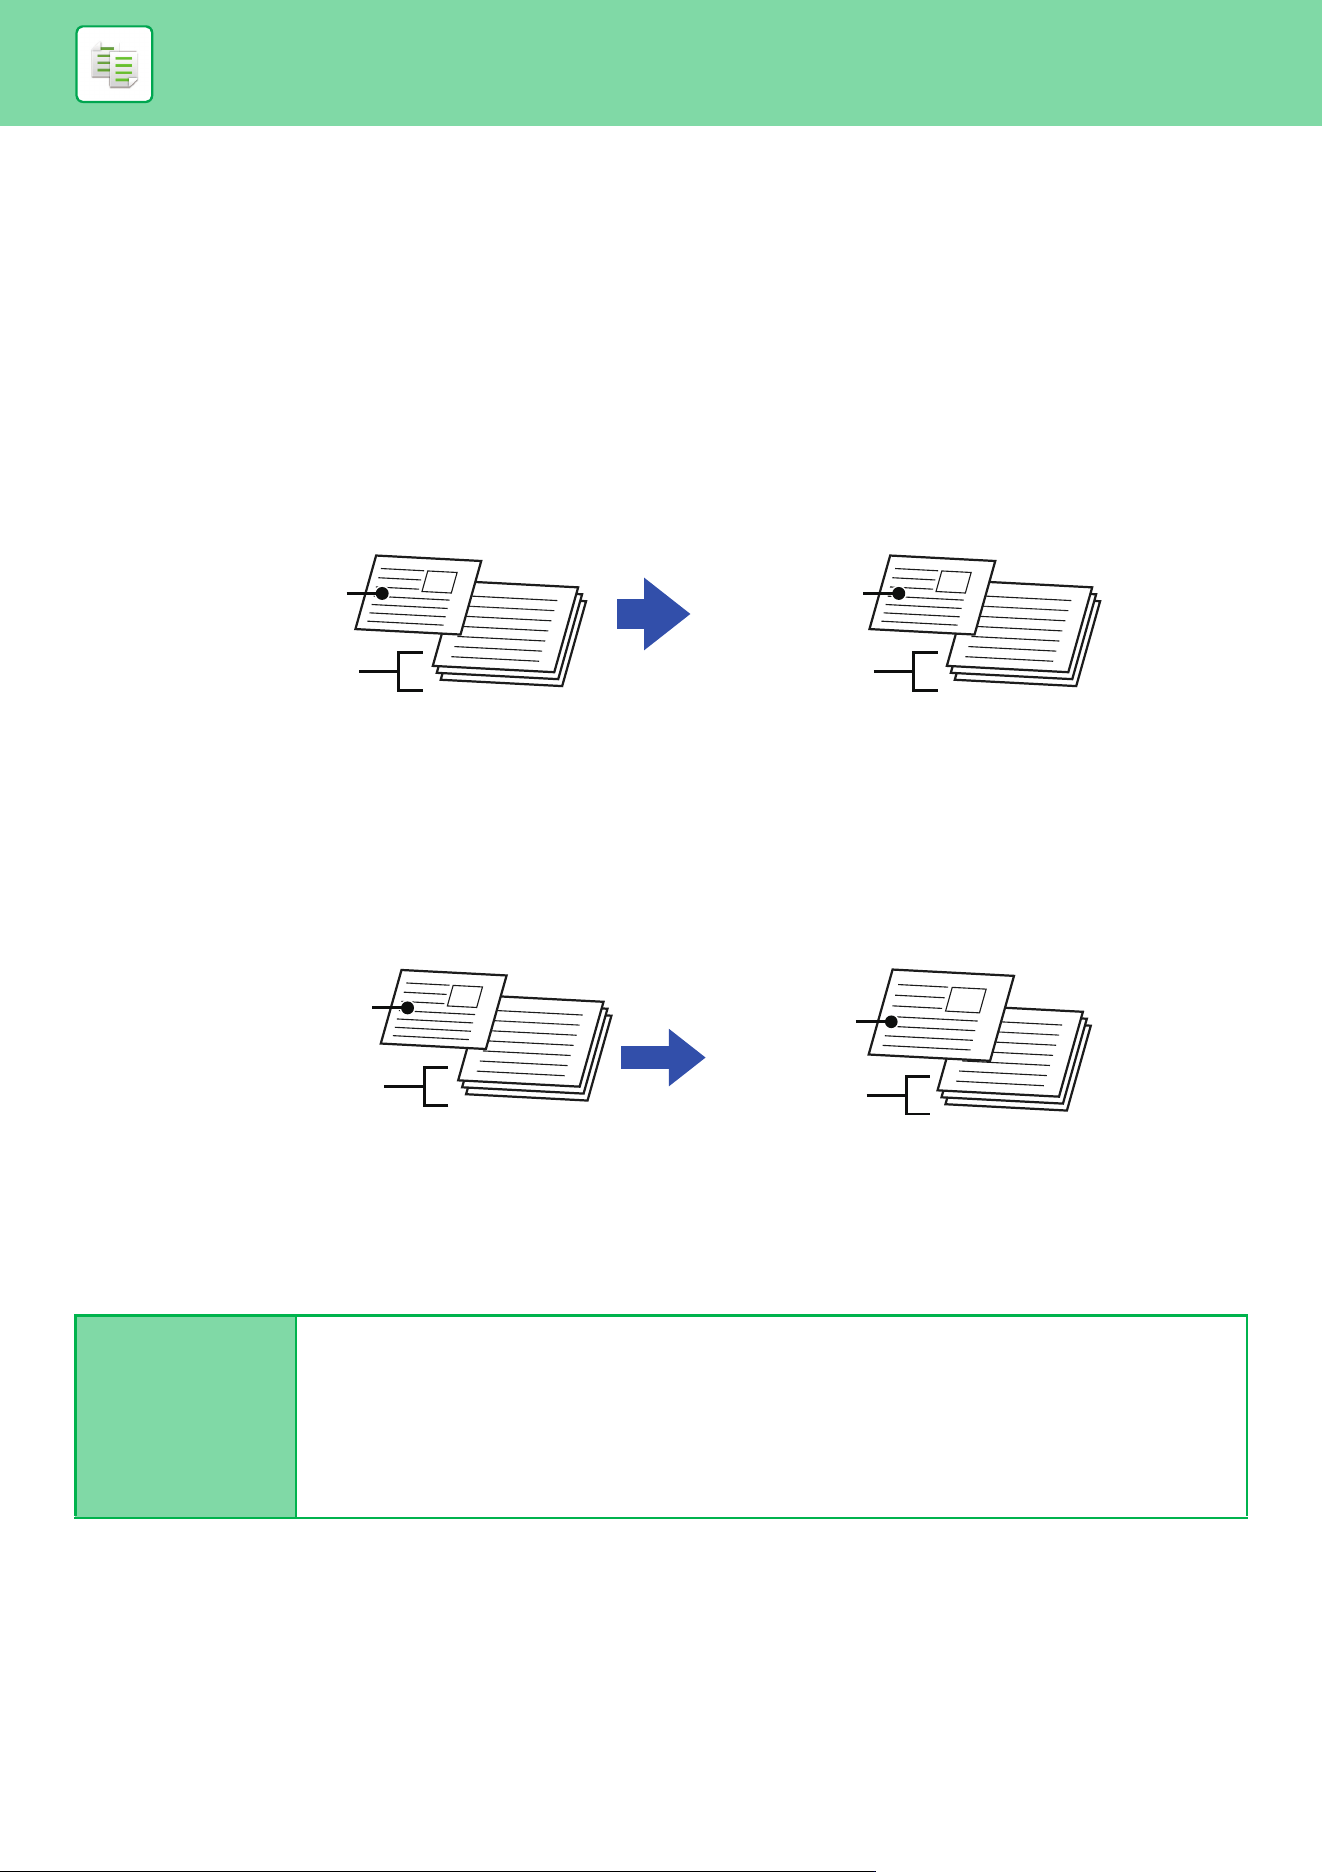
3-103
COPIER►OTHER FUNCTIONS
SCANNING ORIGINALS OF DIFFERENT SIZES (MIXED
SIZE ORIGINAL)
This feature copies originals in different sizes at the same time even when 8-1/2" x 14" (B4) size originals are mixed with
11" x 17" (A3) size originals.
When scanning the originals, the machine automatically detects the size of each original and uses paper appropriate for
that size.
When mixed size original is combined with auto ratio selection, the ratio is adjusted individually for each original
according to the selected paper size, enabling printing on a uniform paper size.
When mixed size original is combined with auto ratio selection
(When 11" x 17" (A3) is selected with the auto ratio selection, 8-1/2" x 14" (B4) size original is enlarged to 11" x 17" (A3)
size for printing.)
There are two settings for mixed size originals.
Same Width
Use this setting for originals that are in 2 types of different sizes but have sides that are the same length.
The originals are inserted in the document feeder tray with the sides that are the same length aligned
together on the left.
• 11" x 17" and 8-1/2" x 11"
• 8-1/2" x 14" and 8-1/2" x 11"R • 8-1/2" x 14" and 5-1/2" x 8-1/2" • 8-1/2" x 13" and 8-1/2" x 11"R
• 8-1/2" x 13" and 5-1/2" x 8-1/2" • 8-1/2" x 11"R and 5-1/2" x 8-1/2"
• A3 and A4 • B4 and B5 • A4R and A5
Originals
8-1/2" x 14" (B4)
11" x 17" (A3)
Copy
8-1/2" x 14" (B4)
11" x 17" (A3)
Originals
8-1/2" x 14" (B4)
11" x 17" (A3)
Copy
11" x 17" (A3)
11" x 17" (A3)
8-1/2" x 14" (B4) size original is
enlarged to 11" x 17" (A3) size for
printing.
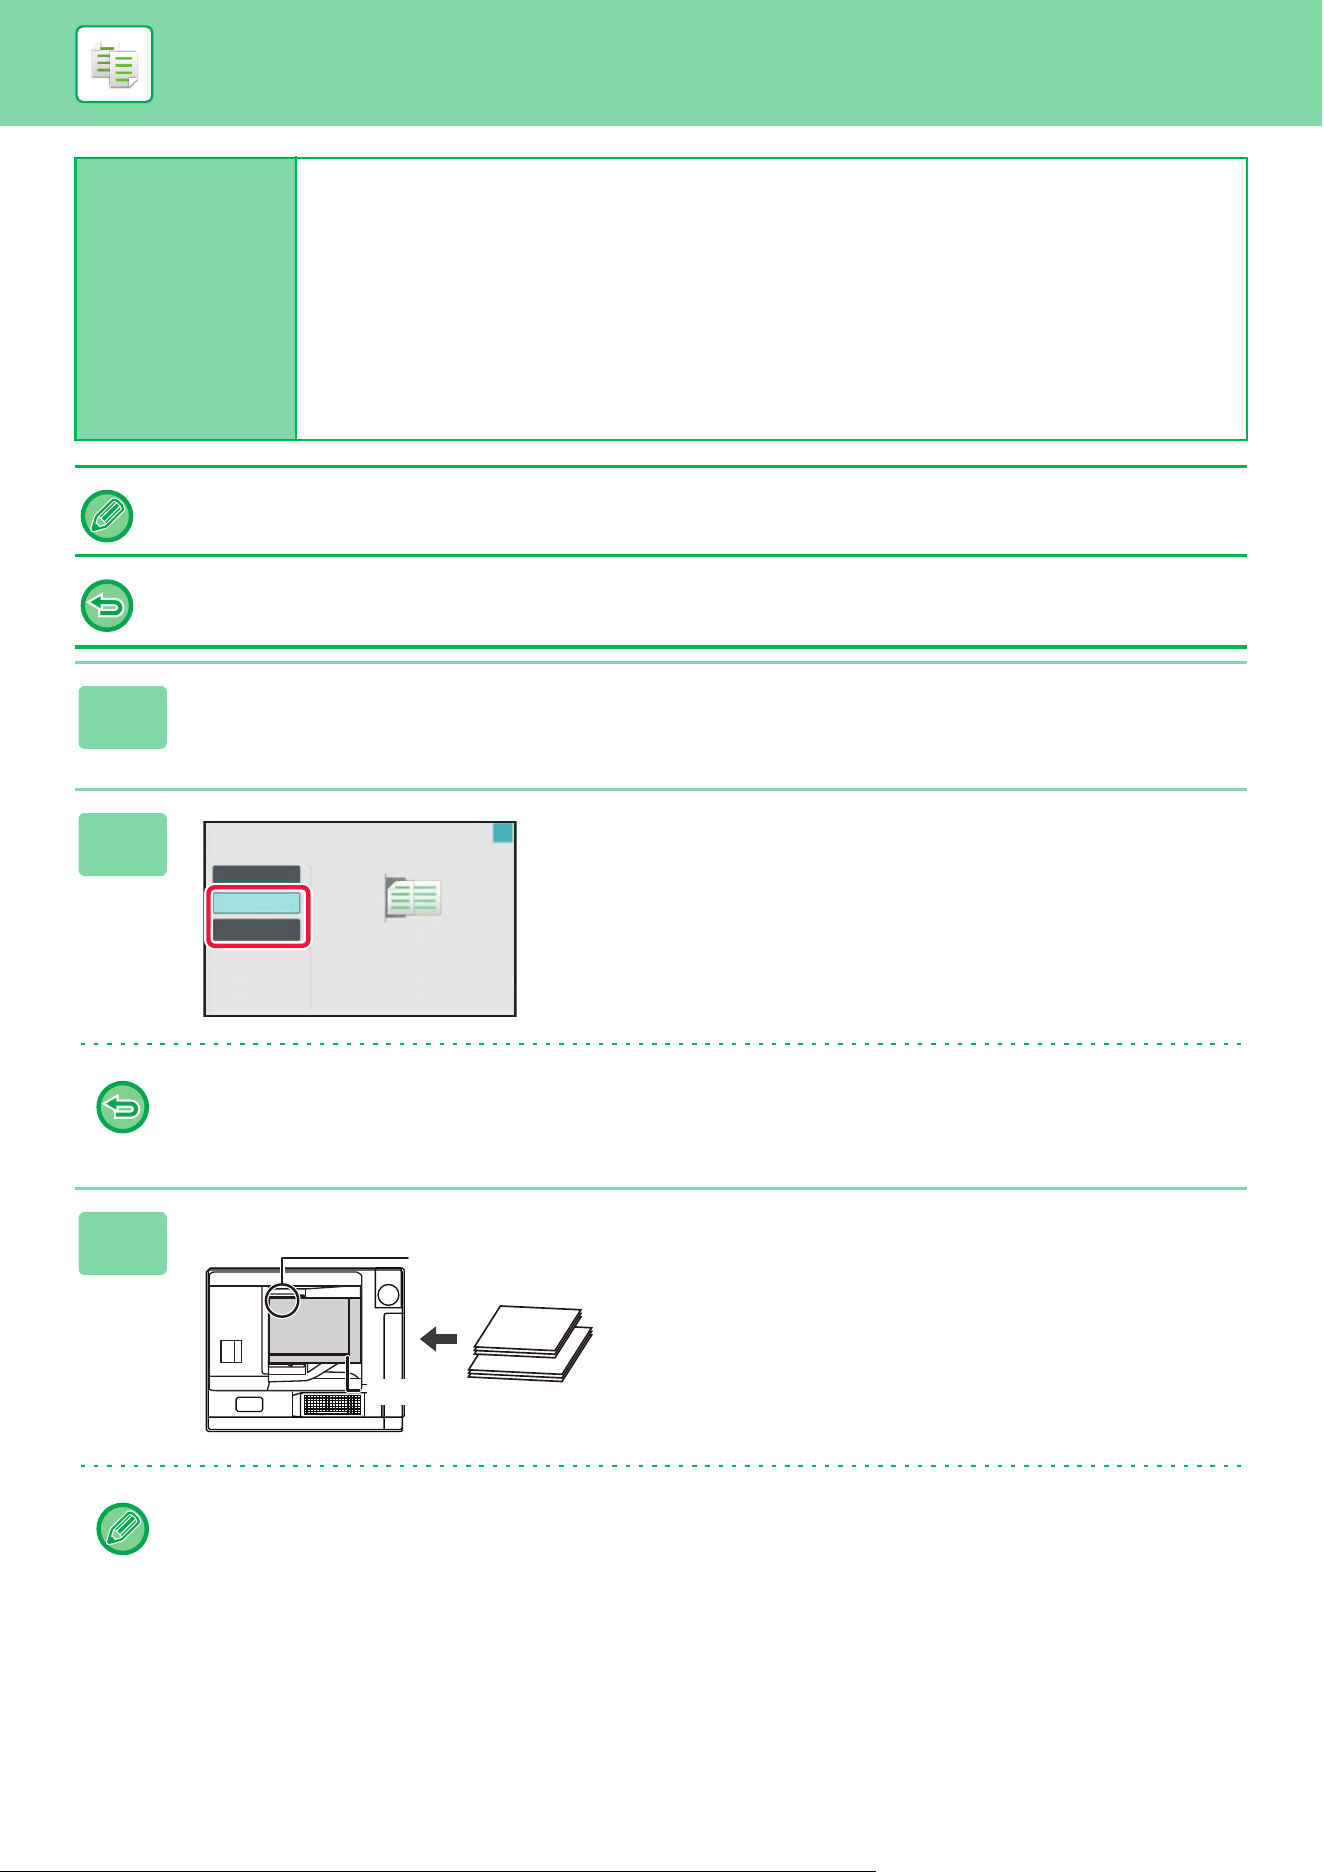
3-104
COPIER►OTHER FUNCTIONS
Different Width
Use this setting when the originals are in 2 types of different sizes and do not have sides that are the
same length. This setting can only be used for the following combinations of sizes:
• 11"x17" and 8-1/2"x14" • 11"x17" and 8-1/2"x13" • 11"x17" and 5-1/2"x8-1/2"
• A3 and B4 • A3 and B5 • B4 and A5 • A4 and B5 • B4 and A4R • B4 and A5
• B5 and A4R • B5 and A5
Use this setting when the originals are in 3 types of different sizes and do not have sides that are the
same length. This setting can only be used for the following combinations of sizes:
• A4R, B4, and A3 • A5, B4, and A3 • A4R, B5, and A3 • A5, B5, and A3 • A4R, A4, and B4
• A5, A4, and B4 • B5, A4R, and A4 • A5, B5, and A4 • B5R, A4R, and B4 • A5, B5R, and B4
• B5R, A4R, and B5 • A5, B5, and B5R
• Mixed Size Original cannot be selected in easy mode.
• Mixed Size Original must be specified before scanning the original.
When [Different Width] is selected, the staple function cannot be used.
1
Tap the [Others] key, and tap the [Mixed Size Original] key.
2
Tap the [Same Width] key or the
[Different Width] key as appropriate for
the originals.
After the settings are completed, tap [OK] and [Back] keys in
sequence.
To cancel the mixed size original setting
Tap the [Off] key.
3
Place the original face up on the
document feeder tray with the corners
aligned together in far left corner.
Place the original as shown on the Mixed Size Original
screen.
For mixed size originals, set "Original" to "Auto".
Mixed Size Original
Off
Same Width
Place the same width
originals.
Different Width
OK
8-1/2" x 14"
11" x 17"
11" x 17" (A3)
8-1/2" x 14"(B4)
Place the originals with
the corners aligned
together in far left corner.

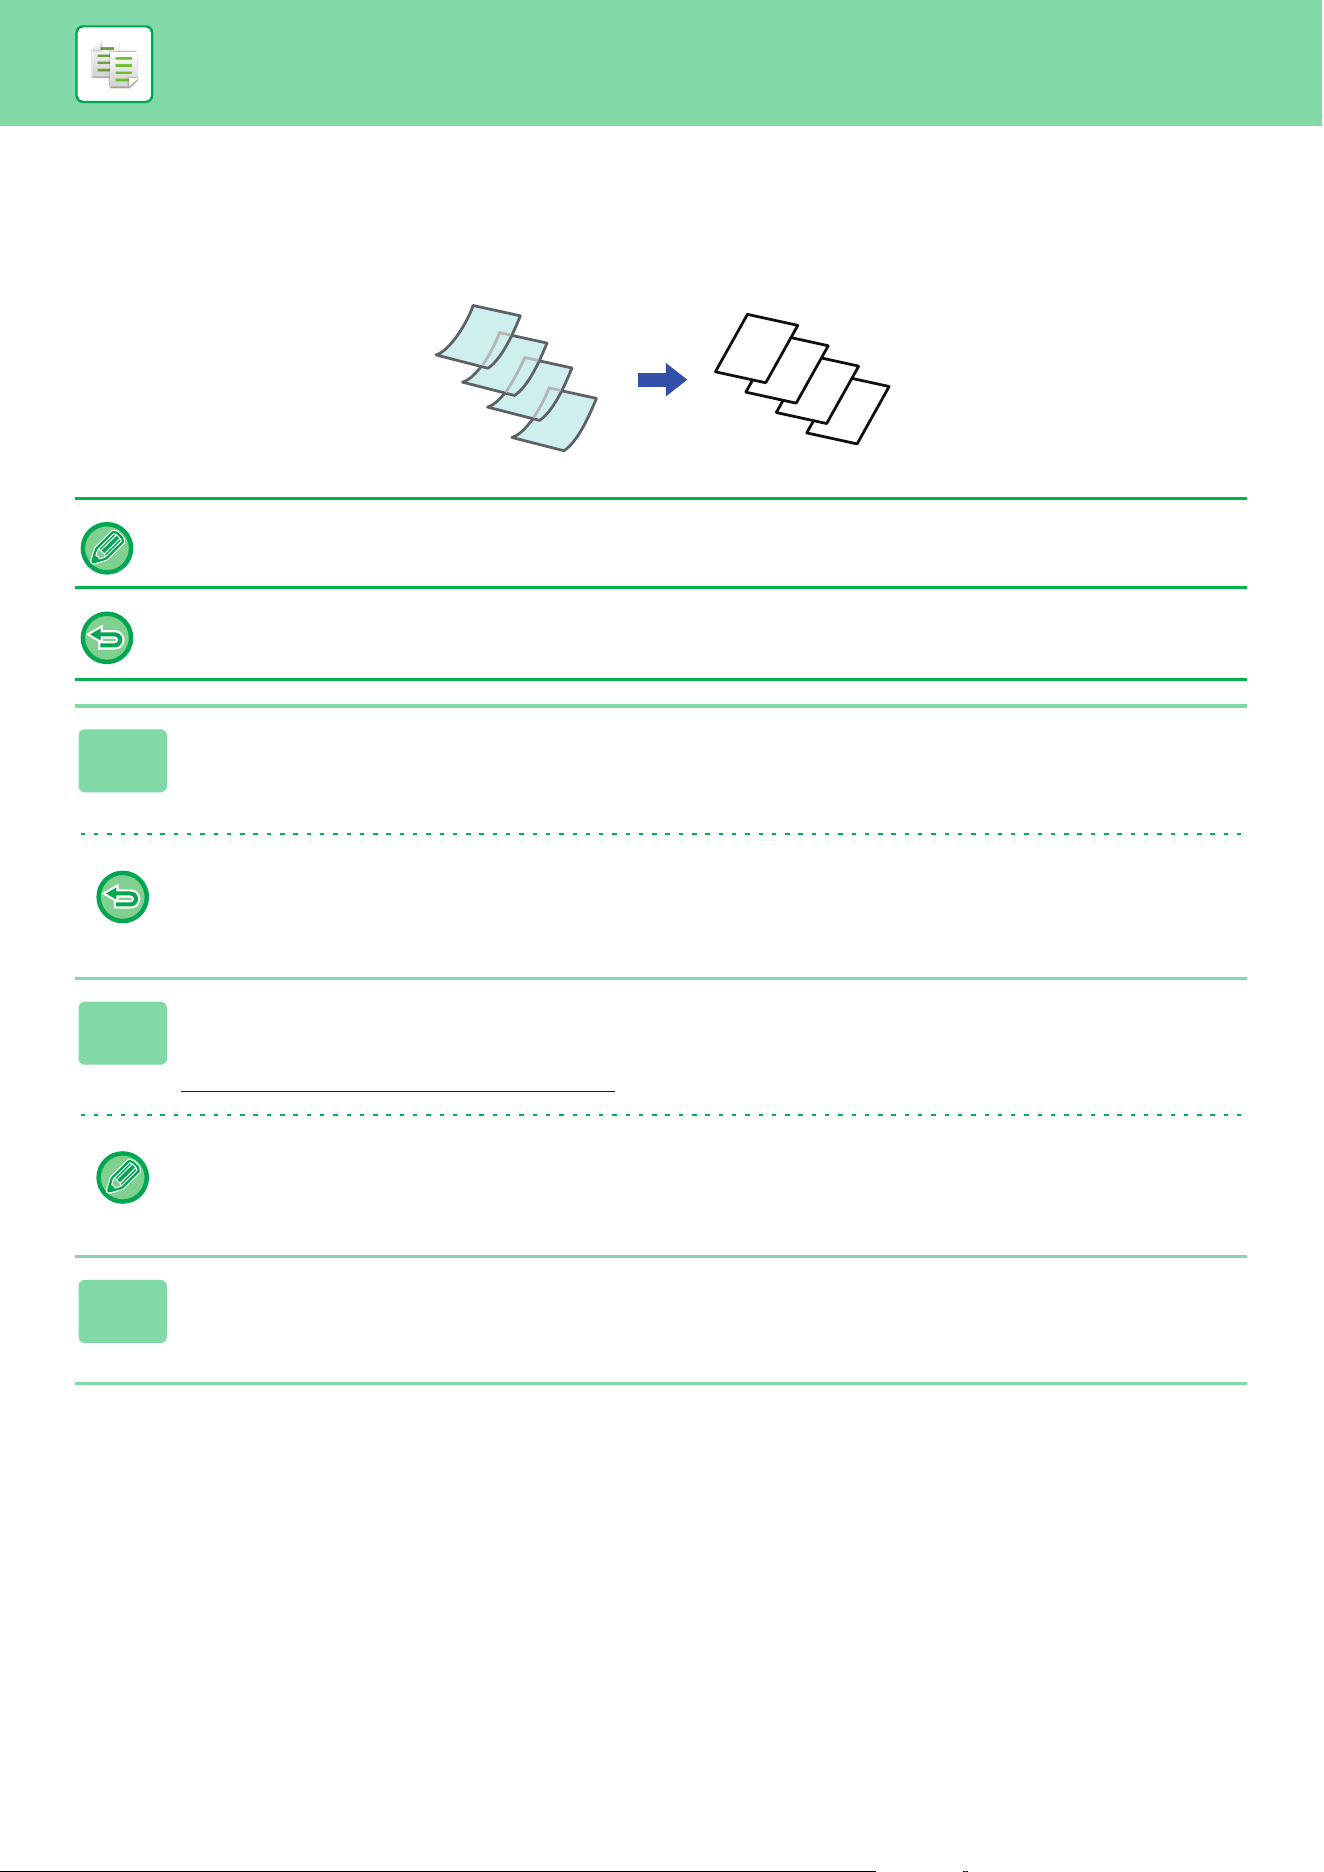
3-106
COPIER►OTHER FUNCTIONS
SCANNING THIN ORIGINALS (SLOW SCAN MODE)
When you wish to scan thin originals using the automatic document feeder, you can use this function, which helps
prevent thin originals from misfeeding.
• Slow Scan Mode cannot be selected in easy mode.
• Slow Scan Mode must be specified before scanning the original.
The "2-Sided→2-Sided" and "2-Sided→1-Sided" modes of automatic 2-sided copying cannot be used.
1
Tap the [Others] key, and tap the [Slow Scan Mode] key.
A checkmark appears on the icon.
After the settings are completed, tap the [Back] key.
To cancel slow scan mode:
Tap the [Slow Scan Mode] key to clear the checkmark.
2
Place the original in the document feeder tray of the automatic document
feeder.
AUTOMATIC DOCUMENT FEEDER (page 1-47)
If the originals are inserted with too much force, they may crumple and misfeed.
3
Tap the [Color Start] or [B/W Start] key to start copying.
D
C
B
A
D
C
B
A
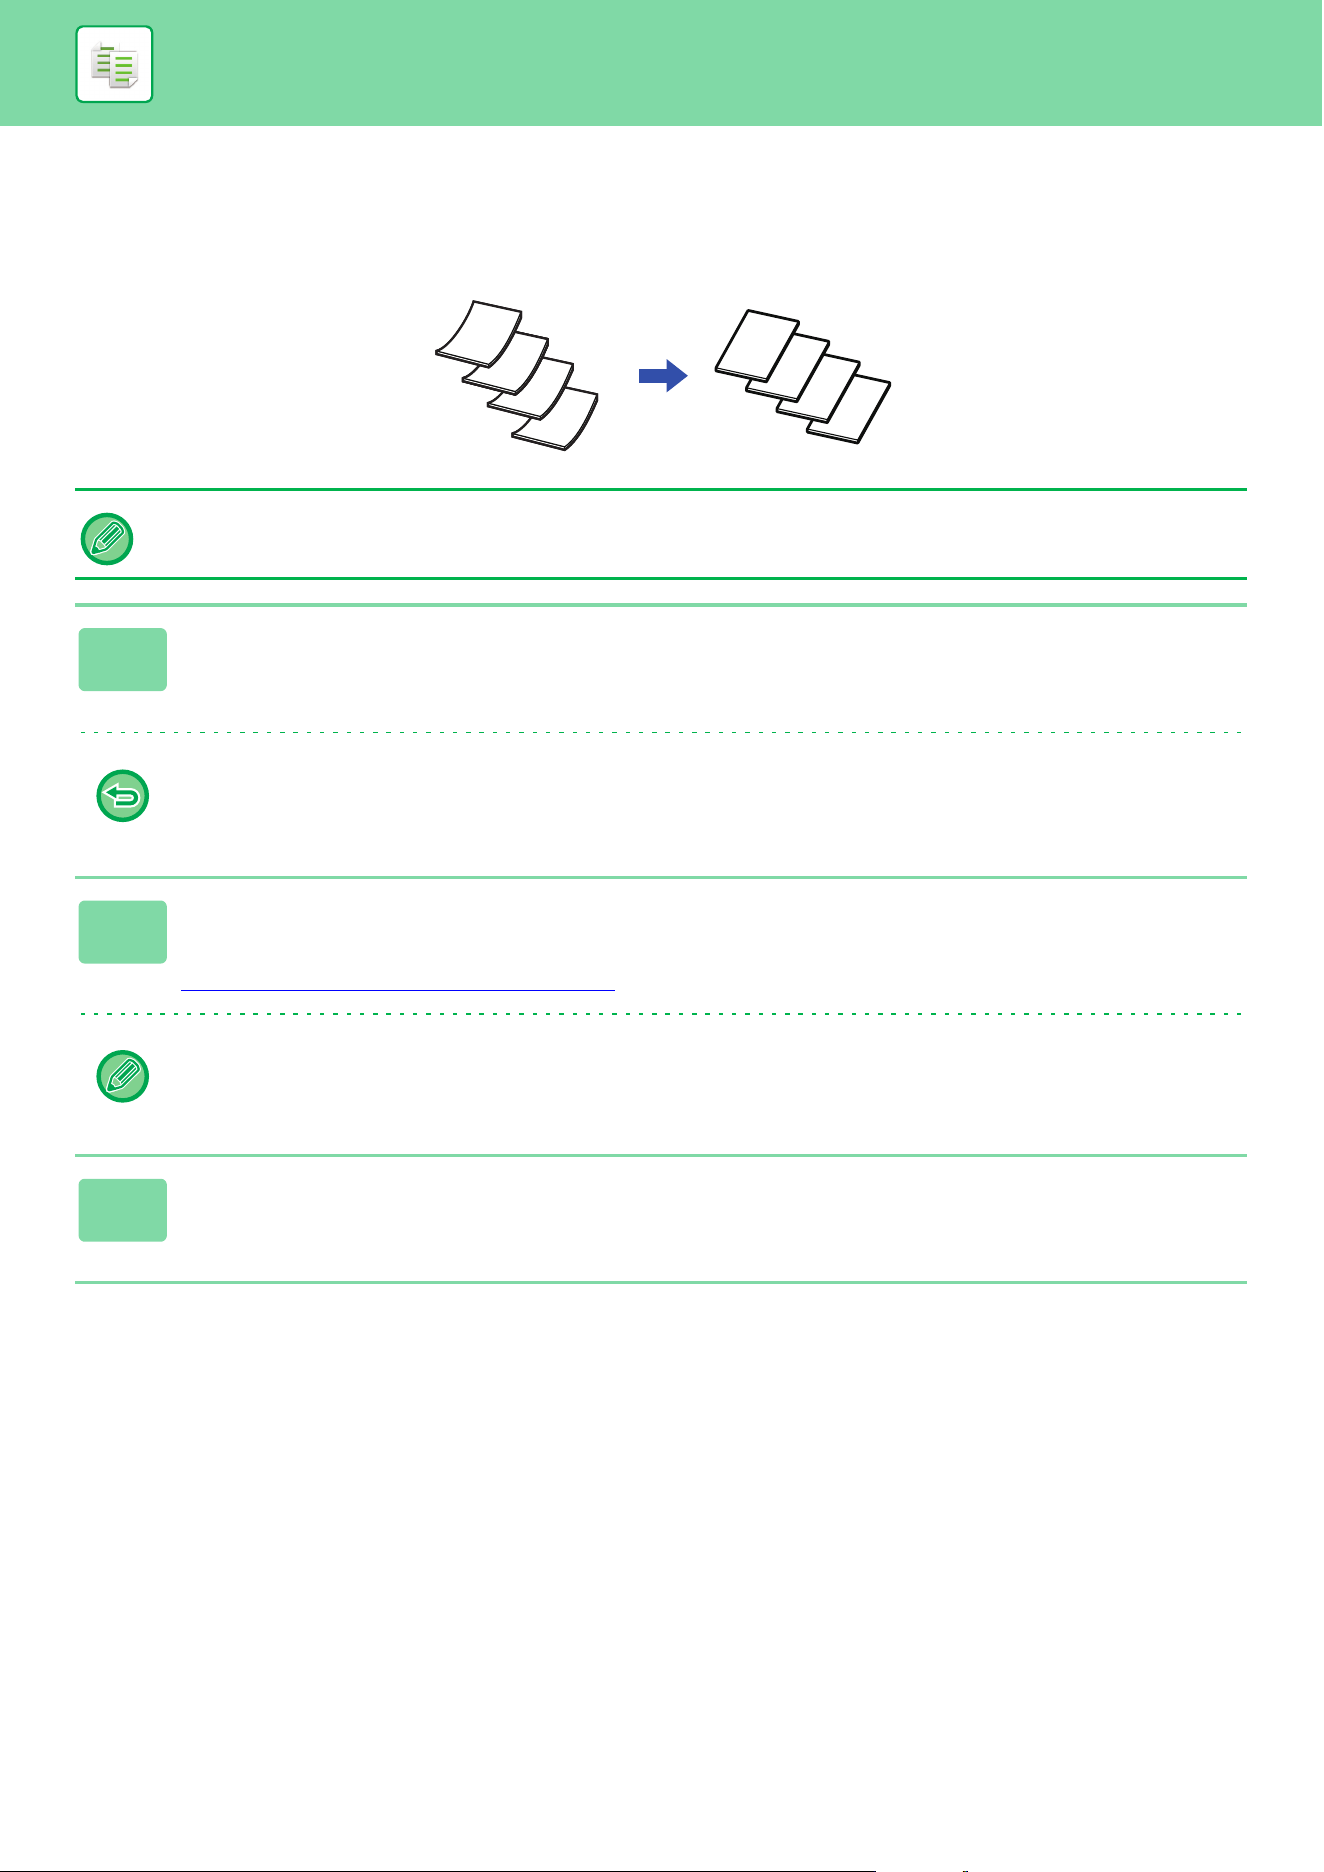
3-107
COPIER►OTHER FUNCTIONS
SCANNING HEAVY ORIGINALS (HEAVY PAPER SCAN)
When you wish to scan heavy originals using the automatic document feeder, you can use this function, which helps
prevent heavy originals from misfeeding.
• Heavy Paper Scan cannot be selected in easy mode.
• Heavy Paper Scan must be specified before scanning the original.
1
Tap the [Others] key, and tap the [Heavy Paper Scan] key.
A checkmark appears on the icon.
After the settings are completed, tap the [Back] key.
To cancel Heavy Paper Scan:
Tap the [Heavy Paper Scan] key to clear the checkmark.
2
Place the original in the document feeder tray of the automatic document
feeder.
AUTOMATIC DOCUMENT FEEDER (page 1-47)
If the originals are inserted with too much force, they may crumple and misfeed.
3
Tap the [Color Start] or [B/W Start] key to start copying.
D
C
B
A
D
C
B
B
A
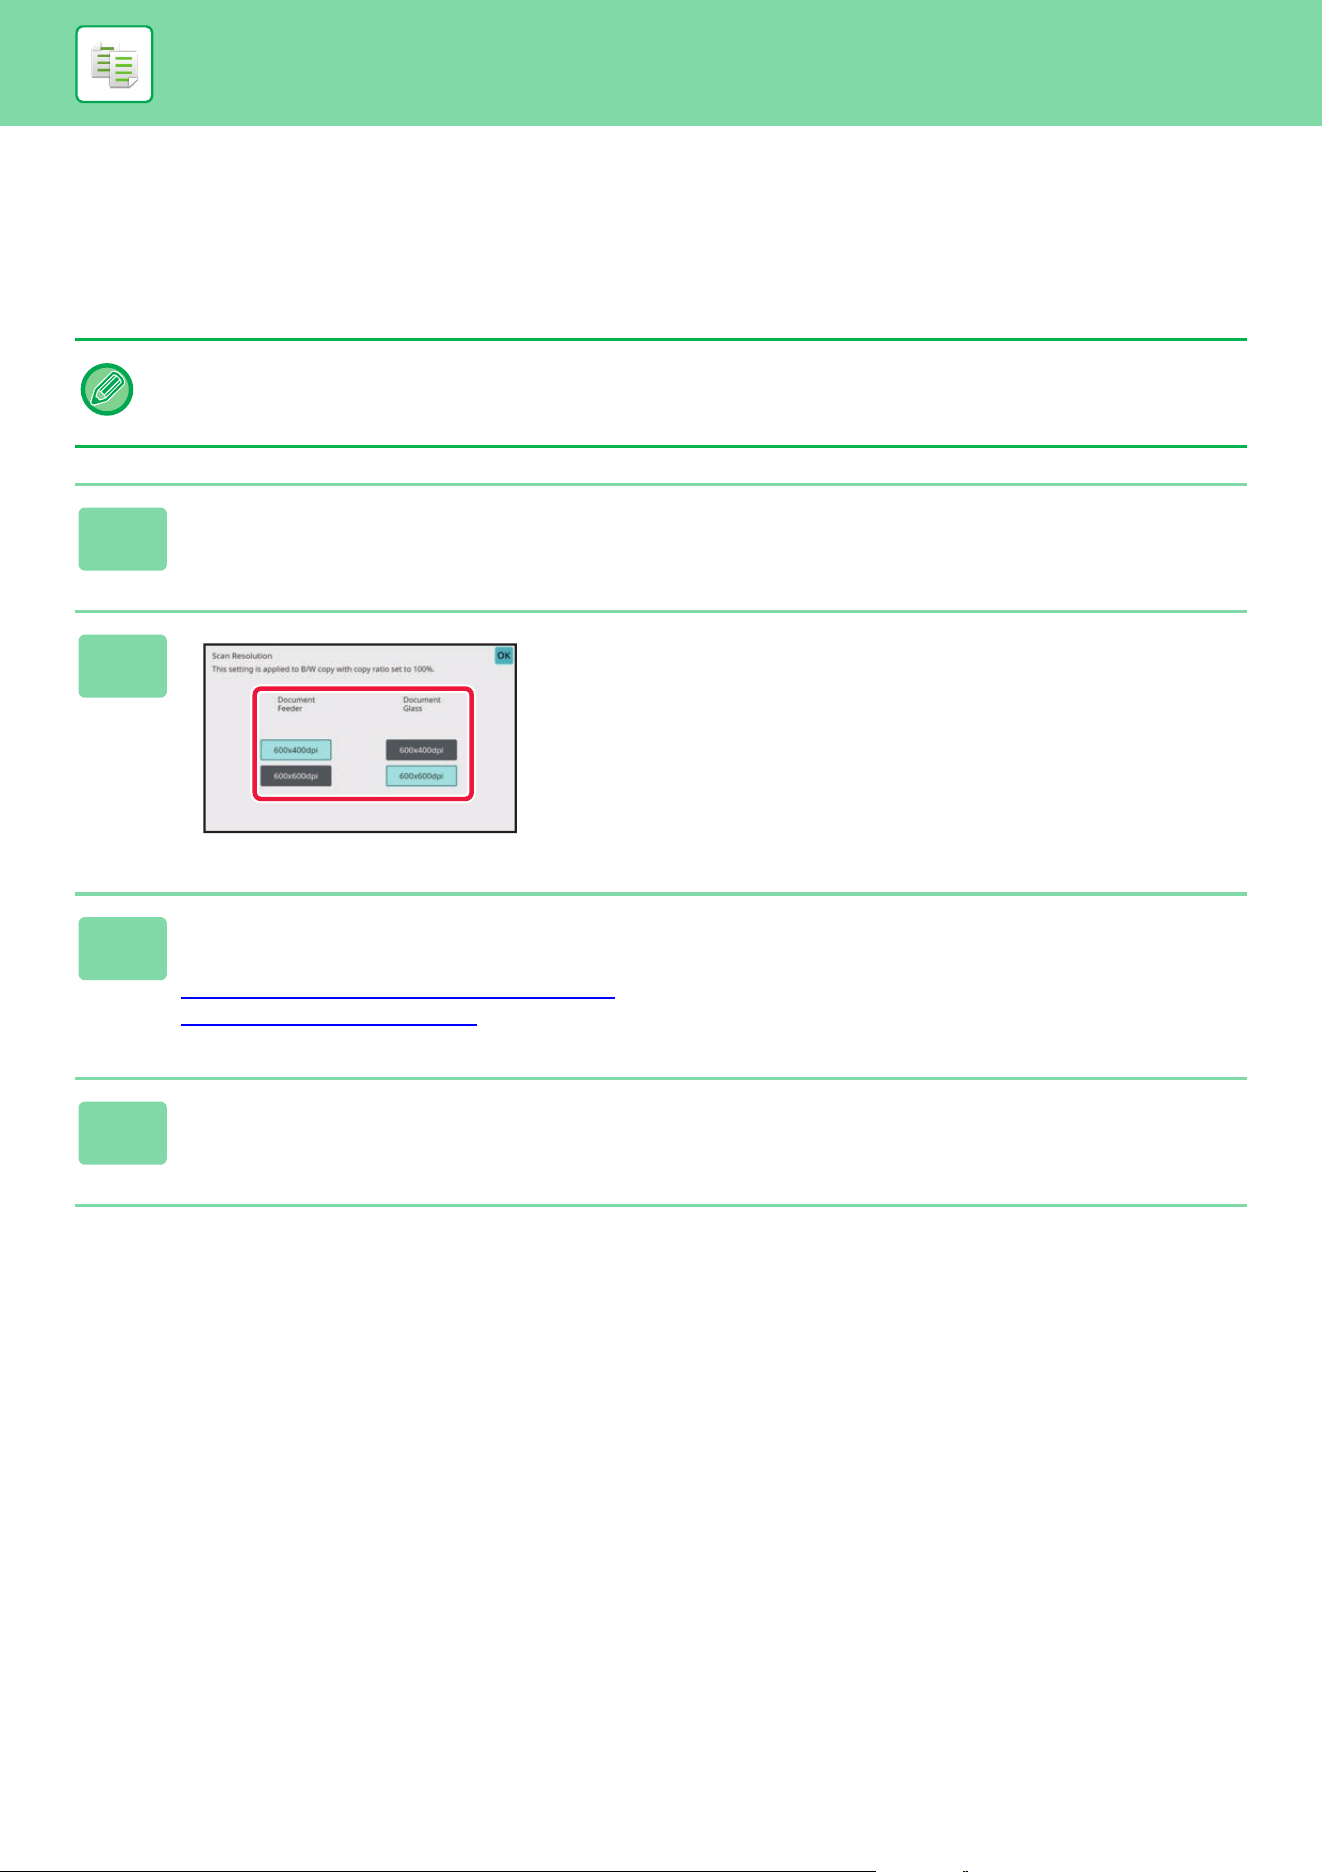
3-108
COPIER►OTHER FUNCTIONS
ADJUSTING RESOLUTION WHEN SCANNING
(RESOLUTION)
This function adjusts the resolution when scanning the original, enabling the high-quality output or speed-priority output
according to the application.
• Resolution cannot be selected in easy mode.
• Resolution must be specified before scanning the original.
• The resolution setting is applied when making a full-size black & white copy.
1
Tap the [Others] key, and tap the [Scan Resolution] key.
2
Select the resolution.
The resolution can be set to both the document feeder and
document glass.
After the settings are completed, tap [OK] and [Back] keys in
sequence.
3
Place the original.
Place the original in the document feeder tray of the automatic document feeder, or on the document glass.
AUTOMATIC DOCUMENT FEEDER
(page 1-47)
DOCUMENT GLASS (page 1-51)
4
Tap the [B/W Start] key to start copying.
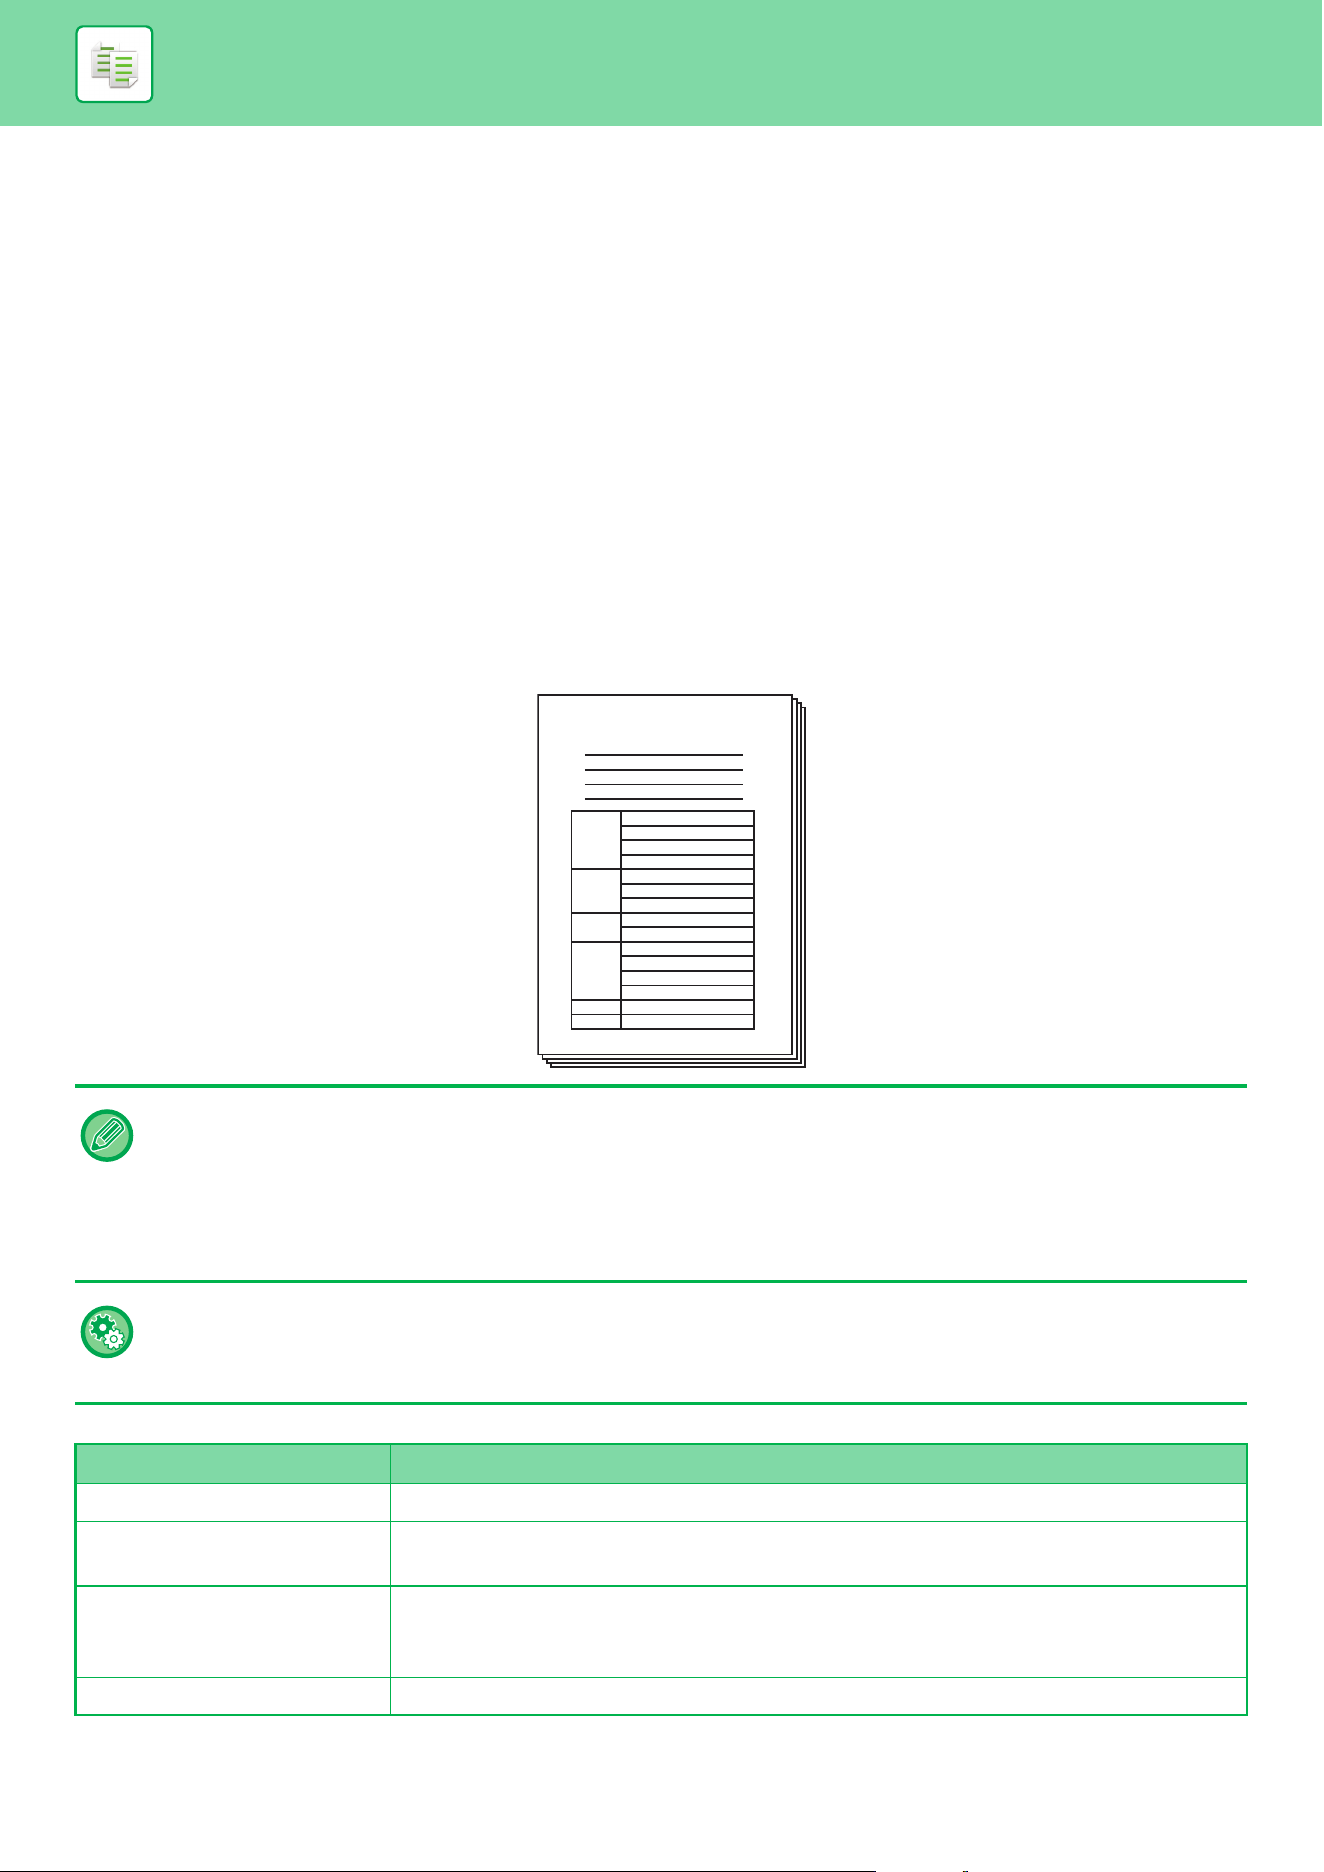
3-109
COPIER►OTHER FUNCTIONS
TEXT AND IMAGE ADDITION FUNCTIONS
PRINTING DATES, PAGE NUMBERS, AND
WATERMARKS (STAMP)
This function prints information such as the "Date" or "Stamp", which is not shown on the original, on copies. You can
print the following six types of information.
•Date
• Page No.
•Stamp
• Copies
•Text
• Watermark
For the stamp or watermark, you can print text such as "CONFIDENTIAL" or "PRIORITY". You can print pre-set text or
any characters as the text.
Each of the items above can be printed on the header or footer of each sheet.
When [Stamp] is combined with other functions:
• Stamp cannot be selected in easy mode.
• If the selected stamp content of one position overlaps the stamp content of another position, priority will be given in the
following order: watermark, right side, left side, center. Content that is hidden due to overlapping will not be printed.
• Text will be printed at the preset size regardless of the copy ratio or paper size setting.
• Text will be printed at the preset exposure regardless of the exposure setting.
• Depending on the size of the paper, some printed content may be cut off or shifted out of position.
Text Setting (Stamp) in Print menu
In "Settings (administrator)", select [System Settings] → [Copy Settings] → [Condition Settings] → [Text /Image Printing] →
[Text Settings (Stamp)]
Register preset text to be used in [Stamp].
Combined function name Print operation
Margin Shift Together with the image, the stamp content is shifted the amount of the margin width.
Tab Copy
Centering
Unlike a copy image that moves, the image will be printed in the position set in the stamp.
Dual Page Copy
Book Divide
Card Shot
Stamp items are printed for each copy sheet.
N-Up Stamp items are printed for each original page.
Confidential
Specification
2015.12
5/45
DRAFT
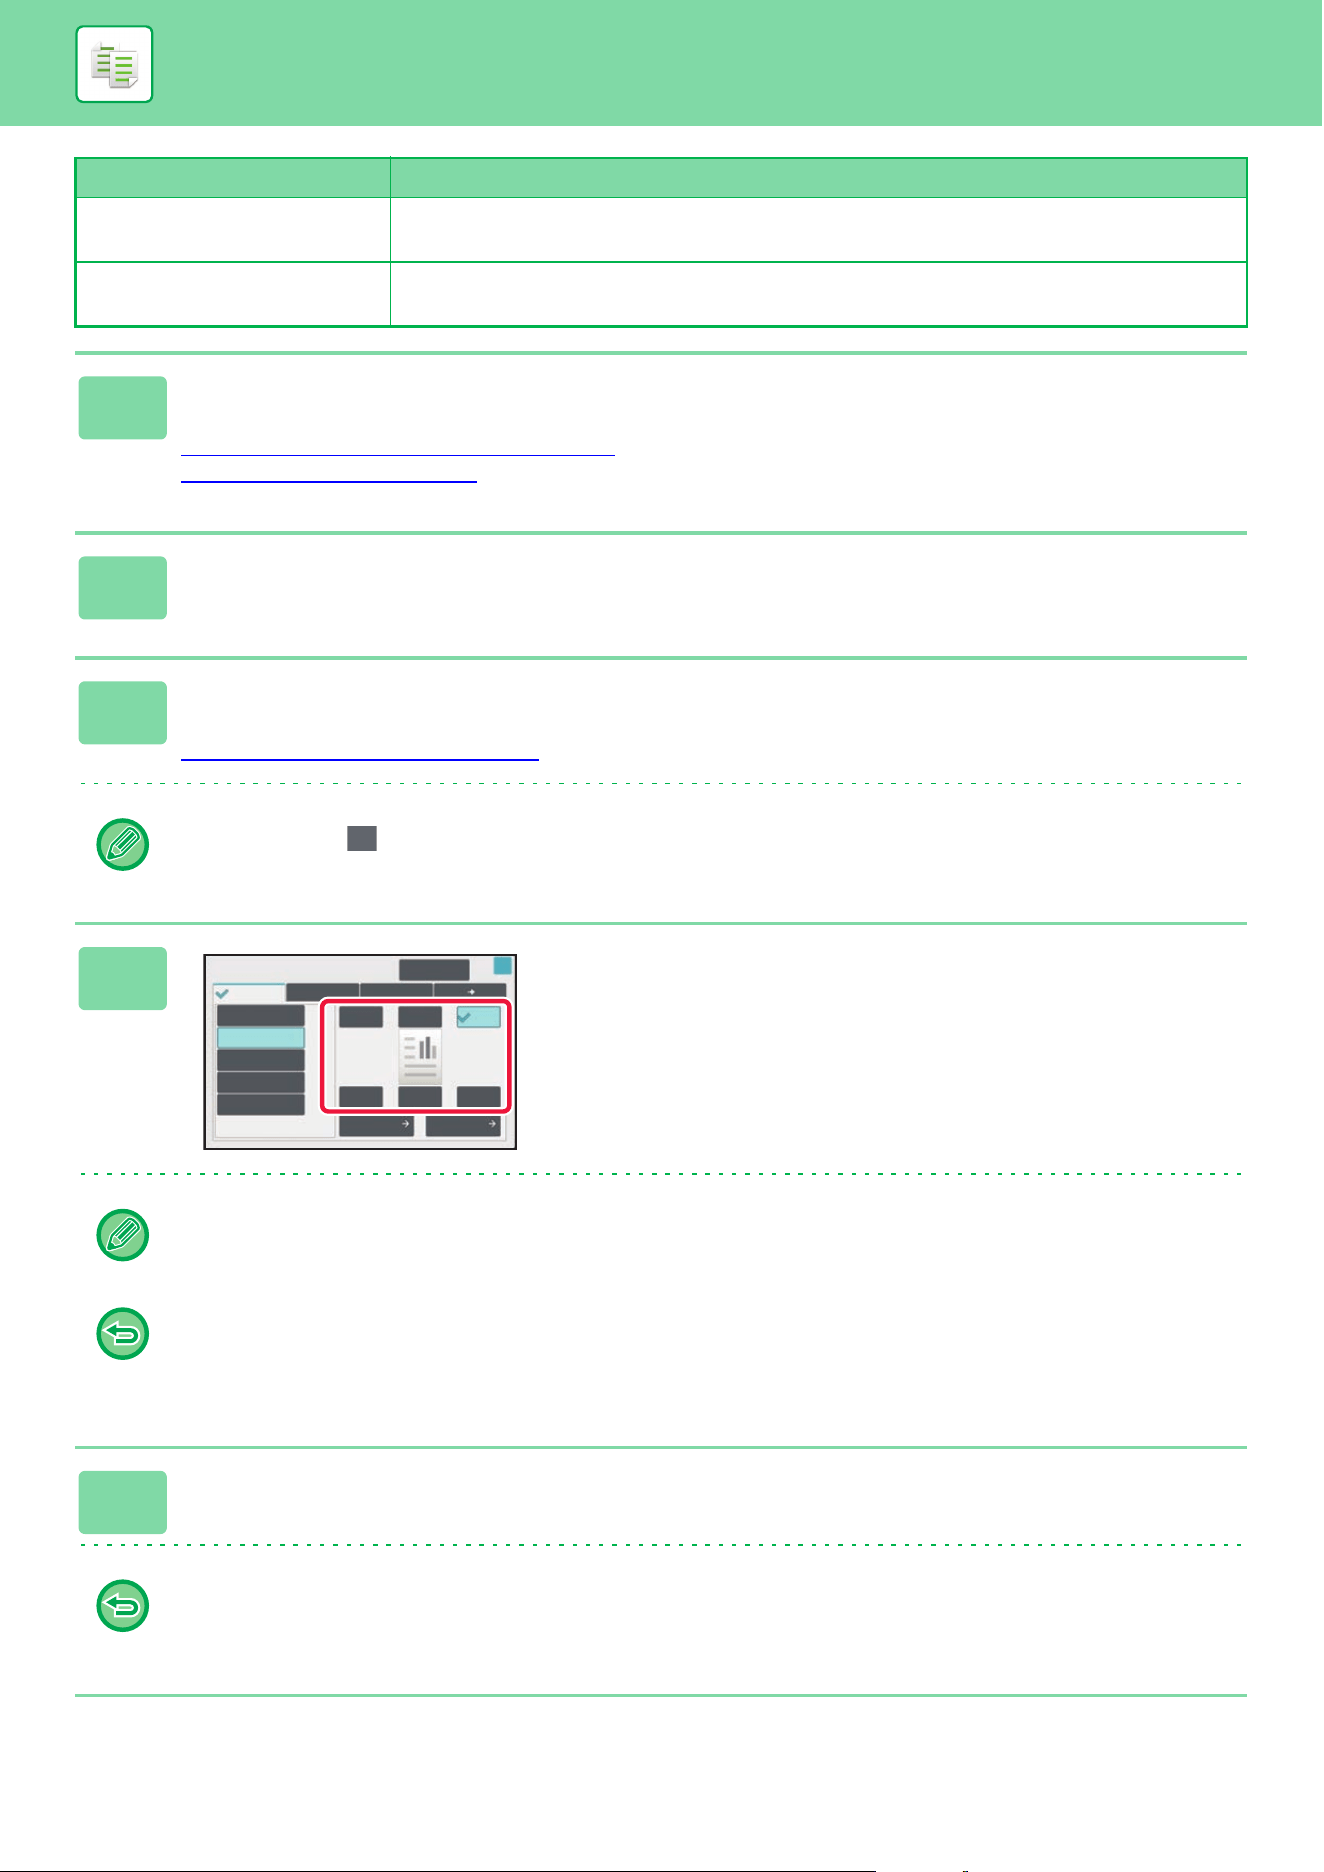
3-110
COPIER►OTHER FUNCTIONS
Booklet
Book Copy
Stamp items are printed for each page when compiling.
Covers/Inserts Use the stamp settings to select whether or not the item is printed on inserted covers and
inserts.
1
Place the original.
Place the original in the document feeder tray of the automatic document feeder, or on the document glass.
AUTOMATIC DOCUMENT FEEDER
(page 1-47)
DOCUMENT GLASS (page 1-51)
2
Tap the [Others] key, and tap the [Stamp] key.
3
Tap a tab to be printed, and tap the format.
The format of the [Text] tab can be entered using pre-set text or soft keyboard.
Setting using the [Text] tab
(page 3-111)
When you tap the tab, the display tab is switched.
4
Tap a key of the desired print position.
Tap any of [1] to [6] keys.
• Tapping the [Detail] key allows you to configure setting for each setting position.
• Tapping the [Layout] key allows you to check the printing position or detailed settings.
• To cancel the text settings:
Tap the [Cancel All] key.
• To cancel all settings:
Tap the [CA] key.
5
Tap the [Color Start] or [B/W Start] key to start copying.
• If you select color printing, tap the [Color Start] key. Tapping the [B/W Start] key will print the stamp items in black and
white even if color printing is specified.
• If color printing is specified for the original in black and white, it is counted as a full color copy.
Combined function name Print operation
Stamp
Cancel All
Date
Page No. Stamp
MM DD, YYYY
Detail
Layout
YYYY/MM/DD
MM/DD/YYYY
DD/MM/YYYY
Off
OK
1
456
2 3
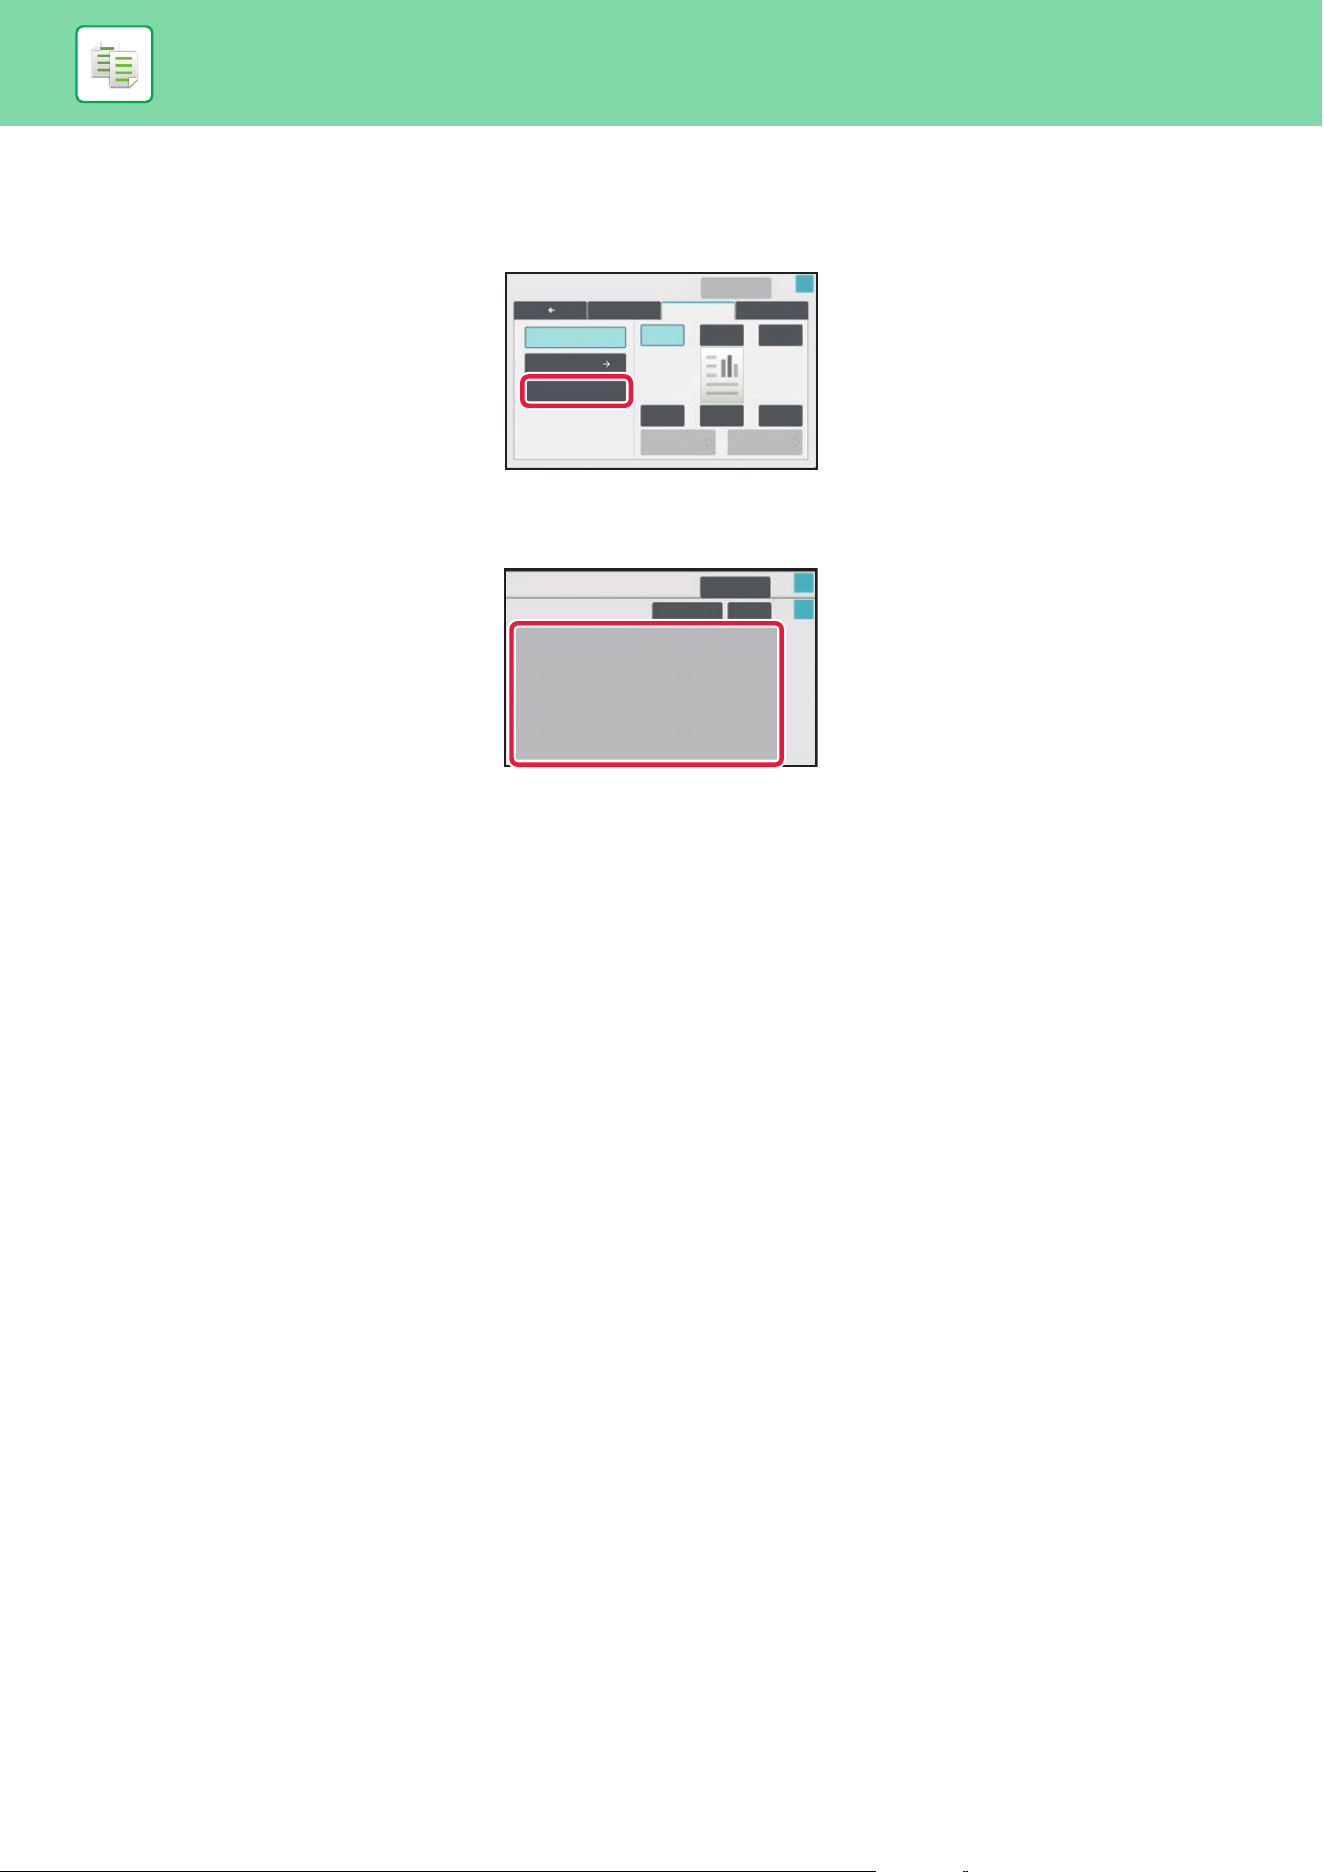
3-111
COPIER►OTHER FUNCTIONS
Setting using the [Text] tab
Tap the [Direct Entry] key in the [Text] tab to display the soft keyboard.
Use the soft keyboard to enter any characters.
Selecting the format from pre-set text
Tapping the [Pre-Set Text] key allows you to select the required one of the registered formats for printing.
Tapping the [Store/Delete] key allows you to edit, delete, or store pre-set text.
Detail
Stamp
Copies Text
Cancel All
Watermark
Pre-Set Text
Direct Entry
O
1
4
2
56
3
Layout
OK
Stamp
Pre-Set Text
Store/Delete Clear
No.05
No.06
No.01
No.04
No.03
No.02
Cancel All
OK
OK

3-112
COPIER►OTHER FUNCTIONS
ADDING A REGISTERED IMAGE TO AN ORIGINAL
(CUSTOM IMAGE)
This function adds an image registered in the machine to an original to make a copy.
Following are two types of custom images.
• Custom stamp (Full-color stamp image)
• Custom watermark (Stamp image with gray-scale watermark)
The combination with other functions is described in the table below.
Combined function Custom image operations
Margin Shift Shifts in the same way as for an original image.
Erase Makes a stamp copy as normal.
Dual Page Copy Makes a stamp copy by sheet.
Booklet Makes a stamp copy as normal.
Job Build Makes a stamp copy as normal.
Tandem Copy Based on the tandem copy.
Covers/Inserts Based on the custom image setting.
Separator Page Printing does not take place on separator pages.
Transparency Inserts Makes a stamp copy as normal.
N-Up Makes a stamp copy by sheet.
Book Copy Makes a stamp copy as normal.
Tab Copy Makes a stamp copy as normal regardless of image shift setting.
Card Shot Makes a stamp copy by sheet.
Business Card Copy Makes Business Card Copy by sheet.
Mirror Image Makes a stamp copy as normal without mirror image reverse.
MEMO
MEMO
Confidential
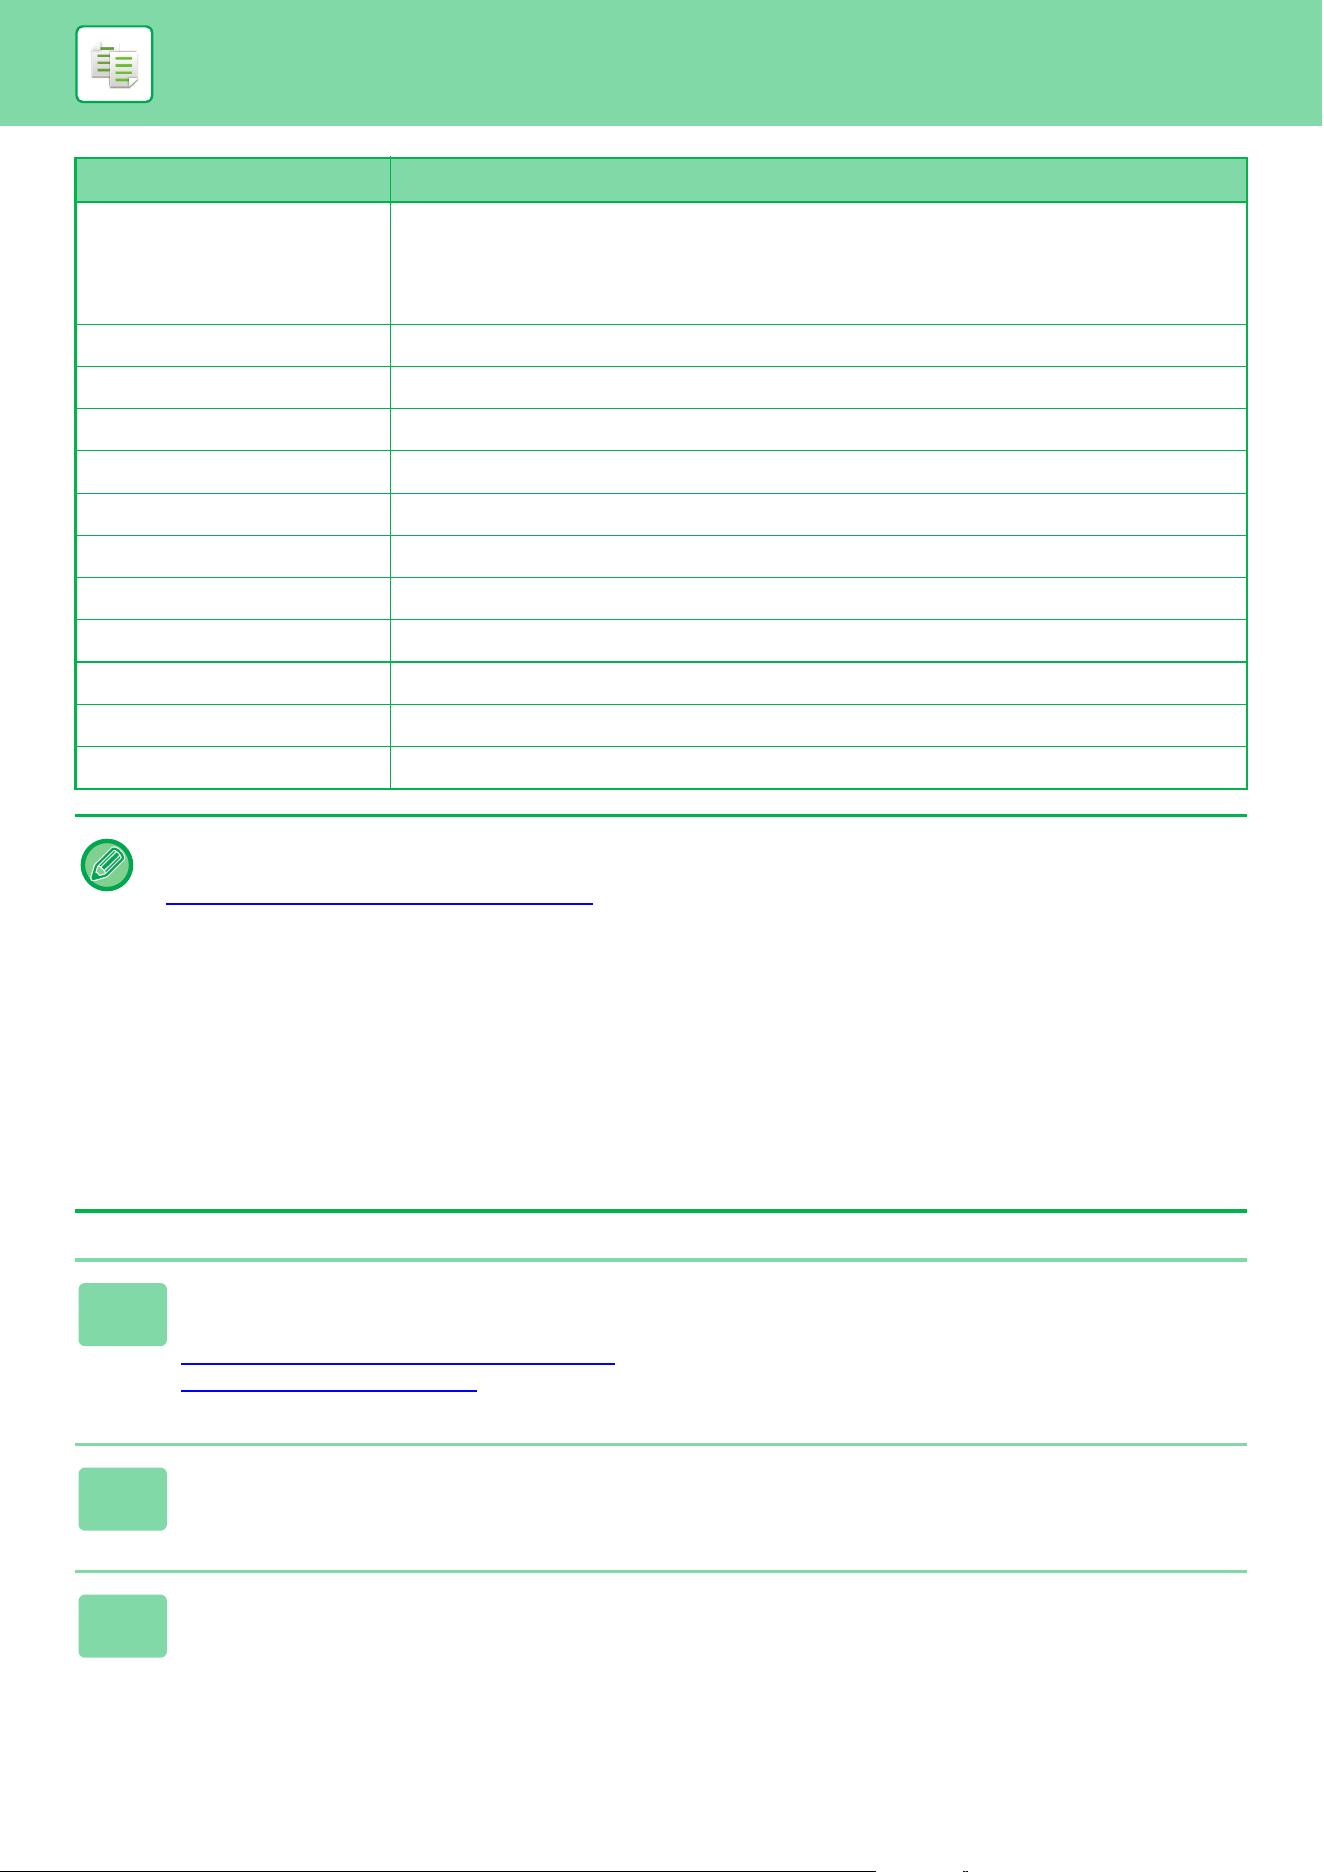
3-113
COPIER►OTHER FUNCTIONS
B/W Reverse Prints an image as normal without B/W reverse. However, the following condition is set when
printed on a dark background.
Custom stamp: Printed in white
Custom watermark: Printed without being whitened
Full Bleed Copy Makes a stamp copy as normal.
Centering Makes a stamp copy as normal without centering.
Color Adjustments Makes a stamp copy using the registered data.
Stamp Makes a stamp copy on the Stamp menu.
Photo Repeat Cannot be combined.
Multi-Page Enlargement Cannot be combined.
Hidden Pattern Print Makes a stamp copy under a pattern print.
Tracking Information Print Makes a stamp copy under a tracking information print.
Repeat Layout Cannot be combined.
Position Image Prints an image at the original position regardless of the Position Image setting.
Book Divide Makes a stamp copy by sheet.
• Custom Image cannot be selected in easy mode.
• An image must be registered in advance from the printer driver to the machine.
REGISTERING A CUSTOM IMAGE (page 4-73)
• A custom stamp image is copied by sheet, not by original. If N-Up is enabled, user stamps are copied for each set of
pages.
• A custom stamp image is copied with the registered size. The size remains unchanged even when the copy ratio is
enlarged or reduced.
• A different custom image cannot be specified for each page.
• When you tap the [B/W Start] key, a monochrome copy is made even if you have selected a custom stamp.
• If an image runs off of the specified paper depending on the registered size or position, the excess will not be copied.
• Custom Image can be combined with Tandem Copy. Stamp copy is performed when a custom image with the same file
name is registered in both the primary unit and secondary unit. If it is not registered, a copy will be made without a custom
image.
1
Place the original.
Place the original in the document feeder tray of the automatic document feeder, or on the document glass.
AUTOMATIC DOCUMENT FEEDER
(page 1-47)
DOCUMENT GLASS (page 1-51)
2
Tap the [Others] key, and tap the [Custom Image] key.
3
Tap the [Custom Stamp] or [Custom Watermark] key.
Combined function Custom image operations
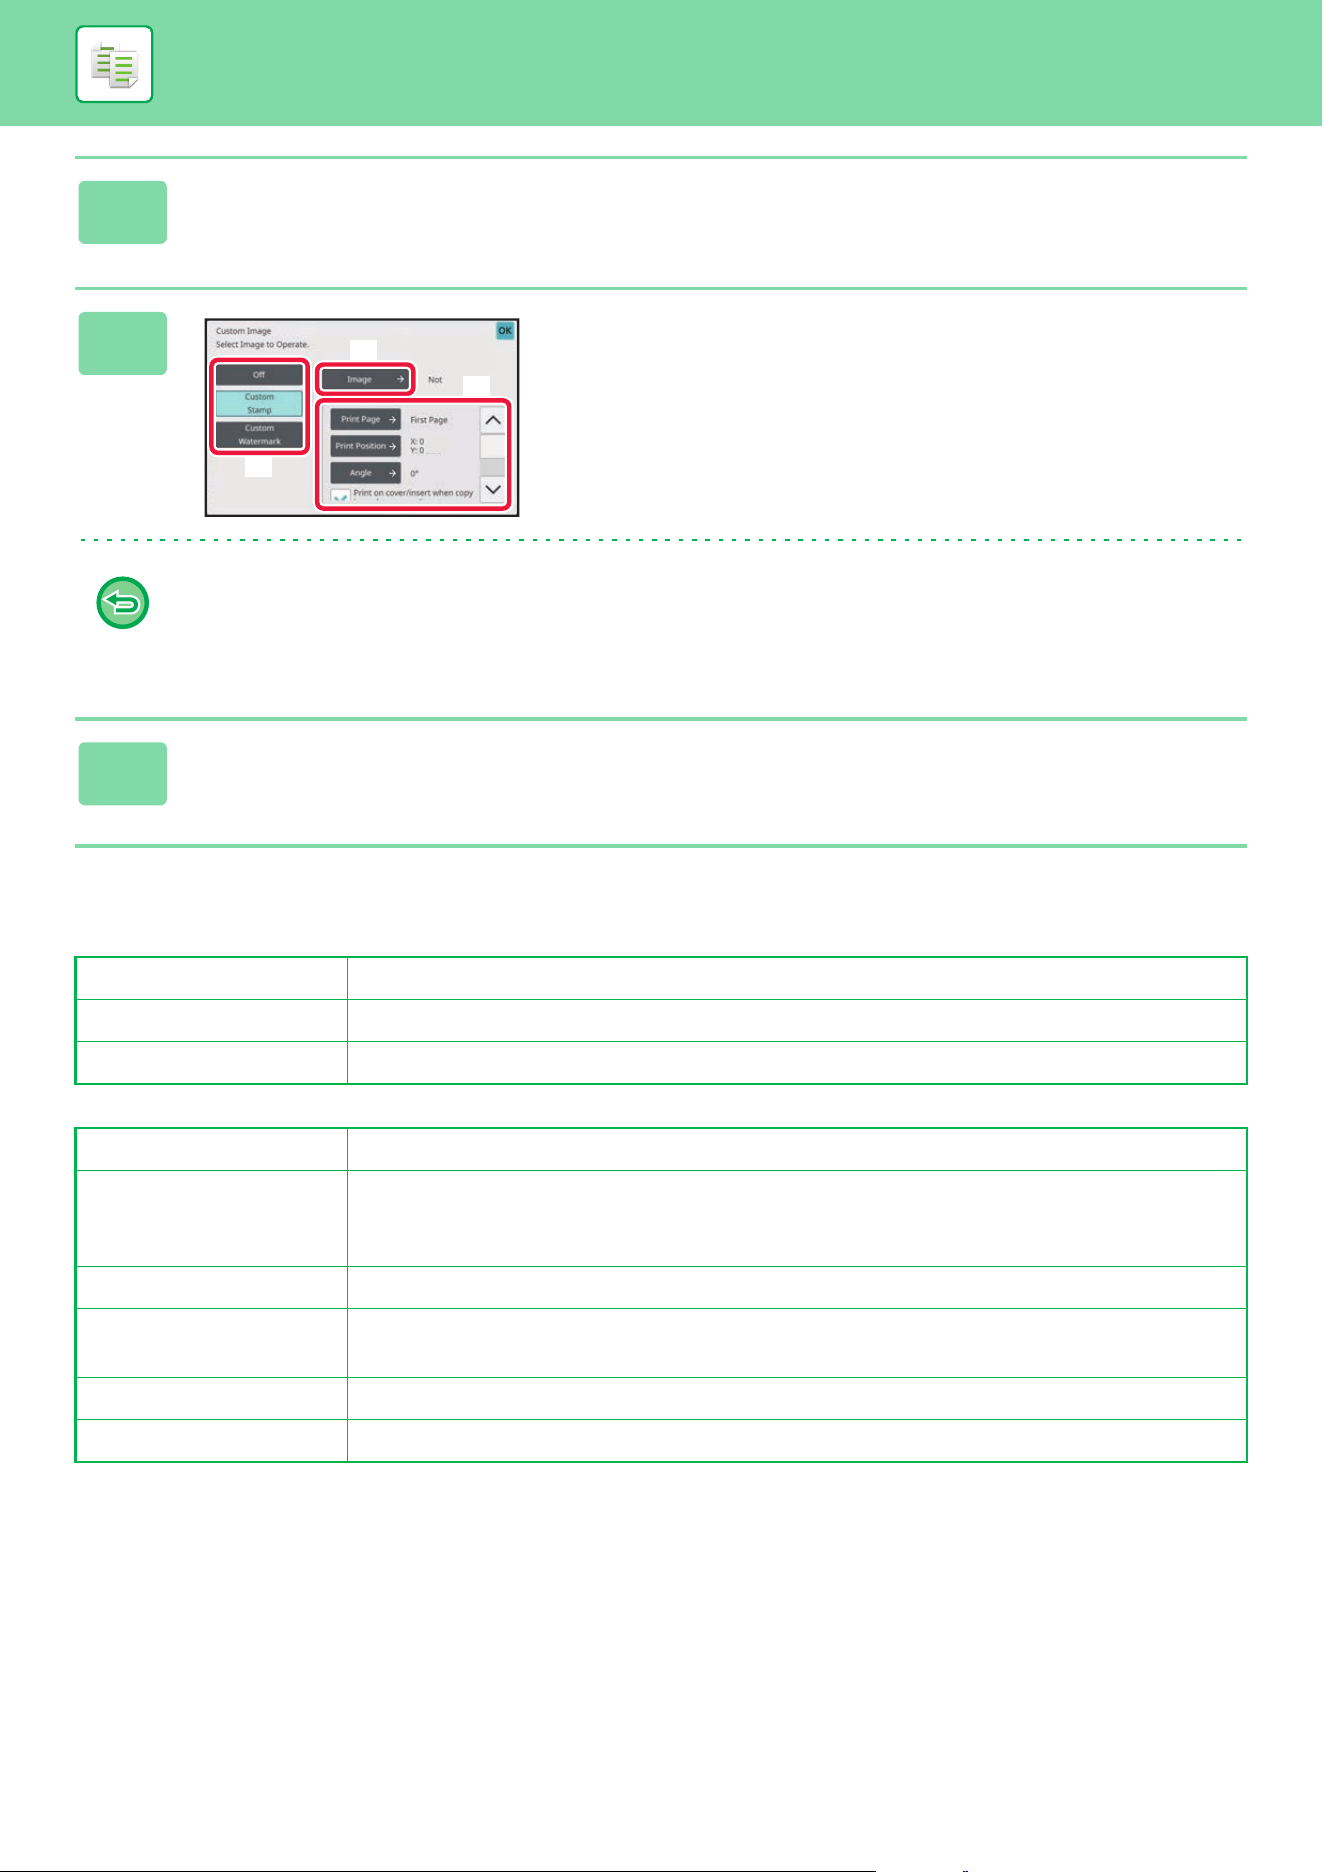
3-114
COPIER►OTHER FUNCTIONS
For settings related to custom stamp and custom water mark, see the following table.
For custom stamp
For custom watermark
4
Tap the [Image] key to select an image.
Select the required thumbnail image(s) from the available selection.
5
Set [Print Page] or [Print Position].
After the settings are completed, tap [OK] and [Back] keys in
sequence.
• To cancel the custom image setting:
Tap the [Off] key.
• To cancel all settings:
Tap the [CA] key.
6
Tap the [Color Start] or [B/W Start] key to start copying.
Print Page Specify a page(s) for stamp copy. First Page or All Pages
Print Position Specify a position for stamp copy.
Print Angle Specify the corner of the image. 0 degrees, -90 degrees, 90 degrees, or 180 degrees
Print Color Specify the image watermark color. Black, red, green, blue, cyan, magenta or yellow.
Print Pattern Specify the image watermark print pattern.
Transparent: Makes an original image transparent for stamp copy.
Overlap: Hides a watermark added to an original image for stamp copy.
Exposure Select the exposure of a watermark from nine levels.
Print Page Specify a page(s) for stamp copy.
First Page or All Pages
Print Position Specify a position for stamp copy.
Print Angle Specify the corner of the image. 0 degrees, -90 degrees, 90 degrees, or 180 degrees
Inch
Inch
(3)
(4)
(5)
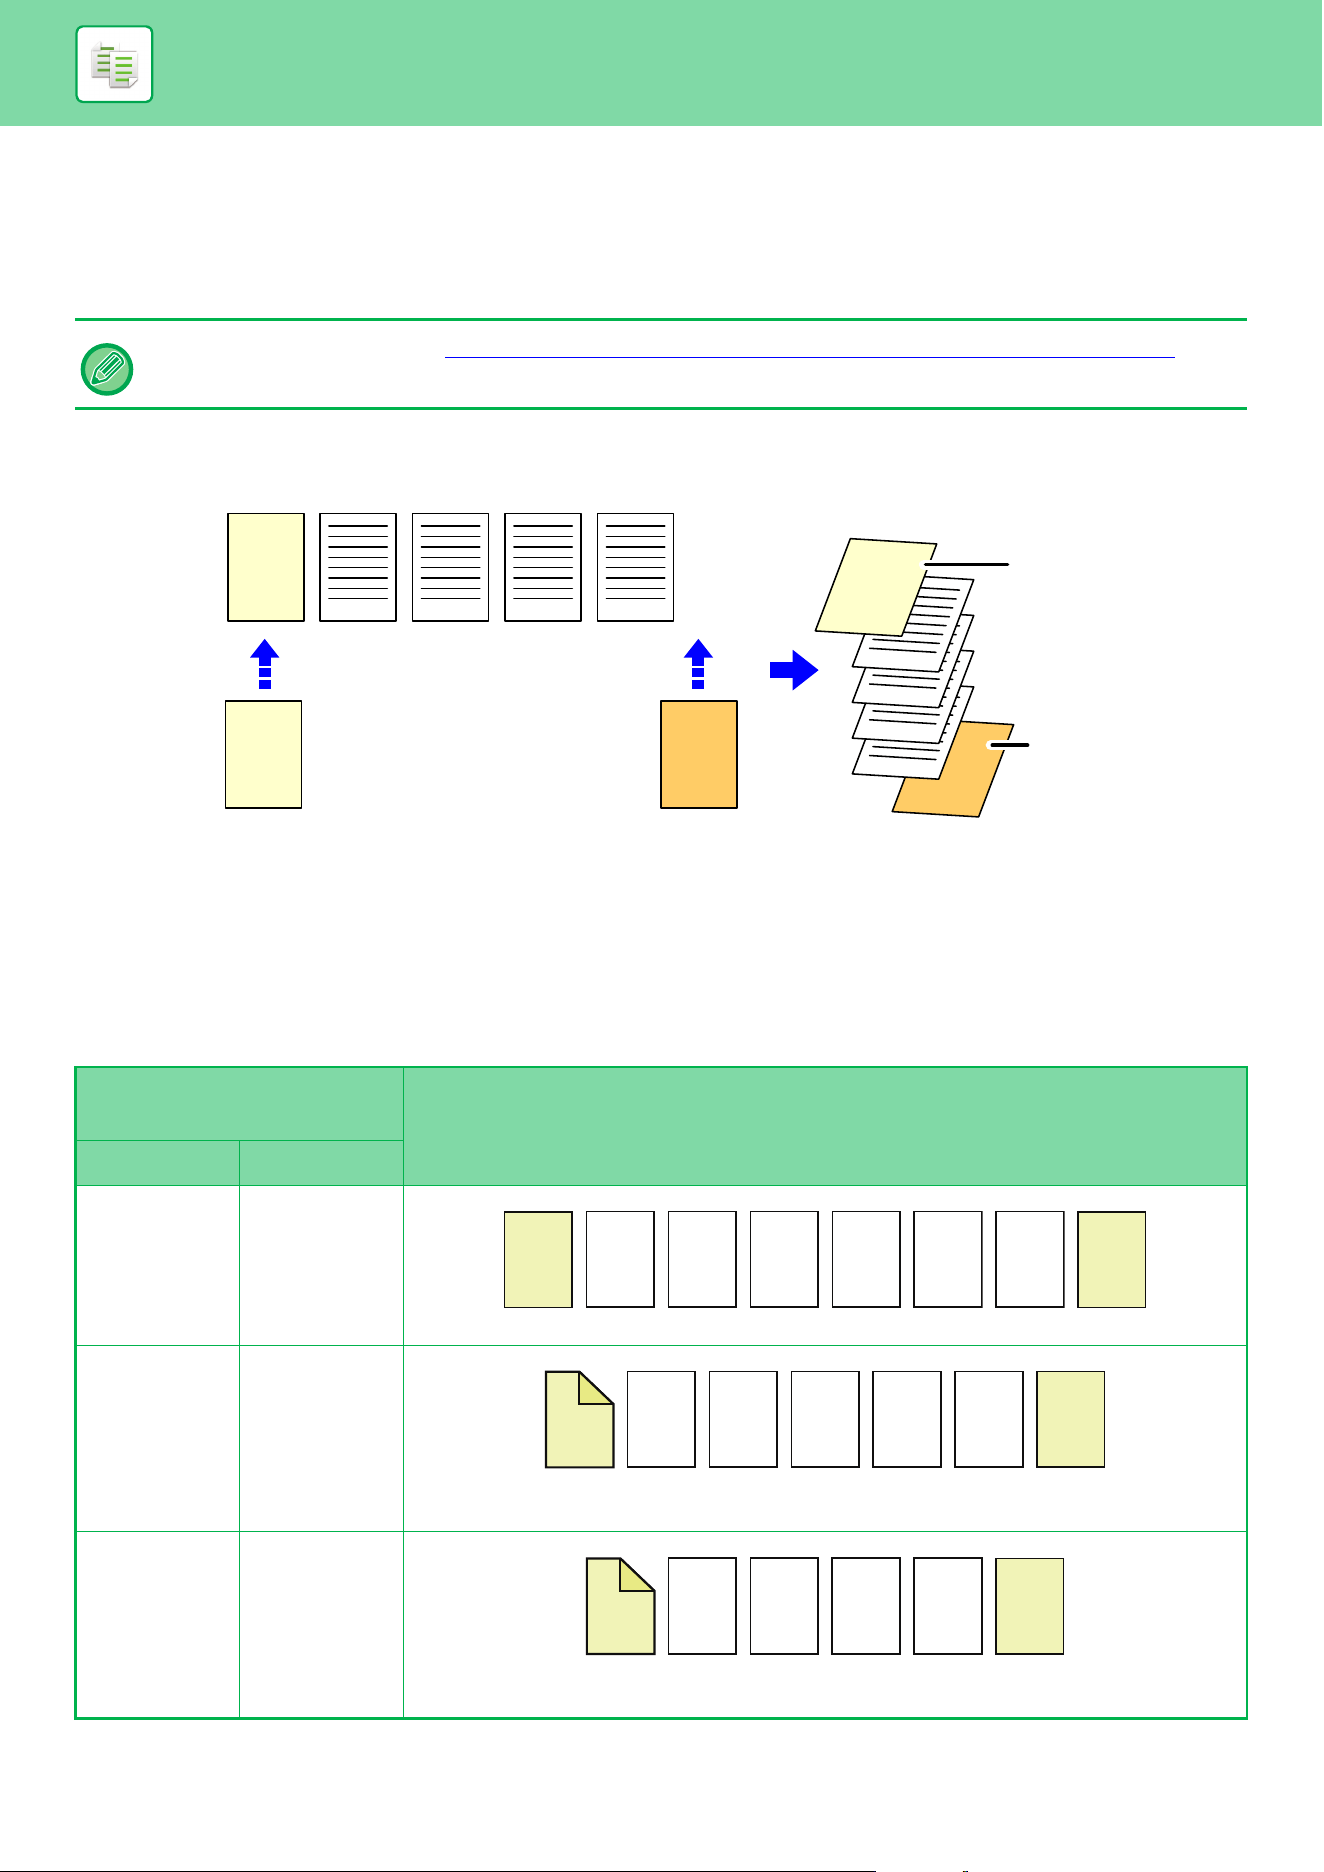
3-115
COPIER►OTHER FUNCTIONS
INSERTING COVERS IN COPIES (COVERS/INSERTS)
This function inserts a different type of paper into the pages corresponding to the front and back covers of a copy job.
It is helpful when you want to change cover paper to make resources look better.
Configure insertion sheet settings if needed.
Copying on a front cover and inserting together with a back cover
A different type of paper is inserted as a front cover, and a back cover is inserted to the last of the copy job.
Cover inserting examples
The following shows the copy results when front and back covers are inserted into six 1-sided original pages or three
2-sided original pages in the four copy modes below.
1-sided copying of 1-sided originals
• To insert insertion sheets, see “INSERTING INSERTION SHEETS IN COPIES (COVERS/INSERTS) (page 3-123)".
• For N-Up, the layout is based on the first page and excludes covers.
Setting conditions for each
cover
Resulting copies
Front Cover Back Cover
Not copied Not copied
Inserts cover sheets at the beginning and end of copies.
1-sided copy Not copied
Makes a 1-sided copy on the first original page for front cover, and inserts a back cover at
the end of copies.
2-sided copy Not copied
Makes a 2-sided copy on the first and second original pages for front cover, and inserts a
back cover at the end of copies.
5
4
2 3 4 51
3
2
1
Front cover paper Back cover paper Copy
Front Cover
Back Cover
2
1
3
6
4 5
1
2 3
6
4 5
1
2
3
6
4 5
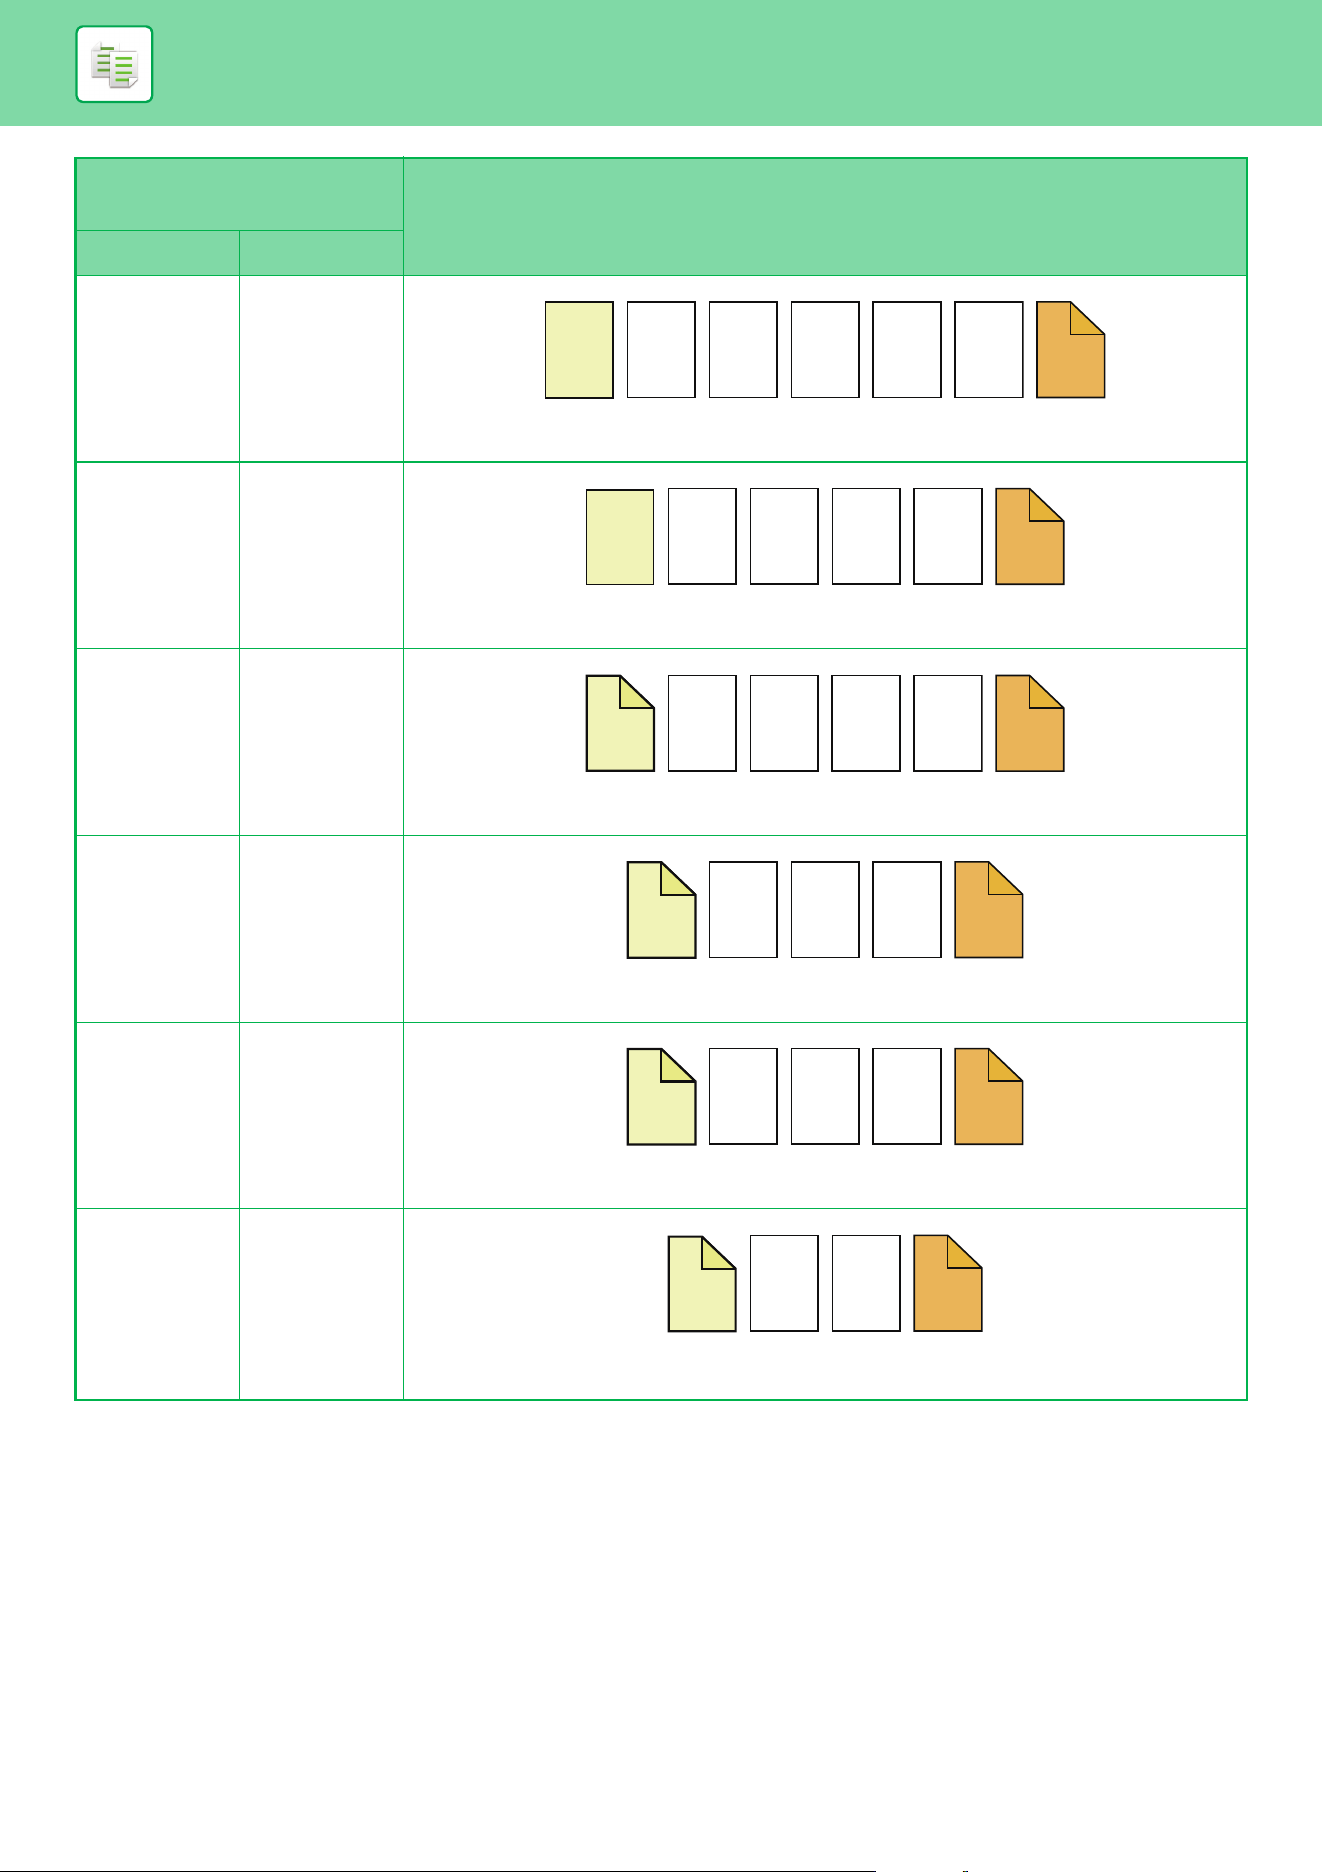
3-116
COPIER►OTHER FUNCTIONS
Not copied 1-sided copy
Inserts a front cover at the beginning of copies, and makes a 1-sided copy on the sixth
original page for back cover.
Not copied 2-sided copy
Inserts a front cover at the beginning of copies, and makes a 2-sided copy on the fifth and
sixth original pages for back cover.
1-sided copy 1-sided copy
Makes a 1-sided copy on the first original page for front cover, and also makes a 1-sided
copy on the sixth original page for back cover.
1-sided copy 2-sided copy
Makes a 1-sided copy on the first original page for front cover, and also makes a 2-sided
copy on the fifth and sixth original pages for back cover.
2-sided copy 1-sided copy
Makes a 2-sided copy on the first and second original pages for front cover, and also makes
a 1-sided copy on the sixth original page for back cover.
2-sided copy 2-sided copy
Makes a 2-sided copy on the first and second original pages for front cover, and
also makes a 2-sided copy on the fifth and sixth original pages for back cover.
Setting conditions for each
cover
Resulting copies
Front Cover Back Cover
6
2
1
3 4 5
6
5
2
1
3 4
1
2 3 4 5
6
1
2 3 4
6
5
6
1
2
3 4 5
1
2
6
5
3 4
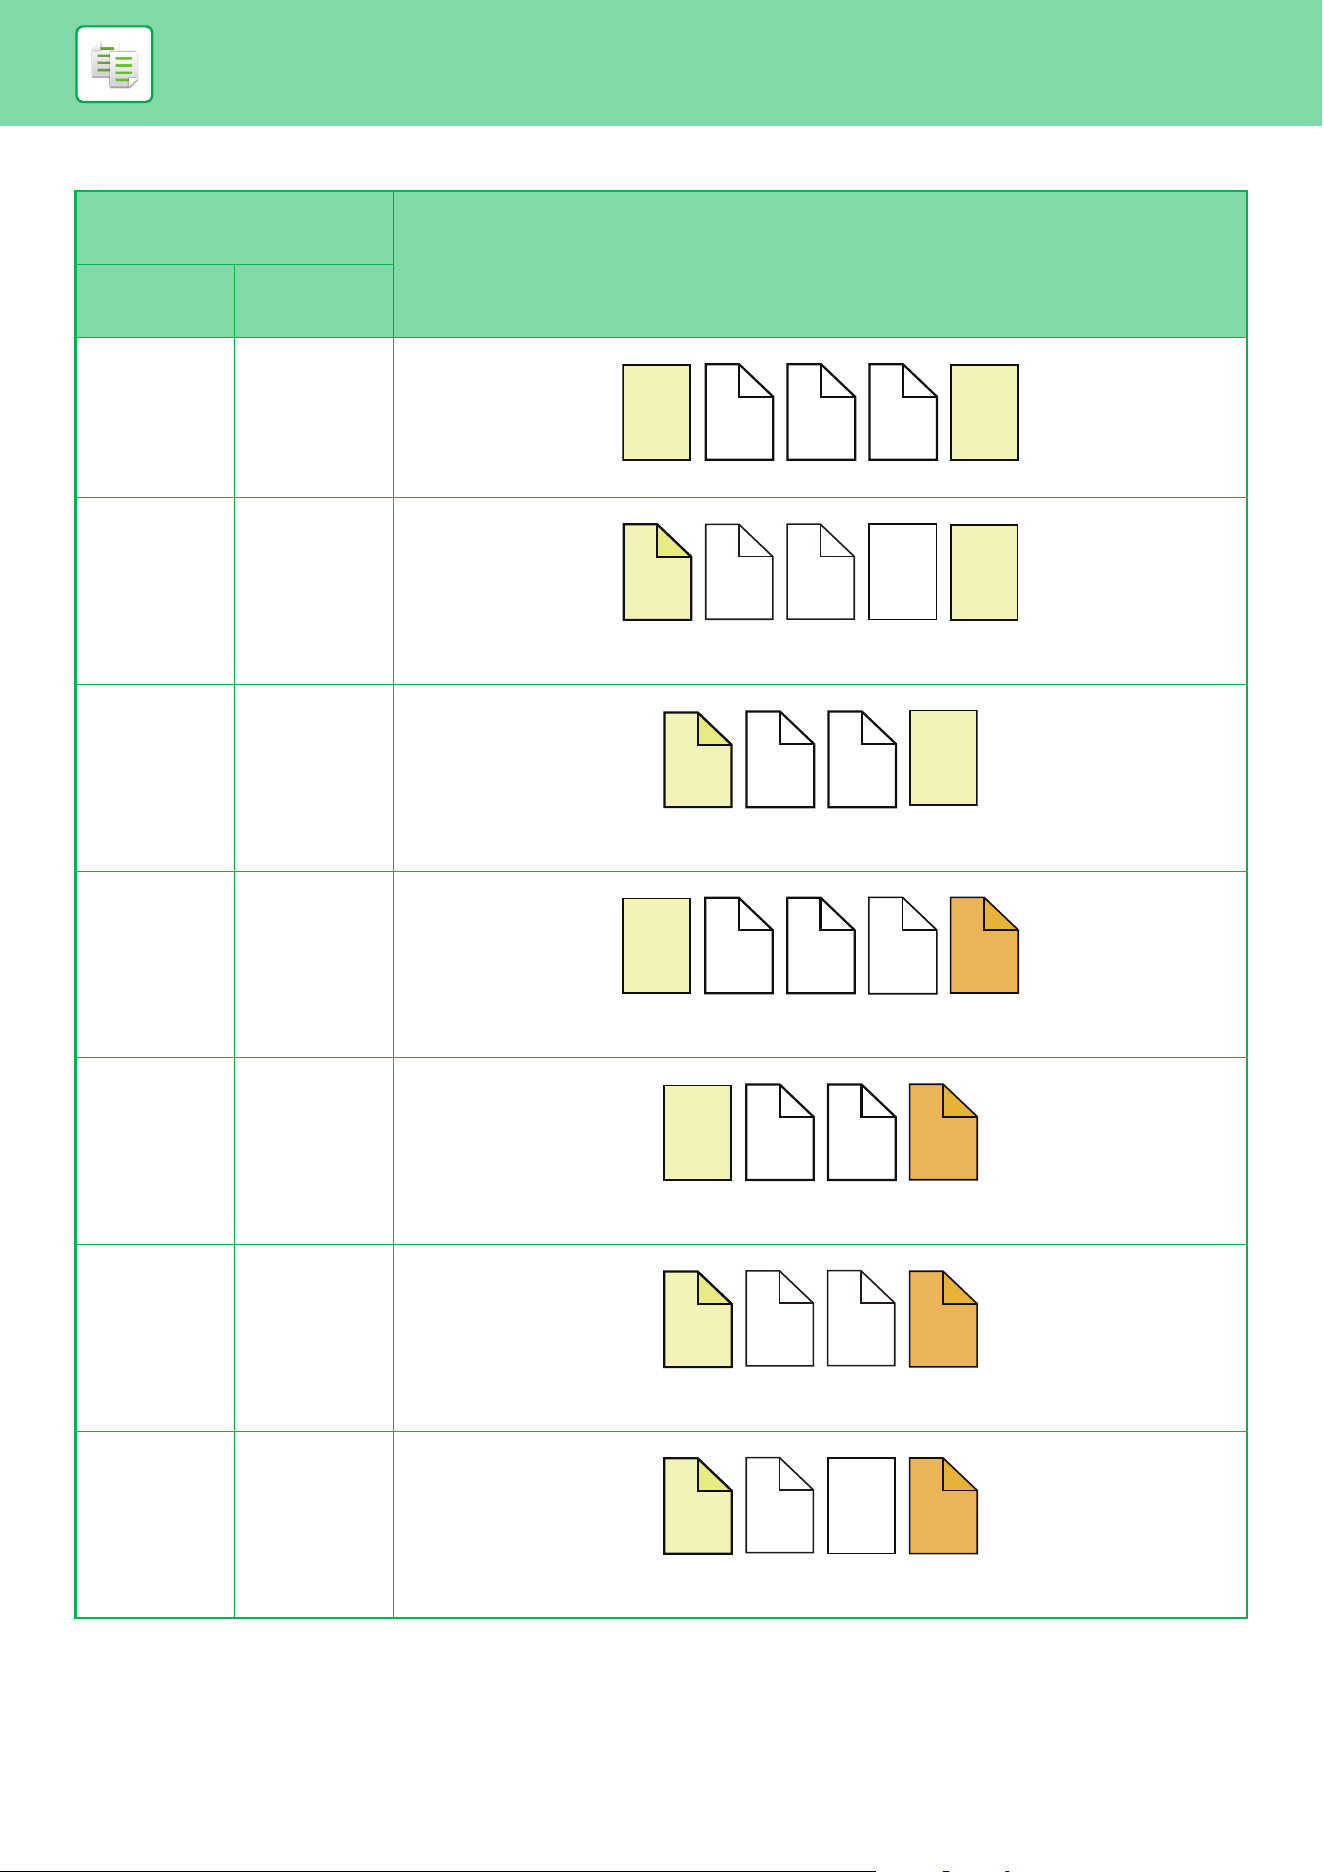
3-117
COPIER►OTHER FUNCTIONS
2-sided copying of 1-sided originals
Setting conditions for
each cover
Resulting copies
Front
Cover
Back Cover
Not copied Not copied
Inserts cover sheets at the beginning and end of copies.
1-sided copy Not copied
Makes a 1-sided copy on the first original page for front cover, and also makes a 1-sided
copy on the sixth original page. Inserts cover sheets at the end of copies.
2-sided copy Not copied
Makes a 2-sided copy on the first and second original pages for front cover, and inserts a
back cover at the end of copies.
Not copied 1-sided copy
Inserts a front cover at the beginning of copies, and makes a 1-sided copy on the sixth
original page for back cover. A 1-sided copy is made on the fifth original page.
Not copied 2-sided copy
Inserts a front cover at the beginning of copies, and makes a 2-sided copy on the fifth and
sixth original pages for back cover.
1-sided copy 1-sided copy
Makes a 1-sided copy on the first original page for front cover, and also makes a 1-sided
copy on the sixth original page for back cover.
1-sided copy 2-sided copy
Makes a 1-sided copy on the first original page for front cover, and also makes a 2-sided
copy on the fifth and sixth original pages for back cover.
3
4
1
2
5
6
4
5
2
3
1
6
3
4
5
6
1
2
3
4
1
2
5
6
6
5
3
4
1
2
4
5
2
3
1
6
2
3
1
6
5
4
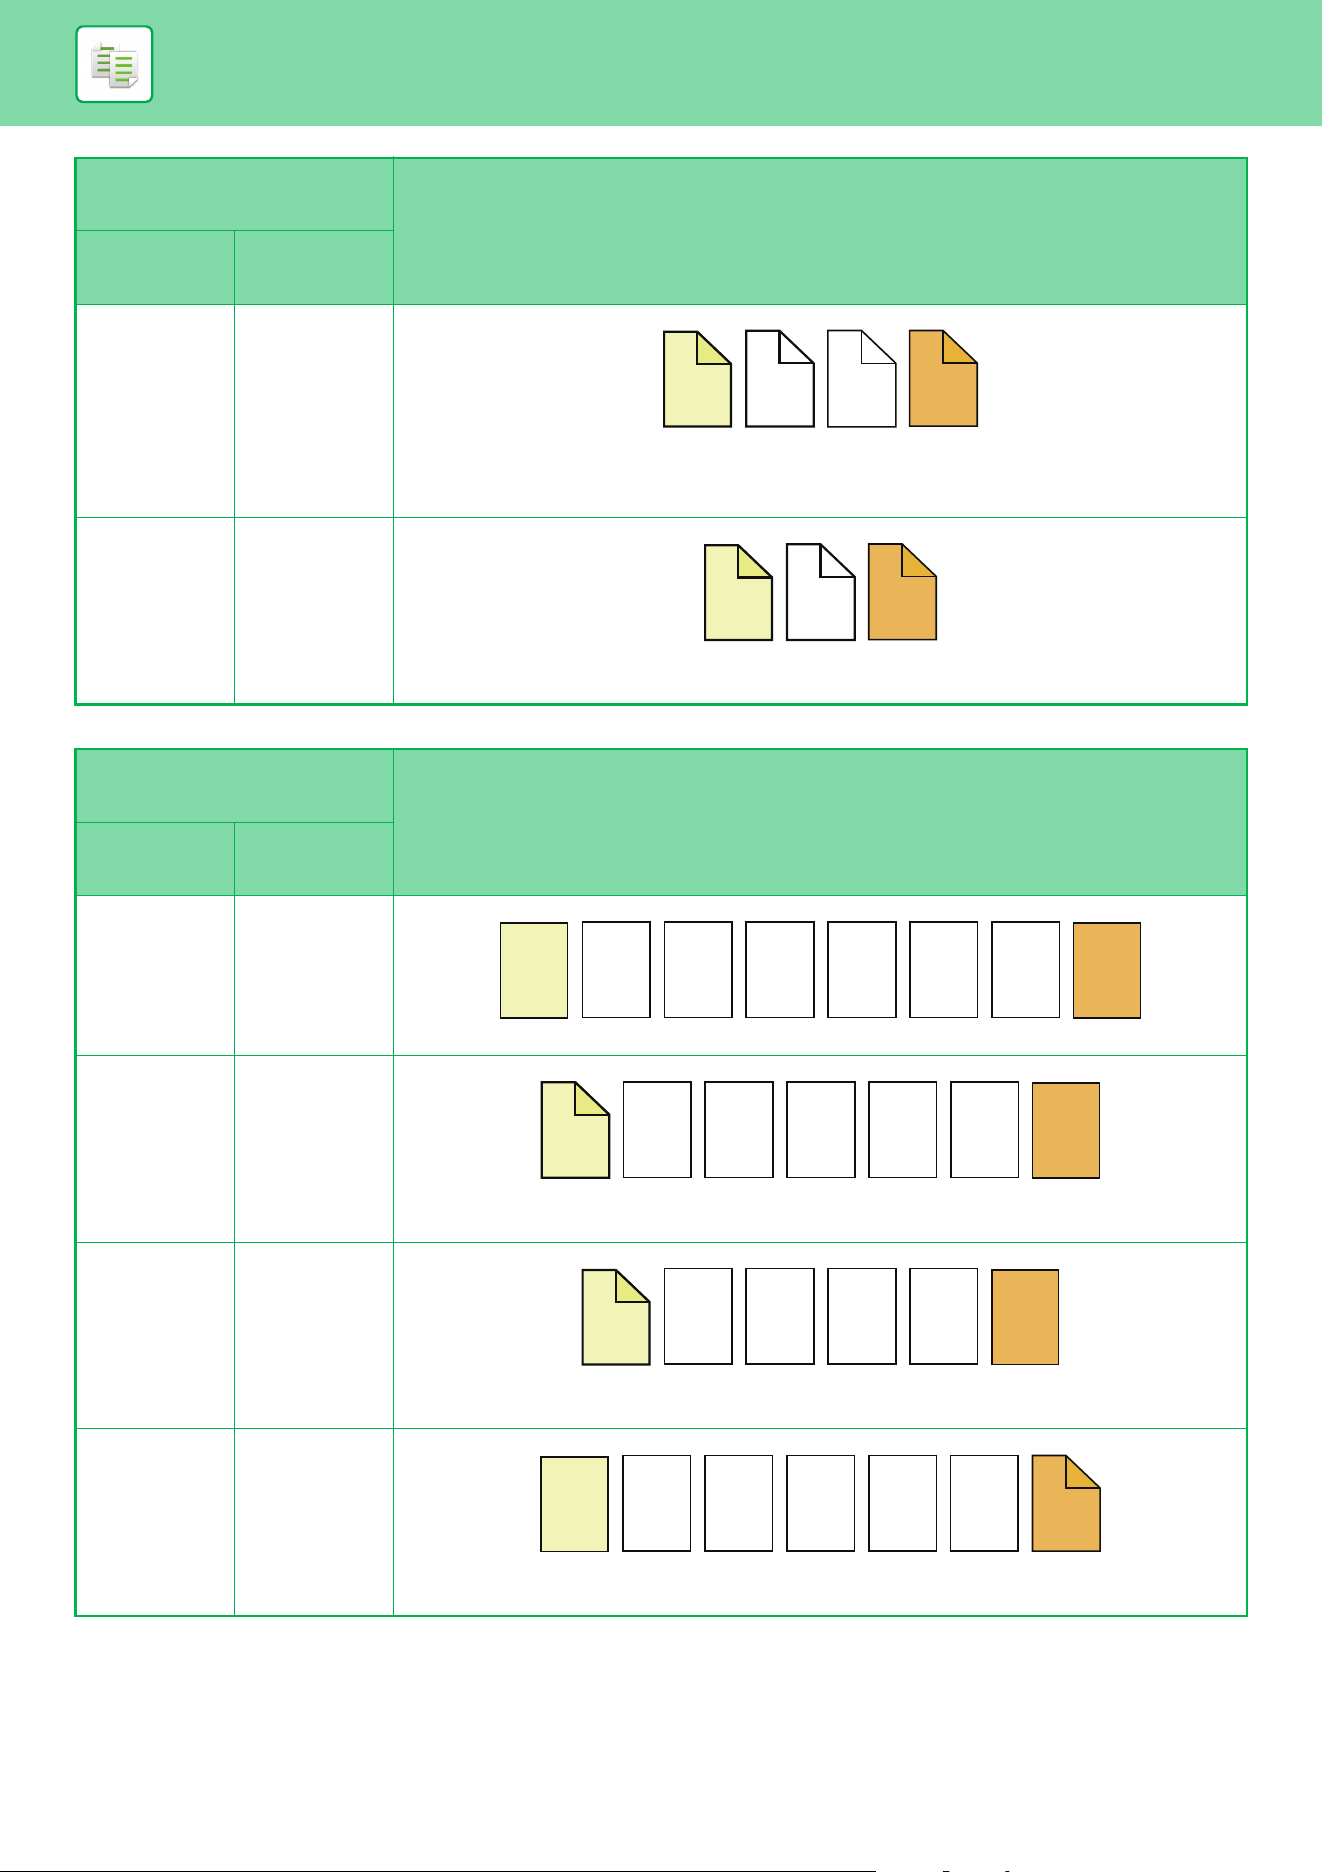
3-118
COPIER►OTHER FUNCTIONS
1-sided copying of 2-sided originals
2-sided copy 1-sided copy
Makes a 2-sided copy on the first and second original pages for front cover, and also makes
a 1-sided copy on the sixth original page for back cover. A 1-sided copy is made on the fifth
original page.
2-sided copy 2-sided copy
Makes a 2-sided copy on the first and second original pages for front cover, and also makes
a 2-sided copy on the fifth and sixth original pages for back cover.
Setting conditions for
each cover
Resulting copies
Front
Cover
Back Cover
Not copied Not copied
Inserts cover sheets at the beginning and end of copies.
1-sided copy Not copied
Makes a 1-sided copy on the first original page for front cover, and inserts a back cover at the
end of copies.
2-sided copy Not copied
Makes a 2-sided copy on the first and second original pages for front cover, and inserts a
back cover at the end of copies.
Not copied 1-sided copy
Inserts a front cover at the beginning of copies, and makes a 1-sided copy on the sixth
original page for back cover.
Setting conditions for
each cover
Resulting copies
Front
Cover
Back Cover
3
4
1
2
5
6
3
4
1
2
6
5
2
1
3 4 5
6
2 3 45
6
1
3 4 5
6
1
2
2
1
3 4 5
6
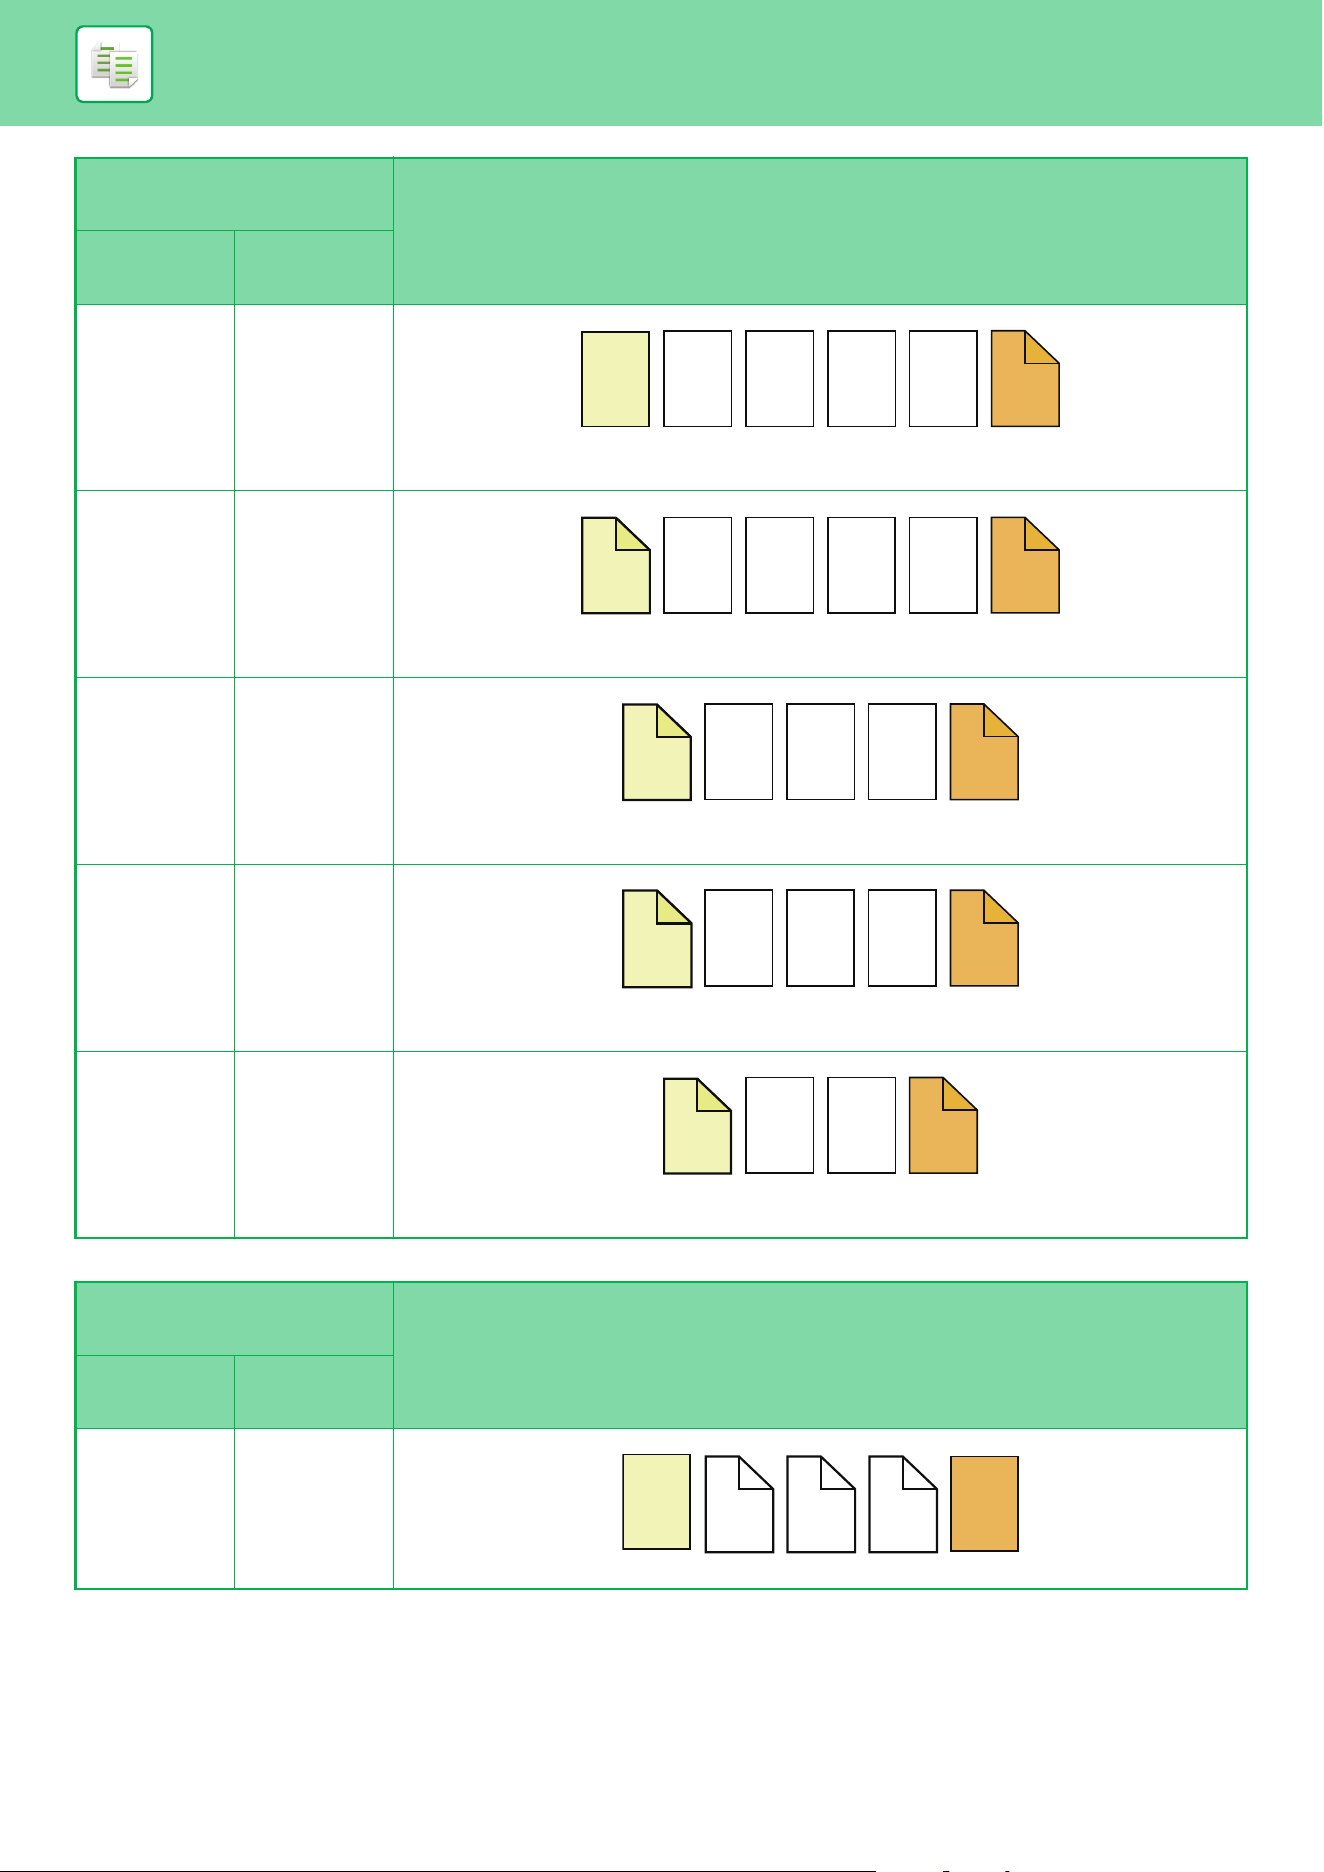
3-119
COPIER►OTHER FUNCTIONS
2-sided copying of 2-sided originals
Not copied 2-sided copy
Inserts a front cover at the beginning of copies, and makes a 2-sided copy on the fifth and
sixth original pages for back cover.
1-sided copy 1-sided copy
Makes a 1-sided copy on the first original page for front cover, and also makes a 1-sided
copy on the sixth original page for back cover.
1-sided copy 2-sided copy
Makes a 1-sided copy on the first original page for front cover, and also makes a 2-sided
copy on the sixth original page for back cover.
2-sided copy 1-sided copy
Makes a 2-sided copy on the first and second original pages for front cover, and also makes
a 1-sided copy on the sixth original page for back cover.
2-sided copy 2-sided copy
Makes a 2-sided copy on the first and second original pages for front cover, and also makes
a 2-sided copy on the fifth and sixth original pages for back cover.
Setting conditions for
each cover
Resulting copies
Front
Cover
Back Cover
Not copied Not copied
Inserts cover sheets at the beginning and end of copies.
Setting conditions for
each cover
Resulting copies
Front
Cover
Back Cover
2
1
3 4
6
5
2 3 4 5
1
6
2 3 4
1
6
5
3 4 5
1
2
6
3 4
1
2
6
5
3
4
1
2
5
6
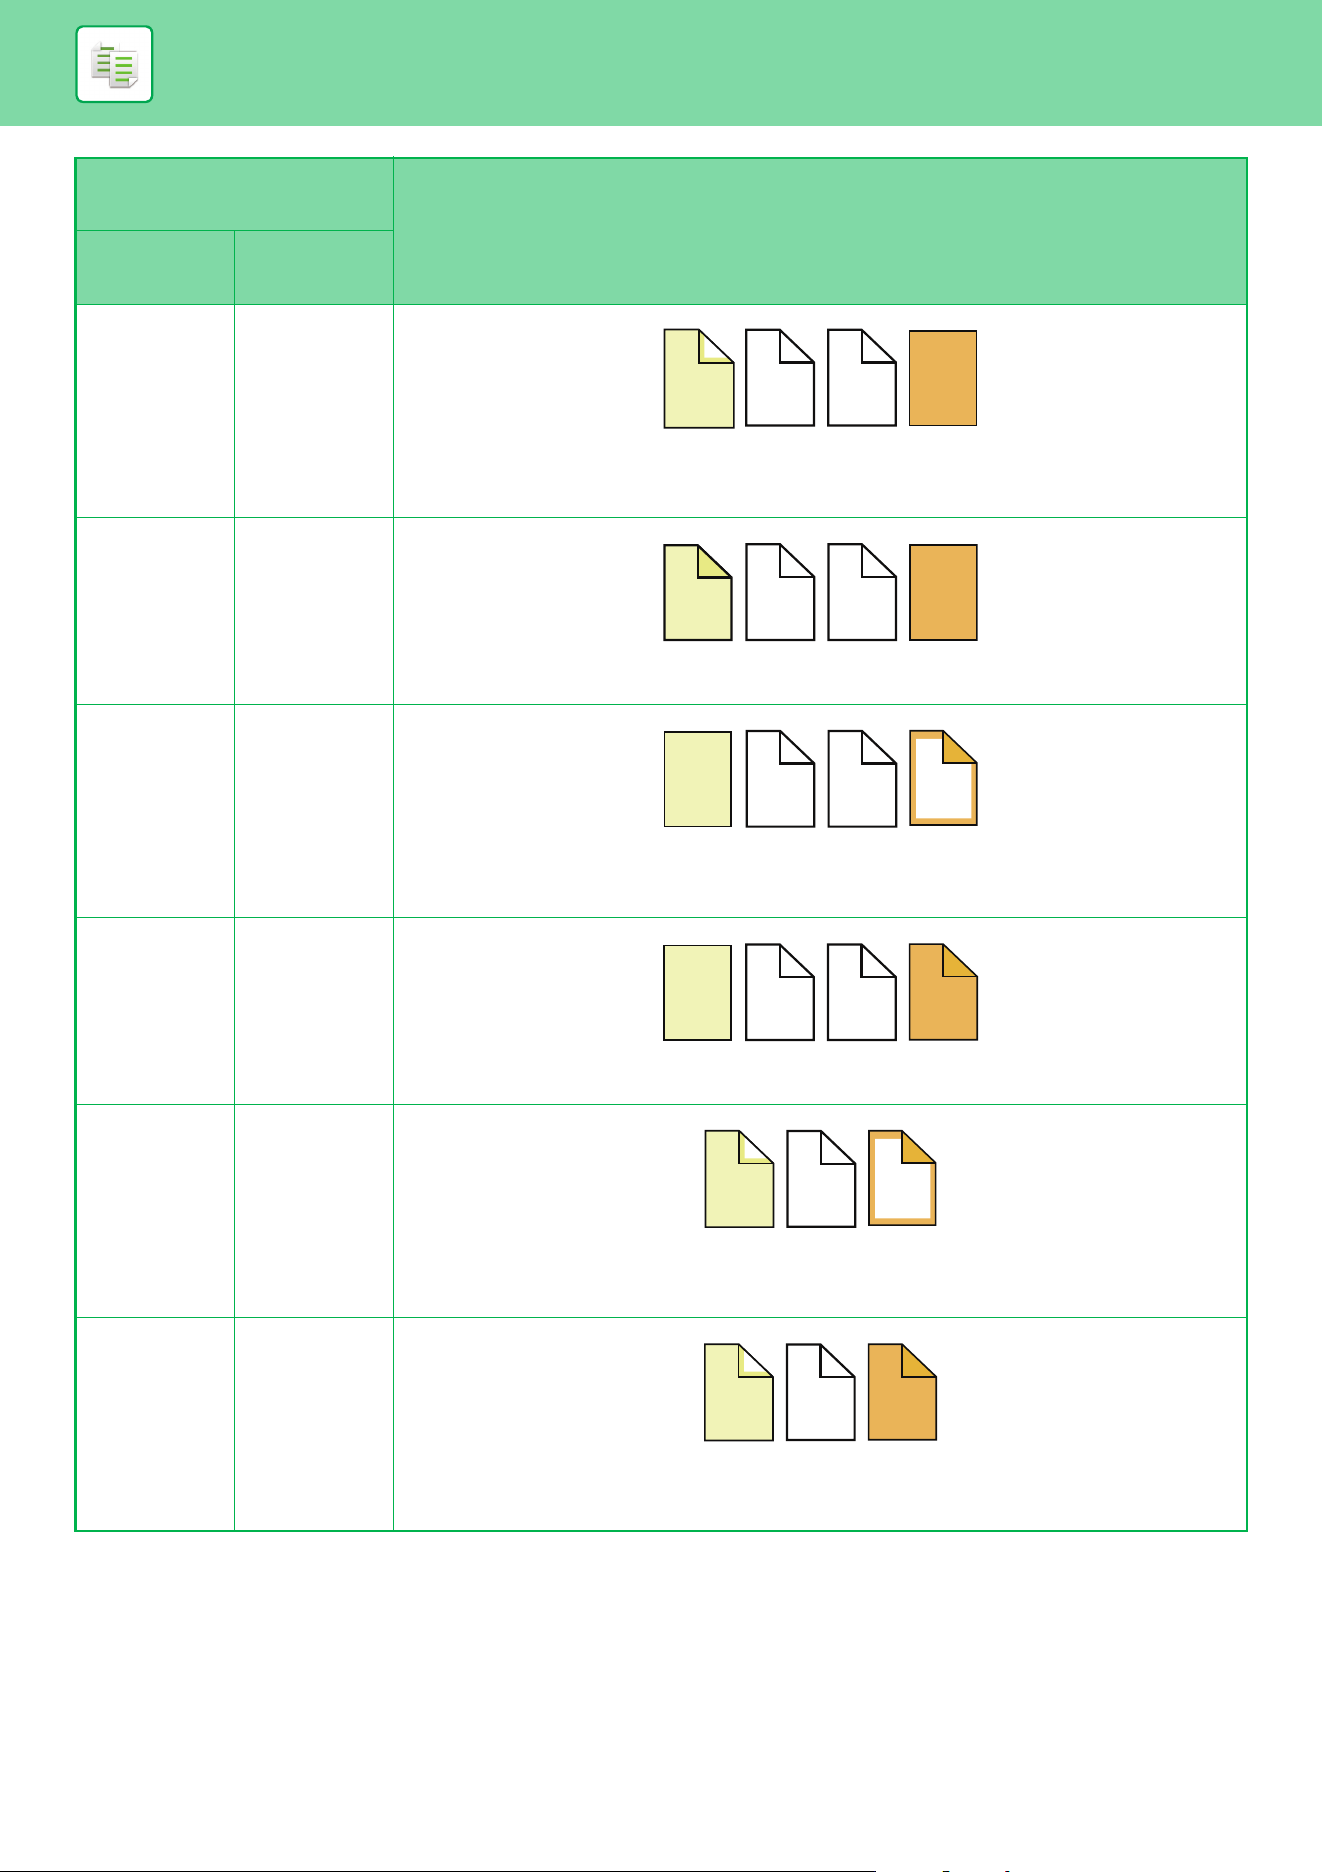
3-120
COPIER►OTHER FUNCTIONS
1-sided copy Not copied
Makes a 1-sided copy on the first original page for front cover, and inserts a back cover at the
end of copies.
*The second original page is not copied.
2-sided copy Not copied
Makes a 2-sided copy on the first and second original pages for front cover, and inserts a
back cover at the end of copies.
Not copied 1-sided copy
Inserts a front cover at the beginning of copies, and makes a 1-sided copy on the sixth
original page for back cover.
* The fifth original page is not copied.
Not copied 2-sided copy
Inserts a front cover at the beginning of copies, and makes a 2-sided copy on the fifth and
sixth original pages for back cover.
1-sided copy 1-sided copy
Makes a 1-sided copy on the first original page for front cover, and also makes a 1-sided
copy on the sixth original page for back cover. The second and the fifth original pages are not
copied.
1-sided copy 2-sided copy
Makes a 1-sided copy on the first original page for front cover, and also makes a 2-sided
copy on the fifth and sixth original pages for back cover.
* The second original page is not copied.
Setting conditions for
each cover
Resulting copies
Front
Cover
Back Cover
3
4
1
5
6
3
4
1
2
5
6
3
4
1
2
6
3
4
1
2
6
5
3
4
1
6
3
4
1
6
5
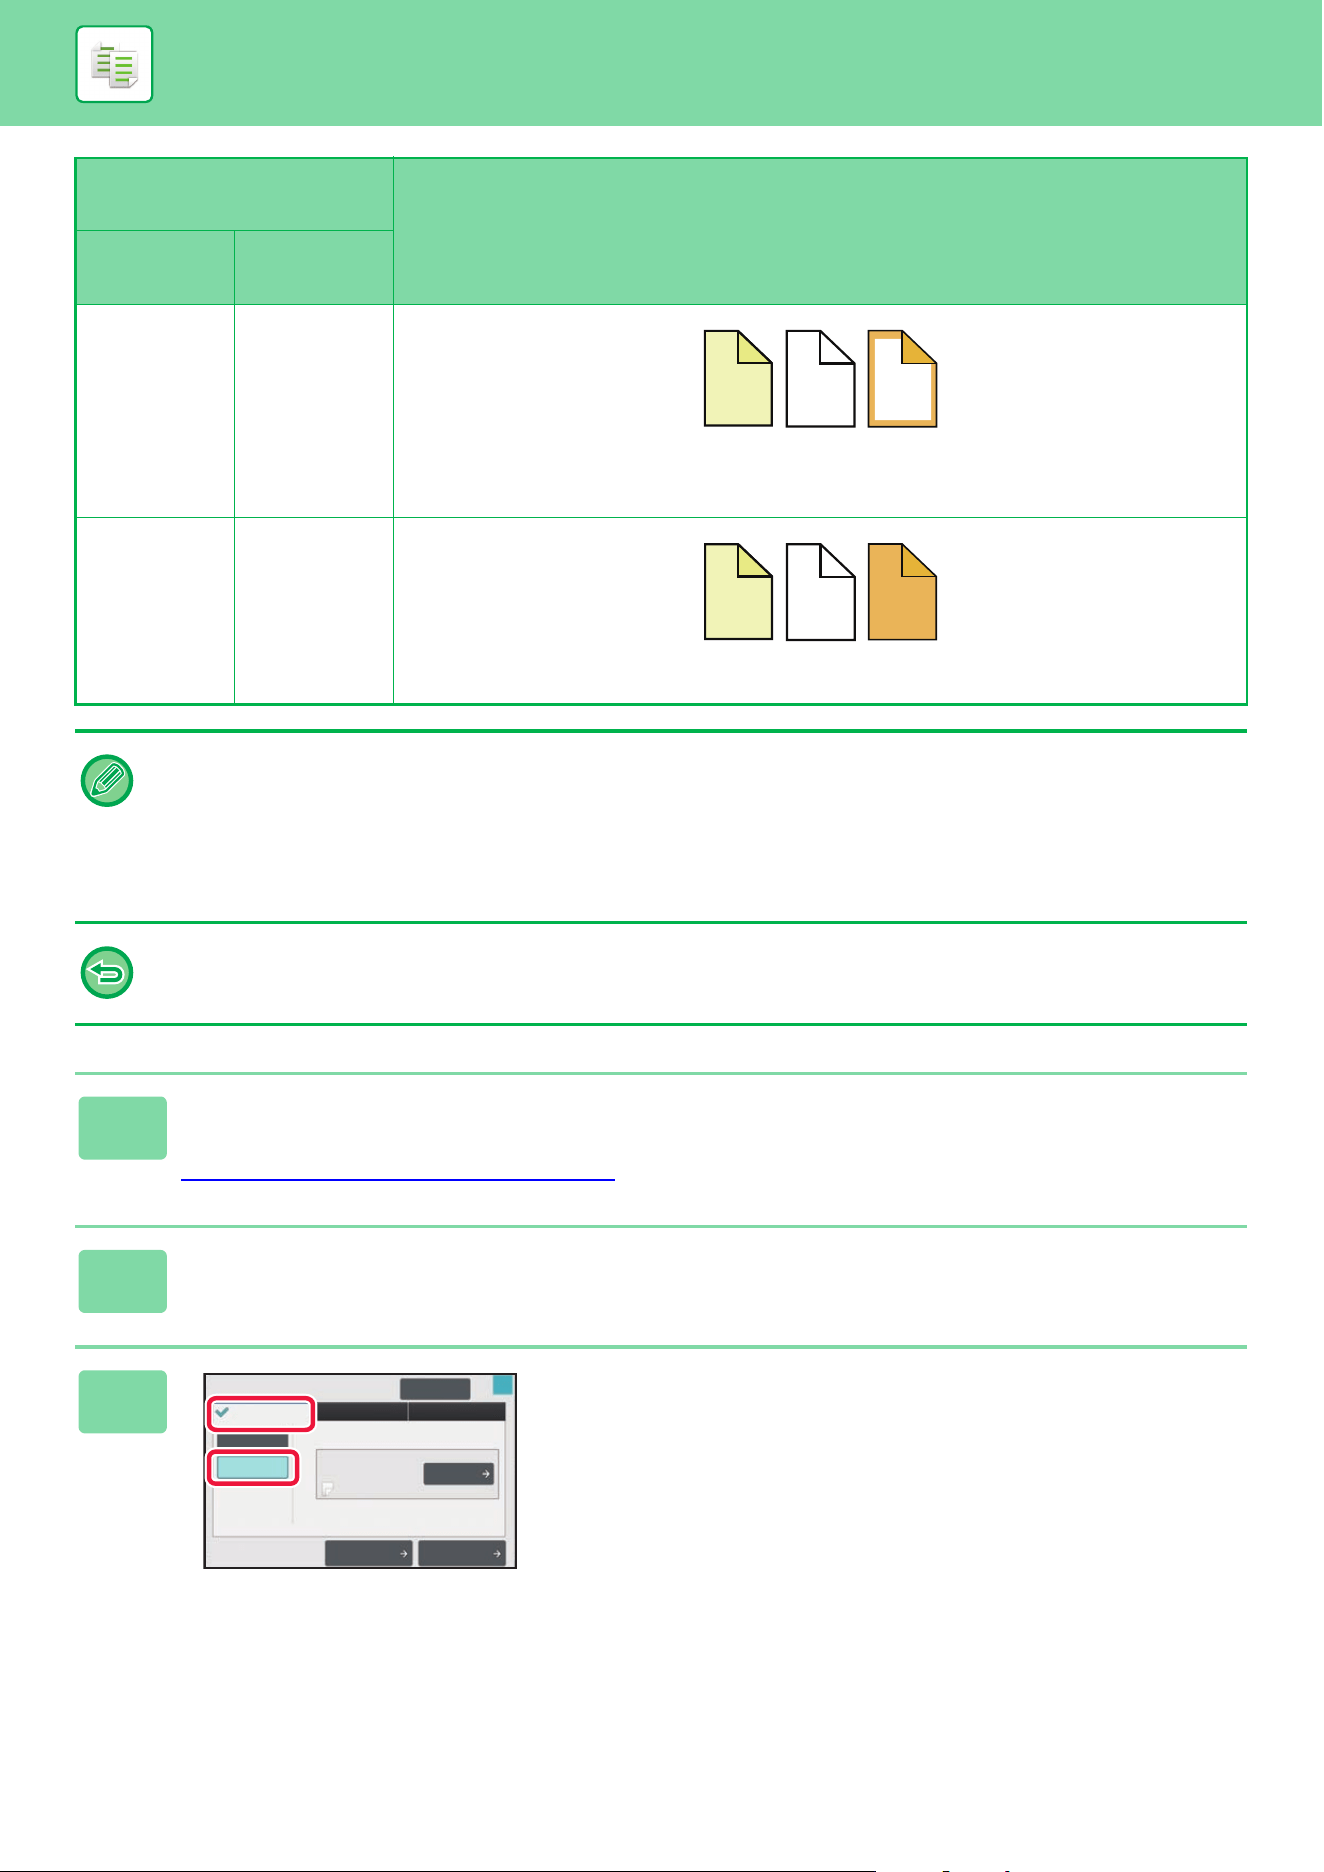
3-121
COPIER►OTHER FUNCTIONS
2-sided copy 1-sided copy
Makes a 2-sided copy on the first and second original pages for front cover, and also makes
a 1-sided copy on the sixth original page for back cover.
* The fifth original page is not copied.
2-sided copy 2-sided copy
Makes a 2-sided copy on the first and second original pages for front cover, and also makes
a 2-sided copy on the fifth and sixth original pages for back cover.
• Covers/Inserts cannot be selected in easy mode.
• Before using the covers/inserts function, load insertion sheets in the tray.
• When selecting the covers/inserts function, place the originals in the document feeder tray, select 1-sided or 2-sided
copying, and select the number of copies and any other desired copy settings. When these settings have been completed,
perform the procedure to select covers/inserts.
• One sheet can be inserted for each of front and back covers.
• When performing 2-sided copying of 2-sided originals, an insertion sheet cannot be inserted between the front and reverse
sides of an original.
• This function cannot be used in combination with the saddle stitch function.
1
Place the original in the document feeder tray of the automatic document
feeder.
AUTOMATIC DOCUMENT FEEDER (page 1-47)
2
Tap the [Others] key, and then tap the [Covers/Inserts] key.
3
Tap the [Front Cover] key, and then tap
the [On] key.
When inserting a back cover, tap the [Back Cover] tab, and
then tap the [On] key.
Setting conditions for
each cover
Resulting copies
Front
Cover
Back Cover
3
4
6
1
2
3
4
1
2
6
5
Insertion Sheet
Back CoverFront Cover
Page Layout
Paper Tray
Settings
On
Off
Change
Bypass
Plain 1
Make No Copy
Covers/Inserts
Cancel All
OK
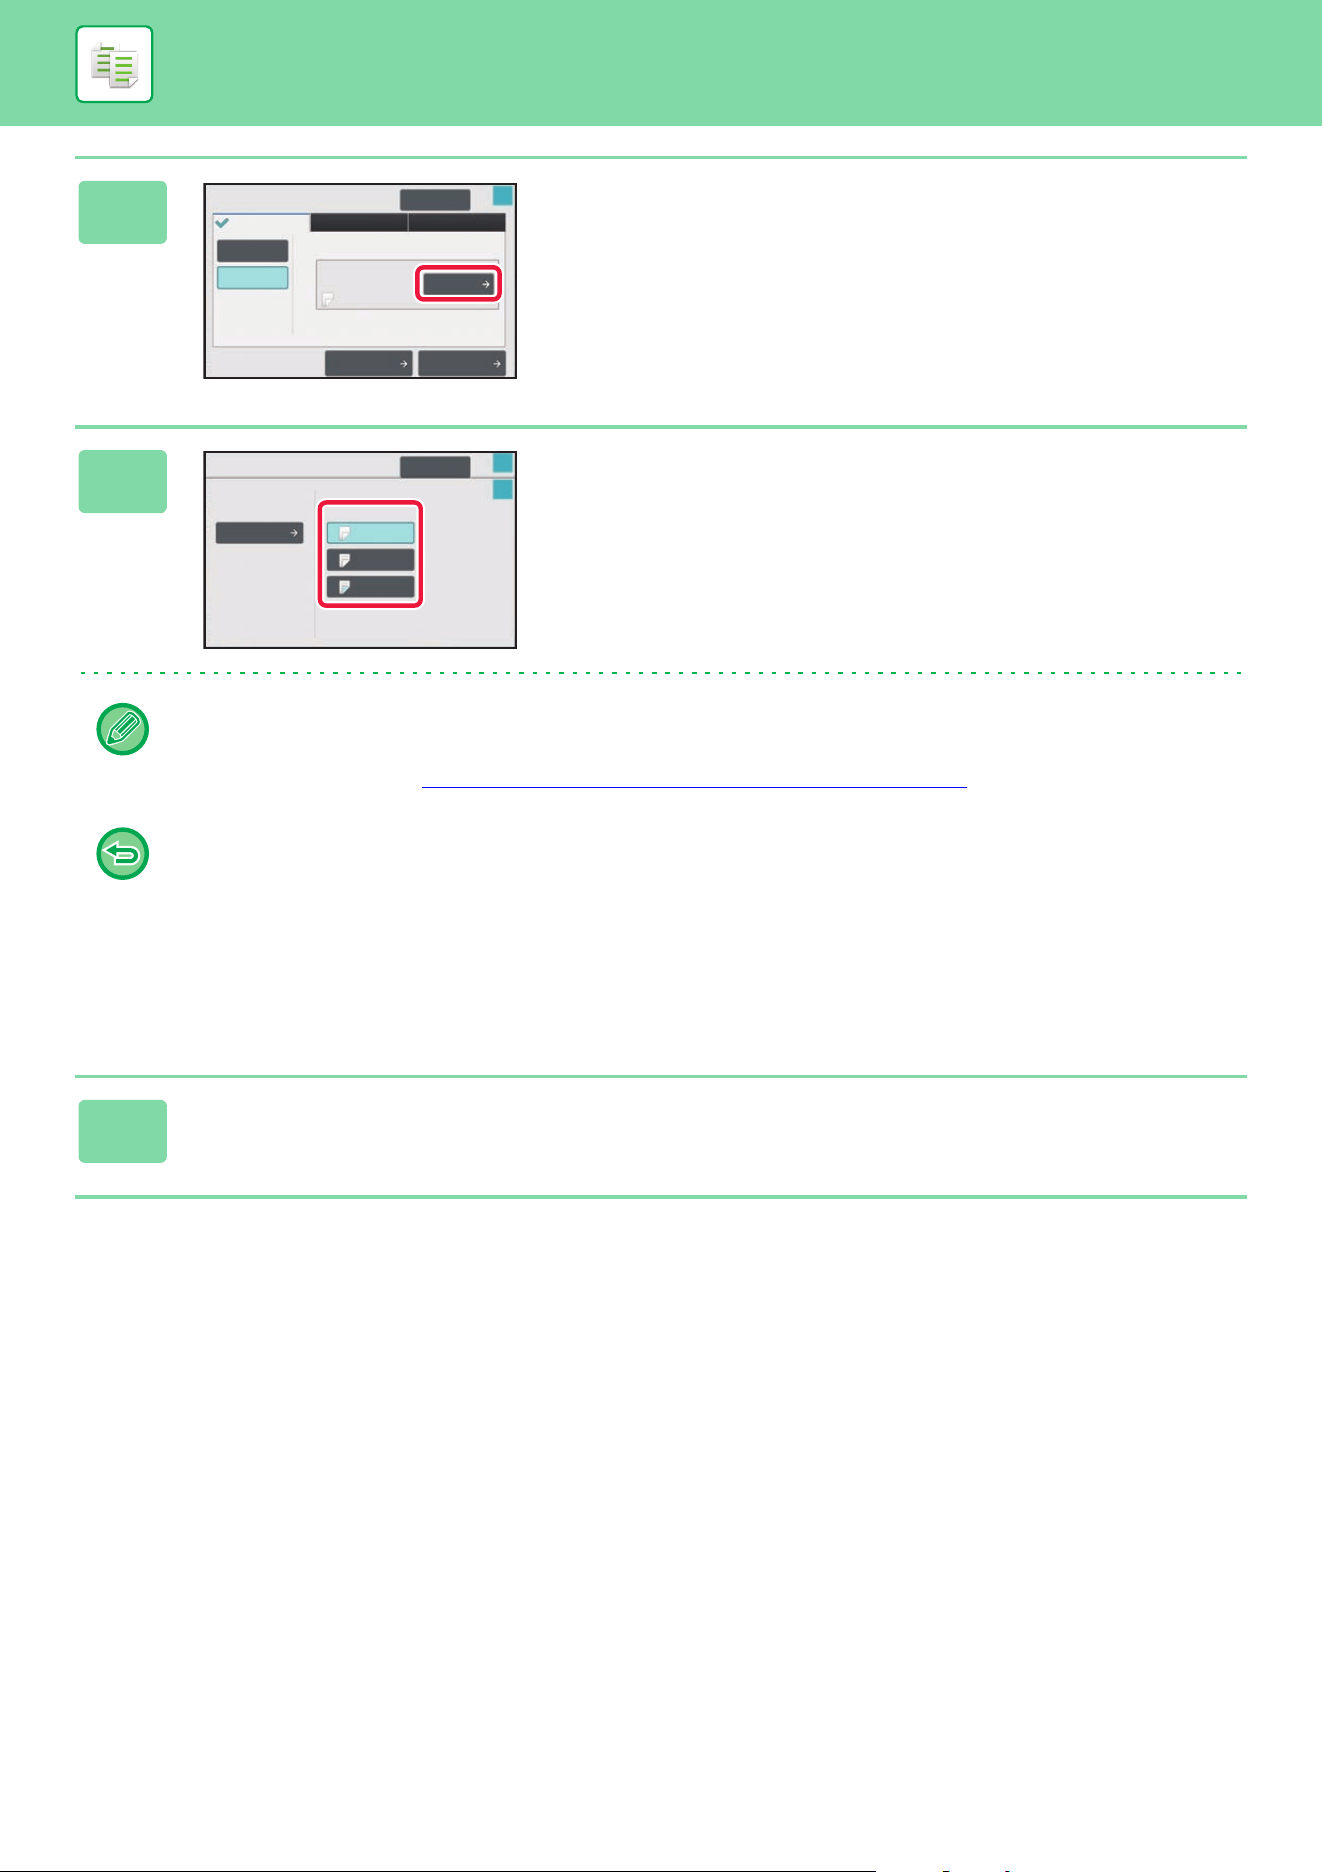
3-122
COPIER►OTHER FUNCTIONS
4
Tap the [Change] key.
5
Configure copy setting of a front cover
sheet.
When only inserting a cover, tap the [Make No Copy] key.
If you selected the [2-Sided Copy] key, tap the [Book] or
[Tablet] key for the front cover binding.
After the settings are completed, tap [OK] key.
To change the cover input tray:
Tap the [Paper Tray Settings] key to display the input tray setting screen. On the input tray setting screen, tap the [Paper
Tray] key of [Front Cover] or [Back Cover].
For more information, see “SELECTING THE PAPER TRAY FOR COPYING
(page 3-13)”.
• If the cover will be copied on, label sheets, transparency film, and tab paper cannot be used. If not copied on, tab
paper can be inserted.
• To cancel cover sheet insertion:
Tap the [Off] key.
• To cancel the front cover, back cover, and insertion sheet settings at the same time:
Tap the [Cancel All] key.
• To cancel all settings:
Tap the [CA] key.
6
Tap the [Color Start] or [B/W Start] key to start copying.
Covers/Inserts
Insertion SheetBack CoverFront Cover
Cancel All
On
Off
OK
Page Layout
Paper Tray
Settings
Change
Bypass
Plain 1
Make No Copy
Front Cover Setting
Paper Tray
Bypass
Simplex
Make No Copy
2-Sided Copy
Print on Front Cover
Plain 1
Covers/Inserts
Cancel All
OK
OK
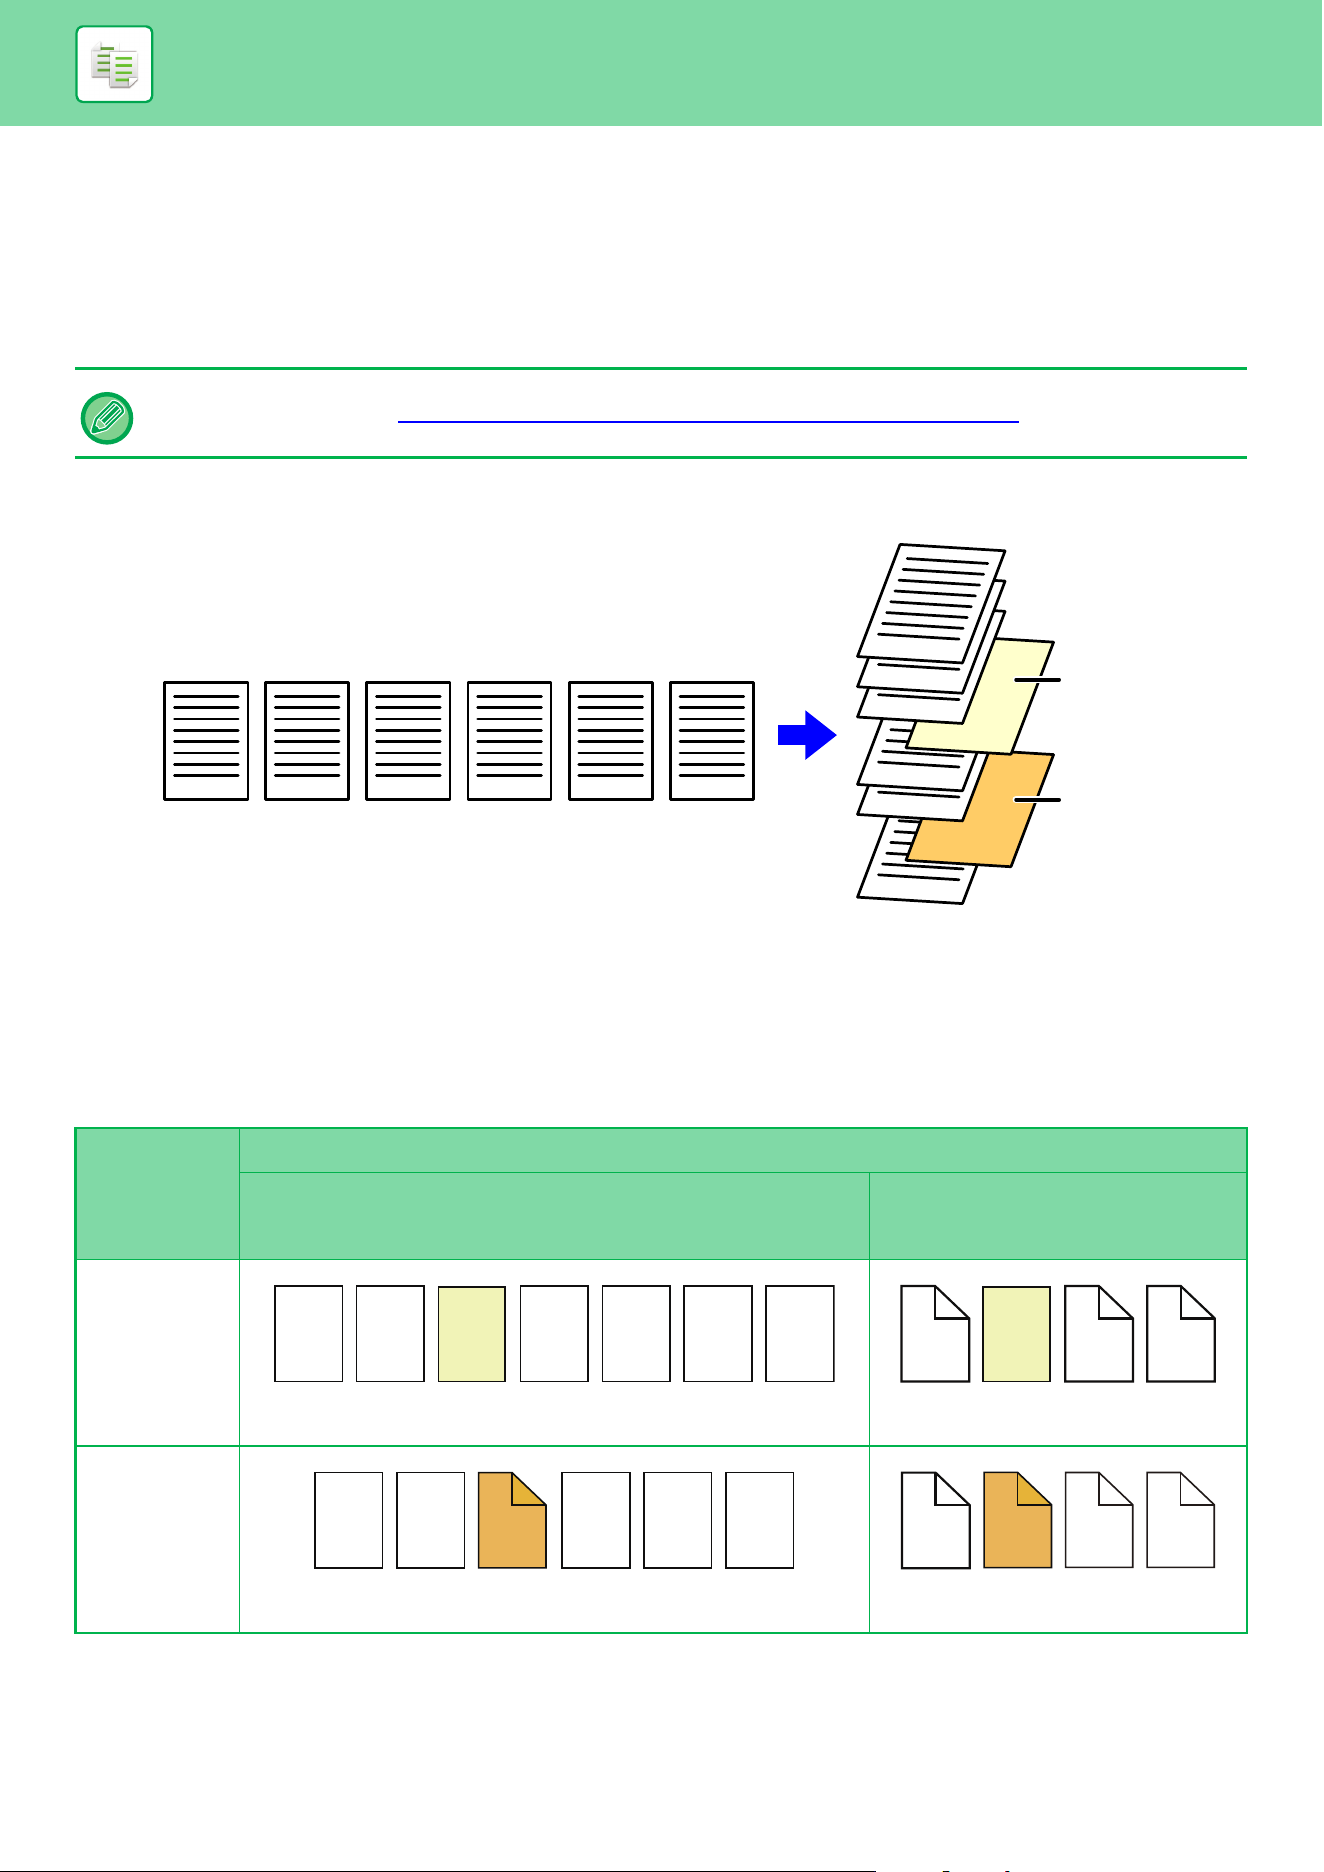
3-123
COPIER►OTHER FUNCTIONS
INSERTING INSERTION SHEETS IN COPIES
(COVERS/INSERTS)
This function inserts a sheet of paper into a specific page as an insertion sheet.
There are two types of insertion sheets. Insertion positions can be specified.
Insert covers if needed.
Example: Inserting sheets after pages 3 and 5
Sheet inserting examples
The following examples show the copy results when insertion sheets are inserted into six 1-sided originals or three
2-sided originals using two copy modes.
1-sided original copying
When inserting covers, see “INSERTING COVERS IN COPIES (COVERS/INSERTS) (page 3-115)".
Insertion
sheet
setting
conditions
Resulting copies
Insert an insertion sheet in 1-sided copy mode. Insert an insertion sheet in
2-sided copy mode.
Not copied
Inserts an insertion sheet between the second and third pages of
copies.
1-sided copy
Makes a 1-sided copy of the third original page on an insertion
sheet.
Insert A
Insert B
6
5
4
2 3 4 5 61
3
2
1
1
Originals
Copy
2
1
3 4 5
6
1
2
3
4
5
6
2
1
4
3
5
6
1
2
6
3
4
5
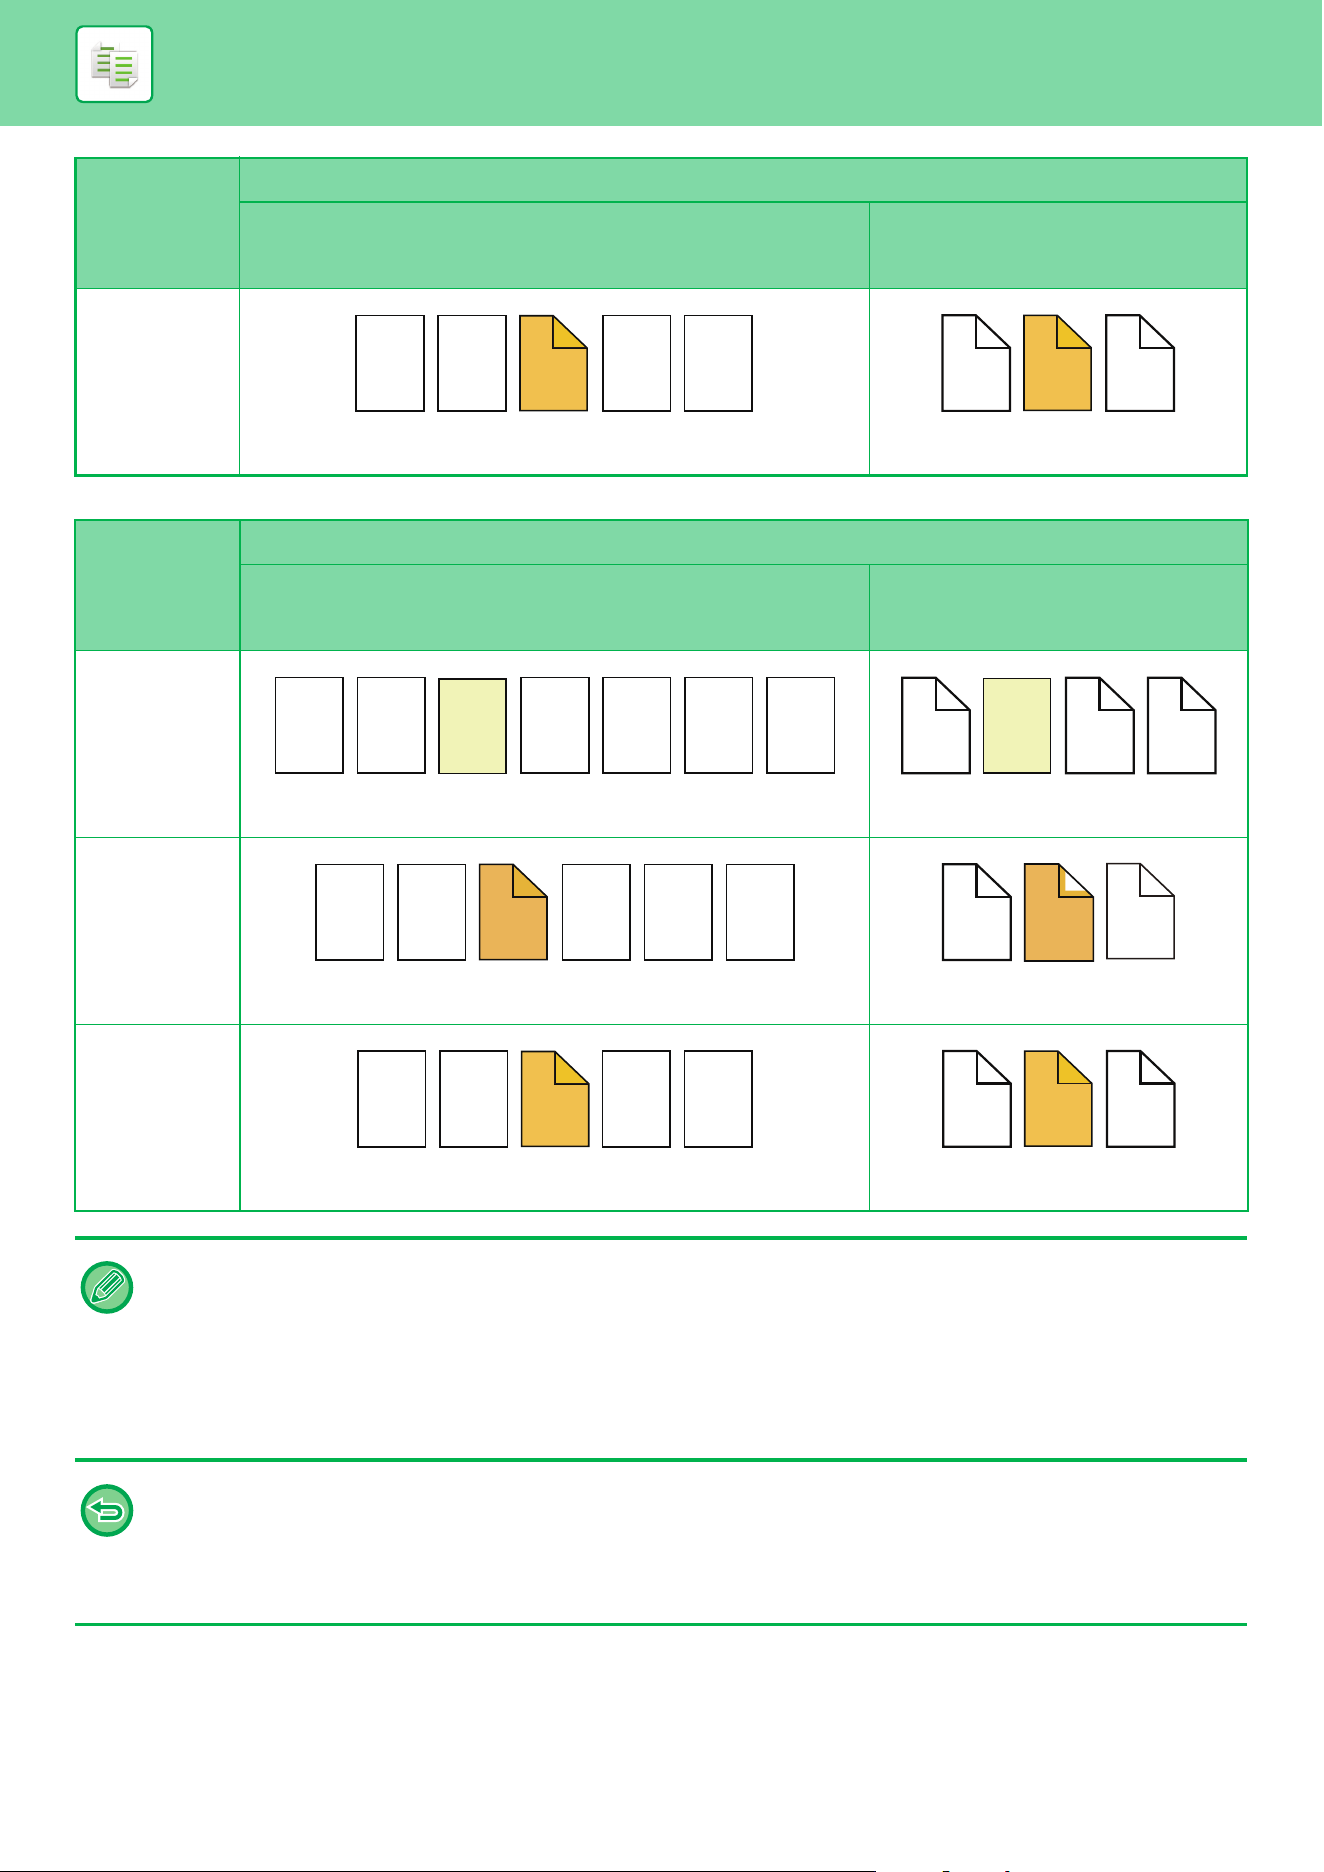
3-124
COPIER►OTHER FUNCTIONS
2-sided original copying
2-sided copy
Makes a 2-sided copy of the third and fourth original pages on an
insertion sheet.
Insertion
sheet
setting
conditions
Resulting copies
Insert an insertion sheet in 1-sided copy mode. Insert an insertion sheet in
2-sided copy mode.
Not copied
Inserts an insertion sheet between the second and third pages of
copies.
1-sided copy
Makes a 1-sided copy of the third original page on an insertion
sheet.
* The fourth original page is not
copied.
2-sided copy
Makes a 2-sided copy of the third and fourth original pages on an
insertion sheet.
• Covers/Inserts cannot be selected in easy mode.
• Before using the covers/inserts function, load insertion sheets in the tray.
• When selecting the covers/inserts function, place the originals in the document feeder tray, select 1-sided or 2-sided
copying, and select the number of copies and any other desired copy settings. When these settings have been completed,
perform the procedure to select covers/inserts.
• The insertion sheet size must be the same as the copy size.
• Up to 100 insertion sheets can be inserted.
• The document glass is not available for this function.
• Take care that two insertion sheets cannot be inserted into the same page.
• When performing 2-sided copying of 2-sided originals, an insertion sheet cannot be inserted between the front and reverse
sides of an original.
• This function cannot be used in combination with the saddle stitch function.
Insertion
sheet
setting
conditions
Resulting copies
Insert an insertion sheet in 1-sided copy mode. Insert an insertion sheet in
2-sided copy mode.
2
1
3
4
5
6
1
2
3
4
5
6
2
1
3 4 5
6
1
2
3
4
5
6
2
1
4
3
5
6
1
2
5
6
3
2
1
3
4
5
6
1
2
3
4
5
6
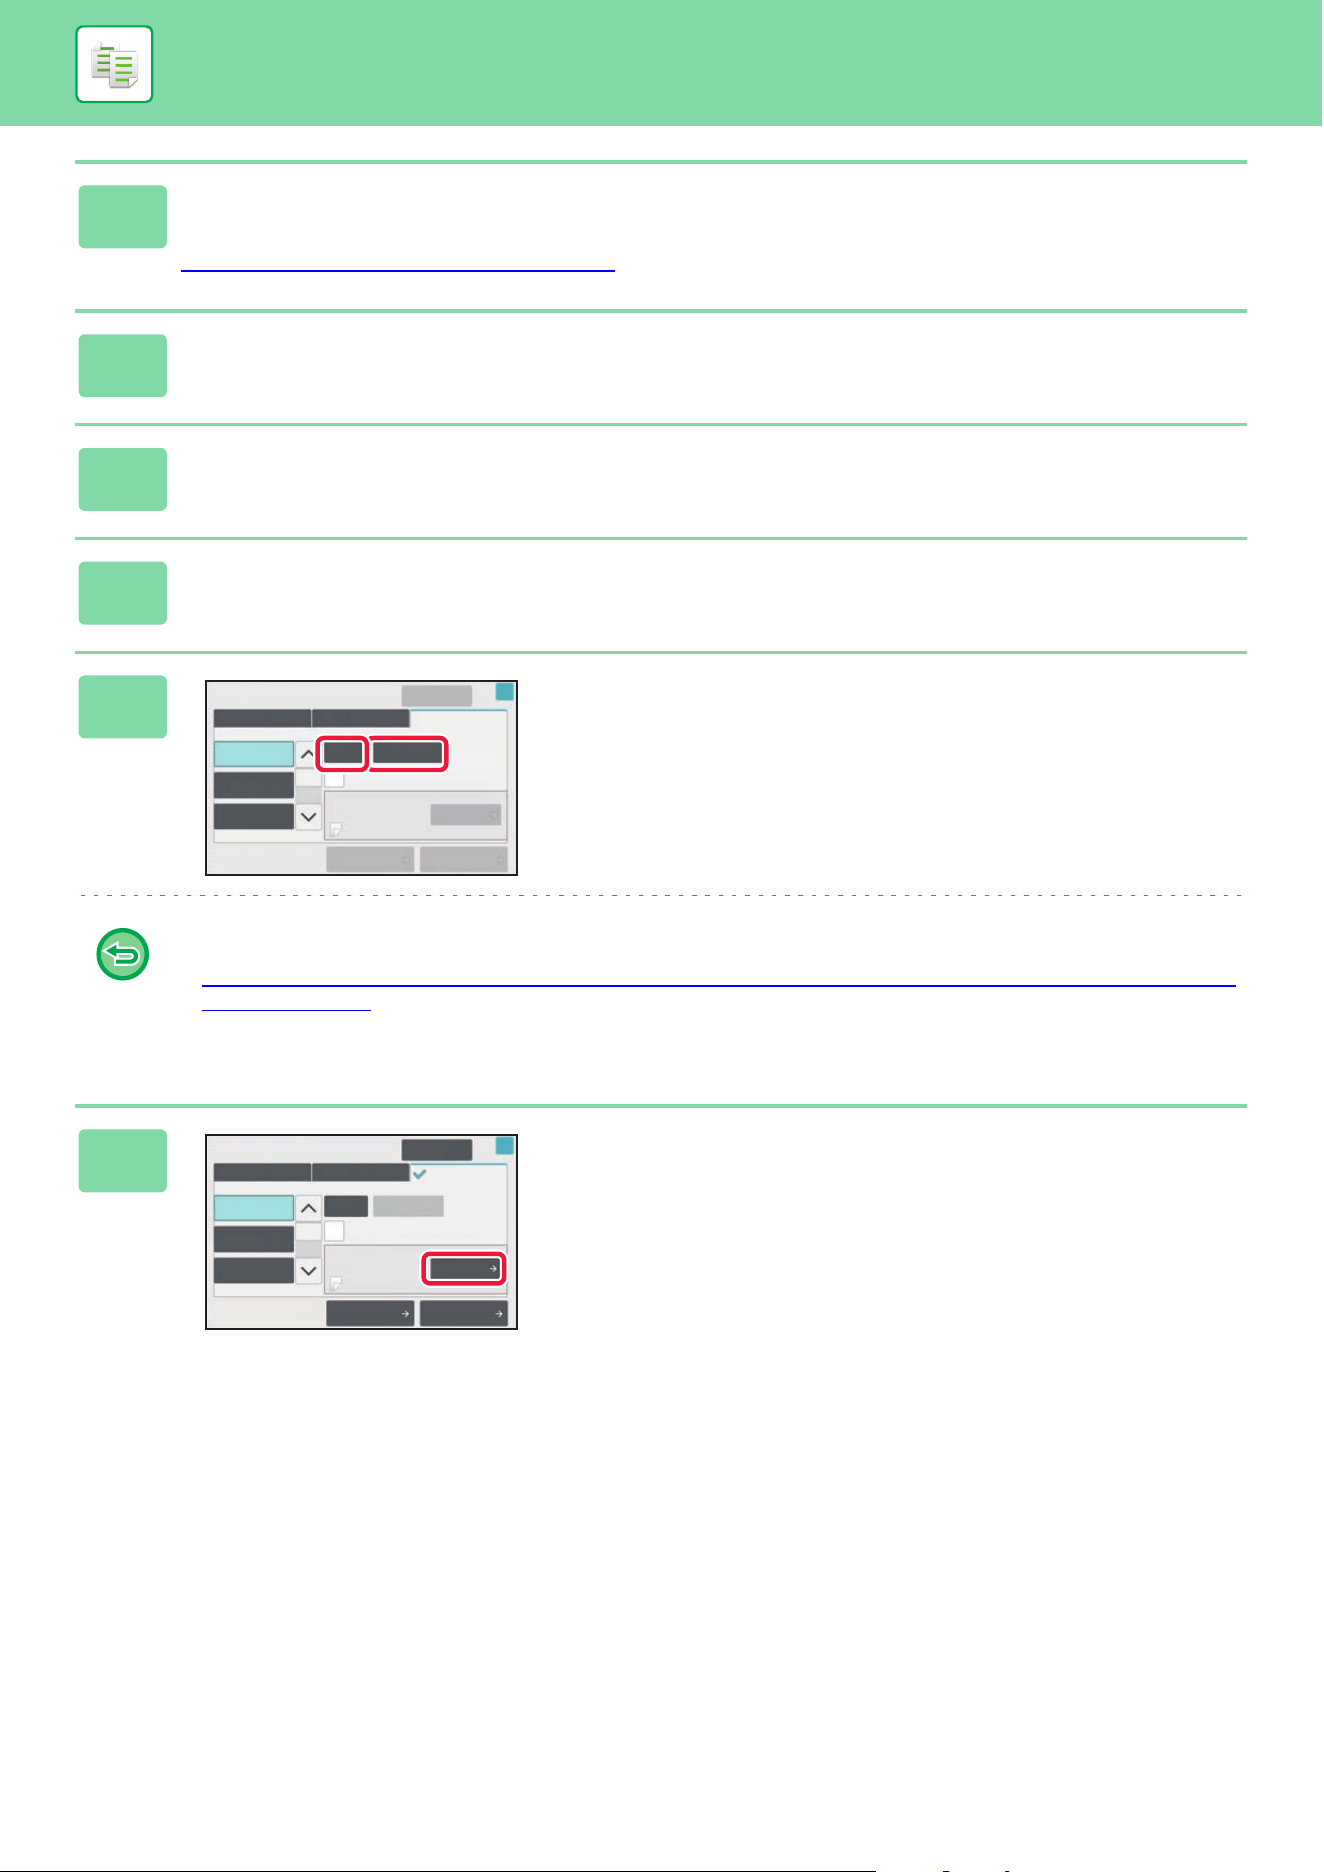
3-125
COPIER►OTHER FUNCTIONS
1
Place the original in the document feeder tray of the automatic document
feeder.
AUTOMATIC DOCUMENT FEEDER (page 1-47)
2
Tap the [Others] key, and then tap the [Covers/Inserts] key.
3
Tap the [Insertion Sheet] tab.
4
Tap the [Insertion Type A] key, and tap the insert page display key.
The Insertion Type B to Type H settings are the same as the Insertion Type A settings.
5
Enter the number of the page you want
to insert a sheet into using numeric
keys, and then tap the [Enter] key.
The total number of insertion sheets is displayed at the side
of [Enter] key. Repeat these steps for the number of
insertion sheets.
After the settings are completed, tap [OK] key.
• If you have entered an incorrect insert page number:
Tap the [Page Layout] key and change the page.
CHECKING, EDITING, AND DELETING THE PAGE LAYOUT
OF COVERS AND INSERTION SHEETS (PAGE LAY-
OUT) (page 3-127)
• To cancel insertion sheets:
Tap the [Cancel All] key.
6
Tap the [Change] key.
Insertion SheetBack CoverFront Cover
Page Layout
Paper Tray
Settings
Insertion Type C
Change
OK
Specify Page to Insert and Press Enter
Bypass
Make No Copy
Before Back Cover
Enter1
Insertion
Plain 1
Insertion Type A
Insertion Type B
Covers/Inserts
Cancel All
Change
Enter
1
Covers/Inserts
Cancel All
Insertion SheetBack CoverFront Cover
Specify Page to Insert and Press Enter
Bypass
Make No Copy
Before Back Cover
Total:1
Insertion
Plain 1
Insertion Type C
Insertion Type A
Insertion Type B
Page Layout
Paper Tray
Settings
OK
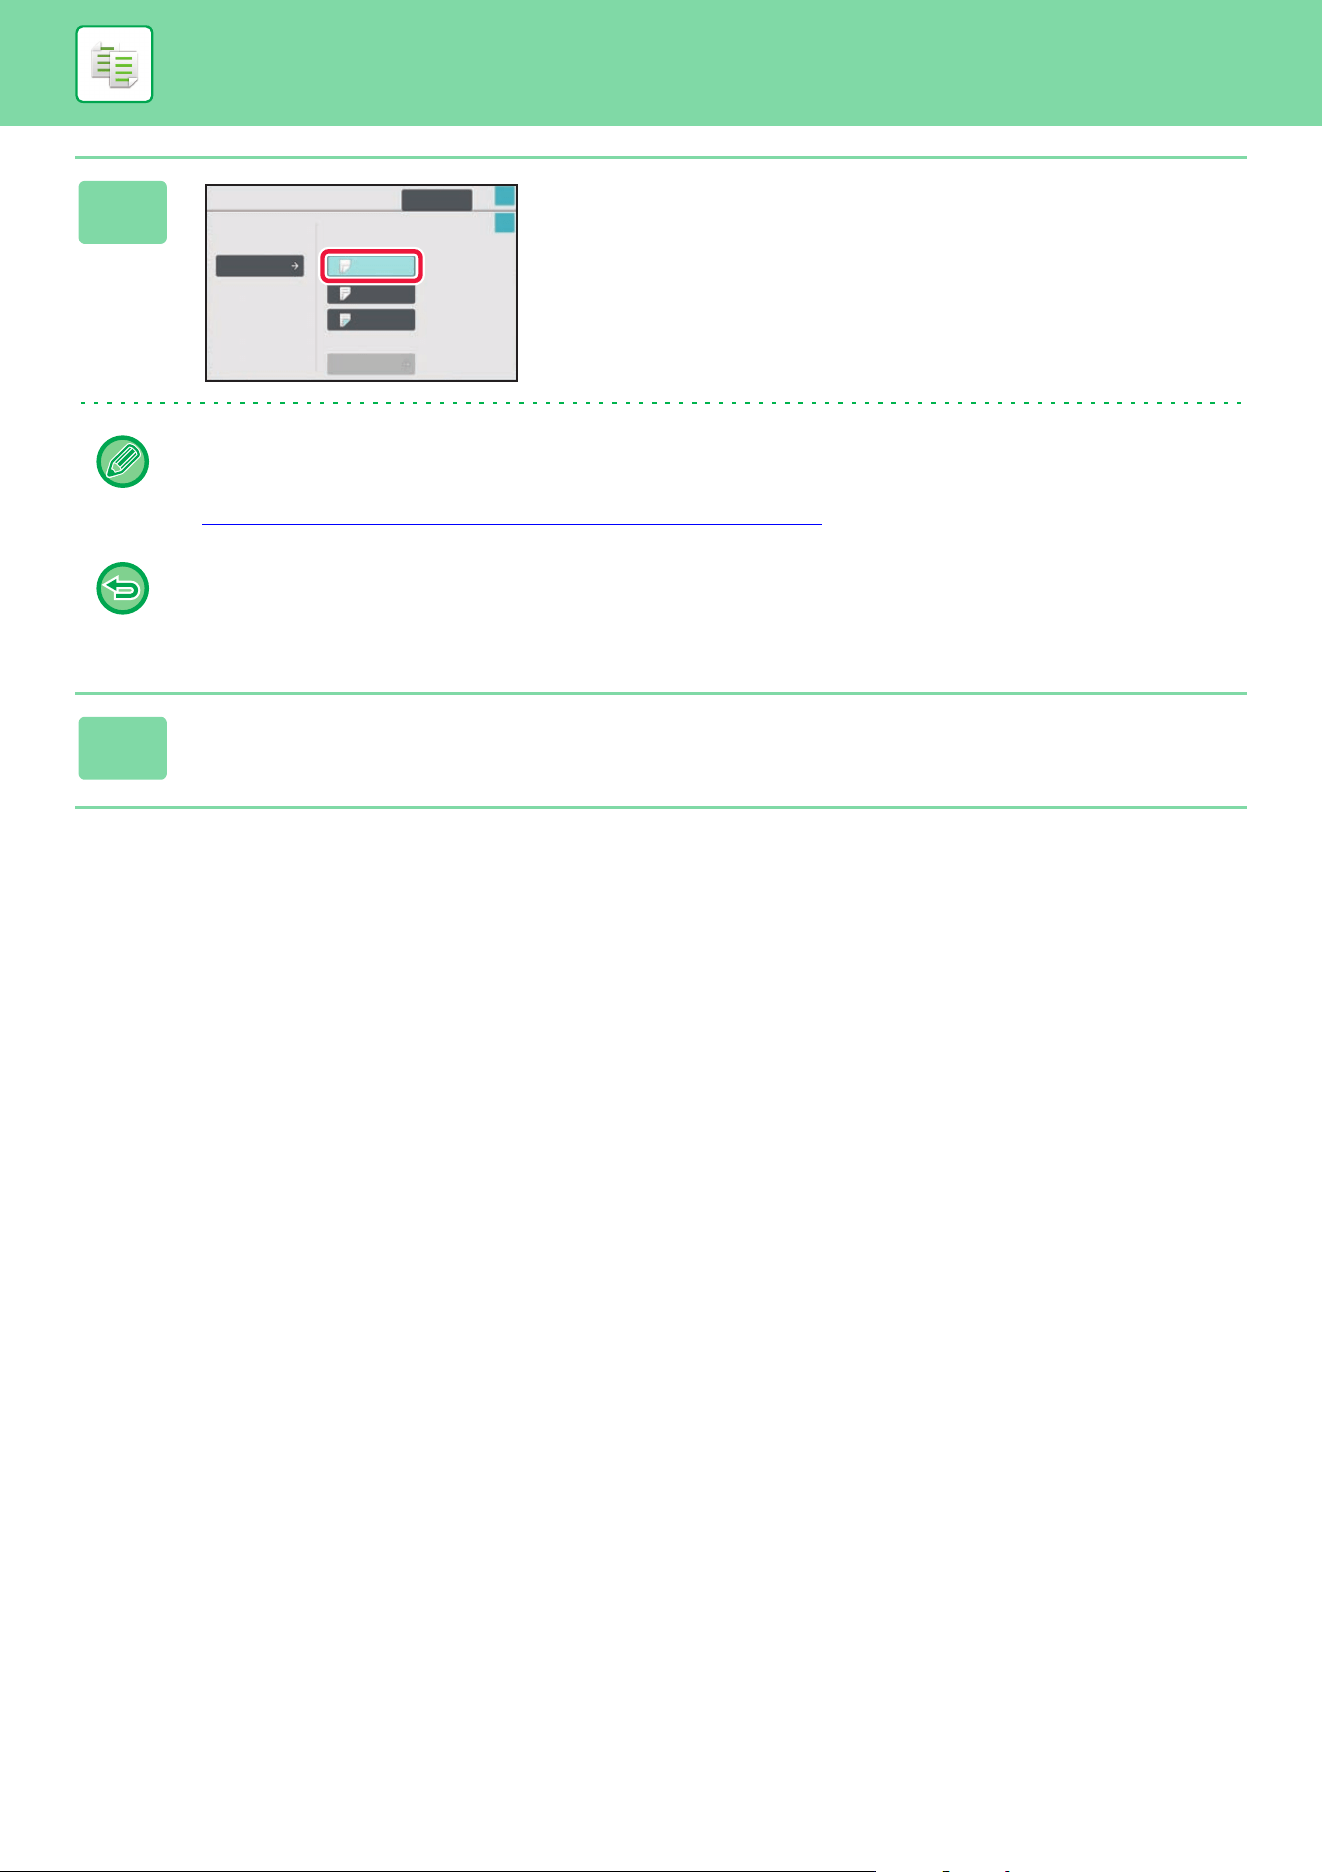
3-126
COPIER►OTHER FUNCTIONS
7
When only inserting insertion sheet A,
tap the [Make No Copy] key.
When making a copy on insertion sheet A, tap the [Simplex]
or [2-Sided Copy] key.
If you selected [2-Sided Copy], tap the [Book] key or [Tablet]
key for the insert sheet binding.
After the settings are completed, tap [OK] key.
• To change an insertion sheet:
Tap the [Paper Tray] key, and select the tray with insertion sheets loaded.
• To copy on tab paper, tap the [Tab Copy] key.
COPYING CAPTIONS ONTO TAB PAPER (TAB COPY)
(page 3-130)
• When copying on both sides of an insertion sheet, you cannot use label sheets, transparency films, or tab paper for
insertion. If not copied on, tab paper can be inserted.
• To cancel all settings:
Tap the [CA] key.
8
Tap the [Color Start] or [B/W Start] key to start copying.
Insertion Type A
Cancel All
Paper Tray
Bypass
Plain 1
Make No Copy
2-Sided Copy
Tab Copy
Simplex
Copy on Insert A
Covers/Inserts
OK
OK
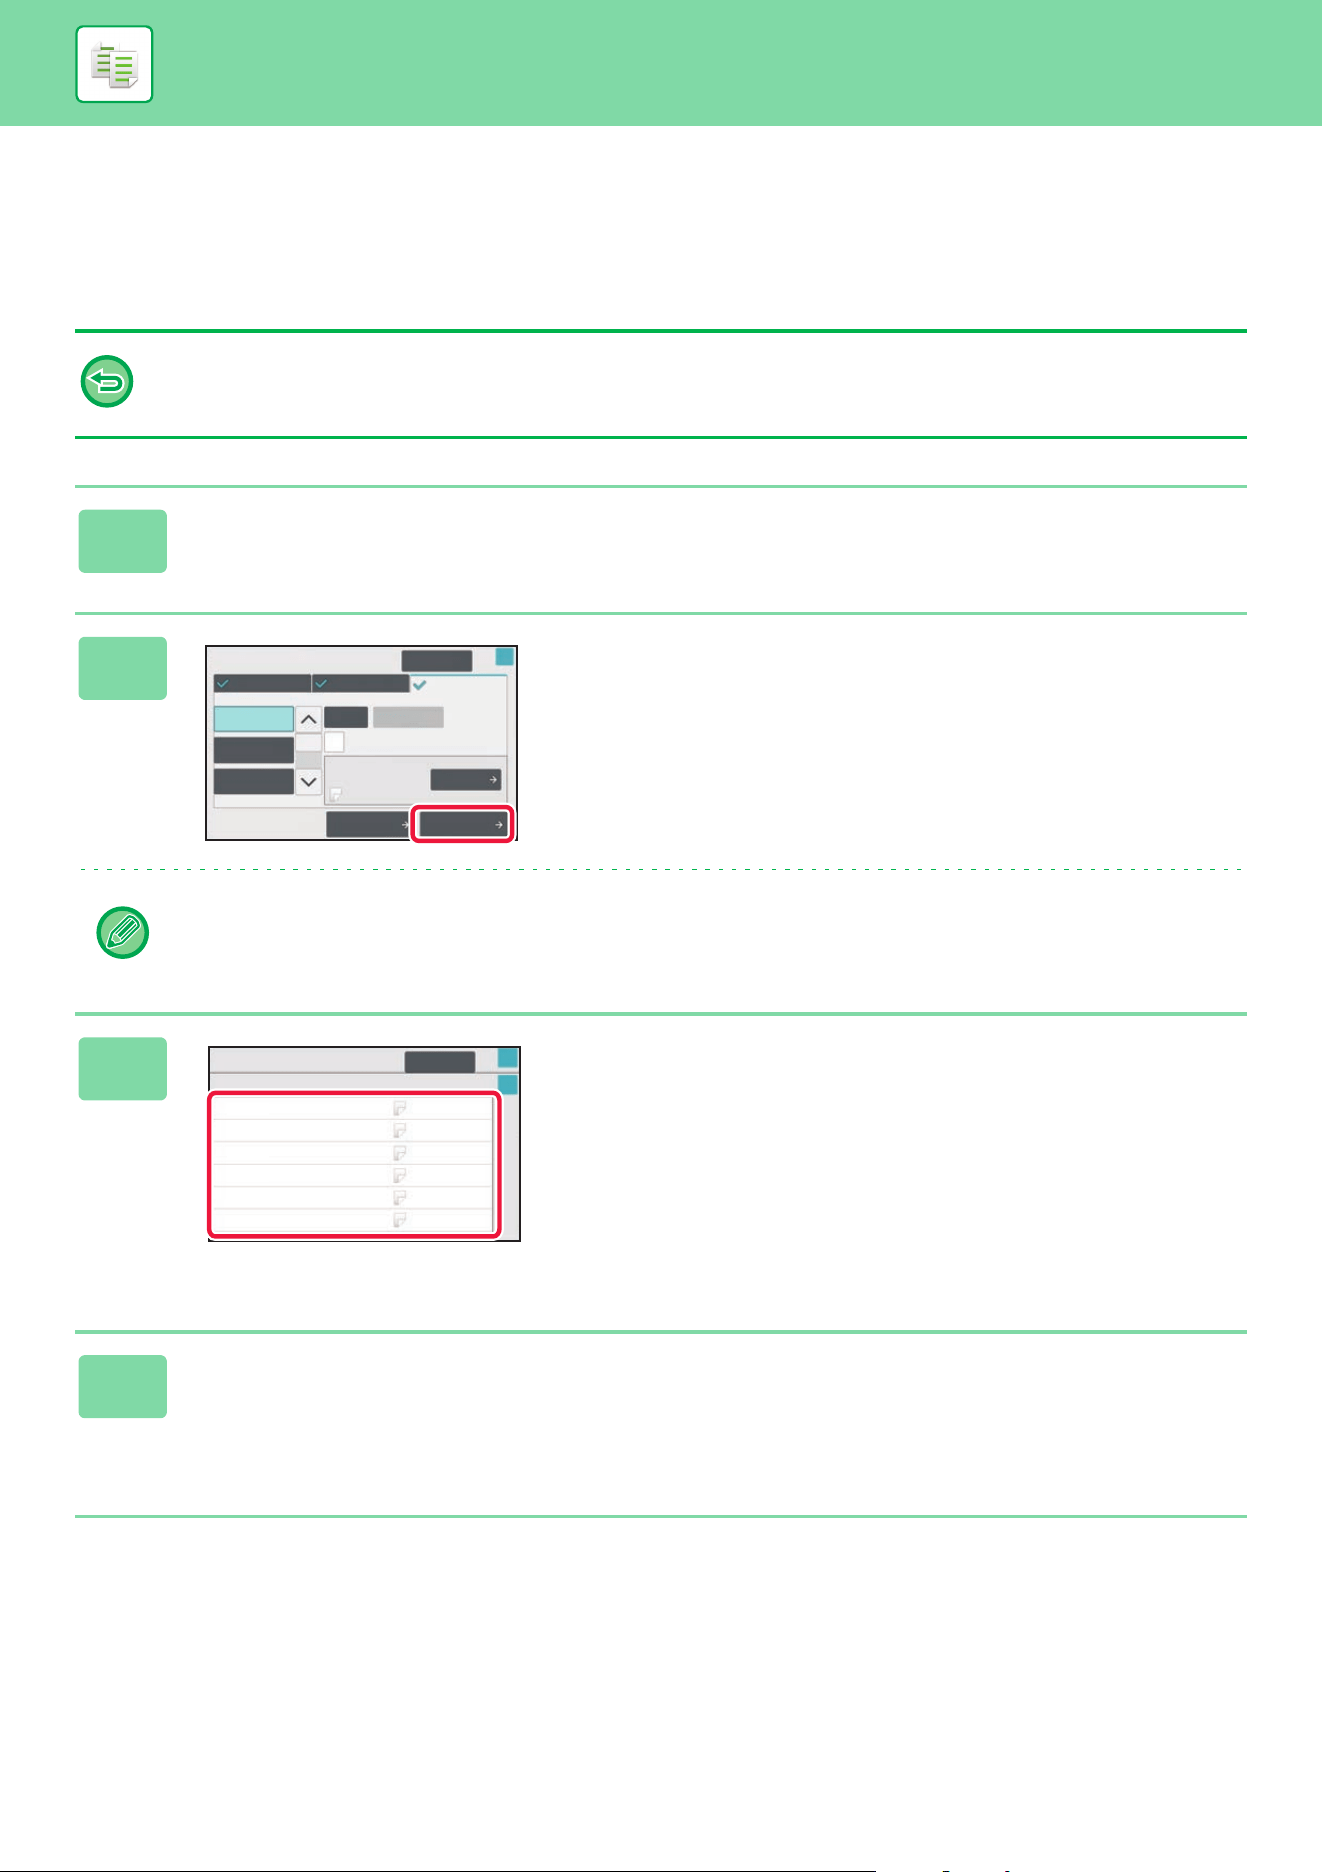
3-127
COPIER►OTHER FUNCTIONS
CHECKING, EDITING, AND DELETING THE PAGE
LAYOUT OF COVERS AND INSERTION SHEETS
(PAGE LAYOUT)
The editing contents are different between the registered covers and insertion sheets as shown below.
• For the "Cover Sheet", you can change settings such as the paper type, copy/do not copy, 1-Sided, and 2-Sided.
• For "Insert Sheet", you can change only the page number you want to insert an insert sheet into.
1
Tap the [Others] key, and then tap the [Covers/Inserts] key.
2
Tap the [Page Layout] key.
If the settings for the covers or insertion sheets are not configured, the [Page Layout] key is disabled.
3
Check the page layout.
To exit this job after checking the page layout, tap the [OK]
key.
To edit or delete, tap the required key. When deleting, tap
the [Delete] key.
When editing, tap the [Modify] key.
When setting consecutive insertion of different types of
inserts at the same page, you can tap [Replace Order of
Inserts] on the action panel to change the order.
4
Change cover or insertion sheet settings.
For the cover, you can change the copy mode.
You can change the page number you want to insert an insert sheet into.
After the settings are completed, tap [OK] key.
Change
Enter
1
Covers/Inserts
Cancel All
Insertion SheetBack CoverFront Cover
Specify Page to Insert and Press Enter
Bypass
Make No Copy
Before Back Cover
Total:1
Insertion
Plain 1
Insertion Type C
Insertion Type A
Insertion Type B
Page Layout
Paper Tray
Settings
OK
Page Layout
Make No Copy
Make No Copy
Make No Copy
Make No Copy
Make No Copy
Make No Copy
-
-
<1
<1
<1
<1
Insertion Type A
Insertion Type B
Insertion Type B
Insertion Type C
Back Cover
Covers/Inserts
Cancel All
Front Cover
OK
OK
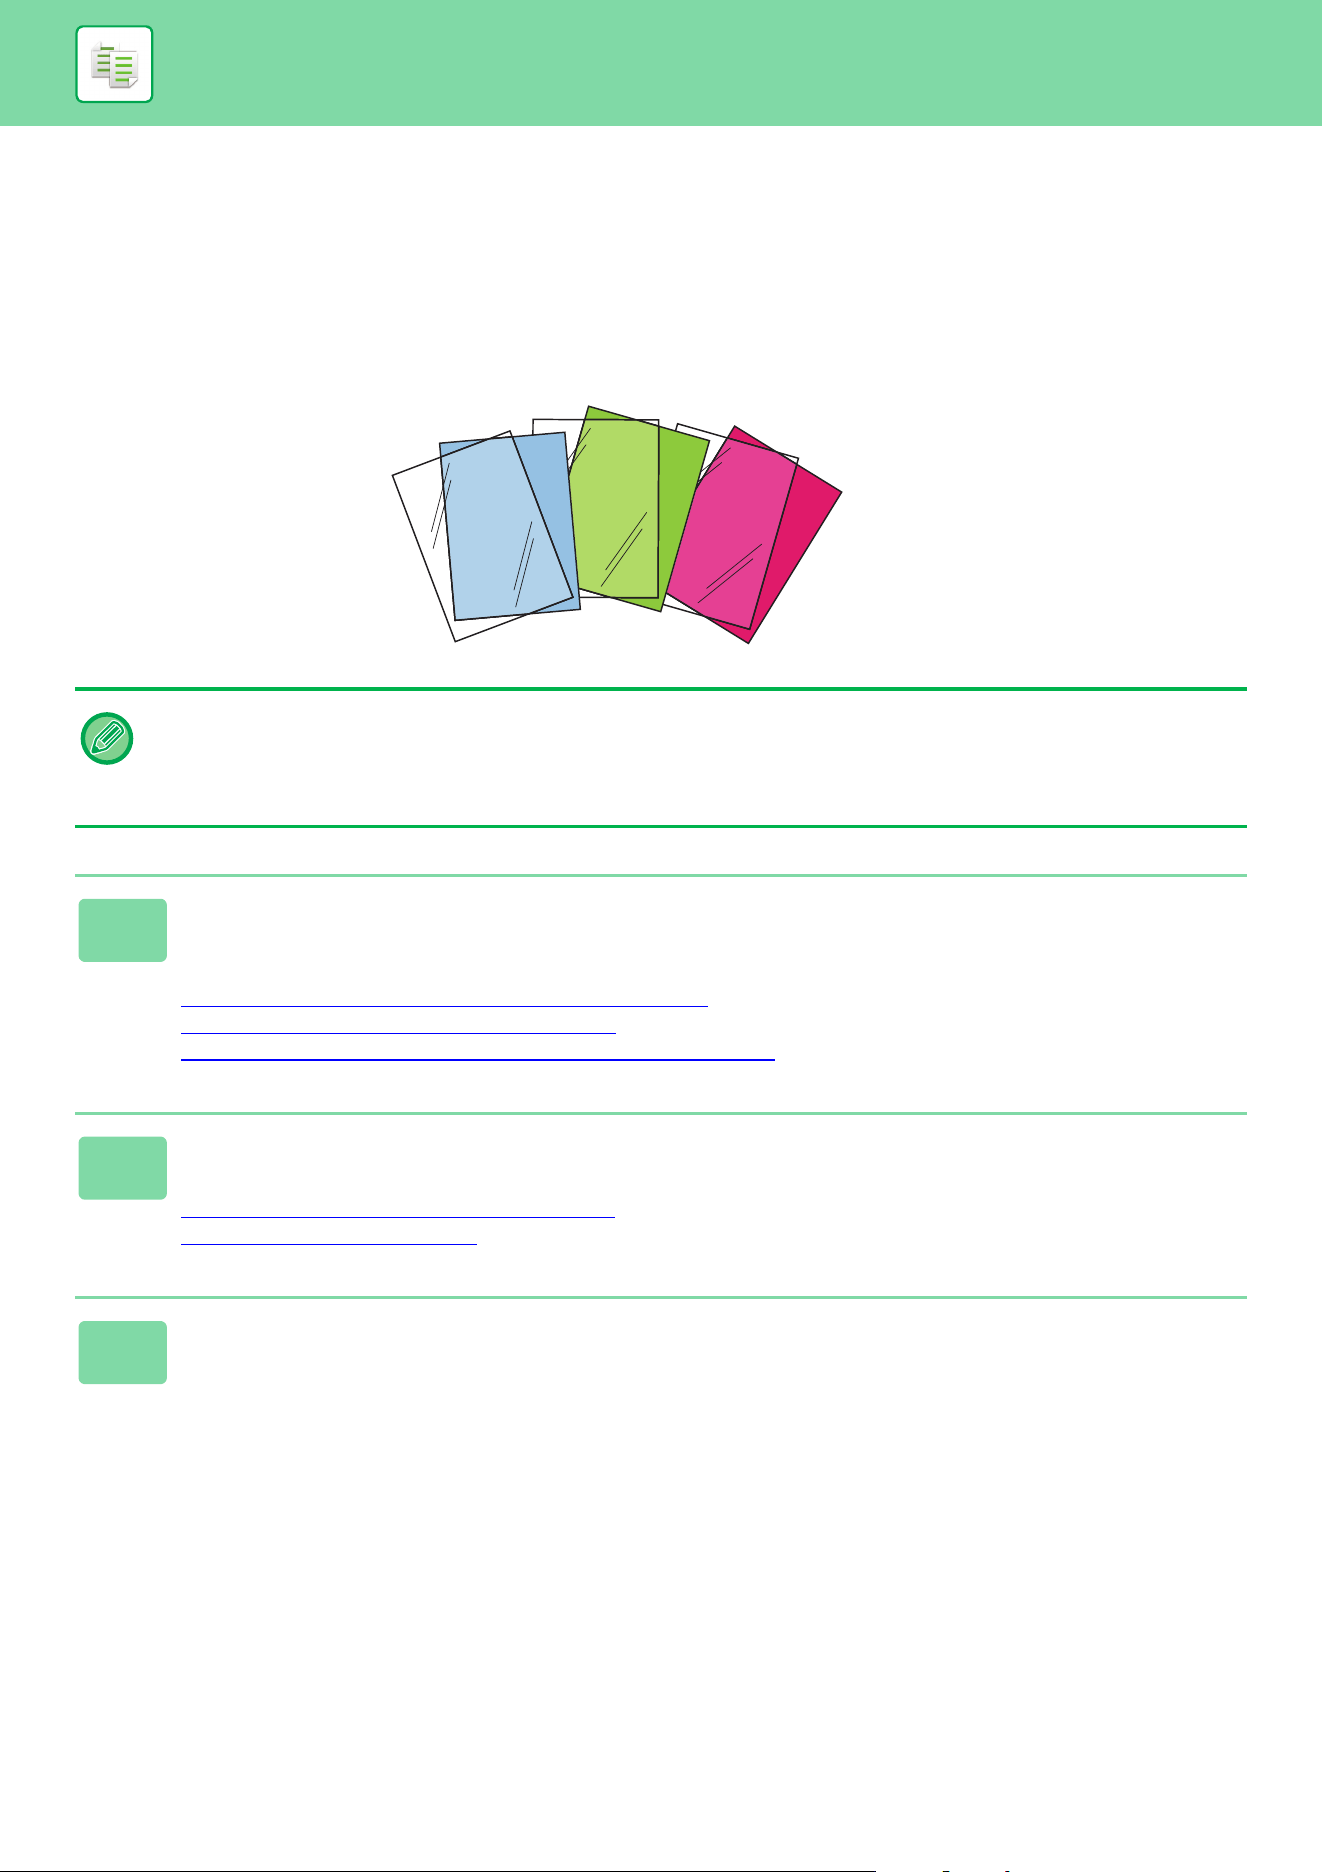
3-128
COPIER►OTHER FUNCTIONS
INSERTING INSERTION SHEETS IN BETWEEN
TRANSPARENCY FILMS (TRANSPARENCY INSERTS)
When copying on transparency film, the sheets may stick together due to static electricity.
The transparency inserts function can be used to automatically insert a sheet of paper between each sheet of
transparency film, making the sheets easy to handle.
It is also possible to copy on insertion sheets.
• Transparency Inserts cannot be selected in easy mode.
• When performing 2-sided copying, only "2-Sided→1-Sided" mode can be used.
• The number of copies cannot be selected in this mode.
• Transparency film can be loaded in the bypass tray, tray 4 and large capacity trays.
1
Load transparency film in the bypass tray, tray 4 or large capacity trays.
When loading paper in the bypass tray or large capacity trays, load with the print side up. In tray 4, load with the print
side down.
MAKING COPIES USING THE BYPASS TRAY
(page 3-35)
LOADING PAPER IN THE TRAY 3/4 (page 1-20)
LOADING PAPER IN THE LARGE CAPACITY TRAYS (page 1-30)
2
Place the original.
Place the original in the document feeder tray of the automatic document feeder, or on the document glass.
AUTOMATIC DOCUMENT FEEDER
(page 1-47)
DOCUMENT GLASS (page 1-51)
3
Tap the [Others] key, and then tap the [Transparency Inserts] key.
C
B
A
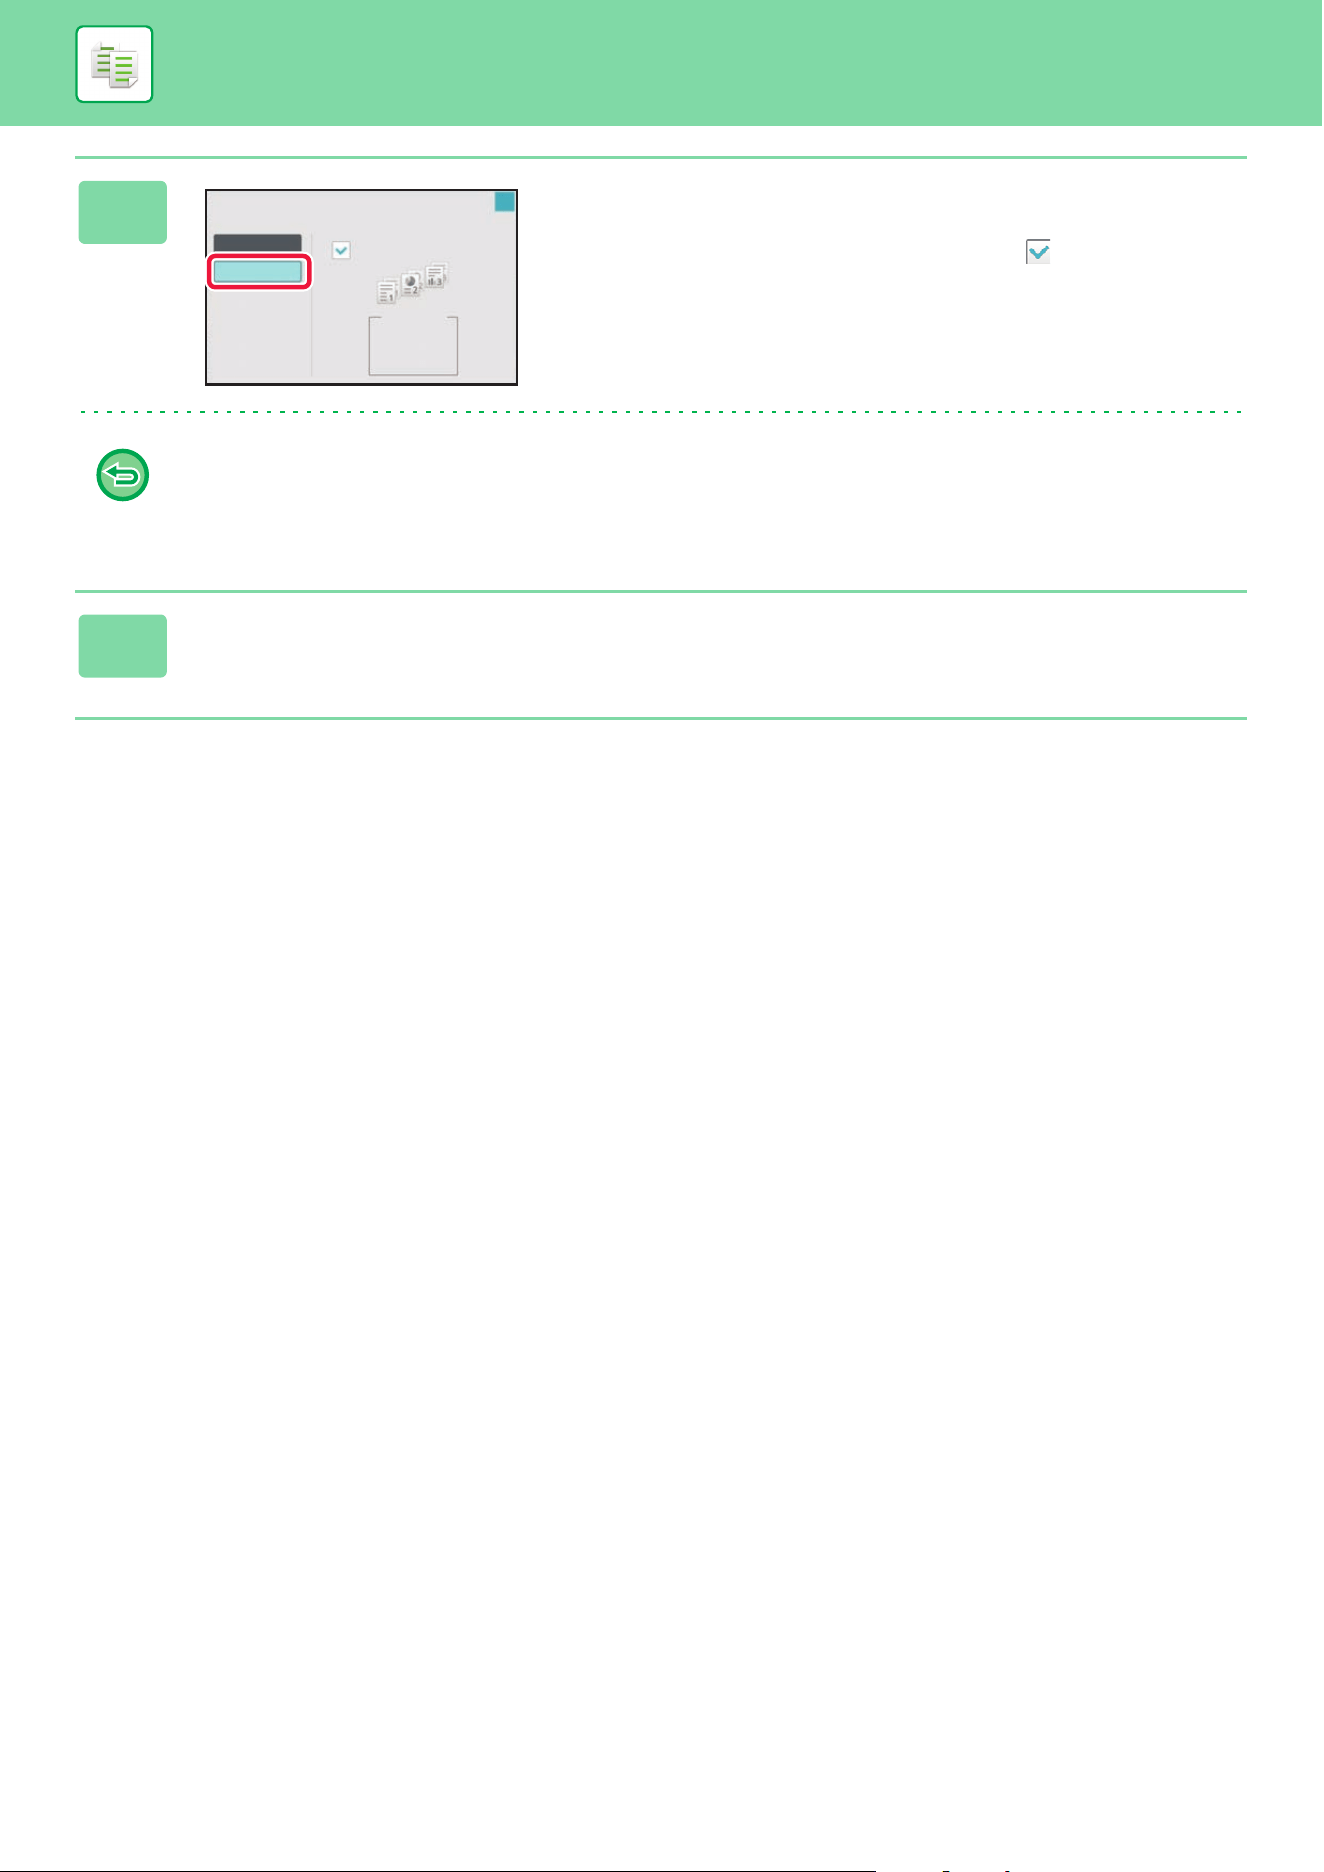
3-129
COPIER►OTHER FUNCTIONS
4
Tap the [On] key.
When making a copy on insertion sheets, tap the [Also Make
Copy on Inserts] checkbox to set to .
After the settings are completed, tap [OK] key.
• To cancel the transparency inserts setting:
Tap the [Off] key.
• To cancel all settings:
Tap the [CA] key.
5
Tap the [Color Start] or [B/W Start] key to start copying.
O
On
Also Make Copy on Insert s
Transparency Inserts
Inserts Paper Tray
Tray 1
8½x11
Plain 1
OK
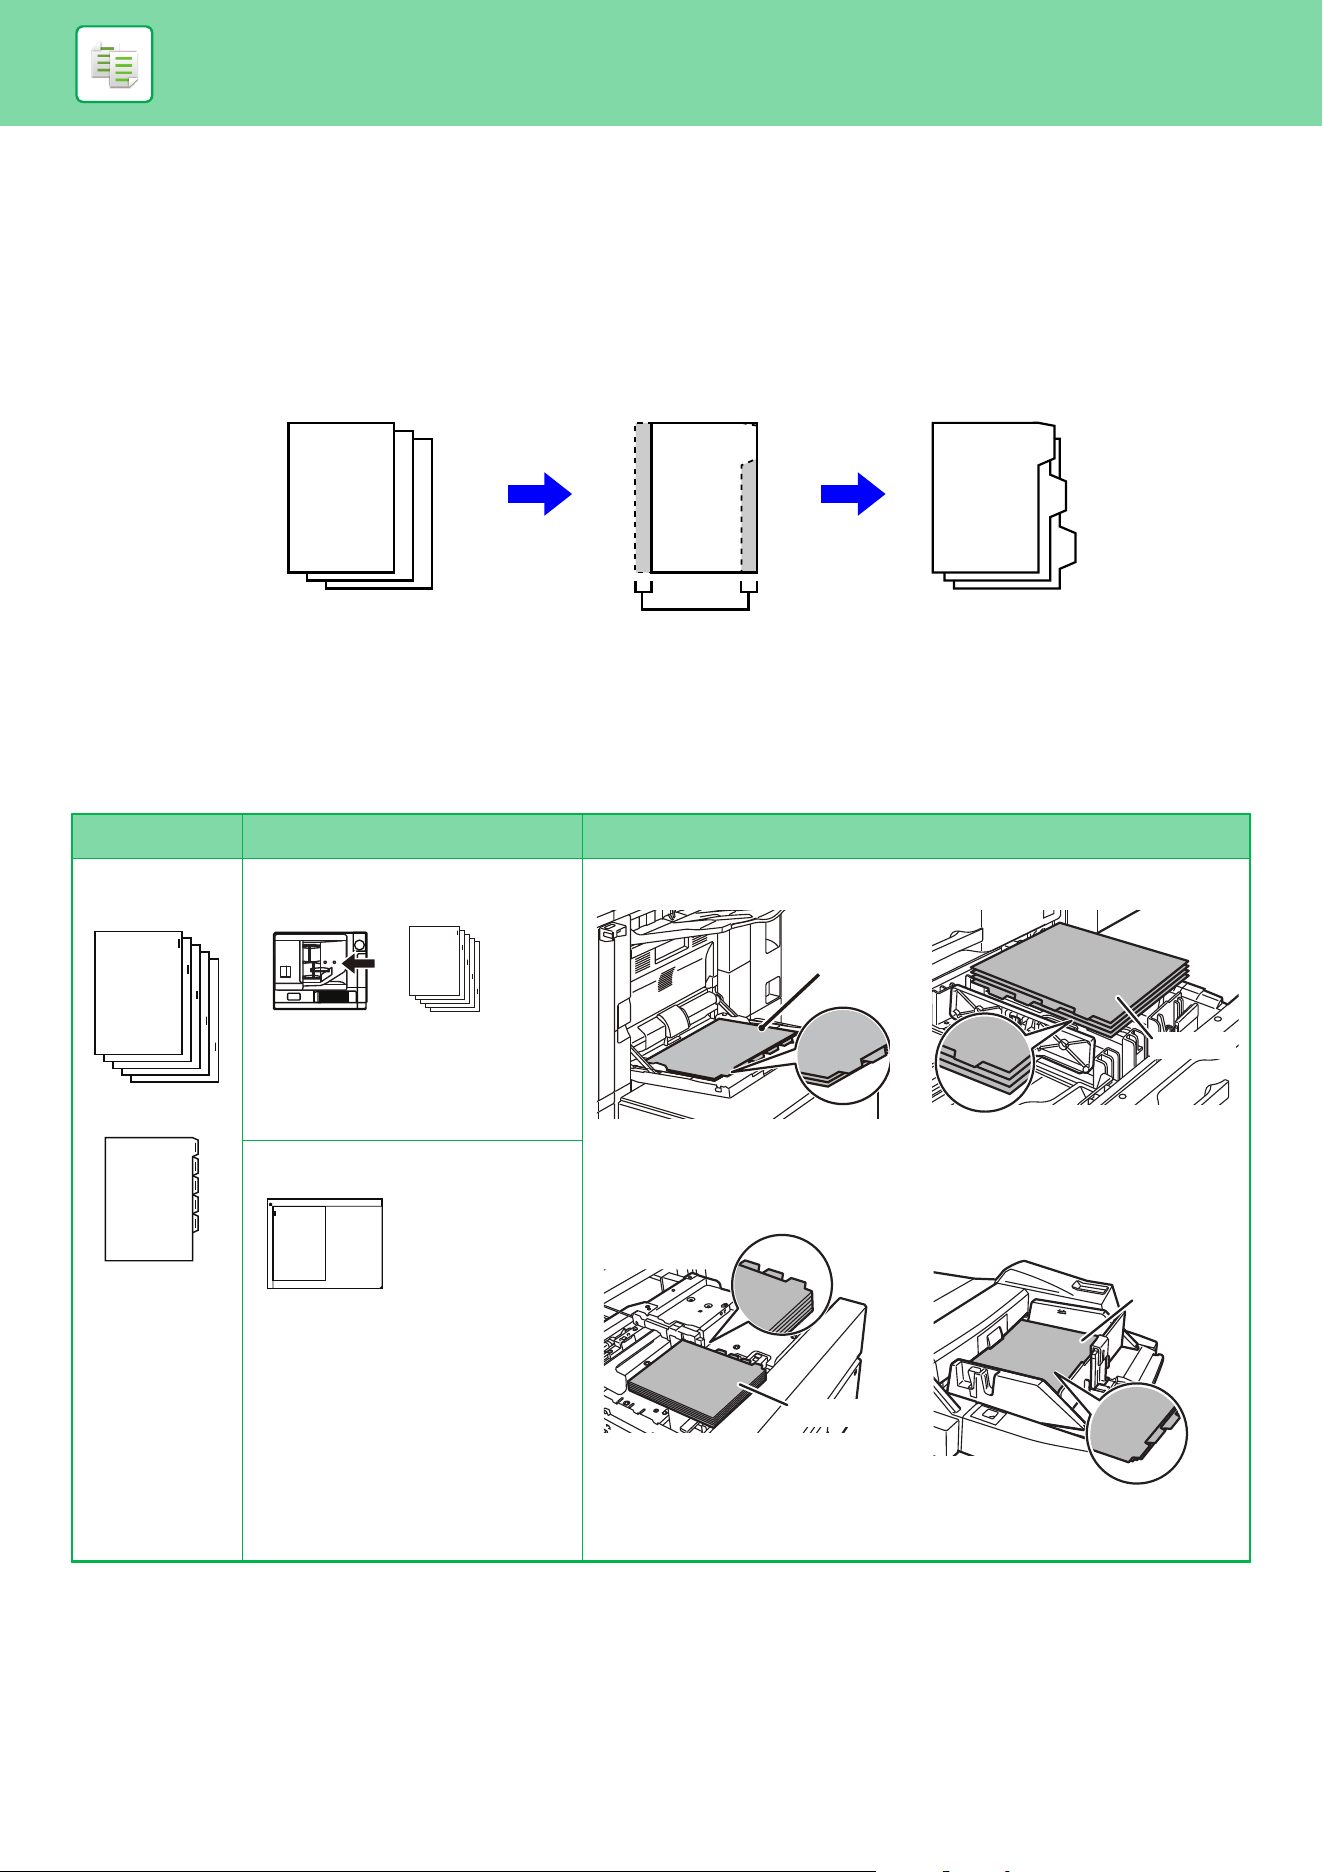
3-130
COPIER►OTHER FUNCTIONS
FUNCTIONS FOR SPECIFIC USES
COPYING CAPTIONS ONTO TAB PAPER (TAB COPY)
Load a tab sheet in the bypass tray, and make a copy on a tab.
Prepare originals for captions that match the tab positions.
The image is shifted by the width of the tab.
Relation between the originals and the tab paper
Tab copying with a left binding
Originals Placing the originals Loading tab paper
Bypass tray (on the machine)
Large capacity trays
Tray 4
Bypass tray
(on the large capacity trays)
Prepare originals that
match the tab positions.
Prepare originals that
match the tab positions.
GHI
DEF
ABC
GHI
DEF
ABC
ABC
1
Originals
Final image
1
Document feeder tray
Insert the originals so that the
side with no tab text enters first.
Side 2
Place the first sheet of tab paper
so that the tab faces toward you.
Side 2
Place the first sheet of tab paper
so that the tab faces toward you.
Side 1
Place the first sheet of tab paper
so that the tab faces toward you.
Side 2
Place the first sheet of tab paper
so that the tab faces toward you.
1
Document glass
Place so that the side with
the tab text is on the left.
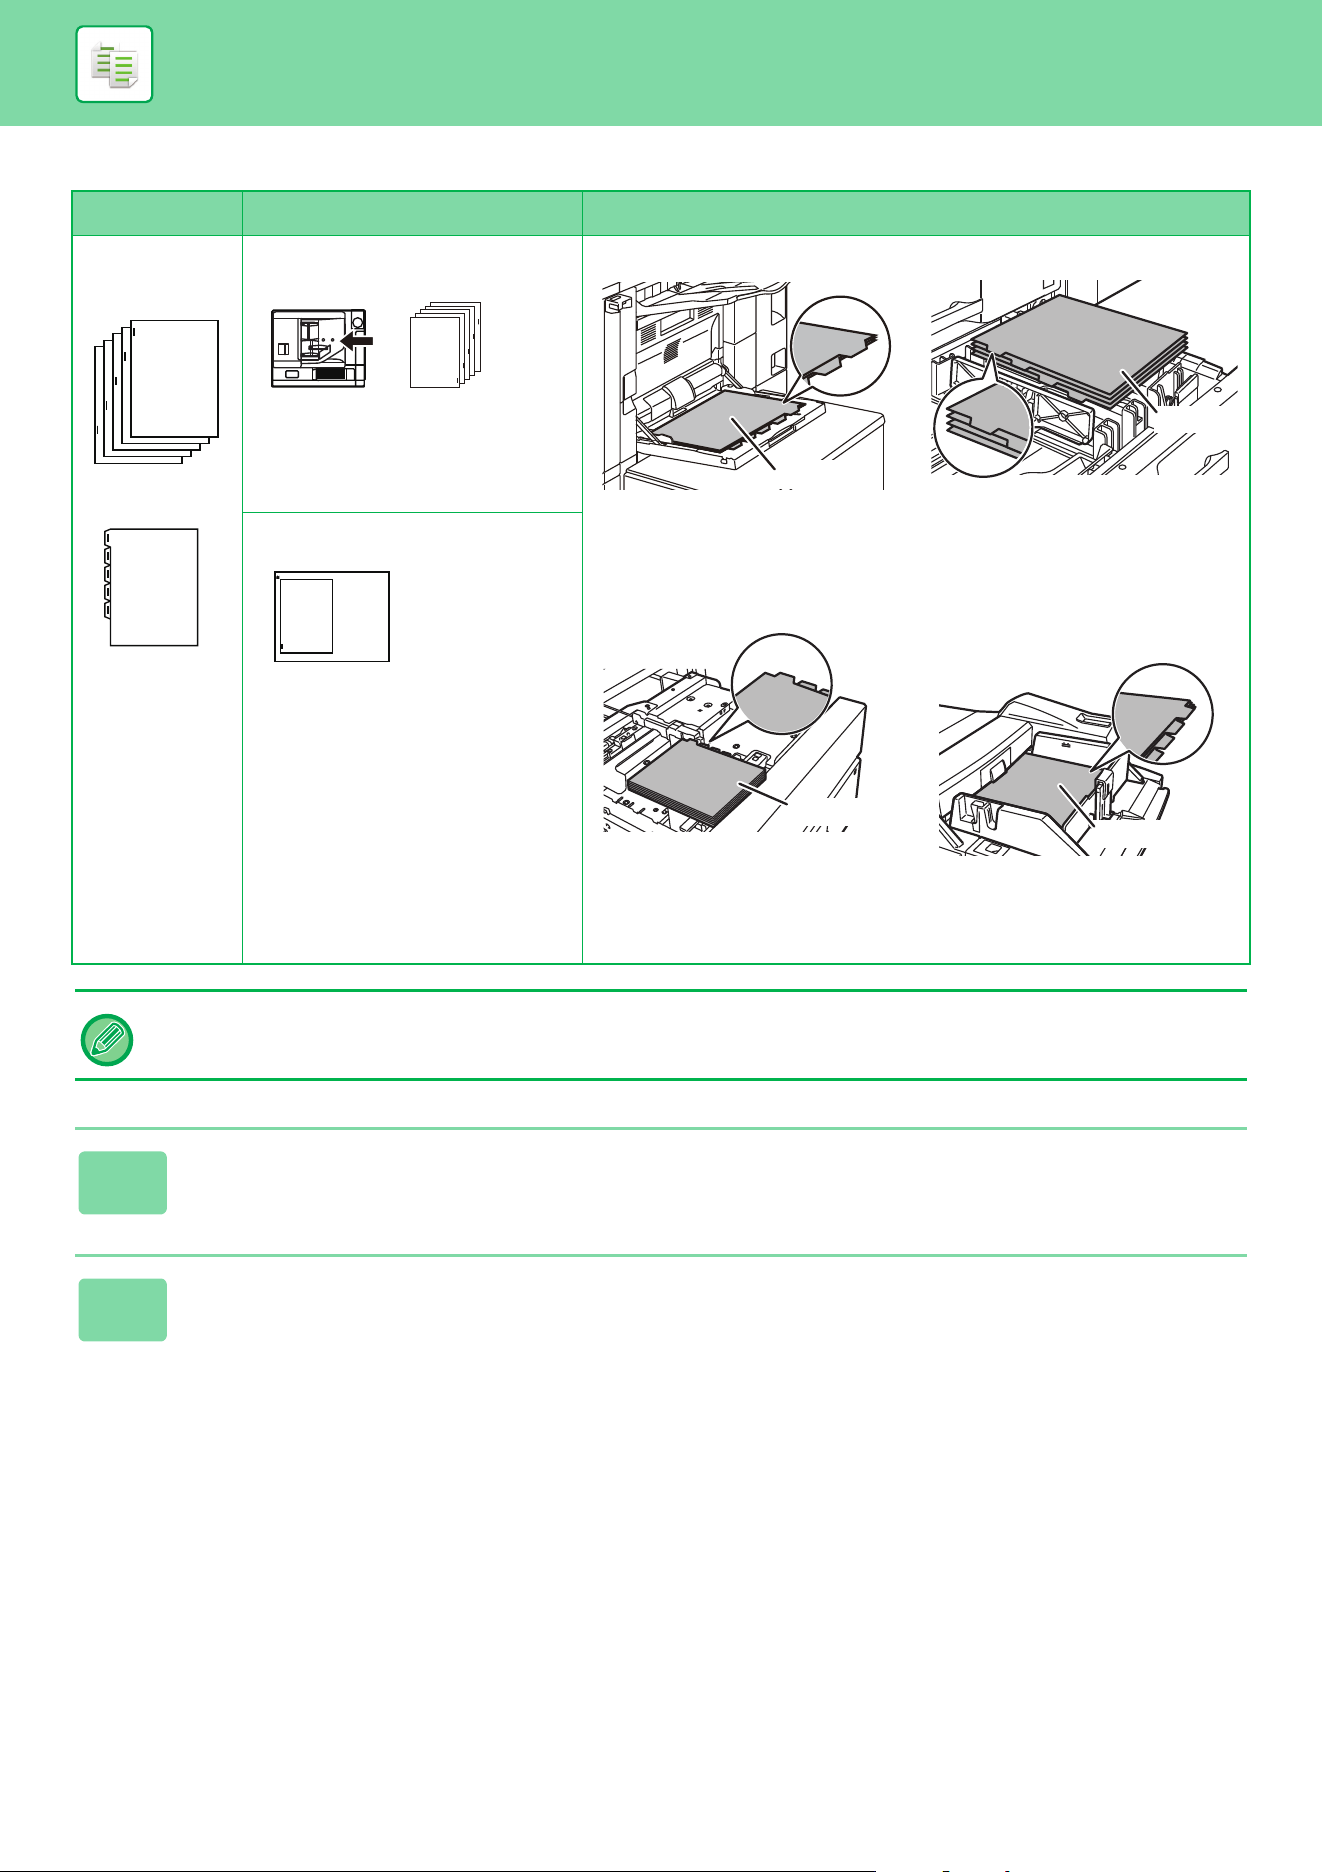
3-131
COPIER►OTHER FUNCTIONS
Tab copying with a right binding
Originals Placing the originals Loading tab paper
Bypass tray (on the machine)
Large capacity trays
Tray 4
Bypass tray
(on the large capacity trays)
• Tab Copy cannot be selected in easy mode.
• Tab Copy must be specified before scanning the original.
1
Tap the [Others] key, and tap the [Tab Copy] key.
2
Tap the [On] key.
1
Final image
Originals
1
Document feeder tray
Insert the originals so that the
side with no tab text enters first.
Side 2
Place the first sheet of tab paper
so that the tab faces away from
you.
Side 2
Place the first sheet of tab paper
so that the tab faces away from
you.
Side 1
Place the first sheet of tab paper
so that the tab faces away from
you.
Side 2
Place the first sheet of tab paper
so that the tab faces away from
you.
1
Document glass
Place so that the side with the
tab text is on the left.
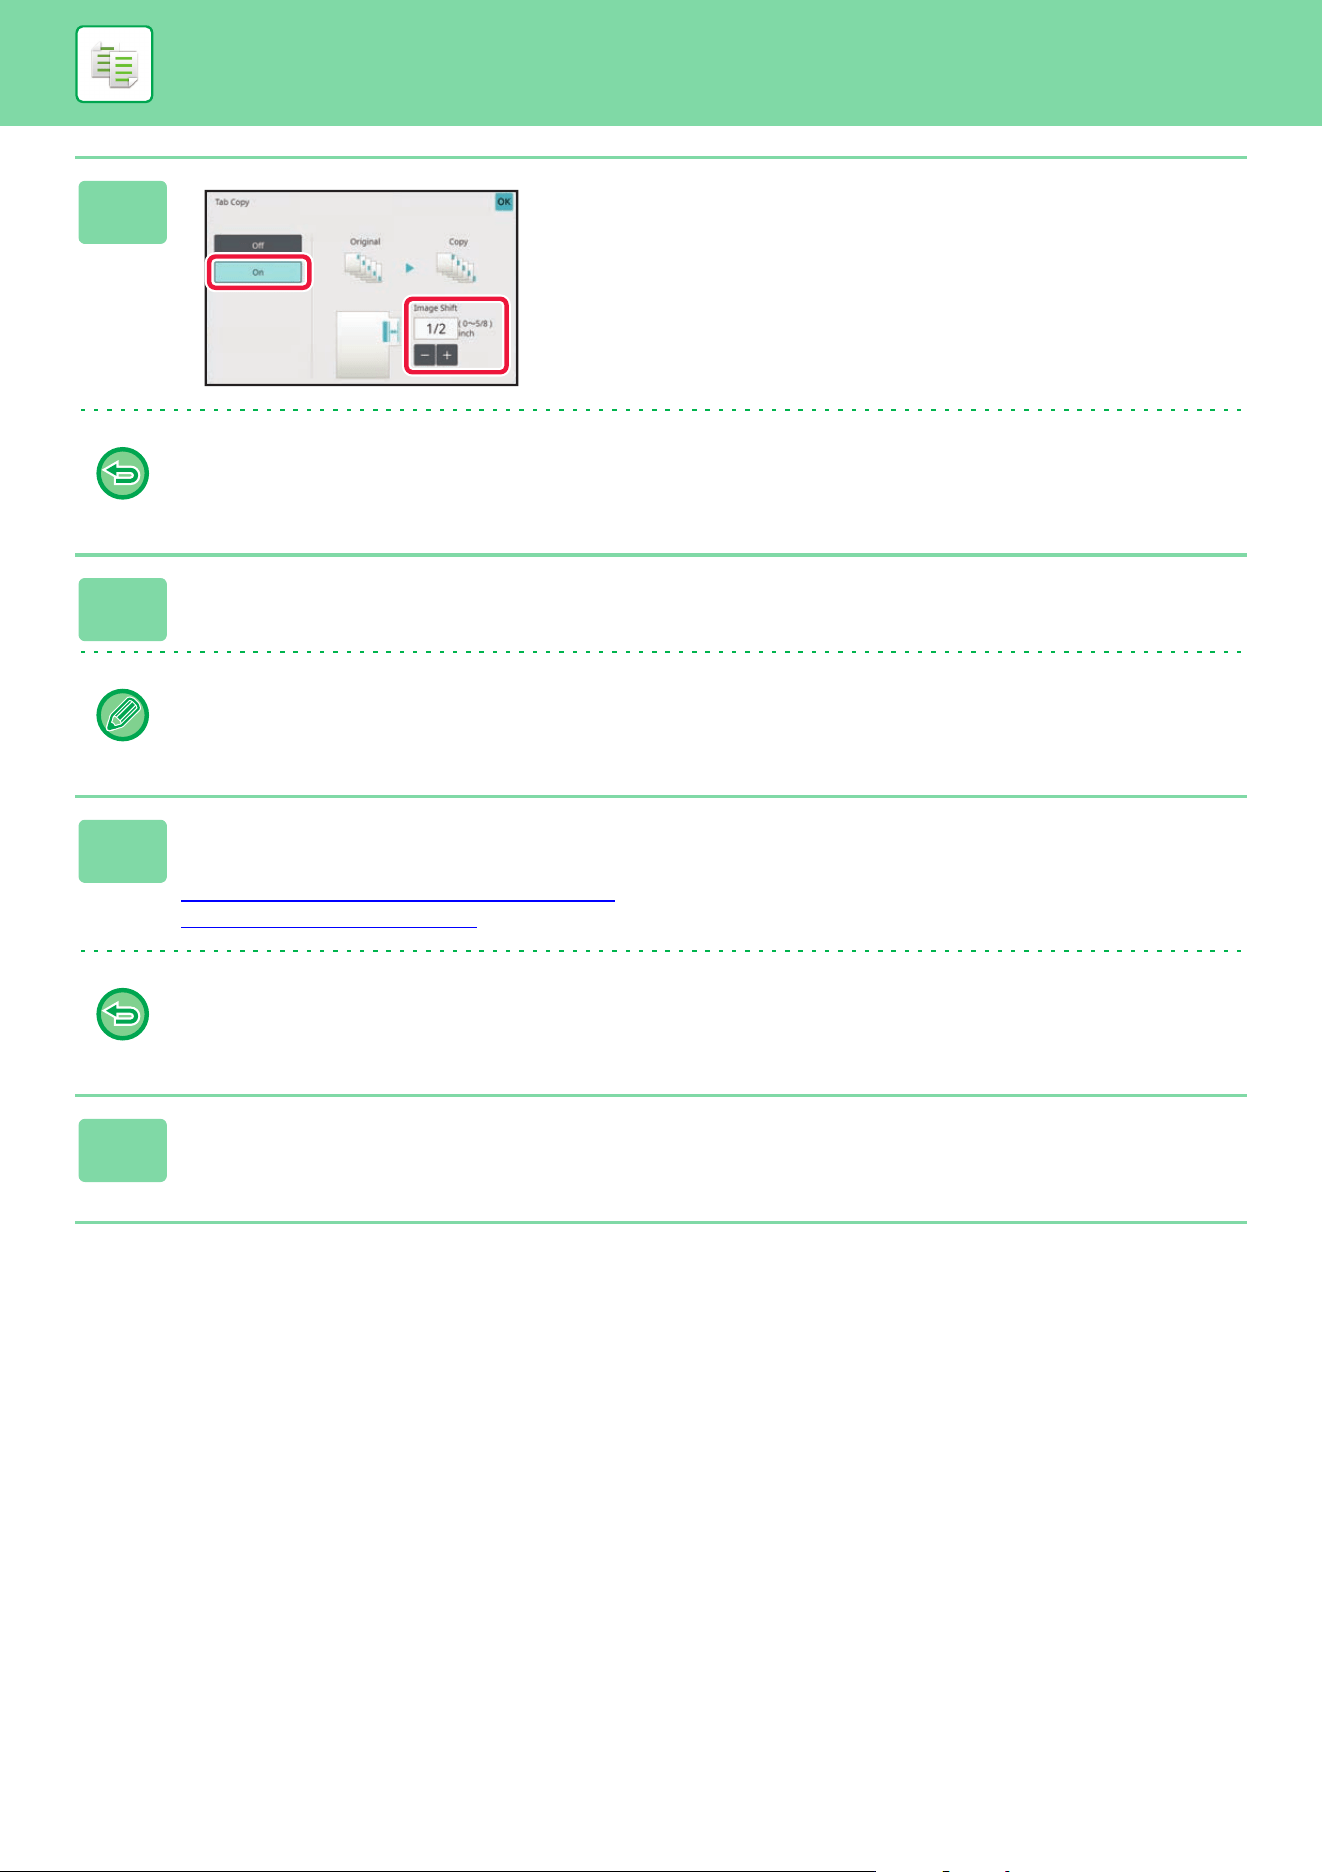
3-132
COPIER►OTHER FUNCTIONS
3
Sets an image shift width (tab width).
• Tap the numeric value display indicating the image shift
width, and enter a shift width using numeric keys.
• After the settings are completed, tap [OK] and [Back] keys
in sequence.
To cancel the tab copy setting:
Tap the [Off] key.
4
Load the tab paper.
The width of the tab paper can be as wide as 8-1/2" x 11" paper (8-1/2") plus 5/8" (or A4 width (210 mm) plus 20 mm).
5
Place the original and tap the [Preview] key.
Place the original in the document feeder tray of the automatic document feeder, or on the document glass.
AUTOMATIC DOCUMENT FEEDER
(page 1-47)
DOCUMENT GLASS (page 1-51)
To cancel all settings:
Tap the [CA] key.
6
Tap the [Color Start] or [B/W Start] key to start copying.
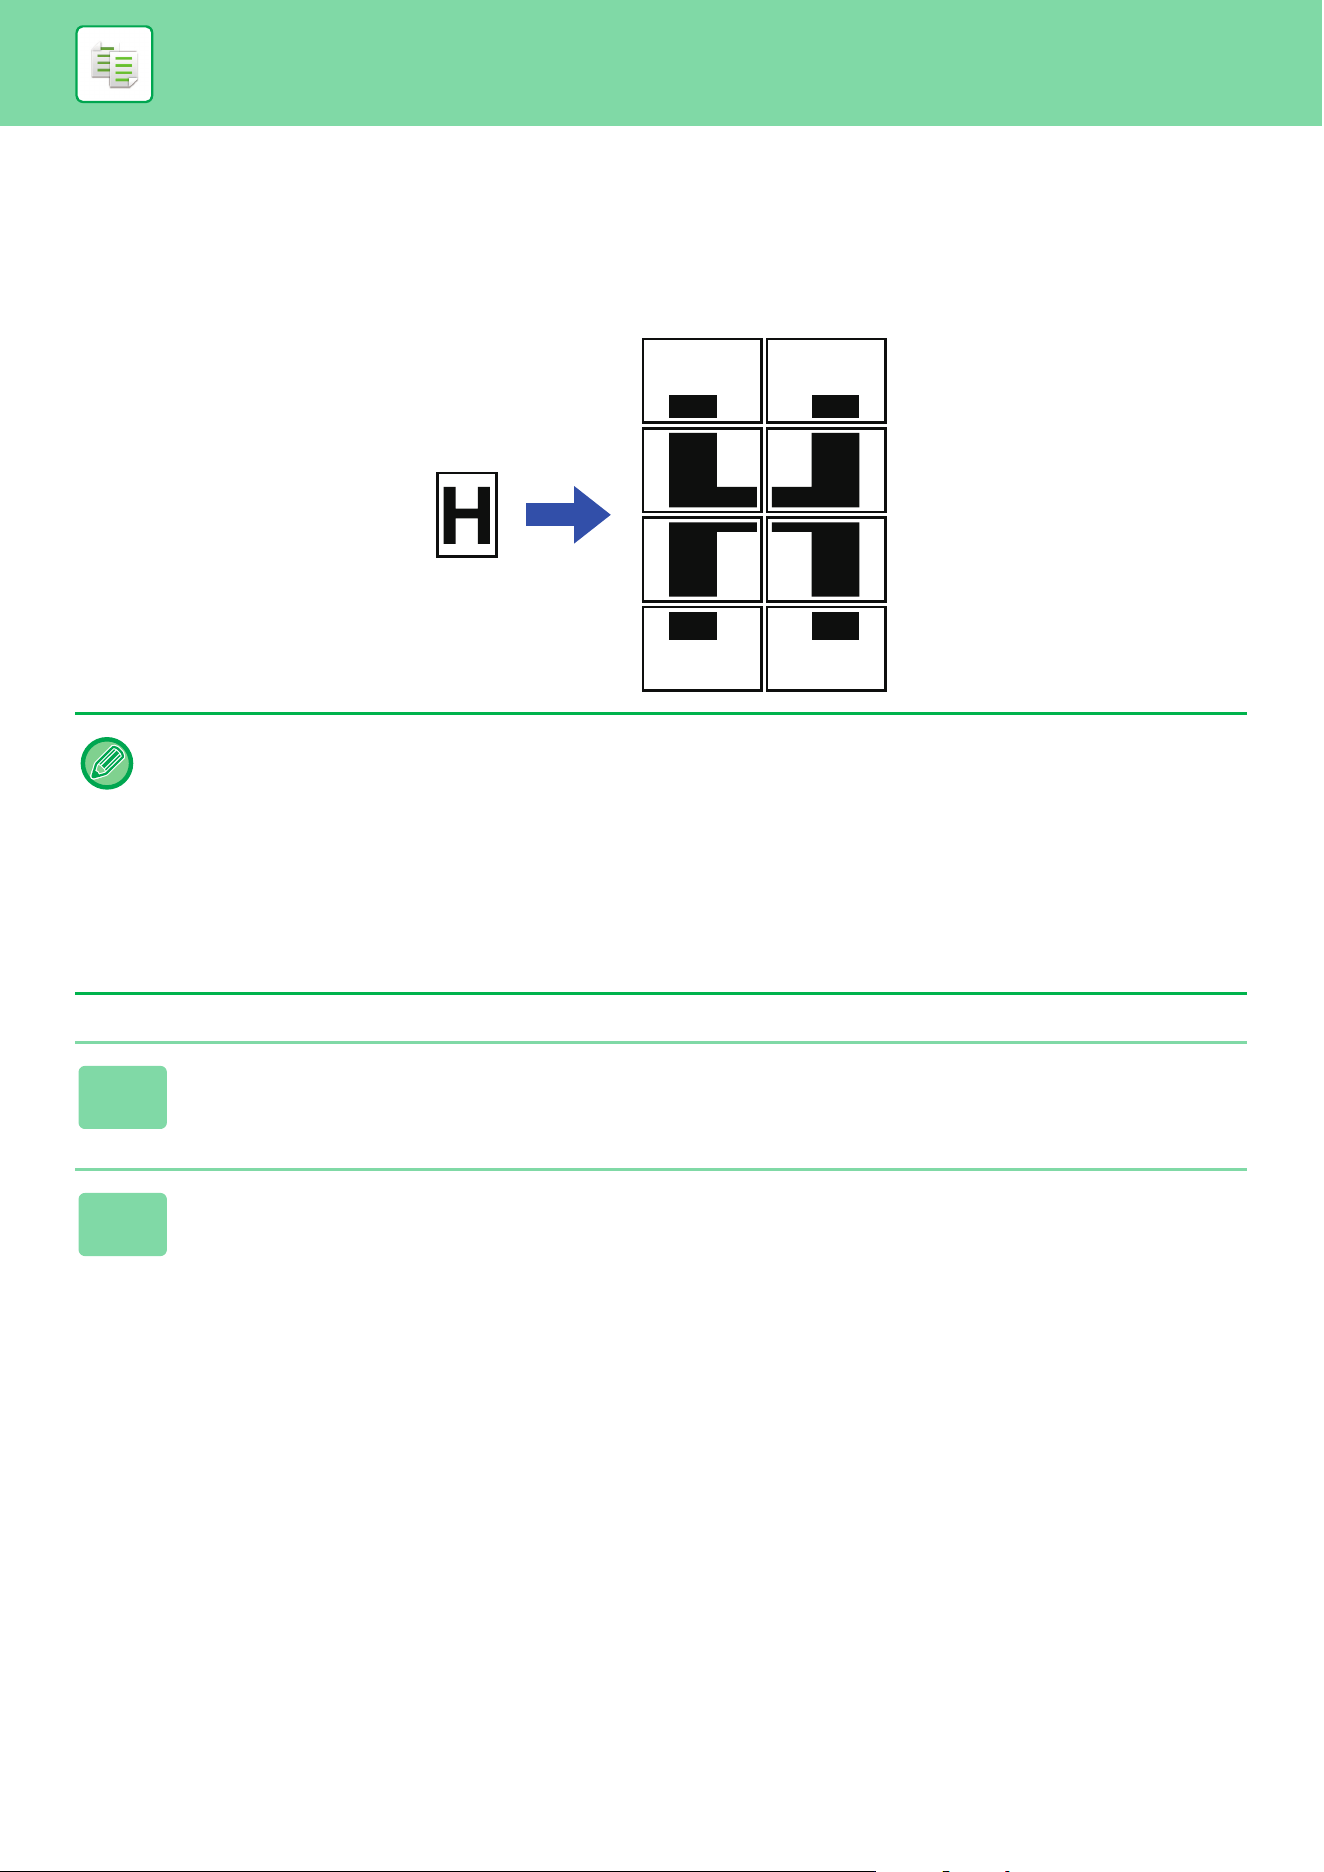
3-133
COPIER►OTHER FUNCTIONS
MAKING A POSTER-SIZED COPY (MULTI-PAGE
ENLARGEMENT)
This function separately copies an enlarged original image on multiple sheets.
For example, an 8-1/2" x 11" (A4) size original can be enlarged on 8 sheets of 11" x 17" (A3) paper.
• Multi-Page Enlargement cannot be selected in easy mode.
• You must select Multi-Page Enlargement before scanning the original.
• Place an original on the document glass.
• When Multi-Page Enlargement is selected, the image orientation is changed to vertical.
• Overlap of sections of image
• There will be a margin around the edges of each copy.
• Areas for overlapping the copies will be created at the leading and trailing edges of each copy.
• The paper size, number of sheets required for the enlarged image, and the ratio are automatically selected based on the
selected original size and enlargement size. (The paper size and ratio cannot be selected manually.)
1
Tap the [Others] key, and tap the [Multi-Page Enlargement] key.
2
Select the [AB] or [Inch] tab to meet the original size for poster-sized copy,
and tap the key that meets the original size.
Tapping the key of the original size displays the keys that show the available enlargement size, copy paper size, and
number of sheets.
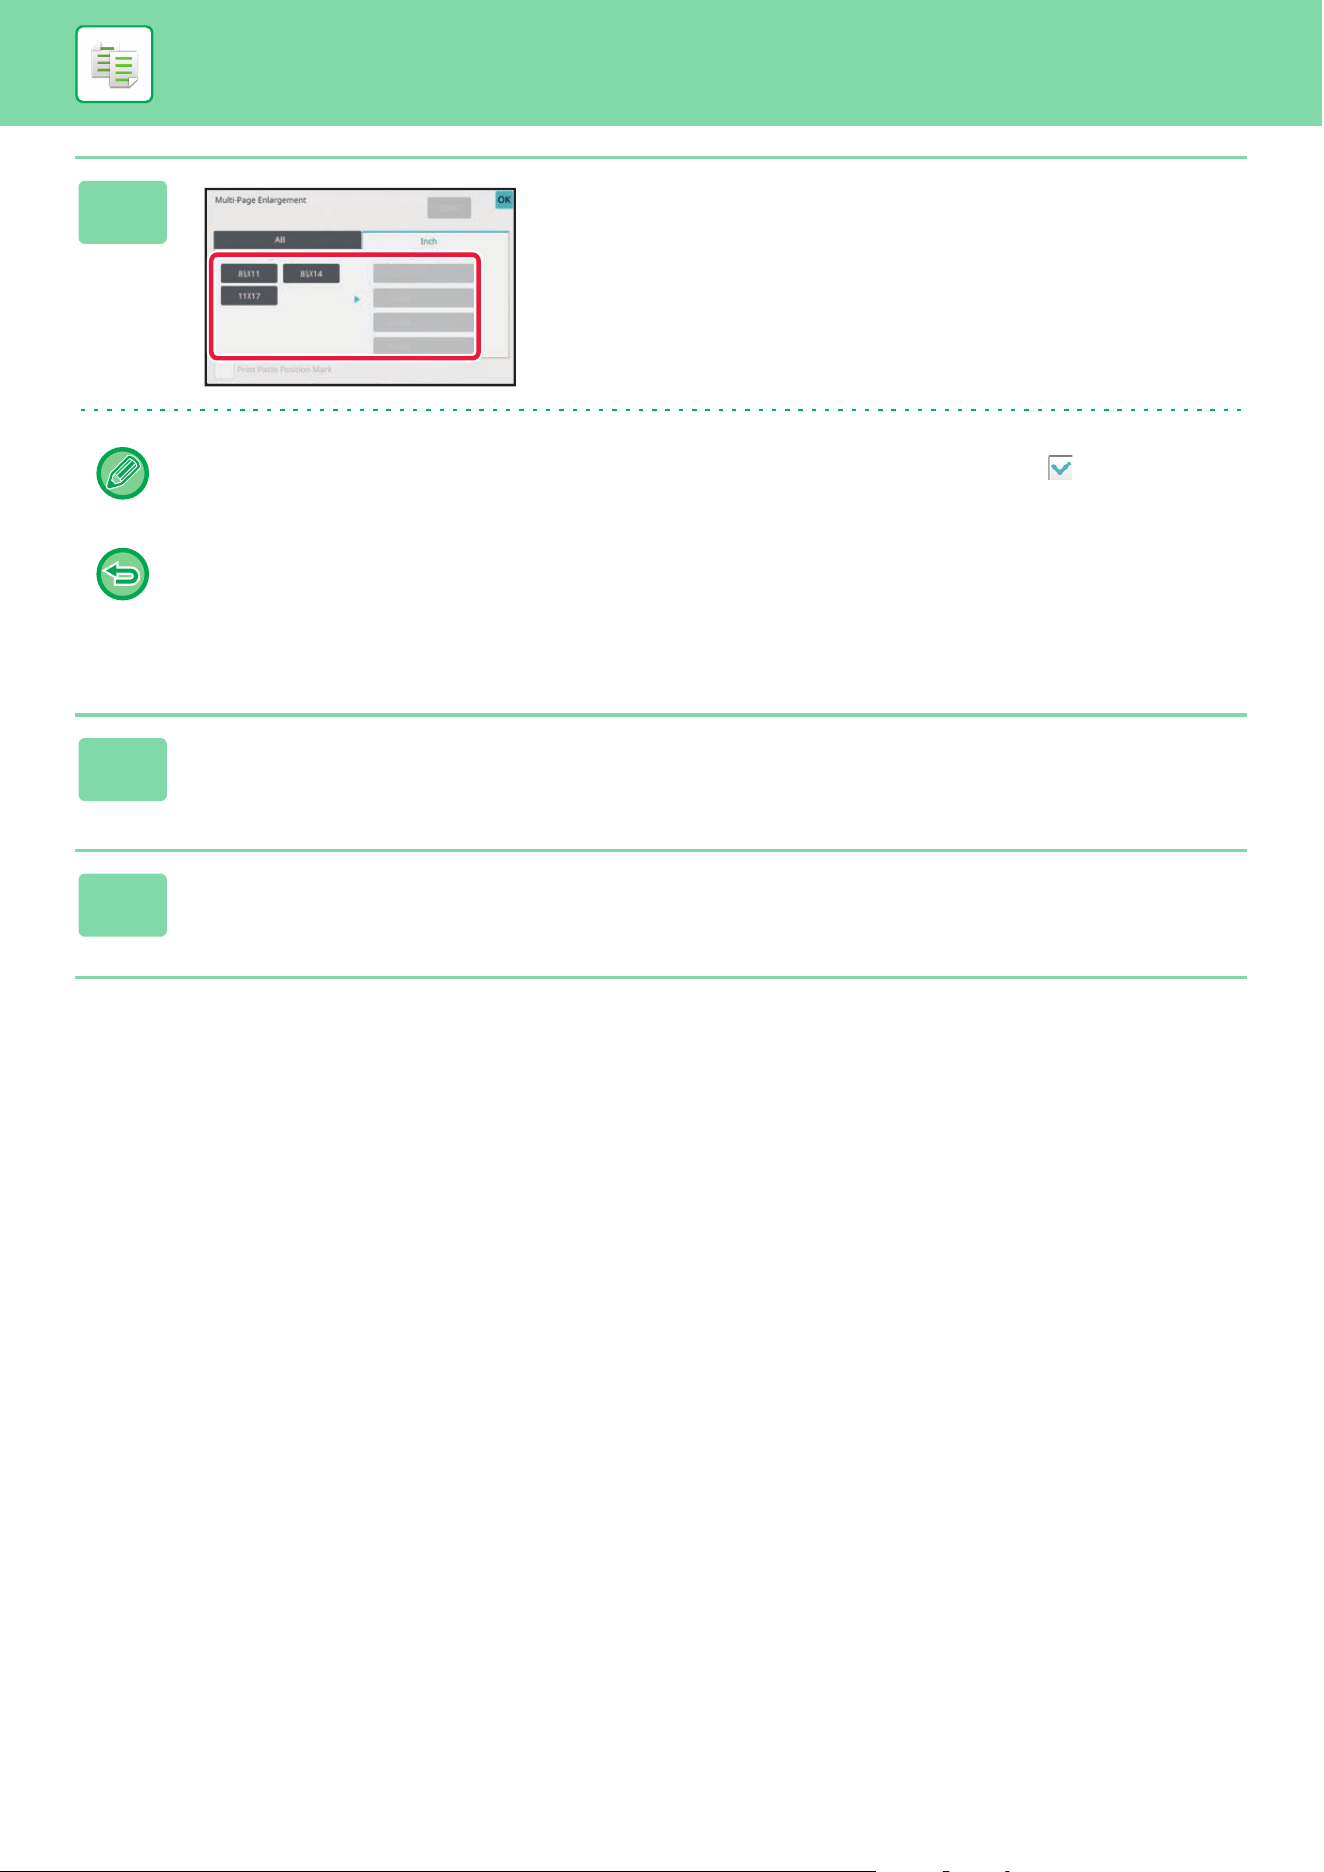
3-134
COPIER►OTHER FUNCTIONS
3
Tap the key of the size you want to
enlarge the original to.
The image orientation appears.
After the settings are completed, tap [OK] key.
When printing the copy image and margin border, set the [Print Paste Position Mark] checkbox to .
• To cancel Multi-Page Enlargement setting:
Tap the [Clear] key.
Even when the multi-page enlargement setting is canceled, the automatically selected ratio is retained.
• To return the ratio to 100%:
Tap the [Copy Ratio] key on the base screen to display the ratio menu, and then tap the [100%] key.
4
Place the original on the document glass based on the orientation displayed
on the screen.
5
Tap the [Color Start] or [B/W Start] key to start copying.
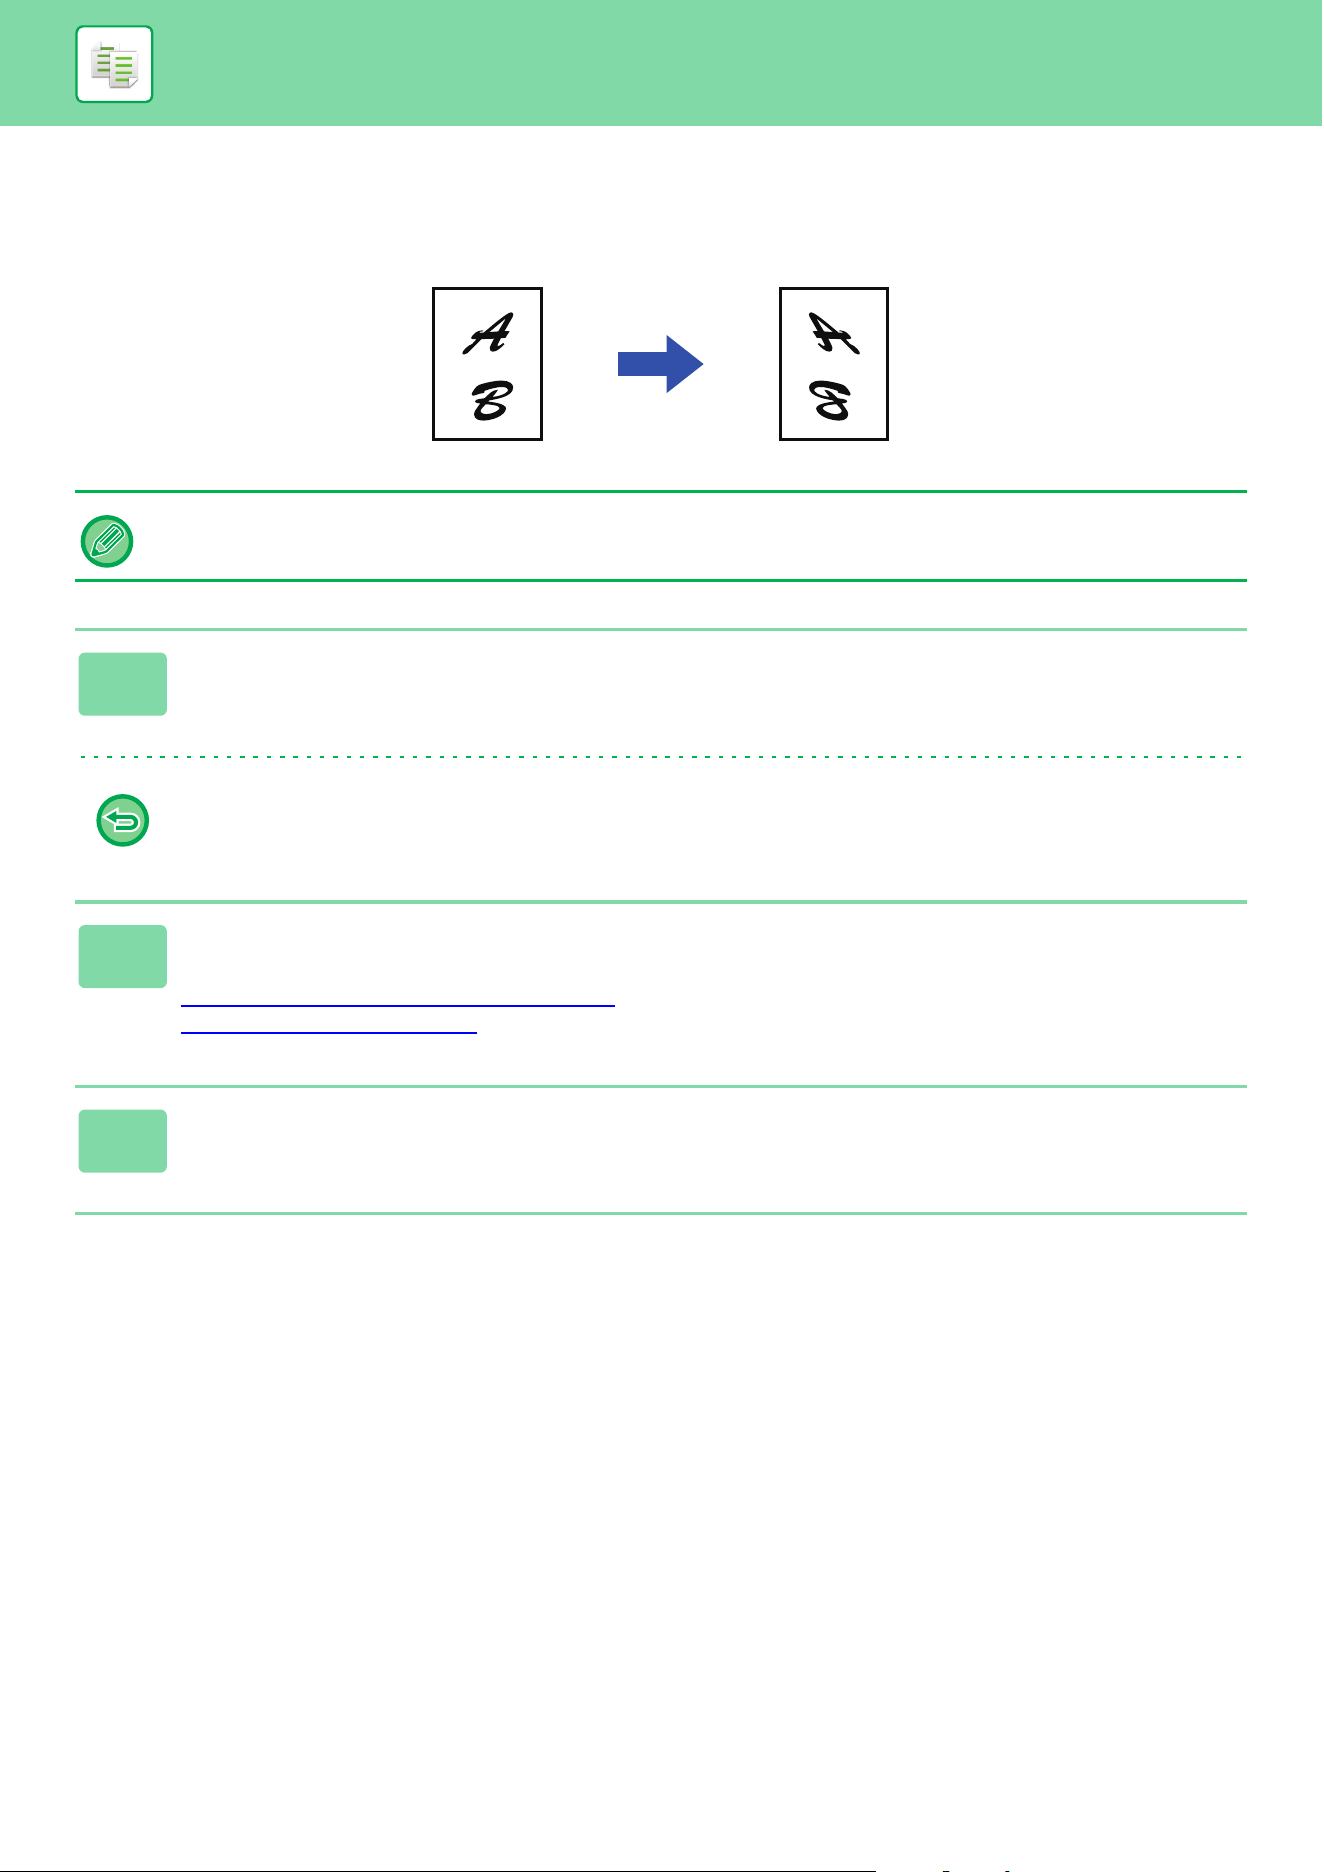
3-135
COPIER►OTHER FUNCTIONS
COPYING WITH MIRROR IMAGE (MIRROR IMAGE)
This function makes copies by inverting the original into a mirror image.
• Mirror Image cannot be selected in easy mode.
• Specify the Mirror Image before scanning an original.
1
Tap the [Others] key, and tap the [Mirror Image] key.
A checkmark appears on the icon.
After the settings are completed, tap [OK] key.
To cancel the mirror image setting:
Tap the [Mirror Image] key to uncheck it.
2
Place the original.
Place the original in the document feeder tray of the automatic document feeder, or on the document glass.
AUTOMATIC DOCUMENT FEEDER
(page 1-47)
DOCUMENT GLASS (page 1-51)
3
Tap the [Color Start] or [B/W Start] key to start copying.
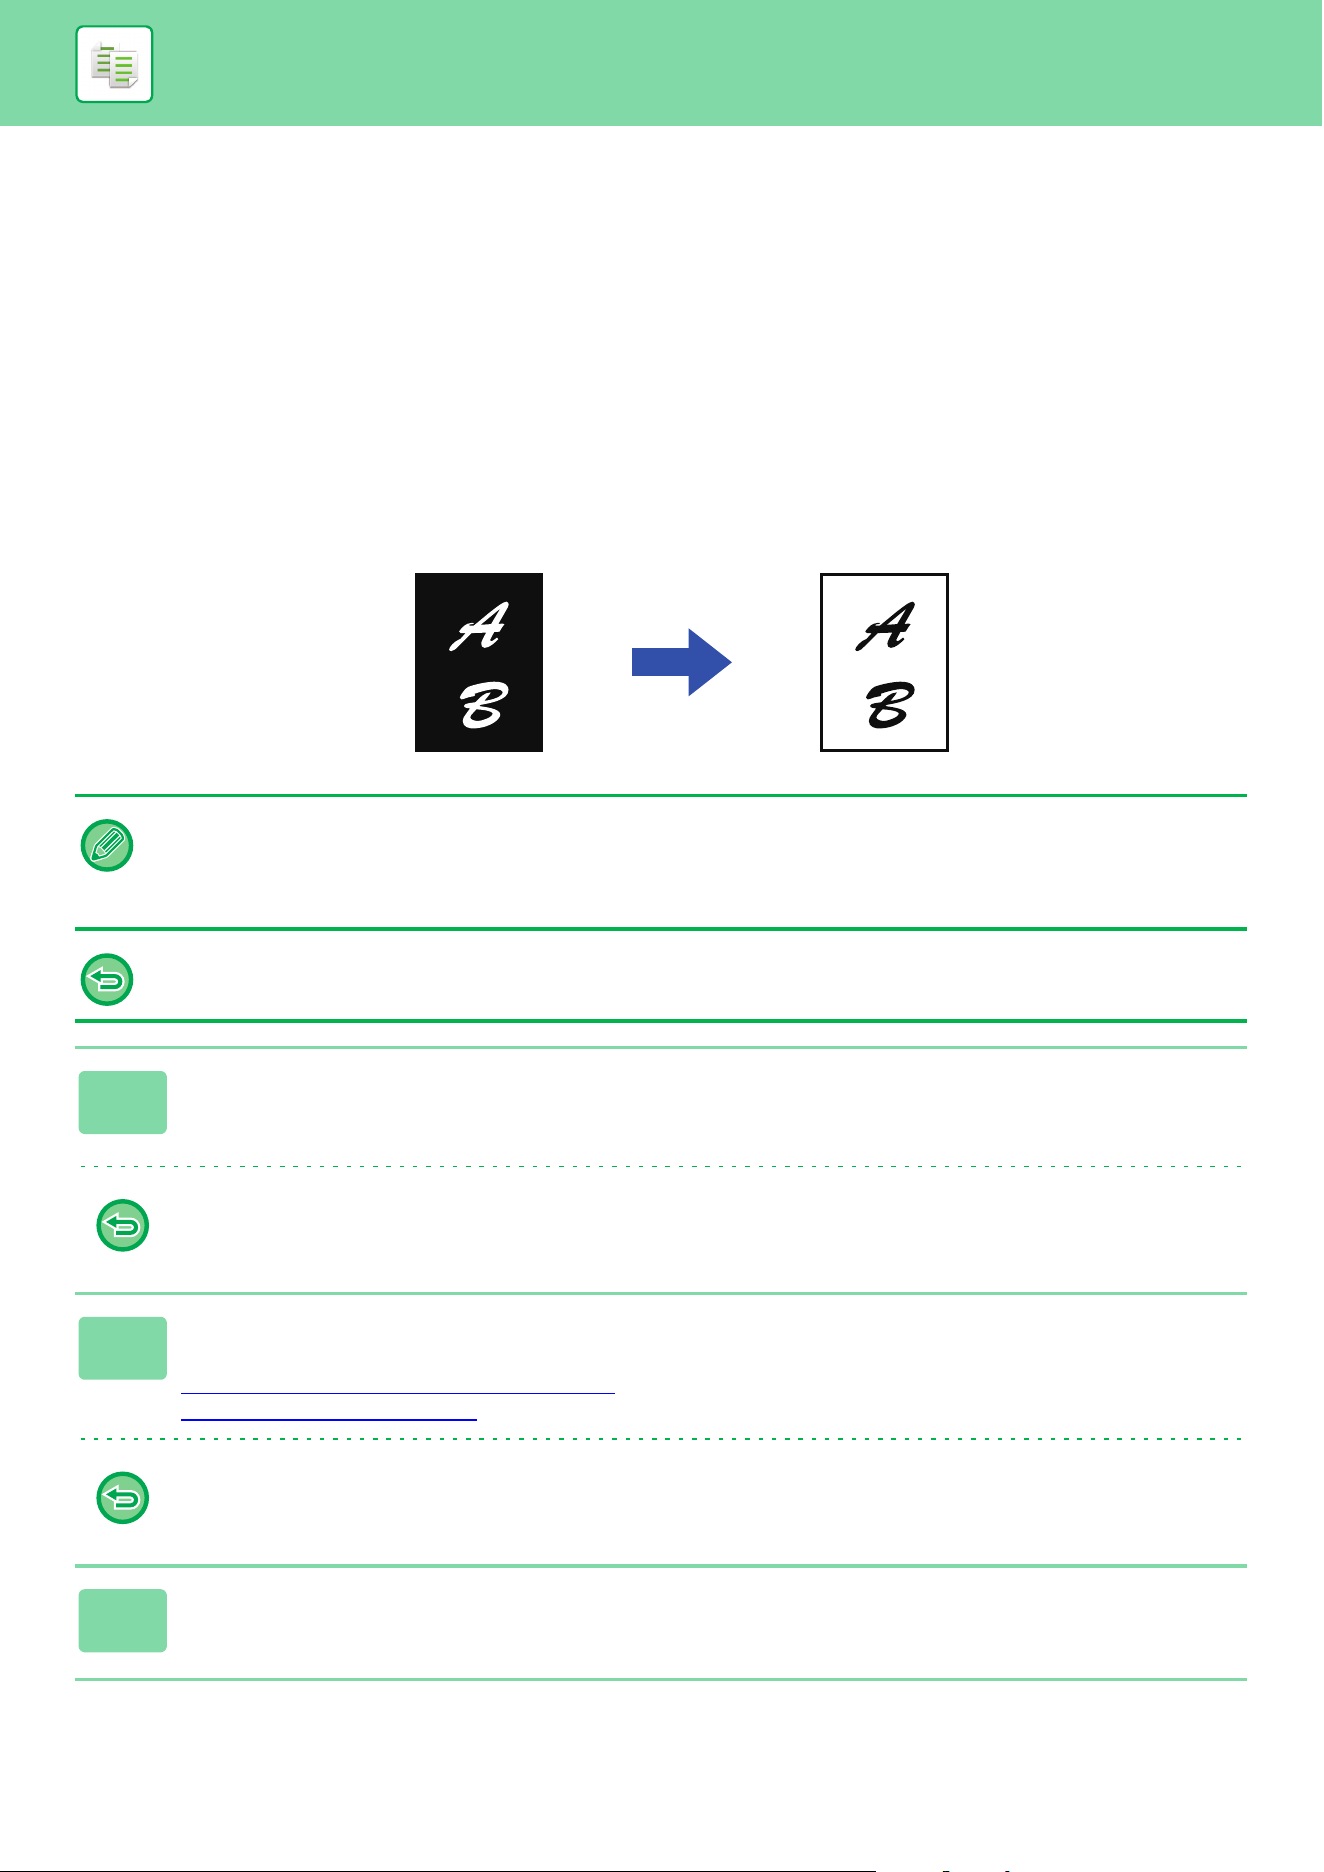
3-136
COPIER►OTHER FUNCTIONS
OUTPUT AND DENSITY ADJUSTMENT
FUNCTIONS
REVERSING WHITE AND BLACK IN A COPY (B/W
REVERSE)
This function reverses black and white in a copy to create a negative image. This function can only be used for black and
white copying.
Originals with large black areas (which use a large amount of toner) can be copied using Black/White Reverse to reduce
toner consumption.
• B/W Reverse cannot be selected in easy mode.
• B/W Reverse must be specified before scanning the original.
• When this function is selected, the "Exposure/Original Type" setting for exposure adjustment automatically changes to
"Text".
When this function is selected, you cannot use the [Color Start] key.
1
Tap the [Others] key, and tap the [B/W Reverse] key.
A checkmark appears on the icon.
After the settings are completed, tap the [Back] key.
To cancel the B/W reverse setting:
Tap the [B/W Reverse] key to uncheck it.
2
Place the original.
Place the original in the document feeder tray of the automatic document feeder, or on the document glass.
AUTOMATIC DOCUMENT FEEDER
(page 1-47)
DOCUMENT GLASS (page 1-51)
To cancel all settings:
Tap the [CA] key.
3
Tap the [B/W Start] key to start copying.
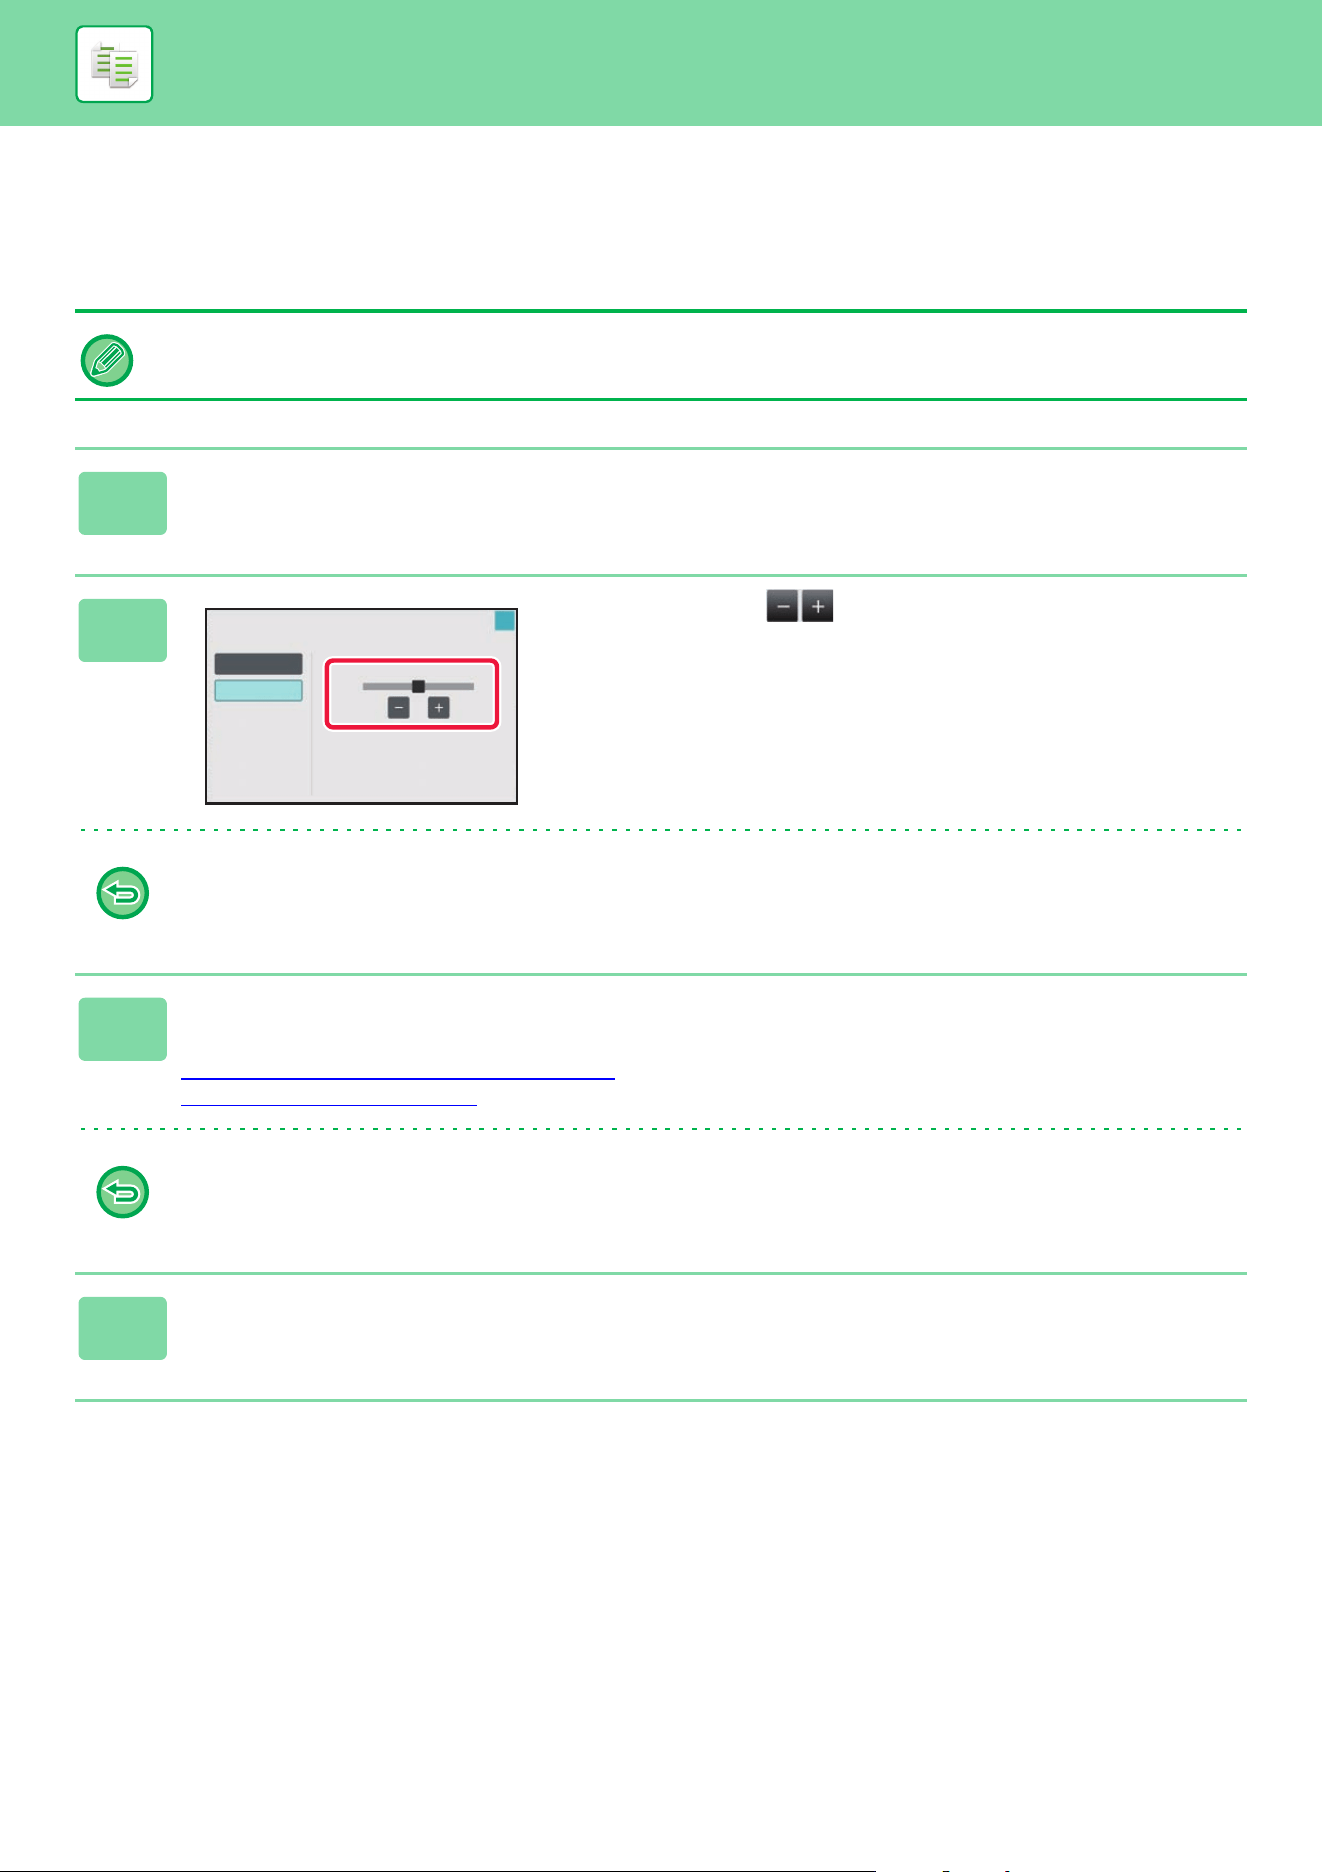
3-137
COPIER►OTHER FUNCTIONS
EASY ADJUSTMENT OF THE IMAGE QUALITY (QUICK
IMAGE QUALITY ADJUSTMENT)
You can easily adjust the color and outlines of images and text.
• Quick Image Quality Adjustment cannot be selected in easy mode.
• You must select Quick Image Quality Adjustment before scanning the original.
1
Tap the [Others] key, and tap the [Quick Image Quality Adjustment] key.
2
Tap or slide the slider to adjust
the image quality.
After the settings are completed, tap [OK] key.
To cancel the quick image quality adjustment setting:
Tap the [Off] key.
3
Place the original.
Place the original in the document feeder tray of the automatic document feeder, or on the document glass.
AUTOMATIC DOCUMENT FEEDER
(page 1-47)
DOCUMENT GLASS (page 1-51)
To cancel all settings:
Tap the [CA] key.
4
Tap the [Color Start] or [B/W Start] key to start copying.
Quick Image Quality Adj ustment
Adjust Color Tone and Darkness.
O
On
Smooth
Sharp
Touch [+] to sharpen and [-] to smoothen
overall color tone and outline.
123
OK
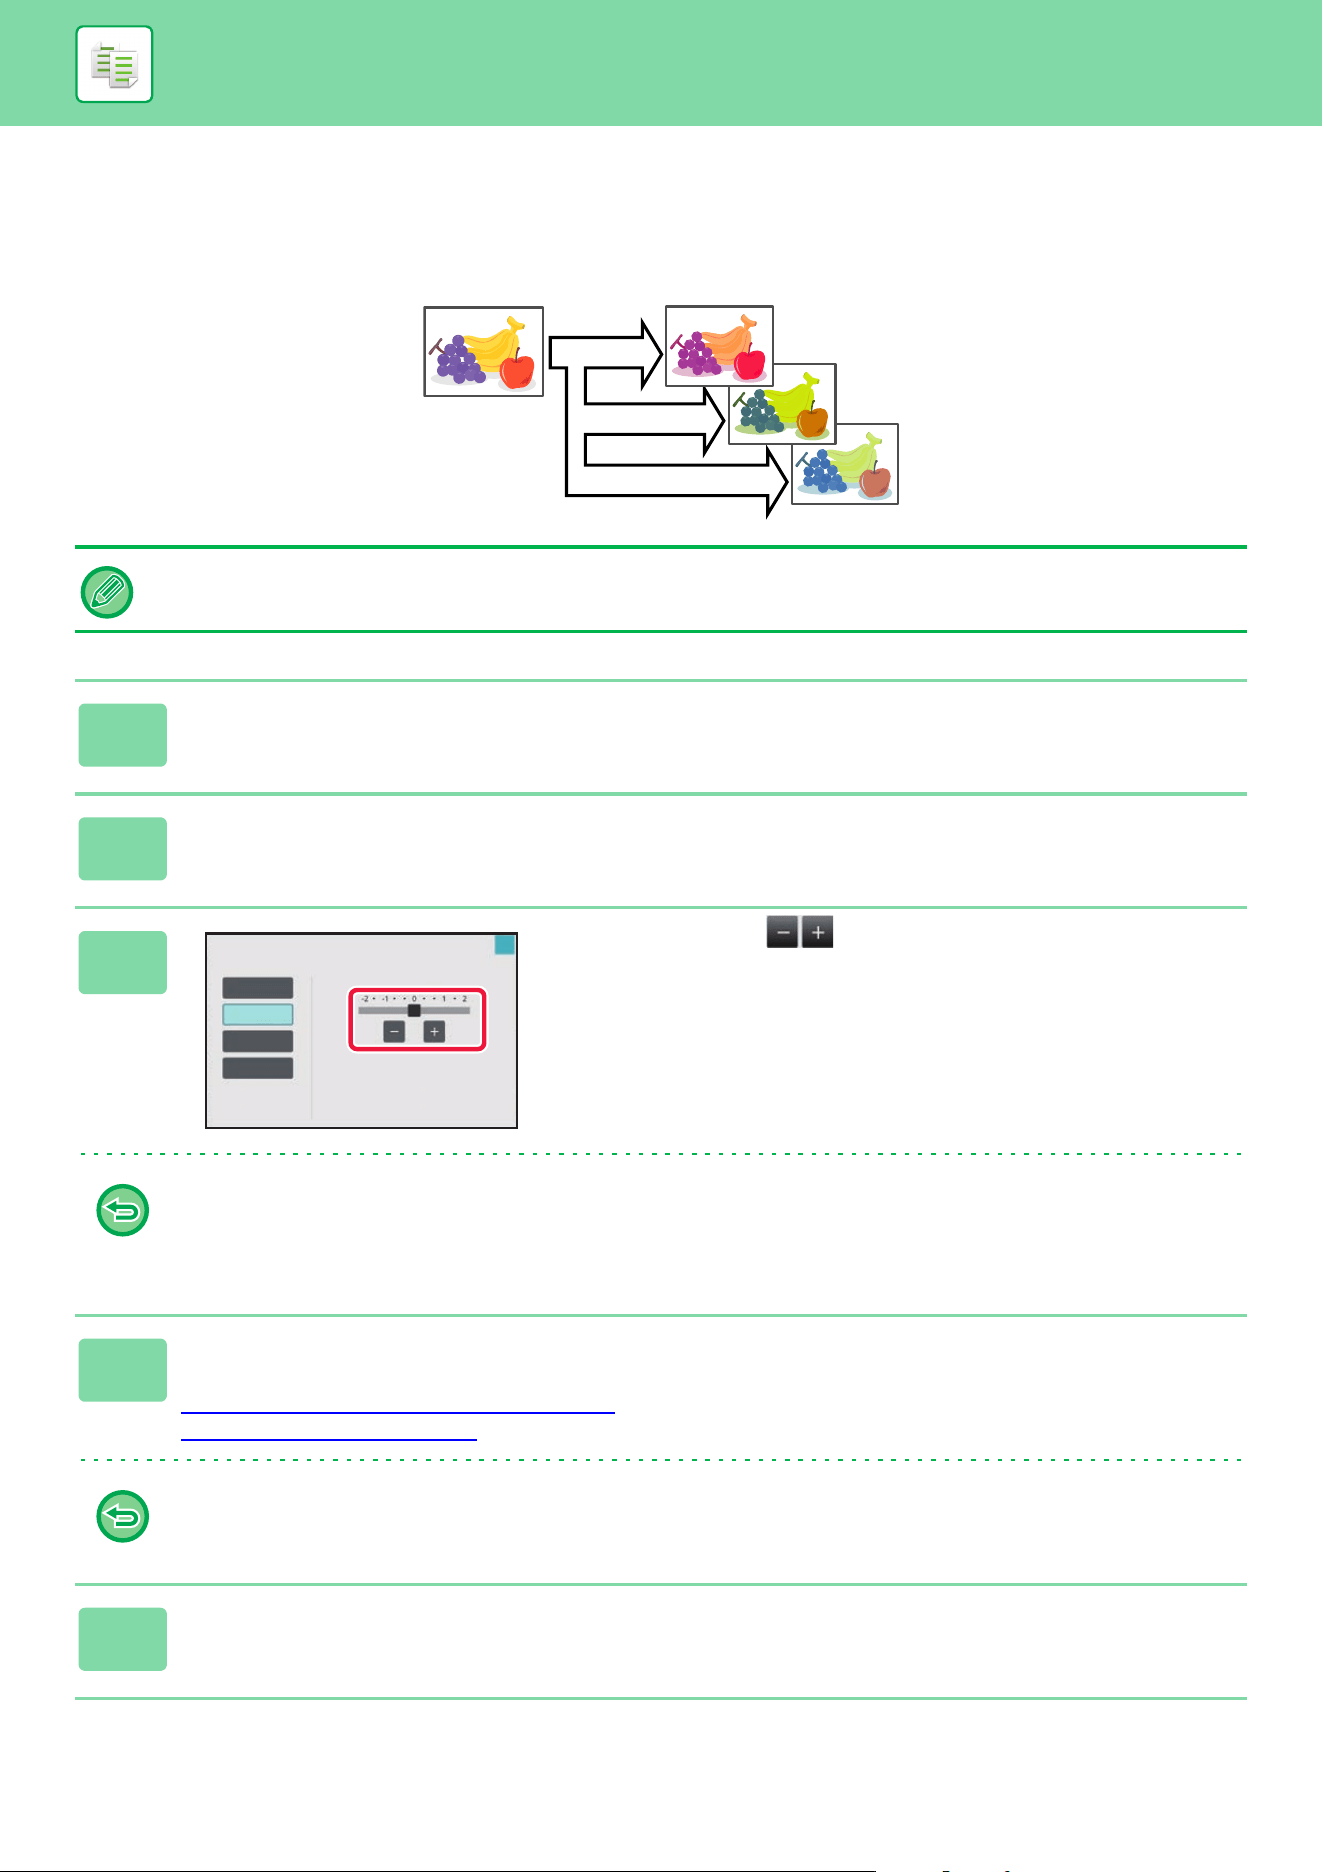
3-138
COPIER►OTHER FUNCTIONS
ADJUSTING RED/GREEN/BLUE IN COPIES (RGB
ADJUST)
This function heightens or lightens any one of the three color components R (red), G (green), and B (blue).
• RGB cannot be selected in easy mode.
• RGB must be specified before scanning the original.
1
Tap the [Others] key, and tap the [RGB Adjust] key.
2
Tap the key of the color you want to adjust.
3
Tap or slide the slider to adjust
the coloring.
After the settings are completed, tap [OK] key.
• Only one color can be adjusted. (If you adjust one color and then tap another color, the adjustment of the first color is
canceled.)
• To cancel the RGB adjust setting:
Tap the [Off] key.
4
Place the original.
Place the original in the document feeder tray of the automatic document feeder, or on the document glass.
AUTOMATIC DOCUMENT FEEDER
(page 1-47)
DOCUMENT GLASS (page 1-51)
To cancel all settings:
Tap the [CA] key.
5
Tap the [Color Start] key to start copying.
R(Red)+
G(Green)+
B(Blue)+
RGB Adjust
Any one color can be adjusted.
This setting is only applied to color.
O
R(Red)
G(Green)
OK
B(Blue)
Touch [+ ] to darken and [-] to lighten
selected color tone.
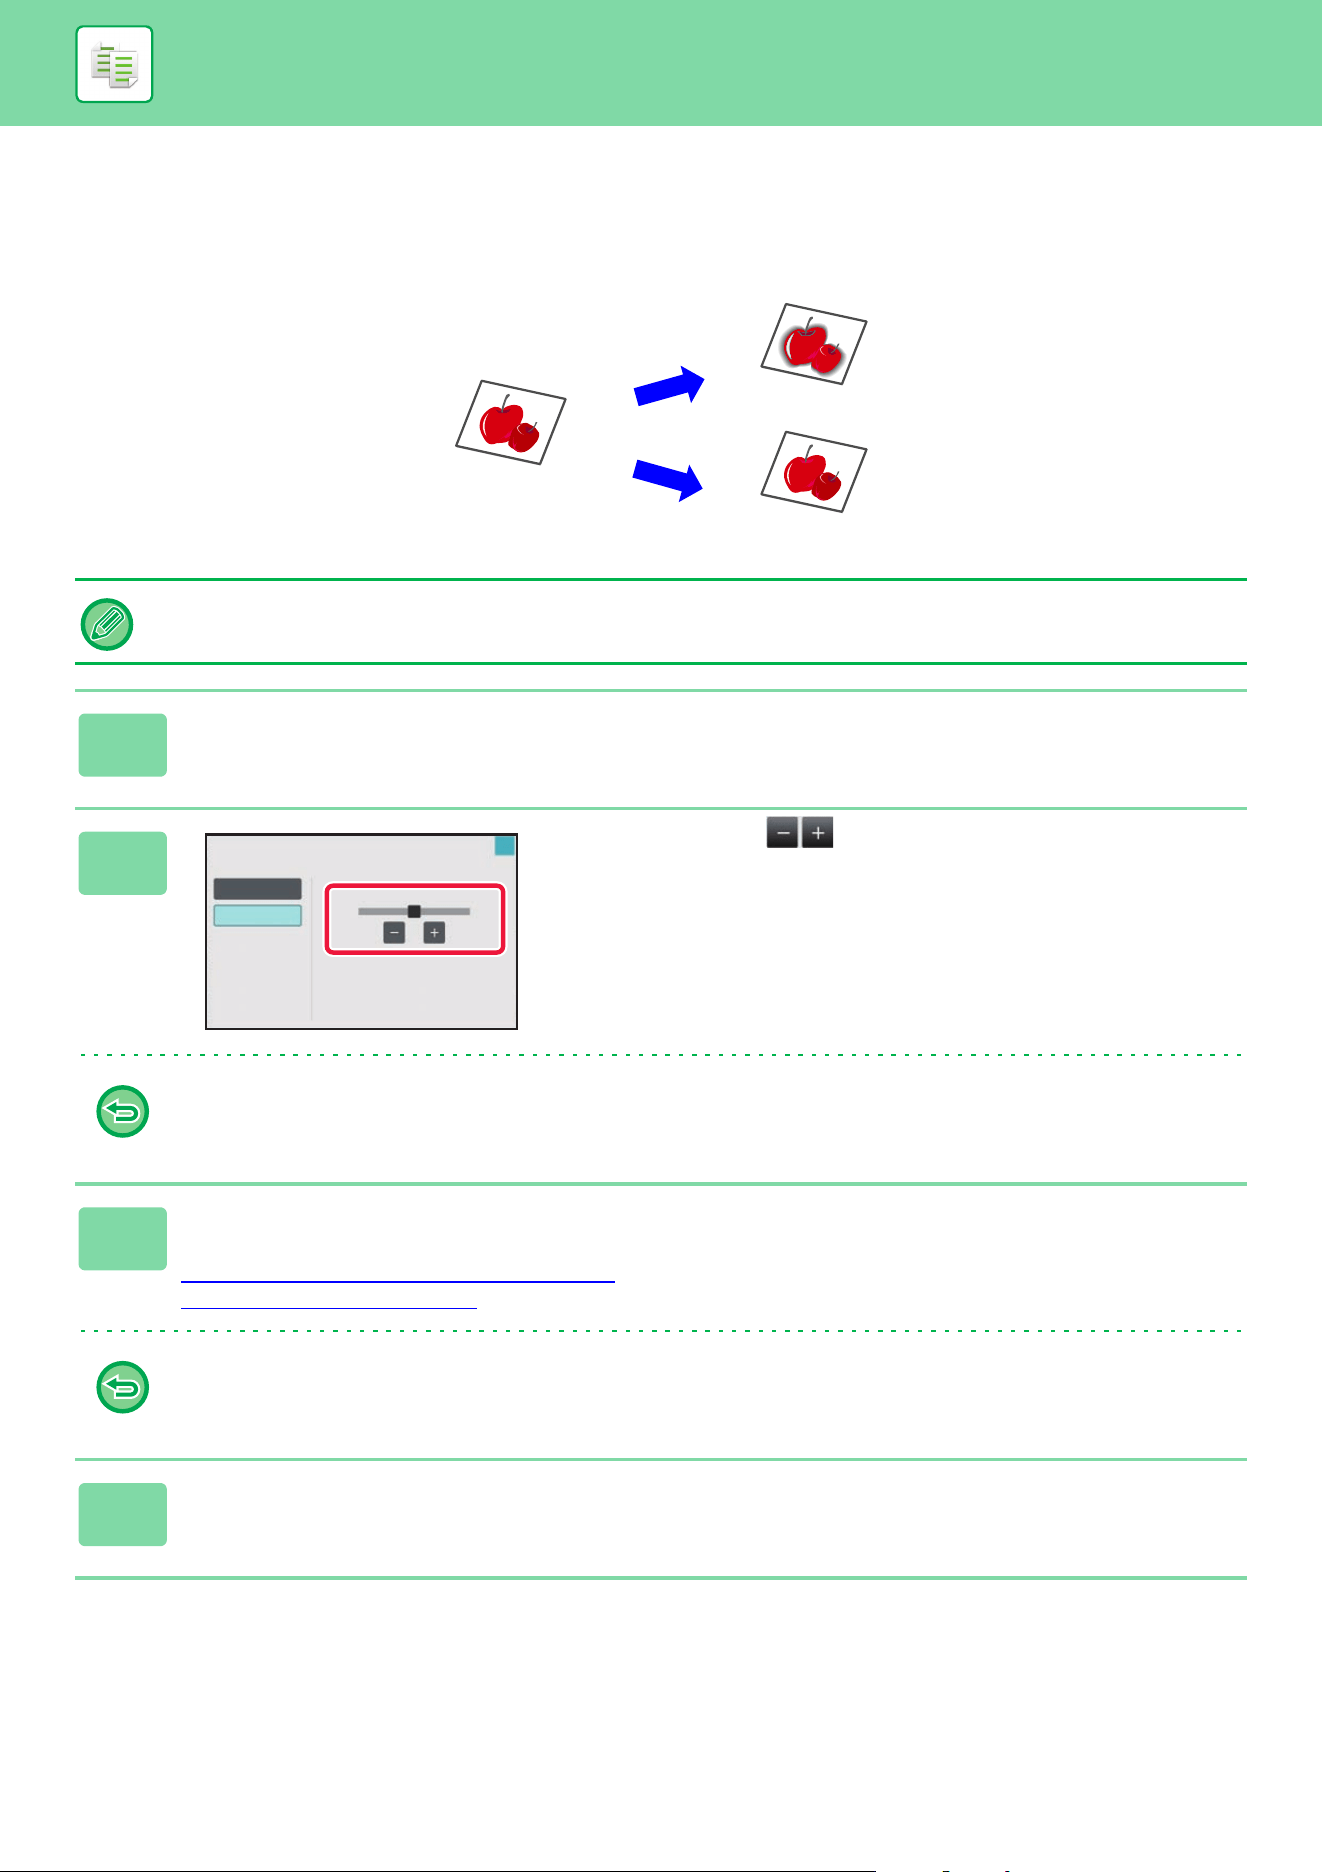
3-139
COPIER►OTHER FUNCTIONS
ADJUSTING THE SHARPNESS OF AN IMAGE
(SHARPNESS)
This function adjusts the sharpness to make a sharper or softer image.
• Sharpness cannot be selected in easy mode.
• Sharpness must be specified before scanning the original.
1
Tap the [Others] key, and tap the [Sharpness] key.
2
Tap or slide the slider to adjust
the sharpness.
Select [More Sharp] for sharper outlines, or [Less Sharp] for
softer outlines.
After the settings are completed, tap [OK] key.
To cancel the sharpness setting:
Tap the [Off] key.
3
Place the original.
Place the original in the document feeder tray of the automatic document feeder, or on the document glass.
AUTOMATIC DOCUMENT FEEDER
(page 1-47)
DOCUMENT GLASS (page 1-51)
To cancel all settings:
Tap the [CA] key.
4
Tap the [Color Start] or [B/W Start] key to start copying.
Softer
Sharper
Sharpness
Off
On
More Sharp
123
Less Sharp
OK
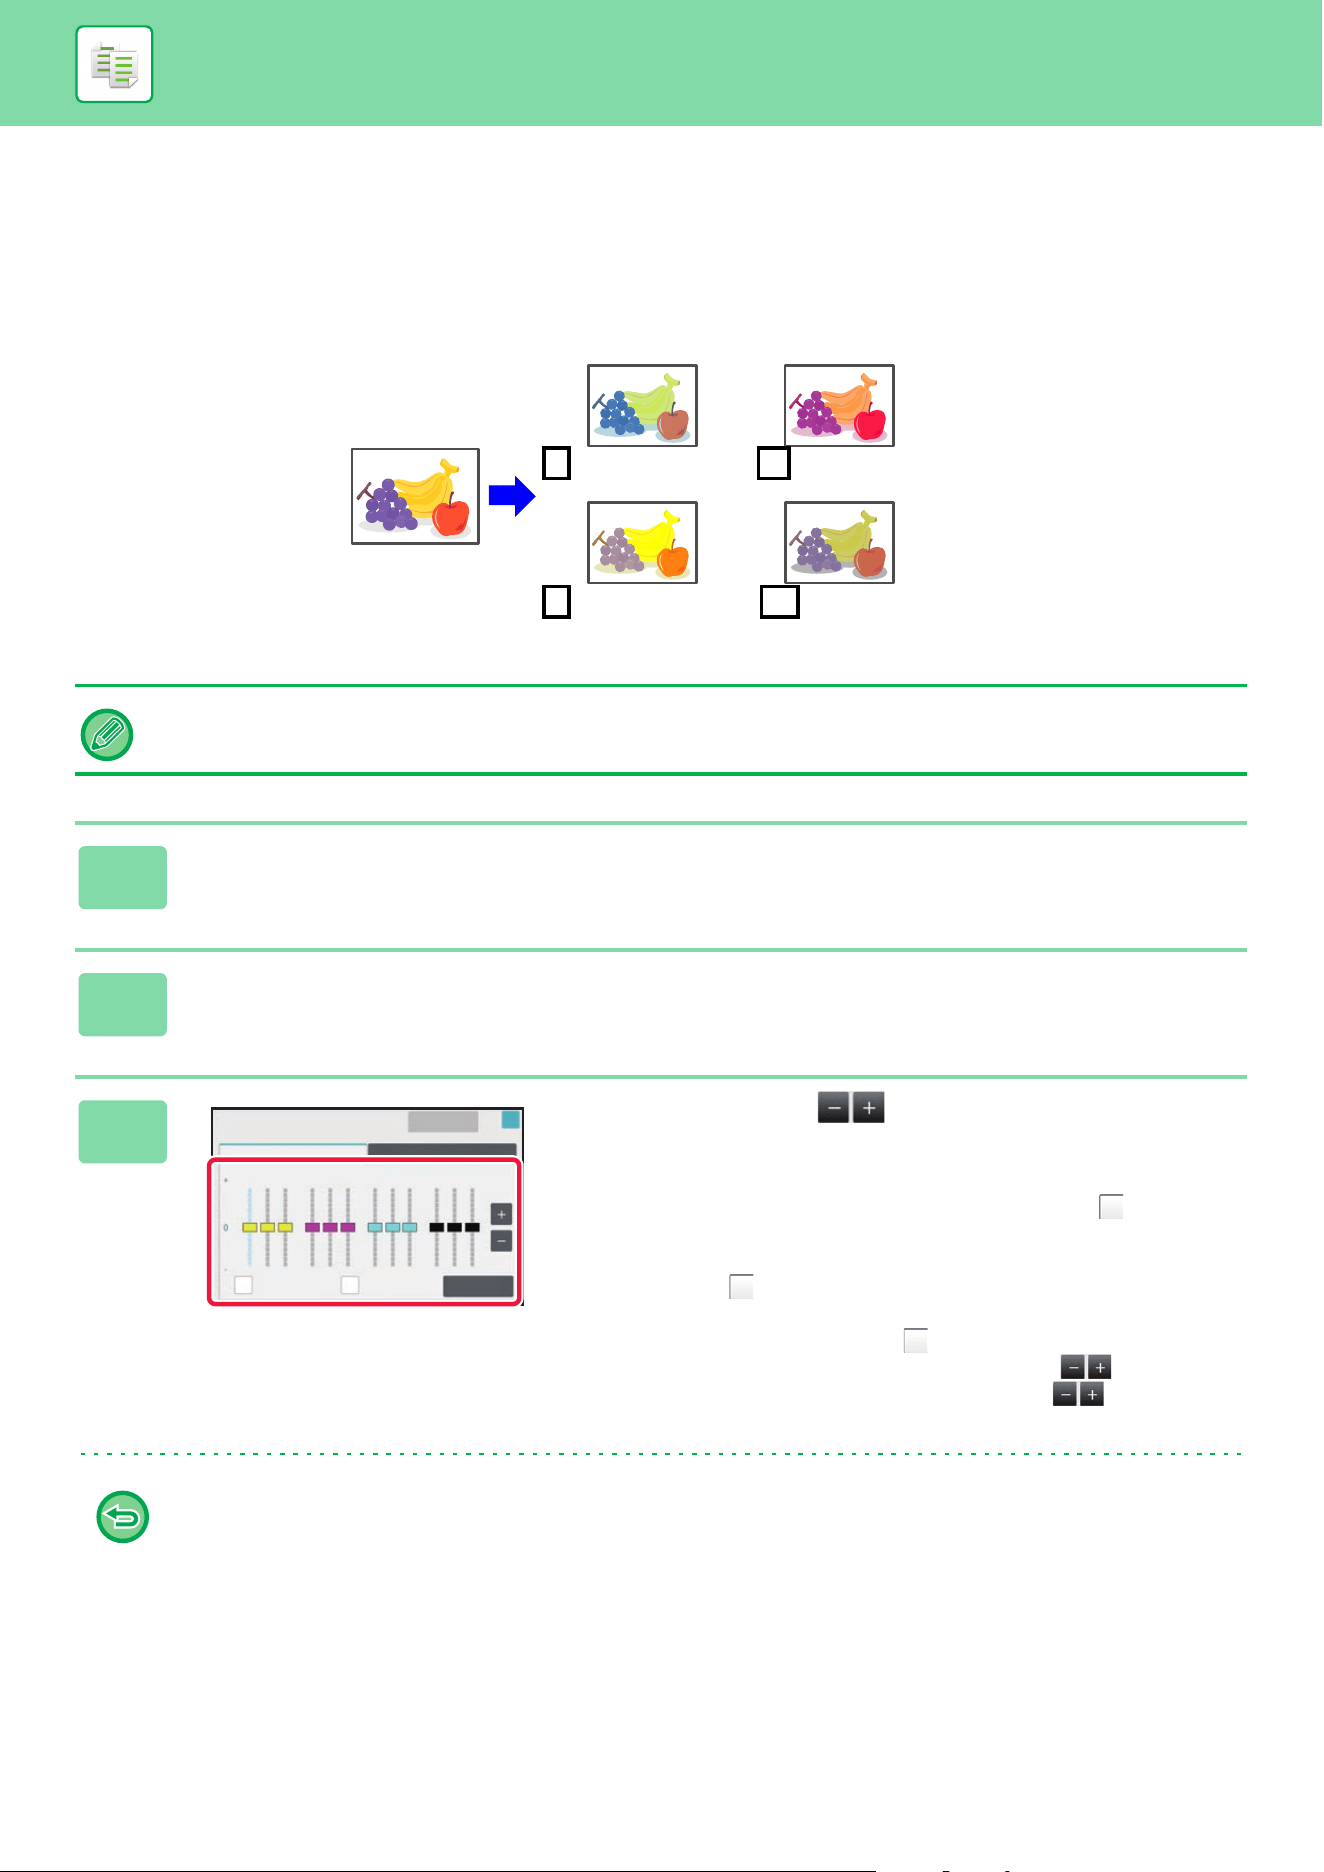
3-140
COPIER►OTHER FUNCTIONS
ADJUSTING THE COLOR (COLOR BALANCE)
You can adjust the color, tone, and density of copies.
Use the [Color] tab for color copy settings, or the [B/W] tab for black & white copy settings.
If you select the [Color] tab, the densities of the colors yellow, magenta, cyan, and black are divided into three ranges,
and you can adjust the density of each range. If needed, you can also adjust all three density ranges at once.
• Color Balance cannot be selected in easy mode.
• Color Balance must be specified before scanning the original.
1
Tap the [Others] key, and tap the [Color Balance] key.
2
Tap the tab of the mode you want to adjust.
3
Tap the key or slide the slider to
adjust the color balance.
• If you want to adjust each color individually on the [Color]
tab, set the [Set in a Batch] checkmark to .
• If you want to further adjust each range of each color
individually, set the [Set in a Group by Color] checkbox to
.
• To adjust each range on the [B/W] tab, set the [Set in a
Batch] checkbox to .
• To adjust a slider individually with the keys, tap the
slider you want to adjust and tap the keys.
• After the settings are completed, tap [OK] key.
To return the color balance of the current tab to the default balance:
• Tap the [Reset] key.
• The values of all gradations currently being adjusted will return to their default color balance values.
Cyan+
C
Yellow+
Y
Bk
M
Black+
Magenta+
Color Balance
Adjust Color Tone for Copy.
Cancel All
Color B/W
YMCBk
Set in a Batch Set in a Group by
Color
Reset
MLLH MLLH MLLHMLLH
OK

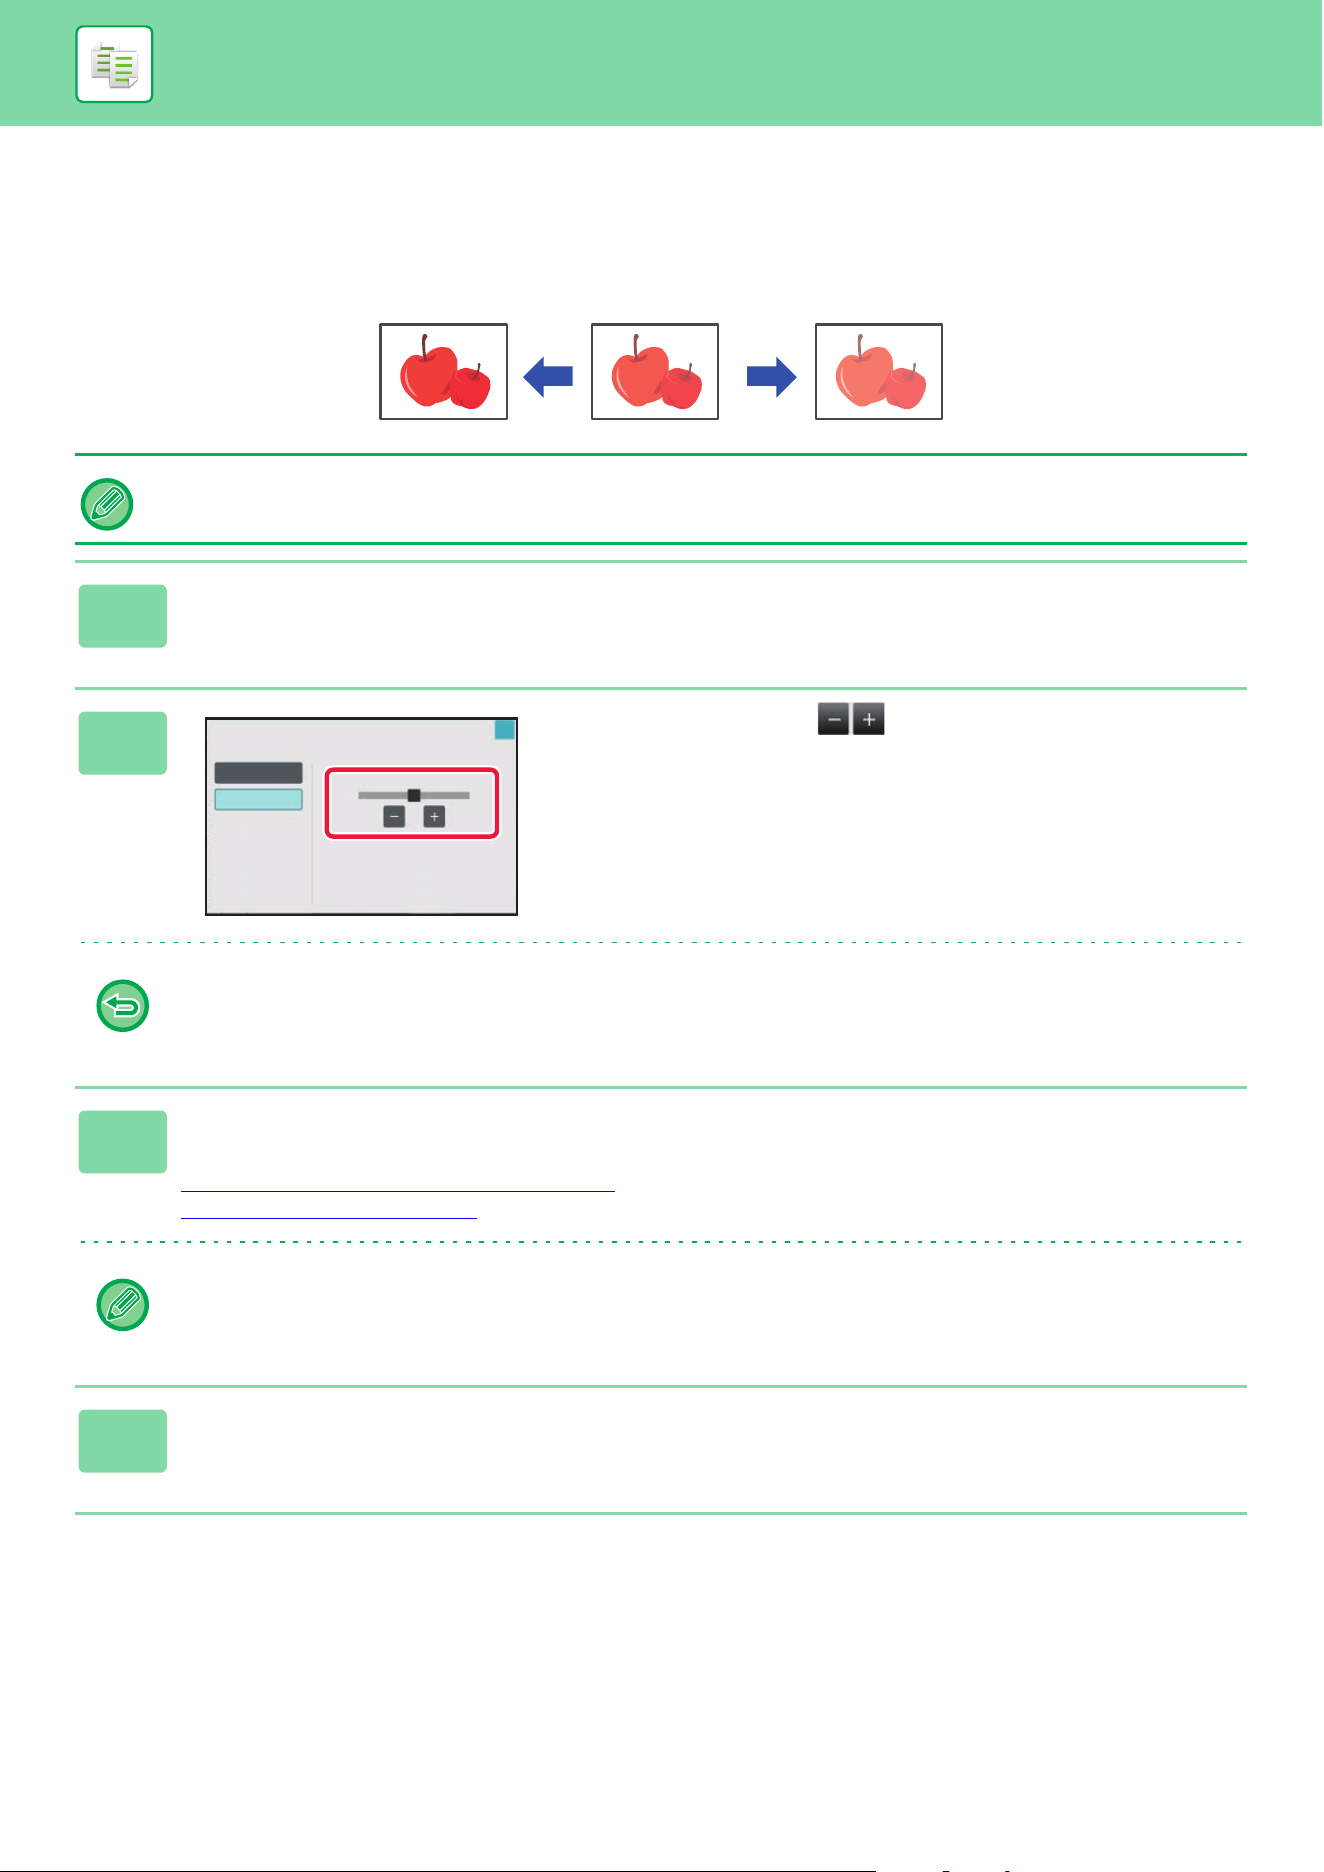
3-142
COPIER►OTHER FUNCTIONS
ADJUSTING THE BRIGHTNESS OF A COPY
(BRIGHTNESS)
This function adjusts the brightness of a color copy image.
• Brightness cannot be selected in easy mode.
• Brightness must be specified before scanning the original.
1
Tap the [Others] key, and tap the [Brightness] key.
2
Tap the key or slide the slider to
adjust the brightness.
After the settings are completed, [OK] and [Back] keys in
sequence.
To cancel the brightness setting:
Tap the [Off] key.
3
Place the original.
Place the original in the document feeder tray of the automatic document feeder, or on the document glass.
AUTOMATIC DOCUMENT FEEDER
(page 1-47)
DOCUMENT GLASS (page 1-51)
To cancel all settings:
Tap the [CA] key.
4
Tap the [Color Start] key to start copying.
Brightness
This setting is only applied to color.
Off
On
Light
-2 -1 0
21
Dark
OK
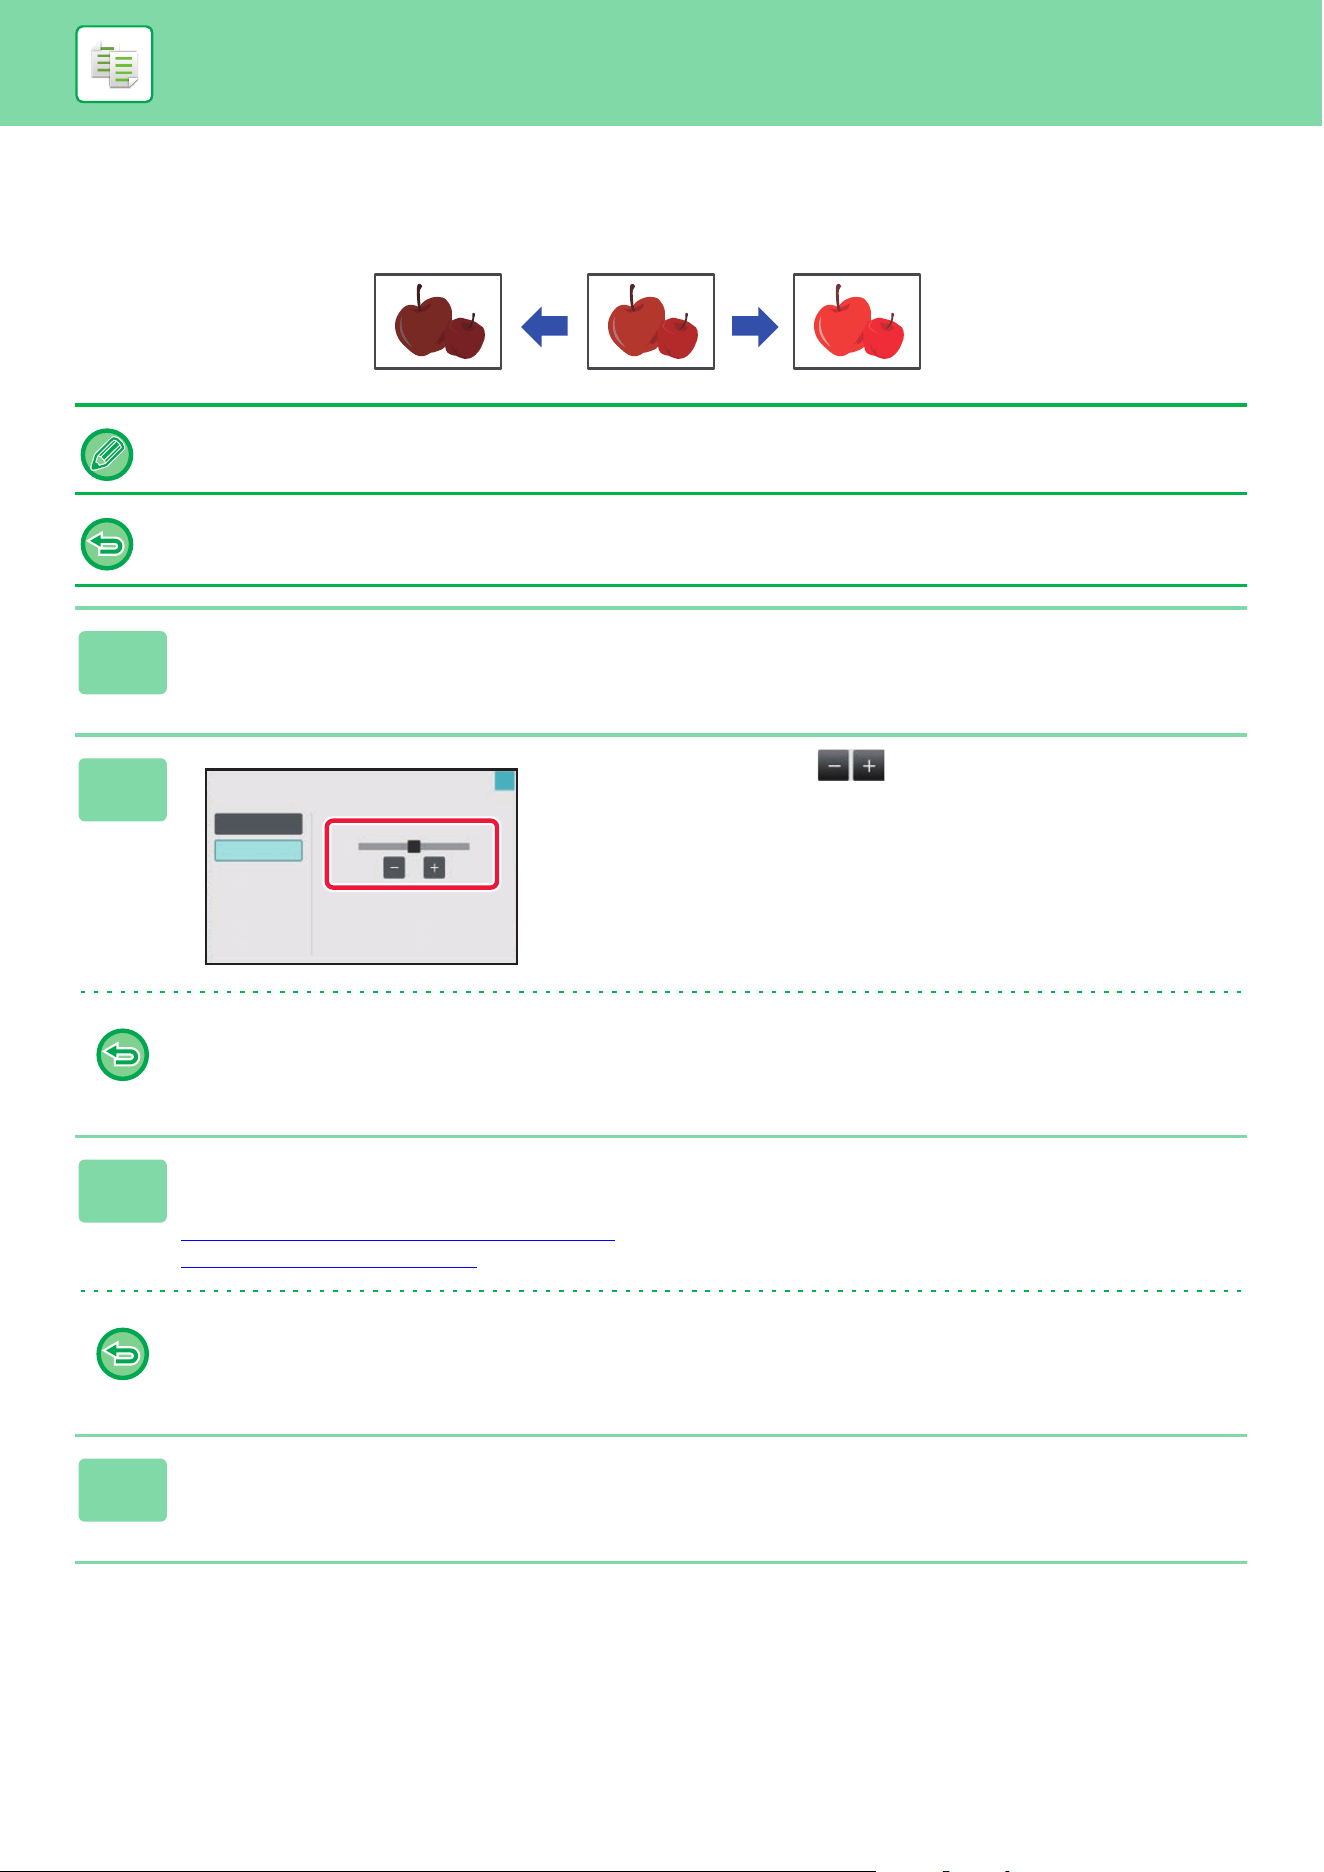
3-143
COPIER►OTHER FUNCTIONS
ADJUSTING THE INTENSITY OF A COPY (INTENSITY)
This function adjusts the intensity (saturation) of a color copy image.
• Intensity cannot be selected in easy mode.
• You must set the intensity before scanning the original.
This function cannot be combined with [Copy of Copy] or [Color Tone Enhancement] in Exposure.
1
Tap the [Others] key, and tap the [Intensity] key.
2
Tap the key or slide the slider to
adjust the intensity.
After the settings are completed, tap the [OK] and [Back]
key.
To cancel the Intensity setting:
Tap the [Off] key.
3
Place the original.
Place the original in the document feeder tray of the automatic document feeder, or on the document glass.
AUTOMATIC DOCUMENT FEEDER
(page 1-47)
DOCUMENT GLASS (page 1-51)
To cancel all settings:
Tap the [CA] key.
4
Tap the [Color Start] key to start copying.
Intensity
Off
On
Darker
-2 -1 0 21
Lighter
This setting is only applied to color.
OK
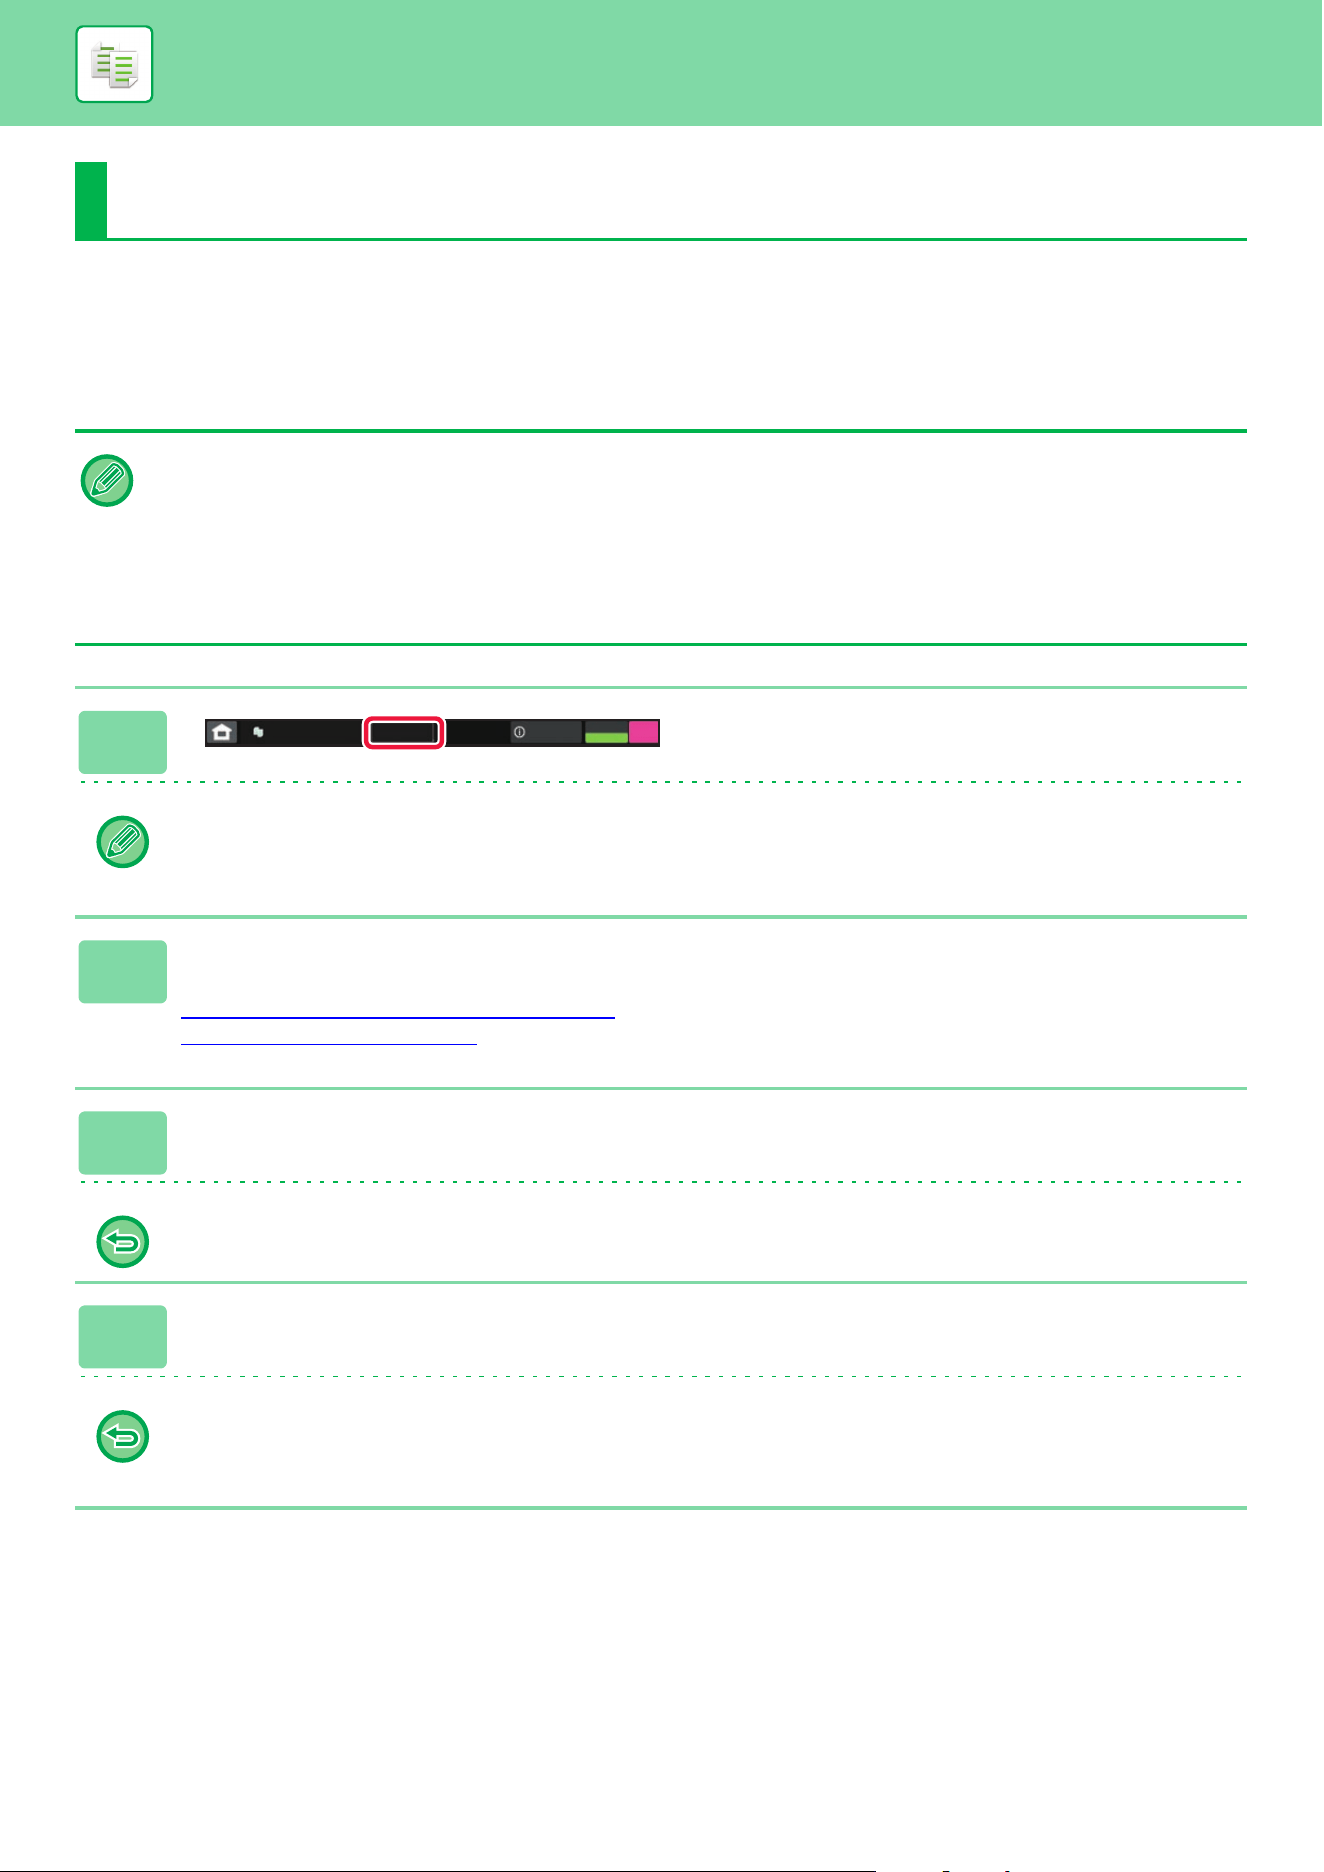
3-144
COPIER►CONVENIENT COPY FUNCTIONS
INTERRUPT COPY
This function suspends a job in progress, and preferentially prints the original specified with interrupt copy.
When you need to make an urgent copy and the machine is busy with a long copy run or other job, use interrupt copy.
CONVENIENT COPY FUNCTIONS
• The [Interrupt] key does not appear while an original is being scanned.
• Depending on the settings of the job in progress, the [Interrupt] key may not appear.
• Interrupt copy cannot be used in combination with the following functions:
Job Build, Tandem Copy, Book Copy, Card Shot, Multi-Page Enlargement, Original Count, Proof Copy, Preview Setting,
and Book Divide.
• If you use the document glass for interrupt copy, you cannot select the booklet, covers/inserts function, or N-Up setting.
If any of these functions are necessary, use the automatic document feeder.
1
Tap the [Interrupt] key.
The interrupt mode screen appears.
If user authentication is specified:
Tap the [Interrupt] key to display the user authentication screen. Enter the login name and password to perform user
authentication.
2
Place the original.
Place the original in the document feeder tray of the automatic document feeder, or on the document glass.
AUTOMATIC DOCUMENT FEEDER
(page 1-47)
DOCUMENT GLASS (page 1-51)
3
Configure copy settings.
To cancel interrupt copy, tap the [Cancel] key.
4
Tap the [Color Start] or [B/W Start] key to start interrupt copying.
When the interrupt copy job is completed, the interrupted job will resume.
The interrupt copy function does not display the preview of the scanned original.
Copy
Interrupt
Machine
Status
Cancel
Print
Job Management
Tray 1
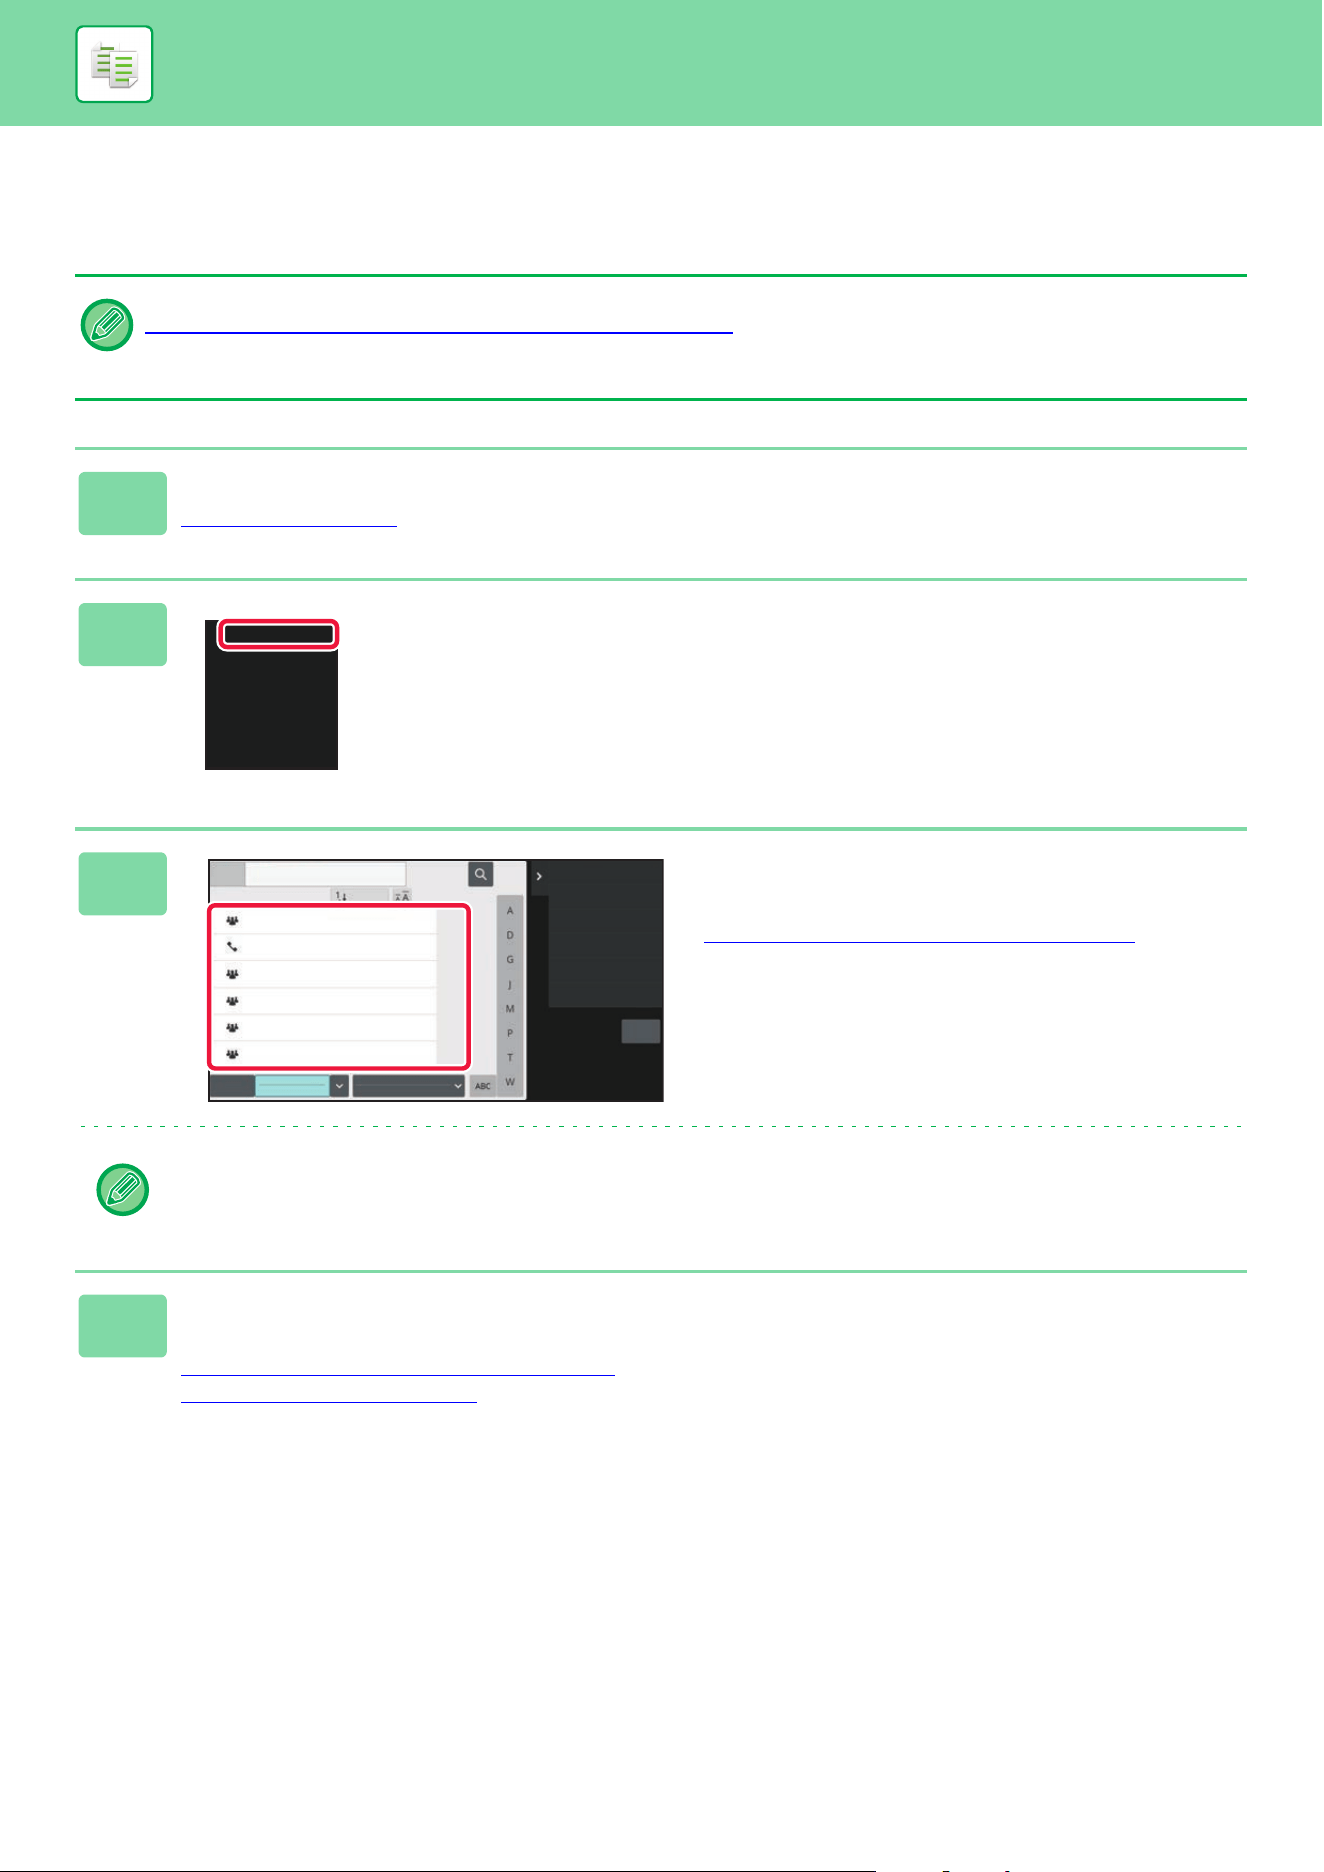
3-145
COPIER►CONVENIENT COPY FUNCTIONS
SEND DATA WHILE COPYING
This function allows you to send an e-mail with an image attached, or save data in the network folder.
You need to store the destination in the address book in advance.
STORING ADDRESSES THROUGH DIRECT ENTRY
(page 5-18)
The image send transmission starts after the copy, and the settings same as the copy are used for transmission.
However, the same results as the copy may not be provided by some functions.
1
Tap the [Detail] key to change to normal mode.
EASY MODE (page 3-3)
2
Tap [Send and Print] on the action
panel.
3
Select a recipient from the address
book.
SELECTING "Contacts" OR "Group" (page 5-15)
After you have selected the recipient, tap the [Enter
Address] key.
You cannot use the soft keyboard to enter an address. If you cannot find the recipient in the address book, enter it in the
address book.
4
Place the original.
Place the original in the document feeder tray of the automatic document feeder, or on the document glass.
AUTOMATIC DOCUMENT FEEDER
(page 1-47)
DOCUMENT GLASS (page 1-51)
Send and Print
Recent J obs
Call Eco Program
Store Data in Folder
File
Store Data Temporarily
Quick Fi le
Register Current Settings
Program Regi stration
Cancel and Return
A
D
G
J
M
P
W
Recent J obs
Frequent
Use
All
Narrow Down
All
Category
Sort
AAA
BBB
CCC
AAA
DDD
ABC
T
BBB
Address
CA

3-146
COPIER►CONVENIENT COPY FUNCTIONS
COPY JOBS
When you tap the job management display, jobs are displayed in a list. To check the status of a copy job, tap the [Print]
tab.
When you wish to stop or delete jobs or to perform priority processing, read "STOPPING/DELETING A JOB, PRIORITY
PROCESSING AND CHECKING THE STATUS (page 2-53)".
5
Set each copy item as required.
You can preview the scanned original by tapping the [Preview] key.
6
Tap the [Color Start] or [B/W Start] key to start copying.
After the copy, the transmission starts.
After the copy, you cannot preview the settings before transmission.
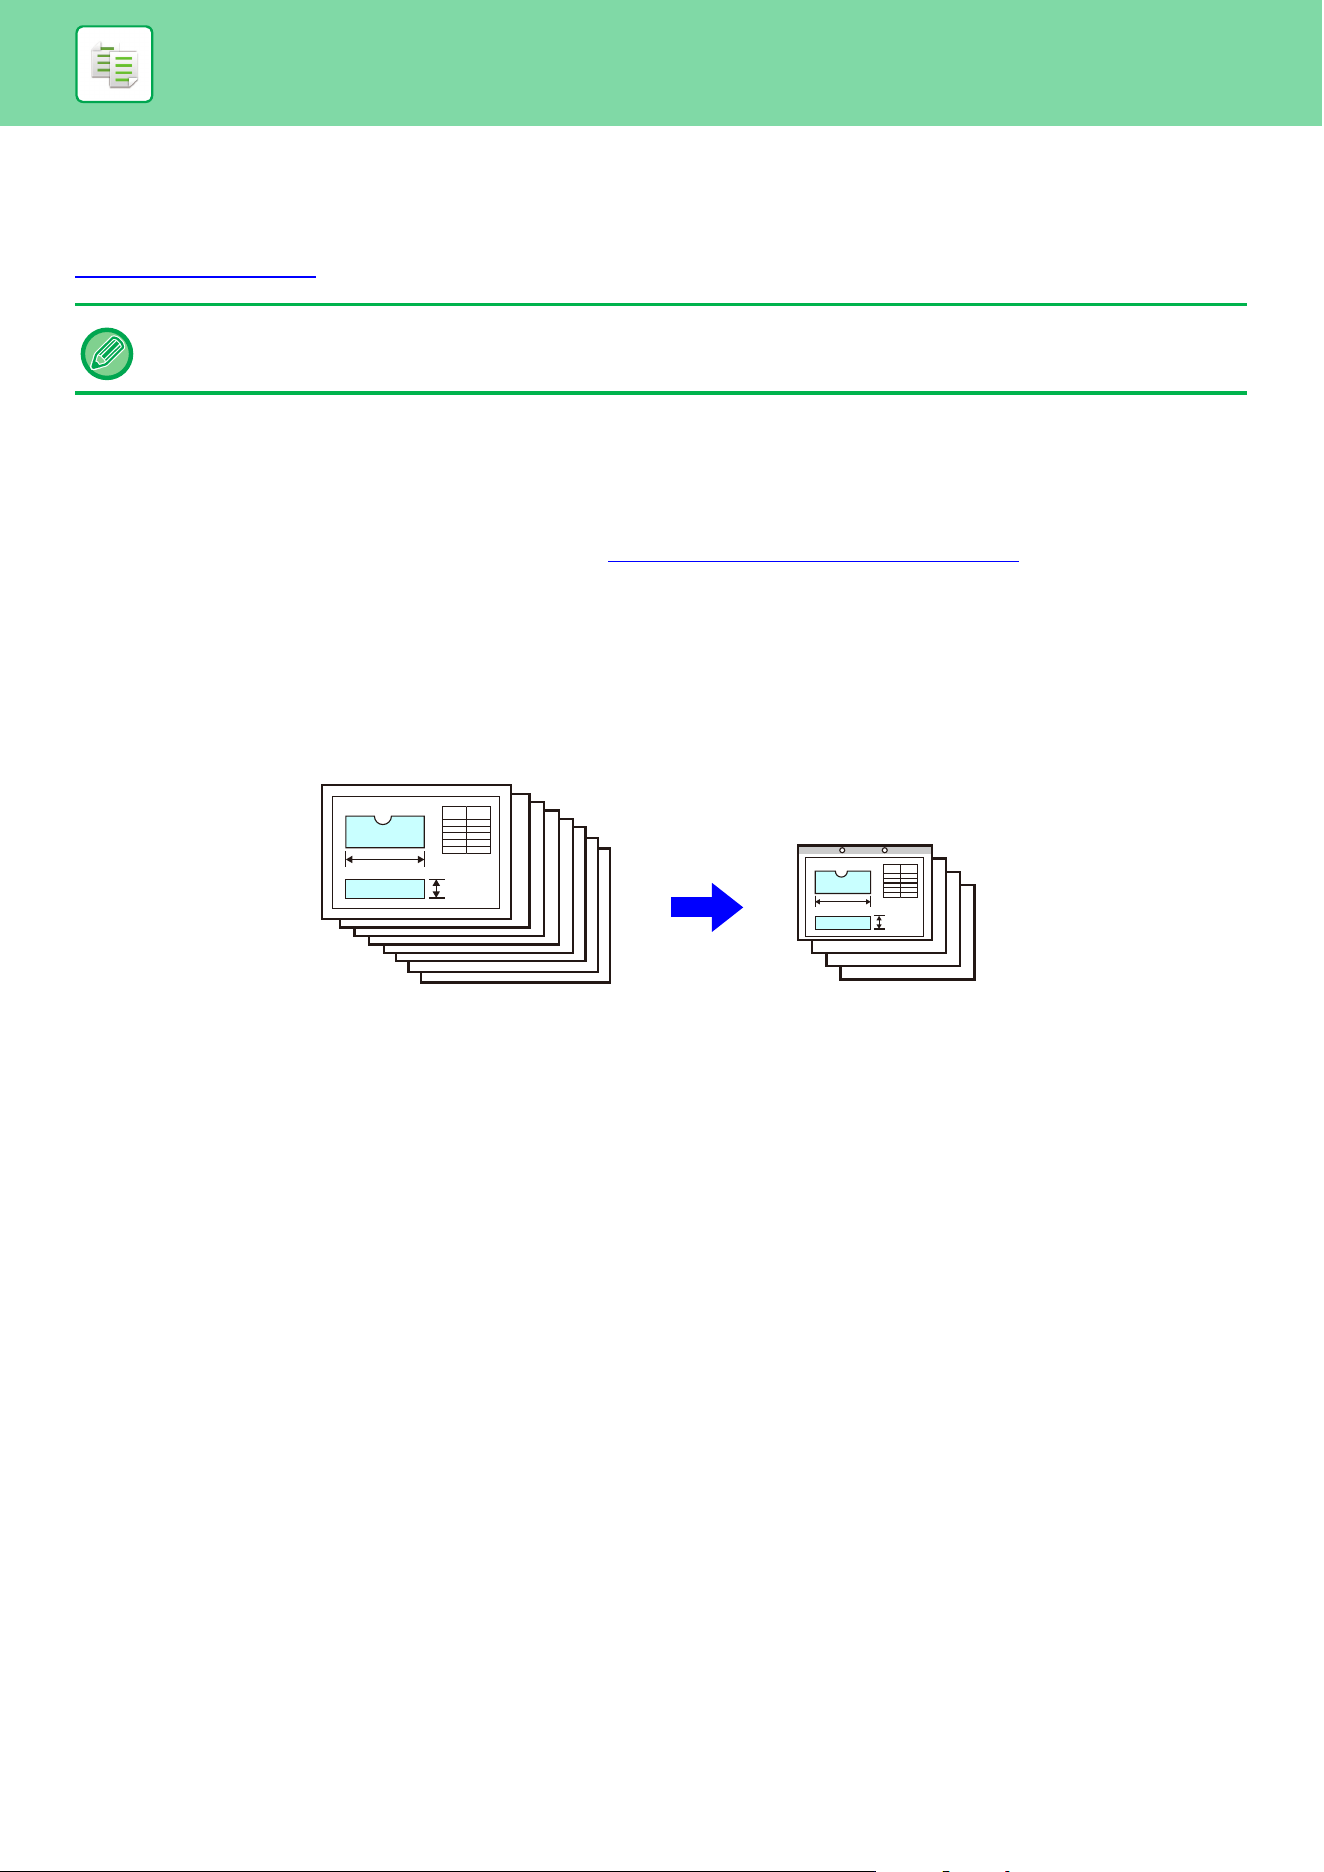
3-147
COPIER►CONVENIENT COPY FUNCTIONS
PROGRAMS
Programs are set from the base screen of normal mode.
EASY MODE
(page 3-3)
STORING A PROGRAM
This function collectively stores copy settings as one program. The stored program can be retrieved using an easy
operation.
For information about how to retrieve a program, see "RETRIEVING A PROGRAM
(page 3-149)".
For example, suppose 11" x 17" (A3) size CAD drawings are copied once a month for archive purposes using the
following settings:
• The 11" x 17" (A3) size CAD drawings are reduced to 8-1/2" x 11" (A4) size.
• To reduce paper use by half, 2-sided copying is used.
• Margin shift is used to allow a margin to punch holes for filing.
Programs cannot be stored in easy mode.
11" x 17" (A3) size CAD drawings
Copy
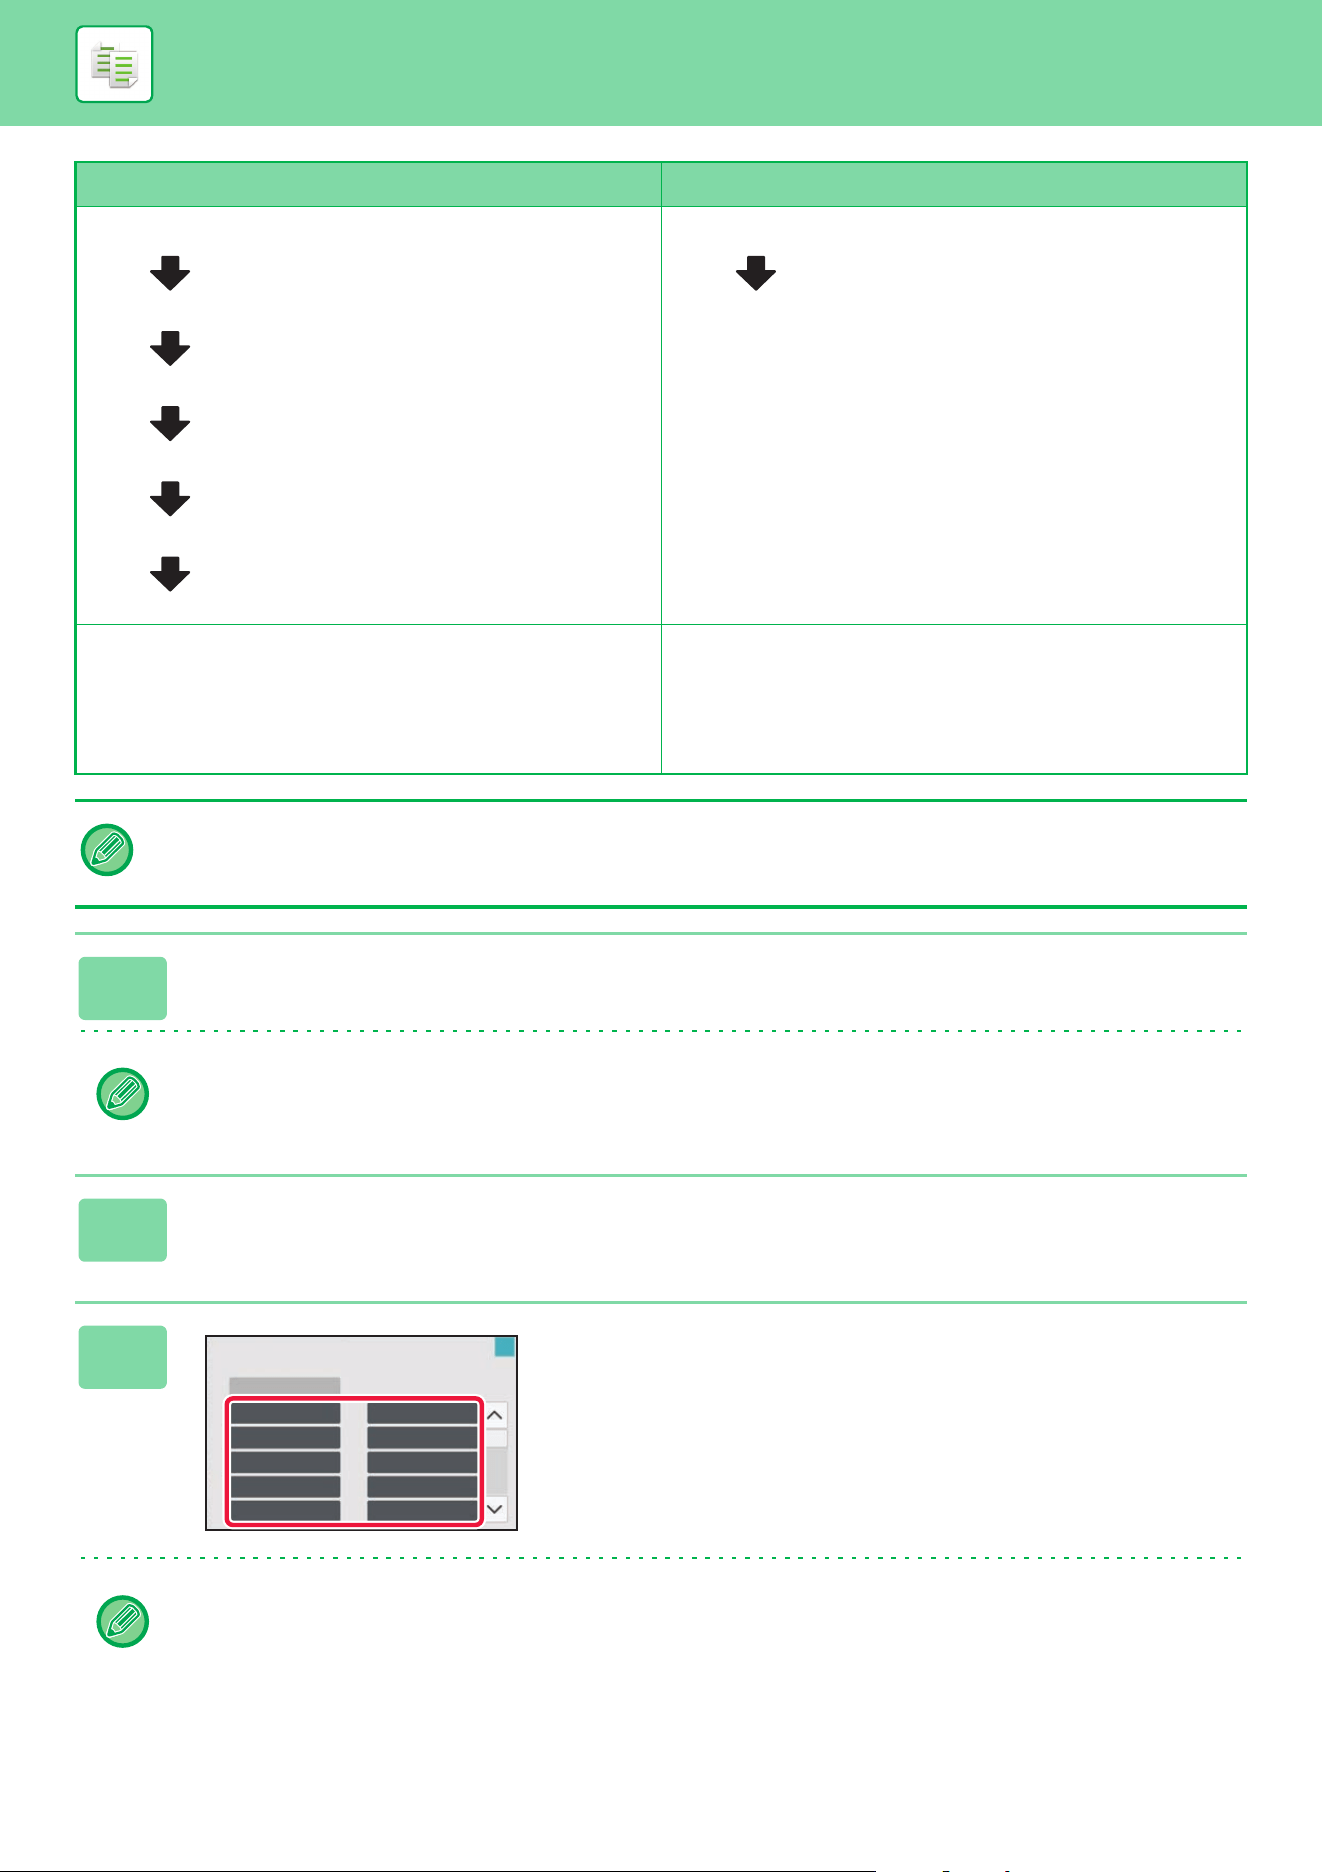
3-148
COPIER►CONVENIENT COPY FUNCTIONS
When a job program is not stored When a job program is stored
Set reduction from 11" x 17" (A3) to 8-1/2" x 11" (A4)
Change the exposure setting.
Set 2-sided copying.
Set margins.
Set punch hole settings.
Tap the [Color Start] or [B/W Start] key.
Retrieve the stored program.
Tap the [Color Start] or [B/W Start] key.
Considerable time is required to copy the drawings each
month because the above settings must be selected.
In addition, mistakes are occasionally made when selecting
the settings, so some copies must be redone.
The settings are stored in a program, so they can be selected
by the touch of a key. This is simple and takes no time.
In addition, the settings are all stored so there are no chances
for mistakes, and thus no need to redo copies due to setting
mistakes.
• Up to 48 programs can be stored.
• Program settings remains registered even when the main power has been turned off.
• A program can also be stored in the home screen or favorite as a shortcut; therefore, it is helpful when retrieving it.
1
Specify the copy function to be stored.
In the base screen, display [Program Registration] on the action panel.
2
Tap [Program Registration] on the action panel.
3
Tap an unused key.
A key with a program stored is displayed in color.
Tap a key with no program stored.
If you do not set a name for the program, a serial number will be automatically assigned as the name.
01 02
03 04
05 06
07 08
09 10
Pre-Setting
Program
Program Registration
Select Program No. to Register.
01
03
05
07
09
02
04
06
08
10
OK
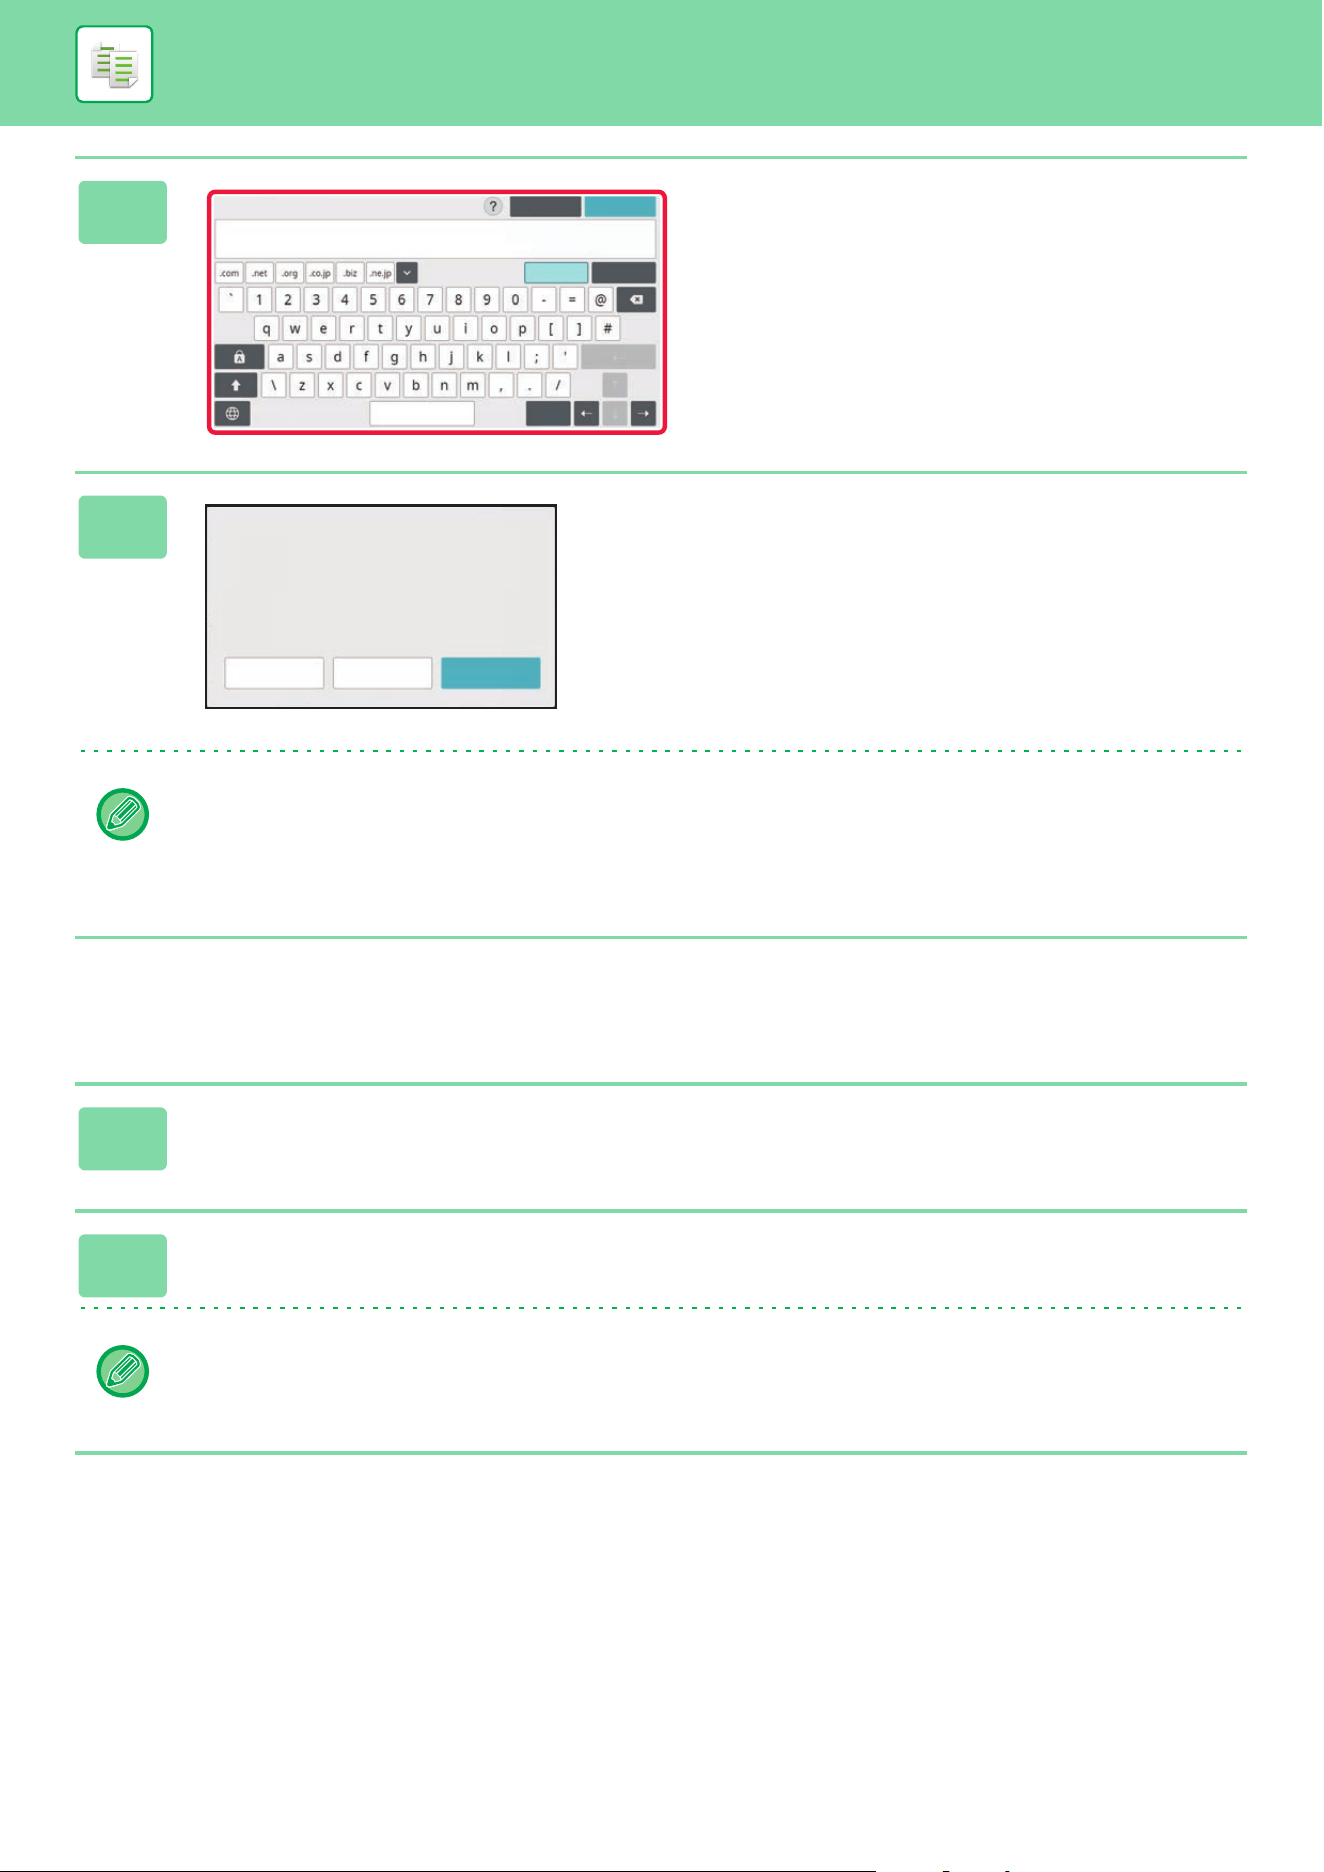
3-149
COPIER►CONVENIENT COPY FUNCTIONS
RETRIEVING A PROGRAM
4
Set a name for the program and tap the
[OK] key.
A registration completion message appears.
5
Select whether or not the program will
be added to the home screen or the
favorites.
To specify print settings, you can select the required one
from pre-set text or use the soft keyboard. You can also print
serial number and account job ID.
When you have completed the settings, tap [OK] and the
[Back] keys in sequence.
• If user authentication is enabled, the shortcut key for the program is registered in the user's home screen or favorite.
• If user authentication is disabled, the administrator password entry screen appears. When the administrator password
is entered, the registration is completed.
• The number of copies cannot be stored.
1
Tap [Call Program] on the action panel.
2
Tap the key of the program you want to retrieve.
You can tap [Register in Favorite] or [Register for Home] on the action panel to register a shortcut key for the selected
program in the favorite or home screen.
Program Name
Cancel OK
Space AltGr
Characters Symbols
Register for
Favorite
Register for
Home
Finish
Program registration is completed.
At the same time, it can be registered
for Favorite or Home to use
as shortcut. Do you register?
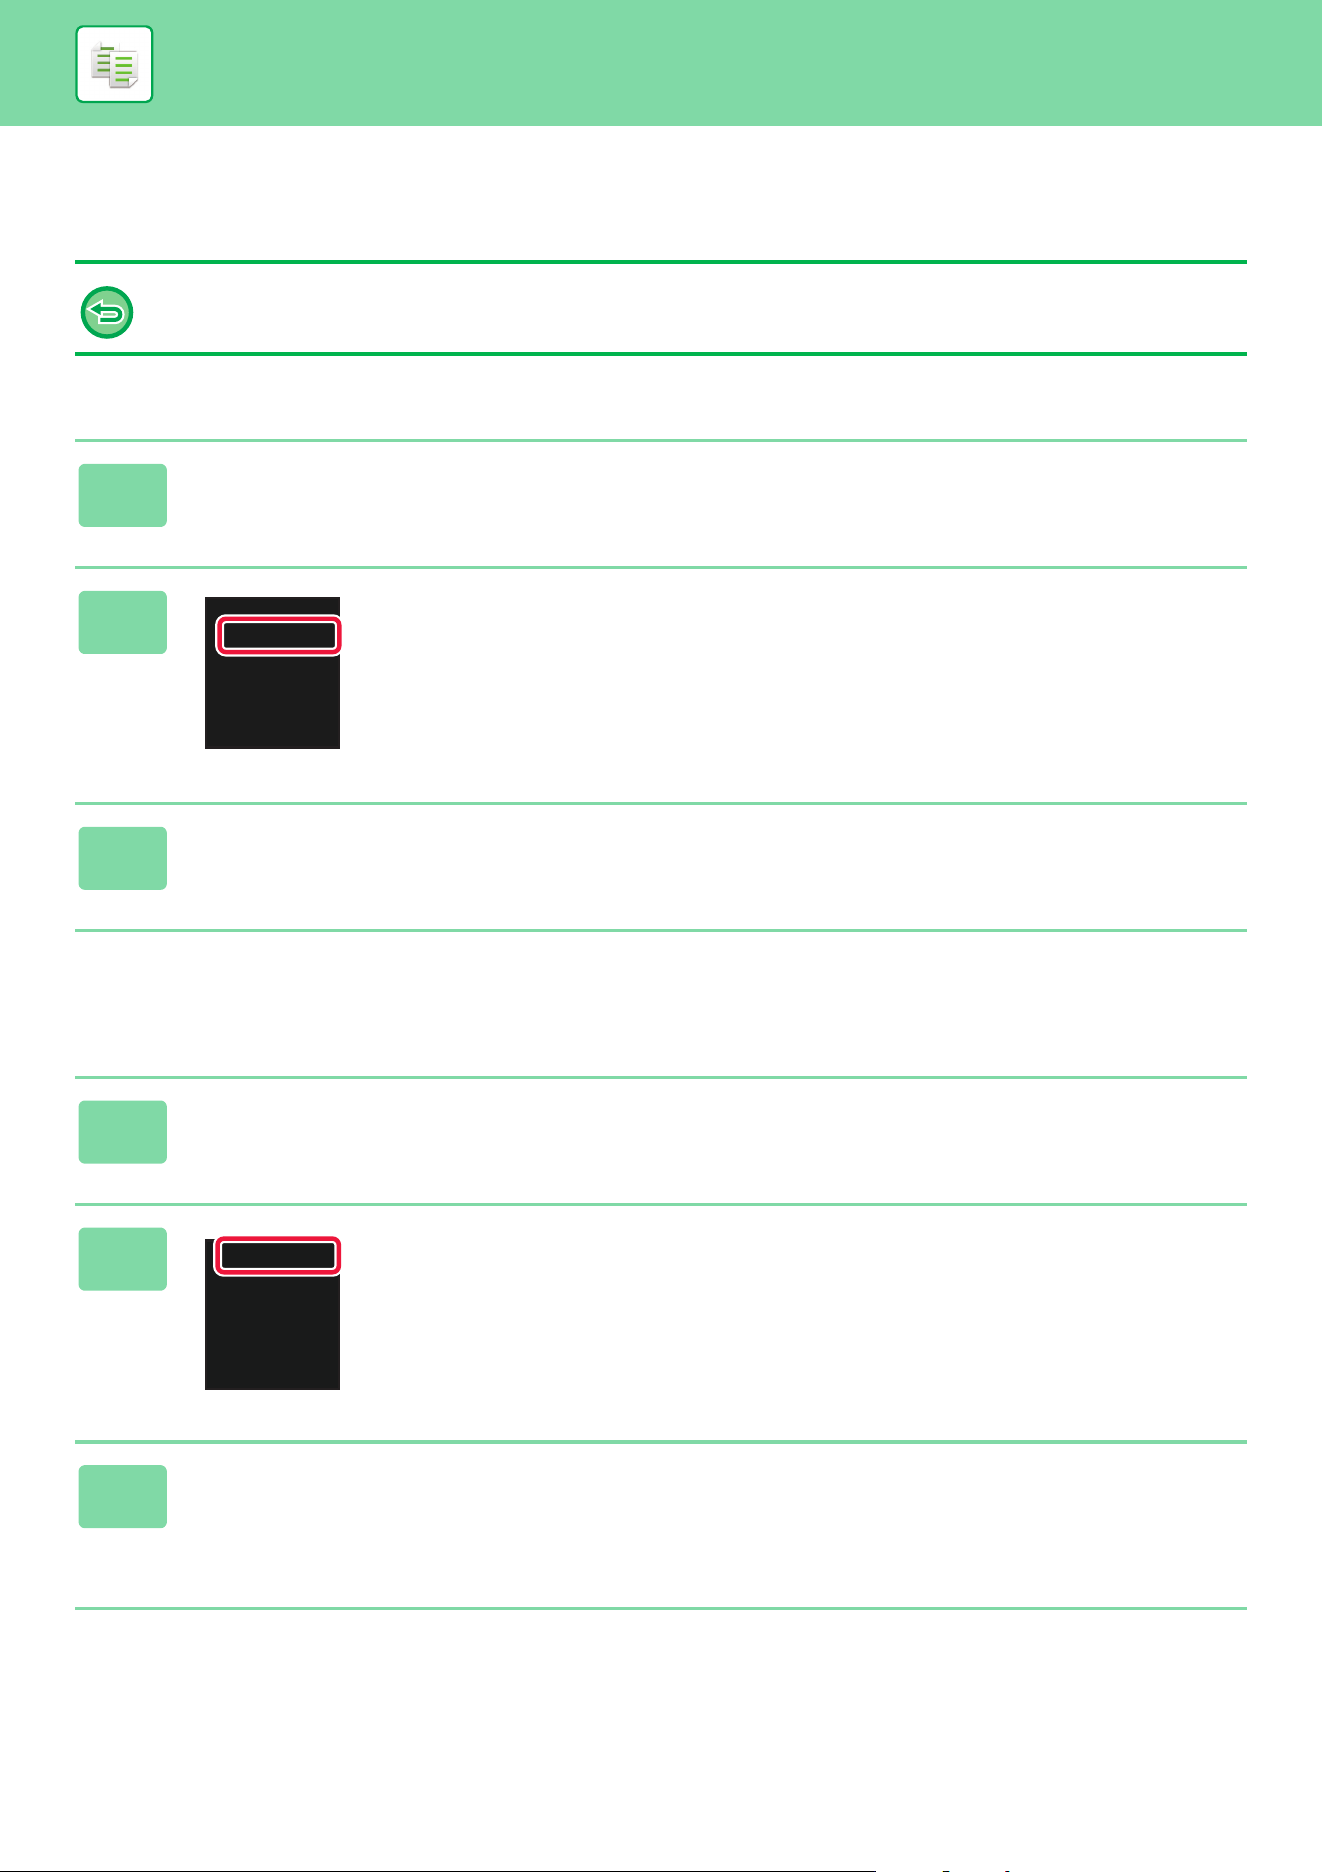
3-150
COPIER►CONVENIENT COPY FUNCTIONS
DELETING AND RENAMING A PROGRAM
This section explains how to delete copy settings in a program and rename a program.
Deleting a program
Renaming a program
A program that is already stored cannot be deleted.
1
Tap [Call Program] on the action panel.
2
Tap [Delete] on the action panel.
3
Tap the key of the program you want to delete, and tap [Delete].
1
Tap [Call Program] on the action panel.
2
Tap [Change Name] on the action
panel.
3
Tap the key of the required program, and rename the program. Then tap the
[OK] key.
After the settings are completed, tap [OK] key.
Change Name
Delete
Register in Favorite
Register for Home
Change Name
Delete
Register in Favorite
Register for Home

4-1
PRINTER FUNCTION OF THE MACHINE
PRINTER FUNCTION . . . . . . . . . . . . . . . . . . . . . . . . . . . . . 4-3
Windows ENVIRONMENT . . . . . . . . . . . . . . . . . . . . . . . . 4-3
macOS ENVIRONMENT . . . . . . . . . . . . . . . . . . . . . . . . . 4-3
PRINTING IN A WINDOWS ENVIRONMENT
BASIC PRINTING PROCEDURE . . . . . . . . . . . . . . . . . . . . 4-4
PRINTER DRIVER SETTINGS SCREEN /
REFERRING TO HELP . . . . . . . . . . . . . . . . . . . . . . . . . . 4-6
SELECTING THE PAPER . . . . . . . . . . . . . . . . . . . . . . . . 4-7
PRINTING ON ENVELOPES . . . . . . . . . . . . . . . . . . . . . . 4-8
PRINTING WHEN THE USER AUTHENTICATION
FUNCTION IS ENABLED . . . . . . . . . . . . . . . . . . . . . . . . . . 4-9
FREQUENTLY USED FUNCTIONS . . . . . . . . . . . . . . . . . 4-11
SAVING SETTINGS AT THE TIME OF PRINTING . . . . 4-11
USING SAVED SETTINGS . . . . . . . . . . . . . . . . . . . . . . 4-12
CHANGING THE PRINTER DRIVER DEFAULT
SETTINGS . . . . . . . . . . . . . . . . . . . . . . . . . . . . . . . . . . . 4-13
SHARE FAVORITE SETTINGS BETWEEN SERVER
AND CLIENT . . . . . . . . . . . . . . . . . . . . . . . . . . . . . . . . . 4-14
PRINTING IN A macOS ENVIRONMENT
BASIC PRINTING PROCEDURE . . . . . . . . . . . . . . . . . . . 4-15
SELECTING THE PAPER . . . . . . . . . . . . . . . . . . . . . . . 4-16
PRINTING ON ENVELOPES . . . . . . . . . . . . . . . . . . . . . 4-17
PRINTING WHEN THE USER AUTHENTICATION
FUNCTION IS ENABLED . . . . . . . . . . . . . . . . . . . . . . . . . 4-18
FREQUENTLY USED FUNCTIONS
SELECTING THE COLOR MODE . . . . . . . . . . . . . . . . . . 4-20
SELECTING THE RESOLUTION . . . . . . . . . . . . . . . . . . . 4-22
2-SIDED PRINTING. . . . . . . . . . . . . . . . . . . . . . . . . . . . . . 4-23
FITTING THE PRINT IMAGE TO THE PAPER. . . . . . . . . 4-25
PRINTING MULTIPLE PAGES ON ONE PAGE. . . . . . . . 4-27
PRINTING WHILE SKIPPING BLANK PAGES . . . . . . . . 4-29
STAPLING OUTPUT/PUNCHING HOLES IN
OUTPUT . . . . . . . . . . . . . . . . . . . . . . . . . . . . . . . . . . . . . . 4-30
STAPLE FUNCTION . . . . . . . . . . . . . . . . . . . . . . . . . . . 4-30
PUNCH FUNCTION . . . . . . . . . . . . . . . . . . . . . . . . . . . . 4-30
PRINTING WITHOUT TOP AND BOTTOM
MARGINS (EDGE-TO-EDGE PRINTING). . . . . . . . . . . . . 4-33
SADDLE STITCH PRINTING AND 2-POSITION
STAPLING . . . . . . . . . . . . . . . . . . . . . . . . . . . . . . . . . . . 4-34
FOLD STAPLING . . . . . . . . . . . . . . . . . . . . . . . . . . . . . . 4-38
SINGLE SHEET . . . . . . . . . . . . . . . . . . . . . . . . . . . . . . . 4-42
CONVENIENT PRINTING FUNCTIONS
CONVENIENT FUNCTIONS FOR CREATING
PAMPHLETS AND POSTERS. . . . . . . . . . . . . . . . . . . . . . 4-47
CREATE A PAMPHLET (BOOKLET/SADDLE
STITCH) . . . . . . . . . . . . . . . . . . . . . . . . . . . . . . . . . . . . .4-47
TRIMMING THE EXCESS OF FOLDED PAPER . . . . . . 4-49
PRINTING WITH MARGIN SHIFT SETTING
(MARGIN) . . . . . . . . . . . . . . . . . . . . . . . . . . . . . . . . . . . .4-51
CREATE A LARGE POSTER (POSTER
PRINTING) . . . . . . . . . . . . . . . . . . . . . . . . . . . . . . . . . . . 4-53
FUNCTIONS TO ADJUST THE SIZE AND
ORIENTATION OF THE IMAGE . . . . . . . . . . . . . . . . . . . . 4-54
ADJUST PRINT POSITION ON ODD AND EVEN
PAGES SEPARATELY (PRINT POSITION). . . . . . . . . . 4-54
ROTATING THE PRINT IMAGE 180 DEGREES
(ROTATE 180 DEGREES) . . . . . . . . . . . . . . . . . . . . . . . 4-55
ENLARGING/REDUCING THE PRINT IMAGE (ZOOM
SETTING/ENLARGE OR REDUCE). . . . . . . . . . . . . . . .4-56
ADJUST THE LINE THICKNESS (WIDTH) . . . . . . . . . .4-58
PRINT A MIRROR-IMAGE (MIRROR-IMAGE
REVERSE/VISUAL EFFECTS). . . . . . . . . . . . . . . . . . . .4-62
COLOR MODE ADJUSTING FUNCTION . . . . . . . . . . . . . 4-63
ADJUST THE BRIGHTNESS AND CONTRAST OF
THE IMAGE (COLOR ADJUSTMENT/RGB
ADJUSTMENT). . . . . . . . . . . . . . . . . . . . . . . . . . . . . . . .4-63
PRINTING FAINT TEXT AND LINES IN BLACK (TEXT
TO BLACK/VECTOR TO BLACK). . . . . . . . . . . . . . . . . .4-64
MODIFYING IMAGES TO SUIT SPECIFIC
PREFERENCES (SCREENING). . . . . . . . . . . . . . . . . . .4-65
ADJUSTING THE SHARPNESS OF AN IMAGE
(SHARPNESS) . . . . . . . . . . . . . . . . . . . . . . . . . . . . . . . . 4-66
SELECTING COLOR SETTINGS TO MATCH THE
IMAGE TYPE (ADVANCED COLOR SETTINGS) . . . . .4-67
FUNCTIONS TO COMBINE TEXT AND IMAGES. . . . . . .4-70
ADDING A WATERMARK TO PRINTED PAGES
(WATERMARK). . . . . . . . . . . . . . . . . . . . . . . . . . . . . . . .4-70
PRINTING AN IMAGE OVER THE PRINT DATA
(IMAGE STAMP). . . . . . . . . . . . . . . . . . . . . . . . . . . . . . .4-72
REGISTERING A CUSTOM IMAGE . . . . . . . . . . . . . . . .4-73
OVERLAY A FIXED FORM ON THE PRINT DATA
(OVERLAYS). . . . . . . . . . . . . . . . . . . . . . . . . . . . . . . . . .4-74
ADDING THE NUMBER OF COPIES (COPIES
STAMP). . . . . . . . . . . . . . . . . . . . . . . . . . . . . . . . . . . . . .4-76
PRINT FUNCTIONS FOR SPECIAL PURPOSES. . . . . . . 4-77
PRINTING SPECIFIC PAGES ON DIFFERENT
PAPER (DIFFERENT PAPER) . . . . . . . . . . . . . . . . . . . .4-77
ADDING INSERTS WHEN PRINTING ON
TRANSPARENCY FILM (TRANSPARENCY
INSERTS) . . . . . . . . . . . . . . . . . . . . . . . . . . . . . . . . . . . .4-80
INSERTING SEPARATOR PAGES BETWEEN JOBS
OR COPIES . . . . . . . . . . . . . . . . . . . . . . . . . . . . . . . . . . 4-82
PRINTING A CARBON COPY (CARBON COPY) . . . . .4-84
PRINTER

4-2
PRINTER
PRINTING TEXT ON TABS OF TAB PAPER (TAB
SHIFT/TAB PAPER PRINT). . . . . . . . . . . . . . . . . . . . . . 4-85
TWO-SIDED PRINTING WITH SPECIFIC PAGES
PRINTED ON THE FRONT SIDE (CHAPTER
INSERTS). . . . . . . . . . . . . . . . . . . . . . . . . . . . . . . . . . . . 4-88
FOLDING PAPER FOR PRINTING (FOLD). . . . . . . . . . 4-89
INSERT PRESET DATA BEFORE OR AFTER EACH
PAGE (PAGE INTERLEAVE). . . . . . . . . . . . . . . . . . . . . 4-95
PRINT THE SAME IMAGE IN TILE PATTERN
(REPEAT PRINT). . . . . . . . . . . . . . . . . . . . . . . . . . . . . . 4-96
PRINTING PATTERN DATA (HIDDEN PATTERN
PRINT) . . . . . . . . . . . . . . . . . . . . . . . . . . . . . . . . . . . . . . 4-97
CHANGING THE RENDERING METHOD AND
PRINTING JPEG IMAGES (USE DRIVER TO
RENDER JPEGS) . . . . . . . . . . . . . . . . . . . . . . . . . . . . . 4-99
MAXIMIZING THE PRINT AREA ON THE PAPER
(PRINT AREA) . . . . . . . . . . . . . . . . . . . . . . . . . . . . . . . 4-100
PRINTING AT AN ENHANCED RESOLUTION
(SMOOTHING). . . . . . . . . . . . . . . . . . . . . . . . . . . . . . . 4-101
CONVENIENT PRINTER FUNCTIONS. . . . . . . . . . . . . . 4-102
USING TWO MACHINES TO PRINT A LARGE PRINT
JOB (TANDEM PRINT) . . . . . . . . . . . . . . . . . . . . . . . . 4-102
SAVING AND USING PRINT FILES (DOCUMENT
FILING). . . . . . . . . . . . . . . . . . . . . . . . . . . . . . . . . . . . . 4-104
AUTOMATICALLY PRINT ALL STORED DATA . . . . . 4-107
PRINTING AND SENDING SIMULTANEOUSLY. . . . . 4-108
PS PASS-THROUGH. . . . . . . . . . . . . . . . . . . . . . . . . . 4-109
PRINTING WITHOUT THE PRINTER
DRIVER
EXTENSION OF PRINTABLE FILES . . . . . . . . . . . . . . . 4-110
DIRECTLY PRINTING A FILE ON AN FTP
SERVER . . . . . . . . . . . . . . . . . . . . . . . . . . . . . . . . . . . . . 4-110
DIRECTLY PRINTING A FILE IN USB MEMORY . . . . . 4-112
DIRECTLY PRINTING A FILE IN A NETWORK
FOLDER . . . . . . . . . . . . . . . . . . . . . . . . . . . . . . . . . . . . . 4-114
PRINTING A FILE IN THE NETWORK FOLDER YOU
HAVE CONFIGURED IN THE MACHINE'S
SETTINGS . . . . . . . . . . . . . . . . . . . . . . . . . . . . . . . . . . 4-114
DIRECTLY PRINTING FROM A COMPUTER . . . . . . . . 4-117
SUBMIT PRINT JOB . . . . . . . . . . . . . . . . . . . . . . . . . . 4-117
FTP PRINT. . . . . . . . . . . . . . . . . . . . . . . . . . . . . . . . . . 4-118
E-MAIL PRINT . . . . . . . . . . . . . . . . . . . . . . . . . . . . . . . 4-118
Universal Print . . . . . . . . . . . . . . . . . . . . . . . . . . . . . . . . 4-120
BEFORE CONNECTING THE Universal Print
SERVICE . . . . . . . . . . . . . . . . . . . . . . . . . . . . . . . . . . . 4-120
Universal Print Settings . . . . . . . . . . . . . . . . . . . . . . . . 4-121
REGISTERING THE MACHINE WITH Azure Active
Directory . . . . . . . . . . . . . . . . . . . . . . . . . . . . . . . . . . . . . . 4-121
REGISTERING THE MACHINE WITH EACH CLIENT
PC . . . . . . . . . . . . . . . . . . . . . . . . . . . . . . . . . . . . . . . . . . . 4-121
DELETE FROM Azure Active Directory . . . . . . . . . . . . . . 4-121
PRINTER JOBS
CHECKING THE PRINT STATUS . . . . . . . . . . . . . . . . . .4-122
PRINTING AN ENCRYPTED PDF FILE . . . . . . . . . . . . . 4-122
CHANGING TO ANOTHER PAPER SIZE AND
PRINTING WHEN PAPER RUNS OUT . . . . . . . . . . . . . . 4-123
PRINT RELEASE FUNCTION
PRINT RELEASE FUNCTION . . . . . . . . . . . . . . . . . . . . . 4-124
INTER-GROUP PRINTING. . . . . . . . . . . . . . . . . . . . . .4-124
BEFORE USING THE PRINT RELEASE FUNCTION. . . 4-125
SETTINGS REQUIRED ON THE MACHINE . . . . . . . .4-125
INSTALLING THE PRINTER DRIVER OF THE
PRIMARY UNIT. . . . . . . . . . . . . . . . . . . . . . . . . . . . . . . 4-126
USING THE PRINT RELEASE FUNCTION. . . . . . . . . . . 4-127
STORING A JOB IN THE PRIMARY UNIT FROM
YOUR COMPUTER . . . . . . . . . . . . . . . . . . . . . . . . . . .4-127
PRINTING/DELETING A JOB STORED IN THE
PRIMARY UNIT FROM A SECONDARY UNIT . . . . . . 4-129
APPENDIX
PRINTER DRIVER SPECIFICATIONS LIST . . . . . . . . . .4-130
Main. . . . . . . . . . . . . . . . . . . . . . . . . . . . . . . . . . . . . . . . 4-130
Paper Source . . . . . . . . . . . . . . . . . . . . . . . . . . . . . . . . 4-130
Finishing . . . . . . . . . . . . . . . . . . . . . . . . . . . . . . . . . . . . 4-131
Layout . . . . . . . . . . . . . . . . . . . . . . . . . . . . . . . . . . . . . .4-131
Job Handling . . . . . . . . . . . . . . . . . . . . . . . . . . . . . . . . .4-131
Inserts . . . . . . . . . . . . . . . . . . . . . . . . . . . . . . . . . . . . . . 4-132
Stamp . . . . . . . . . . . . . . . . . . . . . . . . . . . . . . . . . . . . . .4-132
Image Quality . . . . . . . . . . . . . . . . . . . . . . . . . . . . . . . . 4-132
Color Profile. . . . . . . . . . . . . . . . . . . . . . . . . . . . . . . . . . 4-133
Detailed Settings . . . . . . . . . . . . . . . . . . . . . . . . . . . . . .4-133
SPECIFYING A BILLING CODE USING THE PRINTER
DRIVER . . . . . . . . . . . . . . . . . . . . . . . . . . . . . . . . . . . . . . 4-135
ENABLE BILLING CODE . . . . . . . . . . . . . . . . . . . . . . .4-135
AUTHENTICATION BY SINGLE SIGN-ON. . . . . . . . . . .4-137
SETTINGS . . . . . . . . . . . . . . . . . . . . . . . . . . . . . . . . . .4-137
4-3
PRINTER►PRINTER FUNCTION OF THE MACHINE
PRINTER FUNCTION
The machine is equipped with a full color printing function as standard. To enable printing from your computer, a printer
driver must be installed.
See the table below to determine which printer driver to use in your environment.
Windows ENVIRONMENT
macOS ENVIRONMENT
PRINTER FUNCTION OF THE MACHINE
Printer driver type
PCL6
The machine support the Hewlett-Packard PCL6 printer control languages.
PS
• This printer driver supports the PostScript 3 page description language developed by Adobe.
• If it is desired to use the Windows standard PS printer driver, the PPD driver must be used.
• To install the printer driver and configure settings in a Windows environment, see the Software Setup Guide.
• The User's Manual mainly uses PCL6 printer driver screens to explain how to print in a Windows environment. The printer
driver screens may differ slightly depending on the printer driver you are using.
Printer driver type
PS
PS This printer driver supports the PostScript 3 page description language developed by Adobe and uses a PPD file.
• To install the printer driver and configure settings in a macOS environment, see the Software Setup Guide.
• The explanations of screens and procedures for use in a macOS environment generally assume that macOS 11 is being
used and a PPD driver is installed. The screens may be different depending on the version of the operating system or the
software application.
If a notice page is printed
If a print job cannot be printed as specified and the reason is not shown on the operation panel, a notice page indicating the
reason will print. Read the message and take appropriate action. For example, a notice page will print if the following occurs:
• There is more print data than can be held in memory.
• You selected a function that has been prohibited by the administrator.
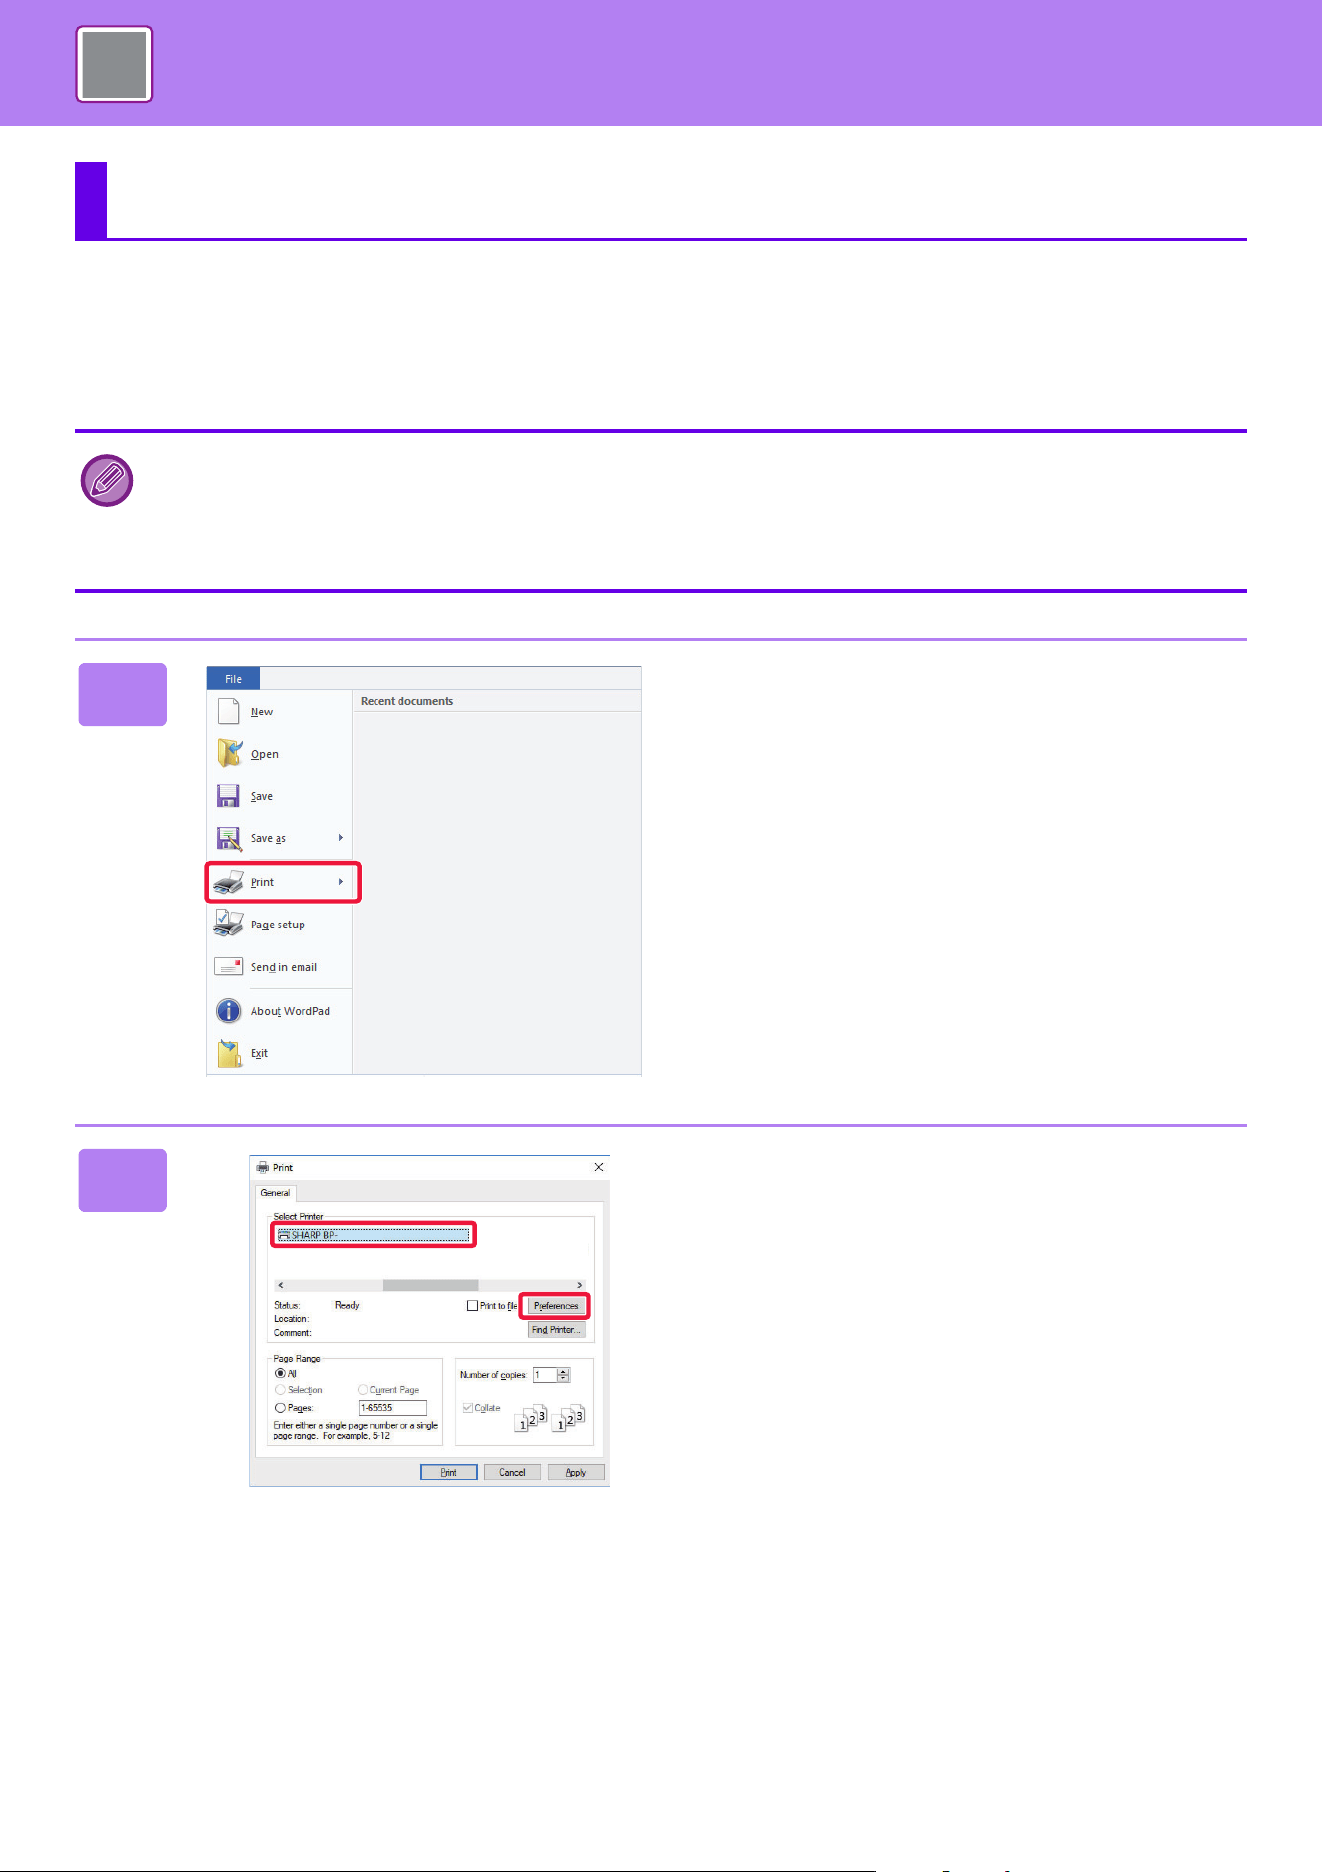
4-4
PRINTER►PRINTING IN A WINDOWS ENVIRONMENT
BASIC PRINTING PROCEDURE
The following example explains how to print a document from "WordPad", which is a standard accessory application in
Windows.
PRINTING IN A WINDOWS ENVIRONMENT
• The menu used to execute printing may vary depending on the application.
• The button that is used to open the printer driver properties window (usually [Property] or [Preferences]) may vary
depending on the application.
• The machine name that normally appears in the [Printer] menu is [BP-xxxxx]. ("xxxxx" is a sequence of characters that
varies depending on the machine model.)
1
Select [Print] from the [File] menu of
WordPad.
2
Select the printer driver for the
machine and click the [Preferences]
button.
The button that is used to open the printer driver properties
window (usually [Property] or [Preferences]) may vary
depending on the application.
xxxxx
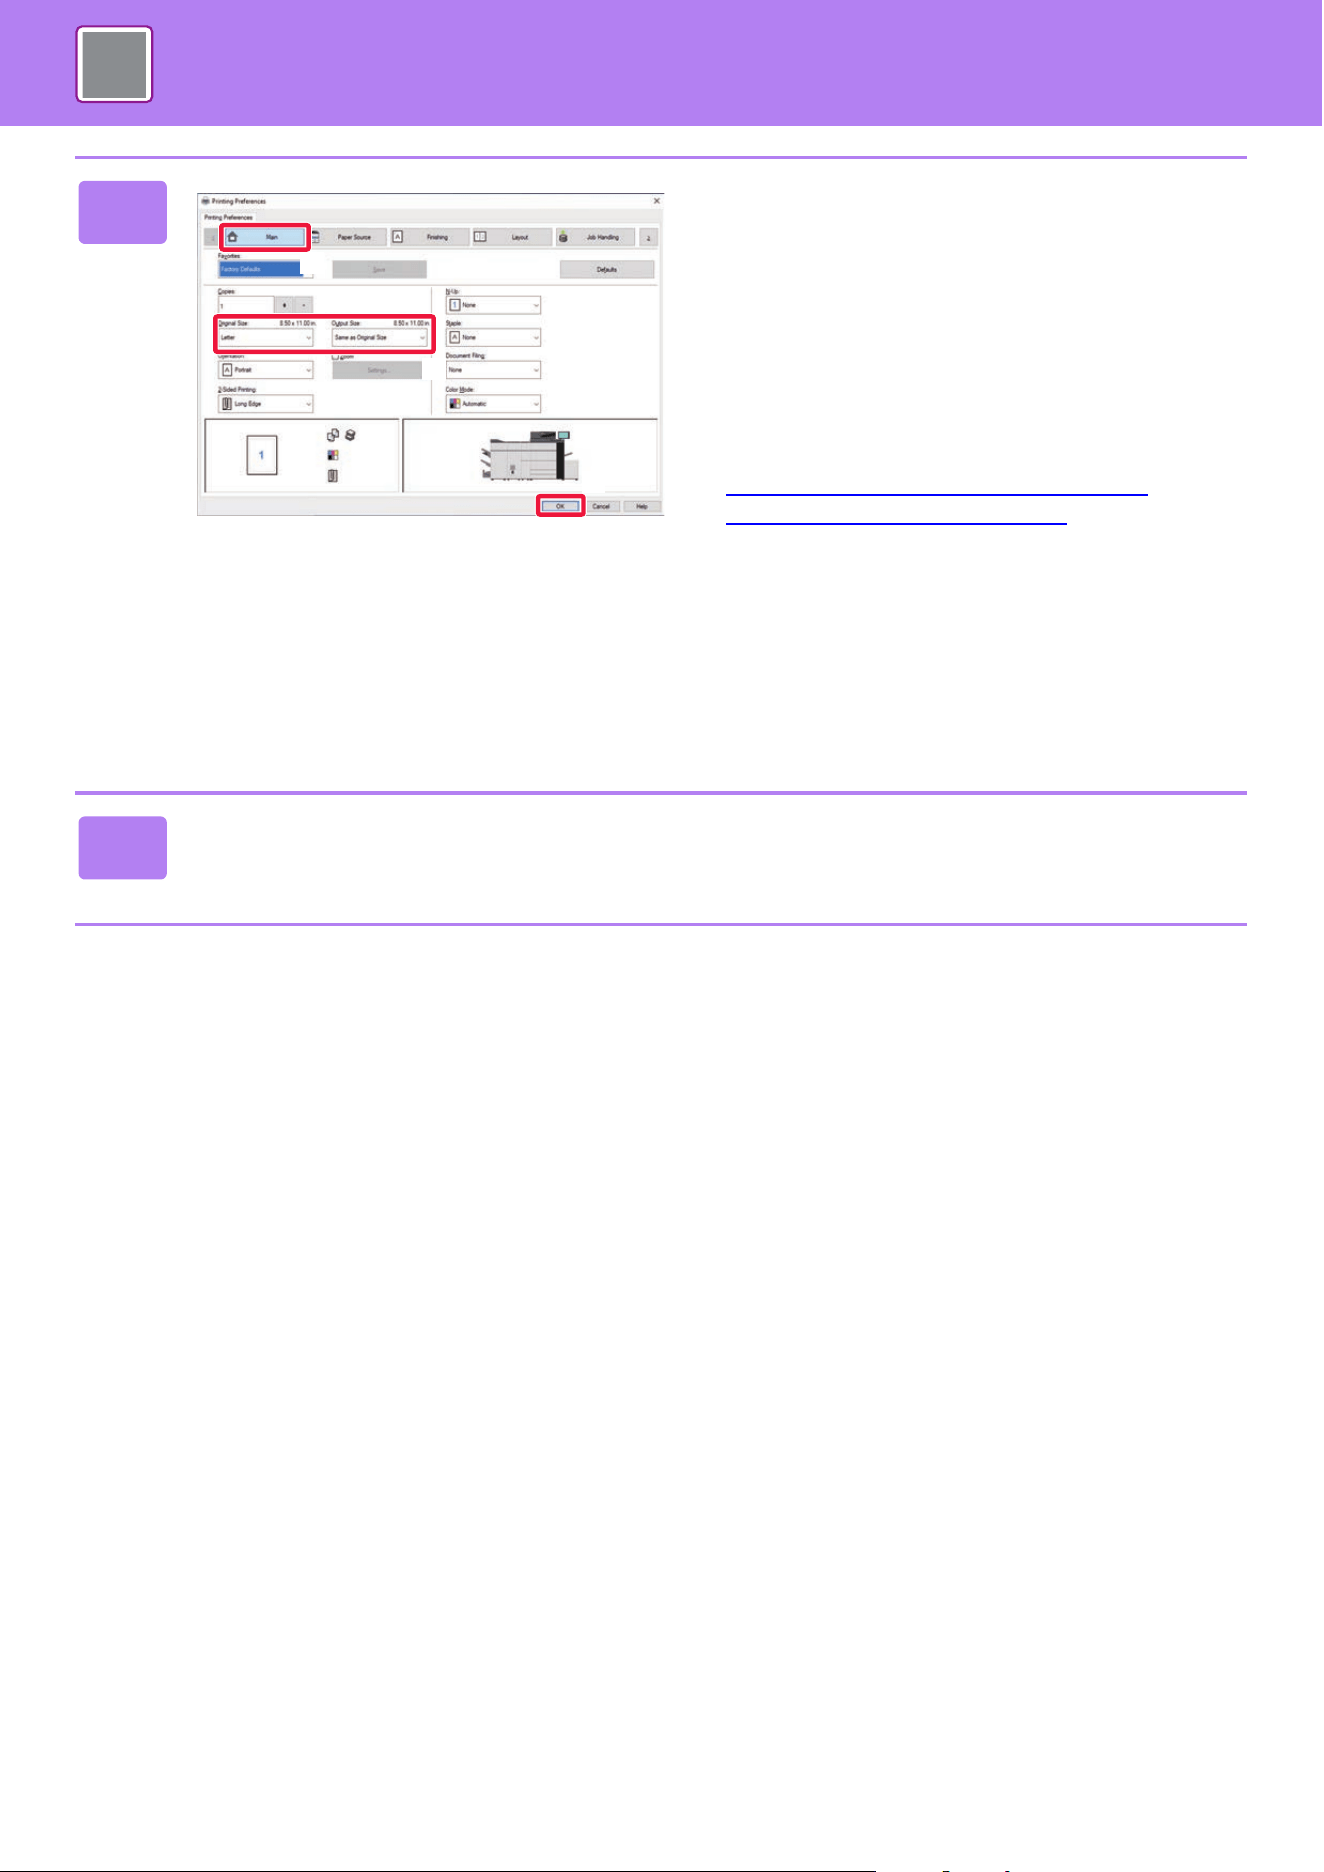
4-5
PRINTER►PRINTING IN A WINDOWS ENVIRONMENT
3
Select print settings.
(1) Click the [Main] tab.
(2) Select the original size.
•You can register up to seven user-defined sizes in
the menu. To store an original size, select [Custom
Paper] or one of [User1] to [User7] from the menu,
and click the [OK] button.
To select settings on other tabs, click the desired
tab and then select the settings.
PRINTER DRIVER SETTINGS SCREEN /
REFERRING TO HELP (page 4-6)
•If an original size larger than the largest paper size
that the machine supports is set, select the paper
size for printing in “Output Size”.
•If an "Output Size" different from the "Original Size"
is selected, the print image will be adjusted to match
the selected paper size.
(3) Click the [OK] button.
4
Click the [Print] button.
Printing begins.
(2)
(3)
(1)
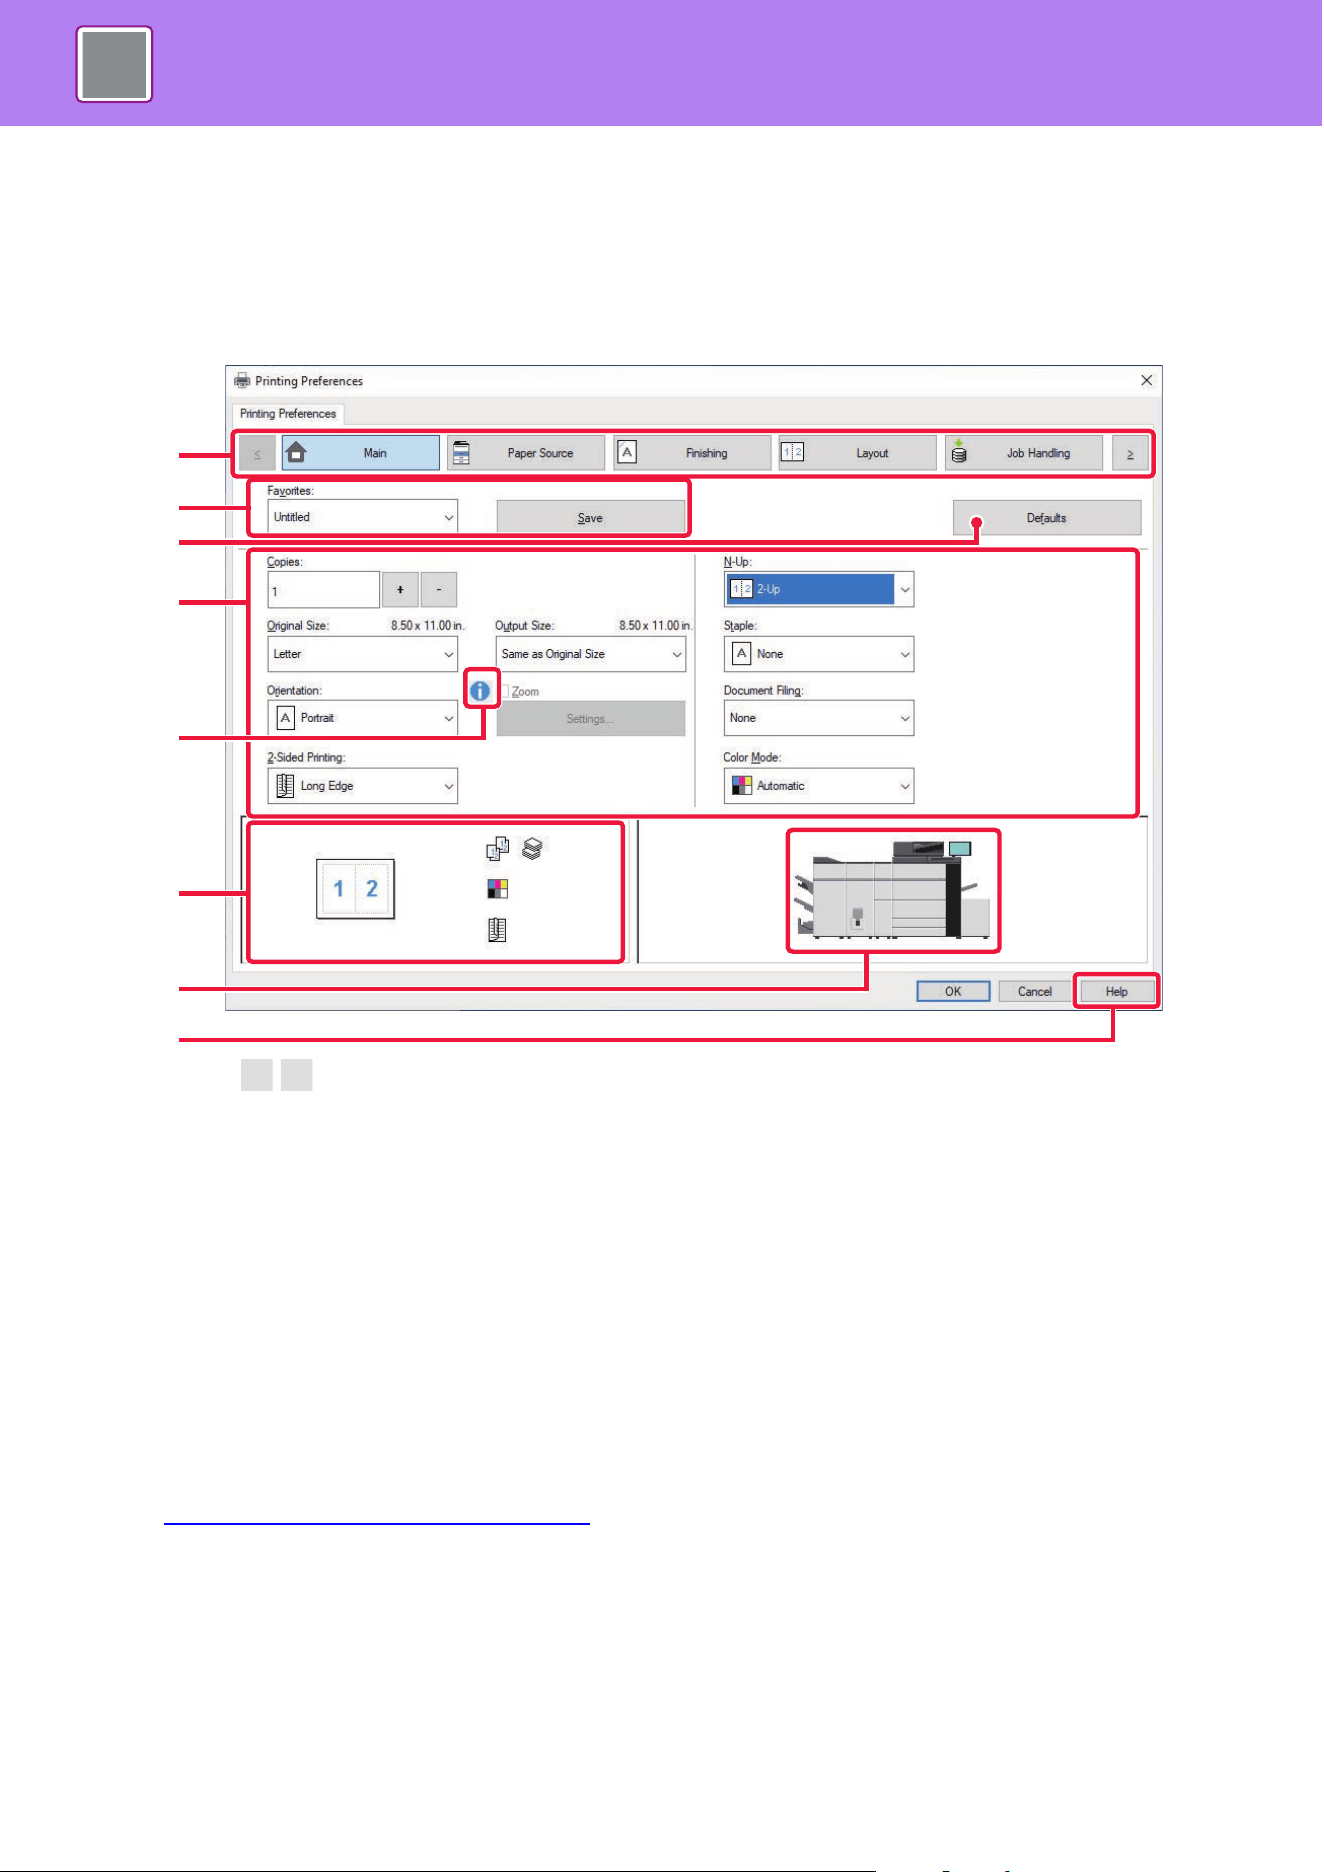
4-6
PRINTER►PRINTING IN A WINDOWS ENVIRONMENT
PRINTER DRIVER SETTINGS SCREEN / REFERRING
TO HELP
The printer driver settings screen consists of 9 tabs. Click a tab to select the settings on that tab.
You can check information on each of the settings in the Help screen. Click the [Help] button at the bottom right of the
screen.
(1) Tabs: Click to change the tabs shown.
• [Main]: Frequently used functions are grouped on this tab. The settings are also on other tabs, and each setting
on this tab is linked to the corresponding setting on the other tab.
• [Paper Source]: Set the size and type of paper used for printing, and the paper tray.
• [Finishing]: Select a finishing function such as stapling, punch, or folding, and set the output tray.
• [Layout]: Select functions related to the layout such as two-sided printing and booklet.
• [Job Handling]: Set Document Filing and user authentication.
• [Inserts]: Select insertion functions such as covers, inserts, and tab paper.
• [Stamp]: Select the watermark or stamp function.
• [Image Quality]: Select various image quality settings.
• [Color Profile]: Set the color profile.
• [Detailed Settings]: Select tandem print and other detailed print settings.
(2) Favorites
Settings configured on each tab at the time of printing can be saved as Favorite.
► FREQUENTLY USED FUNCTIONS
(page 4-11)
(3) Defaults
Return the settings on the currently selected tab to their default state.
(4) Setup Items
Displays the settings on each tab.
(2)
(1)
(3)
(4)
(5)
(6)
(7)
(8)
4-7
PRINTER►PRINTING IN A WINDOWS ENVIRONMENT
(5) Information icon( )
Some restrictions exist on the combinations of settings that can be selected in the printer driver properties window. When a
restriction exists on a selected setting, an information icon ( ) will appear next to the setting. Click the icon to view an
explanation of the restriction.
(6) Print image
This lets you visually check how the current settings affect the print image. Finishing settings and the color mode are indicated
by icons.
(7) Machine image
This shows the options that are installed on the machine, and the paper trays and output trays that are used.
(8) [Help] button
Displays the Help window of the printer driver.
SELECTING THE PAPER
Before printing, check the paper sizes, paper types, and paper remaining in the machine's trays. To check the most
recent tray information, click the [Tray Status] button in the [Paper Source] tab.
The "Output Size" setting and the "Paper Tray" setting are related as follows:
• When "Paper Tray" is set to [Auto Select]
The tray that contains paper of the size and type selected in "Output Size" and "Paper Type" is automatically selected.
• When "Paper Tray" is set to any setting other than [Auto Select]
The specified tray is used for printing regardless of the "Output Size" setting.
When you have set "Paper Type" to [Bypass Tray], be sure to select "Paper Type". Check the paper type that is set for
the bypass tray of the machine, check that paper of that type is actually loaded into the bypass tray, and then select
the appropriate paper type.
• When "Paper Type" is set to [Auto Select]
A tray with plain paper or recycled paper of the size specified in "Output Size" is automatically selected. (The factory
default setting is plain paper 1 only.)
• When "Paper Type" is set to anything other than [Auto Select]
A tray with the specified type of paper and the size specified in "Output Size" is used for printing.
• Help can be displayed for a setting by clicking the setting and pressing the [F1] key.
• You can click the button in the upper right corner of the settings screen and then click a setting to show Help for that
setting in a sub-window.
Special media such as envelopes can also be placed in the bypass tray.
For the procedure for loading paper in the bypass tray, see “LOADING PAPER INTO THE BYPASS TRAY
(page 1-36)".
When [Enable Detected Paper Size in Bypass Tray] (disabled by factory default) or [Enable Selected Paper Type in Bypass
Tray] (enabled by factory default), which you can reach by selecting [System Settings] in "Settings (administrator)" → [Printer
Settings] → [Condition Settings] → [Bypass Tray Settings] is enabled, printing will not take place if the paper size or paper
type specified in the printer driver is different from the paper size or paper type specified in the settings of the bypass tray.
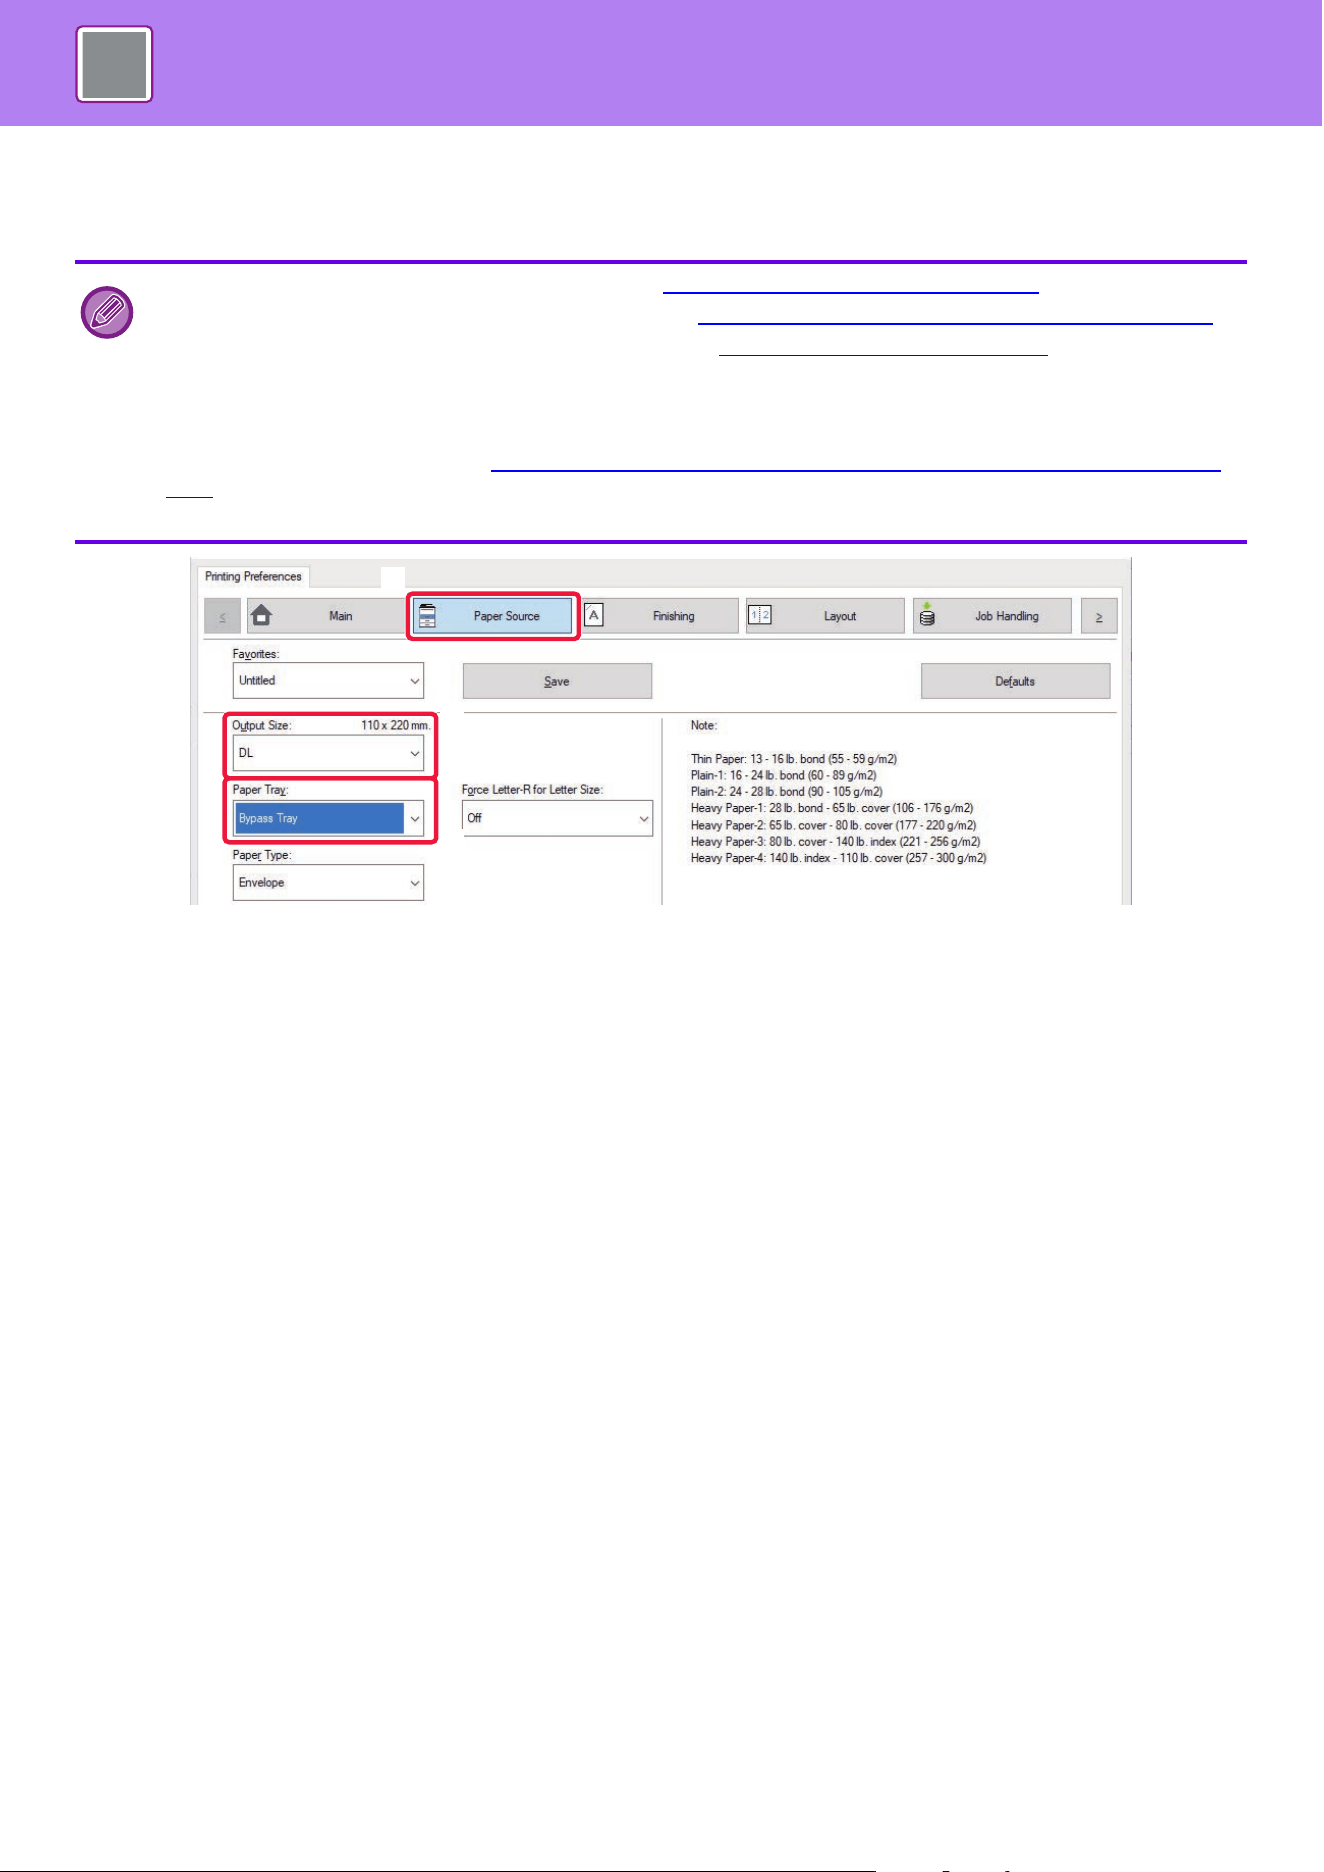
4-8
PRINTER►PRINTING IN A WINDOWS ENVIRONMENT
PRINTING ON ENVELOPES
The bypass tray or tray 4 can be used for envelope printing.
(1) Click the [Paper Source] tab.
(2) Select the envelope size from the "Output Size" menu.
When [Output Size] is set to envelope, [Paper Type] is automatically set to [Envelope].
When "Original Size" is set to envelope on the [Main] tab and "Output Size" is set to [Same as Original Size], "Paper Type" is
automatically set to [Envelope].
(3) Select [Bypass Tray] or [Tray 4] in "Paper Tray".
• For the types of paper that can be used in the tray, see “APPLICABLE PAPER TYPES (page 1-12)".
• For the procedure for loading paper in the bypass tray, see “LOADING PAPER INTO THE BYPASS TRAY
(page 1-36)".
• For more information on the procedure for loading paper, see “SELECTING THE PAPER
(page 4-7)".
• After printing, there may be creases in the envelope depending on the envelope type and format as well as on the printing
environment. Before high-quantity printing, it is recommended that you conduct a test print.
• When using media such as envelopes that can be loaded only in a specific orientation, you can rotate the image 180
degrees. For more information, see "ROTATING THE PRINT IMAGE 180 DEGREES (ROTATE 180 DEGREES) (page
4-55)"
• Tray 4 can only be loaded with Com9, Com10, and Monarch envelopes.
(1)
(2)
(3)

4-9
PRINTER►PRINTING IN A WINDOWS ENVIRONMENT
PRINTING WHEN THE USER
AUTHENTICATION FUNCTION IS ENABLED
The user information (such as login name and password) that must be entered varies depending on the authentication
method being used, so check with the administrator of the machine before printing.
• If you have configured "Printing Policy" on the [Configuration] tab so that user authentication is always performed, users
are required to be authenticated for each print job. This is done by entering authentication information in a dialog box that
appears each time printing is performed.
• The machine's user authentication function cannot be used when the PPD driver
*
is installed and the Windows standard
PS printer driver is used.
• For this reason, the machine can be configured to prohibit users from executing printing unless their user information is
stored in the machine.
* The PPD driver enables the machine to print using the Windows standard PS printer driver.
1
In the printer driver properties window of the application, select the printer
driver of the machine and click the [Preferences] button.
The button that is used to open the printer driver properties window (usually [Property] or [Preferences]) may vary
depending on the application.
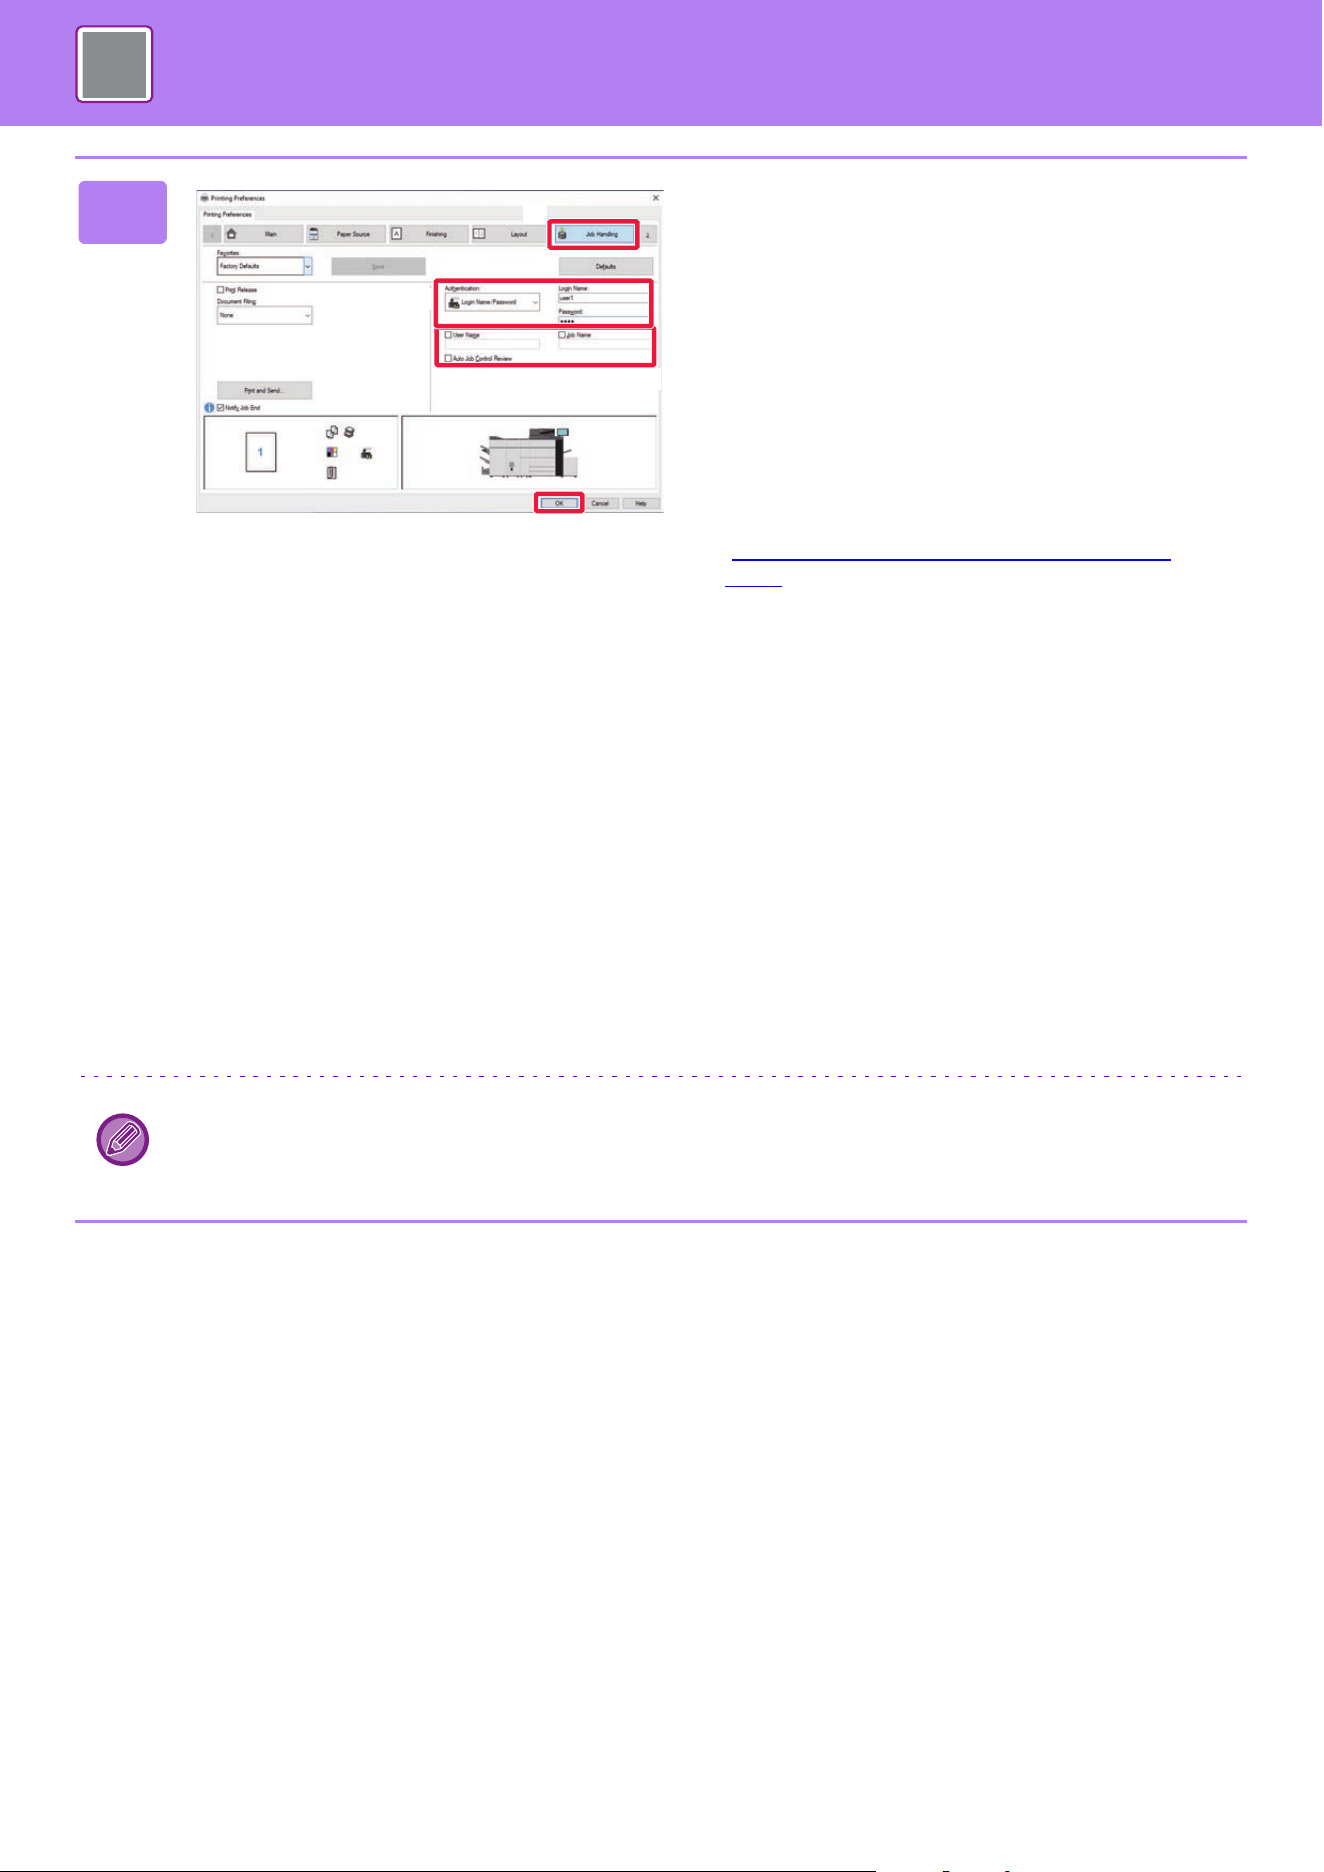
4-10
PRINTER►PRINTING IN A WINDOWS ENVIRONMENT
2
Enter your user information.
(1) Click the [Job Handling] tab.
(2) Enter your user information.
• When authentication is performed by login name, select
[Login Name] and enter your login name.
• When authentication is performed by login
name/password, click [Login Name/Password] and enter
your login name and password. Enter the password using
1 to 32 characters
• When the machine's authentication destination is Active
Directory, [Single Sign-on] can be selected. For
information on single sign-on, refer to
"AUTHENTICATION BY SINGLE SIGN
-ON (page
4-137)".
• When authentication is performed by user number, select
[User Number] and enter your 5 to 8 digit user number.
(3) Enter the user name and job name as
necessary.
• Click the [User Name] checkbox, and enter your user
name using up to 32 characters. The entered user name
will appear on the touch panel of the machine. If you do
not enter a user name, your PC login name will appear.
• Click the [Job Name] checkbox, and enter a job name
using up to 30 characters. The entered job name will
appear as a file name on the touch panel of the machine.
If you do not enter a job name, the file name set in the
application will appear.
• To have a confirmation window appear before printing
starts, select the [Auto Job Control Review] checkbox.
(4) Click the [OK] button to execute printing.
Authentication by Single Sign-on requires that Active Directory authentication be performed on the machine and your
computer. This can only be used when your computer is running Windows.
(2)
(1)
(3)
(4)
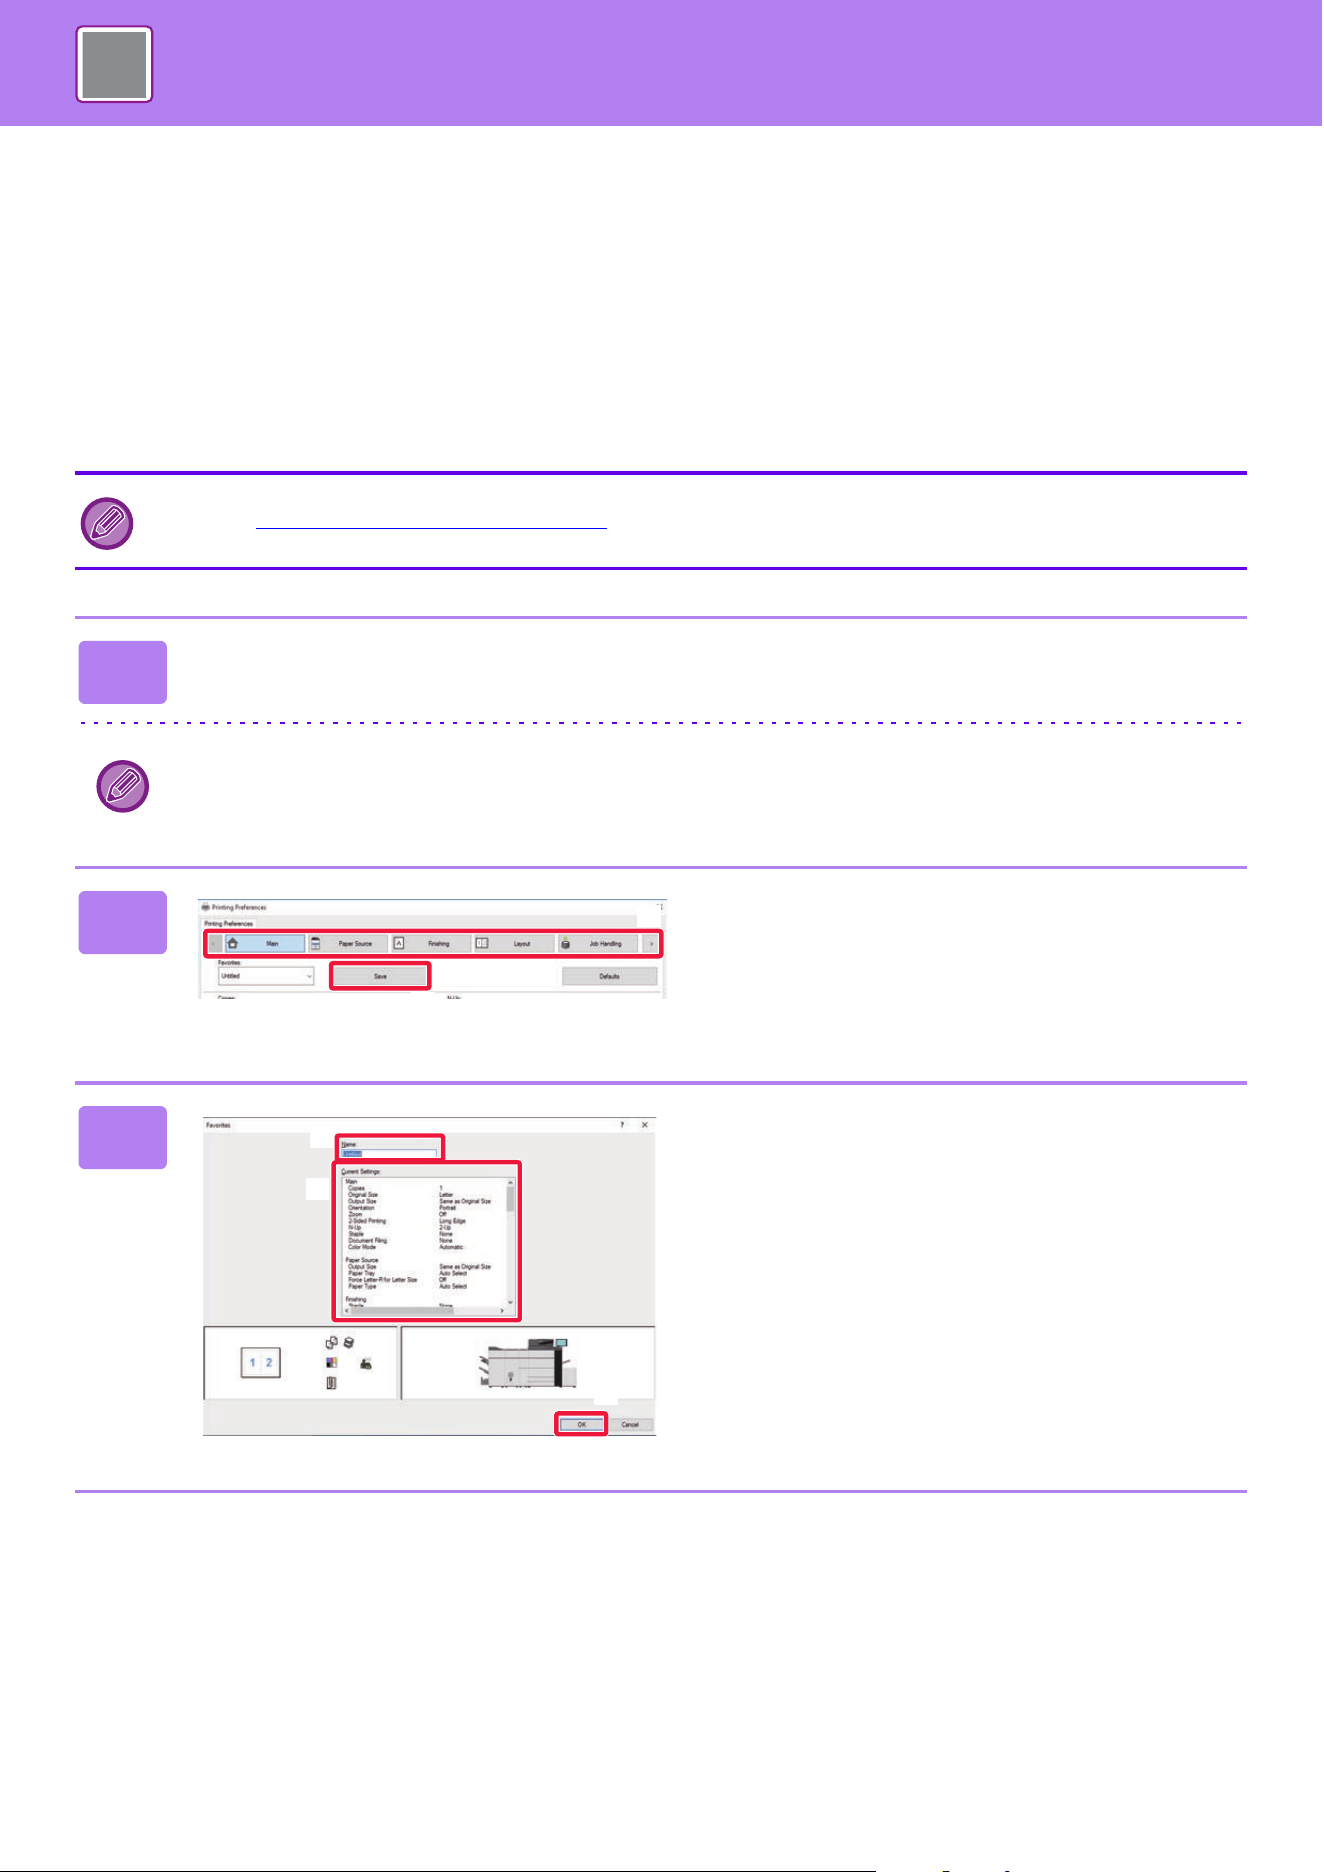
4-11
PRINTER►PRINTING IN A WINDOWS ENVIRONMENT
FREQUENTLY USED FUNCTIONS
SAVING SETTINGS AT THE TIME OF PRINTING
Settings configured on each of the tabs at the time of printing can be saved as Favorite. Saving frequently used settings
or complex color settings under an assigned name makes it easy to select those settings the next time you need to use
them.
Settings can be saved from any tab of the printer driver properties window. Settings configured on each tab are listed at
the time of saving, allowing you to check the settings as you save them.
Deleting saved settings
In step 2 of “USING SAVED SETTINGS (page 4-12)", select the user settings that you want to delete and click the [Delete]
button.
1
Select the machine's printer driver from the print window of the application,
and click the [Preferences] button.
The button that is used to open the printer driver properties window (usually [Property] or [Preferences]) may vary
depending on the application.
2
Register Print Settings.
(1) Configure the print settings on each tab.
(2) Click the [Save] button.
3
Check and save the settings.
(1) Check the displayed settings.
(2) Enter a name for the settings using up to
20 characters.
(3) Click the [OK] button.
(2)
(1)
(2)
(1)
(3)
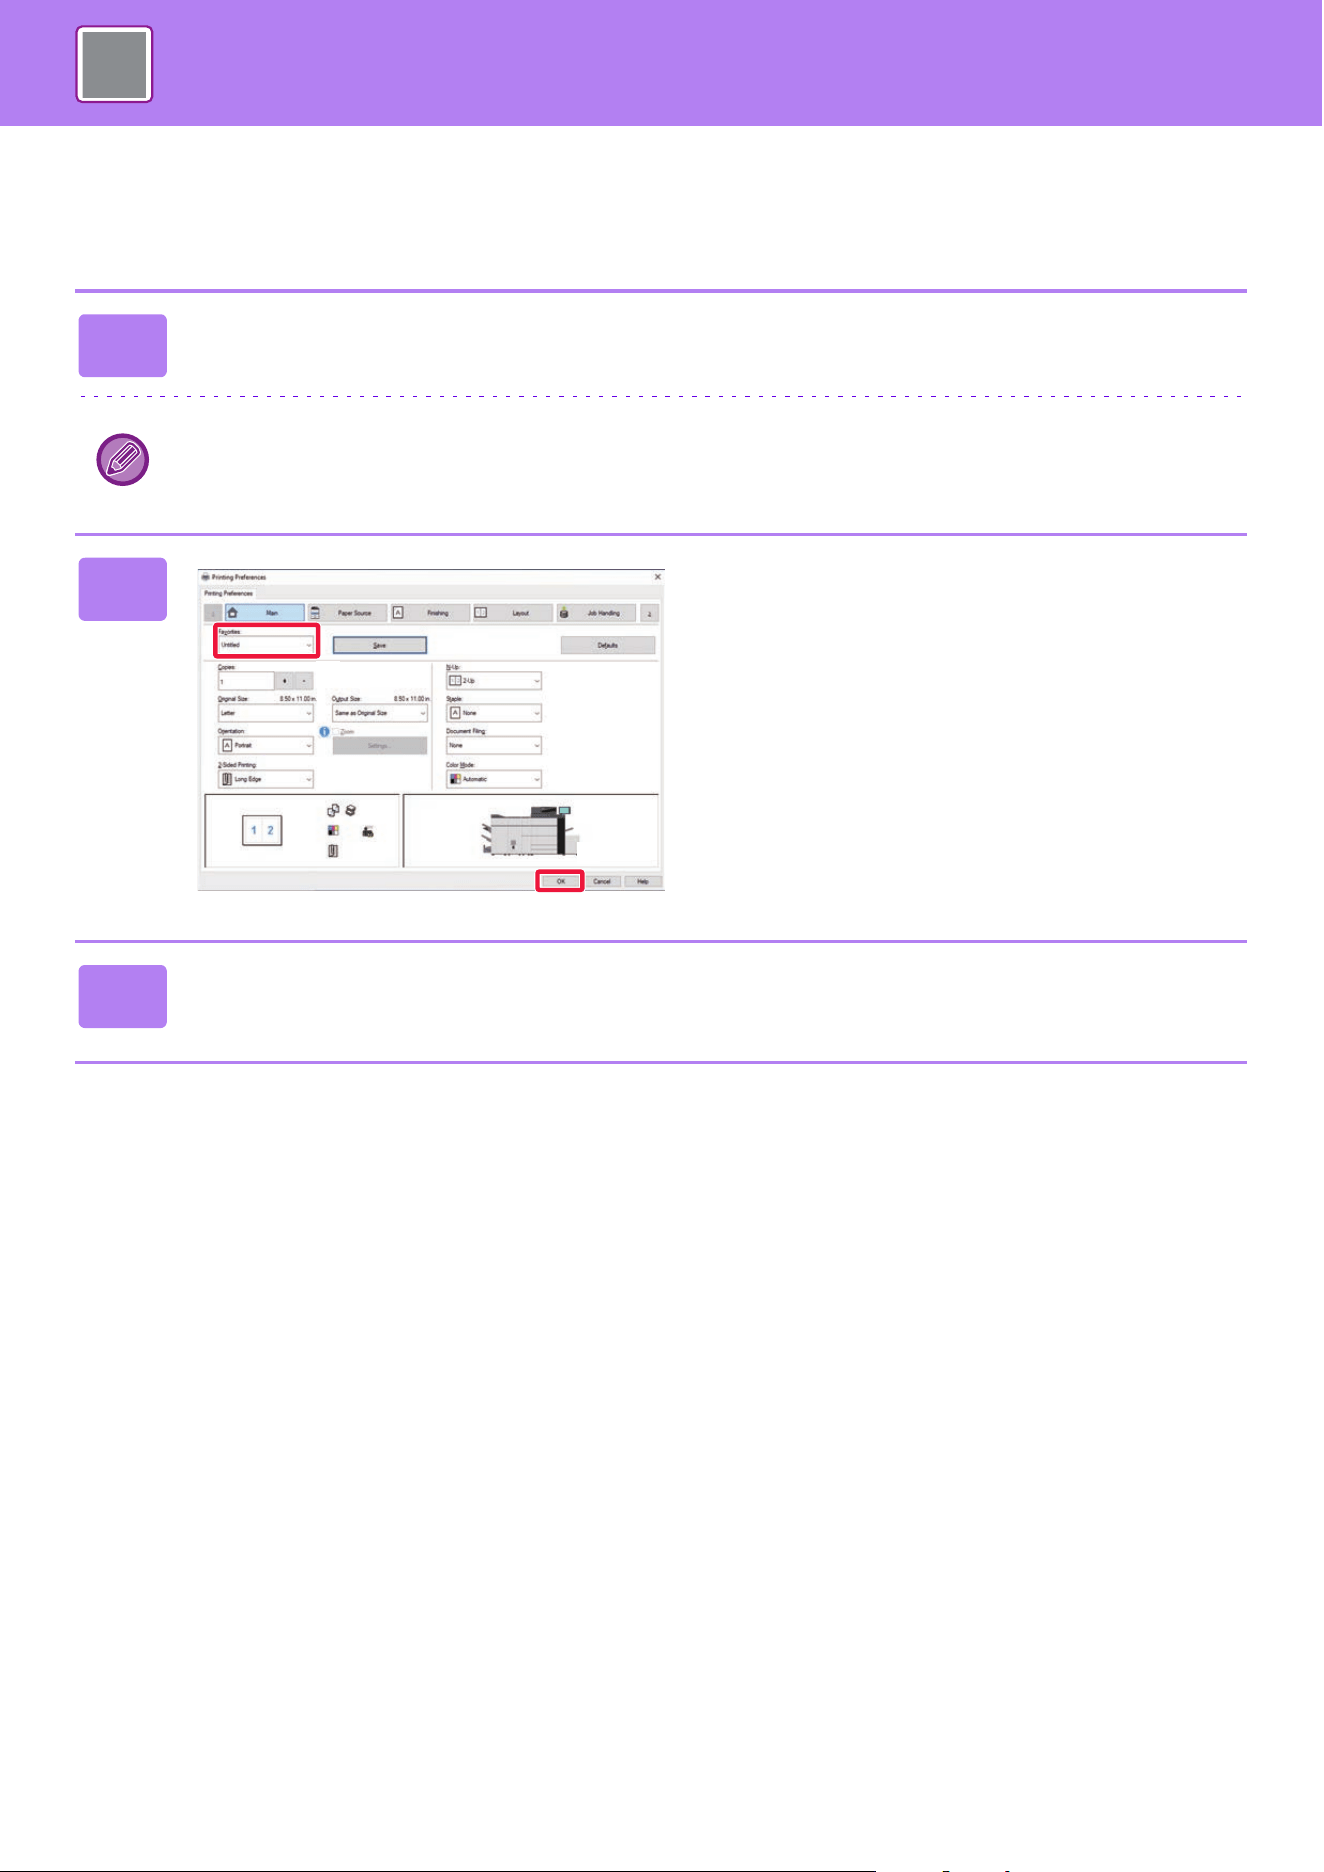
4-12
PRINTER►PRINTING IN A WINDOWS ENVIRONMENT
USING SAVED SETTINGS
You can specify the saved favorites through just one click to apply frequently used settings or complicated color settings
to your printing.
1
Select the machine's printer driver from the print window of the application,
and click the [Preferences] button.
The button that is used to open the printer driver properties window (usually [Property] or [Preferences]) may vary
depending on the application.
2
Select favorite settings.
(1) Select the favorite settings you want to
use.
(2) Click the [OK] button.
3
Start printing.
(1)
(2)

4-13
PRINTER►PRINTING IN A WINDOWS ENVIRONMENT
CHANGING THE PRINTER DRIVER DEFAULT
SETTINGS
You can change the default settings of the printer driver.
Changes you have made in the printer driver properties window when you execute printing from the application are
returned to the default settings specified here when you exit the application.
1
Click the [Start] button, select [Settings] → [Device] → [Printers & scanners].
• In Windows 11, click the [Start] button, select [Bluetooth & devices] → [Printers & scanners].
• In Windows Server 2012, right-click the [Start] button, select [Control Panel] → [View devices and printers] (or
[Devices and Printers]).
2
Click the printer driver name of the
machine and click [Manage].
3
Click [Start].
4
Configure the settings and click the [OK] button.
For explanations of the settings, see printer driver Help.

4-14
PRINTER►PRINTING IN A WINDOWS ENVIRONMENT
SHARE FAVORITE SETTINGS BETWEEN SERVER AND
CLIENT
When using this machine as a shared printer, if "Favorite" is set in the printer driver of the shared server, this setting can
also be used on the shared destination computer.
Configure the following settings in the printer driver of the shared server.
1
Click the [Start] button, select [Settings] → [Device] → [Printers & scanners].
• In Windows 11, click the [Start] button, select [Bluetooth & devices] → [Printers & scanners].
• In Windows Server 2012, right-click the [Start] button, select [Control Panel] → [View devices and printers] (or
[Devices and Printers]).
2
Click the printer driver name of the machine and click [Manage].
3
Click [Printer Properties].
4
Configure the sharing settings.
(1) Click the [Configuration] tab.
(2) Set the [Share Favorites] check box to
,
Server
Client
The favorite settings configured on the server can be used on the client computer.
When "Share Favorites" is enabled...
(1)
(2)
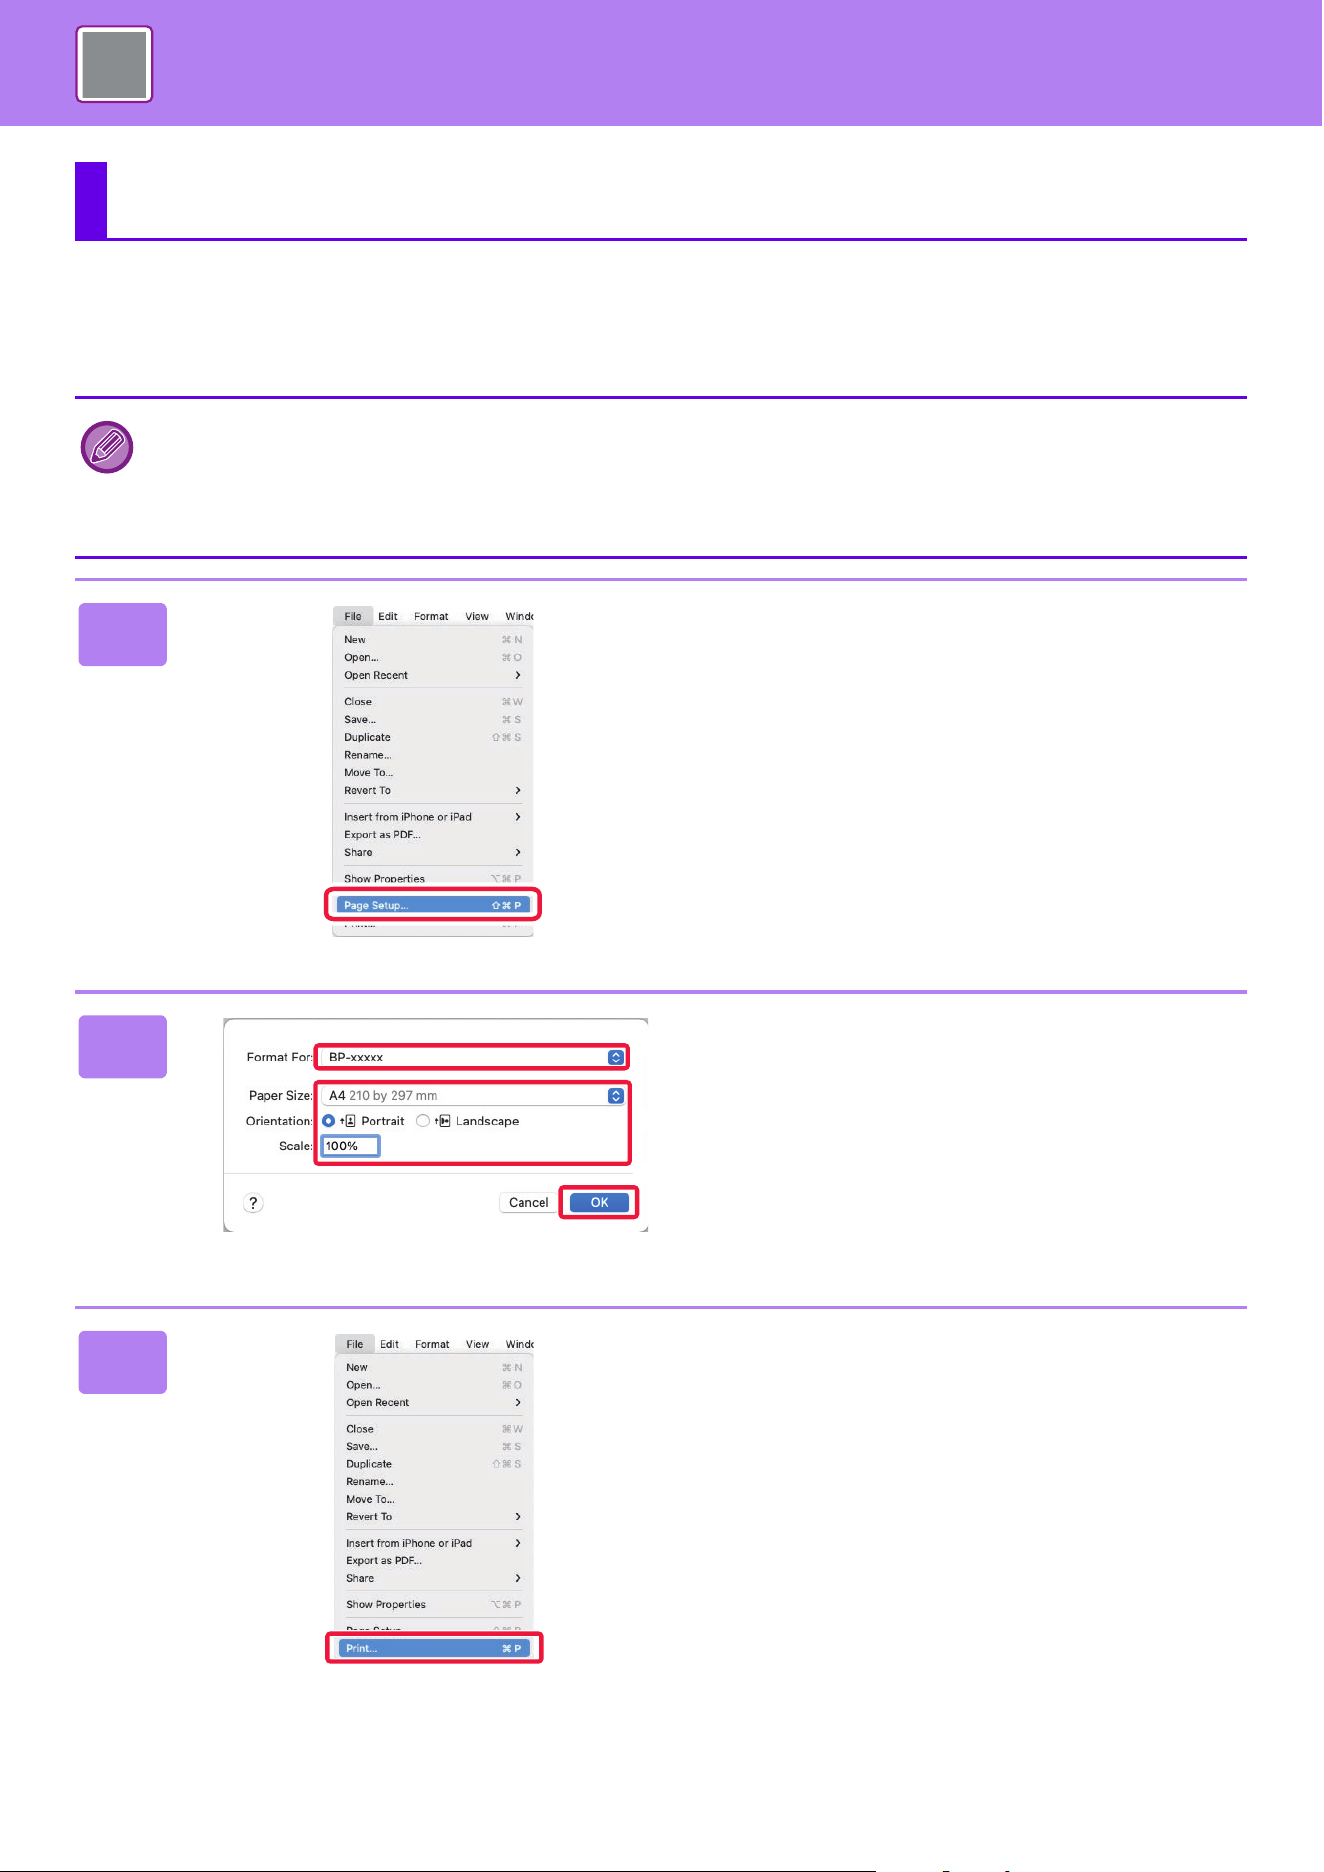
4-15
PRINTER►PRINTING IN A macOS ENVIRONMENT
BASIC PRINTING PROCEDURE
The following example explains how to print a document from the standard accessory application "TextEdit" in macOS.
PRINTING IN A macOS ENVIRONMENT
• To install the printer driver and configure settings in a macOS environment, see the Software Setup Guide.
• The explanations of screens and procedures for use in a macOS environment generally assume that macOS 11 is being
used and a PPD driver is installed. The screens may be different depending on the version of the operating system or the
software application.
• The menu used to execute printing may vary depending on the application.
1
Select [Page Setup] from the [File]
menu and select the printer.
If the printer drivers appear as a list, select the name of the
printer driver to be used from the list.
2
Select paper settings.
(1) Make sure that the correct printer is
selected.
(2) Select paper settings.
Paper size, paper orientation, and enlarge/reduce
settings can be selected.
(3) Click the [OK] button.
3
Select [Print] from the [File] menu.
(1)
(2)
(3)
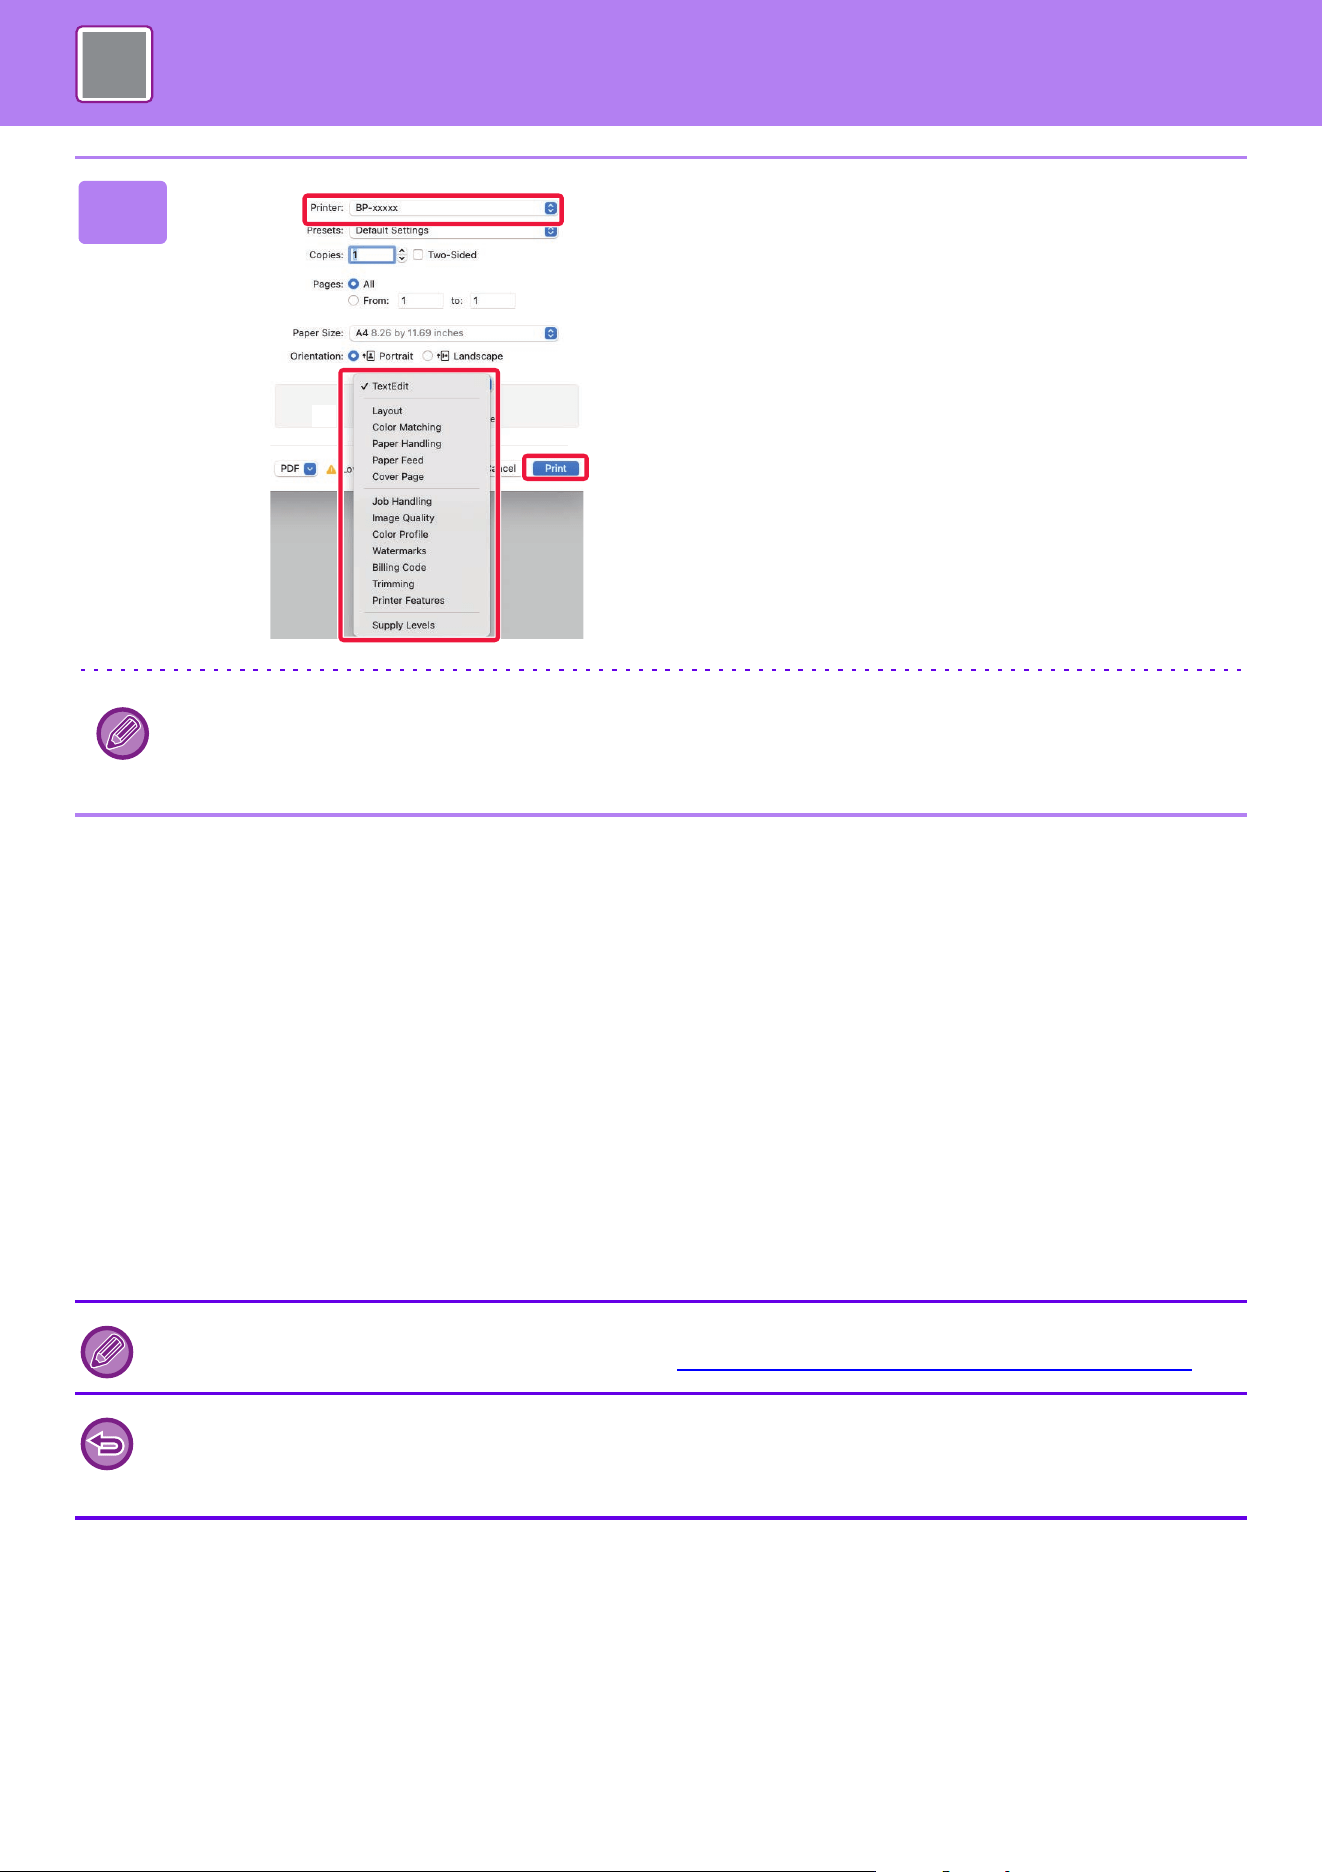
4-16
PRINTER►PRINTING IN A macOS ENVIRONMENT
SELECTING THE PAPER
This section explains the [Paper Feed] settings in the print settings window.
• When [Auto Select] is selected:
A tray that is set for plain or recycled paper (only plain paper 1 in the factory default setting) of the size specified in
"Paper Size" on the page setup screen is automatically selected.
• When a paper tray is specified:
The specified tray is used for printing regardless of the "Paper Size" setting on the page setup screen.
For the bypass tray, also specify the paper type. Check that the paper type that is set for the bypass tray of the
machine, check that paper of that type is actually loaded into the bypass tray, and then select the appropriate bypass
tray (paper type).
• When a paper type is specified:
A tray with the specified type of paper and the size specified in "Paper Size" on the page setup screen is used for
printing.
4
Select print settings.
(1) Make sure that the correct printer is
selected.
(2) Select an item from the menu and
configure the settings as needed.
(3) Click the [Print] button.
The layout of the settings menu is different in macOS 13.
(1)
(2)
(3)
Special media such as envelopes can also be placed in the bypass tray.
For the procedure for loading paper in the bypass tray, see “LOADING PAPER INTO THE BYPASS TRAY
(page 1-36)".
When [Enable Detected Paper Size in Bypass Tray] (disabled by factory default) or [Enable Selected Paper Type in Bypass
Tray] (enabled by factory default), which you can reach by selecting [System Settings] in "Settings (administrator)" → [Printer
Settings] → [Condition Settings] → [Bypass Tray Settings] is enabled, printing will not take place if the paper size or paper
type specified in the printer driver is different from the paper size or paper type specified in the settings of the bypass tray.
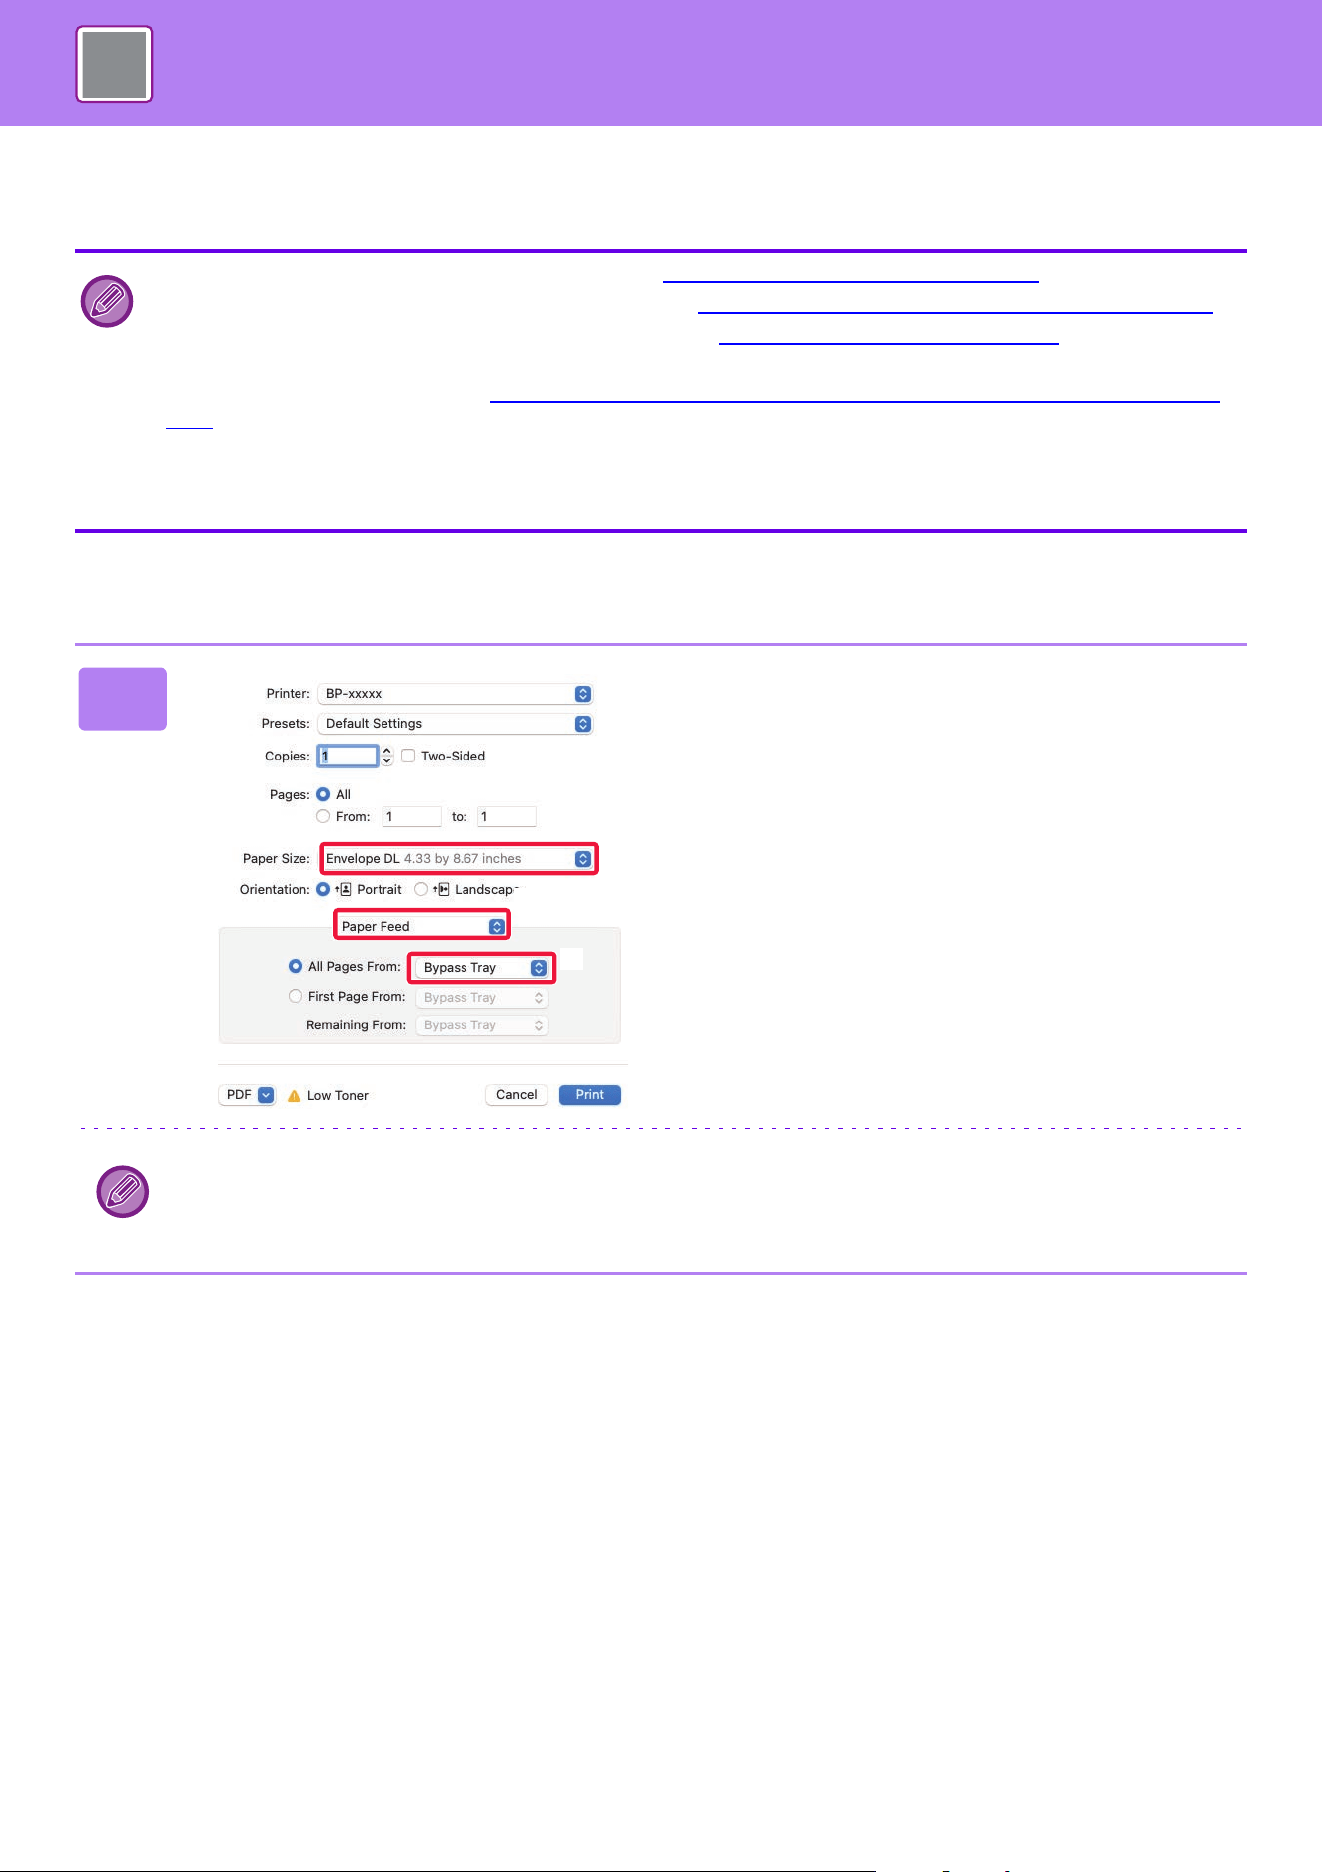
4-17
PRINTER►PRINTING IN A macOS ENVIRONMENT
PRINTING ON ENVELOPES
The bypass tray or tray 4 can be used for envelope printing.
Select the envelope size in the settings of the application ("Page Setup" in many applications) and then perform the
following steps.
• For the types of paper that can be used in the tray, see “APPLICABLE PAPER TYPES (page 1-12)".
• For the procedure for loading paper in the bypass tray, see “LOADING PAPER INTO THE BYPASS TRAY (page 1-36)".
• For more information on the procedure for loading paper, see “SELECTING THE PAPER
(page 4-16)".
• When using media such as envelopes that can be loaded only in a specific orientation, you can rotate the image 180
degrees. For more information, see “ROTATING THE PRINT IMAGE 180 DEGREE
S (ROTATE 180 DEGREES) (page
4-55)".
• Tray 4 can only be loaded with Com9, Com10, and Monarch envelopes.
• After printing, there may be creases in the envelope depending on the envelope type and format as well as on the printing
environment. Before high-quantity printing, it is recommended that you conduct a test print.
1
Select print settings.
(1) Select the envelope size from the "Paper
Size" menu.
(2) Select [Paper Feed].
In macOS 13, [Paper Feed] is located under the
"Printer Options" menu.
(3) Select the [Bypass Tray] or [Tray 4] from
the "All Pages From" menu.
When [Enable Selected Paper Type in Bypass Tray] (enabled by factory default) is enabled in "Settings (administrator)",
set the paper type of the bypass tray to [Envelope].
(2)
(1)
(3)
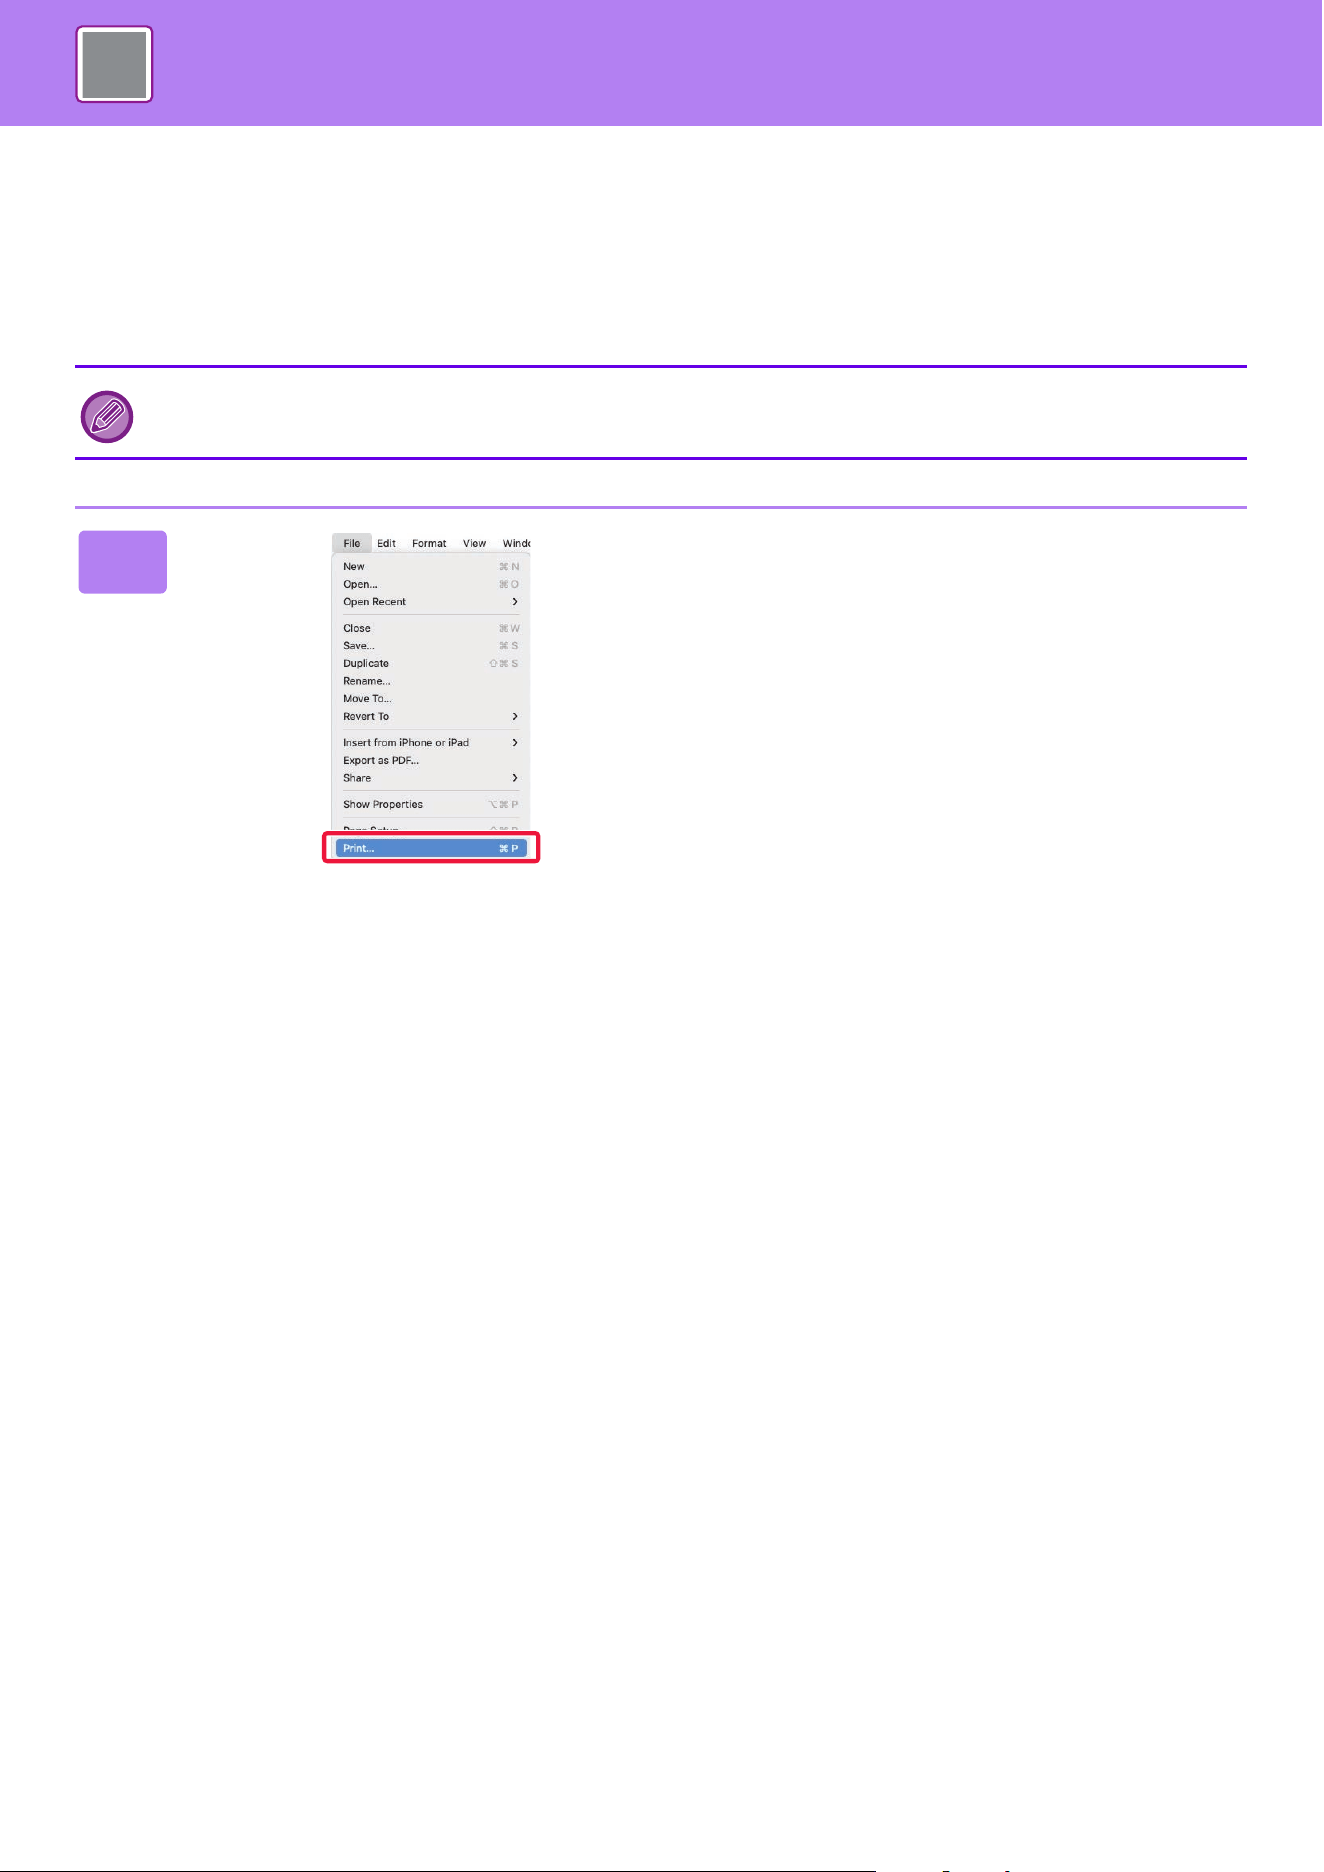
4-18
PRINTER►PRINTING IN A macOS ENVIRONMENT
PRINTING WHEN THE USER
AUTHENTICATION FUNCTION IS ENABLED
The user information (such as login name and password) that must be entered varies depending on the authentication
method being used, so check with the administrator of the machine before printing.
The menu used to execute printing may vary depending on the application.
1
In the application, select [Print] from
the [File] menu.
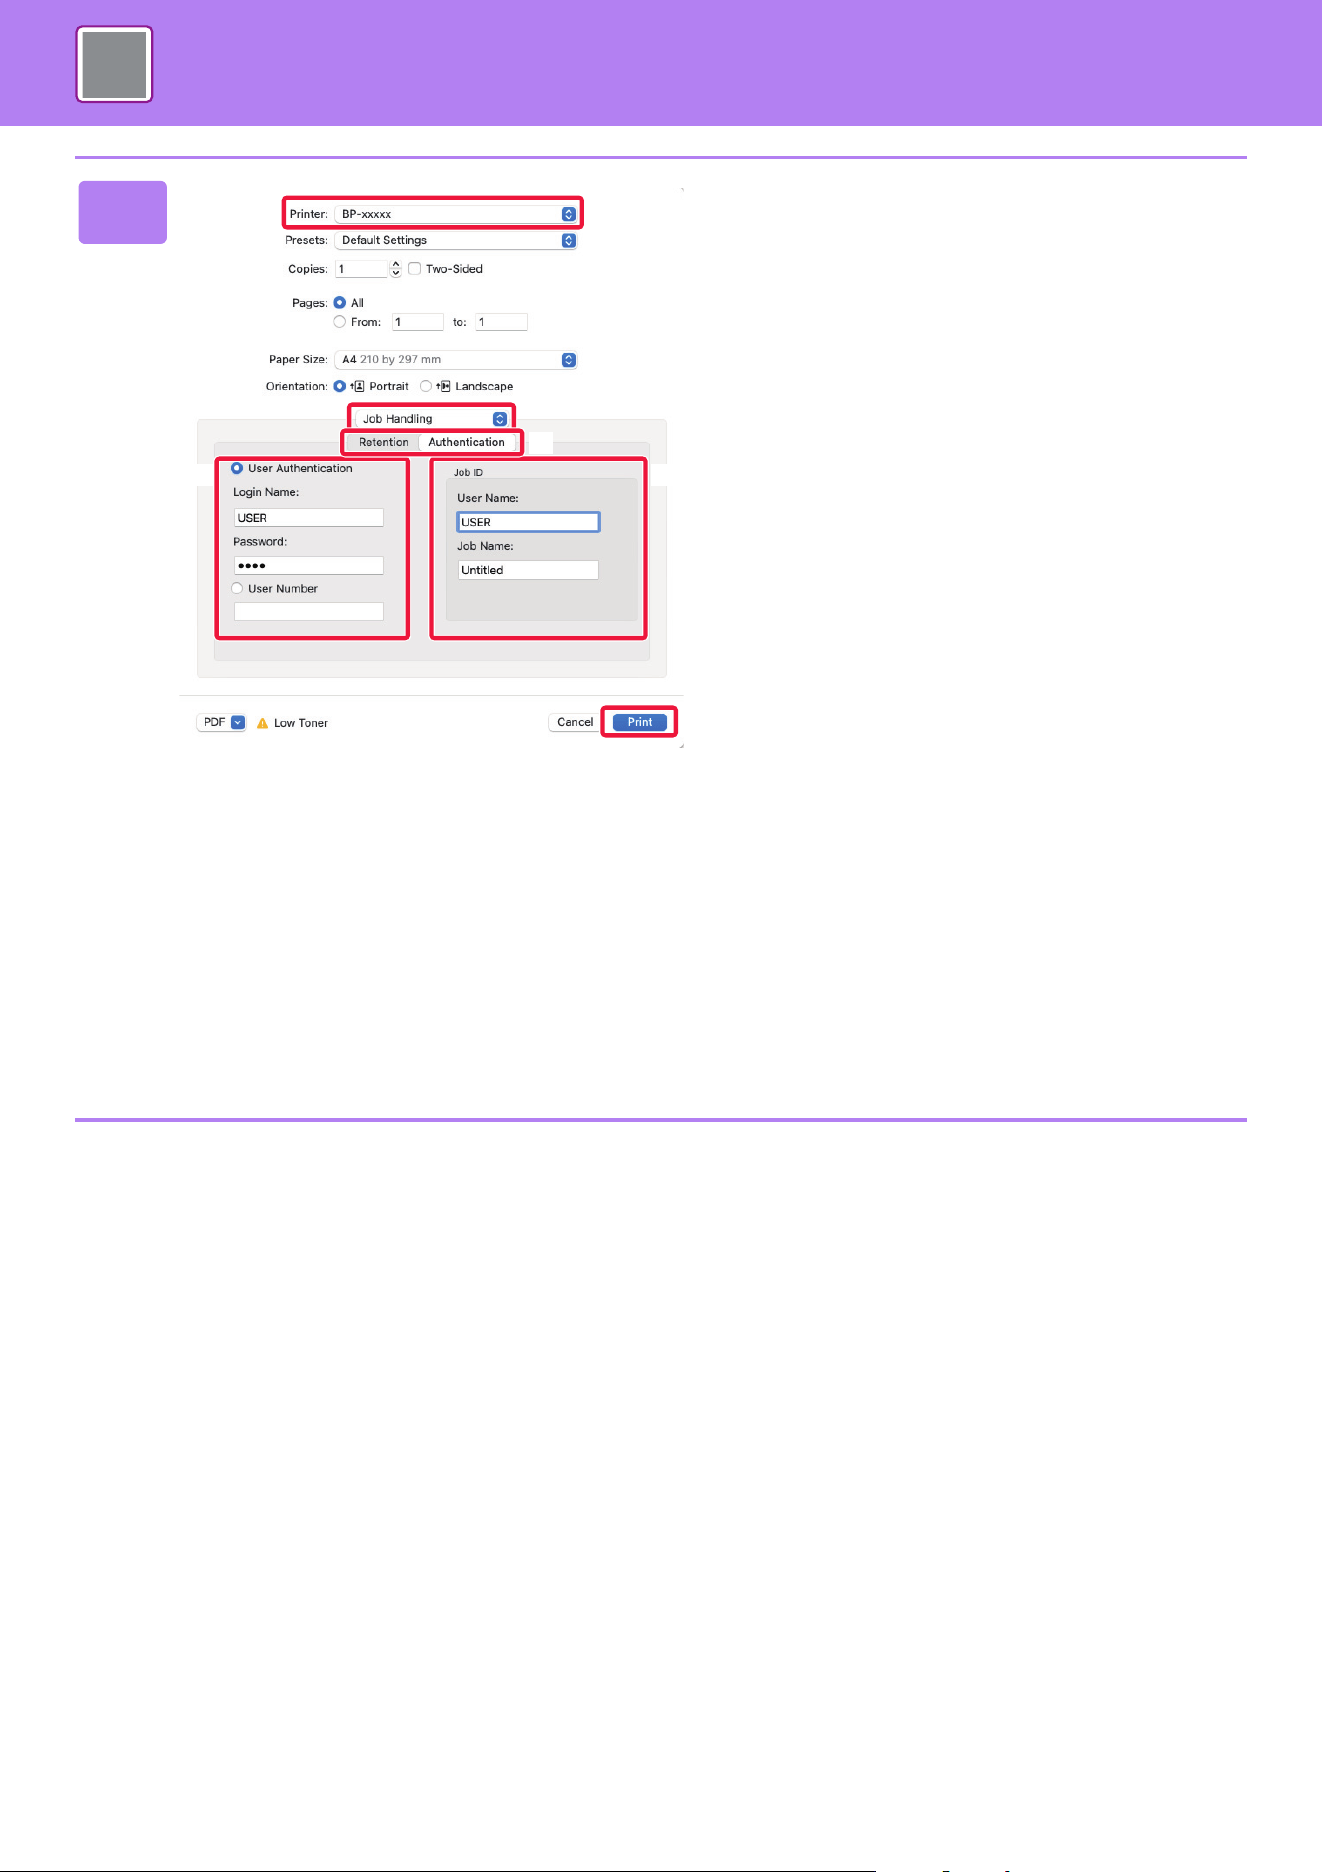
4-19
PRINTER►PRINTING IN A macOS ENVIRONMENT
2
Enter your user information.
(1) Make sure that the machine's printer
name is selected.
(2) Select [Job Handling].
In macOS 13, [Job Handling] is located under the
"Printer Options" menu.
(3) Click the [Authentication] tab.
(4) Enter your user information.
• When authentication is carried out using the login
name/password, enter your login name in "Login
Name" and your password (1 to 32 characters) in
"Password".
• When authentication is carried out using the user
number, enter your user number (5 to 8 digits) in
"User Number".
(5) Enter the user name and job name as
necessary.
•User Name
Enter your user name using up to 32 characters. The
entered user name will appear on the touch panel of
the machine. If you do not enter a user name, your
PC login name will appear.
•Job Name
Enter a job name using up to 32 characters. The
entered job name will appear as a file name on the
touch panel of the machine. If you do not enter a job
name, the file name set in the application will
appear.
(6) Click the [Print] button.
(3)
(4)
(1)
(2)
(5)
(6)
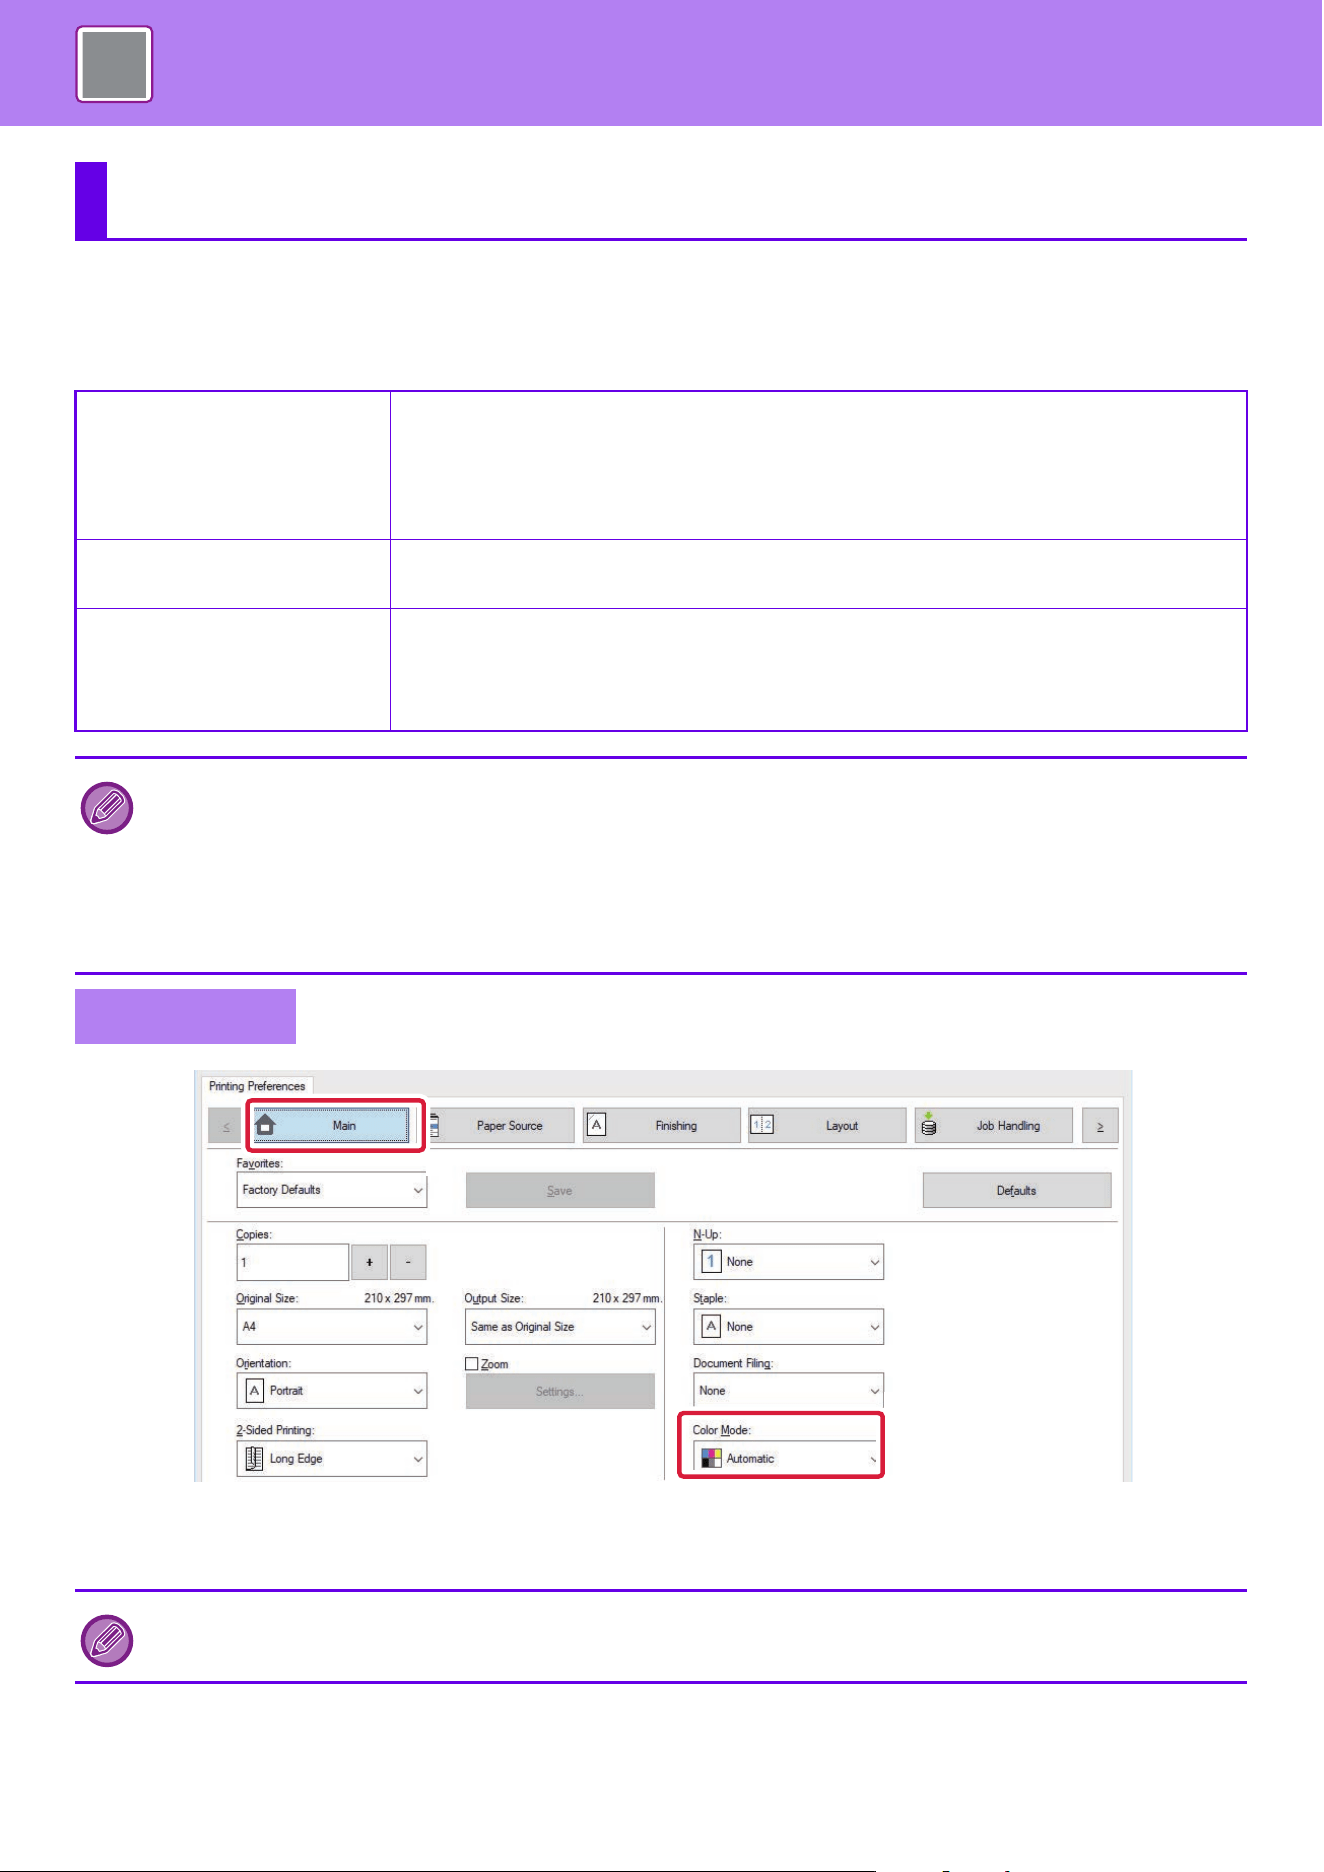
4-20
PRINTER►FREQUENTLY USED FUNCTIONS
SELECTING THE COLOR MODE
The following three selections are available for the "Color Mode" (a set of colors used for printing):
(1) Click the [Main] tab.
(2) Select "Color Mode".
FREQUENTLY USED FUNCTIONS
Automatic The machine automatically determines whether each page is color or black and white and
prints the page accordingly. Pages with colors other than black and white are printed using Y
(Yellow), M (Magenta), C (Cyan) and Bk (Black) toner. Pages that are only black and white
are printed using Bk (Black) toner only. This is convenient when printing a document that has
both color and black and white pages, however, the printing speed is slower.
Color All pages are printed in color. Both color data and black and white data are printed using Y
(Yellow), M (Magenta), C (Cyan) and Bk (Black) toner.
Black and White All pages are printed in black and white. Color data such as images or materials for a
presentation is printed using black toner only. This mode helps conserve color toner when
you do not need to print in color, such as when proofreading or checking the layout of a
document.
When "Color Mode" is set to [Automatic]:
Even if the print result is black and white, the following types of print jobs will be counted as 4-color (Y (Yellow), M (Magenta),
C (Cyan), and Bk (Black)) print jobs.
When you want such jobs to be counted as black and white jobs, select [Black and White].
• When the data is created as color data.
• When the application treats the data as color data even though the data is black and white.
• When an image is hidden under a black and white image.
Windows
In addition to the [Main] tab, [Color Mode] can also be set on the [Image Quality] tab.
(2)
(1)
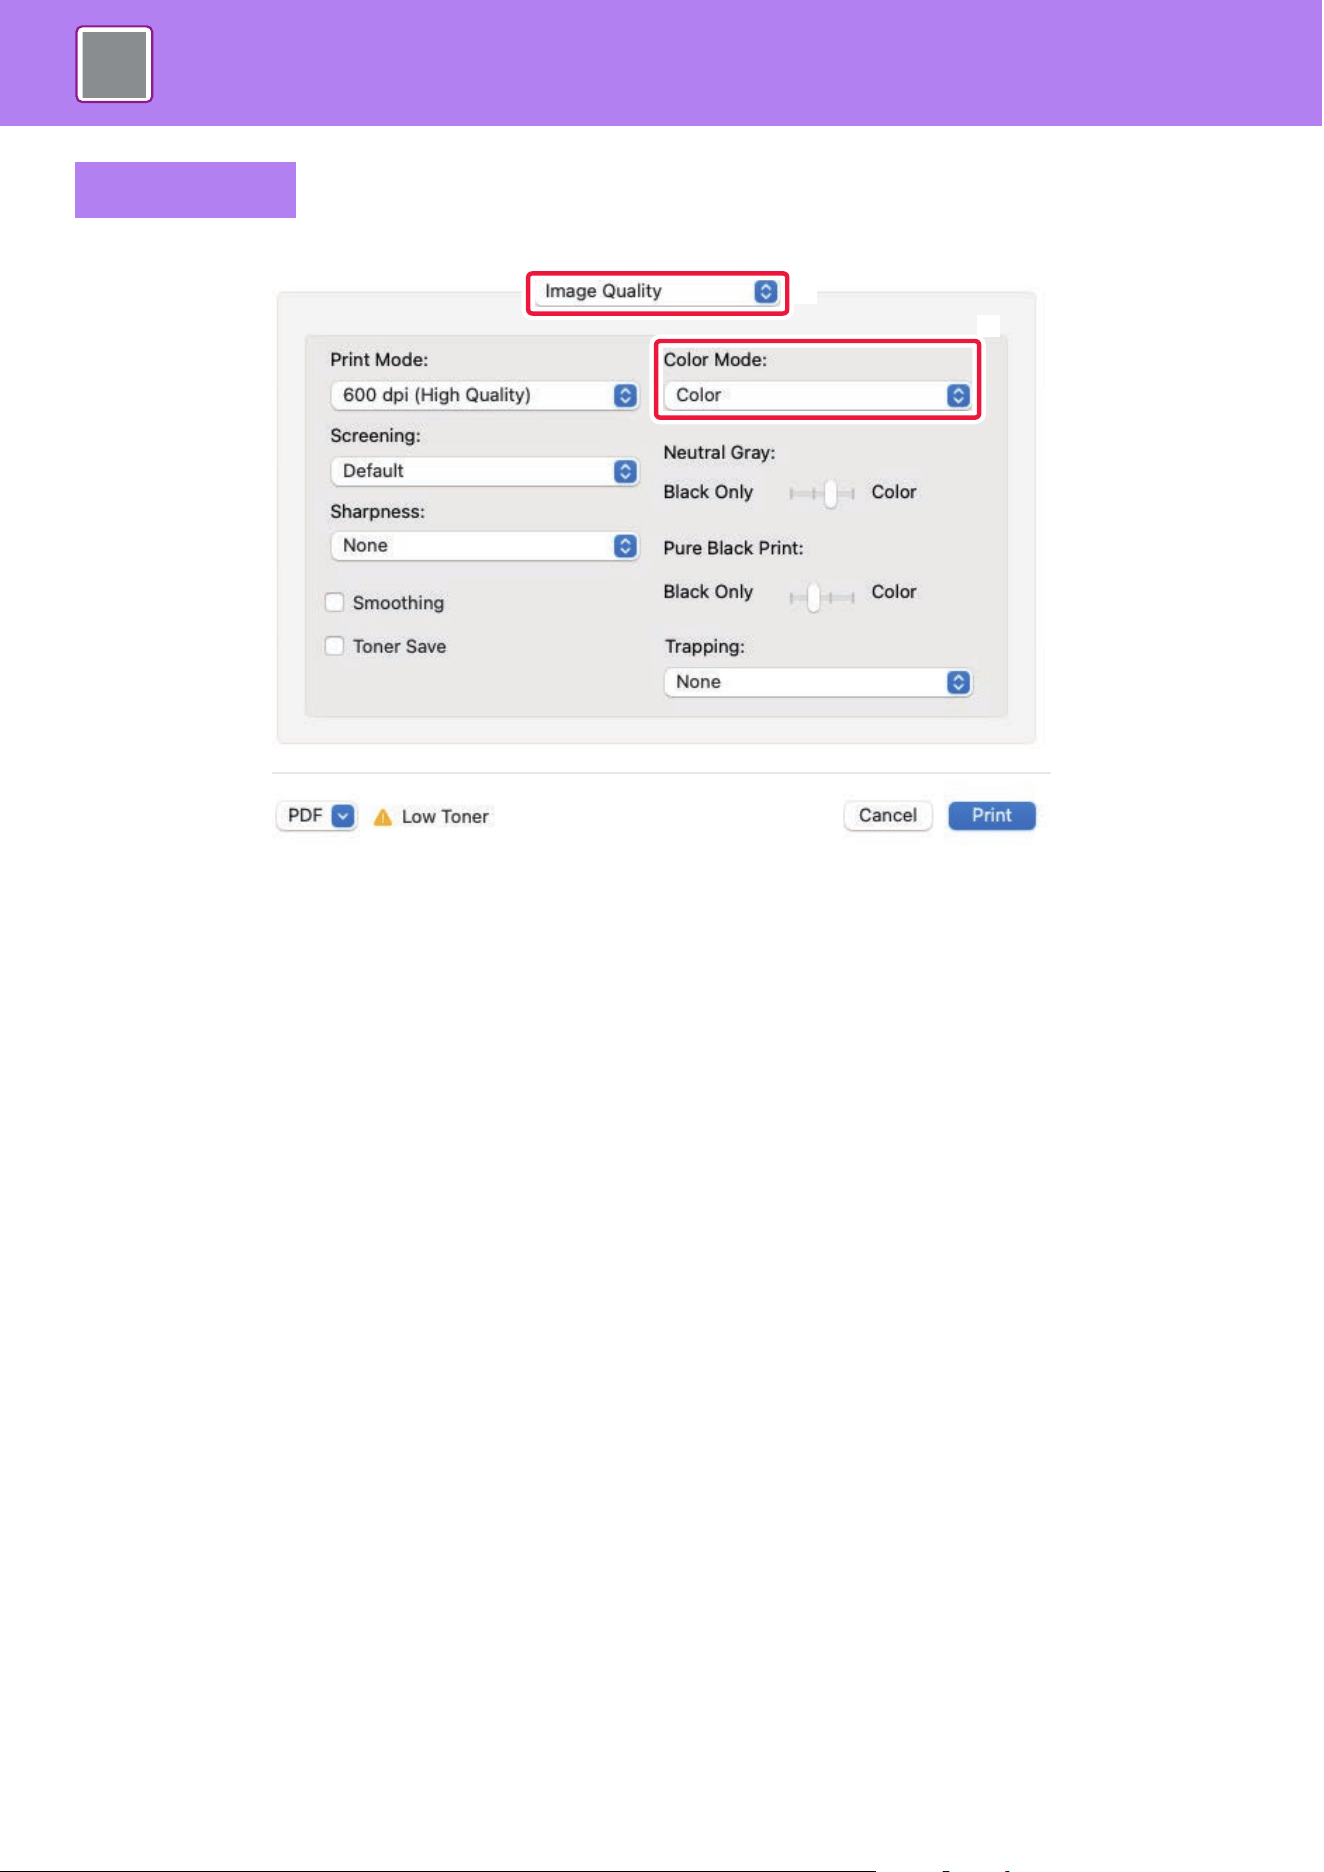
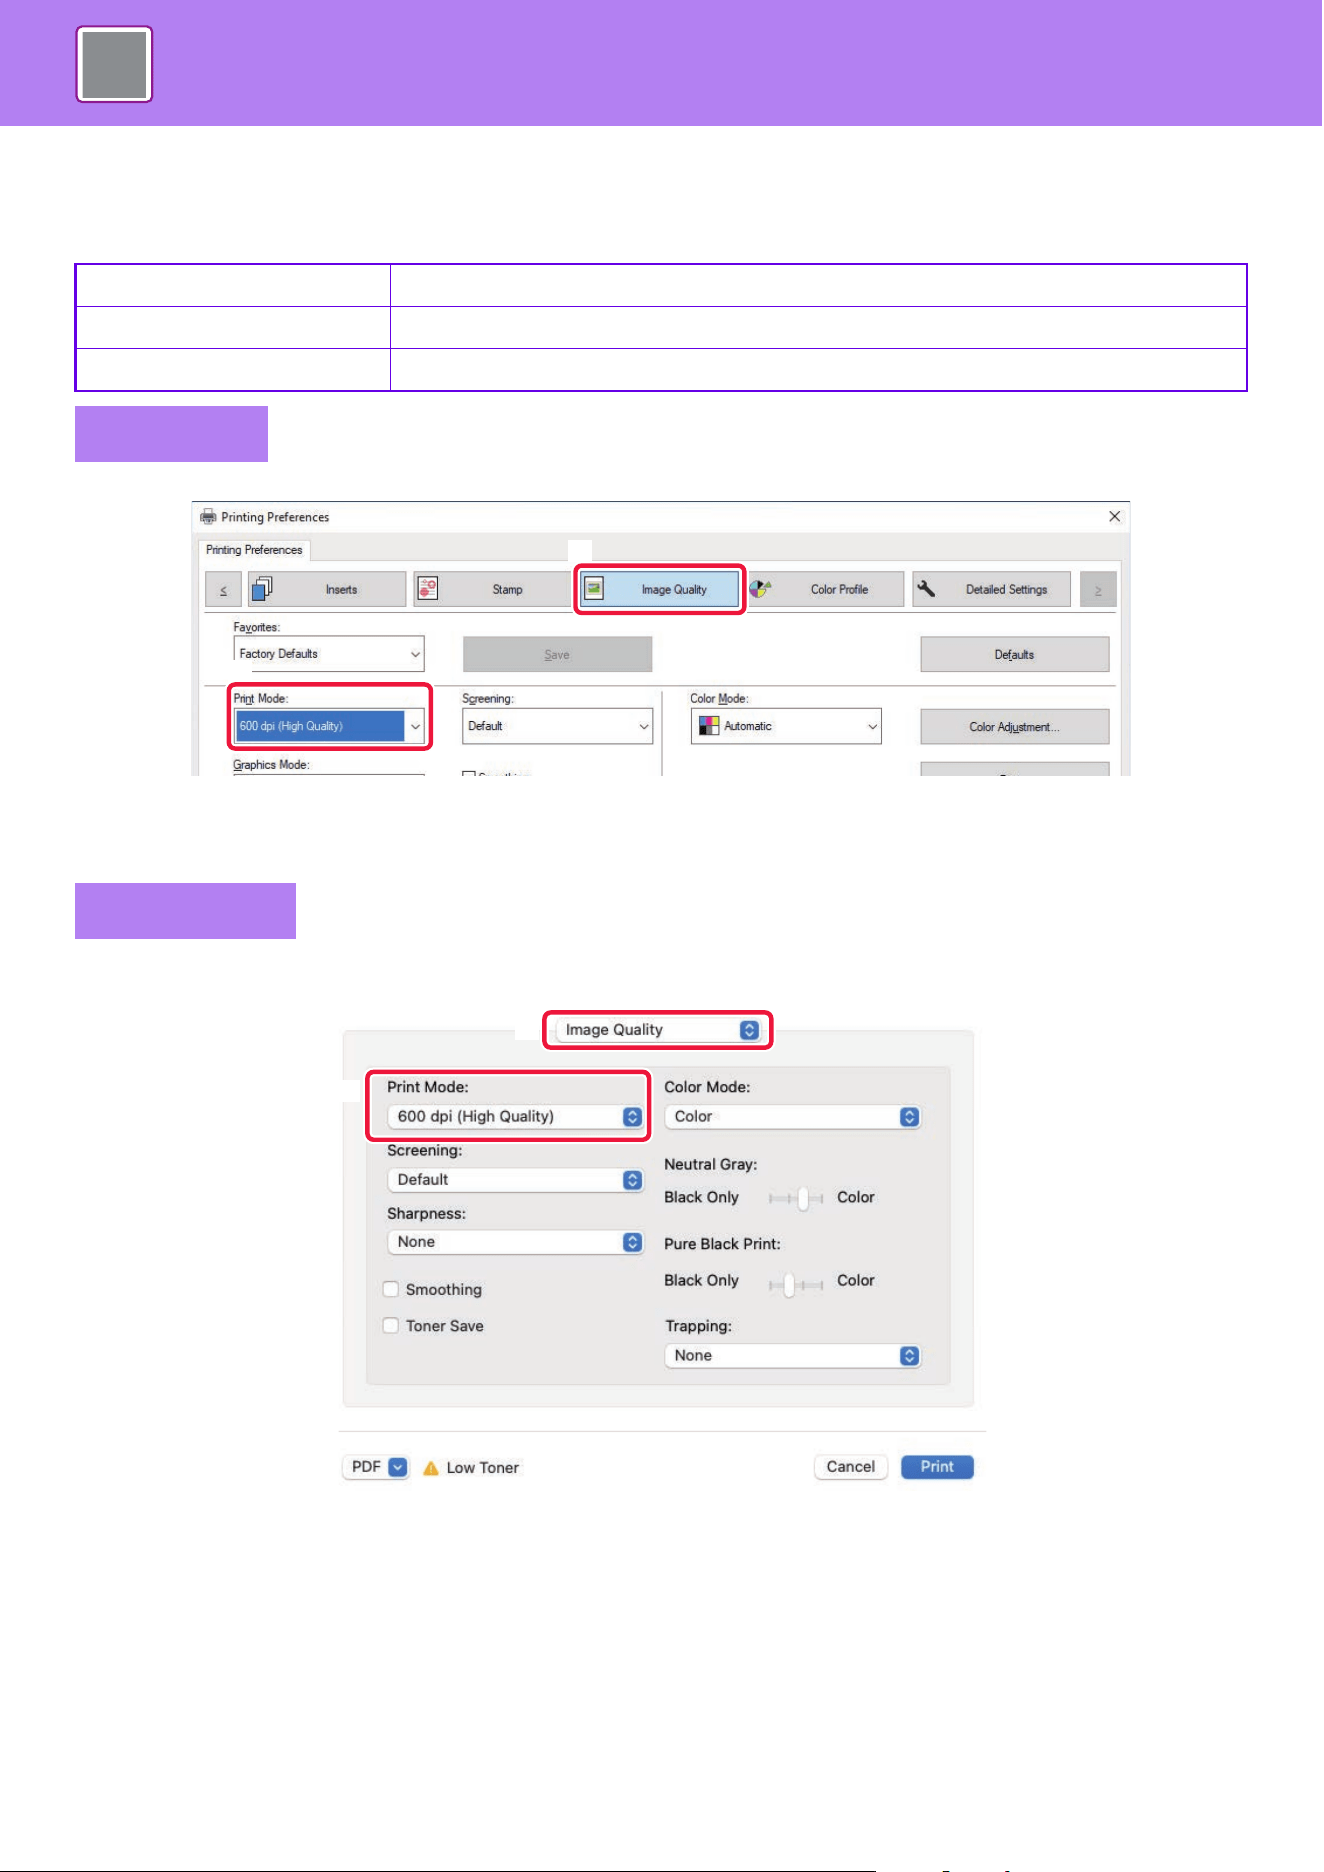
4-22
PRINTER►FREQUENTLY USED FUNCTIONS
SELECTING THE RESOLUTION
The following three selections are available for "Print Mode" (resolution):
(1) Click the [Image Quality] tab.
(2) Select "Print Mode".
(1) Select [Image Quality].
In macOS 13, [Image Quality] is located under the "Printer Options" menu.
(2) Select "Print Mode".
600 dpi This mode is suitable for printing data such as regular text or a table.
600 dpi (High Quality) The print quality of color photos and text are high.
1200 dpi Select this mode to print color photos with higher definition, and to print fine lines clearly.
Windows
macOS
(2)
(1)
(1)
(2)
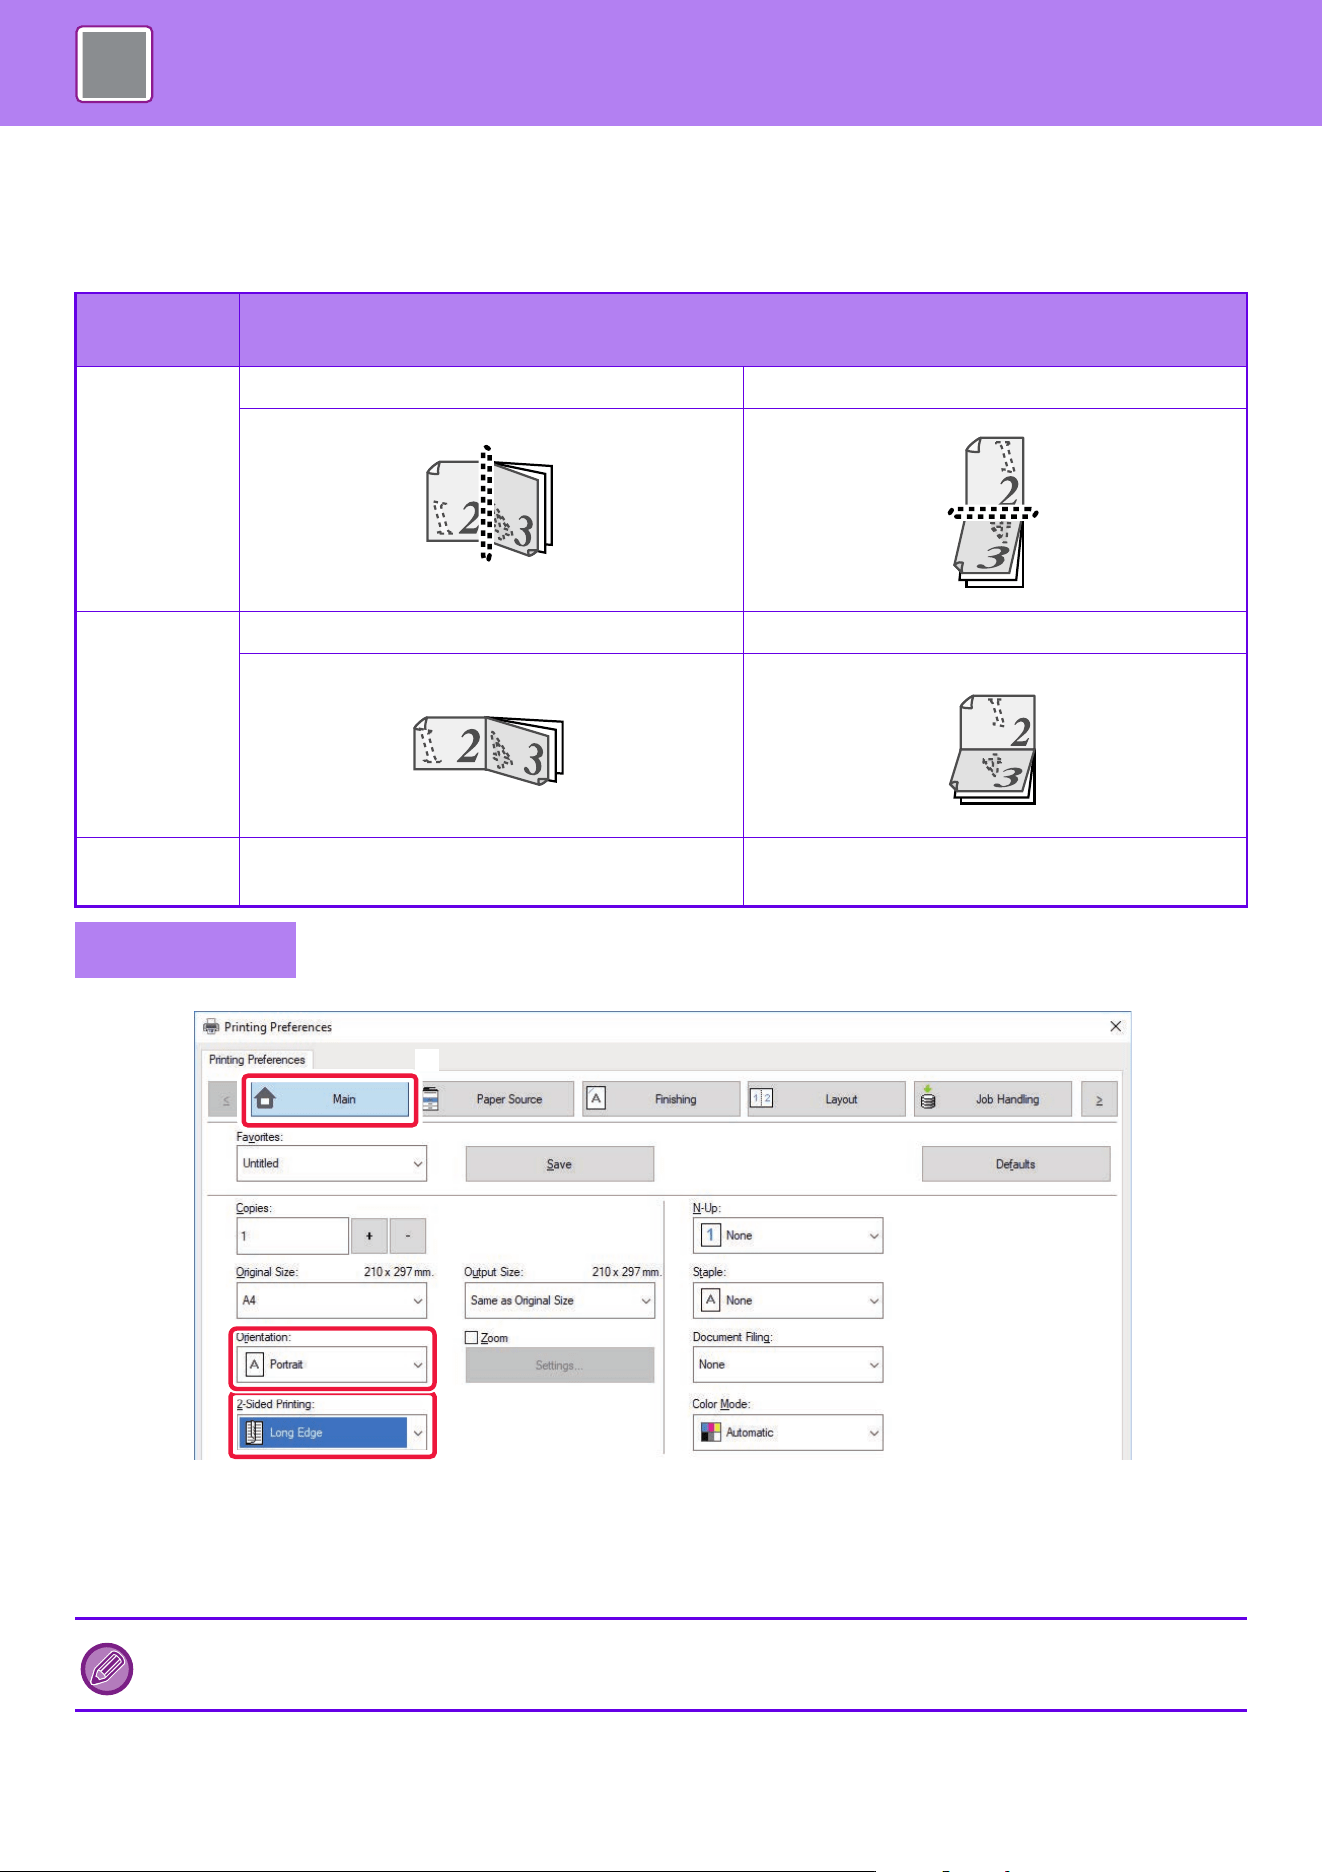
4-23
PRINTER►FREQUENTLY USED FUNCTIONS
2-SIDED PRINTING
The machine can print on both sides of the paper. This function is useful for many purposes, and is particularly
convenient when you want to create a simple pamphlet. 2-sided printing also helps conserve paper.
(1) Click the [Main] tab.
(2) Select the paper orientation.
(3) Select [Long Edge] or [Short Edge].
Paper
orientation
Print results
Portrait Long Edge Short Edge
Landscape Short Edge Long Edge
The pages are printed so that they can be bound at
the left or right side.
The pages are printed so that they can be bound at
the top.
Windows
If necessary, you can select the method of implementing 2-sided printing. Click the [Other Settings] button on the [Detailed
Settings] tab, and select the mode from "Duplex Style".
(2)
(3)
(1)
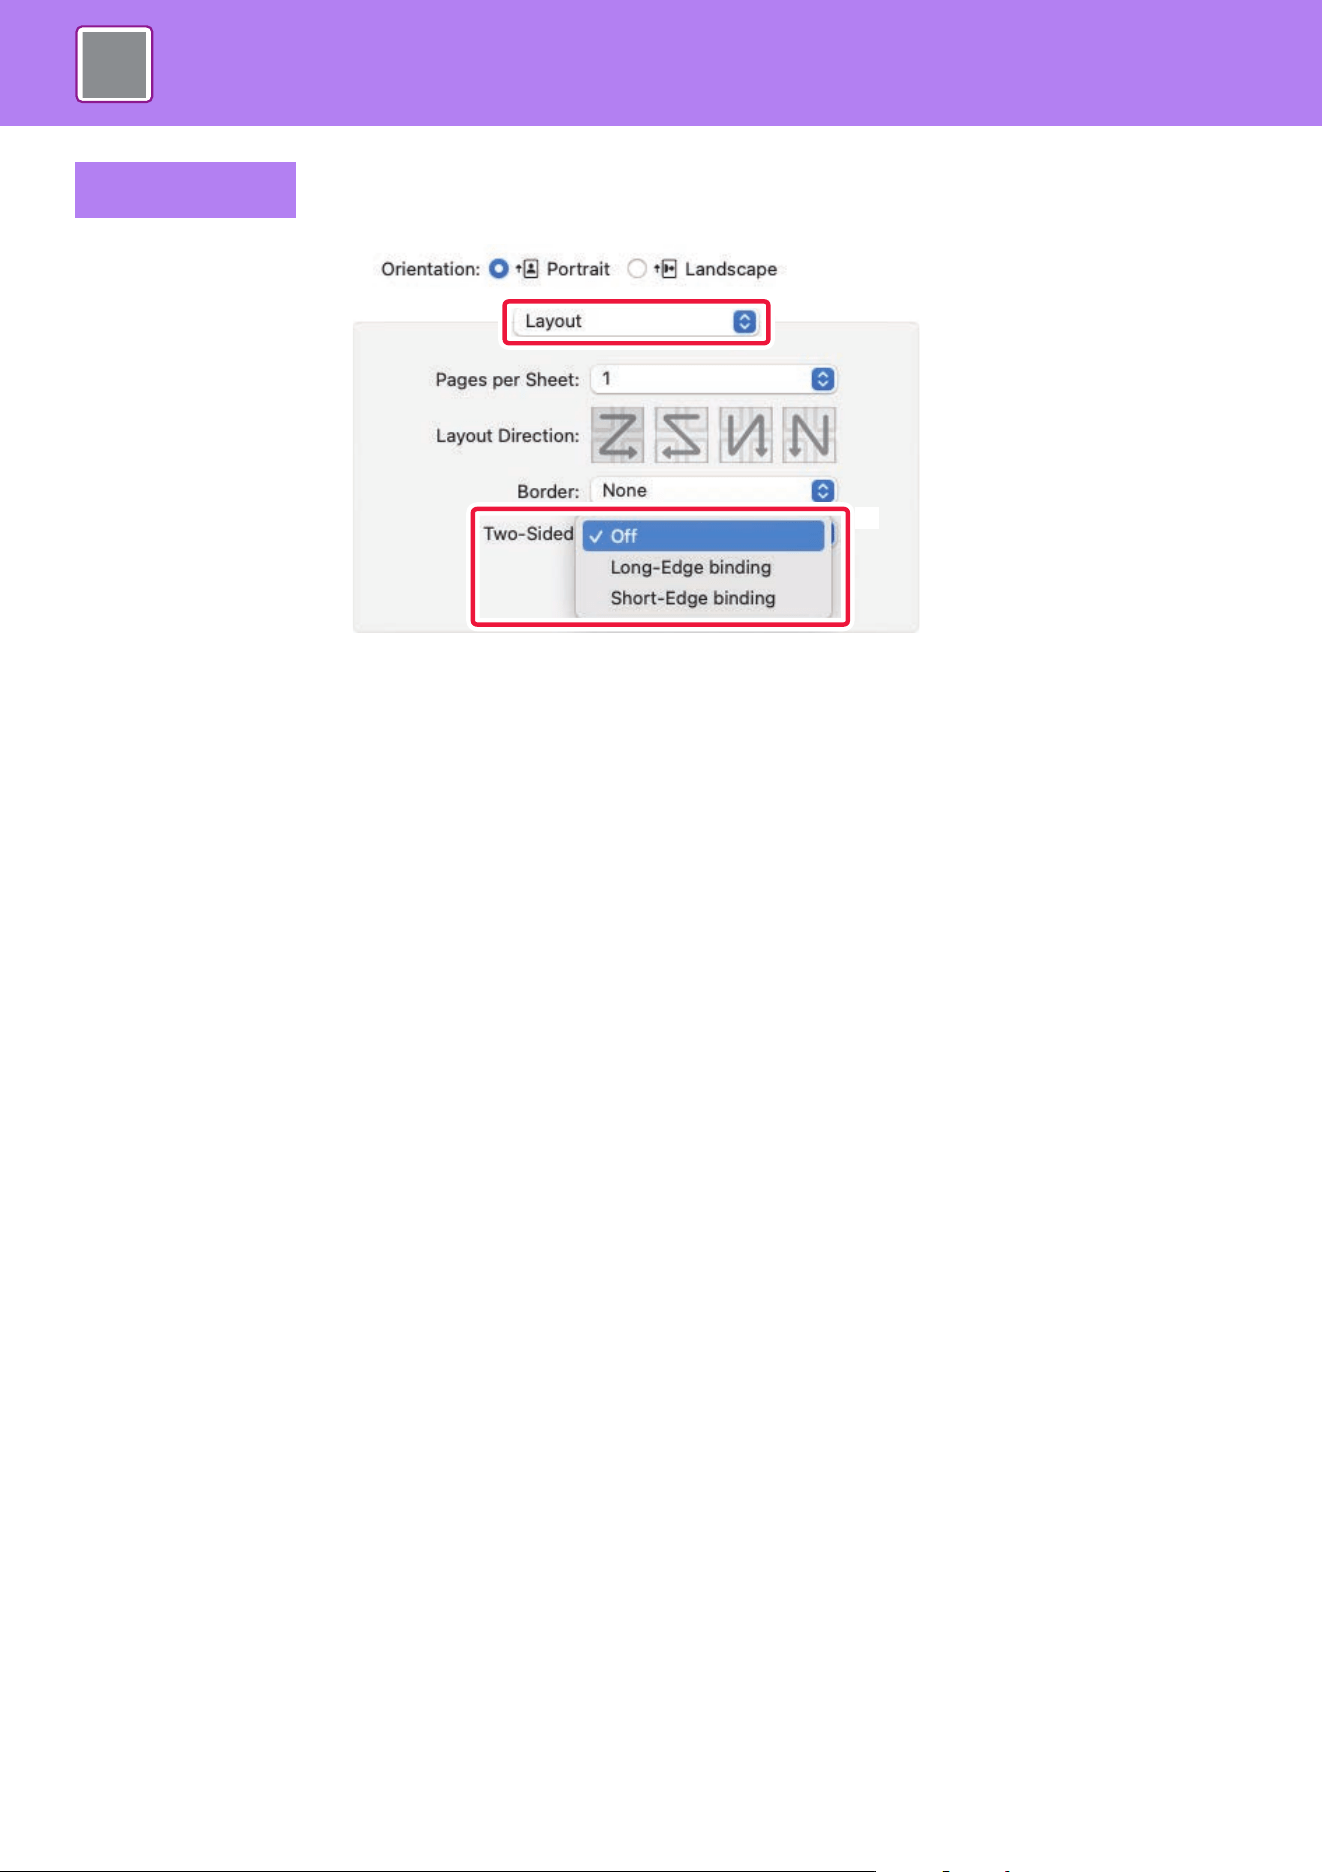
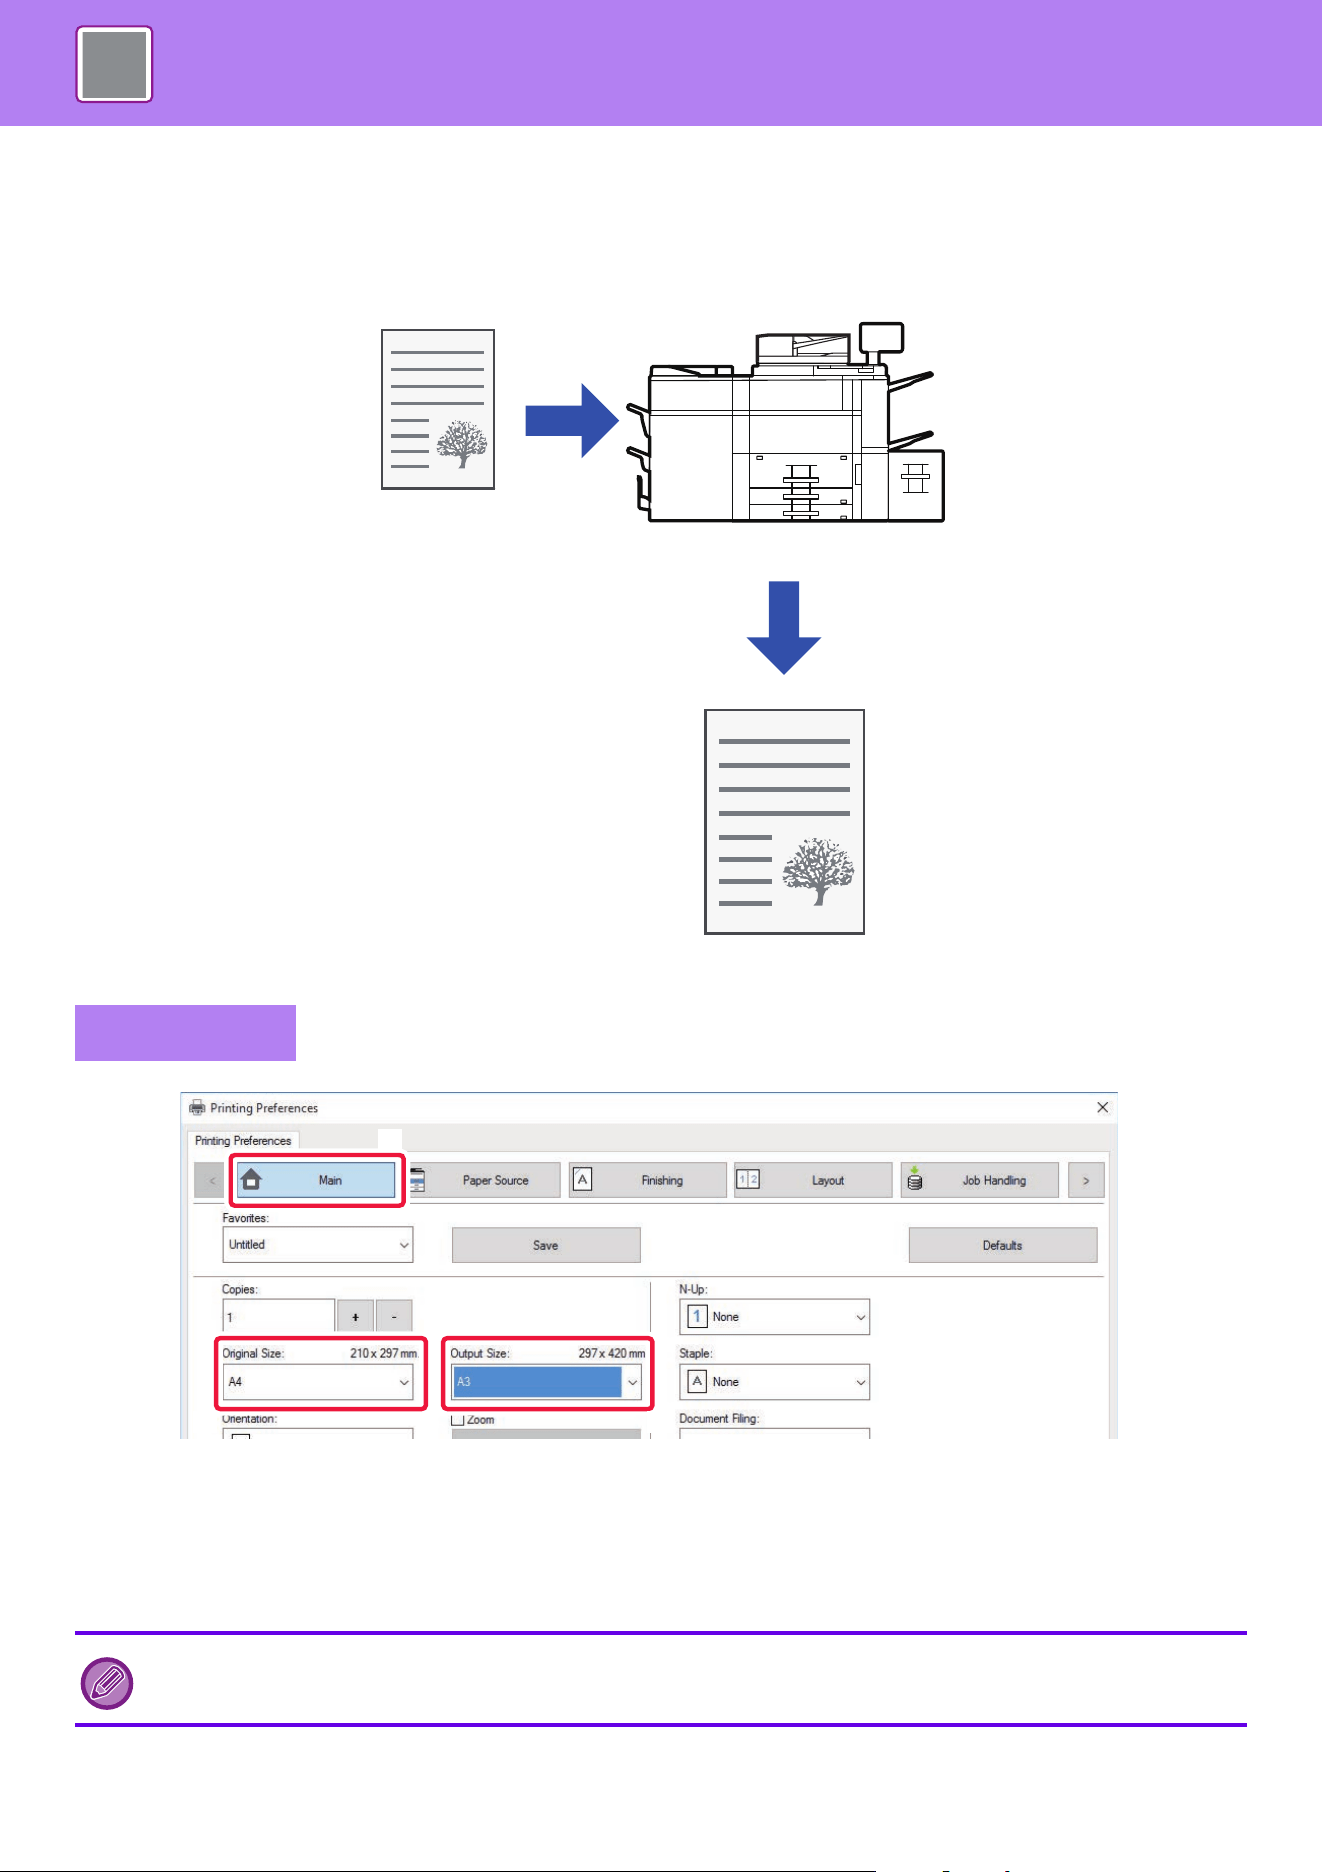
4-25
PRINTER►FREQUENTLY USED FUNCTIONS
FITTING THE PRINT IMAGE TO THE PAPER
This function automatically enlarges or reduces the print image to match the size of the paper loaded in the machine.
This function is convenient when enlarging a letter or A4 size document to ledger or A3 size to make it easier to view, or
when printing a document on paper that is different in size from the original document.
The following example explains how to print a Letter (or A4) size document on A3 (or ledger) size paper.
(1) Click the [Main] tab.
(2) Select the original size from [Original Size] (for example: A4).
(3) Select the actual paper size to be used for printing from [Output Size] (for example: A3).
If the output size is larger than the original size, the printed image will be automatically enlarged.
Windows
If A0, A1, A2, B1, B2, or B3 size is selected in "Original Size", Letter (or A4) is automatically selected in "Output Size".
(2)
(1)
(3)
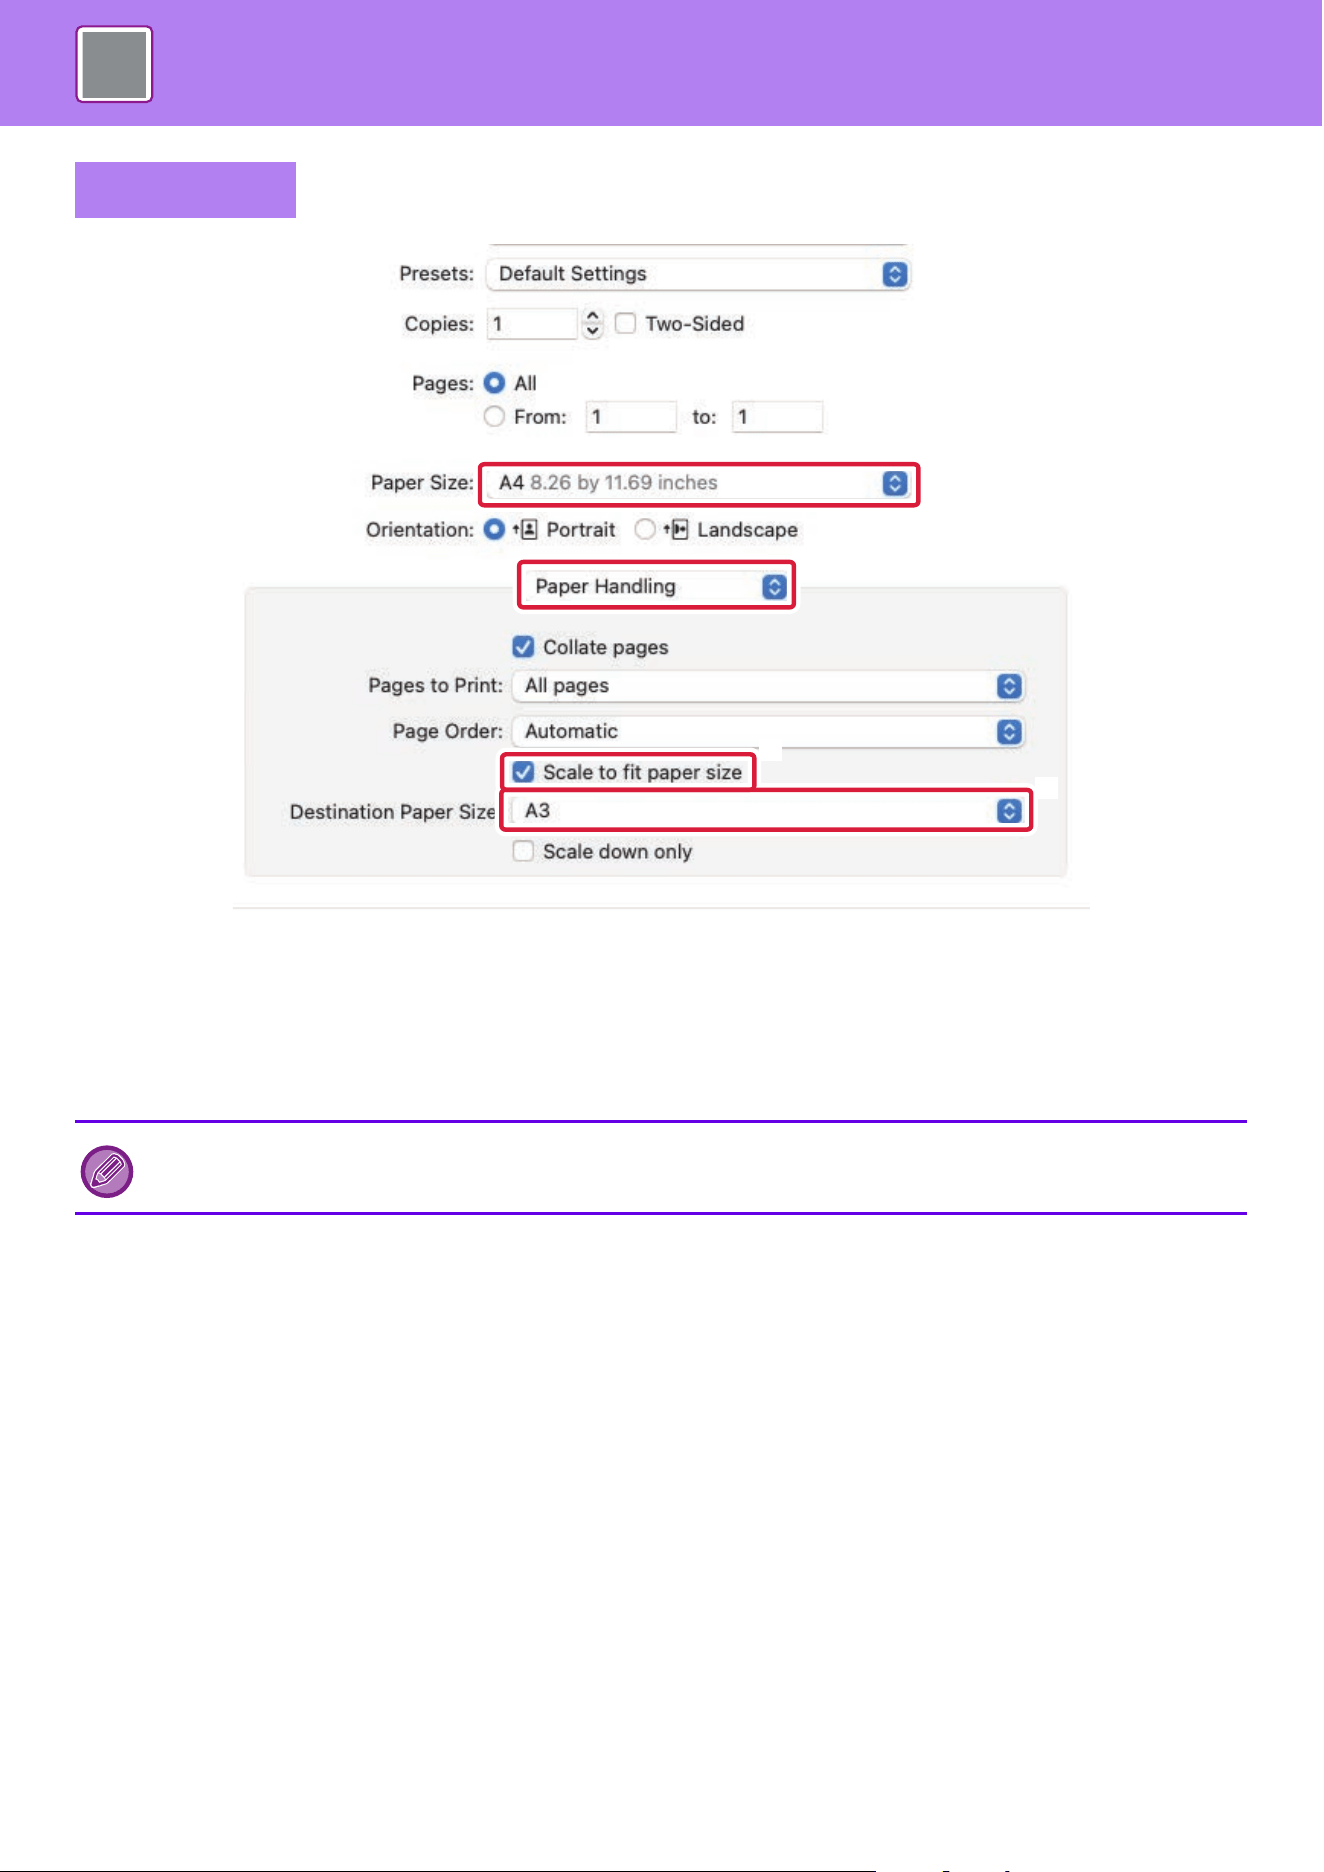
4-26
PRINTER►FREQUENTLY USED FUNCTIONS
(1) Check the paper size for the print image (for example: A4).
(2) Select [Paper Handling].
(3) Select [Scale to fit paper size].
(4) Select the actual paper size to be used for printing (for example: A3).
macOS
When you select A0 (Fit to Page), A1 (Fit to Page), A2 (Fit to Page), B1 (Fit to Page), B2 (Fit to Page), or B3 (Fit to Page) in
"Paper Size", the selected paper size will be selected after the "Suggested Paper" in "Destination Paper Size".
(2)
(1)
(3)
(4)
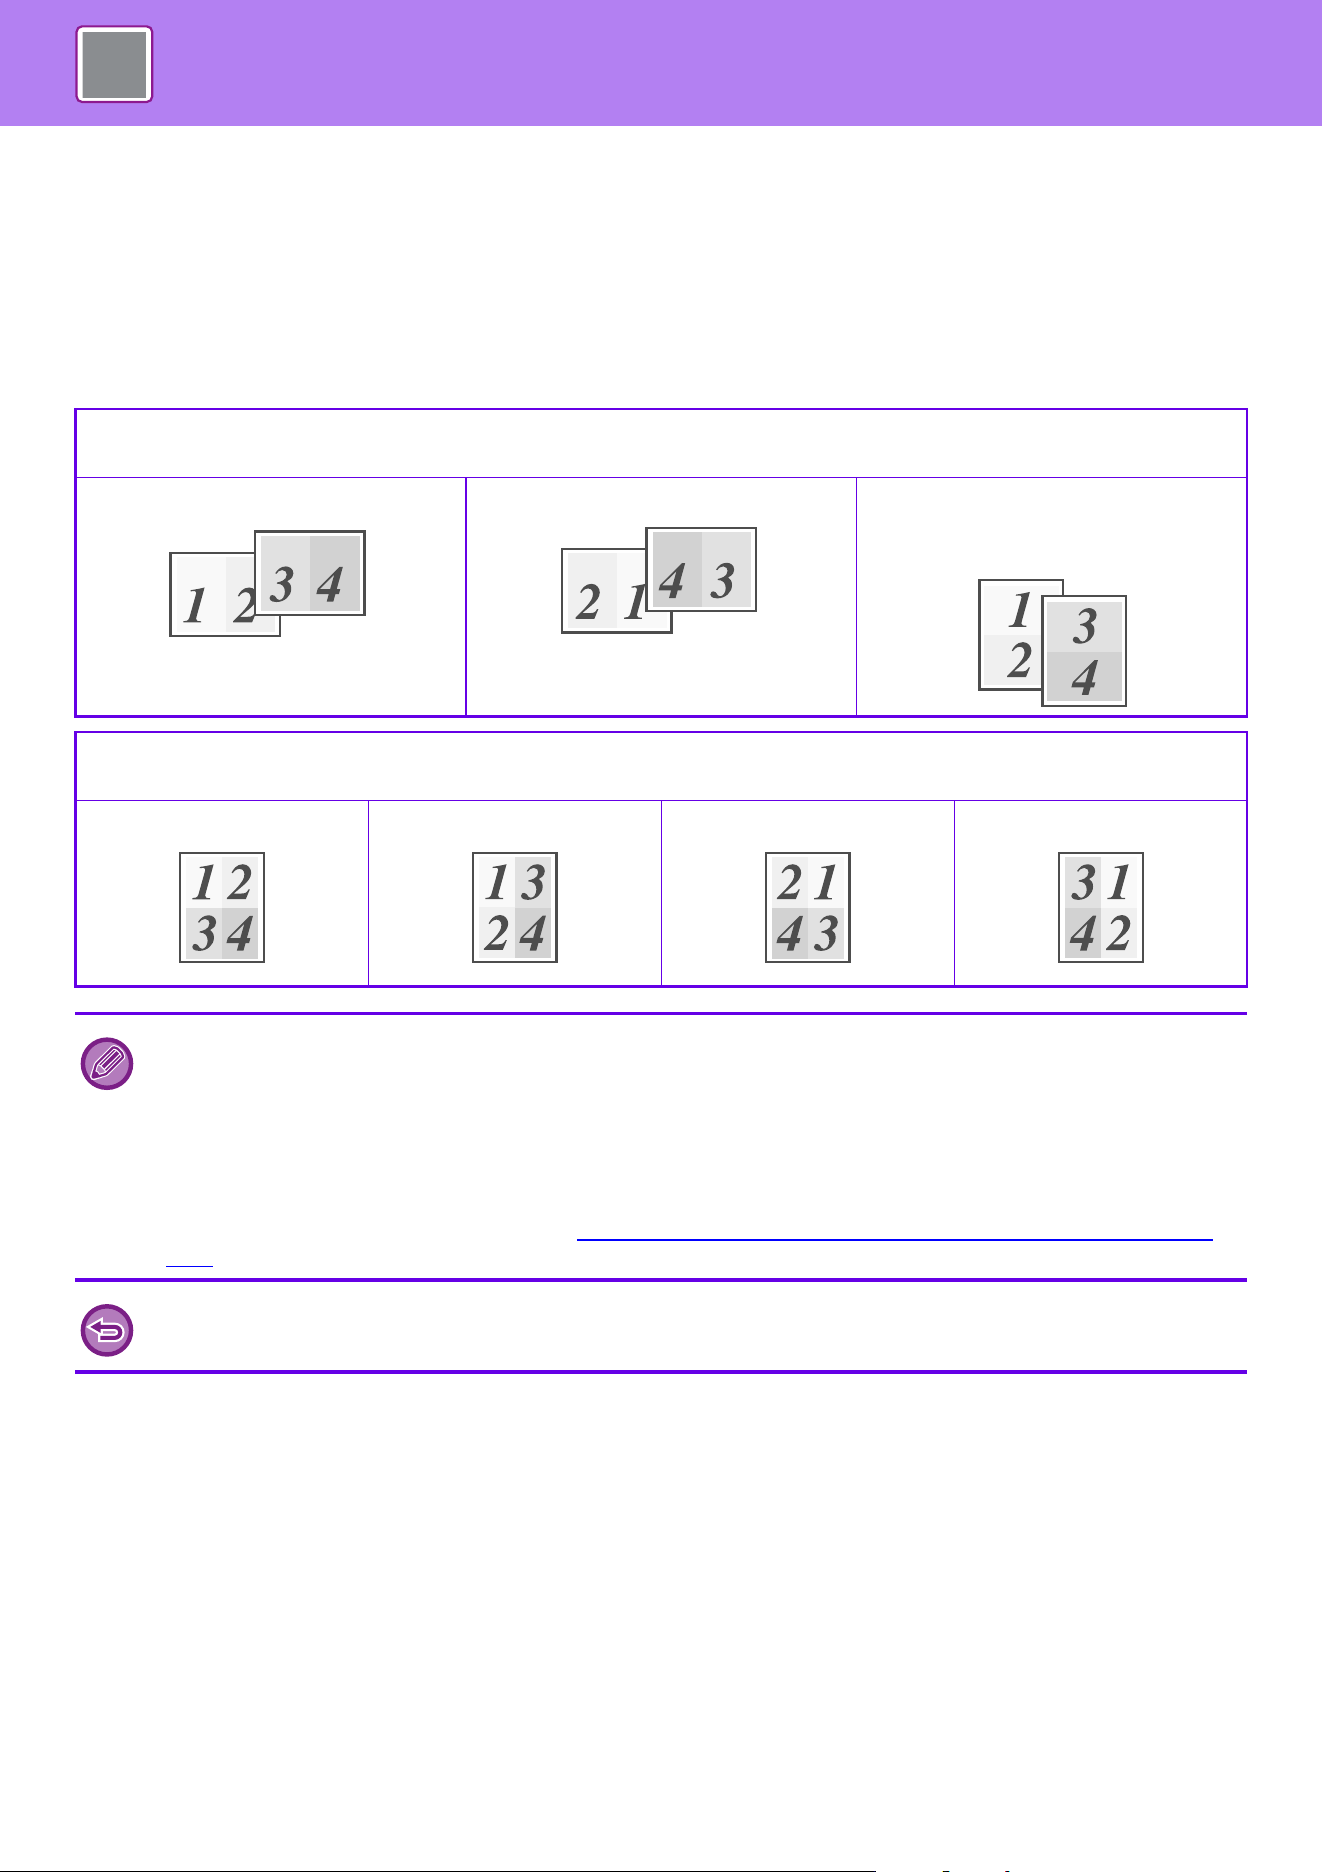
4-27
PRINTER►FREQUENTLY USED FUNCTIONS
PRINTING MULTIPLE PAGES ON ONE PAGE
This function reduces the print image and prints multiple pages on a single sheet of paper. You can print only the first
page in the original size and print multiple reduced pages on the subsequent sheets.
For example, when [2-Up] (2 pages per sheet) or [4-Up] (4 pages per sheet) is selected, the following print results will be
obtained, depending on the selected page order.
This is convenient when you want to print multiple images such as photos on a single sheet of paper, and when you
want to conserve paper. When used in combination with 2-sided printing, this function saves more paper.
2-Up
(2 pages per sheet)
Left to Right Right to Left Top To Bottom
(When the print orientation is
landscape)
4-Up
(4 pages per sheet)
Right, and Down Down, and Right Left, and Down Down, and Left
• [N-Up] that can be set on the [Layout] tab can also be set on the [Main] tab. ("Order" can only be set in the [Layout] tab.)
• Note the following when printing multiple pages on one sheet:
• The page orders for 6-Up, 8-Up, 9-Up, and 16-Up are the same as for 4-Up.
• In a Windows environment, the page order can be viewed in the print image in the printer driver properties window.
• In a macOS environment, the page orders are displayed as selections.
• In a macOS environment, the number of pages that can be printed on a single sheet is 2, 4, 6, 9, or 16. Printing 8 pages
on one sheet is not supported.
• For information on the "Repeat" function, see "PRINT THE SAME IMAGE IN TILE PATTERN (REPEAT PRINT) (page
4-96)".
The function for printing only the first page normally can only be used in the PCL6 printer driver.
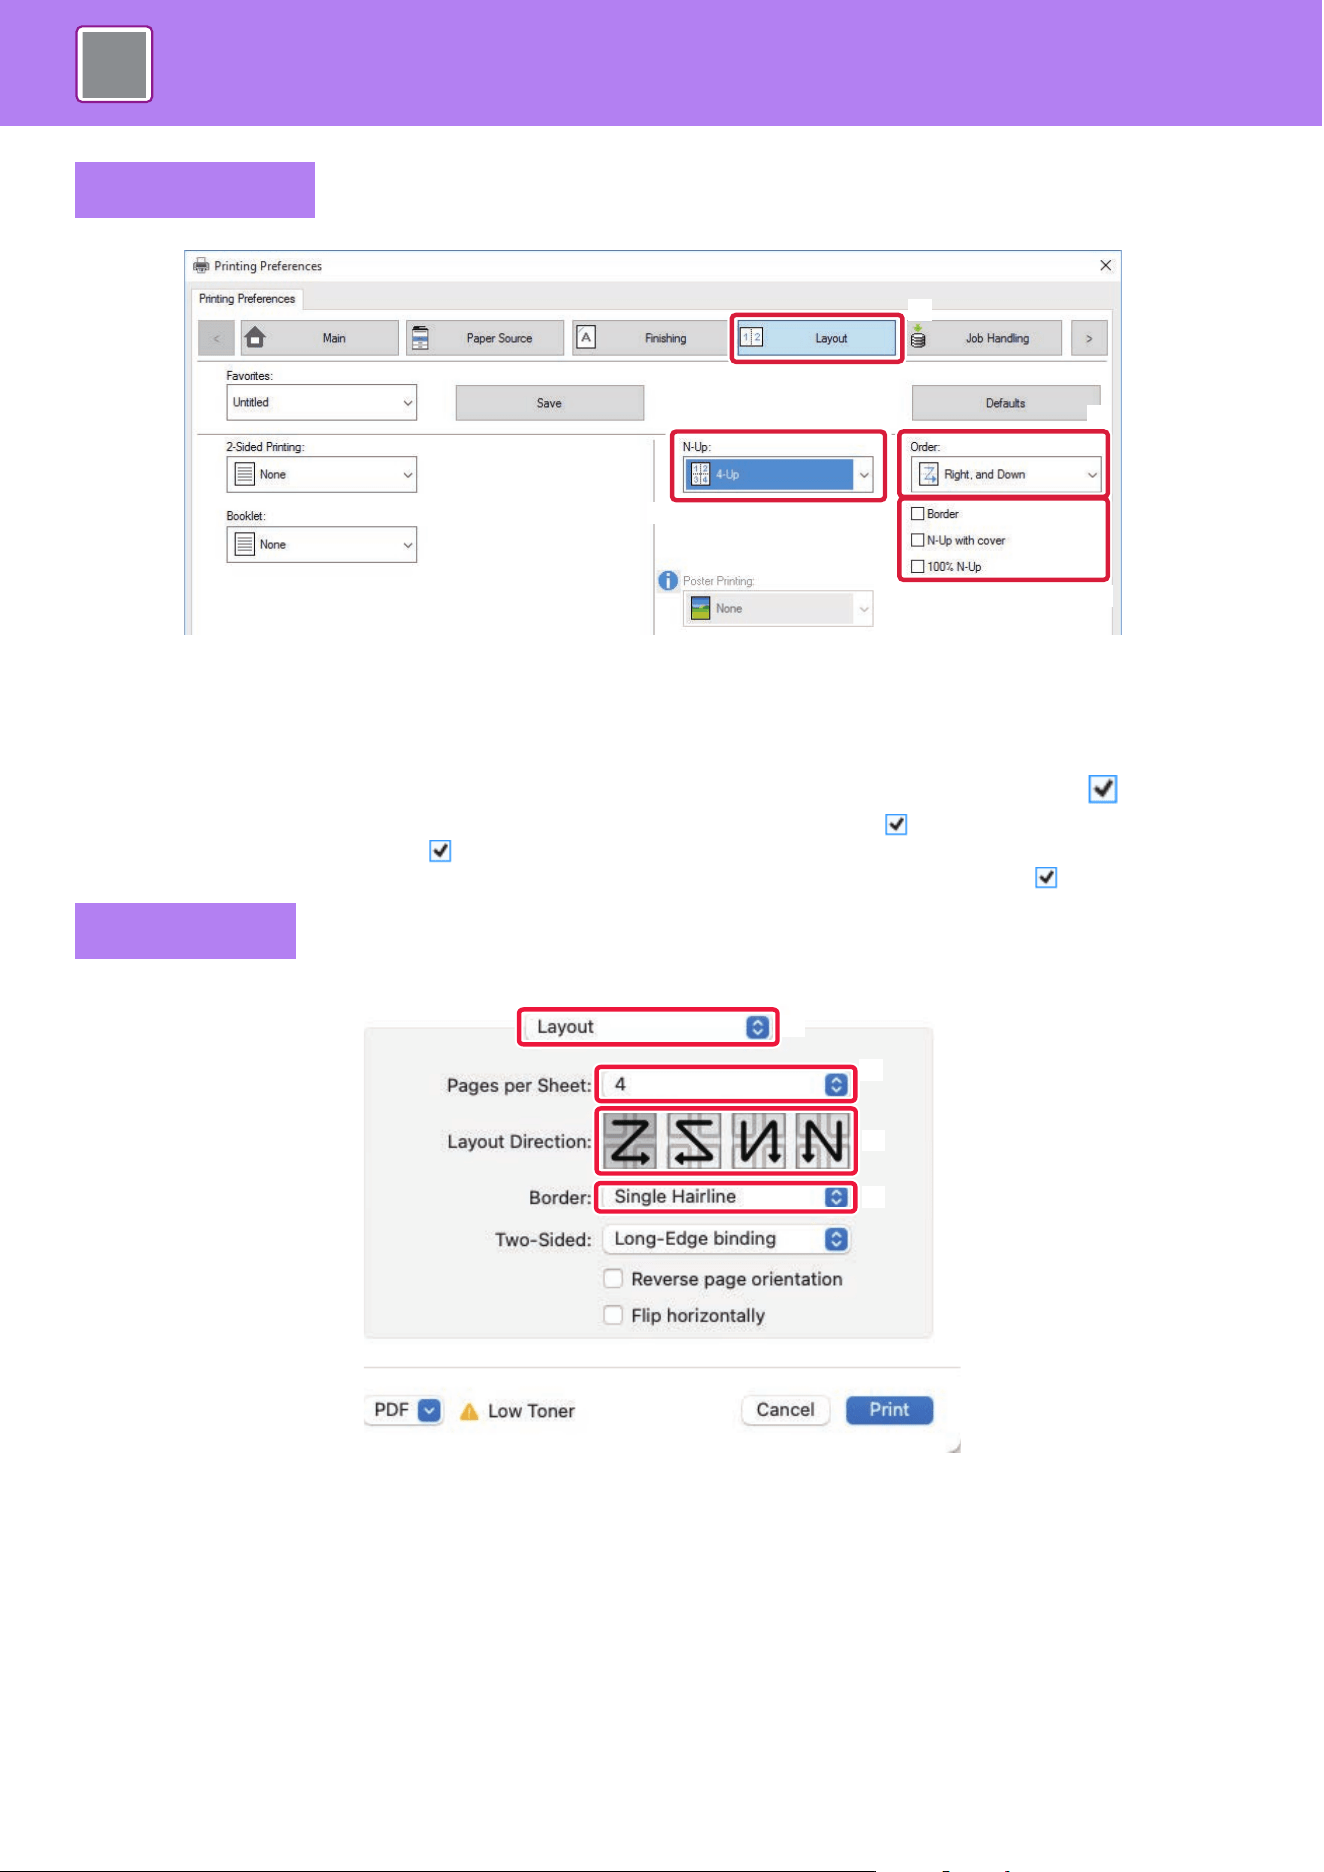
4-28
PRINTER►FREQUENTLY USED FUNCTIONS
(1) Click the [Layout] tab.
(2) Select the number of pages per sheet.
(3) Select the order of the pages.
(4) If you wish to print borderlines, click the [Border] checkbox so that the checkmark appears.
• To print the first page normally (as a cover), select the [N-Up with cover] checkbox ( ). (PCL6 only)
• When [100% N-Up] is selected ( ) for jobs such as N-Up copying of two A4 size pages onto one A3 sheet, the pages will be
printed at the full size of the original. If you select [Border] at this time, only the border will be printed.
(1) Select [Layout].
(2) Select the number of pages per sheet.
(3) Select the order of the pages.
(4) If you wish to print borderlines, select the desired type of borderline.
Windows
macOS
(3)
(1)
(2)
(4)
(2)
(1)
(3)
(4)

4-29
PRINTER►FREQUENTLY USED FUNCTIONS
PRINTING WHILE SKIPPING BLANK PAGES
If the scanned original contains blank pages, the blank pages are skipped during printing. The machine detects blank
pages and does not print them. This eliminates unnecessary printing without you having to check for blank pages before
printing.
(1) Click the [Detailed Settings] tab.
(2) Select [On] in [Disable Blank Page Print].
This function is available in a Windows environment.
• Depending on the state of the original, some pages that are not blank may be detected as blank pages and thus not being
printed, or some pages that are blank may not be detected as blank and thus printed.
• In N-Up Print, blank pages are not excluded and are printed.
Windows
Blank page
Print
Do not print
blank pages
(2)
(1)
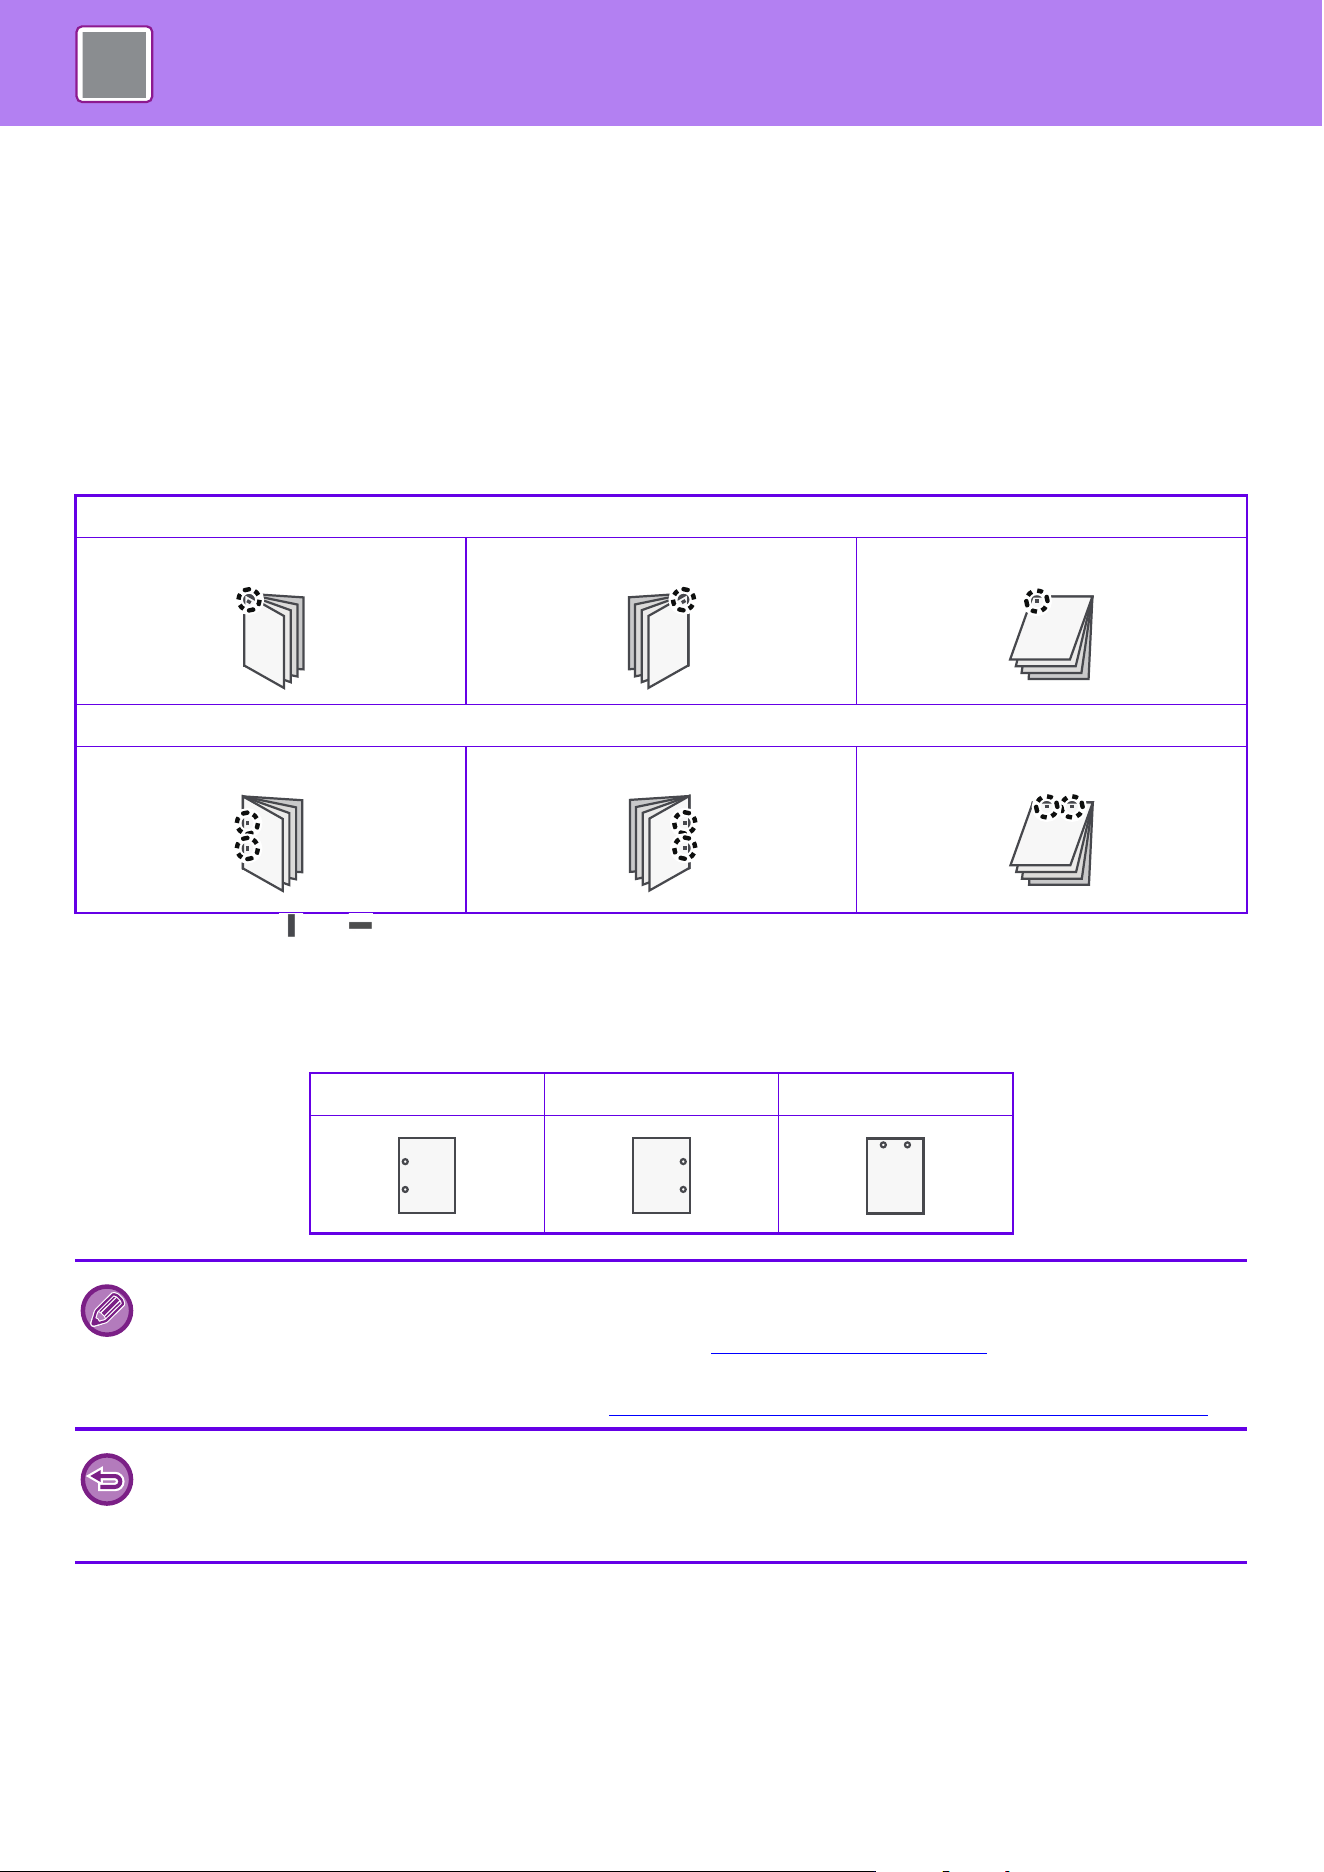
4-30
PRINTER►FREQUENTLY USED FUNCTIONS
STAPLING OUTPUT/PUNCHING HOLES IN
OUTPUT
STAPLE FUNCTION
The staple function staples the output. To create materials with more sophisticated appearance, the staple function can
be used in combination with 2-sided printing.
This function saves considerable time when preparing handouts for a meeting or other stapled materials.
The stapling positions and the number of staples can be selected to obtain the following stapling results.
* The staple orientation (" " or " ") varies depending on the size and orientation of the paper.
PUNCH FUNCTION
The punch function punches holes in the output. The punch hole positions are set by selecting the binding edge.
1 Staple*
Left Right Top
2 Staples
Left Right Top
Left Right Top
• A finisher or saddle stitch finisher is required to use the staple function.
• To use the punch function, installing a punch module in the finisher or saddle stitch finisher.
• For the maximum number of sheets that can be stapled, see "SPECIFICATIONS (page 11-2)
".
• The maximum number of sheets that can be stapled at once includes any covers and/or inserts that are inserted.
• For information on the saddle stitch function, see "CREATE A PAMPHLET (BOOKLET/SADD
LE STITCH) (page 4-47)".
• The staple and offset (shifting the position of the paper that is output for each job) functions cannot be used
simultaneously.
• When the finisher is disabled in the machine's settings, the staple function and punch function cannot be used.
• When the staple function or the punch function is disabled in the machine's settings, stapling or punching is not possible.
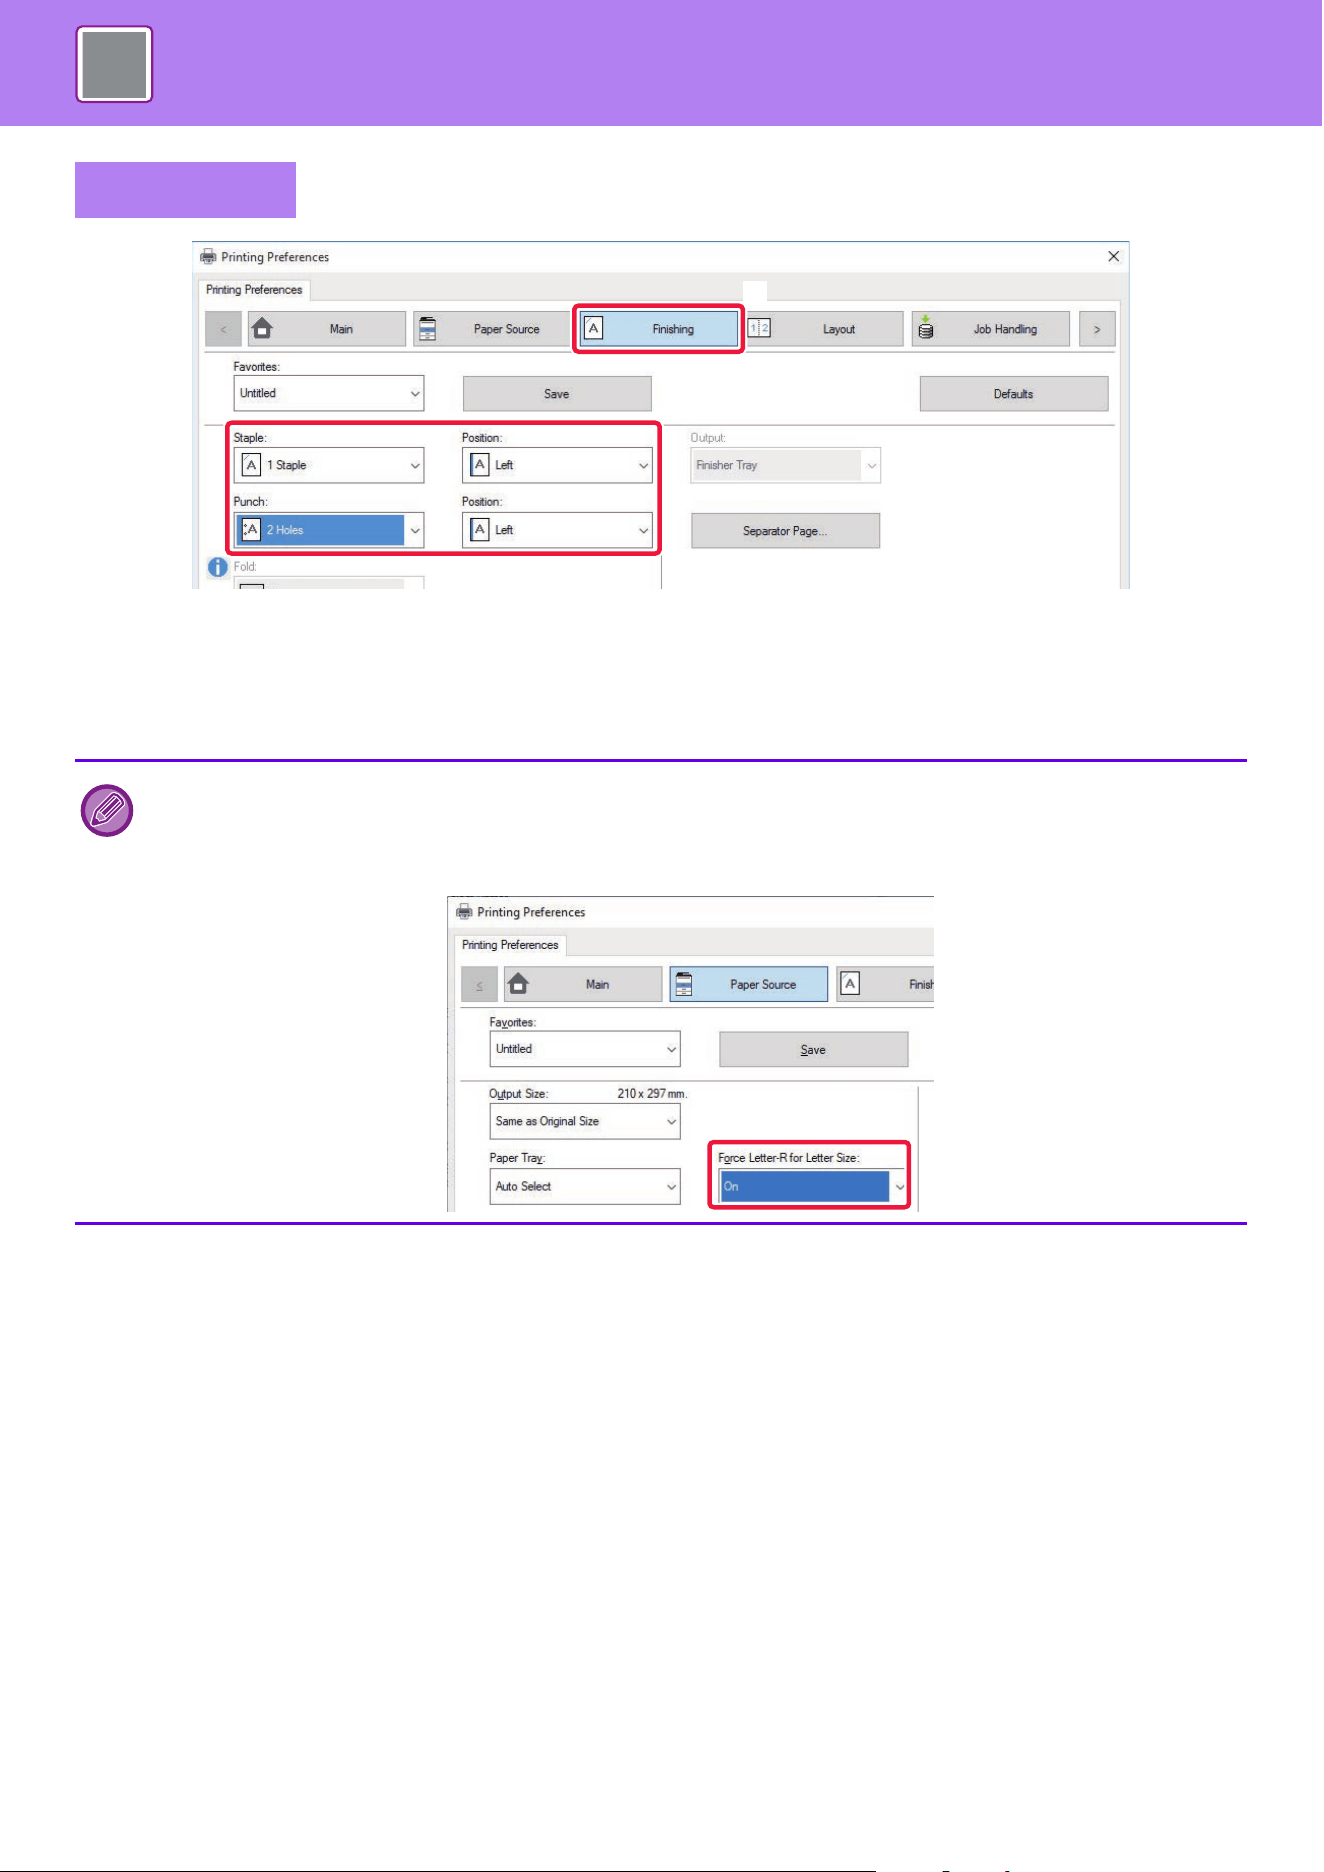
4-31
PRINTER►FREQUENTLY USED FUNCTIONS
(1) Click the [Finishing] tab.
(2) Select the staple function or the punch function.
• For the staple function, select the number of staples in the "Staple" menu and the staple position in the“Position”menu.
• For the punch function, select the type of punch in the "Punch" menu and the punch position in the "Position" menu.
Windows
• In addition to the [Finishing] tab, [Staple] can also be set on the [Main] tab.
• On the [Paper Source] tab, use [Force Letter-R for Letter Size] to always use letter size paper in landscape orientation.
Using this setting, when printing mixed legal size, the short sides will be printed with the same width, so you can staple
them together.
(2)
(1)
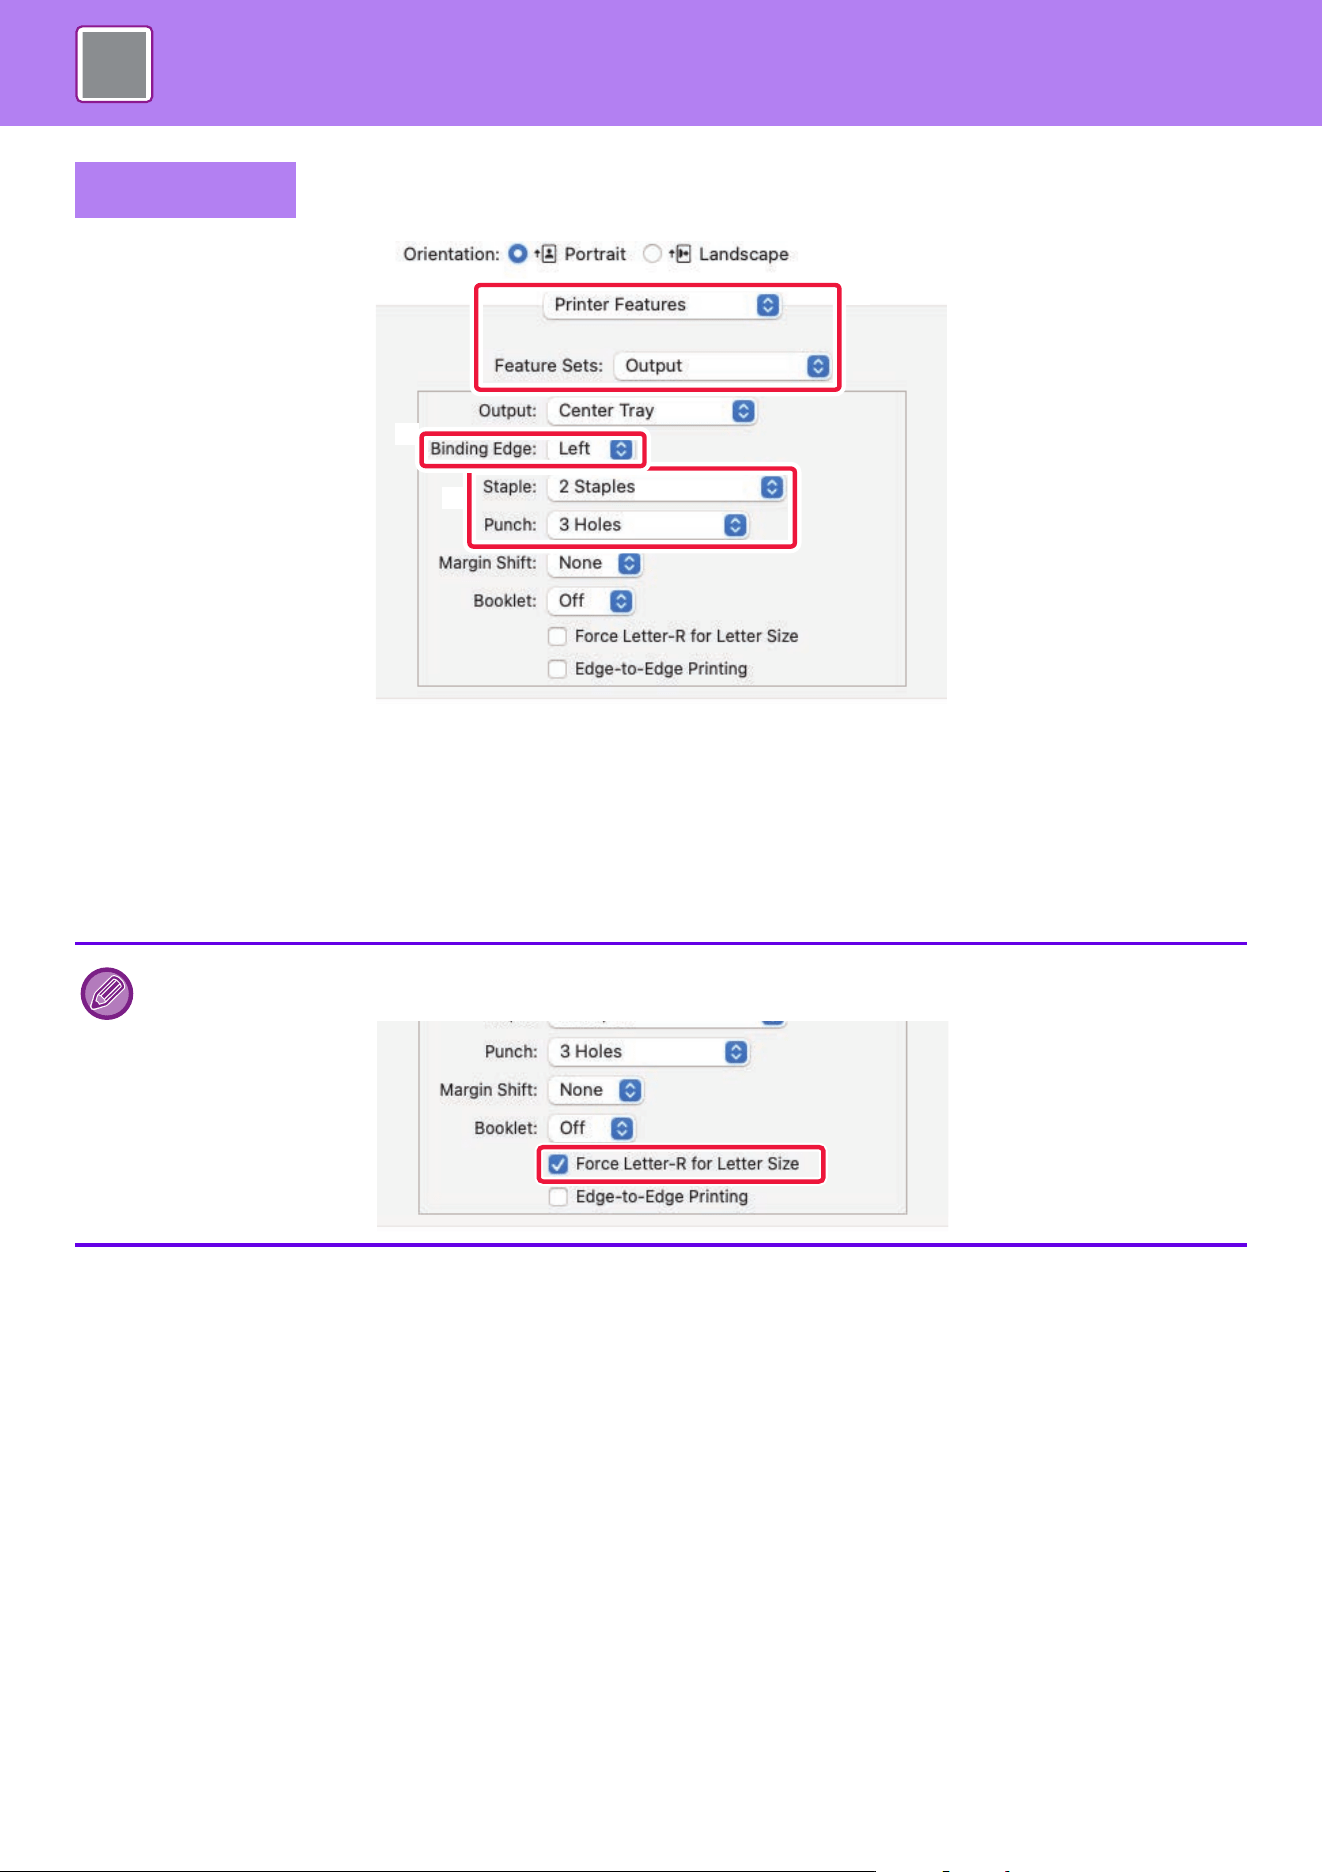
4-32
PRINTER►FREQUENTLY USED FUNCTIONS
(1) Select [Printer Features] and then select [Output].
In macOS 13, [Printer Features] is located under the "Printer Options" menu.
(2) Select "Binding Edge".
(3) Select the staple function or the punch function.
• For the staple function, select the number of staples in the "Staple" menu.
• For the punch function, select the type of punch in the "Punch” menu.
macOS
Use [Force Letter-R for Letter Size] to always use letter size paper in landscape orientation. Using this setting, when printing
mixed legal size, the short sides will be printed with the same width, so you can staple them together.
(1)
(2)
(3)

4-33
PRINTER►FREQUENTLY USED FUNCTIONS
PRINTING WITHOUT TOP AND BOTTOM
MARGINS (EDGE-TO-EDGE PRINTING)
This function enables printing without top and bottom margins.
By combining this function with the saddle stitch printing and trimming functions, a booklet or pamphlet without margins
can be created. (Excluding printing on long paper)
This function can only be used for 11" x 17"/A3, 8-1/2" x 11"/A4, and long paper.
Combination of Edge-to-Edge Printing
• Edge-to-Edge Printing and Long paper: Single sheet
• Edge-to-Edge Printing and 11" x 17"/A3: Single sheet
• Edge-to-Edge Printing and 8-1/2" x 11"/A4: Single sheet
• Edge-to-Edge Printing, 11" x 17"/A3, Saddle Stitch and Trimming: 8-1/2" x 11"/A4 size pamphlet
• Edge-to-Edge Printing, 8-1/2" x 11"/A4, Saddle Stitch and Trimming: 5-1/2" x 8-1/2"/A5 size pamphlet
Edge-to-Edge Printing with long paper is available.
When using Edge-to-Edge Printing with long paper, paper sizes up to 26.3" (668 mm) can be used, and the paper type can
be selected from heavy paper 1, heavy paper 2, and user type 1 to 11.
To use this function effectively, create document data in the application that is 2 mm longer than the top and bottom of the
paper, and 2 mm shorter in the direction of feeding.

4-34
PRINTER►FREQUENTLY USED FUNCTIONS
SADDLE STITCH PRINTING AND 2-POSITION
STAPLING
Original 1
Fold position
Trim the sides
Margins appear on the sides
Margins appear on the top, bottom, and sides
With normal printing...
Margins
The margins on the sides are eliminated, and Edge-to-Edge printing
is completed.
Create document data of a suitable size in the application, or use the
Zoom function, to eliminate the top and bottom margins.
Original 2 Paper
(11’’x17’’/ A3)
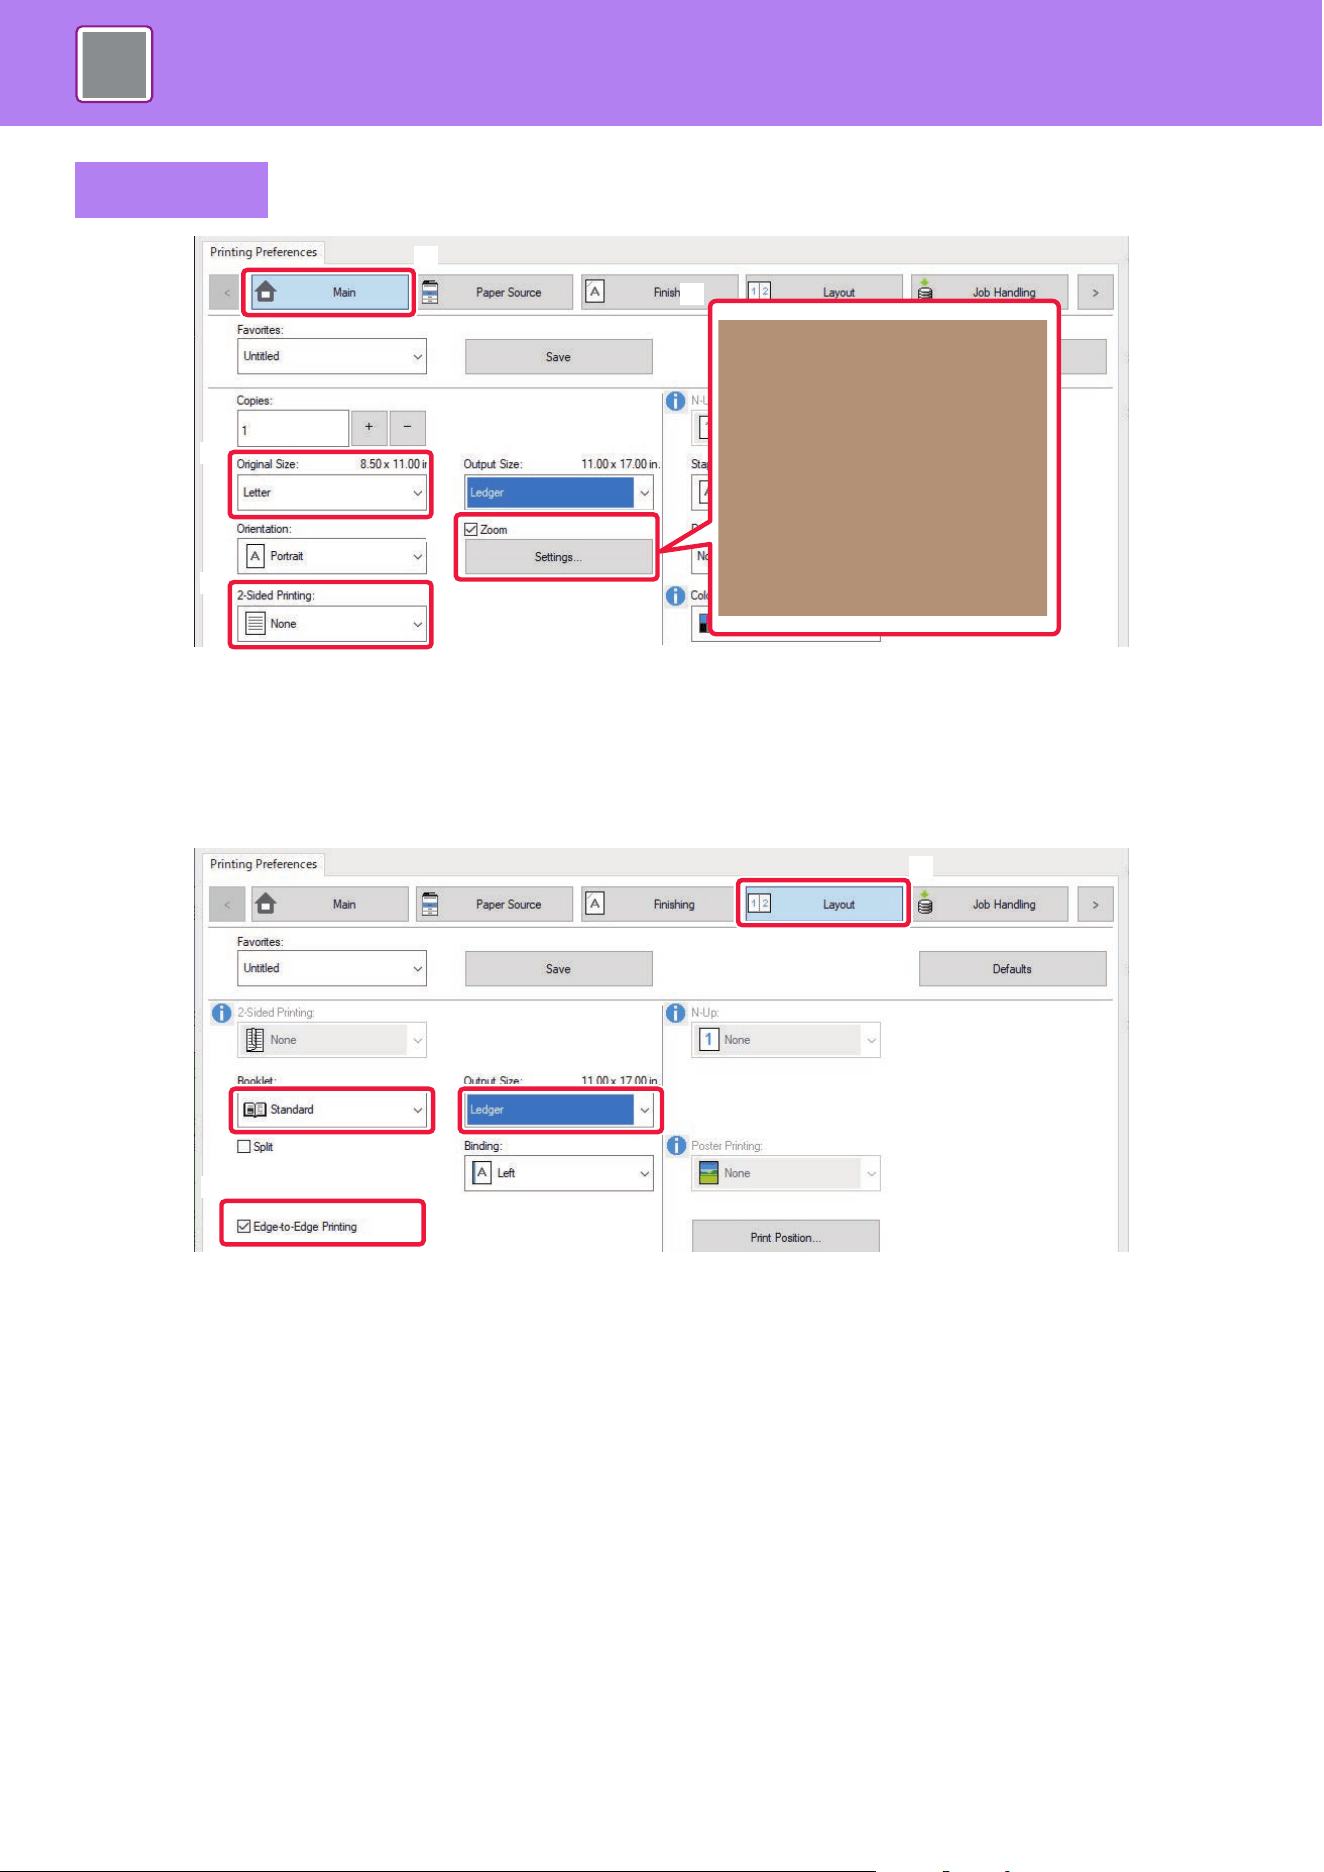
4-35
PRINTER►FREQUENTLY USED FUNCTIONS
(1) Click the [Main] tab and select the original size in [Original Size].
(2) Select [None] in [2-Sided Printing].
(3) Check the [Zoom] checkbox and click [Settings].
(4) Specify the zoom value, select [Center] in [Reference Point] and click [OK].
(5) Click the [Layout] tab and check the [Edge-to-Edge Printing] checkbox.
(6) Select [Standard] in [Booklet].
(7) Select the output size in [Output Size].
Windows
(1)
(3)
(2)
(1)
(4)
(5)
(6) (7)
(5)
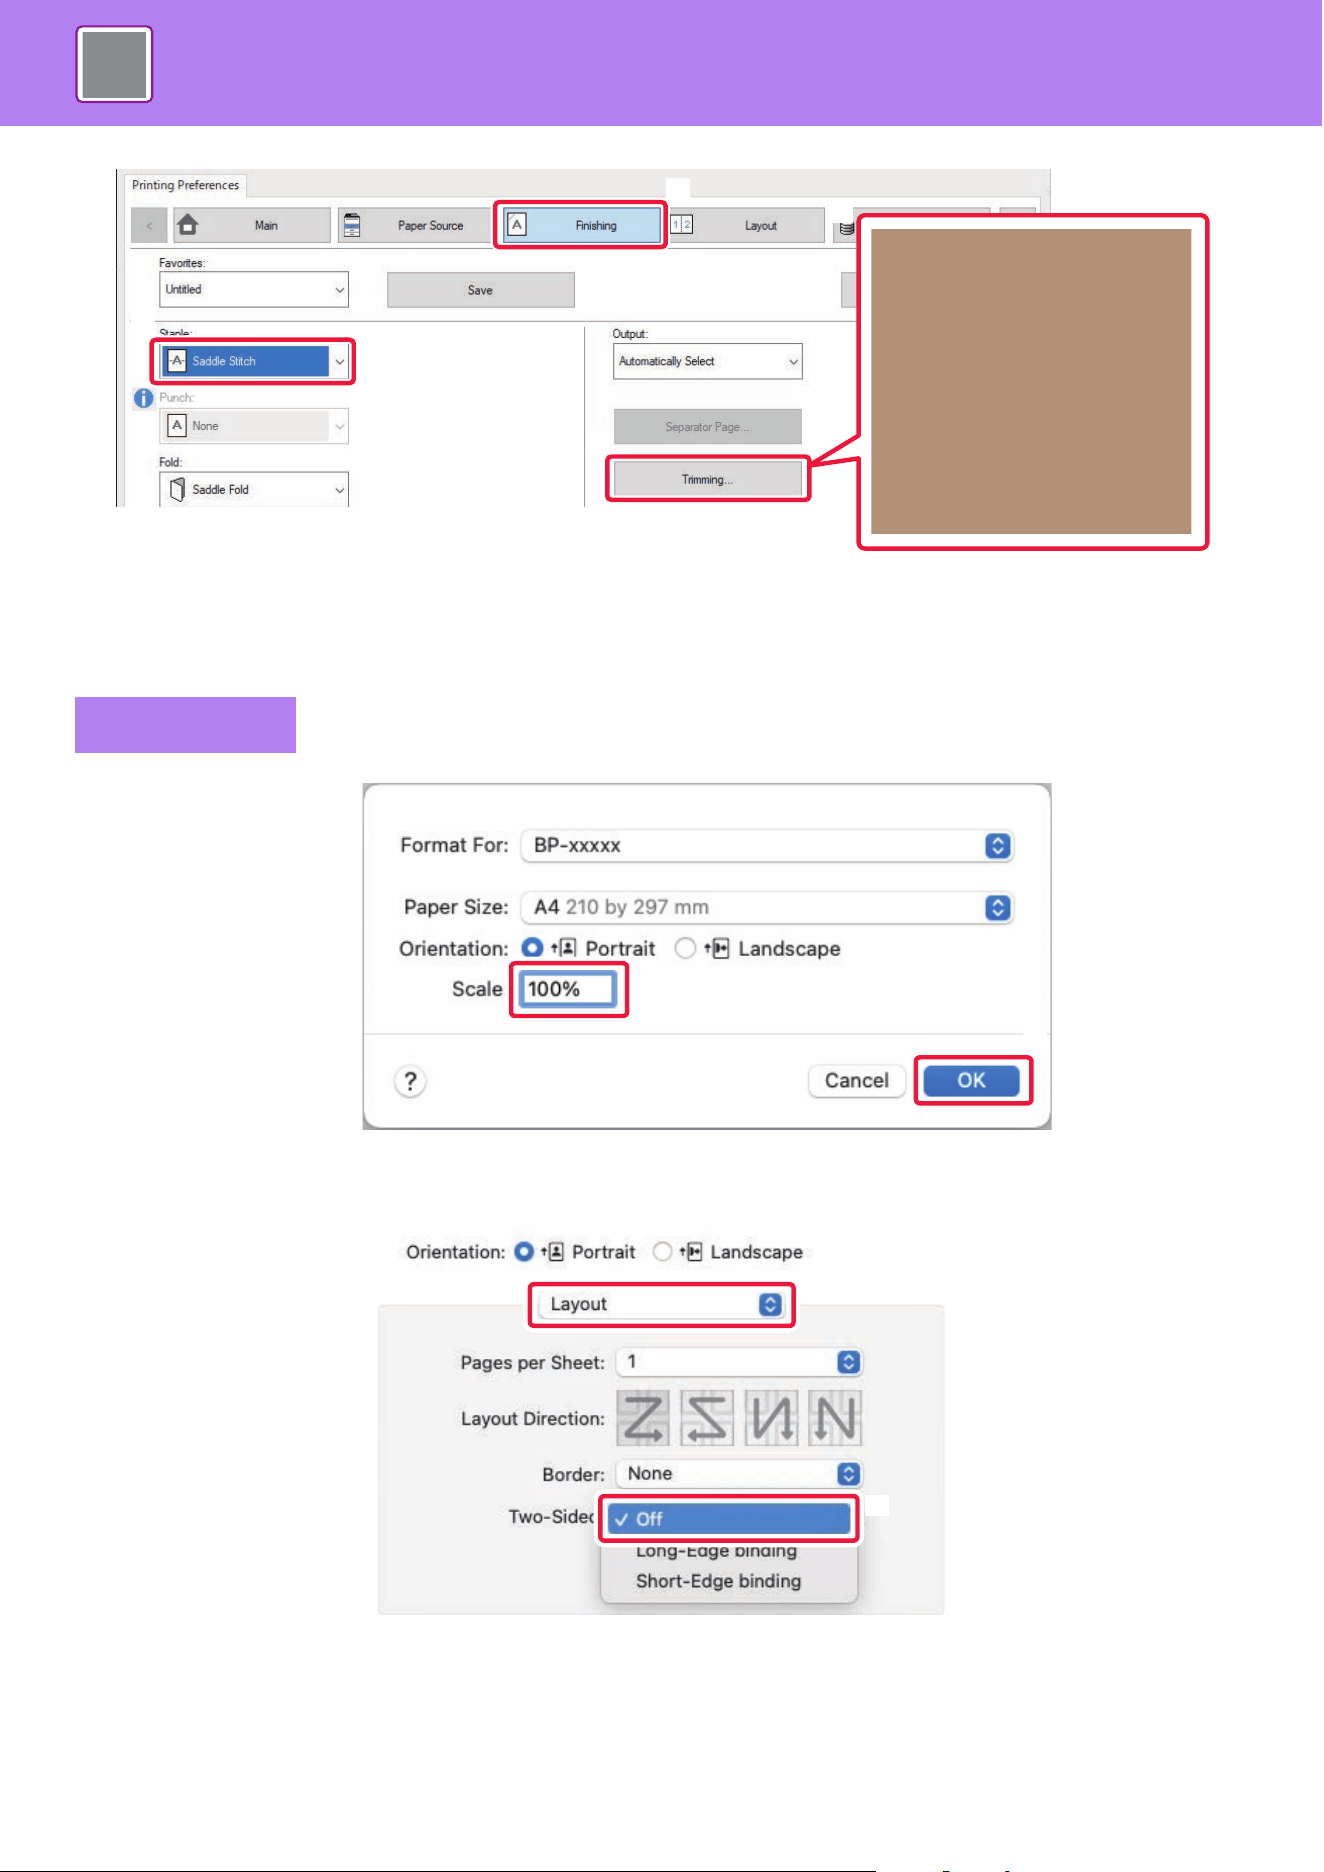
4-36
PRINTER►FREQUENTLY USED FUNCTIONS
(8) Click the [Finishing] tab and select [Saddle Stitich] in [Staple].
(9) Click [Trimming].
(10) Check the [Trimming] checkbox, specify "0.200 inches (5.0 mm)" and click [OK].
(1) Select [Page Setup] from the [File] menu and enter the ratio (%).
(2) Click the [OK] button.
(3) Select [Layout].
(4) Select [Off] .
In macOS 13, Binding is selected in "Double-sided".
macOS
(9)
(8)
(8)
(10)
(2)
(1)
(4)
(3)
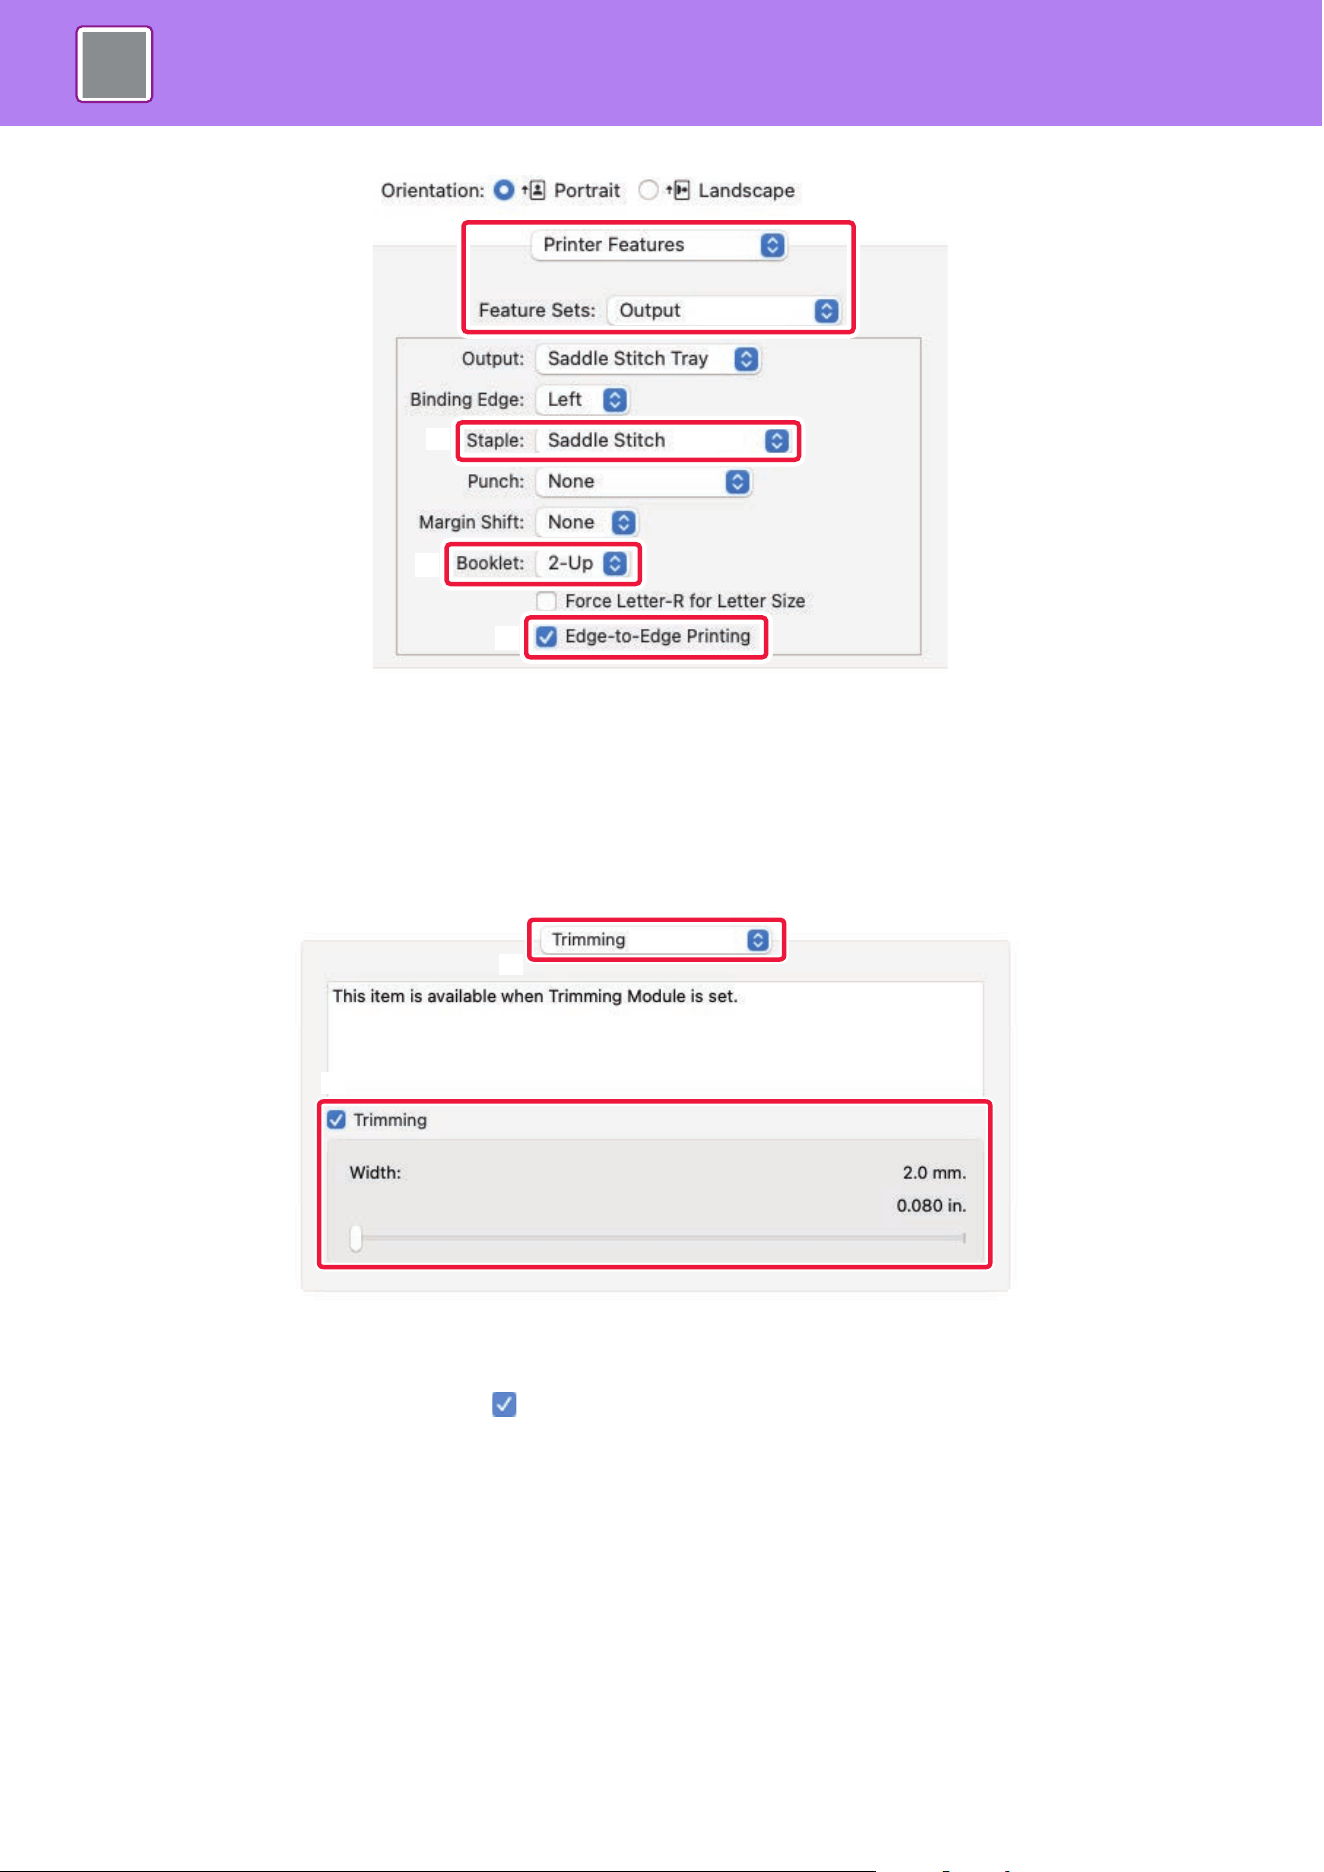
4-37
PRINTER►FREQUENTLY USED FUNCTIONS
(5) Select [Printer Features] and then select [Output].
In macOS 13, [Printer Features] is located under the "Printer Options" menu.
(6) Select [Saddle Stitch].
(7) Select [2-Up].
(8) Select [Edge-to-Edge Printing].
(9) Select [Trimming].
In macOS 13, [Trimming] is located under the "Printer Options" menu.
(10) Set the [Trimming] checkbox to and specify "0.200 inches (5.0 mm)".
(6)
(5)
(7)
(8)
(9)
(10)
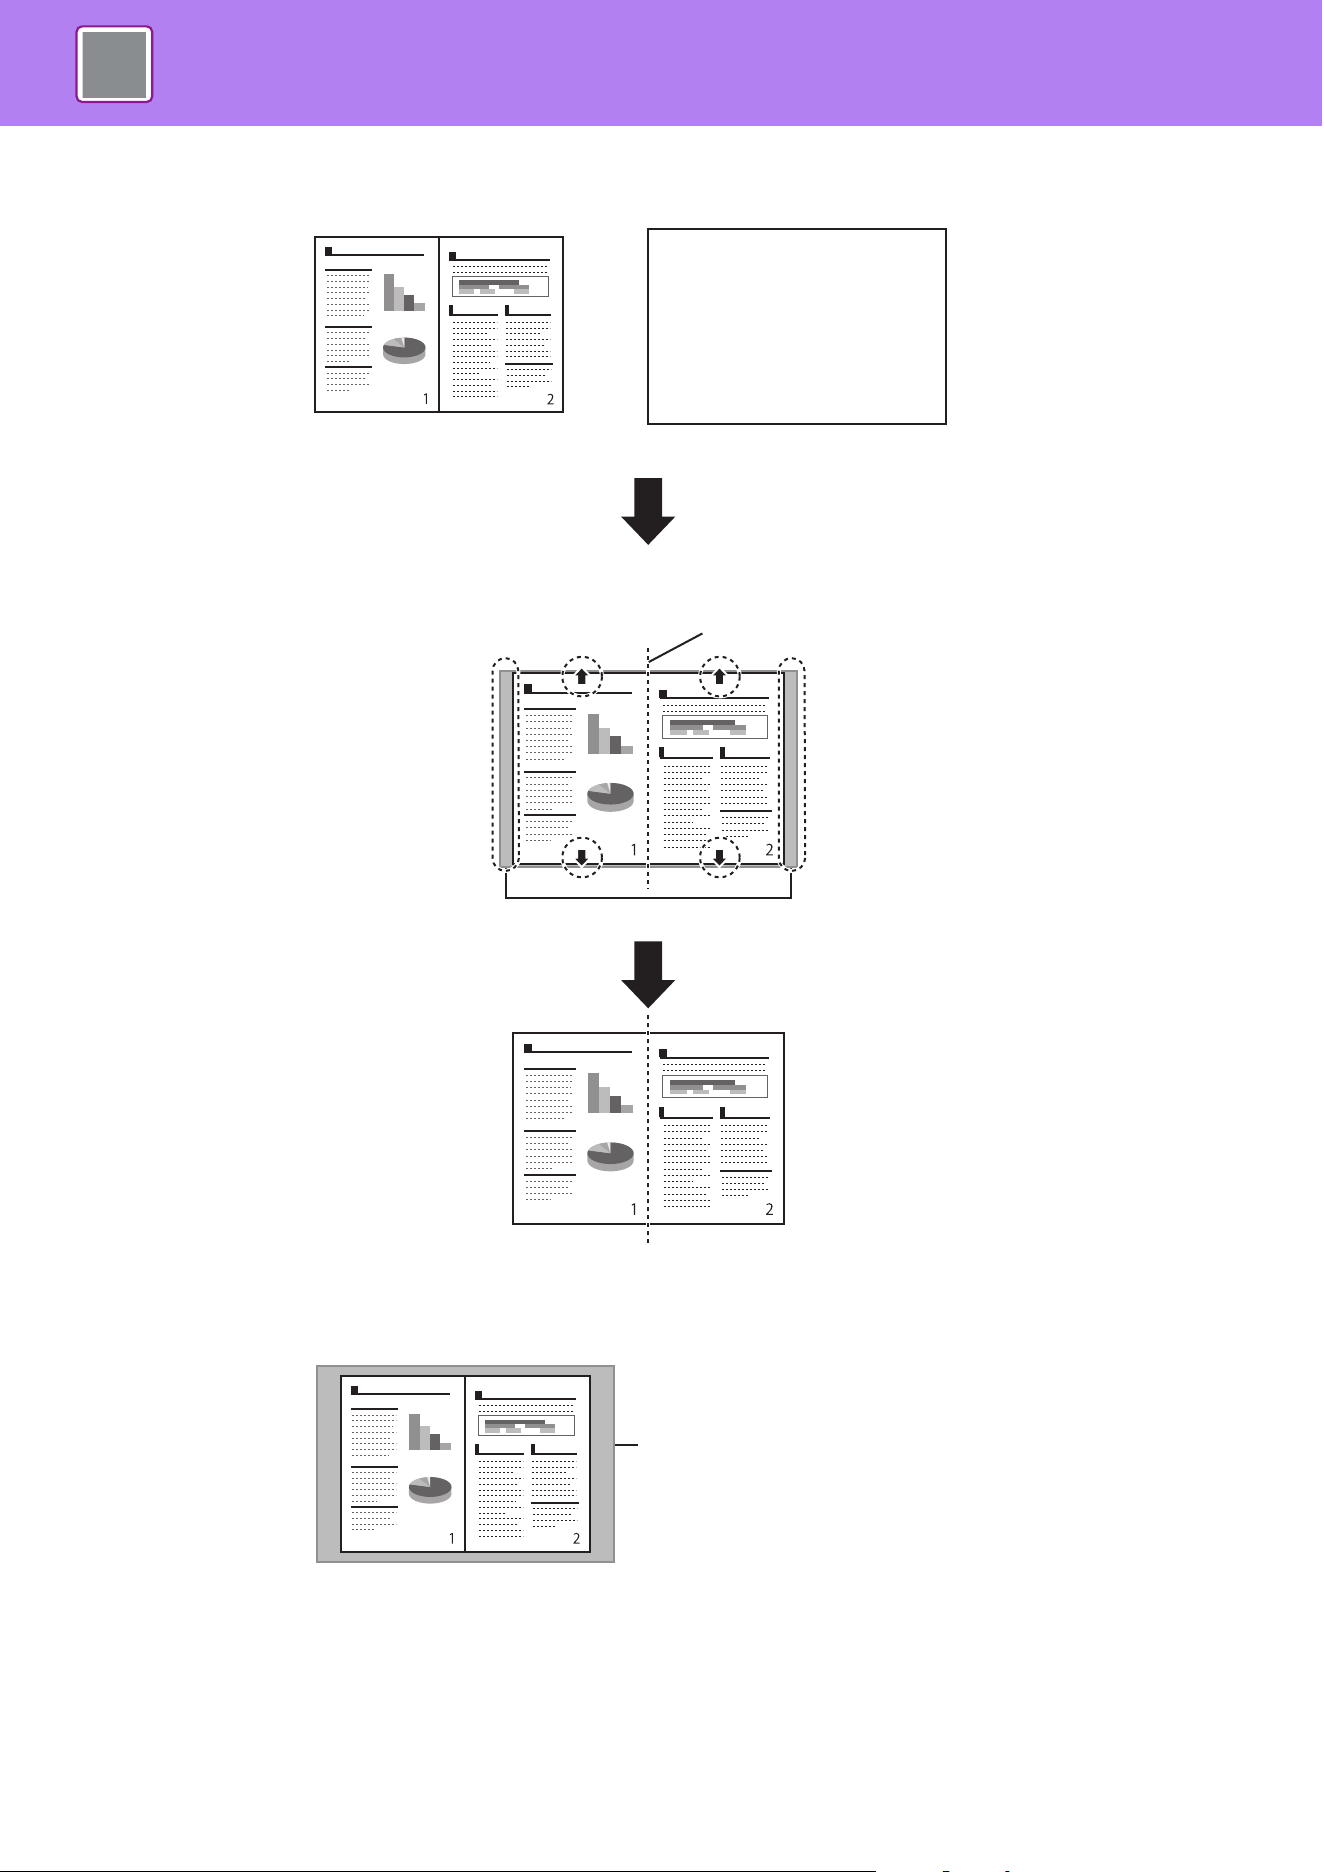
4-38
PRINTER►FREQUENTLY USED FUNCTIONS
FOLD STAPLING
Original
Fold position
Trim the sides
Margins appear on the sides
Margins appear on the top, bottom, and sides
With normal printing...
Margins
The margins on the sides are eliminated, and Edge-to-Edge printing
is completed.
Create document data of a suitable size in the application, or use the
Zoom function, to eliminate the top and bottom margins.
Paper
(11’’x17’’/ A3)
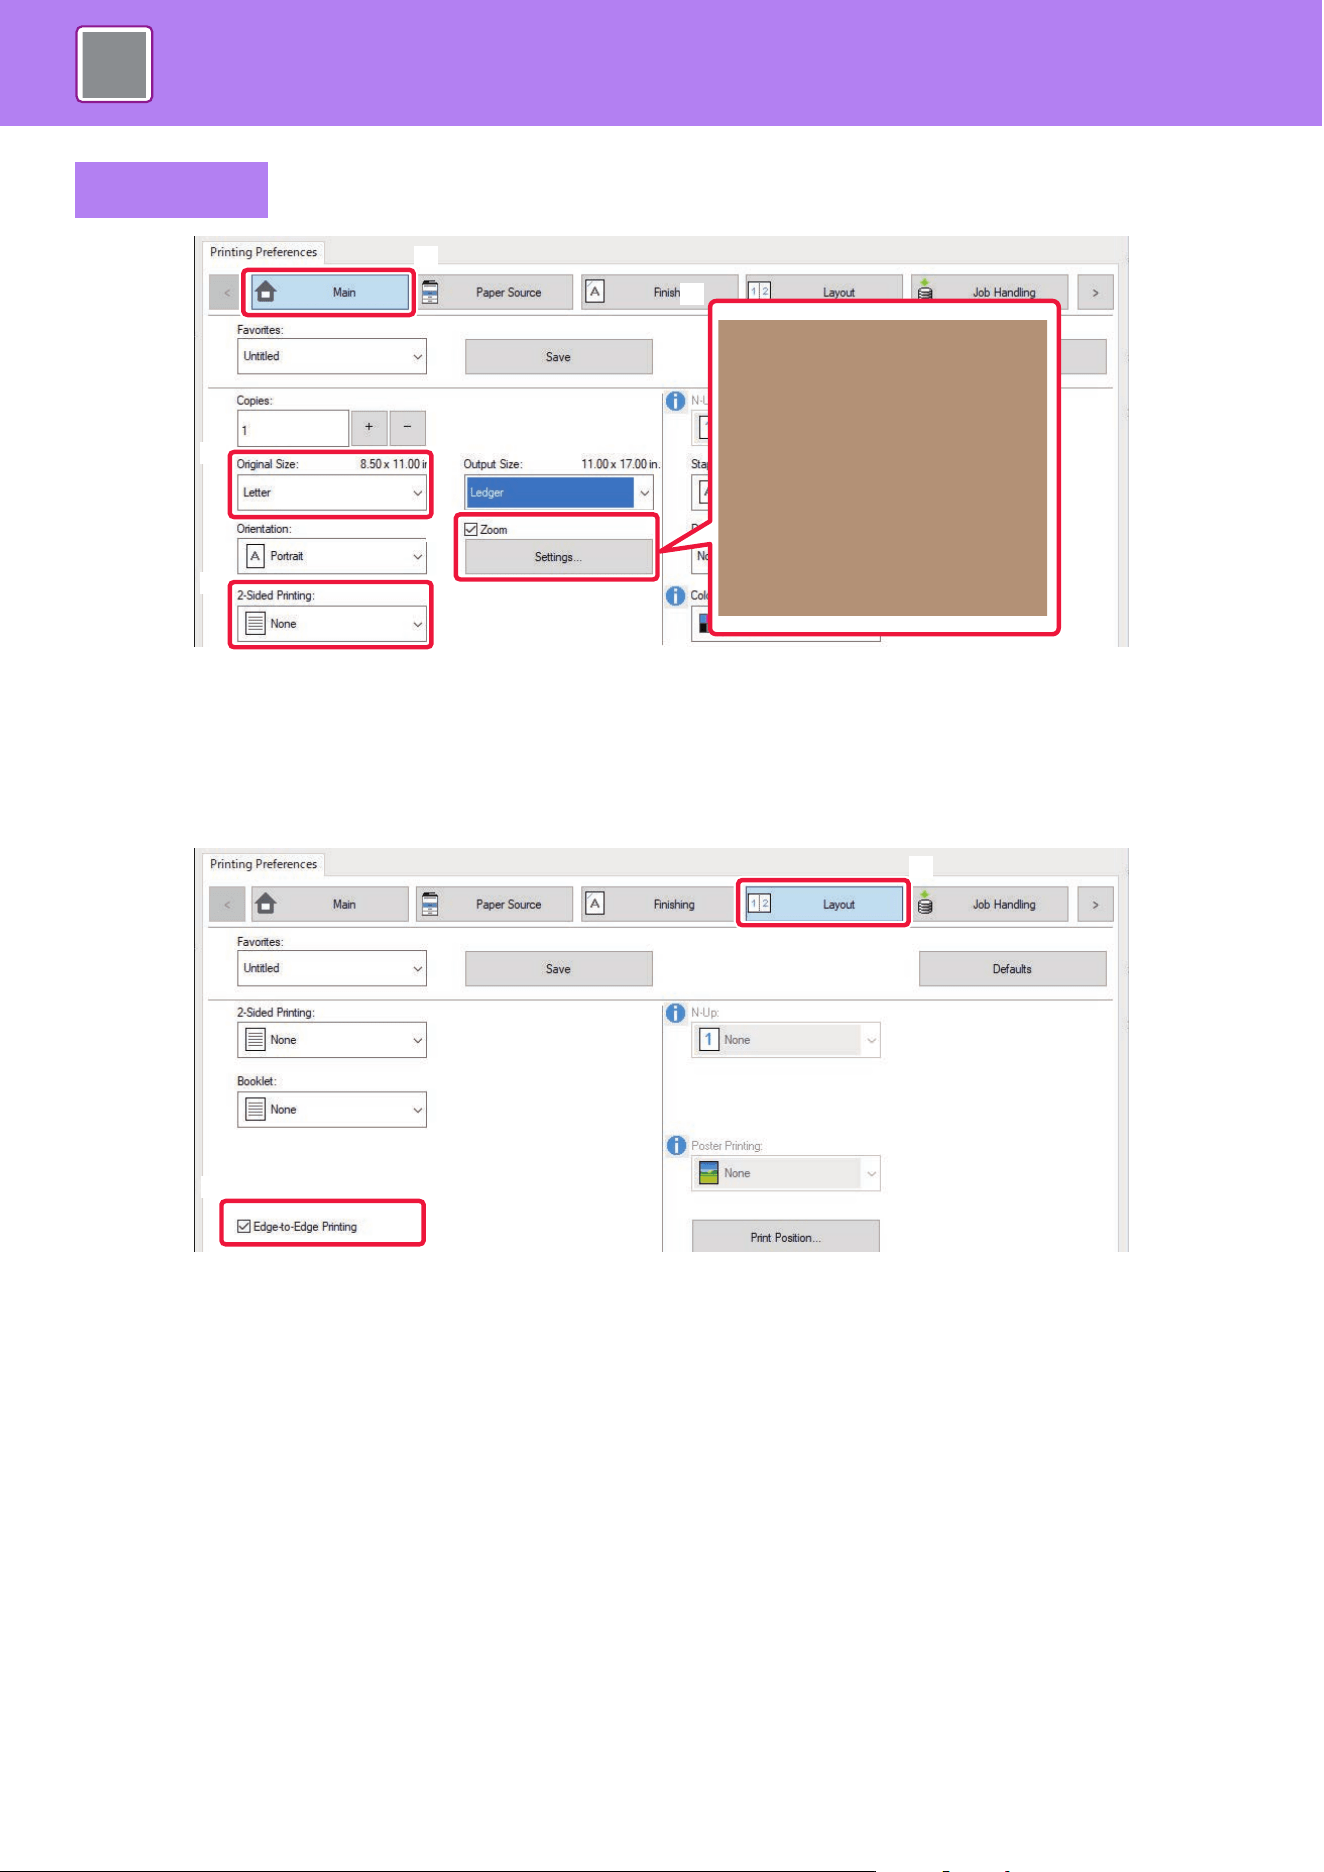
4-39
PRINTER►FREQUENTLY USED FUNCTIONS
(1) Click the [Main] tab and select the original size in [Original Size].
(2) Select [None] in [2-Sided Printing].
(3) Check the [Zoom] checkbox and click [Settings].
(4) Specify the zoom value, select [Center] in [Reference Point] and click [OK].
(5) Click the [Layout] tab and check the [Edge-to-Edge Printing] checkbox.
Windows
(1)
(3)
(2)
(1)
(4)
(5)
(5)

4-40
PRINTER►FREQUENTLY USED FUNCTIONS
(6) Click the [Finishing] tab and select [Saddle Stitich] in [Staple].
(7) Click [Trimming].
(8) Check the [Trimming] checkbox, specify "0.200 inches (5.0 mm)" and click [OK].
(1) Select [Page Setup] from the [File] menu and enter the ratio (%).
(2) Click the [OK] button.
(3) Select [Layout].
(4) Select [Off] .
In macOS 13, Binding is selected in "Double-sided".
macOS
(7)
(6)
(6)
(8)
(2)
(1)
(4)
(3)
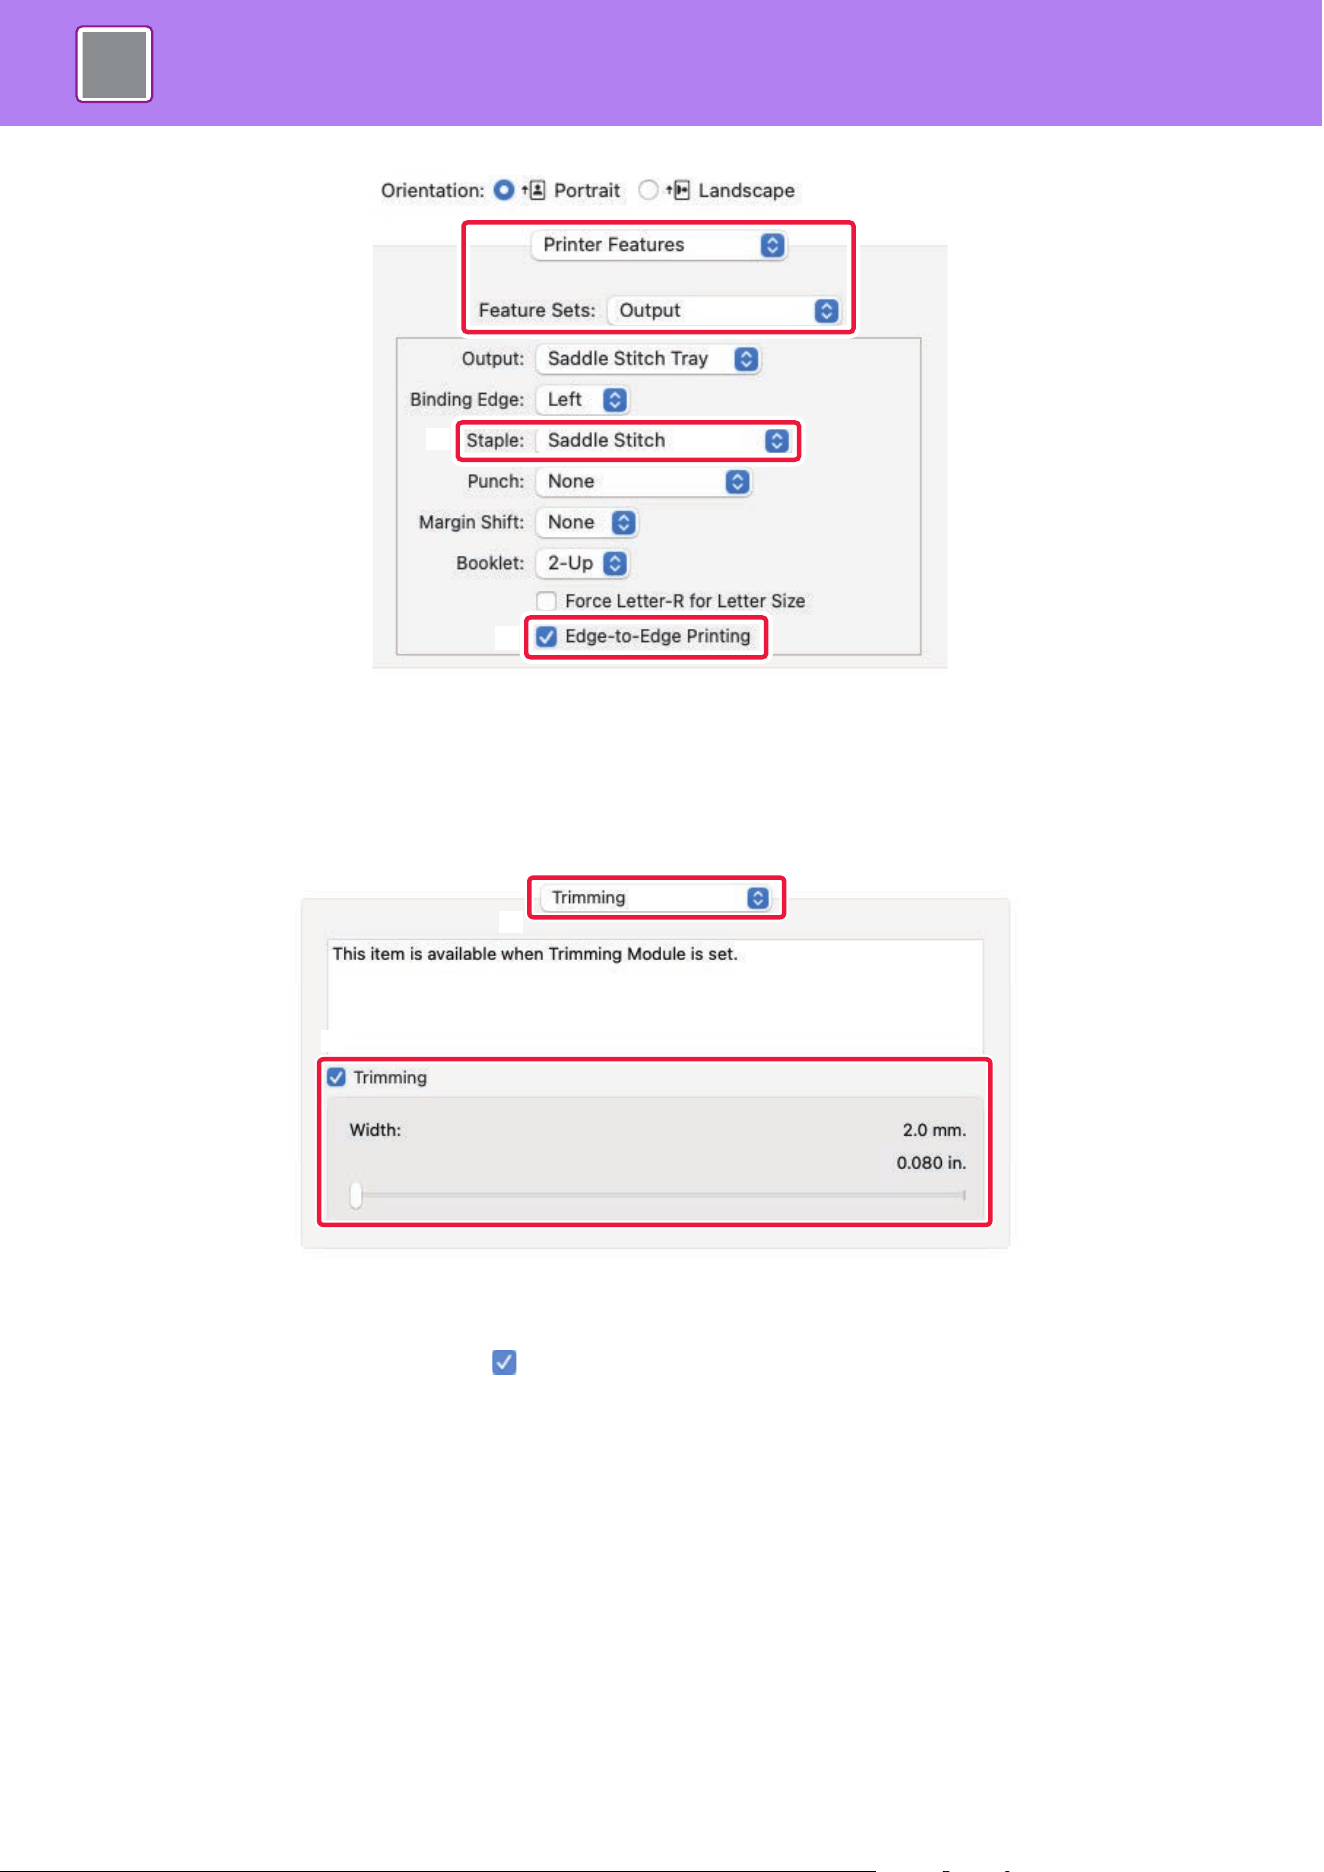
4-41
PRINTER►FREQUENTLY USED FUNCTIONS
(5) Select [Printer Features] and then select [Output].
In macOS 13, [Printer Features] is located under the "Printer Options" menu.
(6) Select [Saddle Stitch].
(7) Select [Edge-to-Edge Printing].
(8) Select [Trimming].
In macOS 13, [Trimming] is located under the "Printer Options" menu.
(9) Set the [Trimming] checkbox to and specify "0.200 inches (5.0 mm)".
(6)
(5)
(7)
(8)
(9)
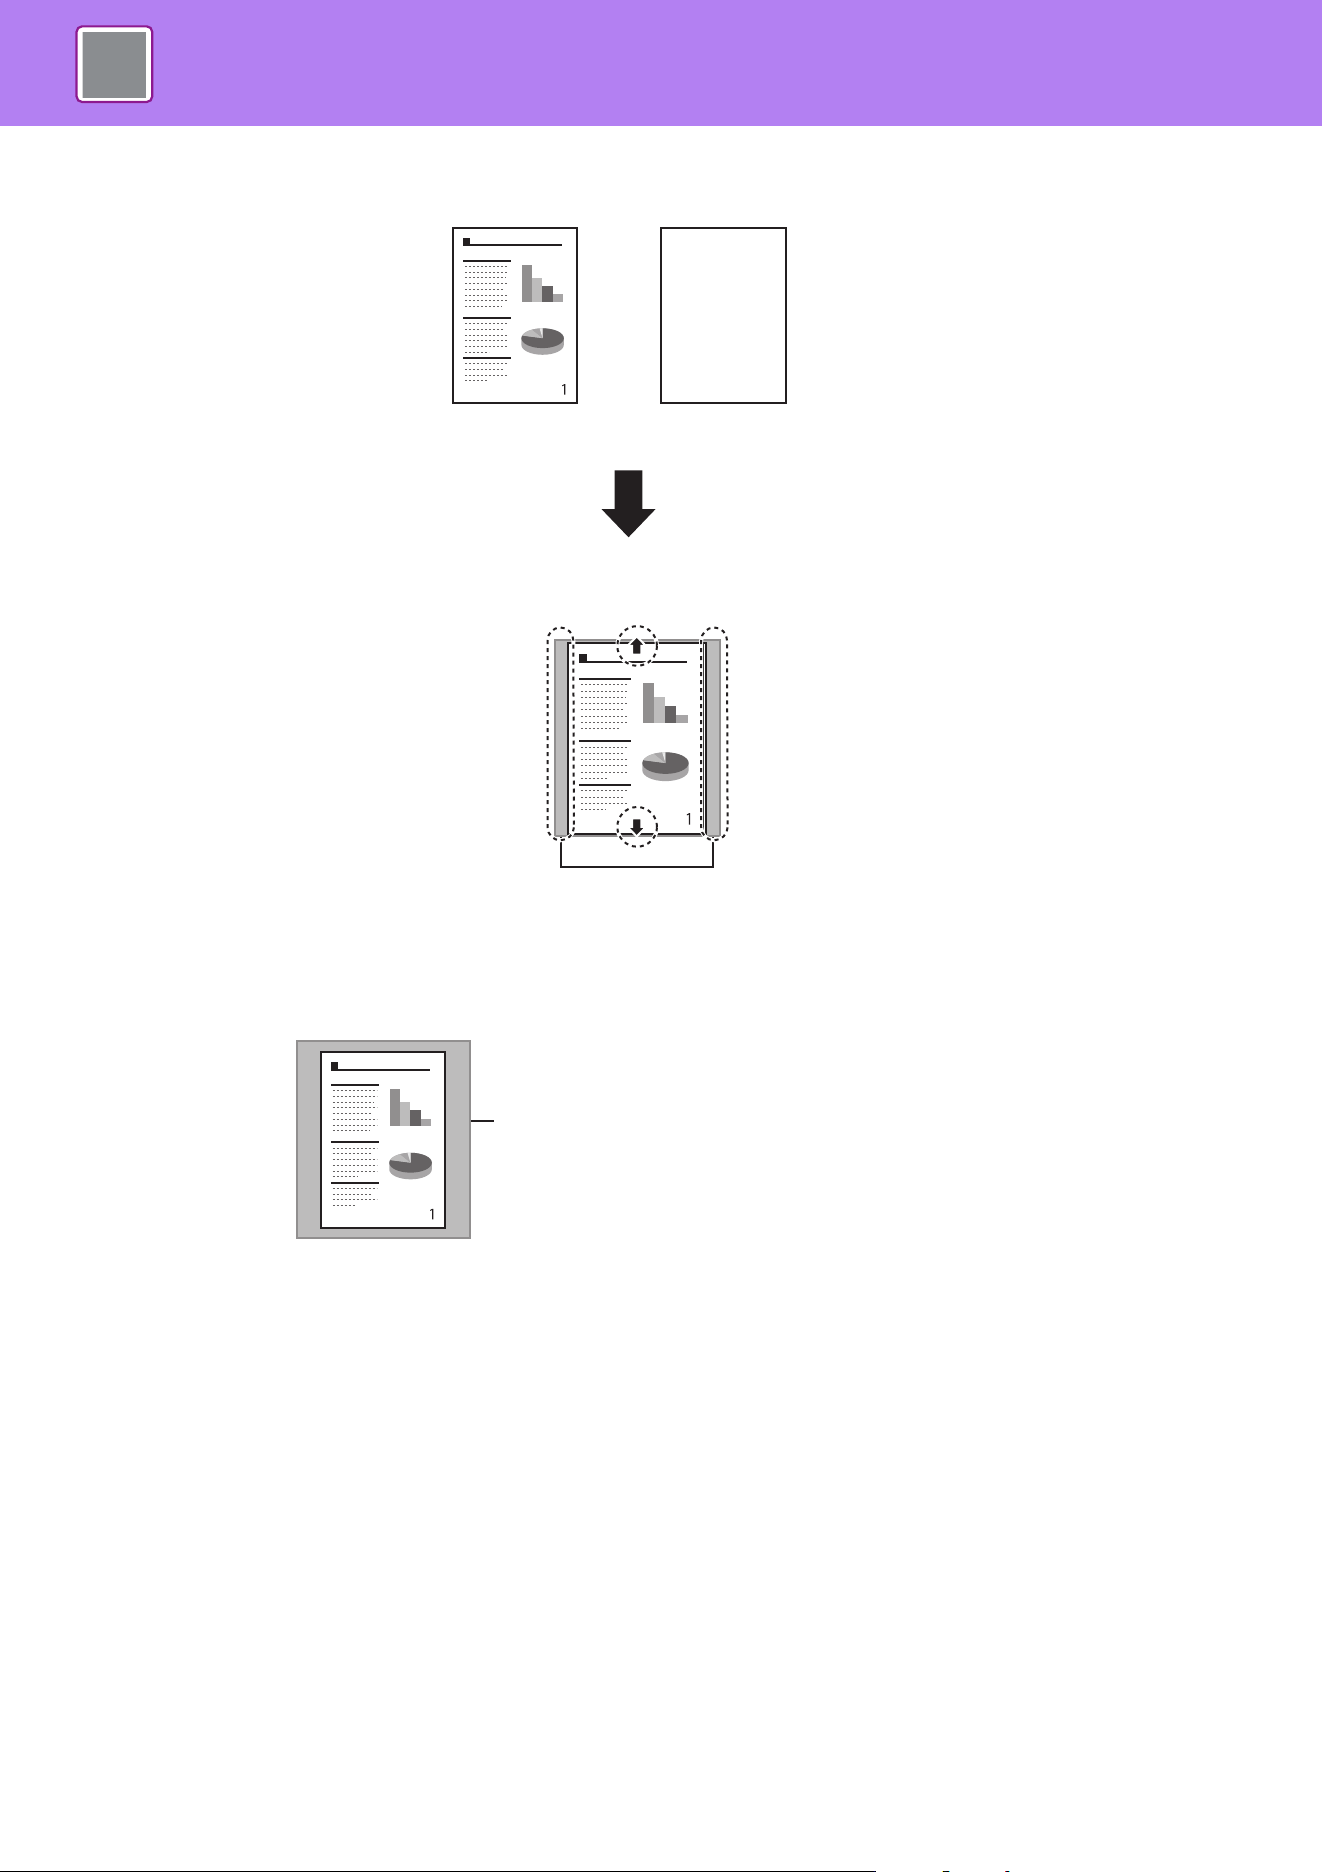
4-42
PRINTER►FREQUENTLY USED FUNCTIONS
SINGLE SHEET
Original 1
Margins appear on the sides
Margins appear on the top, bottom, and sides
With normal printing...
Margins
The margins on the sides are eliminated, and Edge-to-Edge printing
is completed.
Create document data of a suitable size in the application, or use the
Zoom function, to eliminate the top and bottom margins.
Paper
(8-1/2” x 11”/A4)
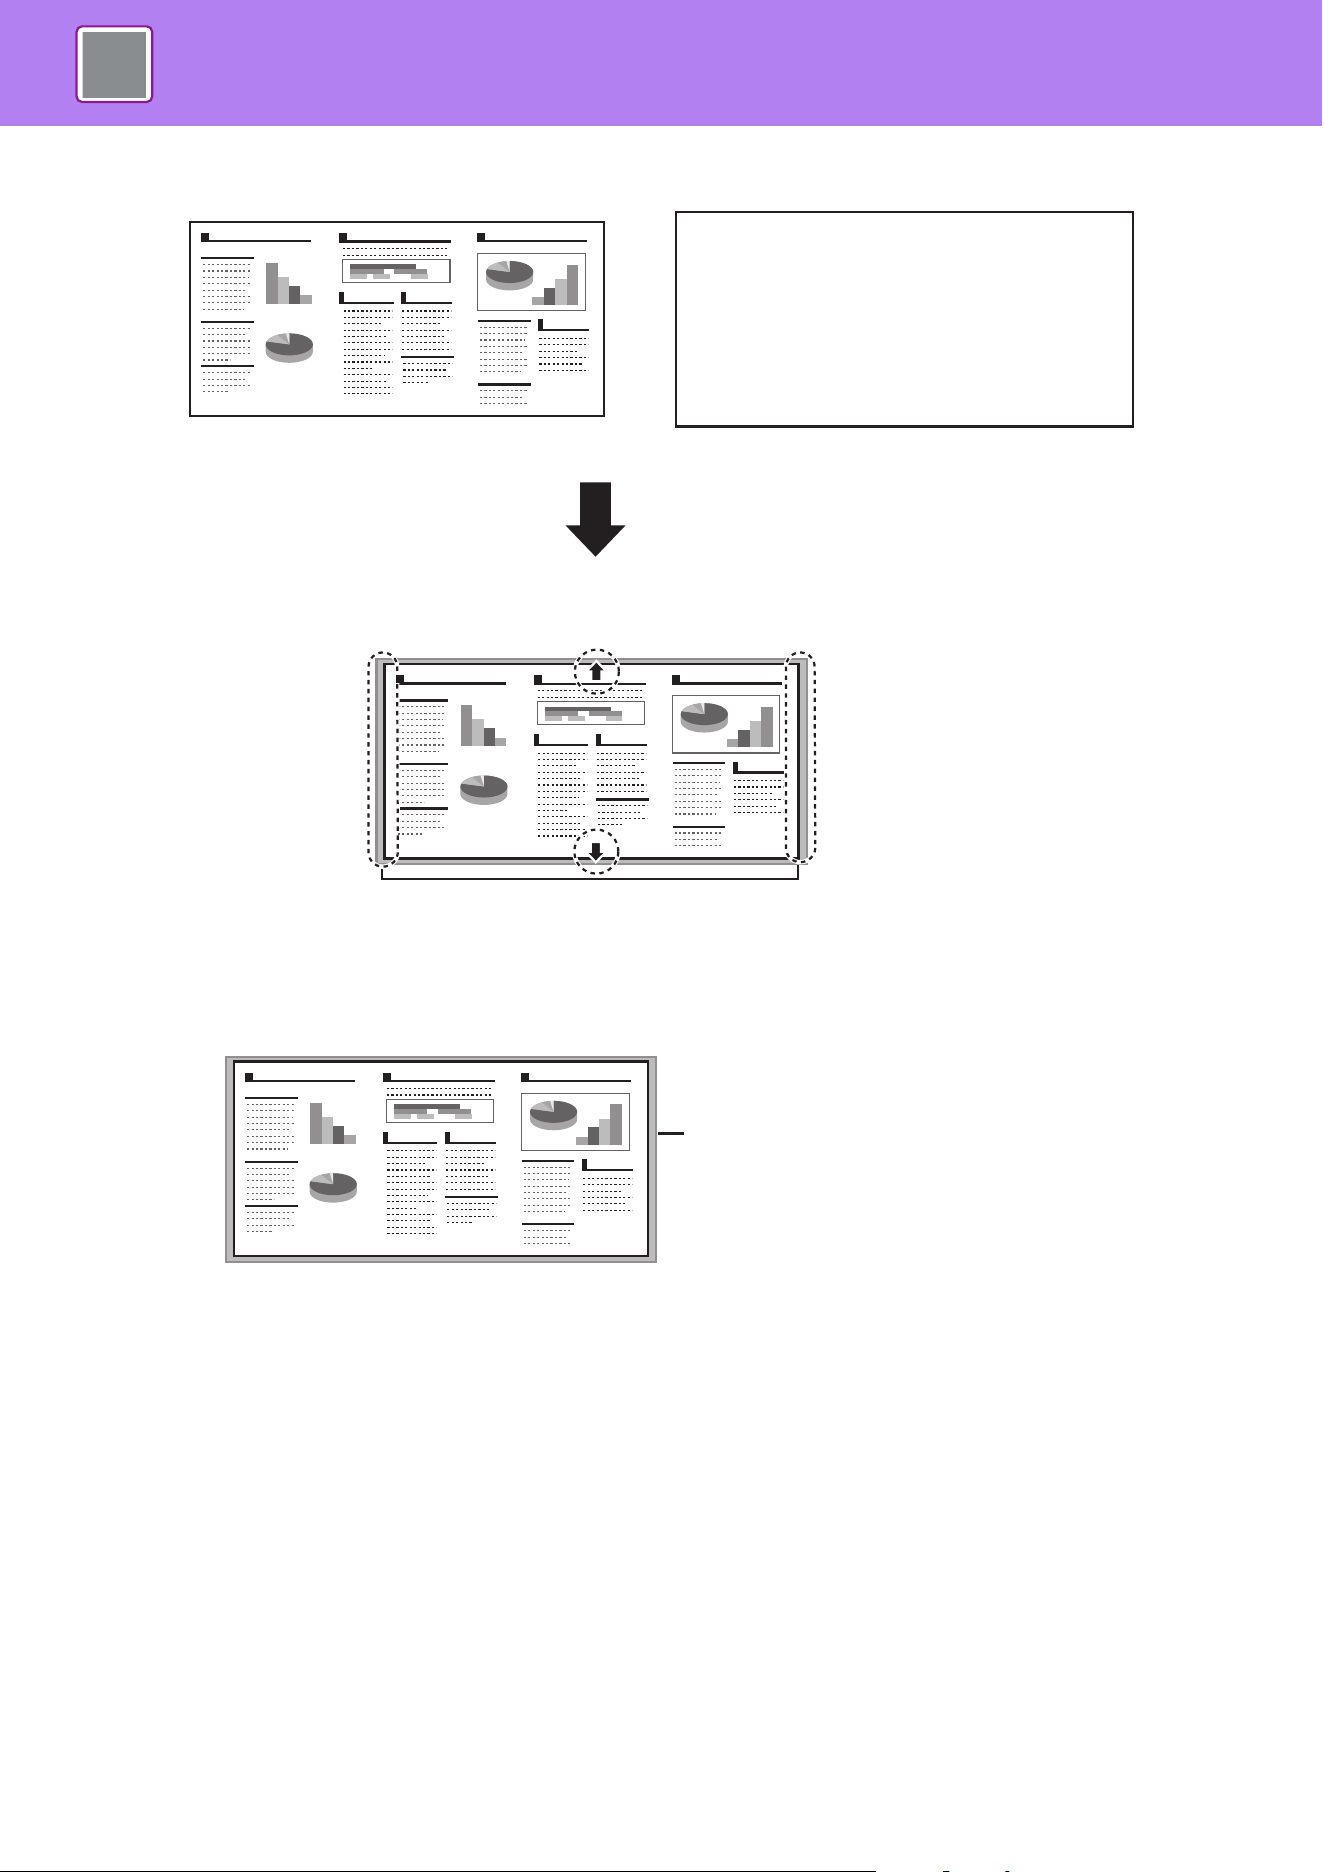
4-43
PRINTER►FREQUENTLY USED FUNCTIONS
Long paper
Original (Long paper)
Margins appear on the sides
Margins appear on the top, bottom, and sides
With normal printing...
Margins
The margins on the sides are eliminated, and Edge-to-Edge printing
is completed.
Create document data of a suitable size in the application, or use the
Zoom function, to eliminate the top and bottom margins.
Paper
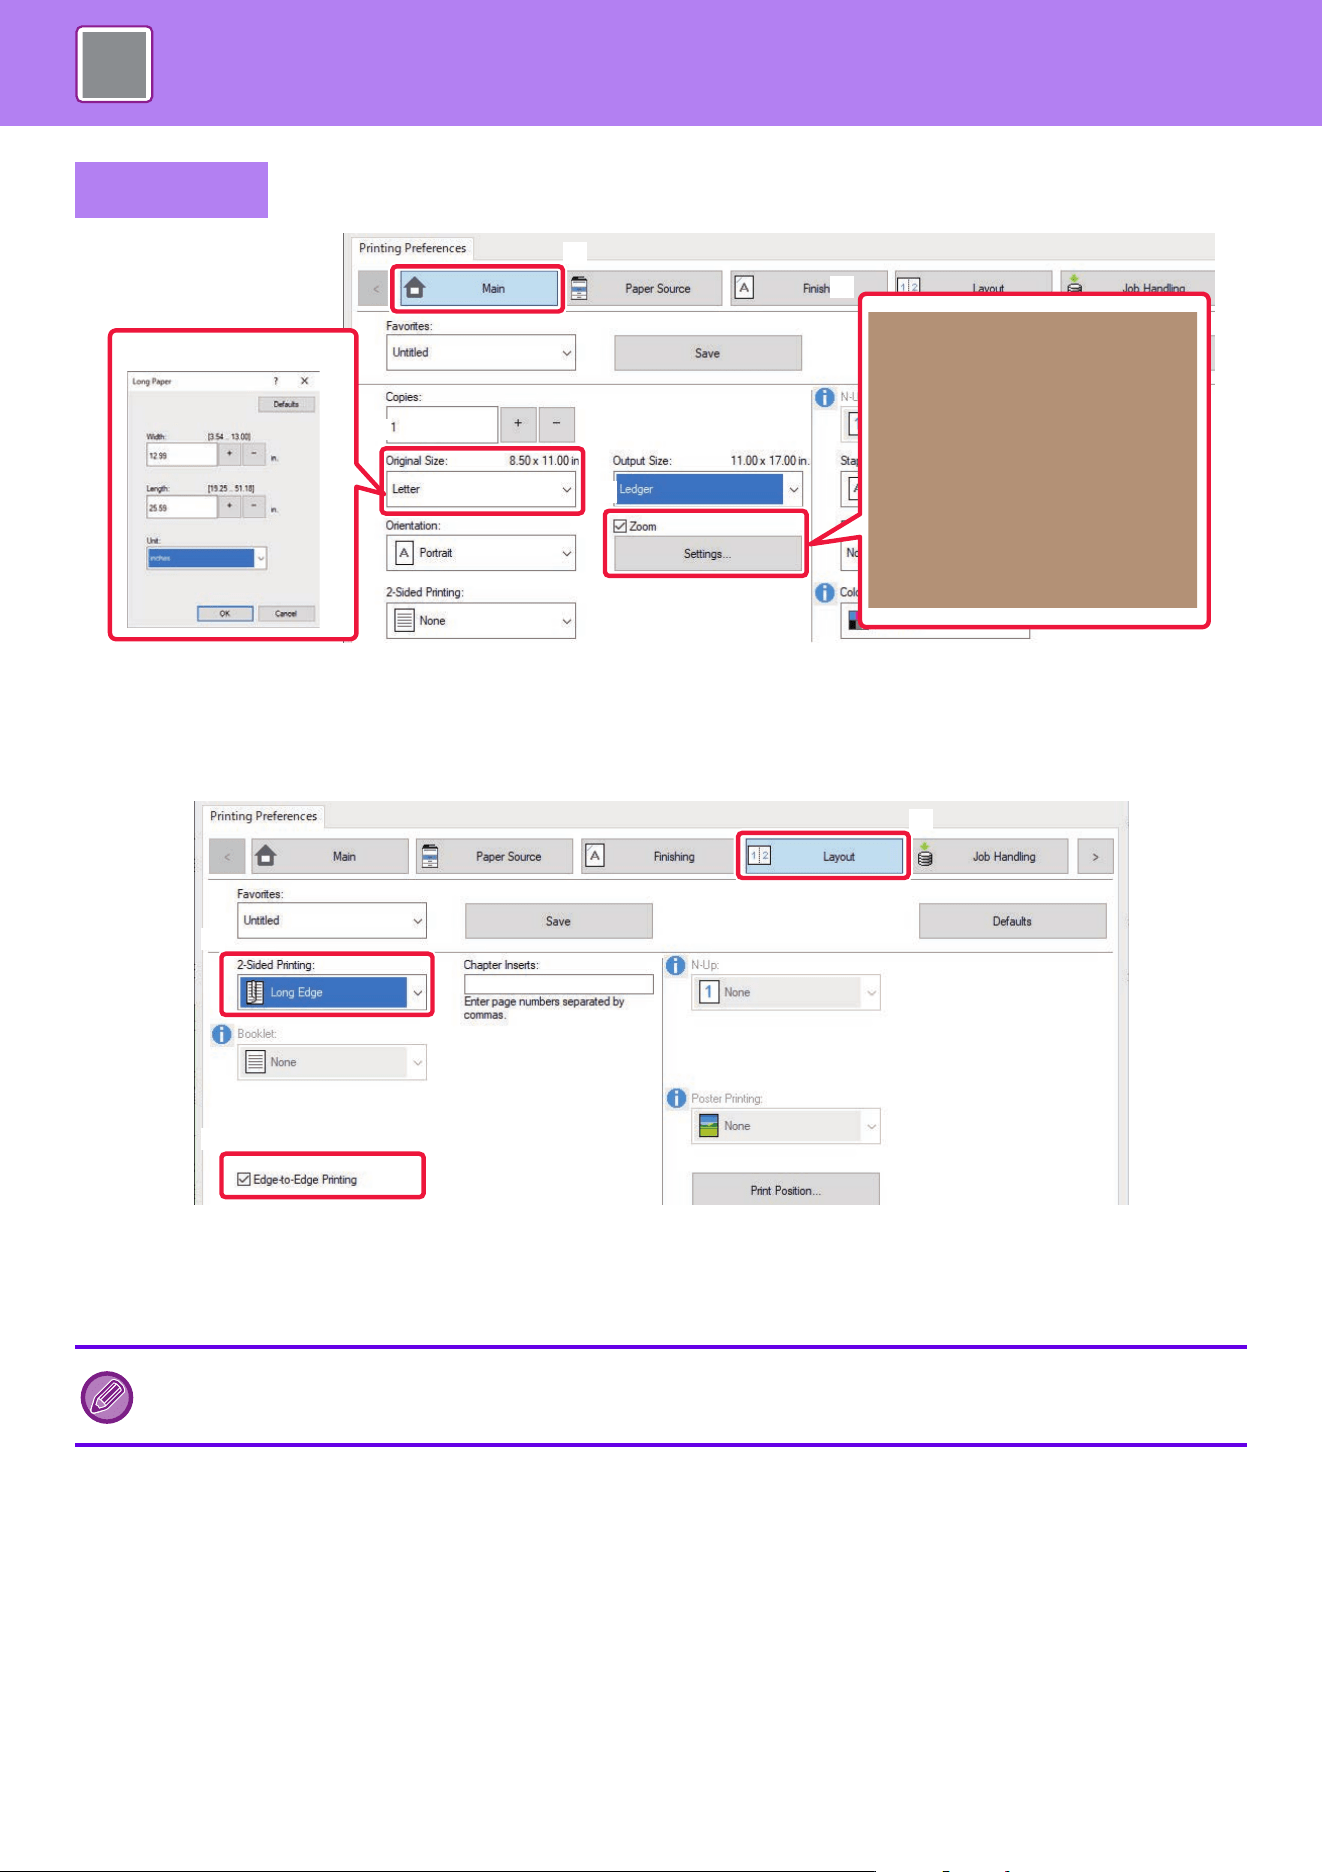
4-44
PRINTER►FREQUENTLY USED FUNCTIONS
(1) Click the [Main] tab and select the original size in [Original Size].
(2) check the [Zoom] checkbox and click [Settings].
(3) Specify the zoom value and select [Center] in [Reference Point] and click [OK].
(4) Click the [Layout] tab and check the [Edge-to-Edge Printing] checkbox.
(5) Select [None], [Long Edge] or [Short Edge] in 2-Sided Printing.
2-sided printing cannot be used when long paper is set.
Windows
Check the actual print result. If margins appear, change the following settings.
"Trimming" in the Trimming Settings dialog
"Print Position" in the Compatibility dialog
(1)
(2)
(1)
(3)
Long size input screen
(4)
(5)
(4)
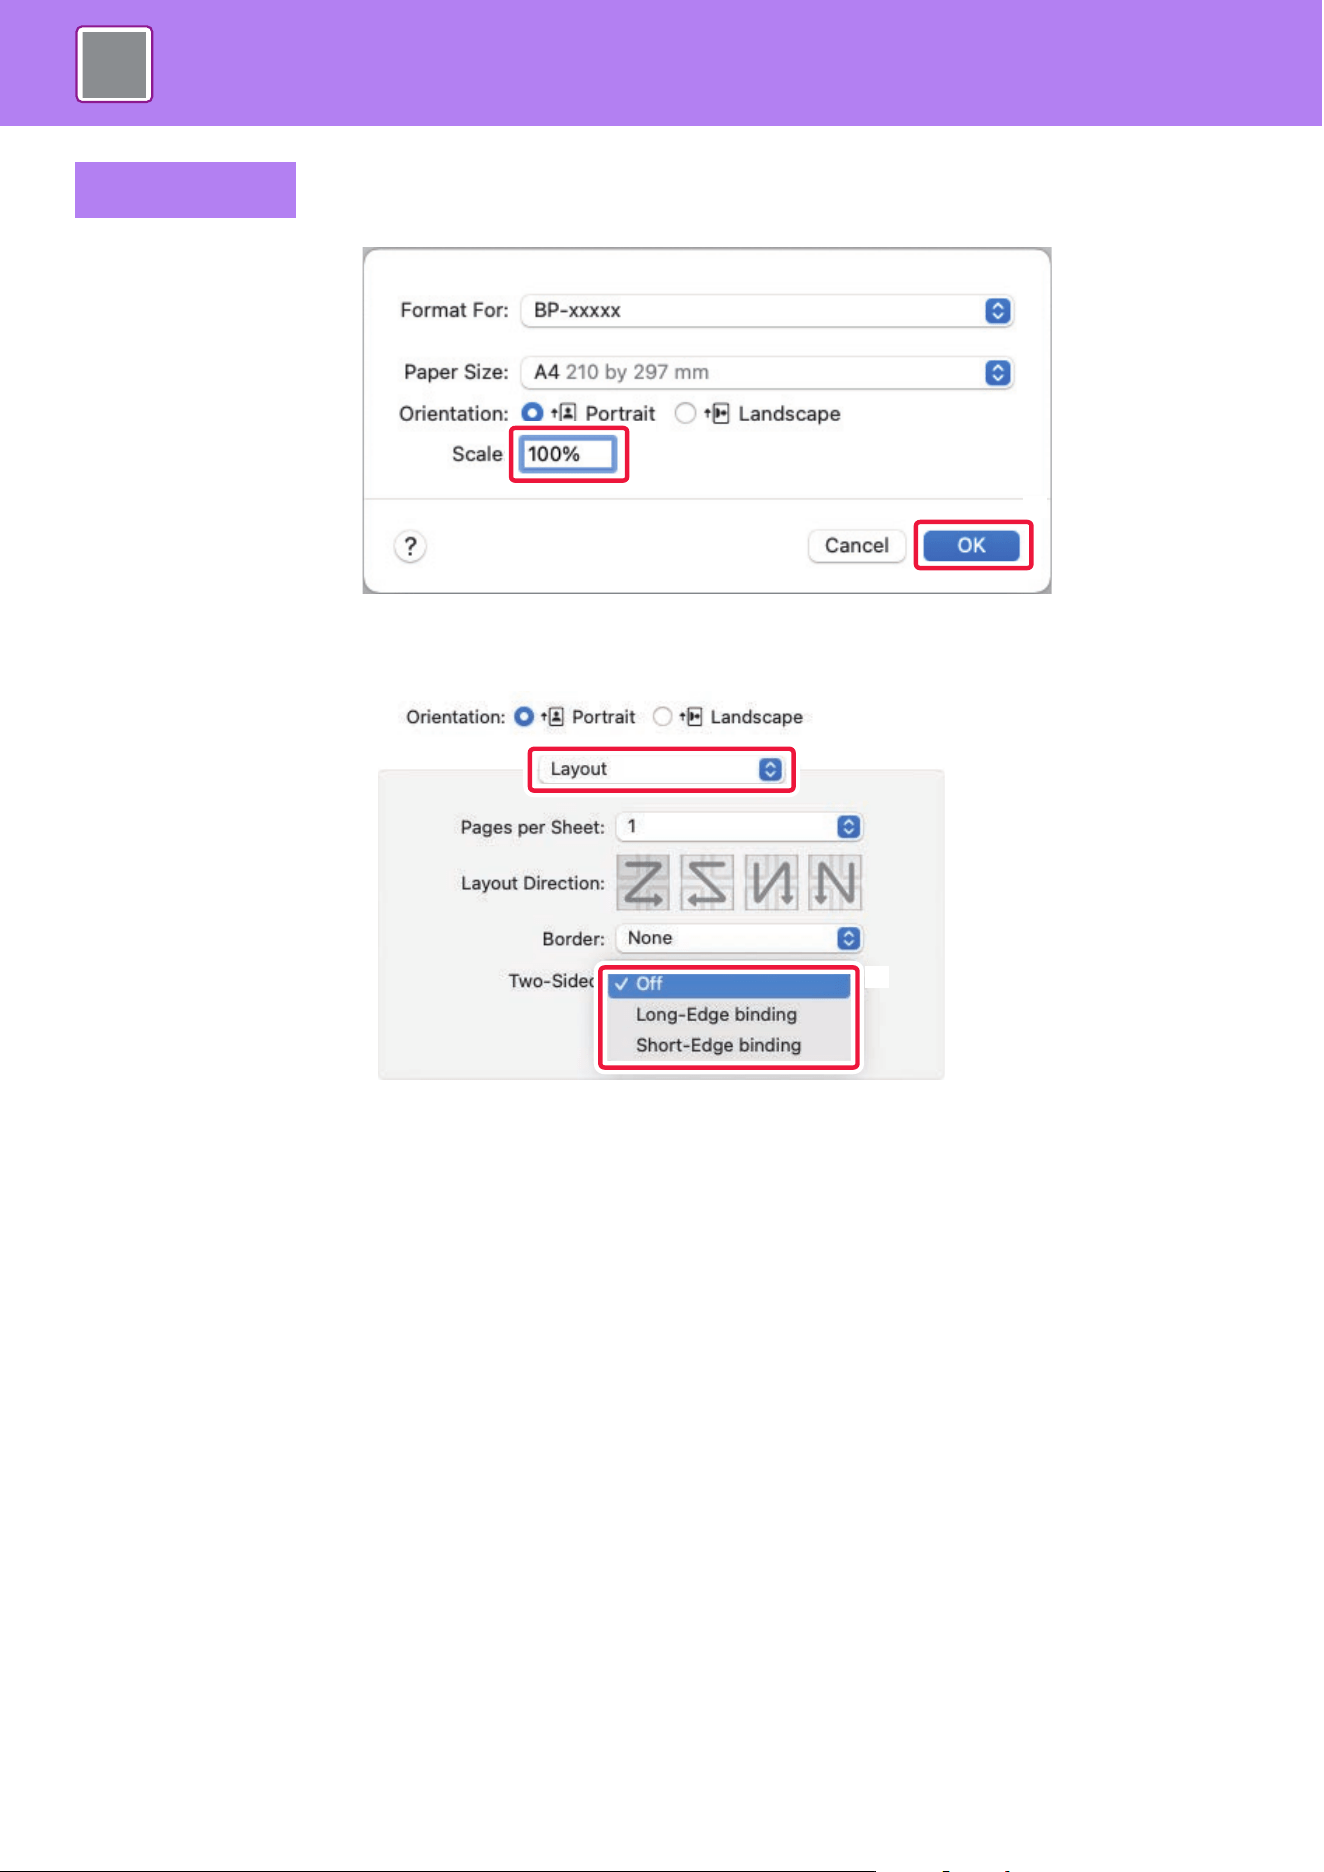
4-45
PRINTER►FREQUENTLY USED FUNCTIONS
(1) Select [Page Setup] from the [File] menu and enter the ratio (%).
(2) Click the [OK] button.
(3) Select [Layout].
(4) Select [Off], [Long Edge] or [Short Edge]
In macOS 13, Binding is selected in "Double-sided".
2-sided printing cannot be used when long paper is set.
macOS
(2)
(1)
(4)
(3)
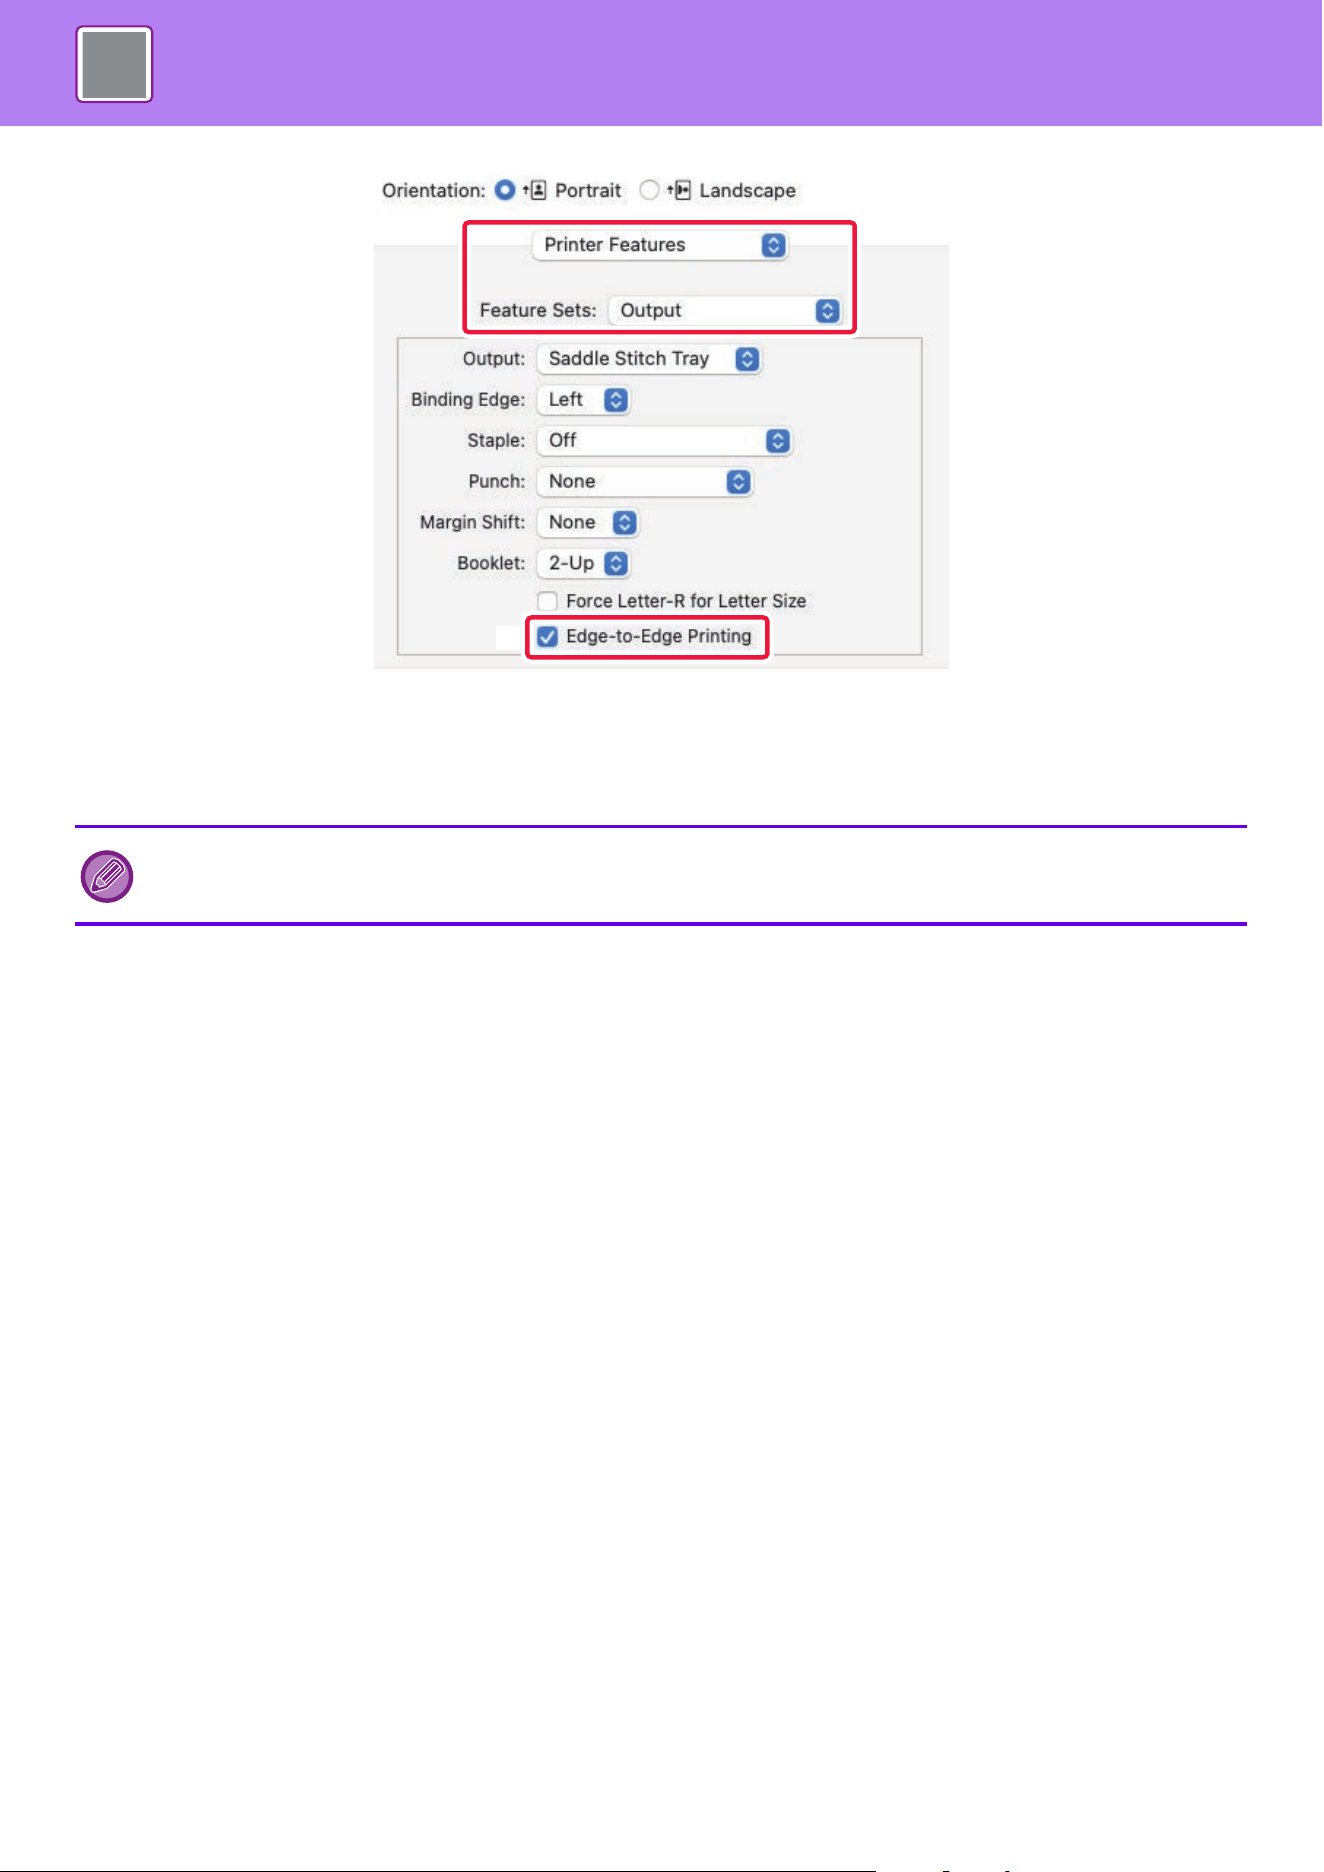
4-46
PRINTER►FREQUENTLY USED FUNCTIONS
(5) Select [Printer Features] and then select [Output].
In macOS 13, [Printer Features] is located under the "Printer Options" menu.
(6) Select [Edge-to-Edge Printing].
Check the actual print result. If margins appear, change the following settings.
"Trimming" in the Trimming Settings dialog
"Print Position" in the Compatibility dialog
(5)
(6)
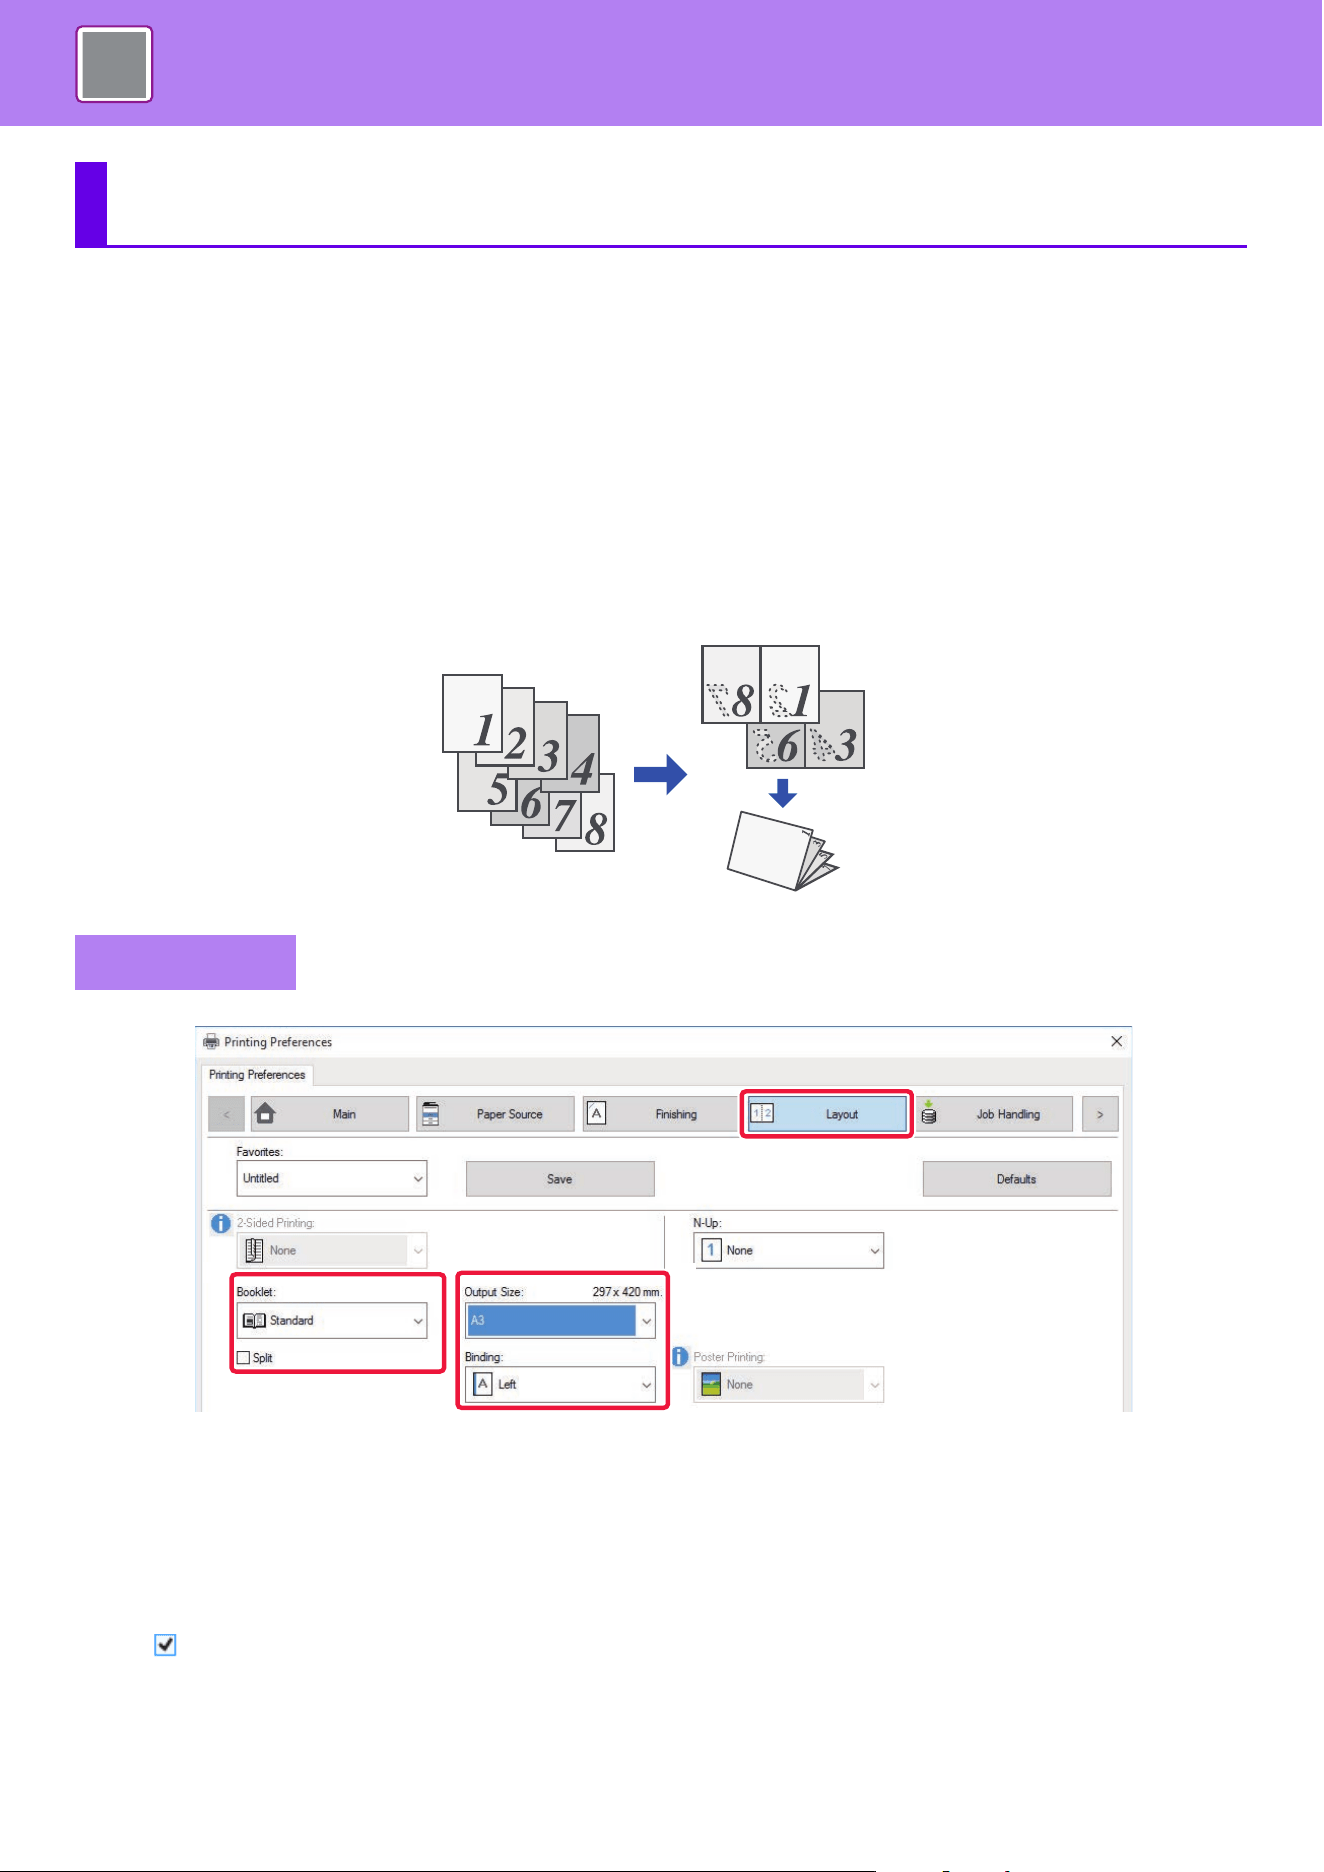
4-47
PRINTER►CONVENIENT PRINTING FUNCTIONS
CONVENIENT FUNCTIONS FOR CREATING
PAMPHLETS AND POSTERS
CREATE A PAMPHLET (BOOKLET/SADDLE STITCH)
The pamphlet function prints on the front and back of each sheet of paper so that the sheets can be folded and bound to
create a pamphlet.
If a saddle finisher is installed and if "Booklet" and "Staple" are selected, this function automatically folds and outputs the
copies. This is convenient when you wish to compile printed output into a pamphlet.
(1) Click the [Layout] tab.
(2) Select [Standard] or [Full Image] in "Booklet".
• When [Standard] is selected, the printed image will be enlarged or reduced to fit the paper selected in "Output Size".
• When [Full Image] is selected, the printed image will be enlarged or reduced to fit the size selected in "Fit To Paper Size". By
selecting a paper size that is larger than the print image, you can cut off the edges of the paper after making the booklet to
create a booklet with no margins.
• When the number of output pages will exceed the number of sheets that can be stapled, you can select the [Split] checkbox
( ) to divide the output into multiple sub-booklets that can each be stapled. When stacked, the sub-booklets will have the
same page order as the original pages.
CONVENIENT PRINTING FUNCTIONS
Windows
(2)
(1)
(3)
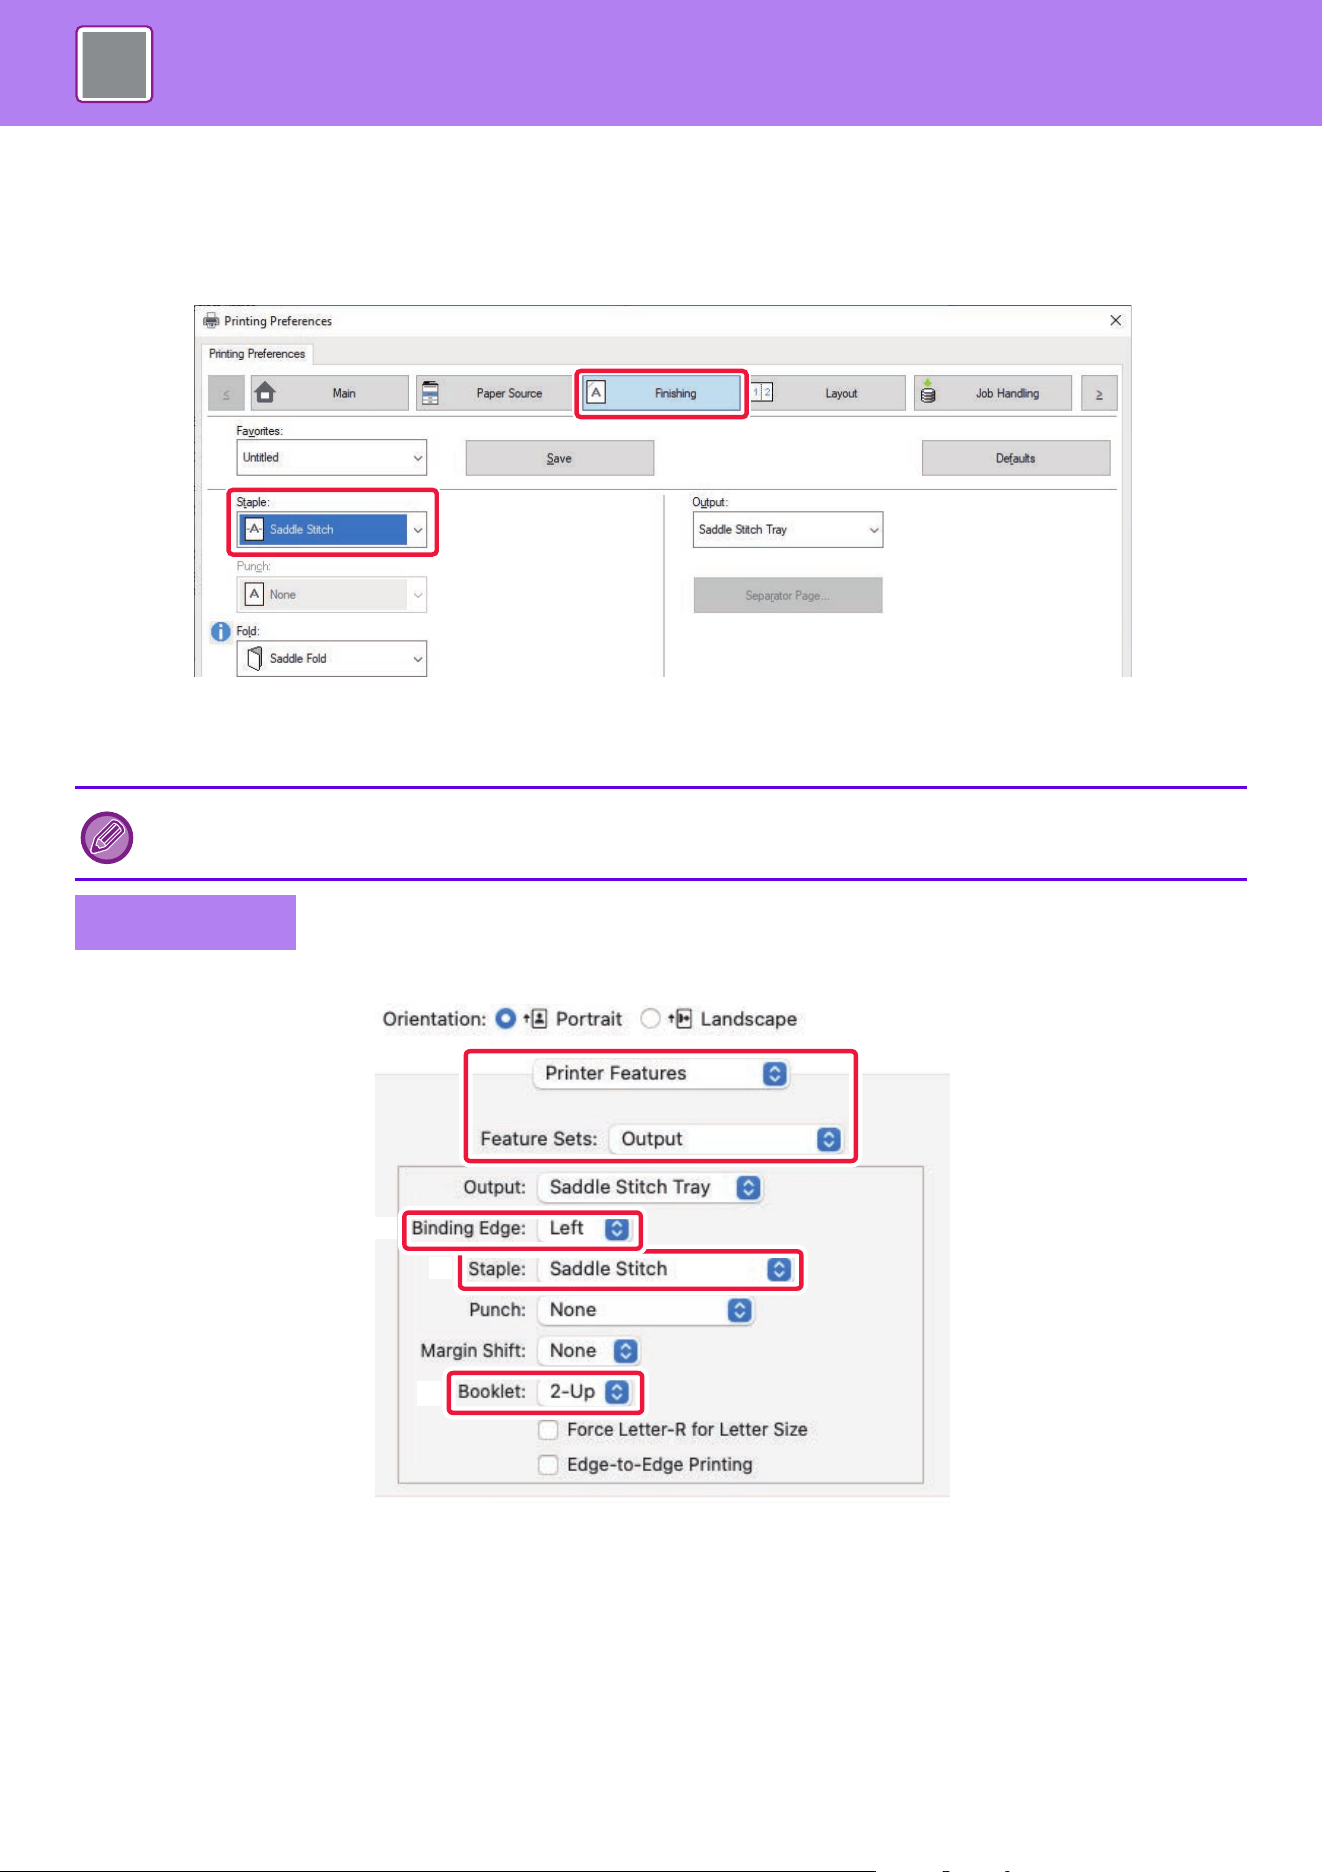
4-48
PRINTER►CONVENIENT PRINTING FUNCTIONS
(3) Select the specified output size and the binding edge.
• When [Standard] is selected, select the output paper size.
• When [Full Image] is selected, select the size to which you want to enlarge or reduce the print image in [Fit To Paper Size],
and select the paper size you want to use for printing in "Output Size".
If a saddle stitch finisher is installed
(4) Click the [Finishing] tab.
(5) Select [Saddle Stitch] from "Staple".
(1) Select [Printer Features] and then select [Output].
In macOS 13, [Printer Features] is located under the "Printer Options" menu.
(2) Select "Binding Edge".
(3) Select [Saddle Stitch].
(4) Select [Tiled] or [2-Up].
When a saddle finisher is installed and the job is not output correctly with [Saddle Stitch], select [Saddle Stitch (Reverse)].
macOS
(5)
(4)
(2)
(3)
(1)
(4)
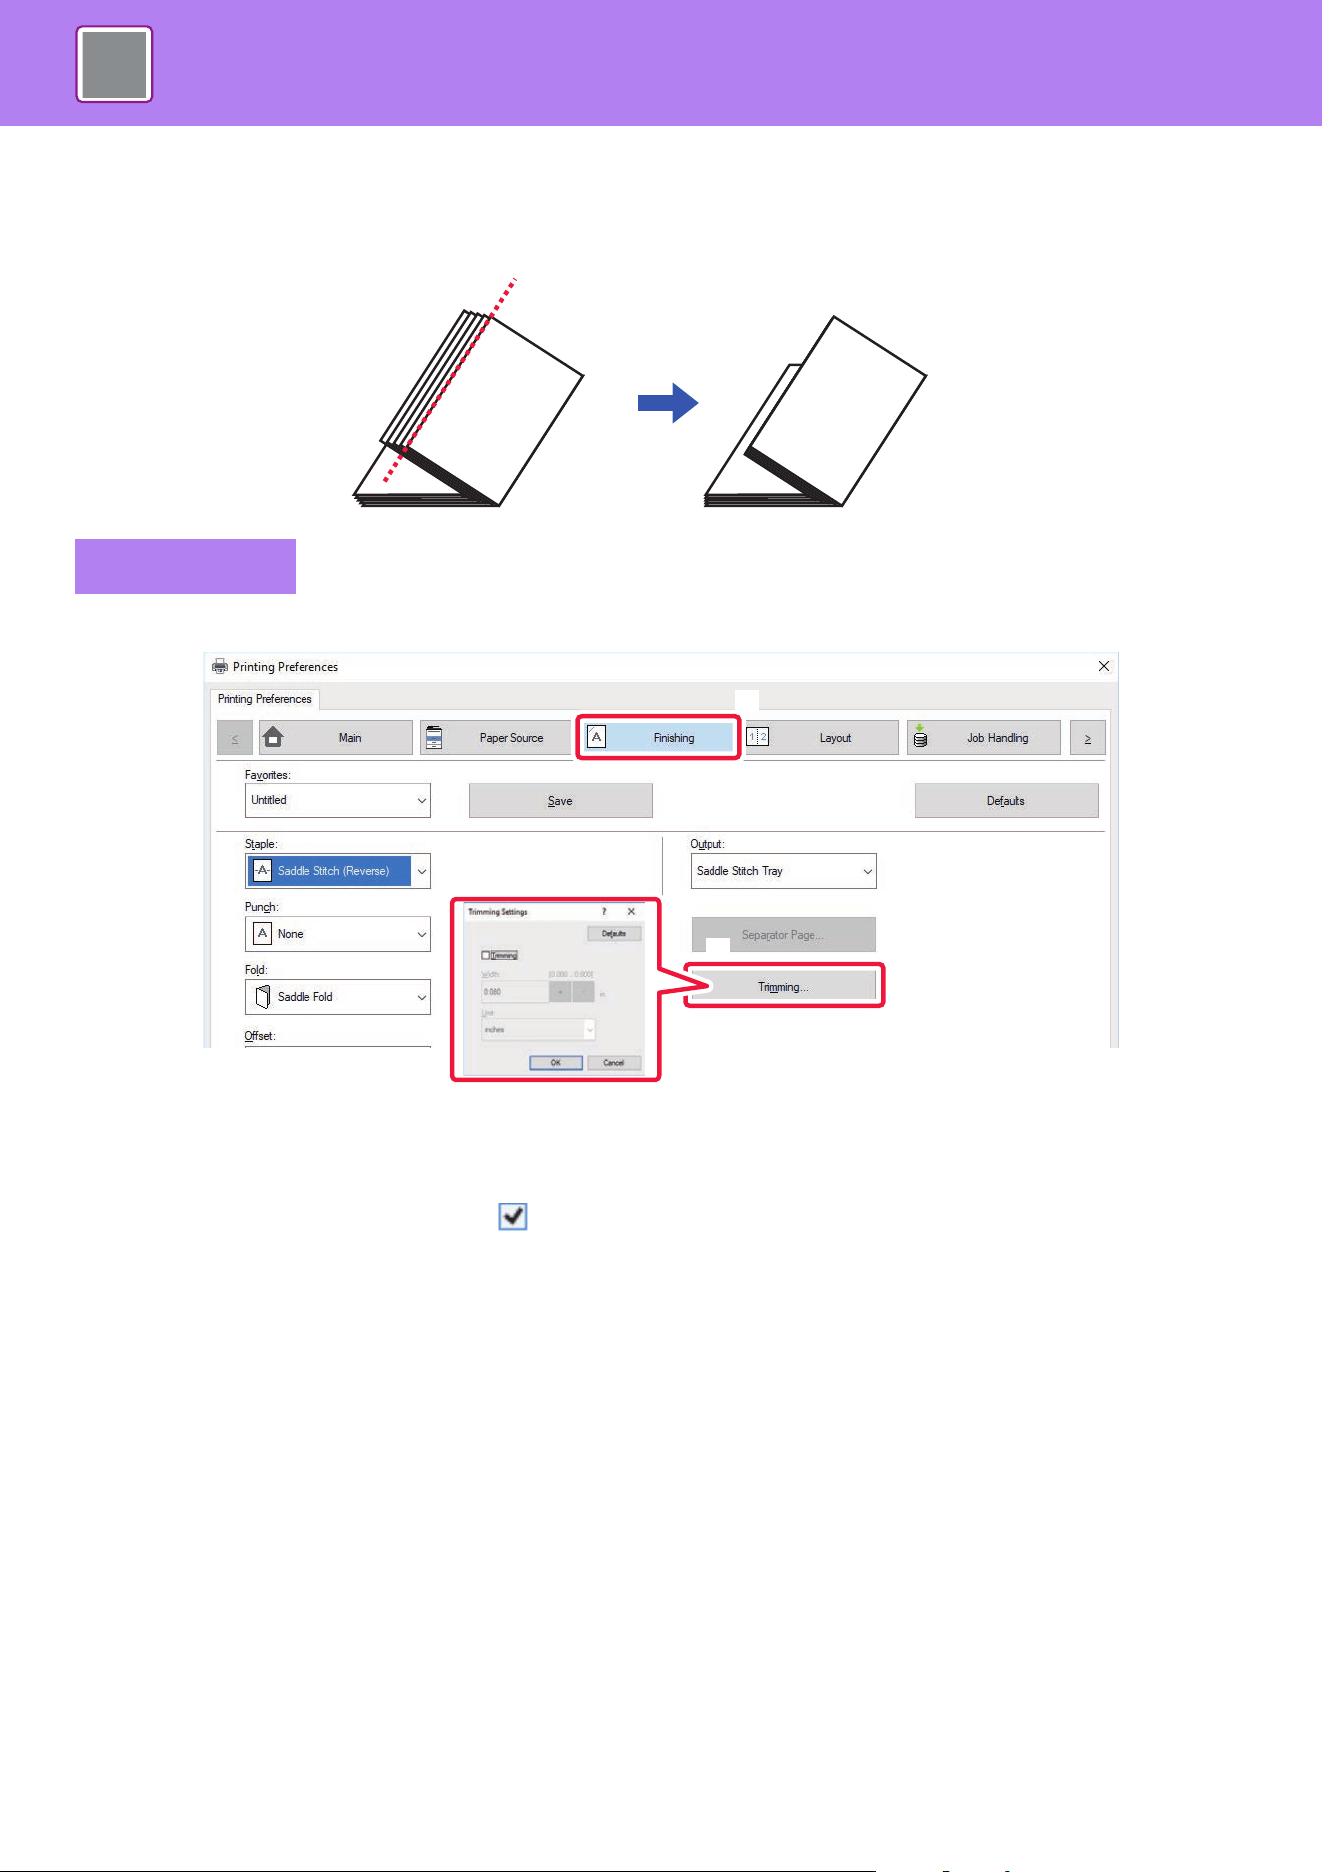
4-49
PRINTER►CONVENIENT PRINTING FUNCTIONS
TRIMMING THE EXCESS OF FOLDED PAPER
If a trimmer unit is installed, you can trim off excess edges of paper for a finer finish.
(1) Click the [Finishing] tab.
(2) Click the [Trimming] button.
(3) Set the [Trimming] checkbox to , and specify "Trimming Width".
Windows
(2)
(1)
(3)
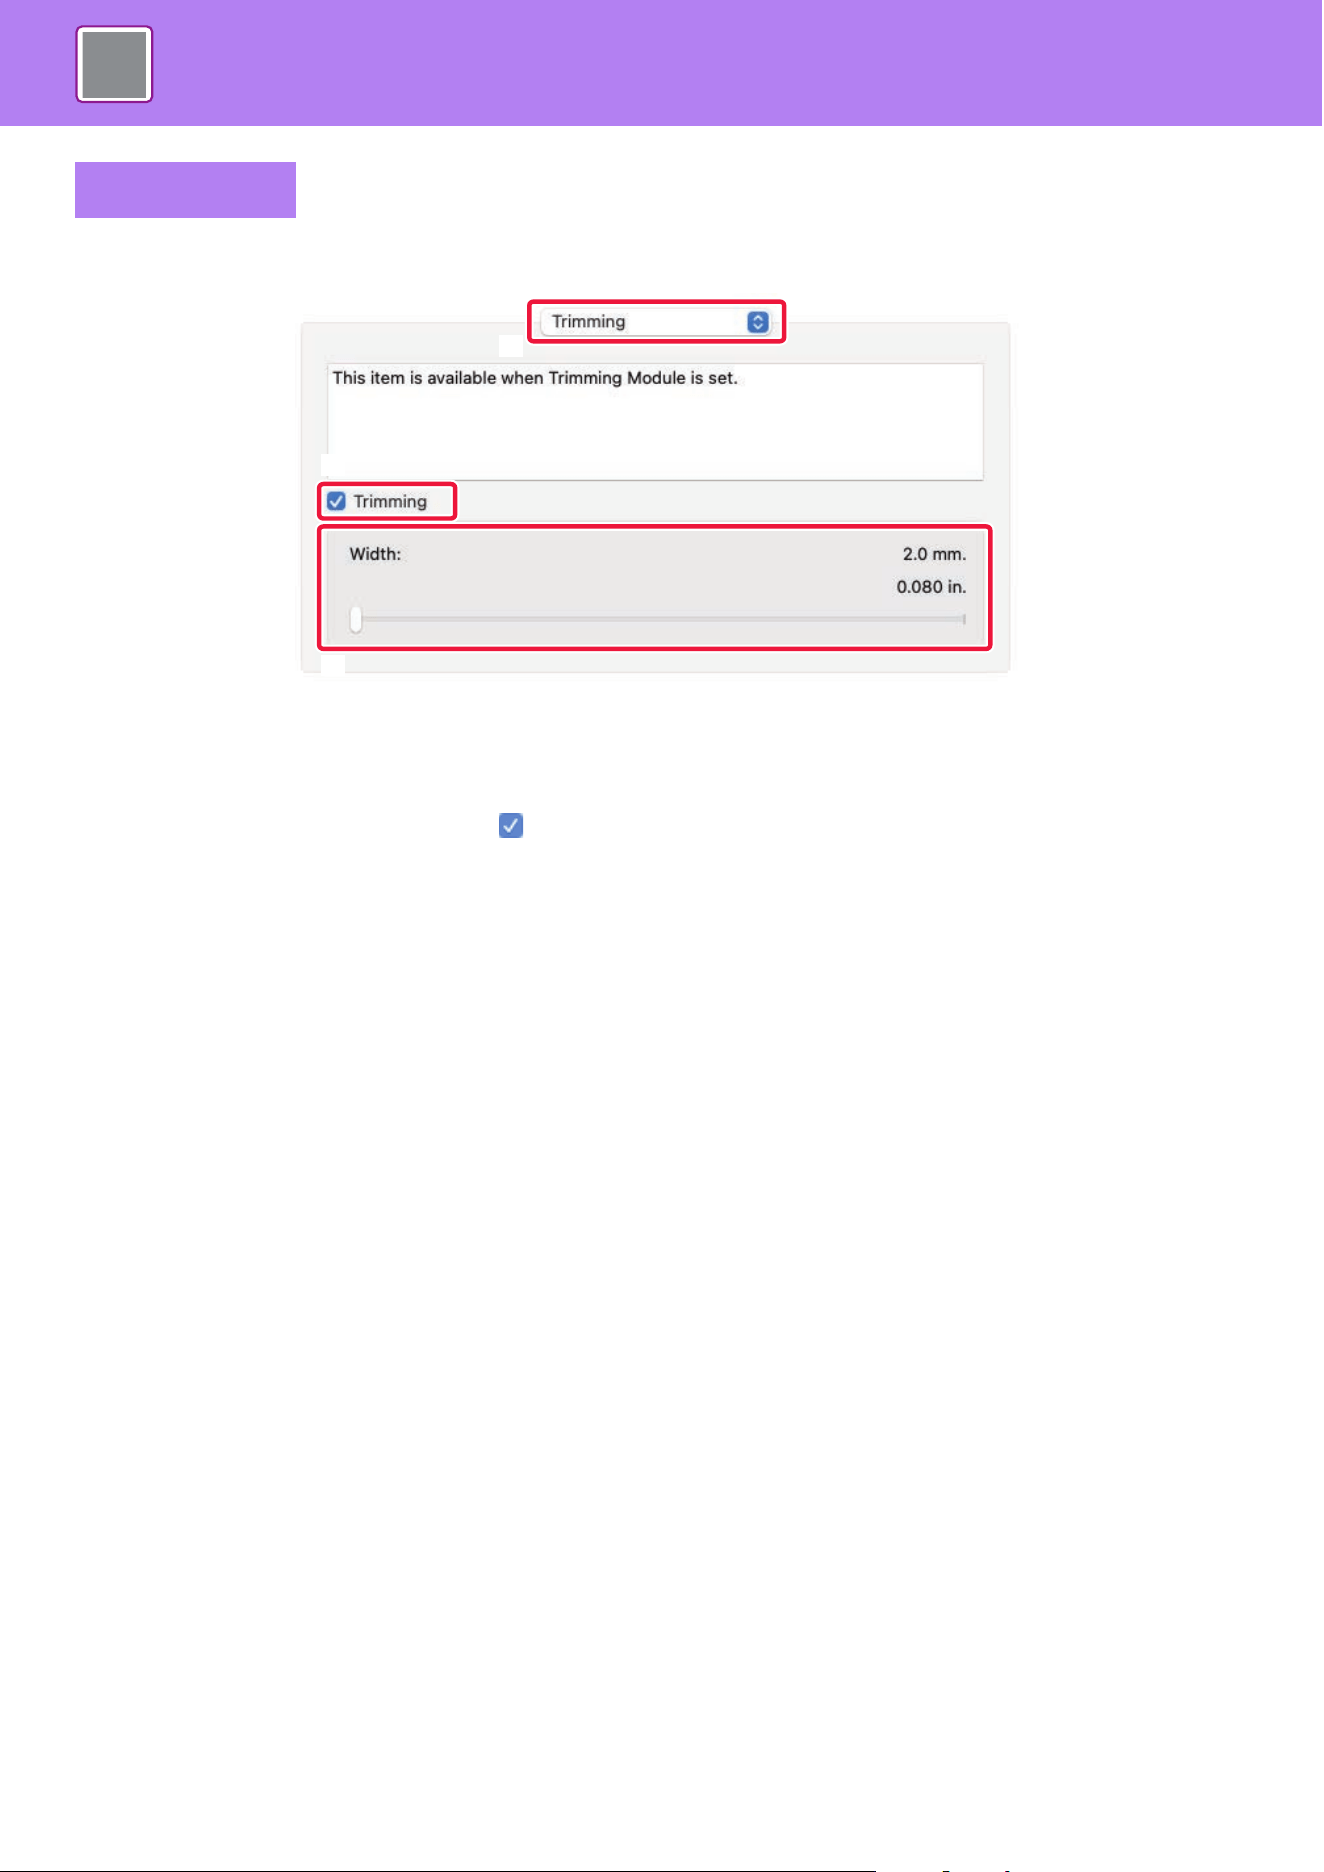
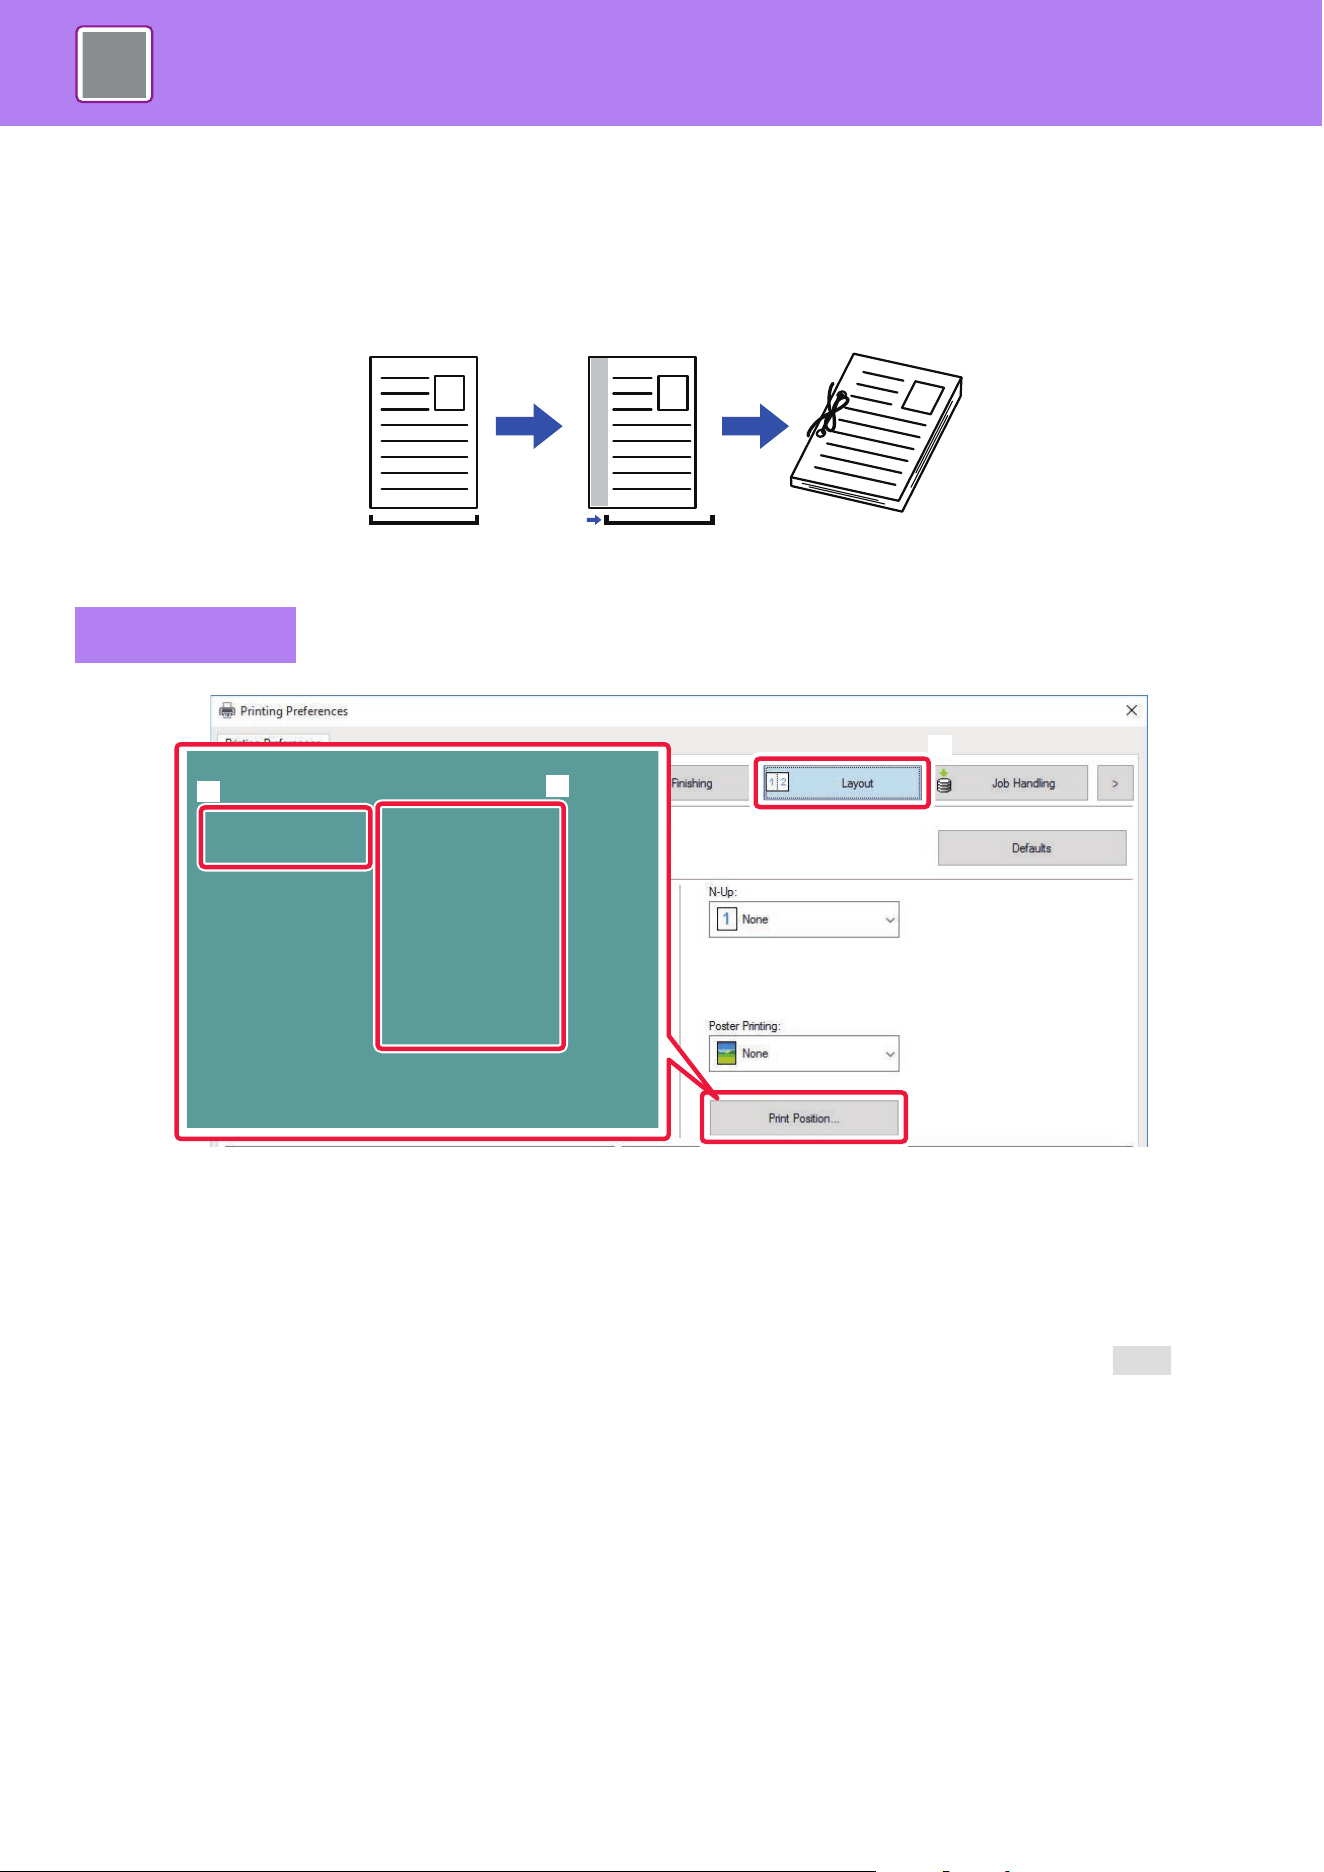
4-51
PRINTER►CONVENIENT PRINTING FUNCTIONS
PRINTING WITH MARGIN SHIFT SETTING (MARGIN)
This function shifts the print image to increase the margin at the left, the right, or the top of the paper.
If a finisher or saddle finisher is installed, the staple and punch functions of the machine can also be used together.
This is convenient when you wish to staple or punch the output but the binding area overlaps the text.
By shifting the image, the part of the image that is outside the print area will not be printed.
(1) Click the [Layout] tab.
(2) Click the [Print Position] button.
(3) Select [Margin Shift].
(4) Select the shift width.
Select from the "Margin Shift" menu. If you wish to configure another numeric setting, select the setting and click buttons
or directly enter the number.
Windows
(2)
(1)
(3)
(4)
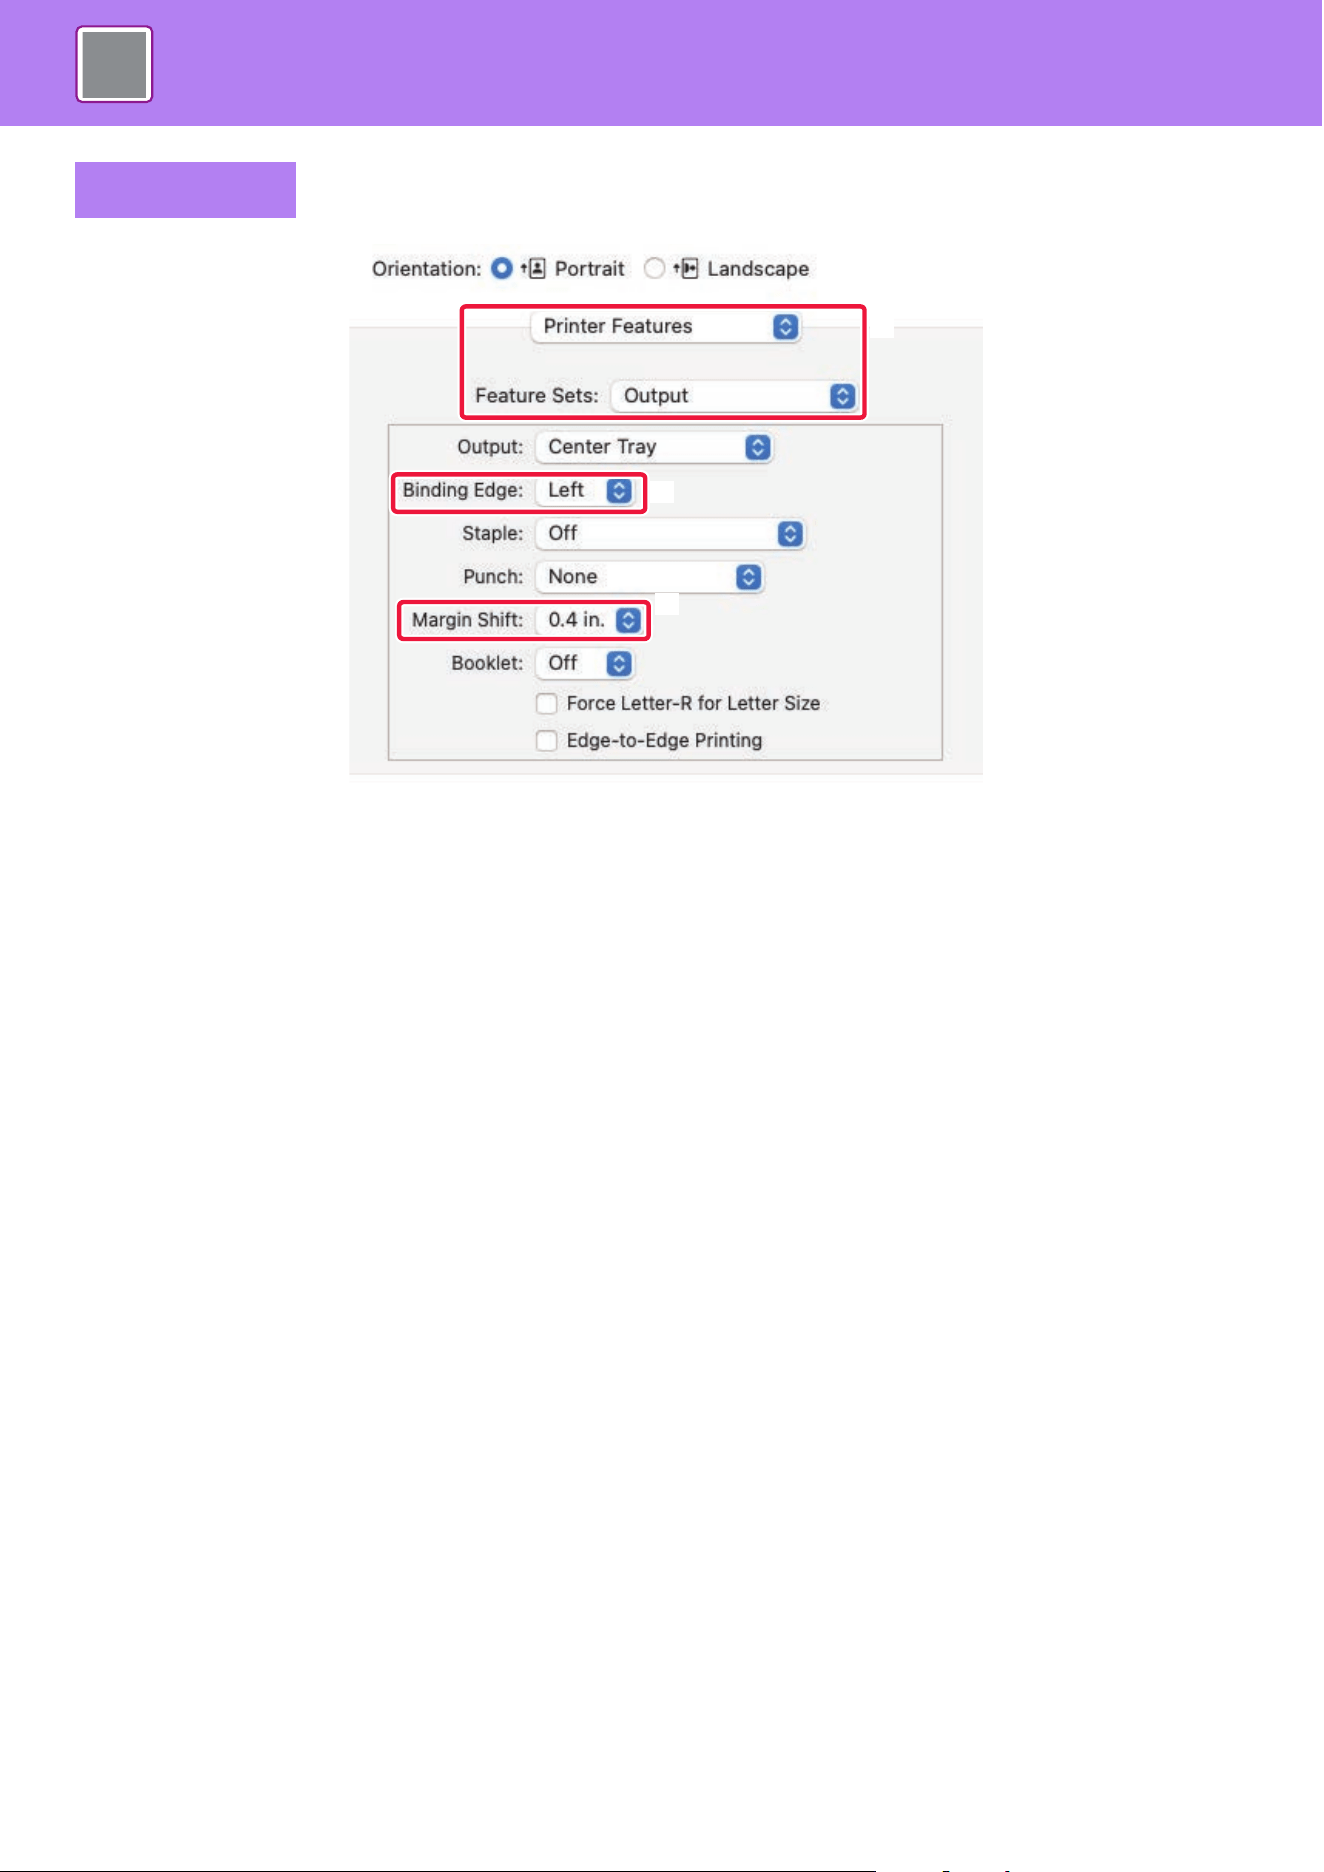
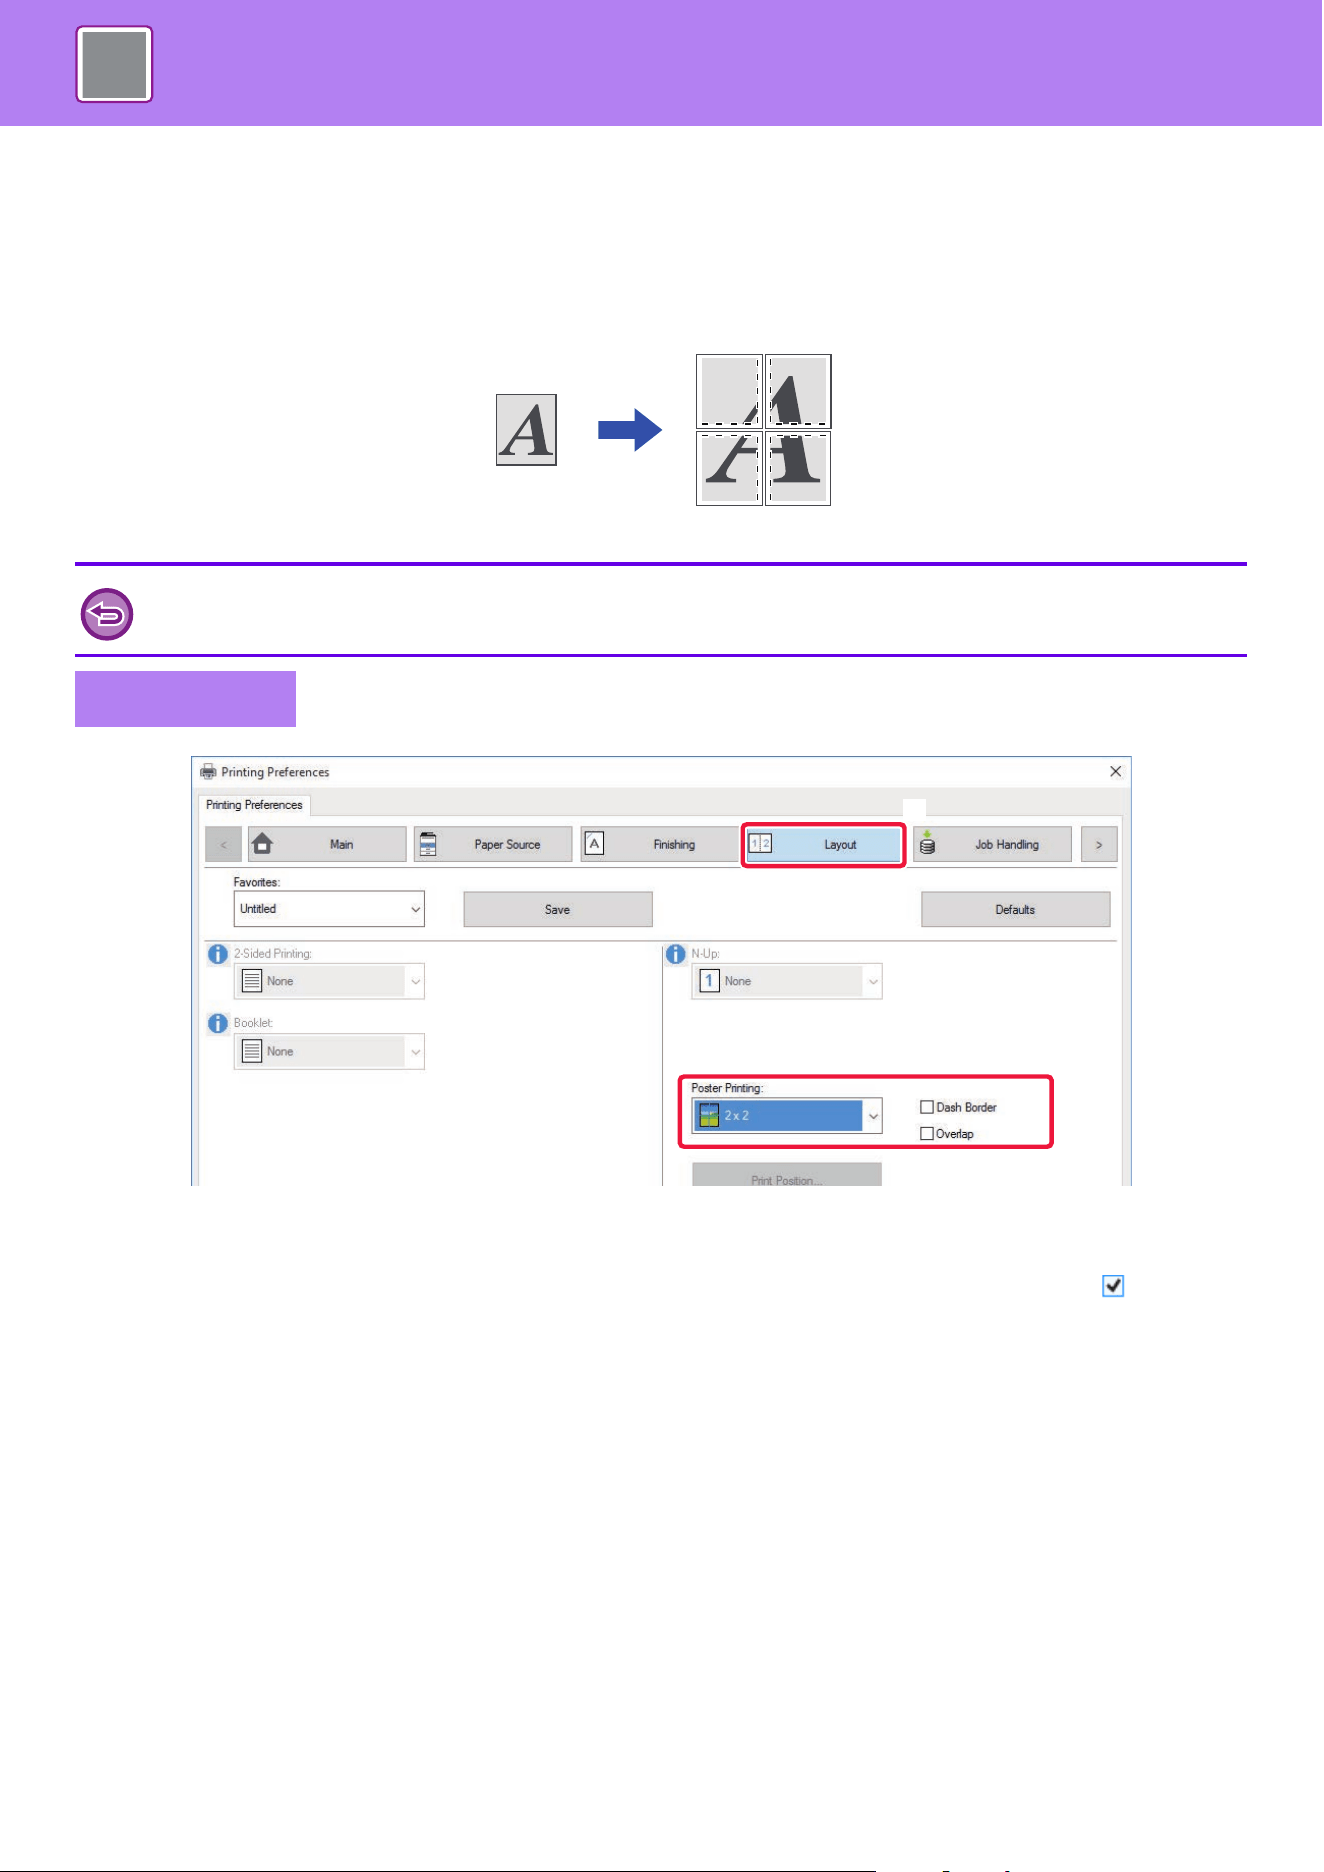
4-53
PRINTER►CONVENIENT PRINTING FUNCTIONS
CREATE A LARGE POSTER (POSTER PRINTING)
One page of print data is enlarged and printed using multiple sheets of paper (2 sheets (1 x 2), 4 sheets (2 x 2), 9 sheets
(3 x 3) or 16 sheets (4 x 4)). The sheets can then be attached together to create a large poster.
To enable precise alignment of the edges of the sheets during attachment, borderlines can be printed or overlapping
edges can be created (overlap function).
(1) Click the [Layout] tab.
(2) Select the number of sheets to be used in "Poster Printing".
If you wish to print borderlines and/or use the overlap function, click the corresponding checkboxes so that the appears.
This function is available in a Windows environment.
Windows
(2)
(1)
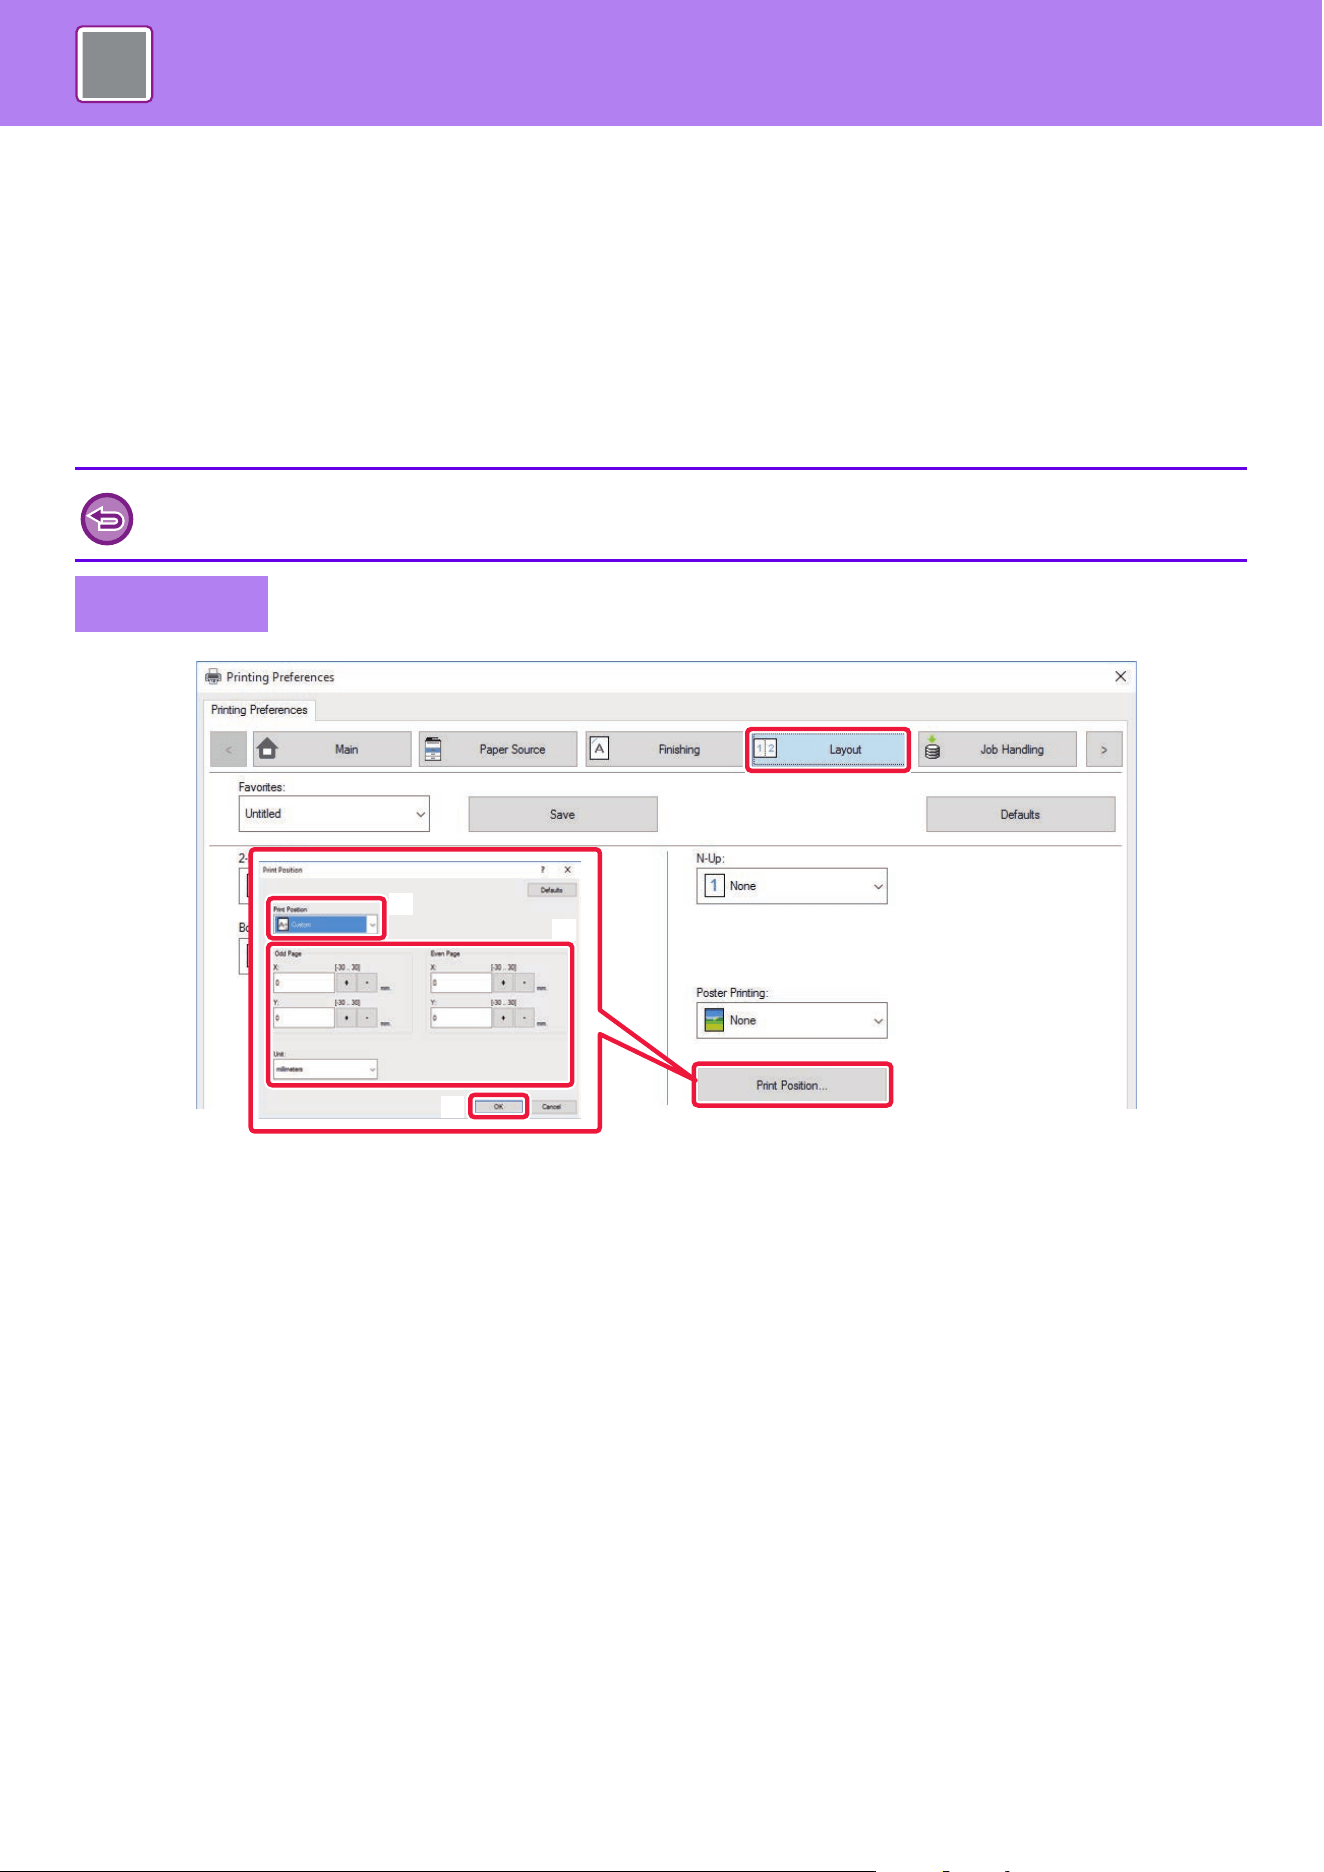
4-54
PRINTER►CONVENIENT PRINTING FUNCTIONS
FUNCTIONS TO ADJUST THE SIZE AND
ORIENTATION OF THE IMAGE
ADJUST PRINT POSITION ON ODD AND EVEN PAGES
SEPARATELY (PRINT POSITION)
This function sets different print positions (margins) separately for odd and even pages and prints the pages.
(1) Click the [Layout] tab.
(2) Click the [Print Position] button.
(3) Select [Custom].
(4) Set the amount of shifting of the print position for odd-numbered pages and even-numbered
pages.
(5) Click the [OK] button.
This function is available in a Windows environment.
Windows
(2)
(1)
(3)
(4)
(5)
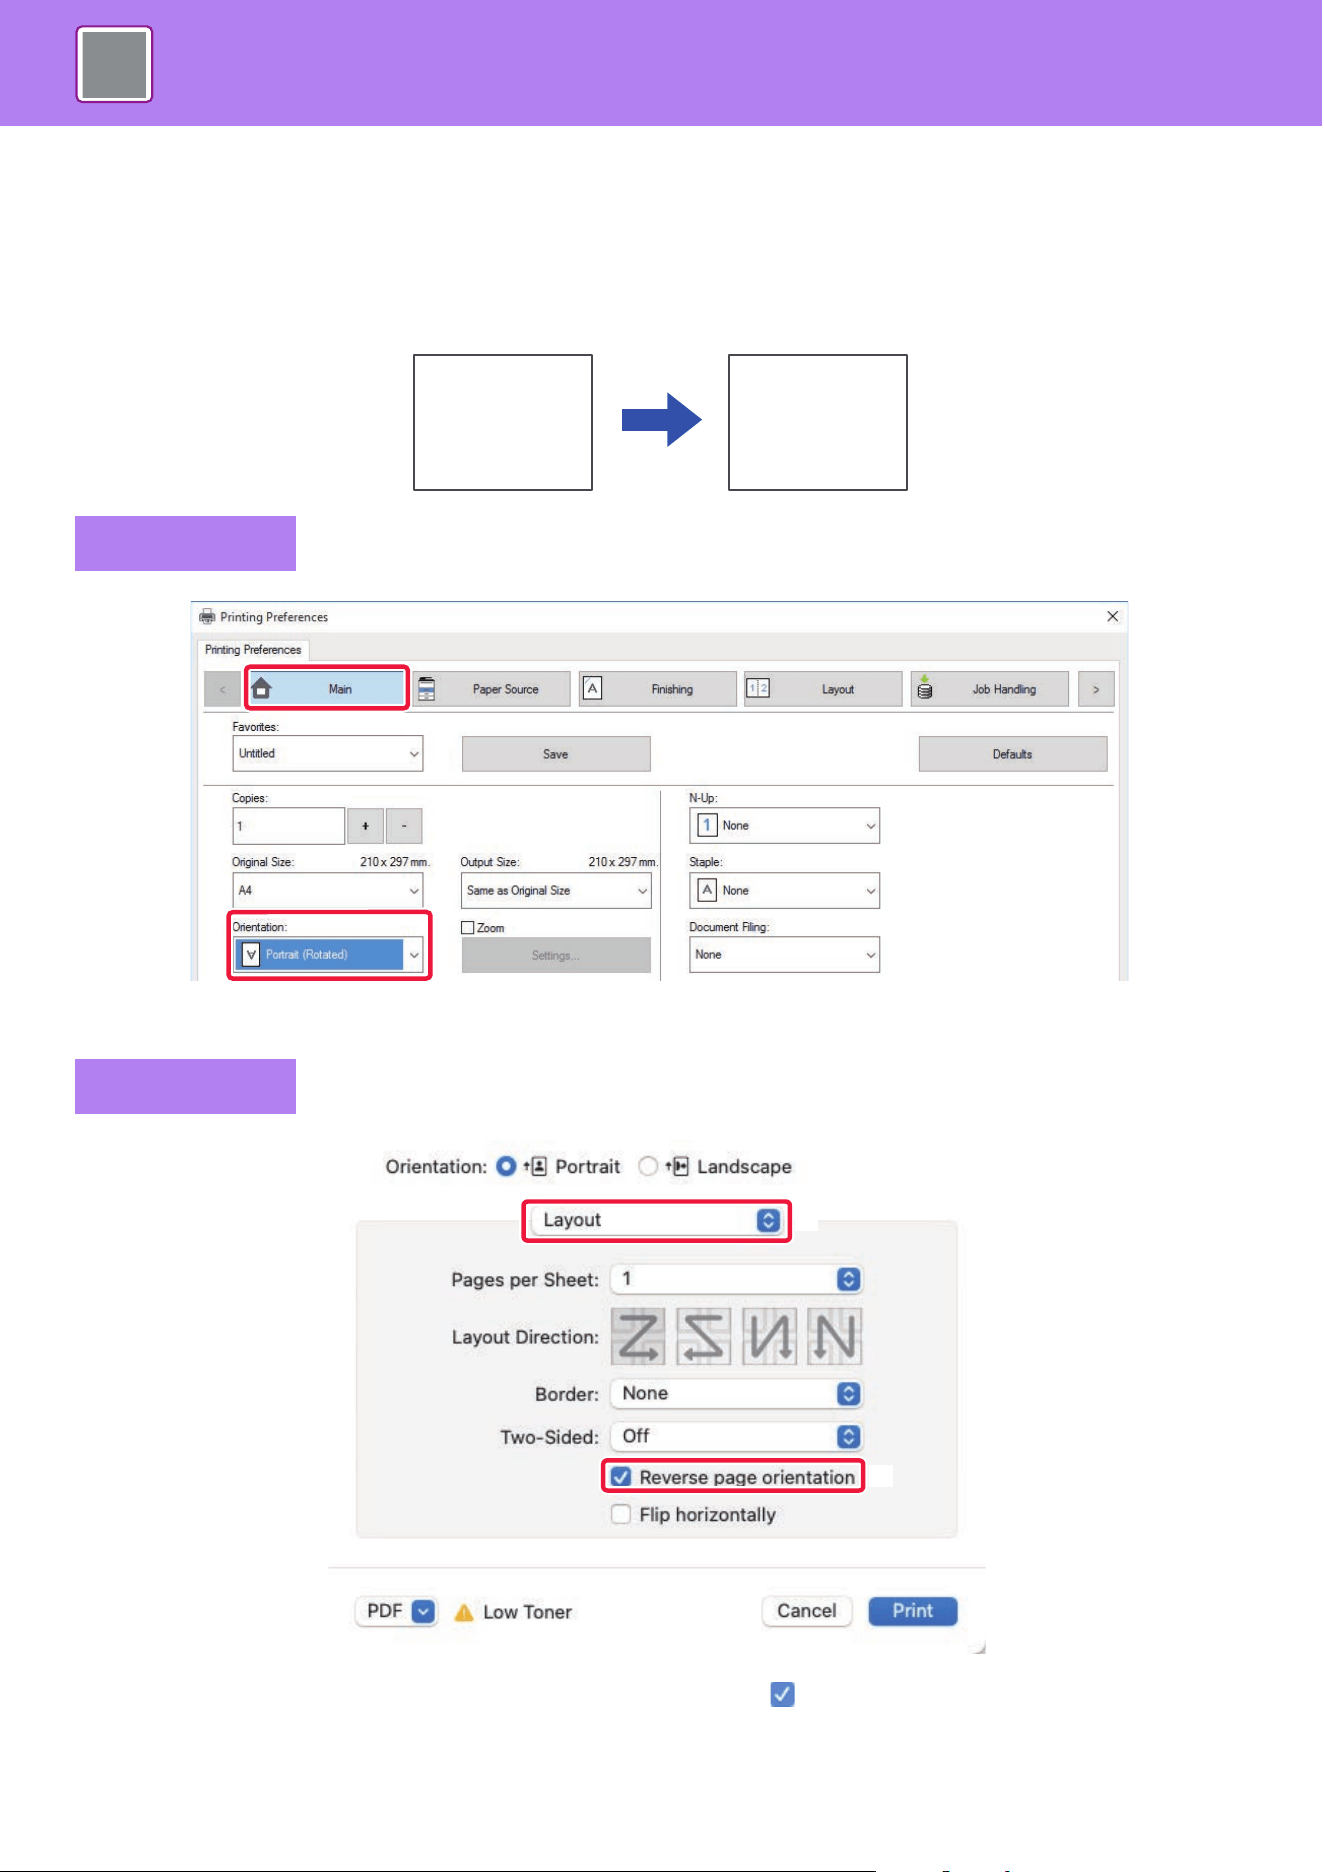
4-55
PRINTER►CONVENIENT PRINTING FUNCTIONS
ROTATING THE PRINT IMAGE 180 DEGREES (ROTATE
180 DEGREES)
This feature rotates the image 180 degrees so that it can be printed correctly on paper that can be loaded in only one
orientation (such as envelopes or paper with punch holes).
(1) Click the [Main] tab.
(2) Select [Portrait (Rotated)] or [Landscape (Rotated)] in "Orientation".
(1) Select [Layout].
(2) Select the [Reverse page orientation] checkbox so that appears.
Windows
macOS
ABCD
ABCD
(1)
(2)
(2)
(1)
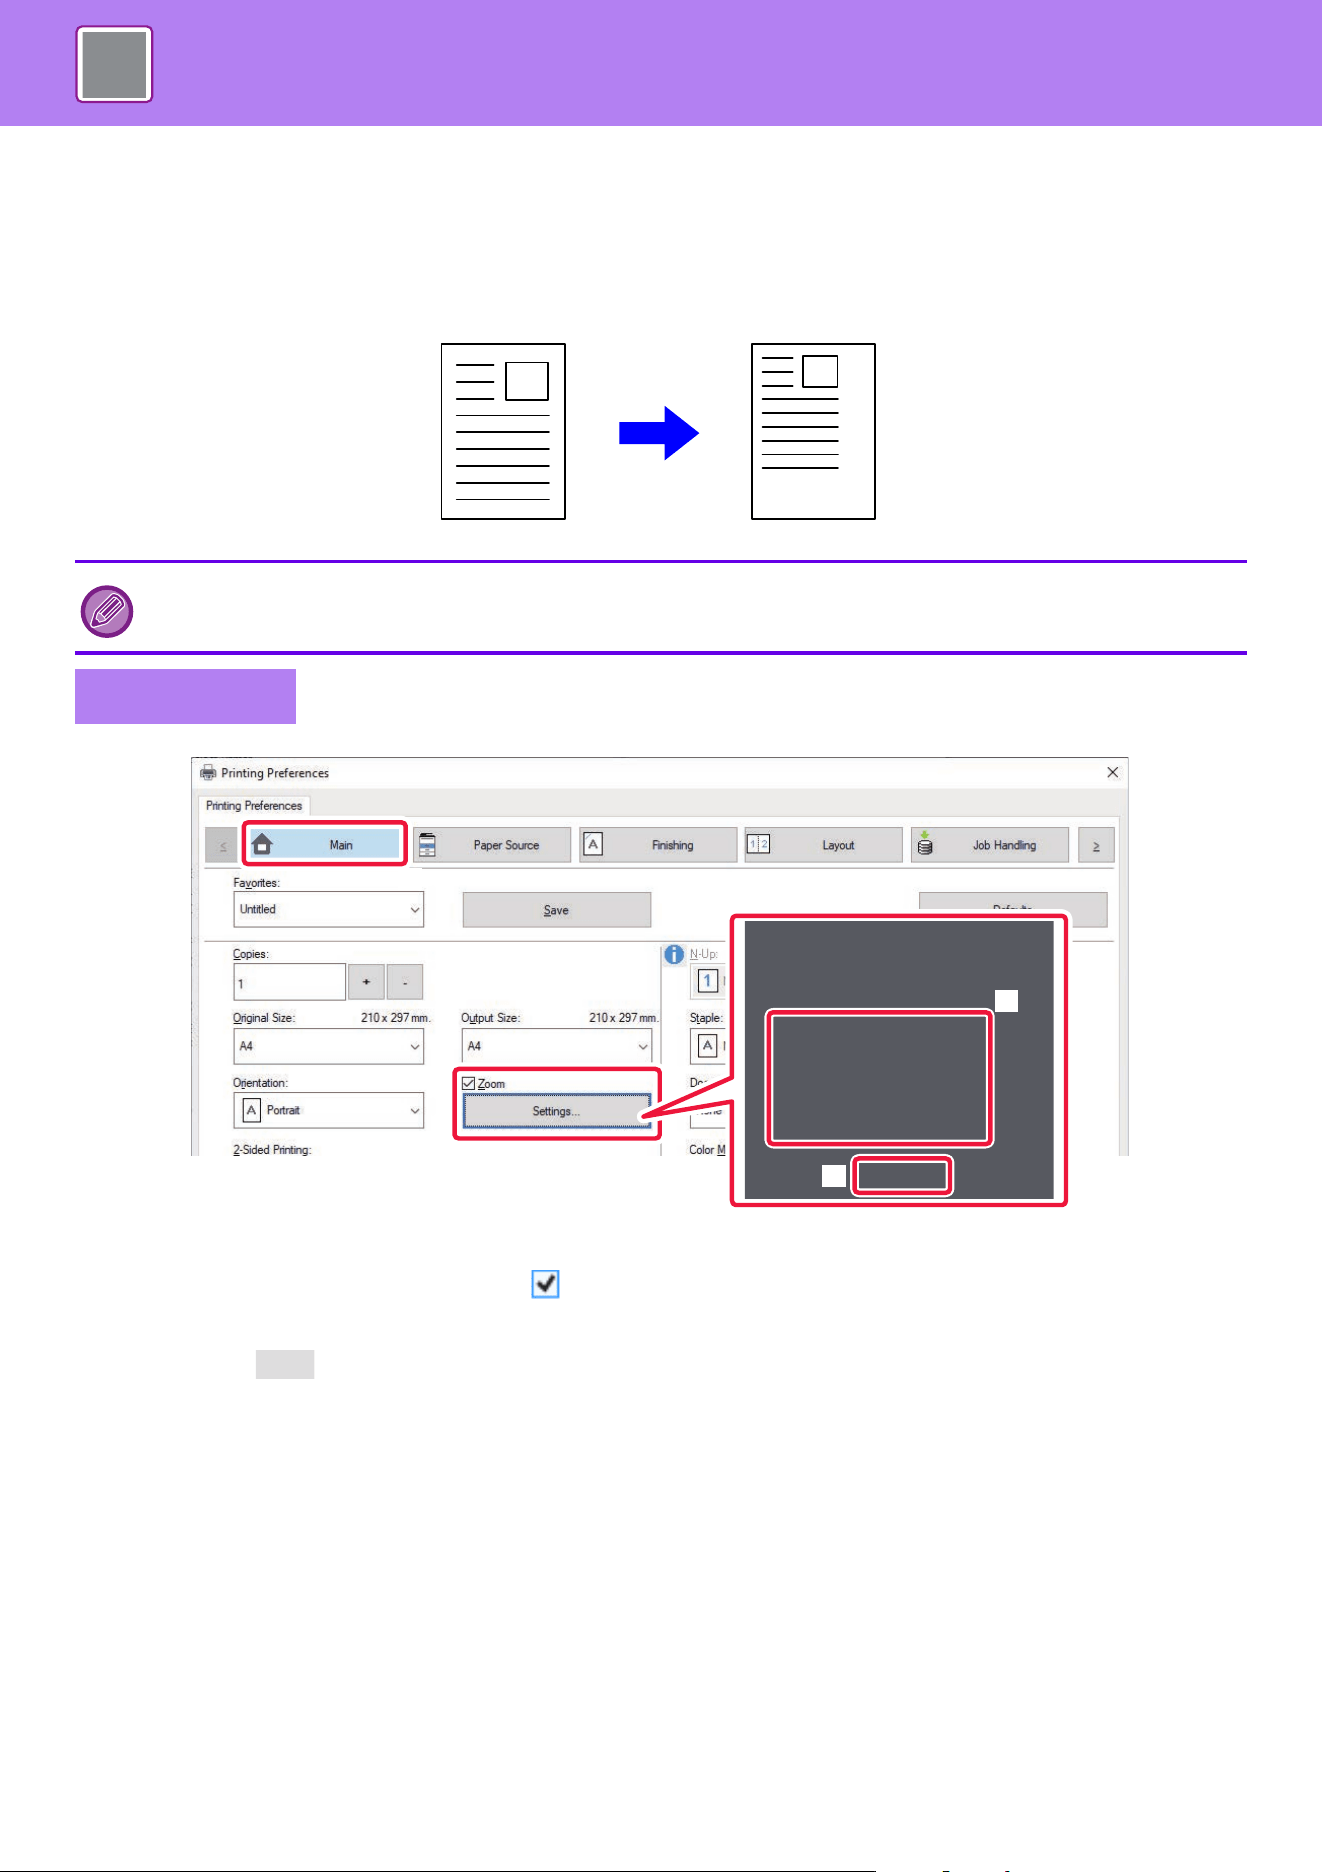
4-56
PRINTER►CONVENIENT PRINTING FUNCTIONS
ENLARGING/REDUCING THE PRINT IMAGE (ZOOM
SETTING/ENLARGE OR REDUCE)
This function enlarges or reduces the image to a selected percentage.
This allows you to enlarge a small image or add margins to the paper by slightly reducing an image.
(1) Click the [Main] tab.
(2) Click the [Zoom] checkbox so that appears, and click the [Settings] button.
(3) Enter the percentage.
By clicking the button, you can specify the value in increments of 1%. In addition, select [Upper Left] or [Center] for the
base point on the paper.
(4) Click the [OK] button.
When using the PS printer driver (Windows), you can set the width and length percentages separately to change the
proportions of the image.
Windows
(2)
(1)
(3)
(4)
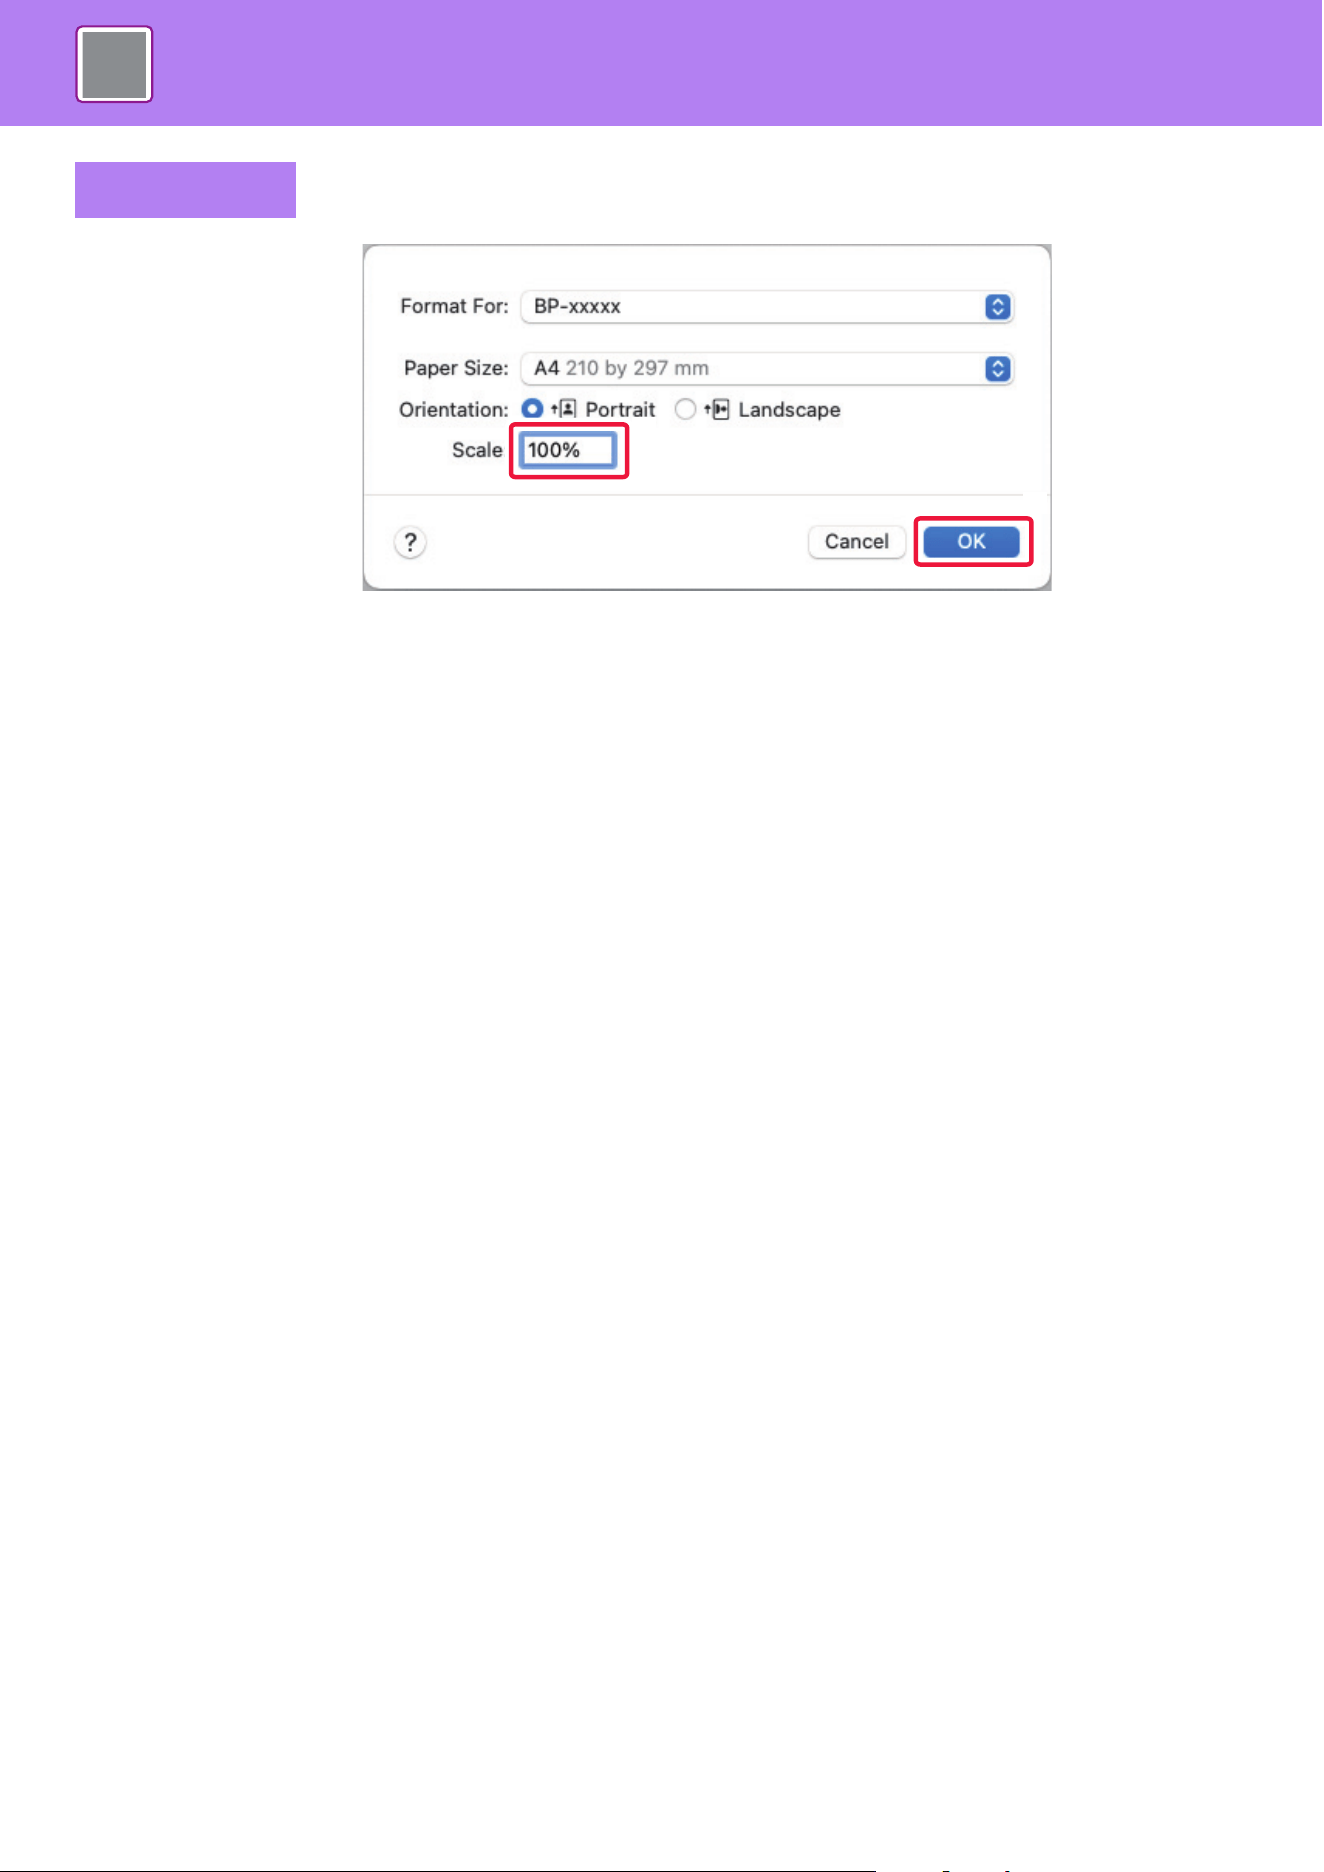
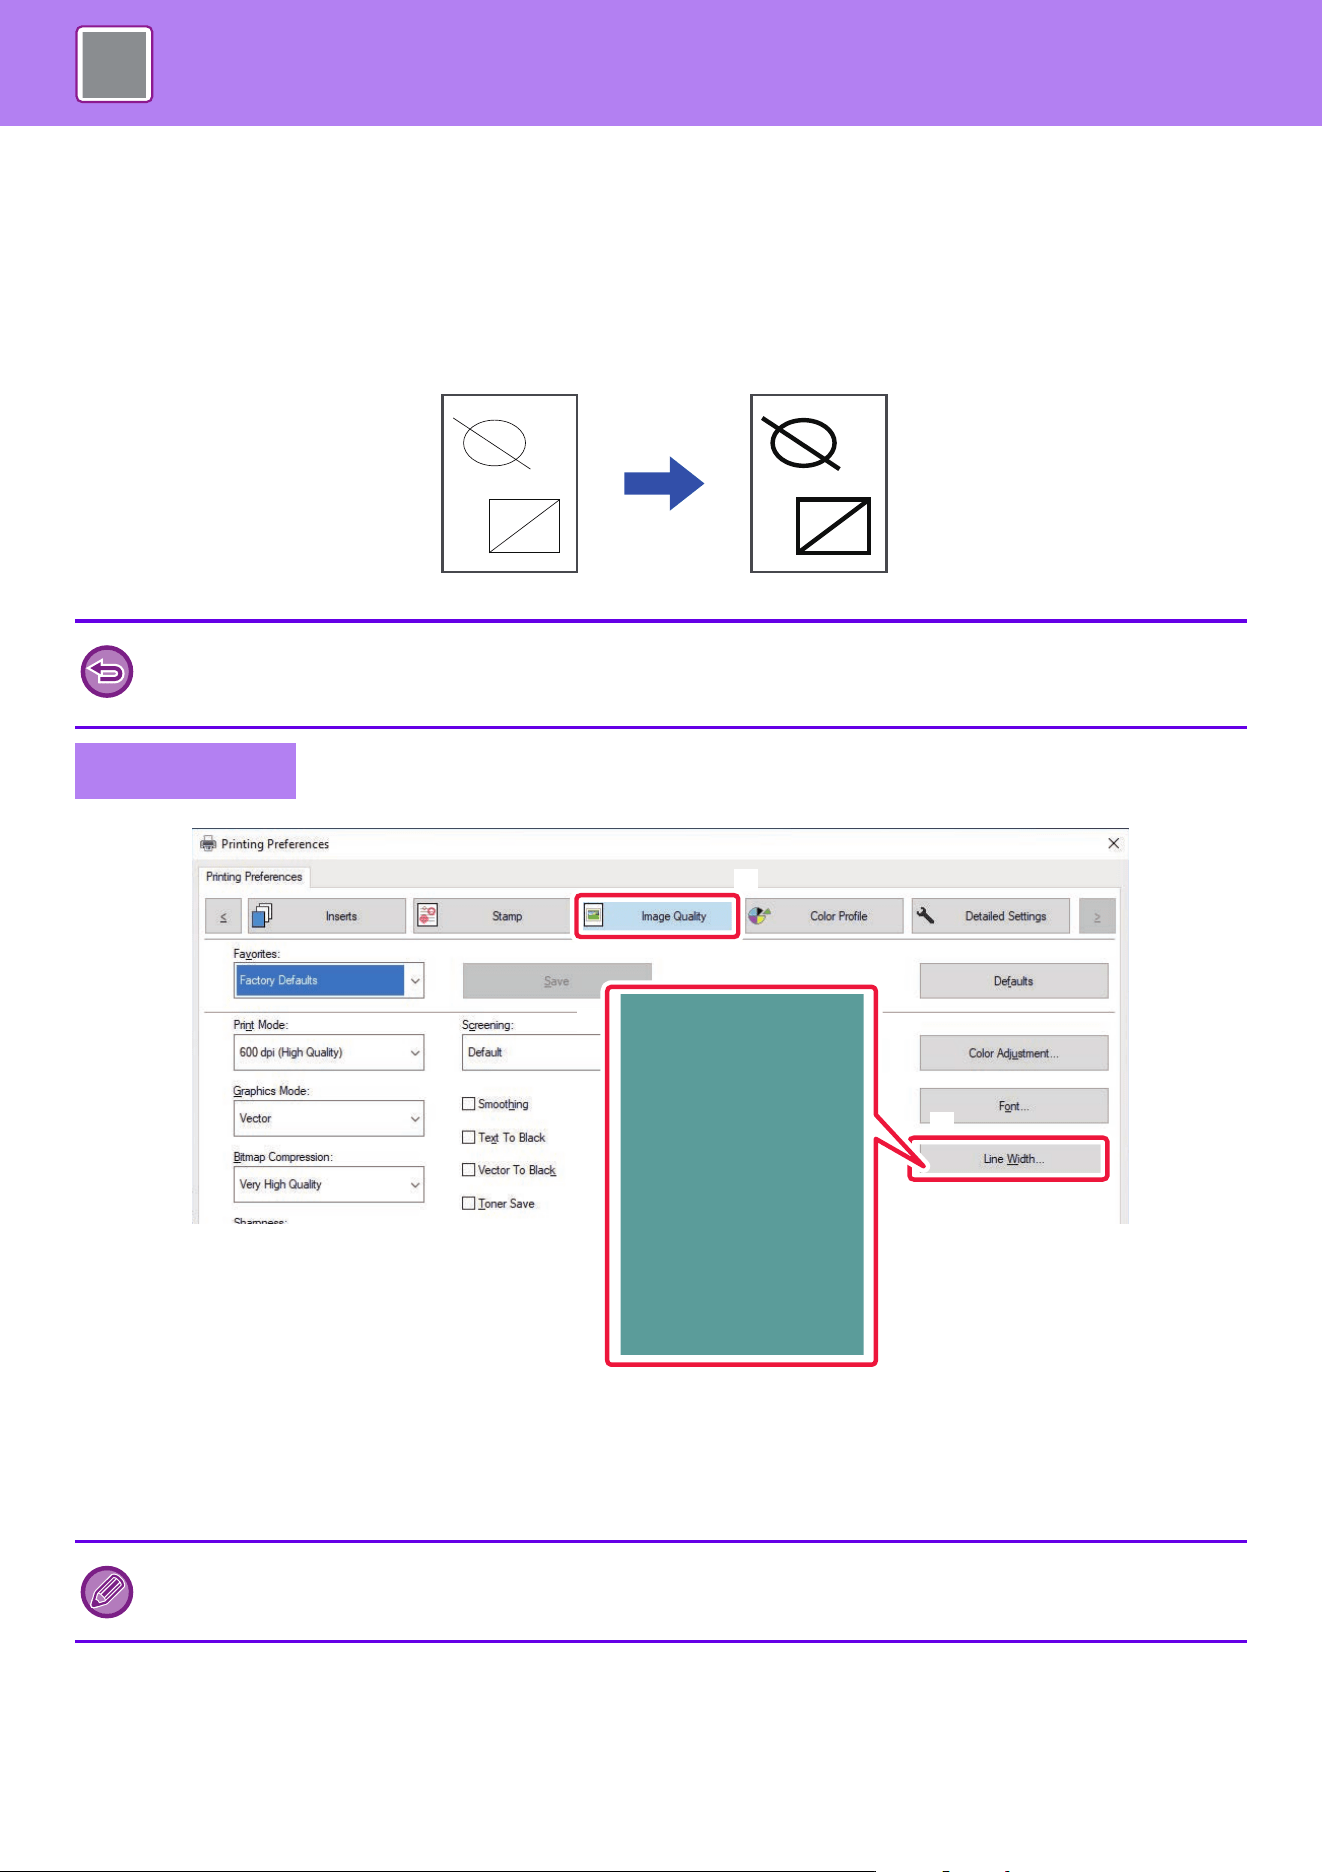
4-58
PRINTER►CONVENIENT PRINTING FUNCTIONS
ADJUST THE LINE THICKNESS (WIDTH)
Adjusting line widths used in data such as CAD
This function increases the thickness of the entire line when the print lines are not clear in CAD or other special
applications.
When the data includes lines of varying widths, you can print all lines at the minimum width as necessary.
(1) Click the [Image Quality] tab.
(2) Click the [Line Width] button.
(3) Set the line thickness and click the [OK] button.
• This function is available in a Windows environment.
• This function can be used when the PCL6 printer driver is used.
• When printing from an application that processes lines as raster graphics, line widths cannot be adjusted.
Windows
• The units of line-width adjustment can be set to "Fixed Width" or "Ratio".
Select from the "Unit" menu.
• To print all line data in the minimum line width, click the [Minimum Line Width] checkbox.
(2)
(1)
(3)

4-59
PRINTER►CONVENIENT PRINTING FUNCTIONS
Thickening fine lines in Excel
When fine border lines in Excel do not print correctly, you can make the lines thicker.
(1) Click the [Detailed Settings] tab.
(2) Click the [Other Settings] button.
(3) Select the [Thicken Fine Lines] checkbox ( ).
• This function is available in a Windows environment.
• This function can be used when the PCL6 printer driver is used.
• Normally this setting is not necessary.
Windows
(2)
(1)
(3)
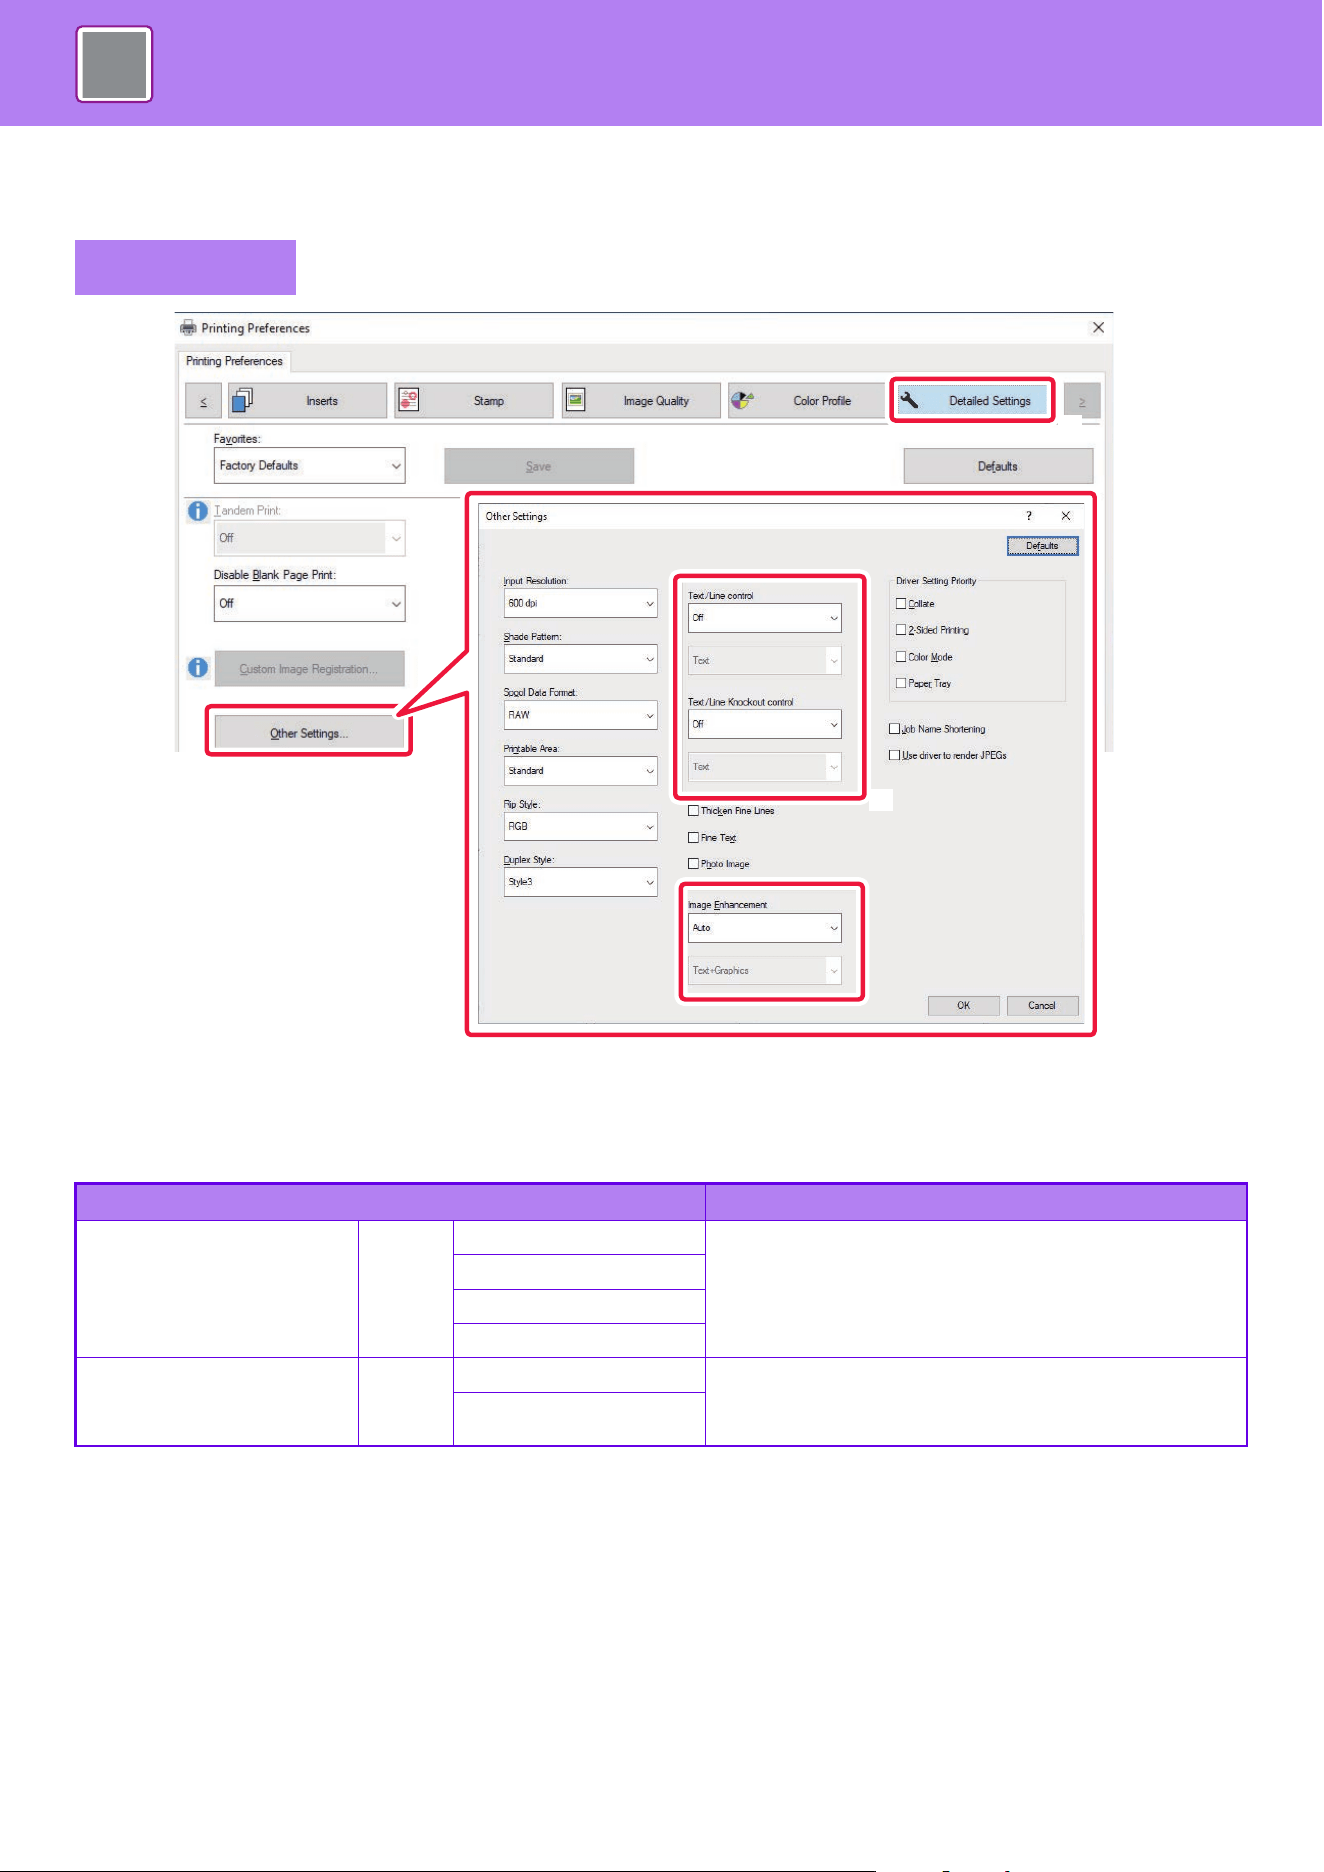
4-60
PRINTER►CONVENIENT PRINTING FUNCTIONS
Adjusting the thickness of text and lines
You can make text and lines thicker. You can also make edges smoother or sharper.
(1) Click the [Detailed Settings] tab.
(2) Click the [Other Settings] button.
(3) Specify the settings.
Windows
Item Description
Text/Line control Thick Text You can make characters and text thicker.
Off: Do not make characters and text thicker.
Thick: Make characters and text thicker.
Graphics
Text+Graphics
Text+Graphics+Photo
Text/Line Knockout control Thick Text You can make knockout text and lines thicker.
Off: Do not make text and lines thicker.
Thick: Make text and lines thicker.
Text+Graphics
(2)
(1)
(3)
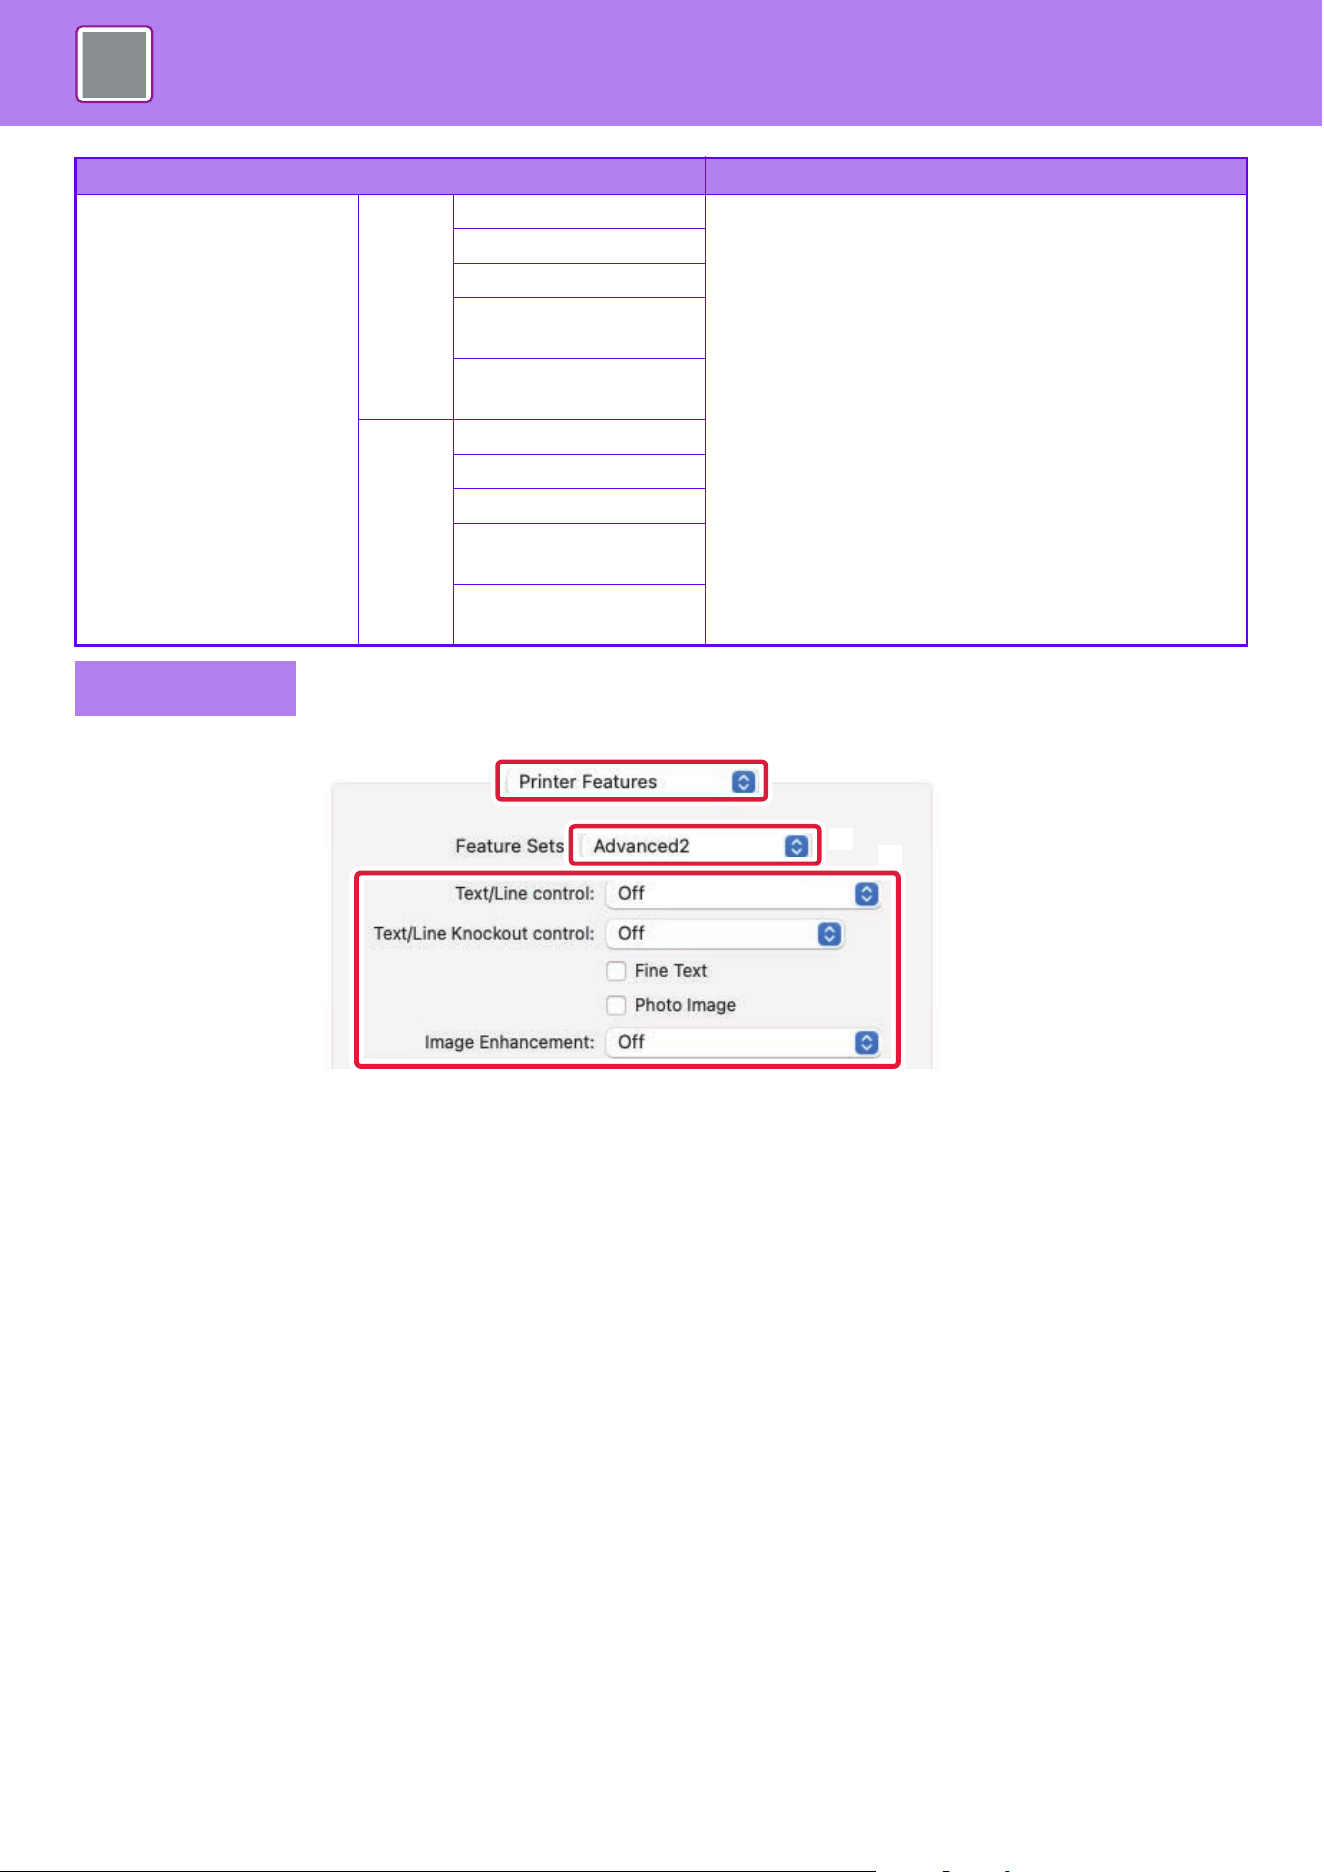
4-61
PRINTER►CONVENIENT PRINTING FUNCTIONS
(1) Select [Printer Features].
In macOS 13, [Printer Features] is located under the "Printer Options" menu.
(2) Select [Advanced2].
(3) Specify the settings.
Image Enhancement Sharp Text You can make the edges of text and graphics smoother
or sharper.
Auto: Perform optimal image enhancement.
Off: No image enhancement is applied.
Sharp: Image enhancement is applied sharply.
Soft: Image enhancement is applied smoothly.
Text+Graphics
Text+knockout text
Text+Graphics+knocko
ut text
Text+Graphics+knocko
ut
Soft Text
Text+Graphics
Text+knockout text
Text+Graphics+knocko
ut text
Text+Graphics+knocko
ut
macOS
Item Description
(3)
(2)
(1)
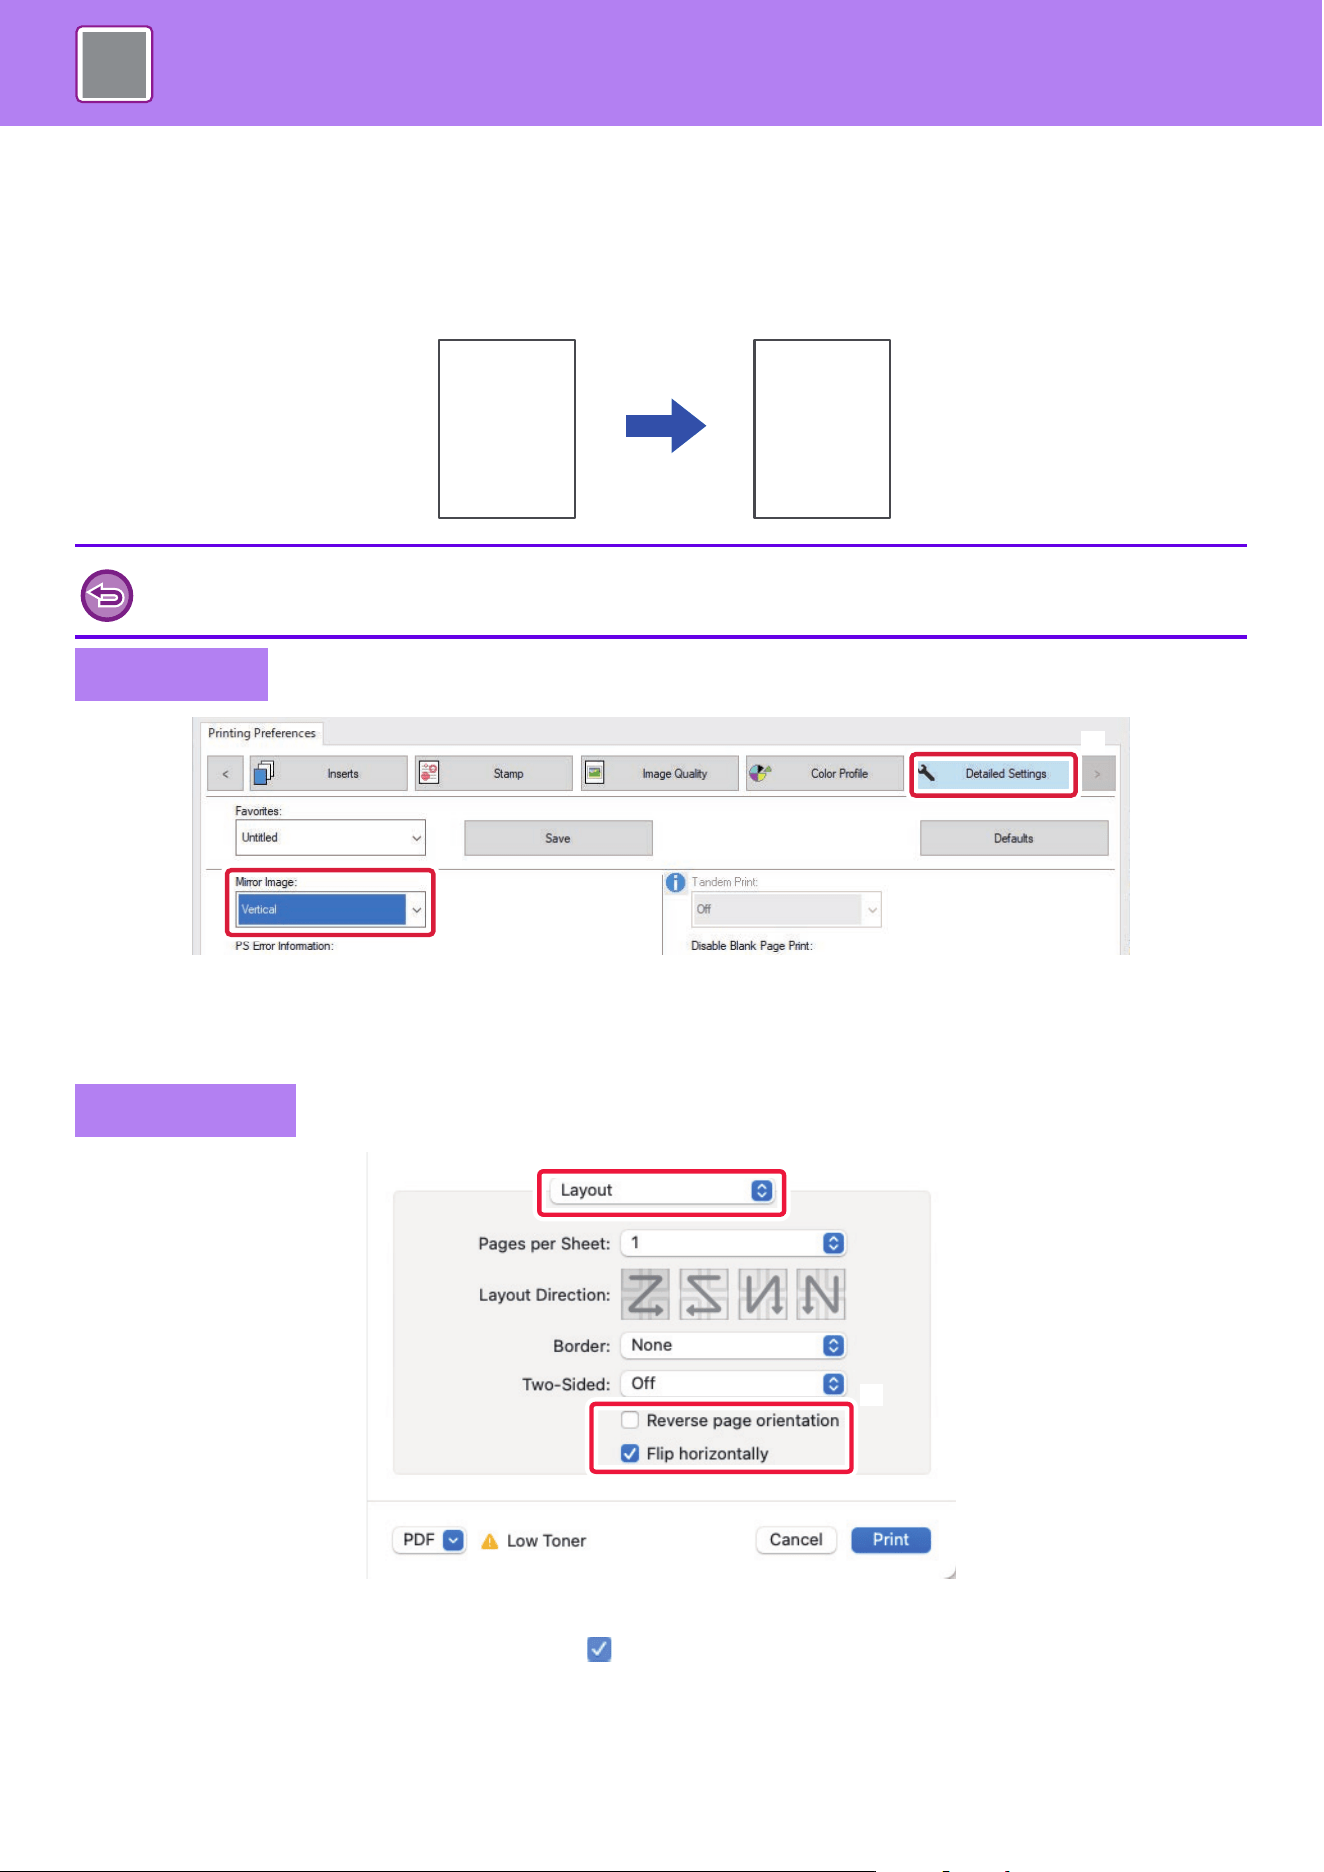
4-62
PRINTER►CONVENIENT PRINTING FUNCTIONS
PRINT A MIRROR-IMAGE (MIRROR-IMAGE
REVERSE/VISUAL EFFECTS)
The image is reversed to create a mirror image.
This function is conveniently used to print a design for a woodblock print or other printing medium.
(1) Click the [Detailed Settings] tab.
(2) If you wish to reverse the image horizontally, select [Horizontal]. If you wish to reverse the image
vertically, select [Vertical].
(1) Select [Layout].
(2) Select the [Flip horizontally] checkbox ( ).
In a Windows environment, this function is only available when using the PS printer driver.
Windows
macOS
B
B
(2)
(1)
(2)
(1)
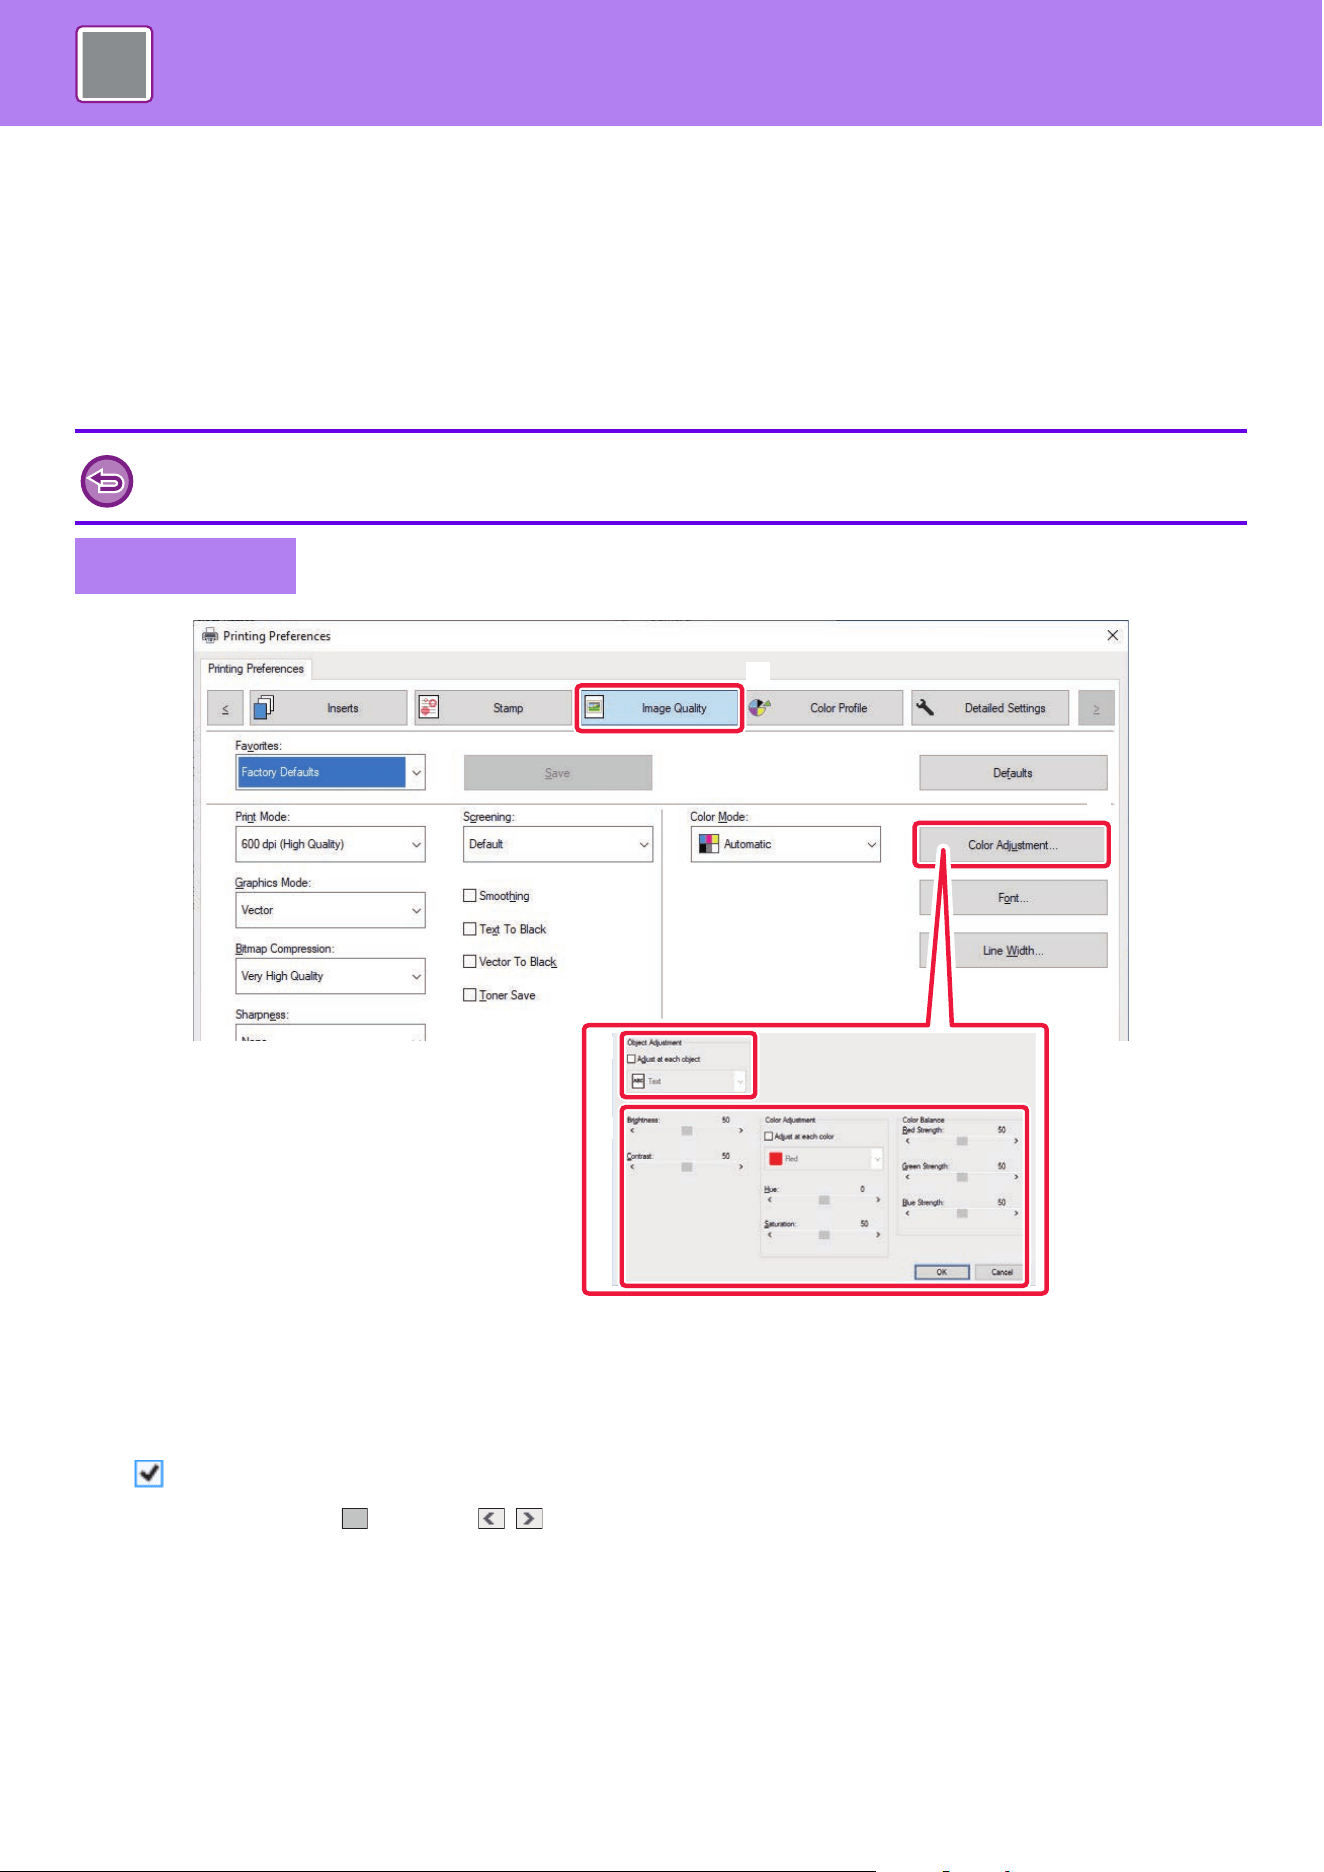
4-63
PRINTER►CONVENIENT PRINTING FUNCTIONS
COLOR MODE ADJUSTING FUNCTION
ADJUST THE BRIGHTNESS AND CONTRAST OF THE
IMAGE (COLOR ADJUSTMENT/RGB ADJUSTMENT)
This function adjusts the brightness and contrast in the print settings when a photo or other image is printed.
This function makes simple corrections even if image editing software is not installed on your computer.
(1) Click the [Image Quality] tab.
(2) Click the [Image Adjustment] button.
When using the PS printer driver, click the [RGB Adjustment] button. Proceed to step (4).
(3) To adjust objects (text, graphics, photos) individually, select the [Adjust at each object] checkbox
( ) and select the object.
(4) Drag the slide bar or click buttons to adjust the image.
This function is available in a Windows environment.
Windows
(2)
(1)
(3)
(4)
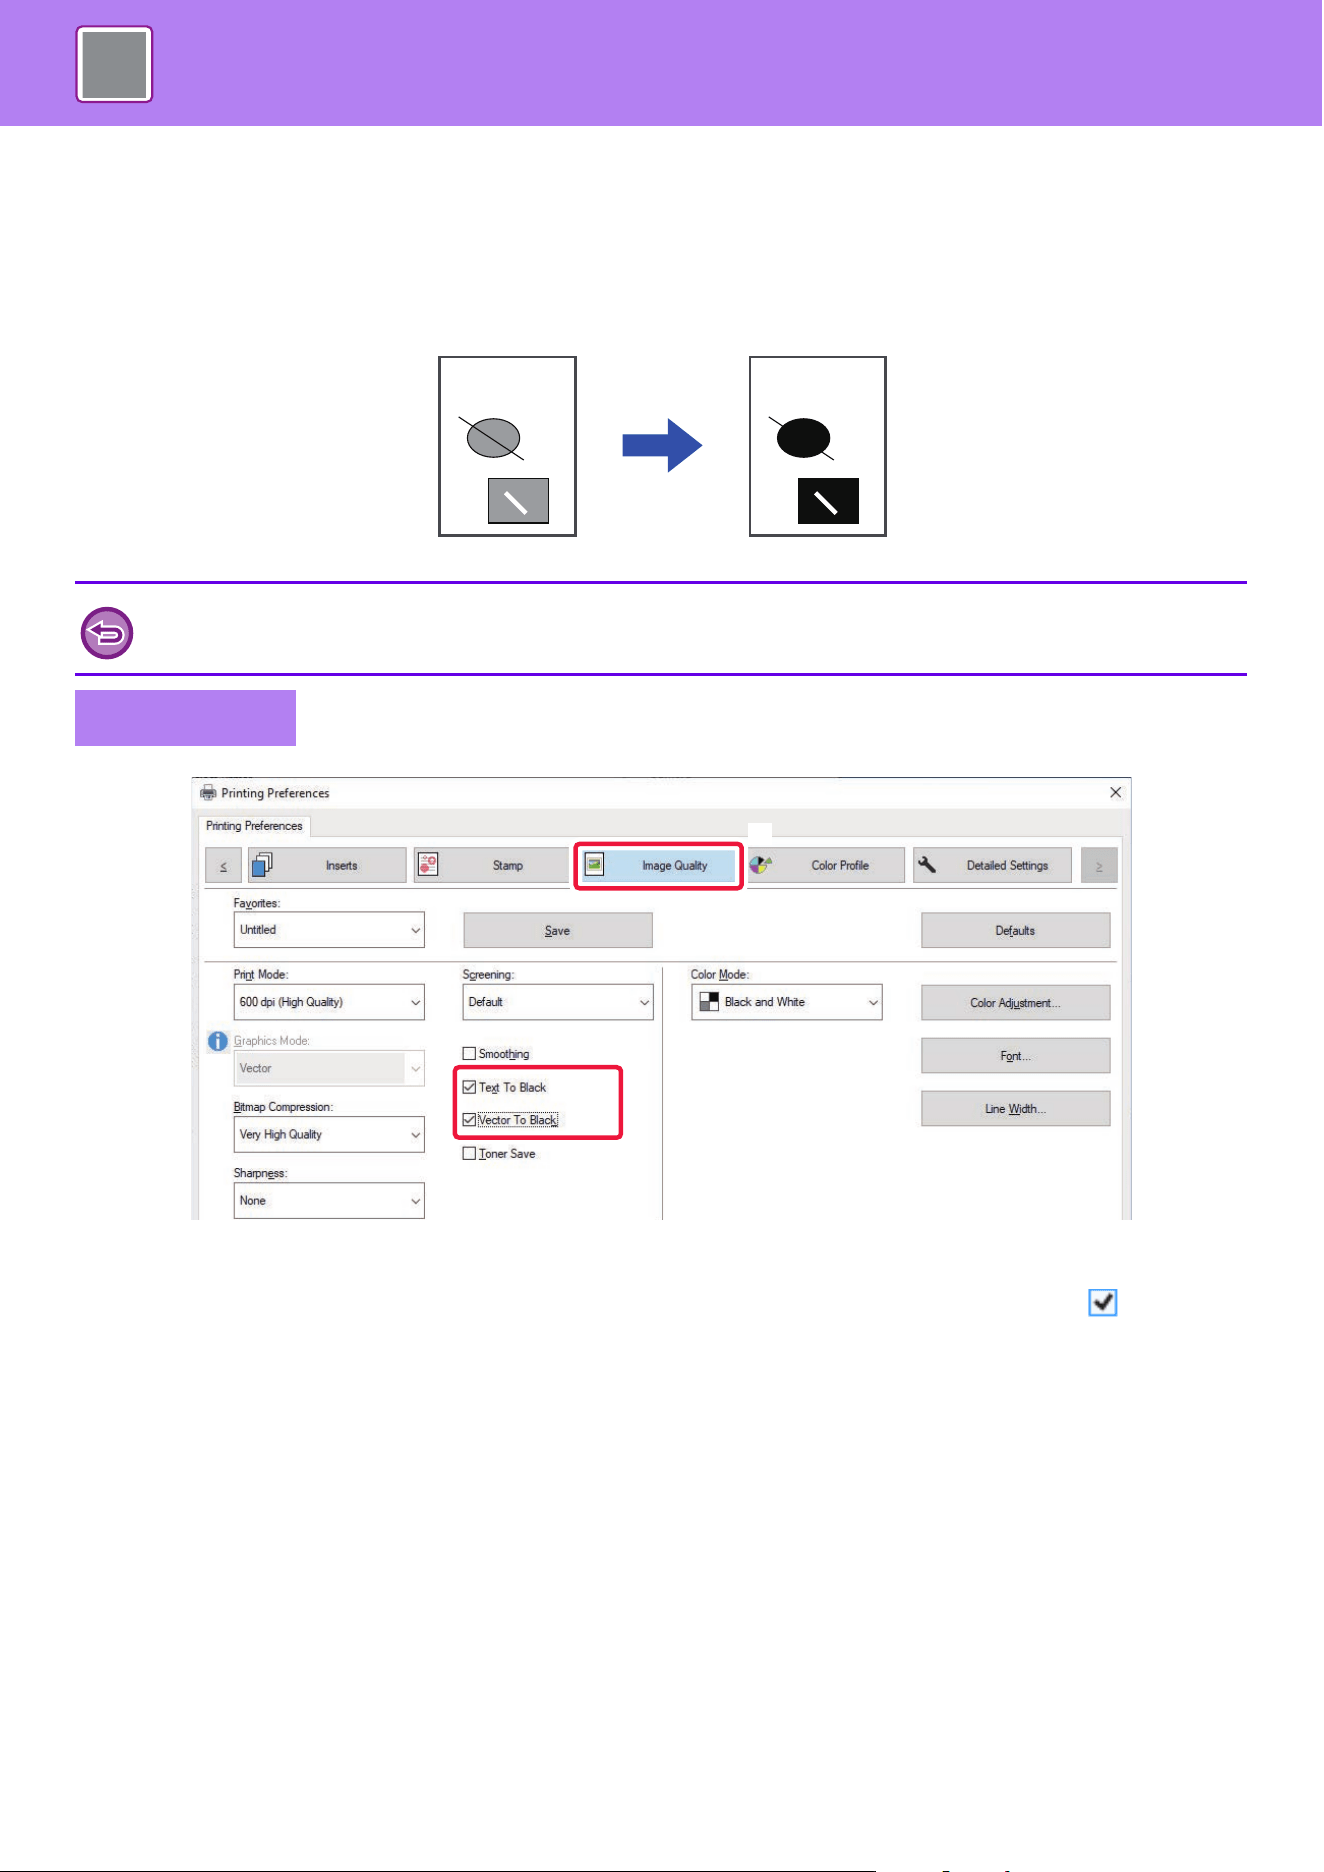
4-64
PRINTER►CONVENIENT PRINTING FUNCTIONS
PRINTING FAINT TEXT AND LINES IN BLACK (TEXT TO
BLACK/VECTOR TO BLACK)
When printing a color image in grayscale, text and lines that are drawn in faint colors are printed in black. This function
allows you to bring out color text and lines that are faint and difficult to see when printed in grayscale.
(1) Click the [Image Quality] tab.
(2) Select the [Text To Black] checkbox and/or the [Vector To Black] checkbox so that appears.
• When [Text To Black] is selected, all text other than white text is printed in black.
• When [Vector To Black] is selected, all vector graphics other than white lines and areas are printed in black.
• Raster data such as bitmap images cannot be adjusted.
•
This function is available in a Windows environment.
Windows
ABCD ABCD
(2)
(1)
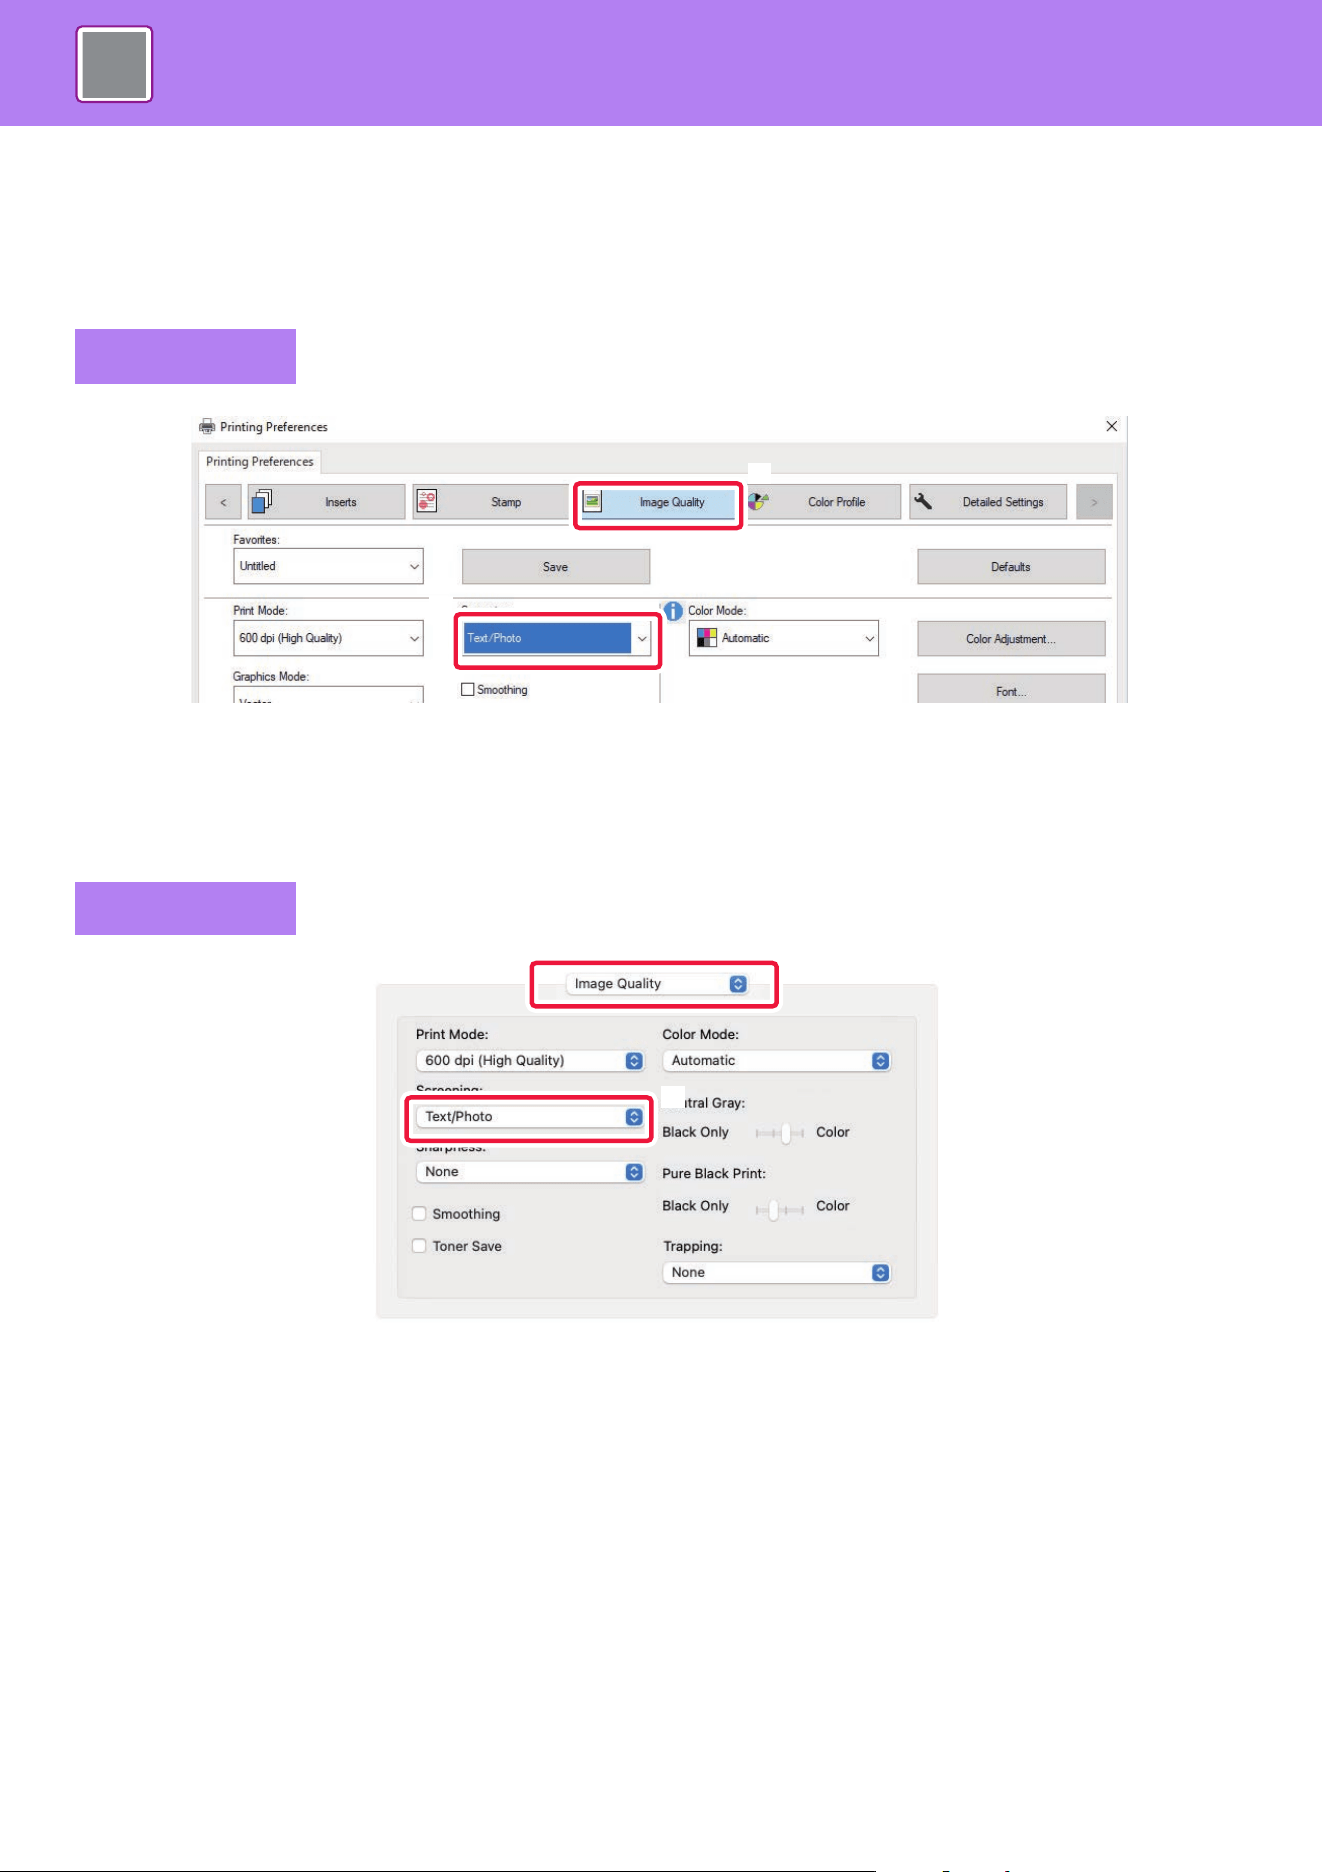
4-65
PRINTER►CONVENIENT PRINTING FUNCTIONS
MODIFYING IMAGES TO SUIT SPECIFIC
PREFERENCES (SCREENING)
Select the screening to modify the image to suit specific preferences, according to the appropriate image processing
method.
(1) Click the [Image Quality] tab.
(2) Select the [Screeing].
• Text/Photo: Image processing suitable for mixed text and photo data.
• Text: Image processing suitable for text-based data.
• Photo: Image processing suitable for photo-based data.
(1) Select [Image Quality].
In macOS 13, [Image Quality] is located under the "Printer Options" menu.
(2) Select [Screening].
• Text/Photo: Image processing suitable for mixed text and photo data.
• Text: Image processing suitable for text-based data.
• Photo: Image processing suitable for photo-based data.
• Dot (High): Image processing suitable for data with a lot of halftone dots.
• Dot (Low): Image processing suitable for data with few halftone dots.
Windows
macOS
(2)
(1)
(1)
(2)
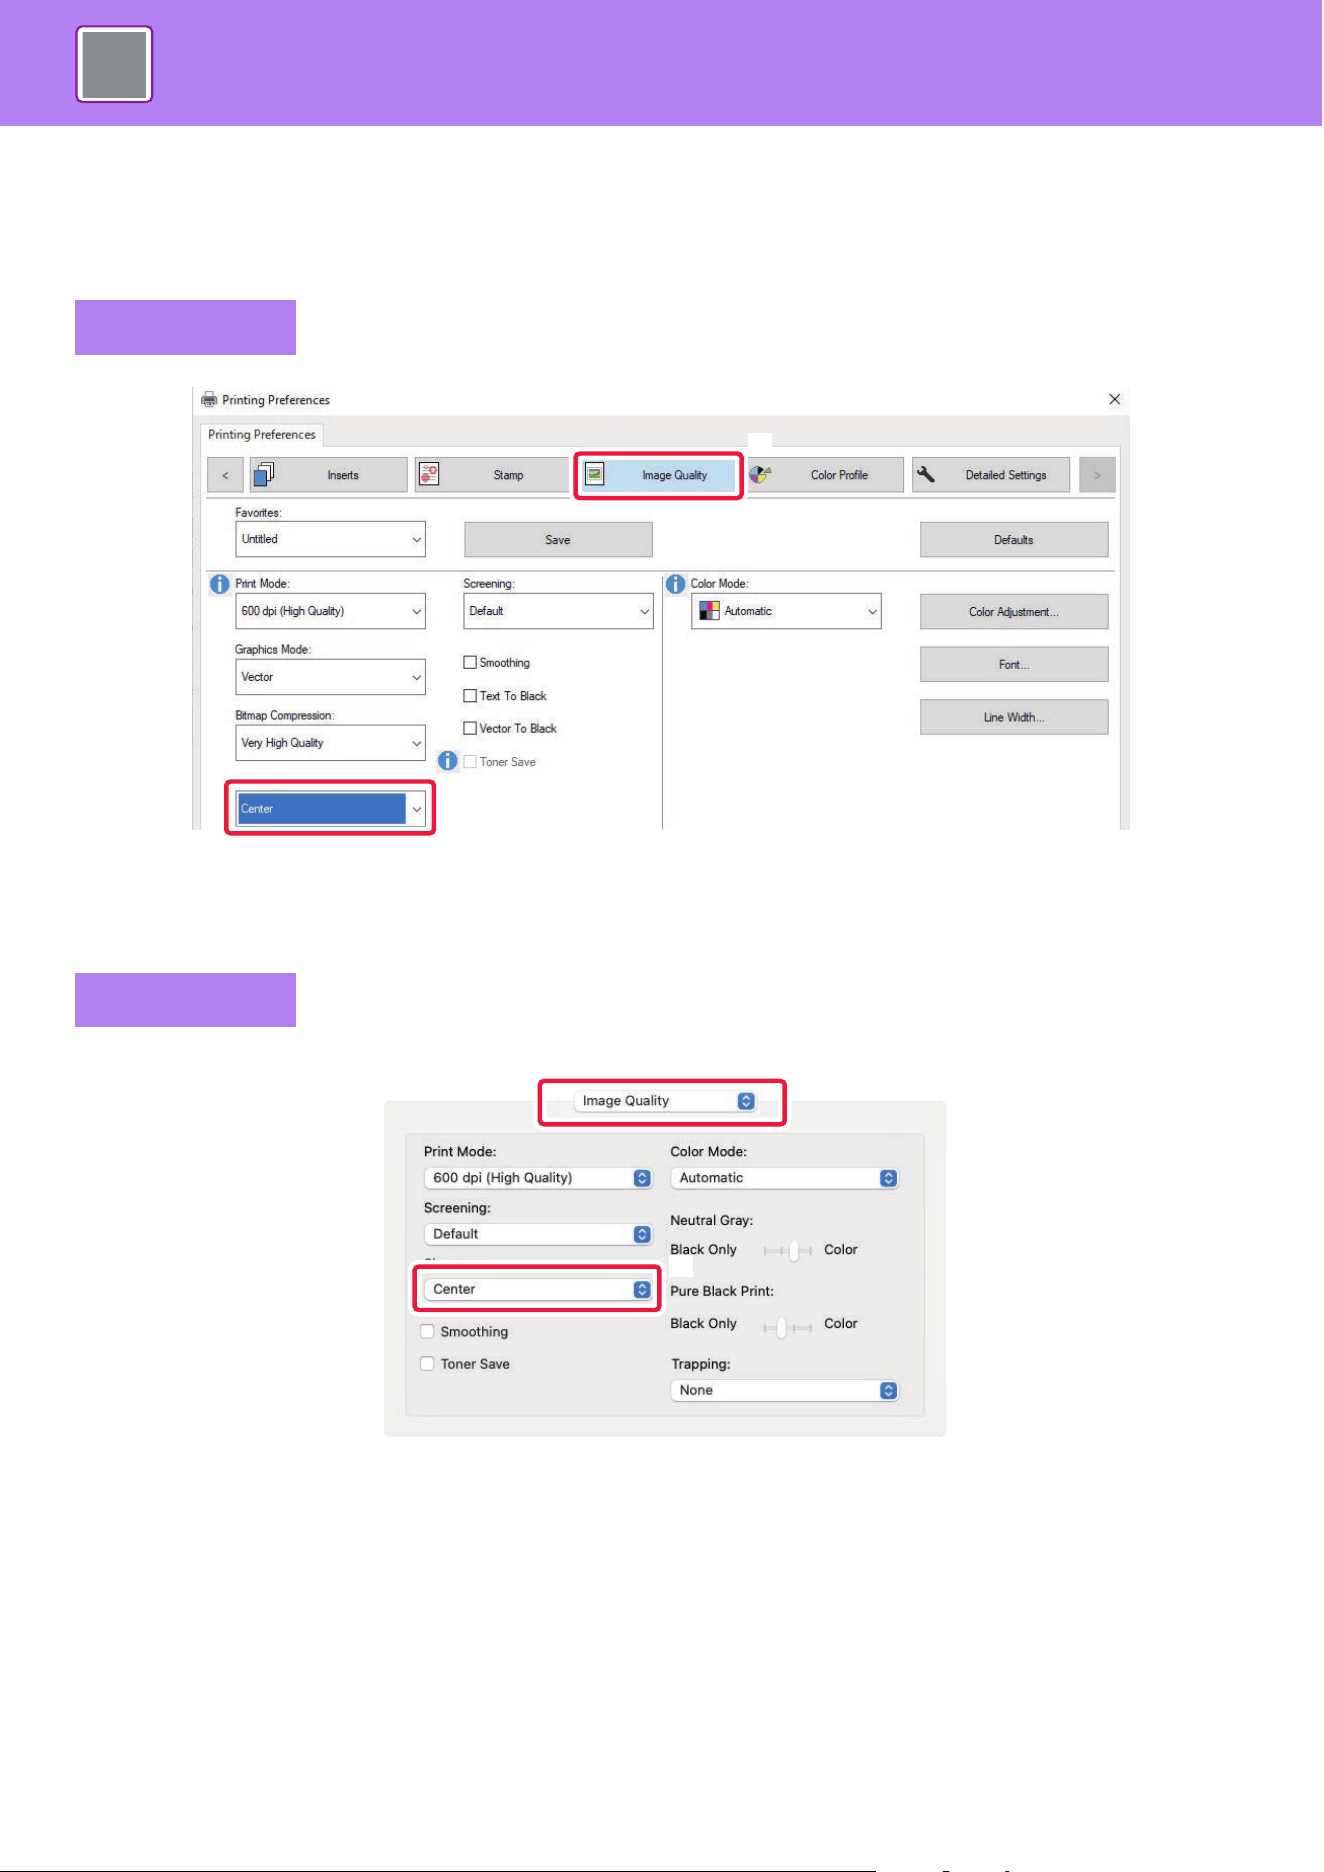
4-66
PRINTER►CONVENIENT PRINTING FUNCTIONS
ADJUSTING THE SHARPNESS OF AN IMAGE
(SHARPNESS)
This is used to sharpen an image or make it softer.
(1) Click the [Image Quality] tab.
(2) Select the [Sharpness].
[Very Soft] has the softest finish and [Very Sharp] has the sharpest finish.
(1) Select [Image Quality].
In macOS 13, [Image Quality] is located under the "Printer Options" menu.
(2) Select [Shaprness].
[Very Soft] has the softest finish and [Very Sharp] has the sharpest finish.
Windows
macOS
(2)
(1)
(1)
(2)
4-67
PRINTER►CONVENIENT PRINTING FUNCTIONS
SELECTING COLOR SETTINGS TO MATCH THE IMAGE
TYPE (ADVANCED COLOR SETTINGS)
Preset color settings are available in the machine's printer driver for various uses. These enable printing using the most
suitable color settings for the color image type.
Advanced color settings, such as the color management settings and the setting for adjusting the color tone expression,
are also available for meeting the needs of color image printing.
The following color management settings are available.
*1 Can only be used when using the PCL6 printer driver.
*2 Can only be used when using the PS printer driver (Windows/macOS).
Windows ICM Color management method in a Windows environment
ColorSync Color management method in a macOS environment
Source Profile Select a source color profile of color matching.
Rendering Intent The selections below provide the ability to modify color image processing to suit specific
preferences. (Color matching method: Method of color converting RGB colors on the display,
etc. into CMYK colors in the printer)
Output Profile Select a color profile for the image to be printed
CMYK Correction
*1
Correct the image to obtain the optimum printing result when printing a CMYK image.
Neutral Gray Select a creating method of neutral gray.
Pure Black Print Select whether you want to print black data area with only black toner.
Trapping Select to prevent void area which may be generated around edge of colors.
Black Overprint
*2
Prevents whitening of the outline of black text.
CMYK Simulation
*2
Adjusts the colors to simulate printing that would be obtained with the process colors used in
printing presses.
Preserve Pure CMYK Colors
*2
When using CMYK simulation, retain cyan, magenta, and yellow pure colors, and retain black
printer information.
Simulation Profile
*2
Select the simulation target.
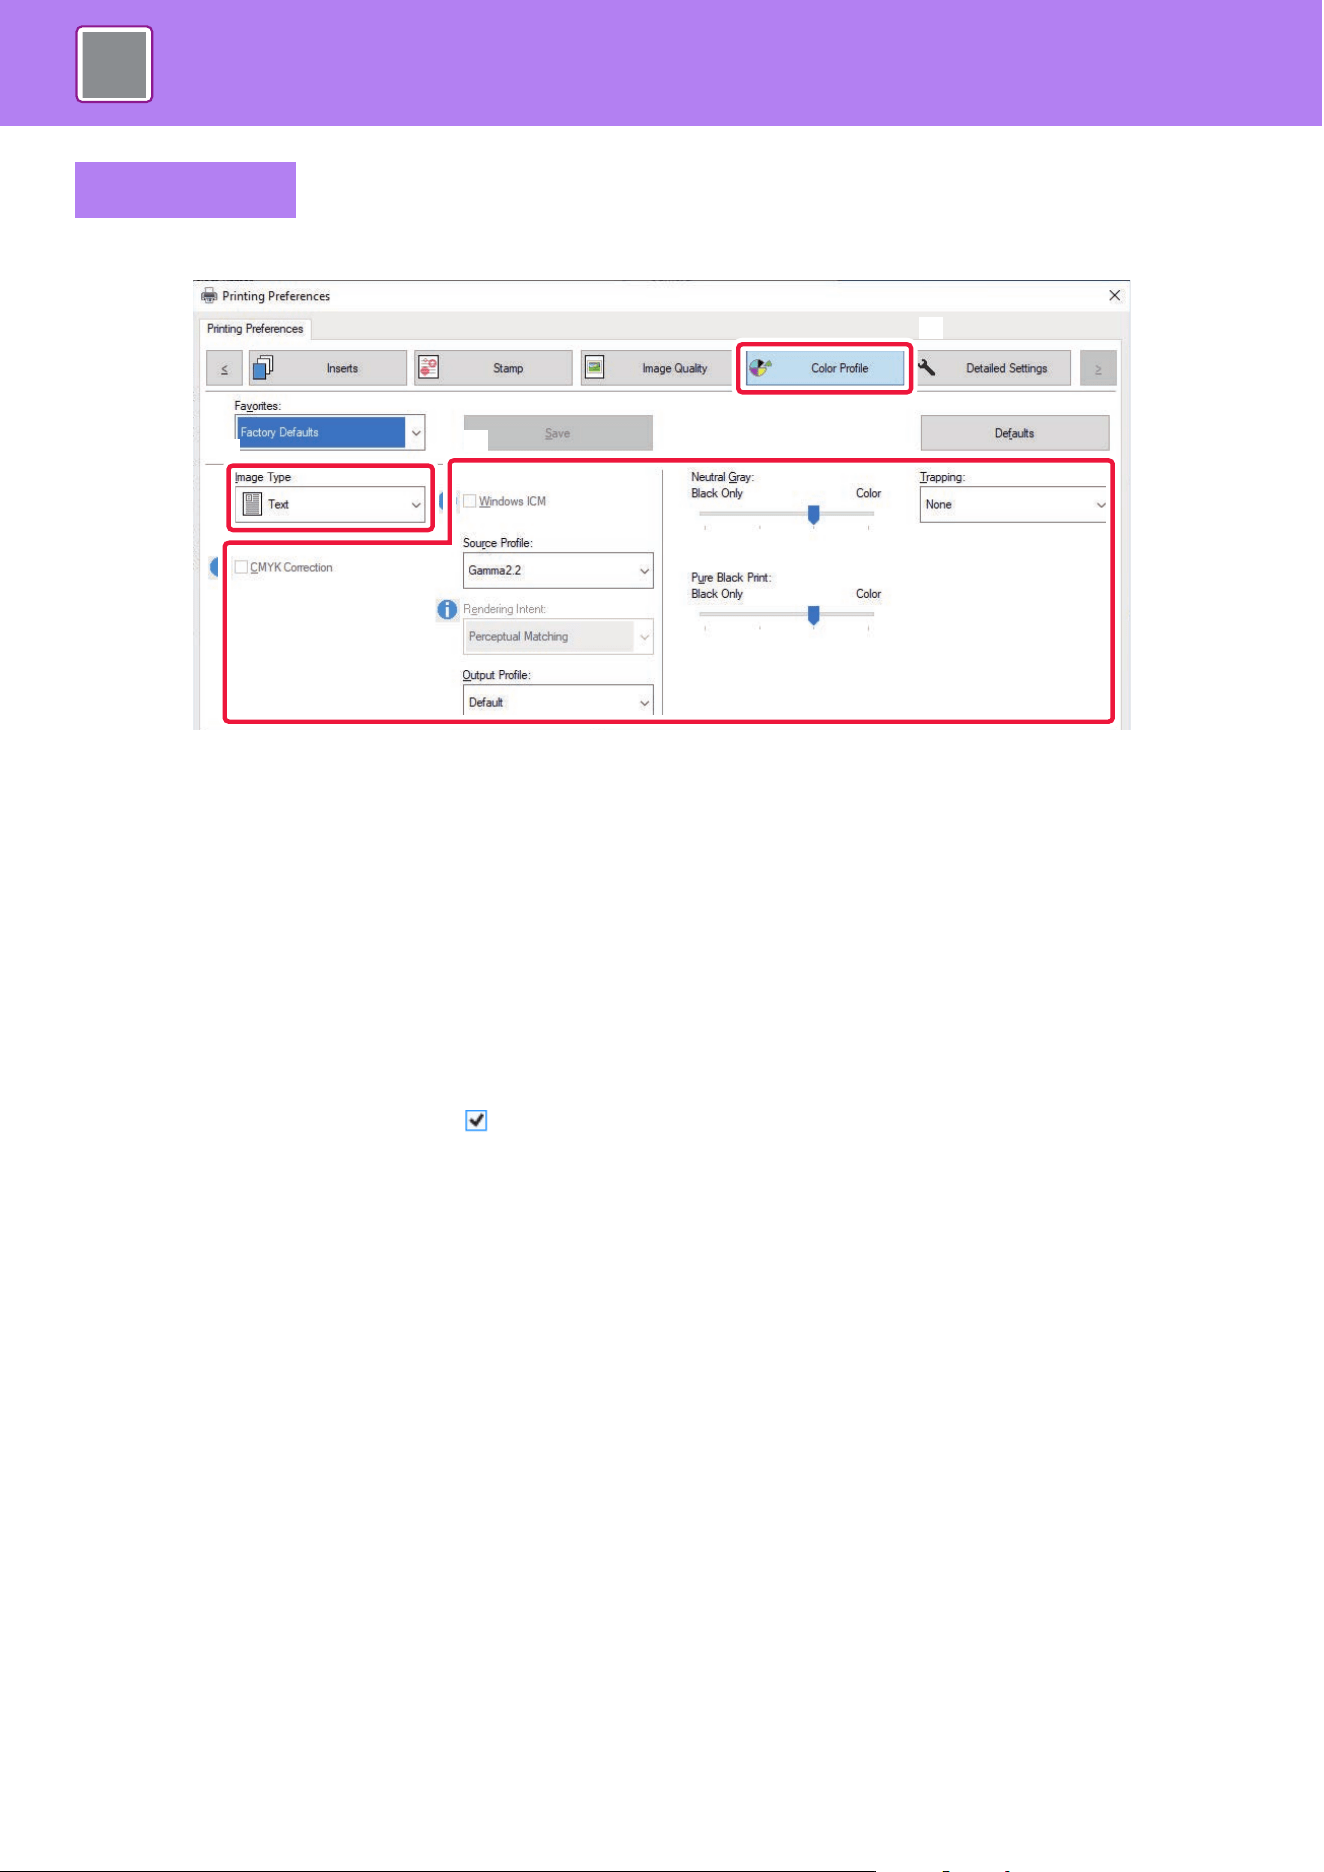
4-68
PRINTER►CONVENIENT PRINTING FUNCTIONS
(1) Click the [Color Profile] tab.
(2) Select [Image Type].
• Text: Data consisting mostly of text
• Presentation: Data with many photos or illustrations
• Photo: Photo data or data that uses photos
• CAD: Engineering drawing data
• Scan: Data scanned by a scanner
• Colorimetric: Data to be printed in colors as viewed on the screen
• Custom: Data to be printed with special settings
(3) Specify the settings.
To configure color management using the Windows OS ICM, set "Image Type" to [Custom] in step (2). Then, click the [Windows
ICM] checkbox so that the checkmark appears.
To configure "Source Profile" and other detailed color management tasks, select the desired settings from the menus.
Windows
(1)
(2)
(3)
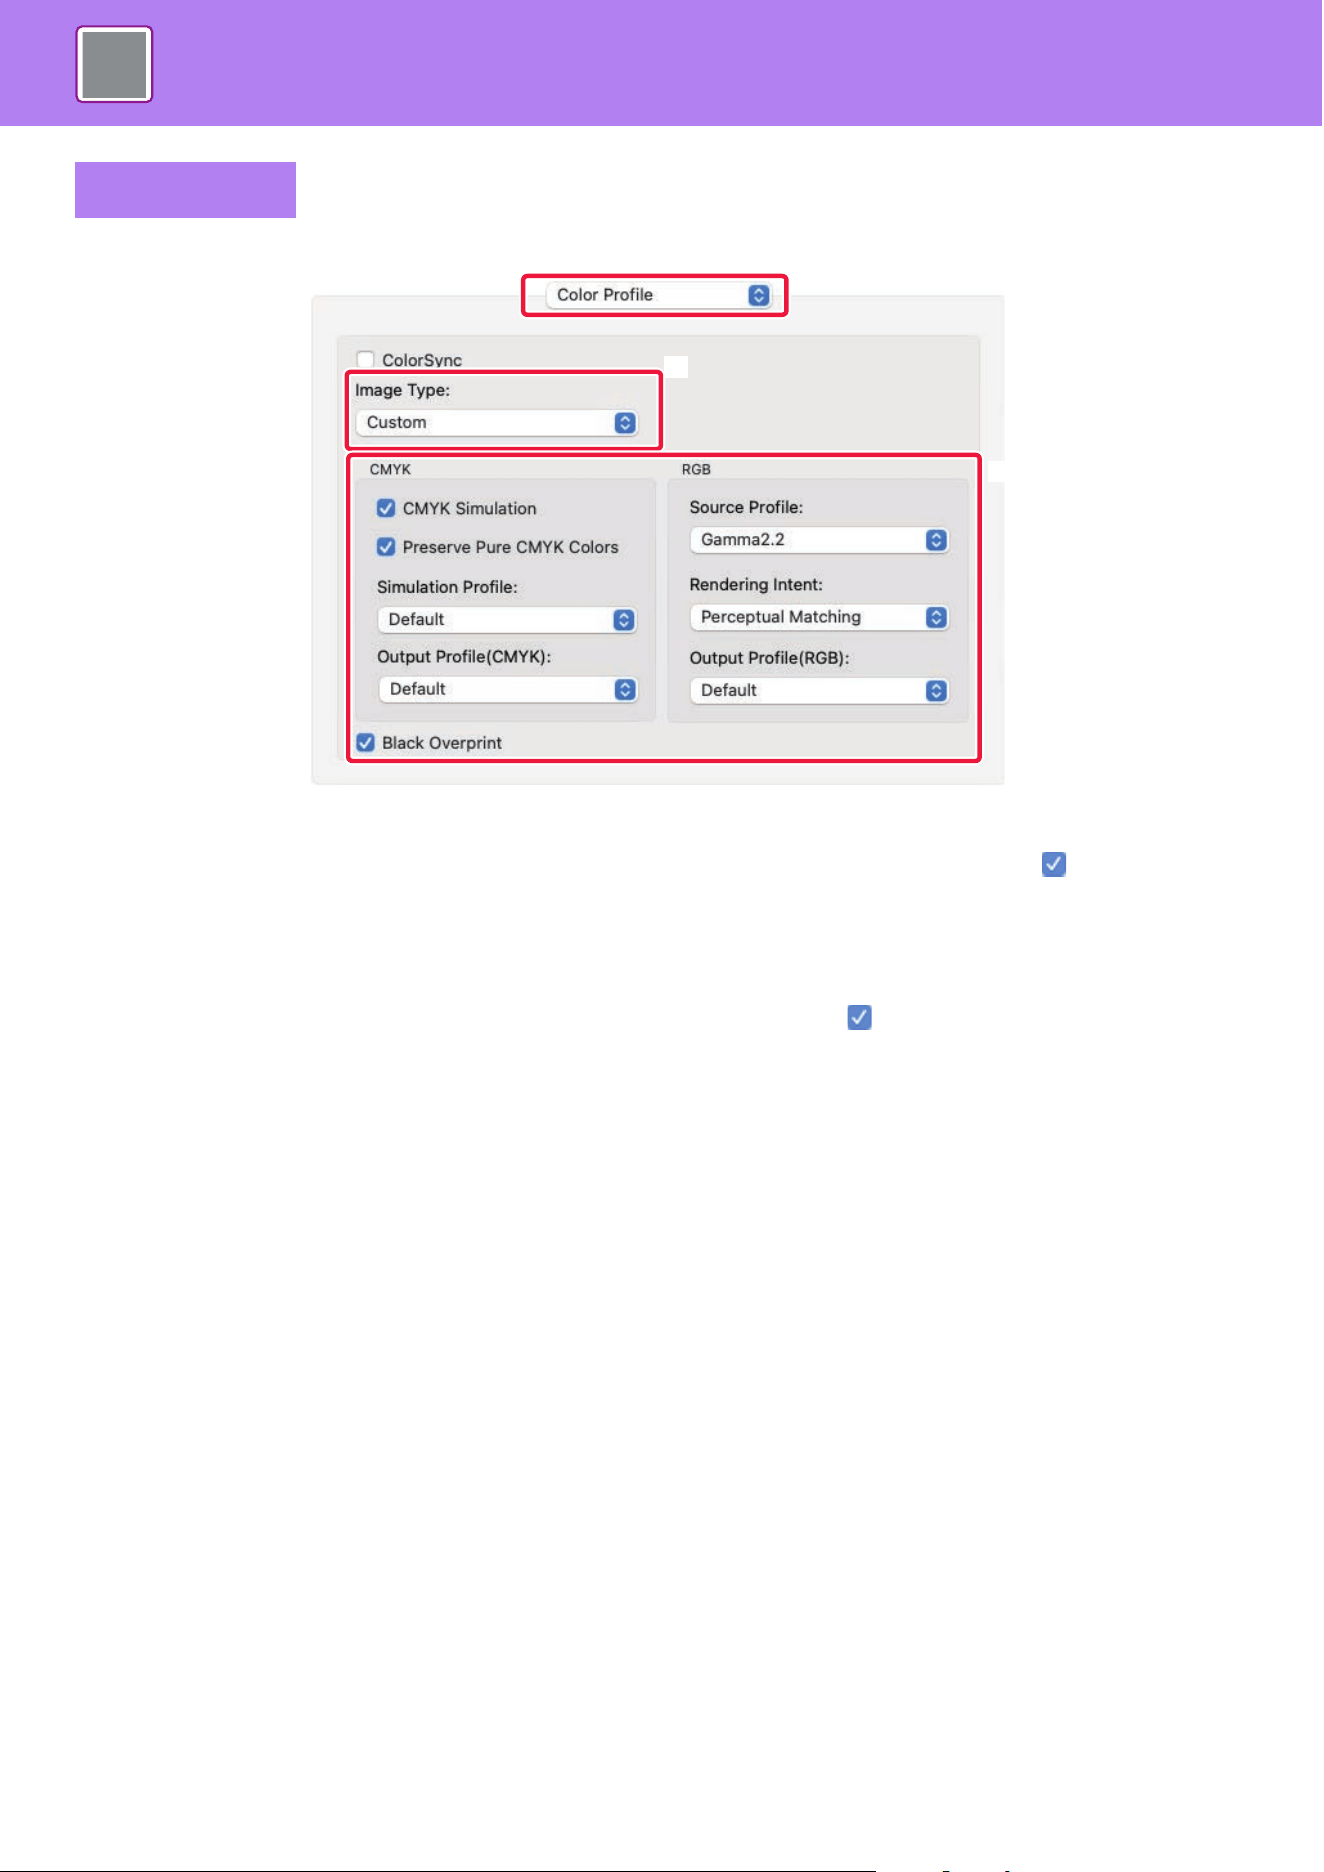
4-69
PRINTER►CONVENIENT PRINTING FUNCTIONS
(1) Select [Color Profile].
To use the macOS color management function, select the [ColorSync] checkbox so that the checkmark appears. In this
case, you cannot select "Image Type".
In macOS 13, select the [Advanced] tab in [Image Quality] of the "Printer Options" menu.
(2) Select [Image Type].
To configure color management settings, select the desired settings from the menus. To select a "CMYK Simulation"
setting,select [Custom] in "Image Type", select the [CMYK Simulation] checkbox ( ), and then select the desired setting.
• Text: Data consisting mostly of text
• Presentation: Data with many photos or illustrations
• Photo: Photo data or data that uses photos
• CAD: Engineering drawing data
• Scan: Data scanned by a scanner
• Colorimetric: Data to be printed in colors as viewed on the screen
• Custom: Data to be printed with special settings
(3) Specify the settings.
macOS
(1)
(2)
(3)
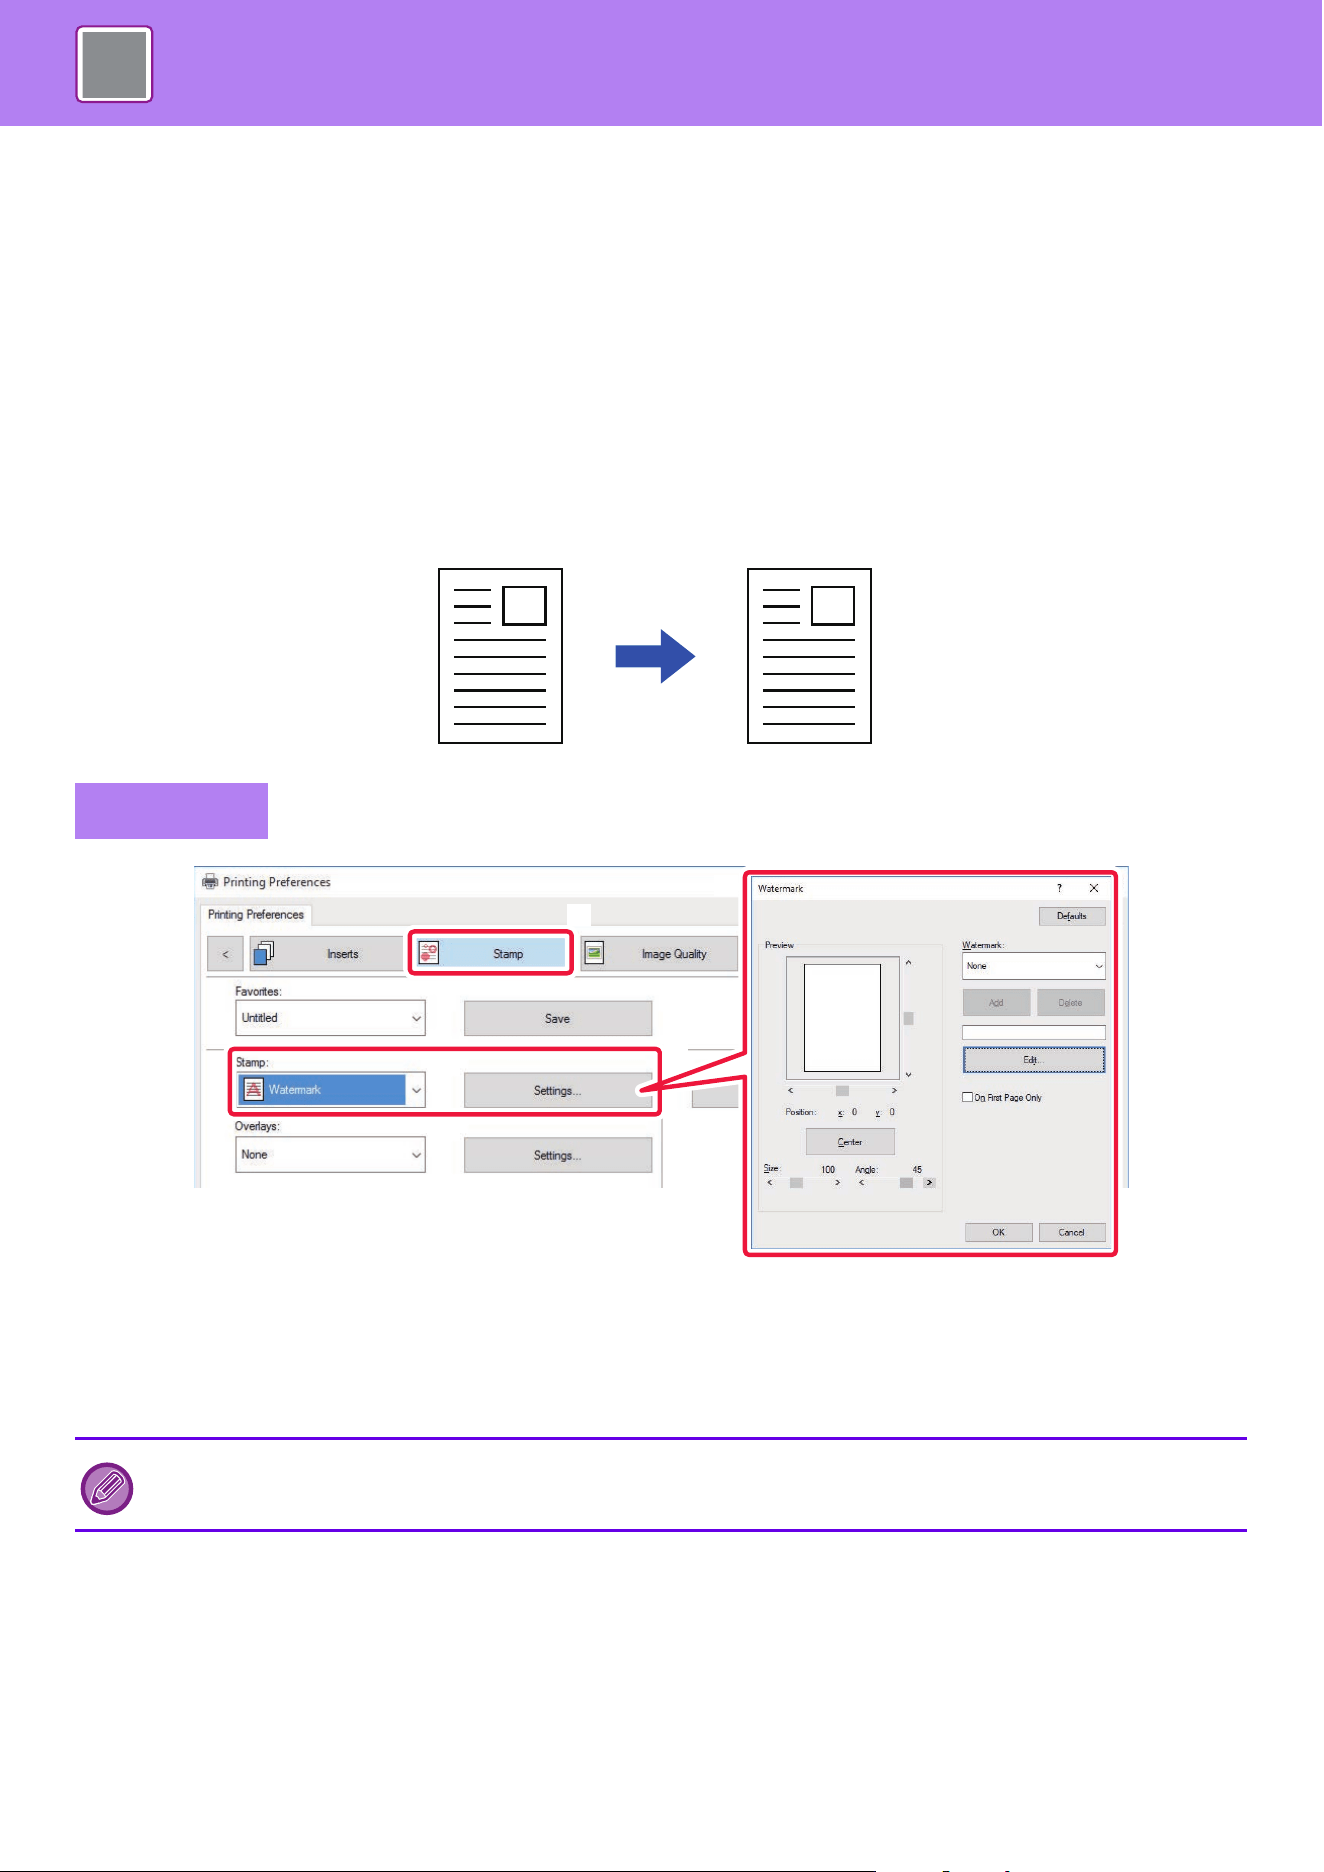
4-70
PRINTER►CONVENIENT PRINTING FUNCTIONS
FUNCTIONS TO COMBINE TEXT AND
IMAGES
ADDING A WATERMARK TO PRINTED PAGES
(WATERMARK)
This function adds faint shadow-like text as a watermark in the background of the printed image. The size and angle of
the watermark text can be adjusted.
The watermark text can be selected from the previously registered text in the list. When necessary, you can enter text to
create an original watermark.
(1) Click the [Stamp] tab.
(2) Select [Watermark] from "Stamp" and click the [Settings] button.
(3) Select the watermark to be used and click the [OK] button.
Click the [Edit] button to edit the font color and select other detailed settings.
Windows
If you want to create a new watermark, enter the text of the watermark in the text box and click the [Add] button.
CONFIDENTIAL
(2)
(1)
(3)
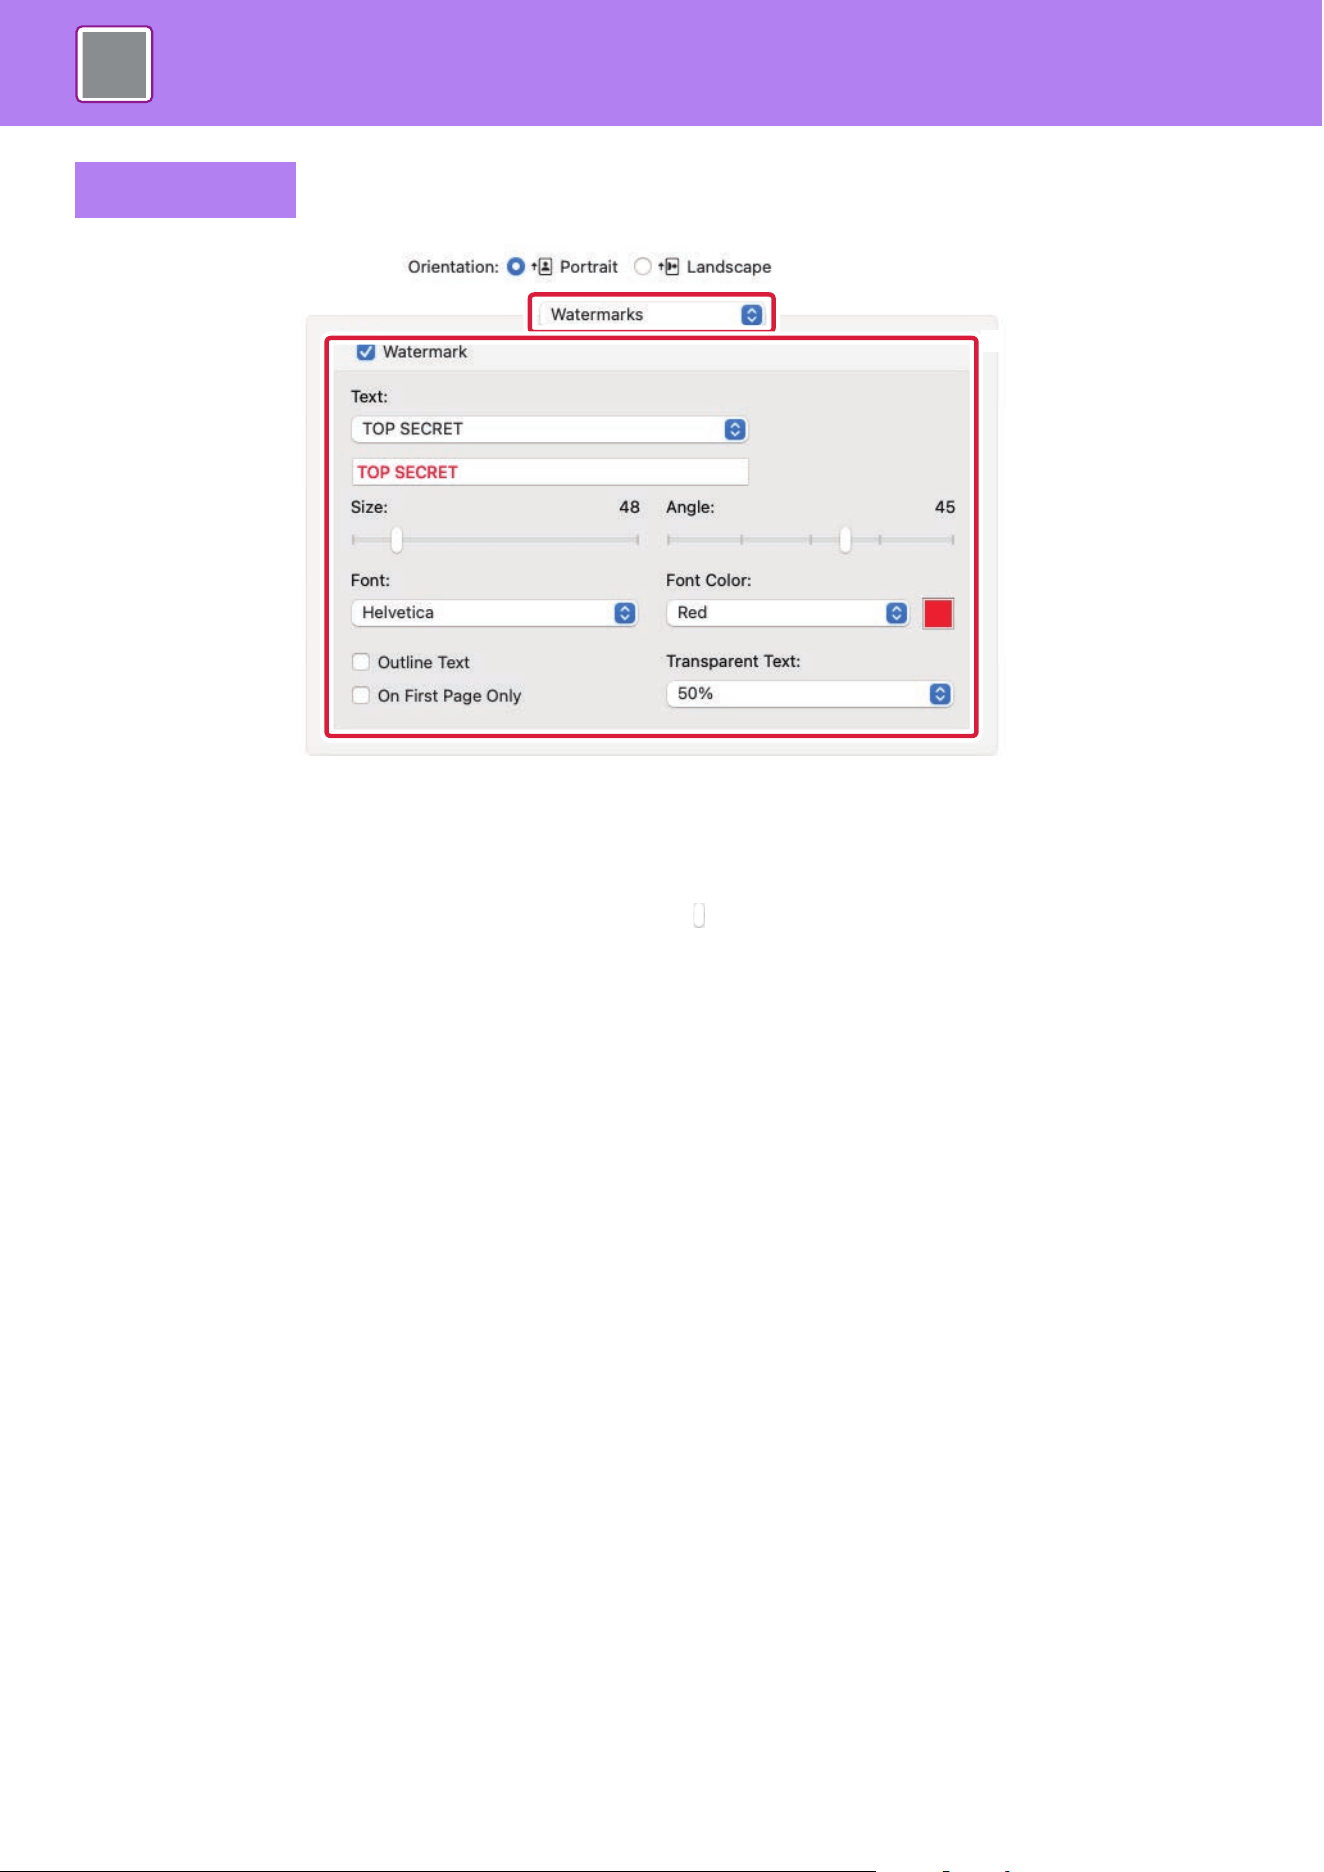
4-71
PRINTER►CONVENIENT PRINTING FUNCTIONS
(1) Select [Watermarks].
In macOS 13, [Watermarks] is located under the "Printer Options" menu.
(2) Click the [Watermark] checkbox and configure watermark settings.
• Configure detailed watermark settings such as selection of the text.
• Adjust the size and angle of the text by dragging the slide bar .
macOS
(2)
(1)
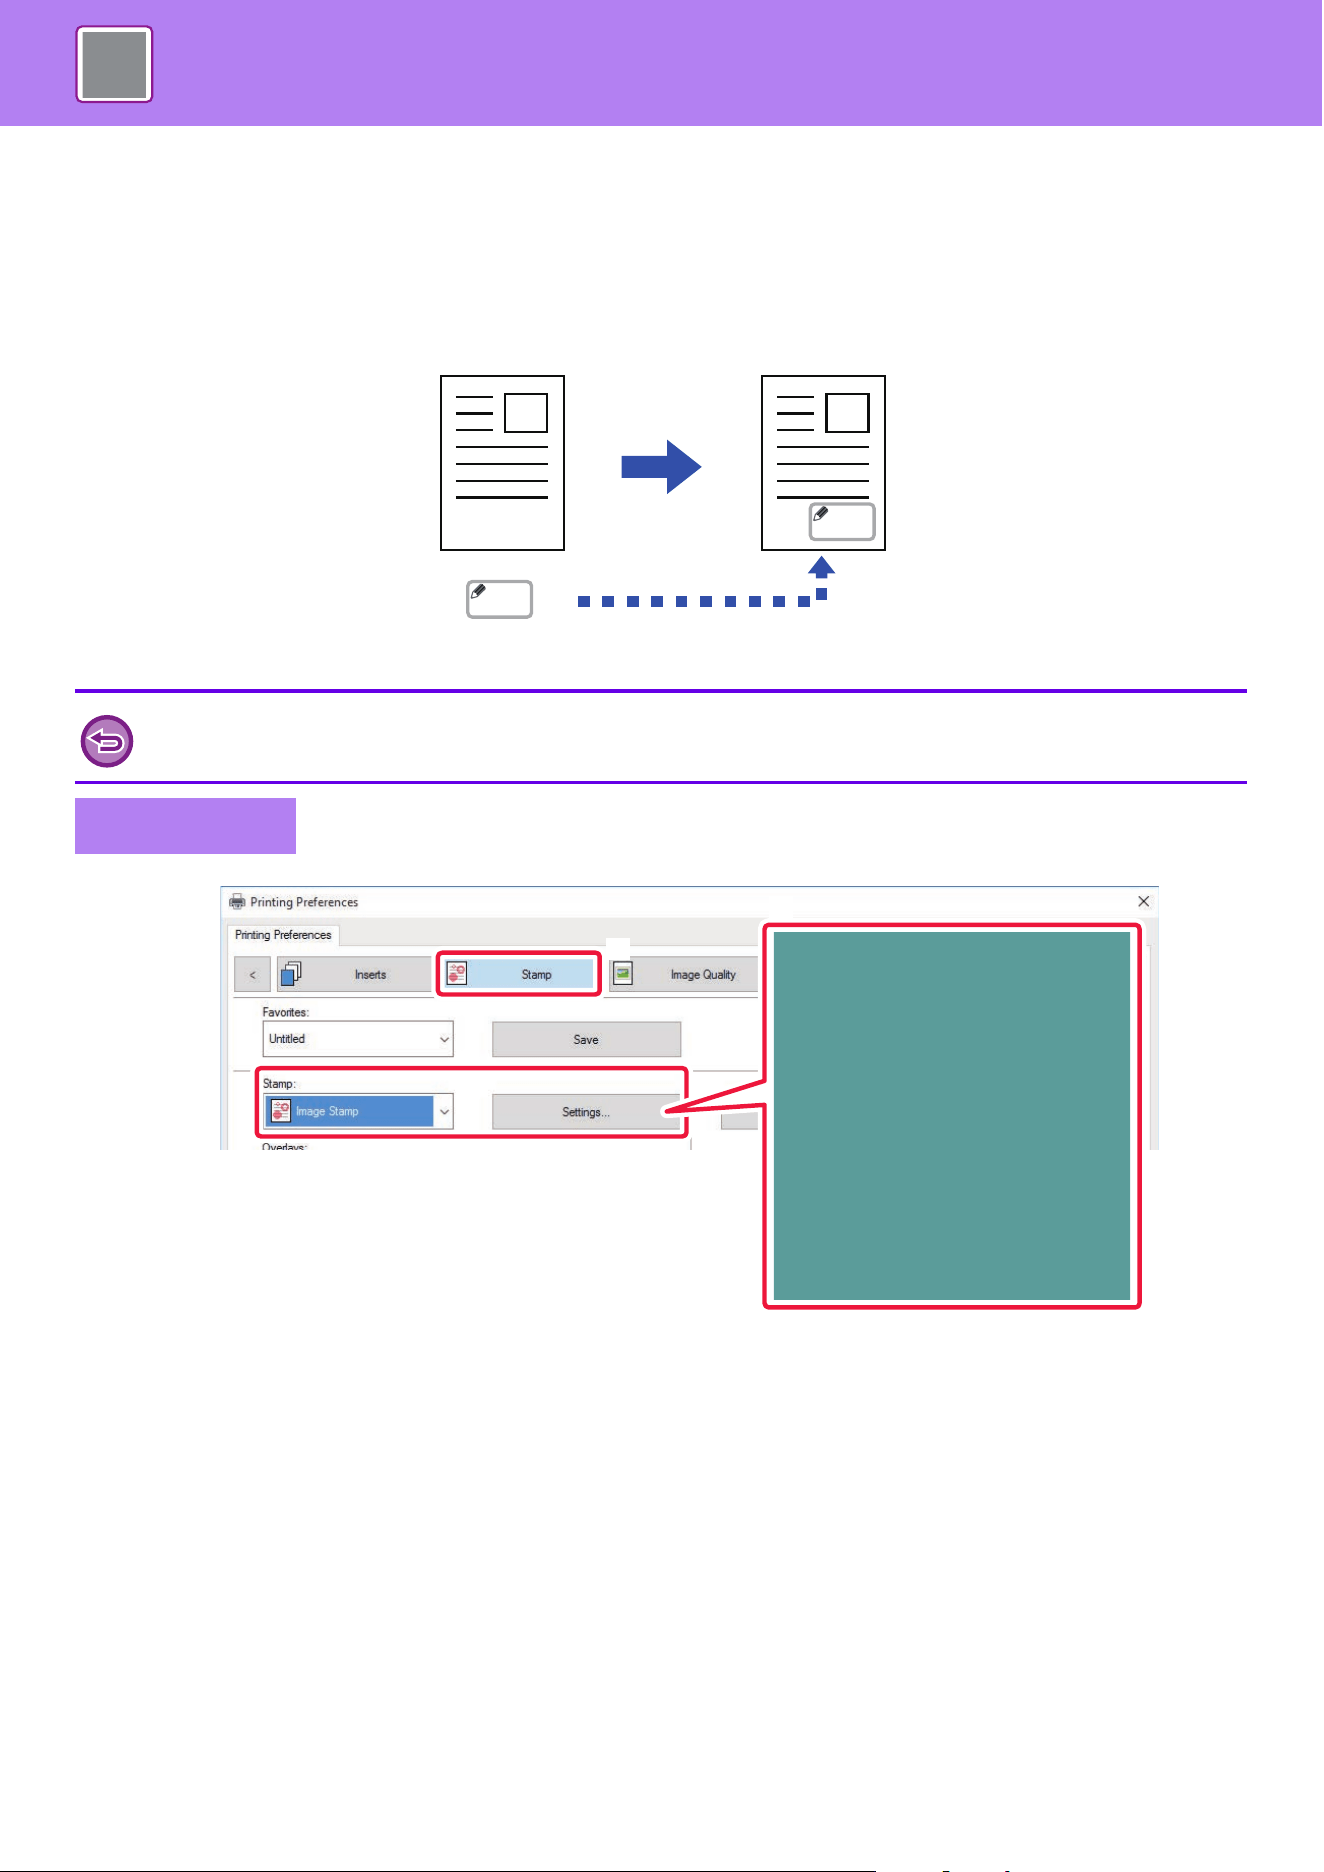
4-72
PRINTER►CONVENIENT PRINTING FUNCTIONS
PRINTING AN IMAGE OVER THE PRINT DATA (IMAGE
STAMP)
This function prints a bitmap or JPEG image stored on your PC over the print data.
This function prints a frequently used image or an icon of your own creation as if it is stamped on the print data. The size,
position, and angle of the image can be adjusted.
(1) Click the [Stamp] tab.
(2) Select [Image Stamp] from "Stamp" and click the [Settings] button.
(3) Select the image stamp to be used, and click the [OK] button.
• If an image stamp has already been stored, it can be selected from the menu.
• If you have not stored an image stamp, click the [Image File], select the file you wish to use for the image stamp, and click the
[Add] button.
This function is available in a Windows environment.
Windows
MEMO
MEMO
(2)
(1)
(3)
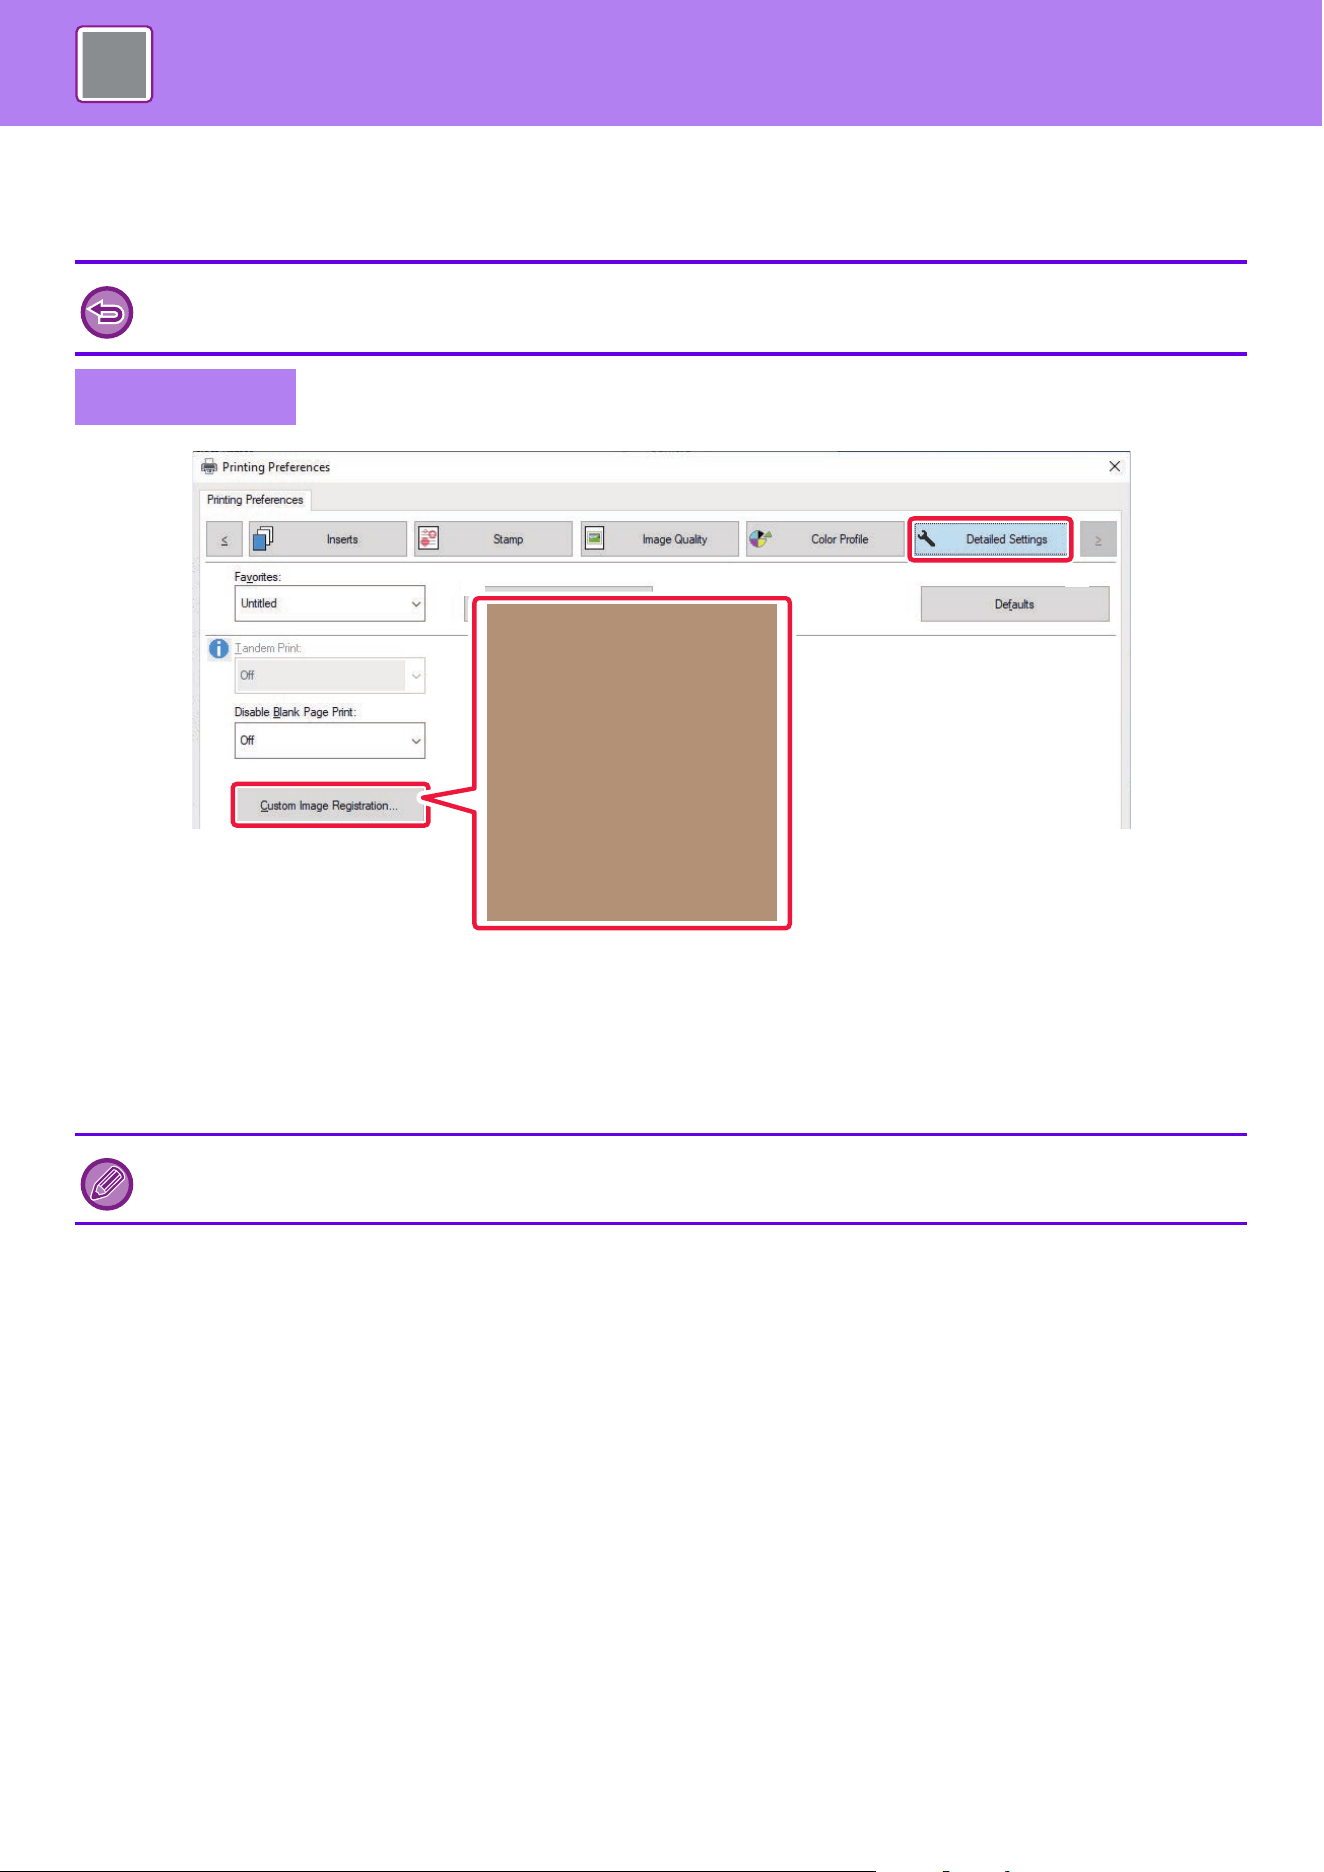
4-73
PRINTER►CONVENIENT PRINTING FUNCTIONS
REGISTERING A CUSTOM IMAGE
This function registers images used as custom images from the printer driver to the machine.
(1) Click the [Detailed Settings] tab.
(2) Click the [Custom Image Registration] button.
(3) Select the registration type and name of the custom image.
When [Custom stamp] is selected in "Registered Type", a full-color, non-transparent stamp image is registered. When [Custom
watermark] is selected, a single-color, transparent watermark image is registered.
• This function is available in a Windows environment.
• This function can be used when the PCL6 printer driver is used.
Windows
If you have attempted to store multiple pages of data, only the first page will be stored.
(2)
(1)
(3)

4-74
PRINTER►CONVENIENT PRINTING FUNCTIONS
OVERLAY A FIXED FORM ON THE PRINT DATA
(OVERLAYS)
This function overlays data on a fixed form you have prepared.
By creating table rulings or a decorative frame in an application different from that of the text file and registering the data
as an overlay file, an attractive print result can be easily obtained without the need for complex manipulations.
Creating an overlay file
(1) Open the driver properties window from the application that is used for creating overlay data.
(2) Click the [Stamp] tab.
(3) Click the [Settings] button.
(4) Click the [New] button and specify the name and folder to be used for the overlay file that you
wish to create.
The file will be created when the settings are completed and printing is started.
This function is available in a Windows environment.
Windows
XXXX
XXX 1 100
XXXX 10 150
XXX 0 120
XXXX 10 250
XXXX
XXX 1 100
XXXX 10 150
XXX 0 120
XXXX 10 250
(3)
(2)
(4)

4-75
PRINTER►CONVENIENT PRINTING FUNCTIONS
Printing with an overlay file
(1) Open the driver properties window from the application that is used for printing with an overlay
file.
(2) Click the [Stamp] tab.
(3) Select an overlay file.
A previously created or stored overlay file can be selected from the menu.
• When printing is started, a confirmation message will appear. The
overlay file will not be created until the [Yes] button is
clicked.
• When you click the [Open] button, the existing overlay file is registered.
(3)
(2)
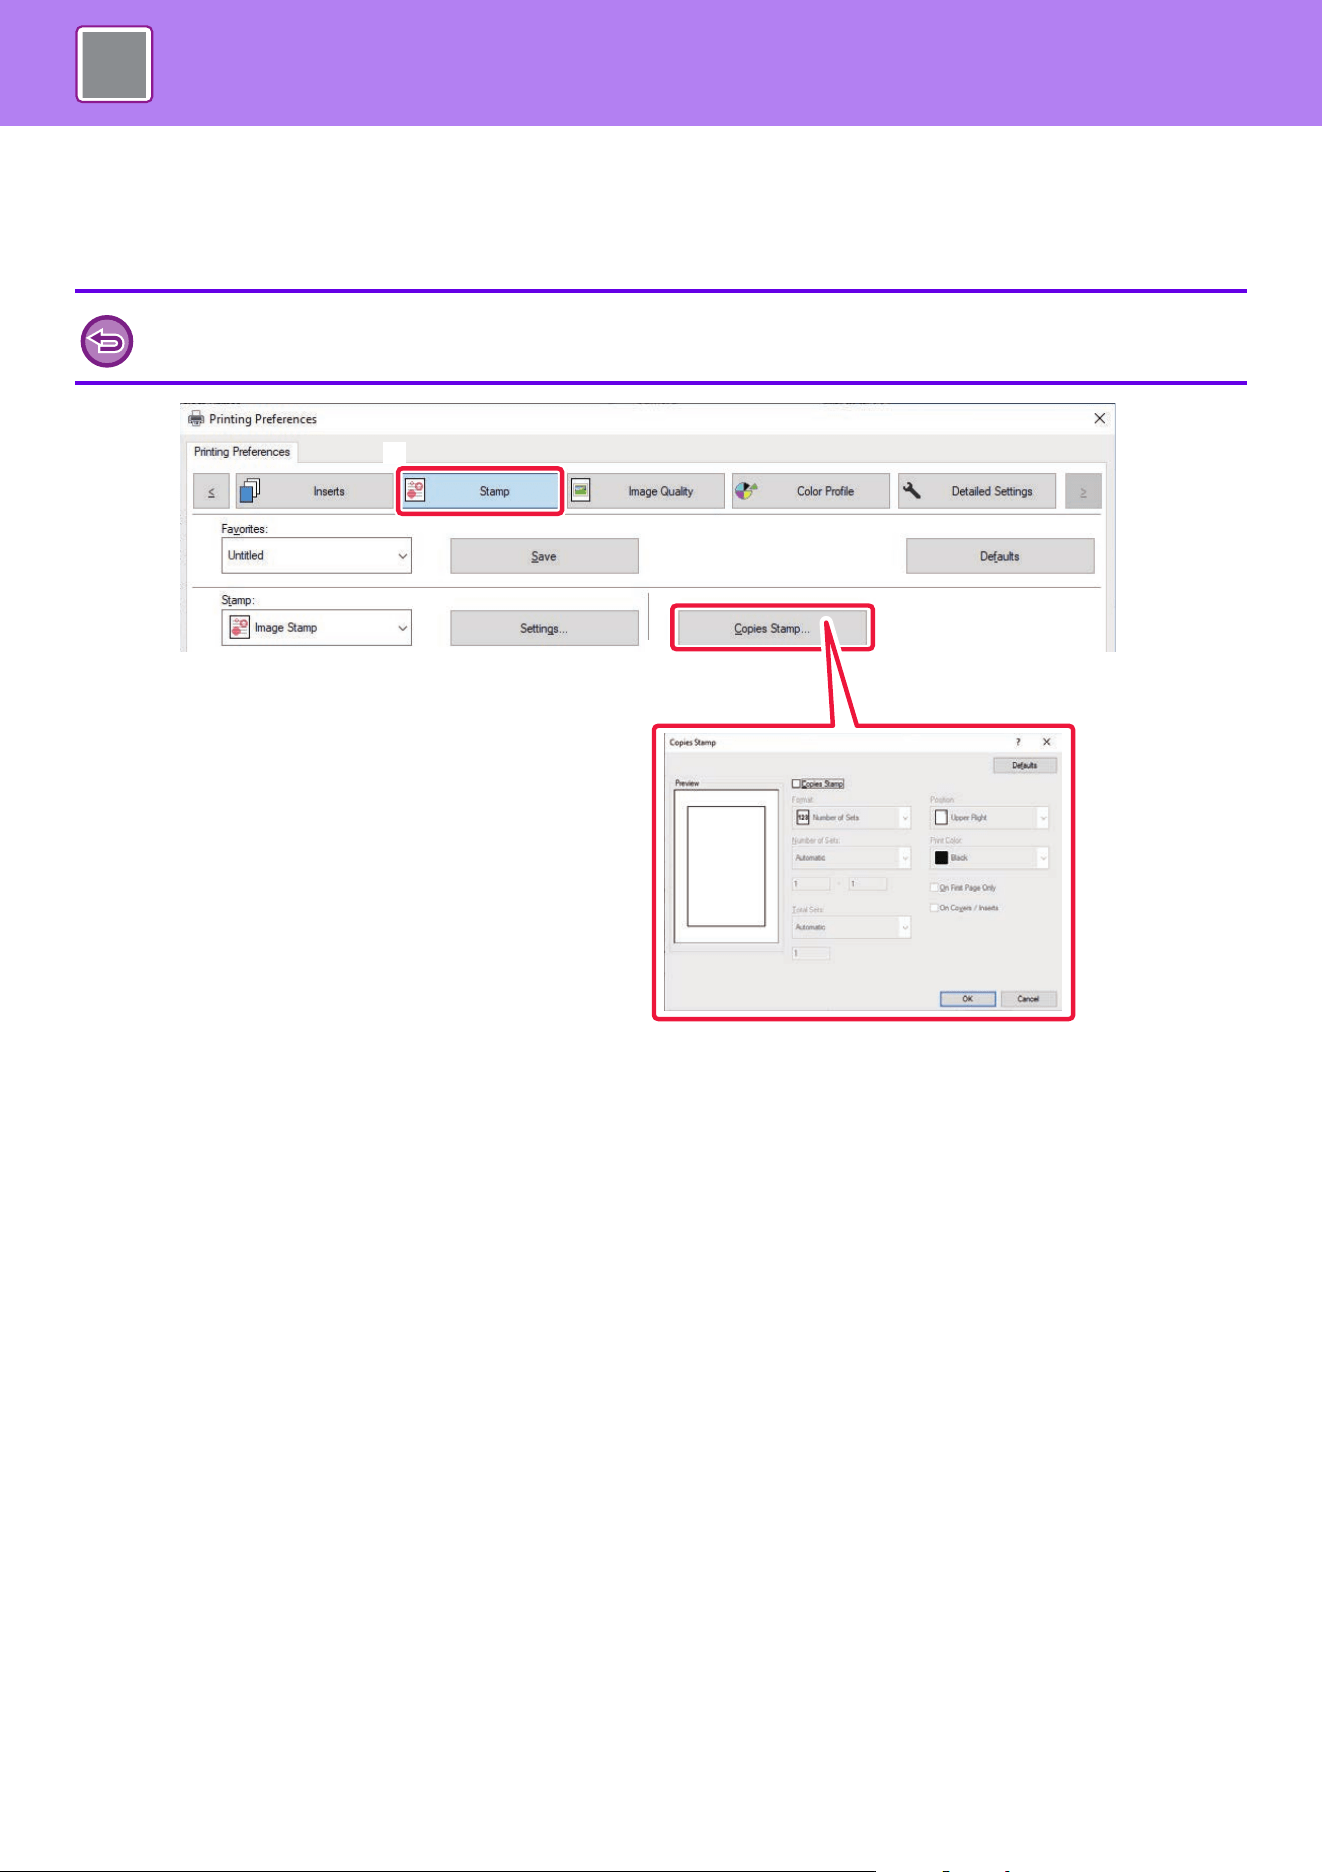
4-76
PRINTER►CONVENIENT PRINTING FUNCTIONS
ADDING THE NUMBER OF COPIES (COPIES STAMP)
You can add the number of copies to the header or footer of the print data. You can also set a copies number and print
position.
(1) Click the [Stamp] tab.
(2) Click the [Copies Stamp] button.
(3) Select the settings, and click the [OK] button.
This function is available in a Windows environment.
(2)
(1)
(3)
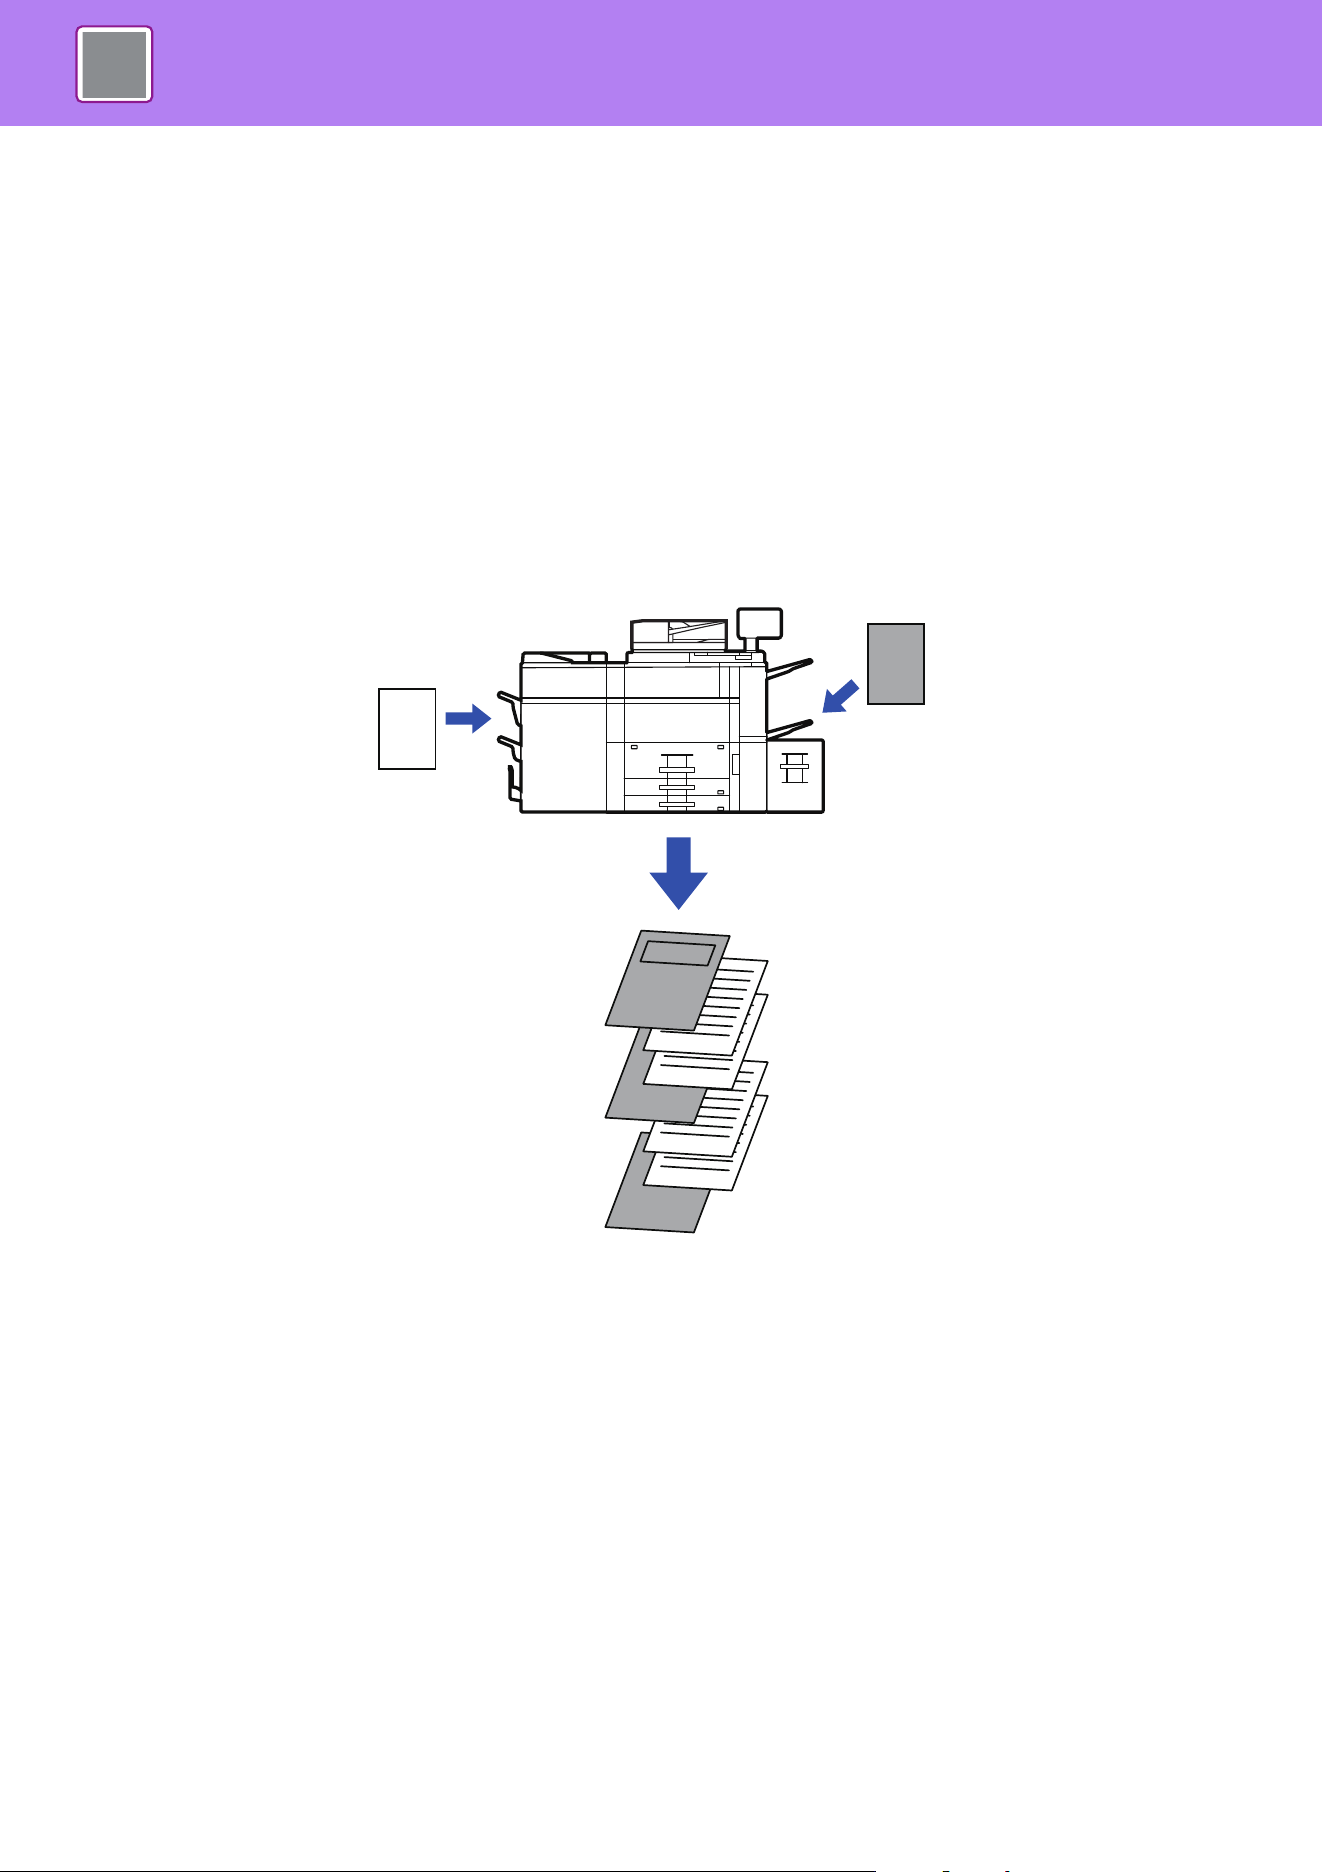
4-77
PRINTER►CONVENIENT PRINTING FUNCTIONS
PRINT FUNCTIONS FOR SPECIAL
PURPOSES
PRINTING SPECIFIC PAGES ON DIFFERENT PAPER
(DIFFERENT PAPER)
In a Windows environment
The front and back covers and specified pages of a document are printed on paper that is different from the other pages.
Use this function when you wish to print the front and back covers on heavy paper, or insert colored paper or a different
paper type at specified pages.
As necessary, paper can be inserted as insertion sheets where nothing is printed.
In a macOS environment
The front and back covers are printed using paper that is different from the other pages. This function can be used, for
example, when you want to print only the front cover and last page on thick paper.
5
4
3
2
1
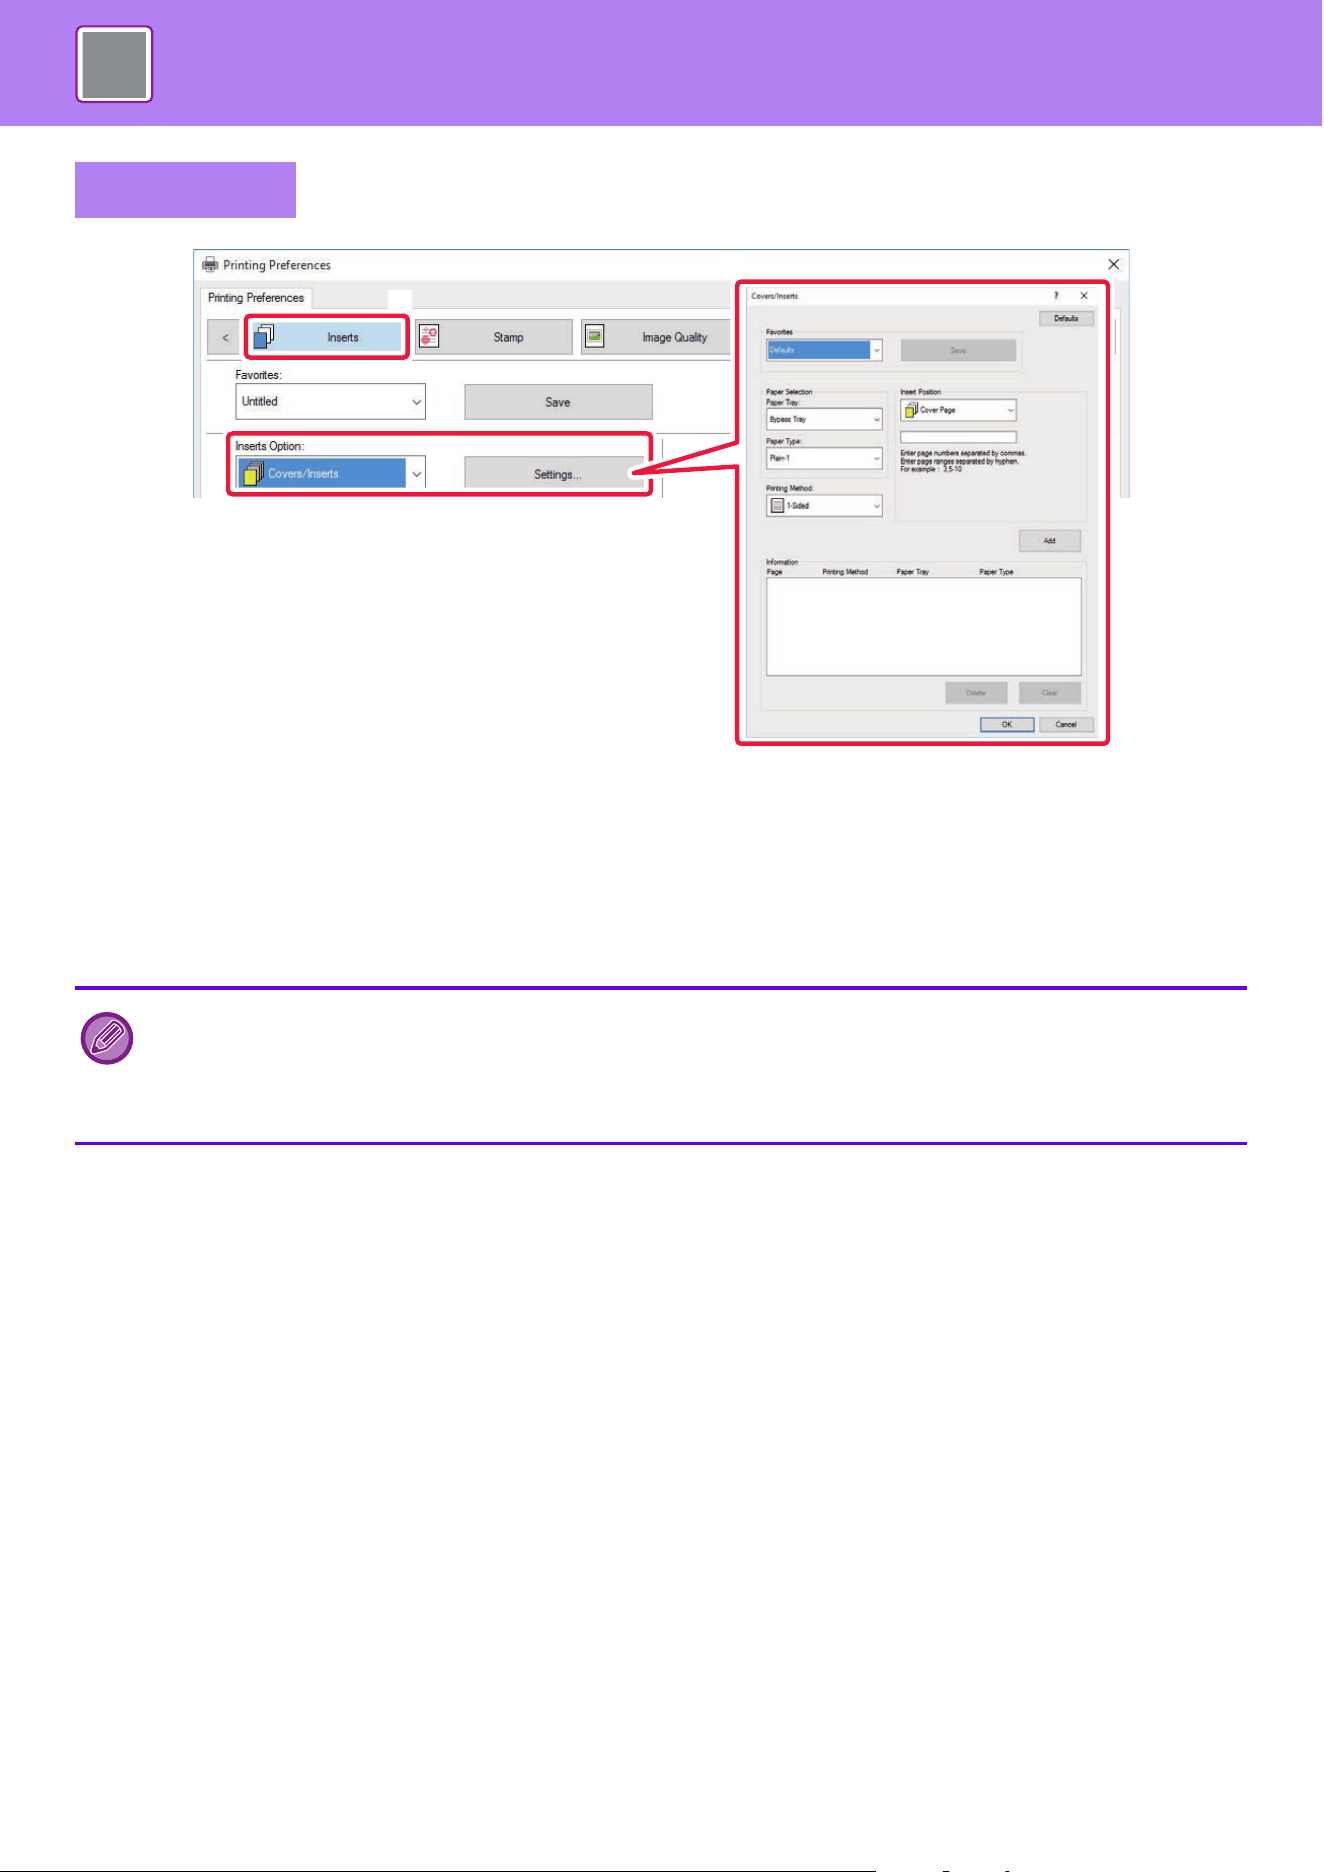
4-78
PRINTER►CONVENIENT PRINTING FUNCTIONS
(1) Click the [Inserts] tab.
(2) Select [Covers/Inserts] from [Inserts Option], and click the [Settings] button.
(3) Select the paper insertion settings.
• Select the insertion position, paper source, and printing method from the corresponding menus.
• Click the [Add] button and your settings will appear in "Information".
• When you have finished selecting settings, click the [Save] button in "Favorites" to save the settings.
Windows
• When [Bypass Tray] is selected in "Paper Tray", be sure to select the "Paper Type" and load that type of paper in the
bypass tray.
• When [Other Page] is selected for "Insert Position", specify the insert position by directly entering a page number. When
"Printing Method" is set to [2-Sided Printing], the specified page and the next page after it will be printed on the front and
reverse side of the paper, and thus an insert setting at a page printed on the reverse side will not be effective.
(2)
(1)
(3)
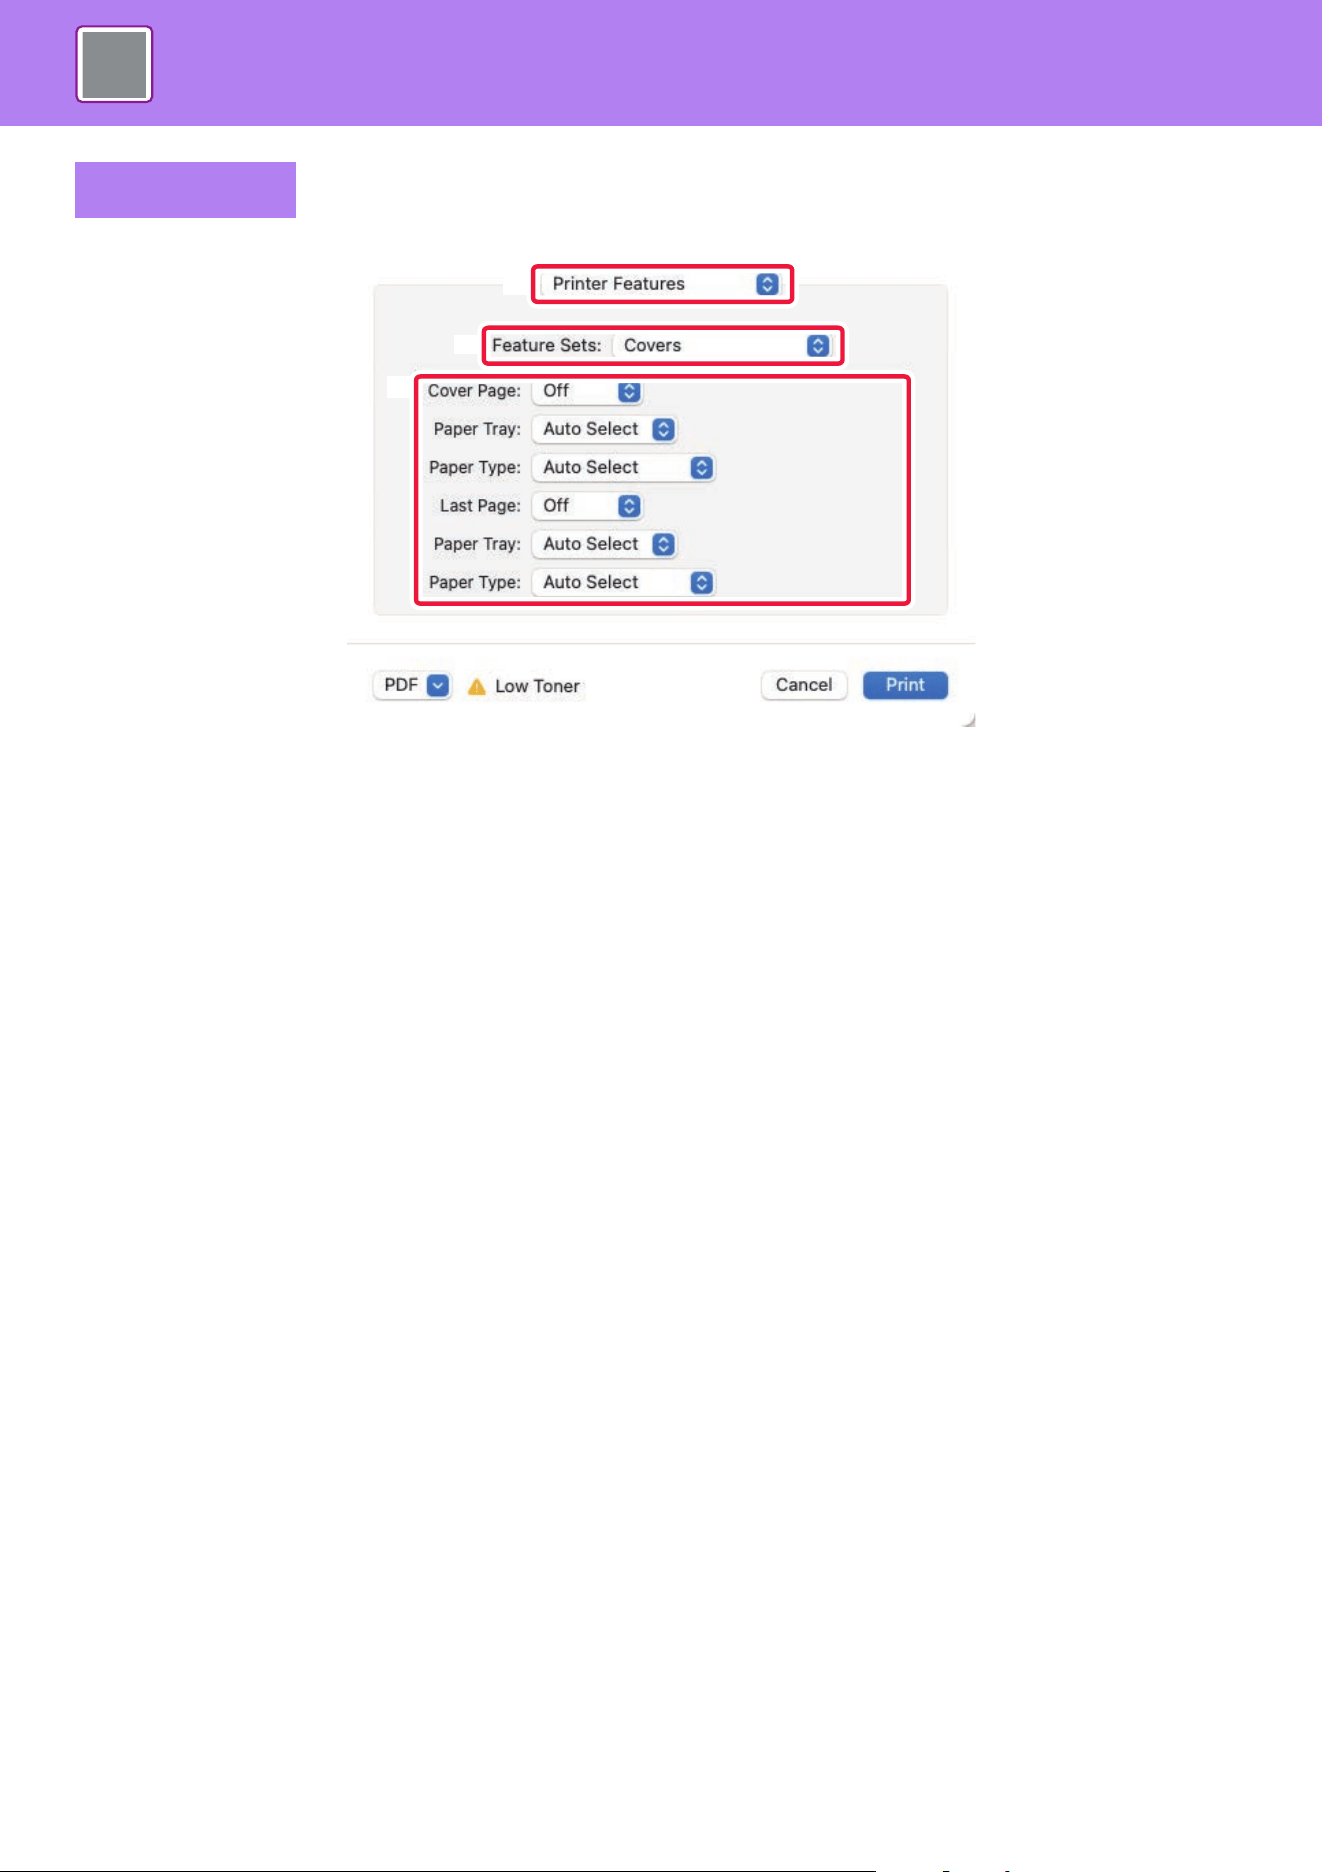
4-79
PRINTER►CONVENIENT PRINTING FUNCTIONS
(1) Select [Printer Features].
In macOS 13, [Printer Features] is located under the "Printer Options" menu.
(2) Select [Covers].
(3) Select the cover insertion settings.
Select the print setting, paper tray, and paper type for the front and back covers.
macOS
(2)
(3)
(1)
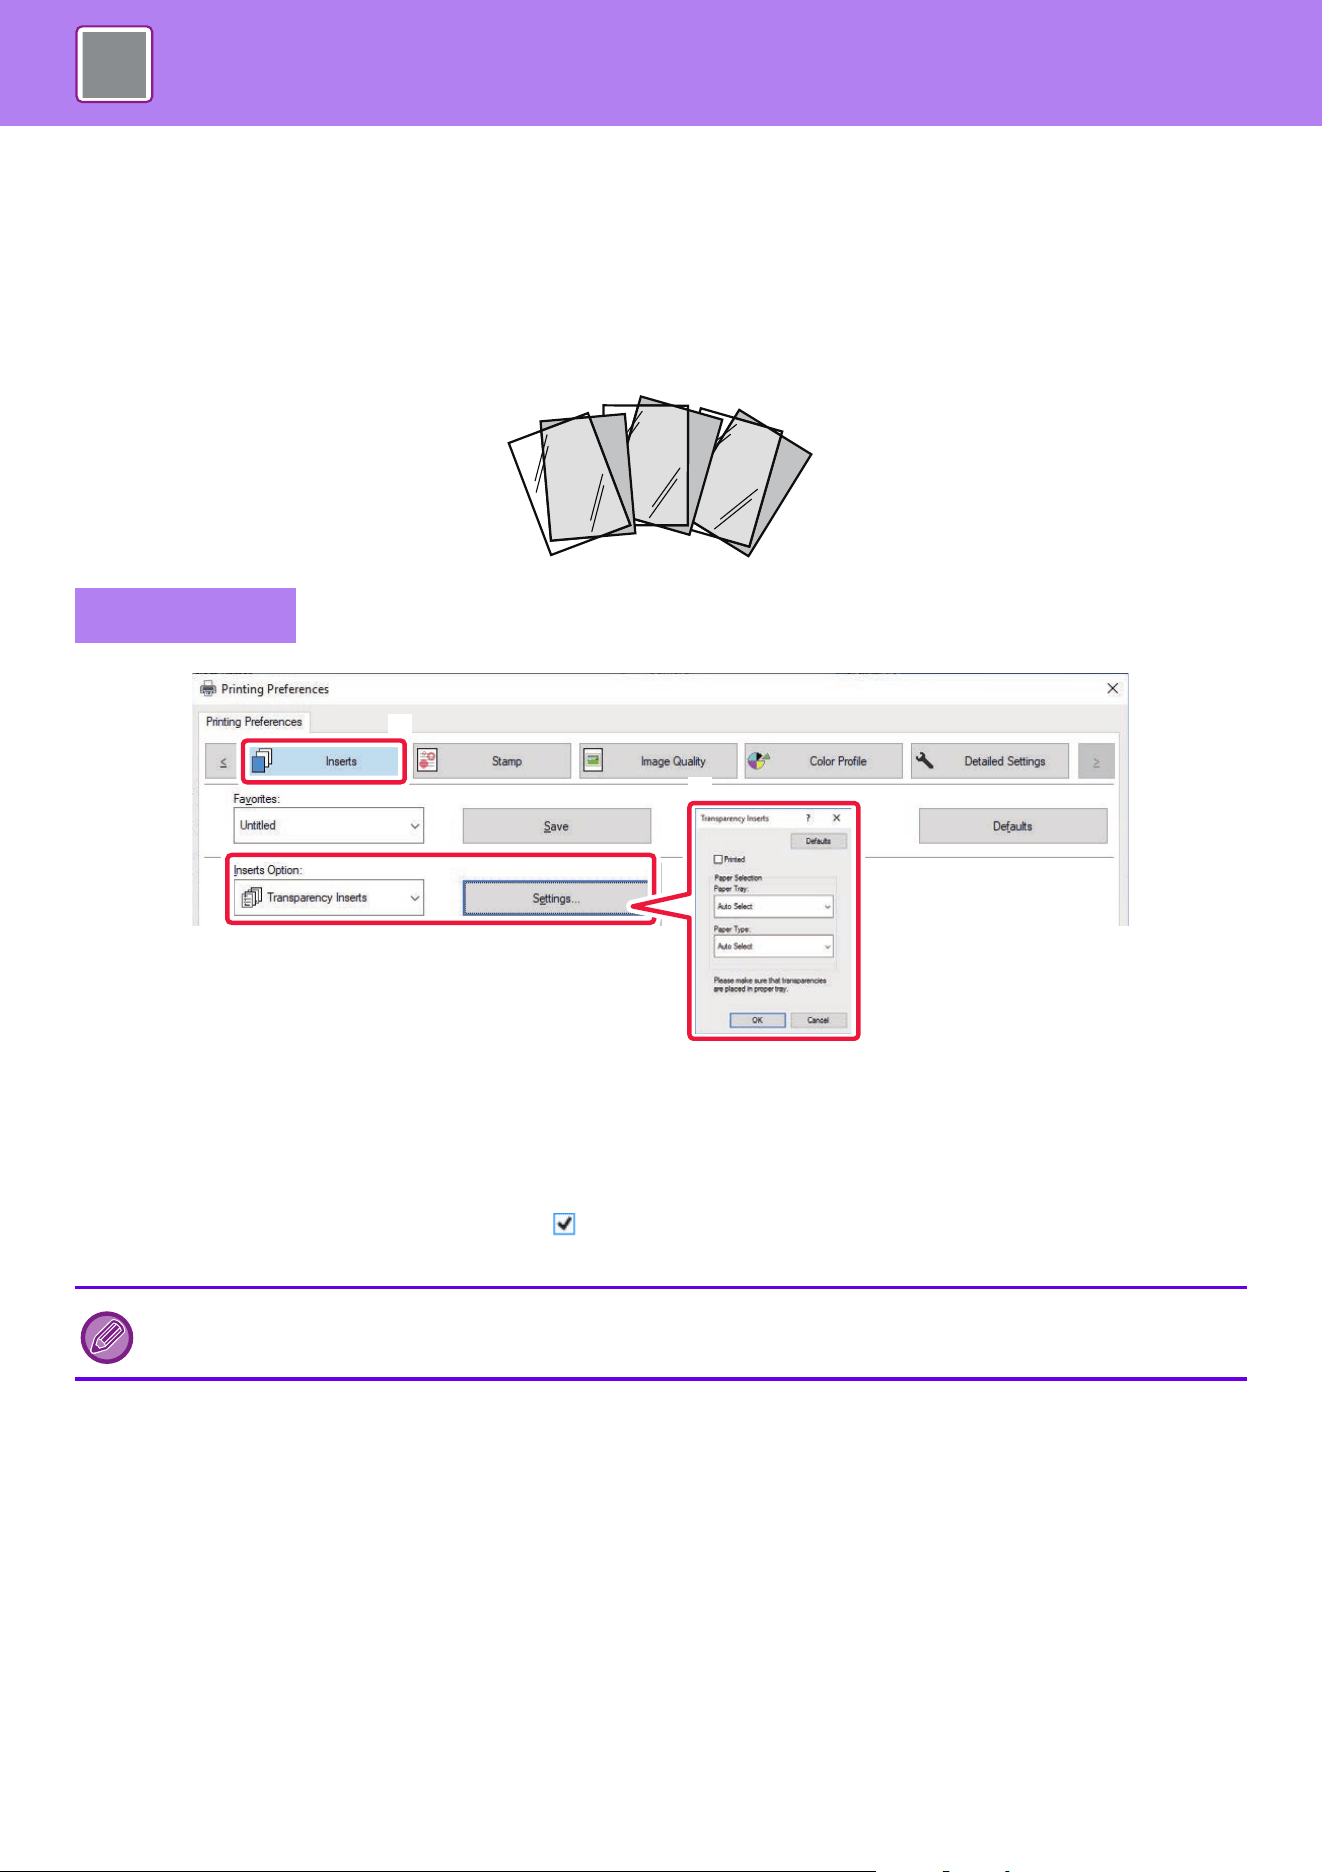
4-80
PRINTER►CONVENIENT PRINTING FUNCTIONS
ADDING INSERTS WHEN PRINTING ON
TRANSPARENCY FILM (TRANSPARENCY INSERTS)
When transparency film is used for printing, this function prevents the sheets of transparency film from sticking together
by inserting a sheet of paper between each sheet of film. As necessary, the same content as that printed on each sheet
of transparency film is also printed on the corresponding sheet of inserted paper.
(1) Click the [Inserts] tab.
(2) Select [Transparency Inserts] and click the [Settings] button.
Select the print setting, paper tray, and paper type for the front and back covers.
(3) Select the transparency insert settings.
When the [Printed] checkbox is selected to set to , the same content as that printed on the transparency film is also printed on
the insert. Select the paper source and type if needed.
Windows
Set the paper type of the bypass tray to [Transparency] and load transparency film into the bypass tray.
C
B
A
(2)
(1)
(3)
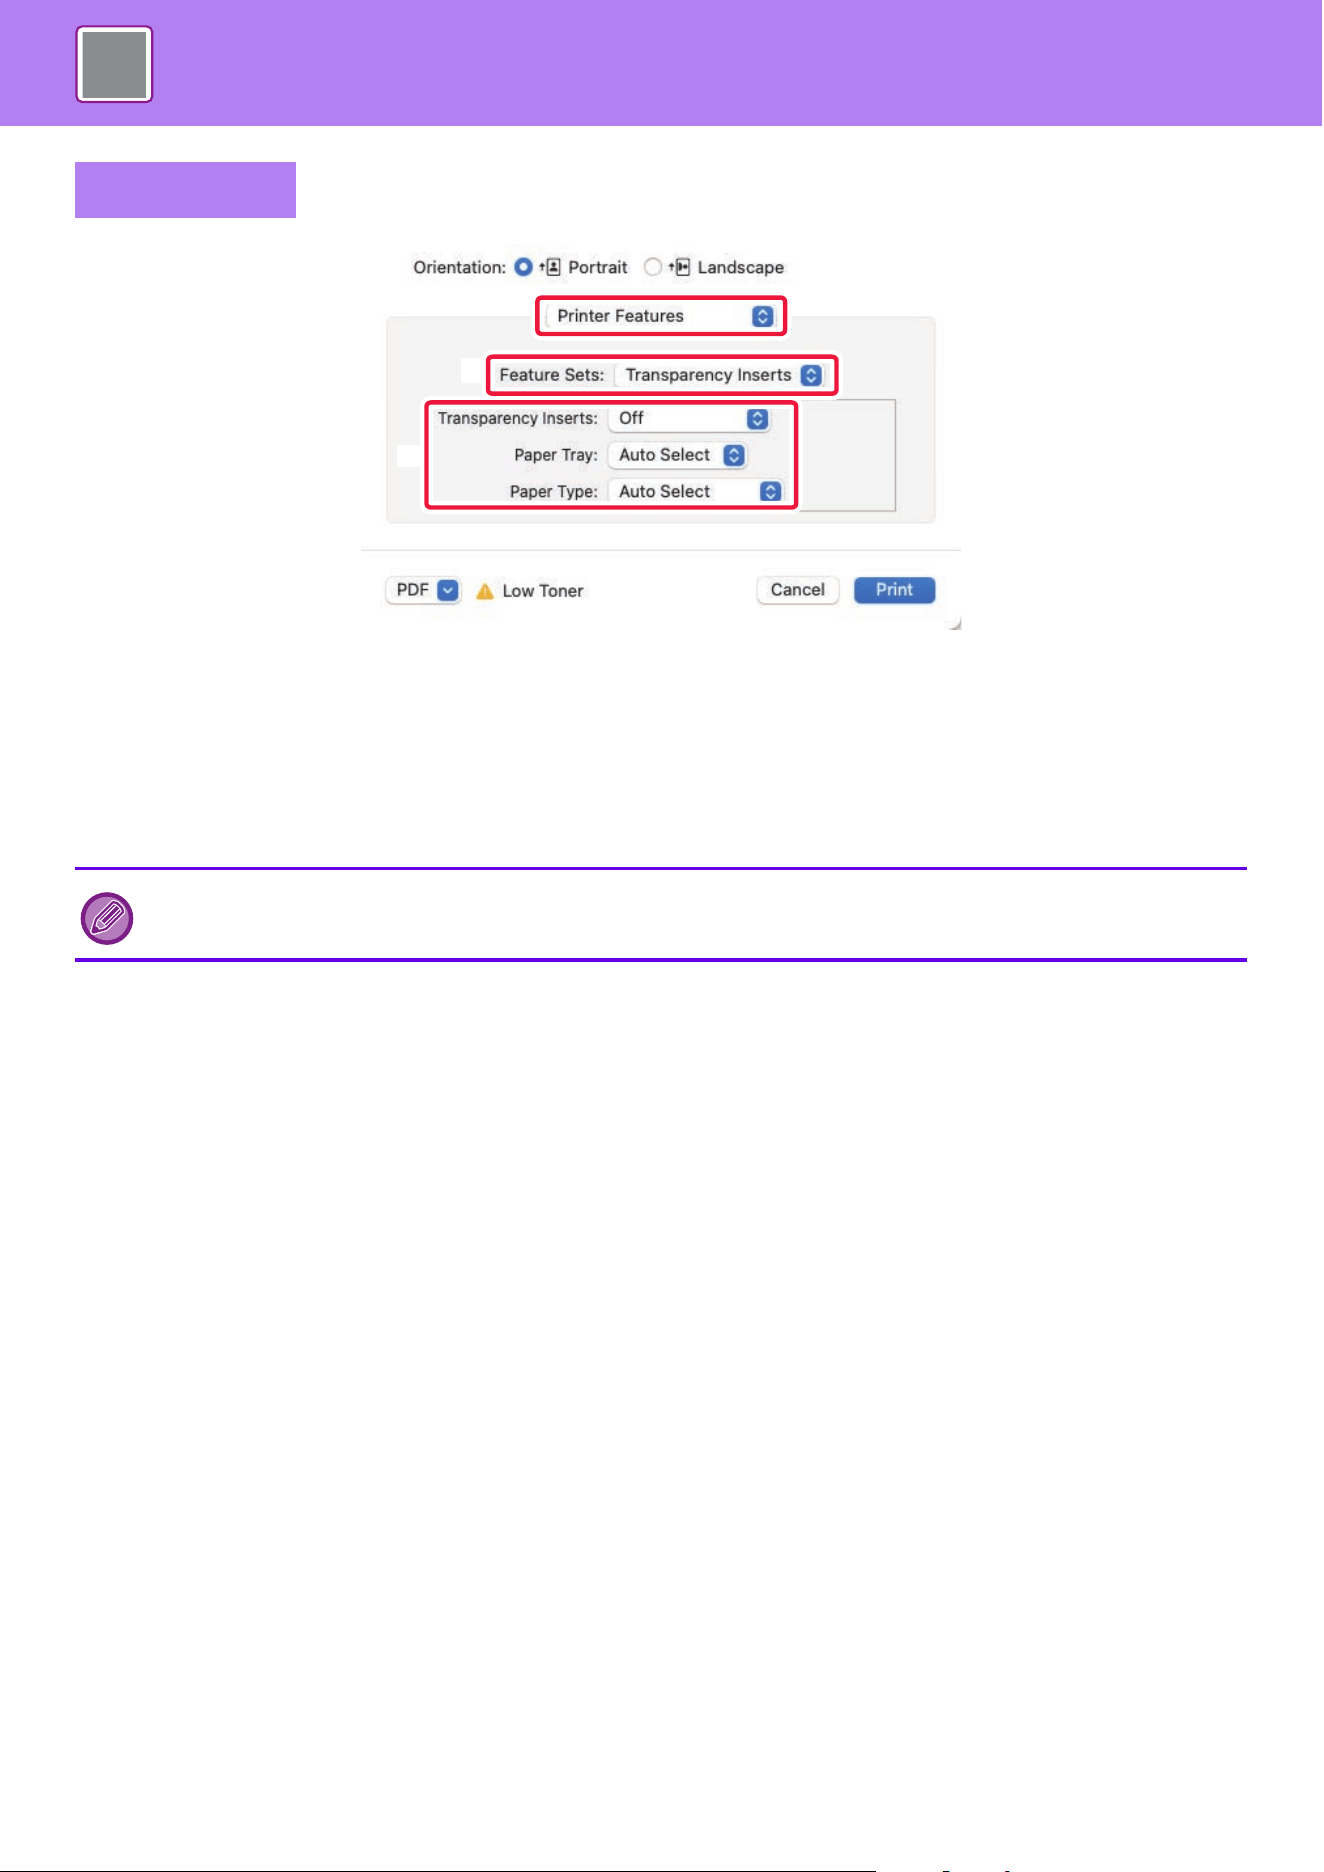
4-81
PRINTER►CONVENIENT PRINTING FUNCTIONS
(1) Select [Printer Features].
In macOS 13, [Printer Features] is located under the "Printer Options" menu.
(2) Select [Transparency Inserts] in "Feature Sets".
(3) Select the transparency insert settings.
When [On (Printed)] is selected from "Transparency Inserts", the same content as that printed on the transparency film is also
printed on the insert. Select the paper source and type if needed.
macOS
Set the paper type of the bypass tray to [Transparency] and load transparency film into the bypass tray.
(2)
(1)
(3)
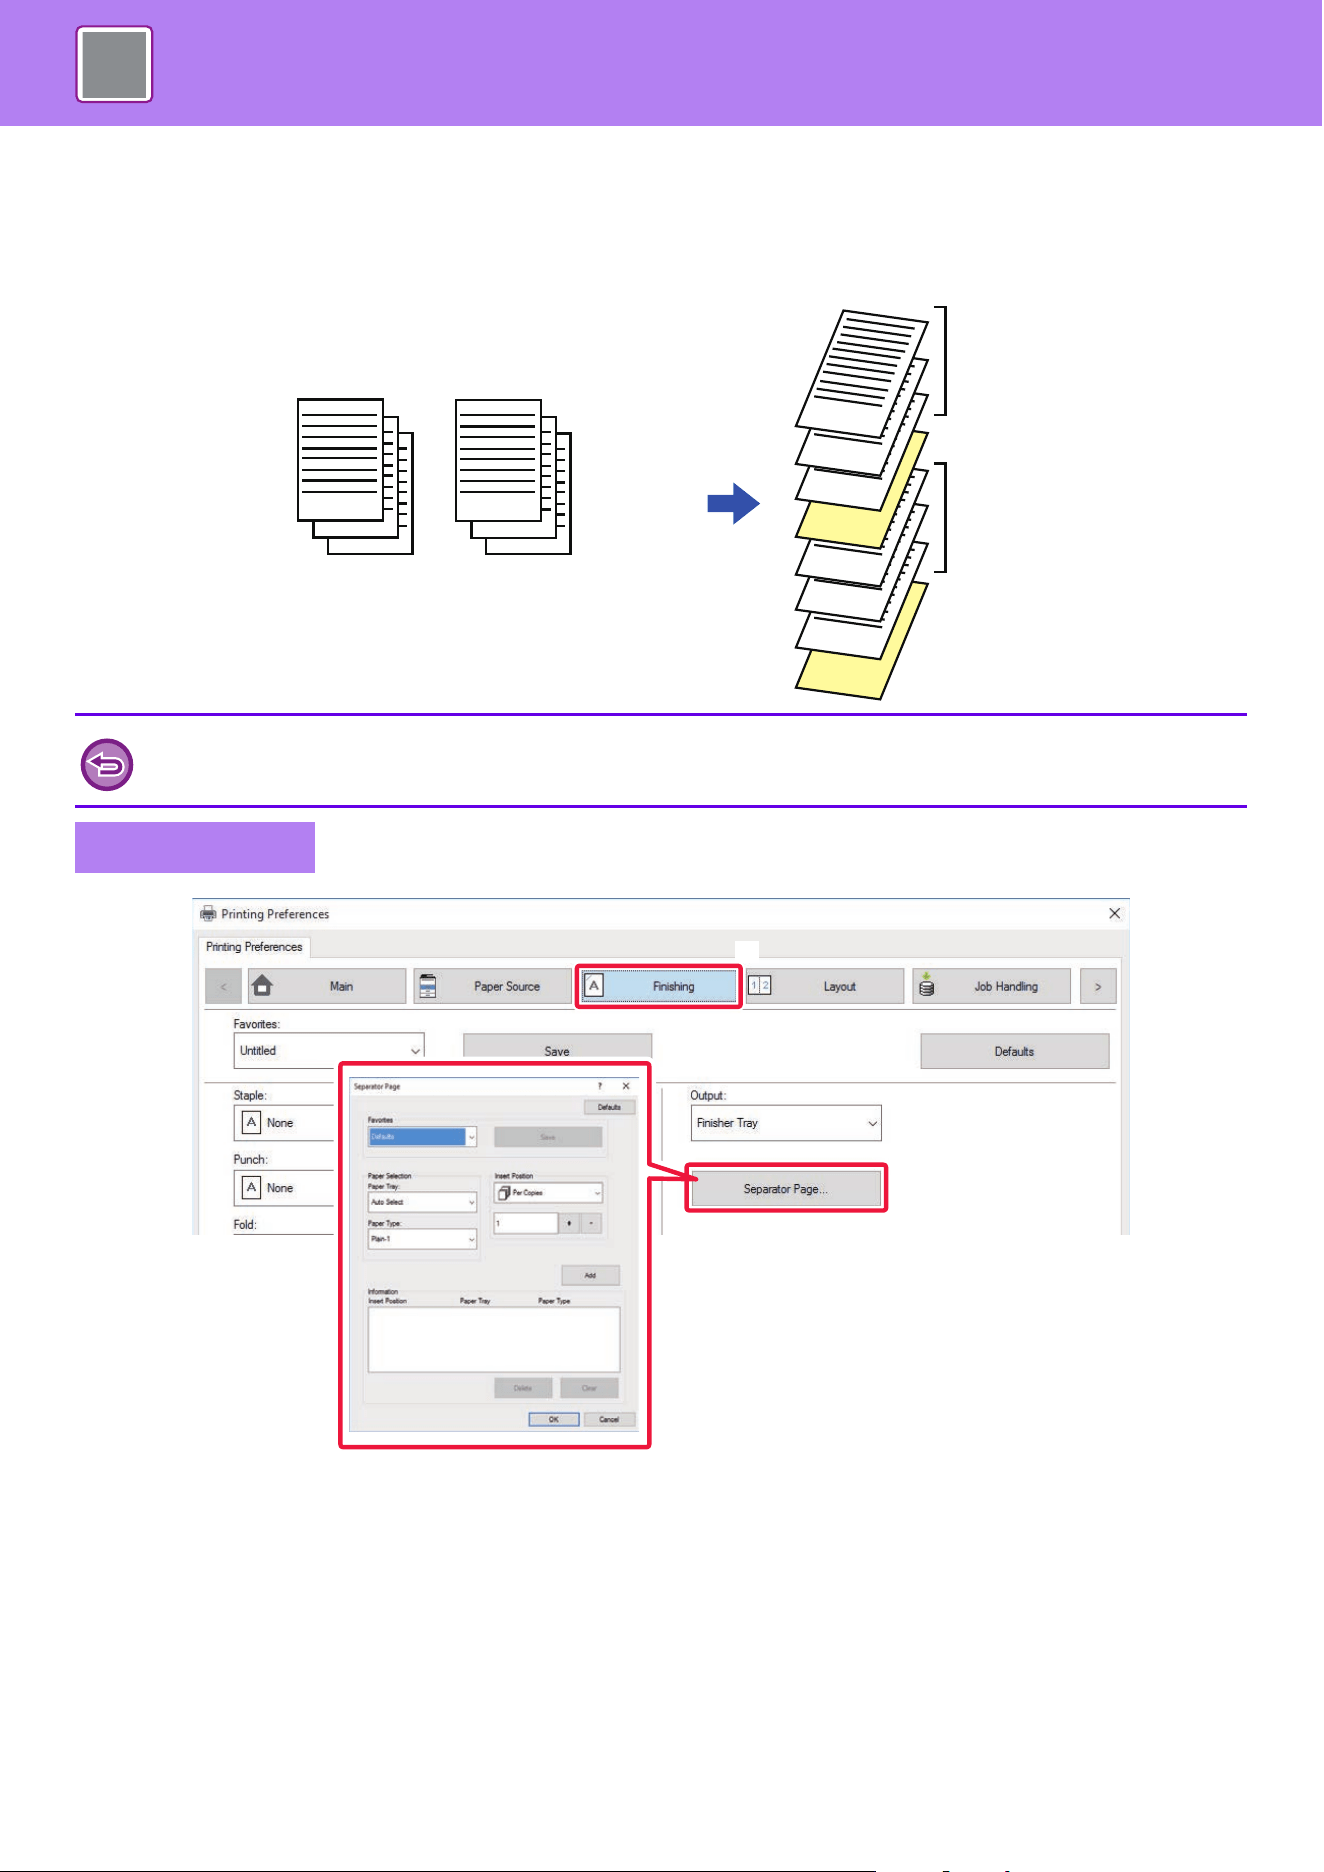
4-82
PRINTER►CONVENIENT PRINTING FUNCTIONS
INSERTING SEPARATOR PAGES BETWEEN JOBS OR
COPIES
You can insert separator pages between jobs or the specified number of copies.
(1) Click the [Finishing] tab.
(2) Click the [Separator Page] button.
This function is available in a Windows environment.
Windows
3
2
1
3
2
1
3
2
1
3
2
1
Job 1
Job 2
Job 1
Job 2
(2)
(3)
(1)

4-83
PRINTER►CONVENIENT PRINTING FUNCTIONS
(3) Changing the settings
• Select the paper tray and paper type from "Paper Selection", and specify the separator page position in "Insert Position".
• To add a separator page each time printing of the set number of copies is completed, select [Per Copies] in "Insert Position".
• For example, if you are printing 10 copies and you select "5", a separator page will be added after the 5th copy and after the
10th copy.
When the bypass tray is selected, be sure to
select the "Paper Type".
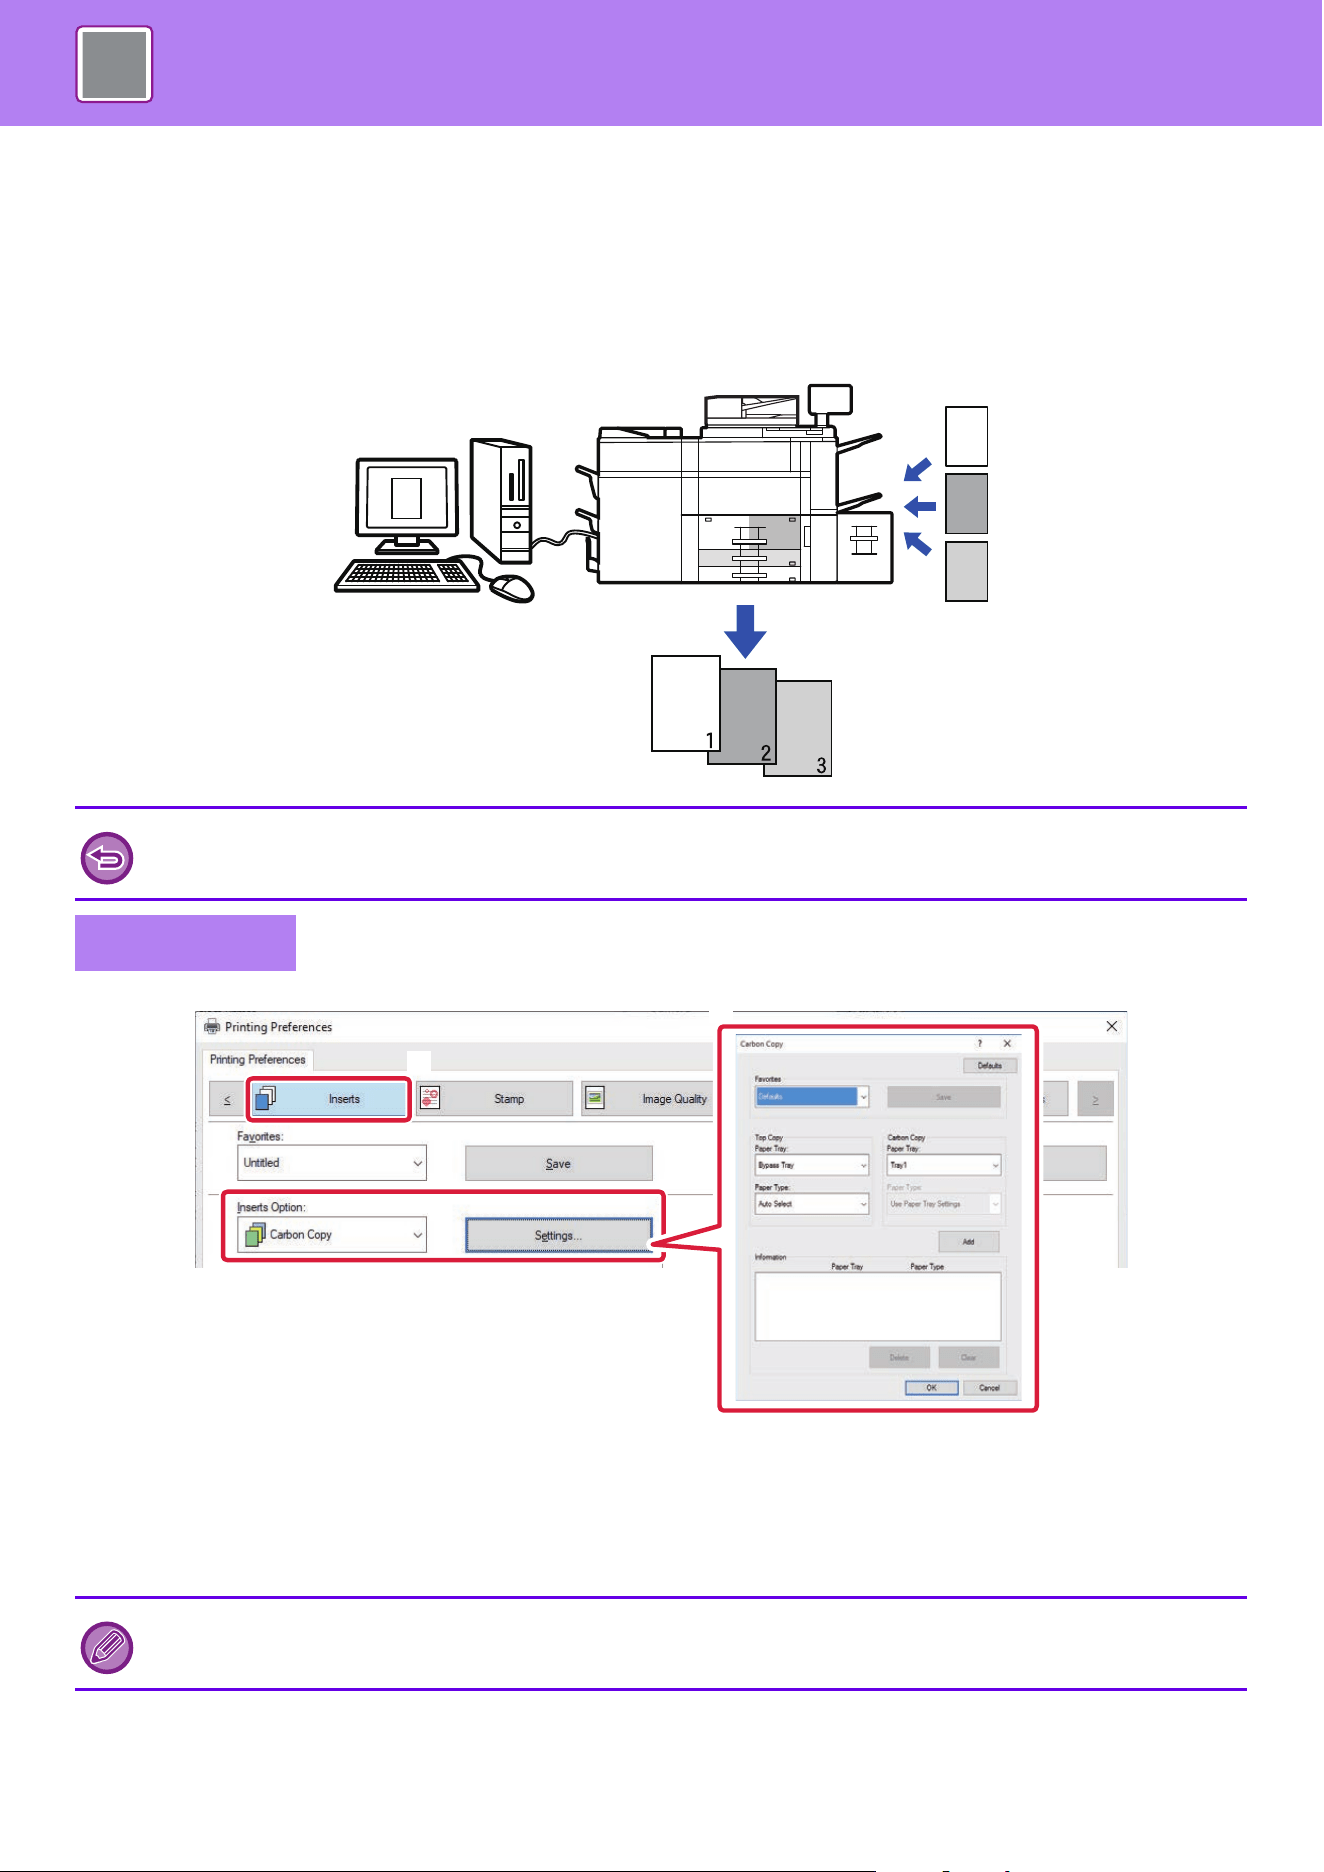
4-84
PRINTER►CONVENIENT PRINTING FUNCTIONS
PRINTING A CARBON COPY (CARBON COPY)
This function prints an additional copy of the print image on paper that is of the same size but from a different paper tray.
For example, if carbon copy print is selected when plain paper is loaded into tray 1 and colored paper is loaded into tray
2, a print result similar to a carbon copy slip is obtained with a single selection of the print command. If plain paper is
loaded into tray 1 and recycled paper is loaded into tray 2 as necessary, selecting Carbon Copy simultaneously prints
one copy for presentation and one copy as a duplicate.
(1) Click the [Inserts] tab.
(2) Select [Carbon Copy] from "Inserts Option"and click the [Settings] button.
(3) Select the tray for the first copy from "Top Copy", and then select the tray for the carbon copy
from "Carbon Copy".
This function is available in a Windows environment.
Windows
When the bypass tray is selected, be sure to select the "Paper Type".
A
A
A
A
(2)
(1)
(3)
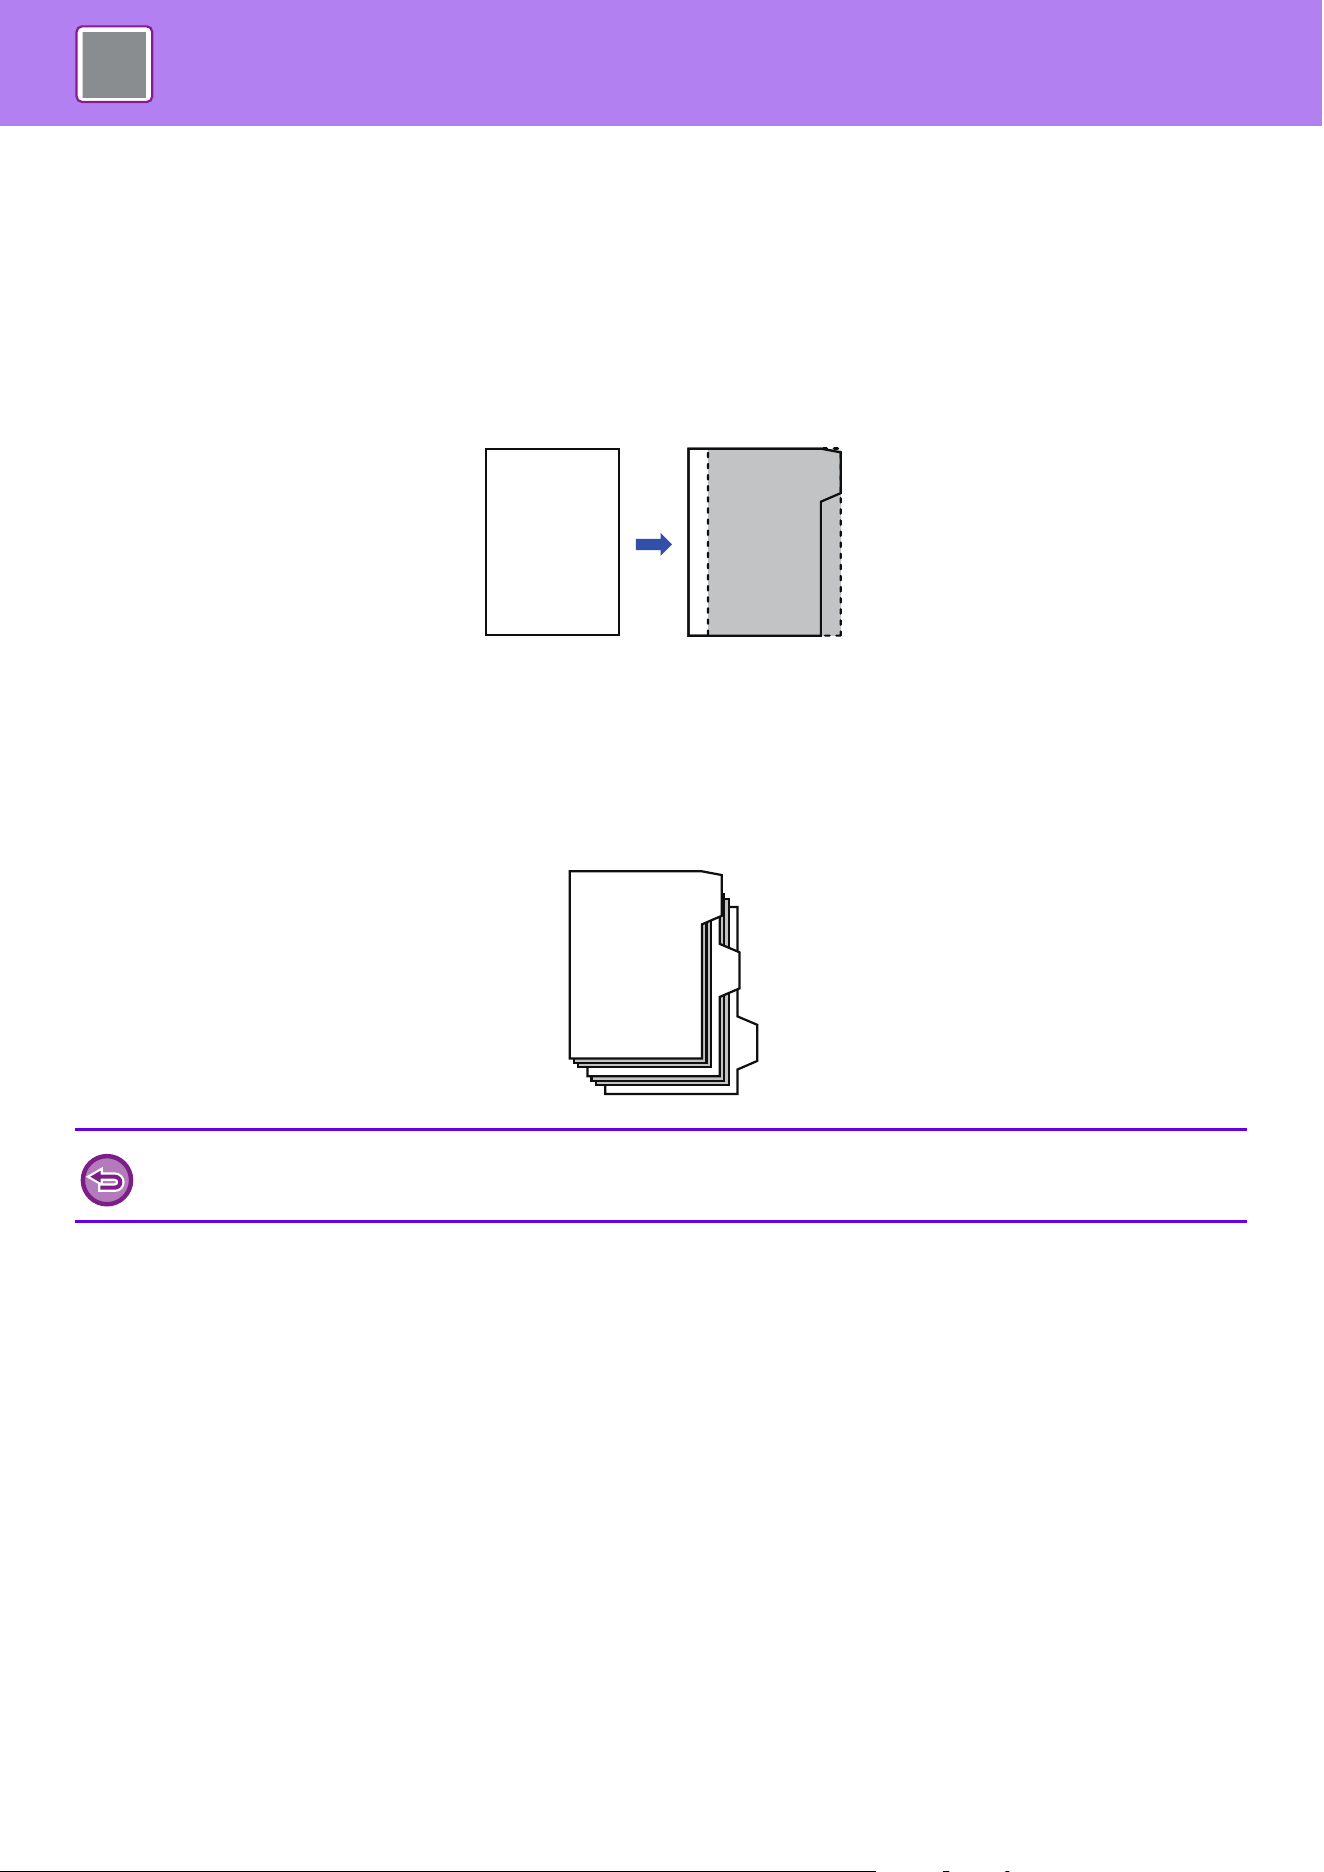
4-85
PRINTER►CONVENIENT PRINTING FUNCTIONS
PRINTING TEXT ON TABS OF TAB PAPER (TAB
SHIFT/TAB PAPER PRINT)
There are two methods of printing on the tabs of tab paper: "Tab Shift" and "Tab Paper Print".
Tab Shift
Create the text to be printed on tab paper in an application, and set the test shifting distance in [Print Position] on the
[Layout] tab of the printer driver property window. The text will be printed on the tabs.
Tab Paper Print (for PCL6 only)
Tab sheets are printed while they are inserted between the desired pages.
Select [Tab Paper] in [Inserts Option] on the [Inserts] tab of the printer driver properties window, and enter the text that
you want to print on the tabs. Specify the detailed settings such as the size of the tabs, the starting position, the distance
between tabs, and the page numbers where tab sheets will be inserted.
• These functions are available in a Windows environment.
• Tab paper must be loaded into the bypass tray.
ABC
ABC
GHI
DEF
ABC
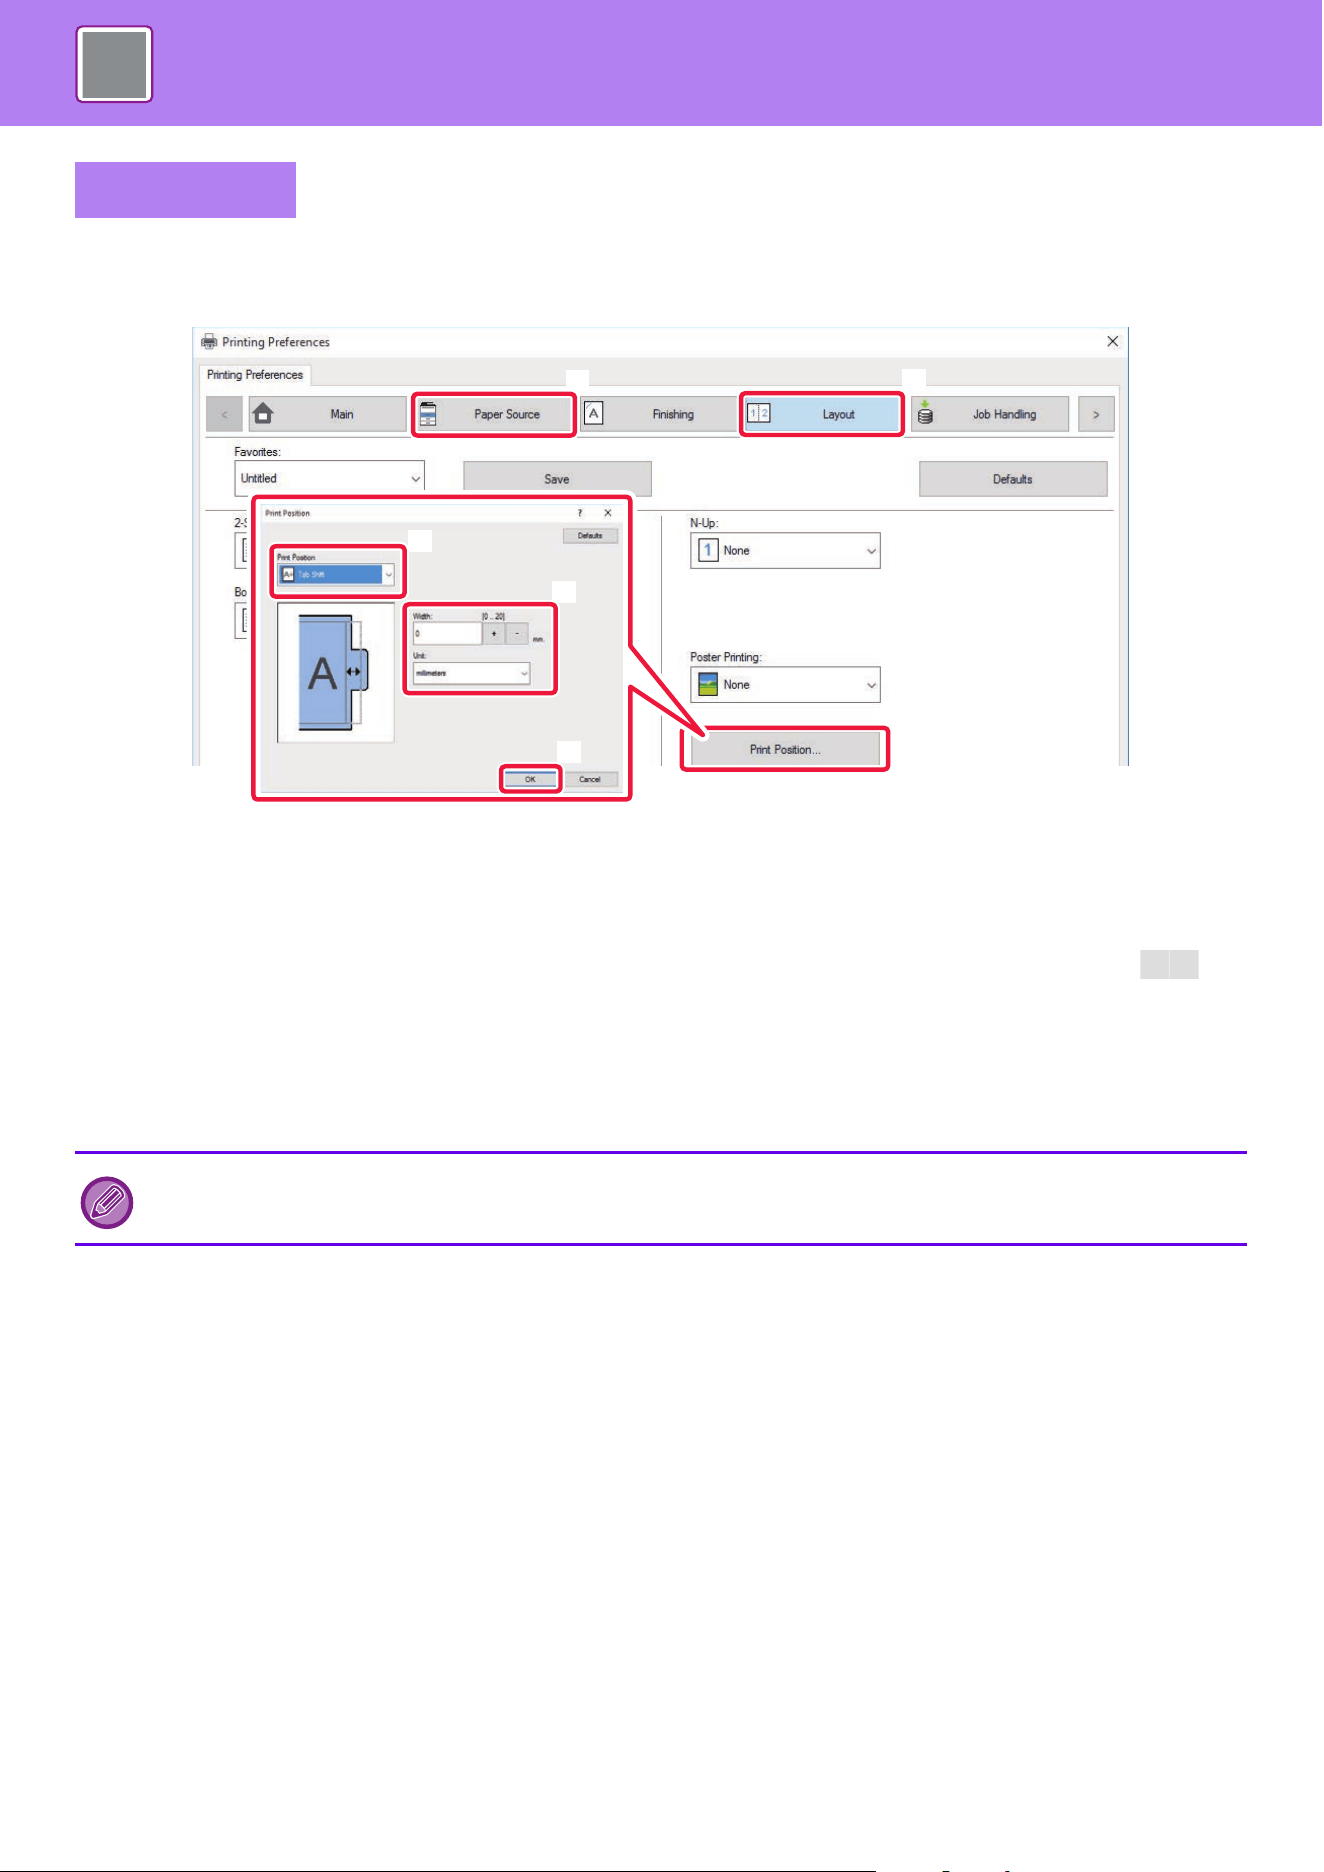
4-86
PRINTER►CONVENIENT PRINTING FUNCTIONS
Tab Shift
When you have finished preparing the data to be printed on tab papers in an application, take the following steps:
(1) Click the [Layout] tab.
(2) Click the [Print Position] button.
(3) Select [Tab Shift].
(4) Specify the distance of shifting the image by directly entering a value or by clicking the
button.
(5) Click the [OK] button.
(6) Select the paper source and type.
Click the [Paper Source] tab, and select [Bypass Tray] in "Paper Tray" and [Tab Paper] in "Paper Type".
Windows
Set the paper type of the bypass tray to [Tab Paper] and load tab papers into the bypass tray.
(2)
(1)
(3)
(4)
(6)
(5)
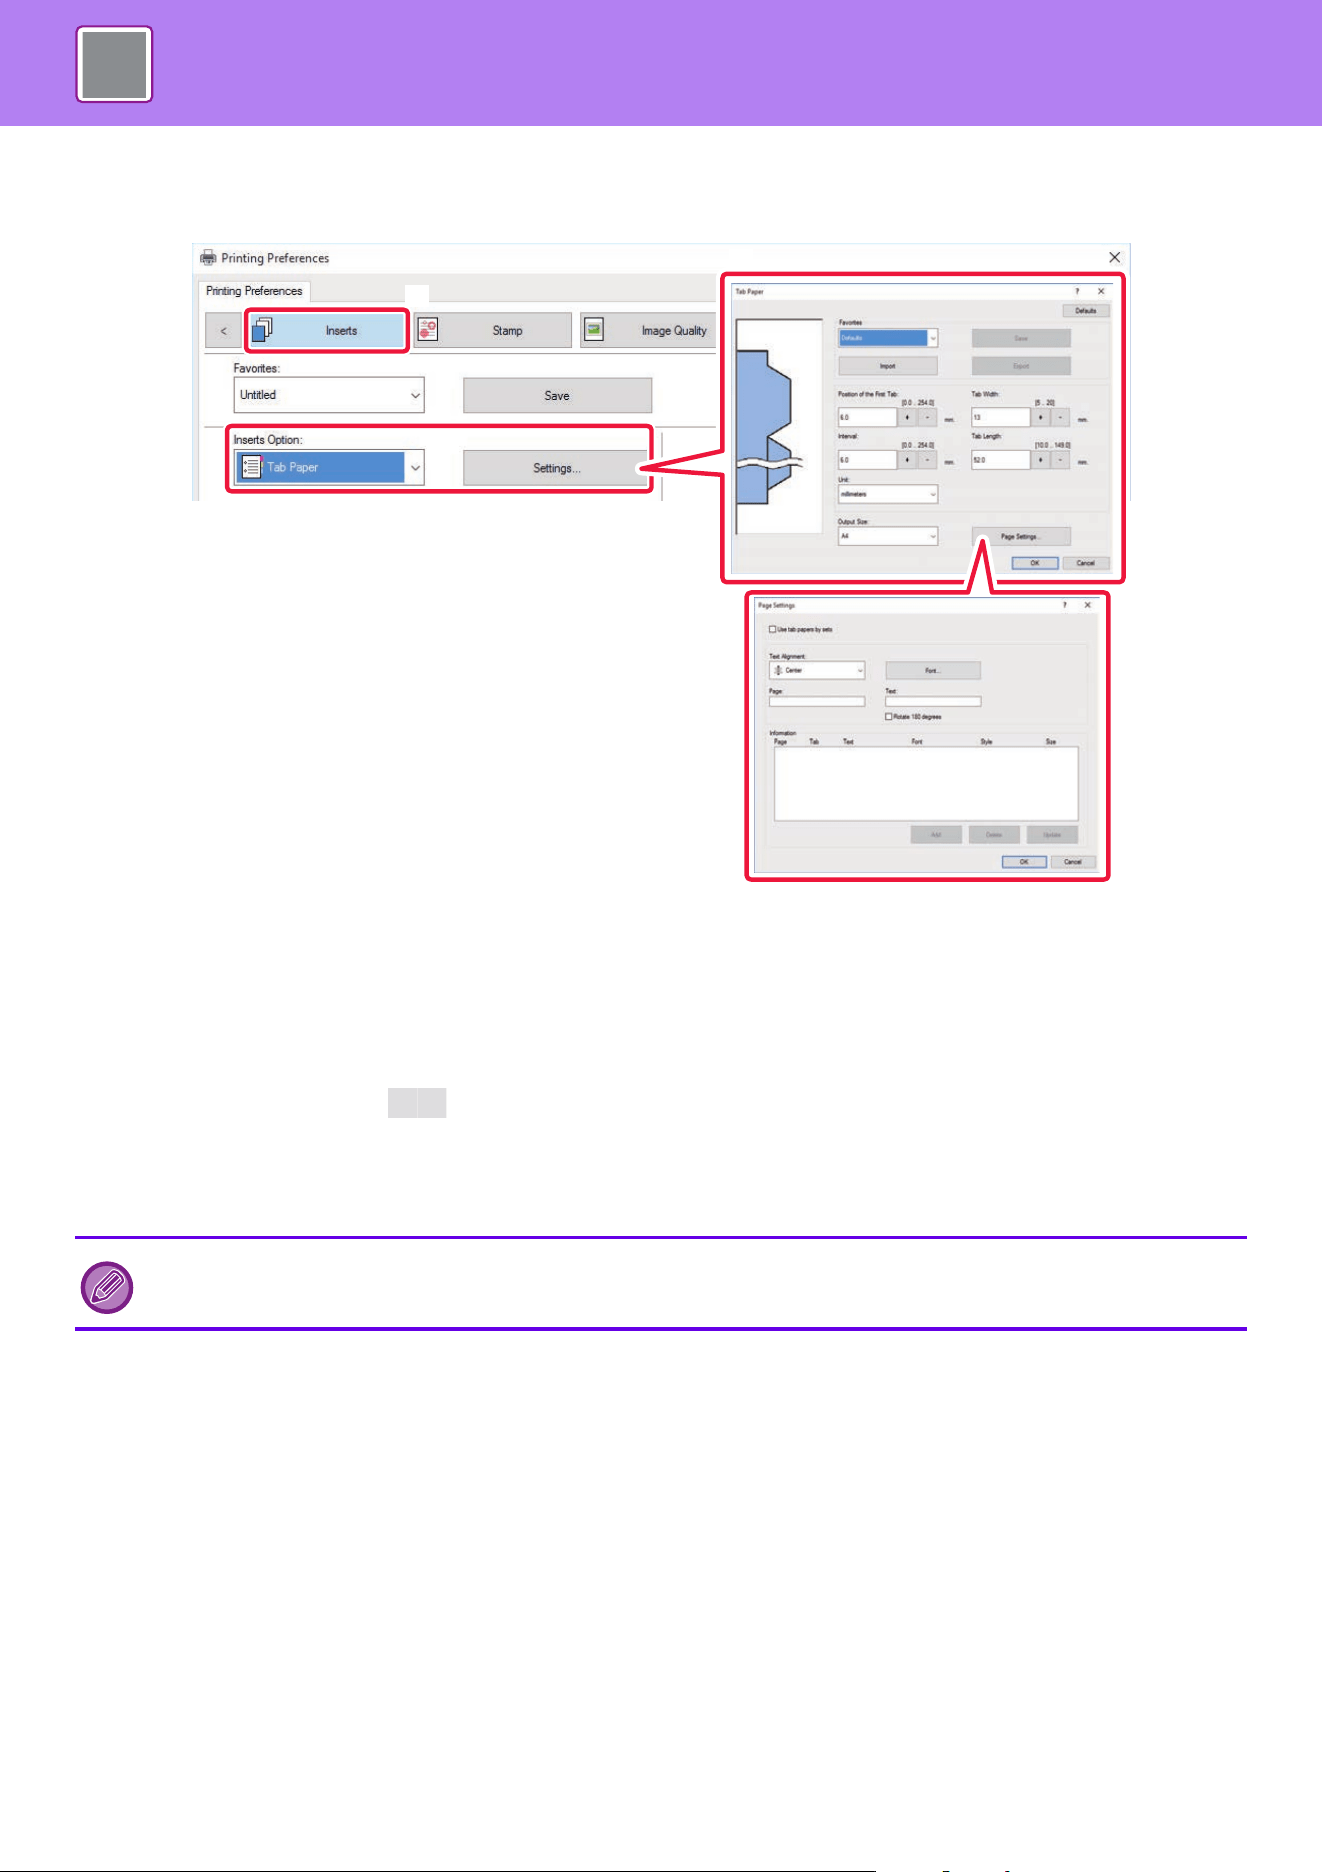
4-87
PRINTER►CONVENIENT PRINTING FUNCTIONS
Tab Paper Print (for PCL6 only)
Open the data into which you wish to insert tab paper, and then select the settings.
(1) Click the [Inserts] tab.
(2) Select [Tab Paper] from “Inserts Option”, and click the [Settings] button.
(3) Select the tab position settings.
For commercially available tab paper, use the existing settings such as [A4-5tab-D] in "Favorites". For other types of tab paper,
the position of the first tab, the distance between tabs, and the horizontal and vertical dimensions of the tab can be directly
entered or changed using the button. In addition, select the size of the tab paper from "Output Size".
(4) Select the page settings.
Specify the pages where you wish to insert tab paper and enter the text that you wish to print on the tabs. Also select the font
and adjust the layout.
• Set the paper type of the bypass tray to [Tab Pape
r] and load tab papers into the bypass tray.
• The tab paper settings can be stored and a stored file can be opened from "Favorites".
(2)
(1)
(3)
(4)
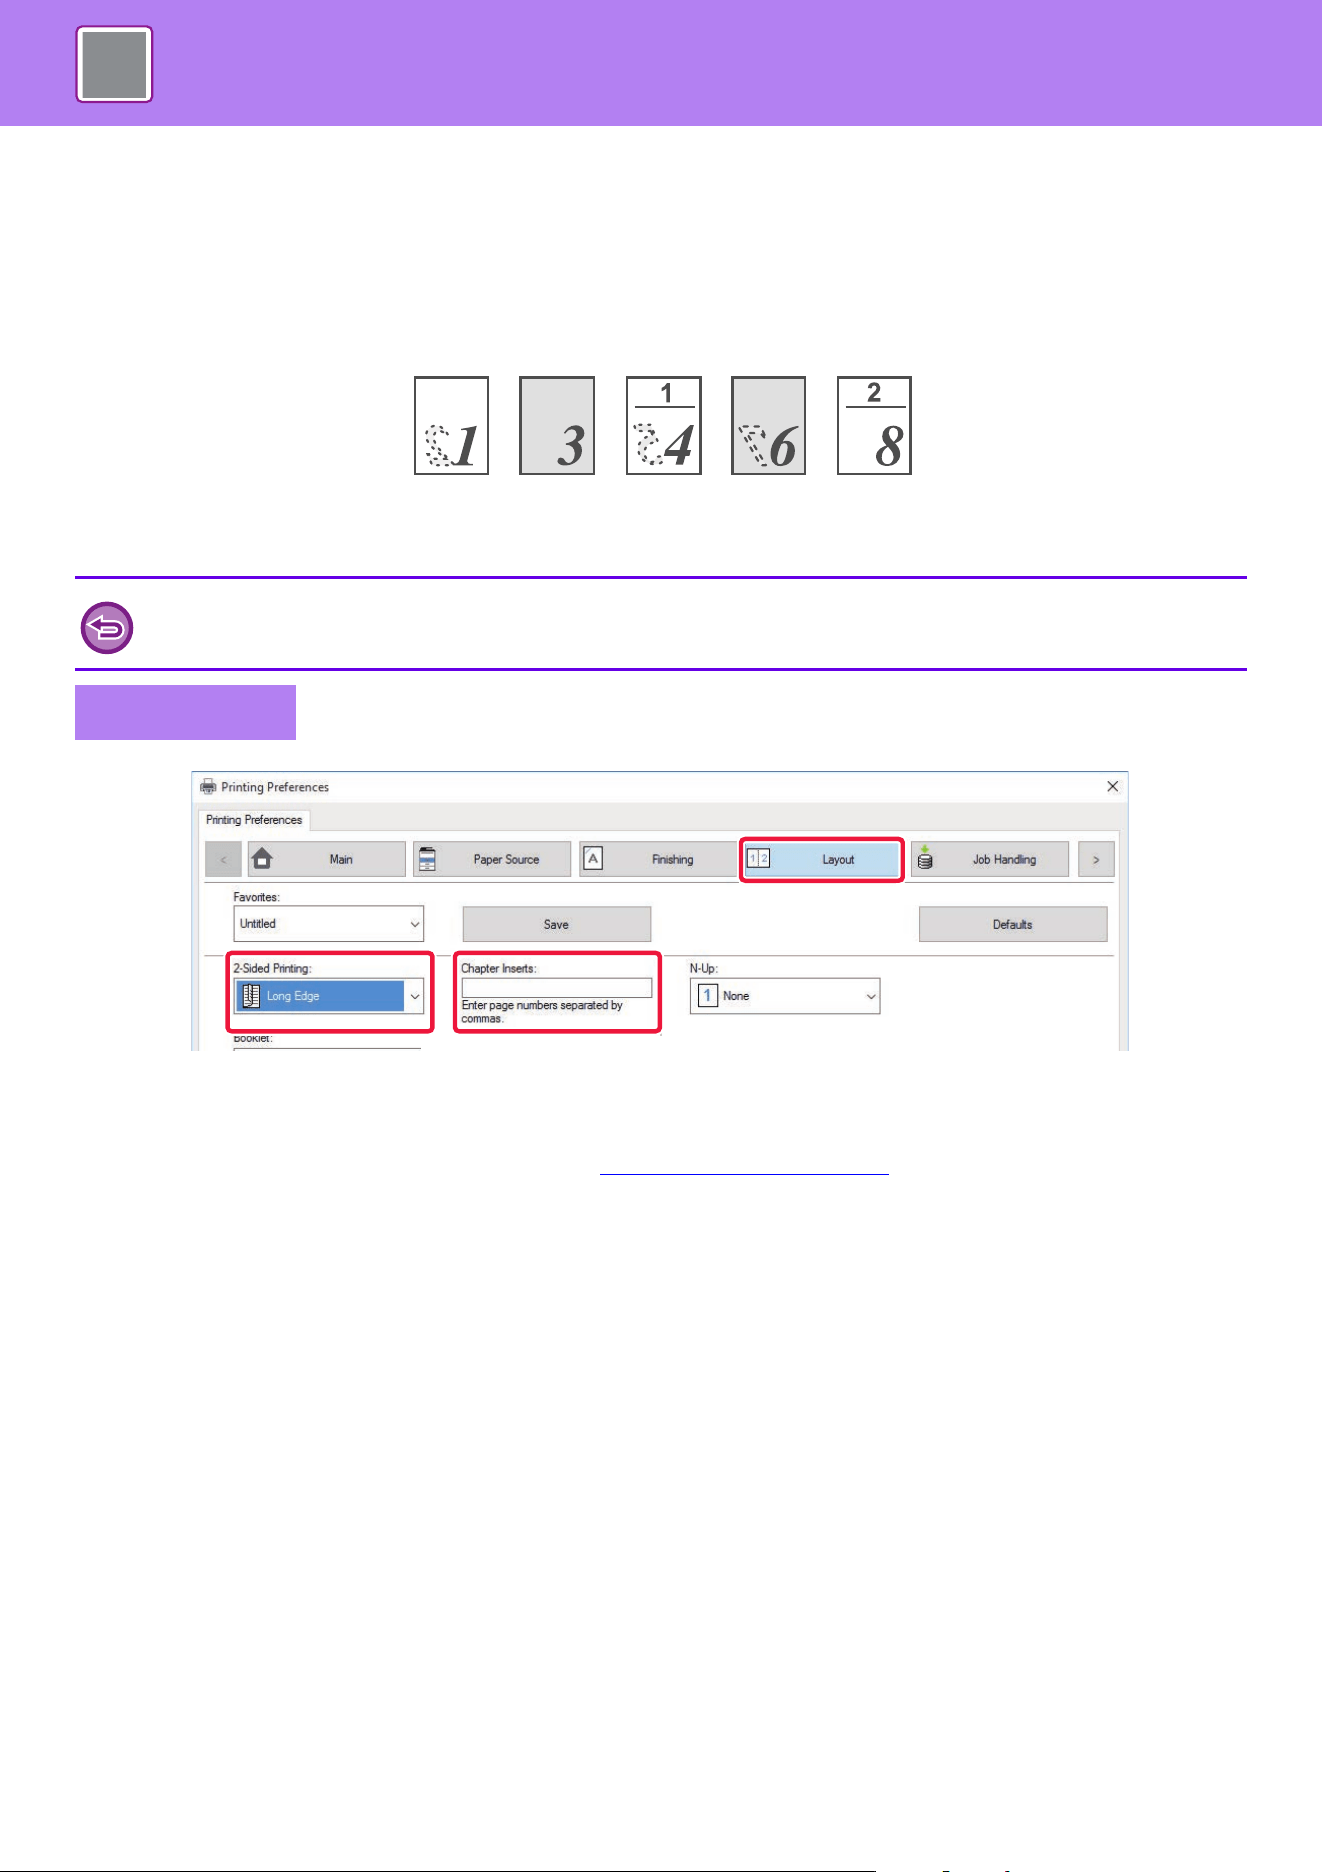
4-88
PRINTER►CONVENIENT PRINTING FUNCTIONS
TWO-SIDED PRINTING WITH SPECIFIC PAGES
PRINTED ON THE FRONT SIDE (CHAPTER INSERTS)
This function prints specific pages on the front side of the paper.
When you specify a page (such as a chapter cover page) to be printed on the front side of the paper, it is printed on the
front side of the next sheet even if it would normally be printed on the reverse side of the paper.
Example: When pages 4 and 8 are specified as page settings.
(4 has a reverse side, and 3 and 8 are blank on the reverse side.)
(1) Click the [Layout] tab.
(2) Select the 2-Sided Printing.
For information on the "2-Sided Printing" setting, see "2-SIDED PRINTING (page 4-23)".
(3) Enter the page numbers of the initial pages of the chapters, separating the numbers with
commas.
• This function is available in a Windows environment.
• This function can be used when the PCL6 printer driver is used.
Windows
(2)
(3)
(1)
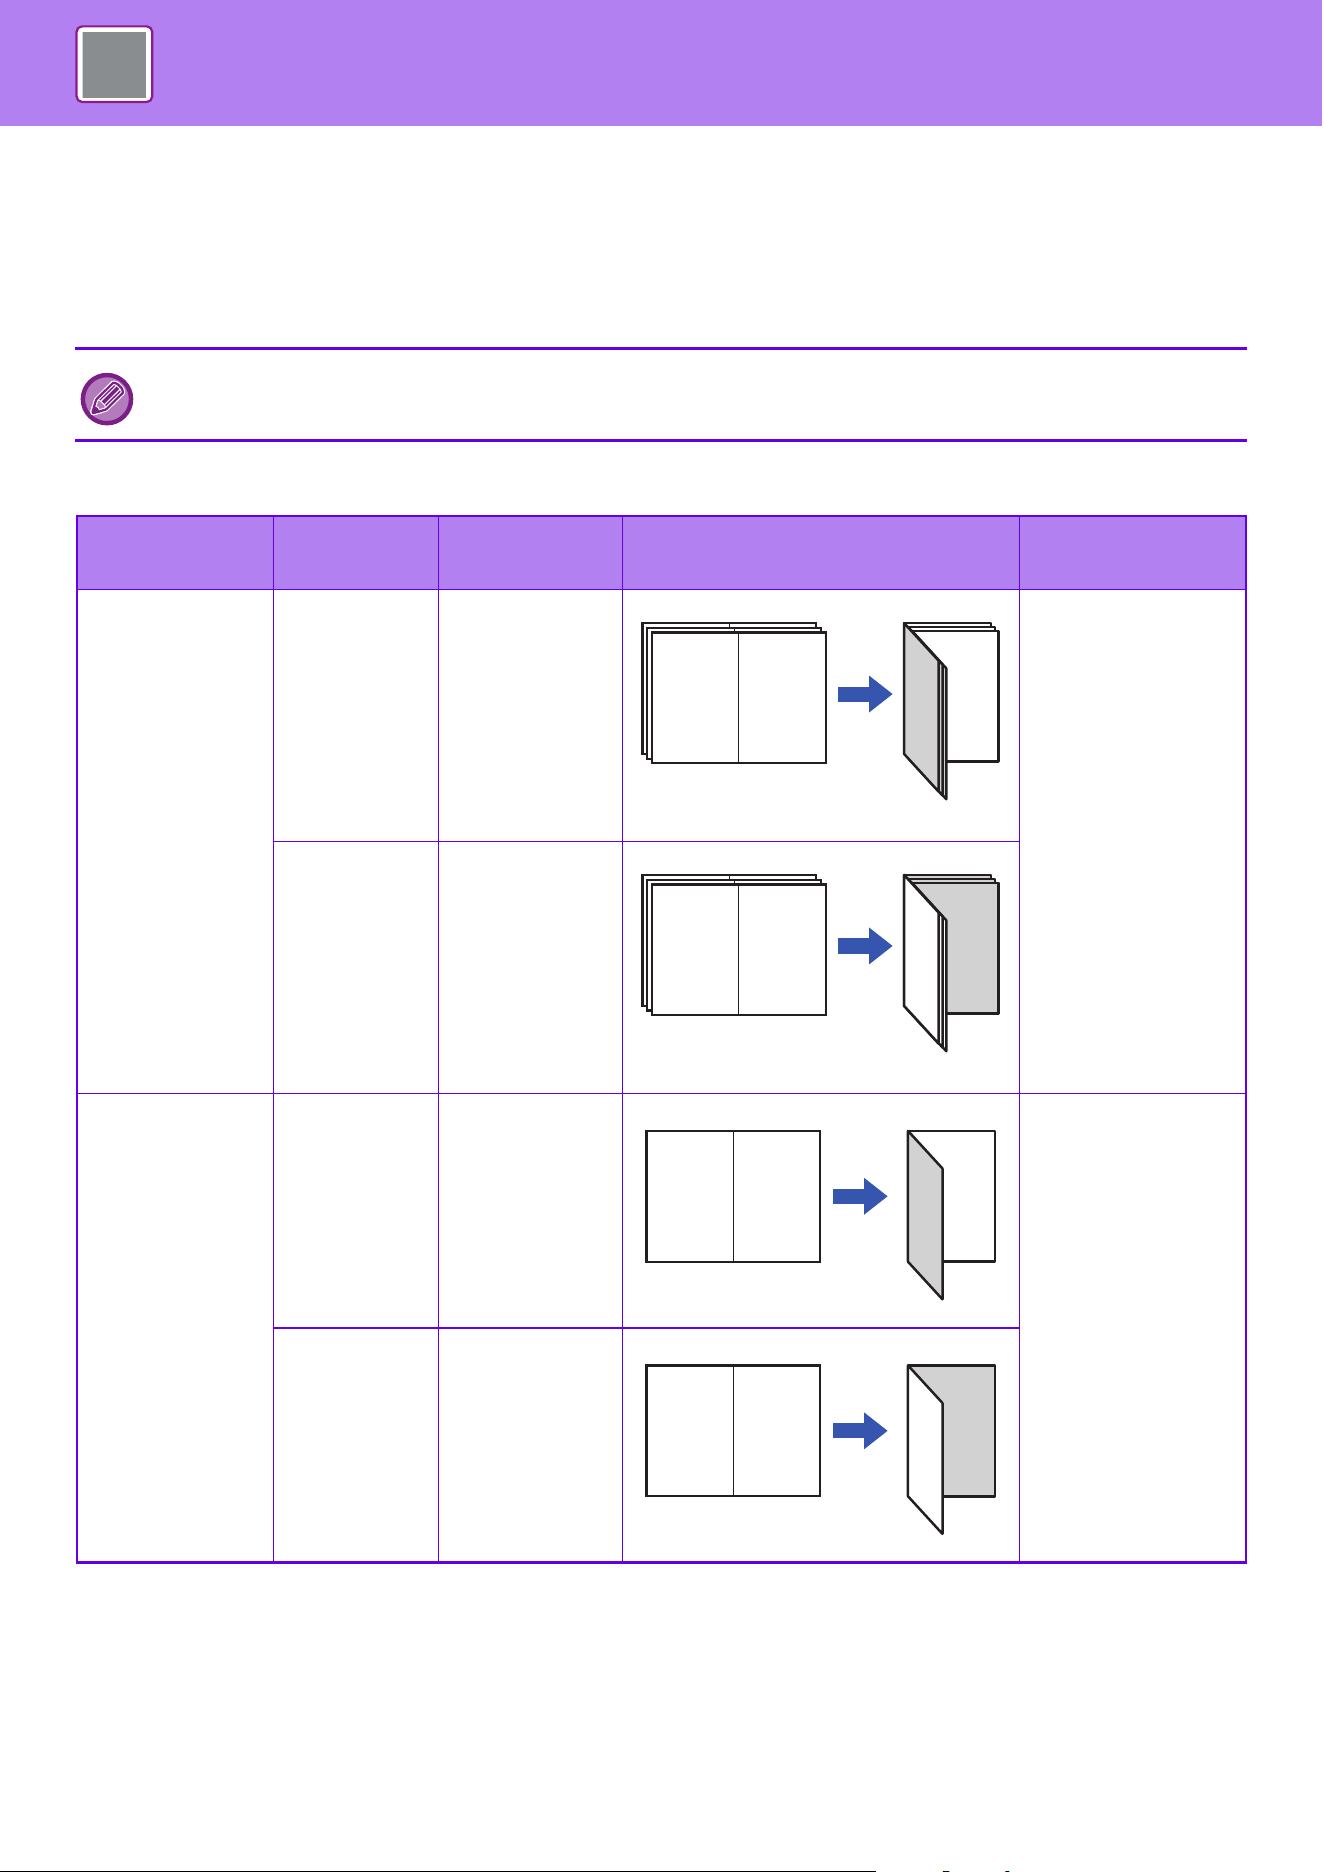
4-89
PRINTER►CONVENIENT PRINTING FUNCTIONS
FOLDING PAPER FOR PRINTING (FOLD)
If a folding unit is installed, print paper can be folded.
For example, if A4 (8-1/2" × 11") and A3 (11" × 17") size print images are mixed, you can fold A3 (11" × 17") size paper
to the A4 (8-1/2" × 11") size to adjust the width of the actual print paper to the A4 (8-1/2" × 11") size. When necessary,
you can staple folded sheets.
Types of paper folding functions
To use the Half Fold and Saddle Fold (Staple) functions, you need to mount a saddle stitch finisher.
Folding types Print Side
Fold
Orientation
Folding results Description
Saddle Fold
Inside -
Multiple sheets are
collectively folded in
the center.
Outside
-
Half Fold
Inside -
Paper is folded in the
center.
Copies are output
sheet by sheet.
Outside -
B
B
B
A
A
A
BA
BA
BA
B
A
B
A
B
A
BA
BA
BA
A
B
B
A
BA
BA
A
A
B
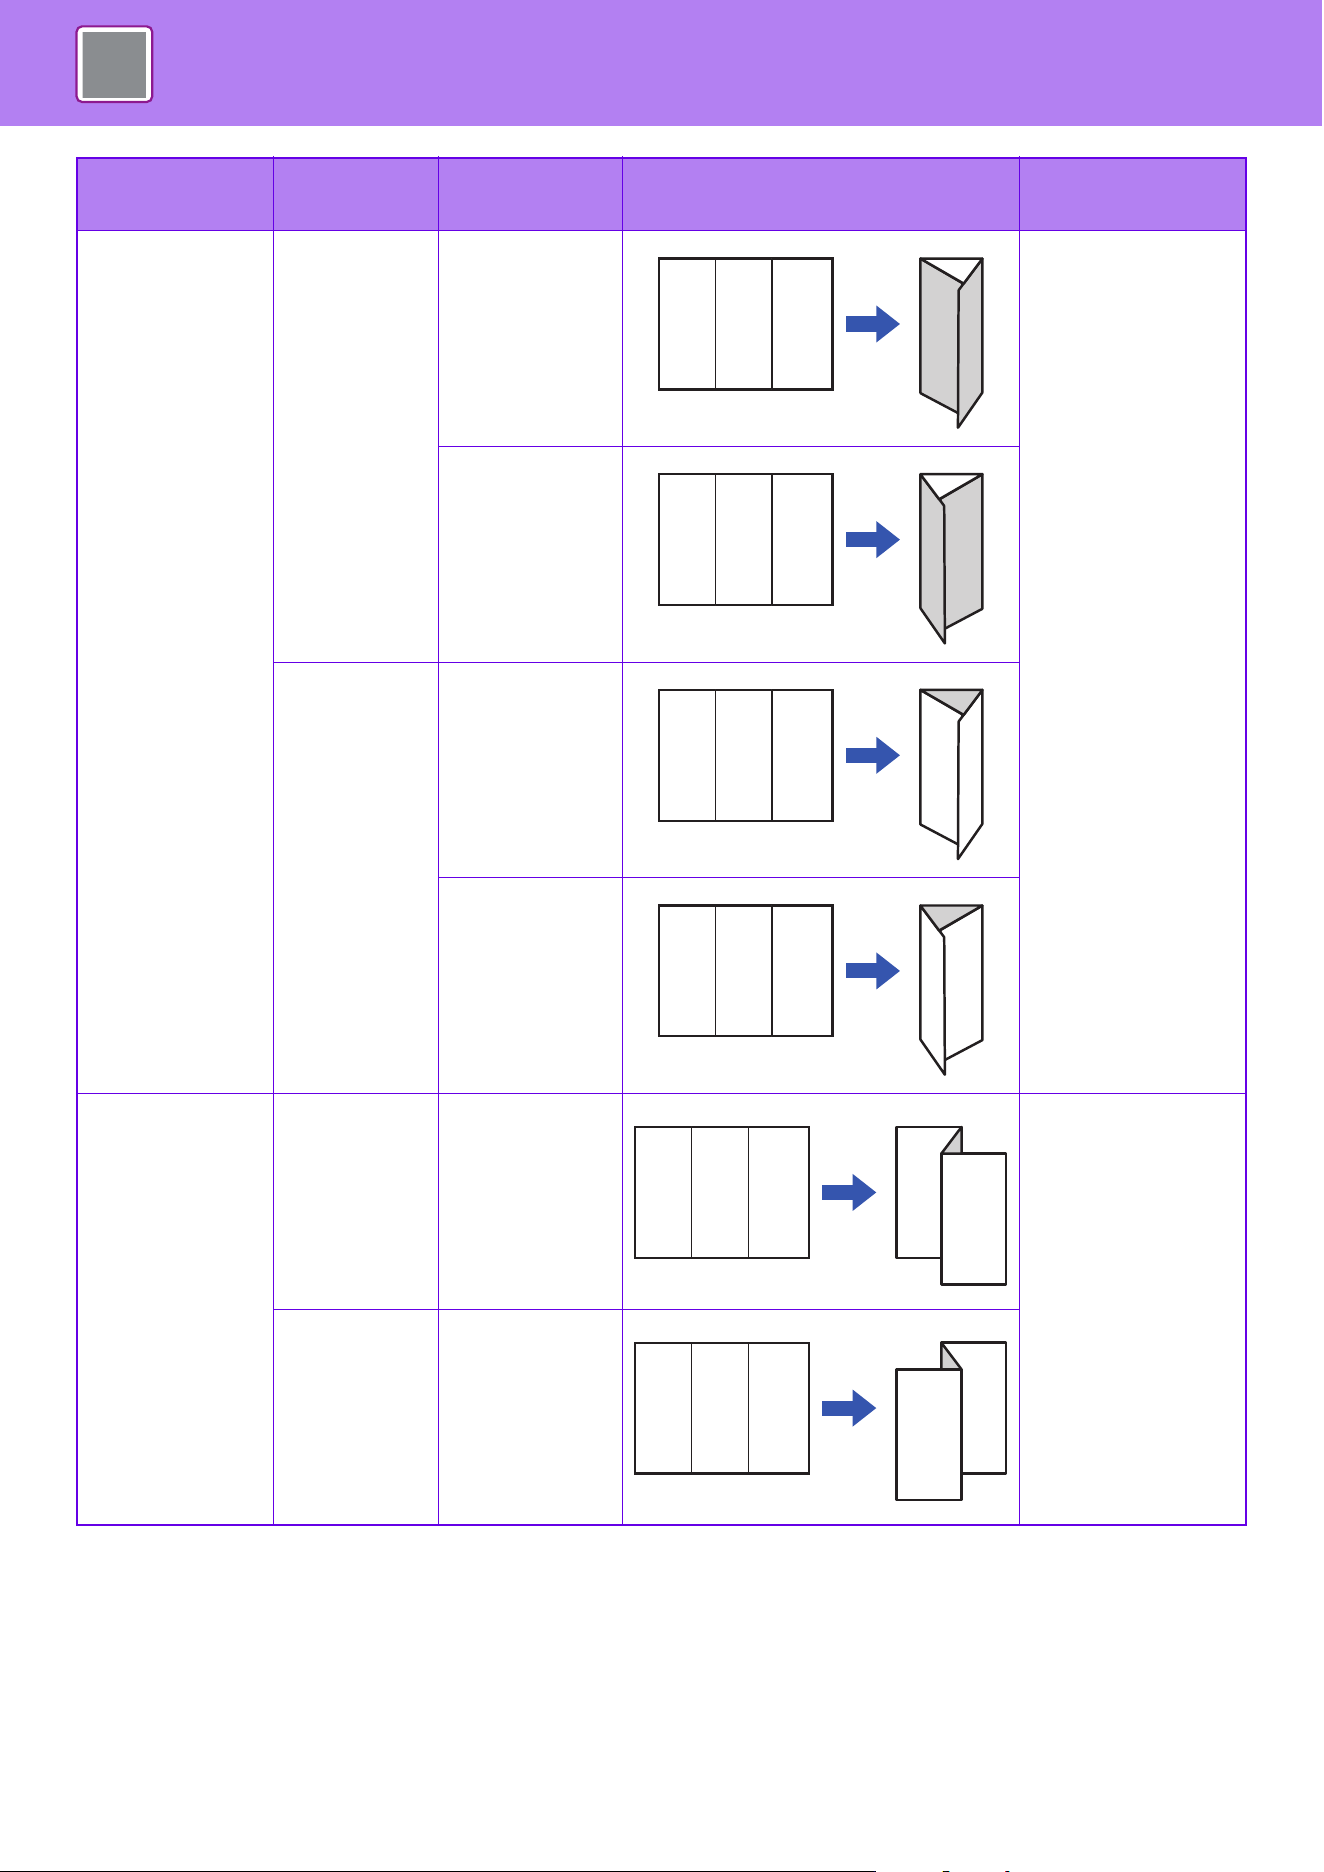
4-90
PRINTER►CONVENIENT PRINTING FUNCTIONS
C-Fold
Inside
Open Right
For example, paper
is folded in three so
that it can be put into
an envelope. Copies
are output sheet by
sheet.
Open Left
Outside
Open Right
Open Left
Accordion Fold
- Open Right
For example, paper
is folded in three so
that it can be put into
an envelope. Copies
are output sheet by
sheet.
- Open Left
Folding types Print Side
Fold
Orientation
Folding results Description
ABC
A
C
ABC
C
A
ABC
C
A
ABC
A
C
ABC
A
C
ABC
C
A
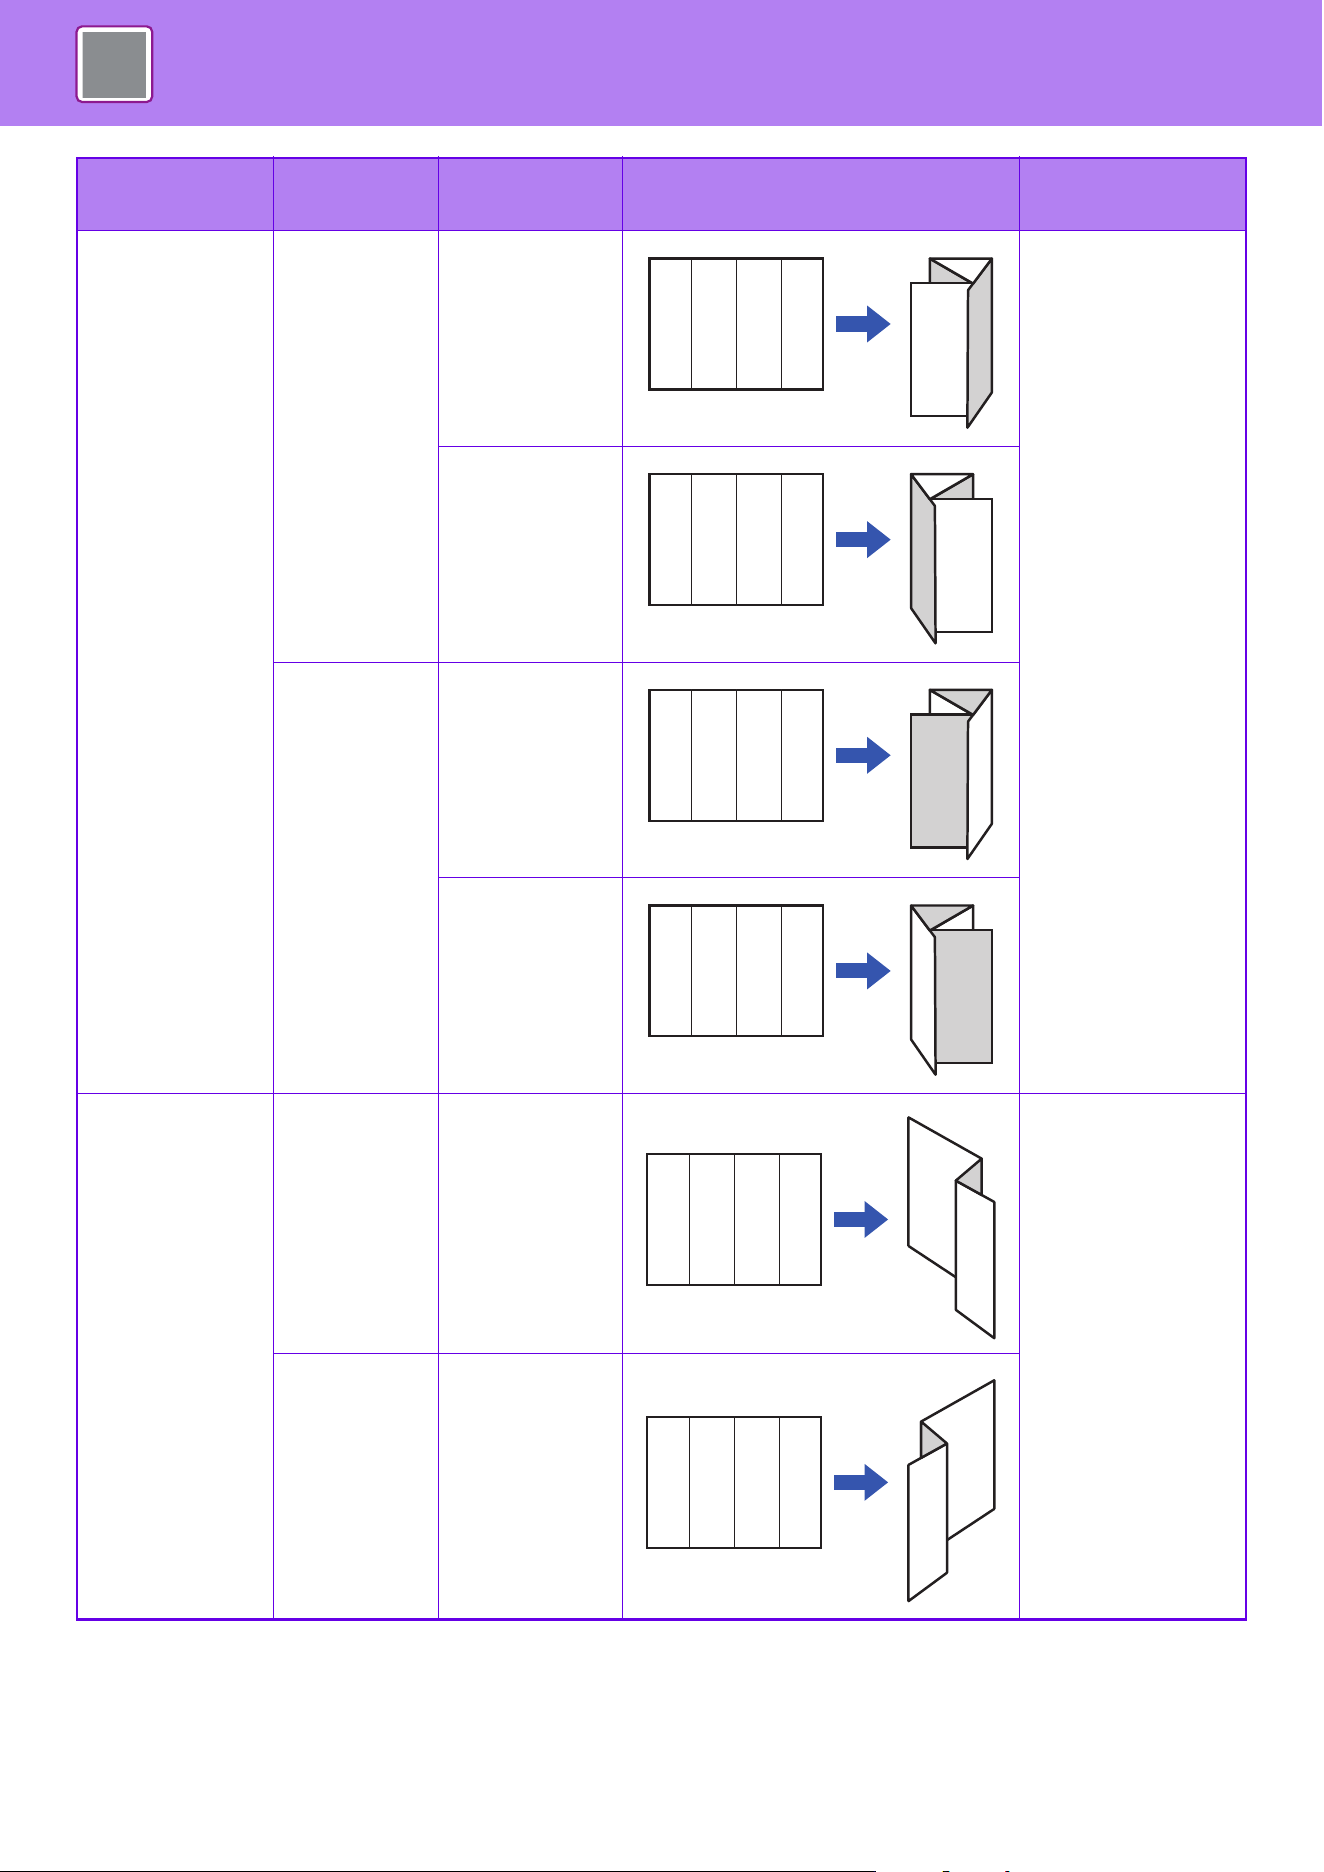
4-91
PRINTER►CONVENIENT PRINTING FUNCTIONS
Double Fold
Inside
Open Right
For example, paper
is folded in four so
that it can be put into
an envelope. Copies
are output sheet by
sheet.
Open Left
Outside
Open Right
Open Left
Z-Fold
- Open Right
For example, if
8-1/2" × 11" (A4) and
11" × 17" (A3) size
print images are
mixed, only the 11" ×
17" (A3) size paper is
folded and changed
to 8-1/2" × 11" (A4)
size paper.
Copies are output
sheet by sheet.
- Open Left
Folding types Print Side
Fold
Orientation
Folding results Description
ABCD
D
A
ABCD
A
D
ABCD
A
D
ABCD
D
A
ABCD
A
B
D
ABCD
D
C
A

4-92
PRINTER►CONVENIENT PRINTING FUNCTIONS
• When printing data in a pamphlet layout, the "Booklet" function can be used to conveniently fold and staple printed output
to create a pamphlet. See "CREATE A PAMPHLET (BOOKLET/SADDLE STITCH)
(page 4-47)".
• The Fold function cannot be used together with the Punch and Staple functions. However, the Z-Fold function can be used
together with the punch and staple functions when one of the following paper size is specified.
• B4, A3, Ledger (11" × 17")
• When a saddle stitch finisher (large stacker) is mounted, the Saddle Fold function folds five sheets every set. For example,
if an original has 12 A4 size plain sheets, they are folded three times in total: 5 sheets + 5 sheets + 2 sheets.
Howerver, some types of paper reduces the number of sheets that are folded every set. For example, heavy paper is
folded on a three-sheet basis.
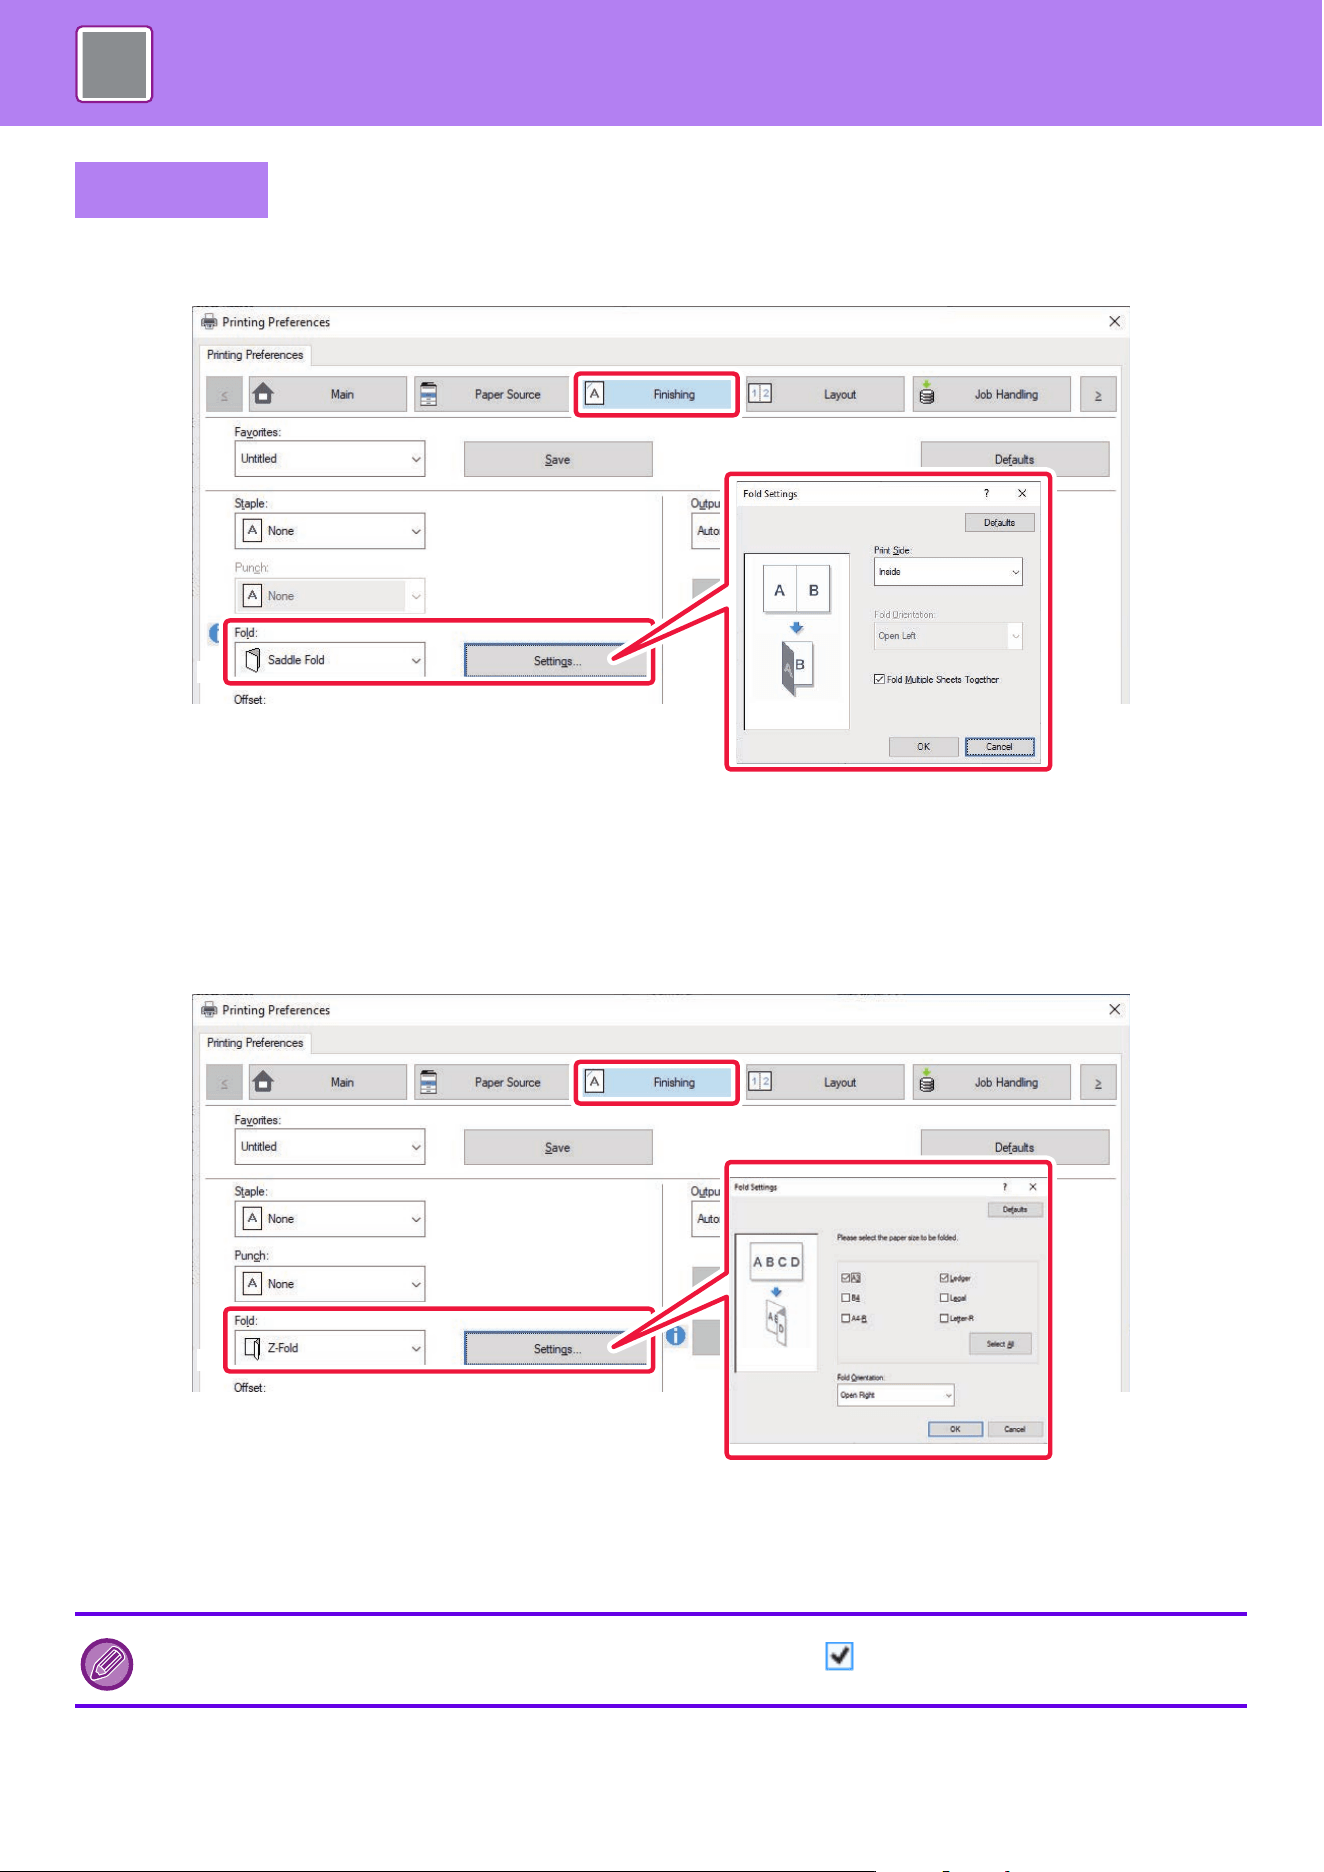
4-93
PRINTER►CONVENIENT PRINTING FUNCTIONS
Folding
(1) Click the [Finishing] tab.
(2) Select the folding method in "Fold", and click the [Settings] button.
(3) Select the desired folding method.
Folding (Z-Fold)
(1) Click the [Finishing] tab.
(2) Select the folding method in "Fold", and click the [Settings] button.
(3) Select the paper to be folded and choose the opening direction.
Windows
If you select "Z-Fold", set the checkbox of the paper size for paper folding to .
(2)
(1)
(3)
(2)
(1)
(3)

4-94
PRINTER►CONVENIENT PRINTING FUNCTIONS
Folding
(1) Select [Printer Features].
In macOS 13, [Printer Features] is located under the "Printer Options" menu.
(2) Select [Folding].
(3) Select the desired folding method.
Folding(Z-Fold)
(1) Select [Printer Features], then select [Folding(Z-Fold)].
In macOS 13, [Printer Features] is located under the "Printer Options" menu.
(2) Configure Fold settings.
macOS
(2)
(1)
(3)
(1)
(2)
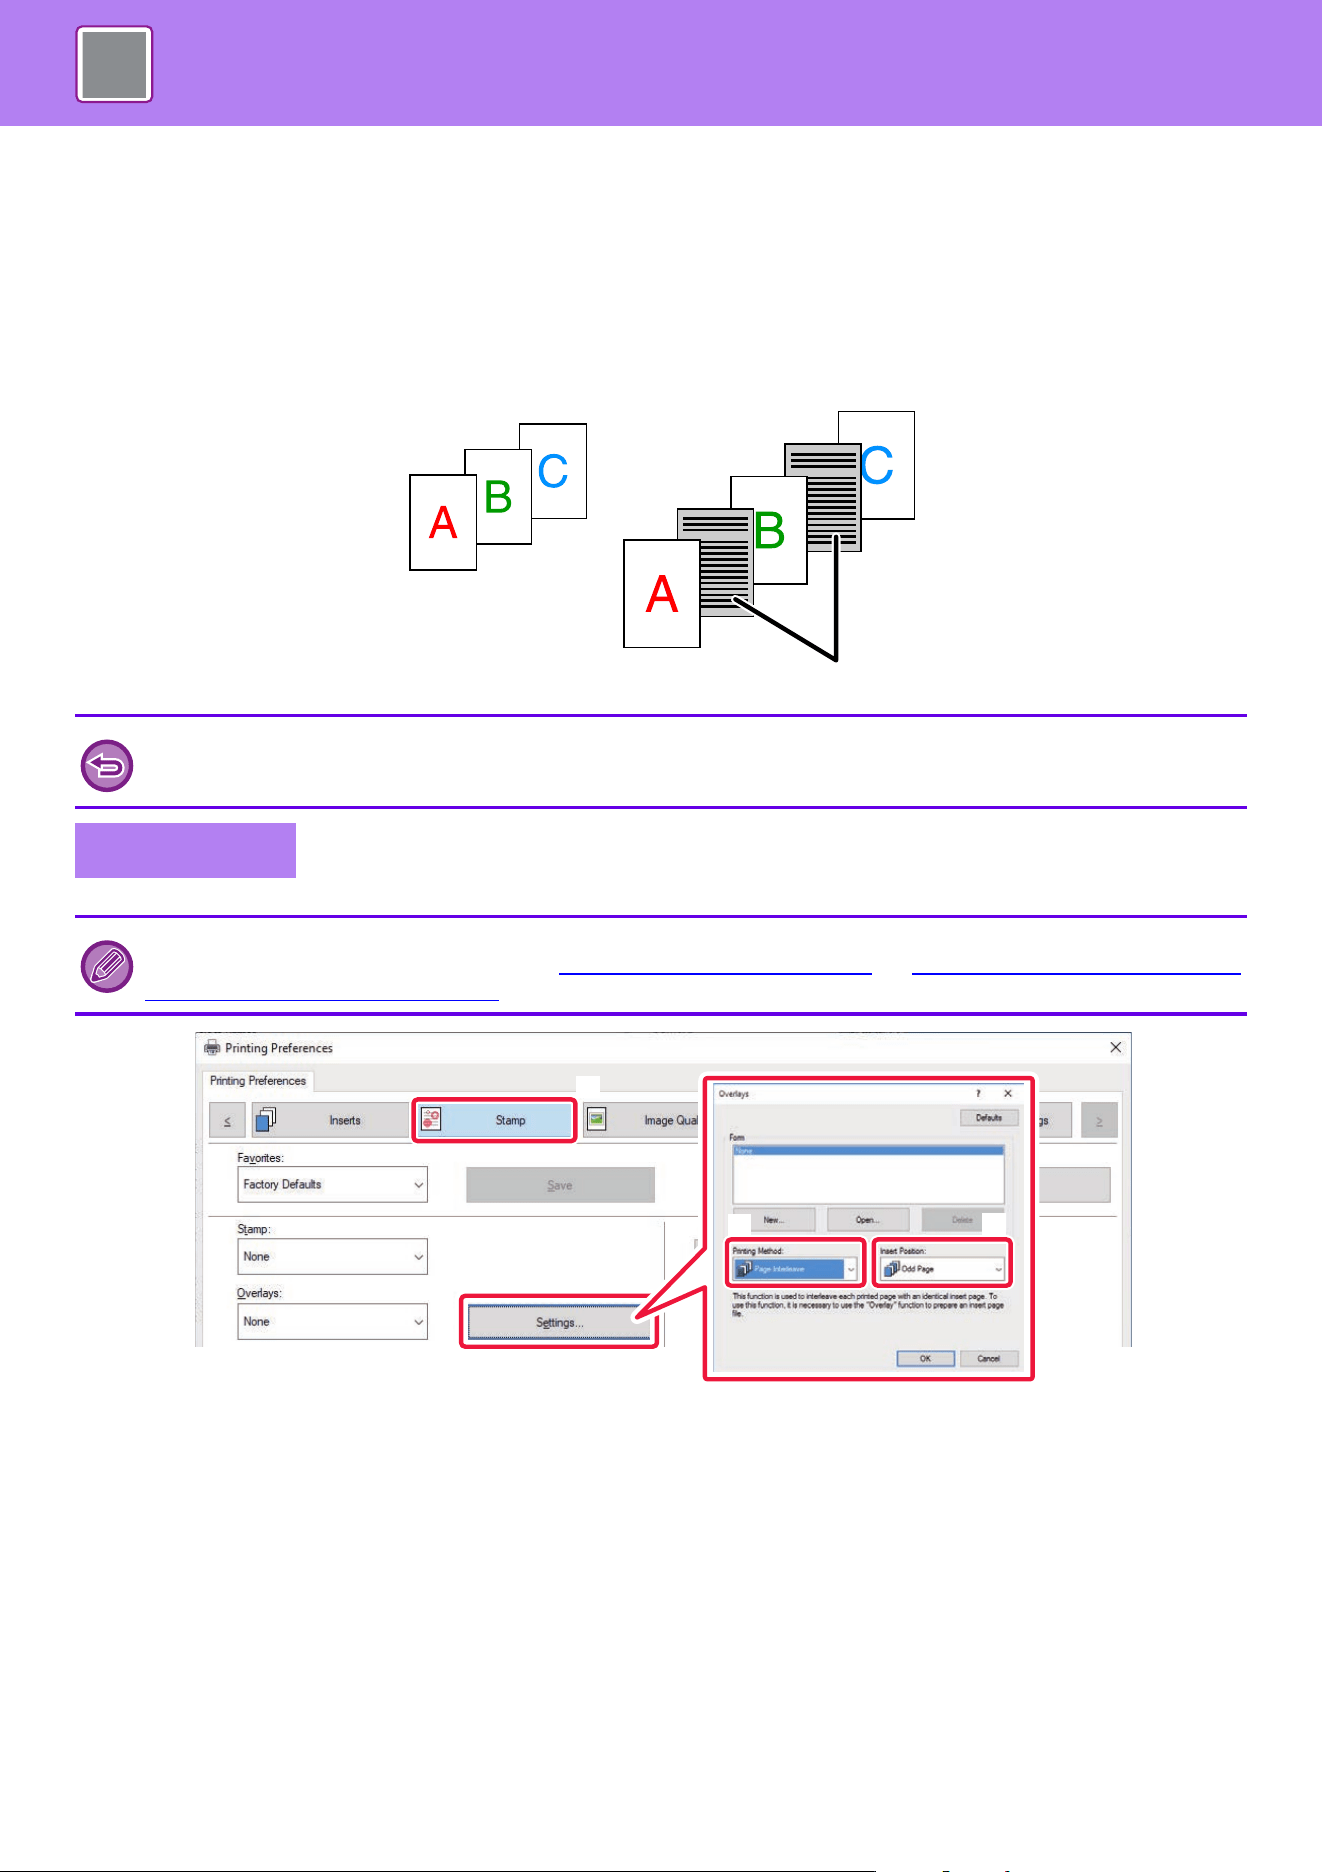
4-95
PRINTER►CONVENIENT PRINTING FUNCTIONS
INSERT PRESET DATA BEFORE OR AFTER EACH
PAGE (PAGE INTERLEAVE)
This function inserts a preset data item into every page during printing.
You can easily create documents with opened page spread that is made up of text on the left-hand page and a memo
space on the right-hand page.
(1) Click the [Stamp] tab.
(2) Click the [Settings] button.
(3) Select [Page Interleave] from the "Printing Method".
(4) Set the overlay data to be inserted and set its insertion position.
• This function is available in a Windows environment.
• This function can be used when the PCL6 printer driver is used.
Windows
You have to create page data to be inserted in advance.
For the procedure for creating page data, see “Creating an overlay file
(page 4-74)" in “OVERLAY A FIXED FORM ON THE
PRINT DATA (OVERLAYS) (page 4-74)".
Pre-set data
(2)
(1)
(3)
(4)
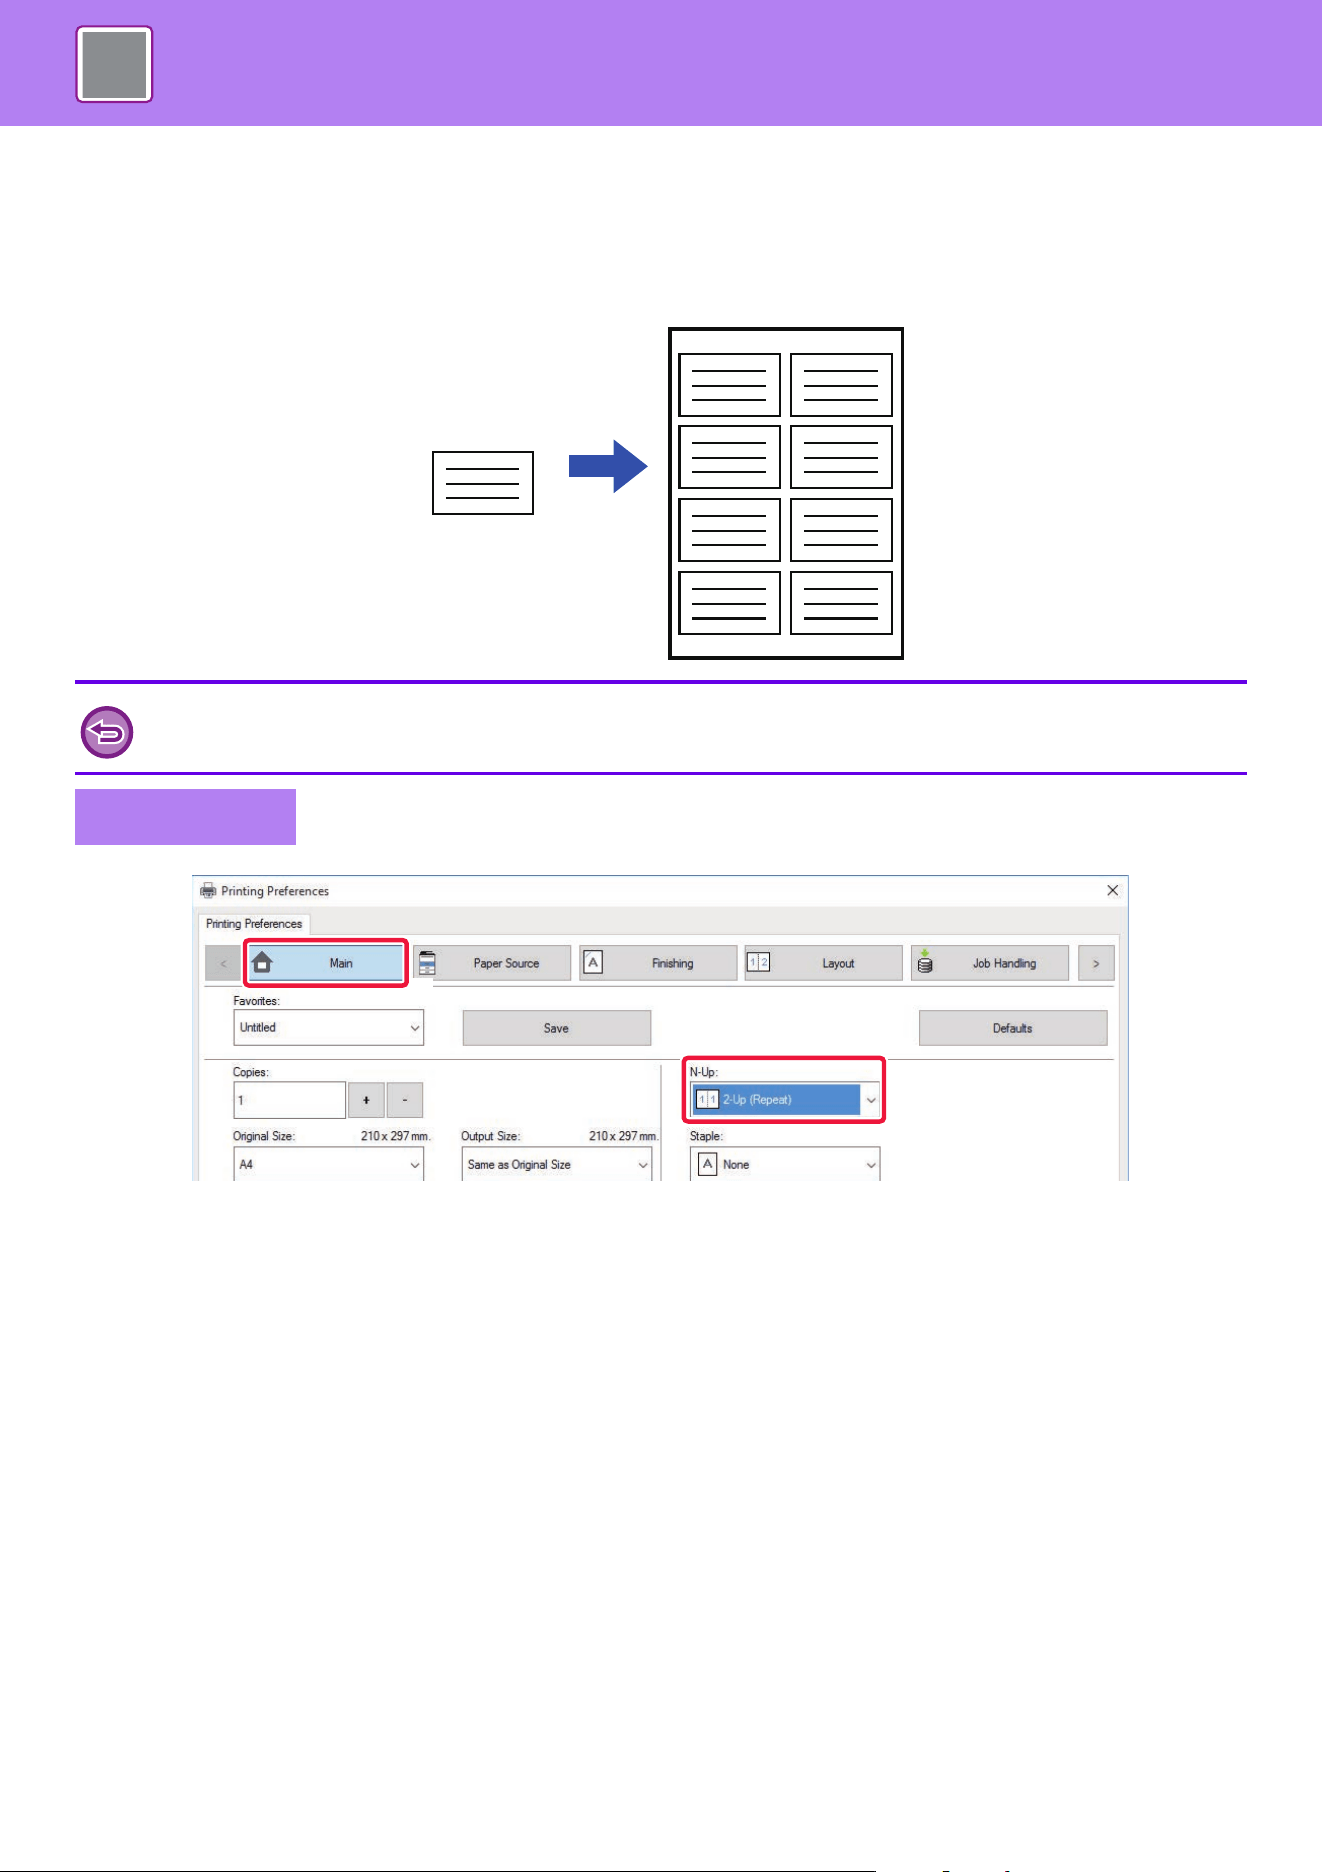
4-96
PRINTER►CONVENIENT PRINTING FUNCTIONS
PRINT THE SAME IMAGE IN TILE PATTERN (REPEAT
PRINT)
This function prints the same image in tile pattern on a sheet. This is useful for producing name cards and stickers.
(1) Click the [Main] tab.
(2) Select the repeat count in "N-Up".
• This function is available in a Windows environment.
• This function can be used when the PCL6 printer driver is used.
Windows
(2)
(1)
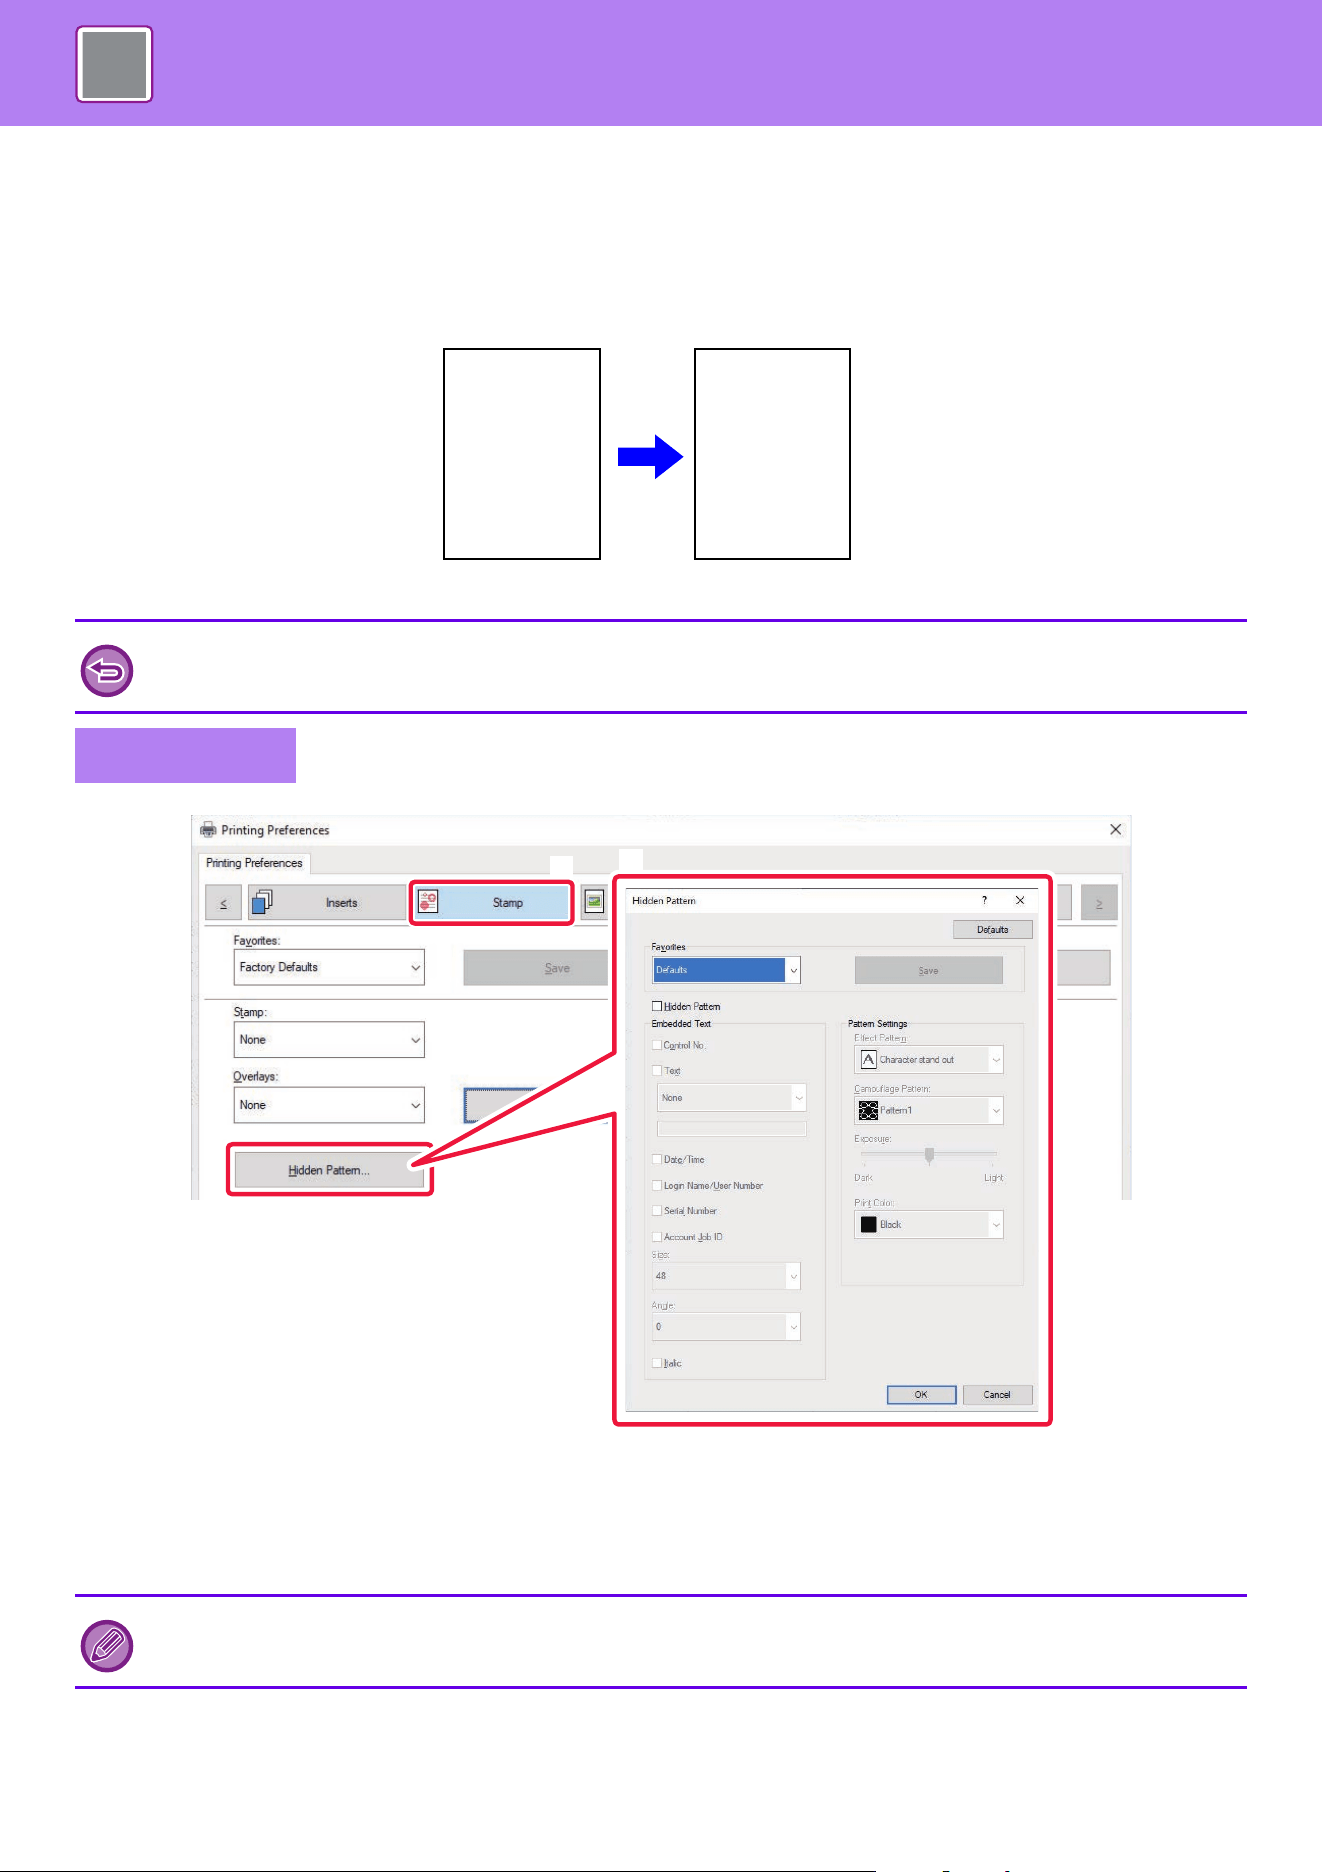
4-97
PRINTER►CONVENIENT PRINTING FUNCTIONS
PRINTING PATTERN DATA (HIDDEN PATTERN PRINT)
This function prints pattern data such as "DO NOT COPY" behind the print data.
If paper with pattern data is duplicated, the pattern data emerges in the background, which will help to prevent
information from being leaked through unauthorized document copying.
(1) Click the [Stamp] tab.
(2) Click the [Hidden Pattern] button.
(3) Configure the settings for hidden pattern printing and click the [OK] button.
• This function is available in a Windows environment.
• This function can be used when the PCL6 printer driver is used.
Windows
The hidden pattern printing function cannot be used when "Print Mode" is set to [1200 dpi].
AB
CD
AB
CD
DO’NOT COPY
DO’NOT COPY
AB
CD
(2)
(1)
(3)

4-98
PRINTER►CONVENIENT PRINTING FUNCTIONS
• "Hidden Pattern" is a function provided for the purpose of deterring unauthorized printing. It does not guarantee the
prevention of information leakage.
• Text may not be completely hidden on an output sheet with a pattern print under certain machine conditions. In "Settings
(administrator)", select [Security Settings] → [Hidden Pattern Print Setting] → [Contrast] if this is the case.
• The hidden pattern may not emerge on copies with certain types of devices or under certain setting conditions used to
copy an output sheet with a pattern print.
• When the color mode is set to [Black and White] or when it is set to [Automatic] and the original is recognized as black and
white, a black background pattern is printed even if a cyan or magenta pattern is selected.
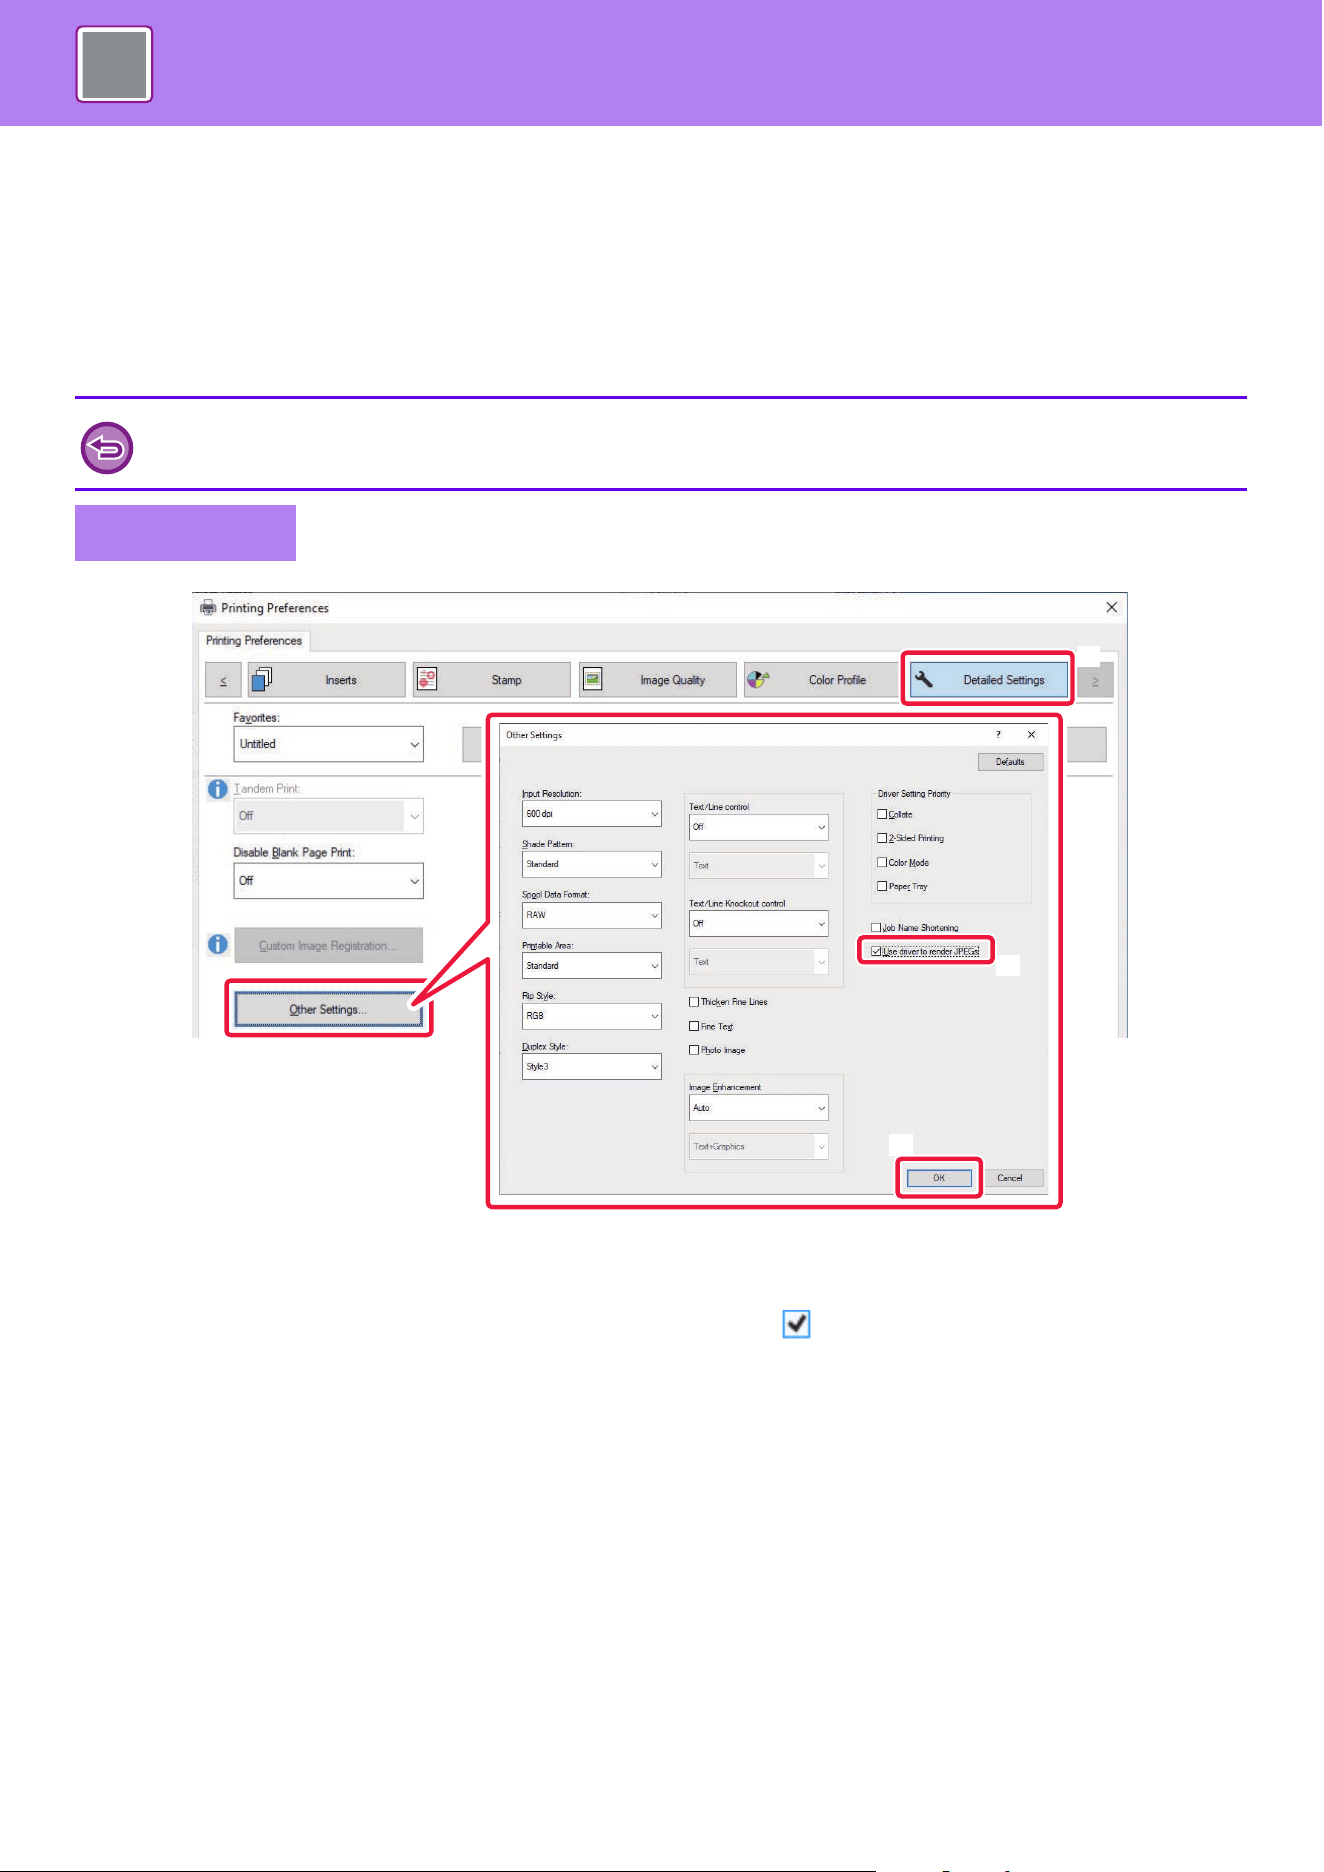
4-99
PRINTER►CONVENIENT PRINTING FUNCTIONS
CHANGING THE RENDERING METHOD AND PRINTING
JPEG IMAGES (USE DRIVER TO RENDER JPEGS)
In some situations, a document containing a JPEG image may not be printed correctly. This can be solved by changing
the way the JPEG image is rendered.
When you print an original containing JPEG images, this function allows you to select whether the images are rendered
in the printer driver or the machine.
(1) Click the [Detailed Settings] tab.
(2) Click the [Other Settings] button.
(3) Click the [Use driver to render JPEGs] checkbox so that appears.
(4) Click the [OK] button.
• This function is available in a Windows environment.
• When images are rendered in the printer driver, it may take time until the printing is completed.
Windows
(2)
(1)
(3)
(4)
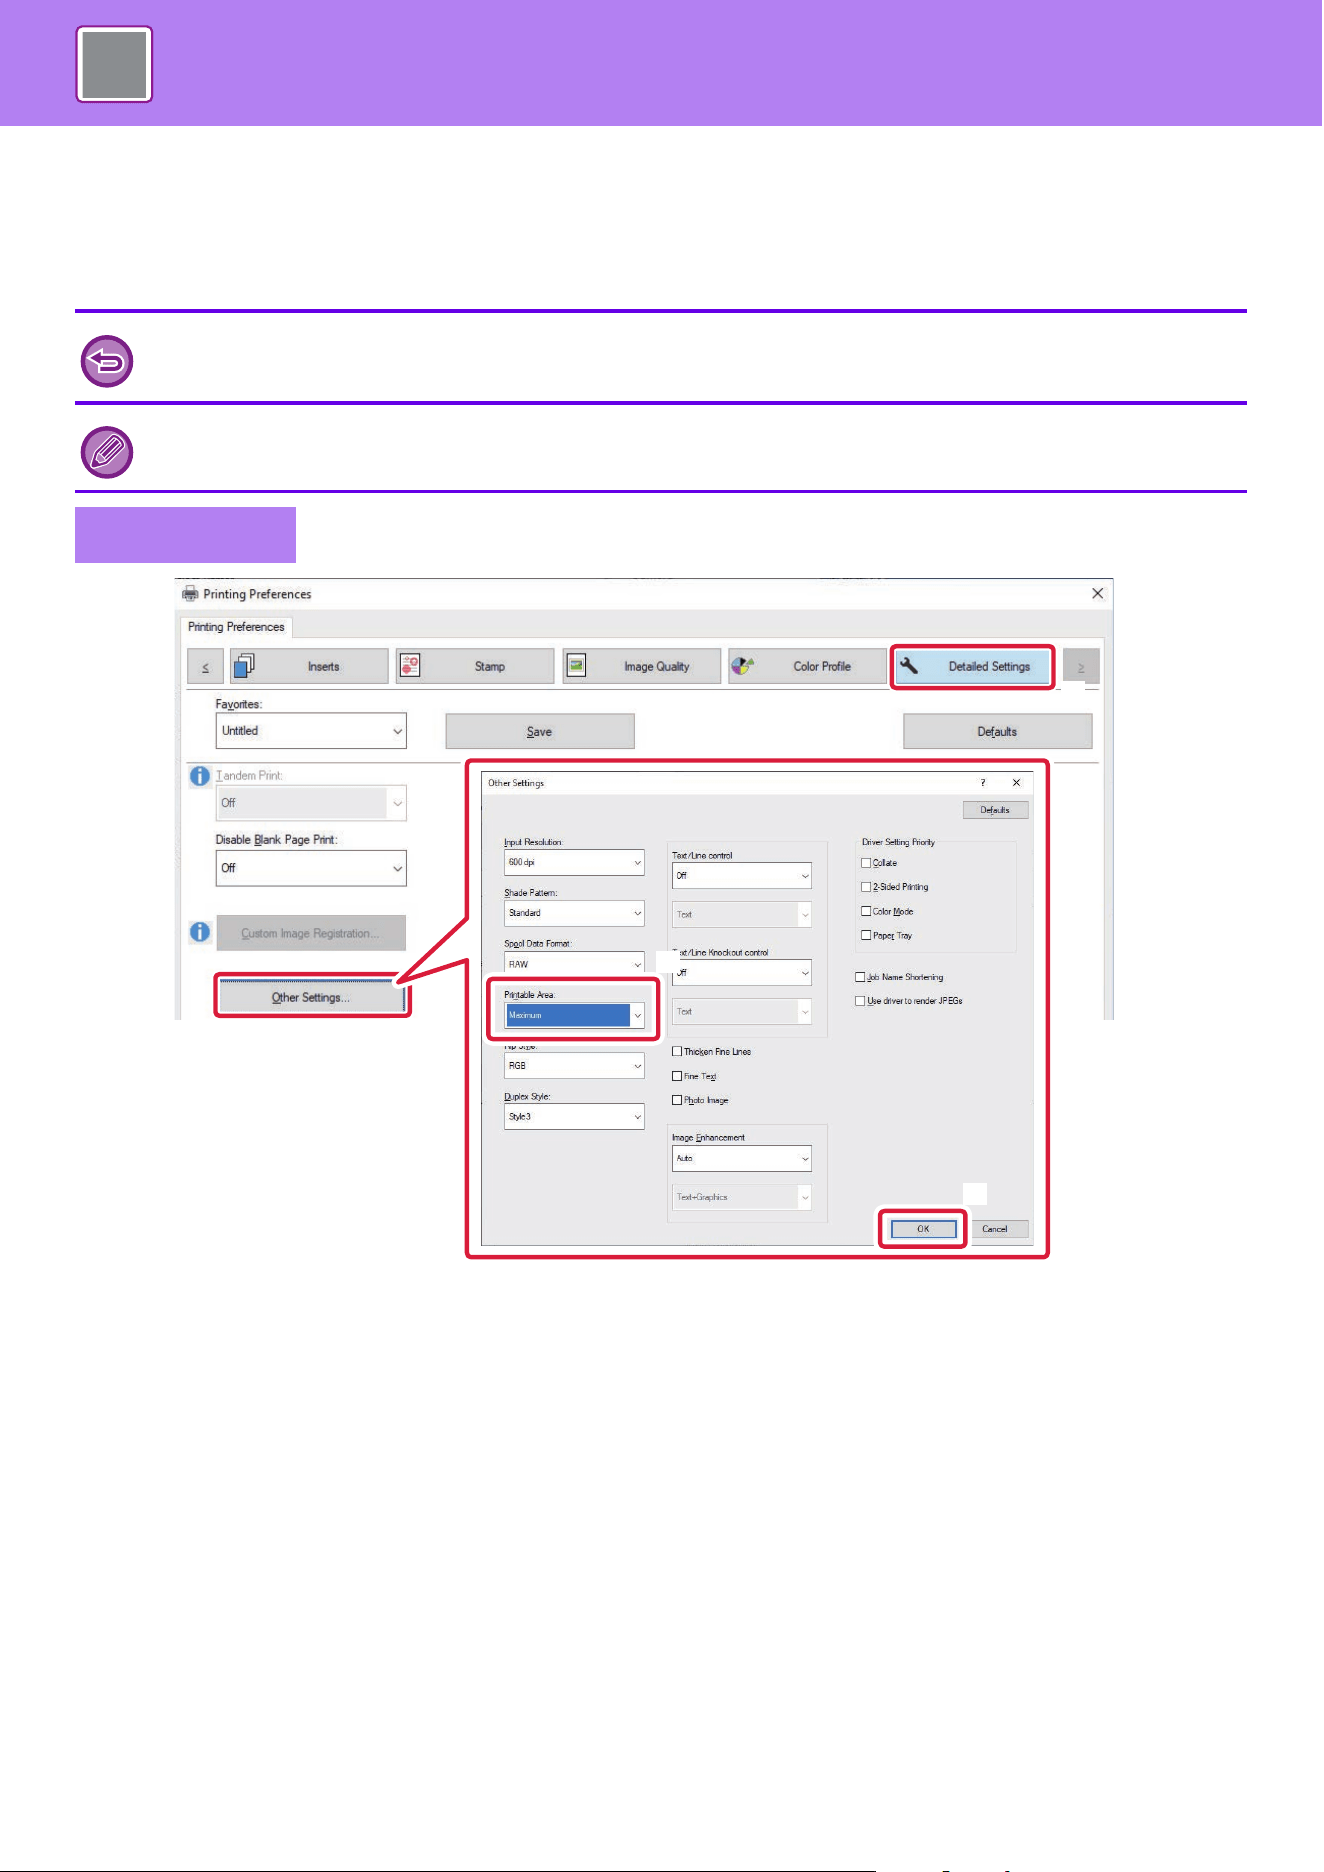
4-100
PRINTER►CONVENIENT PRINTING FUNCTIONS
MAXIMIZING THE PRINT AREA ON THE PAPER (PRINT
AREA)
By maximizing the print area, you can print on the full paper size.
(1) Click the [Detailed Settings] tab.
(2) Click the [Other Settings] button.
(3) Select [Maximum] from the "Printable Area".
(4) Click the [OK] button.
This function is available in a Windows environment.
Even when the print area is maximized, edges may be cut off.
Windows
(2)
(1)
(3)
(4)
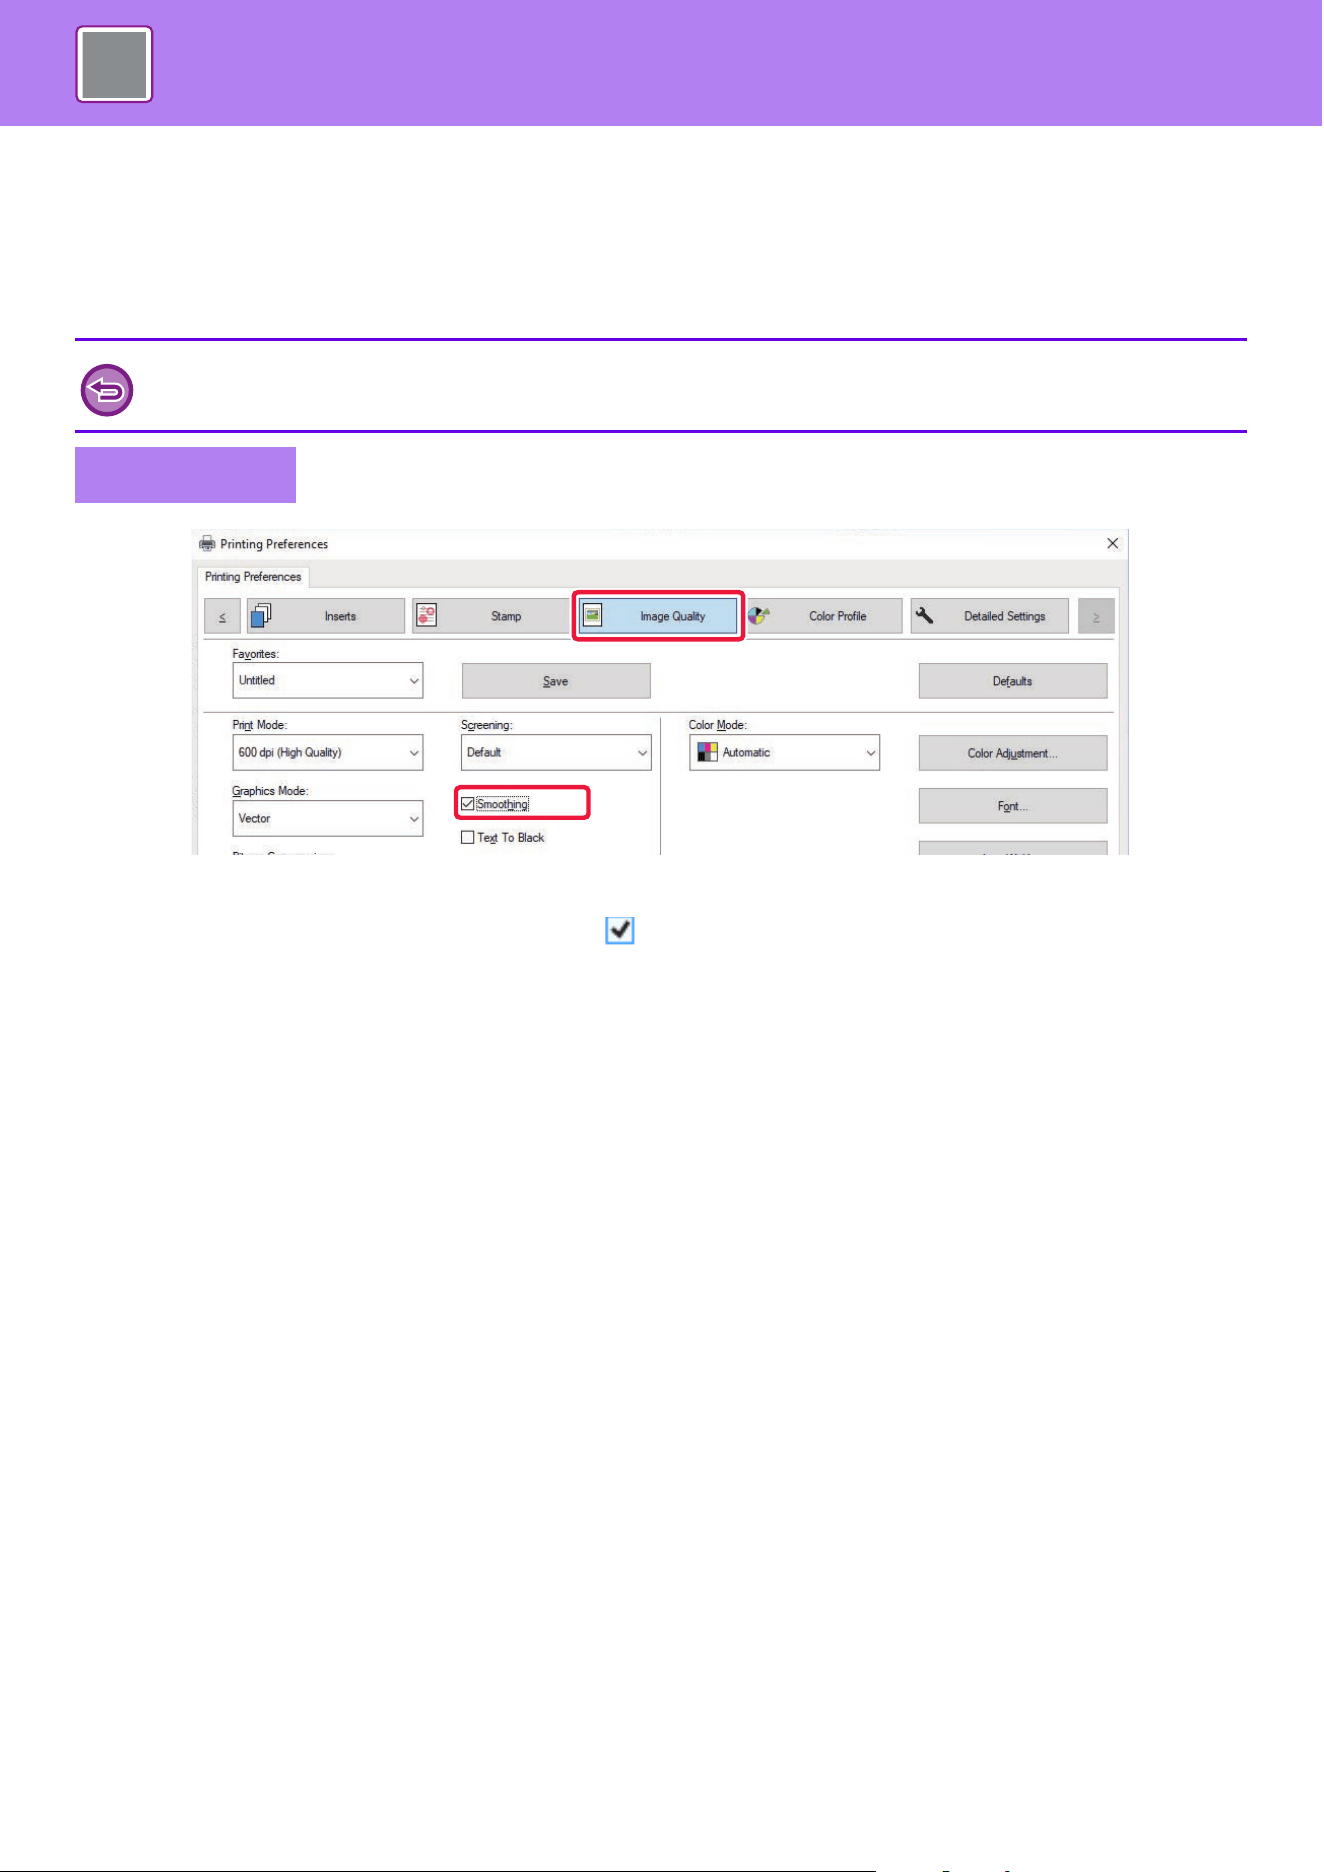
4-101
PRINTER►CONVENIENT PRINTING FUNCTIONS
PRINTING AT AN ENHANCED RESOLUTION
(SMOOTHING)
Resolution enhancement techniques (RETs) are used to smoothen the outlines of images. The images are printed at a
digitally enhanced resolution.
(1) Click the [Image Quality] tab.
(2) Select the [Smoothing] checkbox so that appears.
This function is available in a Windows environment.
Windows
(2)
(1)
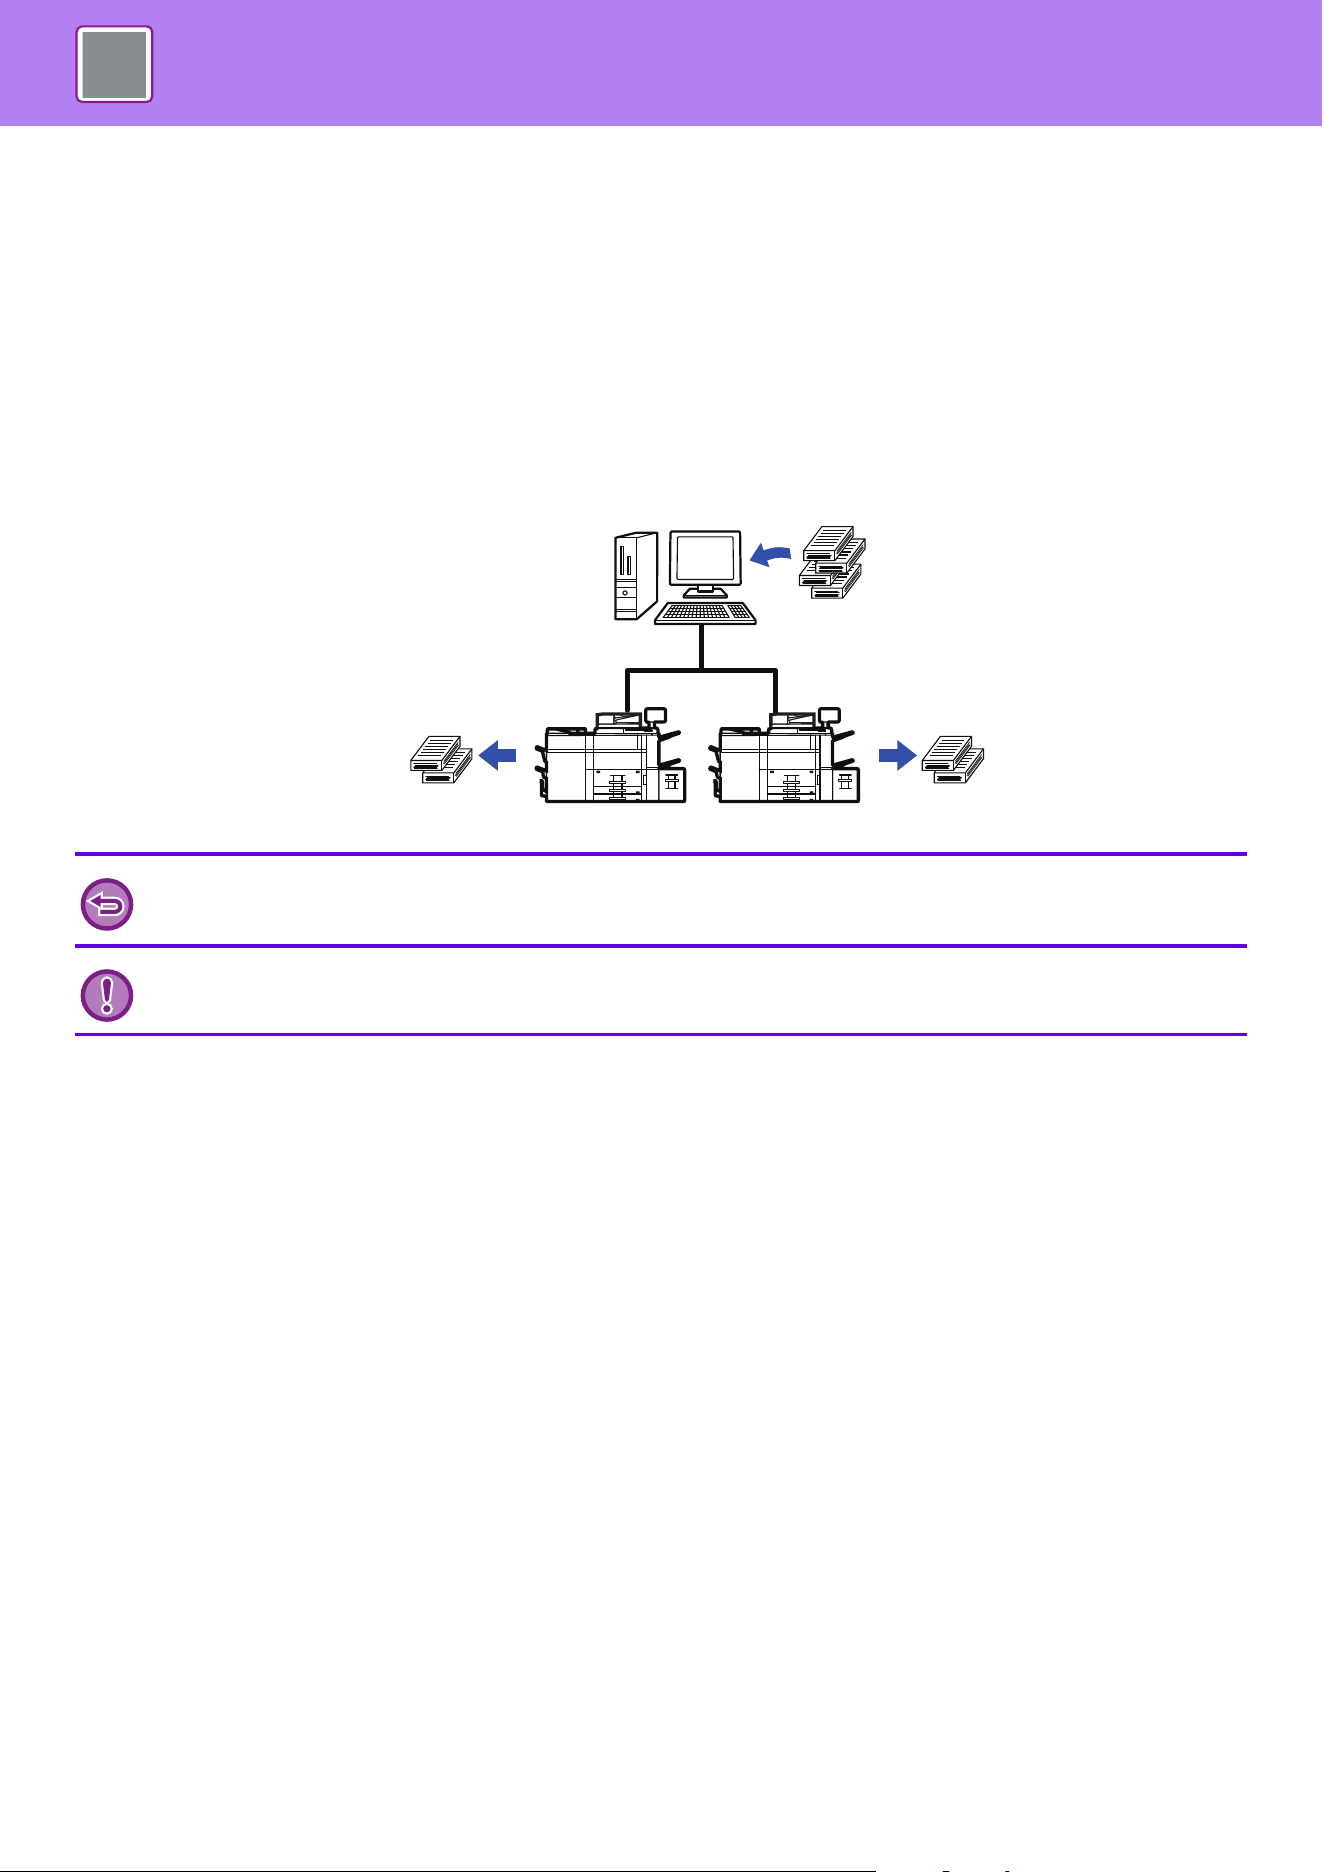
4-102
PRINTER►CONVENIENT PRINTING FUNCTIONS
CONVENIENT PRINTER FUNCTIONS
USING TWO MACHINES TO PRINT A LARGE PRINT
JOB (TANDEM PRINT)
To use this function, two machines that can perform tandem printing are required.
Two machines connected to the same network are used to run a large print job in parallel. This function reduces the
printing time when you handle a large number of prints.
Example: Printing four sets of copies (2 set of copies are executed by the primary unit and secondary unit each)
This function is available in a Windows environment.
To use the tandem print function, the IP address of the secondary unit must be registered in the printer driver.
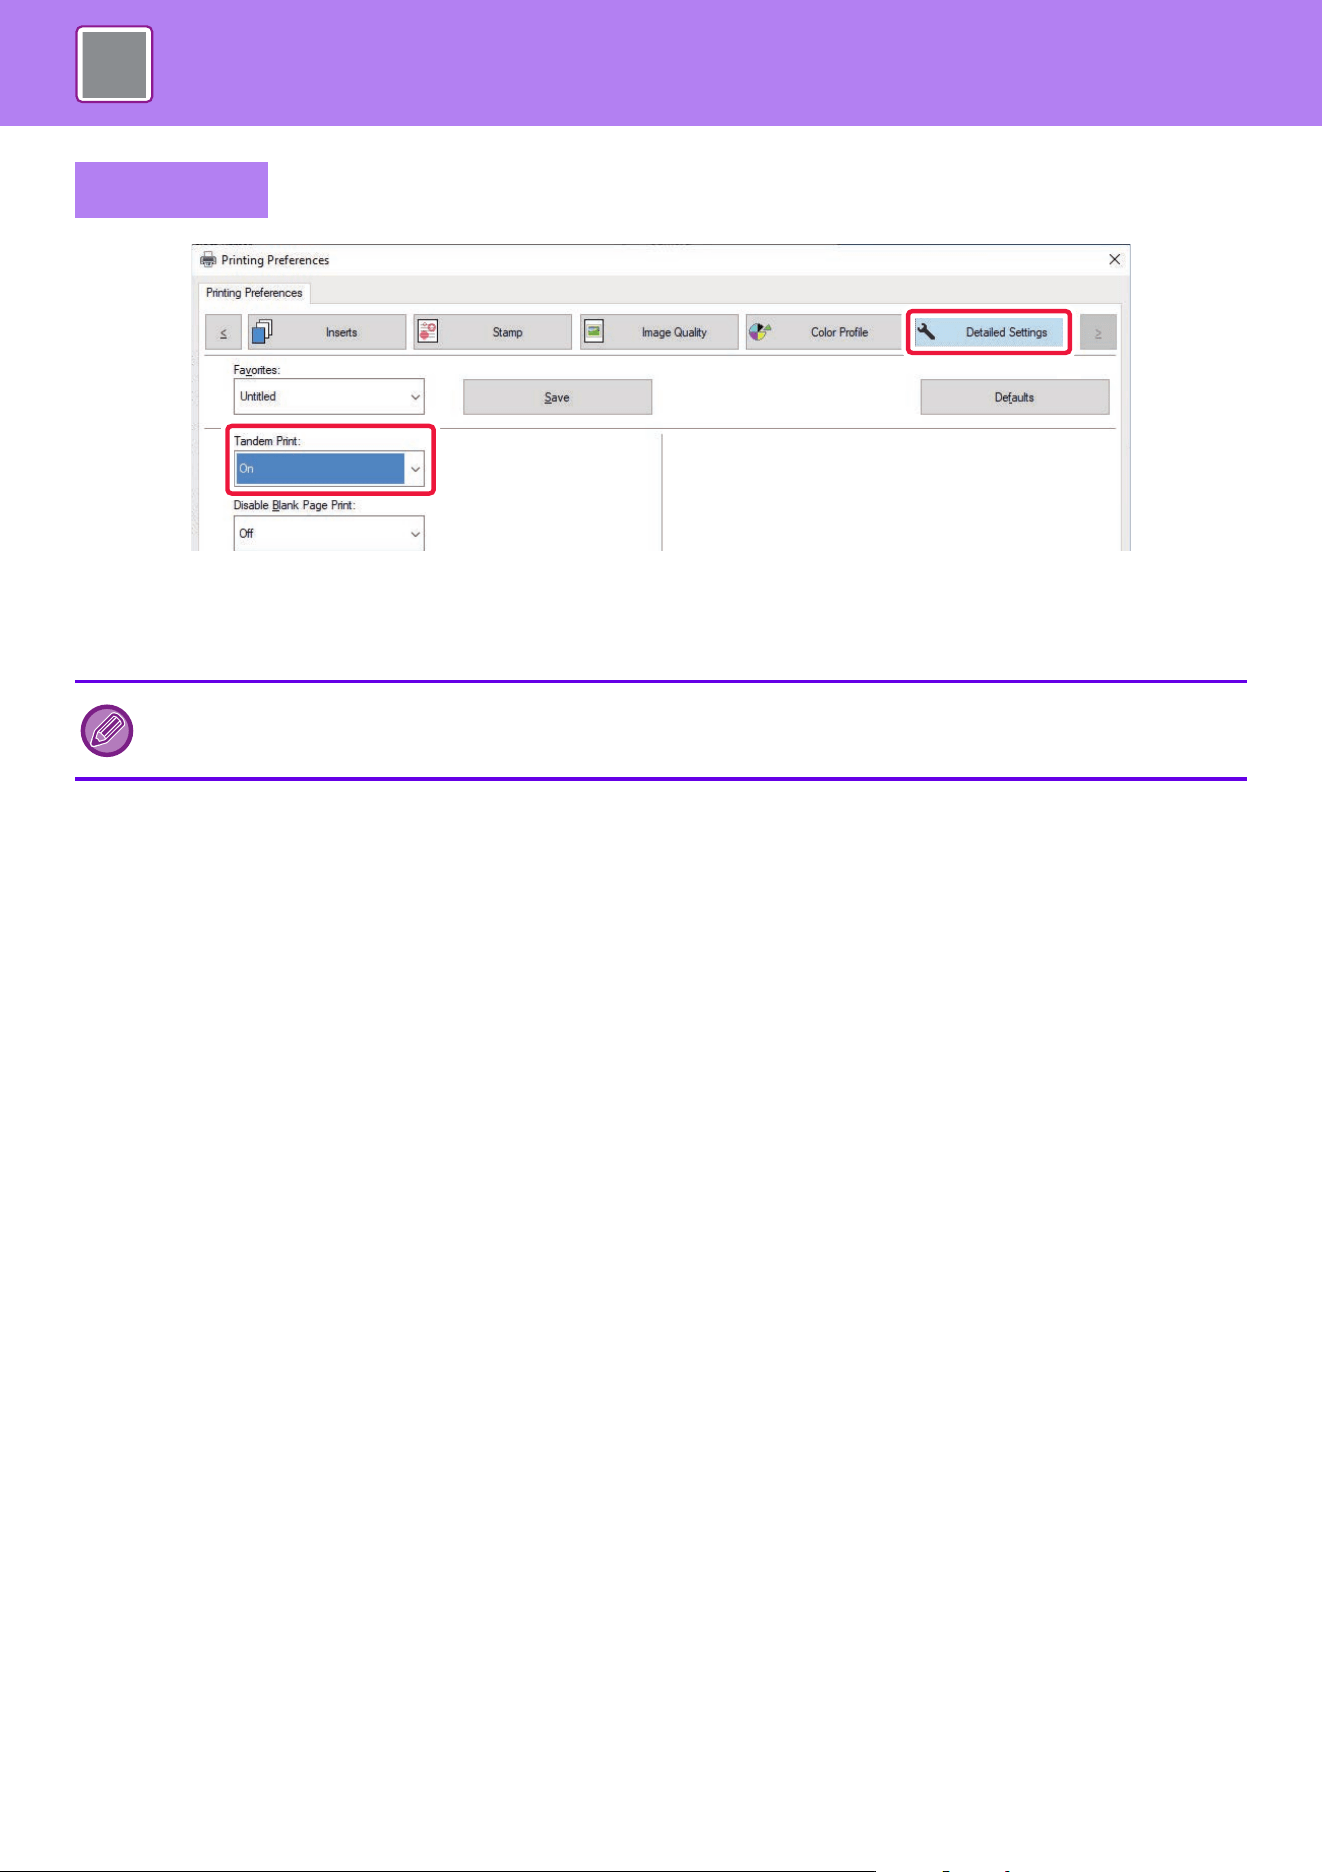
4-103
PRINTER►CONVENIENT PRINTING FUNCTIONS
(1) Click the [Detailed Settings] tab.
(2) Select [On] in "Tandem Print".
Windows
The tandem print function can be used only when the printer driver has been installed using "Custom Installation" with [LPR
Direct Print (Specify Address/Auto Search)] selected and with the [Yes] checkbox selected for "Do you want to use Tandem
Print function?".
(2)
(1)
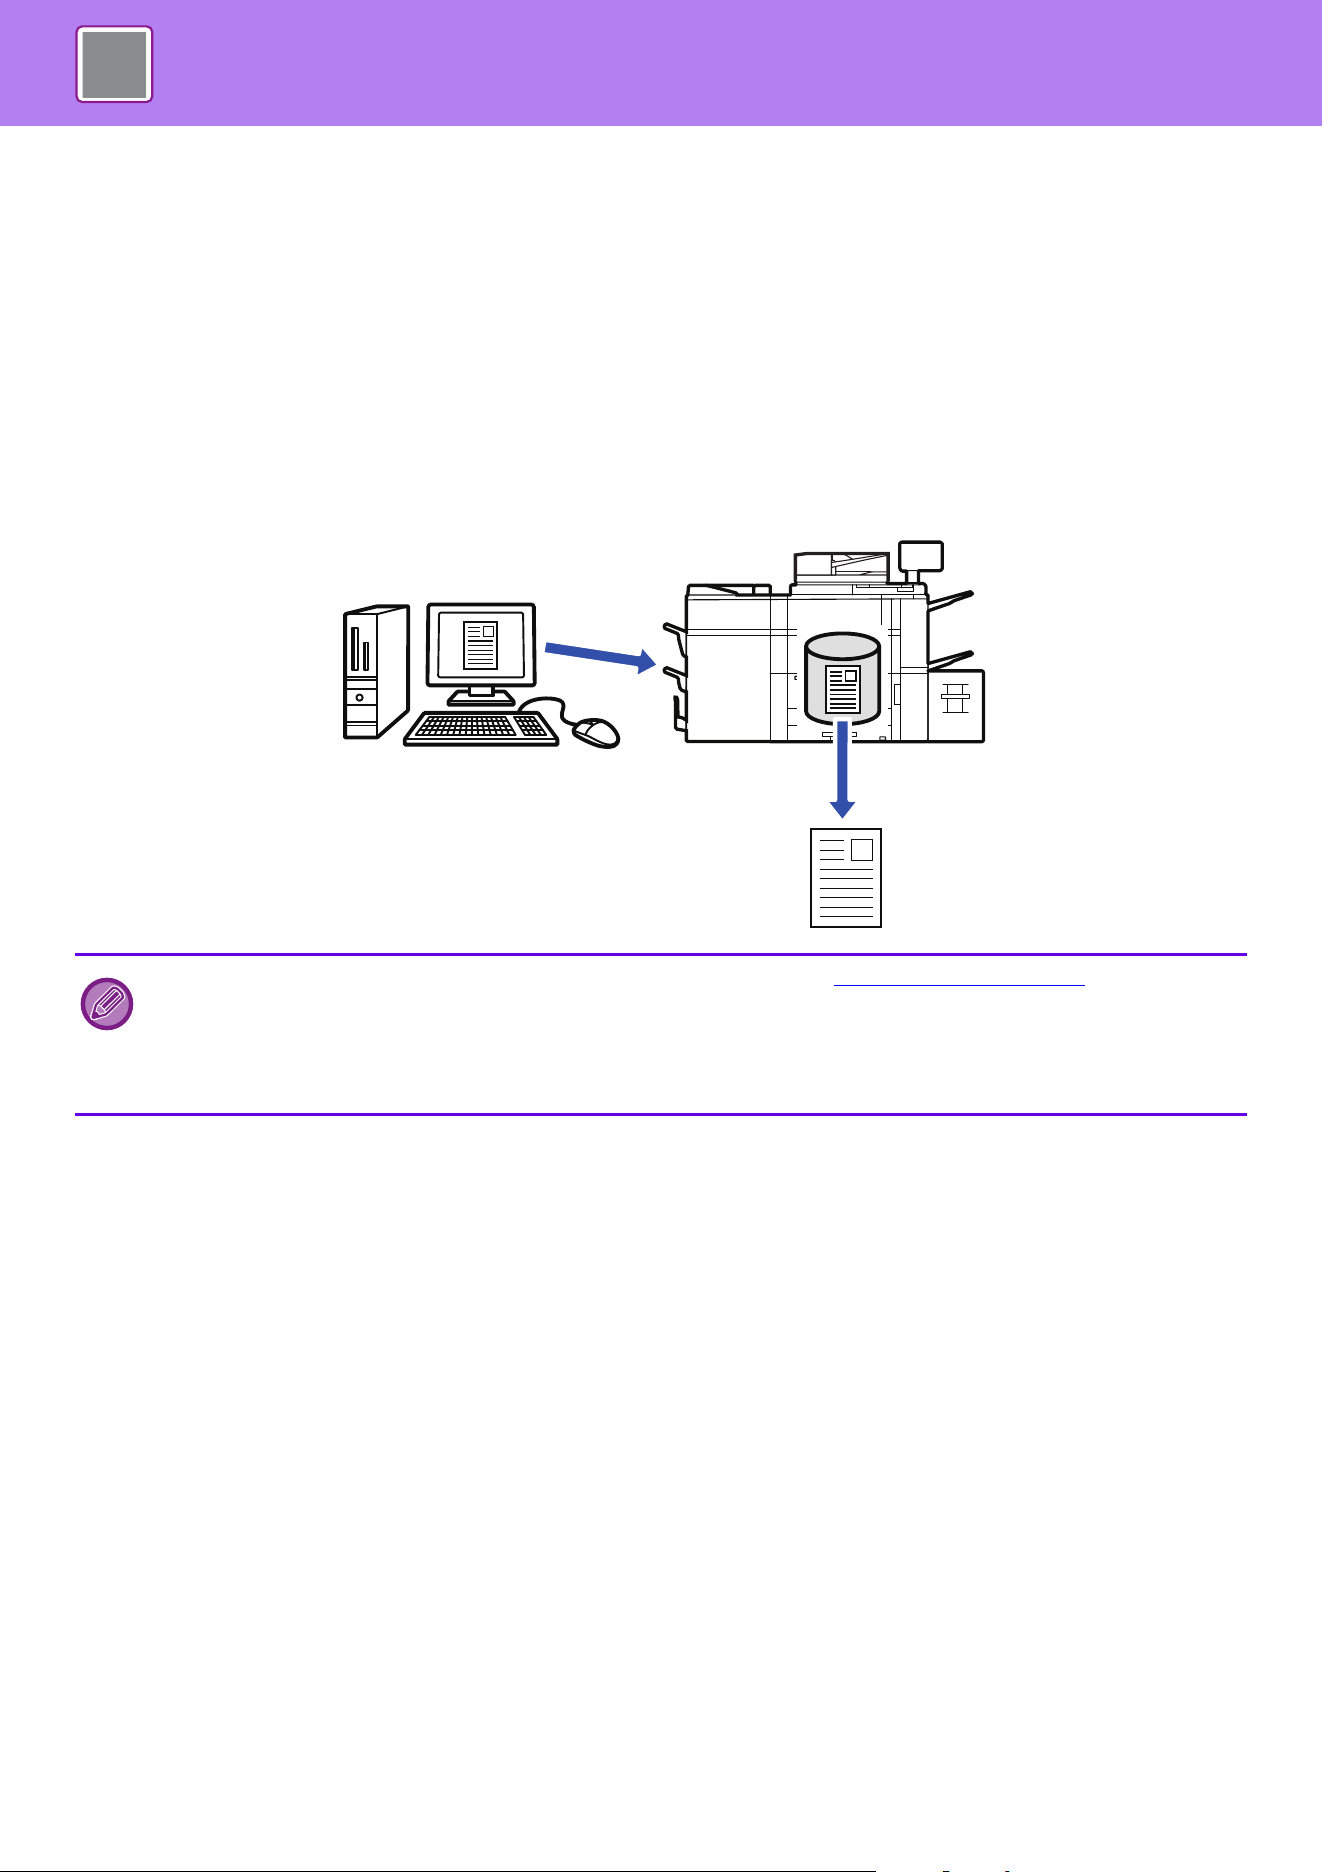
4-104
PRINTER►CONVENIENT PRINTING FUNCTIONS
SAVING AND USING PRINT FILES (DOCUMENT FILING)
This function stores a print job as a file on the machine's local drive, allowing the job to be printed from the touch panel
when needed. The location for storing a file can be selected to prevent the file from being mixed together with files of
other users.
• Hold Only
This setting is used to hold a print job on the machine's local drive without printing it.
• Hold After Print
This setting is used to hold a print job on the machine's local drive after it is printed.
• Sample Print
When a print job is sent to the machine, only the first set of copies is printed. After checking the contents of the first set
of copies, you can print the remaining sets from the operation panel of the machine. This prevents the occurrence of
excessive misprints.
• For the procedure for printing files stored on the machine's local drive, see “FILE PRINTING (page 6-24)" in "Document
Filing".
• When printing from a PC, you can set a password (4 to 8 digits) to maintain the confidentiality of information in a stored file.
When a password is set, the password must be entered to print data.
• [Document Filing] that can be set on the [Job Handling] tab can also be set on the [Main] tab.
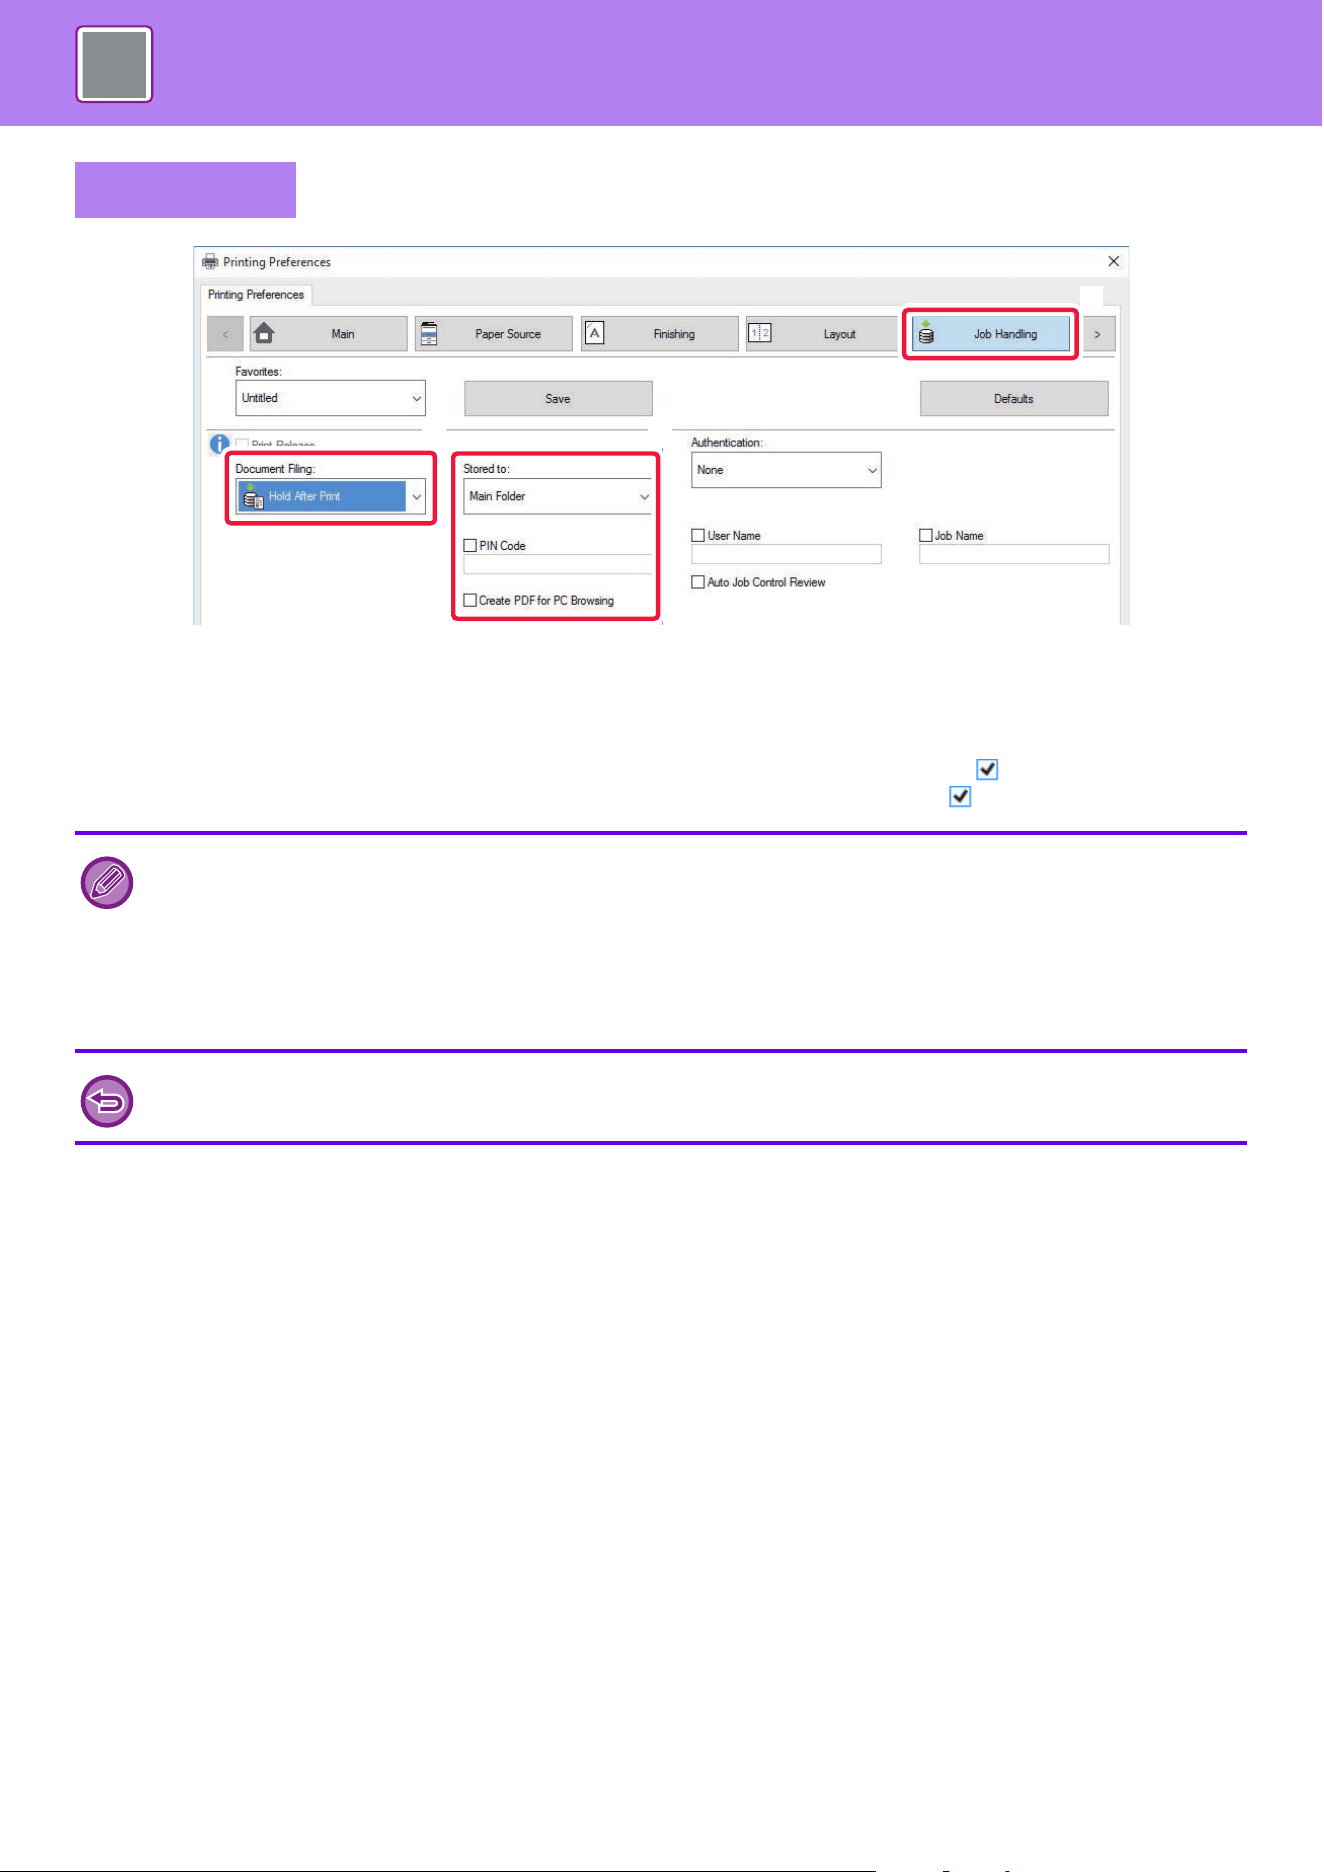
4-105
PRINTER►CONVENIENT PRINTING FUNCTIONS
(1) Click the [Job Handling] tab.
(2) Select the function from the "Document Filing".
(3) Select the folder for storing the file in “Stored to”.
To enter a password (4 to 8 digit number), click the [PIN Code] checkbox so that the checkmark appears.
To create a public PDF for PC browsing, select the [Create PDF for PC Browsing] checkbox ( ).
Windows
• When [Quick File] is selected, "Document Filing" will be set to [Hold After Print].
• When [Quick File] is selected, the password entered in "Document Filing" is cleared.
• If necessary, you can select the data format from CMYK and RGB for data to be stored in the machine. Click the [Other
Settings] button on the [Detailed Settings] tab and select the format from "Rip Style".
• To store a file in a custom folder, you must first create the custom folder using [Document Operations] in "Settings
(administrator)" → [Document Filing]. If you have set a password for the custom folder, enter the password (5 to 8 digit
number) in "PIN Code" on the stored to screen.
If you have configured to always use the force document filing function in "Printing Policy" on the [Configuration] tab, you
cannot clear the [Document Filing] checkbox.
(2)
(1)
(3)
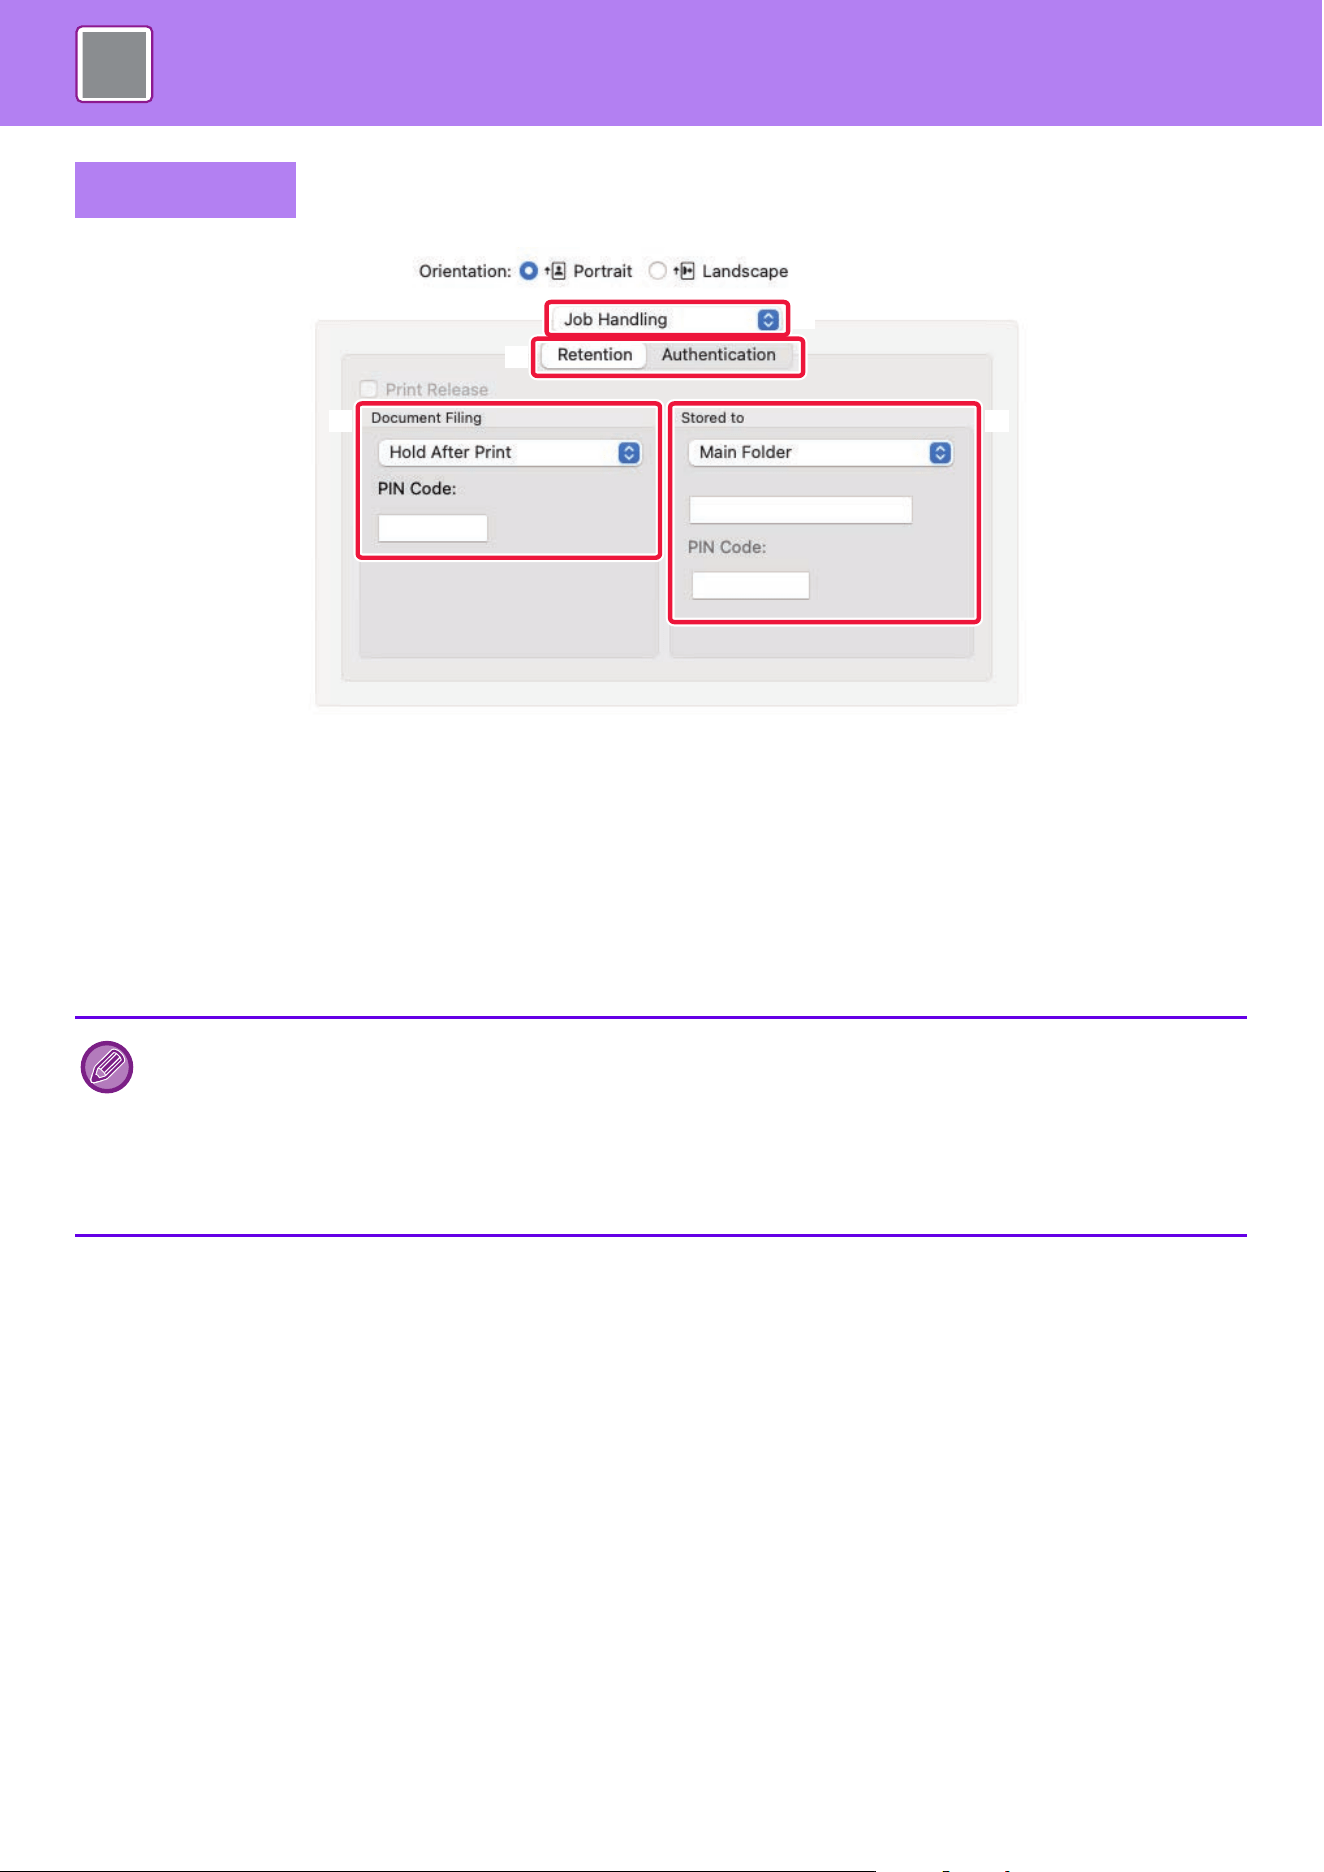
4-106
PRINTER►CONVENIENT PRINTING FUNCTIONS
(1) Select [Job Handling].
In macOS 13, [Job Handling] is located under the "Printer Options" menu.
(2) Select [Retention].
(3) Select how to save the print data in "Document Filing".
If necessary, you can enter a password (4 to 8-digit number).
(4) Select the folder to store the file in "Stored To".
If you selected [Custom Folder], enter the name of the custom folder where you want to save the file.
macOS
• When [Quick File] is selected, "Document Filing" will be set to [Hold After Print].
• When [Quick File] is selected, the password entered in "Document Filing" is cleared.
• If necessary, you can select the data format from CMYK and RGB for data to be stored in the machine. Select [Advanced1]
in [Printer Features] and select the format from "Rip Style".
• To store a file in a custom folder, you must first create the custom folder using [Document Operations] in "Settings
(administrator)" → [Document Filing]. If you have set a password for the custom folder, enter the password (5 to 8 digit
number) in "PIN Code" on the folder selection screen.
(2)
(1)
(4)(3)

4-107
PRINTER►CONVENIENT PRINTING FUNCTIONS
AUTOMATICALLY PRINT ALL STORED DATA
When user authentication is enabled on the machine, all document filing (stored) print jobs of the user who logs in are
automatically printed. After all jobs are printed, the stored jobs are deleted.
(1) Select [Job Handling].
(2) After logging in to the machine, a confirmation message will appear, and then tap the [OK] key.
The print files stored in the quick file folder, main folder, and custom folder will be printed automatically and then deleted.
To use the Print All function, the following steps are necessary:
•
In "Settings (administrator)", select [System Settings] → [Authentication Settings] → [Default Settings] and enable
[Automatically print stored jobs after login].
• When executing document filing print, in addition to the user authentication information, click on the "User Name"
checkbox to enter a user name.
Using this function in a Windows environment: PRINTING IN A WINDOWS ENVIRONMENT
(page 4-4)
Using this function in a macOS environment: PRINTING IN A macOS ENVIRONMENT (page 4-15)
Files with a password and files that are protected by the document filing function of the machine will not be printed. Files in a
folder (excluding My Folder) that has a password will also not be printed.
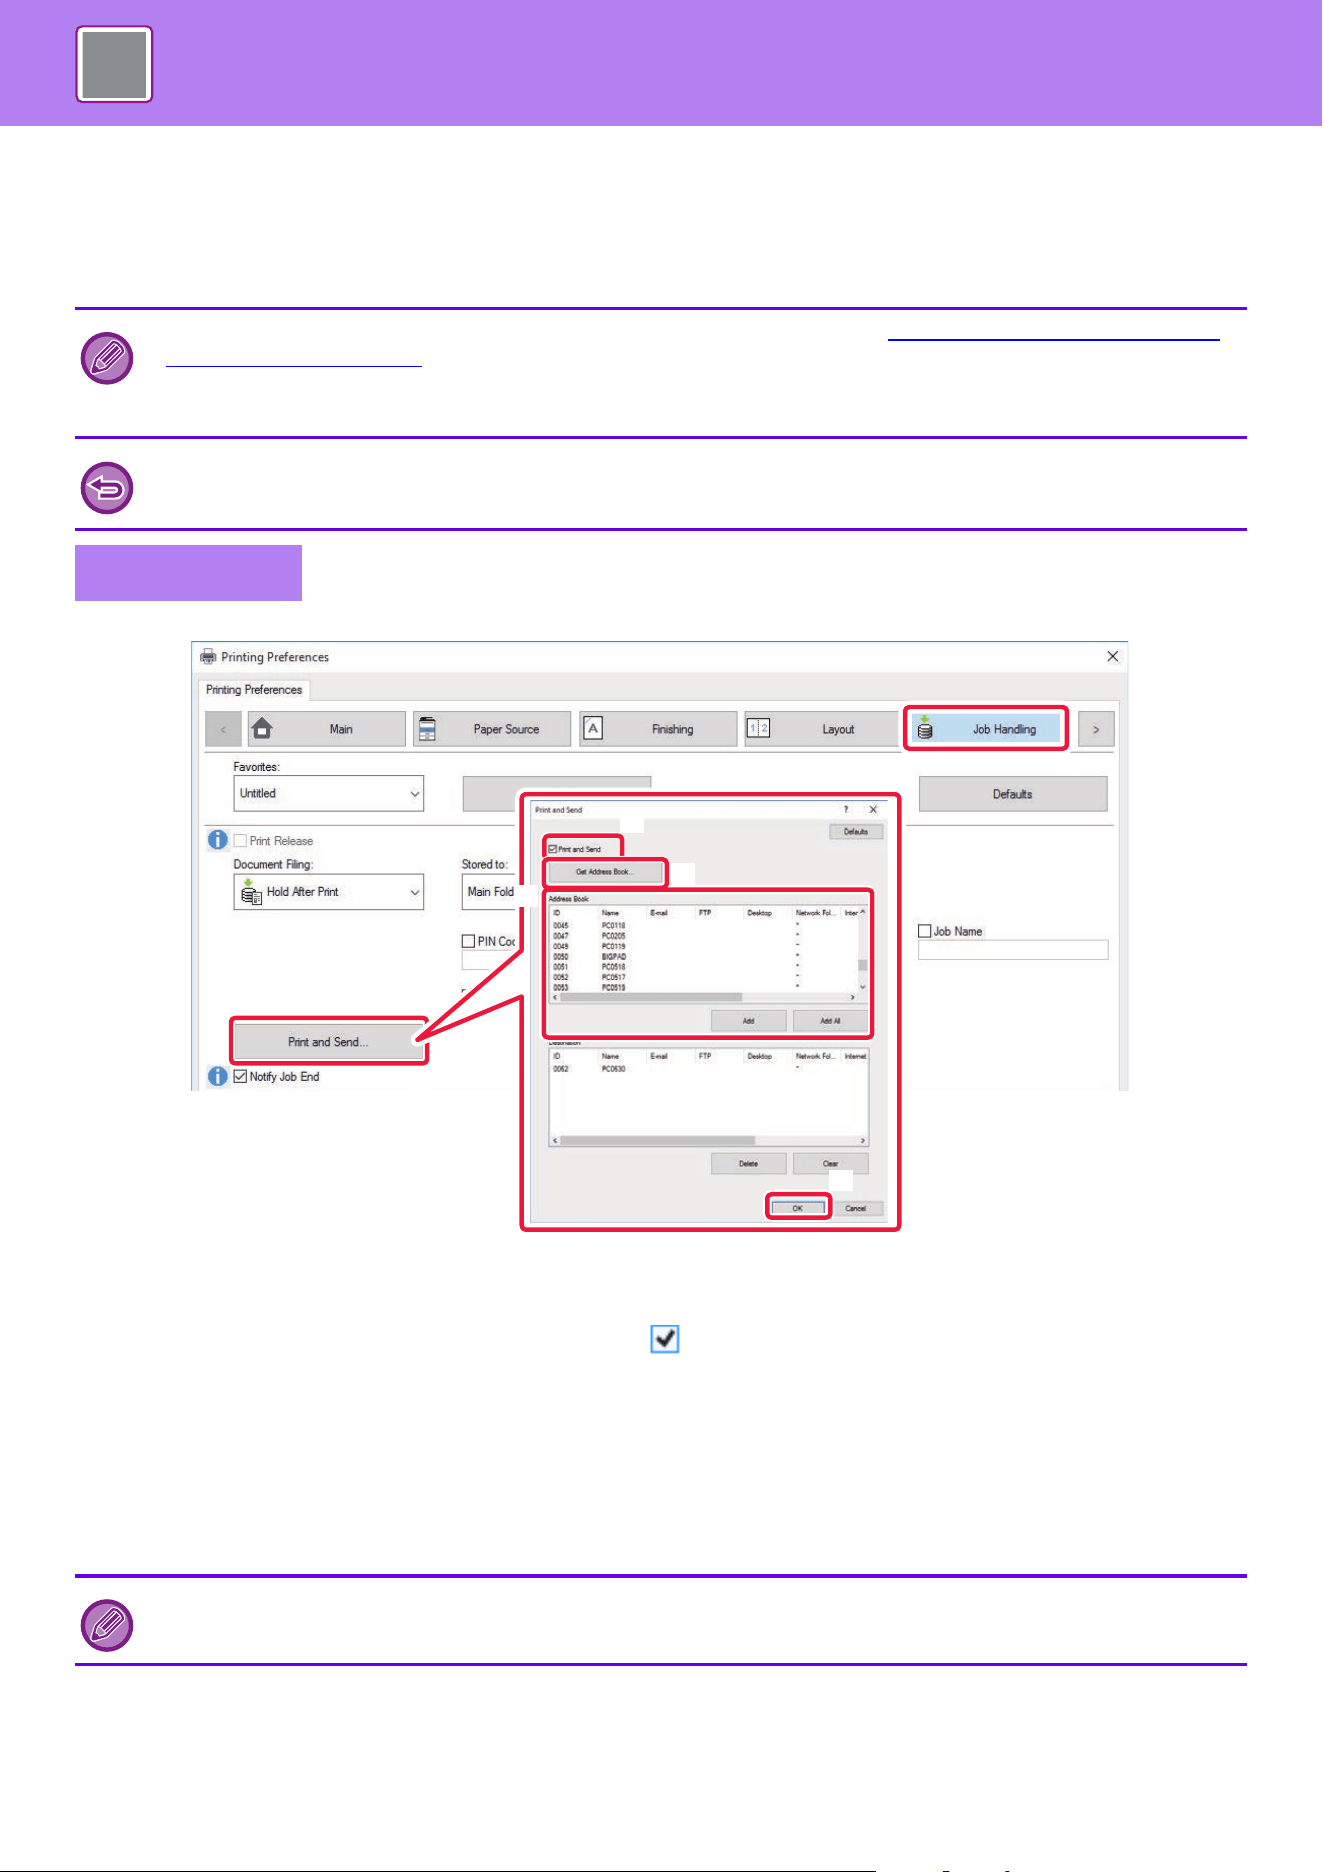
4-108
PRINTER►CONVENIENT PRINTING FUNCTIONS
PRINTING AND SENDING SIMULTANEOUSLY
This function prints data created in an application from the machine and simultaneously sends the data to the addresses
stored in the machine.
This function allows you to complete two tasks, printing and sending, with one operation from the printer driver.
(1) Click the [Job Handling] tab.
(2) Click the [Print and Send] button.
(3) Select the [Print and Send] checkbox so that appears.
(4) Click the [Get Address Book] button.
(5) From the "Address Book" list, select the address to which you wish to send the data, and click
the [Add] button to add the address to the "Destination" list.
• If you wish to send the data to all addresses, click the [Add All] button.
• To delete an address from the "Destination" list, select the address and click the [Delete] button. If you wish to delete all
addresses, click the [Delete All] button.
(6) Click the [OK] button.
The printer driver settings are applied to sending settings.
• Addresses must be stored in advance in the machine. For more information, see "STORING ADDRESSES THROUGH
DIRECT ENTRY (page 5-18)".
• You must complete the preparatory steps for using each sending function of the machine. For more information, see the
explanation of each sending function.
• This function is available in a Windows environment.
• This function can be used when the PCL6 printer driver is used.
Windows
Up to 50 destinations can be specified.
(2)
(1)
(3)
(4)
(5)
(6)
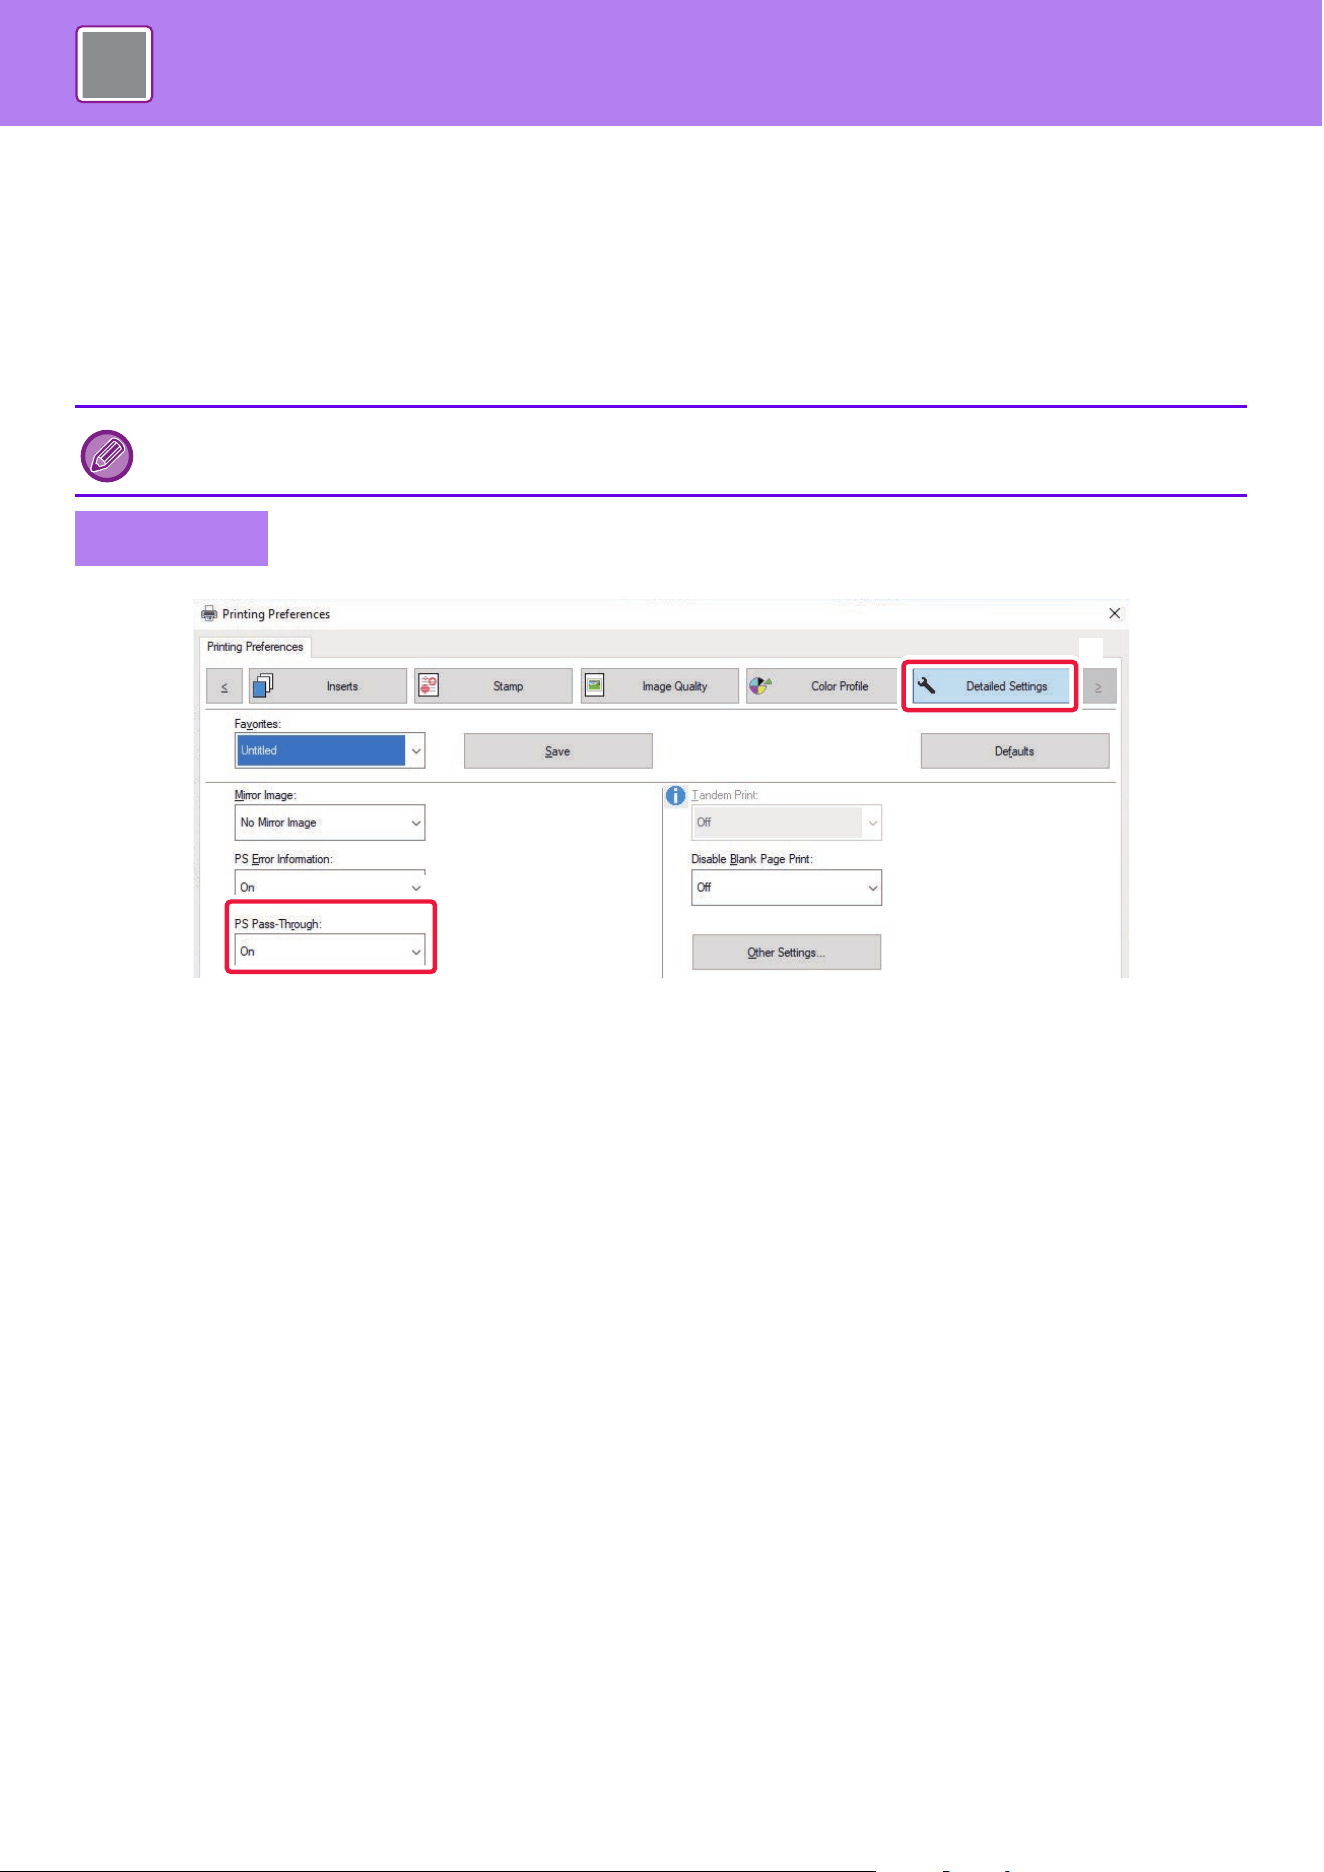
4-109
PRINTER►CONVENIENT PRINTING FUNCTIONS
PS PASS-THROUGH
Select whether PostScript commands are output directly from the application instead of from the printer driver.
Normally, "PS Pass-Through" must be checked for normal use. Some applications output PostScript code that cannot
be controlled by the printer driver and features such as N-up, Watermark are not set correctly by the driver. In this case,
cancel the check, and these feature settings of the driver might be available.
When this item is unchecked, EPS illustrations in the document may be printed at low-resolution image or may not be
printed.
(1) Click the [Detailed Settings] tab.
(2) Select the function from the "PS Pass-Through".
• This function is available in a Windows environment.
• Printer driver PS can use this function.
Windows
(2)
(1)

4-110
PRINTER►PRINTING WITHOUT THE PRINTER DRIVER
EXTENSION OF PRINTABLE FILES
When you do not have the printer driver installed on your PC, or when the application used to open a file that you wish to
print is not available, you can print directly to the machine without using the printer driver.
The file types (and corresponding extensions) that can be printed directly are shown below.
DIRECTLY PRINTING A FILE ON AN FTP
SERVER
When an FTP server is configured, you can directly select and print files on the FTP server from the touch panel of the
machine. This function eliminates the need for downloading the files from the FTP server to your PC and sending print
jobs from the PC to the machine.
PRINTING WITHOUT THE PRINTER
DRIVER
File Type TIFF JPEG PNG PCL PS PDF/
Encrypt PDF/
Compact PDF
DOCX,
XLSX,
PPTX
Extension tiff, tif jpeg, jpg,
jpe, jfif
png pcl, prn ps, prn pdf docx, xlsx,
pptx
• Even if the print result is black and white, the following types of print jobs will be counted as 4-color (Y (Yellow), M
(Magenta), C (Cyan), and Bk (Black)) print jobs. When you want such jobs to be counted as black and white jobs, select
the black and white printing option.
• When the data is created as color data.
• When the application treats the data as color data even though the data is black and white.
• When an image is hidden under a black and white image.
• Some files may not print correctly even if shown in the above table.
When you select a PDF file that has a password, you must enter the password in the job management screen to begin
printing.
PRINTING AN ENCRYPTED PDF FILE (page 4-122)
1
Tap the [File retrieve] key.
2
Tap the [Select File from FTP to Print]
key on the action panel.
Scan to Local Drive
Scan to External
Memory Device
Select File from
FTP to Print
Select File from
USB Memory to Print
Select File from
Network Folder to Print

4-111
PRINTER►PRINTING WITHOUT THE PRINTER DRIVER
Qualcomm
®
DirectOffice
™
is a product of Qualcomm Technologies,Inc. and/or its subsidiaries.
Qualcomm
®
is a trademark of Qualcomm Incorporated, registered in the United States and other countries.
DirectOffice
™
is a trademark of CSR Imaging US, LP, registered in the United States and other countries.
3
Tap the key of the FTP server that you wish to access.
When a server is selected, entry of a user name and password may be necessary. Enter your user name and password,
and tap the [Enter] key.
4
Tap the key of the file that you wish to print, and tap the [Choose Print
Settings] key on the action panel.
• When printing multiple files, tap the keys of the files you wish to print, and tap the [Print] key on the action panel.
• The icon appears to the left of keys of files that can be printed.
• The icon is displayed to the left of keys of folders on the FTP server. To display a folder or a file in a folder, tap this
key.
• A total of 100 keys of files and folders can be displayed.
• Tap to move up one folder level.
• When you move down a folder level by tapping a folder key, appears.
Tap this key to return to the file or folder name selection screen.
• Tap to switch to thumbnails.
• Tap the [File or Folder Name] key to change the order of the files and folders displayed on the screen. Each time the
key is tapped, the order changes between ascending and descending.
• When you tap [Filter by File Type] in the action panel, the screen to specify the file format will be displayed.
Select the file format you want to narrow down, and tap the [OK] key to display the list of files narrowed down to the
selected file format.
You can select other file formats in [Other].
• The file format that can be selected by narrowing down the list is always the same, regardless of the installation status
of the peripheral device. There are some file formats that cannot be used depending on the status of the
machine.When you select a file format that this machine does not support for printing, the [Start] key will be grayed out
and you will not be able to print.
5
Select the print conditions.
• If you have selected multiple files in step 4, you can select only the number of prints.
• If you selected a PS or PCL file that includes print conditions in step 4, the print conditions in the file will be given
priority.
6
Tap the [Start] key.
Printing begins after the selected file is downloaded.
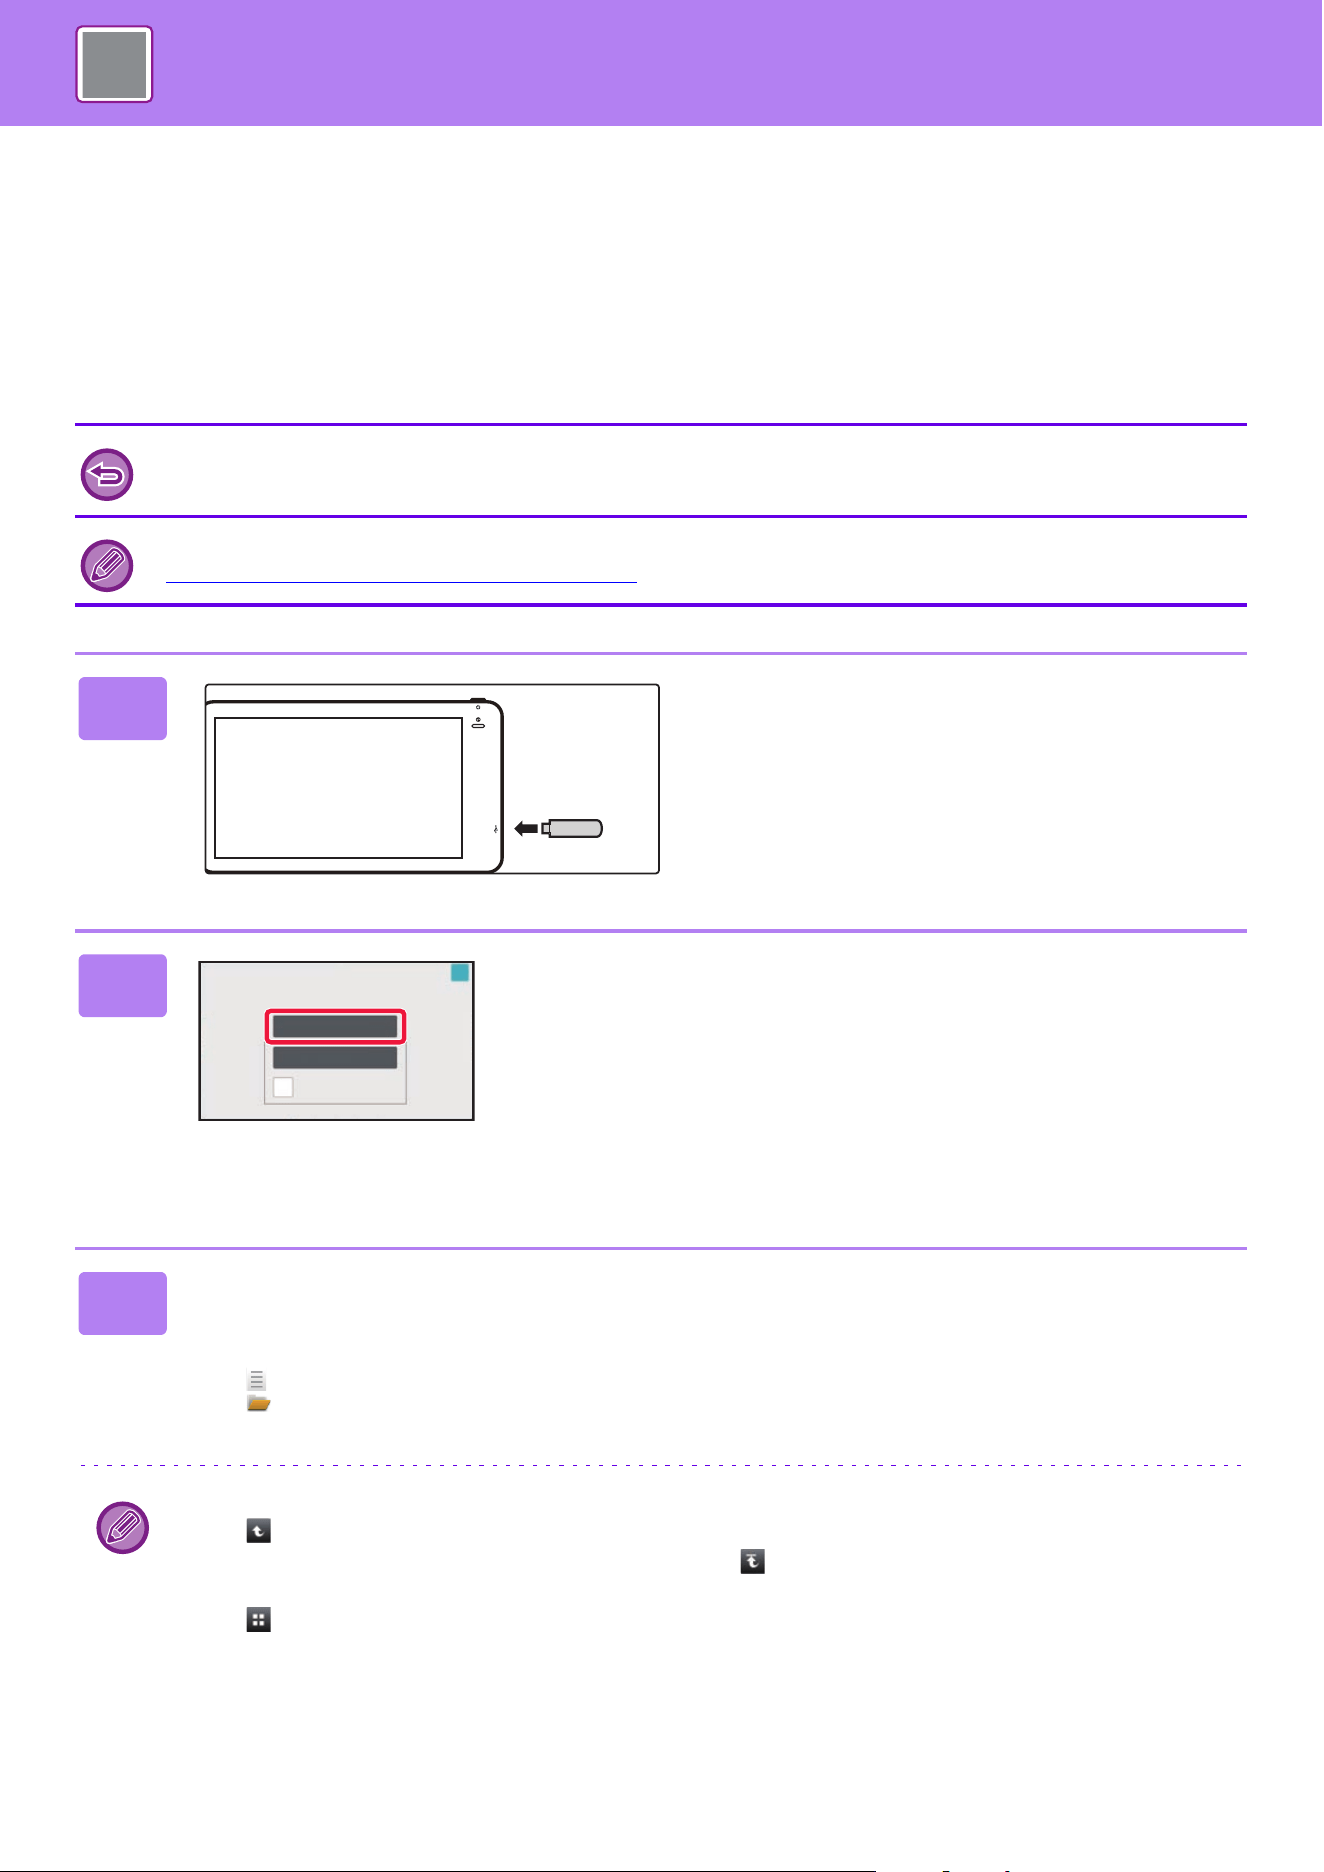
4-112
PRINTER►PRINTING WITHOUT THE PRINTER DRIVER
DIRECTLY PRINTING A FILE IN USB
MEMORY
Files in a USB memory device connected to the machine are printed from the operation panel of the machine without
using the printer driver.
When the printer driver of the machine is not installed on your PC, you can copy a file into a commercially available USB
memory device and connect the device to the machine to print the file directly.
• Use FAT32, NTFS or exFAT format for USB memory device.
• When the format of the USB memory device is FAT32, use a 32 GB or less USB memory device.
When you select a PDF file that has a password, enter the password in the job management screen to begin printing.
PRINTING AN ENCRYPTED PDF FILE (pag
e 4-122)
1
Connect the USB memory device to
the machine.
2
When the screen for selecting the
action appears, tap [Print from
external memory device (USB)].
If the screen does not appear, follow the steps below.
(1) Tap the [File retrieve] key.
(2) Tap the [Select File from USB Memory to
Print] key on the action panel.
3
Tap the key of the file that you wish to print, and tap the [Choose Print
Settings] key on the action panel.
• When printing multiple files, tap the keys of the files you wish to print, and tap the [Print] key on the action panel.
• The icon appears to the left of keys of files that can be printed.
• The icon is displayed to the left of keys of folders in the USB memory device. To display a folder or a file in a
folder, tap this key.
• A total of 500 keys of files and folders can be displayed.
• Tap to move up one folder level.
• When you move down a folder level by tapping a folder key, appears.
Tap this key to return to the file or folder name selection screen.
• Tap to switch to thumbnails.
• Tap the [File or Folder Name] key to change the order of the files and folders displayed on the screen. Each time the
key is tapped, the order changes between ascending and descending.
OK
a
Perform Detail Setting
Scan to External
Memory Device
External memory device (USB) is connected.
Print from external
memory device (USB)
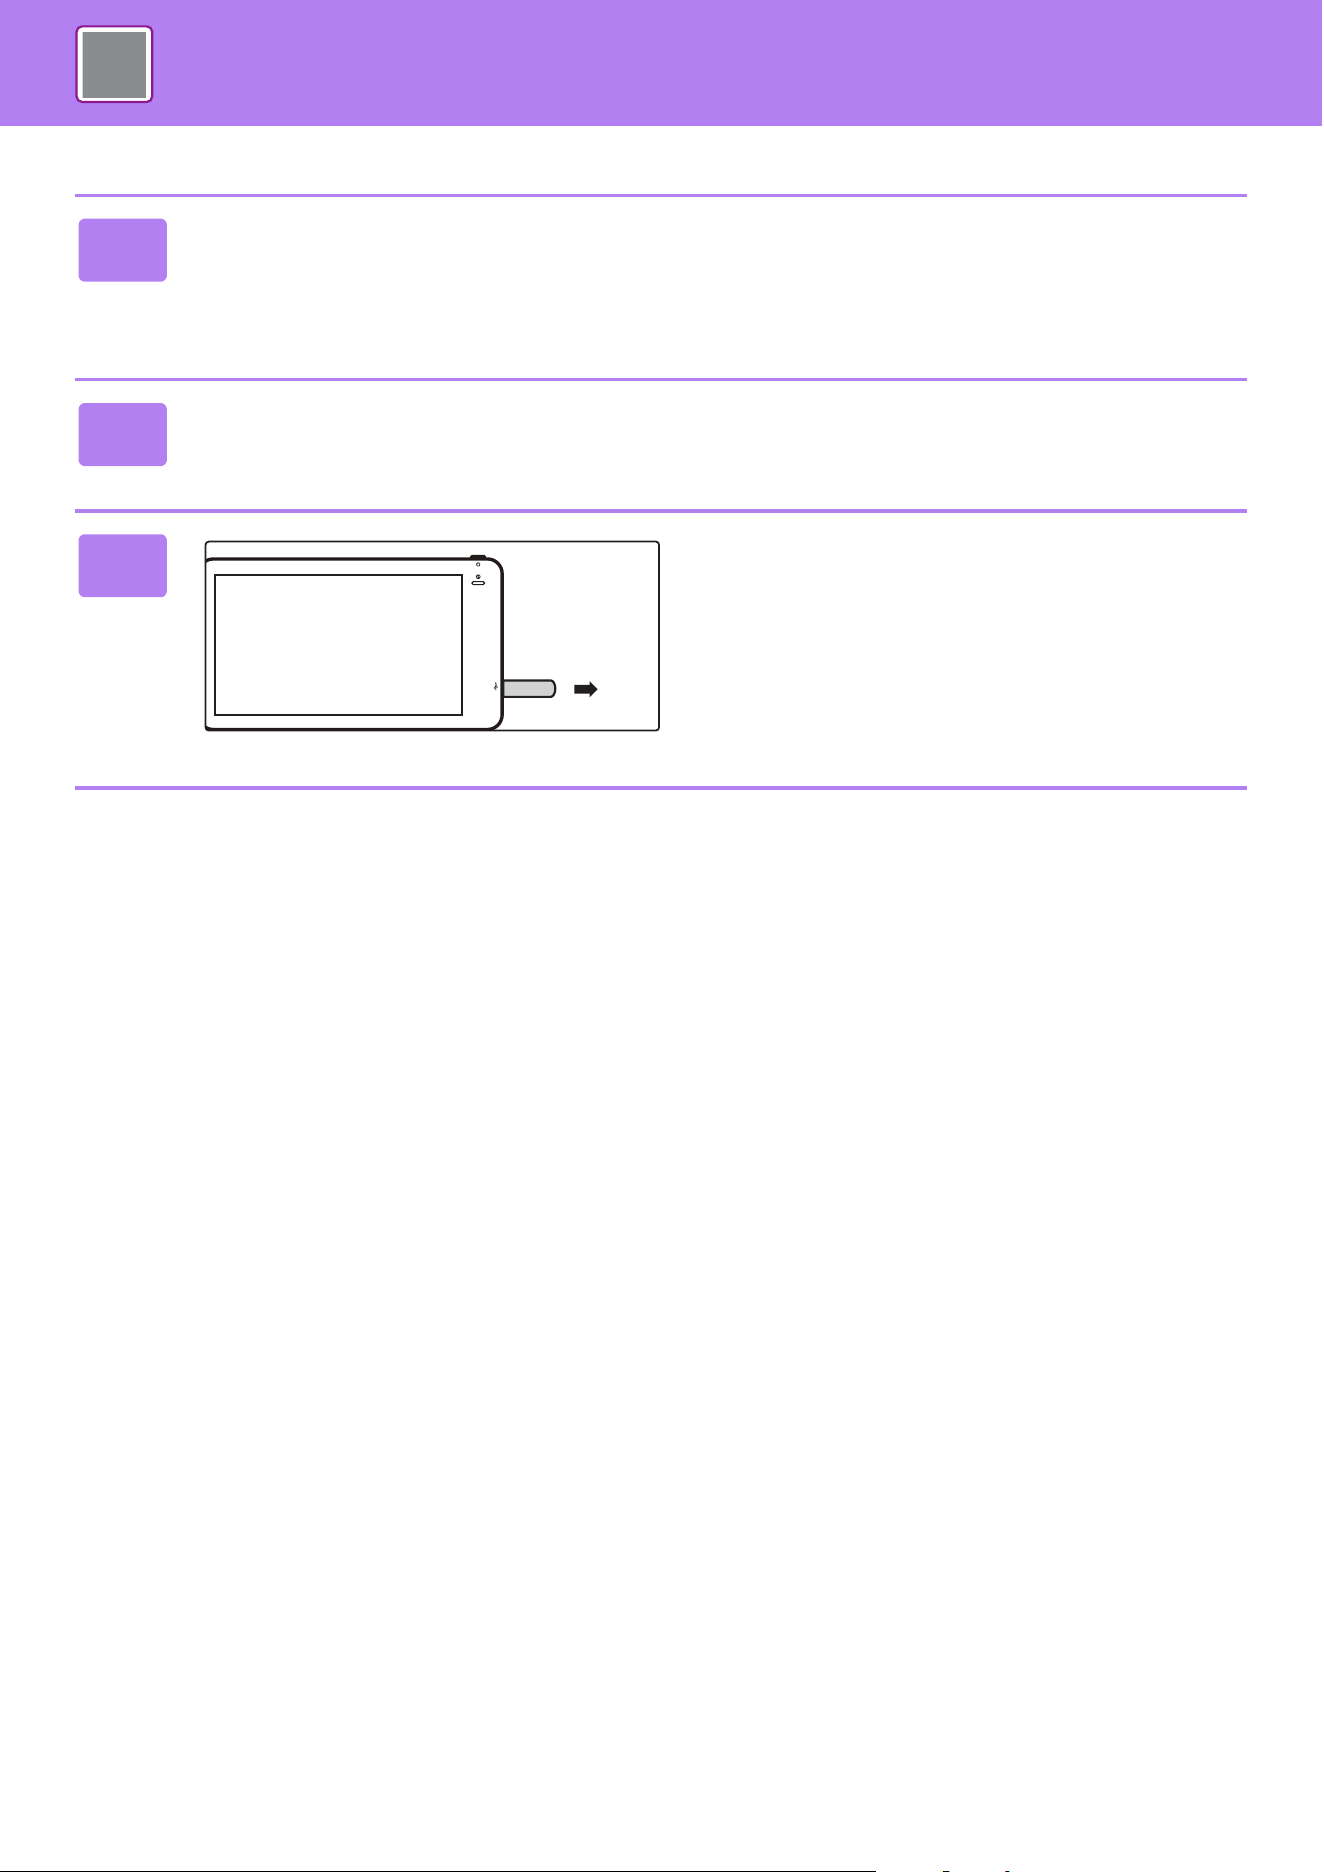
4-113
PRINTER►PRINTING WITHOUT THE PRINTER DRIVER
4
Select the print conditions.
• If you have selected multiple files in step 3, you can select only the number of prints.
• If you selected a PS or PCL file that includes print conditions in step 3, the print conditions in the file will be given
priority.
5
Tap the [Start] key.
Printing begins after the selected file is transferred.
6
Remove the USB memory device from
the machine.
4-114
PRINTER►PRINTING WITHOUT THE PRINTER DRIVER
DIRECTLY PRINTING A FILE IN A NETWORK
FOLDER
You can specify and print a file in a network folder from the touch panel of the machine.
Even if the network folder is not registered, you can access the network folder by directly entering or referring to the path
to the folder in the workgroup.
PRINTING A FILE IN THE NETWORK FOLDER YOU
HAVE CONFIGURED IN THE MACHINE'S SETTINGS
To register a network folder:
In "Settings (administrator)", select [System Settings] → [Printer Settings] → [Direct Print Settings (Network Folder)].
When you select a PDF file that has a password, you must enter the password in the job management screen to begin
printing.
PRINTING AN ENCRYPTED PDF FILE (pag
e 4-122)
1
Tap the [File retrieve] key.
2
Tap the [Select File from Network Folder to Print] key on the action panel.
3
Tap the [Open Registered Network Folder.] key on the action panel and tap
the network folder that you wish to access.
If a screen appears prompting you to enter a user name and password, check with your server administrator and enter
the appropriate user name and password.
• When you tap the [Direct Input of Folder Path] key, a screen appears to allow direct input of the network folder path.
For more information, see “Entering the network folder path directly
(page 4-116)".
• When you select the workgroup, server, and network folder in sequence, you can access the network folder. For more
information, see “Referring to the network folder path
(page 4-116)".
4
Tap the key of the file that you wish to print, and tap the [Choose Print
Settings] key on the action panel.
• When printing multiple files, tap the keys of the files you wish to print, and tap [Print] on the action panel.
• The icon appears to the left of keys of files that can be printed.
• The icon is displayed to the left of keys of folders in the network folder. To display a folder or a file in a folder, tap
this key.
• When you tap [Filter by File Type] in the action panel, the screen to specify the file format will be displayed.
Select the file format you want to narrow down, and tap [OK] key to display the list of files narrowed down to the
selected file format. [Others] allows you to select other file types.
• The file formats that can be selected by narrowing down the list are always the same, regardless of the status of the
peripheral device. Some file formats may not be available depending on the status of the unit. When you select a file
format that this machine does not support for printing, the [Start] key will be grayed out and you will not be able to
print.

4-115
PRINTER►PRINTING WITHOUT THE PRINTER DRIVER
• A total of 100 keys of files and folders can be displayed.
• Tap to move up one folder level.
• To return to the network folder selection screen, tap .
• Tap to switch to thumbnails.
• Tap the [File or Folder Name] key to change the order of the files and folders displayed on the screen. Each time the
key is tapped, the order changes between ascending and descending.
• When you tap the [Filter by File Type] in the action panel. The screen to specify the file format will be displayed. Select
the file format you want to narrow down, and tap the [OK] key to display the list of files narrowed down to the selected
file format.
You can select other file formats in [Other].
• The file format that can be selected by narrowing down the list is always the same, regardless of the installation status
of the peripheral device. There are some file formats that cannot be used depending on the status of the machine.
When you select a file format that this machine does not support for printing, the [Start] key will be grayed out and you
will not be able to print.
5
Select the print conditions.
• If you have selected multiple files in step 4, you can select only the number of prints.
• If you selected a PS or PCL file that includes print conditions in step 4, the print conditions in the file will be given
priority.
6
Tap the [Start] key.
Printing begins after the selected file is transferred.
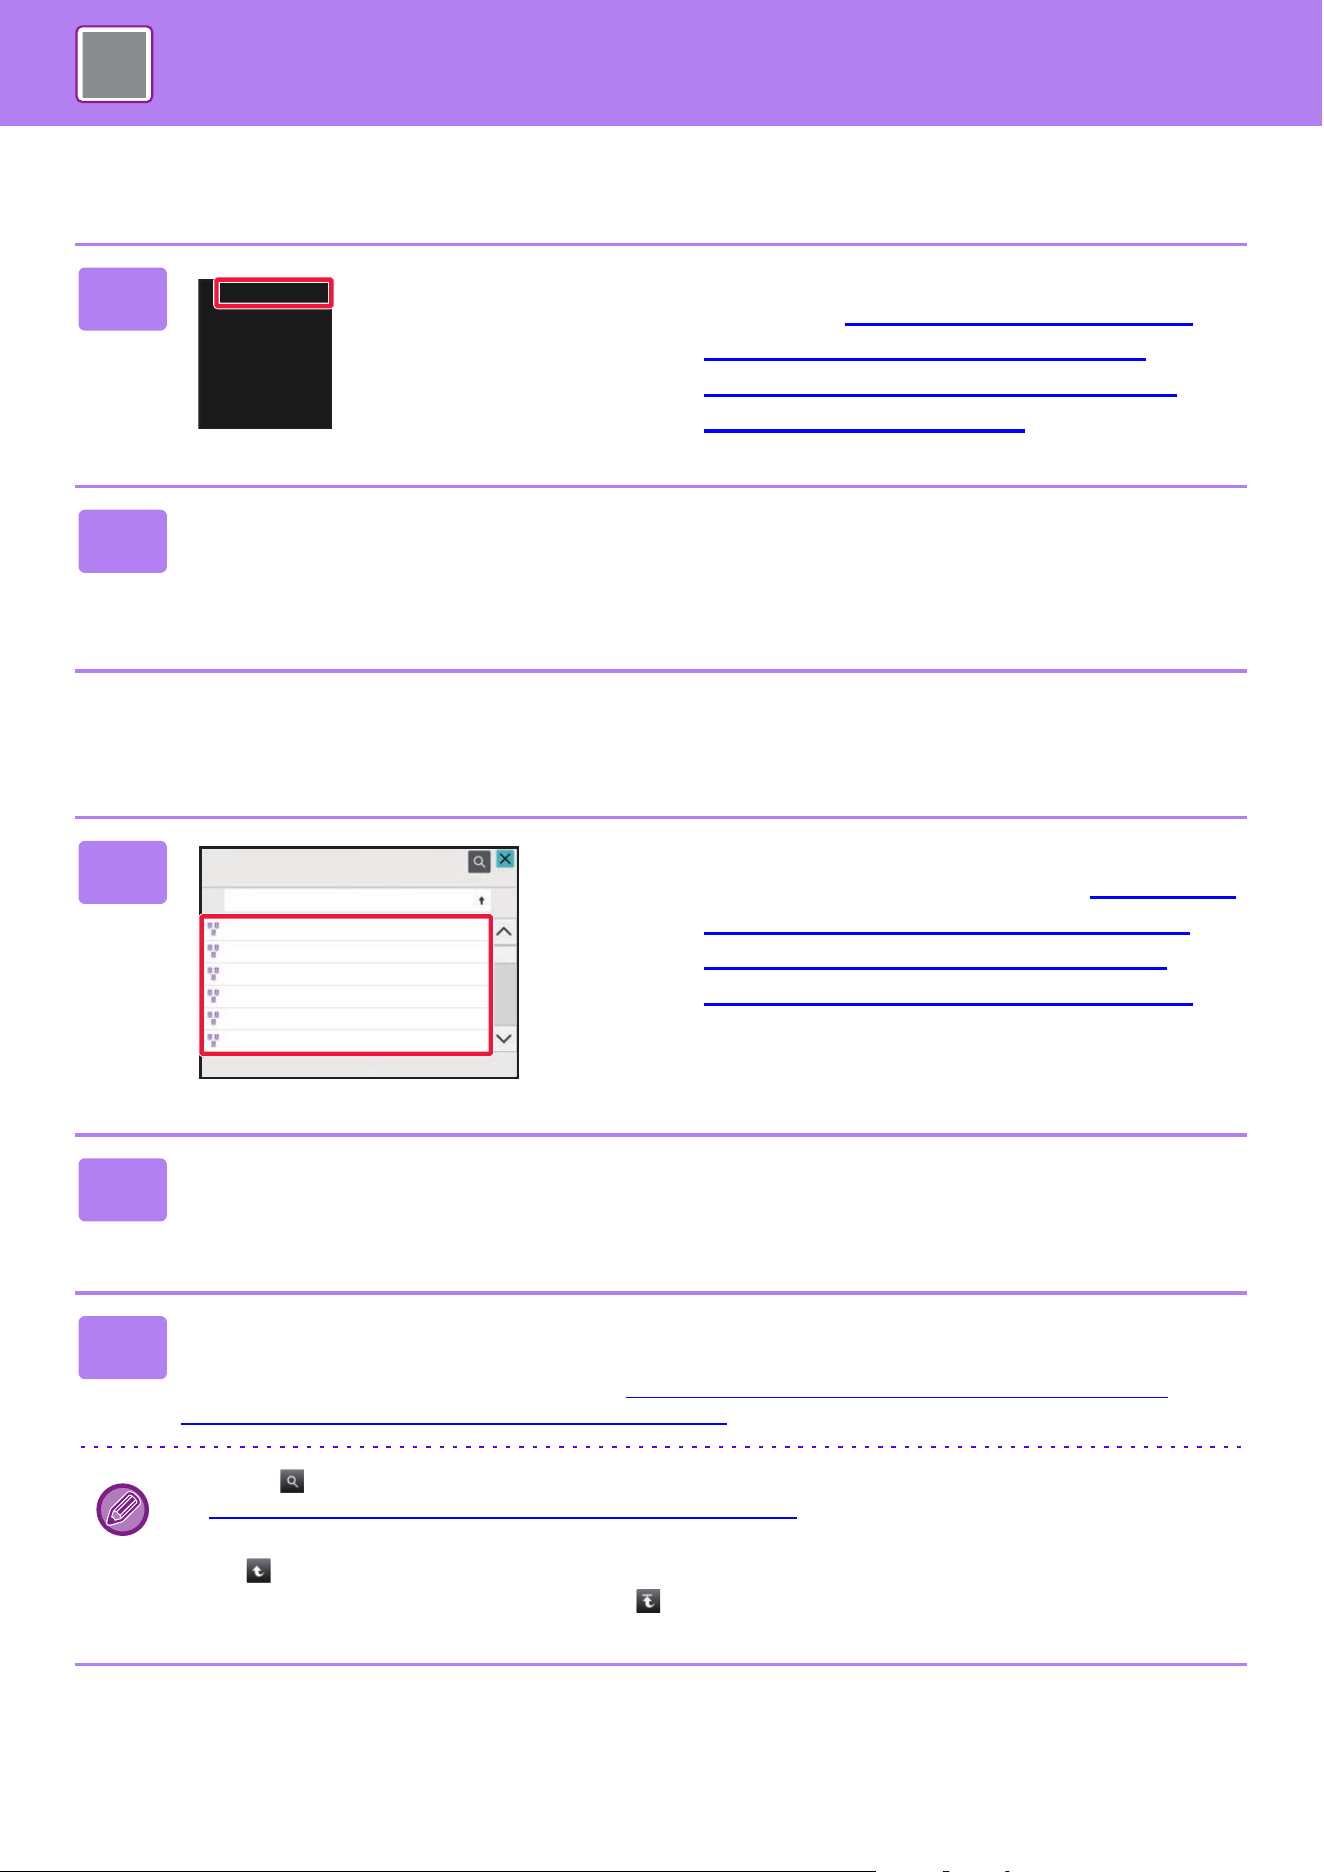
4-116
PRINTER►PRINTING WITHOUT THE PRINTER DRIVER
Entering the network folder path directly
Referring to the network folder path
1
Tap [Direct Input of Folder Path] in
step 3 of “PRINTING A FILE IN THE
NETWORK FOLDER YOU HAVE
CONFIGURED IN THE MACHINE'S
SETTINGS (page 4-114)".
2
Enter the path to the folder, user name and password.
Access the network folder.
For the procedure for printing, see steps 4 to 6 of "Printing a file in the network folder you have configured in the
machine's settings".
1
Tap the key of the workgroup that you
wish to access in step 3 of “PRINTING
A FILE IN THE NETWORK FOLDER
YOU HAVE CONFIGURED IN THE
MACHINE'S SETTINGS (page 4-114)".
2
Tap the key of the server or computer that you wish to access.
If a screen appears prompting you to enter a user name and password, check with your server administrator and enter
the appropriate user name and password.
3
Tap the key of the network folder that you wish to access.
Access the network folder.
For the procedure for printing, see steps 4 to 6 of “PRINTING A FILE IN THE NETWORK
FOLDER YOU HAVE
CONFIGURED IN THE MACHINE'S SETTINGS (page 4-114)".
• Tap the icon and enter a keyword to search for a workgroup, server, or network folder. To enter text, see
"STORING ADDRESSES THROUGH DIRECT E
NTRY (page 5-18)".
• Up to 100 workgroups, 100 servers, and 100 network folders are displayed.
• Tap to move up one folder level.
• To return to the workgroup selection screen, tap .
Direct Input of
Folder Path
Open Registered
Network Folder.
Refer to Folders
on Network
Workgroup Name
Workgroup
WorkGroup1
WorkGroup2
WorkGroup3
WorkGroup4
WorkGroup5
WorkGroup6
4-117
PRINTER►PRINTING WITHOUT THE PRINTER DRIVER
DIRECTLY PRINTING FROM A COMPUTER
SUBMIT PRINT JOB
By selecting [Document Operations] → [Submit Print Job] from "Settings (Web version)" and specifying a file, you can
directly print the file without using the printer driver.
In addition to a file on your PC, this procedure can be used to print any file that can be accessed from your PC, such as
a file on another PC connected to the same network.
Files that can be printed are PDF, TIFF, JPEG, PCL, PS, XPS, DOCX, PPTX, and XLSX files with extensions pdf, tif, tiff,
jpeg, jpg, jpe, jfif, pcl, ps, xps, docx, pptx, and xlsx. Available only if the MFP supports PostScript.
Enter the password for the encrypted PDF data on Spool Queue of the Job Management screen.
Print Settings
Select print settings. Select the file you want to print in “Select File”, select settings, and then click [Print].
Qualcomm
®
DirectOffice
™
is a product of Qualcomm Technologies,Inc. and/or its subsidiaries.
Qualcomm
®
is a trademark of Qualcomm Incorporated, registered in the United States and other countries.
DirectOffice
™
is a trademark of CSR Imaging US, LP, registered in the United States and other countries.
• If you selected a PS or PCL file that includes print conditions, the print conditions in the file will be given priority.
• When user authentication is enabled in the settings of the machine, the print function may be restricted. For more
information, ask your administrator.
Item Description
Copies Set the number of copies to be printed.
Paper Size Set the print size.
Orientation Select portrait or landscape for the print orientation.
2-Sided Print Select one-sided printing, two-sided printing (booklet), or two-sided printing (tablet).
Output If printing by set, select the “Print per Unit” checkbox.
Staple Select staple settings.
Print B/W Print the file in black & white.
Separator Page Select to insert separator pages. Specify whether separator pages are to be added in front
of or behind each set. Select the paper tray with the paper you want to use from the paper
trays.
Fit To Page Print with the file expanded to the full paper size.
Print What Select whether to print a sheet or to print the entire workbook when printing an Excel file.
Output Tray Select the output tray for the print job.
Quick File Save the print data in the Quick File Folder of the machine.
Print Glossy Select this checkbox if the print job will be printed on glossy paper.
Fold Set the paper fold.
Billing Code Select the checkbox of the Billing Code to assign, and then enter the billing code.
4-118
PRINTER►PRINTING WITHOUT THE PRINTER DRIVER
FTP PRINT
You can print a file from your PC by simply dragging and dropping the file onto the FTP server of the machine.
Performing FTP print
Enter the IP address of this machine in the server name field of your FTP client application to connect to this machine.
When you upload the file you want to print in the "Ip" folder on the FTP server of this machine, printing will start
automatically.
E-MAIL PRINT
If you configure your e-mail account in the machine, the machine periodically checks your mail server and automatically
prints received e-mail attachments without using the printer driver.
Performing e-mail print
Using your PC's e-mail software, specify the e-mail address of the machine in "Address" and send e-mail attached with
a file to be printed.
Control commands can be entered in the message of the e-mail to specify the number of copies and print format.
Commands are entered in the format "command name = value" as shown in the following example.
As an example, the control commands include the following:
• If you selected a PS or PCL file that includes print conditions, the print conditions in the file will be given priority.
• When user authentication is enabled in the settings of the machine, the print function may be restricted. For more
information, ask your administrator.
To perform e-mail print:
In "Settings (administrator)", select [System Settings] → [Printer Settings] → [E-mail Print Settings], and register your e-mail
account. (Administrator rights are required.)
Function Command name Values
Copies COPIES 1 to 9999
Staple
*1
STAPLEOPTION NONE, ONE, TWO, SADDLE,
STAPLELESS
Punch
*2
PUNCH OFF, ON
Punch holes PUNCH-NUMBER TWO, THREE, FOUR, FOURWIDE
Collate COLLATE OFF, ON
2-sided Print DUPLEX TOP, LEFT, RIGHT, OFF
Account Number
*3
ACCOUNTNUMBER Number (5 to 8 digits)
File Format LANGUAGE PCL, PCLXL, POSTSCRIPT, PDF,
TIFF, JPG
Paper PAPER Paper that can be used (LETTER, A4,
or others)
Fold V-FOLD OFF, INSIDE, OUTSIDE
Fold (Z-Fold)
*4
FOLD OFF, A3, A4, B4, 8K, LEDGER, LEGAL,
MXLEGAL, LETTER
Document Filing
*5
FILE OFF, ON
FOLDERNAME Up to 28 characters
Quick File
*5
QUICKFILE OFF, ON
Output OUTTRAY CENTER, RIGHT, FINISHER,
TOPTRAY
COPIES=2
DUPLEX=LEFT
ACCOUNTNUMBER=11111
PAPER=A4

4-119
PRINTER►PRINTING WITHOUT THE PRINTER DRIVER
*1 Enabled only when a finisher or saddle stitch finisher is installed.
*2 Enabled only when a punch module is attached to the finisher or saddle stitch finisher.
*3 Can be omitted except when authentication is by user number.
*4 When the folding unit is installed.
*5 Only enabled when either "Document Filing" or "Quick File" is "ON". When both are "ON", this is disabled.
Qualcomm
®
DirectOffice
™
is a product of Qualcomm Technologies,Inc. and/or its subsidiaries.
Qualcomm
®
is a trademark of Qualcomm Incorporated, registered in the United States and other countries.
DirectOffice
™
is a trademark of CSR Imaging US, LP, registered in the United States and other countries.
B/W Print B/W PRINT OFF, ON
Fit Page FITIMAGETOPAGE OFF, ON
Print Glossy MEDIATYPE GLOSSY
Print Pages PRINTPAGES 1-2,5,9-
Print What ALLSHEETS OFF, ON
• The mail text must be in a text format. If entered in Rich Text format (HTML), the commands will have no effect.
• If you enter "Config" in the mail text, a list of control commands is returned.
• If nothing is entered in the body text (message) of the e-mail, printing will take place according to the settings configured in
"Settings (administrator)." → [System Settings] → [Printer Settings] → [Initial Status Settings]. If you selected a PS or PCL
file that includes print conditions, the print conditions in the file will be given priority.
• Enter a file type only when you wish to specify the page-description language. Normally there is no need to enter a file
type.
• Images such as the body of the received email and the logo in the signature may also be printed.
Function Command name Values

4-120
PRINTER►PRINTING WITHOUT THE PRINTER DRIVER
Universal Print
Universal Print is a service that allows data from users and computers connected to Microsoft 365 to be printed on MFPs
and printers via the Universal Print service operated by Microsoft. With Universal Print, MFPs and printers can be
centerally monitored and configured using Azure Active Directory, rather than having to install a printer server and install
printer drivers on each user's computer. monitoring and configuration.
Users can also print to MFPs and printers connected to the Universal Print service via the cloud, without having to install
a printer driver on each user's computer.
BEFORE CONNECTING THE Universal Print SERVICE
Before connecting the machine to the Universal Print service, make sure that the machine is connected to the Internet
beforehand and that [IPP INFRA] is enabled in the client port in "Port Control (page 9-155)
" in the setting mode.
The machine must also be registered in Azure Active Directory and on the client PC before it can be used with the
Universal Print service. For information on how to register with Azure Active Directory and client PCs, see "Universal
Print Settings (page 4-121)".
Printing methods
Once registration is complete, you will be able to print from various Windows applications.
Open the print menu of each application, select the machine and print.
Printing permissions for invalid users
Prints from Universal Print are treated as jobs from "Other User". Therefore, if " Disable Printing by Invalid User (page
9-98)" is enabled in the setting mode, change it to disabled.
Also, if user authentication is enabled in the OSA application, the OSA application should allow invalid users to print.
Registering and deleting from the Universal Print service
You can register or delete the machine in "Universal Print Settings (page 4-121)".
Operation in power saving mode
Prints from Universal Print, as well as normal prints, can be made in the power saving mode, but will return and start
printing as soon as the data is communicated to the machine.
This section describes the licenses and other information you will need to use Universal Print, assuming you have already
prepared them.
Contact Microsoft for more information on the licenses required to use Universal Print.
When registered with Universal Print, the machine does not shift to " Low Power" in "Sleep Mode Power Level (page 8-5)
."

4-121
PRINTER►PRINTING WITHOUT THE PRINTER DRIVER
Universal Print Settings
This function allows you to register or remove the device from the Azure Active Directory, check the current registration
status, or enable or disable the Universal Print function.
REGISTERING THE MACHINE WITH Azure Active
Directory
To register the machine with the Universal Print Service, follow the procedure below from the web administration screen.
(1) Open "Universal Print Settings" in System Settings.
(2) Check the printer name and click "Execute" under "Register with Universal Print".
You will be presented with a registration code and a URL for registering your code. The registration code is valid for 15 minutes.
If you register after 15 minutes, you will have to start from the beginning.
(3) Click on the URL for code registration.
A separate window will open in which you can enter your registration code.
(4) Follow the instructions on the screen to enter the registration code.
(5) View the Azure Active Directory Universal Print management screen in a web browser.
(6) Select the registered printer and click [Share Printer].
(7) Click [Members], and then click [Add].
(8) Select a member or group from the list to use the machine.
To use the machine with the Universal Print service, continue with "Registering the machine with each client PC" below.
REGISTERING THE MACHINE WITH EACH CLIENT PC
To register the machine with each client PC, follow the procedure below on your computer.
(1) Click the [Start] button, select [Settings] → [Accounts].
(2) Click [Connect] under [Access work or school].
If necessary, follow the prompts to sign in with your Microsoft 365 account.
(3) Click [Home], and then click [Devices].
(4) Click [Printers & Scanners], and then click [Add Printer or Scanner].
(5) Select a registered machine from the list.
When you have completed this operation, the unit is ready to be used on the client PC.
DELETE FROM Azure Active Directory
This setting is available when the machine has already been registered for Universal Print Service.
To delete the machine from the Universal Print Service, in the web page (administrator), click [System Settings] →
[Universal Print Settings], and then click the [Delete] key.
• To register with Azure Active Directory, launch the setting mode from your web browser.
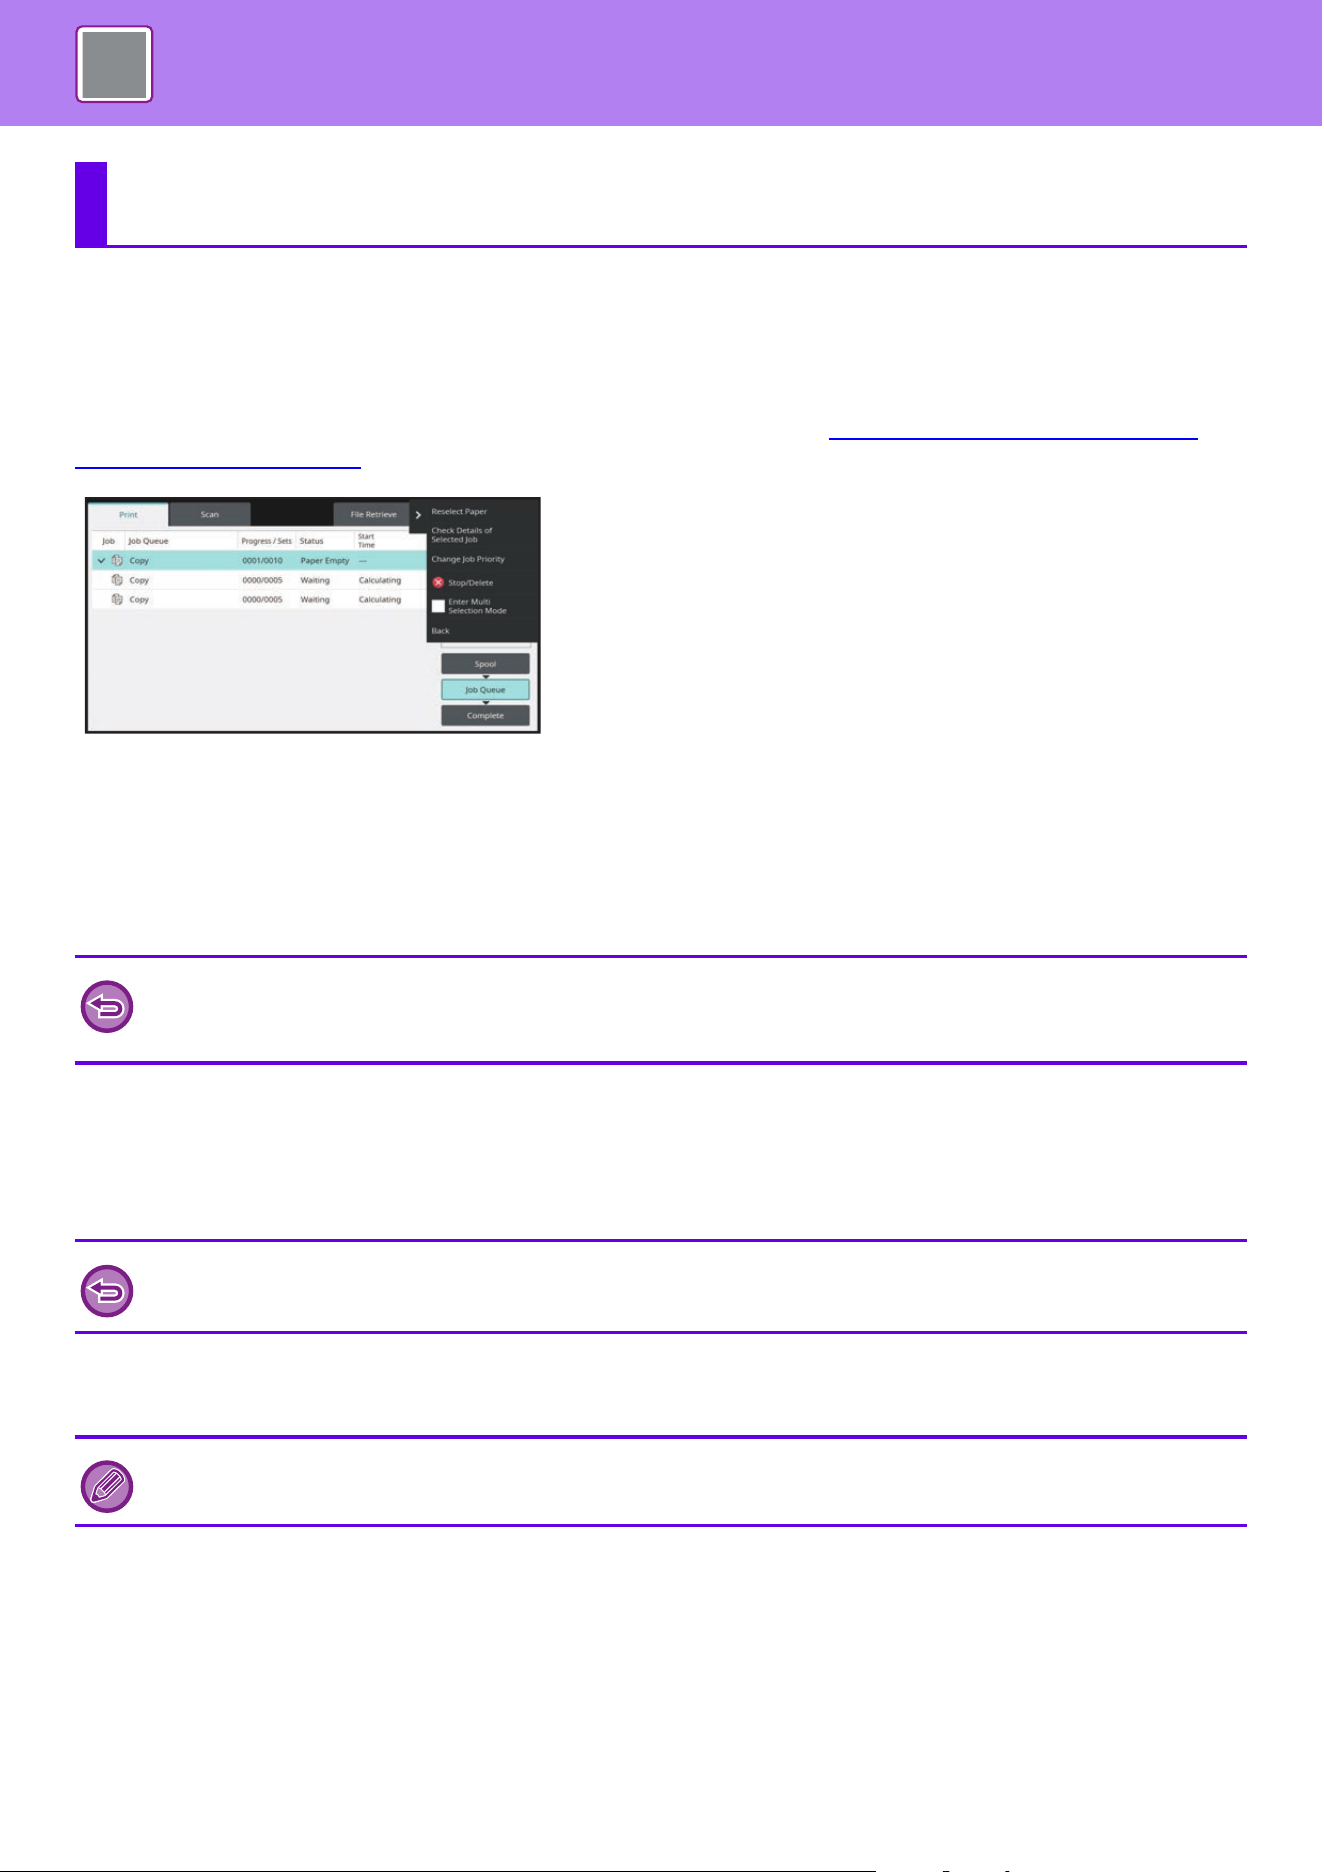
4-122
PRINTER►PRINTER JOBS
CHECKING THE PRINT STATUS
When you tap the job management display, jobs are displayed in a list. To check the status of a printer job, tap the [Print]
tab.
When you wish to stop or delete jobs or to perform priority processing, read "STORING ADDRESSES THROUGH
DIRECT ENTRY (page 5-18)".
PRINTING AN ENCRYPTED PDF FILE
PDF encryption is used to protect a PDF file by requiring the entry of a password to print or edit the file.
To directly print an encrypted PDF file on an FTP server or in a USB memory device, etc. connected to the machine,
reset the password and begin printing.
(1) Tap the job management display and tap the [Print] tab.
(2) Tap the [Spool] key.
When the list contains an encrypted PDF file, a message is displayed to indicate that an encrypted PDF file exists.
(3) Tap the print job key for the encrypted PDF file.
(4) Tap the [Enter Password for Encrypt PDF.] key on the action panel.
(5) Enter the password (32 characters or less) and tap the [Yes] key.
PRINTER JOBS
• To print an encrypted PDF file using the printer driver, enter the password when opening the file on your PC.
• Printing is not possible if you do not know the password for the encrypted PDF file.
• Encrypted PDF versions that can be directly printed are 1.6 (Adobe Acrobat 7.0) and earlier.
You cannot select multiple encrypted PDF files.
When both a master password and a user password (which is used to open the file) have been set, enter the master
password.

4-123
PRINTER►PRINTER JOBS
CHANGING TO ANOTHER PAPER SIZE AND
PRINTING WHEN PAPER RUNS OUT
If printing stops because the machine ran out of paper, or if the size of paper specified in the printer driver is not loaded
in the machine, a message will appear in the touch panel.
Printing will begin automatically when paper is loaded in the machine. If paper of the desired size is not immediately
available, you can use paper that is set in a different tray.
(1) Tap the job management display.
(2) Tap the key of the job for which "Paper Empty" appeared.
(3) Tap the [Reselect Paper] key on the action panel.
(4) Tap the key for the tray containing the paper that you wish to use, and tap [OK].
If you changed to a different paper size, printing may not take place correctly; for example part of the text or image may run
off the paper.
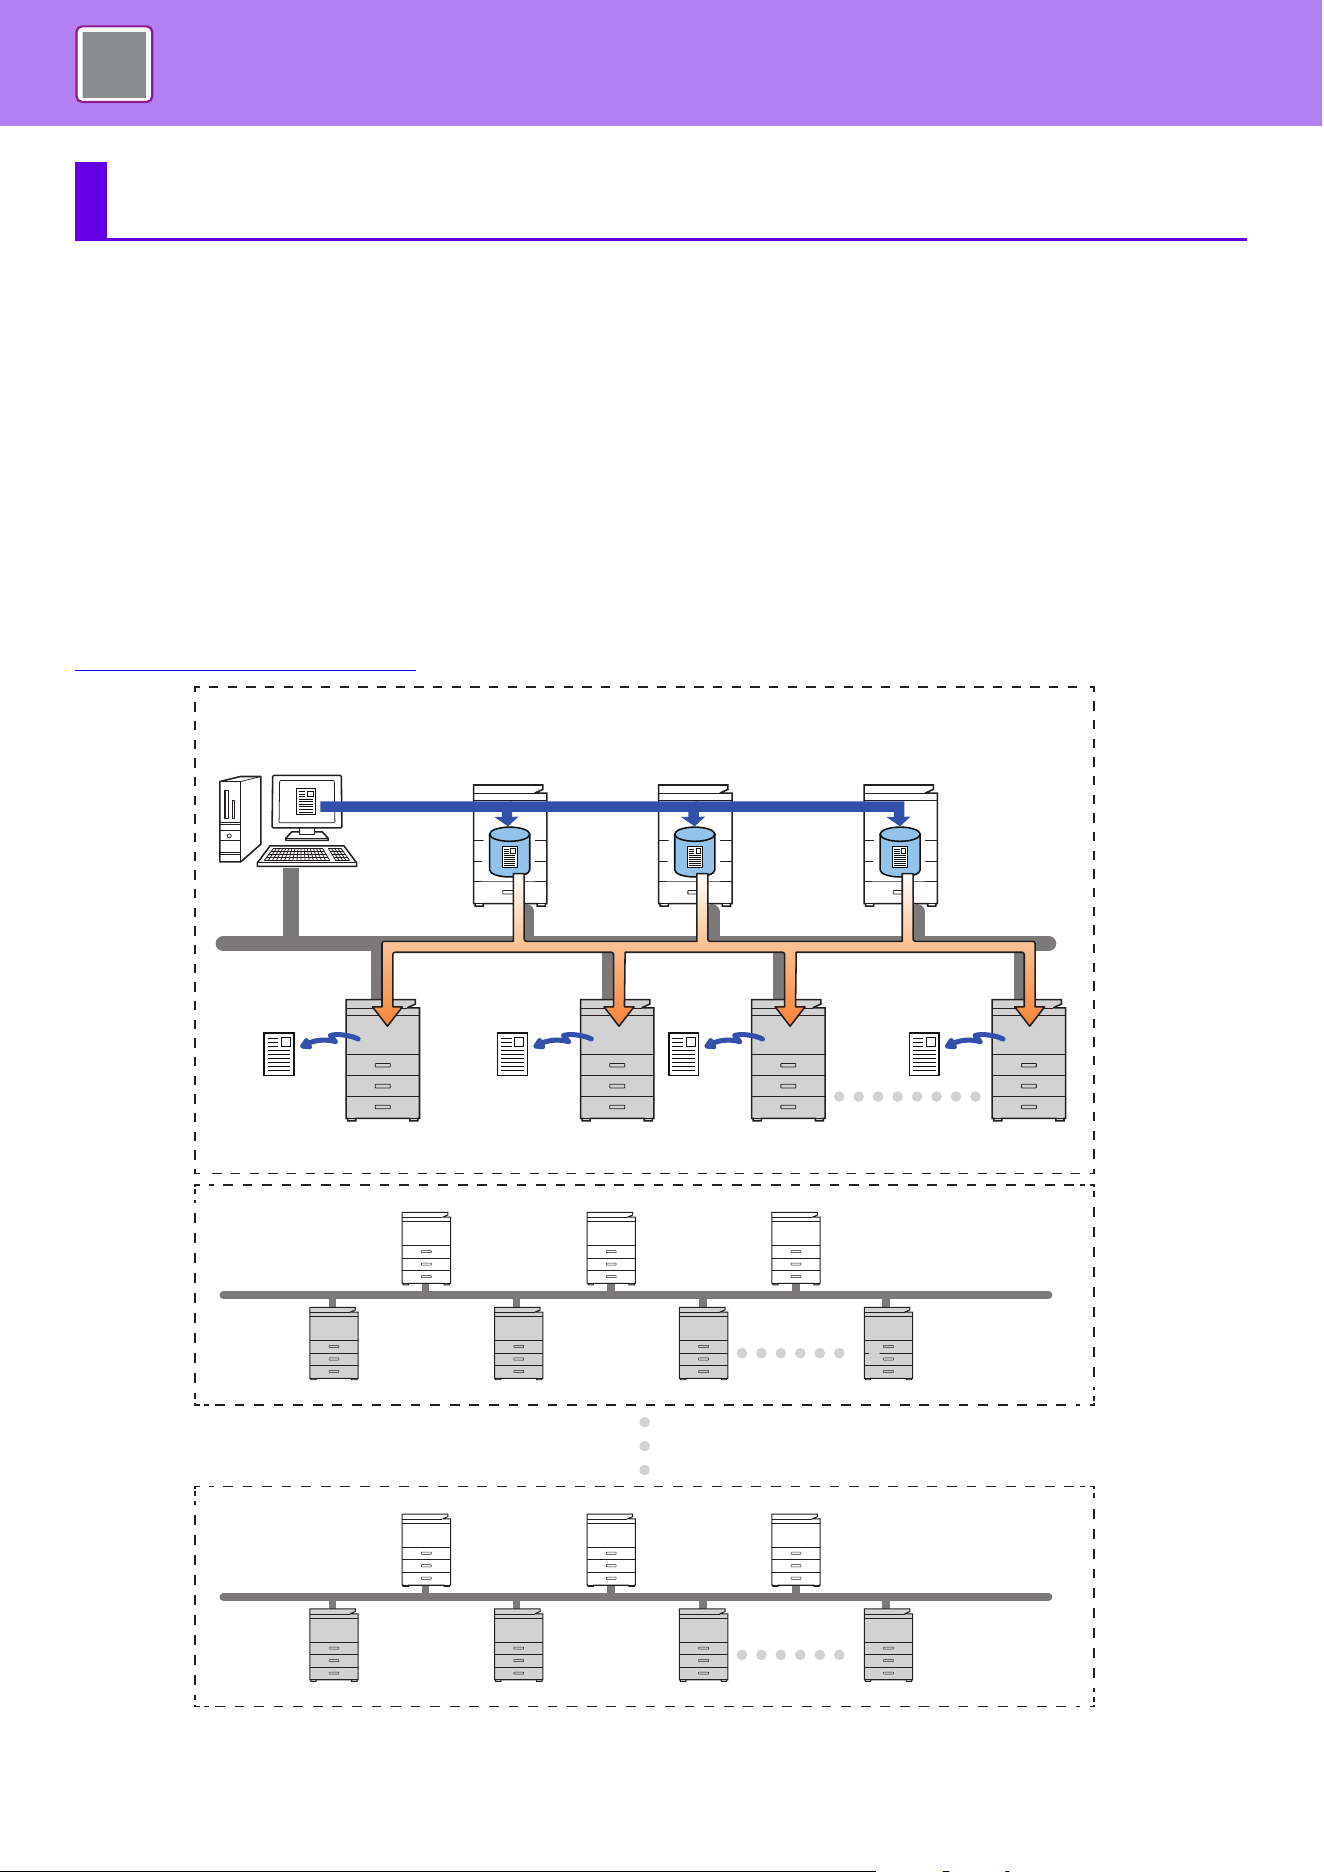
4-124
PRINTER►PRINT RELEASE FUNCTION
PRINT RELEASE FUNCTION
When there are multiple machines that support the print release function on the same network, you can use the print
release function to save data in the machine that is set as the primary unit and then print the saved data from secondary
unit which you set (multiple secondary units can be set).
INTER-GROUP PRINTING
Primary and secondary units can be grouped.
Select a registered group, and use the print release function on the selected group.
Print release settings, such as Primary Unit, Secondary Unit , and group settings, can be configured from the web page
(administrator) in [System Settings] → [Print Settings] → [Print Release Settings].
Print Release Settings (page 9-67)
PRINT RELEASE FUNCTION
TCP/IP network
Primary Unit 3*Primary Unit 2*
Secondary Unit
Primary Unit 1*
Computer
Group 1
Group 2
Secondary UnitSecondary Unit
Secondary Unit Secondary Unit Secondary Unit Secondary Unit
You can print a job saved in
the machine (primary unit)
from other machine
(secondary unit) on the
same network.
Saving a job in the
primary unit.
Secondary Unit
Primary Unit 1 Primary Unit 2 Primary Unit 3
Group 10
Secondary Unit Secondary Unit Secondary Unit Secondary Unit
Primary Unit 1 Primary Unit 2 Primary Unit 3
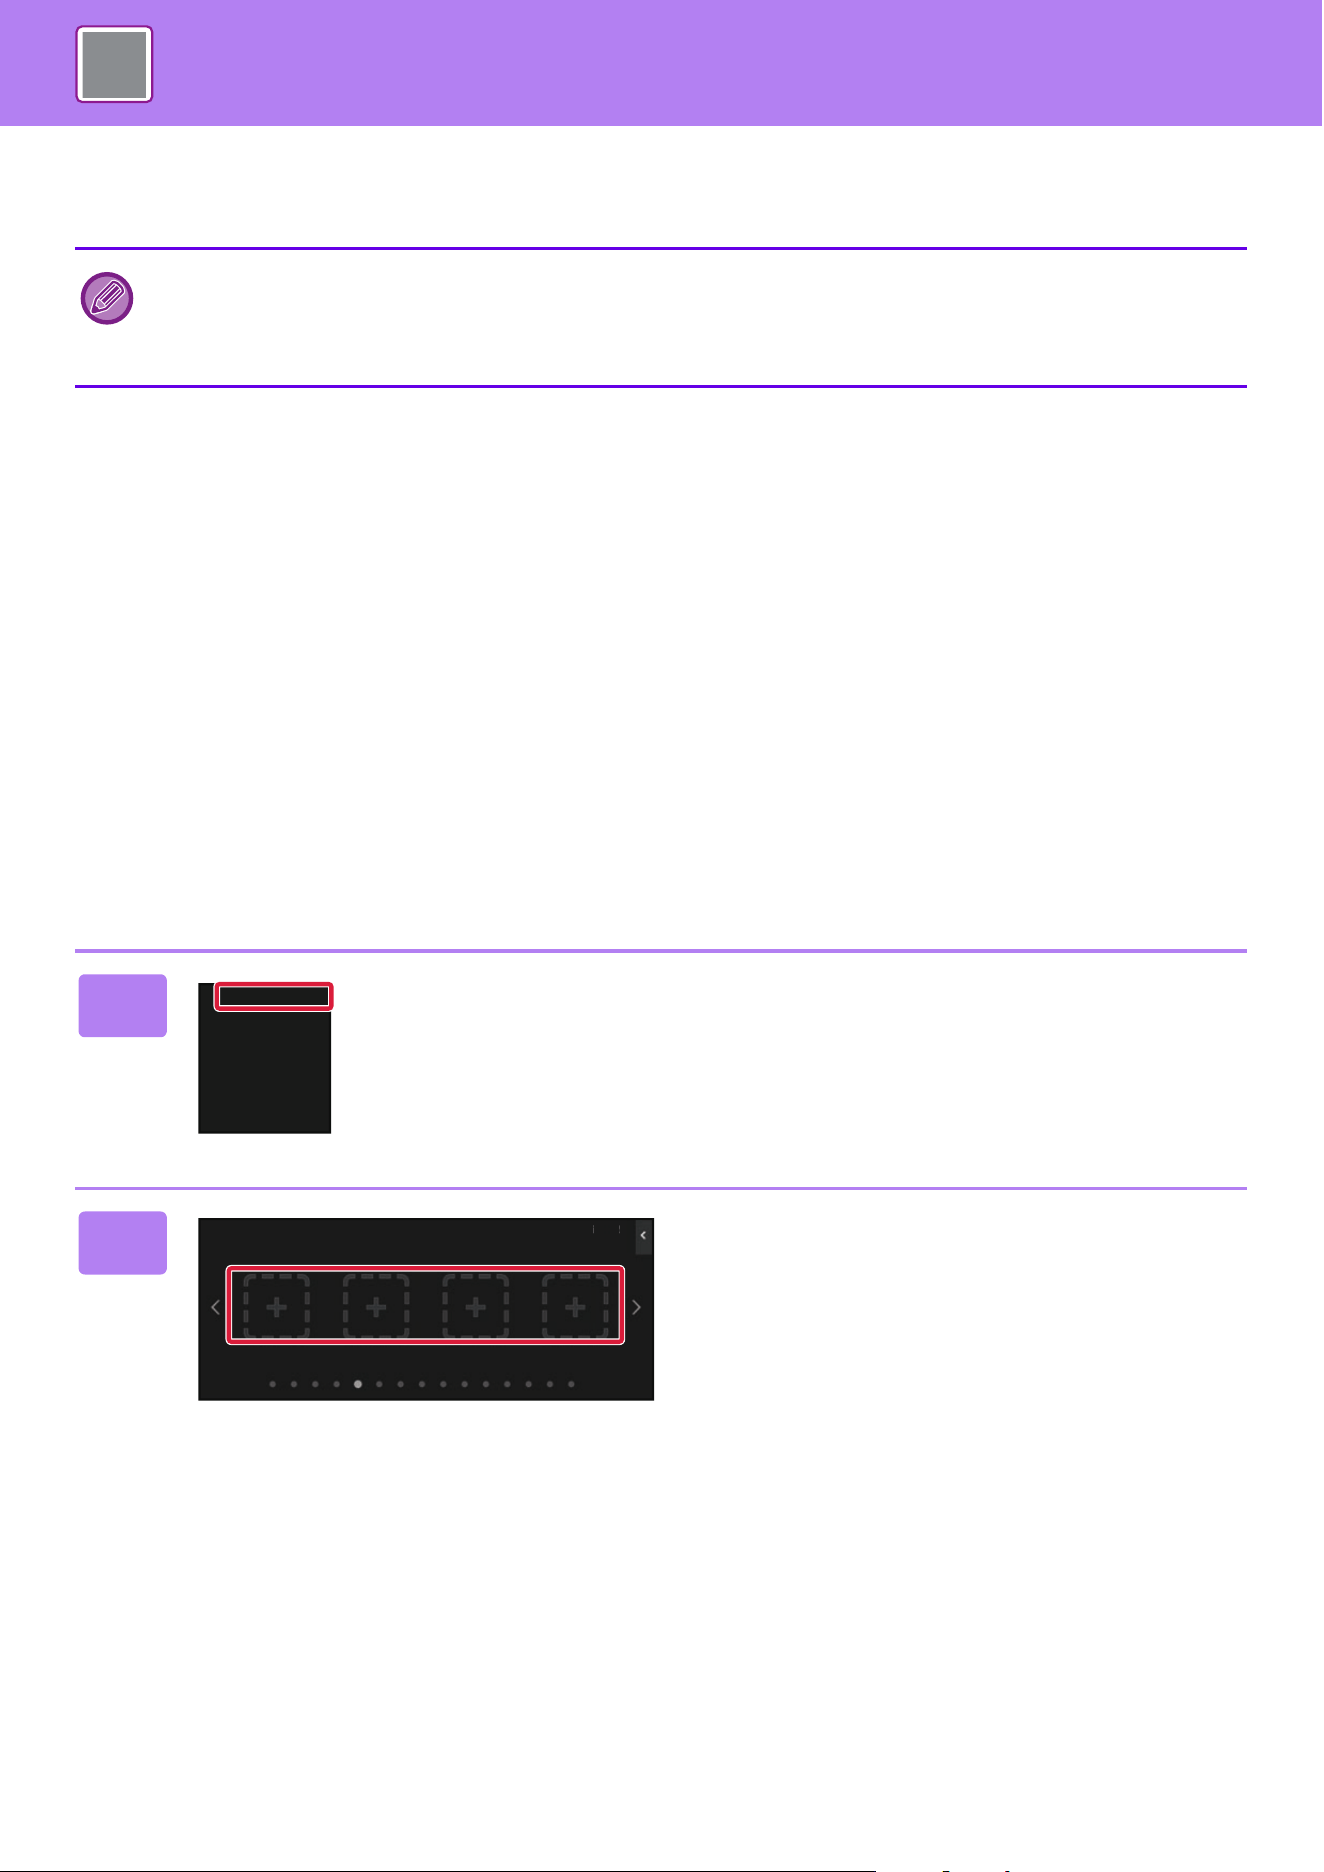
4-125
PRINTER►PRINT RELEASE FUNCTION
For models that support the print release function, and for the number of secondary units that can be controlled by one
primary unit, consult your dealer.
*Available for models with local drive.
BEFORE USING THE PRINT RELEASE
FUNCTION
This section explains settings that must be configured before you can use the Print Release function.
SETTINGS REQUIRED ON THE MACHINE
To use the print release function, configure in setting mode (administrator).
Fixing the IP address of the machine
If the machine is used in a DHCP environment, the IP address of the machine may change. If this happens, you will not
be able to send print release information to the machine.
Adding the print release icon to the Home screen
It is not necessary this setting, if already added the print release icon.
• Up to 3 primary units can be set.
• Up to 10 groups can be registered into Inter-Group Printing.
• When user authentication is enabled, only jobs of the logged-in user can be printed.
• In an environment with mixed models, some printer drivers may not produce the expected print result.
1
Tap [Edit Home] on the action panel.
2
Tap a place without a shortcut key in
home edit mode.
Edit Home
MFP Display Pattern
Setting
Change Text Color
On Home Screen
Key Transparency Setting
10:151
0
:1
5

4-126
PRINTER►PRINT RELEASE FUNCTION
INSTALLING THE PRINTER DRIVER OF THE PRIMARY
UNIT
Install the printer driver of the primary unit on your computer. For the procedures for installing the printer driver, see the
Software Setup Guide.
3
Tap [Print Release].
4
Tap the [Edit End] key.
Home Edit Mode is exited and you return to the home screen.
Operation
Guide
Brightness
Adjustment
Select Functions to add to Home.
Exchange
(E-Mail)
Easy Connect
(QR code)
Received Data
List
Forward Error
Box
Easy
Scan
Print Release
Recent Jobs
Gmail
I-Fax Manual
Receive
Easy
Copy
Easy
Fax
OK
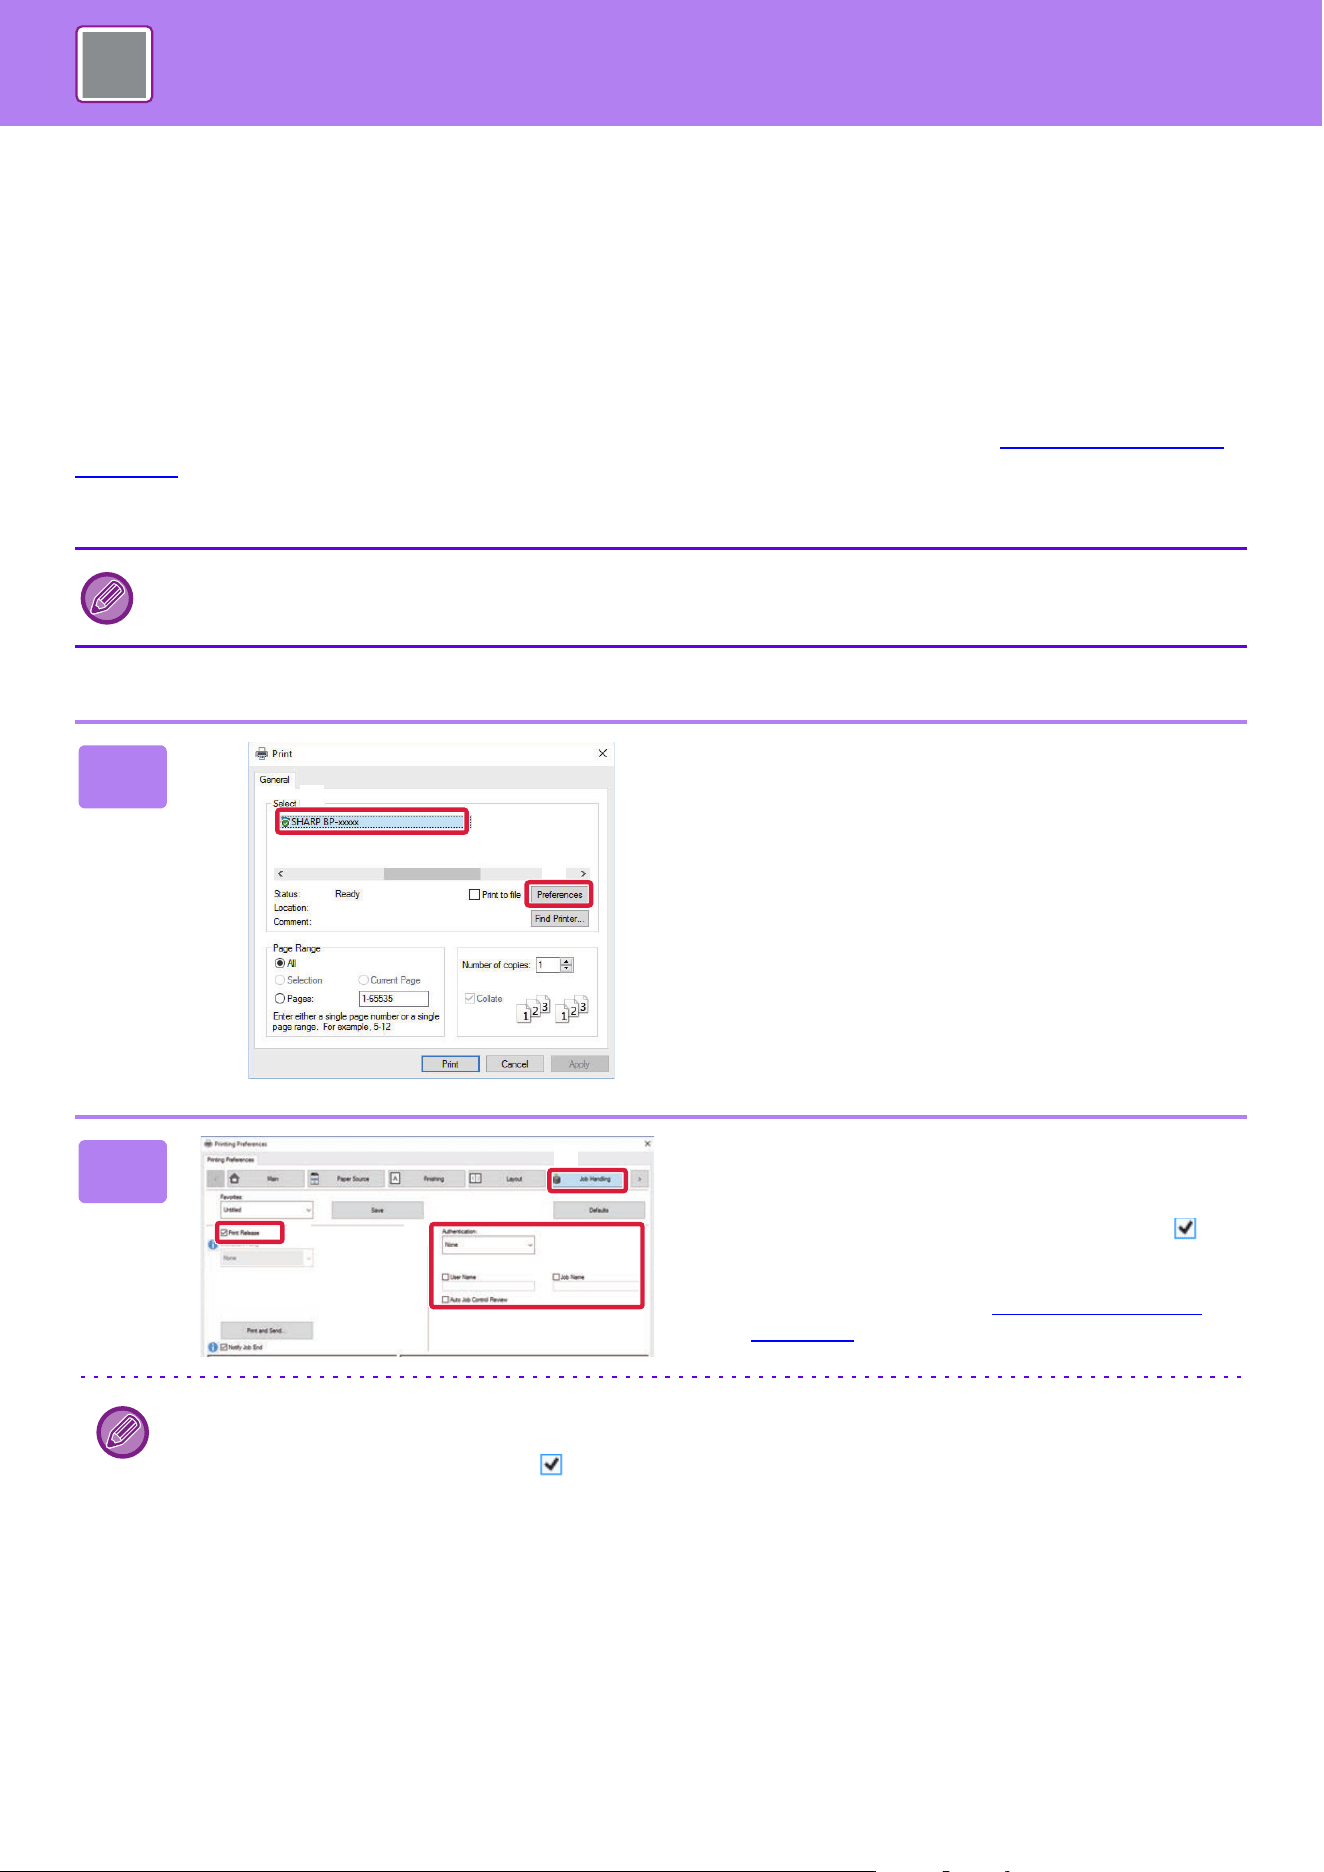
4-127
PRINTER►PRINT RELEASE FUNCTION
USING THE PRINT RELEASE FUNCTION
This section explains how to store jobs in the primary unit, and how to select and print jobs from a secondary unit.
STORING A JOB IN THE PRIMARY UNIT FROM YOUR
COMPUTER
When user authentication enabled in the machine, you must enter your user information (login name, password, etc.) in
the settings screen of the printer driver in order to print.
*
For explanations of the settings, see “PRINTER FUNCTION
(page 4-3)".
* The user information that is required varies depending on the enabled authentication method. Check with the machine administrator for this infor-
mation.
In a Windows environment
Check the paper size and paper type used for printing.
Select a paper size and paper type that are supported by the machine to be used.
If you select a non-supported paper size or paper type, you may not be able to print.
1
Open the printer driver properties
window.
(1) Select the printer driver of the Primary
Unit.
(2) Click the [Preferences] button.
2
Configure the print release function.
(1) Click the [Job Handling] tab.
(2) Select the [Print Release] checkbox .
(3) Enter user information as needed.
For more information, see “Authentication Settings
(page 9-93)".
• The print release function cannot be used at the same time as the document filing function.
• You can change the number of copies and color mode at the time of printing.
• If select the [Print Release] checkbox in [Printing Policy] on the [Configuration] tab, that function will always be
enabled and information on various functions will no longer appear in the print settings screen.
• If less than 10 MB is free in the storage area of the primary unit, the job will not be stored. Delete unneeded jobs and
print again.
(1)
(2)
(1)
(2)
(3)
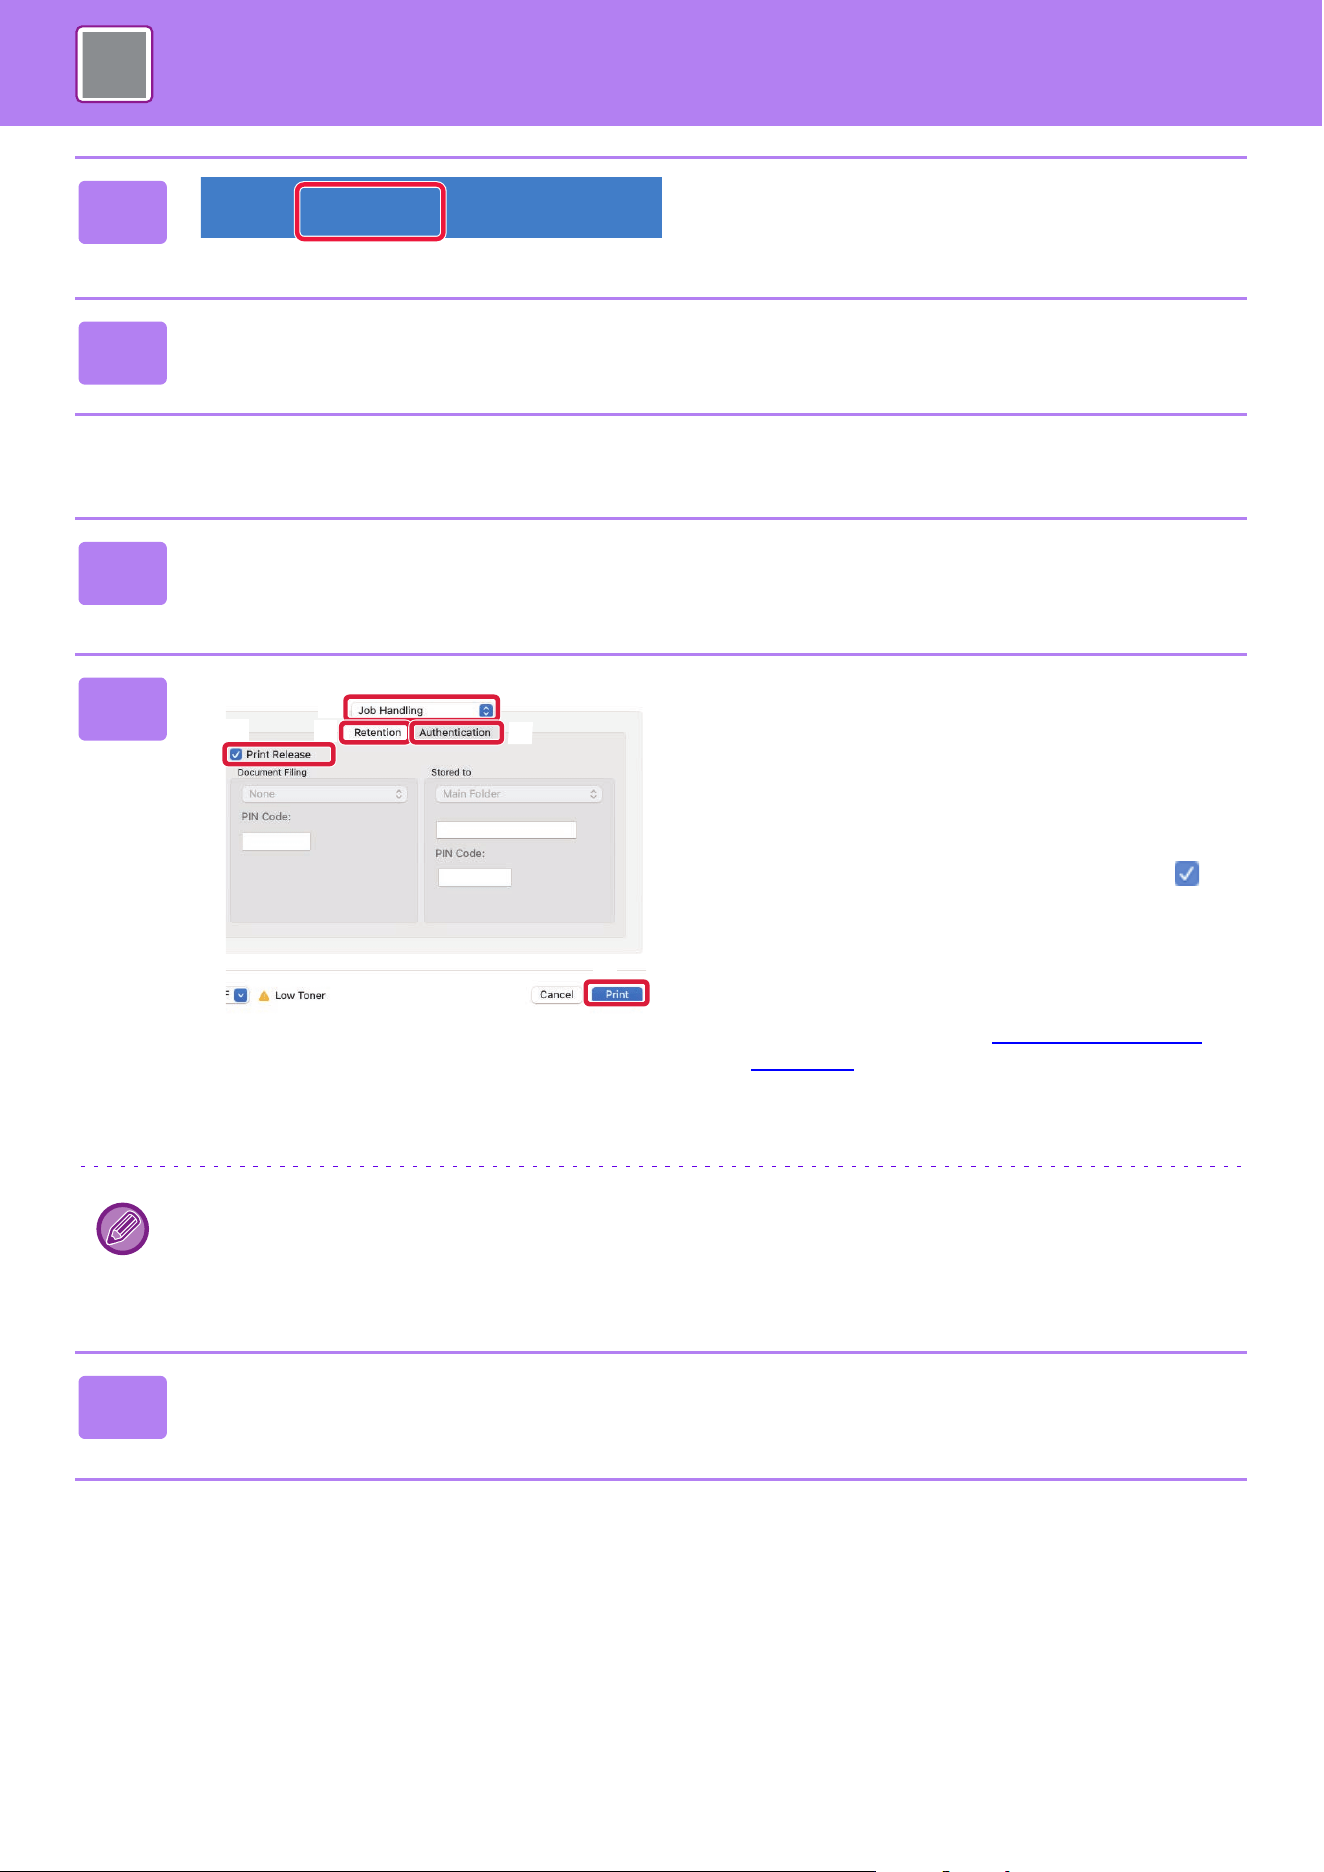
4-128
PRINTER►PRINT RELEASE FUNCTION
In a macOS environment
3
Select any print settings that are
needed, and click the [OK] button.
4
Start printing.
1
In the application, select [Print] from the [File] menu. Make sure that the
machine's printer name is selected.
2
Configure the print release function.
(1) Select [Job Handling].
In macOS 13, [Job Handling] is located under the
"Printer Options" menu.
(2) Click [Retention].
(3) Select the [Print Release] checkbox .
(4) Click [Authentication] and enter your user
information as needed.
If user authentication is not enabled, this step can be
omitted.
For more information, see “Authentication Settings
(page 9-93)".
(5) Select any other print settings that are
needed, and click the [Print] button.
• The print release function cannot be used at the same time as the document filing function.
• You can change the number of copies and color mode at the time of printing.
• If less than 10 MB is free in the storage area of the primary unit, the job will not be stored. Delete unneeded jobs and
print again.
3
Start printing.
(1)
(2)
(3)
(4)
(5)

4-129
PRINTER►PRINT RELEASE FUNCTION
PRINTING/DELETING A JOB STORED IN THE PRIMARY
UNIT FROM A SECONDARY UNIT
This section explains how to print and delete a stored job from a secondary unit.
1
Tap the [Print Release] key on the Home screen.
• A list of the jobs stored in the primary unit appears.
• If the main power of the primary unit is not on, a message will appear and you will not be able to view the stored jobs.
2
Print or delete the selected job.
(1) Tap the job you want to print or delete.
The checkbox is selected .
You can select more than one job.
You can select all jobs with the [Select All] key.
(2) Configure print settings.
To delete the job from the primary unit after printing,
select the [Print and Delete the Data] checkbox .
(This step is no necessary when only deleting the job.)
(3) Start printing or deleting.
If you are deleting the job, a confirmation screen will
appear. Select [Yes] to delete.
A: Machine icon
The communication status with the primary unit is displayed.
By tapping the machine icon, detailed information is
displayed.
B: Pull-down menu
Appears when the MFP group collaboration function is used.
By selecting another MFP group in this pull-down menu, the
print jobs of the other MFP groups are displayed.
When user authentication is enabled, only the print jobs of the logged-in user appear.
• When the secondary unit is a monochrome machine, [B/W Print] does not appear and jobs saved in color are printed in
monochrome.
• When the secondary unit is a color machine, jobs saved in monochrome are printed in monochrome even if the [B/W Print]
checkbox is not selected .
• If you selected a setting such as stapling that cannot be executed because the secondary unit does not have the
necessary option, the setting will be disregarded.
• If the selected job is a PS file, the job will only be printed if the secondary unit supports PS file printing.
Select Job to Operate.
File Name
Select All
Delete
Print
Print B/W
Change Number
of Prints
User1
No. of
Prints
Print and Delete the Data
Login Name Date
(3)
(1)
A B
(2)
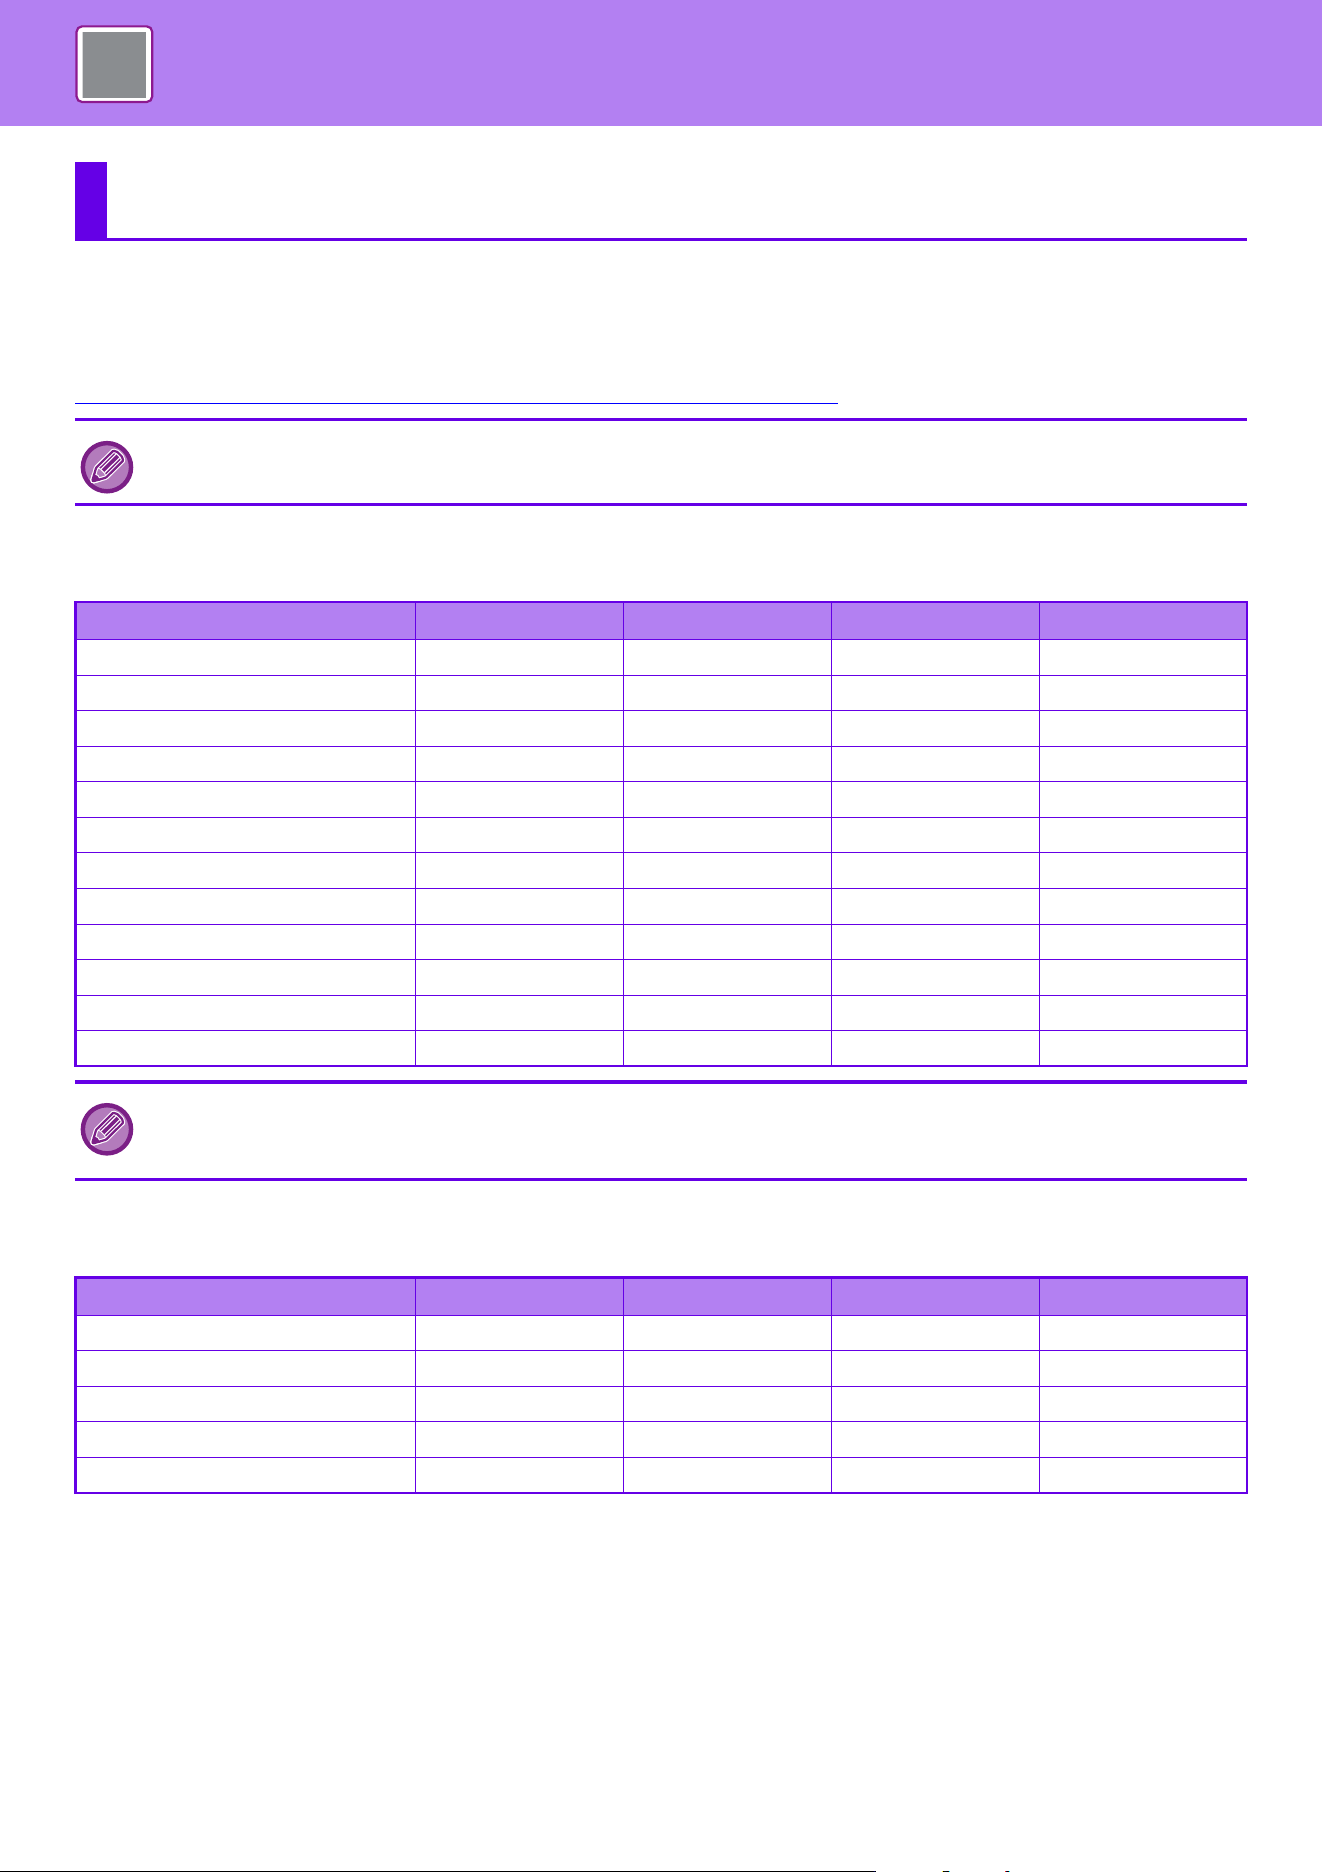
4-130
PRINTER►APPENDIX
PRINTER DRIVER SPECIFICATIONS LIST
For information on the setting items, refer to printer driver Help.
PRINTER DRIVER SETTINGS SCREEN / REFERRING TO HELP
(page 4-6)
Main
Paper Source
APPENDIX
The specifications of each function in Windows PPD and macOS PPD vary depending on the operating system version and
the application.
Function PCL6 PS Windows PPD macOS PS
Copies 1-9999 1-9999 1-9999 1-9999
Collate Yes Yes Yes Yes
Original Size Yes Yes Yes Yes
Output Size Yes Yes Yes Yes
Orientation Yes Yes Yes Yes
Adjust to Paper Size Yes Yes No Yes
Zoom Yes Yes Yes Yes
2-Sided Yes Yes Yes Yes
N-Up 2, 4, 6, 8, 9, 16 2, 4, 6, 8, 9, 16 2, 4, 6, 9,16 2, 4, 6, 9,16
Staple Yes Yes Yes Yes
Document Filing Yes Yes No Yes
Color Mode Yes Yes Yes Yes
• Zoom (PCL6/Windows PPD/macOS PS): The horizontal and vertical proportion cannot be set separately.
• Staple: If a finisher or a saddle stitch finisher is installed (The punch module is also required in order to use the punch
function.)
Function PCL6 PS Windows PPD macOS PS
Output Size Yes Yes No No
Paper Tray Yes Yes Yes Yes
Paper Type Yes Yes Yes Yes
Tray Status Yes Yes No No
Force Letter-R for Letter Size Yes Yes No Yes
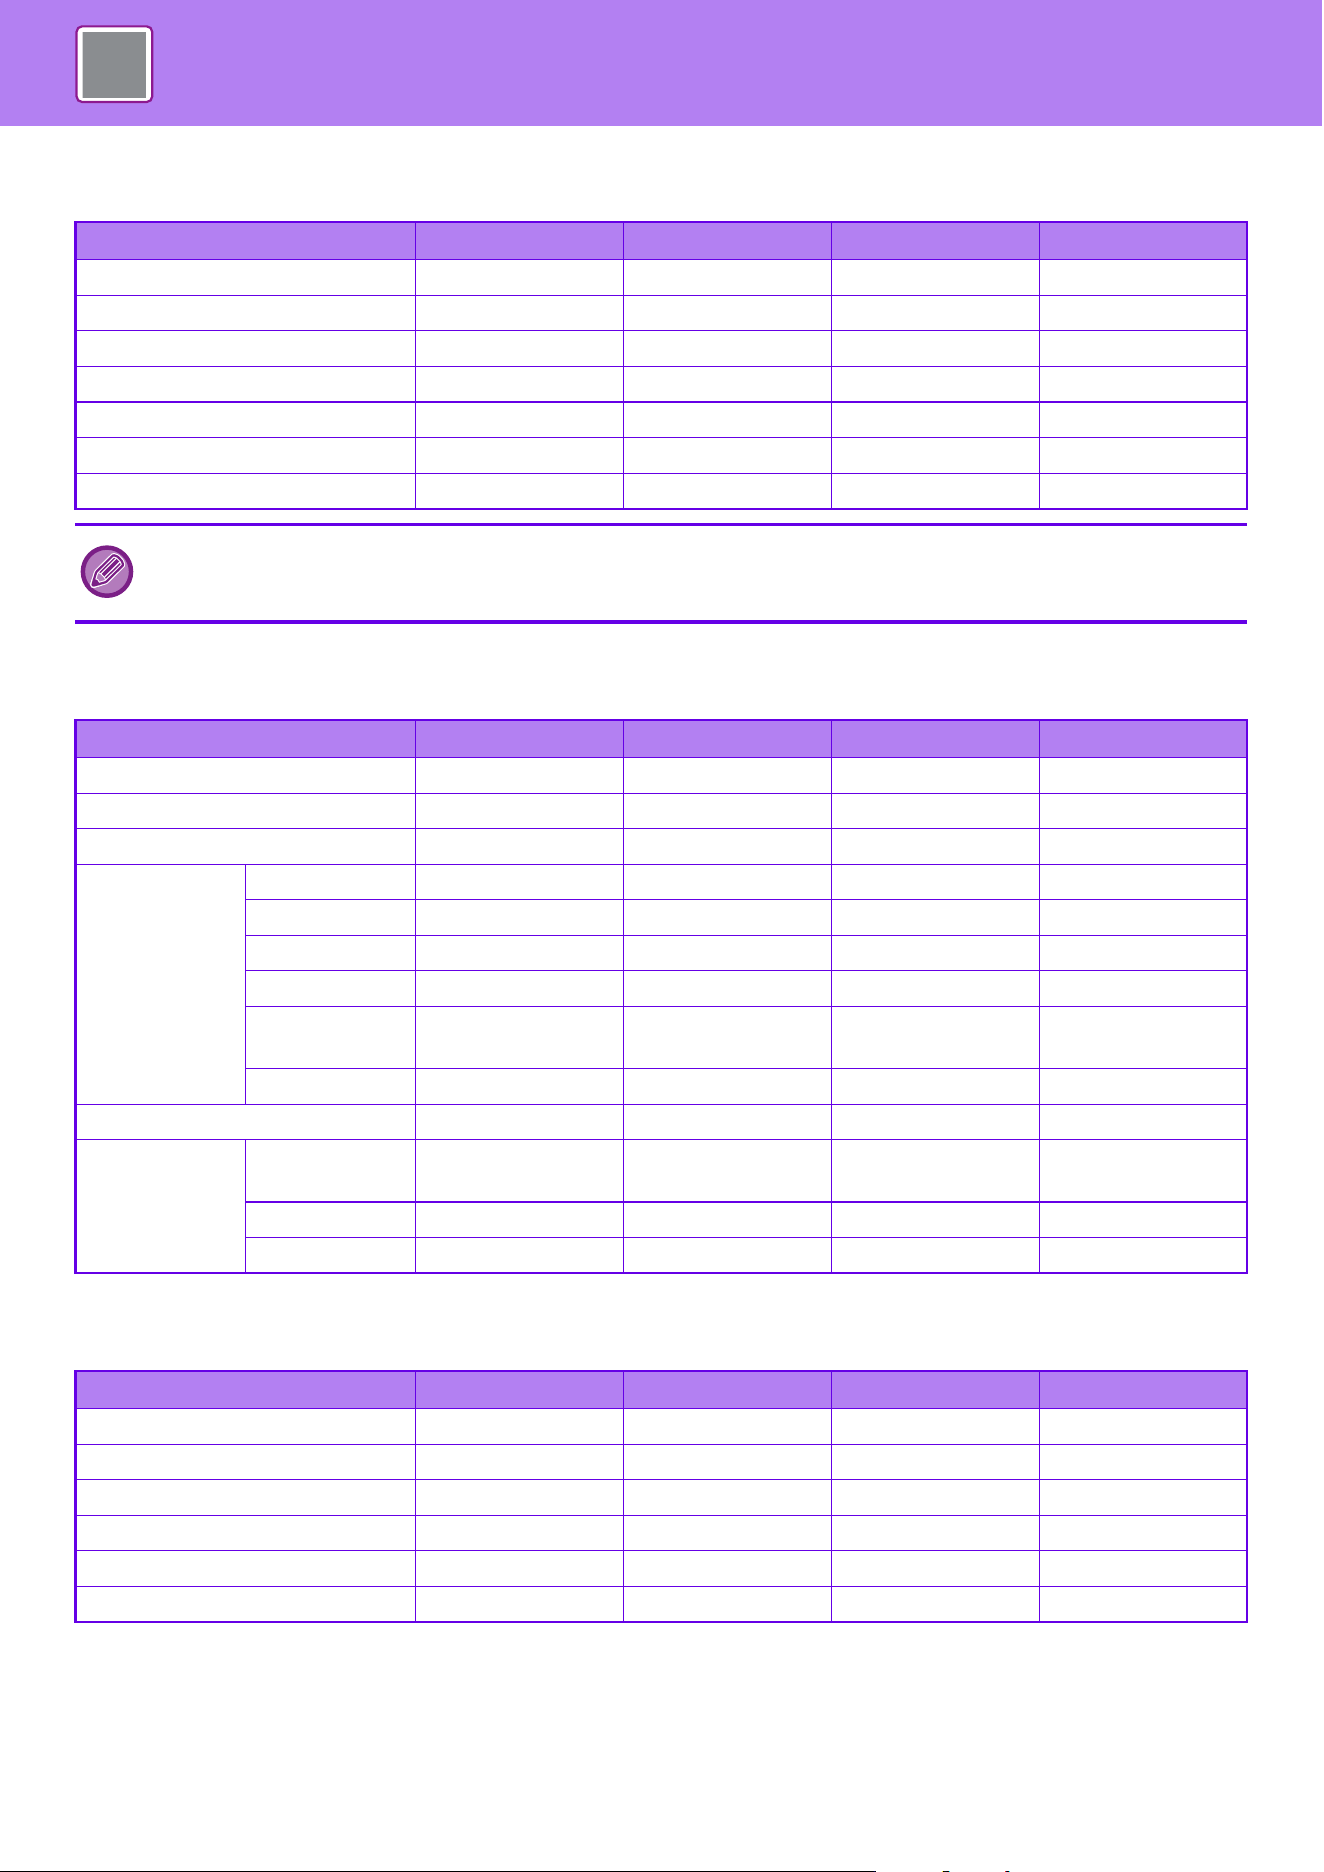
4-131
PRINTER►APPENDIX
Finishing
Layout
Job Handling
Function PCL6 PS Windows PPD macOS PS
Staple/Saddle Stitch Yes Yes Yes Yes
Punch Yes Yes Yes Yes
Fold Yes Yes Yes Yes
Offset Yes Yes Yes Yes
Output Yes Yes Yes Yes
Separator Page Yes Yes No No
Trimming Yes Yes No Yes
• Staple/Punch: If a finisher or a saddle stitch finisher is installed (The punch module is also required in order to use the
punch function.)
• Saddle Stitch/Fold: If a saddle stitch finisher is installed.
Function PCL6 PS Windows PPD macOS PS
2-Sided Yes Yes Yes Yes
Chapter Inserts Yes Yes No No
Booklet Yes Yes Yes Yes
N-Up Page No. 2, 4, 6, 8, 9, 16 2, 4, 6, 8, 9, 16 2, 4, 6, 9,16 2, 4, 6, 9,16
Repeat Yes Yes No No
Order Yes Yes Yes Yes
Border Yes Yes Yes Yes
N-Up with
cover
Yes Yes No No
100% N-Up Yes Yes No No
Poster Printing Yes Yes No No
Print Position Margin Shift 0 inch to 1.2 inch
(0mm to 30mm)
0 inch to 1.2 inch
(0mm to 30mm)
0 inch to 1.2 inch
(0mm to 30mm)
0 inch to 1.2 inch
(0mm to 30mm)
Tab Shift Yes Yes No No
Custom Yes Yes No No
Function PCL6 PS Windows PPD macOS PS
Print Release Yes Yes No Yes
Document Filing Yes Yes No Yes
Create PDF for PC Browsing Yes No No No
Print and Send Yes No No No
Notify Job End Yes Yes No No
Authentication Yes Yes No Yes

4-132
PRINTER►APPENDIX
Inserts
Stamp
Image Quality
Function PCL6 PS Windows PPD macOS PS
Covers/Inserts Yes Yes Yes Yes
Transparency Inserts Yes Yes No Yes
Carbon Copy Yes Yes No No
Tab Paper Yes No No No
Covers/Inserts (Windows PPD/macOS PS): Only covers can be inserted.
Function PCL6 PS Windows PPD macOS PS
Watermark Yes Yes Yes Yes
Image Stamp Yes Yes No No
Overlay Yes Yes No No
Hidden Pattern Yes No No No
Copies Stamp Yes No No No
Function PCL6 PS Windows PPD macOS PS
Print Mode Yes Yes Yes Yes
Graphics Mode Yes No No No
Bitmap Compression Yes Yes No No
Sharpness Yes Yes Yes Yes
Screening Yes Yes Yes Yes
Smoothing Yes Yes Yes Yes
Text To Black Yes Yes No No
Vector To Black Yes Yes No No
Toner Save Yes Yes Yes Yes
Color Mode Yes Yes Yes Yes
Image Type Yes Yes Yes Yes
Advanced Color Yes Yes Yes Yes
Color Adjustment Yes No No No
RGB Adjustment No Yes No No
Font Yes Yes Yes No
Line Width Yes No No No
Boldness Adjustment No No No No
Toner Save: This setting may not operate in some applications and operating systems.
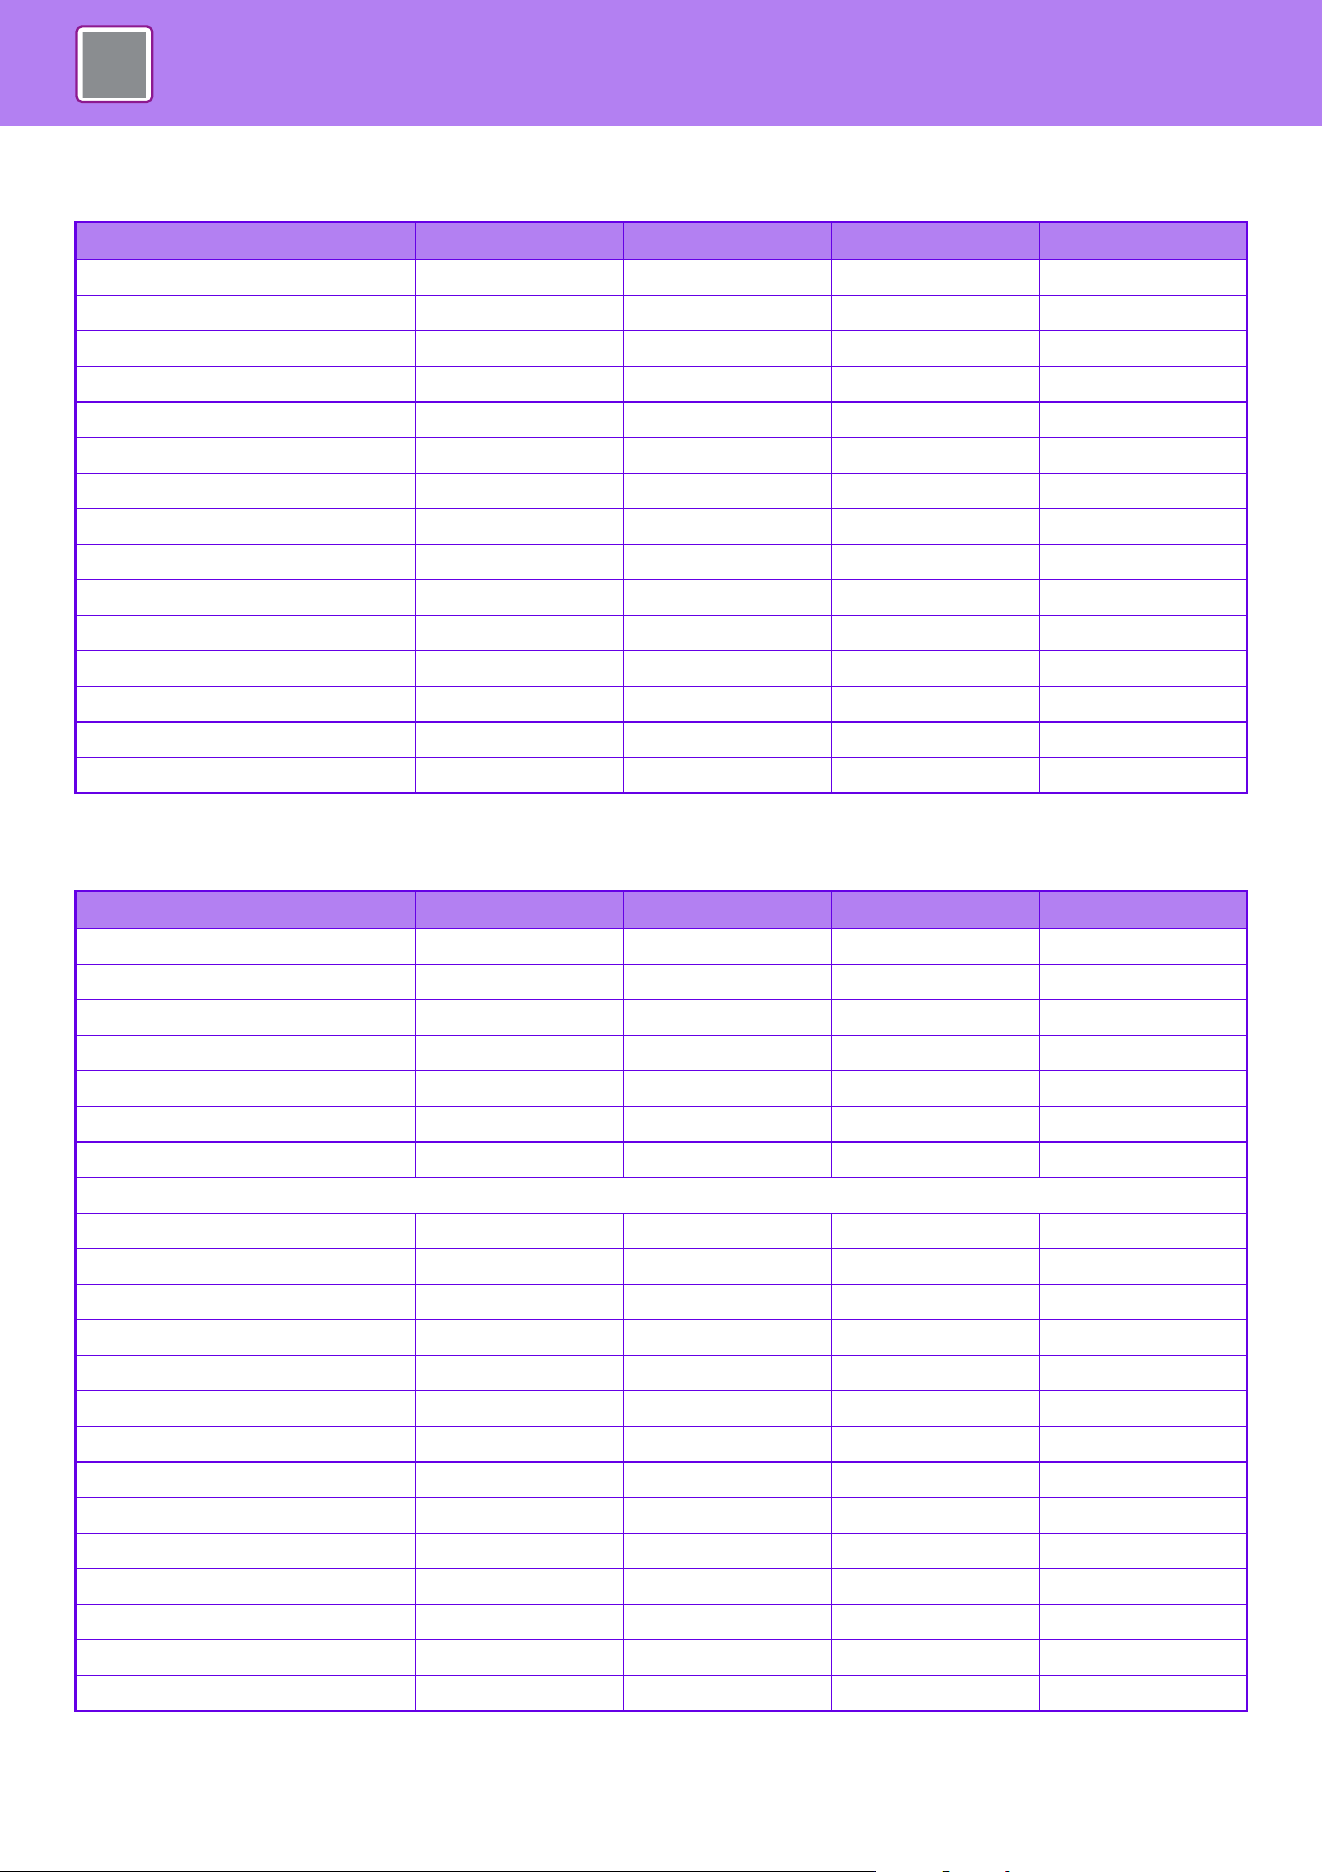
4-133
PRINTER►APPENDIX
Color Profile
Detailed Settings
Function PCL6 PS Windows PPD macOS PS
Image Type Yes Yes Yes Yes
CMYK Simulation No Yes Yes Yes
Simulation Profile No Yes Yes Yes
Output Profile No Yes Yes Yes
Windows ICM Yes Yes No No
ICM Method No No Yes No
ColorSync No No No Yes
Source Profile Yes Yes Yes Yes
Rendering Intent Yes Yes Yes Yes
Output Profile Yes Yes Yes Yes
CMYK Correction Yes No No No
Neutral Gray Yes Yes Yes Yes
Pure Black Print Yes Yes Yes Yes
Black Overprint No Yes Yes Yes
Trapping Yes Yes Yes Yes
Function PCL6 PS Windows PPD macOS PS
Mirror Image No Yes Yes Yes
PS Error Information No Yes Yes No
PS Pass-Through No Yes No No
Job Compression No Yes No No
Tandem Print Yes Yes No No
Disable Blank Page Print Yes Yes No No
Custom Image Registration Yes No No No
Other Settings
• Input Resolution Yes Yes No No
• Shade Pattern Yes No No No
• Spool Data Format Yes Yes No No
• Printable Area Yes Yes No No
• Rip Style Yes Yes No Yes
• Duplex Style Yes Yes No No
• CMYK Image Enhancement No Yes No No
• Job Name Shortening Yes Yes No No
• Use driver to render JPEGs Yes Yes No No
• Expand No No No No
• Thicken Fine Lines Yes No No No
• Fine Text Yes Yes Yes Yes
• Fine Edge No No No No
• Text/Line control Yes Yes Yes Yes

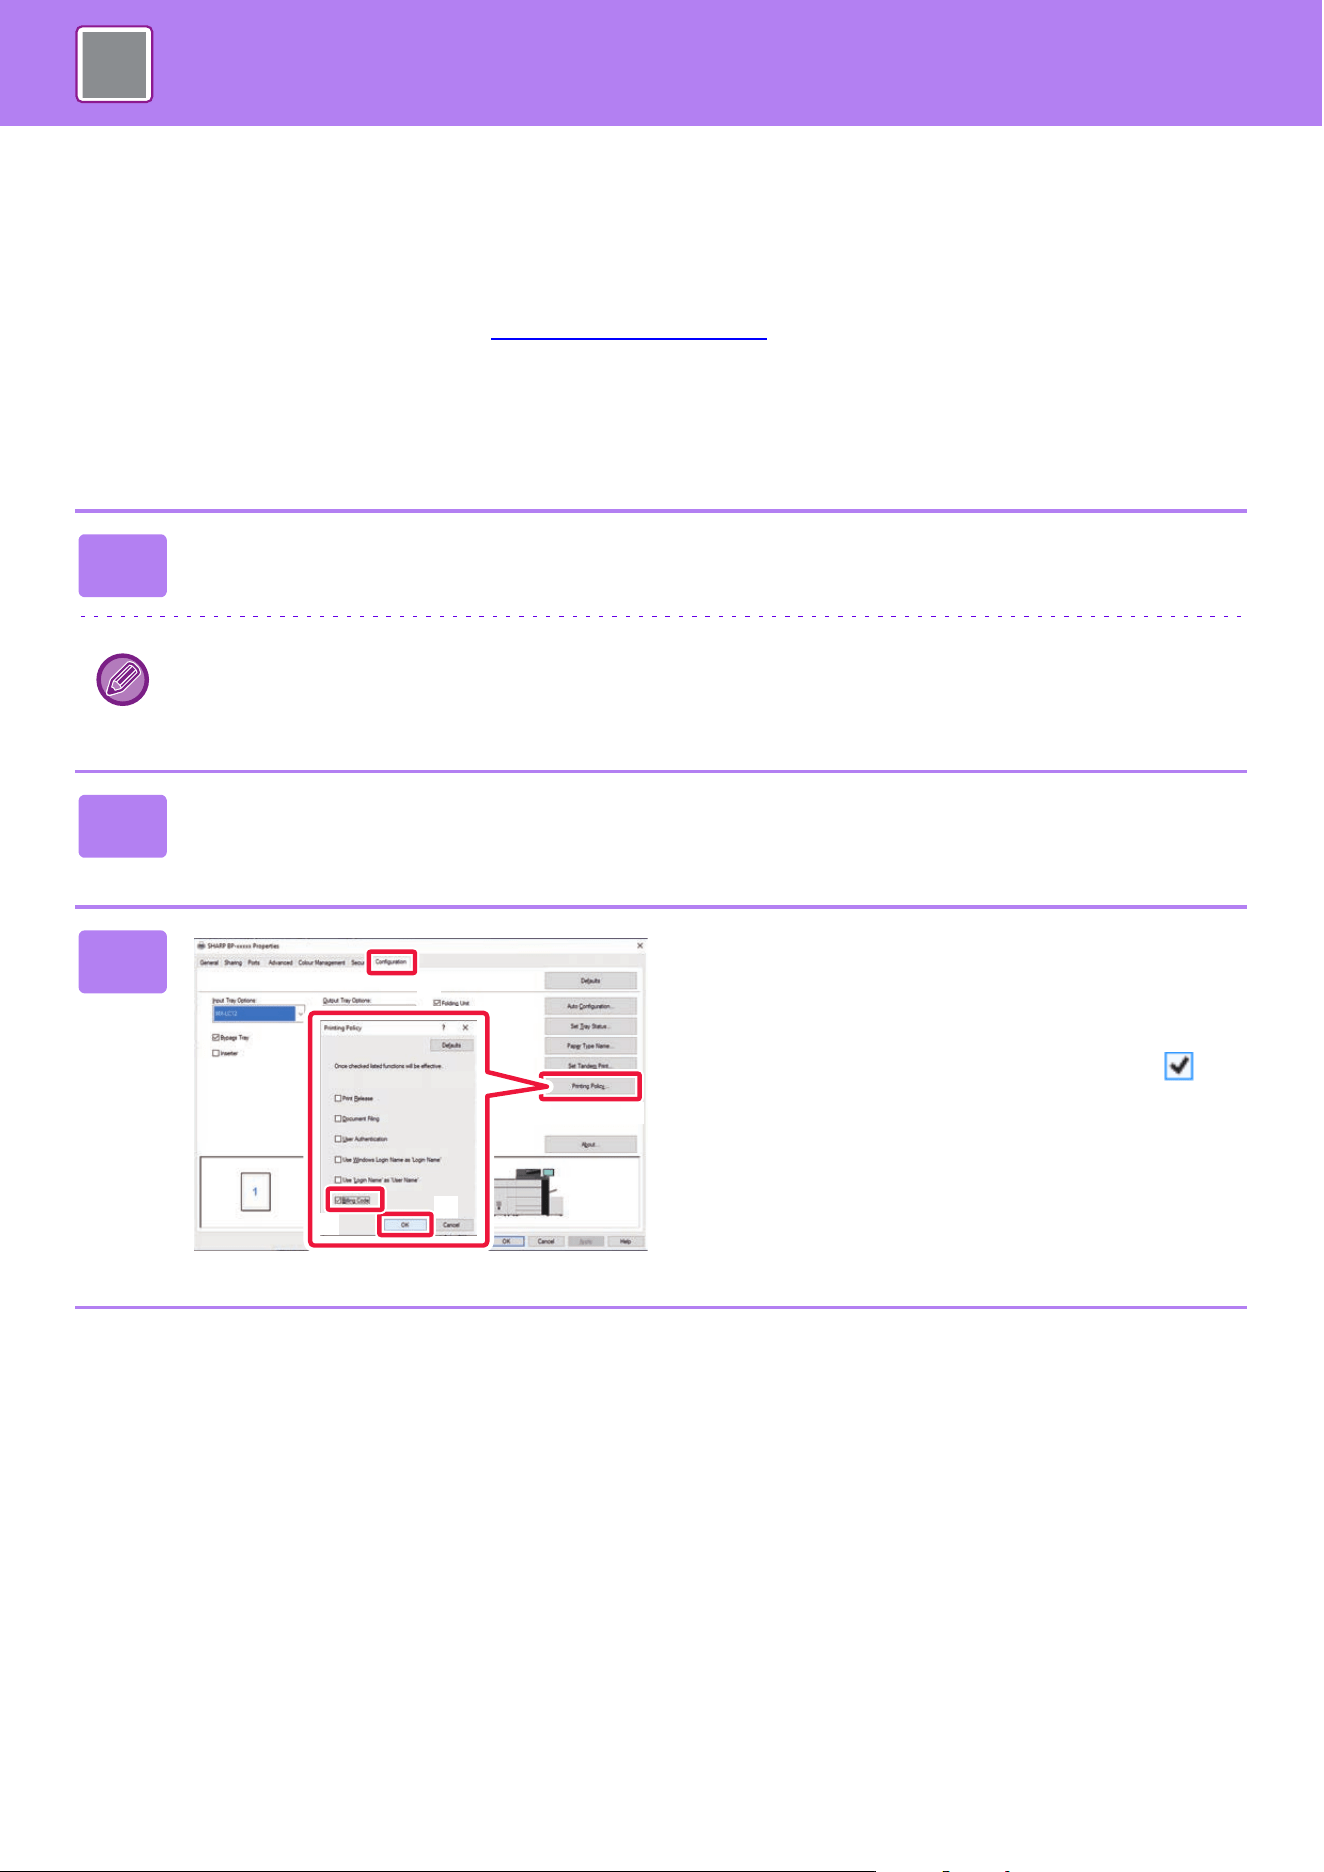
4-135
PRINTER►APPENDIX
SPECIFYING A BILLING CODE USING THE
PRINTER DRIVER
You can enter a billing code using the printer of the machine.
For an overview of a billing code, refer to "BILLING CODE (page 8-24)
".
ENABLE BILLING CODE
This setting is required only in the Windows environment. (Always usable under macOS environment)
1
Click the [Start] button, select [Settings] → [Device] → [Devices and
Printers].
• In Windows 11, click the [Start] button, select [Bluetooth & devices] → [Printers & scanners].
• In Windows Server 2012, right-click the [Start] button, select [Control Panel] → [View devices and printers] (or
[Devices and Printers]).
2
Right-click the printer driver icon of the machine and select [Printer
Properties].
3
Specify a billing code
(1) Click the [Configuration] tab.
(2) Click the [Printing Policy] button.
(3) Set the [Billing Code] check box to ,
(4) Click the [OK] button.
(2)
(1)
(3)
(4)
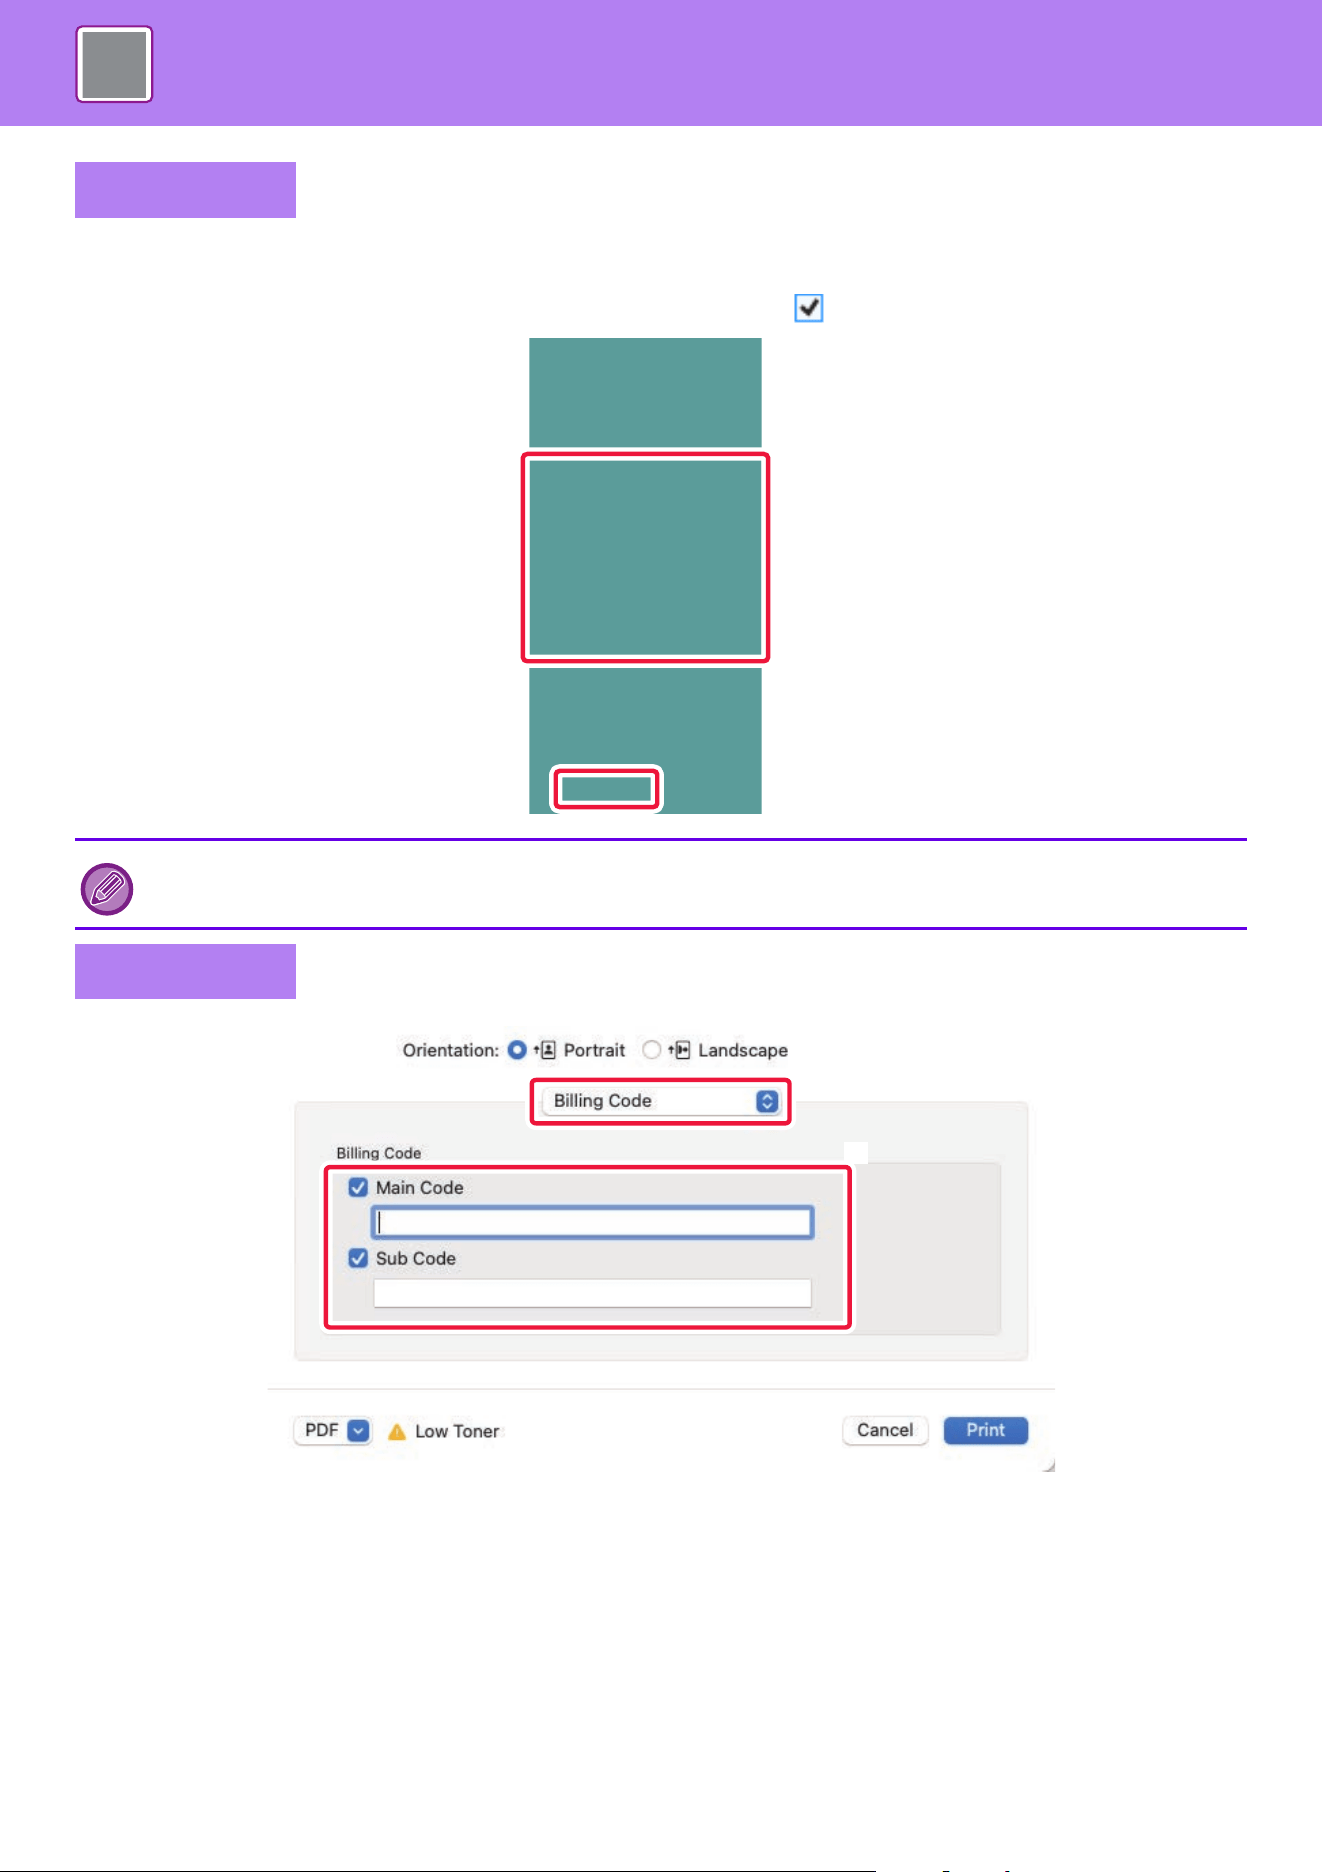
4-136
PRINTER►APPENDIX
When printing starts, the billing code setting screen appears.
Enter the main code and sub code, and click the [OK] button.
To retain the specified billing code, set [Always Use This Billing Code] to .
(1) Select [Billing Code].
In macOS 13, [Billing Code] is located under the "Printer Options" menu.
(2) Enter the main code and sub code.
Windows
• You can click [Get Billing Code] to get the machine's billing code list and select the billing code from the list.
• If you have started printing without specifying a billing code, a use code is recorded in the job log.
macOS
(2)
(1)
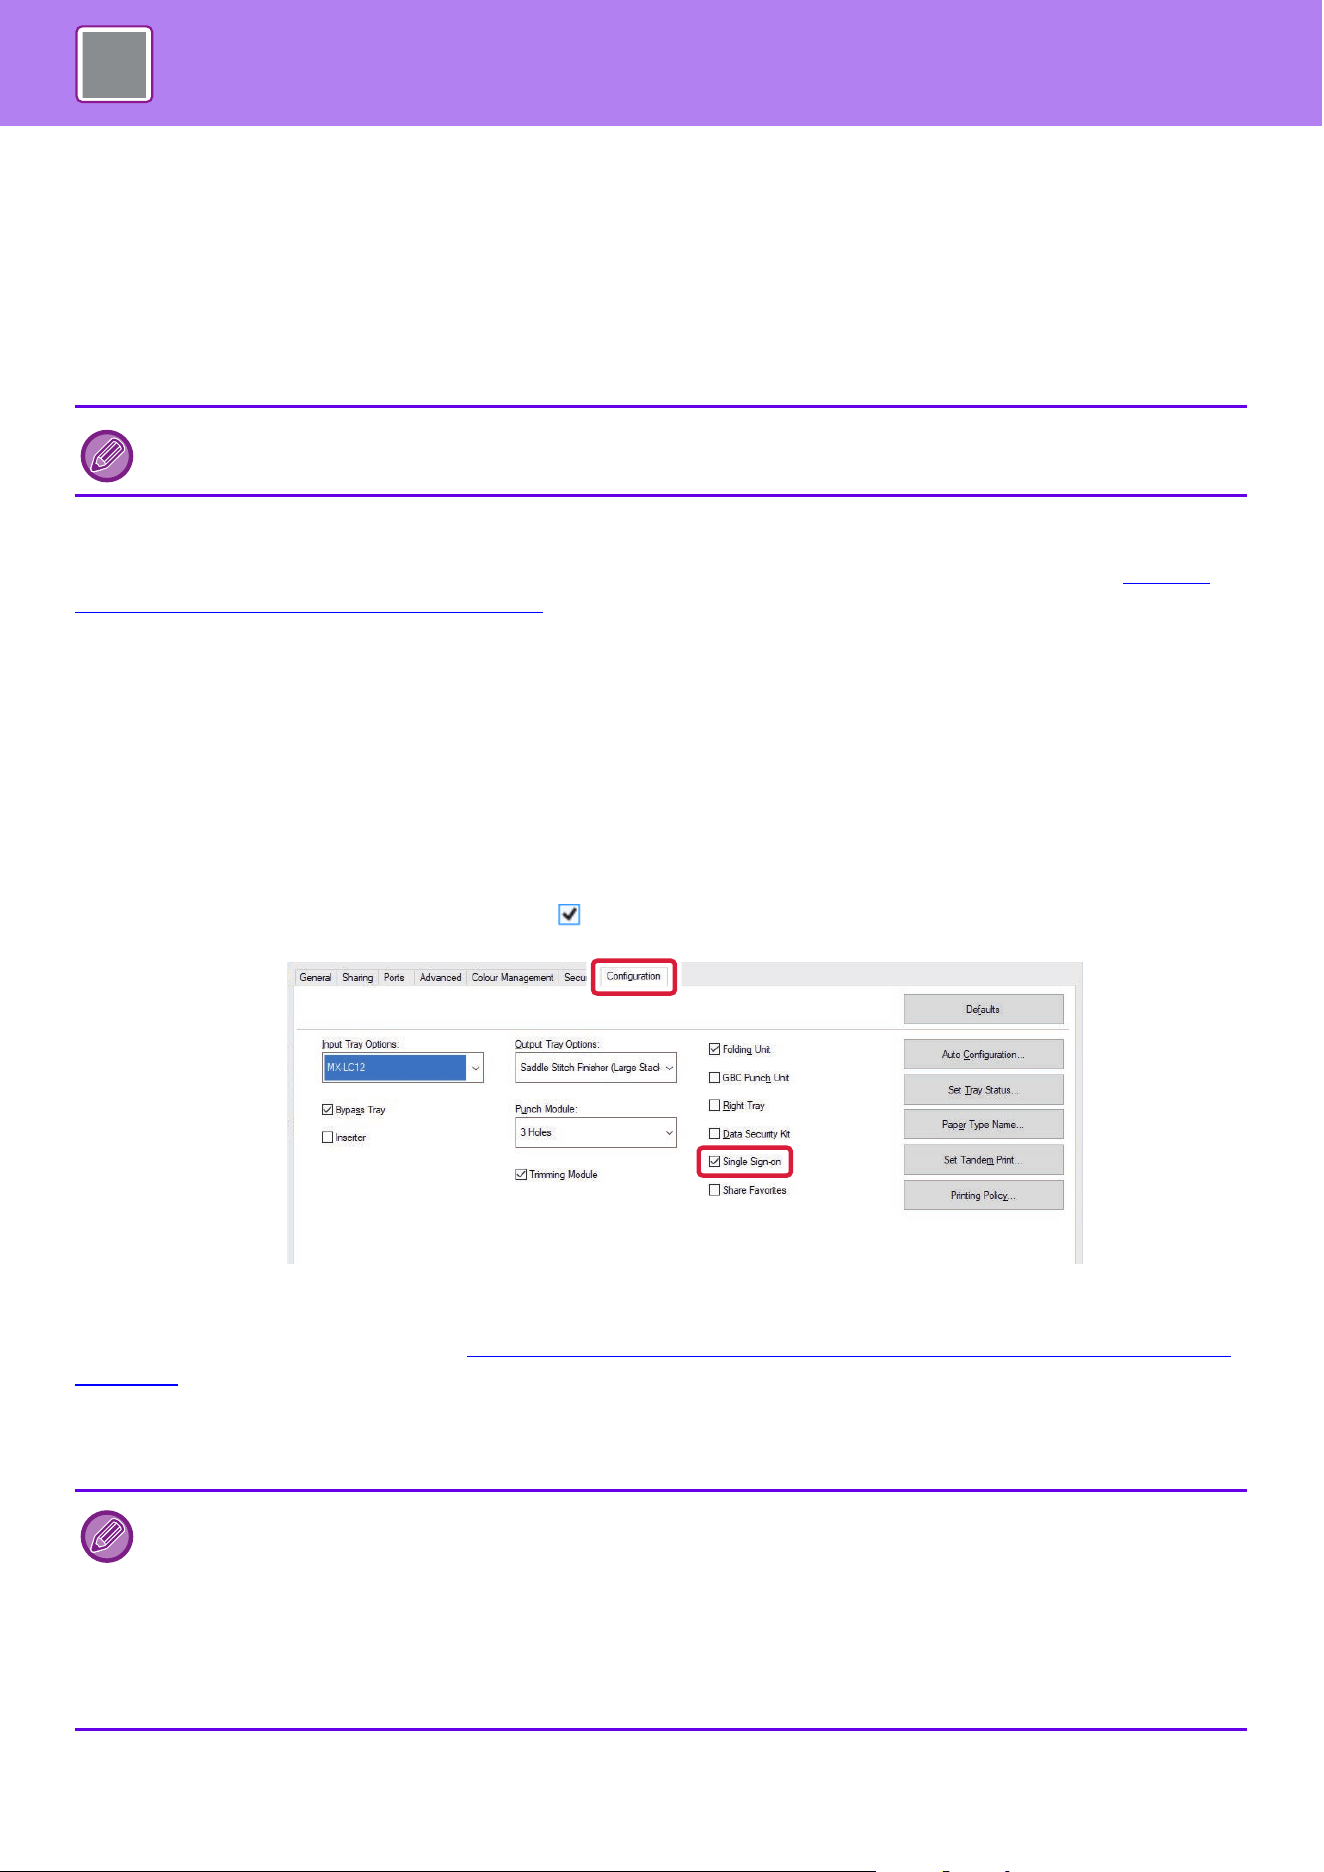
4-137
PRINTER►APPENDIX
AUTHENTICATION BY SINGLE SIGN-ON
When the user authentication is used, you must enter your user name and password to print from a printer driver.
The Single Sign-on function can be used when Active Directory authentication is used on both the machine and the
computer.
When you use this function and print from the printer driver, the print job is sent to the machine using the authentication
information that you used to log in to the computer. This allows easy printing of jobs from the printer driver without the
need to enter your user name or password each time you print when user authentication is enabled.
SETTINGS
Active Directory must be enabled on the machine in advance. For information on Active Directory, refer to “ACTIVE
DIRECTORY LINKING FUNCTION (page 8-23)". After enabling Active Directory, configure the settings below in the
printer driver.
(1) Click the [Start] button, select [Settings] → [Device] → [Devices and Printers].
• In Windows 11, click the [Start] button, select [Bluetooth & devices] → [Printers & scanners].
• In Windows Server 2012, right-click the [Start] button, select [Control Panel] → [View devices and printers] (or [Devices and
Printers]).
(2) Right-click the machine's printer driver icon and select [Printer Properties].
The printer properties appear.
(3) Click the [Configuration] tab.
(4) Set the [Single Sign-on] checkbox to .
Authentication Option
For the authentication method, refer to “PRINTING WHEN THE USER AUTHENTICATION FUNCTION IS ENABLED
(page 4-9)
".
(1) Click the [Job Handling] tab.
(2) In [Authentication], select [Single Sign-on].
Authentication by Single Sign-on requires that Active Directory authentication be performed on the machine and your
computer. This can only be used when your computer is running Windows.
• Single Sign-on authentication is also possible from the Job Handling dialog box and the User Authentication dialog box.
• When Single Sign-on is enabled, [Print and Send] cannot be used.
• If you logged in to the machine in advance before using Single Sign-on, you will have the permissions of the user account
you used to log in.
If you use Single Sign-on without logging in to the machine, the user permissions will be those of "User". This may limit the
functions that you can use.
• If Single Sign-on is used without logging in to the machine, the user name in the job log will be the name set by printer
driver. If the user name is not set by printer driver, the user name in the job log will be the computer login name.
(2)
(1)

5-1
BEFORE USING THE MACHINE AS A
NETWORK SCANNER
BEFORE USING THE MACHINE AS A NETWORK
SCANNER FUNCTION . . . . . . . . . . . . . . . . . . . . . . . . . . . . 5-3
USES OF THE NETWORK SCANNER . . . . . . . . . . . . . . 5-3
BEFORE USING THE NETWORK SCANNER . . . . . . . . 5-4
NETWORK SCANNER MODE . . . . . . . . . . . . . . . . . . . . . . 5-6
EASY MODE . . . . . . . . . . . . . . . . . . . . . . . . . . . . . . . . . . 5-6
NORMAL MODE . . . . . . . . . . . . . . . . . . . . . . . . . . . . . . . 5-8
SELECTING NETWORK SCANNER MODE . . . . . . . . . . . 5-8
IMAGE SEND SEQUENCE. . . . . . . . . . . . . . . . . . . . . . . . . 5-9
IF PAPER MISFEEDS IN THE AUTOMATIC
DOCUMENT FEEDER . . . . . . . . . . . . . . . . . . . . . . . . . . 5-11
ORIGINAL SIZE . . . . . . . . . . . . . . . . . . . . . . . . . . . . . . . . 5-12
TRANSMITTABLE ORIGINAL SIZES . . . . . . . . . . . . . . 5-12
THE SIZE OF THE PLACED ORIGINAL . . . . . . . . . . . . 5-12
ADDRESS BOOK . . . . . . . . . . . . . . . . . . . . . . . . . . . . . . . 5-13
ADDRESS BOOK SCREEN . . . . . . . . . . . . . . . . . . . . . . . 5-14
SELECTING "Contacts" OR "Group" . . . . . . . . . . . . . . . 5-15
STORING ADDRESSES THROUGH DIRECT
ENTRY. . . . . . . . . . . . . . . . . . . . . . . . . . . . . . . . . . . . . . . . 5-18
STORING ADDRESSES THROUGH GLOBAL
ADDRESS SEARCH . . . . . . . . . . . . . . . . . . . . . . . . . . . . . 5-19
STORING ADDRESSES FROM IMAGE SEND LOGS. . . 5-21
STORING GROUPS . . . . . . . . . . . . . . . . . . . . . . . . . . . . . 5-23
EDITING/DELETING ADDRESSES IN ADDRESS
BOOK . . . . . . . . . . . . . . . . . . . . . . . . . . . . . . . . . . . . . . . . 5-25
EDITING/DELETING CONTACTS AND GROUPS . . . . 5-25
EDITING/DELETING ADDRESSES. . . . . . . . . . . . . . . . 5-26
SETTING THE SCOPE FOR PUBLICIZING CONTACTS
AND GROUPS. . . . . . . . . . . . . . . . . . . . . . . . . . . . . . . . . . 5-27
DELETING THE TRANSMISSION HISTORY . . . . . . . . . . 5-28
DELETING A SELECTED HISTORY . . . . . . . . . . . . . . . 5-28
REGISTER AN ADDRESS BOOK IN THE WEB
PAGE. . . . . . . . . . . . . . . . . . . . . . . . . . . . . . . . . . . . . . . . . 5-29
Address Book . . . . . . . . . . . . . . . . . . . . . . . . . . . . . . . . . 5-29
Category Setting. . . . . . . . . . . . . . . . . . . . . . . . . . . . . . . 5-30
ENTERING DESTINATIONS
ENTERING DESTINATIONS. . . . . . . . . . . . . . . . . . . . . . . 5-31
RETRIEVING A DESTINATION FROM AN ADDRESS
BOOK . . . . . . . . . . . . . . . . . . . . . . . . . . . . . . . . . . . . . . . 5-31
MY ADDRESS . . . . . . . . . . . . . . . . . . . . . . . . . . . . . . . . 5-33
VIEWING A LIST OF THE SELECTED
DESTINATIONS. . . . . . . . . . . . . . . . . . . . . . . . . . . . . . . 5-34
USING A SEARCH NUMBER TO RETRIEVE A
DESTINATION . . . . . . . . . . . . . . . . . . . . . . . . . . . . . . . . 5-35
ENTERING AN ADDRESS MANUALLY . . . . . . . . . . . . 5-36
SPECIFYING A NETWORK FOLDER . . . . . . . . . . . . . . 5-37
RETRIEVING A DESTINATION FROM A GLOBAL
ADDRESS BOOK. . . . . . . . . . . . . . . . . . . . . . . . . . . . . . 5-39
USING A TRANSMISSION LOG TO RESEND. . . . . . . . 5-41
SENDING ONLY THE URL OF A SCANNED FILE TO
A SCAN DESTINATION . . . . . . . . . . . . . . . . . . . . . . . . .5-43
TRANSMITTING AN IMAGE
TRANSMITTING AN IMAGE . . . . . . . . . . . . . . . . . . . . . . . 5-46
SENDING AN IMAGE IN SCAN MODE . . . . . . . . . . . . .5-46
CHANGING THE SUBJECT, FILE NAME, REPLY-TO,
AND BODY TEXT AT THE TIME OF SCAN
TRANSMISSION. . . . . . . . . . . . . . . . . . . . . . . . . . . . . . .5-49
SENDING THE SAME IMAGE TO MULTIPLE
DESTINATIONS (BROADCAST TRANSMISSION) . . . . 5-52
RESENDING TO UNSUCCESSFUL BROADCAST
TRANSMISSION DESTINATIONS . . . . . . . . . . . . . . . . . 5-55
IMAGE SETTINGS. . . . . . . . . . . . . . . . . . . . . . . . . . . . . . .5-57
AUTOMATICALLY SCANNING BOTH SIDES OF AN
ORIGINAL (2-SIDED ORIGINAL) . . . . . . . . . . . . . . . . . .5-57
SCAN SIZE AND SEND SIZE
(ENLARGE/REDUCE). . . . . . . . . . . . . . . . . . . . . . . . . . . 5-58
SPECIFYING THE ORIGINAL SCAN SIZE IN PAPER
SIZE . . . . . . . . . . . . . . . . . . . . . . . . . . . . . . . . . . . . . . . . 5-59
SPECIFYING THE ORIGINAL SCAN SIZE USING
NUMERIC VALUES . . . . . . . . . . . . . . . . . . . . . . . . . . . .5-61
STORING FREQUENTLY USED ORIGINAL
SIZES . . . . . . . . . . . . . . . . . . . . . . . . . . . . . . . . . . . . . . .5-63
SPECIFYING THE SEND SIZE OF THE IMAGE . . . . . .5-67
CHANGING THE EXPOSURE AND ORIGINAL IMAGE
TYPE. . . . . . . . . . . . . . . . . . . . . . . . . . . . . . . . . . . . . . . .5-69
CHANGING THE RESOLUTION . . . . . . . . . . . . . . . . . .5-71
CHANGING FORMAT IN SCAN OR DATA ENTRY
MODE . . . . . . . . . . . . . . . . . . . . . . . . . . . . . . . . . . . . . . . 5-72
CHANGING COLOR MODE . . . . . . . . . . . . . . . . . . . . . . 5-78
SETTING SCAN SETTINGS AUTOMATICALLY (Auto
Set) . . . . . . . . . . . . . . . . . . . . . . . . . . . . . . . . . . . . . . . . .5-80
CHECKING THE IMAGE TO BE TRANSMITTED. . . . . . . 5-81
SCANNER

5-2
SCANNER
OTHER FUNCTIONS
STORING SCAN OPERATIONS (PROGRAM) . . . . . . . . 5-82
SCANNING AND SENDING ORIGINALS
COLLECTIVELY . . . . . . . . . . . . . . . . . . . . . . . . . . . . . . . . 5-85
SCANNING ORIGINALS OF DIFFERENT SIZES
(MIXED SIZE ORIGINAL). . . . . . . . . . . . . . . . . . . . . . . . 5-85
SCANNING BOTH SIDES OF A CARD ONTO A
SINGLE PAGE (CARD SHOT). . . . . . . . . . . . . . . . . . . . 5-87
SIMULTANEOUSLY SCANNING MULTIPLE CARDS,
RECEIPTS OR OTHER SMALL ORIGINALS TO
INDIVIDUAL FILES (MULTICROP) . . . . . . . . . . . . . . . . 5-89
SCANNING A BUSINESS CARD, READING THE
TEXT STRING, CREATING A FILE, AND SENDING
THE FILE (BUSINESS CARD SCAN) . . . . . . . . . . . . . . 5-92
SCANNING MULTIPLE PHOTOS AT ONCE TO
INDIVIDUAL FILES (Image Crop) . . . . . . . . . . . . . . . . . 5-97
SCANNING MANY ORIGINALS AT ONCE (JOB
BUILD) . . . . . . . . . . . . . . . . . . . . . . . . . . . . . . . . . . . . . . 5-99
SCANNING AND SENDING AN ORIGINAL AS
SEPARATE PAGES . . . . . . . . . . . . . . . . . . . . . . . . . . . . 5-101
SCANNING AN ORIGINAL AS TWO SEPARATE
PAGES (DUAL PAGE SCAN) . . . . . . . . . . . . . . . . . . . 5-101
SPLITTING A PAMPHLET BY PAGE AND
TRANSMITTING THE PAGES SUCCESSIVELY
(BOOK DIVIDE) . . . . . . . . . . . . . . . . . . . . . . . . . . . . . . 5-104
ADJUSTING COLORS AND SHADING . . . . . . . . . . . . . 5-106
ADJUSTING THE BACKGROUND BY MAKING LIGHT
AREAS OF THE ORIGINAL DARKER OR LIGHTER
(BACKGROUND ADJUSTMENT) . . . . . . . . . . . . . . . . 5-106
ADDING CONTRAST TO THE SCANNED ORIGINAL
BEFORE TRANSMISSION (CONTRAST) . . . . . . . . . . 5-108
ENHANCING THE OUTLINE OF THE SCANNED
ORIGINAL BEFORE TRANSMISSION
(SHARPNESS). . . . . . . . . . . . . . . . . . . . . . . . . . . . . . . 5-110
REMOVING CHROMATIC COLORS FROM THE
SCANNED ORIGINAL BEFORE TRANSMISSION
(DROP OUT COLOR) . . . . . . . . . . . . . . . . . . . . . . . . . 5-112
ADJUSTING RED/GREEN/BLUE (RGB Adjust) . . . . . 5-114
SCANNING ORIGINALS. . . . . . . . . . . . . . . . . . . . . . . . . 5-116
ERASING PERIPHERAL SHADOWS ON THE IMAGE
(ERASE). . . . . . . . . . . . . . . . . . . . . . . . . . . . . . . . . . . . 5-116
SCANNING A THIN ORIGINAL (SLOW SCAN
MODE) . . . . . . . . . . . . . . . . . . . . . . . . . . . . . . . . . . . . . 5-119
SCANNING A HEAVY ORIGINAL (HEAVY PAPER
SCAN) . . . . . . . . . . . . . . . . . . . . . . . . . . . . . . . . . . . . . 5-121
ELIMINATING BLANK PAGES FROM A
TRANSMISSION (BLANK PAGE SKIP). . . . . . . . . . . . 5-123
CHECKING THE NUMBER OF SCANNED ORIGINAL
SHEETS BEFORE TRANSMISSION (ORIGINAL
COUNT) . . . . . . . . . . . . . . . . . . . . . . . . . . . . . . . . . . . . 5-125
AUTOMATICALLY ADJUST SKEWED SCAN DATA
(Original Skew Adjustment) . . . . . . . . . . . . . . . . . . . . . 5-127
SPECIFIC FUNCTIONS . . . . . . . . . . . . . . . . . . . . . . . . . 5-129
STARTING A TRANSMISSION AT A SPECIFIED TIME
(TIMER TRANSMISSION) . . . . . . . . . . . . . . . . . . . . . . 5-129
ADDING A SIGNATURE WHEN SENDING AN IMAGE
(ELECTRONIC SIGNATURE) . . . . . . . . . . . . . . . . . . . 5-132
ENCRYPTING THE TRANSMITTED DATA
(ENCRYPTION) . . . . . . . . . . . . . . . . . . . . . . . . . . . . . . 5-134
CHECKING THE STATUS OF
TRANSMISSION/RECEPTION JOBS
IMAGE SEND JOBS . . . . . . . . . . . . . . . . . . . . . . . . . . . .5-136
COMPLETED TRANSMISSION/RECEPTION JOBS . . . 5-136
SCANNING FROM A COMPUTER (PC Scan
Mode)
BASIC SCANNING PROCEDURE . . . . . . . . . . . . . . . . . 5-137
METADATA DELIVERY
PREPARATIONS FOR METADATA DELIVERY . . . . . . 5-141
METADATA DELIVERY (DATA ENTRY) . . . . . . . . . . . 5-141
SETTINGS REQUIRED IN THE SETTING MODE
(WEB VERSION). . . . . . . . . . . . . . . . . . . . . . . . . . . . . . 5-142
TRANSMITTING METADATA . . . . . . . . . . . . . . . . . . . . .5-143
TRANSMITTING METADATA. . . . . . . . . . . . . . . . . . . . 5-143
METADATA FIELDS . . . . . . . . . . . . . . . . . . . . . . . . . . .5-144

5-3
SCANNER►BEFORE USING THE MACHINE AS A NETWORK SCANNER
BEFORE USING THE MACHINE AS A
NETWORK SCANNER FUNCTION
USES OF THE NETWORK SCANNER
The network scanner allows you to create an image file from the original data scanned by the machine, and send the file
over a network to a PC, FTP server, or other destinations. If necessary, it scans the original using a TWAIN-compliant
application on your PC.
The network scanner function provides the following scanning modes.
Scanner mode
The scanner function of the machine sends a scanned original as described below based on the specification of the
destination.
•Scan to E-mail
You can send a scanned file as an e-mail attachment. You can also save the file to the machine's local drive and send
only a URL link (without attaching the file) that allows the recipient to download the file.
•Scan to FTP
The scanned file is sent to a specified folder of an FTP server.
When the file is sent, it is also possible to send an e-mail to a previously stored e-mail address to inform the recipient
of the location of the file.
• Scan to Network Folder
The scanned file is sent to a network folder on a Windows PC on the same network as the machine.
When the file is sent, it is also possible to send an e-mail to a previously stored e-mail address to inform the recipient
of the location of the file.
For the operating procedure, see “SENDING AN IMAGE IN SCAN MODE (page 5-46)
".
Data entry mode
In data entry mode, information entered using the touch panel or automatically generated by the machine is sent to a
directory on an FTP server or an application on a PC as a metadata file in XML format.
For the operating procedure, see “TRANSMITTING METADATA
(page 5-143)".
BEFORE USING THE MACHINE AS A
NETWORK SCANNER
Installing the application integration module is required to use the metadata delivery function.
The application integration module can be combined with the network scanner to append a metadata file to a scanned image
file.
Metadata is information about a file, how it is to be processed, and its relation to other objects.
5-4
SCANNER►BEFORE USING THE MACHINE AS A NETWORK SCANNER
BEFORE USING THE NETWORK SCANNER
To use the machine as a network scanner, you must store sender information, configure server settings, store
destinations in the address book, and perform other required operations.
1
Make sure the main power switch is in the “ " position.
When the main power indicator is lit up, the main power is in the “ " position. If the main power indicator is not lit up,
turn the main power switch to the “ " position and press the [POWER] button on the operation panel.
TURNING ON THE POWER
(page 1-9)
2
Check the date and time.
Verify that the correct date and time are set in the machine.
To set the date and time of the machine:
In "Settings", select [System Settings] → [Common Settings] → [Device Control] → [Clock Adjust].
3
Store the sender information.
Before using Scan to E-mail:
Store a default sender name in "Sender Name" and a reply e-mail address in "Reply E-mail Address".
• To store the sender's name and e-mail address that are used when a sender is not selected:
In "Settings (administrator)", select [System Settings] → [Image Send Settings] → [Scan Settings] → [Condition Set-
tings] → [Default Reply.Address Set].
• To store the sender's name and address:
In "Settings (administrator)", select [System Settings] → [Image Send Settings] → [Common Settings] → [Own Number
and Name Set] → [Sender Data Registration].
4
Configure settings required in the setting mode.
Configure server settings, default settings for the network scanner.
• To configure server settings:
In "Settings (administrator)", select [System Settings] → [Network Settings] → [Services Settings]. (Administrator rights
are required.)
• To configure basic settings for the network scanner:
In "Settings (administrator)", select [System Settings] → [Image Send Settings] → [Scan Settings]. (Administrator rights
are required.)

5-5
SCANNER►BEFORE USING THE MACHINE AS A NETWORK SCANNER
5
Store the destination addresses for each scan mode in the address book.
You can send an image by directly entering an address when using Scan to Image. It is convenient to previously store
addresses in the address book.
Up to 6000 addresses can be stored in the address book. For information on the address book, see "ADDRESS BOOK".
For how to use the address books and how to store addresses, see the following item.
RETRIEVING A DESTINATION
FROM AN ADDRESS BOOK (page 5-31)
VIEWING A LIST OF THE SELECTED DESTINATIONS (page 5-34)
USING A SEARCH NUMBER TO RETRIEVE A DESTINATION (page 5-35)
ENTERING AN ADDRESS MANUALLY (page 5-36)
SPECIFYING A NETWORK FOLDER (page 5-37)
RETRIEVING A DESTINATION FROM A GLOBAL ADDRESS BOOK (page 5-39)
USING A TRANSMISSION LOG TO RESEND (page 5-41)
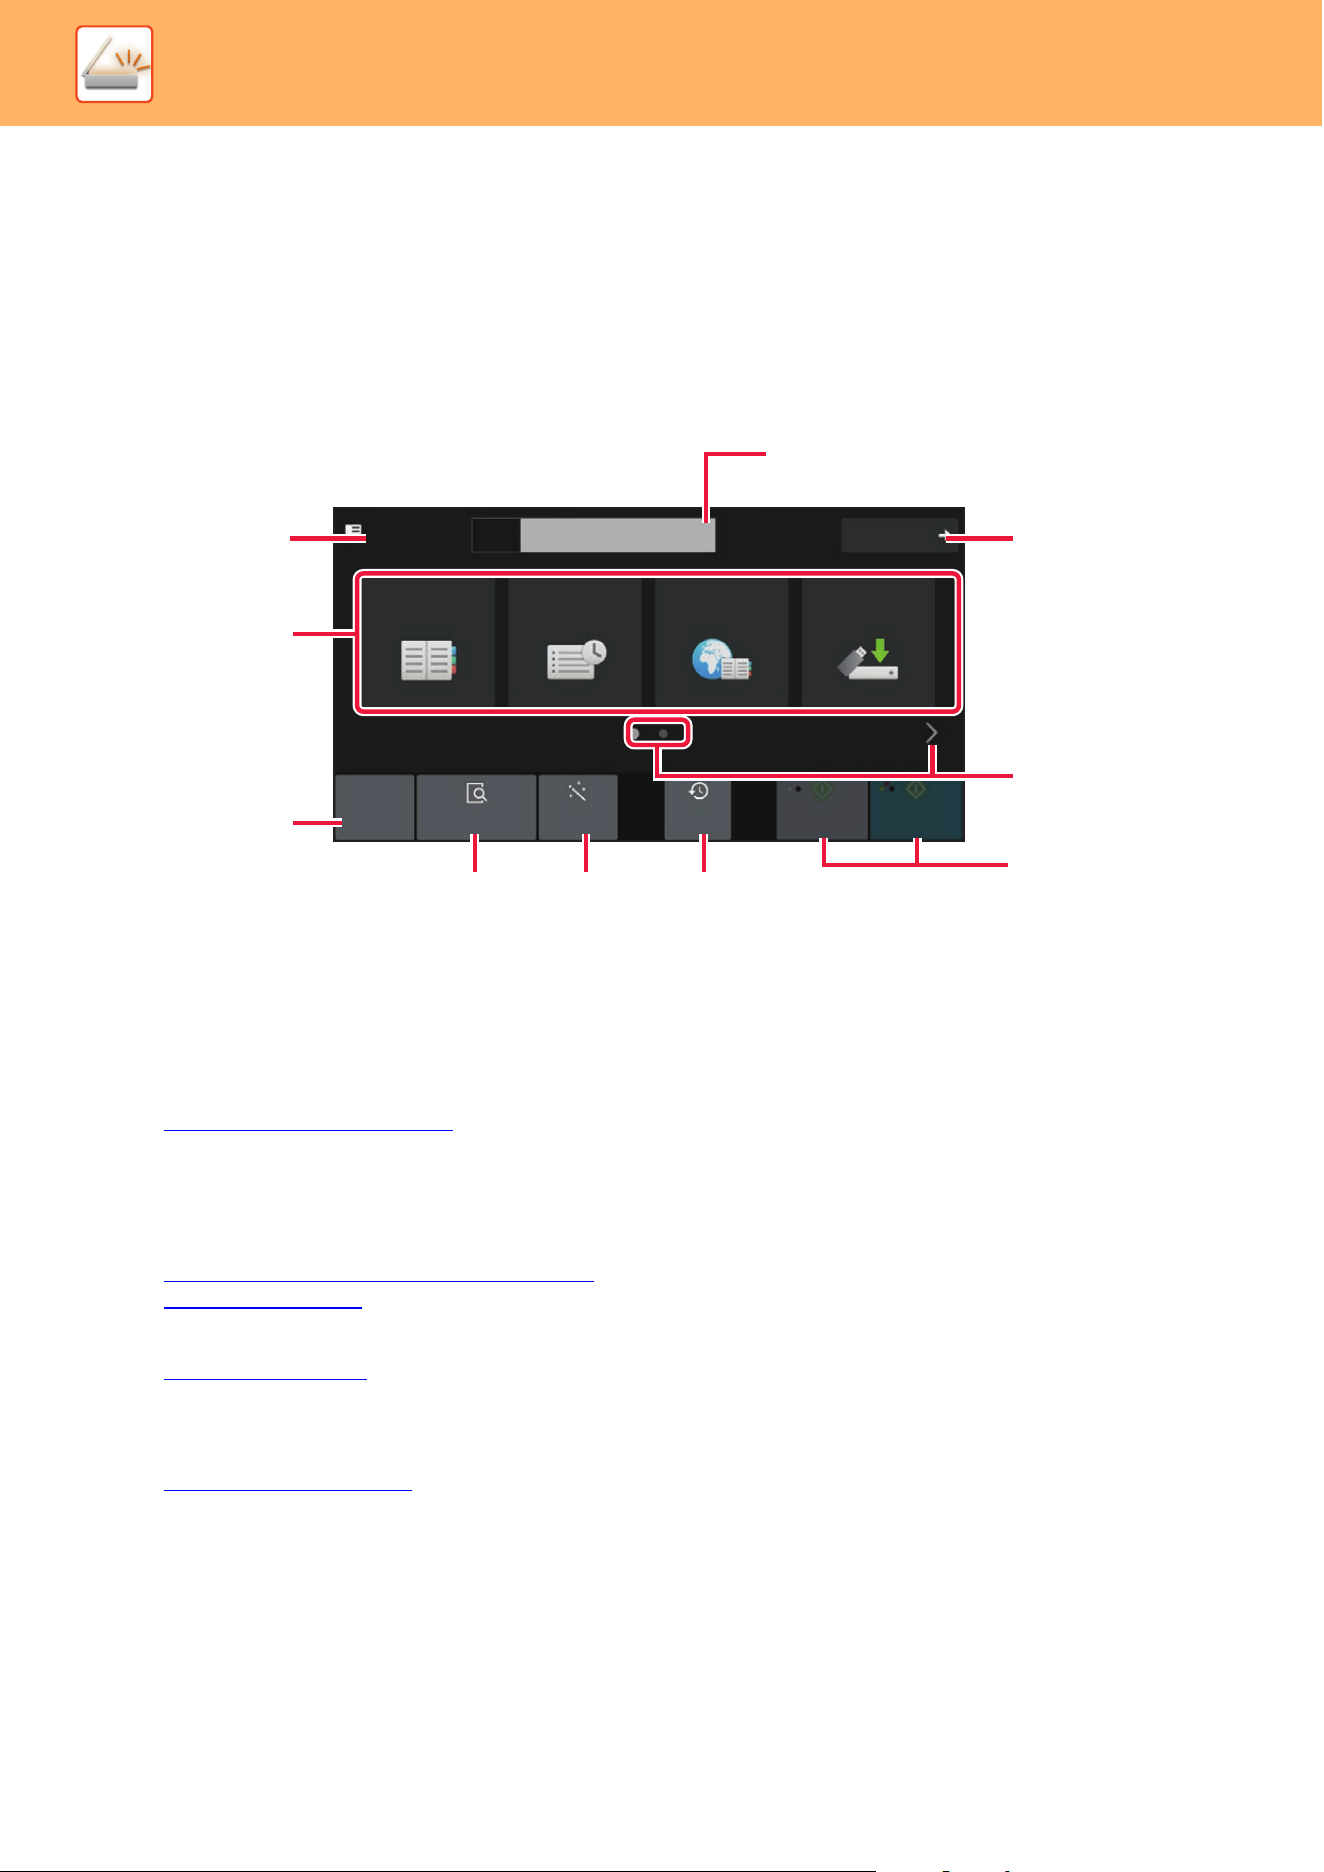
5-6
SCANNER►BEFORE USING THE MACHINE AS A NETWORK SCANNER
NETWORK SCANNER MODE
Network scanner mode has two modes: easy mode and normal mode.
Easy mode is limited to frequently used functions that allow you to smoothly perform most image send jobs.
If you need to select detailed settings or special functions, use normal mode. All functions can be used in normal mode.
EASY MODE
Easy mode makes it easy to select basic settings for network scanner mode.
(1) The original size is displayed.
(2) Set an address.
(3) Reset the address and settings.
(4) Scans the original and shows a preview image.
► PREVIEW SCREEN
(page 2-11)
(5) Automatically set the original placement orientation,
resolution, skipping of blank pages, automatically
detect mono2/grayscale, and Original Skew
Adjustment.
► SETTING SCAN SETTINGS A
UTOMATICALLY
(Auto Set) (page 5-80)
(6) Recently used job setting can be loaded.
► Re
cent jobs (page 2-8)
(7) Tap to display the soft keyboard.
(8) Change to normal mode.
► NORMAL MODE (page 5-8)
(9) Change the function display.
(10) Starts black and white or color transmission.
Address Book
Sending History
Auto Set
Global
Address Search
Local Drive/
USB
Preview
Recent
jobs
Original
8½x11
Address
E-mail Address
Detail
B/W
Start
Color
Start
CA
(1)
(2)
(3)
(4) (5) (6)
(7)
(8)
(9)
(10)
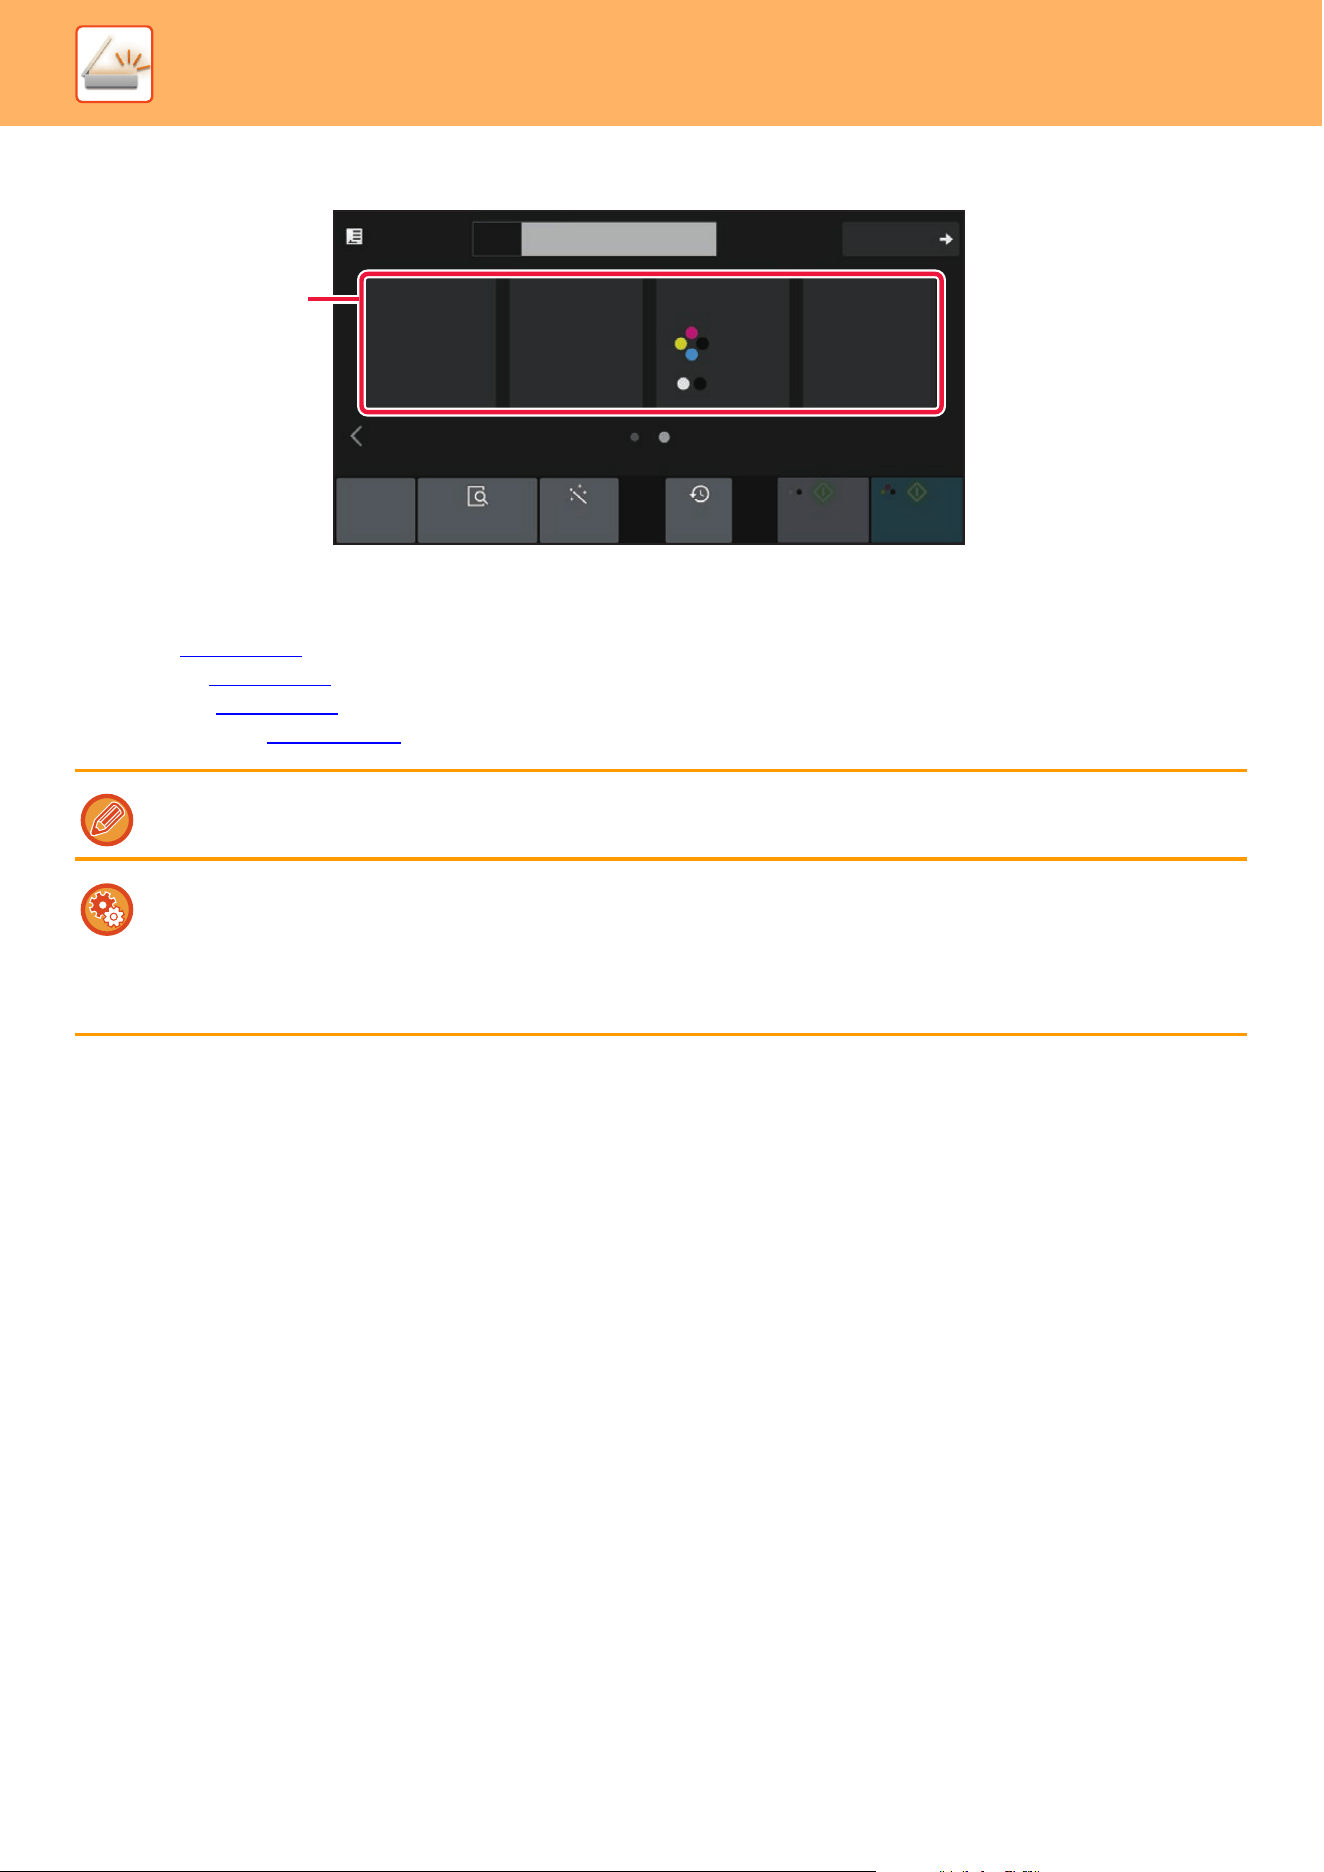
5-7
SCANNER►BEFORE USING THE MACHINE AS A NETWORK SCANNER
(11) Select the function you want to use.
You can select these functions in easy mode.
•Original ►page 5-69
• Resolution ►page 5-71
• File Format ►page 5-72
• Blank Page Skip ►page 5-123
Original
Auto 200x200dpi
PDF
PDF
Off
Resolution File Format
Blank Page
Skip
CA
Preview
Original
8½x11
Address
E-mail Address
Detail
B/W
Start
Color
Start
Auto Set
Recent
jobs
(11)
If able to search for My Address, a [Find My Address] key will be displayed next to the address entry.
• To select a function in easy mode
In "Settings (administrator)", select [System Settings] → [Common Settings] → [Operation Settings] → [Easy Mode Settings]
→ [Easy Scan].
• To cancel the warning message displayed when switching from easy mode to normal mode
In "Settings (administrator)", select [System Settings] → [Common Settings] → [Operation Settings] → [Easy Mode Settings]
→ [Display a Confirmation Message when Selecting "Detail" in Easy Modes] to disable this setting.
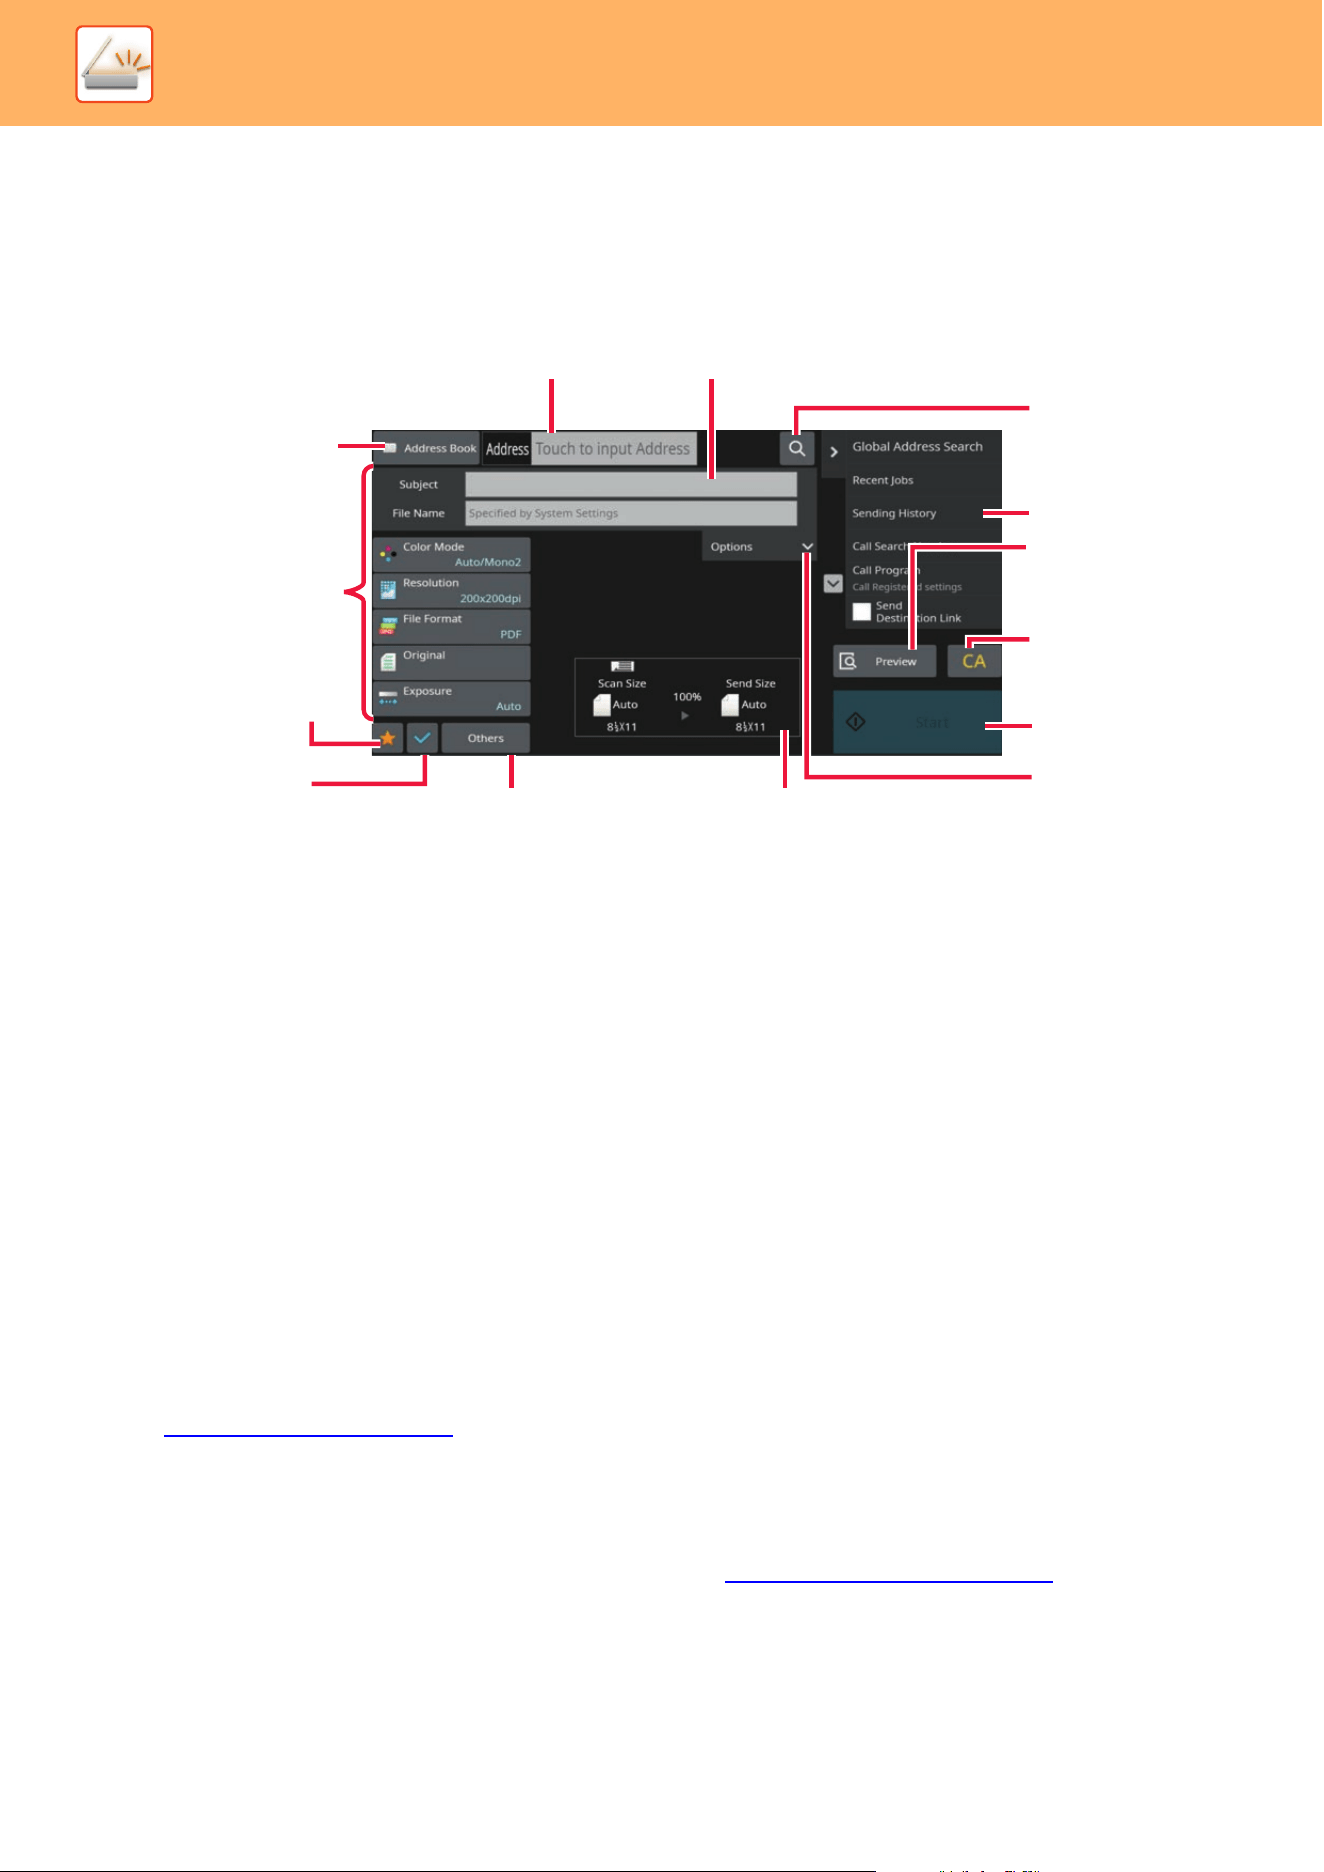
5-8
SCANNER►BEFORE USING THE MACHINE AS A NETWORK SCANNER
NORMAL MODE
Normal mode lets you select any function setting that can be used for network scanner.
This section explains the keys on a base screen, taking as an example the E-mail base screen. Several methods are
available in the Image Send mode, including Scan to E-mail and Scan to FTP. The base screen layout slightly differs
depending on how image is sent.
(1) Tap to display the soft keyboard.
(2) Displays the address box to enter addresses.
(3) Setting keys used for image send operations.
(4) Displays the list of setting keys. Frequently used
[Others], programs, and other settings can be
registered.
(5) Check the current settings.
(6) Displays keys other than the function keys indicated
above.
(7) Displays the sizes of the original and the data to
send.
(8) Enter subject, file name, and other items.
(9) Searches for the address.
(10) Displays the functions that can be used in image
send mode.
(11) Scans the original and shows a preview image.
► PREVIEW SCREEN
(page 2-11)
(12) Reset the address and settings.
(13) Transmission will start immediately.
(14) Enter reply address and body text.
SELECTING NETWORK SCANNER MODE
Change the network scanner mode to other mode as explained in CHANGING MODES (page 2-10).
(10)
(11)
(12)
(13)
(14)
(7)
(6)
(5)
(4)
(3)
(2)
(1)
(8)
(9)

5-9
SCANNER►BEFORE USING THE MACHINE AS A NETWORK SCANNER
IMAGE SEND SEQUENCE
First, to place the machine in a desired image send mode, tap the appropriate icon in the Home screen.
CHANGING MODES
(page 2-10)
1
Place the original.
Place the original in the document feeder tray of the
automatic document feeder, or on the document glass.
AUTOMATIC DOCUMENT FEEDER
(page 1-47)
DOCUMENT GLASS (page 1-51)
2
Enter the destination.
Tap the address key to directly enter the destination, or search and retrieve the address book or destination.
In Easy mode
ENTERING AN ADDRESS MANUALLY
(page 5-36)
RETRIEVING A DESTINATION FROM AN ADDRESS
BOOK (page 5-31)
USING A TRANSMISSION LOG TO RESEND (page
5-41)
RETRIEVING A DESTINATION FROM A GLOBAL
ADDRESS BOOK (page 5-39)
In Normal mode
ENTERING AN ADDRESS MANUALLY
(page 5-36)
RETRIEVING A DESTINATION FROM AN ADDRESS
BOOK (page 5-31)
USING A SEARCH NUMBER TO RETRIEVE A
DESTINATION (page 5-35)
RETRIEVING A DESTINATION FROM A GLOBAL
ADDRESS BOOK (page 5-39)
USING A TRANSMISSION LOG TO RESEND (page 5-41)
VIEWING A LIST OF THE SELECTED DESTINATIONS
(page 5-34)
SPECIFYING A NETWORK FOLDER (page 5-37)
Original
8½x11
Address
Detail
Space
File Format
AltGr
Characters Symbols
Cancel OK
Space
File Format
AltGr
Characters Symbols
Cancel OK
Address
Global Address Search
RJb
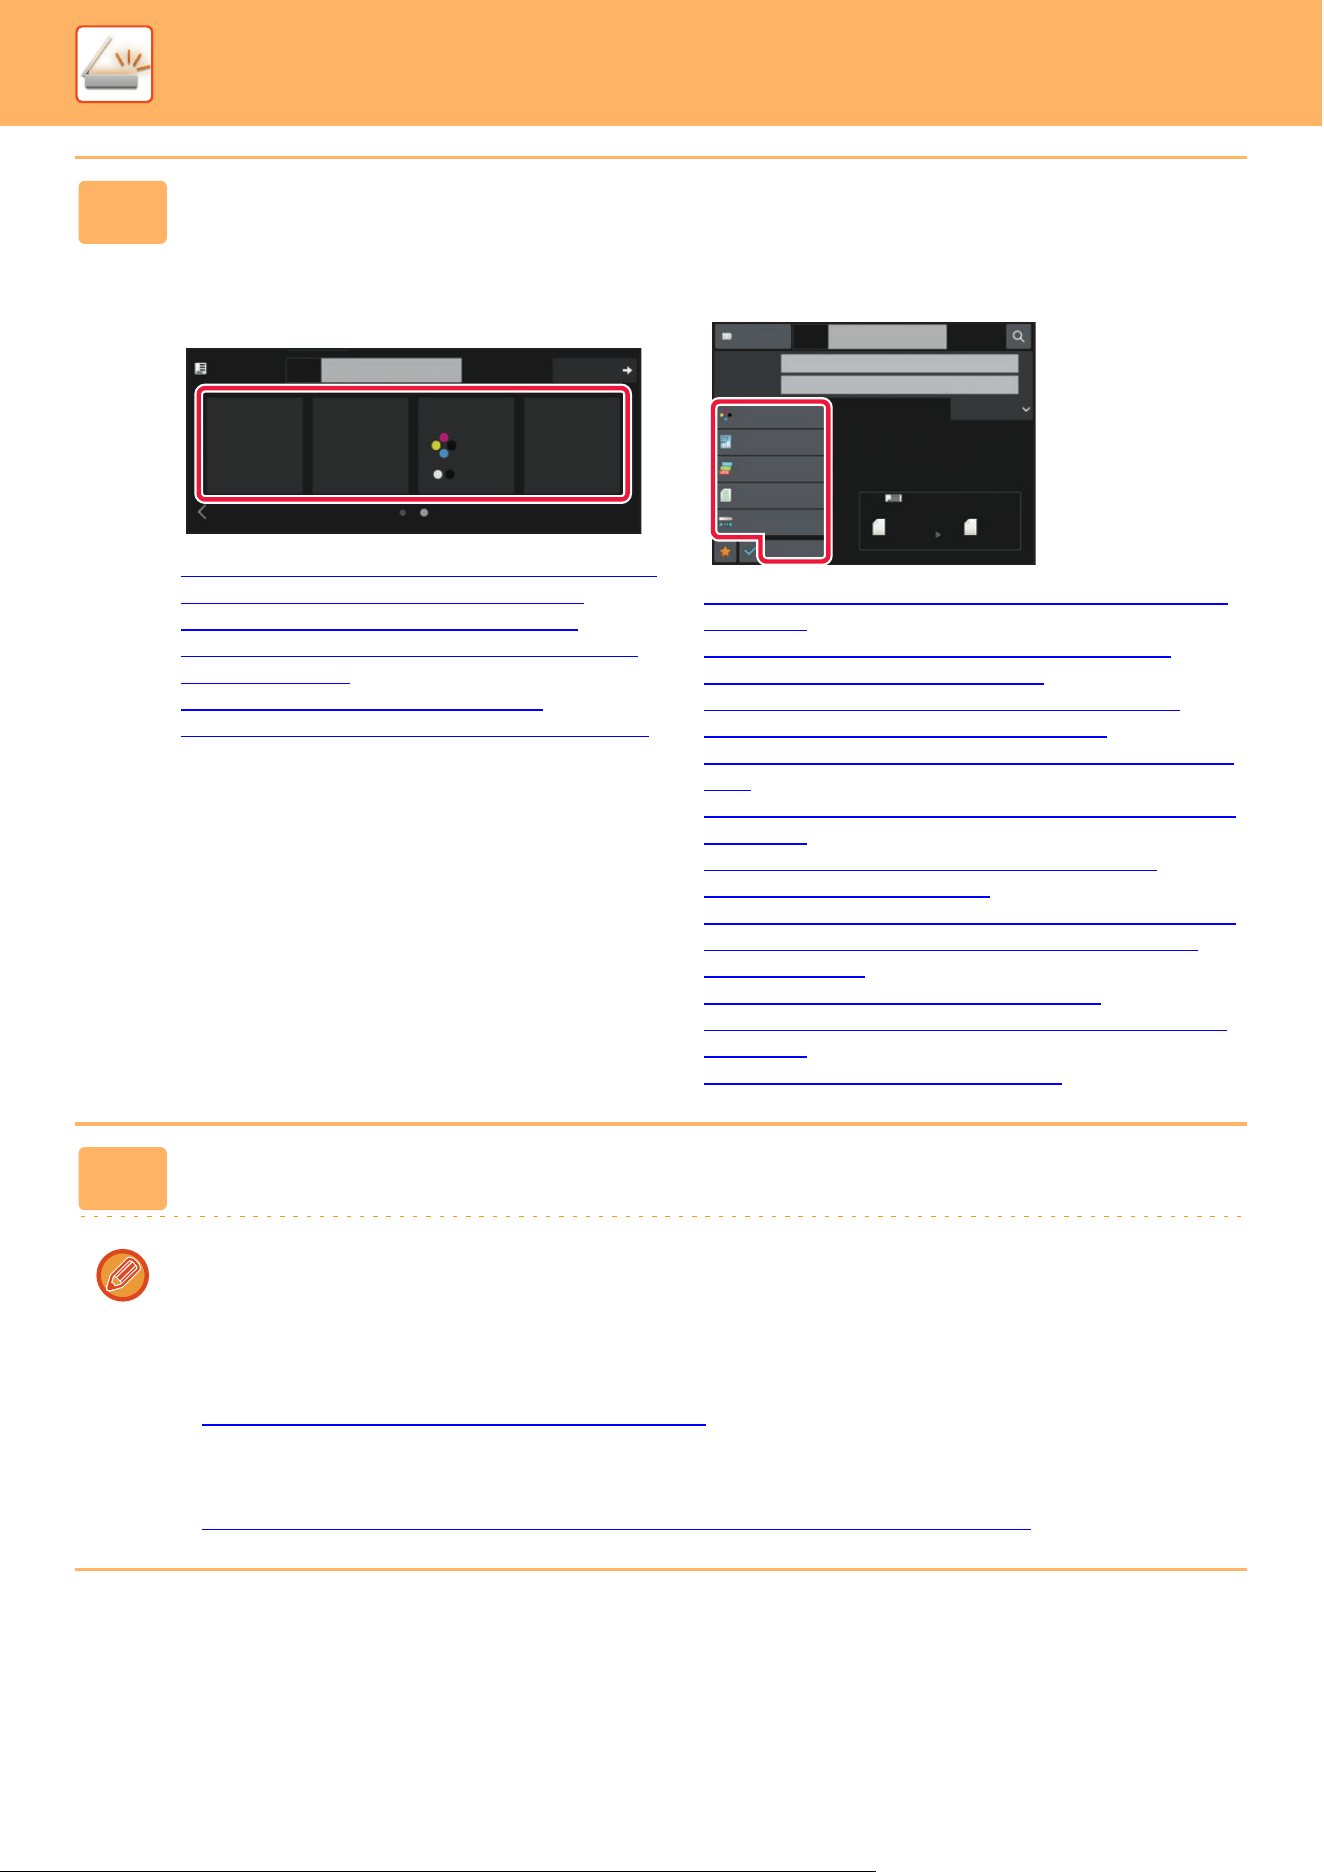
5-10
SCANNER►BEFORE USING THE MACHINE AS A NETWORK SCANNER
3
Select functions.
Specify the original scan size, exposure, file format, and other items.
If necessary, you can refer to the following functions for the setting.
In Easy mode
AUTOMATICALLY SCANNING BOTH SIDES OF AN
ORIGINAL (2-SIDED ORIGINAL) (page 5-57)
CHANGING THE RESOLUTION (page 5-71)
CHANGING FORMAT IN SCAN OR DATA ENTRY
MODE (page 5-72)
ELIMINATING BLANK PAGES FROM A
TRANSMISSION (BLANK PAGE SKIP) (page 5-123)
In Normal mode
SCANNING AND SENDING ORIGINALS COLLECTIVELY
(page 5-85)
ADJUSTING COLORS AND SHADING (page 5-106)
SCANNING ORIGINALS (page 5-116)
AUTOMATICALLY SCANNING BOTH SIDES OF AN
ORIGINAL (2-SIDED ORIGINAL) (page 5-57)
SCAN SIZE AND SEND SIZE (ENLARGE/REDUCE) (page
5-58)
SPECIFYING THE ORIGINAL SCAN SIZE IN PAPER SIZE
(page 5-59)
SPECIFYING THE ORIGINAL SCAN SIZE USING
NUMERIC VALUES (page 5-61)
SPECIFYING THE SEND SIZE OF THE IMAGE (page 5-67)
CHANGING THE EXPOSURE AND ORIGINAL IMAGE
TYPE (page 5-69)
CHANGING THE RESOLUTION (page 5-71)
CHANGING FORMAT IN SCAN OR DATA ENTRY MODE
(page 5-72)
CHANGING COLOR MODE (page 5-78)
4
Send the original.
Tap the [B/W Start] or [Color Start] key ([Start] key in normal mode).
• You can tap the [Preview] key before tapping the [B/W Start] key or the [Color Start] key (the [Start] key in normal
mode) to check a preview of the image.
• When the original is placed on the document glass, repeat the placing original and transmission procedures until all
originals have been sent. After scanning all originals, tap the [Read-End] key.
• In normal mode, if you tap the [File] or [Quick File] on the action panel before sending image, you can save the
scanned original as data.
USING DOCUMENT FILING IN
EACH MODE (page 6-7)
• When the original is scanned while skewed, there is a function which automatically adjusts the skew.
The automatic skew adjustment function is enabled when enabling auto configuration in easy mode.
In normal mode, tap the [Others] key and then the [Original Skew Adjustment] key to switch.
AUTOMATICALLY ADJUST SKEWED SCAN DATA (Original Skew Adjustment) (page 5-127)
Original
8½x11
Address E-mail Address
Detail
Original
Auto
200x200dpi
PDF
PDF
Resolution File Format
Blank Page
Skip
Off
Scan Size
Auto
Auto
Color Mode
Auto/Mono2
Resolution
200x200dpi
File Format
PDF
Original
Auto
Others
8½x11
8½x11
100%
Send Size
Address Book
Subject
File Name
Address
Touch to input Address
Options
Exposure
Specified by System Settings

5-11
SCANNER►BEFORE USING THE MACHINE AS A NETWORK SCANNER
IF PAPER MISFEEDS IN THE AUTOMATIC DOCUMENT
FEEDER
2 patterns can be set.
In "Settings (administrator)", select [System Settings] → [Image Send Settings] → [Scan Settings] → [Condition
Settings] → [Quick On Line Sending].
• If enabled
When an original misfeeds, scanning stops, and scanned data up until that point is sent.
• If disabled
Even if an original misfeeds, scanning does not stop, the misfed original is set again, and scanning starts again. After
all of the original has been scanned, the scanned data is sent.

5-12
SCANNER►BEFORE USING THE MACHINE AS A NETWORK SCANNER
ORIGINAL SIZE
TRANSMITTABLE ORIGINAL SIZES
For information on the original sizes that can be loaded, see AUTOMATIC DOCUMENT FEEDER (page 1-47) and
DOCUMENT GLASS
(page 1-51).
THE SIZE OF THE PLACED ORIGINAL
When a standard size original is placed, the original size is automatically detected and displayed in "Scan Size" on the
based screen.
SCAN SIZE AND SEND SIZE (ENLARGE/REDUCE) (
page 5-58)
Standard sizes are sizes that the machine can automatically detect. The standard sizes are set in "Original Size
Detector Setting" in “Settings”.
List of original size detector settings
DETECTABLE ORIGINAL SIZES (page 1-45)
When the automatic original detection function is operating and the original (of inch or non-standard size) is placed, the
closest standard size may be displayed or the original size may not appear. In this event, manually set the correct original
size.
SPECIFYING THE ORIGINAL SCAN SIZE
IN PAPER SIZE (page 5-59)
SPECIFYING THE ORIGINAL SCAN SIZE USING NUMERIC VALUES (page 5-61)
To specify the size that the machine can automatically detect:
Select the group of detected original sizes by selecting [System Settings] in “Settings (administrator)” → [Common Settings]
→ [Device Control] → [Condition Settings] → [Original Size Detector Setting].
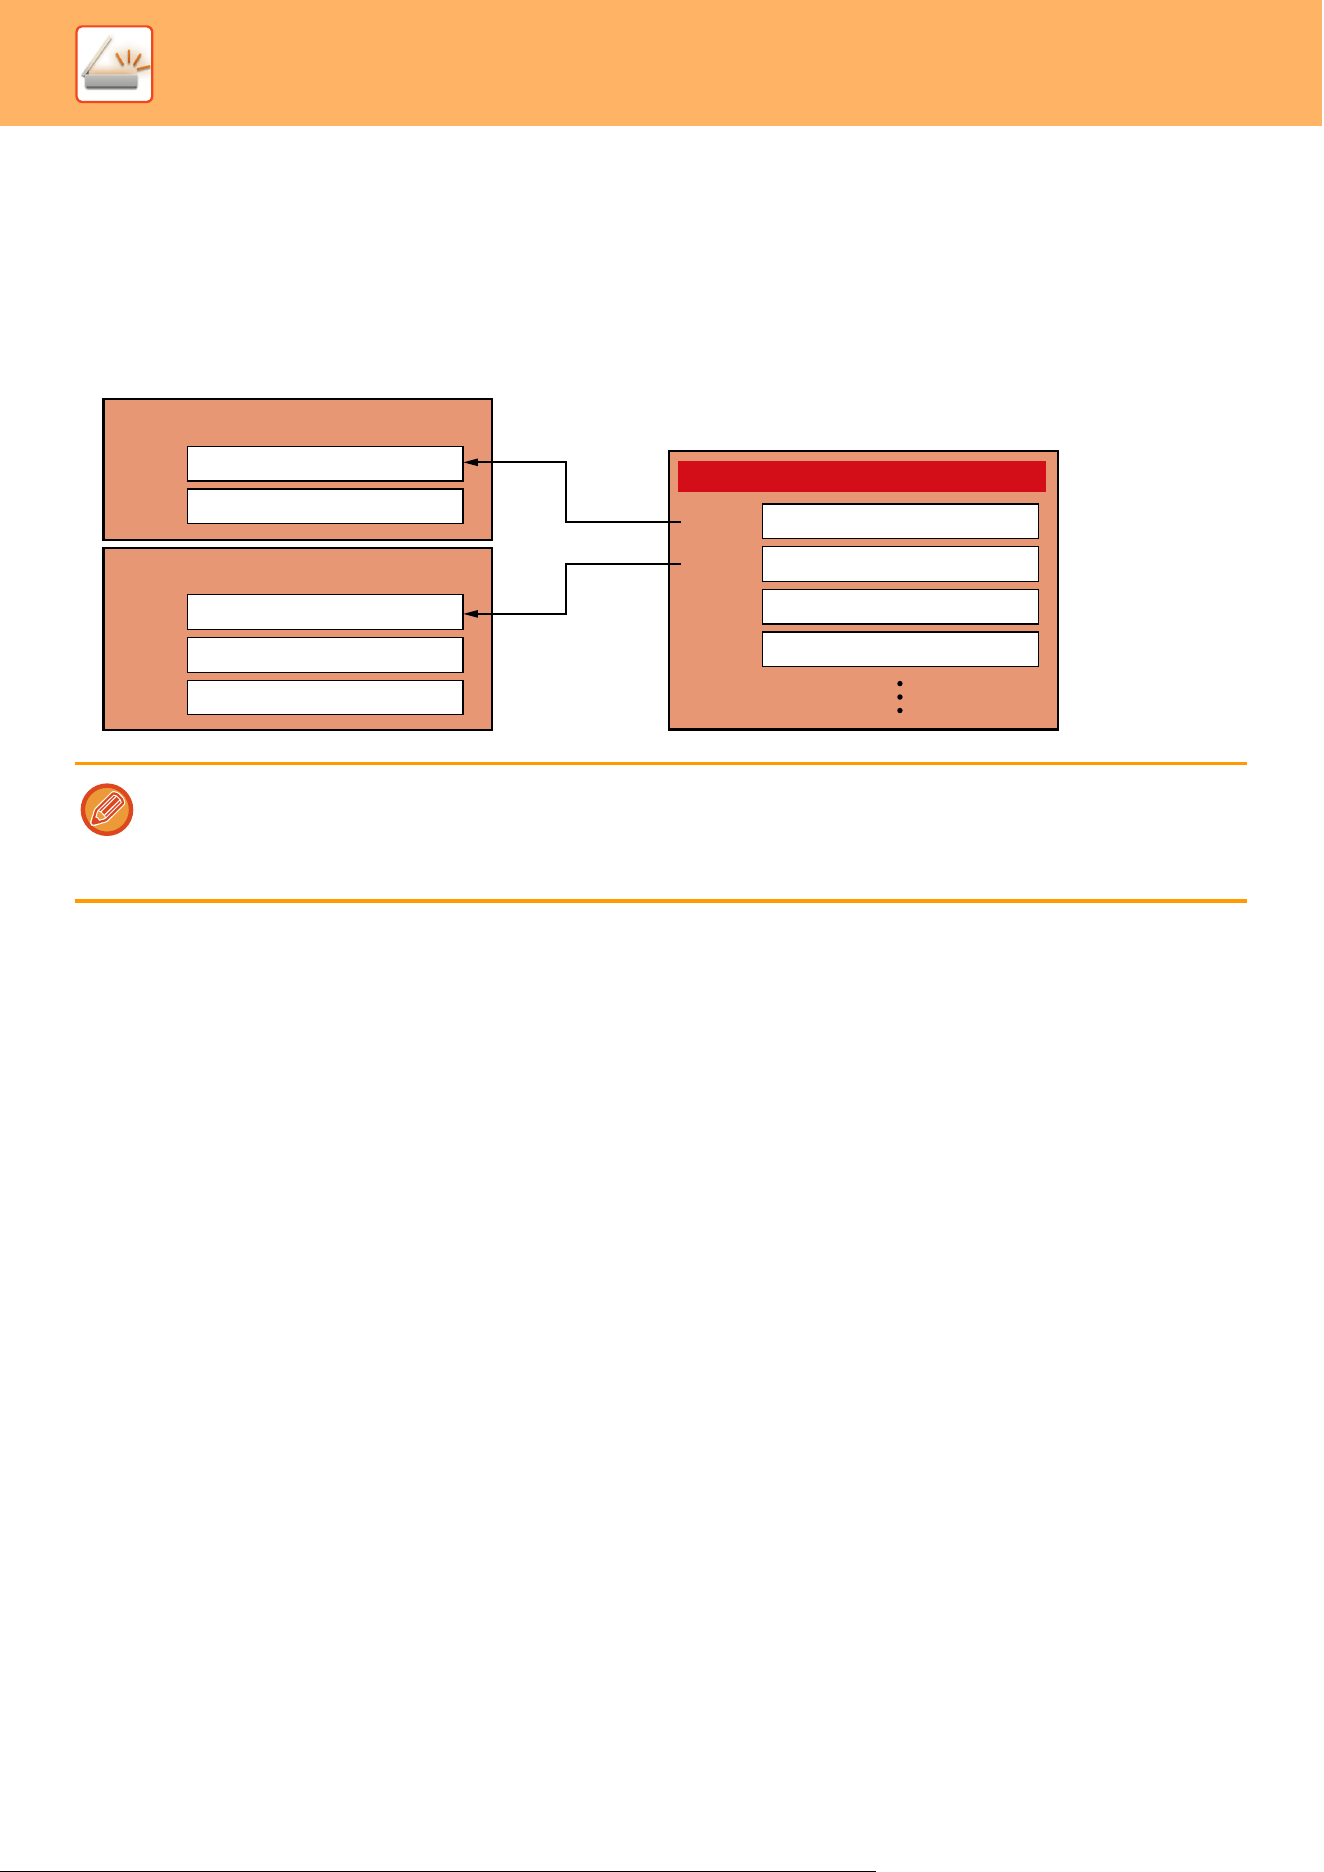
5-13
SCANNER►BEFORE USING THE MACHINE AS A NETWORK SCANNER
ADDRESS BOOK
"Contacts" and "Group" can be stored in the address book.
For a contact, more than one address can be stored, including e-mail and addresses..
Registering addresses stored as "Contacts" as well as directly entered addresses as "Group" enables you to easily send
messages to multiple destinations simply by specifying a group.
• Up to 2000 entries in all can be stored for "Contacts" and "Group".
• The address book can store up to 6000 addresses.
• One "Contacts" can store up to 500 addresses.
• One "Group" can store up to 500 addresses.
Address Book
Contact: Mr. Yamada
Address 1
yamada@xxxx.□□□
06-1234-1234Address 2
Contact: Mr. Suzuki
Address 1
suzuki@xxxx.□□□
\\suzuki_smbAddress 2
192.168.0.XXXAddress 3
Group address: X-project members
Address 1
yamada@xxxx.□□□
suzuki@xxxx.□□□Address 2
yoshida@xxxx.□□□Address 3
\\X-PJ_smbAddress 4
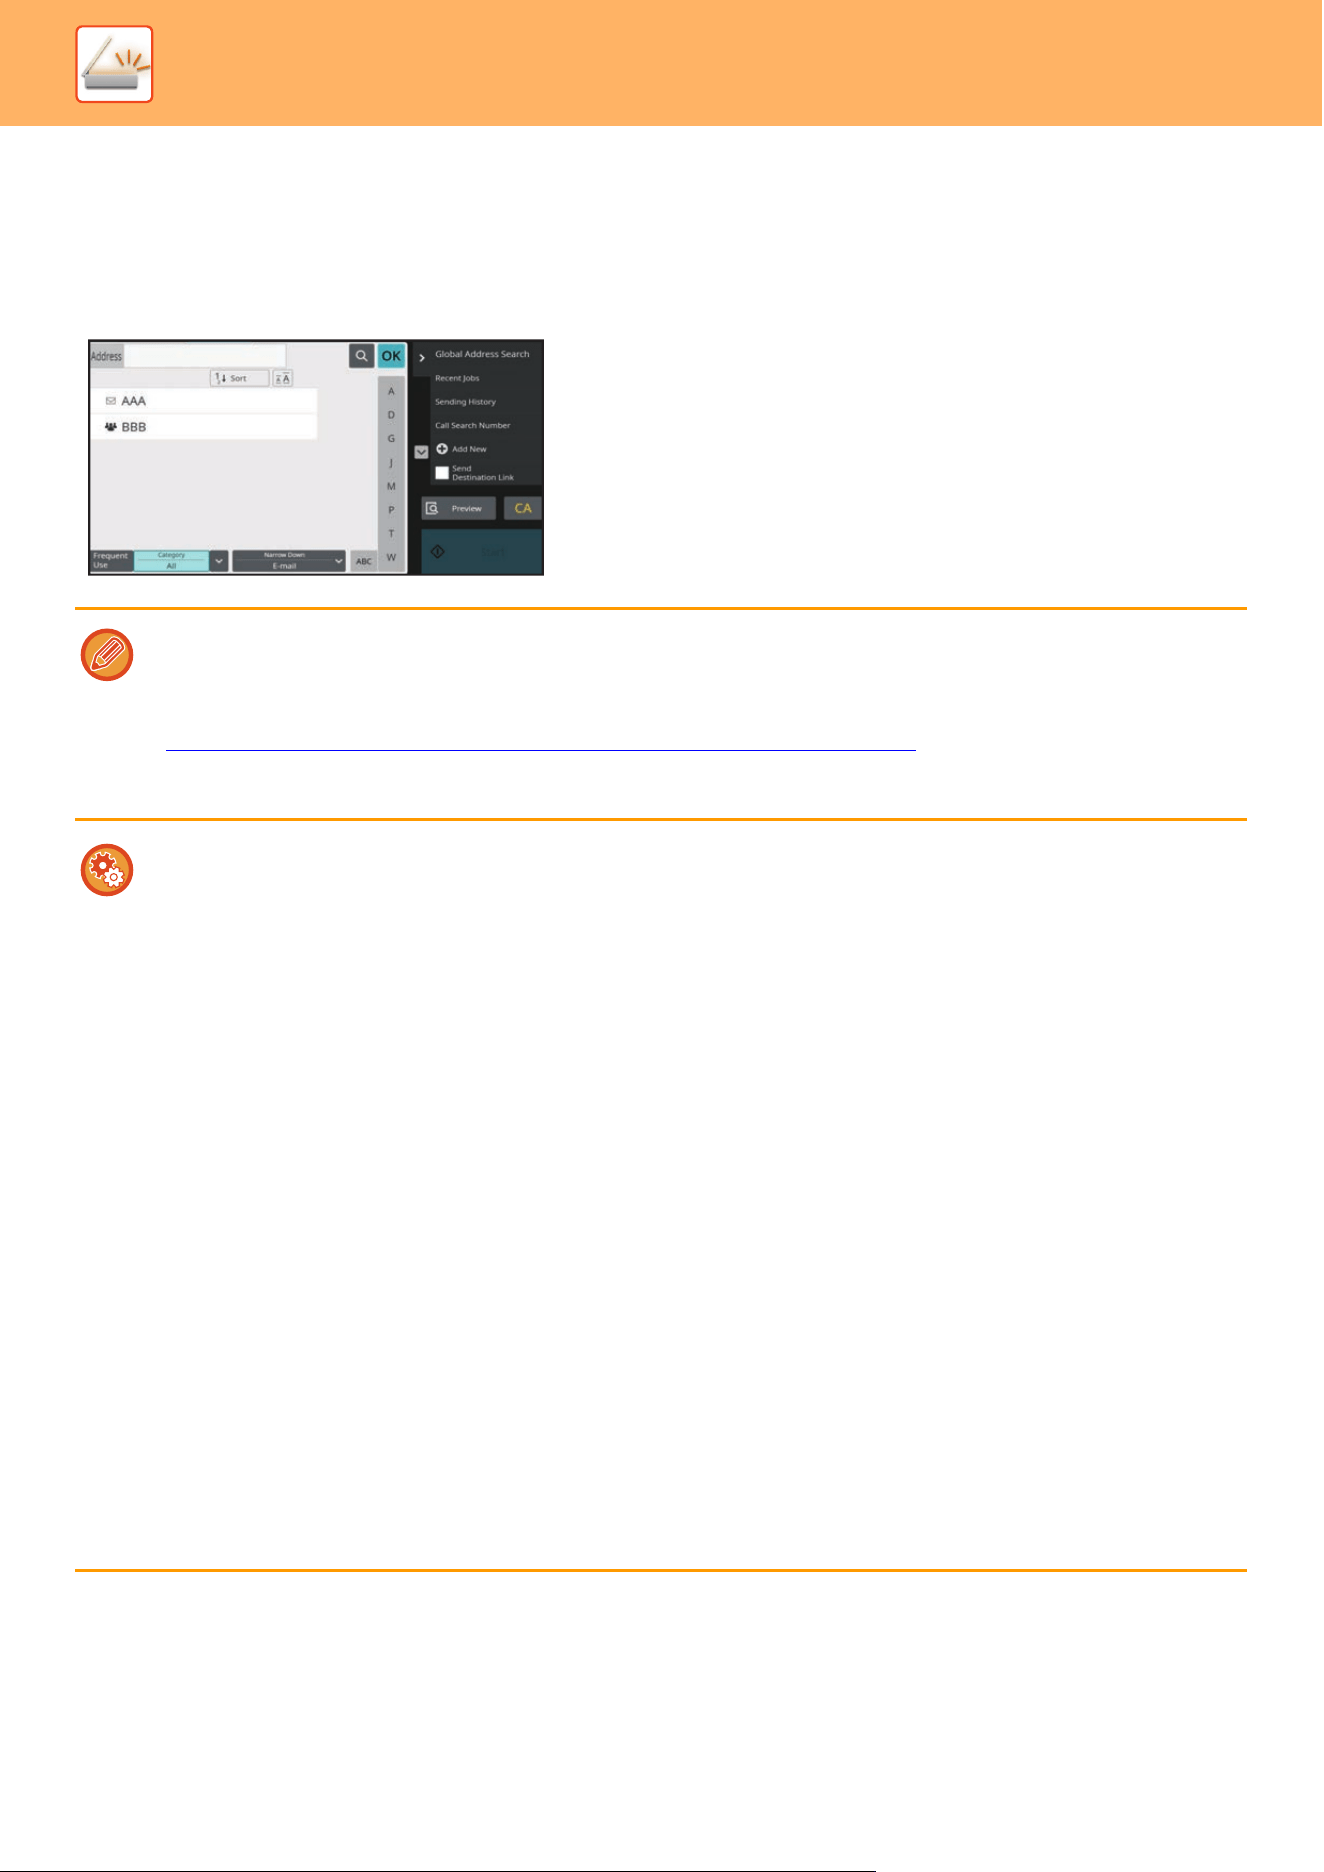
5-14
SCANNER►BEFORE USING THE MACHINE AS A NETWORK SCANNER
ADDRESS BOOK SCREEN
To display the address book, tap the [Address Book] key on the base screen in image send mode such as e-mail. You
can also display it by tapping the [Address Book] icon in the home screen. "Contacts" and "Group" registered are
enabled for alphabetical search and selected condition-based advanced search.
• When the [Address Book] key is tapped on the e-mail base screen, groups and contacts having e-mail addresses are
displayed.
• If user authentication is enabled, registered contacts can be shared within a specified group or stored as personal contacts
that only you are allowed to access.
SETTING THE SCOPE FOR PUBLICIZ
ING CONTACTS AND GROUPS (page 5-27)
• You can tap the [Find My Address] key while logging in and select your e-mail address from the user list. This is convenient
when you want to send an e-mail to yourself.
Disable register an address book
• Prohibiting registration from the machine
In "Settings (administrator)", select [System Settings] → [Image Send Settings] → [Common Settings] → [Enable/Disable
Settings] → [Settings to Disable Registration] → [Disable Registering Destination from Operation Panel].
• Prohibiting registration from the web page
In "Settings (administrator)", select [System Settings] → [Image Send Settings] → [Common Settings] → [Enable/Disable
Settings] → [Settings to Disable Registration] → [Disable Registering Destination on Web Page].
• Disable Switching of Display Order
In "Settings (administrator)", select [System Settings] → [Image Send Settings] → [Common Settings] → [Condition Set-
tings] → [Disable Switching of Display Order].
Disables to change the order of display (search number order, ascending, descending).
Once set, the display sequence is not changed. The display order will remain fixed at the order that is in effect when this
setting is enabled.
• The type of screen set in the initial screen of the address book is shown
In "Settings (administrator)", select [System Settings] → [Image Send Settings] → [Common Settings] → [Condition Set-
tings] → [Category Displayed as Default].
Select a category to be displayed with the default.
• None
• Frequent Use
• Categories 1 to 32
• Show all addresses regardless of the mode
In "Settings (administrator)", select [System Settings] → [Image Send Settings] → [Common Settings] → [Condition Set-
tings] → [Display all address type regardless of the mode being displayed currently.].
Displays all destinations regardless of the displayed mode when this setting is enabled.
• Enlarge the address book
In "Settings (administrator)", select [System Settings] → [Image Send Settings] → [Common Settings] → [Condition Set-
tings] → [Enlarge Address Book].
An enlarged address book list appears.
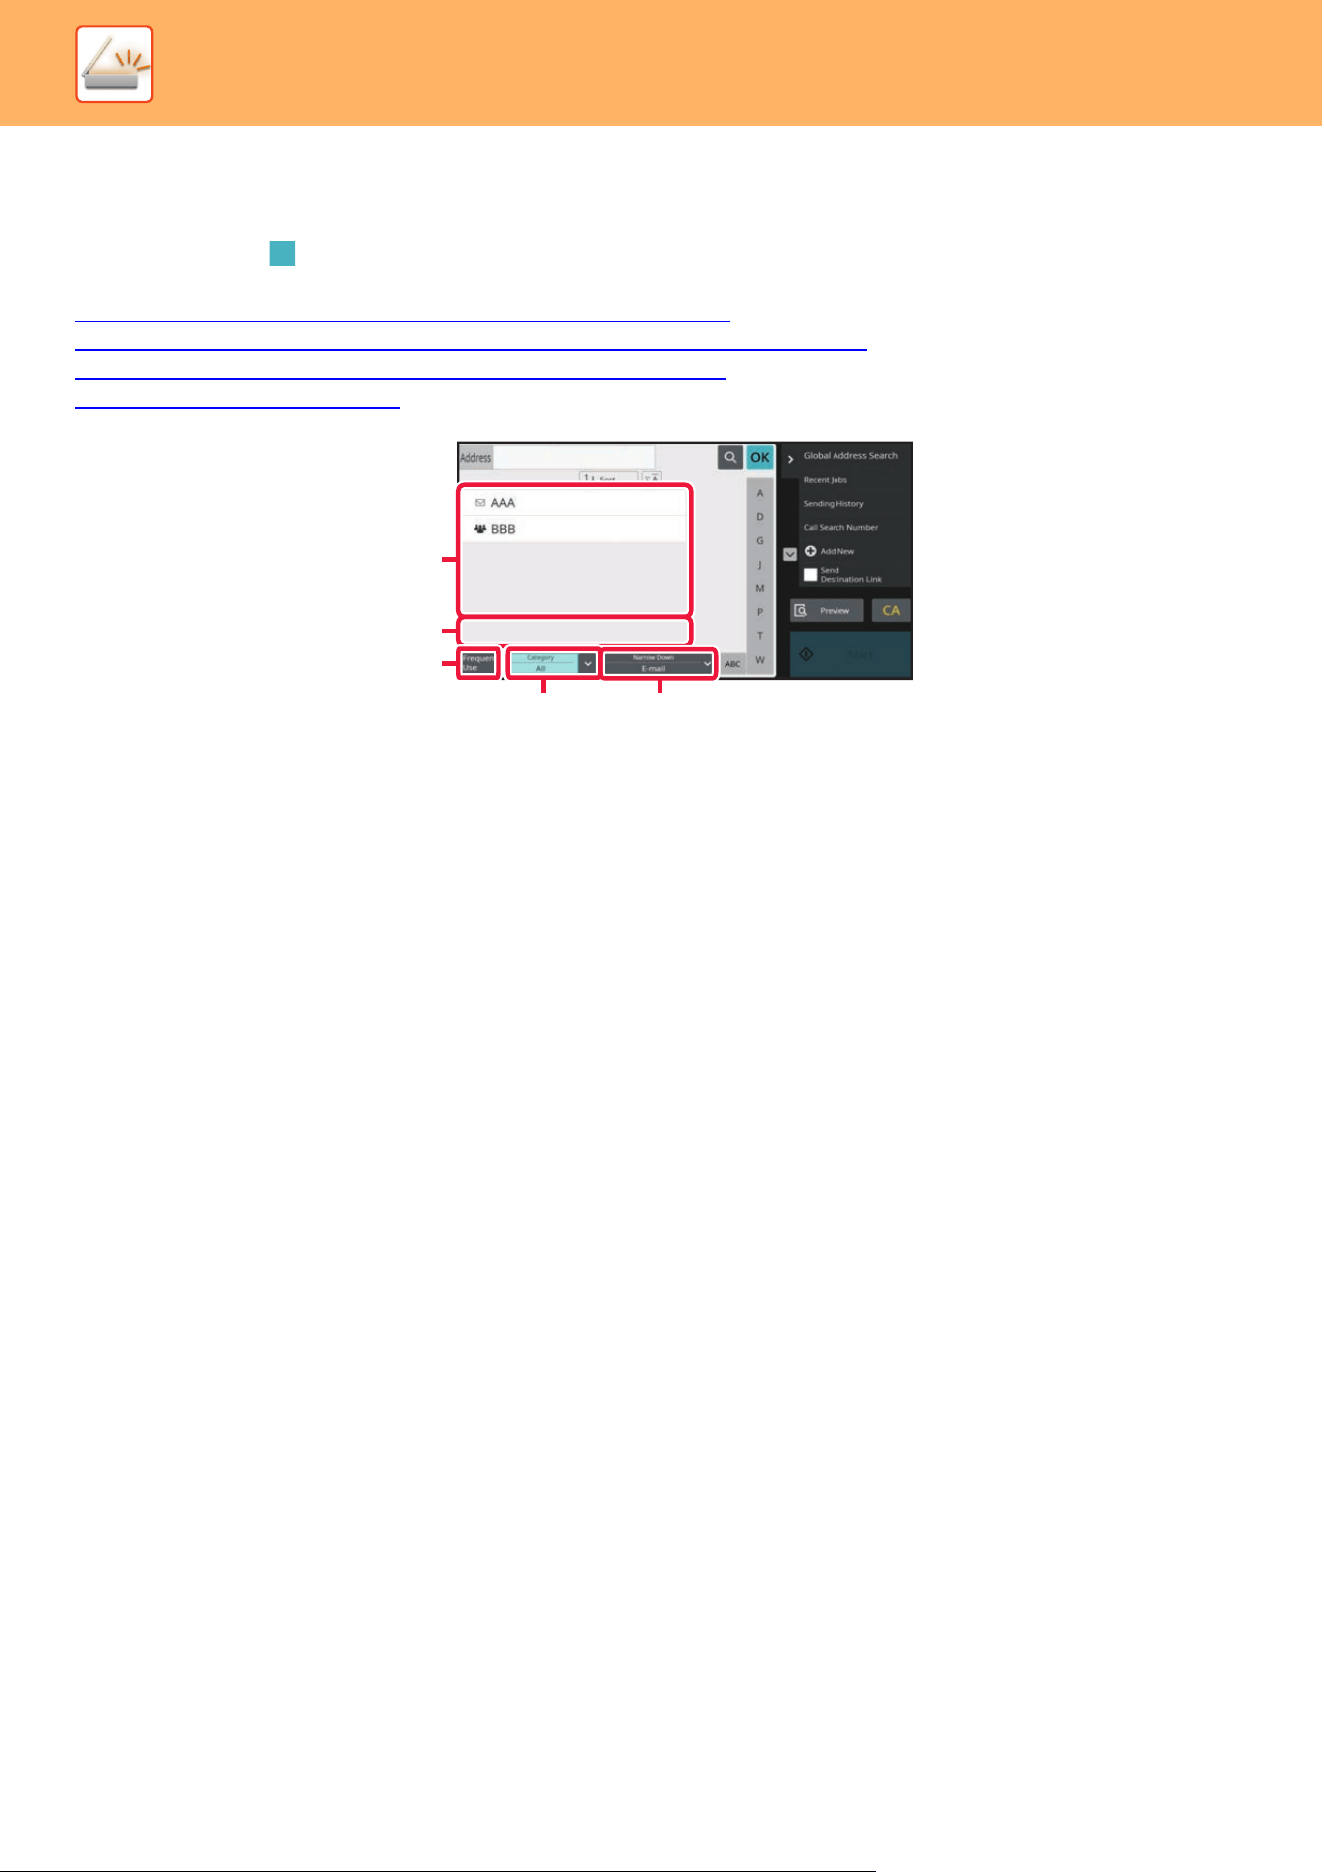
5-15
SCANNER►BEFORE USING THE MACHINE AS A NETWORK SCANNER
SELECTING "Contacts" OR "Group"
Tap a "Contacts" or "Group", and the tapped "Contacts" or "Group" is selected.
After selection, tap .
To add "Contacts" and "Group", refer to the following.
STORING ADDRESSES THROUGH DIRECT ENTRY
(page 5-18)
STORING ADDRESSES THROUGH GLOBAL ADDRESS SEARCH (page 5-19)
STORING ADDRESSES FROM IMAGE SEND LOGS (page 5-21)
STORING GROUPS (page 5-23)
(1) One touch keys of "Contacts"
(2) One touch keys of "Group"
(3) [Frequent Use] key
(4) [Category] key
(5) [Narrow Down] key
(5)
(4)
(3)
(2)
(1)
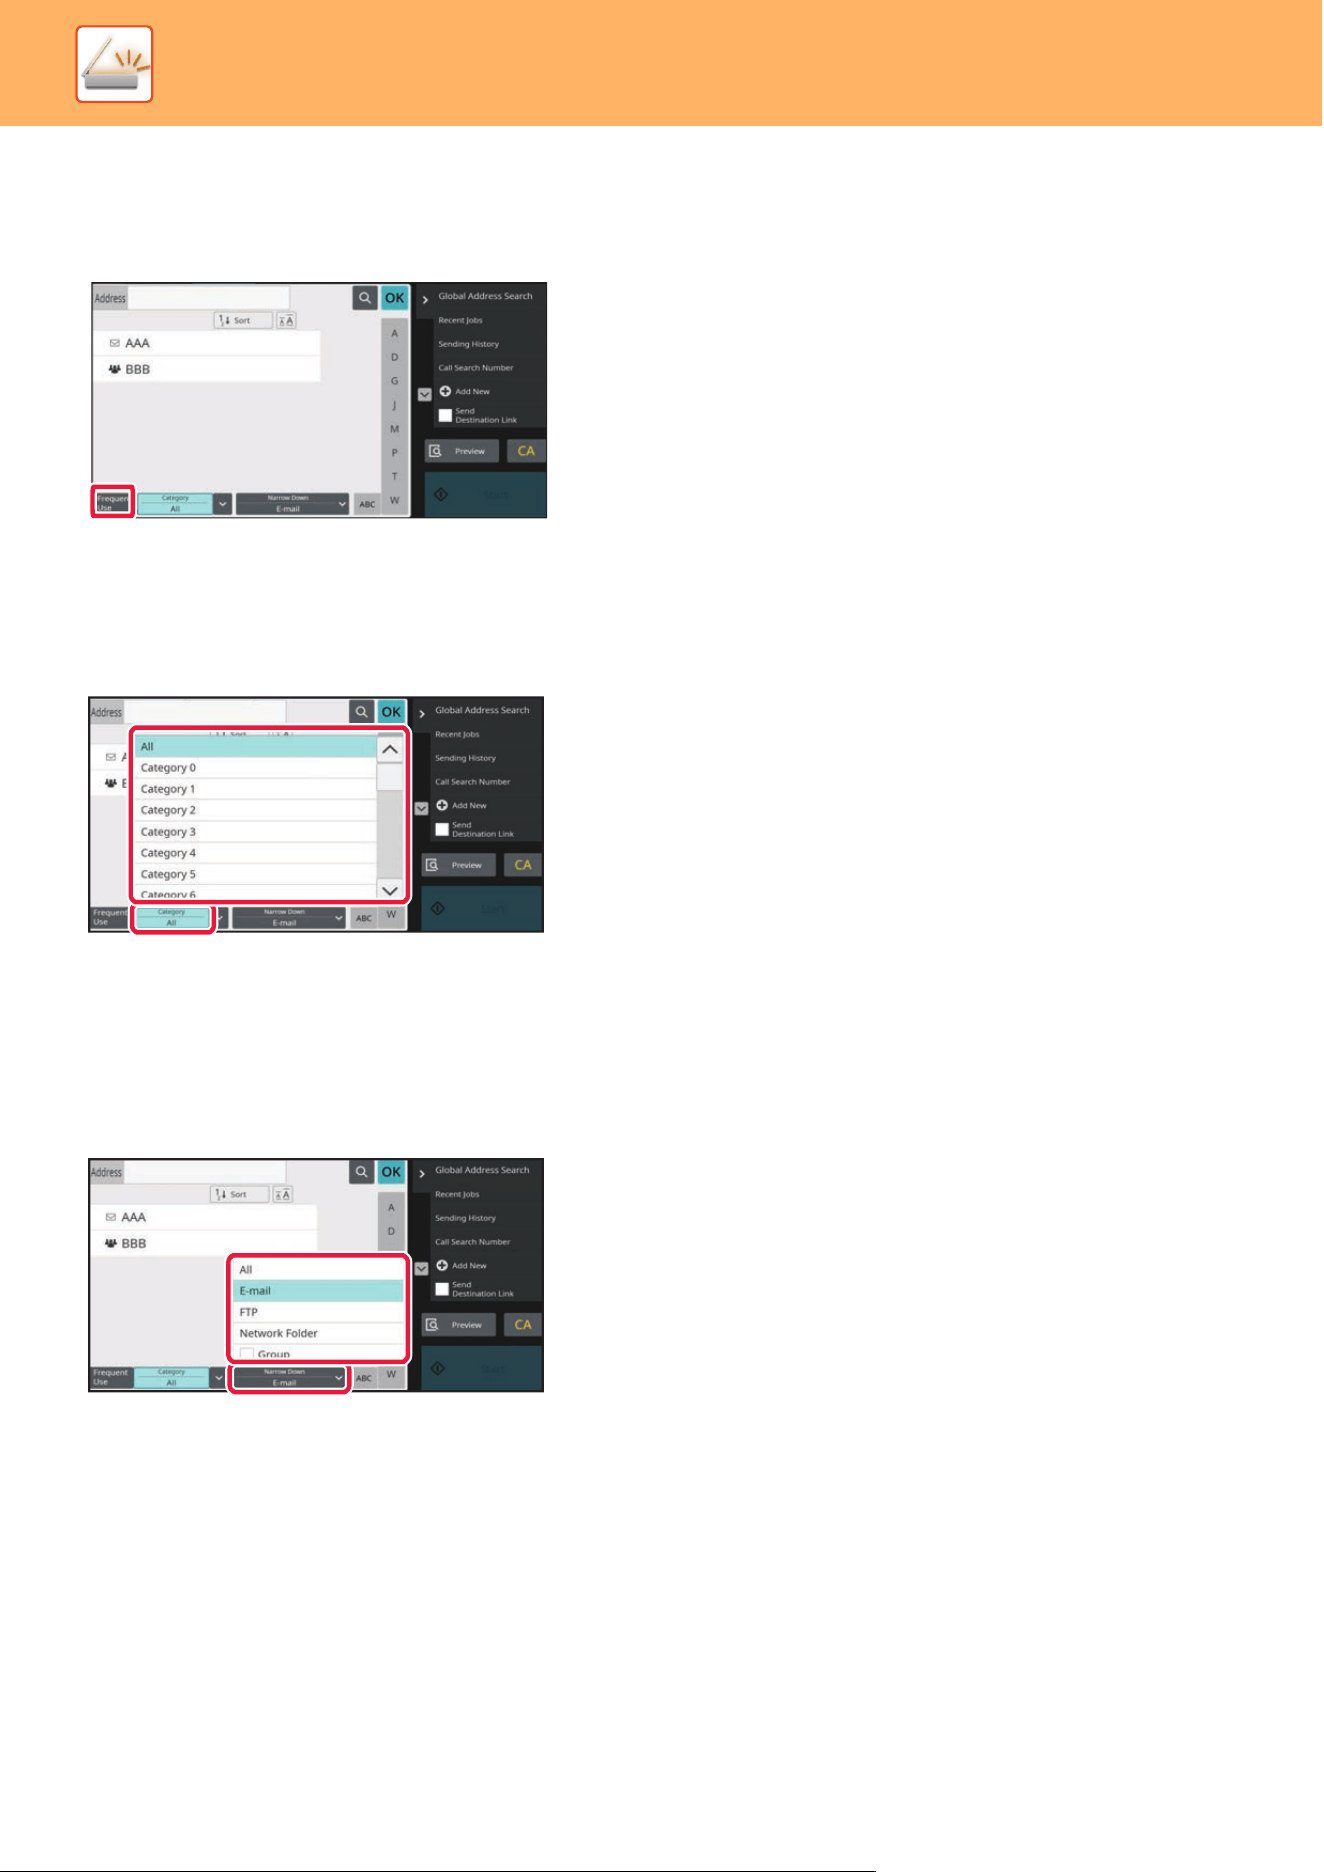
5-16
SCANNER►BEFORE USING THE MACHINE AS A NETWORK SCANNER
Narrowing by frequent Use
Tap the [Frequent Use] key and select an address in the screen that appears.
Addresses registered as "Frequent Use" addresses are shown.
Narrowing by category
Tap the [Category] key to select a category on the screen that appears.
The "Contacts" and "Group" in the selected category appear on a list.
The narrowed-down condition is displayed under the [Category] key.
Narrowing by job type
Tap the [Narrow Down] key to select a job on the screen that appears.
To narrow by "Group", tap the [Group] key.
The "Contacts" and "Group" for the selected job appear on a list.
The narrowed-down condition is displayed under the [Narrow Down] key.
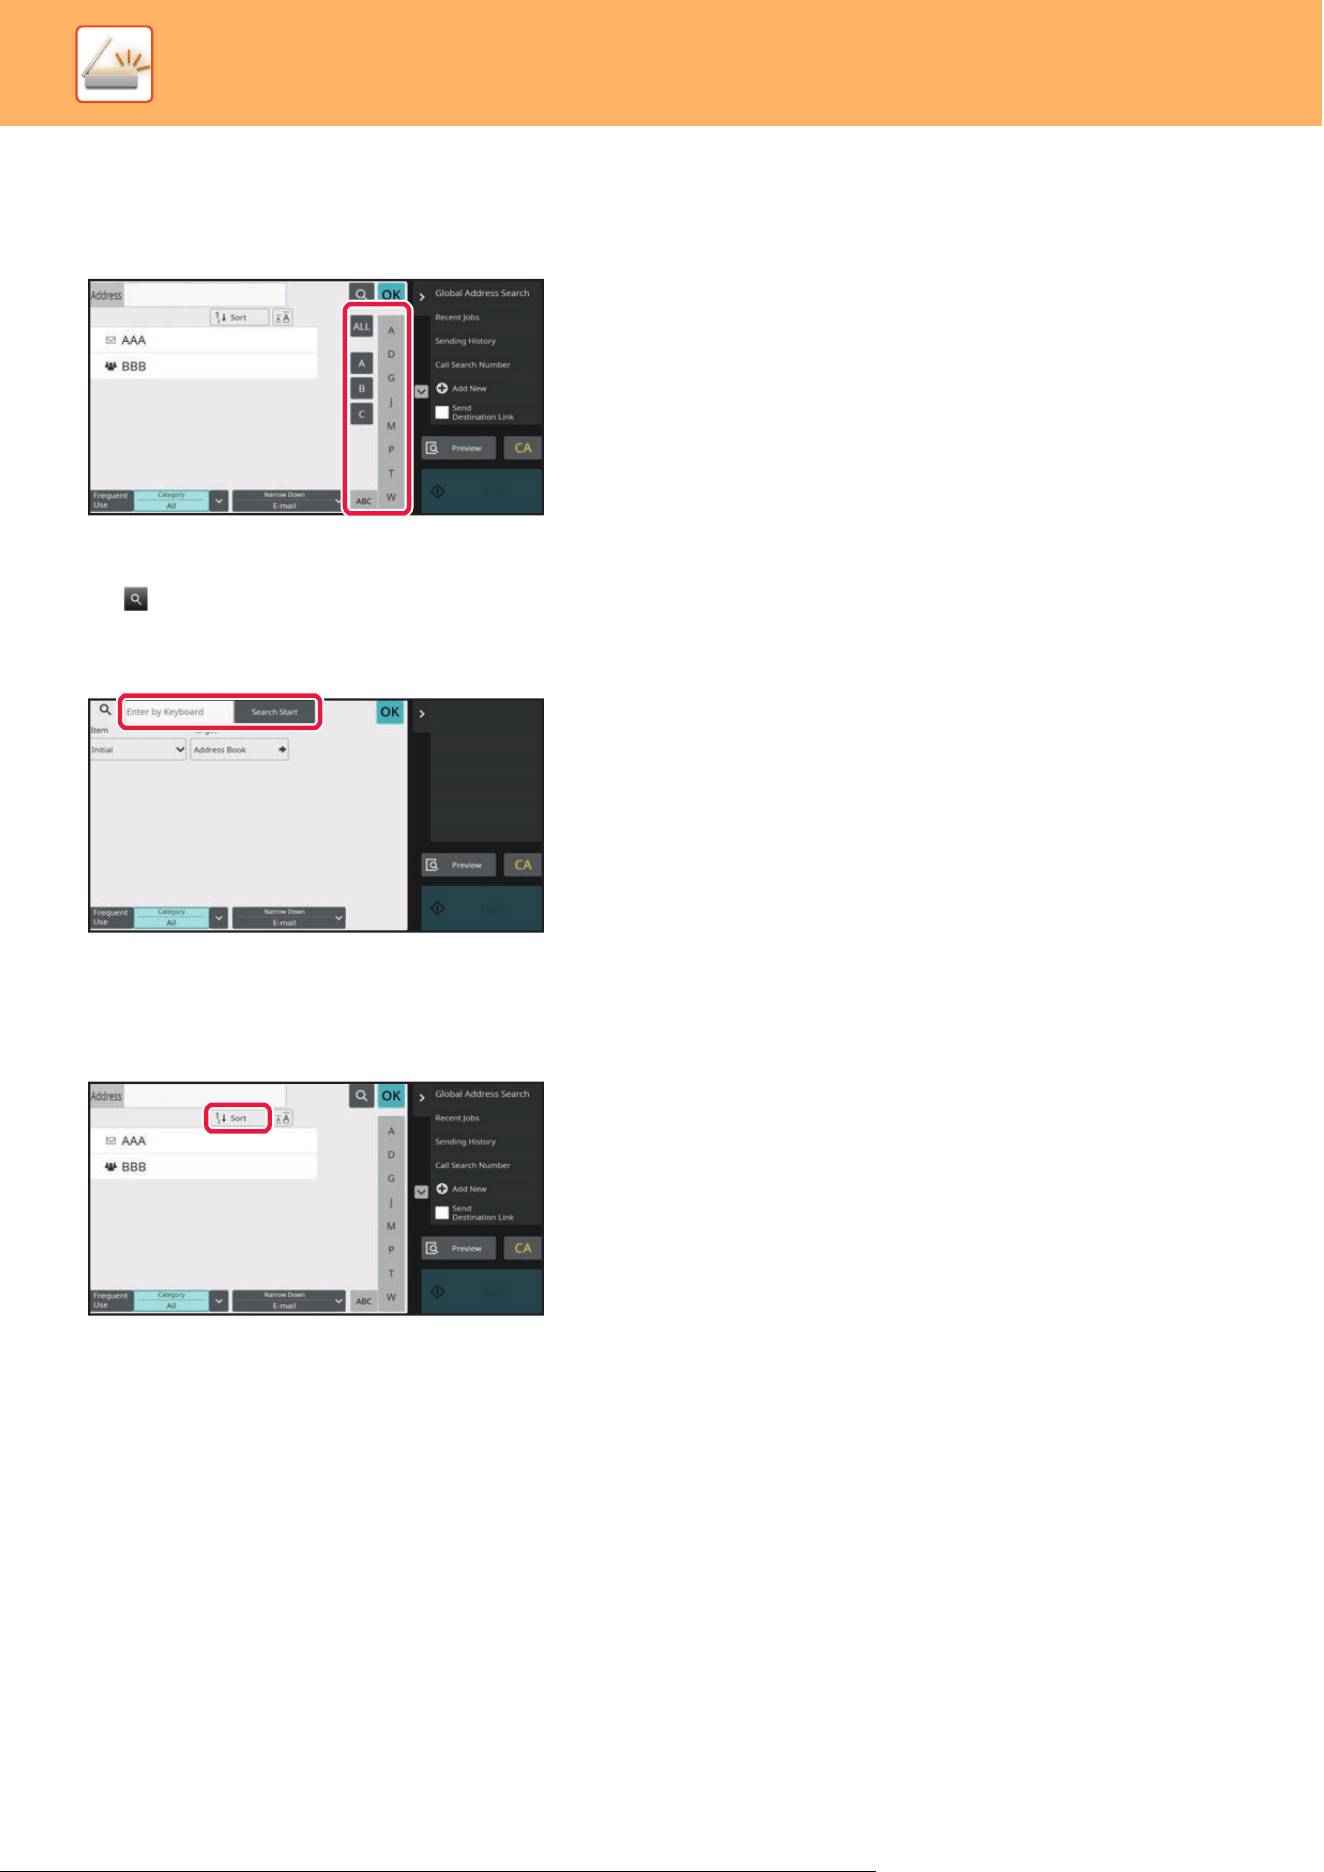
5-17
SCANNER►BEFORE USING THE MACHINE AS A NETWORK SCANNER
Narrowing by index
Search by alphabet to narrow down addresses.
For example, tap "A" on the index bar to display "Contacts" stored with search text starting with "A".
Narrowing by keyword
Tap to display a search screen. Select a target for search, enter a keyword and then tap the [Search Start] key. The
search results are listed.
For example, if [Item] is [Name], search with a keyword "SH" lists contacts and groups starting with "SH".
Displaying in the order of search numbers
Tapping the [Sort] key displays a list in ascending order, descending order, or in the order of search numbers.
The display is switched in the order of [Sort] (▲) (Up) →[Sort] (▼) (Down) → Search Number Order.
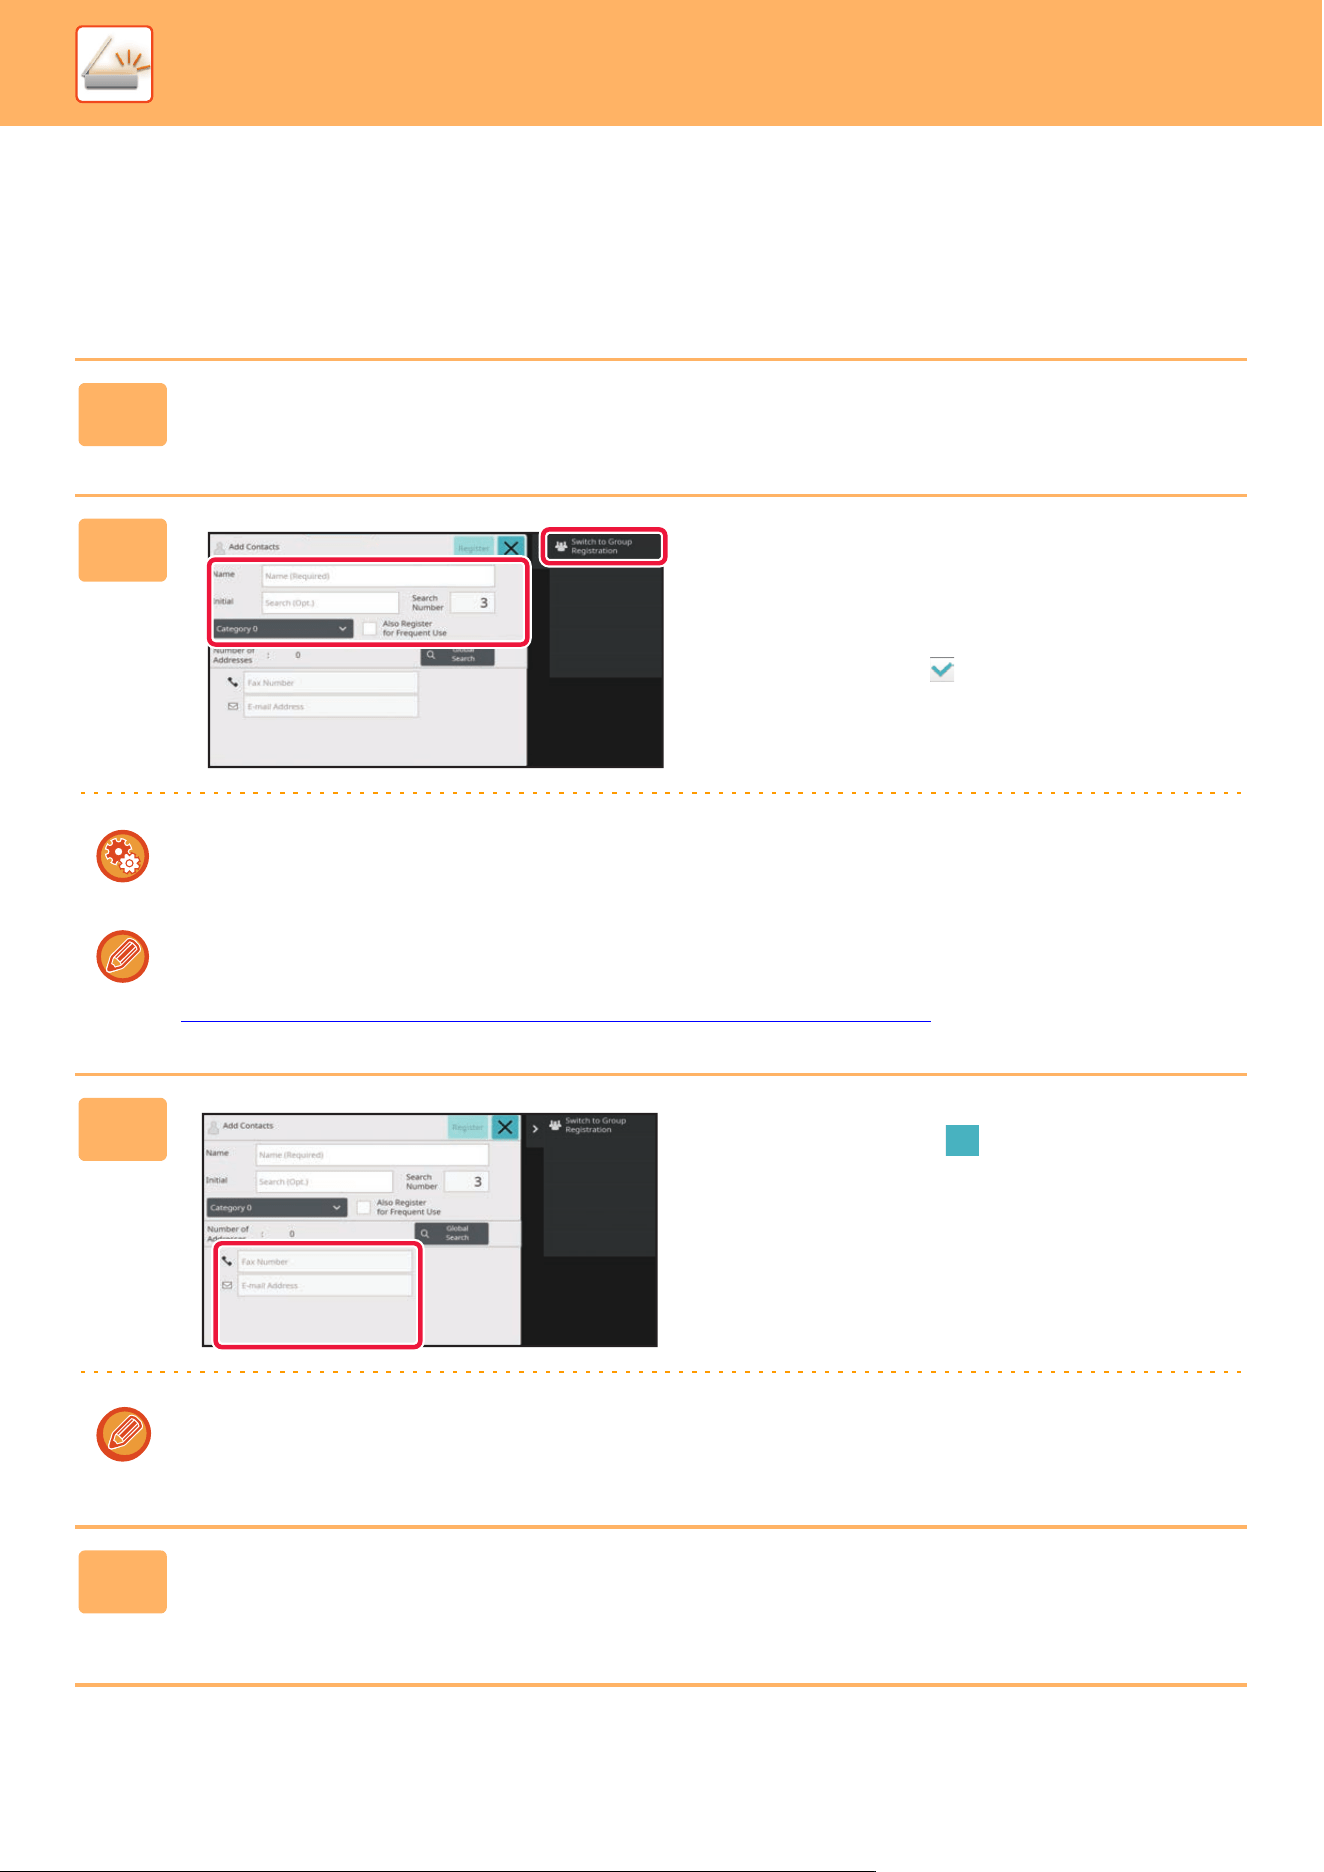
5-18
SCANNER►BEFORE USING THE MACHINE AS A NETWORK SCANNER
STORING ADDRESSES THROUGH DIRECT
ENTRY
Store new names or addresses in the address book by directly entering them.
1
In the address book screen, tap [Add New] on the action panel, or tap the
[Address Control] icon in the home screen.
2
Enter basic information.
Be sure to enter [Name] and [Initial].
To specify a category, select one from a category list that
appears when the entry box is tapped.
To register for frequent use, select the [Also Register for
Frequent Use] checkbox .
To register a category name:
In "Settings (administrator)", select [System Settings] → [Image Send Settings] → [Common Settings] → [Category
Setting].
If user authentication is enabled, the tab for address publication setting appears. Setting address publication enables
stored "Contacts" and "Group" to be shared within a specified group or stored as personal contacts that only you are
allowed to access.
SETTING THE SCOPE FOR PUBLICI
ZING CONTACTS AND GROUPS (page 5-27)
3
Tap [E-mail Address] to enter the
address, and tap .
• Select the checkbox to set that address as the preferred over the others if two or more addresses are stored for
"Contacts".
• FTP and Network Folder addresses can be registered from [Address Book] in "Settings (Web version)".
4
Tap the [Register] key.
The first address of each address type is set as the default address. If no address has the checkbox next to it selected,
a confirmation screen will appear asking you if you want to select a default address.
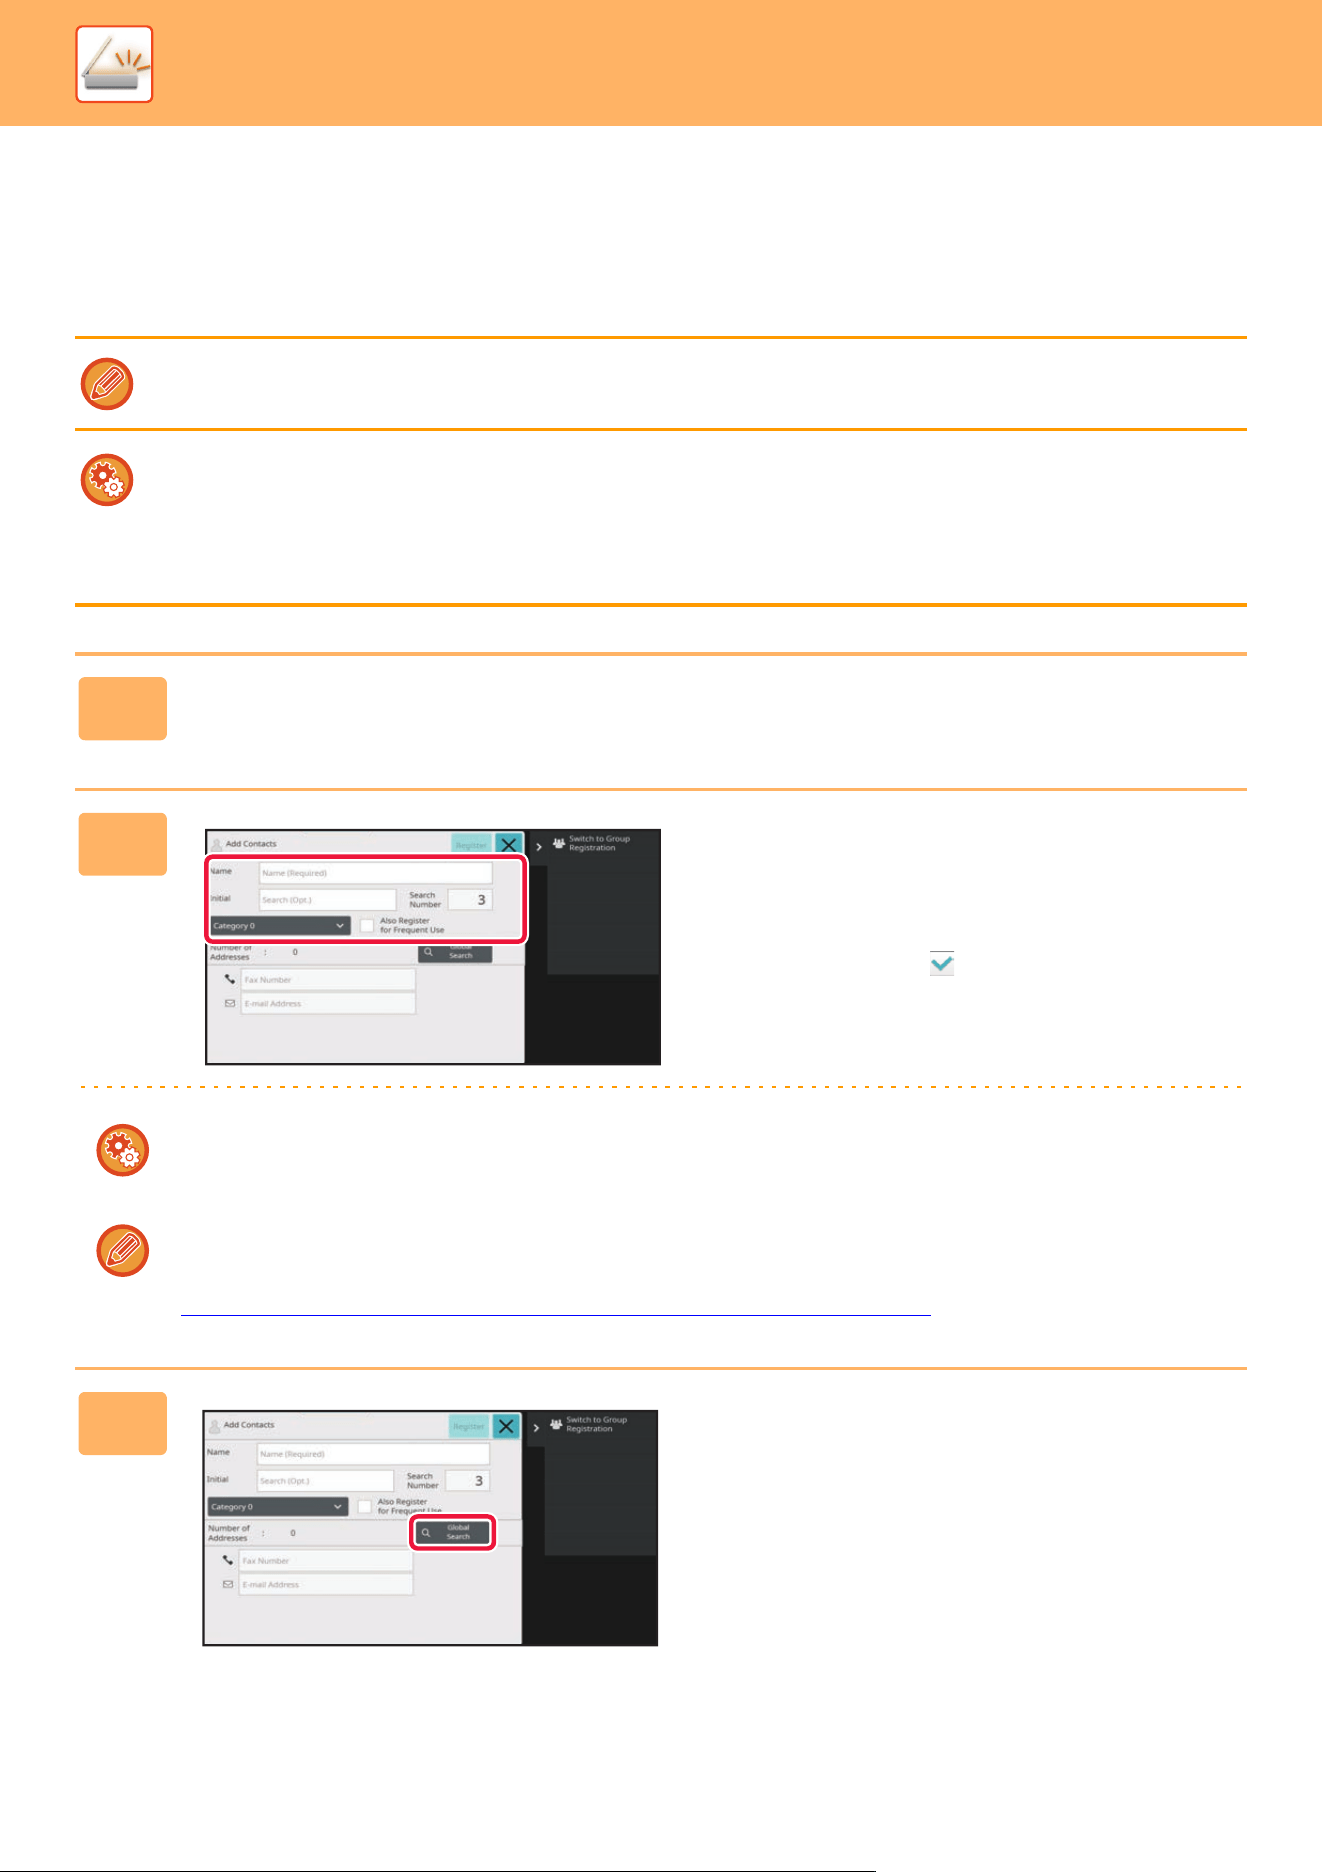
5-19
SCANNER►BEFORE USING THE MACHINE AS A NETWORK SCANNER
STORING ADDRESSES THROUGH GLOBAL
ADDRESS SEARCH
Store the results of searching the global address book as new addresses in the address book.
Global address search requires an LDAP server.
Disable Destination Registration Using Global Address Search
In "Settings (administrator)", select [System Settings] → [Image Send Settings] → [Common Settings] → [Enable/Disable
Settings] → [Settings to Disable Registration] → [Disable Destination Registration Using Global Address Search].
This disables address control from the global address search.
Configure the setting for the following item:
E-mail
1
In the address book screen, tap [Add New] on the action panel, or tap the
[Address Control] icon in the home screen.
2
Enter basic information.
Be sure to enter [Name] and [Initial].
To specify a category, select one from a category list that
appears when the entry box is tapped.
To register for frequent use, select the [Also Register for
Frequent Use] checkbox .
To register a category name:
In "Settings (administrator)", select [System Settings] → [Image Send Settings] → [Common Settings] → [Category
Setting].
If user authentication is enabled, the tab for address publication setting appears. Setting address publication enables
stored "Contacts" and "Group" to be shared within a specified group or stored as personal contacts that only you are
allowed to access.
SETTING THE SCOPE FOR PUBLICI
ZING CONTACTS AND GROUPS (page 5-27)
3
Tap the [Global Search] key.
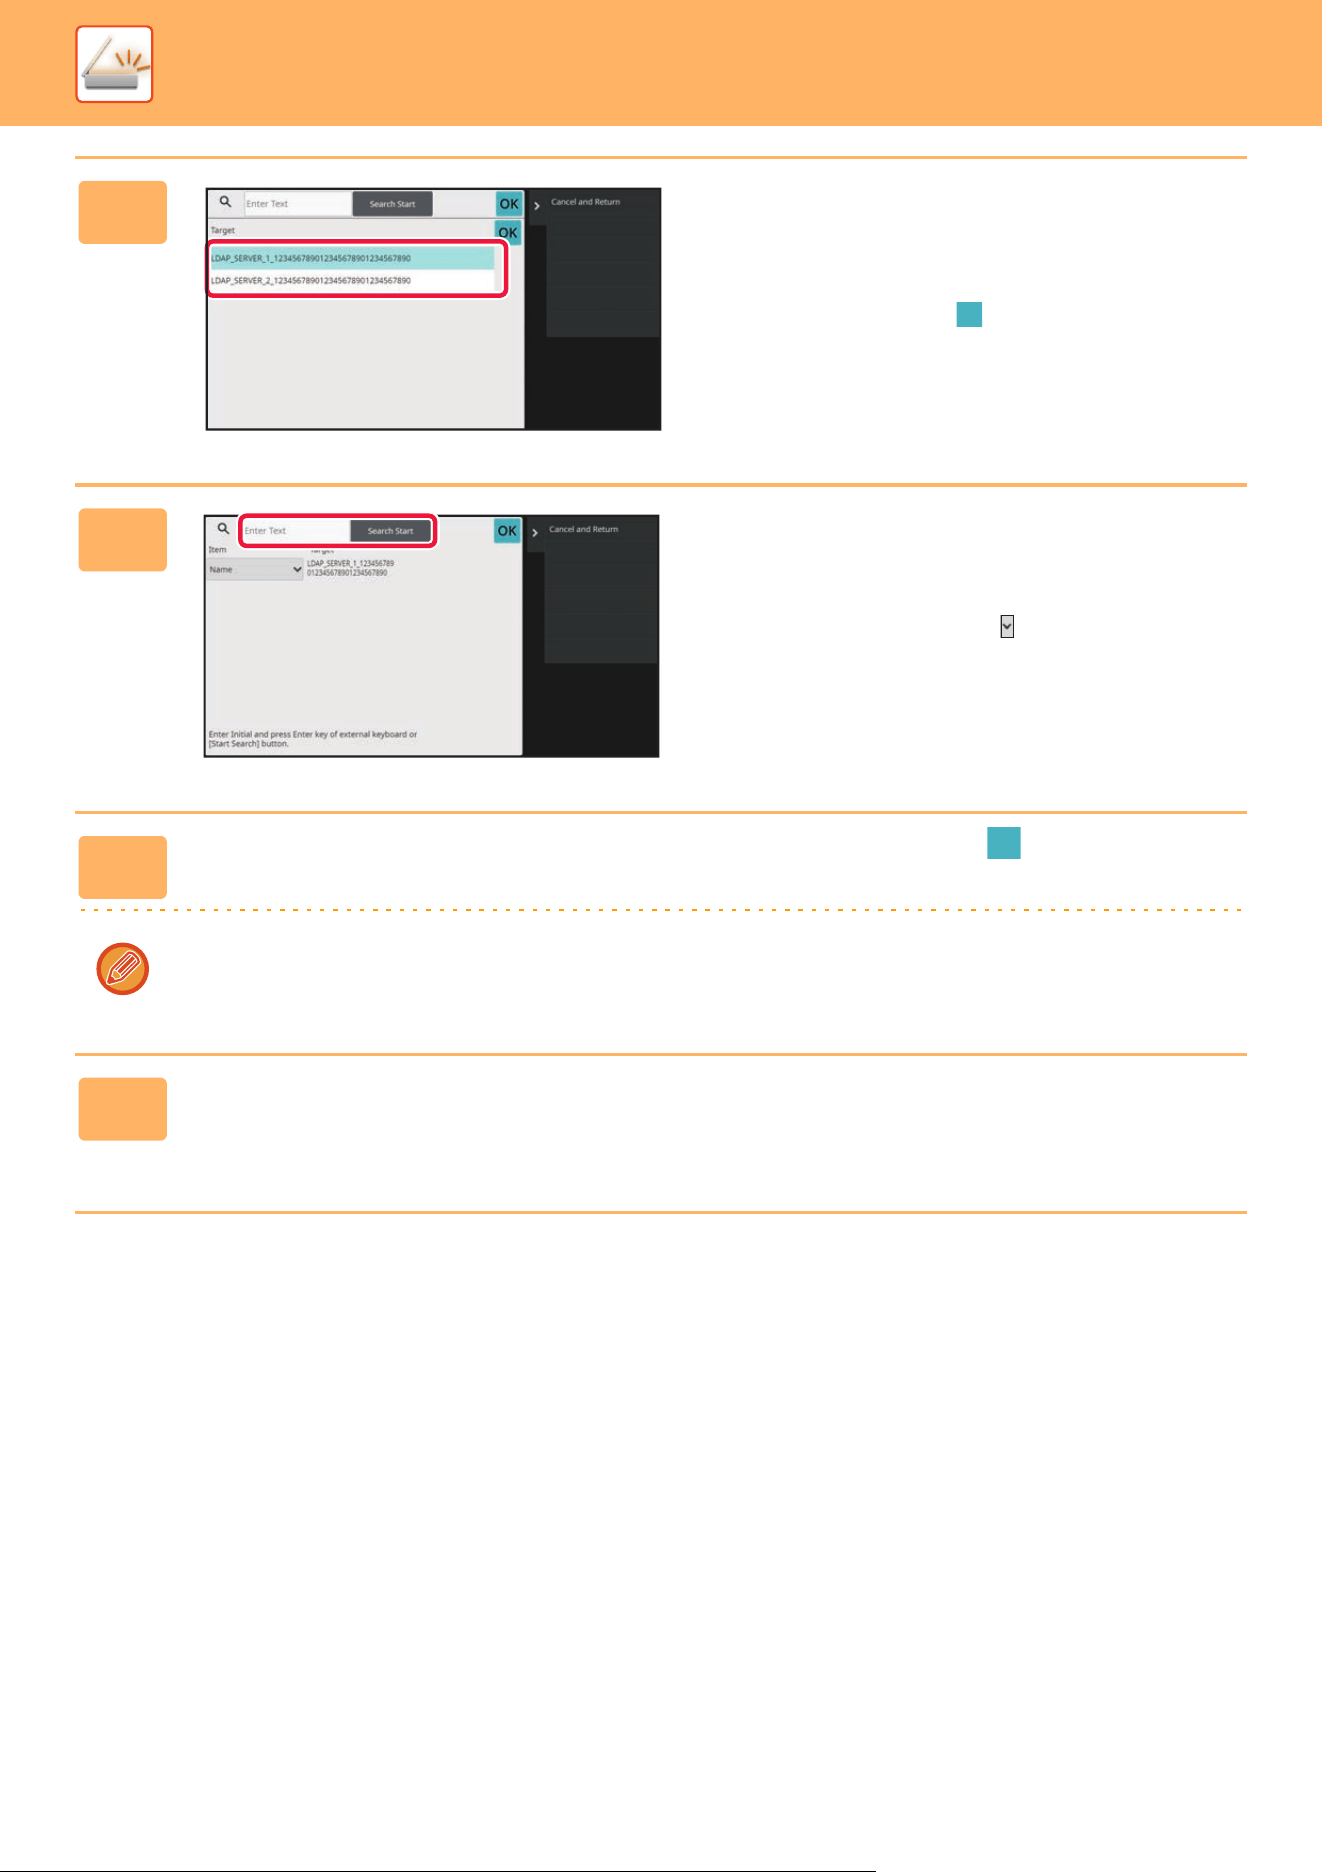
5-20
SCANNER►BEFORE USING THE MACHINE AS A NETWORK SCANNER
4
Select the server from the list of
servers.
If an authentication screen appears, enter your user name
and password, and tap the [OK] key.
After selecting a server, tap .
5
Tap the entry field to enter the search
condition and then tap the [Search
Start] key.
To change the search target, tap for [Item]. You can
select [Name] or [Address].
6
Select one address from the search result list, and tap the key.
To check address information, select the address and tap the [Confirm Registered Information] key.
7
Tap the [Register] key.
The first address of each address type is set as the default address. If no address has the checkbox next to it selected,
a confirmation screen will appear asking you if you want to select a default address.
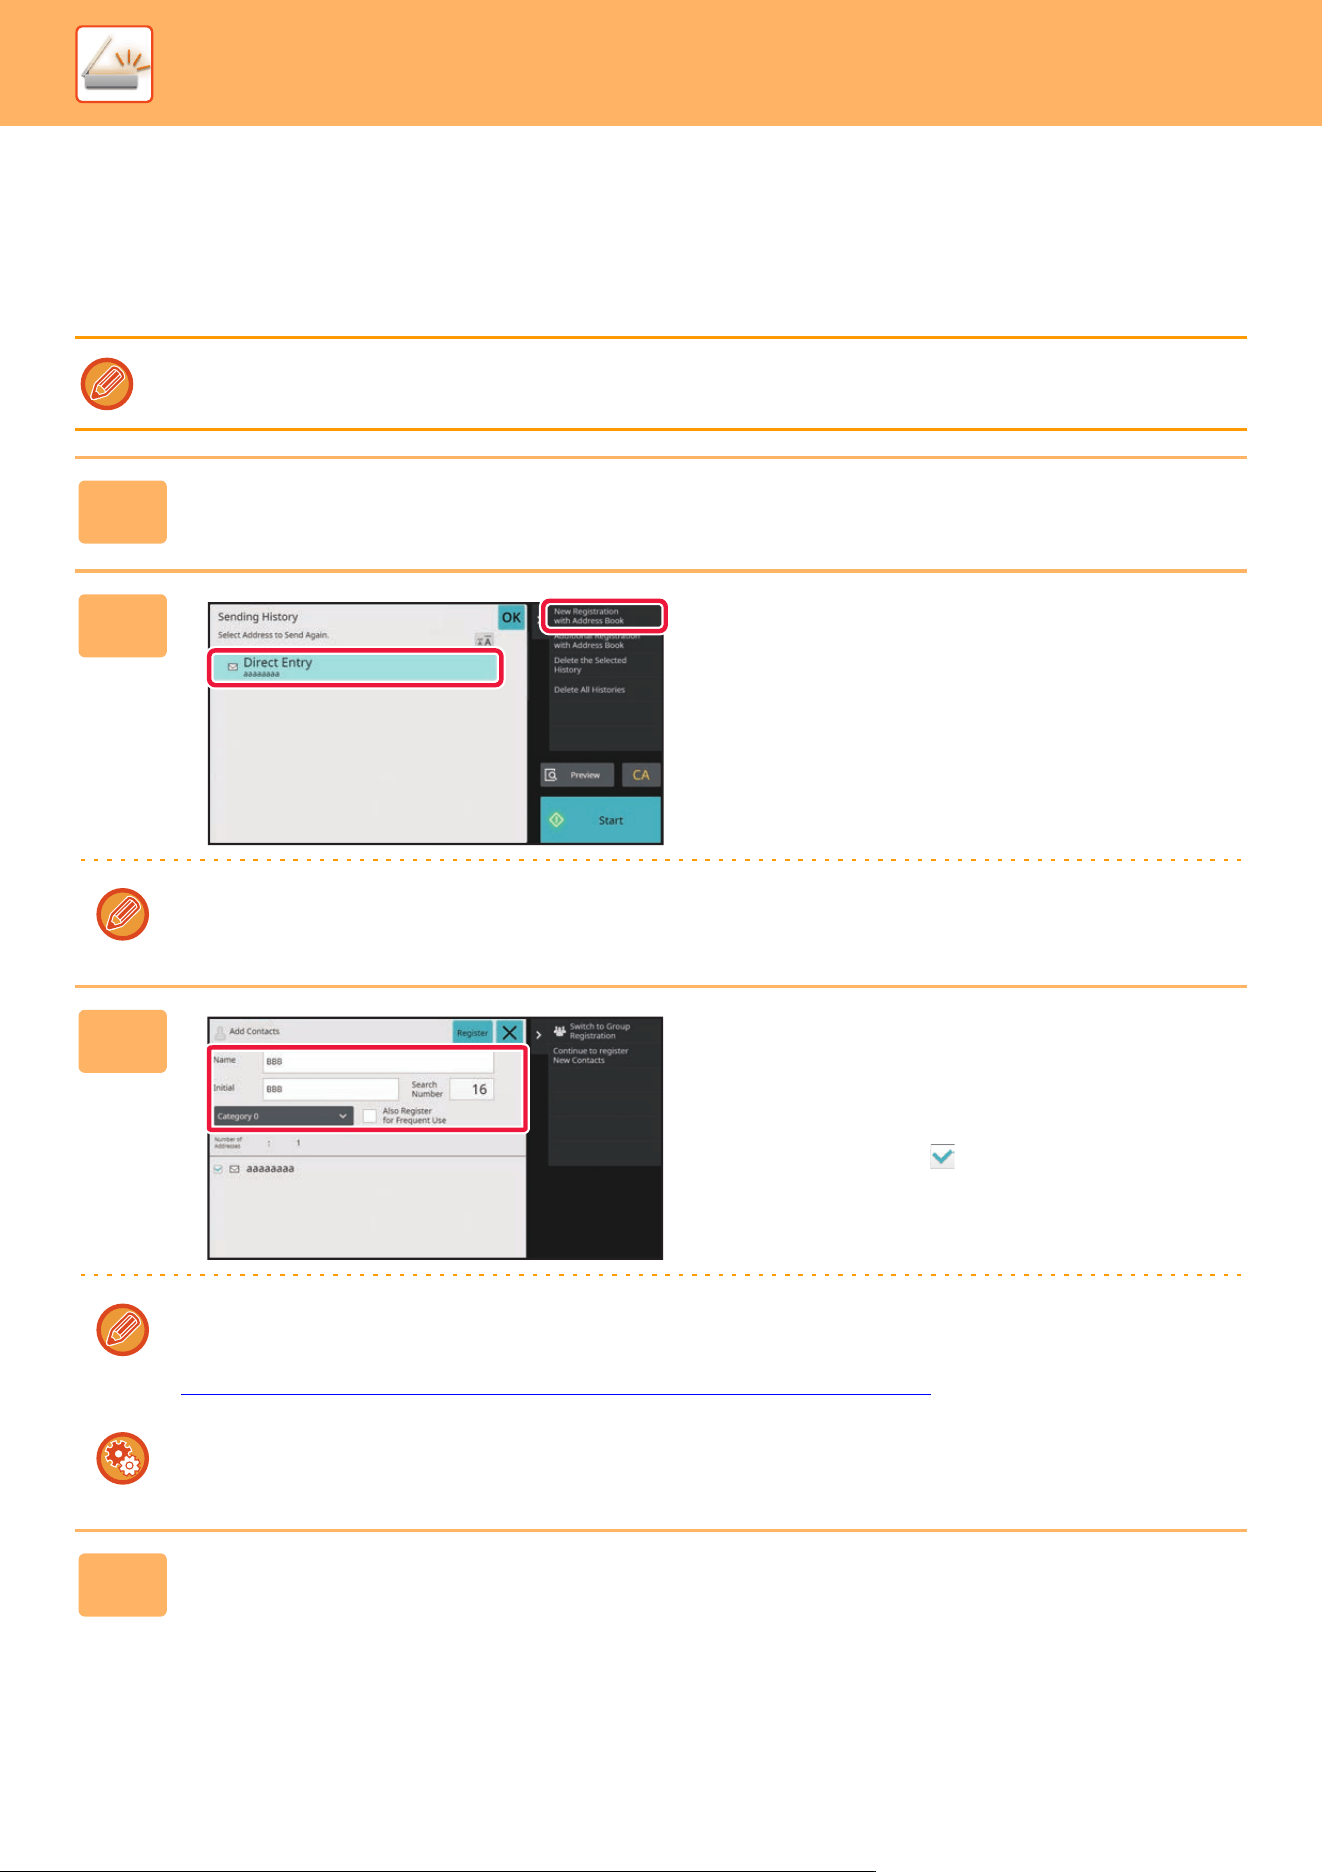
5-21
SCANNER►BEFORE USING THE MACHINE AS A NETWORK SCANNER
STORING ADDRESSES FROM IMAGE SEND
LOGS
As a new registration, add an address you have entered via or image send operations to the address book.
FTP addresses cannot be stored in the address book from transmission logs.
1
In image send mode, tap [Sending History] on the action panel.
2
Select one address you want to
register in the address book from the
send logs, and then tap [New
Registration with Address Book] on
the action panel.
When you tap [Additional Registration with Address Book] on the action panel, you can add the address to a contact
stored in the address book.
3
Enter basic information.
Be sure to enter [Name] and [Initial].
To specify a category, select one from a category list that
appears when the entry box is tapped.
To register for frequent use, select the [Also Register for
Frequent Use] checkbox .
If user authentication is enabled, the tab for address publication setting appears. Setting address publication enables
stored "Contacts" and "Group" to be shared within a specified group or stored as personal contacts that only you are
allowed to access.
SETTING THE SCOPE FOR PUBLICI
ZING CONTACTS AND GROUPS (page 5-27)
To register a category name:
In "Settings (administrator)", select [System Settings] → [Image Send Settings] → [Common Settings] → [Category
Setting].
4
Tap the [Register] key.
The address is registered in the address book and the transmission log screen is restored.
The first address of each address type is set as the default address. If no address has the checkbox next to it selected,
a confirmation screen will appear asking you if you want to select a default address.

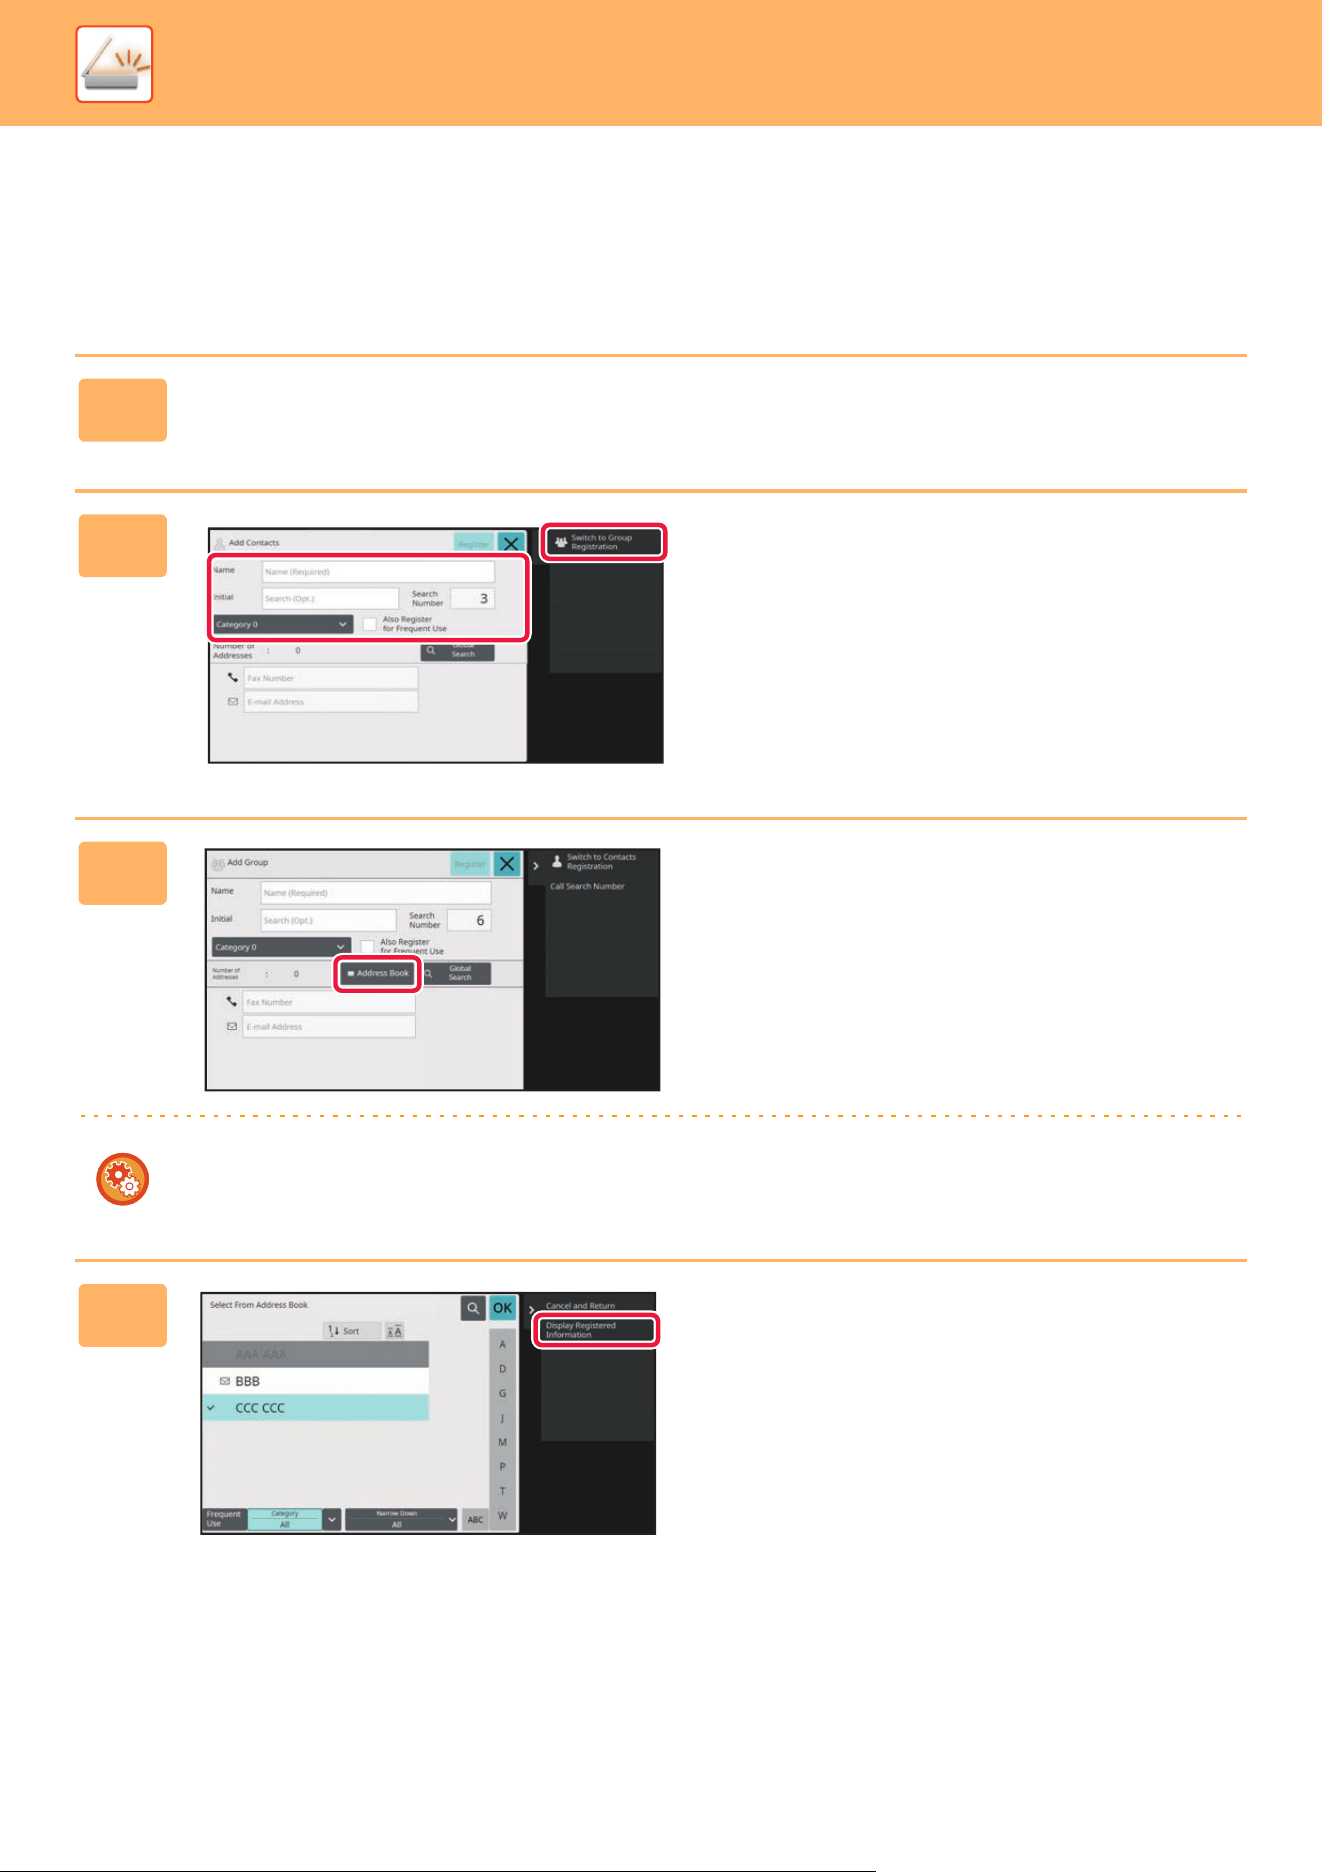
5-23
SCANNER►BEFORE USING THE MACHINE AS A NETWORK SCANNER
STORING GROUPS
Register "Group" by selecting addresses from those already stored as "Contacts". In this case of registration, only
reference to addresses already stored takes place, and so, the total number of registered addresses (maximum 6000) in
the address book does not increase. You can also directly enter a new address for a "Group".
1
In the address book screen, tap [Add New] on the action panel, or tap the
[Address Control] icon in the home screen.
2
Enter the basic information, and tap
[Switch to Group Registration] on the
action panel.
3
Tap the [Address Book] key.
To directly enter a new address for a "Group", tap [E-mail Address].
4
In the contact list, tap the "Contacts"
that includes the address you want to
add to the "Group", and tap [Display
Registered Information] on the action
panel.
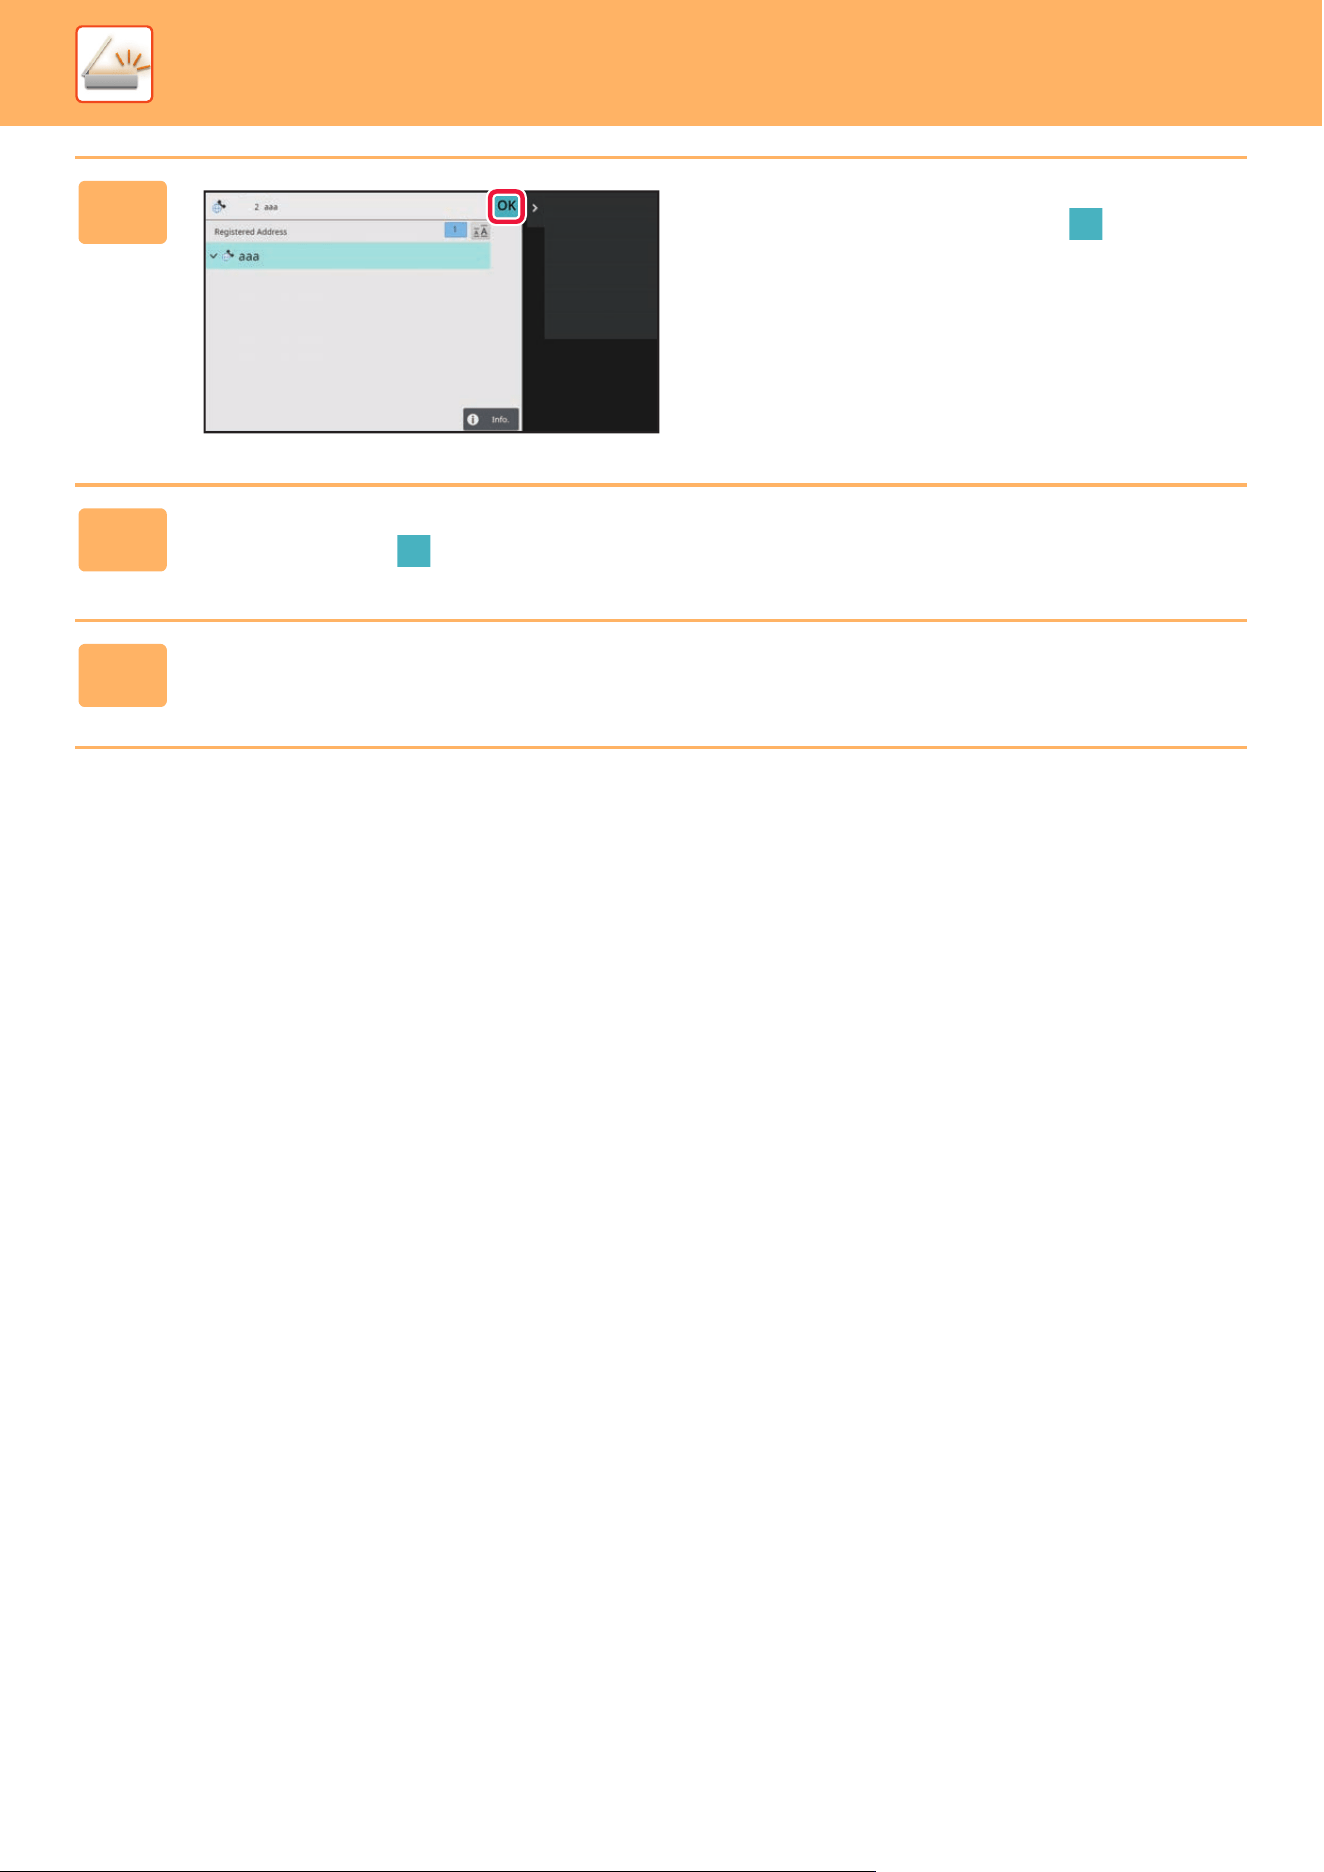
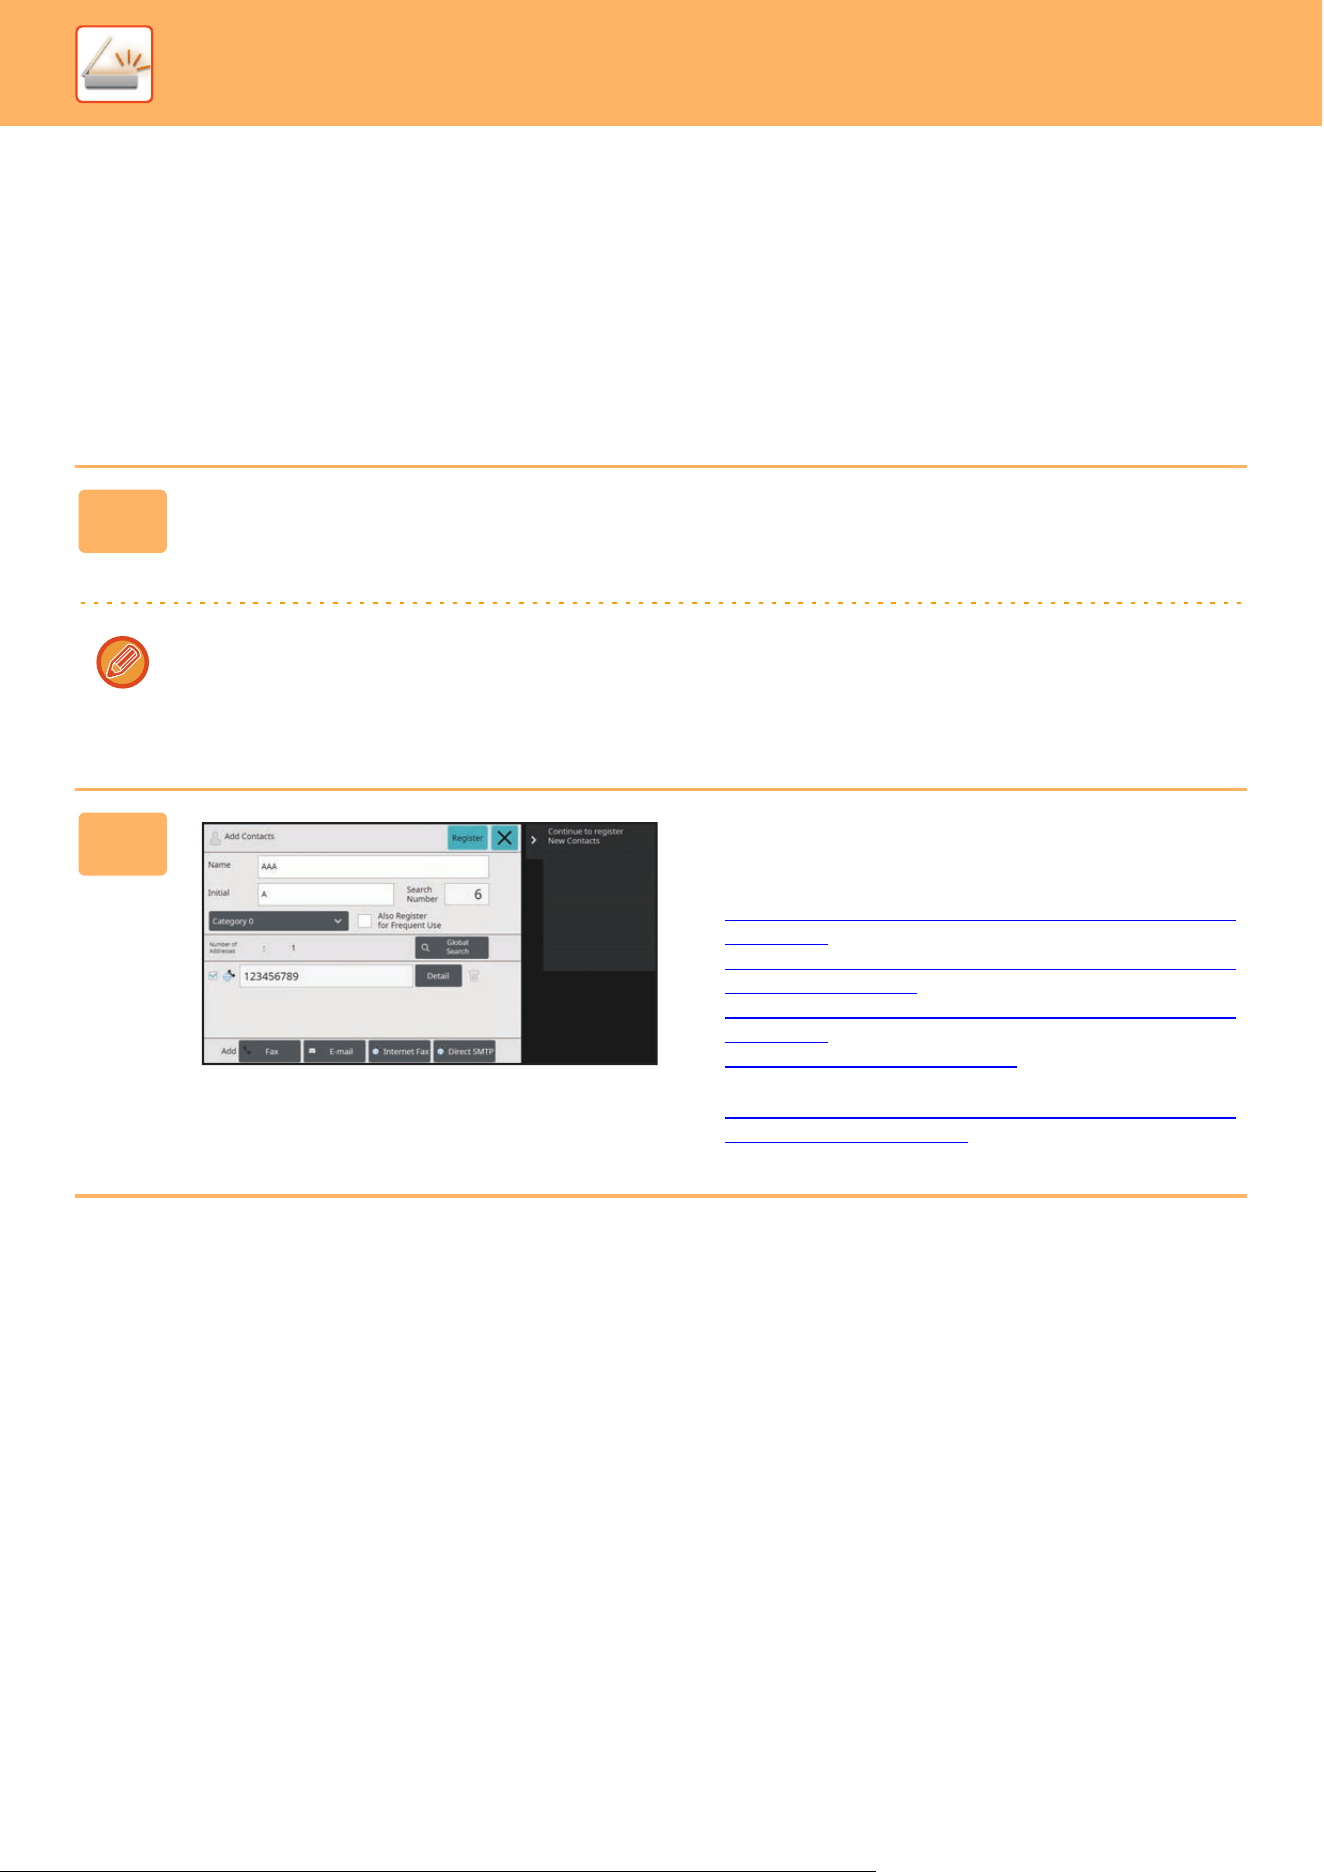
5-25
SCANNER►BEFORE USING THE MACHINE AS A NETWORK SCANNER
EDITING/DELETING ADDRESSES IN
ADDRESS BOOK
You can edit or delete "Contacts" or "Group" information stored in the address book as well as addresses listed under
"Contacts" and "Group".
EDITING/DELETING CONTACTS AND GROUPS
1
In the address book screen, select a contact or group you wish to edit, and
tap [Edit] on the action panel.
To delete a "Contacts" or "Group", tap [Delete] on the action panel.
• For editing, you can only select one "Contacts" or "Group" at a time.
• For deleting, you can select more than one "Contacts" or "Group" at a time.
• If you have logged in as the administrator, you can delete all addresses stored in the address book by tapping the
[Delete All] that appears on the action panel.
2
Editing a "Contacts" or "Group"
• You can change basic information such as names and
categories and also you can add addresses.
STORING ADDRESSES THROUGH DIRECT ENTRY
(page 5-18)
STORING ADDRESSES THROUGH GLOBAL ADDRESS
SEARCH (page 5-19)
STORING ADDRESSES FROM IMAGE SEND LOGS
(page 5-21)
STORING GROUPS (page 5-23)
• You can change the publicity scope.
SETTING THE SCOPE FOR PUBLICIZING CONTACTS
AND GROUPS (page 5-27)
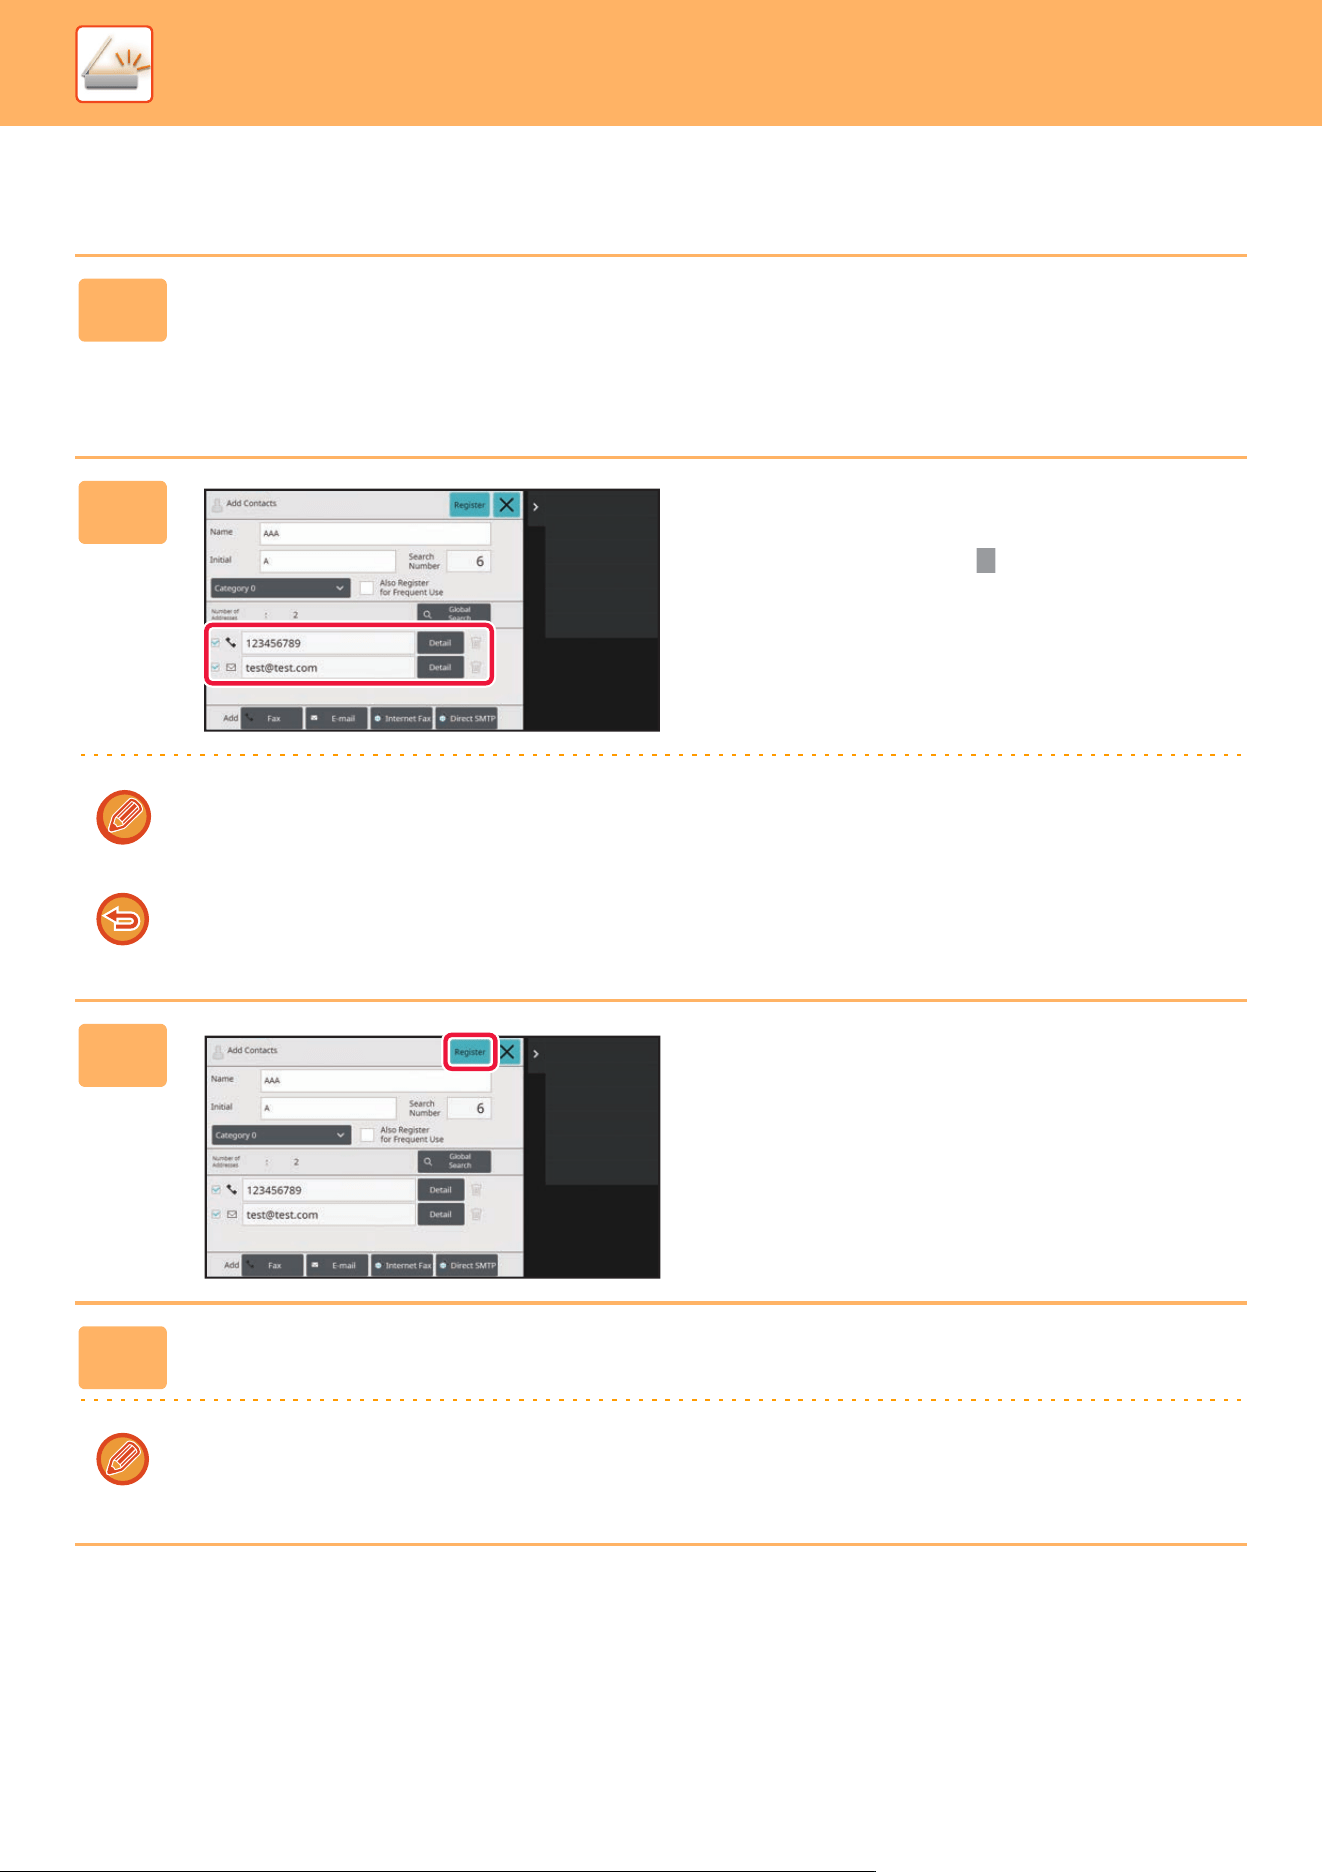
5-26
SCANNER►BEFORE USING THE MACHINE AS A NETWORK SCANNER
EDITING/DELETING ADDRESSES
1
Select a contact or group you wish to edit, and tap [Edit] on the action panel.
In the address book screen, select the contact or group that has the address
you want to edit, and tap [Edit] on the action panel.
Only one contact or group can be selected. If more than one is selected, the [Edit] key does not appear.
2
Tap the address display in the list of
addresses.
To delete an address, tap the key.
• To edit or delete, you can only select one address at a time.
• To check address information, tap the [Detail] key.
You cannot edit or delete an address for a job in a job queue.
3
Edit an address.
After editing, tap the [Register] key.
4
Tap the [OK] key.
You can only edit addresses in the network folder on the edit screen. (The Add New screen cannot be displayed.)
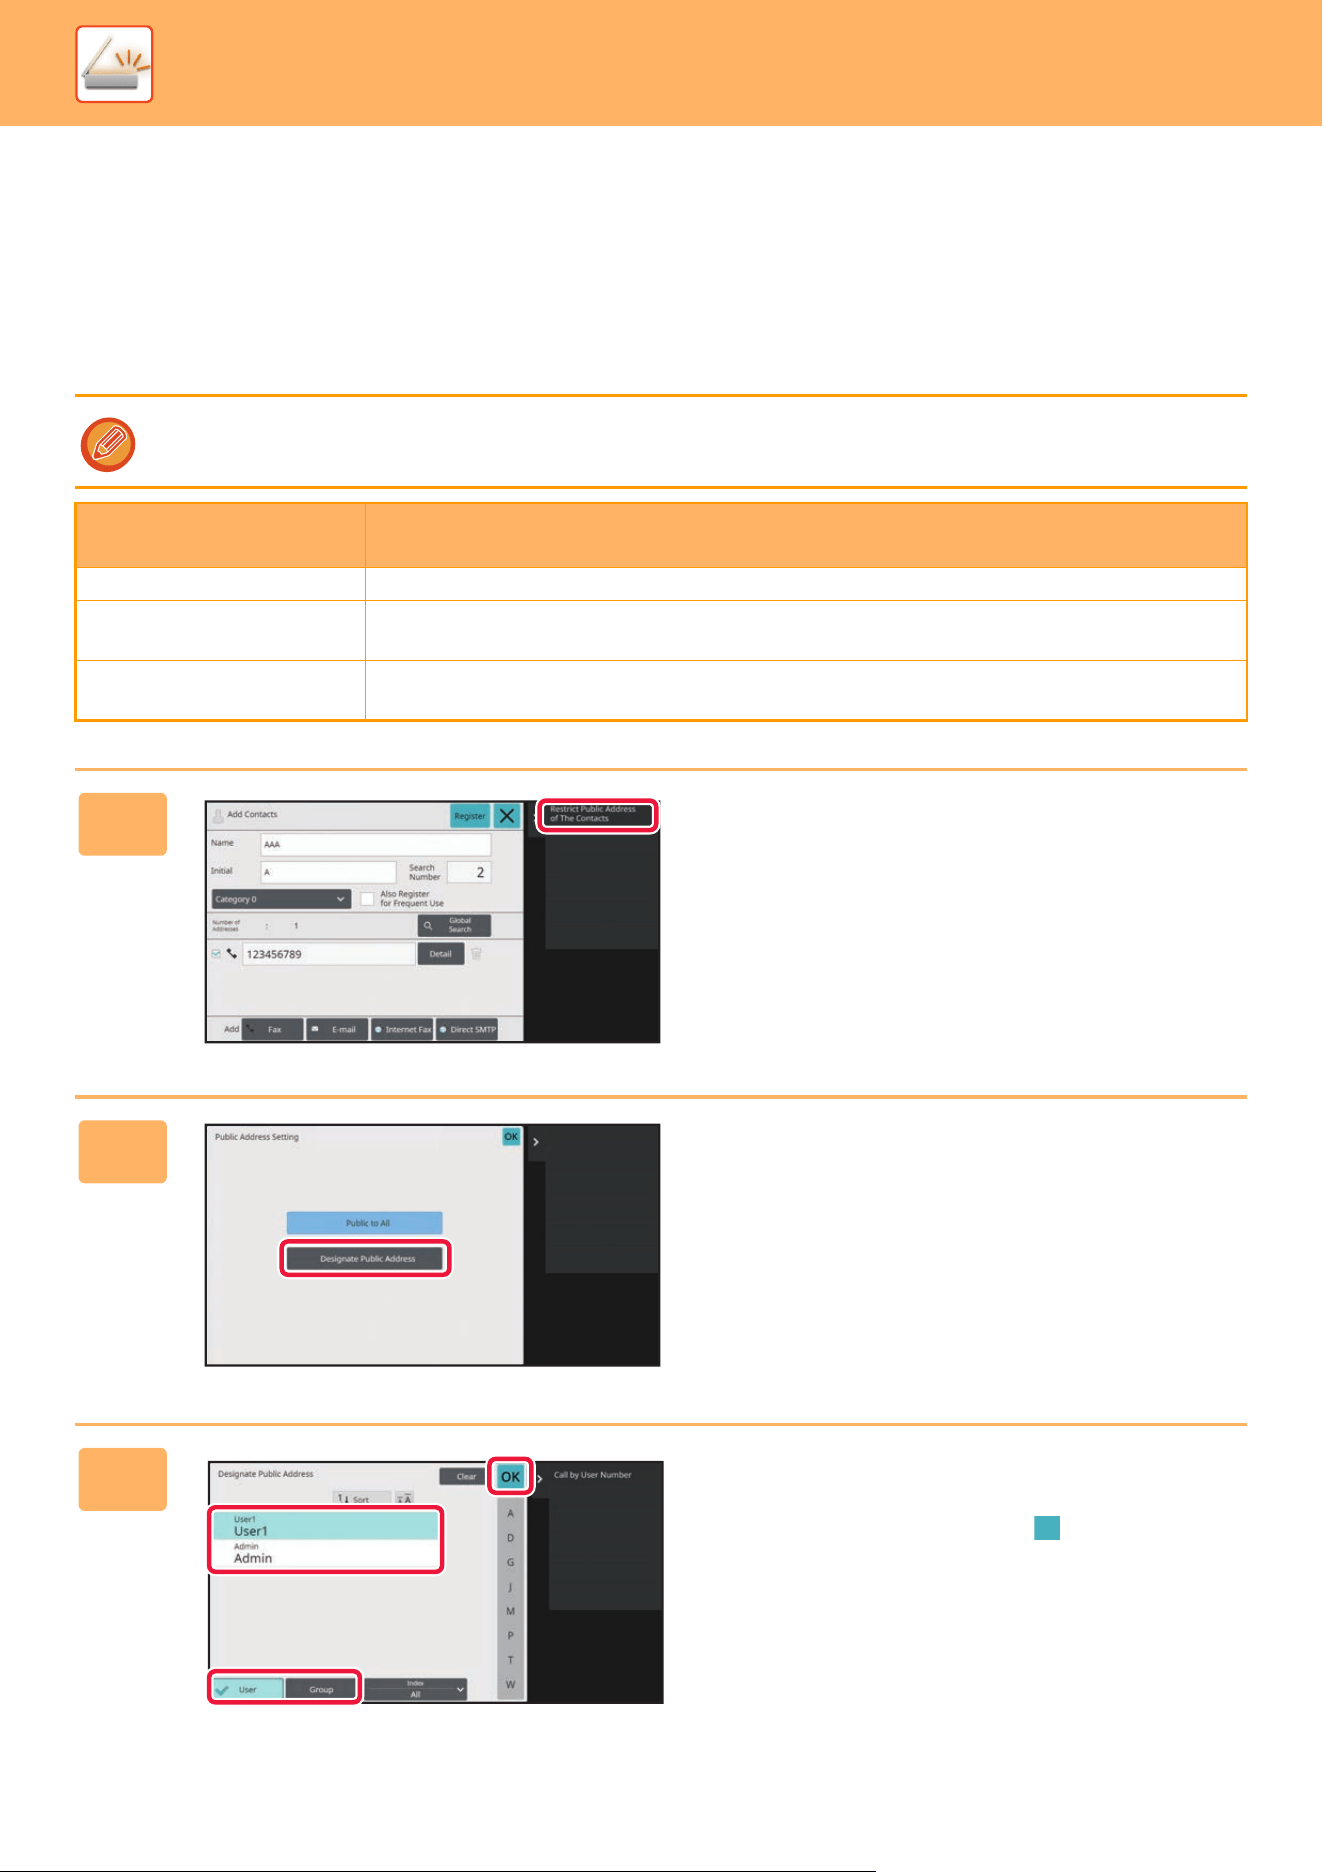
5-27
SCANNER►BEFORE USING THE MACHINE AS A NETWORK SCANNER
SETTING THE SCOPE FOR PUBLICIZING
CONTACTS AND GROUPS
"Contacts" and "Group" stored in the address book can be shared within a specified group or stored as personal
contacts that only you are allowed to access.
If no publicity scope is specified, stored "Contacts" and "Group" are publicized to all users.
User authentication is required to set the scope for publicizing "Contacts" and "Group".
Scope for publicizing
addresses
Description
Publicized to all "Contacts" and "Group" are published to all users of the machine.
User
"Contacts" and "Group" are published only to the user. Registered addresses are preferentially
displayed as "Personal Contacts" in the user's address book.
User Group
Publication of "Contacts" and "Group" is limited to the specified group. Up to eight groups per
"Contacts" or "Group" can be set as the publicity scope.
1
In the address registration screen, tap
[Restrict Public Address of The
Contacts] on the action panel.
2
Tap the [Designate Public Address]
key.
3
Tap [User] or [Group] and specify who
the address is made public to.
After the settings are completed, tap .

5-28
SCANNER►BEFORE USING THE MACHINE AS A NETWORK SCANNER
DELETING THE TRANSMISSION HISTORY
You can delete the image send transmission history.
DELETING A SELECTED HISTORY
Deleting all transmission histories
If you have logged in as the administrator, select any user name desired from the user list.
To register a user:
In "Settings (administrator)", select [User Control] → [User Settings] → [User List] → [Add].
The transmission history is deleted in normal mode.
1
Tap the history you want to delete.
2
In the transmission log screen, tap [Delete the Selected History] on the action
panel.
3
The message "Delete the Selected History?" will appear, tap the [Delete] key.
The selected transmission log is deleted.
1
In the transmission log screen, tap [Delete All Histories] on the action panel.
2
The message "Delete All Histories" will appear, tap the [Delete All] key.
All transmission logs are to be deleted.
5-29
SCANNER►BEFORE USING THE MACHINE AS A NETWORK SCANNER
REGISTER AN ADDRESS BOOK IN THE
WEB PAGE
Address Book
Transmission destinations (contacts) such as Scan to E-mail addresses, and groups of transmission destinations, can
be stored in the address book. In setting mode, a list of stored contact and group information is displayed.
To edit a contact or group, select the name of the contact/group. To add a new contact or group, click the [Add] key.
Item Description
Type Select the contact or group.
Search Number Store a number that can be used to search for a contact or group.
Address Name Store a name for an address.
Initial Store an initial that can be used to search for a contact or group.
Category Enter a category for a contact or group.
Register this Address to be added
to the [Frequent Use] index.
Add a contact to the "Frequent Use" index.
Address Public Setting
Set whether the address will be shared with all users or only selected users.
If you select [Select user], click the user selection buttons to select the users with whom the
address will be shared.
Share also to the following group
When this function is enabled, you can select a previously stored group from the list below
and share the address with that group.
E-mail
E-mail Address
To store a new address, select [New Address] and enter the address in the address entry
field.
Global Address Search
To search for an address stored as a global address, click this key and select the address
from the list.
File Type
*
Select the file format used for a scanned image.
Black & white: Select the compression format used for saving black & white images.
Color/Grayscale:Select the compression format used for saving color/grayscale images. If
the original is mainly text with a small number of colors, select "Reduce Colors" to scan with
the appropriate settings and reduce the file size.
Set as Default used Set an address as a default address.
FTP
FTP Address
To add a new address, select [New Address] and enter the address in [Hostname or IP
Address].
Port Number Set the port number used by the FTP server.
File Type*
Select the file format used for a scanned image.
Black & white: Select the compression format used for saving black & white images.
Color/Grayscale:Select the compression format used for saving color/grayscale images. If
the original is mainly text with a small number of colors, select "Reduce Colors" to scan with
the appropriate settings and reduce the file size.
Directory Specify a directory in the FTP server to be used for transmission.
User Name Enter a user name in the FTP server to be used for transmission.
Password Enter the password associated with the entered user name.
Enable SSL Use SSL/TLS to encrypt data before transmission.
Use PASV mode Send data to an FTP server in PASV mode.
Enable Hyperlink to FTP server to
be e-mailed
When sending data to an FTP server, send the data to the e-mail address that is specified
in the hyperlink to the FTP server.
Set as Default used Set an address as a default address.

5-30
SCANNER►BEFORE USING THE MACHINE AS A NETWORK SCANNER
* Depending on the model and upon installation of peripheral devices, High Compression PDF may be selected. When [OCR] is enabled, text in the
scanned data is automatically recognized. For PDF, the text information is embedded in the PDF. For PDF, RTF, TXT(UTF-8), DOCX, XLSX, or
PPTX, the recognized text is saved in the corresponding format.
Category Setting
A category can be renamed for greater ease of use.
Delete the previously entered characters and enter a new name (up to 127 characters).
The factory default names are "Category 1" to "Category 32".
Network Folder
Network Folder Path To store a new path, select [New Address] and enter the path in the path entry field.
User Name Enter a user name in the computer to be used for transmission.
Password Enter the password associated with the entered user name.
File Type
*
Select the file format used for a scanned image.
Black & white: Select the compression format used for saving black & white images.
Color/Grayscale: Select the compression format used for saving color/grayscale images. If
the original is mainly text with a small number of colors, select "Reduce Colors" to scan with
the appropriate settings and reduce the file size.
Enable Hyperlink to Network
Folder to be e-mailed
When sending data to a shared folder, send the data to the e-mail address that is specified
in the hyperlink to the shared folder.
Set as Default used Set an address as a default address.
Item Description
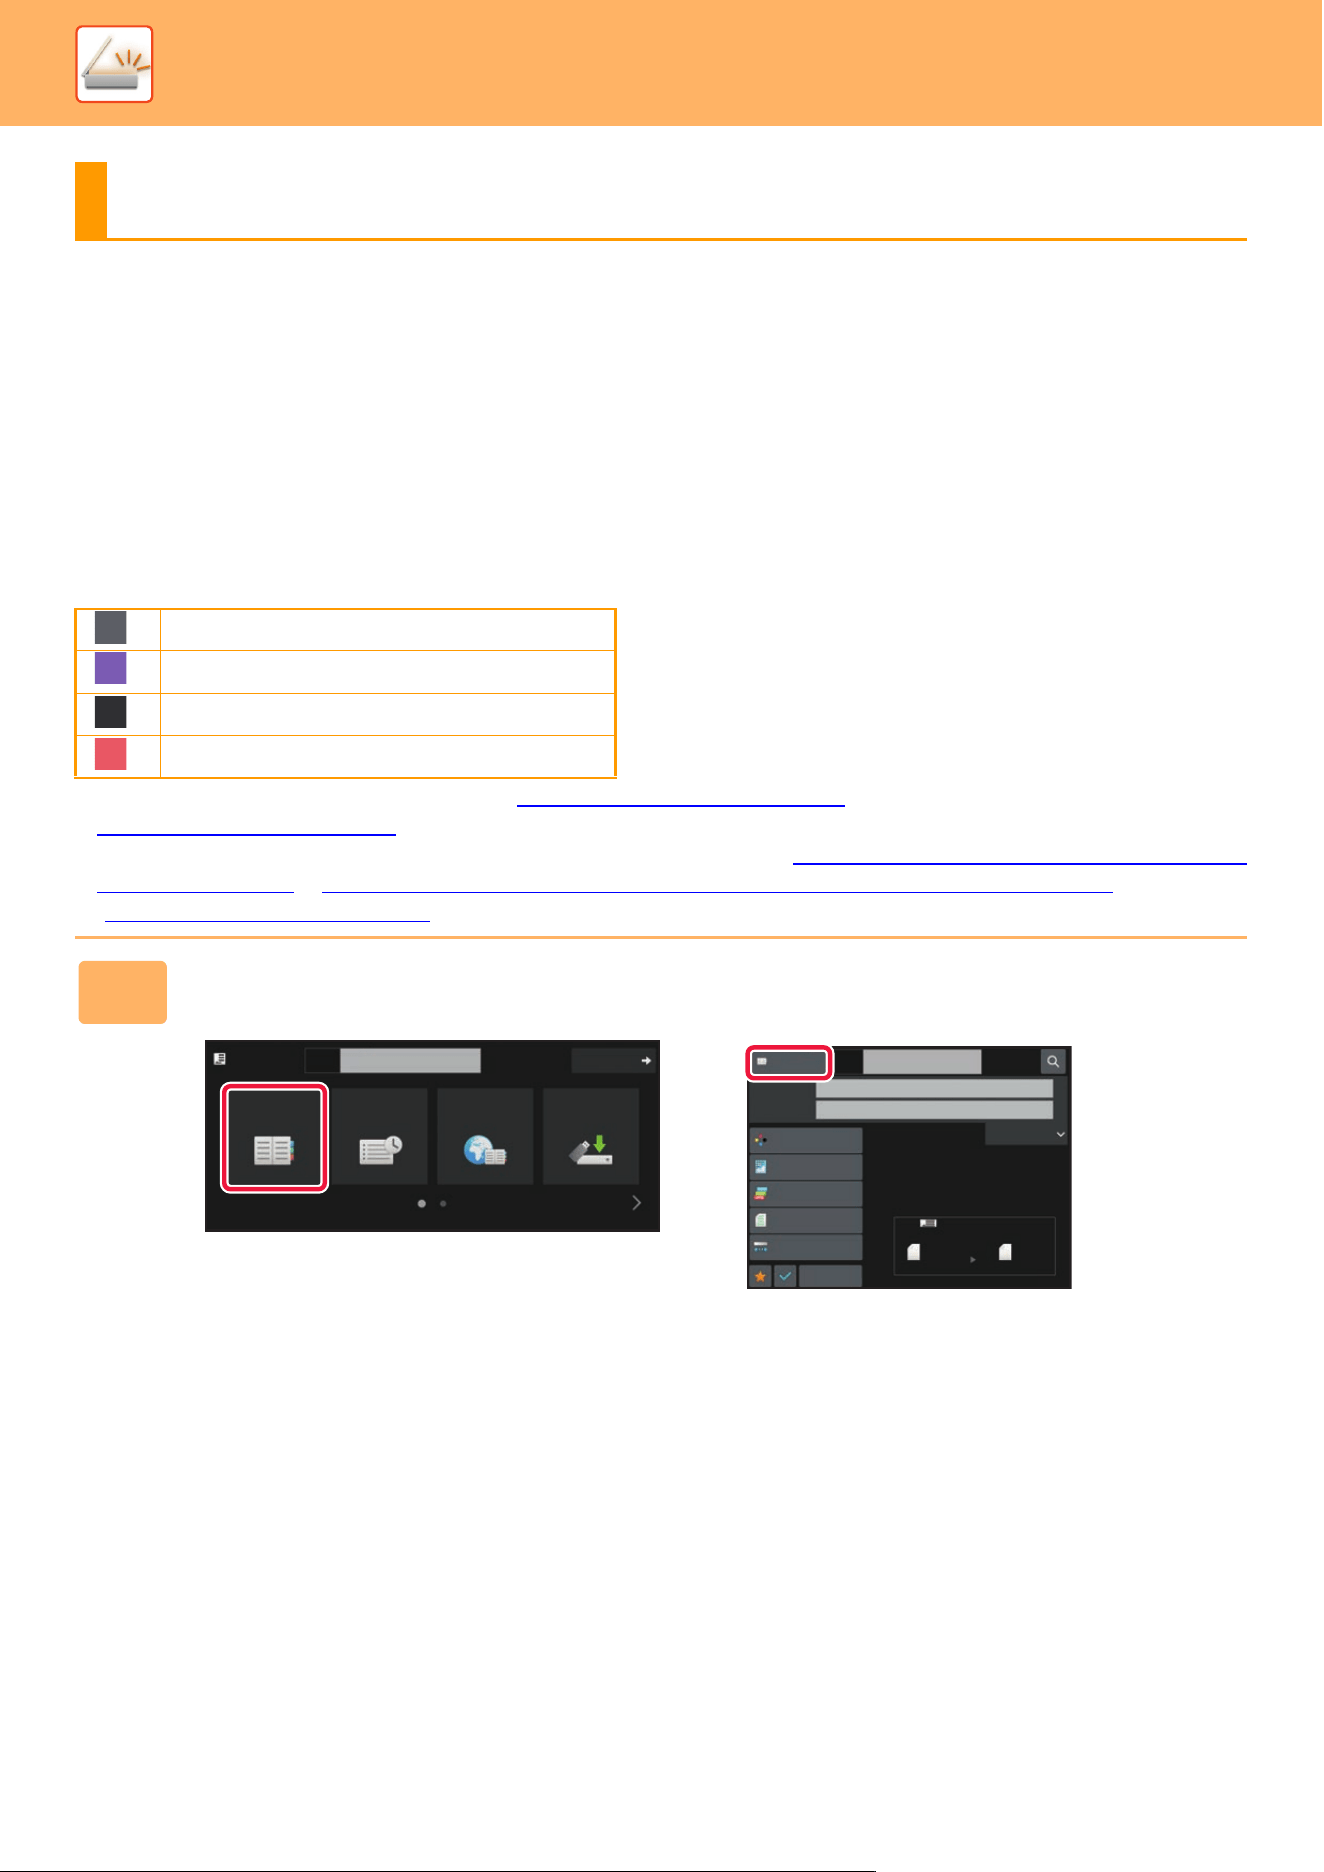
5-31
SCANNER►ENTERING DESTINATIONS
ENTERING DESTINATIONS
RETRIEVING A DESTINATION FROM AN ADDRESS
BOOK
In the address book screen, simply tap the one-touch key of a registered destination to retrieve the destination.
If necessary, store multiple destinations in a one-touch key. Tapping the key will retrieve all the stored destinations.
The address book screen shows all destinations used in each mode. Each one-touch key shows the name of the
destination and an icon indicating the mode used for the destination.
• For information on the address book, see "CHANGING MODES
(page 2-10)".
ADDRESS BOOK
(page 5-13)
• For the procedure for storing the destinations in the address book, see "STORING ADDRESSES THROUGH DIRECT
ENTRY (page 5-18)", "STORING ADDRESSES THROUGH GLOBAL ADDRESS SEARCH (page 5-19)",and
"STORING GROUPS
(page 5-23)".
ENTERING DESTINATIONS
Scan to E-mail
Scan to FTP
Scan to Network Folder
Group key with multiple destinations
1
Tap the [Address Book] key.
In Easy mode In Normal mode
Original
8½x11
Address E-mail Address
Detail
Address Book
Sending History
Global
Address Search
Local Drive/
USB
Specified by System Settings
Scan Size
Auto
Auto
Color Mode
Auto/Mono2
Resolution
200x200dpi
File Format
PDF
Original
Auto
Others
8½x11
8½x11
100%
Send Size
Address Book
Subject
File Name
Address
Touch to input Address
Options
Exposure
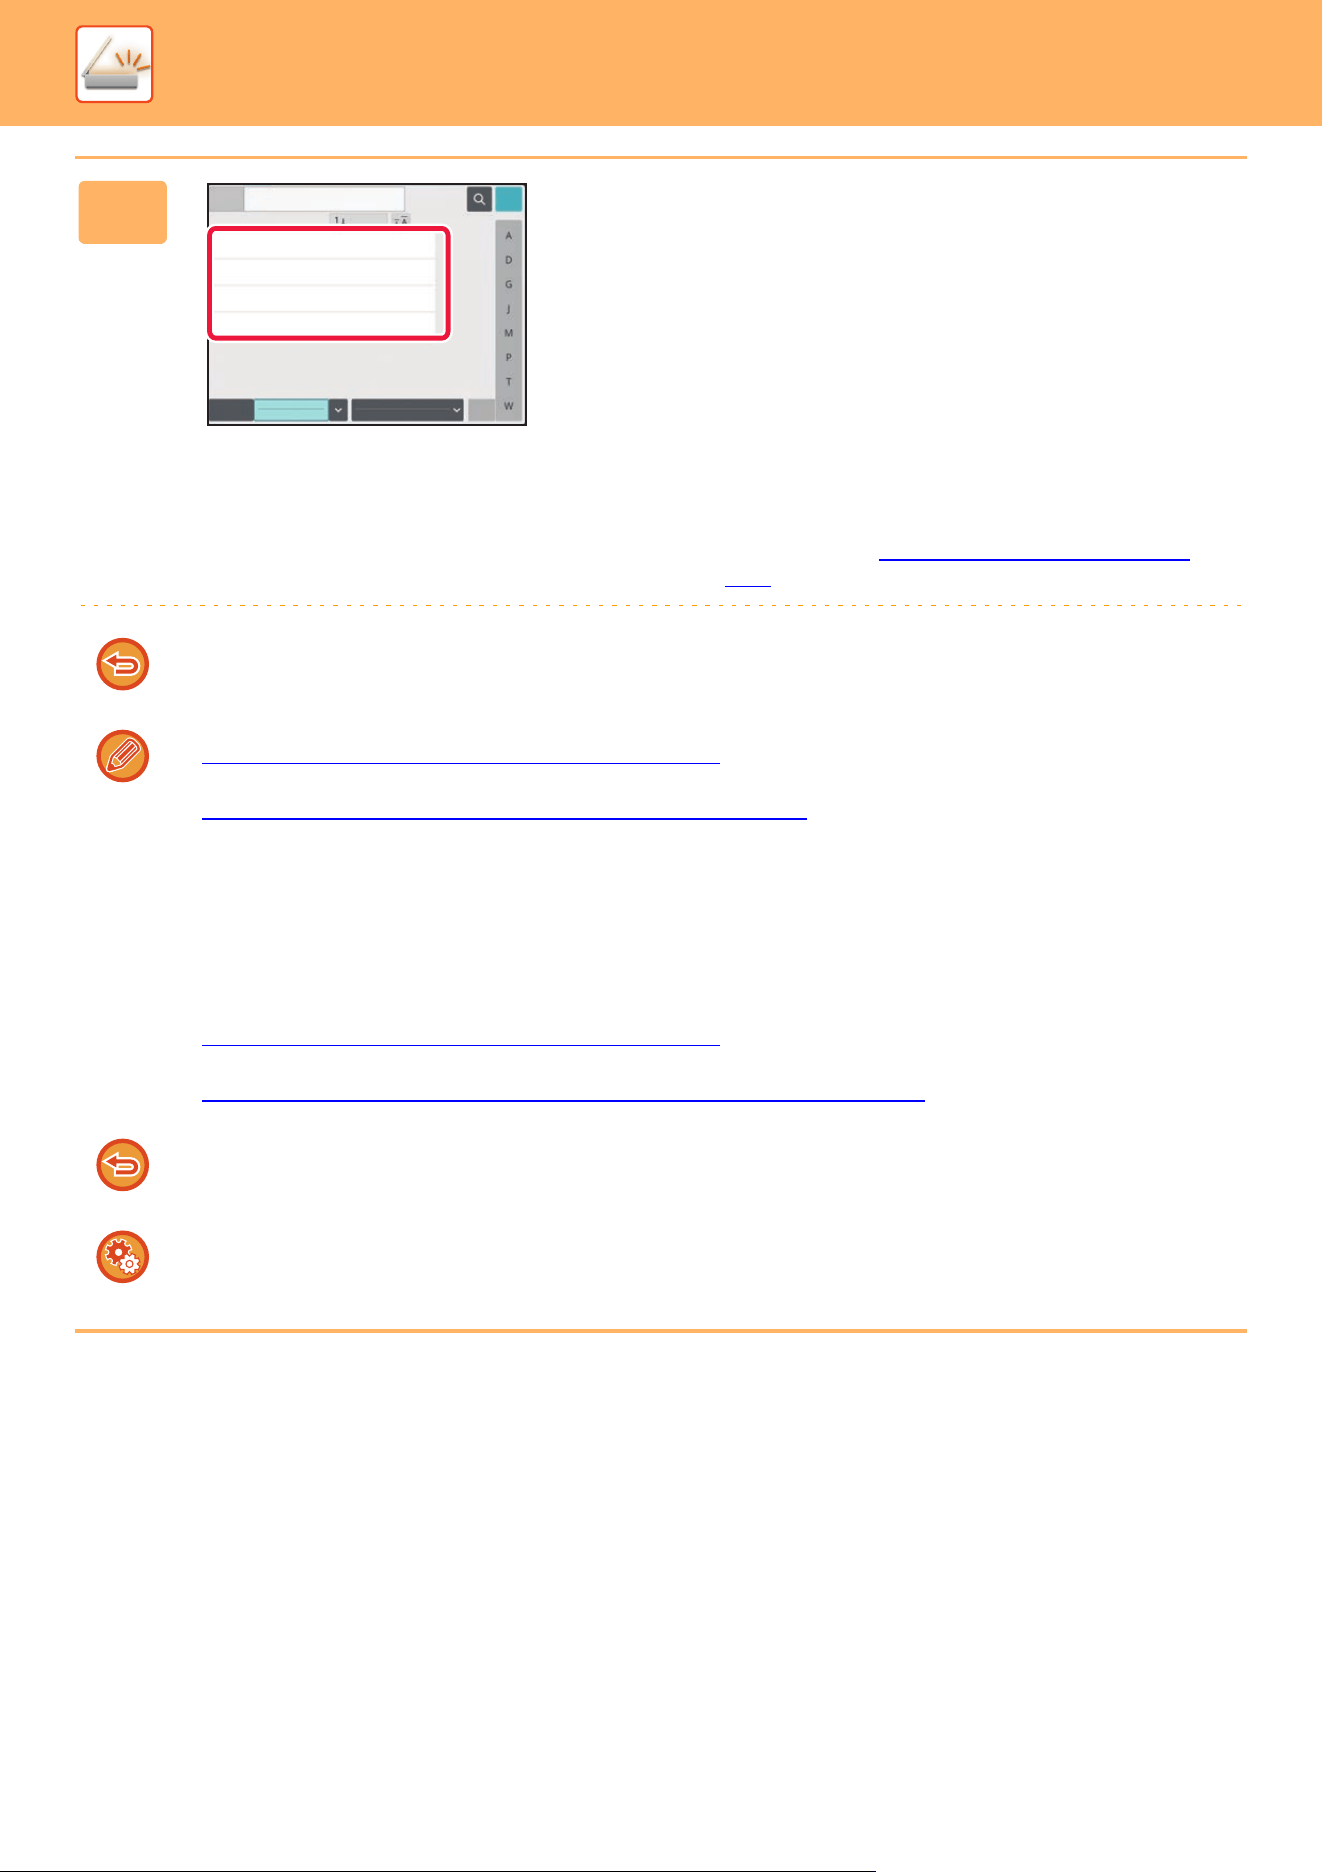
5-32
SCANNER►ENTERING DESTINATIONS
2
Tap the one-touch key of contact or
group that has a destination.
• The destinations displayed on the list can be narrowed
with categories, frequent use, indexes, and keywords. (In
normal mode you can narrow down by job type.)
• Tapping the [Sort] key allows you to change the order of
destinations displayed in the list.
• When adding a destination, tap another one-touch key.
• If two or more destinations are selected or specified, the
total number of addresses appears next to address.
• Even if only a single destination is selected, the number of
addresses appears when the destination is a contact or
group in which multiple addresses are stored. For more
information, see "ADDRESS BOOK SCREEN
(page
5-14)".
If you select an incorrect destination:
Tap the key again to cancel the selection.
• To select a destination from the transmission log, tap the [Sending History] key.
USING A TRANSMISSION LOG TO RESEND
(page 5-41)
• To check the entered destinations, tap the [Address Review] key.
VIEWING A LIST OF THE SELECTED
DESTINATIONS (page 5-34)
• The destination for transmission can be selected by tapping a stored destination.
• If an address that you do not have permission to use is included in the addresses, a message will appear when you
press the [Start] key. To send only to the permitted addresses, press the [OK] key and then the [Enter for send] key.
In Normal mode
• Tap the one-touch key, and then tap [Display Registered Information] on the action panel to display the detailed
information screen.
• To retrieve a destination by using a search number, tap [Call Search Number] on the action panel.
USING A TRANSMISSION LOG TO RESEND
(page 5-41)
• To retrieve a destination from a global address book, tap [Global Address Search] on the action panel.
RETRIEVING A DESTINATION FROM A GLOBAL ADDRESS BOOK (page 5-39)
To cancel a specified destination:
Select the address you want to cancel in the address list screen, and tap the [Delete] key.
To enable transmission to addresses of modes other than the current mode:
Remove the checkmark from [System Settings] → [Image Send Settings] → [Common Settings] → [Condition Settings]
→ [Address Book Default Selection] → [Apply Addresses of Sending Modes Only] in "Settings (administrator)".
Frequent
Use
Address
E-mail
Narrow Down
All
Category
ABC
Sort
AAA
BBB
DDD
OK
EEE

5-33
SCANNER►ENTERING DESTINATIONS
MY ADDRESS
My Address is the user's own e-mail address, and is the e-mail address that has been registered in the user list.
My Address can be used when login by login name / password is enabled in user authentication.
Use this address when you want to send a scanned image to your own e-mail address.
In E-mail mode, [Find My Address] appears on the action panel to let you immediately find and use My Address.
When you use the address book in easy scan screen or E-mail mode, the [Find My Address] button also appears at the
top of the user list for easy access from the address book.
• My Address cannot be used in the following instances:
• When address search from the user list is prohibited in the system settings
• When user authentication is disabled, or is only by user number
• When [Apply E-mail address of the user for login.] is enabled in [Default Address]
• When the e-mail address of the logged in user has not been registered
• After the [Next Address] key is pressed when [Be sure to press Next Address Key ([+]) before selecting the next
address.] is enabled in System Settings - [Image Send Settings] → [Common Settings] → [Condition Settings]
• When [S/MIME Settings] → [Disable sending to the addresses which cannot be encrypted.] is enabled in the security
settings
• You can register [Find My Address] in the home screen. This is convenient when you frequently use My Address.
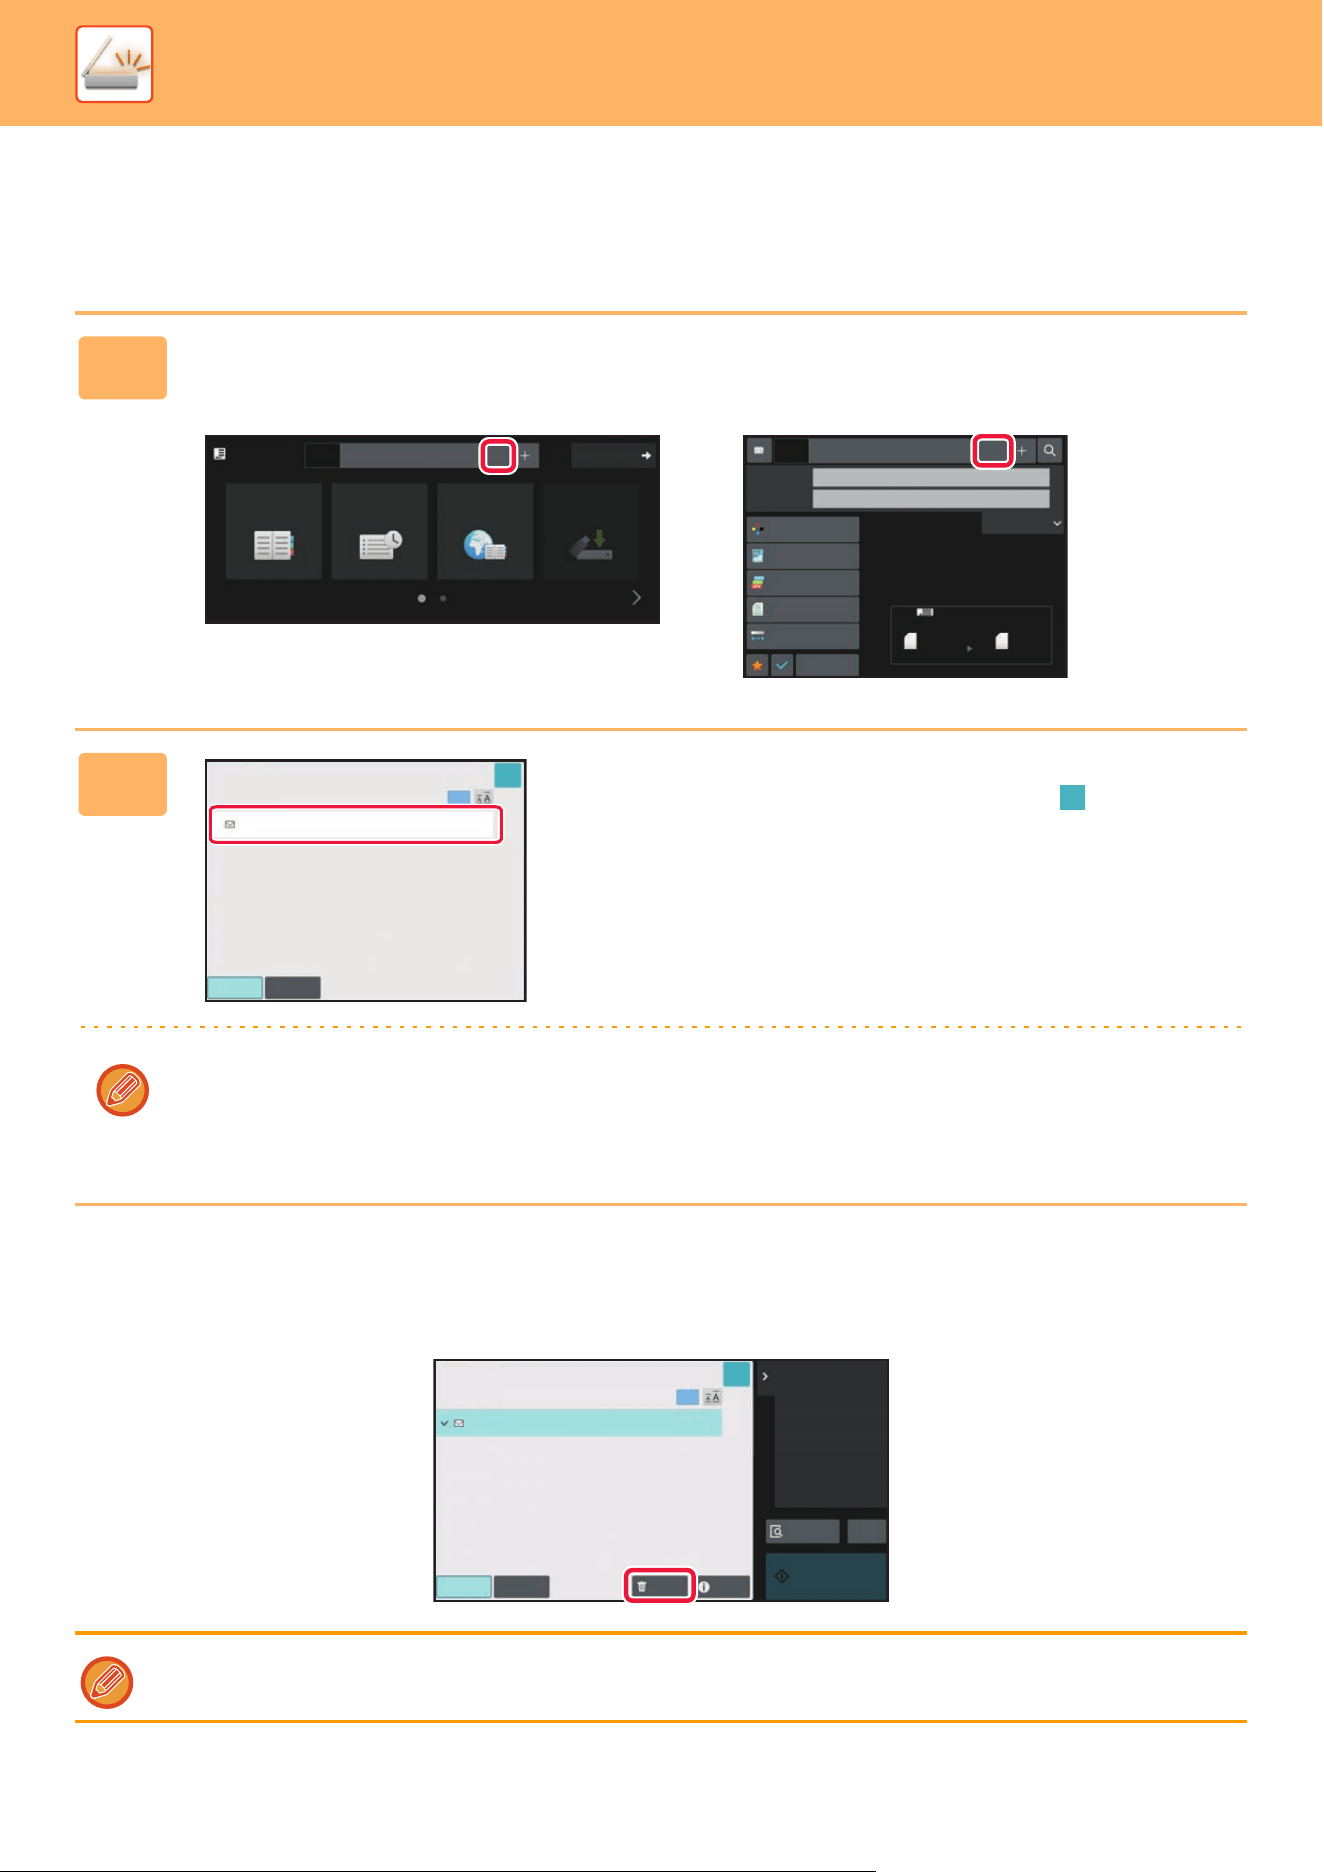
5-34
SCANNER►ENTERING DESTINATIONS
VIEWING A LIST OF THE SELECTED DESTINATIONS
When multiple destinations have been selected, you can display and check the destinations. You can also delete a
destination from the list (cancel selection of the destination).
Deleting Specified Destinations
In step 2 of "VIEWING A LIST OF THE SELECTED DESTINATIONS", select the destination and tap the [Delete] key.
1
Tap the [Address Review] key.
In Easy mode In Normal mode
2
Confirm the destination.
After the confirmation is completed, tap .
To confirm detailed information such as the type or name of the specified destination, tap the one-touch key of the target
destination, and then tap the [Info.] key.
In normal mode, you can change the delivery type (To/Cc/Bcc). Tap the address and then tap [Change to To], [Change
to Cc], or [Change to Bcc] on the action panel.
If you placed the original on the document glass and tapped the [Start] key, you cannot delete an address when changing
settings.
Original
8½x11
Address AAA
Detail
Address Book
Sending History
Global
Address Search
Local Drive/
USB
1
Scan Size
Auto
Auto
Color Mode
Auto/Mono2
Resolution
200x200dpi
File Format
PDF
Original
Auto
Others
8½x11
8½x11
100%
Send Size
Subject
File Name
Address
Options
Exposure
Specified by System Settings
AAA
1
+
To
Cc
All Destinations
AAA
aaaaaaaa
1
OK
To
Cc
Delete
Info.
All Destinations
Change to Cc
AAA
1
aaaaaaaa
Preview
Start
CA
Recent Jobs
OK
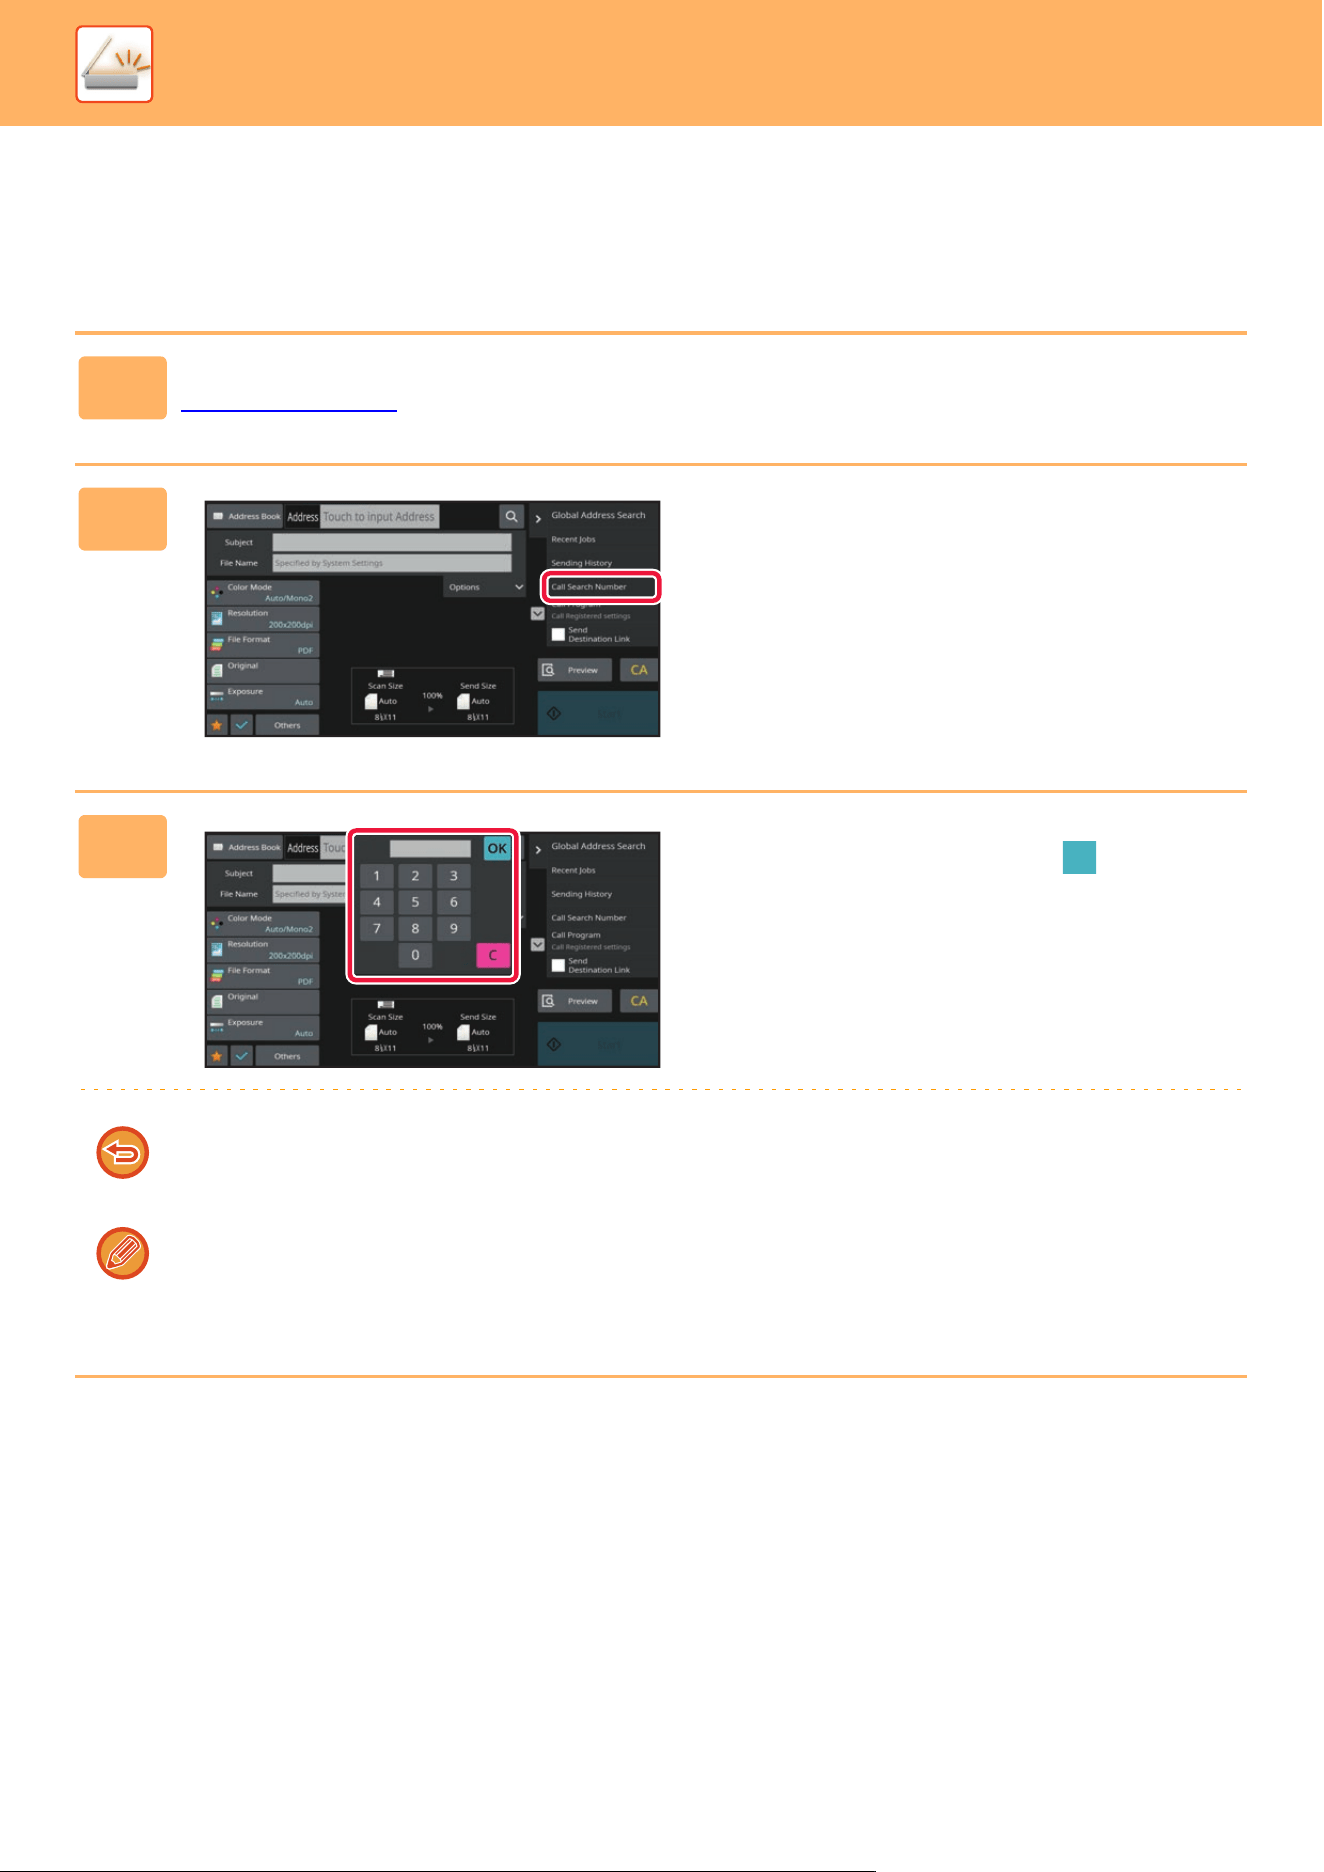
5-35
SCANNER►ENTERING DESTINATIONS
USING A SEARCH NUMBER TO RETRIEVE A
DESTINATION
The search number can be used to specify a destination stored in an address book.
1
Tap the [Detail] key to change to normal mode.
EASY MODE (page 5-6)
2
Tap [Call Search Number] on the
action panel.
3
Enter a search number (4 digits) using
the numeric keys and tap .
When the search number is entered, the stored address is
retrieved and specified as a destination.
If an incorrect search number is entered:
Tap the [C] key to clear the number and enter the correct number.
• The search number is programmed when the destination is stored in the address book.
• If you do not know the search number, tap [Print Individual List] on the action panel to print and check the address list.
• When entering search numbers such as "0001" and "0011", "0" can be omitted. For example to enter "0001", enter "1"
and tap the [OK] key.
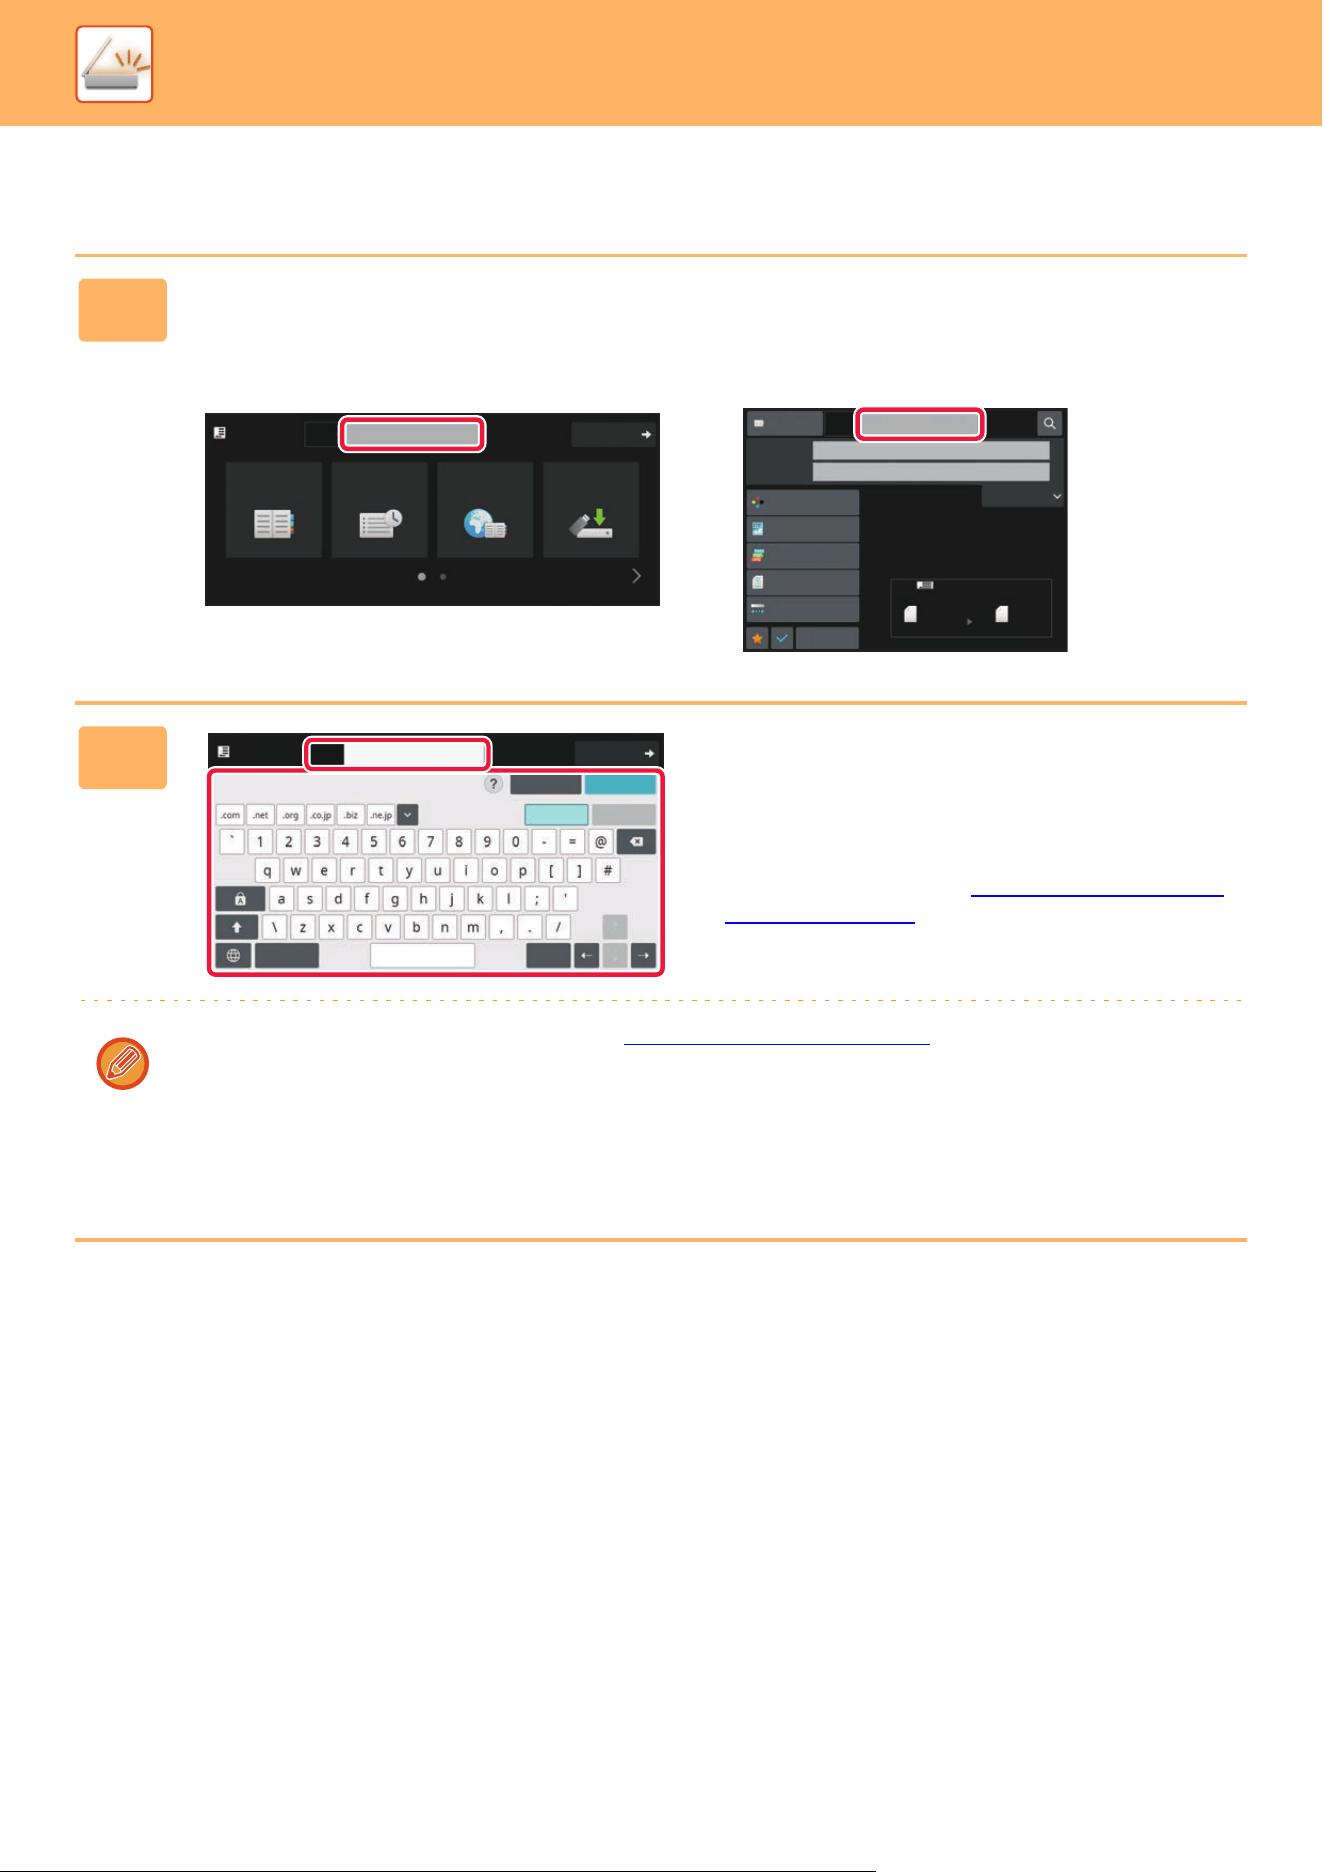
5-36
SCANNER►ENTERING DESTINATIONS
ENTERING AN ADDRESS MANUALLY
1
In the base screen of a mode, tap [Text Box].
In easy mode, only the e-mail addresses can be entered.
In Easy mode In Normal mode
2
Enter the destination address on the
soft keyboard that appears.
• In data entry mode, select the mode of the destination,
and enter the destination address.
• For Scan to Network Folder mode, the network folder
entry screen appears. See “SPECIFYING A NETWORK
FOLDER (page 5-37)".
• After entering the destination address, tap the [OK] key to
close the soft keyboard.
• For details on how to enter characters, refer to "CHARACTER ENTRY (page 2-62)" in "How to operate this machine".
• You can select [Bcc] if [Image Send Settings] → [Scan Settings] → [Default Settings] → [Bcc Setting] → [Enable Bcc]
is enabled in [System Settings].
• When you want to display Bcc address on the job management screen or address list tab, [Image Send Settings] →
[Scan Settings] → [Default Settings] → [Bcc Setting] → [Display Bcc Address on the Job Management Screen] is
enabled in [System Settings].
Original
8½x11
Address E-mail Address
Detail
Address Book
Sending History
Global
Address Search
Local Drive/
USB
Scan Size
Auto
Auto
Color Mode
Auto/Mono2
Resolution
200x200dpi
File Format
PDF
Original
Exposure
Auto
Others
8½x1 8½x1
100%
Send Size
Address Book
Subject
File Name
Address
Touch to input Address
Options
Specified by System Settings
Original
8½x11
Address
Detail
Space
File Format
AltGr
Characters Symbols
Cancel OK
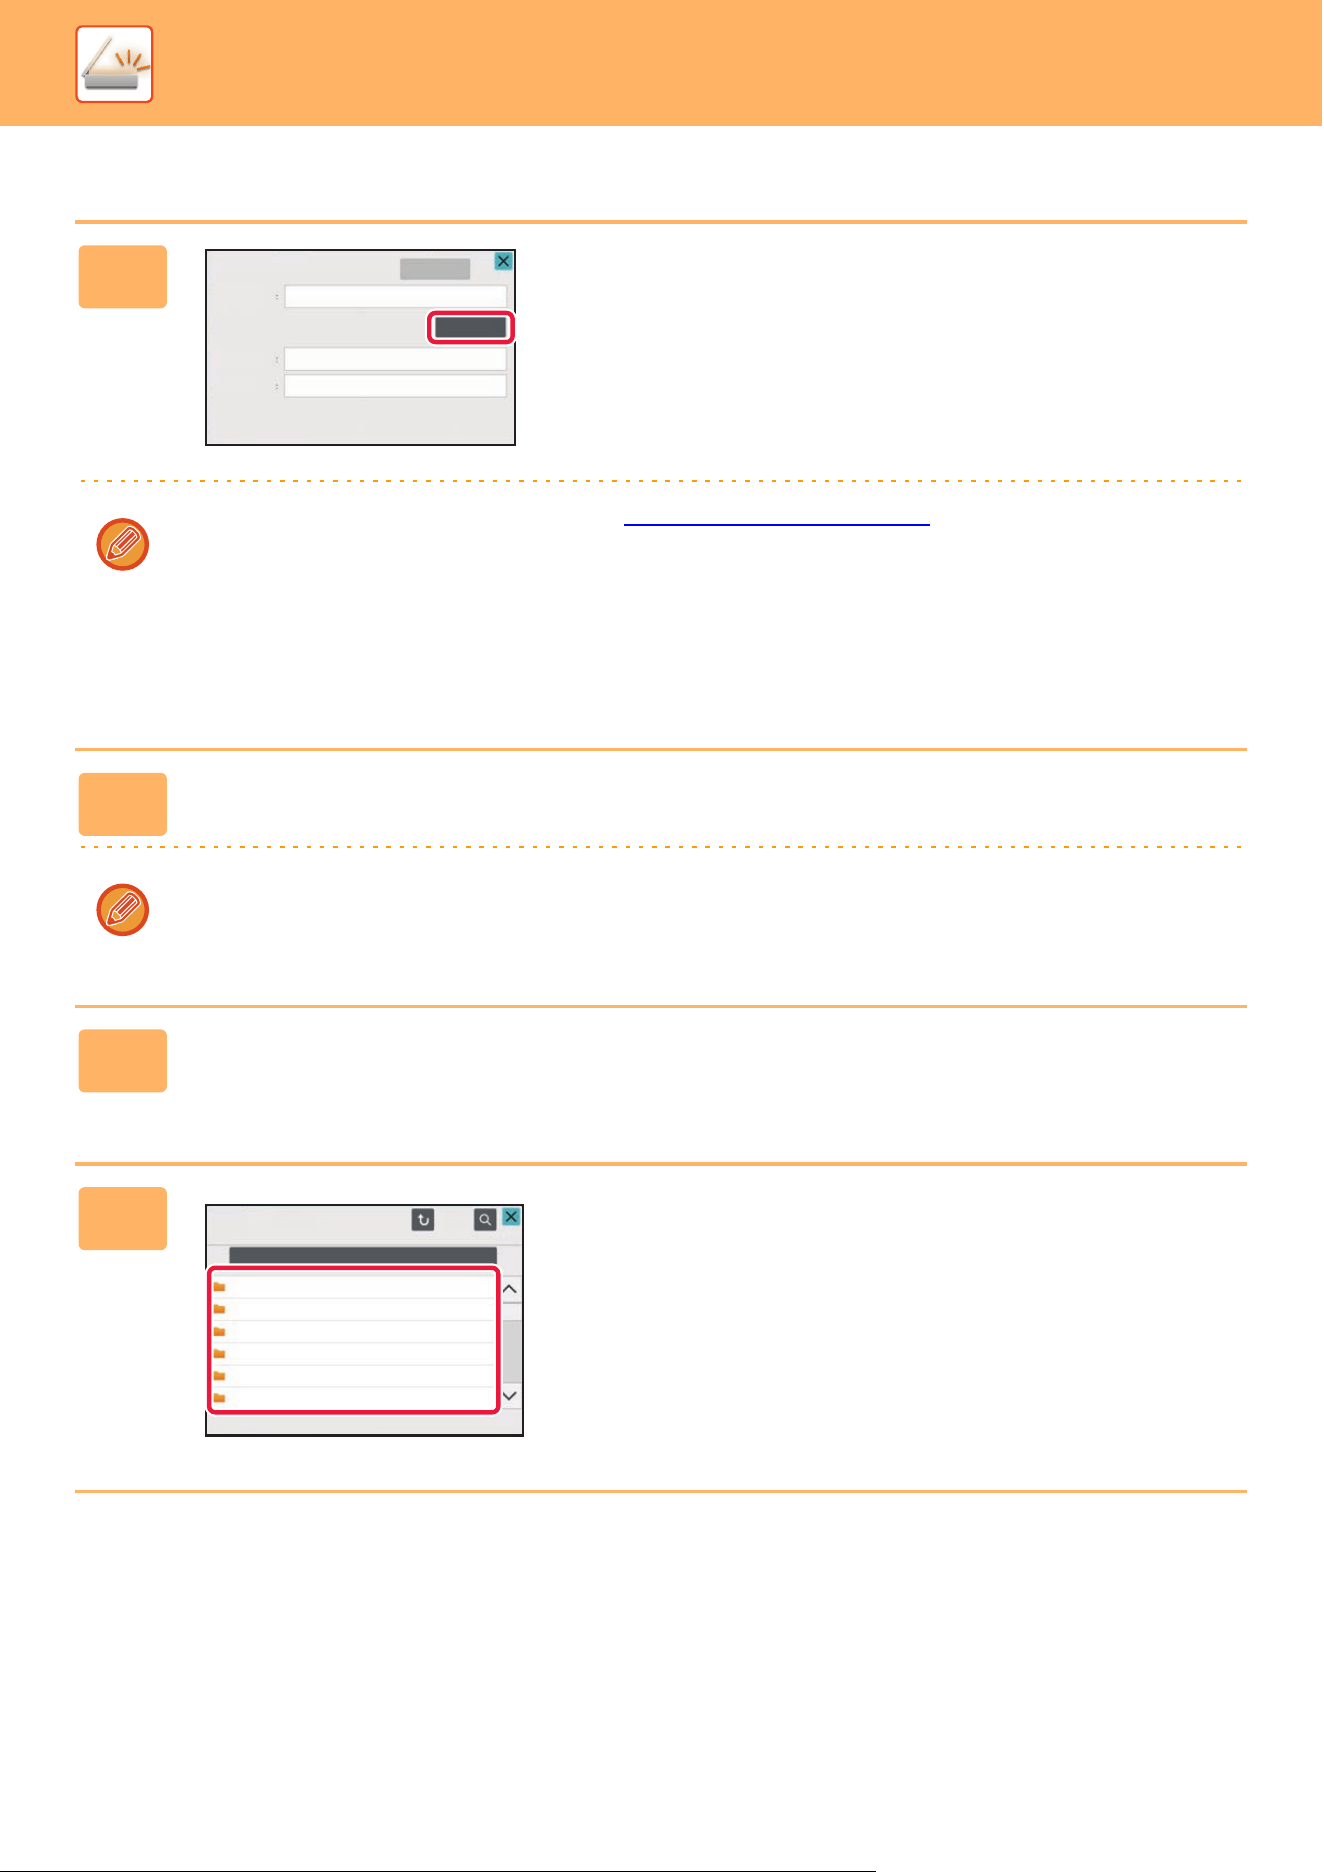
5-37
SCANNER►ENTERING DESTINATIONS
SPECIFYING A NETWORK FOLDER
1
Tap the [Browse] key in the network
folder entry screen.
• To directly enter a folder, tap the [Folder Path] box. The
soft keyboard is displayed.
• If a user name and password are required, check with the
administrator of the server and enter the user name and
password.
• For details on how to enter characters, refer to "CHARACTER ENTRY (page 2-62)" in "How to operate this machine".
• If a user authentication function other than authentication by user number is enabled, the login name of the current
user is automatically entered in the user name field.
• If user authentication is not set and a network folder which has different passwords for each user is selected as the
destination, a screen to enter a user name and password can be displayed at the time of sending.
Configure in "Settings (administrator)" → [System Settings] → [System Control] → [Advanced Settings].
• Enter a password with up to 255 single-byte characters.
2
Tap the key of the workgroup that you wish to access.
• Tap the [Search] key and enter a keyword to search for a workgroup, server, or network folder.
• Up to 100 workgroups, 100 servers, and 100 network folders are displayed.
• Tap the [Cancel] key to return to the screen of step 1.
3
Tap the key of the server or computer that you wish to access.
If a screen appears prompting you to enter a user name and password, check with your server administrator and enter
the appropriate user name and password.
4
Tap the key of the network folder.
After the settings are completed, tap the [OK] key. You will
return to the screen of step 1. Tap the [OK] key again to
accept the destination.
Address Entry
Path Input
to Folder
User Name
Password
Browse
OK
Network Folder
Network Folder Name
\\Server1
Folder1
Folder2
Folder3
Folder4
Folder5
Folder6

5-38
SCANNER►ENTERING DESTINATIONS
SELECTING A SUBFOLDER AS A DESTINATION
If there is only one shared folder selected as the destination, tapping [Select a Subfolder] changes the destination to the
subfolder.
• If the destination is changed to a subfolder, hyperlink e-mail transmission will not take place.
• If a selected destination is a group destination, this function cannot be used.
• If [Send and Print] of the copy function is set, this function cannot be used.
• If [Disable Selection from Address Book] or [Disable Direct Entry] in "Settings (administrator)" → [System Settings] →
[Device Control] → [Enable/Disable Settings] → [Settings to Disable Transmission] is prohibited, this function cannot be
used.
• If [Approval Settings for Each Mode], [Approval Setting for Direct Entry], or [Approval Setting to Use a Local Address Book]
in "Settings (administrator)" → [System Settings] → [User Control] → [Authority Group] is prohibited, this function cannot
be used.
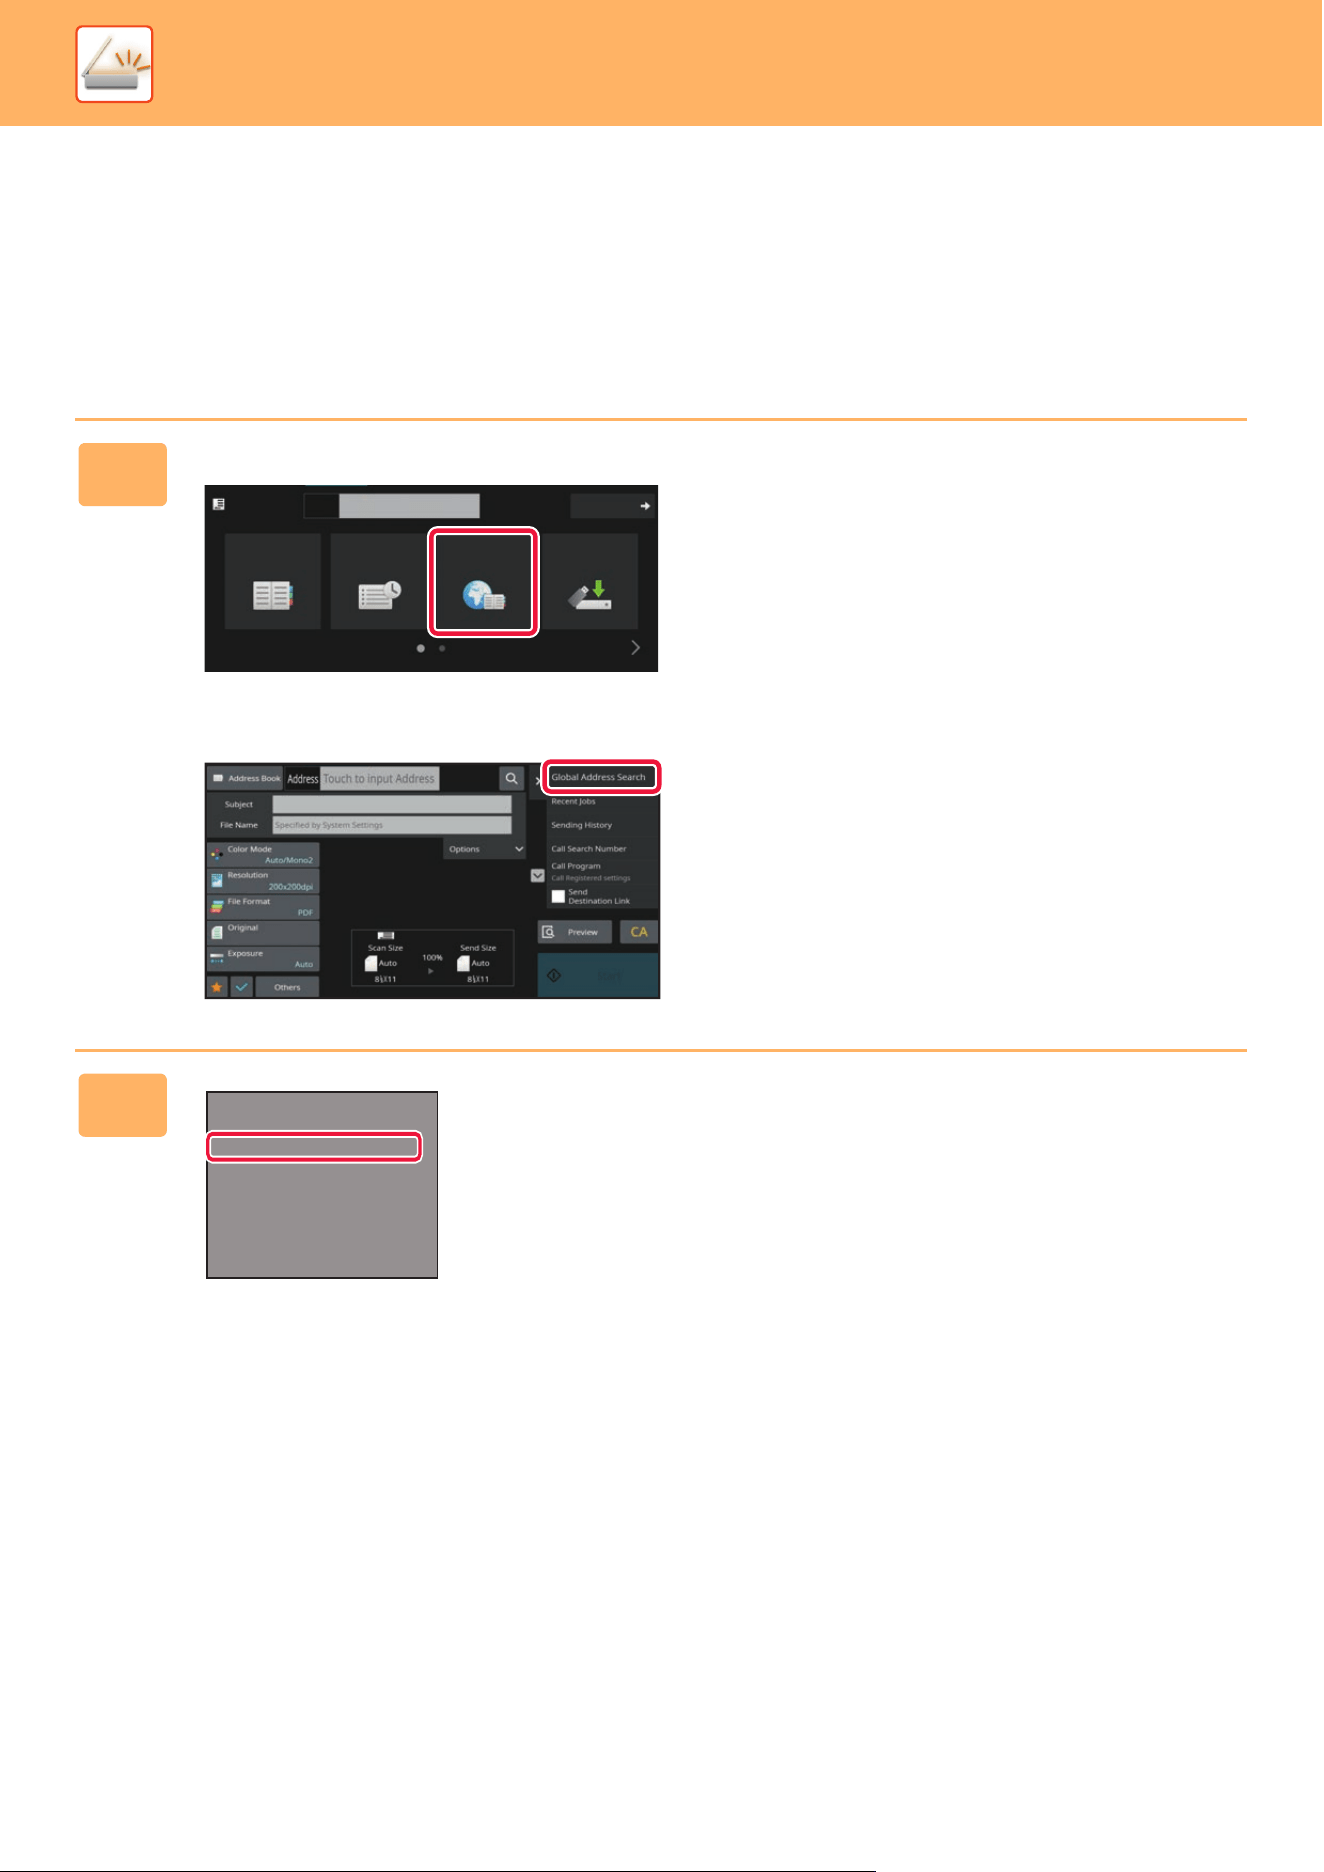
5-39
SCANNER►ENTERING DESTINATIONS
RETRIEVING A DESTINATION FROM A GLOBAL
ADDRESS BOOK
When an LDAP server is configured in the "Settings (Web version)", look up an address in a global address book and
retrieve the destination address for Scan to E-mail.
In normal mode, you can add an address retrieved by searching to the address book. However, addresses of the FTP
transmission cannot be stored from the machine.
1
In Easy mode
Tap the [Global Address Search] key.
In Normal mode
In the base screen or address book
screen, tap [Global Address Search]
on the action panel.
2
Tap [Destination] and tap the LDAP
server to be used.
• If an authentication screen for the LDAP server appears,
enter your user name and password.
• If only one LDAP server has been stored, it is not
necessary to take step 2. In this case, start from step 3.
Original
8½x11
Address E-mail Address
Detail
Address Book
Sending History
Global
Address Search
Local Drive/
USB
OK
LDAP_SERVER_1_123456789012345678901234567890
Targ et
Address Book
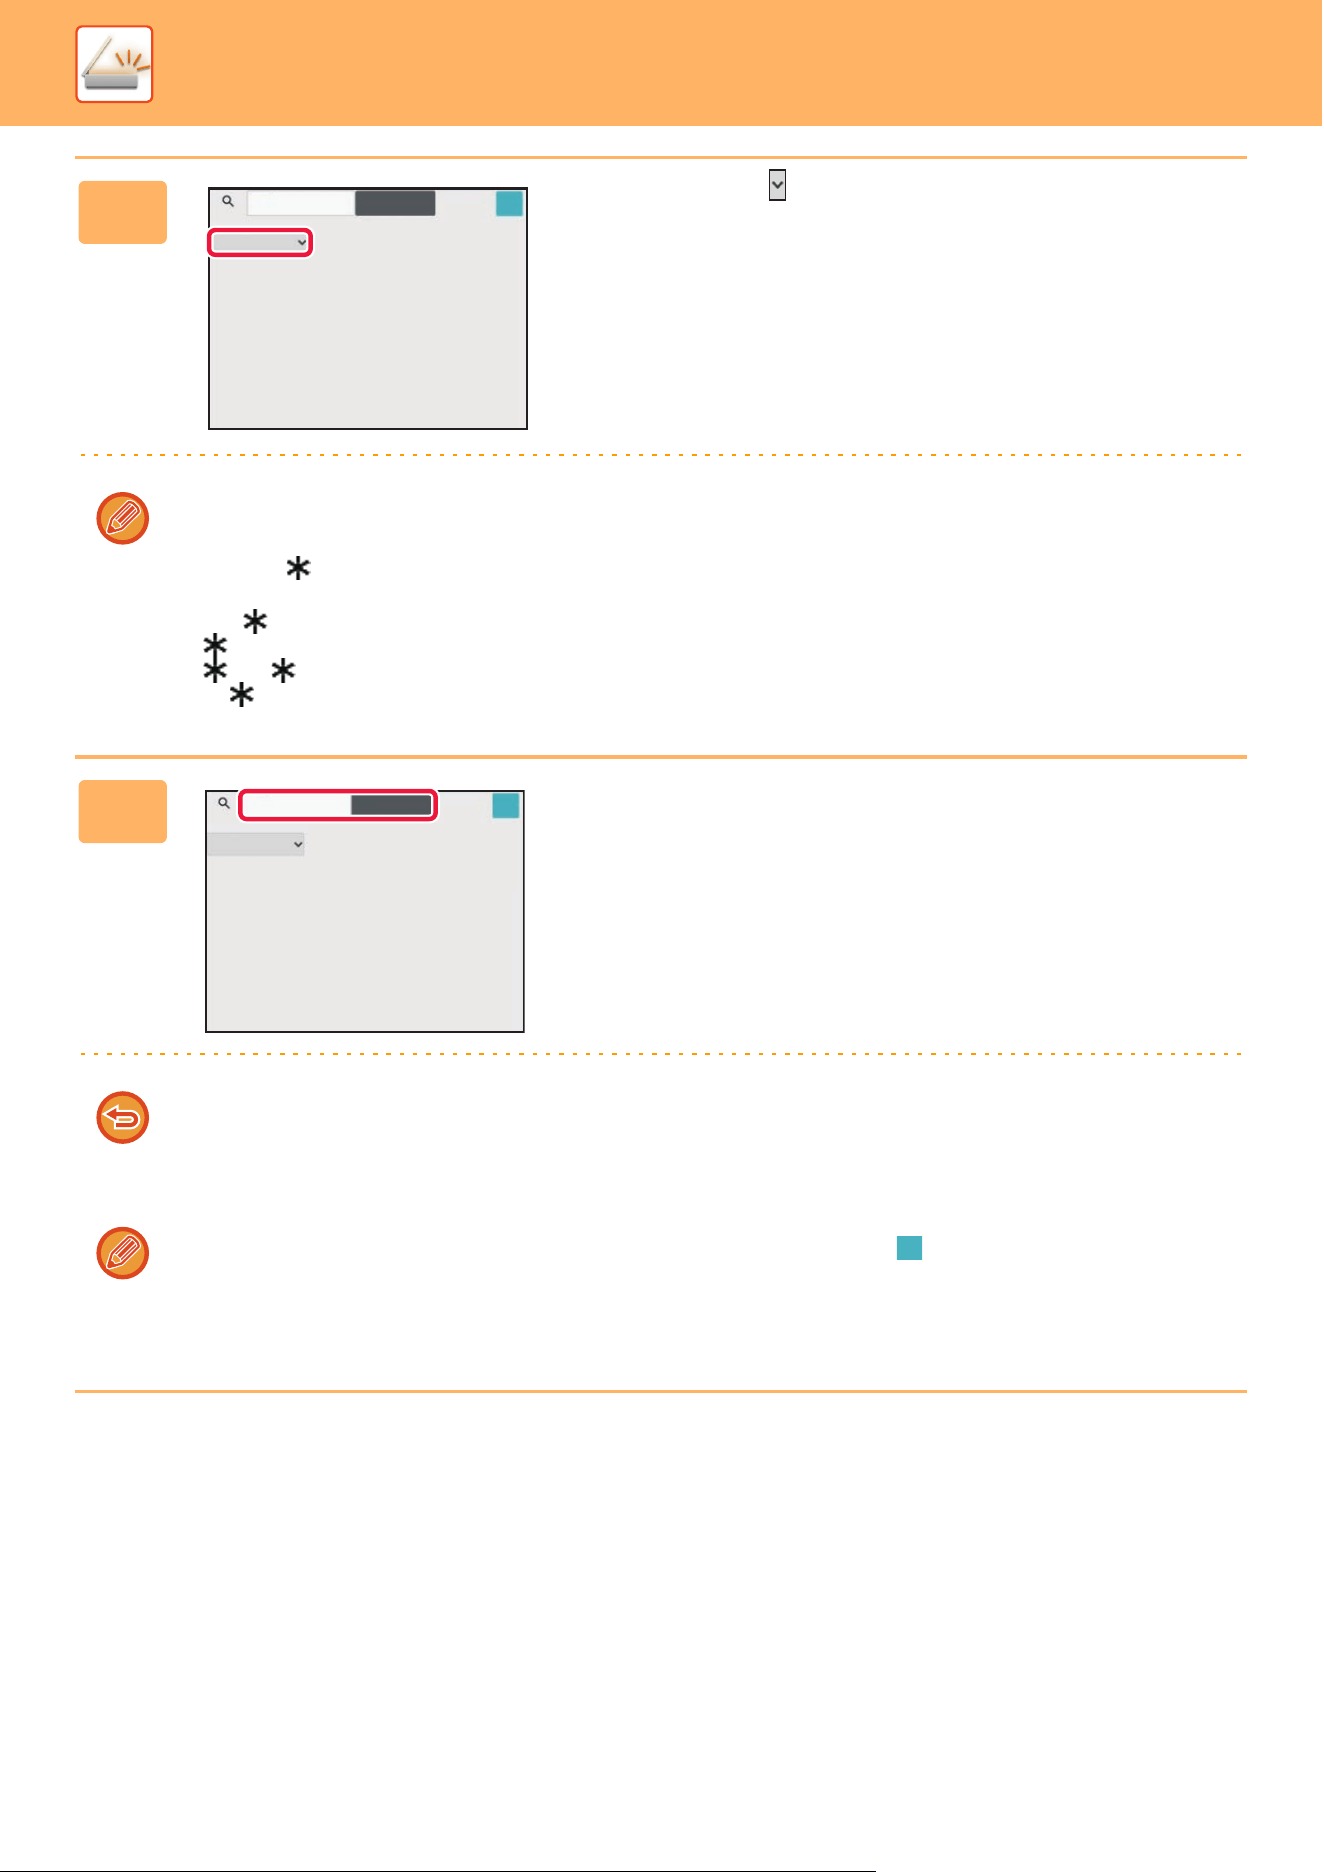
5-40
SCANNER►ENTERING DESTINATIONS
3
Tap of [Item], and select an item to
be searched from [Name] or
[Address].
How to search
Enter the search characters (maximum of 64 characters). The system will look for names starting with the entered
letters.
An asterisk is used as follows:
XXX : Names beginning with "XXX"
XXX: Names that end with "XXX"
XXX : Names containing "XXX"
AA XX: Names that start with "AA" and end with "XX".
4
Enter a keyword and tap the [Search
Start] key.
When you tap the keyword entry box, the soft keyboard
appears.
The search results will appear after a brief interval.
• If no destination is found:
Tap the [Search Again] key to add more search letters.
• To continuously add other destination.
Tap the destination.
To check the destination information:
Tap the one-touch key of the target destination, and then tap the [Info.] key. Tap to close the address information
screen.
In normal mode, you can select an address and tap [New Registration with Address Book] on the action panel to add the
address to the address book. This is convenient if you have entered a destination directly.
Enter Text
Item
Name
Enter Initial and press Enter key of
external keyboard or [Start Search] button.
Search Start
Target
OK
LDAP_ SERVER_ 1_ 123456789
012345678901234567890
Enter Text
Item
Name
Enter Initial and press Enter key of
external keyboard or [Start Search] button.
Target
Search Start
OK
LDAP_ SERVER_ 1_ 123456789
012345678901234567890

5-41
SCANNER►ENTERING DESTINATIONS
USING A TRANSMISSION LOG TO RESEND
Select a destination from a transmission log and resend the data.
The destinations of the most recent 50 transmissions by Scan to E-mail. Select one of these to resend to that
destination. The destinations of the FTP transmission and Scan to Network Folder are also shown in the transmission
log.
In normal mode, the addresses shown in the transmission log can also be stored in an address book. This is convenient
when storing an address that was manually entered.
• When a destination for retransmission is selected in the transmission log screen, the mode of the selected destination is
automatically selected.
• The following types of addresses are not stored for resending.
• One-touch key for a contact or group in which multiple destinations are stored.
• Group destinations
• Broadcasting destinations
• The user name and password are not stored for security reasons. If a screen requiring you to enter such information
appears, enter the information again.
1
In Easy mode
Tap the [Sending History] key
In Normal mode
In the base screen or address book
screen, tap [Sending History] on the
action panel.
Original
A4
Address E-mail Address
Detail
Address Book
Sending History
Global
Address Search
Local Drive/
USB
8½x11
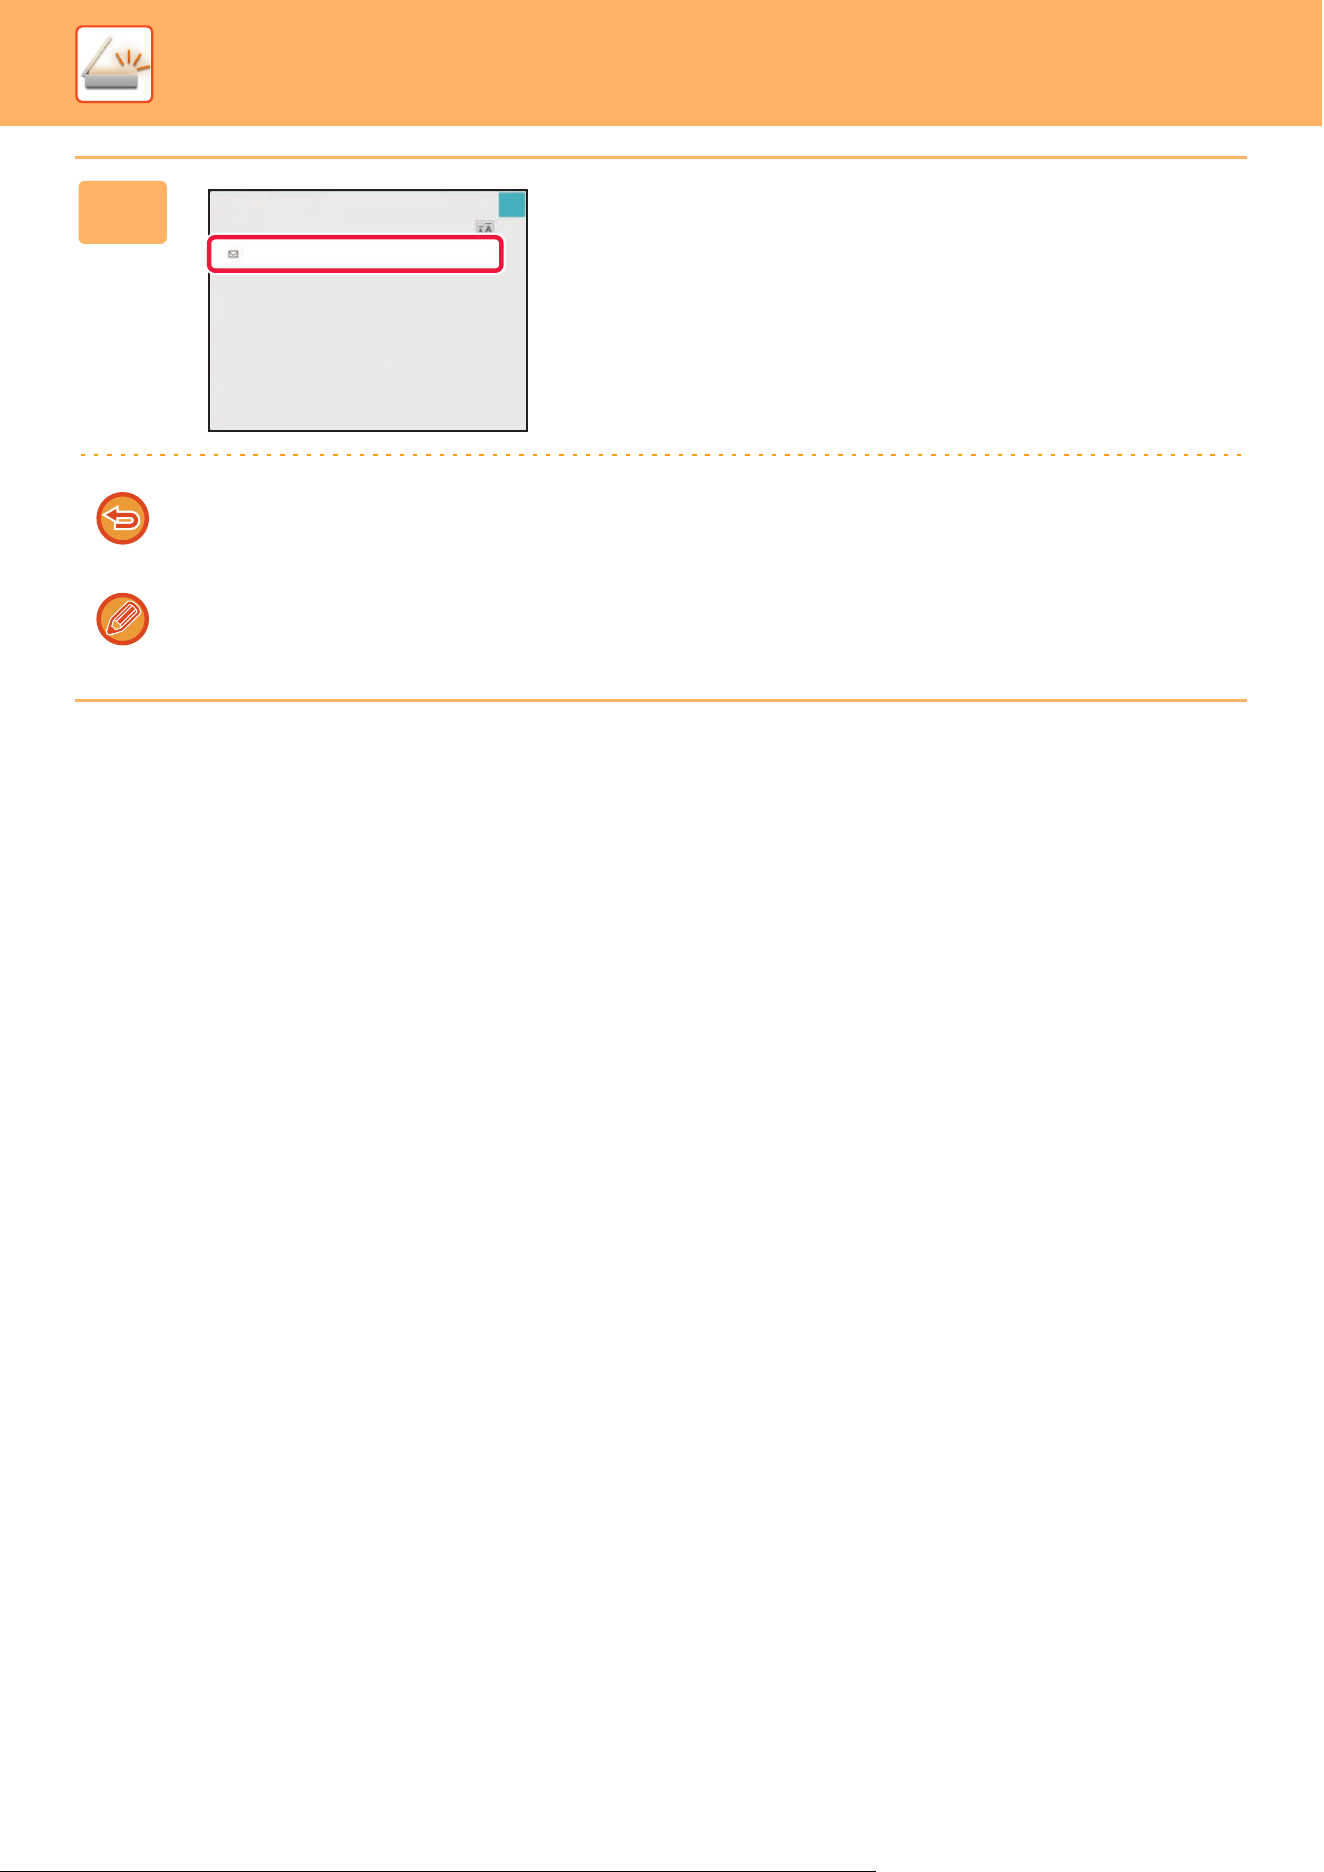
5-42
SCANNER►ENTERING DESTINATIONS
2
Tap the key of the destination to
resend.
The last 50 addresses used for transmission are displayed.
If a screen requiring you to enter the user name and
password appears, enter the information.
To cancel the resend setting:
Tap the highlighted key.
In normal mode, you can select an address and tap [New Registration with Address Book] on the action panel to add the
address to the address book. This is convenient if you have entered a destination directly.
Sending History
Select Address to Send Again.
AAA
aaaaaaaa
OK
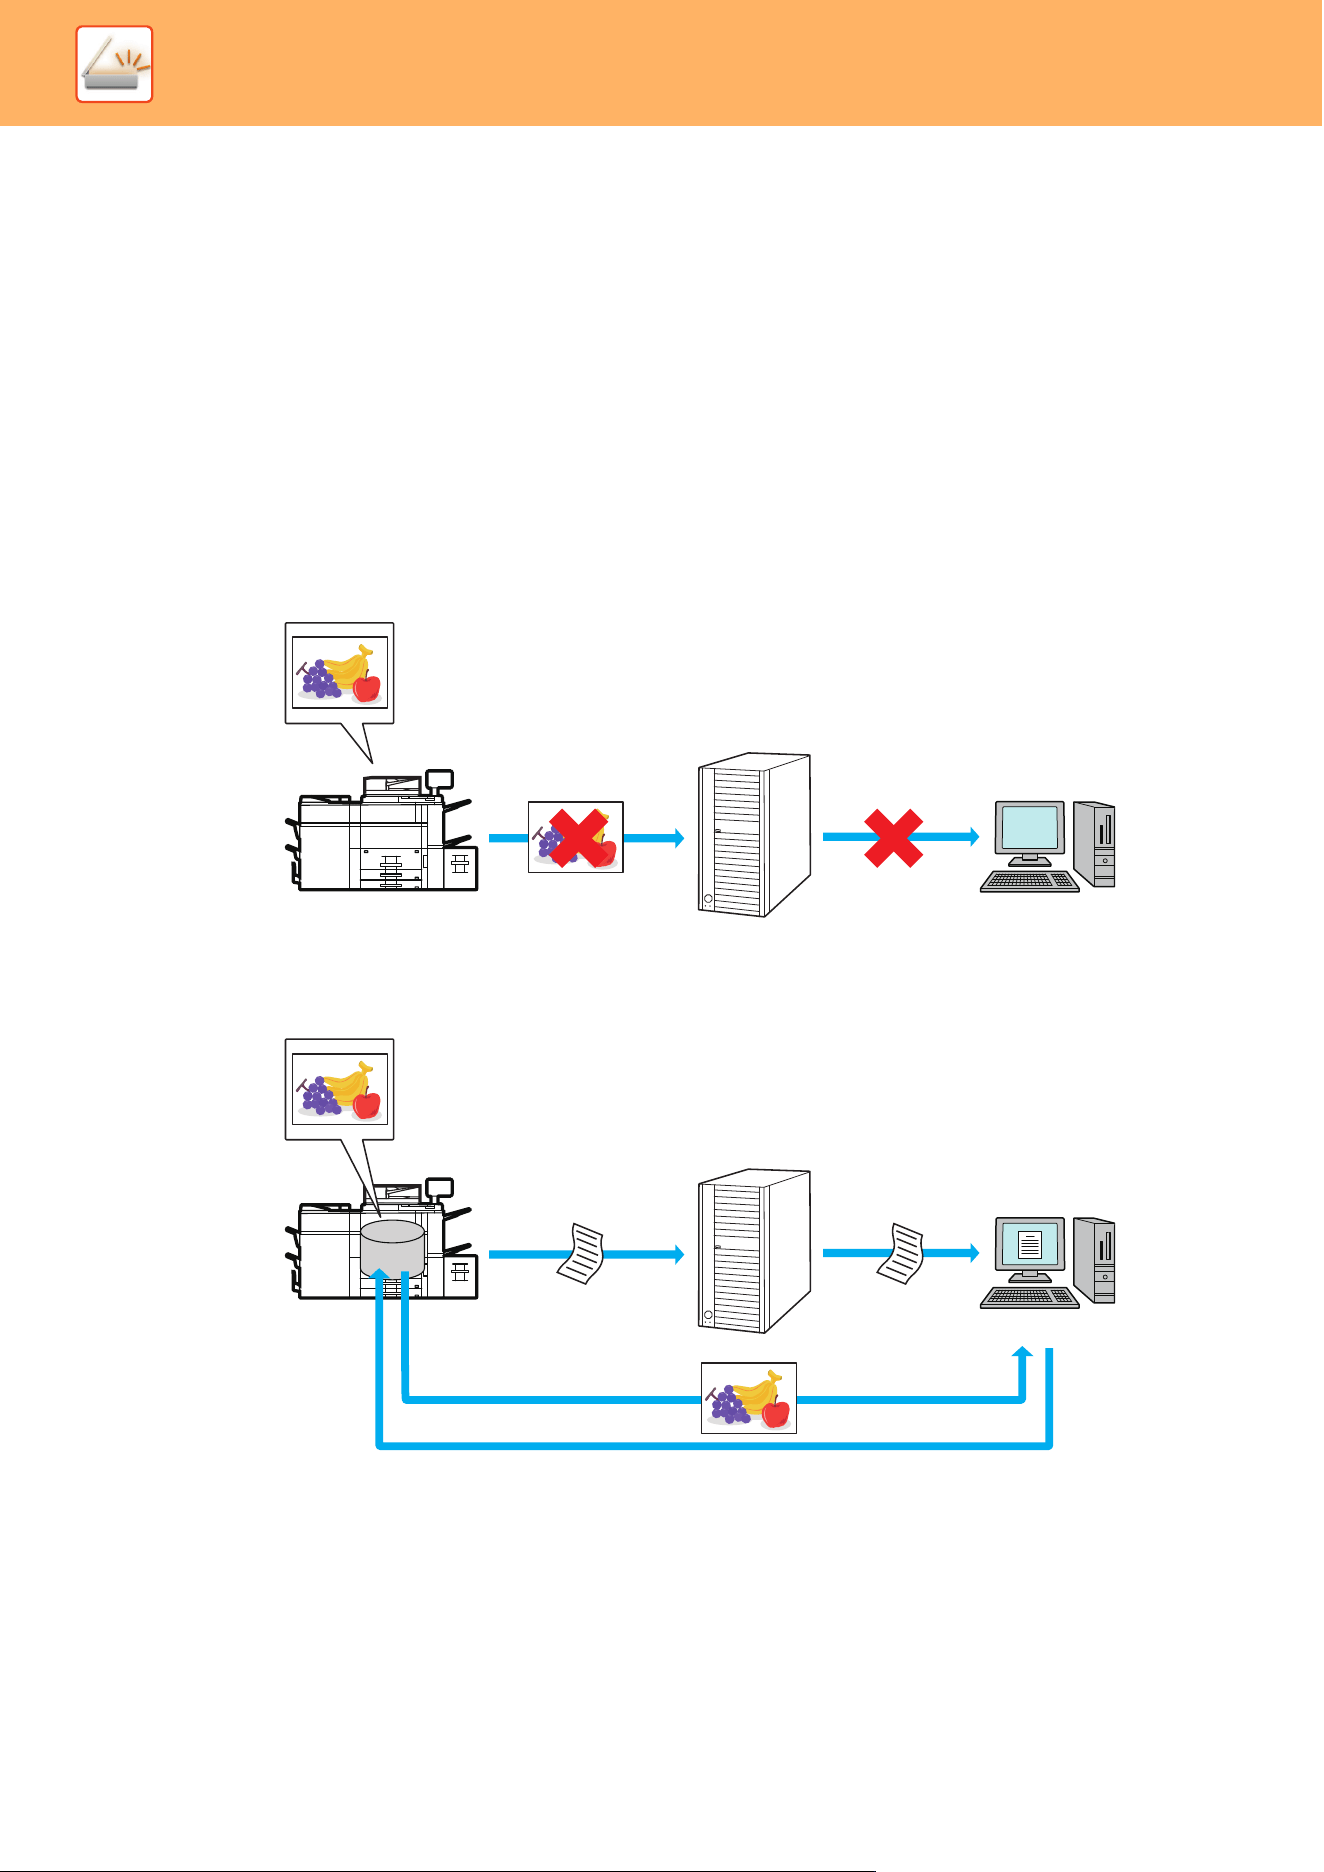
5-43
SCANNER►ENTERING DESTINATIONS
SENDING ONLY THE URL OF A SCANNED FILE TO A
SCAN DESTINATION
When using Scan to E-mail, some originals and/or scan settings may result in a large file.
When the file is large, there is a risk that the e-mail server may reject the file and it will not be sent.
This function saves the scanned file on the machine's local drive, and sends an e-mail providing only the file's URL
information to the recipient.
This function helps reduce the load on the e-mail server and prevents non-delivery of scanned files caused by the e-mail
server.
Upon receiving the e-mail, the recipient can use the URL in the e-mail to download the scanned file.
When the scanned file is too large
Sending only a URL to the recipient
Using easy mode
When [Enable Send Destination Link as Default] is enabled in the settings (administrator), the scanned data is saved in
the machine's local drive, and URL information is sent to the e-mail destination. When disabled, scanned data is sent by
regular Scan to E-mail. This function enable/disable cannot be changed in the easy mode screen.
Local
Drive
Scan to E-mail
Scanned file
Sending the file as an
e-mail attachment
Sending fails
E-mail server
Destination
The attachment is too
large and the e-mail
server rejects the
e-mail
Sending only a URL to the recipient
Scanned file
Save to the machine's
local drive
The e-mail arrives
at the destination
E-mail server
Destination
Send the URL of the
save location by
e-mail
The recipient uses the URL in the e-mail to download the scanned file

5-44
SCANNER►ENTERING DESTINATIONS
Using normal mode
[Send Destination Link] appears on the action panel of the home screen of Scan to E-mail. By selecting this checkbox
, you can use this function.
Number of URLs created
One URL is created per file to be downloaded.
Using [One Page per File]
Multiple scanned files will be created and saved at once, and a URL will be created for each file and sent to the recipient.
Using [Programmed]
Files will be created and saved in a format that varies by recipient, and a URL will be created for each file. A URL will be
sent to each recipient for the file in the format for that recipient.
• To use this function, [Send Destination Link Settings] must be enabled in the System Settings (administrator).
• This function cannot be used in combination with metadata transmission or resending from document filing.
• If a subfolder is selected as the saving destination, this function cannot be used.
• Scanned files are saved in the standard folder area.
• Scanned files cannot be browsed by a method other than downloading.
• Scanned files cannot be manually deleted, and are retained for the save period set in the System Settings. However,
scanned files will be deleted if Clear All Memory or Initialize Private Data/Data in Machine is executed, or you move to
Advanced Security Settings.
• When all destinations in a broadcast transmission are e-mail addresses, URL information is sent to all destinations.
If the file format of the saved scan data is the same for all destinations, the same URL will be sent. If the file format varies
by destination, separate URLs will be sent.
• If the transmission includes recipients for different jobs (Scan to FTP, etc.), transmission will take place by sending only a
URL to the recipient to any e-mail addresses, while the scanned file will be sent directly in the normal way to recipients for
other jobs.
• When [Document Administration Function] is enabled in the System Settings (administrator), the scanned file will be sent
directly to the administrator, not by URL.
• Even when [Send Destination Link Settings] is disabled in the System Settings (administrator), the URL can be accessed
and the scanned file downloaded during the file save period.
• The scanned file will be saved even if a send data limit is set in the System Settings (administrator) and the file exceeds
the limit. The scanned file will be saved as a single file even if [If the send data exceeds maximum size, it will be sent in
multiple files.] is enabled in the System Settings (administrator) and the file exceeds the limit.
If there is a job other than a Scan to E-mail job in a broadcast transmission and the scanned file exceeds the [Maximum
Size of Send Data (FTP/Network Folder)] setting, transmission will not be possible.

5-45
SCANNER►ENTERING DESTINATIONS
• To use this function
Configure in "Settings (administrator)" → [System Settings] → [Image Send Settings] → [Scan Settings] → [Condition
Settings] → [Send Destination Link Settings].
• To always use this function in easy mode
Configure in "Settings (administrator)" → [System Settings] → [Image Send Settings] → [Scan Settings] → [Condition
Settings] → [Enable Send Destination Link as Default].
When this function is enabled and e-mail is sent in normal mode, the [Send Destination Link] checkbox in the action panel
is always .
• Save period for scanned files saved using this function
Configure in "Settings (administrator)" → [System Settings] → [Image Send Settings] → [Scan Settings] → [Condition
Settings] → [File Retention Period].
• Protecting the URL by SSL/TLS
Configure in "Settings (administrator)" → [System Settings] → [Image Send Settings] → [Scan Settings] → [Condition
Settings] → [Enable SSL/TLS].
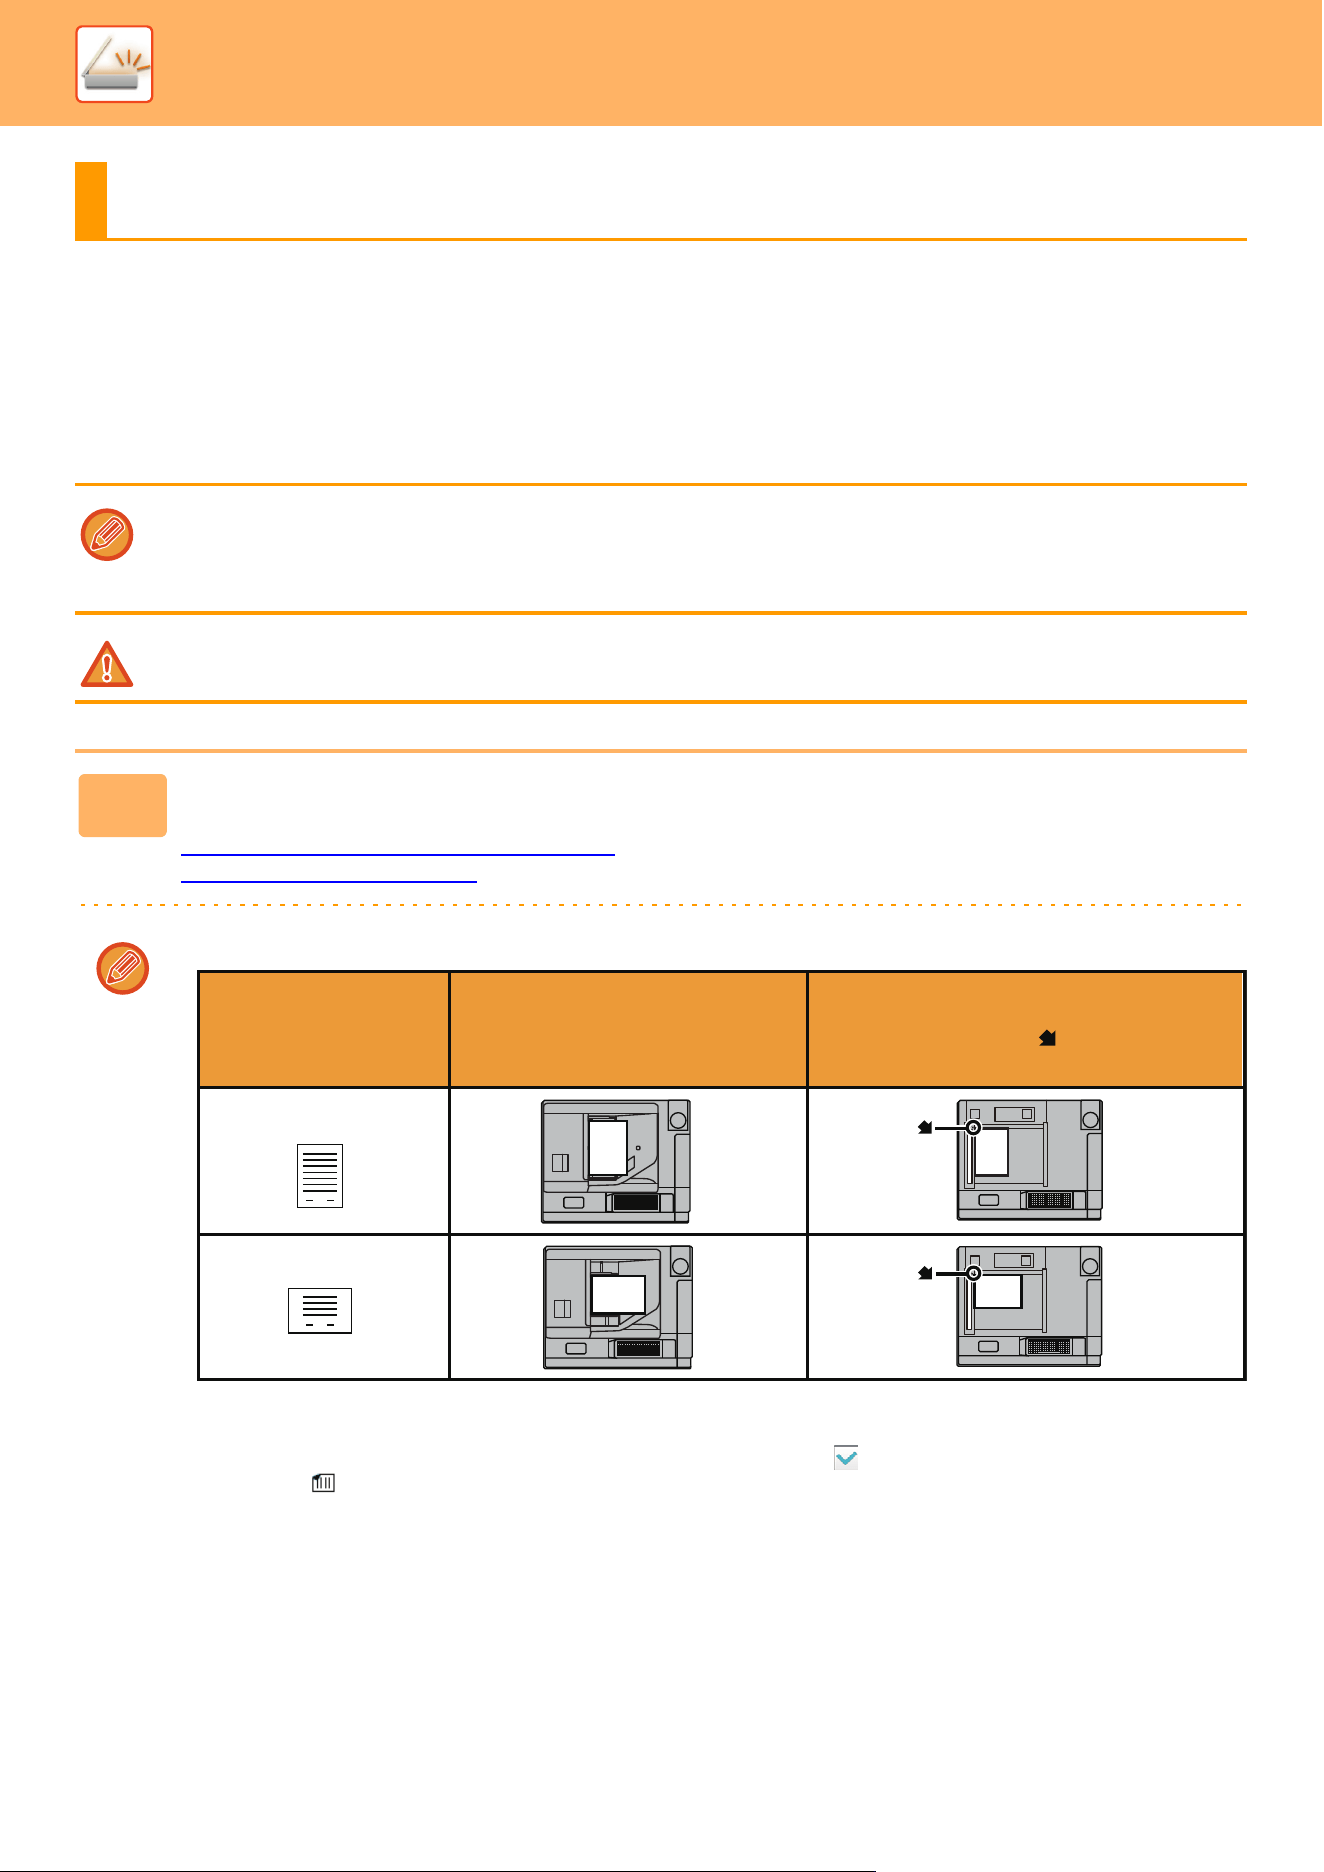
5-46
SCANNER►TRANSMITTING AN IMAGE
TRANSMITTING AN IMAGE
SENDING AN IMAGE IN SCAN MODE
An image can be sent in scan mode (Scan to E-mail, Scan to FTP, and Scan to Network Folder).
TRANSMITTING AN IMAGE
• If the memory becomes full while the originals are being scanned, a message will appear and scanning will stop.
• When performing Scan to E-mail, take care not to send a file that is too large. In particular, multi-page files tend to be large.
When sending a multi-page file or other large file, it may be necessary to reduce the number of scanned pages or reduce
the send size.
Do not place any objects under the original size detector. Closing the automatic document feeder with an object underneath
may damage the original size detector plate and prevent correct detection of the document size.
1
Place the original.
Place the original in the document feeder tray of the automatic document feeder, or on the document glass.
AUTOMATIC DOCUMENT FEEDER
(page 1-47)
DOCUMENT GLASS (page 1-51)
• When placing the originals, orient them as shown below.
*To place a large portrait-oriented original, place it as shown in the figure titled "Landscape orientation" and specify the
placement orientation in step 4.
• Place 5-1/2" x 8-1/2" (A5) size originals in portrait (vertical) orientation ( ). If placed in landscape (horizontal)
orientation ( ), an incorrect size will be detected. For an 5-1/2" x 8-1/2"R (A5R) size original, enter the original size
manually.
1
1
abc
abc
abc
abc
Originals
Document feeder tray
Place the original face up.
Place the original face down and align the
corner with the tip of the mark in the top left
corner of the document glass scale.
Portrait orientation*
Landscape orientation*
Document glass
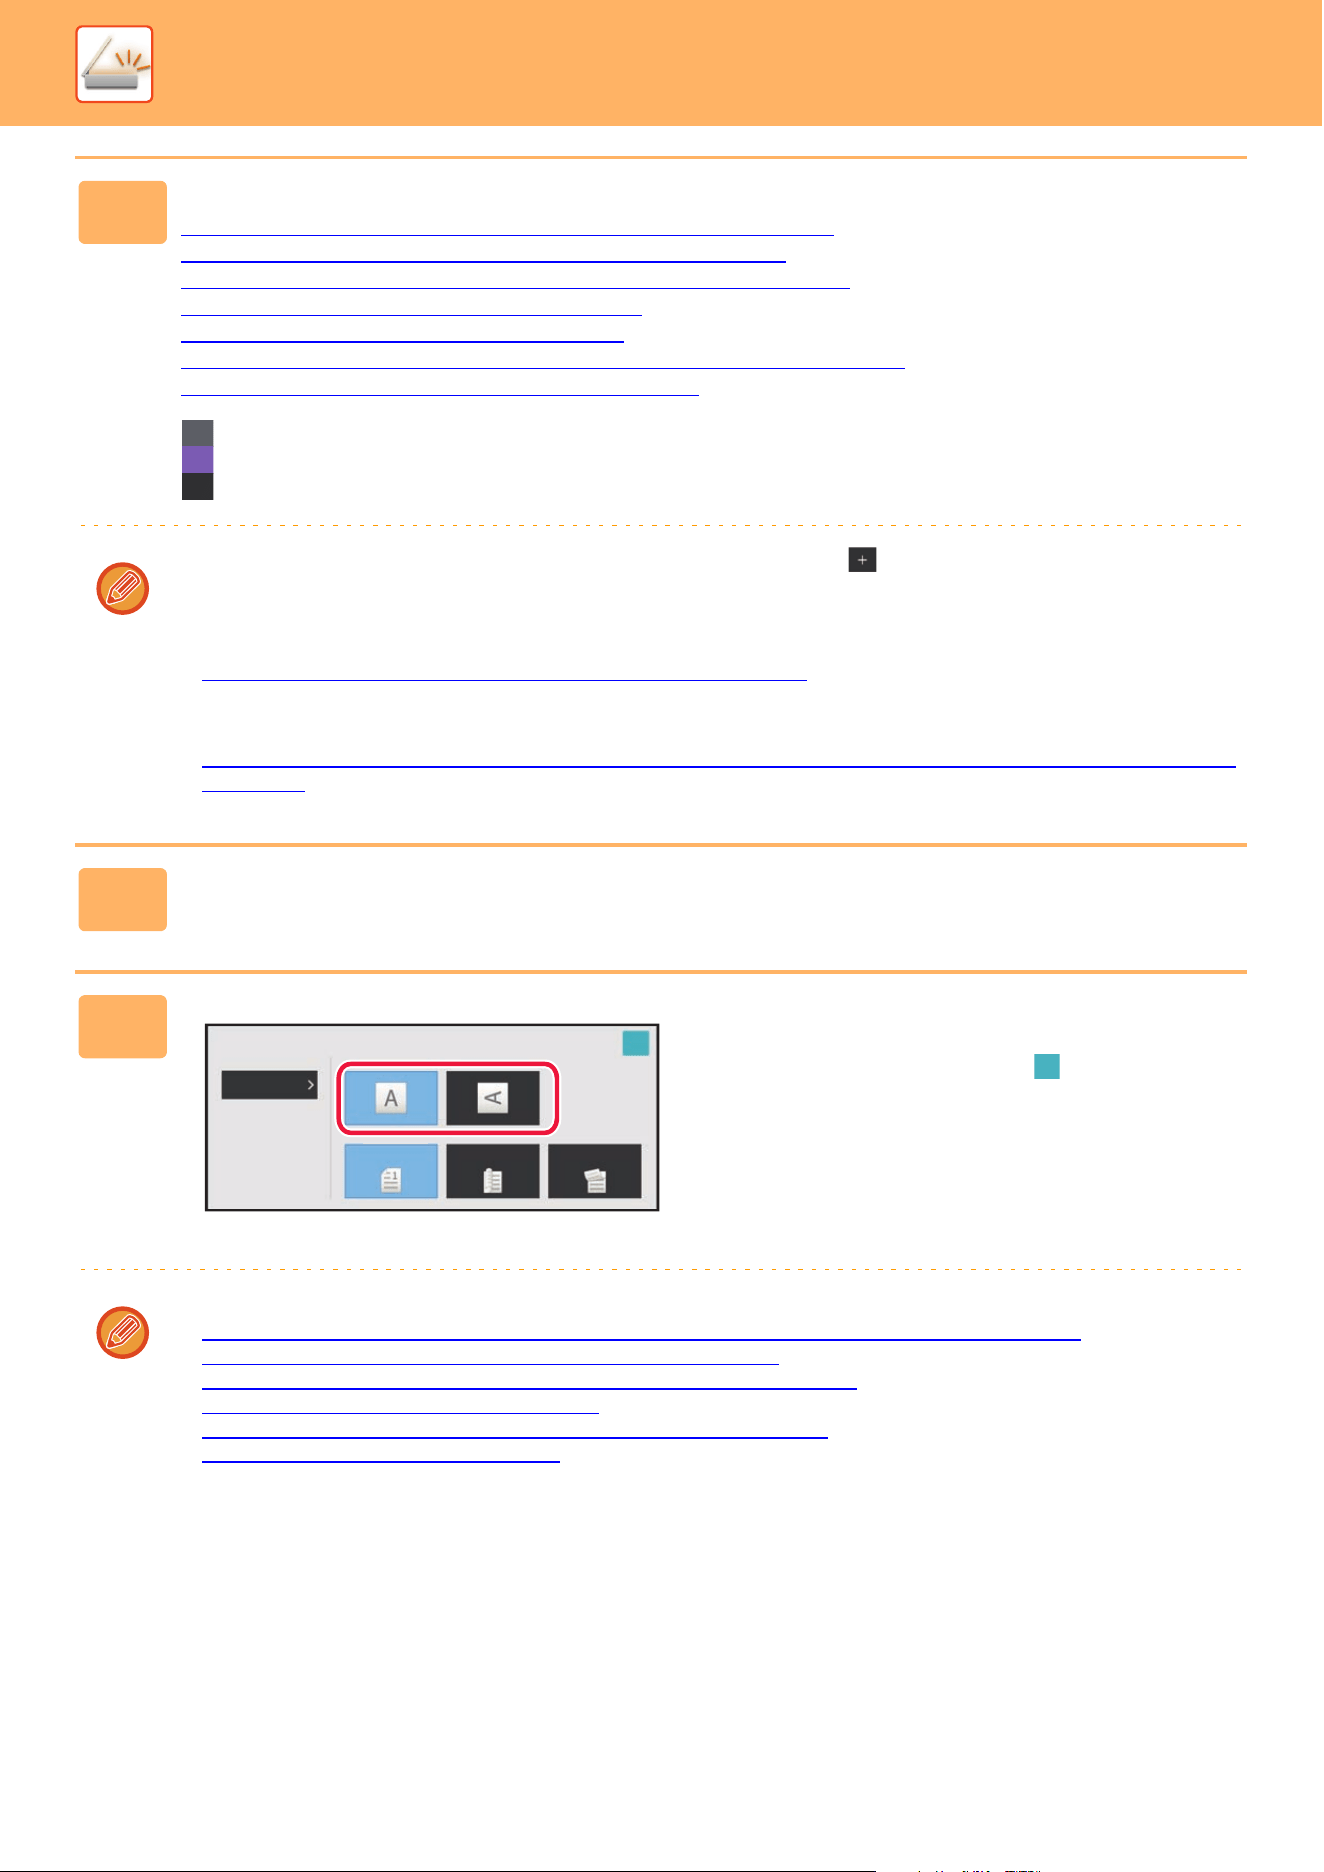
5-47
SCANNER►TRANSMITTING AN IMAGE
2
Specify the destination.
RETRIEVING A DESTINATION FROM AN ADDRESS BOOK (page 5-31)
VIEWING A LIST OF THE SELECTED DESTINATIONS (page 5-34)
USING A SEARCH NUMBER TO RETRIEVE A DESTINATION (page 5-35)
ENTERING AN ADDRESS MANUALLY (page 5-36)
SPECIFYING A NETWORK FOLDER (page 5-37)
RETRIEVING A DESTINATION FROM A GLOBAL ADDRESS BOOK (page 5-39)
USING A TRANSMISSION LOG TO RESEND (page 5-41)
The icon on the key indicates the type of destination stored in the key.
Scan to E-mail
Scan to FTP
Scan to Network Folder
• After a one-touch key is tapped, if the screen is changed without tapping , the destination of the tapped key is
automatically specified.
• When performing Scan to E-mail, you can also send Cc or Bcc copies to other destinations. Tap the [Address Review]
key to select destinations.
VIEWING A LIST OF THE SELECTED
DESTINATIONS (page 5-34)
• Multiple destinations can be specified.
• To change [Subject], [File Name], [Reply-To], or [Body Text] in normal mode, tap a target entry box, or tap [Options].
CHANGING THE SUBJECT, FILE NAME, REPLY-TO, AND BODY TEXT AT
THE TIME OF SCAN TRANSMISSION
(page 5-49)
3
Tap the [Original] key.
4
Tap the appropriate orientation key.
Specify the orientation of the original placed in step 1.
After the settings are completed, tap .
• You can change exposure, resolution, file format, color mode, and other settings.
AUTOMATICALLY SCANNING BOTH SIDES OF AN
ORIGINAL (2-SIDED ORIGINAL) (page 5-57)
SCAN SIZE AND SEND SIZE (ENLARGE/REDUCE) (page 5-58)
CHANGING THE EXPOSURE AND ORIGINAL IMAGE TYPE (page 5-69)
CHANGING THE RESOLUTION (page 5-71)
CHANGING FORMAT IN SCAN OR DATA ENTRY MODE (page 5-72)
CHANGING COLOR MODE (page 5-78)
• Tapping the [Others] key allows you to configure various functions, for example, collectively sending two original
pages as one sheet or original pages with different sizes.
Original
Size
OK
Auto
Image
Orientation
Duplex Setup
1-Sided
Book Tablet

5-48
SCANNER►TRANSMITTING AN IMAGE
5
Tap the [B/W Start] or [Color Start] key to start scanning of the original.
• If the original was inserted in the document feeder tray, a beep will sound when scanning is completed and
transmission will take place.
• If the original is placed on the document glass, the [Read-End] key appears in the touch panel. If the original is only
one page, go to step 7. To scan more pages, go to step 6.
• You can tap the [Preview] key to check a preview of the image before sending an image. For more information, see
“CHECKING THE IMAGE TO BE TRANSMITTED
(page 5-81)".
• If the file format is set to [PDF/Encry.], [PDF/Encry./Reduce Colors], [PDF/Encry./Compact], or
[PDF/Encry./Compact/U-Fine], you will be prompted to enter the password when you tap the [B/W Start] or [Color
Start] key.
Tap the password entry box to open the keyboard screen, enter a password using a maximum of 32 characters, and
tap the [OK] and [Send] key in sequence. The recipient must use the password entered here to open the Encrypt PDF
file.
To cancel Encrypt PDF, tap the [Cancel] key. The format settings screen will appear to let you change the file type.
Select a new file type and tap the [B/W Start] or [Color Start] key to begin transmission.
6
If the original was placed on the document glass, replace it with the next
original and tap the [B/W Start] or [Color Start] key.
Repeat until all originals have been scanned.
7
Tap the [Read-End] key.
A beep will sound to indicate that the operation is completed.
• If no action is taken for one minute after the confirmation screen is displayed, scanning automatically ends and the
transmission is reserved.
• Tap the [Change Setting] key to change the exposure, resolution, scan size, and send size for each original page
scanned. However, when "Card Shot" is selected in Others, change only the exposure when scanning an
even-numbered original page.
• To change the time until transmission takes place automatically:
Select "Settings (administrator)" - [System Settings] → [Image Send Settings] → [Common Settings] → [Condition Set-
tings] → [Job Auto Start Time During Scanning].
• To set the scan complete sound:
In "Settings (administrator)", select [System Settings] → [Sound Settings] → [Beep Sound Settings (Common)] →
[Scan Complete Sound (Image Send)].
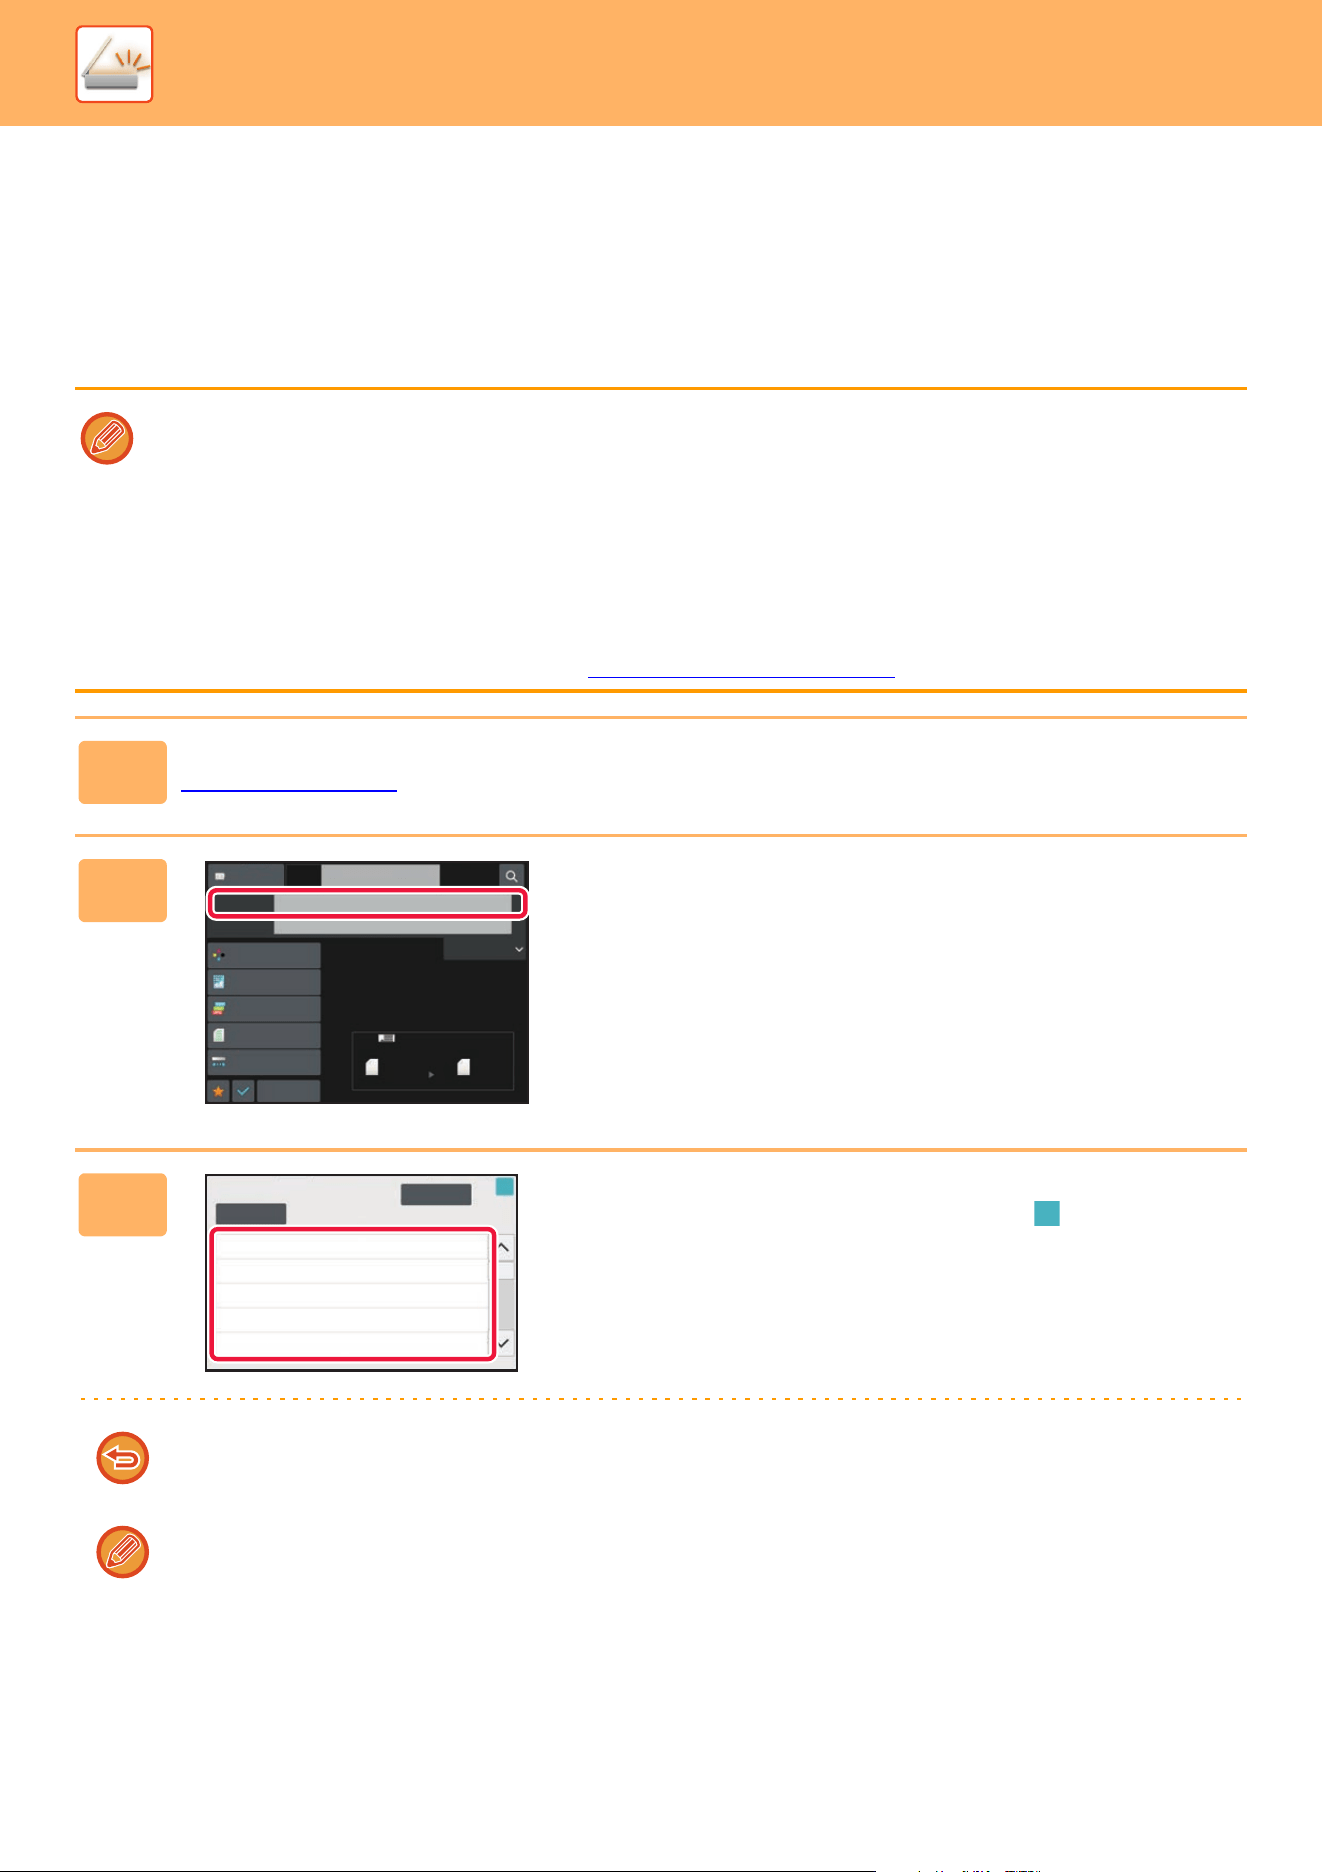
5-49
SCANNER►TRANSMITTING AN IMAGE
CHANGING THE SUBJECT, FILE NAME, REPLY-TO,
AND BODY TEXT AT THE TIME OF SCAN
TRANSMISSION
Change the subject, file name, reply-to, and body text when performing a scan transmission. If necessary, directly enter
the text.
• When performing Scan to FTP or Scan to Network Folder, only the file name is used.
• If the subject or file name is not changed, the settings in [System Settings] → [Image Send Settings] → [Scan Settings] →
[Subject Name Settings], [File Name Settings], and [Message Body Settings] in "Settings (administrator)" are used.
• If the reply-to address is not changed, the settings in [System Settings] → [Image Send Settings] → [Scan Settings] →
[Condition Settings] → [Default Reply.Address Set] in "Settings (administrator)" are used.
If this is not configured, the reply address configured in [Network Settings] → [Services Settings] → [SMTP] → [Sender
Address] in the "Settings" is used. (Administrator rights are required.)
• To configure the candidates for the subject, file name, and body text, select [System Settings] → [Image Send Settings] →
[Scan Settings] in "Settings (administrator)".
• For details on how to enter characters, refer to "CHARACTER ENTRY
(page 2-62)" in "How to operate this machine".
1
Tap the [Detail] key to change to normal mode.
EASY MODE (page 5-6)
2
To change the subject, tap the
[Subject] entry box.
3
Tap a pre-set text key.
After the settings are completed, tap .
To cancel the selection of the subject:
Tap the [Clear] key.
If you wish to directly enter the text, tap the [Direct Entry] key to open the soft keyboard.
Enter the text and tap the [OK] key.
Scan Size
Auto
Auto
Color Mode
Auto/Mono2
Resolution
200x200dpi
File Format
PDF
Original
Auto
Others
8½x11
8½x11
100%
Send Size
Address Book
Subject
File Name
Address
Touch to input Address
Options
Exposure
Specified by System Settings
Subject
Direct Entry
Clear
OK
AAA
BBB
CCC
DDD
EEE
No.1
No.2
No.3
No.4
No.5
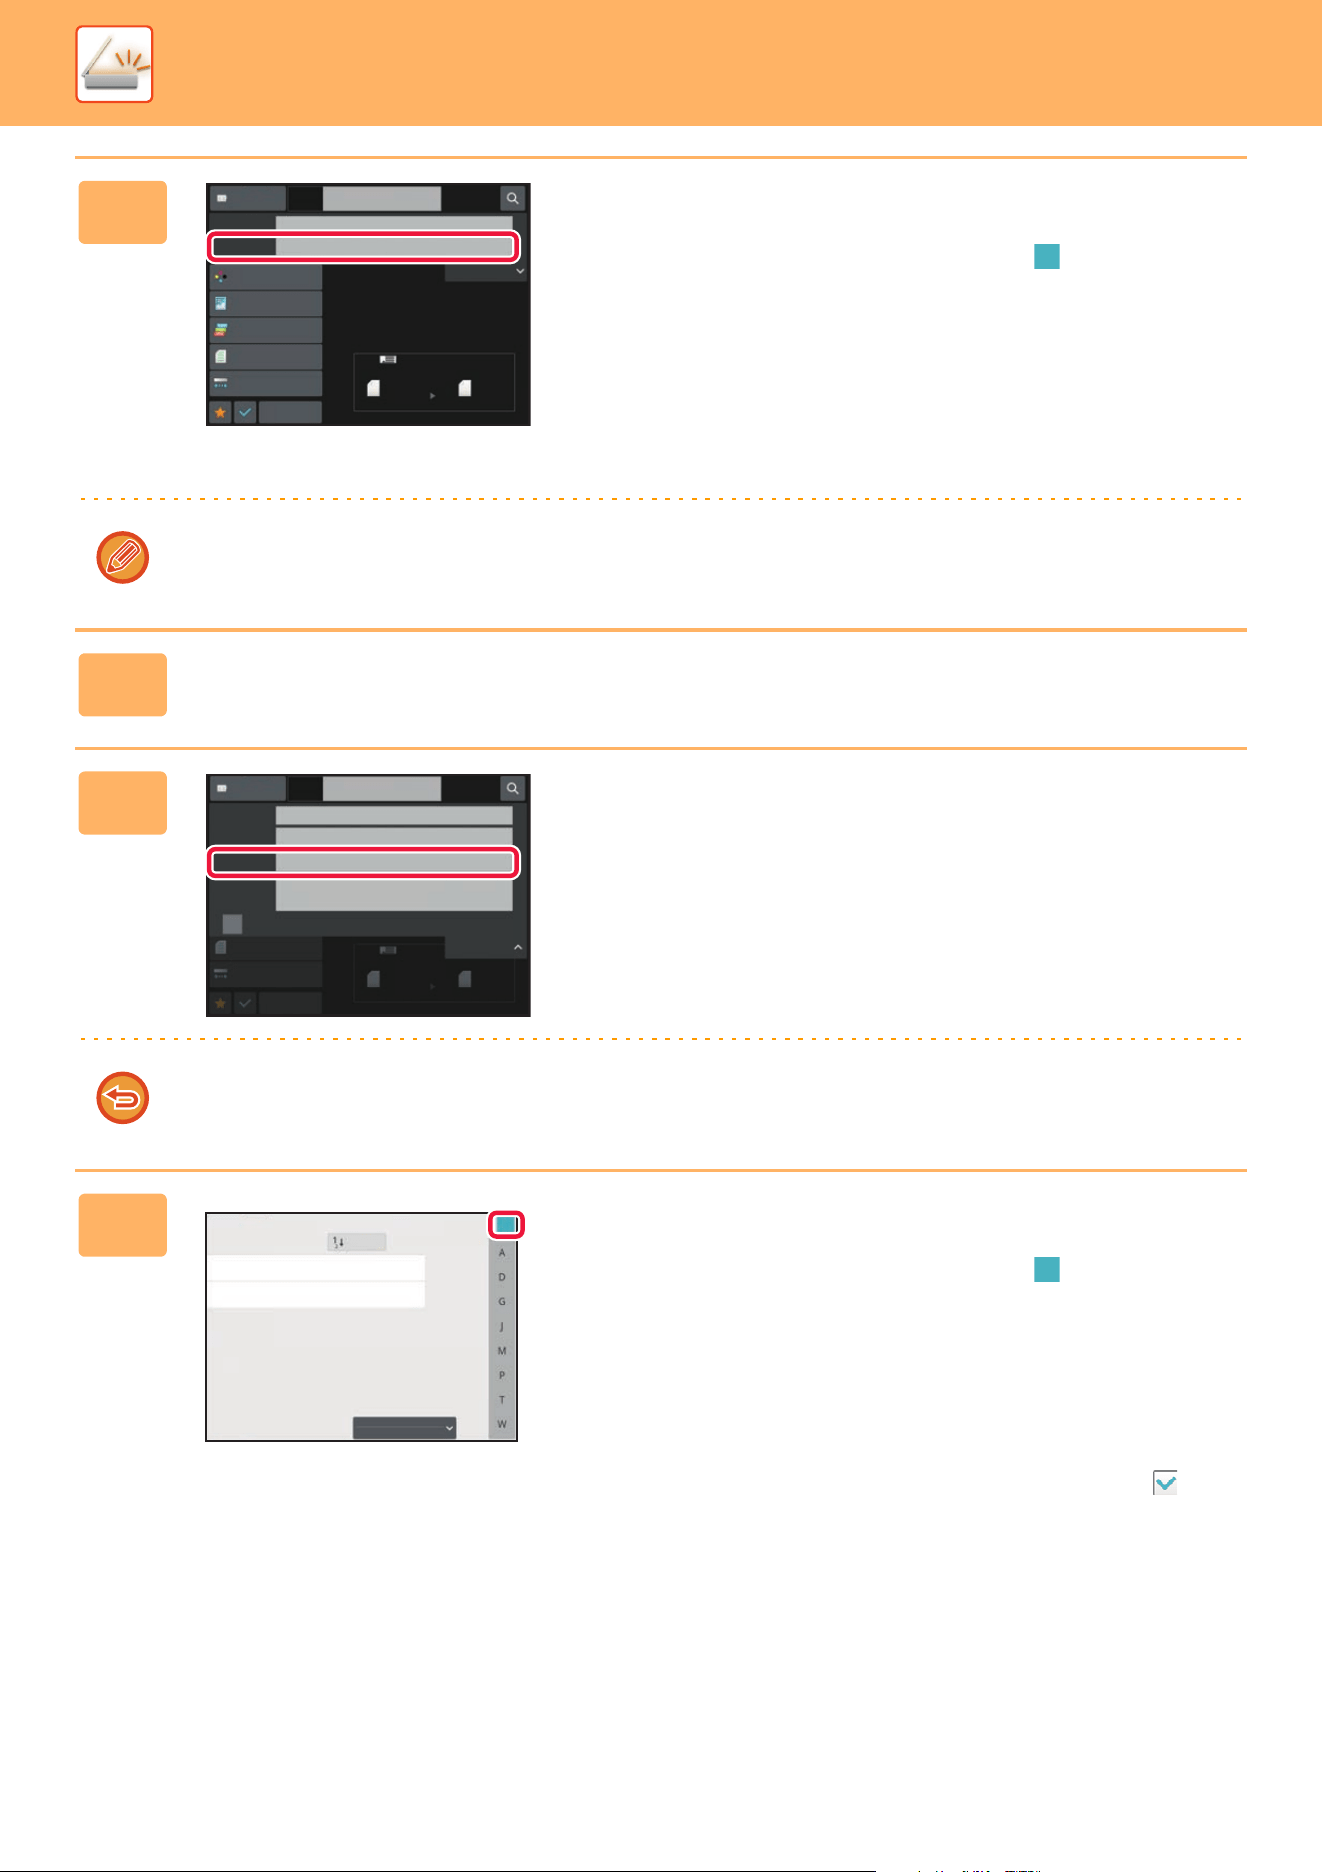
5-50
SCANNER►TRANSMITTING AN IMAGE
4
To change the file name, tap the [File
Name] entry box.
After the settings are completed, tap .
• Tap the key of the file name from the list.
• To directly enter the file name, tap the [Direct Entry] key.
• A prompt is displayed in the file name. The prompt is
changed according to the settings.
If the settings are not changed, "Following the System
Settings" is displayed.
In [OCR Setting], if [File Name Auto Extraction] is enabled,
"File Name Auto Extraction" will be displayed.
When scanning to a shared folder, if you set a file name that is the same as an existing file name in the shared folder,
the file name will be changed to prevent overwriting of the existing file.
5
Tap [Options].
6
To change the reply address, tap the
[Reply-To] entry box.
If user authentication is being used, the information of the user that logged in will be applied, and thus the reply address
cannot be changed.
7
Tap the key that you wish to use for
the reply address.
After the settings are completed, tap .
• You can select addresses from the user list in the same
way as you would select the reply address. You can also
tap [Global Address Search] on the action panel to specify
a user stored in the global address book as the reply
address.
• Tapping [Direct Entry] on the action panel allows you to
directly enter the e-mail address.
• Selecting the [Add 'Reply to' to Cc] checkbox to adds
a reply address to the Cc address.
Scan Size
Auto
Auto
Auto/Mono2
Resolution
200x200dpi
File Format
PDF
Original
Auto
Others
8½x11
8½x11
100%
Send Size
Address Book
Subject
File Name
Address
Touch to input Address
Options
Exposure
Color Mode
Specified by System Settings
Scan Size
Auto
Auto
Original
Auto
Others
8½x11
8½x11
100%
Send Size
Address Book
Subject
File Name
Reply-To
Body Text
Add 'Reply to' to Cc
Address
Touch to input Address
Options
Exposure
Specified by System Settings
User Name
User Name
All
Narrow Down by Index
Sort
AAA AAA
AAA AAA
BBB BBB
BBB BBB
OK
Others
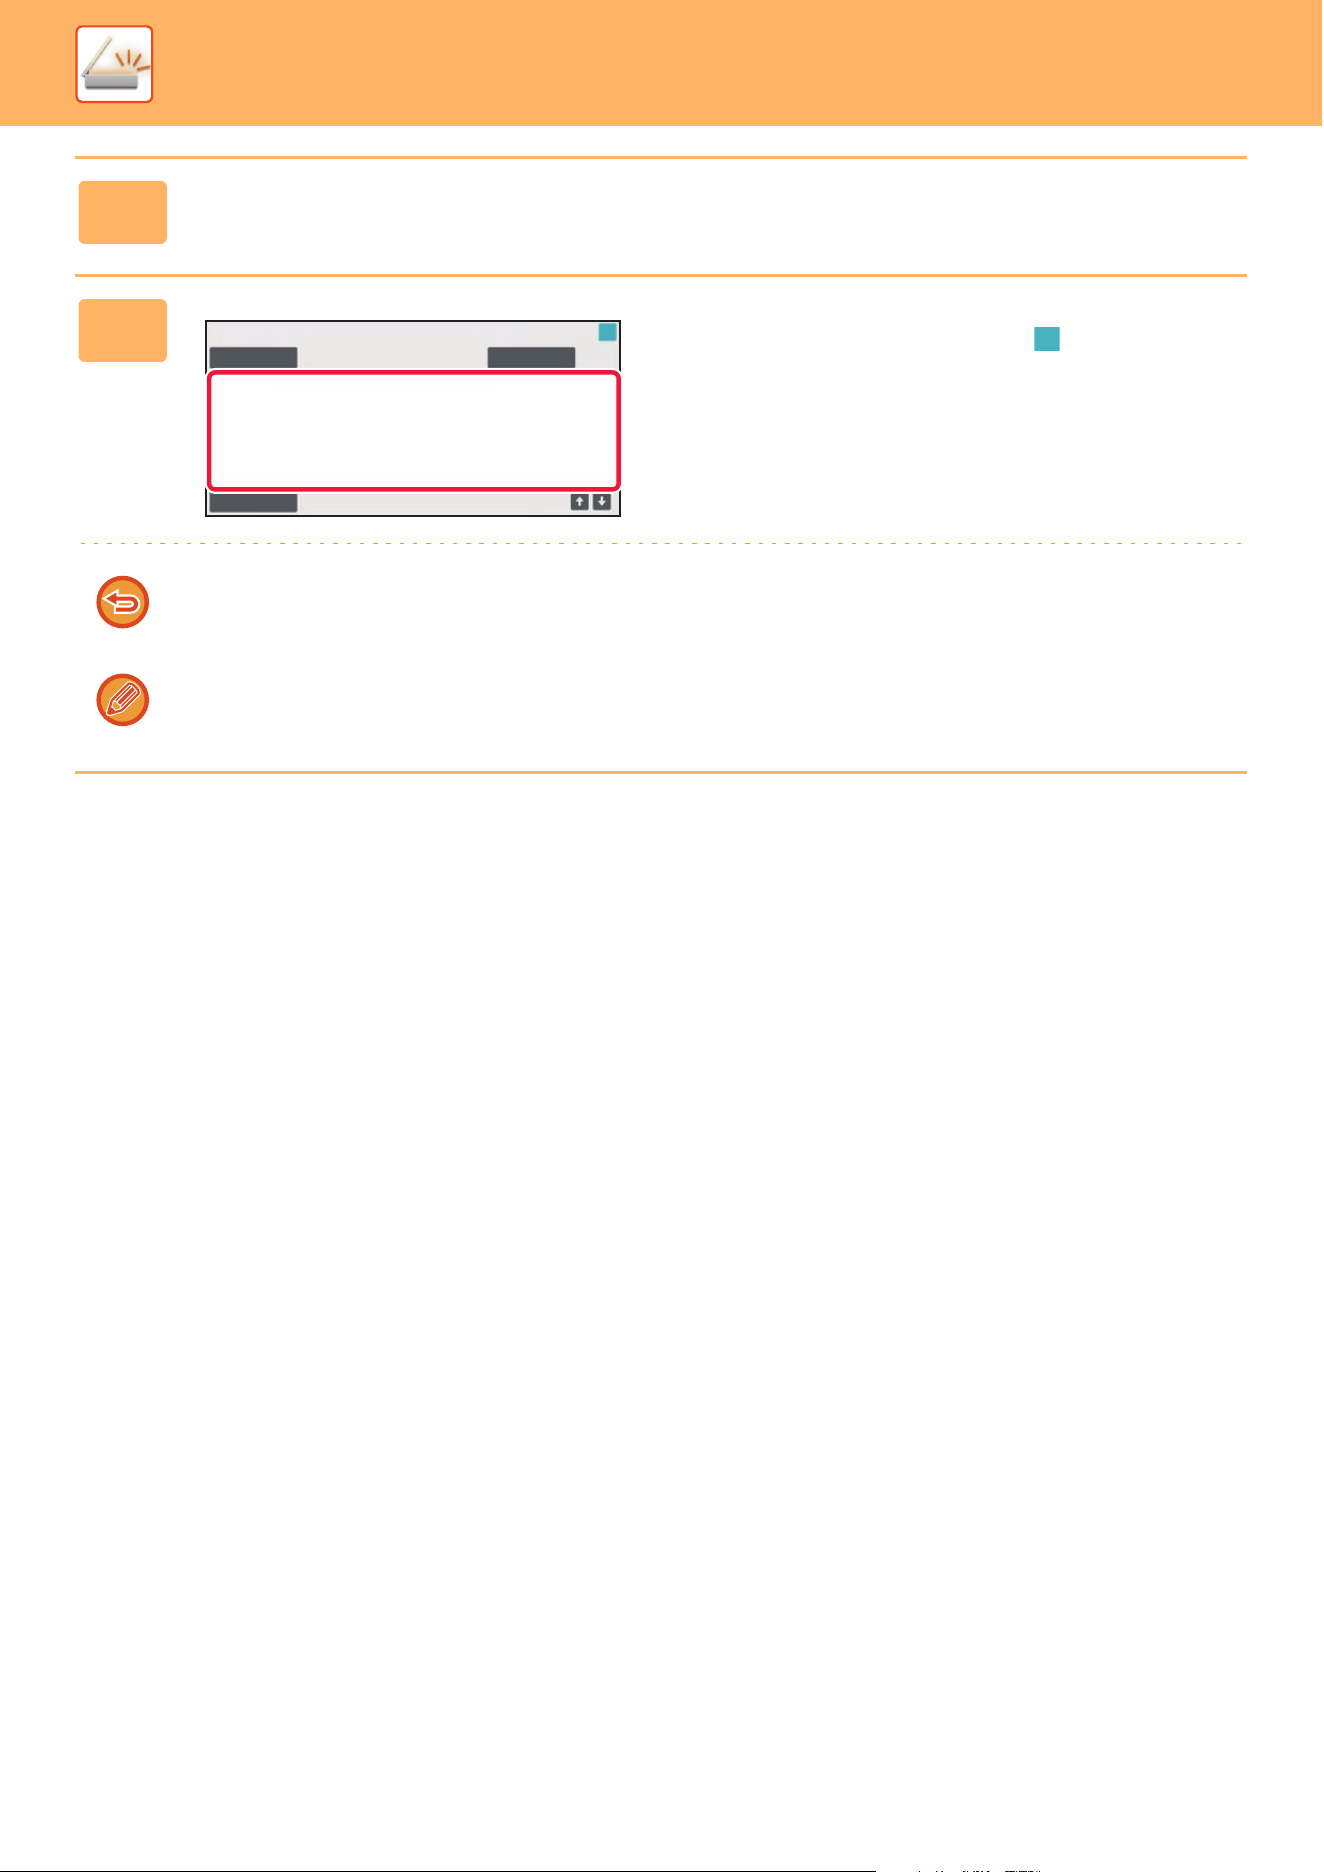
5-51
SCANNER►TRANSMITTING AN IMAGE
8
To change the body text, tap the [Body Text] entry box.
9
Enter the body text.
After the settings are completed, tap .
• To select a pre-set text previously stored in the Setting
mode (Web version), tap the [Pre-set Message] key.
• To directly enter the body text, tap the [Edit] key.
To clear all entered text:
Tap the [Clear All] key. When this key is tapped, the entire body of the message is erased immediately, not just the
selected line.
• Enter up to 1800 characters. (A line break counts as one character.)
• To edit the selected line, tap the [Edit] key. The soft keyboard will appear with the selected text entered.
Body Entry
Clear All
Pre-set Message
Edit
OK
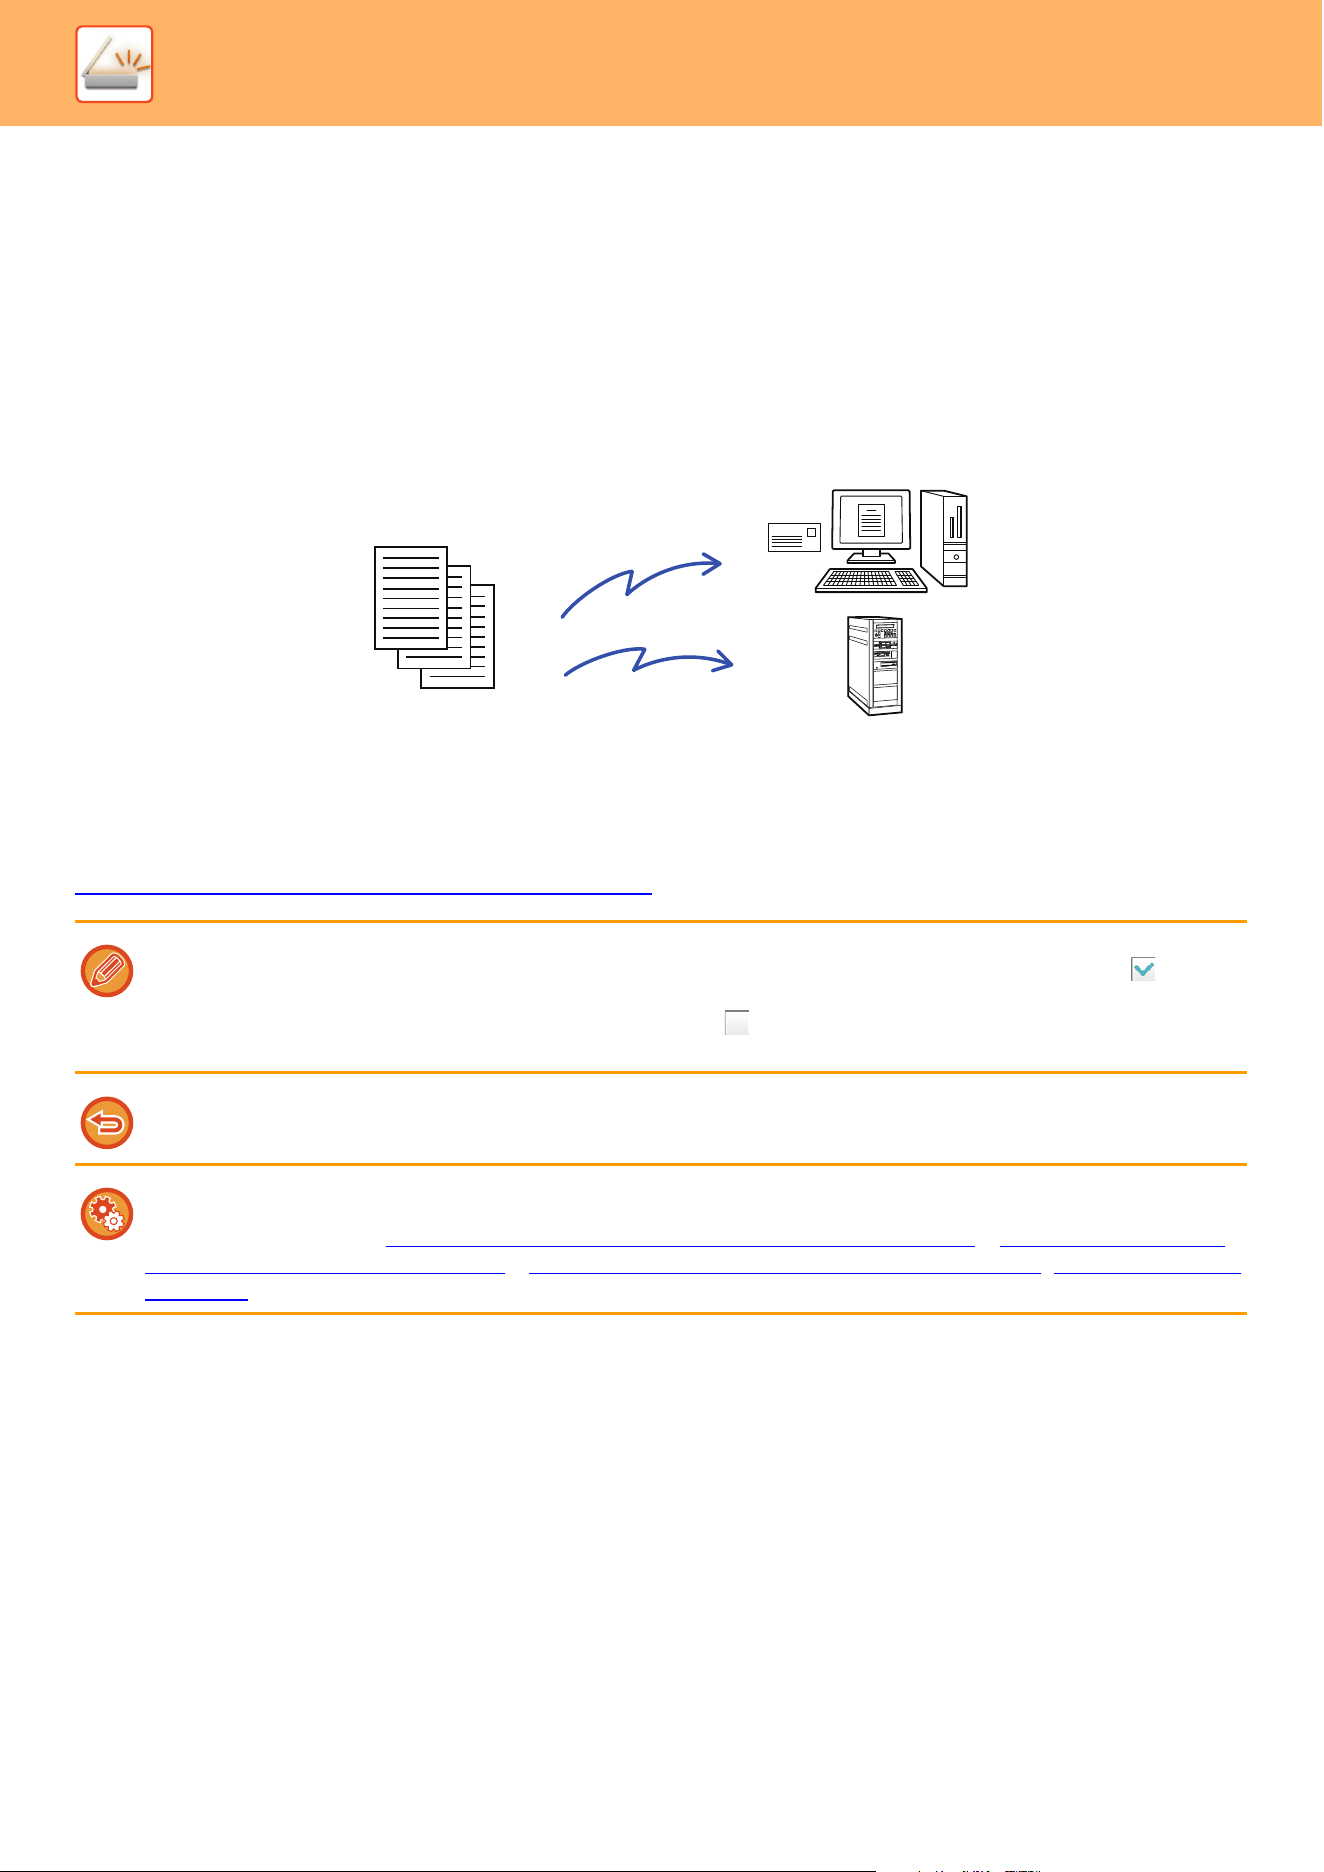
5-52
SCANNER►TRANSMITTING AN IMAGE
SENDING THE SAME IMAGE TO MULTIPLE
DESTINATIONS (BROADCAST TRANSMISSION)
Send the same scanned image to multiple scan destinations in a single operation.
One operation allows you to send data to up to 500 destinations, including the reserved send jobs. (For example, if
broadcast transmission jobs with 450 destinations are already reserved, data can be broadcasted to up to 50
destinations.)
It is convenient to store destinations you frequently use for broadcast transmission as contacts or groups.
A maximum of 500 destinations can be stored in one contact.
USING A TRANSMISSION LOG TO RESEND
(page 5-41)
When the checkbox of "Settings (administrator)" -[System Settings] → [Image Send Settings] → [Common Settings] →
[Condition Settings] → [Address Book Default Selection] → [Apply Addresses of Sending Modes Only] is set to (factory
default setting),the image is only sent to those destinations among the destinations that are set to [Set as Default used] which
are for the currently selected mode. If the checkmark is removed , the image can also be sent to destinations of other
modes.
A transmission is performed, ignoring hyperlinks with Scan to FTP and Scan to Network Folder addresses.
To register destinations in a contact or group:
In the address book screen, tap [Add New] on the action panel, or tap the [Address Control] icon in the home screen.
For more information, see "STORING ADDRESSES THROUGH DIRECT ENTRY
(page 5-18)", "STORING ADDRESSES
THROUGH DIRECT ENTRY (page 5-18)", "USING A TRANSMISSION LOG TO RESEND (page 5-41),"STORING GROUPS
(page 5-23).
Originals
Transmission
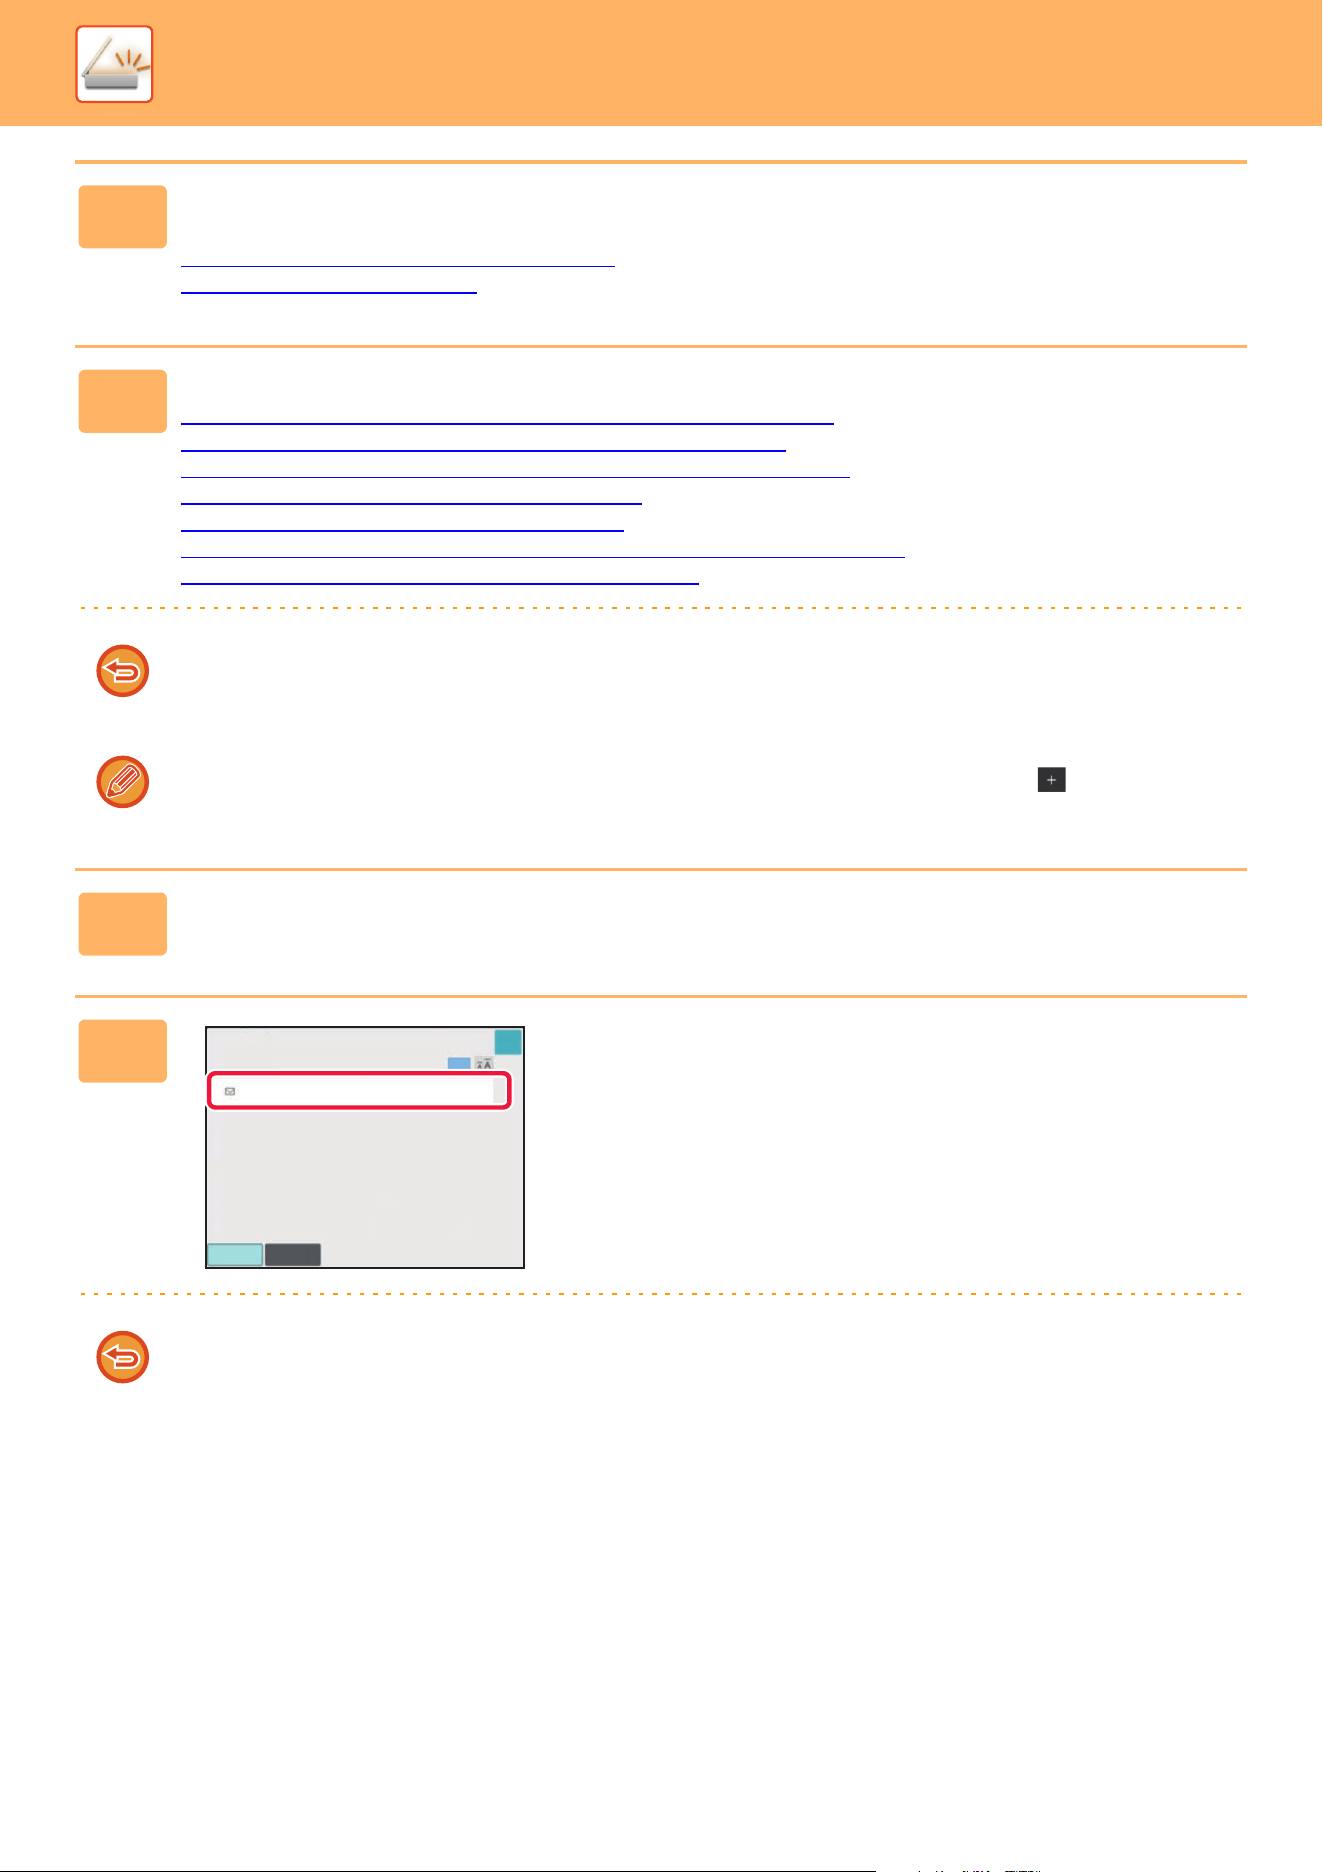
5-53
SCANNER►TRANSMITTING AN IMAGE
1
Place the original.
Place the original in the document feeder tray of the automatic document feeder, or on the document glass.
AUTOMATIC DOCUMENT FEEDER
(page 1-47)
DOCUMENT GLASS (page 1-51)
2
Specify all destinations.
RETRIEVING A DESTINATION FROM AN ADDRESS BOOK (page 5-31)
VIEWING A LIST OF THE SELECTED DESTINATIONS (page 5-34)
USING A SEARCH NUMBER TO RETRIEVE A DESTINATION (page 5-35)
ENTERING AN ADDRESS MANUALLY (page 5-36)
SPECIFYING A NETWORK FOLDER (page 5-37)
RETRIEVING A DESTINATION FROM A GLOBAL ADDRESS BOOK (page 5-39)
USING A TRANSMISSION LOG TO RESEND (page 5-41)
• One-touch keys that cannot be used for broadcast transmission are grayed out to prevent selection.
• If a Scan to FTP or Network Folder address is specified in a broadcast transmission, hyperlink e-mail transmission will
not take place.
If [System Settings] → [Image Send Settings] → [Common Settings] → [Condition Settings] → [Be sure to press Next
Address Key ([+]) before selecting the next address.] is enabled in "Settings (administrator)", tap before specifying
the next destination.
3
Tap [Address Review] on the action panel.
4
Confirm the destination.
• To cancel a specified destination:
Tap the key of the destination that you wish to cancel to release the selection.
• To switch delivery types (To/Cc/Bcc):
Tap the address that you want to change, and tap [Change to To], [Change to Cc], or [Change to Bcc] on the action
panel.
All Destinations
AAA
aaaaaaaa
OK
1
Cc
To

5-54
SCANNER►TRANSMITTING AN IMAGE
5
Tap the [B/W Start] or [Color Start] key ([Start] key in normal mode) to start
scanning of the original.
• If you inserted the original pages in the document feeder tray, all pages are scanned.
A beep will sound to indicate that scanning and transmission have ended.
• When you place the original on the document glass, scan each page at a time.
When scanning finishes, place the next original and tap the [B/W Start] or [Color Start] key ([Start] key in normal
mode). Repeat until all pages have been scanned and then tap the [Read-End] key.
A beep will sound to indicate that transmission has ended.
You can tap the [Preview] key to check a preview of the image before sending an image. For more information, see
“CHECKING THE IMAGE TO BE TRANSMITTED
(page 5-81)".
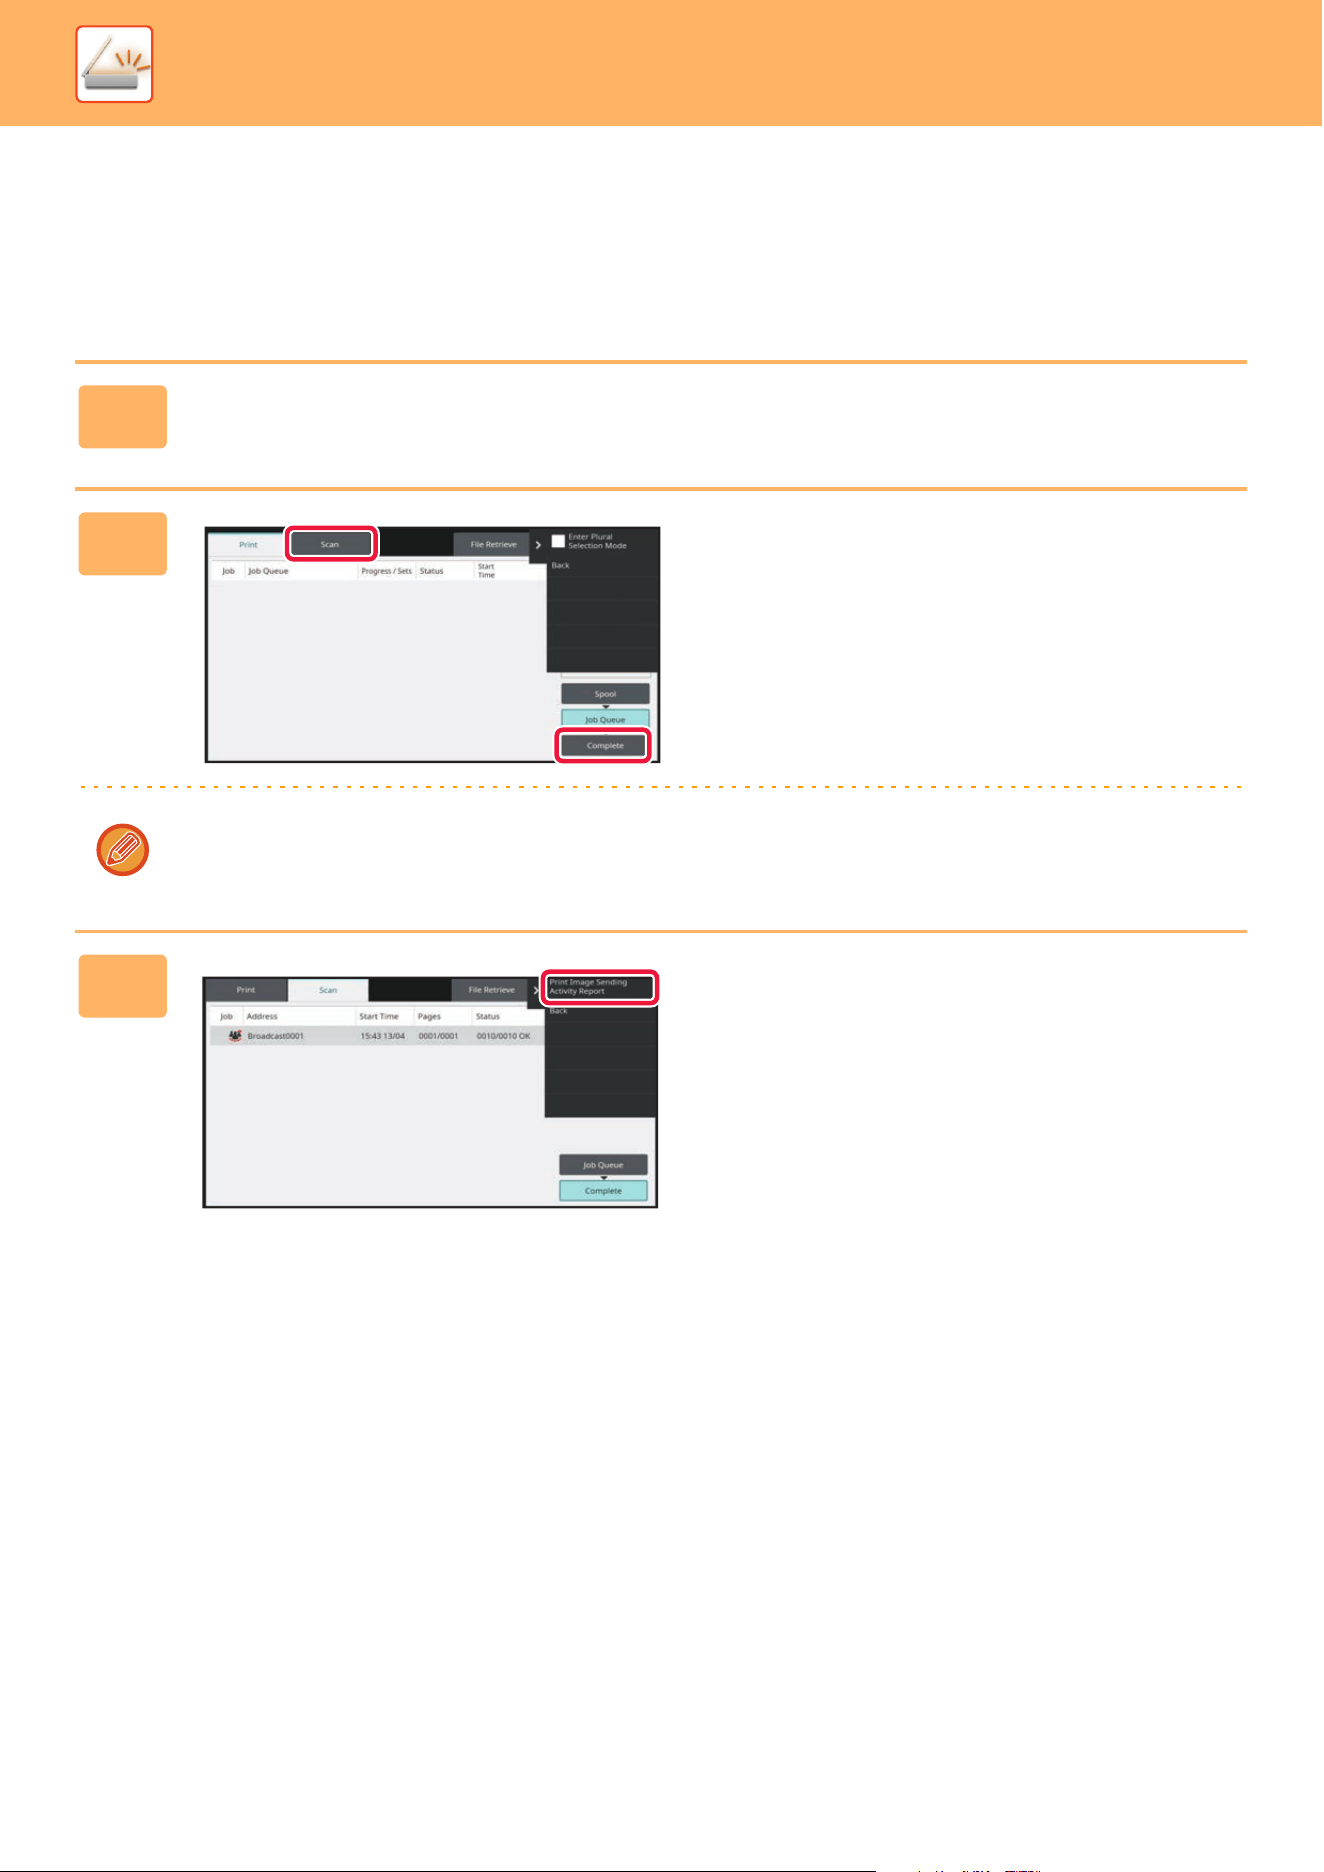
5-55
SCANNER►TRANSMITTING AN IMAGE
RESENDING TO UNSUCCESSFUL BROADCAST
TRANSMISSION DESTINATIONS
The results of a completed broadcast transmission can be checked in the job management screen. If transmission to
any of the destinations failed, resend the image to those destinations.
1
Tap the job management display.
2
Tap the [Scan] tab and tap the
[Complete] key.
If the broadcast transmission included destinations of different modes, the same broadcast transmission key will appear
in each of those modes.
3
After tapping the key of the completed
broadcast transmission, tap [Print
Image Sending Activity Report] on the
action panel.
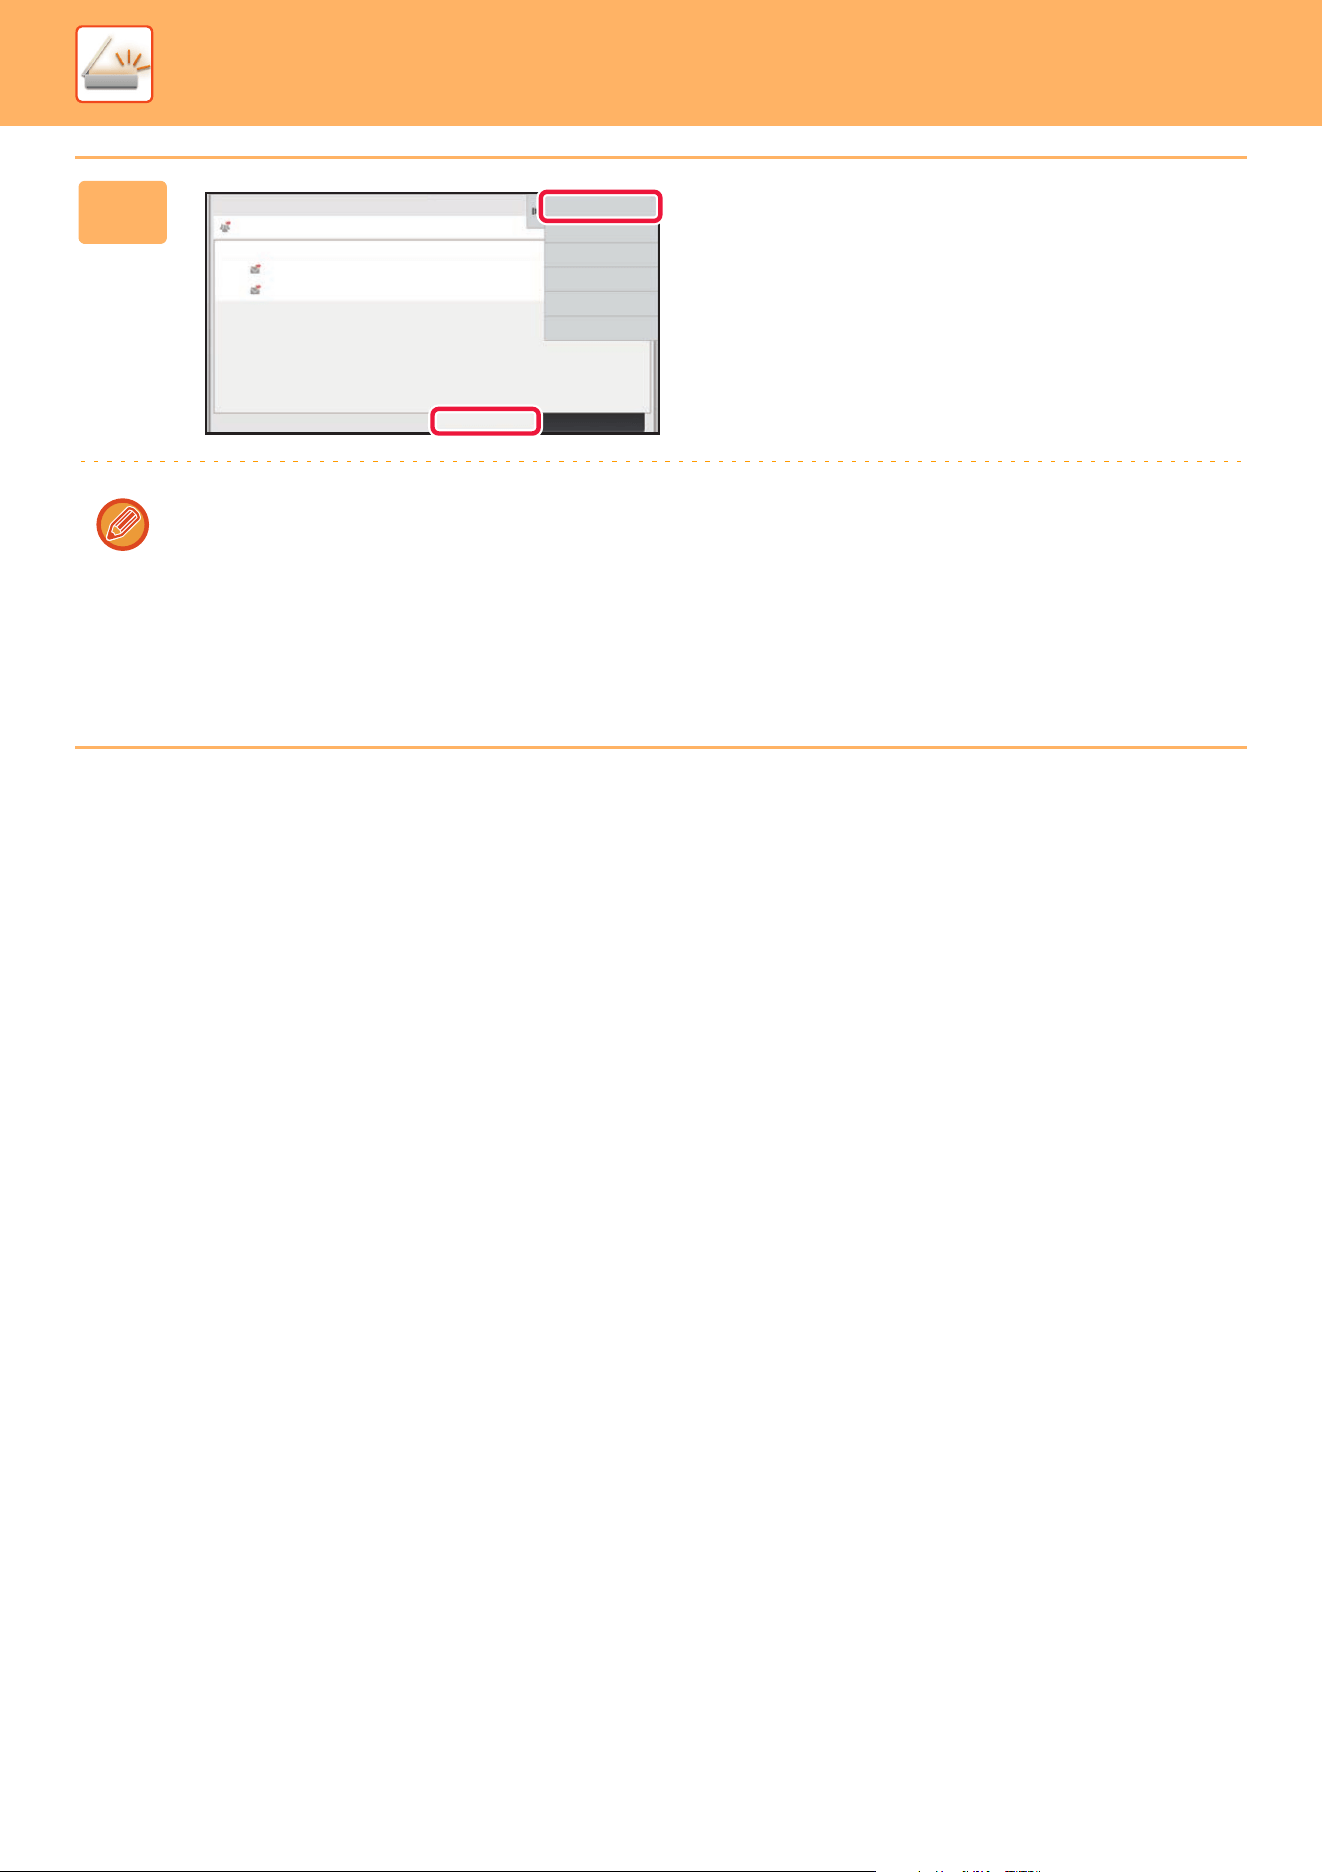
5-56
SCANNER►TRANSMITTING AN IMAGE
4
After tapping the [Failed] tab, tap
[Resend to All Addresses Which Failed
in Sending] on the action panel to
resend the image.
The steps to follow after [Resend to All Addresses Which Failed in Sending] is tapped differ depending on whether or not
document filing is used.
• Using document filing:
You will return to the document filing resend screen with the unsuccessful destinations entered.
Perform the document filing resend procedure. (There is no need to re-scan the original.)
• Not using document filing:
You will return to the base screen with the unsuccessful destinations entered. Place the original and perform the steps
of the broadcast transmission.
All DestinationsFailed
Details
Resend to All Addresses
Which Failed in Sending
Back
Address
aaa@aaa.□□□
bbb@bbb.□□□
001
002
Number: StatusStart Time
10:05 07/07
10:05 07/07
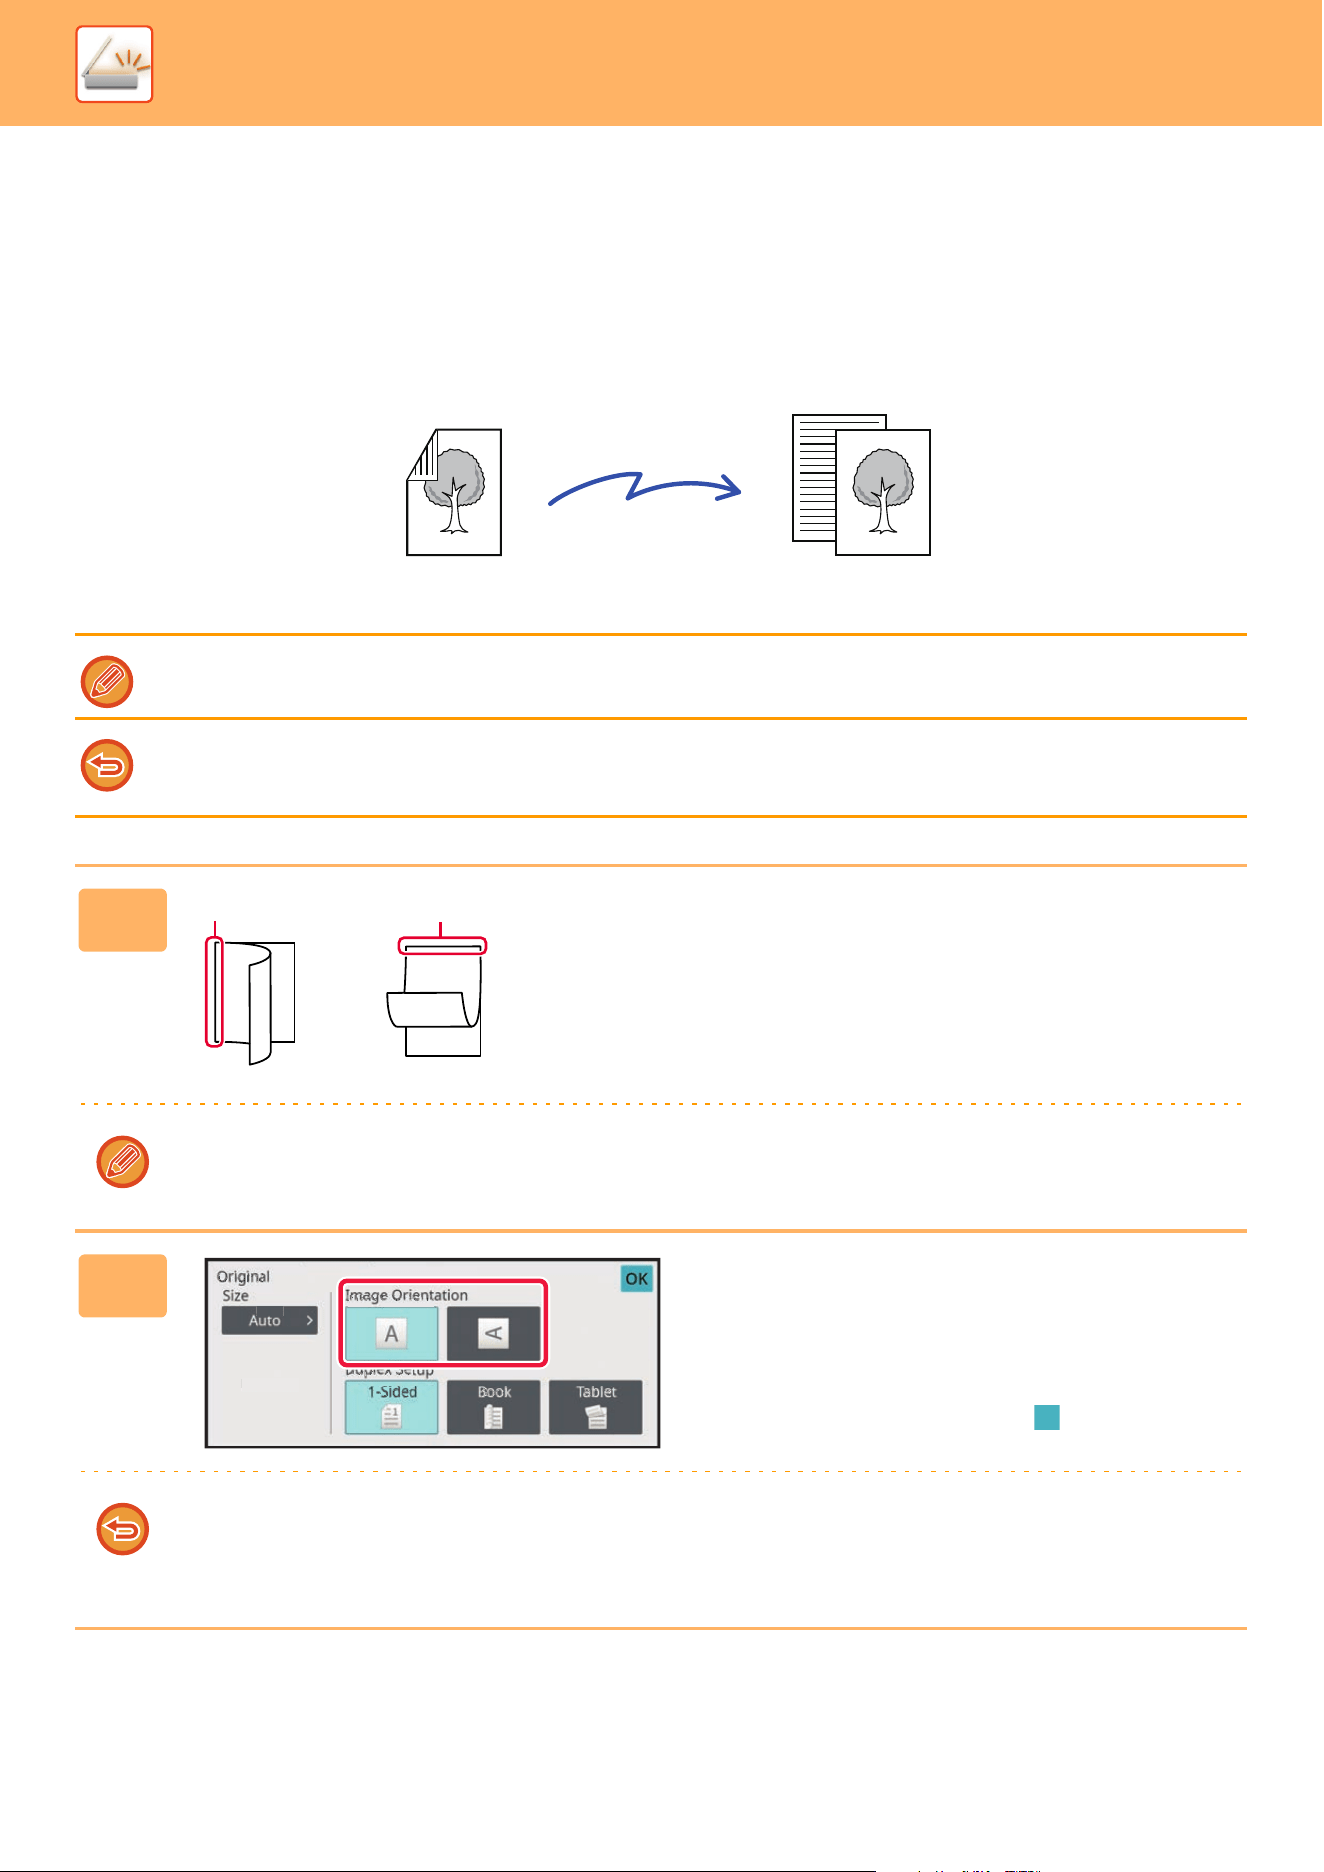
5-57
SCANNER►TRANSMITTING AN IMAGE
IMAGE SETTINGS
AUTOMATICALLY SCANNING BOTH SIDES OF AN
ORIGINAL (2-SIDED ORIGINAL)
The automatic document feeder is used to automatically scan both sides of an original.
The settings on 2-sided scanning are cleared when transmission has completed.
• You cannot use 2-Sided scanning when the original size is set to Long Size.
• 2-sided scanning is not possible when "Settings (administrator)" - [System Settings] → [Common Settings] → [Device
Control] → [Condition Settings] or [Enable/Disable Settings] → [Disabling of Document Feeder] is enabled.
1
After tapping the [Original] key, tap the
[Book] or [Tablet] key.
See the figure on the left to check the binding edge of the
original and select the key to be tapped.
(1) Book
(2) Tablet
In normal mode, tap the [2-Sided Tablet] or [2-Sided Book] key.
2
Tap the [Image Orientation] key with
the same orientation as the placed
original.
If this setting is not correct, a suitable image may not be
transmitted.
After the settings are completed, tap .
To cancel 2-sided scanning:
Tap the [1-Sided] key.
In normal mode, tap the [2-Sided Tablet] key or the [2-Sided Book] key that has been forcibly displayed and cancel the
display.
2-Sided Original
Scan transmission
Front and reverse sides are
scanned
A
C
G
AB
E F
J
L
KL
E
(1) (2)
Auto
Original
Image Orientation
Duplex Setup
1-Sided Book Tablet
Long Size
uAuto
u
u
u
u
u
Orig
Orig
Orig
Orig
Orig
Orig
O
Orig
Orig
Orig
O
Orig
O
O
Orig
Orig
r
Or
Orig
Ori
g
Orig
rig
g
Orig
Orig
Or
Orig
Orig
Orig
Orig
O
Or
Orig
Orig
r
g
Or
Or
Orig
O
O
O
g
Orig
O
O
Orig
g
Orig
Orig
O
O
g
Orig
Orig
r
g
g
g
inal
inal
ina
ina
i
ina
n
inal
nal
inal
inal
inal
al
inal
inal
inal
inal
l
inal
ina
inal
i
in
ina
a
inal
inal
nal
inal
na
a
na
l
a
n
a
na
nal
l
l
a
a
a
ina
a
na
al
a
g
Imag
I
Imag
mag
ma
m
mag
ag
ag
a
g
g
ag
Imag
ag
g
g
a
g
ag
g
Imag
g
Imag
a
g
g
g
g
g
g
e Or
e O
e Or
eO
eOr
e
e O
eOr
eOr
e Or
e Or
O
eO
O
eO
e O
eO
eOr
eOr
e
e
Or
e
O
e
e
O
O
e
eO
e O
e
O
O
O
O
O
eO
e
O
e
O
O
O
e
i
ient
en
ie
ien
ient
ient
ent
t
i
ie
i
i
e
e
i
i
e
e
e
ie
i
e
e
e
e
e
e
ie
i
e
e
e
e
at
atio
atio
atio
t
tio
ti
atio
atio
a
t
at
o
a
at
a
a
at
a
a
a
a
t
at
a
at
a
a
t
t
n
n
n
n
n
n
n
n
n
n
n
n
n
n
n
n
n
n
Dup
D
Dupl
Dupl
Du
Dupl
Dup
Dupl
Dup
up
Dup
Dup
Dupl
up
Dup
D
up
D
Dup
Dup
upl
Dupl
u
Dup
u
D
Du
Dup
Du
u
u
p
D
D
D
u
u
l
Dupl
Dup
u
p
p
D
D
u
p
l
p
ex S
ex S
ex S
ex S
ex S
ex
ex
ex S
ex S
ex S
ex S
S
ex S
ex S
ex S
ex
ex S
ex
ex
S
ex S
ex S
xS
x
S
S
xS
ex S
S
xS
e
xS
xS
xS
S
xS
S
e
e
x
xS
x
x
x
S
S
S
S
e
S
e
x
etup
tup
tu
tup
tup
tu
u
up
etup
up
tup
p
etup
tu
etup
up
u
tu
tu
u
etu
tu
tup
tup
u
up
u
tup
u
t
u
tup
e
e
t
u
p
p
e
et
tup
e
et
t
t
u
p
p
1-Si
Si
-Si
S
1-Si
1-
-S
S
S
i
Si
-S
-S
Si
-S
-Si
S
-Si
S
-S
S
S
S
S
S
S
S
1S
-
S
S
S
S
Si
-S
-
S
-S
S
S
S
S
S
S
ded
ded
ded
ded
d
d
ded
ded
ded
ded
ed
ed
de
de
ded
ed
ded
de
ded
ded
ded
ed
d
ded
ded
de
d
ded
d
ded
ed
e
ed
e
de
de
ded
d
d
d
ded
e
ed
d
d
e
e
e
d
d
Book
Book
Book
Book
k
Book
Book
Boo
Book
Book
Book
Book
Book
Boo
o
Book
Bo
Bo
Book
Book
Book
Book
Book
Boo
Book
Bo
Boo
o
o
Boo
Book
Book
oo
oo
B
Boo
o
o
o
Tabl
Tab
Tabl
Tab
Tab
bl
Tabl
Tabl
Tab
Tab
Tab
Tab
ab
Tab
Tab
Tab
b
ab
Ta
Tab
Tab
a
b
b
Ta
Ta
Tab
Tab
T
Ta
Tab
T
Tab
Ta
Ta
T
T
b
et
et
et
et
et
et
et
et
et
et
et
e
e
et
et
et
e
et
t
et
et
et
et
t
e
e
e
t
L
on
g
Siz
e
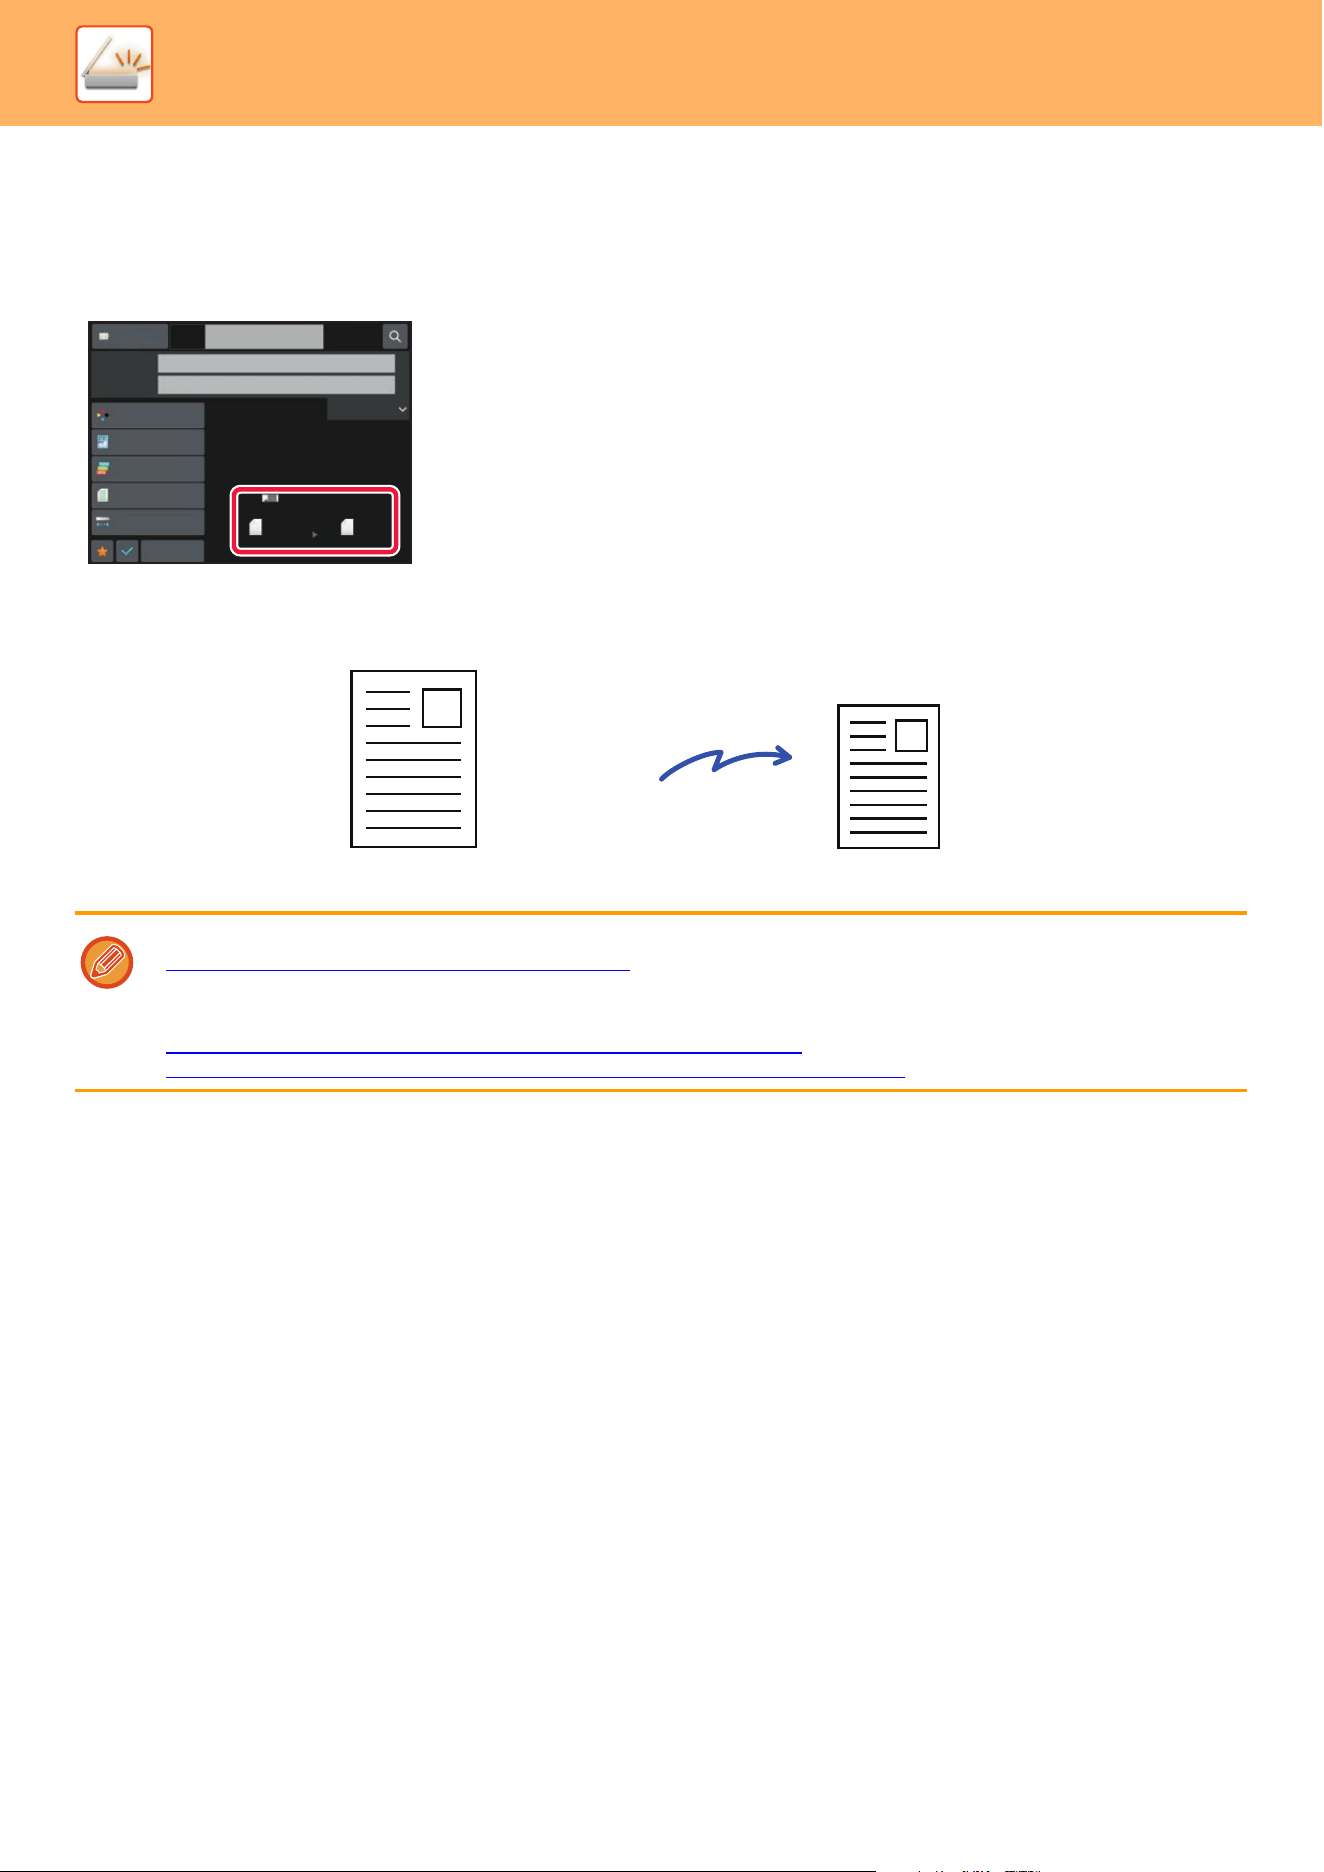
5-58
SCANNER►TRANSMITTING AN IMAGE
SCAN SIZE AND SEND SIZE (ENLARGE/REDUCE)
When the original is placed, its size is automatically detected.
In normal mode, the size of the placed original is indicated as the "Scan Size", and the size to be transmitted is indicated
as the "Send Size".
In the above screen, the scan size (the placed original) is 8-1/2" x 11" (A4) and the send size is auto. For example, if the
scan size is 8-1/2" x 11" (A4) and the send size is 5-1/2" x 8-1/2" (B5), the image will be reduced before transmission.
• Only standard original sizes can be automatically detected.
THE SIZE OF THE PLACED ORIGINAL
(page 5-12)
• When the original size is an inch size or a non-standard size, or if the size is not detected correctly, manually specify the
original scan size.
SPECIFYING THE ORIGINAL SCAN S
IZE IN PAPER SIZE (page 5-59)
SPECIFYING THE ORIGINAL SCAN SIZE USING NUMERIC VALUES (page 5-61)
Scan Size
Auto
Auto
Color Mode
Auto/Mono2
Resolution
200x200dpi
File Format
PDF
Original
Auto
Others
8½x11
8½x11
100%
Send Size
Address Book
Subject
File Name
Address
Touch to input Address
Options
Exposure
Specified by System Settings
8-1/2" x 11" (A4) 5-1/2" x 8-1/2" (B5)
Scan Size
Transmission"Send Size" is set
to 5-1/2" x 8-1/2"
(B5)
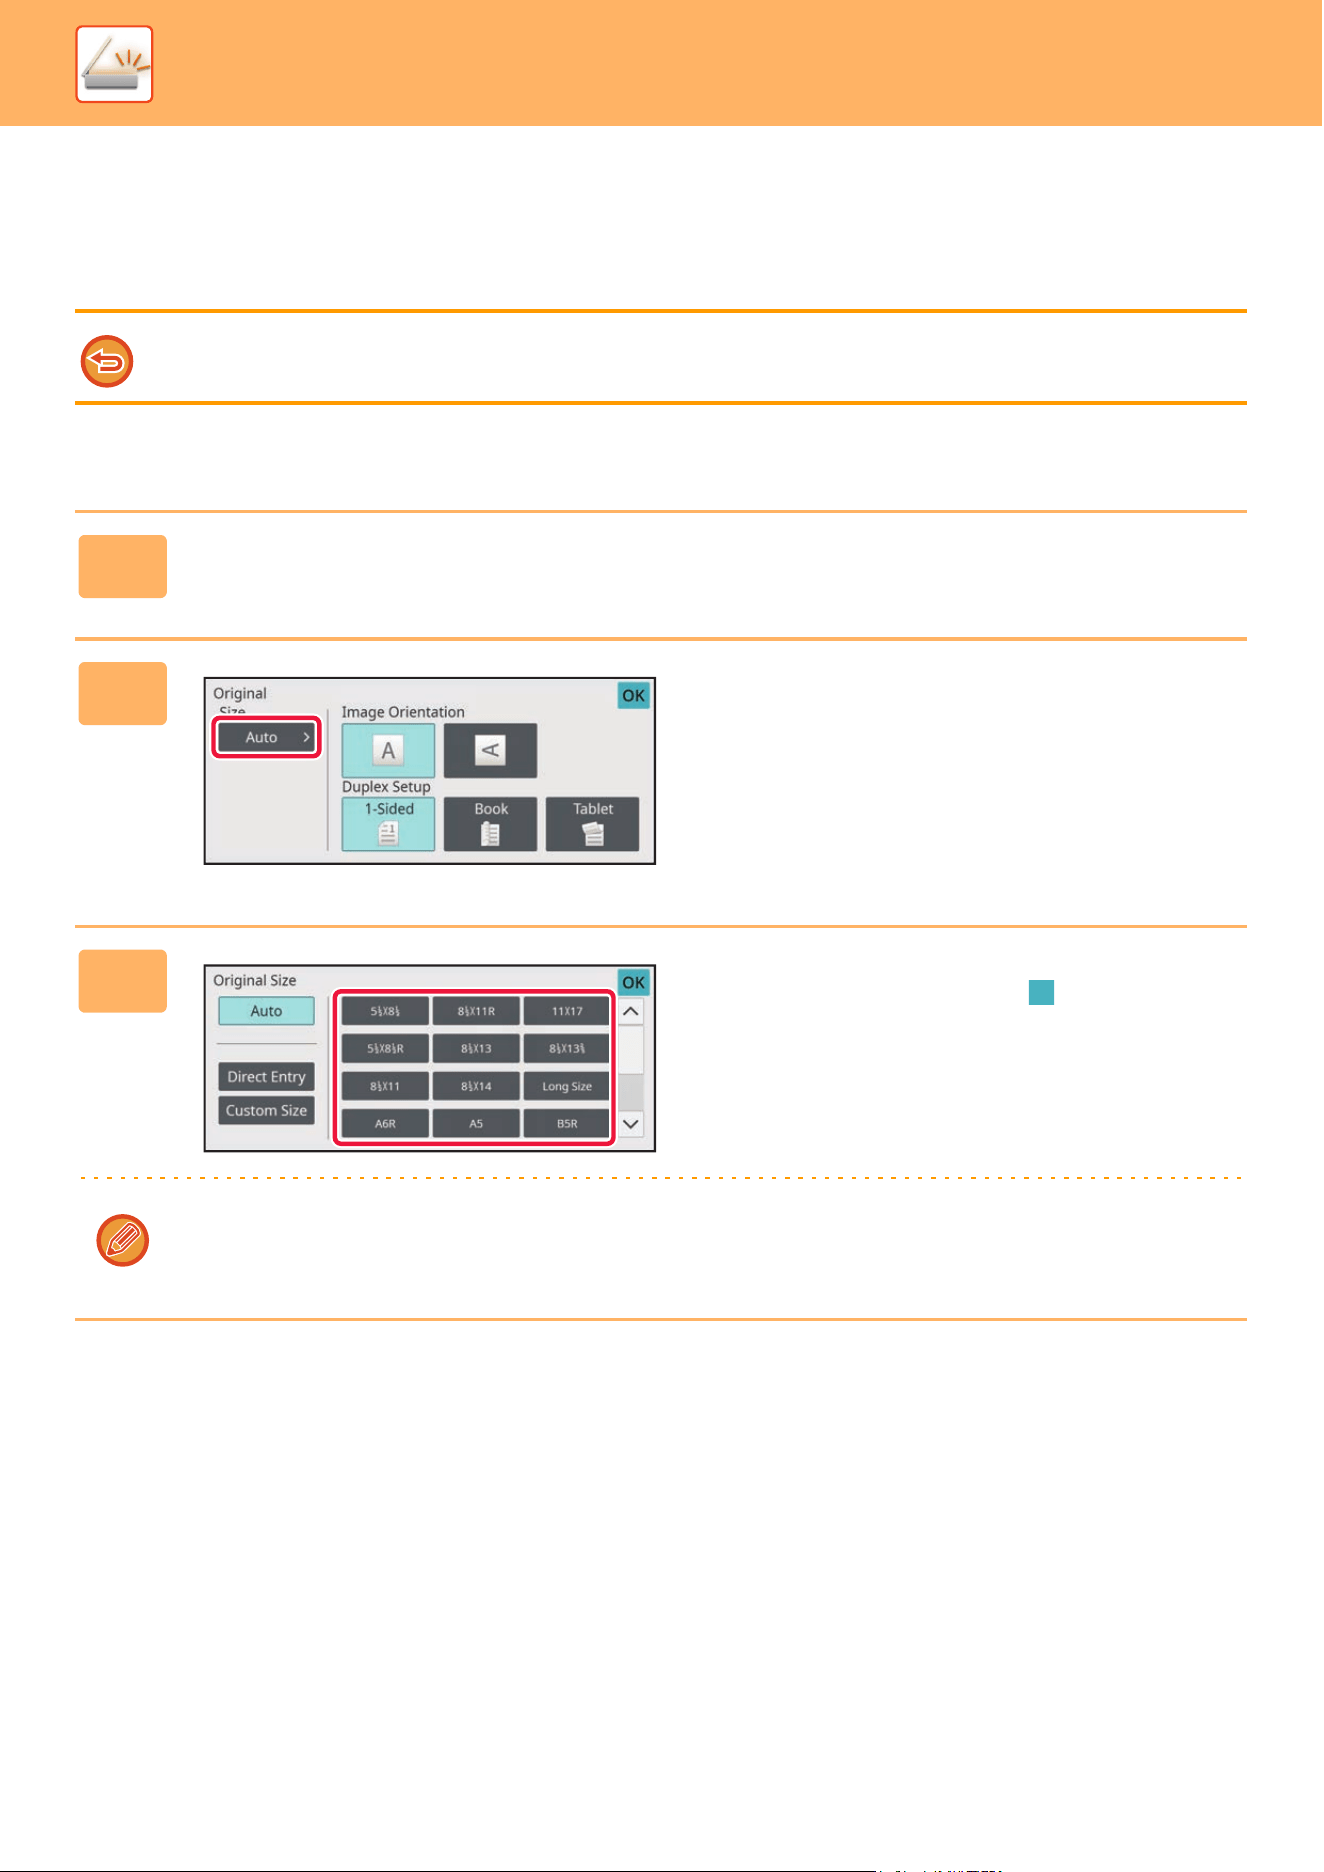
5-59
SCANNER►TRANSMITTING AN IMAGE
SPECIFYING THE ORIGINAL SCAN SIZE IN PAPER
SIZE
When the original size is a non-standard size or is not detected correctly, manually specify the original size.
In Easy mode
When [Long Size] is selected, the 2-sided scanning setting and send size cannot be changed.
The image is sent in Mono2 only.
1
Tap the [Original] key.
2
Tap the [Auto] key.
3
Tap a key of the desired original size.
After the settings are completed, tap
If you are sending a long original, perform the setting in normal mode.
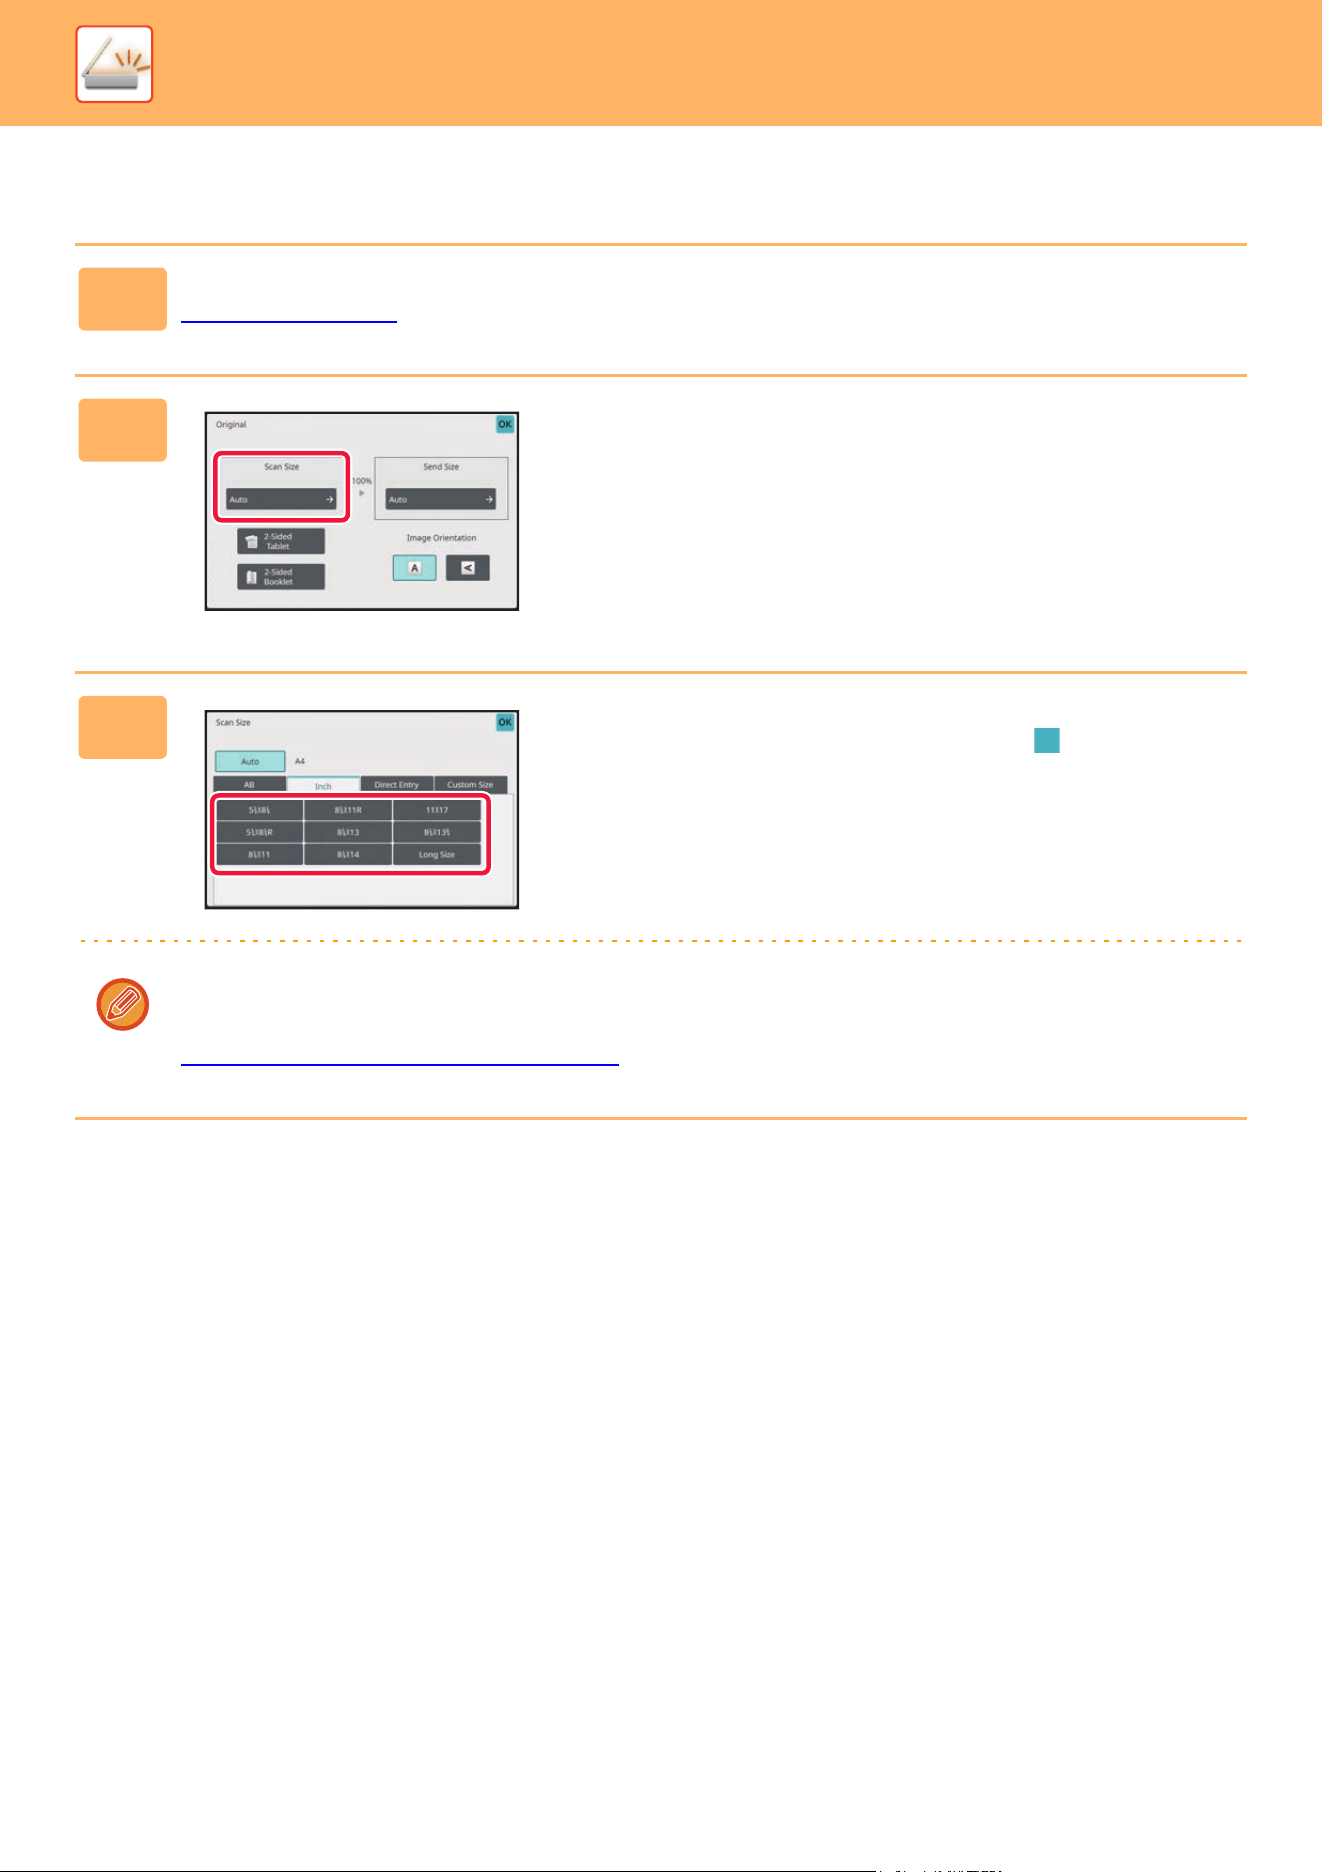
5-60
SCANNER►TRANSMITTING AN IMAGE
In Normal mode
1
Tap the [Detail] key to change to normal mode.
EASY MODE (page 5-6)
2
After tapping the [Original] key, tap the
[Scan Size] key.
3
Tap the appropriate original size key.
After the settings are completed, tap .
If you are sending a long original, tap the [Long Size] key.
Use the automatic document feeder to scan a long original. The maximum width that can be scanned is 39-3/8" (1,000
mm) (the maximum height is 11-5/8" (297 mm)).
TRANSMITTABLE ORIGINAL SIZES
(page 5-12)
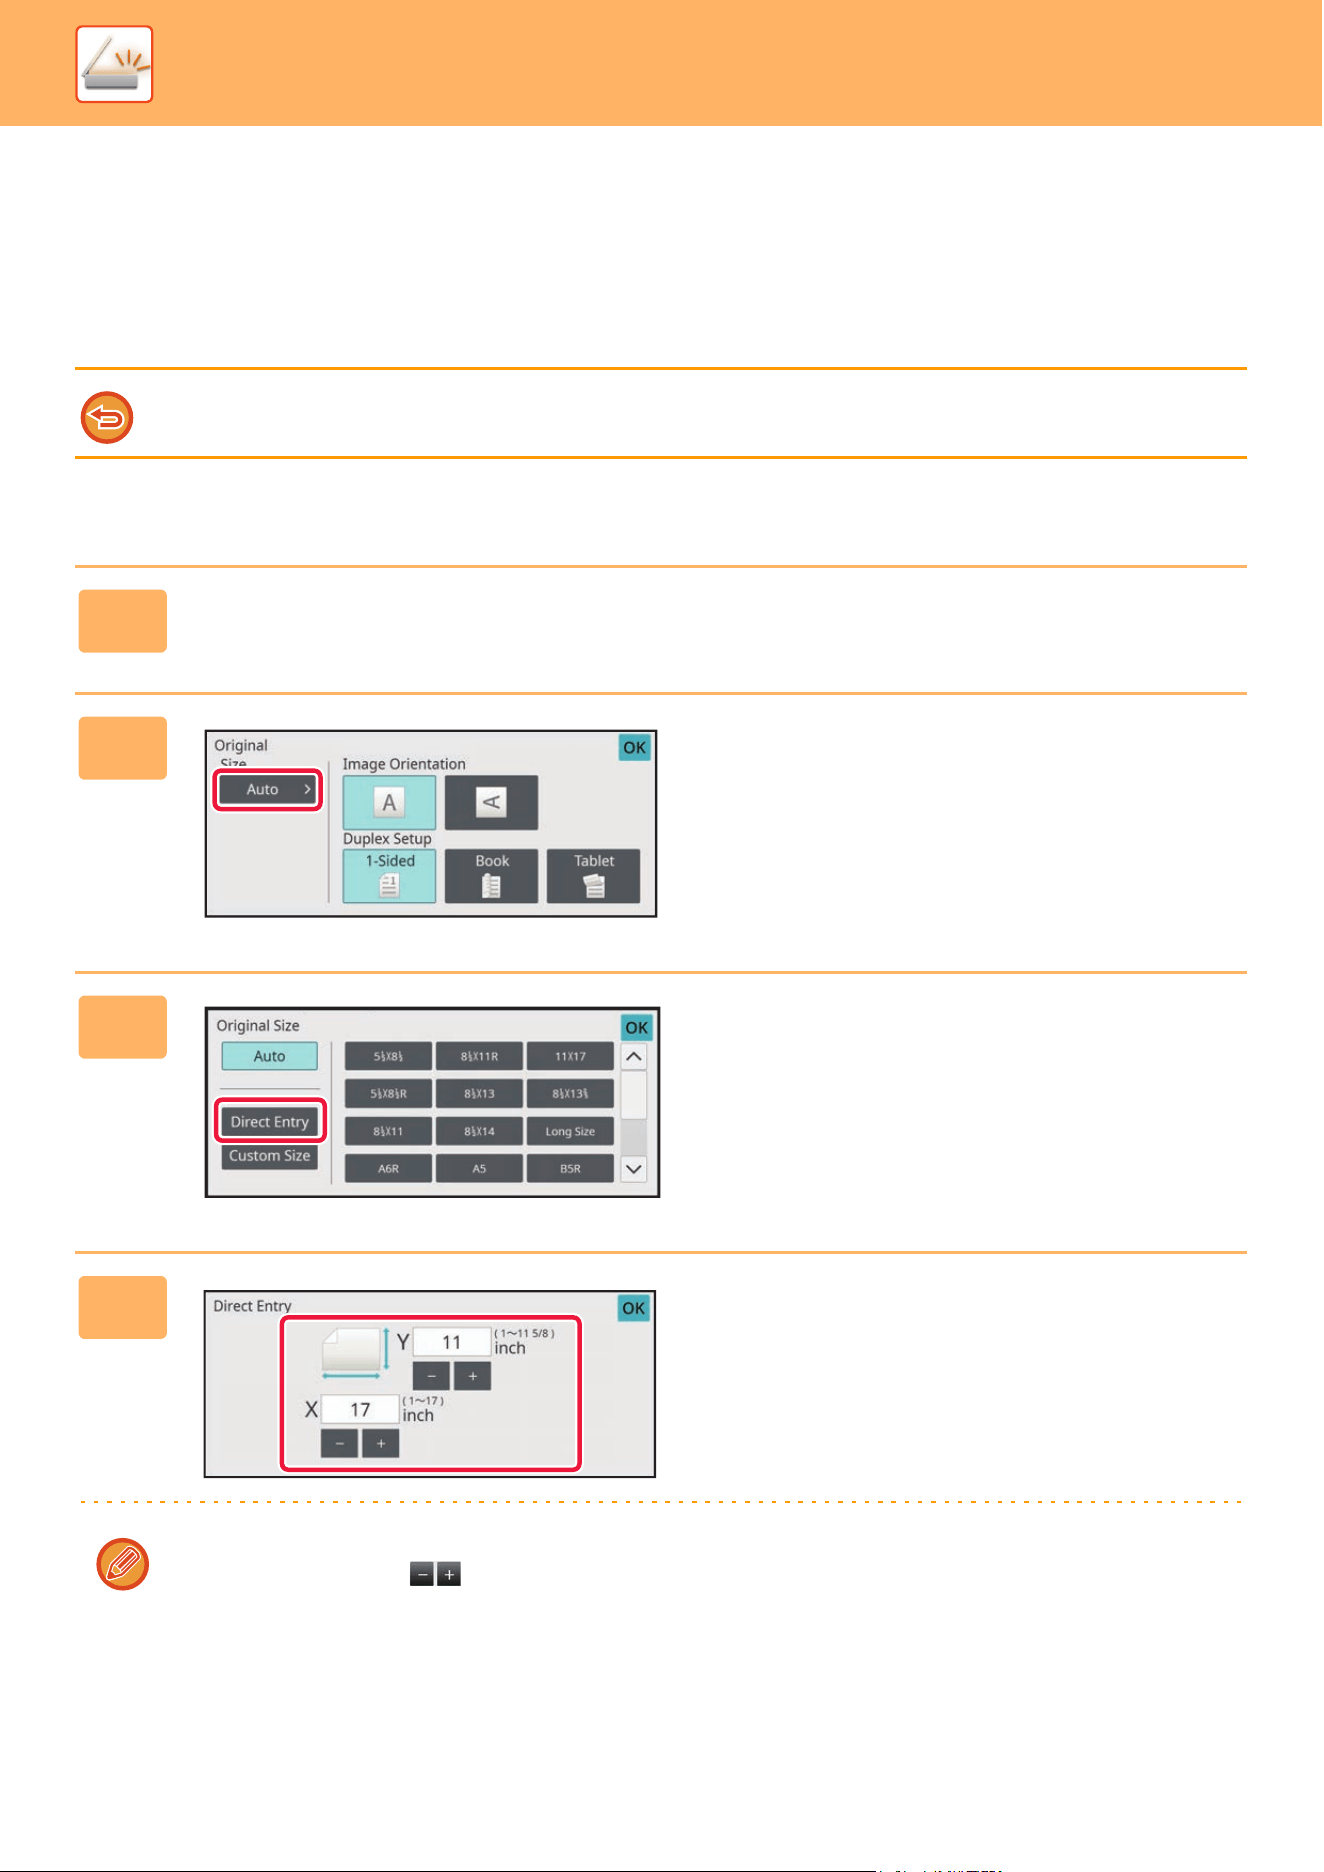
5-61
SCANNER►TRANSMITTING AN IMAGE
SPECIFYING THE ORIGINAL SCAN SIZE USING
NUMERIC VALUES
When scanning a non-standard size original such as a card or postcard, specify the original size using numeric values
after placing the original.
The width can be from 1" to 17" (25 mm to 432 mm), and the height can be from 1" to 11-5/8" (25 mm to 297 mm).
In Easy mode
When the scan size is specified by numeric values, the send size cannot be specified.
1
Tap the [Original] key.
2
After tapping the [Original] key, tap the
[Scan Size] key.
3
Tap the [Direct Entry] key.
4
Specify the original size.
• Tap the areas displaying width and height sizes respectively, and enter the sizes using the numeric keys.
• It is convenient to use ( ) to finely adjust the entered size.
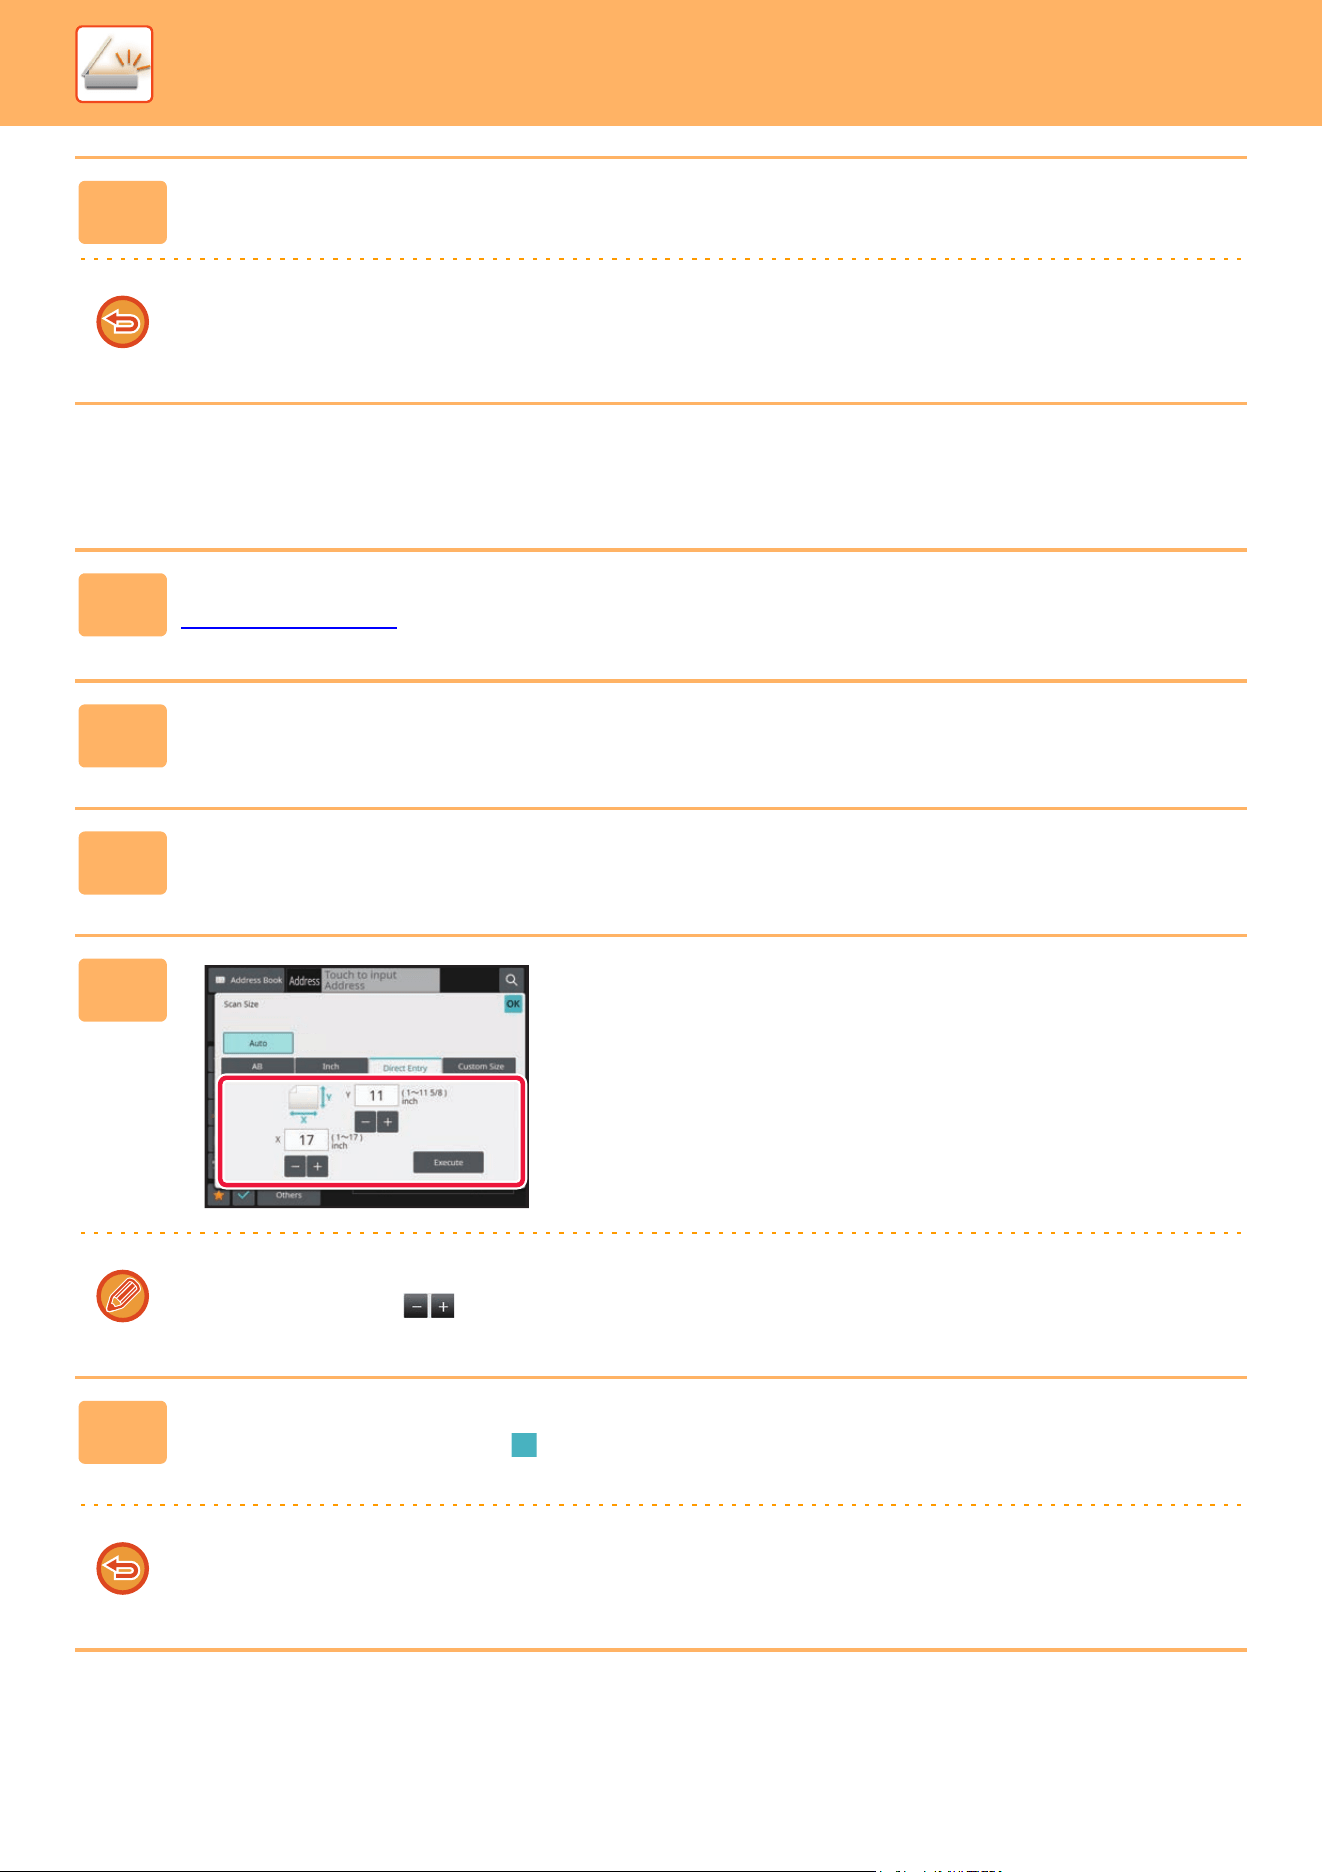
5-62
SCANNER►TRANSMITTING AN IMAGE
In Normal mode
5
Tap [Execute] twice.
On the base screen, check that the specified size is displayed on the [Original] key.
To cancel the specified size settings:
Tap the [Auto] key.
1
Tap the [Detail] key to change to normal mode.
EASY MODE (page 5-6)
2
Tap the [Original] key.
3
After tapping the "Scan Size" key, tap the [Direct Entry] key.
4
Specify the original size.
• Tap the areas displaying width and height sizes respectively, and enter the sizes using the numeric keys.
• It is convenient to use to finely adjust the entered size.
5
Tap the [Execute] key.
After the settings are completed, tap twice.
On the base screen, check that the specified size is displayed on the [Original] key.
To cancel the specified size settings:
Tap the [Auto] key.
8½x11
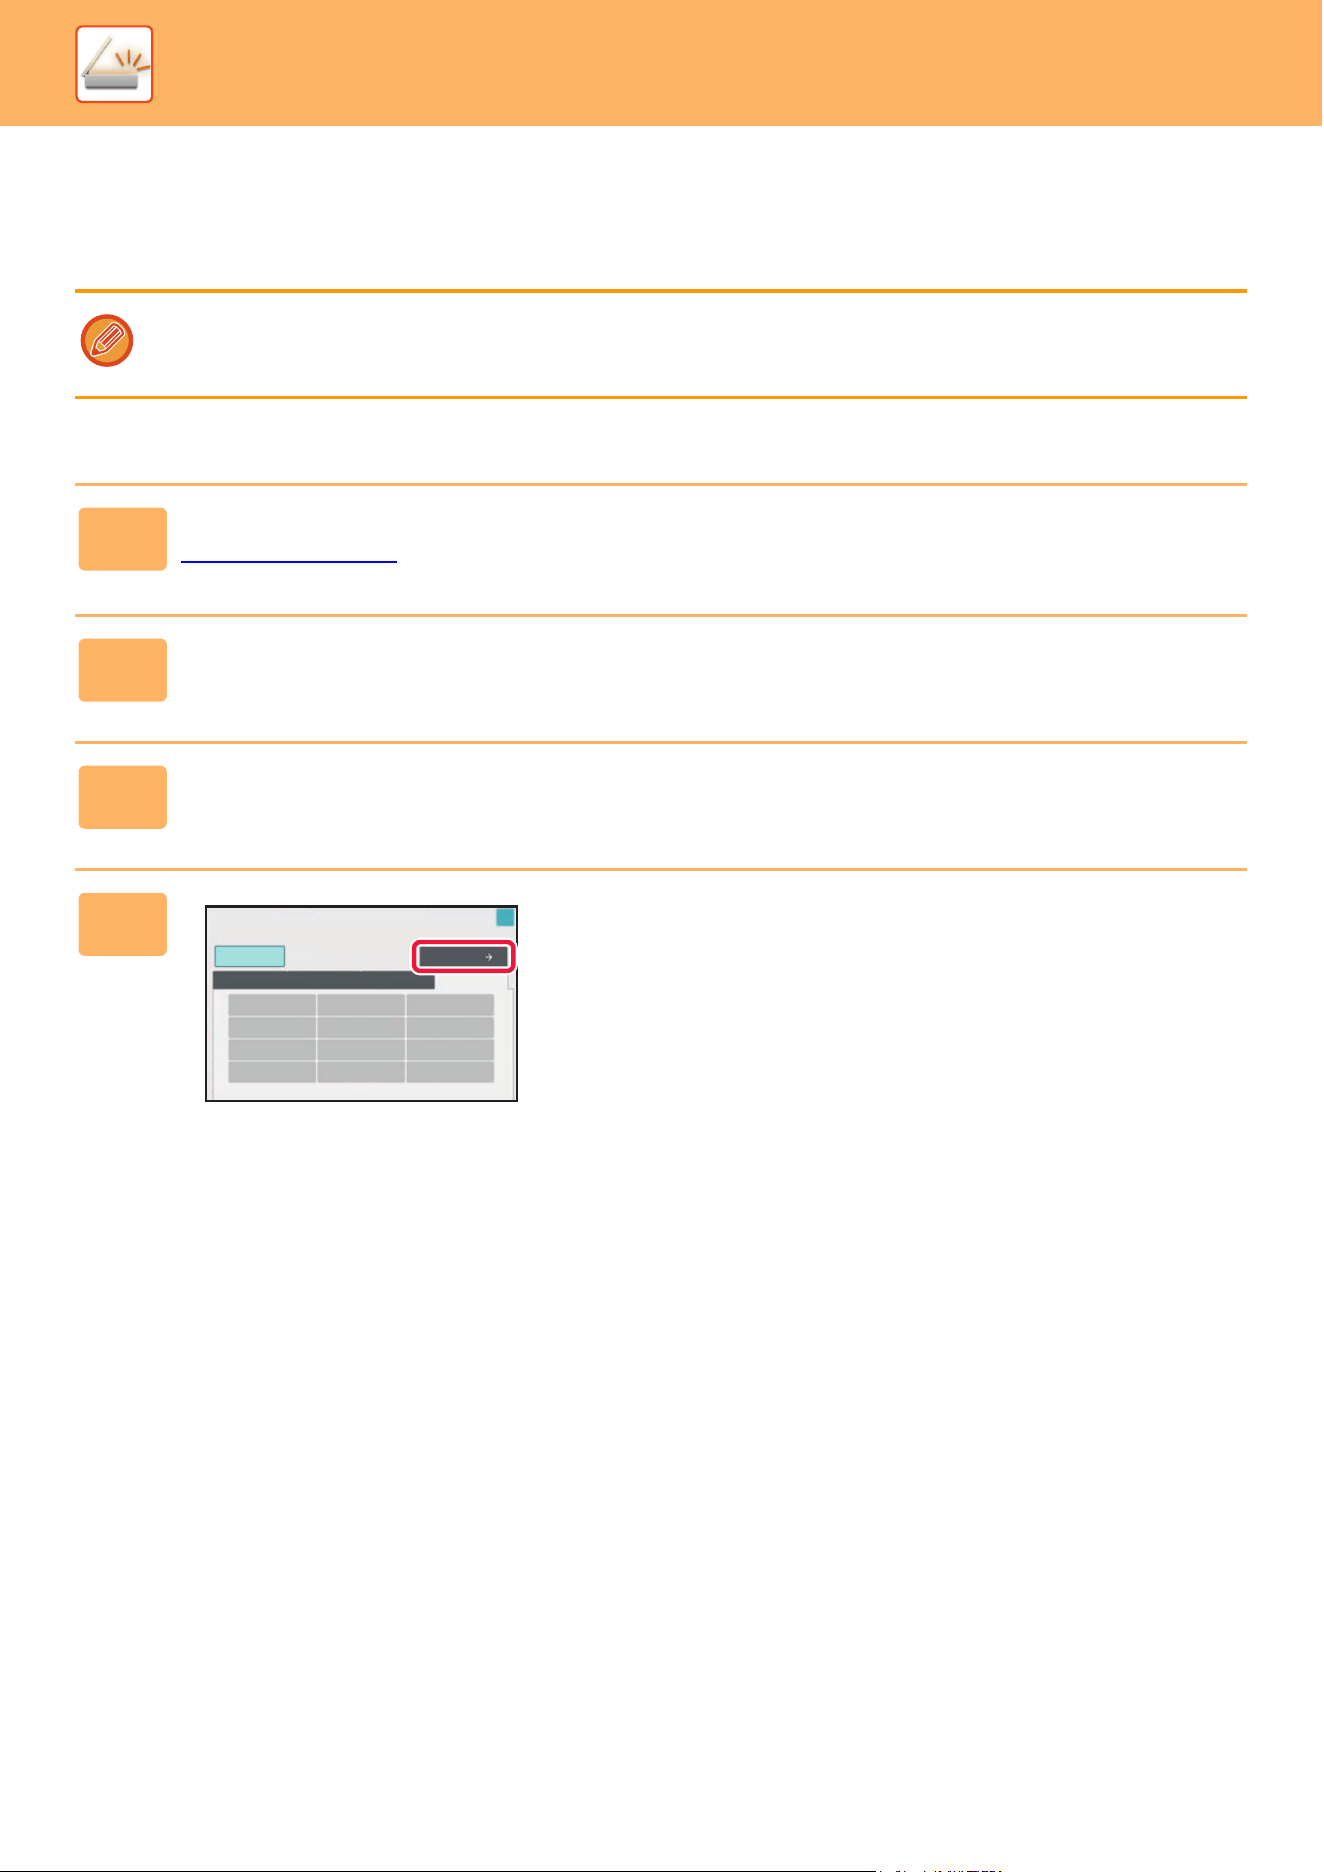
5-63
SCANNER►TRANSMITTING AN IMAGE
STORING FREQUENTLY USED ORIGINAL SIZES
Store the frequently used non-standard original sizes. This section explains how to store, retrieve, change, and delete
non-standard original sizes.
Storing original sizes (Modify/Delete)
• The stored original size will be retained even if the main power is turned off.
• A total of up to 12 non-standard original sizes can be registered for copying and image sending.
• The added original sizes will also appear in other modes.
1
Tap the [Detail] key to change to normal mode.
EASY MODE (page 5-6)
2
Tap the [Original] key.
3
Tap the [Scan Size] key and tap the [Custom Size] tab.
4
Tap [Store/Delete] key.
Auto
Direct Entry
Inch
AB
Custom Size
A4
Scan Size
Store/Delete
OK
8½x11
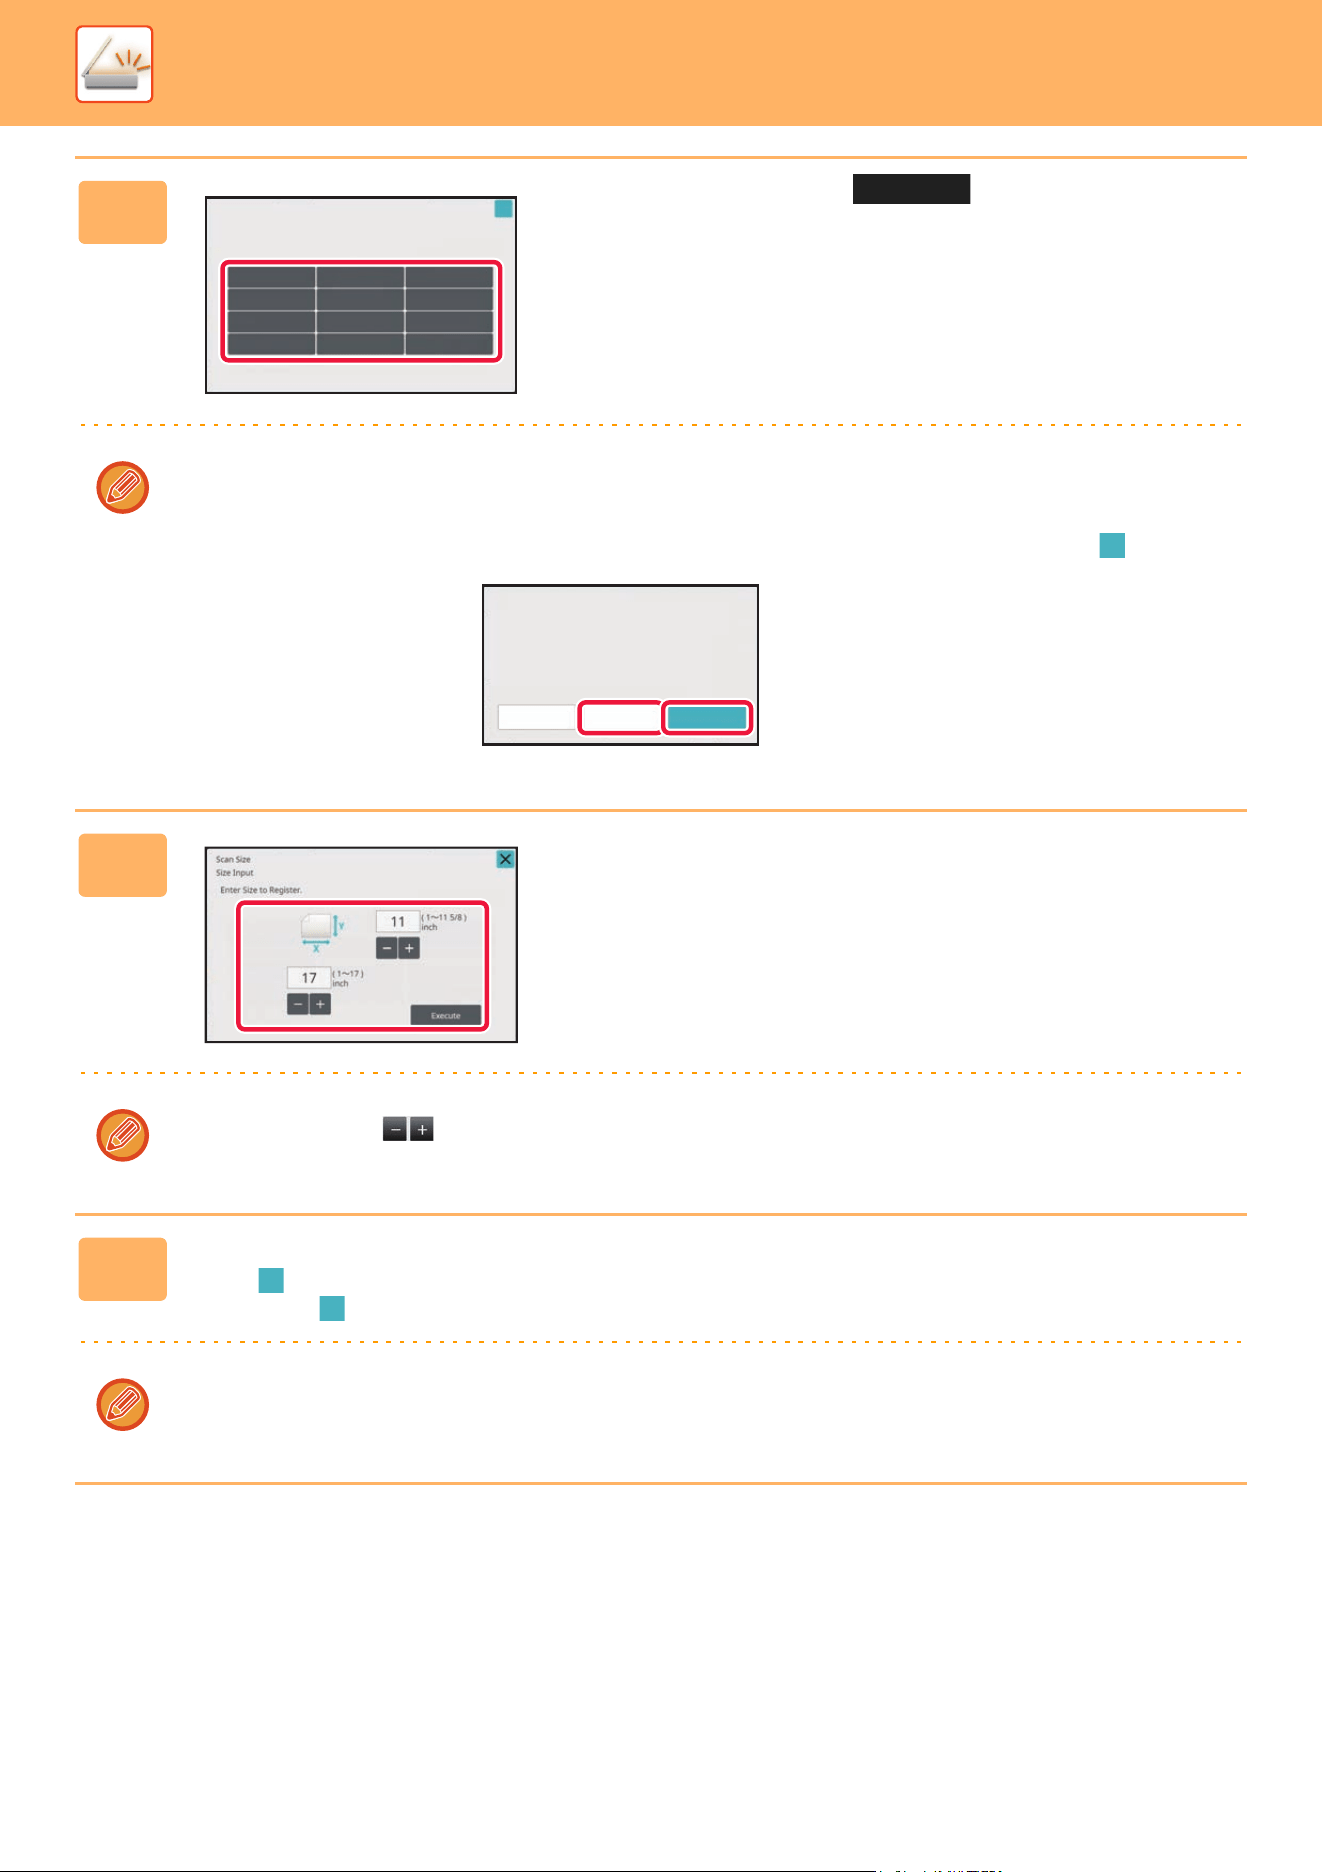
5-64
SCANNER►TRANSMITTING AN IMAGE
5
Tap a key ( ) for storing a
custom original size.
Tap a key that does not show a size.
To modify or delete a previously stored key:
Tap the key that you want to modify or delete. The following screen will appear.
• To modify the key, tap the [Modify] key and go to the next step.
• To delete the key, tap the [Delete] key. Make sure that the original size has been cleared and tap the key.
6
Specify the original size.
Tap the areas displaying width and height sizes respectively,
and enter the sizes using the numeric keys.
It is convenient to use to finely adjust the entered size.
7
Tap the [Execute] key.
Tap the key, and check that the key of the size stored on the Scan Size screen is added properly. After you have
checked it, tap .
To cancel the operation:
Tap the [CA] key.
Scan Size
Store/Delete
OK
Select the size key to store/delete
the custom original size.
A custom size has already been stored
in this location.
Delete
Amend
Cancel
t
S
S
H

5-65
SCANNER►TRANSMITTING AN IMAGE
Retrieving a stored original size
In Easy mode
1
Tap the [Original] key.
2
Tap the [Auto] key.
3
Tap the [Custom Size] key.
4
Tap the key of the original size that
you wish to retrieve.
Tap twice.
On the base screen, check that the specified size is
displayed on the [Original] key.
To cancel the operation
Tap the [CA] key.
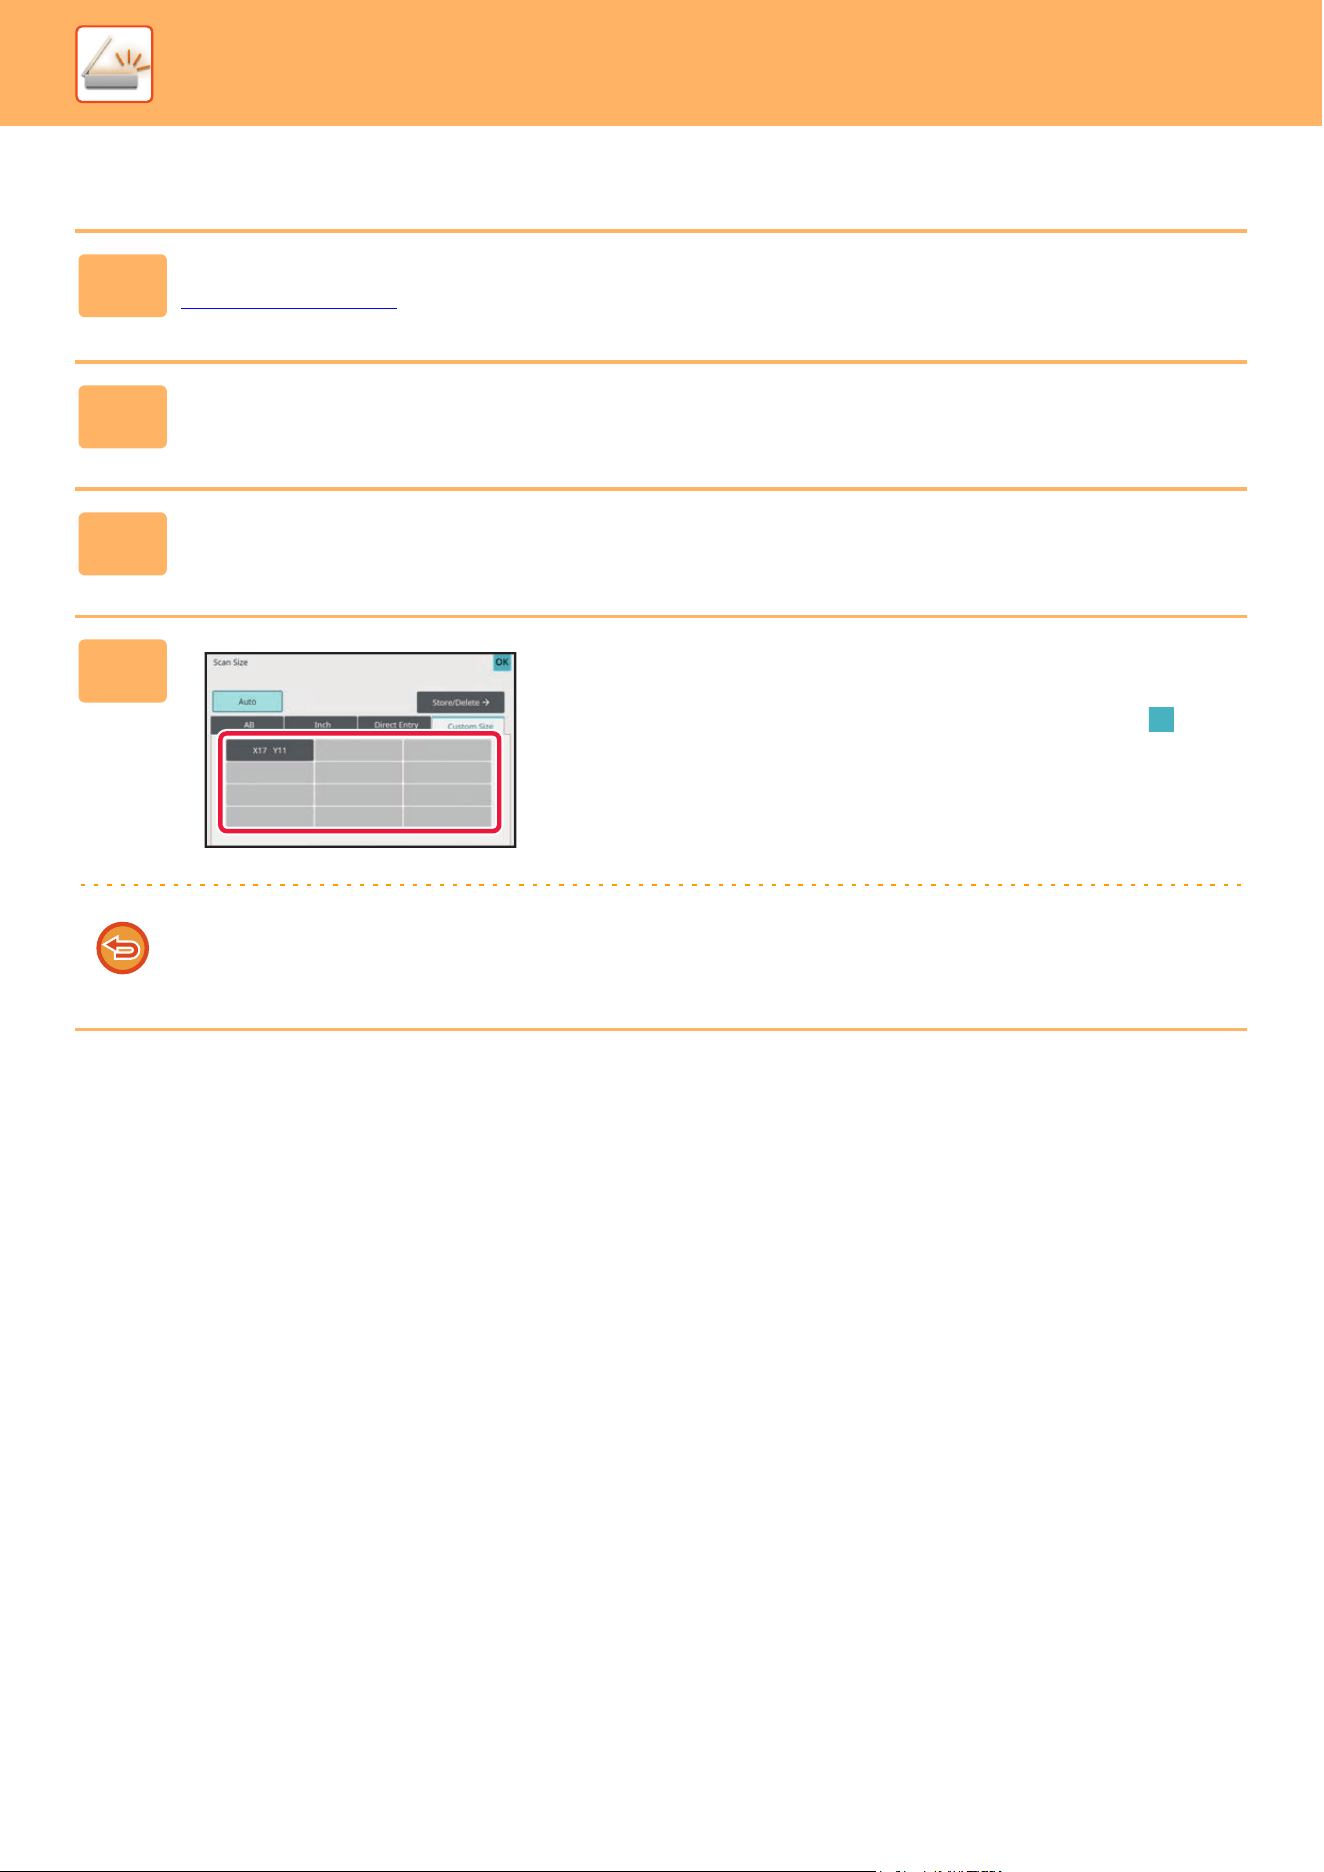
5-66
SCANNER►TRANSMITTING AN IMAGE
In Normal mode
1
Tap the [Detail] key to change to normal mode.
EASY MODE (page 5-6)
2
Tap the [Original] key.
3
Tap the [Scan Size] key and tap the [Custom Size] tab.
4
Tap the key of the original size that
you wish to retrieve.
After selecting the key of the original size, tap the key.
Check that the specified size is displayed on the scan size
screen.
To cancel the operation
Tap the [CA] key.
8½x11
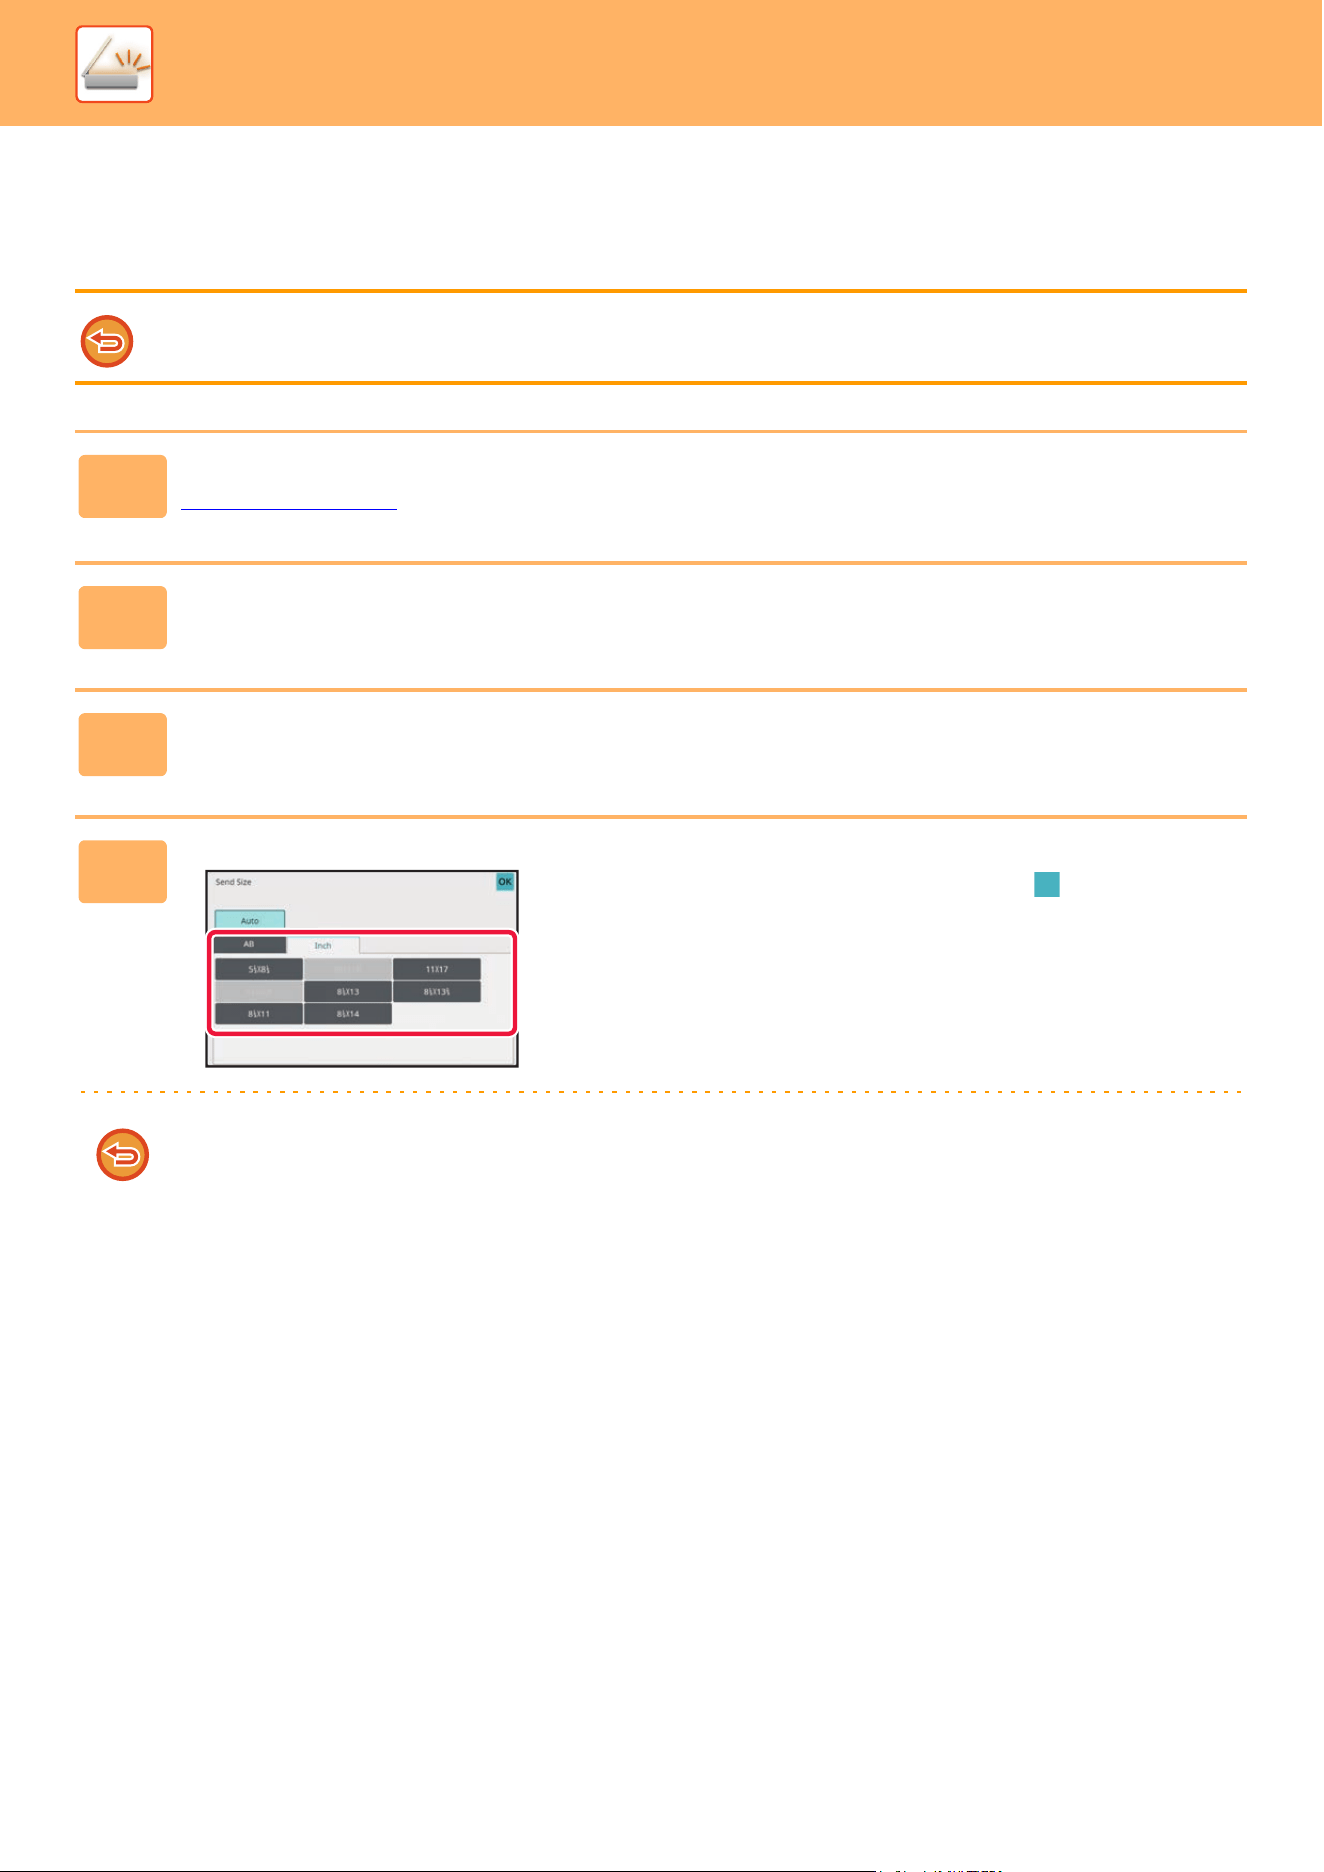
5-67
SCANNER►TRANSMITTING AN IMAGE
SPECIFYING THE SEND SIZE OF THE IMAGE
Tap this key to specify the send size as a paper size. If the specified send size is larger than the scan size, the image will
be enlarged. If the specified send size is smaller than the scan size, the image will be reduced.
The send size cannot be specified when [Long Size] is selected for the scan size, or when the scan size is specified by
numeric values.
1
Tap the [Detail] key to change to normal mode.
EASY MODE (page 5-6)
2
Tap the [Original] key.
3
Tap the [Send Size] key.
4
Tap the desired send size key.
After the settings are completed, tap .
Depending on the paper size specified for the "Scan Size", it may not be possible to select some sizes for the "Send
Size". You cannot tap size keys that are unavailable for the "Send Size".
8½x11
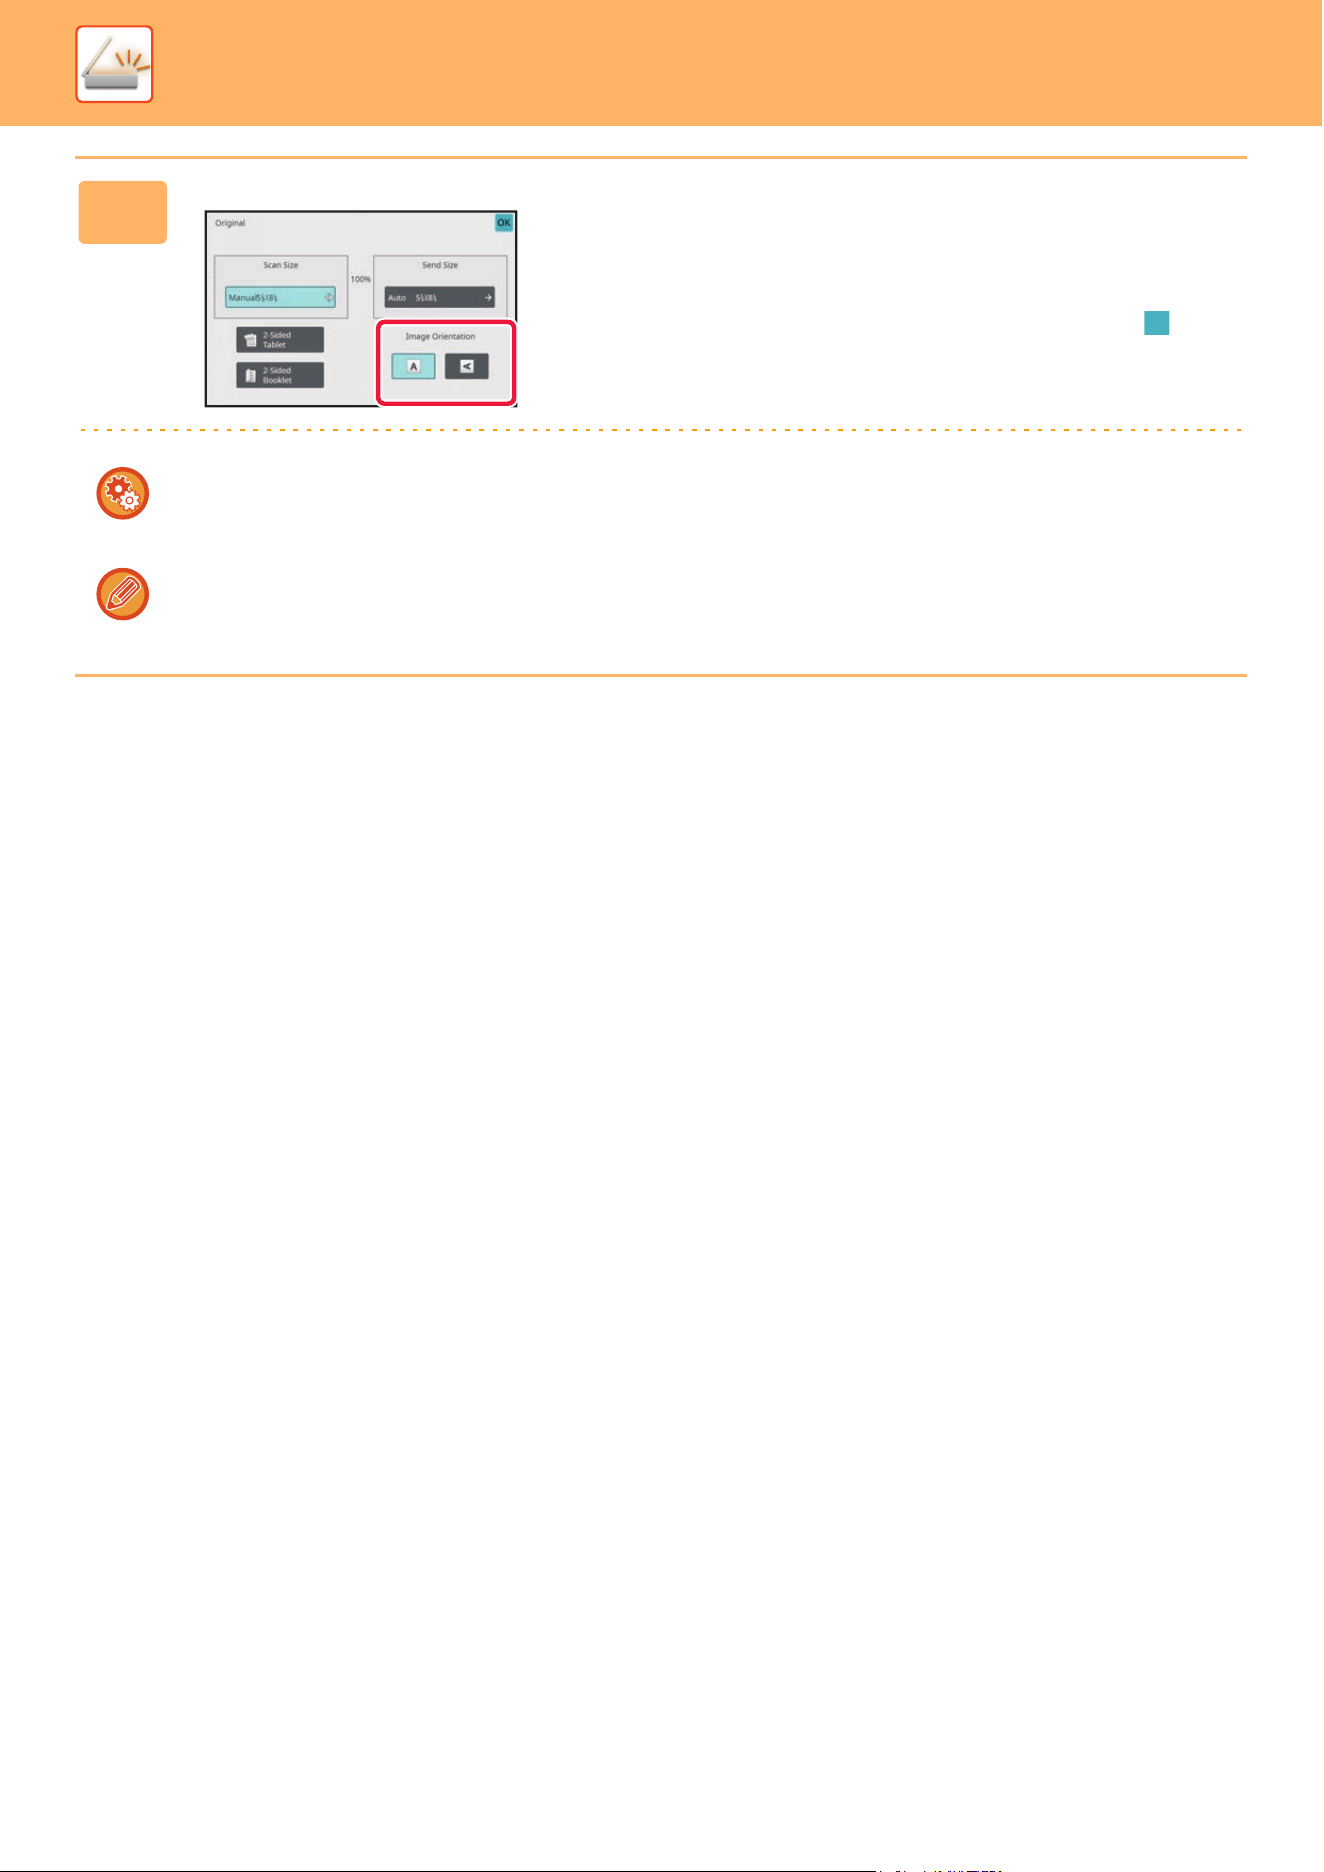
5-68
SCANNER►TRANSMITTING AN IMAGE
5
Tap the [Image Orientation] key with
the same orientation as the original
image.
If this setting is not correct, a suitable image may not be
transmitted. After the settings are completed, tap .
To configure the default setting of image orientation, select [System Settings] → [Image Send Settings] → [Common
Settings] → [Condition Settings] → [Image Orientation] in "Settings (administrator)".
The ratio used for reduction or enlargement of the original will appear between the "Scan Size" and the "Send Size".
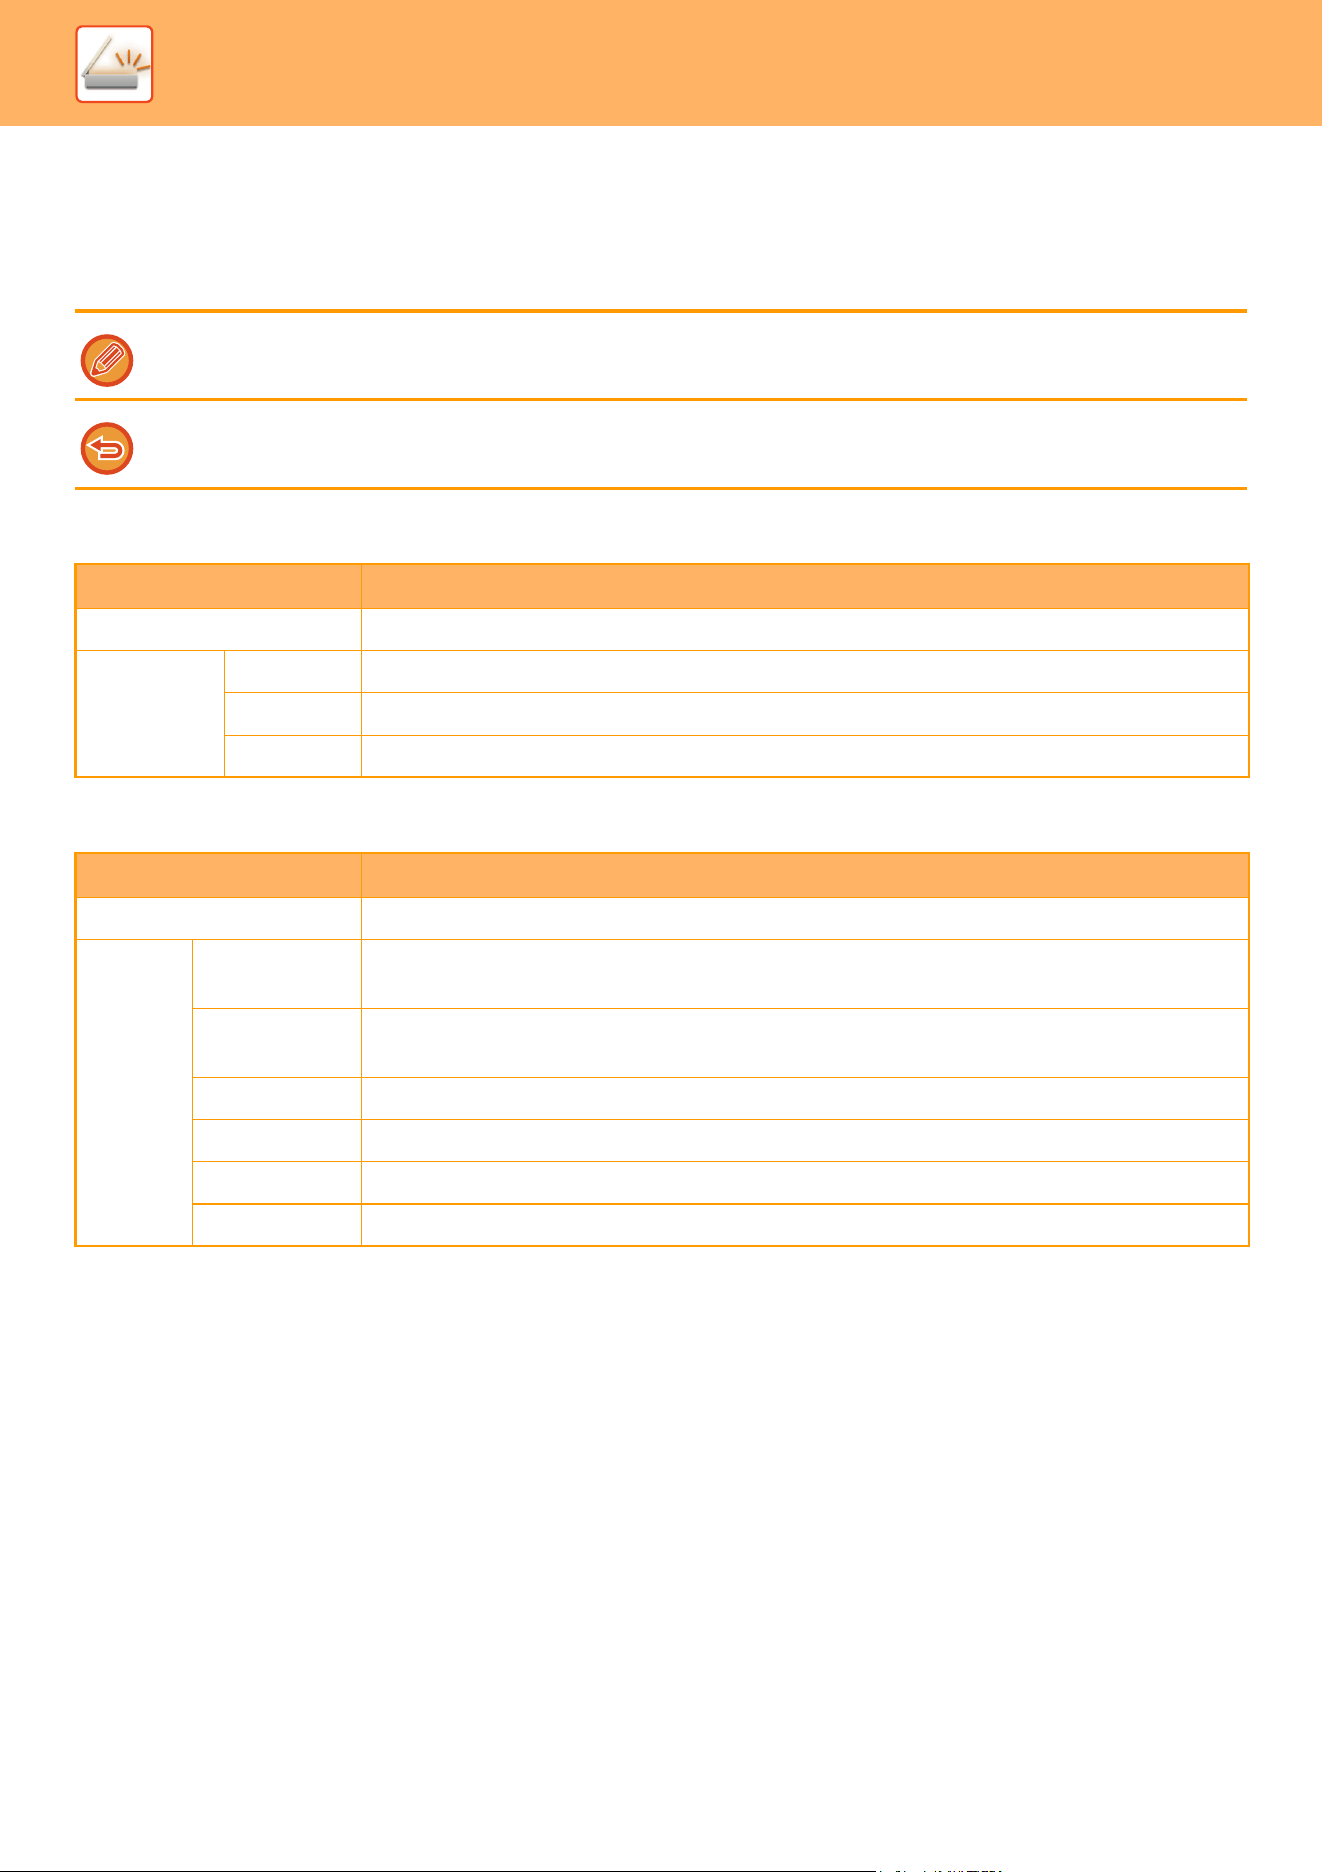
5-69
SCANNER►TRANSMITTING AN IMAGE
CHANGING THE EXPOSURE AND ORIGINAL IMAGE
TYPE
Optimum scanning is ensured by selecting exposure and original image type based on the original.
Exposure settings
How to select the original type (Scan mode, Data entry mode)
When using the document glass to scan multiple original pages, change the exposure setting each time you change pages.
When using the automatic document feeder, the exposure setting cannot be changed once scanning has begun. (If "Job
Build" is used in Others, change the exposure each time a new set of originals is inserted.)
Exposure Suggestion
Auto This setting automatically adjusts the exposure for light and dark parts of the original.
Manual 1-2 Select this setting when the original consists of dark text.
3 Select this setting for a normal original (neither dark nor light).
4-5 Select this setting when the original consists of light text.
Setup Items Description
Auto The original image type is automatically selected to match the original.
Manual Text/Printed
Photo
This mode provides the best balance for scanning an original which contains both text and printed
photographs, such as a magazine or catalogue.
Text/Photo This mode provides the best balance for scanning an original which contains both text and
photographs, such as a text document with a photo pasted on.
Text Use this mode for regular text documents.
Photo Use this mode to scan photos.
Printed Photo This mode is best for scanning printed photographs, such as photos in a magazine or catalogue.
Map This mode is best for copying maps with light color shading and fine text.
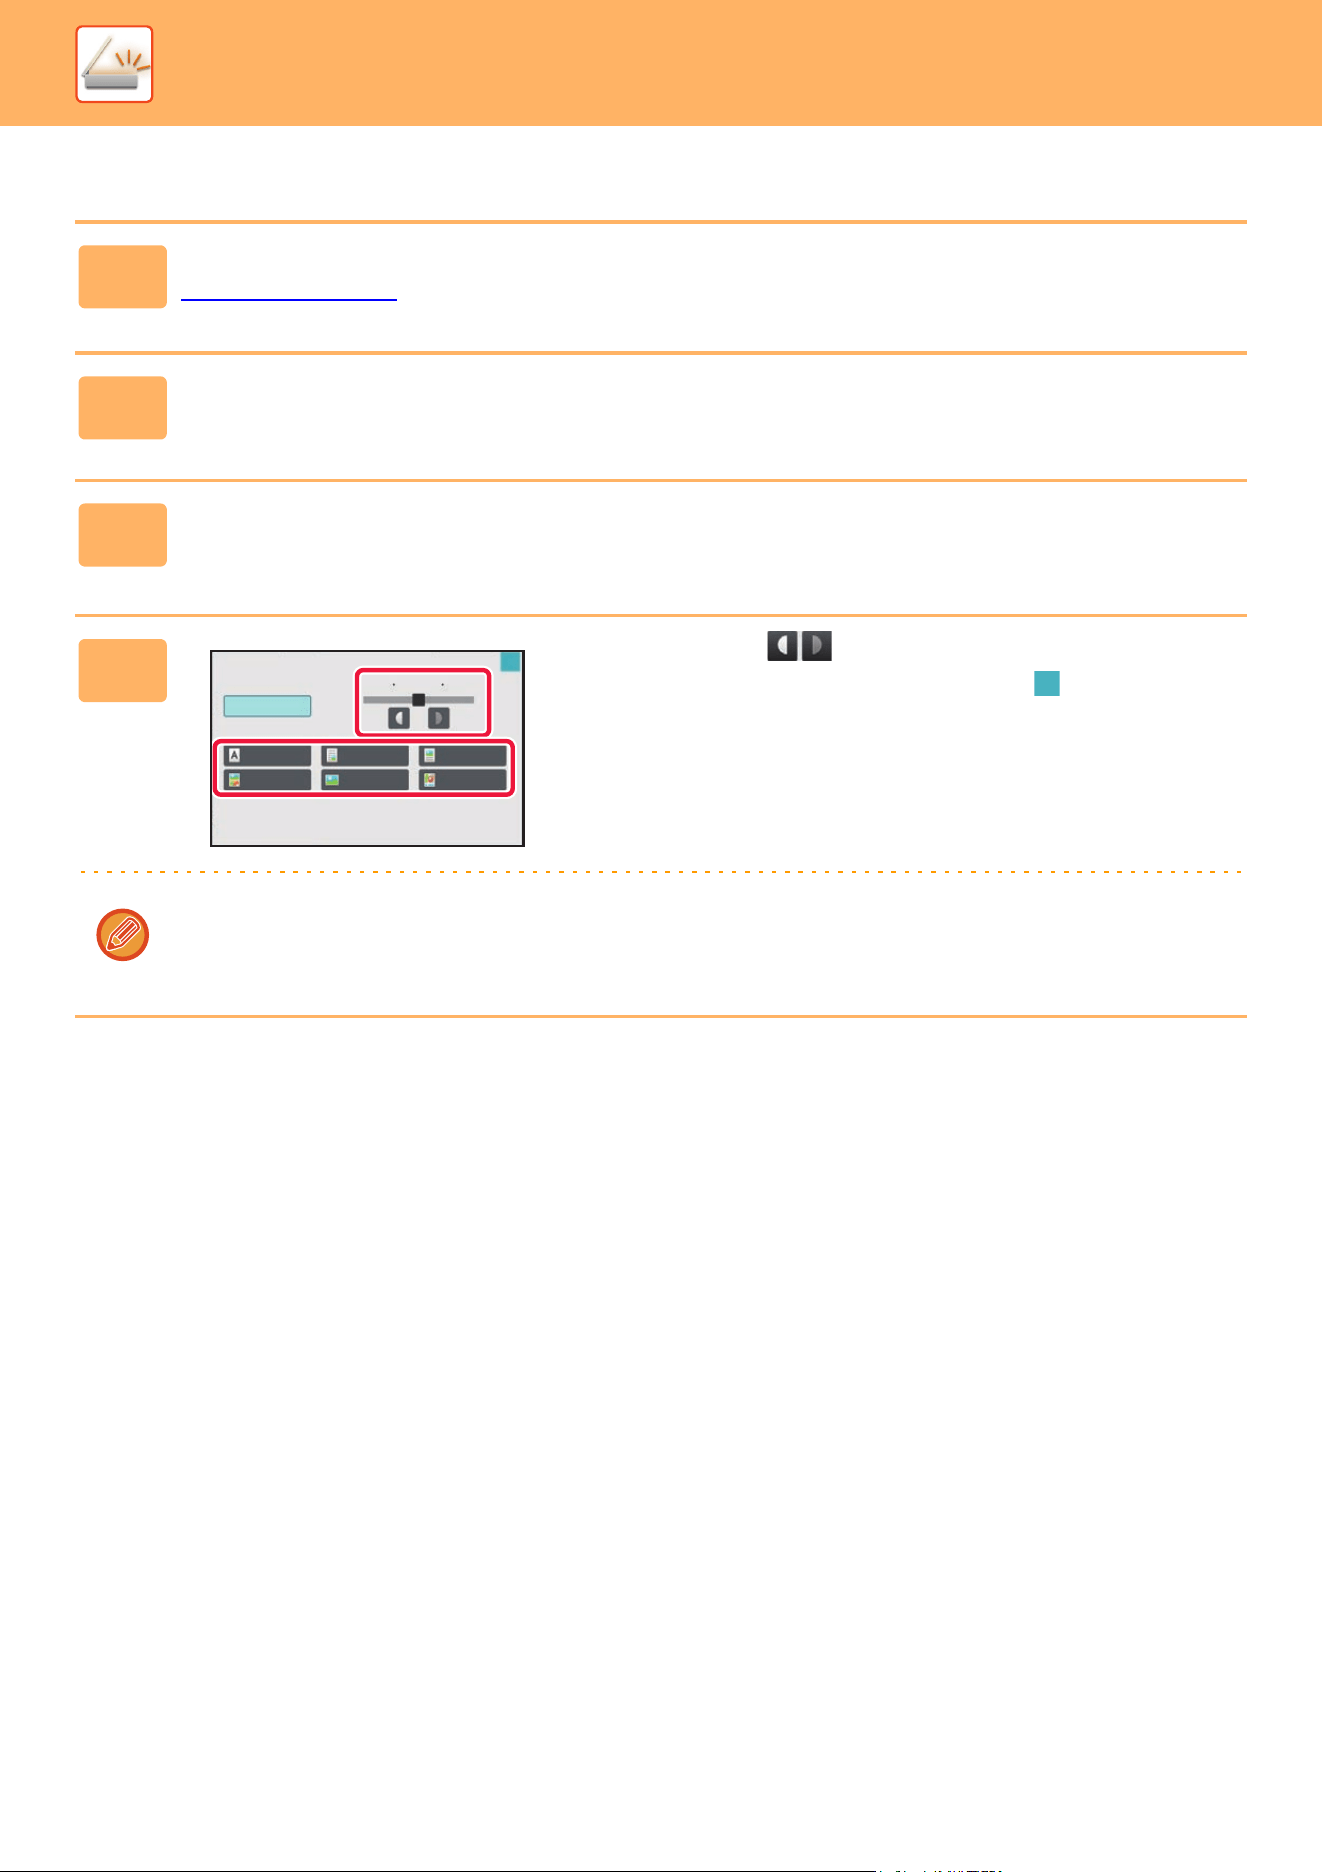
5-70
SCANNER►TRANSMITTING AN IMAGE
In Scan mode or Data entry mode
1
Tap the [Detail] key to change to normal mode.
EASY MODE (page 5-6)
2
Tap the [Exposure] key.
3
Tap the key assigned to the original type you wish to set based on the
original type.
4
Tap to adjust the exposure.
After the settings are completed, tap .
When [Auto] is selected, changing the exposure sets the original image type to [Text/Printed Photo] automatically.
E-mail/Exposure
Specify density of image to send.
Auto
Manual
Text
Text/Printed Photo
Text/Photo
Printed Photo
Photo
Map
351
OK
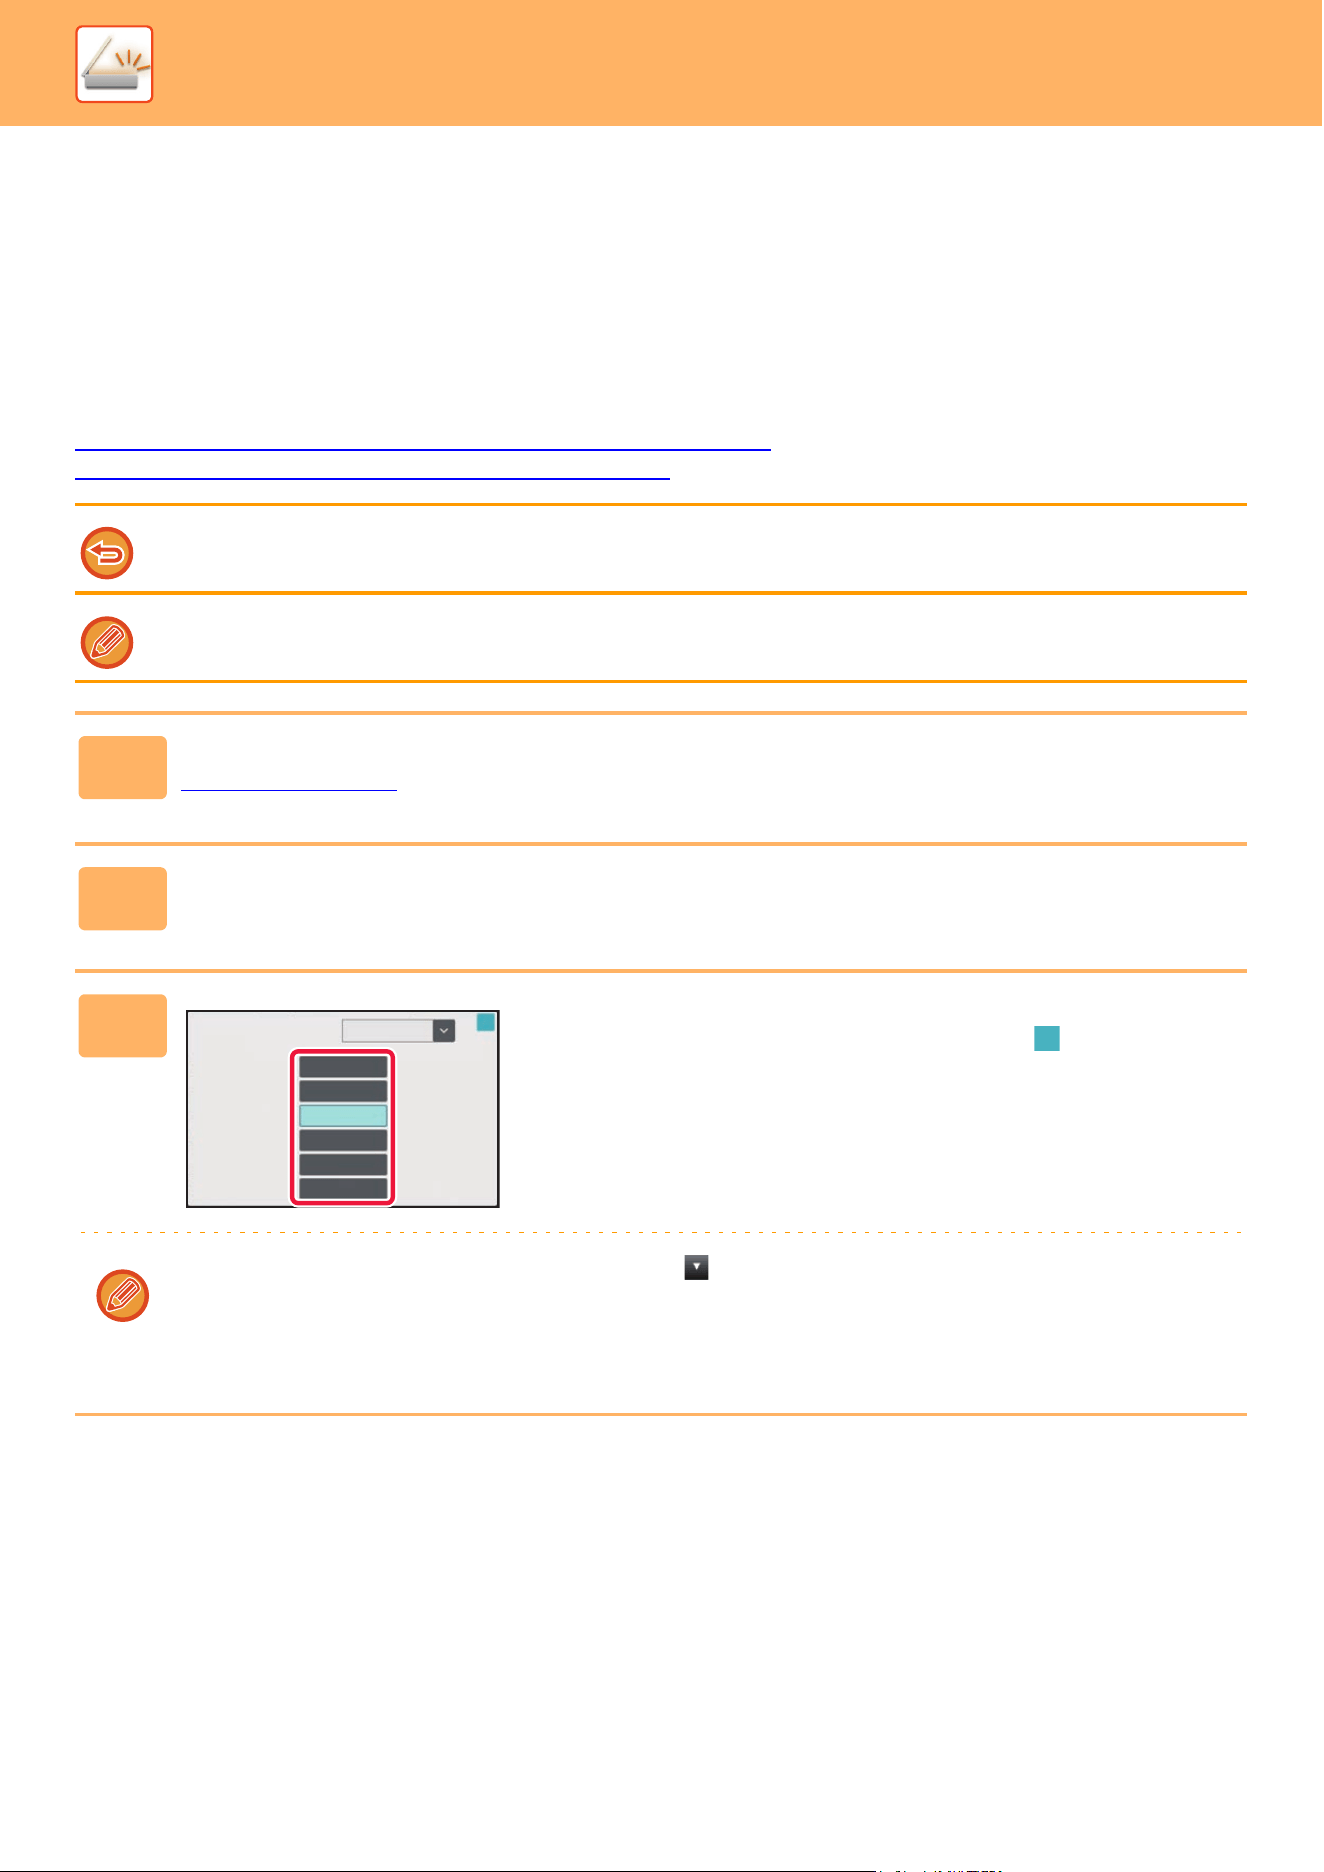
5-71
SCANNER►TRANSMITTING AN IMAGE
CHANGING THE RESOLUTION
Specify the resolution setting.
How to select the resolution
For normal text originals, 200 x 200 dpi produces an image that is sufficiently legible.
For photos and illustrations, a high resolution setting (600 x 600 dpi, etc.) will produce a sharp image.
However, a high resolution setting will result in a large file, and if the file is too large, transmission may not be possible.
In this event, reduce the number of pages scanned or take other measures to decrease the file size.
CHANGING FORMAT IN SCAN OR DATA ENTRY MODE
(page 5-72)
SPECIFYING THE SEND SIZE OF THE IMAGE (page 5-67)
When using the automatic document feeder, the resolution setting cannot be changed after scanning has begun. (However,
when "Job Build" is used in Others, change the resolution each time a new set of originals is inserted.)
When using the document glass to scan multiple original pages, change the resolution setting each time you change pages.
1
Tap the [Detail] key to change to normal mode.
EASY MODE (page 5-6)
2
Tap the [Resolution] key.
3
Tap the key of the desired resolution.
After the settings are completed, tap .
• If there is a mix of destinations in different modes, tap to switch modes to set the resolution in each mode.
However, FTP and Network Folder are set to the same mode.
• If the file format in [File Format] is set to [Compact PDF], then this will set the resolution set in "Compact PDF
Resolution Setting" in system settings.
Resolution
100x100dpi
150x150dpi
200x200dpi
300x300dpi
400x400dpi
600x600dpi
E-mail
OK

5-72
SCANNER►TRANSMITTING AN IMAGE
CHANGING FORMAT IN SCAN OR DATA ENTRY MODE
Change the file format (file type and compression mode/compression ratio) for sending a scanned image at the time of
transmission. In addition, if the scanned originals are divided into separate files, the number of pages per file can be
changed.
File format combinations
*1 When PDF (including encrypted and high compression) is selected for the file format, Flate Compression can be
used to reduce the file size.
*2 This item is not displayed when [Disabling of OCR] is set in the system settings.
*3 This item is displayed when [Disabling of OCR] is set in the system settings.
The file type of [B/W] mode and the file type of [Color/Grayscale] mode are linked. The file type cannot be set separately for
each.
(When [JPEG] is selected for [Color/Grayscale] mode, [TIFF] is automatically selected for [B/W] mode.)
[Color/Grayscale] tab [B/W] tab
PDF
*1
PDF
*1
Compact PDF
*1
PDF
*1
Compact PDF (Ultra Fine)
*1
PDF
*1
PDF/A-1a
*1, 2
PDF/A-1a
*1, 2
PDF/A-1b
*1, 2
PDF/A-1b
*1, 2
PDF/A
*1, 3
PDF/A
*1, 3
Compact PDF/A-1a
*1, 2
PDF/A-1a
*1, 2
Compact PDF/A-1b
*1, 2
PDF/A-1b
*1, 2
Compact PDF/A PDF/A
*1, 3
Compact PDF/A-1a (Ultra Fine)
*1, 2
PDF/A-1a
*1, 2
Compact PDF/A-1b (Ultra Fine)
*1, 2
PDF/A-1b
*1, 2
Compact PDF/A (Ultra Fine)
*1, 3
PDF/A
*1, 3
Encrypt PDF
*1
Encrypt PDF
*1
Encrypt/Compact PDF
*1
Encrypt PDF
*1
Encrypt/Compact PDF (Ultra Fine)
*1
Encrypt PDF
*1
TIFF TIFF
JPEG TIFF
XPS XPS
TXT(UTF-8)
*2
TXT(UTF-8)
*2
RTF
*2
RTF
*2
DOCX
*2
DOCX
*2
XLSX
*2
XLSX
*2
PPTX
*2
PPTX
*2
• The file format for sending a scanned image is specified when the destination is stored in a one-touch key; however, you
can change the format at the time of transmission.
• If [PDF/Encry.] is specified for the file format, the password entry screen appears when scanning. Enter a password with
up to 32 characters.

5-73
SCANNER►TRANSMITTING AN IMAGE
Flate Compression
After compressing a PDF file by JPEG compression, this function compresses the file by lossless compression to further
reduce the file size by a small amount. When the data contains significant solid color, this increases the effectiveness of
compression.
When sending a PDF file, Flate Compression enables greater reduction of the file size than conventional methods.
If the recipient's PDF viewer does not support Flate Compression, the recipient may not be able to view the PDF file. In
this case, Flate Compression can be disabled.
Note the following when [PDF/High] is specified in the [Color/Grayscale] file format.
• When broadcasting to an address with [PDF/High] specified, all files for the scanner will be sent as Compact PDF files.
• When broadcasting to an address with [PDF/High] and [PDF/Compact/U-Fine] specified, all files for the scanner will be
sent as Compact PDF (Ultra Fine) files.
• If [PDF/High] is specified, the resolution cannot be changed in the scanner mode. The resolution set in "Compact PDF
Resolution Setting" in system settings is set.
• If [PDF/High] is set when a resolution setting has been specified in scanner (or other) mode, the resolution setting will be
canceled and the Compact PDF resolution will be used for transmission.
• When [PDF/High] is selected, [Resolution] cannot be changed while waiting for the next original or in [Change Setting] in
the job build settings.
• If [PDF/High] is set when an original type setting has been specified in scanner (or other) mode, [Photo] will change to
[Text/Photo] and [Map] will change to [Text/Printed Photo].
• The condition of the original may prevent the OCR function from correctly recognizing some characters and graphics, and
omissions or incorrect recognition of characters may result.
• The OCR function is not guaranteed to completely reproduce all characters, graphics, or other contents of a scanned
original.
To enable Flate Compression
Enable or disable Flate Compression in [System Settings] → [Image Send Settings] → [Scan Settings] → [Condition
Settings] → [PDF Compression Options] in "Settings (administrator)".
1
Tap the [File Format] key.
If you are in data input mode, start from step 5.
2
Tap the [Color/Grayscale] or [B/W] key.
• The format setting for [B/W] mode is the file format with the [B/W Start] key is tapped.
• The format setting for [Color/Grayscale] mode is the file format with the [Color Start] key is tapped.
• When [Color/Grayscale] mode is selected, the [Compact] and [U-Fine] checkboxes appear. To suppress image quality
deterioration and reduce the data size of a file to be transmitted, select Compact PDF. Select [U-Fine] only when you
select Compact PDF.

5-74
SCANNER►TRANSMITTING AN IMAGE
3
Tap the key of the desired file type.
After the settings are completed, tap .
When the [B/W] key is selected When the [Color/Grayscale] key is selected
When [Disabling of OCR] is set in the system settings.
When the [B/W] key is selected When the [Color/Grayscale] key is selected
4
To enable OCR, select the [OCR] checkbox ( ) and tap [OCR Setting].
After the settings are completed, tap ( ).
B/W
PDF/A-1b
PDF/A-1a
XPS
PDF
DOCX
XLSX
RTF TXT(UTF-8)
Prog.
PPTX
TIFF
File Format
OK
Colour/
Greyscale
PDF/A-1bPDF/A-1a
XPS
PDF
DOCX
XLSX
RTF
TXT(UTF-8) Prog.
PPTX
TIFF
JPEG
File Format
OK
Color/
Grayscale
Color/
Grayscale
English
File Format
Font:
OCR
Encry.
OK
PDF
PDF
Color/Grayscale
B/W
Encry.
Compact
U-Fine

5-75
SCANNER►TRANSMITTING AN IMAGE
• This procedure cannot be used if [Disabling of OCR] is set in the system settings. Proceed to the next step.
• When "Long Size" is selected for the original, [OCR] cannot be used.
• Select the scanning language in the language settings. The following languages can be selected.
Japanese
,
English
,
Spanish
,
French
,
German
,
Italian
,
Dutch
,
Swedish
,
Norwegian
,
Finnish
,
Danish
,
Hungarian
,
Czech
,
Polish
,
Russian
,
Greek
,
Portuguese
,
Turkish
,
Slovak
,
Catalan
,
Simplified Chinese
,
Traditional Chinese
,
Korean
.
• When [RTF], [DOCX], [XLSX], or [PPTX] is selected for the file format, you can set the font of the output text.
• When the [Detect Image Direction] checkbox is selected ( ), the orientation of the original is detected and the
image is rotated before transmission.
• When the [File Name Auto Extraction] checkbox is selected ( ), the text string that is read from the file is included in
the file name. If a file name is set, the set file name will be used for transmission.
• You can set the accuracy of OCR in [OCR Accuracy:]. Select from [Auto] or [Priority Text]. When [Priority Text] is
selected, the character reading accuracy is raised before scanning. When [Priority Text] is selected, accuracy in
diagram and table areas may be degraded. Only change the setting when you particularly want to increase the
accuracy of text areas.
• When the original is scanned while skewed, there is a function which automatically adjusts the skew.
AUTOMATICALLY ADJUST SKEWED SCAN DATA
(Original Skew Adjustment) (page 5-127)
5
To select more detailed settings, tap the [Detail] key to switch to normal
mode.
EASY MODE (page 5-6)
6
Tap the [File Format] key.
7
Tap the [Color/Grayscale] or [B/W] tab and select the format mode for
scanning.
• The format setting for [B/W] mode is the file format with the color mode set to [Mono2].
• The format setting for [Color/Grayscale] mode is the file format with the color mode set to [Full Color] or [Grayscale].
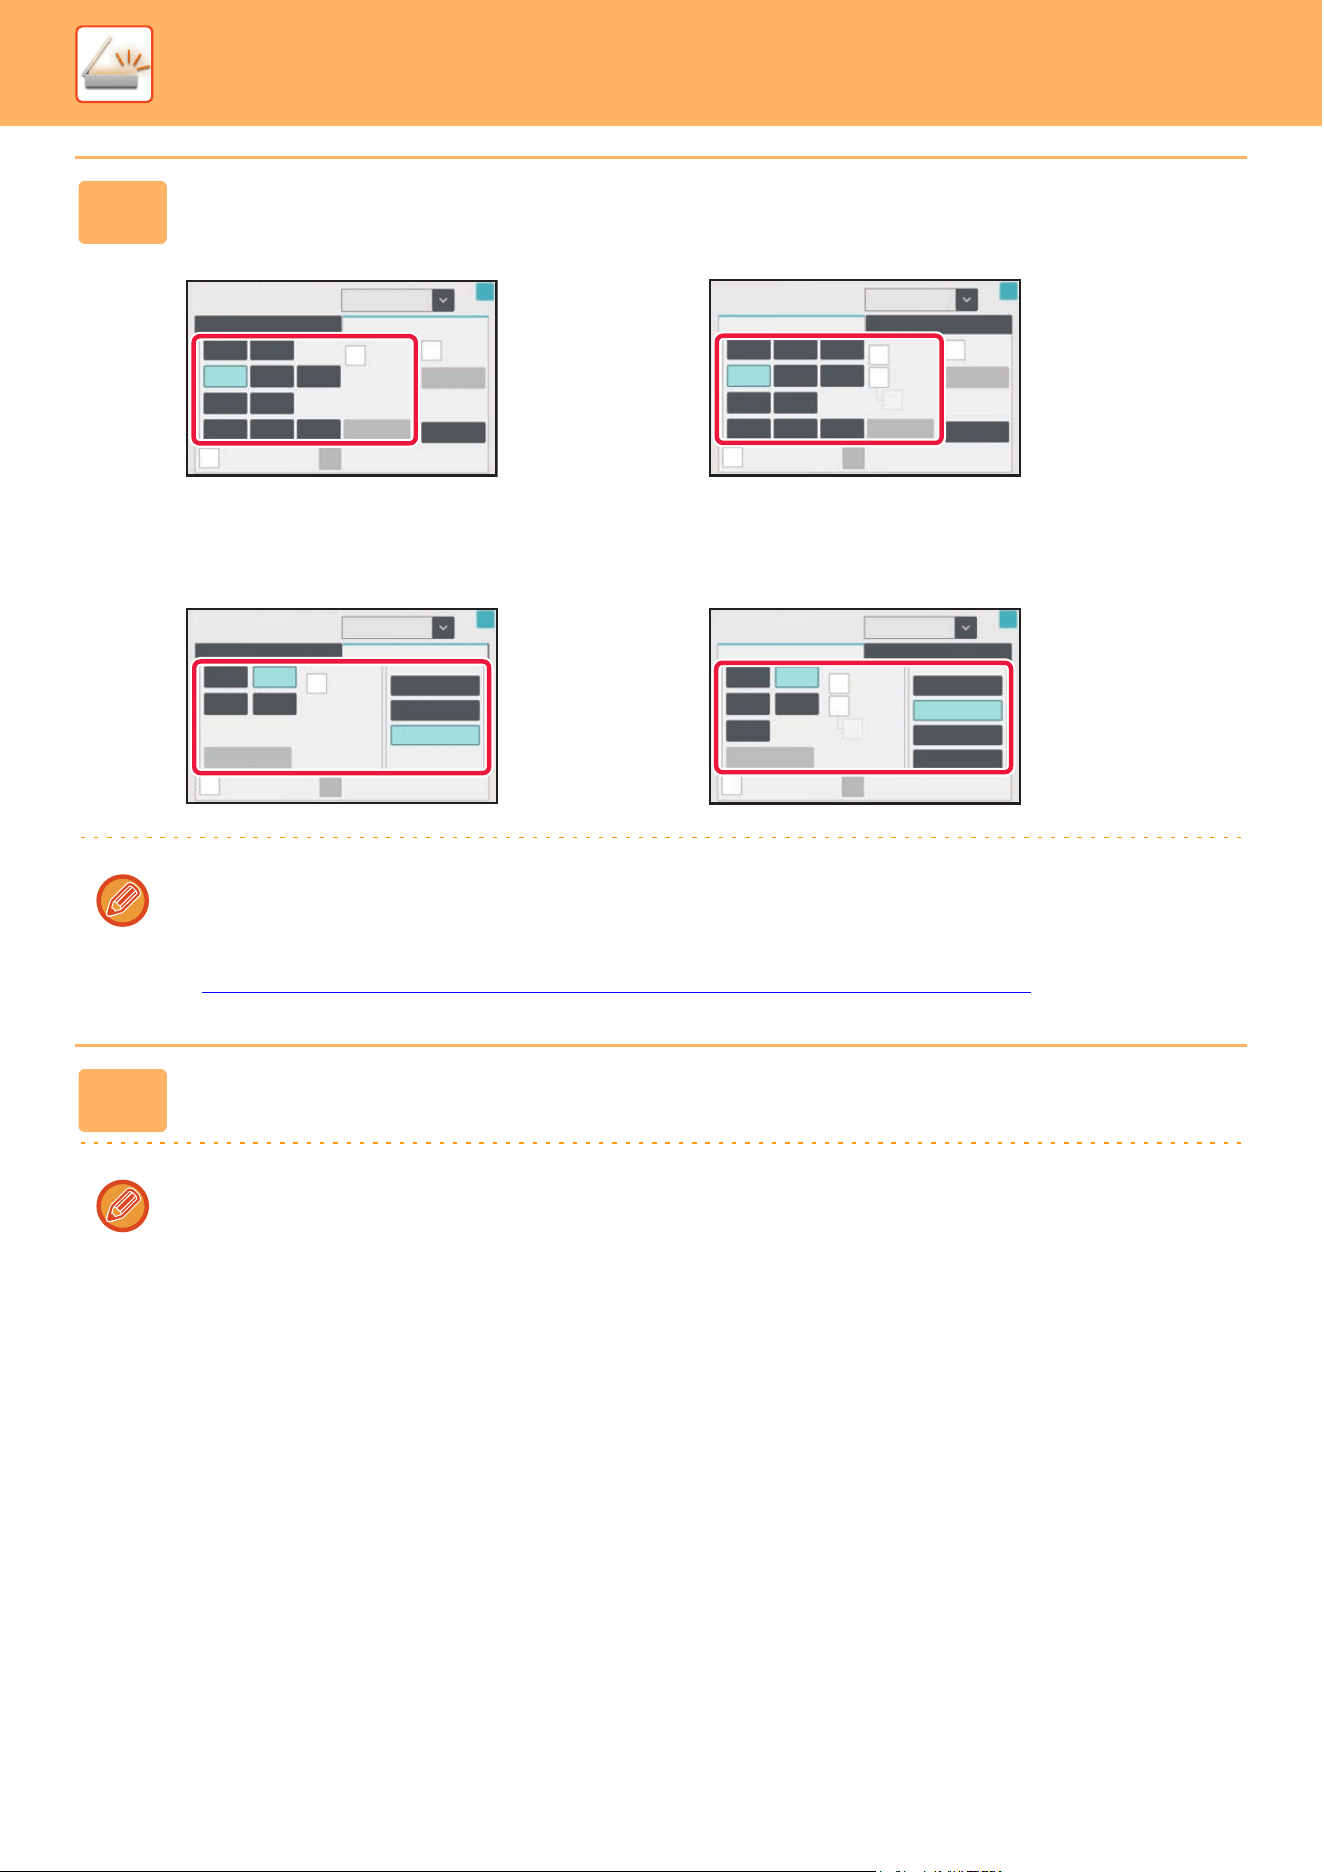
5-76
SCANNER►TRANSMITTING AN IMAGE
8
Tap the key of the desired file type.
When the [B/W] key is selected When the [Color/Grayscale] key is selected
When [Disabling of OCR] is set in the system settings.
When the [B/W] key is selected When the [Color/Grayscale] key is selected
• When [Color/Grayscale] mode is selected, the [Compact] and [U-Fine] checkboxes appear. To suppress image quality
deterioration and reduce the data size of a file to be transmitted, select Compact PDF. Select [U-Fine] only when you
select Compact PDF.
*
• Tap [Original Skew Adjustment] on the action panel to automatically correct the document skew.
AUTOMATICALLY ADJUST SKEWED SCAN DATA
(Original Skew Adjustment) (page 5-127)
9
Tap the [Compression Mode] key or [Compression Ratio] key.
This procedure cannot be used if [Disabling of OCR] is set in the system settings. Proceed to the next step.
File Format
Color/Grayscale
B/W
E-mail
Specified Pages per File
Programmed
Processing time is dependent
on the format.
TIFF
PDF
XPS
Compression
MMR (G4)
OCR
OCR Setting
PPTX
RTF
XLSX
DOCX
TXT(UTF-8)
PDF/A-1a
PDF/A-1b
OK
1
Encry.
File Format
E-mail
Processing time is dependent
on the format.
Specified Pages per File
OCR
OCR Setting
Color/Grayscale
B/W
Programmed
TIFF
PDF
XPS
PPTX
RTF
XLSX
DOCX
TXT(UTF-8)
PDF/A-1a
JPEG
PDF/A-1b
Comp. Ratio
Middle
OK
1
Encry.
Compact
U-Fine
Programmed
Specified Pages per File
TIFF
PDF
XPS PDF/A
Color/Grayscale
B/W
E-mail
MMR (G4)
MH (G3)
None
Compression Mode
File Format
OK
1
Encry.
Specified Pages per File
E-mail
File Format
PDF
XPS
TIFF
PDF/A
JPEG
Programmed
High
Low
Reduce Colors
Compression Ratio
Middle
Color/Grayscale
B/W
OK
1
Encry.
Compact
U-Fine
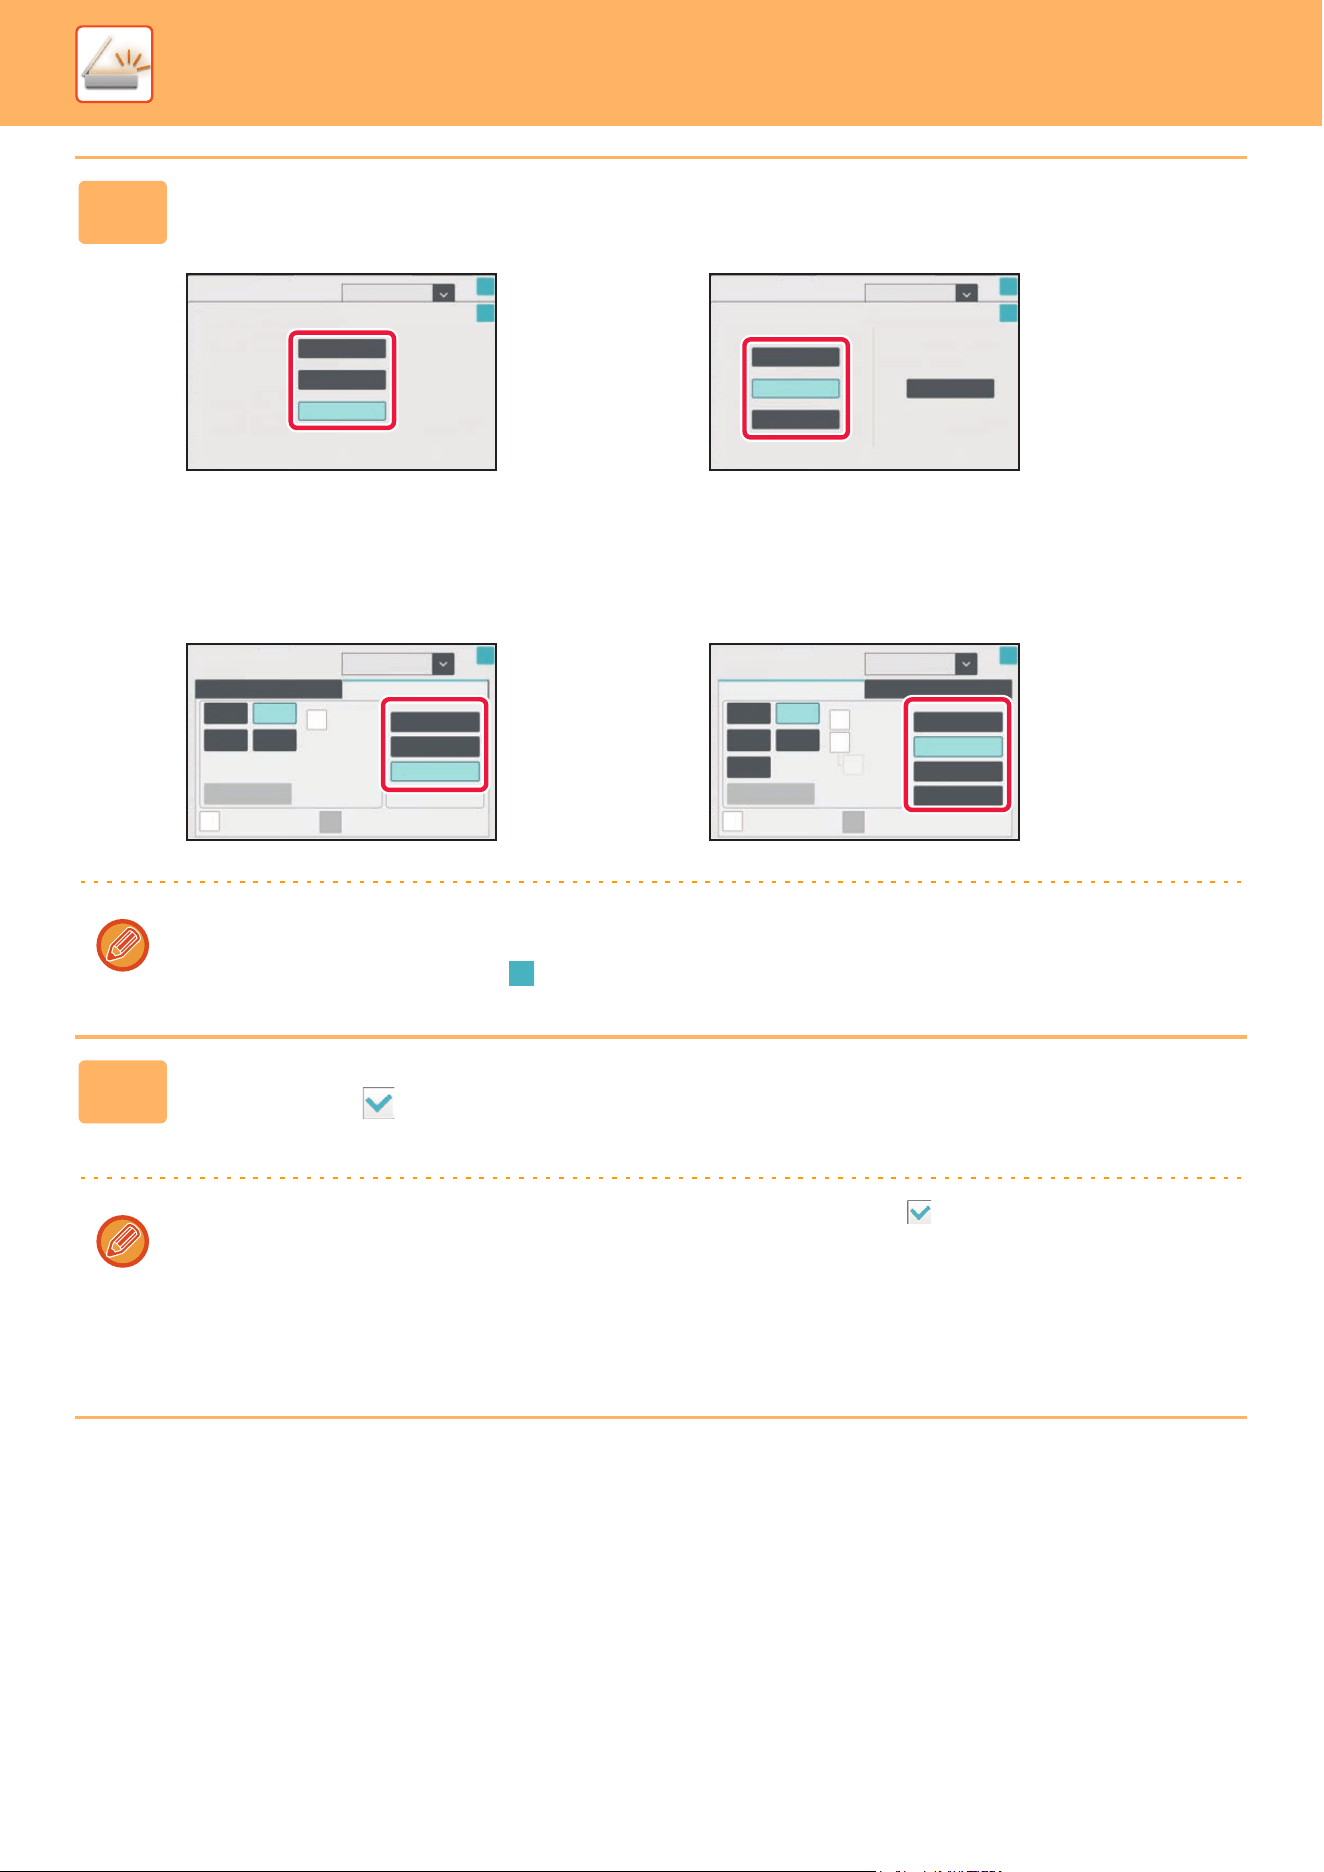
5-77
SCANNER►TRANSMITTING AN IMAGE
10
Tap the Compression key or Compression Ratio key.
When the [B/W] key is selected When the [Color/Grayscale] key is selected
When [Disabling of OCR] is set in the system settings.
When the [B/W] key is selected When the [Color/Grayscale] key is selected
• In the [Color/Grayscale] tab, [Reduce Colors] is a file format that reduces the data size by limiting the number of colors
and shades.
• When settings are completed, tap .
11
To change the number of pages per file, set the [Specified Pages per File]
checkbox to , and use numeric keys to specify the number of pages per
file.
• When the [
Specified Pages per File
] checkbox is , one file is created for each of the
number of pages at the right. When the checkmark is removed, one file is created for all pages.
• When [
Specified Pages per File
] is selected, consecutive numbers are added to the
created file names.
• When [
JPEG
] is selected for the file type, one file is created for each page. For this reason, the
[
Specified Pages per File
] checkbox does not appear.
File Format
E-mail
Compression Mode
MMR (G4)
MH (G3)
None
OK
OK
Processing time is dependent
E-mail
OK
OK
Reduce Colors
High
Middle
Low
File Format
Compression Ratio
Select [Reduce Colors]
if the original is mainly text
with few colors.
Processing time is dependent
File Format
Color/Grayscale
B/W
Programmed
E-mail
Specified Pages per File
Encry.
TIFF
PDF
XPS
PDF/A
MMR (G4)
MH (G3)
None
Compression Mode
OK
1
High
Middle
Low
Reduce Colors
File Format
E-mail
Compression Ratio
Color/Grayscale
B/W
TIFF
XPS
PDF/A
PDF
Encry.
JPEG
Programmed
Specified Pages per File
OK
Compact
1
U-Fine
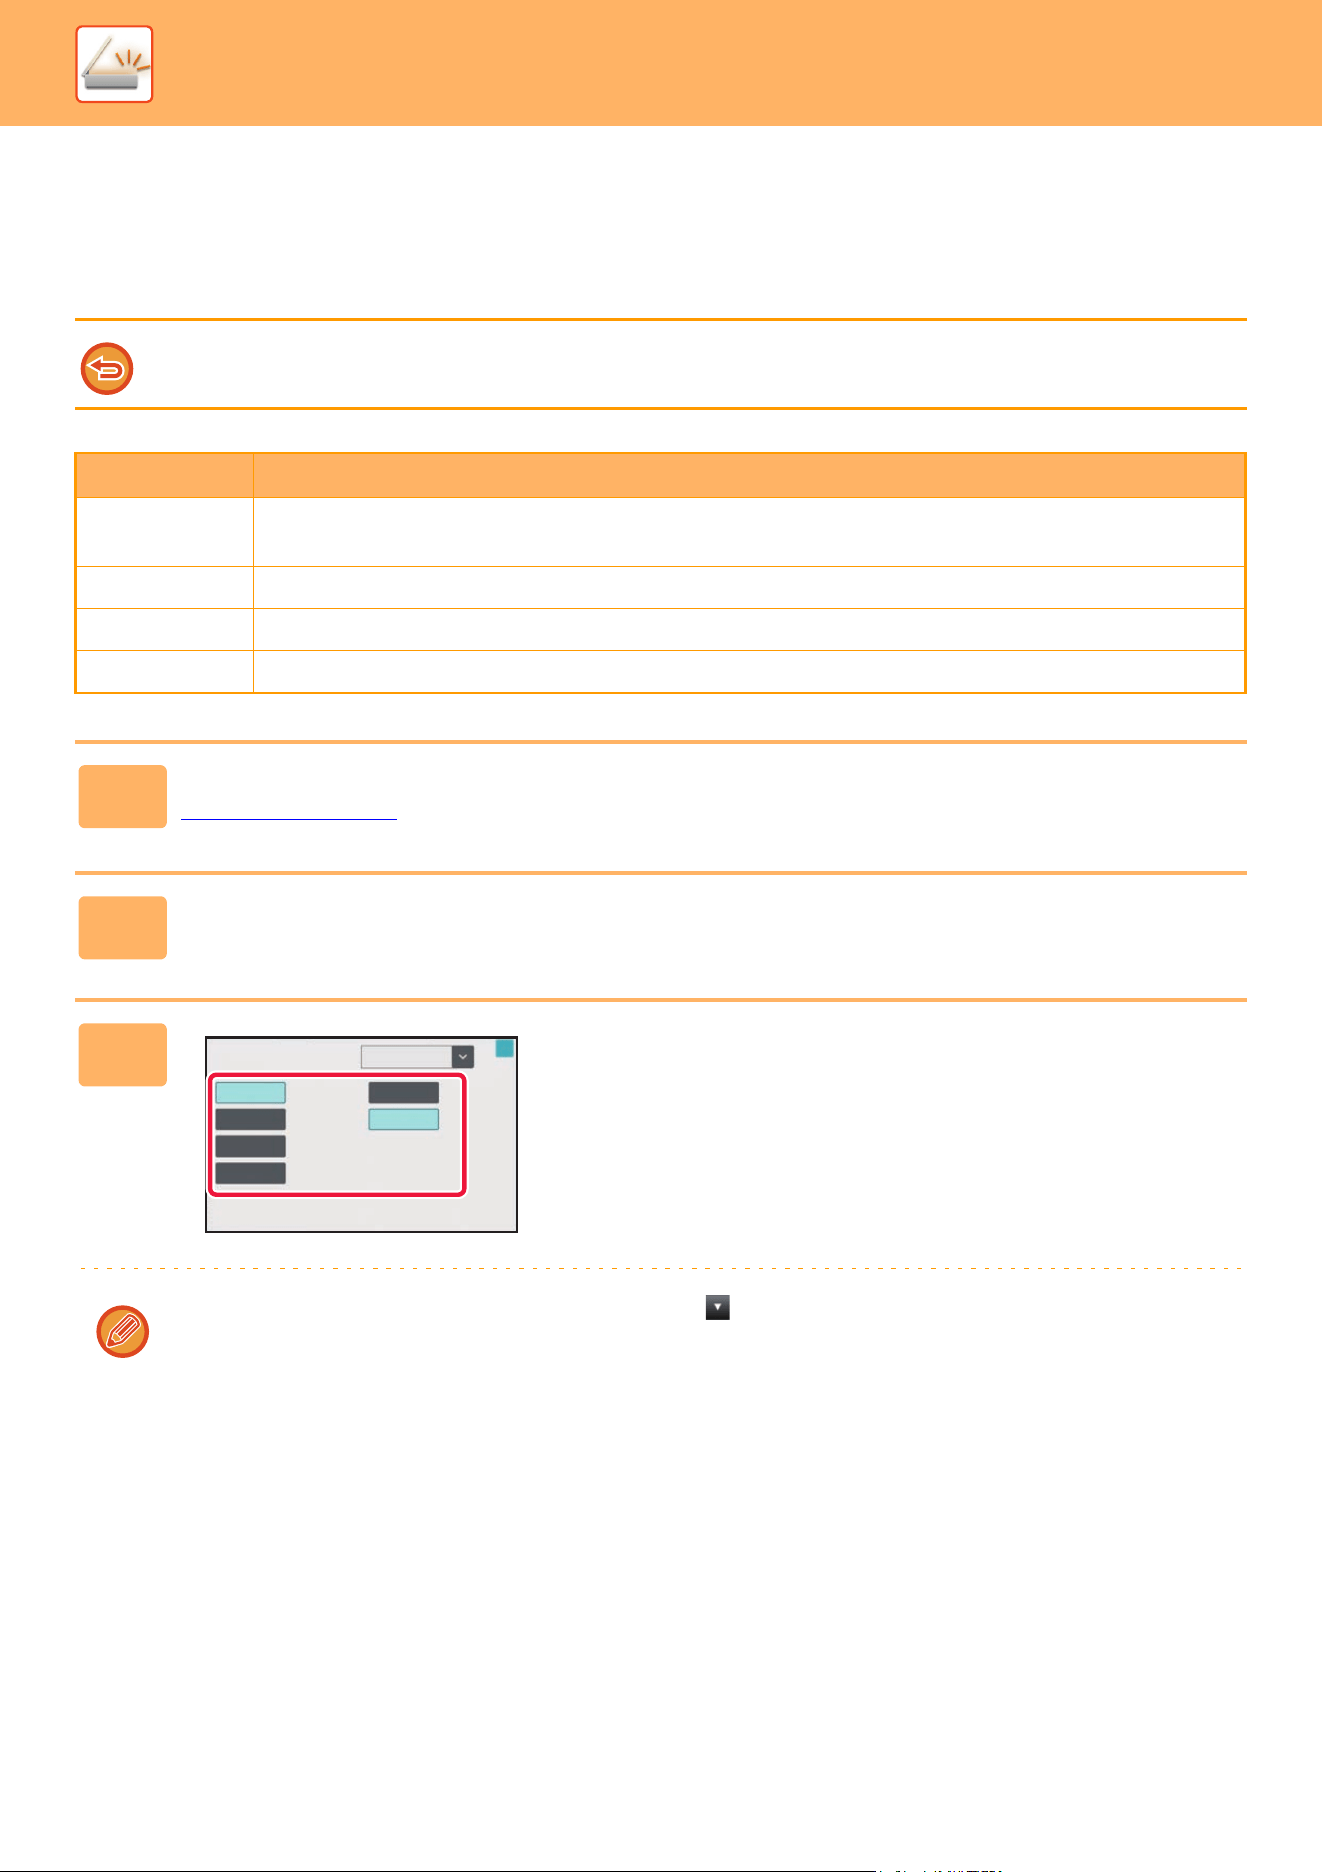
5-78
SCANNER►TRANSMITTING AN IMAGE
CHANGING COLOR MODE
Change the color mode used to scan the original.
In Easy mode
Tap the [B/W Start] or [Color Start] key when scanning the original.
In Normal mode
To set the settings used when each key is tapped, select "Settings (administrator)" - [System Settings] → [Image Send
Settings] → [Scan Settings] → [Initial Status Settings] → [Easy Scan Settings].
Mode Scanning method
Auto The machine detects whether the original is color or black and white and automatically selects full color or
black and white (Mono2 or Grayscale) scanning.
Full Color The original is scanned in full color. This mode is best for full color originals such as catalogues.
Mono2 Colors in the original are scanned as black or white. This mode is best for text-only originals.
Grayscale The colors in the original are scanned in black and white as shades of gray (grayscale).
1
Tap the [Detail] key to switch to the normal mode.
EASY MODE (page 5-6)
2
Tap the [Color Mode] key.
3
Tap the key of the desired color mode
for the original.
If there is a mix of destinations in different send modes, tap to select a send mode (E-mail, FTP or Data Entry) to set
the color mode for each mode.
Color Mode
E-mail
Select B/W Mode
at Color Auto Select
Auto
Full Color
Grayscale
Mono2
Grayscale
Mono2
OK

5-79
SCANNER►TRANSMITTING AN IMAGE
4
Tap the [Grayscale] or [Mono2] key to set the B/W mode for automatic color
selection.
Specify whether Mono2 or grayscale is used when scanning black and white originals.
Note that if the file format is set to JPEG, scanning will take place in grayscale.
After the settings are completed, tap .
The B/W mode can be set only when the [Auto] key is selected in the color mode setting (step 3).

5-80
SCANNER►TRANSMITTING AN IMAGE
SETTING SCAN SETTINGS AUTOMATICALLY
(Auto Set)
To automatically set scan settings appropriate for the original, tap the [Auto Set] key in the base screen of Easy Mode.
The following functions are set automatically.
• Image Orientation
*1
• 1-Sided/2-Sided
*1
• Resolution
• Blank Page Skip
• Automatically detecting mono2/grayscale
• Automatically adjusting the original skew
• Business Card Scan
*2
• Automatically detecting the original size
*2
• Automatically detecting the compression ratio
Each function setting value/parameter can be changed in setting mode.
*1 When the OCR function is enabled.
*2 When using the automatic document feeder.
When "Auto Set" is enabled, grayed out functions cannot be enabled.
CA
Preview
Original
8½x11
Address
E-mail Address
Detail
Start
Color
Start
Original
Auto
Auto
PDF
PDF
Auto
Resolution
File Format
Blank Page
Skip
Auto Set
B/W
Recent
Jobs

5-81
SCANNER►TRANSMITTING AN IMAGE
CHECKING THE IMAGE TO BE
TRANSMITTED
Check the image that will be sent in the touch panel before transmission.
You can tap the [Preview] key to check a preview of the image before sending an image.
As you can adjust the exposure and resolution to scan the original while checking it in the preview screen, you can send
a better quality original to the destination.
• Depending on the size of the transmission data, part of the preview image may not appear in the preview screen in the
touch panel.
• The preview function is not available when the original size is set to Long Size.

5-82
SCANNER►OTHER FUNCTIONS
STORING SCAN OPERATIONS (PROGRAM)
This function collectively stores various settings as one program. The stored program can be retrieved using an easy
operation.
For example, suppose 8-1/2" x 11" (A4) size documents are scanned into a file and sent to each branch office once a
month.
• The same documents are sent to each branch office
• Each page of a bound document is successively transmitted
• Smudges on the edges of the documents are erased before transmission
OTHER FUNCTIONS
When a job program is not stored When a job program is stored
Enter the address of each branch office.
Select Dual Page Scan.
Specify Erase.
Tap the [Start] key.
Scan and send the original.
Tap the key of a stored program.
Tap the [Start] key.
Scan and send the original.
Considerable time is required to send the documents each
month because the above settings must be selected.
In addition, mistakes are occasionally made when selecting
the settings.
When a program is stored, settings are selected with ease by
simply tapping the key of the program. In addition,
transmission takes place based on the stored settings so there
are no chances for mistakes.
To configure a program:
Tap [Program Registration] on the action panel that appears when you operate any mode screens.
8-1/2" x 11" (A4) size documents to
be distributed
Received data by recipients.
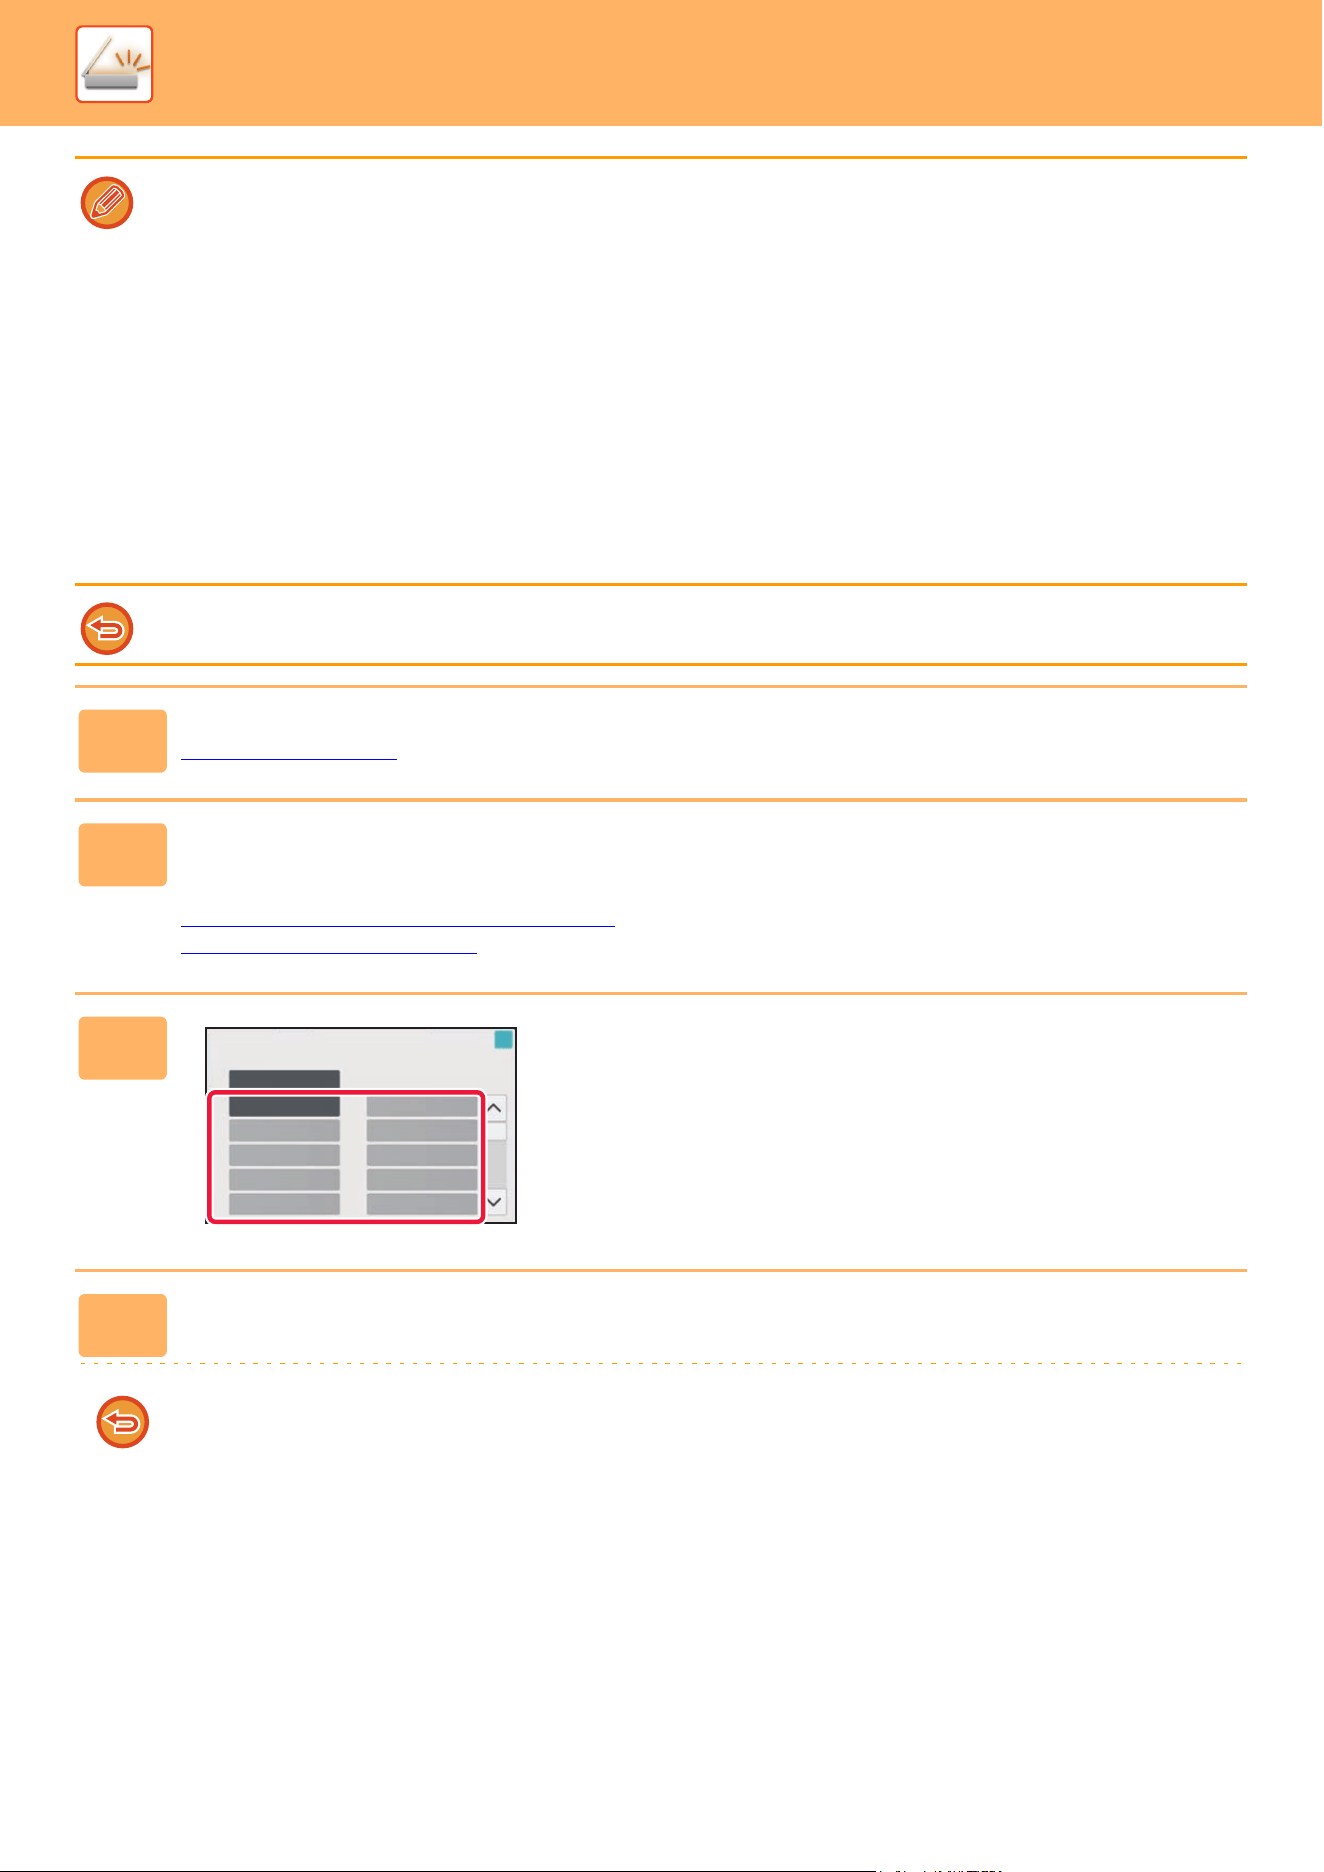
5-83
SCANNER►OTHER FUNCTIONS
• The settings stored in a program will be retained even after the program is used for transmission. The same settings can
be used repeatedly for transmission.
• The following contents cannot be stored in programs:
• Quick File
•File
• Page changes and unspecified erases during preview
• Reply to/Add 'Reply to' to Cc
• Own Name
• Sign E-mail
• Encrypt E-mail
• Up to 48 programs can be stored.
• Up to 500 destinations can be stored in one program.
• When registering a program, if the subject name or file name use the pre-set text set in the system, then by changing the
pre-set text in system settings the program will call the changed subject name and file name. (If the pre-set text registered
in the program is deleted, then the subject name and file name will be blank.)
This function cannot be used in data entry mode.
1
Tap the [Detail] key to switch to the normal mode.
EASY MODE (page 5-6)
2
Place the original and tap [Call Program] on the action panel.
According to the function stored in the program, place the original in the document feeder tray of the automatic document feeder, or
on the document glass.
AUTOMATIC DOCUMENT FEEDER (page 1-47)
DOCUMENT GLASS (page 1-51)
3
Tap the desired program key.
The normal mode screen at program registration is
displayed. If registered in other modes, then switch the
screen.
4
Configure additional settings if needed.
Some settings cannot be added depending on the contents of the called program.
Call Program
Call registered settings when touched.
Pre-Setting
Program
Program01
03
05
07
09
03
01
05
07
09
02
04
06
08
10
02
04
06
08
10
OK

5-84
SCANNER►OTHER FUNCTIONS
5
Tap the [Start] key to start scanning of the original.
• A beep will sound to indicate that scanning and transmission have ended.
• When you place the original on the document glass, scan each page one at a time.
When scanning finishes, place the next original and tap the [Start] key.
Repeat until all pages have been scanned and then tap the [Read-End] key.
You can tap the [Preview] key to check a preview of the image before sending an image. For more information, see
“CHECKING THE IMAGE TO BE TRANSMITTED
(page 5-81)".
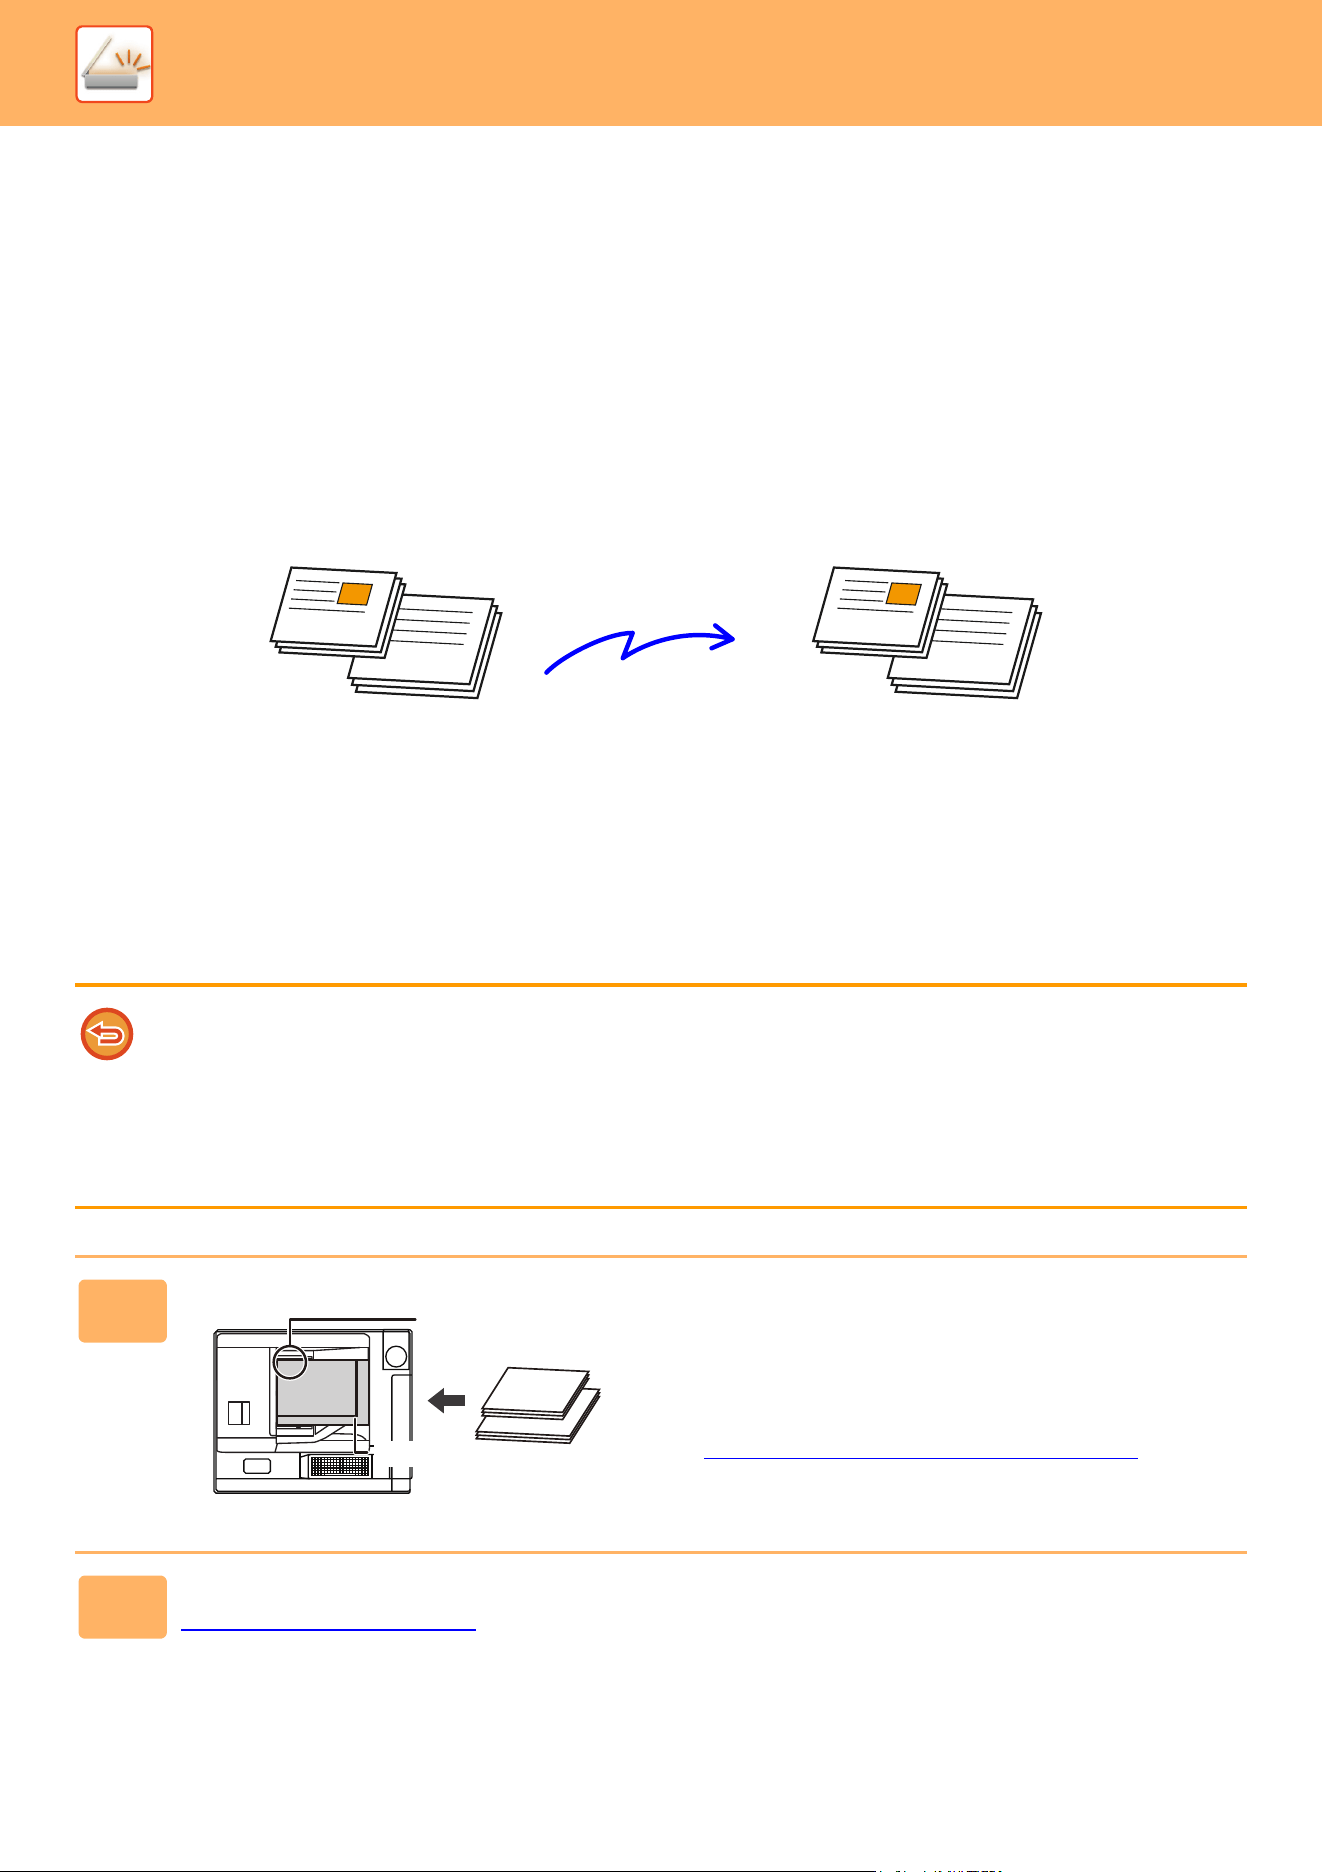
5-85
SCANNER►OTHER FUNCTIONS
SCANNING AND SENDING ORIGINALS
COLLECTIVELY
SCANNING ORIGINALS OF DIFFERENT SIZES (MIXED
SIZE ORIGINAL)
Scan originals of different sizes at the same time; for example, when 8-1/2" x 14" (B4) size originals are mixed together
with 11" x 17" (A3) size originals.
When scanning the originals, the machine automatically detects the size of each original.
This function can only be used with the combinations of original sizes as shown below.
• 11" x 17" and 8-1/2" x 14", 11" x 17" and 8-1/2" x 13", and 11" x 17" and 5-1/2" x 8-1/2"
• A3 and B4, A3 and B5, B4 and A4, and A4 and B5
• A4R and B5, B4 and A4R, B4 and A5, and B5 and A5
• A3, B4 and A4R, A3, B4 and A5, A3, A4R and B5, A3, B5 and A5, B4, A4R and A4, B4, A4 and A5, A4, A4R and B5,
A4, B5 and A5
• B4, A4R and B5R, B4, B5R and A5, A4R, B5R and B5, B5, B5R and A5
• Mixed size scanning is not possible when "Settings (administrator)" - [System Settings] → [Common Settings] → [Device
Control] → [Condition Settings] or [Enable/Disable Settings] → [Disabling of Document Feeder] is enabled.
• When Mixed Size Original is selected, an original scan size cannot be specified.
• After the original scan size has been selected, Mixed Size Original cannot be specified.
• Rotate cannot be used when Mixed Size Original is enabled.
• This function is not available if [System Settings] → [Common Settings] → [Device Control] → [Condition Settings] →
[Original Size Detector Setting] is set to "AB-3" in "Settings (administrator)".
1
Place the original in the document
feeder tray of the automatic document
feeder.
Insert the originals with the corners aligned together in the
far left corner of the document feeder tray.
AUTOMATIC DOCUMENT FEEDER
(page 1-47)
2
Tap the mode display to switch to the initial screen of each mode.
CHANGING MODES (page 2-10)
11" x 17" (A3)
8-1/2" x 14" (B4)
11" x 17" (A3)
8-1/2" x 14" (B4)
8-1/2" x 14"
11" x 17"
11" x 17" (A3)
8-1/2" x 14"(B4)
Place the originals with
the corners aligned
together in far left corner.

5-86
SCANNER►OTHER FUNCTIONS
3
Specify the destination.
RETRIEVING A DESTINATION FROM AN ADDRESS BOOK (page 5-31)
VIEWING A LIST OF THE SELECTED DESTINATIONS (page 5-34)
USING A SEARCH NUMBER TO RETRIEVE A DESTINATION (page 5-35)
ENTERING AN ADDRESS MANUALLY (page 5-36)
SPECIFYING A NETWORK FOLDER (page 5-37)
USING A TRANSMISSION LOG TO RESEND (page 5-41)
4
Tap the [Mixed Size Original] key. Otherwise, tap the [Others] key, and tap the
[Mixed Size Original] key.
A checkmark appears on the icon.
After the settings are completed, tap the [Back] key.
For mixed size originals, set "Original" to "Auto".
To cancel the mixed size original setting
Tap the [Mixed Size Original] key to uncheck it.
5
Tap the [Start] key to start scanning of the original.
A beep will sound to indicate that scanning and transmission have ended.
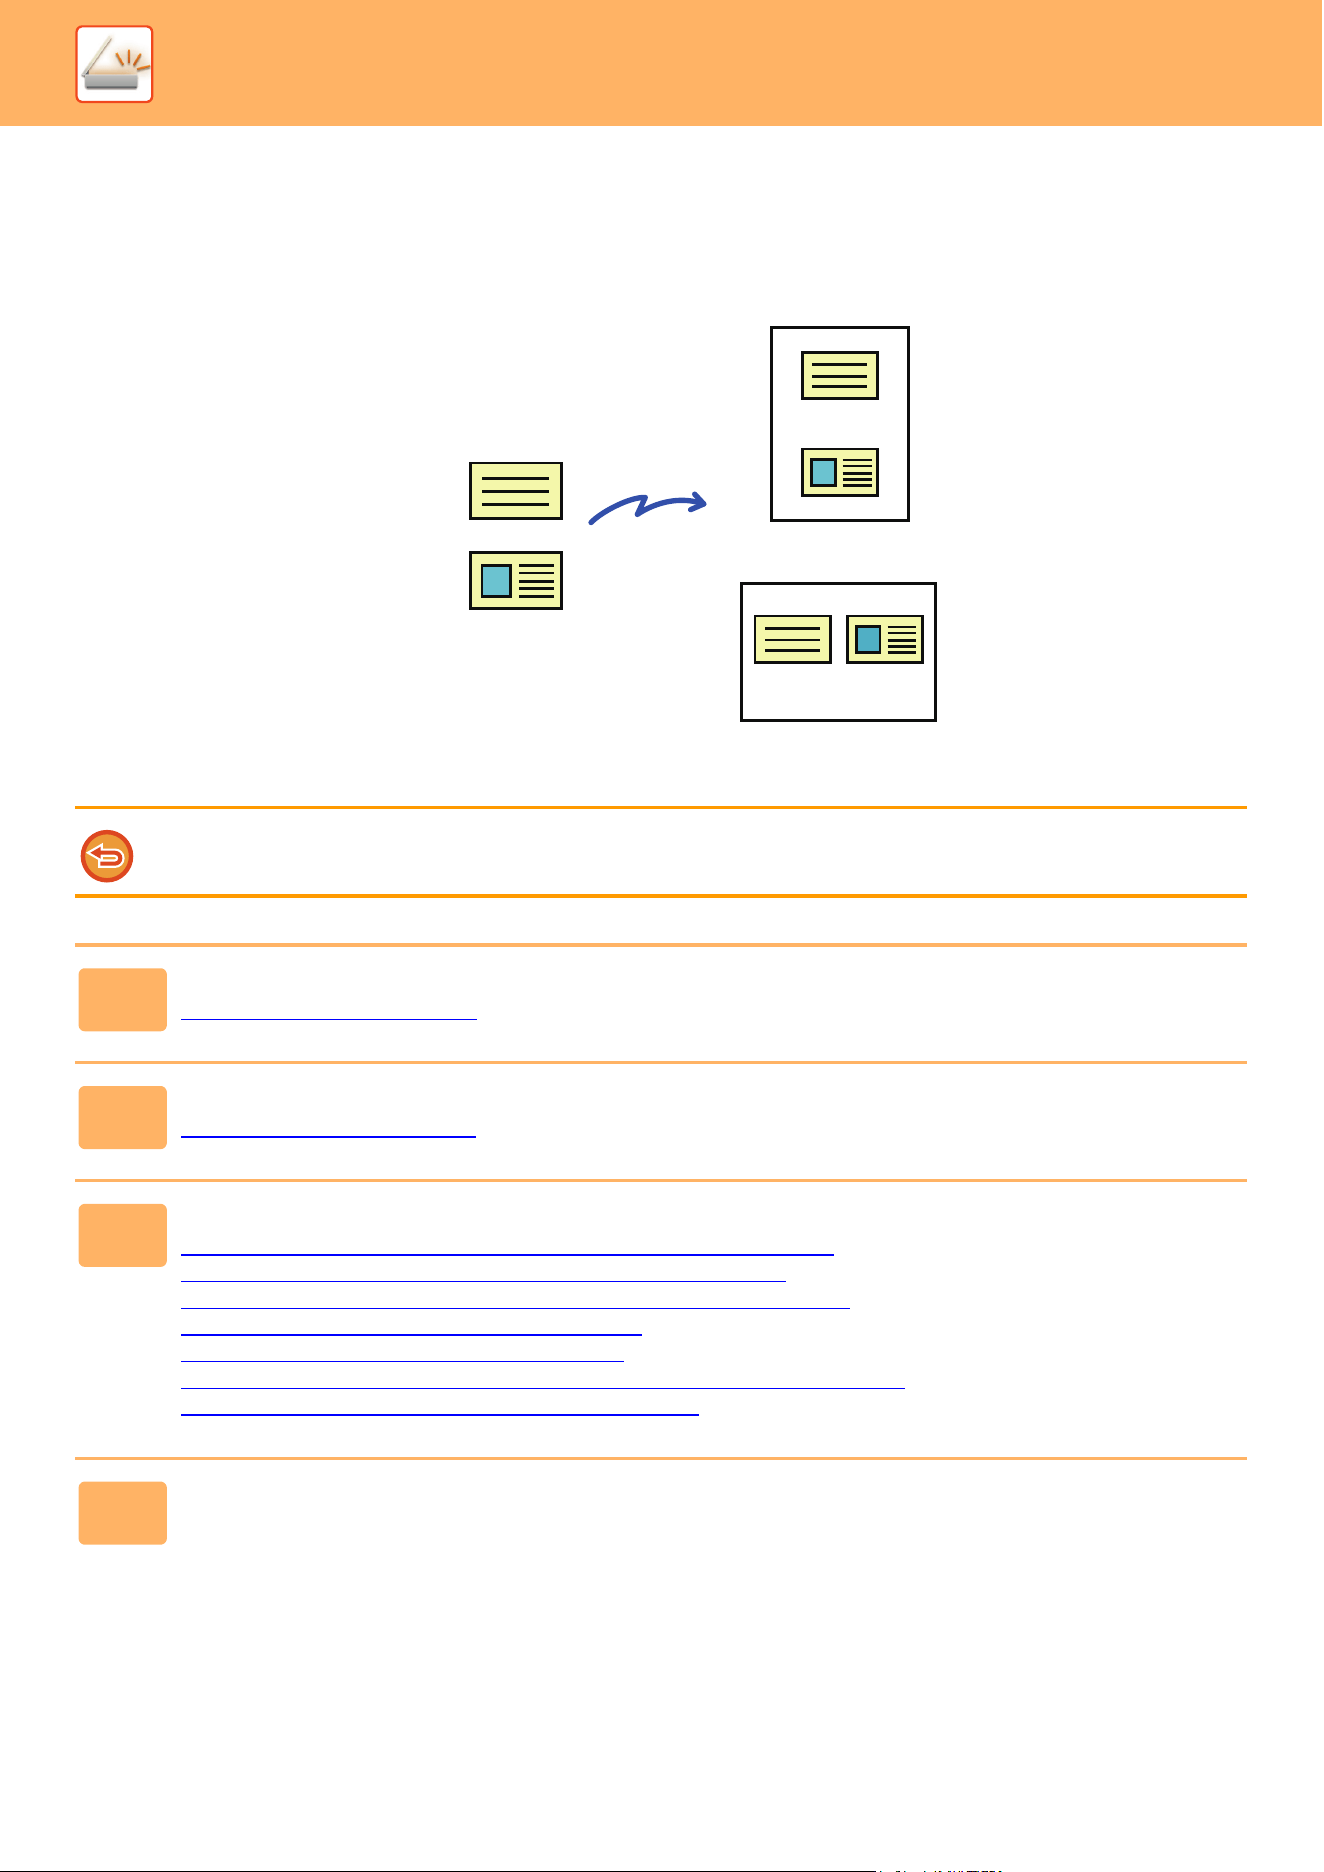
5-87
SCANNER►OTHER FUNCTIONS
SCANNING BOTH SIDES OF A CARD ONTO A SINGLE
PAGE (CARD SHOT)
Send the front and reverse sides of a card as a single page, without the need to send each side separately.
• If the scan size is larger than the send size, it will result in a sending failure.
• The ratio cannot be specified and "Rotation Sending Setting" cannot be selected.
1
Place a card face down on the document glass.
DOCUMENT GLASS (page 1-51)
2
Tap the mode display to switch to the initial screen of each mode.
CHANGING MODES (page 2-10)
3
Specify the destination.
RETRIEVING A DESTINATION FROM AN ADDRESS BOOK (page 5-31)
VIEWING A LIST OF THE SELECTED DESTINATIONS (page 5-34)
USING A SEARCH NUMBER TO RETRIEVE A DESTINATION (page 5-35)
ENTERING AN ADDRESS MANUALLY (page 5-36)
SPECIFYING A NETWORK FOLDER (page 5-37)
RETRIEVING A DESTINATION FROM A GLOBAL ADDRESS BOOK (page 5-39)
USING A TRANSMISSION LOG TO RESEND (page 5-41)
4
Tap the [Others] key, and tap the [Card Shot] key.
Originals
Front
Back
Transmission
Example of an 8-1/2" x 11" (A4)
size portrait scan transmission
Example of an 8-1/2" x 11" (A4)
size landscape scan transmission
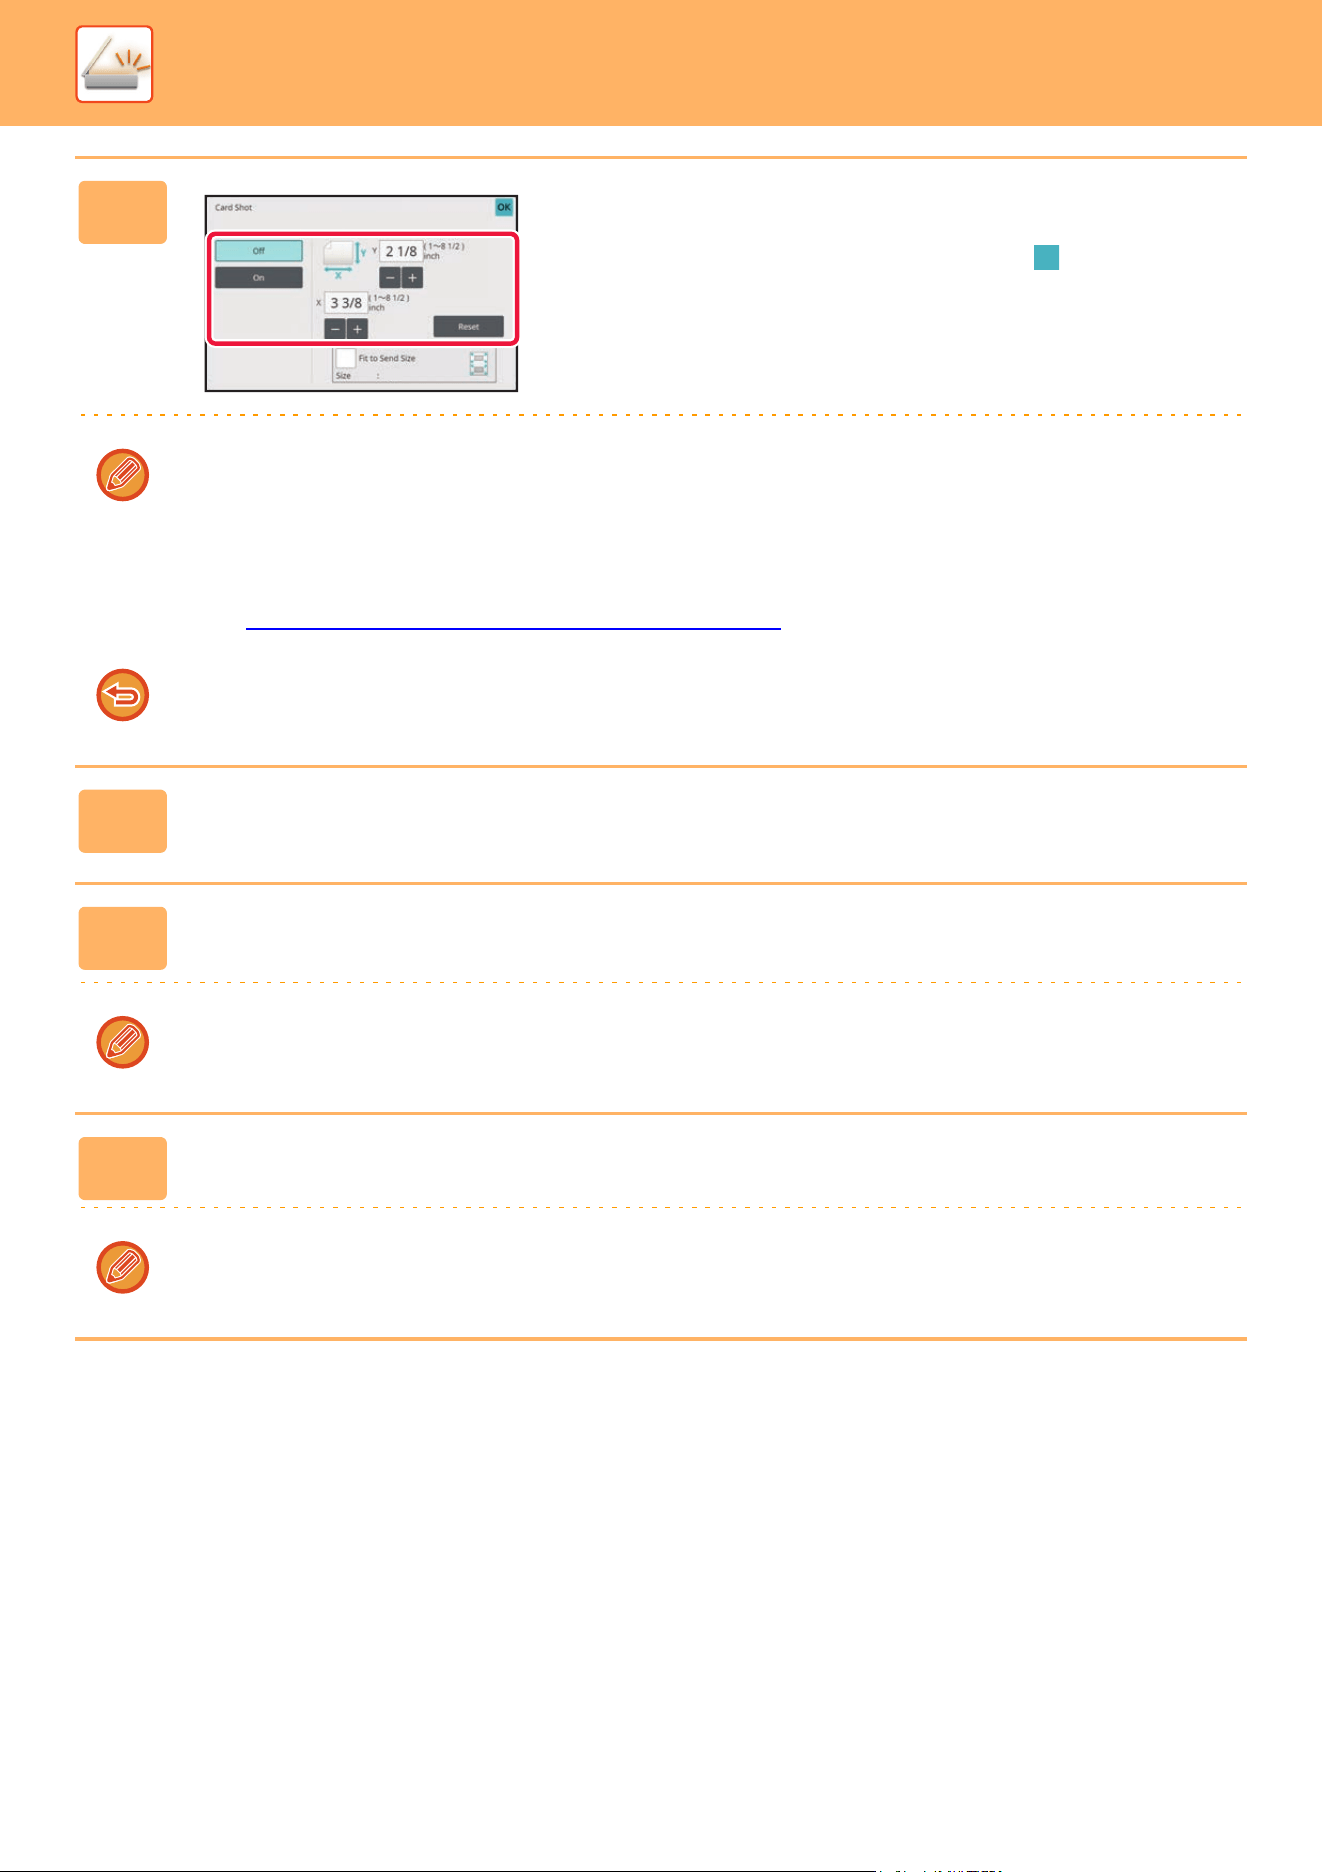
5-88
SCANNER►OTHER FUNCTIONS
5
Tap the [On] key, and specify the
original size as required.
After the settings are completed, tap and [Back] keys in
sequence.
• Tap the areas displaying width and height sizes respectively, and enter the sizes using the numeric keys.
• To quickly set the size, first specify a value close to the desired ratio value by the numeric keys, then tap [-] or [+] for
adjustment .
• To enlarge or reduce the images to fit the paper based on the entered original size, tap the [Fit to Send Size] key.
• After selecting Card Shot, tap the [Original] key in the base screen to change the original scan size or the send size. In
this case, the screen of this step appears when you tap the scan size key. For the procedure for setting the send size,
see “SPECIFYING THE SEND SIZE OF THE IMAGE
(page 5-67)"
To cancel the Card Shot settings
Tap the [Off] key.
6
Tap the [Start] key, and scan the front side.
7
Place a card face up on the document glass, and tap the [Start] key to scan
the reverse side.
Before scanning the back of the card, tap the [Change Setting] key on the touch panel to change the exposure.
8
Tap the [Read-End] key.
If you will continue by scanning the front of the card, you can tap the [Change Setting] key to change the exposure,
resolution, scan size, and send size.
8½x11
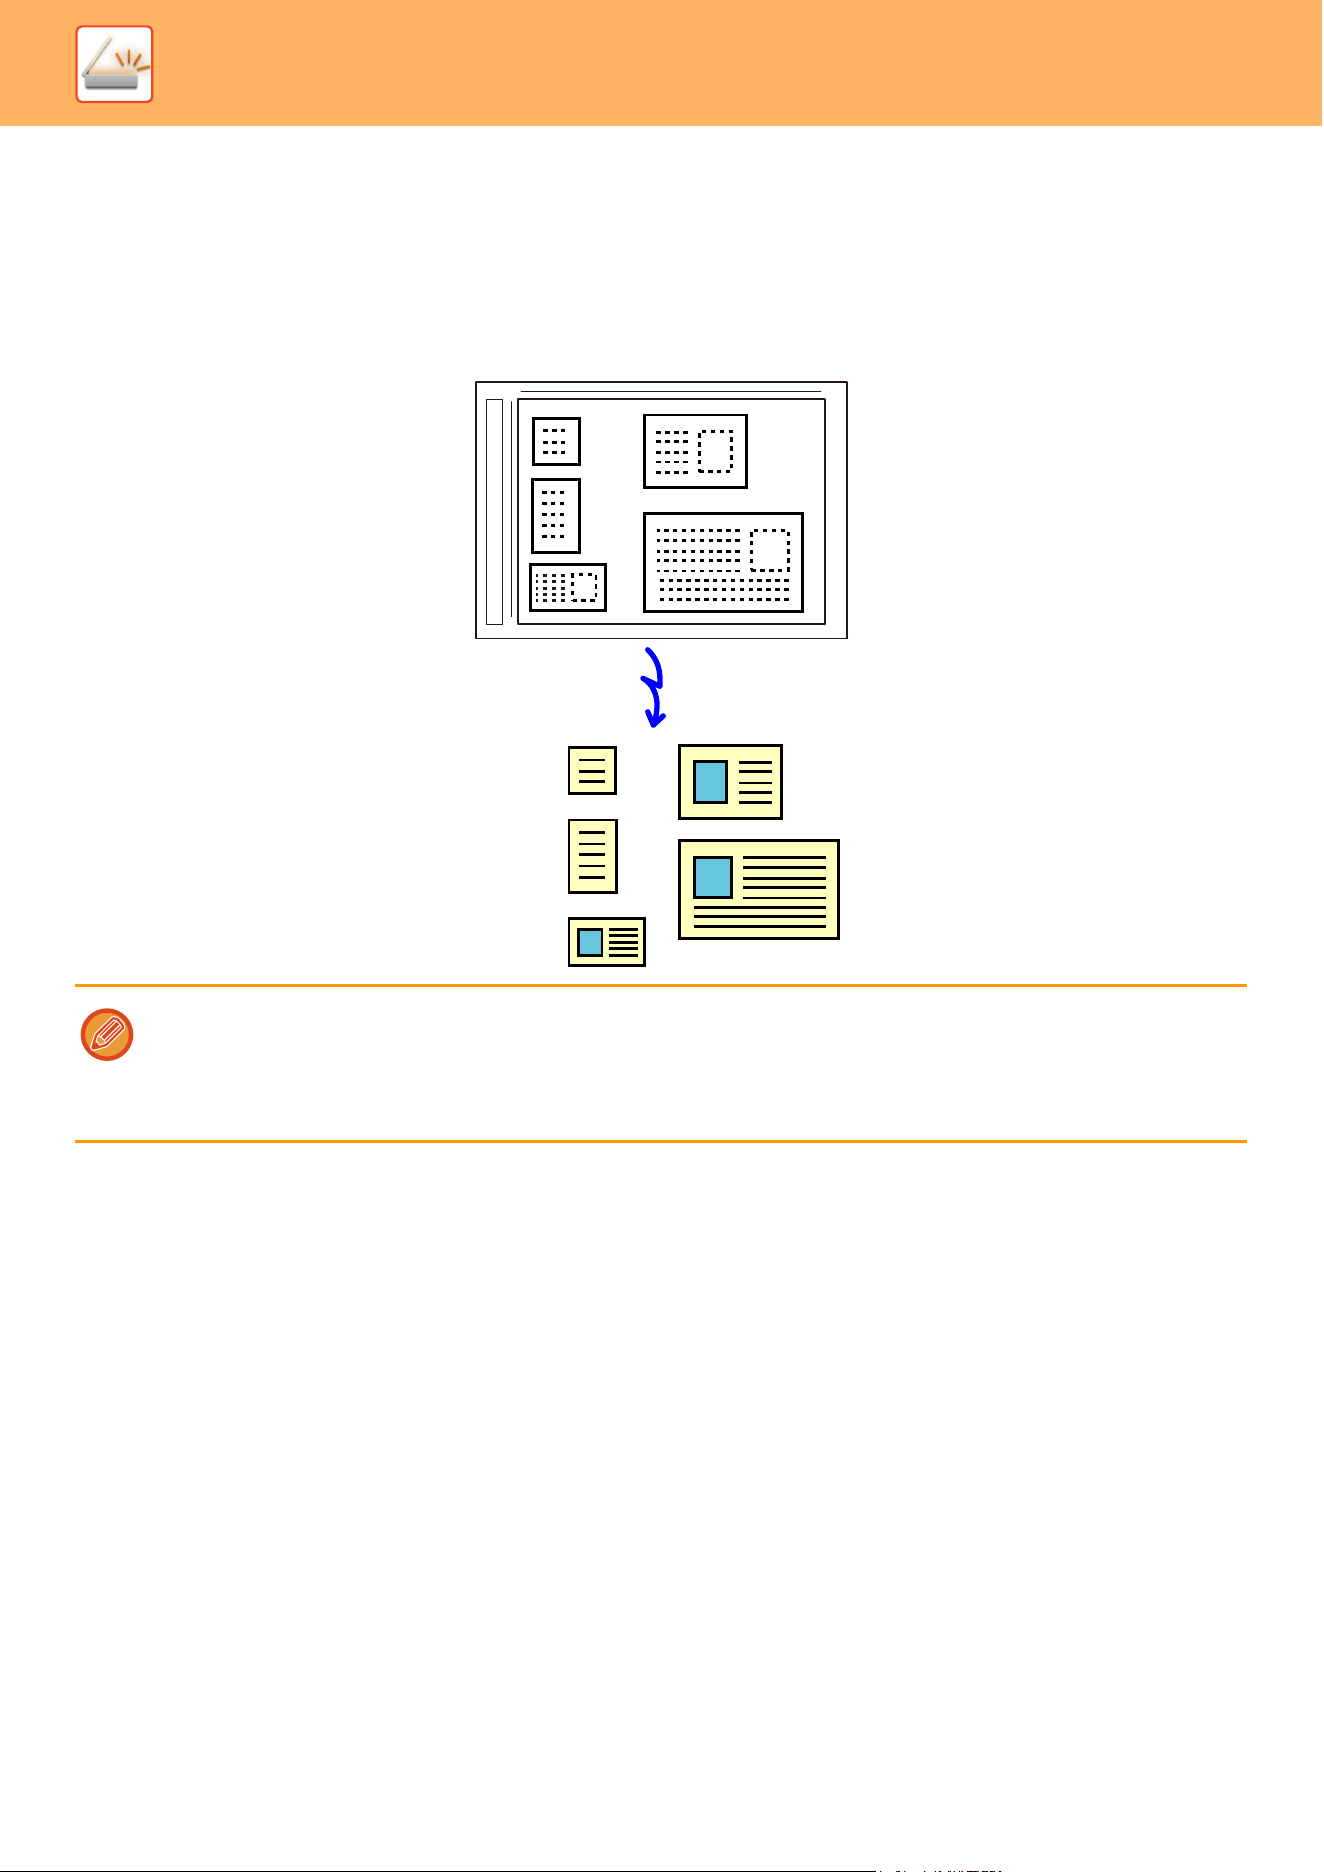
5-89
SCANNER►OTHER FUNCTIONS
SIMULTANEOUSLY SCANNING MULTIPLE CARDS,
RECEIPTS OR OTHER SMALL ORIGINALS TO
INDIVIDUAL FILES (MULTICROP)
This function automatically crops and scans multiple cards, receipts, or other small originals placed on the document
glass to individual files.
• This function can be used with Scan to E-mail, Scan to FTP, Scan to Network Folder, and Save to External Memory
Device.
• The e-mail will be sent without being divided if System Settings - [Image Send Settings] → [Scan Settings] → [Condition
Settings] → [If the E-mail attachment(s) exceed maximum size, it will be sent in multiple files.] is enabled and [Maximum
Size of Send Data (E-Mail)] is set. If the transmitted e-mail exceeds the limit, a send error occurs.
5-90
SCANNER►OTHER FUNCTIONS
1
Place the multiple originals that you want to scan on the document glass.
DOCUMENT GLASS (page 1-51)
Cautions when placing the originals
• Up to 50 originals can be placed at once.
• Separate the originals by at least 5 mm.
• Available originals sizes are 40 to 297 mm in height and 40 to 432 mm in width.
• If the shape of an original is not square or rectangular, the original may not be cropped correctly.
2
Keep the auto document feeder open, not closed.
If you scan the originals with the auto document feeder closed, it will not be possible to detect the outlines of the originals
and scanning will fail. Always use this function with the auto document feeder open. If a light source such as an electric
light shines onto the originals during scanning, cropping may not be successful. Adjust the angle of the automatic
document feeder so that the light source does not affect the image.
Do not look directly at the light during scanning.
3
Tap the mode display and change to the base screen of the desired mode.
CHANGING MODES (page 2-10)
4
Specify the destination.
RETRIEVING A DESTINATION FROM AN ADDRESS BOOK (page 5-31)
VIEWING A LIST OF THE SELECTED DESTINATIONS (page 5-34)
USING A SEARCH NUMBER TO RETRIEVE A DESTINATION (page 5-35)
ENTERING AN ADDRESS MANUALLY (page 5-36)
SPECIFYING A NETWORK FOLDER (page 5-37)
RETRIEVING A DESTINATION FROM A GLOBAL ADDRESS BOOK (page 5-39)
USING A TRANSMISSION LOG TO RESEND (page 5-41)
5
Tap the [Others] key, and tap the [Multicrop] key.
A checkmark appears on the icon. When you have completed the setting, tap the [Back] key.
When original count is enabled, the number of scanned originals will appear during scanning.
To cancel the multicrop setting
Tap the [Multicrop] key to remove the checkmark.

5-91
SCANNER►OTHER FUNCTIONS
6
Tap the [Start] key to start scanning the originals.
When scanning is completed, place the next originals and tap the [Start] key.
Repeat the above step until you have scanned all originals, and then tap the [Read-End] key.
When transmission is completed, a beep sounds.
• Restrictions when multicrop is enabled
The following restrictions apply when multicrop is enabled. Restricted items may change automatically in some cases.
• Resolution: 600 x 600 dpi cannot be used.
• Scan size / send size: Only auto can be used.
• Two-sided original: Only one-sided original is enabled.
• Image Orientation: Cannot be used. (Each cropped original is corrected to the orientation that is least skewed.)
• Format: High compression and ultra-fine cannot be used.
• Compression / compression format: Reduce Colors cannot be used.
• One file per page: Cannot be set when the checkmark is enabled and the number is "1".
• The following functions cannot be used at the same time as multicrop.
Job Build, Slow Scan Mode, Mixed Size Original, Erase, Dual Page Scan, Book Divide, Card Shot, Verif. Stamp,
Blank Page Skip, File, Quick File, Preview, Business Card Scan, Image Crop
• When the Multicrop setting is canceled, the following items retain the setting changes that occurred when Multicrop
was enabled.
Resolution, Scan Size, Send Size, 2-Sided Original, File Type, OCR, Compression Mode/Compression Ratio,
Specified Pages per File
• Depending on the original, it may not be extracted to the file correctly.
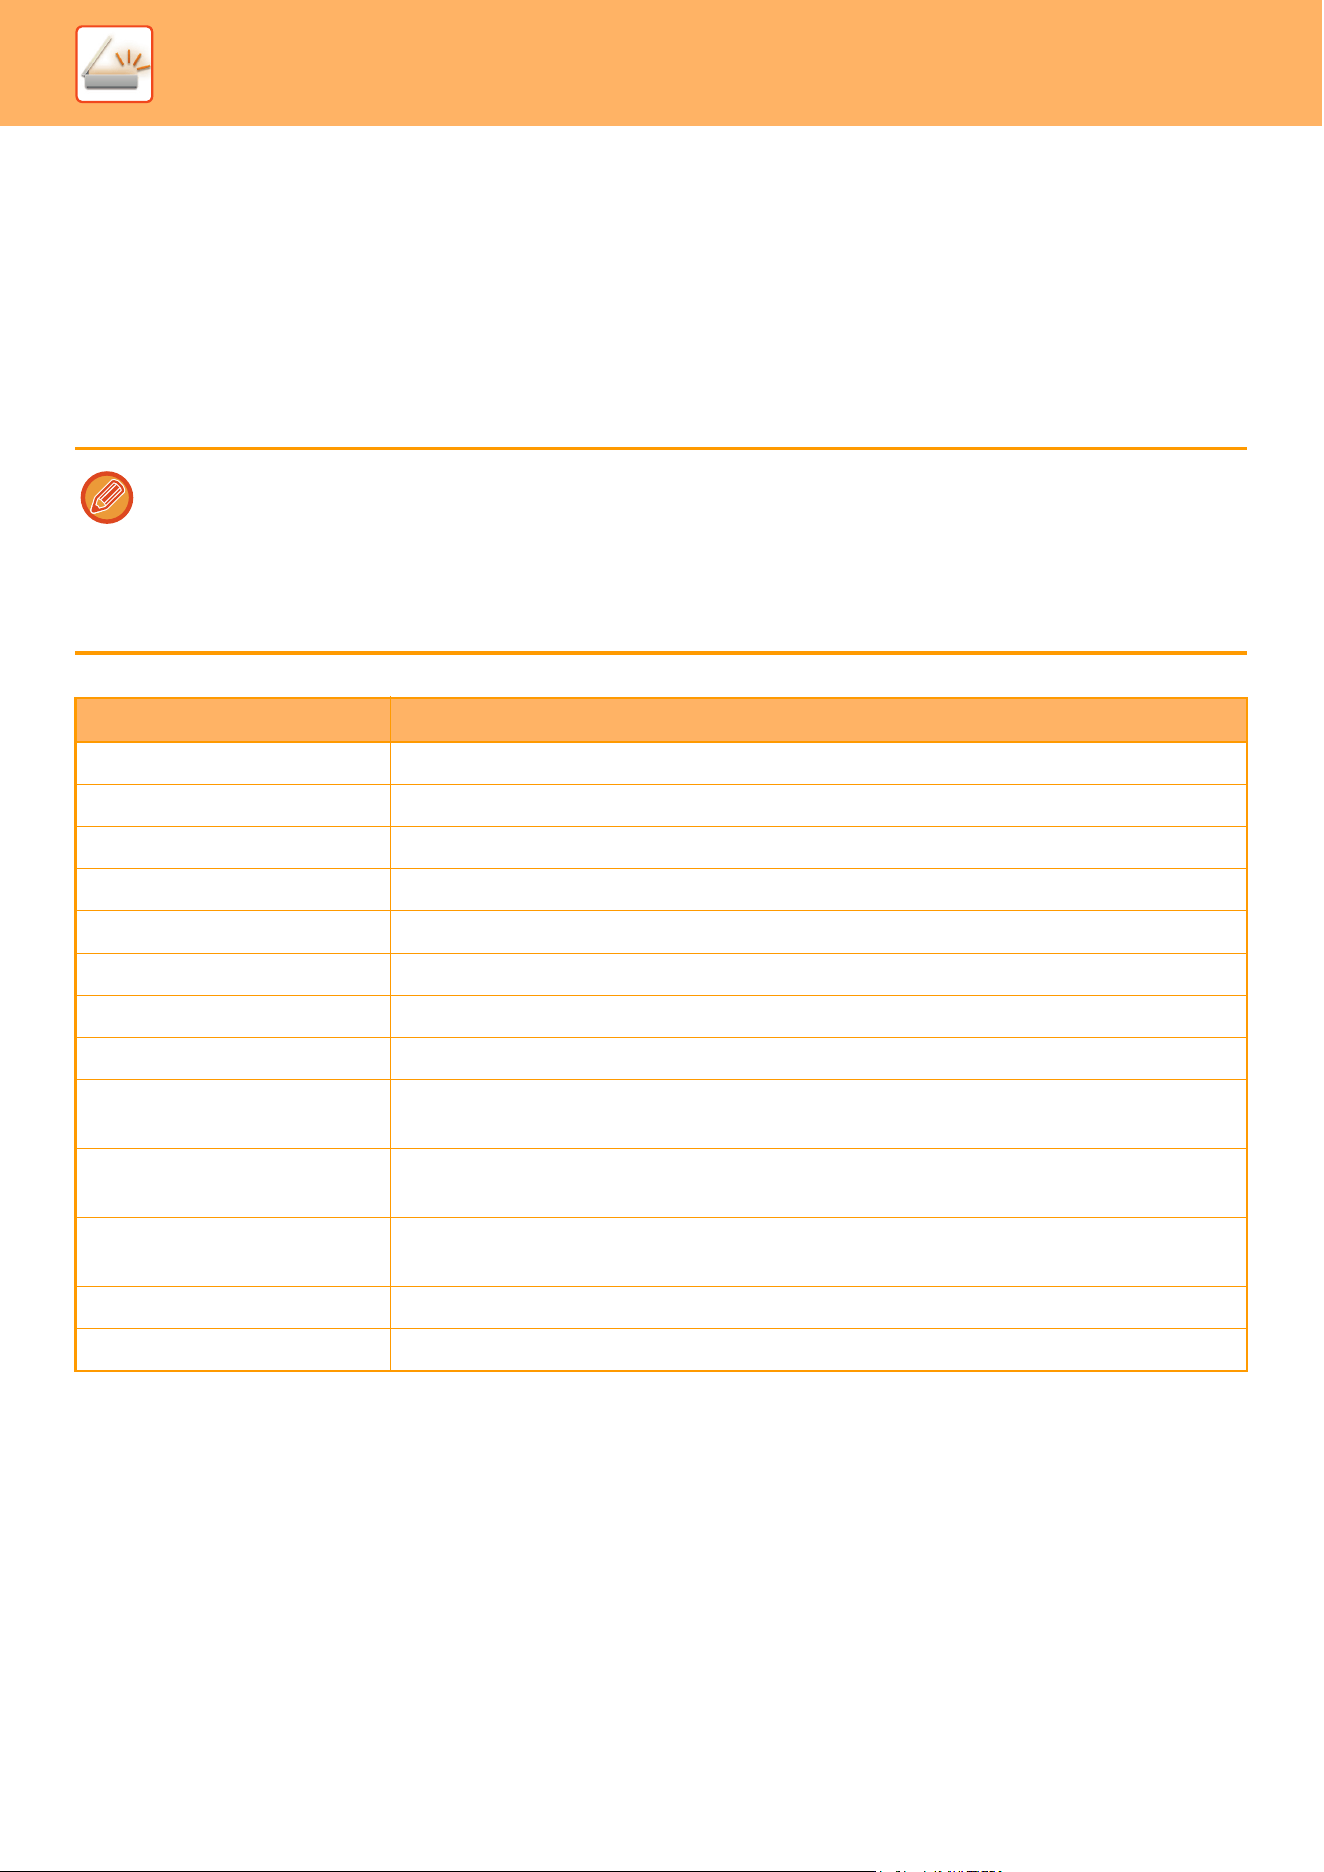
5-92
SCANNER►OTHER FUNCTIONS
SCANNING A BUSINESS CARD, READING THE TEXT
STRING, CREATING A FILE, AND SENDING THE FILE
(BUSINESS CARD SCAN)
(When OCR function is enabled in system settings)
You can scan a business card, extract the name and telephone number from the text string read by OCR, and create
and send a vCard or other file.
For the information that can be extracted and output from a scanned business card, refer to the table below.
• Business card scanning can be used, but only the image will be scanned and the business card information will not be
scanned.
• This function can be used with Scan to E-mail, Scan to FTP, Scan to Network Folder, and Save to External Memory
Device.
The e-mail will be sent without being divided if System Settings - [Image Send Settings] → [Scan Settings] → [Condition
Settings] → [If the E-mail attachment(s) exceed maximum size, it will be sent in multiple files.] is enabled and [Maximum
Size of Send Data (E-Mail)] is set.If the transmitted e-mail exceeds the limit, a send error occurs.
Item Description
Name The name is extracted.
Kana When the language is set to Japanese, you can convert the name to kana.
Pinyin When the language is set to Chinese, you can convert the name to pinyin.
Postal code The postal code is extracted.
Address The address is extracted.
Company/group name The company/organization name is extracted.
Department The department is extracted.
Job title The position is extracted.
Telephone number The telephone number is extracted.
Up to five.
Fax number The fax number is extracted.
Up to five.
URL The URL is extracted.
Up to five.
E-mail address The E-mail address is extracted.
Other Other is used if none of the above apply.

5-93
SCANNER►OTHER FUNCTIONS
1
Place the multiple business cards that you want to scan in the document feeder
tray of the automatic document feeder or on the document glass.
AUTOMATIC DOCUMENT FEEDER (page 1-47)
DOCUMENT GLASS (page 1-51)
Cautions when placing business cards
• Up to 20 business cards can be placed at once.
• Separate the business cards by at least 5 mm.
• Available business card sizes are 45 x 85 mm to 110 x 110 mm.
• If the shape of a business card is not square or rectangular, the business card may not be cropped correctly.
• Place the business cards with the top side of the cards at the far side of the document glass as shown. If the cards are
placed in the wrong orientation, it will not be possible to read the cards correctly.
Notes on loading business cards in the automatic document feeder
• Up to 150 business cards (or a maximum loading height of 38 mm) can be scanned at one time.
• Supported business card sizes range from 51 x 89 mm to 55 x 91 mm.
• If the business card is not square or rectangular in shape, the business card will misfeed.
• When scanning a business card, be sure to set the image orientation.
2
(When using the document glass) Keep the auto document feeder open, not
closed.
If you scan the business cards with the auto document feeder closed, it will not be possible to detect the outlines of the
business cards and scanning will fail. Always use this function with the auto document feeder open. If a light source such
as an electric light shines onto the originals during scanning, cropping may not be successful. Adjust the angle of the
automatic document feeder so that the light source does not affect the image.
Do not look directly at the light during scanning.
3
Tap the mode display and change to the base screen of the desired mode.
CHANGING MODES (page 2-10)
5-94
SCANNER►OTHER FUNCTIONS
4
Specify the destination.
RETRIEVING A DESTINATION FROM AN ADDRESS BOOK (page 5-31)
VIEWING A LIST OF THE SELECTED DESTINATIONS (page 5-34)
USING A SEARCH NUMBER TO RETRIEVE A DESTINATION (page 5-35)
ENTERING AN ADDRESS MANUALLY (page 5-36)
SPECIFYING A NETWORK FOLDER (page 5-37)
RETRIEVING A DESTINATION FROM A GLOBAL ADDRESS BOOK (page 5-39)
USING A TRANSMISSION LOG TO RESEND (page 5-41)
5
Tap the [Others] key, and tap the [Business Card Scan] key.
When [Disabling of OCR] is set in the system settings, tap the [Business Card Scan] key and then a checkmark appears
on the icon. After the settings are completed, tap the [Back] key.
6
Tap the [On] key, and change settings
as needed.
When you have completed the settings, tap the key and
then the [Back] key.
• This procedure cannot be used if [Disabling of OCR] is set in the system settings. Proceed to the next step.
• If original count is enabled, the number of scanned originals will appear during scanning.
• Change the language setting to match the language used on the business card. For the language settings, refer to
“CHANGING FORMAT IN SCAN OR DATA ENTRY MODE
(page 5-72)".
• To use the full name as the file name, enable [Use Full Name on Card as the File Name].
• To send the scanned image file together with the file format selected in [File Format], enable [Also Send Image].
To cancel the business card scan setting
Tap the [Off] key.
Business Card Scan
Off
File Format
of Card Info
Image
vCard (*.vcf)
File Format
of the Image
Language
Setting
English
Use Full Name on Card
as the File Name
OK
Card Information
Image and Card Info
PDF

5-95
SCANNER►OTHER FUNCTIONS
7
Tap the [Start] key to start scanning the originals.
When scanning is completed, place the next group of originals and tap the [Start] key.
Repeat the above step until you have scanned all originals, and then tap the [Read-End] key.
When transmission is completed, a beep sounds.
The image of the scanned business card is sent together with the VCard or CSV file set in File Format.
• Restrictions when Business Card Scan is enabled
The following restrictions apply when Business Card Scan is enabled. Restricted items may change automatically in
some cases.
• Resolution: When [Image] is selected, except 600dpi can be used. When [Card Information] or [Image and Card
Info] is selected, only 300 dpi and 400 dpi can be used.
• Scan size / send size: Only auto can be used.
• Two-sided original: When scanning from the automatic document feeder, if you select a setting other than [Card
Information], 2-sided documents can be scanned. Otherwise, only 1-sided documents can be scanned.
• Image Orientation: Cannot be used. (Each cropped original is corrected to the orientation that is least skewed.)
• Format: High compression and ultra-fine cannot be used.
• Compression / compression format: Reduce Colors cannot be used.
• One file per page: Cannot be set when the checkmark is enabled and the number is "1".
• The following functions cannot be used at the same time as multicrop.
Job Build, Slow Scan Mode, Mixed Size Original, Erase, Dual Page Scan, Book Divide, Card Shot, Verif. Stamp,
Blank Page Skip, File, Quick File, Preview, Multicrop, Image Crop
• When the Business Card Scan setting is canceled, the following items retain the setting changes that occurred when
Business Card Scan was enabled.
Resolution, Scan Size, Send Size, 2-Sided Original, File Type, OCR, Compression Mode/Compression Ratio,
Specified Pages per File
• Depending on the business card, it may not be extracted to the file correctly.
5-96
SCANNER►OTHER FUNCTIONS
File names
The user can assign any file name to a file.
When [Use Full Name on Card as the File Name] is enabled, the name on a scanned business card can be assigned as
the file name.
If you do not set a file name, the machine will assign an automatically generated file name.
File name rules
File names are assigned as follows in each setting.
Setting File File name Description
User entry vCard User_0001.vcf
User_0002.vcf
The name entered by the user
("User" in this case) is inserted at
the beginning of the file name.
CSV User.csv
Scanned image User_0001.jpg
User_0002.jpg
File name auto
extraction
vCard AAAAAA_0001.vcf
AAAAAA_0002.vcf
BBBBBB_0001.vcf
Untitled_0001.vcf
Untitled _0002.vcf
Example: The names read from
business cards are "AAAAAA",
"BBBBB"
When there are cards with the
same first and last name such as
"AAAAAA", the number at the end
is a serial number. If the name
could not be read, the file name is
"Untitled". If there are multiple
untitled files, the number at the end
is a serial number.
CSV AAAAAA_0001.csv
Scanned image AAAAAA_0001.jpg
AAAAAA_0002.jpg
BBBBBB_0001.jpg
Untitled _0001.jpg
Untitled _0002.jpg
Automatic generation vCard MXxxxx_yyyyyy_zzzzzz_0001.vcf
MXxxxx_yyyyyy_zzzzzz_0002.vcf
"xxxx" is the model name,"yyyyyy"
is the scan date, and "zzzzzz" is
the scan time.
CSV MXxxxx_yyyyyy_zzzzzz_0001.csv
Scanned image MXxxxx_yyyyyy_zzzzzz_0001.jpg
MXxxxx_yyyyyy_zzzzzz_0002.jpg
If the user sets a file name when file name auto extraction is enabled, the user's file name is given priority.
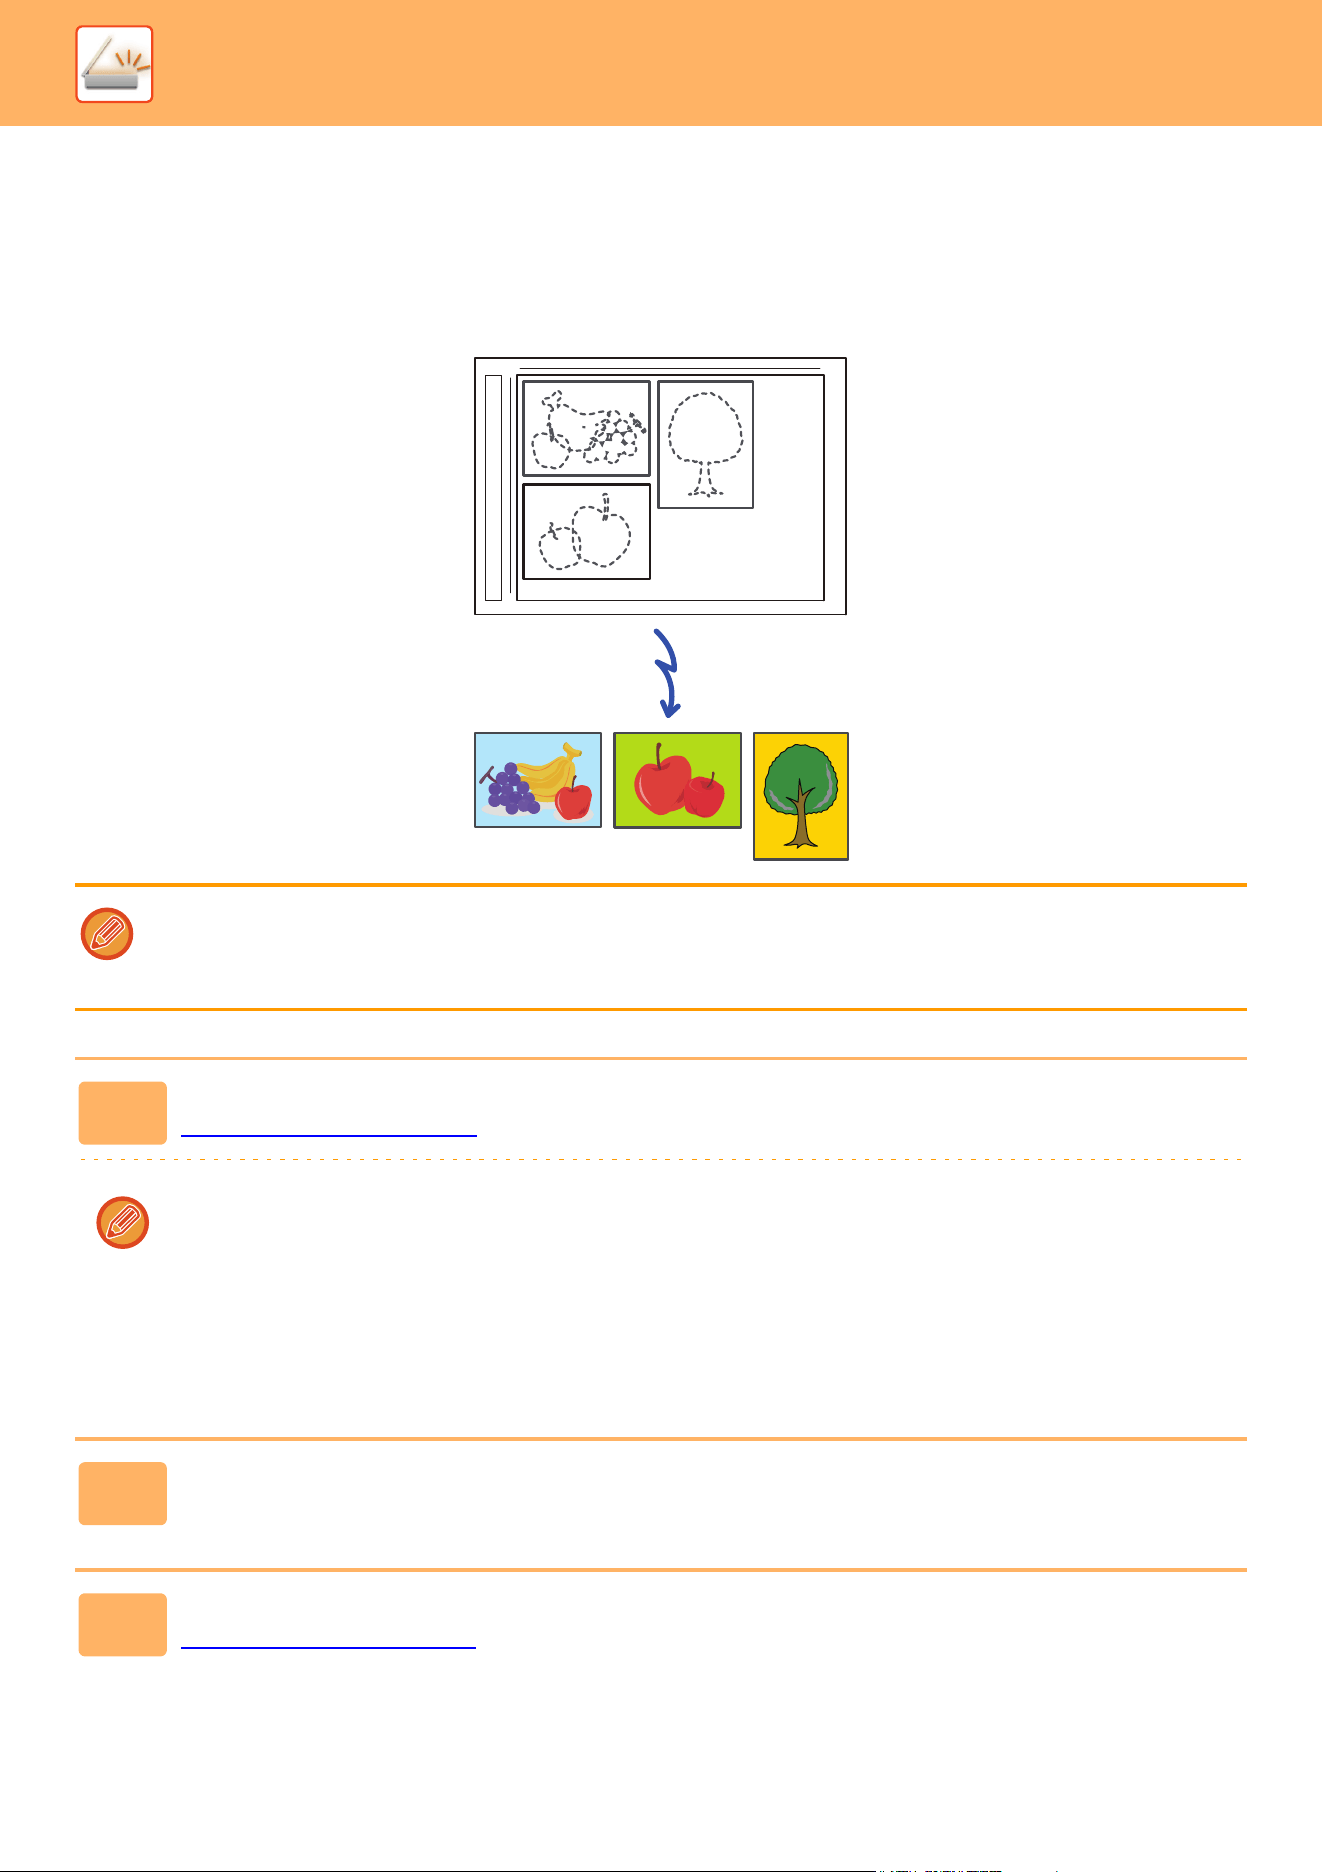
5-97
SCANNER►OTHER FUNCTIONS
SCANNING MULTIPLE PHOTOS AT ONCE TO
INDIVIDUAL FILES
(Image Crop)
This function automatically scans photographs placed on the document glass to individual files.
This function can be used with Scan to E-mail, Scan to FTP, Scan to Network Folder, and Save to External Memory Device.
Settings (administrator) -"Image Send Settings"→"Scan Settings"→"Condition Settings"→"If the E-mail attachment(s)
exceed maximum size, it will be sent in multiple files." is not applied.
If the transmitted e-mail exceeds the limit, a send error will occur.
1
Place the multiple originals that you want to scan on the document glass.
DOCUMENT GLASS (page 1-51)
Cautions when placing the originals
• Up to 50 originals can be placed at once.
• Separate the originals by at least 5 mm.
• Available originals sizes are 40 to 297 mm in height and 40 to 432 mm in width.
• If the shape of an original is not square or rectangular, the original may not be cropped correctly.
• The top and bottom of each original cannot be distinguished automatically, so take care to orient the originals
appropriately.
2
Close the automatic document feeder.
The scanning method is different from multi-crop. Close the automatic document feeder.
3
Tap the mode display and change to the home screen of the desired mode.
CHANGING MODES (page 2-10)

5-98
SCANNER►OTHER FUNCTIONS
4
Specify the destination.
RETRIEVING A DESTINATION FROM AN ADDRESS BOOK (page 5-31)
VIEWING A LIST OF THE SELECTED DESTINATIONS (page 5-34)
USING A SEARCH NUMBER TO RETRIEVE A DESTINATION (page 5-35)
ENTERING AN ADDRESS MANUALLY (page 5-36)
SPECIFYING A NETWORK FOLDER (page 5-37)
RETRIEVING A DESTINATION FROM A GLOBAL ADDRESS BOOK (page 5-39)
USING A TRANSMISSION LOG TO RESEND (page 5-41)
5
Tap the [Others] key, and tap the [Image Crop] key.
A checkmark appears on the icon. After the settings are completed, tap the [Back] key.
When original count is enabled, the number of scanned originals will appear during scanning.
To cancel the image crop setting
Tap the [Image Crop] key to remove the checkmark.
6
Tap the [Start] key to start scanning the originals.
When scanning is completed, place the next group of originals and tap the [Start] key.
Repeat the above step until you have scanned all originals, and then tap the [Read-End] key.
When transmission is completed, a beep sounds.
• Restrictions when image crop is enabled
The following restrictions apply when image crop is enabled. Restricted items may change automatically in some
cases.
• Scan size / send size: Only auto can be used.
• Two-sided original: Only one-sided original is enabled.
• Image Orientation: Cannot be used. (Each cropped original is corrected to the orientation that is least skewed.)
• Format: High compression and ultra-fine cannot be used.
• Compression / compression format: Reduce Colors cannot be used.
• One file per page: Cannot be set when the checkmark is enabled and the number is "1".
• The following functions cannot be used at the same time as image crop.
Job Build, Slow Scan Mode, Mixed Size Original, Erase, Dual Page Scan, Book Divide, Card Shot, Verif. Stamp,
Blank Page Skip, File, Quick File, Preview, Multicrop Business Card Scan
• When the image crop setting is canceled, the following items retain the setting changes that occurred when image
crop was enabled.
Resolution, Scan Size, Send Size, 2-Sided Original, File Type, OCR, Compression Mode/Compression Ratio, Speci-
fied Pages per File
• Depending on the photo, it may not be extracted to the file correctly.
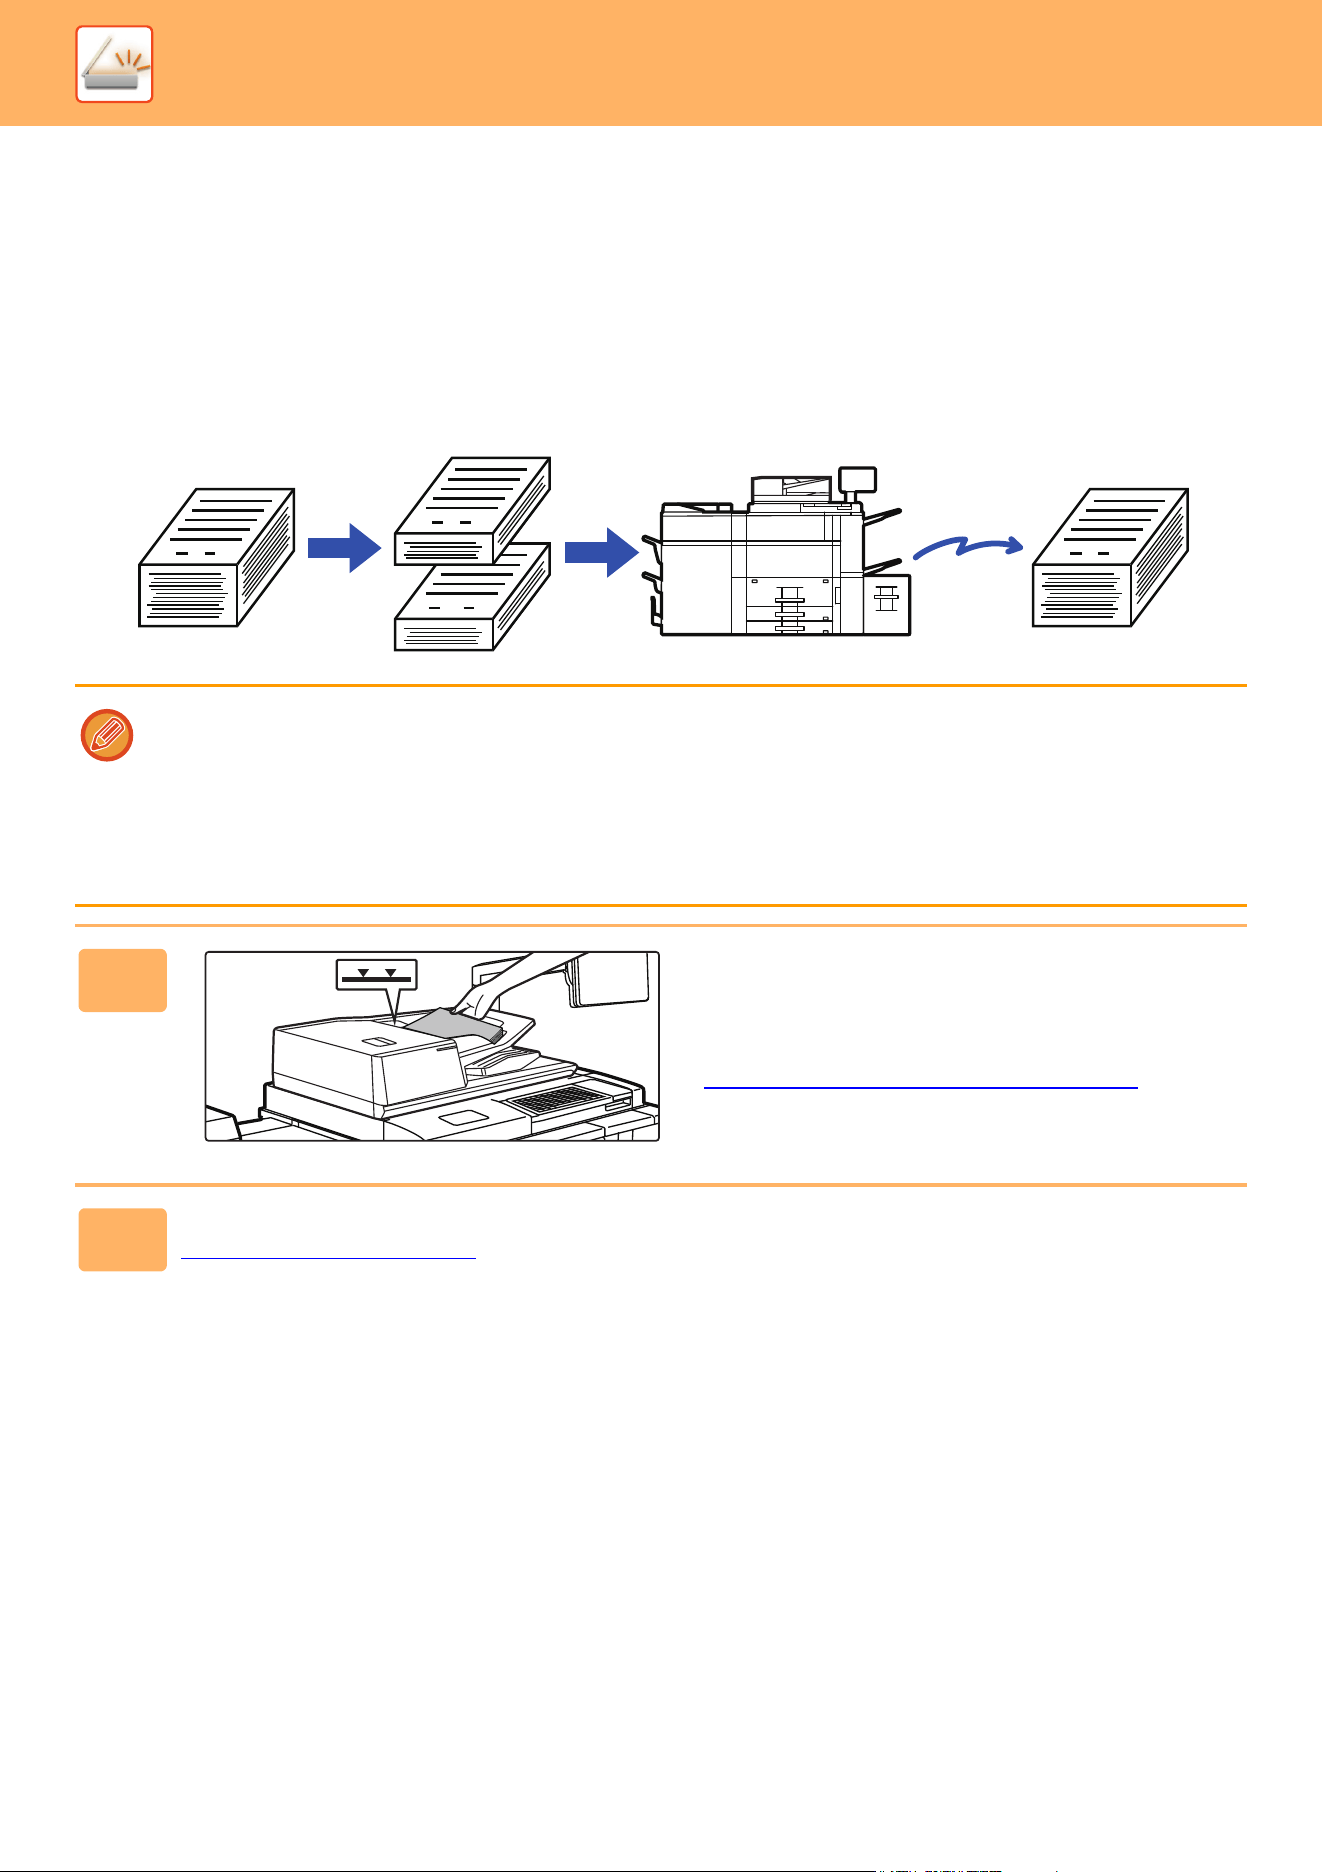
5-99
SCANNER►OTHER FUNCTIONS
SCANNING MANY ORIGINALS AT ONCE (JOB BUILD)
This function lets you separate an original consisting of numerous pages into sets, scan each set using the automatic
document feeder, and transmit the pages in a single transmission.
Use this function when there are more original pages than can be placed at once in the automatic document feeder.
When scanning originals that are separated into sets, scan the set that has the first page first.
The settings that you select for the first set can be used for all remaining sets.
• To change all original settings, configure before scanning the original.
• Up to 9999 pages can be scanned.
Note that when the memory is being used for other jobs, fewer pages can be scanned.
• If the memory becomes full during scanning, a message will appear and the transmission will be canceled.
• The scan settings can be changed for each set of originals.
• Job build is not possible when "Settings (administrator)" - [System Settings] → [Common Settings] → [Device Control] →
[Condition Settings] or [Enable/Disable Settings] → [Disabling of Document Feeder] is enabled.
1
Place originals in the automatic
document feeder.
Insert the originals all the way into the document feeder tray.
Originals can be stacked up to the indicator line.
AUTOMATIC DOCUMENT FEEDER
(page 1-47)
2
Tap the mode display to switch to the initial screen of each mode.
CHANGING MODES (page 2-10)
11
101
1

5-100
SCANNER►OTHER FUNCTIONS
3
Specify the destination.
RETRIEVING A DESTINATION FROM AN ADDRESS BOOK (page 5-31)
VIEWING A LIST OF THE SELECTED DESTINATIONS (page 5-34)
USING A SEARCH NUMBER TO RETRIEVE A DESTINATION (page 5-35)
ENTERING AN ADDRESS MANUALLY (page 5-36)
SPECIFYING A NETWORK FOLDER (page 5-37)
RETRIEVING A DESTINATION FROM A GLOBAL ADDRESS BOOK (page 5-39)
USING A TRANSMISSION LOG TO RESEND (page 5-41)
4
Tap the [Job Build] key.
A checkmark appears on the icon.
If you are performing Scan to E-mail, tap the [Others] key and then tap the [Job Build] key.
To cancel the job build setting:
Tap the [Job Build] key to uncheck it.
5
Change settings as needed.
6
Tap the [Start] key to scan the first original page.
7
Place the next set of originals and tap the [Start] key.
Repeat until all originals have been scanned.
• If needed, tap [Change Setting] before tapping the [Start] key, and change the original scan settings and send settings
for the next original. The setting changes will be applied to the next job.
• If you tap the [Preview] key, you cannot scan additional pages.
To cancel scanning:
Tap the [CA] key. All the settings including scanned data will be cleared.
8
Tap the [Read-End] key.
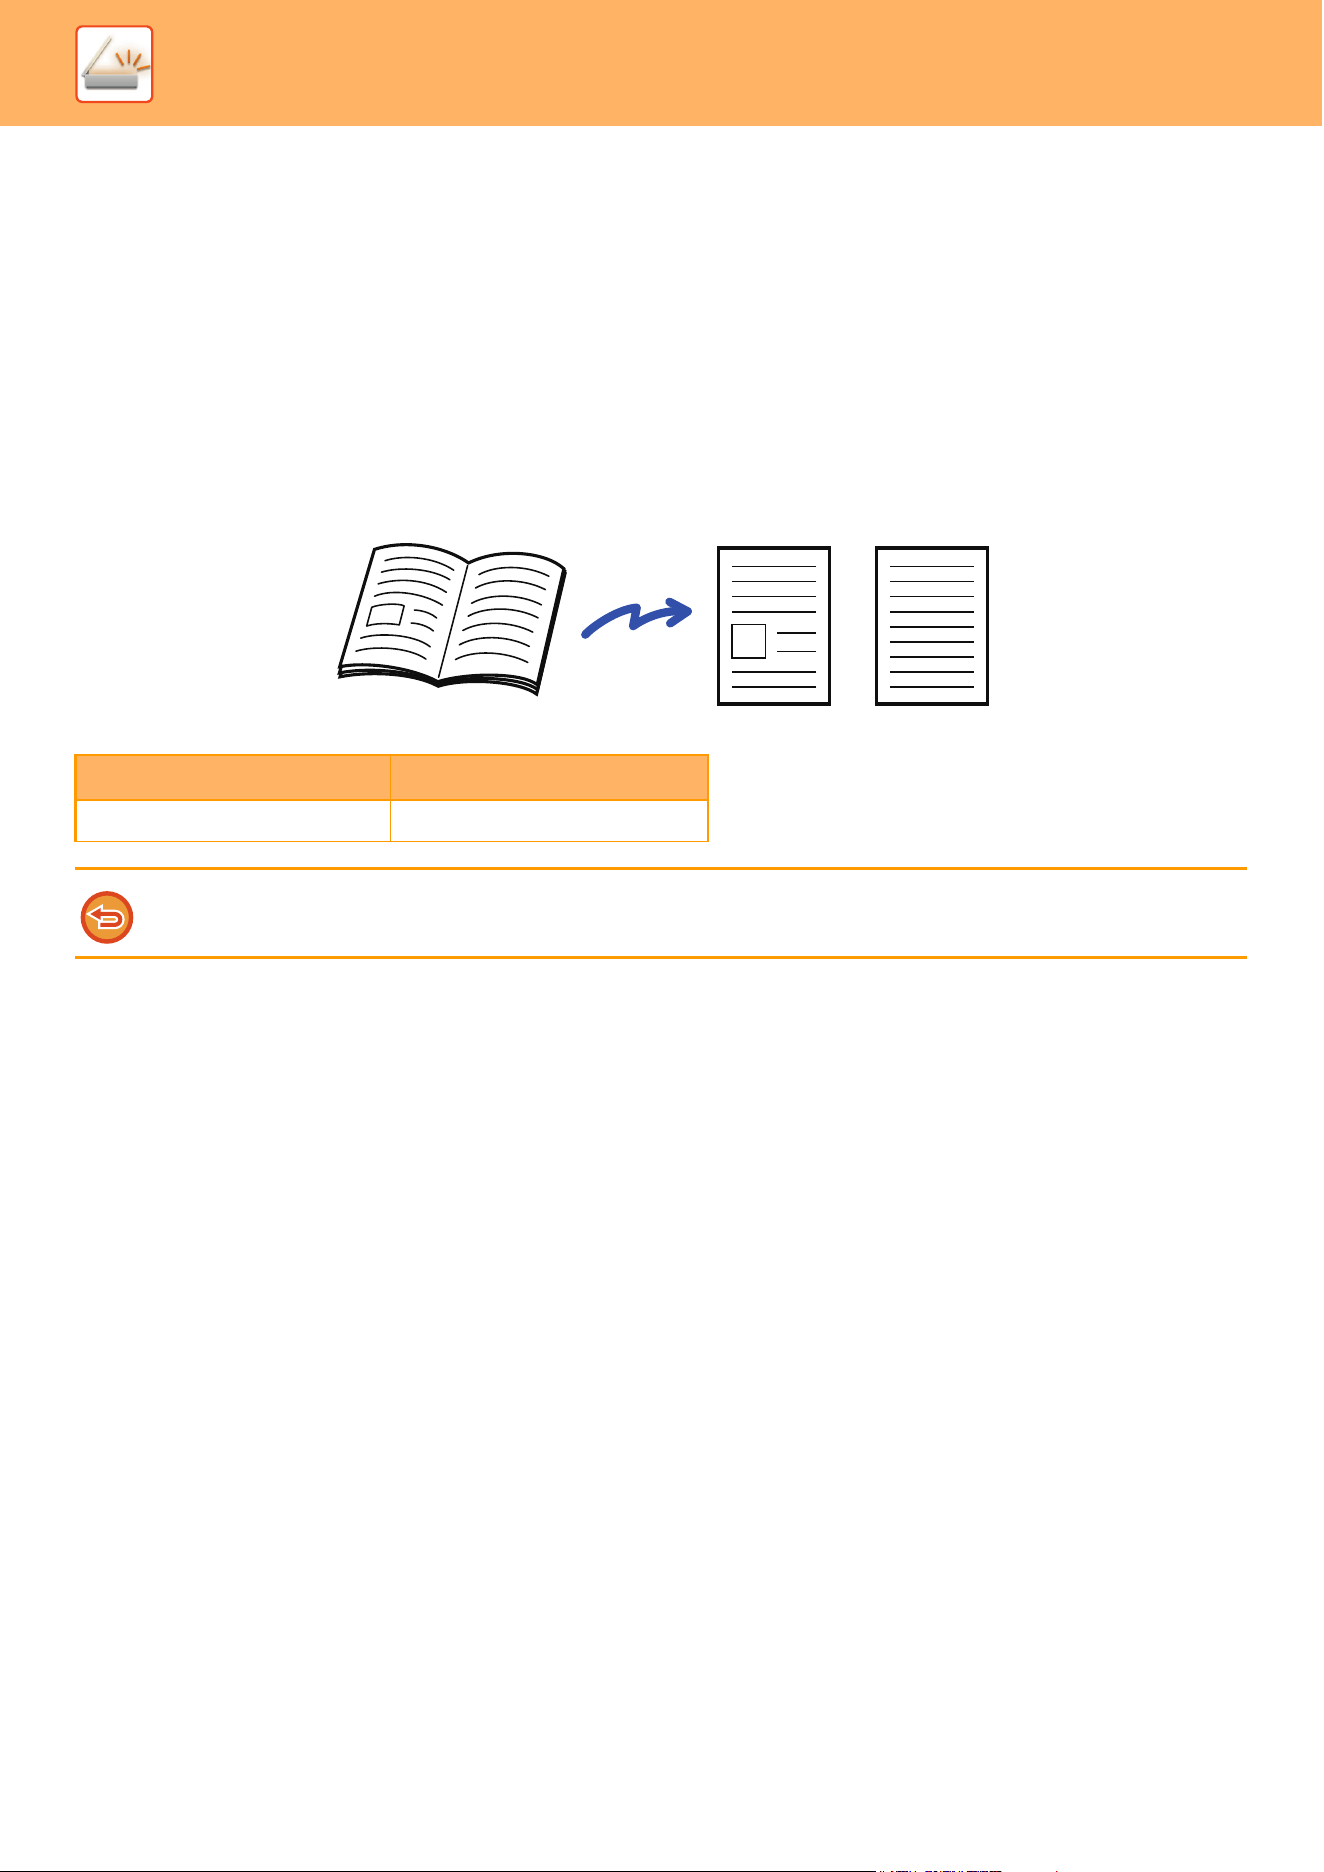
5-101
SCANNER►OTHER FUNCTIONS
SCANNING AND SENDING AN ORIGINAL AS
SEPARATE PAGES
SCANNING AN ORIGINAL AS TWO SEPARATE PAGES
(DUAL PAGE SCAN)
The left and right sides of an original are scanned as two separate pages. This function is useful when you wish to
successively scan each page of a book or other bound document.
When using dual page scan, the original must be placed on the document glass.
Original scan size Transmitted image
11" x 17" (A3) x 1 page 8-1/2" x 11"(A4) x 2 pages
• This function is available when the original size setting is set to [Auto].
• Note that "Center Erase" and "Edge+Center Erase" cannot be used.
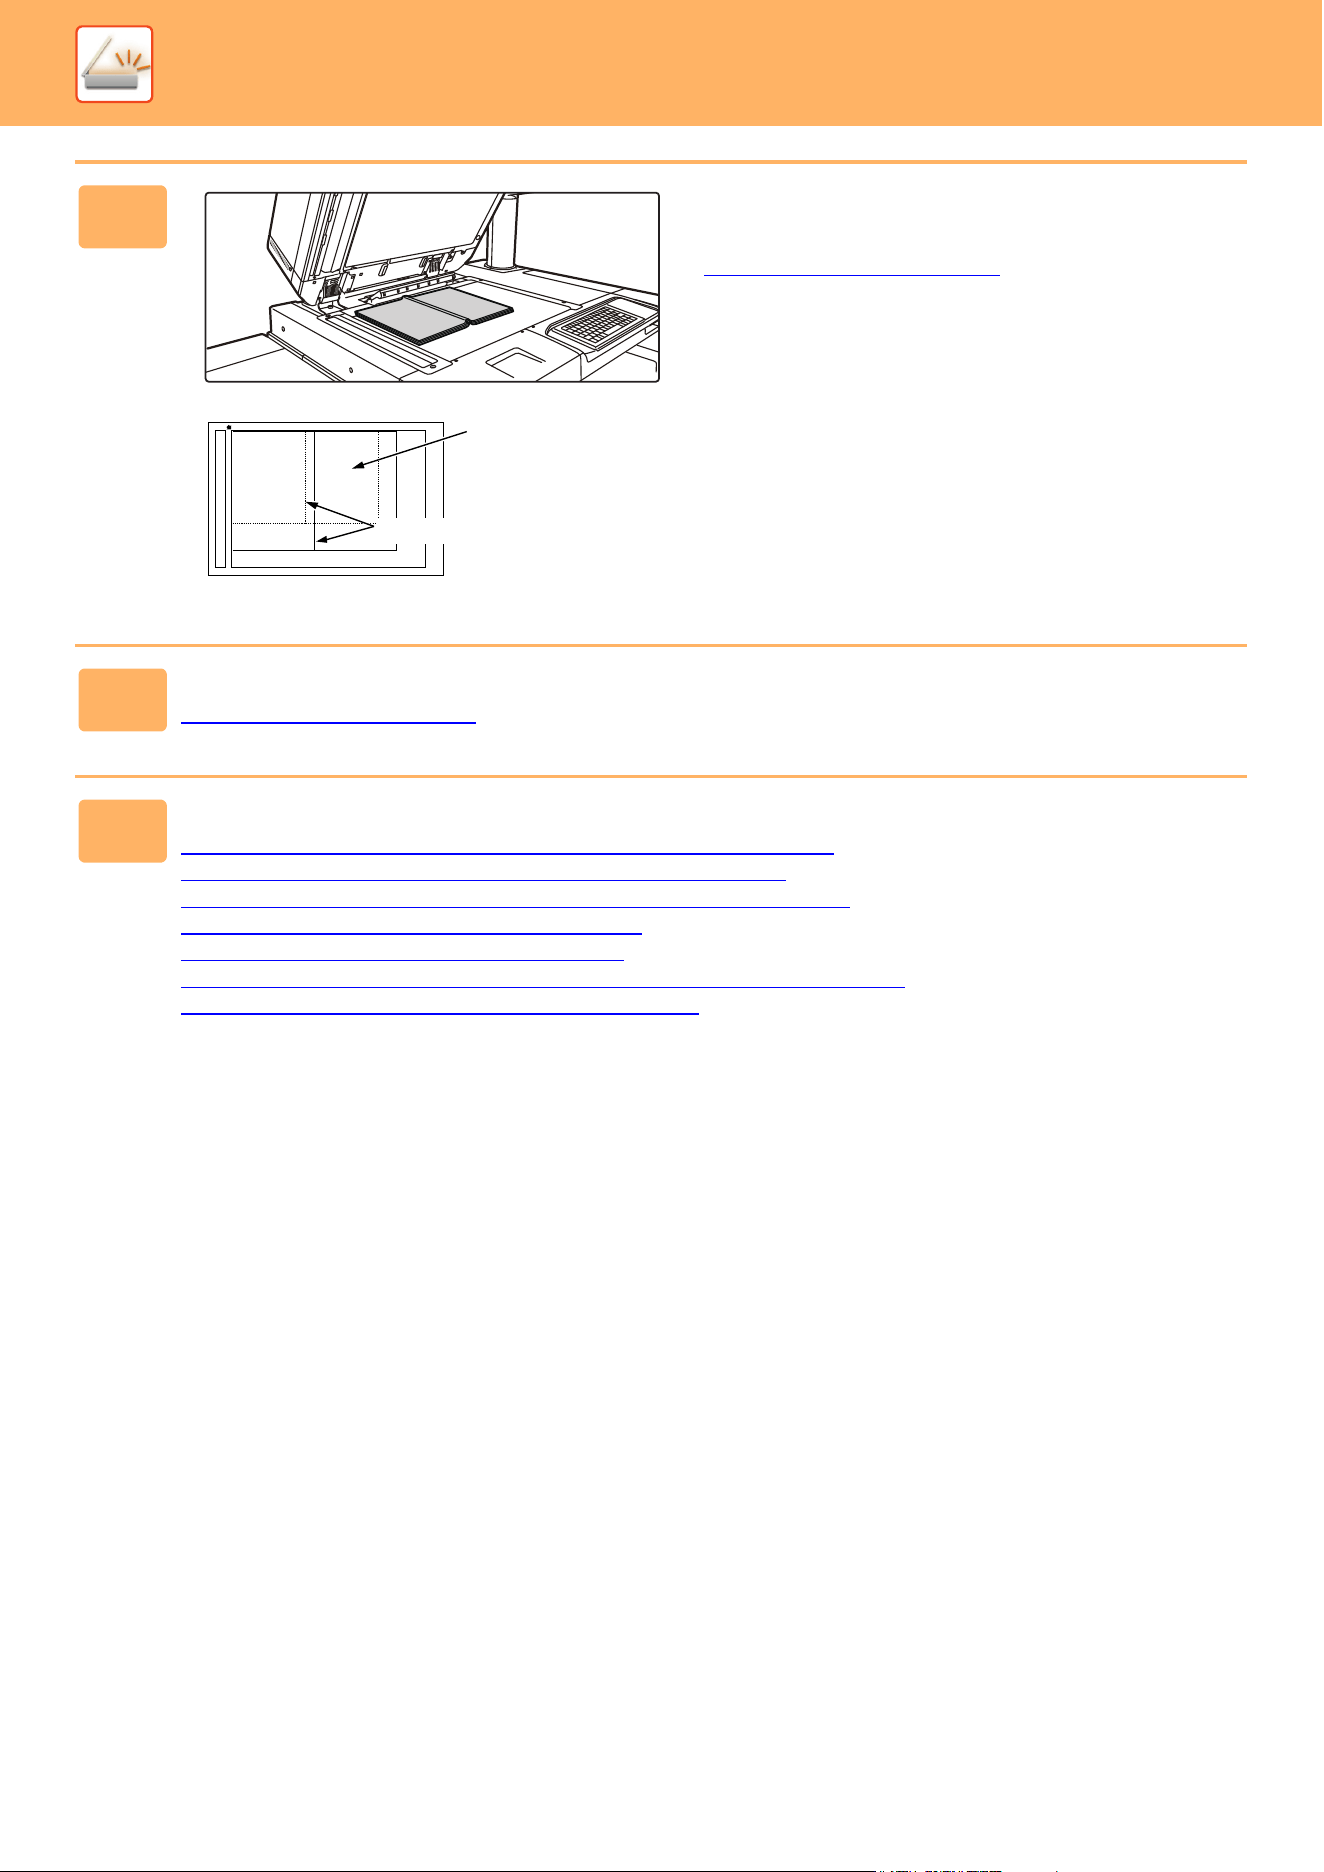
5-102
SCANNER►OTHER FUNCTIONS
1
Place the original on the document
glass.
DOCUMENT GLASS (page 1-51)
2
Tap the mode display to switch to the initial screen of each mode.
CHANGING MODES (page 2-10)
3
Specify the destination.
RETRIEVING A DESTINATION FROM AN ADDRESS BOOK (page 5-31)
VIEWING A LIST OF THE SELECTED DESTINATIONS (page 5-34)
USING A SEARCH NUMBER TO RETRIEVE A DESTINATION (page 5-35)
ENTERING AN ADDRESS MANUALLY (page 5-36)
SPECIFYING A NETWORK FOLDER (page 5-37)
RETRIEVING A DESTINATION FROM A GLOBAL ADDRESS BOOK (page 5-39)
USING A TRANSMISSION LOG TO RESEND (page 5-41)
The page on
this side is
copied first.
Centerline of original
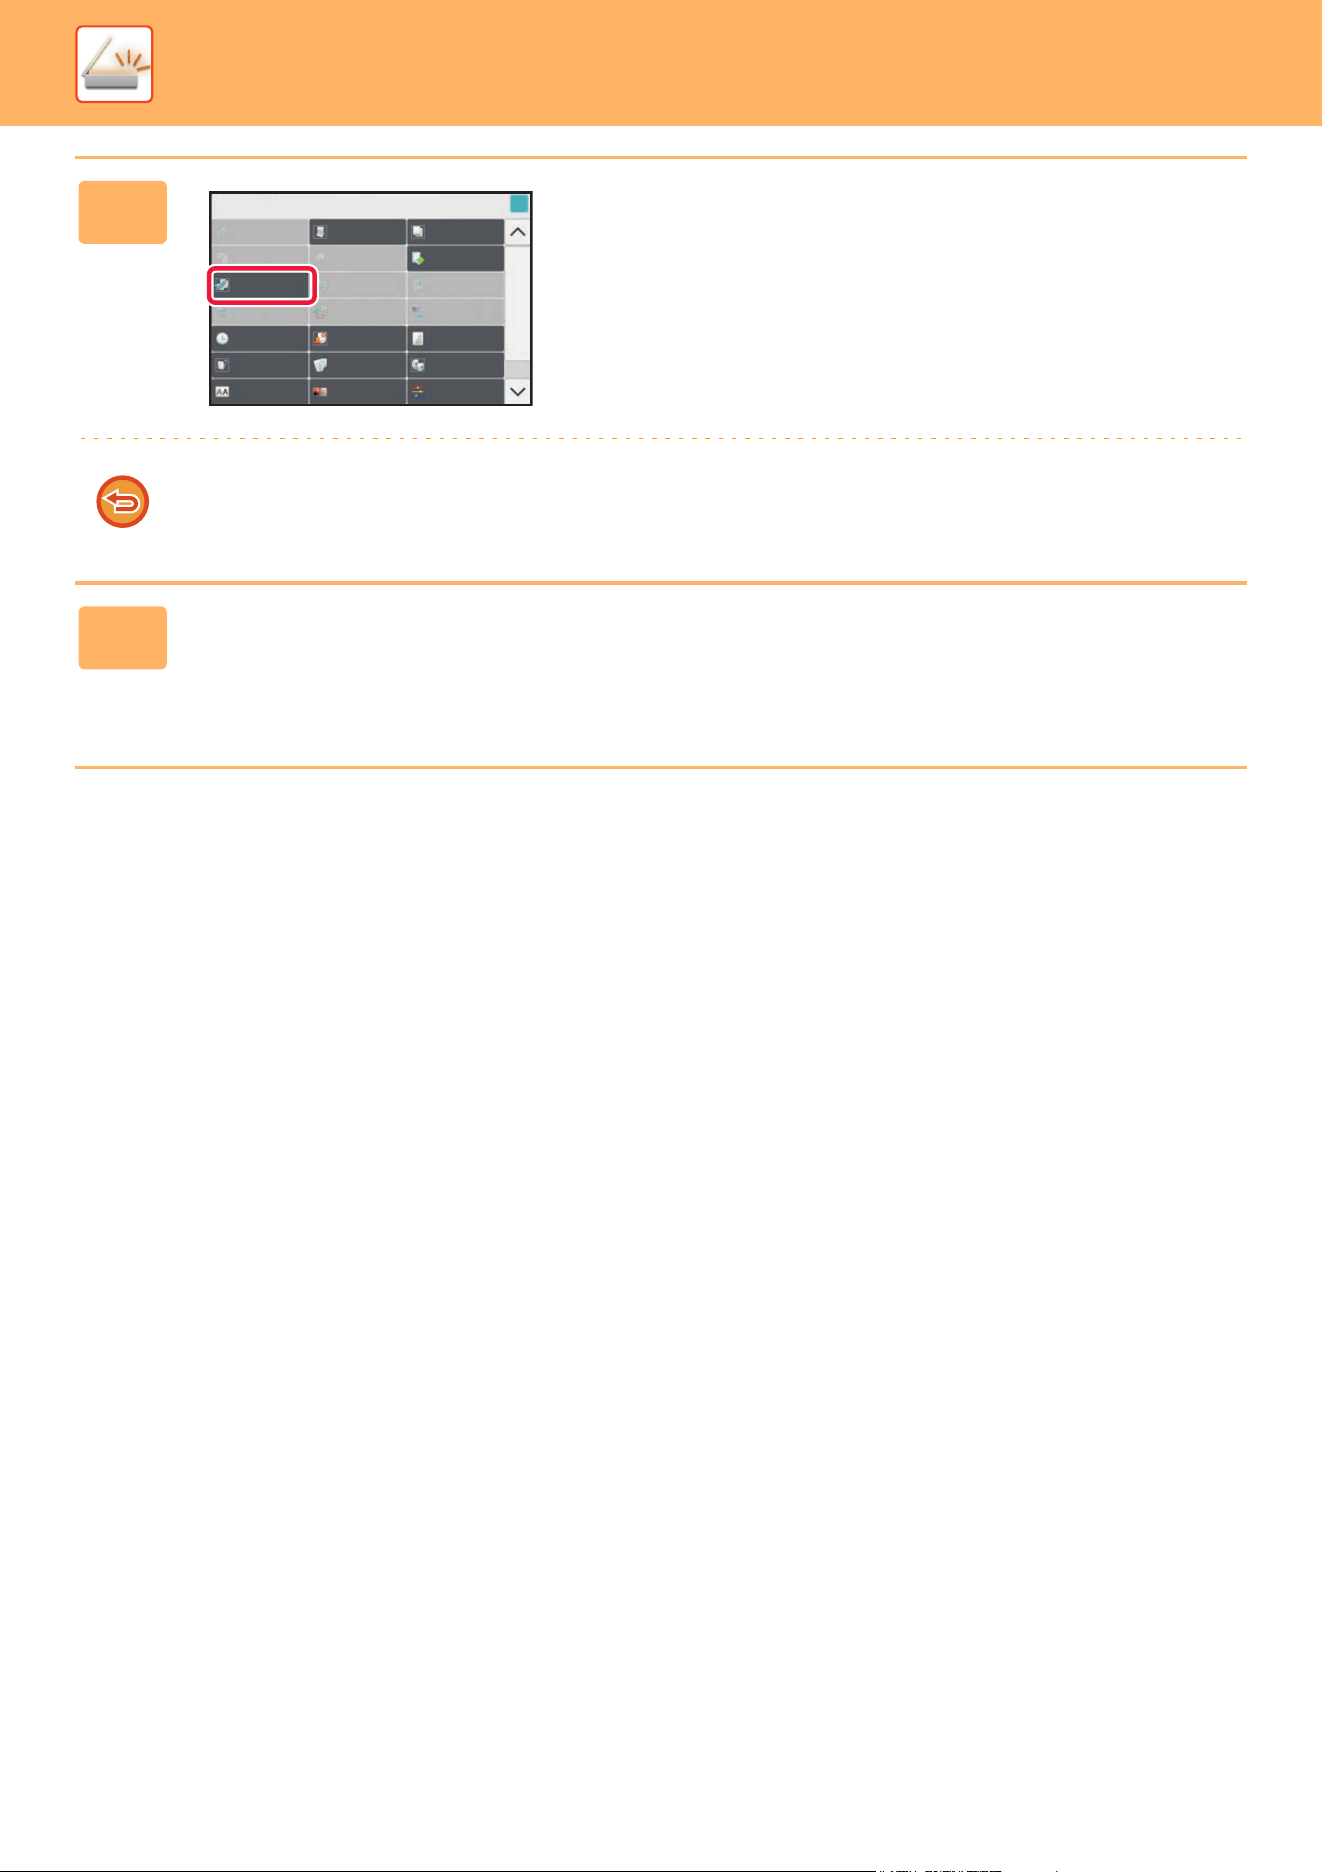
5-103
SCANNER►OTHER FUNCTIONS
4
Tap the [Others] key, and tap the [Dual
Page Scan] key.
A checkmark appears on the icon.
After the settings are completed, tap the [Back] key.
To cancel the dual page scan setting
Tap the [Dual Page Scan] key to uncheck it.
5
Tap the [Start] key to start scanning of the original.
When scanning finishes, place the next original and tap the [Start] key.
Repeat until all pages have been scanned and then tap the [Read-End] key.
A beep will sound to indicate that transmission has ended.
Erase
Dual Page Scan
Book Divide
Job Build
Slow Scan Mode
Original
Count
Card Shot
Timer
Blank Page
Skip
Contrast
Sharpness
Mixed Size
Original
Original Skew
Adjustment
Background
Adjustment
Multicrop
Image Crop
Drop Out
color
Heavy Paper
Scan
RGB Adjust
Others
Business
Card Scan
OK
Verif.
Stamp
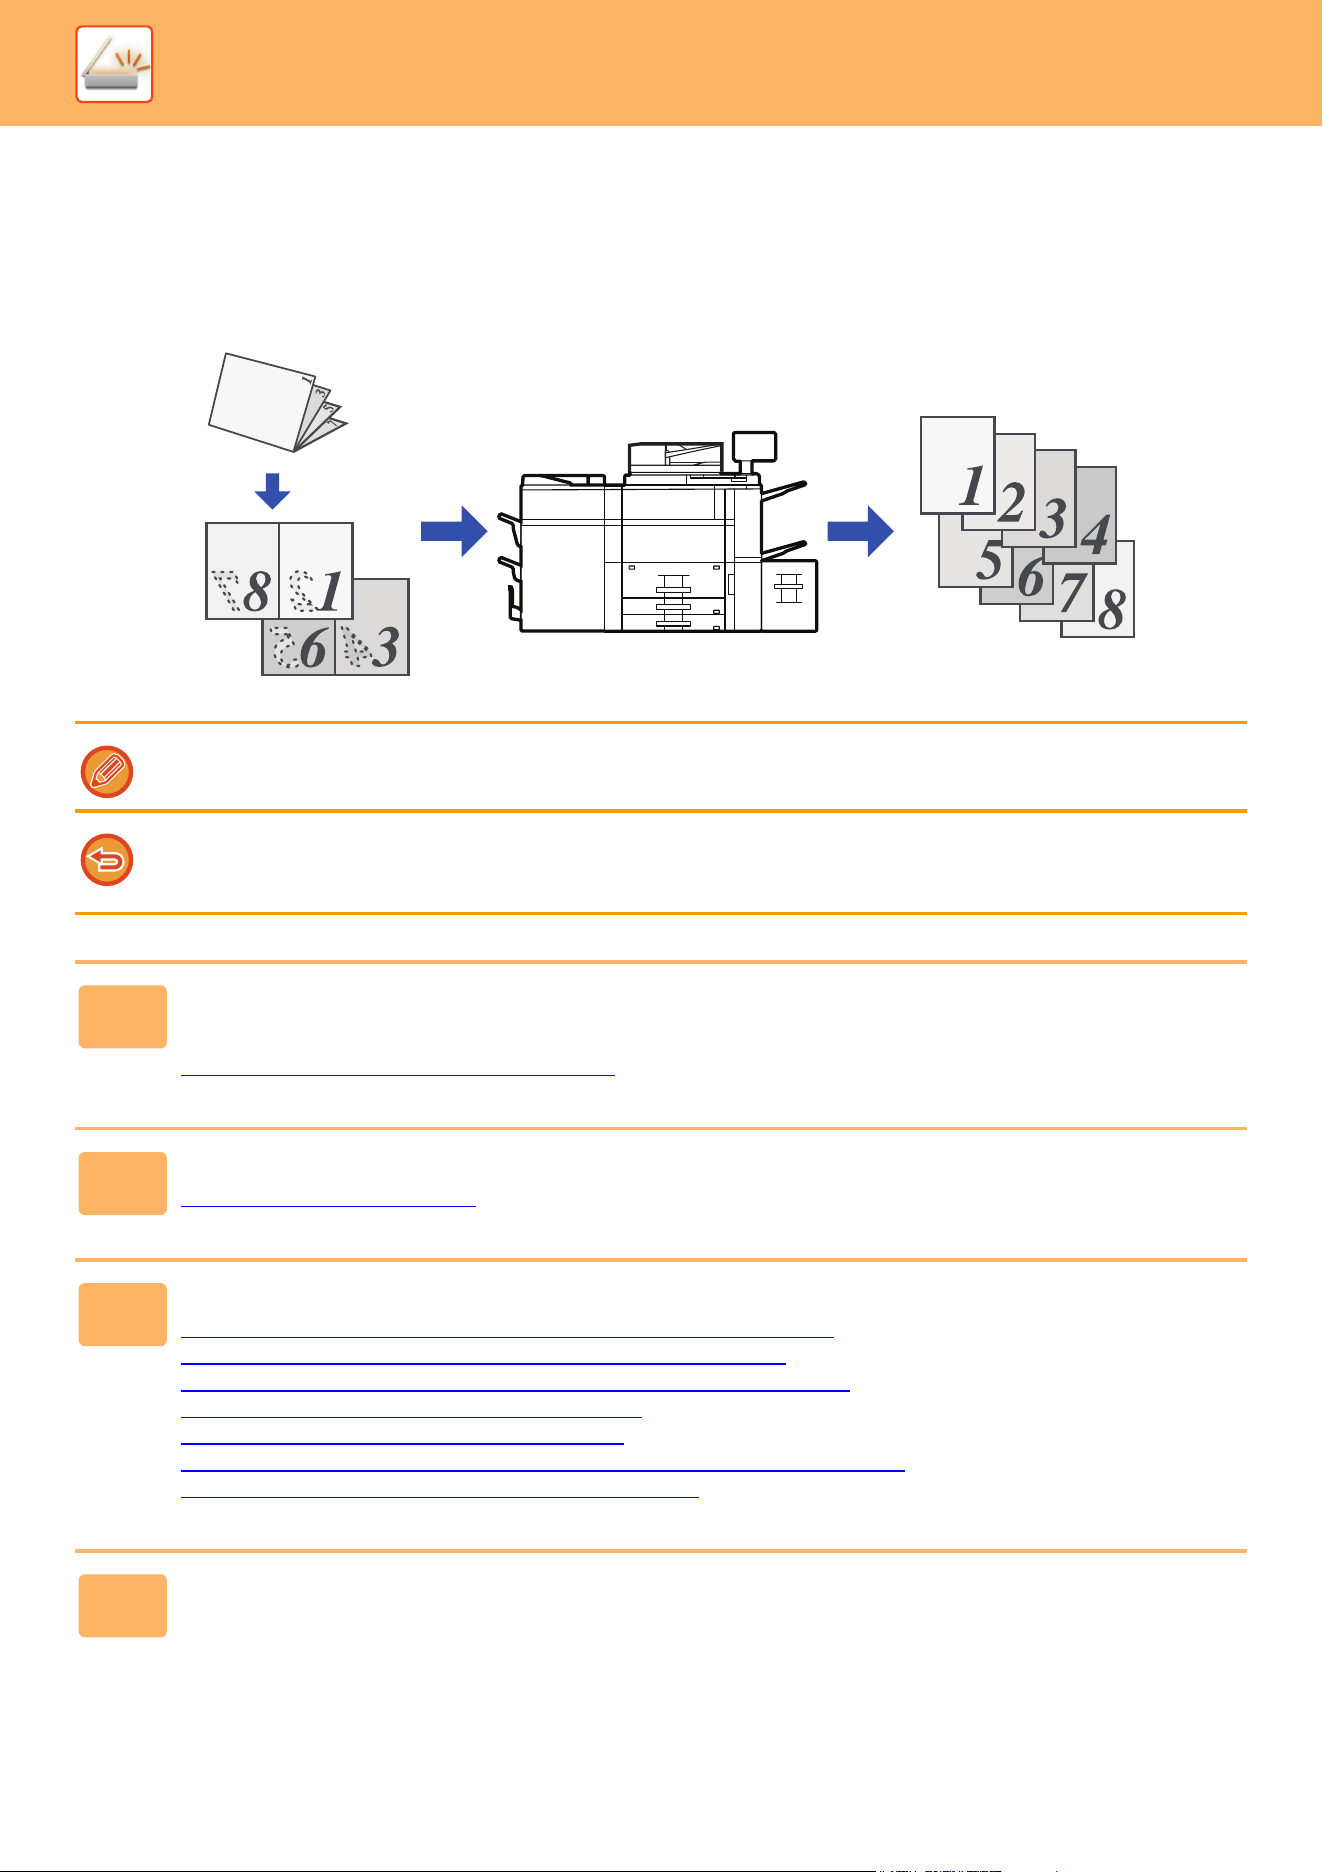
5-104
SCANNER►OTHER FUNCTIONS
SPLITTING A PAMPHLET BY PAGE AND TRANSMITTING
THE PAGES SUCCESSIVELY (BOOK DIVIDE)
The opened pages of a saddle-stitch pamphlet are split by page according to actual page order before transmission.
When using this function, you do not need to sort the original pages to be sent.
This function can be enabled when the original size setting is set to [Auto].
• The document glass is not available for this function.
• Book Divide is not possible when "Settings (administrator)" - [System Settings] → [Common Settings] → [Device Control]
→ [Condition Settings] or [Enable/Disable Settings] → [Disabling of Document Feeder] is enabled.
1
Place the original in the document feeder tray of the automatic document
feeder.
AUTOMATIC DOCUMENT FEEDER (page 1-47)
2
Tap the mode display to switch to the initial screen of each mode.
CHANGING MODES (page 2-10)
3
Specify the destination.
RETRIEVING A DESTINATION FROM AN ADDRESS BOOK (page 5-31)
VIEWING A LIST OF THE SELECTED DESTINATIONS (page 5-34)
USING A SEARCH NUMBER TO RETRIEVE A DESTINATION (page 5-35)
ENTERING AN ADDRESS MANUALLY (page 5-36)
SPECIFYING A NETWORK FOLDER (page 5-37)
RETRIEVING A DESTINATION FROM A GLOBAL ADDRESS BOOK (page 5-39)
USING A TRANSMISSION LOG TO RESEND (page 5-41)
4
Tap the [Others] key, and tap the [Book Divide] key.
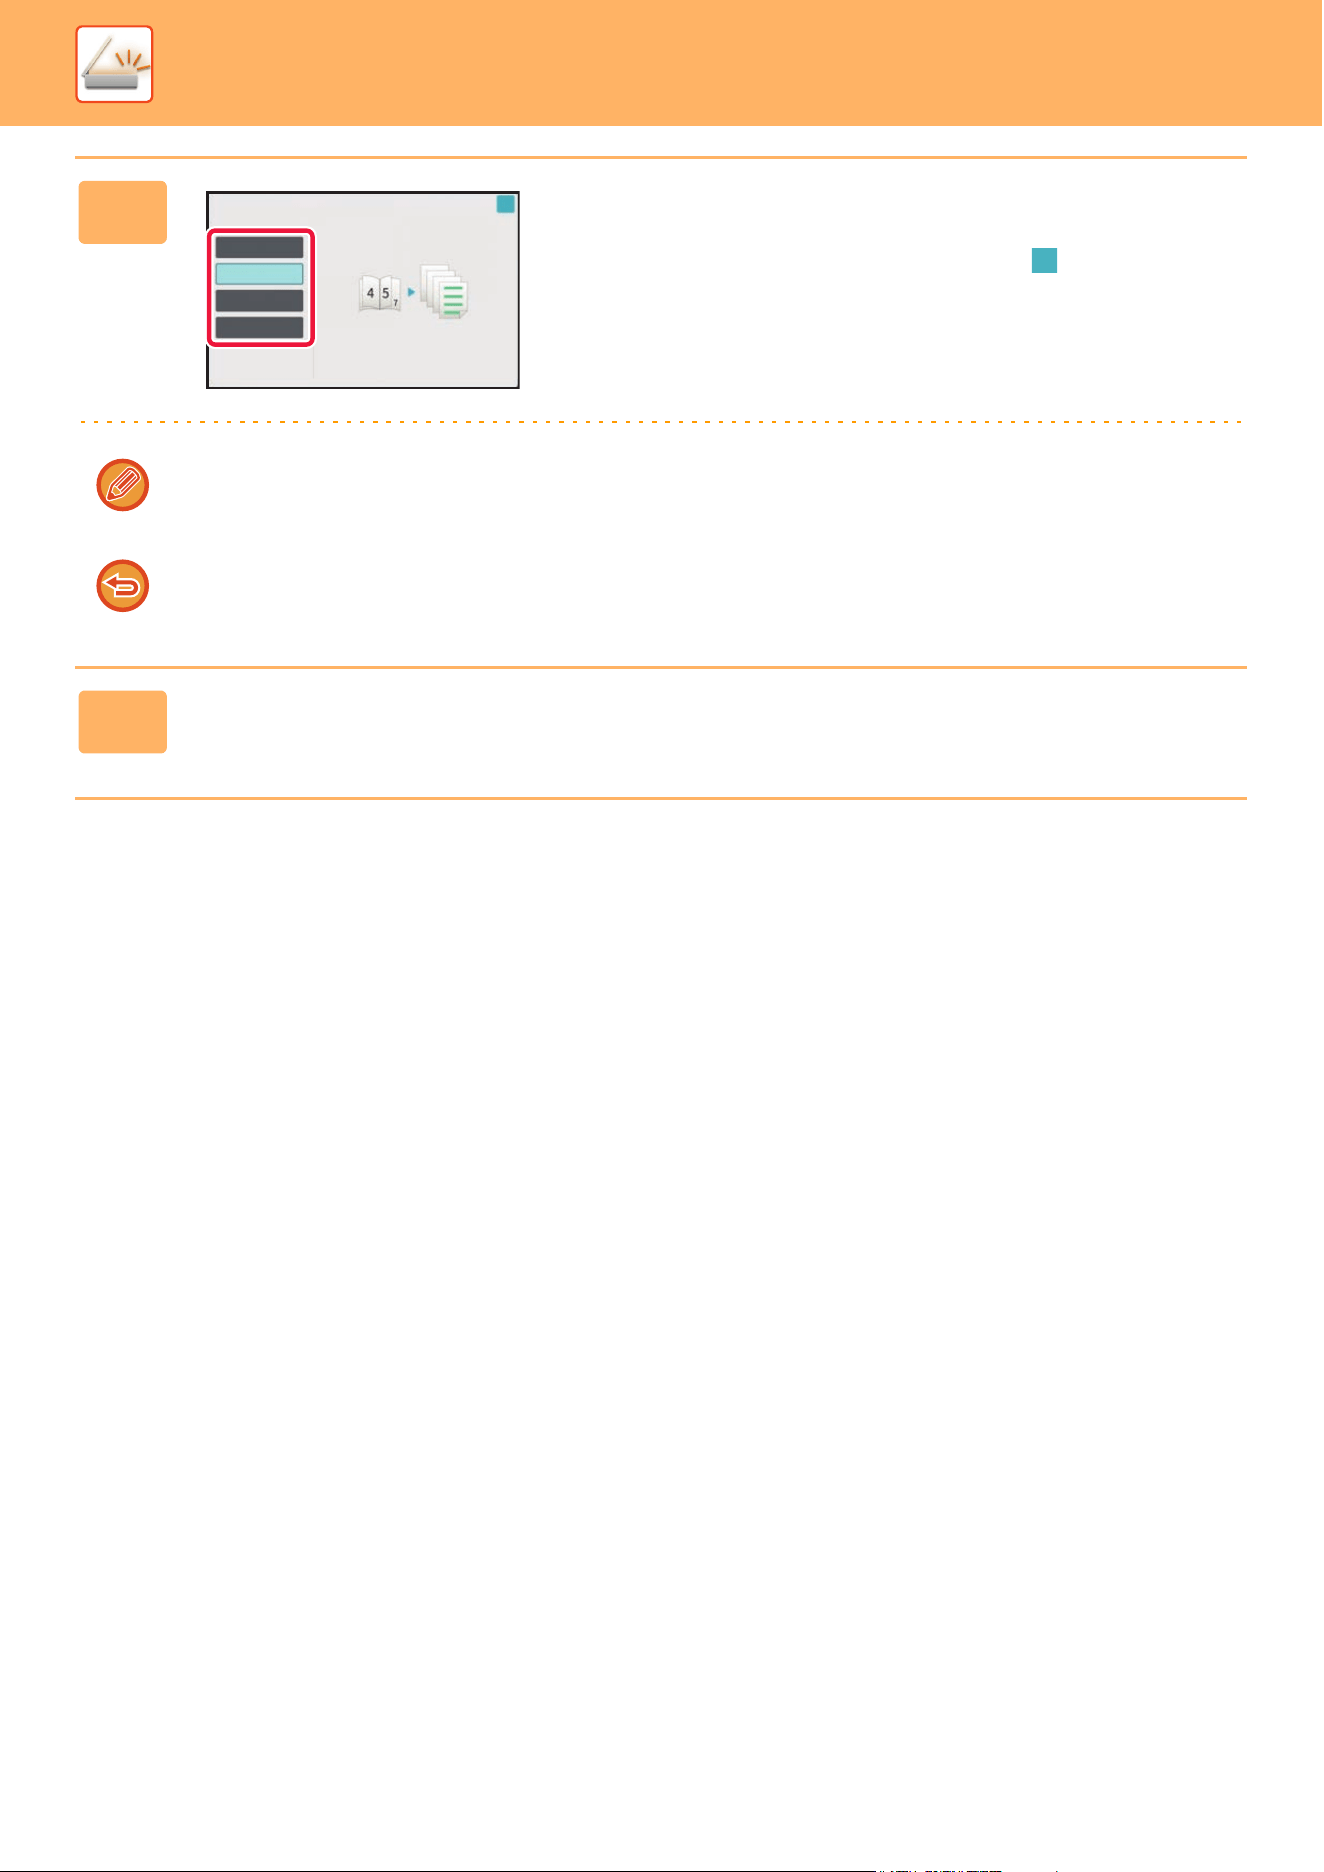
5-105
SCANNER►OTHER FUNCTIONS
5
Select the binding edge of the
pamphlet original.
After the settings are completed, tap and [Back] keys
in sequence.
Check the preview image displayed in the screen, and make sure that the binding edge is correct.
To cancel the Book Divide setting:
Tap the [Off] key.
6
Tap the [Start] key to start scanning of the original.
A beep will sound to indicate that scanning and transmission have ended.
Book Divide
Select Original Binding Edge.
Off
Left Binding
Right Binding
Tablet
OK
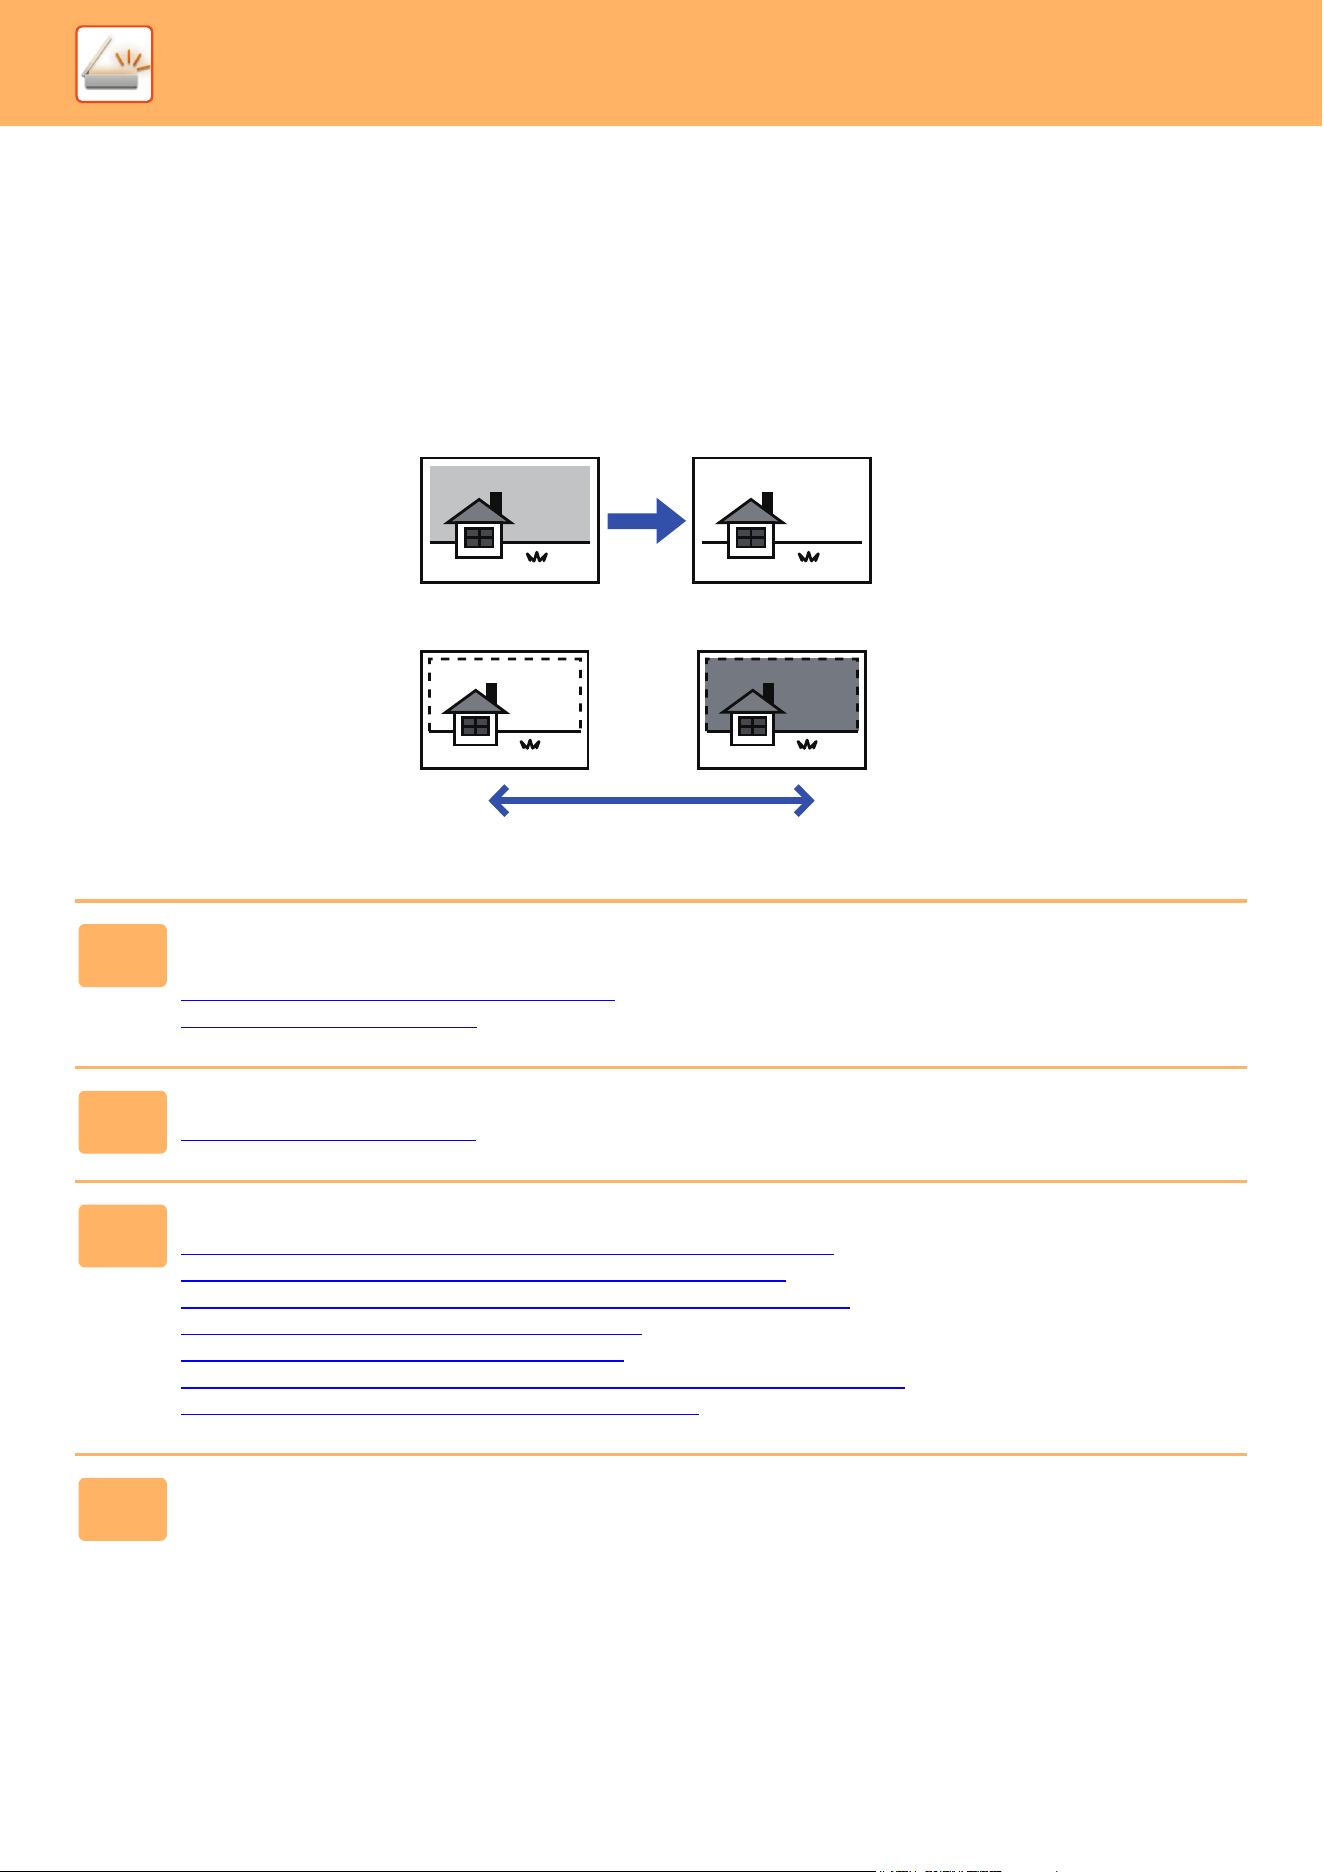
5-106
SCANNER►OTHER FUNCTIONS
ADJUSTING COLORS AND SHADING
ADJUSTING THE BACKGROUND BY MAKING LIGHT
AREAS OF THE ORIGINAL DARKER OR LIGHTER
(BACKGROUND ADJUSTMENT)
You can adjust the background by making light areas of the original darker or lighter.
1
Place the original.
Place the original in the document feeder tray of the automatic document feeder, or on the document glass.
AUTOMATIC DOCUMENT FEEDER
(page 1-47)
DOCUMENT GLASS (page 1-51)
2
Tap the mode display to switch to the initial screen of each mode.
CHANGING MODES (page 2-10)
3
Specify the destination.
RETRIEVING A DESTINATION FROM AN ADDRESS BOOK (page 5-31)
VIEWING A LIST OF THE SELECTED DESTINATIONS (page 5-34)
USING A SEARCH NUMBER TO RETRIEVE A DESTINATION (page 5-35)
ENTERING AN ADDRESS MANUALLY (page 5-36)
SPECIFYING A NETWORK FOLDER (page 5-37)
RETRIEVING A DESTINATION FROM A GLOBAL ADDRESS BOOK (page 5-39)
USING A TRANSMISSION LOG TO RESEND (page 5-41)
4
Tap the [Others] key, and tap the [Background Adjustment] key.
Adjust light areas in
this way.
Level [+]
[+] makes the background darker.
[-] makes the background lighter.
Level [-]
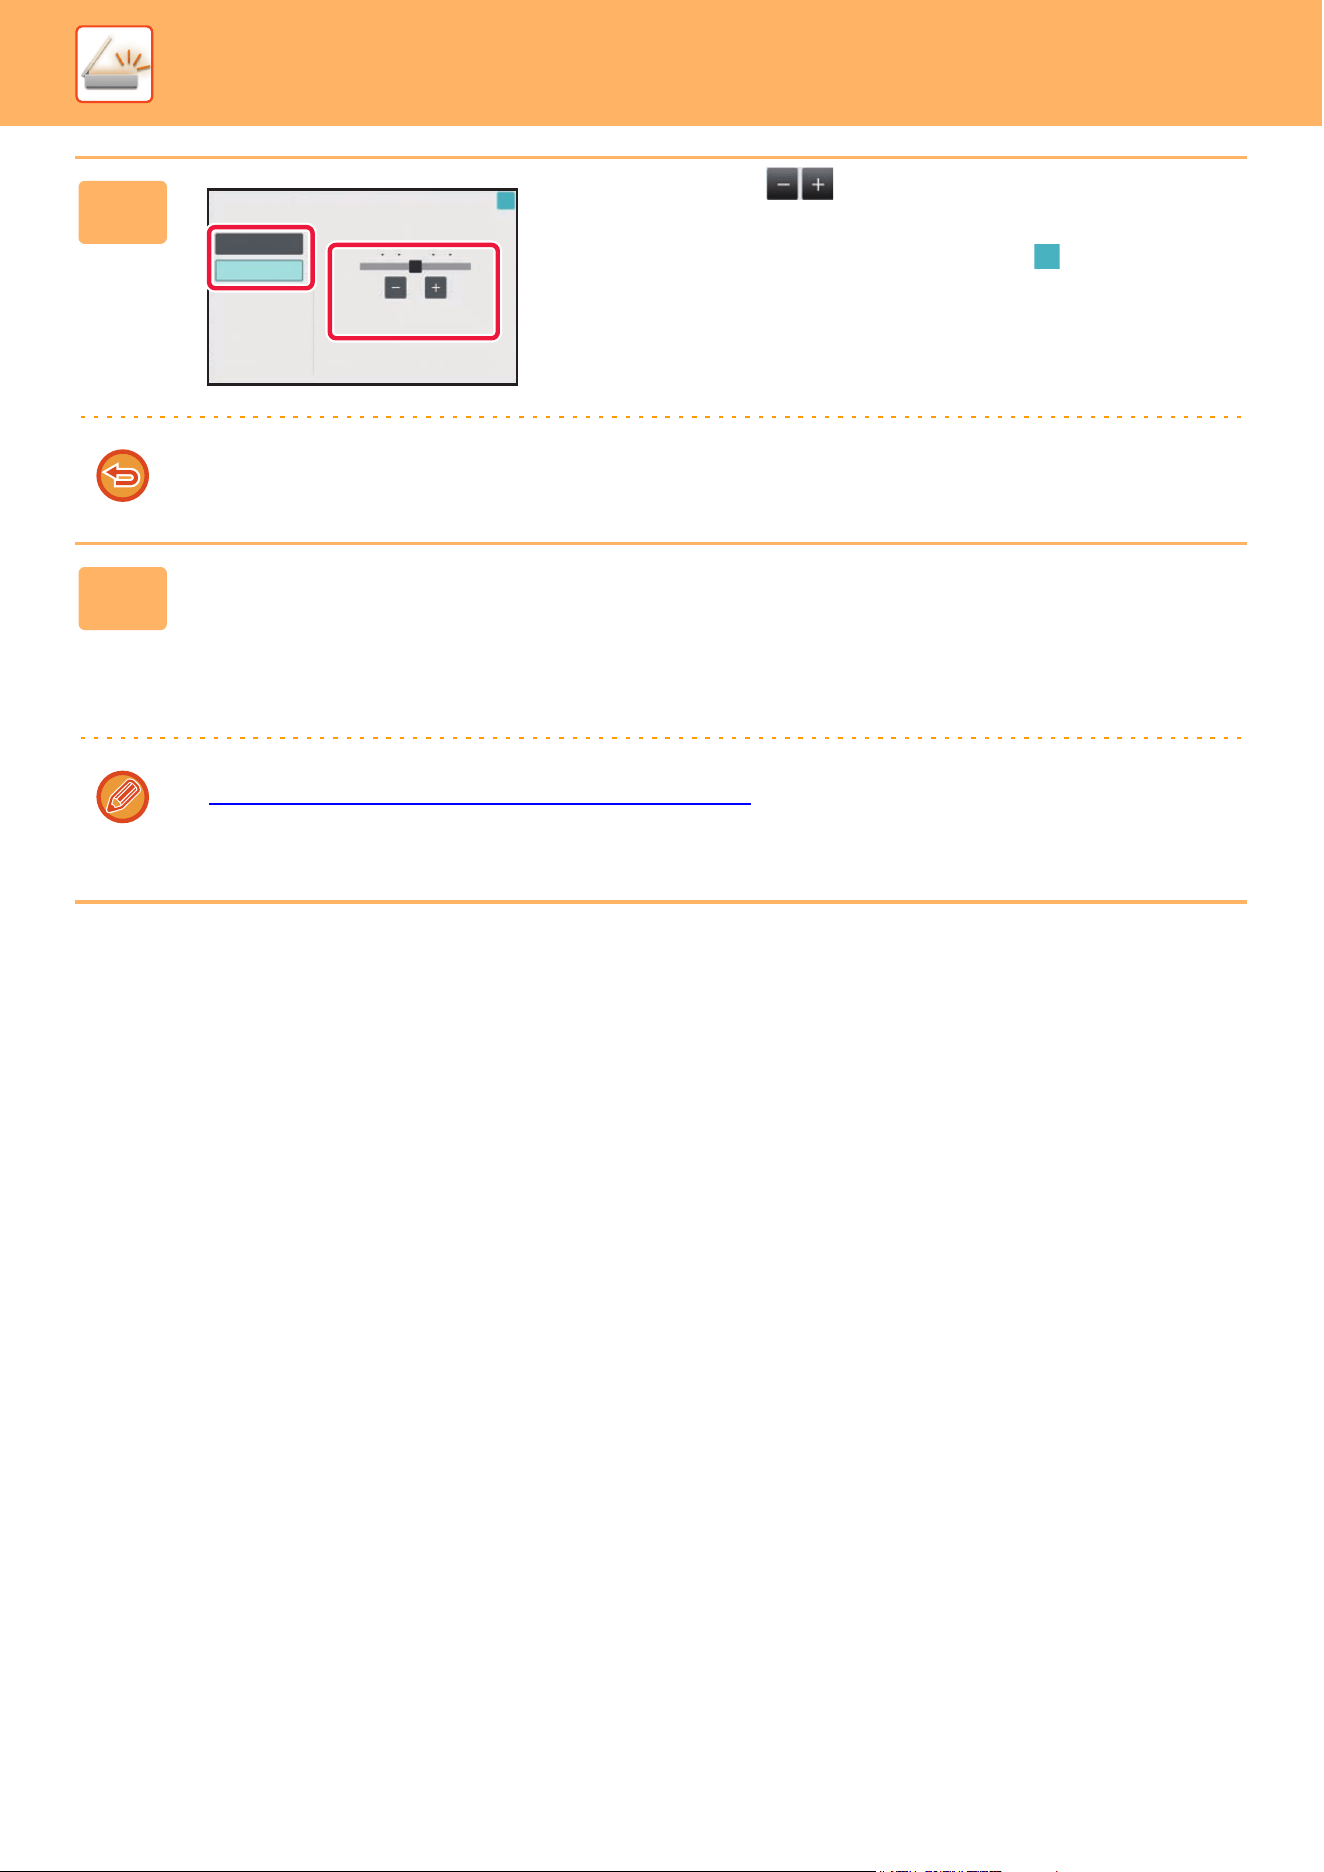
5-107
SCANNER►OTHER FUNCTIONS
5
Tap or slide the slider to adjust
the range to be suppressed.
After the settings are completed, tap and [Back] key in
sequence.
To cancel the background adjustment setting:
Tap the [Off] key.
6
Tap the [Start] key to start scanning of the original.
• If you inserted the original pages in the document feeder tray, all pages are scanned.
A beep will sound to indicate that scanning and transmission have ended.
• When you place the original on the document glass, scan each page one at a time.
When scanning finishes, place the next original and tap the [Start] key.
A beep will sound to indicate that transmission has ended.
• You can tap the [Preview] key to check a preview of the image before sending an image. For more information, see
“CHECKING THE IMAGE TO BE TRANSMITTED
(page 5-81)". However, settings for this function cannot be
changed in the preview screen.
• When the color mode setting is [Mono2], the background adjustment function will not operate.
Background Adjustment
Adjust Original Background Darkness.
Touch [+] darken background.
Touch [-] erase background.
Off
On
-3
03
OK
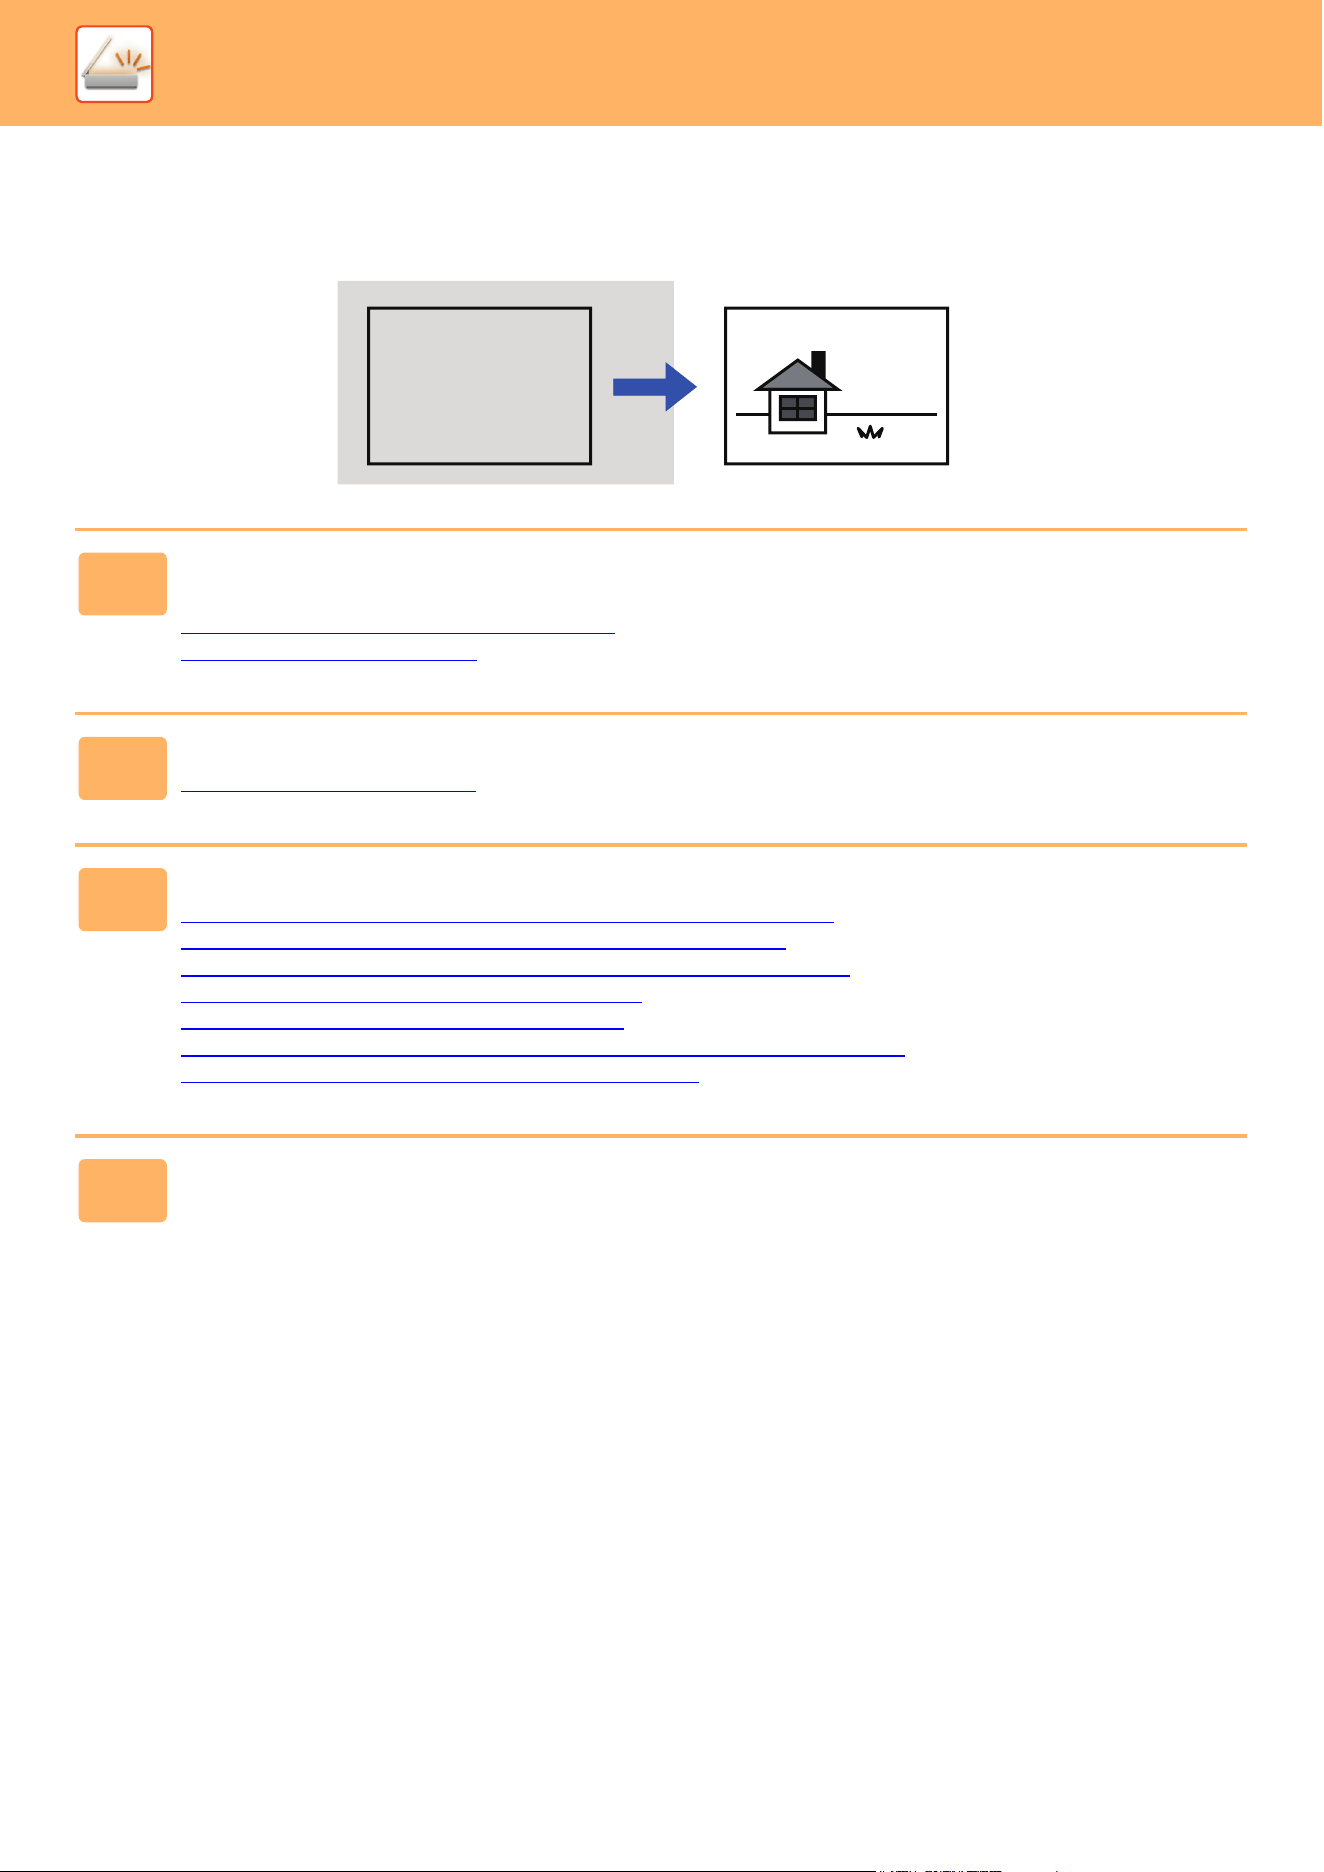
5-108
SCANNER►OTHER FUNCTIONS
ADDING CONTRAST TO THE SCANNED ORIGINAL
BEFORE TRANSMISSION (CONTRAST)
1
Place the original.
Place the original in the document feeder tray of the automatic document feeder, or on the document glass.
AUTOMATIC DOCUMENT FEEDER
(page 1-47)
DOCUMENT GLASS (page 1-51)
2
Tap the mode display to switch to the initial screen of each mode.
CHANGING MODES (page 2-10)
3
Specify the destination.
RETRIEVING A DESTINATION FROM AN ADDRESS BOOK (page 5-31)
VIEWING A LIST OF THE SELECTED DESTINATIONS (page 5-34)
USING A SEARCH NUMBER TO RETRIEVE A DESTINATION (page 5-35)
ENTERING AN ADDRESS MANUALLY (page 5-36)
SPECIFYING A NETWORK FOLDER (page 5-37)
RETRIEVING A DESTINATION FROM A GLOBAL ADDRESS BOOK (page 5-39)
USING A TRANSMISSION LOG TO RESEND (page 5-41)
4
Tap the [Others] key, and tap the [Contrast] key.

5-109
SCANNER►OTHER FUNCTIONS
5
Tap or slide the slider to adjust
the contrast level.
After the settings are completed, tap and [Back] keys in
sequence.
To cancel the contrast settings:
Tap the [Off] key.
6
Tap the [Start] key to start scanning of the original.
• If you inserted the original pages in the document feeder tray, all pages are scanned.
A beep will sound to indicate that scanning and transmission have ended.
• When you place the original on the document glass, scan each page one at a time.
When scanning finishes, place the next original and tap the [Start] key. Repeat the procedure until all pages have
been scanned and then tap the [Read-End] key.
A beep will sound to indicate that scanning and transmission have ended.
You can tap the [Preview] key to check a preview of the image before sending an image. For more information, see
“CHECKING THE IMAGE TO BE TRANSMITTED
(page 5-81)". However, settings for this function cannot be changed in
the preview screen.
Contrast
Off
On
1
2
3
5
4
Low
High
OK
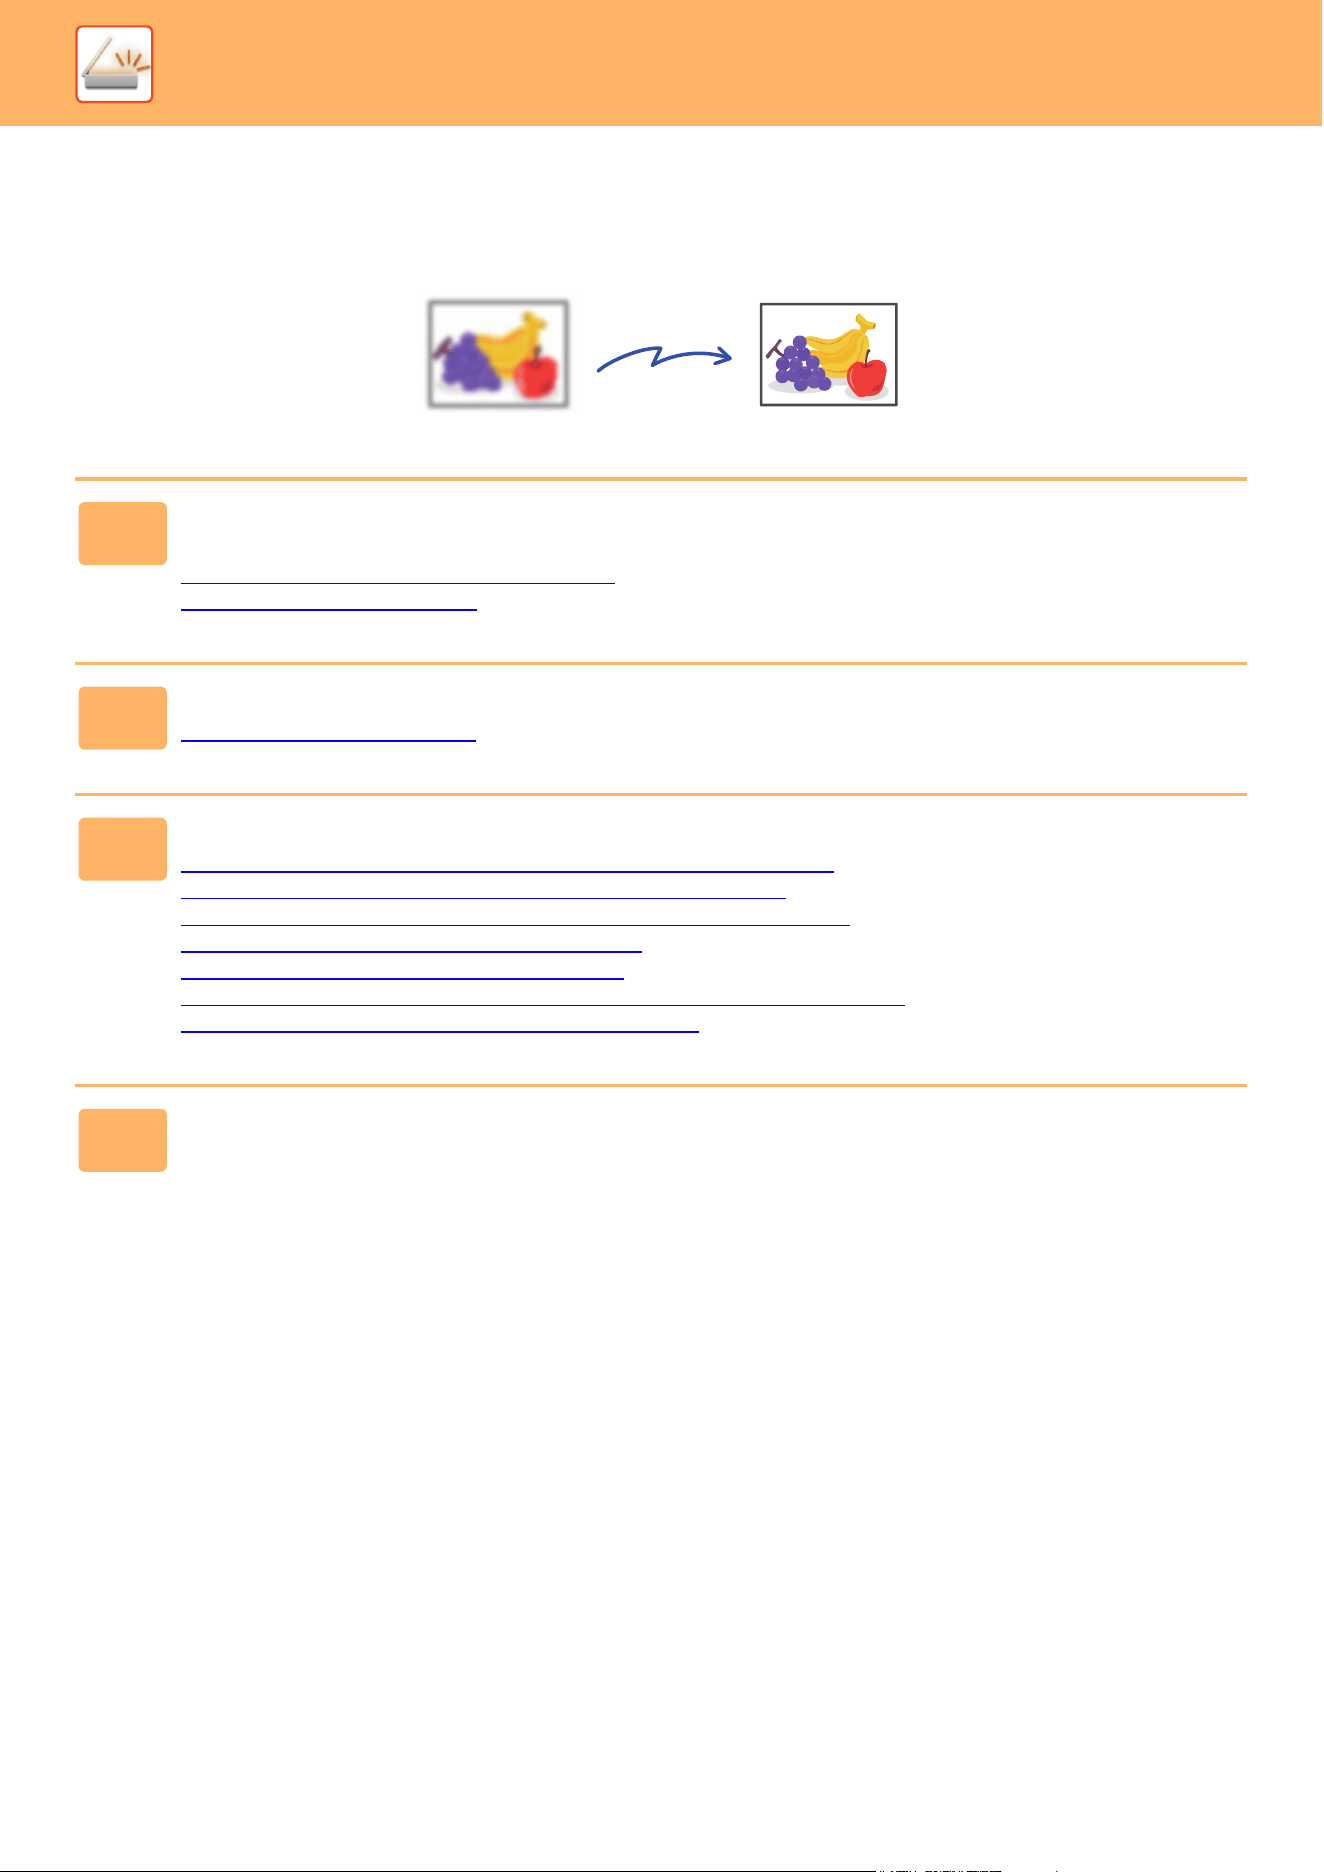
5-110
SCANNER►OTHER FUNCTIONS
ENHANCING THE OUTLINE OF THE SCANNED
ORIGINAL BEFORE TRANSMISSION (SHARPNESS)
1
Place the original.
Place the original in the document feeder tray of the automatic document feeder, or on the document glass.
AUTOMATIC DOCUMENT FEEDER
(page 1-47)
DOCUMENT GLASS (page 1-51)
2
Tap the mode display to switch to the initial screen of each mode.
CHANGING MODES (page 2-10)
3
Specify the destination.
RETRIEVING A DESTINATION FROM AN ADDRESS BOOK (page 5-31)
VIEWING A LIST OF THE SELECTED DESTINATIONS (page 5-34)
USING A SEARCH NUMBER TO RETRIEVE A DESTINATION (page 5-35)
ENTERING AN ADDRESS MANUALLY (page 5-36)
SPECIFYING A NETWORK FOLDER (page 5-37)
RETRIEVING A DESTINATION FROM A GLOBAL ADDRESS BOOK (page 5-39)
USING A TRANSMISSION LOG TO RESEND (page 5-41)
4
Tap the [Others] key, and tap the [Sharpness] key.
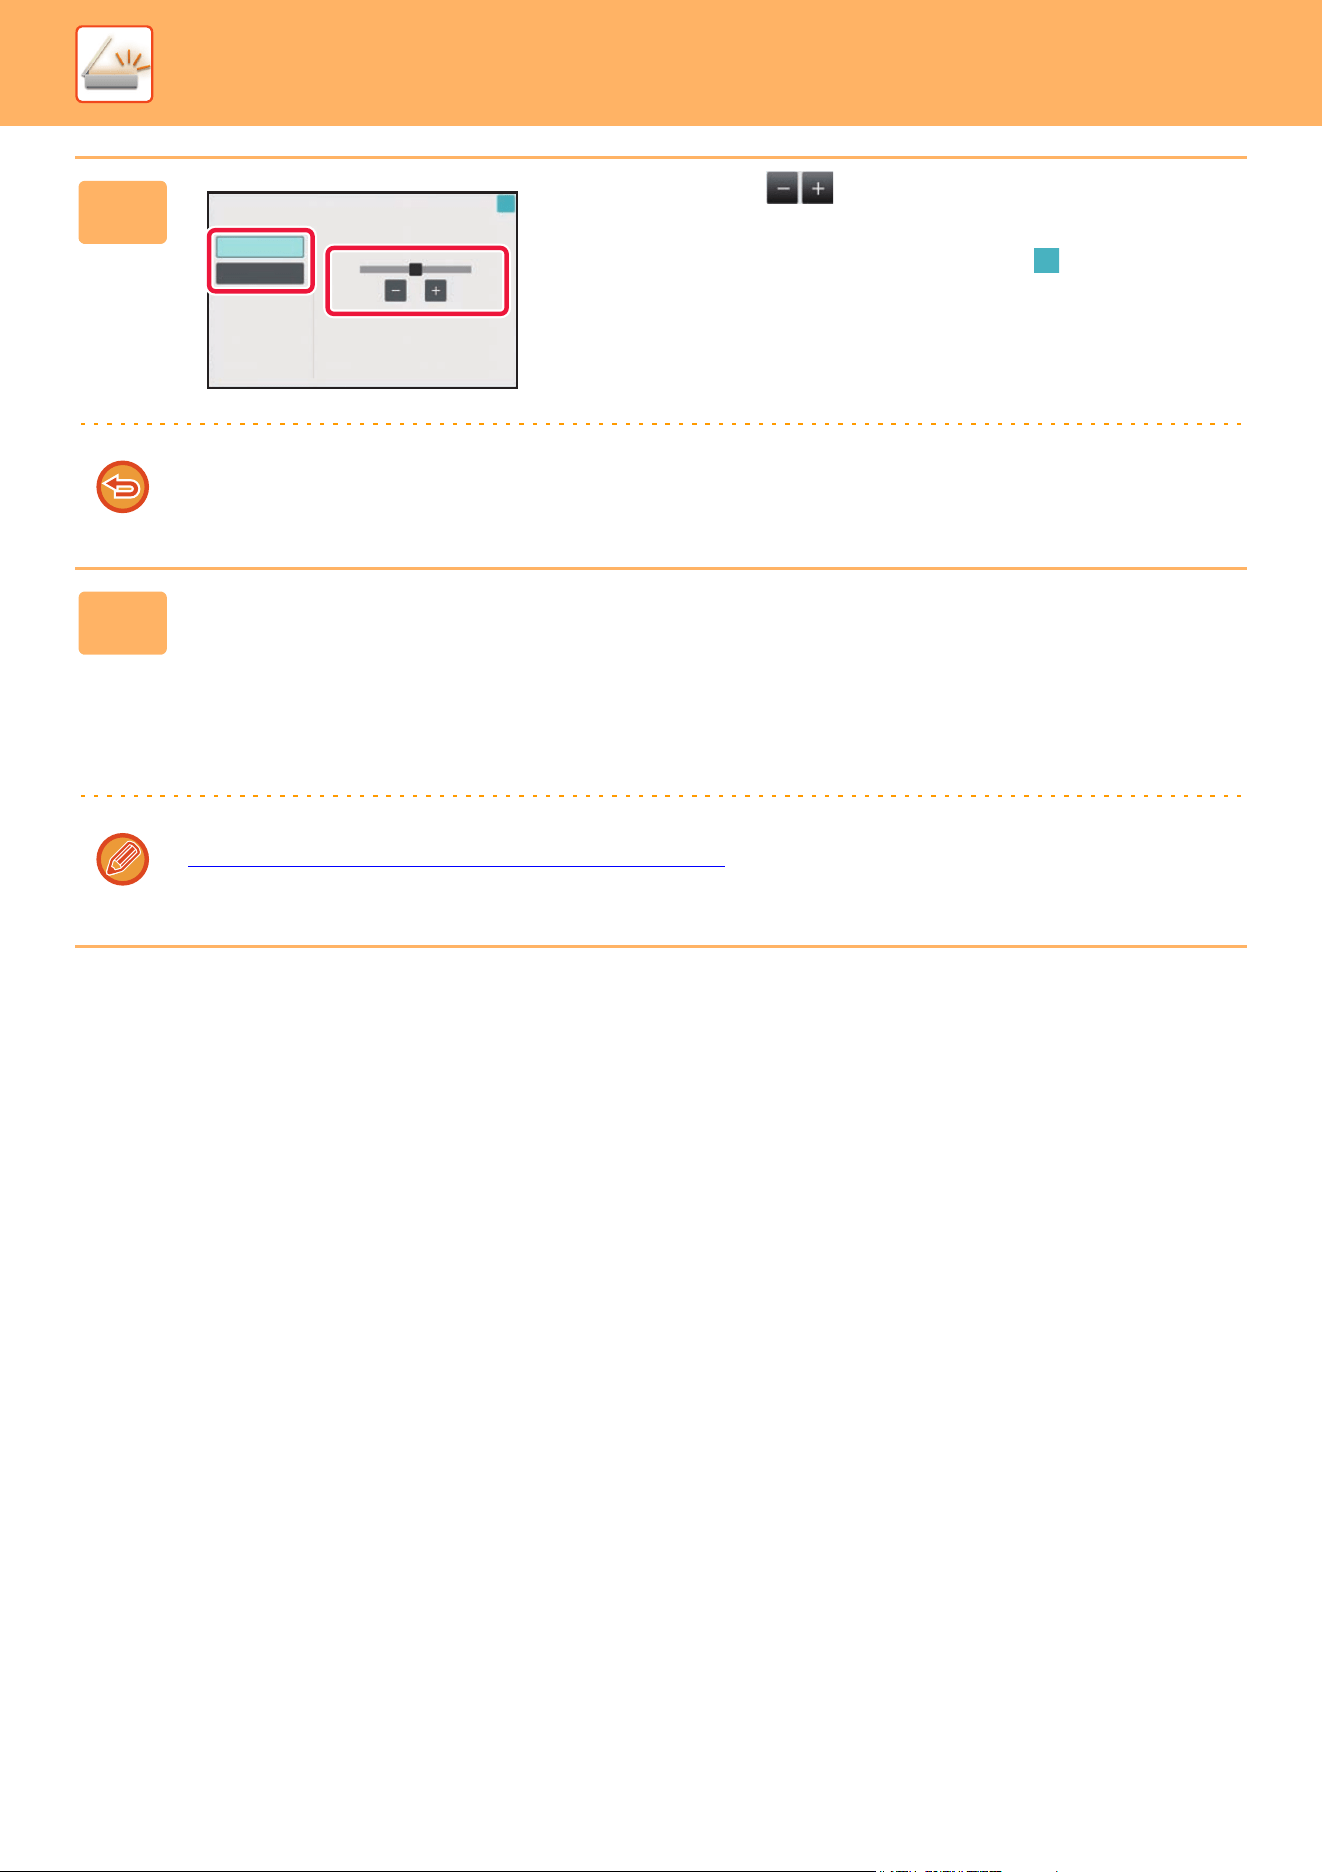
5-111
SCANNER►OTHER FUNCTIONS
5
Tap or slide the slider to adjust
the sharpness.
After the settings are completed, tap and [Back] keys in
sequence.
To cancel the sharpness setting:
Tap the [Off] key.
6
Tap the [Start] key to start scanning of the original.
• If you inserted the original pages in the document feeder tray, all pages are scanned.
A beep will sound to indicate that scanning and transmission have ended.
• When you place the original on the document glass, scan each page one at a time.
When scanning finishes, place the next original and tap the [Start] key. Repeat the procedure until all pages have been
scanned and then tap the [Read-End] key.
A beep will sound to indicate that scanning and transmission have ended.
You can tap the [Preview] key to check a preview of the image before sending an image. For more information, see
“CHECKING THE IMAGE TO BE TRANSMITTED
(page 5-81)". However, settings for this function cannot be changed in
the preview screen.
Sharpness
Off
On
1
2
35
4
Less Sharp
More Sharp
OK
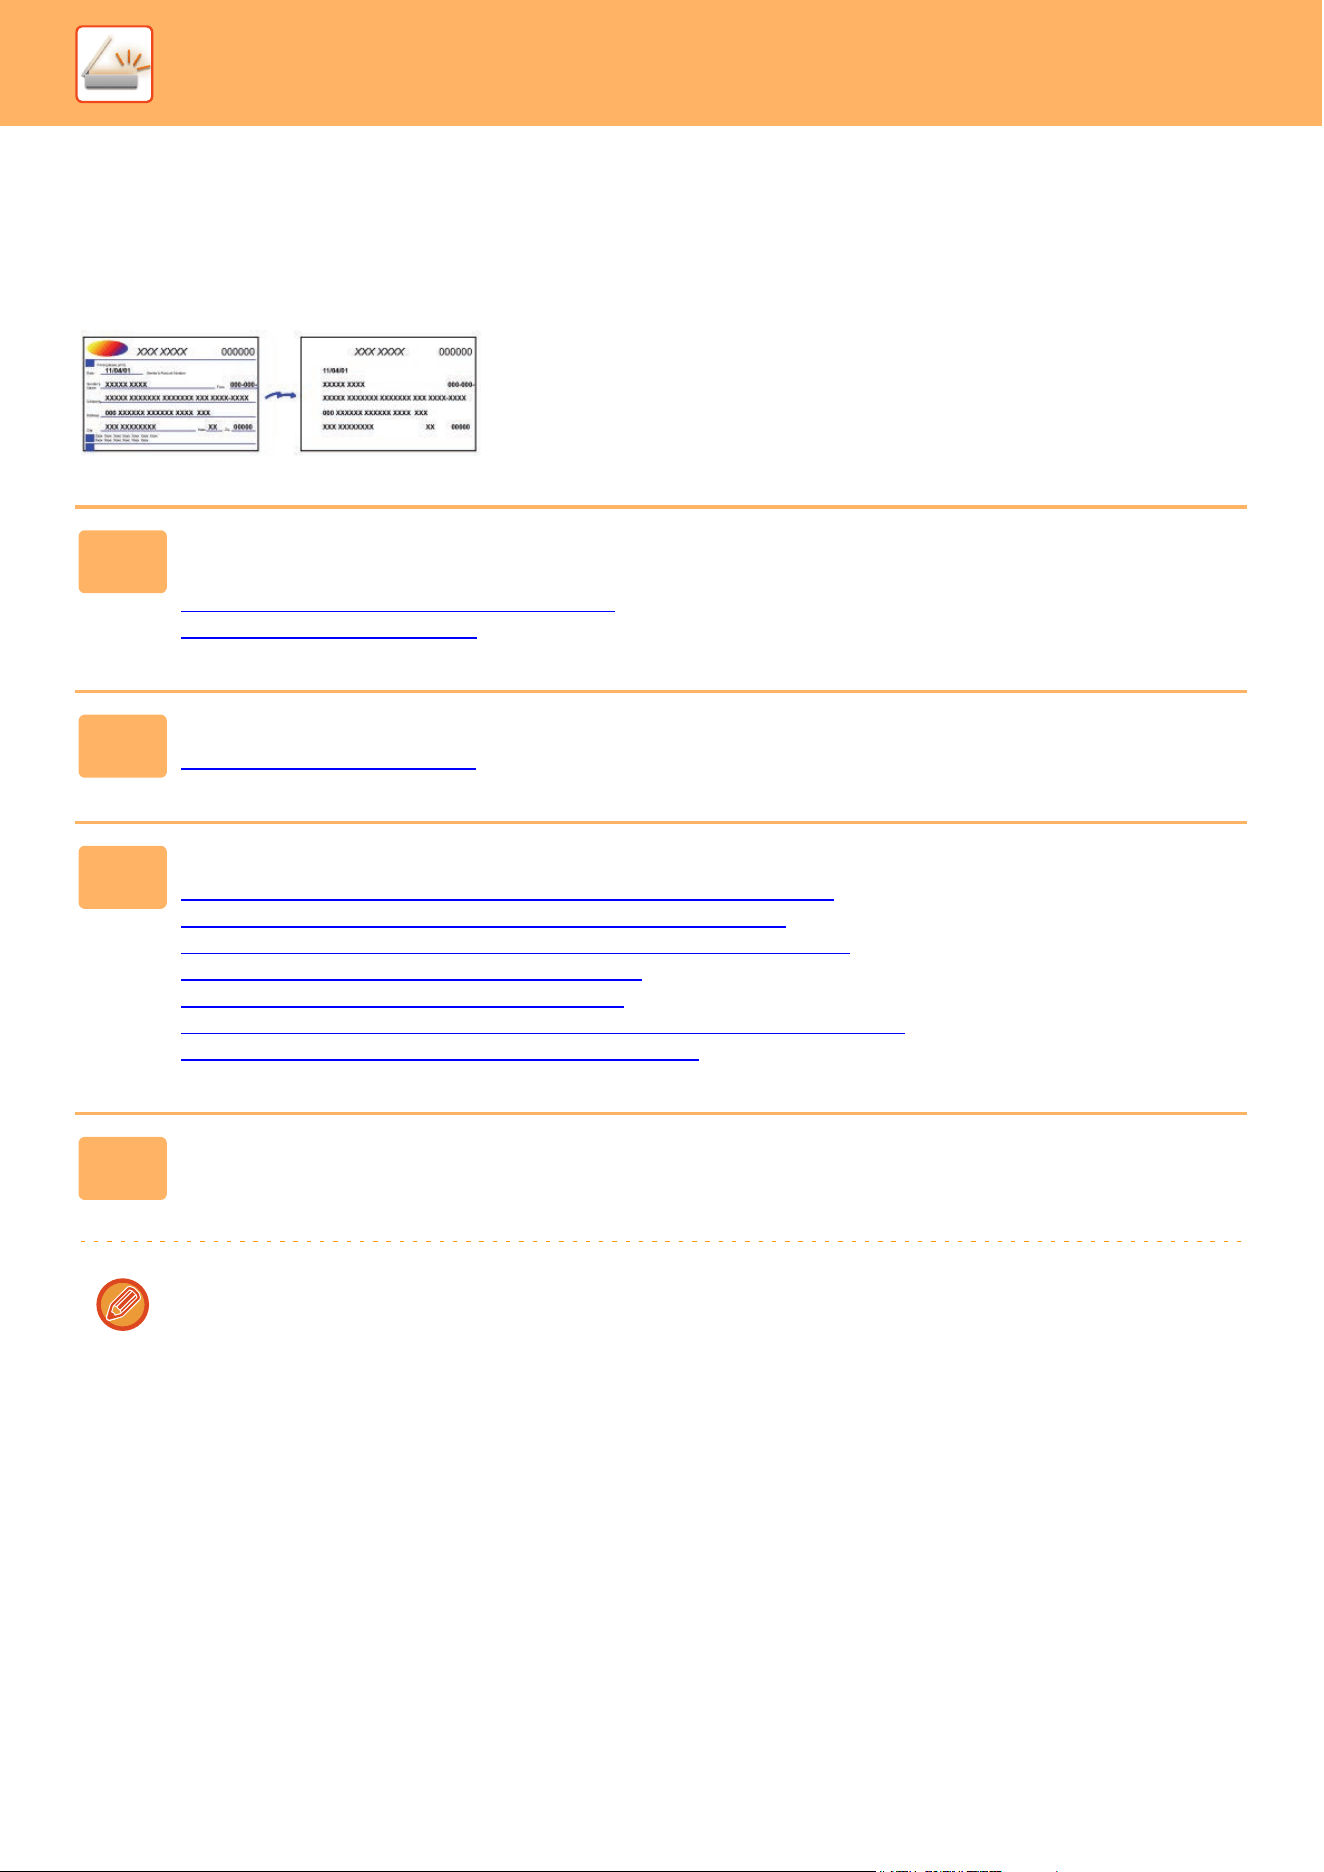
5-112
SCANNER►OTHER FUNCTIONS
REMOVING CHROMATIC COLORS FROM THE
SCANNED ORIGINAL BEFORE TRANSMISSION (DROP
OUT COLOR)
1
Place the original.
Place the original in the document feeder tray of the automatic document feeder, or on the document glass.
AUTOMATIC DOCUMENT FEEDER
(page 1-47)
DOCUMENT GLASS (page 1-51)
2
Tap the mode display to switch to the initial screen of each mode.
CHANGING MODES (page 2-10)
3
Specify the destination.
RETRIEVING A DESTINATION FROM AN ADDRESS BOOK (page 5-31)
VIEWING A LIST OF THE SELECTED DESTINATIONS (page 5-34)
USING A SEARCH NUMBER TO RETRIEVE A DESTINATION (page 5-35)
ENTERING AN ADDRESS MANUALLY (page 5-36)
SPECIFYING A NETWORK FOLDER (page 5-37)
RETRIEVING A DESTINATION FROM A GLOBAL ADDRESS BOOK (page 5-39)
USING A TRANSMISSION LOG TO RESEND (page 5-41)
4
Tap the [Others] key, and then tap the [Drop Out Color] key.
A checkmark appears on the icon.
After the settings are completed, tap the [Back] key.
To cancel the drop out color setting
Tap the [Drop Out Color] key to uncheck it.

5-113
SCANNER►OTHER FUNCTIONS
5
Tap the [Start] key to start scanning of the original.
• If you inserted the original pages in the document feeder tray, all pages are scanned.
A beep will sound to indicate that scanning and transmission have ended.
• When you place the original on the document glass, scan each page one at a time.
When scanning finishes, place the next original and tap the [Start] key. Repeat the procedure until all pages have been
scanned and then tap the [Read-End] key.
A beep will sound to indicate that scanning and transmission have ended.
You can tap the [Preview] key to check a preview of the image before sending an image. For more information, see
“CHECKING THE IMAGE TO BE TRANSMITTED
(page 5-81)".
Tap the [Change Setting] key in the scan-end confirmation screen to change the exposure, resolution, scan size, and
send size. (However, when scanning each even-numbered page of the original, only the exposure can be changed.)
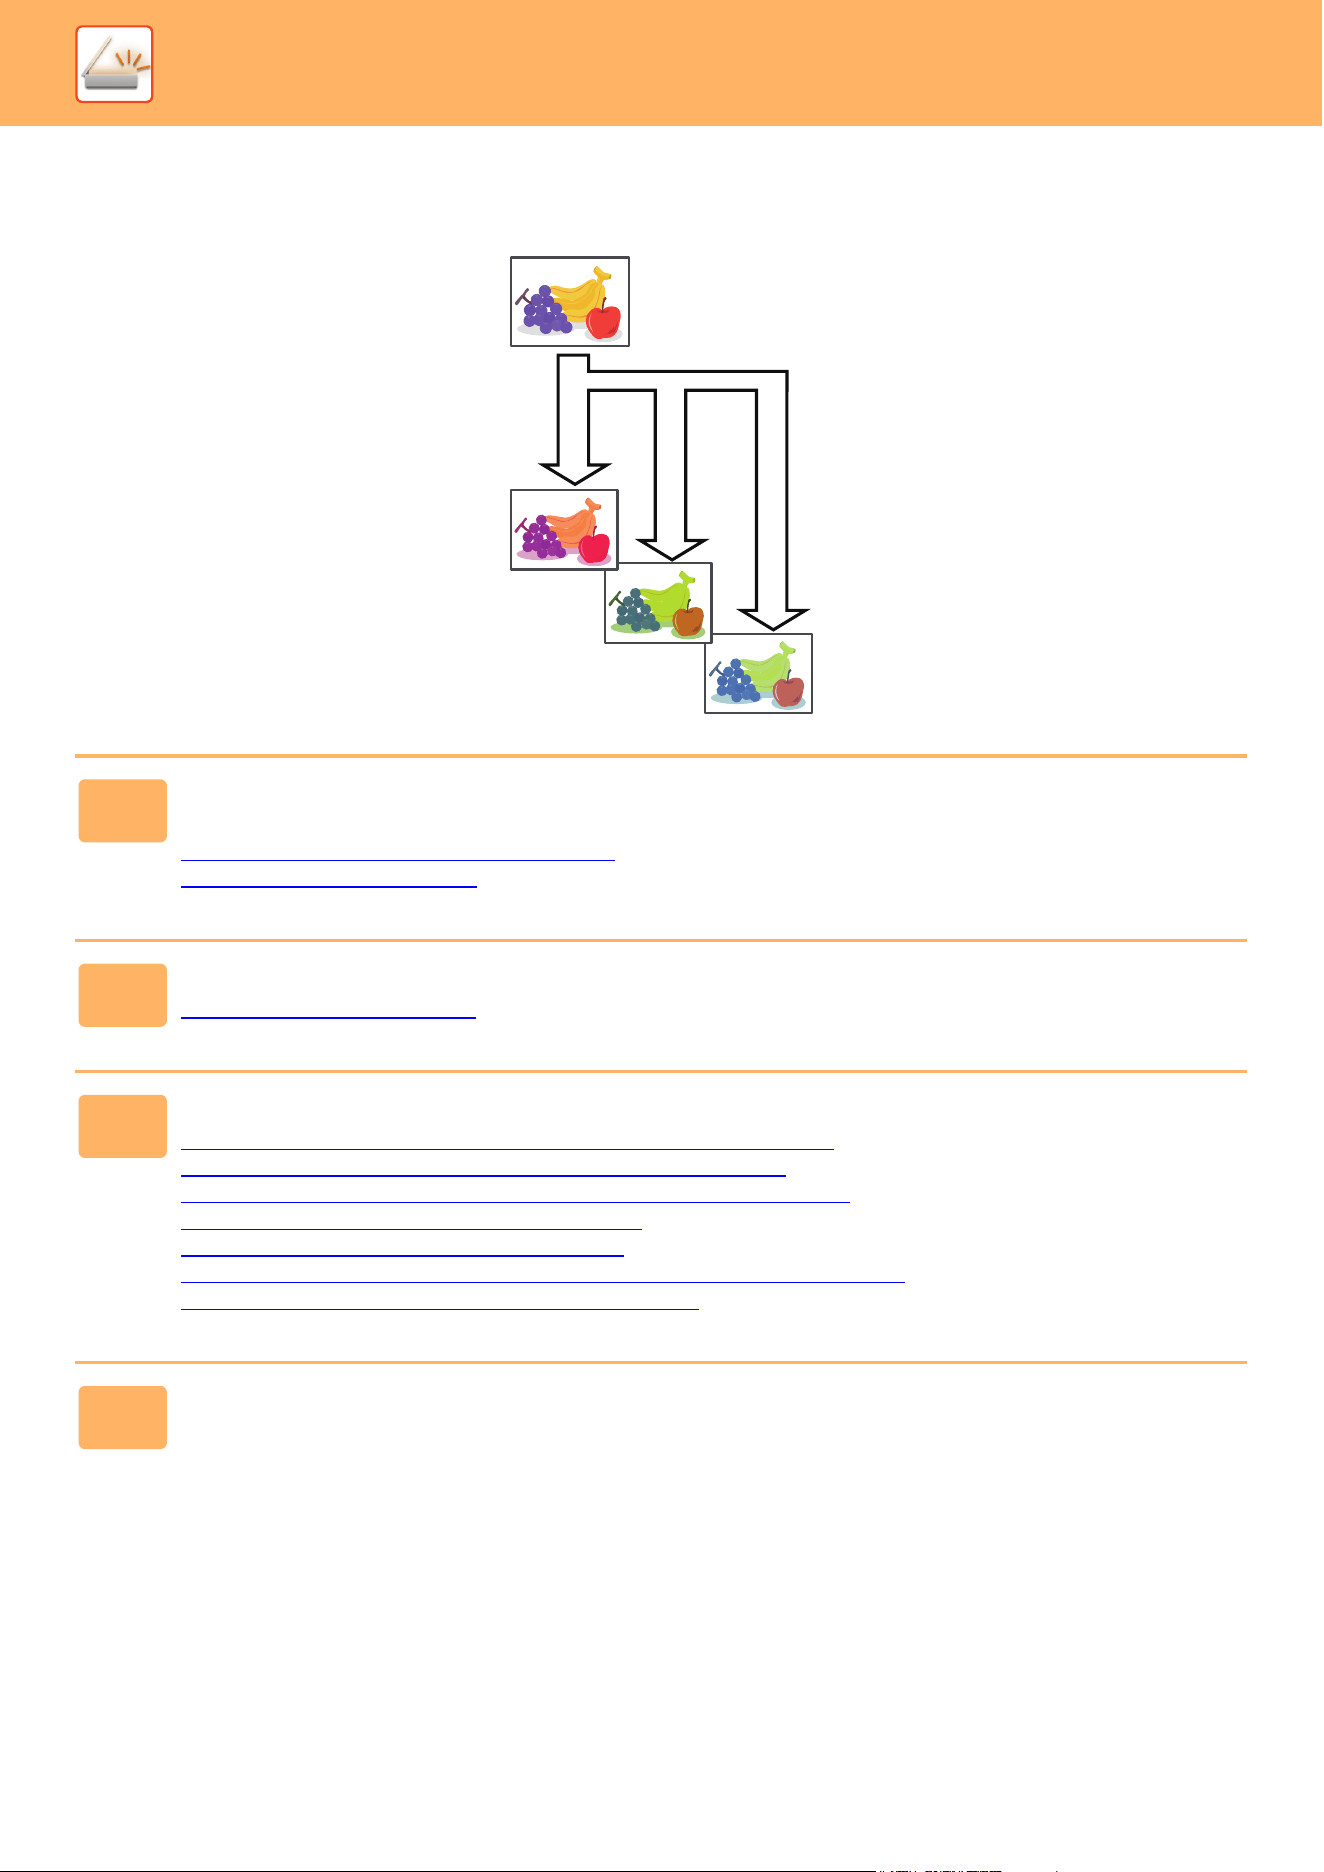
5-114
SCANNER►OTHER FUNCTIONS
ADJUSTING RED/GREEN/BLUE (RGB Adjust)
This function heightens or lightens any one of the three color components R (red), G (green), and B (blue).
1
Place the original.
Place the original in the document feeder tray of the automatic document feeder, or on the document glass.
AUTOMATIC DOCUMENT FEEDER
(page 1-47)
DOCUMENT GLASS (page 1-51)
2
Tap the mode display to switch to the initial screen of each mode.
CHANGING MODES (page 2-10)
3
Specify the destination.
RETRIEVING A DESTINATION FROM AN ADDRESS BOOK (page 5-31)
VIEWING A LIST OF THE SELECTED DESTINATIONS (page 5-34)
USING A SEARCH NUMBER TO RETRIEVE A DESTINATION (page 5-35)
ENTERING AN ADDRESS MANUALLY (page 5-36)
SPECIFYING A NETWORK FOLDER (page 5-37)
RETRIEVING A DESTINATION FROM A GLOBAL ADDRESS BOOK (page 5-39)
USING A TRANSMISSION LOG TO RESEND (page 5-41)
4
Tap the [Others] key, and tap the [RGB Adjust] key.
R
(Red)
+
G
(Green)
+
B
(Blue)
+
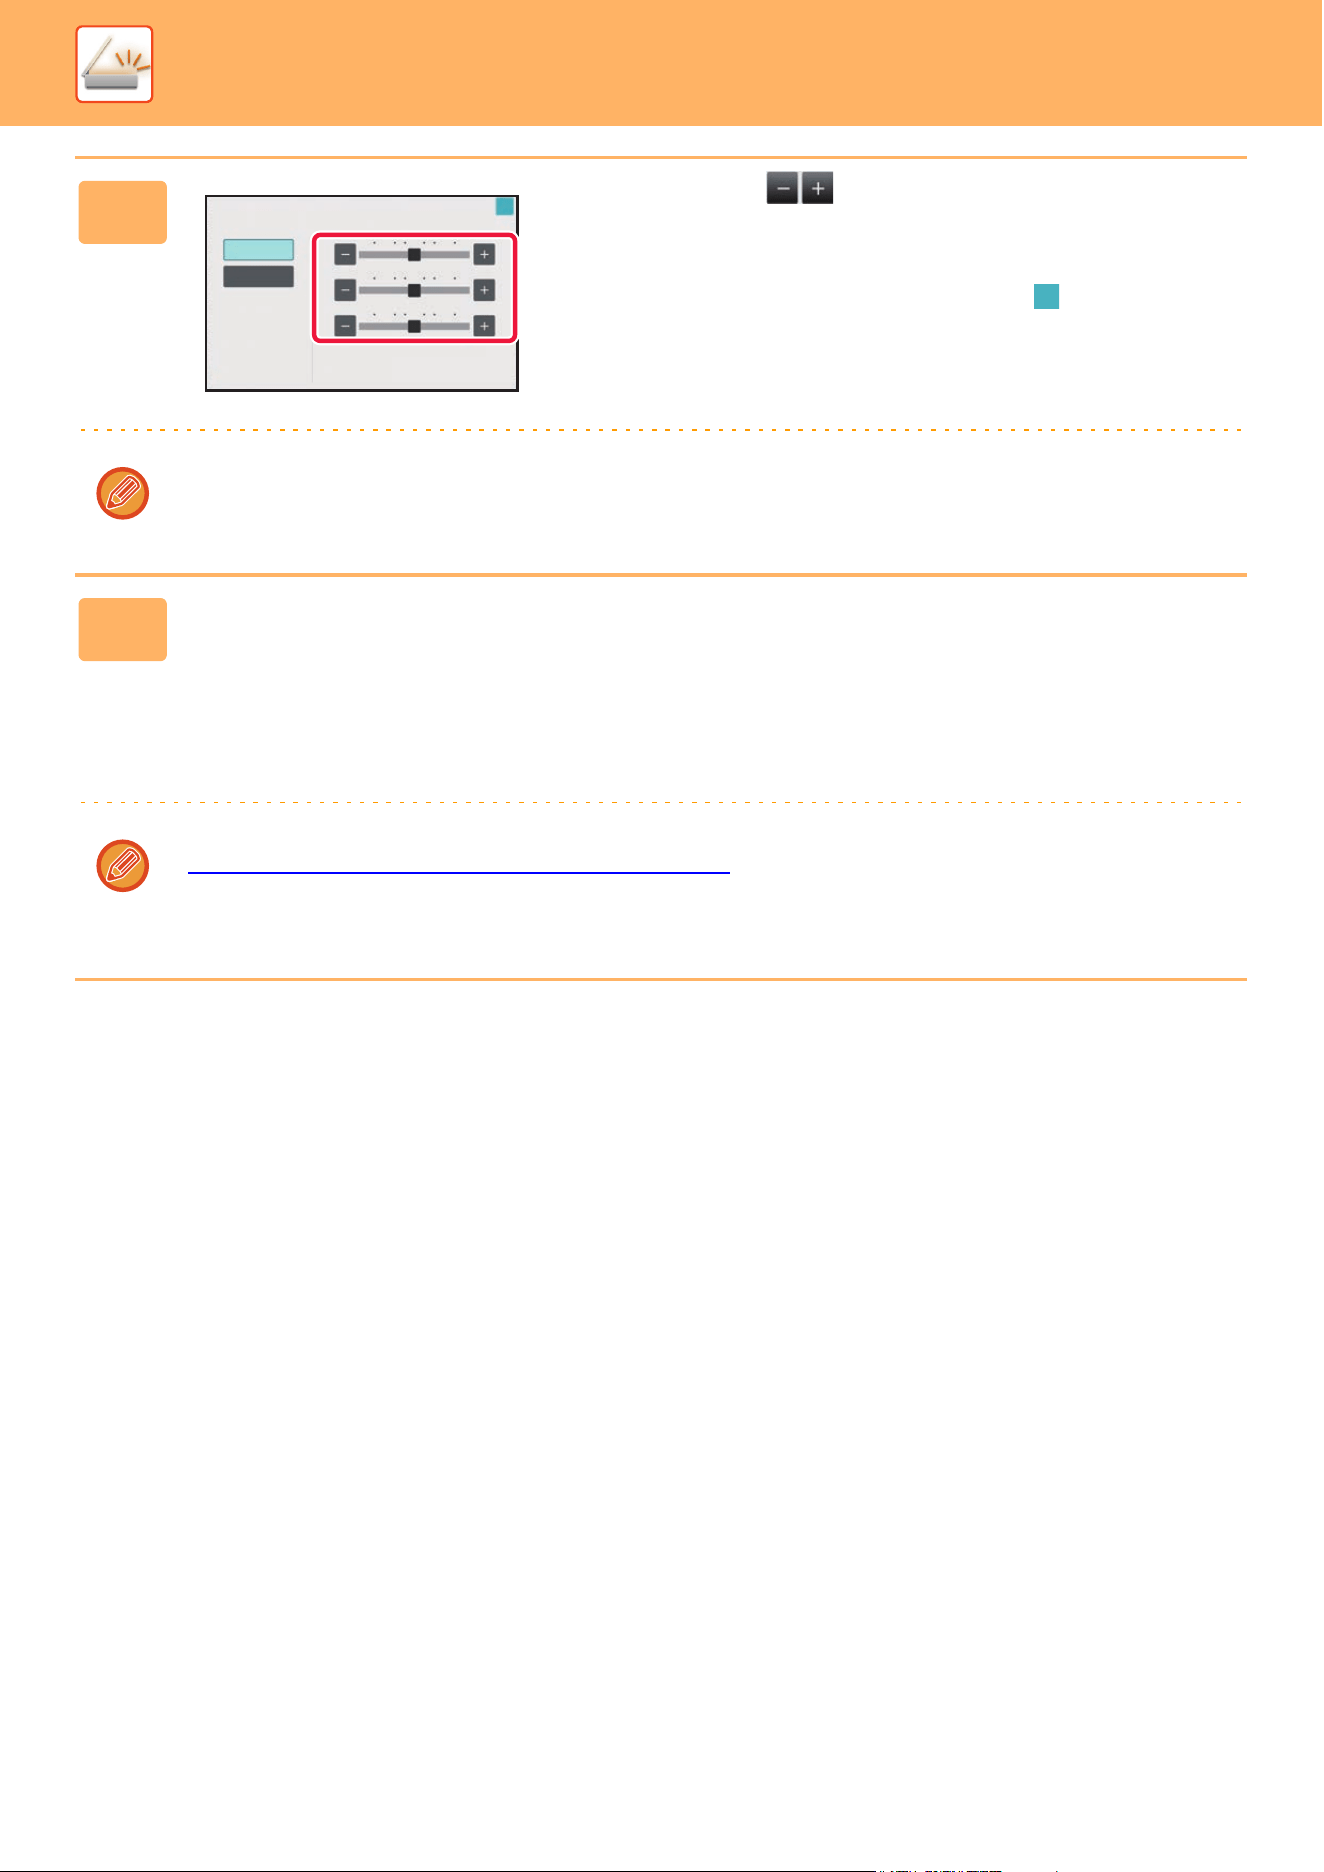
5-115
SCANNER►OTHER FUNCTIONS
5
Tap of the color you want to
adjust or slide the slider to adjust the
coloring.
After the settings are completed, tap and [Back] keys in
sequence.
To cancel the RGB Adjust setting:
Tap the [Off] key.
6
Tap the [Start] key to start scanning of the original.
• If you inserted the original pages in the document feeder tray, all pages are scanned.
A beep will sound to indicate that scanning and transmission have ended.
• When you place the original on the document glass, scan each page one at a time.
When scanning finishes, place the next original and tap the [Start] key. Repeat the procedure until all pages have been
scanned and then tap the [Read-End] key.
A beep will sound to indicate that scanning and transmission have ended.
You can tap the [Preview] key to check a preview of the image before sending an image. For more information, see
“CHECKING THE IMAGE TO BE TRANSMITTED
(page 5-81)".
Tap the [Change Setting] key in the scan-end confirmation screen to change the exposure, resolution, scan size, and
send size. (However, when scanning each even-numbered page of the original, only the exposure can be changed.)
RGB Adjust
This setting is only applied to color jobs.
Off
On
-2 -1 0 21
-2
-1
0
2
1
-2
-1
0
2
1
R
G
B
Touch [+] to darken and [-] to lighten
selected
color
tone.
OK
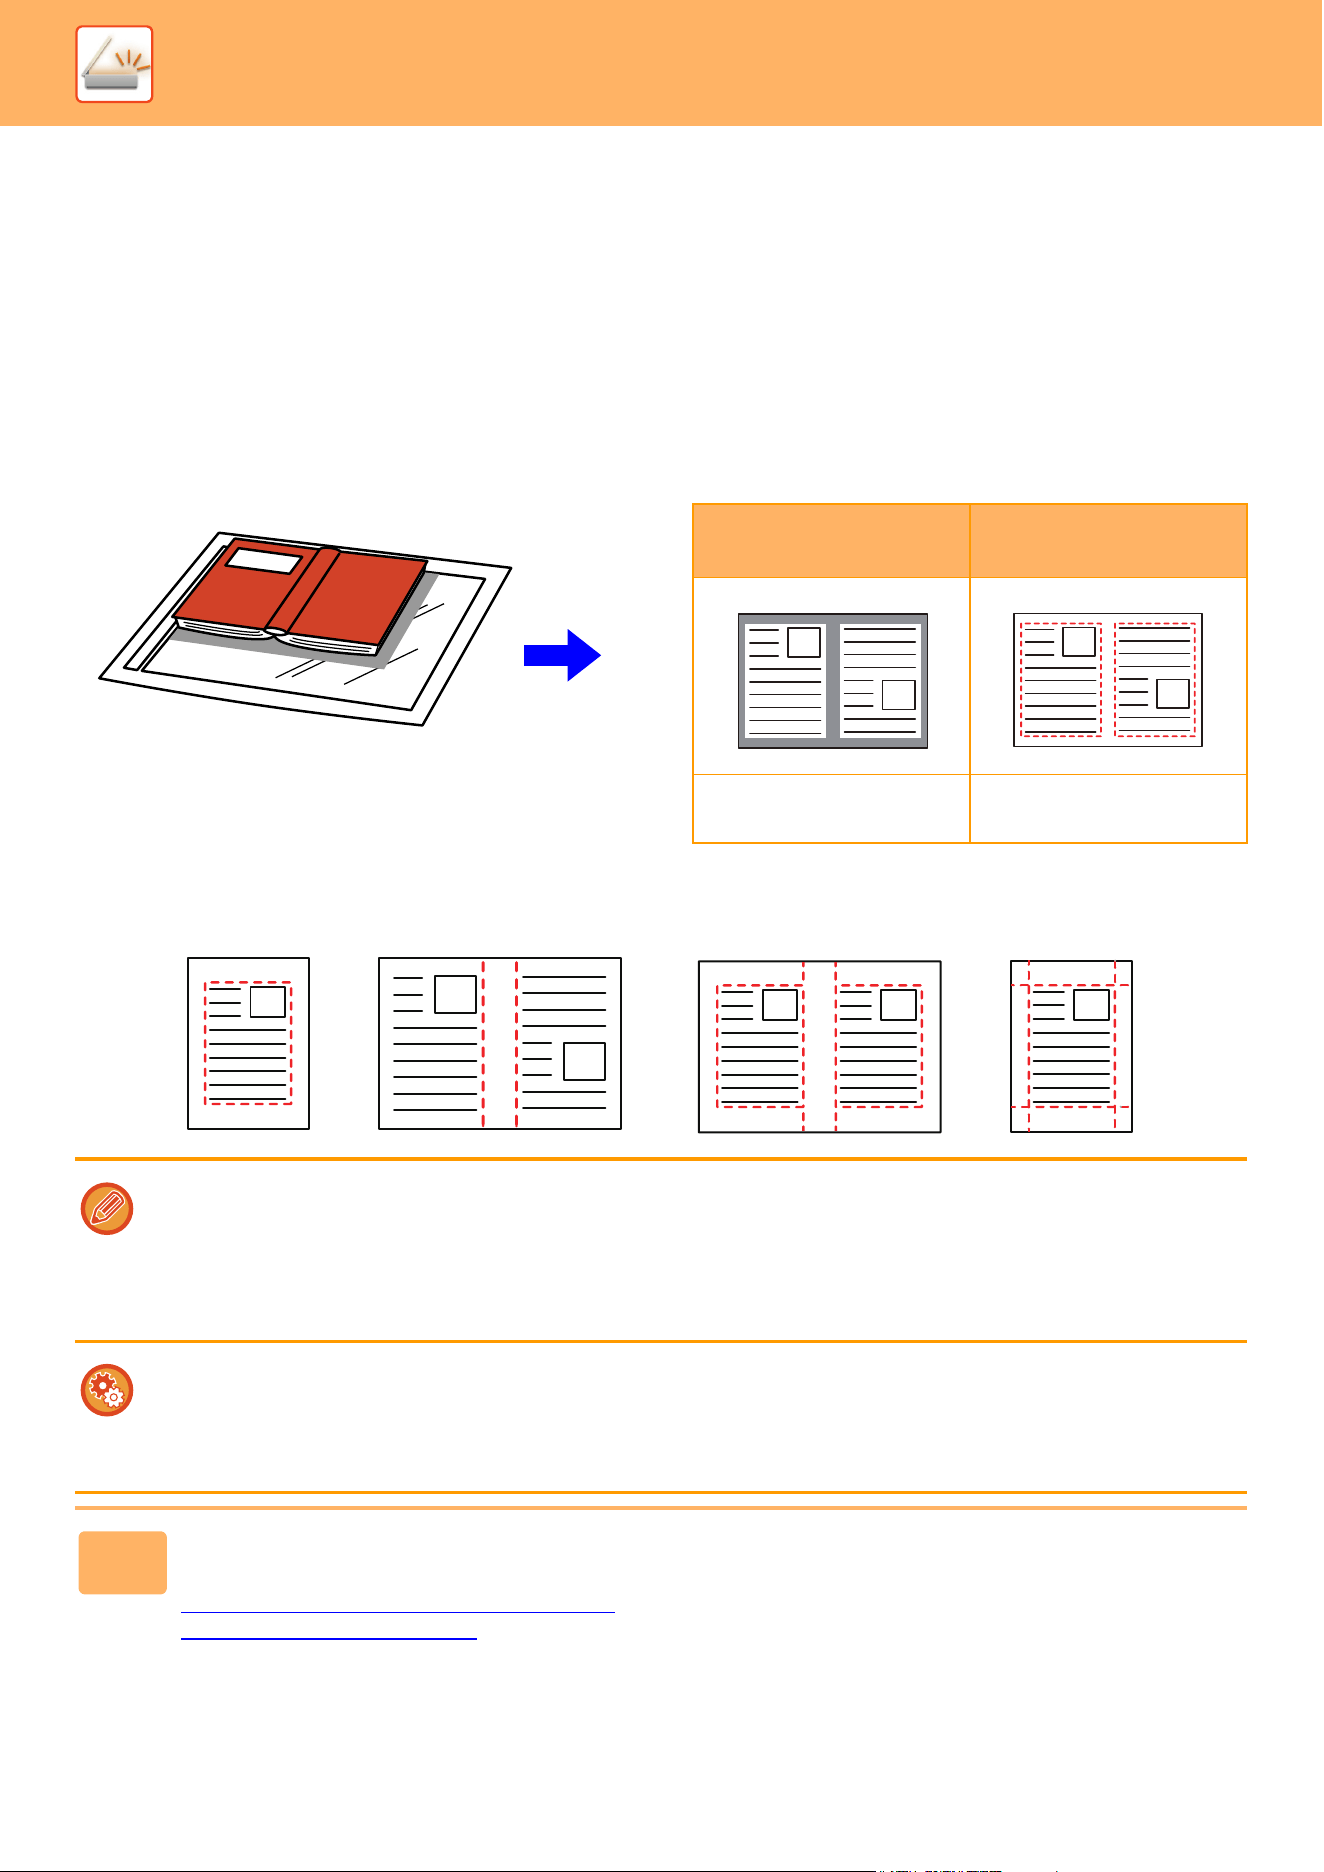
5-116
SCANNER►OTHER FUNCTIONS
SCANNING ORIGINALS
ERASING PERIPHERAL SHADOWS ON THE IMAGE
(ERASE)
When scanning thick originals or books, erase any peripheral shadows that may be produced on the image.
Scanning a thick book
When a bound document is scanned, shadows appear in the peripheral areas and around the binding portion of the
scanned image.
Erase modes
Not using the erase
function
Using the erase
function
Shadows appear in the
image.
No shadows appear.
• This function erases the parts of the image where shadows tend to form, but does not detect shadows and erase only the
shadows.
• If a ratio setting is used in combination with an erase setting, the erase width will change according to the selected ratio.
For example, if you set an erase width of 1/2" (10 mm) and reduce the image to 70% before scanning it, the erase width will
be reduced to 3/8" (7 mm).
• When the erase setting is selected, the image orientation will be forcibly portrait.
To change the default erase width setting:
In "Settings (administrator)", select [System Settings] → [Image Send Settings] → [Common Settings] → [Condition Settings]
→ [Erase Width Adjustment].
The width can be set from 0" to 1" (0 mm to 20 mm). The factory default setting is 1/2" (10 mm). The setting changed here will
apply to [System Settings] → [Copy Settings] → [Condition Settings] → [Erase Width Adjustment] in "Settings".
1
Place the original.
Place the original in the document feeder tray of the automatic document feeder, or on the document glass.
AUTOMATIC DOCUMENT FEEDER
(page 1-47)
DOCUMENT GLASS (page 1-51)
Outer Frame Erase Center Erase Edge + Center Erase Side Erase

5-117
SCANNER►OTHER FUNCTIONS
2
Tap the mode display to switch to the initial screen of each mode.
CHANGING MODES (page 2-10)
3
Specify the destination.
RETRIEVING A DESTINATION FROM AN ADDRESS BOOK (page 5-31)
VIEWING A LIST OF THE SELECTED DESTINATIONS (page 5-34)
USING A SEARCH NUMBER TO RETRIEVE A DESTINATION (page 5-35)
ENTERING AN ADDRESS MANUALLY (page 5-36)
SPECIFYING A NETWORK FOLDER (page 5-37)
RETRIEVING A DESTINATION FROM A GLOBAL ADDRESS BOOK (page 5-39)
USING A TRANSMISSION LOG TO RESEND (page 5-41)
4
Tap the [Others] key, and tap the [Erase] key.

5-118
SCANNER►OTHER FUNCTIONS
5
Tap the checkbox of the edge that you
wish to erase, and specify the erase
position.
Check that the tapped checkbox is set to .
If the [Outer Frame] key is tapped, the [Up], [Down],
[Left],and [Right] checkboxes are set to .
If the [Specify Frame+Center] key is tapped, all the
checkboxes are set to .
Specify the erase edge on the reverse side when erasing edges of one to three sides of Up, Down, Left, and Right on
the front side to scan a 2-sided original.
• If the [Reverse Erase Position of The Back Face] checkbox is set to , the edge in the position opposite to the
erased edge on the front side will be erased.
• If the [Reverse Erase Position of The Back Face] checkbox is set to , the edge in the same position as on the front
side will be erased.
• [Reverse Erase Position of The Back Face] is not possible when "Settings (administrator)" - [System Settings] →
[Common Settings] → [Device Control] → [Condition Settings] or [Enable/Disable Settings] → [Disabling of Document
Feeder] is enabled.
6
Specify the erase width.
After the settings are completed, tap and [Back] keys in sequence.
• Tap the numeric value display indicating the margin shift area on the front side or reverse side, and enter the area
using the numeric keys.
• To quickly set the area, first specify a value close to the desired value by the numeric keys, then adjust it with .
To cancel the erase setting:
Tap the [Clear] key.
7
Tap the [Start] key to start scanning of the original.
• If you inserted the original pages in the document feeder tray, all pages are scanned.
A beep will sound to indicate that scanning and transmission have ended.
• When you place the original on the document glass, scan each page one at a time.
When scanning finishes, place the next original and tap the [Start] key.
Repeat until all pages have been scanned and then tap the [Read-End] key.
A beep will sound to indicate that transmission has ended.
You can tap the [Preview] key to check a preview of the image before sending an image. For more information, see
“CHECKING THE IMAGE TO BE TRANSMITTED
(page 5-81)".
Erase
Clear
Outer Frame
Specify Frame+Center
Reverse erase position of
back face
Down
Up
Right
Left
OK
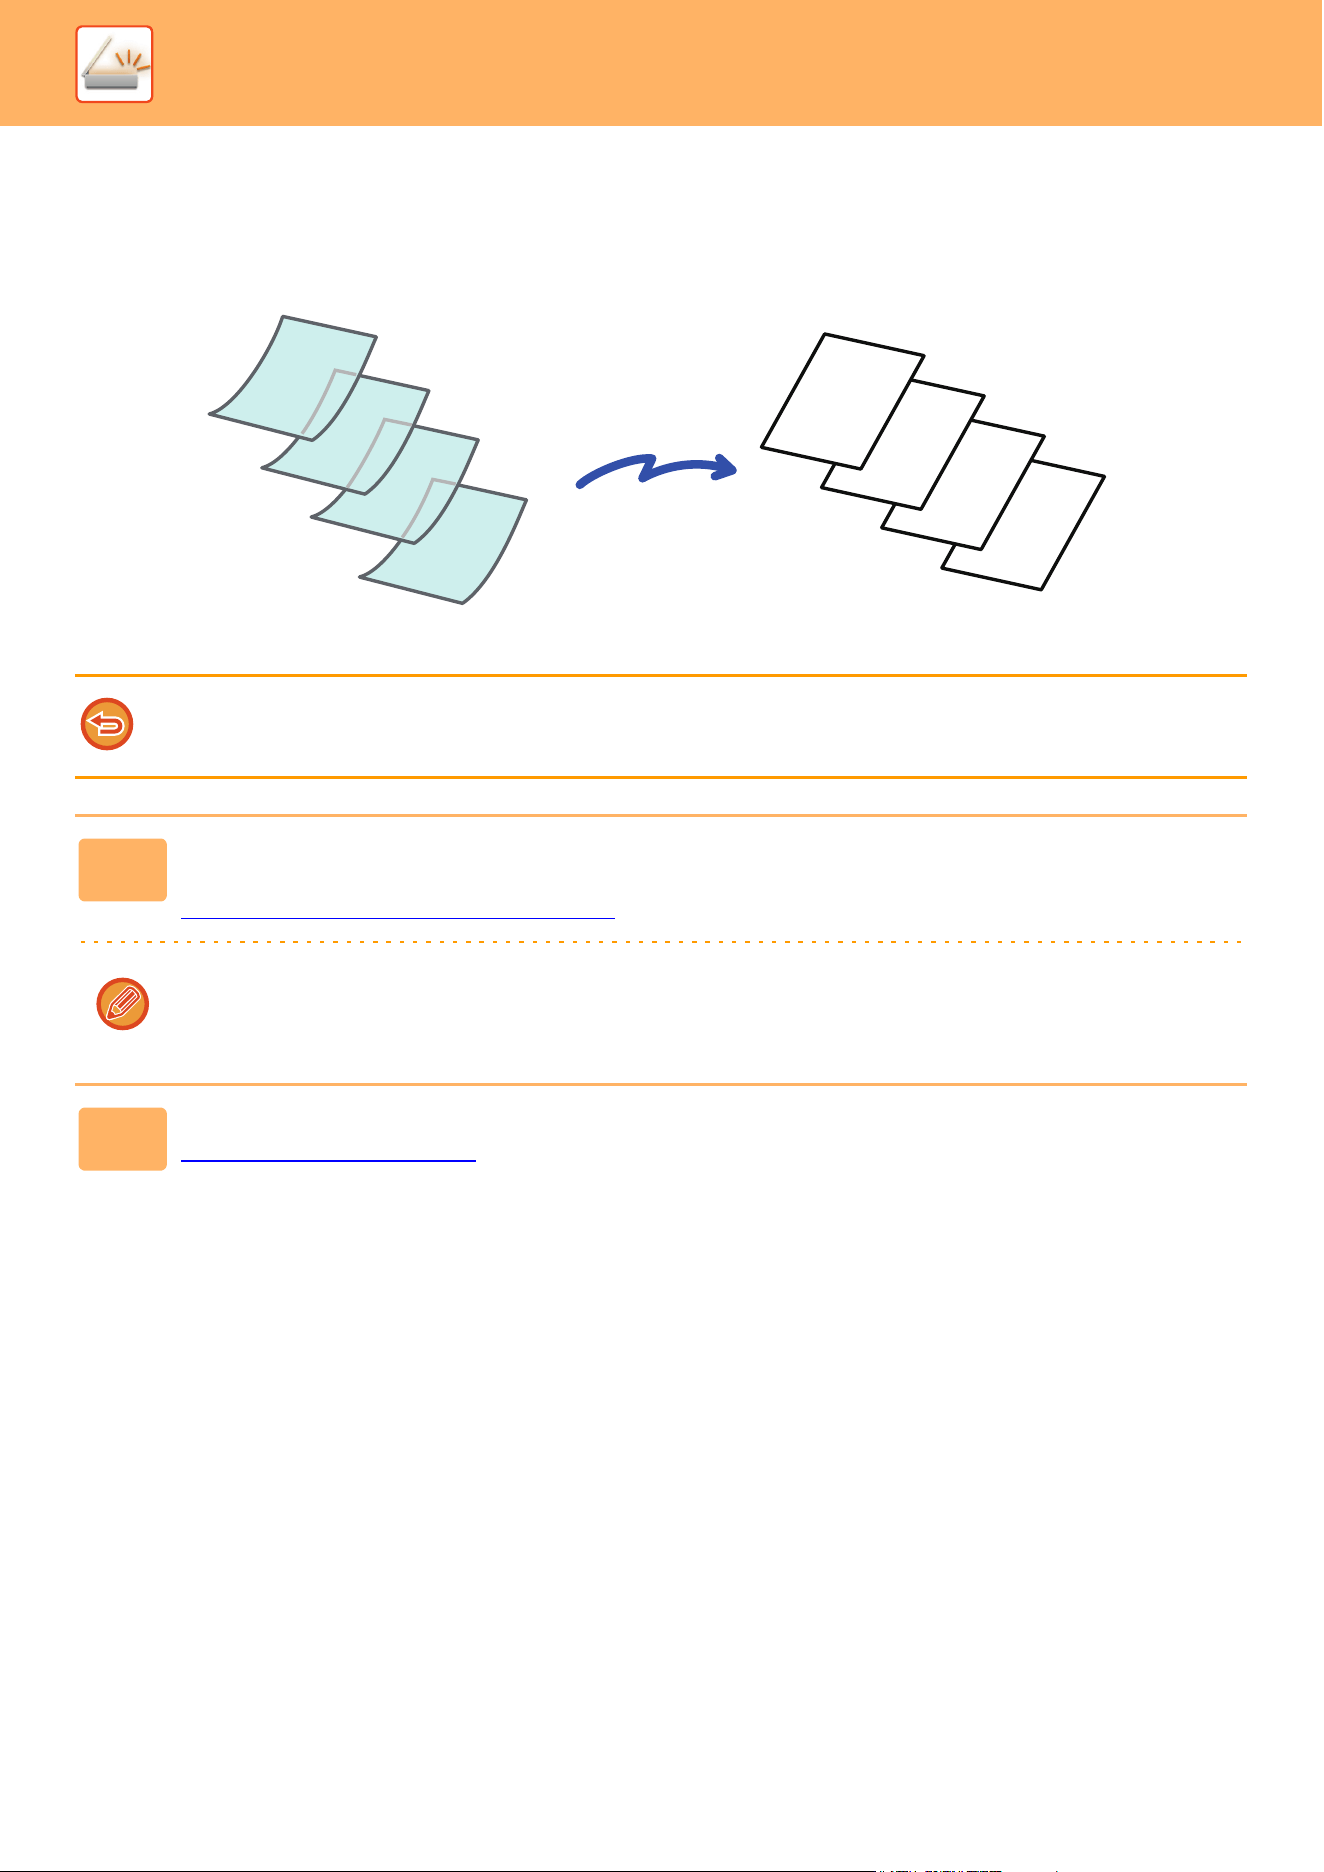
5-119
SCANNER►OTHER FUNCTIONS
SCANNING A THIN ORIGINAL (SLOW SCAN MODE)
Use this function when you wish to scan thin originals using the automatic document feeder. This function helps prevent
thin originals from misfeeding.
• When slow scan mode is selected, 2-sided scanning is not possible.
• Slow scan mode is not possible when "Settings (administrator)" - [System Settings] → [Common Settings] → [Device
Control] → [Condition Settings] or [Enable/Disable Settings] → [Disabling of Document Feeder] is enabled.
1
Place the original in the document feeder tray of the automatic document feeder.
Adjust the original guides slowly.
AUTOMATIC DOCUMENT FEEDER
(page 1-47)
If the originals are inserted with too much force, they may crumple and misfeed.
2
Tap the mode display to switch to the initial screen of each mode.
CHANGING MODES (page 2-10)
D
C
B
A
D
C
B
A

5-120
SCANNER►OTHER FUNCTIONS
3
Specify the destination.
RETRIEVING A DESTINATION FROM AN ADDRESS BOOK (page 5-31)
VIEWING A LIST OF THE SELECTED DESTINATIONS (page 5-34)
USING A SEARCH NUMBER TO RETRIEVE A DESTINATION (page 5-35)
ENTERING AN ADDRESS MANUALLY (page 5-36)
SPECIFYING A NETWORK FOLDER (page 5-37)
RETRIEVING A DESTINATION FROM A GLOBAL ADDRESS BOOK (page 5-39)
USING A TRANSMISSION LOG TO RESEND (page 5-41)
4
Tap the [Others] key, and tap the [Slow Scan Mode] key.
A checkmark appears on the icon.
After the settings are completed, tap the [Back] key.
To cancel the slow scan Mode setting
Tap the [Slow Scan Mode] key to uncheck it.
5
Tap the [Start] key to start scanning of the original.
A beep will sound to indicate that scanning and transmission have ended.
For more information, see “CHECKING THE IMAGE TO BE TRANSMITTED (page 5-81)". However, settings for this
function cannot be changed in the preview screen.
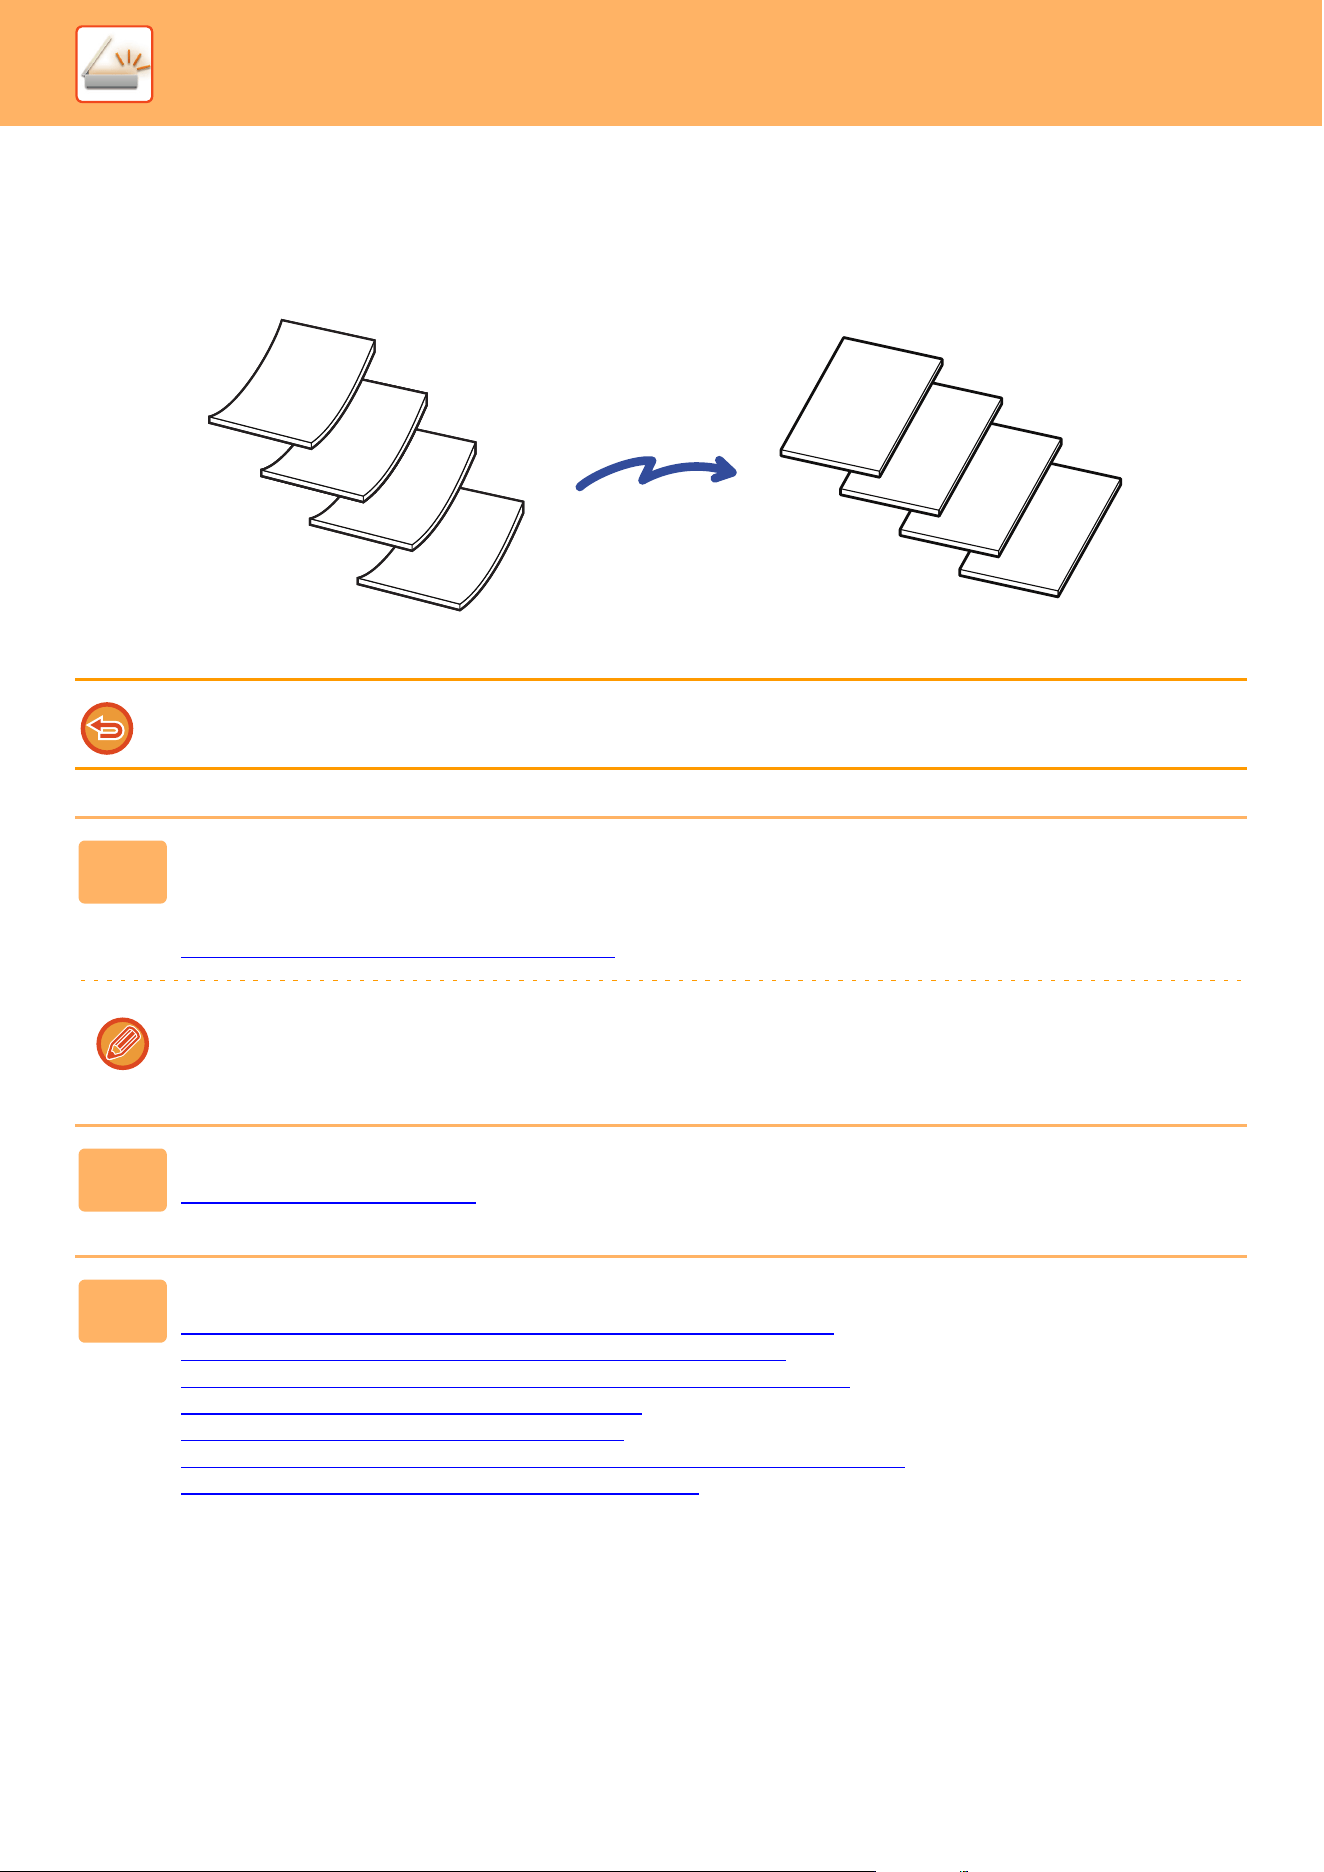
5-121
SCANNER►OTHER FUNCTIONS
SCANNING A HEAVY ORIGINAL (HEAVY PAPER SCAN)
Use this function when you wish to scan heavy originals using the automatic document feeder. This function helps
prevent heavy originals from misfeeding.
Heavy paper scan is not possible when "Settings (administrator)" - [System Settings] → [Common Settings] → [Device
Control] → [Condition Settings] or [Enable/Disable Settings] → [Disabling of Document Feeder] is enabled.
1
Place the original in the document feeder tray of the automatic document
feeder.
Adjust the original guides slowly.
AUTOMATIC DOCUMENT FEEDER
(page 1-47)
If the originals are inserted with too much force, they may crumple and misfeed.
2
Tap the mode display to switch to the initial screen of each mode.
CHANGING MODES (page 2-10)
3
Specify the destination.
RETRIEVING A DESTINATION FROM AN ADDRESS BOOK (page 5-31)
VIEWING A LIST OF THE SELECTED DESTINATIONS (page 5-34)
USING A SEARCH NUMBER TO RETRIEVE A DESTINATION (page 5-35)
ENTERING AN ADDRESS MANUALLY (page 5-36)
SPECIFYING A NETWORK FOLDER (page 5-37)
RETRIEVING A DESTINATION FROM A GLOBAL ADDRESS BOOK (page 5-39)
USING A TRANSMISSION LOG TO RESEND (page 5-41)
D
C
B
A
D
C
B
B
A

5-122
SCANNER►OTHER FUNCTIONS
4
Tap the [Others] key, and tap the [Heavy Paper Scan] key.
A checkmark appears on the icon.
After the settings are completed, tap the [Back] key.
To cancel the Heavy Paper Scan setting
Tap the [Heavy Paper Scan] key to uncheck it.
5
Tap the [Start] key to start scanning of the original.
A beep will sound to indicate that scanning and transmission have ended.
For more information, see “CHECKING THE IMAGE TO BE TRANSMITTED (page 5-81)". However, settings for this
function cannot be changed in the preview screen.
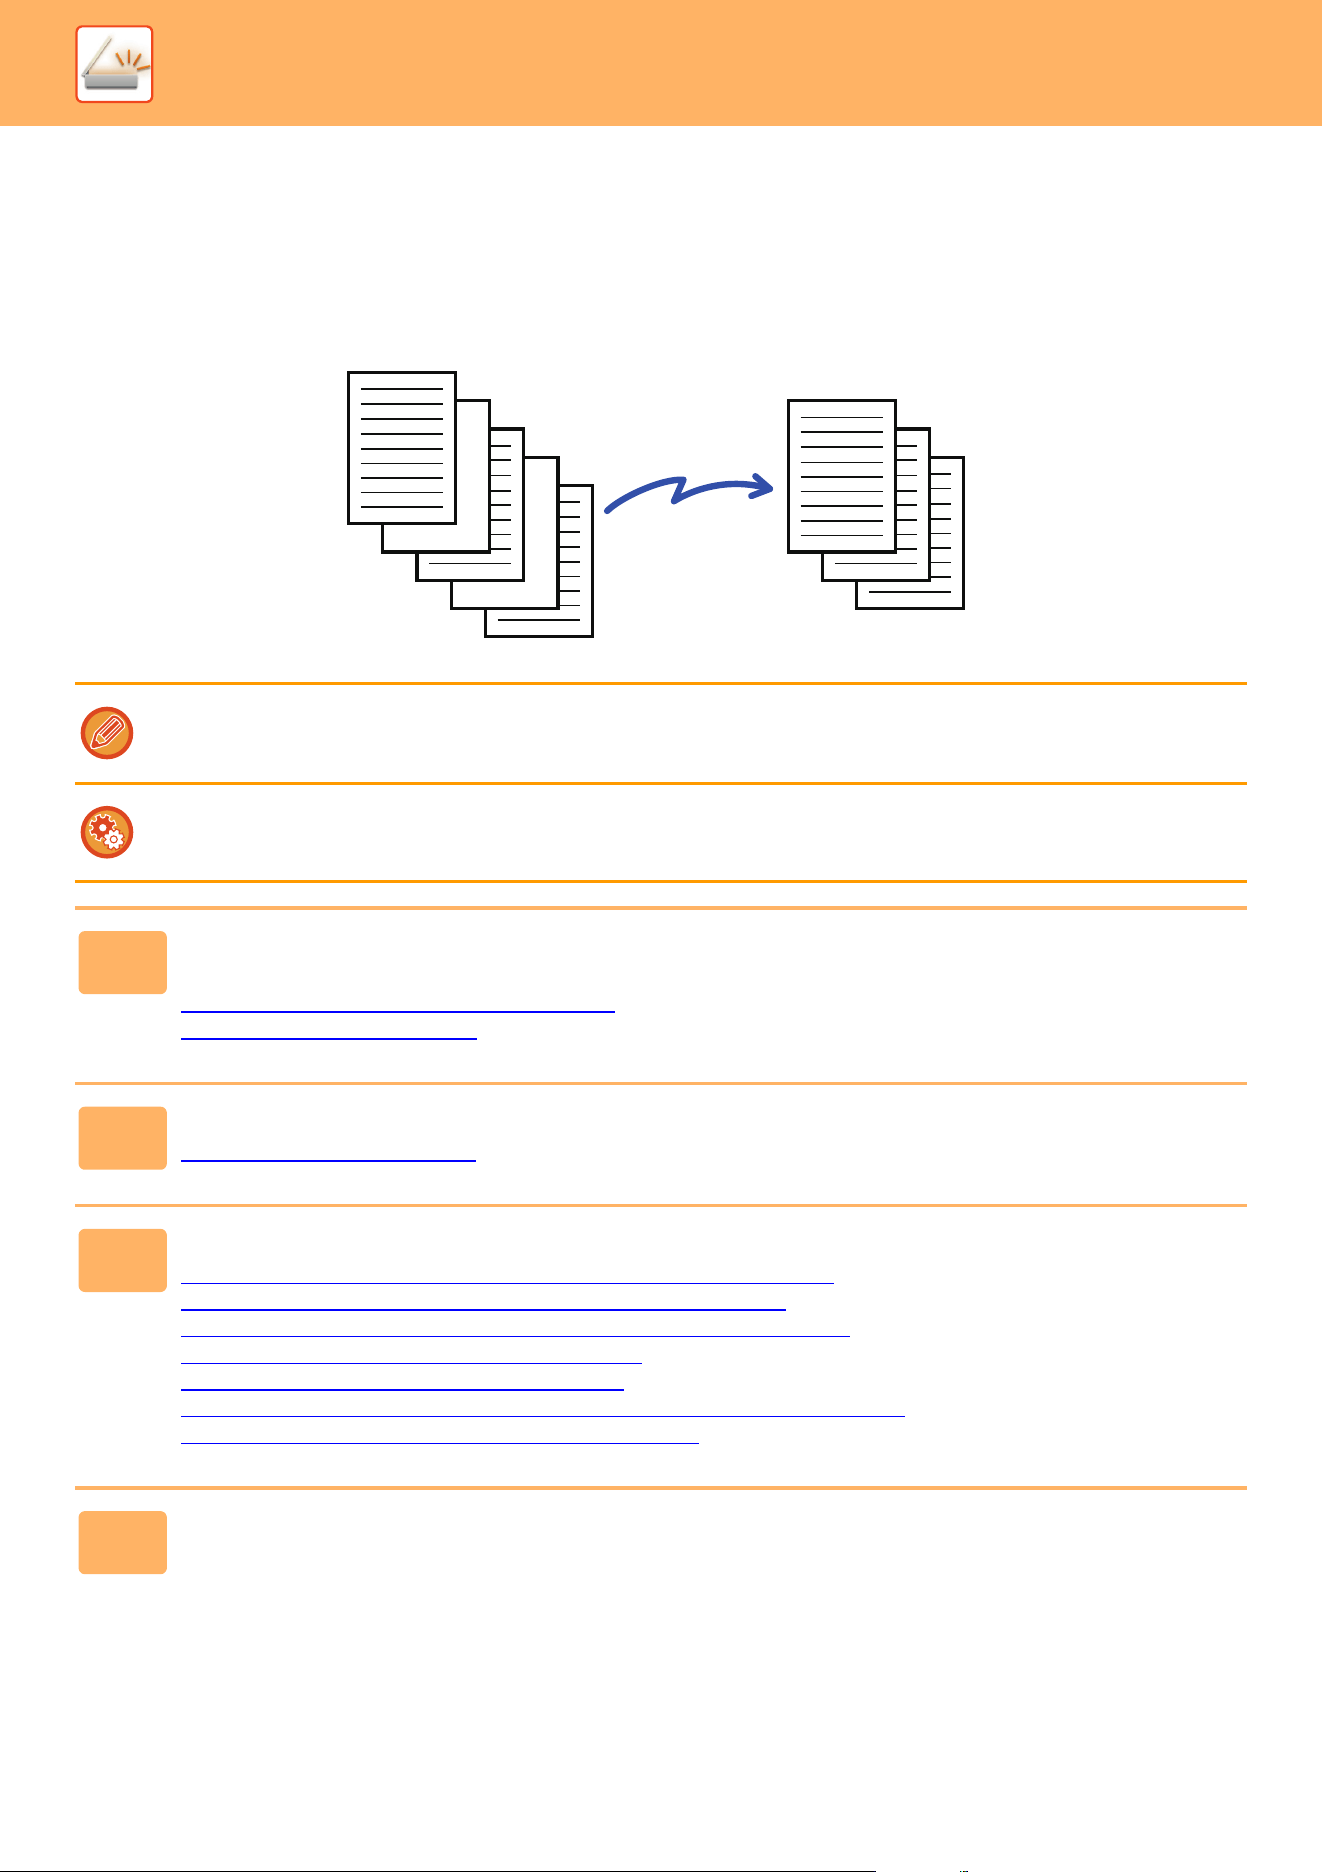
5-123
SCANNER►OTHER FUNCTIONS
ELIMINATING BLANK PAGES FROM A TRANSMISSION
(BLANK PAGE SKIP)
If the scanned original contains blank pages, this function skips them to send only non-blank pages.
The machine detects blank pages, enabling you to skip useless blank sheets without checking an original.
• If an original of which one side is blank is scanned, blank pages are skipped for 2-sided sending.
• Depending on the original, some pages that are not blank may be detected as blank pages and thus not being sent, and
some pages that are blank may not be detected as blank and thus sent.
To display the blank page skip confirmation message:
Select [
System Settings
] → [
Common Settings
] → [
Device Control
] → [
Condition Settings
] → [
Display Blank Page Skip
Confirmation Message
].
1
Place the original.
Place the original in the document feeder tray of the automatic document feeder, or on the document glass.
AUTOMATIC DOCUMENT FEEDER
(page 1-47)
DOCUMENT GLASS (page 1-51)
2
Tap the mode display to switch to the initial screen of each mode.
CHANGING MODES (page 2-10)
3
Specify the destination.
RETRIEVING A DESTINATION FROM AN ADDRESS BOOK (page 5-31)
VIEWING A LIST OF THE SELECTED DESTINATIONS (page 5-34)
USING A SEARCH NUMBER TO RETRIEVE A DESTINATION (page 5-35)
ENTERING AN ADDRESS MANUALLY (page 5-36)
SPECIFYING A NETWORK FOLDER (page 5-37)
RETRIEVING A DESTINATION FROM A GLOBAL ADDRESS BOOK (page 5-39)
USING A TRANSMISSION LOG TO RESEND (page 5-41)
4
Tap the [Others] key, and tap the [Blank Page Skip] key.

5-124
SCANNER►OTHER FUNCTIONS
5
Tap the [Skip Blank Page] or [Skip
Blank and Back Shadow] key.
After the settings are completed, tap and [Back] keys in
sequence.
To cancel the Blank Page Skip setting:
Tap the [Off] key.
6
Tap the [Start] key to start scanning of the original.
A beep will sound to indicate that scanning has ended.
7
When scanning ends, check the
number of original sheets and the
number of sheets to be sent and tap
the [OK] key to start transmission.
• When Job Build mode is used, the confirmation message
will appear after the [Start] key is tapped.
• On the confirmation screen, the number of scanned
original sheets appears in (A), the number of scanned
sides in (B), and the number of sheets to be sent
excluding blank pages in (C).
For example, if five original sheets that include two blank
pages are scanned by duplex scanning, (A) will show "5",
(B) will show "10", and (C) will show "8".
If this step is not performed within one minute after the above confirmation screen appears, the scanned image and
settings will be cleared and the base screen will reappear.
Scanning will not be completed automatically and the image will not be reserved for transmission.
Blank Page Skip
Off
Skip Blank Page
Skip Blank and Back Shadow
OK
5 sheets of original (P.10)
have been scanned. Send 8 pages of the original.
Execute the job?
Cancel
OK
(A)(C) (B)
5-125
SCANNER►OTHER FUNCTIONS
CHECKING THE NUMBER OF SCANNED ORIGINAL
SHEETS BEFORE TRANSMISSION (ORIGINAL COUNT)
Count the number of scanned original sheets and display the count before transmission.
Checking the number of scanned original sheets before transmission helps prevent transmission mistakes.
• The count result is displayed with the number of scanned original sheets, not the number of scanned original pages. For
example, when a 2-sided original is transmitted, the number "1" will appear to indicate that one original sheet is
transmitted, not "2" to indicate the front-side page and the reverse side page.
• When a broadcast transmission is performed, if the original count function is selected in any of the modes, the function will
operate for all destinations.
• The setting should be enabled separately for each mode.
1
Place originals in the automatic document feeder.
AUTOMATIC DOCUMENT FEEDER (page 1-47)
2
Tap the mode display to switch to the initial screen of each mode.
CHANGING MODES (page 2-10)
3
Specify the destination.
RETRIEVING A DESTINATION FROM AN ADDRESS BOOK (page 5-31)
VIEWING A LIST OF THE SELECTED DESTINATIONS (page 5-34)
USING A SEARCH NUMBER TO RETRIEVE A DESTINATION (page 5-35)
ENTERING AN ADDRESS MANUALLY (page 5-36)
SPECIFYING A NETWORK FOLDER (page 5-37)
RETRIEVING A DESTINATION FROM A GLOBAL ADDRESS BOOK (page 5-39)
USING A TRANSMISSION LOG TO RESEND (page 5-41)
4
Tap the [Others] key, and tap the [Original Count] key.
A checkmark appears on the icon.
After the settings are completed, tap the [Back] key.
To cancel the original count setting:
Tap the [Original Count] key to uncheck it.
5
Tap the [Start] key to start scanning of the original.
A beep will sound to indicate that scanning has ended.
For more information, see “CHECKING THE IMAGE TO BE TRANSMITTED (page 5-81)". However, settings for this
function cannot be changed in the preview screen.

5-126
SCANNER►OTHER FUNCTIONS
6
Check the number of original sheets.
The number that is displayed is the number of scanned
original sheets, not the number of scanned original pages.
For example, when 2-sided copying is performed using one
original, the number "1" will appear to indicate that one
original sheet was scanned, not "2" to indicate the front-side
page and the reverse side page.
7
Tap the [Send] key to start transmission.
If this function is combined with [Job Build], the count result is displayed after the [Read-End] key has been tapped.
If this step is not performed within one minute after the above confirmation screen appears, the scanned image and
settings will be cleared and the base screen will reappear. Scanning will not be completed automatically and the image
will not be reserved for transmission.
If the displayed number of original sheets is different from the actual number of sheets:
Tap the [Cancel] key and then tap the [OK] key in the message screen to clear all scanned data. Scan settings and
destination settings will not be cleared. Insert the original sheets in the document feeder tray again and tap the [Start]
key to re-scan.
0 pages of original (Pg.No.1)
have been scanned.
Send the scanned data?
Cancel
Send
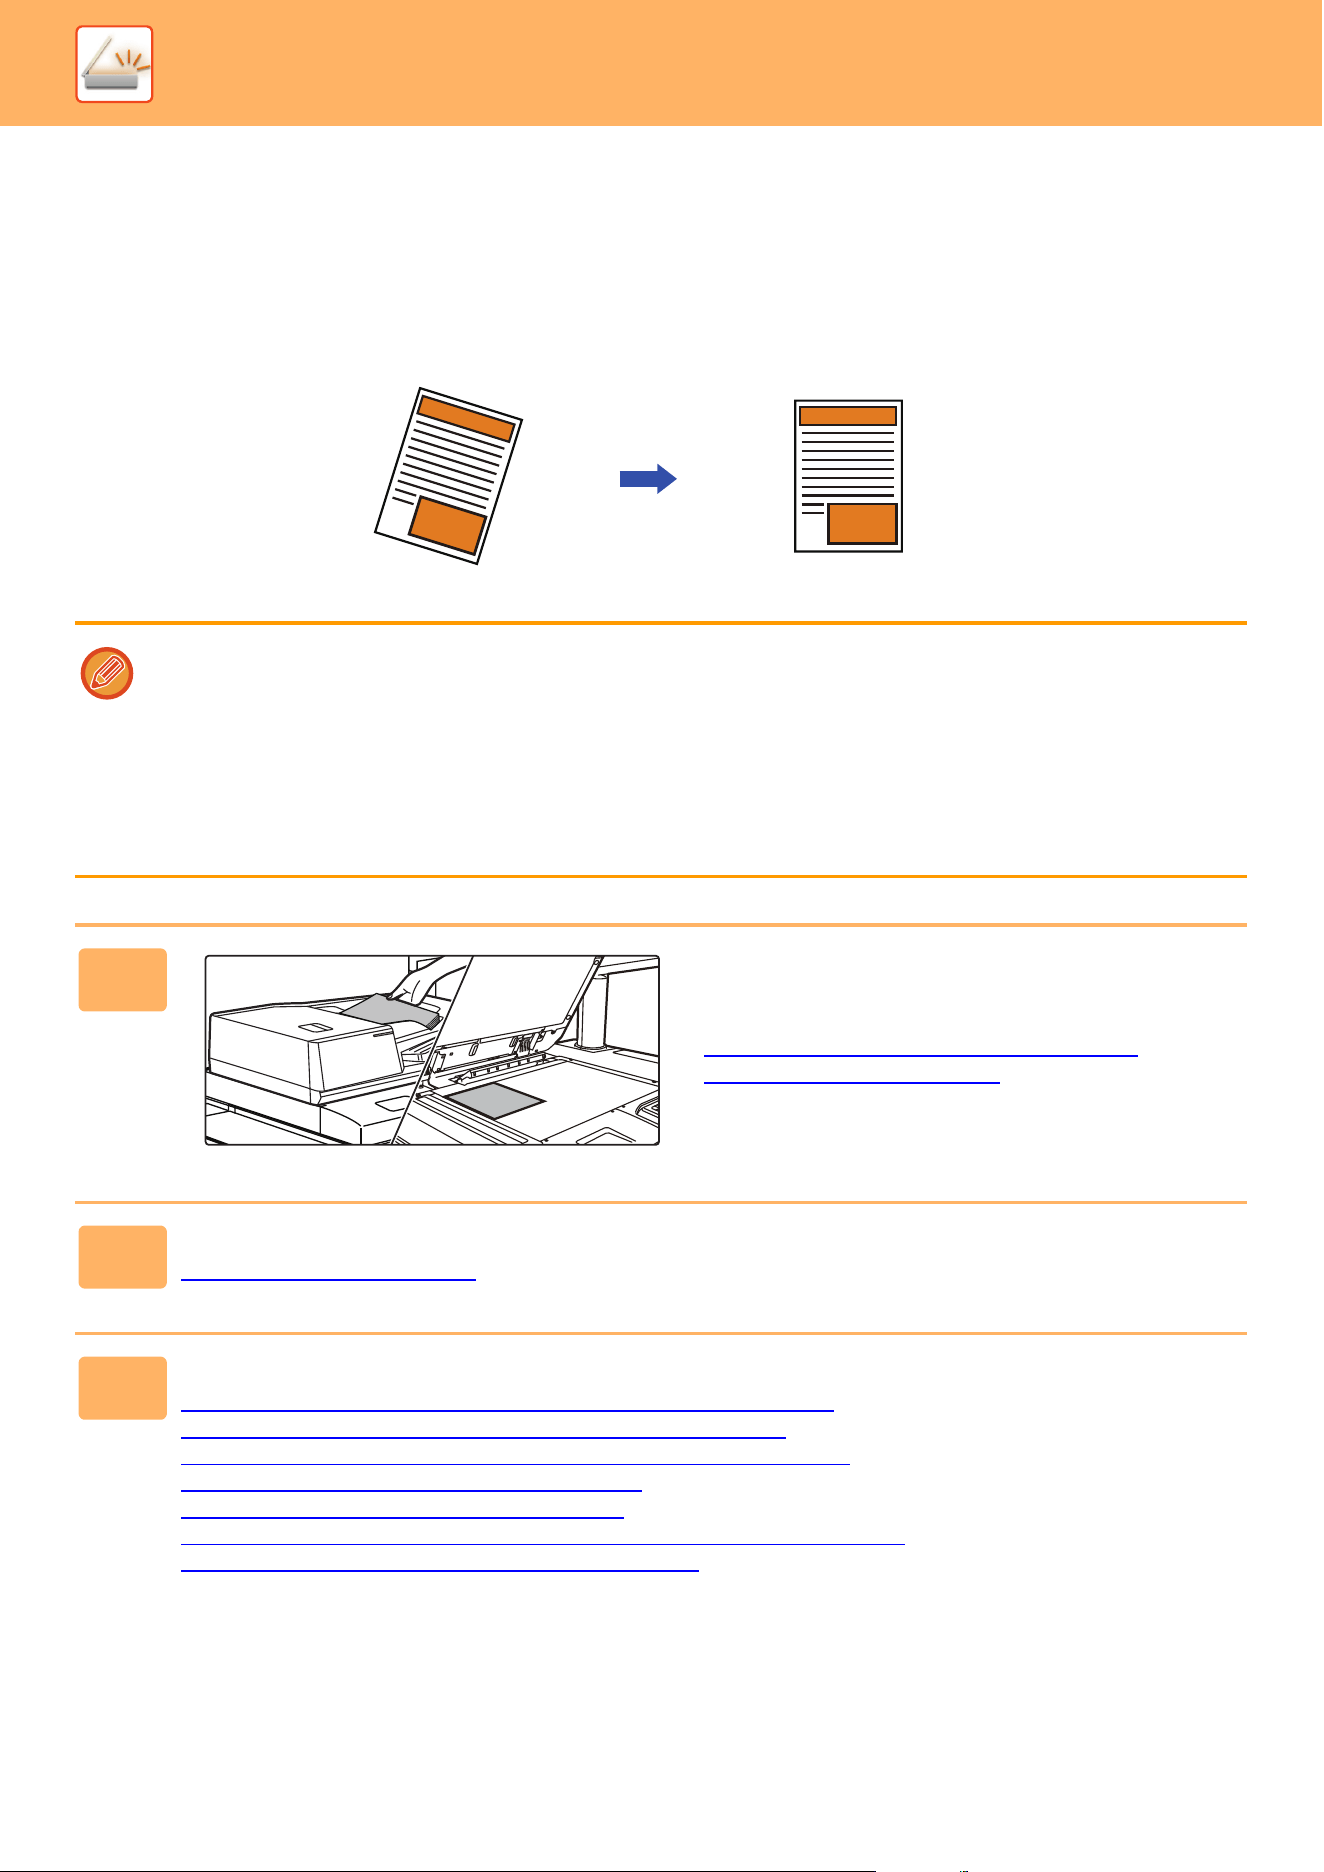
5-127
SCANNER►OTHER FUNCTIONS
AUTOMATICALLY ADJUST SKEWED SCAN
DATA (Original Skew Adjustment)
When the original is skewed, or when images within the original are skewed, this automatically corrects the skewing,
and saves the document.
• The post-adjustment image is not shown in preview images, and is displayed as it was scanned.
• If adjustment is not required and text and images are on an angle for design reasons, adjustment may still occur
automatically.
• If there is little text or image data in the original, this may not be adjusted regardless of the degree of skewing.
• For card shot, this function cannot be used.
• If [Document Filing] → [Main Folder] → [Property] → [Create PDF for PC Browsing] in System Settings is enabled, this
function cannot be used on the document filing function.
• Depending on the degree of skew, correction may not be possible.
1
Place the original.
Place the original in the document feeder tray of the
automatic document feeder, or on the document glass.
AUTOMATIC DOCUMENT FEEDER
(page 1-47)
DOCUMENT GLASS (page 1-51)
2
Tap the mode display to switch to the initial screen of each mode.
CHANGING MODES (page 2-10)
3
Specify the destination.
RETRIEVING A DESTINATION FROM AN ADDRESS BOOK (page 5-31)
VIEWING A LIST OF THE SELECTED DESTINATIONS (page 5-34)
USING A SEARCH NUMBER TO RETRIEVE A DESTINATION (page 5-35)
ENTERING AN ADDRESS MANUALLY (page 5-36)
SPECIFYING A NETWORK FOLDER (page 5-37)
RETRIEVING A DESTINATION FROM A GLOBAL ADDRESS BOOK (page 5-39)
USING A TRANSMISSION LOG TO RESEND (page 5-41)

5-128
SCANNER►OTHER FUNCTIONS
4
Tap the [Others] key, and tap the
[Original Skew Adjustment] key.
A checkmark appears on the icon.
When you have completed the setting, tap the [Back] key.
To cancel the Original Skew Adjustment setting
Tap the [Original Skew Adjustment] key to remove the checkmark.
5
Tap the [Start] key to start scanning of the original.
When scanning finishes, place the next original and tap the [Start] key.
Repeat until all pages have been scanned and then tap the [Read-End] key.
A beep will sound to indicate that transmission has ended.
Others
Original Skew
Adjustment
Blank Page
Skip
Background
Adjustment
Card Shot
Verif.
Stamp
Business
Card Scan
Mixed Size
Original
Original
Count
Erase
Dual Page Scan
Contrast
RGB Adjust
Quick File
Book Divide
Multicrop
Image Crop
Timer
File
Sharpness
Drop Out
color
OK
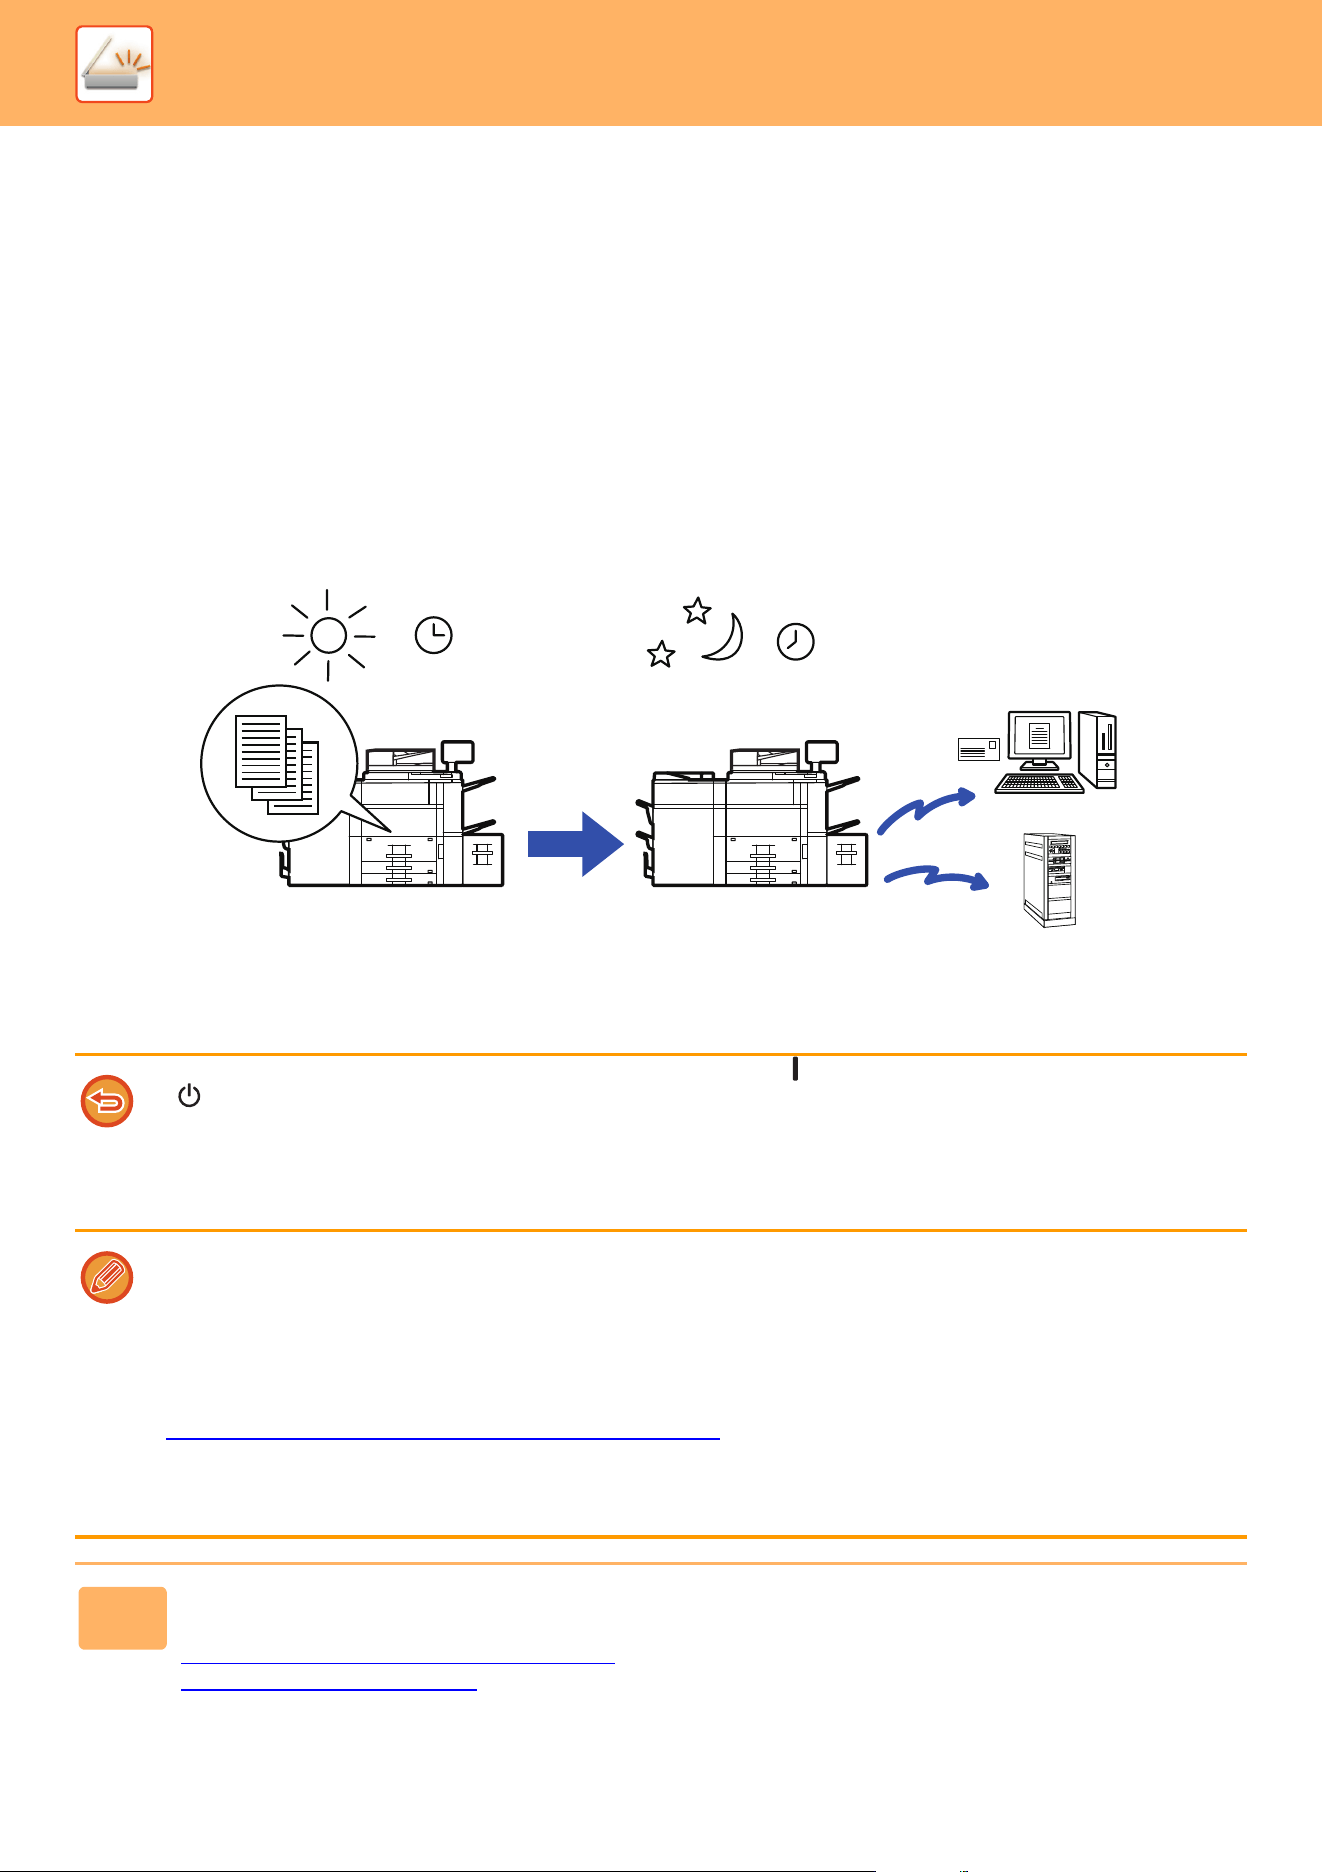
5-129
SCANNER►OTHER FUNCTIONS
SPECIFIC FUNCTIONS
STARTING A TRANSMISSION AT A SPECIFIED TIME
(TIMER TRANSMISSION)
Specify a time at which a transmission or broadcast transmission will automatically take place. Transmission begins
automatically at the specified time.
This function is helpful when you wish to perform reserved, broadcast or other transmissions during your absence or at
night or other times when telephone rates are low.
For example, if it is set to print data received during the day at 20:00, the received data will not be printed immediately,
and printing will begin automatically at 20:00.
• When a timer transmission is set, keep the main power switch in the “ " position. If the main power switch is in the
“ "position at the specified time, transmission will not take place.
• When performing a timer transmission, you must scan the original into memory when you set up the transmission. It is not
possible to leave the document in the document feeder tray or on the document glass and have it scanned at the reserved
time of transmission.
• Up to 100 timer transmissions can be stored at once.
• Settings selected for a timer transmission (exposure, resolution, and other functions) are automatically cleared after the
transmission is finished. (However, when the document filing function is used, the scanned original image and settings are
stored in the built-in local drive.)
• If another transmission is in progress when the specified time arrives, the timer transmission will begin after that
transmission is finished.
• If a job scheduled for timer transmission is given priority on the job management screen, the timer will be canceled. The
transmission will begin as soon as the job in progress is completed.
PRIORITY PROCESSING OF
A RESERVED JOB (page 2-56)
• The time can be specified up to a week in advance.
• After the timer transmission settings are specified, start the transmission in the same way as other functions.
• A timer transmission can be deleted in the job management screen.
1
Place the original.
Place the original in the document feeder tray of the automatic document feeder, or on the document glass.
AUTOMATIC DOCUMENT FEEDER
(page 1-47)
DOCUMENT GLASS (page 1-51)
During the day, configure the
setting to transmit received
data at 20:00.
At 20:00, the transmission
begins automatically.
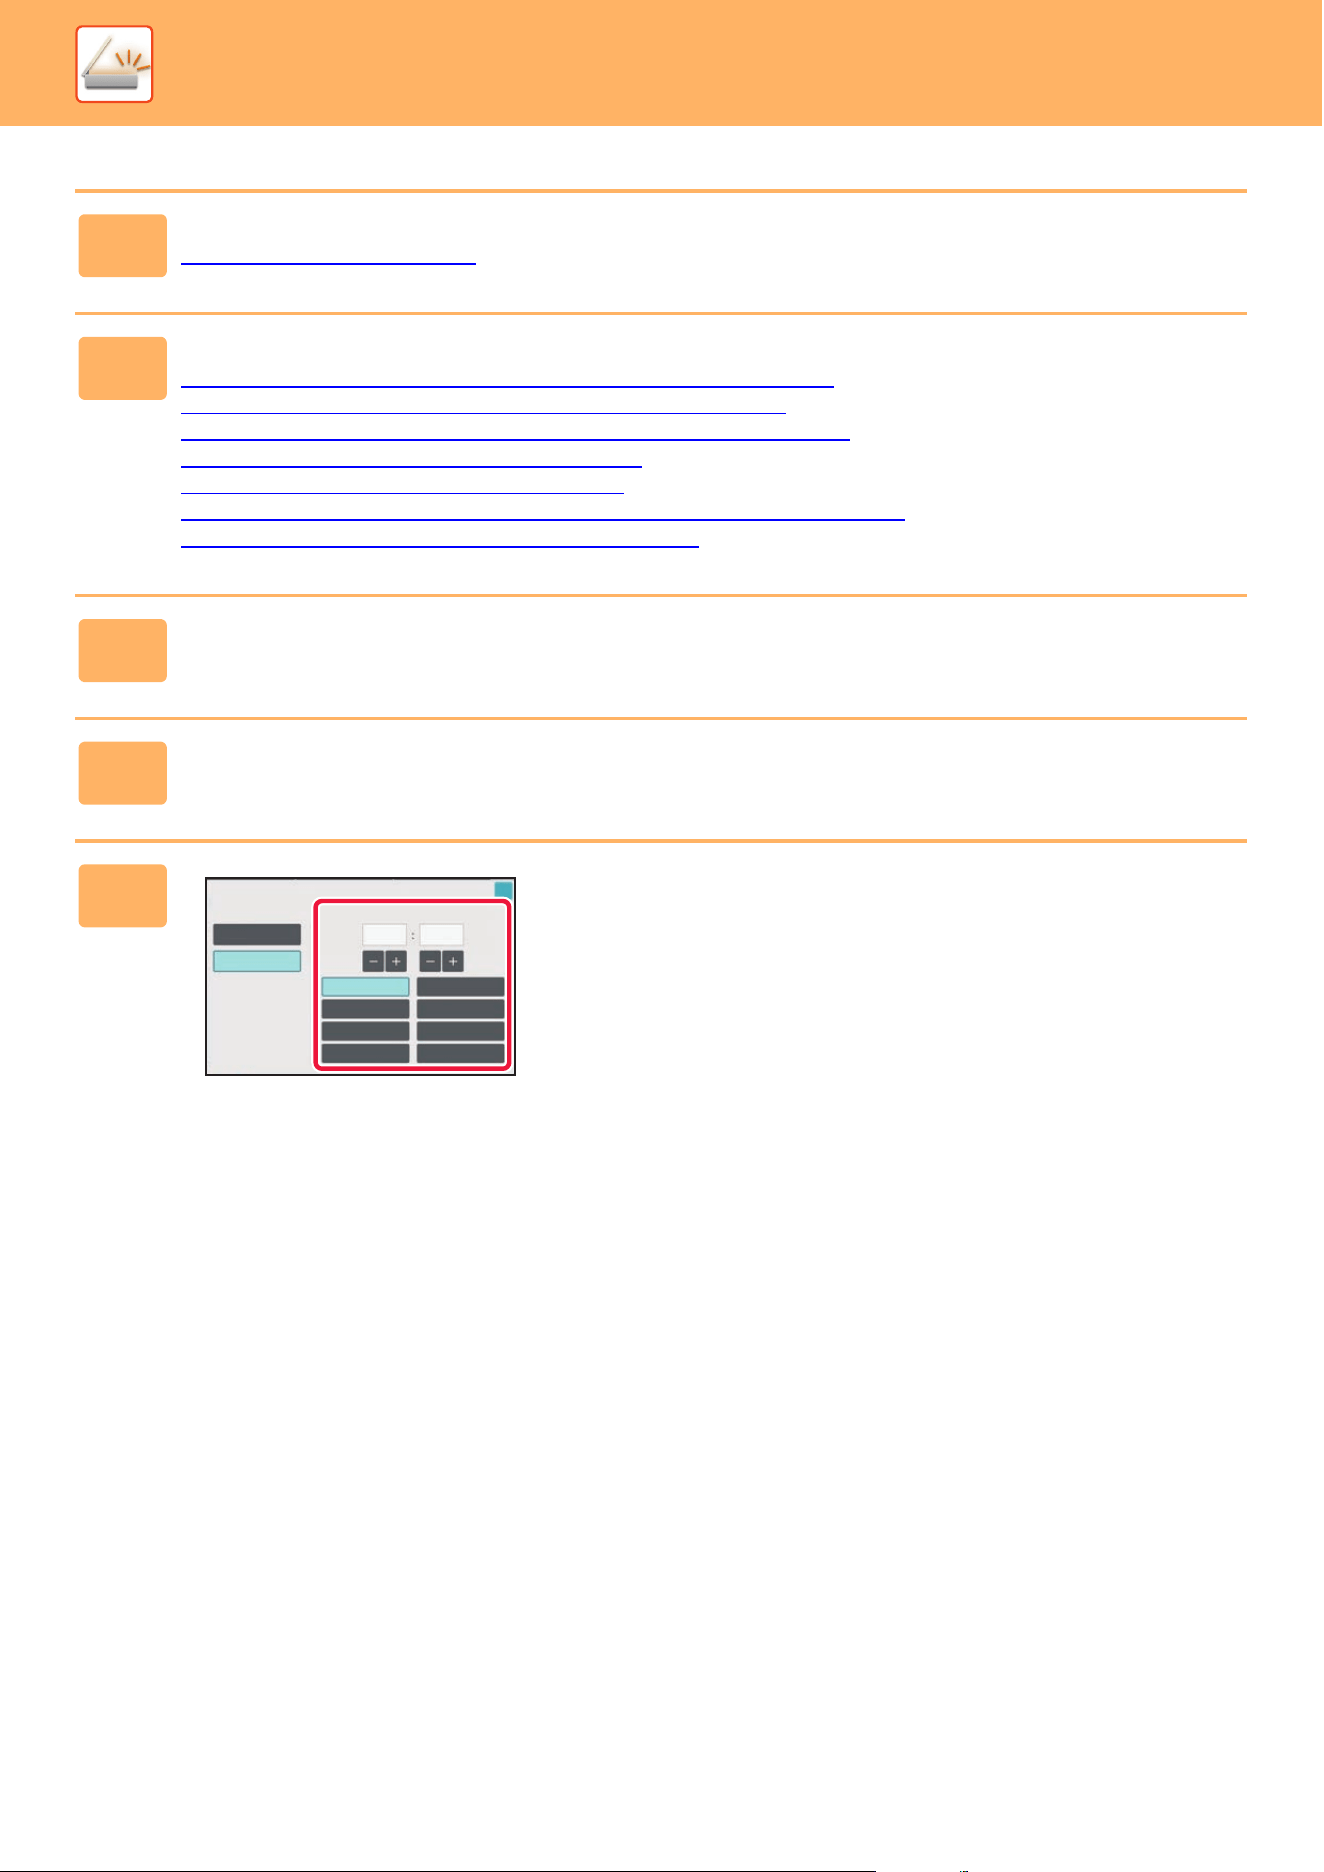
5-130
SCANNER►OTHER FUNCTIONS
2
Tap the mode display to switch to the initial screen of each mode.
CHANGING MODES (page 2-10)
3
Specify the destination.
RETRIEVING A DESTINATION FROM AN ADDRESS BOOK (page 5-31)
VIEWING A LIST OF THE SELECTED DESTINATIONS (page 5-34)
USING A SEARCH NUMBER TO RETRIEVE A DESTINATION (page 5-35)
ENTERING AN ADDRESS MANUALLY (page 5-36)
SPECIFYING A NETWORK FOLDER (page 5-37)
RETRIEVING A DESTINATION FROM A GLOBAL ADDRESS BOOK (page 5-39)
USING A TRANSMISSION LOG TO RESEND (page 5-41)
4
Tap the [Others] key, and tap the [Timer] key.
5
Tap [On] key.
6
Specify the date.
Timer
Off
On
08/04/2021
Thu
10 15
Today
Monday
Wednesday
Friday
Sunday
Tuesday
Thursday
Saturday
OK
5-131
SCANNER►OTHER FUNCTIONS
7
Specify the time (hour and minute) in 24-hour format.
After the settings are completed, tap and [Back] keys in sequence.
• Tap the areas displaying the hour and minute respectively, and enter the values using the numeric keys.
• It is convenient to use to finely adjust the time.
• The setting will show the current time. If the time is not correct, press the [CA] key to cancel the operation. Correct the
time in setting mode and then perform the timer transmission procedure.
BEFORE USING THE MACHINE AS A NETWORK SCANNER FUNCTION
(page 5-3)
To cancel the Timer Transmission settings:
Tap the [Off] key.
To set the date and time of the machine:
In "Settings", select [System Settings] → [Common Settings] → [Device Control] → [Clock Adjust].
8
Tap the [Start] key to start scanning of the original.
• If you inserted the original pages in the document feeder tray, all pages are scanned.
A beep will sound to indicate that scanning has ended, and the machine stands by for transmission.
• When you place the original on the document glass, scan each page one at a time.
When scanning finishes, place the next original and tap the [Start] key.
Repeat until all pages have been scanned and then tap the [Read-End] key.
A beep will sound to indicate that scanning has ended, and the machine stands by for transmission.
You can tap the [Preview] key to check a preview of the image before sending an image. For more information, see
“CHECKING THE IMAGE TO BE TRANSMITTED
(page 5-81)" .
The original is scanned into memory. The original cannot be scanned at a specified time.
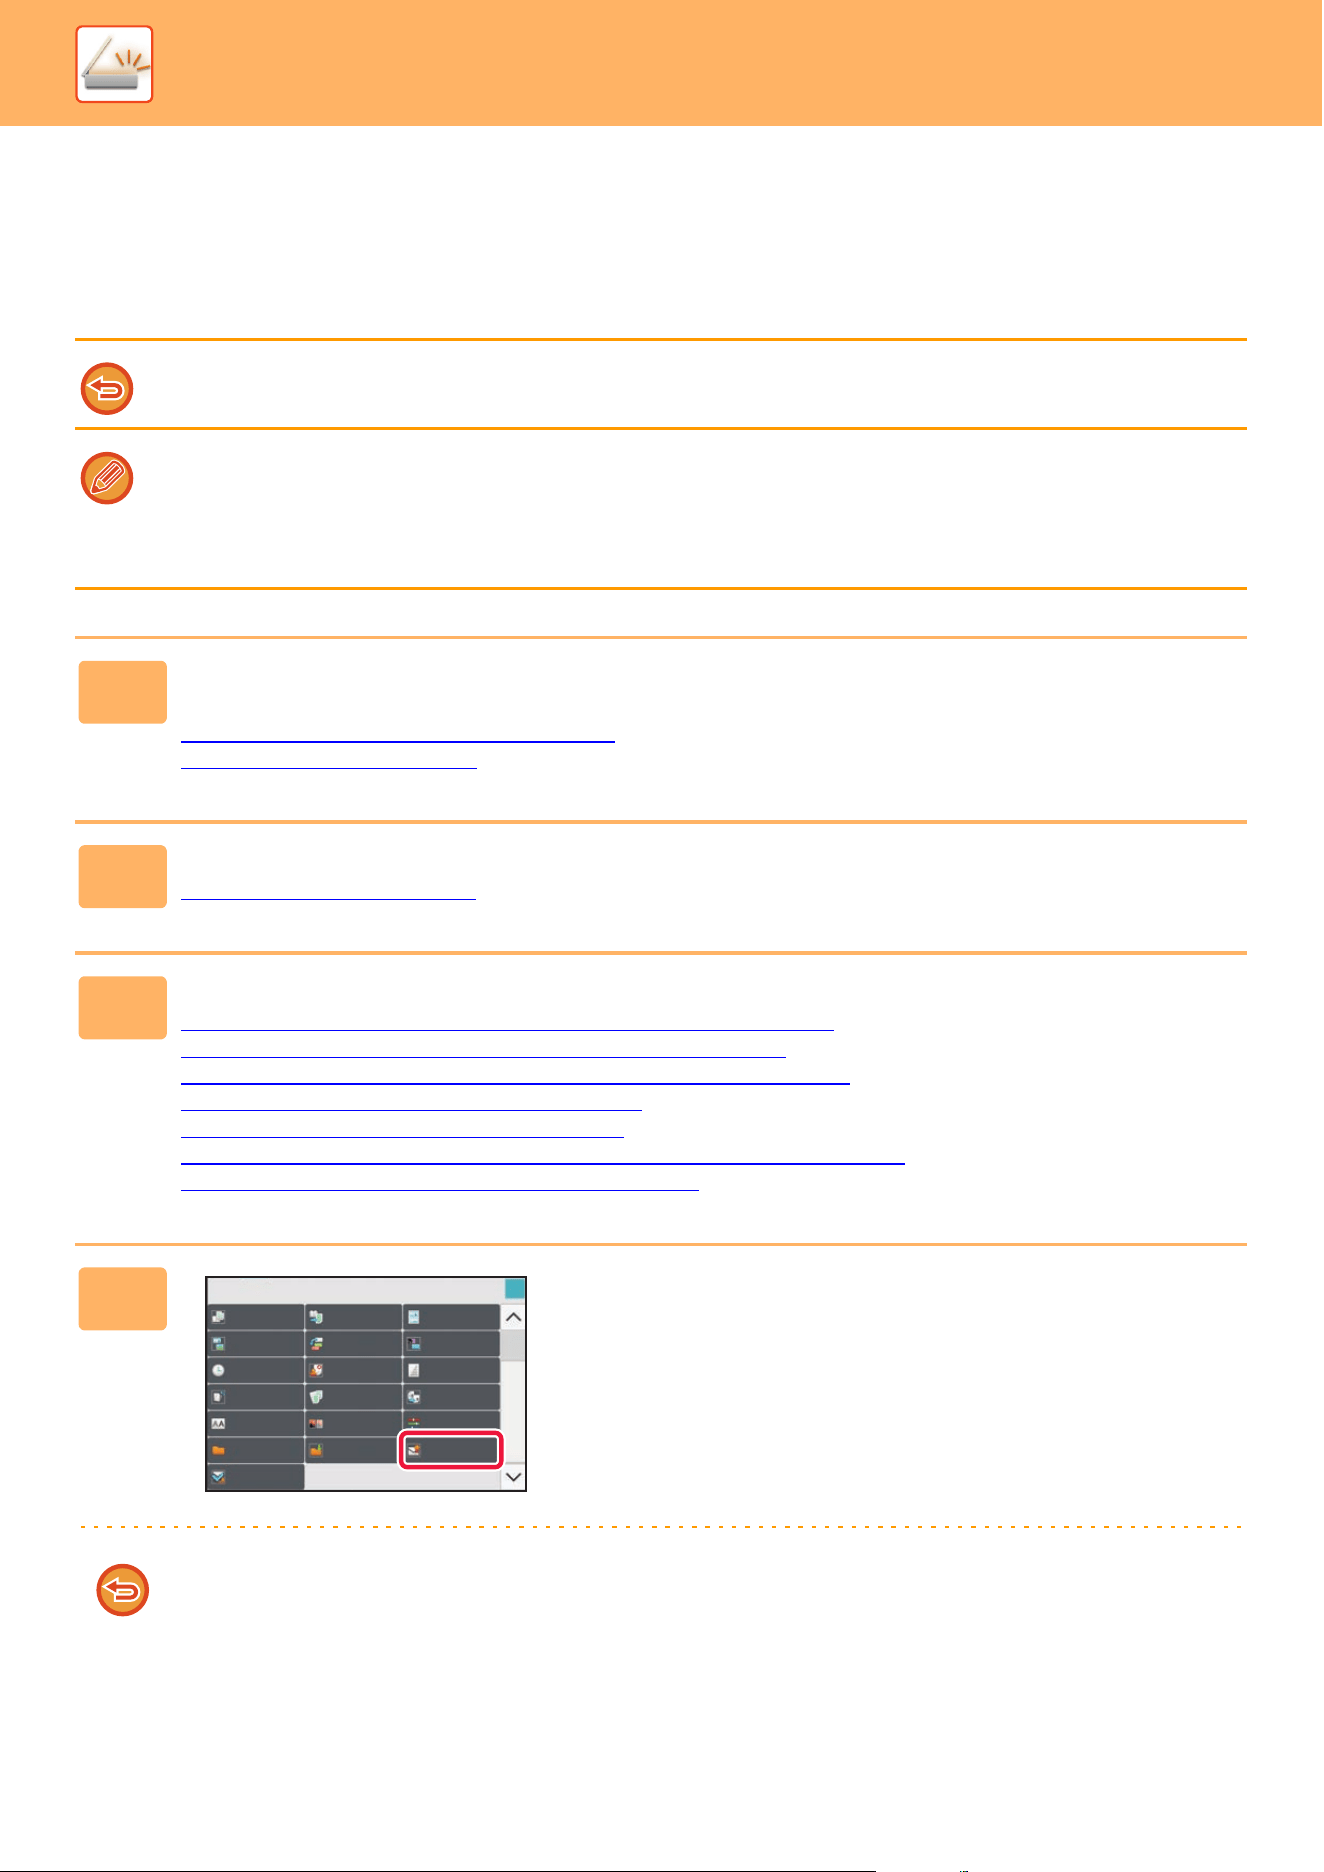
5-132
SCANNER►OTHER FUNCTIONS
ADDING A SIGNATURE WHEN SENDING AN IMAGE
(ELECTRONIC SIGNATURE)
You can add a signature when sending a scanned image. This allows the recipient to check your sender information in
the electronic signature.
This function is available for Scan to E-mail.
To add an electronic signature to a scanned image
• In "Settings (administrator)", select [System Settings] → [Security Settings] → [S/MIME Settings] → [Condition Settings].
• When [Select at Sending] is selected in "Sign E-mail" in "Settings (administrator)", you can specify whether or not an
electronic signature is added each time you send an image. When [Always Enable] is selected, the setting cannot be
changed.
1
Place the original.
Place the original in the document feeder tray of the automatic document feeder, or on the document glass.
AUTOMATIC DOCUMENT FEEDER
(page 1-47)
DOCUMENT GLASS (page 1-51)
2
Tap the mode display to switch to the initial screen of E-mail mode.
CHANGING MODES (page 2-10)
3
Specify the destination.
RETRIEVING A DESTINATION FROM AN ADDRESS BOOK (page 5-31)
VIEWING A LIST OF THE SELECTED DESTINATIONS (page 5-34)
USING A SEARCH NUMBER TO RETRIEVE A DESTINATION (page 5-35)
ENTERING AN ADDRESS MANUALLY (page 5-36)
SPECIFYING A NETWORK FOLDER (page 5-37)
RETRIEVING A DESTINATION FROM A GLOBAL ADDRESS BOOK (page 5-39)
USING A TRANSMISSION LOG TO RESEND (page 5-41)
4
Tap the [Others] key, and tap the [Sign
E-mail] key.
A checkmark appears on the icon.
After the settings are completed, tap the [Back] key.
To cancel the sign E-mail setting
Tap the [Sign E-mail] key to uncheck it.
Business
Card Scan
Dual Page Scan
Book Divide
Verif.
Stamp
Card Shot
Timer
Blank Page
Skip
ContrastSharpness
Original Skew
Adjustment
Background
Adjustment
Multicrop
Image Crop
Drop Out
color
File
RGB Adjust
Others
Quick File
Encrypt E-mail
Sign E-mail
OK

5-133
SCANNER►OTHER FUNCTIONS
5
Tap the [Start] key to start scanning of the original.
• If you inserted the original pages in the document feeder tray, all pages are scanned.
A beep will sound to indicate that scanning and transmission have ended.
• When you place the original on the document glass, scan each page one at a time.
When scanning finishes, place the next original and tap the [Start] key. Repeat the procedure until all pages have been
scanned and then tap the [Read-End] key.
A beep will sound to indicate that scanning and transmission have ended.
You can tap the [Preview] key to check a preview of the image before sending an image. For more information, see
“CHECKING THE IMAGE TO BE TRANSMITTED
(page 5-81)".
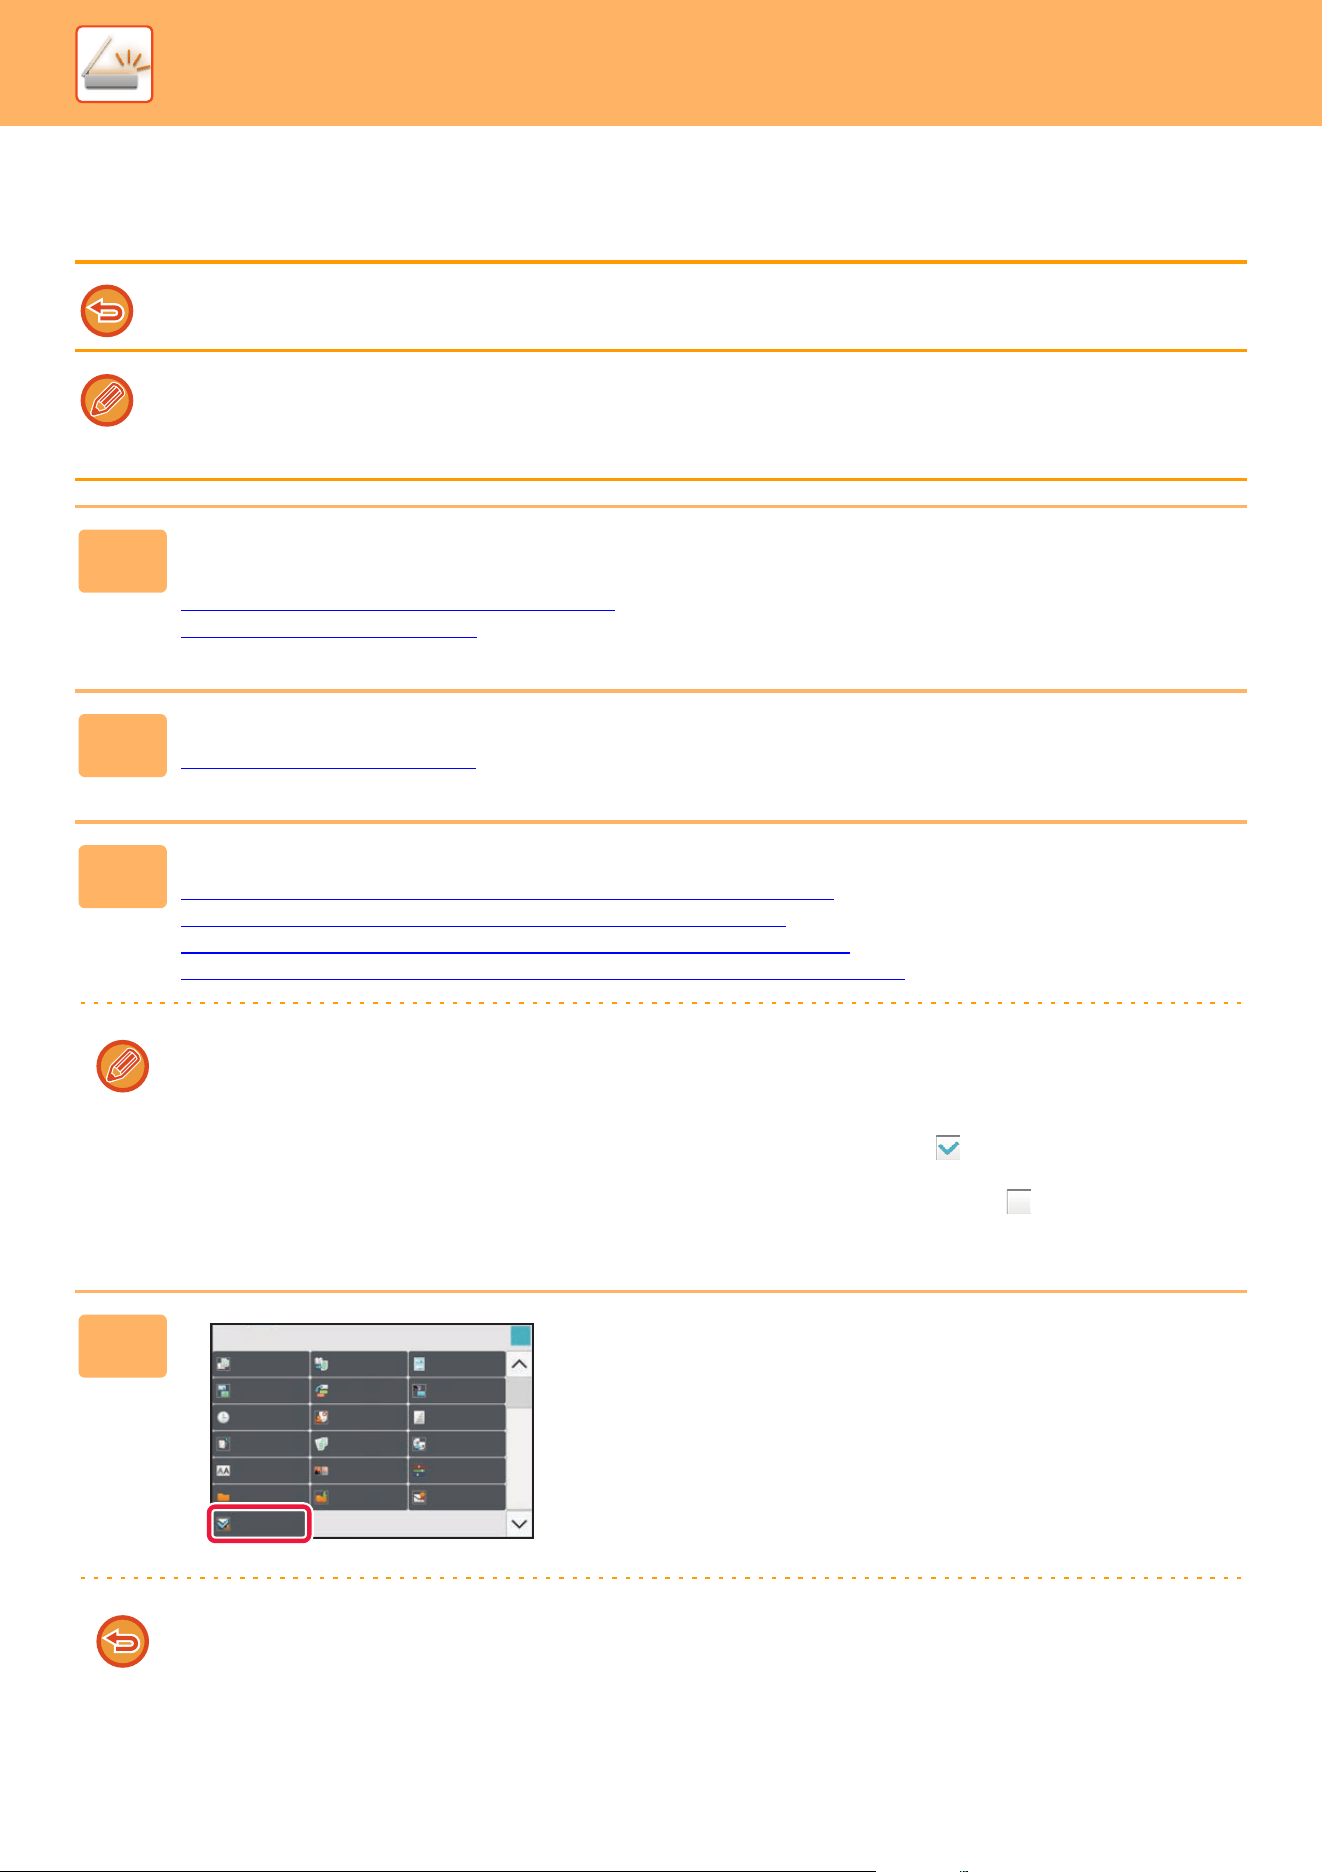
5-134
SCANNER►OTHER FUNCTIONS
ENCRYPTING THE TRANSMITTED DATA (ENCRYPTION)
You can encrypt the transmitted data to strengthen security.
This function is available for Scan to E-mail.
To encrypt transmitted data
•
In "Settings (administrator)", select [
System Settings
] → [
Security Settings
] → [
S/MIME Settings
] → [
Condition Settings
].
•
When [
Select at Sending
] is selected in "
Encrypt E-mail
" in "Settings (administrator)", you can specify whether or not the data
is encrypted each time you send an image. When [
Always Enable
] is selected, the setting cannot be changed.
1
Place the original.
Place the original in the document feeder tray of the automatic document feeder, or on the document glass.
AUTOMATIC DOCUMENT FEEDER
(page 1-47)
DOCUMENT GLASS (page 1-51)
2
Tap the mode display to switch to the initial screen of E-mail mode.
CHANGING MODES (page 2-10)
3
Specify the destination.
RETRIEVING A DESTINATION FROM AN ADDRESS BOOK (page 5-31)
VIEWING A LIST OF THE SELECTED DESTINATIONS (page 5-34)
USING A SEARCH NUMBER TO RETRIEVE A DESTINATION (page 5-35)
RETRIEVING A DESTINATION FROM A GLOBAL ADDRESS BOOK (page 5-39)
• Data encryption is not possible when the address is directly entered.
• Encrypted data can only be sent to an address for which you have registered a user certificate.
Register a user certificate for the address in "Settings (Web version)" - [Address Book] → [E-mail] → "User Certificate".
Only one E-mail address can be registered for an address that has a user certificate.
• If the "Disable sending to the addresses which cannot be encrypted." checkbox is ( ) in "Settings (administrator)" -
[System Settings] → [Security Settings] → [S/MIME Settings] → [Condition Settings] → [Encryption Settings],
addresses without a user certificate cannot be selected. When the checkmark is removed ( ), the data is sent
without encryption.
4
Tap the [Others] key, and tap the
[Encrypt E-mail] key.
A checkmark appears on the icon.
After the settings are completed, tap the [Back] key.
To cancel the encryption setting
Tap the [Encrypt E-mail] key to remove the checkmark.
Verif.
Stamp
Dual Page Scan Book Divide
Business
Card Scan
Card Shot
Timer
Blank Page
Skip
Contrast
Sharpness
Original Skew
Adjustment
Background
Adjustment
Multicrop
Image Crop
Drop Out
color
File
RGB Adjust
Others
Quick File
Encrypt E-mail
Sign E-mail
OK

5-135
SCANNER►OTHER FUNCTIONS
5
Tap the [Start] key to start scanning of the original.
• If you inserted the original pages in the document feeder tray, all pages are scanned.
A beep will sound to indicate that scanning and transmission have ended.
• When you place the original on the document glass, scan each page one at a time.
When scanning finishes, place the next original and tap the [Start] key. Repeat the procedure until all pages have been
scanned and then tap the [Read-End] key.
A beep will sound to indicate that scanning and transmission have ended.
You can tap the [Preview] key to check a preview of the image before sending an image. For more information, see
“CHECKING THE IMAGE TO BE TRANSMITTED
(page 5-81)".
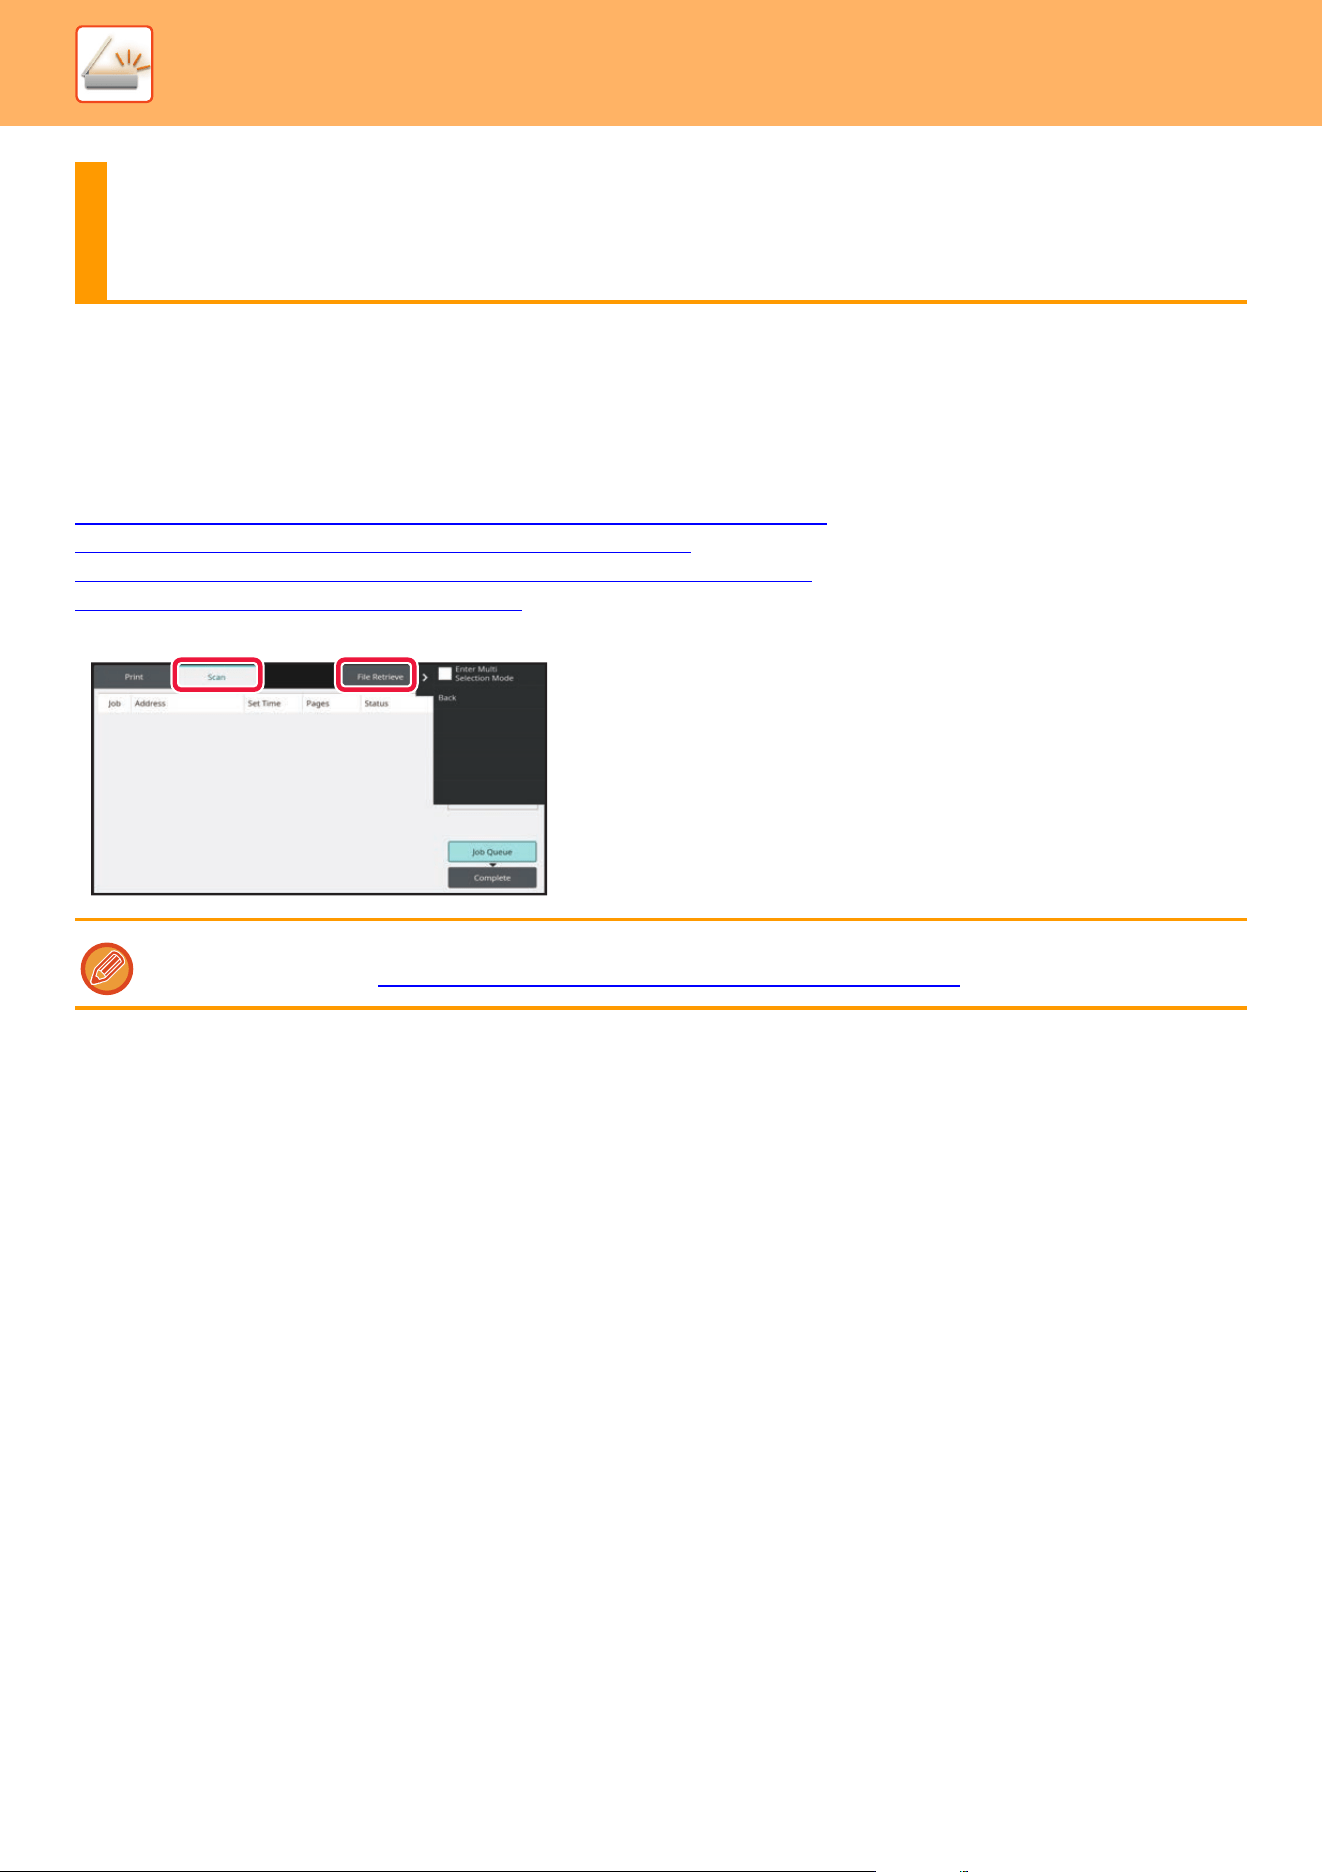
5-136
SCANNER►CHECKING THE STATUS OF TRANSMISSION/RECEPTION JOBS
IMAGE SEND JOBS
When you tap the job management display, jobs are displayed in a list. To check the status of a scanner mode job,
select the [Scan] tab.
When you wish to stop or delete jobs or to perform priority processing, see the following items:.
STOPPING/DELETING A JOB IN PROGRESS OR RESERVED
(page 2-55)
PRIORITY PROCESSING OF A RESERVED JOB (page 2-56)
CHECKING A RESERVED JOB OR THE JOB IN PROGRESS (page 2-58)
CHECKING COMPLETED JOBS (page 2-59)
COMPLETED TRANSMISSION/RECEPTION
JOBS
A usual transmission job moves to the job list when transmission is completed. Then the status field displays "Send OK".
Timer transmission jobs
A timer transmission job appears at the end of the job queue list until the specified time is reached.
Transmission begins at the specified time. When transmission is completed, the job moves to the completed job list and
the status field displays "Send OK".
CHECKING THE STATUS OF
TRANSMISSION/RECEPTION JOBS
Image send jobs include reception, timer transmission, and data forwarding as well as usual transmission. For the Image
Send job operations, see “COMPLETED TRANSMISSION/RECEPTION JOBS
(page 5-136)".
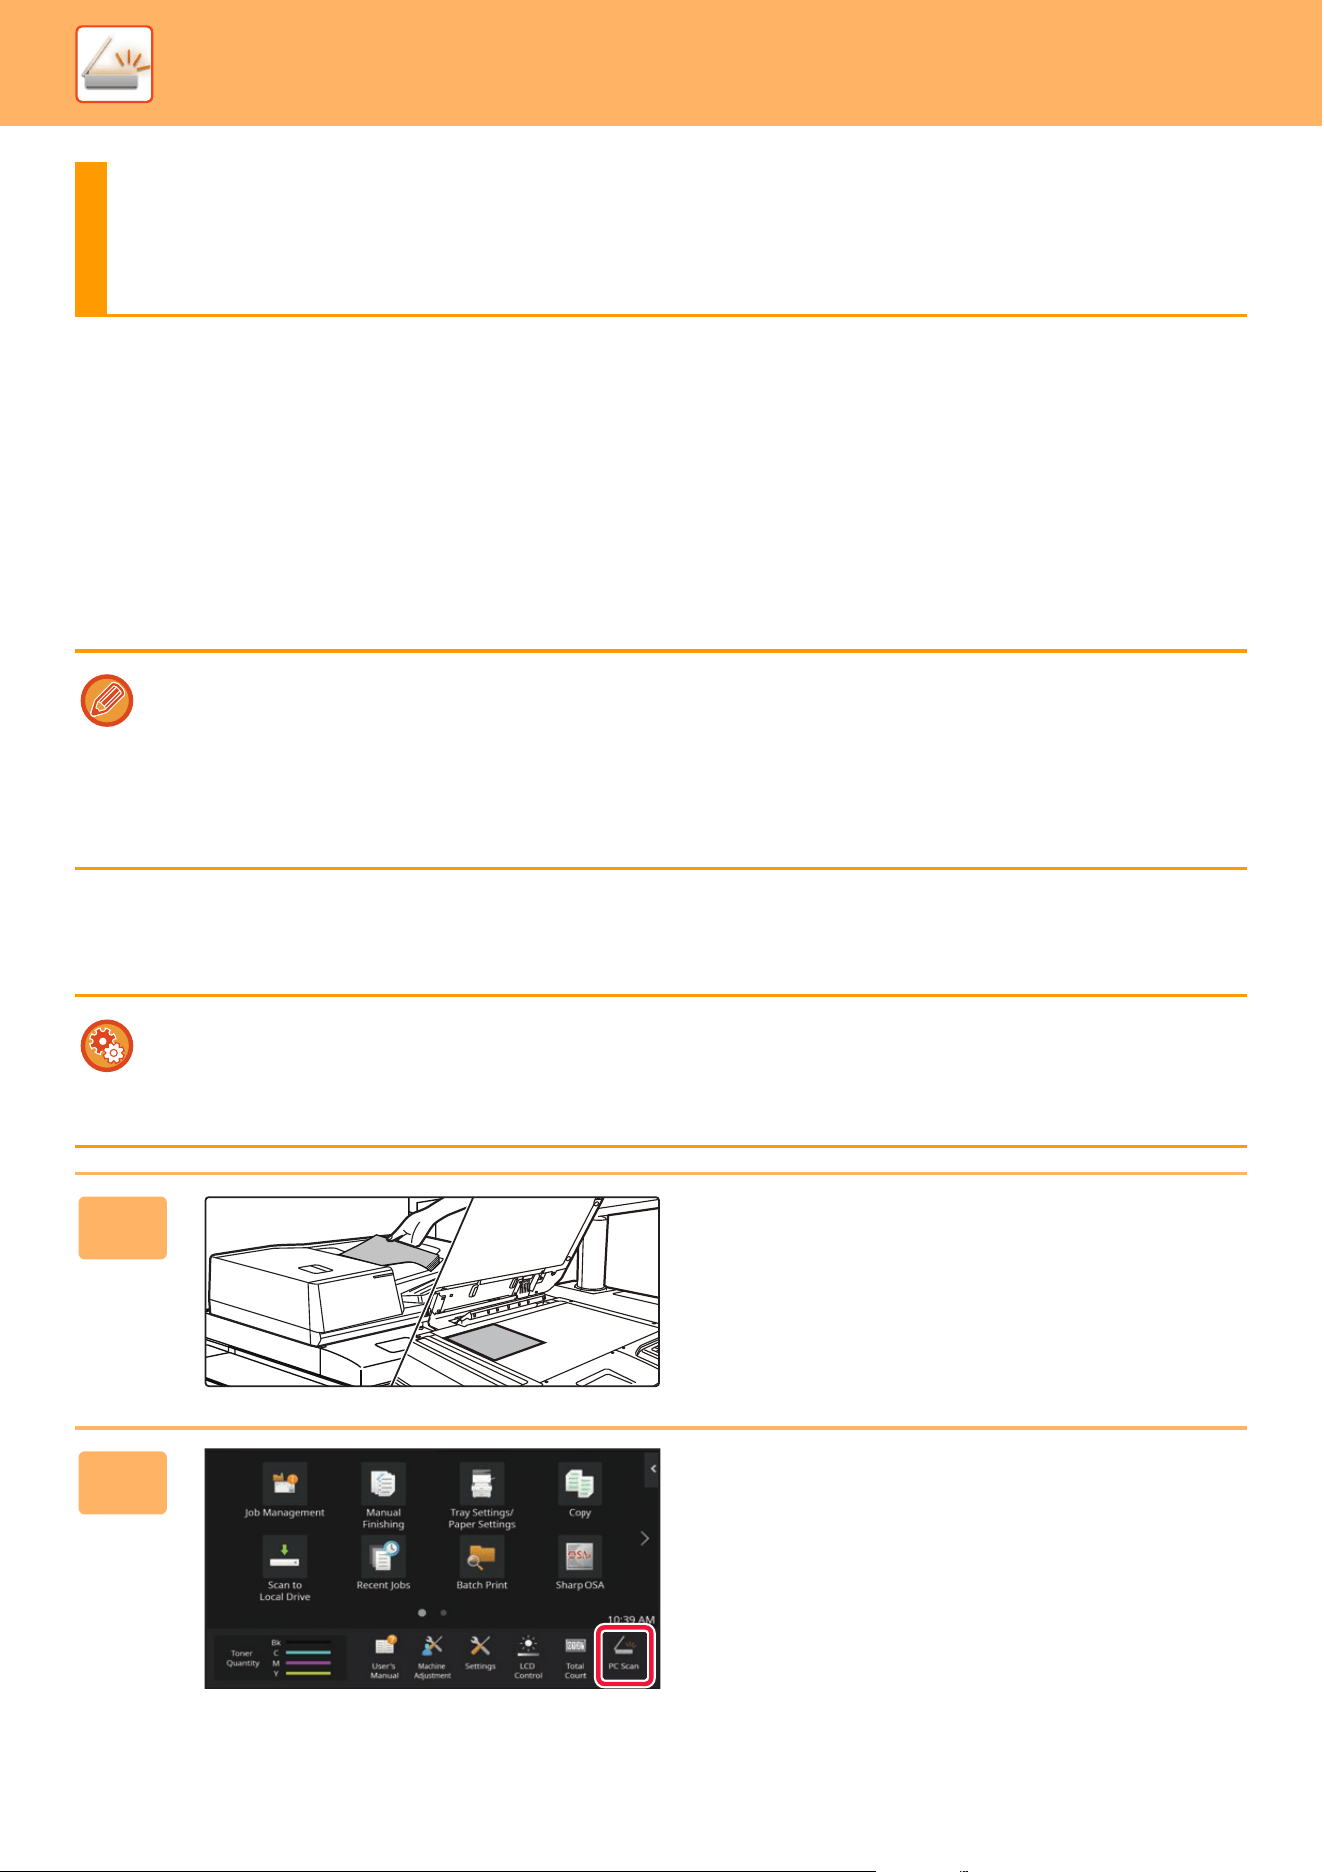
5-137
SCANNER►SCANNING FROM A COMPUTER (PC Scan Mode)
BASIC SCANNING PROCEDURE
You can install the scanner driver on your computer and use a TWAIN* compliant application to scan an image using
your computer.
Scanning from your computer is most useful for scanning a single original such as a photo, particularly when you want to
adjust scan settings as you scan. By contrast, scanning at the machine is most useful for continuous scanning of
multiple originals.
* An interface standard used for scanners and other image input devices. When the scanner driver is installed on your
computer, you can use any TWAIN-compliant application to scan an image.
As an example, the procedure for scanning from the "Sharpdesk" application is explained below.
[At the machine]
SCANNING FROM A COMPUTER
(PC Scan Mode)
• For the procedures for installing the scanner driver and configuring settings, see the Software Setup Guide.
• This function cannot be used when it has been disabled using "Disable Scan Function" in the system settings
(administrator).
• The procedures for selecting the scanner driver and starting scanning vary depending on the TWAIN-compliant
application. For more information, see the manual for the application or Help.
• When a large image is scanned at high resolution, the amount of data will be very large and scanning will take a long time.
Be sure to select appropriate scan settings for the original (text, photo, etc.).
Prohibit PC Scan:
Prohibit sending when an address is manually entered To enable the hold setting for received data print
In "Settings (administrator)", select [System Settings] → [Image Send Settings] → [Common Settings] → [Enable/Disable
Settings] → [Settings to Disable Transmission] → [Disabling of PC Scan].
Prohibit PC Scan.
1
Place the original.
Place the original face up in the document feeder tray, or
face down on the document glass.
2
Tap the [PC Scan] mode icon to switch
to PC Scan mode.

5-138
SCANNER►SCANNING FROM A COMPUTER (PC Scan Mode)
[At your computer]
When PC scan mode is selected, only the [Exit] key displayed in the touch panel can be used on the machine; no other
keys can be used.
1
Start the TWAIN-compliant application on your computer and select [SHARP
MFP TWAIN K] in the application's scanner selection.
2
Preview the image.
(1) Select the location where the original is
placed.
"Scanning Position" menu:
• If the original is a one-sided original and is placed in
the document feeder tray, select [SPF(Simplex)].
• If the original is a 2-sided original and is placed in the
document feeder tray, select [SPF(Duplex - Book)]
or [SPF(Duplex - Tablet)] depending on whether the
original is a book-style or tablet-style original. In
addition, select [Left edge is fed first] or [Top edge is
fed first] depending on the orientation of the original.
(2) Select scan settings.
"Scanning Mode" menu:
Switch between the "Preset" screen and the "Custom
Settings" screen. In the "Preset" screen, select "Web
Pages", "Photo", "FAX" or "OCR" depending on the
original type and your scanning purpose.
If you wish to change the initial settings of any of the
four buttons or select the resolution or other advanced
settings, change to the "Custom Settings" screen.
"Image Area" menu:
Select the scan area. If "Auto" is selected, the original
size detected by the machine will be scanned. You can
also set the scanning area in the preview window with
your mouse.
(3) Click the [Preview] button.
The preview image will appear in the scanner driver.
If you are not satisfied with the preview image, repeat
(2) and (3).
If the [Zoom Preview] checkbox is selected before the
[Preview] button is clicked, the selected area will be
enlarged in the preview window. If the checkmark is
removed, the preview image will return to normal. Note
that if SPF is selected in the "Scanning Position" menu,
the [Zoom Preview] function cannot be used.
• For further information on the scan settings, click the button in the preview image screen of step 7 to
open scanner driver Help.
• If the [Preview] button is clicked when scanning from the document feeder tray, only one original page will be scanned
for the preview image. If you wish to include that original in the scan, return it to the document feeder tray.
(1) (3)(2)
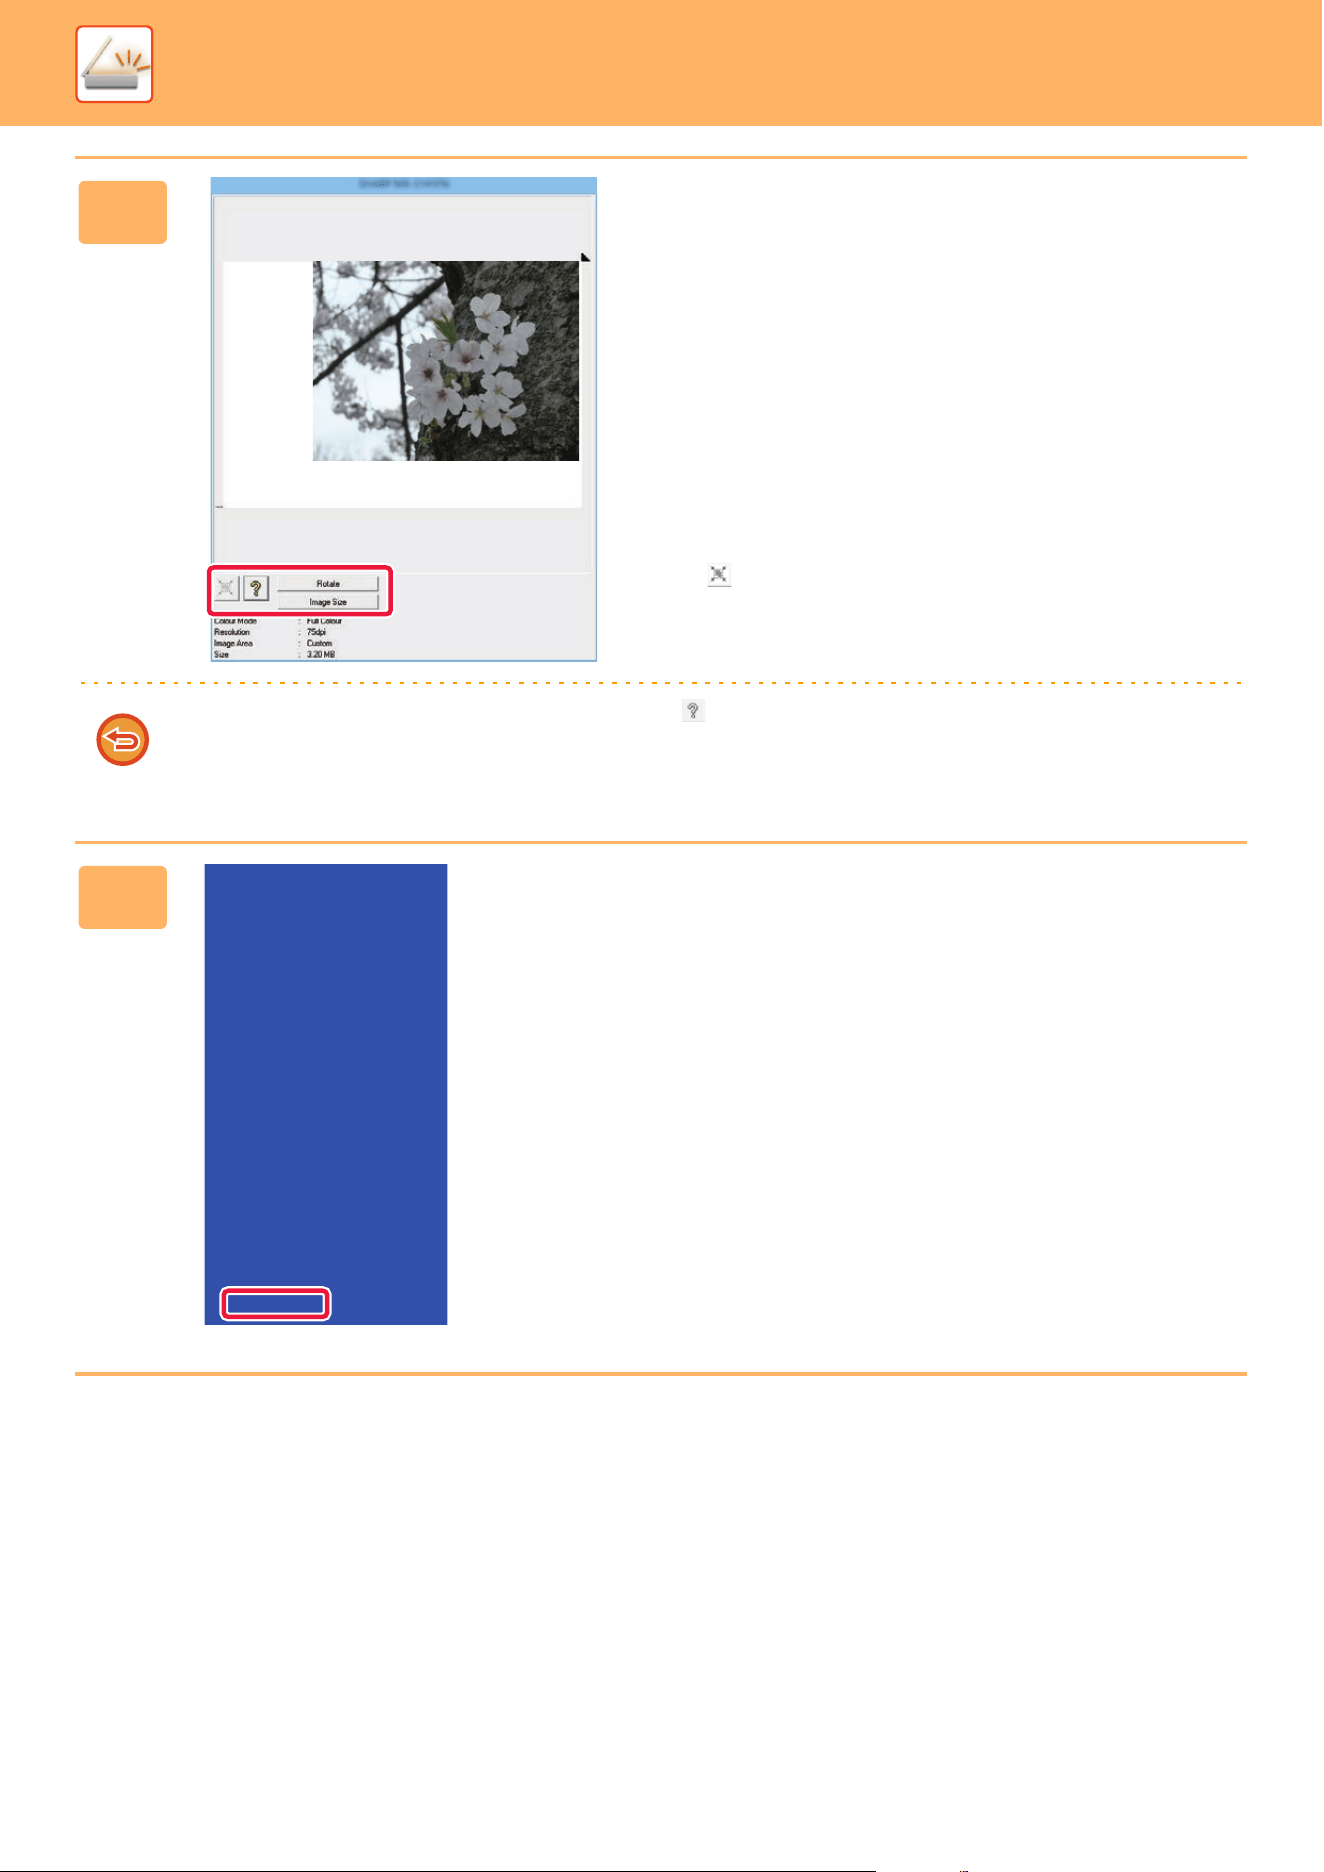
5-139
SCANNER►SCANNING FROM A COMPUTER (PC Scan Mode)
3
Select scanning settings while viewing
the image.
[Rotate] button:
Each time this button is clicked, the preview image rotates
90 degrees. This lets you change the orientation of the
image without picking up and placing the original again. The
image file will be created using the orientation that appears
in the preview window.
[Image Size] button:
Click this button to specify the scan area by entering
numerical values. Pixels, mm, or inches can be selected for
the units of the numerical values. If a scanning area has
already been specified, the entered numbers will change the
area relative to the top left corner of the specified area.
button:
When a preview image is displayed and a scanning area is
not specified, you can click the button to automatically set
the scanning area to the entire preview image.
• For further information on the scan settings, click button to open scanner driver Help.
• If the originals are placed in the document feeder tray, only the top page will be previewed. The top page will be
delivered to the original exit tray. Be sure to return the previewed page to the document feeder tray before previewing
again or scanning.
4
Click the [Scan] button.
Scanning begins. The image appears in your application.
Assign a file name to the scanned image and save it as
appropriate in the software application you are using.
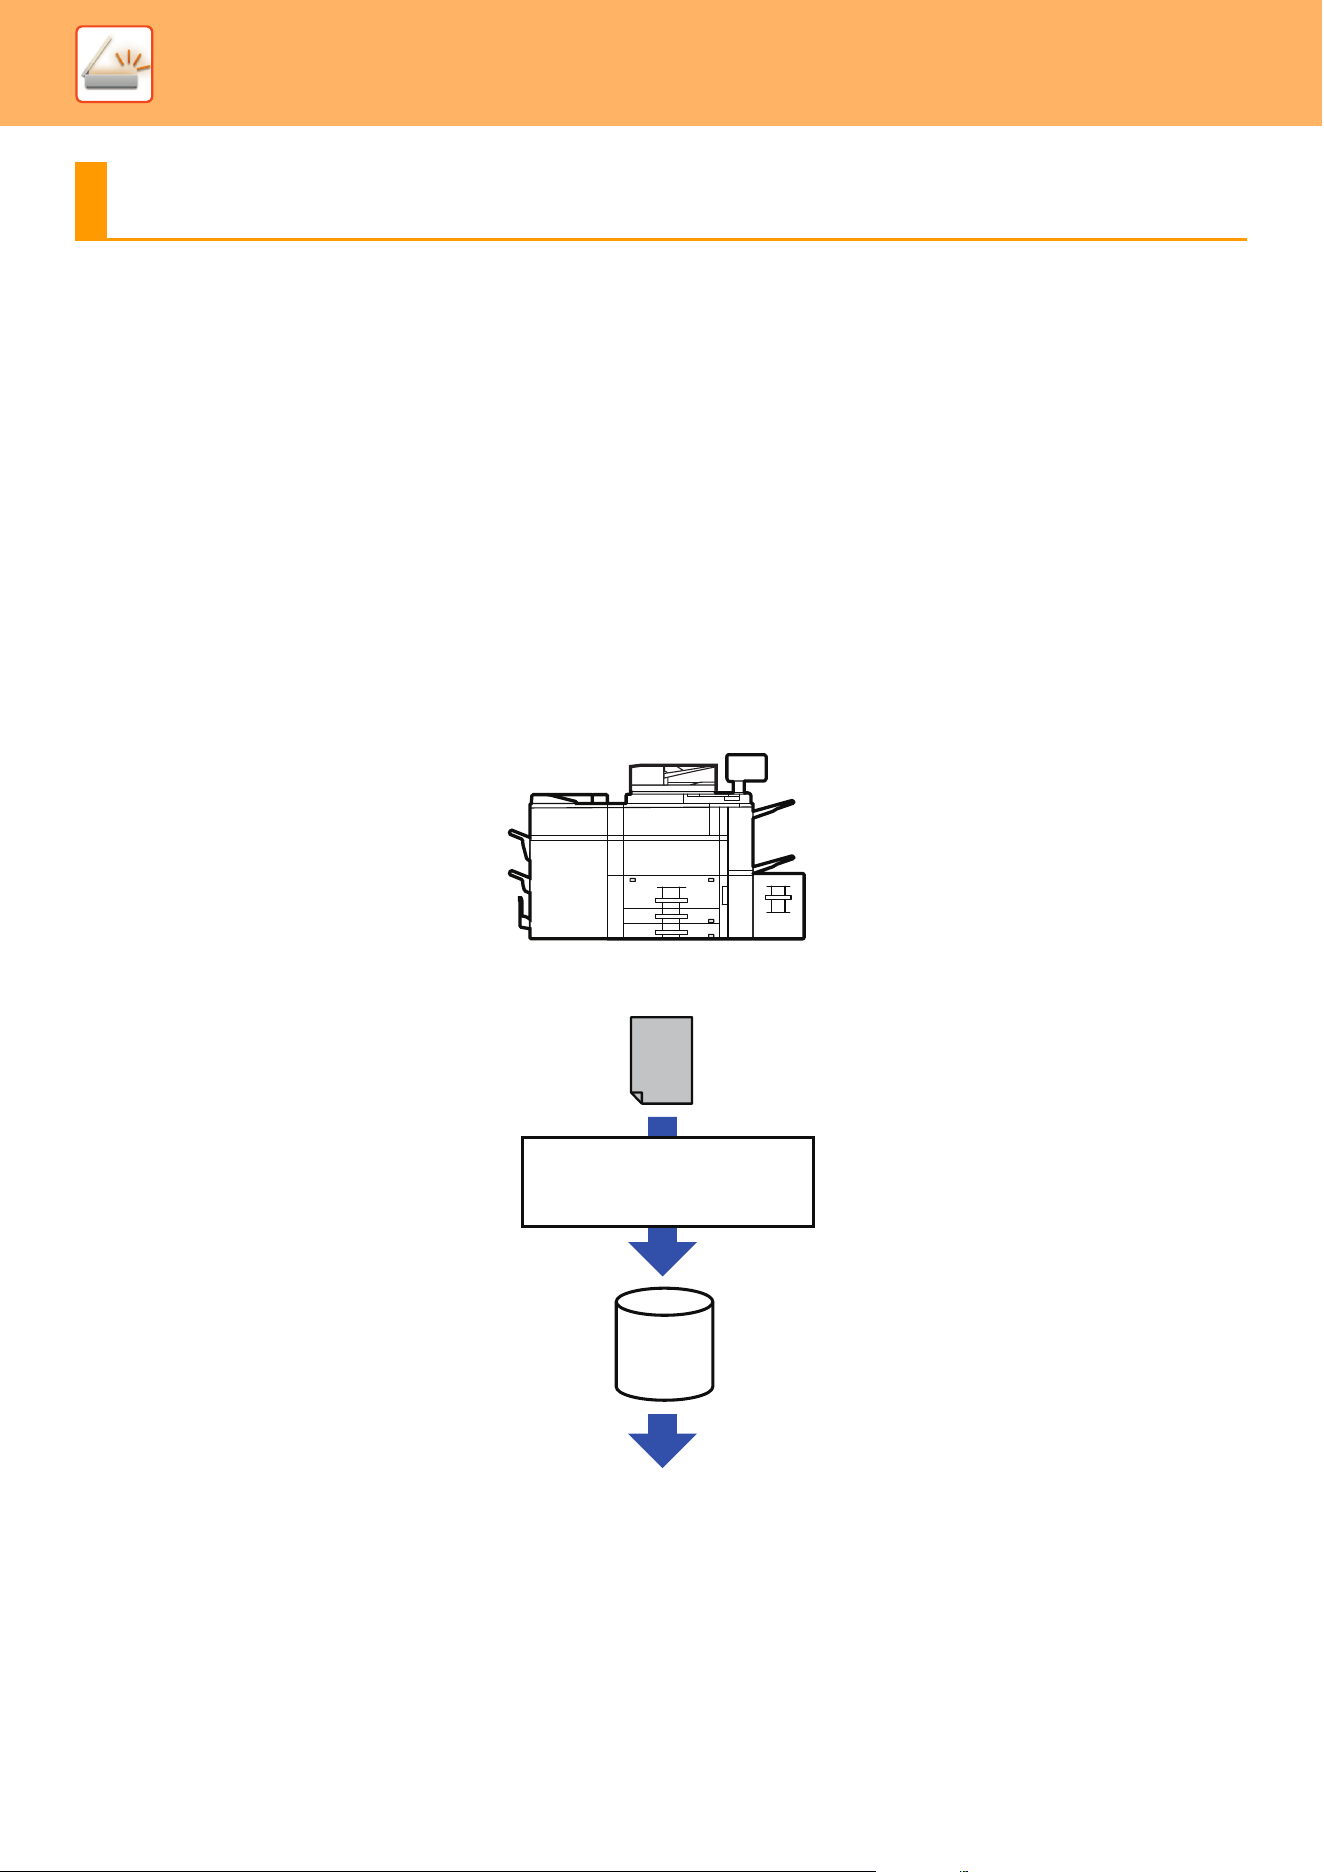
5-141
SCANNER►METADATA DELIVERY
PREPARATIONS FOR METADATA
DELIVERY
METADATA DELIVERY (DATA ENTRY)
When the application integration module kit is installed, metadata (data indicating the attributes of the image file and
how it is to be processed) is generated based on pre-stored information and transmitted separately from an image file
that is generated for sending a scanned image. The metadata file is created in XML format.
By linking the metadata with applications such as document management software, a workflow application, or an
encryption server, a sophisticated document solution environment can be built.
Using the application integration module kit, information on a generated image file can be entered at the touch panel and
transmitted along with the image as an XML file.
METADATA DELIVERY
Image file
Scan to E-mail
Scan to FTP
Scan to Network Folder
Fax server, document
management software, workflow
application, and encryption server,
etc.
Server

5-142
SCANNER►METADATA DELIVERY
SETTINGS REQUIRED IN THE SETTING MODE
(WEB VERSION)
To configure the settings related to metadata, select [System Settings] → [Image Send Settings] → [Metadata
Settings]→ [Metadata Entry] in "Settings (administrator)". (Administrator rights are required.)
Enable metadata delivery.
Storing Metadata Sets
Store the items (the metadata set) to write to the XML file that will be generated during scanning. Up to 10 metadata
items can be configured in a metadata set. A stored metadata set can be selected at the time of transmission.
Addresses specified in "Address Type Allowing Metadata Entry" when a metadata set is stored can be selected as
transmission destinations at the time of transmission using one-touch keys, manual entry, or a global address book
search. (Addresses for which metadata entry is not allowed cannot be specified as transmission destinations.)
5-143
SCANNER►METADATA DELIVERY
TRANSMITTING METADATA
TRANSMITTING METADATA
Select a metadata set, enter each item, and perform metadata delivery.
Metadata delivery is performed using the document filing function. The [Data Entry] tab appears in the transmission settings
screen of document filing mode to allow metadata delivery.
In addition, perform metadata delivery using document filing in [Metadata Entry] in "Settings (Web version)."
• In data entry mode, configure metadata settings to perform metadata delivery.
To perform transmission without sending metadata, switch the screen from data entry mode to a different mode and then
perform transmission.
• When metadata settings have been configured or an address is specified in data entry mode, it will not be possible to
switch to another mode.
• Before configuring metadata settings, specify addresses in all available modes. After metadata settings have been
configured, specify only addresses in modes that are allowed in the selected metadata.
1
Tap the [Data Entry] icon on the [Home Screen], and tap [Metadata Set].
If a specific metadata set has been specified as the default set, go to step 3.
If no metadata sets have been stored, Metadata Entry is unavailable. Store metadata set in the setting mode (Web
version) before performing transmission.
2
Tap the key for the desired metadata set.
3
The keys of the items stored in the metadata set will appear. Tap the key of
the item that you wish to enter.
4
Tap the key of the value that you wish to enter, and tap the [OK] key.
To directly enter the metadata value, tap the [Direct Entry] key. On the soft keyboard screen that appears, tap the [OK]
key. You will return to the screen shown in step 3.
After the settings are completed, tap .
To cancel the selection of the metadata value:Tap the [Clear] key.
5
Configure image or other settings, and perform the scan send procedure.
• Configure job detail settings and then start transmission using the same operations as in other modes.
• When directly entering an address, tap [Touch to input Address] to display the screen for selecting an address type.
If the address type such as E-mail or Network Folder is selected, the address type entry screen appears.
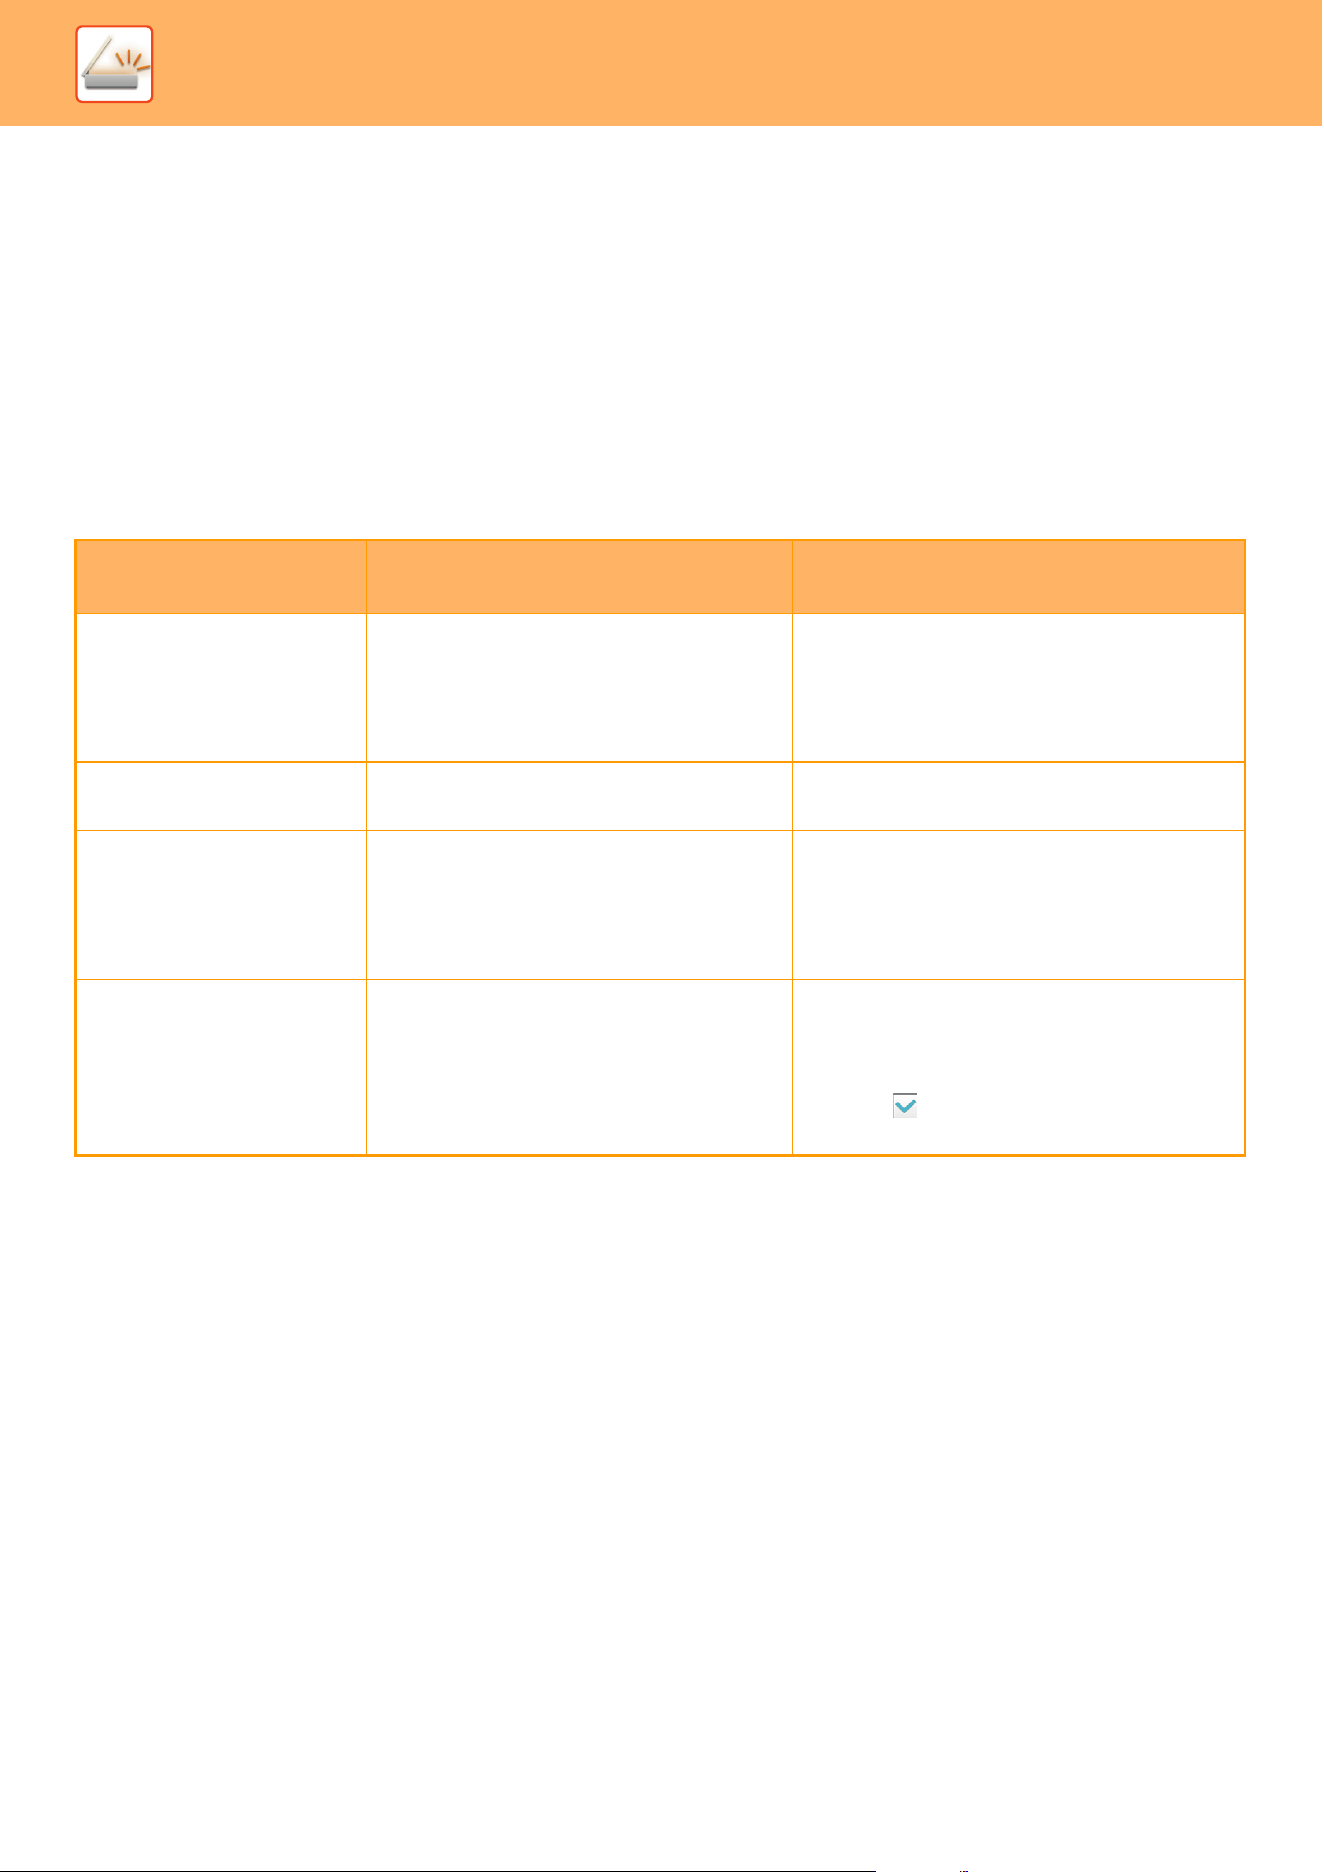
5-144
SCANNER►METADATA DELIVERY
METADATA FIELDS
The following three types of metadata are included in the XML file that is transmitted.
• Data automatically generated by the machine
These data are always included in the XML file and are automatically stored on your PC.
• Previously defined fields
These fields are automatically recognized by the machine and assigned to appropriate XML tags. These fields can be
selected, and can only be included in the XML file if they are enabled in the setting mode (Web version).
• User defined fields
Custom fields are added to the XML file. These fields can be selected and are defined in the setting mode (Web
version).
If a defined metadata field is one of the following fields, a message will appear informing you that the field cannot be
filled in. Enter appropriate information in the related items of the send settings.
Name entered in
metadata fields
Description Where entered
formName Name of the user who sent the job. If the
name is not entered as metadata, the
sender name determined by the usual rules
for determining the sender name will be
applied as metadata.
[Reply-To]
(sender name of selected sender)
replyTo E-mail address to which the transmission
result will be sent.
[Reply-To]
(E-mail address of selected sender)
documentSubject Job name appearing in the E-mail "Subject"
line, or job name on the cover sheet. When
the user enters a [Subject] in the send
settings screen in the touch panel, the
entered value is applied as metadata.
[Subject]
(Blank until a value is set in the send settings
screen.)
fileName Enter the file name of the image to be sent. [File Name]
(Only when the [Allow Custom Filenames]
checkbox is selected in the metadata entry
screen in the setting mode (Web
version)) (Blank until a value is set in the
send settings screen.)

6-1
DOCUMENT FILING
DOCUMENT FILING . . . . . . . . . . . . . . . . . . . . . . . . . . . . . . 6-2
USES OF DOCUMENT FILING . . . . . . . . . . . . . . . . . . . . 6-3
TYPES OF DOCUMENT FILING . . . . . . . . . . . . . . . . . . . 6-3
BEFORE USING SCAN TO LOCAL DRIVE IN
DOCUMENT FILING . . . . . . . . . . . . . . . . . . . . . . . . . . . . 6-4
IMPORTANT POINTS WHEN USING DOCUMENT
FILING . . . . . . . . . . . . . . . . . . . . . . . . . . . . . . . . . . . . . . . 6-6
USING DOCUMENT FILING IN EACH MODE . . . . . . . . 6-7
BASE SCREEN OF DOCUMENT FILING MODE. . . . . . . . 6-8
SAVING FILES WITH DOCUMENT FILING
FILING WHILE USING ANOTHER MODE . . . . . . . . . . . . . 6-9
QUICK FILE . . . . . . . . . . . . . . . . . . . . . . . . . . . . . . . . . . . 6-9
FILE . . . . . . . . . . . . . . . . . . . . . . . . . . . . . . . . . . . . . . . . 6-10
SAVING DOCUMENT DATA ONLY (SCAN TO LOCAL
DRIVE). . . . . . . . . . . . . . . . . . . . . . . . . . . . . . . . . . . . . . . . 6-15
SAVE ON LOCAL DRIVE. . . . . . . . . . . . . . . . . . . . . . . . 6-15
SAVE IN EXTERNAL MEMORY DEVICE . . . . . . . . . . . 6-17
USING STORED FILES
SEQUENCE FOR USING A STORED FILE . . . . . . . . . . . 6-20
FILE SELECTION SCREEN . . . . . . . . . . . . . . . . . . . . . . . 6-21
LIST DISPLAY MODE . . . . . . . . . . . . . . . . . . . . . . . . . . 6-21
THUMBNAIL DISPLAY MODE. . . . . . . . . . . . . . . . . . . . 6-22
SELECTING A FILE TO RETRIEVE . . . . . . . . . . . . . . . . . 6-23
FILE PRINTING. . . . . . . . . . . . . . . . . . . . . . . . . . . . . . . . . 6-24
QUICK PRINTING . . . . . . . . . . . . . . . . . . . . . . . . . . . . . 6-24
CHANGING SETTINGS BEFORE PRINTING . . . . . . . . 6-24
MULTI-FILE PRINTING. . . . . . . . . . . . . . . . . . . . . . . . . . . 6-25
MULTI-FILE PRINTING . . . . . . . . . . . . . . . . . . . . . . . . . 6-25
BATCH PRINTING . . . . . . . . . . . . . . . . . . . . . . . . . . . . . 6-26
FILE TRANSMISSION. . . . . . . . . . . . . . . . . . . . . . . . . . . . 6-27
FILE MOVING . . . . . . . . . . . . . . . . . . . . . . . . . . . . . . . . . . 6-28
DELETE FILE . . . . . . . . . . . . . . . . . . . . . . . . . . . . . . . . . . 6-29
AUTOMATIC DELETION OF FILE. . . . . . . . . . . . . . . . . 6-30
FILE IMAGE CHECKING . . . . . . . . . . . . . . . . . . . . . . . . . 6-31
FILE IMAGE . . . . . . . . . . . . . . . . . . . . . . . . . . . . . . . . . . 6-31
FILE MERGING. . . . . . . . . . . . . . . . . . . . . . . . . . . . . . . . . 6-32
RETRIEVING AND USING A FILE FROM THE JOB
MANAGEMENT SCREEN. . . . . . . . . . . . . . . . . . . . . . . . . 6-33
FILE SEARCH AND RETRIEVAL. . . . . . . . . . . . . . . . . . . 6-34
PRINTING AN EXTERNAL FILE . . . . . . . . . . . . . . . . . . . 6-36
OPERATION IN THE WEB PAGE . . . . . . . . . . . . . . . . . 6-36
DOCUMENT FILING
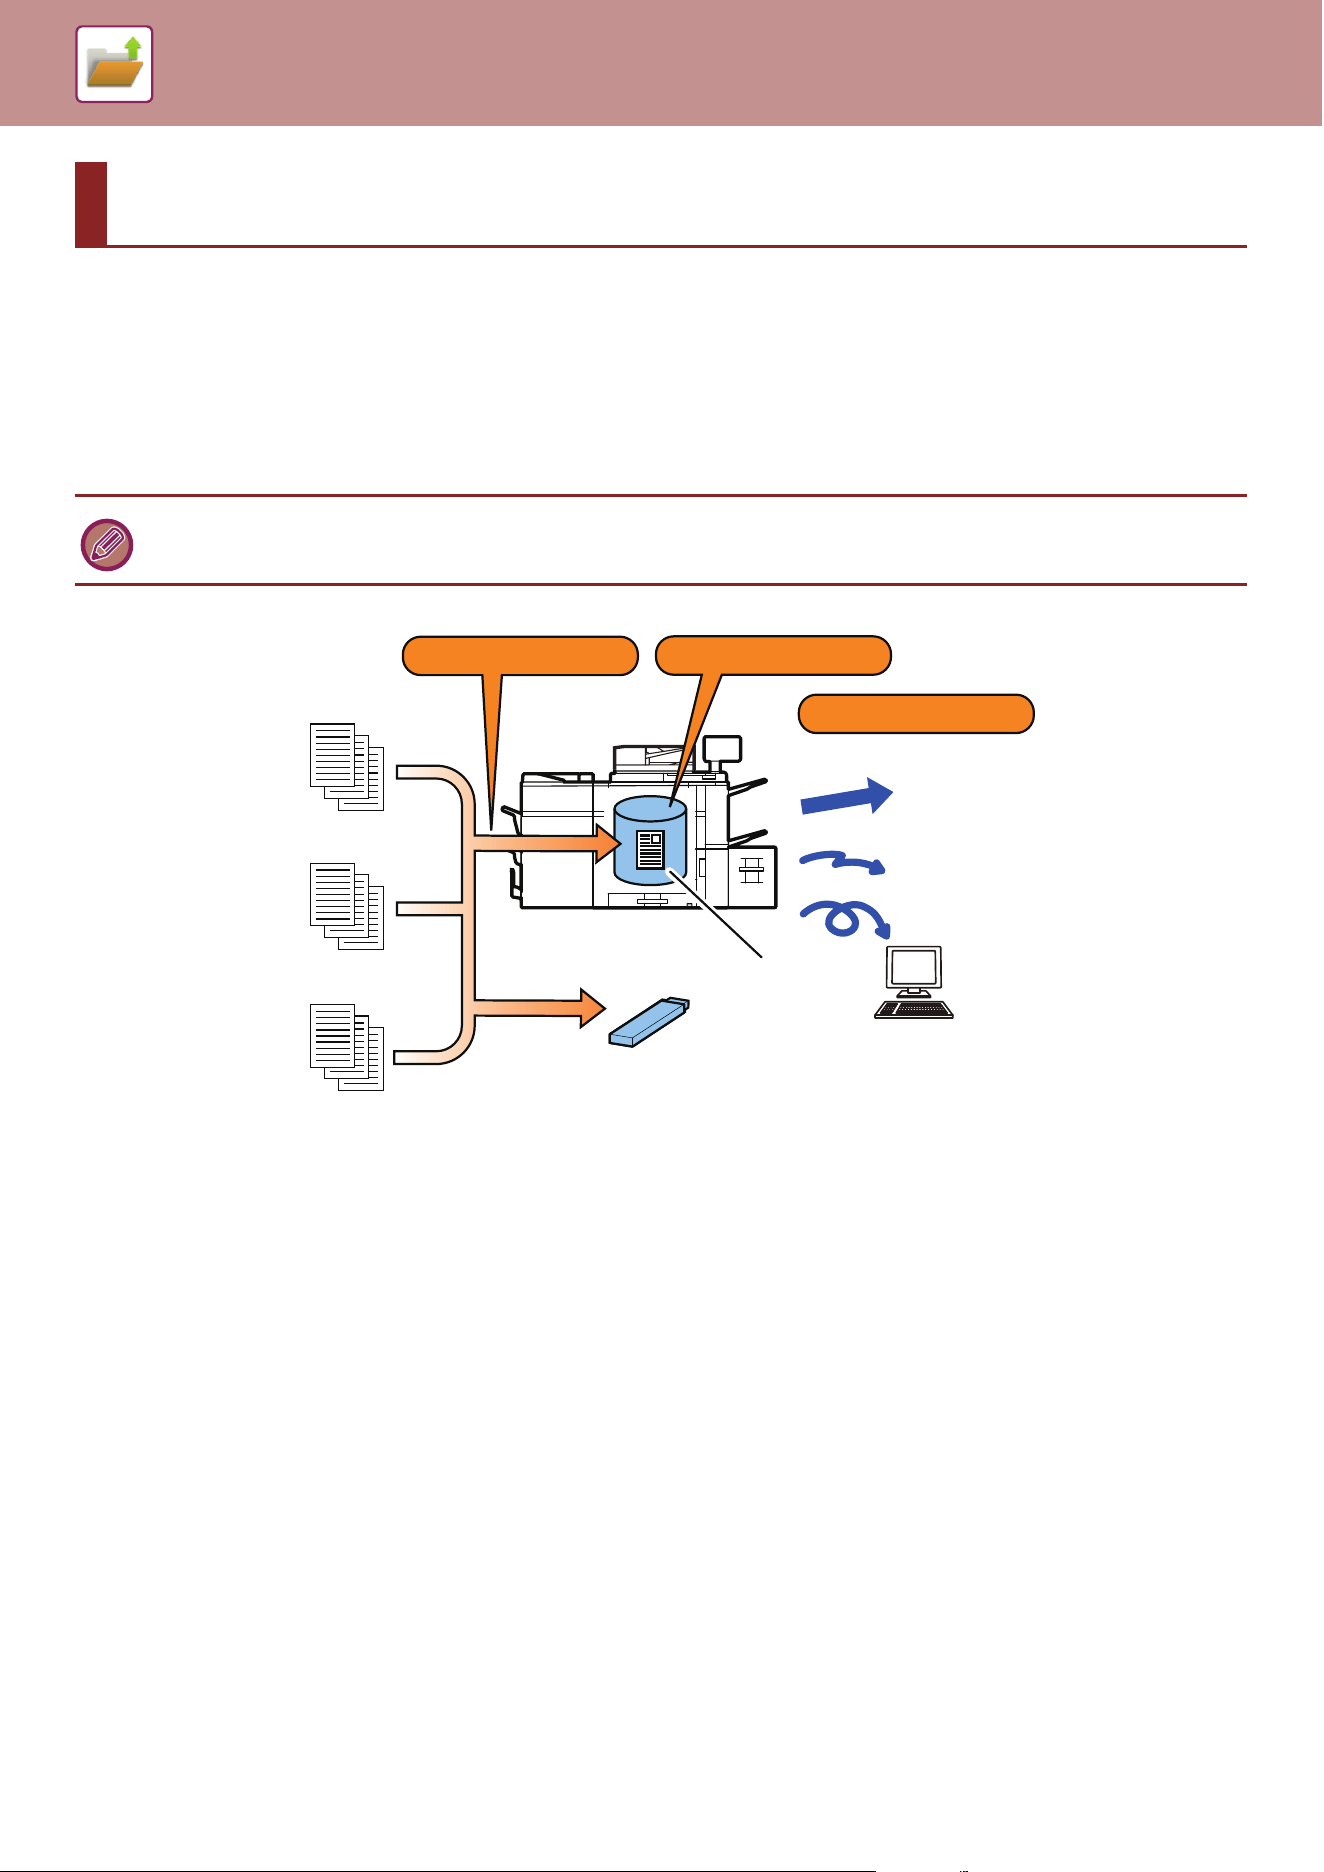
6-2
DOCUMENT FILING►DOCUMENT FILING
DOCUMENT FILING
This function saves the original scanned on the machine or print data from a computer on the local drive of the machine
or an external memory device as data.
The stored files can be printed or transmitted as required. Editing of the stored files, for example combining, is also
possible.
DOCUMENT FILING
A PDF file created for PC browsing can be displayed or printed on a computer.
File Store
Edit
Reuse
Print
Transmission
Download
Local Drive
Your computer
External memory device
Copying
Image send
Printer
6-3
DOCUMENT FILING►DOCUMENT FILING
USES OF DOCUMENT FILING
Using the document filing function allows you to additionally print out conference material with the same settings, or print
out ledger sheets used for routine tasks as required.
TYPES OF DOCUMENT FILING
There are the following ways to save a file using document filing: [Quick File] and [File] in copy mode or image send
mode, and [Scan to Local Drive] and [Scan to External Memory Device] in document filing mode.
Additionally printing out conference material with
the same settings
Printing out ledger sheets as required
Quick File
As a copy, image send, or other job is performed, this function saves the document data to
the local drive. Use this function when you want to quickly and easily store document data
without specifying a file name or other information. The stored file can also be used by
other people. Do not use this method to save files that you do not want others to use.
File
As a copy, image send, or other job is performed, this function saves the document data to
the local drive. Unlike Quick File, various types of information can be appended to the file
when the file is saved to enable efficient file management. A password can also be
established.
Scan to Local Drive
This function scans an original and stores it to the local drive. Like File, various types of
information can be appended.
Scan to External Memory
Device
This function scans an original and stores it in an external memory device such as a USB
memory device. Like File, various types of information can be appended.
1
Scanning is not
necessary.
Settings are
stored together
with original data.
No settings
are necessary.
Printing only
1
Daily report
Business trip application
Vacation application
Printing only
6-4
DOCUMENT FILING►DOCUMENT FILING
BEFORE USING SCAN TO LOCAL DRIVE IN
DOCUMENT FILING
Folder types
Three types of folders are used to store files on the local drive using the document filing function.
Folders on the local drive
Quick File Folder
Documents scanned using [Quick File] on the action panel are stored in this folder. A user name and file name are
automatically assigned to each job.
Main Folder
Scanned documents are stored in this folder.
When you store a job in the Main folder, you can specify a previously stored user name and assign a file name.
A password (4 to 32 characters) can also be set when storing a file ("Confidential" save) as required.
Custom Folder
Folders with custom names are stored inside this folder.
Scanned documents are stored in the stored folder.
Like the Main folder, a custom folder allows you to specify a previously stored user name and assign a file name when
storing a job.
Passwords (PIN code: 4 to 8 digit number) can be established for custom folders and for files saved in custom folders.
Convenient items to store
When storing a job using [File] in copy mode or image send mode, or [Scan to Local Drive] in document filing mode, it is
convenient to store the items below. These settings are not required when storing a job using [Quick File].
A maximum of 1000 custom folders can be created on the local drive.
User Name
This is necessary if you will be assigning a user name to stored files. A user name is also
used as a search condition when searching for a file.
Custom Folder
The Main folder is initially available as a location for storing files by [File] and [File Store].
Store a custom folder and specify it as a location for storing files. Specify a password for the
user folder as required. Enter the PIN Code to use the folder.
When the folder is set a password, “ " appears in the folder that the password is set.
My Folder
A previously created custom folder can be selected as "My Folder", or a new folder created as
"My Folder". When "My Folder" has been configured and user authentication is used, "My
Folder" will always be selected as the destination of [File] and [File Store].
Quick File
Folder
Main Folder Custom Folder
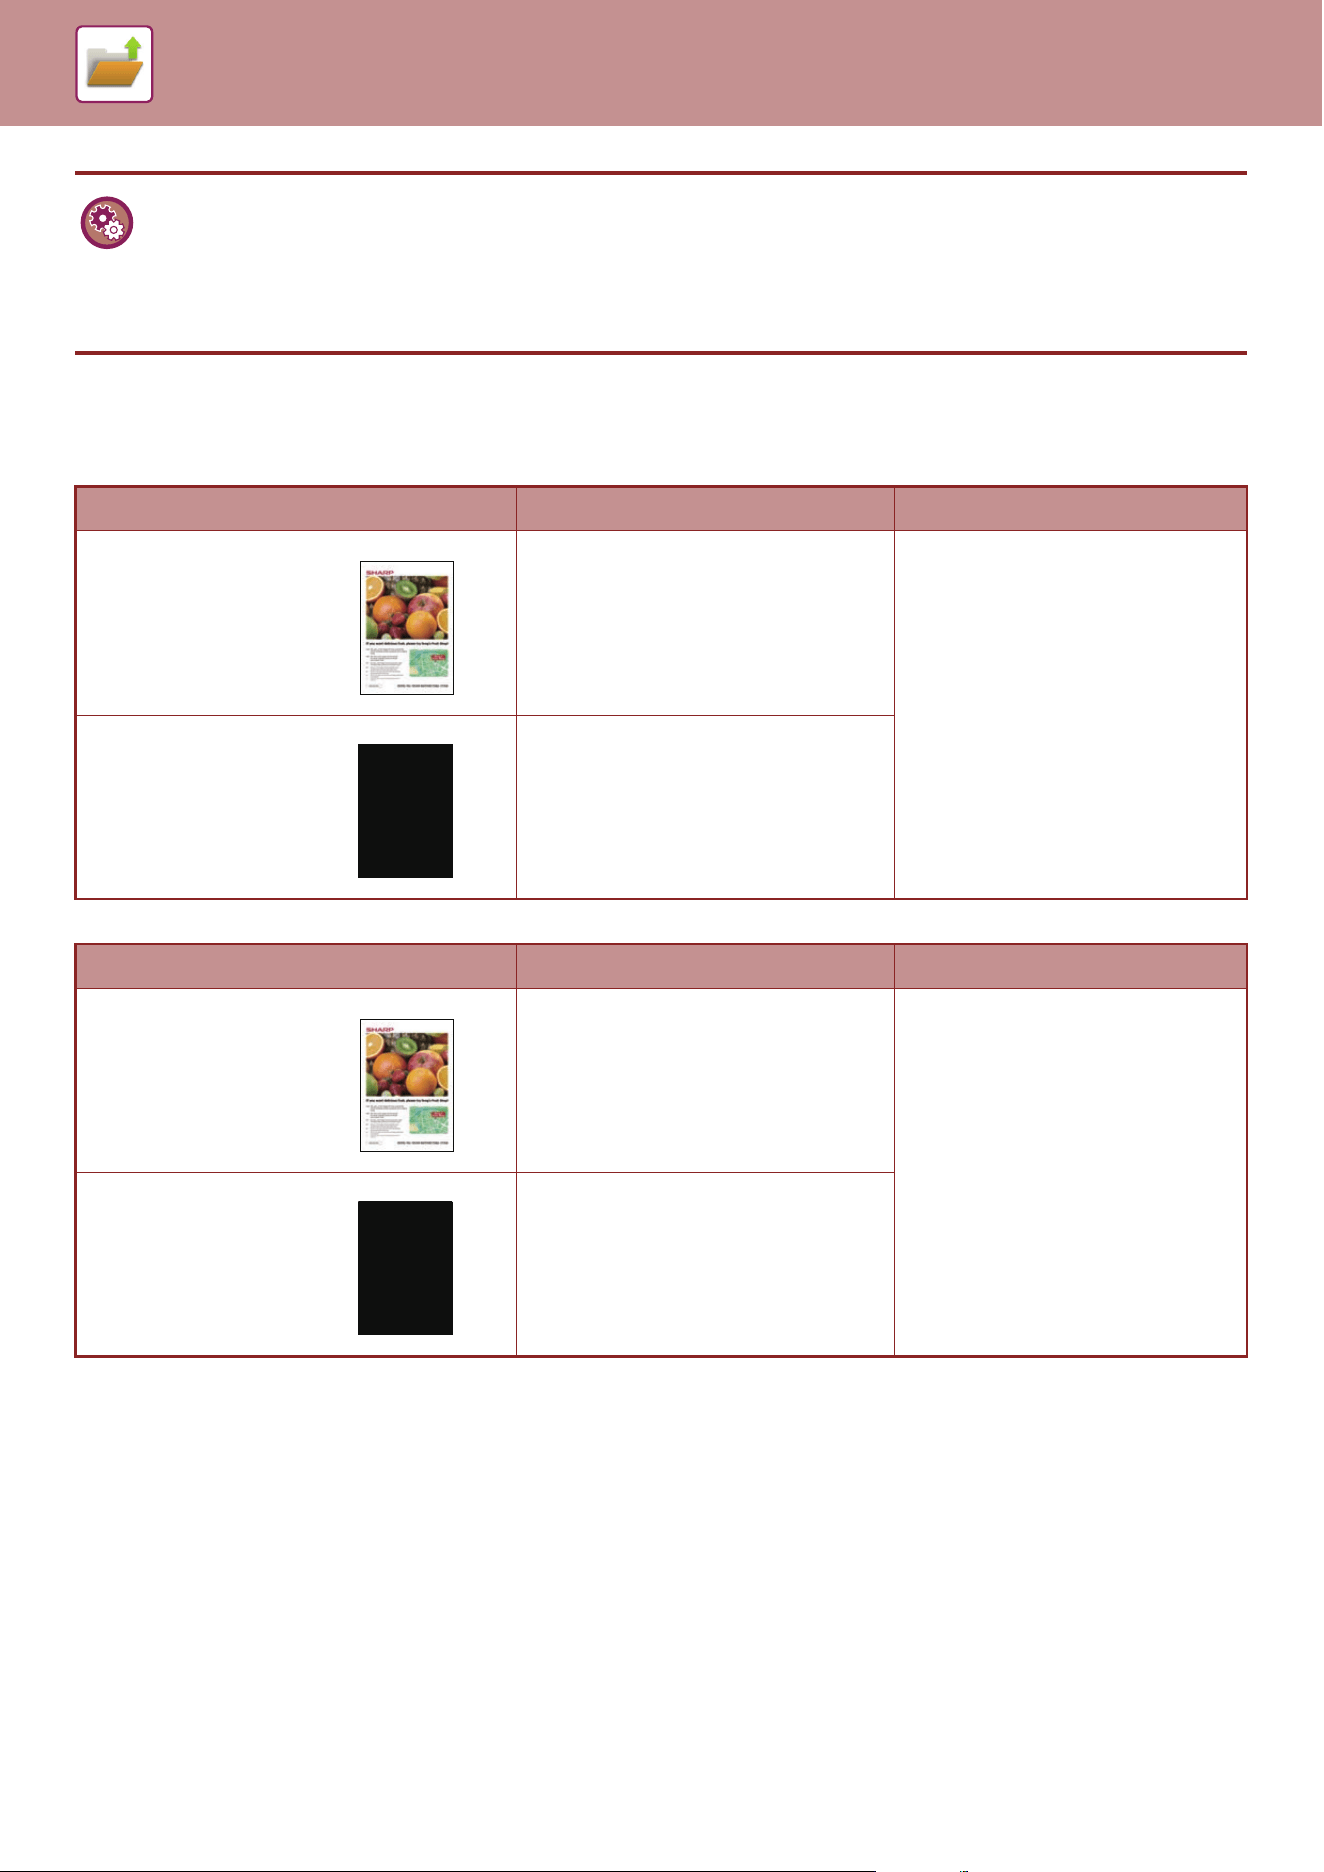
6-5
DOCUMENT FILING►DOCUMENT FILING
Approximate number of pages and files that can be stored
Combined total number of pages and total number of files that can be stored in custom folders and in the Main
folder
Number of pages and number of files that can be stored in the Quick File folder
* The indicated numbers are guidelines for the number of pages that can be stored when all pages are full color, and when all pages are black & white.
Copying in sort mode uses the same memory area as the main folder and custom folder. For this reason, when too
much data has been stored in the main folder and custom folder, it may not be possible to perform a large copy job using
sort mode. Delete unnecessary files from the main folder and custom folder.
The original types above are examples to make the explanation easier to understand. The actual number of pages and
number of files that can be stored will vary depending on the contents of the original images and the settings when the
files are stored.
• To store a custom folder for document filing:
On the Web page, select "Settings (administrator)" → [Document Operations] → [Document Filing] → [Custom Folder].
On the machine, select "Settings (administrator)" → [System Settings] → [Document Filing Settings] → [Document Filing
Control] → [Custom Folder].
• To store a user name and specify a folder as "My Folder":
• In "Settings (administrator)", select [User Control] → [User Settings] → [User List].
Examples of original types Number of pages
*
Number of files
Full color original
(Text and photo
example)
Size: A4
Max. 5700 Max. 3000
Black & white
original
(Text)
Size: A4
Max. 13000
Examples of original types Number of pages
*
Number of files
Full color original
(Text and photo
example)
Size: A4
Max. 700 Max. 1000
Black & white
original
(Text)
Size: A4
Max. 2000
6-6
DOCUMENT FILING►DOCUMENT FILING
Information added to files
When saving a file using "File", add the following information to distinguish it from other files.
IMPORTANT POINTS WHEN USING DOCUMENT FILING
• Files stored using [Quick File] are provided with the "Sharing" property that can be accessed by any person for output
and sending. Therefore, do not store sensitive documents or documents that you do not want to be used by others
using the [Quick File] function.
• When saving a file with [File], you can save it with the "Confidential" property. Set a password for a "Confidential" file
to prevent the file from being used by other people. Exercise care to prevent other people from obtaining the
password.
• The property of a stored "Confidential" file can be changed to "Sharing" by "Property Change" as required. Do not
store sensitive documents or documents that you do not want to be used by others.
• Except in cases provided for by law, SHARP Corporation bears no responsibility for any damages that result from the
disclosure of sensitive information due to manipulation by a third party of any data saved using the Quick File function
or File function, or incorrect operation of the Quick File function or File function by the operator who saves the data.
User Name
The user name is required to enter a file ownership and other information. The user name must be
registered in advance.
File Name
Names a file.
Stored to
Specifies a folder to store files.
Property
Sharing Any user can display and operate files having the "Sharing" property.
Protect Once "Protect" is set, its file cannot be edited, moved, and deleted. No
password setting is required.
Confidential You can set a password (4 to 32 characters) for file protection.
• The above information cannot be specified when a file is saved with Quick File.
• When you select [Create Downloadable File] in Scan to Local Drive and save as a confidential file, the properties cannot
be changed.
To store a user name:
In "Settings (administrator)", select [User Control] → [User Settings] → [User List].
User Name: Name1
File Name: Meeting handout
Password: 12345678
"Meeting minutes"
folder
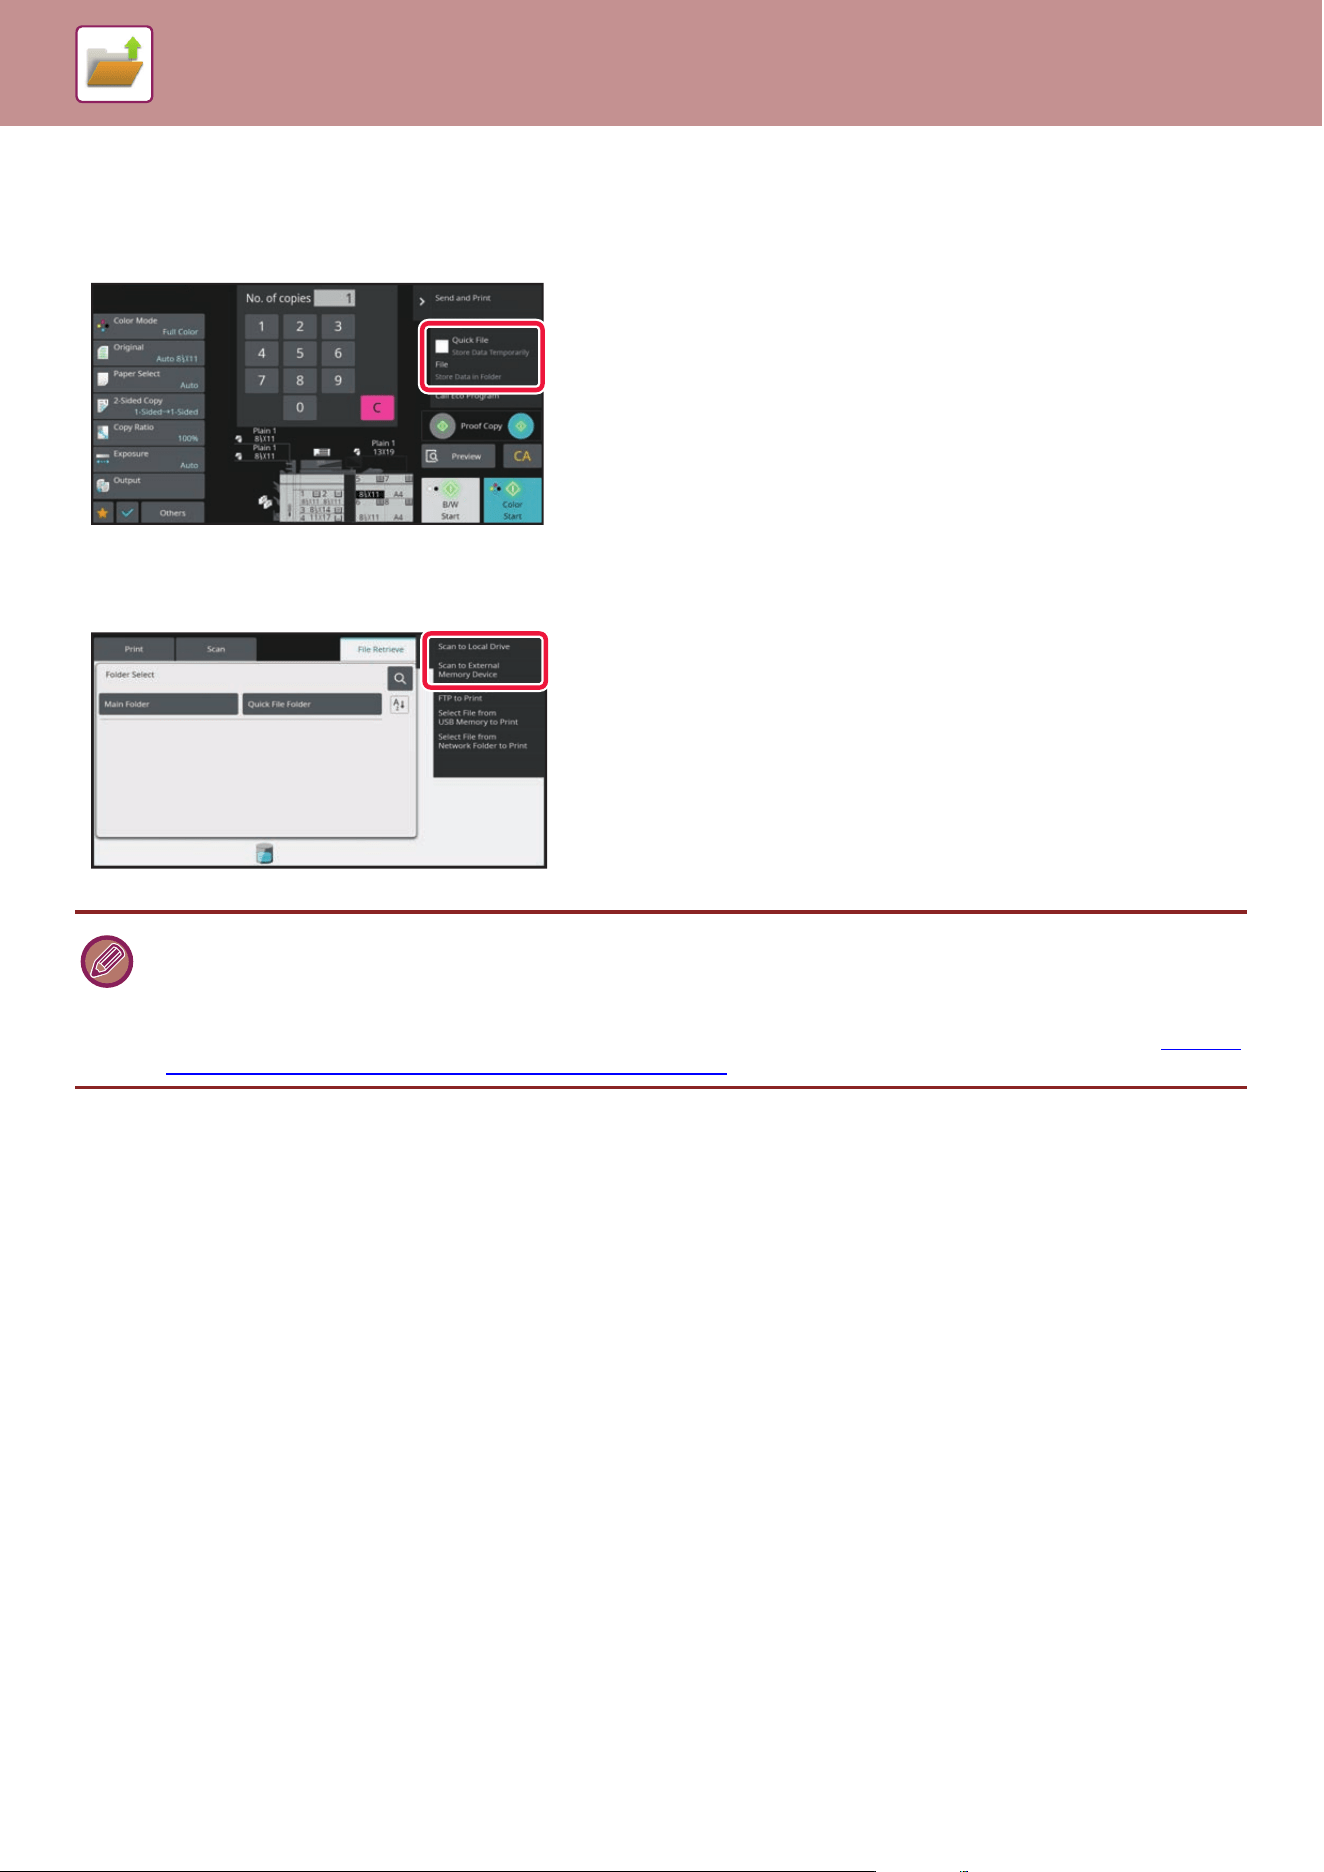
6-7
DOCUMENT FILING►DOCUMENT FILING
USING DOCUMENT FILING IN EACH MODE
To use Document Filing, select the action panel for each mode.
To save data simultaneously with a copy, tap [File] or [Quick File] on the action panel in each mode.
To use Document Filing from the beginning, select the action panel in the Document Filing mode. Tap any one of the
keys to scan and save the original.
• [File] and [Quick File]
These keys may not appear on the action panel depending on the mode or settings. In this case, tap [Others] on the base
screen in each mode, and then tap [Quick File] or [File].
• Using document filing in print mode
To use document filing in print mode, select document filing in the printer driver. For details on document filing, see “SAVING
AND USING PRINT FILES (DOCUMENT FILING) (page 4-104)" in "PRINTER".

6-8
DOCUMENT FILING►DOCUMENT FILING
BASE SCREEN OF DOCUMENT FILING
MODE
(1) Use to save originals to be shared among users.
(2) The folder for the registered user.
(3) Displayed during user authentication. Tap this key to
open the logged-in user's personal screen.
(4) Use to save a file temporarily.
(5) Use to search for a file in a folder.
(6) Displays the functions available in document filing
mode.
(7) Switch the custom folder order between ascending
and descending.
(8) Displays the usage status of the machine's built-in
storage. Tap the key to display details.
(1)
(8)
(4)
(2)
(3)
(7)
(6)
(5)
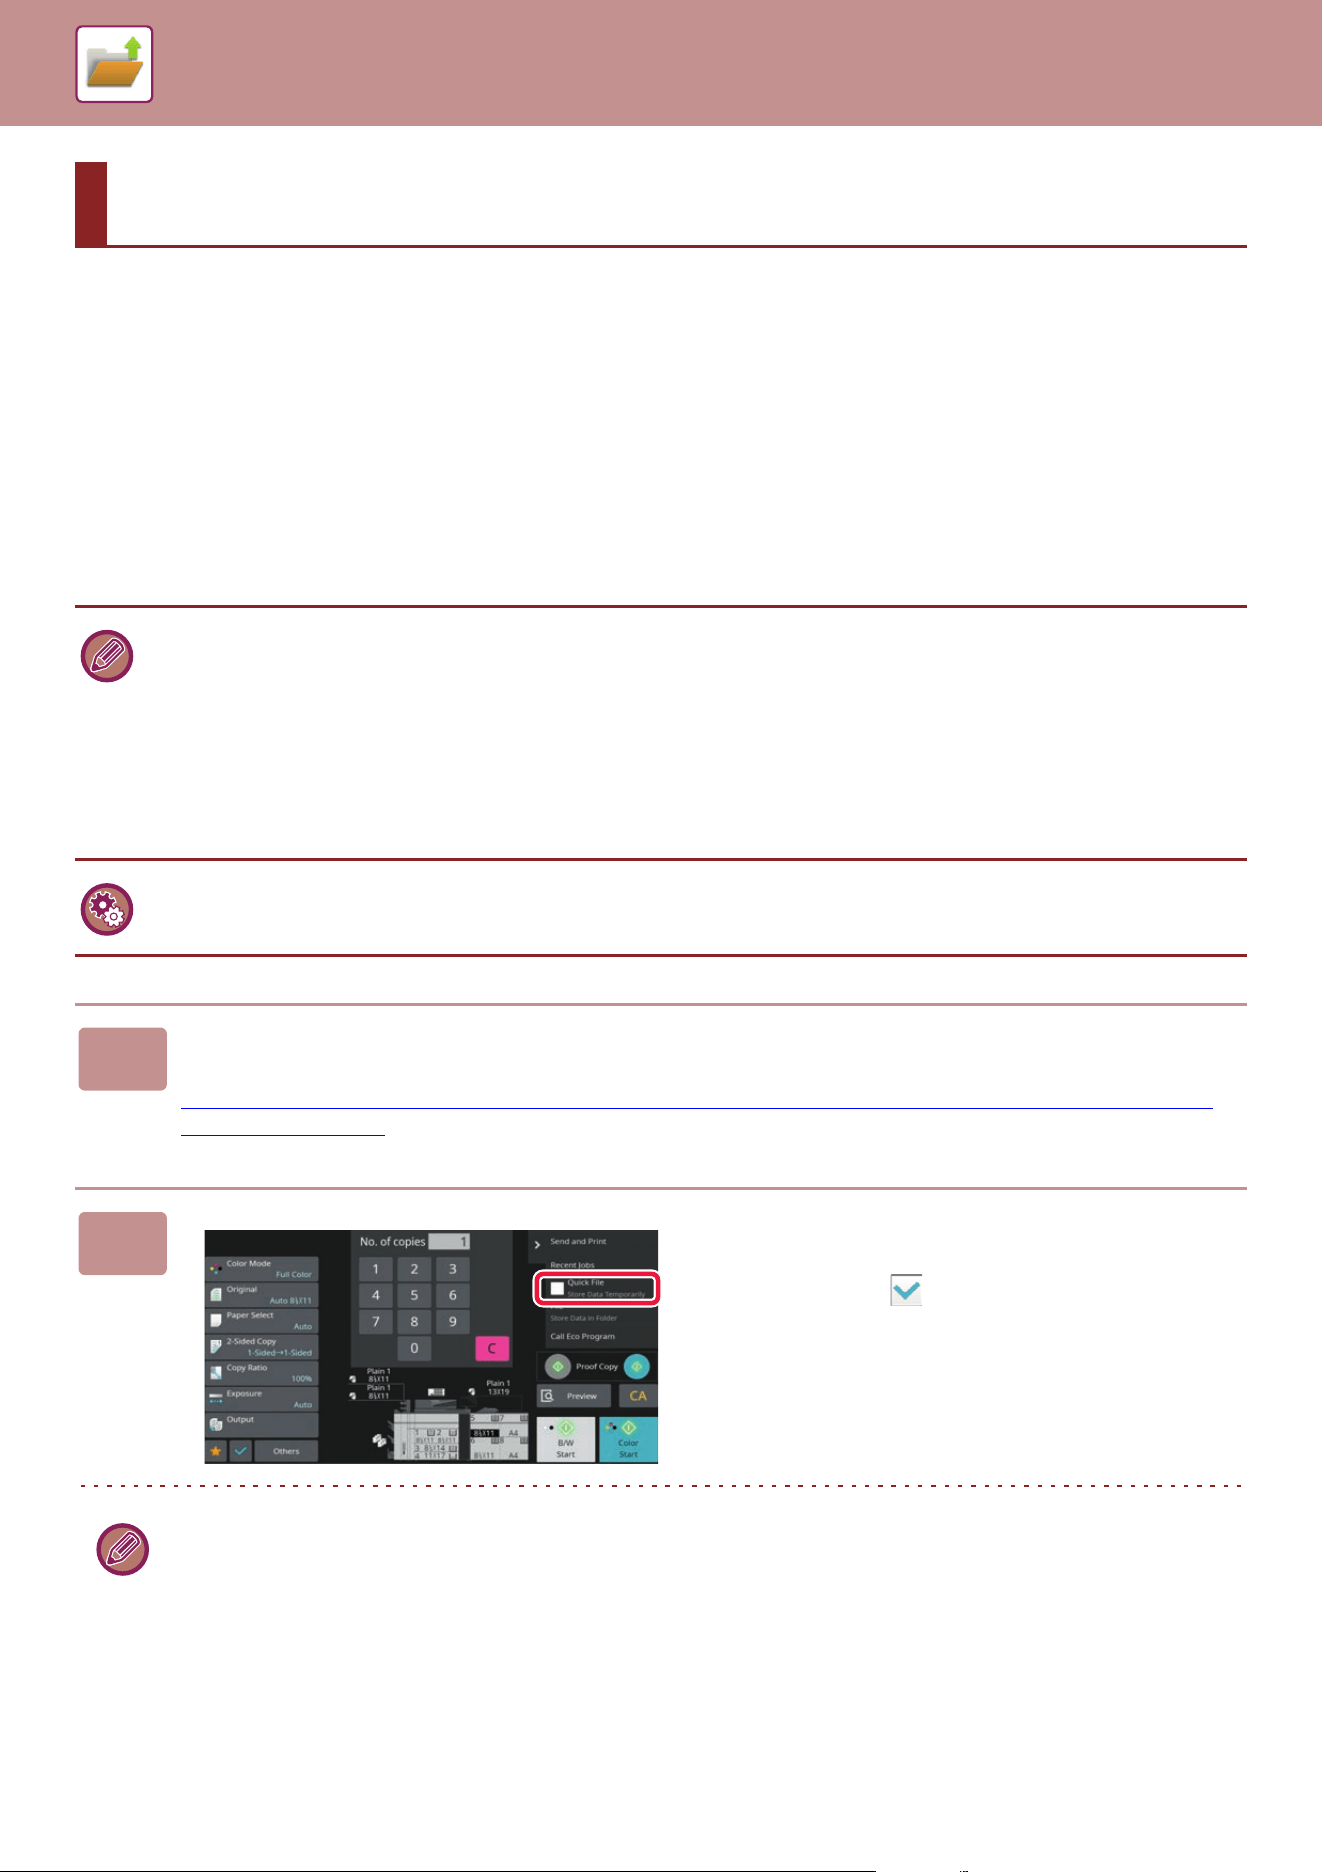
6-9
DOCUMENT FILING►SAVING FILES WITH DOCUMENT FILING
FILING WHILE USING ANOTHER MODE
QUICK FILE
This function allows you to store an original in copy mode or image send mode as an image file in the Quick File folder
of the machine.
The image file stored in quick file mode can be retrieved at a later time, allowing you to copy the document or transmit it
in image send mode without having to locate the original.
As an example, the procedure for using "Quick File" in copy mode is explained below.
SAVING FILES WITH DOCUMENT FILING
• Quick File can be used in normal mode.
• When a file is stored using Quick File, the following user name and file name are automatically assigned to the file.
User Name: User Unknown
File Name: Mode_Month-Day-Year_Hour-Minute-Second
(Example: Copy_10102021_112030AM)
Save location: Quick File Folder
When user authentication is used, the user name that was used for login is automatically selected.
Only the file name and location of a file stored in the Quick File folder can be changed.
• You can change the name of the sending file at scanner or resend transmission by system settings.
To delete all files in the Quick File folder with the exception of protected files:
In "Settings (administrator)", select [System Settings] → [Document Filing Settings] → [Condition Settings] → [Delete All
Quick Files]. Configure settings to have all files deleted when the power is turned on as required.
1
Place the original.
Place the original in the document feeder tray of the automatic document feeder, or on the document glass.
SELECTING A PROCEDURE FOR PLACING THE ORIGINAL DEPE
NDING ON THE TYPE AND STATUS OF THE
ORIGINAL (page 1-45)
2
Change to normal mode and tap
[Quick File] on the action panel so that
it is selected .
When a message relating to saving confidential information appears, tap the [OK] key.

6-10
DOCUMENT FILING►SAVING FILES WITH DOCUMENT FILING
FILE
Tapping the [File] key of the document filing function when printing or transmitting an original in each mode allows you to
store the original in the Main folder or stored Custom folder as a file simultaneously with printing or transmission. The
stored file can be retrieved at a later time, allowing you to recopy or resend the original without having to locate it.
As an example, the procedure for using "File" in copy mode is explained below.
3
Start a copy or image sending.
When the function is executed, the image data of the original is stored in the Quick File folder.
To prevent accidental saving of the file, the message "The scanned data is stored in the quick file folder." appears for 6
seconds (default setting) after the [Start] key ([Color Start] key or [B/W Start] key in copy mode) is tapped.
To change the message display time, in "Settings (administrator)" → [System Settings] → [Common Settings]
→ [Operation Settings] → [Condition Settings] → [Message Time Setting].
To cancel Quick File:
Tap [Quick File] to enable .
• File can be used in normal mode.
• When a file is stored using File without appending file information, the following user name and file name are automatically
assigned to the file.
User Name: User Unknown
File Name: Mode_Month-Day-Year_Hour-Minute-Second
(Example: Copy_10102021_112030AM)
Save location: Main Folder
• You can change the name of the sending file at scanner or resend transmission by system settings.
1
Place the original.
Place the original in the document feeder tray of the automatic document feeder, or on the document glass.
SELECTING A PROCEDURE FOR PLACING THE ORIGINAL DEPE
NDING ON THE TYPE AND STATUS OF THE
ORIGINAL (page 1-45)
There are also cases where settings are required to be made before a preview is carried out.
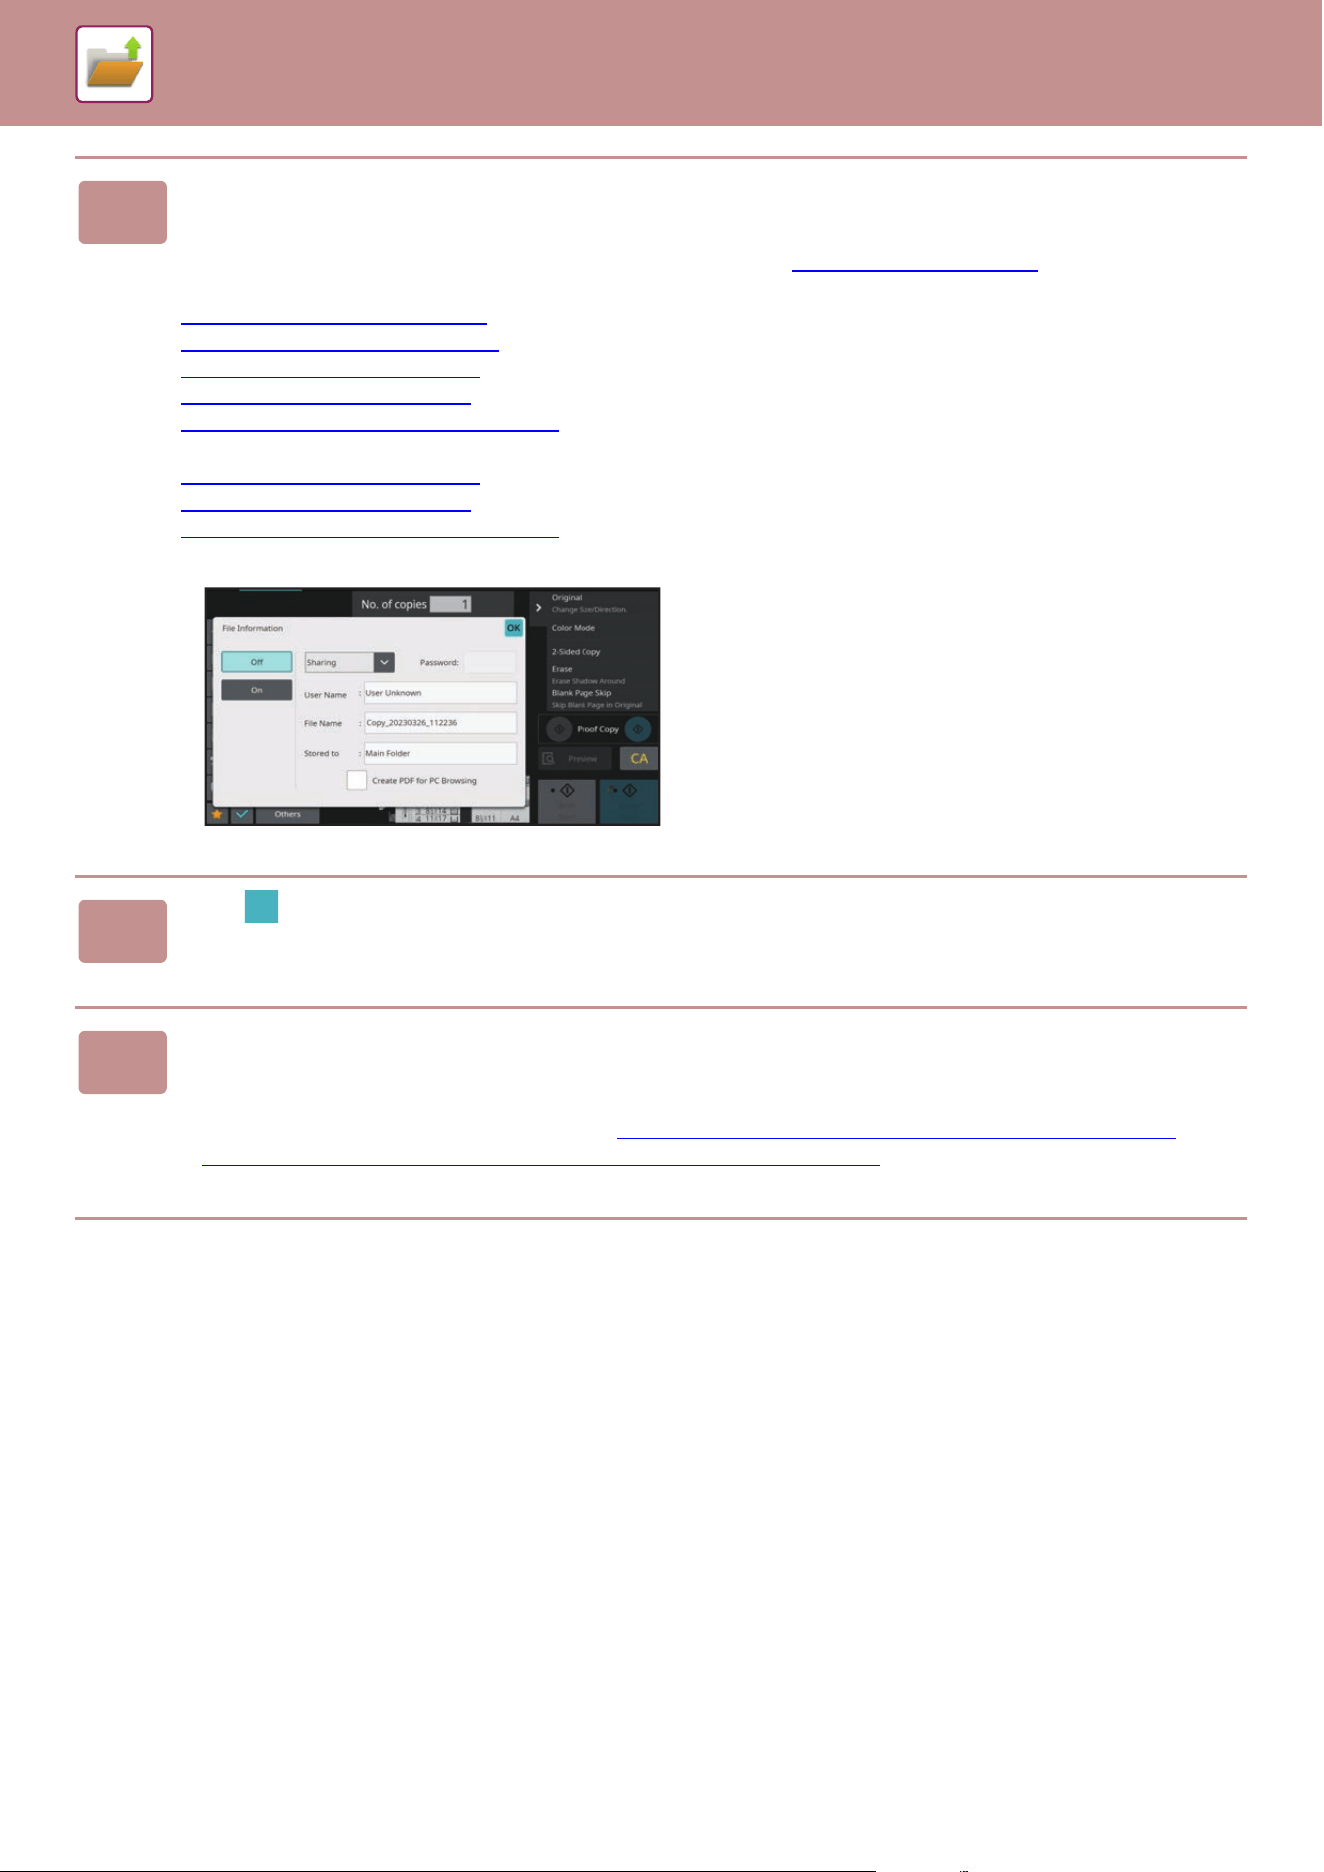
6-11
DOCUMENT FILING►SAVING FILES WITH DOCUMENT FILING
2
Change to normal mode and tap [File] on the action panel to specify the file
information.
To select the user name, file name, folder, and property setting, see “File Information (page 6-12)".
To save on the local drive:
Changing the property
(page 6-12)
Specifying a user name (page 6-13)
Assigning a file name (page 6-13)
Specifying the folder (page 6-13)
Creating PDF for PC browsing (page 6-14)
To save in an external memory device:
Assigning a file name
(page 6-13)
Specifying the folder (page 6-13)
Creating PDF for PC browsing (page 6-14)
After configuring the above settings, you will return to this
screen. Go to the next step.
If you do not wish to assign a user name or other information
to the file, go to the next step.
3
Tap .
You will return to the base screen of copy mode.
4
Select copy settings and then tap the [Color Start] key or the [B/W Start] key.
• Simultaneously with starting copy, the original is stored as a file.
The selected copy settings are also saved.
• For the procedure for placing the original, see "SELECTING A PROCEDURE FOR PLACING THE ORIGINAL
DEPENDING ON THE TYPE AND STATUS OF THE ORIGINAL (page 1-45)".
6-12
DOCUMENT FILING►SAVING FILES WITH DOCUMENT FILING
File Information
The procedure for detail settings is described below.
Specifying a property, user name, file name, and folder makes it easier to manage and search for a file. In addition,
when [Confidential] is selected for Property and a password is established, other people will not be able to view the file
without permission.
Changing the property
A protect setting can be selected for files saved with the document filing function. This prevents a file from being moved,
or automatically or manually deleted.
Three properties are available for saved files: "Sharing", "Protect", and "Confidential". When saved with the "Sharing"
property, a file is not protected. When saved with the "Protect" or "Confidential" property, a file is protected.
Files saved to the Quick File folder are all saved as "Sharing" files. When a file is saved to the Main folder or a custom
folder, "Sharing", "Protect" or "Confidential" can be selected.
Sharing
A "Sharing" file can be changed to "Protect" or "Confidential" using "Property Change" in the Job Settings.
Protect
"Protect" does not require setting of a password, but prevents a file from being moved, deleted or edited. A
password cannot be established.
Confidential
To protect a "Confidential" file, a password is set. (The password must be entered to retrieve the file.)
When a file is saved in encrypted PDF format, the file property is automatically set to "Confidential".
• Restrictions on changing the property
• A file that is set to "Sharing" can be changed to "Protect" or "Confidential" as required. However, a "Sharing" file that is
saved in the Quick File folder can only be changed to "Protect".
• A file that is set to "Protect" can be changed to "Sharing" or "Confidential" as required. However, a "Protect" file that is
saved in the Quick File folder can only be changed to "Sharing".
• A file that is saved in the Quick File folder cannot be changed to "Confidential". If the file is moved to the Main folder or a
custom folder, the property can be changed to "Confidential".
• Two properties cannot be selected for a single file.
1
Select [Property] in the File Information screen.
2
When you have selected [Confidential], enter a password (4 to 32 characters).
Every time you enter one digit, “ " is displayed.
6-13
DOCUMENT FILING►SAVING FILES WITH DOCUMENT FILING
Specifying a user name
Assigning a file name
A file name can be assigned to the file.
Specifying the folder
Specify the folder for storing the file.
1
Tap the [User Name] text box.
When user authentication is used, the user name that was used for login is automatically selected. In this case, this step
is not necessary.
The user name must first be stored by selecting [User Control] in "Settings (administrator)" → [User Settings] → [User
List].
2
Tap the key of the user name.
Alternatively, you can select a user name by tapping the [Call with Registration Number] key and entering the user
number.
The user number must be first set by selecting [User Control] in "Settings (administrator)" → [User Settings] → [User
List].
3
Tap .
The system goes back to the screen of step 1 to display the selected user name.
1
Tap the [File Name] text box and enter the file name.
Enter a file name using up to 30 characters.
File Name
• If a file name that already exists is specified, a tilde and a serial number are added after the file name and this file is
saved as a different file. The file name is not case-sensitive.
For example, if the "test.txt" file already exists and you specify the "TEST.TXT" file, the file will be saved as
"TEST.TXT~1" file.
• If the length of the file name exceeds the limit, excess characters will be omitted and a serial number will be added to
the end of the file name.
1
Tap the [Stored to] text box.
If a user name with a "My Folder" setting is selected, "My Folder" of that user will automatically be selected.
2
Tap the key of the folder where you want to store the file, and tap .
If a password has been set for the folder, a password entry screen appears. Enter the password (5 to 8 digit number)
using the numeric keys and tap the .

6-14
DOCUMENT FILING►SAVING FILES WITH DOCUMENT FILING
Creating PDF for PC browsing
Tap the [Create PDF for PC Browsing] checkbox to , and a public PDF for PC browsing will be created when the file
is saved.
Default Setting of PDF Format for PC Browsing
You can set the initial file format of public PDF or the file for download which is created during execution of each job.
In "Settings (administrator)", select [System Settings] → [Document Filing Settings] → [Common Settings] → [Default
Setting of PDF Format for PC Browsing].
B/W: Compression Mode
None, MH (G3), MMR (G4)
Color/Grayscale: Compression Ratio
Low, Middle, High
• Data saved before using [Disabling of OCR] in the system settings can be downloaded with the OCR function even after
[Disabling of OCR] is enabled.
• Even if using the scanner function "AUTOMATICALLY ADJUST SKEWED SCAN DATA (Original Skew Adjustment)
(page
5-127)", correction results will not be reflected.
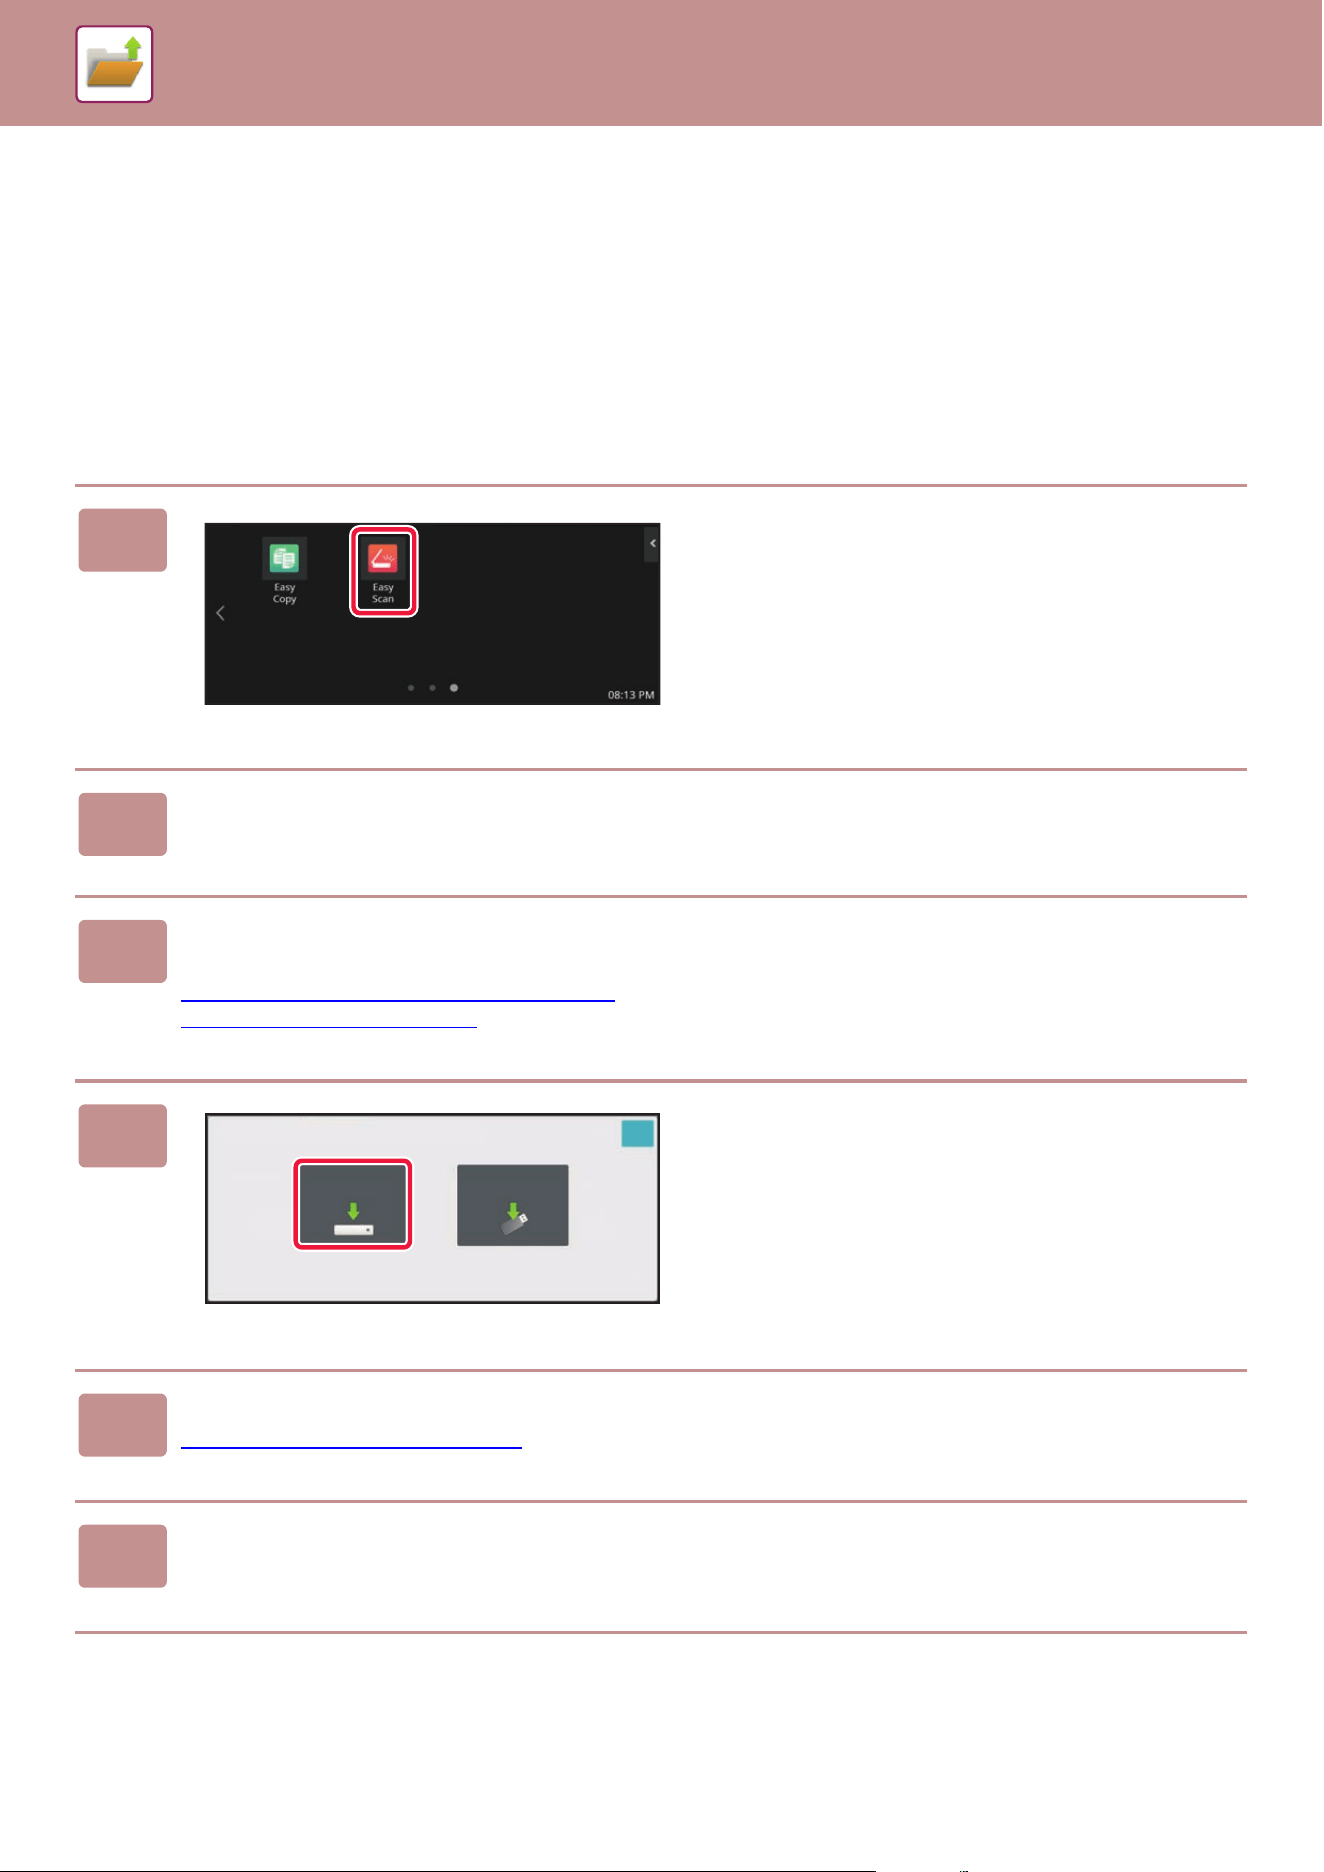
6-15
DOCUMENT FILING►SAVING FILES WITH DOCUMENT FILING
SAVING DOCUMENT DATA ONLY
(SCAN TO LOCAL DRIVE)
SAVE ON LOCAL DRIVE
Storing from Easy Scan
1
Tap the [Easy Scan] key on the Home
screen.
2
Tap [Scan to USB/Local Drive].
3
Place the original.
Place the original in the document feeder tray of the automatic document feeder, or on the document glass.
AUTOMATIC DOCUMENT FEEDER
(page 1-47)
DOCUMENT GLASS (page 1-51)
4
Tap [Scan to Local Drive].
5
To select settings, tap the key of each desired setting.
IMAGE SEND SEQUENCE (page 5-9)
6
Tap the [Color Start] or [B/W Start] key to start scanning.
A beep will sound to indicate that scanning and file store have ended.
Scan to
USB
Scan to
Local Drive
Local Drive/USB
OK
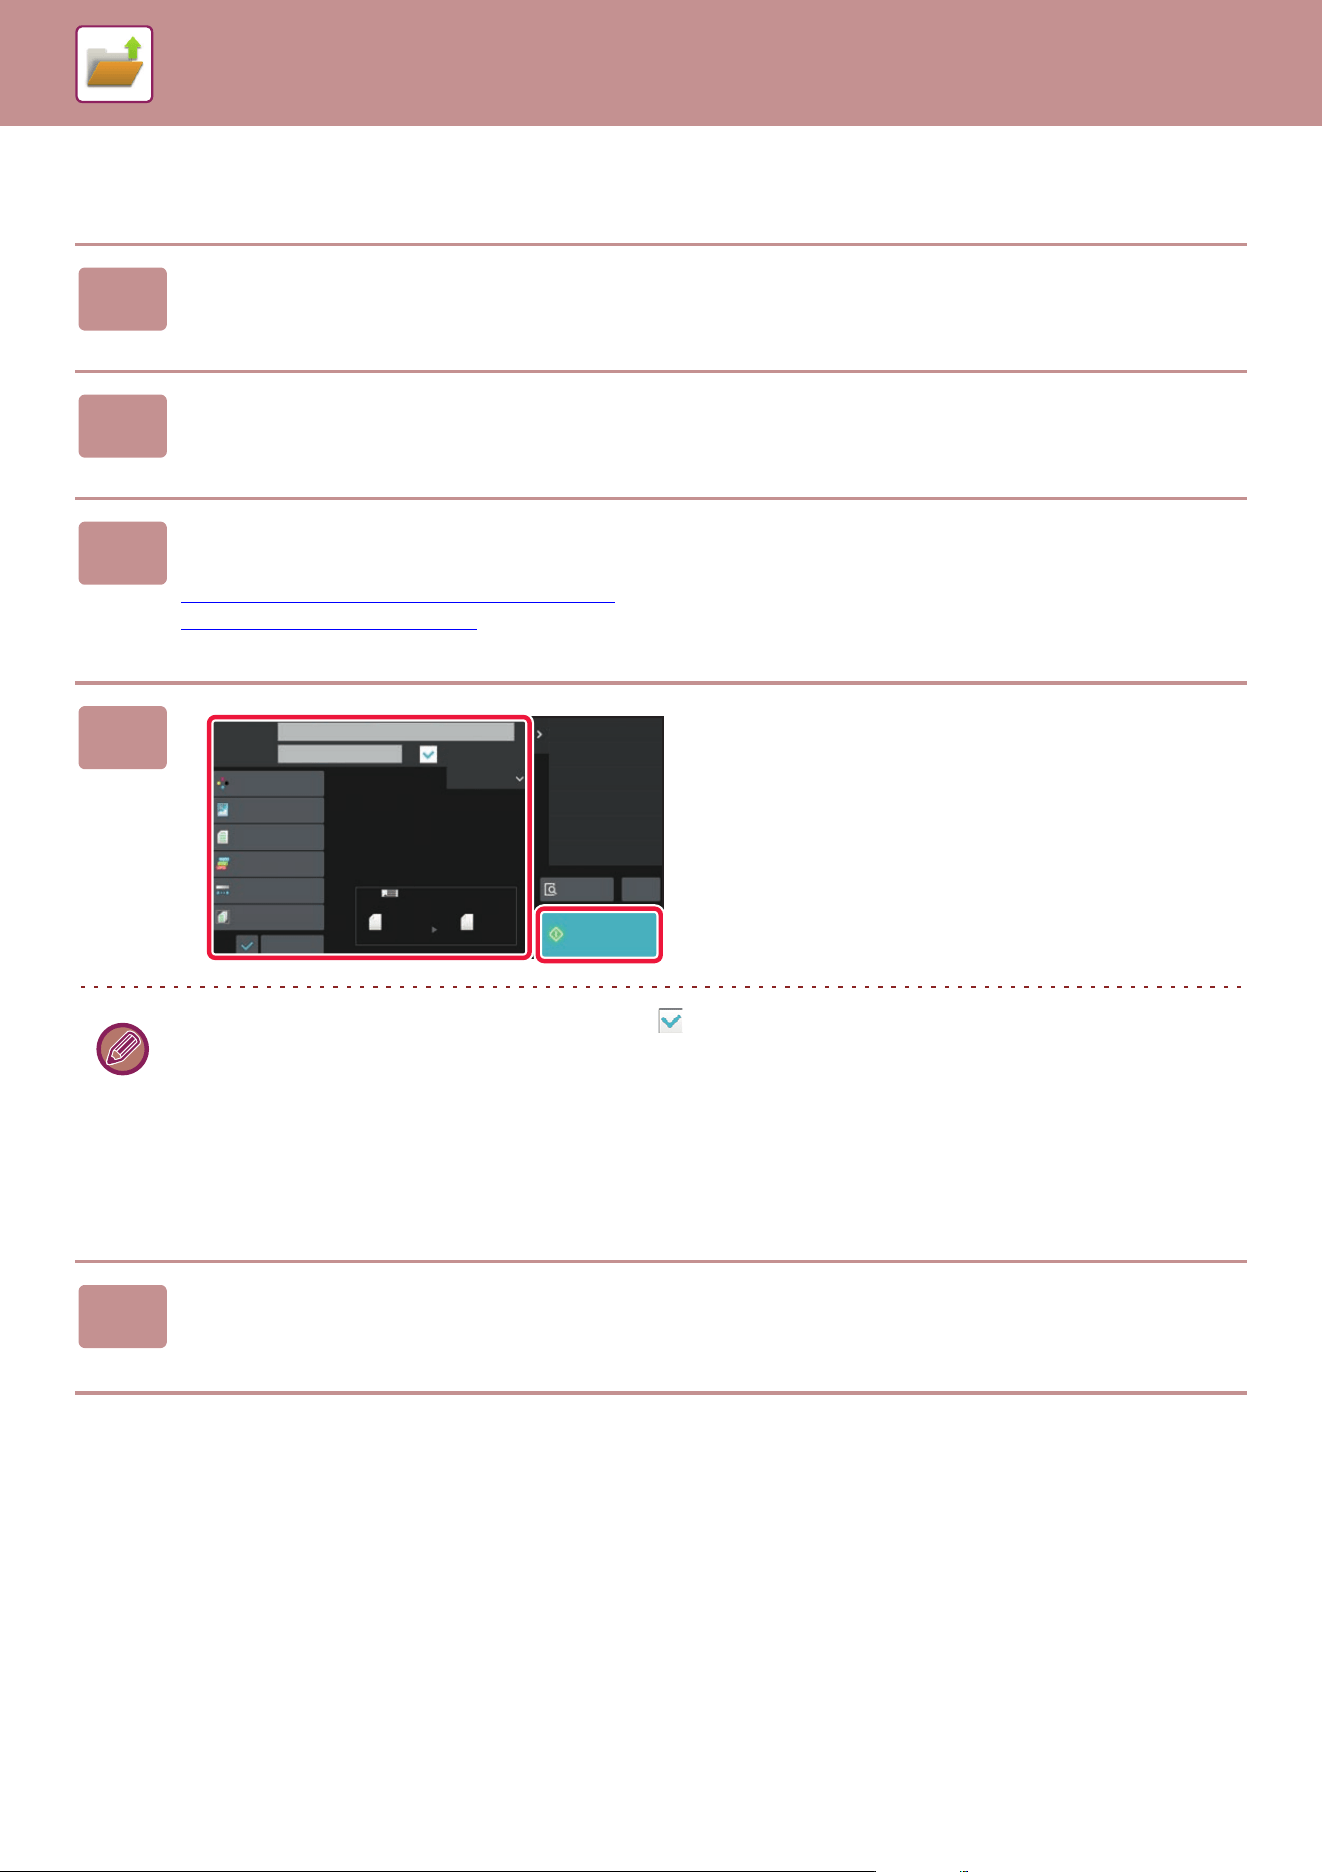
6-16
DOCUMENT FILING►SAVING FILES WITH DOCUMENT FILING
Storing from Document Filing
1
Tap the [File retrieve] key on the Home screen.
2
Tap [Scan to Local Drive] on the action panel.
3
Place the original.
Place the original in the document feeder tray of the automatic document feeder, or on the document glass.
AUTOMATIC DOCUMENT FEEDER
(page 1-47)
DOCUMENT GLASS (page 1-51)
4
Check the file name and save location,
and tap keys for any settings you want
to select.
• When the [Create Downloadable File] checkbox is ( ), the [File Format] key is grayed out and cannot be used. You
will not be able to download scan data in the specified format from the Web page.
• For original scan settings, see the explanation of the copy or image send mode.
• If the original is 2-sided, be sure to tap the [Original] key and then tap the [2-Sided Tablet] key or the [2-Sided Book]
key as appropriate for the original.
• To set a user name, file attribute, or password, tap [Options].
• When a file is created with [Create Downloadable File] disabled, this setting cannot be enabled later.
5
Tap the [Start] key to start scanning.
A beep will sound to indicate that scanning and file store have ended.
CA
Preview
Start
Scan Size
Auto
Auto
Color Mode
Auto/Mono2
Resolution
200x200dpi
File Format
PDF
Original
Auto
Others
A4
A4
100%
Store Size
Main Folder
Options
Create Downloadable File
Return to Folder
Selection Screen
Exposure
Job Build
Scan_20210408_115254
Stored To:
File Name:
Recent Jobs
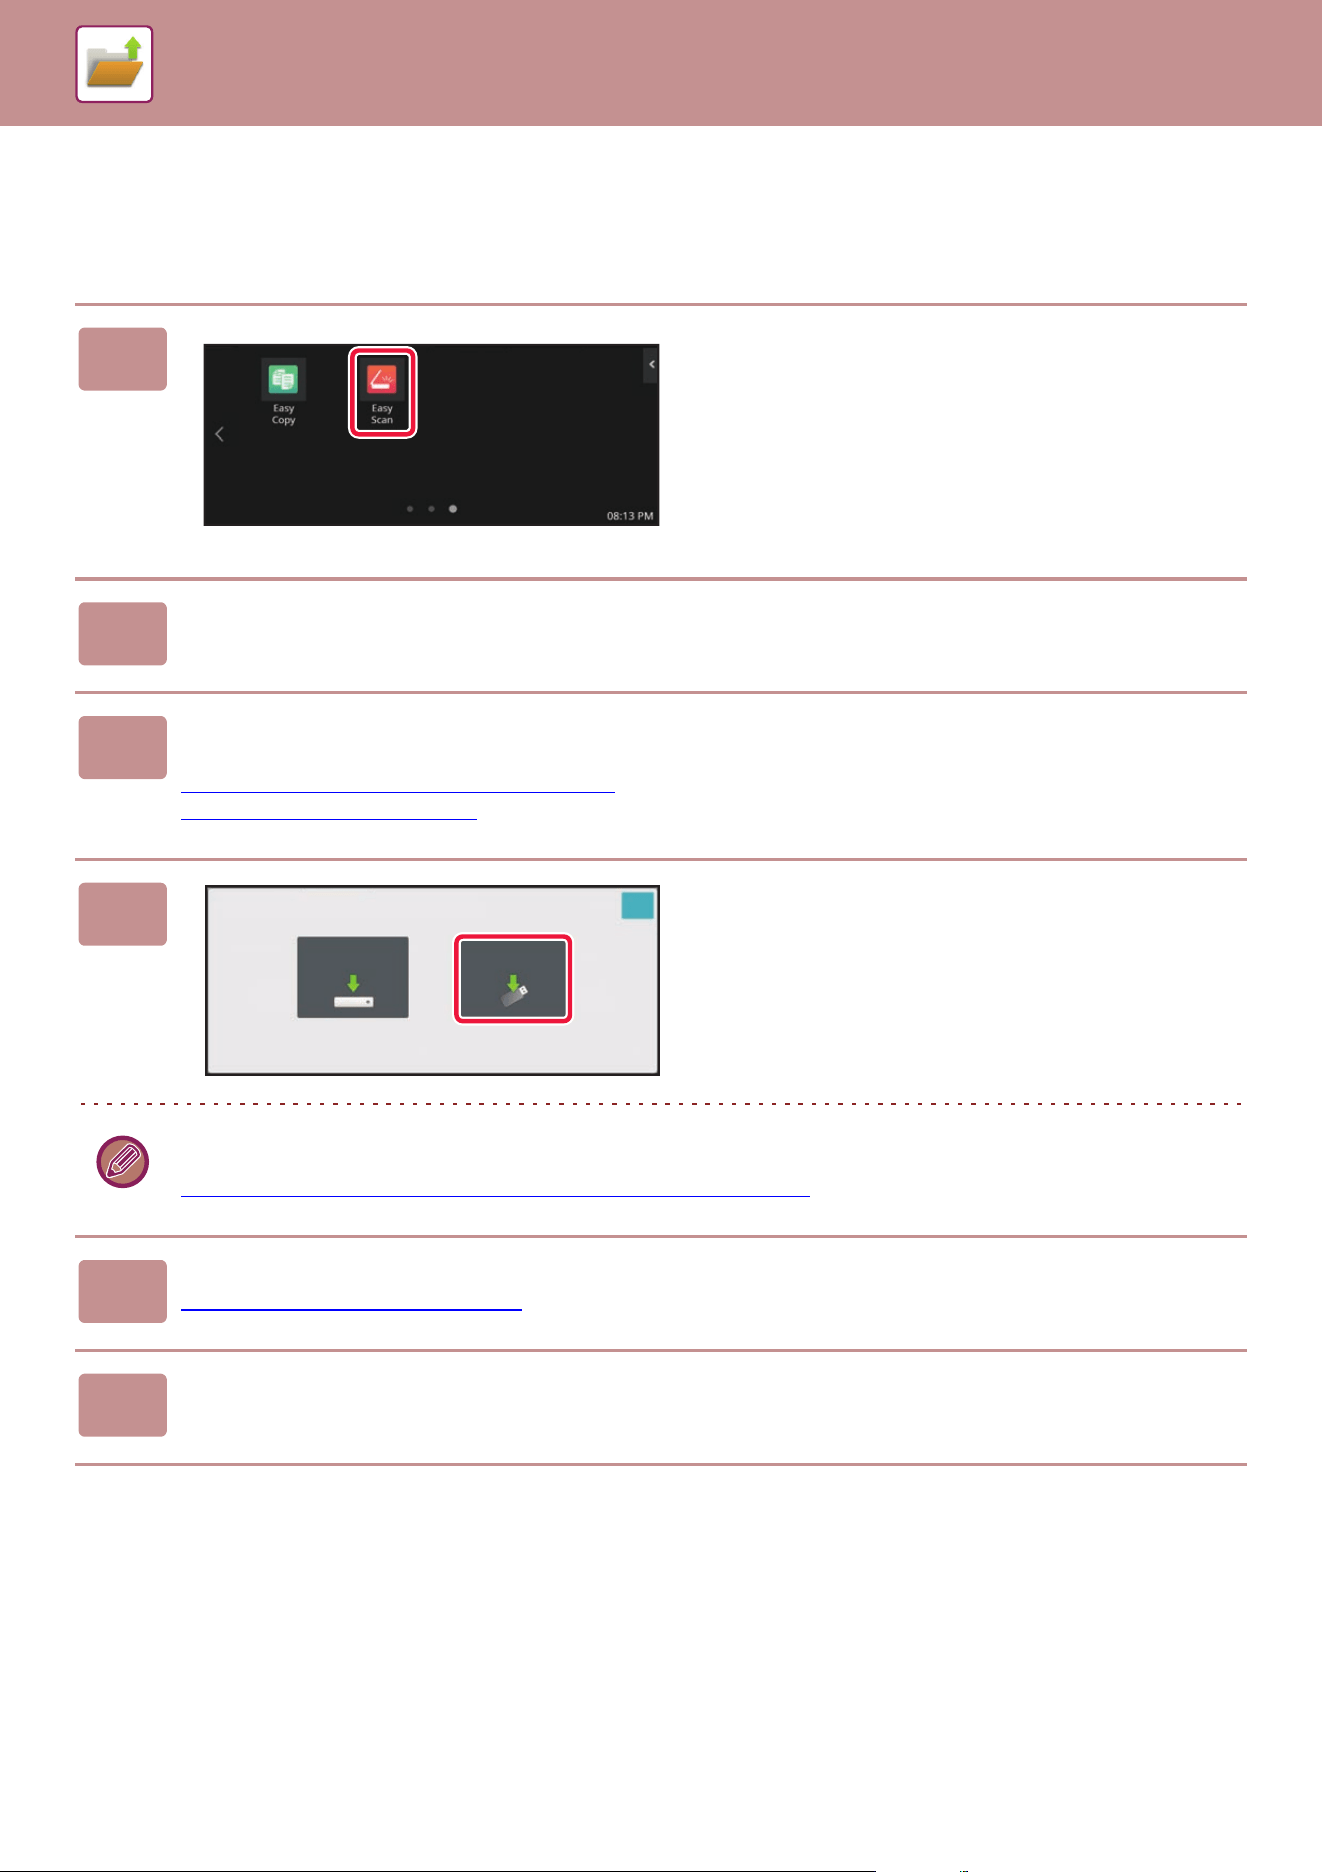
6-17
DOCUMENT FILING►SAVING FILES WITH DOCUMENT FILING
SAVE IN EXTERNAL MEMORY DEVICE
Storing from Easy Scan
1
Tap the [Easy Scan] key on the Home
screen.
2
Tap [Scan to USB/Local Drive].
3
Place the original.
Place the original in the document feeder tray of the automatic document feeder, or on the document glass.
AUTOMATIC DOCUMENT FEEDER
(page 1-47)
DOCUMENT GLASS (page 1-51)
4
Tap [Scan to USB].
Tap the [Auto Set] key to automatically set the read settings to match the original. "Auto Set" cannot be used if [Disabling
of OCR] is set in the system settings.
SETTING SCAN SETTINGS AUT
OMATICALLY (Auto Set) (page 5-80)
5
To select settings, tap the key of each desired setting.
IMAGE SEND SEQUENCE (page 5-9)
6
Tap the [Color Start] or [B/W Start] key to start scanning.
A beep will sound to indicate that scanning and file store have ended.
Scan to
USB
Scan to
Local Drive
Local Drive/USB
OK
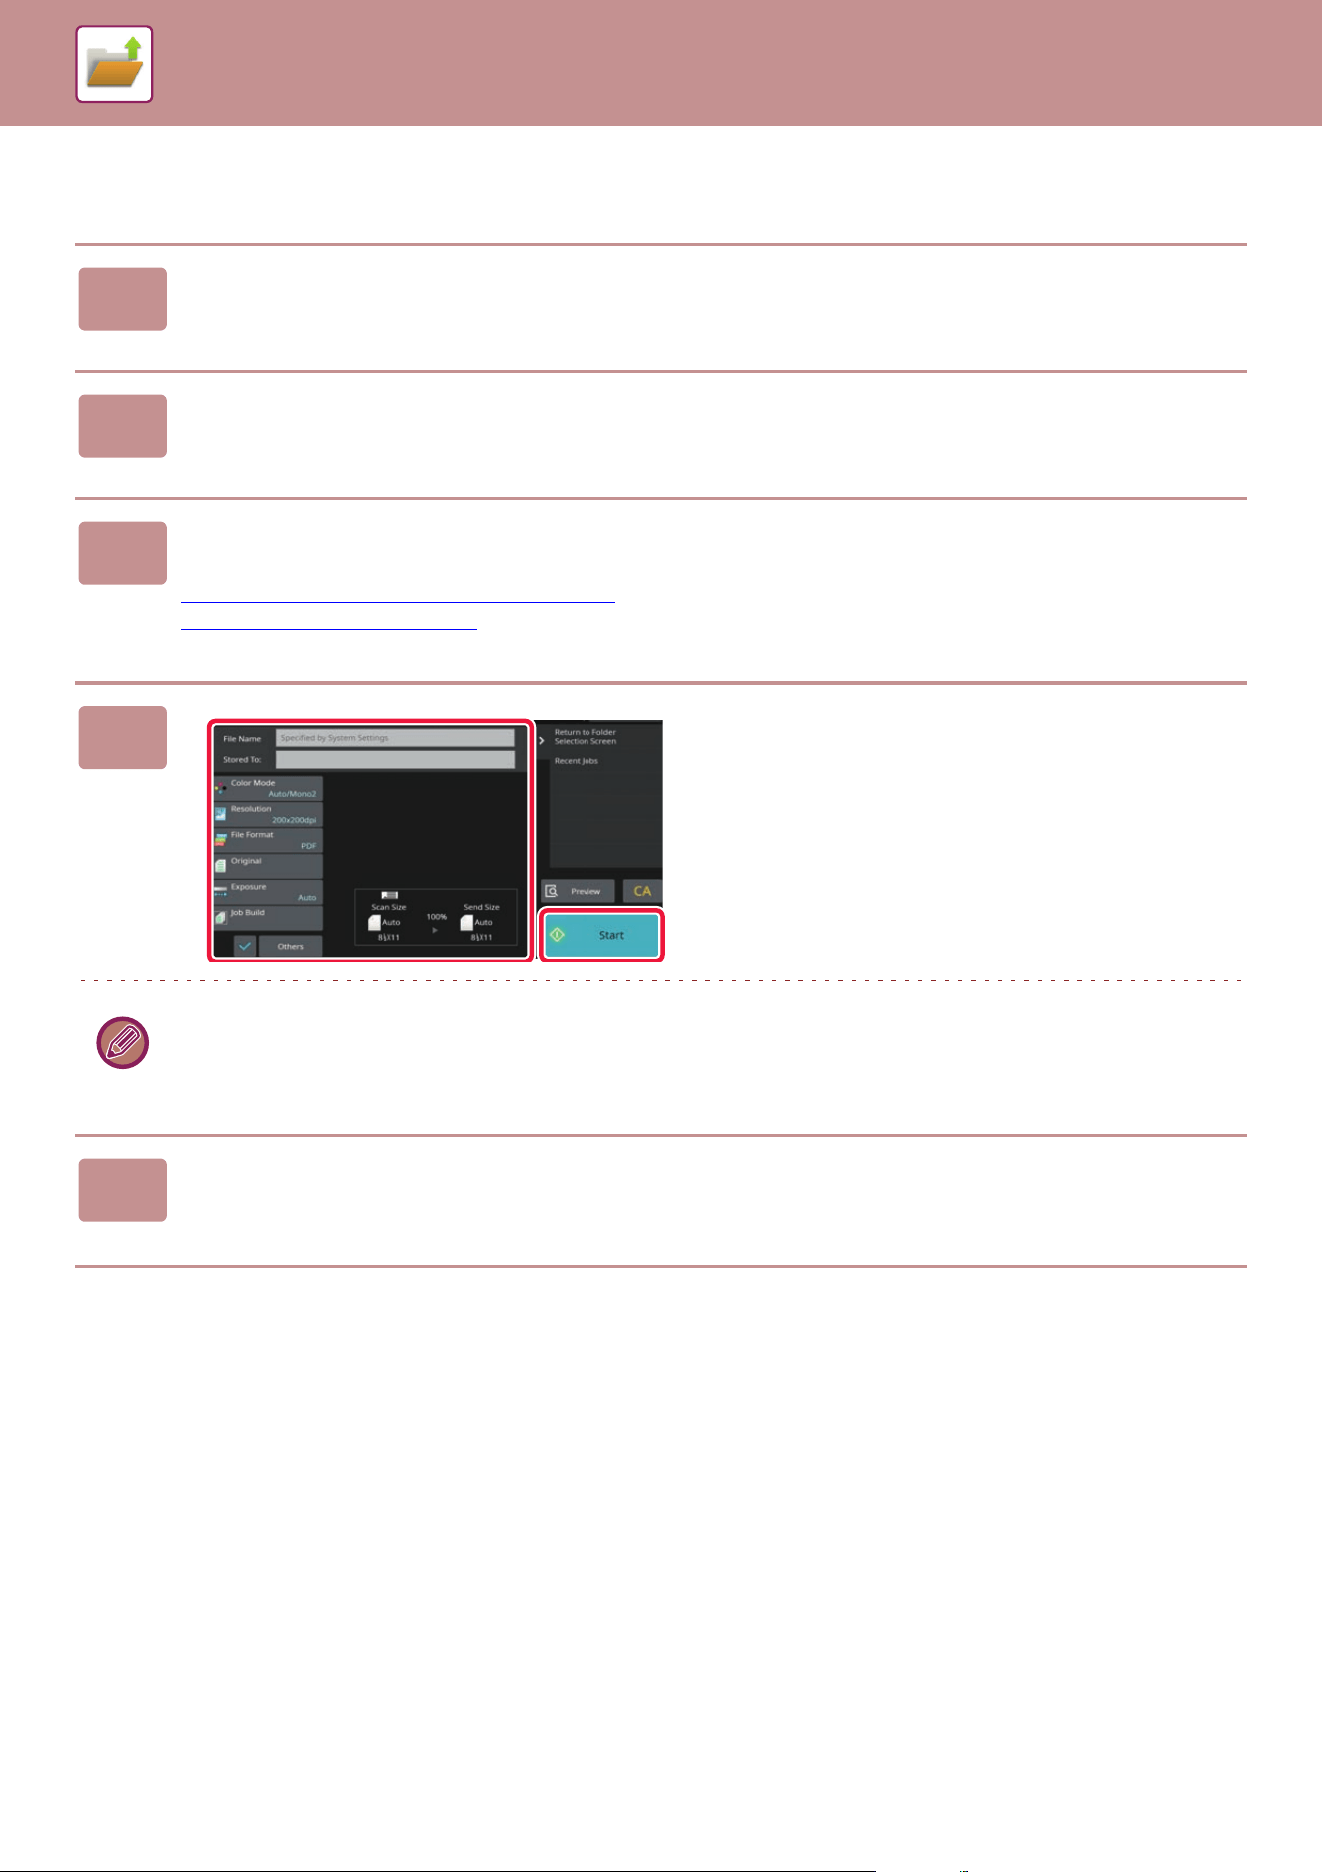
6-18
DOCUMENT FILING►SAVING FILES WITH DOCUMENT FILING
Storing from Document Filing
1
Tap the [File retrieve] key on the Home screen.
2
Tap [Scan to External Memory Device] on the action panel.
3
Place the original.
Place the original in the document feeder tray of the automatic document feeder, or on the document glass.
AUTOMATIC DOCUMENT FEEDER
(page 1-47)
DOCUMENT GLASS (page 1-51)
4
Check the file name and save location,
and tap keys for any settings you want
to select.
• For original scan settings, see the explanation of the copy or image send mode.
• If the original is 2-sided, be sure to tap the [Original] key and then tap the [2-Sided Tablet] key or the [2-Sided Book]
key as appropriate for the original.
5
Tap the [Start] key to start scanning.
A beep will sound to indicate that scanning and file store have ended.
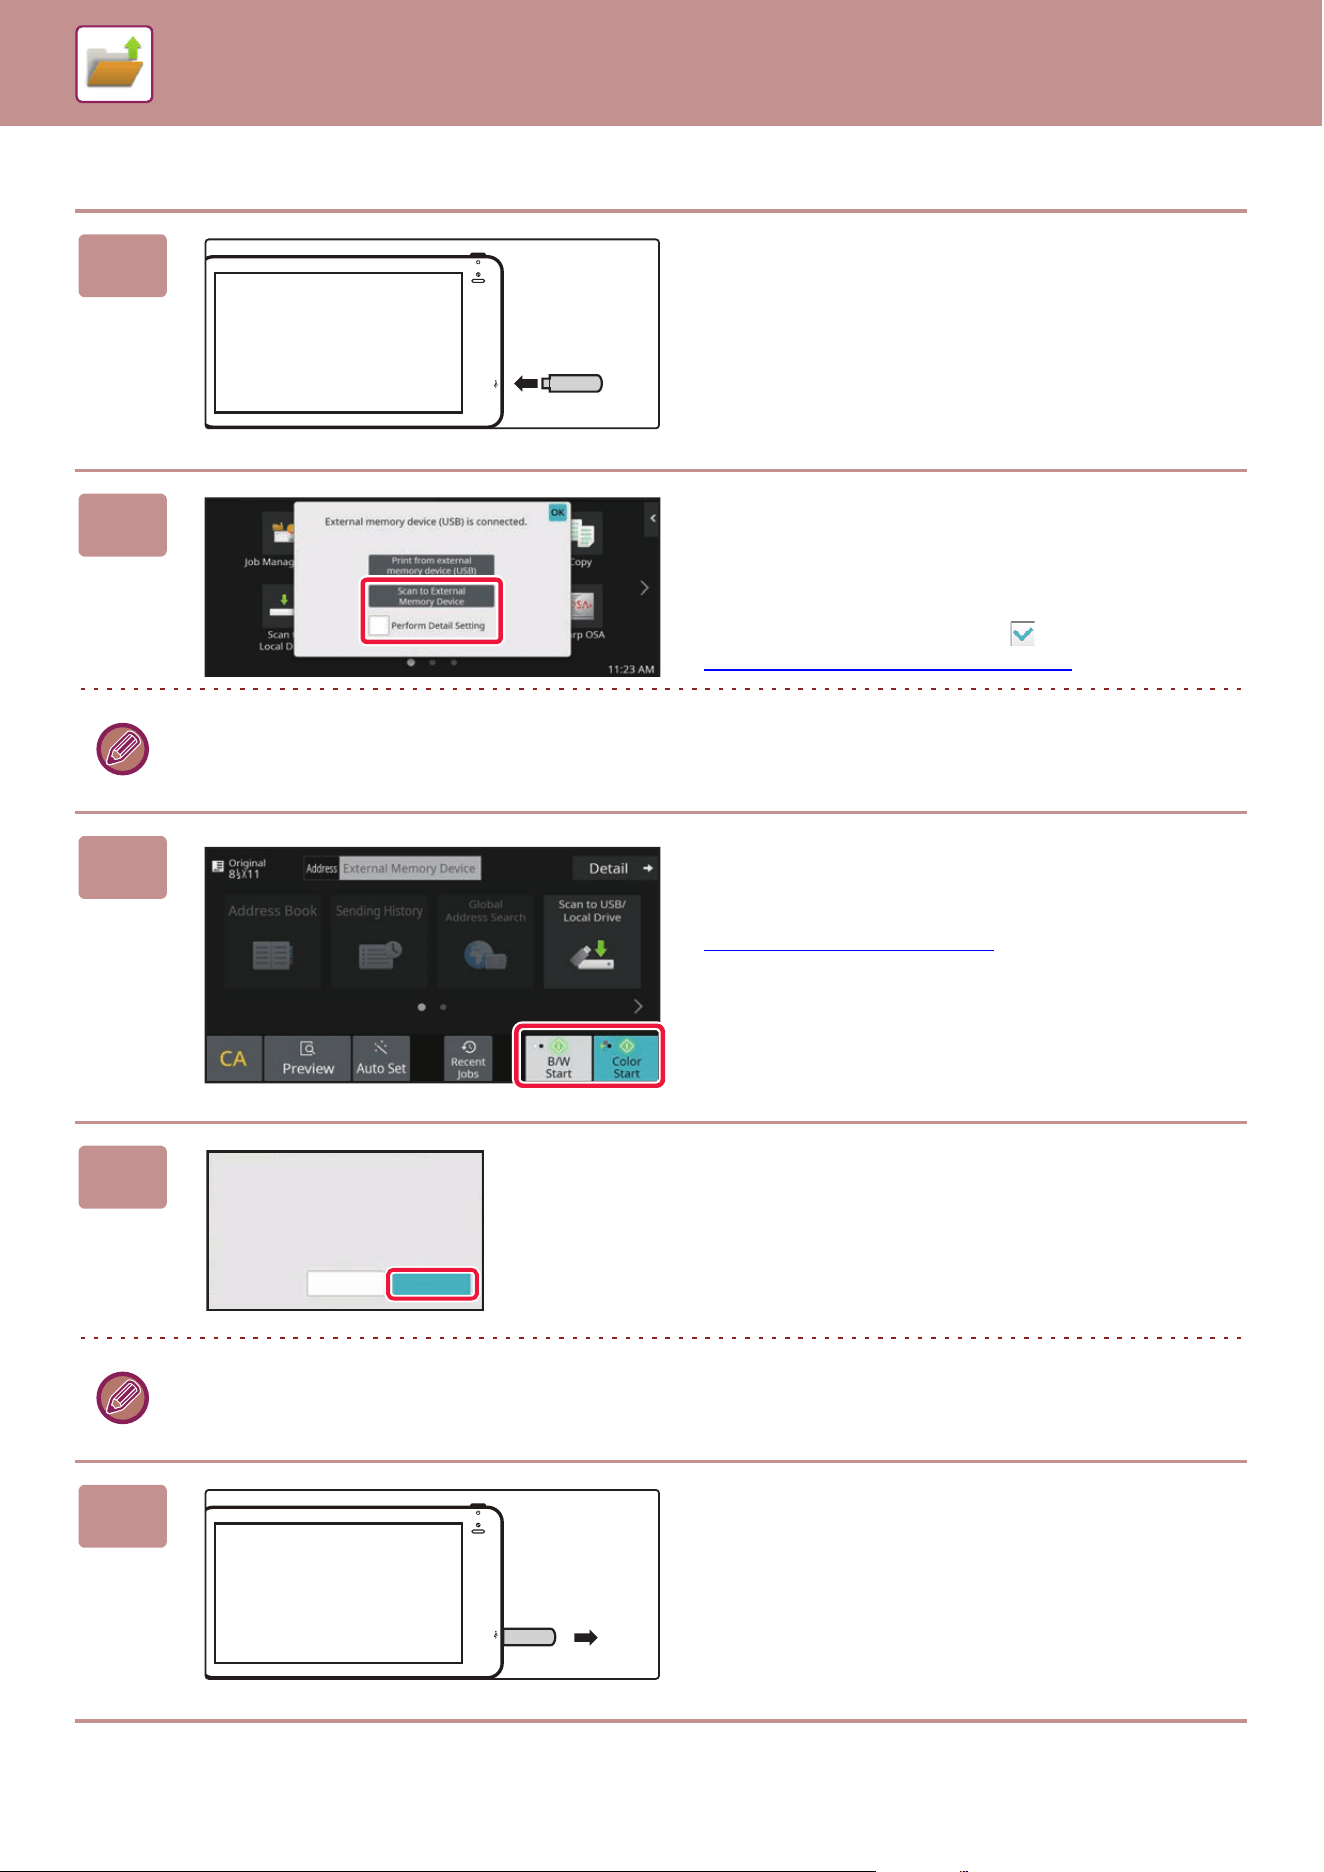
6-19
DOCUMENT FILING►SAVING FILES WITH DOCUMENT FILING
Scan to USB memory device
1
Connect the USB memory device to
the machine.
• Use FAT32, NTFS or exFAT format for USB memory
device.
• When the format of the USB memory device is FAT32,
use a 32 GB or less USB memory device.
2
When a screen for selecting the action
appears, tap [Scan to External Memory
Device].
To select detailed settings in normal mode, select the
[Perform Detail Setting] checkbox .
NETWORK SCANNER MODE
(page 5-6)
If the machine/device save screen is open, this screen will not appear.
3
Tap the [Color Start] key or [B/W Start]
key.
To check a preview of a document, tap the [Preview] key.
PREVIEW SCREEN
(page 2-11)
4
After scanning all originals, tap the
[Read-End] key.
When you scan the original using the automatic document feeder, this screen does not appear.
5
Check the [Sending data has been
completed.] message, and remove the
USB memory device from the machine.
Place next original. (Pg.No.1)
Press [Start].
When finished, press [Read-End].
Change Setting
Read-End
B
o
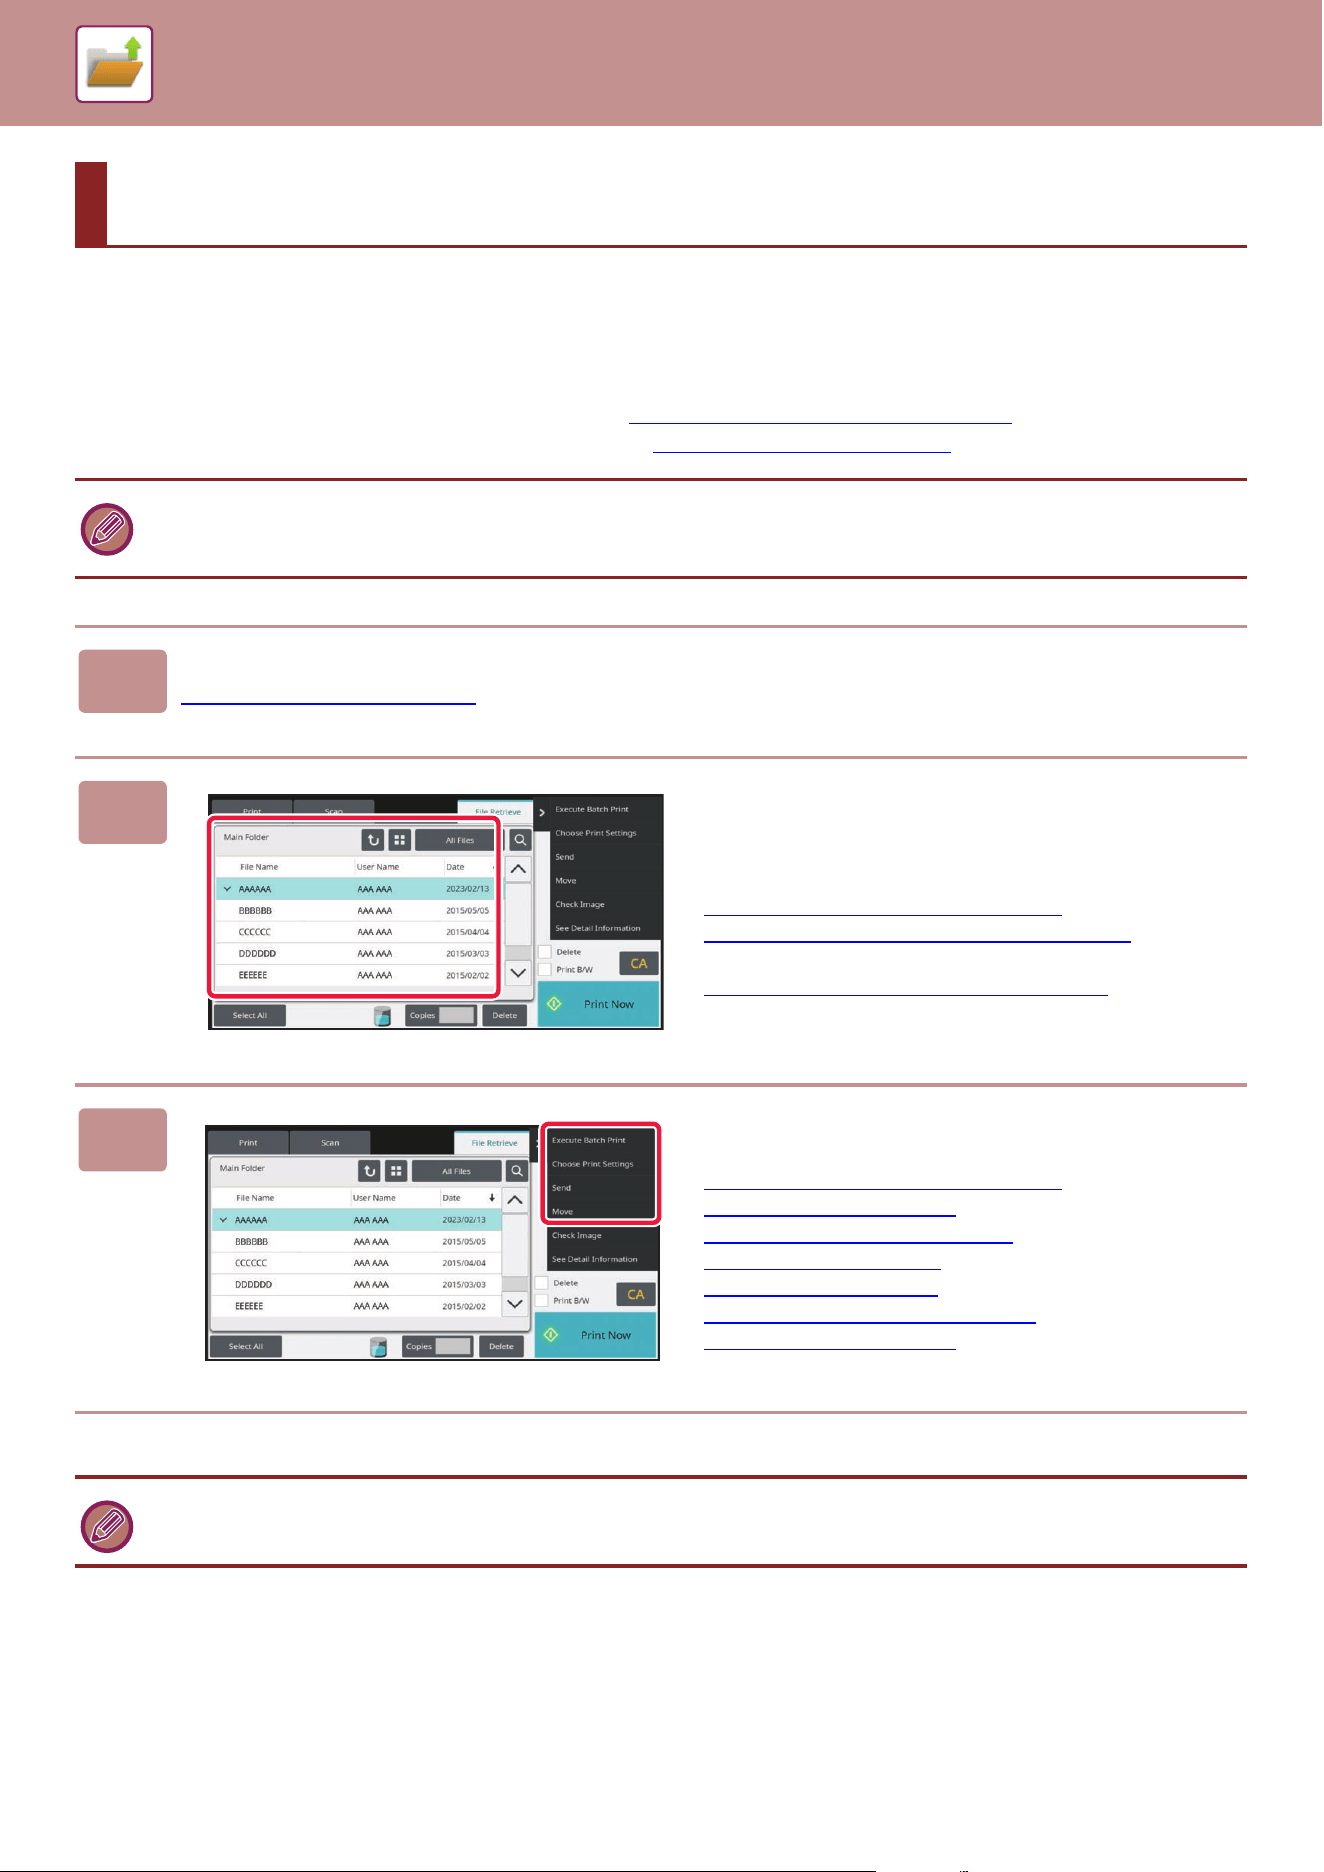
6-20
DOCUMENT FILING►USING STORED FILES
SEQUENCE FOR USING A STORED FILE
The screens and procedures differ depending on whether or not user authentication is enabled.
The sequence for using a stored file depending on the situation is explained.
For information on user authentication procedures, see “USER AUTHENTICATION (page 8-11)
". For information on
enabling user authentication and storing user names, see “USER CONTROL (page 8-19)
".
USING STORED FILES
Also in setting mode (Web version), you can use document filing. In setting mode (Web version), click [Document
Operations] → [Document Filing], and then click the folder that contains the file you wish to use.
You can also check a preview of a stored file in setting mode (Web version).
1
Switch to document filing mode.
CHANGING MODES (page 2-10)
2
Select the file that you wish to retrieve.
When the folder is selected, the files in the folder will appear.
Select the file that you wish to retrieve.
Select a file from the thumbnail images of the stored files.
FILE SELECTION SCREEN
(page 6-21)
SELECTING A FILE TO RETRIEVE (page 6-23)
Retrieve a file using the search function.
FILE SEARCH AND RETRIEVAL
(page 6-34)
3
Select an operation item.
Select the desired operation and configure settings.
FILE SELECTION SCREEN
(page 6-21)
FILE PRINTING (page 6-24)
FILE TRANSMISSION (page 6-27)
FILE MOVING (page 6-28)
DELETE FILE (page 6-29)
FILE IMAGE CHECKING (page 6-31)
FILE MERGING (page 6-32)
When retention is selected on the printer, reset items that cannot be set for retention do not appear.
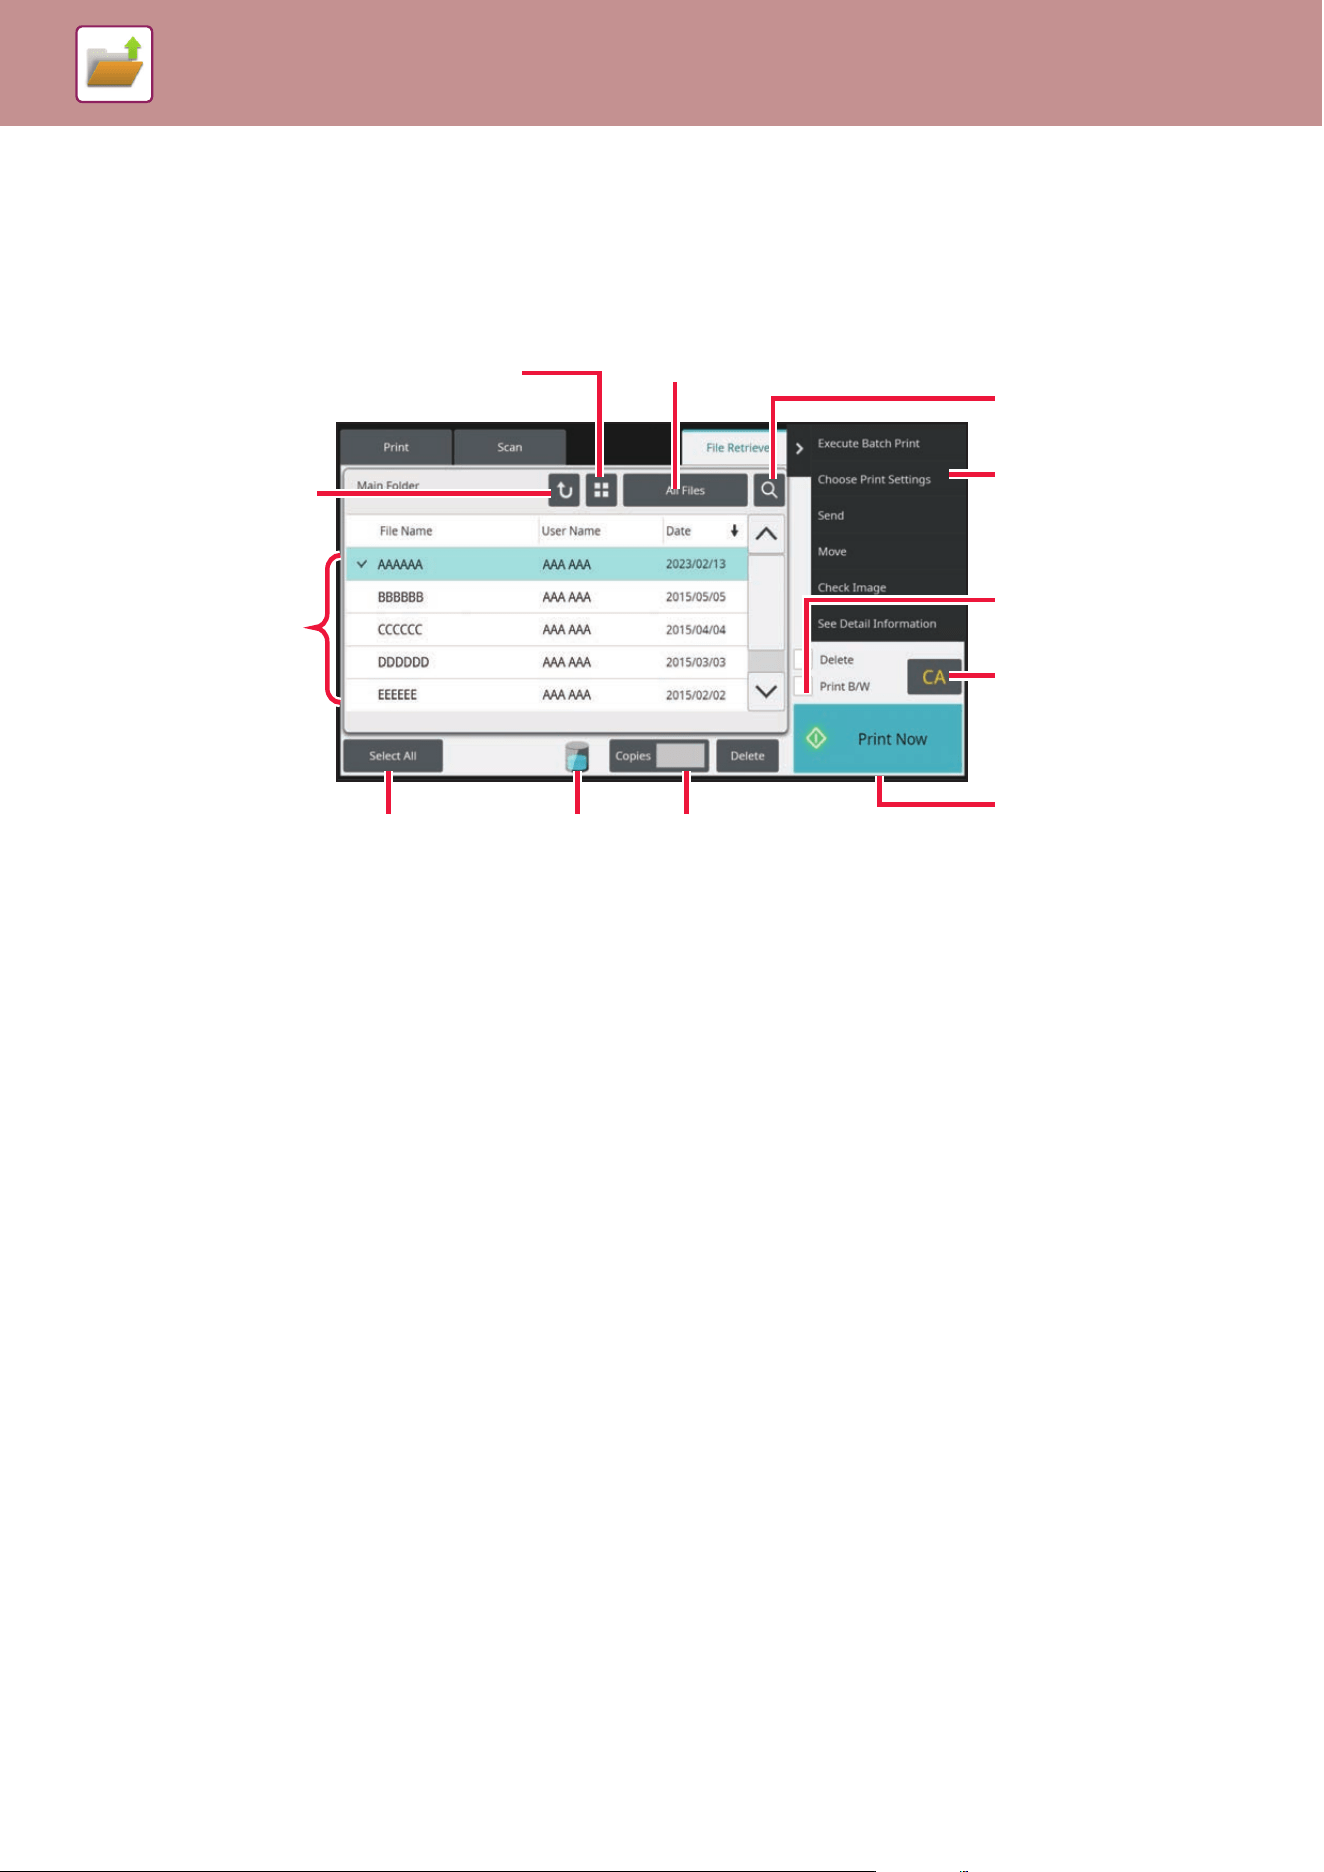
6-21
DOCUMENT FILING►USING STORED FILES
FILE SELECTION SCREEN
The file selection screen can be displayed in "List" format or "Thumbnail" format to display thumbnail images of files.
LIST DISPLAY MODE
(1) Switch the file display mode between list and
thumbnail.
(2) Return to the base screen of document filing mode.
(3) Displays the saved files.
(4) Select or clear all files. Tapping this key switches the
key display mode between [Select All] and [Cancel
All].
(5) Tap this key to display the usage status of the
machine's built-in storage.
(6) The number of copies set in [Copies] is valid when
tapping [Print Now].
(7) Switch the file key displayed for each job type.
(8) Search for a file saved in a folder.
(9) Displays the functions that can be used.
(10) Print in black and white.
(11) Reset all settings.
(12) Start printing immediately.
(1)
(11)
(12)
(6)(5)(4)
(3)
(2)
(7)
(8)
(9)
(10)
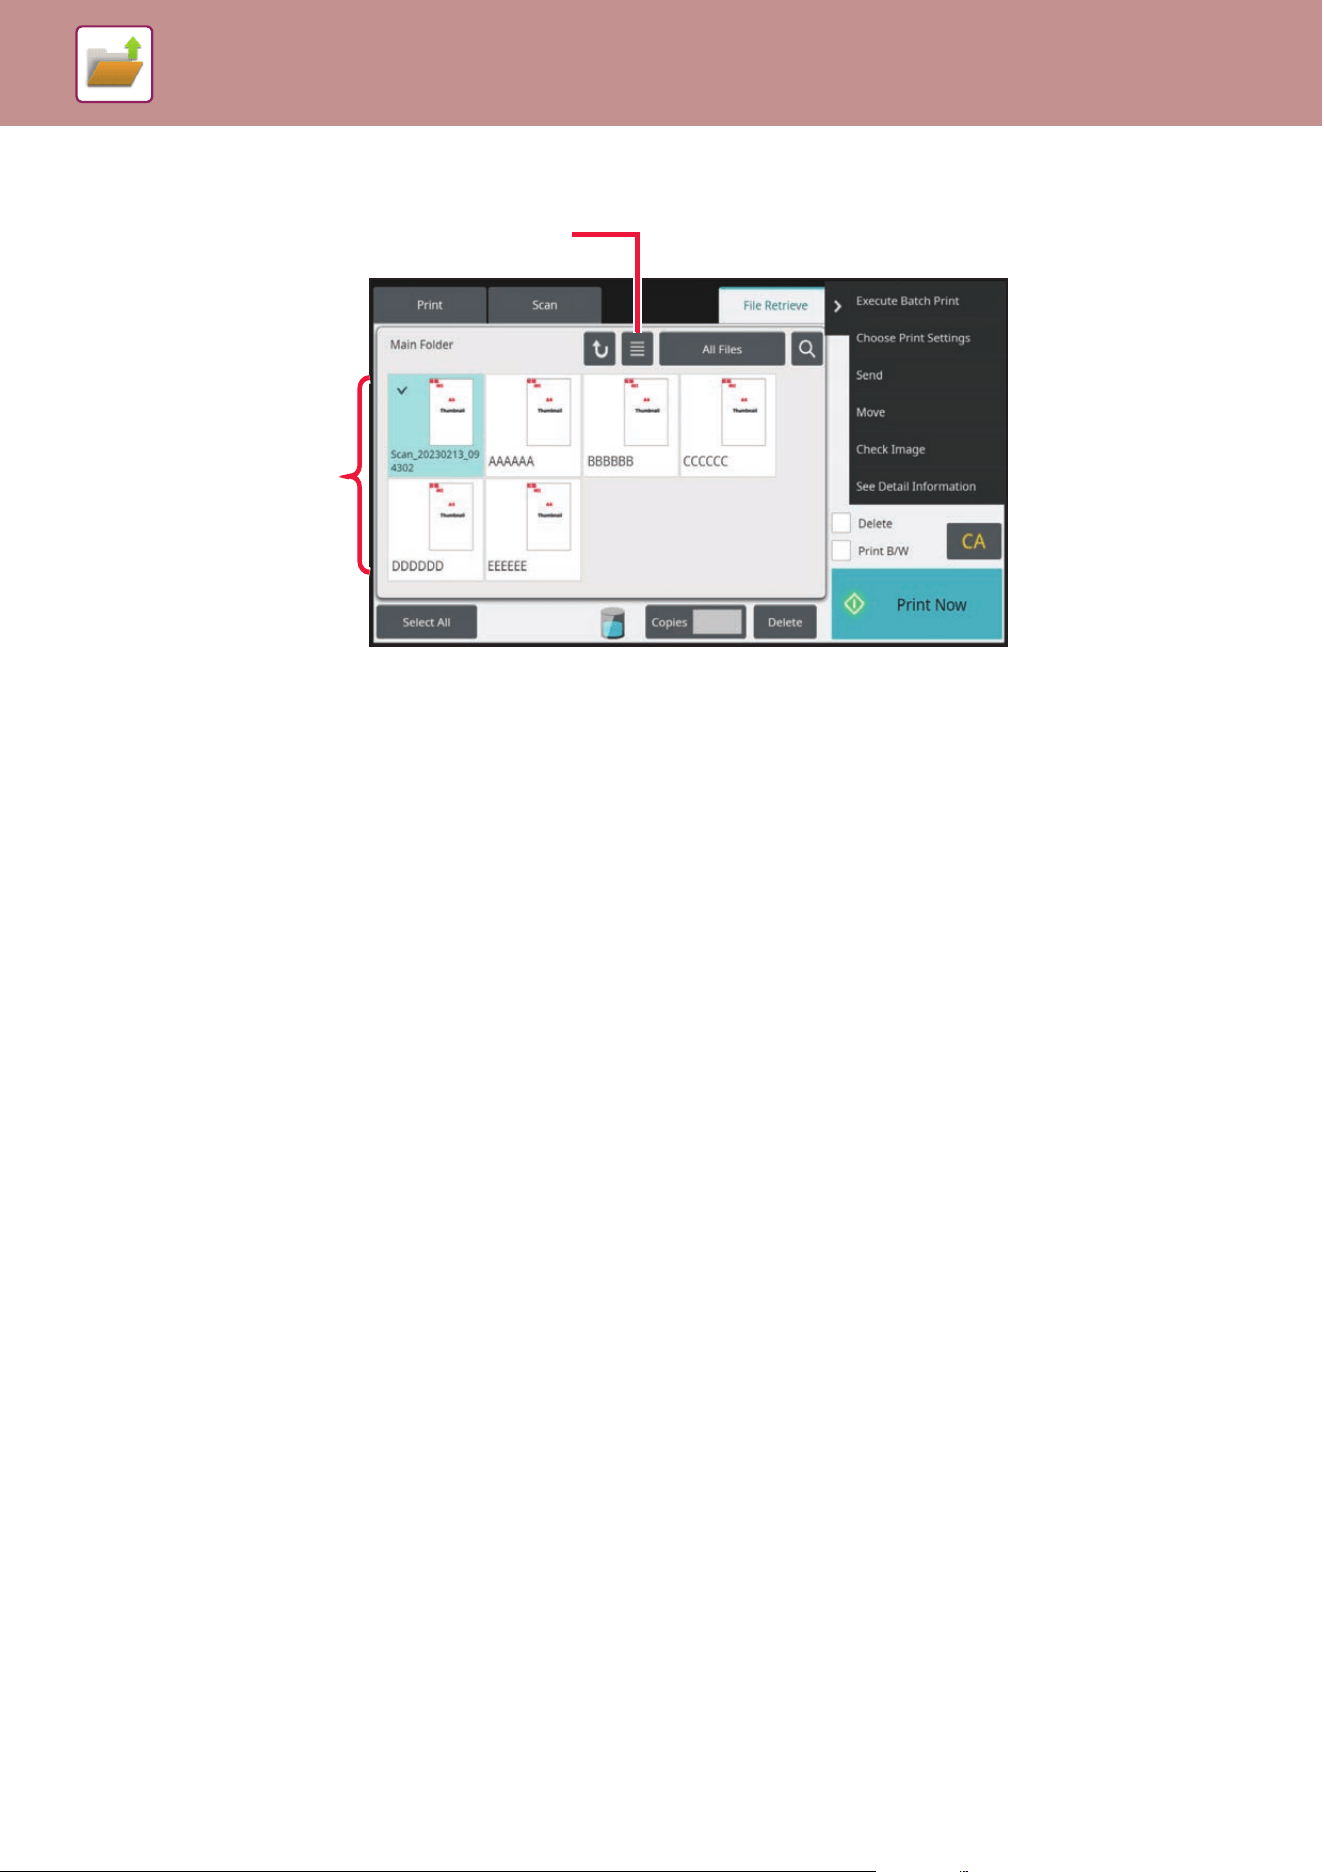
6-22
DOCUMENT FILING►USING STORED FILES
THUMBNAIL DISPLAY MODE
(1) Switch the file display mode between list and
thumbnail.
(2) Displays thumbnails of the saved files.
Sorting order
In "Settings (administrator)", select [System Settings] → [Document Filing Settings] → [Condition Settings] → [Sort
Method Setting].
Selects an order of display files stored in the Main Folder, Custom Folder, and Quick File Folder. Select one of the
following settings:
• File Name
• User Name
•Date
(2)
(1)
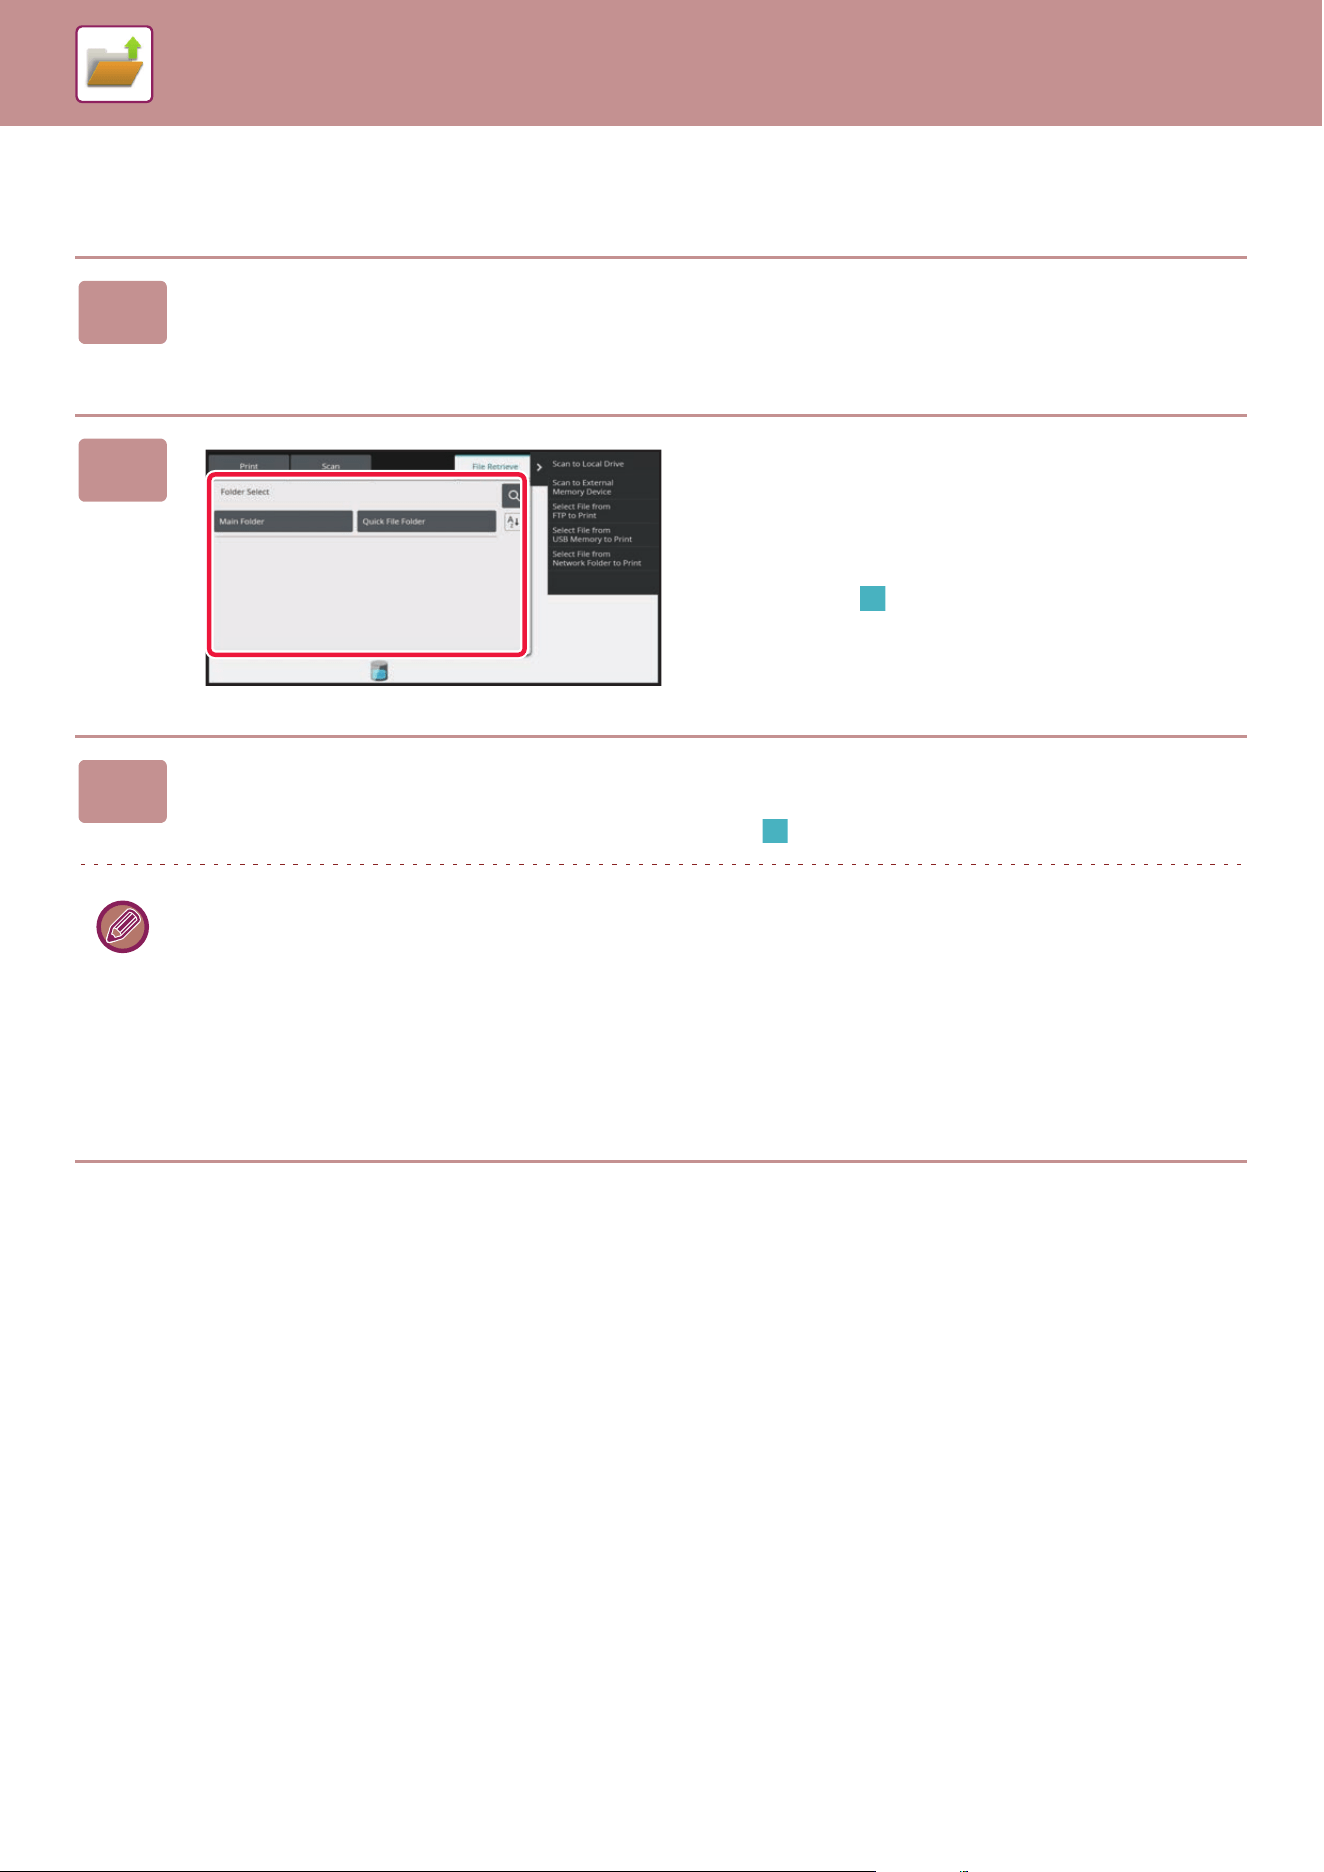
6-23
DOCUMENT FILING►USING STORED FILES
SELECTING A FILE TO RETRIEVE
1
Tap the [File retrieve] key.
When user authentication is enabled and "My Folder" is configured by selecting [User Control] in "Settings
(administrator)" → [User List], the custom folder specified as "My Folder" opens.
2
Tap the key of the folder that contains
the desired file.
If the folder with a PIN Code is tapped, a PIN Code entry
screen will appear.
Enter the PIN Code (4 to 8 digit number) using the numeric
keys and tap the .
3
Tap the key of the desired file.
If the file with a PIN Code or password is tapped, a PIN Code or password entry screen will appear.
Enter the PIN Code or password (4 to 32 characters) and tap the .
• Tap the [Print Now] key to printed out the file with the settings used for its storage.
• Tap the [Filter by Job] key to display the keys of a particular mode such as copy or scanner mode, enabling quick data
search.
• Tap the [File Name] key, the [User Name] key, or the [Date] key to change the order of display of the files.
• Select [User Control] in "Settings (administrator)" → [User Settings] → [User List] → [User Registration] → [Authority
Group]. Then, in authority group setting for the users who are currently logged in, select [Job Settings] → [Document
Filing] and enable [Display only the Files of Logged-in Users] to display only files stored by the users who are currently
logged in.
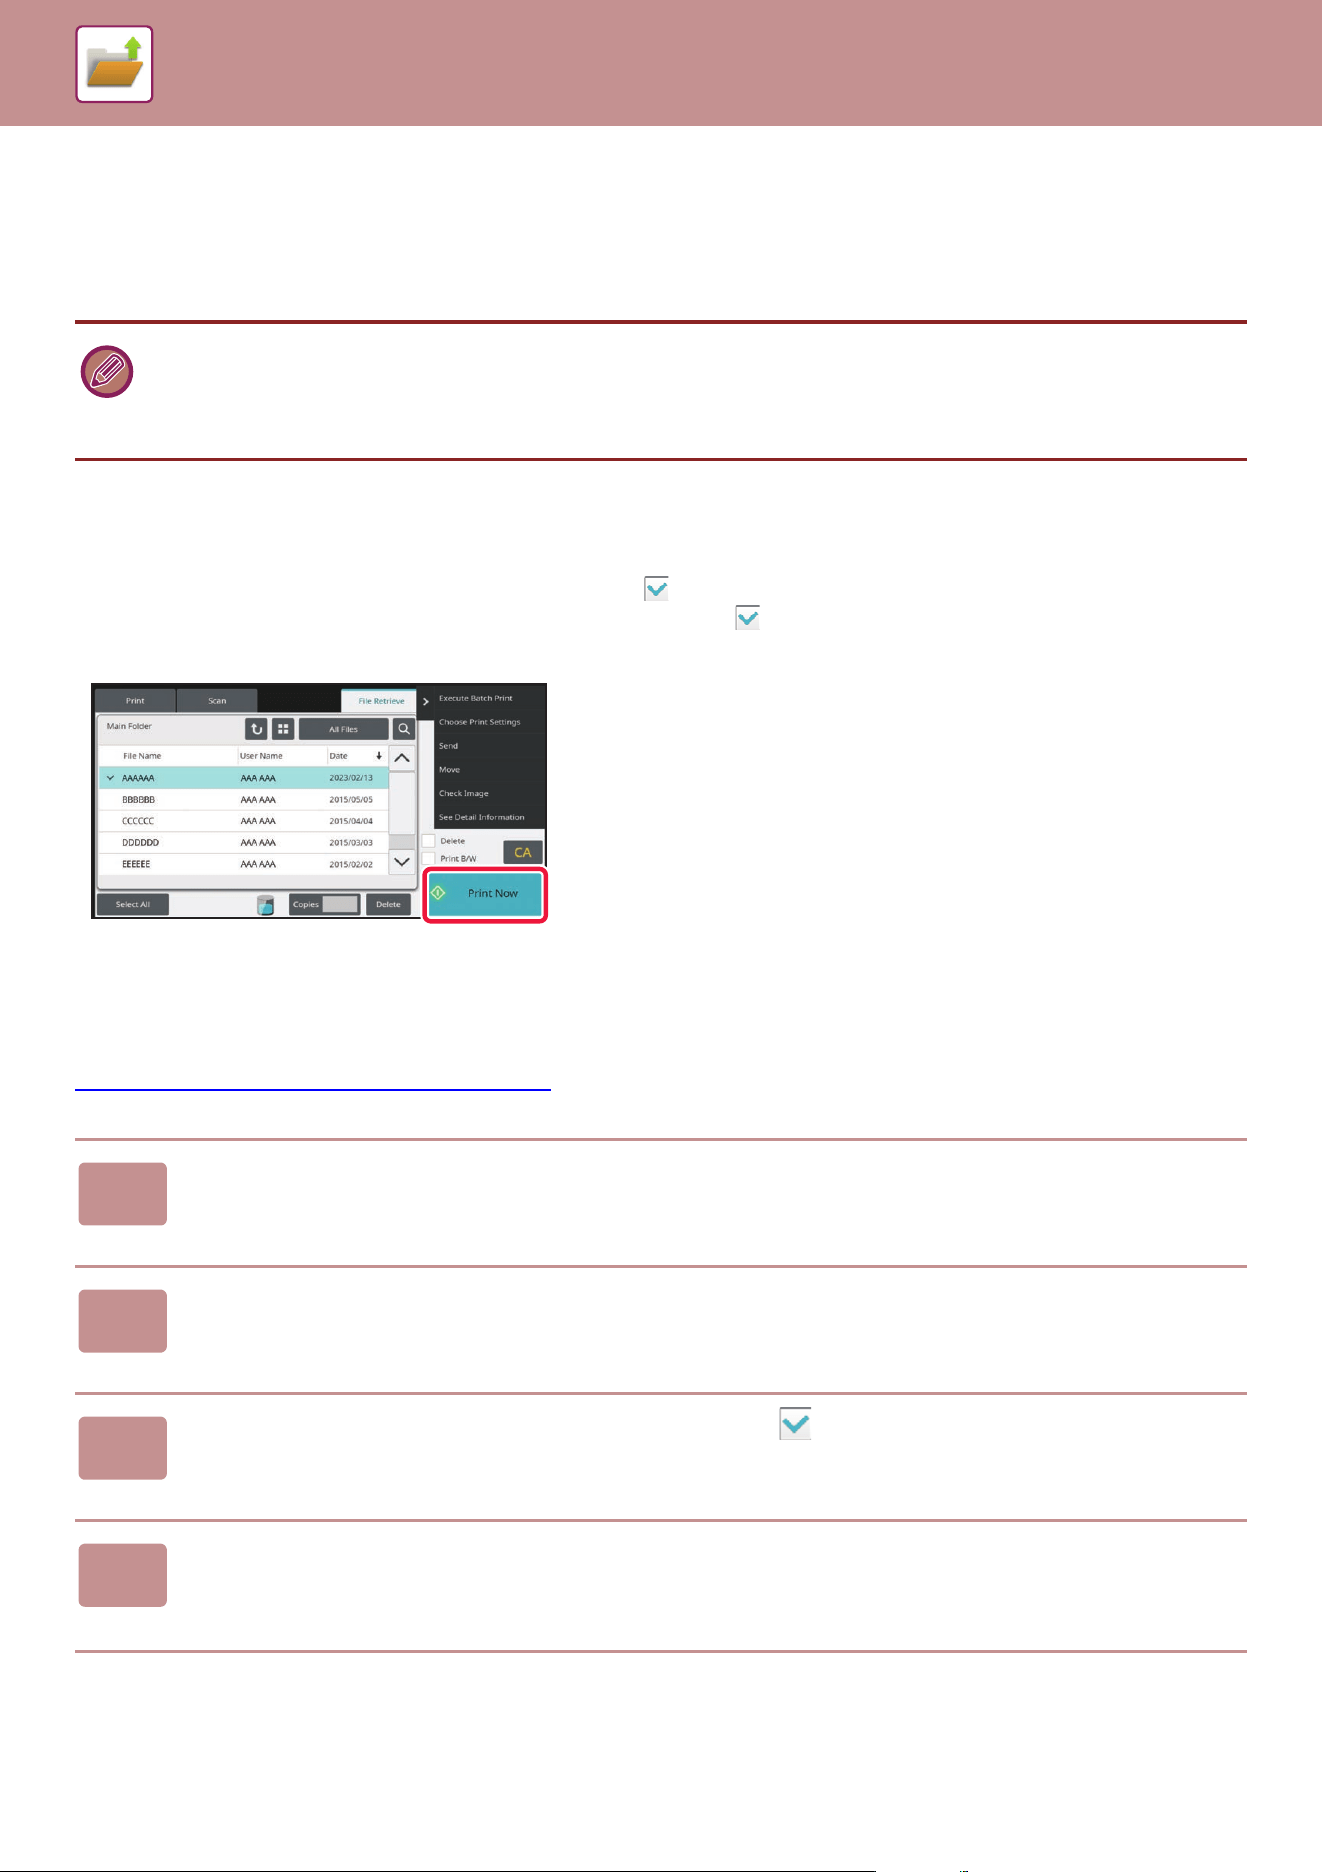
6-24
DOCUMENT FILING►USING STORED FILES
FILE PRINTING
A file stored using document filing can be retrieved and printed when needed. The settings used when the file was
stored are also stored, and thus the file can be printed again using those settings. The file can also be modified before
printing by changing the print settings.
QUICK PRINTING
Prints a file with the various settings used when it was saved. Select a file and tap the [Print Now] key.
To delete data after printing, set the [Delete] checkbox to .
To print the file in black and white, select the [B/W Print] checkbox .
To change the number of sheets to print, tap the [Copies] key and then use the numeric keys to set the number to print.
CHANGING SETTINGS BEFORE PRINTING
After selecting the desired file, follow the steps below.
SELECTING A FILE TO RETRIEVE
(page 6-23)
• A file saved in black and white or grayscale cannot be printed in color.
• Print settings that are changed by re-manipulation of the file cannot be saved.
• The printing speed may be somewhat slow depending on the resolution and exposure mode settings of the stored file.
• When retention is selected on the printer, reset items that cannot be set for retention do not appear.
1
Tap [Choose Print Settings] on the action panel.
2
Change the print settings.
3
Select the [Delete] or [B/W Print] checkbox when needed.
4
Tap the [Start] key.
The file will be printed.
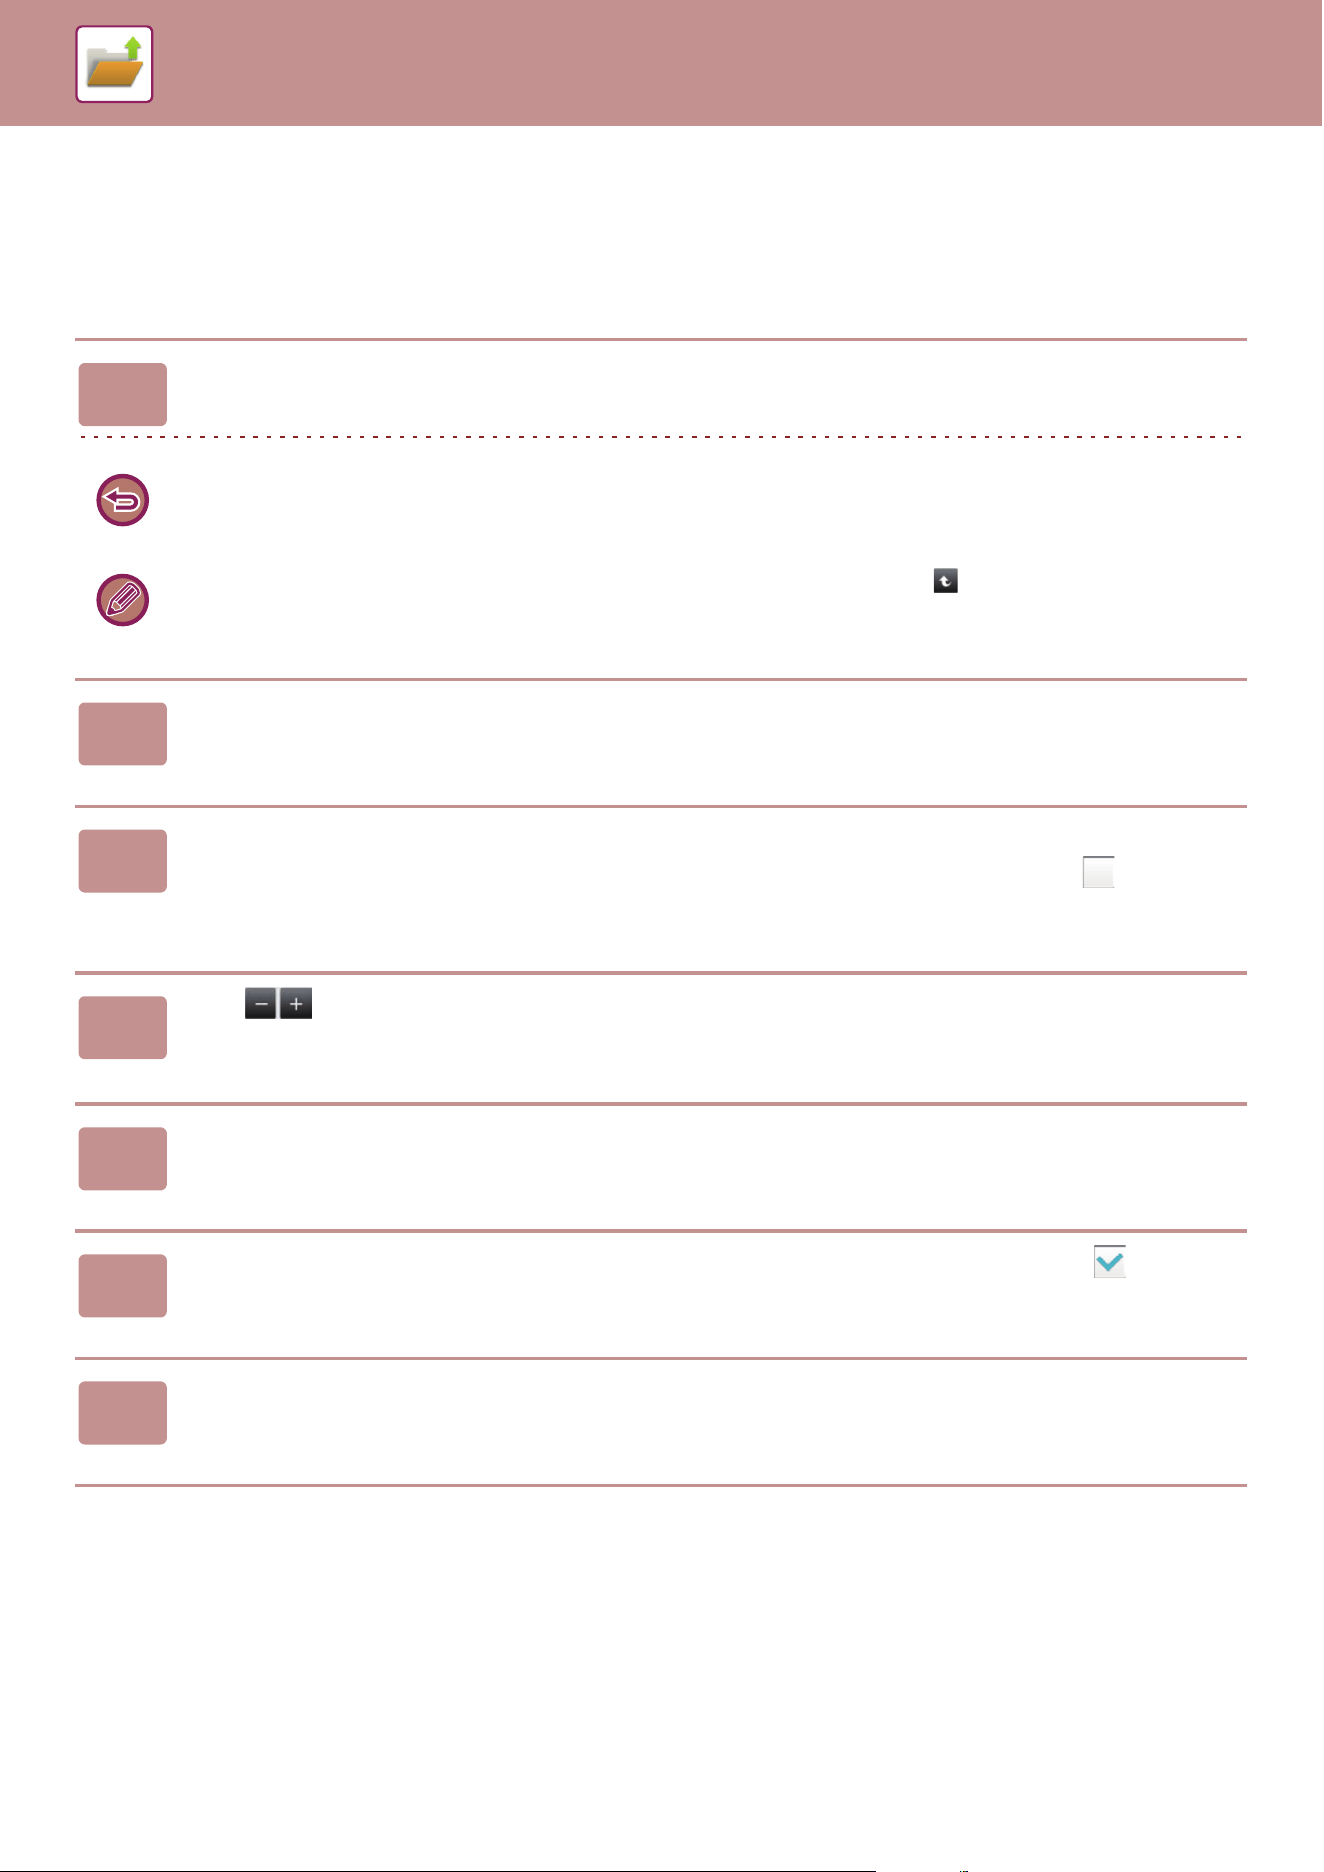
6-25
DOCUMENT FILING►USING STORED FILES
MULTI-FILE PRINTING
MULTI-FILE PRINTING
1
Select the keys of the multiple files that you wish to print.
• Confidential files cannot be printed simultaneously with other files.
• A file in the currently selected folder cannot be selected simultaneously with a file in a different folder.
• If the job type is changed with the By Job Display key or the screen is changed by being tapped while a file is
selected, the selection of the file will be canceled.
2
Tap [Print] on the action panel.
3
When not printing with the number of copies at data saving, tap the [Apply
the Number from Stored Setting of Each Job.] checkbox to set to .
When printing with the number of copies at data saving without specifying copies, go to step 5.
4
Use to specify the number of copies.
As required, directly tap the numeric value display key and change the value using the numeric keys.
5
To set the order of files to print, change with [Print Order].
6
To delete the file after printing, tap the [Delete] checkbox to set to .
7
Tap the [Start] key to start printing.
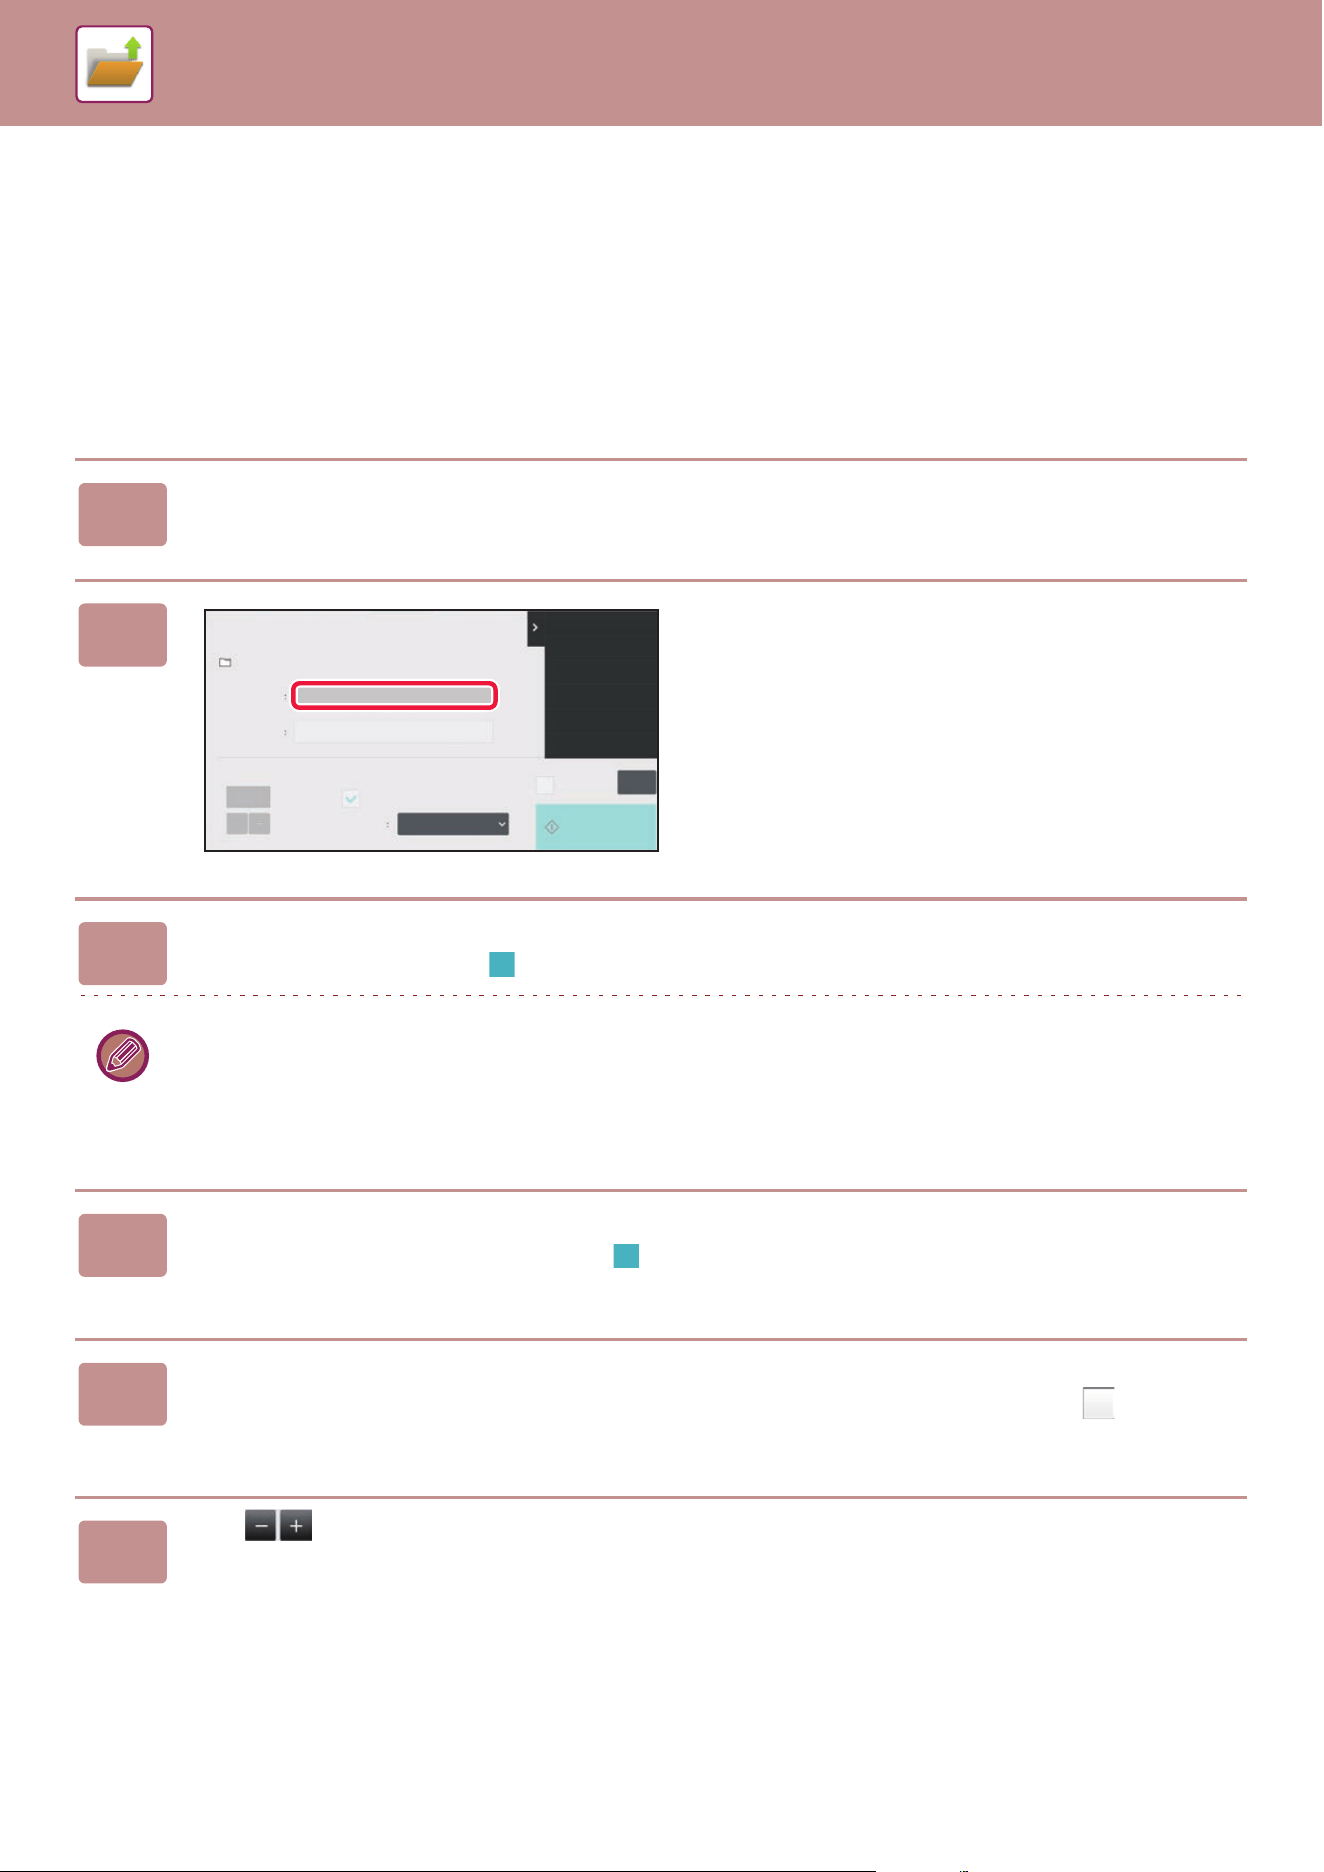
6-26
DOCUMENT FILING►USING STORED FILES
BATCH PRINTING
Batch Print Settings
In "Settings (administrator)", select [System Settings] → [Document Filing Settings] → [Condition Settings] → [Batch
Print Settings].
Set whether or not the [All Users] key and the [User Unknown] key are prohibited in the user name selection screen
when printing all files, whether files are sorted by date in newest or oldest order, and whether file names are sorted in
ascending or descending order.
1
Tap the [Execute Batch Print] key on the action panel.
2
Tap the [User Name] text box.
3
Select the user name.
After selecting the user name, tap .
If you have selected [System Settings] in "Settings (administrator)" → [Document Filing Settings]
→ [Condition Settings] → [Batch Print Settings] and disabled the [Selection of [All Users] is not allowed.] checkbox and
[Selection of [User Unknown] is not allowed.] checkbox, select the [All Users] key and [User Unknown] key.
If you tap the [All Users] key, all files in the folder (the files of all users) are selected.
If you tap the [User Unknown] key, all files in the folder with no user name specified are selected.
4
If a password has been established, tap the [Password] key.
Enter the password (4 to 32 characters) and tap . Only files that have the same password will be selected.
If you do not wish to enter a password, go to the next step.
5
When not printing with the number of copies at data saving, tap the [Apply
the Number from Stored Setting of Each Job.] checkbox to set to .
When printing with the number of copies at data saving, go to step 7.
6
Use to specify the number of copies.
As required, directly tap the numeric value display key and change the value using the numeric keys.
CA
Delete
Start
Return to File
Selection Screen
Batch Print
Main Folder
User Name
PIN Code/Password
Change Print Number
Print
Order
Apply the Number from Stored Setting of
Each Job.
All Files
Date (Dsc.)
( 1~9999 )
1
6-27
DOCUMENT FILING►USING STORED FILES
FILE TRANSMISSION
The settings used when the file was stored with document filing are stored, and thus the file can be transmitted using
those settings. If needed, you can also change the transmission settings to modify the retrieved file.
After selecting the desired file, follow the steps below.
SELECTING A FILE TO RETRIEVE
(page 6-23)
7
To automatically delete the file after printing, tap the [Delete] key.
8
Tap the [Start] key to start printing.
If there are no files that match the search conditions, you will return to the file list screen.
It [Delete the Data] on the action panel is tapped, all files that match the current search conditions will be deleted.
• A file saved in black and white or grayscale cannot be transmitted in color.
• A stored print job cannot be transmitted. (However, if the job was filed in the printer driver, it can be transmitted if "Rip
Style" is set to [RGB]. This settings is accessed by selecting the [Other Settings] button on the [Detailed Settings] tab.)
• These transmission methods require installation of the corresponding options.
• If any of the following other modes were included in the saved file, the file cannot be transmitted.
"Stamp", "Photo Repeat", "Multi-Page Enlargement" for copying.
• If any of the following other modes were included in the saved file, the file can be transmitted, but other functions cannot be
executed.
"Margin Shift", "Transparency Inserts", "Book Copy", "Tab Copy", "Stamp", all "Color Adjust" menu items, "Centering"
• Depending on the reduction or enlargement ratio used when storing a file, it may not be possible to send the stored file
using a selected resolution setting. In this event, try changing the resolution.
• When the original job is not a Print Jobs and the resend format is a PDF format, this function automatically corrects the
skew and sends if the original is scanned while skewed. Since this functions is the same as the scanner function, see
“AUTOMATICALLY ADJUST SKEWED SCAN DATA
(Original Skew Adjustment) (page 5-127)".
1
Tap [Send] on the action panel.
2
Select settings for sending.
3
Tap the [Start] key.
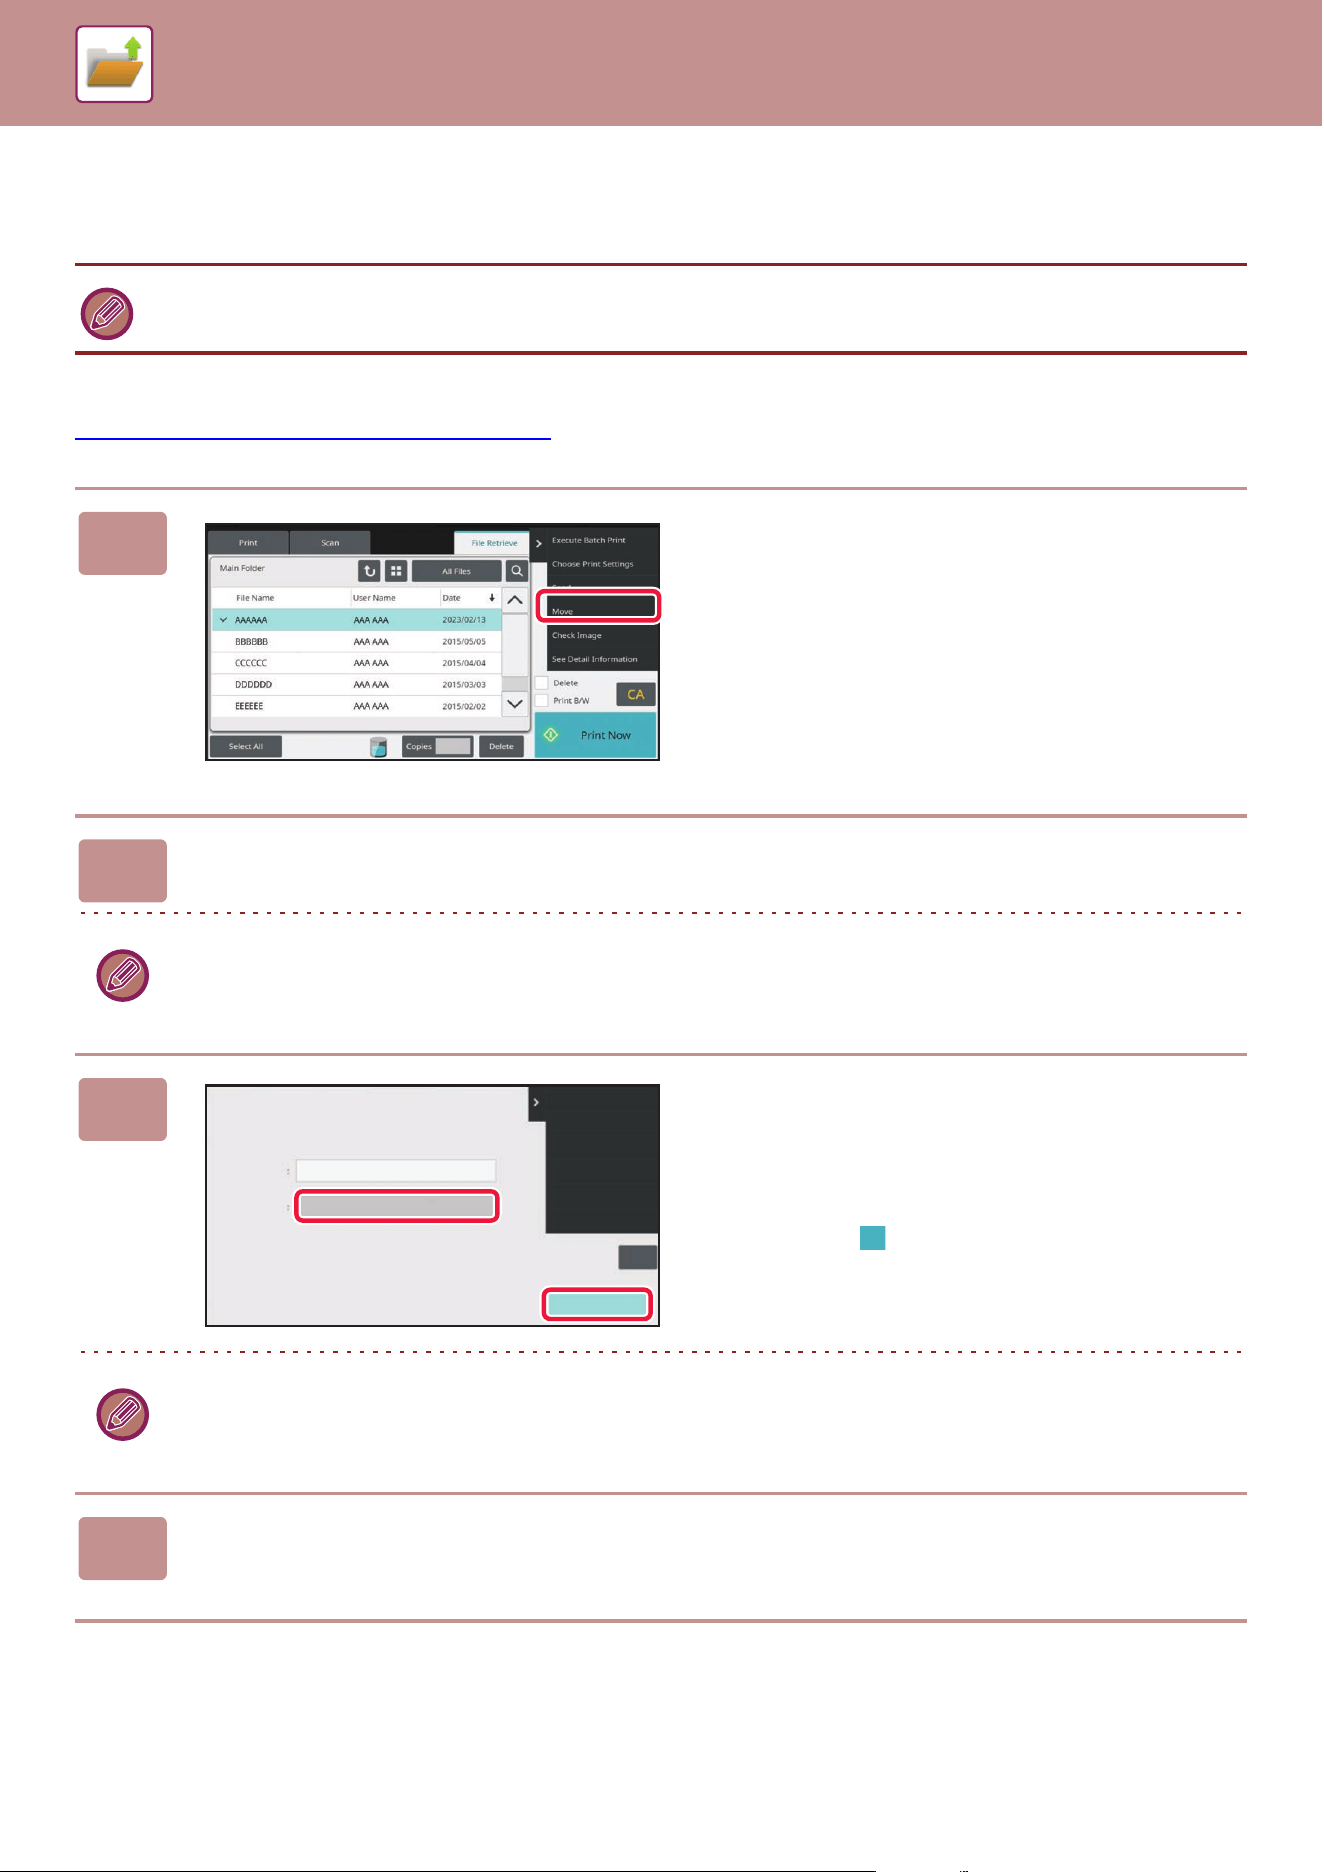
6-28
DOCUMENT FILING►USING STORED FILES
FILE MOVING
Changes the file storage location. (The file is moved to another folder.)
After selecting the desired file, follow the steps below.
SELECTING A FILE TO RETRIEVE
(page 6-23)
A file whose property is "Protect" cannot be moved. To move a protected file, change its property to "Sharing" or
"Confidential".
1
Tap [Move] on the action panel.
2
Tap the [Move to:] key.
• A file cannot be moved to the Quick File folder.
• To change the file name, tap the [File Name] key.
3
Tap the key of the folder to which you
want to move the file.
If the folder with a password is tapped, a password entry
screen will appear.
Enter the password (5 to 8 digit number) using the numeric
keys and tap the .
When multiple files are moved, file names cannot be changed.
4
Tap the [Move] key.
CA
Move
Return to File
Selection Screen
Move File
File Name
Copy_20210520_091323
Move to
Black & White
Copy_20210520_091323
User Unknown
A4
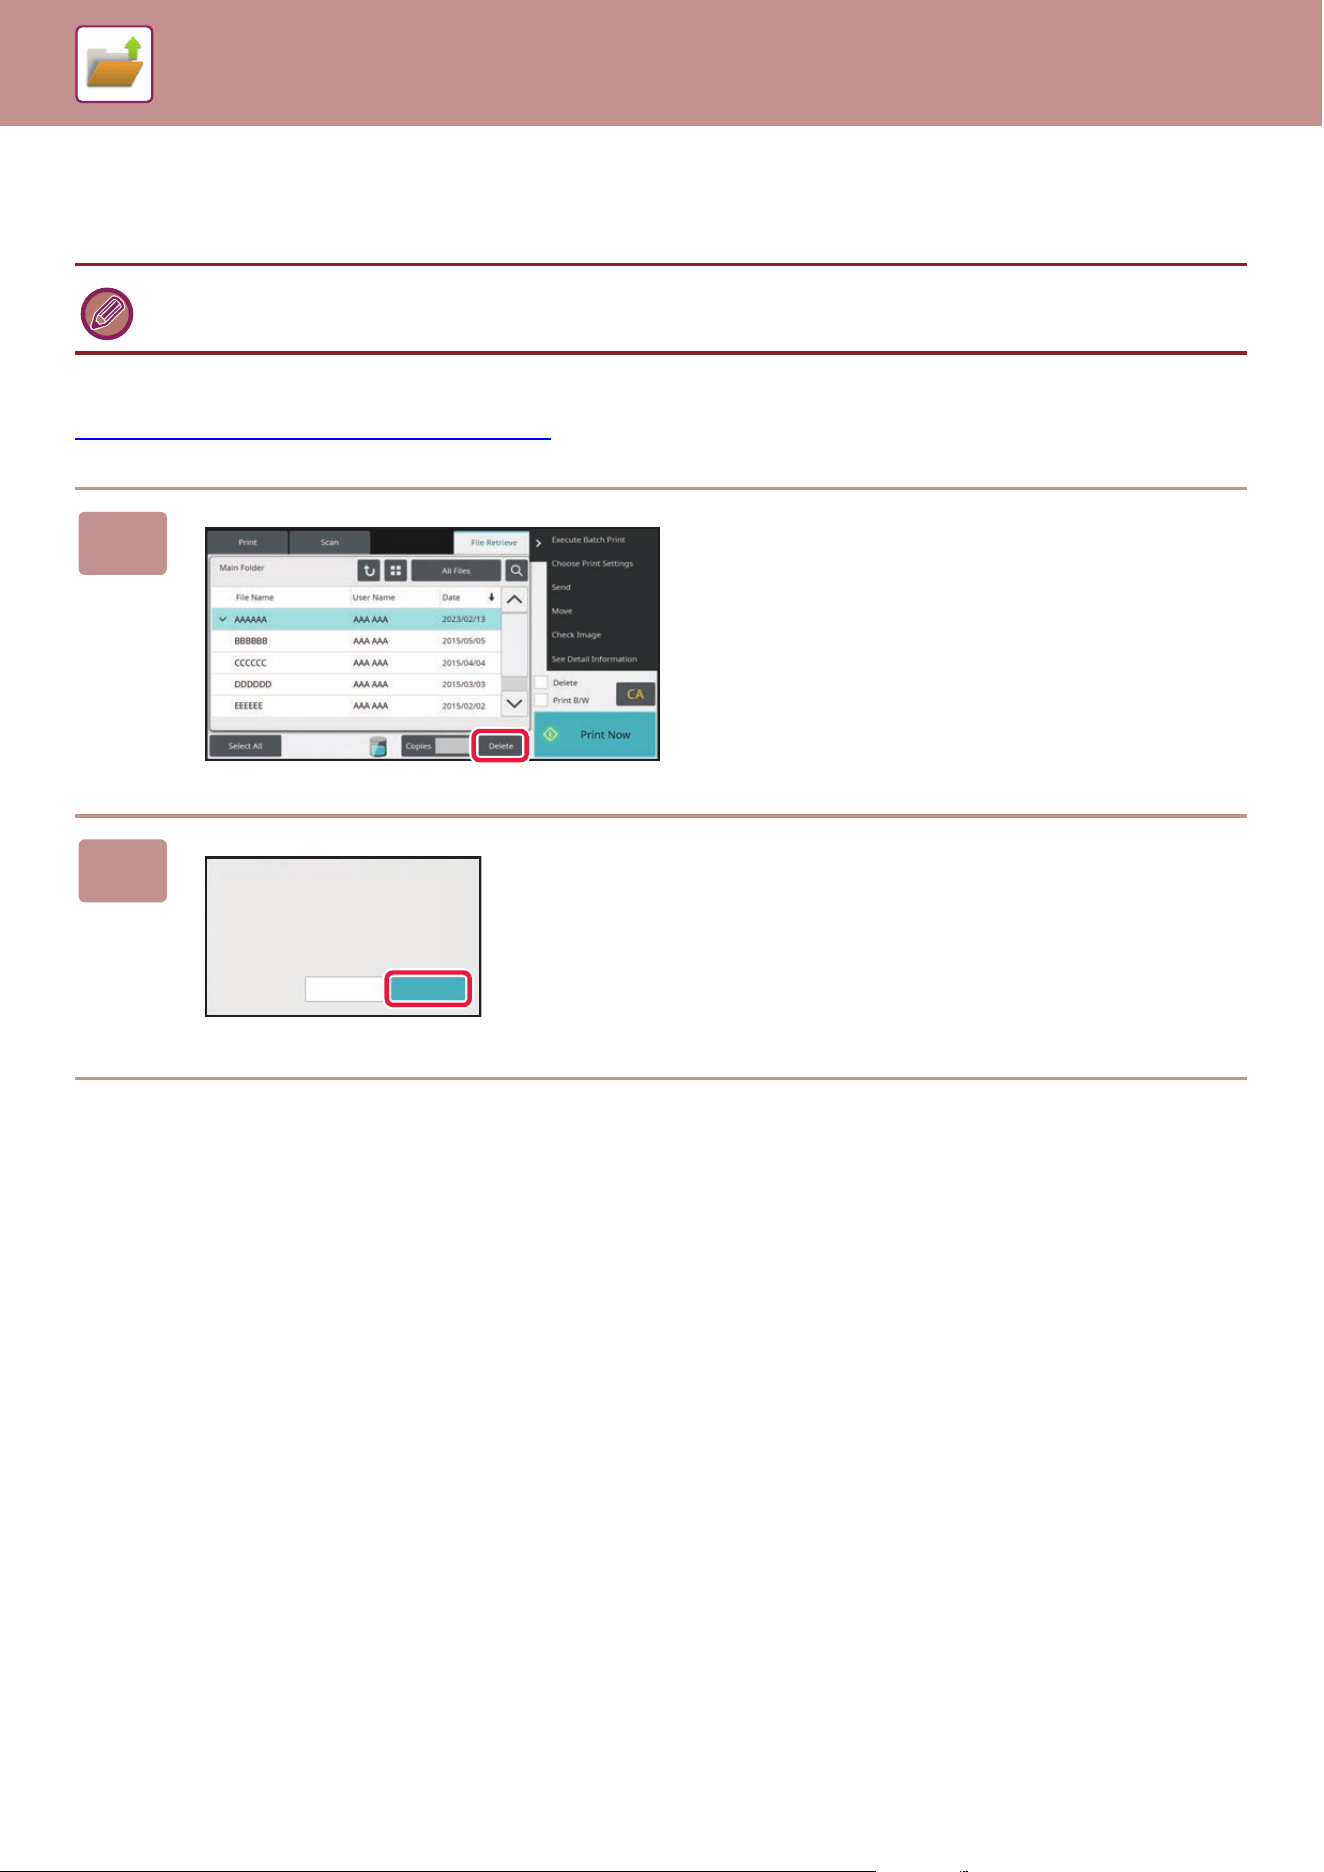
6-29
DOCUMENT FILING►USING STORED FILES
DELETE FILE
Stored files that are no longer required can be deleted.
After selecting the desired file, follow the steps below.
SELECTING A FILE TO RETRIEVE
(page 6-23)
A file whose property is "Protect" cannot be deleted. To delete a protected file, change its property to "Sharing" or
"Confidential".
1
Tap the [Delete] key.
2
Check the file and then tap the [Delete]
key.
Cancel
Delete
Delete the file data?
6-30
DOCUMENT FILING►USING STORED FILES
AUTOMATIC DELETION OF FILE
You can have document filing data in specified folders automatically deleted by specifying the folders and the time.
Periodic deletion of files stored in the machine helps to prevent the disclosure of sensitive information and frees space
on the local drive.
Automatic Deletion of File Settings
Document filing settings are described below. Tap the [Document Filing Settings] key to configure the settings.
Time and folder settings can be configured to have files in specified folders (stored by document filing) automatically
deleted at a specified time. Up to 3 settings can be stored to be automatically deleted.
The procedure for using this function is as follows:
(1) Select [Setting 1], [Setting 2], or [Setting 3].
(2) Set the time and date for automatic deletion.
(3) Select the desired folder.
(4) Specify whether or not protected files and confidential files are to be deleted.
(5) Enable the stored settings.
Delete Now
When this is executed with a folder selected, all files in the folder will be immediately deleted regardless of the date and
time setting.
Executing automatic deletion during Auto Power Shut-Off
(If this is not selected, the files will be deleted after the machine wakes from auto power shutoff mode.)
Execute Auto Deletion even if Auto Power Shut-Off is enabled. When the checkbox is not selected ( ), the files will be
deleted after the machine wakes from auto power shutoff mode.
Item Settings
Schedule Select the cycle for automatic deletion. Select from [Delete by Schedule] or [Delete at
Specified Time after Specified Days Have Elapsed].
Delete by Schedule
Select an automatic deletion cycle.
• Every Day: Auto deletion every day at the specified time.
• Every Week: Auto deletion at the specified time on the specified day of the week.
• Every Month: Auto deletion at the specified time on the specified day of the month.
Delete at Specified Time after Specified Days Have Elapsed
Deletes the file automatically at the specified time after the specified number of days have
passed from the day the file was saved.
• Days: Set the elapsed time and date.
• Time of Deletion: Deletes the file automatically at the specified time.
Folders To select the folder separately, select [Folder Select] and select the desired folder. To
select all folders, including the folder currently being created, select [All Folders (Including
folders registered hereafter)].
Delete Protected File Enable this setting to include protected files in the deletion.
Delete Confidential File Enable this setting to include confidential files in the deletion.
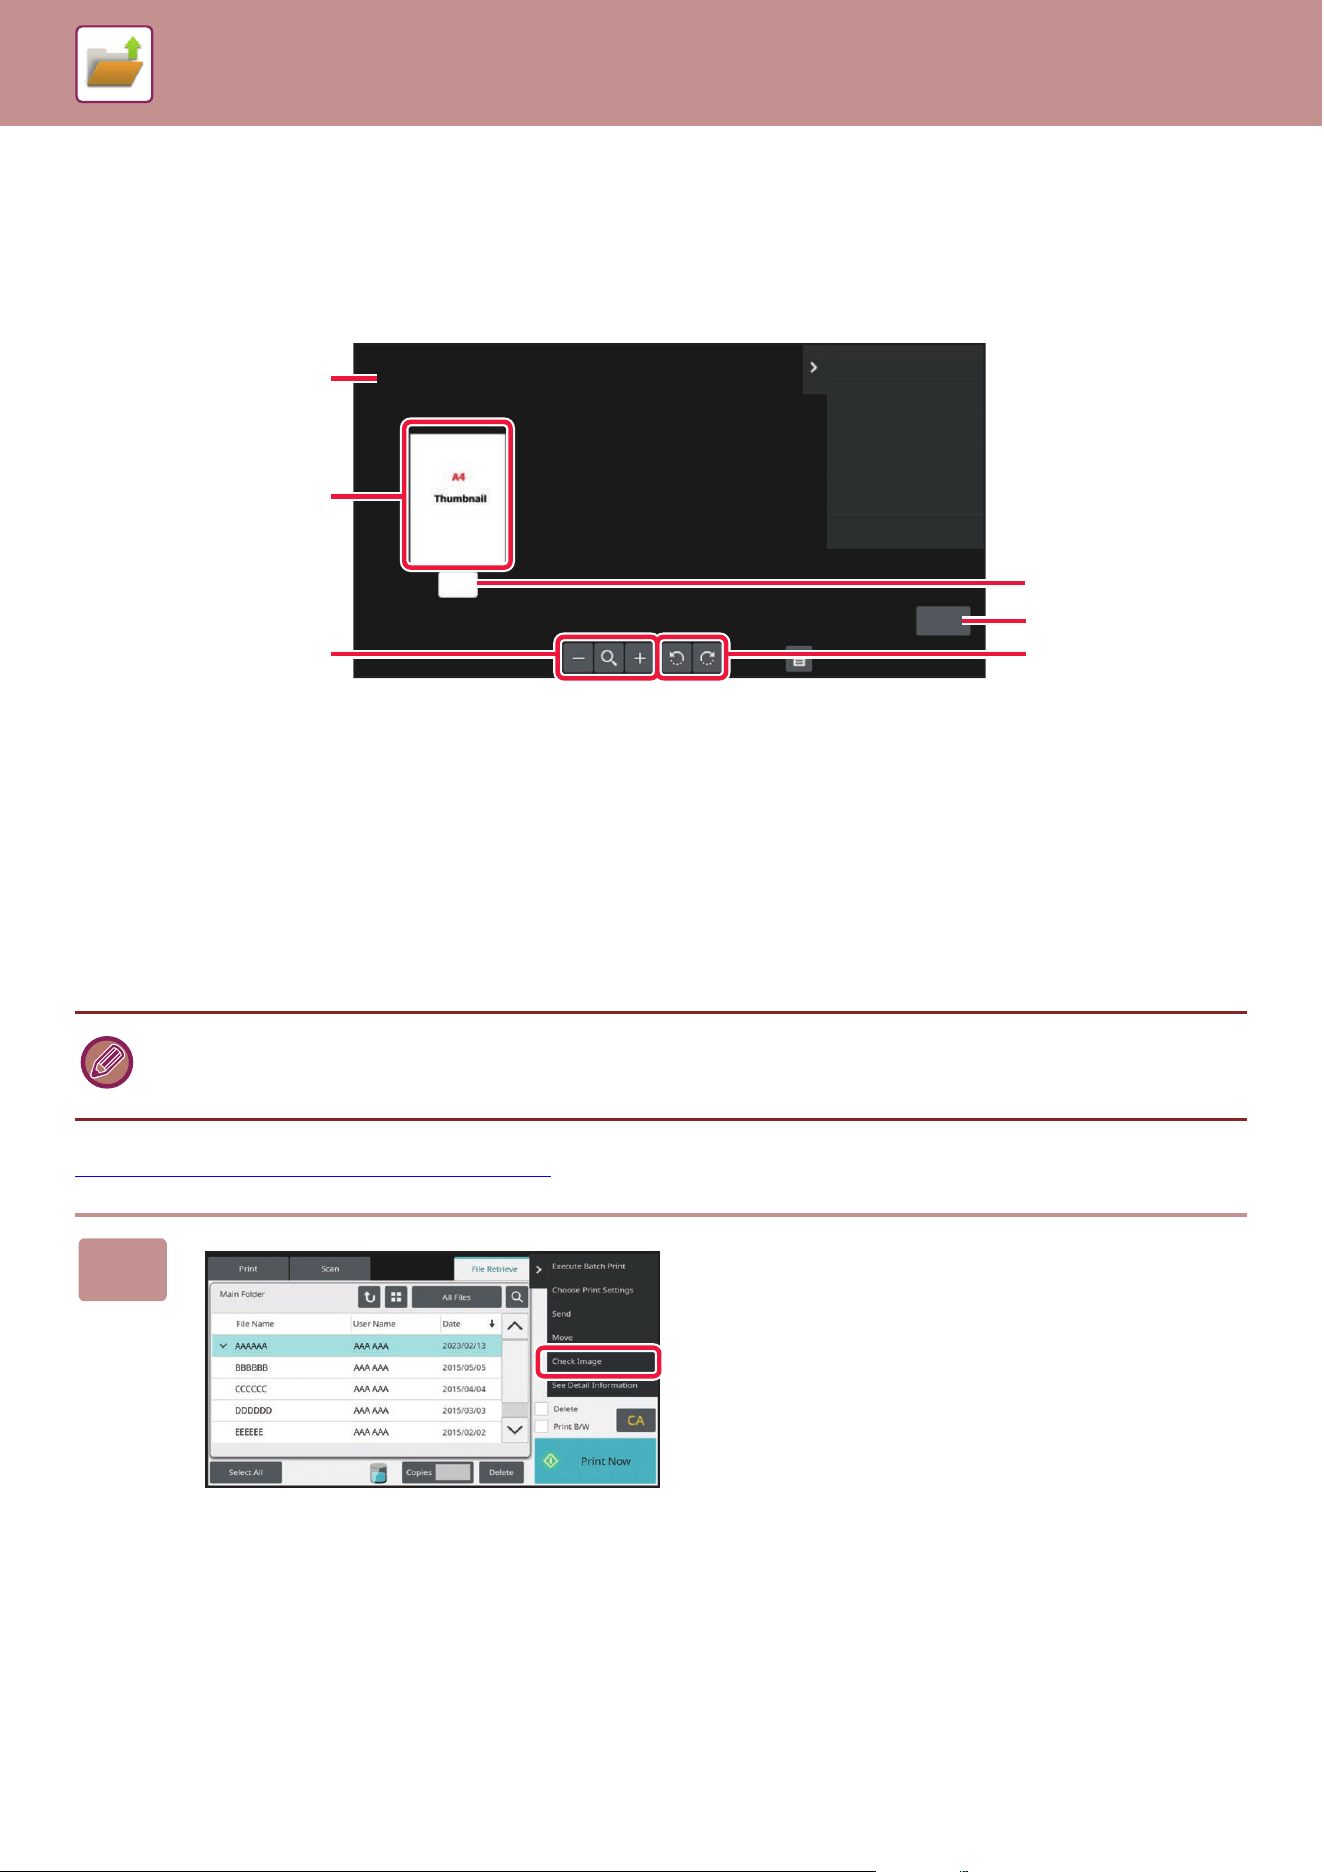
6-31
DOCUMENT FILING►USING STORED FILES
FILE IMAGE CHECKING
FILE IMAGE
(1) Displays file information.
(2) Displays file preview images.
(3) Enlarge or reduce the preview screen.
(4) Displays the page number.
(5) Displays the total page count.
(6) Rotate the preview screen in increments of 90
degrees.
After selecting the desired file, follow the steps below.
SELECTING A FILE TO RETRIEVE
(page 6-23)
Full Colour
User Unknown
Return to File
Selection Screen
A4
Copy_20210520_093143
A4
1
1
(1)
(2)
(3)
(4)
(5)
(6)
Full Color
• Depending on the size of the image, part of the image may be clipped off in the image check screen on the touch panel.
• A preview image is an image for display on the touch panel. It will differ from the actual print result.
• The image check screen does not appear when multiple files are selected.
1
Tap [Check Image] on the action panel.
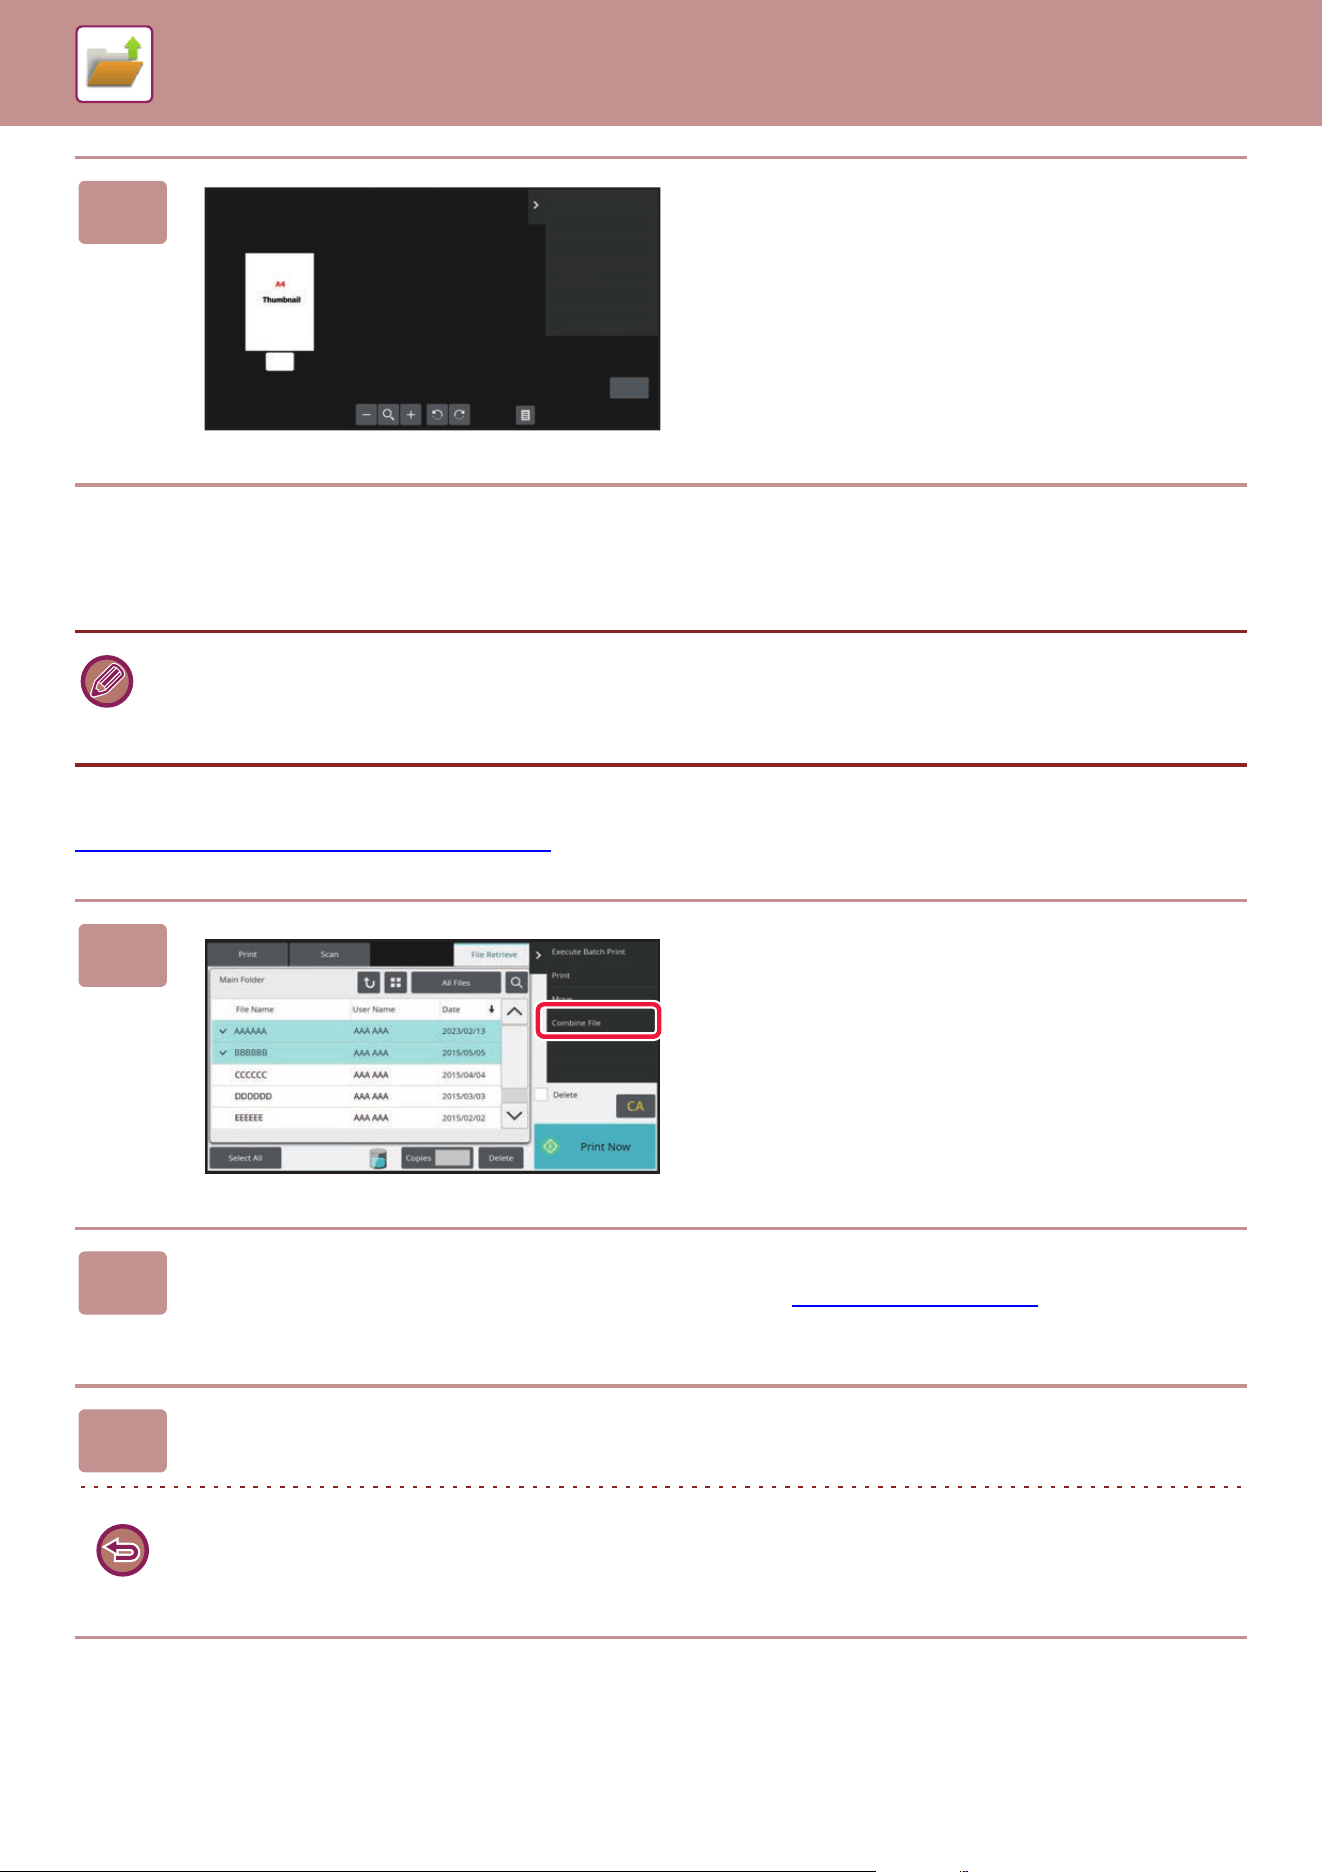
6-32
DOCUMENT FILING►USING STORED FILES
FILE MERGING
You can combine files that have been saved by Document Filing.
After selecting two desired files, follow the steps below.
SELECTING A FILE TO RETRIEVE
(page 6-23)
2
Check the image of the file.
• If you have only selected a single file, the [Combine File] key is not displayed.
• The file name is a combination of "the first file name", "a tilde (~)", and "Serial No.". As required, change the file name at a
later time.
• The files are joined in the selected order.
1
Tap [Combine File] on the action
panel.
2
Append file information.
To select the user name, file name, folder, and property setting, see “File Information (page 6-12)".
To delete the original file, select the [Delete Original File] checkbox.
3
Tap the [Execute] key.
Combining of files starts, and after the processing is finished, the "Combining complete" message appears.
To cancel the operation
Tap the [CA] key. Note that the operation cannot be canceled when the original file is being deleted after the files are
combined.
Full Colour
A4
A4
1
1
User Unknown
Return to File
Selection Screen
Copy_20210520_093143
Full Color
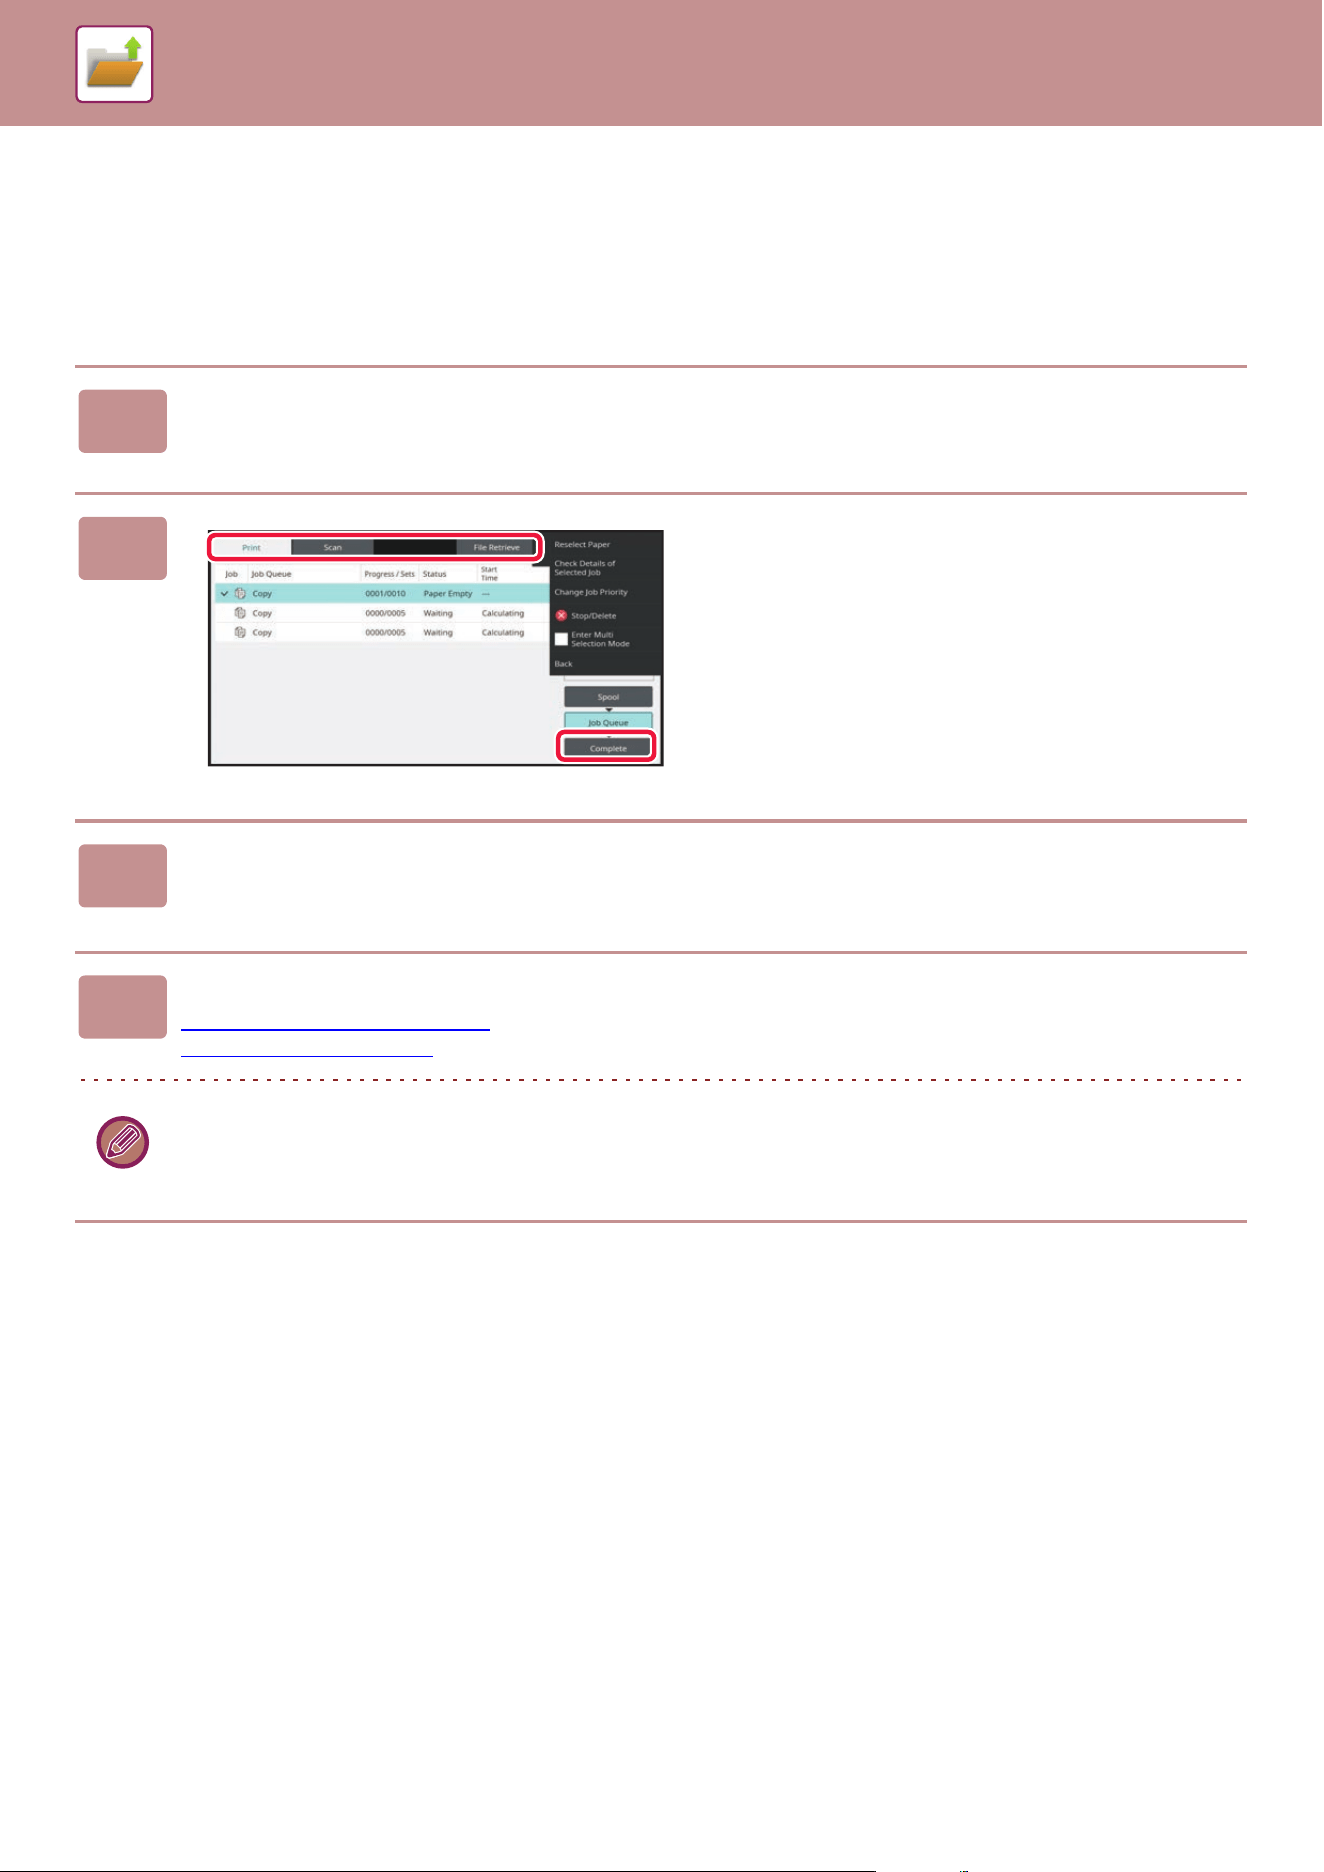
6-33
DOCUMENT FILING►USING STORED FILES
RETRIEVING AND USING A FILE FROM THE
JOB MANAGEMENT SCREEN
Files stored using File and Quick File appear as keys in the job management complete screen.
This is convenient when you need to quickly print the saved data of a copy job.
1
Tap the job management display.
2
Tap the tab with a file to be retrieved,
and tap the [Complete] key.
3
Tap the key of the desired file from the completed job.
A file that has been processed by Quick File or File can be selected for a job in the retrieve operation.
4
Tap [Send] or [Choose Print Settings] on the action panel.
FILE TRANSMISSION (page 6-27)
FILE PRINTING (page 6-24)
To view detailed information on a file, select the file, and then tap [Check Details of Selected Job] on the action panel.
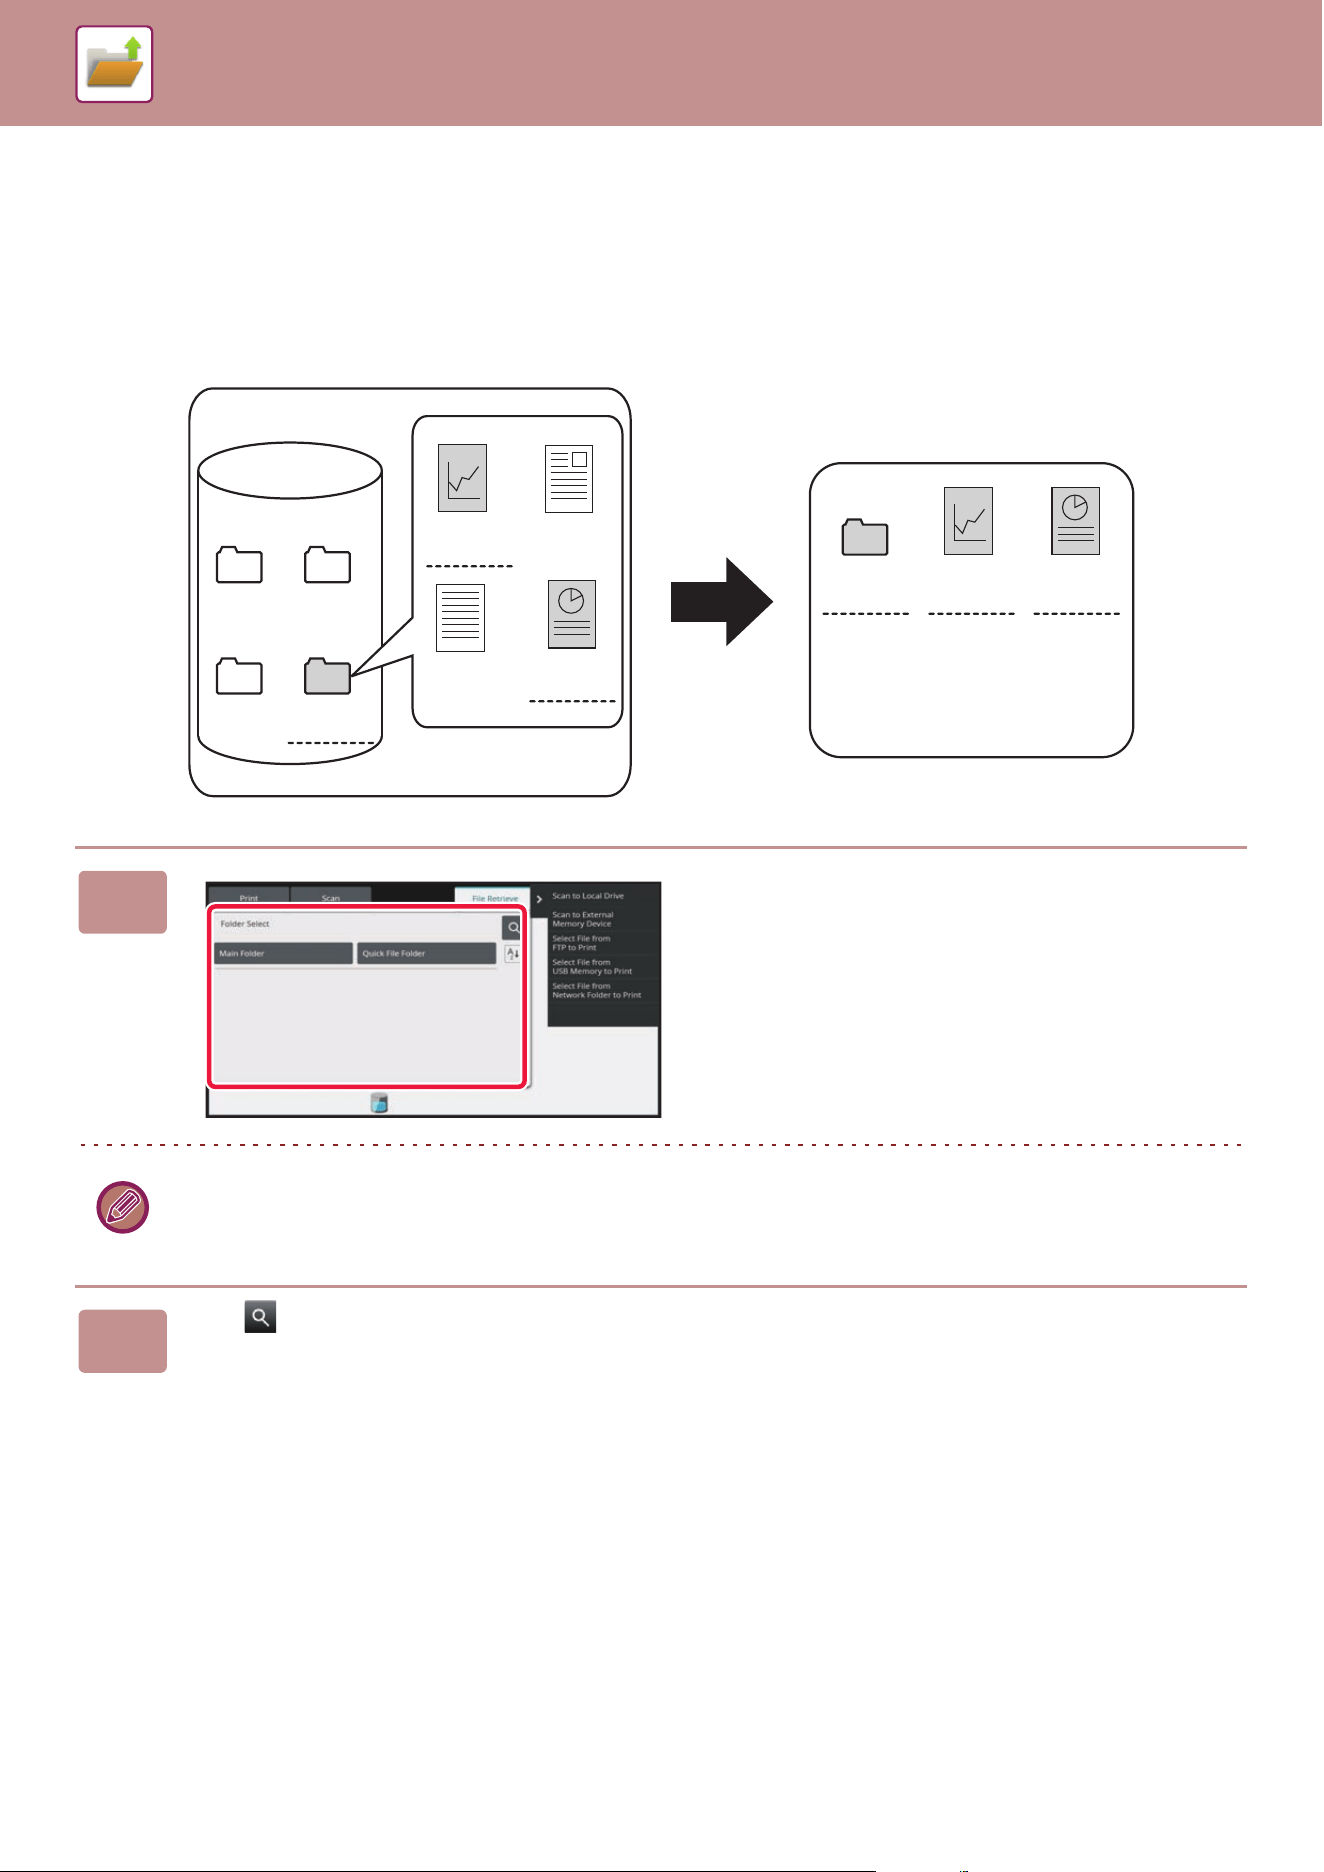
6-34
DOCUMENT FILING►USING STORED FILES
FILE SEARCH AND RETRIEVAL
When there are many stored files, it may take some time to locate a file. The search function of document filing mode
can be used to find a file quickly.
Searching is possible even when you only know part of the file name or folder name. As required, a folder can also be
specified as a search range.
Example: Only part of a file name is known: "Conference"
1
To search for a specific folder, tap its
key.
If the folder with a password is tapped, a password entry screen will appear. Enter the password (4 to 8 digit number)
using the numeric keys.
2
Tap .
You can find all folders
and files that contain
the word "Conference".
Search result
When you search
by entering
"Conference"···
Text 1
Reports
Regular
conference
Regular
conference
Graph for
conference
Graph for
conference
Standard
Quick
File
Personal
use
for
conference
for
conference
Local Drive

6-35
DOCUMENT FILING►USING STORED FILES
3
Select search conditions.
Tap each text box and set the search condition.
To search for the current folder, set the [Search Just Within
the Folder] checkbox to .
[User Name]
Search using the user name.
Select a user on the user selection screen that appears, and
then tap .
[Login Name]
Search using the login name.
Enter the login name on the soft keyboard that appears and
tap the [OK] key.
[File or Folder Name]
Search using the file name or folder name.
Enter the file name or folder name on the soft keyboard that
appears and tap the [OK] key.
[PIN Code/Password]
Search for files that have a password set. Enter the
password with the soft keyboard that appears, and tap the
[OK] key.
[Date]
Search using the date when the file was created.
When you have selected [Today] or [Date Set], set the time
and date.
4
Tap the [Search Start] key.
A list of the files that match your search conditions will appear. Select the desired file from the list. The job settings
screen will appear.
To return to the base screen of document filing mode, tap the [CA] key.
To return to the file search screen, tap the [Search Again] key.
• When you search using [File or Folder Name], custom folders that match the search characters will also appear in the
list. When a folder key is tapped, a list of the files in the folder appears. Tap the desired file in the list.
• Also in setting mode (Web version), you can use the file search function. Click [Document Operations] in "Settings
(Web version)" → [Document Filing] → [Search].
6-36
DOCUMENT FILING►USING STORED FILES
PRINTING AN EXTERNAL FILE
A file stored in the FTP server, USB memory device, or network folder of a PC can be printed. The file can also be
modified before printing by changing the print settings.
On the action panel, tap [Select File from FTP to Print], [Select File from USB Memory to Print] or [Select File from
Network Folder to Print].
For more information, see “PRINTING WITHOUT THE PRINTER DRIVER
(page 4-110)".
OPERATION IN THE WEB PAGE
Document Filing operations can be performed from the Web page using “Settings (Web)” - [Document Operations] →
[Document Filing].
Main Folder
The files that are in the Main Folder can be displayed. A specified file can be manipulated by clicking [Print], [Send],
[Move], or [Delete]. If the file to be manipulated has a password, enter the password in “PIN Code/Password of File”.
Quick File Folder
Files in the Quick File Folder can be displayed. A specified file can be manipulated by clicking [Print], [Send], [Move], or
[Delete].
Custom Folder
The files that are in the Custom Folder can be displayed. A specified file can be manipulated by clicking [Print], [Send],
[Move], or [Delete]. If the file to be manipulated has a password, enter the password in “PIN Code/Password of File”.
Search
Use these settings to enter search conditions. A specified file can be manipulated by clicking [Print], [Send], [Move], or
[Delete]. If the file to be manipulated has a password, enter the password in “PIN Code/Password of File”.
Item Description
Display Style Saved files can be displayed in list format or thumbnail format.
Job Classification The saved files that are displayed can be filtered by job.
Display Items Set the number of files that are displayed.
Item Description
Display Style Saved files can be displayed in list format or thumbnail format.
Job Classification The saved files that are displayed can be filtered by job.
Display Items Set the number of files that are displayed.
Item Description
Bold The displayed Custom Folder names can be filtered by index.
Display Items Set the number of files that are displayed.
Item Description
User Name Enter the user name. (Up to 32 characters)
Select from User List Click the [Setup] button and search for users from the list.
Login Name Set the number of files that are displayed.
6-37
DOCUMENT FILING►USING STORED FILES
Search Result
Use these settings to enter search conditions. A specified file can be manipulated by clicking [Print], [Send], [Move], or
[Delete]. If the file to be manipulated has a password, enter the password in “PIN Code/Password of File”.
File Batch Print
Multiple files can be printed at once by batch printing. Search for the files using search conditions, and then select
multiple files from the displayed search results.
If you want to use the number of copies set when each file was saved by Document Filing, select “Apply the Number of
Copies Stored in Each File”. If you want to set a different number of copies, enter the desired number in “Enter the
Number”. Click [Print] to print the file. To have the file deleted after printing, select the “Print and Delete the Data”
checkbox.
Search Folder Set the folder.
File Name Enter a file name. (Up to 30 characters)
PIN Code/Password of File Enter the password that is set for the file (4 to 32 digits).
Stored Date Set the date and time the file was saved.
Item Description
Display Style The files that were found can be displayed in list format or thumbnail format.
Job Classification The found files can be filtered by job.
Display Items Set the number of files that are displayed.
Item Description
Search Condition
User Name Enter the user name. (Up to 32 characters)
Select from User List Click the [Setup] button and search for users from the list.
Search Folder Set the folder.
File Name Enter a file name. (Up to 30 characters)
PIN Code/Password of File Enter the password that is set for the file. (4 to 32 digits)
Search Result
Job Classification The found files can be filtered by job.
Billing Code
Main Code Select this checkbox, and then enter the main code.
(32 characters or less)
Sub Code Select this checkbox, and then enter the sub code.
(32 characters or less)
Item Description

7-1
MANUAL FINISHING
MANUAL FINISHING . . . . . . . . . . . . . . . . . . . . . . . . . . . . . 7-2
SELECTING MANUAL FINISHING MODE. . . . . . . . . . . . . 7-2
BASE SCREEN OF MANUAL FINISHING MODE . . . . . . . 7-3
PAPERS
CHECKING TYPE AND SIZE OF PAPER . . . . . . . . . . . . . 7-4
PAPER LOADING ORIENTATION . . . . . . . . . . . . . . . . . . . 7-5
STAPLE . . . . . . . . . . . . . . . . . . . . . . . . . . . . . . . . . . . . . . 7-5
PUNCH. . . . . . . . . . . . . . . . . . . . . . . . . . . . . . . . . . . . . . . 7-6
FOLD . . . . . . . . . . . . . . . . . . . . . . . . . . . . . . . . . . . . . . . . 7-6
OPERATION OF MANUAL FINISHING
USING MANUAL FINISHING . . . . . . . . . . . . . . . . . . . . . . . 7-8
STAPLE FUNCTION . . . . . . . . . . . . . . . . . . . . . . . . . . . . . 7-10
COPIES/PAGES FUNCTION. . . . . . . . . . . . . . . . . . . . . 7-11
TRIMMER SETTING . . . . . . . . . . . . . . . . . . . . . . . . . . . 7-12
PUNCH FUNCTION. . . . . . . . . . . . . . . . . . . . . . . . . . . . . . 7-13
PAPER FOLDING FUNCTION . . . . . . . . . . . . . . . . . . . . . 7-14
MULTIPLE FOLD (WHEN SADDLE FOLD IS
SELECTED) . . . . . . . . . . . . . . . . . . . . . . . . . . . . . . . . . . 7-16
TO CHANGE THE PAPER TRAY. . . . . . . . . . . . . . . . . . . 7-17
TO CHANGE THE OUTPUT TRAY. . . . . . . . . . . . . . . . . . 7-17
MANUAL FINISHING
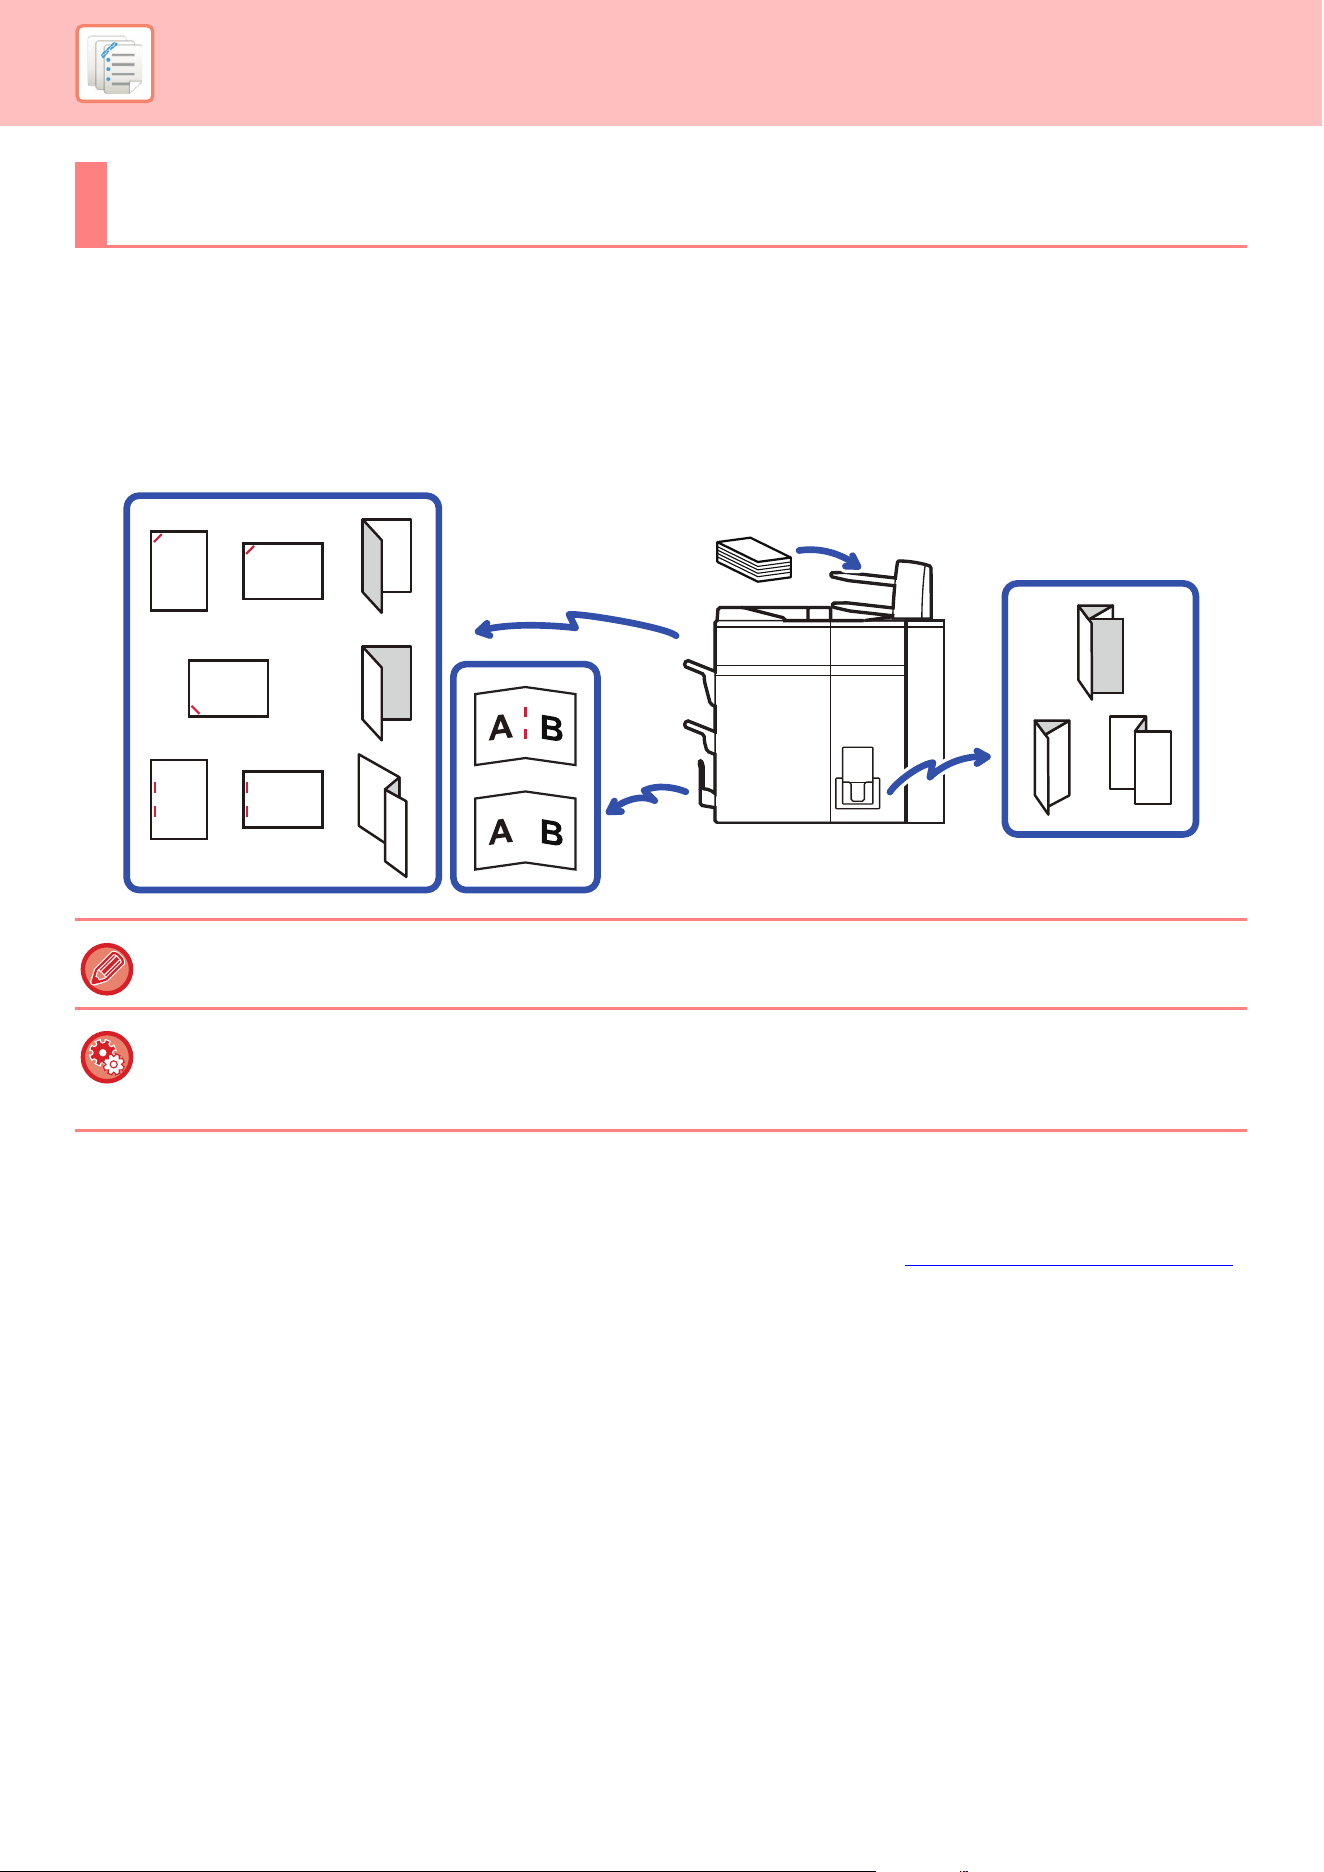
7-2
MANUAL FINISHING►MANUAL FINISHING
MANUAL FINISHING
In manual finishing mode, you can set for finish on copied or printed pages.
You can select the manual finishing mode if the inserter is installed. When the finisher (large stacker), saddle stitch
finisher (large stacker), punch module, or folding unit is installed, finishing operations, such as stapling, punching or
folding can be performed.
SELECTING MANUAL FINISHING MODE
Change the manual finishing mode to simple mode or normal mode as explained in "CHANGING MODES (page 2-10)".
MANUAL FINISHING
Manual finishing cannot be used if the use of manual finishing or inserter is prohibited in "Settings".
To specify whether or not to prohibit the use of manual finishing or inserter:
In "Settings (administrator)", select [System Settings] → [Common Settings] → [Operation Settings] → [Disable Manual
Finishing] to set the use of manual finishing. Select [System Settings] → [Common Settings] → [Device Control] → [Disabling
of Inserter] to set the use of the inserter.
A
A
A
A
A
B
A
A
B
A
C
A
C
D
A
A
B
D
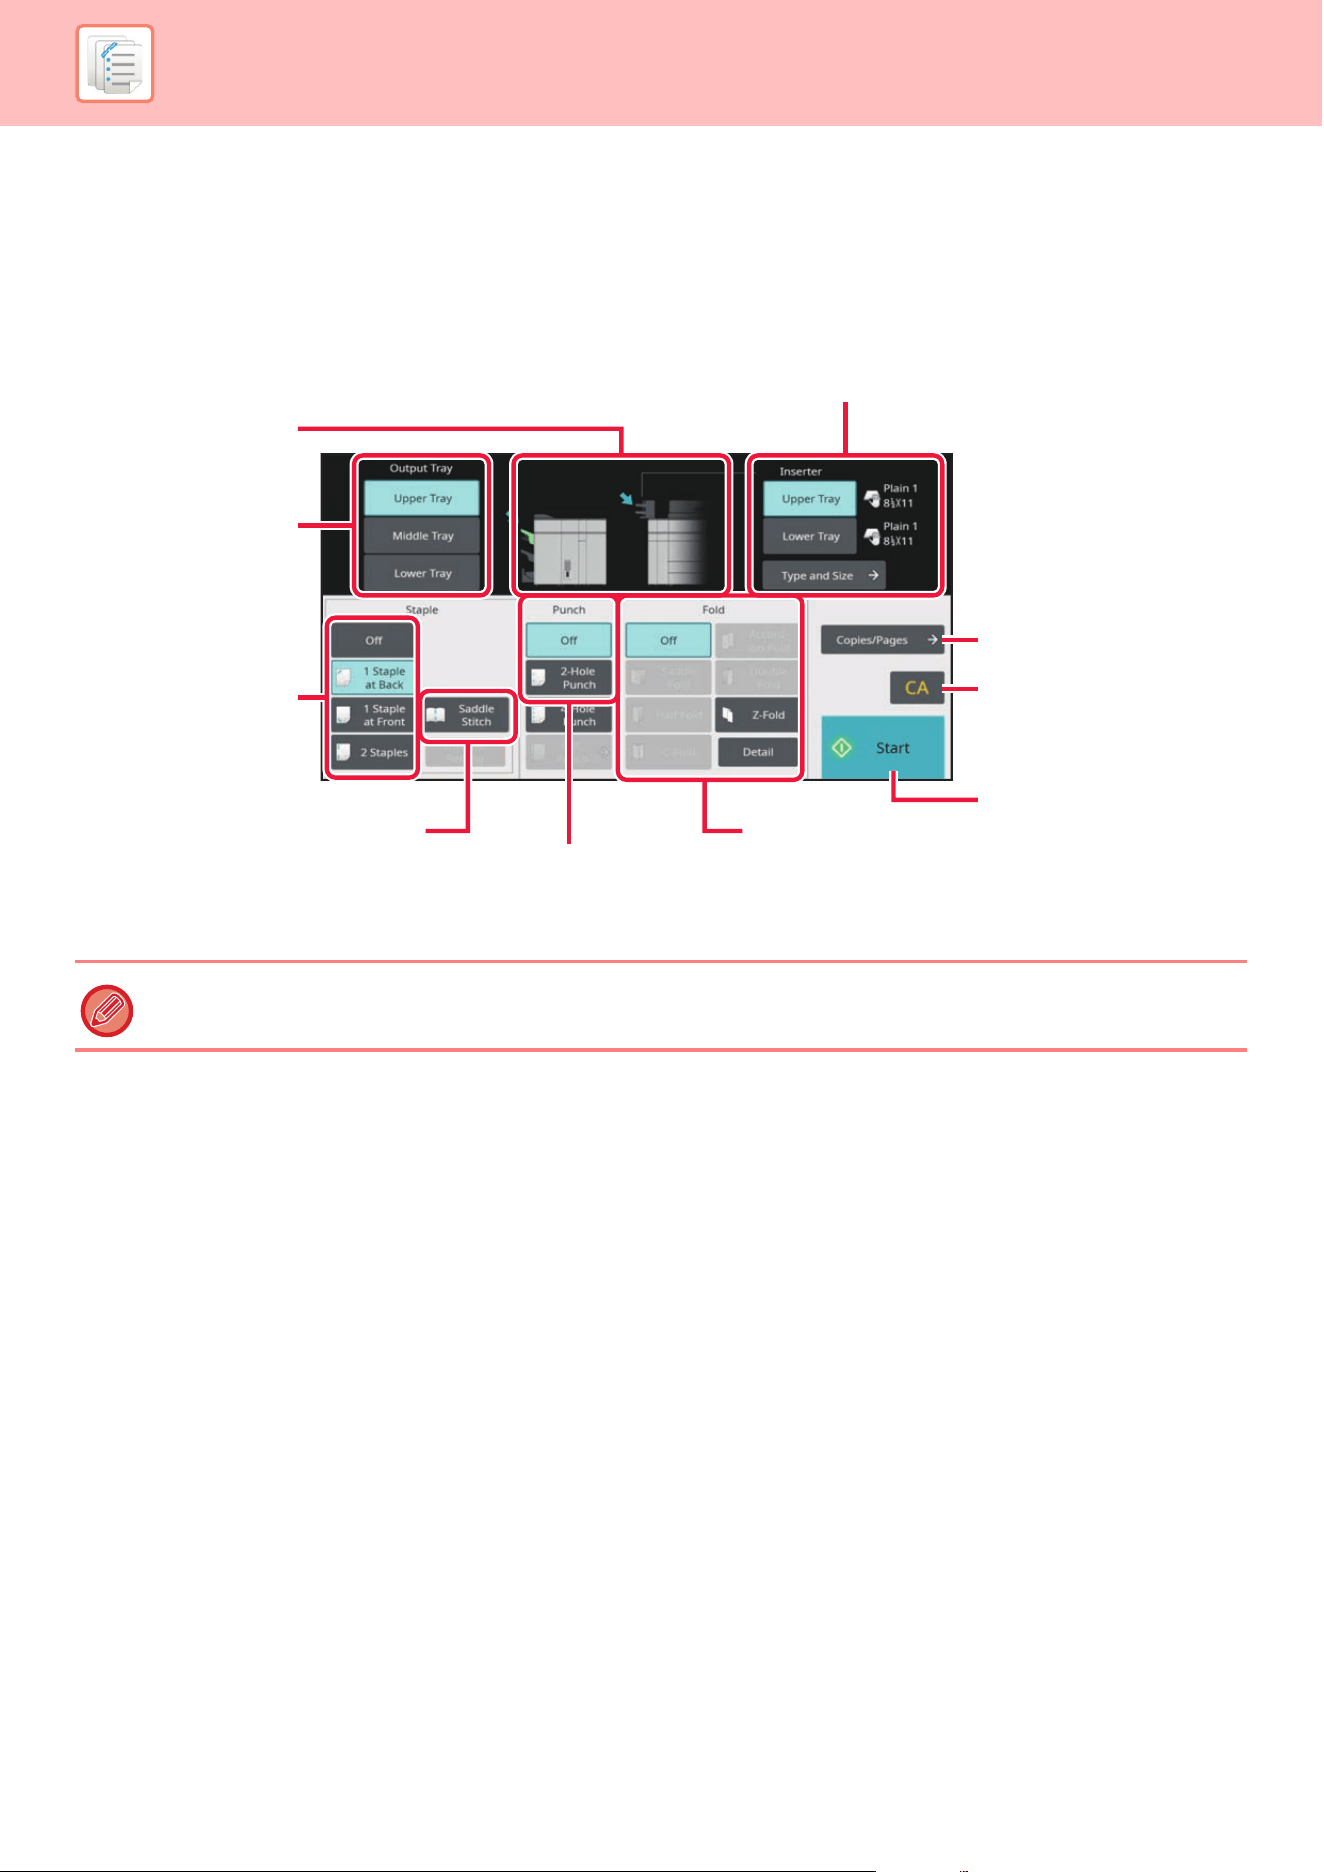
7-3
MANUAL FINISHING►MANUAL FINISHING
BASE SCREEN OF MANUAL FINISHING
MODE
The display will vary depending on the devices installed.
Sets the number of copies
for output and the number of
sheets per set.
Resets all settings.
Starts finishing.
Performs paper folding.
Selects the type of
folding.
Punches holes in paper.
Shows the selected
paper and output trays.
Selects an output tray for
finished paper.
Staples each set of
output.
Selects a staple position.
Staples the center of the booklet and
folds the booklet along the center.
Trims the excessive parts of booklet
folded along the center.
Selects a paper tray for finishing.
Tap the [Type and Size] key to set the paper
type and paper size.
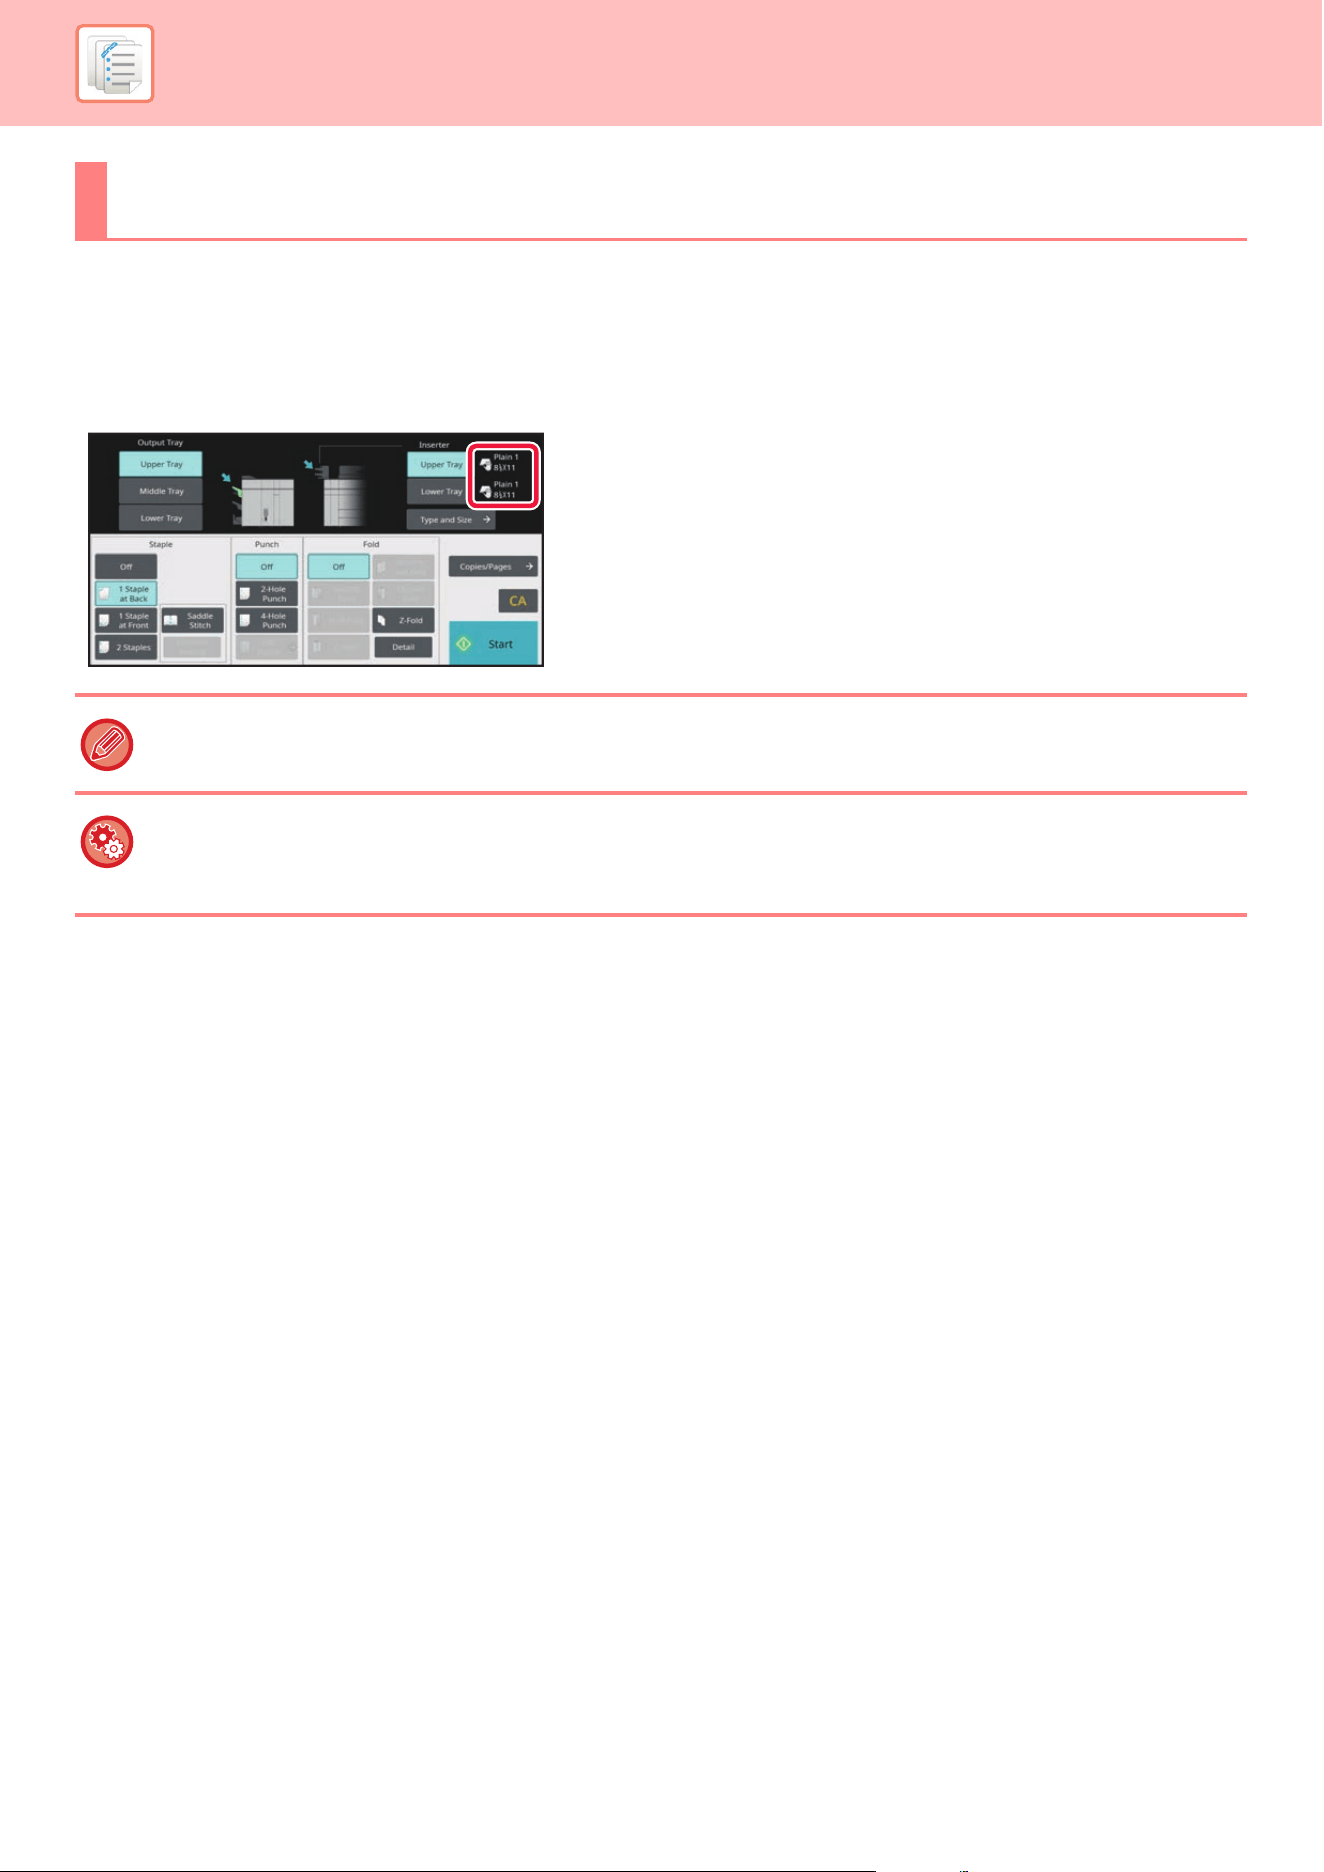
7-4
MANUAL FINISHING►PAPERS
CHECKING TYPE AND SIZE OF PAPER
You can check the type and size of paper loaded in the inserter on the display to the right of [Upper Tray] or [Lower Tray]
key.
PAPERS
If the paper loaded is different from the type that is indicated on the right of the key, tap the [Type and Size] key or change the
settings in "Settings".
Special media such as transparency film and tab paper cannot be used.
To change the paper settings for the paper you load in the inserter:
Tap the [Type and Size] key or in "Settings", select [System Settings] → [Common Settings] → [Paper Settings] → [Paper
Tray Settings] → [Inserter(Upper)] or [Inserter(Lower)].
If the paper size is not correctly detected or paper of a non-standard size or type is loaded, specify this setting.
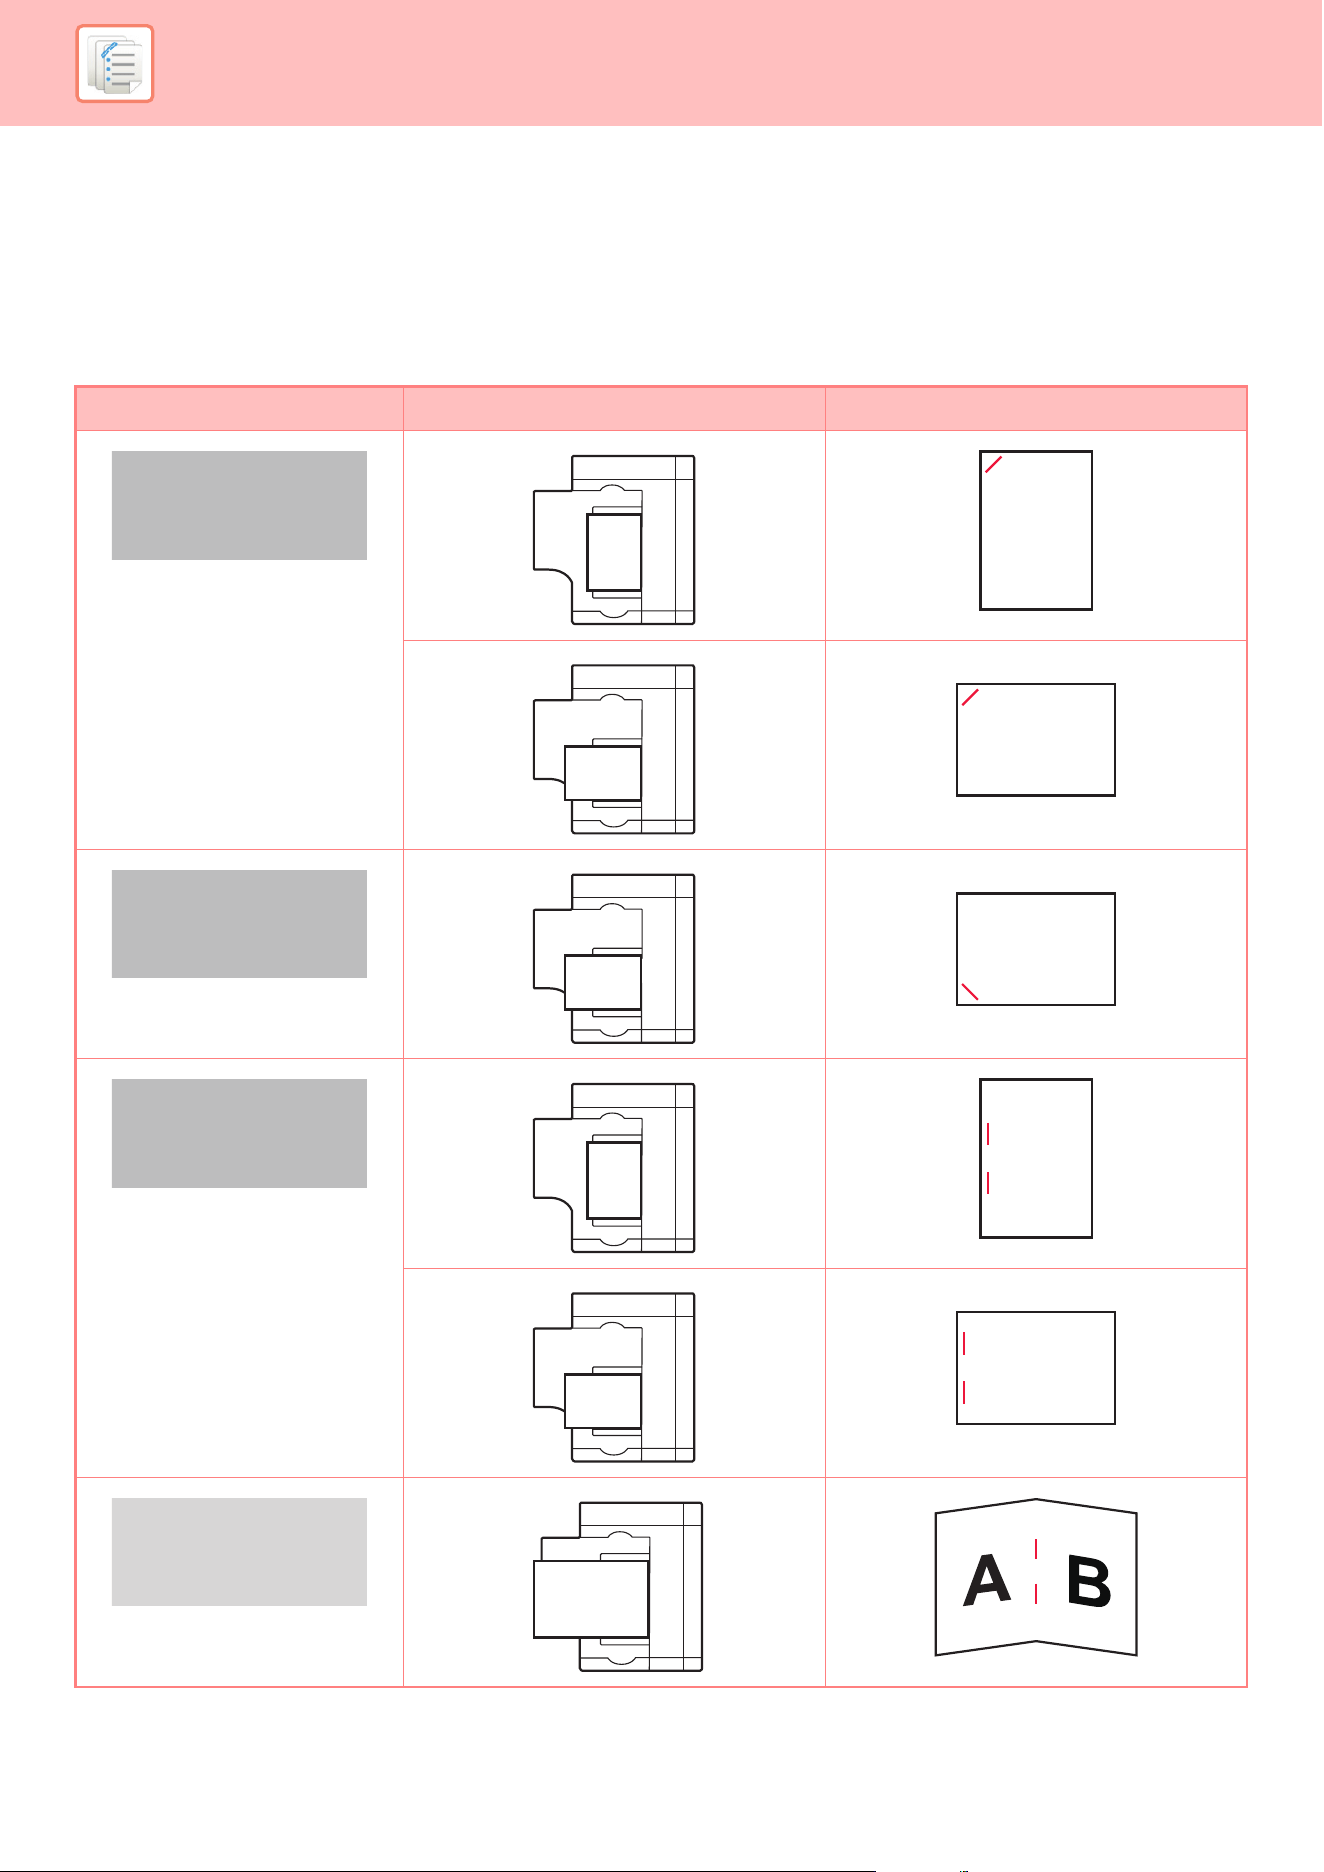
7-5
MANUAL FINISHING►PAPERS
PAPER LOADING ORIENTATION
When using the staple, punch or the paper folding function, the original must be placed as shown below to enable
stapling or punching in the desired position on the paper.
STAPLE
Touch panel key Orientation Result
1 Staple
at Back
A
A
A
A
1 Staple
at Front
A
A
2 Staples
A
A
A
A
Saddle
Stitch
AB
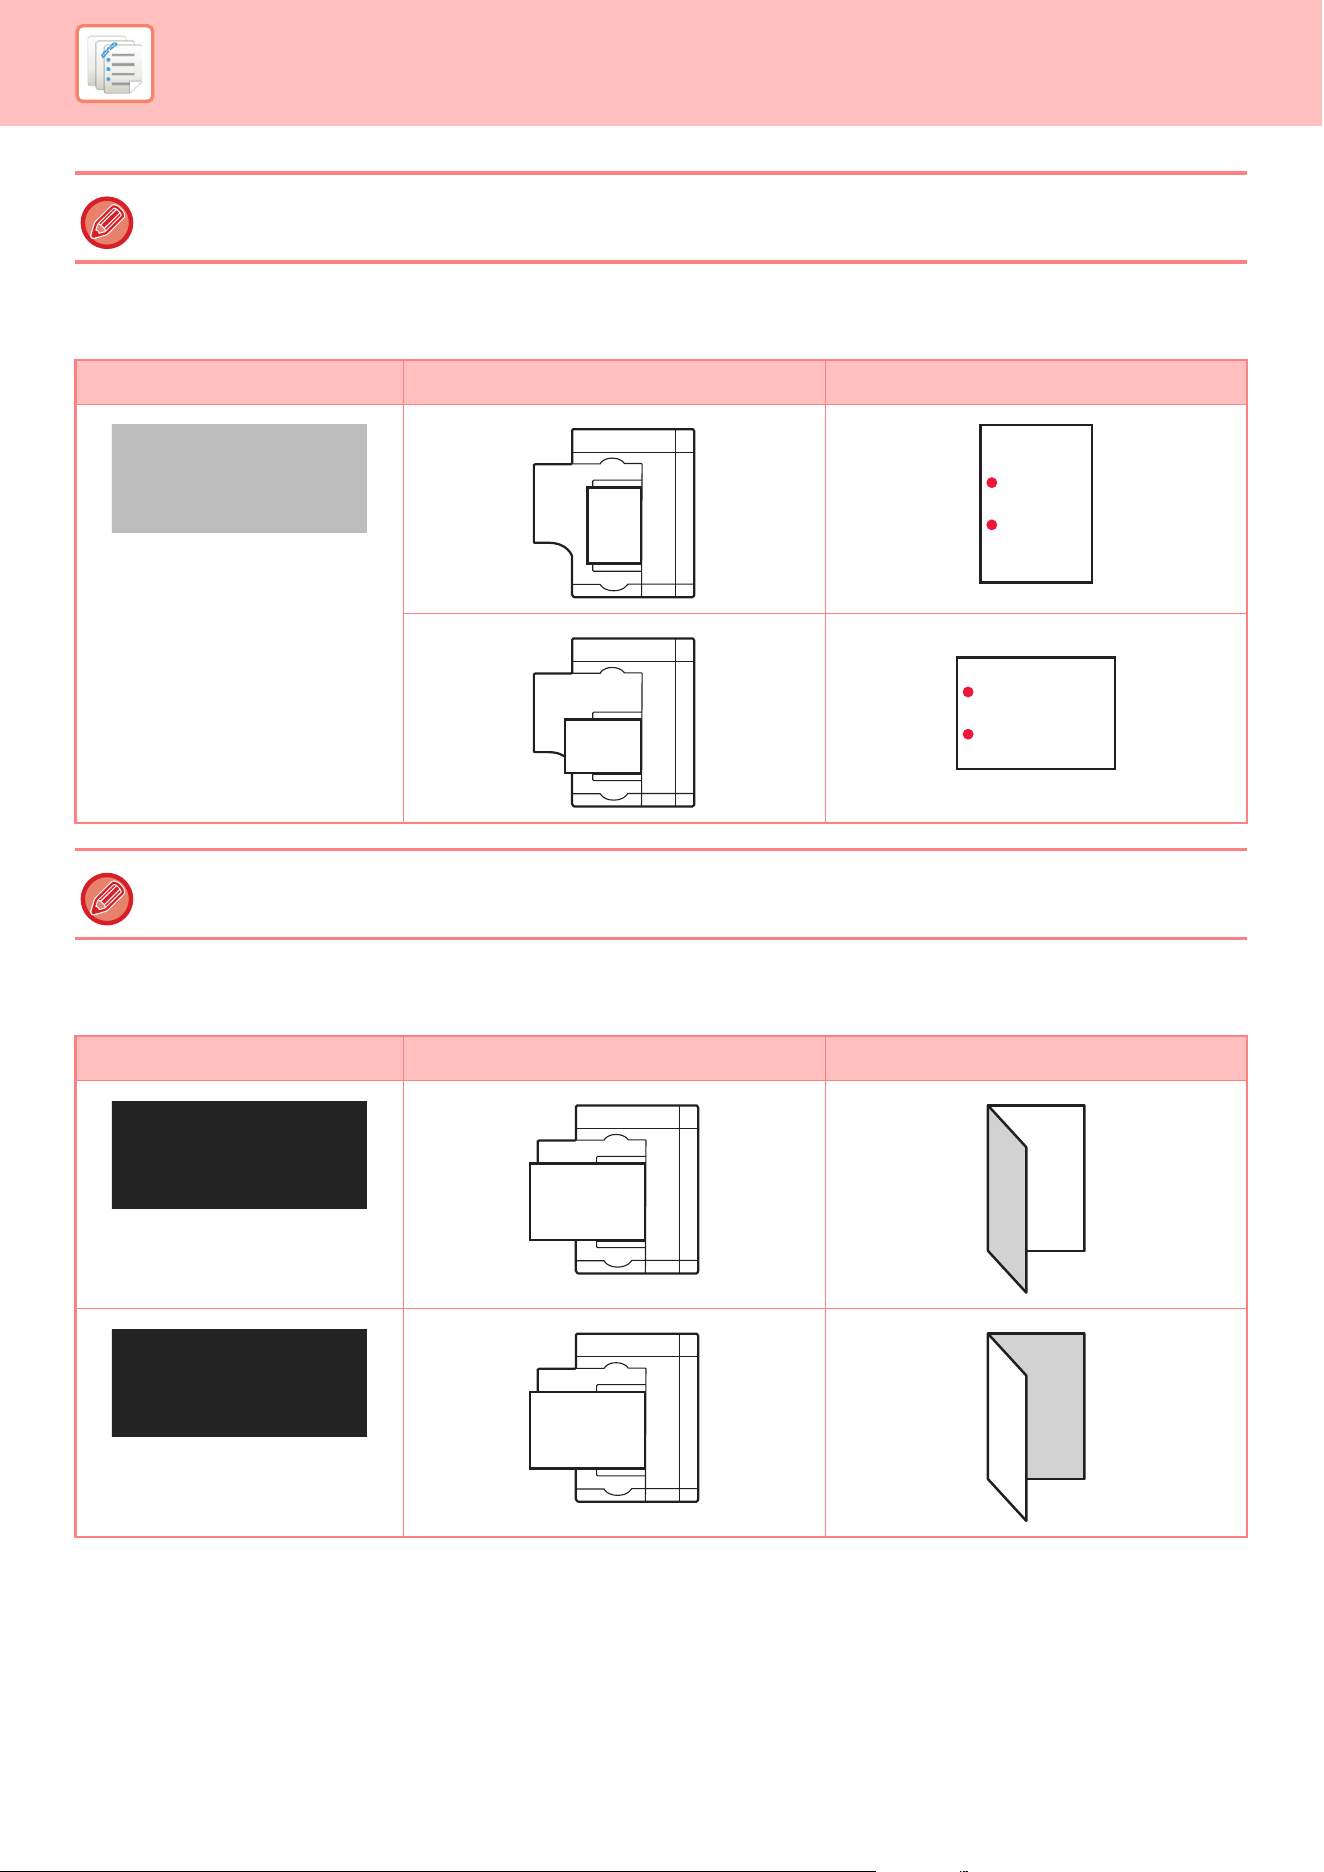
7-6
MANUAL FINISHING►PAPERS
PUNCH
FOLD
• To use the staple function, you need to mount a finisher (large stacker) or saddle stitch finisher (large stacker).
• To use the saddle stitch function, you need to mount a saddle stitch finisher (large stacker).
Touch panel key Orientation Result
A punch module is required for paper punch.
Touch panel key Orientation Result
2 Hole
Punch
A
A
A
A
Saddle
Fold
AB
B
A
Half Fold
AB
A
B
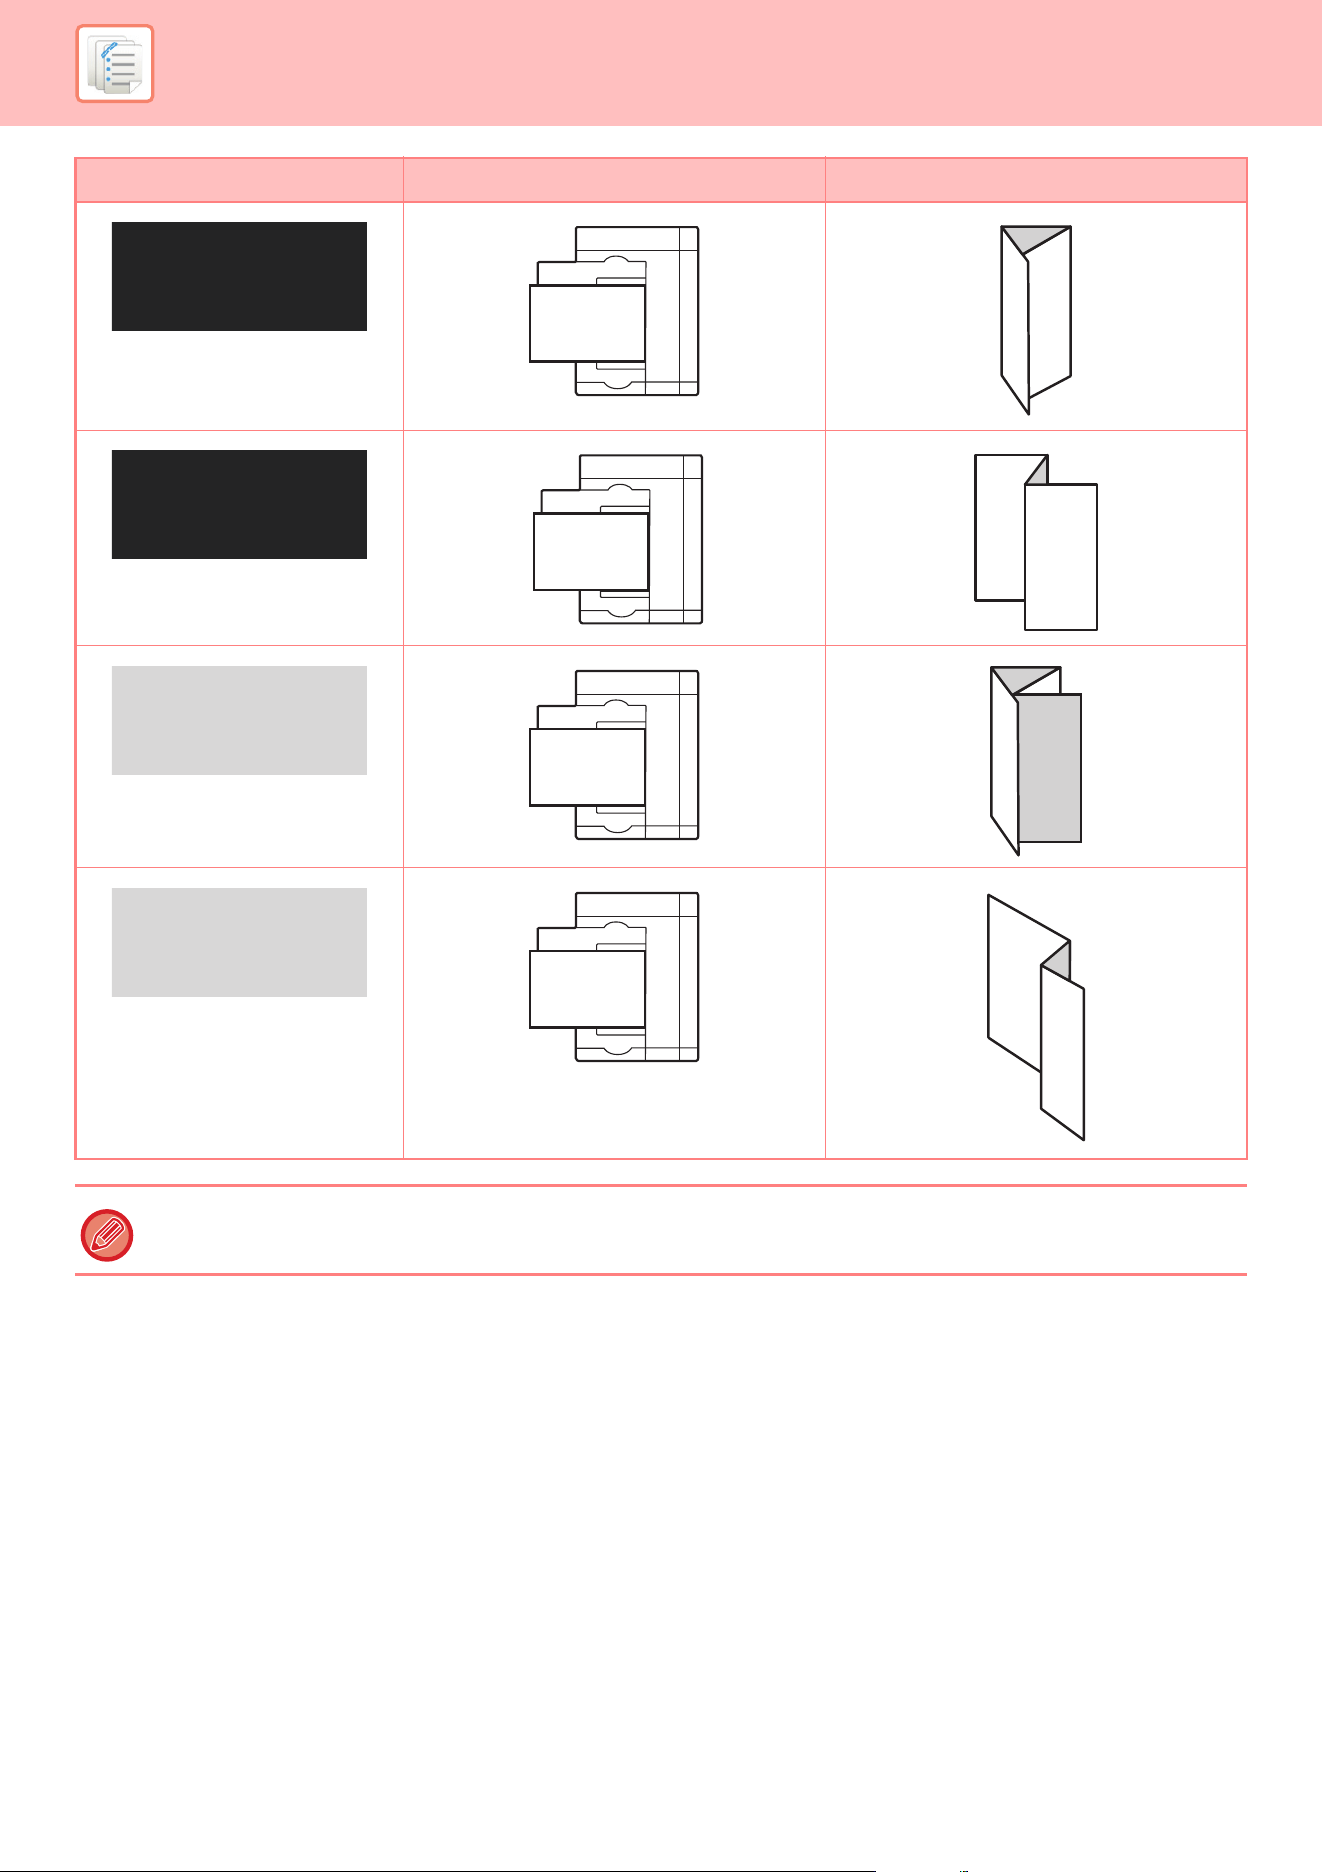
7-7
MANUAL FINISHING►PAPERS
• A folding unit is required to be installed in order to use paper folding functions other than saddle folds.
• To use the saddle fold function, you need to mount a saddle stitch finisher (large stacker).
Touch panel key Orientation Result
C-Fold
ABC
A
C
Accord-
ion Fold
ABC
A
C
Double
Fold
ABCD
D
A
Z-Fold
ABCD
A
B
D
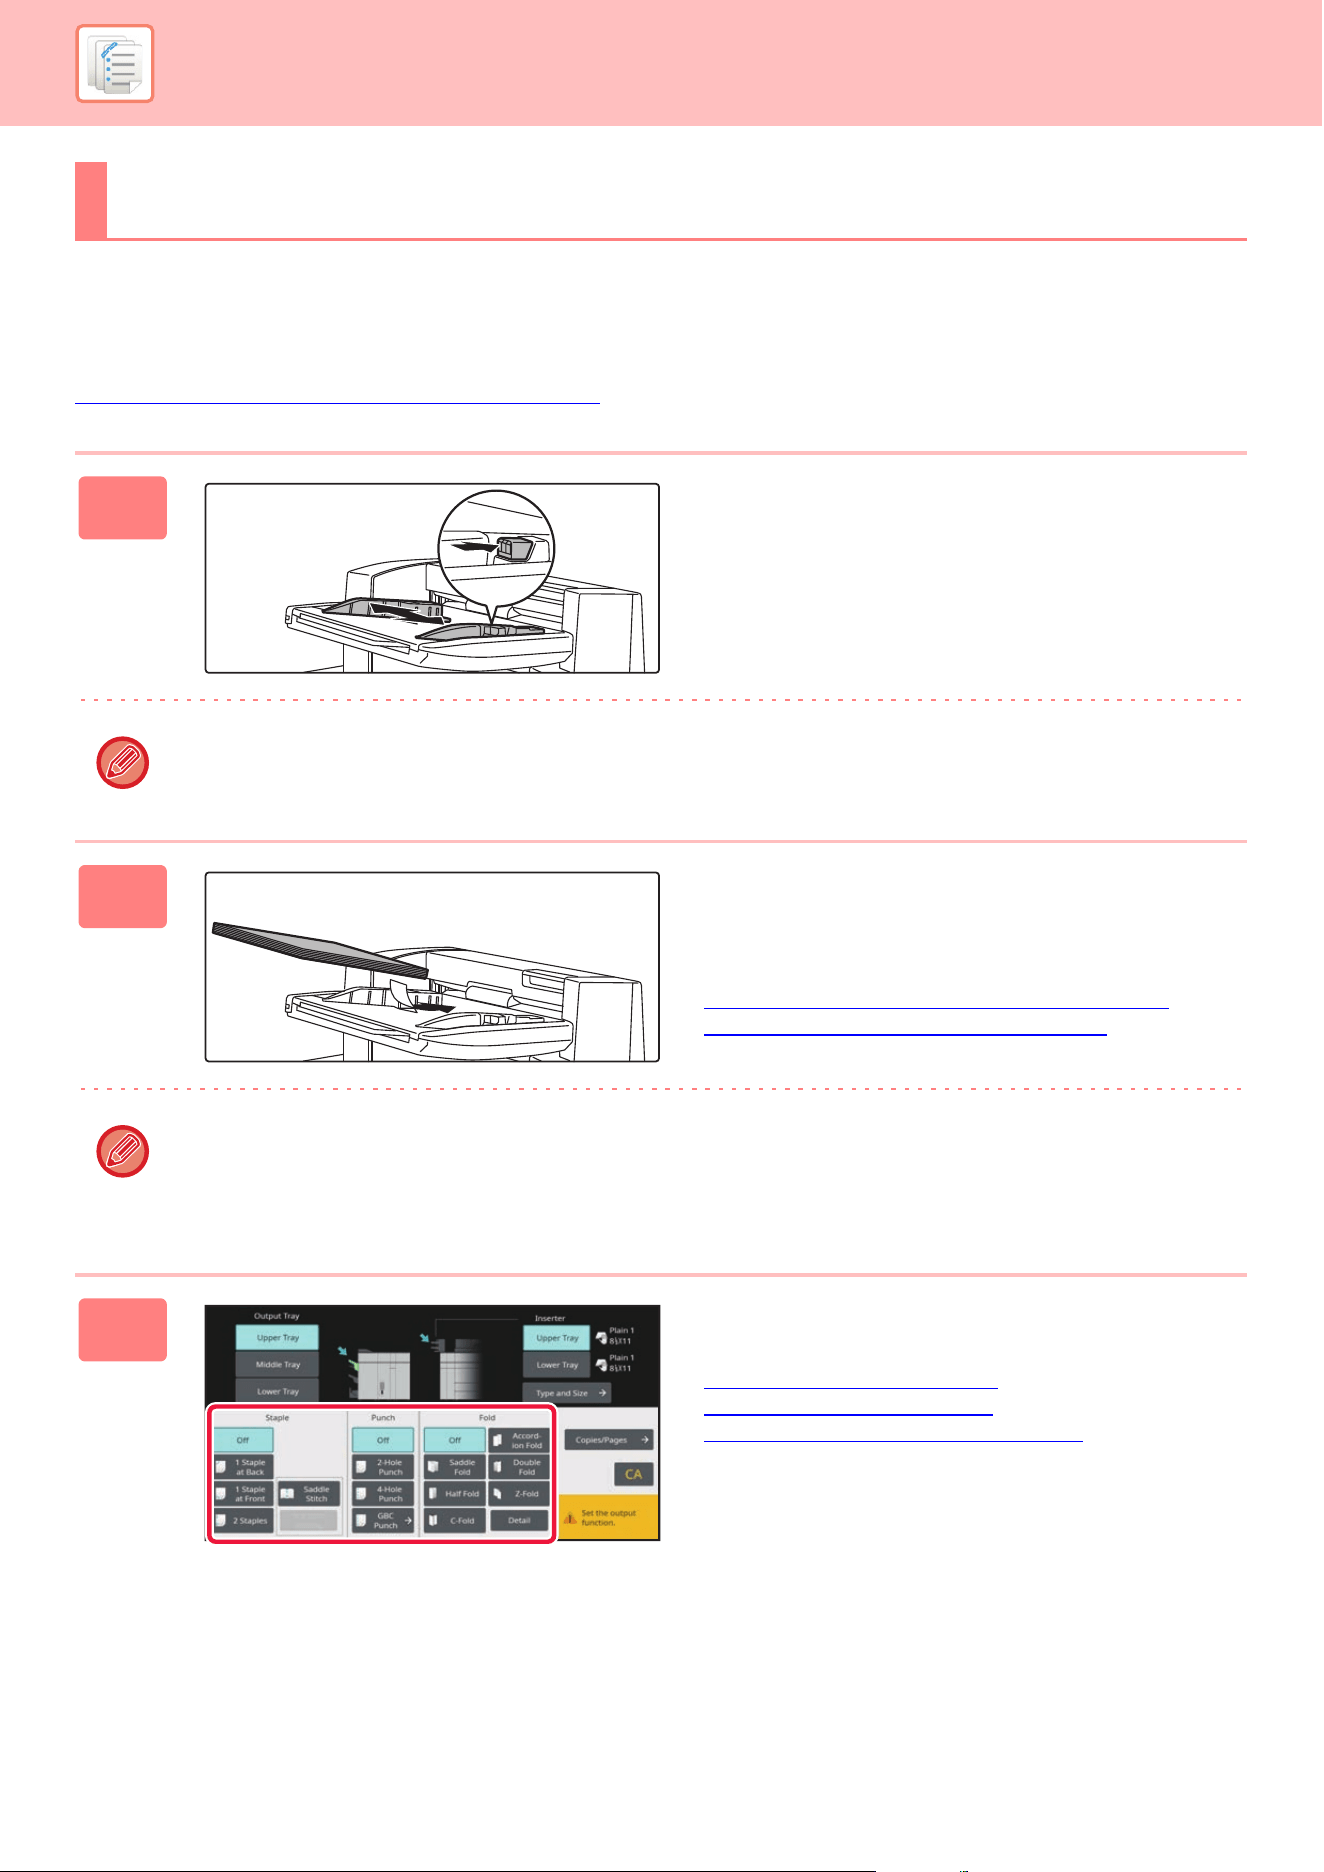
7-8
MANUAL FINISHING►OPERATION OF MANUAL FINISHING
USING MANUAL FINISHING
Change from the Home Screen or each mode to manual finishing mode, and carry out the following procedure.
SELECTING MANUAL FINISHING MODE
(page 7-2)
OPERATION OF MANUAL FINISHING
1
Set the guides to the size of the paper.
Grasp the guide lock lever to adjust the guide.
When you have finished the adjustment, release the lock
lever.
When loading paper larger than 8-1/2" × 11"R, or A4R, extend the bypass tray all the way out. If it is not pulled all the
way out, the size of the loaded paper will not be detected correctly.
2
Load paper into the upper or lower
tray.
The paper orientation varies depending on the manual
finishing function.
CHECKING TYPE AND SIZE OF PAPER
(page 7-4)
PAPER LOADING ORIENTATION (page 7-5)
• Up to 200 sheets of paper can be loaded into each of the upper and lower trays.
• Insert the paper along the guides all the way into the tray.
• If the guide width is not correctly adjusted to match the paper width, paper may be jammed, skewed, or crease. Adjust
the paper guides to fit the width of the paper.
3
Select the appropriate finishing
method.
STAPLE FUNCTION (page 7-10)
PUNCH FUNCTION (page 7-13)
PAPER FOLDING FUNCTION (page 7-14)
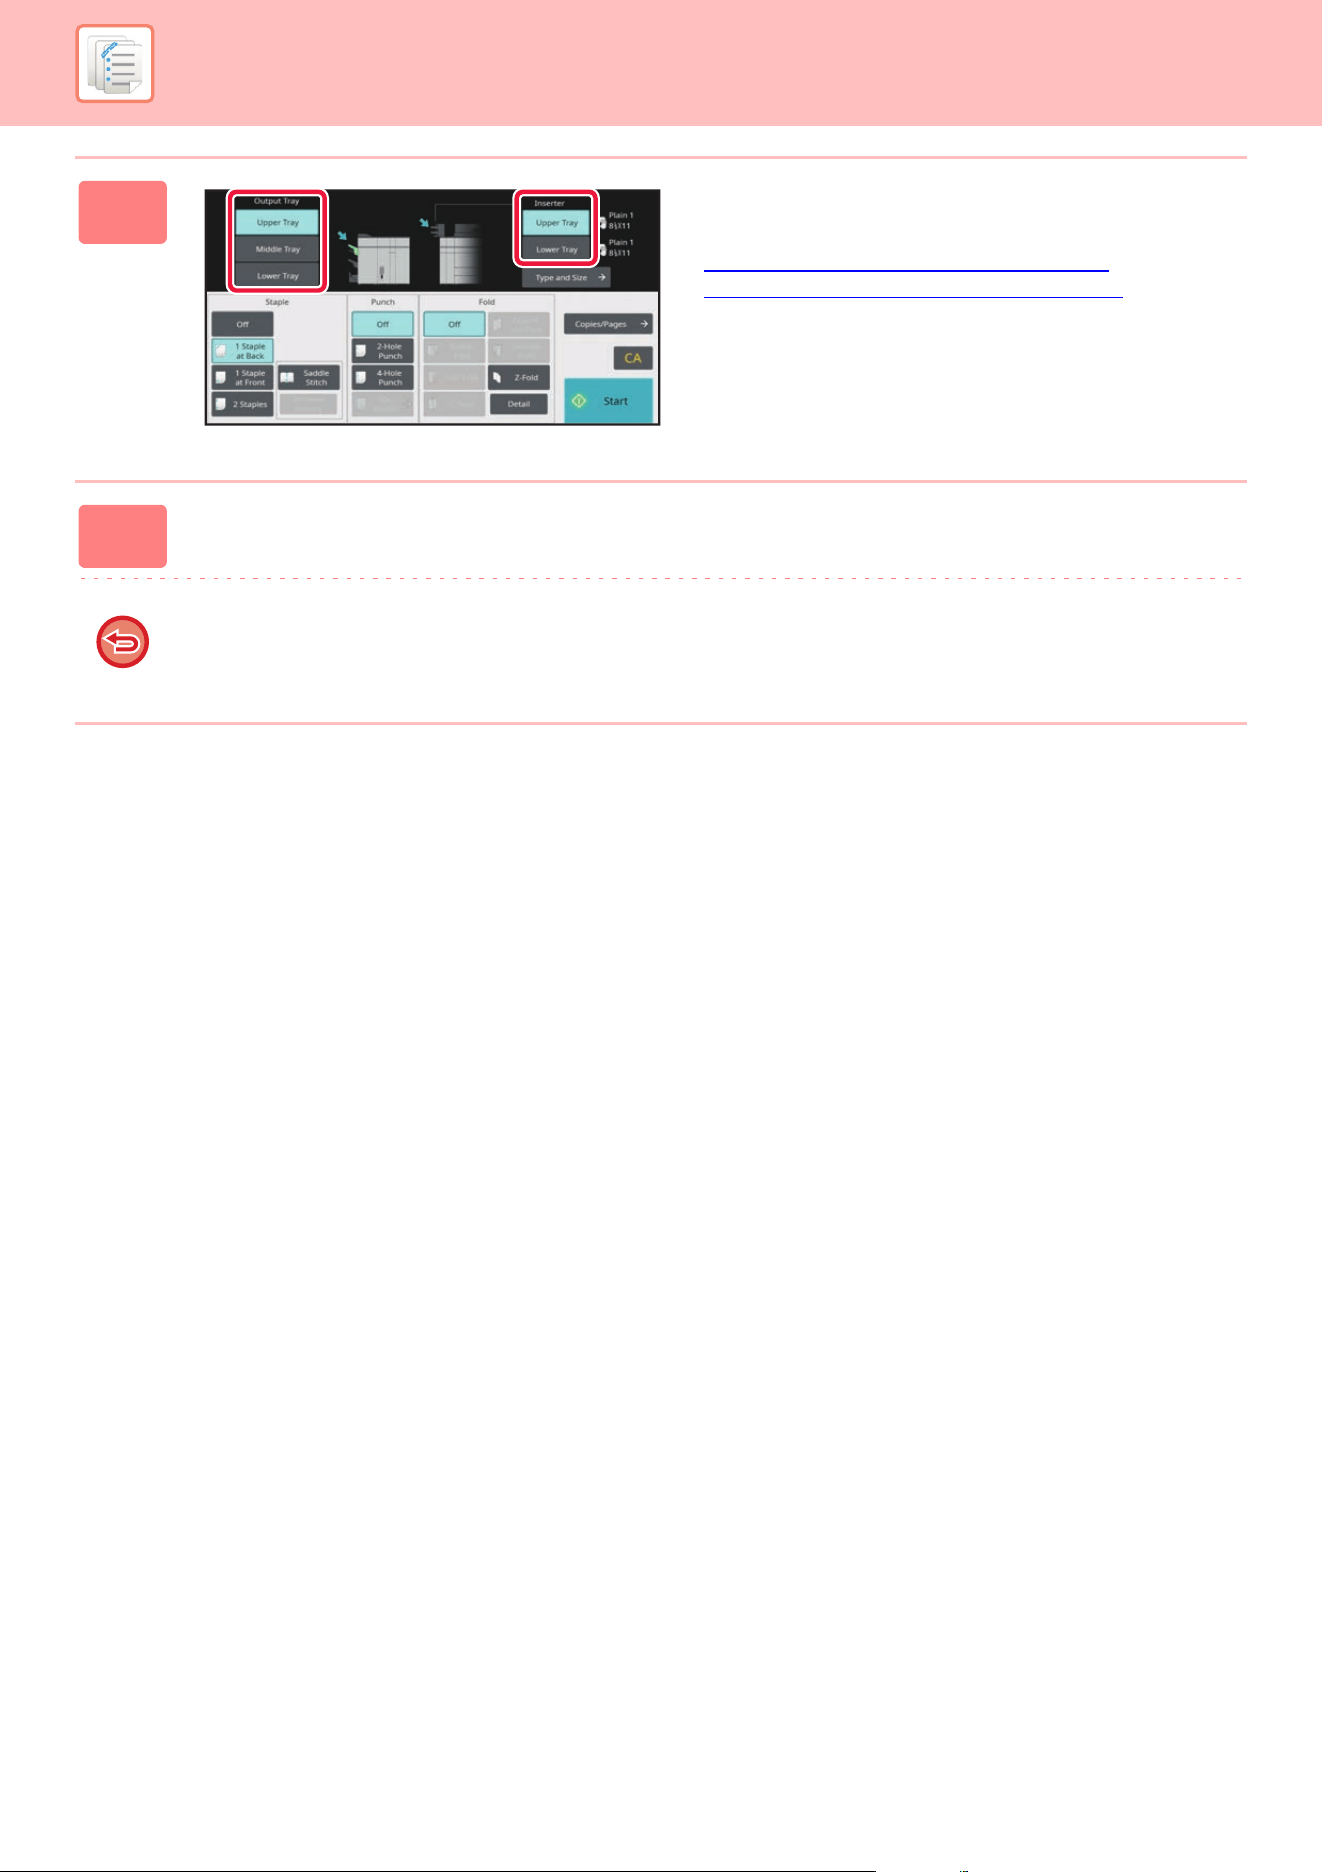
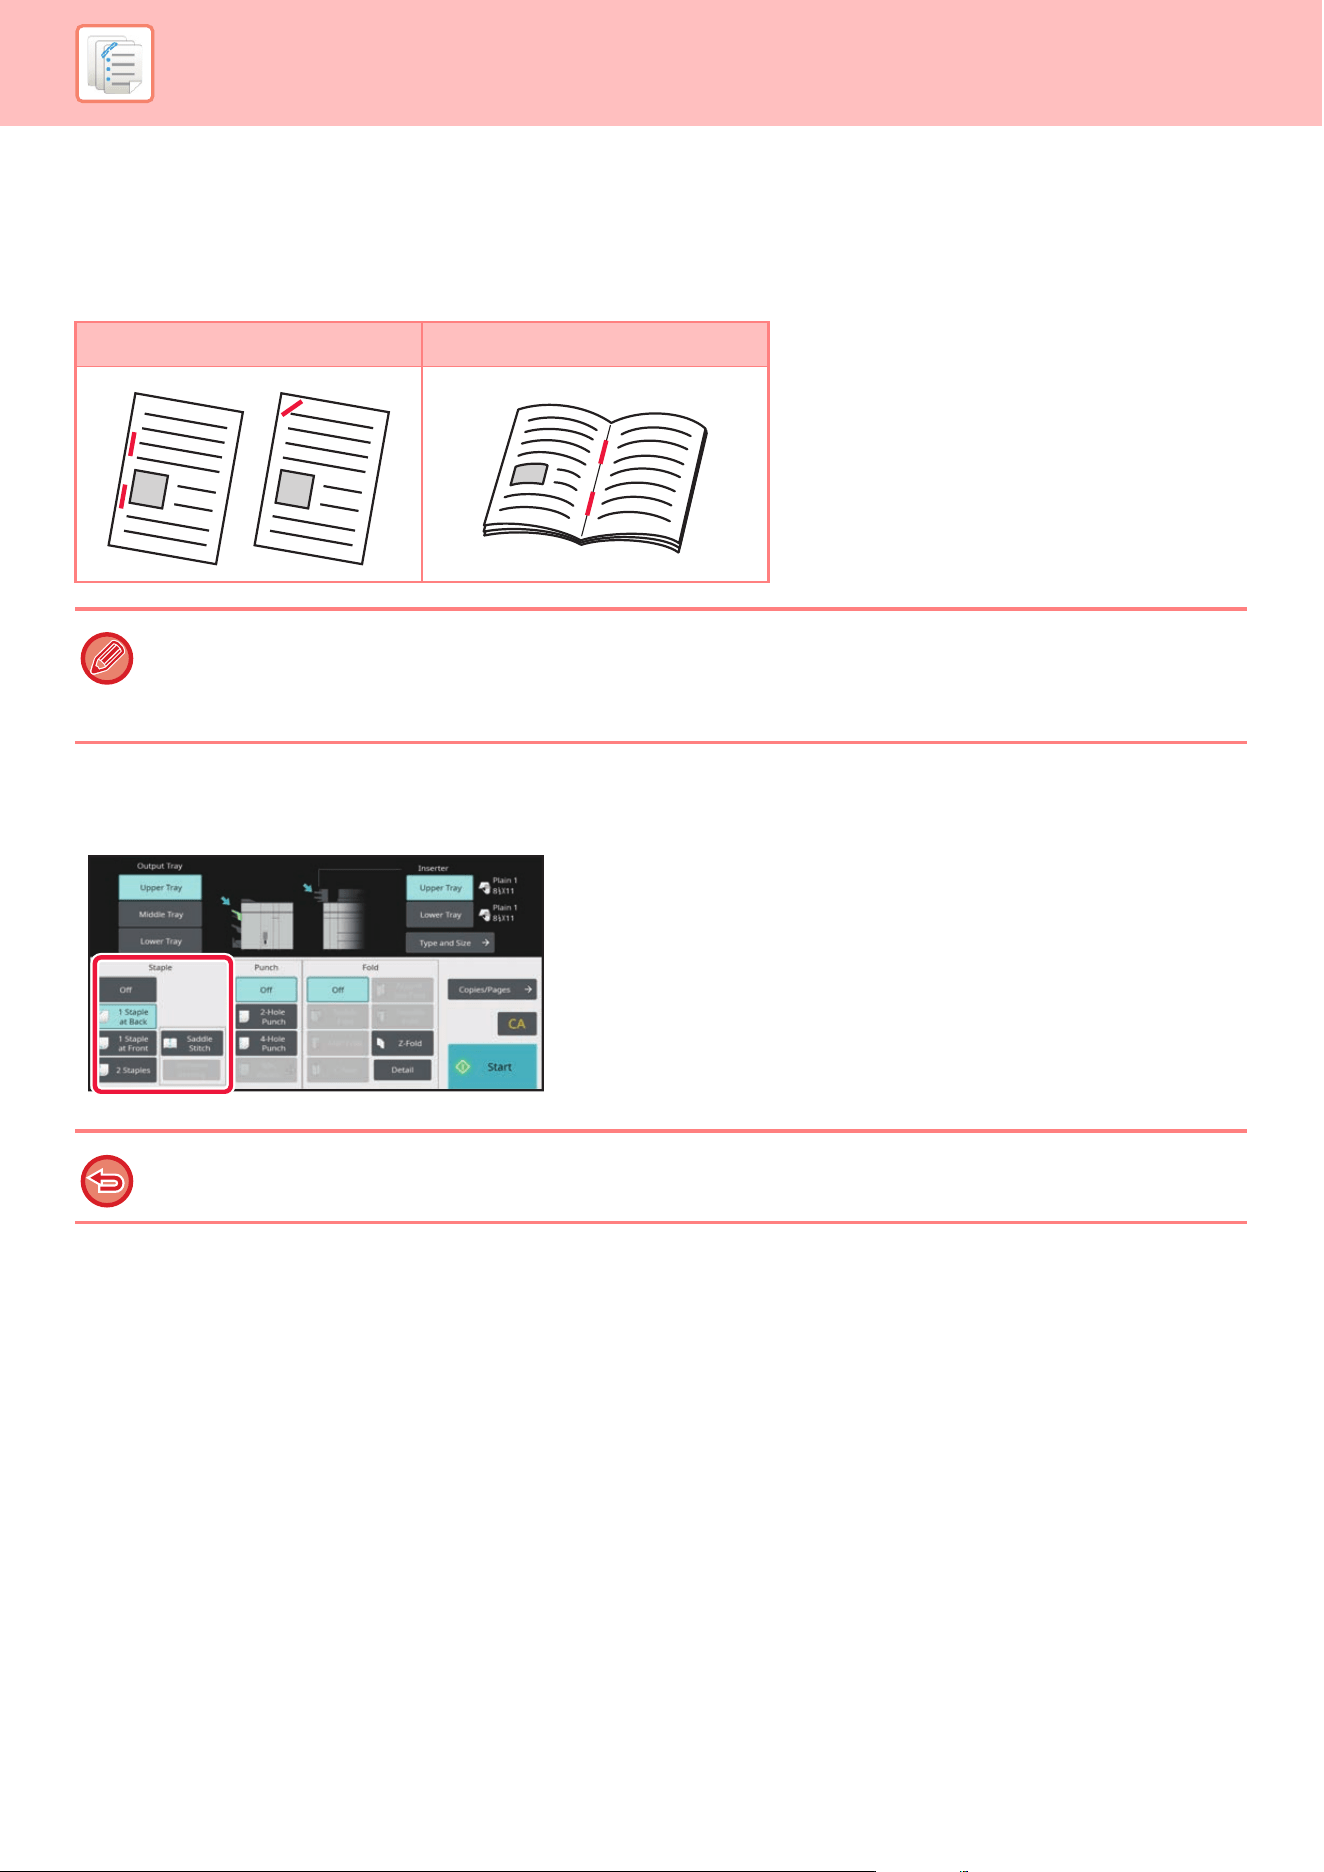
7-10
MANUAL FINISHING►OPERATION OF MANUAL FINISHING
STAPLE FUNCTION
When a finisher (large stacker) is installed, you can staple loaded papers into a sheaf. (Staple function)
When a saddle stitch finisher (large stacker) is installed, you can staple papers in two places on the centerline and fold
them before being output. (Saddle stitch function)
Selecting staple function
Tap your desired staple key in the [Staple].
The output tray is automatically selected based on the selected staple key.
Staple Saddle Stitch
• You can use the saddle stitch function for size 8-1/2 " × 11"R to 12" × 18" (A4R to A3W) papers.
• The saddle stitch function cannot be used with other manual finishing functions.
• If you load only one sheet of paper while the staple function is ON, the staple function is temporarily turned OFF and the
sheet is not stapled.
To cancel the staple function:
Tap the [Off] key.
1
1
5
6
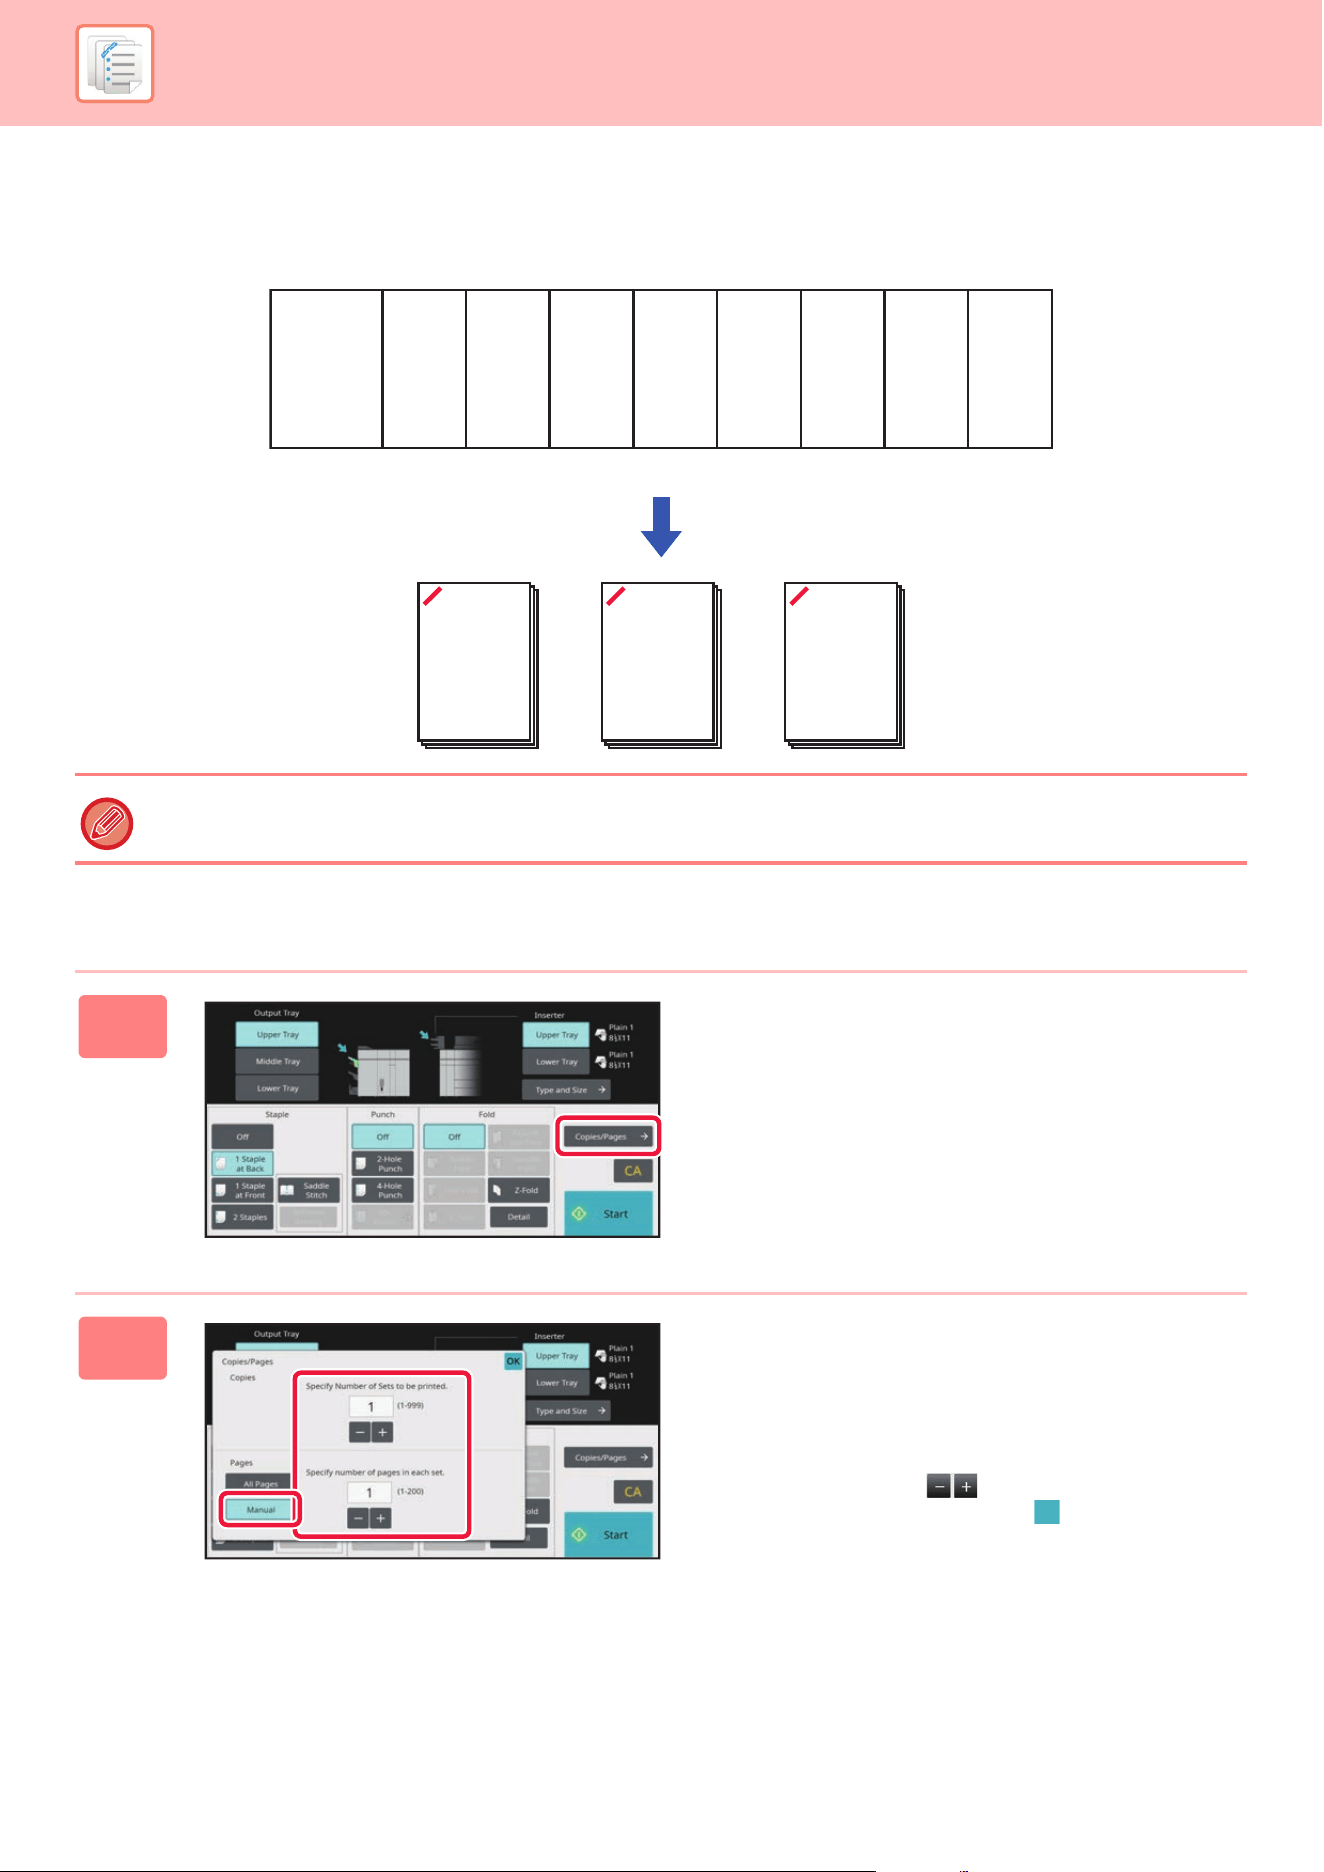
7-11
MANUAL FINISHING►OPERATION OF MANUAL FINISHING
COPIES/PAGES FUNCTION
If you wish to staple multiple sets at once, use the Copies/Pages.
Load sorted paper and tap the [Copies/Pages] key to enter the number of copies and the number of pages per set.
Setting the number of copies (number of pages)
The settings on the Copies/Pages will not be effective for the paper folding and punch functions.
1
Tap the [Copies/Pages] key.
2
Tap the [Manual] key and specify the
number of output copies and the
number of pages per set.
Tap the Number of Copies display and the Number of Pages
per Set display, and enter the values using the numeric
keys. Otherwise, tap the key to enter the values.
After the settings are completed, tap .
ABACBACBA
C
B
A
C
B
A
C
B
A
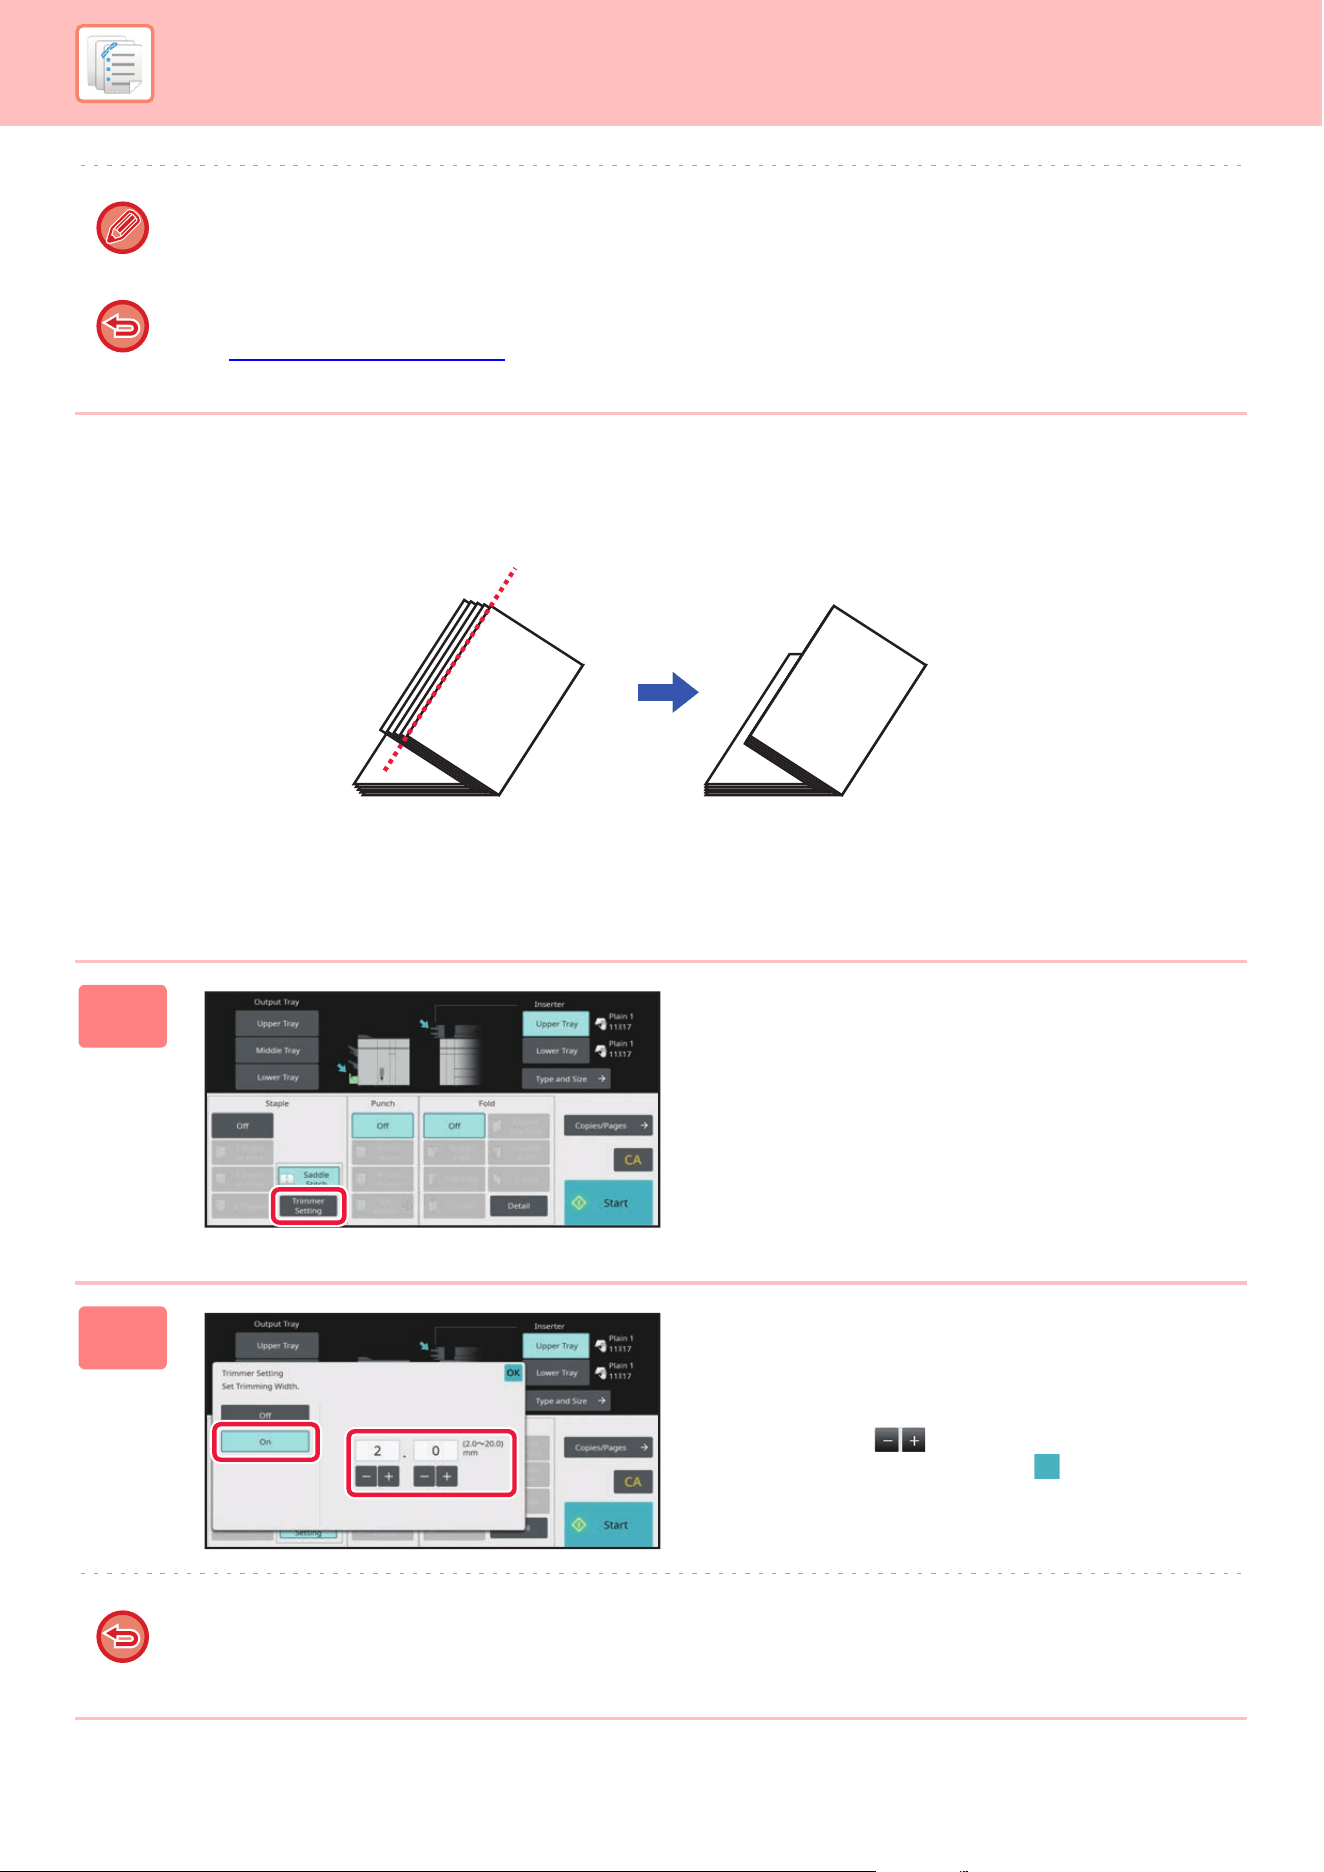
7-12
MANUAL FINISHING►OPERATION OF MANUAL FINISHING
TRIMMER SETTING
If a trimmer unit is installed, you can trim off excess edges of paper for a finer finish.
Trimmer Setting (when Saddle Stitch is selected)
To select the Trimmer Setting, a trimmer unit must be installed.
If you select [All Pages] for the number of copies/number of pages, specify "1" for the number of sets to be printed.
If you set more copies or pages than the number of copies or pages that can be stapled, a message is displayed and the
[Start] key is disabled.
See "SPECIFICATIONS (page 11-2)
" and specify the number of copies or pages that can be stapled.
1
With Saddle Stitch selected, tap the
[Trimmer Setting] key.
2
Tap the [On] key, and specify the
trimming width.
Tap the numeric value display field of the trimming width,
and enter the allowable range using the numeric keys.
Otherwise, tap the key to enter the values.
After the settings are completed, tap .
To cancel the trimmer setting:
Tap the [Off] key.
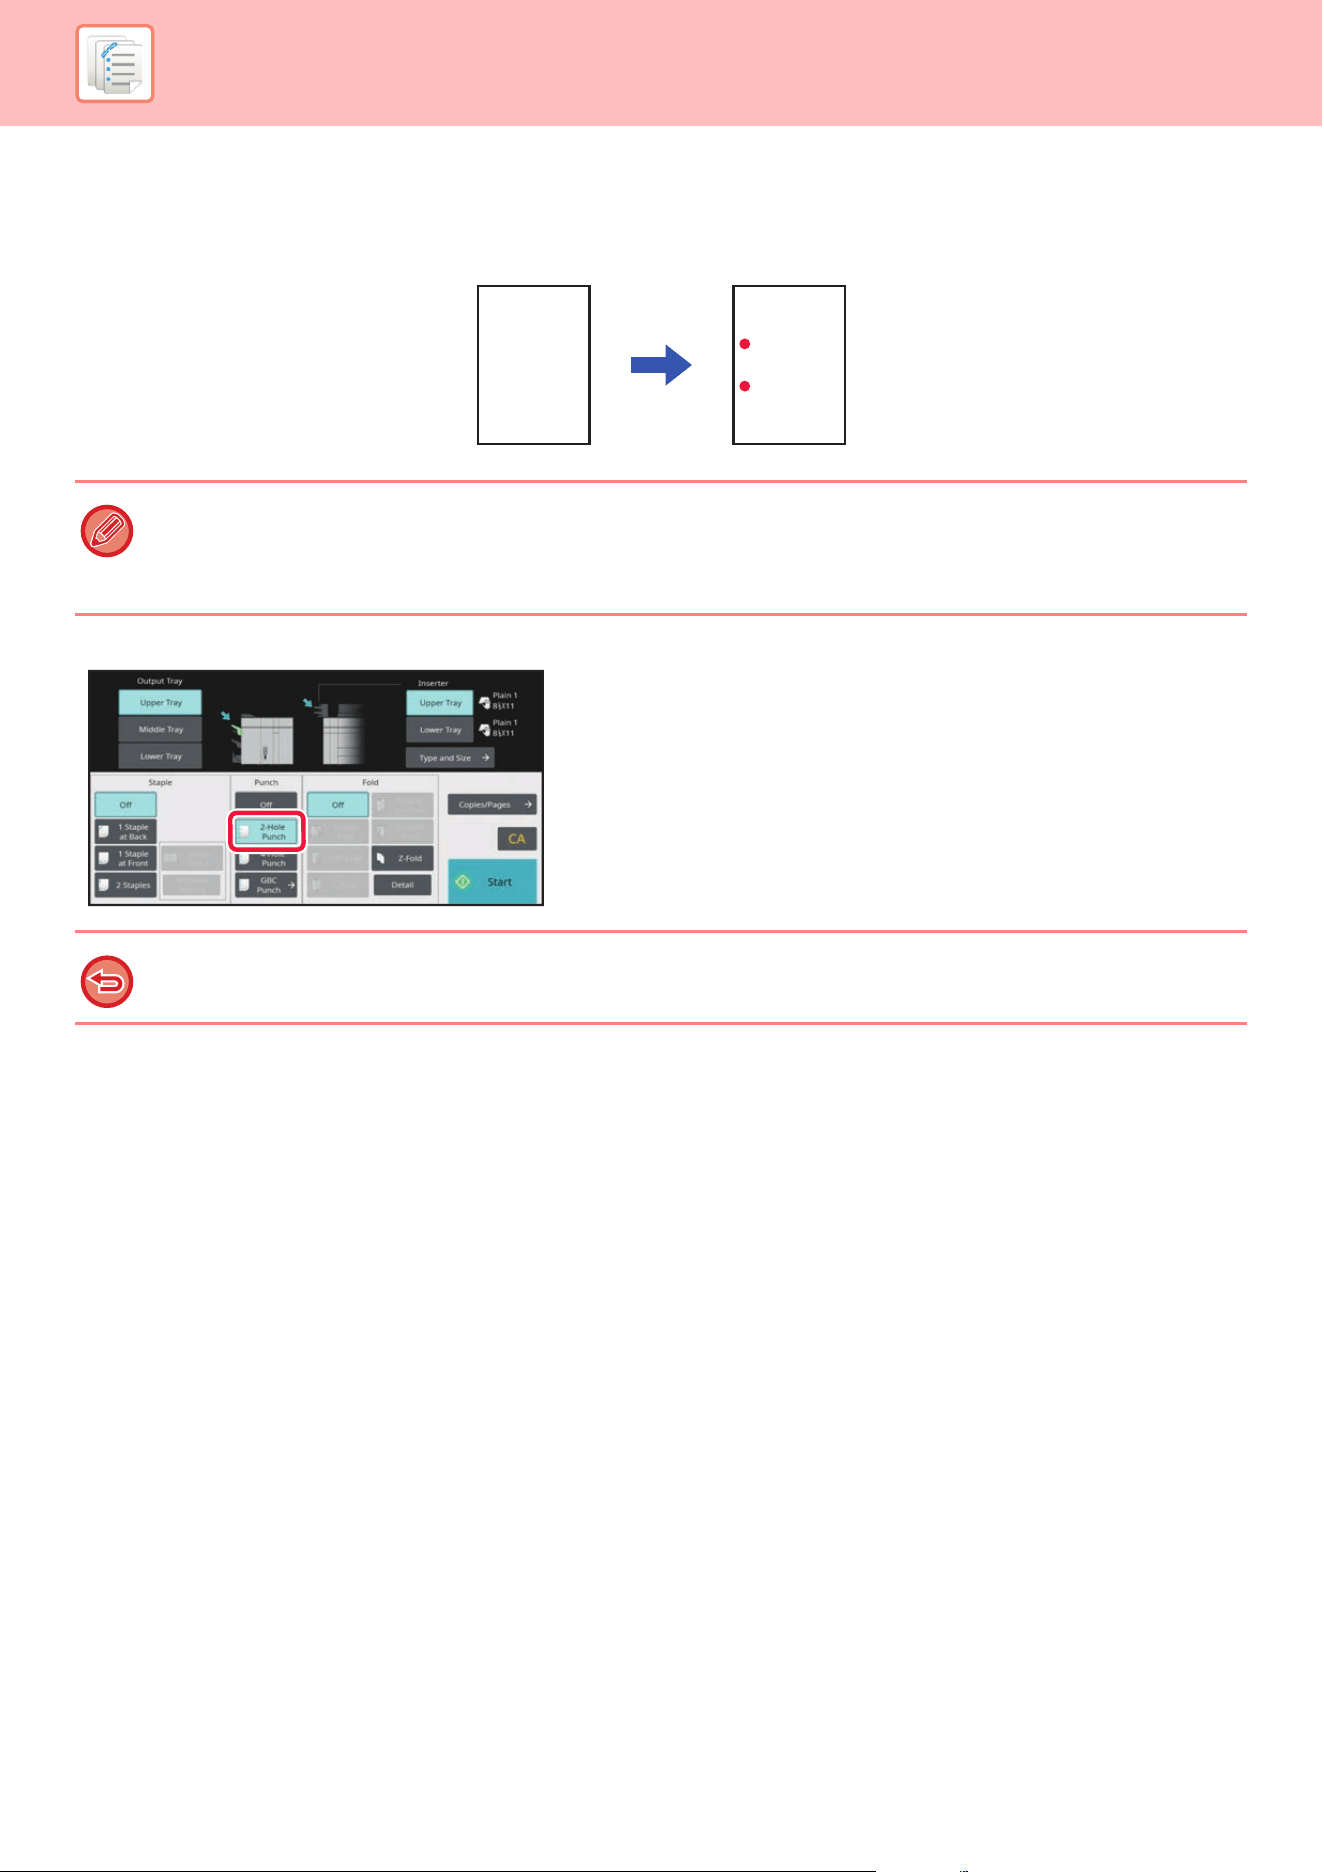
7-13
MANUAL FINISHING►OPERATION OF MANUAL FINISHING
PUNCH FUNCTION
If a punch module is installed, holes can be punched in paper.
Tap the [2 Hole Punch] key under "Punch".
• Paper sizes that are available for the punch function are 8-1/2 " × 11"R to 11" × 17" (B5R to A3).
• You cannot use 12" × 18" (A3W) size papers, and special media such as transparency film.
• The punch function cannot be used with the saddle stitch or paper folding functions. However, it can be used with them if
the paper size used is 11" × 17", A3 or B4 for Z-fold.
To cancel the punch function:
Tap the [Off] key.
A A

7-14
MANUAL FINISHING►OPERATION OF MANUAL FINISHING
PAPER FOLDING FUNCTION
When a paper folding unit is installed, you can fold papers in Z-fold and C-fold. When a saddle stitch finisher (large
stacker) is installed, you can use saddle folds.
The paper sizes that can be selected vary depending on the type of paper fold.
Types of folds and paper sizes available
Types of Folds Folding results Paper Size
Saddle Fold 13" × 19", 12" × 18", 11" × 17", 8-1/2" × 14",
8-1/2" × 13-1/2", 8-1/2" × 13-2/5", 8-1/2" × 13",
8-1/2" × 11"R, SRA3, A3W, A3, B4, A4R, 8K
Half Fold 8-1/2" × 11"R, A4R
C-Fold 8-1/2" × 11"R, A4R
Accordion Fold 8-1/2" × 11"R, A4R
Double Fold 8-1/2" × 11"R, A4R
B
A
BA
BA
A
B
ABC
A
C
ABC
A
C
ABCD
D
A
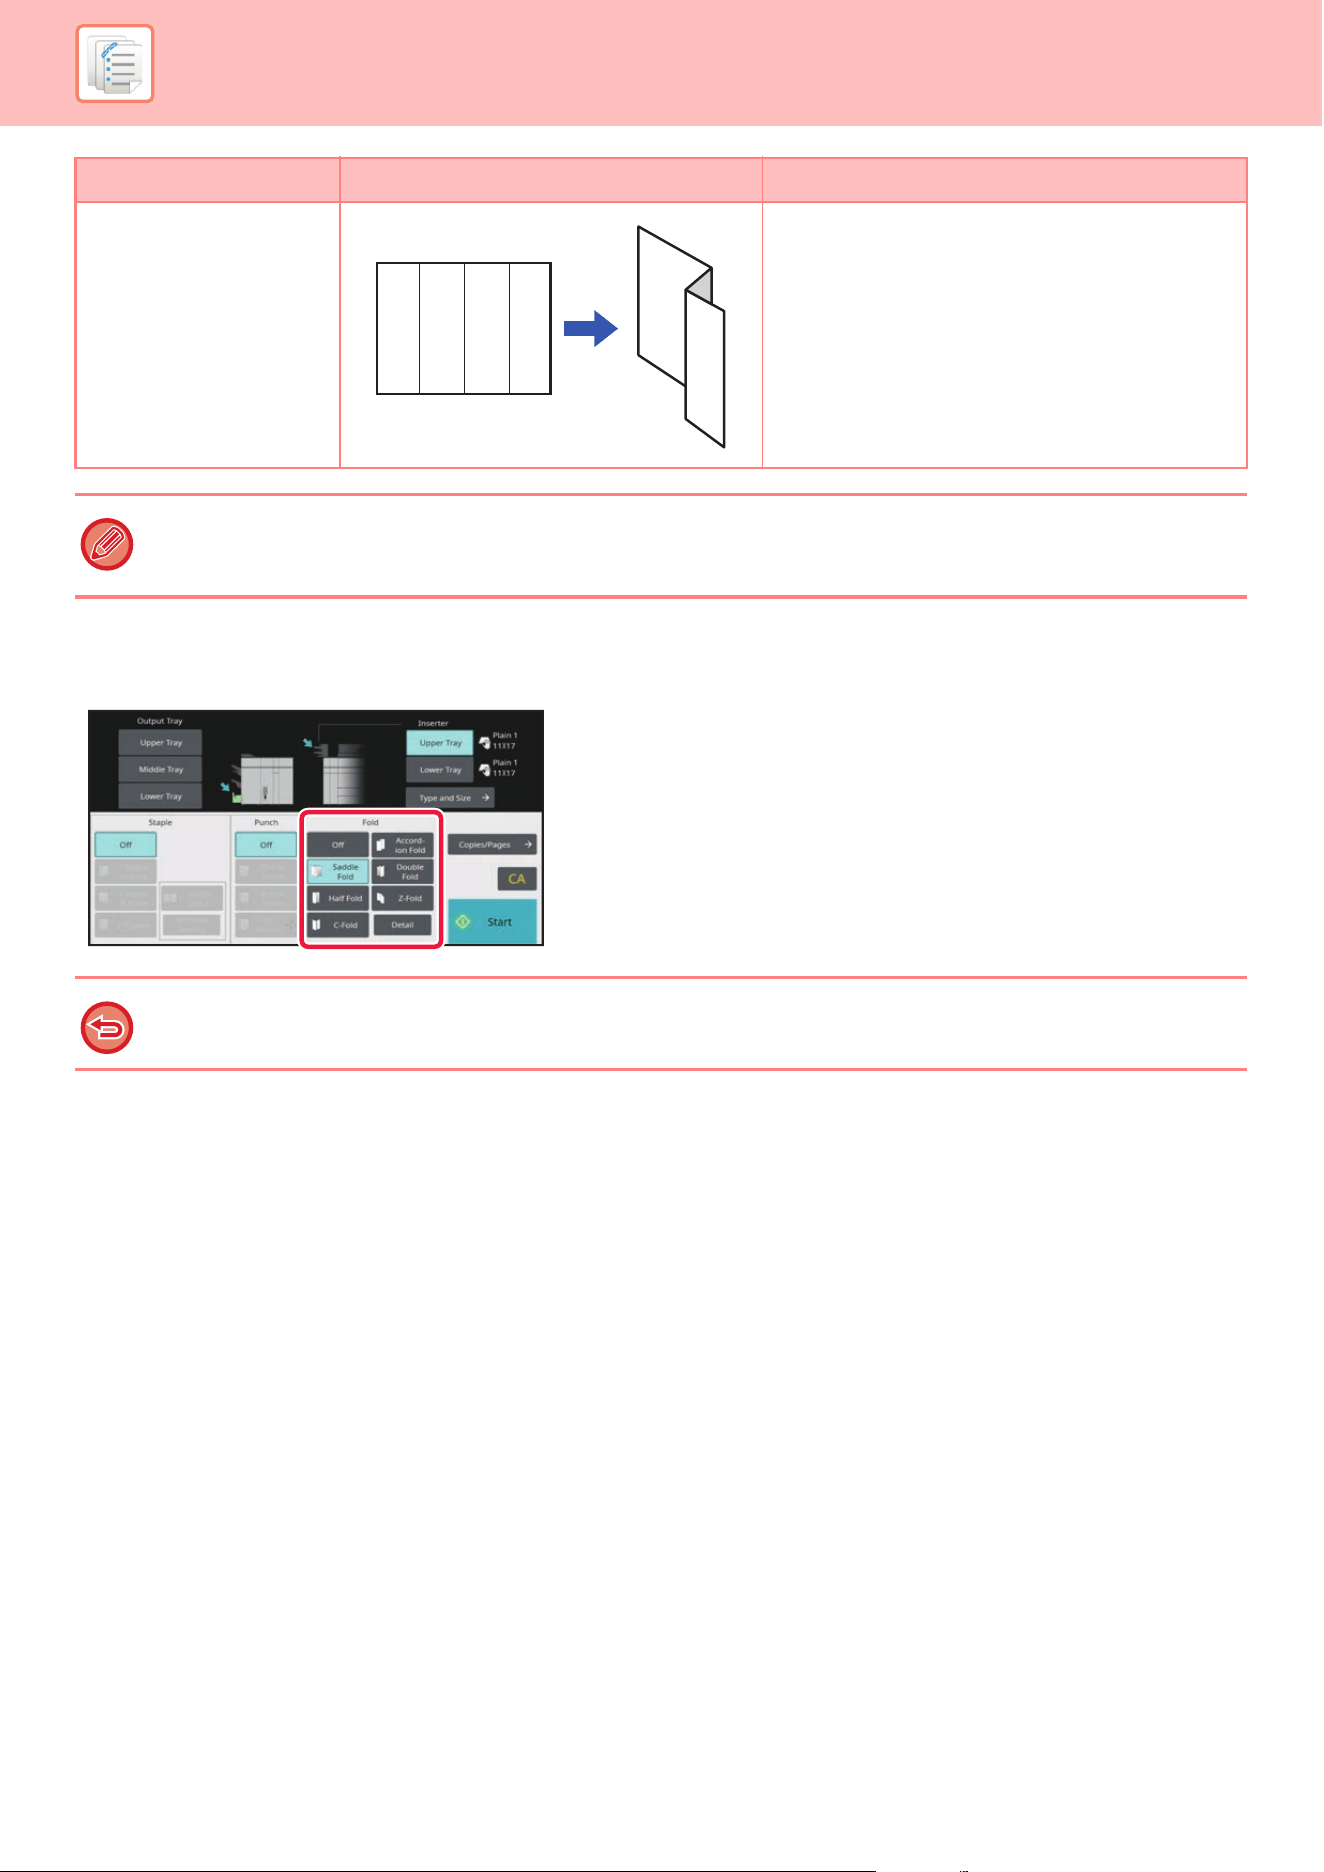
7-15
MANUAL FINISHING►OPERATION OF MANUAL FINISHING
Selecting the paper folding function
Tap your desired fold key in the "Fold".
The output tray is automatically selected based on the selected fold key.
Z-Fold 11" × 17", 8-1/2" × 14", 8-1/2" × 11"R, A3, B4, A4R
• Special media such as transparency film and tab paper cannot be used.
• The paper folding function cannot be used with the staple and hole punch function. However, it can be used with them if
the paper size for Z-fold is 11" × 17", A3 or B4.
To cancel the paper folding function:
Tap the [Off] key.
Types of Folds Folding results Paper Size
ABCD
A
B
D
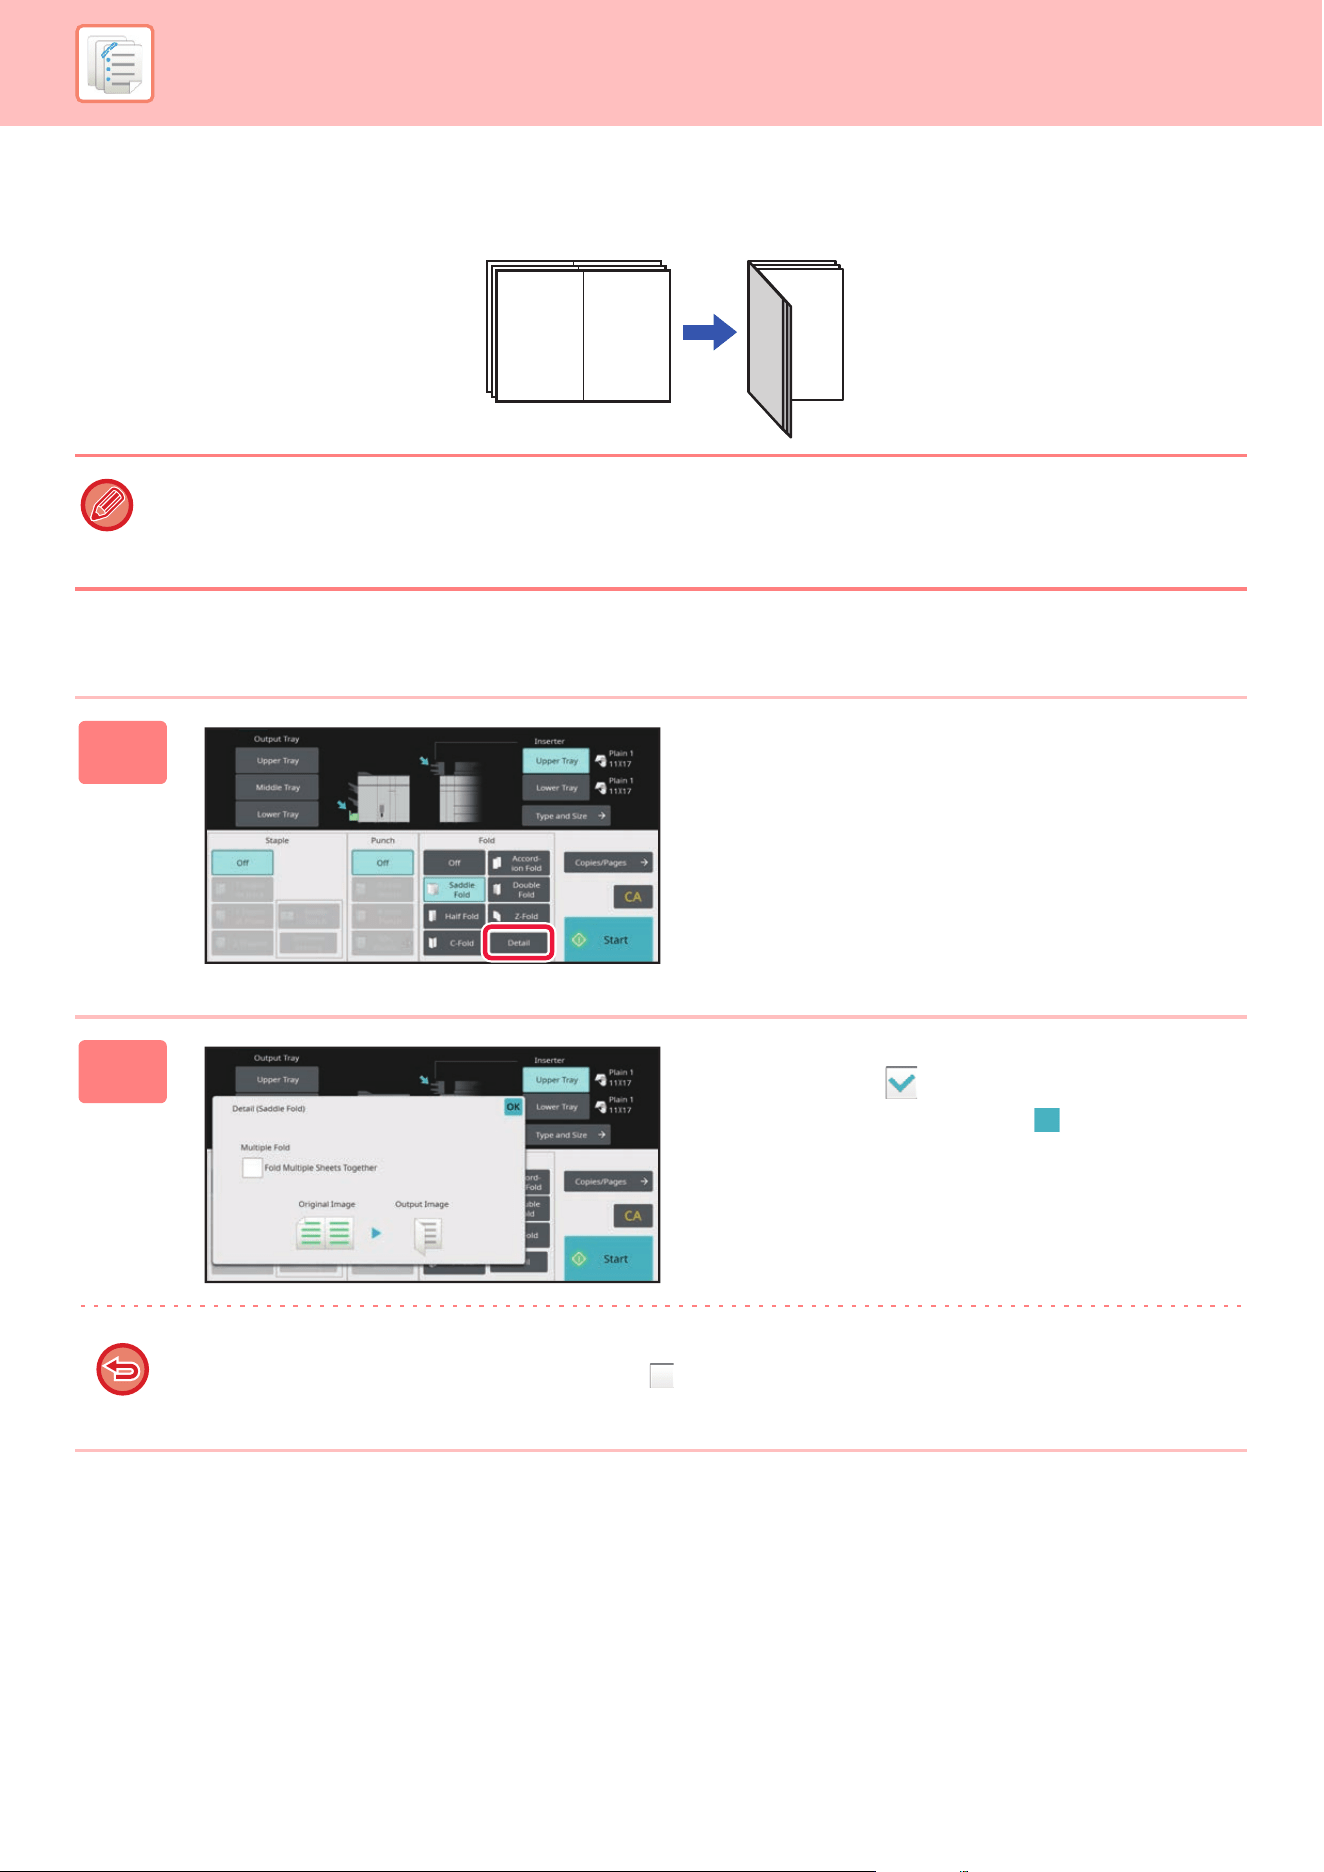
7-16
MANUAL FINISHING►OPERATION OF MANUAL FINISHING
MULTIPLE FOLD (WHEN SADDLE FOLD IS SELECTED)
If Saddle Fold is selected, multiple sheets can be folded together. Five sheets of paper are folded at a time.
Setting Multiple Fold (when Saddle Fold is selected)
• When four or less papers are set, four or less papers are folded at a time.
• If five or more papers are set and if four or less papers remain, the remaining number of papers are folded at a time.
• Some types of paper reduces the number of sheets that are folded every set. For example, three sheets are folded at a
time in the case of heavy paper.
1
With Saddle Fold selected, tap the
[Detail] key.
2
Set the [Fold Multiple Sheets Together]
checkbox to .
After the settings are completed, tap .
To cancel the multiple fold function:
Set the [Fold Multiple Sheets Together] checkbox to .
B
B
B
A
A
A
BA
BA
BA
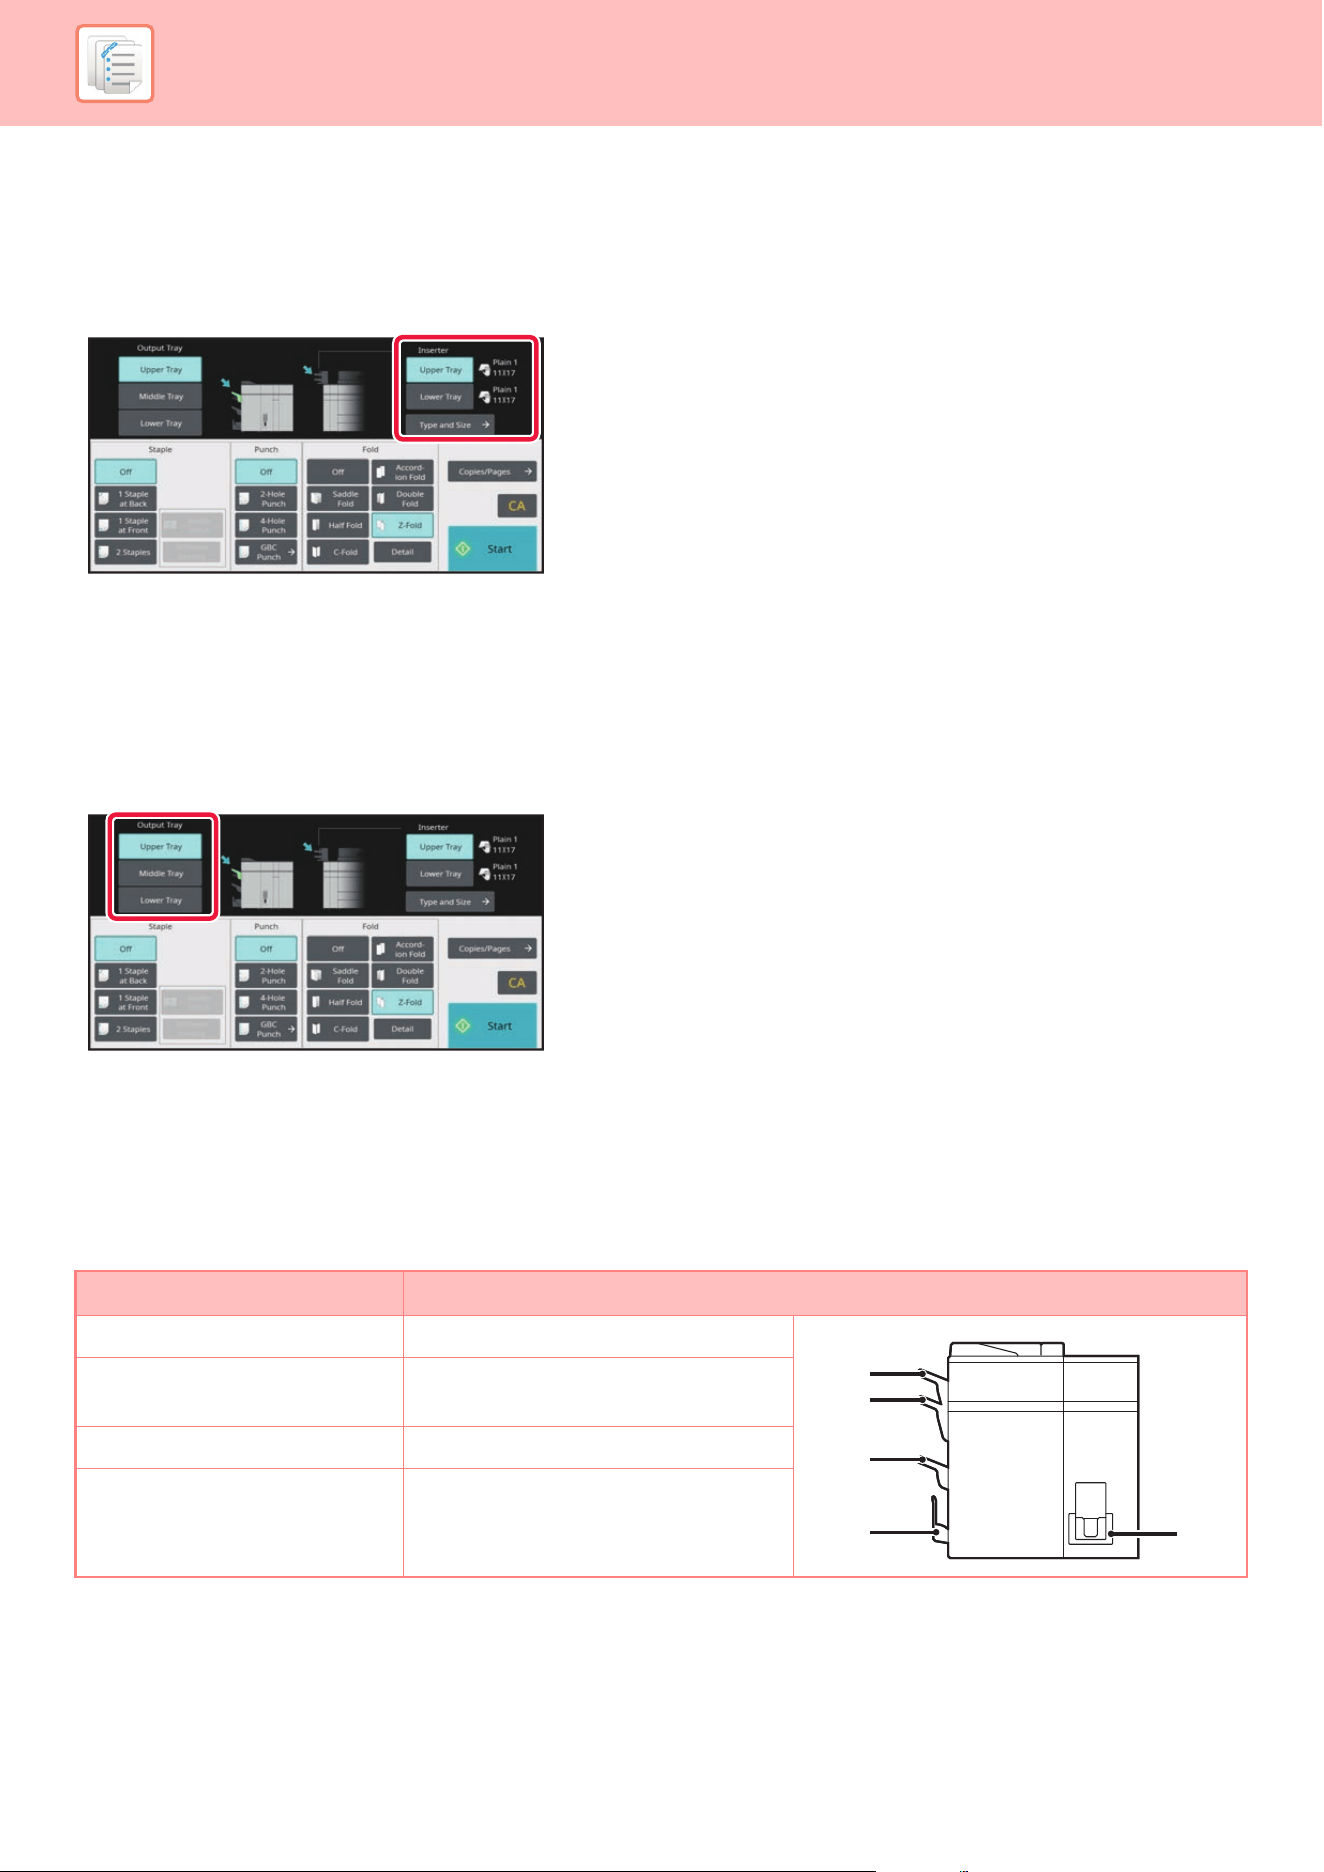
7-17
MANUAL FINISHING►OPERATION OF MANUAL FINISHING
TO CHANGE THE PAPER TRAY
The paper tray is automatically detected when paper is loaded in the inserter.
If you need to specify a paper tray when, for example, paper has been loaded into both the upper and lower trays on the
inserter, tap the [Upper Tray] or [Lower Tray] key to specify the appropriate paper tray.
TO CHANGE THE OUTPUT TRAY
The output tray is automatically selected based on the output function you set. If Z-Fold, Half Fold, or Punch is selected,
you can select the upper, middle or lower tray for the output tray.
Tap the [Upper Tray], [Middle Tray] or [Lower Tray] key in "Output Tray" and select the output tray you require.
Relation between output function and output tray
An output tray is automatically selected as shown below based on the output function you set. Depending on the output
function that is originally deselected, it may be deselected if you tap the [Upper Tray], [Middle Tray] or [Lower Tray] key
to change the output tray.
For example, if you tap the [Upper Tray], [Middle Tray] or [Upper Tray] key with "Saddle Stitch" selected, the setting for
"Saddle Stitch" is canceled.
Output function Deliver to
Staple Upper Tray (A) or Lower Tray (C)
Z-Fold/Half Fold/Punch Upper Tray (A), Middle Tray (B) or
Lower Tray (C)
Saddle Stitch/Saddle Fold Saddle Stitch Tray (D)
C-Fold/Accordion Fold/Double
Fold
Folding Unit Tray (E)
A
B
C
D
E

8-1
USE ENVIRONMENTALLY FRIENDLY
ECO . . . . . . . . . . . . . . . . . . . . . . . . . . . . . . . . . . . . . . . . . . . 8-2
ECO FUNCTIONS OF THE MACHINE . . . . . . . . . . . . . . 8-2
AUTO POWER SHUT-OFF MODE . . . . . . . . . . . . . . . . . 8-2
PREHEAT MODE. . . . . . . . . . . . . . . . . . . . . . . . . . . . . . . 8-3
ECO RECOMMENDATION FUNCTION DISPLAY . . . . . 8-3
AS SOON AS THE REMOTE JOB IS FINISHED,
ENTER AUTO POWER SHUT OFF MODE . . . . . . . . . . . 8-4
ECO SCAN. . . . . . . . . . . . . . . . . . . . . . . . . . . . . . . . . . . . 8-6
ECO SCAN SETTING . . . . . . . . . . . . . . . . . . . . . . . . . . . 8-6
ENERGY SAVING PATTERN LIST . . . . . . . . . . . . . . . . . 8-7
POWER ON/OFF SCHEDULE SETTING . . . . . . . . . . . . 8-8
SPECIFIC DATE OPERATION SETTINGS . . . . . . . . . . . 8-9
DISPLAYING ECO RECOMMENDATION SETTINGS
(ECO RECOMMENDATION FUNCTION DISPLAY) . . . 8-10
TONER SAVE MODE. . . . . . . . . . . . . . . . . . . . . . . . . . . 8-10
MANAGING THE USE OF THE MACHINE
USER AUTHENTICATION . . . . . . . . . . . . . . . . . . . . . . . . 8-11
AUTHENTICATION BY USER NUMBER. . . . . . . . . . . . 8-11
AUTHENTICATION BY LOGIN
NAME/PASSWORD . . . . . . . . . . . . . . . . . . . . . . . . . . . . 8-12
QUICK AUTHENTICATION . . . . . . . . . . . . . . . . . . . . . . 8-16
USER CONTROL . . . . . . . . . . . . . . . . . . . . . . . . . . . . . . . 8-19
ORGANIZATION /GROUP LIST . . . . . . . . . . . . . . . . . . 8-20
PAGE LIMIT GROUP LIST. . . . . . . . . . . . . . . . . . . . . . . 8-21
AUTHORITY GROUP. . . . . . . . . . . . . . . . . . . . . . . . . . . 8-22
FAVORITE OPERATION GROUP LIST. . . . . . . . . . . . . 8-23
ACTIVE DIRECTORY LINKING FUNCTION . . . . . . . . . 8-23
BILLING CODE . . . . . . . . . . . . . . . . . . . . . . . . . . . . . . . . . 8-24
BILLING CODE . . . . . . . . . . . . . . . . . . . . . . . . . . . . . . . 8-24
USE BILLING CODE . . . . . . . . . . . . . . . . . . . . . . . . . . . 8-25
REGISTERING A NEW BILLING CODE . . . . . . . . . . . . 8-28
EDITING OR DELETING THE REGISTERED BILLING
CODE . . . . . . . . . . . . . . . . . . . . . . . . . . . . . . . . . . . . . . . 8-31
USING THIS MACHINE IN A NETWORK
ENVIRONMENT
NAS . . . . . . . . . . . . . . . . . . . . . . . . . . . . . . . . . . . . . . . . . .8-34
FOLDER STRUCTURE. . . . . . . . . . . . . . . . . . . . . . . . . .8-34
REMOTE OPERATION OF THE MACHINE . . . . . . . . . . . 8-35
Sharp OSA. . . . . . . . . . . . . . . . . . . . . . . . . . . . . . . . . . . . .8-37
APPLICATION COMMUNICATION . . . . . . . . . . . . . . . .8-37
EXTERNAL ACCOUNT APPLICATION . . . . . . . . . . . . .8-38
VIRUS SCAN . . . . . . . . . . . . . . . . . . . . . . . . . . . . . . . . . . .8-39
VIRUS SCAN/VIRUS DEFINITION UPDATE TIMING
AND TARGET DATA. . . . . . . . . . . . . . . . . . . . . . . . . . . . 8-39
WHEN A VIRUS IS DETECTED . . . . . . . . . . . . . . . . . . .8-41
UPDATING THE VIRUS DEFINITION FILE . . . . . . . . . .8-43
UNIVERSAL DESIGN IN THE MACHINE
UNIVERSAL DESIGN IN THE MACHINE . . . . . . . . . . . . . 8-44
UNIVERSAL DESIGN RELATED TO OPERATION . . . .8-44
UNIVERSAL DESIGN RELATED TO VISION . . . . . . . .8-45
UNIVERSAL DESIGN RELATED TO HEARING . . . . . . 8-45
UNIVERSAL DESIGN FEATURES. . . . . . . . . . . . . . . . . 8-46
JOB LOG LIST
ITEMS RECORDED IN THE JOB LOG . . . . . . . . . . . . . . . 8-48
CONVENIENT USE OF THE
MACHINE
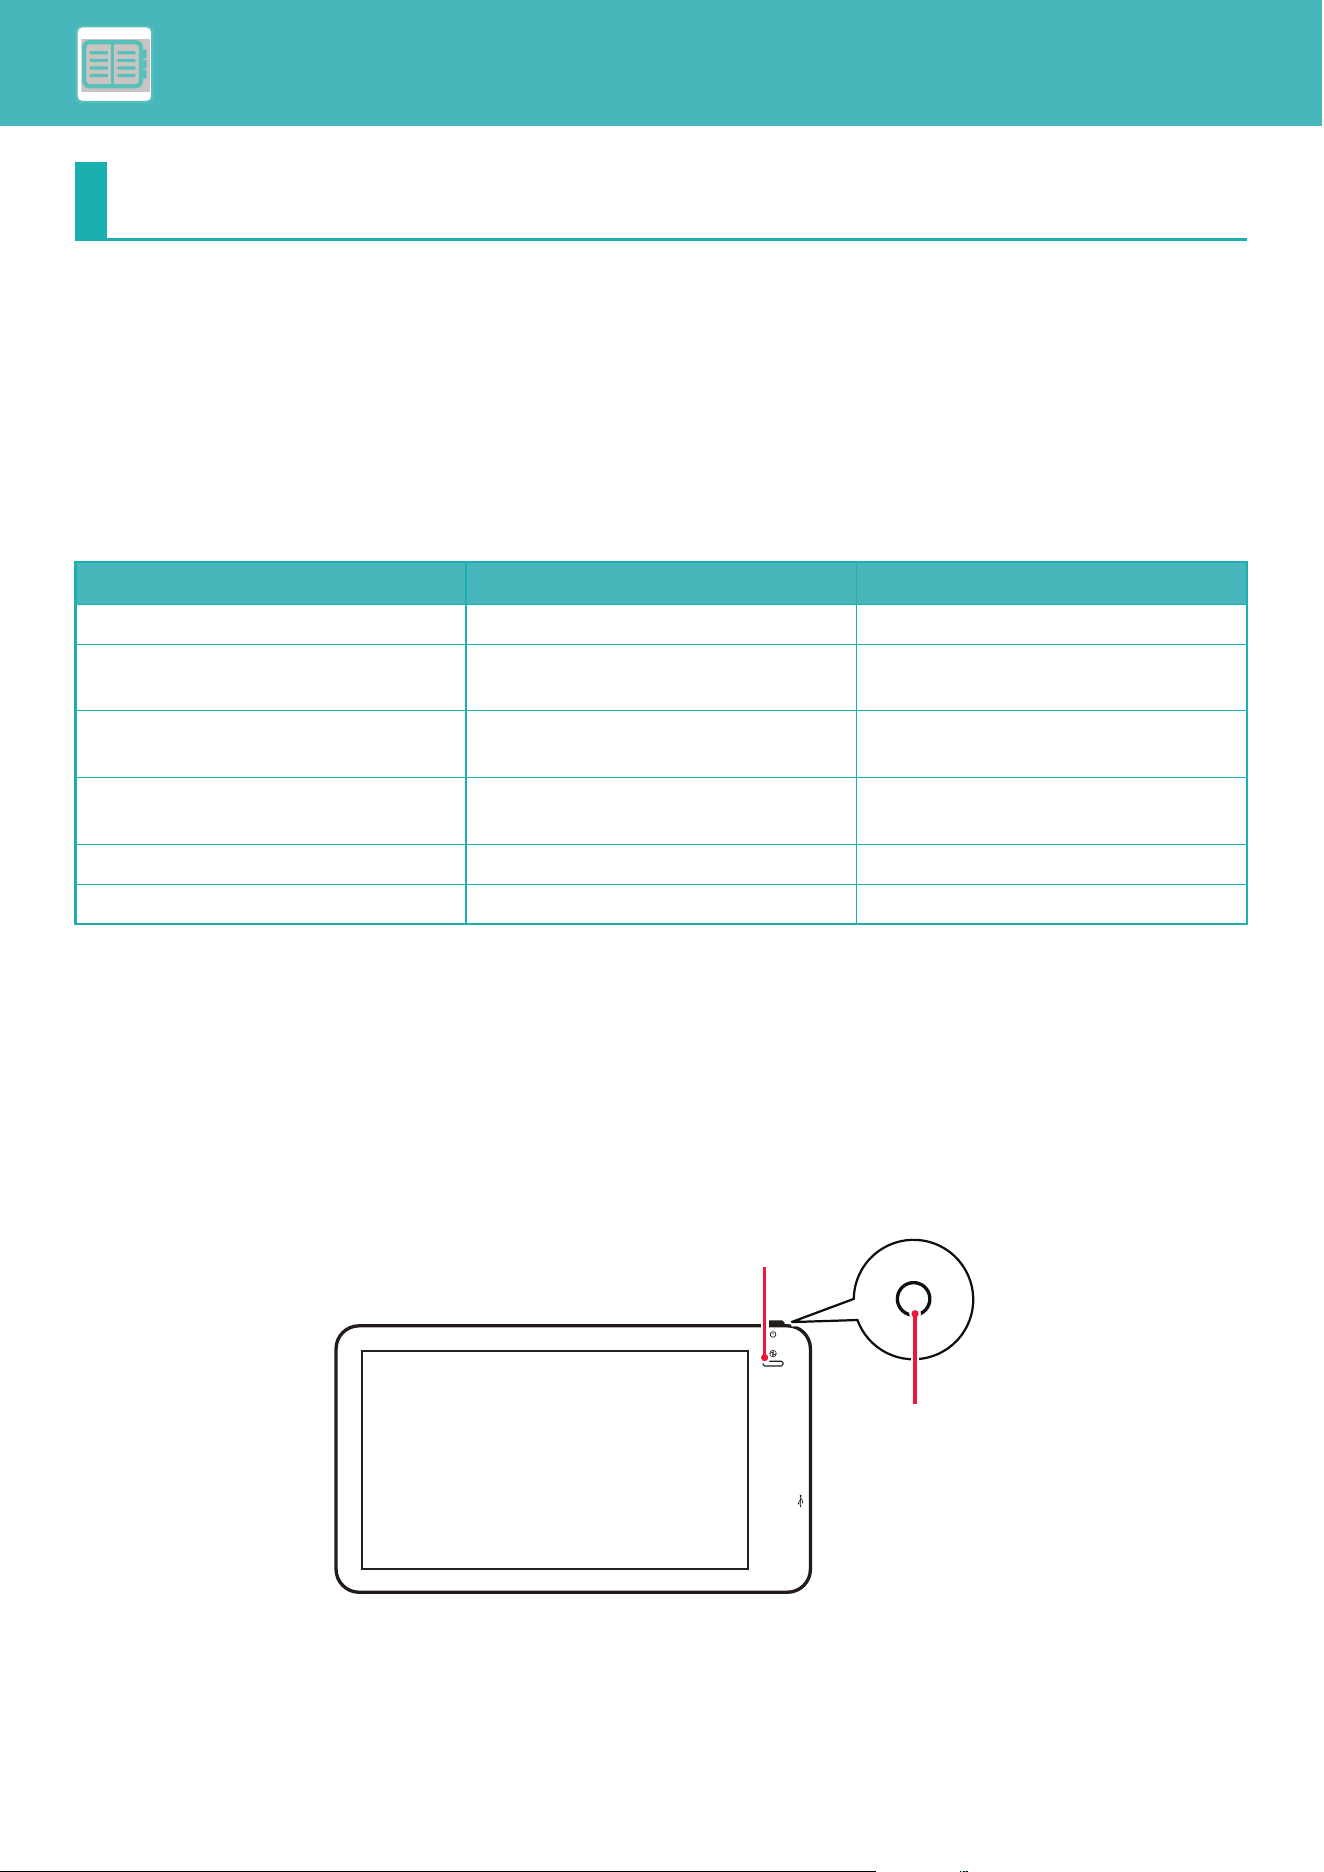
8-2
CONVENIENT USE OF THE MACHINE►USE ENVIRONMENTALLY FRIENDLY
ECO
ECO FUNCTIONS OF THE MACHINE
Mode Settings
The eco function settings are set in a batch. " Mode" and "Eco Mode" are available.
Setting values applied by each mode is as follows.
Each Energy Save settings in System Settings is not applied when Custom/Eco mode is used.
AUTO POWER SHUT-OFF MODE
This mode turns off the power to the operation panel and the fusing unit, and makes the machine wait in the lowest
power consumption state.
Auto Power Shut-Off mode will activate when the set duration of time elapses in waiting status without executing a job.
Compared to preheat mode, the power-saving rate is considerably higher but the wakeup time is longer.
The main power indicator blinks in yellow when the machine is in Auto Power Shut-Off mode.
This mode is cleared when print data is being received, or when the [Power] button is pressed while it is blinking.
USE ENVIRONMENTALLY FRIENDLY
Function Custom Mode Eco Mode
Preheat Mode Setting 1min. 1min.
Turn off Panel Display during pre-heat
mode
On On
Auto Power Shut-Off Timer Fix transition time.:
15min.
Fix transition time.:
1min.
As soon as the remote job is finished,
enter Auto power shut off mode.
On On
Sleep Mode Power Level Low Power Low Power
Eco Scan On On (All Modes Except Copy)
Main power indicator
[Power] button
8-3
CONVENIENT USE OF THE MACHINE►USE ENVIRONMENTALLY FRIENDLY
A message appears 15 seconds before Auto Power Shut-Off Mode is entered.
To close the message and continue normal operation, tap the [Continue] button.
The message appears again 15 seconds before the end of the extension of normal operation time.
If no action is taken within 15 seconds after the message appears, the machine enters auto power shut-off mode.
PREHEAT MODE
This mode lowers the temperature of the fusing unit and makes the machine wait in low power consumption state.
Preheat mode will activate when the set duration of time elapses in waiting status without executing a job.
Compared to Auto Power Shut-Off Mode, the amount of energy saved is less and the wakeup time is shorter.
The touch panel goes off.
The main power indicator lights in blue when the machine is in preheat mode.
The touch panel is cleared when it is tapped or the [Home Screen] button is pressed.
A message appears 15 seconds before Preheat Mode is entered.
To close the message and continue normal operation, tap the [Continue] button.
If no action is taken within 15 seconds after the message appears, the machine enters preheat mode.
ECO RECOMMENDATION FUNCTION DISPLAY
Shows recommended copy/print settings for copy, document filing reprint, and direct print.
Copying
When you change to copy mode (normal mode), the settings recommended for copy mode appear.
Recommended settings: 2-Sided Copy, N-Up, B/W Copy, and Image Orientation
Document filing print
When you tap the [Choose Print Settings] in the action panel on the file list screen of document filing, the settings
recommended for this mode appear.
Recommended settings: 2-Sided Print, N-Up, and Print B/W.
Direct print
When you tap the [Choose Print Settings] in the action panel on the file list screen of direct print, the settings
recommended for this mode appear.
Recommended settings: 2-Sided Print, N-Up, and Print B/W.
To set display of the message:
In "Settings (administrator)", select [System Settings] → [Energy Save] → [Eco Setting] → [Display Message When
Extending Transition Time to Preheat/Auto Power Shut-Off Mode].
Pressing and holding the [Power] button during auto power shut-off will turn off the machine.
To set preheat mode:
"Settings (administrator)" → select [System Settings] → [Energy Save] → [Eco Setting] → [Preheat Mode Setting].
To set display of the message:
In "Settings (administrator)", select [System Settings] → [Energy Save] → [Eco Setting] → [Display Message When
Extending Transition Time to Preheat/Auto Power Shut-Off Mode].
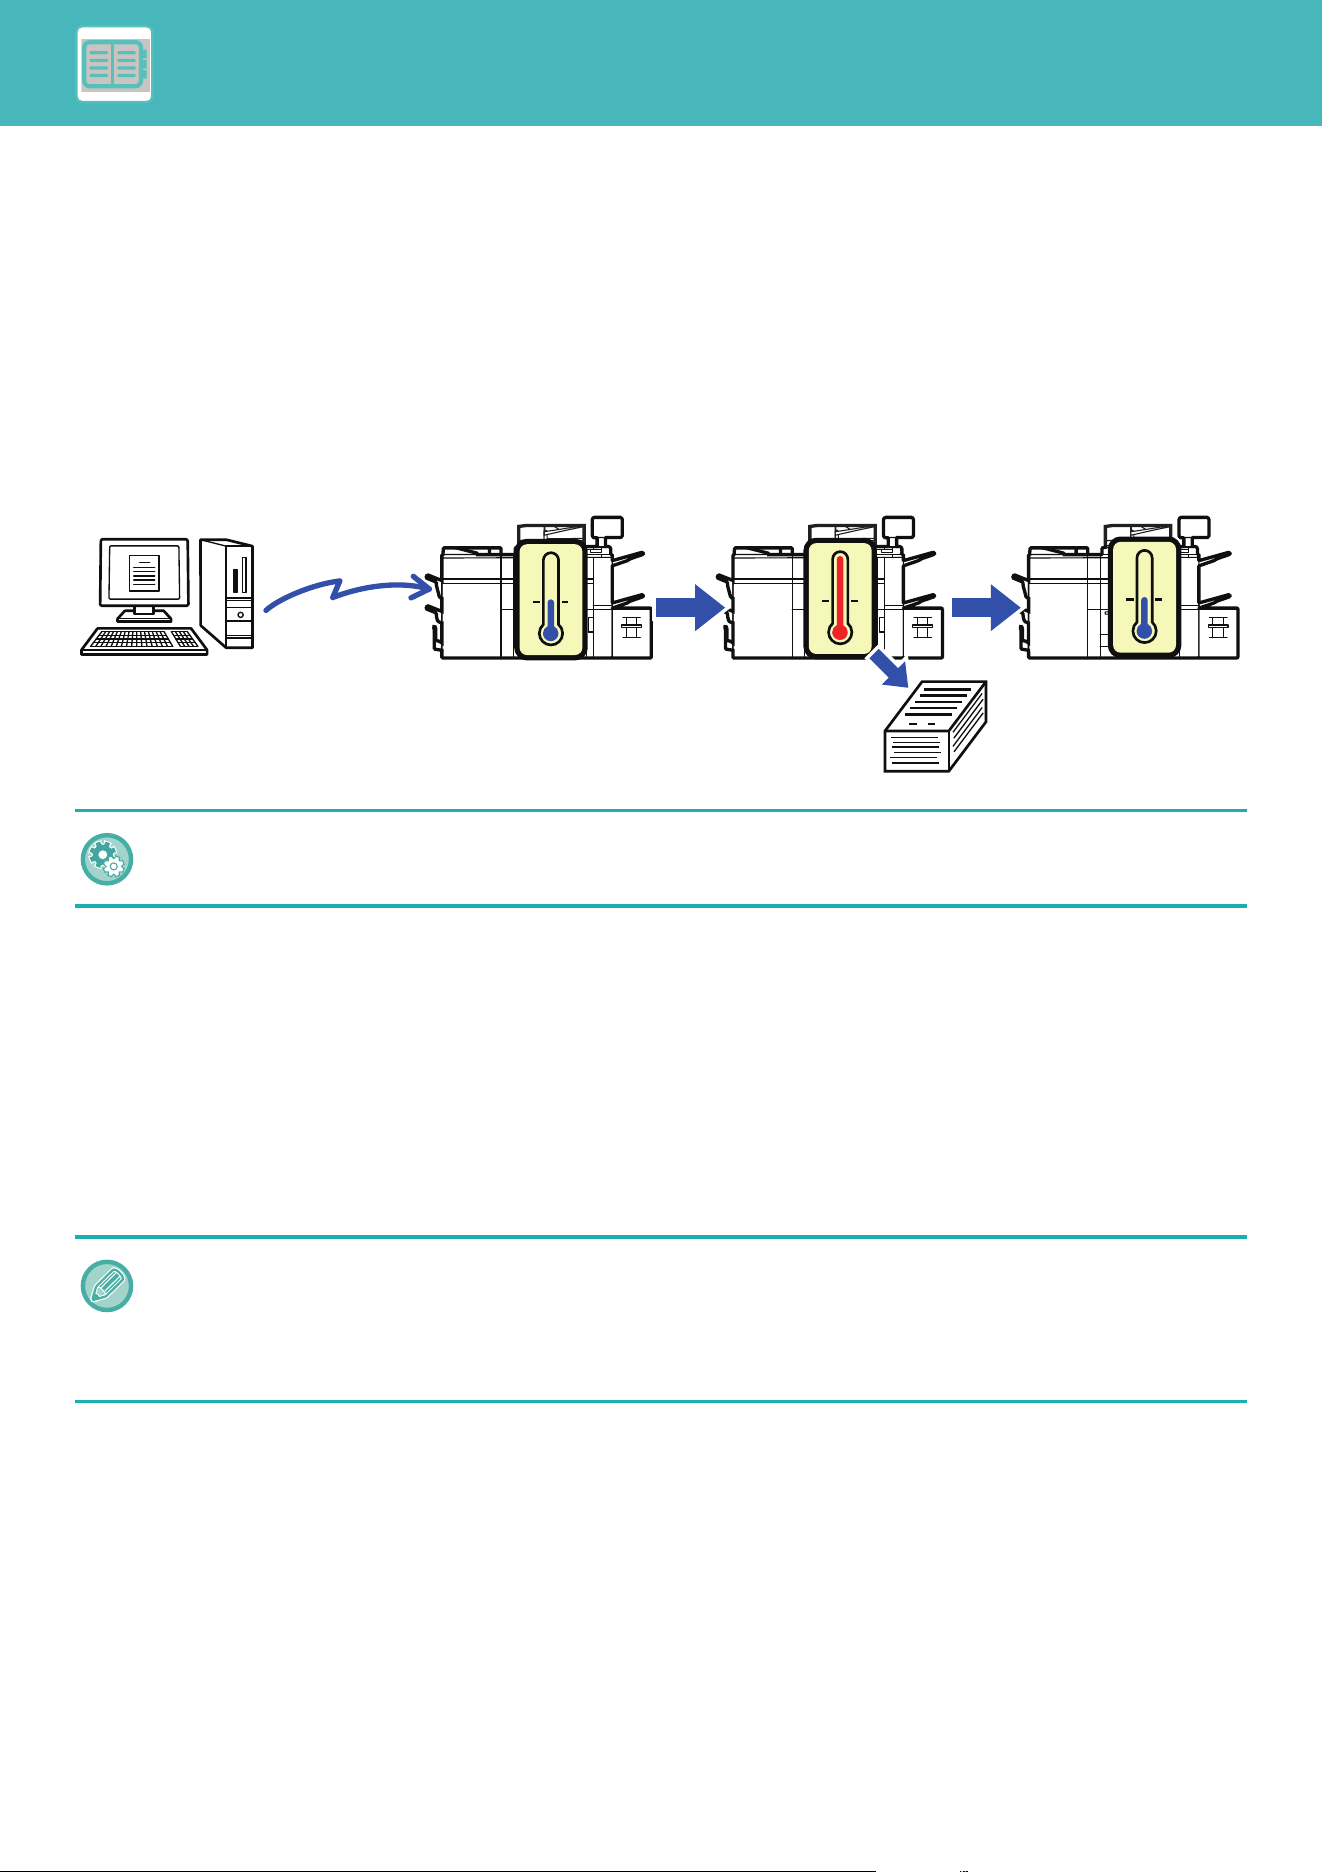
8-4
CONVENIENT USE OF THE MACHINE►USE ENVIRONMENTALLY FRIENDLY
AS SOON AS THE REMOTE JOB IS FINISHED, ENTER
AUTO POWER SHUT OFF MODE
Printing in Auto Power Shut-Off Timer turns on the power, and then the machine returns to Auto Power Shut-Off Mode
immediately after completing the print job.
Fix transition time.
The Auto Power Shut-Off Timer is fixed. Select [Fix transition time.], and set the transition time in [Auto Power Shut-Off
Timer].
When this setting is enabled, the [Change transition time by time of day.] option is disabled.
Change transition time by time of day.
This function controls the transition to Auto Power Shut-Off mode optimally for each time period by analyzing the use of
the machine based on job logs obtained during a 4-week period.
When this setting is enabled, the [Fix transition time.] option is disabled.
To set "As soon as the remote job is finished, enter Auto power shut off mode.":
In "Settings (administrator)", select [System Settings] → [Energy Save] → [Eco Setting] → [As soon as the remote job is
finished, enter Auto power shut off mode.].
• The image transfer control settings are not changed.
• This does not link to the Power On/Off Scheduling. If both of them are enabled, the Power On/Off Scheduling settings
precede.
• Pages are counted for each paper size separately.
• When the power supply of the machine was off, there was no job during this time.
1
Fusing unit is turned
off
Fusing unit is turned
on
Fusing unit is turned
off
Printed
Sleep mode Print Sleep mode
L
L
L
H
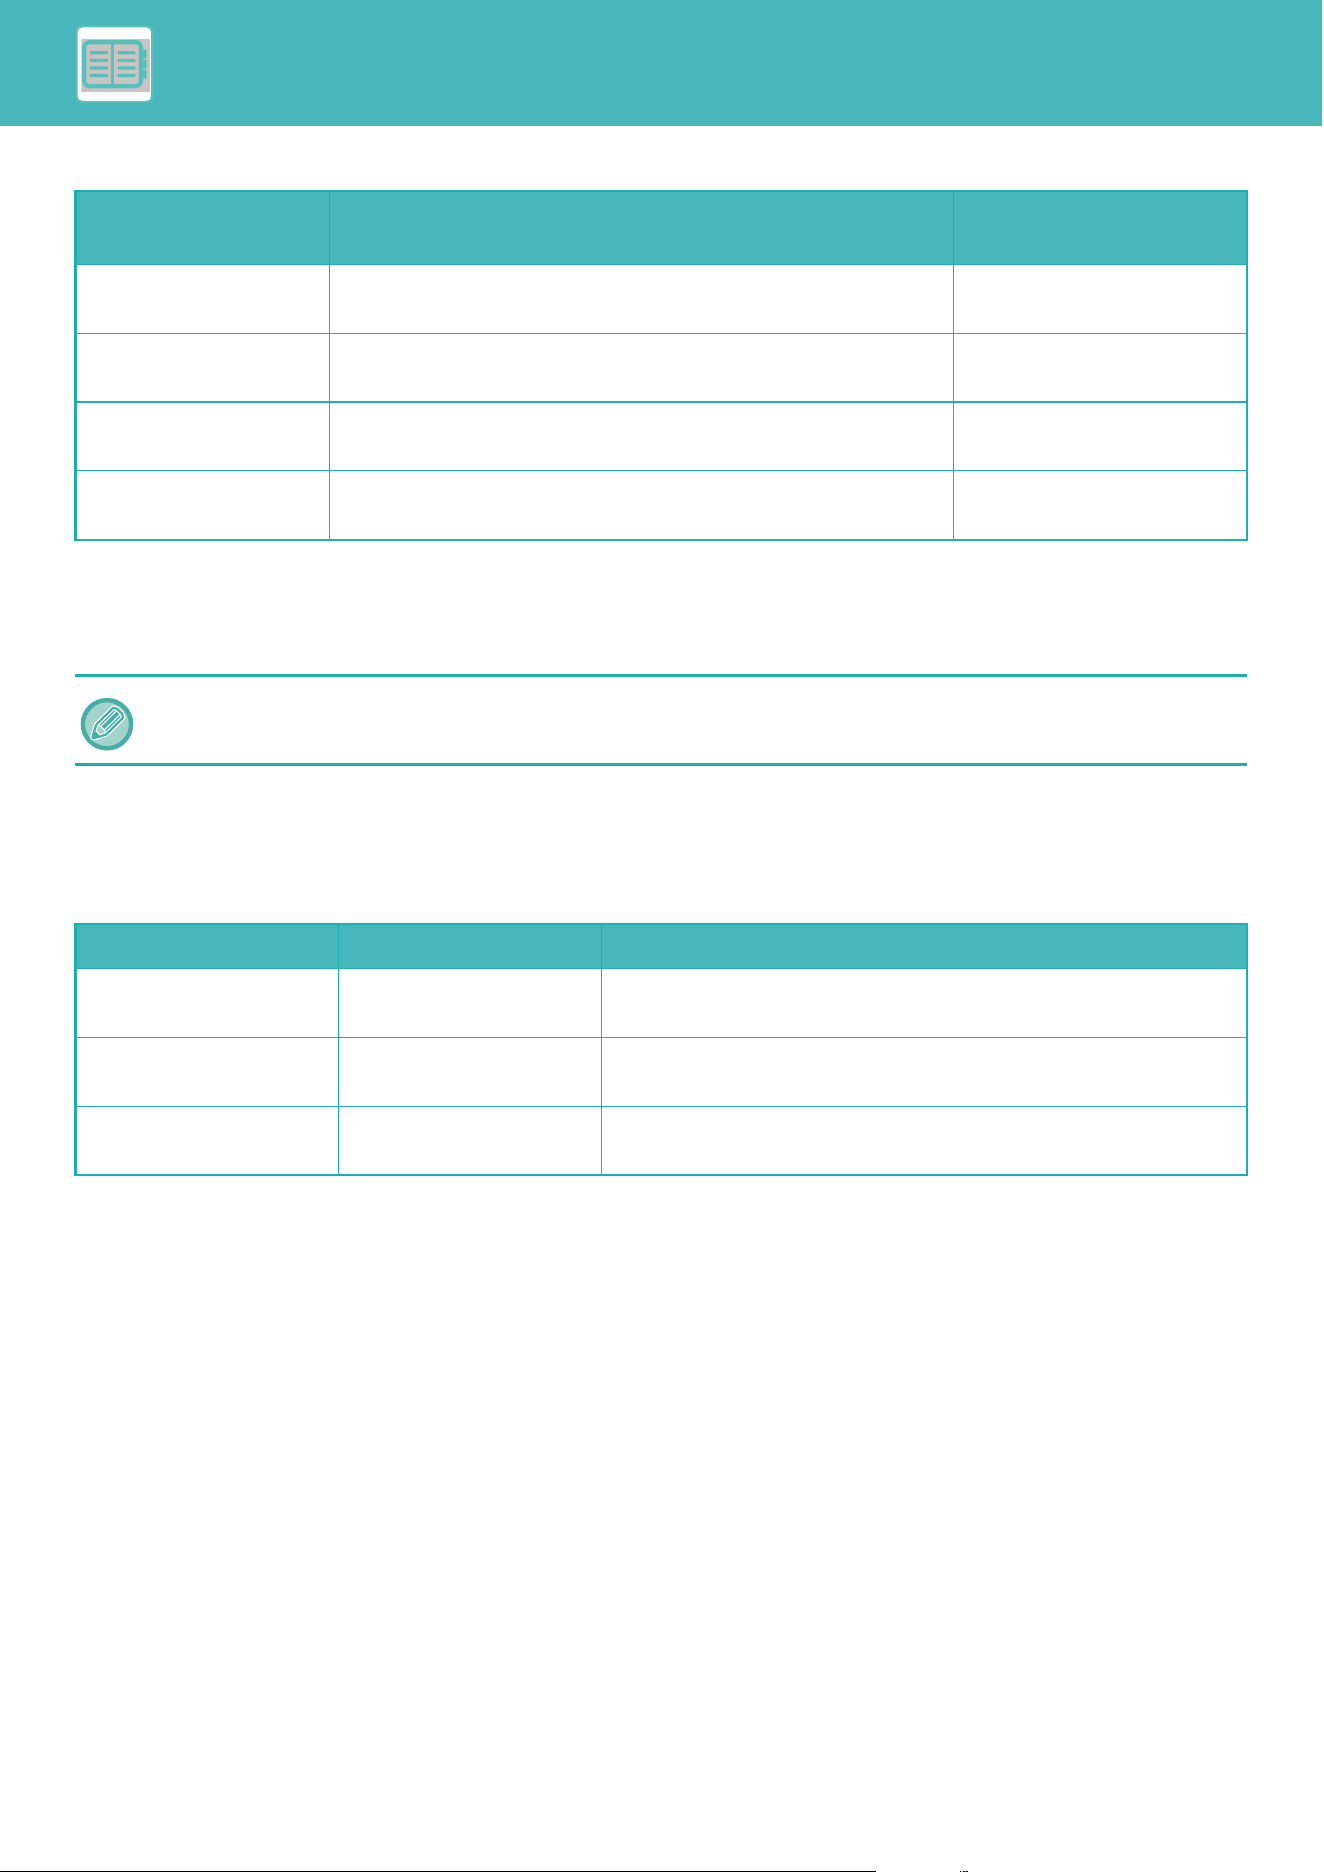
8-5
CONVENIENT USE OF THE MACHINE►USE ENVIRONMENTALLY FRIENDLY
Transition to Energy Saving and Auto Power Shut-Off modes
* Factory default setting
Automatic
This function controls the power optimally for each time period by analyzing the use of machine based on job logs
obtained during a certain time period.
Manual
You can set a pattern for each time band.
The machine already has the 3-pattern template. The Energy Save pattern can be added to the "Original Eco Patterns 1
to 4".
Three-pattern template
Sleep Mode Power Level
Low Power: The machine switches to the power saving mode, but it takes some time to recover.
Fast Wake Up: Compared with Low Power, the power value rises by a certain degree, but it results in faster
recovery.
Pattern Transition time Average outputs per
hour
*
Mode1 (Job Start
Priority1)
After 1 hour 1000 or more
Mode2 (Job Start
Priority2)
After 30 minutes 250 to 999
Mode3 (Energy Saving
Priority1)
After 5 minutes 60 to 249
Mode4 (Energy Saving
Priority2)
After the minimum time period Up to 59
If the machine does not have the 4-week job log information, the machine enters the template2 (Mode3 (Energy Saving
Priority1) between 8:00 and 18:00 hours). Then after that, it enters Mode4 (Energy Saving Priority2).
Template Pattern Description of mode
Template 1 All Day "Energy Save
Priority2"
The machine runs in the "Mode4 (Energy Saving Priority2)" all the
time.
Template 2 8:00-18:00 "Energy Save
Priority1"
The machine runs in "Mode3 (Energy Saving Priority1)" between 8:00
and 18:00, and in "Mode4 (Energy Saving Priority2)" at other times.
Template 3 8:00-18:00 "Job Start
Priority1"
The machine runs in "Mode1 (Job Start Priority1)" between 8:00 and
18:00, and in "Mode4 (Energy Saving Priority2)" at other times.
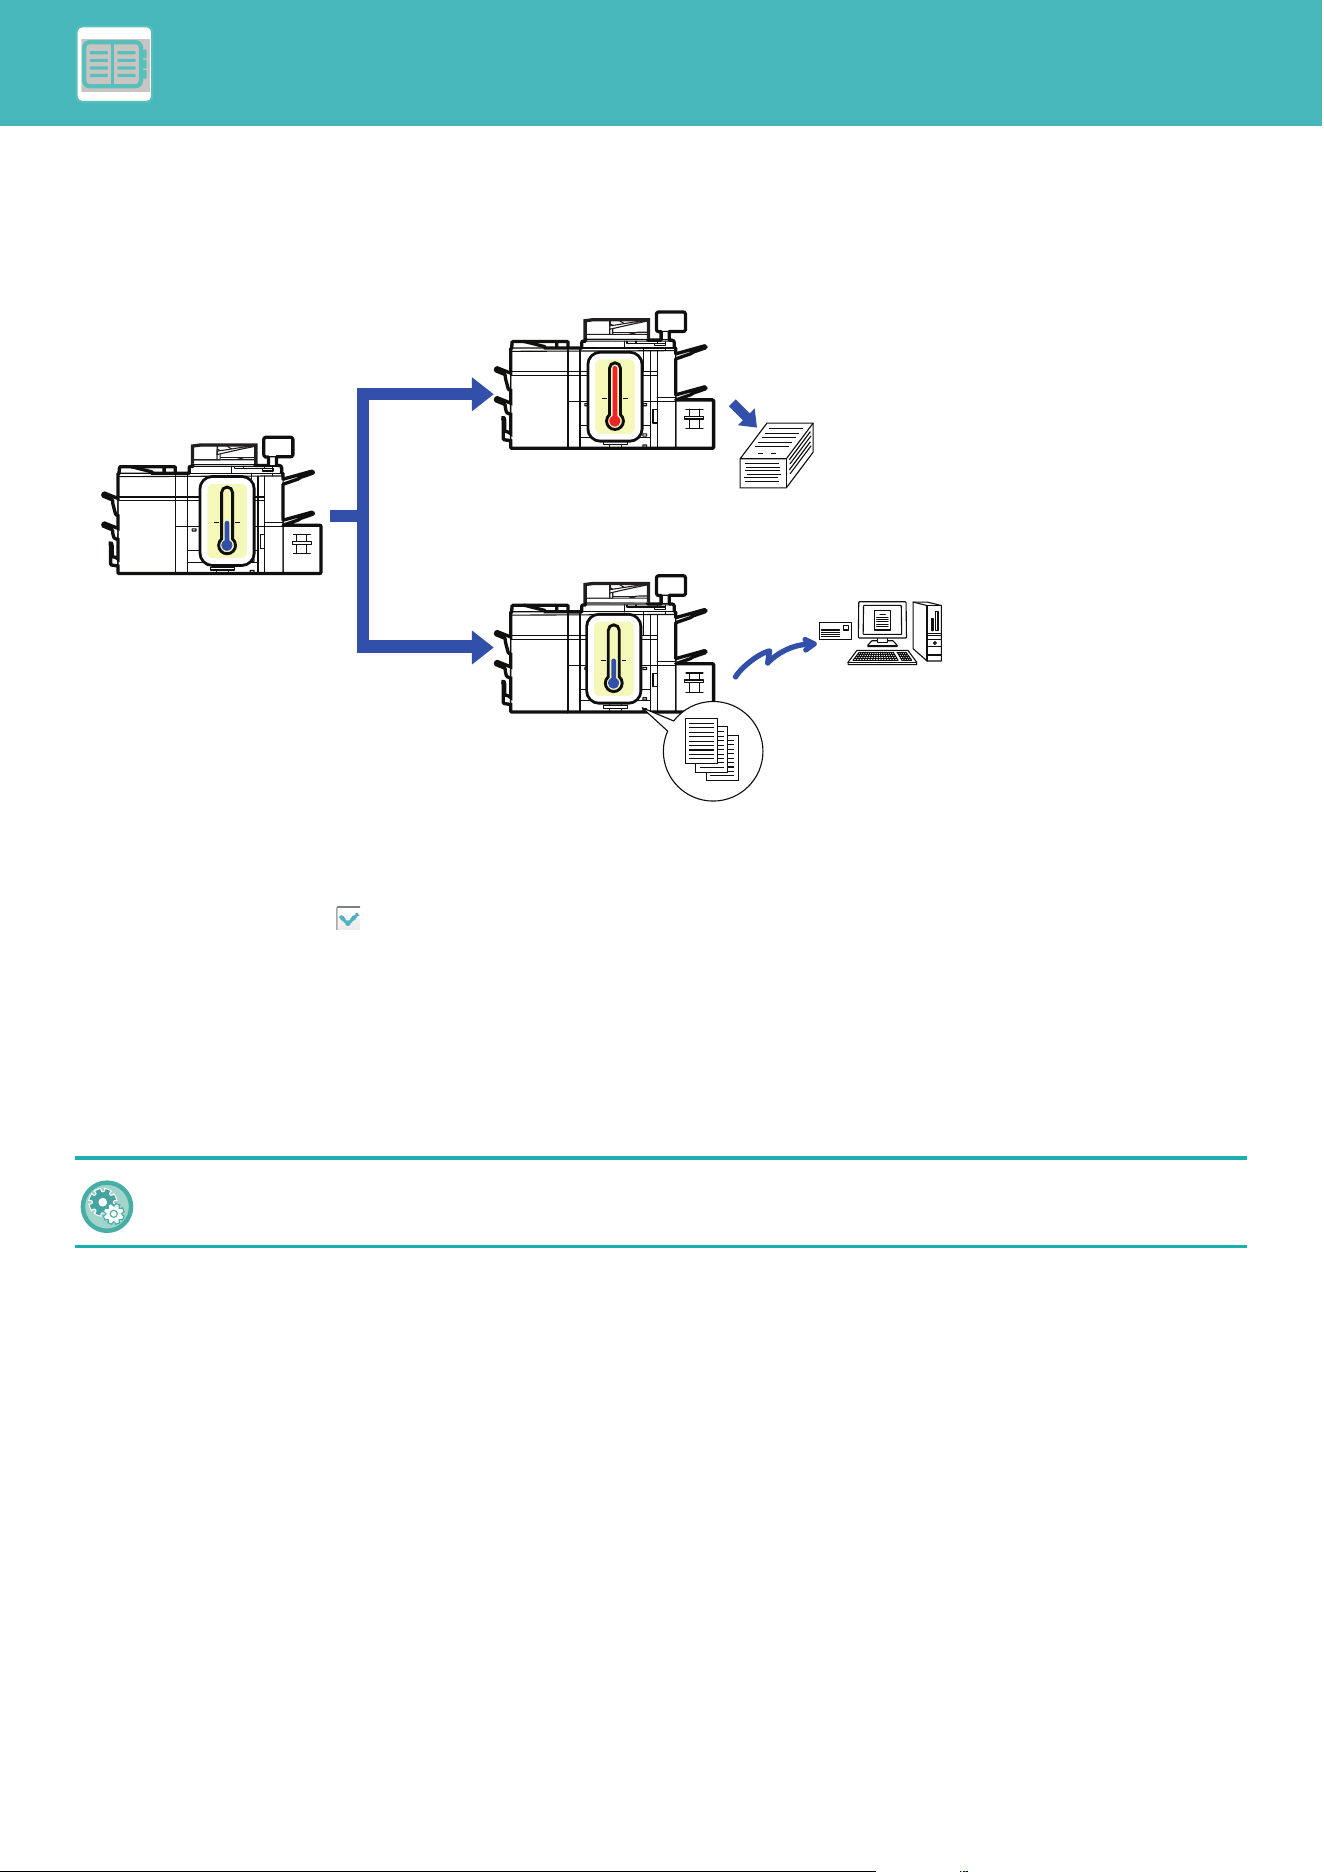
8-6
CONVENIENT USE OF THE MACHINE►USE ENVIRONMENTALLY FRIENDLY
ECO SCAN
Non-print jobs such as sending a scanned original are performed with the fusing unit turned off.
ECO SCAN SETTING
Set “Eco Scan Setting" to , and select a mode or screen in which to enable Eco Scan Setting.
The following modes and screens can be set.
• Home Screen
• Copy
• Image Send
• Document Filing
•System Settings
• Sharp OSA
To set Eco scan:
"Settings (administrator)" → select [System Settings] → [Energy Save] → [Eco Scan Setting].
1
L
Sleep mode
Fusing unit is
turned off
Fusing unit is
turned off
Fusing unit is
turned on
Copy
Print
Image Send
Document Filing
L
L
H
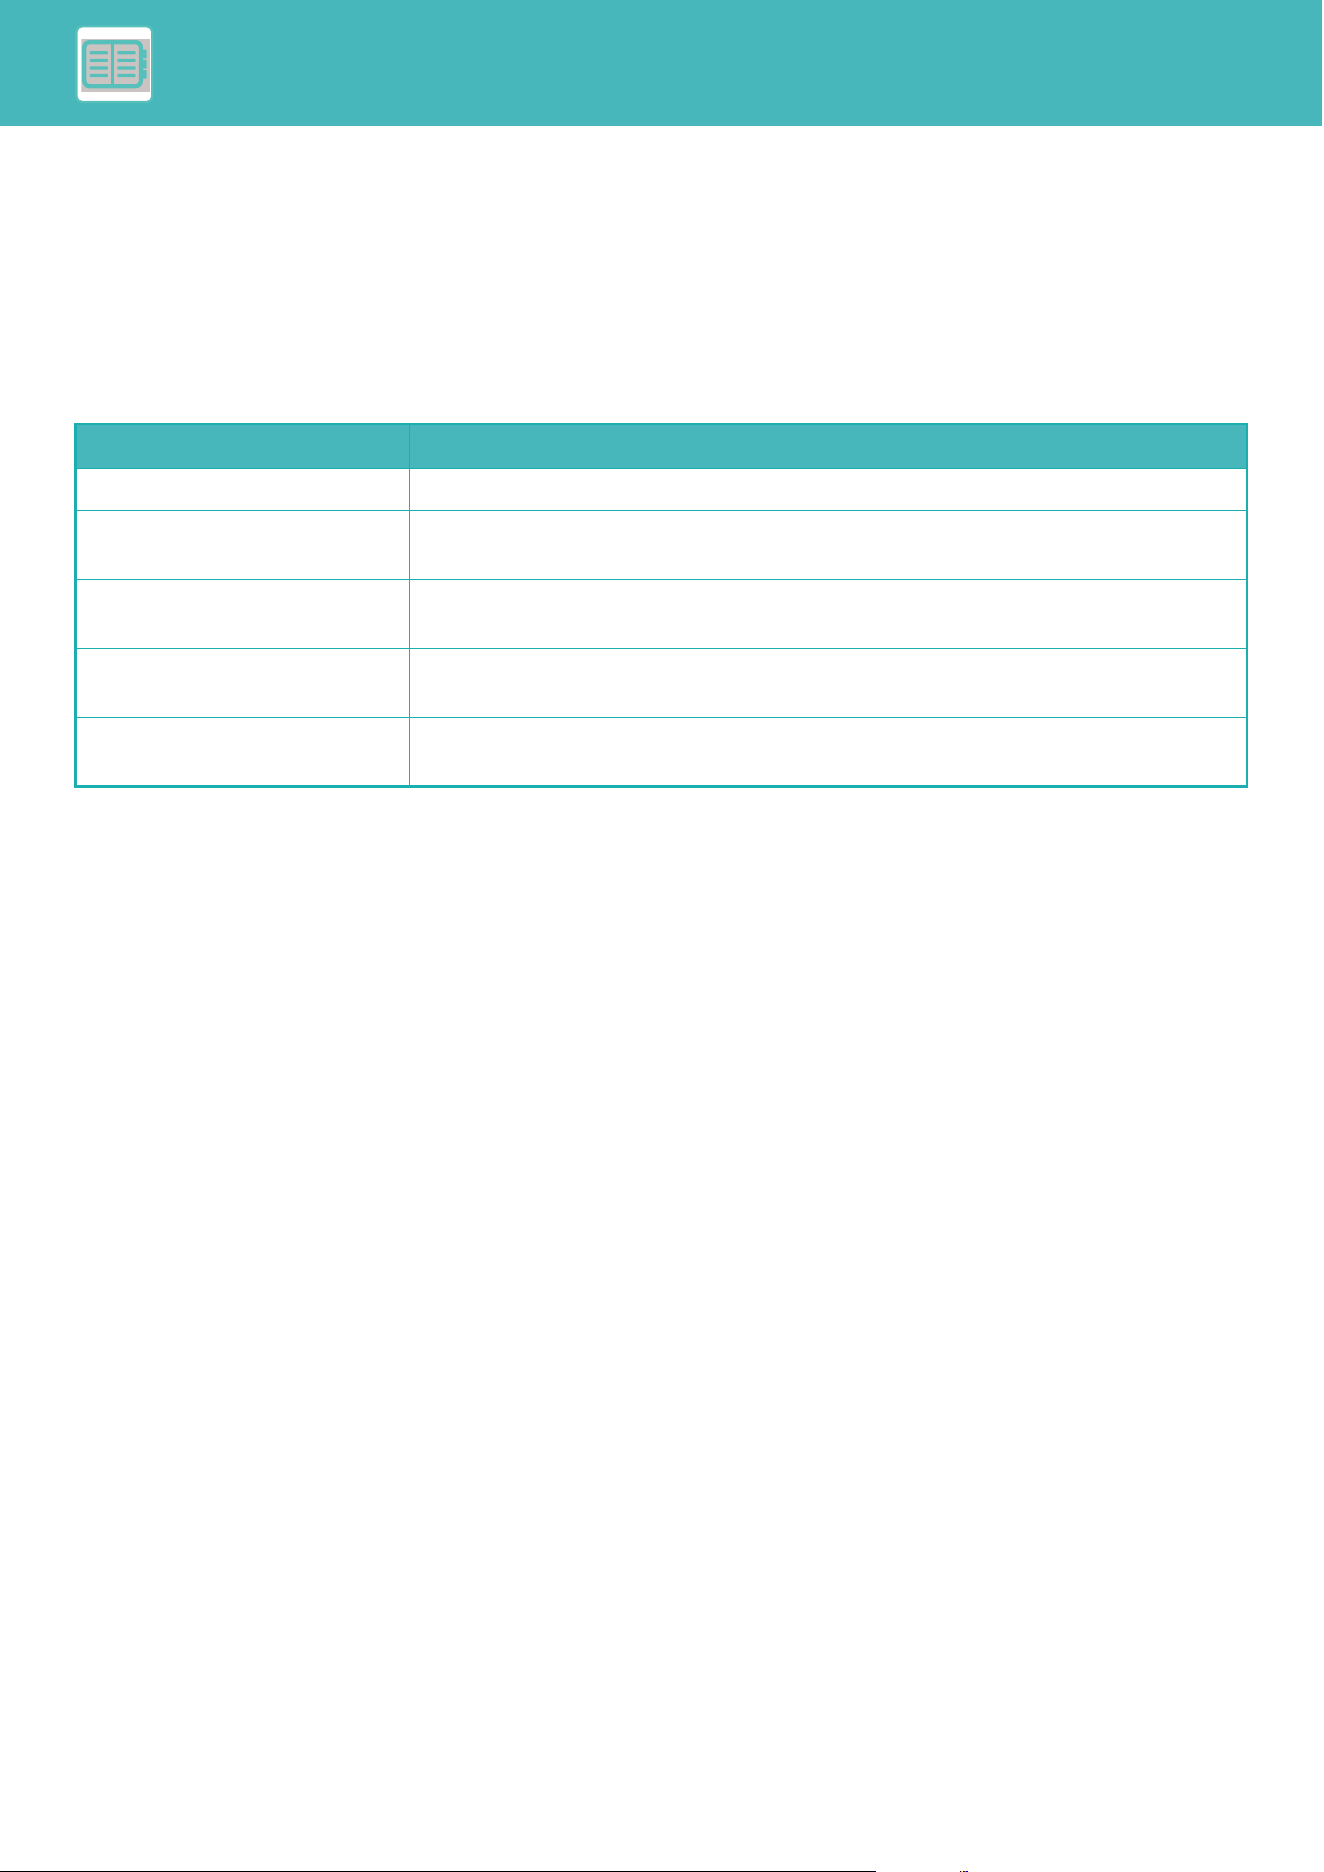
8-7
CONVENIENT USE OF THE MACHINE►USE ENVIRONMENTALLY FRIENDLY
ENERGY SAVING PATTERN LIST
This function analyzes machine usage and controls entry into auto power shutoff mode based on frequency of use. If
you want to manage machine power by using an energy saving pattern list, select [Manual] in "Settings (administrator)"
- [Eco Setting] - [Energy Save] - [Change transition time by time of day.], and select an Automatic Update Pattern from
the pull-down list or one of Original Eco Patterns 1 to 4.
To automatically analyze machine usage and update the pattern as needed, set Automatic Update Pattern.
Edit Pattern
Set the Original Eco Pattern.
Item Description
Change Pattern Name To change the pattern name, enter the desired name.
Pattern to Be Modeled Select the stored pattern that you want to base the new pattern on. To copy the settings of
a selected pattern, select [Copy the selected pattern.].
Energy Save Setting Set time periods for machine modes. Select a mode from 1 to 4, and select a day of the
week, start time, and end time.
Day of the Week Set the day of week on which you want to enable the mode selected in the Energy Save
Setting.
Start Time/Completing Time Set the period of time during which you want to enable the mode selected in the Energy
Save Setting.
8-8
CONVENIENT USE OF THE MACHINE►USE ENVIRONMENTALLY FRIENDLY
POWER ON/OFF SCHEDULE SETTING
The machine operator panel can be turned On or Off at a preset time. Up to three (3) patterns can be set. The "Setting
1", "Setting 2" and "Setting 3" are executed in this sequence if set at the same day of week or at the same clock time.
• The scheduling function does not support the power management settings in the Preheat Mode and Auto Power Shut-Off
Mode.
• The preset power-off time is subject to the following restrictions:
• If the machine is running due to the current job execution or other reasons, the machine is turned off only after the job
has finished.
• The machine cannot receive printer jobs.
• If the Time Specified Output of Received Data setting is enabled, they are output next time the machine is turned on.
• If the power management setting is also enabled, the Power On/Off Scheduling settings precede.
• If the same time is specified, settings are applied in the order of "Setting 1", "Setting 2", and "Setting 3".
• The power is not turned off in the following cases:
• "Power Up Auto Clear" is in progress.
• While the Optimization of a Local Drive is in progress or while a restart is in progress after the setting mode has been
changed.
• The preset power on/off time is within one minute from when the setting is accepted.
Setting Power ON/OFF Scheduling Function
In "Settings", select [System Settings] → [Energy Save] → [Power ON/OFF Schedule Setting].
9:00
12:00
13:00
18:00
ON
ON
OFF
OFF
OFF
Start time
Lunch break
Finish time
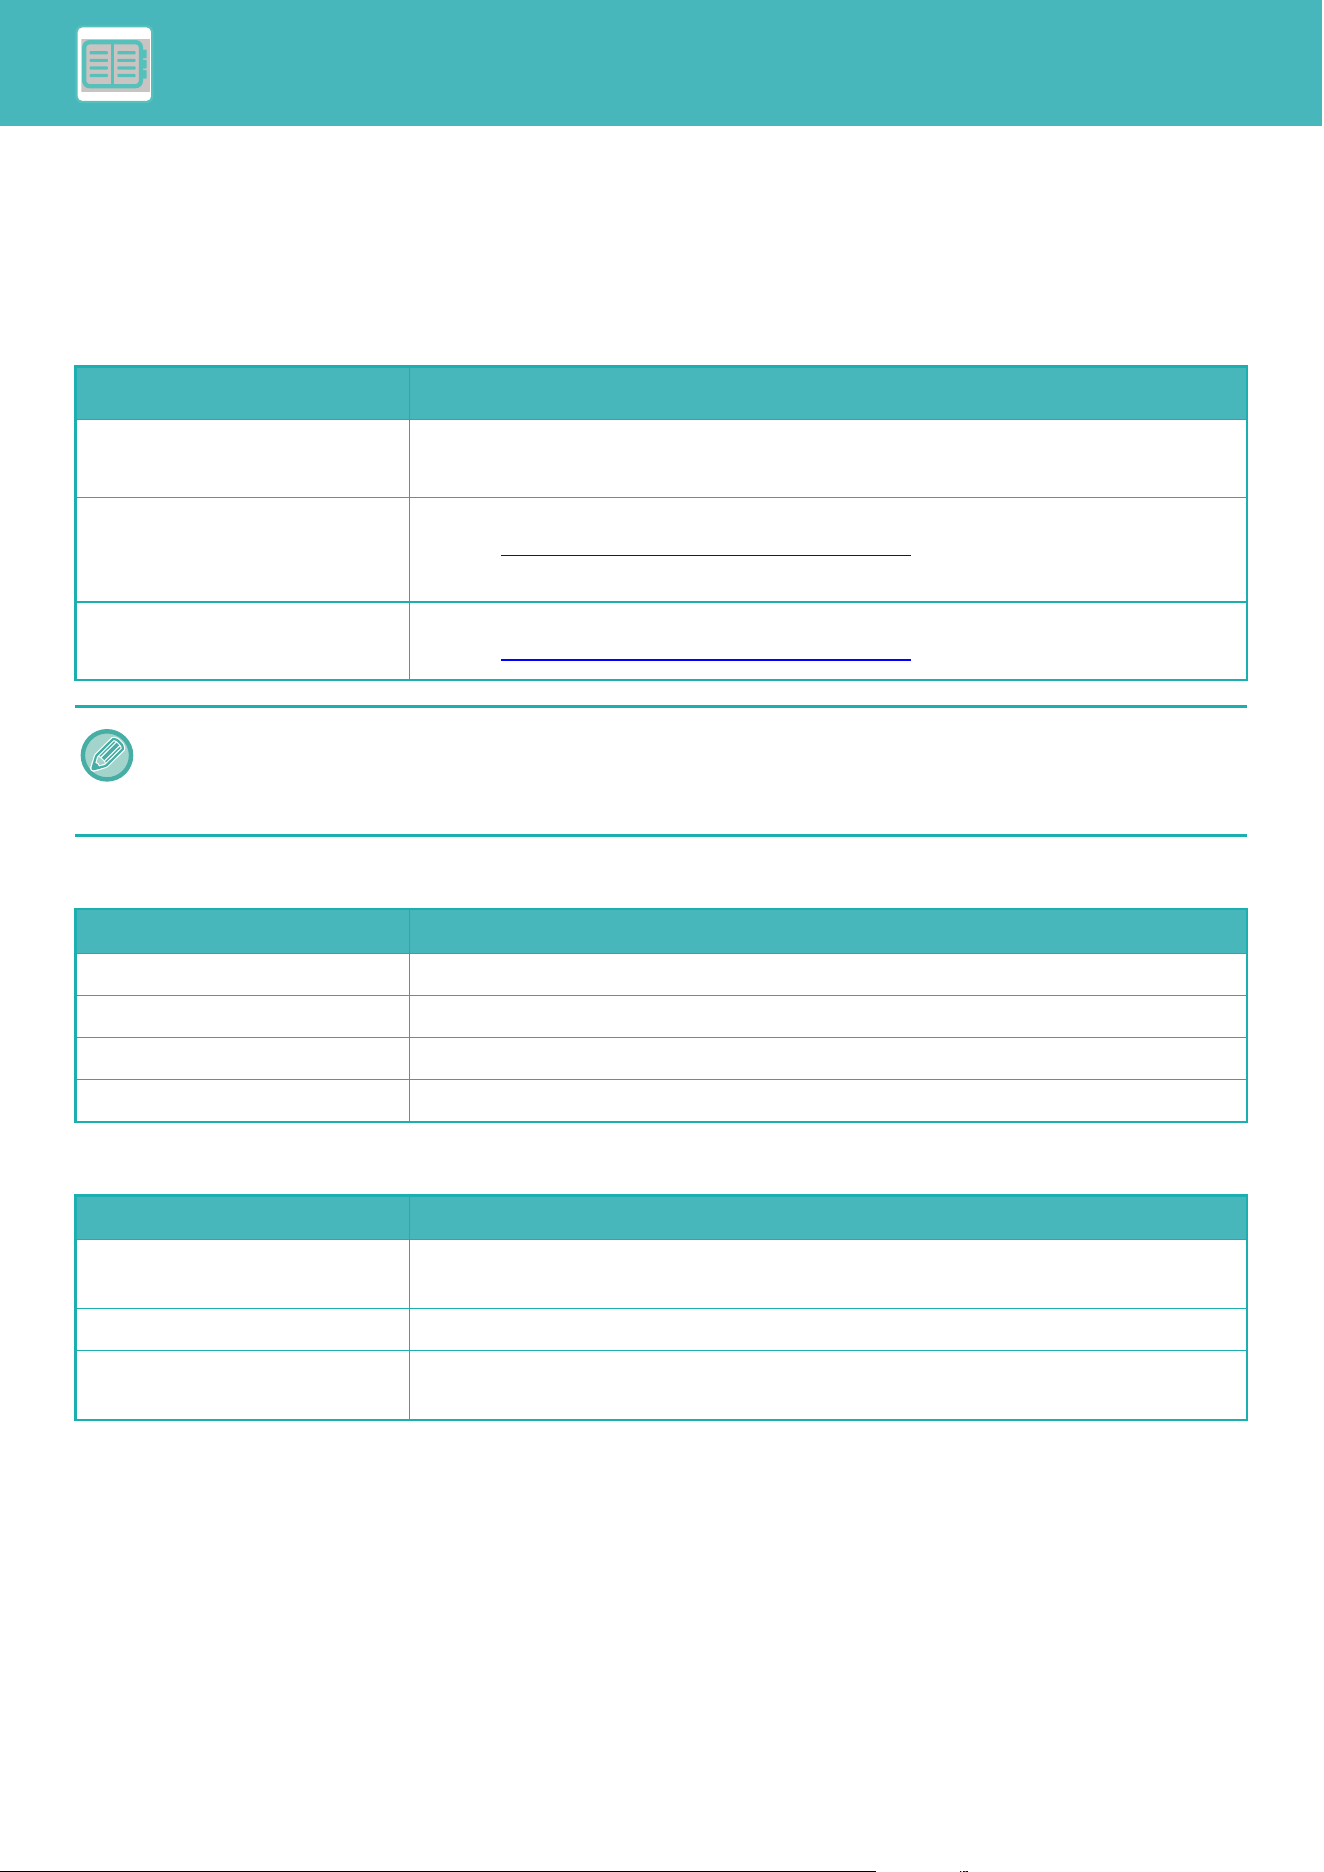
8-9
CONVENIENT USE OF THE MACHINE►USE ENVIRONMENTALLY FRIENDLY
SPECIFIC DATE OPERATION SETTINGS
You can configure a day on which you have high-output printing or want to perform a special operation as the "specific
date" and set a specific energy saving pattern only for that specific date.
"Specific Date" tab
A period of up to 7 days can be set for Specific Date. Set the specific date, energy saving pattern to be applied, and the
operation that takes place if the specific date falls on a non-work day.
"Pattern" tab
This tab is used to configure the details of an energy saving pattern.
"Holiday" tab
Specify a holiday. The day you specified as the holiday will not be a specific date.
Item Description
Date Setting Configure the date on which you want to operate the machine with a specific pattern.
Select a day between 1 and 31 in Every Month or from End of Every Month.
Applied Energy Saving Operation Select an energy saving pattern you want to apply.
Use the ENERGY SAVING PATTERN LIST
(page 8-7) to specify the details of the energy
saving pattern.
Operation for Holiday Configure how the machine operates if the preset specific date falls on a holiday.
Use the ENERGY SAVING PATTERN LIST
(page 8-7) to specify the day as the holiday.
• If a specific date that is initially specified coincides with the one that is moved because it falls on a holiday, the setting for
the former takes precedence.
• If specific dates of the same dates are configured, they are used in ascending order between 1 and 7 (specific date
numbers).
Item Description
Energy Save Operation Select a specific date pattern you want to specify.
Change Pattern Name Enter a pattern name when you want to change the name of a specific date pattern.
Pattern to Be Modeled Select a source pattern when you create a pattern using a stored or preset pattern.
Add new schedule. Add a schedule.
Item Description
Holiday List When you tap this option, the dates and days of the week for the holidays you have set for
two years.
Day of Week Use this option to specify a holiday using a day of the week.
Set Period Use this to specify a holiday using a date.
"Final Registered Time" shows when the holiday that is stored with Set Period was stored.

8-10
CONVENIENT USE OF THE MACHINE►USE ENVIRONMENTALLY FRIENDLY
DISPLAYING ECO RECOMMENDATION SETTINGS
(ECO RECOMMENDATION FUNCTION DISPLAY)
When the base screen of normal mode is displayed, eco recommendation settings appear.
The displayed functions are as follows.
• 2-Sided Copy►page 3-20
• N-Up►page 3-63
• B/W Copy►page 3-20
• Image Orientation►page 3-32
TONER SAVE MODE
This mode is used to reduce toner consumption.
Toner consumption can be set for each print job of "Copy", "Printer", and "Prints (Document Filing)".
Toner consumption can be selected from three levels.
• Toner Save1 (Toner Consumption: Much)
• Toner Save2 (Toner Consumption: Middle)
• Toner Save3 (Toner Consumption: Little)
This function does not operate in easy mode.
To use the eco recommendation function display:
"Settings (administrator)" → [System Settings] → [Energy Save] → [Eco Setting] → [Eco Recommendation Function
Display].
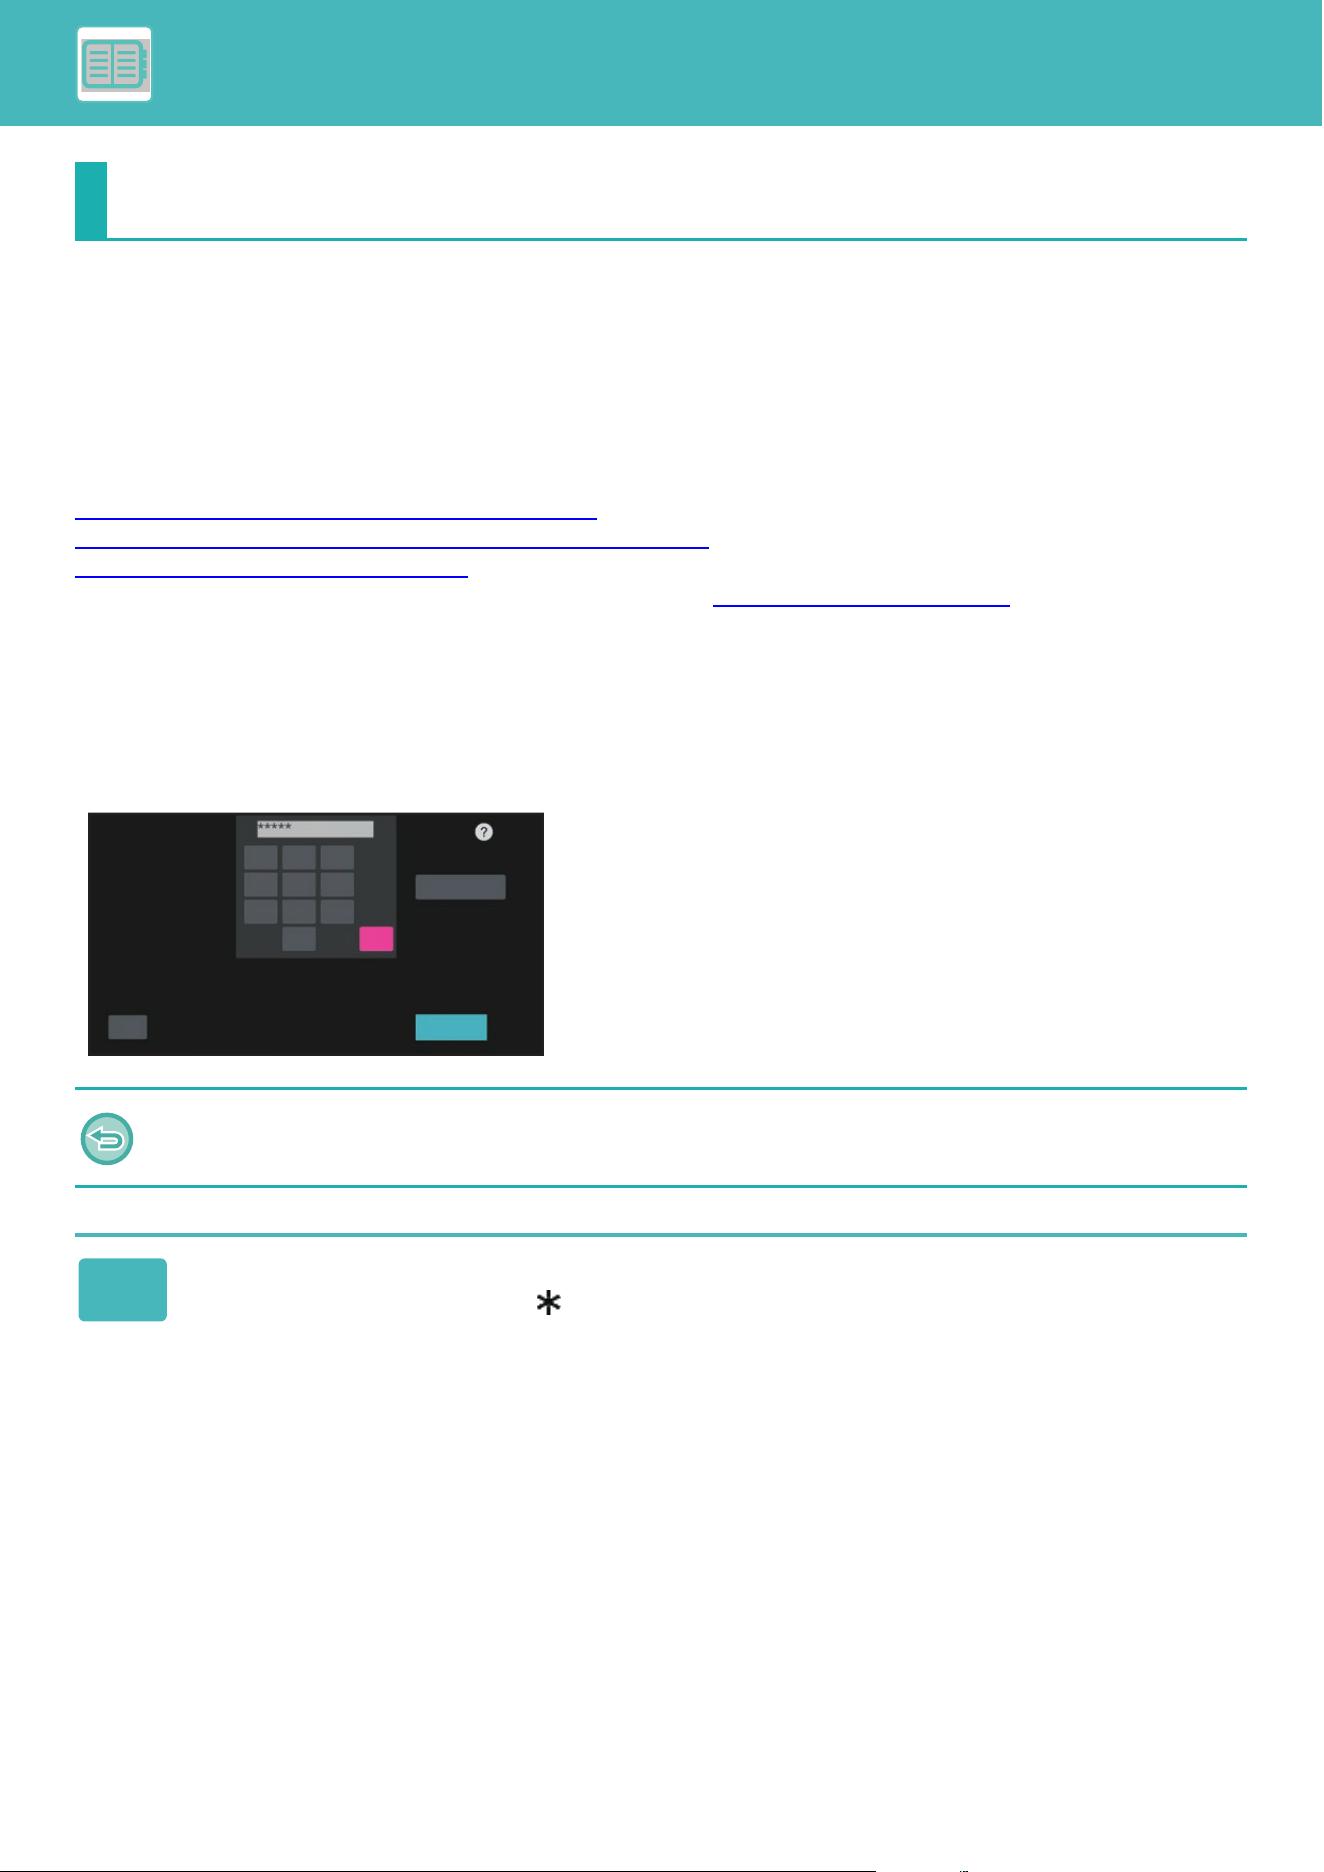
8-11
CONVENIENT USE OF THE MACHINE►MANAGING THE USE OF THE MACHINE
USER AUTHENTICATION
User authentication restricts the use of the machine to users that have been registered. The functions that each user is
allowed to use can be specified, allowing the machine to be customized to meet the needs of your workplace.
When the administrator of the machine has enabled user authentication, each user must log in to use the machine.
There are different types of user authentication, and each type has a different login method.
For more information, see the explanations of the login methods.
AUTHENTICATION BY USER NUMBER
(page 8-11)
AUTHENTICATION BY LOGIN NAME/PASSWORD (page 8-12)
QUICK AUTHENTICATION (page 8-16)
For the settings that are required for user authentication, refer to USER CONTROL (page 8-19).
AUTHENTICATION BY USER NUMBER
The following procedure is used to log in using a user number received from the administrator of the machine.
When starting the machine, the login screen appears.
When controlled by user number
MANAGING THE USE OF THE MACHINE
If "A Warning when Login Fails" is enabled in the system settings, the operation panel will be locked for five minutes if an
incorrect user number is entered three times in a row.
Contact the machine administrator to check the user number assigned for you.
1
Enter your user number (5 to 8 digits) using the numeric keys.
Each entered digit will be displayed as " ".
1
4
7
5
8
6
9
2
0
3
C
User Authentication
Enter your
user number.
CA
Admin Login
OK
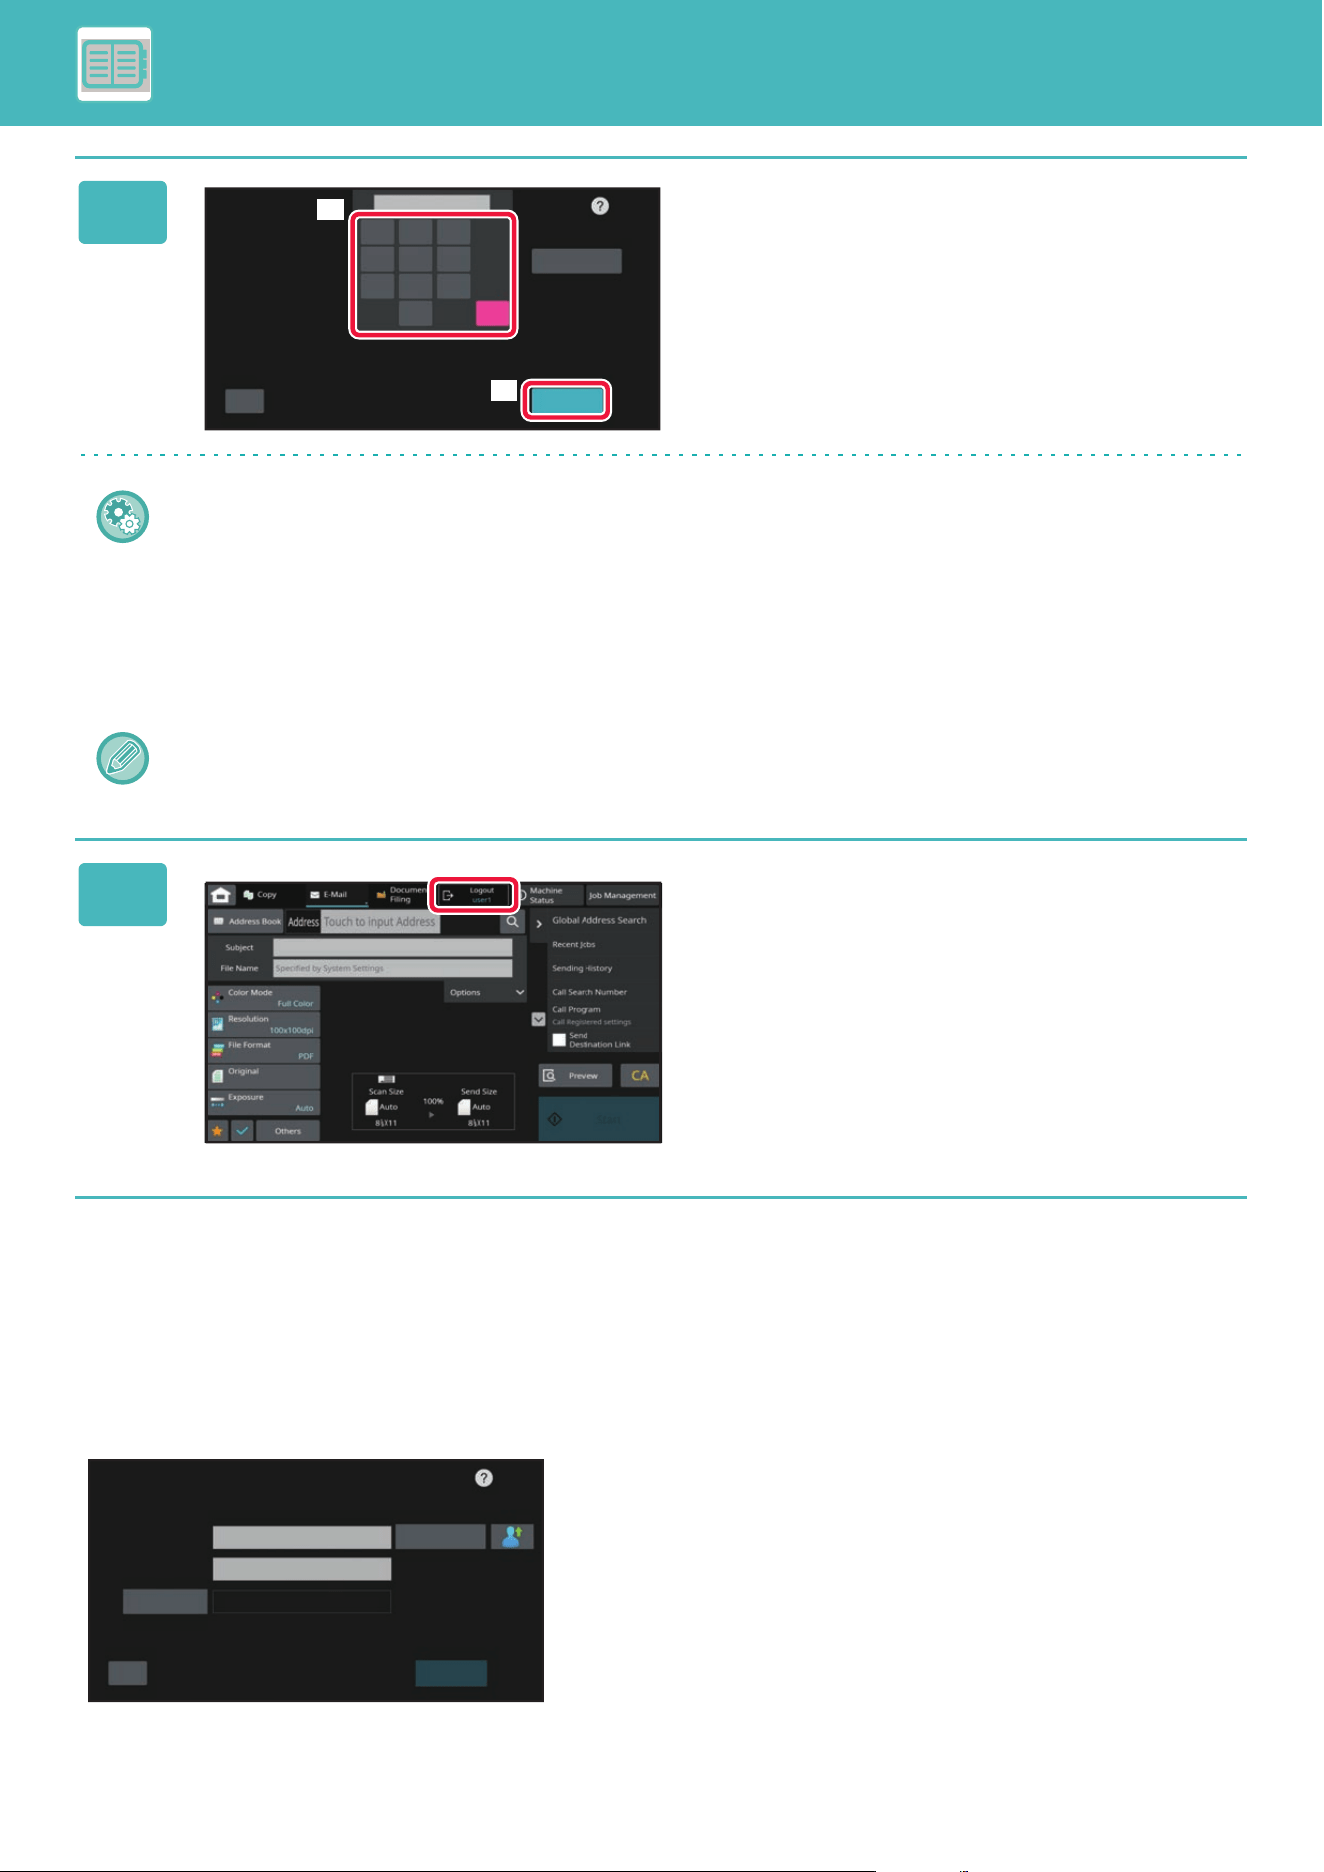
8-12
CONVENIENT USE OF THE MACHINE►MANAGING THE USE OF THE MACHINE
AUTHENTICATION BY LOGIN NAME/PASSWORD
This method enables users to log in using a login name and password received from the administrator of the machine or
the administrator of the LDAP server.
When starting the machine, the login screen appears.
When controlled by login name and password
2
Tap the [OK] key.
If the entered user number is authenticated, the number of
remaining pages that the user can copy or scan is displayed.
When a limitation is set for the number of pages that a user
can use, the use count for the user that has logged in is
displayed.
• To limit the number of pages that a user can use:
In "Settings (administrator)", select [User Control] → [Access Control Settings] → [Pages Limit Group].
• To hide the number of pages that can be used after login:
In "Settings (administrator)", disable [System Settings] → [Authentication Settings] → [Default Settings] → [Display Us-
age Status after Login].
• To change the message display time:
In "Settings" (administrator)", select [System Settings] → [Common Settings] → [Operation Settings] → [Condition Set-
tings] → [Message Time Setting].
When the user number is an 8-digit number, this step is not necessary. Login takes place automatically after the user
number is entered.
3
When you have finished using the
machine and are ready to log out, tap
[Logout].
*****
1
4
7
5
8
6
9
2
0
3
C
User Authentication
Enter your
user number.
CA
Admin Login
OK
(1)
(2)
User Authentication
Enter login name and password.
Login Name
Password
Touch to input Log-in Name
Touch to Input Password
Login Locally
CA
Select from List
OK
Auth to
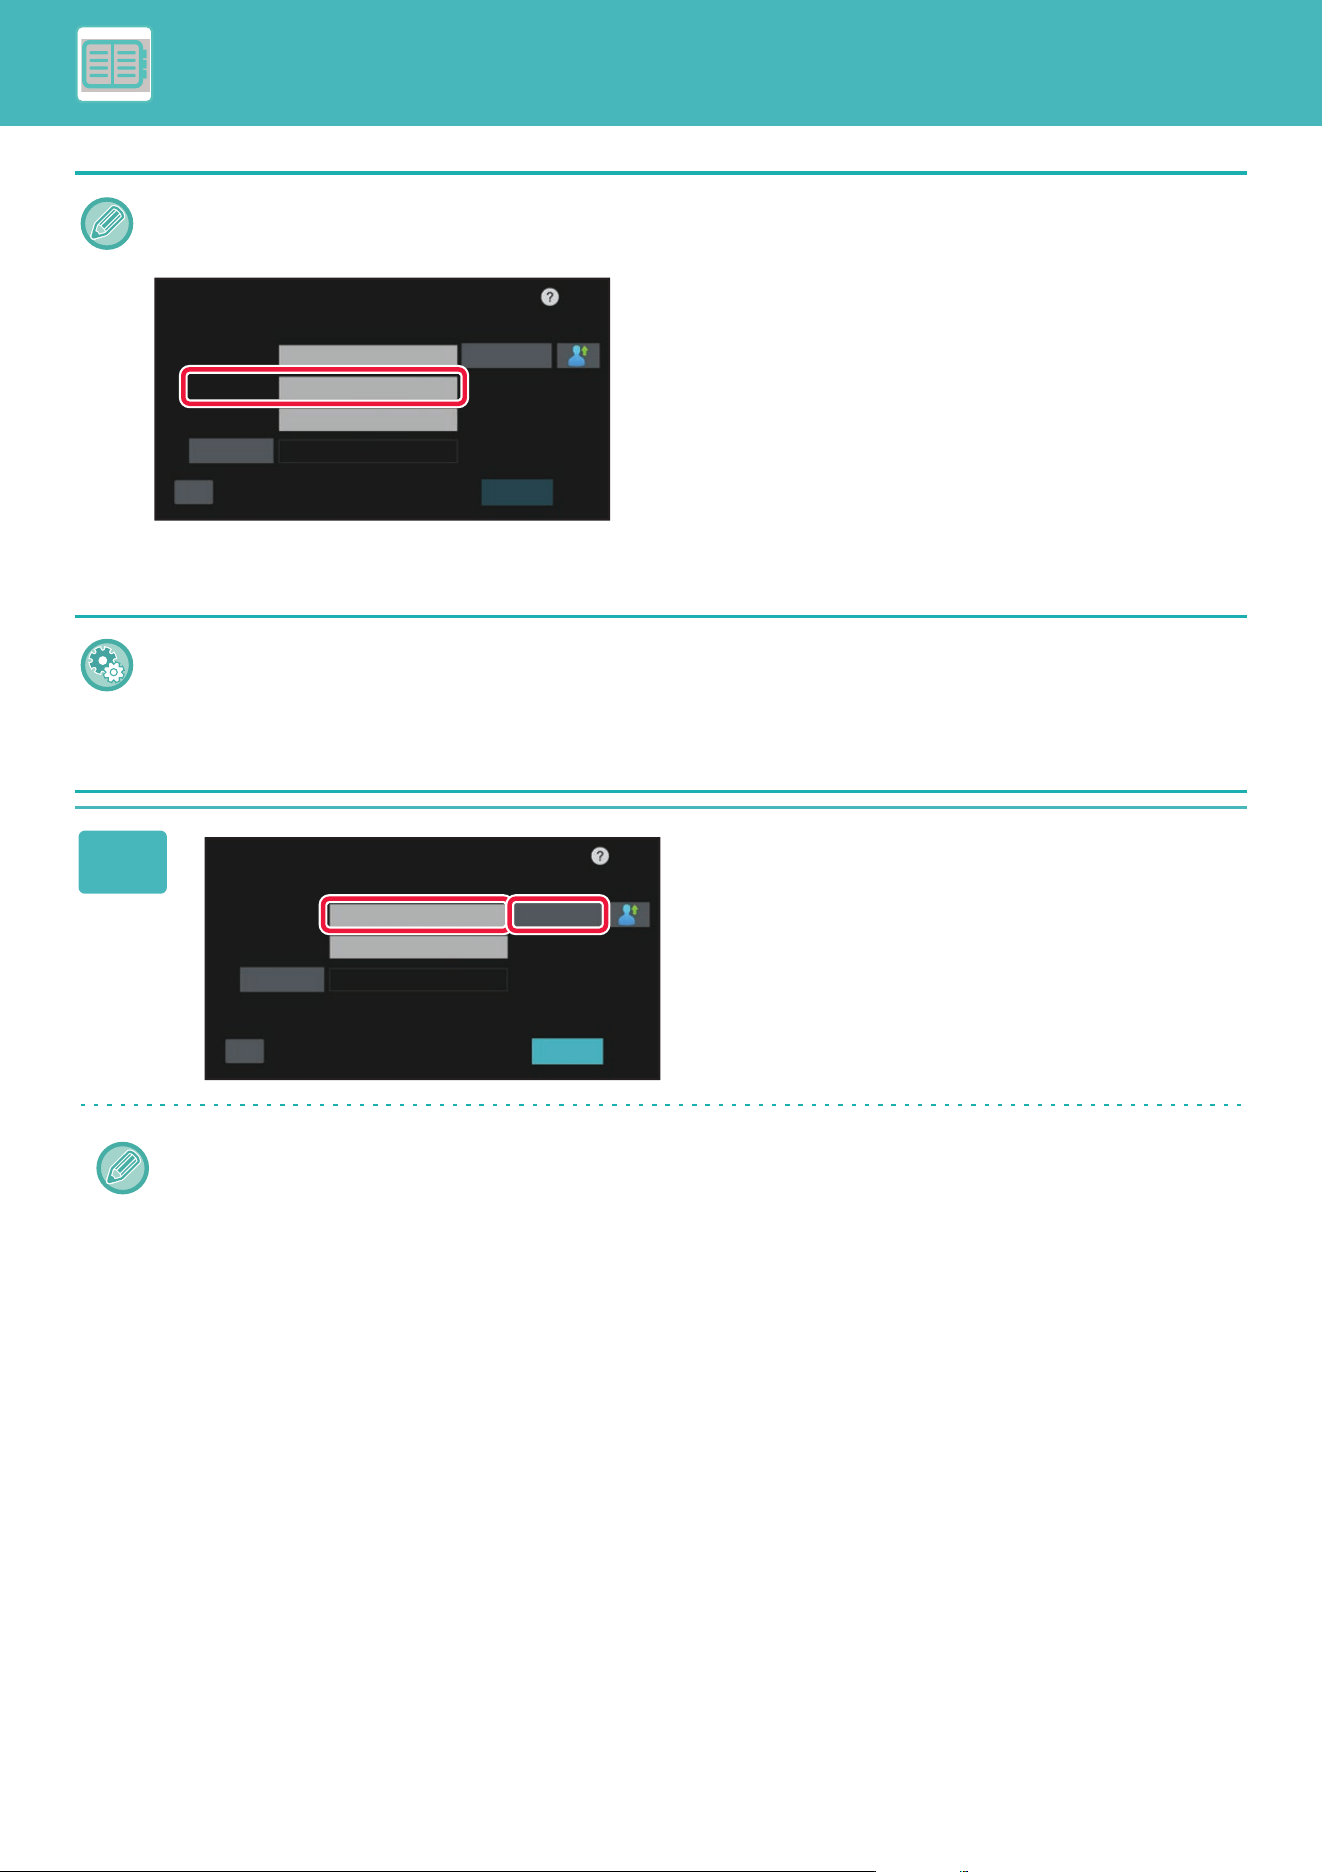
8-13
CONVENIENT USE OF THE MACHINE►MANAGING THE USE OF THE MACHINE
• Different items may appear in the screen when LDAP authentication is used.
• When LDAP authentication is used, the [E-mail Address] key may appear, depending on the authentication method. Tap
the [E-mail Address] text box and enter your e-mail address.
• If "A Warning when Login Fails" is enabled in the system settings, the operation panel will be locked for five minutes if an
incorrect login name or password is entered three times in a row.
Contact the machine administrator to check the login name/password assigned to you.
• To set [A Warning when Login Fails]:
In "Settings (administrator)", select [System Settings] → [Authentication Settings] → [A Warning when Login Fails].
• To store a user name:
In "Settings (administrator)", select [User Control] → [User Settings] → [User List].
Also register detailed information such as the login name, user number, and password. Ask the administrator of the machine
for the information that you need to use the machine.
1
Enter the login name.
Entering using the soft keyboard
If user name registration has not been performed in setting
mode, a user only using LDAP authentication should tap the
[Login Name] text box and enter the login name using the
soft keyboard.
Selecting from a list
Tap the [Select from List] key and select a user name from
the User List screen.
LDAP authentication can be used when the administrator of the server provides LDAP service on the LAN (local area
network).
CA
OK
User Authentication
Select from List
Login Name
E-mail Address
Touch to input Log-in Name
Touch to input E-mail Address
Password
Auth to
Touch to Input Password
Login Locally
Please enter Log-in name/E-mail
address/password.
User Authentication
Enter login name and password.
Login Name
Password
User001
*************************...
Login Locally
CA
OK
Select from List
Auth to
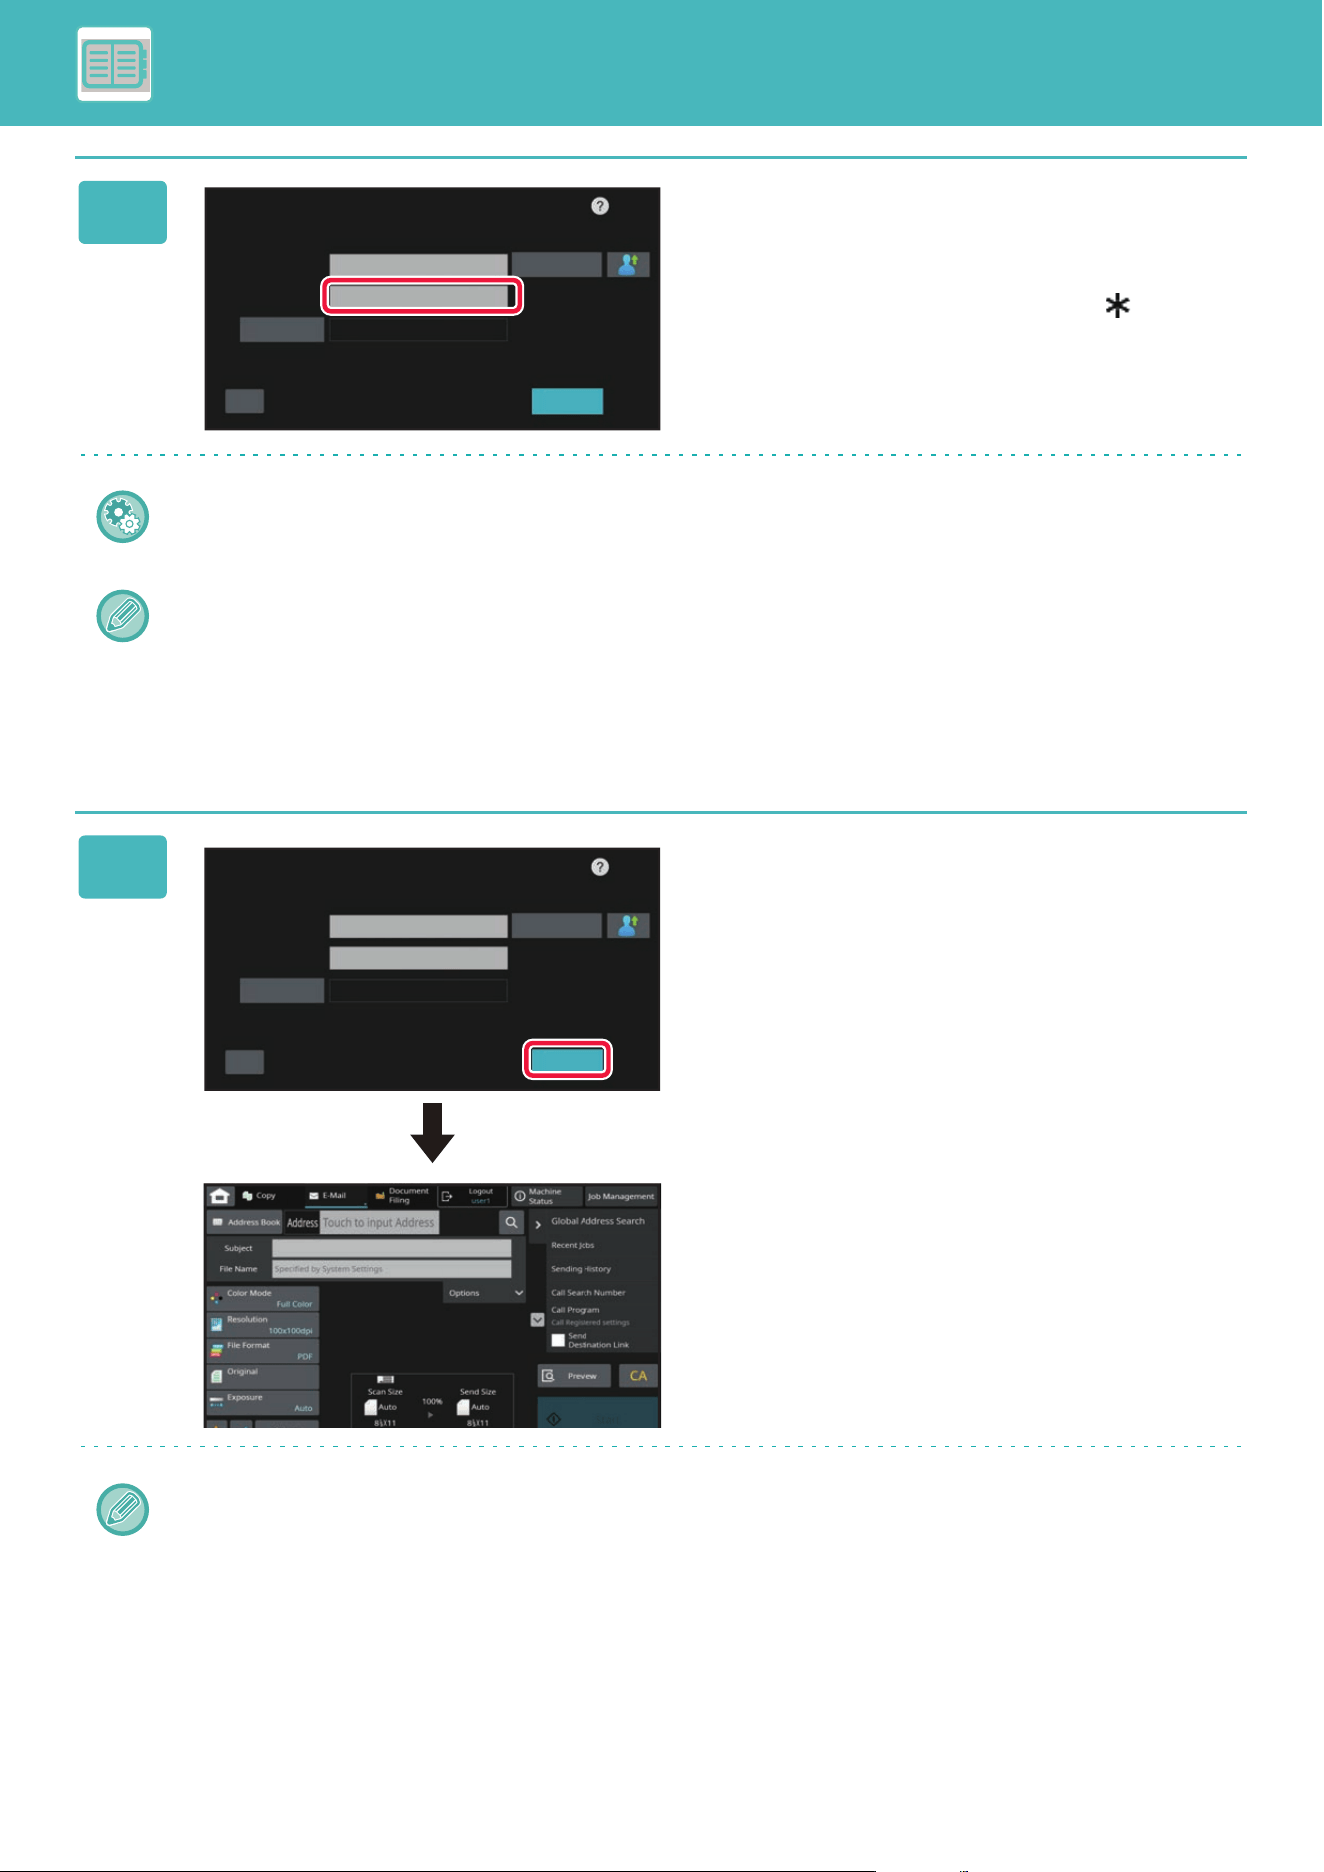
8-14
CONVENIENT USE OF THE MACHINE►MANAGING THE USE OF THE MACHINE
2
Enter the password.
Enter the from the soft keyboard.
If you are logging in to an LDAP server, enter the password
that is stored with your LDAP server login name.
Each entered character will be displayed as “ ". After
entering the , tap the [OK] key.
When authentication is by LDAP server and you have
different passwords stored in "User List" and in the LDAP
server, use the password stored in the LDAP server.
To have the user name and password registered:
In "Settings (administrator)", select [User Control] → [User Settings] → [User List].
When registering the LDAP server, change the information for [Auth to] as required.
• When selecting from the User List screen:
The LDAP server you are connecting to has been registered upon user registration, and so the target server to which
authentication should be directed appears when the login name is selected.
Go to step 3.
• When entering from the soft keyboard:
Tap [Auth to] and select the LDAP server to log in.
3
Tap the [OK] key.
If the entered login name and password are authenticated,
the number of remaining pages that the user can copy or
scan is displayed.
When a limitation is set for the number of pages that a user can use, the use count for the user that has logged in is
displayed.
User Authentication
Enter login name and password.
Login Name
Password
User001
*************************...
Login Locally
CA
OK
Select from List
Auth to
User Authentication
Enter login name and password.
Login Name
Password
Login Locally
CA
OK
Select from List
Auth to
User001
*************************...
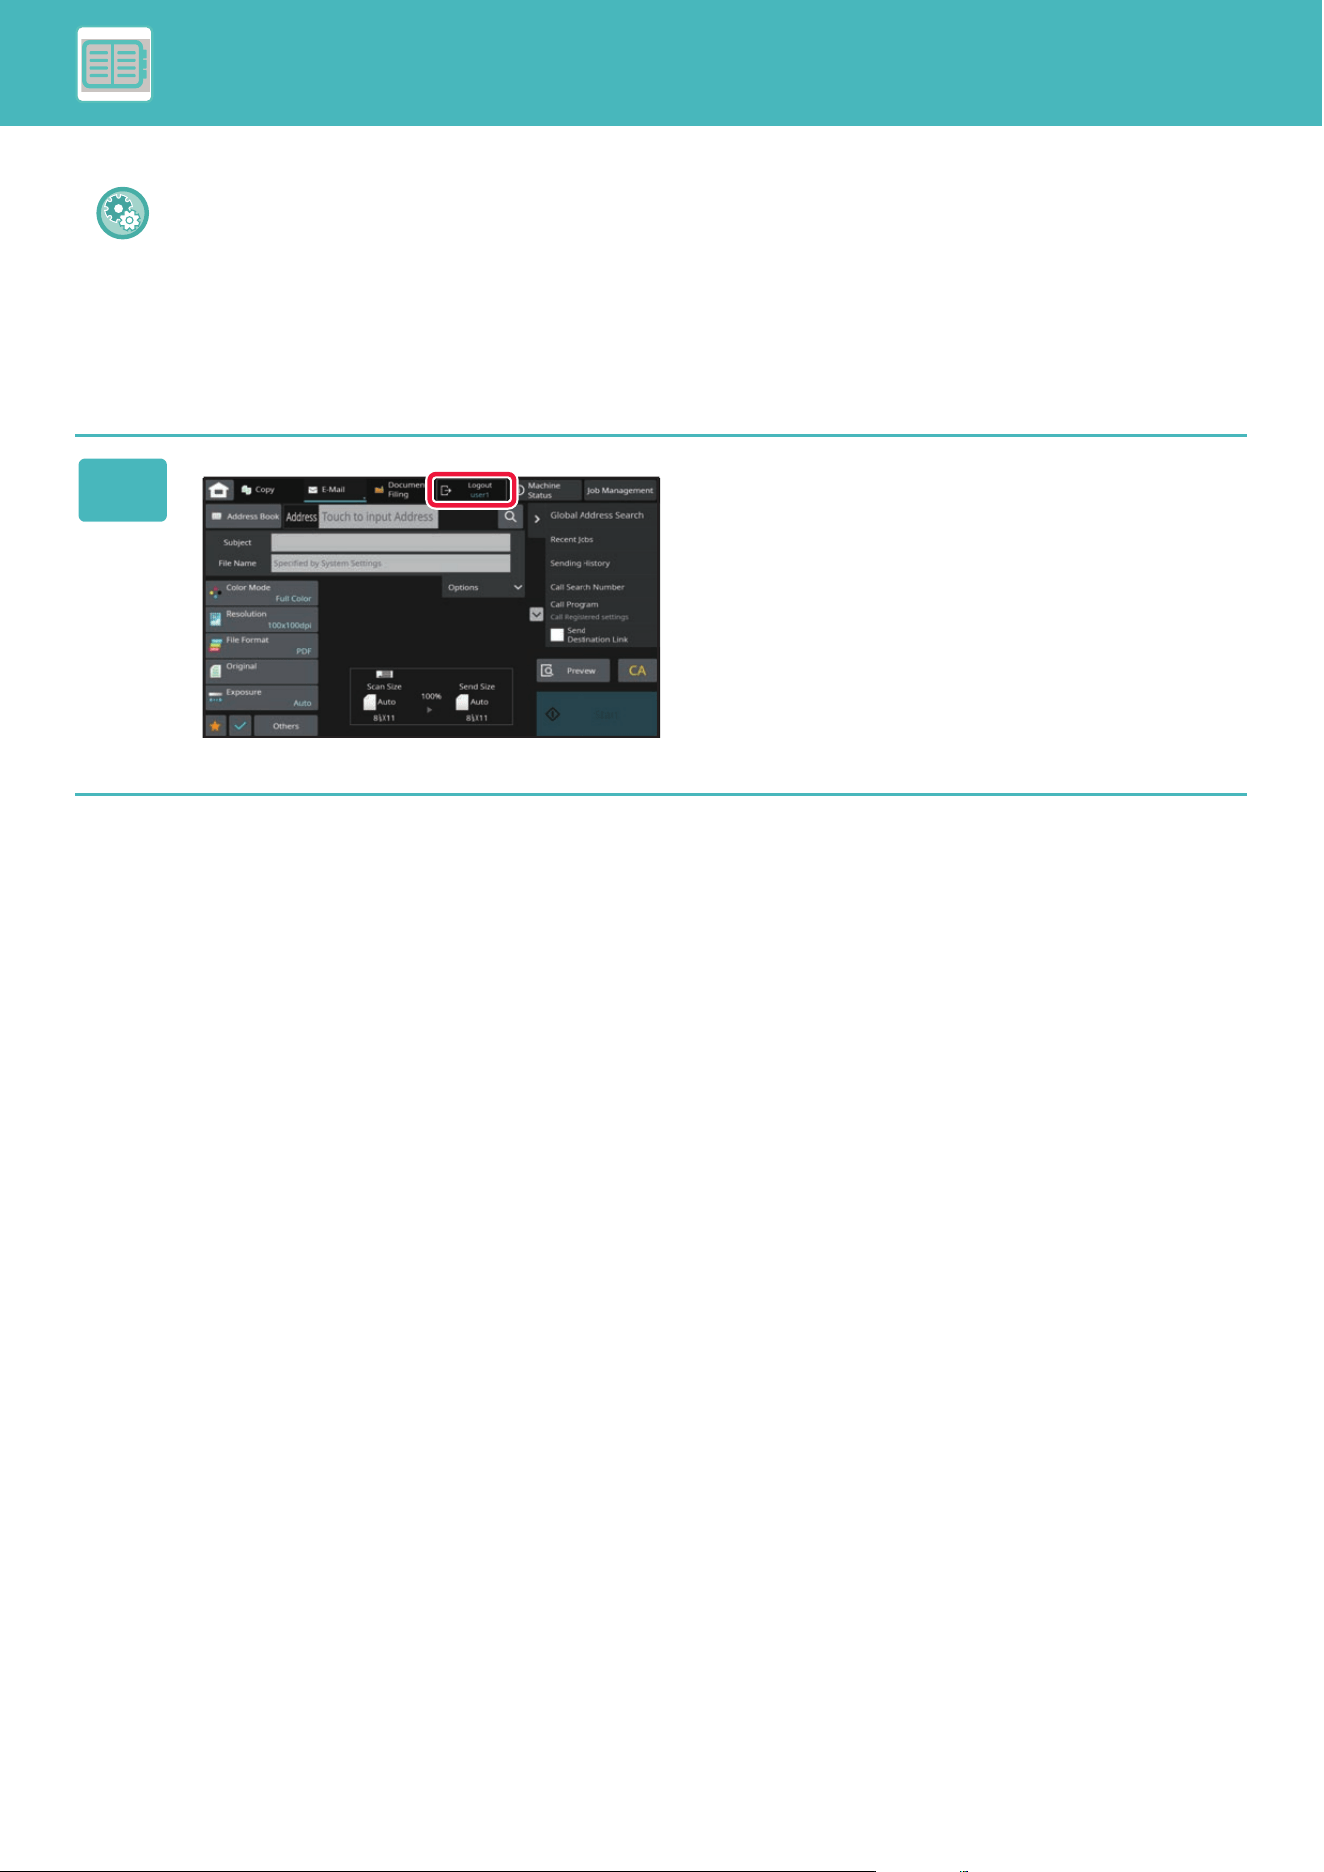
8-15
CONVENIENT USE OF THE MACHINE►MANAGING THE USE OF THE MACHINE
• To limit the number of pages that a user can use:
In "Settings (administrator)", select [User Control] → [Access Control Settings] → [Pages Limit Group].
• To hide the number of pages that can be used after login:
In "Settings (administrator)", disable [System Settings] → [Authentication Settings] → [Default Settings] → [Display Us-
age Status after Login].
• To change the message display time:
In "Settings" (administrator)", select [System Settings] → [Common Settings] → [Operation Settings] → [Condition Set-
tings] → [Message Time Setting].
4
When you have finished using the
machine and are ready to log out,
tap [Logout].

8-16
CONVENIENT USE OF THE MACHINE►MANAGING THE USE OF THE MACHINE
QUICK AUTHENTICATION
When operating the machine, this enables easy authentication by tapping a preconfigured icon.
Register users with quick authentication
When registering users with quick authentication, the User Administration Settings and Web page settings used when
registering normal users cannot be used. Registration is carried out on the quick authentication login screen.
• Up to 20 users can be registered.
• Only the machine supports quick authentication. Web page authentication and authentication from a printer driver cannot
be used. To use web page authentication and authentication from a printer driver, enter to authenticate.
• Quick authentication cannot use IC card authentication or device account mode.
• If [A Warning when Login Fails] is enabled in the system settings, the operation panel will be locked for five minutes if an
incorrect password is entered three times in a row. Contact the machine administrator to check the password assigned to
you.
To use quick authentication
In "Settings (administrator)", enable [System Settings] → [Authentication Settings] → [Default Settings] → [Enable Quick
Login].
For the authentication server settings, set "Login Locally", and for the authentication method settings, set "Login
Name/Password".
1
Tap [Add user/Edit user registration]
on the action panel.
2
Tap the position you wish to register.
This switches to the user registration screen.
When tapping an icon that is already registered, this
switches to the user information edit screen.
Details to edit are the same as the settings details in
registering a new user screen. See step 3 when editing.
Quick Login
Add user/
Edit user registration
Machine
Status
Job Management
Admin Login
Home
Add/Edit user
Machine
Status
Job Management
Home
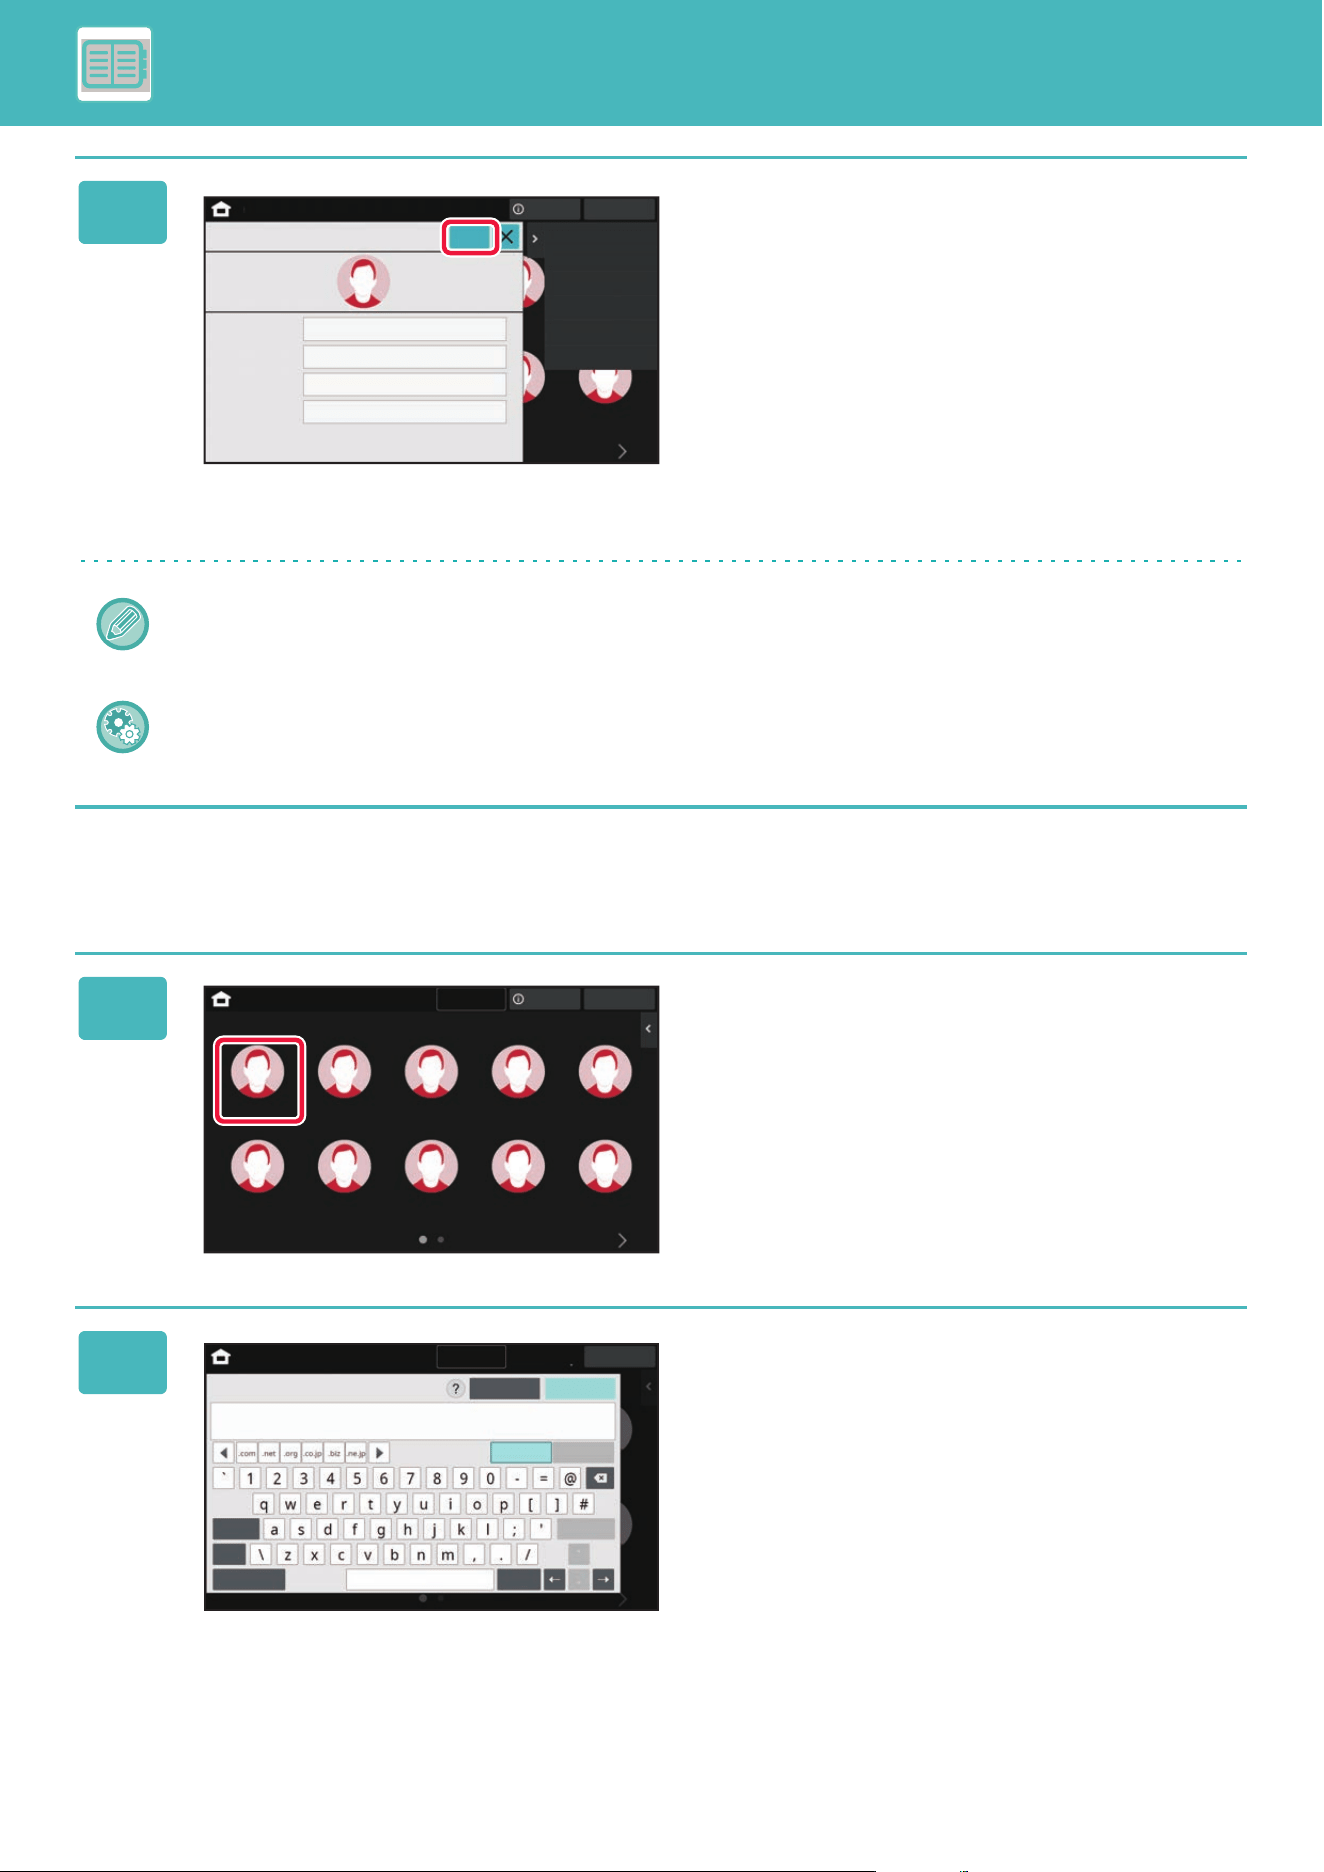
8-17
CONVENIENT USE OF THE MACHINE►MANAGING THE USE OF THE MACHINE
Authenticating the machine using quick authentication
3
Enter user information, and tap the
[Register] key.
Specify the user icon, Login Name, E-mail Address,
Password, and Password (confirmation). Tap the items to
register, and enter necessary details.
• Tap "Change icon(s)" on the action panel, and the icon
selection screen appears. Select the desired icon to
configure.
• Login Name is displayed together with the icon. Ensure
this is entered.
• When editing user information, the Password cannot be
changed. "Password" and "Password (confirmation)" will
not be displayed on the edit screen.
To delete a registered user
Tap [Add user/Edit user registration] on the action panel, then tap the icon of the user to delete. Tap [Delete] on the
action panel, and then tap the [Delete] key in the displayed confirmation message.
User editing and deleting from User Administration Settings and Web page
In "Settings (administrator)", select [User Control] → [User Settings] → [User List].
1
Tap the icon.
If a password is not set, then login will close at this time.
2
If setting a Password, enter the
Password.
Enter the Password from the soft keyboard.
Entered text is displayed with "*". After entering the
Password, tap the [OK] key.
Job Management
Machine
Status
Home
User Name Registration
Register
Change icon(s)
Login Name
E-mail Address
Password
(confirmation)
Password
AAA AAA
aaa@aaa_aaa.com
*********************************************...
*********************************************...
Quick Login
Job Management
Machine
Status
Admin Login
Home
AAA AAA
Job Management
A
Admin Login
Home
Password
Cancel
Caps
Shift
Space
AltGr
Symbols
Characters
Keyboard Select

8-19
CONVENIENT USE OF THE MACHINE►MANAGING THE USE OF THE MACHINE
USER CONTROL
You can perform user management such as registering login users and specifying the user authentication method.
In [User Control] of "Settings (administrator)" and [System Settings] of [Authentication Settings].
User Control allows you to register and manage the users who use the machine.
By limiting the number of pages and functions that a user or a group of users can use, incorrect use of the machine can
be prevented.
To prevent unauthorized use, persons who are not registered can be prohibited from using the machine or prohibited
from using certain functions.
User Name : AAA
Custom Index : Group A
Pages Limit Group : "Limited" group
User Name : BBB
Custom Index : Group B
Pages Limit Group : "Limited" group
User Name : CCC
Custom Index : Group A
Pages Limit Group : "Unlimited" group
Authority Group: User
Favorite Operation Group:
Group a
Authority Group: User
Favorite Operation Group:
Group a
Authority Group: Administrator
Favorite Operation Group:
Group b
Group A
Group A
Custom Index
Group b
Group a
Favorite Operation Group
Using the machine
All machine functions can be used
The machine can be operated using the screen displays and default
settings set for each group.
User Name : None
(Users not registered in the machine)
Example: Information stored in User Name Registration
You can only use functions set in the user
permissions of the Authority Group, and only the
number of sheets set in the Pages Limit Group.
Only functions set in guest authority in the
Authority Group can be used
8-20
CONVENIENT USE OF THE MACHINE►MANAGING THE USE OF THE MACHINE
ORGANIZATION /GROUP LIST
A user can be registered in an organization/group to enable sharing the contacts and group information registered in that
group. When counting all used pages, you can check how many pages and what functions are used by each group.
Multiple organizations/groups can be set for a user.
A
A
DE
DE
F
F
G
G
H
H
I
I
B
B
B
C
C
C
A
New employee group
Accounting
group
Design group
Sales group
Information sharing within new employee group
Information sharing within design group
Information sharing within sales group
Information sharing within accounting group
8-21
CONVENIENT USE OF THE MACHINE►MANAGING THE USE OF THE MACHINE
PAGE LIMIT GROUP LIST
A Page Limit Group List can be used to limit the number of sheets that users in a specific group can use for copies or
print jobs, and limit the number of pages that can be scanned. The users can also be prohibited from using certain
functions.
Page Limit Group List A
Copy :
B/W : Page Limit (10000)
Full Color : Page Limit (10000)
Printer :
B/W : Unlimited
Full Color : Prohibited
Document Filing Print :
B/W : Unlimited
Full Color : Unlimited
List Prints :
B/W : Unlimited
Full Color : Unlimited
Scanner :
B/W : Prohibited
Full Color : Prohibited
Scan to Local Drive :
B/W : Page Limit (50000)
Full Color : Page Limit (50000)
This section explains how to set the Page Limit Group List.
• Users in this group can use up to 10,000 pages for each color and
black & white copying.
• There is no limit on black & white printing.
• Color printing cannot be used.
• Both color and black & white Document Filing Print and List Print
can be used without restriction. Scanner cannot be used.
• Up to 50,000 pages each can be used for color and black & white
scan save.
8-22
CONVENIENT USE OF THE MACHINE►MANAGING THE USE OF THE MACHINE
AUTHORITY GROUP
Authority Group is used to restrict the functions and settings that users who belong to a specific group can use. By
setting restrictions on functions and settings, you can prevent inexperienced users from performing incorrect operations
and settings, and thereby enable safe use of the machine.
Main authority types (Default Group List)
User
Authority Color
Prohibited Authority
Admin
Copy, print, and other functions can be used,
but machine settings cannot be configured.
Color functions cannot be used.
Scanner Prohibited
Authority
Scanner functions cannot be used.
Guest
Only certain functions can be used.
A
ll functions can be used and machine
settings can be configured.
System Administrator
Authority
Copy, printer, and other functions cannot be
used, but machine settings can be configured.

8-23
CONVENIENT USE OF THE MACHINE►MANAGING THE USE OF THE MACHINE
FAVORITE OPERATION GROUP LIST
For each group, you can register an environment with settings that are convenient for the group. For example, if the
users speak different languages, a language can be set for each group, and this setting is applied automatically at login
(normally the display language cannot be changed each time the machine is used).
ACTIVE DIRECTORY LINKING FUNCTION
You can join the Active Directory domain (AD domain) of the machine, and easily perform user management on the
network.
On a network that does not have Active Directory enabled, you must perform network device authentication for each
device.
For this reason, one user must have multiple domain names and passwords.
When you join an AD domain, you only need to be authenticated once. After you are authenticated, the Active Directory
server automatically authenticates network devices. You can log in to multiple devices on the network with a single
domain name and password.
Users using Japanese
Login
By setting English for users using English and Japanese for users using Japanese in the Favorite
Operation Group List, the language will automatically switch between English and Japanese when a user
logs in to the machine.
Users using English
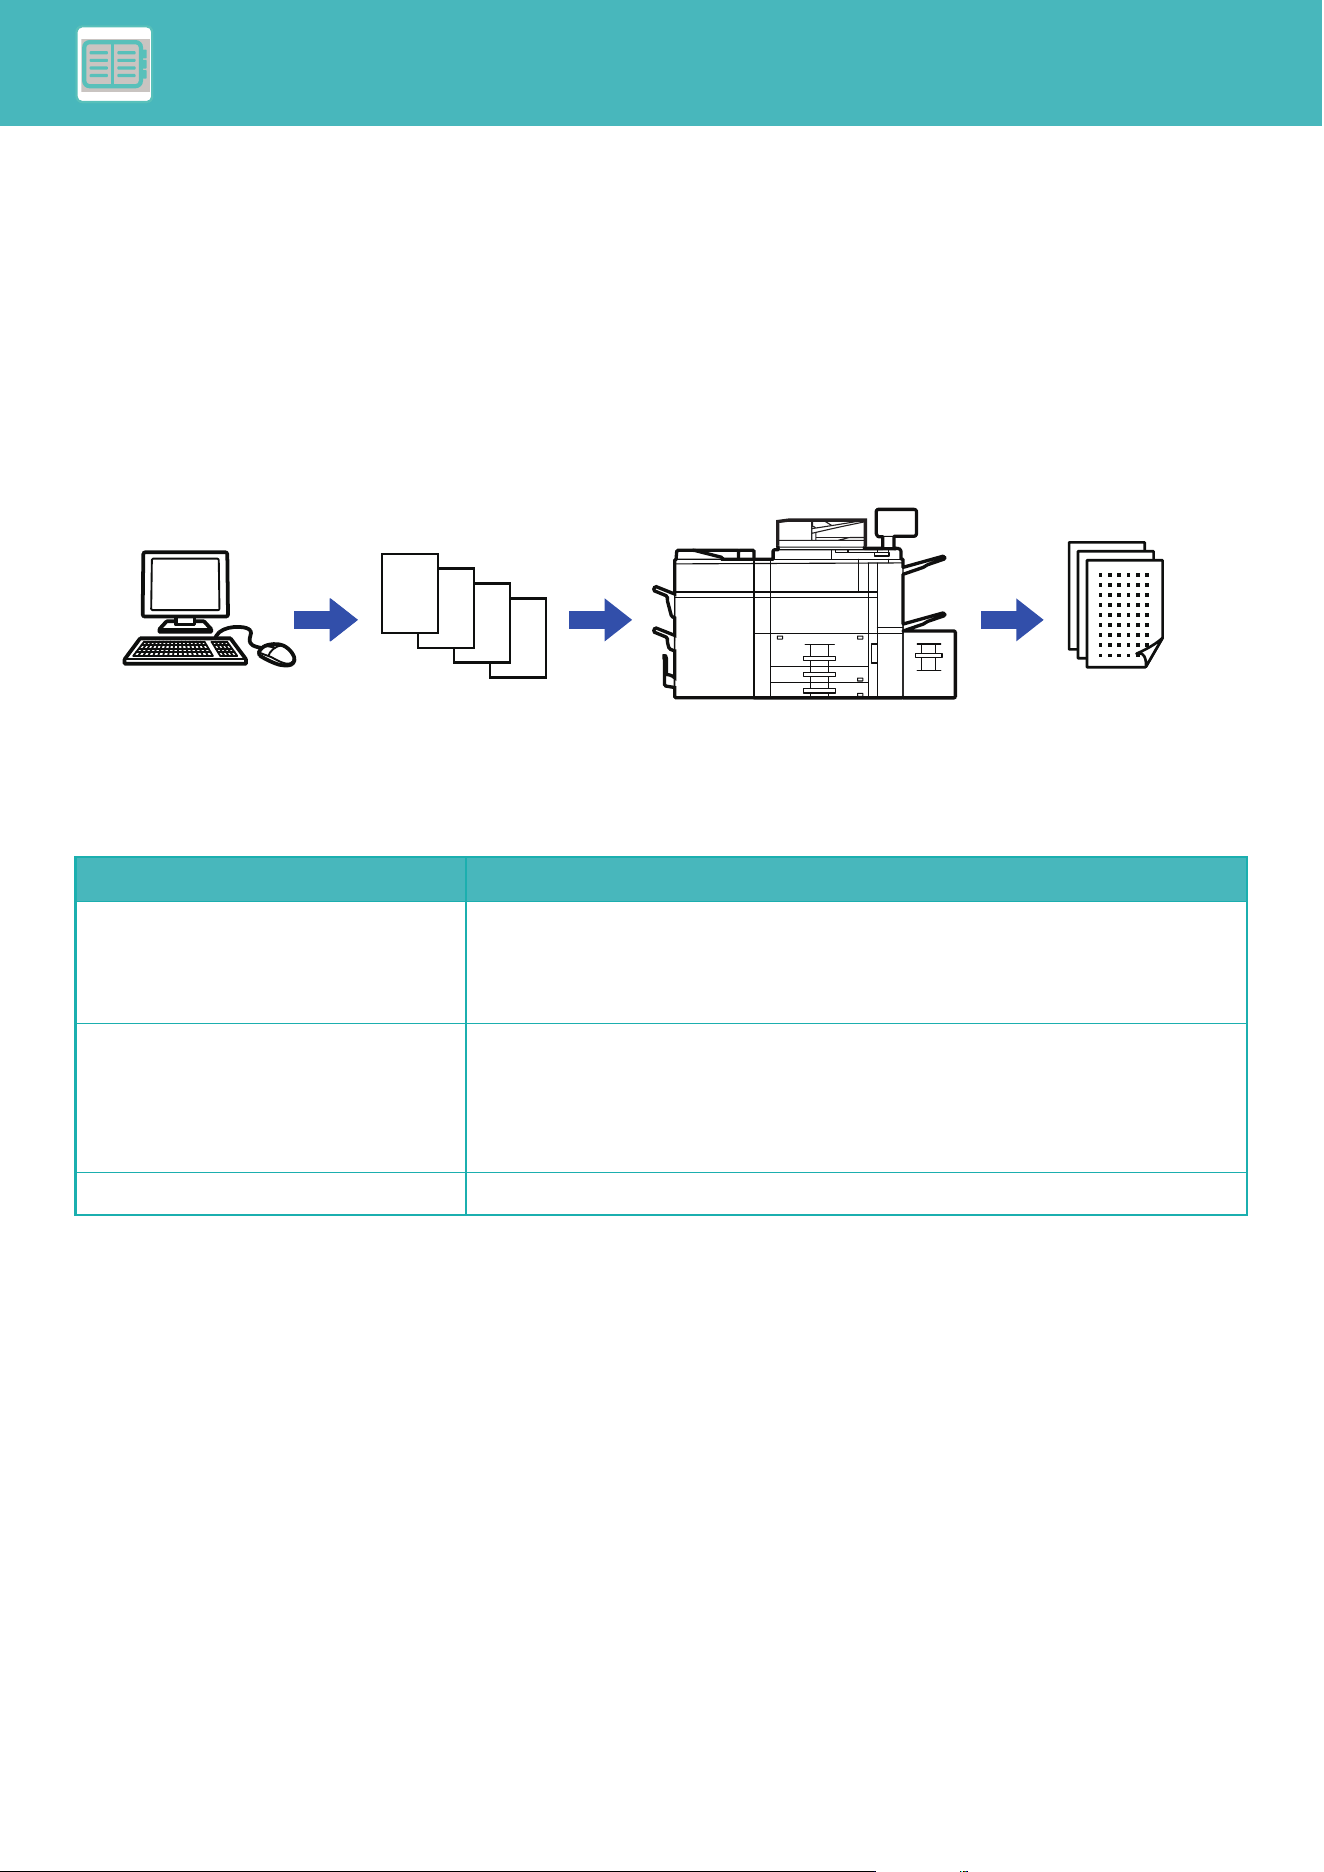
8-24
CONVENIENT USE OF THE MACHINE►MANAGING THE USE OF THE MACHINE
BILLING CODE
BILLING CODE
A billing code, which is added to a recorded job log when a printing or sending job has been executed, is used to
perform billing processing.
Billing codes are classified into two types: main code and sub code. A billing code is recorded in the job log when it is
entered and a print or send job is executed.
Summing up the amounts by Billing Code based on the job logs will facilitate the subsequent operations, for instance,
when making combined billings.
Types of billing codes
Enable use of billing code
To enable use of the billing code, select "Settings (administrator)" → [User Control] → [Billing Code Setting] →
[Administration Settings], then set [Use Billing Code] to [Enable].
Collecting billing codes
In "Settings (administrator)", select [System Settings] → [System Control] → [Job Log] → [Job Log Operation], and click
[Save] button to download the job logs. Then sum up the data by classifying and arranging the stored job logs.
Type Description
Main Code Used to categorize the results of the executed print and send jobs to enable efficient
management. For example, you can assign a code by customer and collect cost
information by customer from job logs.
Code example: Issue of company A
Sub Code Available when the main code alone is not sufficient to enable management of billing
codes. For example, you can assign monthly cost information to a sub code and
collect the total monthly cost information of all customers when the customer name is
assigned to the main code.
Code example: Issue of October, 2020
Default Code Automatically assigned when the main code or sub code has not been specified.
D
C
B
A
Collecting job logs
Billing by code
Recording a billing code in
the job log
Assigning a billing code
and executing the job
Registering billing
codes
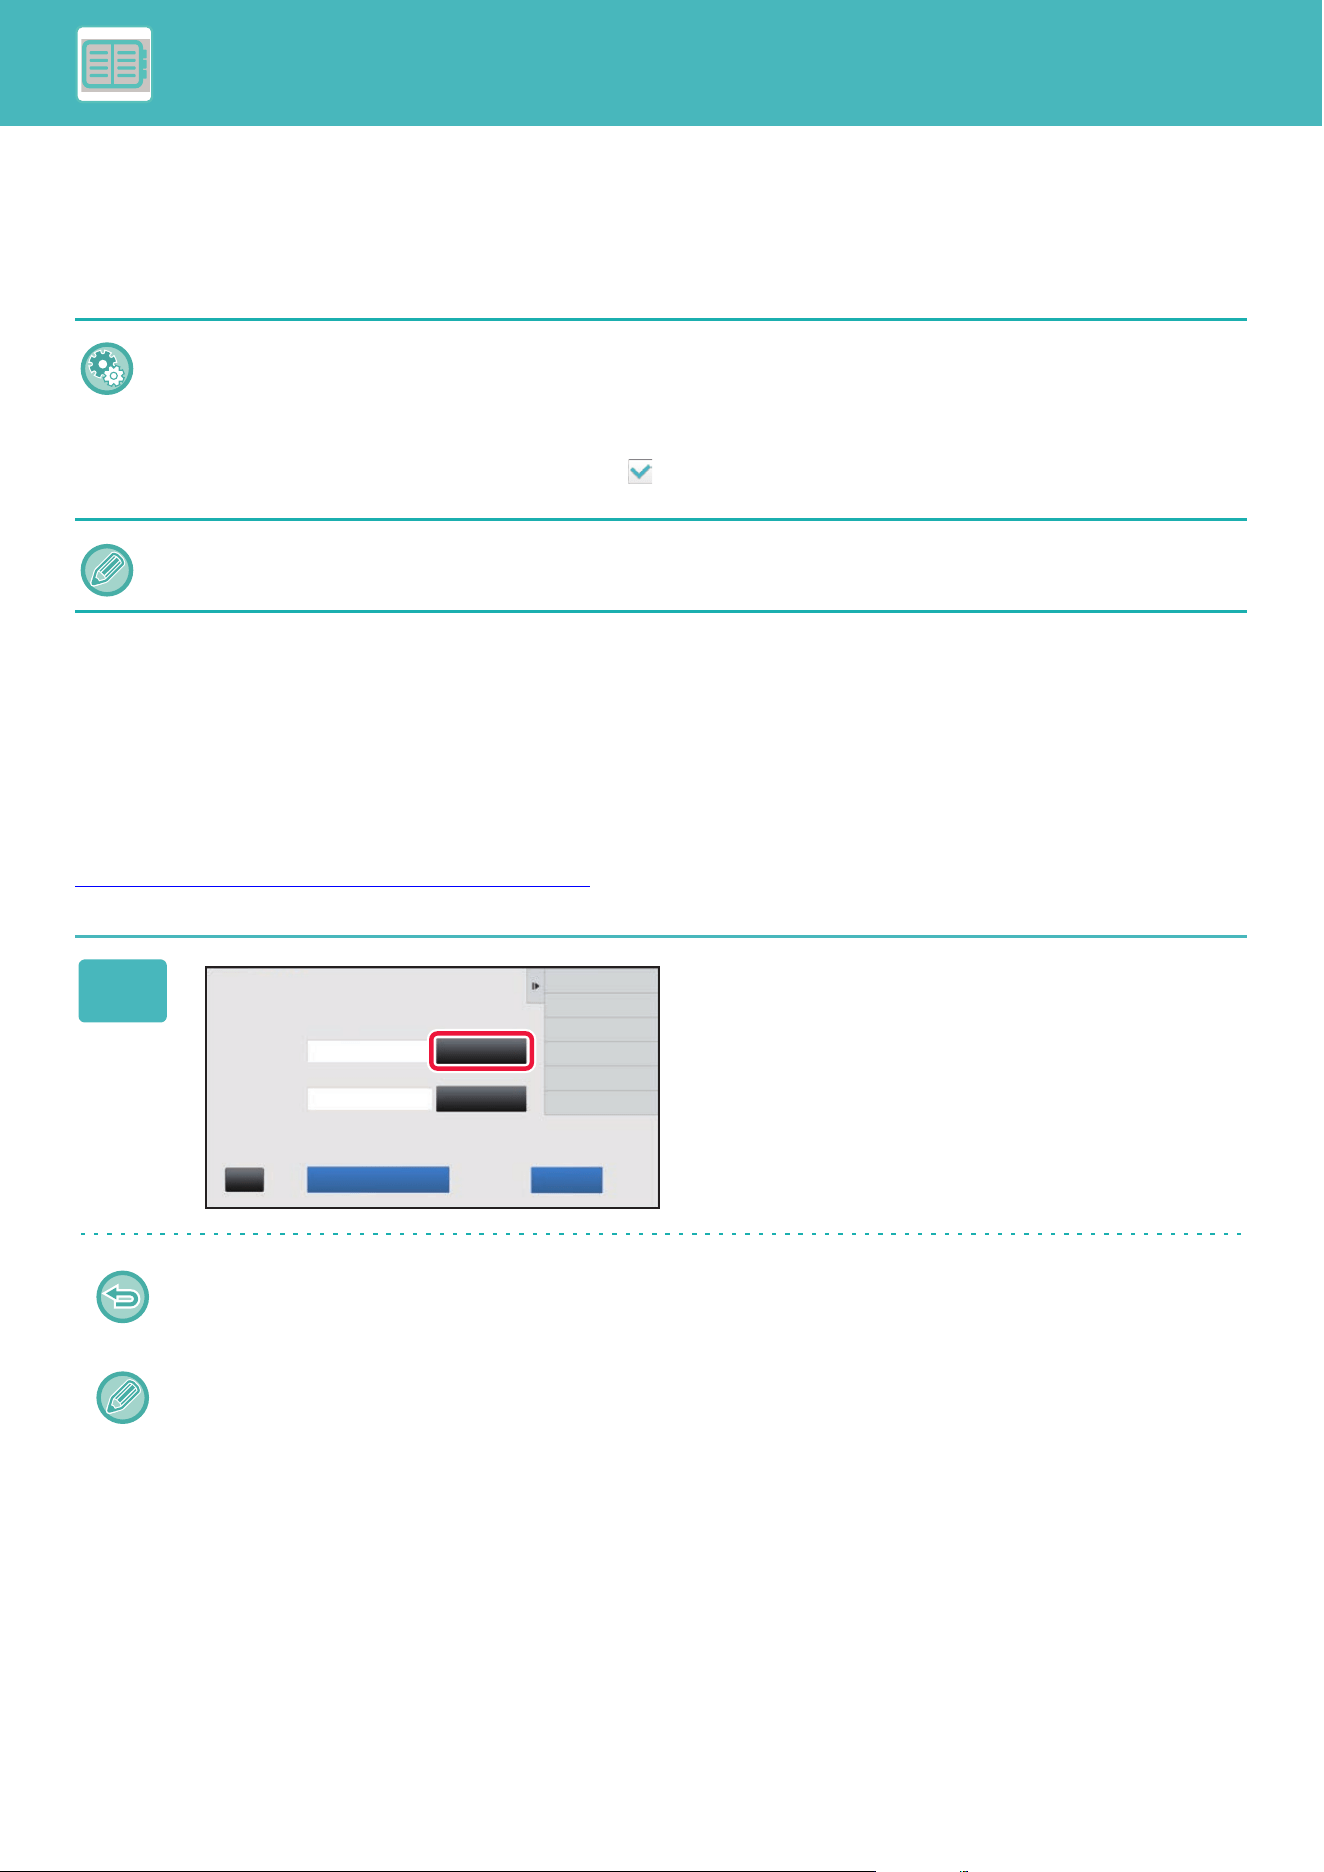
8-25
CONVENIENT USE OF THE MACHINE►MANAGING THE USE OF THE MACHINE
USE BILLING CODE
If the use of billing code is enabled in "Settings (administrator)", the billing code entry window is displayed at the time of
mode transition (at the time of printing/sending in document filing mode).
Enter the main code or sub code as required.
Specifying a billing code again
To change the specified billing code to another one, tap [Switch Billing Code.] on the action panel.
When the billing code entry window is displayed, select a new billing code.
Select a billing code from the list
Select the desired billing code from the list of registered billing codes.
You need to register billing codes in advance.
REGISTERING A NEW BILLING CODE
(page 8-28)
• To enable use of the billing code
Select "Settings (administrator)" → [User Control] → [Billing Code Setting] → [Administration Settings], then set [Use Billing
Code] to [Enable].
• To retain the specified billing code at the time of mode transition
Select "Settings (administrator)" → [User Control] → [Billing Code Setting] → [Administration Settings], then set the [Re-
member Billing Code Between Modes] check box to . This eliminates the need to enter billing codes at each mode tran-
sition.
You can assign billing codes to reprinting/resending of target files and sending of print jobs from "Settings (administrator)" →
[Document Operations].
1
When the billing code entry window is
displayed, tap the [Select from List]
key of the main code.
When not specifying a billing code
Tap the [Bypass Billing Code] key.
To select the previously used billing code (at the time of user authentication)
Tap [Use Previously-Used Billing Code] on the action panel at the time of user authentication; this displays the main
code and sub code the authenticated user has entered previously.
Billing Code
Please enter Billing Code.
Main Code
Sub Code
AAAA
AAAA
Select from List
Select from List
Bypass Billing Code OKCA
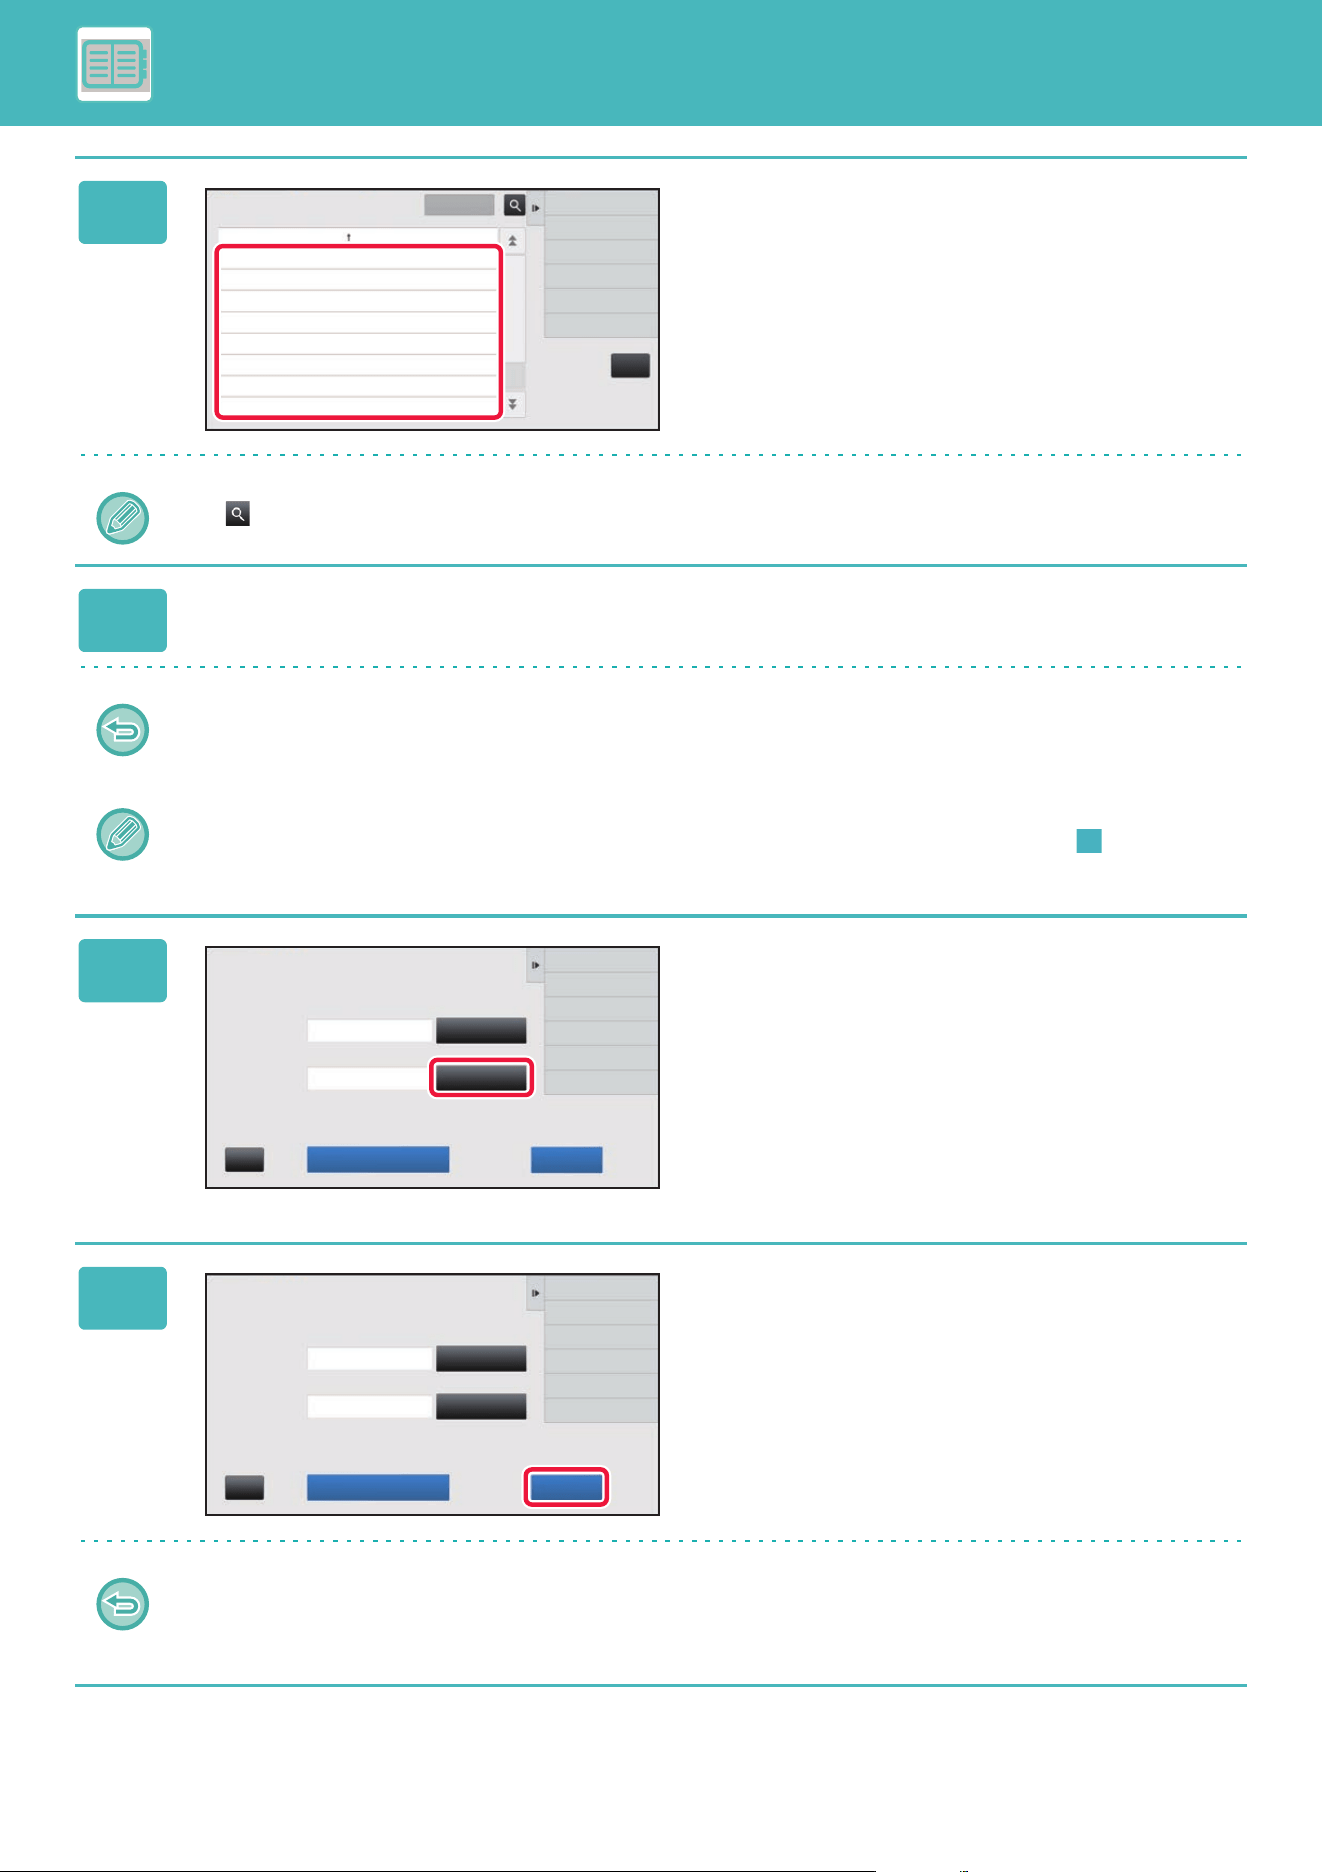
8-26
CONVENIENT USE OF THE MACHINE►MANAGING THE USE OF THE MACHINE
2
Tap and select the main code from the
list.
To search for the main code or main code name
Tap . When the search window is displayed, enter the main code and main code name, then tap the [Search Start]
key. The search result list is displayed.
3
Tap the [OK] key.
Returns the screen to the billing code entry window.
To cancel the selection from the list
Tap [Cancel and Return] on the action panel. This cancels the selected main code and returns the screen to the billing
code entry window.
To check the details of the main code
Tap [Display Details] on the action panel. The detail window is displayed. Check the details, then tap .
4
Tap the [Select from List] key of the
sub code.
The sub code list is displayed. Perform the procedure shown
in steps 2 and 3, then specify the sub code.
5
Tap the [OK] key.
To clear the value of the specified billing code
Tap the [CA] key. Enter the billing code again.
CA
Cancel and Return
Main Code Main Code Name
MAIN001 Company 1
MAIN002 Company 2
MAIN003 Company 3
MAIN004 Company 4
MAIN005 Company 5
MAIN006 Company 6
MAIN007 Company 7
MAIN008 Company 8
Add/Edit Billing Code
OK
Select Billing Code
Billing Code
Main Code
Sub Code
AAAA
AAAA
Select from List
Select from List
Bypass Billing Code OKCA
Please enter Billing Code.
Billing Code
Main Code
Sub Code
AAAA
AAAA
Select from List
Select from List
Bypass Billing Code OKCA
Please enter Billing Code.
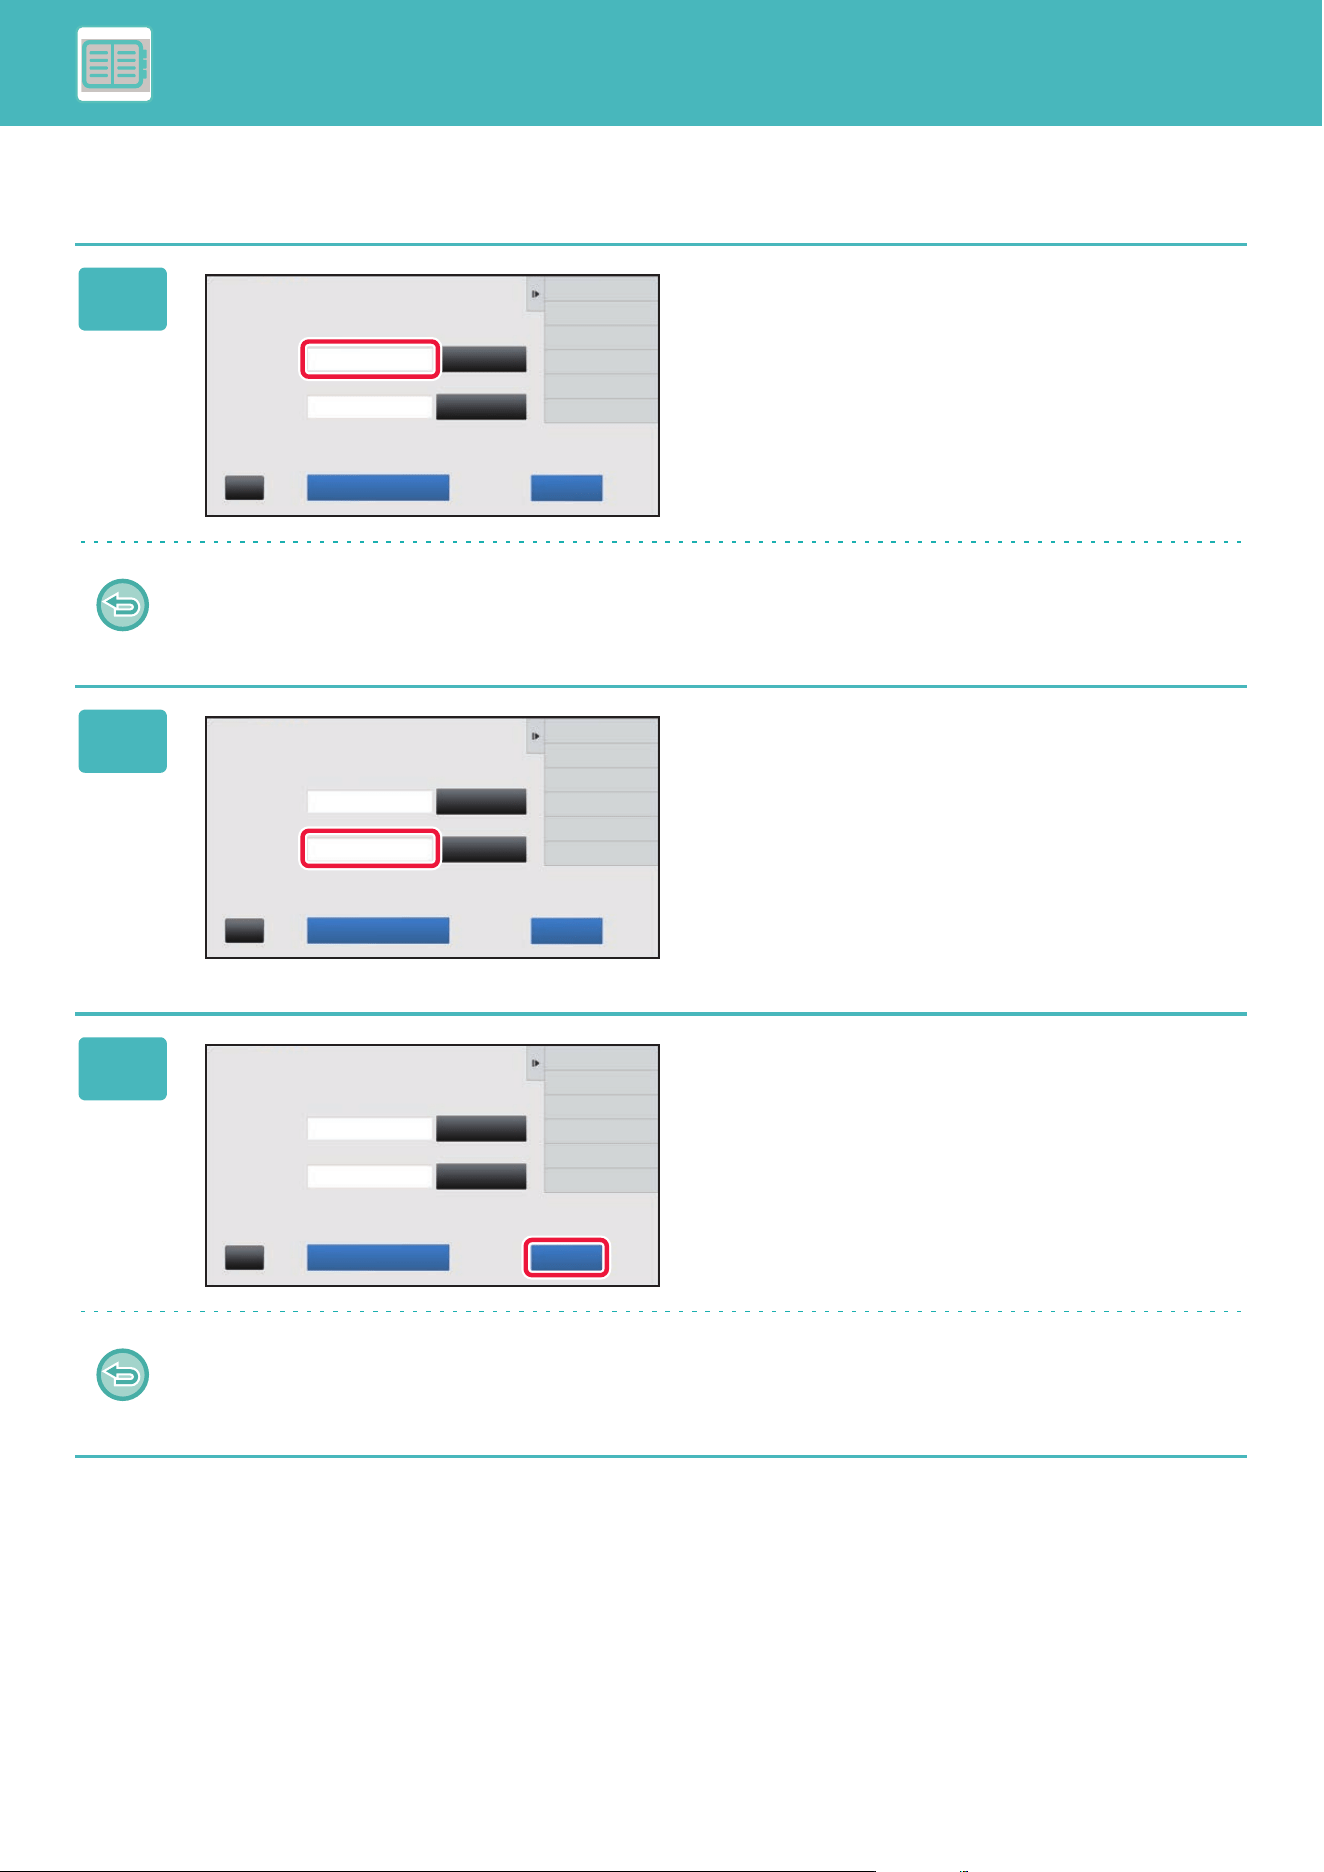
8-27
CONVENIENT USE OF THE MACHINE►MANAGING THE USE OF THE MACHINE
Directly entering a billing code
1
When the billing code entry window is
displayed, tap the box in [Main Code],
then enter the main code.
Specify the code using up to 32 single-byte characters.
When not specifying a billing code
Tap the [Bypass Billing Code] key. The use code is set to the main code.
2
Tap the box of [Sub Code], then enter
the sub code.
Specify the code using up to 32 single-byte characters.
3
Tap the [OK] key.
To clear the value of the specified billing code
Tap the [CA] key. Enter the billing code again.
Billing Code
Main Code
Sub Code
AAAA
AAAA
Select from List
Select from List
Bypass Billing Code OKCA
Please enter Billing Code.
Billing Code
Main Code
Sub Code
AAAA
AAAA
Select from List
Select from List
Bypass Billing Code OKCA
Please enter Billing Code.
Billing Code
Main Code
Sub Code
AAAA
AAAA
Select from List
Select from List
Bypass Billing Code OKCA
Please enter Billing Code.
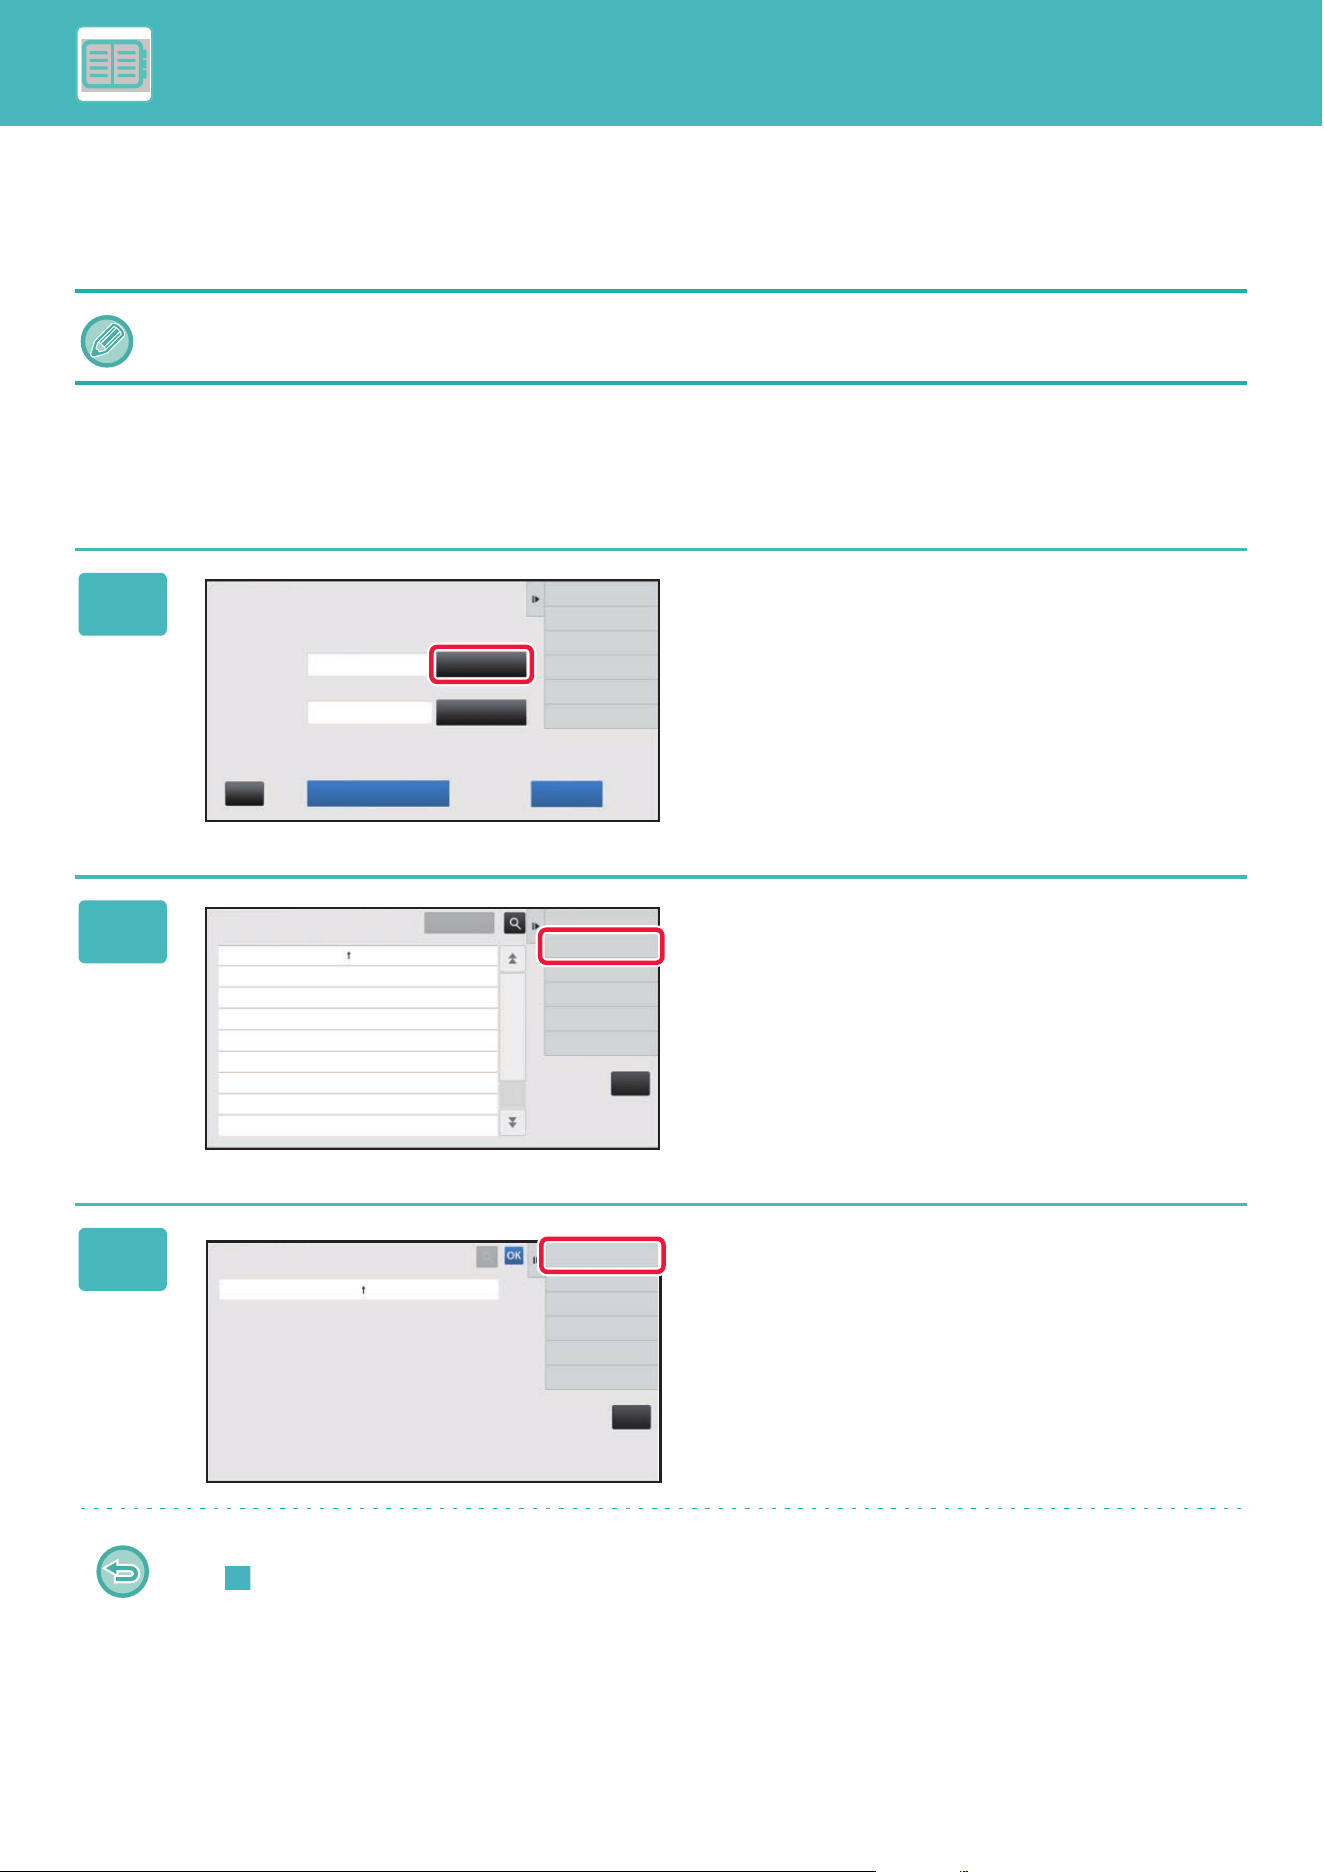
8-28
CONVENIENT USE OF THE MACHINE►MANAGING THE USE OF THE MACHINE
REGISTERING A NEW BILLING CODE
Register a new billing code.
A billing code can be registered not only from the billing code entry window but also from "Settings".
Shared range of billing code
The registered billing codes can only be shared in the specified group at the time of user authentication.
If the shared range is not specified, the registered billing codes are shared by all users.
A total of up to 2000 main and sub codes can be registered.
1
When the billing code entry window is
displayed, tap [Select from List] of the
main code.
To register a new sub code, tap the [Select from List] key of
the sub code.
The subsequent steps are the same as the main code.
2
Tap [Add/Edit Billing Code] on the
action panel.
3
Tap [Add New] on the action panel.
To return to the billing code selection window
Tap .
Billing Code
Please enter Billing Code.
Main Code
Sub Code
AAAA
AAAA
Select from List
Select from List
Bypass Billing Code OKCA
CA
Cancel and Return
Main Code Main Code Name
MAIN001 Company 1
MAIN002 Company 2
MAIN003 Company 3
MAIN004 Company 4
MAIN005 Company 5
MAIN006 Company 6
MAIN007 Company 7
MAIN008 Company 8
Add/Edit Billing Code
OK
Select Billing Code
CA
Main Code Main Code Name
Main Code Registration
Add New
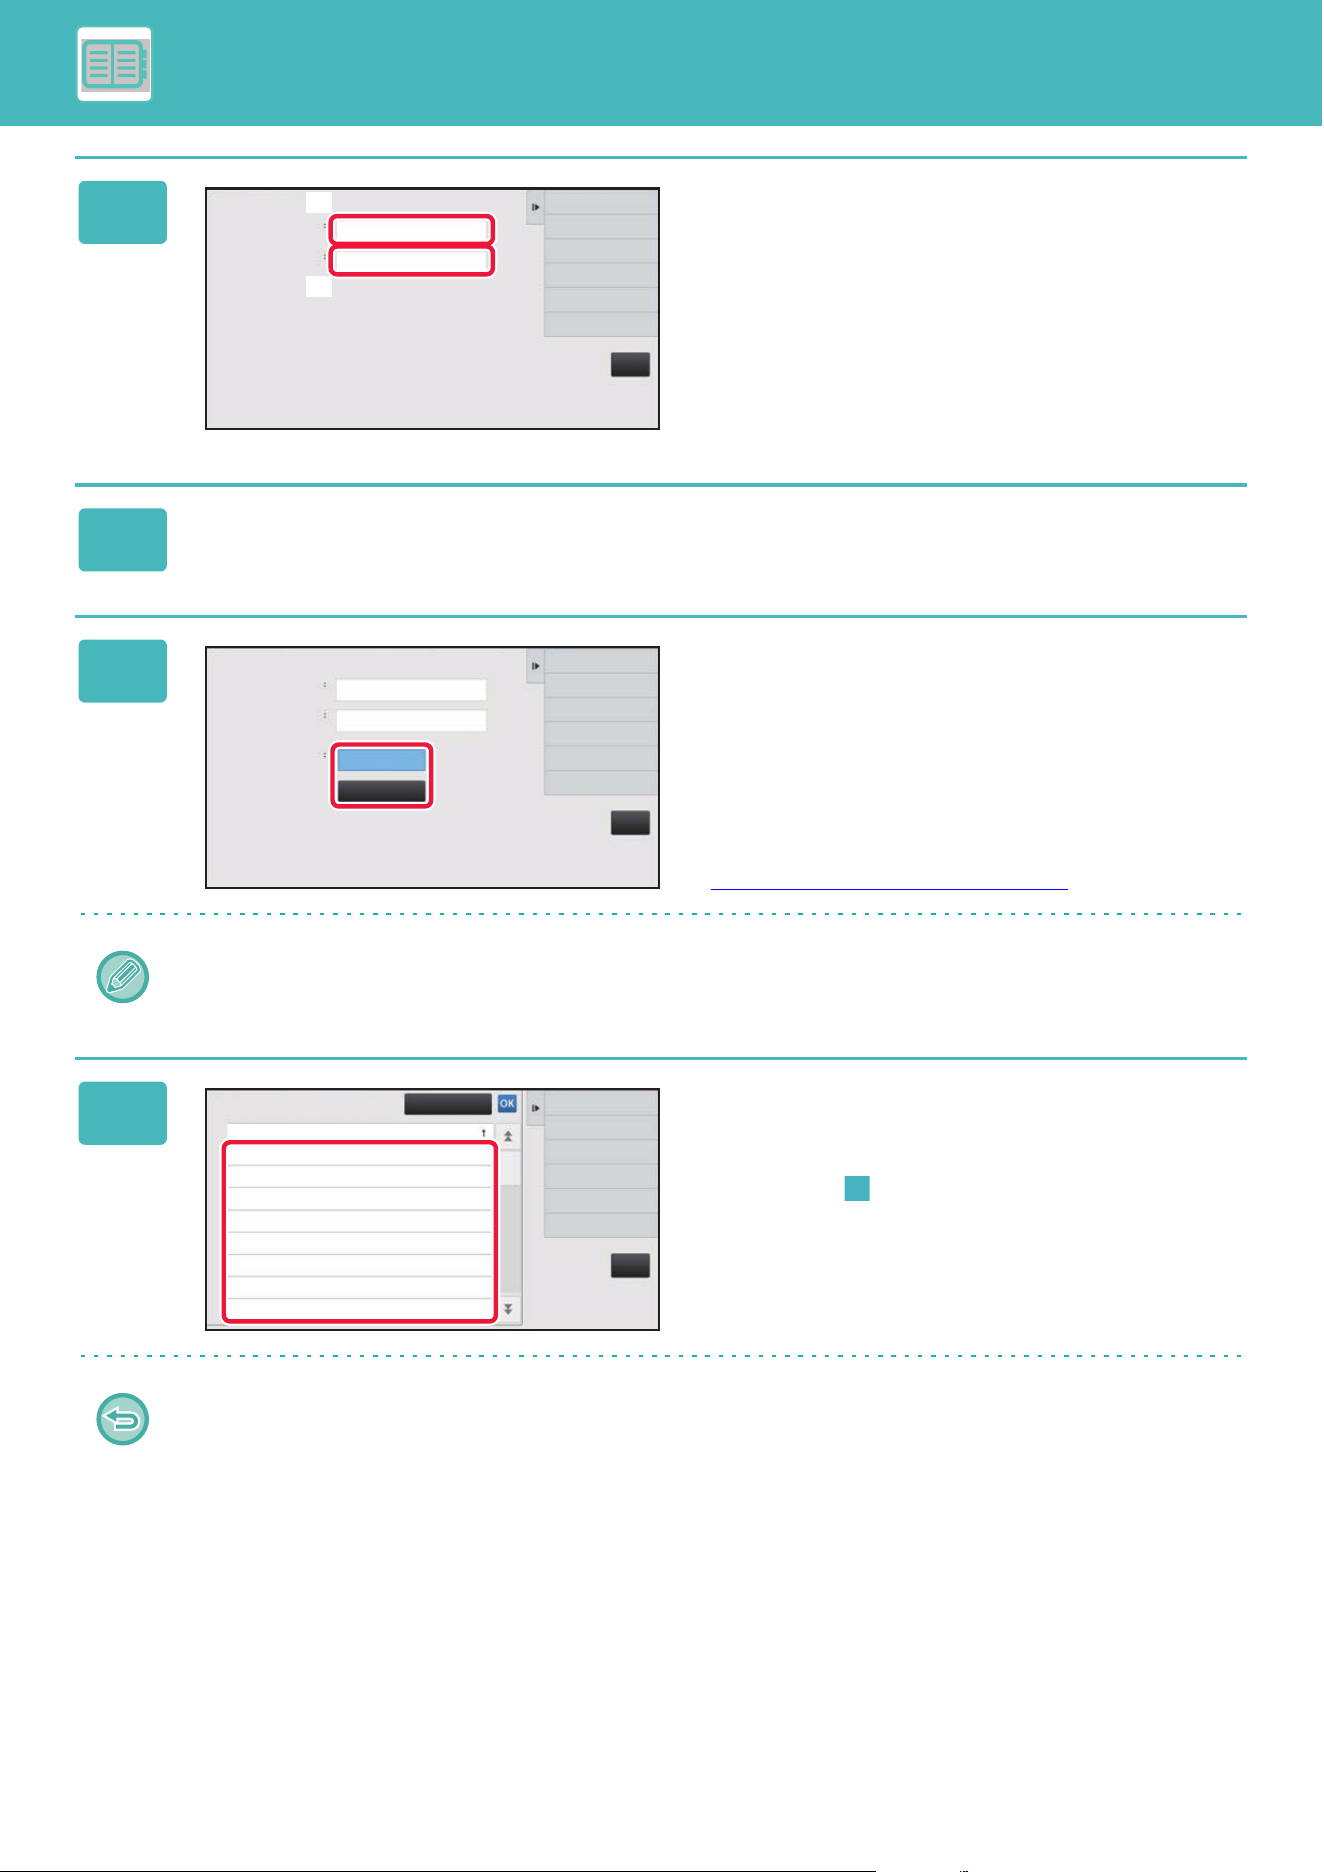
8-29
CONVENIENT USE OF THE MACHINE►MANAGING THE USE OF THE MACHINE
4
Tap the box of [Main Code], then type
in the main code.
Specify the code using up to 32 single-byte characters.
5
Tap the box of [Main Code Name], then type in the main code name.
Specify the code name using up to 32 double- or single-byte characters.
6
If necessary, select the share range of
billing code.
Public to All: Registers the billing code as a public code for
all users who use the machine.
Specify target public address: Limits the share range of
billing code to be registered only to the specified group. Up
to eight groups can be specified as a public destination.
For details on how to specify a public destination, refer to
“Shared range of billing code
(page 8-28)".
The public destination of a billing code is not displayed if user authentication is not performed. The mode is automatically
set to [Public to All].
7
Tap and select a group as a public
destination
Up to eight groups can be specified. After the settings are
completed, tap .
To cancel the setting
Tap [Clear] on the action panel. This cancels the registered public destination and returns the screen to the previous
window.
CA
Main Code
Main Code Name
Main Code Registration
Cancel and Return
End Registration
Register
Next Billing Code.
(4)
(5)
CA
Main Code
Main Code Name
Available to
Public to All
Specify target public address
Main Code Registration
Cancel and Return
End Registration
Register
Next Billing Code.
CA
Organization /Group List
Group 1
Group 2
Group 3
Group 4
Group 5
Group 6
Group 7
Group 8
Clear
Designate Public Address
(Selected:1/32)

8-30
CONVENIENT USE OF THE MACHINE►MANAGING THE USE OF THE MACHINE
8
To continuously register other billing codes, tap [Register Next Billing
Code.].
Execute steps 4 to 7 to register the main code.
To cancel the registration
Tap [Cancel and Return] on the action panel. This cancels all the registered billing codes and returns the screen to the
previous window.
9
Tap [End Registration] on the action panel.
This finalizes the registration and returns the screen to the previous window. Tap to finish the registration procedure.
To return to the billing code entry window
Tap the [CA] key.
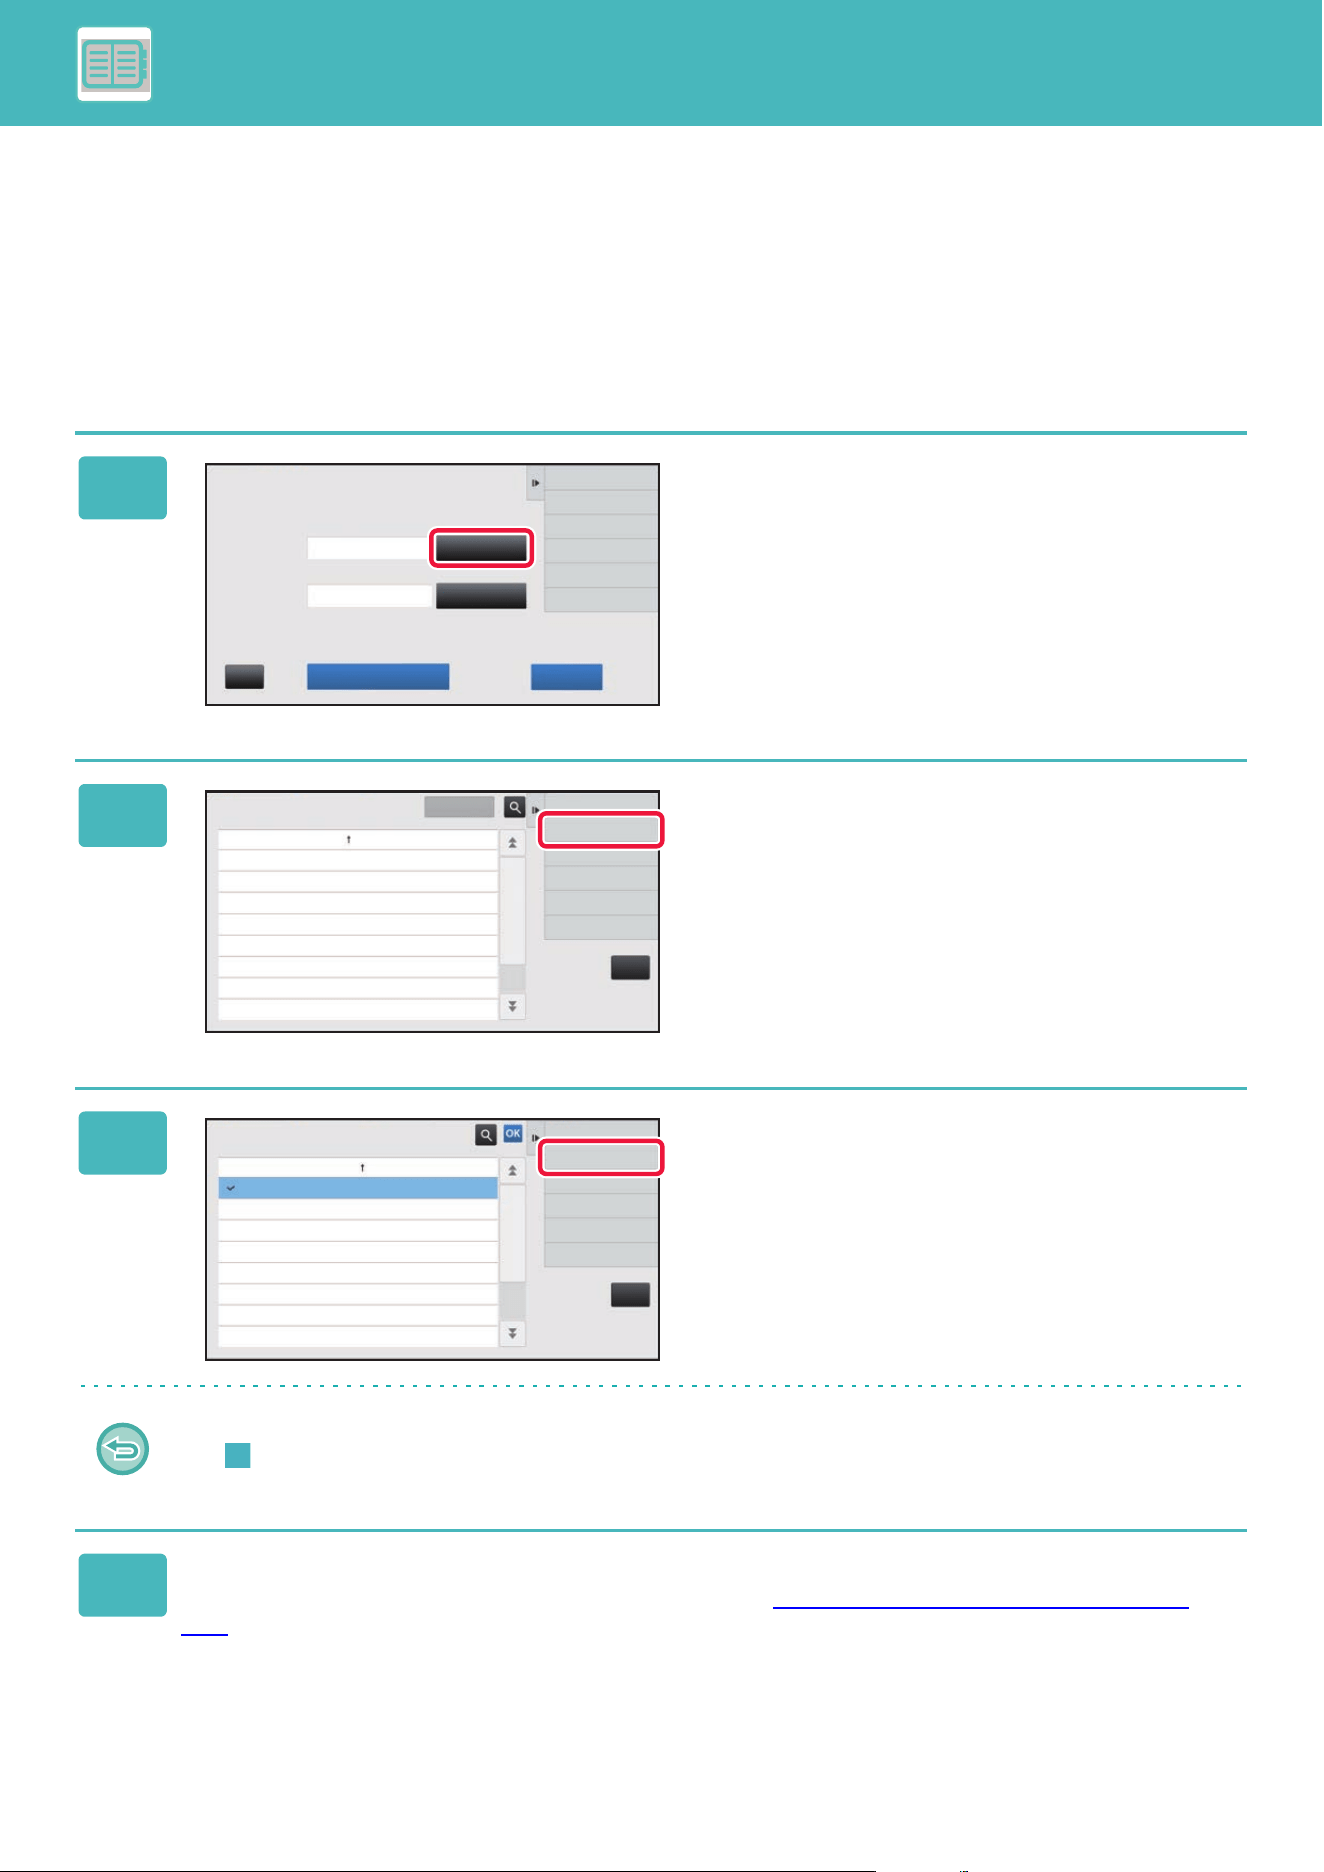
8-31
CONVENIENT USE OF THE MACHINE►MANAGING THE USE OF THE MACHINE
EDITING OR DELETING THE REGISTERED BILLING
CODE
You can change or delete the registered billing code.
The billing code can also be edited or deleted from "Settings".
Editing a billing code
1
When the billing code entry window is
displayed, tap the [Select from List]
key of the main code.
To register a new sub code, tap the [Select from List] key of
the sub code.
The subsequent steps are the same as the main code.
2
Tap [Add/Edit Billing Code] on the
action panel.
3
Tap and select the main code to be
edited, then tap [Edit] on the action
panel.
To return to the billing code selection window
Tap .
4
Edit the main code as required.
For information on how to correct the code, refer to steps 4 to 7 in “REGISTERING A NEW BILLING CODE (page
8-28)".
Billing Code
Please enter Billing Code.
Main Code
Sub Code
AAAA
AAAA
Select from List
Select from List
Bypass Billing Code OKCA
CA
Cancel and Return
Main Code Main Code Name
MAIN001 Company 1
MAIN002 Company 2
MAIN003 Company 3
MAIN004 Company 4
MAIN005 Company 5
MAIN006 Company 6
MAIN007 Company 7
MAIN008 Company 8
Add/Edit Billing Code
OK
Select Billing Code
CA
Add New
Main Code Main Code Name
MAIN001 Company 1
MAIN002 Company 2
MAIN003 Company 3
MAIN004 Company 4
MAIN005 Company 5
MAIN006 Company 6
MAIN007 Company 7
MAIN008 Company 8
Edit
Delete
Main Code Registration
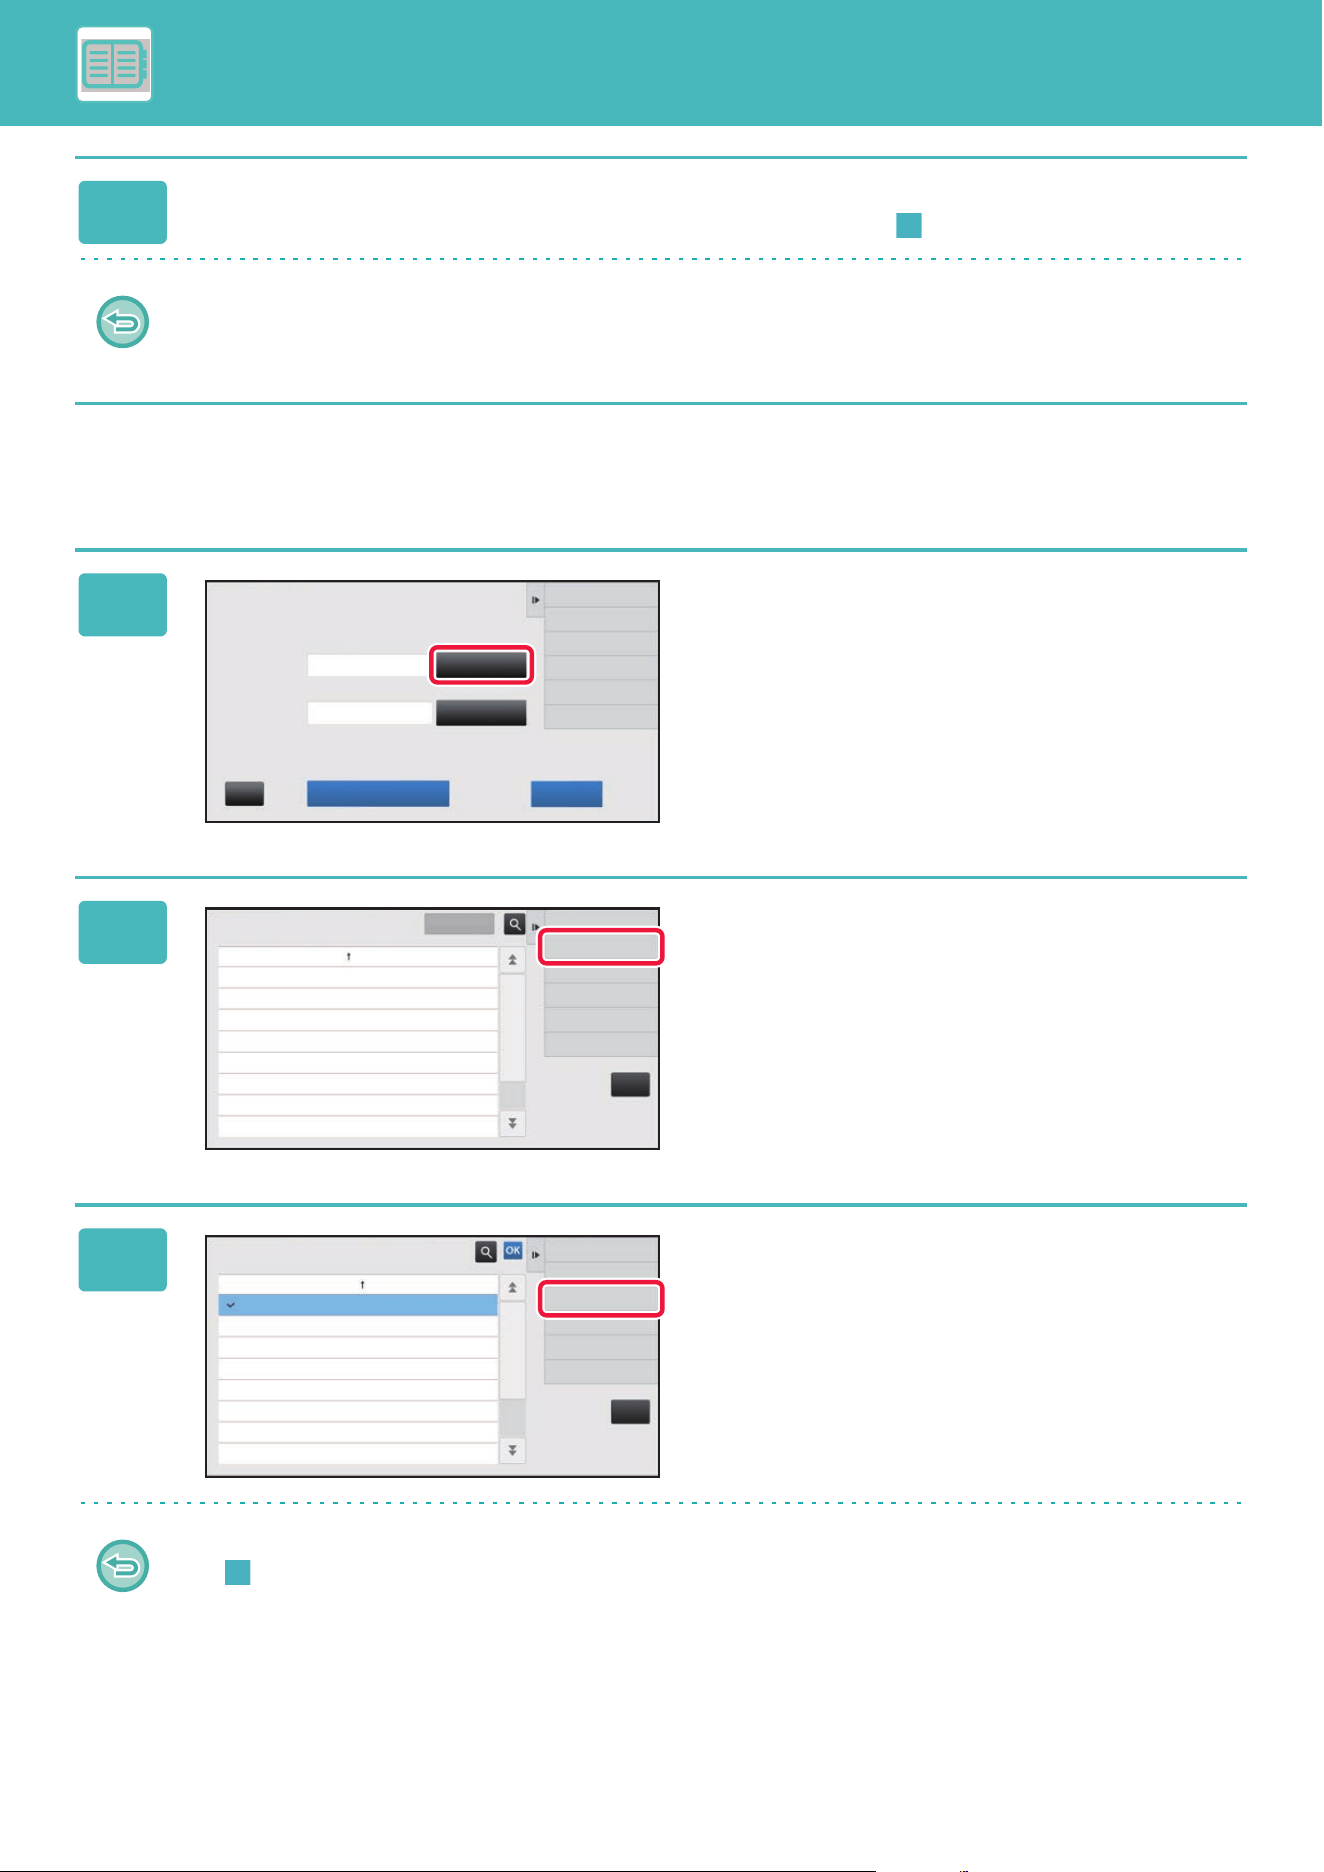
8-32
CONVENIENT USE OF THE MACHINE►MANAGING THE USE OF THE MACHINE
Deleting a billing code
5
Tap [End Registration] on the action panel.
This finalizes the registration and returns the screen to the previous window. Tap to finish the registration procedure.
To return to the billing code entry window
Tap the [CA] key.
1
When the billing code entry window is
displayed, tap the [Select from List]
key of the main code.
To delete a sub code, tap the [Select from List] key of the
sub code.
The subsequent steps are the same as the main code.
2
Tap [Add/Edit Billing Code] on the
action panel.
3
Tap and select the main code to be
deleted, then tap [Delete] on the action
panel.
To return to the billing code selection window
Tap .
Billing Code
Please enter Billing Code.
Main Code
Sub Code
AAAA
AAAA
Select from List
Select from List
Bypass Billing Code OKCA
CA
Cancel and Return
Main Code Main Code Name
MAIN001 Company 1
MAIN002 Company 2
MAIN003 Company 3
MAIN004 Company 4
MAIN005 Company 5
MAIN006 Company 6
MAIN007 Company 7
MAIN008 Company 8
Add/Edit Billing Code
OK
Select Billing Code
CA
Add New
Main Code Main Code Name
MAIN001 Company 1
MAIN002 Company 2
MAIN003 Company 3
MAIN004 Company 4
MAIN005 Company 5
MAIN006 Company 6
MAIN007 Company 7
MAIN008 Company 8
Edit
Delete
Main Code Registration

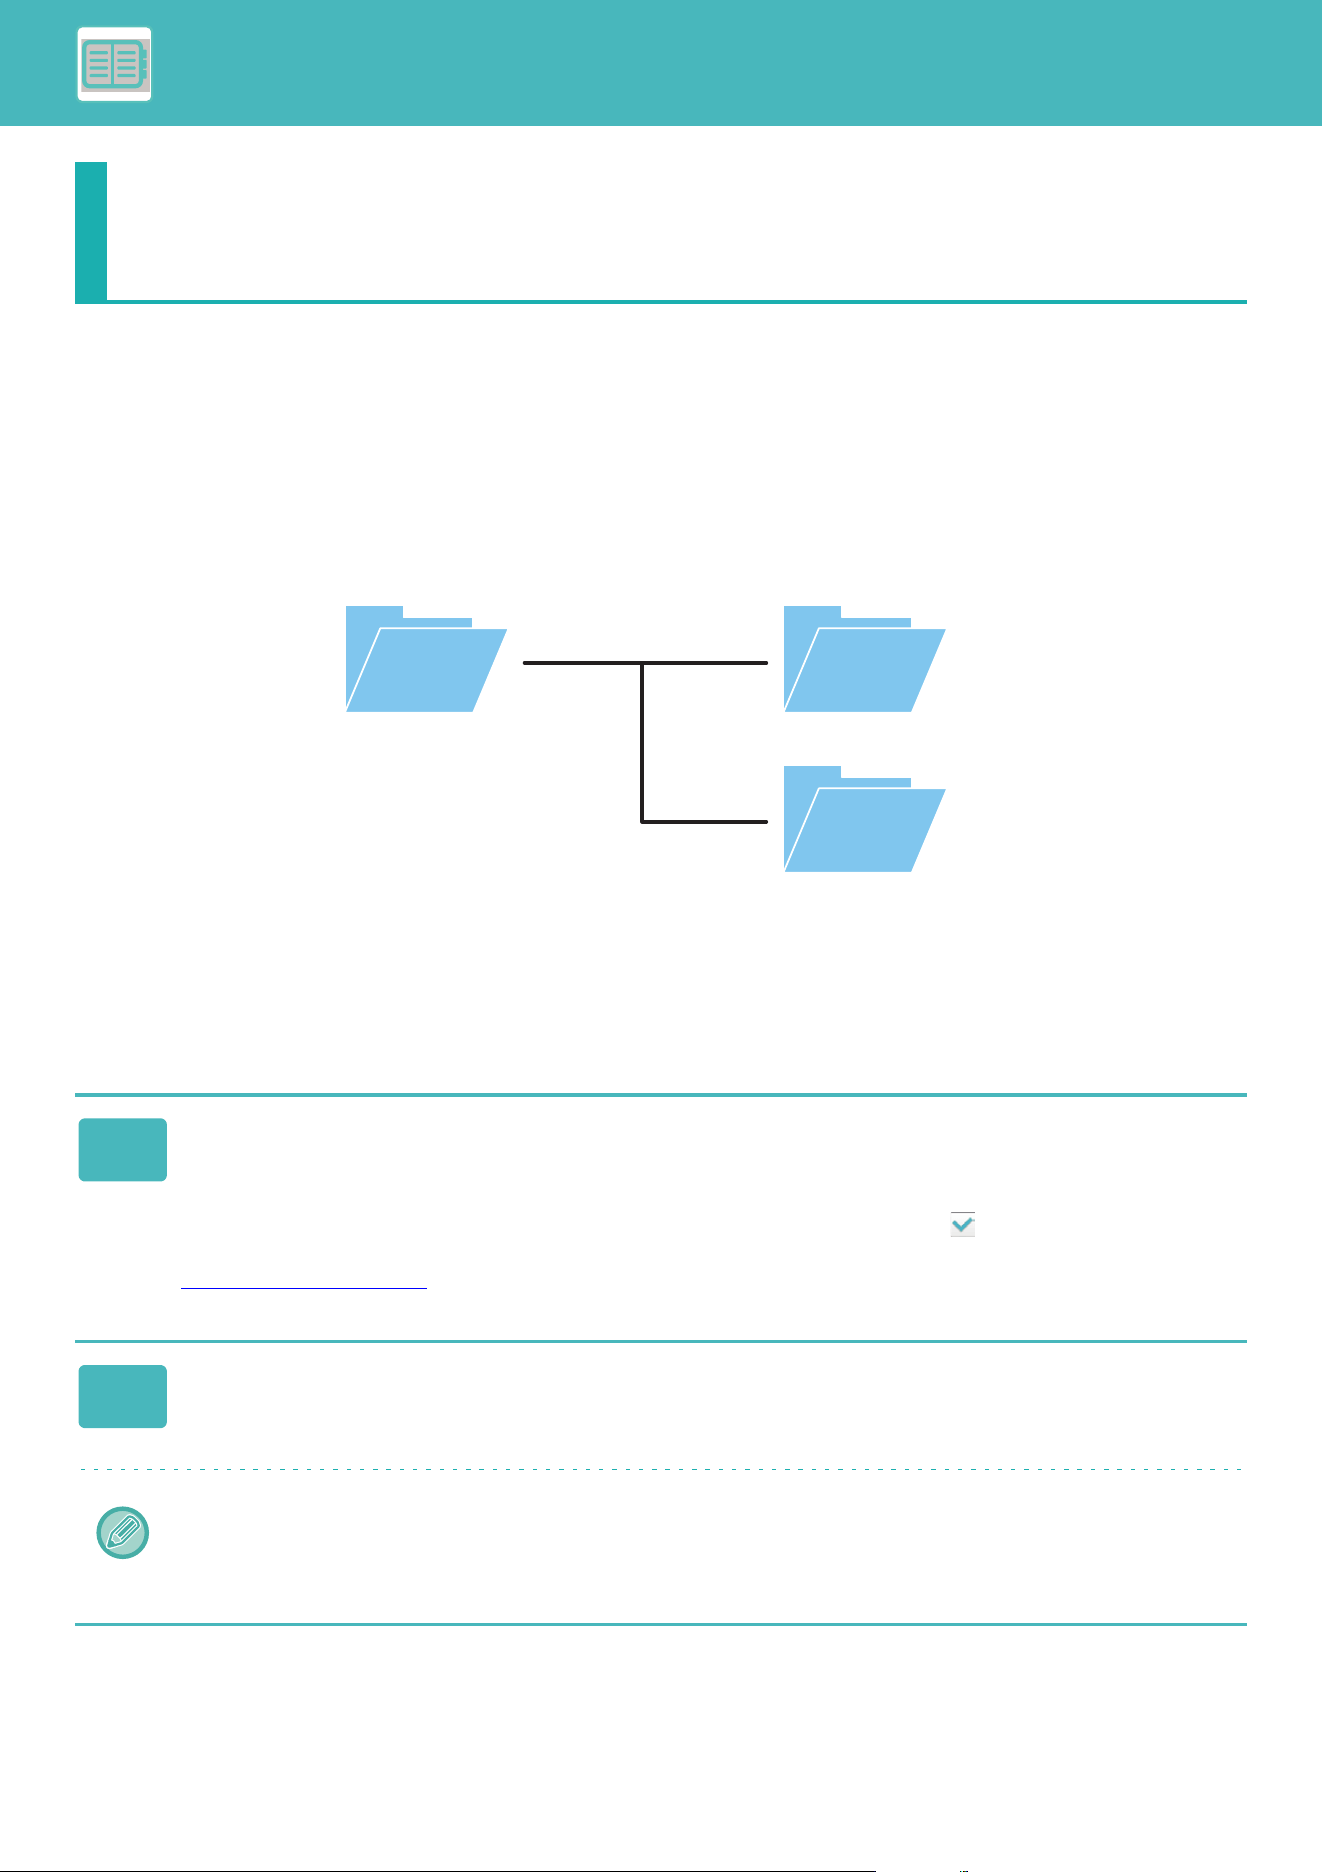
8-34
CONVENIENT USE OF THE MACHINE►USING THIS MACHINE IN A NETWORK ENVIRONMENT
NAS
NAS (Network Attached Storage) is a storage device that is connected to the network.
You can use part of the machine’s local drive area as a simple file server to save files and browse saved files.
FOLDER STRUCTURE
The folder structure is as follows.
•root
•public: Area for storing PDF files for PC browsing that have been created using the document filing function.
•shared: Area where you can freely create folders.
Saving files in NAS / browsing NAS files
USING THIS MACHINE IN A NETWORK
ENVIRONMENT
1
You can save data that you need to the machine’s local drive, and view the
data on your computer.
Document scanned on the machine
In document filing, tap the [Create PDF for PC Browsing] checkbox so that it is selected , and copy to the publicfolder
to save the data.
File Information
(page 6-12)
2
Using as a file server / browsing saved files.
To use this, open any folder screen on your computer and enter the IP address of the machine after “\\” in the address
bar (example: \\192.168.1.28).
• Access restrictions are set for each folder, so you must enter the login name and password of the administrator
account or of a user account that has been registered in the machine.
• The maximum size per file is 2 GB.
root public
shared
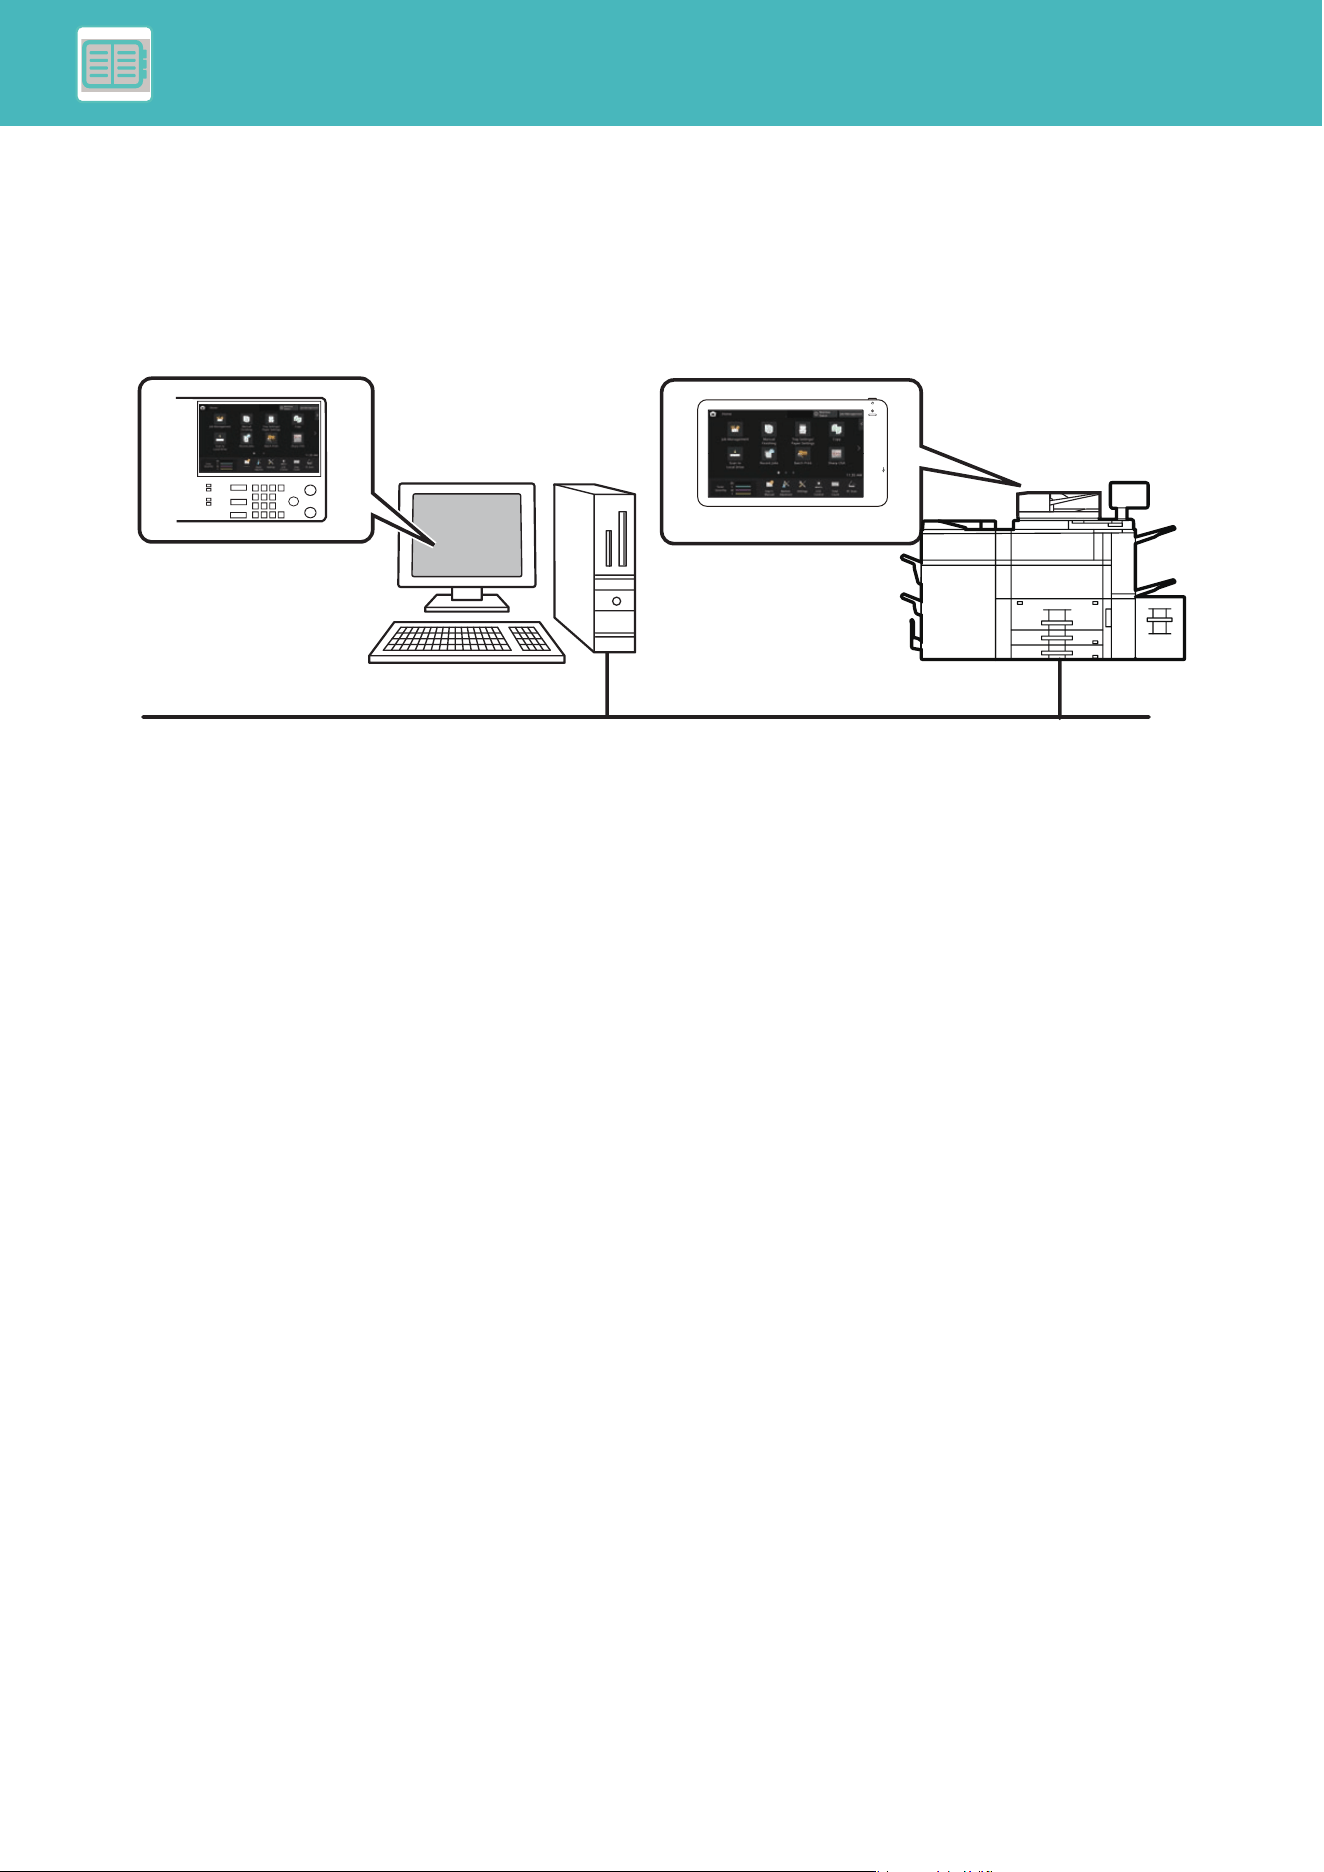
8-35
CONVENIENT USE OF THE MACHINE►USING THIS MACHINE IN A NETWORK ENVIRONMENT
REMOTE OPERATION OF THE MACHINE
Remotely operate the machine on your computer or mobile device such as smartphone.
You can operate the machine from the same panel as the machine's operation panel that is displayed on your PC, with
the same feel as operating in front of the machine.
The remote operation function can only be used on one device at a time.
Before you can use the remote operation function, the following preparation is required.
• In "Settings (administrator)", select [System Settings] → [Common Settings] → [Operation Settings] → [Condition
Settings] → [Remote Operation Settings] → [Remote Software Operation] and select [Allow] for [Operational
Authority].
• Connect the machine to the network.
• Install a VNC application software (recommended VNC software: RealVNC) in your device.
•After the preparation is completed, follow the operation described below to set up the function.
Operate the machine
using your computer
screen.
Your computer
Network
Operation panel
The machine
User's
Manual
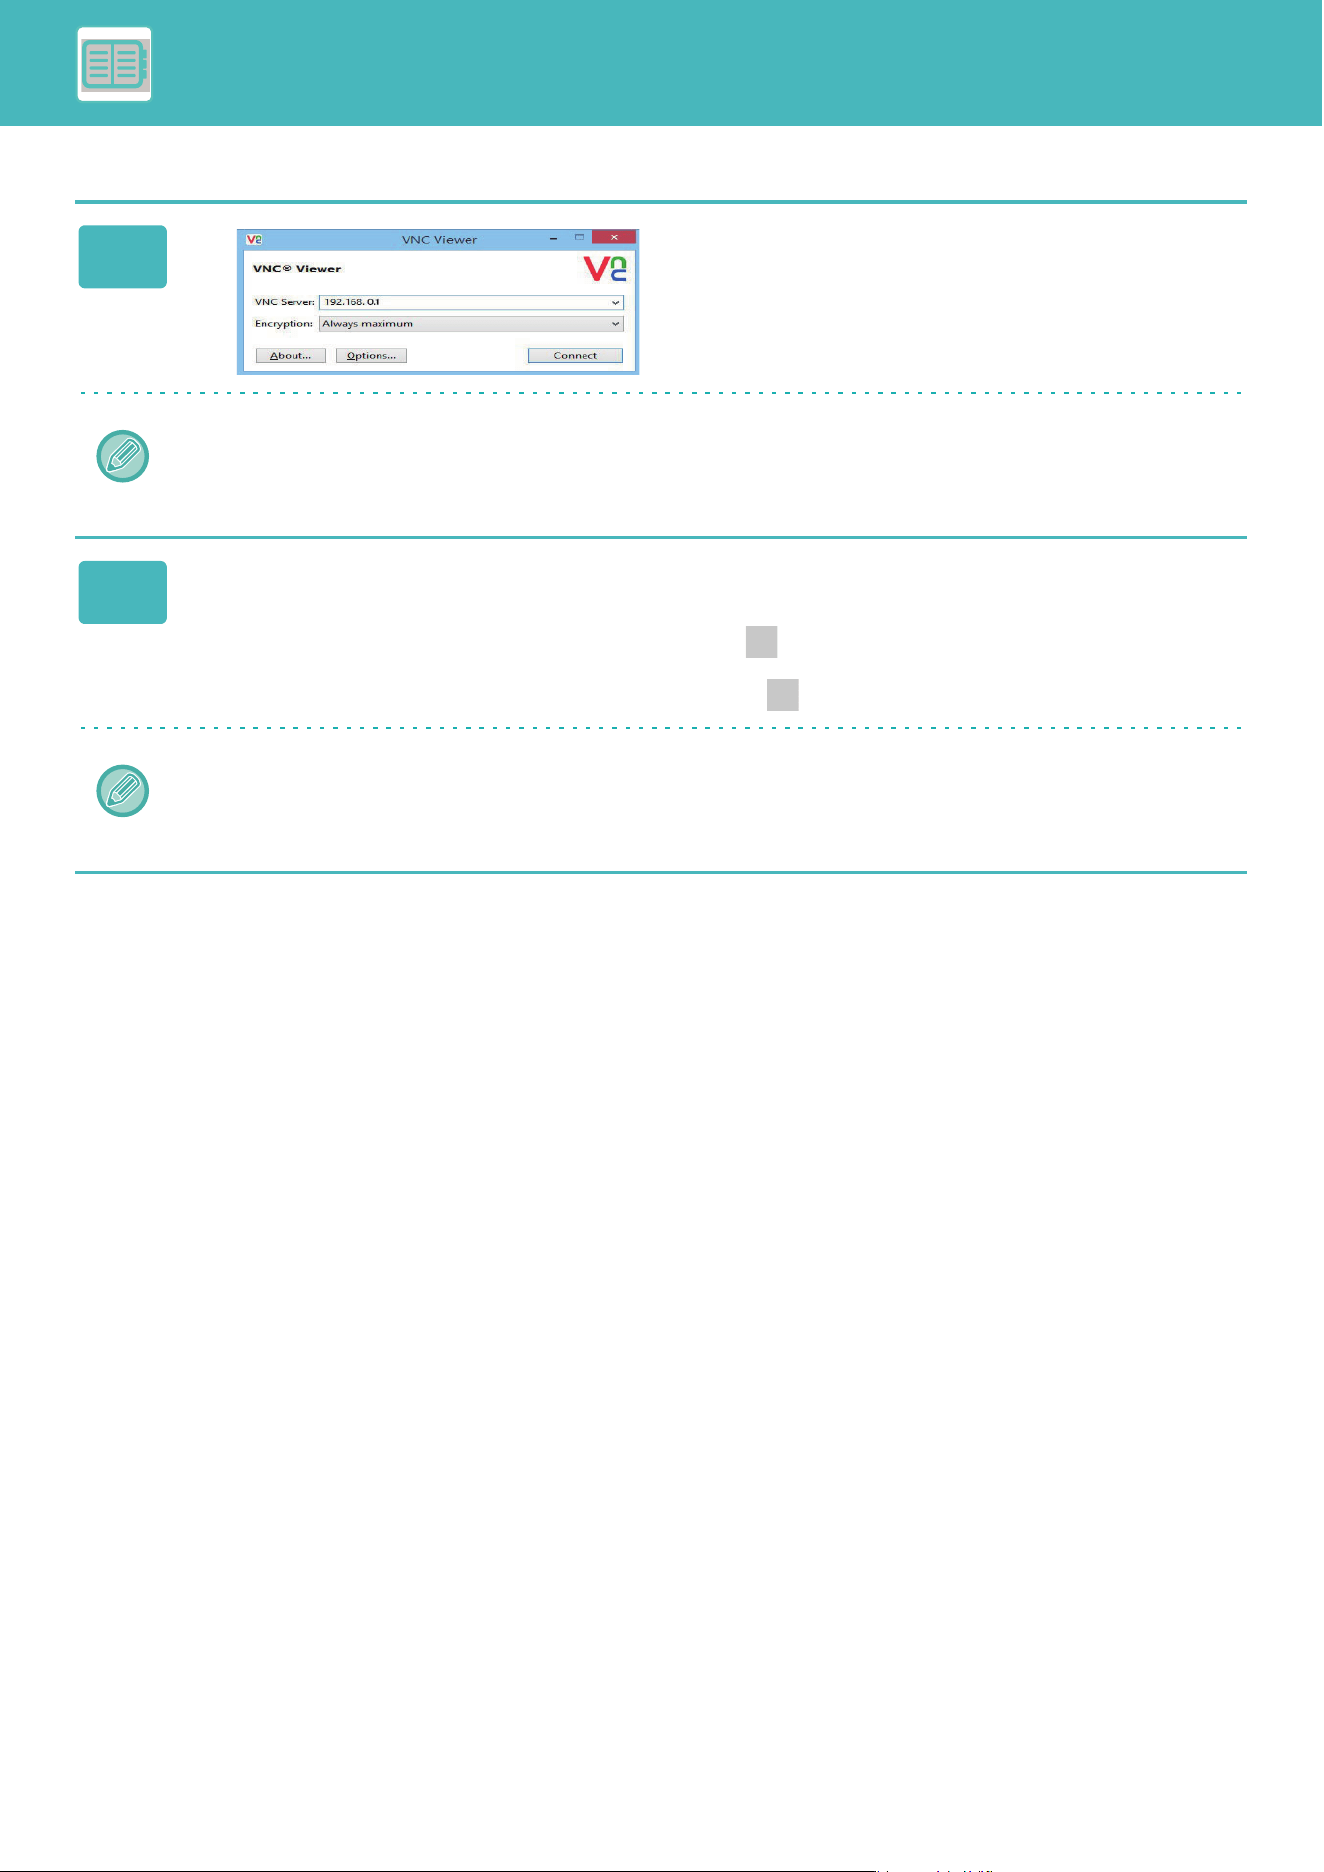
8-36
CONVENIENT USE OF THE MACHINE►USING THIS MACHINE IN A NETWORK ENVIRONMENT
Example: RealVNC®
1
Start the VNC viewer, enter the IP
address of the machine in the "VNC
Server" entry box, and click the
[Connect] button.
Check with the administrator of the machine for its IP address.
2
Follow the message on the operation panel of the machine to permit the
connection.
When the machine is connected to a VNC application software, appears on the system bar of the machine's touch
panel.
If you wish to disconnect, exit the VNC application software or tap .
Use the operation panel in the same way as you would on the machine. However, you cannot enter values in series by
continuously clicking the key.
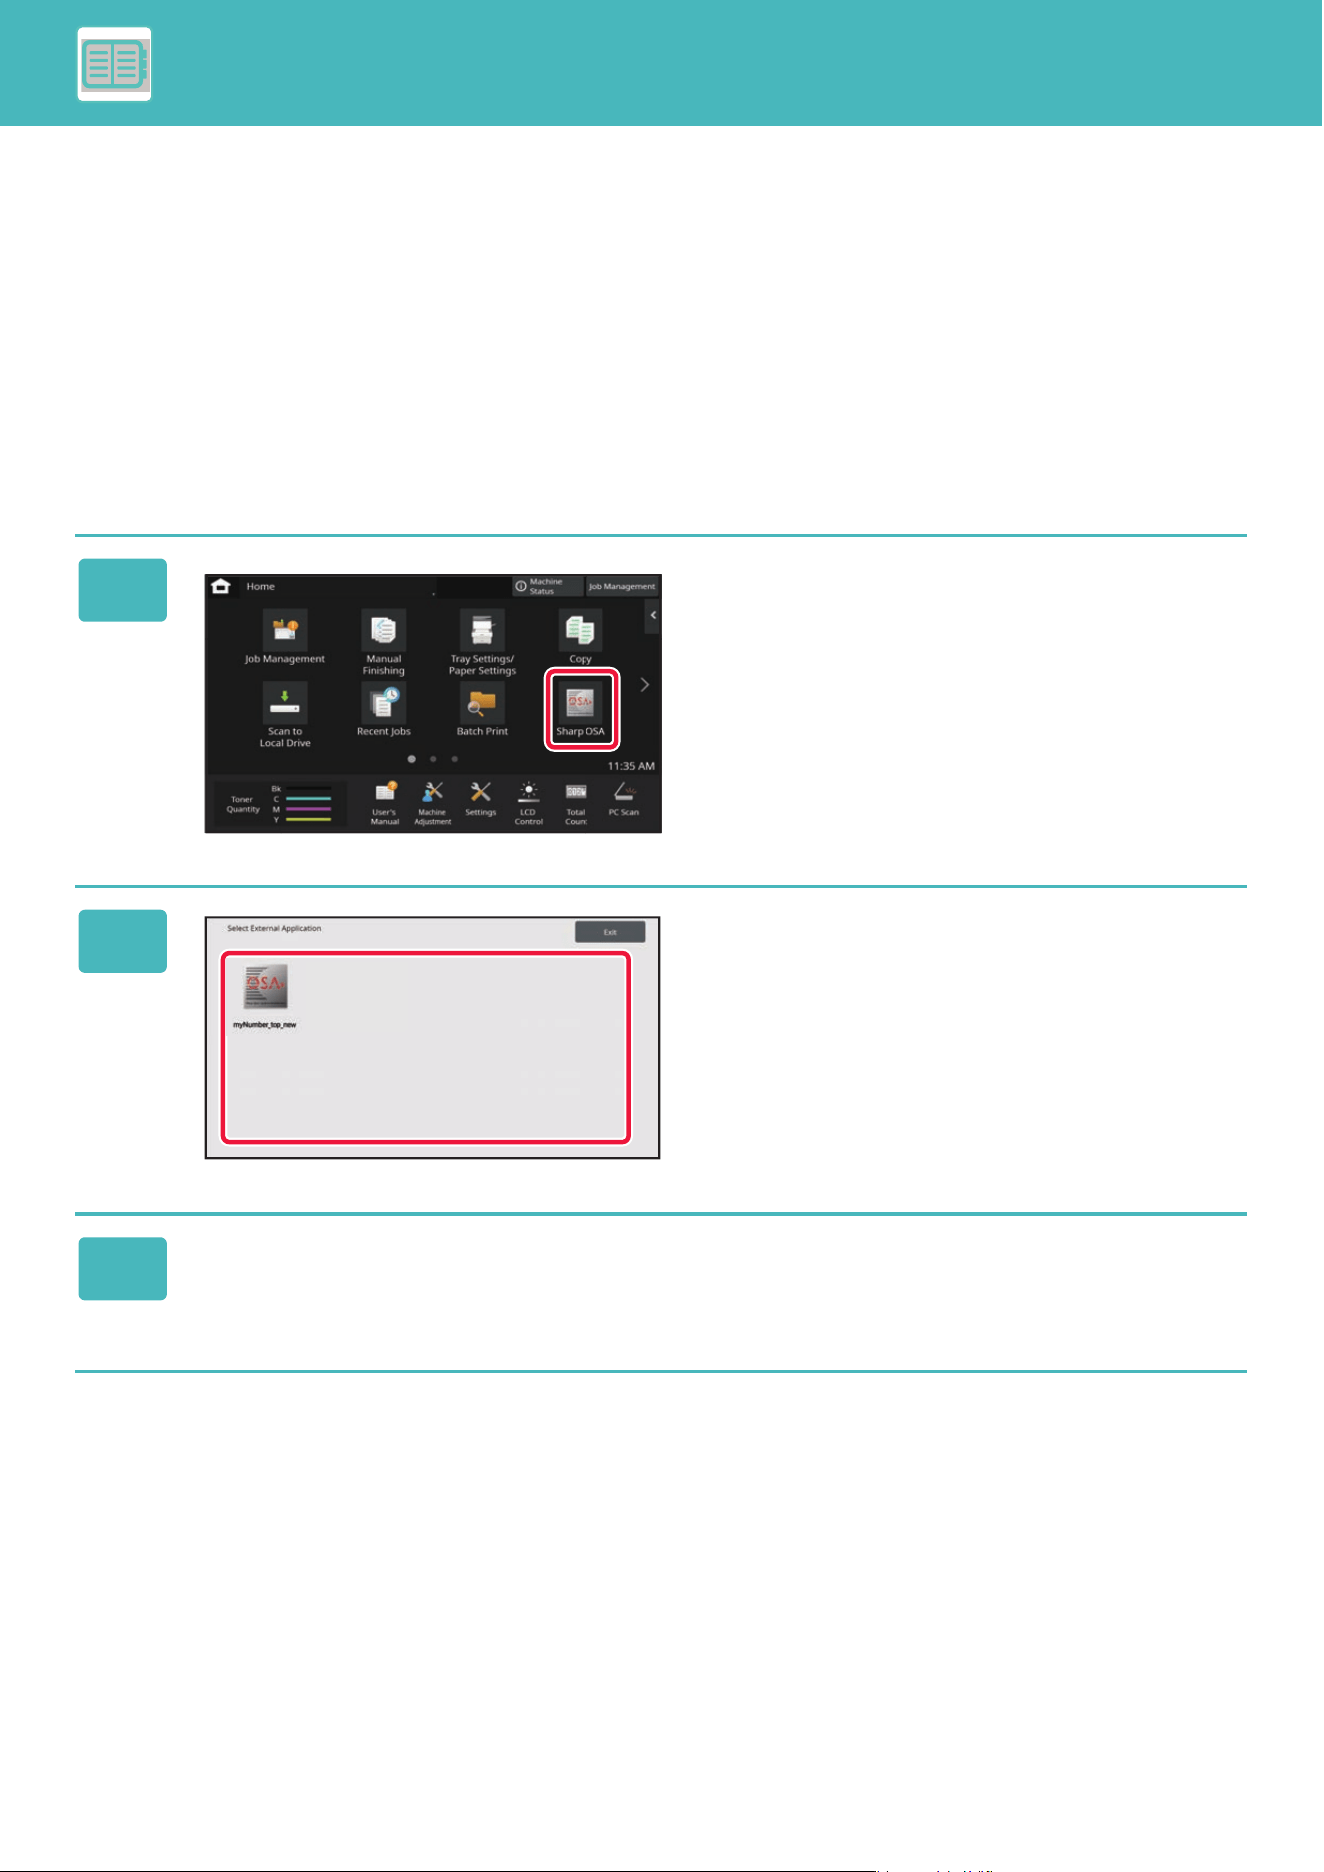
8-37
CONVENIENT USE OF THE MACHINE►USING THIS MACHINE IN A NETWORK ENVIRONMENT
Sharp OSA
Sharp OSA (Open Systems Architecture) is an architecture that directly links the machine to software applications for
work (external applications) over a network.
When you use a machine that supports Sharp OSA, you can link controls on the operation panel and device functions
such as scan send to external applications.
APPLICATION COMMUNICATION
This module enables you to link the machine with a scanner application and other standard applications. Set a standard
application in "Settings (administrator)" and "Sharp OSA".
1
Tap the [Sharp OSA] key in the Home
screen.
If no standard applications have been stored, the key cannot
be tapped.
2
Select a standard application.
If two or more standard applications have been stored, the
screen for selecting a standard application will appear. Tap
the standard application that you wish to use.
If only one standard application has been stored, connection
to the standard application will begin.
3
Connect the machine to the standard application.
The message "Connecting to the external application." appears while the machine communicates with the standard
application.
Select External Application
Exit

8-38
CONVENIENT USE OF THE MACHINE►USING THIS MACHINE IN A NETWORK ENVIRONMENT
EXTERNAL ACCOUNT APPLICATION
The external account module enables you to use an "external account application" for centeralized account
management of an MFP on a network.
An "external account application" can be used in "external authentication mode" or "external count mode".
When "external authentication mode" is used, the login screen is retrieved from the application when the machine is
started. When a job ends, a job notification screen is sent to the application for counts by authenticated user. When
"external count mode" is used, the login screen is not displayed when the machine is started. Only a job result
notification is sent to the application. User authentication by the external account application cannot be used. However,
the external account application can be used in combination with the internal account function.
External account application setup
After setting an external application in "Settings (administrator)", restart the machine to enable the setting.
To restart the machine, see “TURNING ON THE POWER
(page 1-9)".
Operation in external account mode
The following describes operation in the two modes for using an external account application.
External authentication mode
When the machine is powered on in external authentication mode, the machine accesses the external account
application and displays the login screen. The login screen also appears when the [Call] key is tapped to run a job in the
job management complete screen. (The login screen does not appear if the user has already logged in by the normal
method.)
Tap the job management display while the login screen is displayed, and the job management screen appears. To
return to the previous screen, tap a mode select key.
If login fails:
If the login screen fails to appear or the application does not operate correctly, the machine may also stop operating
correctly. In that case, terminate external account mode forcibly.
External count mode
Unlike in external authentication mode, when the machine is started in "external count mode", the login screen of the
external account application is not displayed after the machine has started up. Only the job result is sent to the external
account application.
External count mode can be used together with the user control function of the machine. (External count mode can also
be used when the user control function is disabled.)
• The user control function of the machine cannot be used in external authentication mode.
However, "User Registration", "User Count Display", "User Count Reset", "User Information Print", and "The Number of
User Name Displayed Setting" can be used.
• The mode select key cannot be used while the login screen appears.
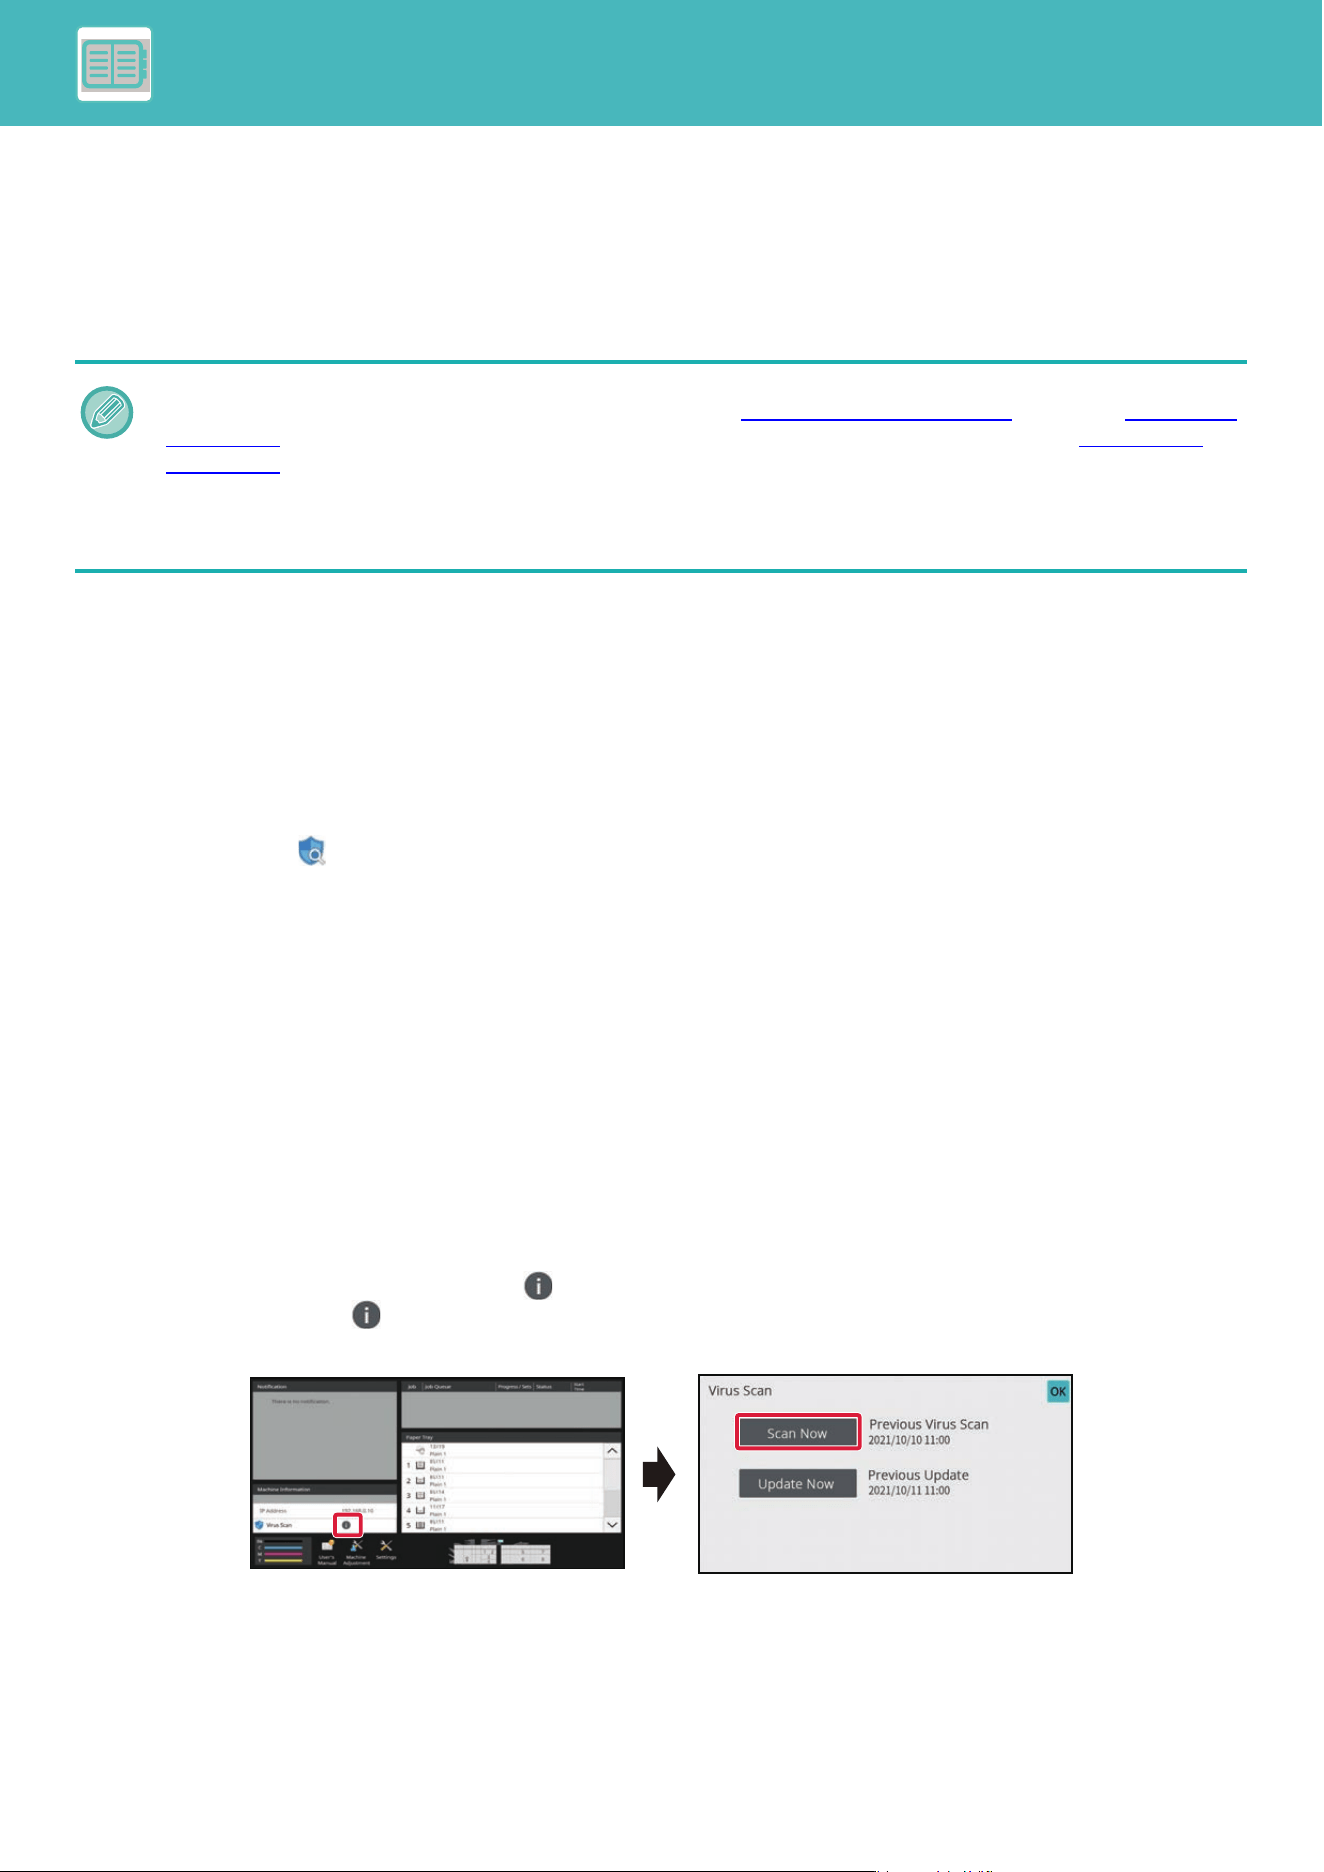
8-39
CONVENIENT USE OF THE MACHINE►USING THIS MACHINE IN A NETWORK ENVIRONMENT
VIRUS SCAN
When this machine is connected to a network environment, it may be exposed to viruses and other attacks from outside.
It is also possible to be infected with a virus via a USB memory device. There is a concern that a virus infecting the
device may spread to other devices. By installing a virus detection kit, viruses can be detected and dealt with at an early
stage to prevent the spread of virus infection.
VIRUS SCAN/VIRUS DEFINITION UPDATE TIMING AND
TARGET DATA
This section describes the timing of virus scan and virus definition file updates and the target data for scanning.
Virus scan timing
The virus scan starts at the following timings.
During the virus scan, icon will be displayed in the System Area and in the machine information of the Machine
Status screen.
Scan during installation and update
Scans for viruses during firmware updates, embedded application installation and updates.
Real time scan
This function scans for viruses during the input and output of data from the machine. This function can be used when
[Perform Virus Scan on Input-Output Data] is enabled in [Virus Scan Setting] of the system settings.
Regular scan
Scans for viruses at a fixed date and time. This function can be used when [Perform Virus Scan at Specified Time] is
enabled in [Virus Scan Setting] of the system settings. The date and time can be set in [Time Schedule] under [Virus
Scan Setting].
On-demand scan
You can run a virus scan immediately. When is displayed in the virus scan of the machine information on the
Machine Status screen, tap , and then tap [Scan Now] to execute the scan. You can also select [Perform Virus Scan
Now] under [Virus Scan Setting] in the system settings to execute the scan.
• The machine must be connected to a network and have access to the Internet. Connect to a LAN using the LAN connector
of the machine, and make the necessary settings by referring to "Network Settings (page 9-136)
". Also, see "Port Control
(page 9-155)", and the HTTPS client port must be set to "Enabled". In addition, if necessary, configure "Proxy Setting
(page 9-149)".
• The virus scan settings are configured in [Virus Scan Setting] in [Security Settings]. The first time you enter [Virus Scan
Setting], the software license agreement screen will appear. Read and agree to the terms of the agreement before using
the virus detection kit.
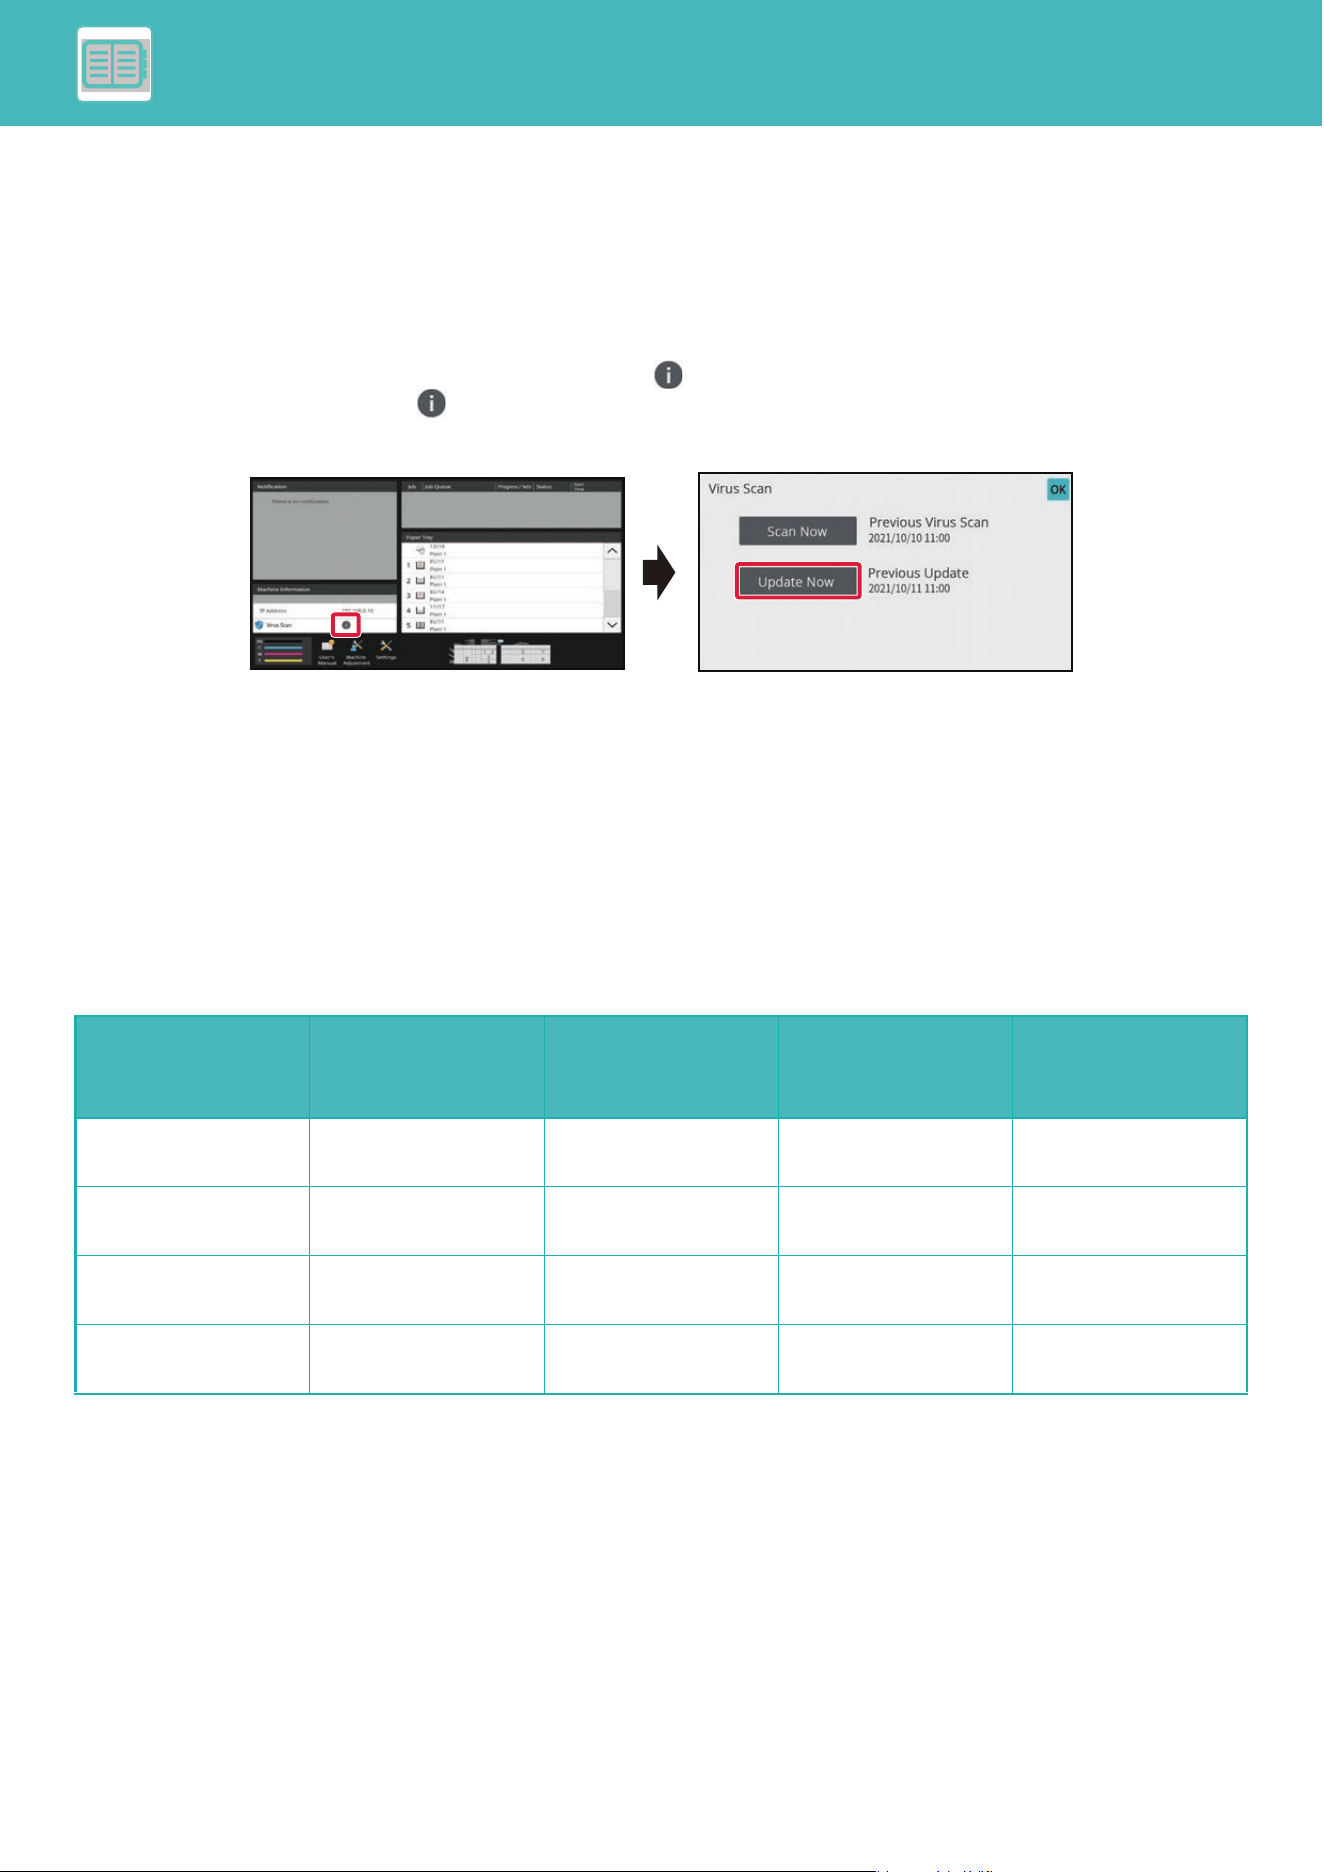
8-40
CONVENIENT USE OF THE MACHINE►USING THIS MACHINE IN A NETWORK ENVIRONMENT
Update timing for virus definition files
You can update the virus definition file at the following time.
Regular update
Automatically updates and keeps virus definition files in the latest state.
On-demand update
You can update the virus definition file immediately. When is displayed in the virus scan of the machine information
on the Machine Status screen, tap and then tap [Update Now] to update the virus definition file. You can also update
the virus definition file by selecting [Perform Update Now] in [Virus Scan Setting] in the system settings.
Target data for virus scan
The following data will be scanned for viruses.
• Firmware for the machine
• Embedded applications
• Input/output data of the machine (job data, configuration data of the machine, address book data, input/output data of
document filing)
• Data stored in the machine's NAS folder (shared folder)
Combination of target data and virus scan
The combinations of target data and virus scan are as follows.
* As for the input/output data of the machine, the data stored in the storage will be targeted for regular scan and on-demand scan.
Scan during
installation and
update
Real time scan Regular scan On-demand scan
Firmware for the
machine
Yes No Yes Yes
Embedded
applications
Yes No Yes Yes
Input/output data of
the machine
No Yes Yes
*
Yes
*
Data stored in the
NAS folder
No No Yes Yes
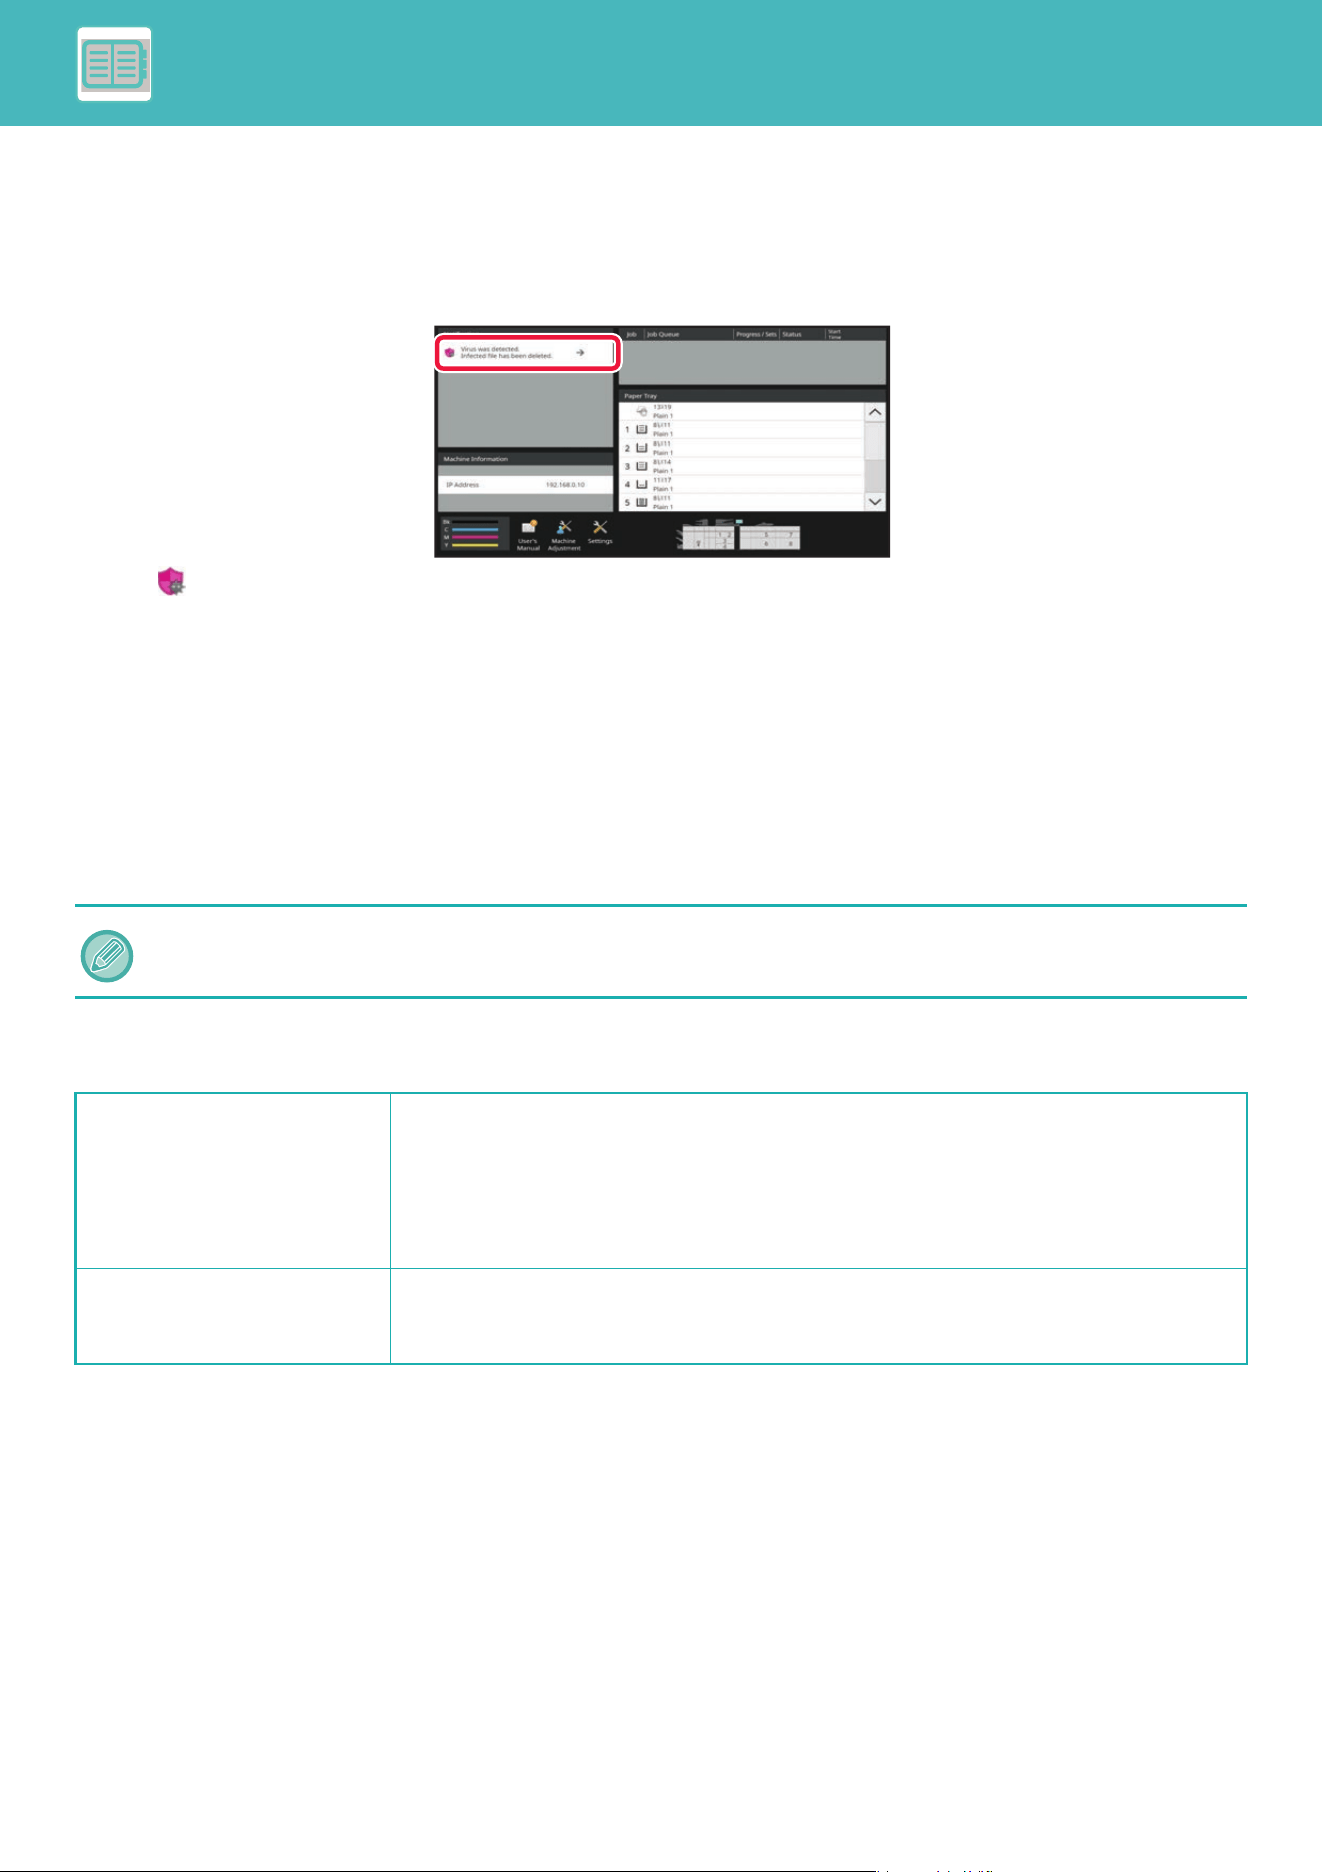
8-41
CONVENIENT USE OF THE MACHINE►USING THIS MACHINE IN A NETWORK ENVIRONMENT
WHEN A VIRUS IS DETECTED
Displayed in the Machine Status screen
When a virus is detected by the virus scan, the following screen will be displayed on the Machine Status screen.
An icon will also appear in the System Area to indicate that a virus has been detected.
If a virus is detected, stop using the machine and take anti-virus countermeasure.
When you tap on the list of "Notification" will display the deleted message and information about the virus, if deleted, the
date and time of detection, the type of target data, and the target file name or the application name.
If the virus detection kit has already taken action against the virus, tap [Delete Notification] to clear the message from
"Notification".
If administrative rights are required to remove the virus, a message will appear with information about the virus, the date
and time of detection, the type of target data, and the target file name or the application name, along with a message to
contact the administrator.
If you need confirmation from the administrator, tap [Delete Notification] to display the administrator's login screen, and
after logging in, the message will be cleared.
When a virus is detected, the machine will proceed as follows.
If the target data is the firmware of the machine
Even if multiple viruses are detected, only one line will be displayed in "Notification". After the first message is deleted from
"Notification", the contents of the next virus will be displayed on the same line in "Notification".
Scan during installation and
update
The update will be canceled and the touch panel will display that the updated file is damaged.
After the user confirms the contents and closes the screen, the machine will operate with the
firmware before the update.
If the firmware was updated remotely, the update will be canceled and the virus detection
information will be displayed in the "Notification" of the Machine Status screen. The machine
will operate with the firmware before the update
Regular scan/On-demand scan The message is displayed in the " Notification" of the Machine Status screen about the virus
detection and the need to consult a nearest SHARP Service Department. The machine will
continue to operate.
8-42
CONVENIENT USE OF THE MACHINE►USING THIS MACHINE IN A NETWORK ENVIRONMENT
If the target data is an embedded application
When the target data is the input/output data of the machine
If the target data is data stored in a NAS folder
If "Audit Log" and "E-mail Alert" are enabled, when a virus is detected, it will be logged and an e-mail alert will be sent.
"Audit Log" of virus scan
For more information about "Audit Log", see "Audit Log (page 9-166)" in system settings.
E-Mail Alert
The subject line of the detected virus and the virus information are reported in the body of the e-mail. For more
information about e-mail alerts, see "E-mail Alert and Status (page 9-181)
" in system settings.
Scan during installation and
update
Installation and update via Application Portal/USB memory
Cancel the installation/update, and the touch panel will display that a virus has been detected.
When updating, the user confirms the contents, closes the screen and then the application
operates as before the update.
Installation and update via Web page
Cancel the installation/update, and display the virus detection on the web page.
When updating, the machine will operate with the application before the update.
When updating the firmware
Checks when the machine is started up after update of the firmware. The update is canceled
and the virus detection message is displayed in the "Notification" of the Machine Status
screen. The application that detected the virus will be deleted.
Regular scan/On-demand scan The virus detection message is displayed in the "Notification" of the Machine Status screen.
Real time scan When a virus is detected with respect to the input data, the touch panel will display that a
virus has been detected, the input data or the job to be input will be canceled, and the data or
job data that was about to be output will be discarded. Data in the data input source (USB
memory, external server, etc.) will not be deleted.
When a virus is detected with the output data, the touch panel will display that a virus has
been detected, the output data or the job to be output will be canceled, and the output data or
job data will be deleted.
The virus detection message will be displayed in the "Notification" of the Machine Status
screen.
Regular scan/On-demand scan The virus detection message is displayed in the "Notification" of the Machine Status screen.
Regular scan/On-demand scan Delete the detected data.
A message will be displayed in the "Notification" of the Machine Status screen with the
contents of the infected data deleted because a virus was detected.
Any files on the NAS folder that are detected to have a virus will be deleted, so be sure to back up your files before you get
infected with a virus. Also, do not save important files in the NAS folder.
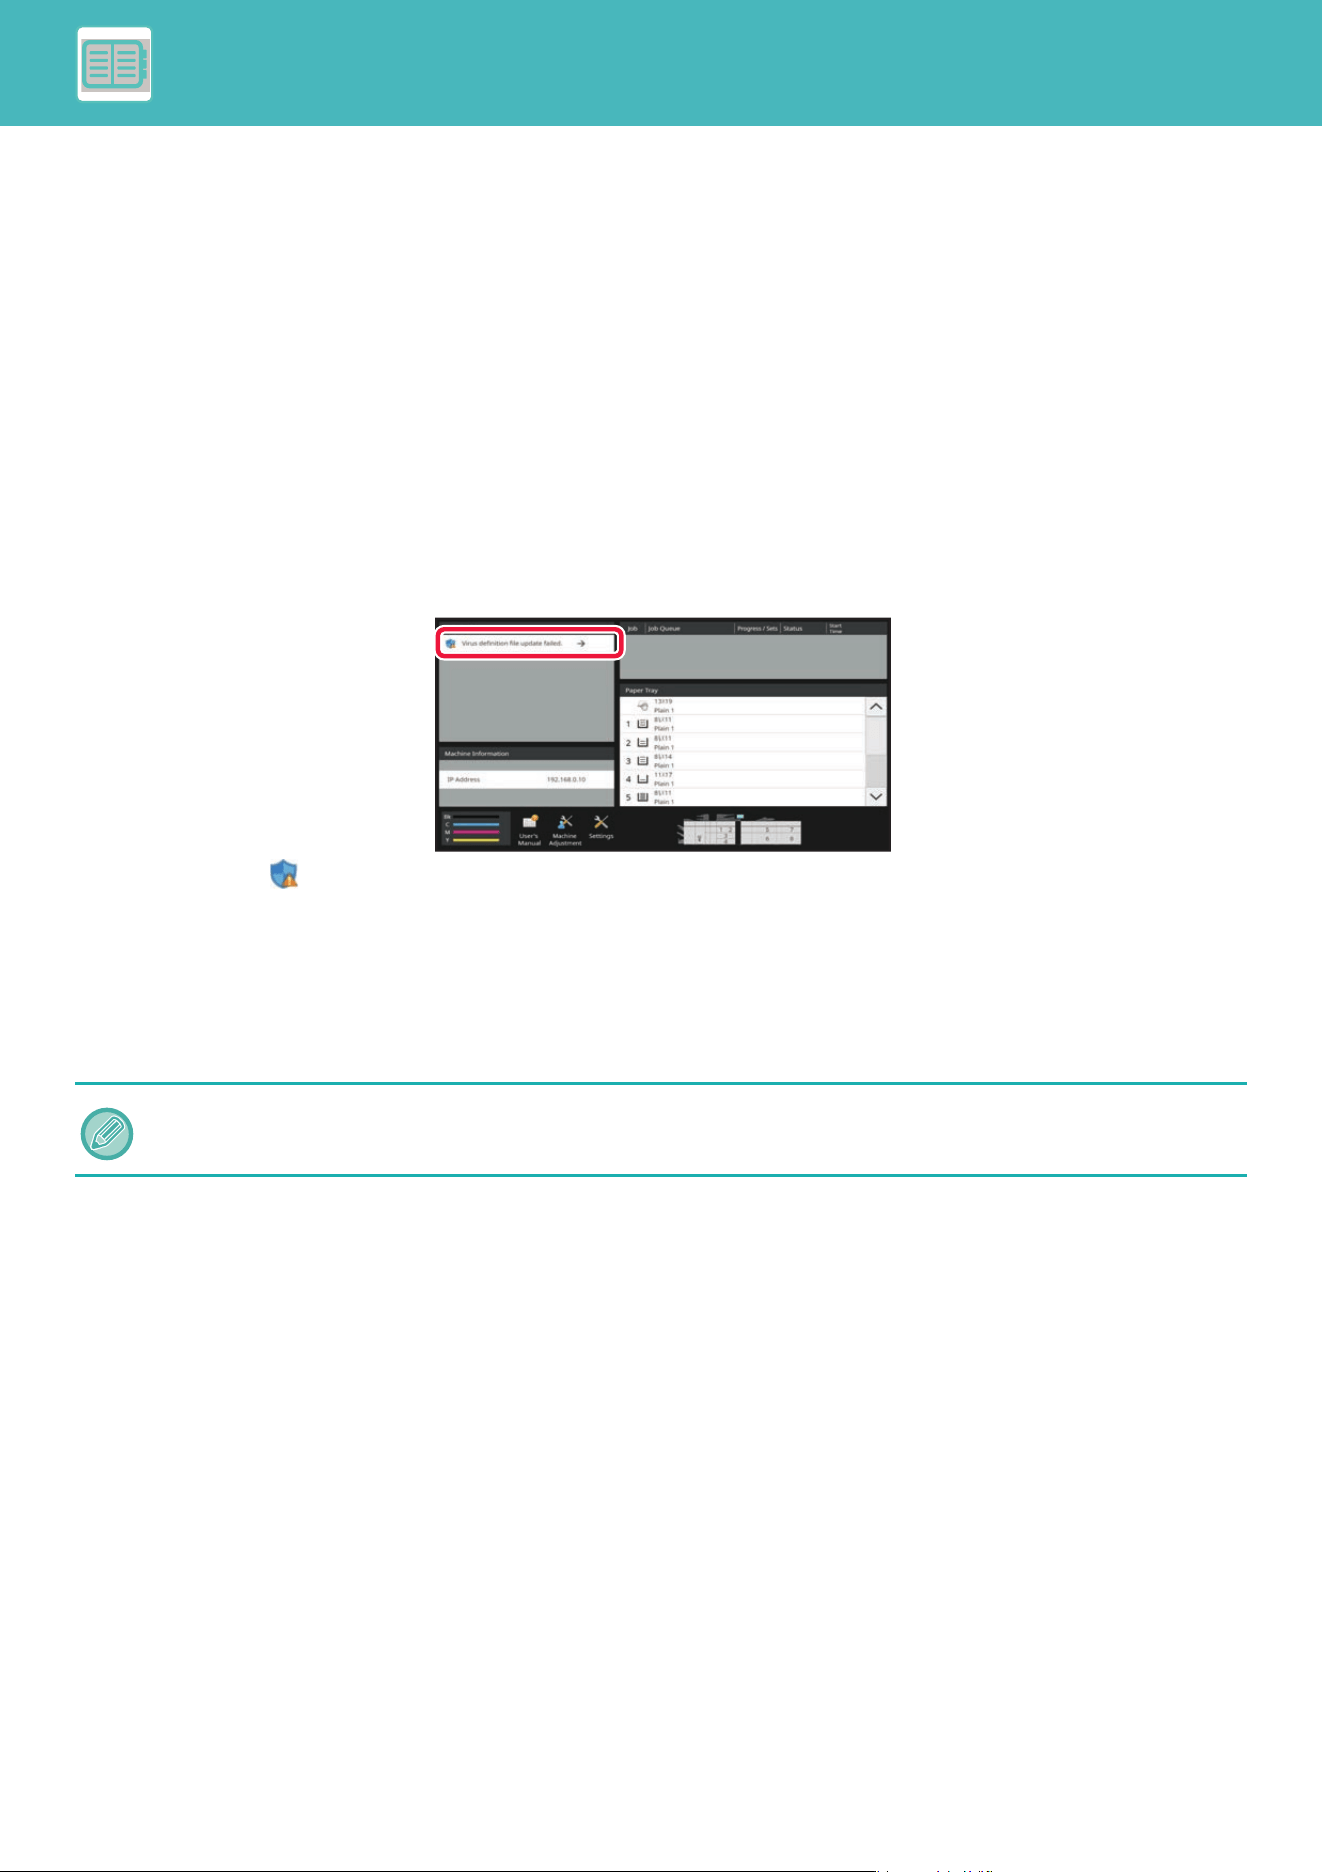
8-43
CONVENIENT USE OF THE MACHINE►USING THIS MACHINE IN A NETWORK ENVIRONMENT
UPDATING THE VIRUS DEFINITION FILE
Updates the virus definition file at the following timings.
• When the machine starts up
Updates the virus definition file when the machine starts up. If virus scan is performed at startup, the virus definition
file is updated before scanning.
• Regular update
Update virus definition files automatically to keep the files in the latest state. It updates automatically, so no settings
are required.
• On-demand update
The virus definition file is updated using the machine information on the Machine Status screen or [Perform Update
Now] in the Virus Scan Setting.
When the virus definition file update fails
When the virus definition file update fails, the following screen appears on the Machine Status screen.
In addition, an icon will be displayed in the System Area to indicate that the virus definition file update has failed.
As for the status, the reason for the update failure will be displayed in the "Notification" section of the Machine Status
screen, check the details.
• Server connection error (cannot connect to the Internet / server not found)
• Download failure (communication error / received data damaged, etc.)
• System time error (the time on the device and the time on the server side are off by more than 24 hours)
• Authentication failure (server authentication failure)
When "Audit Log" is enabled, failure to update virus definition files is logged.
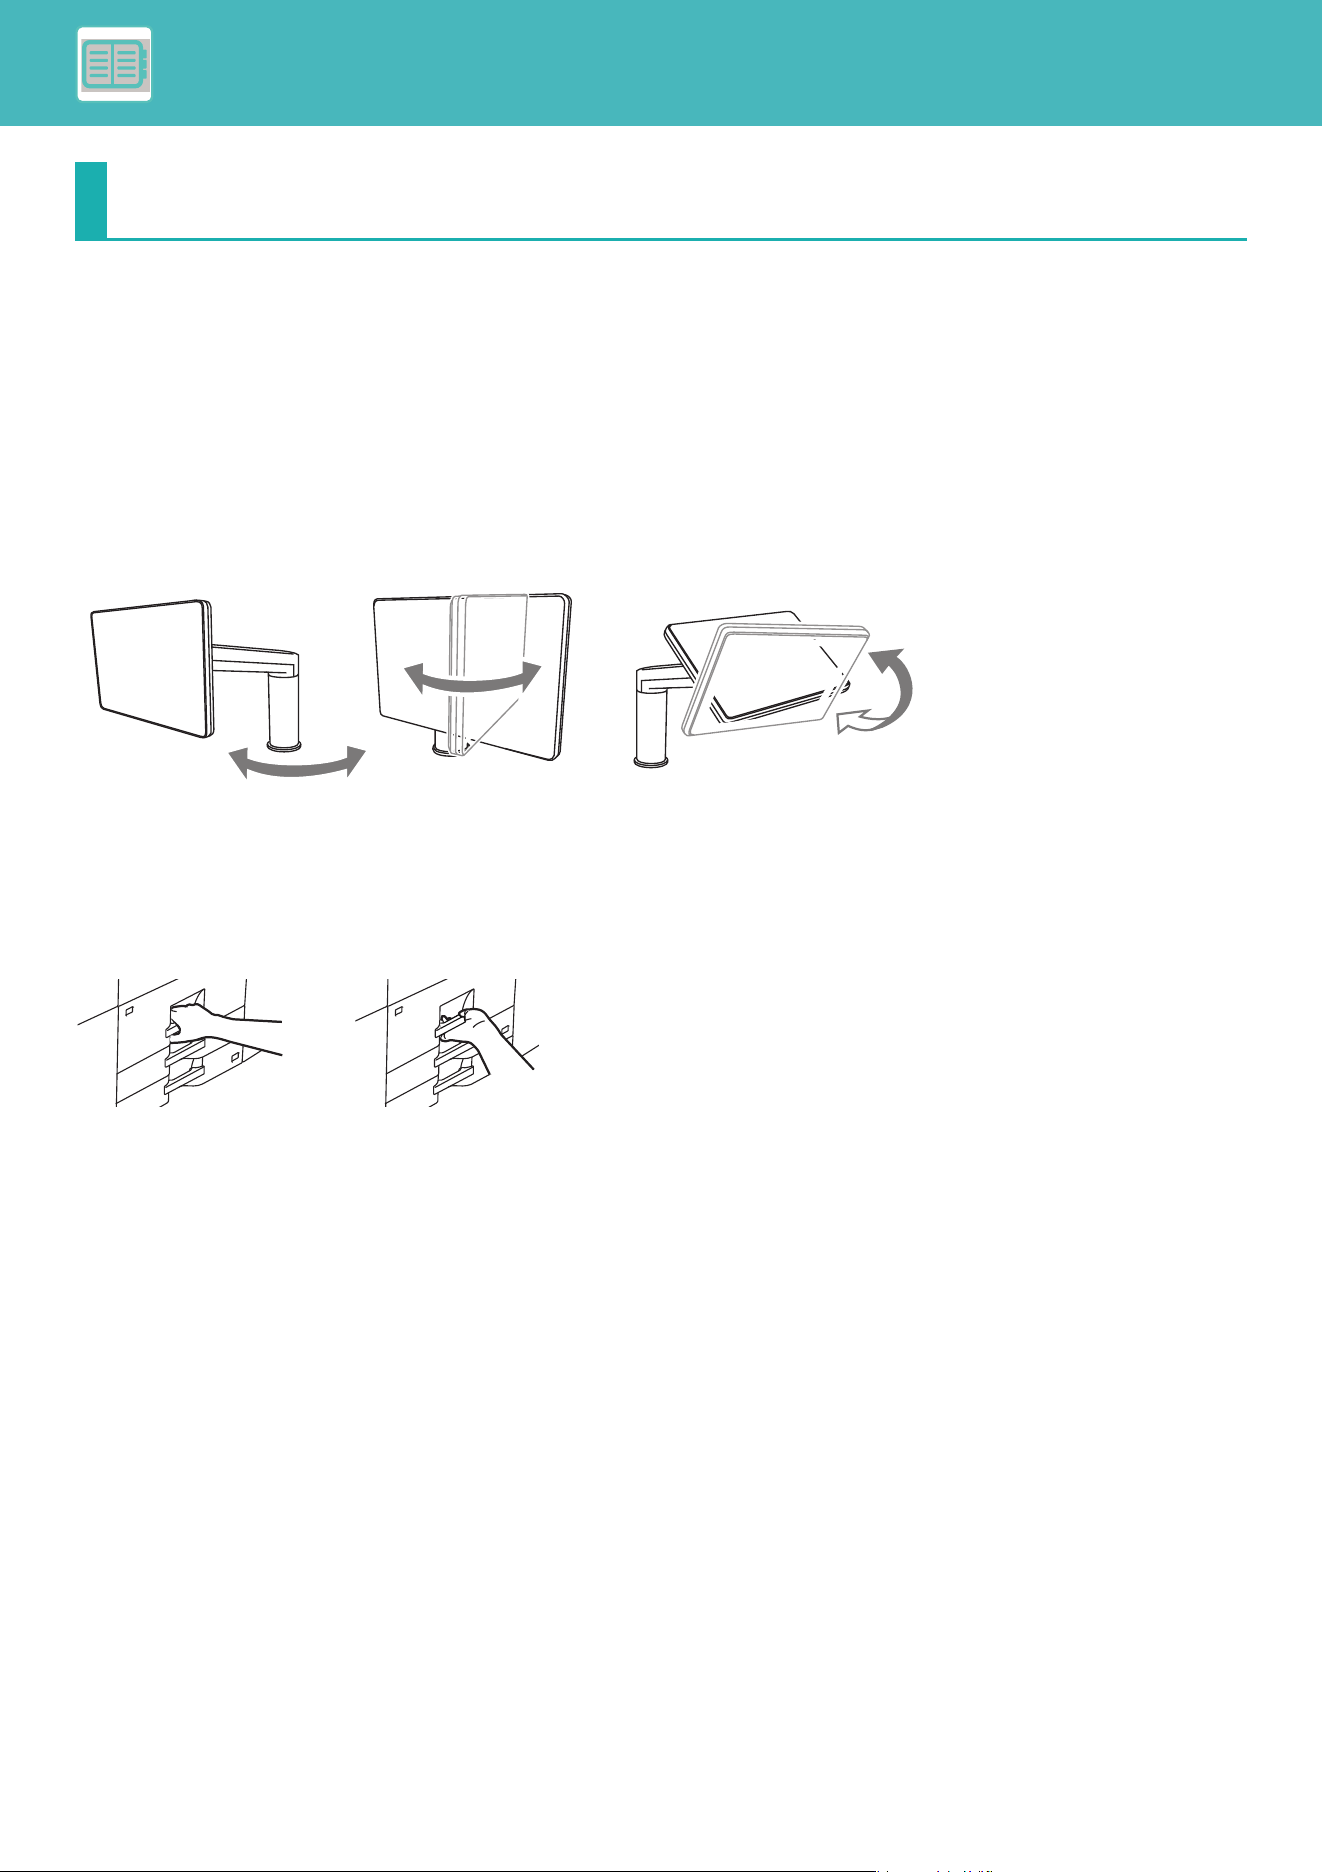
8-44
CONVENIENT USE OF THE MACHINE►UNIVERSAL DESIGN IN THE MACHINE
UNIVERSAL DESIGN IN THE MACHINE
The structure of the machine and the software are designed to allow all people to use the machine with ease.
UNIVERSAL DESIGN RELATED TO OPERATION
Adjustment of operation panel angle
The angle of the entire operation panel can be adjusted to enable use even when seated.
Grip handle on paper trays
The grip-type handles allow easy use from above or below. By simply placing your hand on a handle and pulling
forward, the lock releases. The trays can be manipulated in a natural manner.
Changing of key response time
The response time of the keys can be changed as needed.
In "Settings" (administrator)", select [System Settings] → [Common Settings] → [Operation Settings] → [Condition
Settings] → [Key Operation Setting].
• Time for Accepting Key Entry
This setting determines how long a key in the touch panel must be tapped until the key input is registered. The time
can be set from 0 to 2 seconds in increments of 0.5 seconds.
By lengthening the time setting, key input can be prevented when a key is tapped accidentally. Keep in mind,
however, that when a longer setting is selected more care is required when tapping keys to ensure that key input is
registered.
• Disable Auto Key Repeat
This is used to disable key repeat.
Key repeat causes a setting to change continuously not only each time the key is tapped but while a key is tapped.
• Long-touch Detection Time
Select a time when a long key touch is detected.
• Double Tap Speed Interval
Select an interval when a double tap is detected.
UNIVERSAL DESIGN IN THE MACHINE
8-45
CONVENIENT USE OF THE MACHINE►UNIVERSAL DESIGN IN THE MACHINE
Confirmation of placement of original in document feeder
The original setting lamp lights up when the original is correctly set on the original setting table.
Even for users who have difficulty confirming that the original is set on the original setting table, the original setting lamp
can be turned on to confirm that the original is set correctly.
UNIVERSAL DESIGN RELATED TO VISION
Changing of text size
The size of the text on the touch panel can be changed. When the text on the touch panel is small and difficult to read,
the text can be enlarged.
In "Settings" (administrator)", select [System Settings] → [Common Settings] → [Operation Settings] → [Condition
Settings] → [Enlarge Display Mode].
• Enlarge Display Mode
Displays large characters on the screen.
appears in the system area when Enlarge Display Mode is enabled.
UNIVERSAL DESIGN RELATED TO HEARING
Audible alert sounds when changing settings
When moving through copy ratio or exposure settings, the user is alerted by an audible sound at the default setting
(copy ratio 100%, exposure 3).
In "Settings (administrator)", select [System Settings] → [Sound Settings] → [Beep Sound Settings (Common)] → [Keys
Touch Sound] and [Reference Tone].
• Keys Touch Sound
Control the key touch sound level, or turns the sound off. You can also have two peeps sound at initial values when
setting the ratio in copy mode or when adjusting the exposure in any mode.
• Make Key Touch Sound at Default Setting
When you specify the exposure in the exposure adjustment screen of each mode, a bleep sounds two times when the
reference value is reached.
Screen in which setting is effective Initial value
Ratio setting screen in base screen of copy mode Ratio 100%
Exposure setting screen in base screen of copy mode Exposure level: 3 (medium)
Exposure adjustment screen in base screen of network scanner modes
Exposure adjustment screen for Scan to local drive in document filing mode

8-46
CONVENIENT USE OF THE MACHINE►UNIVERSAL DESIGN IN THE MACHINE
UNIVERSAL DESIGN FEATURES
The machine has design features and settings that are compatible with universal design.
Easy-to-use user interface
• Easy mode
This mode shows only frequently used items. Buttons and text are enlarged to increase ease of operation. Almost all
regular operations can be completed using the easy mode screen.
COPY MODE
(page 3-3)
NETWORK SCANNER MODE (page 5-6)
• Customizing the home screen and adding icons
You can add icons to the home screen. You can also change an icon image to a custom image.
Add an icon image in "Settings (administrator)" - [System Settings] →[Home Screen Settings] →[Icon].
To add an icon to the home screen, add a key in "Settings (administrator)" - [System Settings] →[Home Screen
Settings] →[Condition Settings] →[Home Button]/[Fix Key].
• Customizing the home screen - changing the display order
You can change the order of the items in the home screen so that the items you use most frequently appear first.
To change the order of the items in the home screen, change in "Settings (administrator)" - [System Settings]
→[Home Screen Settings] →[Condition Settings] →[Home Button].
• Customizing the home screen - intuitive and easy-to-use design
A flat icon design is used to make the screen intuitive and easy to view. The toner level is always shown, eliminating
the need to perform an action to check the toner level.
• High-contrast display (UD pattern)
The touch panel image can be set to high contrast.
Select [Pattern 7] in "Settings (administrator)" - [System Settings] →[Common Settings] →[Operation Settings]
→[Condition Settings] →[MFP Display Pattern Setting].
• Multi-language display
The language used in the touch panel can be changed to another language such as English or French.
Select the desired language in "Settings (administrator)" - [System Settings] →[Common Settings] →[Operation
Settings] →[Condition Settings] →[Display Language Setting].
For the procedures for editing the home screen, see "EDITING THE HOME SCREEN (page 2-19)".

8-47
CONVENIENT USE OF THE MACHINE►UNIVERSAL DESIGN IN THE MACHINE
Intuitive operation
• Use the QR code to view the User's Manual page.
Tap the [User's Manual] key on the home screen of the touch panel to display a QR code that indicates the page
containing the user's manual.
You can read the QR code with your mobile device to easily view the corresponding page.
• Easy operation by storing programs
The program function lets you store groups of settings for copying, and other functions. By storing groups of settings
that you frequently use, you can easily select those settings.
PROGRAMS
(page 3-147)
STORING SCAN OPERATIONS (PROGRAM) (page 5-82)
• Remote operation
You can display the machine's touch panel on a computer on the same network to operate the machine from the
computer. You can show how to use the machine on a computer, and people who have difficulty using the touch panel
can operate the machine from a computer.
REMOTE OPERATION OF THE MACHINE
(page 8-35)
Easier operation at the machine
• Darkened output tray color
Output tray colors are darkened to make it easy to distinguish the tray to which a job has been output.
• On right side of operation panel
Located on the right side of the operation panel, this allows smooth removal of paper without interfering with the
output tray.
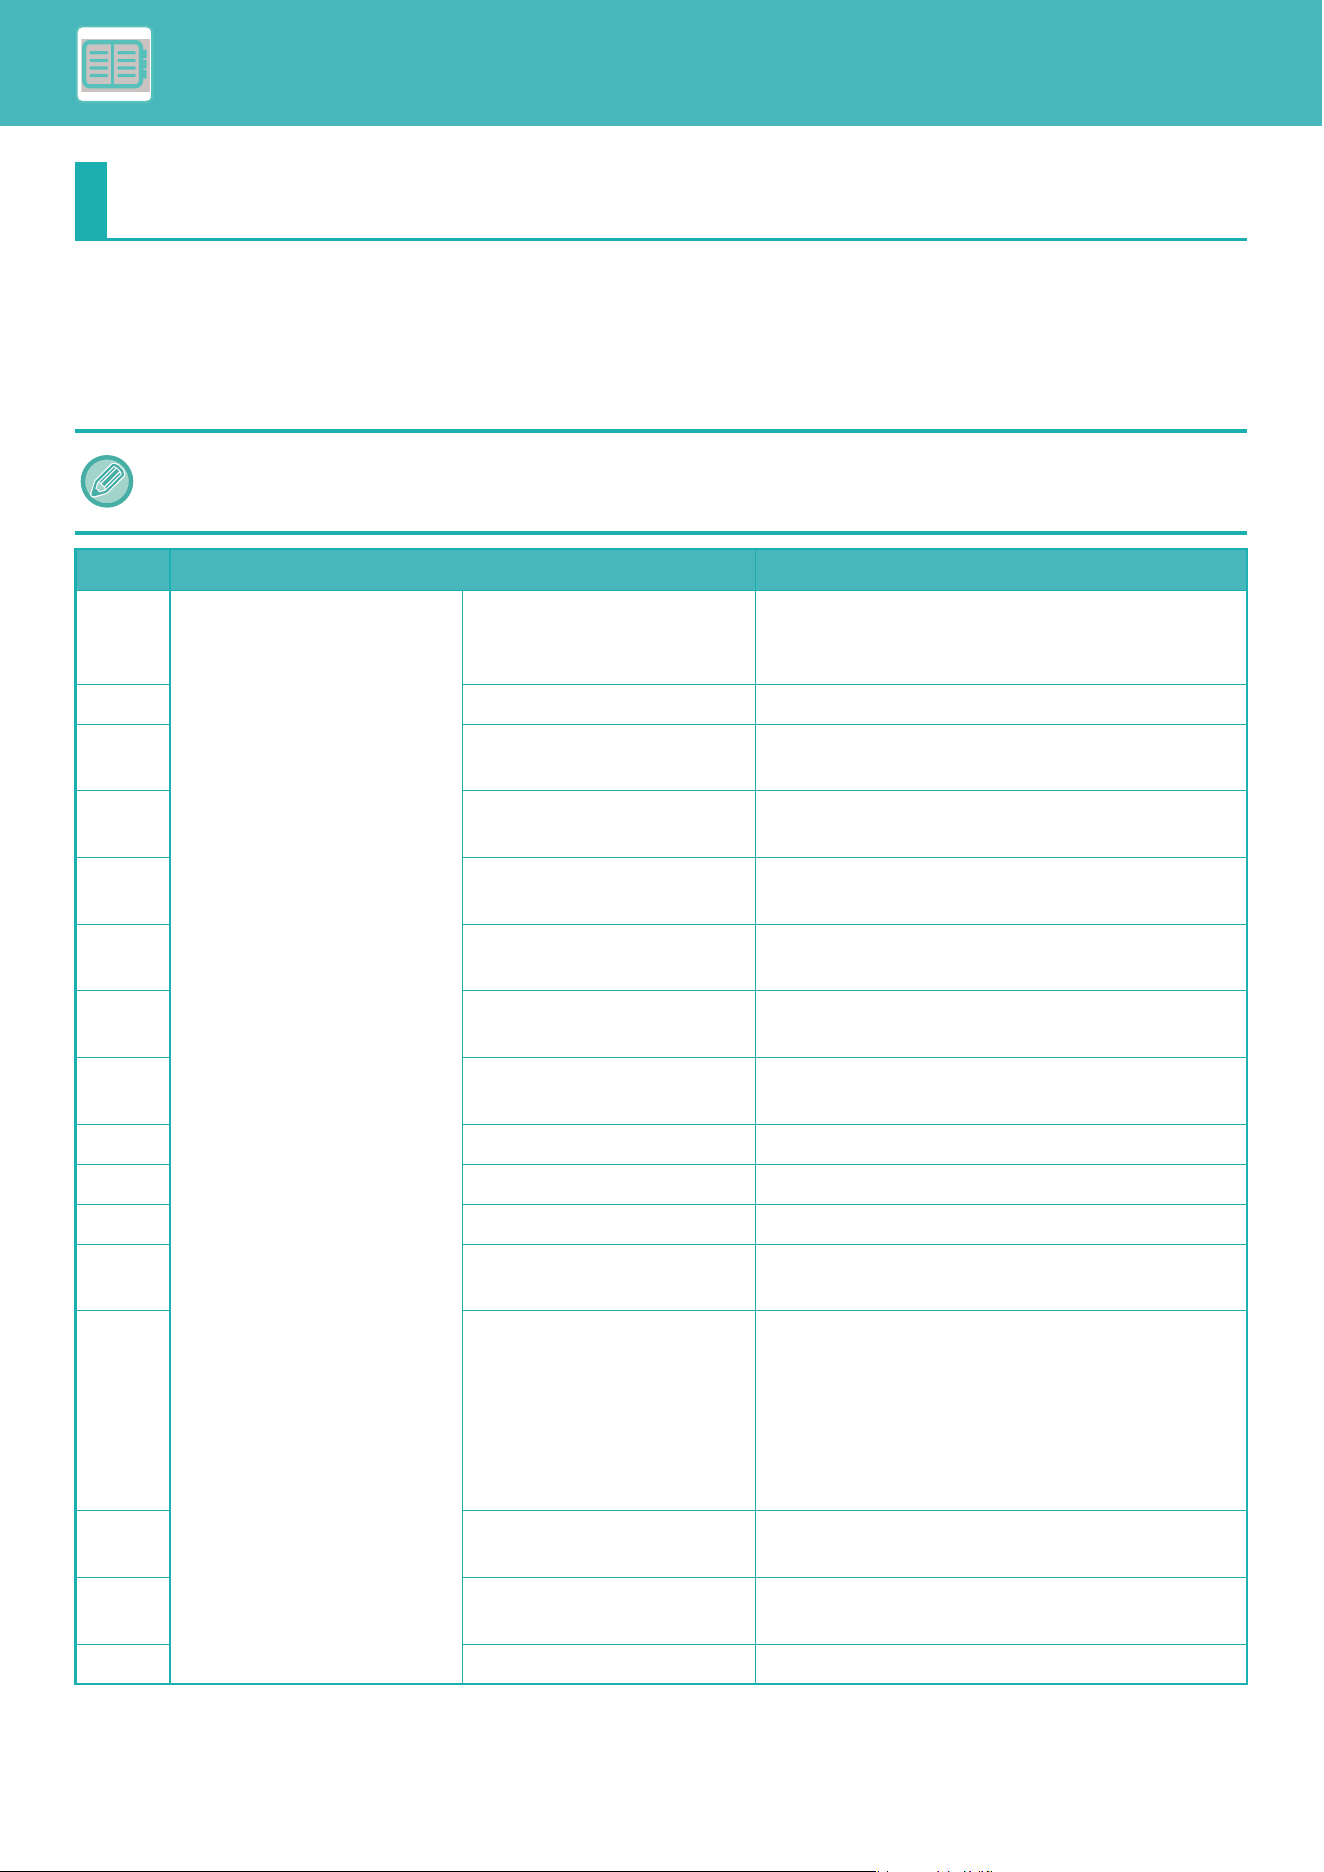
8-48
CONVENIENT USE OF THE MACHINE►JOB LOG LIST
ITEMS RECORDED IN THE JOB LOG
The machine records the performed jobs in the job log.
The main information recorded in the job log is described below.
JOB LOG LIST
• To make it easy to total the usage counts of differently configured machines, the items recorded in the job log are fixed,
regardless of what peripheral devices are installed or the objective of the recording.
• In some cases, job information may not be correctly recorded, such as when a power failure occurs during a job.
No. Item name Description
1 Main items Job ID The job ID is recorded. Job IDs appear in the log as
consecutive numbers up to a maximum of 999999,
after which the count resets to 1.
2 Account Job ID The job ID used in the Sharp OSA is recorded.
3 Job Mode The job mode type, such as copy or print is
recorded.
4 Computer Name The name of the computer that sent a print job is
recorded.
*
5 User Name The user name when the user authentication
function is used is recorded.
6 Login Name The login name when the user authentication
function is used is recorded.
7 Card ID The card ID when it is used for an authentication
process is recorded.
8 Number of Card Issuance The number of times the card has been issued is
written in an SSFC IC card is recorded.
9 Main Code Main Code is recorded.
10 Sub Code Sub Code is recorded.
11 Starting Date & Time The date and time the job was started are recorded.
12 Completing Date & Time The date and time the job was completed are
recorded.
13 Black & White Total Count For a print job, the total count is recorded.
For a send job, the number of transmitted black &
white pages is recorded.
When a broadcast transmission is summarized, the
total number of pages is recorded.
For a scan to local drive job, the number of stored
black & white pages is recorded.
14 Full Color Total Count The total number of pages in a print job that have
been printed using a full color is recorded.
15 Count according to size Counts by original/paper size in color mode and
black & white mode are recorded.
16 Invalid Paper Count(Color) The color invalid sheet count is recorded.
8-49
CONVENIENT USE OF THE MACHINE►JOB LOG LIST
17 Main items Invalid Paper Count(Black &
White)
The black & white invalid sheet count is recorded.
18 Number of Reserved Sets Number of specified sets or reserved destinations is
recorded.
19 Number of Completed Sets Number of completed sets or number of
destinations to which transmission was successfully
completed is recorded.
20 Number of Reserved Pages Number of reserved original pages of a copy, print,
scan job, or other job is recorded.
21 Number of Completed Pages Number of completed pages of a set is recorded.
22 Result The result of a job is recorded.
23 Error Cause When an error occurs during a job, the cause of the
error is recorded.
24 Print Job Related Item Output The output mode of a printed job is recorded.
25 Staple The status of stapling is recorded.
26 Staple Count The staple count is recorded.
27 Punch The status of punching is recorded.
28 Punch Count The punch count is recorded.
29 Fold A job that uses the fold function is recorded.
30 Fold Count Number of folded pages is recorded.
31 Saddle Fold A job that uses the saddle fold function is recorded.
32 Saddle Fold Count Number of saddle folded pages is recorded.
33 Printer Tone The tone used for a print job is recorded.
No. Item name Description
8-50
CONVENIENT USE OF THE MACHINE►JOB LOG LIST
34 Image Send Related Item Address Address of an image send job is recorded.
35 Sender Name Sender name of an image send job is recorded.
36 Sender Address Sender address of an image send job is recorded.
37 Transmission Type Transmission type of an image send job is
recorded.
38 Administrative Serial
Number
Administrative serial number of an image send job
is recorded.
39 Broadcast number Broadcast number of an image send job is
recorded.
40 Entry order Reservation order for broadcast transmission of an
image send job is recorded. This is used to link
communication and printing when recording multi
polling jobs.
41 File Format File format of an image send job or scan to local
drive job is recorded.
42 Sign Records whether or not an electronic signature is
used in e-mail transmission.
43 Encry. Records whether or not encryption is used for
e-mail transmission.
44 Compression
Mode/Compression Ratio
Compression mode and compression ratio of the
file of an image send job or scan to local drive job is
recorded.
45 Document Filing Related
Item
Document Filing Status of document filing is recorded.
46 Storing Mode Document filing storing mode is recorded.
47 Common Functionality Color Setting Color mode selected by user is recorded.
48 Special Modes Special modes selected when the job was executed
is recorded.
49 File Name The stored file name is recorded.
*
50 Data Size [KB] The size of a file is recorded.
No. Item name Description
8-51
CONVENIENT USE OF THE MACHINE►JOB LOG LIST
In some environments this is not recorded.
51 Detailed Items Original Size Size of scanned original is recorded. For a
document filing print job, the paper size of the file is
recorded.
52 Original Type Original type (text, printed photo, etc.) set in the
exposure settings screen is recorded.
53 Original Count Number of scanned original sheets is recorded.
54 Paper Size For a print job, the paper size is recorded.
For a send job, the transmitted paper size is
recorded.
For a Scan to local drive job, the paper size of the
stored file is recorded.
55 Paper Type The paper type used for printing is recorded.
56 Paper Property The paper property specified in "Paper Type" is
recorded.
57 Duplex Setup The duplex setting is recorded.
58 Resolution The scanning resolution is recorded.
59 Machine Item Model Name The model name of the machine is recorded.
60 Unit Serial Number The serial number of the machine is recorded.
61 Name The name of the machine that is set in the Web
pages is recorded.
62 Machine Location The installation location of the machine that is set in
the Web pages is recorded.
63 Machine ID Record the Machine ID entered by the service
technician.
No. Item name Description

9-1
SETTING MODE . . . . . . . . . . . . . . . . . . . . . . . . . . . . . . . . . 9-3
DISPLAYING THE SETTING MODE ON THE
MACHINE. . . . . . . . . . . . . . . . . . . . . . . . . . . . . . . . . . . . . 9-3
DISPLAYING THE SETTING MODE (WEB
VERSION) . . . . . . . . . . . . . . . . . . . . . . . . . . . . . . . . . . . . 9-4
SETTING MODE SCREEN . . . . . . . . . . . . . . . . . . . . . . . . . 9-6
OVERVIEW OF SETTING MODE . . . . . . . . . . . . . . . . . . 9-6
SETTING METHOD. . . . . . . . . . . . . . . . . . . . . . . . . . . . . . . 9-7
SETTING MODE LIST. . . . . . . . . . . . . . . . . . . . . . . . . . . . . 9-9
Status . . . . . . . . . . . . . . . . . . . . . . . . . . . . . . . . . . . . . . . . 9-27
Machine Identification. . . . . . . . . . . . . . . . . . . . . . . . . . . 9-27
Total Count. . . . . . . . . . . . . . . . . . . . . . . . . . . . . . . . . . . 9-28
Device Status . . . . . . . . . . . . . . . . . . . . . . . . . . . . . . . . . 9-28
Network Status . . . . . . . . . . . . . . . . . . . . . . . . . . . . . . . . 9-28
Security Status . . . . . . . . . . . . . . . . . . . . . . . . . . . . . . . . 9-28
Firmware Version . . . . . . . . . . . . . . . . . . . . . . . . . . . . . . 9-29
Power Reset. . . . . . . . . . . . . . . . . . . . . . . . . . . . . . . . . . 9-29
Data List . . . . . . . . . . . . . . . . . . . . . . . . . . . . . . . . . . . . . 9-29
Address Book. . . . . . . . . . . . . . . . . . . . . . . . . . . . . . . . . . 9-31
Category Setting. . . . . . . . . . . . . . . . . . . . . . . . . . . . . . . 9-33
Document Operations . . . . . . . . . . . . . . . . . . . . . . . . . . . 9-34
Document Filing . . . . . . . . . . . . . . . . . . . . . . . . . . . . . . . 9-34
Submit Print Job . . . . . . . . . . . . . . . . . . . . . . . . . . . . . . . 9-36
User Settings . . . . . . . . . . . . . . . . . . . . . . . . . . . . . . . . . . 9-38
User List . . . . . . . . . . . . . . . . . . . . . . . . . . . . . . . . . . . . . 9-38
Custom Index . . . . . . . . . . . . . . . . . . . . . . . . . . . . . . . . . 9-41
Organization /Group List . . . . . . . . . . . . . . . . . . . . . . . . 9-41
User Information Print . . . . . . . . . . . . . . . . . . . . . . . . . . 9-41
Access Control Settings . . . . . . . . . . . . . . . . . . . . . . . . . 9-42
Pages Limit Group . . . . . . . . . . . . . . . . . . . . . . . . . . . . . 9-42
Machine Page Limit Setting . . . . . . . . . . . . . . . . . . . . . . 9-42
Authority Group . . . . . . . . . . . . . . . . . . . . . . . . . . . . . . . 9-43
Favorite Operation Group. . . . . . . . . . . . . . . . . . . . . . . . 9-47
User Count . . . . . . . . . . . . . . . . . . . . . . . . . . . . . . . . . . . . 9-49
View User Count . . . . . . . . . . . . . . . . . . . . . . . . . . . . . . 9-49
Save User Count . . . . . . . . . . . . . . . . . . . . . . . . . . . . . . 9-50
Billing Code Setting. . . . . . . . . . . . . . . . . . . . . . . . . . . . . 9-51
Administration Settings. . . . . . . . . . . . . . . . . . . . . . . . . . 9-51
Main Code List . . . . . . . . . . . . . . . . . . . . . . . . . . . . . . . . 9-51
Sub Code List. . . . . . . . . . . . . . . . . . . . . . . . . . . . . . . . . 9-52
Home Screen Settings . . . . . . . . . . . . . . . . . . . . . . . . . . .9-54
Condition Settings . . . . . . . . . . . . . . . . . . . . . . . . . . . . . .9-54
Icon . . . . . . . . . . . . . . . . . . . . . . . . . . . . . . . . . . . . . . . . . 9-55
Background Image . . . . . . . . . . . . . . . . . . . . . . . . . . . . .9-55
Copy Settings . . . . . . . . . . . . . . . . . . . . . . . . . . . . . . . . . .9-56
Condition Settings . . . . . . . . . . . . . . . . . . . . . . . . . . . . . .9-56
Initial Status Settings. . . . . . . . . . . . . . . . . . . . . . . . . . . .9-59
Text /Image Printing . . . . . . . . . . . . . . . . . . . . . . . . . . . . 9-61
Printer Settings. . . . . . . . . . . . . . . . . . . . . . . . . . . . . . . . .9-62
Condition Settings . . . . . . . . . . . . . . . . . . . . . . . . . . . . . .9-62
Interface Settings . . . . . . . . . . . . . . . . . . . . . . . . . . . . . .9-63
Initial Status Settings. . . . . . . . . . . . . . . . . . . . . . . . . . . .9-64
PCL Settings . . . . . . . . . . . . . . . . . . . . . . . . . . . . . . . . . .9-66
PostScript Settings . . . . . . . . . . . . . . . . . . . . . . . . . . . . .9-66
OOXML Settings . . . . . . . . . . . . . . . . . . . . . . . . . . . . . . .9-67
Print Release Settings. . . . . . . . . . . . . . . . . . . . . . . . . . .9-67
E-mail Print Settings . . . . . . . . . . . . . . . . . . . . . . . . . . . .9-69
Direct Print Settings (FTP) . . . . . . . . . . . . . . . . . . . . . . .9-70
Direct Print Settings (Network Folder). . . . . . . . . . . . . . .9-71
Print Setting from PC/Mobile Terminal . . . . . . . . . . . . . . 9-71
Common Settings . . . . . . . . . . . . . . . . . . . . . . . . . . . . . . . 9-72
Condition Settings . . . . . . . . . . . . . . . . . . . . . . . . . . . . . .9-72
Enable/Disable Settings . . . . . . . . . . . . . . . . . . . . . . . . .9-74
Category Setting . . . . . . . . . . . . . . . . . . . . . . . . . . . . . . .9-75
Scan Settings . . . . . . . . . . . . . . . . . . . . . . . . . . . . . . . . . . 9-76
Initial Status Settings. . . . . . . . . . . . . . . . . . . . . . . . . . . .9-76
Condition Settings . . . . . . . . . . . . . . . . . . . . . . . . . . . . . .9-78
Default Address. . . . . . . . . . . . . . . . . . . . . . . . . . . . . . . .9-81
Subject Name Settings . . . . . . . . . . . . . . . . . . . . . . . . . .9-82
File Name Settings . . . . . . . . . . . . . . . . . . . . . . . . . . . . .9-82
Message Body Settings. . . . . . . . . . . . . . . . . . . . . . . . . .9-83
Metadata Settings. . . . . . . . . . . . . . . . . . . . . . . . . . . . . . . 9-84
Metadata Delivery . . . . . . . . . . . . . . . . . . . . . . . . . . . . . .9-84
Metadata Set Registration. . . . . . . . . . . . . . . . . . . . . . . . 9-84
Edit or Delete Metadata Set . . . . . . . . . . . . . . . . . . . . . . 9-84
Settings . . . . . . . . . . . . . . . . . . . . . . . . . . . . . . . . . . . . . .9-84
Document Filing Settings . . . . . . . . . . . . . . . . . . . . . . . .9-85
Condition Settings . . . . . . . . . . . . . . . . . . . . . . . . . . . . . .9-85
Document Filing Control . . . . . . . . . . . . . . . . . . . . . . . . .9-88
Automatic Deletion of File Settings . . . . . . . . . . . . . . . . .9-89
Sharp OSA Settings . . . . . . . . . . . . . . . . . . . . . . . . . . . . .9-90
Condition Settings . . . . . . . . . . . . . . . . . . . . . . . . . . . . . .9-90
Standard Application Settings . . . . . . . . . . . . . . . . . . . . . 9-91
External Accounting Application Settings . . . . . . . . . . . . 9-91
Embedded Application Settings . . . . . . . . . . . . . . . . . . . 9-92
Polling Setting . . . . . . . . . . . . . . . . . . . . . . . . . . . . . . . . . 9-92
External Service Connect . . . . . . . . . . . . . . . . . . . . . . . . 9-92
Authentication Settings . . . . . . . . . . . . . . . . . . . . . . . . . . 9-93
Default Settings. . . . . . . . . . . . . . . . . . . . . . . . . . . . . . . . 9-93
Administration Settings . . . . . . . . . . . . . . . . . . . . . . . . . . 9-98
Actions when the user is authenticated. . . . . . . . . . . . . . 9-99
Card Reader Settings . . . . . . . . . . . . . . . . . . . . . . . . . . 9-100
SETTING MODE
SETTING MODE LIST
STATUS
ADDRESS BOOK
DOCUMENT OPERATIONS
USER CONTROL
SYSTEM SETTINGS
SETTING MODE

9-2
SETTING MODE
Paper Settings . . . . . . . . . . . . . . . . . . . . . . . . . . . . . . . . 9-101
Paper Tray Settings . . . . . . . . . . . . . . . . . . . . . . . . . . . 9-101
Tray Registration . . . . . . . . . . . . . . . . . . . . . . . . . . . . . 9-104
Custom Size Registration (Bypass) . . . . . . . . . . . . . . . 9-104
Paper Settings . . . . . . . . . . . . . . . . . . . . . . . . . . . . . . . 9-104
Paper Type Registration. . . . . . . . . . . . . . . . . . . . . . . . 9-117
Operation Settings. . . . . . . . . . . . . . . . . . . . . . . . . . . . . 9-118
Condition Settings . . . . . . . . . . . . . . . . . . . . . . . . . . . . 9-118
Easy Mode Settings . . . . . . . . . . . . . . . . . . . . . . . . . . . 9-122
Favorite Key Setting . . . . . . . . . . . . . . . . . . . . . . . . . . . 9-123
Mode Key Display Setting . . . . . . . . . . . . . . . . . . . . . . 9-123
Keyboard Settings . . . . . . . . . . . . . . . . . . . . . . . . . . . . 9-123
Custom Links . . . . . . . . . . . . . . . . . . . . . . . . . . . . . . . . 9-123
Device Control . . . . . . . . . . . . . . . . . . . . . . . . . . . . . . . . 9-124
Condition Settings . . . . . . . . . . . . . . . . . . . . . . . . . . . . 9-124
Status Indicator Setting . . . . . . . . . . . . . . . . . . . . . . . . 9-127
Machine Identification Settings. . . . . . . . . . . . . . . . . . . 9-127
Clock Adjust . . . . . . . . . . . . . . . . . . . . . . . . . . . . . . . . . 9-128
Enable/Disable Settings . . . . . . . . . . . . . . . . . . . . . . . . 9-129
Product Key/Application Number Input. . . . . . . . . . . . . 9-134
Sound Settings. . . . . . . . . . . . . . . . . . . . . . . . . . . . . . . . 9-134
Beep Sound Settings (Common) . . . . . . . . . . . . . . . . . 9-134
Network Settings . . . . . . . . . . . . . . . . . . . . . . . . . . . . . . 9-136
Quick Settings . . . . . . . . . . . . . . . . . . . . . . . . . . . . . . . 9-136
Network Name Setting . . . . . . . . . . . . . . . . . . . . . . . . . 9-138
Interface Settings . . . . . . . . . . . . . . . . . . . . . . . . . . . . . 9-138
Services Settings . . . . . . . . . . . . . . . . . . . . . . . . . . . . . 9-141
Print Port Settings . . . . . . . . . . . . . . . . . . . . . . . . . . . . 9-144
External Print Services Settings . . . . . . . . . . . . . . . . . . 9-145
LDAP Settings . . . . . . . . . . . . . . . . . . . . . . . . . . . . . . . 9-145
Active Directory Settings . . . . . . . . . . . . . . . . . . . . . . . 9-148
Public Folder / NAS Setting . . . . . . . . . . . . . . . . . . . . . 9-148
Proxy Setting . . . . . . . . . . . . . . . . . . . . . . . . . . . . . . . . 9-149
Device Web Page Setting . . . . . . . . . . . . . . . . . . . . . . 9-150
Security Settings . . . . . . . . . . . . . . . . . . . . . . . . . . . . . . 9-151
Password Setting . . . . . . . . . . . . . . . . . . . . . . . . . . . . . 9-151
Condition Settings . . . . . . . . . . . . . . . . . . . . . . . . . . . . 9-154
Port Control . . . . . . . . . . . . . . . . . . . . . . . . . . . . . . . . . 9-155
Filter Setting . . . . . . . . . . . . . . . . . . . . . . . . . . . . . . . . . 9-155
Intrusion/Attack Detection . . . . . . . . . . . . . . . . . . . . . . 9-156
Virus Scan Setting . . . . . . . . . . . . . . . . . . . . . . . . . . . . 9-157
SSL/TLS Settings . . . . . . . . . . . . . . . . . . . . . . . . . . . . . 9-159
S/MIME Settings. . . . . . . . . . . . . . . . . . . . . . . . . . . . . . 9-160
IPsec Settings . . . . . . . . . . . . . . . . . . . . . . . . . . . . . . . 9-161
Document Administration Function. . . . . . . . . . . . . . . . 9-163
Hidden Pattern Print Setting. . . . . . . . . . . . . . . . . . . . . 9-164
Tracking Information Print . . . . . . . . . . . . . . . . . . . . . . 9-165
Audit Log . . . . . . . . . . . . . . . . . . . . . . . . . . . . . . . . . . . 9-166
Certificate Management . . . . . . . . . . . . . . . . . . . . . . . . 9-170
Energy Save . . . . . . . . . . . . . . . . . . . . . . . . . . . . . . . . . . 9-172
Eco Setting . . . . . . . . . . . . . . . . . . . . . . . . . . . . . . . . . . 9-172
Eco Scan Setting . . . . . . . . . . . . . . . . . . . . . . . . . . . . . 9-175
Energy Saving Pattern List. . . . . . . . . . . . . . . . . . . . . . 9-175
Specific Date Operation Settings . . . . . . . . . . . . . . . . . 9-176
Power ON/OFF Schedule Setting. . . . . . . . . . . . . . . . . 9-177
Toner Save Mode. . . . . . . . . . . . . . . . . . . . . . . . . . . . . 9-177
System Control . . . . . . . . . . . . . . . . . . . . . . . . . . . . . . . 9-178
Job Log. . . . . . . . . . . . . . . . . . . . . . . . . . . . . . . . . . . . . 9-178
Data Import/Export (CSV Format) . . . . . . . . . . . . . . . . 9-178
Storage Backup . . . . . . . . . . . . . . . . . . . . . . . . . . . . . . 9-179
Device Cloning . . . . . . . . . . . . . . . . . . . . . . . . . . . . . . . 9-179
Address Book Forward. . . . . . . . . . . . . . . . . . . . . . . . . 9-179
Filing Data Backup . . . . . . . . . . . . . . . . . . . . . . . . . . . . 9-180
Reset Settings . . . . . . . . . . . . . . . . . . . . . . . . . . . . . . . 9-180
Optimization of a Local Drive . . . . . . . . . . . . . . . . . . . .9-180
E-mail Alert and Status . . . . . . . . . . . . . . . . . . . . . . . . . 9-181
Image Quality Adjustment . . . . . . . . . . . . . . . . . . . . . . .9-184
Collective Adjustment . . . . . . . . . . . . . . . . . . . . . . . . . . 9-184
Copy Image Quality. . . . . . . . . . . . . . . . . . . . . . . . . . . . 9-186
Print Image Quality . . . . . . . . . . . . . . . . . . . . . . . . . . . . 9-186
Scan Image Quality. . . . . . . . . . . . . . . . . . . . . . . . . . . .9-187
Color Profile Settings. . . . . . . . . . . . . . . . . . . . . . . . . . .9-187
Common Functions . . . . . . . . . . . . . . . . . . . . . . . . . . . . 9-188
Initial Installation Settings . . . . . . . . . . . . . . . . . . . . . . . 9-189
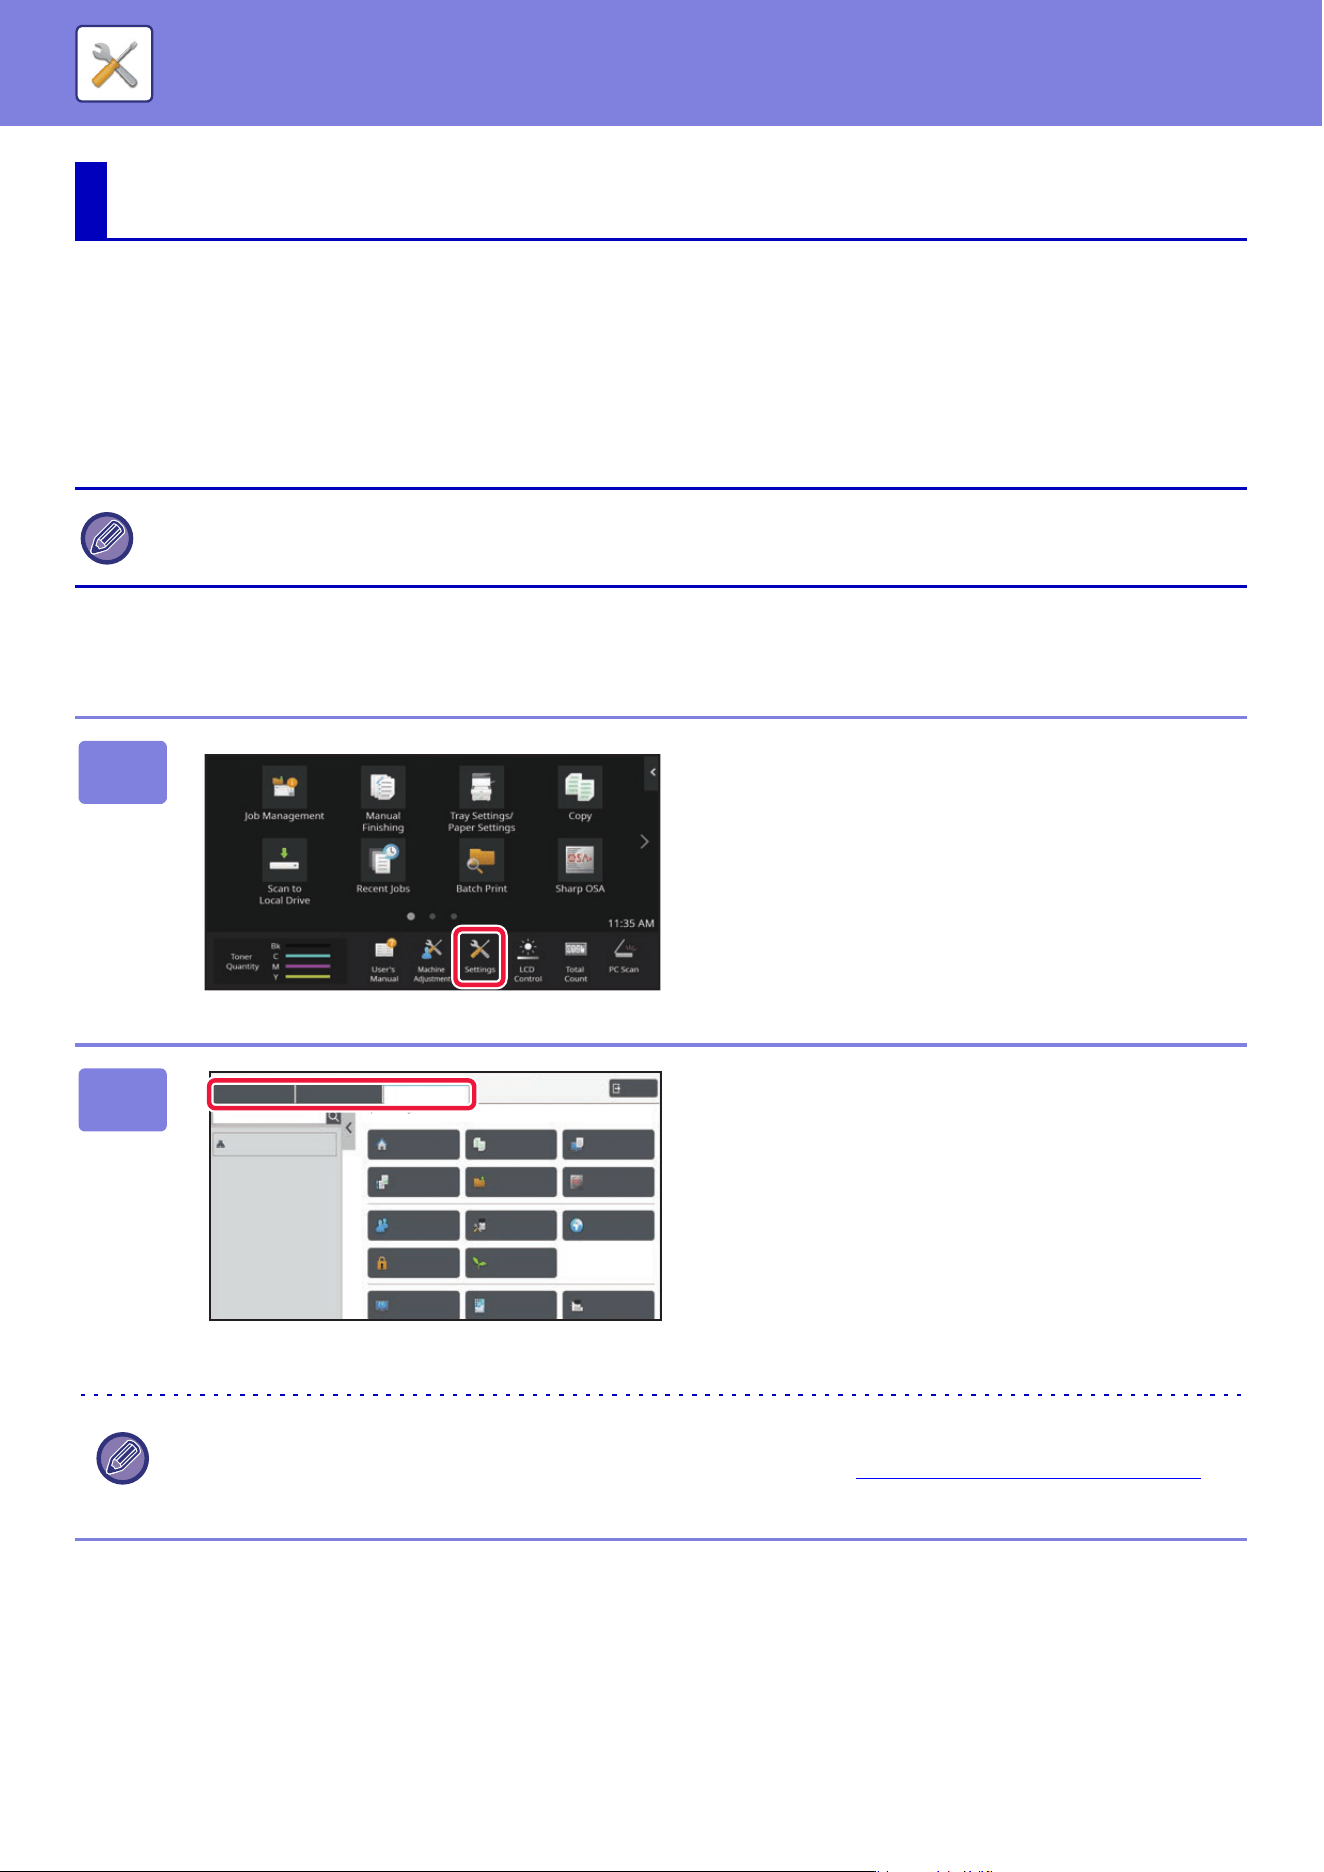
9-3
SETTING MODE►SETTING MODE
SETTING MODE
"Settings" allows management of various functions that will make it easier to use the machine, such as default
registration for each function, network connection setting, and log check of operation status.
Setting mode can also be selected using the Web browser by accessing the machine from a PC connected to the same
network as the machine.
DISPLAYING THE SETTING MODE ON THE MACHINE
SETTING MODE
Administrator password
To maintain security, the machine administrator should promptly change the password after the machine is purchased. (For
the default administrator password, see Start Guide.) To change the password, see "CHANGE PASSWORD".
1
Tap the [Settings] key.
Tap the [Settings] key on the home screen.
The setting mode screen appears on the touch panel.
The setting menu appears at the top of the displayed screen.
Tap the setting in the menu that you want to configure.
For details of the settings, see the explanation for each item.
2
On the upper tab, tap the item that you
want to set.
The setting menu appears on the left side of the displayed
screen.
Tap the setting in the menu that you want to configure.
When you tap the [System Settings] tab, item keys appear
on the screen.
When you tap the key of an item, a setting item menu
appears.
(When you tap the [Image Send Settings] key, further item
keys appear.)
• To quit the setting mode, tap the [Exit] key in the upper right corner of the screen.
• For details on login procedures when user authentication is enabled, see "USER AUTHENTICATION (page 8-11)".
Status
Home Screen
Settings
Copy Settings Printer
Settings
System Settings
Sitemap
System Settings
User Control
Image Send
Settings
Document Filing
Settings
Sharp OSA
Settings
Common
Settings
Authentication
Settings
Network
Settings
Energy Save
Security
Settings
Init. Install.
Settings
System Control Image Quality
Adjustment
Administrator Login
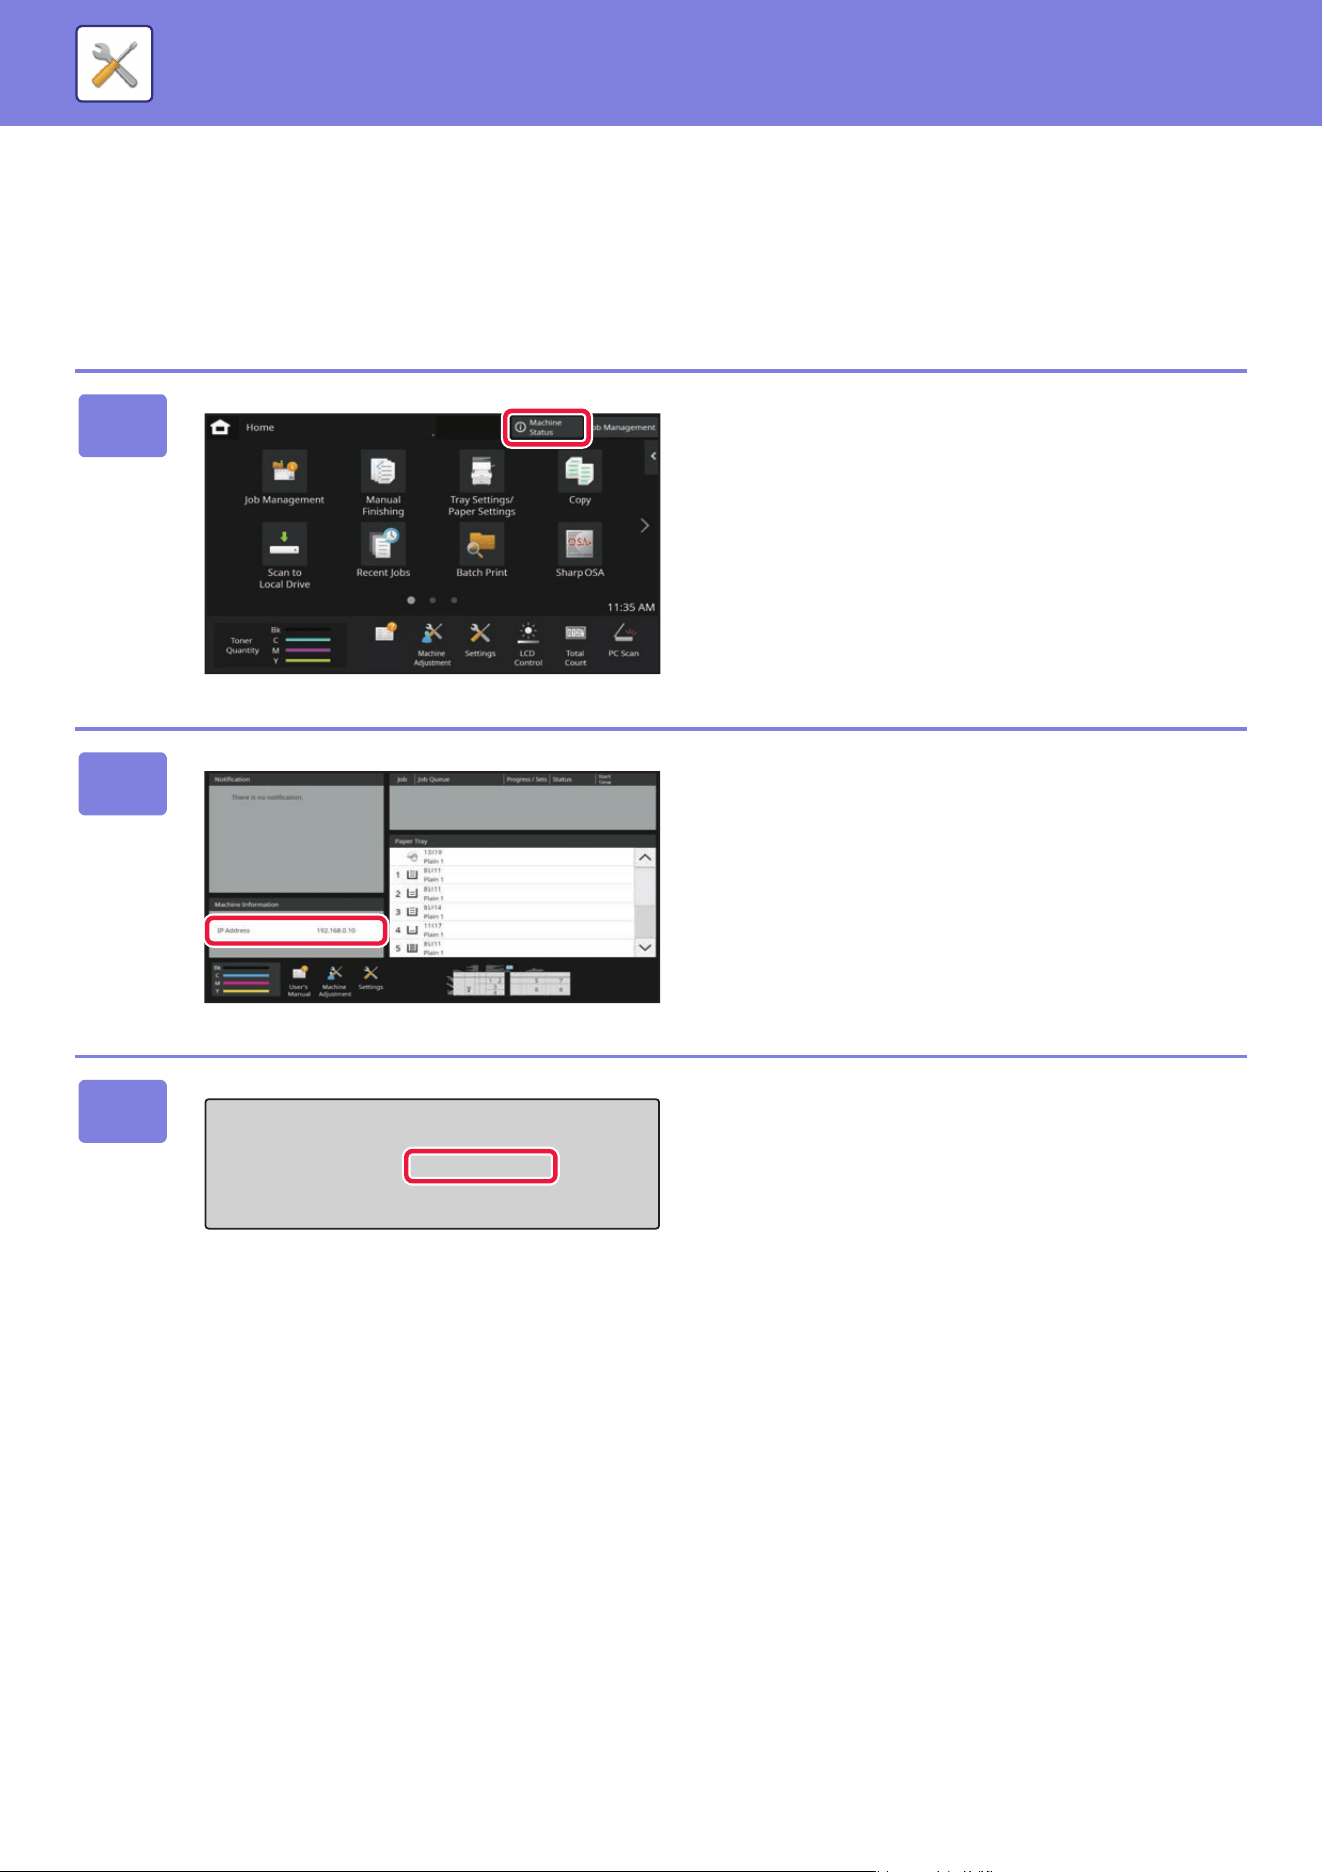
9-4
SETTING MODE►SETTING MODE
DISPLAYING THE SETTING MODE (WEB VERSION)
When the machine is connected to the network, access the built-in Web server of the machine using the PC’s Web
browser.
From the setting mode of the machine, print the IP address of the machine and enter the address on the PC’s Web
browser.
1
Tap the [Machine Status] key.
2
Check the IP address in the machine
information.
3
Start the Web browser on the PC, and
enter the IP address of the machine.
Start a Web browser on a PC on the same network the
machine is on, and enter the IP address of the machine.
Recommended Web browsers:
Microsoft Edge (Windows
®
),
Firefox (Windows
®
),
Safari (Mac OS
®
)
Chrome (Windows
®
)
Latest version and previous major release
Displays the setting mode (Web version).
In the factory default state, the user password must be
entered.
Depending on the machine settings, user authentication
may be required to display the setting mode (Web version).
For password and other information required for user
authentication, contact the administrator of the machine.
User's
Manual
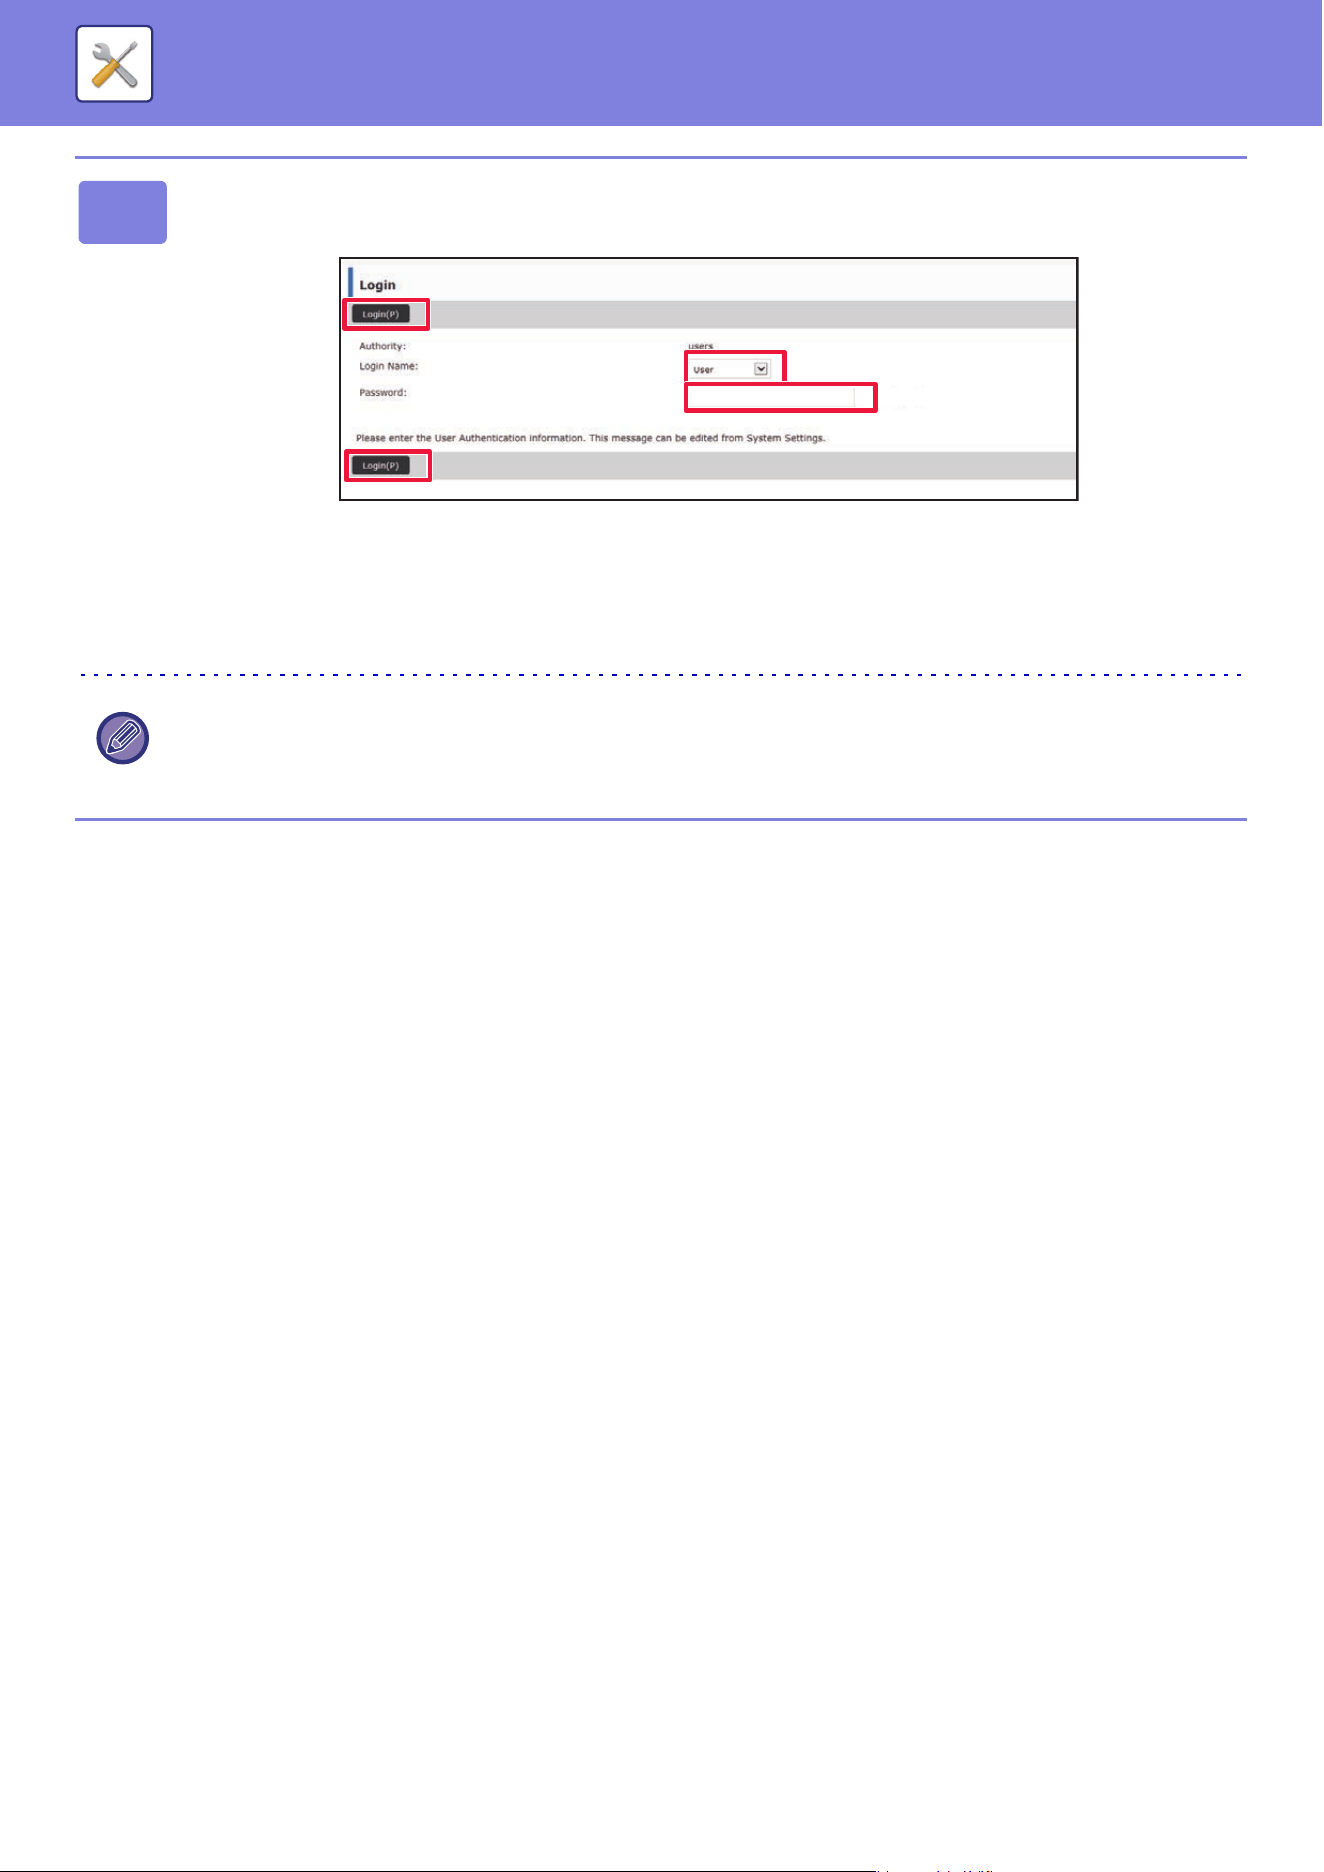
9-5
SETTING MODE►SETTING MODE
4
Select a login name and enter your password.
Entering a password
• If you click an item that requires administrator rights, the password entry screen will appear regardless of the settings.
Select a user that has administrator rights and enter the user password.
• If user authentication is not enabled, you can set the login name to "Administrator" and enter the administrator
password to log in to the Web page.
Once you have logged in to the Web page with administrator rights, the password entry screen will not appear when
you click other items that require administrator rights (until you log out).
At the bottom of the login screen you will find links to download manuals, such as the User's Manual, and the latest
printer drivers.
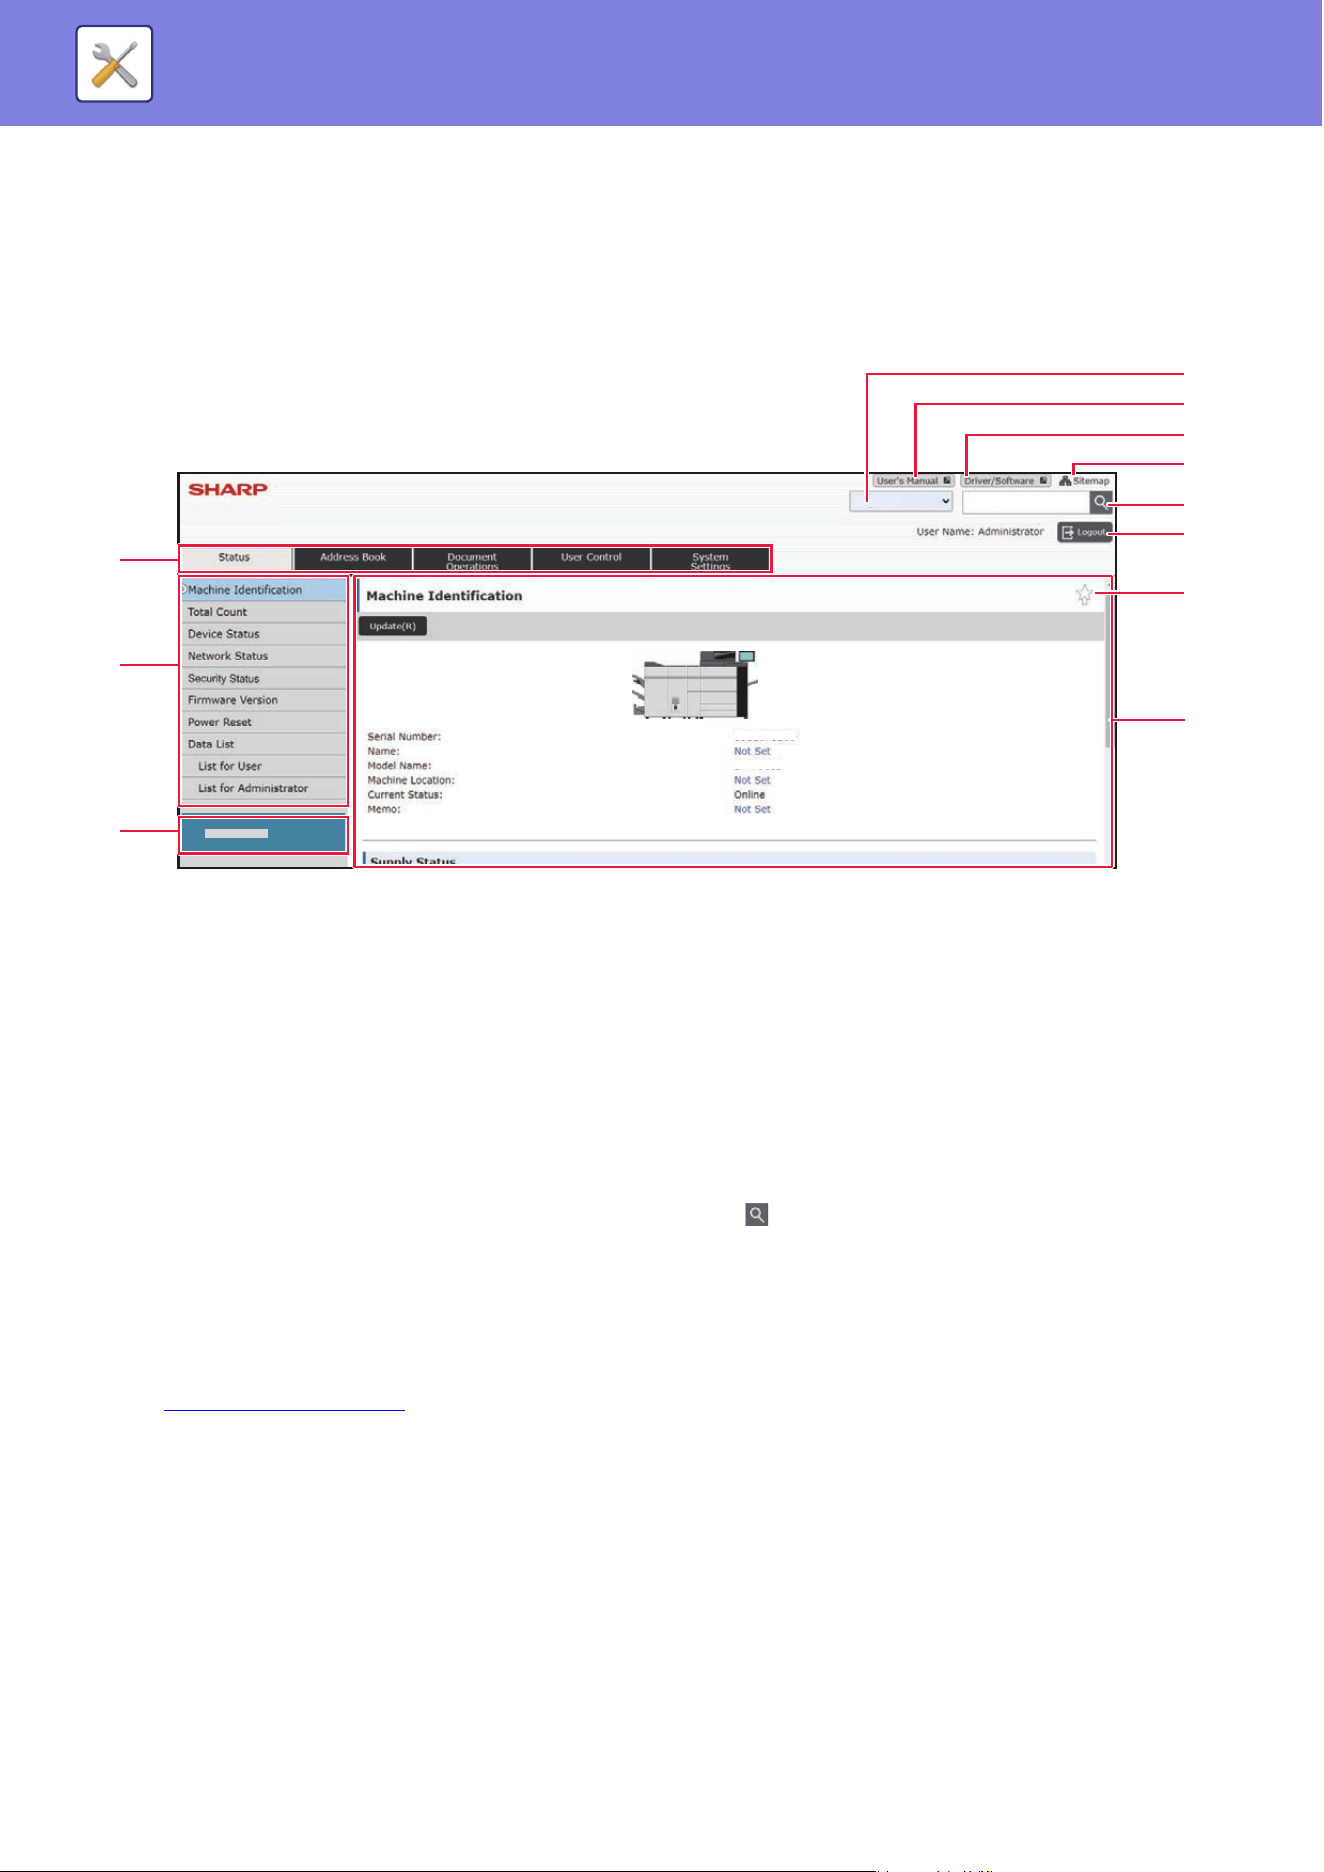
9-6
SETTING MODE►SETTING MODE
SETTING MODE SCREEN
This section describes typical items in the operation method in the setting mode.
OVERVIEW OF SETTING MODE
(1) Menu tab
This tab shows the first level of the setting menu. Click
this tab to show the tab's setting items in the setting
menu.
Some settings such as the system settings do not appear
in the setting menu when the tab is clicked. Instead,
further setting item buttons appear in the setting area.
(2) Setting menu
This shows the items that can be set on the web page.
The items are in a tree structure.
When you click an item that requires machine
administrator rights, the password entry screen appears.
Select the previously registered login name and enter the
password.
(3) Custom links
You can register custom links in advance to show the
custom links in the setting menu.
► Custom Links (page 9-123)
(4) Language
Set the language that appears on the web page.
(5) User’s Manual
Go to the website of the instruction manual in PDF format
such as the user's manual.
(6) Driver/Software
Go to the website where you can download the printer
driver and software.
This button may not be displayed depending on the
countries or regions.
(7) Sitemap
This shows a sitemap of the website.
(8) Search
Use this to search for setting items and other information.
Enter the item you want to find in the text box and click
.
(9) [Login/Logout] button
[Login] button
Click to log in to the web page.
[Logout] button
When you have completed all settings in the web pages,
click this button to log out and exit the web browser.
(10) Shortcut icon
Click this icon to register a page you want to show on the
shortcut tab.
(11) Setting area
This shows the setting screen of the item selected in the
setting menu at left.
(2)
(1)
(3)
(5)
(6)
(7)
(8)
(9)
(11)
(4)
(10)
BP-xxxxx
BP-xxxxx
xxxxxxxx
xxx xxx
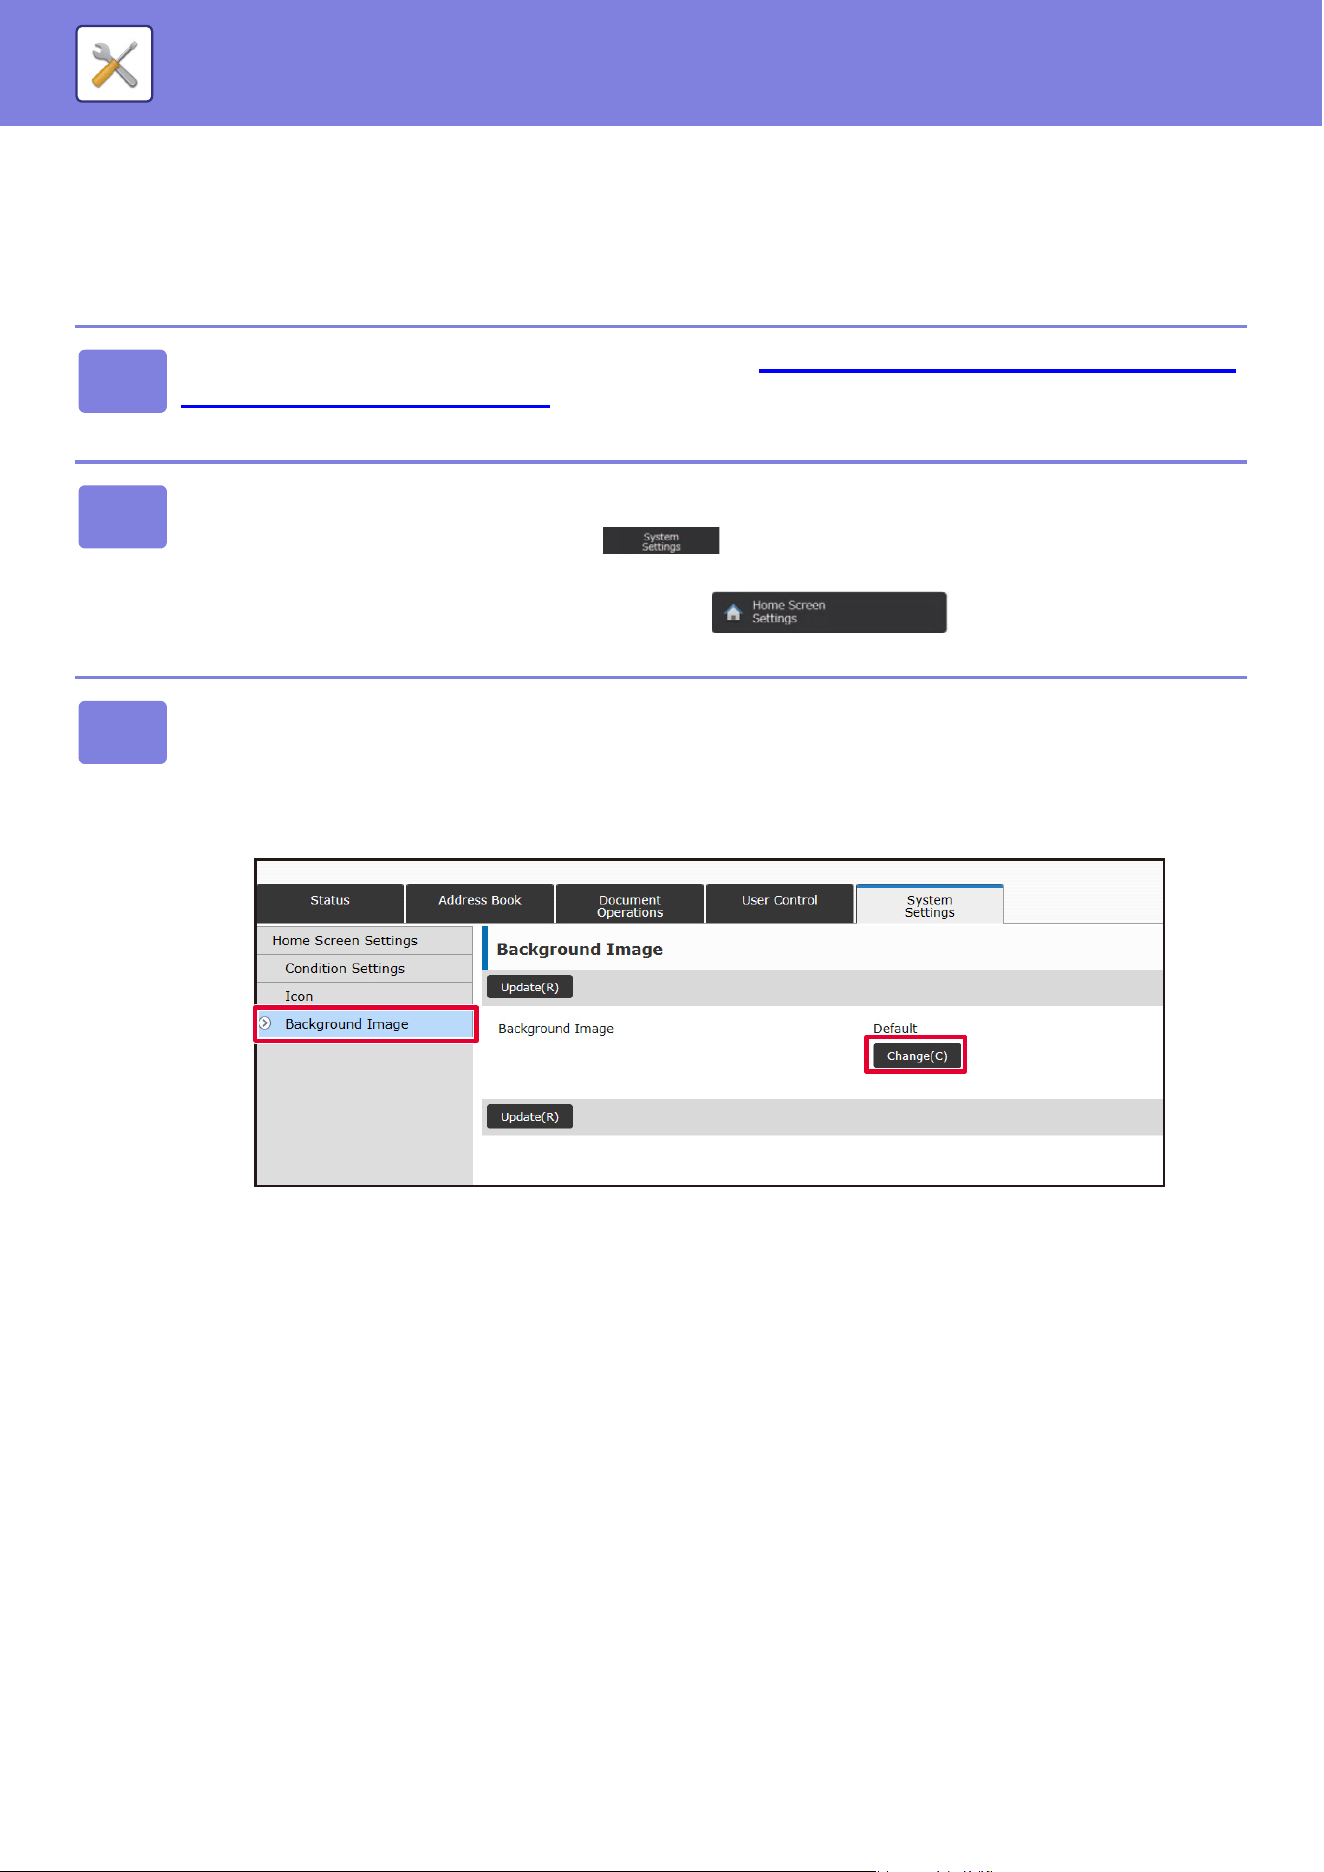
9-7
SETTING MODE►SETTING MODE
SETTING METHOD
This section explains the basic procedure for configuring settings using "Home Screen Settings" as an example.
This setting is used to change the background image of a home screen to an image provided by the user.
1
Connect to the web page as explained in "DISPLAYING THE SETTING MODE
(WEB VERSION) (page 9-4)".
2
Display the "Home Screen Settings" setting screen.
(1) Click the [System Settings] tab ( ).
The setting items of the system settings appear in the setting area.
(2) Click the [Home Screen Settings] button ( ).
3
Click [Background Image] in the setting menu and set the background image.
(1) Click [Background Image] in the setting menu.
(2) Click the [Change] button in "Background Image".
The "Home Screen Registration" screen appears.
(1)
(2)
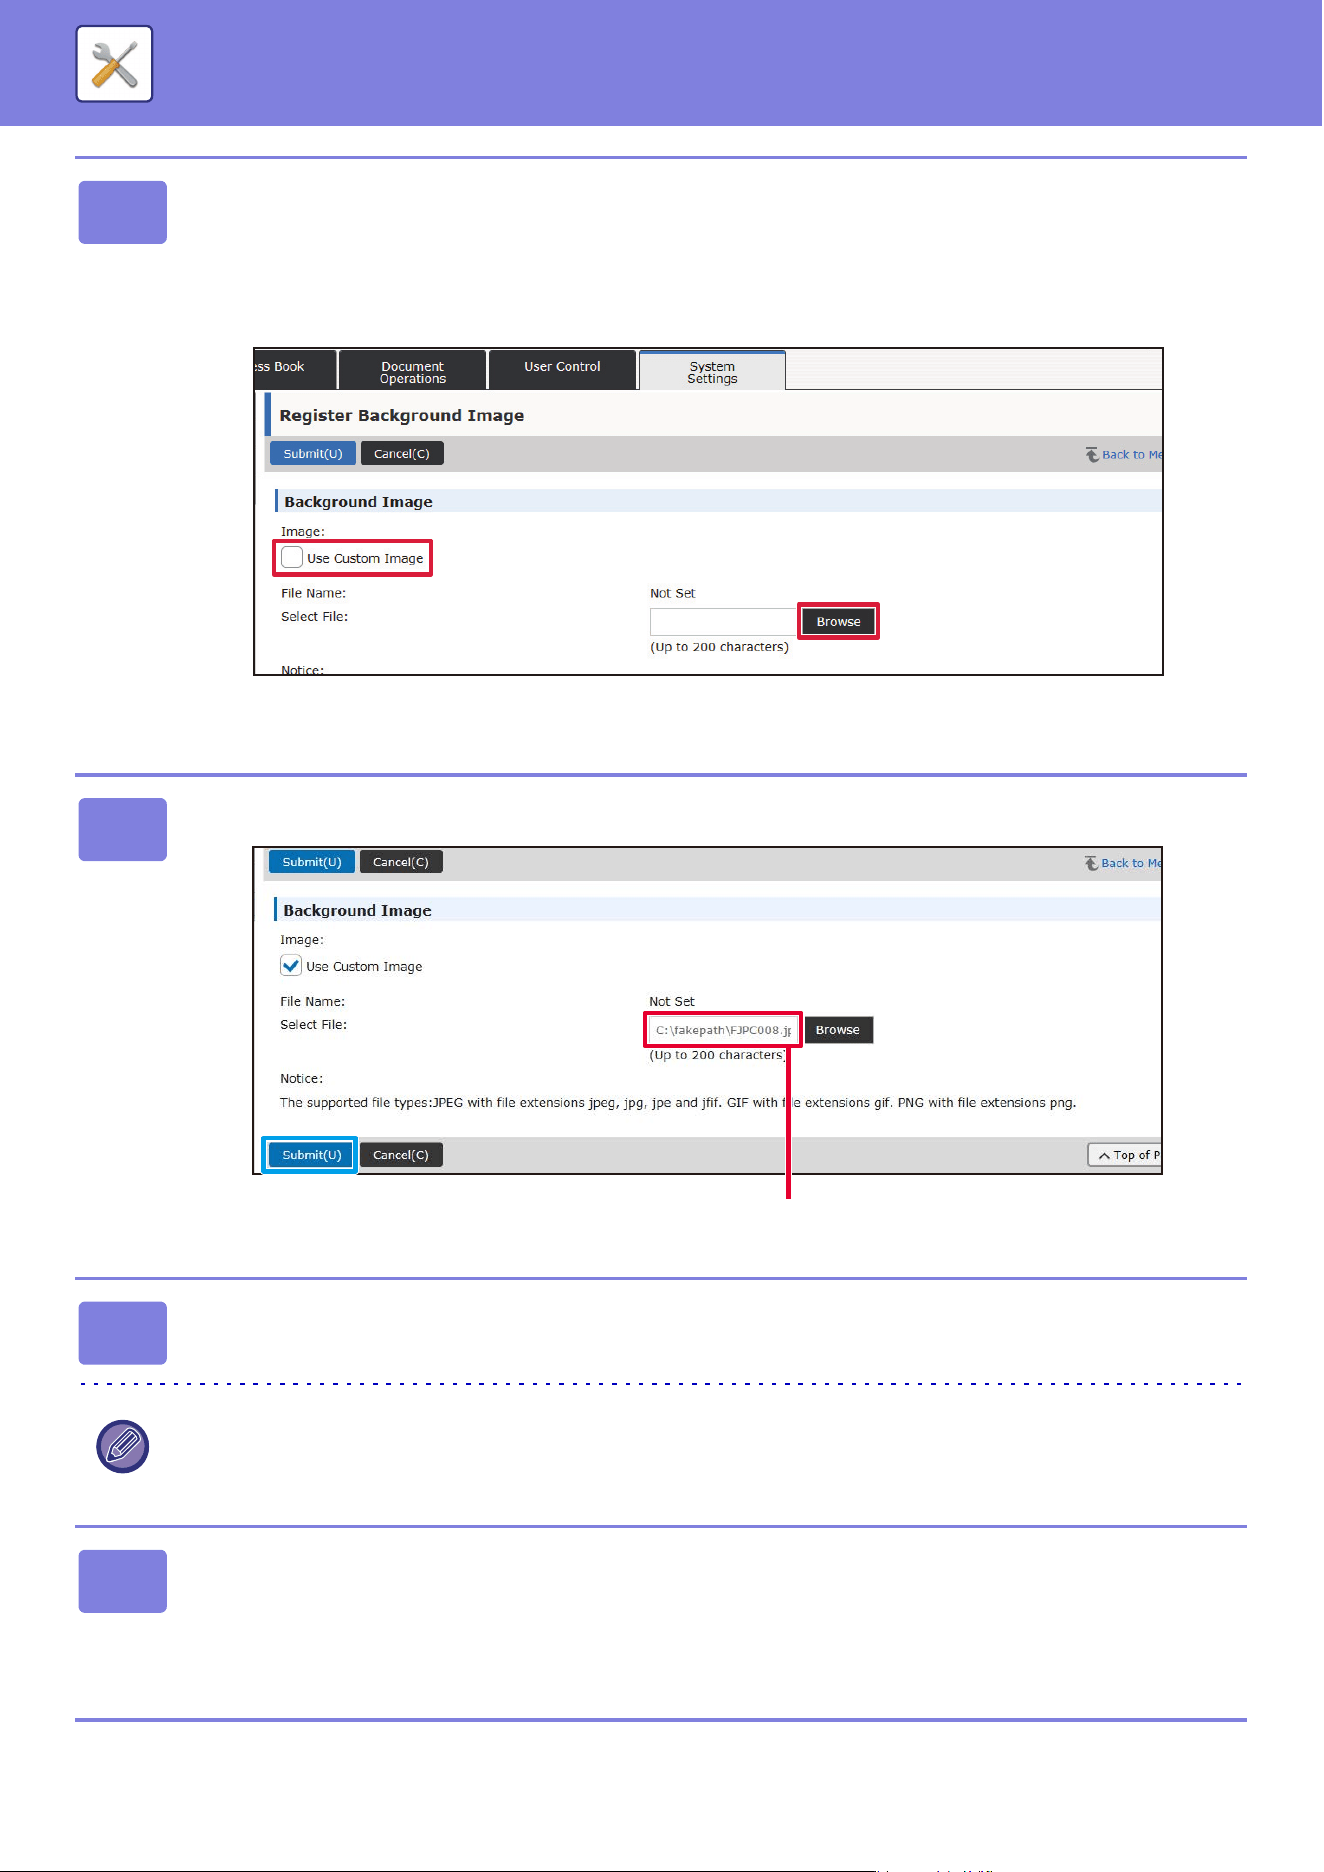
9-8
SETTING MODE►SETTING MODE
4
Select "Use Custom Image" and click the [Browse] button to select the
desired image.
(1) Check the "Use Custom Image" checkbox
(2) Click the [Browse] button.
When you click the [Browse] button, the file selection screen appears. Select the file of the desired background
image.
5
Click the [Submit] button.
6
If you have another item you want to set, configure the setting from the
setting menu or menu tab.
If you use the "Forward" or "Back" function of the web browser to move to a different item, the item that you set may not
be saved. Use the setting menu or menu tab to move to a different item.
7
When you have finished configuring settings, click the [Logout] button and
exit.
When you exit the settings, a message may appear on the touch panel of the machine. Read and then close the
message.
(1)
(2)
Path

9-9
SETTING MODE►SETTING MODE LIST
SETTING MODE LIST
Click the link file to see the details of each description.
In the setting mode, there are some that can be set only on the Web page and some that can be set only on this
machine.
*1Only web pages can be set.
*2Items that can be set only in the setting mode of this machine.
*3For more information on settings, consult a qualified service technician.
■ Status
●Status
Machine Identification
Total Count
Device Status
Network Status
Security Status
Firmware Version
Power Reset
Data List
List for User
List for Administrator
■ Address Book
*1
●Address Book
Category Setting
■ Document Operations
*1
●Document Operations
Document Filing
Main Folder
Quick File Folder
Custom Folder
My Folder
File Batch Print
Submit Print Job
Print Settings
SETTING MODE LIST
Depending on the machine specifications and peripheral devices installed, it may not be possible to use settings.

9-10
SETTING MODE►SETTING MODE LIST
■ User Control-User Settings
●User Settings
User List
Custom Index
Organization /Group List
User Information Print
■ User Control-Access Control Settings
●Access Control Settings
Pages Limit Group
Machine Page Limit Setting
Authority Group
Favorite Operation Group
*1
Favorite Operation Group List
Favorite Key List
Home Screen List
■ User Control-User Count
●User Count
■ User Control-Billing Code Setting
●Billing Code Setting
Administration Settings
Use Billing Code
Default Code Setting
Remember Billing Code Between Modes
Disable Change of Billing Code
Apply Default Code when Billing Code not entered
Disable Billing Code for Selected Applications
Billing Code Display Name Setting
Main Code List
Sub Code List

9-11
SETTING MODE►SETTING MODE LIST
■ System Settings-Home Screen Settings
●Home Screen Settings
Condition Settings
Home Screen Registration
Icon
Background Image
■ System Settings-Copy Settings
●Copy Settings
Condition Settings
Rotation Copy Setting
Disable Copy in Different Size
Add or Change Extra Preset Ratios
Setting a Maximum Number of Copies
Stamp
Initial Margin Shift Setting
Erase Width Adjustment
InitialN-Up Setting
Card Shot Settings
Automatic Saddle Stitch
Initial Tab Copy Setting
Disabling of Registration/Deletion of Program
Disabling of Bypass-Tray in Duplex Copy
Disabling of Auto Paper Selection
Auto Selection Setting of Tray that is Supplied the Paper
Disabling Registration of Custom Image
Disabling sending while copying
High Quality Scan from Document Feeder (B/W)
Quick Scan from Document Glass (B/W)
Auto Clear Before Copy Execution Also
Display Warning Message when Original is not Detected
Initial Status Settings
Text /Image Printing
Text Settings (Stamp)
Custom Stamp
Custom Watermark

9-12
SETTING MODE►SETTING MODE LIST
■ System Settings-Printer Settings
●Printer Settings
Condition Settings
Prohibit Notice Page Printing
Prohibit Test Page Printing
A4/Letter Size Auto Change
A3/Ledger Size Auto Change
Bypass Tray Settings
Job Spool Queuing
Disabling of USB Memory Direct Print
Disabling of Network Folder Direct Print
Disabling sending while printing
Interface Settings
Hexadecimal Dump Mode
I/O Timeout
Enable Network Port
Network Port Emulation Switching
Port Switching Method
Initial Status Settings
PCL Settings
PostScript Settings
OOXML Settings
Print Release Settings
Standard
Advanced
E-mail Print Settings
E-mail Print
POP3 Server
Port Number
POP Authentication
User Name
Password
Check Interval
Enable SSL/TLS
Direct Print Settings (FTP)
FTP Server Registration
Direct Print Settings (Network Folder)
Registration of Network Folder
Print Setting from PC/Mobile Terminal
FTP Print
Port Number
IPP Print (Driverless)
geo URI (RFC 5870)

9-13
SETTING MODE►SETTING MODE LIST
■ System Settings-Image Send Settings-Common Settings
●Common Settings
Condition Settings
Hold settings for a while after scanning has been completed
Job Auto Start Time During Scanning
Default Display Settings
Address Book Default Selection
Image Orientation
Default Exposure Settings
Default Original Image Type
Erase Width Adjustment
Enable/Disable Settings
Settings to Disable Registration
Settings to Disable Transmission
Disabling of PC Scan
Disable Storing to External Memory Device
Disabling of Find My Address
Disabling of OCR
Category Setting
*2

9-14
SETTING MODE►SETTING MODE LIST
■ System Settings-Image Send Settings-Scan Settings
●Scan Settings
Initial Status Settings
Default Color Mode Settings
Initial File Format Setting
Easy Scan Settings
Resolution Setting
Original Skew Adjustment
Condition Settings
Default Reply.Address Set
Bcc Setting
Quick On Line Sending
PDF Compression Options
Compact PDF Resolution Setting
Compression Mode at Broadcasting
Send Destination Link Settings
Maximum Size of Send Data (E-Mail)
Maximum Size of Data Attachments (FTP/Network Folder)
Auto Scan Setting
Preset restriction of E-mail for direct input
Default Address
Default Address Setting
Add Selected
Subject Name Settings
Default Subject
Pre-Set Registration
File Name Settings
Default Settings for File Names
Direct Entry/Pre-Set Text Selection Settings
Pre-Set Registration
Message Body Settings
Add Job Information Automatically to the Mail Message Body
Add a Footer Automatically to
the Mail Message Body
Mail Footer Registration
Pre-Set Registration
■ System Settings-Image Send Settings-Metadata Settings
●Metadata Settings

9-15
SETTING MODE►SETTING MODE LIST
■ System Settings-Document Filing Settings
●Document Filing Settings
Condition Settings
Default Mode Settings
Sort Method Setting
Administrator Authority Setting
Delete All Quick Files
Image Orientation
Default Color Mode Settings
Default Exposure Settings
Default Original Image Type
Initial Resolution Settings
Default Output Tray
Disable Text/Stamp functions for Reprinting
Batch Print Settings
Print Order Setting for the Batch Print/Multi-File Print
Erase Width Adjustment
Card Shot Settings
Setting of store/delete after file print
Default Setting of PDF Format for PC Browsing
Document Output Options
Document Filing Control
*2
Automatic Deletion of File Settings
Delete Now
Executing automatic deletion during Auto Power Shut-Off.

9-16
SETTING MODE►SETTING MODE LIST
■ System Settings-Sharp OSA Settings
●Sharp OSA Settings
Condition Settings
Sharp OSA version
Cookie Setting
*2
Delete Cookie
*2
Automatically Start an Application at Power up and Wake up
Accept remote access request from application
Application allowed to access
Approve remote access request on operation panel
Accept UI operation request from application
Display dialog of connection in Sharp OSA mode
Accept secondary send request from Sharp OSA application
Standard Application Settings
External Accounting Application Settings
Embedded Application Settings
Polling Setting
External Service Connect

9-17
SETTING MODE►SETTING MODE LIST
■ System Settings-Authentication Settings
●Authentication Settings
Default Settings
User Authentication
Authentication Server Settings
Default Network Authentication Server Setting
Specify network server access control
Authentication Method Setting
Enable Quick Login
Device Account Mode Setting
Login User
Settings for Using Authentication Information
Cache Authentication Information for External Service Connect
Card Setting
Disable Printing by Invalid User
Automatic Logout Setting
A Warning when Login Fails
Allow Remote Scanner Using Before Login
Include Job Management in user authentication
Display Machine Status Screen Before Login
Enable IPP Authentication Except for Printer Driver
Actions when the Limit of Pages for Output Jobs
Automatically print stored jobs after login
Reset Counter After Sending E-mail Status
Disable Display/Change of Other Users' Information in the Job Management
Apply login name to the user name of network folder
Login Name Display
Display Usage Status after Login
Edit Help Display of Login Screen
Card Reader Settings
Condition Settings
Card Reader Device Registration

9-18
SETTING MODE►SETTING MODE LIST
■ System Settings-Common Settings-Paper Settings
●Paper Settings
Paper Tray Settings
Auto Switching of Tray
Display Paper Tray Settings when bypass tray detects paper.
Paper Weight Setting
Tray Settings
Tray Registration
Select Paper Sizes for Auto Detection
Custom Size Registration (Bypass)
Paper Settings
Paper Type Registration

9-19
SETTING MODE►SETTING MODE LIST
■ System Settings-Common Settings-Operation Settings
●Operation Settings
Condition Settings
Enlarge Display Mode
Message Time Setting
Language Setting
Default Display Settings
Display Machine Status Screen as Default
Display IP Address on the Machine Status Screen
Display Favorite Menus as Default
Display Action Panel as default.
Icon is displayed when network cable is not connected.
Display Confirmation Dialog when job is canceled.
Display Status Notification Message
Restrict Total Count display
Switch the Number of Sets to be Displayed for Job Management
Display the estimated job start time
Alignment Order of 10-Key
Setting Display from Main Unit
MFP Display Pattern Setting
Key Operation Setting
Disabling of Bypass Printing
Priority of Print Jobs
Disabling of Covers/Inserts Mode
Disable Manual Finishing
Disabling Recent Jobs
Initial Original Count Setting
Preview Setting
Remote Operation Settings
Data List
Tandem Connection Setting
Easy Mode Settings
Favorite Key Setting
Mode Key Display Setting
Keyboard Settings
Default Keyboard Setting
Keyboard Select
Set Keyboard Priority
Soft Keyboard Template Setting
Custom Links
*1

9-20
SETTING MODE►SETTING MODE LIST
■ System Settings-Common Settings-Device Control
●Device Control
Condition Settings
Original Size Detector Setting
Cancel Detection at Document Glass
Original Feeding Mode
Double Feed Detection Setting
Actions When Maximum Number of Sheets that can be Stapled is Reached
Automatic Saddle Stitch
Saddle Fold/Stitch Position Adjust
Paper Type for Auto Paper Selection
Plain Paper Compatibility Settings
Detect Standard in Auto Color Mode
Total Setting for Finish
Disabling of Duplex
Disabling of Offset
Disabling of Stapler
Disabling of Punch
Disabling of Color Mode
Disabling of Document Feeder
Disabling of Large Capacity Cassette
Disabling of Tray Settings
Disabling of Bypass-Tray
Disabling of Inserter
Disabling of Finisher
Disabling of Folding Unit
Disabling of Trimming Module
Status Indicator Setting
Machine Identification Settings
Clock Adjust
Daylight Saving Time Setting
Date Format
Enable/Disable Settings
Authentication Settings
Copy Settings
Printer Settings
Image Send Settings
Document Filing Settings
Operation Settings
Device Control
Security Settings
Product Key/Application Number Input


9-22
SETTING MODE►SETTING MODE LIST
■ System Settings-Network Settings
●Network Settings
Quick Settings
IPv4 Settings
Network Name Settings
DNS Settings
SMTP Settings
LDAP Settings
Network Name Setting
Device Name
Domain Name
Comment
Interface Settings
IPv4 Settings
IPv6 Settings
DNS Settings
IEEE802.1X Setting
Services Settings
SMTP
Kerberos
SNTP
mDNS
SNMP
SMB
Print Port Settings
LPD
RAW
WSD
External Print Services Settings
Universal Print Settings
*1
LDAP Settings
Active Directory Settings
Public Folder / NAS Setting
Proxy Setting
Device Web Page Setting
HTTP Access Settings
View Login User
Current Login User
Logout All Users

9-23
SETTING MODE►SETTING MODE LIST
■ System Settings-Security Settings
●Security Settings
Password Setting
Password Policy Settings
Password Change
Condition Settings
Restrict Print Jobs other than the current Print Hold Job
Automatic Deletion of Suspended Print Jobs
Time until Suspended Print Jobs are Automatically Deleted
Reject Requests from External Sites
If Firmware Corruption is Detected, Restore It
Apply Security Policy
Mandatory Access Control
Job Management Jobs Completed List Display Setting
Job Management Display Setting
Port Control
Filter Setting
IP Address Filter Settings
MAC Address Filter Settings
Intrusion/Attack Detection
Virus Scan Setting
Virus Scan
Virus Scan Settings
Virus Definition File Update Setting
SSL/TLS Settings
Setting of SSL/TLS
S/MIME Settings
S/MIME Settings
IPsec Settings
Condition Settings
IPsec Rules
Document Administration Function
Hidden Pattern Print Setting
Initial Status Settings
Contrast
Custom Text Registration
Tracking Information Print
Initialize Private Data/Data in Machine
*2, *3
Security code input
*2, *3
Audit Log
Administration Settings
Storage/Send Settings
Save/Delete Audit Log

9-24
SETTING MODE►SETTING MODE LIST
Certificate Management
Device Certificate Management
Certificate Signing Request (CSR) Management
CA Certificate Management
■ System Settings-Energy Save
●Energy Save
Eco Setting
Eco Recommendation Function Display
Display Message When Extending Transition Time to Preheat/Auto Power Shut-Off Mode
Mode Setting
Preheat Mode Setting
As soon as the remote job is finished, enter Auto power shut off mode.
Fix transition time.
Change transition time by time of day.
Sleep Mode Power Level
Eco Scan Setting
Energy Saving Pattern List
Specific Date Operation Settings
Power ON/OFF Schedule Setting
Toner Save Mode

9-25
SETTING MODE►SETTING MODE LIST
■ System Settings-System Control
●System Control
Job Log
View Job Log
Job log Operation
Data Import/Export (CSV Format)
Export Settings
Import Settings
Storage Backup
Export Settings
Import Settings
Device Cloning
Export Settings
Import Settings
Address Book Forward
*2
Filing Data Backup
*1
Export Settings
Import Settings
Reset Settings
Restore Factory Defaults
Reset the NIC
Optimization of a Local Drive
*2
E-mail Alert and Status
Status Message
Alerts Message
SMTP Settings

9-26
SETTING MODE►SETTING MODE LIST
■ System Settings-Image Quality Adjustment
●Image Quality Adjustment
Collective Adjustment
Registration Adjustment
*2
Fusing Cleaning Mode
*2
MC Cleaning Mode
*2
PTC Cleaning Mode
*2
Black Letter/Black Line Width Adjustment
Dark Streak Reduction
Display Warning When Streak is Detected
Copy Image Quality
Quick Image Quality Adjustment
Color Balance (Color / B/W)
Density Adjustment when [Auto] is selected for Exposure
Sharpness
Print Image Quality
Quick Image Quality Adjustment (Color / B/W)
Color Balance (Color / B/W)
Exposure Adjustment
Color Line Width Adjustment
Scan Image Quality
RGB Adjust
Sharpness
Contrast
Color Profile Settings
*1
CMYK Simulation Profile
CMYK Output Profile
RGB Input Profile
RGB Output Profile
Common Functions
*2
Auto Color Calibration (for Copy)/Auto Color Calibration (for Print)
Density Smoothing Adjustment
■ System Settings-Initial Installation Settings
●Initial Installation Settings
9-27
SETTING MODE►STATUS
Status
Machine Identification
The Machine Identification displays the system information of the machine.
It displays the model name, current status, and machine location.
This setting can also be set by general users, except for some items.
STATUS
Item Description
Serial Number Indicates the serial number of the machine.
Name When you tap the [Not Set] key, the [Machine Identification] screen appears.
If [Name] is not set, [Not Set] appears.
Model Name Displays the standard model name of the machine.
Machine Location The information entered in the [Machine Location] item in [Machine Identification] appears.
If no name has been set, [Not Set] appears.
Current Status Displays the current status of the machine.
If two or more errors occur at the same time, only one status is displayed according to the
priority order.
The errors and machine conditions are displayed in the following priority order.
• Printer Error
• Account Limit
• Incorrect Paper
• Overdue service maintenance
• Paper Jam
• Marker Supply Missing
• Toner Empty
• Replace toner collection container.
• Cover Open
• Paper Empty
• Input Tray Empty
• Specified Input Tray Open
• Specified Output Tray Full
•Offline
• Printer Warning
• Toner Low
• Paper Low
• Input Tray Open
• Output Tray Full
• Output Tray Nearly Full
• Near to overdue service maintenance
•Online
• Auto Power Shut-Off
• Warming Up
•Busy
Memo Displays text that the administrator entered.
If you have logged in as an administrator, you can enter a memo.
If no name has been set, [Not Set] appears.
When you tap the [Not Set] key, the Machine Identification screen appears.
9-28
SETTING MODE►STATUS
Total Count
This function shows the page count in each mode.
This setting may require administrator privileges.
Device Status
This screen shows the device status.
This setting can also be made by general users.
Network Status
Displays general, TCP / IP, and DNS status information.
The contents displayed here are the items to be set in the network settings and their setting values.
For each setting, see the following "Network Settings (page 9-136)
".
This setting can also be made by general users.
Security Status
Displays the security settings status of the machine.
The contents displayed here are the items to be set in the security settings and their setting values.
For each setting, see the following "Security Settings (page 9-151)
".
This setting can also be made by general users.
Supply Status Displays the current status of supplies.
If staples are installed, their status is displayed.
Paper Input Tray Status Displays the current status of the paper trays installed in the machine.
Display Pattern Setting Switches the display pattern of the home screen.
[Reboot the MFP] key Displays the restart screen.
(Administrator rights are required.)
[Enter the Power Save Mode] key Displays the power save mode screen.
(Administrator rights are required.)
• Pages printed directly from the machine such as list prints are included in the "Other Prints" count.
• The items displayed (or printed) will vary depending on the machine specifications and peripheral devices installed.
• When "Restrict Total Count display" is set, only administrators can confirm this.
Item Description
Paper Input Tray Status Displays the current status of the paper trays installed in the machine.
Output Tray Status Displays the current status of the output tray installed in the machine.
Supply Status Displays the current status of supplies.
If staples are installed, their status is displayed.
Device Configuration Displays the information of options installed in the machine.
Local Drive Status Displays the usage status of the local drive.
Item Description
9-29
SETTING MODE►STATUS
Firmware Version
Shows the firmware version of the machine as a list.
This function requires administrator rights.
Power Reset
The Power Reset screen enables you to restart the machine or enter the power save mode.
Data List
Lists showing the settings and information registered in the machine can be printed.
List for User
This setting can also be made by general users.
This function requires administrator rights.
Item Description
Reboot the MFP Reboots the machine.
Tapping the [Execute] key opens the Restart screen, and then tapping the [Execute] key
again restarts the machine.
Enter the Power Save Mode Shifts the machine to power save mode.
Tap the [Execute] key to open the power saving mode screen.
The two-sided or one-sided list printing setting is determined by Operation Settings - Data List - 1-Sided/2-Sided.
List name Description
Machine Status List This list shows information needed by regular users, such as hardware statuses, software
statuses, printer environment settings, and paper tray settings.
Printer Test Page This is used to print the PCL Symbol Set List, various font lists, and the NIC page (network
interface settings, etc.).
•PCL Symbol Set List
• PCL Internal Font List
• PCL Extended Font List
• PS Font List
• PS Extended Font List
• NIC Page
Sending Address List Lists can be printed of various addresses stored in the machine.
• Individual List
• Group List
Document Filing Folder List This shows the folder names for document filing.
Paper Settings List This shows the stored settings in Paper Settings.
Prohibit Test Page
You cannot print the test page when [Prohibit Test Page Printing] is enabled. In "Settings (administrator)", select [System
Settings] → [Printer Settings] → [Condition Settings] → [Prohibit Test Page Printing].

9-30
SETTING MODE►STATUS
List for Administrator
You can print out the lists and reports that only the administrator can refer to.
Home Screen
• Home Screen List
Copy Settings
• Copy Settings List
Printer Settings
• Printer Settings List
Image Send Settings
• Metadata Set List
• Common Settings List
• Scan Settings List
Document Filing Settings
• Document Filing Settings List
Sharp OSA Settings
• Sharp OSA Settings List
Authentication Settings
• Authentication Settings List
Common
Lists of the administrator settings for the following modes can be printed.
• Paper Settings List
• Machine Identification Settings List
• Operation Settings List
• Keyboard Settings List
• Device Control List
Network Settings
• Network Settings List
Security Settings
• Security Settings List
Energy Save Setting
• Energy Save List
Image Quality Adjustment
• Image Quality Adjustment List
Image Sending Activity Report
• Image Sending Activity Report (Scan)
When [Print Only the Settings that have been Changed] is enabled, only the items in the selected list that have been changed
from the factory default will be selected for printing.
9-31
SETTING MODE►ADDRESS BOOK
Address Book
Transmission destinations (contacts) such as Scan to E-mail addresses, and groups of transmission destinations, can
be stored in the address book.
To edit a contact or group, select the name of the contact/group. To add a new contact or group, click the [Add] key.
For the procedure for storing contacts and groups using the machine's
touch panel, see "ADDRESS BOOK SCREEN
(page 5-14)". In setting mode, a list of stored contact and group
information is displayed.
This setting can also be made by general users.
ADDRESS BOOK
This setting can only be set on web pages.
Item Description
Type Select the contact or group.
Factory default settings: Contacts
Search Number Store a number that can be used to search for a contact or group.
Address Name Store a name for an address.
Group Name Store a name of group.
Initial Store an initial that can be used to search for a contact or group.
Category Enter a category for a contact or group.
Factory default settings: Category1
Register this Address to be added
to the [Frequent Use] index.
Add a contact to the "Frequent Use" index.
Factory default settings: Disabled
Address Public Setting Set whether the address will be shared with all users or only selected users. If you select
[Select user], click the user selection buttons to select the users with whom the address will
be shared.
Factory default settings: All.
Share also to the following group When this function is enabled, you can select a previously stored group from the list below
and share the address with that group.
Factory default settings: Disabled
E-mail
E-mail Address To store a new address, select [New Address] and enter the address in the address entry
field.
Global Address Search To search for an address stored as a global address, click this key and select the address
from the list.
File Type
*
Select the file format used for a scanned image.
When [OCR] is enabled, text in the scanned data is automatically recognized.
If [Disabling of OCR] is set, OCR function cannot be used.
Factory default settings: PDF
Black & White Select the compression format used for saving black & white images.
Factory default settings: MMR (G4)
9-32
SETTING MODE►ADDRESS BOOK
Color/Grayscale Color/Grayscale: Select the compression format used for saving color/grayscale images. If
you select a PDF file format as the file format setting, you can select [Reduce Colors].
Factory default settings: Compression Ratio: Middle, Reduce Colors: Disabled
Set as Default used Set an address as a default address.
Factory default settings: Disabled
User Certificate Displayed when S/MIME setting is enabled and one destination is selected when [Contacts]
is set for the type. You can install and select the user certificate to be used.
FTP
FTP Address To add a new address, select [New Address] and enter the address in [Hostname or IP
Address].
Port Number Set the port number used by the FTP server.
Factory default settings: 21
File Type
*
Select the file format used for a scanned image.
For PDF, the text information is embedded in the PDF.
When [OCR] is enabled, text in the scanned data is automatically recognized.
For PDF, RTF, TXT(UTF-8), DOCX, XLSX, or PPTX, the recognized text is saved in the
corresponding format.
If [Disabling of OCR] is set, OCR function cannot be used.
Black & White Select the compression format used for saving black & white images.
Factory default settings: MMR (G4)
Color/Grayscale Color/Grayscale: Select the compression format used for saving color/grayscale images. If
you select a PDF file format as the file format setting, you can select [Reduce Colors].
Factory default settings: Compression Ratio: Middle, Reduce Colors: Disabled
Directory Specify a directory in the FTP server to be used for transmission.
User Name Enter a user name in the FTP server to be used for transmission.
Password Enter the password associated with the entered user name.
Factory default settings: Change Password: Disabled
Enable SSL/TLS Use SSL/TLS to encrypt data before transmission.
Factory default settings: Disabled
Use PASV mode Send data to an FTP server in PASV mode.
Factory default settings: Disabled
Enable Hyperlink to FTP server to
be e-mailed
When sending data to an FTP server, send the data to the e-mail address that is specified
in the hyperlink to the FTP server.
Factory default settings: Disabled
Set as Default used Set an address as a default address.
Factory default settings: Disabled
Network Folder
Network Folder Path To store a new path, select [New Address] and enter the path in the path entry field.
User Name Enter a user name in the computer to be used for transmission.
Password Enter the password associated with the entered user name.
Factory default settings: Change Password: Disabled
Item Description
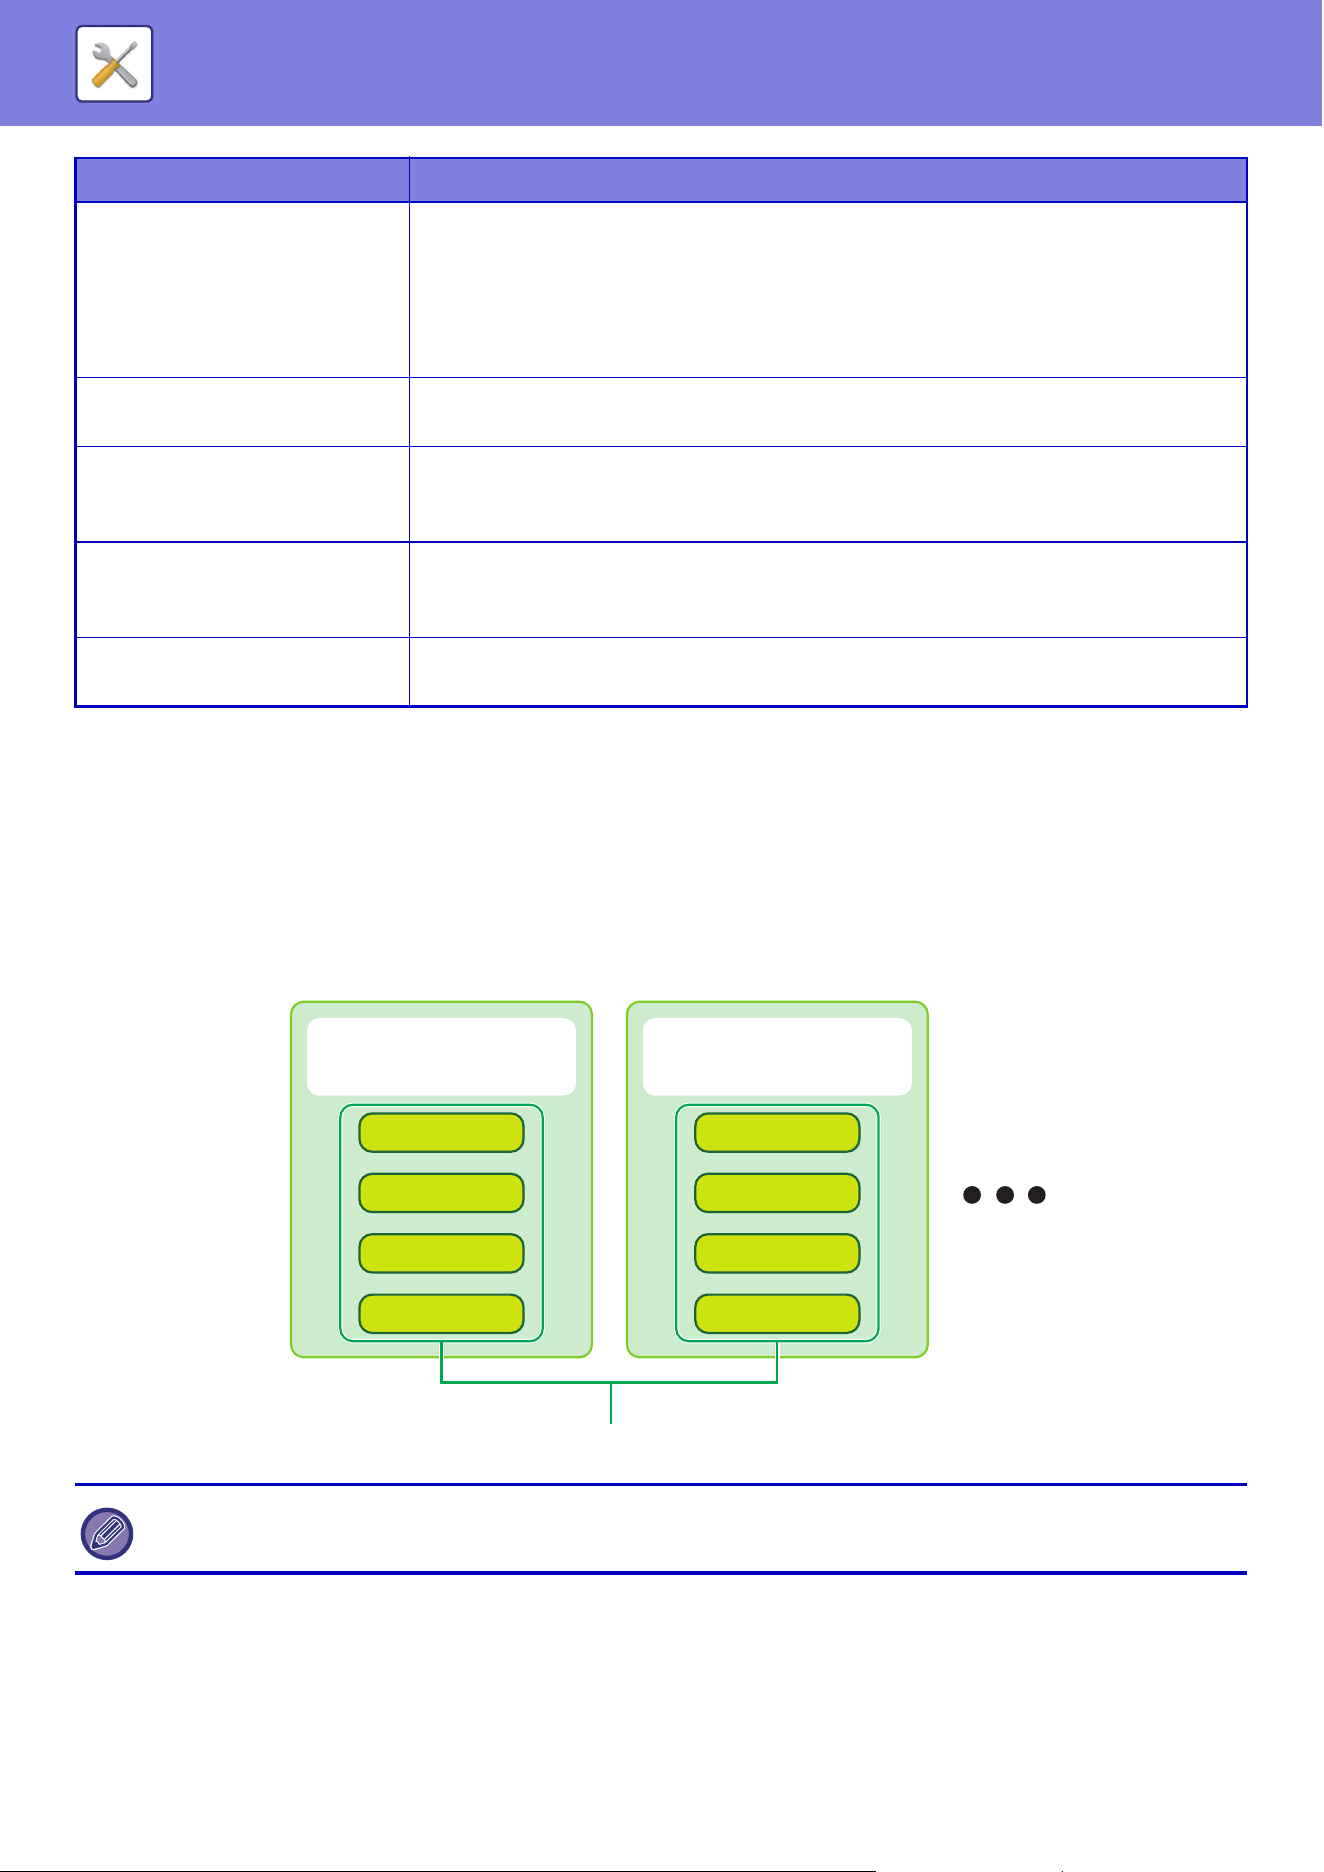
9-33
SETTING MODE►ADDRESS BOOK
* Depending on the model and upon installation of peripheral devices, High Compression PDF may be selected. When [OCR] is enabled, text in the
scanned data is automatically recognized. For PDF, the text information is embedded in the PDF. For PDF, RTF, TXT(UTF-8), DOCX, XLSX, or
PPTX, the recognized text is saved in the corresponding format.
Category Setting
A “Category” can be set for an address. By setting a category for an address, the category can be used to filter
addresses when searching for that address, making it easier to find the address.
Any name can be set for a category. By assigning distinctive names to categories, addresses can be easily sorted.
The factory default names are "Category 1" to "Category 32".
File Type
*
Select the file format used for a scanned image.
For PDF, the text information is embedded in the PDF.
When [OCR] is enabled, text in the scanned data is automatically recognized.
For PDF, RTF, TXT(UTF-8), DOCX, XLSX, or PPTX, the recognized text is saved in the
corresponding format.
If [Disabling of OCR] is set, OCR function cannot be used.
Black & White Select the compression format used for saving black & white images.
Factory default settings: MMR (G4)
Color/Grayscale Color/Grayscale: Select the compression format used for saving color/grayscale images. If
you select a PDF file format as the file format setting, you can select [Reduce Colors].
Factory default settings: Compression Ratio: Middle, Reduce Colors: Disabled
Enable Hyperlink to Network
Folder to be e-mailed
When sending data to a shared folder, send the data to the e-mail address that is specified
in the hyperlink to the shared folder.
Factory default settings: Disabled
Set as Default used Set an address as a default address.
Factory default settings: Disabled
This setting can only be set on web pages.
Item Description
BBB BBB
AAA AAA
CCC CCC
DDD DDD
Group A
(Category 1)
FFF FFF
EEE EEE
GGG GGG
HHH HHH
Group B
(Category 2)
Address
9-34
SETTING MODE►DOCUMENT OPERATIONS
Document Operations
This setting can also be made by general users.
Document Filing
Data saved by Document Filing can be manipulated from the Web.
Main Folder
Files in the Main Folder can be displayed. A specified file can be manipulated by clicking [Print], [Send], [Move], or
[Delete].
Quick File Folder
Files in the Quick File Folder can be displayed. You can re-operate the specified file. Clicking [Print], [Send], [Move], or
[Delete].
Custom Folder
The files that are in the Custom Folder can be displayed. You can re-operate the specified file. Clicking [Print], [Send],
[Move], or [Delete]. If the file to be manipulated has a password, enter the password in "Password of File".
My Folder
Displayed when My Folder is set.
Displays the files in My Folder. Allows you to retrieve the specified file. A specified file can be manipulated by clicking
[Print], [Send], [Move], or [Delete].
If the file to be manipulated has a password, enter the password in "Password of File".
DOCUMENT OPERATIONS
Item Description
Display Style Saved files can be displayed in list format or thumbnail format.
Job Classification The saved files that are displayed can be filtered by job.
Download When there is a PDF file for PC viewing or downloading, select it to download the file to
your computer.
Display Items Set the number of files that are displayed.
Item Description
Display Style Saved files can be displayed in list format or thumbnail format.
Job Classification The saved files that are displayed can be filtered by job.
Display Items Set the number of files that are displayed.
Item Description
Index The displayed Custom Folder names can be filtered by index.
Download When there is a PDF file for PC viewing or downloading, select it to download the file to
your computer.
Display Items Set the number of files that are displayed.

9-35
SETTING MODE►DOCUMENT OPERATIONS
Search
Search Result
Use these settings to enter search conditions. A specified file can be manipulated by clicking [Print], [Send], [Move], or
[Delete]. If the file to be manipulated has a password, enter the password in "Password of File".
File Batch Print
Multiple files can be printed at once by batch printing. Search for the files using search conditions, and then select
multiple files from the displayed search results.
Click [Print] to print the file.
Item Description
User Name Enter the user name.
Select from User List Click the [Setup] button and search for users from the list.
Login Name Set the number of files that are displayed.
Search Folder Set the folder.
File Name Enter a file name.
Password of File Enter the password that is set for the file.
Stored Date Set the date and time the file was saved.
Item Description
Display Style The files that were found can be displayed in list format or thumbnail format.
Job Classification The found files can be filtered by job.
Display Items Set the number of files that are displayed.
Item Description
Search Condition
User Name Enter the user name.
Select from User List Click the [Setup] button and search for users from the list.
Search Folder Select the folder that contains the target file.
File Name Enter a file name.
Password of File Enter the password for the target file.
Search Result
Job Classification The found files can be filtered by job.
Factory default settings: All Jobs
Number of Copies Set the number of copies to be printed.
Factory default settings: Apply the Number of Copies Stored in Each File
Print and Delete the Data After printing, delete the file.
Factory default settings: Disabled
Billing Code
Displayed when "Use Billing Code" is enabled.
Main Code Select this checkbox, and then enter the main code.
(32 characters or less)
9-36
SETTING MODE►DOCUMENT OPERATIONS
Submit Print Job
In addition to a file on your PC, this procedure can be used to print any file that can be accessed from your PC, such as
a file on another PC connected to the same network.
Files that can be printed are PDF, TIFF, JPEG, PCL, PS, XPS, DOCX, PPTX, and XLSX files with extensions pdf, tif, tiff,
jpeg, jpg, jpe, jfif, pcl, ps, xps, docx, pptx, and xlsx. Available only if the MFP supports PostScript.
Enter the password for the encrypted PDF data on Spool Queue of the Job Management screen.
For the procedure for accessing "Setting Mode (Web version)", refer to "SETTING MODE".
Print Settings
Select print settings. Select the file you want to print in "Select File", select settings, and then click [Print].
Sub Code Select this checkbox, and then enter the sub code.
(32 characters or less)
Item Description
Copies Set the number of copies to be printed.
Paper Size Set the print size.
Orientation Select portrait or landscape for the print orientation.
Factory default settings: Portrait
2-Sided Print Select one-sided printing, two-sided printing (booklet), or two-sided printing (tablet).
Factory default settings: 1-Sided
Output If printing by set, select the "Print per Unit" checkbox.
Factory default settings: Print per Unit: Enabled
Staple It can be used by connecting a finisher, or saddle stitch finisher. The settings differ
depending on the connected finisher, and saddle stitch finisher.
Factory default settings: Off
Separator Page Select to insert separator pages. Specify whether separator pages are to be added in front
of or behind each set. Select the paper tray with the paper you want to use from the paper
trays.
Factory default settings: Insert Top of Sets:Disabled, Insert End of Sets:Disabled
Punch It can be used when the punch unit is attached to the finisher.
Fold It can be used when the saddle finisher is attached. Set the orientation of the paper fold.
Saddle Fold It can be used when the saddle finisher is attached. Set the orientation of the paper fold in
"Print Side". If you want to fold the printed paper together in the saddle, set "Fold Multiple
Sheets Together".
Paper Size for Z-Fold It can be used when the paper folding unit is attached. Select the paper size to use for
Z-fold.
C-Fold It can be used when the paper folding unit is attached. Set the fold orientation in "Print
side". In "Opening direction", select the opening orientation when unfolding the folded
paper.
Accordion Fold It can be used when the paper folding unit is attached. In "Opening direction", select the
opening orientation when unfolding the folded paper.
Double Fold It can be used when the paper folding unit is attached. Set the orientation of the paper fold
in "Print Side".
Item Description
9-37
SETTING MODE►DOCUMENT OPERATIONS
Qualcomm
®
DirectOffice
™
is a product of Qualcomm Technologies,Inc. and/or its subsidiaries.
Qualcomm
®
is a trademark of Qualcomm Incorporated, registered in the United States and other countries.
DirectOffice
™
is a trademark of CSR Imaging US, LP, registered in the United States and other countries.
Half Fold It can be used when the paper folding unit is attached. Set the orientation of the paper fold
in "Print side".
Trimmer Setting Available when the trimming module is installed. Sets the cutting width.
Print B/W Print the file in black & white.
Fit To Page Print with the file expanded to the full paper size.
Print What Select whether to print the sheet or the entire workbook when printing the Excel file.
Output Tray Select the output tray for the print job.
Quick File Save the print data in the Quick File Folder of the machine.
Print Glossy Select this checkbox if the print job will be printed on glossy paper.
Billing Code Select the checkbox of the Billing Code to assign, and then enter the billing code.
Item Description

9-38
SETTING MODE►USER CONTROL
User Settings
It manages users such as registration of users to log in and user authentication methods.
User List
Add, edit, and delete users for user authentication, and configure user authentication settings.
•[Add] key
Add a new user.
• [Delete All Users] key
Deletes all registered users. (Excluding users stored as factory default.) Only the administrator of the machine can
use this function.
• [Delete All Auto-registered users] key
Deletes all auto-registered users.
• [Delete Your Information for External Service Connect] key
Deletes the external connect caches used by the logged in user. [Store user authentication information for External
Connect] must be enabled to use this function.
• [Delete All Information for External Service Connect] key
Only the administrator of the machine can use this function. Delete all External Connect caches. [Store user
authentication information for External Connect] must be enabled to use this function.
• User List
This shows the users stored as factory default and the currently stored users. An asterisk [*] appears in front of the
user name of auto-registered users.
When you select a user name, the user edit or delete screen appears.
Storing a user
When you tap the [Add] key, the registration screen appears. Up to 1000 groups can be registered.
For each setting, see the following "Settings
(page 9-40)".
USER CONTROL
The [Vender] and [Vender2] options are displayed only when the vender is connected.

9-39
SETTING MODE►USER CONTROL
Editing and deleting a user
When you select a user from the list, the user edit/delete screen appears.
For each setting, see the following "Settings
(page 9-40)".
A user can be deleted using the [Delete] key.
Users stored as factory default
The following users are stored in the machine at the factory.
• Administrator:
The administrator account of the machine, stored as factory default.
•User:
This is used when network authentication is used and a login name that is not stored in the machine is entered
directly. (This cannot be selected from the login user screen.)
• Device Account:
An account to which the color prohibited authority is granted.
• Other User:
This is used when a print job is executed using invalid user information. (This cannot be selected from the login user
screen.)
For settings related to each of the users, see the following table.
*1 Items that can be changed
*2 For detailed information about each of the settings, see "List of settings and factory default settings of template groups".
• If the login authentication with a Fixed User is set, the "Delete All Users" option cannot be used.
• Users stored as factory default cannot be deleted.
User Name Administrator User Device Account Other User
Login Name admin users device account Other
Password (Refer to the Start
Guide)
*1
users
*1
device account
*1
-
My Folder No No Main Folder No
Authentication
Settings
Login Locally -
Pages Limit Group Unlimited
*1
Authority Group
*2
Admin User
*1
Color Prohibited Authority
*1
Guest
*1
Favorite Operation
Group
Following the System Settings
*1
Default Billing Code Not Set
*1
9-40
SETTING MODE►USER CONTROL
Settings
Item Description
User Name This user name is used as the key name in the authentication screen, the user name for
document filing, and the sender name. If you want to use the "Automatically p
rint stored
jobs after login (page 9-99)" function, register up to 16 double-byte characters.
Apply User Name to Log-in
Name
*1
Select this to enter the entered user name in the login name.
Factory default settings: Disabled
Initial This determines where the user name will appear in the user list. Enter a maximum of 10
characters for the initials.
Index Select a custom index to be stored. The custom index names are the same as those used
in the address book.
Factory default settings: User1
Login Name
*1
Login name/password Enter the login name to be used when setting authentication. Enter
the password, consisting of 1 to 255 characters, that is used for user authentication by login
name and password (the password is optional).
Password
*1
,
*3
Enter the password used when setting the authentication by login name / password using 1
to 255 characters. (Optional)
After entering the password, enter once again in "Password (for confirmation)".
Change Password Check this when you want to change the set password. (Displayed when
modifying/deleting.)
Factory default settings: Disabled
Release Operation Lock Status Displayed when login has failed, and subsequent login to the printer is not possible. Tap the
[Execute] to clear this login lock, and allow the user to log in again.
User Number
*2
Enter a user number in 5 to 8 digits.
E-mail Address Enter the e-mail address that is used in the sender list and for LDAP authentication.
Home Directory Path Enter for the home directory path.
Copy Login Name to Use for User
Authentication
Copy Login Name to Use for User Authentication to the user name for home directory path
authentication.
Factory default settings: Enabled
User Name Enter for the user name for home directory path authentication.
Password Enter a maximum of 255 numeric digits for the password for home directory path
authentication.
Change Password Check this when you want to change the set password. (Displayed when
modifying/deleting.)
Factory default settings: Disabled
Authentication Settings
*1
Select either [Login Locally], [Network Authentication] (when LDAP is enabled) or [Active
Directory] (when Active Directory is enabled) for authentication.
Factory default settings: Login Locally
Authentication Server When the [Network Authentication] is selected, select the server to be used for user
authentication from the LDAP server list that is stored using Setting mode (Web version).
Organization/Group Set a group to which the user belongs.
Up to 8 groups can be assigned.
9-41
SETTING MODE►USER CONTROL
*1 It is not displayed when "User Number" is selected for the authentication method.
*2 It is displayed when "User Number" is selected for the authentication method.
*3 When using network authentication, the password registered in the LDAP server is used, so there is no need to set it.
Custom Index
You can change the custom index name.
Tap the custom index name on the list to edit it.
Delete the previously entered characters and enter a new name.
Organization /Group List
This is used to store user groups.
Tap each group name to enter them directly.
User Information Print
Prints the following item lists.
•User List
• List of Number of Pages Used
• Page Limit Group List
*
• Authority Group List
• Favorite Operation Group List
*
• All User Information Print
Select each item and tap the [Print] key to print it out.
* Cannot be printed when no groups are stored.
Pages Limit Group Specify the page limit for the user by selecting one of the stored page limit groups.
For more information, see "Pages Limit Group
(page 9-42)".
Factory default settings: Unlimited
Authority Group Specify the user authority by selecting one of the stored authority groups. For more
information, see "Authority Group
(page 9-43)".
Factory default settings: User
Favorite Operation Group The favorite operation group is displayed when the user logs in.
To change the settings, select [User Control] in Setting mode (Web version).
Factory default settings: Following the System Settings
Default Billing Code Set the Main Code and Sub Code when the user logs in.
Factory default settings: Not Set
My Folder Store a folder to be used for document filing as the dedicate user folder (or My folder). A
stored folder can be selected, or you can create and specify a new folder.
In All User Information Print, the following items are handled by 2-sided printing on an item basis.
• User List
• List of Number of Pages Used
• Pages Limit Group
• Favorite Operation Group
Item Description

9-42
SETTING MODE►USER CONTROL
Access Control Settings
Pages Limit Group
This is used to register the page limit settings in advance for each group.
The page limit for each user is specified by selecting one of these registered groups when the user is registered.
• [Add] key
Use this to add a new group.
•List display
This shows the currently stored groups. Selecting a group name displays the edit screen for that group.
Storing page limit groups
When you tap the [Add] key, the registration screen appears. Up to 20 groups can be registered.
For each setting, see the following "Settings
(page 9-42)".
Editing a page limit group
Selecting a group from the list displays the edit screen for that group.
For each setting, see the following "Settings
(page 9-42)".
To return a group to the factory default state, set "Select the Group Name to be the Registration Model" to "Unlimited" on
the edit screen.
Settings
Machine Page Limit Setting
Sets the page limit for the machine.
Settings
Item Description
Group Name Store a name of group (up to 32 characters).
Select the Group Name to be the
Registration Model
Select one of the previously stored groups for use as a template for the new group. When
selected, the settings of this group are applied.
Function Names The name of the functions that can be configured is displayed. Set a limit for each function.
Page Limit When [Prohibited] is selected for a mode, input from the mode is prohibited.
When [Unlimited] is selected for a mode, there is no limit to the number of pages that can
be input/output in that mode.
When [Limited] is selected, enter a page limit (1 to 99999999 pages).
Item Description
Function Names The name of the functions that can be configured is displayed. Set a limit for each function.
Page Limit When [Prohibited] is selected for a mode, input from the mode is prohibited.
When [Unlimited] is selected for a mode, there is no limit to the number of pages that can
be input/output in that mode.
When [Limited] is selected, enter a page limit (1 to 99999999 pages).
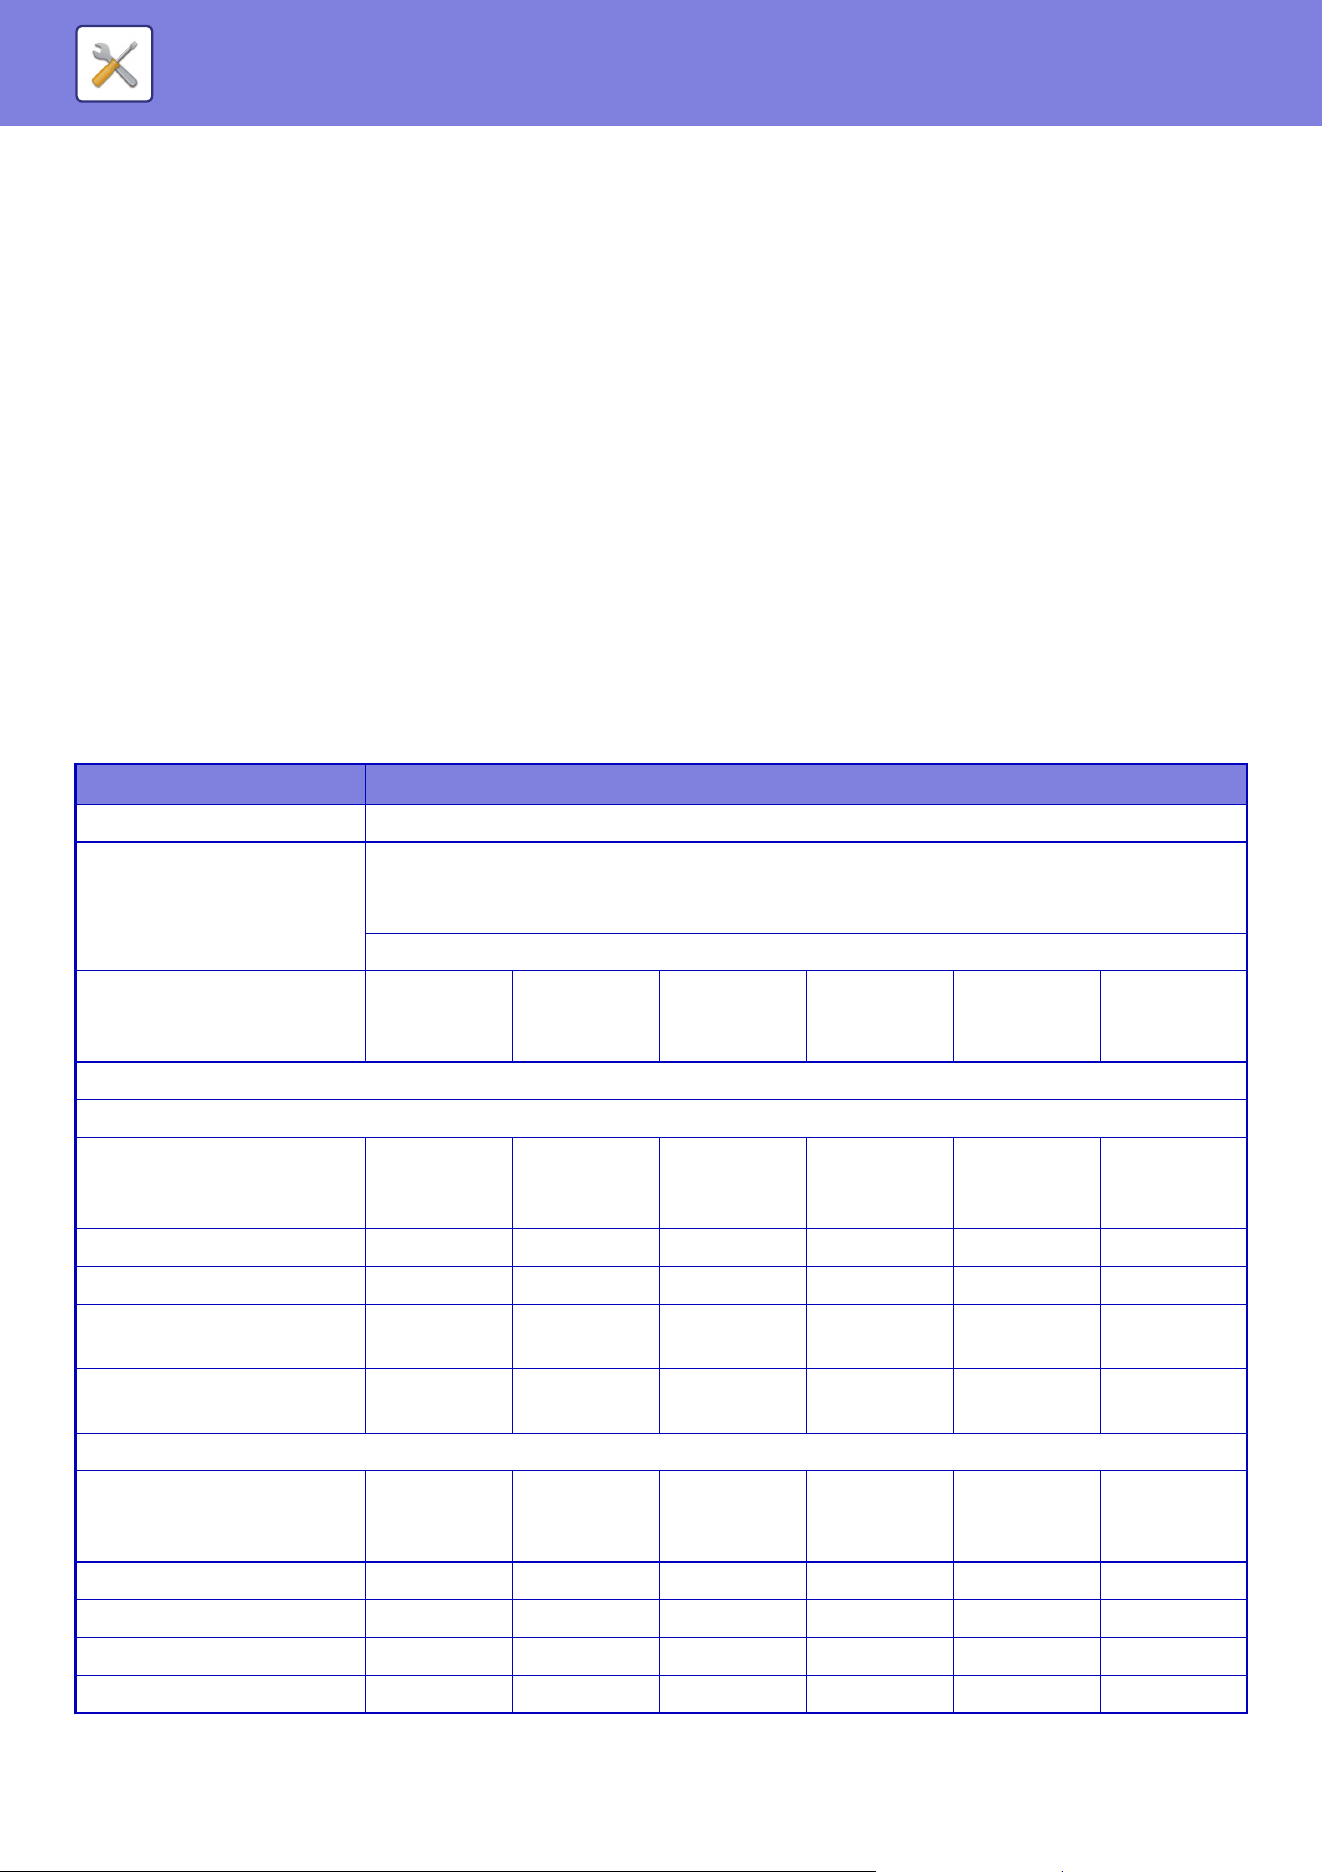
9-43
SETTING MODE►USER CONTROL
Authority Group
This is used to store the settings relevant to user authorities in advance for each group. The authority of each user is
specified by selecting one of these registered groups when the user is registered.
• [Add] key
Use this to add a new group.
•List display
This shows the currently stored groups. Selecting a group name displays the edit screen for that group.
Storing authority groups
When you tap the [Add] key, the registration screen appears. Up to 20 groups can be registered.
For detailed information about each of the settings, see "List of settings and factory default settings of template groups".
Editing an authority group
Selecting a group from the list displays the edit screen for that group. For detailed information about each of the settings,
see "List of settings and factory default settings of template groups".
To return a group to the factory default state, select the group from the list and select any of options [Return to the
Administrator Authority], [Return to the system administrator authority.], [Return to the User Authority], [Return to the
Guest Authority], [Return to the color prohibited authority.] and [Return to the scanner prohibited authority.].
Tapping the [Execute] key resets the group status to the factory default.
Item Description
Group Name Store a name of group (up to 32 characters).
Select the Group Name to be
the Registration Model
Select one of the previously stored groups for use as a template for the new group. When
selected, the settings of this group are applied.
When selected, the settings of this group are applied.
The factory default groups and their settings are shown below.
Admin System
Administrator
User Guest Color
Prohibited
Authority
Scanner
Prohibited
Authority
Job Settings
Copy
Color Mode Approval Setting All allowed All prohibited All allowed Only Black &
White
Allowed
Only Black &
White
Allowed
All allowed
Special Modes Usage Allowed Prohibited Allowed Prohibited Prohibited Allowed
Sending while copying Allowed Allowed Allowed Allowed Allowed Allowed
Approval Setting to Use
Toner Save Mode
No Toner
Save
No Toner
Save
No Toner
Save
No Toner
Save
No Toner
Save
No Toner
Save
Creation of PDF for PC
Browsing
Allowed Prohibited Allowed Allowed Allowed Allowed
Printer
Color Mode Approval Setting Allowed All prohibited Allowed Only Black &
White
Allowed
Only Black &
White
Allowed
All allowed
FTP Pull Print Allowed Prohibited Allowed Prohibited Prohibited Allowed
USB Memory Direct Print Allowed Prohibited Allowed Prohibited Prohibited Allowed
Network Folder Pull Print Allowed Prohibited Allowed Prohibited Prohibited Allowed
Sending while printing Allowed Allowed Allowed Allowed Allowed Allowed
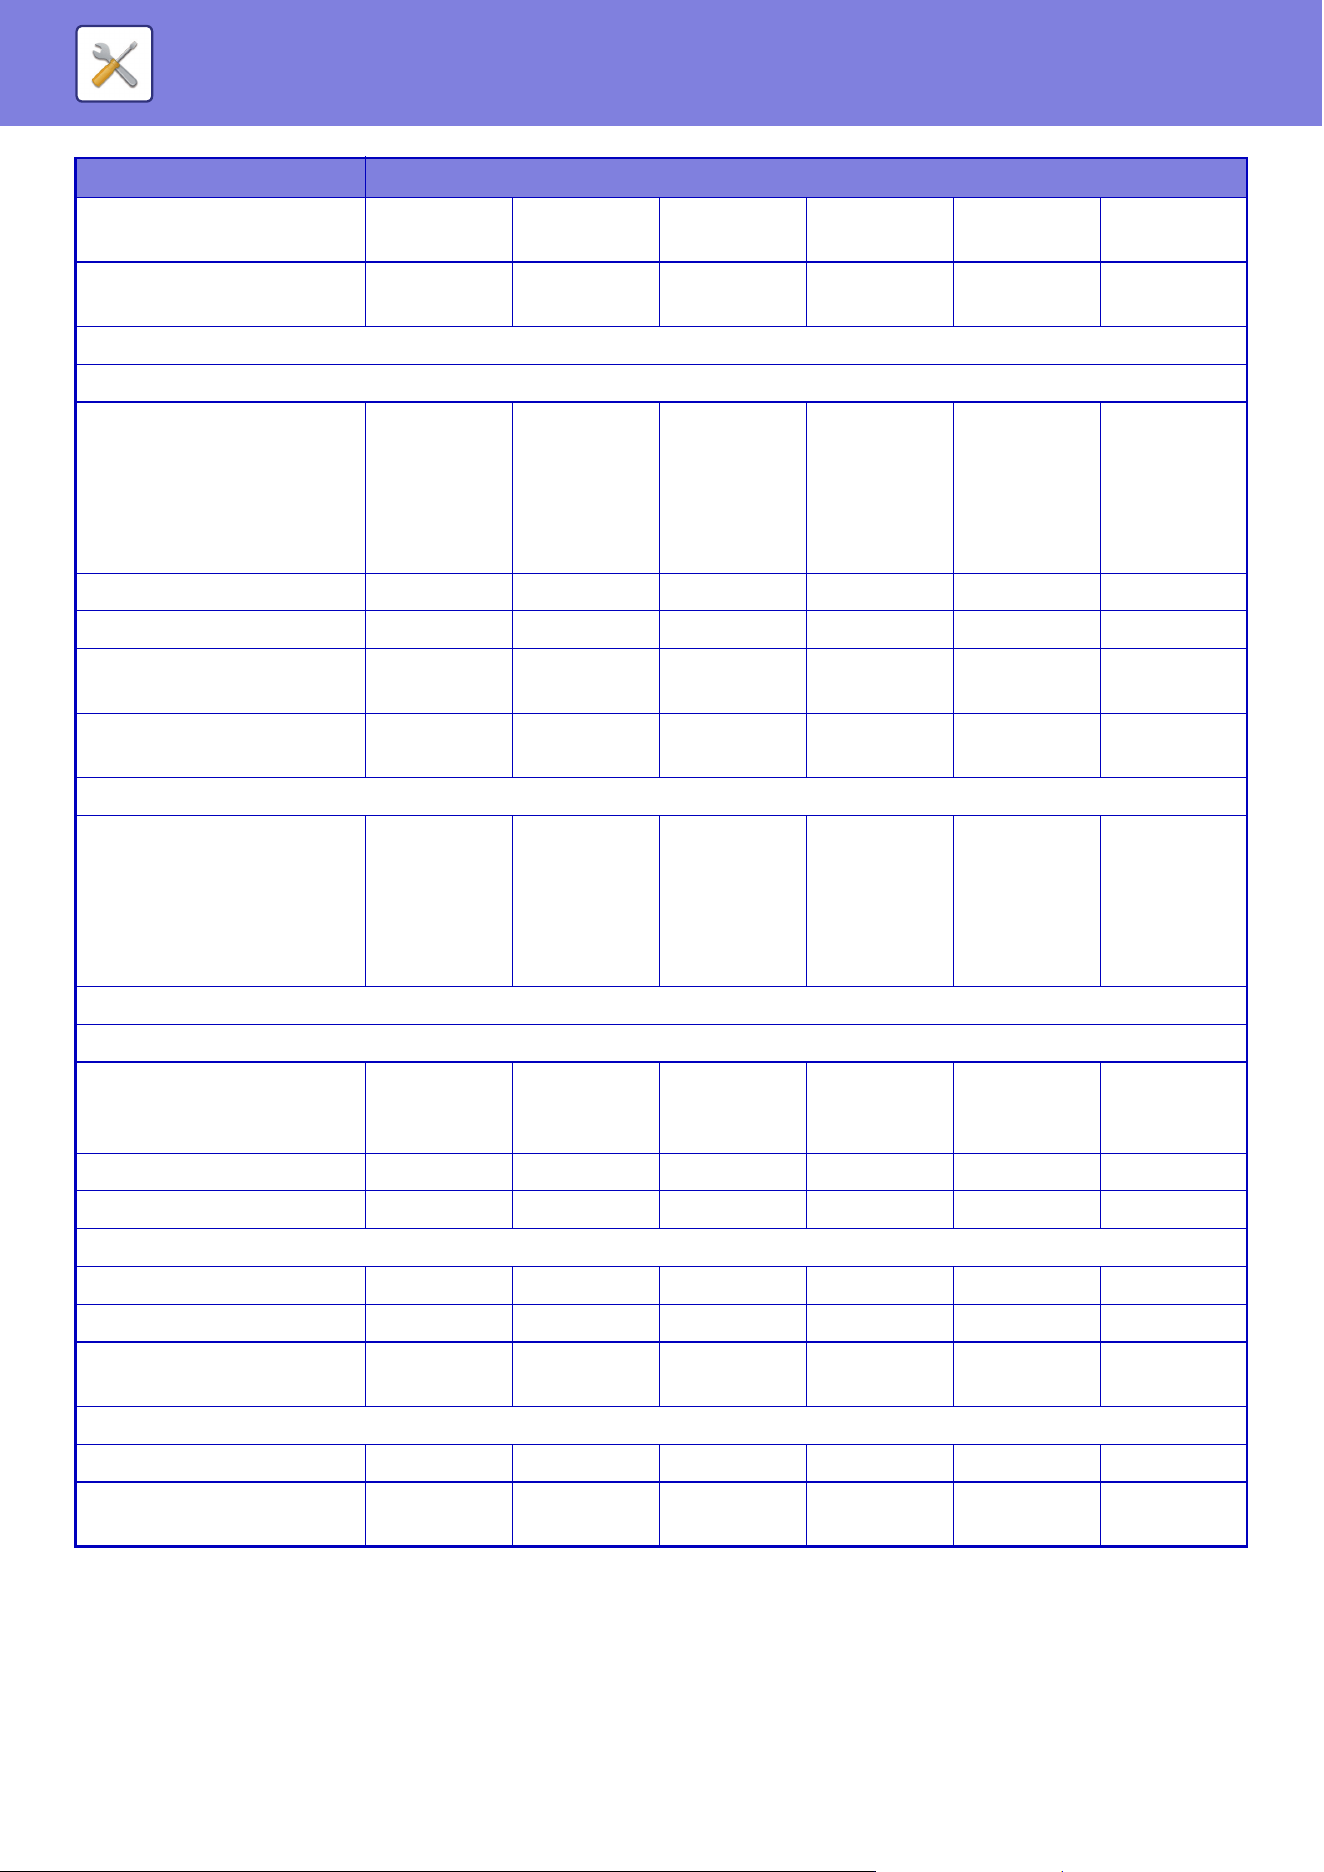
9-44
SETTING MODE►USER CONTROL
Approval Setting to Use
Toner Save Mode
No Toner
Save
No Toner
Save
No Toner
Save
No Toner
Save
No Toner
Save
No Toner
Save
Creation of PDF for PC
Browsing
Allowed Prohibited Allowed Allowed Allowed Allowed
Image Send
Approval Settings for Each Mode
•E-mail
•FTP
• Network Folder
• Save in External Memory
Device
•PC Scan
All allowed All prohibited All allowed All allowed All allowed All prohibited
Color Scan Allowed Prohibited Allowed Prohibited Prohibited Allowed
Special Modes Usage Allowed Prohibited Allowed Prohibited Prohibited Allowed
Registration/Deletion of
Program
Allowed Prohibited Allowed Prohibited Prohibited Allowed
Creation of PDF for PC
Browsing
Allowed Prohibited Allowed Allowed Allowed Allowed
Approval Setting for Addressing
• Approval Setting for Direct
Entry
• Approval Setting to Use a
Local Address Book
• Approval Settings to Use a
Global Address Book
All allowed All allowed All allowed All allowed All allowed All allowed
Document Filing
Scan to Local Drive
Color Scan Allowed Prohibited Allowed Only Black &
White
Allowed
Only Black &
White
Allowed
Allowed
Special Modes Usage Allowed Prohibited Allowed Prohibited Prohibited Allowed
Creating Downloadable File Allowed Prohibited Allowed Allowed Allowed Allowed
Prints (Document Filing)
Color Mode Approval Setting Allowed Prohibited Allowed Allowed Allowed Allowed
Special Modes Usage Allowed Prohibited Allowed Prohibited Prohibited Allowed
Approval Setting to Use
Toner Save Mode
No Toner
Save
No Toner
Save
No Toner
Save
No Toner
Save
No Toner
Save
No Toner
Save
Document Filing Image Check
Approval Setting Allowed Prohibited Allowed Prohibited Allowed Allowed
Display only the Files of
Logged-in Users
Prohibited Prohibited Allowed Allowed Allowed Allowed
Item Description

9-45
SETTING MODE►USER CONTROL
Sharp OSA
Approval Setting to Use a
Sharp OSA
Allowed Prohibited Allowed Allowed Allowed Allowed
Common Functions
Approval Settings for 2-Sided
Print
All allowed All allowed All allowed All allowed All allowed All allowed
Changing Billing Code Allowed Allowed Allowed Allowed Allowed Allowed
Output Approval Settings All allowed All prohibited All allowed All prohibited All prohibited All allowed
Security
Document Filing Approval
Setting:Quick File
Mode/Sharing Mode
Prohibited Prohibited Prohibited Prohibited Prohibited Prohibited
Document Filing Approval
Setting:Confidential Mode
Allowed Prohibited Allowed Prohibited Prohibited Allowed
Print Jobs Other than Print
Hold Job
Allowed Allowed Allowed Allowed Allowed Allowed
Hidden Pattern Print Setting
- Direct Entry
Allowed Prohibited Allowed Prohibited Prohibited Allowed
Machine Settings
Total Count Allowed Allowed Allowed Prohibited Allowed Allowed
Device / Network Status Allowed Allowed Allowed Prohibited Allowed Allowed
Power Reset Allowed Allowed Prohibited Prohibited Prohibited Prohibited
List for User Allowed Allowed Allowed Prohibited Allowed Allowed
List for Administrator Allowed Allowed Prohibited Prohibited Prohibited Prohibited
Address Registration Allowed Allowed Allowed Prohibited Allowed Allowed
Document Filing Folder
Registration
Allowed Allowed Allowed Prohibited Allowed Allowed
User Control (Admin) Allowed Allowed Prohibited Prohibited Prohibited Prohibited
User Control (User) Allowed Allowed Allowed Prohibited Allowed Allowed
Home Screen Settings Allowed Allowed Prohibited Prohibited Prohibited Prohibited
Copy Settings Allowed Allowed Prohibited Prohibited Prohibited Prohibited
Printer Settings (Admin) Allowed Allowed Prohibited Prohibited Prohibited Prohibited
Printer Settings (User) Allowed Allowed Allowed Prohibited Allowed Allowed
Image Send Settings >
Common Settings
Allowed Allowed Prohibited Prohibited Prohibited Prohibited
Scan Settings Allowed Allowed Prohibited Prohibited Prohibited Prohibited
Metadata Entry Allowed Allowed Prohibited Prohibited Prohibited Prohibited
Document Filing Settings Allowed
*
Allowed
*
Prohibited Prohibited Prohibited Prohibited
Sharp OSA Settings Allowed Allowed Prohibited Prohibited Prohibited Prohibited
Paper Settings (Bypass Tray
Excluded)
Allowed Allowed Allowed Prohibited Allowed Allowed
Paper Settings (Bypass Tray) Allowed Allowed Allowed Prohibited Allowed Allowed
Operation Settings Allowed Allowed Prohibited Prohibited Prohibited Prohibited
Item Description
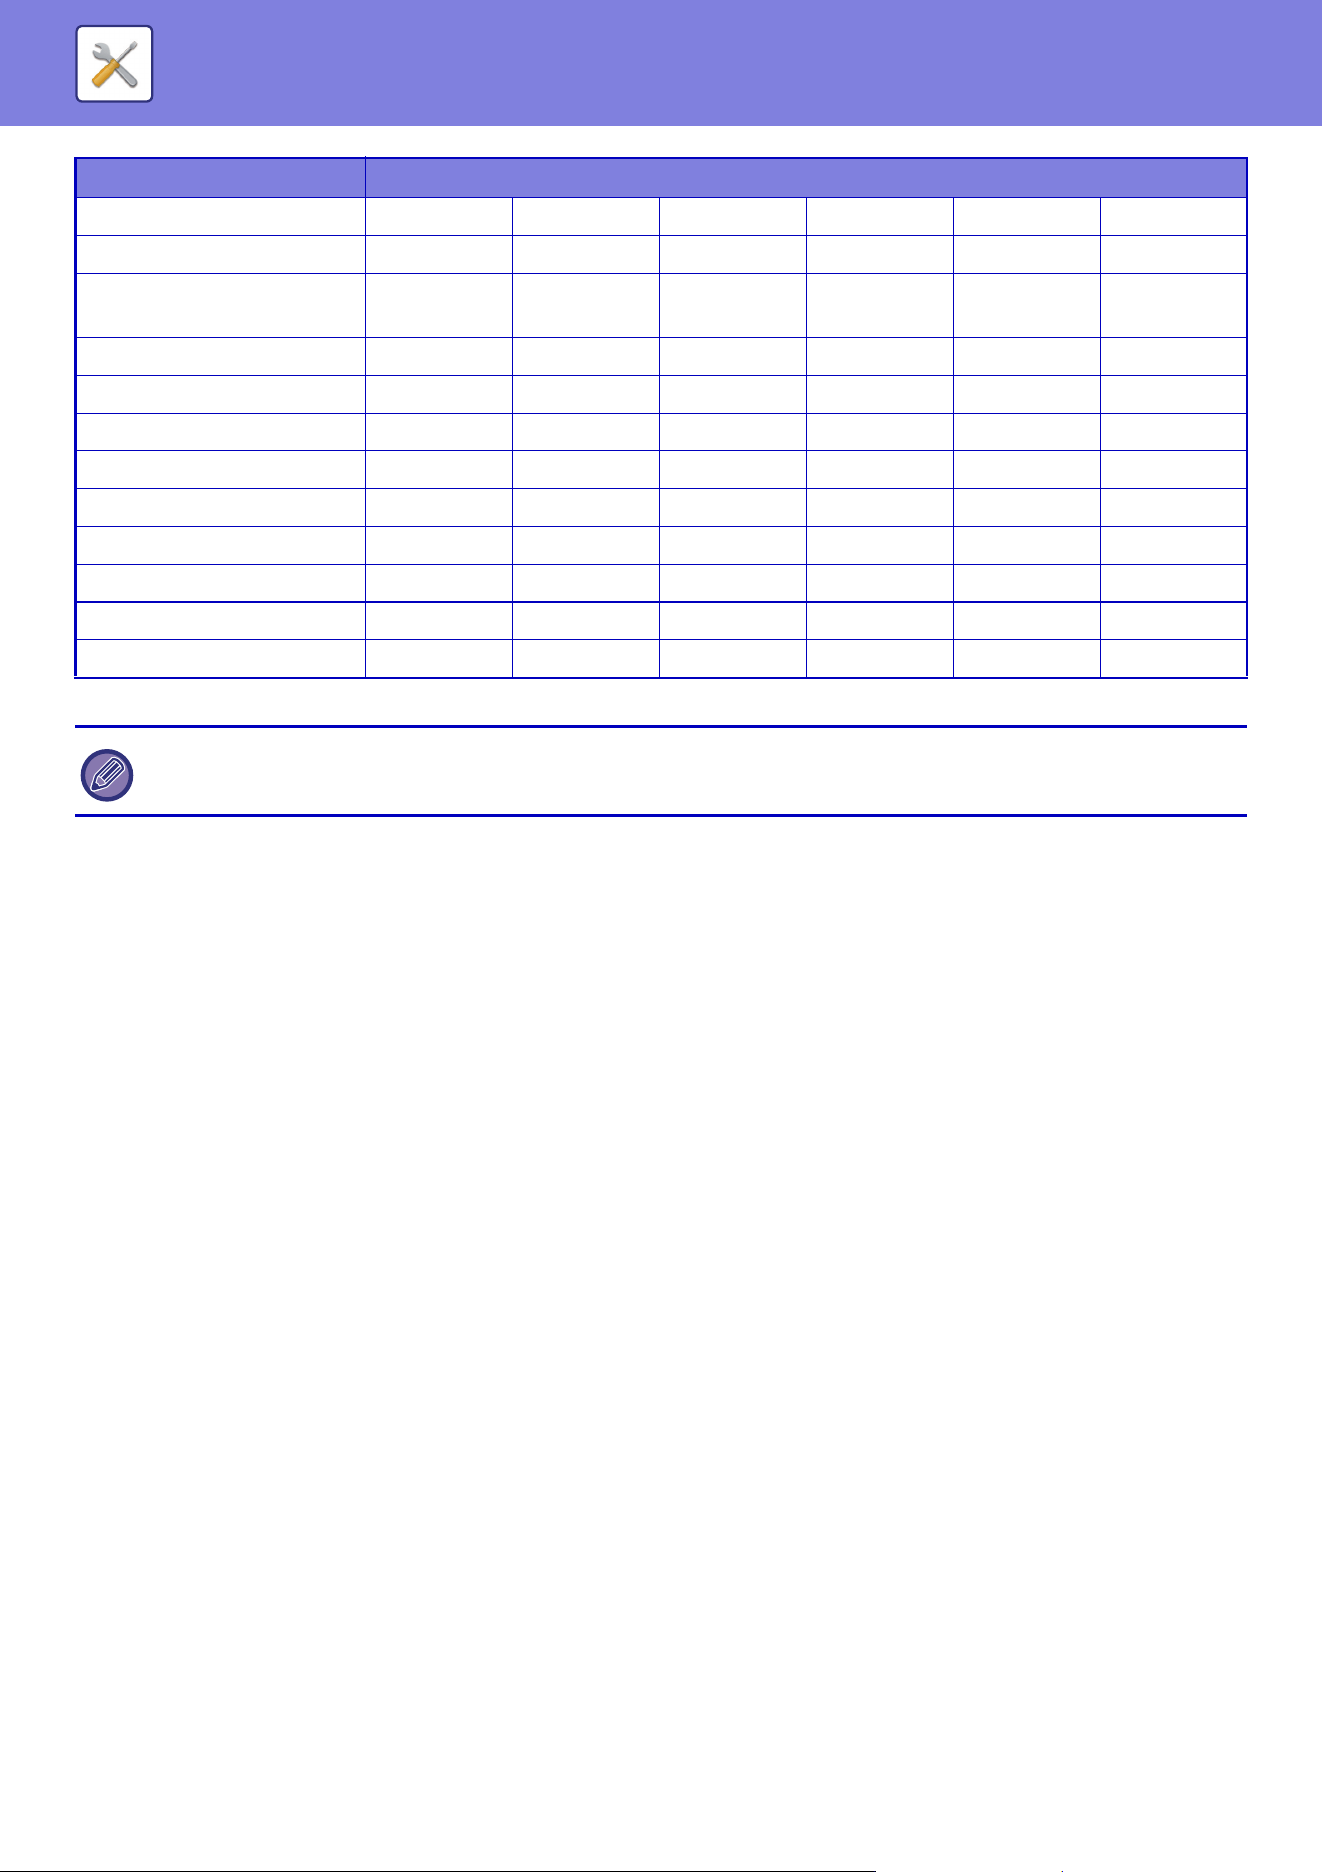
9-46
SETTING MODE►USER CONTROL
* For information on each setting, see the setting mode list.
Keyboard Settings Allowed Allowed Prohibited Prohibited Prohibited Prohibited
Device Control Allowed Allowed Prohibited Prohibited Prohibited Prohibited
Machine Identification
Settings
Allowed Allowed Prohibited Prohibited Prohibited Prohibited
Clock Adjust Allowed Allowed Prohibited Prohibited Prohibited Prohibited
Product Key Allowed Allowed Prohibited Prohibited Prohibited Prohibited
Custom Link Setting Allowed Allowed Prohibited Prohibited Prohibited Prohibited
Network Settings Allowed Allowed Prohibited Prohibited Prohibited Prohibited
Security Settings Allowed Allowed Prohibited Prohibited Prohibited Prohibited
Energy Save Allowed Allowed Prohibited Prohibited Prohibited Prohibited
System Control Allowed Allowed Prohibited Prohibited Prohibited Prohibited
Image Quality Adjustment Allowed Allowed Prohibited Prohibited Prohibited Prohibited
Shortcut Page Setting Allowed Allowed Prohibited Prohibited Prohibited Prohibited
Depending on the machine specifications and peripheral devices installed, it may not be possible to use some settings.
Item Description
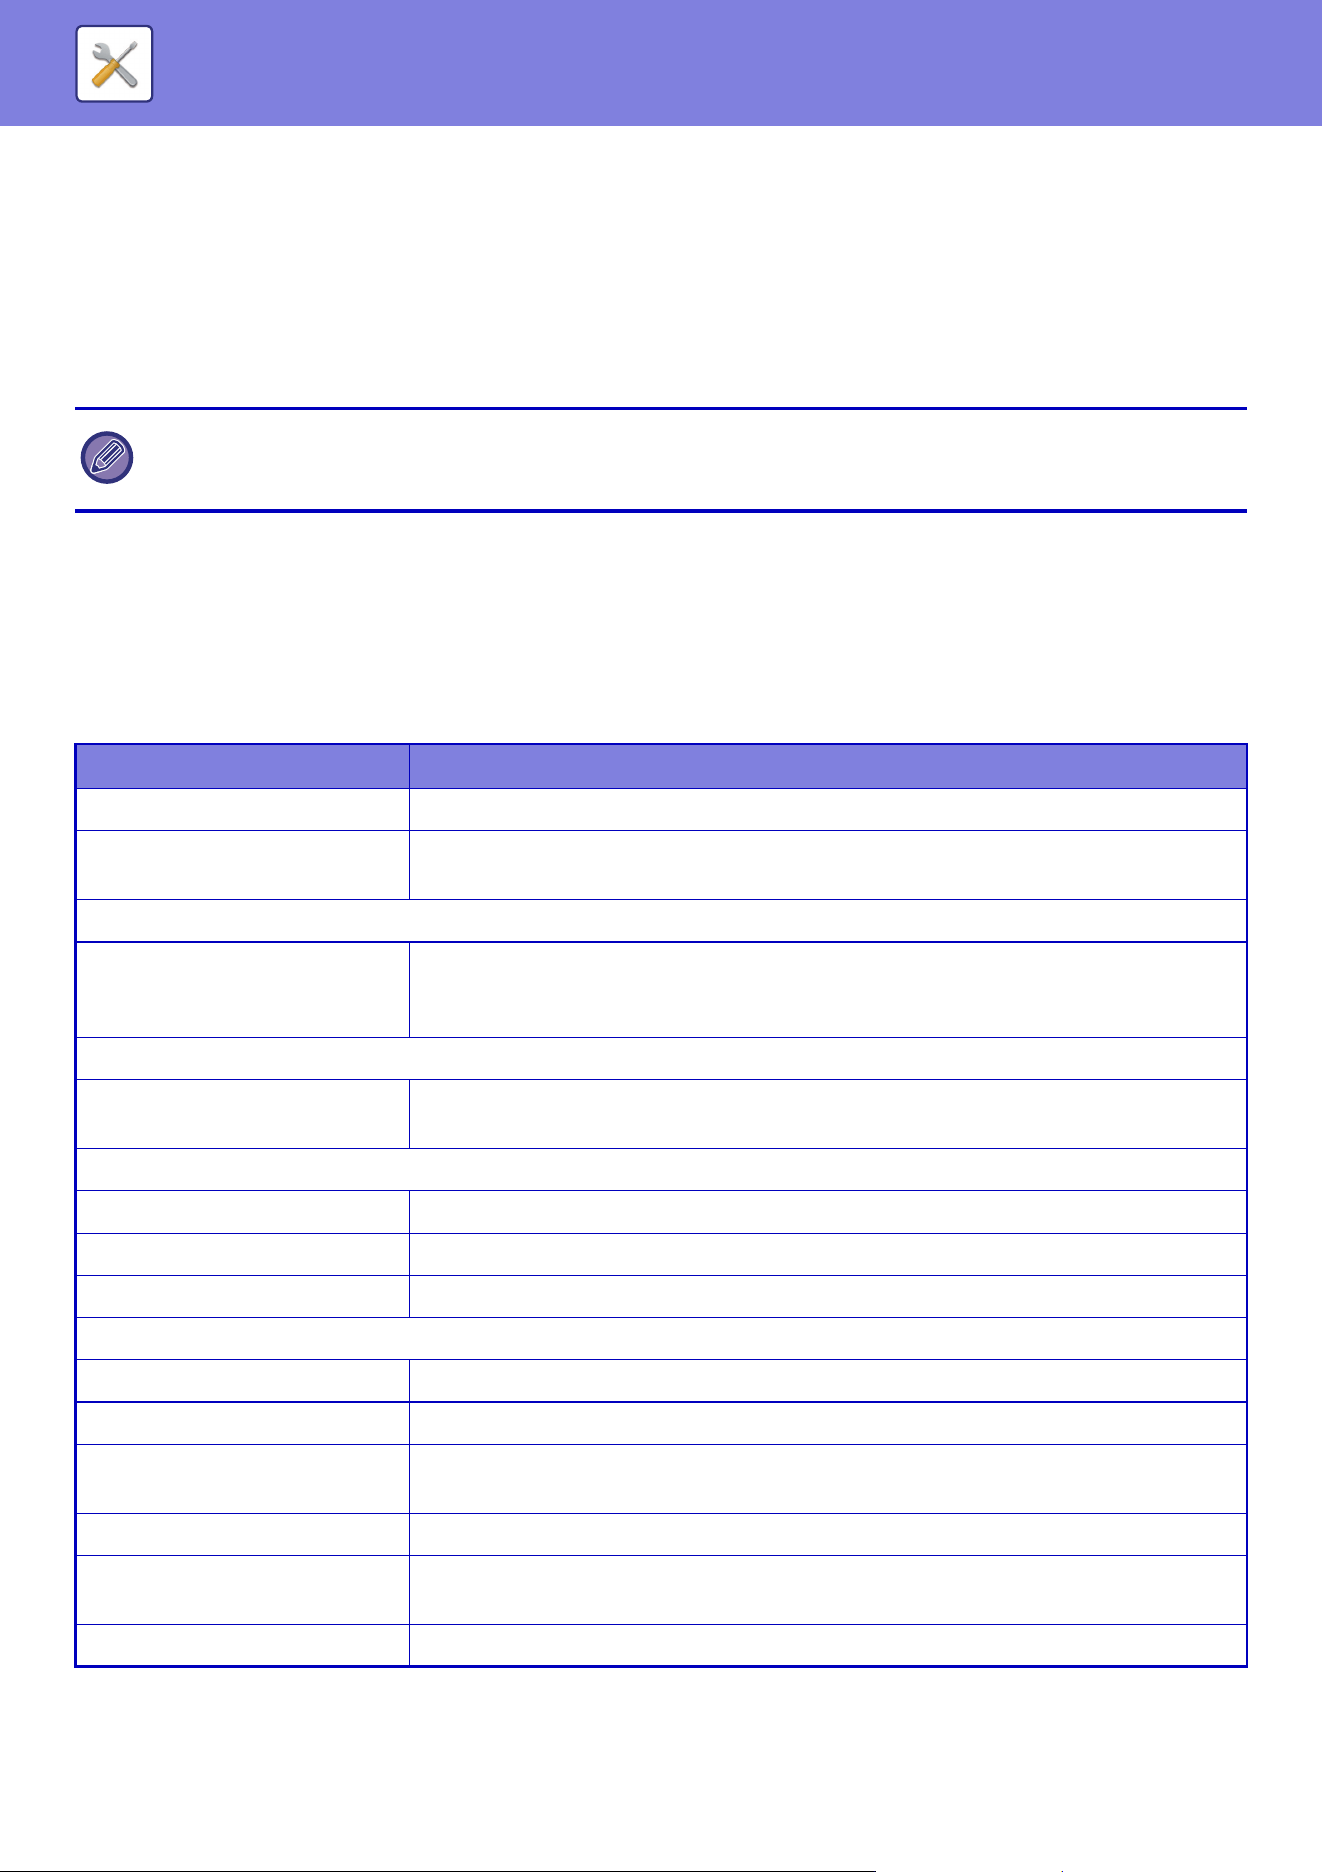
9-47
SETTING MODE►USER CONTROL
Favorite Operation Group
Favorite Operation Group List
For each group, you can register an environment with settings that are convenient for the group. For example, a user
who speaks a different language would normally have to change the display language each time he or she uses the
machine; however, by registering the language in a favorite operation group in advance, the language is automatically
selected when the user logs in.
Adding/editing a group
Tap the [Add] key to display the favorite operation group registration screen.
Tap a group name to display the registration screen for that favorite operation group. You can edit the group in this
screen.
Settings
• This setting can only be configured in Setting mode (Web version). It cannot be configured in the touch panel of the
machine.
• Depending on the machine specifications and peripheral devices installed, it may not be possible to use some settings.
Item Description
Group Name Store a name of group.
Select the Group Name to be the
Registration Model
Select one of the previously stored groups for use as a template for the new group. When
selected, the settings of this group are applied.
Copy
Initial Status Settings Select settings for Color Mode, Paper Tray, Exposure Type, Copy Ratio, 2-Sided, Output,
Offset, Output Tray, Staple Position, Punch, Fold, Z-fold paper size C-Fold Outer tri-fold,
Double Fold, Half Fold and Trimming Width Settings and Half Fold.
Image Send
Initial Status Settings Select settings for Image Orientation, Exposure, Resolution, Color Mode, File Format
Original Image Type, and OCR Setting.
Document Filing
Image Orientation Specify the image orientation.
Initial Status Settings Select settings for Color Mode, Exposure, Original Image Type, and Resolution.
Prints (Document Filing) Set the default output tray for document filing print.
System Settings
Enlarge Display Mode Turn this option ON to display large characters on the Setting mode screen.
Original Size Detector Setting Set the AB system and inch system for document detection.
Cancel Detection at Document
Glass
Cancels the detection of the original on the platen (document glass).
Language Setting Select the display language.
Switch the Number of Sets to be
Displayed for Job Management
Select whether to display the number of progress sets or remaining sets as the job
management.
Key Operation Setting Set the key input time and Auto Key Repeat setting.
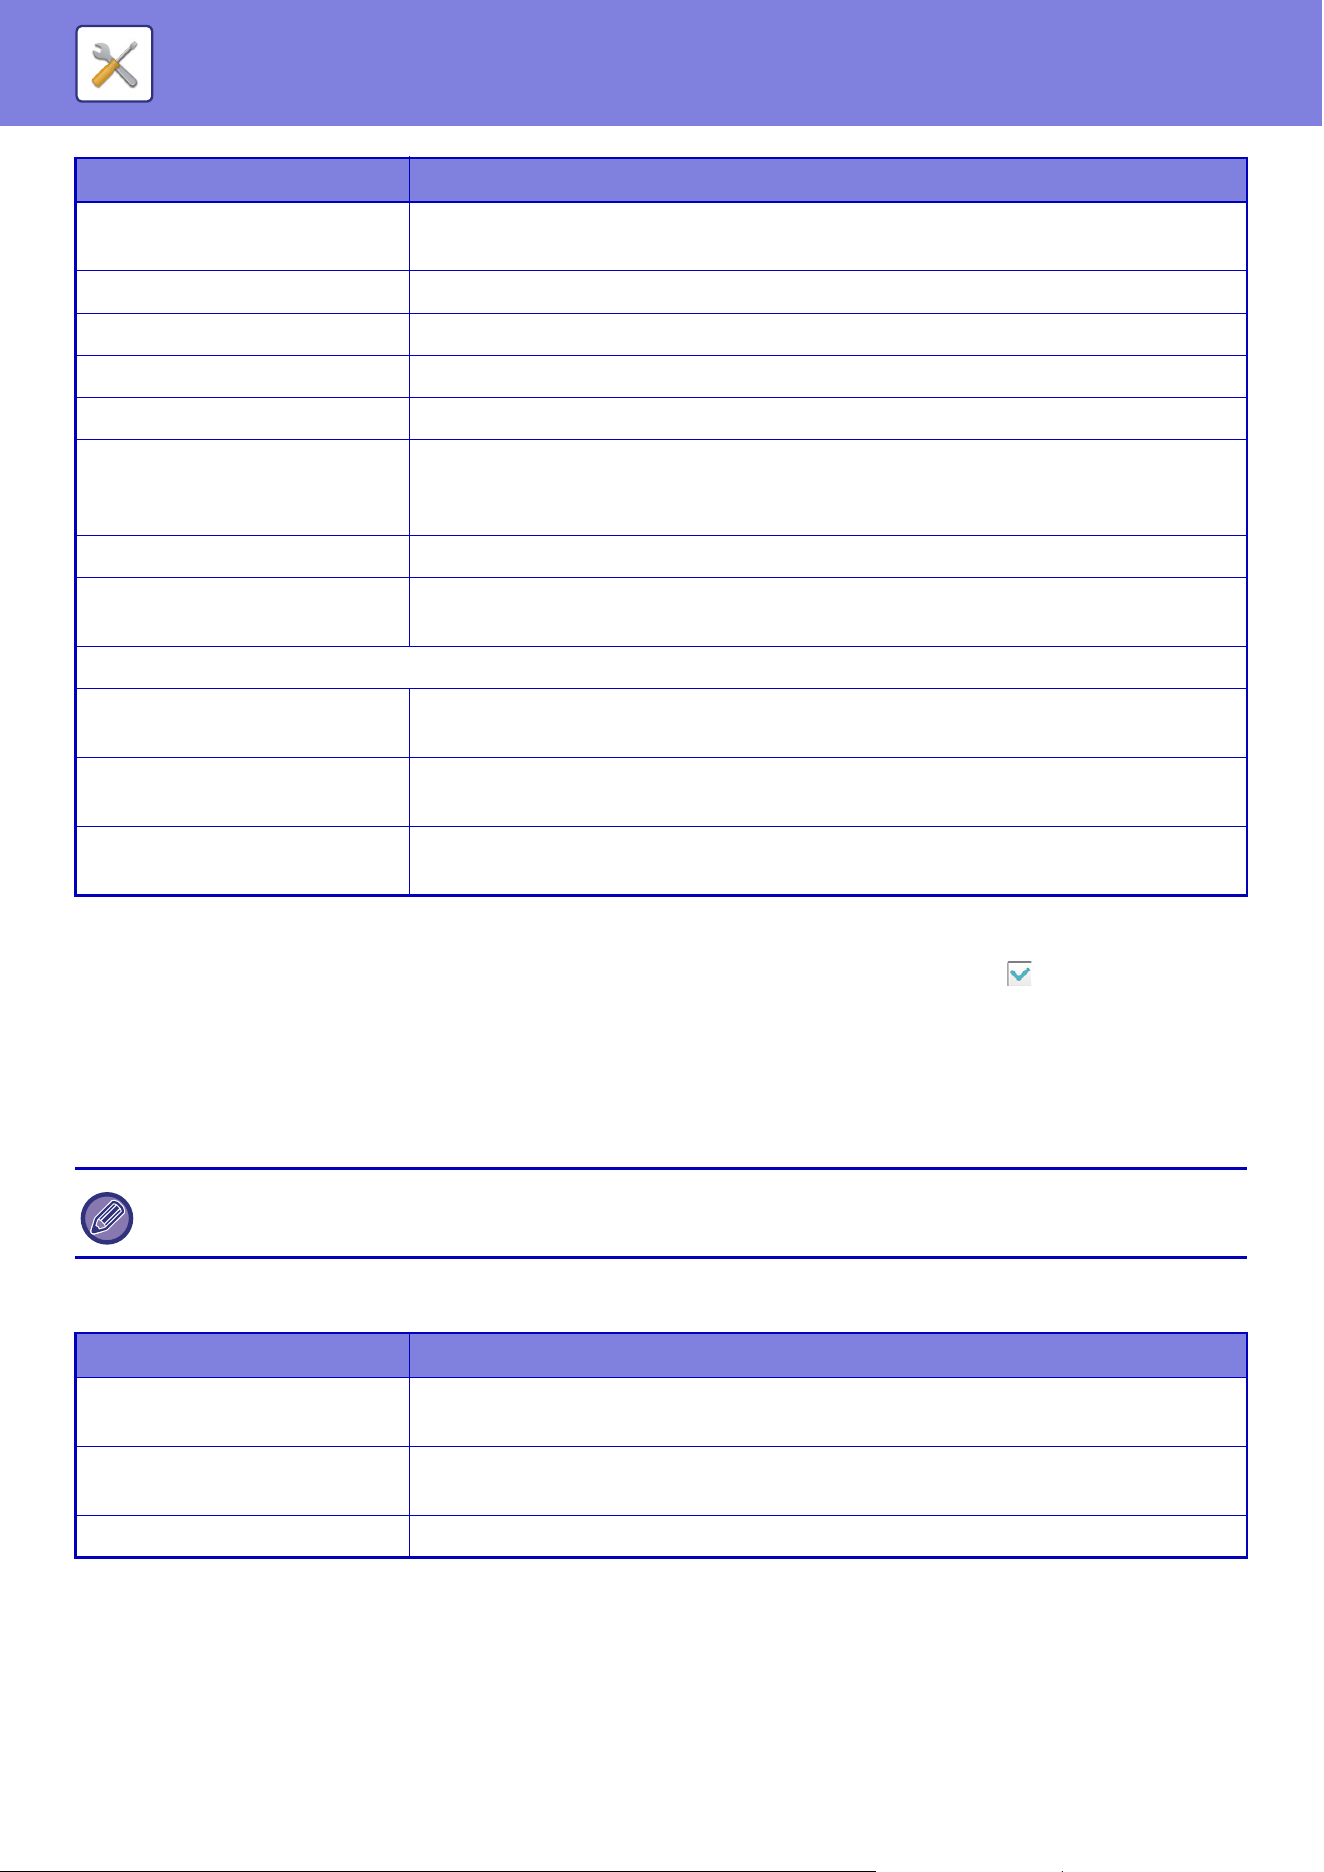
9-48
SETTING MODE►USER CONTROL
Returning a favorite operation group to "Unlimited"
To return a selected favorite operation group to the factory default state, select the checkbox ( ) to the left of "No."
and tap the [Return to the Defaults] key.
Favorite Key List
Assign shortcut keys to frequently used functions.
They will be displayed in the base screen of each mode.
Settings
Time for Accepting Key Entry of
Long Touch
Select a time when a long key touch is detected.
Double Tap Interval Setting Select an interval when a double tap is detected.
Keys Touch Sound Set the sound made when keys are touched.
Keyboard Select Set the language that appears on the keyboard.
MFP Display Pattern Setting Select the color pattern used in the touch panel.
Automatically print stored jobs
after login
When retention is enabled in the printer driver and print data has been spooled to the
machine, the spooled print data is automatically printed out when the user who enabled
retention logs in.
Favorite Key Setting Select whether to follow the system settings or the registered favorite key settings.
Home Screen Settings Select to use System Settings or use the stored home screen settings for performing Home
Screen Settings.
Preview Setting: Default List/Thumbnail Display
File Retrieve of Main
Folder/Quick File Folder
Select whether the default display format of the document filing main folder and temporary
folder screens is list or thumbnails.
File Retrieve of Custom Folder Select whether the default display format of the document filing custom folder screen is list
or thumbnails.
File Retrieve of Direct Print Select whether the default state of the file list screen for direct print shows the folders as a
list or as thumbnails.
This setting can only be set on web pages.
Item Description
Key Name Enter a maximum of 20 characters for the favorite key name.
(Up to 20 full-width characters can be entered, but only 10 will be shown on the key.)
Function Menu/Program/Other Select the function that you wish to assign to the favorite key. The functions that can be
selected vary by mode.
No Display Enable this setting to not show favorite keys.
Item Description
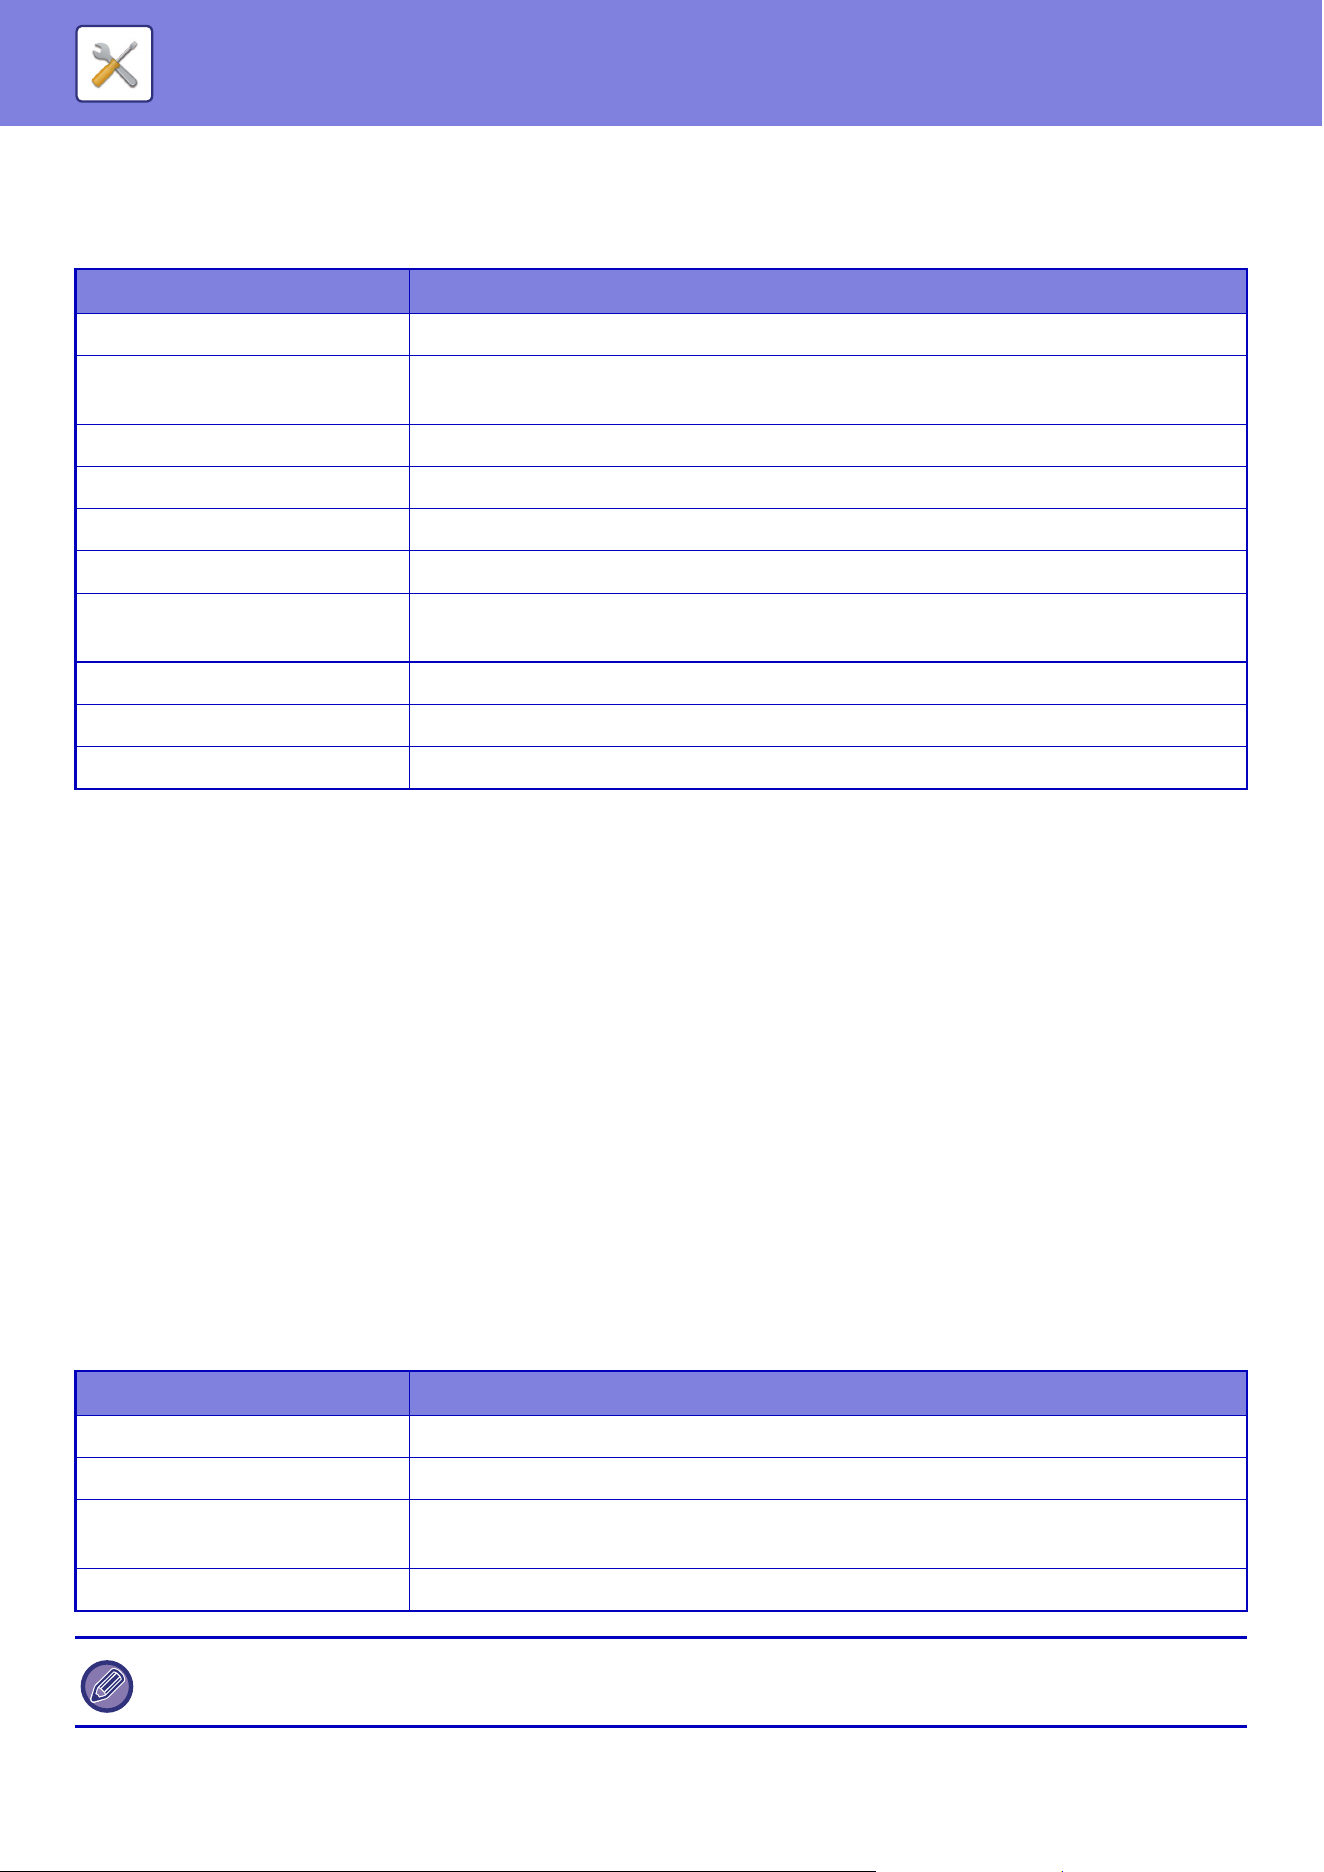
9-49
SETTING MODE►USER CONTROL
Home Screen List
Home screen settings must be previously stored.
Select a home screen when registering Favorite Operation Group List.
User Count
This displays the total number of pages printed by each user.
• [Select All] key
This selects all users.
• [Clear Checked] key
This clears all selections.
[Show] key
This shows the counts of the selected user.
• [Clear Count] key
Use this to reset the counts of the selected user.
• User List
This shows the users stored as factory default and the currently stored users. When you select a user name, the user
is selected.
View User Count
When you select a user and tap the [Show] key, this user count is displayed.
Item Description
Name Enter a maximum of 32 characters for the home screen name.
Select the Group Name to be the
Registration Model
Select one of the previously stored home screens as a template for the new home screen.
When selected, the settings of this home screen are applied.
Key Layout of the Screen The layout of the keys in the home screen is displayed.
Key Transparency Setting Sets the transparency of the shortcut keys as a percentage.
Home button Registers the function to use for the selected key number.
Display Toner Quantity Select this to display the toner level in the fixed area.
Fixed button Registers the function to use for the selected key number. This button is displayed on all
pages of the home screen.
Rename Home Screen Enter a home screen name to change the existing name.
Template Select a layout pattern of the registered key.
Text Color Select this to display the toner level in the fixed area.
Item Description
Next Displays the next user (in the order of the registration numbers).
Previous Displays the previous user (in the order of the registration numbers).
Show Counts Displays the counts and the number of pages remaining of the selected user for each
function.
Page Limit The page limit set for the user appears in parentheses below the count.
If peripheral devices are not mounted, their count is not displayed.

9-50
SETTING MODE►USER CONTROL
Resetting user counts
Select a user in the setting screen and tap the [Delete] key. A count reset screen for that user will appear.
The reset screen will vary depending on whether a single user or multiple users were selected. The items displayed in
each case are described in the table below.
When a single user is selected
When multiple users are selected
Save User Count
Clicking the [Save] button saves the user count information as a data file.
To delete the user count information in the machine, click the checkbox next to the "Save and Delete the Data" so that it
is selected and click the [Save] button.
Item Description
Next Displays the next user (in the order of the registration numbers).
Previous Displays the previous user (in the order of the registration numbers).
Show Counts Displays the counts and the number of pages remaining of the selected user for each
function.
Clear Count Reset the count of the selected item to "0".
Clear All Count Clears all counts of the selected user to zero (0).
Item Description
Show Counts Displays the counts and the number of pages remaining of the selected user for each
function.
Clear Count Reset the count of the selected item to "0".
Clear All Count Clears all counts of the selected user to zero (0).
This setting can only be configured in Setting mode (Web version). It cannot be configured in the touch panel of the machine.

9-51
SETTING MODE►USER CONTROL
Billing Code Setting
Select billing codes.
Administration Settings
Change the billing code setting.
Use Billing Code
Switch whether to enable or disable a billing code.
Factory default settings: Disabled
Default Code Setting
A use code is automatically assigned when no billing code is entered. Specify the code using up to 32 single-byte
characters.
Remember Billing Code Between Modes
If this function is enabled, the billing code entry window is not displayed at the time of mode transition.
Disable Change of Billing Code
If this function is enabled, you cannot register, edit, or delete a billing code.
In addition, you cannot directly type in a billing code in the billing code entry window.
Apply Default Code when Billing Code not entered
If this function is enabled, a use code is always set while you are logging in with device account.
Disable Billing Code for Selected Applications
The billing code entry window is displayed when the external application that is set to enable is started.
The following settings can be configured.
• Application Name registered as Standard Application
Billing Code Display Name Setting
You can change the main code or sub code name displayed in the billing code entry window or billing code selection
window.
Main Code List
You can display a list of main codes to search for, register, correct, or delete a main code.
• [Search] key
Searches for a main code.
• [Add] key
Adds a new main code.
• List display
Displays a list of registered main codes. Selecting each main code displays the window to correct the main code.
• [Delete] key
Set the check box on the left of each main code to , then tap the [Delete] key; the selected main code is deleted.
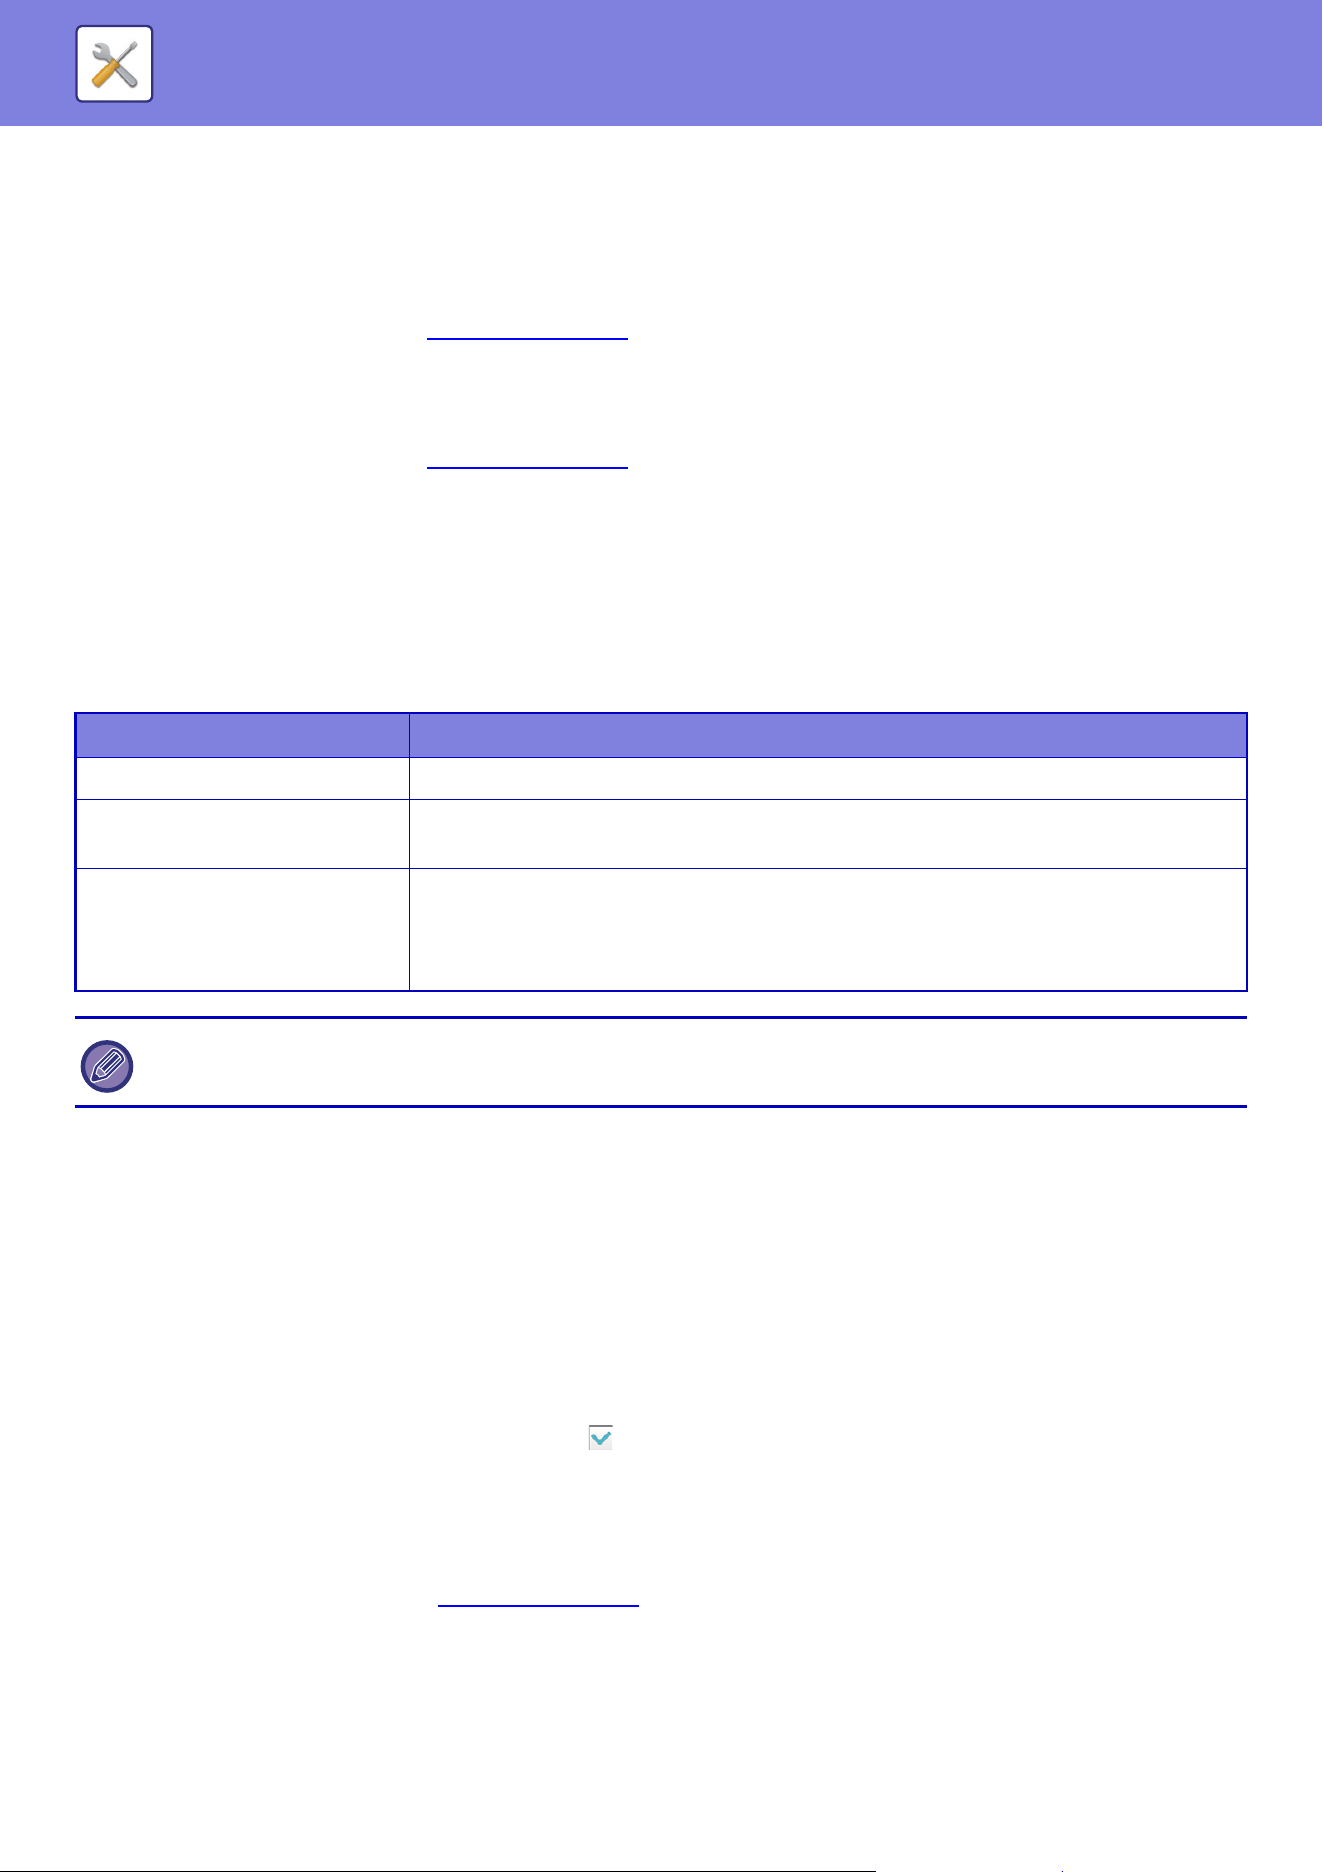
9-52
SETTING MODE►USER CONTROL
Register a main code
When you tap the [Add] key, the registration screen appears. A total of up to 2,000 main and sub codes can be
registered.
After the setting has been completed, tap the [Submit and Register Next] key; you can continuously register the next
main code. To end the registration process, tap the [Submit] key.
For each setting, see the following "Settings
(page 9-52)".
Correct a main code
Selecting a main code from the list displays the window to correct the main code.
For each setting, see the following "Settings
(page 9-52)".
After the setting has been completed, tap the [Submit] key; you can apply the corrected contents and complete
processing.
Search for a main code
Enter the main code and main code name, then tap the [Search] key; the search result is displayed.
Settings
Sub Code List
You can display a list of sub codes to search for, register, correct, or delete a sub code.
• [Search] key
Searches for a sub code.
• [Add] key
• List display
Adds a new sub code.
Displays a list of registered sub codes. Selecting each sub code displays the window to correct the sub code.
• [Delete] key
Set the check box on the left of each sub code to , then tap the [Delete] key; the selected sub code is deleted.
Register a sub code
When you tap the [Add] key, the registration screen appears. A total of up to 2,000 main and sub codes can be
registered.
For information on the settings, see "Settings
(page 9-53)".
After the setting has been completed, tap the [Submit and Register Next] key; you can continuously register the next sub
code. To end the registration process, tap the [Submit] key.
Item Description
Main Code Enter the main code. Specify the code using up to 32 single-byte characters.
Main Code Name Enter the main code. Specify the code name using up to 32 double- or single-byte
characters.
Public Group The registered billing codes can only be shared in the specified group.
When not specifying a public destination, select [Public to All].
When specifying a public destination, select [Designate Public Address.], then specify a
group to share the billing code.
To register a group for specifying a public destination:
In "Settings (administrator)", select [User Control] → [User Settings] → [Organization /Group List].
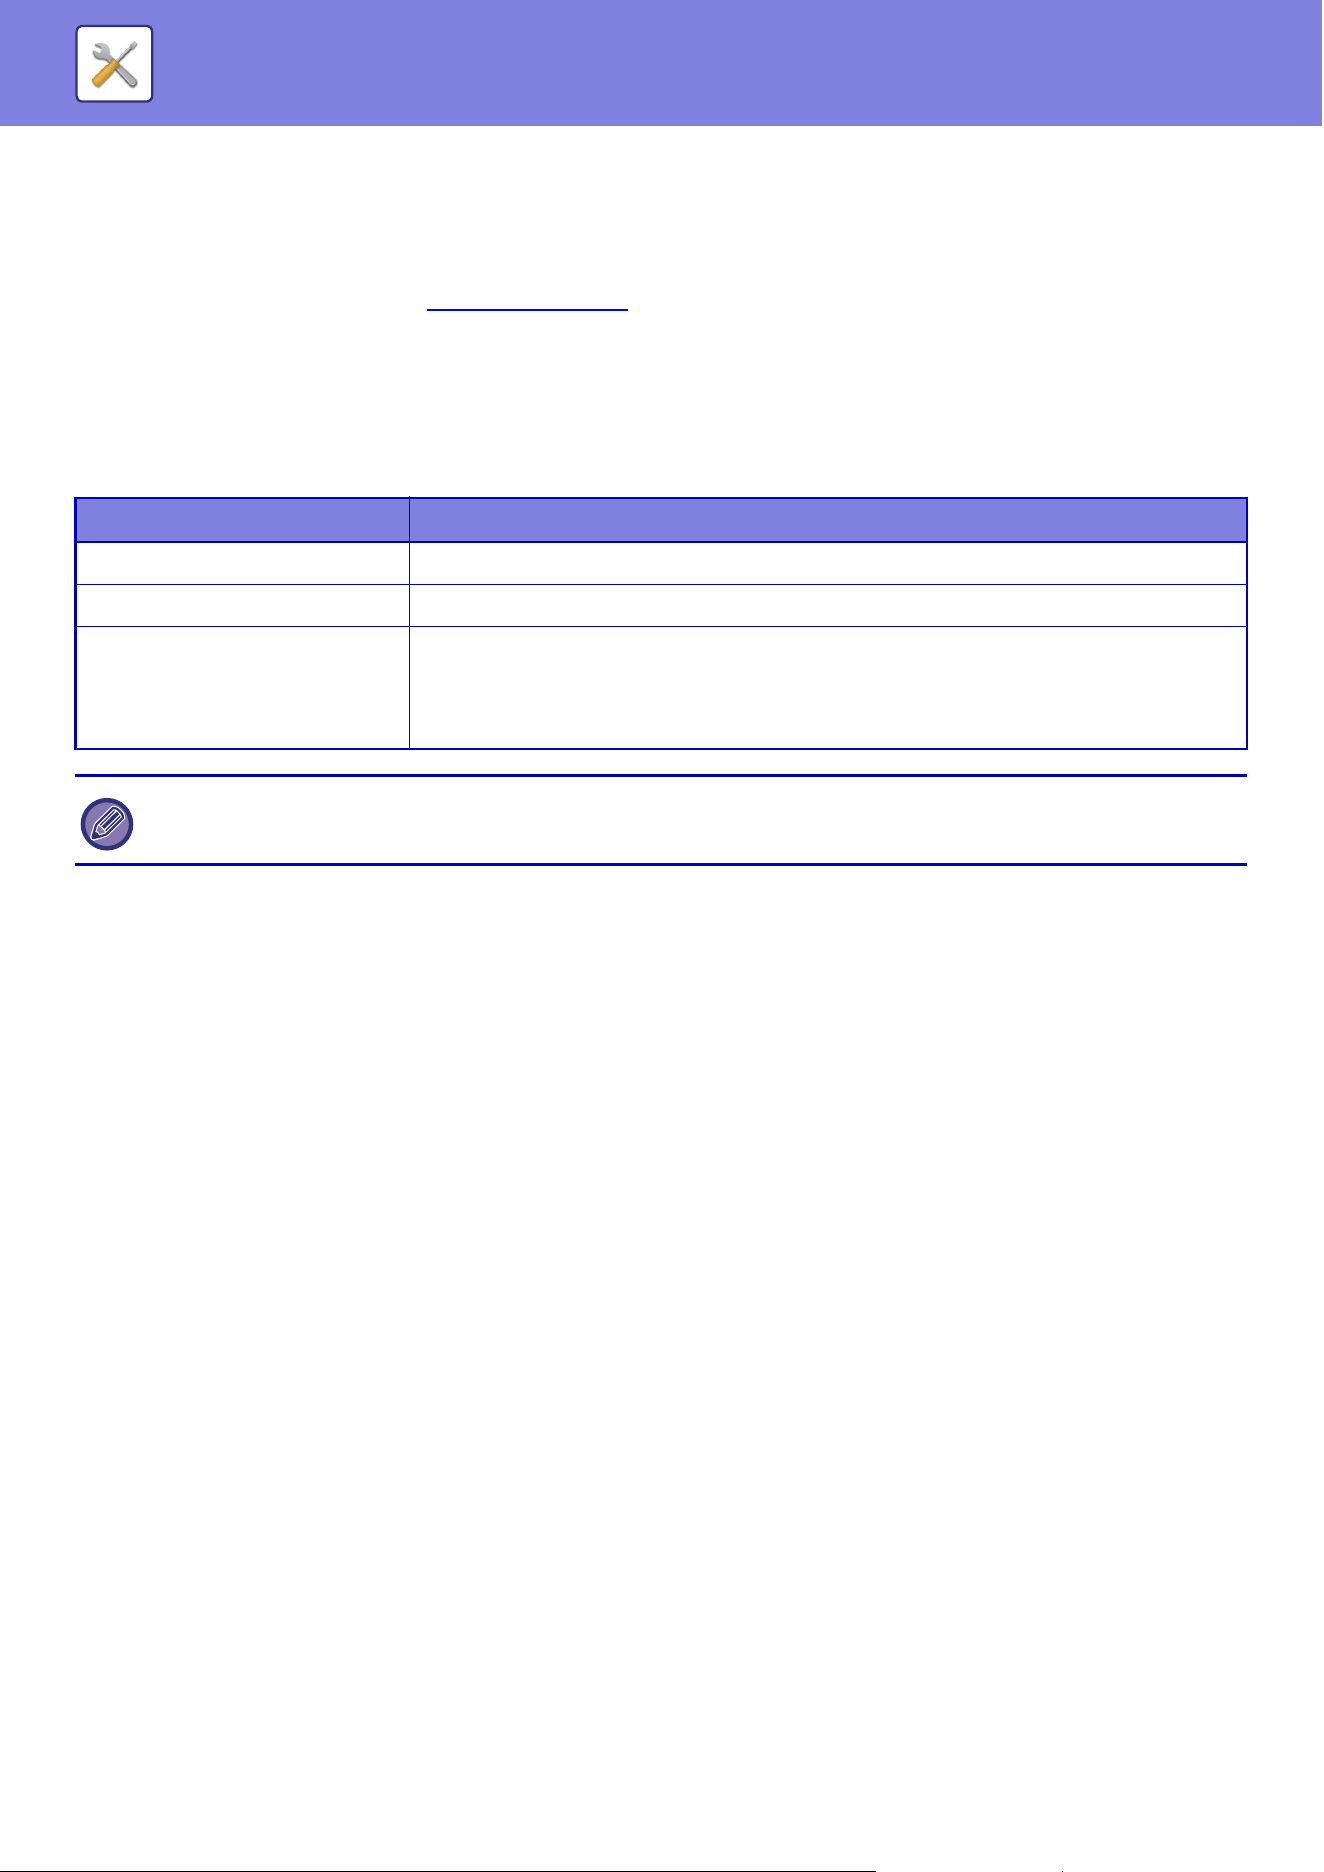
9-53
SETTING MODE►USER CONTROL
Correct a sub code
Selecting a sub code from the list displays the window to correct the sub code.
After the setting has been completed, tap the [Submit] key; you can apply the corrected contents and complete
processing.
For each setting, see the following "Settings
(page 9-53)".
Search for a sub code
Enter the sub code and sub code name, then tap the [Search] key; the search result is displayed.
Settings
Item Description
Sub Code Enter the sub code. Specify the code using up to 32 single-byte characters.
Sub Code Name Enter the sub code Specify the code name using up to 32 double- or single-byte characters.
Public Group The registered billing codes can only be shared in the specified group.
When not specifying a public destination, select [Public to All].
When specifying a public destination, select [Designate Public Address.], then specify a
group to share the billing code.
To register a group for specifying a public destination:
In "Settings (administrator)", select [User Control] → [User Settings] → [Organization /Group List].
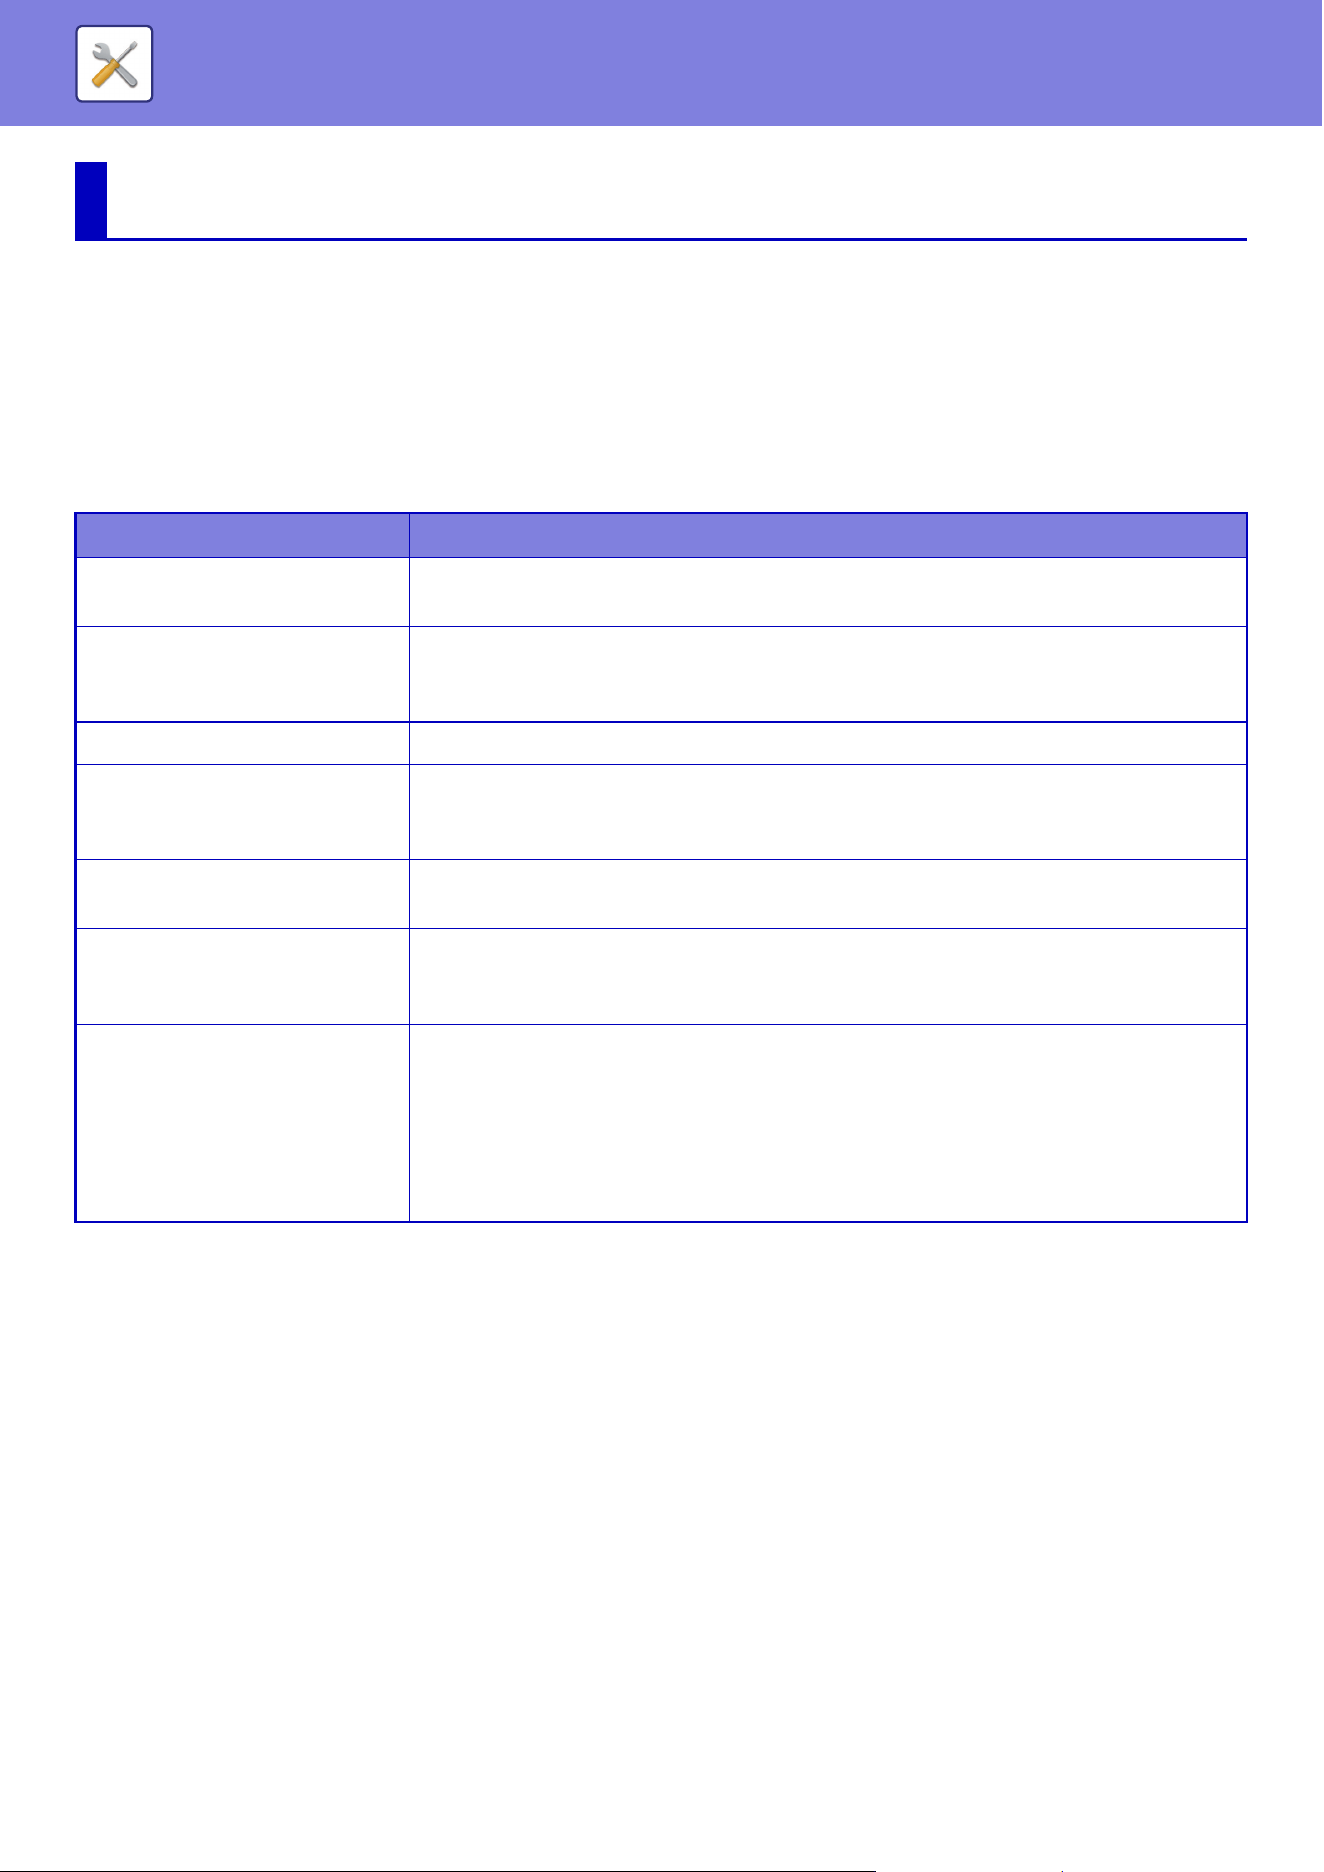
9-54
SETTING MODE►SYSTEM SETTINGS
Home Screen Settings
You can change the layout, icons, and background of the machine's home screen.
This setting requires administrator privileges.
Condition Settings
Home Screen Registration
You can click a home button in the home screen list to change the settings of the home button.
Select the function that you want to assign to the button. If you select [None], a home button will no longer appear in that
location. To register a key name, select [Custom] and enter the name (maximum 28 characters).
To change the image of a home button, register the desired icon in advance using [Icon], and then select the image with
[Select File].
SYSTEM SETTINGS
Item Description
Home Button Position You can select the position of the [Home Screen] key, left or right.
Factory default settings: Left
Home Screen List The order of arrangement of the shortcut keys in the home screen is indicated by the "No.",
and the displayed keys appear in the home button column. To edit the home buttons, click
the Home Button item.
Key Transparency Setting Sets the transparency of the shortcut keys as a percentage.
Fixed area list Set the keys (fixed keys) that appear in the fixed area below the home buttons. The order of
arrangement of the keys is indicated by the "No.", and the keys appear in the fixed key
column. To edit the fixed keys, click the Fix Key item.
Display Toner Quantity Select this to display the toner level in the fixed area.
Factory default settings: Enable
Template You can change the layout of the keys by selecting a pattern saved in advance.
The [Key Layout of the Screen] image changes as you make selections.
Factory default settings: Pattern 1
Change Text Color On Home
Screen
Select this to display the toner level in the fixed area.
Scrolling Area
Factory default settings: White
Fixed Area
Factory default settings: White
Clock
Factory default settings: Black

9-55
SETTING MODE►SYSTEM SETTINGS
Icon
Use this setting to register a key icon.
Background Image
Use this setting to register a background image.
Item Description
Icon list Use this setting to register icons for home screen shortcut keys. The image files of shortcut
key icons are registered in a list. To register an image, click an image file registered in
"Name" or "Not Set".
Image formats that can be registered are JPEG, GIF, PNG (jpeg, jpg, jpe, jfif, gif, png).
The maximum image file size that can be registered is 50 KB.
To configure this setting on the machine, insert the USB memory device that contains the image into the machine.
Item Description
Background image list Image files such as a background images are registered in the registered image list. To
register an image, click a name with a registered image or an unused name. The
background image registration screen will appear. Register the desired image.
The formats of images that can be registered are JPEG, GIF, and PNG (jpeg, jpg, jpe, jfif,
gif, png).
The maximum file size for a background image is 640 MB.
To configure this setting on the machine, insert the USB memory device that contains the image into the machine.
9-56
SETTING MODE►SYSTEM SETTINGS
Copy Settings
Condition Settings
The following settings are related to copying.
Default settings selected with these settings apply to all functions of the machine (not just the copy function).
This setting requires administrator privileges.
Rotation Copy Setting
When the original and paper are placed in different orientations, this function automatically rotates the image 90 degrees
to enable correct copying on the paper.
Factory default settings: Rotation Copy
Disable Copy in Different Size
Copying is prohibited when the orientation of the copy paper and the original are different, or when the optimum size
copy paper is not loaded.
Factory default settings: Disable
Add or Change Extra Preset Ratios
Add two enlargement preset ratio values (101% to 400%) and two reduction preset ratio values (25% to 99%).
Also, you can change the preset ratio if necessary.
Setting a Maximum Number of Copies
This is used to set the maximum number that can be entered for the number of copies (number of continuous copies).
Any number from 1 to 9999 can be specified.
Factory default settings: 9999
Stamp
Set the font size of the print menu.
Factory default settings: Middle
Initial Margin Shift Setting
This is used to set the default margin shift amount. Specify a value from 0" (0 mm) to 2" (50 mm) in increments of 1/8" (3
mm) for both the front and reverse sides.
Factory default settings: Side 1:1/2" (10mm), Side 2:1/2" (10mm)
Erase Width Adjustment
This is used to set the default erase width for erase function. Specify a value from 0" (0 mm) to 1" (25 mm) in increments
of 1/8" (3 mm) for both edge erase and center erase.
Factory default settings: Edge Clearance Width:1/2" (10mm), Center Clearance Width 2:1/2" (10mm)
When copying 5-1/2" x 8-1/2" (or A5 / A6) size documents to 5
-1/2" x 8-1/2" R (or A5R / A6R) size paper, set the rotation
copy.
It is valid when "Rotation Copy Setting
(page 9-56)" is canceled.
Preset ratios other than added preset ratios cannot be changed.
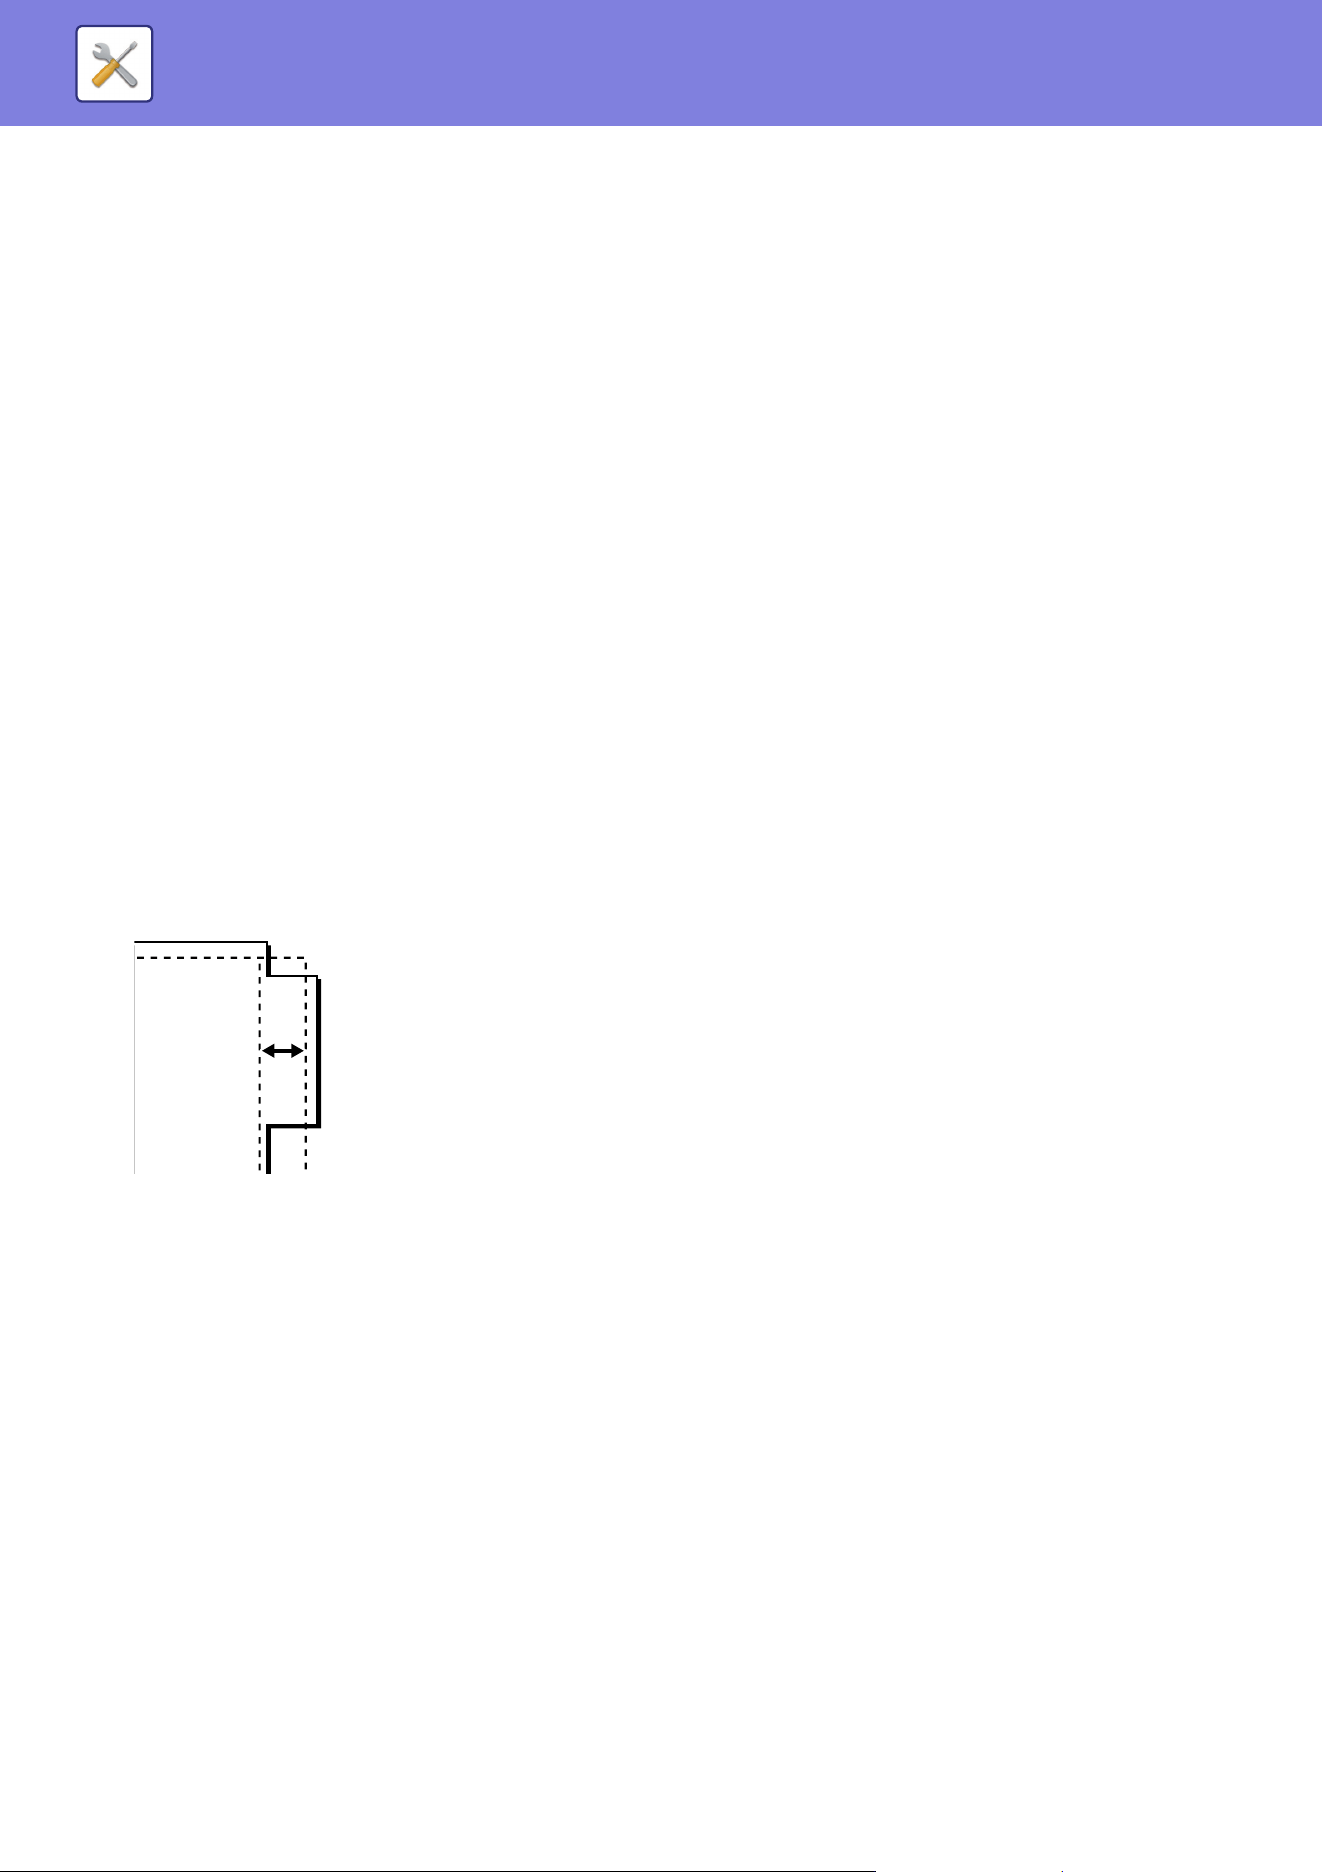
9-57
SETTING MODE►SYSTEM SETTINGS
InitialN-Up Setting
Set the default state for Multi Shot. Select the page layout for Multi Shot, whether or not borders are added, and if
added, whether the borders are solid lines or dotted lines.
Factory default settings: Off, Layout:Left to Right/Right, and Down, Border:No Print
Card Shot Settings
This is used to set the default original size for the card shot function.
Specify a value from 1" (25 mm) to 8-1/2" (216 mm) in increments of 1/8" (3 mm) for both the X (horizontal) and Y
(vertical) dimensions of the original.
Factory default settings: Original Size:X: 3-3/8" (86 mm), Y: 2-1/8" (54 mm)
Fit to Page
Enable this setting to have the [Fit to Page] key always appear in the card shot screen.
Factory default settings: Disable
Layout
Select an image layout.
Factory default settings: Set Vertically
Automatic Saddle Stitch
Set when saddle stitching is automatically stapled when binding is set.
Factory default settings: Enable
Initial Tab Copy Setting
This is used to set the default image shift width (tab width) for tab copying.
Specify a value from 0" (0 mm) to 1" (25 mm) in increments of 1/8" (3 mm).
Factory default settings: Image Shift: 1/2" (10 mm)
Disabling of Registration/Deletion of Program
This is used to prohibit the deletion and changing of copy settings stored in job programs.
Factory default settings: Disable
Disabling of Bypass-Tray in Duplex Copy
Disables the use of the bypass tray when making 2-sided copies.
The bypass tray is often used to feed label sheets, transparency film, and other special media for which 2-sided copying
is prohibited. If a sheet of one of these special media enters the reversing unit, a misfeed or damage to the unit may
result. If special media for which 2-sided copying is prohibited is often used, it is recommended that you enable this
setting.
Factory default settings: Disable

9-58
SETTING MODE►SYSTEM SETTINGS
Disabling of Auto Paper Selection
Disables the Auto Paper Selection function.
When this setting is enabled, automatic selection of paper that is the same size as the original on the document glass or
in the automatic document feeder does not take place.
Factory default settings: Disable
Auto Selection Setting of Tray that is Supplied the Paper
When this setting is enabled and paper is loaded into a tray while the machine is on standby in copy mode, that tray is
automatically selected.
Factory default settings: Disable
Disabling Registration of Custom Image
Disables storage of a custom image.
Factory default settings: Disable
Disabling sending while copying
Disables the Image Send function during copy.
Factory default settings: Disable
High Quality Scan from Document Feeder (B/W)
The resolution for copying in black and white using the automatic document feeder can be changed from 600 x 400 dpi
to 600 x 600 dpi (high quality mode).
When high quality mode is used, fine print and thin lines are reproduced with greater clarity, however, the scanning
speed is slower.
Factory default settings: Enable
Quick Scan from Document Glass (B/W)
The resolution for copying in black and white using the document glass can be changed from 600 x 600 dpi to 600 x 400
dpi (high speed mode).
When high speed mode is selected, the first copy time is quicker, however, the copy image is not as clear.
Factory default settings: Disable
Auto Clear Before Copy Execution Also
Enables the Auto Clear function during copy even when a copy job is not completed. This protects the machine from
being held due to the incomplete copy job.
Factory default settings: Disable
When high quality mode is not selected, the foll
owing conditions must be satisfied in order to scan at 600 x 400 dpi and attain
the fastest speed.
• The copy ratio must be set to 100%.
• Do not select a special mode that will change the ratio.
• [Copy of Copy] must not be enabled.
• Do not copy in black and white with the [Color Start] key.
When high quality mode is not selected, the following conditions must be satisfied in order to scan at 600 x 400 dpi and attain
the fastest speed.
• The copy ratio must be set to 100%.
• Do not select a special mode that will change the ratio.
• [Copy of Copy] must not be enabled.
• Do not copy in black and white with the [Color Start] key.
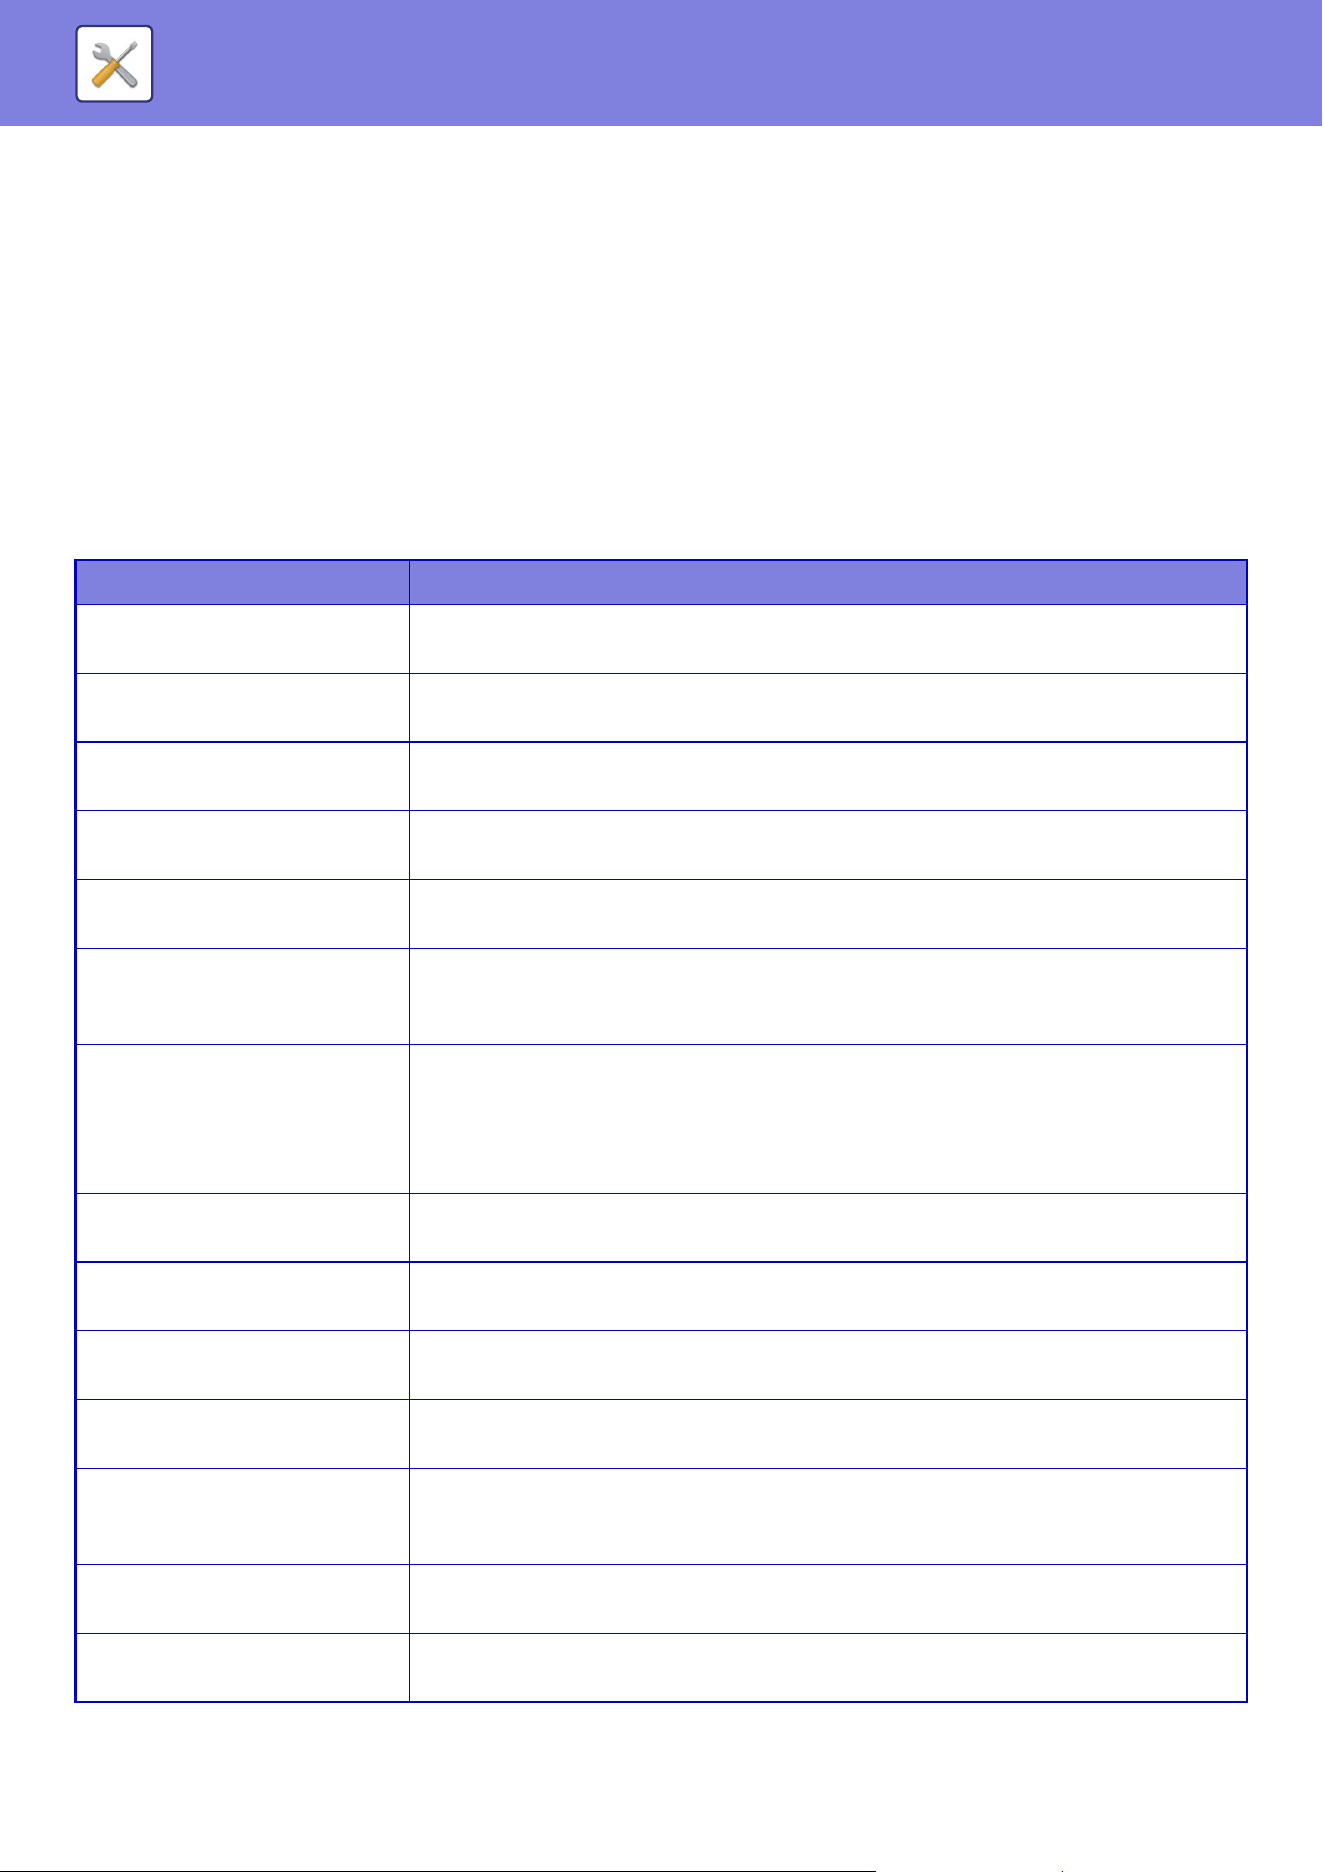
9-59
SETTING MODE►SYSTEM SETTINGS
Display Warning Message when Original is not Detected
A message is displayed when the original size cannot be detected when the original is set. You can prevent output with
an unintended original size.
Factory default settings: Disable
Initial Status Settings
The following settings are related to copying.
Default settings selected with these settings apply to all functions of the machine (not just the copy function).
The copier settings are reset to the initial state when the [Power] button is turned on, when the [CA] key is tapped, or
when the auto clear interval has elapsed. These settings are used to change the default settings for copy mode.
This setting requires administrator privileges.
The following settings can be changed:
Item Description
Color Mode Configure default color mode settings.
Factory default settings: Full Color
Image Orientation Specify the original orientation.
Factory default settings: Portrait
Paper Tray Specify the paper tray that is selected by default.
Factory default settings: Varies depending on the machine configuration
Exposure Type Configure default exposure mode settings.
Factory default settings: Auto
Copy Ratio Specify the copy ratio that is selected by default.
Factory default settings: 100%
Select magnification
automatically according to paper
size, when paper tray is selected.
The copy magnification is automatically changed according to the paper size in the selected
paper tray.
Factory default settings: Disable
2-Sided Copy Configure the 2-sided mode settings that are selected by default.
If this setting is used to change the default setting for the duplex function to any setting
other than "1-Side to 1-Side" and the duplex function or automatic document feeder fails or
is disabled, the setting will revert to "1-Side to 1-Side".
Factory default settings: 1-Side to 1-Side
Original Binding Set the original binding in 2-Sided copy.
Factory default settings: Book
Output Set the print output method and output tray that are selected by default.
Factory default settings: Auto
Output Tray Set the default delivery tray.
Factory default settings: Varies depending on the machine configuration
Offset Set whether or not offset is performed in the default settings.
Factory default settings: Enable
Separator Page Separator pages can be inserted before or after jobs. Set the paper tray used for the
separator pages.
Factory default settings: Insert Before Job:Disable, Insert After Job:Disable
Staple Sort Select staple settings.
Factory default settings: 1 Staple
Staple Position Set the staple position.
Factory default settings: Left
9-60
SETTING MODE►SYSTEM SETTINGS
Punch Set the punch.
Factory default settings: 3-Hole Punch
Fold Set the paper folding.
Factory default settings: Disable
Saddle Fold Set the saddle fold.
Factory default settings: Print Side:Fold Inside
Paper Size for Z-Fold Select the paper size to use for Z-Fold.
Factory default settings: Valid for all paper sizes
C-Fold Set the print surface and opening method for C-Fold.
Factory default settings: Print Side:Inside, Fold Orientation:Open Right
Accordion Fold Set how to open accordion fold.
Factory default settings: Fold Orientation:Open Right
Double Fold Set the print surface and opening method for Double Fold.
Factory default settings: Print Side:Inside, Fold Orientation:Open Right
Half Fold Set the print surface and opening method for half fold.
Factory default settings: Print Side:Inside
Trimming Width Settings Sets the cutting width.
Return to the Defaults This returns all items to the factory default settings.
Item Description

9-61
SETTING MODE►SYSTEM SETTINGS
Text /Image Printing
Text Settings (Stamp)
You can add fixed text used in the [Stamp] of copying.
Custom Stamp
You can set an image to be used in [Custom Stamp] in [Custom Image] for copying.
Custom Watermark
You can set an image to be used in [Custom Watermark] in [Custom Image] for copying.

9-62
SETTING MODE►SYSTEM SETTINGS
Printer Settings
Settings related to the printer function can be configured.
Condition Settings
Printer condition settings are described below.
Prohibit Notice Page Printing
Disables to print a notice page.
Factory default settings: Enable
Prohibit Test Page Printing
Disables to print the test page.
When this setting is enabled, [Status] → [Data List] → [List for User] → [Printer Test Page] in "Settings" cannot be used
to print test pages.
Factory default settings: Disable
A4/Letter Size Auto Change
When printing an 8-1/2" x 11" (letter) size image, this setting allows A4 size paper to be used if 8-1/2" x 11" size paper is
not loaded.
Factory default settings: Disable
A3/Ledger Size Auto Change
When printing 11" x 17" (ledger) size, if 11" x17" size paper is not loaded in the paper tray, it will be printed on A3 paper.
Factory default settings: Disable
Bypass Tray Settings
Enable Detected Paper Size in Bypass Tray
This is used to prohibit printing when the paper size specified for a print job is different from the paper size inserted in
the bypass tray.
Factory default settings: Disable
Enable Selected Paper Type in Bypass Tray
This is used to prohibit printing when the paper type specified for a print job is different from the paper type inserted in
the bypass tray.
Factory default settings: Enabled
Exclude Bypass-Tray from Auto Paper Select
When [Auto] is selected for paper type selection, the bypass tray is excluded from the trays that can be selected. This is
recommended when special paper is often placed in the bypass tray.
Factory default settings: Disable
Job Spool Queuing
When this function is enabled, received print jobs are displayed in the spool queue of the job management screen. The
jobs are moved to the job queue after they have been analyzed by the machine.
Multiple jobs that have not yet been analyzed appear in the spool queue.
When this function is disabled, received print jobs are displayed in the job queue instead of being displayed in the spool
queue. However, when an encrypted PDF job is printed, the job appears in the spool queue.
Factory default settings: Enable
Disabling of USB Memory Direct Print
Disables the function for directly printing of a file in a USB memory device.
Factory default settings: Disable
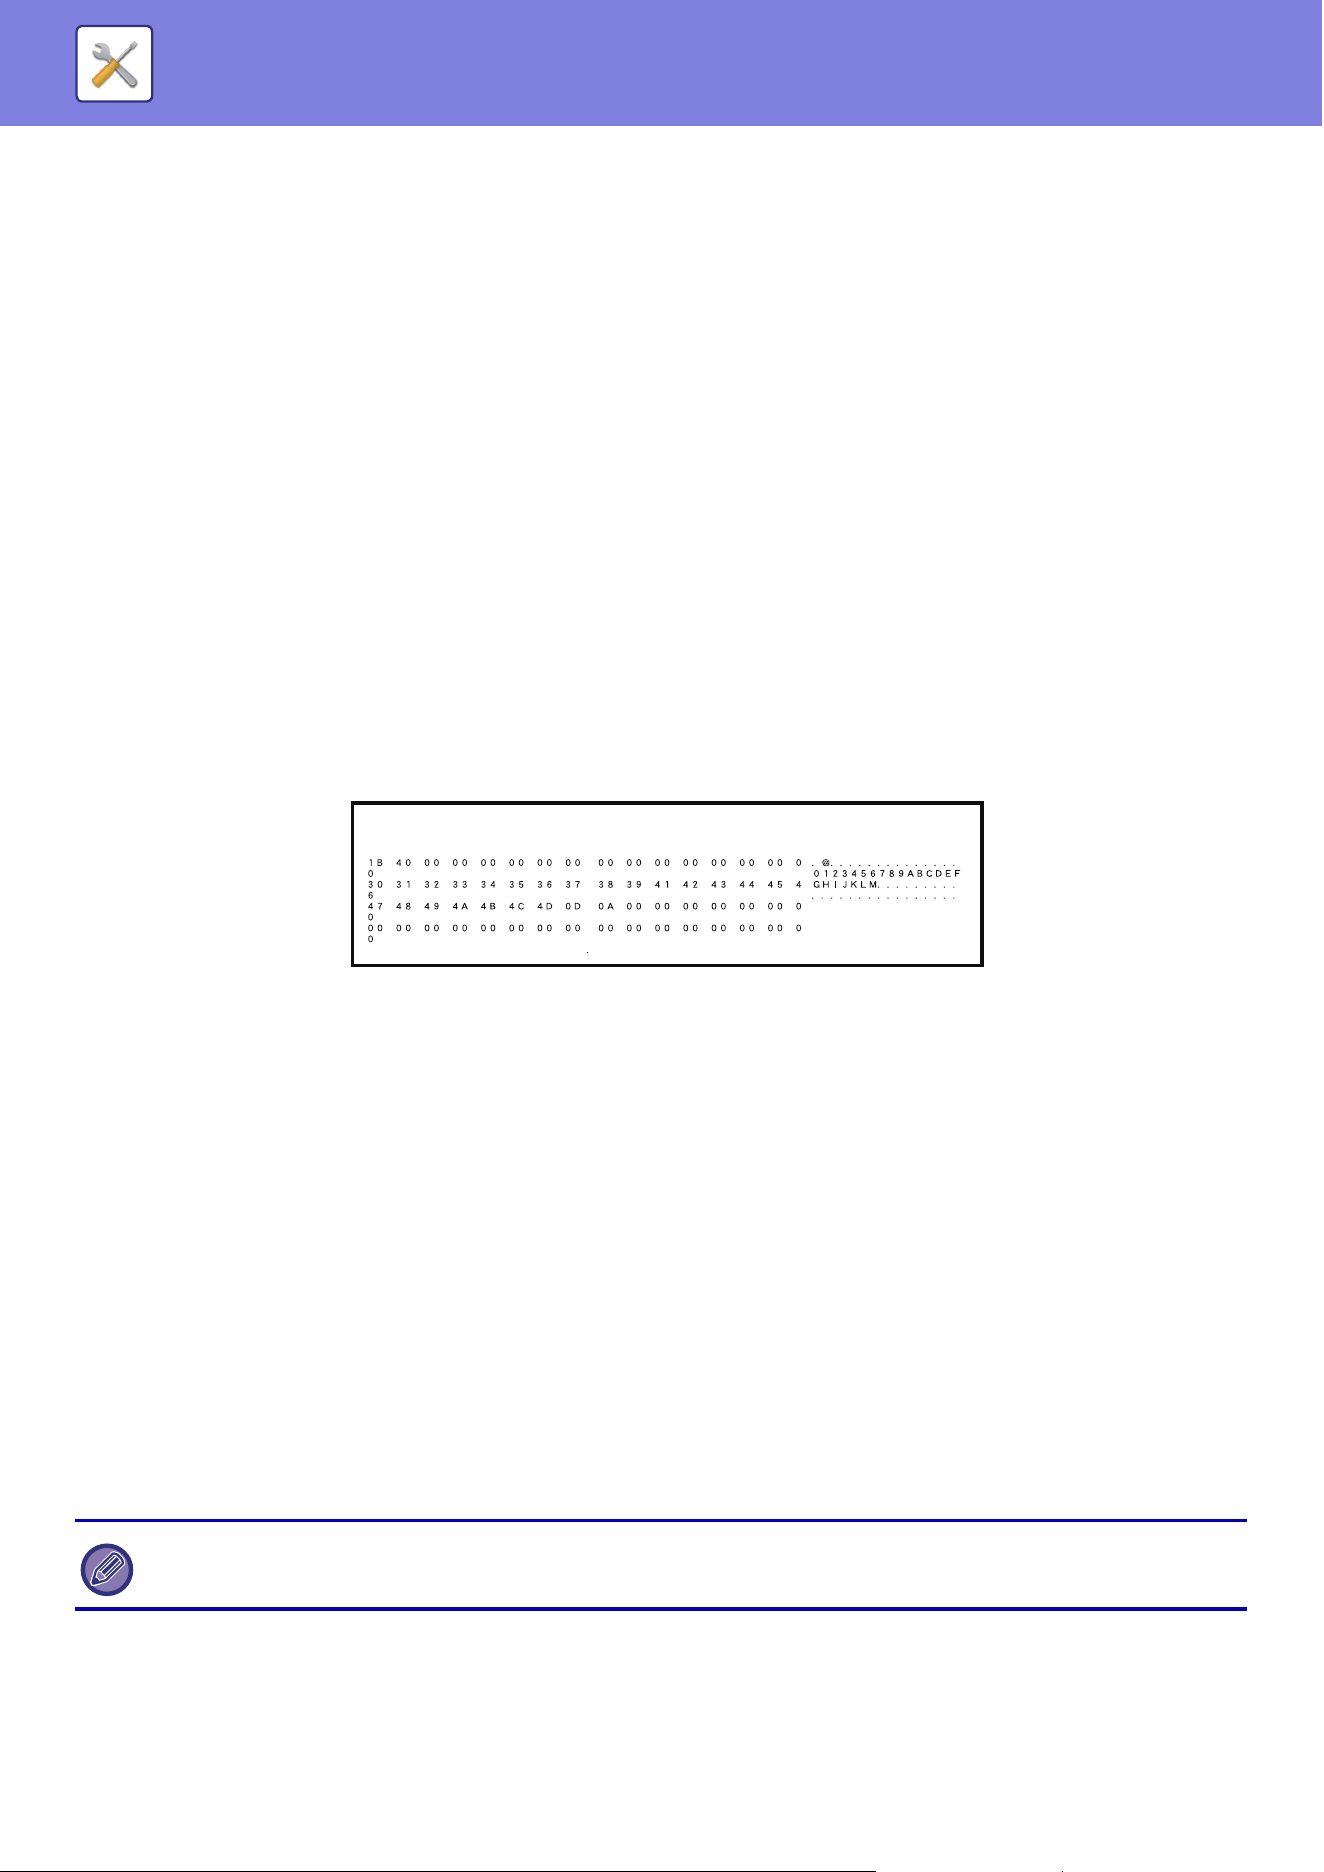
9-63
SETTING MODE►SYSTEM SETTINGS
Disabling of Network Folder Direct Print
Disables the direct printing from a network folder.
Factory default settings: Disable
Disabling sending while printing
Disables the Image Send function during printing.
Factory default settings: Disable
Interface Settings
Settings related to the printer function can be configured.
These settings are used to control and monitor data transmitted to the network port of the machine.
Hexadecimal Dump Mode
This function is used to print the print data from a computer in hexadecimal format together with the corresponding
ASCII text. This mode allows you to check whether or not print data from the PC is being transmitted to the printer
correctly.
Factory default settings: Disable
Example of a hexadecimal dump
I/O Timeout
The I/O timeout can be set to any number of seconds from 1 to 999.
The I/O timeout function temporarily breaks the connection if the set duration of time elapses without any data being
received by the port. After the connection is broken, the port is set to auto selection or the next print job is begun.
Enable Network Port
Enables printing from the network port.
Factory default settings: Enable
Network Port Emulation Switching
This setting is used to select the emulated printer language when the machine is connected by a network port.
The following settings can be configured.
Auto
PostScript
PCL
Factory default settings: Auto
Unless printer errors occur frequently, it is recommend
ed that you use the factory default setting "Auto".
9-64
SETTING MODE►SYSTEM SETTINGS
Port Switching Method
Selects when port switching takes place.
• Switch at End of Job
The port changes to auto selection when printing ends.
• Switch after I/O Timeout
When the time set in "I/O Timeout" elapses, the port changes to Auto Selection.
Factory default settings: Switch at End of Job
Initial Status Settings
If you print data in an environment where the printer driver is not used (that is, if you print data using the MS-DOS
system or if you print data using the PC that does not have the provided printer driver installed), set the detailed printing
conditions. (However, the "Disable Blank Page Print" function will be effective even when the PCL printer driver is used.)
Settings
Setting item Description
Copies 1 - 9999 sets
Orientation Portrait
Landscape
Factory default settings: Portrait
Paper Size Set the default paper size.
Factory default settings: Varies depending on the machine configuration
Output Tray Set the default delivery tray.
Factory default settings: Varies depending on the machine configuration
Paper Type Set the default paper type.
Factory default settings: Plain Paper 1
Resolution Setting 600dpi
600dpi (High Quality)
1200dpi
Factory default settings: 600dpi (High Quality)
Disable Blank Page Print (Enabled)
(Disabled)
Factory default settings: It does not prohibit
2-Sided Print 1-Sided
2-Sided(Book)
2-Sided(Tablet)
Factory default settings: Portrait
Color Mode Auto
Black & White
Factory default settings: Auto
9-65
SETTING MODE►SYSTEM SETTINGS
N-Up Print
*1
N-Up
1-Up
2-Up
4-Up
8-Up
Factory default settings: 1-Up
Layout
Left to Right
*2
Right to Left
*2
Right, and Down
*3
Down, and Right
*3
Left, and Down
*3
Down, and Left
*3
Factory default settings: 1-Up/2-Up: Left to Right, 4-Up/8-Up: Right, and Down
Fit To Page
*4
(Use Fit to Page)
(Do not use Fit to Page)
Factory default settings: Use Fit to Page
Output (Use Print per Unit)
(Do not use Print per Unit)
Factory default settings: Use Print per Unit
Separator Page Insert Before Job
Insert After Job
Factory default settings: Disable
Staple Sort
*5
None, 1 Staple at Back, 2 Staples, 2 Staples (Top)
Factory default settings: Off
Punch
*6
(Punch)
(Do not use Punch)
Factory default settings: No Punch
Fold
*7
(Fold the paper)
(Do not fold paper)
Factory default settings: Insert After Job
Fold
*8
Set the paper folding.
Factory default settings: Disable
Saddle Fold
*8
Set the saddle fold.
Factory default settings: Print Side:Fold Inside
Paper Size for Z-Fold
*8
Select the paper size to use for Z-Fold.
Factory default settings: Valid for all paper sizes
C-Fold
*8
Set the print surface and opening method for C-Fold.
Factory default settings: Print Side:Inside, Fold Orientation:Open Right
Accordion Fold
*8
Set how to open accordion fold.
Factory default settings: Fold Orientation:Open Right
Double Fold
*8
Set the print surface and opening method for Double Fold.
Factory default settings: Print Side:Inside, Fold Orientation:Open Right
Half Fold
*8
Set the print surface and opening method for half fold.
Factory default settings: Print Side:Inside
Trimming Width Settings
*9
Sets the cutting width.
Setting item Description
9-66
SETTING MODE►SYSTEM SETTINGS
*1 Paper sizes that can be used with this function are 11" x 17", 8-1/2" x 14", 8-1/2" x 11", A3, B4, and A4. (This function may not take effect with
some print methods.)
*2 Can be selected when 2-Up is selected.
*3 Can be selected when 4-Up/8-Up is selected.
*4 Only effective when printing PDF, JPEG, and TIFF files.
*5 It can be used by connecting a finisher, or saddle stitch finisher.
*6 When a punch module is installed.
*7 When the Saddle stitch finisher is installed.
*8 When the folding unit is installed.
*9 When the trimming module is installed.
PCL Settings
This is used to set the symbol sets, fonts, and line feed code used in a PCL environment.
Settings
PostScript Settings
When an error occurs during PostScript printing, these settings determine whether or not an error notice is printed and
whether or not the PostScript data is received in binary format.
Quick File (Enabled)
(Disabled)
Setting item Settings
PCL Symbol Set Setting Specify the symbol set used for printing.
Factory default settings: PC-8
PCL Font Setting Select a font used for printing.
Factory default settings: Internal Font: 0.Courier
PCL Line Feed Code This setting is used to select how the printer responds when a line feed command is
received.
Factory default settings: 0.CR=CR; LF=LF; FF=FF
Wide A4 When this is enabled, 80 characters per line are printed on the 8-1/2" x 11" (A4) size paper
using a 10-pitch font. (When this setting is disabled, up to 78 characters are printed per
line.)
Factory default settings: Disable
Setting item Settings
Screen Settings Configure image settings for PostScript.
Factory default settings: Standard
Print PS Errors When a PS (PostScript) error occurs during PostScript printing, this setting determines
whether or not an error notice is printed.
Factory default settings: Disable
Binary Processing Receive PostScript data in binary format.
Factory default settings: Disable
Store Print Data in PS Format Save print data in PS (PostScript) format.
Factory default settings: Disable
Setting item Description

9-67
SETTING MODE►SYSTEM SETTINGS
OOXML Settings
When you print an Excel file directly, select the sheet for which you want to print or the entire workbook of the file.
Print Release Settings
Standard
Print Release
Sets the use of print releases.
Factory default settings: Disable
Initial Status Settings
Print B/W
When [Enable] is selected, [Print B/W] is enabled in the print screen of the print release job.
Factory default settings: Disable
Print and Delete the Data
When [Enable] is selected, [Print B/W] is enabled in the print screen of the print release job.
Factory default settings: Enable
Print Order
Set the print order from the oldest date, or from the data list number.
Factory default settings: Date (Asc.)
Communication Timeout
Sets the communication timeout used in the print release.
Factory default settings: 10 seconds
Primary Unit Settings
Primary Unit
Set the multifunction device that saves the print release job to [Primary Unit].
Factory default settings: Disable
Require Authentication when Storing
Select whether or not authentication is required to store a print release job in the machine that is functioning as the
primary unit.
Factory default settings: Enable
Force to Enable the Print Release Function
When this is ON and the machine is functioning as the primary unit, print jobs that are not print release jobs are also
forcibly save as print release jobs.
Factory default settings: Disable
Delete Stored Data after Specified Time
Select whether or not stored print release jobs are automatically deleted after a set time elapses.
If you select [Enable], jobs that have been stored the number of days set in "Days" will be automatically deleted.
Factory default settings: Enable
Days
When "Delete Stored Data after Specified Time" is enabled, set the number of days jobs are stored.
Factory default settings: 7 days
Local Drive Status
Displays the usage status of the local drive.
Connecting Code
Enter a code for authentication between the primary unit and secondary unit. Maximum of 32 alphanumeric characters.

9-68
SETTING MODE►SYSTEM SETTINGS
Port Number
Set the port number used for print release in the primary unit and in the secondary unit. Be sure to set the same number
in both the primary unit and the secondary unit. (The default port number is "53000", and there is no particular need to
change this.)
Factory default settings: 53000
Delete All
When the machine functions as the primary unit, select this to delete all stored print release jobs.
Destination Settings
Primary Unit 1 to Primary Unit 3
Enter the addresses of the Primary Unit 1 to the Primary Unit 3.
Connecting Code
Enter a code for authentication between the primary unit and secondary unit. Maximum of 32 alphanumeric characters.
Port Number
Set the port number used for print release in the primary unit and in the secondary unit. Be sure to set the same number
in both the primary unit and the secondary unit. (The default port number is "53000", and there is no particular need to
change this.)
Factory default settings:53000
Advanced
Extend Destination Group
You can increase the number of groups by using the extension.
Factory default settings: Disable
Default Group
Select the group to be used in groups 1-10.
You can set the selected group as the default group for use in print releases. It is convenient to set a frequently used
group because it will always be set to the selected group.
Factory default settings: Group 1
Destination Group Setting
Set the group to connect to.
Groups 1-10
Use This Group
When [Enable] is selected, [Use This Group] is set on the print screen of the print release job.
Factory default settings: Disable
Primary Unit 1 address to Primary Unit 3 address, connection code, port number
Set the address, connection code, and port number of the base unit 1 to base unit 3 used in the group.
Factory default settings: Port Number:53000

9-69
SETTING MODE►SYSTEM SETTINGS
E-mail Print Settings
Select this option to use the E-mail printing.
E-mail Print
Set whether or not E-mail print is performed.
Factory default settings: Disable
POP3 Server
Set the POP3 server used for E-mail.
Port Number
Set the port number of the E-mail server.
Factory default settings: 110
POP Authentication
Set this to perform POP authentication for E-mail.
Factory default settings: Disable
User Name
Set the E-mail user name.
Password
Set the password used for E-mail.
Check Interval
Set the automatic e-mail check frequency (polling interval).
Factory default settings: 5 minutes
Enable SSL/TLS
Use when SSL/TLS is used.
Factory default settings: Disable

9-70
SETTING MODE►SYSTEM SETTINGS
Direct Print Settings (FTP)
Configure these settings if you will be printing files on an FTP server by direct print.
A list of available FTP servers is shown. To add an FTP server, click the [Add] button and configure the settings.
FTP Server Registration
Configure FTP server settings.
Name
Set the name to be used for direct print.
FTP Server
Set the name of the FTP server.
Port Number
Set the port number of the FTP server.
Factory default settings: 21
Directory
Set the directory of the FTP server that has the files.
User Name
Set the user name used to log in to the FTP server.
Password
Set the password used to log in to the FTP server.
Enable SSL/TLS
Enable SSL/TLS
Factory default settings: Disable
Use PASV mode
Set to use PASV mode.
Factory default settings: Disable

9-71
SETTING MODE►SYSTEM SETTINGS
Direct Print Settings (Network Folder)
Configure these settings if you will be printing files on a network folder by direct print.
A list of available network folders is shown. To add a network folder, click the [Add] button and configure the settings.
Registration of Network Folder
Configure network folder settings.
Name
Set the name to be used for direct print.
Folder Path
Set the folder path that has the files.
User Name
Set the user name used to log in to the network folder.
Password
Set the password used to log in to the network folder.
Print Setting from PC/Mobile Terminal
Configure these settings to print files on a computer or mobile terminal by direct print.
FTP Print
Specify whether or not FTP print settings are used for direct print.
Factory default settings: Enable
Port Number
Enter the port number used for direct print.
Factory default settings: 21
IPP Print (Driverless)
Print from the network using the IPP protocol without using a printer driver.
Factory default settings: Enable
geo URI (RFC 5870)
You can set the location information of this machine.
Factory default settings: geo

9-72
SETTING MODE►SYSTEM SETTINGS
Common Settings
Settings related to the image send function (E-mail etc.) can be configured. The operation settings below apply to all
image send functions.
Condition Settings
Hold settings for a while after scanning has been completed
Use this setting to hold the settings after scanning is completed (until Auto Clear Mode activates).
Factory default settings: Disable
Job Auto Start Time During Scanning
Set the time at which transmission is automatically started even if the original is still being scanned.
Factory default settings: 60 seconds
Default Display Settings
When resending by document filing or recalling by saved program settings that do not include an address, select from
the following 6 types of base screens that appear.
•E-Mail
• Network Folder
• FTP
• Data Entry
Factory default settings: E-Mail
Address Book Default Selection
Higher priority is given to the display of address book.
If image send mode is enabled, the Address Book is displayed in place of the initial screen of this mode.
Factory default settings: Disable
Apply Addresses of Sending Modes Only
When an address is selected from the address book, only the addresses displayed in narrowing mode are applied.
Factory default settings: Enable
Category Displayed as Default
Select a category to be displayed with the default.
• None
• Frequent Use
• Categories 1 to 32
Factory default settings: None
Display all address type regardless of the mode being displayed currently.
Displays all destinations regardless of the displayed mode when this setting is enabled.
Factory default settings: Disable
Enlarge Address Book
An enlarged address book list appears.
Factory default settings: Enable
Image Orientation
Sets the default image orientation.
Factory default settings: Portrait
In "Setting mode", if a default address has been configured by selecting [System Settings] → [Image Send Settings] → [Scan
Settings] → [Default Address] → [Default Address Setting], the [Higher priority is given to the display of address book.]
function cannot be used.

9-73
SETTING MODE►SYSTEM SETTINGS
Default Exposure Settings
This is used to set the default exposure settings for scanning a document in image send mode. Select [Auto] or
[Manual]. If you select [Manual], set the exposure to one of 5 levels.
Factory default settings: Auto
Default Original Image Type
Select the original type beforehand to enable scanning at a resolution suitable for the original (only in scan mode and
USB memory device scan mode).
The following settings can be configured.
• Text/Printed Photo
• Text/Photo
•Text
•Photo
• Printed Photo
•Map
Factory default settings: Text
Be sure to press Next Address Key ([+]) before selecting the next address.
Set whether or not the Next Address ([+]) key must be pressed before an address is added for a multi-address job such
as broadcast transmission.
Factory default settings: Disable
Disable Switching of Display Order
Disables to change the order of display (search number order, ascending, descending).
Once set, the display sequence is not changed. The display order will remain fixed at the order that is in effect when this
setting is enabled.
Factory default settings: Disable
Erase Width Adjustment
This is used to set the default erase width for erase function. Specify a value from 0" (0 mm) to 1" (25 mm) in increments
of 1/8" (3 mm) for both edge erase and center erase.
Factory default settings: Edge Clearance Width:1/2" (10mm), Center Clearance Width:1/2" (10mm)
When the exposure is set to [Auto], a defa
ult original type cannot be selected.

9-74
SETTING MODE►SYSTEM SETTINGS
Enable/Disable Settings
Settings to Disable Registration
Storing from the machine, storing from Setting mode (Web version), and storing from the PC can each be separately
prohibited.
Disable Registering Destination from Operation Panel
Disables address control from the machine.
Configure the setting for each of the following items:
• Group (Direct Entry)
• Group (Address Book)
Select All: Select all items.
Clear Checked: Deselect all items.
Factory default settings: All Invalid
Disable Registering Destination on Web Page
Disables to store the destination from Setting mode (Web version).
Configure the setting for each of the following items:
• Group (Direct Entry)
• Group (Address Book)
• Contacts
Select All: Select all items.
Clear Checked: Deselect all items.
Factory default settings: All Invalid
Disable Registration/Delection of All Program Items
This is used to prohibit the deletion and changing of image send settings stored in job programs.
Factory default settings: Disable
Disable Destination Registration Using Global Address Search
This disables address control from the global address search.
Configure the setting for the following item:
E-mail
Factory default settings: All Invalid
Disabling of Forwarding via Network
This prohibits inbound routing.
Factory default settings: Disable

9-75
SETTING MODE►SYSTEM SETTINGS
Settings to Disable Transmission
These settings are used to disable the following transmission operations.
Disabling Sending History
Prohibits resending using the sending history.
Factory default settings: Disable
Disable Selection from Address Book
Disables the selection of destinations from the address book.
Configure the setting for each of the following items:
•E-mail
• FTP
• Network Folder
Select All: Select all items.
Clear Checked: Deselect all items.
Factory default settings: All Invalid
Disable Direct Entry
Disables the direct entry of destination address and others.
Configure the setting for each of the following items:
•E-mail
• Network Folder
Select All: Select all items.
Clear Checked: Deselect all items.
Factory default settings: All Invalid
Disabling of PC Scan
Prohibits remote PC scans.
Factory default settings: Disable
Disable Storing to External Memory Device
Prohibits saving scan data to an external memory device.
Factory default settings: Disable
Disabling of Find My Address
This prohibits Find My Address.
Factory default settings: Disable
Disabling of OCR
Prohibits the use of the OCR function when scanning.
Factory default settings: Disable
Category Setting
This setting can be set on this machine. This setting is the same as "Category Setting (page 9-33)".

9-76
SETTING MODE►SYSTEM SETTINGS
Scan Settings
The following settings are related to the scanner.
Initial Status Settings
Default Color Mode Settings
Select a default color mode setting for both color and black & white in e-mail address, network folder and FTP. Specify
"Scanner Common" unless E-mail is specified.
Settings
Auto (Mono2, Grayscale
*
), Full Color, Grayscale, Mono2
* When scanning a black and white original with the color mode set to [Auto]
Factory default settings: Mono2
File Type
Disables black & white settings from the base screen when the color mode is set to Auto.
Factory default settings: Disable
Initial File Format Setting
Specify the initial file format for sending a file in E-mail, Network Folder, or FTP mode. Specify "Scanner Common"
unless E-mail is specified.
File Format
PDF, PDF/A-1a, PDF/A-1b, TIFF, JPEG, Compact PDF, Compact PDF (Ultra Fine), Compact PDF/A-1a, Compact
PDF/A-1a (Ultra Fine), Compact PDF/A-1b, Compact PDF/A-1b (Ultra Fine), Encrypt PDF, Encrypt/Compact PDF,
Encrypt/Compact PDF (Ultra Fine), XPS, RTF, TXT(UTF-8), DOCX, XLSX, PPTX
File Format when [Disabling of OCR] is set
PDF, PDF/A, TIFF, JPEG, Compact PDF, Compact PDF (Ultra Fine), Compact PDF/A, Compact PDF/A (Ultra Fine),
Encrypt PDF, Encrypt/Compact PDF, Encrypt/Compact PDF (Ultra Fine), XPS
Factory default settings: PDF
OCR Setting
*
If the file format is PDF, the characters in the scanned image are read and the character information is added to the
PDF.
Factory default settings: Disable
Black & White
Compression Mode: None, MH (G3), MMR (G4)
Factory default settings: MMR (G4)
Color/Grayscale
Data compression ratio: Low, Medium, High
Factory default settings: Medium
Reduce Colors
Factory default settings: Disable
Specified Pages per File
Generates a separate file for each scanned page when multiple pages are scanned.
If this setting is enabled, a number of pages per file can be specified.
Factory default settings: Disable
Number of Pages
Any number of pages can be specified as the number of pages per file. This setting can be used if [Specified Pages per
File] is enabled.
Factory default settings: 1
OCR Setting*
Configure the settings that are required for OCR.
Font
*
Set the font used for each recognized character language.
Factory default settings: Western Languages:Arial, Japanese:MS gothic, Simplified Chinese:SimSun,
Traditional Chinese:MingLiU, Korean:Dotum
9-77
SETTING MODE►SYSTEM SETTINGS
Detect Image Direction
*
The orientation of the scanned original is automatically detected.
Factory default settings: Enable
File Name Extraction
*
Extract the file name.
Factory default settings: Disable
* Not available when the OCR function is disabled.
Easy Scan Settings
Set the default color mode for Easy Scan.
Set [Color] for when the Color Start key is tapped, and [Black & White] for when the B/W Start key is tapped.
Factory default settings: Color:Auto, Black & White:Mono2
Resolution Setting
The following settings are available for the default resolutions of common scan, E-mail mode.
Scanner Common
100X100dpi, 150X150dpi, 200X200dpi, 300X300dpi, 400X400dpi, 600X600dpi
E-mail
100X100dpi, 150X150dpi, 200X200dpi, 300X300dpi, 400X400dpi, 600X600dpi
Apply the Resolution Set when Stored
When an image stored by document filing is used, this applies the resolution setting that was stored with the image.
Factory default settings: Apply the Resolution Set when Stored:All Invalid, Resolution:200×200dpi
Original Skew Adjustment
When the document is tilted or the image in the document is tilted, the tilted state is automatically corrected and the data
is saved.
Factory default settings: Disable
When [JPEG] is selected for the file type, [Specified
Pages per File] cannot be selected.
Setting item Settings
Color Auto
Full Color
Black & White Grayscale
Mono2

9-78
SETTING MODE►SYSTEM SETTINGS
Condition Settings
Default Reply.Address Set
The information stored here is used if you do not specify [Reply to] in the send settings when performing Scan to E-mail.
Factory default settings: Disable
Bcc Setting
Enable Bcc
Enable this setting if you wish to use Bcc delivery. Displays the [Bcc] key on the image send address book screen.
Factory default settings: Disable
Display Bcc Address on the Job Management Screen
Displays Bcc addresses on the job management screen and address list tab.
Factory default settings: Disable
Quick On Line Sending
When this setting is enabled, the machine starts transmitting a data as soon as the first page is scanned.
Transmission takes place at the same time as the remaining pages are being scanned.
PDF Compression Options
Flate Compression
When sending a PDF file, you can compress the file by Flate Compression to reduce the file size.
Factory default settings: Enable
Compact PDF Resolution Setting
Set the resolution when saving as a highly compressed PDF.
Factory default settings: 300x300dpi
Compression Mode at Broadcasting
Selects the compression mode for broadcasting using Scan to E-mail. The compression mode set here is used for all
destinations regardless of their individual compression mode settings.
Black & White
MH (G3), MMR (G4)
Color/Grayscale
Low, Medium, High
Reduce Colors
Reduce the file size by limiting the number of colors and shades used.
Factory default settings: B/W:MH (G3), Color/Grayscale:Middle, Reduce Colors:Disable

9-79
SETTING MODE►SYSTEM SETTINGS
Send Destination Link Settings
Enable this to send only the URL of scanned data to the destination.
Factory default settings: Disable
Enable Send Destination Link as Default
Enable this to always send only the URL of scanned data to the destination. When this function is enabled and you are
in simple mode, only the URL is sent to the e-mail address. When normal mode is used, the [Send Destination Link]
checkbox is always in the action panel that appears in the home screen of Scan to E-mail.
Factory default settings: Disable
File Retention Period
Set the save period for scanned data saved in the machine when sending only the URL to the destination. When this
period elapses, the files are automatically deleted.
Factory default settings: 4
Enable SSL/TLS
Use this to protect files using SSL/TLS transmission.
Factory default settings: Enable
Maximum Size of Send Data (E-Mail)
To prevent the transmission of excessively large image files by Scan to E-mail, a file size limit can be set from 1 MB to
99 MB in increments of 1 MB. If the total size of the image files created by scanning the original exceeds the limit, the
image files are discarded.
If you do not wish to set a limit, select [Unlimited].
Factory default settings: Unlimited
If the send data exceeds maximum size, it will be sent in multiple files.
If an E-mail attachment exceeds the maximum size, it will be sent in multiple files. If one of the divided files exceeds the
maximum size, it will be sent with the resolution automatically lowered.
When sending files in JPEG format, only one file is attached to one e-mail, regardless of the file size.
If a file scanned in TXT(UTF-8), RTF, DOCX, XLSX, or PPTX format exceeds the file size limit, the file will be discarded
without being sent even if this setting is selected.
Maximum Size of Data Attachments (FTP/Network Folder)
A limit can be set for the size of files that can be sent by Scan to FTP and Scan to Network Folder. Limits that can be
selected are 50 MB, 150 MB, and 300 MB. If the total size of the image files created by scanning the original exceeds
the limit, the image files are discarded.
If you do not wish to set a limit, select [Unlimited].
Factory default settings: Unlimited
• When a file scanned to a format other than TXT(UTF-8), RTF, DOCX,
XLSX, or PPTX exceeds the size limit, this function
reduces the data size below the limit by lowering the resolution or other means, and thereby enables sending without
canceling the data.
• When multi-crop, Image Crop, Send Destination Link and card scan are used, the scanned data is not divided. If the e-mail
exceeds the set size limit, a send error occurs.

9-80
SETTING MODE►SYSTEM SETTINGS
Auto Scan Setting
Configure auto scan setting.
Factory default settings: Disable
Set Image Orientation Automatically
The orientation of placed originals can be automatically detected. Set whether the original is scanned by one-sided
scanning or two-sided scanning.
Factory default settings: Enable
Set Resolution Automatically
You can have the machine automatically set the resolution.
Factory default settings: Enable
Blank Page Skip
Set whether or not blank original pages are automatically skipped during scanning.
Factory default settings: Blank Page Skip
Automatically Detect Mono2/Grayscale
Originals Automatically Detect Mono2/Grayscale.
Factory default settings: Enable
Detection Standard
Automatically Detect Mono2/Grayscale.
Factory default settings: 3 (Normal)
Automatically Adjust Skewed Original
The tilt of the document is automatically corrected.
Factory default settings: Enable
Automatically Detect Original Size from Document Feeder
The original size is automatically determined when the original is read by the automatic original feeder.
Factory default settings: Enable
Create Card Information File when Detected
If it is determined that the card is a business card based on the original size, the business card information is also saved
using the OCR function.
Factory default settings: Enable
File Format of Card Info
Set the file format of business card information.
Factory default settings: vCard (*.vcf)
Use Full Name on Card as the File Name
The name of the business card is the name of the file that stores the business card information.
Factory default settings: Enable
Set Compression Ratio Automatically
Automatically selects the best compression ratio from the original document.
Factory default settings: Enable
Preset restriction of E-mail for direct input
Enable this setting to prohibit e-mail transmission to an address that has an unsuitable domain. A file will not be sent if
the e-mail address is entered directly and the domain is one of the set domains.

9-81
SETTING MODE►SYSTEM SETTINGS
Default Address
Default Address Setting
A default address can be stored that makes it possible to transmit by simply pressing the [Color Start] key or the [B/W
Start] key without specifying an address.
If [Apply E-mail address of the user for login.] is selected, the E-mail address of the login user is set as the default
destination. When [Apply Home Directory of The User for Login] is selected, the default address is the home directory of
the user that logged in.
When the user logs in by internal authentication (authentication by the machine), the home directory setting of the user
that logged in is configured in "User Registration" in "User List" in "User Control". When the user logs in by external
authentication (network authentication), the home directory setting is configured in "Global Address Book Settings" in
"LDAP Settings" in "Network Settings".
Factory default settings: Disable
Add Selected
Select an address that is to be used by default.
Apply E-mail address of the user for login.
The E-mail address of the login user is set as the default address.
Select [Allow cancel of the first entered address] based on your intended use.
Apply Home Directory of The User for Login
The home directory of the login user is set as the default address.
Select [Allow cancel of the first entered address] based on your intended use.
Select From Address Book
To display your desired address book, narrow the search by alphabet or category with the list of [Index]. You can select
the number of addresses that are to be displayed at a time with [Display Items].
When you select the desired address name and tap the [Store] key, the selected address can be selected for the default
address.
Allow cancel of the first entered address
You can cancel the E-mail address of the login user that is entered automatically. To cancel, tap the [x] button next to
the address entry field.
When this setting is disabled, selection of an address other than the entered default address is prohibited.
Factory default settings: Disable
Apply Login Name to the Path of Network Folder
Append the login name of the logged-in user to the path of the network folder.
Add a Subfolder Path to the End of the Home Directory Path
You can add more folders (subfolders) after the home directory path you have set, and make them the default address.
This setting is available only when [Default Address Setting] is [Enable] and [Apply Home Directory of The User for
Login] is selected.
Factory default settings: Disable
Subfolder Path
Enter the path of the subfolder.
The entries here will be used as the subfolder name, and this folder will be set as the default address folder.
You can specify two or more levels of folders by entering "\". If the subfolder does not exist, a folder will be created.
For example, if you enter \AAA\BBB, the default address will be the subfolder AAA\BBB of the configured home
directory.
Only a single default address can be set for Scan to E-mail, Scan to FTP and Scan to Network Folder.
If an e-mail address is not set for the logged-in user, scanner transmission cannot be used.

9-82
SETTING MODE►SYSTEM SETTINGS
Disable selection of other address(es)
It is prohibited to send to other than the default destination.
Factory default settings: Disable
Subject Name Settings
Default Subject
Set the title of the e-mail, such as sending an e-mail.
Pre-Set Registration
You can save a preset subject for transmitted files. Click the [Add] key and set the subject.
File Name Settings
Default Settings for File Names
File Naming
You can select the information included in the name of scanned files.
Serial Number
You can add the machine's serial number to the file name.
Factory default settings: Disable
Text
You can add any text to the file name.
Factory default settings: Disable
Sender Name
You can add the sender's name to the file name.
Factory default settings: Enable
Date & Time
You can add the date and time of transmission to the file name.
Factory default settings: Enable
Session Page Counter
You can add counter information to the file name.
Factory default settings: Disable
Unique Identifier
An ID number can be created for each file and added to the file name.
Factory default settings: Disable
Direct Entry/Pre-Set Text Selection Settings
Add Date & Time
Add the date and time to the end of the file name when the file name to be sent is set by direct input or fixed phrase
selection.
Factory default settings: Disable
Pre-Set Registration
Add the date and time to the end of the file name when the file name to be sent is set by direct input or fixed phrase
selection.

9-83
SETTING MODE►SYSTEM SETTINGS
Message Body Settings
Add Job Information Automatically to the Mail Message Body
Add Job Information Automatically to the Mail Message Body
You can automatically add job information to the body message of e-mail.
Factory default settings: Enable
Add a Footer Automatically to the Mail Message Body
You can add any text as a footer to the body message of e-mail.
Factory default settings: Disable
Mail Footer Registration
Set any text to be added when [Add a Footer Automatically to the Mail Message Body] is enabled.
Pre-Set Registration
You can save a preset e-mail subject and body message (fixed text). Click the [Add] key.
9-84
SETTING MODE►SYSTEM SETTINGS
Metadata Settings
If the Application Integration Kit is installed, you can control the metadata to be used in other applications.
The stored metadata is displayed on the metadata settings page.
You can add a metadata, and edit or delete an existing metadata.
• [Add] key
Adds a new metadata set.
•List display
Lists the currently stored metadata sets.
Metadata Delivery
Enables or disables the metadata delivery function.
Factory default settings: Disable
Metadata Set Registration
When you tap the [Add] key, the registration screen appears. Up to 10 items can be stored.
For each setting, see the following "Settings
(page 9-84)".
Edit or Delete Metadata Set
When you tap a title on the list, the edit screen appears for that metadata set.
Tap the [Delete] key to delete the metadata set.
Settings
Item Description
Metadata Set Name Enter a metadata name.
Metadata Destination Select a destination where you wish to send the image and metadata.
Allow Custom Filenames Enable or disable to edit the name of image file and XML file to be sent by the metadata
send job.
Factory default settings: Disable
Address Type Allowing Metadata
Entry
Set the destination information to be used for metadata transmission.
Factory default settings: All Invalid
Name Enter a metadata name to be displayed on the touch panel.
XML Tag Name XML Tag Name
Entry Type Direct entry: Allows direct entry of each metadata from the soft keyboard or the numeric
keypad.
Metadata list: Allows a selection of metadata from the previously entered data list. You must
enter optional values for metadata selection in the input area. Entries must be separated by
semicolons or commas. Each option can be comprised of up to 70 characters.
Initial entry by default: Uses a default value as the first value of the entered metadata list.
Factory default settings: Direct Entry:Disable, Selection List:Disable
Include MFP Extended Scan
Settings in XML File.
When the machine generates metadata automatically, the "metadataSetName",
"userLoginId" (if user authentication is used), "pageSize", and "imageMode" are added to
the metadata.
Factory default settings: Enable
To Be Used as Default The current metadata set is used as the default.
Factory default settings: Disable

9-85
SETTING MODE►SYSTEM SETTINGS
Document Filing Settings
Condition Settings
Document filing settings are described below.
Tap the [Document Filing Settings] key to configure the settings.
Default Mode Settings
Specifies which mode, Sharing or Confidential, is used as the default mode when storing a file.
When [Confidential Mode] is selected, the [Confidential] checkbox is set to on the information screen for filing.
Factory default settings: Sharing Mode
Sort Method Setting
Selects an order of display files stored in the Main Folder, Custom Folder, and Quick File Folder. Select one of the
following settings:
• File Name
• User Name
•Date
Factory default settings: Date
Administrator Authority Setting
For files and user folders that have a password, this setting allows the administrator password to be entered instead of
the password when accessing the file or folder.
Also, you can change the preset ratio if necessary.
Factory default settings: All Invalid
Delete All Quick Files
Deletes all files from the Quick File folder except for protected files.
Delete
Tap this key to start deletion of all files immediately.
Delete quick files at power up.(Protected files excluded)
This is used to automatically delete all files in the Quick File Folder (with the exception of protected files) when the
[Power] button is turned "On".
Factory default settings: Enable
Image Orientation
Changes the image orientation.
Factory default settings: Portrait
The condition of the machine may prevent deletion in some cases.

9-86
SETTING MODE►SYSTEM SETTINGS
Default Color Mode Settings
Selects the default settings for black & white and color when Scan to Local Drive is used.
The following settings can be configured.
•Auto
• Full Color
• Grayscale
• Mono2
Factory default settings: Auto, Mono2
Disable Change of B/W Setting in Auto Mode
Disables black & white settings from the base screen when the color mode is set to Auto.
Factory default settings: Disable
Default Exposure Settings
Default exposure settings for document filing can be configured.
Select [Auto] or [Manual].
If you select [Manual], set the exposure to one of 5 levels.
Factory default settings: Auto
Default Original Image Type
Select the original type beforehand to enable scanning at a resolution suitable for the original.
The following settings can be configured.
• Text/Printed Photo
• Text/Photo
•Text
•Photo
• Printed Photo
•Map
Factory default settings: Text
Initial Resolution Settings
One of the following resolutions can be selected for the default resolution for transmission.
• 100x100dpi
• 150x150dpi
• 200x200dpi
• 300x300dpi
• 400x400dpi
• 600x600dpi
Factory default settings: 200x200dpi
Default Output Tray
Selects the default output tray for printing a file stored by Scan to Local Drive.
The items that appear will vary depending the machine configuration.
Disable Text/Stamp functions for Reprinting
When a stored file is retrieved and printed, the printing functions are disabled.
This function prevents an inconsistency of the date between the original data and output data and others.
Factory default settings: Disable
When the exposure is set to [Auto], a defa
ult original type cannot be selected.

9-87
SETTING MODE►SYSTEM SETTINGS
Batch Print Settings
Set whether or not the [All Users] key and the [User Unknown] key are prohibited in the user name selection screen
when printing all files.
Factory default settings: Selection of [All Users] is not allowed.:Enable, Selection of [User Unknown] is not allowed.:Enable
Print Order Setting for the Batch Print/Multi-File Print
Sets whether the files are ordered by date (newer/older) or by file name (ascending/descending).
Factory default settings: Date (Dsc.)
Erase Width Adjustment
This is used to set the default erase width for erase function.
Specify a value from 0" (0 mm) to 1" (25 mm) in increments of 1/8" (3 mm) for both edge erase and center erase.
Factory default settings: Edge Clearance Width:10mm (1/2"), Center Clearance Width:10mm (1/2")
Card Shot Settings
This is used to set the default original size for the card shot function.
Specify a value from 1" (25 mm) to 8-1/2" (216 mm) in increments of 1/8" (3 mm) for both the X (horizontal) and Y
(vertical) dimensions of the original.
Factory default settings: Original Size:X: 86 mm (3-3/8"), Y: 54 mm (2-1/8")
Fit to Store Size
Always displays the [Fit to Store Size] key on the card shot screen.
Factory default settings: Disable
Setting of store/delete after file print
Select whether or not to save or delete a file after printing.
Factory default settings: Store
Default Setting of PDF Format for PC Browsing
You can set the initial file format of public PDF or the file for download which is created during execution of each job.
B/W, Color/Grayscale
Set the compression format for B/W,and the compression rate for Color/Grayscale.
For B/W, select from uncompressed, MH (G3), MMR (G4).
For Color/Grayscale, select the file compression ratio from Low, Medium, and High.
Settings during each job execution
When each of copy, printer, scanner, or stored scan data is executed, you can specify to create a public PDF and to set
the resolution of public PDF.
Factory default settings:B/W:Compression Mode:MMR(G4)
Color/Grayscale:Compression Ratio:Middle
Copy:Disable, Apply the resolution at job execution:Disable, Resolution:200dpi×200dpi
Printer:Disable, Apply the resolution at job execution:Disable, Resolution:200dpi×200dpi
Scanner:Disable, Apply the resolution at job execution:Disable, Resolution:200dpi×200dpi
Scan to Local Drive:Disable, Apply the resolution at job execution:Disable, Resolution:200dpi×200dpi

9-88
SETTING MODE►SYSTEM SETTINGS
Document Output Options
The use of a stored file can be allowed or prohibited by operation type and by the mode from which the file was stored.
Document Filing Control
This setting can be set on this machine. This setting is the same as the registration method of "Custom Folder (page
9-34)".
The items that appear will vary depending on the functions that have been added to the machine.
Item Description
Print For each mode, select whether or not printing of stored files is allowed.
Factory default settings: Copy:Enable, Printer:Enable, Scan Send:Disable, Scan to Local
Drive:Enable
Scan Send For each mode, select whether or not scanning transmission of stored files is allowed.
Factory default settings:Copy:Disable, Printer:Disable, Scan Send:Enable, Scan to Local
Drive:Enable
9-89
SETTING MODE►SYSTEM SETTINGS
Automatic Deletion of File Settings
Document filing settings are described below. Tap the [Document Filing Settings] key to configure the settings.
Time and folder settings can be configured to have files in specified folders (stored by document filing) automatically
deleted at a specified time. Up to 3 settings can be stored to be automatically deleted.
The procedure for using this function is as follows:
(1) Select [Setting 1], [Setting 2], or [Setting 3].
(2) Set the time and date for automatic deletion.
(3) Select the desired folder.
(4) Specify whether or not protected files and confidential files are to be deleted.
(5) Enable the stored settings.
Delete Now
When this is executed with a folder selected, all files in the folder will be immediately deleted regardless of the date and
time setting.
Executing automatic deletion during Auto Power Shut-Off.
(If this is not selected, the files will be deleted after the machine wakes from auto power shutoff mode.)
Execute Auto Deletion even if Auto Power Shut-Off is enabled. When the checkbox is not selected ( ), the files will be
deleted after the machine wakes from auto power shutoff mode.
Factory default settings: Disable
Item Description
Schedule Select an automatic deletion cycle. Select from [Delete by Schedule] and [Delete at
Specified Time after Specified Days Have Elapsed].
Delete by Schedule
Every Day: Auto deletion every day at the specified time.
Every Week: Auto deletion at the specified time on the specified day of the week.
Every Month: Auto deletion at the specified time on the specified day of the month.
Delete at Specified Time after Specified Days Have Elapsed
The file is automatically deleted at the specified time after the specified number of days
have passed since the file was saved.
Elapsed date and time: Set the elapsed date and time.
Delete time: Automatically deletes at the specified time.
Factory default settings: Delete by Schedule, Every Day
Folders To select individual folders, select [Select Folder] and select any folder. To select all
folders, including the folder currently being created, select [All Folders (Including folders
registered hereafter)].
Factory default settings: Select Folders from List Below
Delete Protected File Enable this setting to include protected files in the deletion.
Factory default settings: Enable
Delete Confidential File Enable this setting to include confidential files in the deletion.
Factory default settings: Enable

9-90
SETTING MODE►SYSTEM SETTINGS
Sharp OSA Settings
Condition Settings
Sharp OSA version
Displays the version of Sharp OSA Settings by this unit.
Cookie Setting
Specify how application cookies are handled when using an application in Sharp OSA.
When "Hold Cookie" is selected, the machine holds cookies that are used in an application.
When "Not hold Cookie" is selected, cookies are not held when an application is used.
Factory default settings: Not hold Cookie
Delete Cookie
Delete cookies held by the machine.
Automatically Start an Application at Power up and Wake up
After the machine has been turned on, or after it has recovered from an auto power shutoff, it will automatically start the
registered applications.
Application
Set the applications to be launched automatically.
Accept remote access request from application
Check this when using a Sharp OSA application that is accessed remotely from the outside of this unit.
Application allowed to access
Register the application URL of the Sharp OSA application that allows remote access to this machine.
Approve remote access request on operation panel
When you start using the remote access function, the approval dialog is displayed on the operation panel of the main
unit.
Accept UI operation request from application
Select this when using an application that operates the UI of this machine.
Display dialog of connection in Sharp OSA mode
During remote access, the connecting dialog is displayed on the operation panel of the main unit.
Accept secondary send request from Sharp OSA application
Accept secondary send request from Sharp OSA application
When "Hold Cookie" is selected, the login information from the previous operation may be stored. Note that when the user
authentication function is disabled, and when the fixed user login setting is enabled, all users can use the login information
stored in the machine.
9-91
SETTING MODE►SYSTEM SETTINGS
Standard Application Settings
The standard application settings can be added and controlled.
• [Add] key
When "Hold Cookie" is selected, the machine holds cookies that are used in an application.
• List display
When "Not hold Cookie" is selected, cookies are not held when an application is used.
Standard Application Registration
When you tap the [Add] key, the registration screen appears. Up to 64 items can be stored.
For information on the settings, see "Settings".
Edit or Delete Standard Application
When you tap an application name on the list, the edit screen appears for that standard application.
Tap the [Delete] key to delete the standard application.
Settings
* These functions can be set only in the Web page.
External Accounting Application Settings
An external account application can be added and controlled.
Set the server name where you have installed the external accounting application.
* This setting can be set in Server 1.
Item Description
Application Name Enter an application name.
Address for Application UI Set an IP address of the application or a network name to control the UI of the machine.
Timeout Enter a timeout. The default setting is 20 seconds.
Extended Platform Set this option to use the expansion platform.
Data Size Set the screen size of application.
Use Custom Icon
*
Select whether or not custom icon is used.
File Name
*
Reports file name.
Select File
*
Type the file name.
Item Description
Server 1-4 Set to enable each of the servers.
Application Name Enter an application name.
Use Embedded Application Set when using an embedded application.
Address for Application UI
*
Enter the URL of the login screen to be accessed first when the machine is turned on.
Address for Web Service Enter the URL of the server or computer which sends commands and events by
XML/SOAP protocol.
Timeout Enter a timeout. The default setting is 20 seconds.
Extended Platform Set this option to use the expansion platform.
Data Size
*
Set the screen size of application.
Find My Address This Search Find My Address.
9-92
SETTING MODE►SYSTEM SETTINGS
Embedded Application Settings
Store and manage "embedded applications" that are installed in the machine.
• [Add] key
Adds a new embedded application.
• List display
Lists the currently installed embedded applications.
Install Embedded Application
When you tap the [Add] key, the registration screen appears. You can install up to 64 in total.
Store Embedded Application
By storing an already installed embedded application in "standard application", the application can be used.
Select the application name checkbox and tap the [Add Standard Applications] key.
Delete Embedded Application
Tap an application name in the list to display the information of that standard application.
After checking the information, delete the standard application with the [Delete] key.
Polling Setting
When linked to an external application, you can store and manage addresses in order to use a service that uses a
polling function.
External Service Connect
Enable the cloud connector function you want to use.
The following cloud connector functions can be set.
• SharePoint Online Connector
• OneDrive Connector
• Google Drive Connector
• Gmail Connector
• Exchange Connector
• When installing from the operation panel of the machine, the files in the USB memory connected to the machine are
installed. When installing from the Web page, the files in the computer are installed.
• The maximum storage space available to the application is 4GB. If previously installed applications are already using 4 GB
of area, a new application cannot be installed.
Item Description
Server 1 - Server 2 Set to enable each of the servers.
Polling Address Enter the URL of the server or computer that the machine will poll.
Check Interval Enter the check interval for the server. The default is 1 minute.
Timeout Set the timeout time. The default setting is 20 seconds.

9-93
SETTING MODE►SYSTEM SETTINGS
Authentication Settings
Default Settings
This section describes the settings in [System Settings] → [Authentication Settings] → [Initial Settings] in "Settings
(Administrator)".
User Authentication
This setting enables or disables user authentication and specifies the authentication method.
When the user authentication is enabled, each user of the machine is registered. When a user logs in, the separate
authentication settings apply to the user. This function allows greater control of security and cost management than that
on previous machines.
Even if user information is not stored on the machine, you can directly enter the user information stored in an LDAP
server to log in the machine if necessary. In this case, the authentication information of the "User" being stored as
factory default applies to the login user. For more information see "Users stored as factory default
(page 9-39)".
Factory default settings: Disable
User Authentication
When [User Authentication] is enabled, the authentication screen appears before an operation is carried out in any
mode except the job management screen
*
.
Log in as an already registered user.
After logging in, you can move freely through the modes.
* The login screen appears when a document filing file is used or when a broadcast transmission is reattempted from the job management screen.
Authentication Server Settings
Set the location where user authentication is to be enabled.
Login Locally: User authentication is performed on this machine.
LDAP: User authentication by LDAP server.
Active Directory: User authentication by Active Directory.
Sharp OSA: Authenticate the user using the Sharp OSA application.
Factory default settings: Login Locally
Default Network Authentication Server Setting
Use this to set the default network authentication server.
When you log into Setting mode (Web version) or send a print job to the machine using user information that is not
registered in the machine, the authentication server is not known.
This setting is used to select one of the LDAP servers registered in the machine as the authentication server.
• For the procedure for storing users, see "User List (page 9-38)".
• For details on login procedures when user authentication is enabled, see "USER AUTHENTICATION
(page 8-11)".
When login is performed by network authentication using user information that is not registered in the machine, the login
user will be the "User" registered as factory default. For more information see "Users stored as factory default
(page 9-39)".

9-94
SETTING MODE►SYSTEM SETTINGS
Specify network server access control
Register the access control information for page count limits, authorities, and favorite operations can be registered on an
network server in advance. By using this network server for network authentication, perform the user authentication
based on the registered access control information.
Use this function when user authentication is performed by network authentication using an LDAP server or a directory
service (Active Directory, etc.).
Before using this function, configure settings for authentication by network server, obtain control numbers for the "Pages
Limit Group", "Authority Group", "Favorite Operation Group", and "My Folder" (including base settings for each group),
and associate these with the control numbers registered in the machine.
To use this function, add the properties associated with "Pages Limit Group", "Authority Group", "Favorite Operation
Group", and "My Folder" to the directory information of the network server used for user authentication.
The property information is indicated below. Settings previously stored in the machine cannot be changed.
Rename the properties that the machine obtains from the LDAP server as follows. In "Settings", select [Network
Settings] → [LDAP Settings]. From the Global Address Book setting screen that is displayed, select [Linkage with User
Control Function] and then select [Pages Limit Group], [Authority Group], [Favorite Operation Group] and [My Folder].
The [Pages Limit Group], [Authority Group], and [Favorite Operation Group] information that is registered in each
machine determines the authority and settings that the user is actually granted. To use this function to ensure that users
are granted the same authority and settings on any machine, register the [Pages Limit Group], [Authority Group], and
[Favorite Operation Group] information with the same authority so that they will be registered in each machine using the
same registration numbers.
For [My Folder], register the folder having the same name in [Custom Folder] in each machine.
The directory information of the network server that is used cannot be changed from the machine. Consult the
administrator of the network server.
If 1000 users have already been manually registered, login will not be possible. Consult the administrator of the
machine.
Factory default settings: Disable
Property Name of property in factory
default state
Settings
Pages Limit Group pagelimit Registration number of Pages Limit Group registered in the
machine, or a group name previously registered in the
machine.
Registration number of Authority Group registered in the
machine, or a group name previously registered in the
machine.
Unlimited: unlimited
Authority Group authority Registration number of Authority Group registered in the
machine, or a group name previously registered in the
machine.
Registration number of Authority Group registered in the
machine, or a group name previously registered in the
machine.
Admin: admin
User: user
Guest: guest
Favorite Operation Group favorite Registration number of Favorite
Operation Group registered in the machine, or a group name
previously registered in the machine.
Following the System Settings: systemsettings
My Folder myfolder Folder name of user folder stored in the machine.
Do not enter if the default folder is specified.
9-95
SETTING MODE►SYSTEM SETTINGS
Users auto-registered
When you log in by network authentication, your user information is automatically registered in the machine.
The information stored is as follows:
* If the user name cannot be acquired by network authentication, the first 16 characters of the text string used as the login name for network au-
thentication is applied.
Authentication Method Setting
This selects the authentication method. When using user authentication, be sure to configure this setting first. The items
to be configured for users stored after setting the user authentication method vary depending on the selected
authentication method.
Authenticate a User by Login Name and Password
Standard authentication method using a login name and password.
Authenticate a User by Login Name, Password and E-mail Address
This authentication also checks the e-mail address, in addition to the login name and password of the user.
Authenticate a User by User Number Only
Use this option for simple authentication if you skip the network authentication.
Factory default settings: Authenticate a User by Login Name and Password
• If Access Control is enabled and the access control information cannot be acquired from the authentication server, user
authentication will not be possible.
• If a user that is registered in the machine is authenticated by network authentication, the user registration settings in the
machine will be given priority for the page count limit group, authority group, favorite operations group, and my folder.
• If the access control obtained from the LDAP server is not registered in the machine, the factory default user authority will
be applied.
• When this function is not enabled and a user is authenticated by network authentication as a non-registered user, the
factory default user authority will be applied.
Item Description
User Name This information is acquired from the authentication server.
*
Initial 1
Index User1
Card ID -
Password -
Authentication Server Settings -
Authentication Server Network Authentication
E-mail Address When Access Control is enabled, this information is acquired from the authentication
server.
My Folder
Pages Limit Group
Authority Group
Favorite Operation Group
• The login screen will vary depending on the authentication method that is selected.
For more information see "USER AUTHENTICATION
(page 8-11)".
• When "Authenticate a User by User Number Only" is selected for the authentication method, network authentication
cannot be used.

9-96
SETTING MODE►SYSTEM SETTINGS
Case sensitivity of login name is enabled.
Set whether or not to make login names used at the time of user authentication case sensitive. If the checkbox is set to
, login names with identical spelling but different cases (upper and lower) will be identified as different login names.
Therefore, login names with identical spelling but different cases will be authenticated as user names of different users.
If the checkbox is set to , case sensitivity for login names is disabled. Therefore, identically spelled user names with
upper and lower case character differences will be authenticated as the user name of the same user.
Factory default settings: Enable
Enable Quick Login
Enable "QUICK AUTHENTICATION (page 8-16)".
Factory default settings: Disable
Device Account Mode Setting
A specific user can be registered as an auto login user. When this option is enabled, the registered user can log in the
machine automatically.
This function can eliminate each login procedure on the authentication screen and apply the selected user settings
(such as network authentication and favorite operations). As an example, this enables uses such as "authentication for
color copying only".
Also, you can temporarily log in as a user other than the auto login user, and operate the machine with the privileges of
this user. To allow other users to log in temporarily when [Device Account Mode] is enabled, select [Allow Login by
Different User].
Factory default settings: Device Account Mode:Disable, Allow Login by Different User:Disable, Disable Home Edit Mode when in
Device Account Mode:Disable
Login User
This setting is used to select the auto login user when auto user login is enabled.
Settings for Using Authentication Information
Store User Information
Set whether or not automatically registered users are created.
Externally authenticated users in Sharp OSA can also be automatically registered.
Factory default settings: Enable
Store Password
Set whether or not automatically registered users are created. Externally authenticated users in Sharp OSA can also be
automatically registered.
Factory default settings: Enable
Cache Period
Set whether or not automatically registered users are created.
Externally authenticated users in Sharp OSA can also be automatically registered.
Factory default settings: Unlimited
Enable Offline Authentication with stored User Information
Allows the machine to be used in the event of a network failure, even when using network-based user authentication.
Factory default settings: Disable
If the selected checkbox is changed to , and identical user names with only upper and lower case character differences
exist, the user names that have already been registered are identified as user names of different users.
• If you have logged in as the Auto Login user, and if you have failed automatic login due to some reasons or if you do not
have the administrator's privileges, you cannot use the general setting modes or Setting mode. In that case, the
administrator should tap the [Administrator Password] key on the Setting mode screen and log in again.
• To log in as a user other than a fixed user when [Allow Login by Different User] is enabled, tap the [Logout] key to cancel
the fixed user login state. When the user authentication screen appears, log in as the desired user again. After you have
used the machine, tap the [Logout] key to log out as the current user.

9-97
SETTING MODE►SYSTEM SETTINGS
Enable Personalization when external authentication is used
Even if you use external authentication such as LDAP authentication, you can customize it for each user.
The items that can be customized are as follows.
Home screen icon, home screen text color, custom display pattern, display language, large text mode, favorites
Factory default settings: Enable
Cache Authentication Information for External Service Connect
Set whether or not authentication information for connection to the cloud is retained as cache information.
When this setting is enabled, the authentication information of a successfully authenticated user is retained to enable
smooth authentication when the user subsequently logs in.
When this setting is disabled, the previously retained cloud connection authentication information of all users is deleted
and authentication information is no longer retained.
Factory default settings: Enable
Card Setting
Use IC Card for Authentication
Allows the IC card to be used when authenticating the user.
Factory default settings: Disable
Authentication Method Setting
Set the authentication method with the IC card.
Factory default settings: Only Card Authentication Approved
Request Password at IC Card Authentication
This can be set when "Authentication Settings" is "Active Directory" and "Use IC Card for Authentication" is enabled.
When enabled, enter the password each time you authenticate with the IC card. If disabled, the password will be
entered when logging in with the IC card for the first time, and the password information will be sent to the Active
Directory server. You can omit entering the password for the second and subsequent logins.
Factory default settings: Disable
Automatic Logout with a Card
Log out when you remove the IC card from the IC card reader/writer. (You can also log out by tapping the [Logout] key.)
Factory default settings: Disable
Item Description
Only Card Authentication
Approved
User authentication is only for IC cards.
Card / Front Panel Operation
Authentication Approved
User authentication is possible from both the IC card and the operation panel.

9-98
SETTING MODE►SYSTEM SETTINGS
Administration Settings
Disable Printing by Invalid User
Print jobs by users who have not registered user information in this machine, such as jobs for which appropriate user
information has not been entered in the printer driver or when "DIRECTLY PRINTING A FILE ON AN FTP SERVER
(page 4-110)" is entered from the setting mode (administrator), are prohibited.
Factory default settings: Disable
Automatic Logout Setting
When user authentication is enabled, this setting specifies whether or not to enable automatic logout.
The time until logout can be specified up to 240 seconds in increments of 10 seconds.
Factory default settings: Enable
A Warning when Login Fails
When entering passwords, including administrator passwords, during user authentication, the number of incorrect
password attempts is counted, and if the number of attempts reaches the specified number (three), the user account is
locked, and the user is blocked from making any more attempts at authenticating their account until a period of five
minutes has elapsed. The number of incorrect entries made is counted separately for each user, and the count is reset
when the correct password is entered.
This prevents an unauthorized person from attempting to guess a password. (The number of failed login attempts is
retained even if the power is turned off.)
Factory default settings: Disable
Allow Remote Scanner Using Before Login
This setting specifies whether scanning can be performed by remote operation before a user has logged in.
Factory default settings: Disable
Include Job Management in user authentication
When user authentication is enabled, this setting specifies whether or not to include the job management in user
authentication.
Factory default settings: Disable
Display Machine Status Screen Before Login
Set whether the machine status screen can be displayed before logging in.
Factory default settings: Disable
Enable IPP Authentication Except for Printer Driver
Enable IPP authentication on a non-printer driver.
Factory default settings: Enable
• Lockout only applies to the user who failed to login, not all users. Even if one user is locked out, the other users can still log
in.
• When LDAP or Active Directory network authentication is used, lockout is executed by the server, not the machine. Select
appropriate lockout settings on the server.
• If the same user has been locked out, the [Release Operation Lock Status] key is displayed in the "User Registration"
screen for that user. An administrator can tap this key to carry out a manual clear.

9-99
SETTING MODE►SYSTEM SETTINGS
Actions when the user is authenticated
Actions when the Limit of Pages for Output Jobs
This setting determines whether or not a job will be completed if the page limit is reached while the job is in progress.
The following settings can be configured.
• Print through the end of the job
• Stop the job
• Cancel and delete the job during receiving
Factory default settings: Switch at End of Job
Automatically print stored jobs after login
When retention is enabled in the printer driver and print data has been spooled to the machine, you can have the
spooled print data automatically print out when the user who enabled retention logs in.
Factory default settings: Disable
Reset Counter After Sending E-mail Status
After E-mail Status has been sent, the counter is reset.
Displayed only when E-mail Alert and Status is enabled.
Factory default settings: Disable
Disable Display/Change of Other Users' Information in the Job
Management
This can be set when the job management is subject to user authentication.
When this setting is enabled, only the logged-in user's job is displayed on the job management screen.
Factory default settings: Disable
Apply login name to the user name of network folder
Applies the login name to the user name in the shared folder.
Login Name Display
When user authentication is enabled, select whether the login name is shown or asterisks are shown.
Factory default settings: Display login name
Display Usage Status after Login
When user authentication is enabled, this setting specifies whether or not to display the page counts of a user when the
user logs in.
Factory default settings: Disable
Edit Help Display of Login Screen
Settings you have created here is displayed on the login screen.
Item Description
Display login name Show the login name.
Display login name with "*" Hide the login name with asterisks.

9-100
SETTING MODE►SYSTEM SETTINGS
Card Reader Settings
Condition Settings
Card Scan Test
Perform a read test of the card to be used.
Card ID Registration/Change Authority
Set whether the logged-in user can register/change/delete his/her card ID information in this machine.
Factory default settings: Disable
Check System Code only in FeliCa User Area mode
Check the System Code only in FeliCa User Area mode.
Factory default settings: Disable
Check Facility Code in HID mode
Set whether to check the facility code when using a HID card.
When this setting is enabled, the facility code (up to 128 single-byte characters) is registered.
Factory default settings: Disable
Importing from the setup file
When you enter the configuration file name and tap the [Execute] key, the card area settings are read from the
configuration file. If you tap the [Clear] key, all files that match the current search conditions are deleted.
Facility Code
Enters the facility code of a HID card. When you tap the [Store] key, the facility code is stored.
Card Reader Device Registration
Set when connecting a card reader/writer.
This setting can be set in the setting mode of this machine.

9-101
SETTING MODE►SYSTEM SETTINGS
Paper Settings
Paper Tray Settings
Paper tray and paper type settings are explained in this section.
These settings specify the paper type, paper size, and functions allowed for each paper tray.
When the [Tray Settings] key is tapped, a list appears showing the trays and the current settings.
Auto Switching of Tray
When a tray runs out of paper during printing, this determines whether or not another tray with the same size and type of
paper is automatically selected and printing continues.
Factory default settings: Disable
Display Paper Tray Settings when bypass tray detects paper.
You can have the paper tray settings appear automatically when paper is detected in the bypass tray.
Factory default settings: Disable
Paper Weight Setting
These are used to control the toner fusing temperature according to the weight of the paper.
These settings apply to recycled paper, punched paper, pre-printed paper, letterhead paper, colored paper, and user
type paper.
Enter "/".
You can select "60g/m
2
to 89g/m
2
" or "90g/m
2
to 105g/m
2
" ("16 to 24 lbs." or "24+ to 28 lbs.").
Factory default settings: 60 to 89g/m
2
(16 to 24 lbs.)
Settings of each tray
When the [Change] key is tapped, the corresponding setting screen appears.
The following settings can be configured.
List name Description
Type Select a type of paper to be loaded into the tray.
The paper types that can be selected vary by paper tray. For more information see "Tray
Settings (page 9-102)".
To user type setup, see "Paper Type Registration
(page 9-117)".
Size Select the paper size from the list. The paper sizes that can be selected vary by tray. The
sizes that can be selected may also be restricted by the paper type selected above. For
more information see "Tray Settings
(page 9-102)".
If the desired size does not appear in the list, select [Custom Size] and directly enter the
size (only for the bypass tray). For more information see "Tray Settings
(page 9-102)".
Feeding Approved Job Select the modes that can be used. If there is a function that you do not wish to be used
with the selected tray, disable the function.
• If the paper size specified here is different from the size of paper that is loaded into a tray, a problem or misfeed may occur
when printing.
• To change the paper size in a tray, see "IMPORTANT POINTS ABOUT PAPER
(page 1-10)".
• Paper properties such as "Fixed Paper Side" are automatically set when the paper type is selected. The paper tray
properties cannot be changed in this screen.
• [Settings] → [System Settings] → [Common Settings] → [Device Control] → [Default Settings] → [Disabling of Tray
Settings], [Disabling of Large Capacity Cassette]. When it is set, the paper feed tray (excluding the bypass tray) cannot be
set.
9-102
SETTING MODE►SYSTEM SETTINGS
Tray Settings
Paper Tray Paper Type Size
Tray 1 Plain Paper 1 to 2
*1
,
Recycled, Color, Letter
Head, Pre-Printed,
Pre-Punched, User Type
8-1/2" x 11", A4
Tray 2 Plain Paper 1 to 2
*1
,
Recycled, Color, Letter
Head, Pre-Printed,
Pre-Punched, User Type
8-1/2" x 11", A4
Tray 3 Plain Paper 1 to 2
*1
,
Recycled, Color, Letter
Head, Pre-Printed,
Pre-Punched, Heavy Paper
1 to 4
*2
, User Type
Auto-Inch (12" x 18", 11" x 17", 8-1/2" x 14", 8-1/2" x 11",
8-1/2" x 11"R, 7-1/4" x 10-1/2"R),
Auto-AB (A3W, A3, B4, A4, A4R, B5, B5R, 8-1/2" x 13"
(216 x 330 mm)
*3
),
9" x 12" (A4W), 8-1/2" x 13-1/2" (216 x 343 mm)
*3
, 8-1/2" x 13-2/5"
(216 x 340 mm)
*3
), 8K, 16K, 16KR
Tray 4 Plain Paper 1 to 2
*1
,
Recycled, Color, Letter
Head, Pre-Printed,
Pre-Punched, Heavy Paper
1 to 4
*2
, Embossed,
Envelope, Tab Paper,
Transparencies, Labels,
User Type
Auto-Inch (12" x 18", 11" x 17", 8-1/2" x 14", 8-1/2" x 11",
8-1/2" x 11"R, 7-1/4" x 10-1/2"R, 5-1/2" x 8-1/2"R),
Auto-AB (A3W, A3, B4, A4, A4R, B5, B5R, A5R, 8-1/2" x 13"
(216 x 330 mm)
*3
),
9" x 12" (A4W), 8-1/2" x 13-1/2" (216 x 343 mm)
*3
, 8-1/2" x 13-2/5"
(216 x 340 mm)
*3
), 8K, 16K, 16KR, custom size
Monarch, COM9, COM10
Tray 5 (when a large
capacity tray (MX-LC12)
is installed)
Plain Paper 1 to 2
*1
,
Recycled, Color, Letter
Head, Pre-Printed,
Pre-Punched, Heavy Paper
1 to 2
*2
, User Type
8-1/2" x 11", A4, B5
Tray 5 (when a large
capacity tray
(MX-LCX3 N) is
installed)
Plain Paper 1 to 2
*1
,
Recycled, Color, Letter
Head, Pre-Printed,
Pre-Punched, Heavy Paper
1 to 2
*2
, User Type
11"×17", 8-1/2" x 14", 8-1/2" x 13" (216 x 330 mm), 8-1/2" x 11",
8-1/2" x 11"R, SRA3, SRA4, A3, B4, A4, A4R, B5, 12" x 18" (A3W)
Tray 5/7 (when a large
capacity trays are
installed)
Plain Paper 1 to 2
*1
,
Recycled, Color, Letter
Head, Pre-Printed,
Pre-Punched, Thin Paper,
Heavy Paper 1 to 4
*2
,
Heavy Paper (110 lbs cover
to 130 lbs cover (301 g/m
2
to
360 g/m
2
)), Embossed, Tab
Paper, Transparencies,
Labels, Glossy Paper, User
Type
Auto-Inch (13" x 19", 12" x 18", 9" x 12", 11" x 17", 8-1/2" x 14"
*3
,
8-1/2" x 13-1/2" (216 x 343 mm)
*3
, 8-1/2" x 13-2/5"
(216 x 340 mm)
*3
, 8-1/2" x 11", 8-1/2" x 11"R, 7-1/4" x 10-1/2"R,
SRA3, A3W, A3, B4, SRA4, A4W, A4, B5),
Auto-AB (SRA3, A3W, A3, B4, SRA4, A4W, A4, A4R, B5, B5R,
13" x 19", 12" x 18", 11" x 17", 8-1/2" x 13-1/2" (216 x 343 mm)
*3
,
8-1/2" x 13-2/5" (216 x 340 mm)
*3
, 8-1/2" x 13" (216 x 330 mm)
*3
,
8-1/2" x 11"),
8K, 16K, 16KR, custom size

9-103
SETTING MODE►SYSTEM SETTINGS
*1 Plain Paper 1: 16 lbs bond to 24 lbs bond (60 g/m
2
to 89 g/m
2
)
Plain Paper 2: 24 lbs bond to 28 lbs bond (90 g/m
2
to 105 g/m
2
)
*2 Heavy paper 1: 28 lbs bond to 65 lbs Cover (106 g/m
2
to 176 g/m
2
)
Heavy paper 2: 65 lbs Cover to 80 lbs Cover (177 g/m
2
to 220 g/m
2
)
Heavy paper 3: 80 lbs Cover to 140 lbs Index (221 g/m
2
to 256 g/m
2
)
Heavy paper 4: 140 lbs Index to 110 lbs Cover (257 g/m
2
to 300 g/m
2
)
Thin paper: 13 lbs bond to 16 lbs. bond (55 g/m
2
to 59 g/m
2
)
*3 The size that is automatically detected is set in "Select Paper Sizes for Auto Detection
(page 9-104)" in the bypass tray settings screen.
Tray 6/8 (when a large
capacity trays are
installed)
Plain Paper 1 to 2
*1
,
Recycled, Color, Letter
Head, Pre-Printed,
Pre-Punched, Thin Paper,
Heavy Paper 1 to 4
*2
,
Heavy Paper (110 lbs cover
to 130 lbs cover (301 g/m
2
to
360 g/m
2
)), Embossed, Tab
Paper, Transparencies,
Labels, Glossy Paper, User
Type
Auto-Inch (13" x 19", 12" x 18", 9" x 12", 11" x 17", 8-1/2" x 14"
*3
,
8-1/2" x 13-1/2" (216 x 343 mm)
*3
, 8-1/2" x 13-2/5"
(216 x 340 mm)
*3
, 8-1/2" x 11", 8-1/2" x 11"R, 7-1/4" x 10-1/2"R,
SRA3, A3W, A3, B4, SRA4, A4W, A4, B5),
Auto-AB (SRA3, A3W, A3, B4, SRA4, A4W, A4, A4R, B5, B5R,
13" x 19", 12" x 18", 11" x 17", 8-1/2" x 13-1/2" (216 x 343 mm)
*3
,
8-1/2" x 13-2/5" (216 x 340 mm)
*3
, 8-1/2" x 13" (216 x 330 mm)
*3
,
8-1/2" x 11"),
8K, 16K, 16KR, custom size
Bypass tray
(on the machine)
Plain Paper 1 to 2
*1
,
Recycled, Color, Letter
Head, Pre-Printed,
Pre-Punched, Thin Paper,
Heavy Paper 1 to 4
*2
,
Heavy Paper (110 lbs cover
to 130 lbs cover (301 g/m
2
to
360 g/m
2
)), Embossed,
Envelope, Tab Paper,
Transparencies, Labels,
Glossy Paper, User Type
Auto-Inch (13" x 19", 12" x 18", 11" x 17", 8-1/2" x 14"
*3
,
8-1/2" x 13-1/2" (216 x 343 mm)
*3
, 8-1/2" x 13-2/5"
(216 x 340 mm)
*3
, 8-1/2" x 11", 8-1/2" x 11"R, 7-1/4" x 10-1/2"R,
5-1/2" x 8-1/2"R
*3
, SRA3, A3, B4, SRA4, A4, B5),
Auto-AB (SRA3, A3W, A3, B4, SRA4, A4, A4R
*3
, B5, B5R, A5R,
A6R,
13" x 19", 11" x 17", 8-1/2" x 13-1/2" (216 x 343 mm)
*3
,
8-1/2" x 13-2/5" (216 x 340 mm)
*3
, 8-1/2" x 13" (216 x 330 mm),
8-1/2" x 11"),
Monarch, COM9, COM10, DL, C4, C5, C6,
9" x 12" (A4W), 8K, 16K, 16KR, custom size
Bypass tray (on the
large capacity trays)
Plain Paper 1 to 2
*1
,
Recycled, Color, Letter
Head, Pre-Printed,
Pre-Punched, Thin Paper,
Heavy Paper 1 to 2
*2
, Tab
Paper, Transparencies, User
Type
Auto-Inch (12" x 18", 11" x 17", 9" x 12", 8-1/2" x 14",
8-1/2" x 13-1/2" (216 x 343 mm)
*3
, 8-1/2" x 13-2/5"
(216 x 340 mm)
*3
, 8-1/2" x 11", 8-1/2" x 11"R
*3
,
7-1/4" x 10-1/2"R, 5-1/2" x 8-1/2"R, A3, B4, A4),
Auto-AB (A3W, A3, B4, A4W, A4, A4R
*3
, B5, B5R, A5R,
11" x 17", 8-1/2" x 13-1/2" (216 x 343 mm)
*3
, 8-1/2" x 13-2/5" (216 x
340 mm)
*3
, 8-1/2" x 13" (216 x 330 mm)
*3
, 8-1/2" x 11"),
13" x 19", SRA3, SRA4, 8K, 16K, 16KR, custom size
Inserter (Upper tray) Plain Paper 1 to 2
*1
,
Recycled, Color, Letter
Head, Pre-Printed,
Pre-Punched, Heavy Paper
1 to 2
*2
, User Type
Auto-Inch (12" x 18", 9" x 12", 11" x 17", 8-1/2" x 14"
*3
,
8-1/2" x 13-1/2" (216 x 343 mm)
*3
, 8-1/2" x 13-2/5"
(216 x 340 mm)
*3
, 8-1/2" x 11", 8-1/2" x 11"R
*3
, 7-1/4" x 10-1/2"R,
5-1/2" x 8-1/2"R, A3, B4, A4W, A4),
Auto-AB (A3W, A3, B4, A4W, A4, A4R
*3
, B5, B5R, A5R,
11" x 17", 8-1/2" x 13-1/2" (216 x 343 mm)
*3
, 8-1/2" x 13-2/5"
(216 x 340 mm)
*3
, 8-1/2" x 13" (216 x 330 mm)
*3
, 8-1/2" x 11"),
13" x 19", SRA3, SRA4, 8K, 16K, 16KR, custom size
Inserter (Lower tray) Plain Paper 1 to 2
*1
,
Recycled, Color, Letter
Head, Pre-Printed,
Pre-Punched, Heavy Paper
1 to 2
*2
, User Type
Auto-Inch (12" x 18", 9" x 12", 11" x 17", 8-1/2" x 14"
*3
,
8-1/2" x 13-1/2" (216 x 343 mm)
*3
, 8-1/2" x 13-2/5"
(216 x 340 mm)
*3
, 8-1/2" x 11", 8-1/2" x 11"R
*3
, 7-1/4" x 10-1/2"R,
5-1/2" x 8-1/2"R, A3, B4, A4W, A4),
Auto-AB (A3W, A3, B4, A4W, A4, A4R
*3
, B5, B5R, A5R,
11" x 17", 8-1/2" x 13-1/2" (216 x 343 mm)
*3
, 8-1/2" x 13-2/5"
(216 x 340 mm)
*3
, 8-1/2" x 13" (216 x 330 mm)
*3
, 8-1/2" x 11"),
13" x 19", SRA3, SRA4, 8K, 16K, 16KR, custom size
Paper Tray Paper Type Size
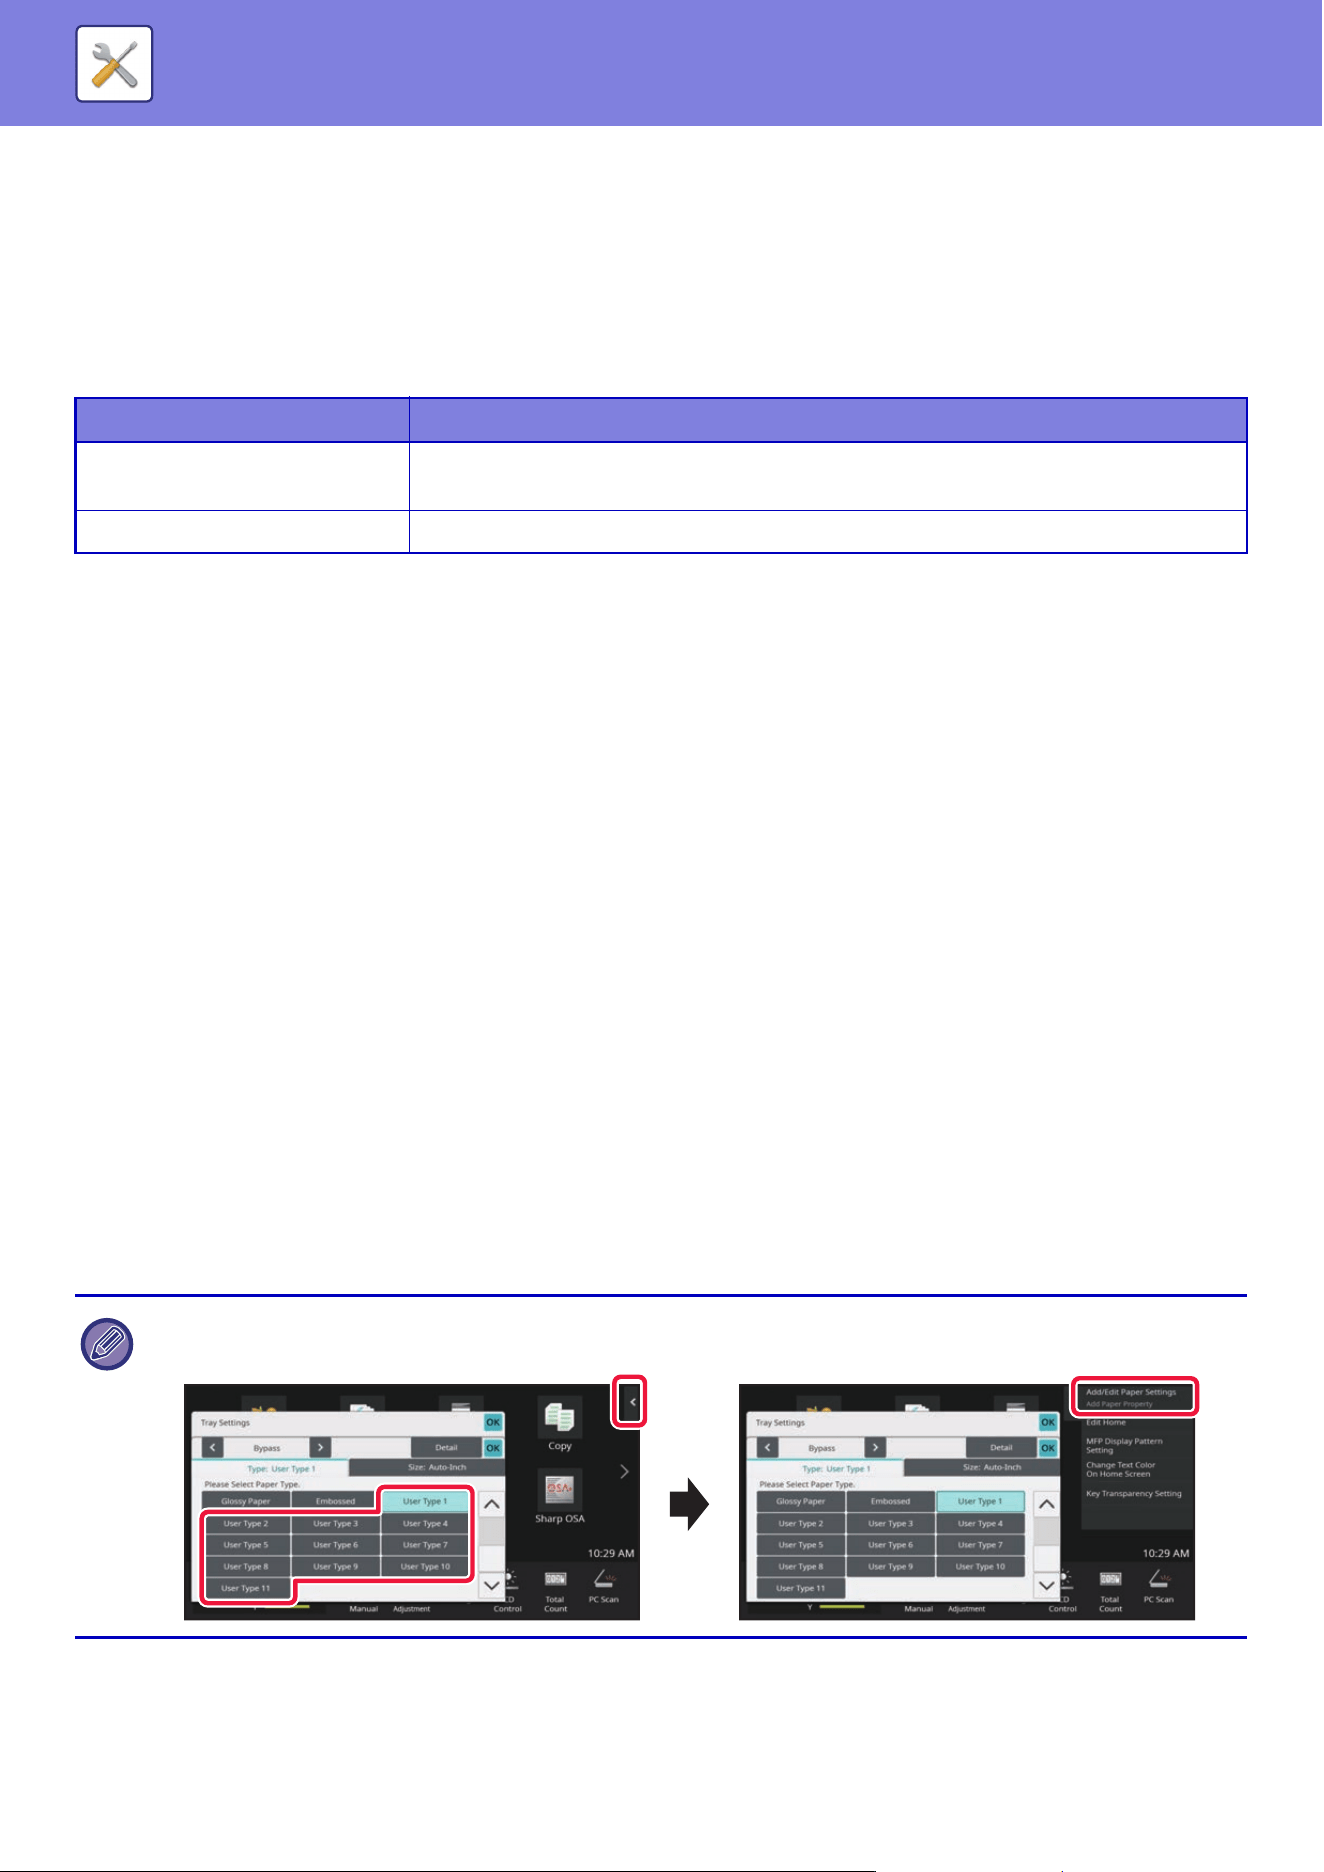
9-104
SETTING MODE►SYSTEM SETTINGS
Tray Registration
Select Paper Sizes for Auto Detection
"Select Paper Sizes for Auto Detection" in the bypass tray settings screen is used to select the paper size that is
automatically detected from similar sizes when the automatic paper size detection takes place.
When paper that is the same size as one of the paper sizes in the settings is placed in the bypass tray, the size that is
selected in the settings will be automatically detected.
Custom Size Registration (Bypass)
If you frequently use a non-standard size paper in the bypass tray, register that paper size in advance.
Registering the paper size saves you the trouble of setting the size each time you need to use it.
Up to Seven paper sizes can be registered.
Tap the key ([Custom 1] to [Custom 7]) in which you wish to register or change a paper size, and the registration screen
appears.
Select whether you wish to enter the size in mm ("Size Input-AB") or inches ("Size Input-Inch"), and then set the X and Y
dimensions of the paper.
"Size Input-AB"
The X direction can be set between 140mm and 457mm.
The Y direction can be set between 90mm and 320mm.
Factory default settings:X:420 mm, Y:297 mm
"Size Input-Inch"
The X direction can be set between 5-1/2" and 18".
The Y direction can be set between 3-5/8" and 12-1/2".
Factory default settings:X: 17" Y: 11"
Paper Settings
When [Add] is tapped in Paper Settings selection in the paper tray settings, the Paper Settings registration screen
appears. By selecting advanced settings in Paper Properties for the paper to be used, you can print using the most
suitable conditions for the printed mater.
A maximum of 1000 properties can be registered.
List name Description
Auto-AB A4R, A5, 216mm x 330mm (8-1/2” x 13"), 216mm x 340mm (8-1/2" x 13-2/5"), 216mm x
343mm (8-1/2" x 13-1/2")
Auto-Inch 8-1/2" x 14", 8-1/2" x 13-2/5" (216 mm x 340 mm), 8-1/2" x 13-1/2" (216 mm x 343 mm)
The Paper Settings can also be set from Tray Settings/Paper Settings in the Home screen. Select User Type for the paper
type selection, and tap "Add/Edit Paper Settings" in the action panel.
9-105
SETTING MODE►SYSTEM SETTINGS
Item Description
Name Enter a name for the Paper Settings (maximum of 50 half or full width characters).
Search Number Set a search number.
[Default Settings] tab
Paper Weight Setting Set the paper weight to be used.
Unit Set the units used for the Paper Weight.
Paper Type Set the paper type.
Select the paper type based on the surface finish of the paper or select the envelope.
The following types can be selected.
• Uncoated Paper
• Coated Paper (Gloss)
• Coated Paper (Matte)
• Embossed
• Envelope
Paper Information Set when Color paper, Tab Paper, or Pre-Punched paper is used.
Paper Property Set the properties of the paper to be used.
For the properties, refer to the settings in "Paper Type Registration".
[Detail] tab
Fusing Temperature Settings Set the appropriate fusing unit temperature for the paper to be used.
Fuser Pressure Setting Adjust the pressure on the paper.
Some types of paper such as thick paper may not bend easily, and this may cause
transfer deviations.
You can use this setting to adjust the pressure on the paper and reduce transfer
deviations.
Double Feed Detection Setting Specify whether double feeds are detected. This function cannot be used when paper
heavier than 68 lbs. (256 g/m
2
) is used.
Primary Transfer Setting Set the current of the primary transfer unit that is used to transfer toner to the transfer belt.
By adjusting the current of the primary transfer unit, transfer problems such as insufficient
transfer to the transfer belt can be improved.
Select settings for both black & white and 4 color (black, cyan, magenta, yellow).
Secondary Transfer Setting Set the current of the secondary transfer unit that is used to transfer toner from the
transfer belt to the paper. By adjusting the current of the secondary transfer unit, transfer
problems such as insufficient transfer to the paper can be improved.
When Uncoated Paper is selected for [Paper Type]
Set for the Side 1 and Side 2 for both black & white and color.
When other than Uncoated Paper is selected for [Paper Type]
Select settings for both black & white and color.
PTC Current Value Setting Set the PTC discharge current. The PTC discharge current can be adjusted to obtain
transferability suitable for the paper being used.
When Embossed is selected for the [Paper Type]
Set for both black & white and color.
When other than Embossed is selected for [Paper Type]
Set for black & white and color at the same time.
Transfer Condition Adjustment
Setting
Set enable/disable of transfer environment correction of Primary Transfer Current Value,
Secondary Transfer Current Value and PTC Current Value.
Motor Speed Setting You can adjust the motor speed and the speed change timing.
Color Reg. Adjustment This performs color registration adjustment.
9-106
SETTING MODE►SYSTEM SETTINGS
Paper Reg. Adjustment You need to bend the paper to print at the correct position on the paper.
This function adjusts the proper amount of deflection.
Maximum Density Setting This performs the adjustment of maximum density for each of Y/M/C/K.
Side 1/2, XY Ratio/Print Position
Auto Adjust
By reading a chart (output paper) for adjustment, the XY ratio and XY print position on the
Side 1/2 of the paper are automatically adjusted.
Side 1/2, XY Ratio Settings Configure settings to equalize the size of the image in duplex printing. This adjusts the
size of the image on the Side 1 and Side 2 sides of the paper.
Side 1/2, XY Print Position Configure settings to make the Side 1 and Side 2 centers match in duplex printing. This
corrects Side 1 and Side 2 misalignment.
Print Void Settings Adjust void areas at the top, bottom, and front/rear direction (leading and trailing ends) of
the paper.
• Depending on the tray being used, there may be restrictions on the setting options that can be selected, or a setting may
not be possible.
• The parameters that can be set vary depending on the peripheral devices that are installed.
• The Side 1/2, XY Ratio Settings can only be selected when the machine is used as a printer.
• The characteristics of some paper types may not provide a suitable printing result.
• When "Envelope" is selected for the paper type, the below settings are fixed and cannot be changed.
• Paper Weight Setting
• Paper Information
• Paper Property
• Fuser Pressure Setting
• Double Feed Detection Setting
• Motor Speed Setting
• Side 1/2, XY Ratio Settings
• Side 1/2, XY Print Position
Item Description
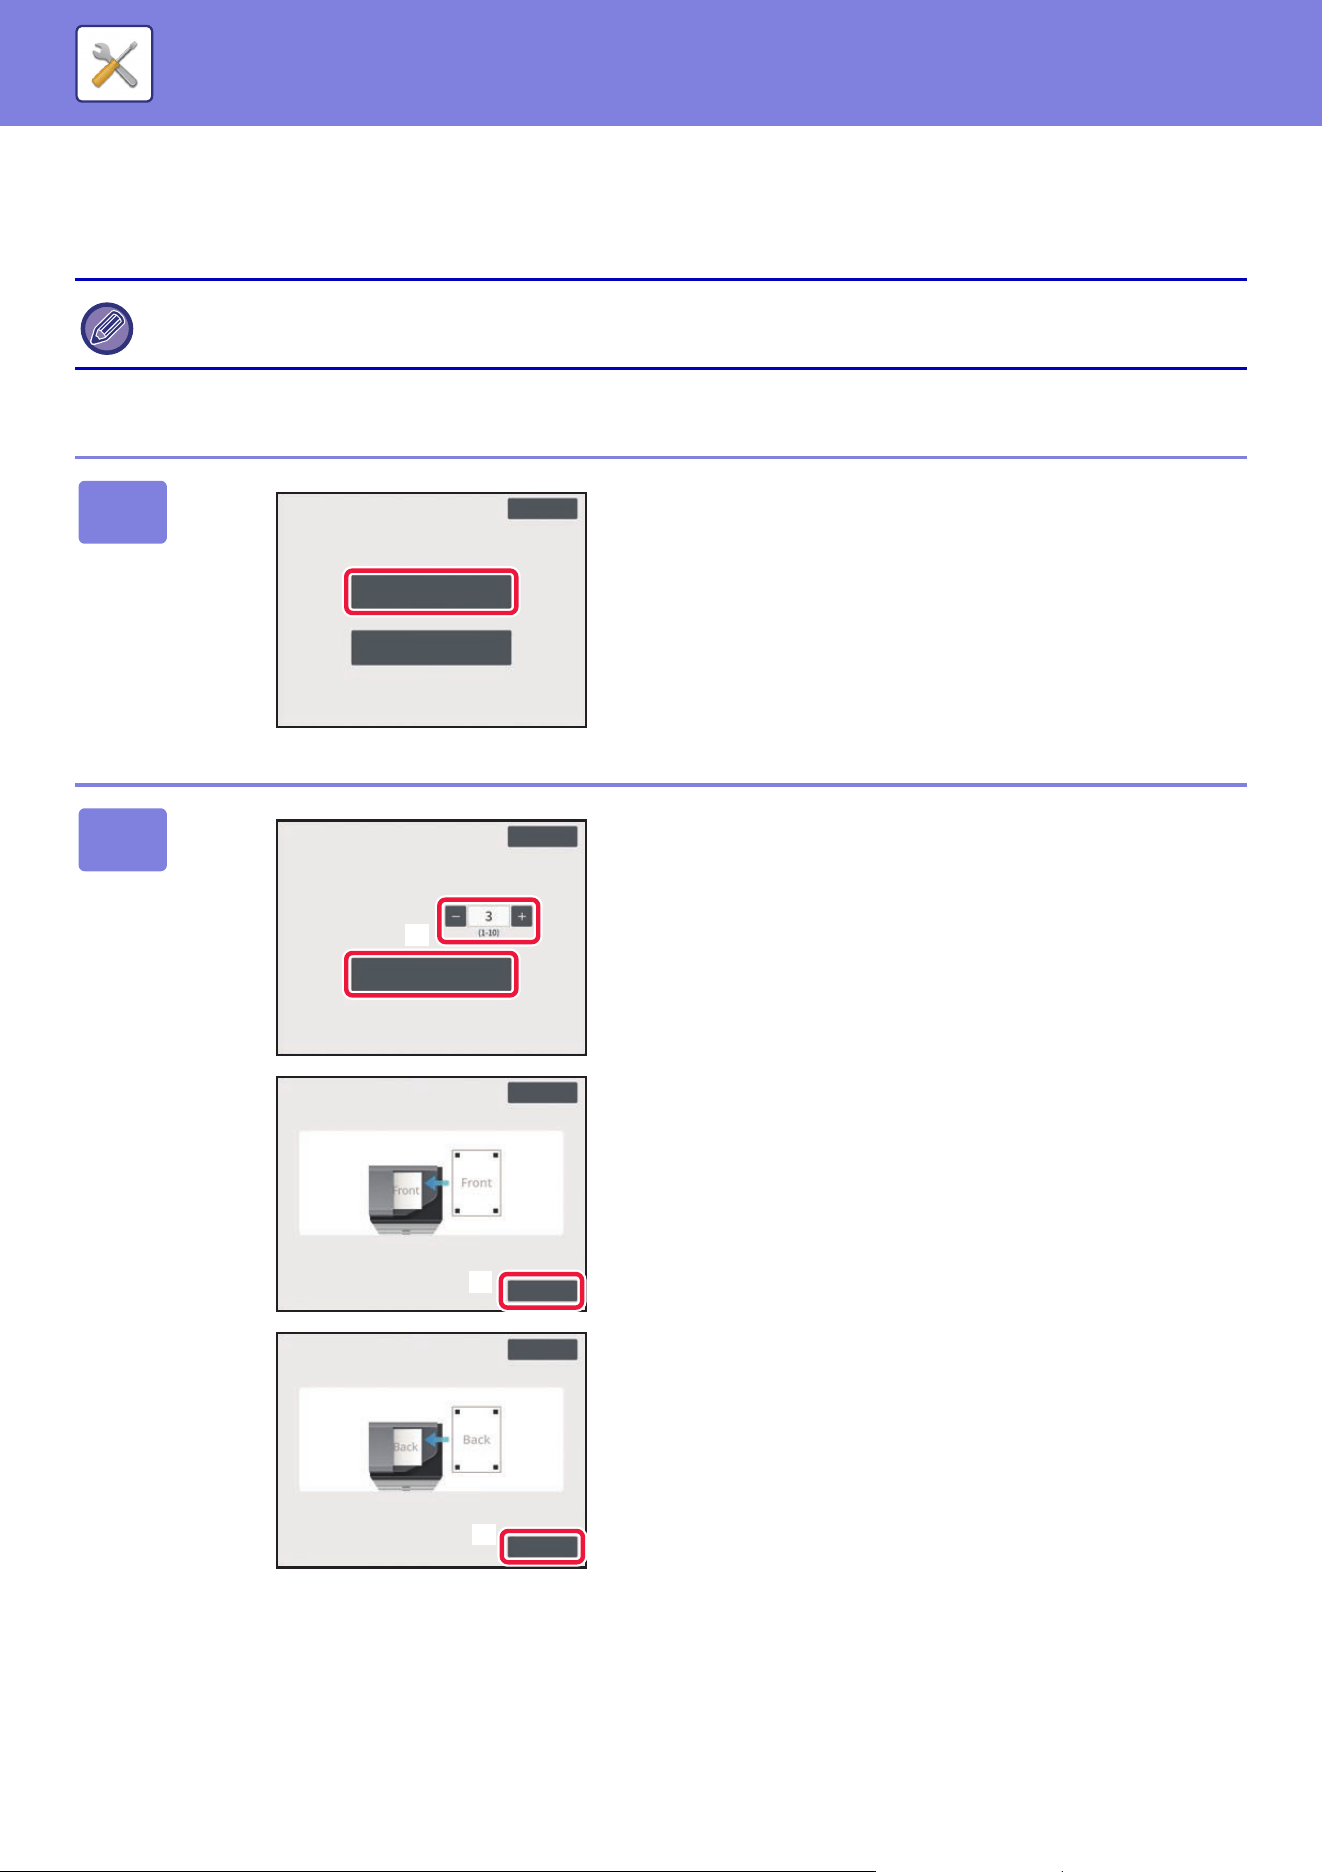
9-107
SETTING MODE►SYSTEM SETTINGS
Side 1/2, XY Ratio/Print Position Auto Adjust
By reading a chart (output paper) for adjustment, the XY ratio and XY print position on the Side 1/2 of the paper are
automatically adjusted.
For automatic document feeder
When using this function, register the Paper Settings in advance.
1
Tap [Document Feeder].
2
Print and read the chart.
(1) Select the number of charts and tap [Print
Chart].
(2) Place the chart side 1 into the automatic
document feeder and tap [Read].
(3) Place the chart side 2 into the automatic
document feeder and tap [Read].
Back
Document Feeder
Document Glass
Side 1/2, XY Ratio/Print Position Auto Adjust
Select which to load the chart for the automatic adjustment.
Back
Print Chart
Side 1/2, XY Ratio/Print Position Auto Adjust
Please set the number of charts to print and press [Print Chart].
Number of charts to print
(1)
Back
Read
Side 1/2, XY Ratio/Print Position Auto Adjust
Load the chart in the document feeder and press [Read].
Set side 1 of the chart face up
(2)
Back
Read
Side 1/2, XY Ratio/Print Position Auto Adjust
Load the chart in the document feeder and press [Read].
Set side 2 of the chart face up
(3)

9-108
SETTING MODE►SYSTEM SETTINGS
3
When the adjustment result is
displayed, tap [Register].
Tap [Cancel] to return to the Detail Settings screen without registering the settings.
RegisterCancel
Side 1/2, XY Ratio/Print Position Auto Adjust
Results of auto adjustment are as follows.
Please press [Register] to register the results.
Ratio
Side 1
Side 2
X:100.00%
X:100.00%
Y:100.00%
Y:100.00%
Print Position
Side 1
Side 2
X:0.0mm
X:0.0mm
Y:0.0mm
Y:0.0mm

9-109
SETTING MODE►SYSTEM SETTINGS
For document glass
1
Tap [Document Glass].
2
Tap [Print Auto-adjustment Cover
Sheet], print the cover sheet, then
select the number of charts, and tap
[Print Chart].
When the cover sheet remains from a previous automatic adjustment of the document glass, it is not necessary to print
the cover sheet.
Back
Document Feeder
Document Glass
Side 1/2, XY Ratio/Print Position Auto Adjust
Select which to load the chart for the automatic adjustment.
Back
Print Chart
Print Auto-adjustment
Cover Sheet
Side 1/2, XY Ratio/Print Position Auto Adjust
Please print an autoadjustment cover sheet.
Printing is not required if you already have the auto-adjustment
cover sheet of the same size as the chart.
Please set the number of charts to print and press [Print Chart].
Number of charts to print
1
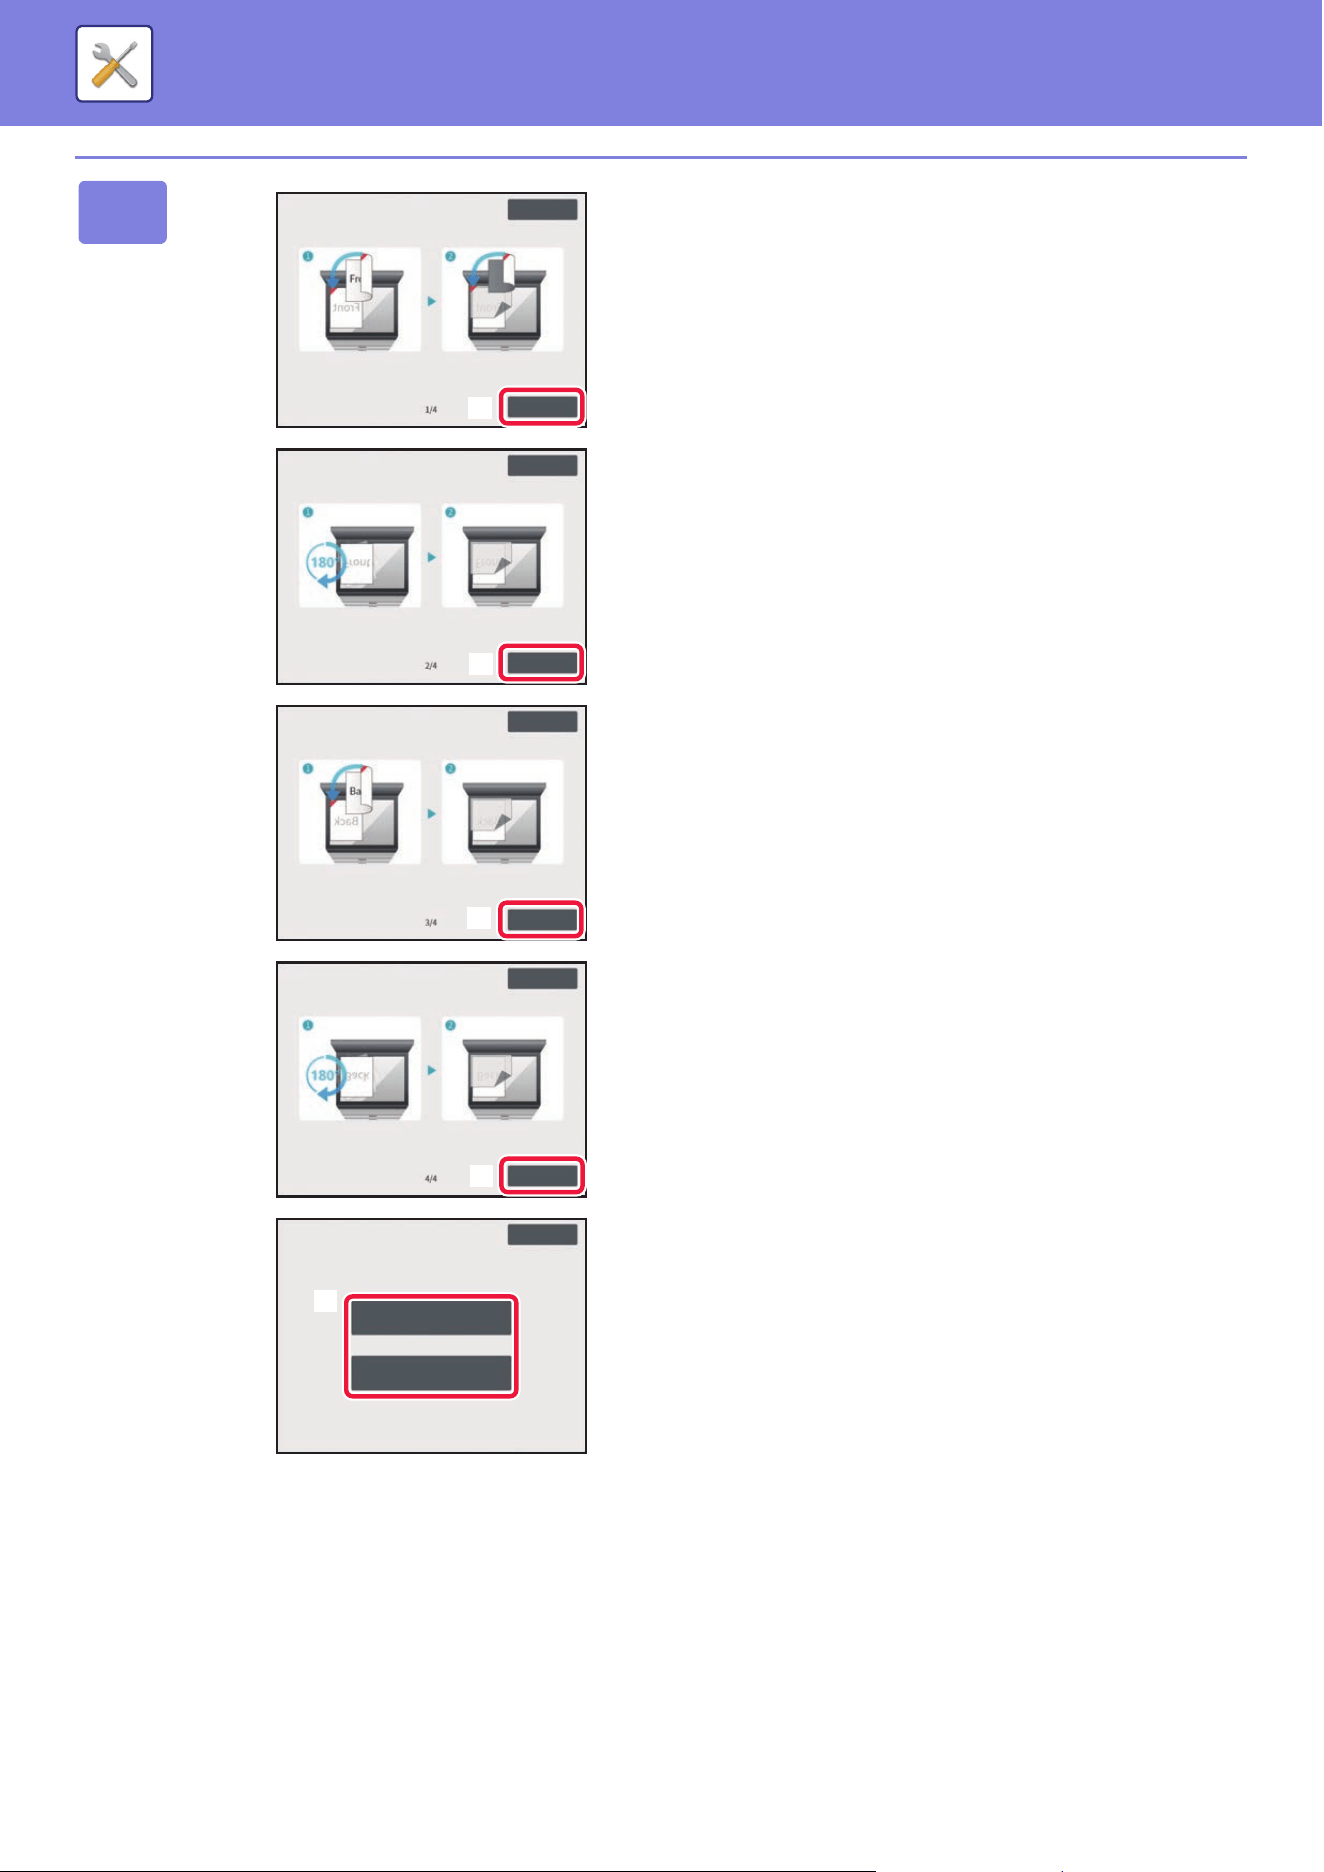
9-110
SETTING MODE►SYSTEM SETTINGS
3
Print and read the chart.
(1) Place the chart side 1 on the document
glass, place the printed side of the cover
sheet on the document glass, overlap the
cover sheet so that the left and top edges
of the chart are covered, and tap [Read].
(2) Rotate the chart side 1 180 degrees, place
it on the document glass, place the
printed side of the cover sheet on the
document glass, overlap the cover sheet
so that the left and top edges of the chart
are covered, and tap [Read].
(3) Place the chart side 2 on the document
glass, place the printed side of the cover
sheet on the document glass, overlap the
cover sheet so that the left and top edges
of the chart are covered, and tap [Read].
(4) Rotate the chart side 2 180 degrees, place
it on the document glass, place the
printed side of the cover sheet on the
document glass, overlap the cover sheet
so that the left and top edges of the chart
are covered, and tap [Read].
(5) To load the next chart, tap [Read Next
Chart], and to exit, tap [Read-End].
Back
Read
Side 1/2, XY Ratio/Print Position Auto Adjust
Set chart and autoadjustment cover sheet on the document glass
and press [Read].
Set side 1 of the chart
facedown and align it with
upper left corner of
document glass.
Cover the chart with the print
side of the autoadjustment
cover sheet face-down to
hide its left and top edges.
(1)
Back
Read
Side 1/2, XY Ratio/Print Position Auto Adjust
Reset the chart and autoadjustment cover sheet on the glass again
and press [Read].
Rotate the chart 180 degrees
and align it with upper left
corner of the document
glass.
Cover the chart with the print
side of the autoadjustment
cover sheet face-down to
hide its left and top edges.
(2)
Back
Read
Side 1/2, XY Ratio/Print Position Auto Adjust
Set chart and autoadjustment cover sheet on the document glass
and press [Read].
Set side 2 of the chart
facedown and align it with
upper left corner of
document glass.
Cover the chart with the print
side of the autoadjustment
cover sheet face-down to
hide its left and top edges.
(3)
Back
Read
Side 1/2, XY Ratio/Print Position Auto Adjust
Reset the chart and autoadjustment cover sheet on the glass again
and press [Read].
Rotate the chart 180 degrees
and align it with upper left
corner of the document
glass.
Cover the chart with the print
side of the autoadjustment
cover sheet face-down to
hide its left and top edges.
(4)
Cancel
Read Next Chart
Read-End
Side 1/2, XY Ratio/Print Position Auto Adjust
End reading chart or continue?
(5)

9-111
SETTING MODE►SYSTEM SETTINGS
4
When the adjustment result is
displayed, tap [Register].
Tap [Cancel] to return to the Detail Settings screen without registering the settings.
RegisterCancel
Side 1/2, XY Ratio/Print Position Auto Adjust
Results of auto adjustment are as follows.
Please press [Register] to register the results.
Ratio
Side 1
Side 2
X:100.00%
X:100.00%
Y:100.00%
Y:100.00%
Print Position
Side 1
Side 2
X:0.0mm
X:0.0mm
Y:0.0mm
Y:0.0mm
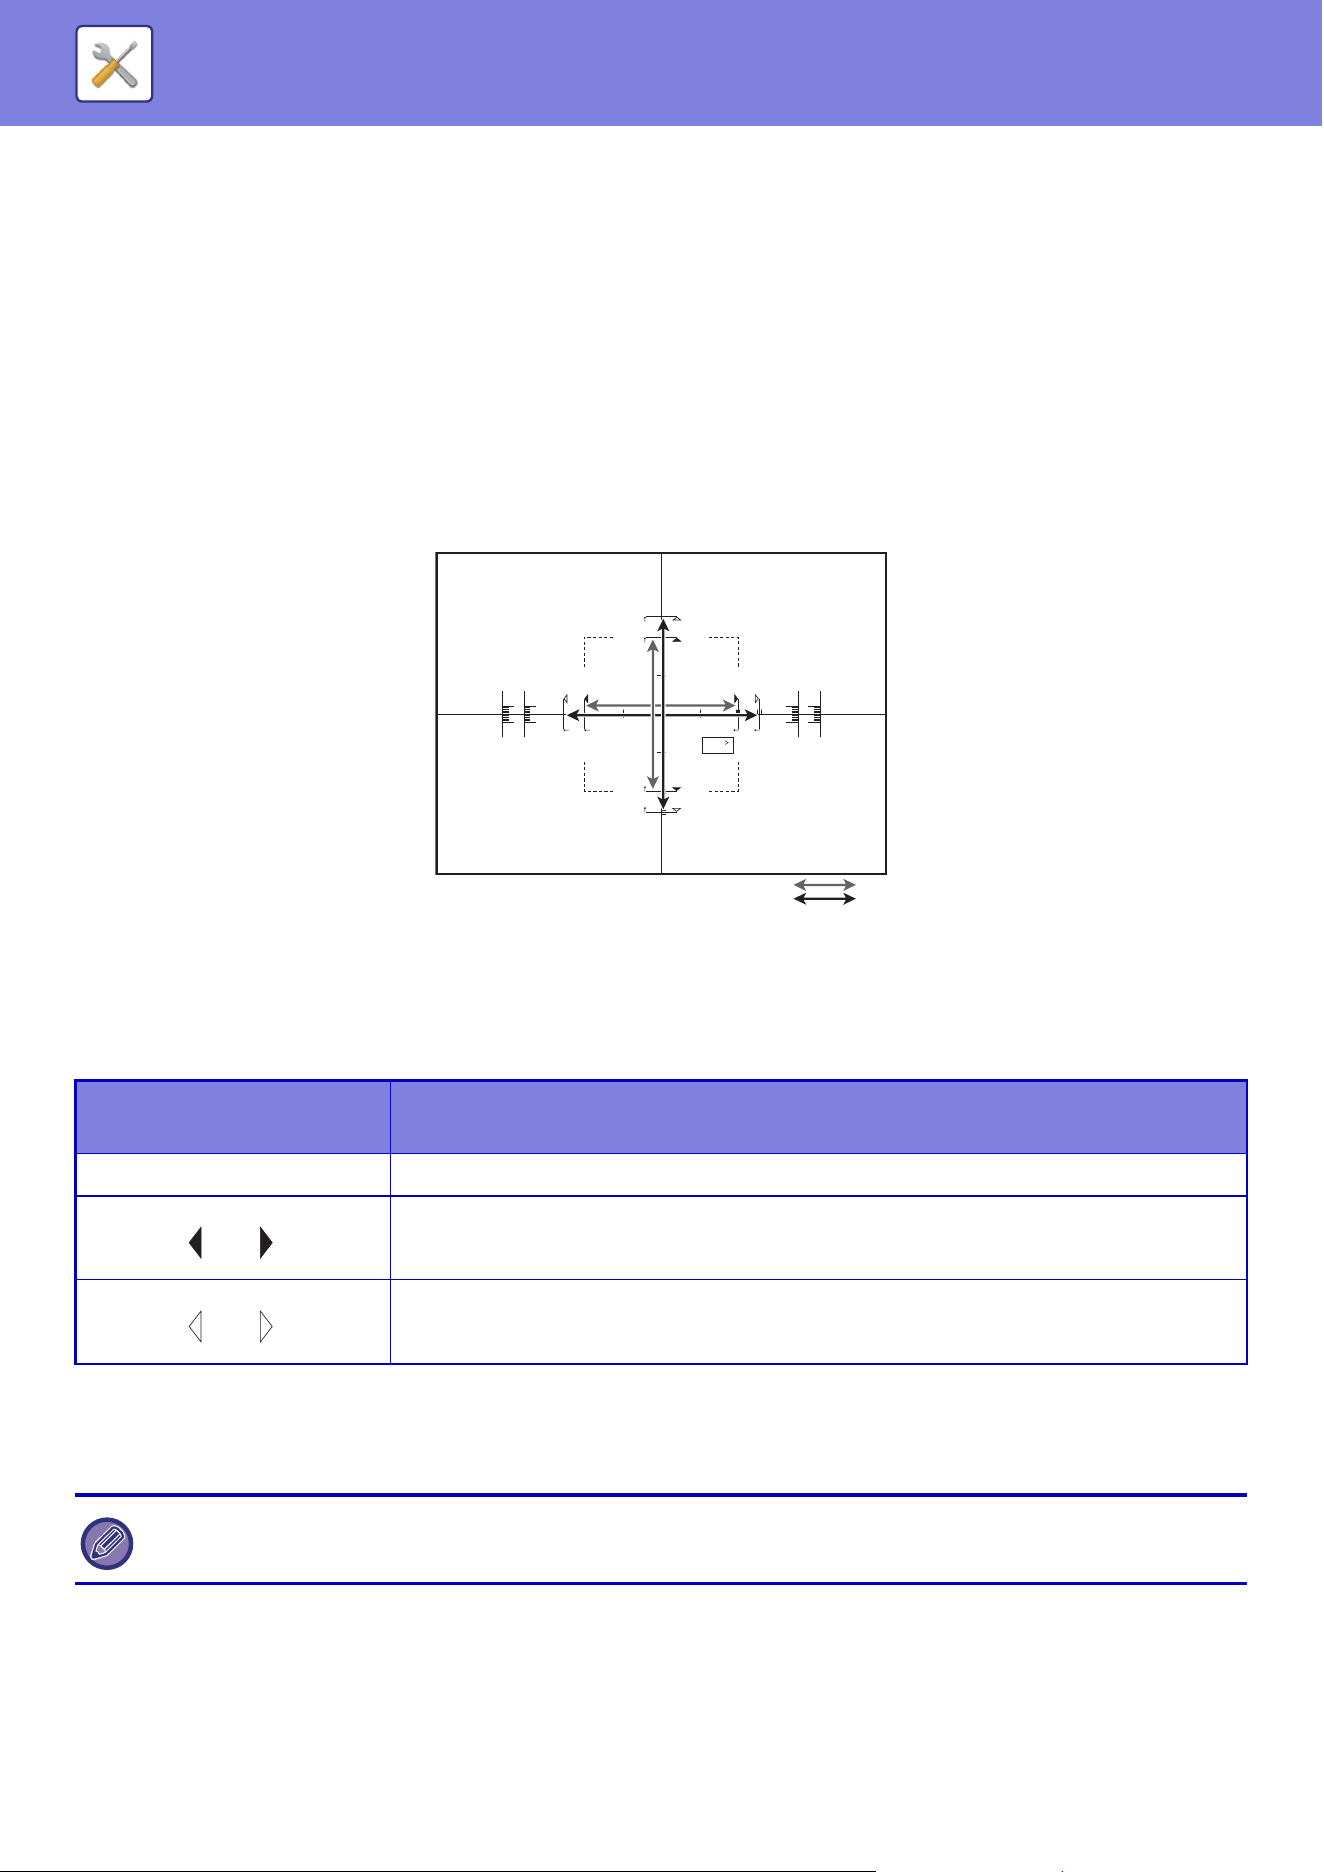
9-112
SETTING MODE►SYSTEM SETTINGS
Side 1/2, XY Ratio Settings / Side 1/2, XY Print Position
Side 1/2, XY Ratio Settings
The Side 1/2, XY Ratio Settings are used to eliminate print deviation by changing the Side 1/Side 2 ratio so that the print
sizes match.
Tap [Change] in the Side 1/2, XY Ratio Settings to display the advanced settings screen of the Side 1/2, XY Ratio
Settings.
(1) Print a test pattern
Before starting, print a test pattern from [Test Print] in Side 1/2, XY Ratio Settings. One page of patterns for settings are printed
by duplex printing.
For the measurement patterns, refer to “Measurement patterns for Side 1/2, XY Ratio Settings / Side 1/2, XY Print Position”.
(2) Calculate the values from the pattern and enter the values.
[AB sizes]
Measure the length of (a-1) in mm. Divide 10000 by the measured length of (a-1), and enter that value in [Y] for the Side 1.
Measure the length of (b-1) in mm. Divide 10000 by the measured length of (b-1), and enter that value in [X] for the Side 1.
[Inch sizes]
Measure the length of (a-2) in inches. Divide 500 by the measured length of (a-2), and enter that value in [Y] for the Side 1.
Measure the length of (b-2) in inches. Divide 500 by the measured length of (b-2), and enter that value in [X] for the Side 1.
(3) Tap [OK].
(4) Return to step 1 and check the result of adjustment.
If the size has deviated as a result of adjustment, repeat adjustment until the deviation is eliminated.
Measurement Line
(Measurement Marker)
Length specified by measurement line interval
Assistant Line 50 mm (1.969 inch)
100 mm
5 inch
• If the print position has shifted due to these settings, configure the Side 1/2, XY Print Position Settings.
• The Side 1/2, XY Ratio Settings can only be used when the machine is used as a printer.
Y +6 -6 mm
Y +6 -6 mm
Y +6 -6 mm
Y +6 -6 mm
X1 X1 X2 X2
Front
(Side1)
Y2
+1 -1
Y2 Y1 Y1
/10 mm : %(X) /5’’ : %(X)
-1+1
/5’’ :
100%
/100mm :
100%
AB
(a-1)
(b-1)
(a-2)
(b-2)
Inch
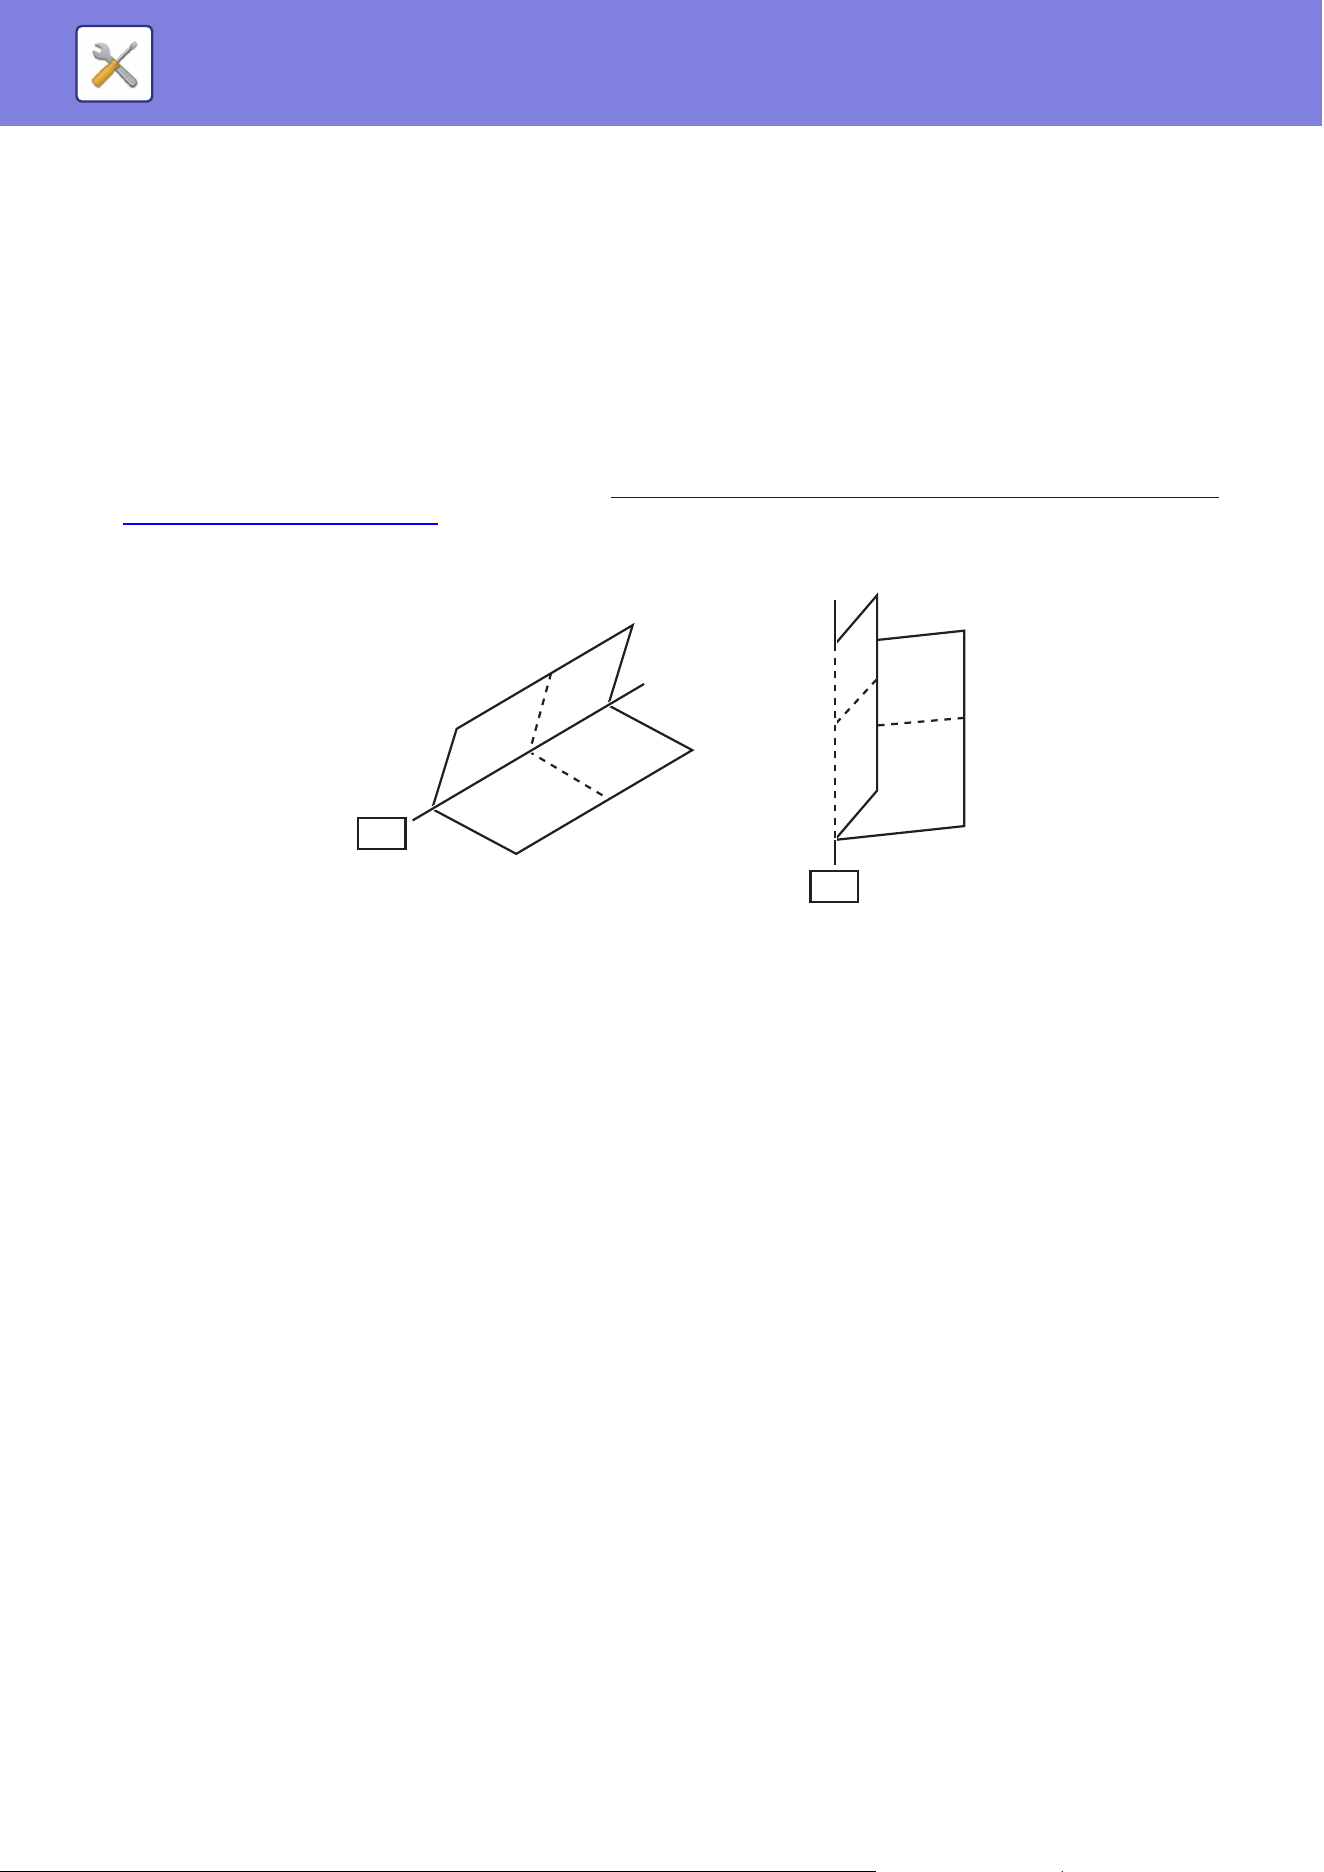
9-113
SETTING MODE►SYSTEM SETTINGS
Side 1/2, XY Print Position Settings
The Side 1/2, XY Print Position Settings are used to make the centers of the Side 1 and Side 2 print positions match to
remove printing misalignment.
Tap the [Change] button in Side 1/2, XY Print Position Settings to display the advanced settings screen of Side 1/2, XY
Print Position Settings.
(1) Select the units used in the Side 1/2, XY Print Position Settings
Tap [mm] to select the units used for the settings.
(2) Print a test pattern
Before starting, print a test pattern from [Test Print] in Side 1/2, XY Print Position. One page of patterns for settings are printed
by duplex printing.
For information on the measurement patterns, refer to "Measurement patterns for Side 1/2, XY Ratio Settings / Side 1/2, XY
Print Position Settings (page 9-115)".
(3) Read the scale from the patterns and enter the values.
Fold the sheet in half with the center in the horizontal and vertical direction as folding lines respectively and put creases at both
ends, then unfold to return.
Measure the crease position of X and Y by scale for Side1 and Side2 respectively and input the values.
If the values of both ends are different, the average value should be input.
Y
X
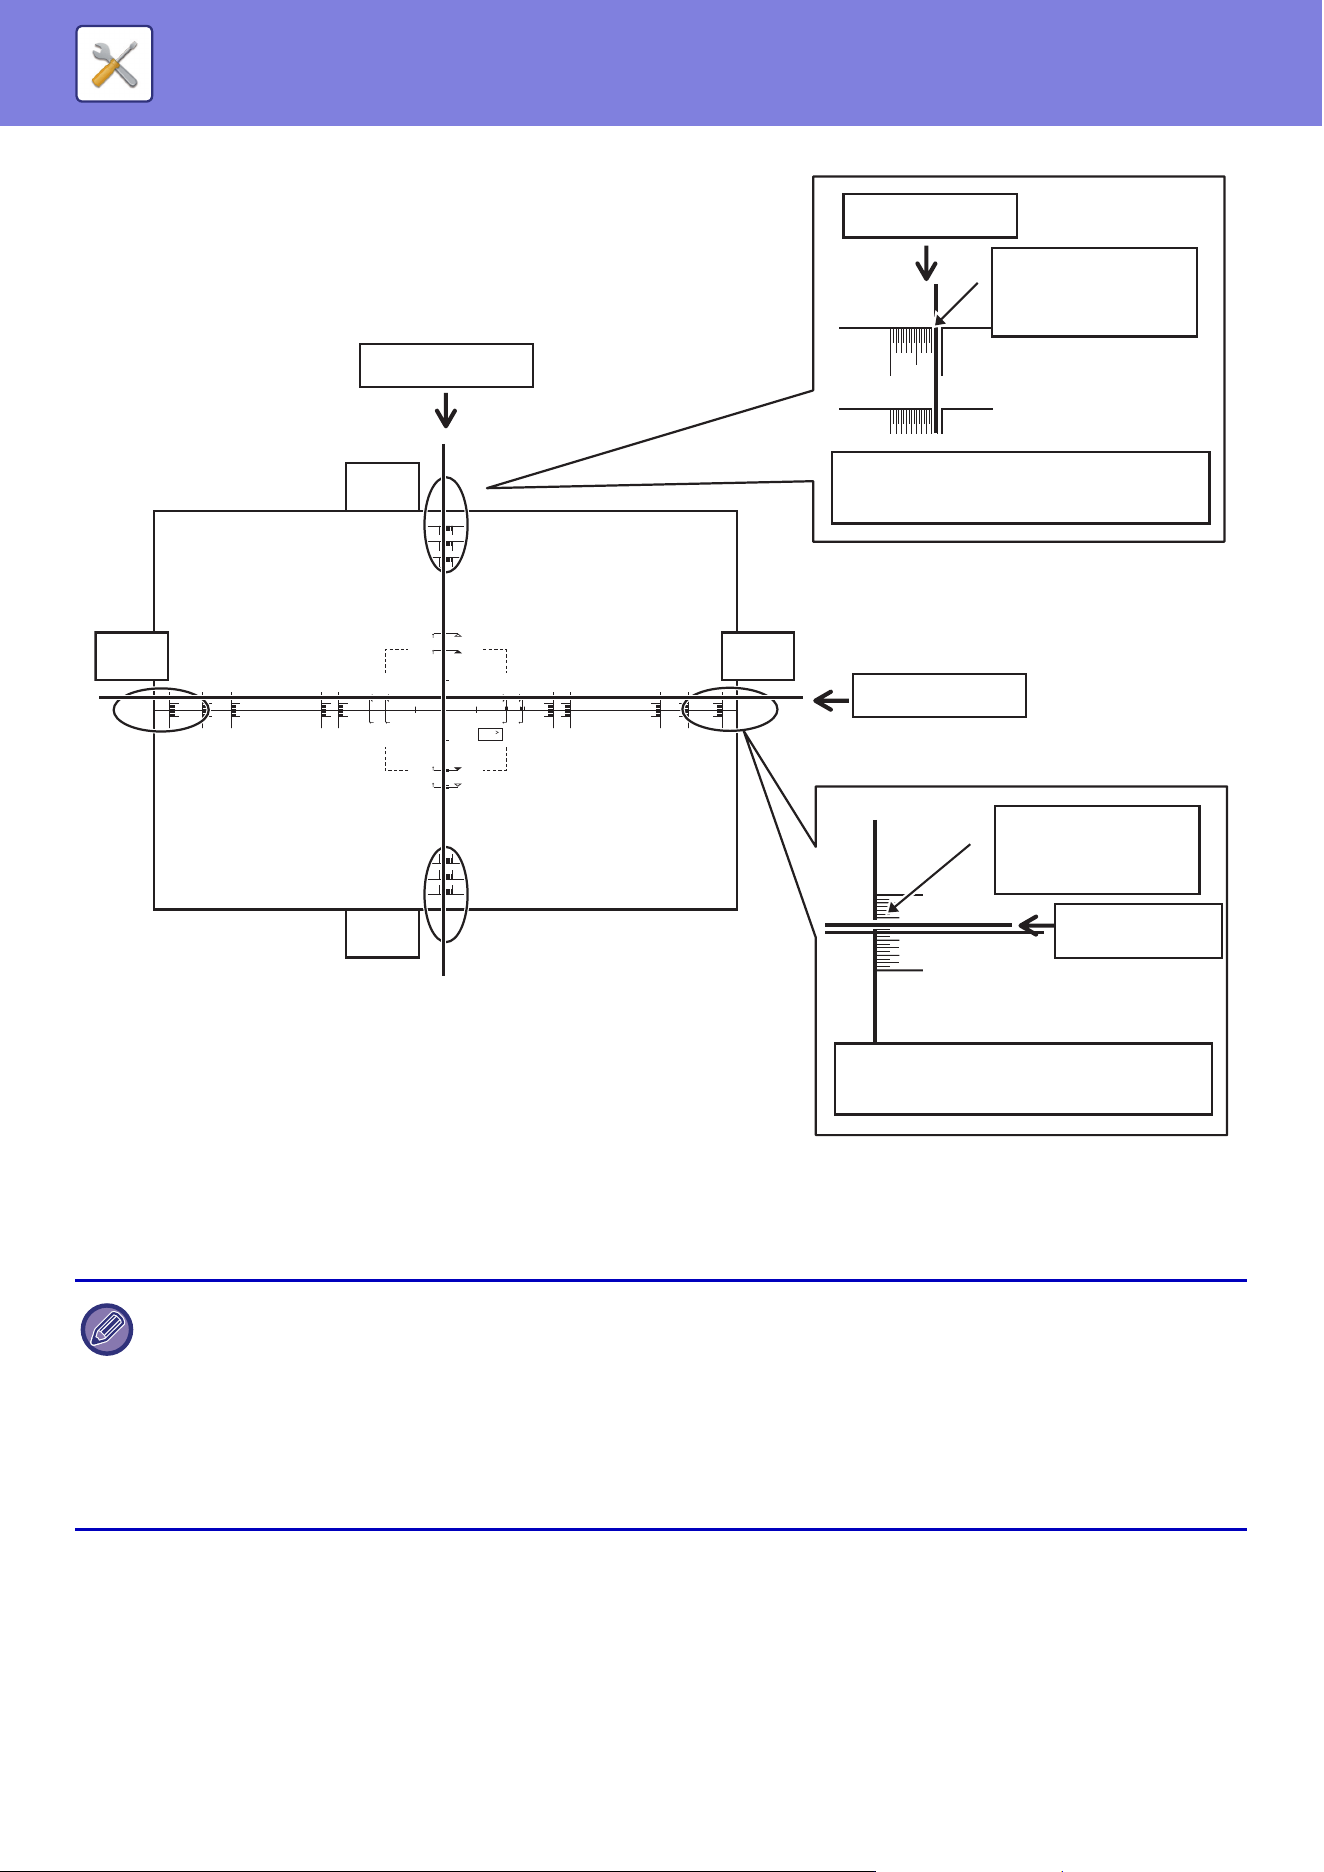
9-114
SETTING MODE►SYSTEM SETTINGS
(4) Tap [OK].
(5) Return to step 2 and check the result of adjustment.
If the size has deviated as a result of adjustment, repeat adjustment until the deviation is eliminated.
• The measurement line content of the measurement pattern varies dep
ending on the paper size. Measure from the
measurement line closest to the edge of the paper.
• It may not be possible to guarantee the operation adjustment range in the Y direction of (± 3 mm) depending on the
machine settings or paper size.
• When the vertical or horizontal width is 100 mm or less, measure from the assistant line.
• If you need to use this setting together with the Side 1/2, XY Ratio Settings, specify the Side 1/2, XY Ratio Settings first.
• Changes in the environment of the machine, such as humidity and temperature, may cause a deviation of about 1 mm in
the Side 1/2, XY Print Position.
X +5 -5 mm
X +5 -5 mm
X +5 -5 mm
X +5 -5 mm
X +5 -5 mm
X +5 -5 mm
Y +6 -6 mm
Y +6 -6 mm
Y +6 -6 mm
Y +6 -6 mm
Y +6 -6 mm
Y +6 -6 mm
Y +6 -6 mm
Y +6 -6 mm
Y +6 -6 mm
Y +6 -6 mm
X1 X1 X2 X2
Front
(Side1)
Y2
+1 -1
Y2 Y1 Y1
/10 mm : %(X) /5’’ : %(X)
-1+1
/5’’ :
100%
/100mm :
100%
X +5 -5 mm
X +5 -5 mm
Y +5 -5 mm
Folding Line
YY
X
X
Folding Line
Read the scale
(Ex.)X=-2
Read the scale
(Ex.)Y=+1m
Fold line is at+side: Input plus value
Fold line is at-side: Input minus value
Fold line is at+side: Input plus value
Fold line is at-side: Input minus value
Folding Line
Folding Line
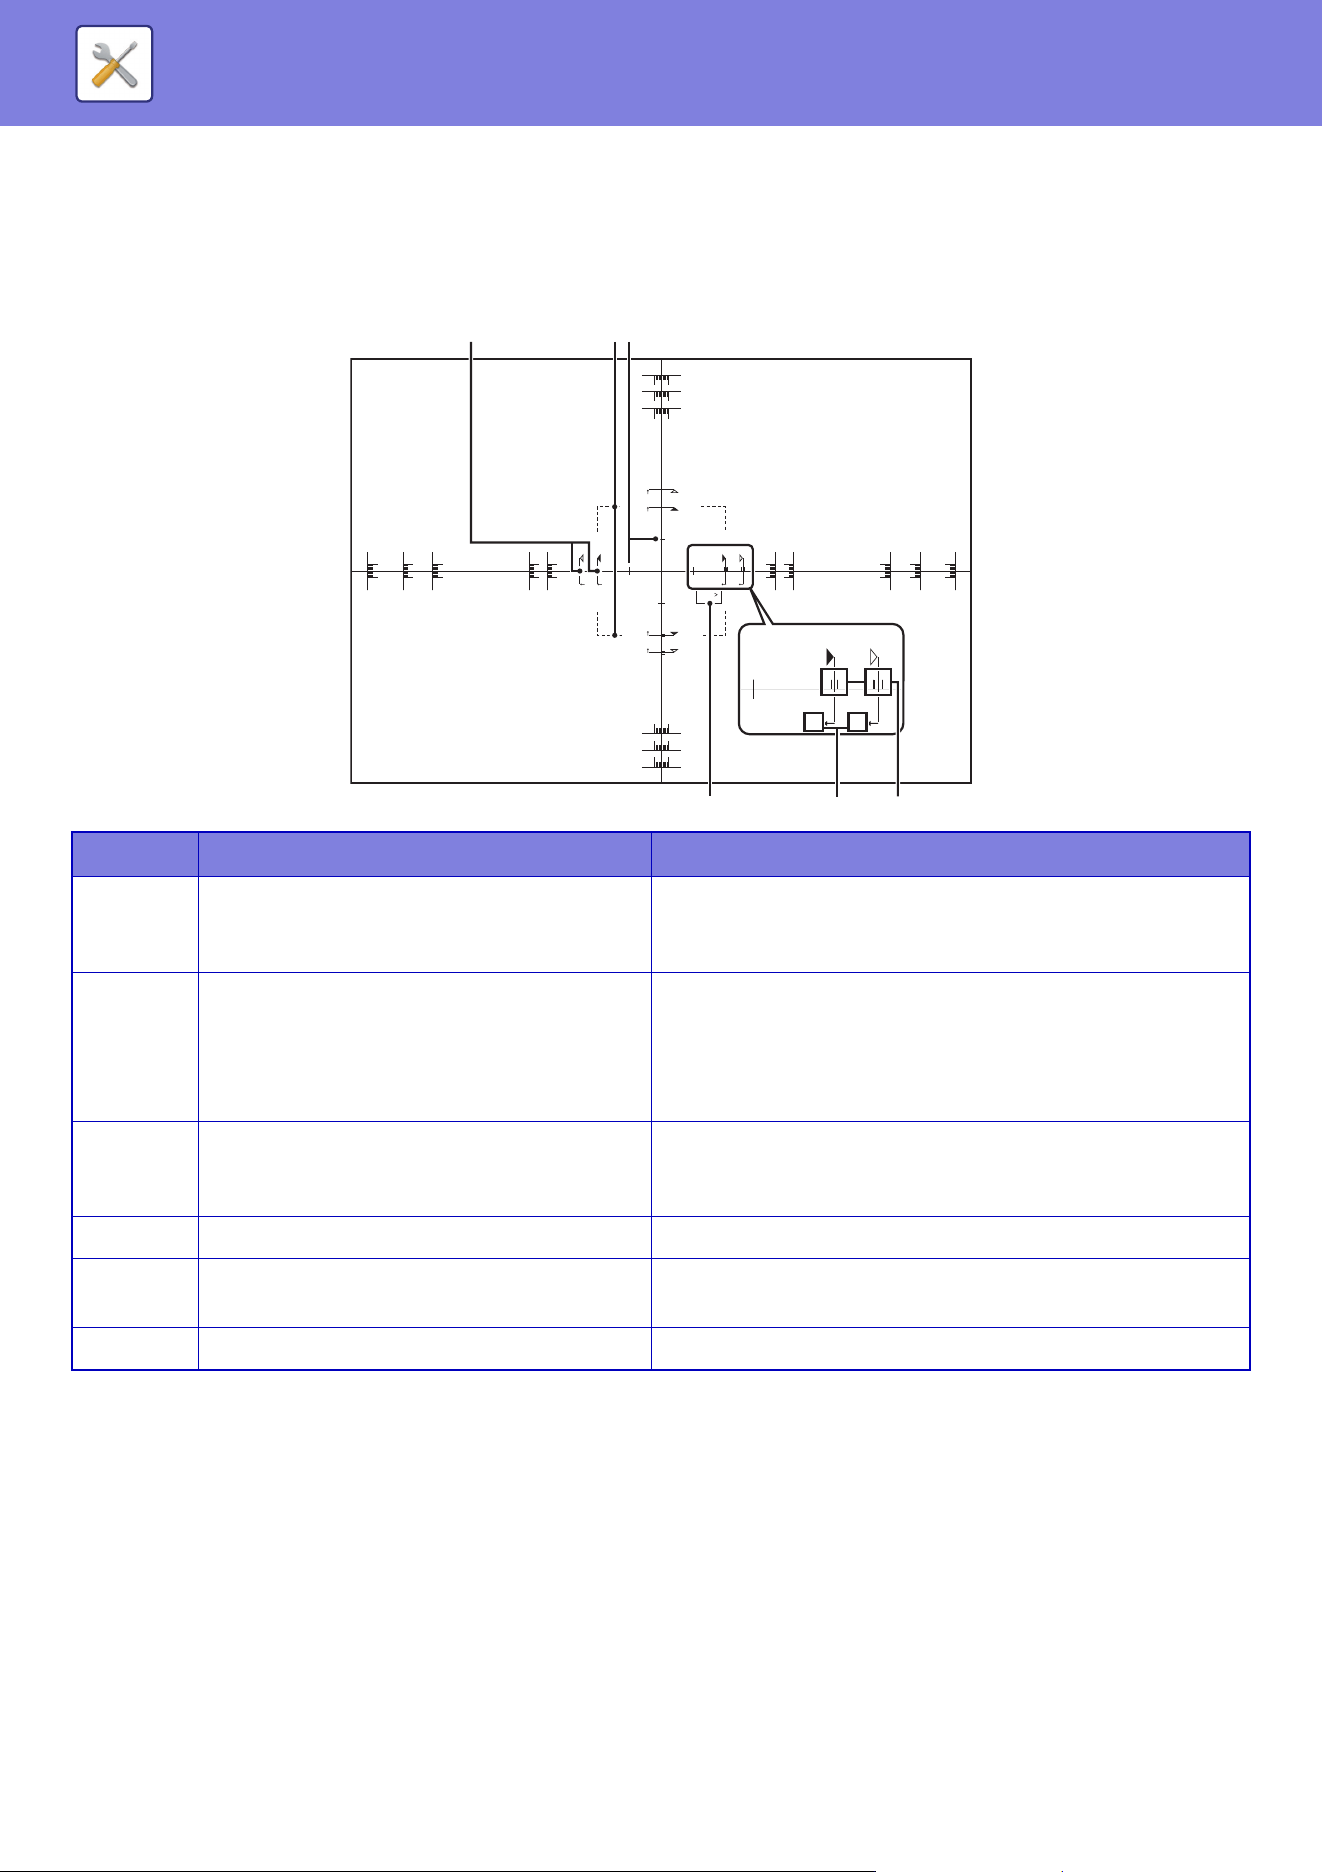
9-115
SETTING MODE►SYSTEM SETTINGS
Measurement patterns for Side 1/2, XY Ratio Settings / Side 1/2, XY Print
Position Settings
To specify Side 1/2, XY Print Position Settings and Side 1/2, XY Ratio Settings, print a pattern for measurement.
Content of the measurement pattern
The same measurement pattern content is printed at the same size, regardless of the paper size. The outer perimeter of
the measurement pattern is trimmed to match the paper size.
No. Item Description
1 Measurement Line Reference line for measurement.
Measurement lines for AB sizes and inch sizes have been
created.
2 Dot Line This line is visible through the Side 1 and Side 2 to let you
visually check for misalignment. The line is printed at the same
position on the Side 1 and Side 2. If visual inspection reveals
that the lines are not aligned, the print positions on the Side 1
and Side 2 are not aligned.
3 Assistant Line Assistant line located 25 mm from the center of the paper.
When the paper size is 100 mm or less, use this line for
measurement.
4 Notes (Side 1/Side 2) These indicate the Side 1 and Side 2.
5 Notes (X/Y axis) When entering the settings, these indicate the X and Y axes of
the paper.
6 Assistant Line (Magnification) Indicates a position that is ±1% of the measured distance.
X +5 -5 mm
X +5 -5 mm
X +5 -5 mm
X +5 -5 mm
X +5 -5 mm
X +5 -5 mm
Y +6 -6 mm
Y +6 -6 mm
Y +6 -6 mm
Y +6 -6 mm
Y +6 -6 mm
Y +6 -6 mm
Y +6 -6 mm
Y +6 -6 mm
Y +6 -6 mm
Y +6 -6 mm
X1 X1 X2 X2
Front
(Side1)
Y2
+1 -1
Y2 Y1 Y1
/10 mm : %(X) /5’’ : %(X)
/10 mm : %(X) /5’’ : %(X)
-1+1
/5’’ :
100%
/100mm :
100%
X2 X2
-1+1
(1) (2)(3)
(4)
(5) (6)
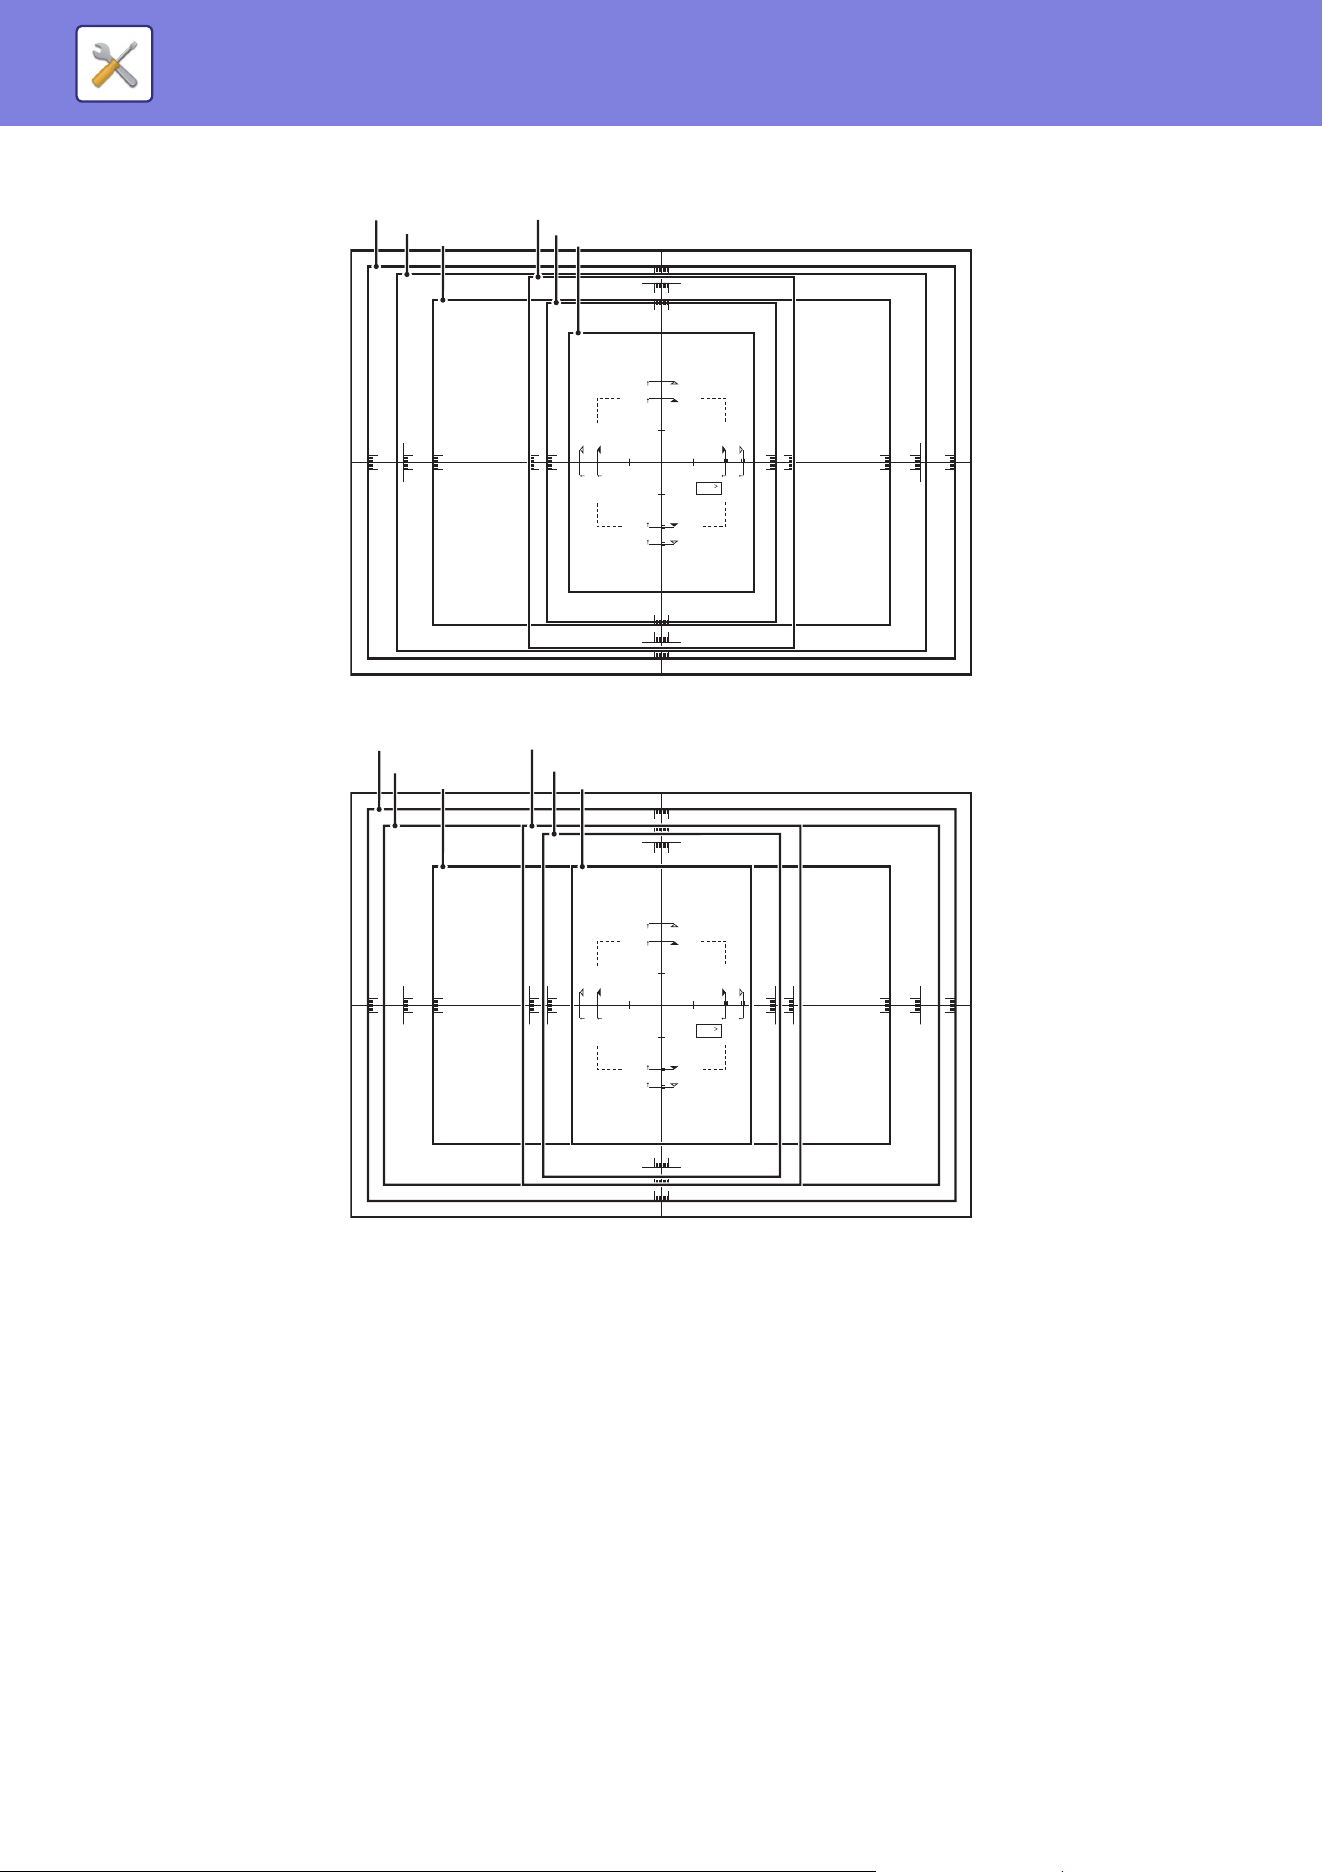
9-116
SETTING MODE►SYSTEM SETTINGS
Example: Content trimmed for an AB size
Example: Content trimmed for an inch size
X +5 -5 mm
X +5 -5 mm
X +5 -5 mm
X +5 -5 mm
X +5 -5 mm
X +5 -5 mm
Y +6 -6 mm
Y +6 -6 mm
Y +6 -6 mm
Y +6 -6 mm
Y +6 -6 mm
Y +6 -6 mm
Y +6 -6 mm
Y +6 -6 mm
Y +6 -6 mm
Y +6 -6 mm
X1 X1 X2 X2
Front
(Side1)
Y2
+1 -1
Y2 Y1 Y1
/10 mm : %(X) /5’’ : %(X)
-1+1
/5’’ :
100%
/100mm :
100%
A3W
A3
B4
A4
B5
A5
X +5 -5 mm
X +5 -5 mm
X +5 -5 mm
X +5 -5 mm
X +5 -5 mm
X +5 -5 mm
Y +6 -6 mm
Y +6 -6 mm
Y +6 -6 mm
Y +6 -6 mm
Y +6 -6 mm
Y +6 -6 mm
Y +6 -6 mm
Y +6 -6 mm
Y +6 -6 mm
Y +6 -6 mm
X1 X1 X2 X2
Front
(Side1)
Y2
+1 -1
Y2 Y1 Y1
/10 mm : %(X) /5’’ : %(X)
-1+1
/5’’ :
100%
/100mm :
100%
12’’x18’’
11’’x17’’
8-1/2’’x14’’
8-1/2’’x14’’
7-1/4’’x10-1/2’’
5-1/2’’x8-1/2’’
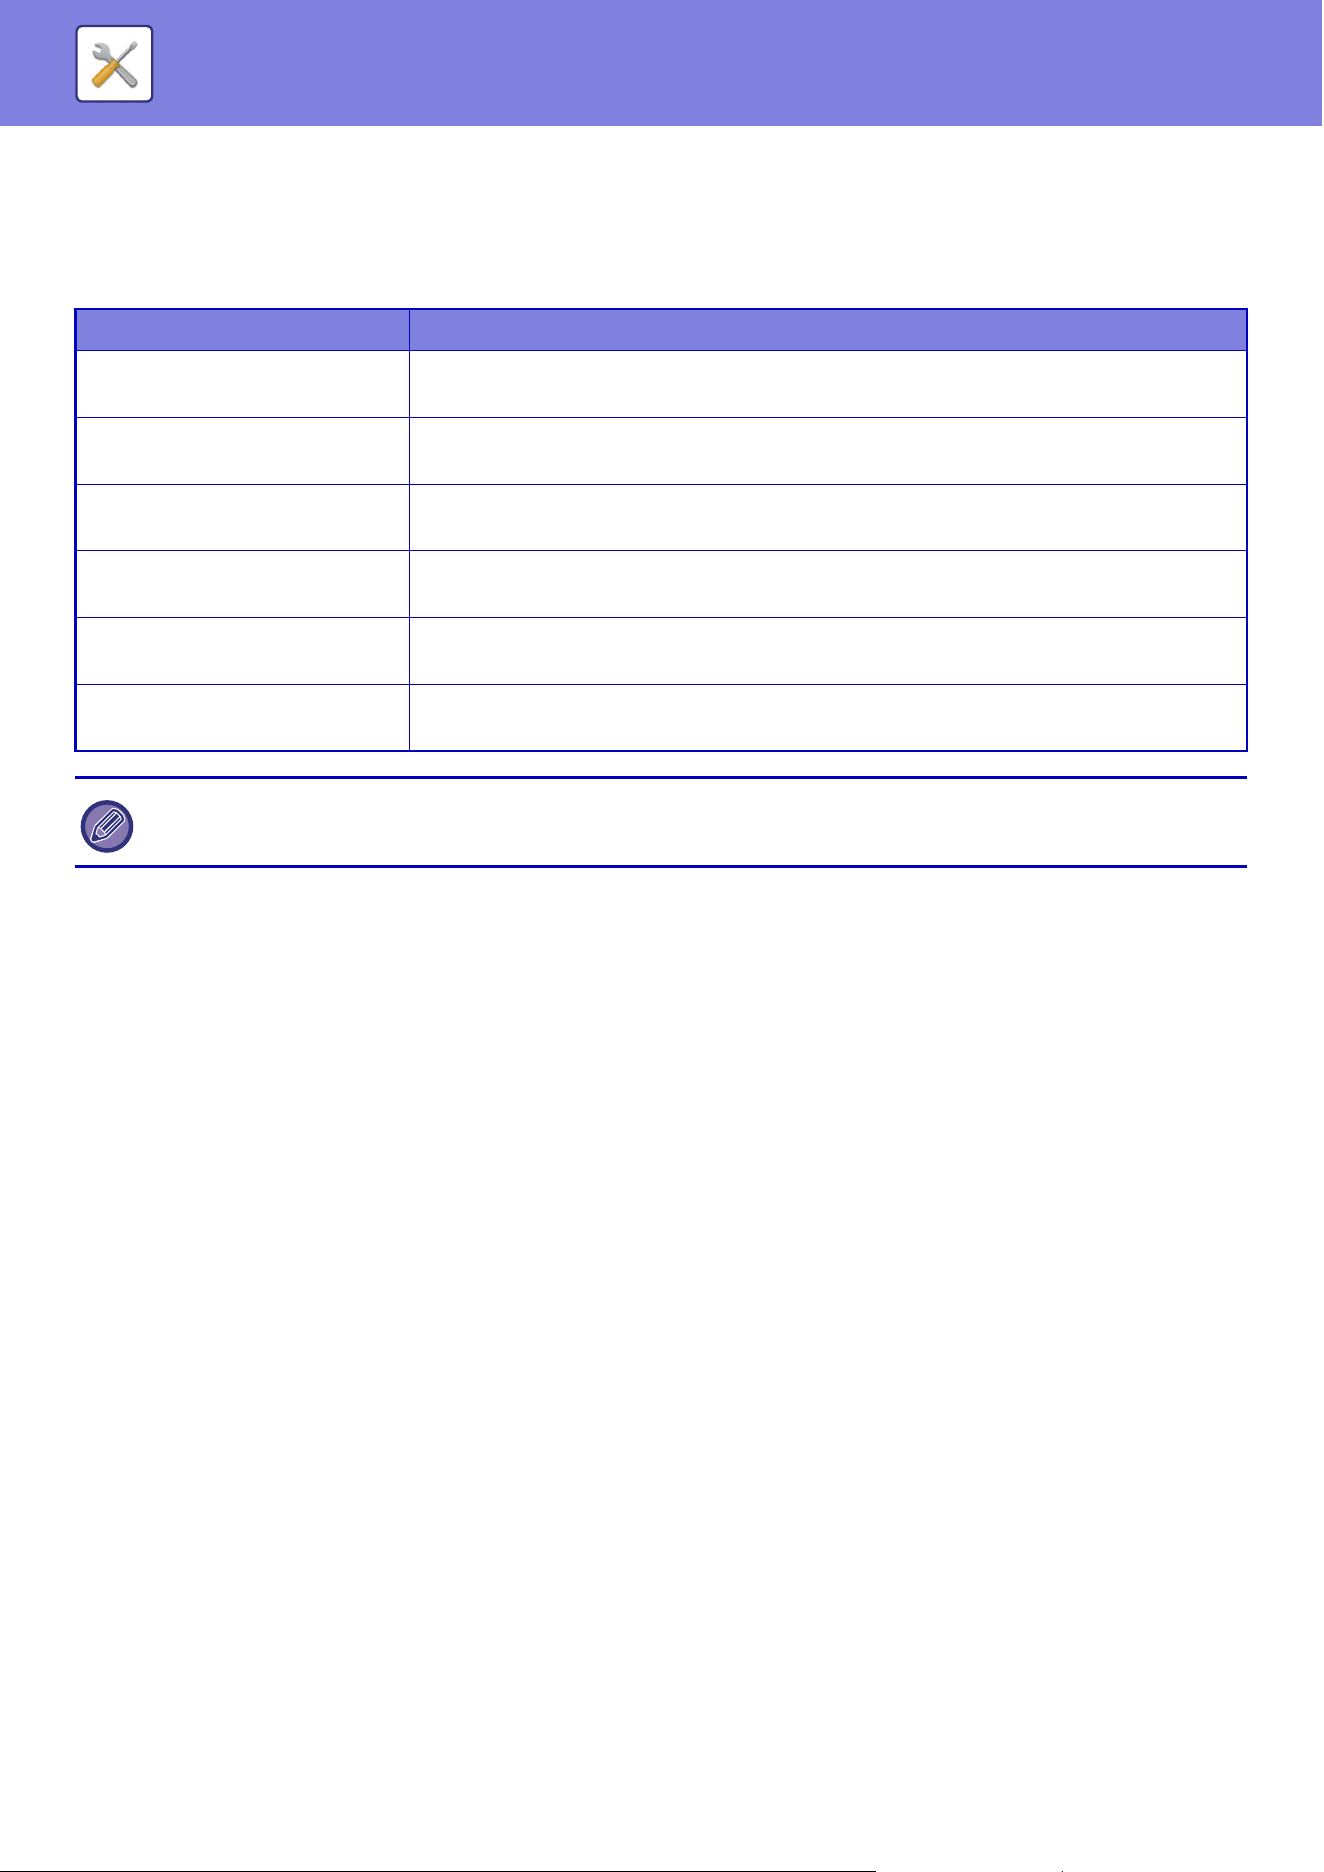
9-117
SETTING MODE►SYSTEM SETTINGS
Paper Type Registration
Store a paper type when the desired paper type does not appear as a selection or when you wish to create a new set of
paper properties.
Up to 11 paper types can be registered.
List name Description
Type Name Register any name.
The factory default names are "User Type 1" to "User Type 11".
Fixed Paper Side Use this setting when paper with a front and reverse side is used.
Factory default settings: Disable
Disable Duplex Use this setting when paper loaded cannot be used for 2-sided printing.
Factory default settings: Disable
Disable Staple Use this setting when paper used cannot be stapled.
Factory default settings: Disable
Disable Punch Use this setting when paper used cannot be punched.
Factory default settings: Disable
Disable Fold Use this setting when using paper that cannot be disable fold.
Factory default settings: Disable
The settings that can be selected vary depending on the peripheral devices installed.

9-118
SETTING MODE►SYSTEM SETTINGS
Operation Settings
Condition Settings
Enlarge Display Mode
Displays large characters on the screen.
appears in the system area when Large Character Mode is enabled.
Factory default settings: Disable
Message Time Setting
The duration of time that messages appear in the touch panel (the time until a message is automatically cleared) can be
set to any number of seconds from 1 to 12.
Factory default settings: 6 seconds
Language Setting
The language that appears in the touch panel can be changed to any language.
Factory default settings: American English
Default Display Settings
Set the screen that appears after auto clear and login.
Easy Copy, Easy Scan, Copy, Print Release, E-mail, Network Folder/FTP, Address Book, Address Book (Easy Scan), ,
Document Filing, Select from the Home Screen, Sharp OSA screen, Exchange (E-Mail), Job Management, and Gmail.
Factory default settings: Home Screen
Display Machine Status Screen as Default
When switching between modes, first set whether to display the "Machine Status Screen".
Factory default settings: Disable
Display IP Address on the Machine Status Screen
This setting specifies whether or not to display the IP address of the machine on the "Machine Status" screen.
Factory default settings: Enable
Display Favorite Menus as Default
You can specify to display the "Favorite" first during mode selection.
Factory default settings: Disable
Display Action Panel as default.
Specify whether or not to display with the action panel on the screen.
Factory default settings: Enable
Icon is displayed when network cable is not connected.
Show an icon when a LAN cable is not connected.
Factory default settings: Enable
When user authentication is enabled and a display language is speci
fied in the favorite operation group, that setting is given
priority.

9-119
SETTING MODE►SYSTEM SETTINGS
Display Confirmation Dialog when job is canceled.
Set whether to display a notification message when a job is completed.
Factory default settings: Disable
Display Status Notification Message
Show a confirmation dialog box when a job is canceled.
Factory default settings: Enable
Restrict Total Count display
When this setting is enabled, the total count is hidden when checking the total count from the home screen.
Factory default settings: Disable
Switch the Number of Sets to be Displayed for Job Management
Set whether the remaining number of sets or the final number of sets is shown in the job management.
Factory default settings: Progress
Display the estimated job start time
Specify whether or not to display the estimated start time of the job in the job management.
Factory default settings: Enable
Alignment Order of 10-Key
Set whether the numeric keys are arranged in ascending order with "1" in the upper left corner, or "1" in the lower left
corner.
Factory default settings: Ascending order from upper left
Setting Display from Main Unit
Select settings for the path information of the setting destination displayed when setting mode is set on the machine.
Display Current Path
Set whether or not the current setting items are shown in the path information.
Factory default settings: Enable
Enable link of current path
Set whether the link at the top is enabled.
Factory default settings: Enable
MFP Display Pattern Setting
Set the background color of the touch panel. Each time you change patterns, the touch panel image at the bottom of the
screen changes.
Factory default settings: Pattern 2

9-120
SETTING MODE►SYSTEM SETTINGS
Key Operation Setting
Auto Clear Setting
The time until Auto Clear activates can be set to any number of seconds from 10 to 240 in increments of 10 seconds.
If the machine is not used for the duration of time set here, the auto clear function will clear any settings that have been
selected and return the screen to the base screen of copy mode or the job management screen.
Factory default settings: 60 seconds
Cancel Timer
This is used to disable the auto clear function.
Factory default settings: Disable
Key Operation Setting
Time for Accepting Key Entry
This setting determines how long a key in the touch panel must be tapped until the key input is registered. The time can
be set from 0 to 2 seconds in increments of 0.5 seconds.
By lengthening the time setting, key input can be prevented when a key is tapped accidentally. Keep in mind, however,
that when a longer setting is selected more care is required when tapping keys to ensure that key input is registered.
Factory default settings: 0.0 seconds
Disable Auto Key Repeat
This is used to disable key repeat.
Factory default settings: Disable
Key repeat causes a setting to change continuously not only each time the key is tapped but while a key is tapped.
Time for Accepting Key Entry of Long Touch
Select a time when a long key touch is detected.
Factory default settings: 0.5 seconds
Double Tap Interval Setting
Select an interval when a double tap is detected.
Factory default settings: 0.5 seconds
Disabling of Bypass Printing
This setting is used to disable bypass printing (printing other jobs ahead of a job that has been stopped
*
because the
paper required for the job is not available in any of the trays).
* This does not include cases where the paper ran out during the job.
Factory default settings: Disable
Priority of Print Jobs
Set the priority for each job and start printing from the job with the highest priority.
Factory default settings: All Low
Disabling of Covers/Inserts Mode
Disables the use of the covers and inserts function.
Factory default settings: Disable
Disable Manual Finishing
Disables the use of manual finishing.
Factory default settings: Disable
Disabling Recent Jobs
Prohibit the use of [Recent Jobs].
Factory default settings: Disable

9-121
SETTING MODE►SYSTEM SETTINGS
Initial Original Count Setting
Specifies whether or not "Original Count" in Others is enabled for each function.
Copy
• Copy
Image Send
• Scan
• Data Entry
Document Filing
• Scan to Local Drive
Factory default settings: All Invalid
Preview Setting
Default List/Thumbnail Display
• File Retrieve of Main Folder/Quick File Folder:
Select whether the default display format of the document filing main folder and temporary folder screens is list or
thumbnails.
Factory default settings: List
• File Retrieve of Custom Folder:
Select whether the default display format of the document filing custom folder screen is list or thumbnails.
Factory default settings: List
• File Retrieve of Direct Print:
Select whether the default state of the folder screen for direct print shows the folders as a list or as thumbnails.
Factory default settings: List
Remote Operation Settings
Configure settings required for remote operation of the machine from a PC connected to the same network.
Remote Software Operation
• Operational Authority:
This is used when remote software is used to operate the machine remotely.
• View Password Entry Screen:
When operating the machine by remote control using the remote software, the password entry screen will appear on
both the computer and the machine, or on only the computer.
Factory default settings: Operational Authority:Prohibited, View Password Entry Screen:Display in Both PC and MFP
Operation from Specified PC
• Operational Authority:
This is used to allow remote operation of the machine using the specified PC.
• View Password Entry Screen:
When operating the machine by remote control using the remote software, the password entry screen will appear on
both the computer and the machine, or on only the computer.
Factory default settings: Operational Authority: Prohibited, View Password Entry Screen:Display in Both PC and MFP
Operation by User who Has Password
• Operational Authority:
This is used to allow a user who has a password to operate the machine remotely. For information on the password,
consult your service technician.
• View Password Entry Screen:
When operating the machine by remote control using the remote software, the password entry screen will appear on
both the computer and the machine, or on only the computer.
Factory default settings: Operational Authority: Prohibited, View Password Entry Screen: Display in Both PC and MFP
9-122
SETTING MODE►SYSTEM SETTINGS
Data List
Set whether to print the data list with 1-sided print or 2-sided print.
Factory default settings: 1-sided print
Tandem Connection Setting
When two machines are used as network printers using TCP/IP protocol, use this setting to configure the port number
and IP address of the machine used as the tandem secondary unit.
Factory default settings: Port Number:50001
Disabling of Primary Unit Mode
To prohibit tandem transmission, enable this setting. (Normally this setting is not necessary.)
Factory default settings: Disable
Disabling of Secondary Unit Mode
To prohibit tandem reception, enable this setting. (Normally this setting is not necessary.)
Factory default settings: Disable
Easy Mode Settings
Set the items that can be selected in Easy Copy and other Easy modes.
The items appear will appear in order on the screen starting from the item that is set in No. 1.
Items that can be set in Easy Copy
Paper Select, 2-Sided Copy, Copy Ratio Staple / Punch, Color Mode, Original, Exposure, N-Up, Card Shot
Job Build, Blank Page Skip, Dual Page Copy
Factory default settings: No.1:Paper Select, No.2:2-Sided Copy, No.3:Copy Ratio, No.4:Staple / Punch, Staple (For models without
punch function), No.5:Color Mode, No.6:Image Orientation, No.7:Exposure, No.8:Card Shot
Items that can be set in Easy Scan
Address Book, History, Global Address Search, Local Drive/USB, Original, Resolution, File Format, Blank Page Skip
and Card Shot, Job Build, Dual Page Scan, File Name
Factory default settings: No.1:Address Book, No.2:History, No.3:Global Address Search, No.4:Local Drive/USB, No.5:Original,
No.6:Resolution, No.7:File Format, No.8:Blank Page Skip
To use the tandem function when user authen
tication is enabled, the same login name and password must be used on both
the primary unit and secondary unit. If the same login name and password are not used, the page count may not be added to
the appropriate user count or only the primary unit print.
Use the same port number as long as it does not cause any inconvenience.
The items that can be set vary depending on the peripheral devices that are installed.

9-123
SETTING MODE►SYSTEM SETTINGS
Favorite Key Setting
Set the information that appears when favorite keys are tapped in normal mode.
Click the Copy, Scan, and Data Entry tabs to configure settings for the favorite key screens shown in each of the normal
modes.
Favorite Key Number
Sets the favorite key number.
The items appear will appear in order on the screen starting from the item that is set in No. 1.
Key Name
Enter a maximum of 20 characters for the favorite key name.
Function Menu
To set functions such as "Other Functions", select the functions from the pull-down menu.
Job Programs
To set a program, select one of the preset programs from the program list.
Not Display
You can hide a set key in the favorite key screen.
Mode Key Display Setting
Configure settings for the display of mode keys at the top of the screen.
Modes to Display
Select the mode keys that you want to display.
Factory default settings: Easy Copy: Enabled, Copy: Disabled, Easy Scan: Enabled, Image Send: Disabled, Document Filing: Disa-
bled, Sharp OS: Enabled
Display Mode Keys on Home
You can enable display of the mode keys in the home screen as well.
Factory default settings: Enable
Keyboard Settings
Default Keyboard Setting
Configure settings for the keyboard used for entry on the text.
Keyboard Select
Change the key layout and display according to the set language.
Factory default settings: English(US)
Set Keyboard Priority
When an external keyboard is connected, set whether the external keyboard or the keyboard shown on the touch panel
(soft keyboard) is given priority.
Factory default settings: Soft Keyboard
Soft Keyboard Template Setting
Register a text that you frequently use when entering an address or domain name in advance.
Custom Links
You can display registered web addresses in the display field of the setting menu.
By clicking on a custom link, you can jump to the web site of the registered address.
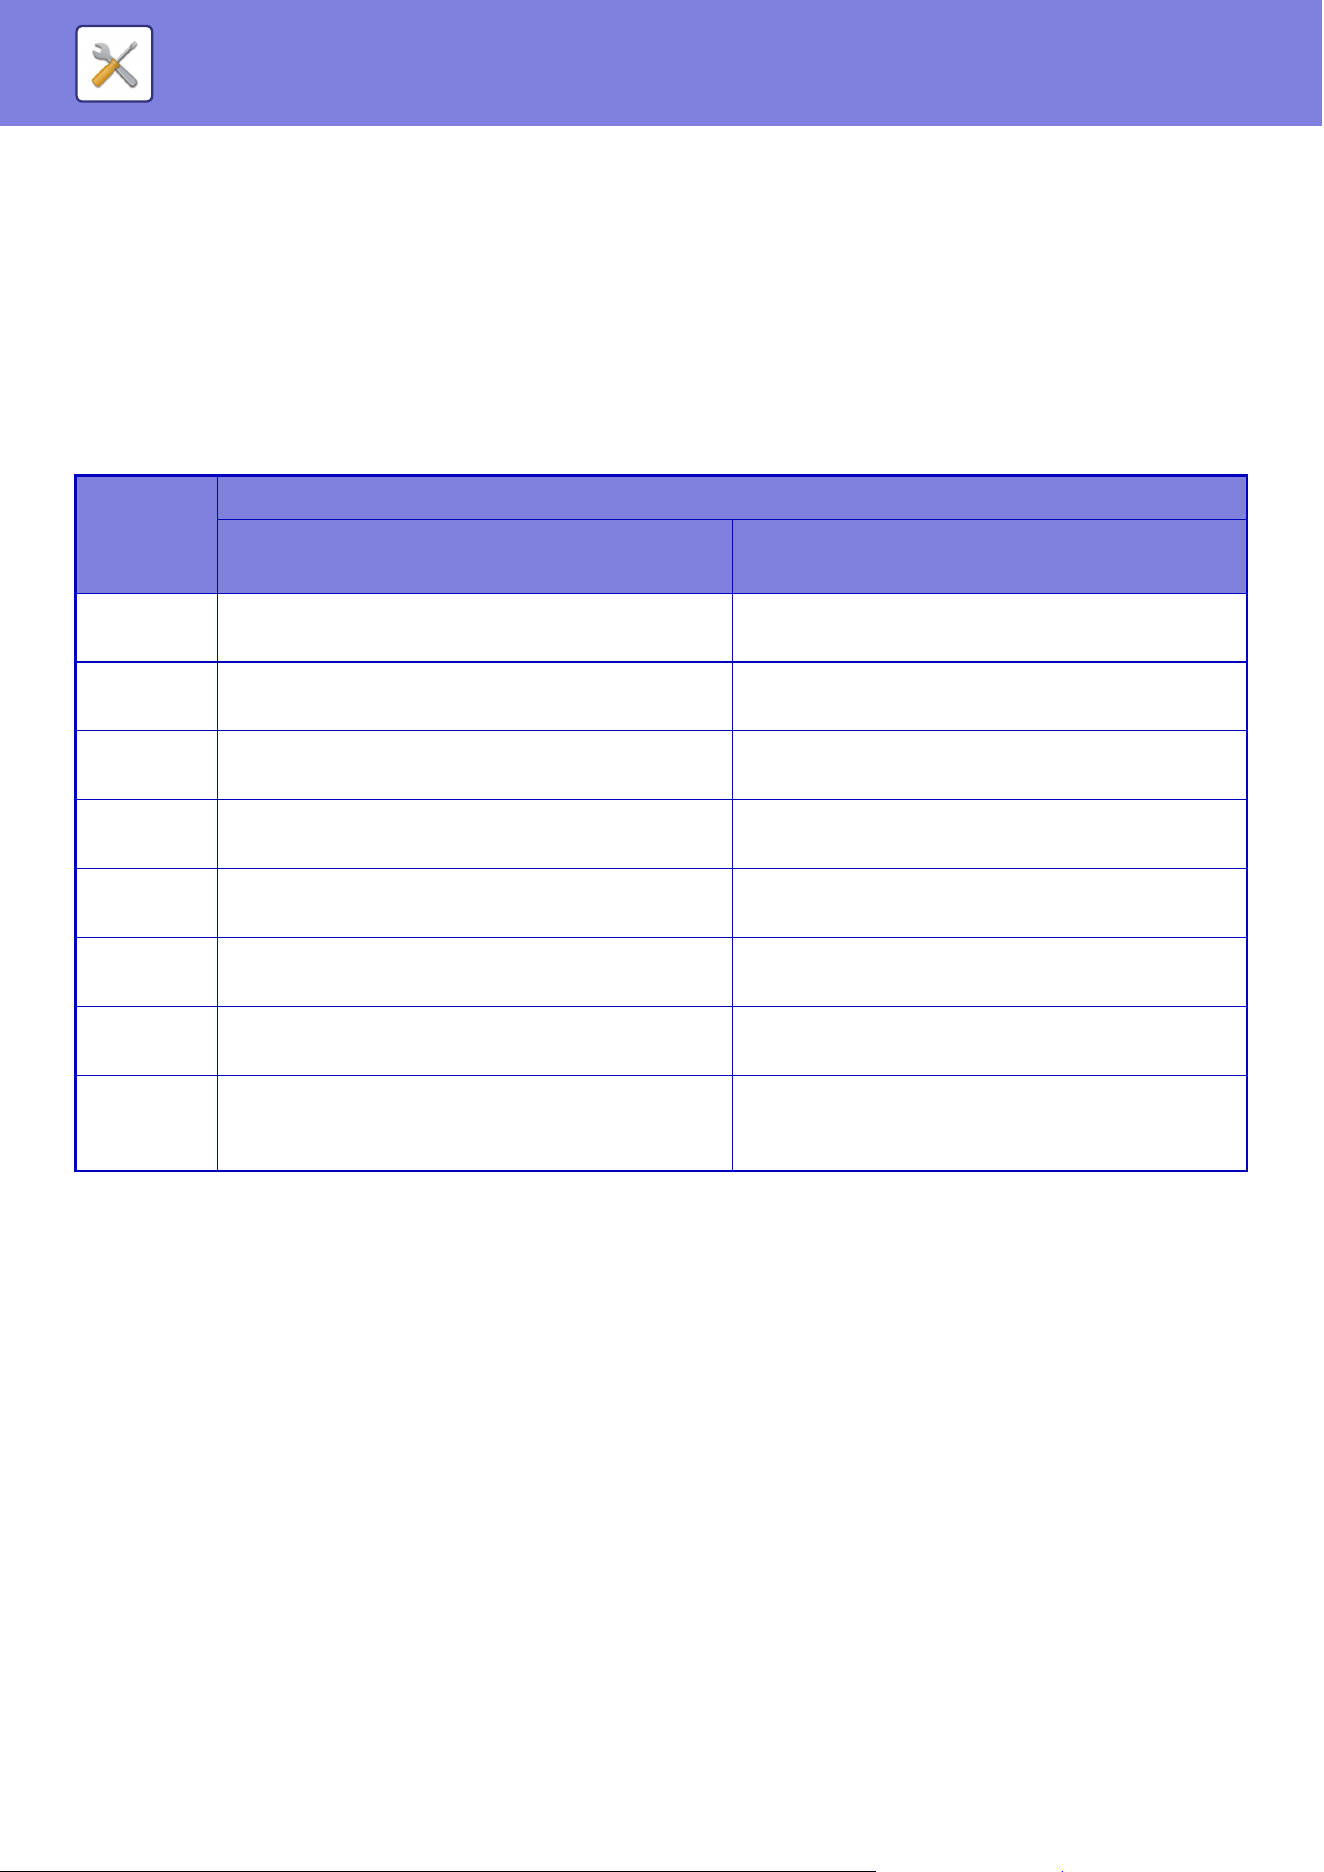
9-124
SETTING MODE►SYSTEM SETTINGS
Device Control
Various devices mounted on the machine can be set.
Condition Settings
Original Size Detector Setting
One of the 8 groups of standard original sizes shown below can be selected for detection by the original size detection
function.
Factory default settings: Inch-1
Cancel Detection at Document Glass
Original size detection on the document glass can be disabled. When this is done, all originals placed on the document
glass are treated as special size originals.
Factory default settings: Disable
Original Feeding Mode
The following original feeding modes can be set to operate by default in copy, image send, and scan to local drive.
When a mode is frequently used, this saves you from having to select the mode in another mode each time you need to
use it.
• Mixed Size Doc. Same Width
• Mixed Size Doc. Different Width
• Slow Scan Mode
• Blank Page Skip
If you select Blank Page Skip, select [Skip Blank Paper] or [Skip Blank and Back Shadow].
Factory default settings: None
Selection
s
Detectable original sizes
Document Glass Document feeder tray (automatic document
feeder)
AB-1 A3, A4, A4R, A5, B4, B5, B5R A3, A4, A4R, A5, A5R, A6R, B4, B5, B5R, 11"x17",
8-1/2"x14", 8-1/2"x11"
AB-2 A3, A4, A4R, A5, B5, B5R, 216 mm x 330 mm (8-1/2"
x 13")
A3, A4, A4R, A5, A5R, A6R, B4, B5, B5R, 11” x 17",
8-1/2” x 11", 216 mm x 330 mm (8-1/2"x13")
AB-3 A4, A4R, A5, B4, 8K, 16K, 16KR A3, A4, A4R, A5, A5R, A6R, B4, 11” x 17", 8-1/2” x
11", 216 mm x 330 mm (8-1/2” x 13"), 8K, 16K, 16KR
AB-4 216 mm x 340 mm (8-1/2" x 13-2/5"), A3, A4, A4R, A5,
B5, B5R
A3, A4, A4R, A5, A5R, A6R, B4, B5, B5R, 11"x17",
8-1/2"x11", 216mm x 340mm (8-1/2” x 13-2/5")
AB-5 216 mm x 343 mm (8-1/2" x 13-1/2"), A3, A4, A4R, A5,
B5, B5R
A3, A4, A4R, A5, A5R, A6R, B4, B5, B5R, 11” x 17",
8-1/2” x 11", 216 mm x 343 mm (8-1/2” x 13-1/2")
Inch-1 11" x 17", 8-1/2" x 14", 8-1/2" x 11", 8-1/2" x 11"R,
5-1/2" x 8-1/2"
11"x17", 8-1/2"x14", 8-1/2"x11", 8-1/2"x11"R,
5-1/2"x8-1/2", 5-1/2"x8-1/2"R, A3, A4
Inch-2 11" x 17", 216 mm x 330 mm (8-1/2" x 13"), 8-1/2" x
11", 8-1/2" x 11"R, 5-1/2" x 8-1/2"
11"x17", 216 mm x 330 mm (8-1/2"x13"), 8-1/2"x11",
8-1/2"x11"R, 5-1/2"x8-1/2", 5-1/2"x8-1/2"R, A3, A4
Inch-3 11"x17", 216 mm x 340 mm (8-1/2” x 13-2/5"),
8-1/2"x11", 8-1/2"x11"R, 5-1/2"x8-1/2"
11"x17", 216 mmx340 mm (8-1/2” x 13-2/5),
8-1/2"x11", 8-1/2"x11"R, 5-1/2"x8-1/2", 5-1/2” x
8-1/2"R, A3, A4

9-125
SETTING MODE►SYSTEM SETTINGS
Display Blank Page Skip Confirmation Message
Set whether to display a message when a blank page is detected by the automatic document feeder.
Factory default settings: Enable
Double Feed Detection Setting
If a original overlaps with another original and you try to load it at the same time, the original will be considered misfed
and loading will be stopped.
Factory default settings: Enable
Actions When Maximum Number of Sheets that can be Stapled is Reached
Set whether to display a message to select a remedy when the maximum number of staples is reached.
Factory default settings: Stop the Job and Display Confirmation Message
Automatic Saddle Stitch
When the bookbinding function is set, the saddle stitch staple setting is automatically enabled.
Factory default settings: Enable
Saddle Fold/Stitch Position Adjust
Adjust the position of the folds and staples when saddle stitching.
Factory default settings: All 0 mm
Paper Type for Auto Paper Selection
The paper types
*
that the Auto Paper Selection function will select can be specified. Select one of the following settings:
• Plain Paper 1
• Plain Paper 2
• Plain and Recycle Paper
•Recycled
The Auto Paper Selection function will not select any paper types other than the paper types specified with this setting.
* The paper type set for each paper tray by selecting [System Settings] in "Settings" → [Paper Tray Settings].
Factory default settings: Plain1, Plain2
Plain Paper Compatibility Settings
Set the basis weight of plain paper that is normally used.
Select from Plain1 and Plain2.
The weight of Plain Paper 1 is 60 to 89 g/m
2
(16 to 24 lbs bond). The weight of Plain Paper 2 is 90 to 105 g/m
2
(24 to 28
lbs bond).
Factory default settings: Plain1
Detect Standard in Auto Color Mode
When the color mode is set to auto in copy mode, the discrimination point for detecting whether originals are color or
black and white can be set to one of 5 levels. When set to [(Closer B/W)], the originals are easier to recognize as black
and white. When set to [Closer color], the originals are easier to recognize as color.
Factory default settings: 3 (Normal)
Total Setting for Finish
Select the finish setting. Set whether finishing positions are specified on the specified paper or on the original.
Factory default settings: Specify Finishing Position Based on Paper Selected.
Disabling of Duplex
This is used to disable 2-sided printing, such as when the duplex module malfunctions.
Factory default settings: Disable

9-126
SETTING MODE►SYSTEM SETTINGS
Disabling of Offset
Disable offset output.
Factory default settings: Disable
Disabling of Stapler
This setting is used to prohibit the use of staple, such as when the staple of finisher or saddle finisher malfunctions.
Factory default settings: Disable
Disabling of Punch
This setting is used to prohibit the use of punch, such as when the punch module of finisher or saddle finisher
malfunctions.
Disabling of Color Mode
(Normally this setting is not necessary.)
When a color-related problem has occurred and printing is not possible, the use of color mode can be temporarily
prohibited. Black & white printing will still be allowed.
Factory default settings: Disable
Disabling of Document Feeder
Use this setting to prohibit the use of the automatic document feeder, such as when the feeder malfunctions. (When the
setting is enabled, scanning is still possible using the document glass.)
Factory default settings: Disable
Disabling of Large Capacity Cassette
This setting is used to prohibit the use of the large capacity tray, such as when it malfunctions.
Factory default settings: Disable
Disabling of Tray Settings
This setting is used to prohibit tray settings (except for the bypass tray).
Factory default settings: Disable
Disabling of Bypass-Tray
Disables use of the bypass tray.
Factory default settings: Disable
Disabling of Inserter
Disables use of the inserter.
Factory default settings: Disable
Disabling of Finisher
This setting is used to prohibit the use of finisher or saddle finisher, such as when it malfunctions.
Factory default settings: Disable
Disabling of Folding Unit
It is used when the use of the paper folding unit is prohibited or when it breaks down.
Factory default settings: Disable
This function is only for use as an emergency me
asure. Once this setting is enabled, only a service technician can cancel the
setting.
Contact your dealer or the nearest SHARP Service Department as soon as possible and have a service technician cancel the
settings and resolve the problem.

9-127
SETTING MODE►SYSTEM SETTINGS
Disabling of Trimming Module
This setting is used to disable the trimming module.
Factory default settings: Disable
Status Indicator Setting
Use Original Detection Light for Document Feeder
Set whether to use the document set lamp on the automatic document feeder.
Factory default settings: Enable
Use Preventive Light to Indicate Original Left Behind
Set whether to use the document removal prevention lamp on the automatic document feeder.
Factory default settings: Enable
Machine Identification Settings
Enter a name or code to identify the machine.

9-128
SETTING MODE►SYSTEM SETTINGS
Clock Adjust
Use this to set the date and time in the machine's built-in clock.
Daylight Saving Time Setting
Enable daylight saving time.
Date Format
The format used to print the date on lists and other output can be changed.
Item Description
Specify Time Zone If your region is ahead of GMT (Greenwich Mean Time), select [+]. If your region is behind
GMT, select [-]. Next, specify the time difference between your region and GMT in hours
and minutes. (Example: If your region is Japan, + 9 hours 00 minutes.)
Date&Time Settings Select and set the year, month, day, hour, and minute.
Item Description
Daylight Saving Time Setting Select whether or not the Daylight Saving Time Setting is enabled. If disabled, the following
settings will not be possible.
Factory default settings: Disabled
Select Setting Type Specify whether the starting and ending day of daylight saving time are to be set using the
day of the week or the date.
Start Time Set the starting time of daylight saving time. If you selected "Day of the Week" in "Select
Setting Type", set the starting week of daylight saving time and then the starting day. If you
selected "Date" in "Select Setting Type", set the starting date. Set the hour and minute and
the UTC (Coordinated Universal Time) setting.
Completing Time Set the ending time of daylight saving time in the same way as you set the starting time.
Adjustment Time Set the time to be adjusted when daylight saving time begins.
Item Description
Current Setting The current time appears in the format set in Date Format.
Format Set the order of display of the year, month, and day (YYYY/MM/DD).
Factory default settings:MM/DD/YYYY
Separator Select one of three symbols or a blank space for the separator used in the date.
Factory default settings: /
Day-Name Position Select whether the day name appears before or after the date.
Factory default settings:12-Hour Display
Time Display Select 12-hour format or 24-hour format for the time.
• 24-Hour Display: 00:00 to 24:00
• 12-Hour Display: 00:00 AM to 11:59 AM/00:00 PM to 11:59 PM
Factory default settings: 12 Hour

9-129
SETTING MODE►SYSTEM SETTINGS
Enable/Disable Settings
The following settings enables or disables certain functions.
The prohibited setting items in the settings of each function such as copy settings and the items in this prohibited setting
are linked.
Authentication Settings
Disable Home Edit Mode when in Device Account Mode
Disable Home Edit Mode when in Device Account Mode.
Factory default settings: Disable
Disabling of Printing by Invalid User
Printing by users whose information is not stored in the machine, such as printing without entering valid user information
in the printer driver or printing of a file on an FTP server in Setting mode (Web version), can be prohibited.
Factory default settings: Disable
Copy Settings
Disable Copy in Different Size/Direction
Copying is prohibited when the orientation of the copy paper and the original are different, or when the optimum size
copy paper is not loaded.
Factory default settings: Disable
Disabling of Registration/Deletion of Program
This is used to prohibit the deletion and changing of copy settings stored in job programs.
Factory default settings: Disable
Disabling of Bypass-Tray in Duplex Copy
Disables the use of the bypass tray when making 2-sided copies.
The bypass tray is often used to feed label sheets, transparency film, and other special media for which 2-sided copying
is prohibited. If a sheet of one of these special media enters the reversing unit, a misfeed or damage to the unit may
result. If special media for which 2-sided copying is prohibited is often used, it is recommended that you enable this
setting.
Factory default settings: Disable
Disabling of Auto Paper Selection
Disables the Auto Paper Selection function.
When this setting is enabled, automatic selection of paper that is the same size as the original on the document glass or
in the automatic document feeder does not take place.
Factory default settings: Disable
Disabling Registration of Custom Image
Disables storage of a custom image.
Factory default settings: Disable
Disabling sending while copying
Disables the Image Send function during copy.
Factory default settings: Disable
It is valid when "Rotation Copy Setting
(page 9-56)" is canceled.

9-130
SETTING MODE►SYSTEM SETTINGS
Printer Settings
Prohibit Notice Page Printing
Disables to print a notice page.
Factory default settings: Enable
Prohibit Test Page Printing
Disables to print the test page.
When this setting is enabled, [Status] → [Data List] → [List for User] → [Printer Test Page] in "Settings" cannot be used
to print test pages.
Factory default settings: Disable
Exclude Bypass-Tray from Auto Paper Select
When [Auto] is selected for paper type selection, the bypass tray is excluded from the trays that can be selected. This is
recommended when special paper is often placed in the bypass tray.
Factory default settings: Disable
Disabling of USB Memory Direct Print
Disables the function for directly printing of a file in a USB memory device.
Factory default settings: Disable
Disabling of Network Folder Direct Print
Disables the direct printing from a network folder.
Factory default settings: Disable
Disabling sending while printing
Disables the Image Send function during printing.
Factory default settings: Disable
Disable Blank Page Print
Disables to print a blank page.
Factory default settings: Disable
Image Send Settings
Disable Switching of Display Order
Disables a change of display sequence (search number order, ascending, descending) in the address book and others.
If set, the display is not sorted even when you tap the tab on the address book screen.
The currently selected display order will be the order that is used after the setting is selected.
Factory default settings: Disable
Disable Scan Function
PC Scan
Specify this to disable remote PC scanning.
Factory default settings: Disable
Disable Storing to External Memory Device
Set this when you want to prohibit data saving to an external memory such as a USB memory.
Factory default settings: Disable
Disable Registering Destination from Operation Panel
Disables address control from the machine.
Configure the setting for each of the following items:
• Group (Direct Entry)
• Group (Address Book)
• Contacts
Select All: Selects all items.
Clear Checked: Clears all selections.
Factory default settings: All Invalid

9-131
SETTING MODE►SYSTEM SETTINGS
Settings to Disable Registration
Disable Registering Destination on Web Page
Disables to store the destination from Setting mode (Web version).
Configure the setting for each of the following items:
• Group (Direct Entry)
• Group (Address Book)
• Contacts
Select All: Selects all items.
Clear Checked: Clears all selections.
Factory default settings: All Invalid
Disable Registration/Delection of All Program Items
Disables the use of address book when a program is stored.
Factory default settings: Disable
Disable Destination Registration Using Global Address Search
This disables address control from the global address search.
Configure the setting for the following item:
E-mail
Factory default settings: All Invalid
Disabling of Forwarding via Network
This prohibits inbound routing.
Factory default settings: Disable
Settings to Disable Transmission
These settings are used to disable the following transmission operations.
Disabling Sending History
This disables the use of [Sending History].
Factory default settings: Disable
Disable Selection from Address Book
Disables the selection of destinations from the address book.
Configure the setting for each of the following items:
•E-mail
• FTP
• Network Folder
Select All: Select all items.
Clear Checked: Deselect all items.
Factory default settings: All Invalid
Disable Direct Entry
Disables the direct entry of destination address and others.
Configure the setting for each of the following items:
•E-mail
• Network Folder
Select All: Selects all items.
Clear Checked: Clears all selections.
Factory default settings: All Invalid
Disabling of Find My Address
This prohibits Find My Address.
Factory default settings: Disable
Disabling of OCR
Prohibits the use of the OCR function when scanning.
Factory default settings: Disable

9-132
SETTING MODE►SYSTEM SETTINGS
Document Filing Settings
Disable Text/Stamp functions for Reprinting
When a stored file is retrieved and printed, the printing functions are disabled.
This function prevents an inconsistency of the date between the original data and output data and others.
Factory default settings: Disable
Batch Print Settings
Set whether or not the [All Users] key and the [User Unknown] key are prohibited in the user name selection screen
when printing all files, whether files are sorted by date in newest or oldest order, and whether file names are sorted in
ascending or descending order.
Factory default settings: Disable
Operation Settings
Cancel Auto Clear Timer
Disables the Auto Clear mode.
Factory default settings: Disable
Disabling of Job Priority Operation
Disables bypass printing (printing other jobs ahead of a job that has been stopped
*
because the paper required for the
job is not in any of the trays).
* This option is ignored when paper runs out during the job.
Factory default settings: Disable
Disable Auto Key Repeat
Disables the Auto Key Repeat function.
Factory default settings: Disable
Disabling of Covers/Inserts Mode
Disables the use of the covers and inserts function.
Factory default settings: Disable
Disable Manual Finishing
Disables the use of manual finishing.
Factory default settings: Disable
Disabling Recent Jobs
Prohibit the use of [Recent Jobs].
Factory default settings: Disable
The Enable/Disable Settings control the same parame
ters as the enable/disable settings in other settings. The settings are
linked together (changing one setting changes the other).

9-133
SETTING MODE►SYSTEM SETTINGS
Device Control
Disabling of Document Feeder
Use this setting to prohibit the use of the automatic document feeder, such as when the feeder malfunctions. (When the
setting is enabled, scanning is still possible using the document glass.)
Factory default settings: Disable
Disabling of Duplex
This is used to disable 2-sided printing, such as when the duplex module malfunctions.
Factory default settings: Disable
Disabling of Large Capacity Cassette
This setting is used to prohibit the use of the large capacity tray, such as when it malfunctions.
Factory default settings: Disable
Disabling of Tray Settings
This setting is used to prohibit tray settings (except for the bypass tray).
Factory default settings: Disable
Disabling of Finisher
This setting is used to prohibit the use of finisher or saddle finisher, such as when it malfunctions.
Factory default settings: Disable
Disabling of Bypass-Tray
Disables use of the bypass tray.
Factory default settings: Disable
Disabling of Inserter
Disables use of the inserter.
Factory default settings: Disable
Disabling of Offset
Disable offset output.
Factory default settings: Disable
Disabling of Stapler
This setting is used to prohibit the use of staple, such as when the staple of finisher or saddle finisher malfunctions.
Factory default settings: Disable
Disabling of Punch
Disabling of Folding Unit.
Factory default settings: Disable
Disabling of Folding Unit
It is used when the use of the paper folding unit is prohibited or when it breaks down.
Factory default settings: Disable
Disabling of Trimming Module
This setting is used to disable the trimming module.
Factory default settings: Disable
Disabling of Color Mode (When color-related trouble occurs)
When a color-related problem has occurred and printing is not possible, the use of color mode can be temporarily
prohibited. Black & white printing will still be allowed.
Factory default settings: Disable
Disabling of Primary Unit Mode
Disables the primary unit mode for tandem printing.
(Normally this setting is not necessary.)
Factory default settings: Disable
Disabling of Secondary Unit Mode
Disables the secondary unit mode for tandem printing.
(Normally this setting is not necessary.)
Factory default settings: Disable
This function is only for use as an emergency me
asure. Once this setting is enabled, only a service technician can cancel the
setting. Contact your dealer or the nearest SHARP Service Department as soon as possible and have a service technician
cancel the settings and resolve the problem.
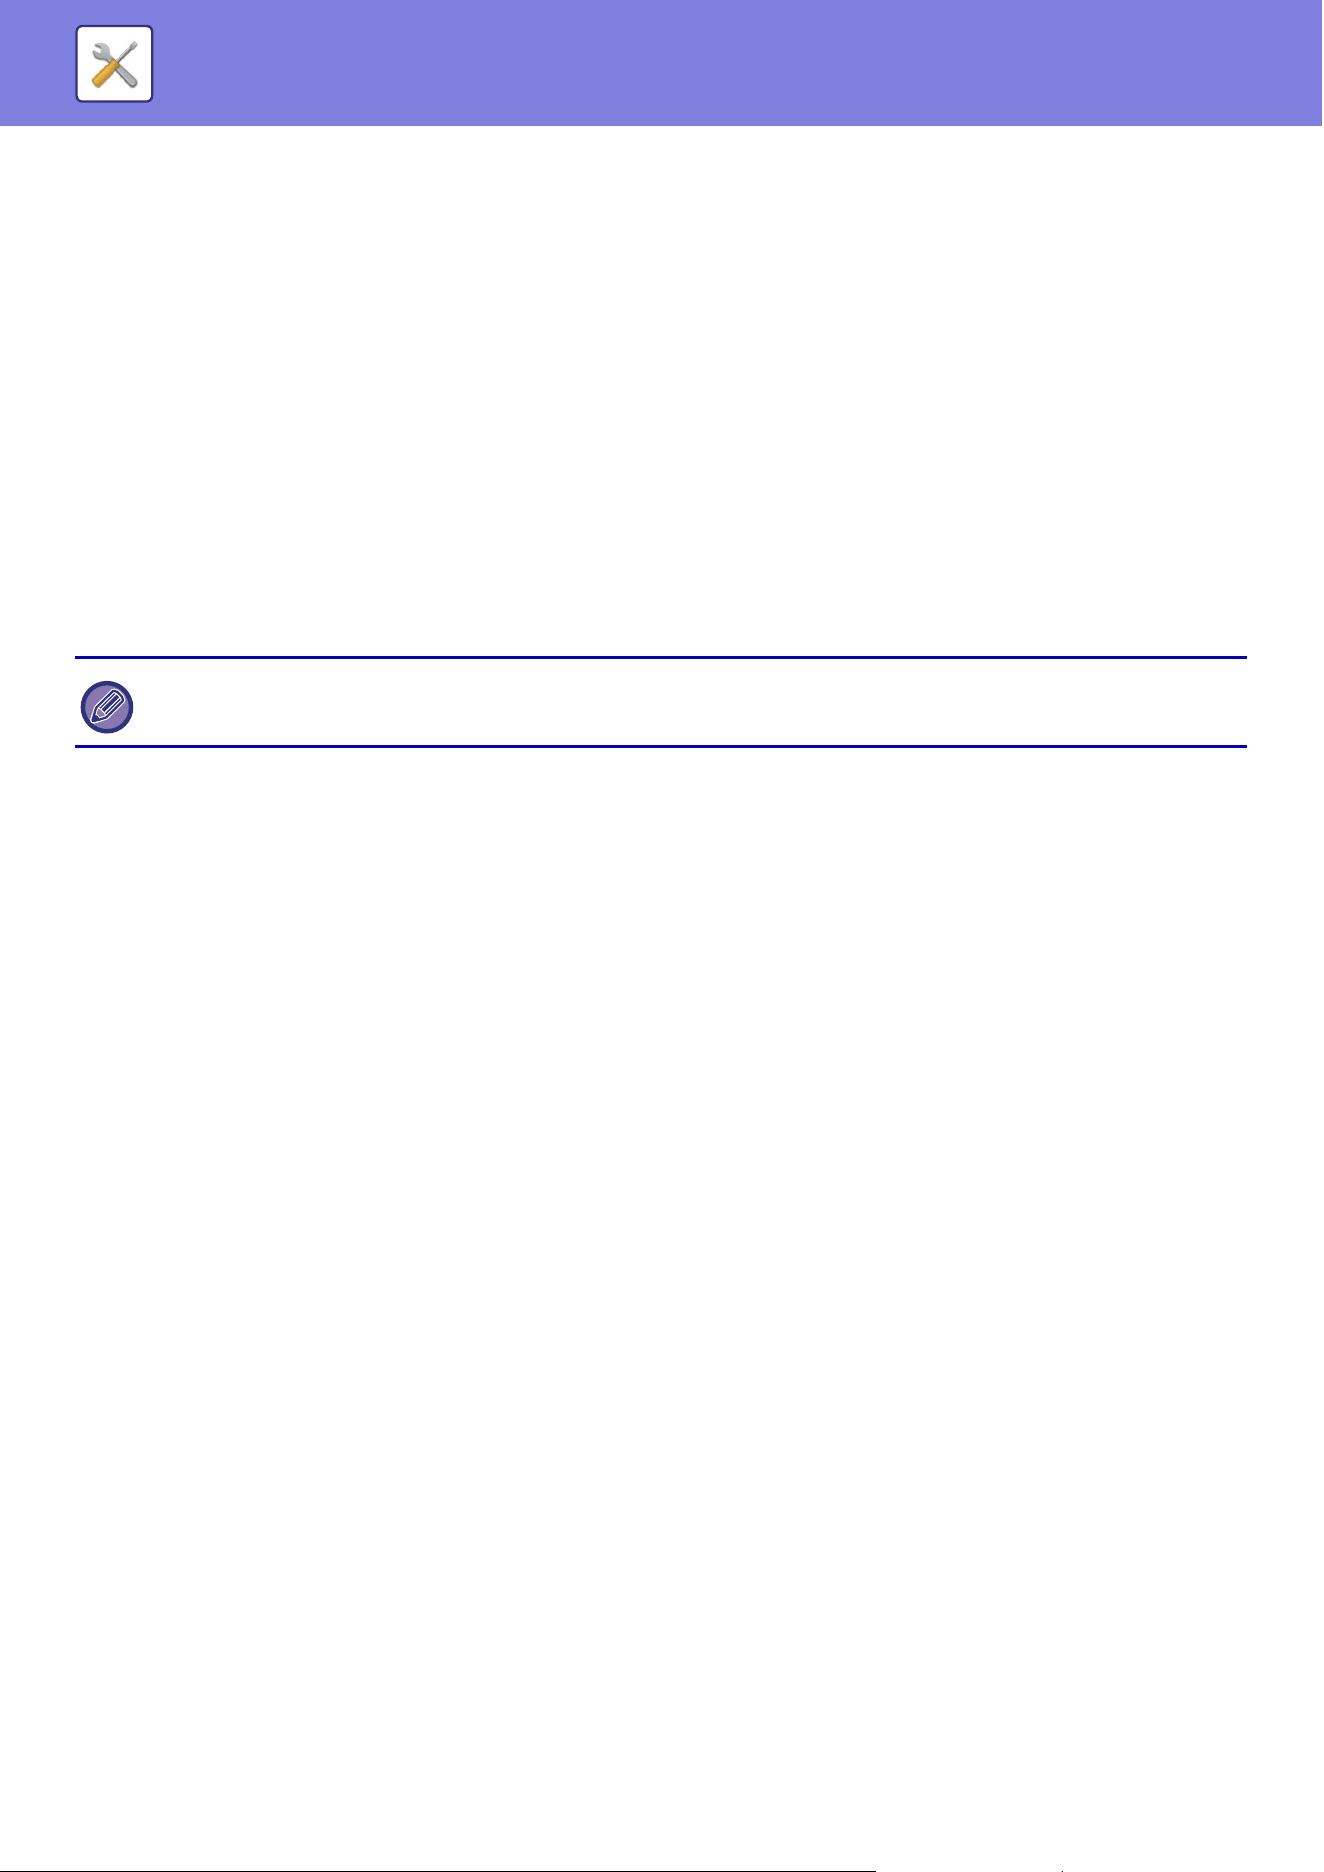
9-134
SETTING MODE►SYSTEM SETTINGS
Security Settings
This setting is used to set the security enhancement functions.
Hidden Pattern Print Setting
Disables the direct entry of background pattern and others.
Factory default settings: Disable
Product Key/Application Number Input
Enter the product key and application number to use the extensions below.
Serial Number
Font Kit for Barcode
Application Integration Module
Application Communication Module
External Account Module
Virus Detection Kit
Enter the product key and application number for the above functions.
Sound Settings
Configure machine notification sounds and their volume.
Beep Sound Settings (Common)
Keys Touch Sound
Controls the key touch sound level, or turns the sound off.
Factory default settings: Middle
Beep of Invalid Input
Control the volume of the sound, or turn the sound off at an invalid setting, such as when a number that cannot be
specified is entered.
Factory default settings: Middle
Reference Tone
This turns the sound on when changing the copy ratio or exposure, and the setting reaches the standard value (copy
ratio 100%, exposure 3). Control the reference tone sound level, or turns the sound off.
Factory default settings:No Sound
Copy Complete Sound
Control the copy completed notification sound level, or turns the sound off.
Factory default settings:No Sound
Scan Complete Sound (Image Send)
Control the scanner scanning completed notification sound level, or turns the sound off.
Factory default settings: Middle
Depending on the activation status of the extended functio
n of the machine, the items displayed will change.
For the product key to be entered, contact your dealer.

9-135
SETTING MODE►SYSTEM SETTINGS
Powering Off Sound
Control the machine power off notification sound level, or turns the sound off.
Factory default settings: Middle
Caution Sound Settings
Set whether to play a notification sound when the machine is in the following status.
Paper Empty, No Original, Jam, Toner Empty (Black), Toner Empty (Color), Waste Toner Full, Output Tray Full, Stapler
Empty, Maximum Number of Sheets that can be Stapled is Reached
Factory default settings: Warning Beep:Medium, Paper Empty:Enable, Invalid except Paper Empty

9-136
SETTING MODE►SYSTEM SETTINGS
Network Settings
Quick Settings
Select the minimum required settings for the machine connection to the network.
IPv4 Settings
When using the machine on a TCP/IP (IPv4) network,
use this setting to configure the IP address of the
machine. The settings are shown below.
DHCP
Use this setting to have the IP address obtained automatically using DHCP (Dynamic Host Configuration
Protocol)/BOOTP (Bootstrap Protocol). When this setting is enabled, it is not necessary to manually enter an IP
address.
Factory default settings: Enable
IPv4 Address
Enter the IP address of the machine.
Subnet Mask
Enter the IP subnet mask.
Default Gateway
Enter the default gateway address.
Network Name Settings
Device Name
Enter a device name.
Domain Name
Enter the domain name.
Factory default settings: Sharp-Printer
DNS Settings
Primary Server
Enter the IP address of primary DNS server.
Secondary Server
Enter the IP address of secondary DNS server.
Domain Name
Enter the domain name where the selected DNS server exists.
If DHCP/BOOTP is used, the IP address assigned to the machine may change automatically. If the IP address changes,
printing will not be possible.

9-137
SETTING MODE►SYSTEM SETTINGS
SMTP Settings
Primary Server
Enter the IP address or the host name of the primary SMTP server.
Sender Name
Enter the sender name.
Sender Address
If data transmission has failed, the undelivered e-mail may be returned from the server. Enter an e-mail address (a
single address only) to receive such undelivered mails. Usually, enter the e-mail address of system administrator.
Enable SSL/TLS
If is selected, the SMTP-over-TLS encryption communication can be used by STARTTLS command.
This requires the server to support the STARTTLS command.
To allow SSL/TLS communication, set the "Port Number" to the same port number as the normal SMTP.
Factory default settings: Disable
SMTP Authentication
If is set, the SMTP server authentication is carried out.
Factory default settings: Disable
User Name
This setting is available when "SMTP Authentication" is selected as "Authentication Option".
Enter the user name.
Password
This setting is available when "SMTP Authentication" is selected as "Authentication Option".
Enter the password.
Change Password
To change the password, set .
Factory default settings: Disable
Connection Test
Tap the [Execute] button to test the connection to the SMTP server.
LDAP Settings
Name
Enter the address book name.
Default Address Setting
Enters the search defaults to search for a specific area of the LDAP directory information tree.
Example: o = ABC, ou = NY, cn = Everyone
Entries must be separated by semicolons or commas.
LDAP Server
Enter the IP address or host name of the LDAP server.
User Name
Enter the account name for LDAP setting.
Password
Enter the password.
Change Password
To change the password, set .

9-138
SETTING MODE►SYSTEM SETTINGS
Authentication Type
Select the authentication server from the drop-down list.
Factory default settings: Anonymous
KDC Server
Enter the IP address or host name of the Kerberos authentication server.
Realm
Enter the Kerberos realm.
Enable SSL/TLS
If is set, the SSL/TLS encryption communication is enabled.
Connection Test
Tap the [Execute] button to test the connection to the LDAP server.
Network Name Setting
Device Name
Enter a device name.
Domain Name
Enter the domain name.
Factory default settings: Sharp-Printer
Comment
Enter a comment.
Interface Settings
Mainly set items related to TCP/IP.
IPv4 Settings
When using the machine on a TCP/IP (IPv4) network,
use this setting to configure the IP address of the
machine. The settings are shown below.
DHCP
Use this setting to have the IP address obtained automatically using DHCP (Dynamic Host Configuration Protocol).
When this setting is enabled, it is not necessary to manually enter an IP address.
Factory default settings: Enable
IPv4 Address
Enter the IP address of the machine.
Subnet Mask
Enter the IP subnet mask.
Default Gateway
Enter the default gateway address.
If DHCP/BOOTP is used, the IP address assigned to the machine may change automatically. If the IP address changes,
printing will not be possible.

9-139
SETTING MODE►SYSTEM SETTINGS
IPv6 Settings
When using the machine on a TCP/IP (IPv6) network, use this setting to configure the IP address of the machine.
IPv6
Enable this setting.
Factory default settings: Enable
DHCPv6
Use this setting to have the IP address obtained automatically using DHCP (Dynamic Host Configuration Protocol) v6.
When this setting is enabled, it is not necessary to manually enter an IP address.
Factory default settings: Enable
Manual Address / Prefix Length
Enter the IP address and the prefix length (0 to 128) of the machine.
Factory default settings: 0
Default Gateway
Enter the default gateway.
MTU Settings
Set the maximum data size that can be forwarded.
Factory default settings:1500
Ping Command
Checks if the machine can communicate with the PC of the network.
Specify the IP address of the desired PC and tap the [Execute] key. A message indicating a response by the PC or not
is displayed.
DNS Settings
IPv4 Settings
Primary Server
Enter the IP address of primary DNS server.
Secondary Server
Enter the IP address of secondary DNS server.
IPv6 Settings
Primary Server
Enter the IP address of primary DNS server.
Secondary Server
Enter the IP address of secondary DNS server.
Domain Name
Enter the domain name where the selected DNS server exists.
DNS Update
Set this option to use the dynamic updating of DNS server.
Factory default settings: Disable
If DHCPv6 is used, the IP address assigned to the machine may change automatically. If the IP address changes, printing
will not be possible.

9-140
SETTING MODE►SYSTEM SETTINGS
IEEE802.1X Setting
IEEE802.1X can be used to authenticate a user to allow use of the machine.
IEEE802.1X protocol defines port-based authentication for wired networks.
Use IEEE802.1X authentication to allow only authenticated devices to use network, and protect against network abuse
by third parties.
Depending on the Web page settings, connection to the machine may not be allowed, or the settings may not allow
printing, scanning, or Setting mode (Web version) display. In this case, deselect this setting and change the Setting
mode (Web version) settings.
IEEE802.1X Authentication
Set whether to use authentication using IEEE802.1X.
Factory default settings: Disable
EAP Authentication Method
Set the EAP authentication method in IEEE802.1X.
Factory default settings: EAP-TLS
EAP User Name
Enter the EAP user name when authenticating.
Password
Enter the EAP password for authentication.
Server Authentication
Set whether to use server authentication.
Factory default settings: Enable
EAP Timeout
Set the EAP timeout.
Factory default settings: 10 seconds
Number of EAP Retries
Set the number of times to re-access the EAP when communication fails.
Factory default settings: 3 Time(s)
Certificate Status
Shows the status of the certificate required for transmission using IEEE802.1X. To install a certificate, click [Install].
CA Certificate Status
Shows the status of the CA certificate required for transmission using IEEE802.1X. To install a certificate, click [Install].

9-141
SETTING MODE►SYSTEM SETTINGS
Services Settings
Make settings for SMTP, Kerberos Authentication Settings, SNTP, mDNS, SNMP, and SMB.
SMTP
SMTP Settings
Primary Server
Enter the IP address or the host name of the primary SMTP server.
Secondary Server
Enter the IP address or the host name of the secondary SMTP server.
Port Number
Enter a port number.
Factory default settings:25
Timeout
Enter a timeout. This value is used for connection to the SMTP server and for data transmission according to the e-mail
system specifications.
Factory default settings: 20 seconds
Sender Name
Enter the sender name.
Sender Address
Enter the sender's address
Enable SSL/TLS
If the SSL is enabled, the SMTP-over-TLS encryption communication can be used by STARTTLS command.
This requires the server to support the STARTTLS command.
To allow SSL/TLS communication, set the "Port Number" to the same port number as the normal SMTP.
Factory default settings: Disable
SMTP Authentication
Carries out the SMTP server authentication.
If you use the Kerberos authentication, set the KDC server, port number, and realm on the Kerberos authentication
settings page.
Factory default settings: Disable
User Name
Enter the user name.
Password
Enter the password.
To change the password, set [Change Password] to .
When settings are changed, the changes will take effect after the machine is restarted. For details on restarting this machine,
see "TURNING ON THE POWER
(page 1-9)".

9-142
SETTING MODE►SYSTEM SETTINGS
POP before SMTP
If is set, you are authenticated to the POP server before using the SMTP communication.
• POP3 Server: Enter the IP address or the host name of the secondary SMTP server.
Factory default settings: Disable
• Port Number: Enter the POP3 port number for POP before SMTP communication. The default setting is port 110.
Factory default settings:110
• POP Authentication: If is set, the authentication protocol (including APOP) is used for authentication to the POP3
server.
Factory default settings: Disable
• User Name: Enter the user name for POP before SMTP communication.
• Password: Enter the password required for POP before SMTP communication. To change the password, set [Change
Password] to .
• Enable SSL/TLS:If set to , the POP over SSL/TLS communication or the POP over TLS communication by STLS
command is enabled. This requires the server to support the POP over SSL/TLS communication or the STLS
command. To allow SSL/TLS communication, set the "Port Number" to the POP over SSL communication port
number. To allow POP over TLS communication, set the "Port Number" to the same port number as for the normal
POP3 communication.
Factory default settings: Disable
Connection Test
Tap the [Execute] button to test the connection to the SMTP server.
Kerberos
Kerberos Authentication Settings
KDC Server
Enter the IP address or host name of the Kerberos authentication server.
Port Number
Enter the port number of the Kerberos authentication server.
Factory default settings: 88
Realm
Enter the Kerberos realm.
SNTP
SNTP Settings
SNTP
Set this option to use the SNTP protocol.
Factory default settings: Disable
SNTP Server
Enter the IP address or host name of the SNTP server.
Port Number
Enter a port number.
Factory default settings:123
Timeout
Enter a timeout.
Factory default settings: 5 seconds
Synchronous Interval
Enter an interval to synchronize to the SNTP server.
Factory default settings: 6 Hour
Synchronize Upon Start
To establish synchronization during machine startup, set to .
Factory default settings: Disable

9-143
SETTING MODE►SYSTEM SETTINGS
Synchronize Now
When tapped, the machine is synchronized with the SNTP server time.
mDNS
mDNS Settings
mDNS
Set this option to use the mDNS settings.
Factory default settings: Enable
Service Name
Enter a service name.
Domain Name
Display the domain name.
Highest Priority Service
Select a service you use with the priority.
Factory default settings: LPD
SNMP
SNMP v1 Settings
SNMP v1 Settings
Set this option to use the SNMPv1 settings.
Factory default settings: Enable
Access Method
Set an access method.
Factory default settings: Read-write Access
GET Community
Enter the GET community name to fetch the device information using SNMP.
Factory default settings: public
SET Community
Enter the SET community name required for SNMP setting.
Factory default settings: private
Change SET Community
To change the SET community, set .
Factory default settings: Disable
TRAP Community
Enter the community name to be used for the SNMP TRAP sent from the device.
Factory default settings: public
TRAP Target Address
Enter the IP address of the destination computer for SNMP TRAP communication.
SNMP v3 Settings
SNMP v3 Settings
Set this option to use the SNMPv3 settings.
Factory default settings: Disable
User Name
Enter the user name.
Authentication Key
Enter the authentication key.
Factory default settings: Algorithm:MD5

9-144
SETTING MODE►SYSTEM SETTINGS
Privacy Key
Enter the privacy key.
Factory default settings: Algorithm
Context Name
Display the context name.
SMB
SMB Settings (Server)
Set the version of SMB protocol that is used for functions such as public folder/NAS.
Use this setting to connect to a device that cannot automatically change the SMB protocol version, or when there is a
problem in the connection with another device due to different versions.
Set the version to SMBv1, SMBv2, or SMBv3.
Factory default settings: All Enabled
Use encrypted communication
When the checkbox is checked, encrypted communication is used when sending files from the connected terminal to the
public folder/NAS of the machine.
Factory default settings: Disable
SMB Settings (Client)
Set the version of SMB protocol that is used for functions such as Scan to Network Folder.
Use this setting to connect to a device that cannot automatically change the SMB protocol version, or when there is a
problem in the connection with another device due to different versions.
Set the version to SMBv1, SMBv2, or SMBv3.
Factory default settings: All Enabled
Print Port Settings
LPD
LPD Settings
LPD
Set this option to use LPD.
Factory default settings: Enable
Timeout
Enter a timeout.
Factory default settings: 90 seconds
Use Banner
Set this option to use the banner.
Factory default settings: Disable
RAW
Raw Print Settings
Raw Print
Set this option to use RAW printing.
Factory default settings: Enable
Port Number
Enter a port number.
Factory default settings:9100
Timeout
Enter a timeout.
Factory default settings: 90 seconds

9-145
SETTING MODE►SYSTEM SETTINGS
Use Bidirectional
To use bidirectional communication, set to .
Factory default settings: Disable
WSD
WSD Settings
WSD Print
Set this option to use WSD printing.
Factory default settings: Disable
Use Multicast Discovery
Set this option to use multicast discovery.
Factory default settings: Enable
External Print Services Settings
Universal Print Settings
Universal Print
Sets whether the Universal Print service is used.
Factory default settings: Enable
Status
Displays the current status of the Universal Print service.
Printer Name
Set the print name for use with the machine's Universal Print service.
This setting is available when the machine is not registered for Universal Print service.
Register with Universal Print
This option is available when the Universal Print service is not yet registered.
Registration Code
You will see a code to register for the Universal Print service.
URL for code registration
Clicking on the URL will take you to a separate window where you can enter your code for registration.
Delete from Universal Print
This is used to unregister the machine from the Universal Print service.
LDAP Settings
The following explains the LDAP settings.
When you tap the [Store] key, the LDAP settings are updated with your entries.
The default address book is set to .
Add
To add a global address book, tap the Add key.
Enabling this setting will automatically enable IPP INFRA on the Client Port in the Port Control.
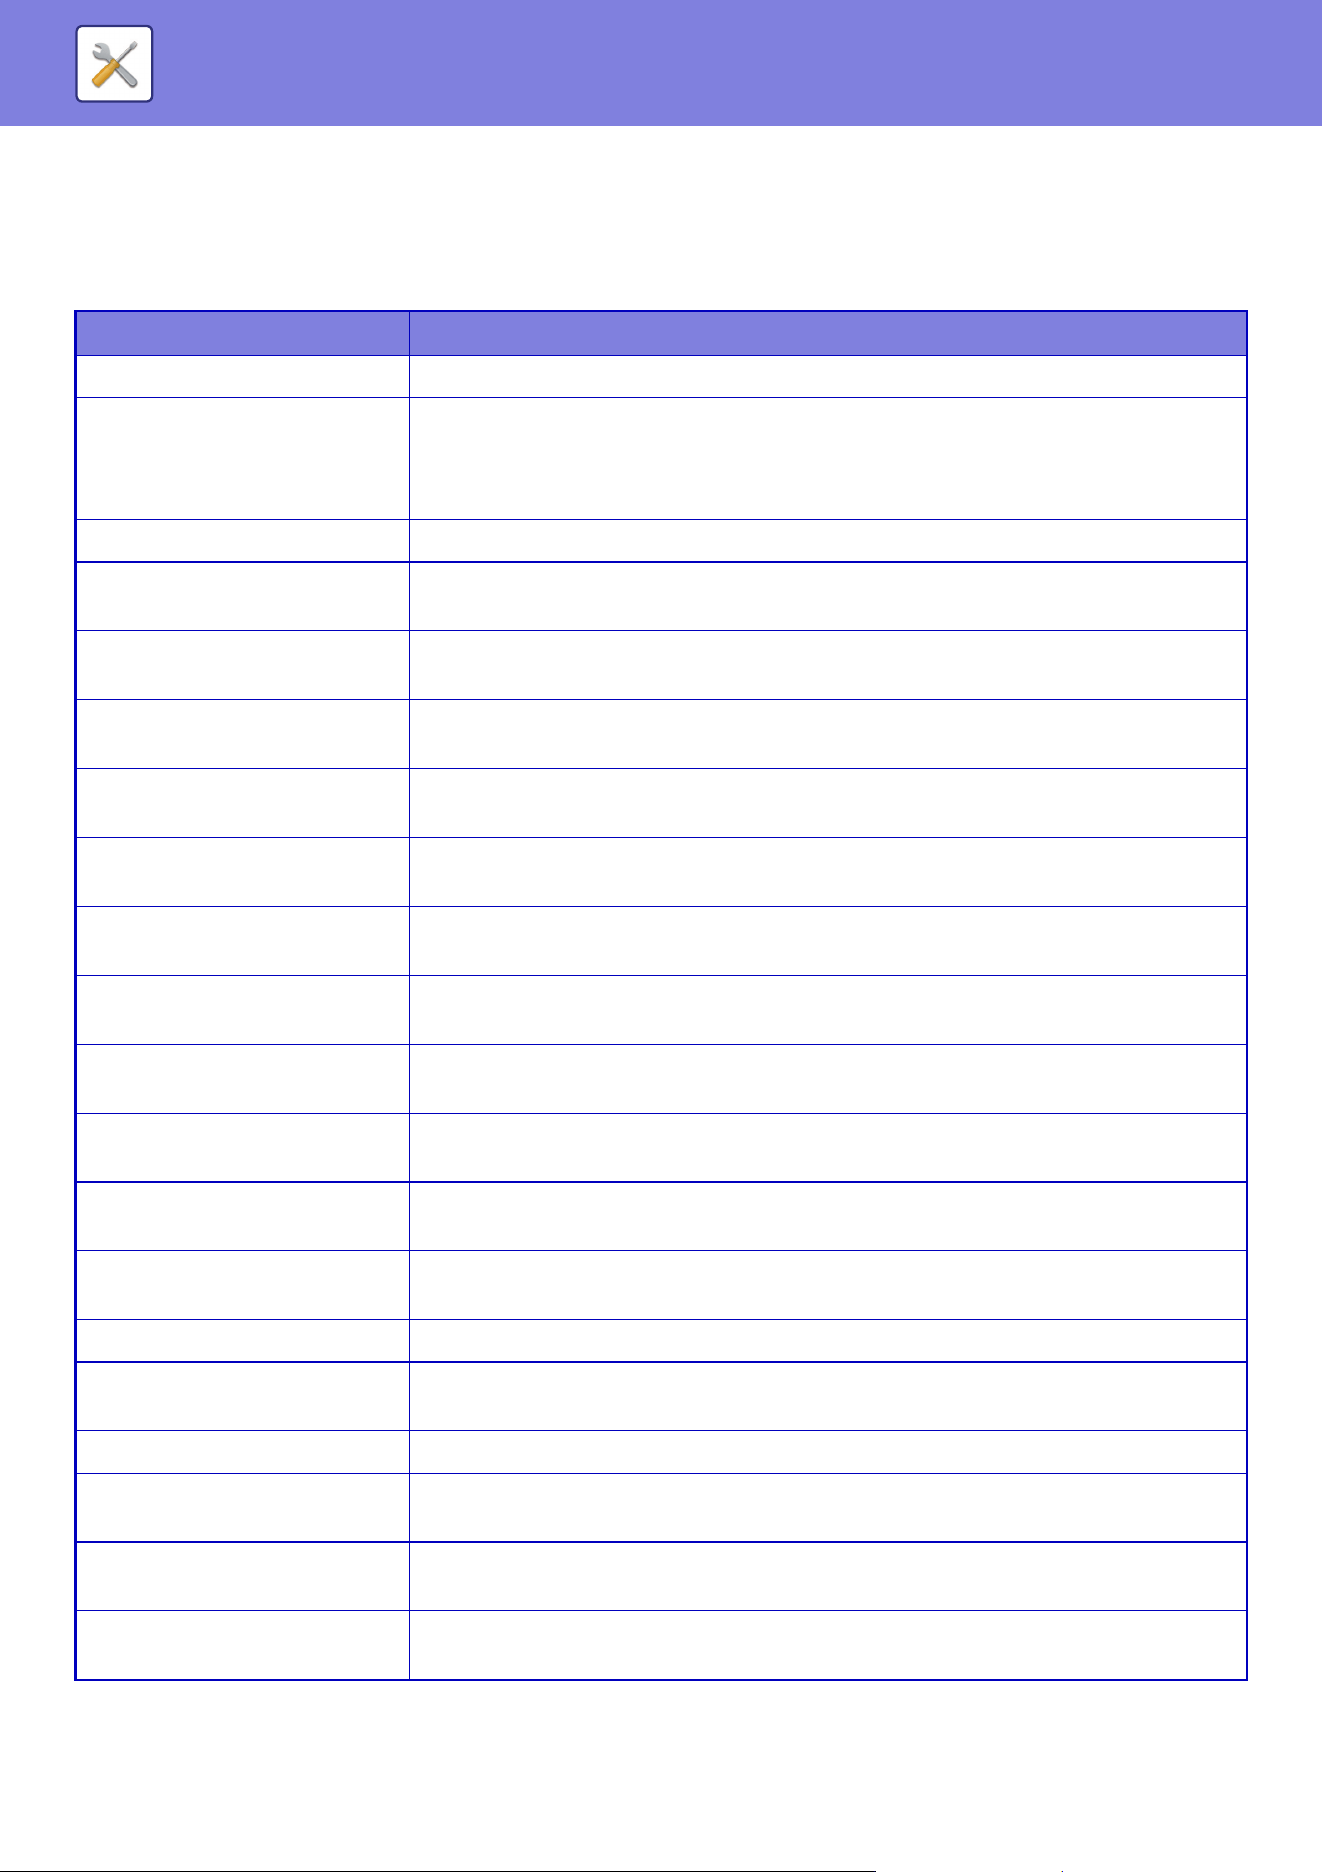
9-146
SETTING MODE►SYSTEM SETTINGS
Delete
To delete the global address book, select the item and tap the [Delete] key.
Settings
Setting item Settings
Name Enter the address book name.
Search Root Enters the search defaults to search for a specific area of the LDAP directory information
tree.
Example: o = ABC, ou = NY, cn = Everyone
Entries must be separated from each other by semicolons or commas.
LDAP Server Enter the IP address or host name of the LDAP server.
Server Type Select the Default or Custom from the service type list.
Factory default settings: Default
User Identity Attribute Set the user ID property.
Factory default settings: uid
Search Attribute Set the LDAP search property.
Factory default settings: cn
Obtain E-mail address from Set the e-mail address search.
Factory default settings: mail
Public Key Search Sets the open key search.
Factory default settings: userCertificate
Pages Limit Group Set the Storing Page Limit Group Search.
Factory default settings: pagelimit
Authority Group Set the Storing Authority Group Search.
Factory default settings: authority
Favorite Operation Group Set the Favorite Operation Group Search.
Factory default settings: favorite
My Folder Set the My Folder Search.
Factory default settings: myfolder
Card ID Sets the card ID search.
Factory default settings: cardid
Home Directory Enter the path to your home directory.
Factory default settings: homeDirectory
User Name Enter the user name for authentication against your home directory path.
Password Enter a maximum of 255 numeric digits for the password for home directory path
authentication.
Custom Attribute 1-10 Enter each custom property.
Port Number Enter a port number.
Factory default settings:389
Timeout Enter a timeout.
Factory default settings: 5 seconds
User Name Enter the account name for LDAP setting.
Factory default settings: Anonymous
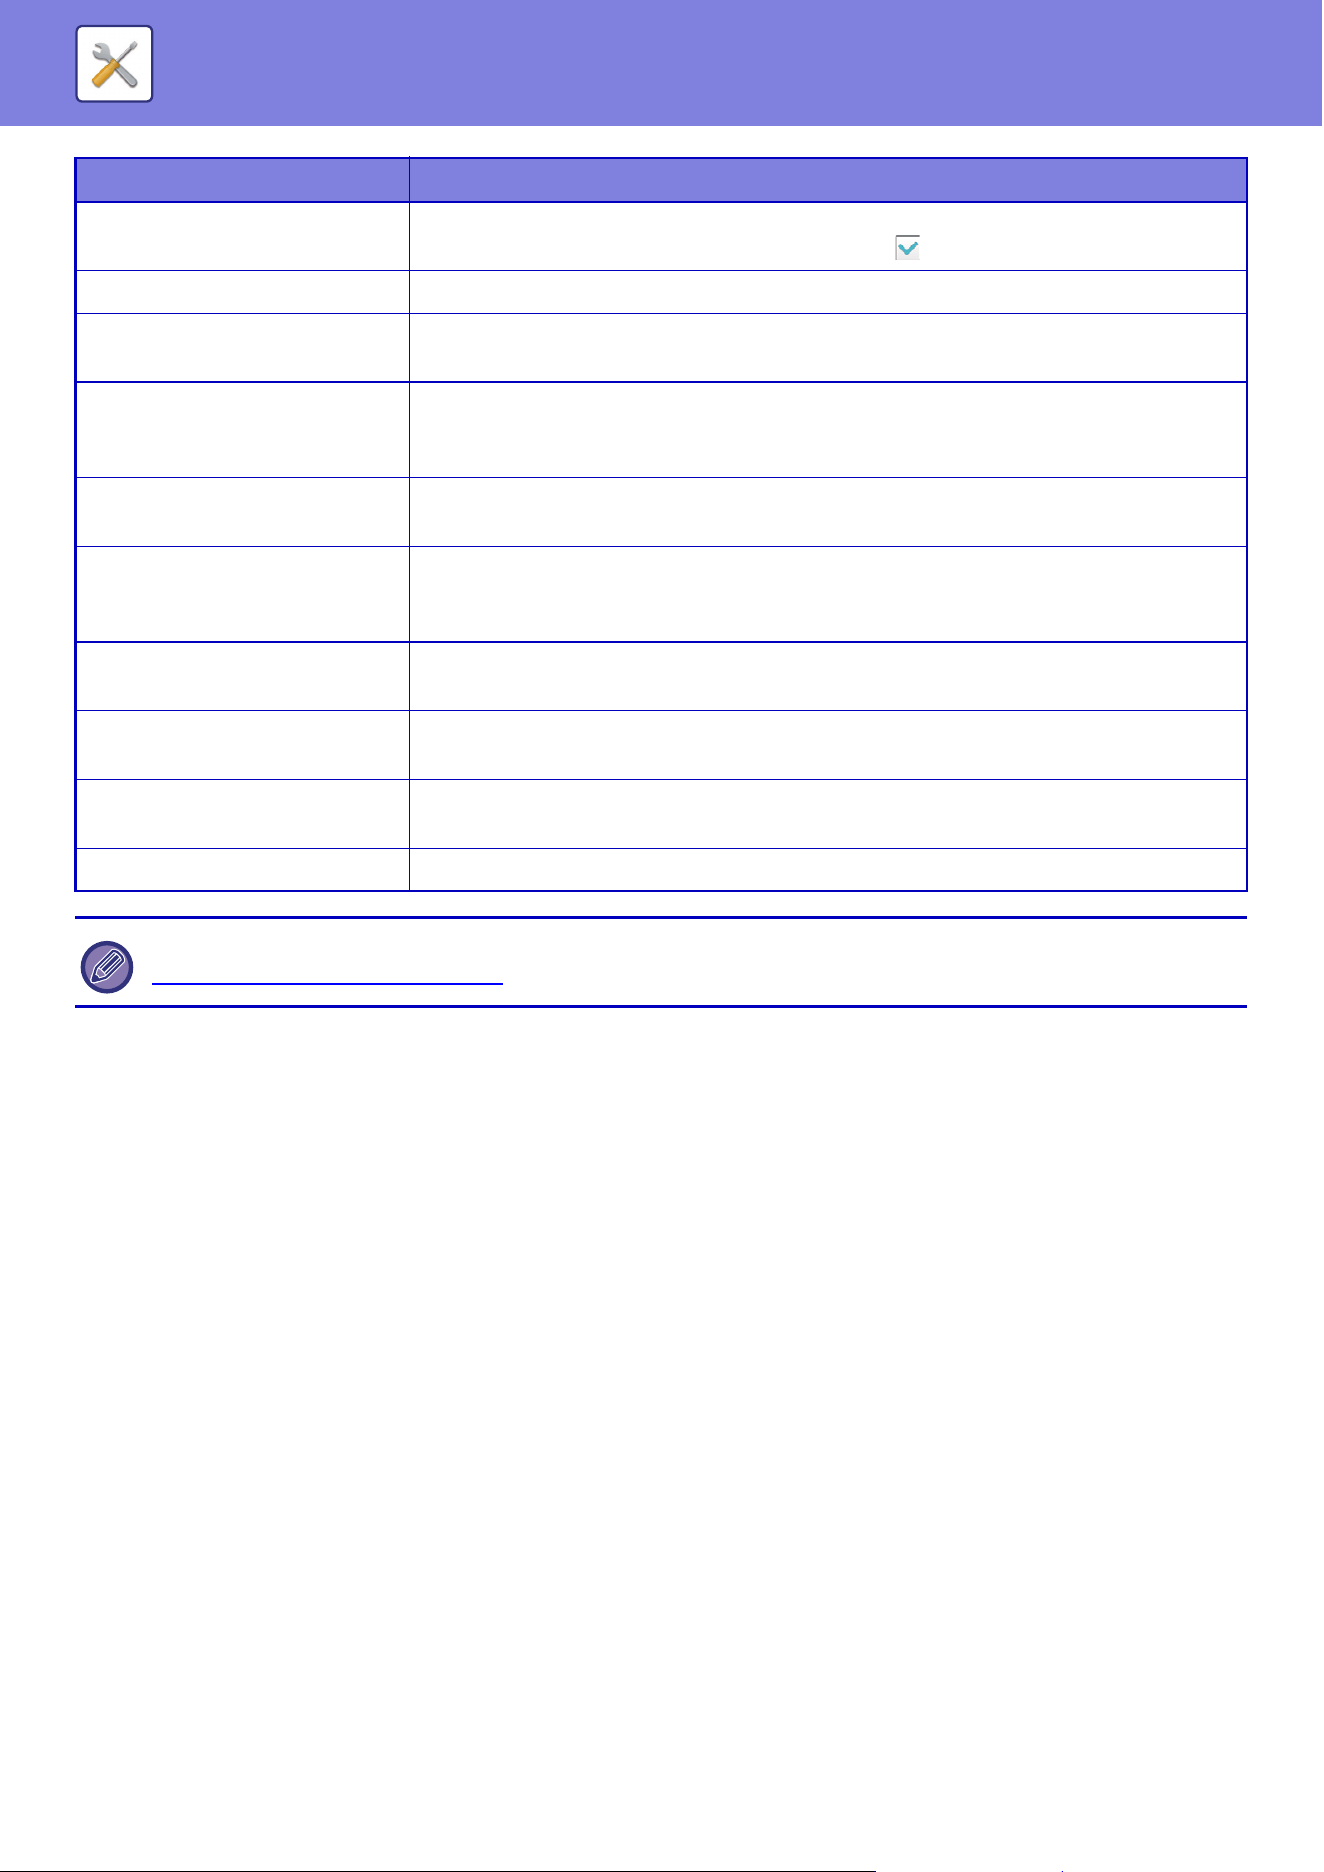
9-147
SETTING MODE►SYSTEM SETTINGS
Password Enter the password.
To change the password, set [Change Password] to .
Authentication Type Select the authentication server from the drop-down list.
Bind Prefix Set the Bind prefix.
Factory default settings: uid
Server Usage Set the server application.
Set the address book and user authentication.
Factory default settings: All EnabledLPD
Applicable Destination Type Select the applicable destination type from E-mail Address.
Factory default settings: E-mail Address
Allow selection on operation
panel.
Specify whether or not enable the global address to be selected on the operation panel of
the machine.
Factory default settings: Disable
To Be Used as Default Specify whether or not to use the selected global address as default.
Factory default settings: Disable
Authenticate a User in Global
Address Search
Select whether or not authenticate a user when a global address is searched for.
Factory default settings: Disable
Enable SSL/TLS Encrypted communication by SSL/TLS is performed.
Factory default settings: Disable
Connection Test Tap the [Execute] button, and the connection test is executed and its result is displayed.
When settings are changed, the changes will take effect after the machine is restarted. To restart the machine, see
"TURNING ON THE POWER
(page 1-9)".
Setting item Settings

9-148
SETTING MODE►SYSTEM SETTINGS
Active Directory Settings
This section describes the items to be set in the Active Directory settings of the system settings among the settings to be
made when using Active Directory on this machine.
Search Attribute
Set search attributes.
Factory default settings: cn
Linkage with User Control Function
Pages Limit Group
Enter when setting the usage restriction group.
Factory default settings: pagelimit
Authority Group
Enter when setting the permission group.
Factory default settings: authority
Favorite Operation Group
Enter when setting the preferred operation group.
Factory default settings: favorite
My Folder
Enter when setting My Folder.
Factory default settings: myfolder
Device Registration Account
User Name
Enter the user name to use.
Password
Enter the password.
Public Folder / NAS Setting
Set each option to [Prohibited] if the storage is not used.
Factory default settings: Use of Storage:All Allow
When settings are changed, the changes will take effect after the machine is restarted. For details on restarting this machine,
see "TURNING ON THE POWER
(page 1-9)".
9-149
SETTING MODE►SYSTEM SETTINGS
Proxy Setting
Access the network through a proxy server.
Settings
Item Description
Proxy Setting Access the network through a proxy server.
Factory default settings: Disable
Proxy Server Address Enter the proxy server address.
User Name Enter a user name to access the proxy server.
Password Enter a password to allow access to the proxy server.
Port Number Enter the proxy server port number.
Factory default settings:8080
Address without Using Proxy Specify the exception address of the proxy used by the external linkage function or Sharp
OSA.
[Entry method]
1) Can be set using a host name or an IP address.
2) When using a host name, you can use a wildcard (*) at the beginning of the domain
name.
(Example: "*example.□□□" (equivalent to "example.□□□", "sub.example.□□□",
"subexample.□□□", etc.)
3) When using an IP address, you can use a wildcard (*) at the end of the address.
(Example: "10*" (equivalent to 100.nnn.nnn.nnn to 109.nnn.nnn.nnn)
If the Sharp OSA application using "HTML Browser 3.5" is set to an exception address, rule
(3) cannot be used.
4) You can use a separator (semicolon (;)) to enter multiple addresses.
(Example: "99.99.99.99;example.□□□")
9-150
SETTING MODE►SYSTEM SETTINGS
Device Web Page Setting
The following explains the access settings to Setting mode (Web version).
HTTP Access Settings
Number of Users who can Log-in at the Same Time
Enter a number of users who can access Setting mode (Web version) simultaneously.
Factory default settings:32
Auto Logout Time
Enter a time to automatically log out when no communication continues with the machine.
Factory default settings: 60 minutes
View Login User
The user or users who have logged in this machine are displayed.
Current Login User
Shows the currently logged in user and IP address.
Logout All Users
The current login users are logged out.
When settings are changed, the changes will take effect after the machine is restarted. For details on restarting this machine,
see "TURNING ON THE POWER
(page 1-9)".
When settings are changed, the changes will take effect after the machine is restarted. For details on restarting this machine,
see "TURNING ON THE POWER
(page 1-9)".

9-151
SETTING MODE►SYSTEM SETTINGS
Security Settings
Password Setting
Password Policy Settings
This setting is used when you want to set a more strict password or when users who have not logged in for a specified
period of time are to be deleted.
Password Policy Settings
Enables this option when you want to make your existing password settings more strict.
Factory default settings: Disable
Administrator Password
Changes the setting of the administrator password.
Minimum Password Length
Specifies the number of characters for the password to be entered.
Factory default settings:5
Enable Password Creation Rules
When setting a password, make sure that it contains at least one or more numbers, uppercase and lowercase letters of
the alphabet, and symbols.
The characters that can be entered are as follows.
• Numbers: 0 to 9
• Upper case alphabet: A to Z
• Lower case alphabet: a to z
• Symbols: ! @ # $ % ^ & * ( ) “ ‘ + , - . / : ; < = > ? [ \ ] _ ` { | } ~ and spaces
Factory default settings: Disable
Prohibit Reuse of Current Password
Check if the password you set before the change is the same as the password after the change, and if it is the same,
you will not be able to register it. (However, if "Minimum Password Length" is 0, this setting cannot be used.)
Factory default settings: Disable
User Password
Changes the setting of the user password.
Minimum Password Length
Specifies the number of characters for the password to be entered.
Factory default settings:5
When settings are changed, the changes will take effect after the machine is restarted. For details on restarting this machine,
see "TURNING ON THE POWER
(page 1-9)".
If you enable this setting, you will need to enter at least four characters: one each for numbers, uppercase alphabet,
lowercase alphabet, and symbols. Even if you set "Minimum Password Length" to 3 or less, you will still need to enter 4
characters.

9-152
SETTING MODE►SYSTEM SETTINGS
Enable Password Creation Rules
When setting a password, make sure that it contains at least one or more numbers, uppercase and lowercase letters of
the alphabet, and symbols.
The characters that can be entered are as follows.
• Numbers: 0 to 9
• Upper case alphabet: A to Z
• Lower case alphabet: a to z
• Symbols: ! @ # $ % ^ & * ( ) “ ‘ + , - . / : ; < = > ? [ \ ] _ ` { | } ~ and spaces
Factory default settings: Disable
Prohibit Reuse of Current Password
Check if the password you set before the change is the same as the password after the change, and if it is the same,
you will not be able to register it. (However, if "Minimum Password Length" is 0, this setting cannot be used.)
Factory default settings: Disable
Delete Users who Have not Logged in for a Specified Period of Time
Deletes users who have not logged in to the machine for the specified period from the machine’s user list.
Counting the days
• If the user logs in before this setting is enabled, the number of days will be counted from the day after the setting is
registered.
• If the user logs in after this setting is enabled, the number of days will be counted from the day after the last login.
• If a new user is registered after this setting is enabled, the number of days will be counted from the day after the user's
registration date.
• Users imported via storage backup will be counted from the day after import.
Factory default settings: Disable
Delete timing
• Users will be deleted at the time the date changes (0:00) after the specified period has passed.
• If the machine is in energy saving mode or turned off, the user will be deleted when the machine is restored or turned
on.
• If the number of days for this setting is shortened, the corresponding user will be deleted after the setting is registered.
Factory default settings: Disable, Period:365
If you enable this setting, you will need to enter at least fou
r characters: one each for numbers, uppercase alphabet,
lowercase alphabet, and symbols. Even if you set "Minimum Password Length" to 3 or less, you will still need to enter 4
characters.
• Users who are set as fixed users are excluded from this setting.
• If you enable this setting and then change the setting to disable it, the days count will be reset.

9-153
SETTING MODE►SYSTEM SETTINGS
Prohibit Reuse of Deleted User's Account Name
Prohibits the reregistration of user accounts (login names) once they have been deleted. This setting can be used to
prohibit reregistration for a certain period of time or for no period of time.
After enabling the setting, set the period of time to prohibit reregistration. If you select "Undefined", you can prohibit
reregistration without setting a period.
If [Case sensitivity of login name is enabled.] is enabled in the authentication settings, it will be judged case sensitive. If
it is disabled, it will be judged without distinguishing case.
Example: Deleted login name: ABC, login name to be registered: Abc
If [Case sensitivity of login name is enabled.] is enabled in the authentication settings, the login name Abc can be
registered because bc is in lower case. If it is disabled, Abc cannot be registered.
Factory default settings: Disable, Period:365
Password Change
Restrict Device Web Page Access Via Password
Use this setting to display the login screen and require login in order to access the Web server.
Change Password
The administrator password can be changed.
When you change the password, be sure to remember the new password.
(It is recommended that you periodically change the administrator password.)
• Enter a password consisting of 5 to 255 characters, and tap the [Store] key. Your setting is made valid only when the
machine is turned On again.
The user-level authentication password is required to add, edit or delete the destination. When you log on, enter
"users" as the user name. Then, enter the user password that you have registered with this option.
The administrator-level authentication password is required to select all settings and the same functions as those
available with the user-level password. When you log on, enter "admin" as the user name. Then, enter the
administrator password that you have registered with this option.
• If you tap the [Store] key without entering a password, the previously set value is assumed. Password protection is
enabled by default.
• The login names of user accounts that have been deleted since the time this setting was enabled are recorded in the list,
up to a maximum of 2000. When the number of user accounts exceeds 2000, the login names of the oldest user accounts
will be deleted.
• When this setting is enabled and then disabled, the login name record of the deleted user account will be erased.
• The login names of user accounts that are deleted when this setting is disabled will not be recorded.
• The day of deletion is the first day, and the login names of user accounts that have exceeded the set period will be
removed from the list.
• The login names of user accounts deleted by [Delete All Users] in the user list will not be recorded in the list and will not be
subject to this setting.
In the factory default state, the user password must be entered.
(For the default administrator password, see Start Guide.)

9-154
SETTING MODE►SYSTEM SETTINGS
Condition Settings
Restrict Print Jobs other than the current Print Hold Job
You can select settings to cancel print jobs that are not print hold jobs, or force all print jobs to be held.
When [Restrict Print Jobs other than the current Print Hold Job] is turned ON, the settings below can be selected.
Factory default settings: Force Retention
Automatic Deletion of Suspended Print Jobs
If the job is interrupted due to a paper jam, etc., the job is automatically deleted after the time set in "Time until automatic
deletion" has elapsed.
Factory default settings: Disable
Time until Suspended Print Jobs are Automatically Deleted
Set the time after stopping a job to automatically deleting the job.
Factory default settings: 5 minutes
Reject Requests from External Sites
You can reject the request from external sites.
Factory default settings: Enabled
If Firmware Corruption is Detected, Restore It
When the machine starts up, the firmware is inspected, and if any damage is found, it automatically recovers to the state
before the damage.
Factory default settings: Disable
Apply Security Policy
The default administrator is displayed at login. Set whether to apply the security policy on this machine.
Factory default settings: Disable
Mandatory Access Control
Set whether to perform forced access control. Once set, access to all files inside the machine will be forcibly controlled.
Factory default settings: Disable
Job Management Jobs Completed List Display Setting
Set to show/hide the completion screen of the job management screen.
Factory default settings: All disable
Job Management Display Setting
Sets the contents to be displayed in the job management. For printing, you can choose to show or hide the file name.
For image send, the destination can be shown or hidden.
Factory default settings: All disable
Item Description
Force Retention This setting forcibly sets all print jobs as print hold jobs, even jobs for which print hold is not
selected.
Disable Job Prohibit all print jobs other than print hold jobs.
9-155
SETTING MODE►SYSTEM SETTINGS
Port Control
For the various major ports used in the system, set the prohibition/permission and port number, and tap the [Register]
key.
The ports that can be set are as follows.
Filter Setting
You can set the filter by an IP or MAC address to prevent an unauthorized access to the machine via a network.
Set the IP or MAC address filter and tap the [Store] key.
Factory default settings: Disable
IP Address Filter Settings
This option sets an IP address.
You can specify whether to allow or prohibit access to the machine from the IP address you set.
Factory default settings: Enable
Server Port Factory default settings Client Port Factory default settings
Port Control Enable/Dis
able
Port Control Enable/Dis
able
HTTP 80 Enabled HTTP Enabled
HTTPS 443 Enabled HTTPS Enabled
FTP Print 21 Enabled FTP Enabled
Raw Print 9100 Enabled FTPS Enabled
LPD 515 Enabled SMTP Enabled
IPP 631 Enabled SMTP-SSL/TLS Enabled
IPP-SSL/TLS 443 Disabled POP3 Enabled
Tandem Output Receive 50001 Enabled POP3-SSL/TLS Enabled
PC Scan 52000 Enabled SNMP-TRAP 162 Enabled
Remote Operation Panel 5900 Enabled Notify Job End Enabled
SNMPD 161 Enabled LDAP Enabled
SMB Disable LDAP-SSL/TLS Enabled
SMTP Enabled SMB Enabled
WSD Enabled SNTP Enabled
Print Release 53000 Enabled mDNS Enabled
Sharp OSA (Expansion
Platform)
Tandem Output Send Enabled
•HTTP 10080 Enabled Data Backup (Send) Enabled
•HTTPS 1443 Enabled Print Release Enabled
IPP INFRA Enabled
syslog 514 Enabled
syslog-SSL/TLS 6514 Enabled
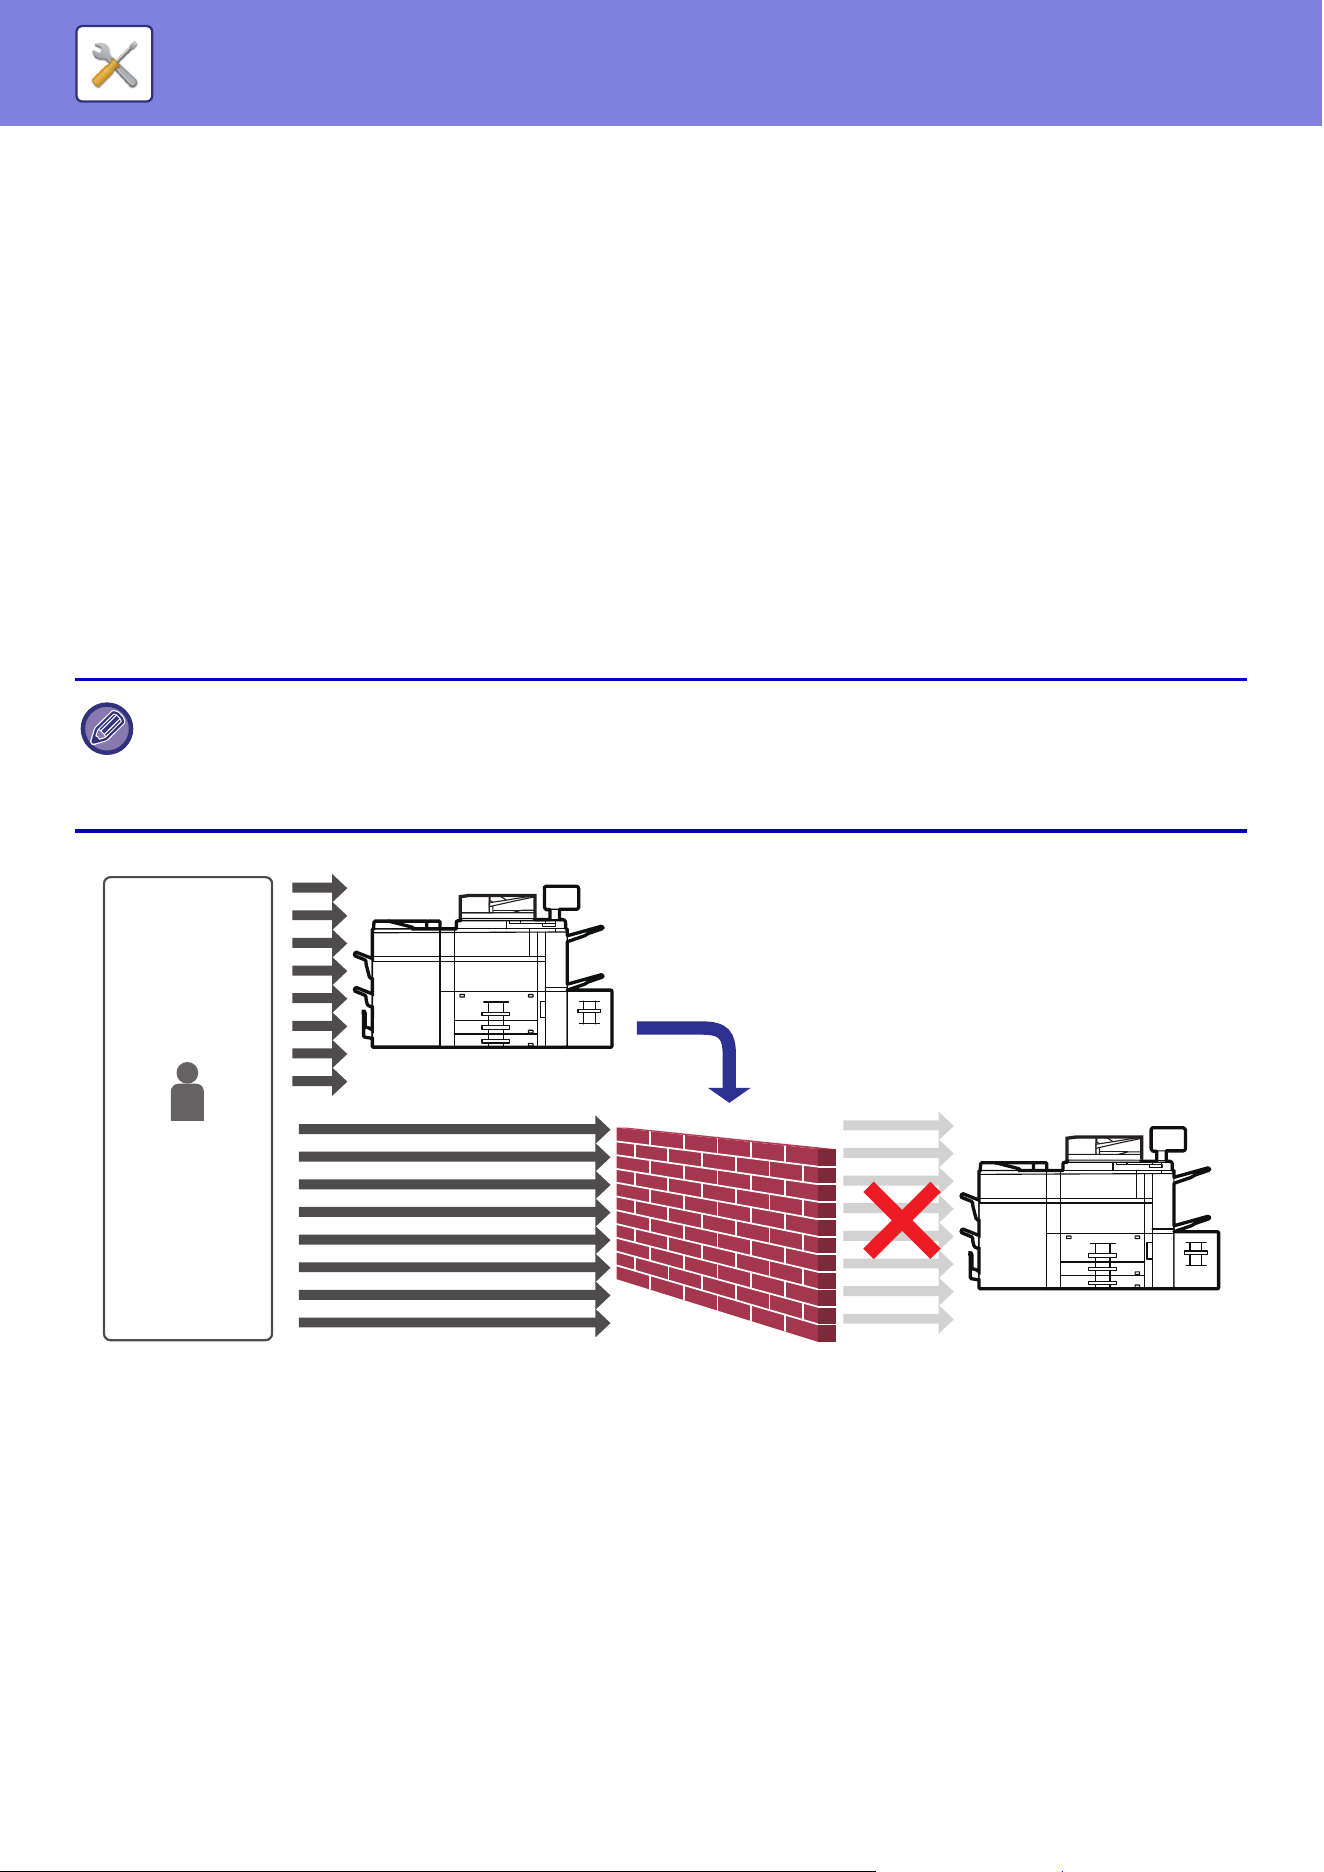
9-156
SETTING MODE►SYSTEM SETTINGS
MAC Address Filter Settings
This option sets a MAC address.
It allows access to the machine from the MAC address you set.
Intrusion/Attack Detection
This section explains how to protect the machine by partially blocking communications with an attempt to attack the
machine via network.
If the multifunction device receives more than the set number of communications from the same IP address within the
set period, communication from that IP address is prohibited.
IP addresses whose communication is prohibited are recorded in the audit log and registered as a reception refusal list.
In addition, those IP addresses are notified by e-mail to the addresses in the e-mail alert message list 1/2 and dealer
e-mail alert message list.
The removal of the IP address from the rejection list is also recorded in the audit log.
The maximum number of IP addresses that can be registered in the reception rejection list is 100, and when the number
reaches 100, external connection requests for multifunction devices will not be accepted.
Factory default settings: Disable
• Even if the power is turned on/off, the intrusion/attack detection settings and reception refusal list are retained.
When you execute [Reset the NIC] or [Factory Reset], the intrusion / attack detection settings and reception rejection list
are initialized.
• When you want to send e-mail to the E-mail alert address list or E-mail alert dealer address list, enable [Security Alert] in
[E-mail Alert].
IP address
xxx.xxx.xxx.1
When the first attempt of
attacking the machine is
made, the attacker’s IP
address is registered on the
list of denied IP addresses.
Since the attacker’s IP address is on
the list of denied IP addresses, their
attack does not reach the machine.
List of Denied
IP Addresses
xxx.xxx.xxx.1
List of Denied
IP Addresses
xxx.xxx.xxx.1
9-157
SETTING MODE►SYSTEM SETTINGS
List of Denied IP Addresses
Virus Scan Setting
This setting is available when the virus detection kit is installed. Specifies the settings for virus detection.
Virus Scan
Specifies whether to use the virus scan function.
Factory default settings: Disable
Virus Scan Settings
Perform Virus Scan on Input-Output Data
When the input/output data of the machine is generated, the corresponding data is scanned for viruses.
Factory default settings: Disable
Perform Virus Scan at Specified Time
Scans for viruses at the specified date and time.
Factory default settings: Disable
Perform Virus Scan Now
Perform this setting when you want to scan for viruses immediately.
Time Schedule
Specifies the schedule for virus scan.
Every Day
When this setting is enabled, a daily virus scan will be performed.
(Start Time)
Sets the time to start scanning.
Factory default settings:12:00
Every Week
When this setting is enabled, a virus scan will be performed every week on the specified day and time.
(Day of the Week)
Sets the day of the week to start scanning.
Factory default settings: Monday
(Start Time)
Sets the time to start scanning.
Factory default settings: 12:00
Item Description
IP Address Displays the IP address that is rejected. The default setting is "OFF".
Start Time of Incoming Packet
Denials
Displays the date and time when reception refusal started.
Total Displays the number registered in the reception rejection list.
Factory default settings: Allow
When you open the Virus Scan Setting for the first time, or when you go to the Virus Scan Setting if you have not agreed to
the software license agreement when you opened it before, the software license agreement screen will appear. Check the
contents, and if you have no problems using the software, select [Agree].
When the machine is not turned on at the date and time specified in the "Time Schedule", the virus scan will start the next
time the machine is started.

9-158
SETTING MODE►SYSTEM SETTINGS
Every Month
When this setting is enabled, virus scan will be performed on the specified day and time.
(Date)
Sets the date when the scan will start.
For months that have days that do not exist (for example, February and April when 31 is set), run at the end of the
month.
Factory default settings:1
(Start Time)
Sets the time to start scanning.
Factory default settings:12:00
Virus Scan Target
Select the data to be scanned for viruses.
• System File (Firmware)
• Embedded Application
• NAS Stored Data
Factory default settings: All enabled
Virus Definition File Update Setting
Perform Update Now
Perform this setting when you want to update the virus scan definition files immediately
When the machine is not turned on at the date and time specified in the "Time Schedule", the following operation is
performed.
• Even when the Audit Log is enabled, virus scan failures are not recorded.
• When you set "Every Day", the virus scan will not be performed until the same time the next day.
• When you set "Every Week" or "Every Month", the virus scan is performed after the first start up of the machine after the
time when the virus scan was not performed. Even if there are multiple times the opportunity to perform the virus scan
during a period of time when the machine is not turned on, the virus scan will only be performed once after the machine is
started up.

9-159
SETTING MODE►SYSTEM SETTINGS
SSL/TLS Settings
SSL/TLS can be used for data transmission over a network.
SSL is a protocol that enables the encryption of information communicated over a network. Encrypting data makes it
possible to transmit and receive sensitive information safely.
Data encryption can be set by the following protocols.
Setting of SSL/TLS
Server Port
• HTTPS: Apply SSL encryption to HTTP communication.
Factory default settings: Enable
• IPP-SSL/TLS: Apply SSL encryption to IPP communication.
Factory default settings: Disable
• Redirect HTTP to HTTPS in Device Web Page Access: When this setting is enabled, all communication that attempts
to access the machine by HTTP is redirected to HTTPS.
Factory default settings: Disable
Client Port
• HTTPS: Apply SSL encryption to HTTP communication.
Factory default settings: Enable
• FTPS: Apply FTP encryption to HTTP communication.
Factory default settings: Enable
• SMTP-SSL/TLS: Apply SMTP encryption to HTTP communication.
Factory default settings: Enable
• POP3-SSL/TLS: Apply SSL/TLS encryption to communication using POP3.
Factory default settings: Enable
• LDAP-SSL/TLS: Apply SSL/TLS encryption to communication using LDAP.
Factory default settings: Enable
• syslog-SSL/TLS: Apply SSL/TLS encryption when sending audit logs.
Factory default settings: Enable
• Verify Signature of Server Certificate of the Other Party:Validate the certificate of the server you are communicating
with.
Factory default settings: Disable
• TLS1.2: Use only TLS1.2.
Factory default settings: Enable
• TLS1.3: Use only TLS1.3.
Factory default settings: Enable
Level of Encryption
The encryption strength can be set to one of three levels.
Factory default settings: Low
Device Certificate
Certificate Status
Displays the status of the certificate required for SSL/TLS communication. Click the [Select] key to install the certificate.
Certificate Information
If the device certificate is installed, click the [Show] key to display the certificate information.
Select Device Certificate
Click the [Select] key to display the device certificates that have already been registered. Select from them.

9-160
SETTING MODE►SYSTEM SETTINGS
S/MIME Settings
S/MIME Settings
Sets whether or not to use S/MIME for scan to E-mail.
Factory default settings: Disable
Device Certificate
Certificate Status
Shows the status of the certificate required for sending using S/MIME. If you want to install the certificate, click the
[Select] key.
Sign Settings
Sign E-mail
Enable "Sign E-mail" to use a signature.
Factory default settings: Always Enable
Signature Algorithm
Set the algorithm for the signature.
Factory default settings: SHA-1
Encryption Settings
Encrypt E-mail
Sets the use of encryption.
Factory default settings: Always Enable
Encrypt
Select the method to be used for encryption.
Factory default settings: AES-128
Disable sending to the addresses which cannot be encrypted.
Prohibit transmission to addresses that cannot be encrypted.
Factory default settings: Enable
Certificate Information
If the device certificate is installed, click the [Show] key to display the certificate information.
Select Device Certificate
Click the [Select] key to display the device certificates that have already been registered. Select from them.
This setting can only be set on web pages.

9-161
SETTING MODE►SYSTEM SETTINGS
IPsec Settings
IPsec can be used for data transmission/reception on a network.
When IPsec is used, data can be sent and received safely without the need to configure settings for IP packet encryption
in a Web browser or other higher-level application.
When enabling this settings, take the following notes.
• It may take some time to reflect on the machine settings, and you cannot connect to the machine during this time.
• If the Setting mode (Web version) settings are not correctly selected, connection to the machine may not be allowed,
or the settings may not allow printing, scanning, or Setting mode (Web version) display. In this case, deselect this
setting and change the System Settings (on Web pages).
Condition Settings
IPsec Settings
Sets whether to use IPsec for transmission.
Factory default settings: Disable
IKEv1 Settings
Pre-Shared Key
Enter the Pre-Shared Key to be used for IKEv1.
SA Lifetime (time)
Set the SA lifetime.
Factory default settings: 28800 seconds
SA Lifetime (size)
Set the SA lifetime size.
Factory default settings: 28800 KB
IKE Lifetime
Set the IKE lifetime.
Factory default settings: 30 seconds
IPsec Rules
The registered IPsec rules are displayed.
To add a new rule, click the [Add] key.
To delete a rule, select the rule you want to delete and click the [Delete] key.
IPsec Rule Registration
Rule Name
Enter a name for the IPsec rule.
Priority
Set the priority level.
Factory default settings:1
Select the Rule Name to be the Registration Model
If there is a previously registered rule that is similar to the rule you want to create, you can create the new rule based on
the registered rule.
Device Address
Set the type of IP address to be used on the machine and the port number (for IPv6, set the port number / prefix length).
Client Address
Set the destination IP address type and port number (for IPv6, set the port number / prefix length).
Protocol
Set the protocol to be used.
Factory default settings: TCP

9-162
SETTING MODE►SYSTEM SETTINGS
Filter Mode
Configure settings for the authentication method used for IPsec.
Factory default settings: IPsec
IPsec Encryption
Configure settings for the authentication method used for IPsec.
ESP
Select to use ESP authentication.
Factory default settings: Enable
Allow Communication not using ESP
Specify whether or not communication that does not use ESP is allowed.
Factory default settings: Enable
AH
Select to use AH authentication.
Factory default settings: Disable
Allow Communication not using AH
Specify whether or not communication that does not use AH is allowed.
Factory default settings: Disable
9-163
SETTING MODE►SYSTEM SETTINGS
Document Administration Function
All of the transmitted image data (sent or received by e-mail transfer) can be forwarded to any destination.
List name Settings
Forwarding Destination Settings (Send Data)
Forward Send Data Set a destination to forward the send data.
Factory default settings: Disable
E-mail/Network Folder/FTP Select a forwarding type of the send or received image data. When determined, select the
destination from the address book.
You can enter an e-mail directly.
• Format: Select the file format for inbound routing.
Clear Setting Releases the destination settings.
File Format Select the file format for inbound routing.
Even if using the scanner function "AUTOMATICALLY ADJUST SKEWED SCAN DAT
A (Original Skew Adjustment) (page
5-127)", correction results will not be reflected.
9-164
SETTING MODE►SYSTEM SETTINGS
Hidden Pattern Print Setting
Select Hidden Pattern Print Setting.
The hidden pattern print function is effective at preventing unauthorized copying as the specified text emerges in the
background on output sheets.
Initial Status Settings
Condition Settings
Print Contents Setting
Item Description
Hidden Pattern Print Setting A pattern print can be printed with this settings.
Factory default settings: All Invalid
Print Color Select a print color.
Factory default settings: Black
Exposure Select an exposure.
Factory default settings: Standard
Font Size Select a font size.
Factory default settings: 48point
Angle Select a character angle.
Factory default settings: 0°
Font Style Select the standard or italic character settings.
Factory default settings: Standard
Camouflage Pattern Set a camouflage pattern.
Factory default settings: Pattern 1
Print Method Select a character display pattern.
• Character stand out.
• The background stands out.
Factory default settings: Positive
Item Description
Pre-Set Word Allows you to select a preset character string.
The following character strings can be selected.
• DO NOT COPY, Copy Ban, Internal Use Only, Handle With Care, CONFIDENTIAL, Copy
Invalid, IMPORTANT, COPY
Factory default settings: Enable, Copier
Pre-set Text Select a stored preset character string.
This setting is ignored if [Direct Entry] is enabled.
• DO NOT COPY, Copy Ban, Internal Use Only, Handle With Care, CONFIDENTIAL, Copy
Invalid, IMPORTANT, COPY
Information Printing Enables simultaneous printing of the following information sets.
• Serial number, account job ID, login name/user number, number of copy control, date
and time
Factory default settings: All Invalid
Disable Direct Entry Set whether to enable direct input of print characters for tint block printing in each mode.
Factory default settings: Disable
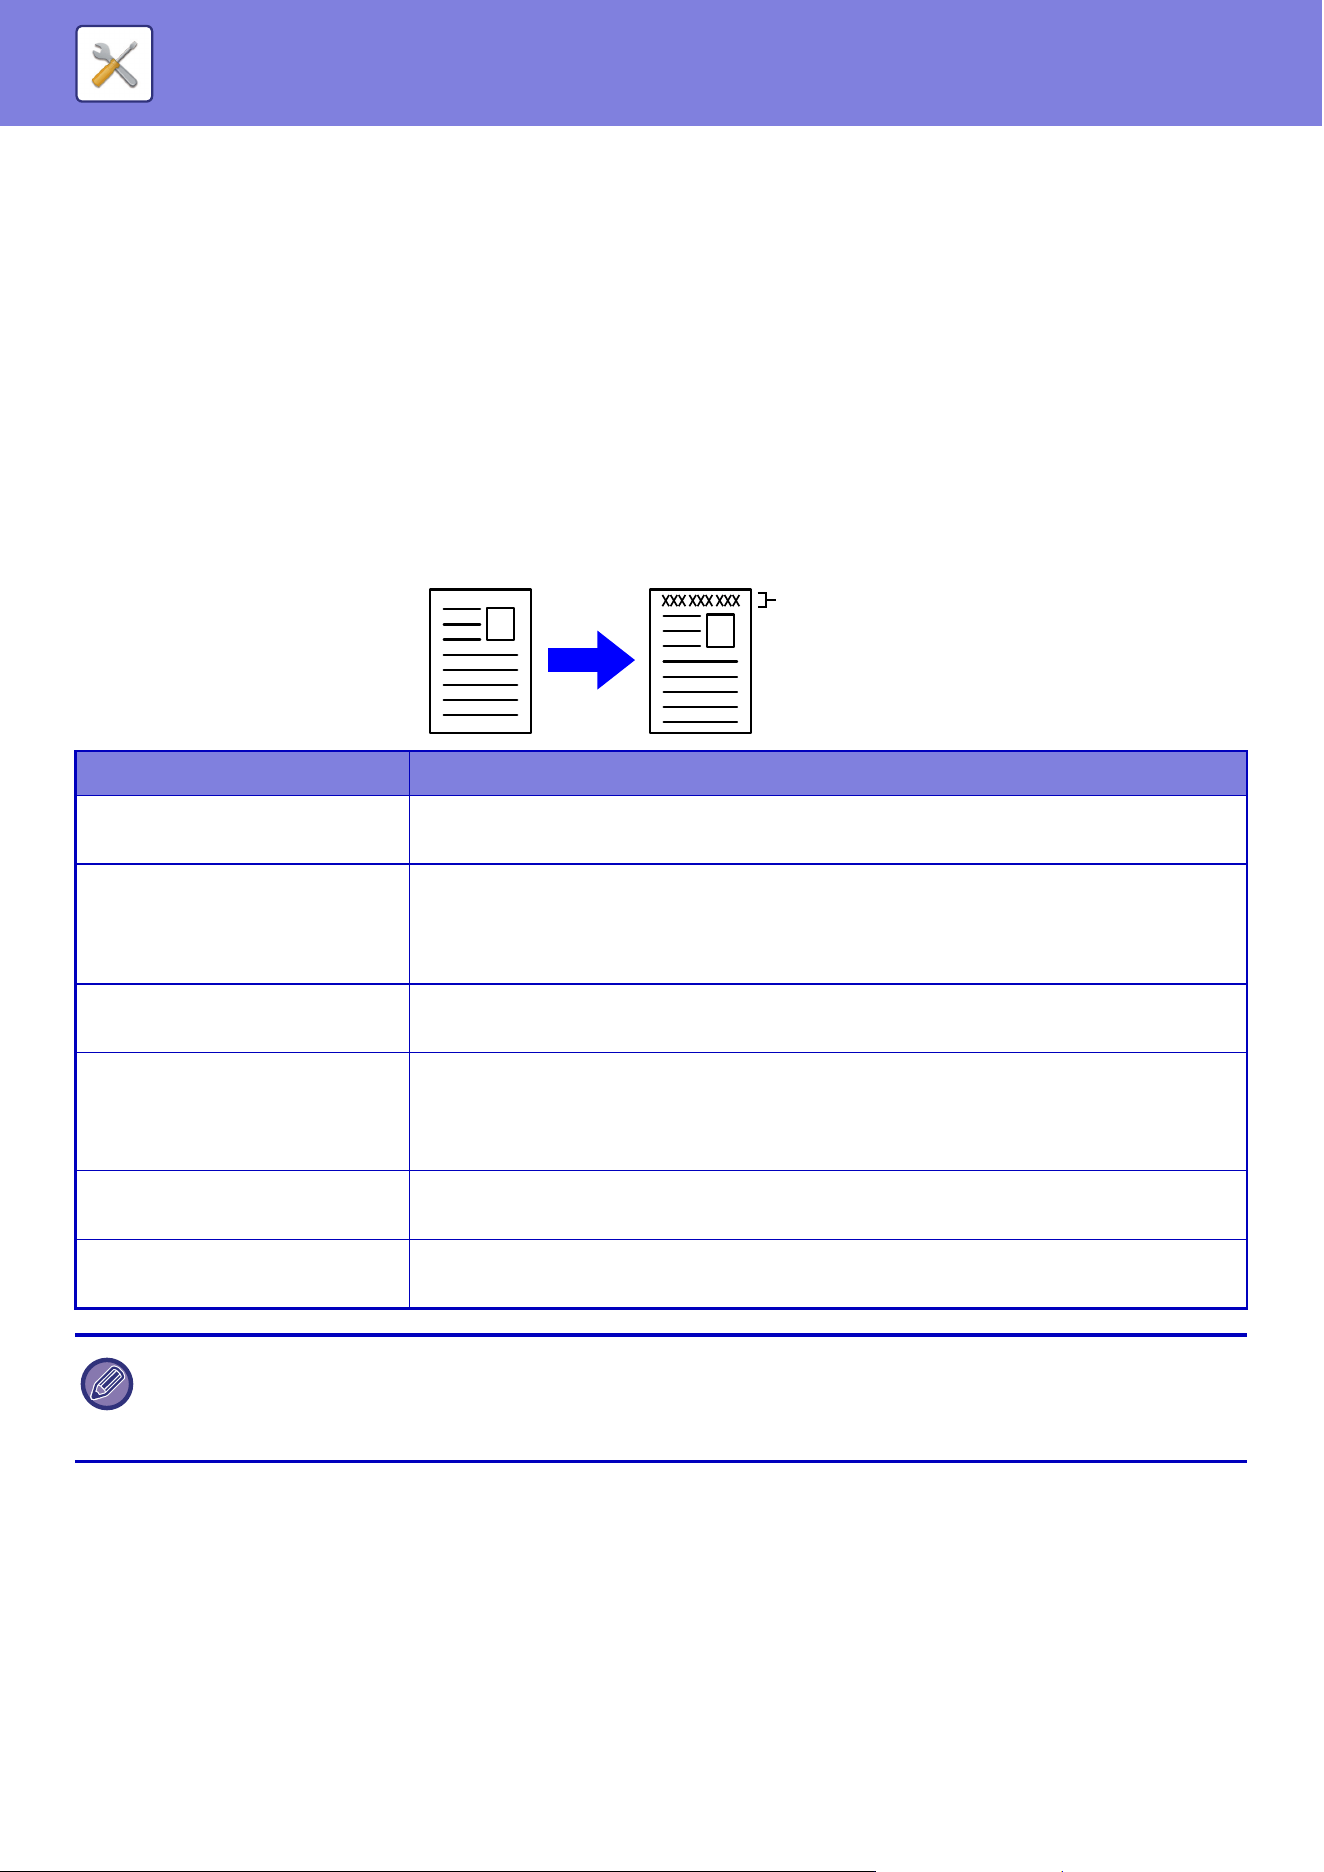
9-165
SETTING MODE►SYSTEM SETTINGS
Contrast
Set a character contrast.
The black, magenta, and cyan can be set in any of 9 levels.
Factory default settings: All 5
Custom Text Registration
Stores the user-created print characters. Up to 30 characters can be stored.
Tracking Information Print
Prints the tracking information at the top or bottom of output pages when copy or print job is executed.
This function forcibly prints the pre-specified traceable information to prevent an unauthorized copy.
Item Description
Tracking Information Print Setting Set this option to print the tracking information.
Factory default settings: Disable
Print Information The following information can be printed.
• Serial number, characters, account job ID, login name/user number, date and time
Factory default settings: Serial number:Enable, Text:Disable, Account Job ID:Enable,
Login Name/User Number:Enable, Date/Time:Enable
Print Color Set the print color.
Factory default settings: Black
Print Position Set a print position on each page.
Factory default settings: Print Upper Side of Paper:Disable, Print Lower Side of Paper:En-
able, Print Left Side of Paper:Enable, Print Right Side of Paper:Disable, Position Adjust-
ment:1(Outer)
Font Size Set the size of the characters to be printed.
Factory default settings: Middle
Select the Job to Print Set a job to print the tracking information.
Factory default settings: All Enabled
• If this function is specified together with another image compositing function, tracking information is printed at the top.
• The information added at printing or the preview image of the account job ID and date/time are displayed as shown below.
Account job ID: 00000
Date/time: MM/DD/YYYY hh:mm
Originals
Trace
information
area

9-166
SETTING MODE►SYSTEM SETTINGS
Audit Log
Logs are created and saved for various events relating to security functions and settings.
Audit logs are created and saved in English. However, setting values such as filenames which are input from external
sources are saved as-is.
Audit logs which have been saved in the internal storage can be exported by an administrator to a PC as TSV files.
You can select either the internal storage or an external server as the destination for saving audit logs.
Administration Settings
"Audit Log" can be carried out as follows.
In "Settings (administrator)", select [System Settings] → [Security Settings] → [Audit Log]
Select "Security Control", "Storage/Send Settings" or "Save/Delete Audit Log".
Factory default settings: Disable
Storage/Send Settings
"Storage/Send Settings" can be carried as follows.
In "Settings (administrator)", select [System Settings] → [Security Settings] → [Audit Log]→ [Storage/Send Settings]
Then make the storage and transmission settings.
Factory default settings: Local Drive Store:Enable, Server Send:Disable, Enable SSL/TLS:Disable, Port Number:514, Port Number
(Use SSL/TLS):6514
Save/Delete Audit Log
"Save/Delete Audit Log" can be carried out as follows.
In "Settings (administrator)", select [System Settings] → [Security Settings] → [Audit Log]→ [Save/Delete Audit Log]
Select "Save Audit Log" or "Delete Audit Log".
Audit Log specifications
If the audit log is saved to an external server, the audit log is temporarily saved in the buffer area reserved in the internal
storage until the transmission to the external server is successful.
• Audit logs that are successfully sent to the external server are cleared from the buffer area.
• If the transmission to the external server fails, a warning message will be displayed on the operation panel and the
screen of the web page, and the transmission will be periodically retransmitted to the external server until the
transmission is successful.
The audit events and information stored in the audit log are as shown in the following table.
When the space for saving audit logs internally becomes full, the logs are overwritten starting from the oldest ones.
• "Save Audit Log" can only be carried out from the web page.
• If you have set a high level of security, it will not be displayed if audit logging is disabled or storage storage is disabled.
If the power of this machine is turned off by a method other than the procedure described in the user's manual or due to a
power failure, the [End Audit] event may not be recorded. Make sure to turn off the power of this machine according to the
correct procedure. We also recommend using an uninterruptible power supply (UPS) in the event of an unforeseen event
such as a power outage.

9-167
SETTING MODE►SYSTEM SETTINGS
Event name Date &
Time
*1
Operation
I/F
*2
Login Name Result
*
3
Additional Information
Audit Start Yes N/A N/A Yes Reasons for starting
Normal start-up: main power on,
panel SW pressed, reboot, timer,
network, other
Other: security erase
Audit End Yes N/A N/A Yes N/A
Job Completion Yes Yes Job owner
(SYSTEM)
Yes Finished job name
I&A Success Yes Yes The string entered as
your login name
N/A IP address of the login source
127.0.0.1 for the operation panel
I&A Failure Yes Yes The string entered as
the login name
N/A IP address of the login source
127.0.0.1 for the operation panel
Add User Yes Yes User who added Yes Added login name
Login Terminated Yes Yes The string entered as
your login name
N/A Active termination/
Timeout
Change Password Yes Yes The user who made
the change
Yes Login name of the user whose
password has been changed
Change Login Name Yes Yes The user who made
the change
Yes Login name after change
Delete user Yes Yes User who deleted Yes Deleted login name (ALL if all
users are deleted)
Add Auth Group Yes Yes User who added Yes Added authority group name
Change Role Yes Yes The user who made
the change
Yes • Login name of the user whose
authority group has been
changed
• Changed authority group name
Change Auth Group Setting Yes Yes The user who made
the change
Yes Privilege changed settings
Group Name
Add Page Limit Group Yes Yes Users with additional
functions
Yes Name of the additional page limit
group
Delete Page Limit Group Yes Yes Users whose functions
are deleted
Yes Name of the deleted page limit
group
Change Page Limit Group
Setting
Yes Yes Users who have
changed the settings
Yes Name of the changed page limit
group
Change Time Setting Yes Yes The user who made
the change
Yes N/A
Change Setting Yes Yes User who made the
change (“ByPolicy”
when applying AD
policy)
Yes • Setting items whose setting
values have been changed
• Set value after change
Firm Recovery Yes N/A N/A Yes • Firmware name
• Firmware version after recovery
Exec Rejection Yes N/A N/A Yes Distinguished name of firmware or
embedded OSA app

9-168
SETTING MODE►SYSTEM SETTINGS
TLS, IPsec communication
failure (Comm Failure)
* Communication partner is
other than the audit server
Yes N/A Users who are
communicating
N/A • IP address of the
communication starter
• IP address of the
communication partner
• Communication direction
• Reason for failure
Modify AddrBook Yes Yes User who updated Yes • At the time of addition: Internal
management ID and destination
name of the added entry
• When deleting / changing:
Internal management ID of
deleted / changed entry
Firm Update Yes Yes User who updated Yes • Firmware name
• Firmware version before update
• Firmware version after update
Intrusion/Attack Detected Yes N/A N/A Yes • IP addresses that have been
blocked
• When the maximum number of
detections is reached, "reaches
limit" is added.
Release Denied Addr Yes Yes Users who have been
released
Yes Released IP address
Invoke EAM App Yes N/A N/A Yes Starting Sharp OSA External
Accounts Application
Additional Information: IP Address
and Application Name of Sharp
OSA External Account Server
CSRF Trial Yes Net N/A N/A Attacking IP address
Enabling Embedded OSA
Applications
Yes Yes (N/A for
firmware
updates)
Users who have
activated the function
(default administrator
for installation and
update via Application
Portal, system for
firmware update)
for installation and
update from
Application Portal,
"system" for firmware
update)
Yes • Application name
• Connection details (IP address
where the activation operation
was performed)
(127.0.0.1 for the operation
panel))
Send External Dest Yes Yes Users who sent Yes Destination e-mail address/IP
address/SMB folder path
Web Push Print Yes Yes Users of the function Yes IP address from which the file was
downloaded
Change Service Setting Yes Yes Users who have
changed the settings
Yes Changed settings and their values
Switch to service mode Yes Yes Service Yes N/A
Running in service mode Yes Yes Service Yes Changed setting values
Event name Date &
Time
*1
Operation
I/F
*2
Login Name Result
*
3
Additional Information
9-169
SETTING MODE►SYSTEM SETTINGS
* 1 The date and time when the event occurred is displayed in the extended format of ISO 8601.
* 2 Either Ope/Web/sNet is displayed as the operation interface. However, if it is “N / A” in the table, it will be written as “N / A”.
* 3 Either Success / Failure will be displayed as the result of the event.
Sharp OSA external account
user authentication
Yes Yes The string entered as
your login name
Yes N/A
Scheduled Virus Scan Yes N/A N/A Success
/ Failure
In case of failure, the reason
• Interruption of running scan
due to power off Interruption of
the scan
• Any other reason Interruption of
a running scan due to other
than the above
• Scan failure due to errors other
than the above
On-demand Virus Scan Yes Ope/Web Users who requested
the scan to be
performed
Success
/ Failure
In case of failure, the reason
• Interruption of running scan
due to power off Interruption of
the scan
• Any other reason Interruption of
a running scan due to other
than the above
• Scan failure due to errors other
than the above
Virus Detection Yes N/A N/A Always
"Succes
s"
One of the following
• Firmware
• Inbound data
• Outbound data
• Stored data
• OSA app
Data identification name (file
name, etc., if obtainable. N/A if not
possible)
Identification name of the virus
Auto Pattern Update Yes N/A N/A Success
/ Failure
In case of failure, the reason
• Connection error to the server
• Failed to download the pattern
file
• Incorrect system setting time
• Scan failure due to errors other
than the above
On-demand Pattern Update Yes Ope/Web Users who requested
the implementation of
the update
Success
/ Failure
In case of failure, the reason
• Connection error to the server
• Failed to download the pattern
file
• Incorrect system setting time
• Scan failure due to errors other
than the above
Change Setting Yes Yes Users who have
changed the setting
values
Success
/ Failure
Setting items and values for Web
page (Virus Scan Setting)
Event name Date &
Time
*1
Operation
I/F
*2
Login Name Result
*
3
Additional Information
9-170
SETTING MODE►SYSTEM SETTINGS
Certificate Management
Device Certificate Management
Import
Import the certificate/private key.
Export
Export the certificate/private key.
Certificate Information
Shows the status of the certificate.
Creation of Certificate and Private Key
Common Name (Required)
Enter the name to be used.
Organization
Enter the name of the organization.
Organizational Unit
Enter the name of the unit within the organization.
City/Locality
Enter the city or locality.
State/Province
Enter the state or province.
Country/Region (Required)
Enter the country code.
Sender Address
Enter the sender's E-mail address.
Certificate Start Date
Enter the start date and time for the certificate.
Certificate Validity Period
Enter the expiration date of the certificate.
Certificate Information
Enter the Certificate Information.
Certificate Signing Request (CSR) Management
Install
Install the certificate.
This setting can only be set on web pages.
This setting can only be set on web pages.
This setting can only be set on web pages.

9-171
SETTING MODE►SYSTEM SETTINGS
Certificate Information
Shows the status of the certificate.
Make of Certificate Signing Request(CSR)
Common Name (Required)
Enter the name to be used.
Organization
Enter the name of the organization.
Organizational Unit
Enter the name of the unit within the organization.
City/Locality
Enter the city or locality.
State/Province
Enter the state or province.
Country/Region (Required)
Enter the country code.
Sender Address
Enter the sender's E-mail address.
Certificate Start Date
Enter the start date and time for the certificate.
Certificate Validity Period
Enter the expiration date of the certificate.
Certificate Information
Enter the Certificate Information.
CA Certificate Management
Import
Import the certificate.
Certificate Information
Shows the status of the certificate.
9-172
SETTING MODE►SYSTEM SETTINGS
Energy Save
Eco Setting
The machine's power consumption can be reduced by Eco Mode setting. Although each function setting can be
changed separately, the machine has the "Custom" and "Eco Mode" to allow simultaneous changing of settings.
Eco Recommendation Function Display
You can display eco-recommended functions such as two-sided printing and N-Up during copying, document filing print,
and direct print.
Setting values applied by each mode is as follows.
Factory default settings: Disable
Display Message When Extending Transition Time to Preheat/Auto Power
Shut-Off Mode
Set whether a message is displayed 15 seconds before Preheat Mode or Auto Power Shut-Off Mode is entered.
Factory default settings: Disable
Mode Setting
This function allows you to set the Eco function at once. There are "Custom Mode" and "Eco Mode".
Energy Save Custom Mode Eco Mode
Preheat Mode Setting 1 minutes 1 minutes
Turn off Panel Display during pre-heat mode On On
Auto Power Shut-Off Timer Fix transition time.:
15min.
Fix transition time.:
1min.
As soon as the remote job is finished, enter
Auto power shut off mode.
On On
Sleep Mode Power Level Low Power Low Power
Eco Scan Setting On On (All Modes Except Copy)
Each Energy Save settings in System Settings is not applied when Custom/Eco mode is used.
Item Description
Custom Mode Allows easy machine operation with reduced power consumption.
Eco Mode Minimizes the machine's power consumption.
9-173
SETTING MODE►SYSTEM SETTINGS
Preheat Mode Setting
The time until the preheating mode works is 1 to 120 minutes in 1-minute units.
Preheat Mode will activate when the set duration of time elapses after printing ends and no further operations are
performed. This function reduces your power costs, and at the same time helps conserve natural resources and reduce
pollution.
Select the time that best suits the needs of your workplace.
The panel display can be turned Off in the Preheat mode.
Factory default settings: 1 minutes
Turn off Panel Display during pre-heat mode
Set whether the lights on the operation panel turn off in preheat mode.
Factory default settings: Enable
As soon as the remote job is finished, enter Auto power shut off mode.
This function works in Auto Power Shut-Off mode. When the machine completes a print job received from the PC, the
machine immediately returns to the Auto Power Shut-Off mode.
Factory default settings: Enable
Fix transition time.
The Auto Power-Off transition time is fixed. Select [Fix transition time.], and set the transition time in [Auto Power
Shut-Off Timer].
When this setting is enabled, the [Change transition time by time of day.] option is disabled.
Factory default settings: Enable, Auto Power Shut-Off Timer:11 minutes
Change transition time by time of day.
This function controls the transition to Auto Power Shut-Off mode optimally for each time period by analyzing the use of
the machine based on job logs obtained during a 4-week period.
When this setting is enabled, the [Fix transition time.] option is disabled.
Factory default settings: Disable
Preheat mode cannot be disabled.
•
The image transfer control settings are not changed.
• This does not link to the Power On/Off Scheduling. If both of them are enabled, the Power On/Off Scheduling settings
precede.
• Pages are counted for each paper size separately.
• When the power supply of the machine was off, there was no job during this time.
9-174
SETTING MODE►SYSTEM SETTINGS
Transition to Energy Saving and Auto Power Shut-Off modes
* Factory default setting
Auto
This function controls the power optimally for each time period by analyzing the use of machine based on job logs
obtained during a certain time period.
Manual
You can set a pattern for each time band.
The machine already has the 3-pattern template. The Energy Save pattern can be added to the "Original Eco Patterns 1
to 4".
Three-pattern template
Sleep Mode Power Level
Low Power: The machine switches to the power saving mode, but it takes some time to recover.
Fast Wake Up: Compared with Low Power, the power value rises by a certain degree, but it results in faster recovery.
Factory default settings: Low Power
Pattern Transition time Average outputs per
hour*
Mode1 (Job Start Priority1) After 1 hour 1000 or more
Mode2 (Job Start Priority2) After 30 minutes 250 to 999
Mode3 (Energy Saving
Priority1)
After 5 minutes 60 to 249
Mode4 (Energy Saving
Priority2)
After the minimum time period 0 to 59
If the machine does not have the 4-week job log information, the machine enters the template2 (Mode3 (Energy Saving
Priority1) between 8:00 and 18:00 hours). Then after that, it enters Mode4 (Energy Saving Priority2).
Template Pattern Description of mode
Template 1 All Day "Energy Save
Priority2"
The machine runs in the "Mode4 (Energy Saving Priority2)" all the
time.
Template 2 8:00-18:00 "Energy Save
Priority1"
The machine runs in "Mode3 (Energy Saving Priority1)" between
8:00 and 18:00, and in "Mode4 (Energy Saving Priority2)" at other
times.
Template 3 8:00-18:00 "Job Start
Priority1"
The machine runs in "Mode1 (Job Start Priority1)" between 8:00 and
18:00, and in "Mode4 (Energy Saving Priority2)" at other times.
9-175
SETTING MODE►SYSTEM SETTINGS
Eco Scan Setting
This setting keeps the fusing unit off when you perform an operation that does not involve printing, such as sending a
scanned document.
Set "Eco Scan Setting" to , and select a mode or screen in which to enable Eco Scan Setting.
The following modes and screens can be set.
• Home Screen
• Copy
• Image Send
• Document Filing
•System Settings
• Sharp OSA
Factory default settings: Enable, Home Screen:Disable, Copy:Disable, Image Send:All Enabled, Document Filing:All Enabled, Sys-
tem Settings:Enable, Sharp OSA:All Enabled
Energy Saving Pattern List
This function analyzes machine usage and controls entry into auto power shut-off mode based on frequency of use. If
you want to manage machine power by using an energy saving pattern list, select [Manual] in [System Settings] - [Eco
Setting] - [Change transition time by time of day.], and select an Automatic Update Pattern from the pull-down list or one
of Original Eco Patterns 1 to 4.
To automatically analyze machine usage and update the pattern as needed, set Automatic Update Pattern.
Edit Pattern
Set the Original Eco Pattern.
Item Description
Change Pattern Name To change the pattern name, enter the desired name.
Pattern to Be Modeled Select the stored pattern that you want to base the new pattern on. To copy the settings of
a selected pattern, select [Copy the selected pattern.].
Energy Save Setting Set time periods for machine modes. Select a mode from 1 to 4, and select a day of the
week, start time, and end time.
Day of the Week Set the day of week on which you want to enable the mode selected in the Energy Save
Setting.
Start Time/Completing Time Set the period of time during which you want to enable the mode selected in the Energy
Save Setting.
9-176
SETTING MODE►SYSTEM SETTINGS
Specific Date Operation Settings
You can configure a day on which you have high-output printing or want to perform a special operation as the "specific
date" and set a specific energy saving pattern only for that specific date.
"Specific Date" tab
A period of up to 7 days can be set for Specific Date. Set the specific date, energy saving pattern to be applied, and the
operation that takes place if the specific date falls on a non-work day.
"Pattern" tab
This tab is used to configure the details of an energy saving pattern.
"Holiday" tab
Specify a holiday. The day you specified as the holiday will not be a specific date.
The specific date operation is performed on the day configured as the specific date regardless of the setting on Auto
Power-Off transition time (enabled or disabled).
Item Description
Date Configure the date on which you want to operate the machine with a specific pattern.
Select a day between 1 and 31 in Every Month or from End of Every Month.
Applied Energy Saving Operation Select an energy saving patten you want to apply.
Use the "Pattern" tab
(page 9-176) to specify the details of the energy saving pattern.
Operation for Holiday Configure how the machine operates if the preset specific date falls on a holiday.
Use the "Holiday" tab
(page 9-176) to specify the day as the holiday.
• If a specific date that is initially specified coincides with the one that is moved because it falls on a holiday, the setting for
the former takes precedence.
• If specific dates of the same dates are configured, they are used in ascending order between 1 and 7 (specific date
numbers).
Item Description
Energy Save Operation Select a specific date pattern you want to specify.
Change Pattern Name Enter a pattern name when you want to change the name of a specific date pattern.
Pattern to Be Modeled Select a source pattern when you create a pattern using a stored or preset pattern.
Add new schedule. Add a schedule.
Item Description
Holiday List When you tap this option, the dates and days of the week for the holidays you have set for
two years.
Day of Week Use this option to specify a holiday using a day of the week.
Set Period Use this to specify a holiday using a date.
"Final Registered Time" shows when the holiday that is stored with Set Period was stored.

9-177
SETTING MODE►SYSTEM SETTINGS
Power ON/OFF Schedule Setting
The machine operator panel can be turned On or Off at a preset time. Up to three (3) patterns can be set. The "Setting
1", "Setting 2" and "Setting 3" are executed in this sequence if set at the same day of week or at the same clock time.
Toner Save Mode
This mode is used to reduce toner consumption.
Toner consumption can be set for each print job of "Copy", "Printer", and "Prints (Document Filing)".
Toner consumption can be selected from three levels.
• Toner Save1 (Toner Consumption: Much)
• Toner Save2 (Toner Consumption: Middle)
• Toner Save3 (Toner Consumption: Little)
Factory default settings: All Invalid
• The scheduling function does not support the power management se
ttings in the Preheat Mode and Auto Power Shut-Off
Mode.
• The preset power-off time is subject to the following restrictions:
• If the machine is running due to the current job execution or other reasons, the machine is turned off only after the job
has finished.
• The machine cannot receive printer jobs.
• If the Time Specified Output of Received Data setting is enabled, they are output next time the machine is turned on.
• If the power management setting is also enabled, the Power On/Off Scheduling settings precede.
• If the same time is specified, settings are applied in the order of "Setting 1", "Setting 2", and "Setting 3".
• The power is not turned off in the following cases:
• "Automatic deletion when power is turned on" is in progress.
• While the optimization of the local drive is in progress or while a restart is in progress after the setting mode has been
changed.
• The preset power on/off time is within one minute from when the setting is accepted.

9-178
SETTING MODE►SYSTEM SETTINGS
System Control
Job Log
View Job Log
Views log of a job executed on the machine.
Select a view item and period, and tap the [Show] key.
Factory default settings: Job Log:All Enabled
Job log Operation
Deletes or stores log of a job executed on the machine.
Set the number of jobs for [The Number of Job Log to Notify by E-mail] and click [Store].
Tap the [Delete] key to delete the job log.
Factory default settings: The Number of Job Log to Notify by E-mail:50000
Data Import/Export (CSV Format)
You can import or export data.
Export Settings
Export Settings Type
Select the data to be exported from the address book or registered user information. Once you have selected the data,
click the [Execute] key. The data will be exported in CSV format.
Factory default settings: Address Book:Enabled, User Register Information:Disabled
Import Settings
Import settings from file
You can import data that was exported in CSV format into the machine.
You can save the job log by selecting the [Job Log] in Setting mode (Web version).
9-179
SETTING MODE►SYSTEM SETTINGS
Storage Backup
Address book information and user information stored in the machine can be saved to and retrieved from a USB
memory device.
To use the machine to manipulate a file, first insert the USB memory device in the machine. If you need to select
settings on the Web page, use your computer to manipulate the file.
Export Settings
Exports data.
Factory default settings: All Invalid
Import Settings
Imports data into the machine.
Device Cloning
Saves the machine setting information in XML format and copies the information to another machine.
This function saves you the trouble of repeatedly configuring the same settings in multiple machines.
To use the machine to manipulate a file, first insert the USB memory device in the machine. If you need to select
settings on the Web page, use your computer to manipulate the file.
Export Settings
Exports data.
Factory default settings: All Invalid
Import Settings
Imports data into the machine.
Address Book Forward
Forward the data stored in the address book of the machine to another machine.
To forward the address book contents, enter the IP address of the destination machine and the password of the
administrator of that machine, and tap the [Execute] key.
When [Password Policy Settings] is enabled, the following user accounts are not targeted for import.
• User accounts that do not have a minimum password length.
• When [Enable Password Creation Rules] is enabled, user accounts that do not fully match this setting.
• User accounts that have been determined to be reregistration when [Prohibit Reuse of Deleted User’s Account Name] is
enabled.
• For models that can be imported, please contact the store where you purchased the product.
• The following data is not copied when device cloning is performed:
• List print.
• Count and device status display items.
• IP address of the machine, device name, administrator password, sender names for image send, and other information
that is specific to the machine.
• Adjustment values unique to each hardware, such as screen contrast/saddle stitch staple position adjustment
9-180
SETTING MODE►SYSTEM SETTINGS
Filing Data Backup
You can back up a file saved with Document Filing, and restore a backed up file to the machine.
Export Settings
Select the folder you want to back up and click [Execute]. The files are saved to your computer.
Import Settings
You can restore a file to the machine that was saved with "Export Settings". Enter a maximum of 200 characters for the
path of the saved file in "Import settings from file", and click [Execute].
Reset Settings
Restore Factory Defaults
Restores the current settings (you have selected in Setting mode) to the factory default settings. If you wish to create a
record of the current settings before restoring, print the current settings by selecting [Status] in "Settings (administrator)"
→ [Data List] → [List for Administrator]".
Reset the NIC
This returns all "Network Settings" to the factory default settings.
Optimization of a Local Drive
Various devices mounted on the machine can be set.
This function optimizes the local drive of the machine by defragmenting data. If a job is in progress, a message will
appear and optimization will not begin until the job is finished. During optimization, the following operations are not
possible:
• Access to Setting mode (Web version), and reception of print data
• Use of keys on the operation panel
• Turning off the power with the main power switch of the machine.
• Auto Power Shut-Off
When optimization is completed, the machine will automatically restart.
Backup of filing data is operated in the setting mode (Web version).
Item Description
Index The displayed Folder names can be filtered by index.
Display Items Set the number of files that are displayed.
When settings are changed, the changes will take effect after the machine is restarted. For details on restarting this machine,
see "TURNING ON THE POWER
(page 1-9)".
When the document filing function is frequently used and output of files seems somewhat slow, optimizing the hard drive may
improve performance.
9-181
SETTING MODE►SYSTEM SETTINGS
E-mail Alert and Status
Status Message
Selects the Standard E-mail Status function or Advanced E-mail Status function settings.
The E-mail Status function can periodically transmit the machine status information to the stored address.
Standard
Sets the E-mail status address list 1, E-mail status address list 2, and E-mail status dealer address list separately.
Advanced
Status Message by E-mail Request Setup
Item Description
E-mail Address Enter the destination e-mail address for transmission of machine status information. When
you enter multiple addresses, separate them by a semicolon (;) or a comma (,).
Send Now When tapped, the status message is sent to the destination of the e-mail address list.
Send by Schedule 1 If checked as , an E-mail is sent periodically according to the preset schedule.
Send by Schedule 2 If checked as , an E-mail is sent periodically according to the preset schedule.
Time Schedule Select a schedule to send E-mails.
Item Description
POP3 Server Enter the IP address or host name of the POP3 server.
Port Number Enter the port number of the POP3 server.
Factory default settings:110
POP Authentication The authentication protocol (including APOP) is used for authentication to the POP3 server.
Factory default settings: Disable
User Name Enter the user name. The special user account is required for bi-directional e-mail status
transmission.
Password Enter the password.
To change the password, set [Change Password] to .
Check Interval Enter the polling interval for the POP3 server. The default setting is five minutes.
Enable SSL/TLS When SSL/TLS is enabled , encrypted communication is performed as POP over
SSL/TLS or POP over TLS by STLS command.
Therefore, the server must support POP over SSL/TLS or STLS commands.
For POP over SSL / TLS, set the POP over SSL / TLS port number in "Port Number".
To allow POP over TLS communication, set the "Port Number" to the same port number as
for the normal POP3 communication.
Factory default settings: Disable
Connection Test Tap the [Execute] button to test the connection to the POP3 server.

9-182
SETTING MODE►SYSTEM SETTINGS
Alerts Message
Selects the E-mail Alert function settings.
The E-mail Alert function can report a trouble of the machine to the administrator or dealer using e-mail.
Sets the E-mail Alert Message List 1, E-mail Alert Message List 2, and Dealer E-mail Alert Message List separately.
E-mail Address
Enter the destination E-mail address for alert message transmission. You can enter multiple addresses by separating
them by a semicolon or comma.
Example: aaa@xxxxx.□□□; bbb@xxxxx.□□□
A report will be sent by e-mail in the following situations. You can individually set the status for sending alerts for each
address list. When the unit becomes the target of the alert, an email will be sent to the set address.
Jam, Toner Low, Toner Empty, Paper Empty, Service Request, PM Request, Waste Toner Almost Full, Waste Toner
Full, Job Log Full, Security Alert
Factory default settings: All enable except security alerts
SMTP Settings
Use SMTP Server in [Network Settings].
Set the SMTP server settings used for e-mail status and E-mail alert to the same settings as SMTP Settings (page
9-137) of network setting.
SMTP Settings
Use this setting when not using "Use SMTP Server in [Network Settings].".
Primary Server
Enter the IP address or the host name of the primary SMTP server.
Secondary Server
Enter the IP address or the host name of the secondary SMTP server.
Port Number
Enter a port number.
Factory default settings: 25
Timeout
Enter a timeout. This value is used for connection to the SMTP server and for data transmission according to the e-mail
system specifications.
Factory default settings: 20 seconds
Sender Name
Enter the sender name.
Sender Address
Enter the sender's address.
Enable SSL/TLS
If the SSL is enabled , the SMTP-over-TLS encryption communication can be used by STARTTLS command.
This requires the server to support the STARTTLS command.
To allow SSL/TLS communication, set the "Port Number" to the same port number as the normal SMTP.
SMTP Authentication
Carries out the SMTP server authentication.
If you use the Kerberos authentication, set the KDC server, port number, and realm on the Kerberos authentication
settings page.
User Name
Enter the user name.
Password
Enter the password.
To change the password, set [Change Password] to .

9-183
SETTING MODE►SYSTEM SETTINGS
POP before SMTP
If is set, you are authenticated to the POP server before using the SMTP communication.
• POP3 Server: Enter the IP address or the host name of the secondary SMTP server.
• Port Number: Enter the POP3 port number for POP before SMTP communication. The default setting is port 110.
• POP Authentication: If is set, the authentication protocol (including APOP) is used for authentication to the POP3
server.
• User Name: Enter the user name for POP before SMTP communication.
• Password: Enter the password required for POP before SMTP communication. To change the password, set [Change
Password] to .
• Enable SSL/TLS:If set to , the POP over SSL/TLS communication or the POP over TLS communication by STLS
command is enabled.
This requires the server to support the POP over SSL/TLS communication or the STLS command.
To allow SSL/TLS communication, set the "Port Number" to the POP over SSL communication port number.
To allow POP over TLS communication, set the "Port Number" to the same port number as for the normal POP3
communication.
Connection Test
Tap the [Execute] button to test the connection to the SMTP server.
9-184
SETTING MODE►SYSTEM SETTINGS
Image Quality Adjustment
Collective Adjustment
Various devices mounted on the machine can be set.
Registration Adjustment
If the printed colors shift out of position when you print by Color printing, you can adjust the print position of each color to
reduce color shifting.
Tap the [Execute] key.
Fusing Cleaning Mode
Use this function to clean the machine's fusing unit when dots or other dirt appear on the printed side of the paper. When
this function is executed, "V" printed paper is output and the fusing unit is cleaned.
MC Cleaning Mode
This machine periodically executes automatic cleaning and normally it is not necessary to execute this mode. Only in
case, however, that black lines appear on the printed paper, execute this mode.
PTC Cleaning Mode
If black lines or colored lines appear even after you have cleaned the document glass, automatic document feeder and
main charger, execute this mode.
Black Letter/Black Line Width Adjustment
Adjust black text and the width of black lines. After using this function to perform adjustment, perform [System Settings]
- [Common Functions] - [Auto Color Calibration (for Copy)], [Auto Color Calibration (for Print)].
Factory default settings:0
Registration Adjustment and Fusing Cleaning Mode in [Collective Adjustment], all Common Functions, and removal of a
toner cartridge can only be executed in setting mode on the machine.
Color Profile Settings can only be configured on the Web page.
If improvement is not noticed after the first time you use the function, try executing the function again.
Do not use this function when no black lines appear. Using this function under the normal condition may cause deterioration
of the cleaner.

9-185
SETTING MODE►SYSTEM SETTINGS
Dark Streak Reduction
Specify to use the dark streak reduction or not.
The dark streak reduction can be used for Scan Original, Copy, Image Send, and Scan to local drive functions.
If the dark streak reduction is enabled, select any of the following options.
• Thin Dark Streak Reduction:
Use this setting to make thin dark streaks less apparent. (Low level)
•Normal:
Use this setting to make dark streaks less apparent. (Medium level)
• Thick Dark Streak Reduction:
Use this setting to make thick dark streaks less apparent. (High level)
Factory default settings: Disable
Display Warning When Streak is Detected
Set this option to display a warning message when dark streaks are detected by the document feeder.
Factory default settings: Disable
Increasing the level of dark streak treatment may resu
lt in faint text and poor reproduction of lines.

9-186
SETTING MODE►SYSTEM SETTINGS
Copy Image Quality
Quick Image Quality Adjustment
You can easily perform copy quality adjustment in the default state.
You can change the default setting ([2]) to [1 (Smooth)] or [3 (Sharp)].
Factory default settings:2
Color Balance (Color / B/W)
You can adjust the default color, gradation, and density of color copies and black & white copies.
The density of each color is divided into 3 ranges, and you can adjust the level of each.
Factory default settings: All 0
Density Adjustment when [Auto] is selected for Exposure
Configure settings for color copying and black & white copying when [Auto] is selected for the copy exposure. The
exposure can be adjusted separately for copying using the document glass and copying using the auto document
feeder.
Factory default settings: Color:Document Glass, Document Feeder:5 (Normal), B/W:Document Glass, Document Feeder:5 (Normal)
Sharpness
You can make copy images in the default state sharper or softer.
Factory default settings:2
Print Image Quality
Quick Image Quality Adjustment (Color / B/W)
Perform quick adjustment of print quality.
You can change the default setting ([2]) to [1 (Smooth)] or [3 (Sharp)].
This setting can be set separately for color mode and monochrome mode.
Factory default settings: All 2
Color Balance (Color / B/W)
You can adjust the tone and density of color in color printing and black & white printing. You can adjust the default color,
gradation, and density of color copies and black & white copies.
The density of each color is divided into 3 ranges, and you can adjust the level of each.
Factory default settings: All 0
Exposure Adjustment
Set the density of color printing and of black & white printing.
Factory default settings:3 (Normal)
Color Line Width Adjustment
When color lines do not print correctly in special applications such as CAD, you can make lines thicker.
Factory default settings:5

9-187
SETTING MODE►SYSTEM SETTINGS
Scan Image Quality
RGB Adjust
Set the color tone (RGB) for scanning.
Factory default settings: All 0
Sharpness
Use this setting to obtain a sharp image when scanning an original.
Factory default settings: 3 (Normal)
Contrast
You can adjust the contrast of scanned images.
Factory default settings:3 (Normal)
Color Profile Settings
Set color profiles used for printing.
CMYK Simulation Profile
Current Profile Name
This shows the currently set profile name.
Save to PC
Save the current color profile on the computer.
Profile Update
Select the updated color profile and click the [Store] key.
CMYK Output Profile
Current Profile Name
This shows the currently set profile name.
Save to PC
Save the current color profile on the computer.
Profile Update
Select the updated color profile and click the [Store] key.
RGB Input Profile
Current Profile Name
This shows the currently set profile name.
Save to PC
Save the current color profile on the computer.
Profile Update
Select the updated color profile and click the [Store] key.
9-188
SETTING MODE►SYSTEM SETTINGS
RGB Output Profile
Current Profile Name
This shows the currently set profile name.
Save to PC
Save the current color profile on the computer.
Profile Update
Select the updated color profile and click the [Store] key.
Common Functions
Auto Color Calibration (for Copy)/Auto Color Calibration (for Print)
Performs automatic color correction when the color is off.
For copying, adjust with [Auto Color Calibration (for Copy)]. For printing, adjust with [Auto Color Calibration (for Print)].
The machine prints a test patch, the test patch is scanned, and the color is automatically corrected.
After the [Execute] key is tapped and a test patch is printed, a message appears prompting you to begin automatic
calibration.
Follow the instructions in the message to perform color adjustment.
Density Smoothing Adjustment
If uneven density occurs in a copy and others, use this function to smooth the density.
The uneven density is automatically corrected by scanning a test patch that you print.
After the [Execute] key is tapped and a test patch is printed, a message appears prompting you to begin automatic
calibration.
Follow the instructions in the message to perform density smoothing.
If there are no problems after adjustment, perform "Auto Color Calibration (for Copy)" and "Auto Color Calibration (for
Print)".
To return the adjusted values to their factory default state, tap [Return Density Smoothing Adjustment Value to Defaults].
If you tapped [Return to the Defaults], perform adjustment of the density that you want to readjust (medium density in the
default mode).
Factory default settings: Middle
• If the color is still off after performing Auto Color Calibration
, repeating Auto Color Calibration once again may improve the
color.
• Before executing Auto Color Calibration, check to see if the registration adjustment is correct.
If the registration adjustment is not correct, perform "Registration Adjustment."
If the intensity deviation correction does not resolve the intensity deviations, repeat the correction. This may suppress the
deviations. To repeat the correction, start over the procedure from the first step, or tap the [Back] key after going through the
correction procedure.
9-189
SETTING MODE►SYSTEM SETTINGS
Initial Installation Settings
This is a group of settings that are required when you initially install the machine. The initial installation setting items are
the same as the regular setting items that have the same name. For information on a setting item, see the explanation of
the regular item.
Item Description
Condition Settings
Name System Settings - Common Settings - Machine Identification Settings (page 9-127)
Machine Code
Machine Location
Memo
Clock Adjust System Settings - Common Settings - Clock Adjust (page 9-128)
Daylight Saving Time Setting
Preheat Mode Setting System Settings - Energy Save - Eco Setting (page 9-172)
Auto Power Shut-Off
Display Message When
Extending Transition Time to
Preheat/Auto Power Shut-Off
Mode
Sleep Mode Power Level
Network Quick Settings System Settings - Network Settings - Quick Settings (page 9-136)
Tray Settings System Settings - Common Settings - Paper Settings- Paper Tray Settings (page 9-101)
Product Key System Settings - Common Settings - Product Key/Application Number Input (page 9-134)

10-1
Q&A
GENERAL PROBLEMS . . . . . . . . . . . . . . . . . . . . . . . . . . 10-2
CHECK LIST . . . . . . . . . . . . . . . . . . . . . . . . . . . . . . . . . 10-2
COPYING PROBLEMS. . . . . . . . . . . . . . . . . . . . . . . . . . 10-20
CHECK LIST . . . . . . . . . . . . . . . . . . . . . . . . . . . . . . . . 10-20
PRINTING PROBLEMS . . . . . . . . . . . . . . . . . . . . . . . . . 10-25
CHECK LIST . . . . . . . . . . . . . . . . . . . . . . . . . . . . . . . . 10-25
IMAGE SEND PROBLEMS. . . . . . . . . . . . . . . . . . . . . . . 10-35
CHECK LIST . . . . . . . . . . . . . . . . . . . . . . . . . . . . . . . . 10-35
DOCUMENT FILING PROBLEMS . . . . . . . . . . . . . . . . . 10-42
CHECK LIST . . . . . . . . . . . . . . . . . . . . . . . . . . . . . . . . 10-42
REMOVING MISFEEDS
REMOVING MISFEEDS . . . . . . . . . . . . . . . . . . . . . . . . . 10-46
TROUBLESHOOTING

10-2
TROUBLESHOOTING►GENERAL PROBLEMS
GENERAL PROBLEMS
Have functions been disabled by the administrator?
Some functions may have been disabled in the setting mode. When user authentication is enabled, the functions that
you can use may be restricted in your user settings. Check with your administrator.
CHECK LIST
Q&A
Problem Check Page
I CAN'T USE A PARTICULAR
FUNCTION OR PERIPHERAL
DEVICE
Have functions been disabled by the administrator? 10-5
I DON'T KNOW HOW TO CHECK
THE TOTAL NUMBER OF PAGES
USED
Hold down the [Home Screen] key. 10-6
You can check in the status of setting mode. 10-6
THE OPERATION PANEL CANNOT
BE USED
Is the main power indicator lit? 10-6
Did you just power on the machine? 10-6
Is the main power indicator blinking? 10-6
Is a cover open or a device separated from the machine? 10-6
Did login fail three times in a row? 10-6
Does a message appear indicating that Auto Login failed? 10-6
Does the message "Call for service. Code:xx-xx*." appear in the touch
panel?
10-6
PRINTING IS NOT POSSIBLE OR
STOPS DURING A JOB
Is a tray out of paper? 10-7
Is the machine out of toner? 10-7
Has a paper misfeed occurred? 10-7
Is the output tray full? 10-7
Is the toner collection container full? 10-7
Are restrictions placed on the trays that can be used in each mode
(copy, print, image send, and document filing)?
10-7
I DON'T KNOW HOW TO PROHIBIT
COLOR PRINTING
You can prohibit color printing in User Control. 10-7
For copy mode, you can set copying to black & white priority. For
printing mode, you can set printing to black & white priority in the printer
driver settings.
10-7
THE ORIGINAL SIZE IS NOT
AUTOMATICALLY SELECTED OR
THE WRONG SIZE IS SELECTED
Is the original curled or folded? 10-7
Did you place an original smaller than 5-1/2" x 8-1/2" (A5 for AB
settings) size on the document glass?
10-8
Did you place an original smaller than 5-1/2" x 8-1/2" (A6R for AB
setting) size in the document feeder?
10-8
Is an original of the 5-1/2" x 8-1/2" (A5 for AB setting) size set to
landscape (5-1/2" x 8-1/2"R (A5R)) on the document glass?
10-8
Is an original of the A6 size set to portrait (A6 size) in the document
feeder?
10-8
Is the document feeder sensor dirty? 10-8
THE DISPLAYED BYPASS TRAY
PAPER SIZE IS NOT CORRECT
Do the bypass tray guides match the width of the loaded paper? 10-8
?
10-3
TROUBLESHOOTING►GENERAL PROBLEMS
THE ORIGINAL MISFEEDS
(AUTOMATIC DOCUMENT FEEDER)
Is too much paper loaded into the document feeder tray? 10-8
Is the original a long original? 10-8
Is the original on thin paper? 10-8
Is the original on heavy paper? 10-8
Is the feed roller dirty? 10-8
MULTIPLE ORIGINALS ARE FED AT
THE SAME TIME AND CANNOT BE
LOADED CORRECTLY
(AUTOMATIC DOCUMENT FEEDER)
Are your originals warped or folded? Are you using a pasted originals? 10-9
THE EJECTED ORIGNALS ARE NOT
ALIGNED NEATLY (AUTOMATIC
DOCUMENT FEEDER)
Is the original set correctly? Depending on the condition of the original,
the type of paper, the temperature at the time of use, and the humidity
environment, the ejected originals may not be aligned neatly.
10-9
THE PAPER MISFEEDS Is a torn piece of paper remaining in the machine? 10-9
Is too much paper loaded in the tray? 10-9
Are multiple sheets feeding at once? 10-9
Are you using paper that is not within the specifications? 10-10
Are the bypass tray guides adjusted to the width of the paper? 10-10
Is the bypass tray extension guide pulled out? 10-10
Is the bypass feed roller dirty? 10-10
Is A5/A6 (5-1/2" x 8-1/2") size paper loaded? 10-10
Is the paper size specified? 10-10
Did you add paper to the tray? 10-10
Are you using punched paper? 10-10
Are you using label sheets that cannot be used? 10-10
Remove the paper, turn it over, and reload it. Using a different paper
type may solve the problem.
10-10
Did you load an envelope? 10-10
PAPER DOES NOT FEED FROM
THE PAPER TRAY
Is the paper loaded correctly into the paper tray? 10-10
Has the tray been prohibited in some modes (copy, print, image send,
document filing)?
10-11
I DON'T KNOW HOW TO CHANGE
THE PAPER SIZE
Set the paper size used in each tray in the tray settings. 10-11
THE OUTPUT IS NOTICEABLY
CURLED AND UNEVEN
Remove the paper, turn it over, and reload it. Using a different paper
type may solve the problem.
10-11
THE IMAGE IS SKEWED ON THE
PAPER
Is too much paper loaded into the bypass tray? 10-11
Are the bypass tray guides adjusted to the width of the paper? 10-11
Are the original guides adjusted to the width of the paper? 10-11
Is the control plate auxiliary block attached to the tray? (When using
SRA3)
10-11
The original is scanned skewed. 10-11
LINES APPEAR IN THE IMAGE Are the scanning areas of the document glass or automatic document
feeder dirty?
10-12
Is the bypass feed roller dirty? 10-12
Did you clean the laser unit? 10-12
Did you execute Dark Streak Reduction of system setting? 10-12
SMUDGES APPEAR ON PRINTED
OUTPUT
Are you using paper that is not within the specifications? 10-12
Are you printing on pre-punched paper? 10-12
Does a message appear indicating the need for maintenance? 10-12
Remove the paper, turn it over, and reload it. Using a different paper
type may solve the problem.
10-12
Problem Check Page
?
10-4
TROUBLESHOOTING►GENERAL PROBLEMS
WHEN PRINTING ON THICK PAPER,
THE PRINT RESULT IS DIRTY FROM
THE 2ND PAGE ON
Has the paper type been set correctly? 10-13
I DON'T KNOW HOW TO CHANGE
THE OUTPUT TRAY
Did you change the output tray? 10-13
PART OF THE IMAGE IS CUT OFF Has the correct paper size been set? 10-13
Was the original placed in the correct position? 10-13
PRINTING TAKES PLACE ON THE
WRONG SIDE OF THE PAPER
Is the paper loaded with the print side facing in the correct direction? 10-14
A COVER OR INSERT IS NOT
PRINTED ON THE SPECIFIED
PAPER
Has the paper type been set correctly? 10-14
THE CONNECTED USB DEVICE
CANNOT BE USED
Is the USB device compatible with the machine? 10-14
Is the connected USB device recognized correctly? 10-14
Is the USB memory formatted as FAT32 or NTFS? 10-14
Are you using a USB memory device with a capacity of more than 32
GB?
10-14
THE FINISHER/SADDLE FINISHER
DOES NOT OPERATE
Does a message appear indicating that you need to remove paper from
the stapler compiler?
10-15
Have functions been disabled by the administrator? 10-15
STAPLING DOES NOT TAKE PLACE
(INCLUDING SADDLE STITCH)
Does a message appear instructing you to check the staple unit? 10-15
Does a message appear instructing you to add staples? 10-15
Is a different width of paper mixed in? 10-15
Are there more sheets than can be stapled at once? 10-15
Is a paper size that cannot be stapled included in the print job? 10-15
Is the paper type setting of the tray selected in the printer driver set to a
paper type that cannot be stapled?
10-15
PUNCHING DOES NOT TAKE
PLACE
Does a message appear instructing you to check the punch module? 10-15
Is a different size of paper mixed in? 10-16
Is a paper size that cannot be punched included in the print job? 10-16
Is the tray selected in the printer driver set to a paper type that cannot
be punched?
10-16
THE STAPLING POSITION OR
PUNCH POSITION IS NOT
CORRECT
Is the stapling position setting correctly? 10-16
Are the punching positions setting correctly? 10-16
FOLDING DOES NOT TAKE PLACE Is it a paper size that can be folded? 10-16
Did the administrator enable the [Disabling of Duplex] setting? 10-16
Are you using a paper type that has a specific front and reverse side? 10-16
THE FOLD POSITION IS NOT
CORRECT
Is the original placed face up or face down correctly? 10-17
PREVIEW IMAGES OR THUMBNAIL
IMAGES DO NOT APPEAR
Are there a number of jobs waiting to be executed? 10-17
THE TOUCH PANEL DISPLAY IS
DIFFICULT TO VIEW
Is the brightness properly adjusted? 10-17
YOU WERE LOGGED OUT
WITHOUT LOGGING OUT
YOURSELF
Did Auto Clear activate? 10-17
I DON'T KNOW WHERE THE IP
ADDRESS SETTING IS
The IP address is set in the Network Settings of Setting mode. 10-18
I DON'T KNOW HOW TO CHANGE
THE BACKGROUND COLOR OF
THE HOME SCREEN
You can change the background color in "MFP Display Pattern Setting". 10-18
Problem Check Page
?
10-5
TROUBLESHOOTING►GENERAL PROBLEMS
I DON'T KNOW HOW TO ADD A
SHORTCUT TO OR DELETE A
SHORTCUT FROM THE HOME
SCREEN
You can change a shortcut in "Edit Home". 10-18
I DON'T KNOW HOW TO RESTORE
THE LARGE TEXT SETTING TO ITS
ORGINAL STATE
Is large text mode enabled in the home screen? 10-18
I DON'T KNOW HOW TO ADJUST
THE TIME THE MACHINE ENTERS
ENERGY SAVE MODE
Set the time the machine enters energy save mode in the Energy Save
settings of setting mode.
10-19
I FORGOT THE ADMINISTRATOR
PASSWORD
Was the administrator password changed from the factory default
setting?
10-19
I DON'T KNOW WHOM TO
CONTACT FOR MAINTENANCE
AND SERVICE
Please check the customer support information. 10-19
I CAN'T USE A PARTICULAR FUNCTION OR
PERIPHERAL DEVICE
Check Solution
Have functions been disabled by the
administrator?
■ Check with your administrator.
Some functions may have been disabled in the setting mode. When user
authentication is enabled, the functions that you can use may be restricted in
your user settings.
Problem Check Page
?
!
10-6
TROUBLESHOOTING►GENERAL PROBLEMS
I DON'T KNOW HOW TO CHECK THE TOTAL
NUMBER OF PAGES USED
Check Solution
Hold down the [Home Screen] key. ■ When you hold down the [Home Screen] key, a message showing the total page
usage and toner level will appear.
You can check in the status of setting
mode.
■ [Total Count] appears in the [Status] of setting mode. You can check the total
pages used from this item.
THE OPERATION PANEL CANNOT BE USED
Check Solution
Is the main power indicator lit? ■ If the main power indicator is not lit up, turn the machine's power on.
Make sure that the power plug is firmly inserted in the power outlet, switch the
main power switch to the " " position.
Did you just power on the machine? ■ After the [Power] button is turned on, the machine requires some time to
complete warmup operation. During warmup operation, functions can be
selected, but a job cannot be run.
Is the main power indicator blinking? ■ Auto Power Shut-Off mode has activated. To return the machine to normal
operation, press the [Power] button. For more information, see ECO
(page 8-2).
Is a cover open or a device separated
from the machine?
■ Read the message and take appropriate actions.
A warning message will appear when a cover is open or a device is separated
from the machine.
Did login fail three times in a row? ■ After operation unlocks, log in using the correct user information.
When [A Warning when Login Fails] is enabled in the setting mode and login fails
3 times in a row, a warning will be displayed and user authentication operation
will lock for 5 minutes.
(If you do not know your user information, contact your administrator.)
"Settings (administrator)" → [System Settings] → [Authentication Settings] →
[Default Settings] → [A Warning when Login Fails]
Does a message appear indicating
that Auto Login failed?
■ Check with your administrator.
Auto Login failed due to network or other problems. If you are the administrator,
tap the [Administrator Password] key, log in as an administrator, and temporarily
change the auto login settings in the setting mode. (Restore the changed settings
to their original state after the problems have been solved.)
Does the message "Call for service.
Code:xx-xx*." appear in the touch
panel?
*Letters and numbers appear in xx-xx.
■ Turn on the machine power again.
■ Make sure that the background color of the job management display at the upper
right corner of the touch panel is gray, and press the [Power] button and then turn
the main power switch to the " " position. Waiting at least 10 seconds and then
turn the main power switch to the " " position.
■ If the message still appears after switching the [Power] button and the main
power switch off and on several times, it is likely that a failure has occurred that
requires service. In this event, stop using the machine, unplug the power plug,
and contact your dealer or nearest SHARP Service Department. (When
contacting your dealer or nearest SHARP Service Department, inform them of
the displayed error code.)
!
!

10-7
TROUBLESHOOTING►GENERAL PROBLEMS
PRINTING IS NOT POSSIBLE OR STOPS DURING A
JOB
Check Solution
Is a tray out of paper? ■ Add paper as instructed by the message in the touch panel.
Is the machine out of toner? ■ Replace the toner cartridge.REPLACEMENT OF TONER CARTRIDGE (page
1-84)
Has a paper misfeed occurred? ■ Remove the misfeed as instructed by the message in the touch panel.
Is the output tray full? ■ Remove the output from the tray and resume printing.
When the output tray becomes full, a detector activates and stops printing.
Is the toner collection container full? ■ Replace the toner collection container as instructed by the message in the touch
panel.
Are restrictions placed on the trays
that can be used in each mode (copy,
print, image send, and document
filing)?
■ Check the settings in [Paper Tray Settings] and see if checkmarks appear in the
checkboxes of each mode ([Feeding Approved Job]).
Functions without a checkmark cannot be used for printing using that tray.
"Settings" → [System Settings] → [Common Settings] → [Paper Settings] →
[Paper Tray Settings] → [Tray Registration] → [Feeding Approved Job]
I DON'T KNOW HOW TO PROHIBIT COLOR PRINTING
Check Solution
You can prohibit color printing in
User Control.
■ When user authentication is enabled, you can prohibit color printing for specific
users.
"Settings (administrator)" → [User Control] → [User Settings] → [User List].
"Settings (administrator)" → [User Control] → [Access Control Settings] →
[Machine Page Limit Setting].
For copy mode, you can set copying
to black & white priority. For printing
mode, you can set printing to black &
white priority in the printer driver
settings.
■ Although this does not prohibit color copies, you can set the color mode to black
& white priority as a means of reducing the number of color pages printed.
Copying
Set "Settings(administrator)" → [System Settings] → [Copy Settings] → [Initial
Status Settings] → [Color Mode] to [B/W]
■ Printing
Select [Grayscale] on the [Main] tab of the printer driver.
THE ORIGINAL SIZE IS NOT AUTOMATICALLY
SELECTED OR THE WRONG SIZE IS SELECTED
Check Solution
Is the original curled or folded? ■ Straighten the original.
The correct original size cannot be detected if the original is curled or folded.
!
!
!

10-8
TROUBLESHOOTING►GENERAL PROBLEMS
Did you place an original smaller than
5-1/2" x 8-1/2" (A5 for AB settings)
size on the document glass?
■ Select the original size manually.
Original sizes smaller than 5-1/2" x 8-1/2" (A5) cannot be detected automatically.
When scanning a small original on the document glass, it is convenient to place a
blank sheet of paper on top of the original which is the same size (such as 8-1/2"
x 11" and 5-1/2" x 8-1/2" (A4 and B5)) as the paper at you wish to use for printing.
Did you place an original smaller than
5-1/2" x 8-1/2" (A6R for AB setting)
size in the document feeder?
■ Select the original size manually.
Original sizes smaller than 5-1/2" x 8-1/2" (A6R for AB setting) cannot be
detected automatically.
Is an original of the 5-1/2" x 8-1/2" (A5
for AB setting) size set to landscape
(5-1/2" x 8-1/2"R (A5R)) on the
document glass?
■ If an original of the 5-1/2" x 8-1/2" (A5) size is set to landscape (5-1/2" x 8-1/2"R
(A5R)) size, it is not detected automatically.
Set the 5-1/2" x 8-1/2" (A5) size document in portrait orientation (5-1/2" x 8-1/2"
(A5)).
Is an original of the A6 size set to
portrait (A6 size) in the document
feeder?
■ If an original of the A6 size is set to portrait (A6 size), it is not detected
automatically.
Set the A6 size document in landscape orientation (A6R).
Is the document feeder sensor dirty? ■ Wipe the sensor clean using a damp cloth or a wet tissue.
THE DISPLAYED BYPASS TRAY PAPER SIZE IS NOT
CORRECT
Check Solution
Do the bypass tray guides match the
width of the loaded paper?
■ Set the bypass tray guides to the width of the paper.
When loading paper in the bypass tray, be sure to pull out the extension guide to
enable the paper size to be detected correctly.
THE ORIGINAL MISFEEDS (AUTOMATIC DOCUMENT
FEEDER)
Check Solution
Is too much paper loaded into the
document feeder tray?
■ Make sure that the stack of paper in the tray is not higher than the indicator line.
AUTOMATIC DOCUMENT FEEDER
(page 1-47)
Is the original a long original? ■ When using the automatic document feeder to scan a long original, set the scan
size to [Long Size].
(Note that long originals cannot be copied using the copy function.)
Is the original on thin paper? ■ Use the document glass to scan the original.
If you need to use the automatic document feeder, use [Slow Scan Mode] in
[Others] to scan the original.
Is the original on heavy paper? ■ Use the document glass to scan the original.
If you need to use the automatic document feeder, use [Heavy Paper Scan] in
[Others] to scan the original.
Is the feed roller dirty? ■ Clean the surface of the paper feed roller.
CLEANING THE PAPER FEED ROLLER
(page 1-83)
Check Solution
!
!
!

10-9
TROUBLESHOOTING►GENERAL PROBLEMS
MULTIPLE ORIGINALS ARE FED AT THE SAME TIME
AND CANNOT BE LOADED CORRECTLY
(AUTOMATIC DOCUMENT FEEDER)
Check Solution
Are your originals warped or folded?
Are you using a pasted originals?
■ Fix any warps or folds in the originals. Fan the originals well and load them in
automatic document feeder. Align the edges of the original and set the original
size.
Depending on the condition of the original, the type of paper, and the temperature
and humidity of the environment in which the machine is used, multiple sheets of
paper may be fed at the same time and may not be loaded correctly, or the
ejected originals may not be neatly aligned.
It may be improved by the following settings.
• For copying: Set the resolution to 600x600dpi
• For scan transmission: use "Preview"
AUTOMATIC DOCUMENT FEEDER
(page 1-47)
THE EJECTED ORIGNALS ARE NOT ALIGNED
NEATLY (AUTOMATIC DOCUMENT FEEDER)
Check Solution
Is the original set correctly?
Depending on the condition of the
original, the type of paper, the
temperature at the time of use, and
the humidity environment, the ejected
originals may not be aligned neatly.
■ Depending on the condition of the original, the type of paper, the temperature at
the time of use, and the humidity environment, the ejected originals may not be
aligned neatly.
It may be improved by the following settings.
• For copying: Set the resolution to 600x600dpi
• For scan transmission: use "Preview"
AUTOMATIC DOCUMENT FEEDER
(page 1-47)
THE PAPER MISFEEDS
Check Solution
Is a torn piece of paper remaining in
the machine?
■ Follow the instructions in the touch panel to remove all paper.
Is too much paper loaded in the tray? ■ Reload the paper. Load no more than the maximum number of sheets and do not
exceed the indicator line.
LOADING PAPER
(page 1-10)
Are multiple sheets feeding at once? ■ Fan the paper well before loading it.
!
!
!

10-10
TROUBLESHOOTING►GENERAL PROBLEMS
Are you using paper that is not within
the specifications?
■ Use SHARP-recommended paper.
Using paper that is for other models or special paper that is not supported may
result in misfeeds, creases, or smudges.
"SUPPLIES" in Start Guide
For paper that is prohibited or not recommended, see IMPORTANT POINTS
ABOUT PAPER (page 1-10).
Are the bypass tray guides adjusted
to the width of the paper?
■ Adjust the bypass tray guides to the width of the paper so that they slightly
contact the sides of the paper.
LOADING PAPER INTO THE BYPASS TRAY
(page 1-36)
Is the bypass tray extension guide
pulled out?
■ When loading large-size paper, pull out the extension guide.
LOADING PAPER INTO THE BYPASS TRAY
(page 1-36)
Is the bypass feed roller dirty? ■ Clean the surface of the bypass feed roller.
CLEANING THE BYPASS FEED ROLLER
(page 1-81)
Is A5/A6 (5-1/2" x 8-1/2") size paper
loaded?
■ When loading A5/A6 (5-1/2" x 8-1/2") size paper, place the paper in the horizontal
(A5R/A6R (5-1/2" x 8-1/2"R)) orientation.)*
* A6R cannot be used without the right tray.
Is the paper size specified? ■ If you are using a non-standard size, be sure to specify the paper size.
If the size of paper loaded into a tray was changed, be sure to check the paper
size setting.
"Settings" → [System Settings] → [Common Settings] → [Paper Settings] →
[Paper Tray Settings] → [Tray Registration]
Did you add paper to the tray? ■ When adding paper, remove any paper remaining in the bypass tray, combine it
with the paper to be added, and reload as a single stack.
If paper is added without removing the remaining paper, a misfeed may occur.
Do not add paper other than the bypass tray.
Are you using punched paper? ■ When using punched paper, set the paper type to punched.
"Settings" → [System Settings] → [Common Settings] → [Paper Settings] →
[Paper Tray Settings] → [Tray Registration]
Are you using label sheets that
cannot be used?
■ Labels without a carrier sheet may stick to the transfer surface and cause a
misfeed.
Remove the paper, turn it over, and
reload it. Using a different paper type
may solve the problem.
■ This may improve some states of paper curling.
LOADING PAPER
(page 1-10)
Did you load an envelope? ■ Do not load envelopes except tray 4 and the bypass tray.
■ When loading envelopes in tray 4, do not exceed the indicator line.
■ Set the paper type to "Envelope", and for the paper size, specify the paper size
you set.
PAPER DOES NOT FEED FROM THE PAPER TRAY
Check Solution
Is the paper loaded correctly into the
paper tray?
■ Set the guides to the size of the paper.
Reload the paper. Load no more than the maximum number of sheets and do not
exceed the indicator line.
LOADING PAPER
(page 1-10)
Check Solution
!
!

10-11
TROUBLESHOOTING►GENERAL PROBLEMS
Has the tray been prohibited in some
modes (copy, print, image send,
document filing)?
■ Check the settings in [Paper Tray Settings] and see if checkmarks appear in the
checkboxes of each mode ([Feeding Approved Job]). Functions without a
checkmark cannot be used for printing using that tray.
"Settings" → [System Settings] → [Common Settings] → [Paper Settings]
→ [Paper Tray Settings] → [Tray Registration] → [Feeding Approved Job]
I DON'T KNOW HOW TO CHANGE THE PAPER SIZE
Check Solution
Set the paper size used in each tray in
the tray settings.
■ The "Tray Settings" key can be found in the home screen.
Tap this key to display the tray settings screen.
Tap the tray whose paper size you want to change, select the paper type, and
then tap the [Size] tab. Select the paper size and tap the [OK] key.
If you loaded a special size of paper in the bypass tray, tap the [Direct Entry] key
after tapping the [Size] tab, enter the paper size manually, and tap the [Execute]
key.
THE OUTPUT IS NOTICEABLY CURLED AND UNEVEN
Check Solution
Remove the paper, turn it over, and
reload it. Using a different paper type
may solve the problem.
■ This may improve some states of paper curling.
LOADING PAPER
(page 1-10)
THE IMAGE IS SKEWED ON THE PAPER
Check Solution
Is too much paper loaded into the
bypass tray?
■ Reload the paper. Load no more than the maximum number of sheets and do not
exceed the indicator line.
The maximum number of sheets varies depending on the paper type setting.
Are the bypass tray guides adjusted
to the width of the paper?
■ Adjust the bypass tray guides to the width of the paper so that they slightly
contact the sides of the paper.
Are the original guides adjusted to the
width of the paper?
■ Adjust the original guides to the width of the paper.
Is the control plate auxiliary block
attached to the tray? (When using
SRA3)
■ Attach the control plate auxiliary block.
The original is scanned skewed. ■ Setting up a Easy Scan with automatic settings may solve the problem.
Check Solution
!
!
!
!

10-12
TROUBLESHOOTING►GENERAL PROBLEMS
LINES APPEAR IN THE IMAGE
Check Solution
Are the scanning areas of the
document glass or automatic
document feeder dirty?
■ Clean the scanning areas of the document glass or automatic document feeder.
CLEANING THE DOCUMENT GLASS AND AUTOMATIC DOCUMENT
FEEDER (page 1-74)
Is the bypass feed roller dirty? ■ Clean the surface of the bypass feed roller.
CLEANING THE BYPASS FEED ROLLER
(page 1-81)
Did you clean the laser unit? ■ Clean the laser unit. For details on cleaning, refer to the CLEANING THE LASER
UNIT (page 1-77).
Did you execute Dark Streak
Reduction of system setting?
■ Execute in "Settings (administrator)" → [System Settings] → [Image Quality
Adjustment] → [Collective Adjustment] → [Dark Streak Reduction]. To detect
dark streaks, enable [Display Warning When Streak is Detected]. For more
information on the setting, refer to the User's Manual.
Dark Streak Reduction
(page 9-185)
SMUDGES APPEAR ON PRINTED OUTPUT
Check Solution
Are you using paper that is not within
the specifications?
■ Use SHARP-recommended paper.
Using paper that is for other models or special paper that is not supported may
result in misfeeds, creases, or smudges.
"SUPPLIES" in Start Guide
■ Try setting the paper type to a type that is slightly heavier or slightly lighter than
normal. (For plain paper, switch plain paper 1 to plain paper 2 or plain paper 2 to
plain paper 1.) Depending on the paper type, print quality may be improved. For
details, contact your dealer or nearest SHARP Service Department.
Are you printing on pre-punched
paper?
■ Take care that the image does not overlap the punch holes.
If the printed image overlaps the punch holes, smudges may appear on the
reverse side of the paper following 1-sided printing, or on both sides following
2-sided printing.
Does a message appear indicating the
need for maintenance?
■ Contact your dealer or nearest SHARP Service Department as soon as possible.
Remove the paper, turn it over, and
reload it. Using a different paper type
may solve the problem.
■ This may improve some states of paper curling.
LOADING PAPER
(page 1-10), HOW TO PLACE THE ORIGINAL (page 1-45)
!
!

10-13
TROUBLESHOOTING►GENERAL PROBLEMS
WHEN PRINTING ON THICK PAPER, THE PRINT
RESULT IS DIRTY FROM THE 2ND PAGE ON
Check Solution
Has the paper type been set
correctly?
■ Set the correct paper type in the tray settings. Make sure that the following did
not occur:
• When using heavy paper, change the paper type in the tray settings to Heavy.
(The image may disappear if rubbed.)
• Paper other than heavy paper is being used, but heavy paper is selected in the
tray settings. (This may cause creases and misfeeds.)
"Settings" → [System Settings] → [Common Settings] → [Paper Settings] →
[Paper Tray Settings] → [Tray Registration]
I DON'T KNOW HOW TO CHANGE THE OUTPUT TRAY
Check Solution
Did you change the output tray? ■ When copying, you can select the output tray in normal mode. Tap [Output] in the
base screen of normal mode. You can set the output tray in the screens.
When printing, you can select the output tray in the printer driver. Click the
[Finishing] tab in the printer driver, and select the output tray in [Output Tray].
The output tray is fixed and cannot be changed when some copy or print settings
are selected. Some copy or print settings may be canceled when you change the
output tray.
PART OF THE IMAGE IS CUT OFF
Check Solution
Has the correct paper size been set? ■ If you are using a non-standard size, be sure to specify the paper size.
If the size of paper loaded into a tray was changed, be sure to check the paper
size setting.
"Settings" → [System Settings] → [Common Settings] → [Paper Settings] →
[Paper Tray Settings] → [Tray Registration]
Was the original placed in the correct
position?
■ If you are using the document glass, be sure to place the original in the far left
corner of the document glass.
LOADING PAPER
(page 1-10), HOW TO PLACE THE ORIGINAL (page 1-45)
!
!
!

10-14
TROUBLESHOOTING►GENERAL PROBLEMS
PRINTING TAKES PLACE ON THE WRONG SIDE OF
THE PAPER
Check Solution
Is the paper loaded with the print side
facing in the correct direction?
■ Make sure that the print side of paper is facing in the correct direction.
• Trays 1 to 4:
Place the paper with the print side face up.*
• Bypass Tray, Tray 5:
Place the paper with the print side face down.*
* When the paper type is "Pre-Printed" or "Letter Head", load the paper in the
opposite way.
(Except when [Disabling of Duplex] is enabled in the setting mode
(administrator).
For information about the setting mode, consult your administrator.)
A COVER OR INSERT IS NOT PRINTED ON THE
SPECIFIED PAPER
Check Solution
Has the paper type been set
correctly?
■ Set the correct paper type for the tray that contains the paper specified for the
cover or insert.
If the paper type set for the cover or insert is not the same as the paper type set
for the tray, paper will be fed from a different tray.
"Settings" → [System Settings] → [Common Settings] → [Paper Settings] →
[Paper Tray Settings] → [Tray Registration]
THE CONNECTED USB DEVICE CANNOT BE USED
Check Solution
Is the USB device compatible with the
machine?
■ Ask your dealer if the device is compatible with the machine.
USB devices that are not compatible with the machine cannot be used.
Is the connected USB device
recognized correctly?
■ When a USB device is connected to the machine and correctly recognized, an
icon ( ) will appear at the top of the touch panel. If it is not recognized, connect
it once again.
Is the USB memory formatted as
FAT32 or NTFS?
■ Check the file format of the USB memory device.
If the USB memory is formatted as other than FAT32, NTFS or exFAT, use a
computer to change the format to FAT32, NTFS, or exFAT.
Are you using a USB memory device
with a capacity of more than 32 GB?
■ Use a 32 GB or less USB memory device.
!
!
!

10-15
TROUBLESHOOTING►GENERAL PROBLEMS
THE FINISHER/SADDLE FINISHER DOES NOT
OPERATE
Check Solution
Does a message appear indicating
that you need to remove paper from
the stapler compiler?
■ Remove all remaining paper from the stapler compiler.
Have functions been disabled by the
administrator?
■ Check with your administrator.
Some functions may have been disabled in the setting mode.
STAPLING DOES NOT TAKE PLACE (INCLUDING
SADDLE STITCH)
Check Solution
Does a message appear instructing
you to check the staple unit?
■ Remove jammed staples.
PERIPHERAL DEVICES
(page 1-53)
Does a message appear instructing
you to add staples?
■ Replace the staple cartridge.
Do not forget to replace the staple case.
PERIPHERAL DEVICES
(page 1-53)
Is a different width of paper mixed in? ■ To perform mixed size stapling, using paper of the same width and select the
[Same Width] setting.
Stapling is not possible when paper of different widths are mixed together. When
copying, select [Same Width] for [Mixed Size Original] in [Others].
Are there more sheets than can be
stapled at once?
■ For the maximum number of sheets that can be stapled, see "SPECIFICATIONS
(page 11-2)".
Is a paper size that cannot be stapled
included in the print job?
■ For paper sizes that can be stapled, see "SPECIFICATIONS (page 11-2)".
Is the paper type setting of the tray
selected in the printer driver set to a
paper type that cannot be stapled?
■ You must check the paper types that are set on the machine, and select a paper
tray that is set to paper* that can be used for staple printing.
Click the [Tray Status] button in [Paper Source] tab of the printer properties
window and check the paper type setting of each tray.
*Stapling is not possible on labels, tab paper, glossy paper, transparency film, or
envelopes. In addition, if "Disable Staple" is selected in the user type, stapling will
not be possible.
PUNCHING DOES NOT TAKE PLACE
Check Solution
Does a message appear instructing
you to check the punch module?
■ Dispose of punch scraps.
PUNCH MODULE (MX-PN13A/B/C/D)
(page 1-69)
!
!
!

10-16
TROUBLESHOOTING►GENERAL PROBLEMS
Is a different size of paper mixed in? ■ Punching is not possible when different widths of paper are mixed together. To
perform mixed size punching, use paper of the same width and select the [Same
Width] setting. When copying, select [Same Width] for [Mixed Size Original] in
[Others].
Is a paper size that cannot be
punched included in the print job?
■ For the paper sizes that can be punched, see "SPECIFICATIONS" .
Is the tray selected in the printer
driver set to a paper type that cannot
be punched?
■ Check the paper type settings in the machine and select a tray that has paper
that can be used for punching*. Click the [Tray Status] button in [Paper Source]
tab of the printer properties window and check the paper type setting of each tray.
*Punching is not possible on labels, tab paper, glossy paper, transparency film,
and envelopes. In addition, if "Disable Punch" is selected in the user type,
punching will not be possible.
THE STAPLING POSITION OR PUNCH POSITION IS
NOT CORRECT
Check Solution
Is the stapling position setting
correctly?
■ Check the stapling position in "PREVIEW SCREEN".
Are the punching positions setting
correctly?
■ Check the punch position in "PREVIEW SCREEN".
FOLDING DOES NOT TAKE PLACE
Check Solution
Is it a paper size that can be folded? ■ Check the paper size that can be folded.
APPLICABLE PAPER TYPES
(page 1-12)
Did the administrator enable the
[Disabling of Duplex] setting?
■ The paper folding function cannot be used when [Disabling of Duplex] is enabled
in the setting mode. Check with your administrator.
In "Settings (administrator)", [System Settings] → [Common Settings]
→ [Condition Settings] → [Device Control] → [Disabling of Duplex].
Are you using a paper type that has a
specific front and reverse side?
■ The folding function cannot be used with pre-printed paper, letterhead paper, or
other paper that has specific front or reverse sides.
When folding paper, use a paper type such as plain paper that does not have
specific front or reverse sides.
Check Solution
!
!
!
10-17
TROUBLESHOOTING►GENERAL PROBLEMS
THE FOLD POSITION IS NOT CORRECT
Check Solution
Is the original placed face up or face
down correctly?
■ Check the orientation for loading the original or the orientation of the paper to be
folded, and take appropriate actions. For more information, see the FOLD
SETTING (page 3-49) or FOLDING PAPER FOR PRINTING (FOLD) (page
4-89).
PREVIEW IMAGES OR THUMBNAIL IMAGES DO NOT
APPEAR
Check Solution
Are there a number of jobs waiting to
be executed?
■ Wait until several of the jobs have been executed.
THE TOUCH PANEL DISPLAY IS DIFFICULT TO VIEW
Check Solution
Is the brightness properly adjusted? ■ Tap the [LCD Control] key ( ) on the home screen to adjust the brightness.
YOU WERE LOGGED OUT WITHOUT LOGGING OUT
YOURSELF
Check Solution
Did Auto Clear activate? ■ When user authentication is used, the currently logged in user will be
automatically logged out if Auto Clear activates. Log in again.
If you are the administrator, change the time setting of Auto Clear or disable Auto
Clear in [Auto Clear Setting].
"Settings (administrator)" → [System Settings] → [Common Settings] →
[Operation Settings] → [Condition Settings] → [Auto Clear Setting]
!
!
!
!

10-18
TROUBLESHOOTING►GENERAL PROBLEMS
I DON'T KNOW WHERE THE IP ADDRESS SETTING IS
Check Solution
The IP address is set in the Network
Settings of Setting mode.
■ To set a permanent IP address, ask your network administrator for the IP address
assigned to the machine and other information necessary for the Network
Settings.
"Settings (administrator)" → [System Settings] → [Network Settings]
→ [Interface Settings]
I DON'T KNOW HOW TO CHANGE THE
BACKGROUND COLOR OF THE HOME SCREEN
Check Solution
You can change the background color
in "MFP Display Pattern Setting".
■ Open the action panel on the home screen and tap [MFP Display Pattern
Setting]. Enter the administrator password, and select the desired color from
patterns 1 to 5. For more information, see EDITING THE HOME SCREEN
(page
2-19).
I DON'T KNOW HOW TO ADD A SHORTCUT TO OR
DELETE A SHORTCUT FROM THE HOME SCREEN
Check Solution
You can change a shortcut in "Edit
Home".
■ Open the action panel on the home screen and tap [Edit Home]. Enter the
administrator password, tap the desired location and add a shortcut, or tap a
shortcut and delete. For more information, see EDITING THE HOME SCREEN
(page 2-19).
I DON'T KNOW HOW TO RESTORE THE LARGE TEXT
SETTING TO ITS ORGINAL STATE
Check Solution
Is large text mode enabled in the
home screen?
■ If the large text mode icon is , large text mode is enabled. Tap the large text
mode icon to change it to and cancel large text mode.
!
!
!
!

10-19
TROUBLESHOOTING►GENERAL PROBLEMS
I DON'T KNOW HOW TO ADJUST THE TIME THE
MACHINE ENTERS ENERGY SAVE MODE
Check Solution
Set the time the machine enters
energy save mode in the Energy Save
settings of setting mode.
■ Set the time the machine enters energy save mode in the Energy Save settings
of setting mode.
Set the time the machine enters Preheat Mode.
"Settings (administrator)" → [System Settings] → [Energy Save]
→ [Eco Setting] → [Preheat Mode Setting]
■ Set the time that Auto Power Shut-Off takes place
"Settings (administrator)" → [System Settings] → [Energy Save]
→ [Eco Setting] → [Auto Power Shut-Off Timer]
I FORGOT THE ADMINISTRATOR PASSWORD
Check Solution
Was the administrator password
changed from the factory default
setting?
■ Contact your dealer or nearest SHARP Service Department.
For the factory default administrator password, see "FOR THE
ADMINISTRATOR" in Start Guide. After changing the password, take special
care to remember it.
I DON'T KNOW WHOM TO CONTACT FOR
MAINTENANCE AND SERVICE
Check Solution
Please check the customer support
information.
■ Contact your dealer or nearest SHARP Service Department.
!
!
!

10-20
TROUBLESHOOTING►GENERAL PROBLEMS
COPYING PROBLEMS
Have functions been disabled by the administrator?
Some functions may have been disabled in the setting mode. When user authentication is enabled, the functions that
you can use may be restricted in your user settings. Check with your administrator.
CHECK LIST
Problem Check Page
AUTO SELECTION OF THE COLOR
MODE DOES NOT TAKE PLACE
CORRECTLY
Are you scanning one of the following types of originals? 10-21
2-SIDED COPYING DOES NOT
TAKE PLACE
Does the paper type setting of the selected tray specify a type of paper
that cannot be used for 2-sided copying?
10-21
Are you using a special size or type of paper? 10-21
Are you copying using settings that do not allow 2-sided copying? 10-21
ROTATE COPY DOES NOT WORK Did you select the copy ratio manually? 10-21
Are you copying using settings that do not allow rotate copying? 10-21
Is "Rotation Copy Setting" disabled in the setting mode? 10-22
ENLARGE/REDUCE DOES NOT
WORK
Are the original, paper, and ratio settings correct? 10-22
THE IMAGE IS TOO LIGHT OR TOO
DARK
Is the image too light? 10-22
Is the image too dark? 10-22
Has an appropriate exposure mode for the original type been selected? 10-22
Is the overall copy density too light? 10-23
COLOR ARE OFF Did you perform "Registration Adjustment"? 10-23
PART OF THE IMAGE IS CUT OFF Has an appropriate ratio been selected for the original size and paper
size?
10-23
Are you using an AB (inch) size original? 10-23
COPIES COME OUT BLANK Is the original placed face up or face down correctly? 10-23
I WANT TO COPY MULTIPLE A4
PAGES ONTO ONE A4 SHEET OF
PAPER
Use N-Up. 10-24
MIXED SIZE ORIGINALS CANNOT
BE SCANNED
Is Mixed Size Original setting performed? 10-24
Is unsupported combination of sizes used? 10-24
Is the original orientation correct? 10-24
THIN PAPER CANNOT BE
SCANNED
Is the paper thickness applicable? 10-24
THICK PAPER CANNOT BE
SCANNED
Is the paper thickness applicable? 10-24
?

10-21
TROUBLESHOOTING►GENERAL PROBLEMS
AUTO SELECTION OF THE COLOR MODE DOES NOT
TAKE PLACE CORRECTLY
Check Solution
Are you scanning one of the following
types of originals?
When Black & White is not selected:
• Are there colors or coloring in the
paper?
When Color is not selected:
• Is the color in the original very light?
• Is the color in the original very dark,
almost black?
• Is only a very small area of the original
colored?
■ When the color mode is set to "Auto", the machine detects whether the original is
black and white or color when the [Color Start] key is tapped. However, when an
original of a type as shown on the left is used, automatic detection may not give
the correct result.
In this event, specify the color mode manually.
2-SIDED COPYING DOES NOT TAKE PLACE
Check Solution
Does the paper type setting of the
selected tray specify a type of paper
that cannot be used for 2-sided
copying?
■ Check "Paper Tray Settings" in the setting mode.
"Settings" → [System Settings] → [Common Settings] → [Paper Settings] →
[Paper Tray Settings] → [Tray Registration] → [Feeding Approved Job]
Check the [Tray Settings] in the home screen.
Tap the selected tray, and in the screen that appears, tap the [Paper Property]
key.
If the [Disable Duplex] checkbox in the paper properties screen is , the tray
cannot be used for duplex printing. Change the paper type to a type that can
be used for duplex printing.
Are you using a special size or type of
paper?
■ For the paper types and sizes that can be used for two-sided copying, read
"SPECIFICATIONS (page 11-2)
".
Are you copying using settings that
do not allow 2-sided copying?
■ 2-Sided Copy can generally be combined with other modes as required,
however, some combinations are not possible. If a prohibited combination is
selected, a message will appear in the touch panel.
ROTATE COPY DOES NOT WORK
Check Solution
Did you select the copy ratio
manually?
■ Use automatic ratio selection when copying.
Are you copying using settings that
do not allow rotate copying?
■ Rotate copying can generally be combined with other modes as required,
however, some combinations are not possible. If a prohibited combination is
selected, a message will appear in the touch panel.
!
!
!

10-22
TROUBLESHOOTING►GENERAL PROBLEMS
Is "Rotation Copy Setting" disabled in
the setting mode?
■ Check with your administrator.
If you are the administrator, enable [Rotation Copy Setting].
Select [System Settings] → [Copy Settings] → [Condition Settings] →
[Rotation Copy Setting] → [Rotation Copy] in "Settings".
ENLARGE/REDUCE DOES NOT WORK
Check Solution
Are the original, paper, and ratio
settings correct?
■ Check if the original size that appears on the screen is correct. After that, check if
the correct paper is selected. Tap the [Ratio] key and then tap the [Auto Image]
key. The appropriate ratio for the original and paper will appear.
THE IMAGE IS TOO LIGHT OR TOO DARK
Check Solution
Is the image too light? ■ Select an appropriate exposure mode for the original being copied and adjust the
exposure level manually.
Is the image too dark?
Has an appropriate exposure mode
for the original type been selected?
■ Select one of the following modes depending on the original type. (This can be
set in normal mode.)
•Text
Use this mode for regular text documents.
• Text/Printed Photo
This mode provides the best balance for copying an original which contains both
text and printed photographs, such as a magazine or catalogue.
• Text/Photo
This mode provides the best balance for copying an original which contains both
text and photographs, such as a text document with a photo pasted on.
• Printed Photo
This mode is best for copying printed photographs, such as photos in a magazine
or catalogue.
•Photo
Use this mode to copy photos.
•Map
This mode is best for copying the light color shading and fine text found on most
maps.
• Light Original
Use this mode for originals with light pencil writing.
Check Solution
!
!
!

10-23
TROUBLESHOOTING►GENERAL PROBLEMS
Is the overall copy density too light? ■ Change the overall copy density with either method below.
• Changing the default setting
Select "Settings (administrator)" - [System Settings] → [Image Quality
Adjustment] → [Copy Image Quality] → [Quick Image Quality Adjustment]. Set
default setting [2] to [3 (Sharp)] to increase the overall density, or [1 (Smooth)] to
decrease the overall density.
• Temporarily changing the setting
Select Normal Mode (the setting cannot be changed in Easy Mode). In [Others]
→ [Quick Image Quality Adjustment], set default setting [2] to [3 (Sharp)] to
increase the overall density, or [1 (Smooth)] to decrease the overall density. The
setting is automatically reset when you return to the home screen.
COLORS ARE OFF
Check Solution
Did you perform "Registration
Adjustment"?
■ Ask your administrator to perform "Registration Adjustment".
"Settings (administrator)" → [System Settings] → [Image Quality Adjustment]
→ [Collective Adjustment] → [Registration Adjustment] .
If the color tones are off, perform [Auto Color Calibration (for Copy)] after
finishing registration adjustment. (If the colors are still off after calibration,
repeating calibration may improve the results.)
"Settings (administrator)" → [System Settings] → [Image Quality Adjustment]
→ [Common Functions] → [Auto Color Calibration (for Copy)]
PART OF THE IMAGE IS CUT OFF
Check Solution
Has an appropriate ratio been
selected for the original size and
paper size?
■ Select an appropriate ratio setting.
Are you using an AB (inch) size
original?
■ When copying an AB (inch) size original, specify the original size manually.
COPIES COME OUT BLANK
Check Solution
Is the original placed face up or face
down correctly?
■ When using the document glass, the original must be placed face down. When
using the automatic document feeder, the original must be placed face up.
Check Solution
!
!
!
!

10-24
TROUBLESHOOTING►GENERAL PROBLEMS
I WANT TO COPY MULTIPLE A4 PAGES ONTO ONE
A4 SHEET OF PAPER
Check Solution
Use N-Up. ■ N-Up lets you reduce and copy the images of up to eight A4 pages on one sheet.
Tap the [N-Up] key.
In normal mode, you can also add borders to N-Up copies.
MIXED SIZE ORIGINALS CANNOT BE SCANNED
Check Solution
Is Mixed Size Original setting
performed?
■ Perform the Mixed Size Original setting.
Is unsupported combination of sizes
used?
■ Check the supported combinations.
Is the original orientation correct? ■ Place the original according to the instruction diagram in the Mixed Size Original
screen.
THIN PAPER CANNOT BE SCANNED
Check Solution
Is the paper thickness applicable? ■ Check the applicable paper thickness.
THICK PAPER CANNOT BE SCANNED
Check Solution
Is the paper thickness applicable? ■ Check the applicable paper thickness.
!
!
!
!

10-25
TROUBLESHOOTING►GENERAL PROBLEMS
PRINTING PROBLEMS
Have functions been disabled by the administrator?
Some functions may have been disabled in the setting mode. When user authentication is enabled, the functions that
you can use may be restricted in your user settings. Check with your administrator.
CHECK LIST
Problem Check Page
PRINTING DOES NOT TAKE PLACE Is your PC connected correctly to the machine? 10-26
Is the machine connected to the same network (LAN, etc.) as your PC? 10-26
Have you changed your network environment by replacing a computer
or adding a new router?
10-26
Is the IP address selected correctly? (Windows) 10-26
Are you using a printer port created using Standard TCP/IP Port?
(Windows)
10-26
Is your computer in an unstable state? 10-27
Is the machine specified correctly in the application that you are using
for printing?
10-27
Are the network connection devices operating normally? 10-27
Is the I/O timeout setting too short? 10-27
Was a Notice Page printed? 10-27
Have functions been disabled by the administrator? 10-27
Did you save settings in the Condition Settings that cannot be used with
your current option configuration?
10-27
I DON'T KNOW WHICH PRINTER
DRIVER TO INSTALL
Check the features of each printer driver before installing. 10-28
I DON'T KNOW HOW TO CANCEL
PRINTING
Follow the steps below to cancel printing 10-28
COLOR PRINTING DOES NOT TAKE
PLACE
Is the color mode set to "Color"? 10-28
Have functions been disabled by the administrator? 10-28
I DON'T KNOW HOW TO SWITCH
BETWEEN COLOR AND BLACK &
WHITE PRINTING
The color mode setting is configured in the printer driver. 10-29
I DON'T KNOW HOW TO PRINT ON
SPECIAL MEDIA (ENVELOPES,
ETC.)
For envelopes*, use tray 4 or the bypass tray, and for special papers
such as embossed paper, use the bypass tray.
10-29
2-SIDED PRINTING DOES NOT
TAKE PLACE
Does the paper type setting of the selected tray specify a type of paper
that cannot be used for 2-sided printing?
10-29
Are you using a special size or type of paper? 10-29
Have functions been disabled by the administrator? 10-28
DIRECT PRINTING OF A FILE IN A
SHARED FOLDER ON A
COMPUTER IS NOT POSSIBLE
Is [IPsec Settings] enabled on the machine? 10-30
A TRAY, FINISHER, OR OTHER
PERIPHERAL DEVICE INSTALLED
ON THE MACHINE CANNOT BE
USED
Have the peripheral devices that are installed on the machine been
configured with the printer driver?
10-30
THE IMAGE IS GRAINY Are the printer driver settings appropriate for the print job? 10-30
THE IMAGE IS TOO LIGHT OR TOO
DARK
Is the overall print density too light? 10-30
Does the image (particularly a photo) need correction? (Windows) 10-31
COLORS ARE OFF Did you perform "Registration Adjustment"? 10-31
?
10-26
TROUBLESHOOTING►GENERAL PROBLEMS
TEXT AND LINES ARE FAINT AND
DIFFICULT TO SEE
Was color data printed in black and white? (Windows) 10-31
Is the overall print density too light? 10-31
Are there fine lines in the original data? 10-31
PART OF THE IMAGE IS CUT OFF Does the paper size specified by the job match the size of paper loaded
into the tray?
10-32
Is the print orientation setting (portrait or landscape) correct? 10-32
Are the margins set correctly in the layout settings of the application? 10-32
THE IMAGE IS UPSIDE DOWN Are you using a type of paper (envelopes, punch paper, etc.) that can
only be loaded in a fixed orientation?
10-32
Is the correct binding position selected for 2-sided printing? 10-32
MANY GARBLED CHARACTERS
ARE PRINTED
Is your computer or the machine in an unstable state? 10-33
AFTER THE ROUTER WAS
REPLACED, I CAN NO LONGER
PRINT TO THE MACHINE
Does your computer connect to the machine? 10-34
PRINTING DOES NOT TAKE PLACE
Check Solution
Is your PC connected correctly to the
machine?
■ Make sure that the cable is connected securely to the LAN connector of your PC
and that of the machine.
If you are connecting to a network, make sure that the LAN cable is securely
connected to the hub as well.
SIDE AND BACK
(page 1-7)
Is the machine connected to the same
network (LAN, etc.) as your PC?
■ The machine must be connected to the same network as your PC.
If you do not know which network the machine is connected to, ask the network
administrator.
Have you changed your network
environment by replacing a computer
or adding a new router?
■ The connection to the computer may not be correct due to a change in IP
address caused by replacing your computer or by a change in the network
environment. Contact your network administrator to confirm that the settings
between the machine and your computer or network environment are correct.
Is the IP address selected correctly?
(Windows)
■ Check the IP address setting.
If the machine does not have a permanent IP address (the machine receives an
IP address from a DHCP server), printing will not be possible if the IP address
changes.
You can check the machine's IP address in [Network Status] of setting mode. If
the IP address has changed, change the port setting in the printer driver.
"Settings" → [Status] → [Network Status]
See: Software Setup Guide
If the IP address changes frequently, it is recommended that a permanent IP
address be assigned to the machine.
"Settings (administrator)" → [System Settings] → [Network Settings]
Are you using a printer port created
using Standard TCP/IP Port?
(Windows)
■ Check the PC settings.
When a port created with Standard TCP/IP Port in Windows is used and the
[SNMP Status Enabled] checkbox is , it may not be possible to print correctly.
Change the [SNMP Status Enabled] checkbox to .
See: Software Setup Guide
Problem Check Page
?
!

10-27
TROUBLESHOOTING►GENERAL PROBLEMS
Is your computer in an unstable
state?
■ Restart your computer.
Printing is sometimes not possible when you run multiple applications at once or
there is insufficient memory or local drive space. Restart your computer.
Is the machine specified correctly in
the application that you are using for
printing?
■ Check whether the machine's printer driver has been selected from the print
window of the application.
If the machine's printer driver does not appear in the list of available printer
drivers, it may not be installed correctly. Remove the printer driver and then
install it once again.
See: Software Setup Guide
Are the network connection devices
operating normally?
■ Make sure that the routers and other network connection devices are operating
correctly.
If a device is not powered on or is in an error state, see the manual of the device
to correct the problem.
Is the I/O timeout setting too short? ■ Check with your administrator.
If the I/O timeout setting is too short, errors may occur while writing to the printer.
Ask the administrator of the machine to configure an appropriate time in "I/O
Timeout".
"Settings (administrator)" → [System Settings] → [Printer Settings]
→ [Condition Settings] → [I/O Timeout].
Was a Notice Page printed? ■ Check the Notice Page.
A Notice Page will be printed to indicate the cause of the problem if a print job
cannot be performed as specified and the cause is not shown in the display.
Read the printed page and take appropriate actions.
For example, a Notice Page will be printed in the following situations.
• The print job is too large to fit in memory.
• A function that has been prohibited by the administrator is specified.
By factory default, Notice Pages are not printed.
Have functions been disabled by the
administrator?
■ Check with your administrator.
When user authentication is enabled, the functions that you can use may be
restricted in your user settings. Check with your administrator.
Did you save settings in the Condition
Settings that cannot be used with
your current option configuration?
■ Initialize the Condition Settings.
If you change your option configuration after changing the Condition Settings, the
Print Settings screen may not appear. Return to your original option
configuration, or initialize the Condition Settings.
Check Solution
!

10-28
TROUBLESHOOTING►GENERAL PROBLEMS
I DON'T KNOW WHICH PRINTER DRIVER TO INSTALL
Check Solution
Check the features of each printer
driver before installing.
■ Each printer driver has specific features. Install and use the printer drivers that
match your needs.
• PCL6 printer driver
The machine supports the Hewlett-Packard PCL6 printer control languages.
Prints fast and is good for regular print jobs.
• PS printer driver
The PS printer driver supports the PostScript 3 page description language
developed by Adobe Inc.
Excellent reproduction of images that include fine graphics.
• PPD driver
The PPD driver enables the machine to use the standard Windows PS printer
driver.
I DON'T KNOW HOW TO CANCEL PRINTING
Check Solution
Follow the steps below to cancel
printing
■ If the print data has not been spooled to the machine, refer to the manual for your
operating system or application.
If the print data has been spooled to the machine, tap the [Job Management] key,
the [Spool] key, or the [Job Queue] key, and select the job you want to delete
from the list. Open the action panel and tap [Stop/Delete]. A message will appear
to confirm the cancelation. Tap the [Cancel] key.
COLOR PRINTING DOES NOT TAKE PLACE
Check Solution
Is the color mode set to "Color"? ■ Select "Auto" or "Color" for the color mode setting.
Windows:
The setting is selected in the [Main] tab of the printer driver.
macOS:
The color mode setting is configured in the [Image Quality] menu of the print
window.
Have functions been disabled by the
administrator?
■ Check with your administrator.
When user authentication is enabled, the functions that you can use may be
restricted in your user settings.
!
!
!

10-29
TROUBLESHOOTING►GENERAL PROBLEMS
I DON'T KNOW HOW TO SWITCH BETWEEN COLOR
AND BLACK & WHITE PRINTING
Check Solution
The color mode setting is configured
in the printer driver.
■ Select "Auto" or "Color" for the color mode setting.
Windows:
The setting is selected in the [Main] tab of the printer driver.
macOS:
The print mode setting is configured in the [Image Quality] menu of the print
window.
I DON'T KNOW HOW TO PRINT ON SPECIAL MEDIA
(ENVELOPES, ETC.)
Check Solution
For envelopes*, use tray 4 or the
bypass tray, and for special papers
such as embossed paper, use the
bypass tray.
■ For envelopes, set envelopes in tray 4 or in the bypass tray. For special papers
such as embossed paper, set the paper in the bypass tray. After loading the
media, set the paper size and paper in [Tray Settings] in the home screen. In
addition, check the method of setting the paper, and the type and size of paper,
such as the envelope type, etc. When you have completed the settings on the
machine, set the "Original Size" and "Paper Size" appropriately on the [Main] tab
of the printer driver.
* Depending on the countries or regions, envelopes may not be available.
2-SIDED PRINTING DOES NOT TAKE PLACE
Check Solution
Does the paper type setting of the
selected tray specify a type of paper
that cannot be used for 2-sided
printing?
■ Check "Paper Tray Settings" in the setting mode.
"Settings" → [System Settings] → [Common Settings] → [Paper Settings] →
[Paper Tray Settings] → [Tray Registration] → [Feeding Approved Job]
Check the [Tray Settings] in the home screen.
Tap the selected tray, and in the screen that appears, tap the [Paper Property]
key.
If the [Disable Duplex] checkbox in the paper properties screen is , the tray
cannot be used for duplex printing. Change the paper type to a type that can
be used for duplex printing.
Are you using a special size or type of
paper?
■ Check the paper types and sizes that can be used for two-sided copying.
Have functions been disabled by the
administrator?
■ Check with your administrator.
Some functions may have been disabled in the setting mode. Check with your
administrator.
When user authentication is enabled, the functions that you can use may be
restricted in your user settings. Check with your administrator.
!
!
!

10-30
TROUBLESHOOTING►GENERAL PROBLEMS
DIRECT PRINTING OF A FILE IN A SHARED FOLDER
ON A COMPUTER IS NOT POSSIBLE
Check Solution
Is [IPsec Settings] enabled on the
machine?
■ Check with your administrator.
When [IPsec Settings] is enabled in the setting mode, direct printing of a file in a
shared folder may not be possible in your PC environment. For information about
[IPsec Settings], consult your administrator.
"Settings" → [Security Settings] → [IPsec Settings]
A TRAY, FINISHER, OR OTHER PERIPHERAL DEVICE
INSTALLED ON THE MACHINE CANNOT BE USED
Check Solution
Have the peripheral devices that are
installed on the machine been
configured with the printer driver?
■ Open the printer properties dialog box and click [Auto Configuration] on the
[Options] tab. (Windows)
If auto configuration cannot be executed, see the Software Setup Guide.
THE IMAGE IS GRAINY
Check Solution
Are the printer driver settings
appropriate for the print job?
■ Check the settings of the printer driver.
When selecting print settings, select a print mode from [600dpi], [600dpi (High
Quality)], or [1200dpi]. When you need a very clear image, select [1200dpi].
Windows: The resolution setting is selected in the [Image Quality] tab of the
printer driver properties window.
macOS: The print mode setting is configured in the [Image Quality] menu of the
print window.
THE IMAGE IS TOO LIGHT OR TOO DARK
Check Solution
Is the overall print density too light? ■ Use the setting below to change the overall print density.
Select "Settings (administrator)" - [System Settings] → [Image Quality
Adjustment] → [Print Image Quality] → [Quick Image Quality Adjustment]. Set
default setting [2] to [3 (Sharp)] to increase the overall density, or [1 (Smooth)] to
decrease the overall density.
This setting can be set separately for color mode and monochrome mode.
!
!
!
!

10-31
TROUBLESHOOTING►GENERAL PROBLEMS
Does the image (particularly a photo)
need correction?
(Windows)
■ Check the settings of the printer driver.
Correct brightness and contrast with [Image Quality] on the [Color Adjustment]
tab of the printer driver. Use these settings to make simple corrections in a case
such as when image editing software is not installed on your computer.
COLOR ARE OFF
Check Solution
Did you perform "Registration
Adjustment"?
■ Ask your administrator to perform "Registration Adjustment".
"Settings (administrator)" → [System Settings] → [Image Quality Adjustment]
→ [Collective Adjustment] → [Registration Adjustment] .
If the color tones are off, perform [Auto Color Calibration (for Print)] after
finishing registration adjustment. (If the colors are still off after calibration,
repeating calibration may improve the results.)
"Settings (administrator)" → [System Settings] → [Image Quality Adjustment]
→ [Common Functions] → [Auto Color Calibration (for Print)]
TEXT AND LINES ARE FAINT AND DIFFICULT TO SEE
Check Solution
Was color data printed in black and
white?
(Windows)
■ Check the settings of the printer driver.
When color text and lines are printed in black and white, they may become faint
and difficult to see. To have color text or lines (areas) that could become faint
converted to black, select [Text To Black] or [Vector To Black] on the [Image
Quality] tab of the printer driver. (Raster data such as bitmap images cannot be
adjusted.)
Is the overall print density too light? ■ Use the setting below to change the overall print density.
Select "Settings (Web version)" - [System Settings] → [Image Quality
Adjustment] → [Print Image Quality] → [Quick Image Quality Adjustment]. Set
default setting [2] to [3 (Sharp)] to increase the overall density, or [1 (Smooth)] to
decrease the overall density.
This setting can be set separately for color mode and monochrome mode.
Are there fine lines in the original
data?
■ Change the width of specific printed lines.
Select "Settings (administrator)" - [System Settings] → [Image Quality
Adjustment] → [Print Image Quality] → [Color Line Width Adjustment]. Increase
the value of default setting [5] to make the lines thicker, or decrease the value to
make the lines thinner. (Text and raster data such as bitmap images cannot be
changed.)
Check Solution
!
!
!

10-32
TROUBLESHOOTING►GENERAL PROBLEMS
PART OF THE IMAGE IS CUT OFF
Check Solution
Does the paper size specified by the
job match the size of paper loaded
into the tray?
■ Make sure that the paper size setting matches the size of paper loaded into the
tray.
Windows: The setting is selected in the [Paper Source] tab of the printer driver.
If [Paper Tray] is selected, check the loaded paper and the paper size setting.
macOS: The setting is selected in the [Page Setup] menu.
Is the print orientation setting (portrait
or landscape) correct?
■ Set the print orientation to match the image.
Windows: The setting is selected in the [Main] tab of the printer driver.
macOS: The setting is selected in the [Page Setup] menu.
Are the margins set correctly in the
layout settings of the application?
■ Select an appropriate paper size and margins in the layout settings of the
application.
If the edge of the image extends outside the printable area of the machine, the
edge will be cut off.
THE IMAGE IS UPSIDE DOWN
Check Solution
Are you using a type of paper
(envelopes, punch paper, etc.)
that can only be loaded in a fixed
orientation?
■ Rotate the image 180 degrees before printing.
When the image size and paper size are the same but the orientations are
different, the orientation of the image is automatically rotated to match the paper.
However, when the paper can only be loaded in a fixed orientation, the image
may be printed upside down. In this event, rotate the image 180 degrees before
printing.
Windows: The setting is selected in "Orientation" on the [Main] tab of the printer
driver.
macOS: The setting is selected in the [Layout] menu of the print window.
Is the correct binding position
selected for 2-sided printing?
■ Be sure to set the appropriate binding position.
When 2-sided printing is performed, every other page is printed upside down
when tablet binding is selected for the binding position.
Windows: The setting is selected in the [Main] tab of the printer driver.
macOS: The setting is selected in the [Layout] menu of the print window.
!
!

10-33
TROUBLESHOOTING►GENERAL PROBLEMS
MANY GARBLED CHARACTERS ARE PRINTED
Check Solution
Is your computer or the machine in an
unstable state?
■ Cancel printing, restart your PC and the machine, and try printing again.
If there is only a small amount of free space remaining in the memory or local
drive of your PC, or if a large number of jobs have been spooled on the machine
and only a small amount of free space remains, text may be printed as garbled
characters.
To cancel printing:
• Windows:
Double-click the printer icon that appears at the lower right of the task bar and
click "Cancel All Documents" (or "Purge Print Documents") in the [Printer] menu.
•macOS:
Double-click the name of the machine in the printer list, select the job that you
wish to delete, and delete it.
•At the machine:
Tap the job management display on the operation panel, tap the [Print] tab to
change the screen, tap the key of the print job that you wish to delete, and tap the
[Stop/Delete] key. A message will appear to confirm the cancelation. Tap the
[Cancel] key.
If some printed characters are still garbled after restarting, ask your administrator to
lengthen the timeout setting of [I/O Timeout] in the setting mode.
"Settings (administrator)" → [System Settings] → [Printer Settings]
→ [Condition Settings] → [I/O Timeout].
If garbled characters are being still printed after the above measures are taken,
remove and then reinstall the printer driver.
!

10-34
TROUBLESHOOTING►GENERAL PROBLEMS
AFTER THE ROUTER WAS REPLACED, I CAN NO
LONGER PRINT TO THE MACHINE
Check Solution
Does your computer connect to the
machine?
■ The network connection between the machine and your computer may not be
working correctly. Check the machine's IP address and your computer's IP
address, and make sure that your computer can connect to the machine. Also
check if the correct "Print Port" is specified in your computer's driver settings.
• Check the IP address setting.
If the machine does not have a permanent IP address (the machine receives an
IP address from a DHCP server), printing will not be possible if the IP address
changes.
You can check the machine's IP address in [Network Status] of setting mode. If
the IP address has changed, change the port setting in the printer driver.
•"Settings" → [Status] → [Network Status]
See: Software Setup Guide
If the IP address changes frequently, it is recommended that a permanent IP
address be assigned to the machine.
• "Settings (administrator)" → [System Settings] → [Network Settings]
• Check if the correct print port is set on the computer.
Windows:
Click the [Start] button, select [Settings] → [Device] → [Devices and Printers]. (In
Windows 11, click the [Start] button, select [Bluetooth & devices] → [Printers &
scanners].) (In Windows Server 2012, right-click the [Start] button, select [Control
Panel] → [View devices and printers] (or [Devices and Printers]).)
(In Windows 7/Windows Server 2008, click the [Start] button, select [Devices and
Printers].)
Select and then right-click the printer → [Printer properties]→ [Port]
macOS:
Delete and then reinstall the printer.
!

10-35
TROUBLESHOOTING►GENERAL PROBLEMS
IMAGE SEND PROBLEMS
Have functions been disabled by the administrator?
Some functions may have been disabled in the setting mode. When user authentication is enabled, the functions that
you can use may be restricted in your user settings. Check with your administrator.
CHECK LIST
Problem Check Page
TRANSMISSION DOES NOT TAKE
PLACE
Did you select the correct destination (destination information)? Is the
correct information (e-mail address or FTP server information) stored for
that destination?
10-36
Does the image file exceed the e-mail attachment limit set in the setting
mode (administrator)?
10-36
Did the image file exceed the file attachment size limit of your mail
server?
10-36
Has the folder on the destination computer been set as a shared folder
so that files can be sent to it?
10-36
Is [IPsec Settings] enabled on the machine? 10-36
Did you place an original that is folded? 10-36
AUTO SELECTION OF THE COLOR
MODE DOES NOT TAKE PLACE
CORRECTLY
Are you scanning one of the following types of originals? 10-37
THE RECEIVED IMAGE FILE
CANNOT BE OPENED
Does the viewer program used by the recipient support the format of the
received image data?
10-37
Does a message appear prompting you to enter your password? 10-37
I DON'T KNOW HOW TO SPECIFY
THE ORIGINAL/SEND SIZE
Are you using Easy mode? 10-37
TRANSMISSION TAKES A LONG
TIME
Is the resolution setting appropriate at the time of scanning? 10-38
A DESTINATION IS PRE-SELECTED Is [Default Address Setting] enabled in the setting mode? 10-38
THE SCANNED IMAGE IS CLIPPED Is the original scan size setting smaller than the actual original size? 10-38
THE QUALITY OF THE SCANNED
IMAGE IS POOR
Is the original printed matter such as a book or magazine? 10-39
When scanning a color or grayscale original, is the color mode set to
[Mono2]?
10-39
Is the resolution setting too low? 10-39
Is the compression ratio too high? 10-39
THE SCANNED IMAGE IS BLANK Is the original placed face up or face down correctly? 10-39
JPEG WAS SELECTED FOR THE
FILE TYPE BUT THE FILE WAS
CREATED AS A TIFF FILE
Did you select [Mono2] in color mode? 10-39
THE FILE SIZE IS LARGE Was the color mode set to [Grayscale] when you scanned a
monochrome original?
10-40
Is the resolution setting too high? 10-40
Is the compression ratio too low? 10-40
AN ADDRESS (A ONE-TOUCH
INDIVIDUAL KEY OR GROUP KEY)
CANNOT BE STORED
Has the maximum number of keys been stored? 10-40
AN ADDRESS (A ONE-TOUCH
INDIVIDUAL KEY OR GROUP KEY)
CANNOT BE EDITED OR DELETED
Is the key being used in a reserved transmission or a transmission in
progress?
10-40
Has your administrator enabled a function that prevents
editing/deleting?
10-40
?

10-36
TROUBLESHOOTING►GENERAL PROBLEMS
I WANT TO CHANGE THE FORMAT
OR COMPRESSION OF A SCANNED
IMAGE
Use the [Format] key. 10-41
I DON'T KNOW HOW TO CHECK AN
ADDRESS WHEN SENDING AN
IMAGE
Tap the [Address Review] key. 10-41
AFTER THE ROUTER WAS
REPLACED, I CAN'T USE SCAN TO
NETWORK FOLDER OR SCAN
Has the machine's IP address been changed? 10-41
TRANSMISSION DOES NOT TAKE PLACE
Check Solution
Did you select the correct destination
(destination information)? Is the
correct information (e-mail address or
FTP server information) stored for
that destination?
■ Make sure that the correct information is stored for the destination and that the
destination is correctly selected.
If delivery by e-mail (Scan to E-mail) is unsuccessful, an error message such as
"Undelivered Message" may be sent to the designated administrator's e-mail
address. This information may help you determine the cause of the problem.
Does the image file exceed the e-mail
attachment limit set in the setting
mode (administrator)?
■ Check with your administrator.
If your administrator has set a limit on the size of transmitted files, a file that
exceeds the limit cannot be transmitted.
Did the image file exceed the file
attachment size limit of your mail
server?
(When Scan to E-mail is used)
■ Reduce the size of the file attachment (reduce the number of pages to scan) for
one e-mail transmission.
The size of the file can also be reduced by scanning using a lower resolution
setting. Ask your mail server administrator (or Internet service provider, etc.) what
the file size limit is for one e-mail transmission.
■ When [Send Destination Link] is selected, the data is saved to the machine's
local drive, and a URL link to the saved data is sent by e-mail to the destination.
The recipient uses the link to download the file. Because this method is not
affected by mail server restrictions, you can use it in instances such as when you
cannot reduce the size of the file.
Has the folder on the destination
computer been set as a shared folder
so that files can be sent to it?
(When using Scan to Network Folder)
■ If the destination folder is not configured as a shared folder, select "Sharing" in
the folder properties.
If the folder was moved or otherwise changed, the "Sharing" setting may have
been canceled.
Is [IPsec Settings] enabled on the
machine?
(When using Scan to Network Folder)
■ Check with your administrator.
When [IPsec Settings] is enabled in setting mode, it may not be possible to scan
to a shared folder in some computer environments.
"Settings (administrator)" → [System Settings] → [Security Settings]
→ [IPsec Settings]
Did you place an original that is
folded?
■ Following the instructions in the display, unfold the original, place it in the
automatic document feeder again, and re-scan it.
If a folded original is placed in the automatic document feeder, an error will occur
and scanning will be canceled when the actual original size is detected during
scanning.
Problem Check Page
?
!

10-37
TROUBLESHOOTING►GENERAL PROBLEMS
AUTO SELECTION OF THE COLOR MODE DOES NOT
TAKE PLACE CORRECTLY
Check Solution
Are you scanning one of the following
types of originals?
When Black & White is not selected:
• Are there colors or coloring in the
paper?
When Color is not selected:
• Is the color in the original very light?
• Is the color in the original very dark,
almost black?
• Is only a very small area of the original
colored?
■ Specify the color mode manually.
When the color mode is set to [Auto], the machine detects whether the original is
black and white or color when the [Color Start] key is tapped; however, in the
cases as shown on the left, automatic detection may not give the correct result.
THE RECEIVED IMAGE FILE CANNOT BE OPENED
Check Solution
Does the viewer program used by the
recipient support the format of the
received image data?
■ Use a software program that is capable of opening the selected file type and
compression mode.
The recipient may be able to open the file if you change the file type and
compression mode selected at the time of transmission.
Does a message appear prompting
you to enter your password?
■ Ask the sender for the password, or have the image sent again in a
non-encrypted format.
The received file is an encrypted PDF file.
I DON'T KNOW HOW TO SPECIFY THE
ORIGINAL/SEND SIZE
Check Solution
Are you using Easy mode? ■ Use normal mode to set the original size and send size. Tap the [Original] key in
the base screen of normal mode. Specify the scan size (original size), and
specify the send size that will be received at the destination.
!
!
!

10-38
TROUBLESHOOTING►GENERAL PROBLEMS
TRANSMISSION TAKES A LONG TIME
Check Solution
Is the resolution setting appropriate at
the time of scanning?
■ Select resolution and data compression settings that are suited to the purpose of
transmission.
To create image data that is balanced in terms of resolution and file size, pay
attention to the following points:
Resolution modes:
The default resolution setting is [200x200dpi] in "E-Mail", "FTP", "Network
Folder", and "Scan to External Memory Device". If the original does not contain a
halftone image such as a photo or illustration, scanning at the default resolution
will create a more practical and useful image. A higher resolution setting should
only be selected if the original contains a photo and you wish to give priority to the
quality of the photo image. Exercise caution in this case as a larger file will be
created than when the default setting is used.
A DESTINATION IS PRE-SELECTED
Check Solution
Is [Default Address Setting] enabled
in the setting mode?
■ If you wish to send to a destination other than the default destination, tap the
[Cancel] key.
If you are the administrator and wish to change or disable the default destination,
change the settings as appropriate in [Default Address Setting].
"Settings (administrator)" → [System Settings] → [Image Send Settings] →
[Scan Settings] → [Default Address] → [Default Address Setting]
THE SCANNED IMAGE IS CLIPPED
Check Solution
Is the original scan size setting
smaller than the actual original size?
■ Set the scan size to the actual original size.
If you have intentionally set a smaller size than the actual original size, place the
original considering the reference placement position for the selected scan size.
For example, when scanning an A4 (8-1/2" x 11") original using a B5 (5-1/2" x
8-1/2") setting on the document glass, align the original using the document glass
scale at the left edge to fit the area you wish to scan into the B5 (5-1/2" x 8-1/2")
scanning area.
!
!
!

10-39
TROUBLESHOOTING►GENERAL PROBLEMS
THE QUALITY OF THE SCANNED IMAGE IS POOR
Check Solution
Is the original printed matter such as
a book or magazine?
■ To reduce the moire effect, take the following procedure:
When the original is printed matter, vertical patterns (moire) may occur. Select
[Others] → [Sharpness] in the Base Screen of normal mode and soften the edges
of image to reduce the moire effect (only in "E-Mail", "FTP", "Network Folder",
and "Scan to External Memory Device"). It may also be possible to reduce the
moire effect by changing the resolution setting or shifting the original (or changing
its angle) slightly on the document glass.
When scanning a color or grayscale
original, is the color mode set to
[Mono2]?
■ Setting the color mode to [Mono2] replaces the colors in the original with either
black or white. This is suitable for text-only originals; however, for originals that
contain illustrations, it is best to use the [B/W Start] key with the color mode set to
[Grayscale], or set the color mode of the [Color Start] key to [Full Color] or
[Grayscale] and then scan.
Is the resolution setting too low? ■ A low resolution setting results in a coarser image.
Increasing the resolution setting produces a smoother image. (The higher the
resolution, the larger the file size.)
Is the compression ratio too high? ■ If the compression ratio is set to a high value when "Color Mode" transmission is
set to full color or grayscale, noise may be noticeable and colors may appear dull.
Set [File Format] → "Compression Ratio" to a lower value to reduce noise and
dulling of color. (The lower the compression ratio, the larger the file size.)
This is set in Normal Mode.
THE SCANNED IMAGE IS BLANK
Check Solution
Is the original placed face up or face
down correctly?
■ Place the original again in the correct orientation, and resend.
When using the document glass, the original must be placed face down. When
using the automatic document feeder, the original must be placed face up.
JPEG WAS SELECTED FOR THE FILE TYPE BUT THE
FILE WAS CREATED AS A TIFF FILE
Check Solution
Did you select [Mono2] in color
mode?
■ Change the color mode to [Full Color] or [Grayscale], and then tap the [Start] key.
When [JPEG] is selected for the file type and the image is scanned in Mono2, the
file will be created as a TIFF file.
!
!
!

10-40
TROUBLESHOOTING►GENERAL PROBLEMS
THE FILE SIZE IS LARGE
Check Solution
Was the color mode set to [Grayscale]
when you scanned a monochrome
original?
■ [Grayscale] is suitable when you want a high-quality image of text or a photo, but
the file size will be larger. Using [Mono2] for a text-only original will significantly
reduce the file size. This is set in Normal Mode.
Is the resolution setting too high? ■ The higher the resolution setting, the larger the file size.
Lowering the resolution results in a coarser image, but produces a smaller file
size.
Is the compression ratio too low? ■ If the compression ratio is set to a low value when Color Mode is set to
[Full Color] or [Grayscale], the file size will be large.
If [File Format] → [Compression Ratio] is set to a higher value, noise may
become noticeable and colors may appear duller, but the file size will be smaller.
This is set in Normal Mode.
AN ADDRESS (A ONE-TOUCH INDIVIDUAL KEY OR
GROUP KEY) CANNOT BE STORED
Check Solution
Has the maximum number of keys
been stored?
■ Adjust the number of stored keys.
Delete addresses (one-touch keys and group keys) that are not being used.
AN ADDRESS (A ONE-TOUCH INDIVIDUAL KEY OR
GROUP KEY) CANNOT BE EDITED OR DELETED
Check Solution
Is the key being used in a reserved
transmission or a transmission in
progress?
■ Wait until the transmission is finished or cancel the reserved transmission and
then edit or delete the key.
Has your administrator enabled a
function that prevents
editing/deleting?
■ Check with your administrator.
If your administrator has enabled settings such as [Default Address Setting] and
[Inbound Routing Settings], keys cannot be edited or removed.
!
!
!

10-41
TROUBLESHOOTING►GENERAL PROBLEMS
I WANT TO CHANGE THE FORMAT OR
COMPRESSION OF A SCANNED IMAGE
Check Solution
Use the [Format] key. ■ You can use the [Format] key to set the format and compression percentage of a
file to be saved or sent. In normal mode, you can create a file of a number of
original pages
[Specified Pages per File] can be used.
I DON'T KNOW HOW TO CHECK AN ADDRESS WHEN
SENDING AN IMAGE
Check Solution
Tap the [Address Review] key. ■ Tap the [Address Review] key to view a list of the addresses.
AFTER THE ROUTER WAS REPLACED, I CAN'T USE
SCAN TO NETWORK FOLDER OR SCAN
Check Solution
Has the machine's IP address been
changed?
■ Check the IP address setting.
If the machine does not have a permanent IP address (the machine receives an
IP address from a DHCP server), scanning to network folder or scanning will not
be possible if the IP address changes.
You can check the machine's IP address in [Network Status] of setting mode. If
the IP address has changed, change the port setting in the printer driver.
"Settings" → [Status] → [Network Status]
See: Software Setup Guide
If the IP address changes frequently, it is recommended that a permanent IP
address be assigned to the machine.
"Settings (administrator)" → [System Settings] → [Network Settings]
!
!
!
10-42
TROUBLESHOOTING►GENERAL PROBLEMS
DOCUMENT FILING PROBLEMS
Have functions been disabled by the administrator?
Some functions may have been disabled in the setting mode. When user authentication is enabled, the functions that
you can use may be restricted in your user settings. Check with your administrator.
CHECK LIST
Problem Check Page
DOCUMENT FILING DOES NOT
TAKE PLACE
Did you enable document filing in the printer driver? 10-42
A JOB CANNOT BE STORED IN A
CUSTOM FOLDER
Do the custom folders created with the machine appear in "Folder
Information"? (When printing)
10-43
Does the custom folder have a PIN Code? 10-43
A STORED FILE HAS
DISAPPEARED
Did you enable the [Delete] checkbox to print a stored file? 10-43
Has automatic deletion of document filing files been enabled? 10-43
A FILE CANNOT BE DELETED Is the property of the file set to [Protect]? 10-43
THE PROPERTY OF A FILE
CANNOT BE SET TO [Confidential]
Is the file in the Quick File folder? 10-43
A CONFIDENTIAL FILE OR
CONFIDENTIAL FOLDER CANNOT
BE OPENED
Did you enter the wrong password/PIN Code? 10-44
I CAN'T STORE OR CHANGE A FILE
NAME OR CUSTOM FOLDER NAME
Does the name include characters that cannot be used in a file or folder
name?
10-44
A FILE NAME IS CUT OFF Was the file name stored in the advanced transmission settings during a
scan?
10-44
I DON'T KNOW HOW TO SCAN TO
USB MEMORY
Did you insert the USB memory device? 10-44
Did you select [Scan to USB] in [Scan to Local Drive/USB] of Easy Scan
mode?
10-44
Did you select [Scan to External Memory Device] in Document Filing
mode?
10-44
I DON'T KNOW TO PRINT BY USB
DIRECT PRINT
Did you insert the USB memory device? 10-44
Did you select [Select File from USB Memory to Print] in Document
Filing mode?
10-45
DOCUMENT FILING DOES NOT TAKE PLACE
Check Solution
Did you enable document filing in the
printer driver?
■ Enable document filing.
In print mode, enable document filing on the [Job Handling] tab of the printer
driver.
In other than print mode, specify Document Filing settings from Quick File or File.
?
!

10-43
TROUBLESHOOTING►GENERAL PROBLEMS
A JOB CANNOT BE STORED IN A CUSTOM FOLDER
Check Solution
Do the custom folders created with
the machine appear in "Folder
Information"?
(When printing)
■ Click the [Get Folder Name] button in the document filing save screen of the
printer driver to call up the custom folders that have been created on the
machine.
Does the custom folder have a PIN
Code?
■ Enter the PIN Code configured in the machine in the document filing save screen.
A STORED FILE HAS DISAPPEARED
Check Solution
Did you enable the [Delete] checkbox
to print a stored file?
■ If you print the file by enabling the [Delete] checkbox, the file is automatically
deleted after being printed.
The file property can be set to [Protect] to prevent the file from being easily
deleted.
Has automatic deletion of document
filing files been enabled?
■ If files that you need have been deleted, consult the administrator of the machine.
When [Automatic Deletion of File Settings] is enabled in the setting mode, the
files in the specified folders are periodically deleted. (Even when the file property
is [Confidential] or [Protect], the file may be deleted.)
"Settings (administrator)" → [System Settings] → [Document Filing Settings]
→ [Automatic Deletion of File Settings]
A FILE CANNOT BE DELETED
Check Solution
Is the property of the file set to
[Protect]?
■ A file cannot be deleted when its property is set to [Protect].
Change the file property from [Protect] to [Sharing] and then delete the file.
THE PROPERTY OF A FILE CANNOT BE SET TO
[Confidential]
Check Solution
Is the file in the Quick File folder? ■ Move the file to a different folder and then set its property to "Confidential".
[Confidential] cannot be specified for a file in the Quick File folder. (Note that
[Protect] can be specified for a file in the Quick File folder to prevent it from being
easily deleted.)
!
!
!
!

10-44
TROUBLESHOOTING►GENERAL PROBLEMS
A CONFIDENTIAL FILE OR CONFIDENTIAL FOLDER
CANNOT BE OPENED
Check Solution
Did you enter the wrong
password/PIN Code?
■ Check with your administrator.
I CAN'T STORE OR CHANGE A FILE NAME OR
CUSTOM FOLDER NAME
Check Solution
Does the name include characters
that cannot be used in a file or folder
name?
■ The following characters cannot be used in a file or folder name:
? / " : < > * \ |
A FILE NAME IS CUT OFF
Check Solution
Was the file name stored in the
advanced transmission settings
during a scan?
■ If the name was stored in the advanced transmission settings before Quick File or
File settings were configured, that name will be used for the stored file. If the
number of characters in the name exceeds the maximum number of characters
allowed for a Quick File name (30 characters), characters after the 30th character
will be discarded.
I DON'T KNOW HOW TO SCAN TO USB MEMORY
Check Solution
Did you insert the USB memory
device?
■ When you insert a USB memory device in the machine, a message will appear.
To scan to USB memory, tap the [Scan to External Memory Device] key. The
external memory device screen set in Easy Scan mode appears. Place the
original and tap the [Start] key to scan the document into the USB memory
device. You can select the [Perform Detail Setting] checkbox to select detailed
save settings.
Did you select [Scan to USB] in [Scan
to Local Drive/USB] of Easy Scan
mode?
■ When [Scan to USB] is selected in [Scan to Local Drive/USB] of Easy Scan
mode, the scanned document will be saved to the connected USB memory
device.
Did you select [Scan to External
Memory Device] in Document Filing
mode?
■ When [Scan to External Memory Device] is selected on the action panel of
Document Filing mode, the scanned document will be saved to the connected
USB memory device.
!
!
!
!

10-45
TROUBLESHOOTING►GENERAL PROBLEMS
I DON'T KNOW TO PRINT BY USB DIRECT PRINT
Check Solution
Did you insert the USB memory
device?
■ When you insert a USB memory device in the machine, a message will appear.
To perform USB Direct Print, tap the [Print from external memory device (USB)]
key.
Did you select [Select File from USB
Memory to Print] in Document Filing
mode?
■ Tap [Select File from USB Memory to Print] on the action panel of Document
Filing mode.
!
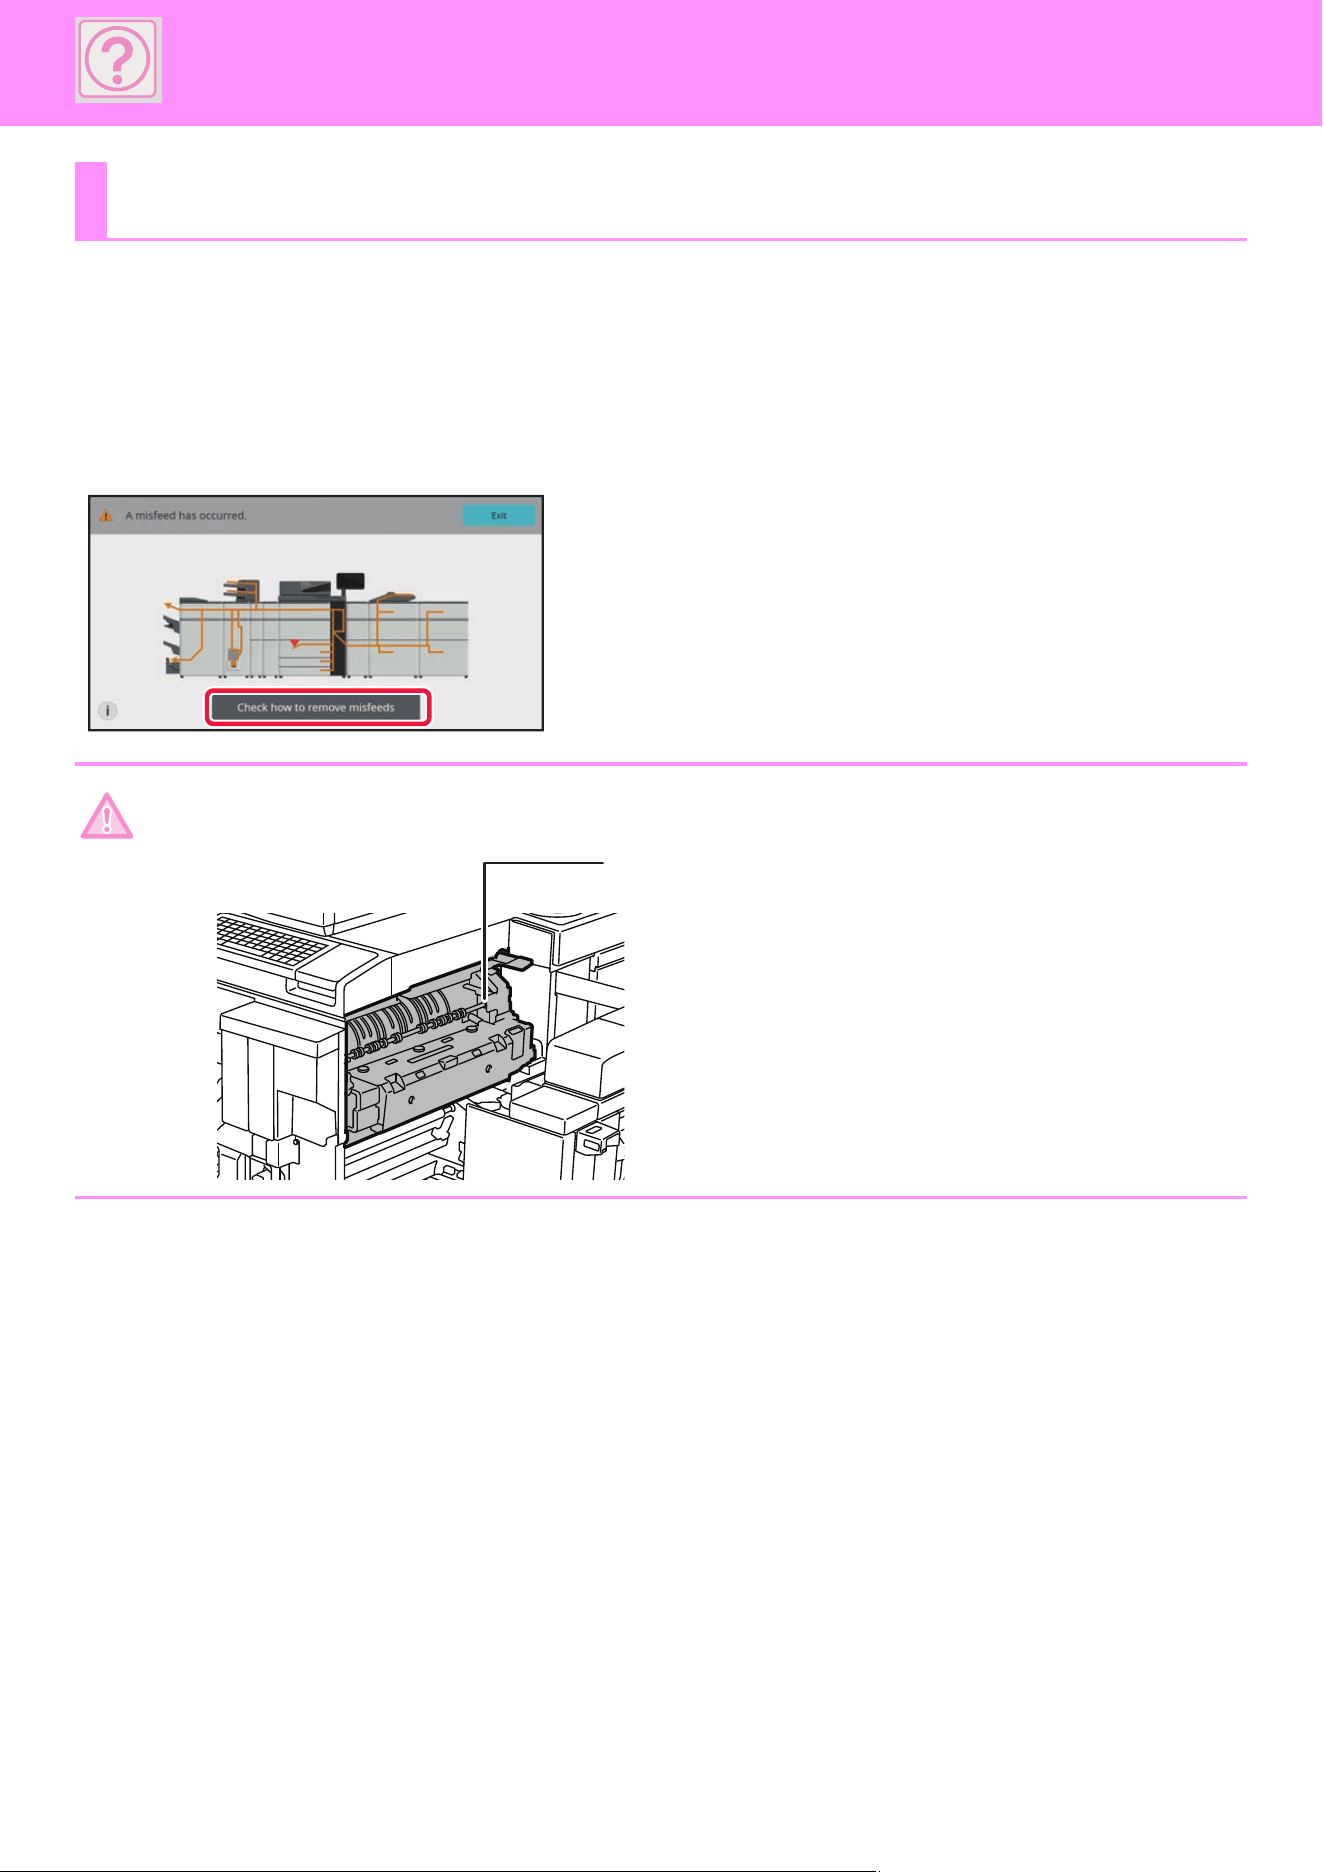
10-46
TROUBLESHOOTING►REMOVING MISFEEDS
REMOVING MISFEEDS
If a paper misfeed occurs, the "Paper Jam" message will appear in the touch panel and printing and scanning will stop.
In this event, tap the [Check how to remove misfeeds] key in the touch panel.
When the key is tapped, instructions for removing the misfeed will appear. Follow the instructions. When the misfeed is
cleared, the message will automatically disappear.
REMOVING MISFEEDS
• The fusing unit and paper output area are hot.
• When removing a misfeed, do not touch the fusing unit. You may burn yourself.
Fusing unit

11-2
APPENDIX►SPECIFICATIONS
SPECIFICATIONS
Basic Specifications /
Copier Specifications
Automatic Document Feeder
* 9 to 13 lbs.(35 to 49 g/m
2
) is by thin paper scanning.
40 lbs to 80 lbs. Cover (158 to 220 g/m
2
) is by heavy paper scanning.
SPECIFICATIONS
Name BP-90C70/BP-90C80
Type Console
Color Full color
Copier system Laser electrostatic copier
Resolution Read (B/W): 600 x 600 dpi, 600 x 400 dpi
Read (color): 600 x 600 dpi
Write:1200 x 1200 dpi (B/W only), 600 x 600 dpi,
equivalent to 9600 dpi × 600 dpi
Gradation Scan: equivalent to 256 levels
Print: equivalent to 256 levels
Original paper
sizes
Max. 11" x 17" (A3) for sheets and bound documents
Copy sizes 13" x 19" to 5-1/2" x 8-1/2"R (A3 wide to A6R),
Transparency film, Heavy paper, Tab paper, Glossy paper,
Custom
Tray 1: 8-1/2" x 11", A4
Tray 2: 8-1/2" x 11", A4
Tray 3: 12" x 18", 11" x 17", 8-1/2" x 14", 8-1/2" x 13-1/2",
8-1/2" x 13-2/5", 8-1/2" x 13", 8-1/2" x 11",
8-1/2" x 11"R, 7-1/4 x 10-1/2"R, A3 wide, A3, B4, A4
wide, A4, A4R, B5, B5R
Tray 4: 12" x 18", 11" x 17", 8-1/2" x 14", 8-1/2" x 13-1/2",
8-1/2" x 13-2/5", 8-1/2" x 13", 8-1/2" x 11",
8-1/2" x 11"R, 7-1/4 x 10-1/2"R, 5-1/2" x 8-1/2"R, A3
wide, A3, B4, A4 wide, A4, A4R, B5, B5R, A5R,
COM-9, COM-10, Monarch, Custom (5.875" to 18" x 4"
to 12" (148 to 457 mm x 100 to 305 mm))
Bypass*: 13" x 19", 12" x 18", 11" x 17", 8-1/2" x 14", 8-1/2" x
13-1/2", 8-1/2" x 13-2/5", 8-1/2" x 13", 8-1/2" x 11",
8-1/2" x 11"R, 7-1/4 x 10-1/2"R, 5-1/2" x 8-1/2"R, A3
wide, A3, B4, A4 wide, A4, A4R, B5, B5R, A5R, A6R,
SRA3, SRA4, Monarch, COM-9, COM-10, DL, C4, C5,
C6, Custom (5.5" to 19.2" x 3.625" to 13" (140 to 488
mm x 90 to 330 mm))
Lost margin
Leading edge: 11/64" ± 3/64" (4 mm ± 1 mm)
Trailing edge: 3/32" to 13/64" (2 mm to 5 mm)
Leading edge / Trailing edge: total 21/64" (8 mm) or less
Left edge / Right edge: total 11/64" ± 3/32" (4 mm ± 2 mm)
Maximum print area: 12-9/16" x 50-7/8" (319 mm x 1292 mm)
Paper type Tray 1/2: Plain
Tray 3:Plain, Heavy paper (26 lbs. bond to 110 lbs. Cover (106
g/m
2
to 300 g/m
2
))
Tray 4:Plain, Heavy paper (26 lbs. bond to 110 lbs. Cover (106
g/m
2
to 300 g/m
2
)), Transparency film, Label, Tab paper,
Emboss, Envelope
Bypass*:Plain, Heavy paper (26 lbs. bond to 130 lbs. Cover (106
g/m
2
to 360 g/m
2
)), Transparency film, Label, Tab paper,
Emboss, Thin paper, Envelope, Glossy paper
Paper weight:
Tray 1/2: 16 lbs. bond to 28 lbs. bond (60 g/m
2
to 105 g/m
2
)
Tray 3/4: 16 lbs. bond to 110 lbs. Cover (60 g/m
2
to 300 g/m
2
)
Bypass*: 13 lbs. bond to 130 lbs. Cover (55 g/m
2
to 360 g/m
2
)
Some usage conditions or paper types may prevent correct
printing.
Warm-up time 90 seconds
This may vary depending on the ambient conditions.
First-copy time BP-90C70 BP-90C80
B/W Color B/W Color
Document
cover
3.7
seconds
4.8
seconds
3.5
seconds
4.6
seconds
DSPF 5.4
seconds
7.6
seconds
5.2
seconds
7.3
seconds
This may vary depending on the state of the machine.
* Portrait feeding of 8-1/2" x 11" (A4) sheets.
Continuous
copying speeds*
(when shifter is
not in operation)
(Unit: copies/min.) BP-90C70
(Color/
B/W)
BP-90C80
(Color/
B/W)
8-1/2" x 11", A4, B5 70/75 80/80
A4W 53/53 56/56
8-1/2" x 11"R, 7-1/4" x 10-1/2"R,
5-1/2" x 8-1/2"R, A4R, B5R, A5R,
16KR
45/45 48/48
8-1/2" x 14", 8-1/2" x 13", 8-1/2" x
13-2/5", 8-1/2" x 13-1/2", B4
39/39 42/42
11" x 17", A3, 8K 34/34 37/37
A3W 33/33 35/35
*Continuous speed for same original source. Output may be
temporarily interrupted to stabilize image quality.
Copy ratios Same size: 1: 1 ± 0.5 %
Enlarge (Inch size): 121 %, 129 %, 200 %, 400 %
(AB size: 115 %, 122 %, 141 %, 200 %, 400 %)
Reduce (Inch size): 25 %, 50 %, 64 %, 77 %
(AB size: 25 %, 50 %, 70 %, 81 %, 86 %)
Zoom range: 25 to 400 % in 1 % increments, total 376
increments. Can calculate zoom rate when mm is specified. (25 -
200 % using automatic document feeder)
Paper feed /
capacity
1200 plus 800 plus 500 plus 500 ( = 3000) sheets in 4 trays plus
100-sheet multi-bypass tray
Using 20 lbs. bond (80 g/m
2
) weight paper
Max. paper feed /
max. capacity
13500 sheets in 4 trays (1200 + 800 + 500 x 2) plus large
capacity trays (5000) plus large capacity trays (5000) plus
500-sheet multi-bypass tray
Using 20 lbs. bond (80 g/m
2
) weight paper
Continuous copy Max. 9999 copies
Memory Standard: 6 GB SSD: 256GB
1 GB = One billion bytes when referring to hard drive capacity.
Actual format capacity is less.
Ambient
environment
Operating environment 50 °F to 91 °F (10 °C to 35 °C)
(20 % to 85 % RH) 800 - 1,013 hPa
Standard environment 69.5 °F to 77 °F (21 °C to 25 °C)
(50 ± 10 % RH)
Required power
supply
AC 208-240V/15A, 60Hz
Power consumption
BP-90C70/BP-90C80: Max. 3.55 kW
(including options such as the desk)
Dimensions 38-43/64" (W) x 30-1/4" (D) x 60-1/4" (H)
(982 mm (W) x 768 mm (D) x 1530 mm (H))
(When the operation panel and keyboard are set to the default
position)
Weight Approx. 485.1 lbs (220 kg)
Overall
dimensions
49-21/32" (W) x 30-1/4" (D) (1261 mm (W) x 768 mm (D)) (With
multi-bypass tray extended, and the operation panel and
keyboard are set to the default position)
Document feeder
types
Duplex Single Pass Feeder (DSPF)
Original paper
sizes
11" × 17" to 5-1/2" × 8-1/2" (A3 to A6R), business card
Paper weight of
original
One-sided:9 lbs. Bond to 80 lbs. Cover* (35 to 220 g/m
2)
Two-sides:13 lbs. Bond to 80 lbs. Cover (50 to 220 g/m
2
)
Paper storage
capacity
300 sheets (20 lbs. (80 g/m
2
))
(or maximum stack height of 1-1/2" (38 mm))
Business card: 150 sheets
(or maximum stack height of 1-1/2" (38 mm))
Scan speed
(copy)
105 sheets/minute: B/W (600 × 400 dpi)
70 sheets/minute: Full color (600 × 600 dpi)
11-3
APPENDIX►SPECIFICATIONS
Multi Bypass Tray
Large Capacity Tray
Large Capacity Trays
Finisher (Large stacker) / Saddle
Stitch Finisher (Large stacker)
Name Multi Bypass Tray (MX-MF11)
(For large capacity trays)
Paper sizes 13" x 19" to 5-1/2" x 8-1/2"R (A3 wide to A5R) ,SRA3, SRA4
Useable paper 13 lbs bond to 80 lbs cover (55 to 220 g/m
2
)
Paper capacity 500 sheets (20 lbs (80 g/m
2
))
(or maximum stack height of 2-11/64" (55 mm))
Required power
supply
Supplied from large capacity trays
Dimensions When paper tray is closed
27-3/4" (W) x 21-57/64" (D) x 8" (H)
(705 mm (W) x 556 mm (D) x 203 mm (H))
When paper tray is pulled out
34-9/16" (W) x 21-57/64" (D) x 8" (H)
(878 mm (W) x 556 mm (D) x 203 mm (H))
Weight Approx. 39.7 lbs (18 kg)
Name Large Capacity Tray
(MX-LC12)
Large Capacity Tray
(MX-LCX3 N)
Paper sizes 8-1/2" x 11", A4, B5 13" x 19" to 8-1/2" x 11"R
(A3 wide to B5)
Useable paper 16 lbs bond to 80 lbs cover
(60 to 220 g/m
2
)
16 lbs bond to 80 lbs cover
(60 to 220 g/m
2
)
Paper capacity 3500 sheets
(20 lbs (80 g/m
2
))
3000 sheets
(20 lbs (80 g/m
2
))
Required power
supply
Supplied from the machine Supplied from the machine
Dimensions 14-13/16" (W) x 22-43/64" (D) x
20-5/8" (H)
(376 mm (W) x 576 mm (D) x
524 mm (H))
26-3/8" (W) x 22-7/16" (D) x
20-43/64" (H)
(670 mm (W) x 570 mm (D) x
525 mm (H))
Weight Approx. 63 lbs (28.5 kg) Approx. 110 lbs (50 kg)
Name Large Capacity Trays (MX-LC13 N)
Paper sizes 13" x 19" to 8-1/2" x 11" (A3 wide to B5R) ,SRA3, SRA4
Useable paper 13 lbs bond to 130 lbs cover (55 to 360 g/m
2
)
Paper capacity 5000 sheets (2500 x 2 20 lbs (80 g/m
2
))
Required power
supply
AC 120V/15A ,60Hz
Dimensions 35-1/4" (W) x 30-1/32" (D) x 38-13/16" (H)
(895 mm (W) x 763 mm (D) x 986 mm (H))
Weight Approx. 288 lbs (131 kg)
Name Finisher (MX-FN21)
Saddle Stitch Finisher (MX-FN22)
Paper sizes Depends on feeder specifications
Useable paper Paper weight 13 lbs. to 130 lbs. Cover (55 g/m
2
to 360 g/m
2
)
No. of trays MX-FN21:3 (Upper tray / Middle tray / Lower tray)
MX-FN22:4 (Upper tray / Middle tray / Lower tray) + Saddle stitch
tray
Tray capacity
(20 lbs. bond
(80g/m
2
))*
Upper tray
Non-stapled 13" x 19", 12" x 18", 9" x 12", 11" x 17",
8-1/2" x 14", 8-1/2" x 11"R,
7-1/4" x 10-1/2"R (SRA3, SRA4, A3 wide,
A4 wide, A3, B4, A4R, B5R): 750 sheets
8-1/2" x 11", 5-1/2" x 8-1/2"R (A4, B5,
A5R): 1500 sheets
Staple function 11" x 17", 8-1/2" x 14", 8-1/2" x 11"R (A3,
B4, A4R): 50 units or 750 sheets
8-1/2" x 11" (A4, B5): 100 units or 1500
sheets
Middle tray
Non-stapled 13" x 19", 12" x 18", 9" x 12", 11" x 17",
8-1/2" x 14", 8-1/2" x 11"R,
7-1/4" x 10-1/2"R (SRA3, SRA4, A3 wide,
A4 wide, A3, B4, A4R, B5R): 125 sheets
8-1/2" x 11", 5-1/2" x 8-1/2"R (A4, B5,
A5R): 250 sheets
(Offset output is not available)
Lower tray
Non-stapled 13" x 19", 12" x 18", 9" x 12", 11" x 17",
8-1/2" x 14",8-1/2" x 11"R, 7-1/4" x
10-1/2"R (SRA3, SRA4, A3 wide, A4
wide, A3, B4, A4R, B5R,): 750 sheets
8-1/2" x 11", 5-1/2" x 8-1/2"R (A4, B5,
A5R): 1500 sheets
8-1/2" x 11" (A4, B5): 2450 sheets
(Offset output is not available)
Staple function 11" x 17", 8-1/2" x 14", 8-1/2" x 11"R (B4,
A3, A4R): 50 units or 750 sheets
8-1/2" x 11" (A4, B5): 100 units or 1500
sheets
Saddle stitch tray (MX-FN22)
Non-stapled 16 lbs bond to 28 lbs bond (60 to
105 g/m
2
): 5 sheets
Staple function 16 lbs bond to 21 lbs bond (60 to
81.4 g/m
2
): 5 units (16 to 20 sheets), 10
units (11 to 15 sheets), 15 units (6 to 10
sheets), 25 units (1 to 5 sheets)
21 lbs bond over to 28 lbs bond
(81.4 g/m
2
over to 105 g/m
2
): 15 units (6
to 10 sheets), 25 units (1 to 5 sheets)
Staple function in cover mode
16 lbs bond to 21 lbs bond (60 to
81.4 g/m
2
): 5 units (16 to 20 sheets),
10 units (1 to 15 sheets)
21 lbs bond over to 28 lbs bond
(81.4 g/m
2
over to 105 g/m
2
): 10 units
(1 to 10 sheets)
Offset output is not available for 13" x 19", 12" x 18" /
7-1/4" x 10-1/2"R, 5-1/2" x 8-1/2"R (A3 wide, B5R, A5R).
Max. no. of
stapled sheets
(20 lbs. bond
(80g/m
2
))
Max. no. of 100 sheets (8-1/2" x 11" (A4, B5))
Max. no. of 50 sheets (11" x 17", 8-1/2" x 14", 8-1/2" x 11"R (A3,
B4, A4R))
Staple position Front: 1 position (slant), Back: 1 position (slant),
Center: 2 positions
11-4
APPENDIX►SPECIFICATIONS
*: Output capacity may vary depending on environmental conditions at the
installation location, the type of paper used, and the storage condition of the
paper.
Punch Module
* Some options may not be available in some countries and regions.
Paper Pass Unit
Relay Unit
Curl Correction Unit
Trimming Module
Folding Unit
Inserter
Saddle Stitch
(MX-FN22)
Staple method (for saddle stitch)
Centered fold with stapling in 2 center places
Saddle stitch fold position
Centered fold
Saddle usable sizes
13" x 19", 12" x 18", 11" x 17", 8-1/2" x 14", 8-1/2" x 13-1/2",
8-1/2" x 13-2/5", 8-1/2" x 13", 8-1/2" x 11"R (SRA3, A3 wide, A3,
B4, A4R)
Saddle usable paper weight
16 lbs bond (60 g/m
2
) to 110 lbs cover (300 g/m
2
)
Paper weighting 28 lbs bond (106 g/m
2
) to 110 lbs cover (300
g/m
2
) is only able to be used in cover mode and for single sheet
fold.
Max. no. of saddle-stitched sheets
Max. no. of 20 sheets (20 lbs (80 g/m
2
)):
19 sheets (20 lbs bond (80 g/m
2
)) + 1 sheet (110 lbs cover (300
g/m
2
))
Required power
supply
AC 120V/12A ,60Hz
Weight MX-FN21: Approx. 134.5 lbs (61 kg)
MX-FN22: Approx. 238.1 lbs (108 kg)
Dimensions MX-FN21:
When output paper tray is stored
25-3/4" (W) x 30-1/8" (D) x 40-15/16" (H)
(654 mm (W) x 765 mm (D) x 1040 mm (H))
When output paper tray is extended
30-51/64" (W) x 30-1/8" (D) x 40-15/16" (H)
(782 mm (W) x 765 mm (D) x 1040 mm (H))
MX-FN22:
When output paper tray is stored
30-13/64" (W) x 30-1/8" (D) x 40-15/16" (H)
(767 mm (W) x 765 mm (D) x 1040 mm (H))
When output paper tray is extended
35-9/32" (W) x 30-1/8" (D) x 40-15/16" (H)
(896 mm (W) x 765 mm (D) x 1040 mm (H))
Name Punch module (MX-PN13B)
Paper size for
punch module
11" x 17", 8-1/2" x 14", 8-1/2" x 13-1/2", 8-1/2" x 13-2/5", 8-1/2" x
13", 8-1/2" x 11", 8-1/2" x 11"R (A3, A4, A4R)
Holes 2 holes / 3 holes (Auto select)
Required power
supply
Supplied from finisher/saddle stitch finisher
Dimensions 3-3/4" (W) x 28-9/64" (D) x 9-7/16" (H)
(95 mm (W) x 715 mm (D) x 392 mm (H))
Weight Approx. 8.6 lbs (3.7 kg)
Name Paper Pass Unit (MX-RB12 N) Paper Pass Unit (MX-RB14)
Dimensions 21-5/8" (W) x 20-9/16" (D) x
5-61/64" (H)
(549 mm (W) x 522 mm (D) x
151 mm (H))
18" (W) x 29-59/64" (D) x
41-27/64" (H)
(457 mm (W) x 760 mm (D) x
1052 mm (H))
Weight Approx. 13.5 lbs (6.1 kg) Approx. 60.7 lbs (27.5 kg)
Name Relay Unit (MX-RB13)
Dimensions 8-7/16" (W) x 29-59/64" (D) x 38-13/16" (H)
(214 mm (W) x 760 mm (D) x 986 mm (H))
Weight Approx. 40 lbs (14.5 kg)
Name Curl Correction Unit (MX-RB27)
Paper sizes Depends on feeder specifications
Useable paper Depends on feeder specifications
Required power
supply
Supplied from the machine
Dimensions 8-7/16" (W) x 29-59/64" (D) x 38-13/16" (H)
(214 mm (W) x 760 mm (D) x 986 mm (H))
Weight Approx. 40.6 lbs (18.4 kg)
Name Trimming module (MX-TM10)
Useable size for
trimming module
13" x 19", 12" x 18" (A3 wide), 11" x 17", 8-1/2" x 14", 8-1/2" x
13-1/2", 8-1/2" x 13-2/5", 8-1/2" x 13", 8-1/2" x 11"R, SRA3, A3,
B4, A4R
Max. no. of
sheets to be
trimmed
1 to 20 sheets (16 lbs bond to 21 lbs bond (60 g/m
2
to 81.4 g/m
2
))
1 to 10 sheets (21 lbs bond over to 28 lbs bond (81.4 g/m
2
over to
105 g/m
2
))
1 to 3 sheets (28 lbs bond over to 80 lbs cover (105 g/m
2
over to
220 g/m
2
))
When plain paper trimmed. Including one front cover of 110 lbs
cover (300 g/m
2
) or less.
Required power
supply
Supplied from saddle stitch finisher
Dimensions 9-7/8" (W) x 24-15/32" (D) x 15-7/8" (H)
(251 mm (W) x 625 mm (D) x 403 mm (H))
Weight Approx. 70.6 lbs (32 kg)
Name Folding unit (MX-FD10)
Folding types Z-Fold, C-Fold, Accordion Fold, Double Fold, Half Fold.
Useable size for
folding unit
Z-Fold: 11" x 17", 8-1/2" x 14", 8-1/2" x 11"R, A3, B4, A4R
C-Fold, Accordion Fold, Double Fold, Half Fold: 8-1/2" x 11"R,
A4R
Useable paper 13 lbs bond to 28 lbs bond (55 g/m
2
to 105 g/m
2
)
Tray capacity
(20 lbs (80 g/m
2
))
*
C-Fold/Accordion Fold/Double Fold
2-23/64" (60 mm) (Equivalent to 40 sheets. (Equivalent to 25
sheets for Double Fold))
Copies made in Z-Fold or Half Fold are output to the tray of the
finisher (large stacker) or saddle stitch finisher (large stacker).
Required power
supply
Supplied from finisher/saddle stitch finisher
Dimensions 13-15/64" (W) x 31-15/64" (D) x 41-11/32" (H)
(336 mm (W) x 793 mm (D) x 1050 mm (H))
Weight Approx. 145.5 lbs (66 kg)
Name Inserter (MX-CF11)
Useable size for
inserter
13" x 19", 12" x 18", 9" x 12", 11" x 17", 8-1/2" x 14", 8-1/2" x
13-1/2", 8-1/2" x 13-2/5", 8-1/2" x 13", 8-1/2" x 11", 8-1/2" x 11"R,
7-1/4 x 10-1/2"R, 5-1/2" x 8-1/2"R, A3 wide, A4 wide, A3, B4, A4,
A4R, B5, B5R, A5R, SRA3, SRA4
Useable paper 16 lbs bond to 80 lbs cover (60 g/m
2
to 220 g/m
2
)
No. of trays 2
Tray capacity
(20 lbs (80 g/m
2
))
Upper tray: 200 sheets
Lower tray: 200 sheets
Required power
supply
Supplied from the machine
Dimensions 21-1/4" (W) x 29-7/8" (D) x 50-1/4" (H)
(540 mm (W) x 760 mm (D) x 1276 mm (H))
Weight Approx. 99.2 lbs (45 kg)
11-5
APPENDIX►SPECIFICATIONS
Network Printer Specifications
Network Scanner Specifications
*1: You must decrease the scan size when increasing the resolution.
*2: There are cases when a connection cannot be established. Please contact
your local dealer for more information.
*3: Appears when the OCR function is enabled in the system settings.
*4: Appears when the OCR function is disabled in the system settings.
*5: XPS stands for XML Paper Specification.
*6: When PDF, PDF/A, PDF/A-1a/1b, or encrypt PDF is selected.
Type Built-in type
Continuous p
rint
speed
Same as continuous copy speed
Resolution Data processing:600 × 600 dpi, 1200 × 1200 dpi, 2400 × 2400 dpi
Print:600 × 600 dpi, 1200 × 1200 dpi, 2400 × 2400 dpi
equivalent to 9600 dpi × 600 dpi
Page description
language
PCL6 emulation, Adobe
PostScript 3
Compatible
protocols
TCP/IP (LPD, Port9100, IPP, SMB, FTP, WSD, POP3<E-mail
Print>, HTTP)
Compatible OS Windows Server 2012, Windows 10, Windows 11, Windows
Server 2016, Windows Server 2019, Windows Server 2022
macOS (10.10, 10.11, 10.12, 10.13, 10.14, 10.15, 11, 12, 13)
Internal fonts 80 fonts for PCL, 139 fonts for Adobe PostScript 3
Memory Machine system memory and local drive
Interface 10BASE-T/100BASE-TX/1000BASE-T
USB 2.0 (Host, Hi speed mode)
USB 3.0 (Host, Super speed mode)
Type Color scanner
Scan resolution
(main × vertical)
100 × 100 dpi, 150 × 150 dpi, 200 × 200 dpi, 300 × 300 dpi,
400 × 400 dpi, 600 × 600 dpi (push scan)
50 to 9600 dpi
*1
(pull scan)
Scan speed
(A4 (8-1/2" ×
11"))
140 sheets/minute (200 × 200 dpi/300 × 300 dpi) (one-sided),
280 pages/minute (200 × 200 dpi/300 × 300 dpi) (two-sided)
When in standard mode using Sharp standard paper
(A4 (8-1/2" × 11") size with 6% coverage) and the auto color
detector is turned off.
The speed varies depending on the data volume of the original.
Interface 10BASE-T/100BASE-TX/1000BASE-T,
USB 2.0, USB3.0 (when an external memory device is used)
Compatible
protocols
TCP/IP
Compatible OS
(Pull scan
(TWAIN))
*2
Windows Server 2012, Windows 10, Windows 11, Windows
Server 2016, Windows Server 2019, Windows Server 2022
Output format (B/W)
TIFF, PDF, PDF/A-1a
*3
, PDF/A-1b, PDF/A
*4
, Encrypted PDF,
XPS
*5
, Searchable PDF
*3
, Office file (pptx, xlsx, docx)
*3
, TXT (
UTF-8)
*3
, RTF
*4
Compression method: decompression, G3 (MH), G4 (MMR)
(Gray scale/color)
TIFF, JPEG, PDF, PDF/A-1a
*3
, PDF/A-1b, PDF/A
*4
,
Encrypted PDF, High compression, Compact PDF (Ultra Fine),
Compact PDF/A-1a
*3
, Compact PDF/A-1b, Compact
PDF/A
*4,
Compact PDF/A-1a (Ultra Fine)
*3
, Compact
PDF/A-1b (Ultra Fine), Compact PDF/A (Ultra Fine), XPS
*5
,
Searchable PDF
*3
, Office file (pptx, xlsx, docx)
*3
, TXT(UTF-8)
*3,
RTF
*3
Compression method: JPEG (high, mid, and low compression),
high compression PDF, Reduce Colors
*6
Driver TWAIN compliant

11-6
APPENDIX►SPECIFICATIONS
TRADEMARK ACKNOWLEDGEMENTS
The following trademarks and registered trademarks are used in conjunction with the machine and its peripheral devices and accessories.
•Microsoft
®
, Windows
®
, Windows Server
®
2012, Windows
®
10, Windows
®
11, Windows Server
®
2016, Windows
Server
®
2019, Windows Server
®
2022, Internet Explorer
®
, Active Directory, Excel, Microsoft 365, SharePoint and
OneDrive are registered trademarks or trademarks of Microsoft Corporation in the U.S.A. and other countries.
• Intel
®
is a trademark of Intel Corporation in the U.S. and/or other countries.
• PostScript and PostScript3 are a registered trademark of Adobe.
• Adobe, the Adobe logo, Acrobat, the Adobe PDF logo, and Reader are registered trademarks or trademarks of Adobe in the United
States and other countries.
• Apple, macOS, AppleTalk and EtherTalk are trademarks of Apple Inc., registered in the U.S. and other countries.
• Mozilla
®
and Firefox
®
are registered trademarks or trademarks of the Mozilla Foundation in the U.S.A. and other
countries.
• Sharpdesk is a trademark of Sharp Corporation.
• Sharp OSA is a trademark of Sharp Corporation.
• © 2021 ACCESS CO., LTD.
• RealVNC is a trademark of RealVNC Limited.
•Qualcomm
®
DirectOffice™is a product of Qualcomm
®
Technologies, Inc. and/or its subsidiaries.
Qualcomm is a trademark of Qualcomm Incorporated, registered in the United States and other countries.
DirectOffice™ is a trademark of CSR Imaging US, LP, registered in the United States and other countries.
• Android, Play, Gmail and Google Drive are trademarks of Google LLC. Use of this trademark requires a license from Google.
• QR Code is a registered trademark of DENSO WAVE INCORPORATED in Japan and other countries.
• All other trademarks and copyrights are the property of their respective owners.
The built-in fonts of this printer use MicroType
®
font compression technology of Monotype GoogleImaging, and also use
the scalable font rendering subsystem of UFST
®
(Universal Font Scaling Technology) of Monotype Imaging.
MicroType and UFST
®
are trademarks of Monotype Imaging, Inc. registered in the United States Patent and Trademark
Office and may be registered in certain jurisdictions.
Candid, Gold, and Taffy are trademarks of Monotype Imaging, Inc. registered in the United States Patent and Trademark Office and may
be registered in certain jurisdictions.
CG Omega, CG Times, Garamond Antiqua, Garamond Halbfett, Garamond Kursiv, Garamond and Halbfett Kursiv are trademarks of
Monotype Imaging, Inc. and may be registered in certain jurisdictions.
Albertus, Arial, Ashley Script, Coronet, Gill Sans, Joanna and Times New Roman are trademarks of The Monotype Corporation registered
in the United States Patent and Trademark Office and may be registered in certain jurisdictions.
Avant Garde, ITC Bookman, Lubalin Graph, Mona Lisa, Zapf Chancery and Zapf Dingbats are trademarks of International Typeface
Corporation registered in the United States Patent and Trademark Office and may be registered in certain jurisdictions.
Clarendon, Eurostile, Helvetica, Optima, Palatino, Stempel Garamond, Times and Univers are trademarks of Heidelberger
Druckmaschinen AG, which may be registered in certain jurisdictions, exclusively licensed through Linotype Library GmbH, a wholly
owned subsidiary of Heidelberger Druckmaschinen AG.
Apple Chancery, Chicago, Geneva, Monaco and New York are trademarks of Apple Inc. and may be registered in certain jurisdictions.
Wingdings is a registered trademark of Microsoft Corporation in the United States and other countries.
Marigold and Oxford are trademarks of Arthur Baker and may be registered in some jurisdictions.
Antique Olive is a trademark of Marcel Olive and may be registered in certain jurisdictions.
Hoefler Text is a trademark of Johnathan Hoefler and may be registered in some jurisdictions.
HGGothicB, HGMinchoL, HGPGothicB and HGPMinchoL are trademarks of Ricoh Company, Ltd. and may be registered in some
jurisdictions. ITC is a trademark of International Typeface Corporation registered in the United States Patent and Trademark Office and
may be registered in certain jurisdictions.
Agfa is a trademark of the Agfa-Gevaert Group and may be registered in certain jurisdictions.
Intellifont, MicroType and UFST are trademarks of Monotype Imaging, Inc. registered in the United States Patent and Trademark Office
and may be registered in certain jurisdictions.
TrueType is trademark of Apple Inc. registered in the United States Patent and Trademark Office and other countries.
PostScript is a trademark of Adobe and may be registered in some jurisdictions.
HP, PCL, FontSmart and LaserJet are trademarks of Hewlett-Packard Company and may be registered in some jurisdictions.
The Type 1 processor resident in Monotype Imaging’s UFST product is under license from Electronics For Imaging, Inc. All
other trademarks are the property of their respective owners.

LICENSE INFORMATION
Information on the Software License for This Product
Software composition
The software included in this product is comprised of various software components whose individual copyrights are held
by SHARP or by third parties.
Software developed by SHARP and open source software
The copyrights for the software components and various relevant documents included with this product that were
developed or written by SHARP are owned by SHARP and are protected by the Copyright Act, international treaties, and
other relevant laws. This product also makes use of freely distributed software and software components whose
copyrights are held by third parties. These include software components covered by a GNU General Public License
(hereafter GPL), a GNU Lesser General Public License (hereafter LGPL) or other license agreement.
Obtaining source code
Some of the open source software licensors require the distributor to provide the source code with the executable
software components. GPL and LGPL include similar requirements. For information on obtaining the source code for the
open source software and for obtaining the GPL, LGPL, and other license agreement information, visit the following
website:
http://sharp-world.com/products/copier/source/download/index.html
We are unable to answer any questions about the source code for the open source software. The source code for the
software components whose copyrights are held by SHARP is not distributed.
Software Copyrights
Copyright (c) 2000 Carnegie Mellon University. All rights reserved.
Redistribution and use in source and binary forms, with or without modification, are permitted provided that the following
conditions are met:
1.Redistributions of source code must retain the above copyright notice, this list of conditions and the following
disclaimer.
2.Redistributions in binary form must reproduce the above copyright notice, this list of conditions and the following
disclaimer in the documentation and/or other materials provided with the distribution.
3.The name "Carnegie Mellon University" must not be used to endorse or promote products derived from this software
without prior written permission. For permission or any other legal details, please contact
Office of Technology Transfer Carnegie Mellon University 5000 Forbes Avenue Pittsburgh, PA 15213-3890
(412) 268-4387, fax: (412) 268-7395
tech-transfer@andrew.cmu.edu
4.Redistributions of any form whatsoever must retain the following acknowledgment:
"This product includes software developed by Computing Services at Carnegie Mellon University
(http://www.cmu.edu/computing/)."
CARNEGIE MELLON UNIVERSITY DISCLAIMS ALL WARRANTIES WITH REGARD TO THIS SOFTWARE,
INCLUDING ALL IMPLIED WARRANTIES OF MERCHANTABILITY AND FITNESS, IN NO EVENT SHALL CARNEGIE
MELLON UNIVERSITY BE LIABLE FOR ANY SPECIAL, INDIRECT OR CONSEQUENTIAL DAMAGES OR ANY
DAMAGES WHATSOEVER RESULTING FROM LOSS OF USE, DATA OR PROFITS, WHETHER IN AN ACTION OF
CONTRACT, NEGLIGENCE OR OTHER TORTIOUS ACTION, ARISING OUT OF OR IN CONNECTION WITH THE
USE OR PERFORMANCE OF THIS SOFTWARE.

Copyright (c) 1995 - 2008 Kungliga Tekniska Högskolan (Royal Institute of Technology,
Stockholm, Sweden). All rights reserved.
All rights reserved. Export of this software from the United States of America may require a specific license from the
United States Government. It is the responsibility of any person or organization contemplating export to obtain such a
license before exporting.
WITHIN THAT CONSTRAINT, permission to use, copy, modify, and distribute this software and its documentation for
any purpose and without fee is hereby granted, provided that the above copyright notice appear in all copies and that
both that copyright notice and this permission notice appear in supporting documentation, and that the name of M.I.T.
not be used in advertising or publicity pertaining to distribution of the software without specific, written prior permission.
Furthermore if you modify this software you must label your software as modified software and not distribute it in such a
fashion that it might be confused with the original MIT software. M.I.T. makes no representations about the suitability of
this software for any purpose. It is provided "as is" without express or implied warranty.
THIS SOFTWARE IS PROVIDED "AS IS" AND WITHOUT ANY EXPRESS OR IMPLIED WARRANTIES, INCLUDING,
WITHOUT LIMITATION, THE IMPLIED WARRANTIES OF MERCHANTIBILITY AND FITNESS FOR A PARTICULAR
PURPOSE.
Individual source code files are copyright MIT, Cygnus Support, OpenVision, Oracle, Sun Soft, FundsXpress, and
others.
Project Athena, Athena, Athena MUSE, Discuss, Hesiod, Kerberos, Moira, and Zephyr are trademarks of the
Massachusetts Institute of Technology (MIT). No commercial use of these trademarks may be made without prior written
permission of MIT.
"Commercial use" means use of a name in a product or other for-profit manner. It does NOT prevent a commercial firm
from referring to the MIT trademarks in order to convey information (although in doing so, recognition of their trademark
status should be given).
OpenSSL License
---------------
Copyright (c) 1998-2004 The OpenSSL Project. All rights reserved.
Redistribution and use in source and binary forms, with or without modification, are permitted provided that the following
conditions are met:
1.Redistributions of source code must retain the above copyright notice, this list of conditions and the following
disclaimer.
2.Redistributions in binary form must reproduce the above copyright notice, this list of conditions and the following
disclaimer in the documentation and/or other materials provided with the distribution.
3.All advertising materials mentioning features or use of this software must display the following acknowledgment: "This
product includes software developed by the OpenSSL Project for use in the OpenSSL Toolkit.
(http://www.openssl.org/)"
4.The names "OpenSSL Toolkit" and "OpenSSL Project" must not be used to endorse or promote products derived from
this software without prior written permission. For written permission, please contact openssl-core@openssl.org.
5.Products derived from this software may not be called "OpenSSL" nor may "OpenSSL" appear in their names without
prior written permission of the OpenSSL Project.
6.Redistributions of any form whatsoever must retain the following acknowledgment: "This product includes software
developed by the OpenSSL Project for use in the OpenSSL Toolkit. (http://www.openssl.org/
)"

THIS SOFTWARE IS PROVIDED BY THE OpenSSL PROJECT "AS IS" AND ANY EXPRESSED OR IMPLIED
WARRANTIES, INCLUDING, BUT NOT LIMITED TO, THE IMPLIED WARRANTIES OF MERCHANTABILITY AND
FITNESS FOR A PARTICULAR PURPOSE ARE DISCLAIMED. IN NO EVENT SHALL THE OpenSSL PROJECT OR
ITS CONTRIBUTORS BE LIABLE FOR ANY DIRECT, INDIRECT, INCIDENTAL, SPECIAL, EXEMPLARY, OR
CONSEQUENTIAL DAMAGES (INCLUDING, BUT NOT LIMITED TO, PROCUREMENT OF SUBSTITUTE GOODS
OR SERVICES; LOSS OF USE, DATA, OR PROFITS; OR BUSINESS INTERRUPTION) HOWEVER CAUSED AND
ON ANY THEORY OF LIABILITY, WHETHER IN CONTRACT, STRICT LIABILITY, OR TORT (INCLUDING
NEGLIGENCE OR OTHERWISE) ARISING IN ANY WAY OUT OF THE USE OF THIS SOFTWARE, EVEN IF
ADVISED OF THE POSSIBILITY OF SUCH DAMAGE.
This product includes cryptographic software written by Eric Young ([email protected]
). This product includes software
written by Tim Hudson (tjh@cryptsoft.com
).
Original SSLeay License
---------------
Copyright (C) 1995-1998 Eric Young ([email protected]) All rights reserved.
This package is an SSL implementation written by Eric Young ([email protected]). The implementation was written so
as to conform with Netscapes SSL.
This library is free for commercial and non-commercial use as long as the following conditions are aheared to. The
following conditions apply to all code found in this distribution, be it the RC4, RSA,lhash, DES, etc., code; not just the
SSL code. The SSL documentation included with this distribution is covered by the same copyright terms except that the
holder is Tim Hudson ([email protected]
).
Copyright remains Eric Young's, and as such any Copyright notices in the code are not to be removed. If this package is
used in a product, Eric Young should be given attribution as the author of the parts of the library used. This can be in the
form of a textual message at program startup or in documentation (online or textual) provided with the package.
Redistribution and use in source and binary forms, with or without modification, are permitted provided that the following
conditions are met:
1.Redistributions of source code must retain the copyright notice, this list of conditions and the following disclaimer.
2.Redistributions in binary form must reproduce the above copyright notice, this list of conditions and the following
disclaimer in the documentation and/or other materials provided with the distribution.
3.All advertising materials mentioning features or use of this software must display the following acknowledgement:
"This product includes cryptographic software written by Eric Young ([email protected]
)" The word 'cryptographic'
can be left out if the rouines from the library being used are not cryptographic related :-).
4.If you include any Windows specific code (or a derivative thereof) from the apps directory (application code) you must
include an acknowledgement: "This product includes software written by Tim Hudson ([email protected]
)"
THIS SOFTWARE IS PROVIDED BY ERIC YOUNG "AS IS" AND ANY EXPRESS OR IMPLIED WARRANTIES,
INCLUDING, BUT NOT LIMITED TO, THE IMPLIED WARRANTIES OF MERCHANTABILITY AND FITNESS FOR A
PARTICULAR PURPOSE ARE DISCLAIMED. IN NO EVENT SHALL THE AUTHOR OR CONTRIBUTORS BE LIABLE
FOR ANY DIRECT, INDIRECT, INCIDENTAL, SPECIAL, EXEMPLARY, OR CONSEQUENTIAL DAMAGES
(INCLUDING, BUT NOT LIMITED TO, PROCUREMENT OF SUBSTITUTE GOODS OR SERVICES; LOSS OF USE,
DATA, OR PROFITS; OR BUSINESS INTERRUPTION) HOWEVER CAUSED AND ON ANY THEORY OF LIABILITY,
WHETHER IN CONTRACT, STRICT LIABILITY, OR TORT (INCLUDING NEGLIGENCE OR OTHERWISE) ARISING
IN ANY WAY OUT OF THE USE OF THIS SOFTWARE, EVEN IF ADVISED OF THE POSSIBILITY OF SUCH
DAMAGE.

The licence and distribution terms for any publically available version orderivative of this code cannot be changed. i.e.
this code cannot simply becopied and put under another distribution licence [including the GNU Public Licence.]
D3DES License
---------------
Copyright (c) 1988,1989,1990,1991,1992 by Richard Outerbridge. (GEnie : OUTER; CIS :
[71755,204]) Graven Imagery, 1992.
GNU GENERAL PUBLIC LICENSE
Version 2, June 1991
Copyright (C) 1989, 1991 Free Software Foundation, Inc., 51 Franklin Street, Fifth Floor, Boston, MA 02110-1301
USA Everyone is permitted to copy and distribute verbatim copies of this license document, but changing it is not
allowed.
Preamble
The licenses for most software are designed to take away your freedom to share and change it. By contrast, the GNU
General Public License is intended to guarantee your freedom to share and change free software--to make sure the
software is free for all its users. This General Public License applies to most of the Free Software Foundation's software
and to any other program whose authors commit to using it. (Some other Free Software Foundation software is covered
by the GNU Lesser General Public License instead.) You can apply it to your programs, too.
When we speak of free software, we are referring to freedom, not price. Our General Public Licenses are designed to
make sure that you have the freedom to distribute copies of free software (and charge for this service if you wish), that
you receive source code or can get it if you want it, that you can change the software or use pieces of it in new free
programs; and that you know you can do these things.
To protect your rights, we need to make restrictions that forbid anyone to deny you these rights or to ask you to
surrender the rights. These restrictions translate to certain responsibilities for you if you distribute copies of the software,
or if you modify it.
For example, if you distribute copies of such a program, whether gratis or for a fee, you must give the recipients all the
rights that you have. You must make sure that they, too, receive or can get the source code. And you must show them
these terms so they know their rights.
We protect your rights with two steps: (1) copyright the software, and (2) offer you this license which gives you legal
permission to copy, distribute and/or modify the software.
Also, for each author's protection and ours, we want to make certain that everyone understands that there is no
warranty for this free software. If the software is modified by someone else and passed on, we want its recipients to
know that what they have is not the original, so that any problems introduced by others will not reflect on the original
authors' reputations.

Finally, any free program is threatened constantly by software patents. We wish to avoid the danger that redistributors
of a free program will individually obtain patent licenses, in effect making the program proprietary. To prevent this, we
have made it clear that any patent must be licensed for everyone's free use or not licensed at all.
The precise terms and conditions for copying, distribution and modification follow.
GNU GENERAL PUBLIC LICENSE
TERMS AND CONDITIONS FOR COPYING, DISTRIBUTION AND MODIFICATION
0. This License applies to any program or other work which contains a notice placed by the copyright holder saying it
may be distributed under the terms of this General Public License. The "Program", below, refers to any such program or
work, and a "work based on the Program" means either the Program or any derivative work under copyright law: that is
to say, a work containing the Program or a portion of it, either verbatim or with modifications and/or translated into
another language. (Hereinafter, translation is included without limitation in the term "modification".) Each licensee is
addressed as "you".
Activities other than copying, distribution and modification are not covered by this License; they are outside its scope.
The act of running the Program is not restricted, and the output from the Program is covered only if its contents
constitute a work based on the Program (independent of having been made by running the Program). Whether that is
true depends on what the Program does.
1. You may copy and distribute verbatim copies of the Program's source code as you receive it, in any medium,
provided that you conspicuously and appropriately publish on each copy an appropriate copyright notice and disclaimer
of warranty; keep intact all the notices that refer to this License and to the absence of any warranty; and give any other
recipients of the Program a copy of this License along with the Program.
You may charge a fee for the physical act of transferring a copy, and you may at your option offer warranty protection in
exchange for a fee.
2. You may modify your copy or copies of the Program or any portion of it, thus forming a work based on the Program,
and copy and distribute such modifications or work under the terms of Section 1 above, provided that you also meet all
of these conditions:
a) You must cause the modified files to carry prominent notices stating that you changed the files and the date of any
change.
b) You must cause any work that you distribute or publish, that in whole or in part contains or is derived from the
Program or any part thereof, to be licensed as a whole at no charge to all third parties under the terms of this License.
c) If the modified program normally reads commands interactively when run, you must cause it, when started running
for such interactive use in the most ordinary way, to print or display an announcement including an appropriate
copyright notice and a notice that there is no warranty (or else, saying that you provide a warranty) and that users
may redistribute the program under these conditions, and telling the user how to view a copy of this License.
(Exception: if the Program itself is interactive but does not normally print such an announcement, your work based on
the Program is not required to print an announcement.)
These requirements apply to the modified work as a whole. If identifiable sections of that work are not derived from the
Program, and can be reasonably considered independent and separate works in themselves, then this License, and its
terms, do not apply to those sections when you distribute them as separate works. But when you distribute the same

sections as part of a whole which is a work based on the Program, the distribution of the whole must be on the terms of
this License, whose permissions for other licensees extend to the entire whole, and thus to each and every part
regardless of who wrote it.
Thus, it is not the intent of this section to claim rights or contest your rights to work written entirely by you; rather, the
intent is to exercise the right to control the distribution of derivative or collective works based on the Program.
In addition, mere aggregation of another work not based on the Program with the Program (or with a work based on the
Program) on a volume of a storage or distribution medium does not bring the other work under the scope of this License.
3. You may copy and distribute the Program (or a work based on it, under Section 2) in object code or executable form
under the terms of Sections 1 and 2 above provided that you also do one of the following:
a) Accompany it with the complete corresponding machine-readable source code, which must be distributed under
the terms of Sections 1 and 2 above on a medium customarily used for software interchange; or,
b) Accompany it with a written offer, valid for at least three years, to give any third party, for a charge no more than
your cost of physically performing source distribution, a complete machine-readable copy of the corresponding
source code, to be distributed under the terms of Sections 1 and 2 above on a medium customarily used for software
interchange; or,
c) Accompany it with the information you received as to the offer to distribute corresponding source code. (This
alternative is allowed only for noncommercial distribution and only if you received the program in object code or
executable form with such an offer, in accord with Subsection b above.)
The source code for a work means the preferred form of the work for making modifications to it. For an executable work,
complete source code means all the source code for all modules it contains, plus any associated interface definition
files, plus the scripts used to control compilation and installation of the executable. However, as a special exception, the
source code distributed need not include anything that is normally distributed (in either source or binary form) with the
major components (compiler, kernel, and so on) of the operating system on which the executable runs, unless that
component itself accompanies the executable.
If distribution of executable or object code is made by offering access to copy from a designated place, then offering
equivalent access to copy the source code from the same place counts as distribution of the source code, even though
third parties are not compelled to copy the source along with the object code.
4. You may not copy, modify, sublicense, or distribute the Program except as expressly provided under this License.
Any attempt otherwise to copy, modify, sublicense or distribute the Program is void, and will automatically terminate
your rights under this License. However, parties who have received copies, or rights, from you under this License will not
have their licenses terminated so long as such parties remain in full compliance.
5. You are not required to accept this License, since you have not signed it. However, nothing else grants you
permission to modify or distribute the Program or its derivative works. These actions are prohibited by law if you do not
accept this License. Therefore, by modifying or distributing the Program (or any work based on the Program), you
indicate your acceptance of this License to do so, and all its terms and conditions for copying, distributing or modifying
the Program or works based on it.
6. Each time you redistribute the Program (or any work based on the Program), the recipient automatically receives a
license from the original licensor to copy, distribute or modify the Program subject to these terms and conditions. You

may not impose any further restrictions on the recipients' exercise of the rights granted herein. You are not responsible
for enforcing compliance by third parties to this License.
7. If, as a consequence of a court judgment or allegation of patent infringement or for any other reason (not limited to
patent issues), conditions are imposed on you (whether by court order, agreement or otherwise) that contradict the
conditions of this License, they do not excuse you from the conditions of this License. If you cannot distribute so as to
satisfy simultaneously your obligations under this License and any other pertinent obligations, then as a consequence
you may not distribute the Program at all. For example, if a patent license would not permit royalty-free redistribution of
the Program by all those who receive copies directly or indirectly through you, then the only way you could satisfy both it
and this License would be to refrain entirely from distribution of the Program.
If any portion of this section is held invalid or unenforceable under any particular circumstance, the balance of the
section is intended to apply and the section as a whole is intended to apply in other circumstances.
It is not the purpose of this section to induce you to infringe any patents or other property right claims or to contest
validity of any such claims; this section has the sole purpose of protecting the integrity of the free software distribution
system, which is implemented by public license practices. Many people have made generous contributions to the wide
range of software distributed through that system in reliance on consistent application of that system; it is up to the
author/donor to decide if he or she is willing to distribute software through any other system and a licensee cannot
impose that choice.
This section is intended to make thoroughly clear what is believed to be a consequence of the rest of this License.
8. If the distribution and/or use of the Program is restricted in certain countries either by patents or by copyrighted
interfaces, the original copyright holder who places the Program under this License may add an explicit geographical
distribution limitation excluding those countries, so that distribution is permitted only in or among countries not thus
excluded. In such case, this License incorporates the limitation as if written in the body of this License.
9. The Free Software Foundation may publish revised and/or new versions of the General Public License from time to
time. Such new versions will be similar in spirit to the present version, but may differ in detail to address new problems
or concerns.
Each version is given a distinguishing version number. If the Program specifies a version number of this License which
applies to it and "any later version", you have the option of following the terms and conditions either of that version or of
any later version published by the Free Software Foundation. If the Program does not specify a version number of this
License, you may choose any version ever published by the Free Software Foundation.
10. If you wish to incorporate parts of the Program into other free programs whose distribution conditions are different,
write to the author to ask for permission. For software which is copyrighted by the Free Software Foundation, write to the
Free Software Foundation; we sometimes make exceptions for this. Our decision will be guided by the two goals of
preserving the free status of all derivatives of our free software and of promoting the sharing and reuse of software
generally.
NO WARRANTY
11. BECAUSE THE PROGRAM IS LICENSED FREE OF CHARGE, THERE IS NO WARRANTY FOR THE
PROGRAM, TO THE EXTENT PERMITTED BY APPLICABLE LAW. EXCEPT WHEN OTHERWISE STATED IN
WRITING THE COPYRIGHT HOLDERS AND/OR OTHER PARTIES PROVIDE THE PROGRAM "AS IS" WITHOUT
WARRANTY OF ANY KIND, EITHER EXPRESSED OR IMPLIED, INCLUDING, BUT NOT LIMITED TO, THE IMPLIED
WARRANTIES OF MERCHANTABILITY AND FITNESS FOR A PARTICULAR PURPOSE. THE ENTIRE RISK AS TO

THE QUALITY AND PERFORMANCE OF THE PROGRAM IS WITH YOU. SHOULD THE PROGRAM PROVE
DEFECTIVE, YOU ASSUME THE COST OF ALL NECESSARY SERVICING, REPAIR OR CORRECTION.
12. IN NO EVENT UNLESS REQUIRED BY APPLICABLE LAW OR AGREED TO IN WRITING WILL ANY
COPYRIGHT HOLDER, OR ANY OTHER PARTY WHO MAY MODIFY AND/OR REDISTRIBUTE THE PROGRAM AS
PERMITTED ABOVE, BE LIABLE TO YOU FOR DAMAGES, INCLUDING ANY GENERAL, SPECIAL, INCIDENTAL
OR CONSEQUENTIAL DAMAGES ARISING OUT OF THE USE OR INABILITY TO USE THE PROGRAM
(INCLUDING BUT NOT LIMITED TO LOSS OF DATA OR DATA BEING RENDERED INACCURATE OR LOSSES
SUSTAINED BY YOU OR THIRD PARTIES OR A FAILURE OF THE PROGRAM TO OPERATE WITH ANY OTHER
PROGRAMS), EVEN IF SUCH HOLDER OR OTHER PARTY HAS BEEN ADVISED OF THE POSSIBILITY OF SUCH
DAMAGES.
END OF TERMS AND CONDITIONS
How to Apply These Terms to Your New Programs
If you develop a new program, and you want it to be of the greatest possible use to the public, the best way to achieve
this is to make it free software which everyone can redistribute and change under these terms.
To do so, attach the following notices to the program. It is safest to attach them to the start of each source file to most
effectively convey the exclusion of warranty; and each file should have at least the "copyright" line and a pointer to
where the full notice is found.
<one line to give the program's name and a brief idea of what it does.> Copyright (C) <year> <name of author>
This program is free software; you can redistribute it and/or modify it under the terms of the GNU General Public
License as published by the Free Software Foundation; either version 2 of the License, or (at your option) any later
version.
This program is distributed in the hope that it will be useful, but WITHOUT ANY WARRANTY; without even the
implied warranty of MERCHANTABILITY or FITNESS FOR A PARTICULAR PURPOSE. See the GNU General
Public License for more details.
You should have received a copy of the GNU General Public License along with this program; if not, write to the Free
Software Foundation, Inc., 51 Franklin Street, Fifth Floor, Boston, MA 02110-1301 USA.
Also add information on how to contact you by electronic and paper mail.
If the program is interactive, make it output a short notice like this when it starts in an interactive mode:
Gnomovision version 69, Copyright (C) year name of author Gnomovision comes with ABSOLUTELY NO
WARRANTY; for details type `show w'. This is free software, and you are welcome to redistribute it under certain
conditions; type `show c' for details.
The hypothetical commands `show w' and `show c' should show the appropriate parts of the General Public License. Of
course, the commands you use may be called something other than `show w' and `show c'; they could even be
mouse-clicks or menu items--whatever suits your program.

You should also get your employer (if you work as a programmer) or your school, if any, to sign a "copyright disclaimer"
for the program, if necessary. Here is a sample; alter the names:
Yoyodyne, Inc., hereby disclaims all copyright interest in the program `Gnomovision' (which makes passes at
compilers) written by James Hacker.
<signature of Ty Coon>, 1 April 1989
Ty Coon, President of Vice
This General Public License does not permit incorporating your program into proprietary programs. If your program is a
subroutine library, you may consider it more useful to permit linking proprietary applications with the library. If this is
what you want to do, use the GNU Lesser General Public License instead of this License.
GNU LESSER GENERAL PUBLIC LICENSE
Version 2.1, February 1999
Copyright (C) 1991, 1999 Free Software Foundation, Inc. 51 Franklin Street, Fifth Floor, Boston, MA 02110-1301
USA Everyone is permitted to copy and distribute verbatim copies of this license document, but changing it is not
allowed.
[This is the first released version of the Lesser GPL. It also counts as the successor of the GNU Library Public
License, version 2, hence the version number 2.1.]
Preamble
The licenses for most software are designed to take away your freedom to share and change it. By contrast, the GNU
General Public Licenses are intended to guarantee your freedom to share and change free software--to make sure the
software is free for all its users.
This license, the Lesser General Public License, applies to some specially designated software packages--typically
libraries--of the Free Software Foundation and other authors who decide to use it. You can use it too, but we suggest
you first think carefully about whether this license or the ordinary General Public License is the better strategy to use in
any particular case, based on the explanations below.
When we speak of free software, we are referring to freedom of use, not price. Our General Public Licenses are
designed to make sure that you have the freedom to distribute copies of free software (and charge for this service if you
wish); that you receive source code or can get it if you want it; that you can change the software and use pieces of it in
new free programs; and that you are informed that you can do these things.
To protect your rights, we need to make restrictions that forbid distributors to deny you these rights or to ask you to
surrender these rights. These restrictions translate to certain responsibilities for you if you distribute copies of the library
or if you modify it.
For example, if you distribute copies of the library, whether gratis or for a fee, you must give the recipients all the rights
that we gave you. You must make sure that they, too, receive or can get the source code. If you link other code with the

library, you must provide complete object files to the recipients, so that they can relink them with the library after making
changes to the library and recompiling it. And you must show them these terms so they know their rights.
We protect your rights with a two-step method: (1) we copyright the library, and (2) we offer you this license, which
gives you legal permission to copy, distribute and/or modify the library.
To protect each distributor, we want to make it very clear that there is no warranty for the free library. Also, if the library
is modified by someone else and passed on, the recipients should know that what they have is not the original version,
so that the original author's reputation will not be affected by problems that might be introduced by others.
Finally, software patents pose a constant threat to the existence of any free program. We wish to make sure that a
company cannot effectively restrict the users of a free program by obtaining a restrictive license from a patent holder.
Therefore, we insist that any patent license obtained for a version of the library must be consistent with the full freedom
of use specified in this license.
Most GNU software, including some libraries, is covered by the ordinary GNU General Public License. This license, the
GNU Lesser General Public License, applies to certain designated libraries, and is quite different from the ordinary
General Public License. We use this license for certain libraries in order to permit linking those libraries into non-free
programs.
When a program is linked with a library, whether statically or using a shared library, the combination of the two is
legally speaking a combined work, a derivative of the original library. The ordinary General Public License therefore
permits such linking only if the entire combination fits its criteria of freedom. The Lesser General Public License permits
more lax criteria for linking other code with the library.
We call this license the "Lesser" General Public License because it does Less to protect the user's freedom than the
ordinary General Public License. It also provides other free software developers Less of an advantage over competing
non-free programs. These disadvantages are the reason we use the ordinary General Public License for many libraries.
However, the Lesser license provides advantages in certain special circumstances.
For example, on rare occasions, there may be a special need to encourage the widest possible use of a certain library,
so that it becomes a de-facto standard. To achieve this, non-free programs must be allowed to use the library. A more
frequent case is that a free library does the same job as widely used non-free libraries. In this case, there is little to gain
by limiting the free library to free software only, so we use the Lesser General Public License.
In other cases, permission to use a particular library in non-free programs enables a greater number of people to use a
large body of free software. For example, permission to use the GNU C Library in non-free programs enables many
more people to use the whole GNU operating system, as well as its variant, the GNU/Linux operating system.
Although the Lesser General Public License is Less protective of the users' freedom, it does ensure that the user of a
program that is linked with the Library has the freedom and the wherewithal to run that program using a modified version
of the Library.

The precise terms and conditions for copying, distribution and modification follow. Pay close attention to the difference
between a "work based on the library" and a "work that uses the library". The former contains code derived from the
library, whereas the latter must be combined with the library in order to run.
GNU LESSER GENERAL PUBLIC LICENSE
TERMS AND CONDITIONS FOR COPYING, DISTRIBUTION AND MODIFICATION
0. This License Agreement applies to any software library or other program which contains a notice placed by the
copyright holder or other authorized party saying it may be distributed under the terms of this Lesser General Public
License (also called "this License"). Each licensee is addressed as "you".
A "library" means a collection of software functions and/or data prepared so as to be conveniently linked with
application programs (which use some of those functions and data) to form executables.
The "Library", below, refers to any such software library or work which has been distributed under these terms. A "work
based on the Library" means either the Library or any derivative work under copyright law: that is to say, a work
containing the Library or a portion of it, either verbatim or with modifications and/or translated straightforwardly into
another language. (Hereinafter, translation is included without limitation in the term "modification".)
"Source code" for a work means the preferred form of the work for making modifications to it. For a library, complete
source code means all the source code for all modules it contains, plus any associated interface definition files, plus the
scripts used to control compilation and installation of the library.
Activities other than copying, distribution and modification are not covered by this License; they are outside its scope.
The act of running a program using the Library is not restricted, and output from such a program is covered only if its
contents constitute a work based on the Library (independent of the use of the Library in a tool for writing it). Whether
that is true depends on what the Library does and what the program that uses the Library does.
1. You may copy and distribute verbatim copies of the Library's complete source code as you receive it, in any medium,
provided that you conspicuously and appropriately publish on each copy an appropriate copyright notice and disclaimer
of warranty; keep intact all the notices that refer to this License and to the absence of any warranty; and distribute a copy
of this License along with the Library.
You may charge a fee for the physical act of transferring a copy, and you may at your option offer warranty protection
in exchange for a fee.
2. You may modify your copy or copies of the Library or any portion of it, thus forming a work based on the Library, and
copy and distribute such modifications or work under the terms of Section 1 above, provided that you also meet all of
these conditions:
a) The modified work must itself be a software library.
b) You must cause the files modified to carry prominent notices stating that you changed the files and the date of any
change.

c) You must cause the whole of the work to be licensed at no charge to all third parties under the terms of this
License.
d) If a facility in the modified Library refers to a function or a table of data to be supplied by an application program
that uses the facility, other than as an argument passed when the facility is invoked, then you must make a good faith
effort to ensure that, in the event an application does not supply such function or table, the facility still operates, and
performs whatever part of its purpose remains meaningful.
(For example, a function in a library to compute square roots has a purpose that is entirely well-defined independent
of the application. Therefore, Subsection 2d requires that any application-supplied function or table used by this
function must be optional: if the application does not supply it, the square root function must still compute square
roots.)
These requirements apply to the modified work as a whole. If identifiable sections of that work are not derived from the
Library, and can be reasonably considered independent and separate works in themselves, then this License, and its
terms, do not apply to those sections when you distribute them as separate works. But when you distribute the same
sections as part of a whole which is a work based on the Library, the distribution of the whole must be on the terms of
this License, whose permissions for other licensees extend to the entire whole, and thus to each and every part
regardless of who wrote it.
Thus, it is not the intent of this section to claim rights or contest your rights to work written entirely by you; rather, the
intent is to exercise the right to control the distribution of derivative or collective works based on the Library.
In addition, mere aggregation of another work not based on the Library with the Library (or with a work based on the
Library) on a volume of a storage or distribution medium does not bring the other work under the scope of this License.
3. You may opt to apply the terms of the ordinary GNU General Public License instead of this License to a given copy
of the Library. To do this, you must alter all the notices that refer to this License, so that they refer to the ordinary GNU
General Public License, version 2, instead of to this License. (If a newer version than version 2 of the ordinary GNU
General Public License has appeared, then you can specify that version instead if you wish.) Do not make any other
change in these notices.
Once this change is made in a given copy, it is irreversible for that copy, so the ordinary GNU General Public License
applies to all subsequent copies and derivative works made from that copy.
This option is useful when you wish to copy part of the code of the Library into a program that is not a library.
4. You may copy and distribute the Library (or a portion or derivative of it, under Section 2) in object code or executable
form under the terms of Sections 1 and 2 above provided that you accompany it with the complete corresponding
machine-readable source code, which must be distributed under the terms of Sections 1 and 2 above on a medium
customarily used for software interchange.
If distribution of object code is made by offering access to copy from a designated place, then offering equivalent
access to copy the source code from the same place satisfies the requirement to distribute the source code, even
though third parties are not compelled to copy the source along with the object code.
5. A program that contains no derivative of any portion of the Library, but is designed to work with the Library by being
compiled or linked with it, is called a "work that uses the Library". Such a work, in isolation, is not a derivative work of the
Library, and therefore falls outside the scope of this License.

However, linking a "work that uses the Library" with the Library creates an executable that is a derivative of the Library
(because it contains portions of the Library), rather than a "work that uses the library". The executable is therefore
covered by this License. Section 6 states terms for distribution of such executables.
When a "work that uses the Library" uses material from a header file that is part of the Library, the object code for the
work may be a derivative work of the Library even though the source code is not. Whether this is true is especially
significant if the work can be linked without the Library, or if the work is itself a library. The threshold for this to be true is
not precisely defined by law.
If such an object file uses only numerical parameters, data structure layouts and accessors, and small macros and
small inline functions (ten lines or less in length), then the use of the object file is unrestricted, regardless of whether it is
legally a derivative work. (Executables containing this object code plus portions of the Library will still fall under Section
6.)
Otherwise, if the work is a derivative of the Library, you may distribute the object code for the work under the terms of
Section 6. Any executables containing that work also fall under Section 6, whether or not they are linked directly with the
Library itself.
6. As an exception to the Sections above, you may also combine or link a "work that uses the Library" with the Library
to produce a work containing portions of the Library, and distribute that work under terms of your choice, provided that
the terms permit modification of the work for the customer's own use and reverse engineering for debugging such
modifications.
You must give prominent notice with each copy of the work that the Library is used in it and that the Library and its use
are covered by this License. You must supply a copy of this License. If the work during execution displays copyright
notices, you must include the copyright notice for the Library among them, as well as a reference directing the user to
the copy of this License. Also, you must do one of these things:
a) Accompany the work with the complete corresponding machine-readable source code for the Library including
whatever changes were used in the work (which must be distributed under Sections 1 and 2 above); and, if the work
is an executable linked with the Library, with the complete machine-readable "work that uses the Library", as object
code and/or source code, so that the user can modify the Library and then relink to produce a modified executable
containing the modified Library. (It is understood that the user who changes the contents of definitions files in the
Library will not necessarily be able to recompile the application to use the modified definitions.)
b) Use a suitable shared library mechanism for linking with the Library. A suitable mechanism is one that (1) uses at
run time a copy of the library already present on the user's computer system, rather than copying library functions into
the executable, and (2) will operate properly with a modified version of the library, if the user installs one, as long as
the modified version is interface-compatible with the version that the work was made with.
c) Accompany the work with a written offer, valid for at least three years, to give the same user the materials specified
in Subsection 6a, above, for a charge no more than the cost of performing this distribution.
d) If distribution of the work is made by offering access to copy from a designated place, offer equivalent access to
copy the above specified materials from the same place.
e) Verify that the user has already received a copy of these materials or that you have already sent this user a copy.

For an executable, the required form of the "work that uses the Library" must include any data and utility programs
needed for reproducing the executable from it. However, as a special exception, the materials to be distributed need not
include anything that is normally distributed (in either source or binary form) with the major components (compiler,
kernel, and so on) of the operating system on which the executable runs, unless that component itself accompanies the
executable.
It may happen that this requirement contradicts the license restrictions of other proprietary libraries that do not normally
accompany the operating system. Such a contradiction means you cannot use both them and the Library together in an
executable that you distribute.
7. You may place library facilities that are a work based on the Library side-by-side in a single library together with
other library facilities not covered by this License, and distribute such a combined library, provided that the separate
distribution of the work based on the Library and of the other library facilities is otherwise permitted, and provided that
you do these two things:
a) Accompany the combined library with a copy of the same work based on the Library, uncombined with any other
library facilities. This must be distributed under the terms of the Sections above.
b) Give prominent notice with the combined library of the fact that part of it is a work based on the Library, and
explaining where to find the accompanying uncombined form of the same work.
8. You may not copy, modify, sublicense, link with, or distribute the Library except as expressly provided under this
License. Any attempt otherwise to copy, modify, sublicense, link with, or distribute the Library is void, and will
automatically terminate your rights under this License. However, parties who have received copies, or rights, from you
under this License will not have their licenses terminated so long as such parties remain in full compliance.
9. You are not required to accept this License, since you have not signed it. However, nothing else grants you
permission to modify or distribute the Library or its derivative works. These actions are prohibited by law if you do not
accept this License. Therefore, by modifying or distributing the Library (or any work based on the Library), you indicate
your acceptance of this License to do so, and all its terms and conditions for copying, distributing or modifying the
Library or works based on it.
10. Each time you redistribute the Library (or any work based on the Library), the recipient automatically receives a
license from the original licensor to copy, distribute, link with or modify the Library subject to these terms and conditions.
You may not impose any further restrictions on the recipients' exercise of the rights granted herein. You are not
responsible for enforcing compliance by third parties with this License.
11. If, as a consequence of a court judgment or allegation of patent infringement or for any other reason (not limited to
patent issues), conditions are imposed on you (whether by court order, agreement or otherwise) that contradict the
conditions of this License, they do not excuse you from the conditions of this License. If you cannot distribute so as to
satisfy simultaneously your obligations under this License and any other pertinent obligations, then as a consequence
you may not distribute the Library at all. For example, if a patent license would not permit royalty-free redistribution of the
Library by all those who receive copies directly or indirectly through you, then the only way you could satisfy both it and
this License would be to refrain entirely from distribution of the Library.

If any portion of this section is held invalid or unenforceable under any particular circumstance, the balance of the
section is intended to apply, and the section as a whole is intended to apply in other circumstances.
It is not the purpose of this section to induce you to infringe any patents or other property right claims or to contest
validity of any such claims; this section has the sole purpose of protecting the integrity of the free software distribution
system which is implemented by public license practices. Many people have made generous contributions to the wide
range of software distributed through that system in reliance on consistent application of that system; it is up to the
author/donor to decide if he or she is willing to distribute software through any other system and a licensee cannot
impose that choice.
This section is intended to make thoroughly clear what is believed to be a consequence of the rest of this License.
12. If the distribution and/or use of the Library is restricted in certain countries either by patents or by copyrighted
interfaces, the original copyright holder who places the Library under this License may add an explicit geographical
distribution limitation excluding those countries, so that distribution is permitted only in or among countries not thus
excluded. In such case, this License incorporates the limitation as if written in the body of this License.
13. The Free Software Foundation may publish revised and/or new versions of the Lesser General Public License from
time to time. Such new versions will be similar in spirit to the present version, but may differ in detail to address new
problems or concerns.
Each version is given a distinguishing version number. If the Library specifies a version number of this License which
applies to it and "any later version", you have the option of following the terms and conditions either of that version or of
any later version published by the Free Software Foundation. If the Library does not specify a license version number,
you may choose any version ever published by the Free Software Foundation.
14. If you wish to incorporate parts of the Library into other free programs whose distribution conditions are
incompatible with these, write to the author to ask for permission. For software which is copyrighted by the Free
Software Foundation, write to the Free Software Foundation; we sometimes make exceptions for this. Our decision will
be guided by the two goals of preserving the free status of all derivatives of our free software and of promoting the
sharing and reuse of software generally.
NO WARRANTY
15. BECAUSE THE LIBRARY IS LICENSED FREE OF CHARGE, THERE IS NO WARRANTY FOR THE LIBRARY,
TO THE EXTENT PERMITTED BY APPLICABLE LAW. EXCEPT WHEN OTHERWISE STATED IN WRITING THE
COPYRIGHT HOLDERS AND/OR OTHER PARTIES PROVIDE THE LIBRARY "AS IS" WITHOUT WARRANTY OF
ANY KIND, EITHER EXPRESSED OR IMPLIED, INCLUDING, BUT NOT LIMITED TO, THE IMPLIED WARRANTIES
OF MERCHANTABILITY AND FITNESS FOR A PARTICULAR PURPOSE. THE ENTIRE RISK AS TO THE QUALITY
AND PERFORMANCE OF THE LIBRARY IS WITH YOU. SHOULD THE LIBRARY PROVE DEFECTIVE, YOU
ASSUME THE COST OF ALL NECESSARY SERVICING, REPAIR OR CORRECTION.
16. IN NO EVENT UNLESS REQUIRED BY APPLICABLE LAW OR AGREED TO IN WRITING WILL ANY
COPYRIGHT HOLDER, OR ANY OTHER PARTY WHO MAY MODIFY AND/OR REDISTRIBUTE THE LIBRARY AS
PERMITTED ABOVE, BE LIABLE TO YOU FOR DAMAGES, INCLUDING ANY GENERAL, SPECIAL, INCIDENTAL
OR CONSEQUENTIAL DAMAGES ARISING OUT OF THE USE OR INABILITY TO USE THE LIBRARY (INCLUDING
BUT NOT LIMITED TO LOSS OF DATA OR DATA BEING RENDERED INACCURATE OR LOSSES SUSTAINED BY

YOU OR THIRD PARTIES OR A FAILURE OF THE LIBRARY TO OPERATE WITH ANY OTHER SOFTWARE), EVEN
IF SUCH HOLDER OR OTHER PARTY HAS BEEN ADVISED OF THE POSSIBILITY OF SUCH DAMAGES.
END OF TERMS AND CONDITIONS
How to Apply These Terms to Your New Libraries
If you develop a new library, and you want it to be of the greatest possible use to the public, we recommend making it
free software that everyone can redistribute and change. You can do so by permitting redistribution under these terms
(or, alternatively, under the terms of the ordinary General Public License).
To apply these terms, attach the following notices to the library. It is safest to attach them to the start of each source file
to most effectively convey the exclusion of warranty; and each file should have at least the "copyright" line and a pointer
to where the full notice is found.
<one line to give the library's name and a brief idea of what it does.> Copyright (C) <year> <name of author>
This library is free software; you can redistribute it and/or modify it under the terms of the GNU Lesser General Public
License as published by the Free Software Foundation; either version 2.1 of the License, or (at your option) any later
version.
This library is distributed in the hope that it will be useful, but WITHOUT ANY WARRANTY; without even the implied
warranty of MERCHANTABILITY or FITNESS FOR A PARTICULAR PURPOSE. See the GNU Lesser General
Public License for more details.
You should have received a copy of the GNU Lesser General Public License along with this library; if not, write to the
Free Software Foundation, Inc., 51 Franklin Street, Fifth Floor, Boston, MA 02110-1301 USA
Also add information on how to contact you by electronic and paper mail.
You should also get your employer (if you work as a programmer) or your school, if any, to sign a "copyright disclaimer"
for the library, if necessary. Here is a sample; alter the names:
Yoyodyne, Inc., hereby disclaims all copyright interest in the library `Frob' (a library for tweaking knobs) written by
James Random Hacker.
<signature of Ty Coon>, 1 April 1990
Ty Coon, President of Vice
That's all there is to it!

GNU GENERAL PUBLIC LICENSE
Version 3, 29 June 2007
Copyright (C) 2007 Free Software Foundation, Inc. <http://fsf.org/>
Everyone is permitted to copy and distribute verbatim copies of this license document, but changing it is not allowed.
Preamble
The GNU General Public License is a free, copyleft license for software and other kinds of works.
The licenses for most software and other practical works are designed to take away your freedom to share and
change the works. By contrast, the GNU General Public License is intended to guarantee your freedom to share and
change all versions of a program--to make sure it remains free software for all its users. We, the Free Software
Foundation, use the GNU General Public License for most of our software; it applies also to any other work released this
way by its authors. You can apply it to your programs, too.
When we speak of free software, we are referring to freedom, not price. Our General Public Licenses are designed to
make sure that you have the freedom to distribute copies of free software (and charge for them if you wish), that you
receive source code or can get it if you want it, that you can change the software or use pieces of it in new free
programs, and that you know you can do these things.
To protect your rights, we need to prevent others from denying you these rights or asking you to surrender the rights.
Therefore, you have certain responsibilities if you distribute copies of the software, or if you modify it: responsibilities to
respect the freedom of others.
For example, if you distribute copies of such a program, whether gratis or for a fee, you must pass on to the recipients
the same freedoms that you received. You must make sure that they, too, receive or can get the source code. And you
must show them these terms so they know their rights.
Developers that use the GNU GPL protect your rights with two steps:
(1) assert copyright on the software, and (2) offer you this License giving you legal permission to copy, distribute and/or
modify it.
For the developers' and authors' protection, the GPL clearly explains that there is no warranty for this free software. For
both users' and authors' sake, the GPL requires that modified versions be marked as changed, so that their problems
will not be attributed erroneously to authors of previous versions.
Some devices are designed to deny users access to install or run modified versions of the software inside them,
although the manufacturer can do so. This is fundamentally incompatible with the aim of protecting users' freedom to
change the software. The systematic pattern of such abuse occurs in the area of products for individuals to use, which is
precisely where it is most unacceptable. Therefore, we have designed this version of the GPL to prohibit the practice for
those products. If such problems arise substantially in other domains, we stand ready to extend this provision to those
domains in future versions of the GPL, as needed to protect the freedom of users.
Finally, every program is threatened constantly by software patents. States should not allow patents to restrict
development and use of software on general-purpose computers, but in those that do, we wish to avoid the special
danger that patents applied to a free program could make it effectively proprietary. To prevent this, the GPL assures that
patents cannot be used to render the program non-free.
The precise terms and conditions for copying, distribution and modification follow.
TERMS AND CONDITIONS
0. Definitions.

"This License" refers to version 3 of the GNU General Public License.
"Copyright" also means copyright-like laws that apply to other kinds of works, such as semiconductor masks.
"The Program" refers to any copyrightable work licensed under this License. Each licensee is addressed as "you".
"Licensees" and "recipients" may be individuals or organizations.
To "modify" a work means to copy from or adapt all or part of the work in a fashion requiring copyright permission, other
than the making of an exact copy. The resulting work is called a "modified version" of the earlier work or a work "based
on" the earlier work.
A "covered work" means either the unmodified Program or a work based on the Program.
To "propagate" a work means to do anything with it that, without permission, would make you directly or secondarily
liable for infringement under applicable copyright law, except executing it on a computer or modifying a private copy.
Propagation includes copying, distribution (with or without modification), making available to the public, and in some
countries other activities as well.
To "convey" a work means any kind of propagation that enables other parties to make or receive copies. Mere
interaction with a user through a computer network, with no transfer of a copy, is not conveying.
An interactive user interface displays "Appropriate Legal Notices" to the extent that it includes a convenient and
prominently visible feature that (1) displays an appropriate copyright notice, and (2) tells the user that there is no
warranty for the work (except to the extent that warranties are provided), that licensees may convey the work under this
License, and how to view a copy of this License. If the interface presents a list of user commands or options, such as a
menu, a prominent item in the list meets this criterion.
1. Source Code.
The "source code" for a work means the preferred form of the work for making modifications to it. "Object code" means
any non-source form of a work.
A "Standard Interface" means an interface that either is an official standard defined by a recognized standards body,
or, in the case of interfaces specified for a particular programming language, one that is widely used among developers
working in that language.
The "System Libraries" of an executable work include anything, other than the work as a whole, that (a) is included in
the normal form of packaging a Major Component, but which is not part of that Major Component, and (b) serves only to
enable use of the work with that Major Component, or to implement a Standard Interface for which an implementation is
available to the public in source code form. A "Major Component", in this context, means a major essential component
(kernel, window system, and so on) of the specific operating system (if any) on which the executable work runs, or a
compiler used to produce the work, or an object code interpreter used to run it.
The "Corresponding Source" for a work in object code form means all the source code needed to generate, install, and
(for an executable work) run the object code and to modify the work, including scripts to control those activities.
However, it does not include the work's System Libraries, or general-purpose tools or generally available free programs
which are used unmodified in performing those activities but which are not part of the work. For example, Corresponding
Source includes interface definition files associated with source files for the work, and the source code for shared
libraries and dynamically linked subprograms that the work is specifically designed to require, such as by intimate data
communication or control flow between those subprograms and other parts of the work.
The Corresponding Source need not include anything that users can regenerate automatically from other parts of the
Corresponding Source.

The Corresponding Source for a work in source code form is that same work.
2. Basic Permissions.
All rights granted under this License are granted for the term of copyright on the Program, and are irrevocable provided
the stated conditions are met. This License explicitly affirms your unlimited permission to run the unmodified Program.
The output from running a covered work is covered by this License only if the output, given its content, constitutes a
covered work. This License acknowledges your rights of fair use or other equivalent, as provided by copyright law.
You may make, run and propagate covered works that you do not convey, without conditions so long as your license
otherwise remains in force. You may convey covered works to others for the sole purpose of having them make
modifications exclusively for you, or provide you with facilities for running those works, provided that you comply with the
terms of this License in conveying all material for which you do not control copyright. Those thus making or running the
covered works for you must do so exclusively on your behalf, under your direction and control, on terms that prohibit
them from making any copies of your copyrighted material outside their relationship with you.
Conveying under any other circumstances is permitted solely under the conditions stated below. Sublicensing is not
allowed; section 10 makes it unnecessary.
3. Protecting Users' Legal Rights From Anti-Circumvention Law.
No covered work shall be deemed part of an effective technological measure under any applicable law fulfilling
obligations under article 11 of the WIPO copyright treaty adopted on 20 December 1996, or similar laws prohibiting or
restricting circumvention of such measures.
When you convey a covered work, you waive any legal power to forbid circumvention of technological measures to the
extent such circumvention is effected by exercising rights under this License with respect to the covered work, and you
disclaim any intention to limit operation or modification of the work as a means of enforcing, against the work's users,
your or third parties' legal rights to forbid circumvention of technological measures.
4. Conveying Verbatim Copies.
You may convey verbatim copies of the Program's source code as you receive it, in any medium, provided that you
conspicuously and appropriately publish on each copy an appropriate copyright notice; keep intact all notices stating
that this License and any non-permissive terms added in accord with section 7 apply to the code; keep intact all notices
of the absence of any warranty; and give all recipients a copy of this License along with the Program.
You may charge any price or no price for each copy that you convey, and you may offer support or warranty protection
for a fee.
5. Conveying Modified Source Versions.
You may convey a work based on the Program, or the modifications to produce it from the Program, in the form of
source code under the terms of section 4, provided that you also meet all of these conditions:
a) The work must carry prominent notices stating that you modified it, and giving a relevant date.
b) The work must carry prominent notices stating that it is released under this License and any conditions added under
section
7. This requirement modifies the requirement in section 4 to "keep intact all notices".
c) You must license the entire work, as a whole, under this License to anyone who comes into possession of a copy.
This License will therefore apply, along with any applicable section 7 additional terms, to the whole of the work, and all
its parts, regardless of how they are packaged. This License gives no permission to license the work in any other way,
but it does not invalidate such permission if you have separately received it.

d) If the work has interactive user interfaces, each must display Appropriate Legal Notices; however, if the Program
has interactive interfaces that do not display Appropriate Legal Notices, your work need not make them do so.
A compilation of a covered work with other separate and independent works, which are not by their nature extensions
of the covered work, and which are not combined with it such as to form a larger program, in or on a volume of a storage
or distribution medium, is called an "aggregate" if the compilation and its resulting copyright are not used to limit the
access or legal rights of the compilation's users beyond what the individual works permit. Inclusion of a covered work in
an aggregate does not cause this License to apply to the other parts of the aggregate.
6. Conveying Non-Source Forms.
You may convey a covered work in object code form under the terms of sections 4 and 5, provided that you also
convey the machine-readable Corresponding Source under the terms of this License, in one of these ways:
a) Convey the object code in, or embodied in, a physical product (including a physical distribution medium),
accompanied by the Corresponding Source fixed on a durable physical medium customarily used for software
interchange.
b) Convey the object code in, or embodied in, a physical product (including a physical distribution medium),
accompanied by a written offer, valid for at least three years and valid for as long as you offer spare parts or customer
support for that product model, to give anyone who possesses the object code either (1) a copy of the Corresponding
Source for all the software in the product that is covered by this License, on a durable physical medium customarily used
for software interchange, for a price no more than your reasonable cost of physically performing this conveying of
source, or (2) access to copy the Corresponding Source from a network server at no charge.
c) Convey individual copies of the object code with a copy of the written offer to provide the Corresponding Source.
This alternative is allowed only occasionally and noncommercially, and only if you received the object code with such an
offer, in accord with subsection 6b.
d) Convey the object code by offering access from a designated place (gratis or for a charge), and offer equivalent
access to the Corresponding Source in the same way through the same place at no further charge. You need not require
recipients to copy the Corresponding Source along with the object code. If the place to copy the object code is a network
server, the Corresponding Source may be on a different server (operated by you or a third party) that supports
equivalent copying facilities, provided you maintain clear directions next to the object code saying where to find the
Corresponding Source. Regardless of what server hosts the Corresponding Source, you remain obligated to ensure that
it is available for as long as needed to satisfy these requirements.
e) Convey the object code using peer-to-peer transmission, provided you inform other peers where the object code
and Corresponding Source of the work are being offered to the general public at no charge under subsection 6d.
A separable portion of the object code, whose source code is excluded from the Corresponding Source as a System
Library, need not be included in conveying the object code work.
A "User Product" is either (1) a "consumer product", which means any tangible personal property which is normally
used for personal, family, or household purposes, or (2) anything designed or sold for incorporation into a dwelling. In
determining whether a product is a consumer product, doubtful cases shall be resolved in favor of coverage. For a
particular product received by a particular user, "normally used" refers to a typical or common use of that class of
product, regardless of the status of the particular user or of the way in which the particular user actually uses, or expects
or is expected to use, the product. A product is a consumer product regardless of whether the product has substantial
commercial, industrial or non-consumer uses, unless such uses represent the only significant mode of use of the
product.
"Installation Information" for a User Product means any methods, procedures, authorization keys, or other information
required to install and execute modified versions of a covered work in that User Product from a modified version of its

Corresponding Source. The information must suffice to ensure that the continued functioning of the modified object code
is in no case prevented or interfered with solely because modification has been made.
If you convey an object code work under this section in, or with, or specifically for use in, a User Product, and the
conveying occurs as part of a transaction in which the right of possession and use of the User Product is transferred to
the recipient in perpetuity or for a fixed term (regardless of how the transaction is characterized), the Corresponding
Source conveyed under this section must be accompanied by the Installation Information. But this requirement does not
apply if neither you nor any third party retains the ability to install modified object code on the User Product (for example,
the work has been installed in ROM).
The requirement to provide Installation Information does not include a requirement to continue to provide support
service, warranty, or updates for a work that has been modified or installed by the recipient, or for the User Product in
which it has been modified or installed. Access to a network may be denied when the modification itself materially and
adversely affects the operation of the network or violates the rules and protocols for communication across the network.
Corresponding Source conveyed, and Installation Information provided, in accord with this section must be in a format
that is publicly documented (and with an implementation available to the public in source code form), and must require
no special password or key for unpacking, reading or copying.
7. Additional Terms.
"Additional permissions" are terms that supplement the terms of this License by making exceptions from one or more of
its conditions. Additional permissions that are applicable to the entire Program shall be treated as though they were
included in this License, to the extent that they are valid under applicable law. If additional permissions apply only to part
of the Program, that part may be used separately under those permissions, but the entire Program remains governed by
this License without regard to the additional permissions.
When you convey a copy of a covered work, you may at your option remove any additional permissions from that copy,
or from any part of it. (Additional permissions may be written to require their own removal in certain cases when you
modify the work.) You may place additional permissions on material, added by you to a covered work, for which you
have or can give appropriate copyright permission.
Notwithstanding any other provision of this License, for material you add to a covered work, you may (if authorized by
the copyright holders of that material) supplement the terms of this License with terms:
a) Disclaiming warranty or limiting liability differently from the terms of sections 15 and 16 of this License; or
b) Requiring preservation of specified reasonable legal notices or author attributions in that material or in the
Appropriate Legal Notices displayed by works containing it; or
c) Prohibiting misrepresentation of the origin of that material, or requiring that modified versions of such material be
marked in reasonable ways as different from the original version; or
d) Limiting the use for publicity purposes of names of licensors or authors of the material; or
e) Declining to grant rights under trademark law for use of some trade names, trademarks, or service marks; or
f) Requiring indemnification of licensors and authors of that material by anyone who conveys the material (or modified
versions of it) with contractual assumptions of liability to the recipient, for any liability that these contractual assumptions
directly impose on those licensors and authors.
All other non-permissive additional terms are considered "further restrictions" within the meaning of section 10. If the
Program as you received it, or any part of it, contains a notice stating that it is governed by this License along with a term
that is a further restriction, you may remove that term. If a license document contains a further restriction but permits

relicensing or conveying under this License, you may add to a covered work material governed by the terms of that
license document, provided that the further restriction does not survive such relicensing or conveying.
If you add terms to a covered work in accord with this section, you must place, in the relevant source files, a statement
of the additional terms that apply to those files, or a notice indicating where to find the applicable terms.
Additional terms, permissive or non-permissive, may be stated in the form of a separately written license, or stated as
exceptions; the above requirements apply either way.
8. Termination.
You may not propagate or modify a covered work except as expressly provided under this License. Any attempt
otherwise to propagate or modify it is void, and will automatically terminate your rights under this License (including any
patent licenses granted under the third paragraph of section 11).
However, if you cease all violation of this License, then your license from a particular copyright holder is reinstated (a)
provisionally, unless and until the copyright holder explicitly and finally terminates your license, and (b) permanently, if
the copyright holder fails to notify you of the violation by some reasonable means prior to 60 days after the cessation.
Moreover, your license from a particular copyright holder is reinstated permanently if the copyright holder notifies you
of the violation by some reasonable means, this is the first time you have received notice of violation of this License (for
any work) from that copyright holder, and you cure the violation prior to 30 days after your receipt of the notice.
Termination of your rights under this section does not terminate the licenses of parties who have received copies or
rights from you under this License. If your rights have been terminated and not permanently reinstated, you do not
qualify to receive new licenses for the same material under section 10.
9. Acceptance Not Required for Having Copies.
You are not required to accept this License in order to receive or run a copy of the Program. Ancillary propagation of a
covered work occurring solely as a consequence of using peer-to-peer transmission to receive a copy likewise does not
require acceptance. However, nothing other than this License grants you permission to propagate or modify any
covered work. These actions infringe copyright if you do not accept this License. Therefore, by modifying or propagating
a covered work, you indicate your acceptance of this License to do so.
10. Automatic Licensing of Downstream Recipients.
Each time you convey a covered work, the recipient automatically receives a license from the original licensors, to run,
modify and propagate that work, subject to this License. You are not responsible for enforcing compliance by third
parties with this License.
An "entity transaction" is a transaction transferring control of an organization, or substantially all assets of one, or
subdividing an organization, or merging organizations. If propagation of a covered work results from an entity
transaction, each party to that transaction who receives a copy of the work also receives whatever licenses to the work
the party's predecessor in interest had or could give under the previous paragraph, plus a right to possession of the
Corresponding Source of the work from the predecessor in interest, if the predecessor has it or can get it with
reasonable efforts.
You may not impose any further restrictions on the exercise of the rights granted or affirmed under this License. For
example, you may not impose a license fee, royalty, or other charge for exercise of rights granted under this License,
and you may not initiate litigation (including a cross-claim or counterclaim in a lawsuit) alleging that any patent claim is
infringed by making, using, selling, offering for sale, or importing the Program or any portion of it.
11. Patents.

A "contributor" is a copyright holder who authorizes use under this License of the Program or a work on which the
Program is based. The work thus licensed is called the contributor's "contributor version".
A contributor's "essential patent claims" are all patent claims owned or controlled by the contributor, whether already
acquired or hereafter acquired, that would be infringed by some manner, permitted by this License, of making, using, or
selling its contributor version, but do not include claims that would be infringed only as a consequence of further
modification of the contributor version. For purposes of this definition, "control" includes the right to grant patent
sublicenses in a manner consistent with the requirements of this License.
Each contributor grants you a non-exclusive, worldwide, royalty-free patent license under the contributor's essential
patent claims, to make, use, sell, offer for sale, import and otherwise run, modify and propagate the contents of its
contributor version.
In the following three paragraphs, a "patent license" is any express agreement or commitment, however denominated,
not to enforce a patent (such as an express permission to practice a patent or covenant not to sue for patent
infringement). To "grant" such a patent license to a party means to make such an agreement or commitment not to
enforce a patent against the party.
If you convey a covered work, knowingly relying on a patent license, and the Corresponding Source of the work is not
available for anyone to copy, free of charge and under the terms of this License, through a publicly available network
server or other readily accessible means, then you must either (1) cause the Corresponding Source to be so available,
or (2) arrange to deprive yourself of the benefit of the patent license for this particular work, or (3) arrange, in a manner
consistent with the requirements of this License, to extend the patent license to downstream recipients. "Knowingly
relying" means you have actual knowledge that, but for the patent license, your conveying the covered work in a country,
or your recipient's use of the covered work in a country, would infringe one or more identifiable patents in that country
that you have reason to believe are valid.
If, pursuant to or in connection with a single transaction or arrangement, you convey, or propagate by procuring
conveyance of, a covered work, and grant a patent license to some of the parties receiving the covered work authorizing
them to use, propagate, modify or convey a specific copy of the covered work, then the patent license you grant is
automatically extended to all recipients of the covered work and works based on it.
A patent license is "discriminatory" if it does not include within the scope of its coverage, prohibits the exercise of, or is
conditioned on the non-exercise of one or more of the rights that are specifically granted under this License. You may
not convey a covered work if you are a party to an arrangement with a third party that is in the business of distributing
software, under which you make payment to the third party based on the extent of your activity of conveying the work,
and under which the third party grants, to any of the parties who would receive the covered work from you, a
discriminatory patent license (a) in connection with copies of the covered work conveyed by you (or copies made from
those copies), or (b) primarily for and in connection with specific products or compilations that contain the covered work,
unless you entered into that arrangement, or that patent license was granted, prior to 28 March 2007.
Nothing in this License shall be construed as excluding or limiting any implied license or other defenses to infringement
that may otherwise be available to you under applicable patent law.
12. No Surrender of Others' Freedom.
If conditions are imposed on you (whether by court order, agreement or otherwise) that contradict the conditions of this
License, they do not excuse you from the conditions of this License. If you cannot convey a covered work so as to satisfy
simultaneously your obligations under this License and any other pertinent obligations, then as a consequence you may
not convey it at all. For example, if you agree to terms that obligate you to collect a royalty for further conveying from
those to whom you convey the Program, the only way you could satisfy both those terms and this License would be to
refrain entirely from conveying the Program.
13. Use with the GNU Affero General Public License.

Notwithstanding any other provision of this License, you have permission to link or combine any covered work with a
work licensed under version 3 of the GNU Affero General Public License into a single combined work, and to convey the
resulting work. The terms of this License will continue to apply to the part which is the covered work, but the special
requirements of the GNU Affero General Public License, section 13, concerning interaction through a network will apply
to the combination as such.
14. Revised Versions of this License.
The Free Software Foundation may publish revised and/or new versions of the GNU General Public License from time
to time. Such new versions will be similar in spirit to the present version, but may differ in detail to address new problems
or concerns.
Each version is given a distinguishing version number. If the Program specifies that a certain numbered version of the
GNU General Public License "or any later version" applies to it, you have the option of following the terms and
conditions either of that numbered version or of any later version published by the Free Software Foundation. If the
Program does not specify a version number of the GNU General Public License, you may choose any version ever
published by the Free Software Foundation.
If the Program specifies that a proxy can decide which future versions of the GNU General Public License can be used,
that proxy's public statement of acceptance of a version permanently authorizes you to choose that version for the
Program.
Later license versions may give you additional or different permissions. However, no additional obligations are
imposed on any author or copyright holder as a result of your choosing to follow a later version.
15. Disclaimer of Warranty.
THERE IS NO WARRANTY FOR THE PROGRAM, TO THE EXTENT PERMITTED BY APPLICABLE LAW. EXCEPT
WHEN OTHERWISE STATED IN WRITING THE COPYRIGHT HOLDERS AND/OR OTHER PARTIES PROVIDE THE
PROGRAM "AS IS" WITHOUT WARRANTY OF ANY KIND, EITHER EXPRESSED OR IMPLIED, INCLUDING, BUT
NOT LIMITED TO, THE IMPLIED WARRANTIES OF MERCHANTABILITY AND FITNESS FOR A PARTICULAR
PURPOSE. THE ENTIRE RISK AS TO THE QUALITY AND PERFORMANCE OF THE PROGRAM IS WITH YOU.
SHOULD THE PROGRAM PROVE DEFECTIVE, YOU ASSUME THE COST OF ALL NECESSARY SERVICING,
REPAIR OR CORRECTION.
16. Limitation of Liability.
IN NO EVENT UNLESS REQUIRED BY APPLICABLE LAW OR AGREED TO IN WRITING WILL ANY COPYRIGHT
HOLDER, OR ANY OTHER PARTY WHO MODIFIES AND/OR CONVEYS THE PROGRAM AS PERMITTED ABOVE,
BE LIABLE TO YOU FOR DAMAGES, INCLUDING ANY GENERAL, SPECIAL, INCIDENTAL OR CONSEQUENTIAL
DAMAGES ARISING OUT OF THE USE OR INABILITY TO USE THE PROGRAM (INCLUDING BUT NOT LIMITED
TO LOSS OF DATA OR DATA BEING RENDERED INACCURATE OR LOSSES SUSTAINED BY YOU OR THIRD
PARTIES OR A FAILURE OF THE PROGRAM TO OPERATE WITH ANY OTHER PROGRAMS), EVEN IF SUCH
HOLDER OR OTHER PARTY HAS BEEN ADVISED OF THE POSSIBILITY OF SUCH DAMAGES.
17. Interpretation of Sections 15 and 16.
If the disclaimer of warranty and limitation of liability provided above cannot be given local legal effect according to their
terms, reviewing courts shall apply local law that most closely approximates an absolute waiver of all civil liability in
connection with the Program, unless a warranty or assumption of liability accompanies a copy of the Program in return
for a fee.

END OF TERMS AND CONDITIONS
How to Apply These Terms to Your New Programs
If you develop a new program, and you want it to be of the greatest possible use to the public, the best way to achieve
this is to make it free software which everyone can redistribute and change under these terms.
To do so, attach the following notices to the program. It is safest to attach them to the start of each source file to most
effectively state the exclusion of warranty; and each file should have at least the "copyright" line and a pointer to where
the full notice is found.
<one line to give the program's name and a brief idea of what it does.>
Copyright (C) <year> <name of author>
This program is free software: you can redistribute it and/or modify it under the terms of the GNU General Public
License as published by the Free Software Foundation, either version 3 of the License, or (at your option) any later
version.
This program is distributed in the hope that it will be useful, but WITHOUT ANY WARRANTY; without even the implied
warranty of MERCHANTABILITY or FITNESS FOR A PARTICULAR PURPOSE. See the GNU General Public License
for more details.
You should have received a copy of the GNU General Public License along with this program. If not, see
<http://www.gnu.org/licenses/>.
Also add information on how to contact you by electronic and paper mail.
If the program does terminal interaction, make it output a short notice like this when it starts in an interactive mode:
<program> Copyright (C) <year> <name of author>
This program comes with ABSOLUTELY NO WARRANTY; for details type `show w'.
This is free software, and you are welcome to redistribute it under certain conditions; type `show c' for details.
The hypothetical commands `show w' and `show c' should show the appropriate parts of the General Public License.
Of course, your program's commands might be different; for a GUI interface, you would use an "about box".
You should also get your employer (if you work as a programmer) or school, if any, to sign a "copyright disclaimer" for
the program, if necessary.
For more information on this, and how to apply and follow the GNU GPL, see <http://www.gnu.org/licenses/>.
The GNU General Public License does not permit incorporating your program into proprietary programs. If your
program is a subroutine library, you may consider it more useful to permit linking proprietary applications with the library.
If this is what you want to do, use the GNU Lesser General Public License instead of this License. But first, please read
<http://www.gnu.org/philosophy/why-not-lgpl.html>.

---------------------------------------------------------------------------libtiff---------------------------------------------------------------------------
Copyright (c) 1988-1997 Sam Leffler
Copyright (c) 1991-1997 Silicon Graphics, Inc.
Permission to use, copy, modify, distribute, and sell this software and its documentation for any purpose is hereby
granted without fee, provided that (i) the above copyright notices and this permission notice appear in all copies of the
software and related documentation, and (ii) the names of Sam Leffler and Silicon Graphics may not be used in any
advertising or publicity relating to the software without the specific, prior written permission of Sam Leffler and Silicon
Graphics.
THE SOFTWARE IS PROVIDED "AS-IS" AND WITHOUT WARRANTY OF ANY KIND, EXPRESS, IMPLIED OR
OTHERWISE, INCLUDING WITHOUT LIMITATION, ANY WARRANTY OF MERCHANTABILITY OR FITNESS FOR A
PARTICULAR PURPOSE.
IN NO EVENT SHALL SAM LEFFLER OR SILICON GRAPHICS BE LIABLE FOR ANY SPECIAL, INCIDENTAL,
INDIRECT OR CONSEQUENTIAL DAMAGES OF ANY KIND, OR ANY DAMAGES WHATSOEVER RESULTING
FROM LOSS OF USE, DATA OR PROFITS, WHETHER OR NOT ADVISED OF THE POSSIBILITY OF DAMAGE,
AND ON ANY THEORY OF LIABILITY, ARISING OUT OF OR IN CONNECTION WITH THE USE OR
PERFORMANCE OF THIS SOFTWARE.
--------------------------------------------------------------------------libjpeg--------------------------------------------------------------------------
This software is based in part on the work of the Independent JPEG Group.

SOFTWARE LICENSE
PLEASE READ THIS LICENSE CAREFULLY BEFORE USING THE SOFTWARE. BY USING THE SOFTWARE,
YOU ARE AGREEING TO BE BOUND BY THE TERMS OF THIS LICENSE.
1. License
The application, demonstration, system and other software accompanying this License, whether on disk, in read only
memory, or on any other media (the "Software") and related documentation are licensed to you by SHARP. You own
the disk on which the Software is recorded but SHARP and/or SHARP's Licensors retain title to the Software and
related documentation. This License allows you to use the Software on one or more computers connected to a single
printer and make one copy of the Software in machine-readable form for backup purposes only. You must reproduce
on such copy the SHARP copyright notice, the copyright notice of SHARP’s Licensors and any other proprietary
legends of SHARP and/or its Licensors that were on the original copy of the Software. You may also transfer all your
license rights in the Software, the backup copy of the Software, the related documentation and a copy of this License
to another party, provided the other party reads and agrees to the terms and conditions of this License.
2. Restrictions
The Software contains copyrighted material, trade secrets and other proprietary material which is owned by SHARP
and/or its Licensors and in order to protect them you may not decompile, reverse engineer, disassemble or otherwise
reduce the Software to a human-perceivable form. You may not modify, network, rent, lease, loan, distribute or create
derivative works based upon the Software in whole or in part. You may not electronically transmit the Software from
one computer to another or over a network.
3. Termination
This license is effective until terminated. You may terminate this License at any time by destroying the Software and
related documentation and all copies thereof. This License will terminate immediately without notice from SHARP
and/or SHARP’s Licensors if you fail to comply with any provision of this License. Upon termination you must destroy
the Software and related documentation and all copies thereof.
4. Export Law Assurances
You agree and certify that neither the Software nor any other technical data received from SHARP, nor the direct
product thereof, will be exported outside the United States except as authorized and as permitted by the laws and
regulations of the United States. If the Software has been rightfully obtained by you outside of the United States, you
agree that you will not re-export the Software nor any other technical data received from SHARP, nor the direct
product thereof, except as permitted by the laws and regulations of the United states and the laws and the regulation
of the jurisdiction in which you obtained the Software.
5. Government End Users
If you are acquiring the Software on behalf of any unit or agency of the United States Government, the following
provisions apply. The Government agrees:
(i) if the Software is supplied to the Department of Defense (DoD), the Software is classified as "Commercial
Computer Software" and the Government is acquiring only "restricted rights" in the Software and its
documentation as that term is defined in Clause 252.227-7013 (c)(1) (Oct., 1988) of the DFARS; and
(ii) if the Software is supplied to any unit or agency of the United States Government other than DoD, the Software is
classified as "Commercial" that term is defined at 48 C.F.R. 2.101 and as "Commercial Computer Software" that
term is defined in 48 C.F.R. 12.212, and the Government's rights in the Software and its documentation will be as
defined in Clause 52.227-19 (c)(2) of the FAR or, in the case of NASA, in Clause 18-52.227-86 (d) of the NASA
Supplement to the FAR.

6. Limited Warranty on Media.
SHARP warrants the disks on which the Software is recorded to be free from defects in materials and workmanship
under normal use for a period of ninety (90) days from the date of purchase as evidenced by a copy of the receipt.
The entire liability of SHARP and/or its Licensors and your exclusive remedy will be replacement of the disk which
fails to meet the limited warranty provided by this Clause 6. A disk will be replaced when it is returned to SHARP or a
SHARP authorized representative with a copy of the receipt. SHARP will have no responsibility to replace a disk
damaged by accident, abuse or misapplication.
ANY IMPLIED WARRANTIES ON THE DISKS, INCLUDING THE IMPLIED WARRANTIES OF MERCHANTABILITY
AND FITNESS FOR A PARTICULAR PURPOSE, ARE LIMITED IN DURATION TO NINETY (90) DAYS FROM THE
DATE OF DELIVERY. THIS WARRANTY GIVES YOU SPECIFIC LEGAL RIGHTS, AND YOU MAY ALSO HAVE
OTHER RIGHTS WHICH VARY FROM JURISDICTION TO JURISDICTION.
7. Disclaimer of Warranty on Software
You expressly acknowledge and agree that use of the Software is at your sole risk. The Software and related
documentation are provided "AS IS" and without warranty of any kind and SHARP and SHARP's Licensor(s) (for the
purpose of provisions 6 and 7, SHARP and SHARP's Licensor(s) shall be collectively referred to as "SHARP")
EXPRESSLY DISCLAIM ALL WARRANTIES, EXPRESS OR IMPLIED, INCLUDING, BUT NOT LIMITED TO, THE
IMPLIED WARRANTIES OF MERCHANTABILITY AND FITNESS FOR A PARTICULAR PURPOSE. SHARP DOES
NOT WARRANT THAT THE FUNCTIONS CONTAINED IN THE SOFTWARE WILL MEET YOUR REQUIREMENTS,
OR THAT THE OPERATION OF THE SOFTWARE WILL BE UNINTERRUPTED OR ERROR-FREE, OR THAT
DEFECTS IN THE SOFTWARE WILL BE CORRECTED. FURTHERMORE, SHARP DOES NOT WARRANT OR
MAKE ANY REPRESENTATIONS REGARDING THE USE OR THE RESULTS OF THE USE OF THE SOFTWARE
OR RELATED DOCUMENTATION IN TERMS OF THEIR CORRECTNESS, ACCURACY, RELIABILITY, OR
OTHERWISE. NO ORAL OR WRITTEN INFORMATION OR ADVICE GIVEN BY SHARP OR A SHARP
AUTHORIZED REPRESENTATIVE SHALL CREATE A WARRANTY OR IN ANY WAY INCREASE THE SCOPE OF
THIS WARRANTY. SHOULD THE SOFTWARE PROVE DEFECTIVE, YOU (AND NOT SHARP OR A SHARP
AUTHORIZED REPRESENTATIVE) ASSUME THE ENTIRE COST OF ALL NECESSARY SERVICING, REPAIR OR
CORRECTION, SOME JURISDICTIONS DO NOT ALLOW THE EXCLUSION OF IMPLIED WARRANTIES, SO THE
ABOVE EXCLUSION MAY NOT APPLY TO YOU.
8. Limitation of Liability
UNDER NO CIRCUMSTANCES INCLUDING NEGLIGENCE, SHALL SHARP BE LIABLE FOR ANY INCIDENTAL,
SPECIAL OR CONSEQUENTIAL DAMAGES THAT RESULT FROM THE USE OR INABILITY TO USE THE
SOFTWARE OR RELATED DOCUMENTATION, EVEN IF SHARP OR A SHARP AUTHORIZED
REPRESENTATIVE HAS BEEN ADVISED OF THE POSSIBILITY OF SUCH DAMAGES. SOME JURISDICTIONS
DO NOT ALLOW THE LIMITATION OR EXCLUSION OF LIABILITY FOR INCIDENTAL OR CONSEQUENTIAL
DAMAGES SO THE ABOVE LIMITATION OR EXCLUSION MAY NOT APPLY TO YOU.
In no event shall SHARP's total liability to you for all damages, losses, and causes of action (whether in contract, tort
(including negligence) or otherwise) exceed the amount paid by you for the Software.
9. Controlling Law and Severability
For a portion of the Software related with Apple Macintosh and Microsoft Windows, this license shall be governed by
and construed in accordance with the laws of the state of California and Washington, respectively. If for any reason a
court of competent jurisdiction finds any provision of this License, or portion thereof, to be unenforceable, that
provision of the License shall be enforced to the maximum extent permissible so as to effect the intent of the parties,
and the remainder of this License shall continue in full force and effect.
10. Complete Agreement
This License constitutes the entire agreement between the parties with respect to the use of the Software and
related documentation, and supersedes all prior or contemporaneous understandings or agreements, written or oral,
regarding such subject matter. No amendment to or modification of this License will be binding unless in writing and
signed by a duly authorized representative of SHARP.

Version 01a / bp90c80_usr_01a_us
