
D3 Series
Version: 1.5
Due to regular upgrades of systems and products, ZKTeco could not guarantee exact consistency between the
actual product and the written information in this manual.
Quick Start Guide
1
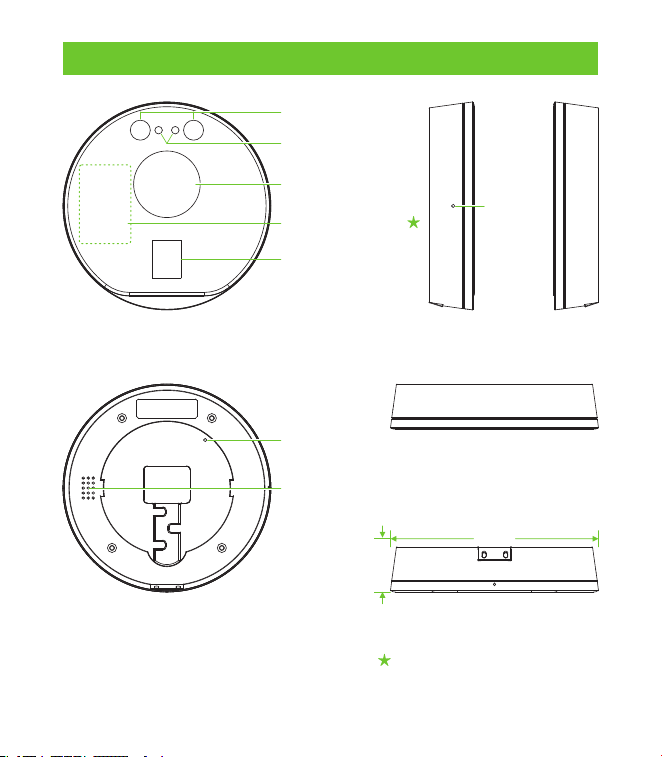
Overview
Front
Rear
Side
Top
Near-Infrared Flash
Camera
Display Screen
Fingerprint Sensor
Reset
Speaker
Bottom
27mm
125mm
Note: Not all products have the function with , the real product shall prevail.
Card Reading Area
Restore
2
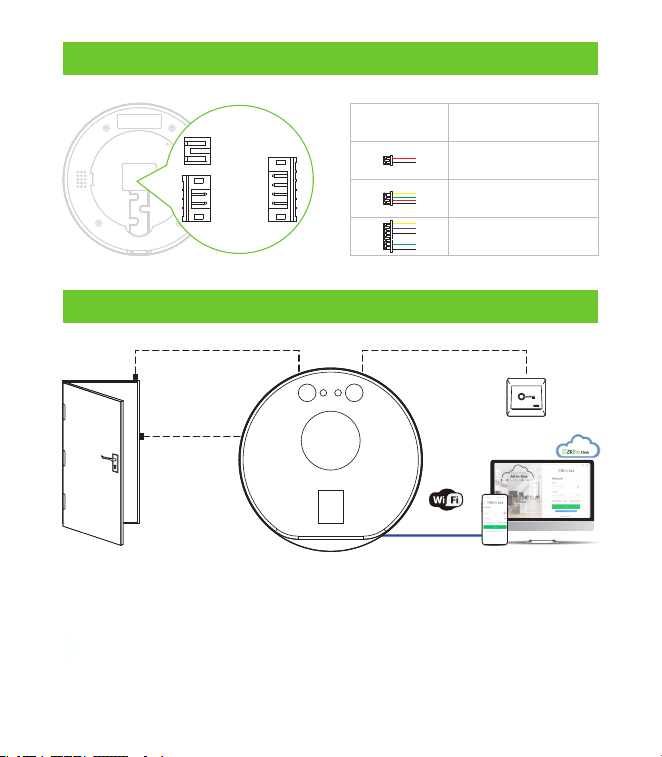
+12V
GND
TX+
TX-
RX+
RX-
NC
COM
NO
SEN
GND
BUT
Interface
Description
Power In
Network Interface
Access Control
Standalone Installation
Lock
Exit Button
Door Sensor
TCP/IP
SaaS-Based
SmartOffice
Management Solution
Make sure that the device and the PC have access to the external network
before using ZKBio Zlink to bind them.
After successfully binding the device to ZKBio Zlink, the standby screen
will display the current IP address for 30 seconds every time it is powered.
1.
2.
Note:
Terminal Block
3
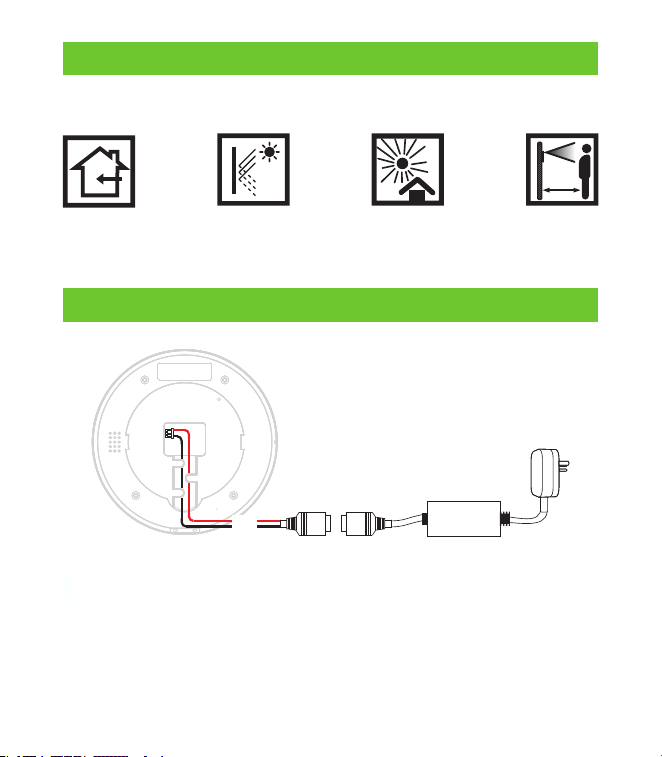
12V ± 10%, at least 1500mA.
To share the power with other devices, use an AC Adapter with higher
current ratings.
1.
2.
+12V
GND
AC Adapter
DC 12 - 1.5A
Installation Environment
AVOID DIRECT
SUNLIGHT
AND EXPOSURE
AVOID GLASS
REFRACTION
KEEP EFFECTIVE
DISTANCE
0.3 to 1.6m
Please refer to the following recommendations for installation:
Power Connection
INSTALL INDOORS
ONLY
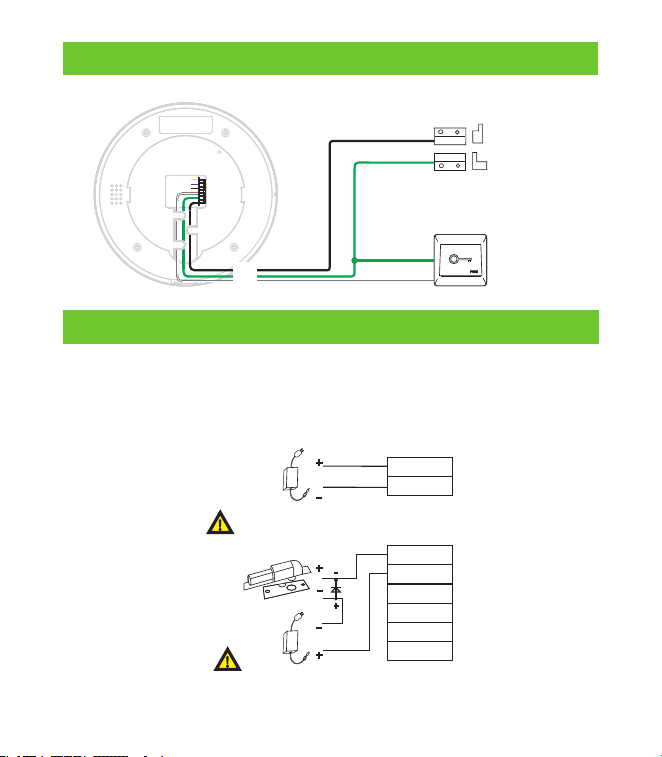
NC
BUT
GND
SEN
NO
COM
Normally Closed Lock
DC12V
FR107
Maximum 30V 3A input.
GND
+12V
DC12V
Do not reverse the polarity.
Door Sensor and Exit Button Connection
ExitButton
Door Sensor
SEN
GND
BUT
Lock Relay Connection
The system supports Normally Opened Lock and Normally Closed Lock. The
NO LOCK (normally unlocked when power-on) is connected with 'NO' and
'COM' terminals whereas the NC LOCK (normally locked when power-on) is
connected with 'NC' and 'COM' terminals. Take NC Lock as an example below:
4
5
After creating a ZKBio Zlink App account (see the user manual for details), follow
the steps below to add the device and configure the network for the device.
Configuring the Network via Bluetooth
Add Device:
Log in to the ZKBio Zlink APP with the account you have already created.
Click [Applications] > [CloudATT] > [Device] to enter the Device add screen.
1.
2.
Click icon to add a new device. Review the instructions and click [Continue].
Then click [Use bluetooth to add device] > [Rescan Bluetooth device]
to search for the device via Bluetooth. And the searched Bluetooth
devices will be displayed in the list.
3.
4.
Then just select the device you want to add based on the serial number.
5.
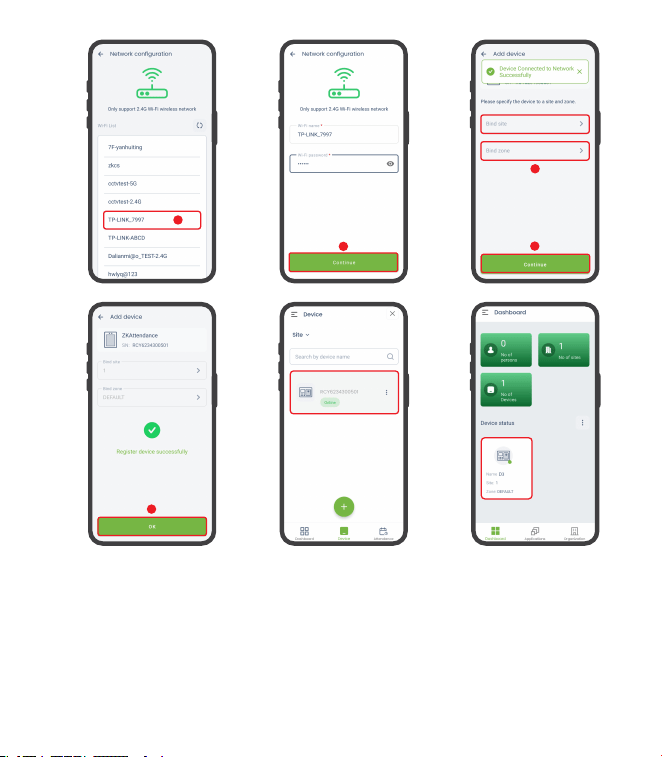
Once the device is selected, you will enter the Network Configuration interface.
Select a Wi-Fi in the list and enter the password to connect. When the
interface prompts “Device Connected to Network Successfully”, it
means the connection is successful.
1.
2.
Then specify the device to a site and zone. Enter the parameters and click
[OK], when prompted successfully, the configuration is complete.
3.
Configuring the Network via Bluetooth:
The added devices will be displayed in the Dashboard and Device module.
4.
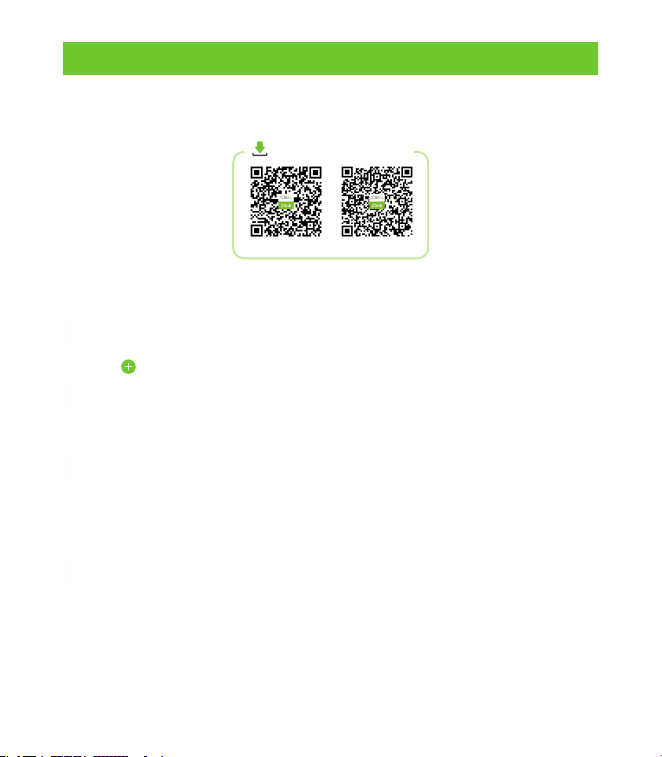
Apple App Store Google Play Store
Download the App!
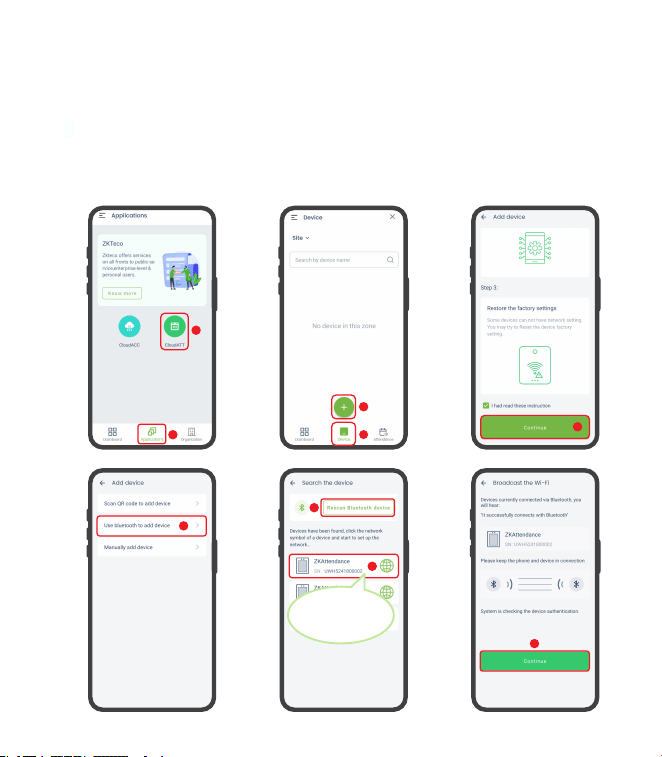
The device can only connect to 2.4GHz Wi-Fi networks. Make sure that
your phone is connected to the 2.4GHz network.
Note:
Turn on your smartphone's Bluetooth and location functions before powering
up the device.
The device must be near the phone to avoid search failures.
1.
2.
3.
6
6
7
8
Confirm the SN
code of the device
9
1
2
4
3
5
6
7
10
11
12
13
14
Enter the account
and password
you have created
2
1
D3
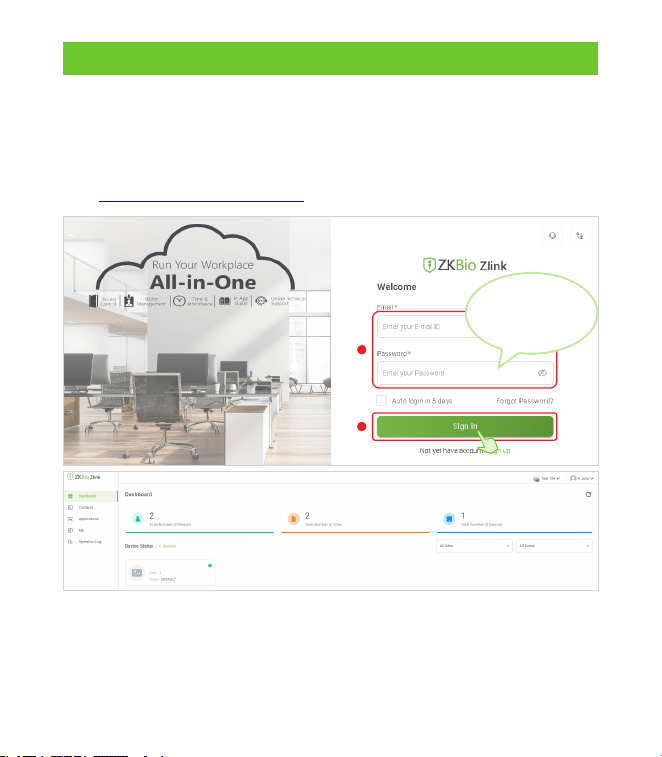
After successfully adding devices using the ZKBio Zlink App, you can use the
created account to access ZKBio Zlink Web to find devices, add new
personnel, register the verification method of registered personnel,
synchronize personnel to devices and query records. Access the ZKBio Zlink
Web https://zlink.minervaiot.com/.
Connecting to ZKBio Zlink Web
8
9
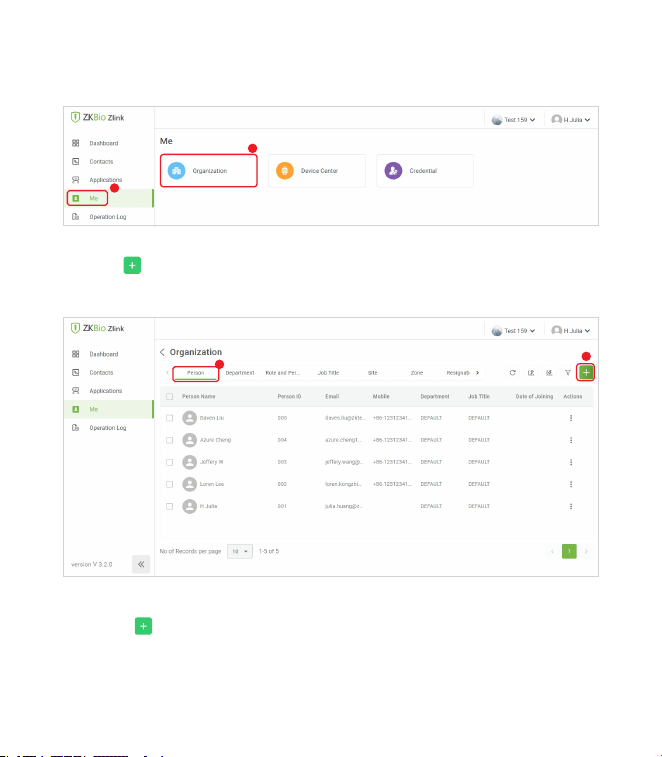
Click [Me] > [Organization] on the ZKBio Zlink Web main menu to add person.
1.
Click icon to add a new person. Then enter the person's information, and
click [Add].
2.
Add Person on the ZKBio Zlink Web:
1
2
1
2
Note: It is also possible to add persons to the App via path [Organization] >
[Person] > icon .
2
10
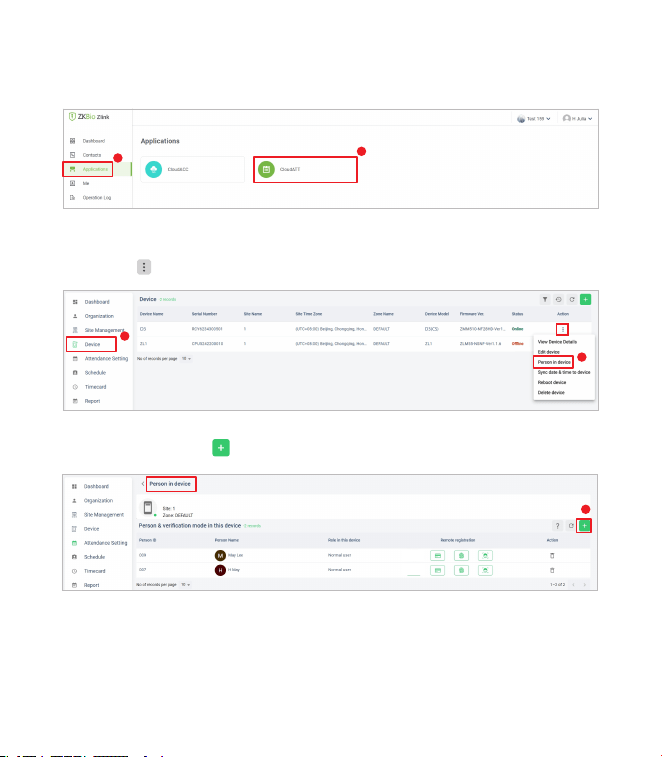
Click [Applications] > [CloudATT] to enter the CloudATT setting screen.
1.
Synchronize Persons to Device:
1
2
Click [Device] and select the device you want to synchronize people with,
click the icon after it and select [Person in device].
2.
3
4
Then click add icon to choose persons to synchronize to this device.
3.
D3
5
Enroll Face
Device Interface
11
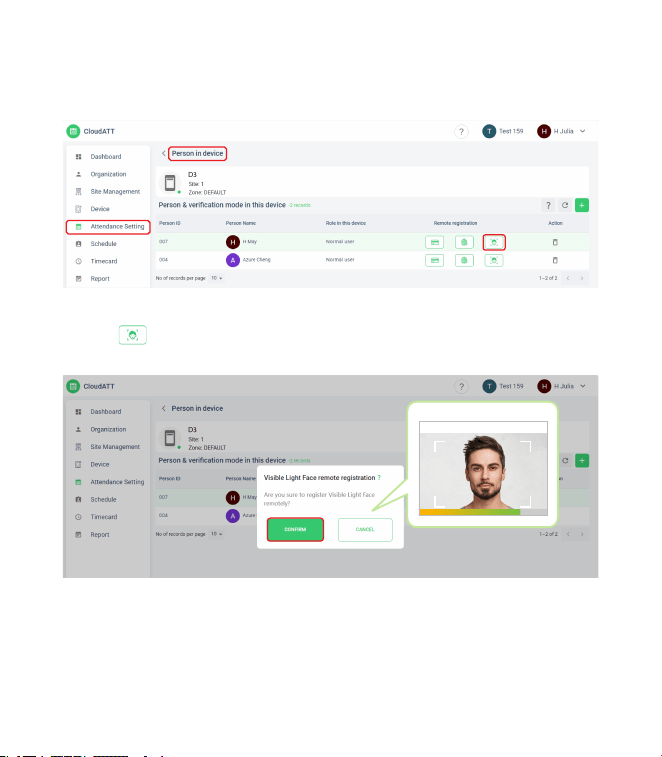
Registering Face and Fingerprint on the ZKBio Zlink Web:
After the successfully synchronizing persons to device, you can view the
basic information in the [Person in device] interface.
1.
Click icon to register Visible Light Face remotely. Click [CONFIRM] to
confirm. Then follow the prompts to enter your face on the device side.
2.
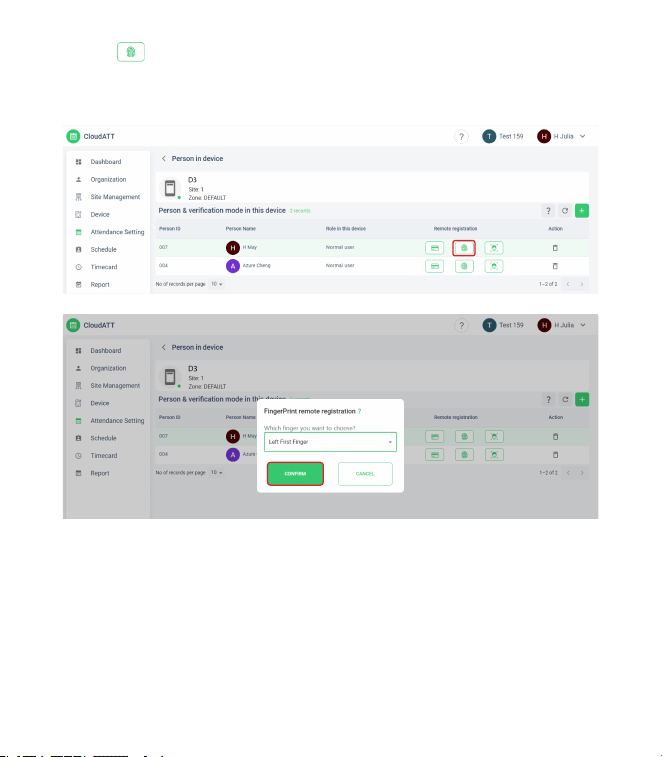
12
Click icon to register Fingerprint. Select the finger to be recorded, click
[CONFIRM] to confirm. and then follow the voice prompts to record the
fingerprint on the device side.
3.
Note: The registration of the card number is the same, D3 series does not
support the password method.
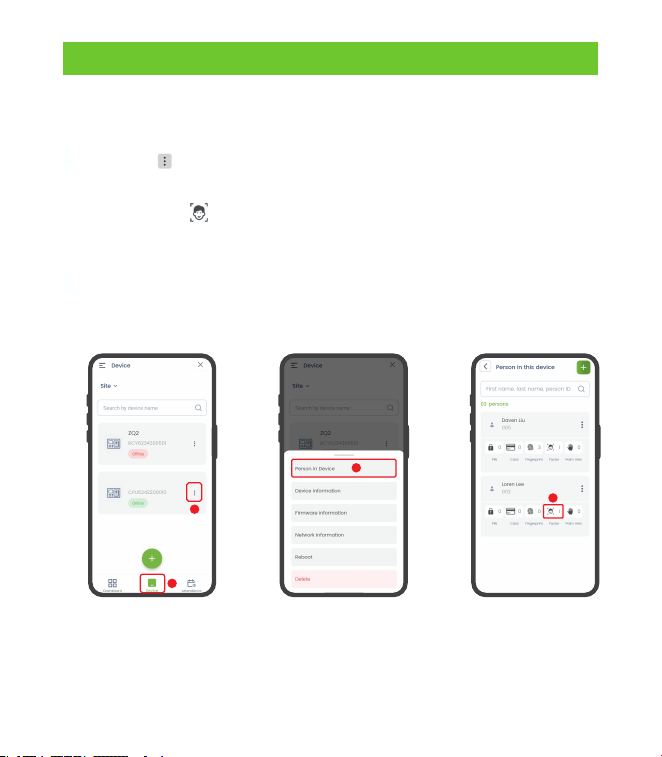
Registering Face on the App
Log in to the App and click [Applications] > [CloudATT] > [Device] to
enter the Device screen.
Click the icon behind the device and select Person in Device in the
pop-up menu.
1.
2.
Then click the icon of the person whose face needs to be registered. At
the same time, the device voice prompts “Please look straight to the
camera”.
Operate according to the prompts, when you hear the device prompts
“Registration is successful”, it means that the face registration is
successful.
3.
4.
4
1
2
D3
3
Please refer to the User Manual for more details.
13
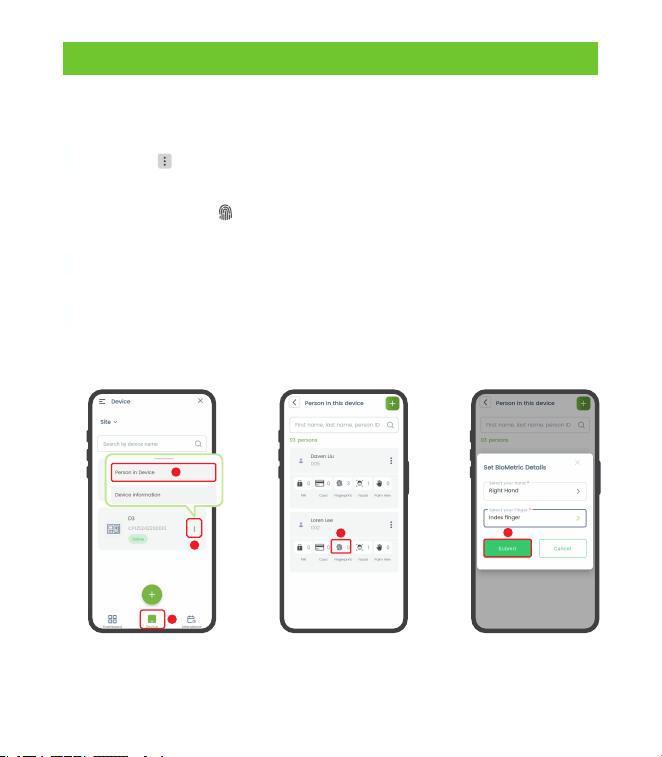
Registering Fingerprint on the App
Log in to the App and click [Applications] > [CloudATT] > [Device] to
enter the Device screen.
Click the icon behind the device and select Person in Device in the
pop-up menu.
1.
2.
Then click on the icon and select the fingerprint to be enrolled in the
pop-up window. Click [Submit] to confirm.
At the same time, the device voice prompts “Please press your finger”
and press three times on the collector after hearing the prompt.
3.
4.
Please refer to the User Manual for more details.
When you hear the message “Registration is successful”, the registration
is successful. And you can repeat the above operation to register other
fingers.
5.
4
1
2
3
5
14

ZKTeco Industrial Park, No. 32, Industrial Road,
Tangxia Town, Dongguan, China.
Phone : +86 769 - 82109991
Fax : +86 755 - 89602394
www.zkteco.com
Copyright © 2024 ZKTECO CO., LTD. All Rights Reserved.
